Bowser's Castle: Difference between revisions
Joanfran1202 (talk | contribs) |
Technetium (talk | contribs) m (→Items) |
||
| Line 1: | Line 1: | ||
{{ | {{about|Bowser's actual castle|other uses|[[Bowser's Castle (disambiguation)]]}} | ||
[[ | {{distinguish|Castle Bowser|Neo Bowser Castle}} | ||
{{location infobox | |||
|image=[[File:MK8 Bowser's Castle.jpg|250px]]<br>Bowser's Castle in ''[[Mario Kart 8]]''/''[[Mario Kart 8 Deluxe]]'' | |||
|greater_location=[[Dark Land]], [[Valley of Bowser]], [[Bowser's Kingdom]], [[World 8]], etc. | |||
|capital= | |||
|ruler=[[Bowser]] | |||
|inhabitants=Bowser, [[Koopalings]], [[Bowser Jr.]], [[Bowser's Minions]] | |||
|first_appearance=''[[Super Mario Bros.]]'' ([[List of games by date#1985|1985]]) | |||
|latest_appearance=''[[Mario & Luigi: Brothership]]'' ([[List of games by date#2024|2024]]) | |||
}} | |||
{{quote|Gee, it's only the best castle ever made! Take a look from a distance! Powerful and awe-inspiring design choices slap your face! It's like looking at me!|Bowser|Mario & Luigi: Bowser's Inside Story}} | |||
'''Bowser's Castle''' (or simply '''Bowser Castle''') is a recurring location in the [[Super Mario (franchise)|''Super Mario'' franchise]]. It is the domicile of the [[Koopa (species)|Koopa]] villain [[Bowser]] and the base of operations for [[Bowser's Minions|his army]]. The castle's name, design, and greater location vary from game to game, but the castle is usually a Western-themed castle and situated in a volcanic wasteland, and it is characteristically an important base from which Bowser formulates his plans and summons his minions to take over the [[Mushroom Kingdom]] and carry out the capture of [[Princess Peach]]. Bowser's Castle is usually the final area that [[Mario]] and his friends visit to defeat Bowser and rescue Peach and is usually guarded by Bowser's most powerful minions. In the ''Super Mario'' spin-offs, the castle can serve as a go-kart course, a tennis court, a baseball stadium, etc., depending on the sport on which the game is based. | |||
== | ==History== | ||
===''Super Mario'' series=== | ===''Super Mario'' series=== | ||
====''Super Mario Bros.''==== | ====''Super Mario Bros.'' / ''Super Mario Bros.: The Lost Levels''==== | ||
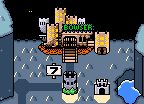
Bowser's Castle first | Bowser's Castle first appears in ''[[Super Mario Bros.]]'' at the end of [[World 8 (Super Mario Bros.)|World 8]]. In [[World 8-3 (Super Mario Bros.)|World 8-3]], [[Mario]] battles [[Bowser]]'s forces outside of the castle, which can be seen in the background; in [[World 8-4 (Super Mario Bros.)|World 8-4]], Mario ventures into the castle itself, where he battles and defeats Bowser in order to save [[Princess Peach|Princess Toadstool]]. It is also the setting of [[World 8-4 (Super Mario Bros.: The Lost Levels)|World 8-4]] in ''[[Super Mario Bros.: The Lost Levels]]'', except is shown to be located in the sky at the end of [[World 8-3 (Super Mario Bros.: The Lost Levels)|World 8-3]]. Additionally, it appears in [[World D-3]] and [[World D-4|D-4]], where it is instead grounded. In ''[[Super Mario All-Stars]]'', Bowser's Castle is easily distinguished from the other [[castle]]s by having thunder and lightning flash in the background. | ||
====''Super Mario Bros. 3''==== | ====''Super Mario Bros. 3''==== | ||
In ''[[Super Mario Bros. 3]]'', Bowser's | {{multiple image | ||
|align=right | |||
|direction=horizontal | |||
|footer=Bowser's Castle in ''Super Mario Bros. 3''. | |||
|image1=BowsersCastleSMB3.png | |||
|alt1= | |||
|width1=32 | |||
|caption1=NES | |||
|image2=SMB3 Bowserscastle.png | |||
|alt2=Super Mario All-Stars screencap | |||
|width2=32 | |||
|caption2=SNES | |||
|image3=SMA4 Bowser Castle Map Icon.gif | |||
|alt3=Super Mario Advance 4 sprite | |||
|width3=32 | |||
|caption3=GBA | |||
}} | |||
{{main|World 8-Bowser's Castle (Super Mario Bros. 3)}} | |||
In ''[[Super Mario Bros. 3]]'', Bowser's stronghold (as well as Bowser himself) is not seen until the very end of his kingdom, [[Dark Land]] (which is also called "Bowser's Castle" in later remakes). The mentioned [[World 8-Bowser's Castle (Super Mario Bros. 3)|castle itself]] is one of the longest levels in the game and is where Bowser is keeping Princess Toadstool captive. The map icon is animated in ''[[Super Mario Advance 4: Super Mario Bros. 3]]''. It is also the only actual castle level in the game. | |||
====''Super Mario World''==== | |||
{{main|Front Door}} | |||
{{main|Back Door}} | |||
[[File:SMW Bowserscastle.png|thumb|left]] | |||
In ''[[Super Mario World]]'', Bowser's Castle is found in the [[Valley of Bowser]]. There are two ways of entering the castle and many ways to reach the end of the level. There are two main corridors where Mario or Luigi will have to choose one of four possible doors. The player can also reach the Castle by using the [[Star Road (Super Mario World)|Star Road]] that leads them to the front gate, bypassing the rest of the Valley of Bowser entirely. To get to the back gate, the player had to find the secondary exit in [[Valley of Bowser 2]] and go through [[Valley Fortress]]. This takes the player straight to [[Back Door]], skipping most of the level. The castle itself featured a neon sign with Bowser's name spelled out. Bowser is also seen flying in the background of the castle in his Koopa Clown Car, albeit in silhouette during occasional thunderclaps and his eyes glowing in the darkness otherwise. In ''Super Mario Advance 2'', he is absent entirely after the level is cleared. | |||
{{br}} | |||
====''New Super Mario Bros.''==== | |||
{{Main|World 8-Bowser's Castle (New Super Mario Bros.)}} | |||
[[File:Bowser Castle NSMB.png|frame|left]] | |||
[[File:Bowsercastlensmb.png|thumb|Bowser's Castle in ''New Super Mario Bros.'']] | |||
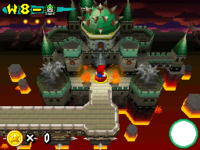
In ''[[New Super Mario Bros.]]'', Bowser's Castle is relatively similar in appearance to the one in ''[[Super Mario World]]''. It is found rising out of a lake of lava and is at the end of a twelve-level-long path. Once inside, Mario/Luigi will encounter [[Thwomp]]s, [[Dry Bones]], [[burner]]s, as well as [[Lava Bubble|Podoboo]]s. The ? Switches in the castle have an unusual effect; once pressed, the gravity of the castle will invert and the Player, along with any enemies (excluding burners) will have their positions inverted. The second part of the castle is a looping room, similar to Worlds 4-4 and 7-4 of ''[[Super Mario Bros.]]'', with lots of lava, a single Podoboo and a single [[Fire Bar]]. Once the final boss door is reached at the castle's end, Mario/Luigi will have to battle both [[Bowser Jr.]] and [[Bowser]] to rescue [[Princess Peach]]. | |||
====''New Super Mario Bros. Wii''==== | |||
{{main|World 8-Bowser's Castle (New Super Mario Bros. Wii)}} | |||
[[File:NSMBW Bowser's Castle World Map Screenshot.png|thumb|left|Bowser's Castle in ''New Super Mario Bros. Wii''.]] | |||
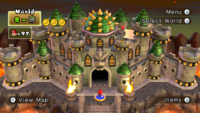
[[Bowser]] is again fought in his castle in ''[[New Super Mario Bros. Wii]]''. After clearing {{world link|8|airship|World 8-Airship (New Super Mario Bros. Wii)}} for the first time, the characters reunite with [[Princess Peach]] before [[Kamek]] takes her to Bowser's Castle, which was hidden behind a rock wall in the northern part of World 8. The wall then recedes, revealing the castle, and Bowser's evil laugh is heard as Kamek swoops down into the castle with Peach. The characters go through three parts: The first is a normal side-scrolling area with lava, [[Lava Bubble]]s and [[Fire Bar]]s. The second part is a vertical area with draining lava which auto-scrolls downwards, more Fire Bars and some [[Dry Bones]] trying to stop Mario. The third is Bowser's lair. In the final battle, Kamek casts a spell to make Bowser grow massive and he chases Mario and the rest of the characters through his castle. | |||
Later after the final battle, when six of the Koopalings flip Bowser on his belly, the castle starts collapsing and falling down on top of them. | |||
{{br}} | |||
====''Super Mario Galaxy 2''==== | |||
{{main|Breaking into Bowser's Castle}} | |||
In ''[[Super Mario Galaxy 2]]'', Bowser's Castle appears in the mission [[Breaking into Bowser's Castle]]. | |||
====''Super Mario 3D Land''==== | |||
{{main|World 8-Bowser: Part 1}} | |||
{{main|World 8-Bowser: Part 2}} | |||
[[File:BowserIcon SM3DW.png|frame|left]] | |||
{{multiple image | |||
|align=right | |||
|direction=vertical | |||
|width=240 | |||
|image1=BowsercastleSM3DL.png | |||
|image2=Bowsercastle2DL2.png | |||
|footer=Bowser's first castle and second castle as seen in ''Super Mario 3D Land''. | |||
}} | |||
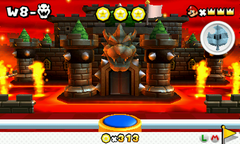
Bowser has two castles in ''[[Super Mario 3D Land]]'', both located in [[World 8 (Super Mario 3D Land)|World 8]]. The first castle is the World 8 Castle. Its appearance is similar to castles of the previous titles, as well as the previous castle levels in the game. At the end of the castle Mario fights Bowser and defeats him by pressing the switch at the end of the bridge, causing Bowser to sink in the lava below. Mario makes his way to Peach (which can previously be seen in the level using a pair of [[binoculars]]), only to discover that it is just a cardboard cutout. Bowser then appears with the real Peach in hand and flees to his larger castle, which is the true Bowser's Castle. | |||
The real Bowser's Castle differs from previous castle levels, as Mario spends much of it riding [[Spine Coaster|Bone Roller Coaster]]s. Mario then reaches a cannon which launches him to a tower with another cannon on it, which Mario uses to reach Bowser's tower. No [[Checkpoint Flag]]s are found in this level, although there is an invisible checkpoint at the start of Bowser's fight. Mario then walks to the big red door and enters. Peach is tied up to the flagpole, but before Mario can rescue her, Bowser falls from above and attempts to crush Mario, which causes the floor to collapse and the final battle begins. Bowser attacks Mario with fireballs, spiked balls and barrels as Mario makes his way up the castle until they reach the second bridge. Mario tricks Bowser into clearing the path to the switch, which Mario presses, causing the bridge to collapse and Bowser to fall. However, as Mario continues to make his way up the castle, Bowser returns and pursues Mario, breathing purple flames which jet towards Mario, until they reach the final bridge, in which Bowser chases Mario until Mario reaches the final switch, which he presses, once again causing the bridge to explode, sending Bowser falling into the lava. Mario then rescues Peach and they head back home. | |||
After completing the Special Worlds, Bowser kidnaps Peach again and Mario must return to his castle to defeat him and save Peach once again. | |||
====''New Super Mario Bros. 2''==== | |||
{{Main|World 6-Bowser's Castle}} | |||
[[File:NSMB2-Bowser Castle Course Icon.png|frame|left]] | |||
Bowser's Castle reappears in [[World 6 (New Super Mario Bros. 2)|World 6]] of ''[[New Super Mario Bros. 2]]''. Like in ''New Super Mario Bros. Wii'', Mario and Luigi face Bowser through two phases at the end of the castle. Its appearance in this game is again similar to that of ''New Super Mario Bros.'' | |||
{{br}} | |||
====''New Super Mario Bros. U''==== | |||
{{Main|Peach's Castle (world)}} | |||
Although Bowser's Castle itself does not appear in ''[[New Super Mario Bros. U]]'', Bowser after capturing Peach's Castle in the beginning of the game starts renovating the castle to better resemble his own castle, ultimately succeeding by the time Mario fights Bowser Jr. for the final time at the end of [[Meringue Clouds|World 7]]. After he is defeated, the castle returns to its normal state. | |||
====''Super Mario 3D World / Super Mario 3D World + Bowser's Fury''==== | |||
{{main|World Castle}} {{main|The Great Tower of Bowser Land}} | |||
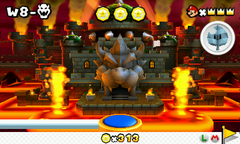
In ''[[Super Mario 3D World]]'', Bowser's Castle reappears as [[World Castle]], the seventh world of the game. The castle appears to be floating high above the Sprixie Kingdom, the game's setting. A second castle appears in [[World Bowser]], the game's final world, and is themed after an amusement park. | |||
====''Super Mario Maker'' / ''Super Mario Maker for Nintendo 3DS''==== | |||
In ''[[Super Mario Maker]]'', Bowser's Castle appears in the 10 Mario Challenges and the 100 Mario Challenges. | |||
====''Super Mario Odyssey''==== | |||
{{main|Bowser's Kingdom}} | |||
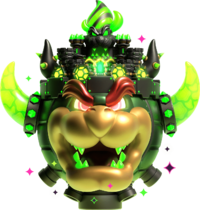
In ''[[Super Mario Odyssey]]'', Bowser's Castle is located in [[Bowser's Kingdom]]. The castle featured in the game was constructed specifically for Bowser's wedding with Princess Peach.<ref>{{cite|language=en-us|author=Kanmuri, Yukari Tasai, Rachel Roberts, and Jenny Blenk, editors|title=''[[The Art of Super Mario Odyssey]]''|format=First English Edition|location=Milwaukie|publisher=[[Dark Horse Comics|Dark Horse Books]]|date=November 5, 2019|page=263|isbn=978-1-50671-375-5}}</ref> Unlike in most games, in which the castle has a Western design, the castle featured in this game is traditional [[Japan|Japanese]] castle, with a concentric series of walls and baileys, a traditional garden and tea house, and a central keep. Instead of the usual [[lava]], its moats are filled with [[Poison (obstacle)|poison]]. | |||
====''Super Mario Maker 2''==== | |||
In ''[[Super Mario Maker 2]]'', Bowser's Castle appears as a background cameo in castle-themed ''[[Super Mario 3D World]]'' courses. In the version 3.0.0 update, it also appears as a world part for World Maker. | |||
====''Super Mario Bros. Wonder''==== | |||
[[File:SMBW CastleBowser Render.png|thumb|Castle Bowser in ''Super Mario Bros. Wonder'']] | |||
Although the location itself does not make an appearance, a variation is used for the game where Bowser merged with his Koopa Clown Car and Prince Florian's castle to become [[Castle Bowser]]<ref>{{file link|SMBW Trading Cards.png|''Super Mario Bros. Wonder'' trading cards}}</ref> via the [[Wonder Flower]]'s power. He uses this form to conquer portions of the [[Flower Kingdom]]. | |||
===''Super Mario Bros.: Peach-hime Kyūshutsu Dai Sakusen!''=== | |||
[[File:TheGreatMissionKingKoopasCastle.png|thumb|left|Bowser's castle as seen in ''Super Mario Bros.: Peach-hime Kyūshutsu Dai Sakusen!'']] | |||
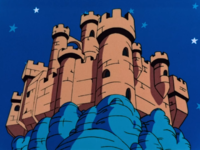
In the anime movie ''[[Super Mario Bros.: Peach-hime Kyūshutsu Dai Sakusen!]]'', Bowser turns [[Peach's Castle]] into his own after kidnapping [[Princess Peach]] and conquering the [[Mushroom Kingdom]]. While under his control, the building is situated on a tall mountain and is furnished to Bowser's liking, among other things featuring catacombs filled with traps to stop [[Mario]] and [[Luigi]]. The castle is destroyed after Luigi accidentally floods it while mining for [[coin]]s; once Bowser is defeated, his spell on the Mushroom Kingdom is broken, restoring Peach's Castle to its original form. | |||
{{br|left}} | |||
===DIC cartoons=== | |||
====''The Super Mario Bros. Super Show!''==== | |||
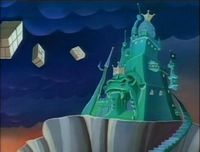
In ''[[The Super Mario Bros. Super Show!]]'', King Koopa owns a wide range of castles, ranging from fortresses, towers and even an ice palace; most often at the end of an episode, the featured castle of King Koopa would be destroyed and if not, would likely not be seen again. Unlike the games, the various castles seen in ''The Super Mario Bros. Super Show!'' lack the abundance of traps that would normally appear in a castle owned by Bowser. | |||
====''The Adventures of Super Mario Bros. 3''==== | |||
[[File:BowsersCastleSMB3Toon.jpg|thumb|Kastle Koopa as seen in ''The Adventures of Super Mario Bros. 3''.]] | |||
''[[The Adventures of Super Mario Bros. 3]]'' migrates away from the concept of King Koopa owning several castles and, instead, he only owns one castle, located in [[Dark Land]]. This castle is interchangeably referred to by the names "Kastle Koopa" and "Koopa Kastle". Kastle Koopa largely resembles its video game counterpart, with Bowser's image engraved on it, although it is blue in color and lacks the towers. Kastle Koopa also possesses a large hall filled with portraits, as well as bedrooms for the [[Koopalings]] and a laboratory most often used by [[Ludwig von Koopa|Kooky von Koopa]]. | |||
====''Super Mario World'' television series==== | |||
[[File:BowsersCastleSMWToon.jpg|thumb|left|The Neon Castle from the ''Super Mario World'' cartoon.]] | |||
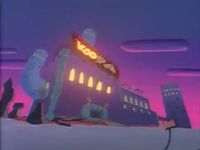
In the ''[[Super Mario World (television series)|Super Mario World]]'' cartoon produced by [[DIC Entertainment]] and Nintendo, the main base and home for Bowser and the Koopalings is called '''King Koopa's Neon Castle'''. Apparently located in a lava filled wasteland, Neon Castle lacks the amount of towers its game counterpart possesses, only having one; Neon Castle also possesses a rectangular shape and, like the Japanese version of the game, has "KOOPA" flashing in neon lights on its front, instead of "BOWSER". The castle carries over many of its game counterpart's traps, like [[Spinner|Ball 'N' Chain]]s, lava, [[Bowser Statue|fire-breathing statues]] and various kinds of minions. In the episode "[[Mama Luigi]]," Mario refers to it as King Koopa's "'''Coney Island Disco Palace'''," possibly based off of the final section of Bowser's Castle in that game, which featured a "[[? Block#Super Mario World|disco ball]]" that illuminated it. | |||
{{br}} | |||
===''Super Mario Adventures''=== | |||
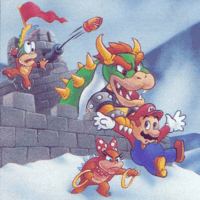
In ''[[Super Mario Adventures]]'', Bowser's Castle is only seen near the end of the comic and is portrayed as a large fortress, having many spike-covered towers and a large great hall, capable of holding several hundred different creatures. Catacombs and a lava filled chamber inhabited by [[Blargg]]s are also depicted in this version of Bowser's Castle. | |||
===''Mario Kart'' series=== | |||
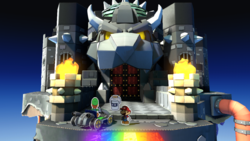
At least one race course set in Bowser's Castle has appeared in every ''[[Mario Kart (series)|Mario Kart]]'' game to date. It is one of three course settings with this property, alongside [[Mario Circuit]] and [[Rainbow Road]]. Unlike them, however, this even extends to the arcade games (although these have featured equivalents to Mario Circuit and Rainbow Road in their place). Most games in the series introduce one [[New course|new]] Bowser's Castle course each; however, ''[[Super Mario Kart]]'' introduces three Bowser's Castles, while ''[[Mario Kart: Super Circuit]]'' introduces four. ''[[Mario Kart Tour]]'' does not introduce a fully original Bowser's Castle course, though it does introduce [[RMX Bowser's Castle 1]], a [[remix course]] based on ''Super Circuit''{{'}}s versions, particularly {{classic link|GBA|Bowser's Castle 1}}. | |||
Starting from ''Super Circuit'', Bowser's Castle courses are the third course of the [[Special Cup]], before Rainbow Road. They typically include hazards such as lava, [[Thwomp]]s, dangerous jumps, and [[Bowser Statue|giant statues of Bowser]] attacking the racers. Though most of these courses use the name "Bowser's Castle", those from ''Super Mario Kart'' and ''Mario Kart DS'' are instead called "Bowser Castle"; this was also true of those from ''Mario Kart: Super Circuit'' prior to their appearances in ''Mario Kart Tour''. | |||
{| class="wikitable" width=100% style="text-align:center" | |||
!width=10%|Course | |||
!width=10%|Games | |||
!width=30%|Description | |||
|- | |||
![[File:SMK Bowser Castle 1 Lower-Screen Map.png]]<br>[[Bowser Castle 1]] | |||
|''[[Super Mario Kart]]''<br>''[[Mario Kart: Super Circuit]]'' | |||
|The first Bowser Castle of ''Super Mario Kart'', which appears as the fourth course of the [[Mushroom Cup]]. It features several long, straight paths, as well as 90° bends, and a couple of jumps. [[Thwomp]]s also appear here to hinder the racers' path. | |||
|- | |||
![[File:SMK Bowser Castle 2 Lower-Screen Map.png]]<br>[[Bowser Castle 2]] | |||
|''[[Super Mario Kart]]''<br>''[[Mario Kart: Super Circuit]]'' | |||
|The second Bowser Castle of ''Super Mario Kart'', which appears as the fourth course of the [[Flower Cup]]. Still featuring 90° bends and Thwomps, is more complicated in design, and includes a dead end that can only be passed over with a [[Cape Feather|Feather]]. | |||
|- | |||
![[File:SMK Bowser Castle 3 Lower-Screen Map.png]]<br>[[SNES Bowser Castle 3|Bowser Castle 3]] | |||
|''[[Super Mario Kart]]''<br>''[[Mario Kart: Super Circuit]]''<br>''[[Mario Kart Tour]]''<br>''[[Mario Kart 8 Deluxe]]'' <small>(''[[Mario Kart 8 Deluxe – Booster Course Pass|Booster Course Pass]]'')</small> | |||
|The final Bowser Castle of ''Super Mario Kart'', which appears as the fourth course of the [[Star Cup]]. It features several split paths on two straightaways, the first of which being made of several differently-sized jumps. In ''Mario Kart Tour'' and ''Mario Kart 8 Deluxe'', this first path is bent upwards, which is also in [[anti-gravity]] in ''Mario Kart 8 Deluxe''. | |||
|- | |||
![[File:Bowser's Castle MK64.png|250px]]<br>[[N64 Bowser's Castle|Bowser's Castle]] | |||
|''[[Mario Kart 64]]''<br>''[[Mario Kart Wii]]'' | |||
|This iteration appears in ''Mario Kart 64'' at the end of the Star Cup. Starting outside, racers drive into the castle and traverse various rooms while avoiding Thwomps. | |||
|- | |||
![[File:MKSC Bowser Castle 1 Starting Line.png|200px]]<br>[[GBA Bowser's Castle 1|Bowser's Castle 1]] | |||
|''[[Mario Kart: Super Circuit]]''<br>''[[Mario Kart 7]]''<br>''[[Mario Kart Tour]]'' | |||
|The first Bowser's Castle of ''Mario Kart: Super Circuit'', appearing as the final course of the Mushroom Cup. It is a short, angular course with various 90° turns and Thwomps. It features a large door with Bowser's emblem in the background. | |||
|- | |||
![[File:MKSC Bowser Castle 2 Starting Line.png|200px]]<br>[[GBA Bowser's Castle 2|Bowser's Castle 2]] | |||
|''[[Mario Kart: Super Circuit]]''<br>''[[Mario Kart DS]]''<br>''[[Mario Kart Tour]]'' | |||
|The second Bowser's Castle of ''Mario Kart: Super Circuit'', appearing as the final course of the Flower Cup. A slightly larger course with more 90° turns, as well as holes in the road. The course features a large statue of Bowser in the background, but in ''Mario Kart Tour'', it reuses the same environment from Bowser's Castle 1 instead. | |||
|- | |||
![[File:MKSC Bowser Castle 3 Starting Line.png|200px]]<br>[[GBA Bowser's Castle 3|Bowser's Castle 3]] | |||
|''[[Mario Kart: Super Circuit]]''<br>''[[Mario Kart Wii]]''<br>''[[Mario Kart Tour]]'' | |||
|The third Bowser's Castle of ''Mario Kart: Super Circuit'', appearing as the final course of the Star Cup. The course features a variety of 90° turns. This course takes place outside with blue cobblestone roads, featuring dark clouds and purple towers in the background, but in ''Mario Kart Tour'', it reuses the same environment from Bowser's Castle 1 instead. | |||
|- | |||
![[File:MKSC Bowser Castle 4 Starting Line.png|200px]]<br>[[GBA Bowser's Castle 4|Bowser's Castle 4]] | |||
|''[[Mario Kart: Super Circuit]]''<br>''[[Mario Kart Tour]]'' | |||
|The final Bowser's Castle of ''Mario Kart: Super Circuit'', appearing as the third course of the [[Special Cup]]. The course features a lot of 90° turns and holes. The course features a large statue of Bowser in the background, but in ''Mario Kart Tour'', its environment is instead a more ruinous version of that of Bowser's Castle 1. In ''Mario Kart Tour'', it also has a split path in the second half of the course. | |||
|- | |||
![[File:BowserCastleIcon-MKDD.png|200px]]<br>[[Bowser's Castle (Mario Kart: Double Dash!!)|Bowser's Castle]] | |||
|''[[Mario Kart: Double Dash!!]]'' | |||
|This version of Bowser's Castle from ''Mario Kart: Double Dash!!'' starts outside and features several turns and elevations, as well as a turning, circular room with [[Fire Bar]]s. As racers re-emerge outside, a moving [[Bowser Statue]] awaits them, shooting fireballs. | |||
|- | |||
![[File:IconBowserCastleMKAGP2.png|200px]]<br>[[Bowser's Castle (Mario Kart Arcade GP)|Bowser's Castle]] | |||
|''[[Mario Kart Arcade GP]]''<br>''[[Mario Kart Arcade GP 2]]'' | |||
|The first course of the [[Bowser Cup]] in ''Mario Kart Arcade GP'', as well as ''Mario Kart Arcade GP 2''. Similar in style to the iteration from ''Mario Kart: Double Dash!!'', this one has racers drive through the throne rooms of Bowser and Bowser Jr. The second course in the Bowser Cup, [[Castle Wall]], takes place on the same course, but has racers drive outside on the castle's walls instead. ''Mario Kart Arcade GP DX'' revamps this course's layout for [[Bowser's Factory]]. | |||
|- | |||
![[File:Bowser Castle MKDS preview.png|200px]]<br>[[Bowser Castle (Mario Kart DS)|Bowser Castle]] | |||
|''[[Mario Kart DS]]'' | |||
|The Bowser's Castle from ''Mario Kart DS'' reuses several elements from previous iterations, including a turning circular room and several 90° turns. The second half also features a turning, cylindrical bridge, and moving platforms over lava. | |||
|- | |||
![[File:BowsersCastleMKW.png|200px]]<br>[[Bowser's Castle (Mario Kart Wii)|Bowser's Castle]] | |||
|''[[Mario Kart Wii]]'' | |||
|This iteration from ''Mario Kart Wii'' starts outside, like the version from ''Mario Kart: Double Dash!!'' Entering the castle, racers drive into a wavy hallway in which [[Jump Boost|tricks]] can be performed on. This course also features a long, curved [[Kanaami Road]], where drivers can avoid fireballs from a Bowser Statue using [[half-pipe (object)|half-pipe]]s. | |||
|- | |||
![[File:BowserCastleMK7.png|200px]]<br>[[3DS Bowser's Castle|Bowser's Castle]] | |||
|''[[Mario Kart 7]]''<br>''[[Mario Kart Tour]]'' | |||
|In this iteration from ''Mario Kart 7'', drivers will start outside the castle, requiring to reach the entrance using a [[Glide Ramp]]. It also has an underwater section with lava geysers, and the second half of the course has racers drive through volcanic ground. | |||
|- | |||
![[File:MKAGPDX Bowser Castle.jpg|200px]]<br>[[Bowser's Castle (Mario Kart Arcade GP DX)|Bowser's Castle]] | |||
|''[[Mario Kart Arcade GP DX]]'' | |||
|The second course of the [[Bowser Cup]] in ''Mario Kart Arcade GP DX''. Racers drive through dungeons and glide above active volcano ground to a library owned by Kamek. It takes place in the same location as the first course of the Bowser Cup, [[Bowser's Factory]], in which racers drive through a factory where Bob-ombs and Bullet Bills are produced. This course's layout is revamped from that of [[Castle Wall]] from ''Mario Kart Arcade GP'' and ''Mario Kart Arcade GP 2''. | |||
|- | |||
![[File:MK8 Bowser's Castle.jpg|200px]]<br>[[Bowser's Castle (Mario Kart 8)|Bowser's Castle]] | |||
|''[[Mario Kart 8]]''<br>''[[Mario Kart 8 Deluxe]]'' | |||
|This course, debuting in ''Mario Kart 8'', features an anti-gravity section that leads into a split path, where a large [[Bowser Monument]] alternates between sides to punch the floor. The outside is volcanic and features rolling [[boulder]]s, while the inside also features laser-shooting Bowser Statues and a [[Spinner]]. | |||
|- | |||
![[File:MKLHC Bowser's Castle Course Icon.png|200px]]<br>[[Bowser's Castle (Mario Kart Live: Home Circuit)|Bowser's Castle]] | |||
|''[[Mario Kart Live: Home Circuit]]'' | |||
|The iteration of Bowser's Castle for ''Mario Kart Live: Home Circuit'' appears as the final course of the [[Shell Cup]]. Due to the nature of ''Mario Kart Live: Home Circuit'' using a remote-controlled car and augmented reality, course layout design depends on what the player has set up. Aside from that, this version has Lava Bars implemented at the gates players have to race through, and adds a reddish tint to the screen. This version of Bowser's Castle reuses the music from ''Mario Kart 8''{{'}}s version. | |||
|- | |||
![[File:MKT RMX Bowser Castle 1 scene.png|150px]]<br>[[RMX Bowser's Castle 1]] | |||
|''[[Mario Kart Tour]]'' | |||
|Unlike other [[remix course]]s in ''Mario Kart Tour'', RMX Bowser's Castle 1 is based on the GBA Bowser's Castles (using GBA Bowser's Castle 1's environment), rather than the SNES Bowser Castles. It is an angular course with 90° bends, featuring Thwomps and [[Conveyor Belt]]s. | |||
|} | |||
Outside of these courses, Bowser's Castle as it appears in ''[[Paper Mario]]'' can be seen in the background of ''Mario Kart: Super Circuit''{{'}}s [[Rainbow Road (Mario Kart: Super Circuit)|Rainbow Road]]. | |||
===''Mario is Missing!''=== | |||
[[File:Mario Captured.gif|thumb|Bowser's Castle in ''Mario is Missing!'']] | |||
Bowser's Castle is the main setting of ''[[Mario is Missing! (PC)|Mario is Missing!]]'', and it is unusually located in [[Antarctica]]. It contains many doors with portals to various cities around the [[real world]]. | |||
===''Mario's Time Machine''=== | |||
The castle is the main setting for the [[Mario is Missing! (PC)|MS-DOS and]] [[Mario's Time Machine (Super Nintendo Entertainment System)|SNES versions of ''Mario's Time Machine'']], specifically as the location of [[Bowser's Museum]]. In the [[Mario's Time Machine (Nintendo Entertainment System)|NES version]], Bowser's Museum is instead a separate building. | |||
===''Yoshi's Safari''=== | |||
{{main|Bowser's Castle (Yoshi's Safari)}} | |||
Bowser's Castle is the last level in the final area in ''[[Yoshi's Safari]]'', which is the [[Dark Realm]] of [[Jewelry Land]]. After being defeated, Bowser retreats. | |||
====''Super Mario | ===''Yoshi's Island'' series=== | ||
====''Super Mario World 2: Yoshi's Island''==== | |||
{{main|King Bowser's Castle (Super Mario World 2: Yoshi's Island)}} | |||
In ''[[Super Mario World 2: Yoshi's Island]]'' and its [[Yoshi's Island: Super Mario Advance 3|Game Boy Advance version]], Bowser's Castle is located atop a tall mountain in [[World 6 (Super Mario World 2: Yoshi's Island)|World 6]]. The last level takes place here and it requires the player to go into one of four random doors. Afterward, a giant playroom for [[Baby Bowser]] is discovered inside. After defeating Baby Bowser, Kamek will come by and make him extremely large. The player fights on the top of the castle which, throughout the battle, is slowly destroyed. The castle is later entirely destroyed after the final battle. | |||
Bowser's | ====''Yoshi's Island DS''==== | ||
{{main|At Last, Bowser's Castle!}} | |||
[[File:Bowser's Castle (YIDS).png|thumb|Bowser's Castle in ''Yoshi's Island DS'']] | |||
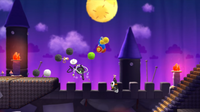
In ''[[Yoshi's Island DS]]'', Bowser travels back to the past searching for the seven Star Children so he could rule the universe. He takes over the castle of his younger self. After Baby Bowser is defeated, Bowser himself is faced. When he is defeated the first time, Kamek makes Bowser gigantic and destroys the castle in the battle. | |||
===='' | ====''Yoshi's New Island''==== | ||
{{main| | {{main|Bowser's Castle Break-In|Make Way for King Bowser!}} | ||
In ''[[ | [[File:Baby Bowser's Castle Break-In.png|thumb|left|Yoshi inside Bowser's Castle in ''Yoshi's New Island'']] | ||
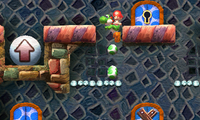
The | In ''[[Yoshi's New Island]]'', Yoshi ventures to Bowser's Castle to save Baby Luigi and the Stork from the clutches of Bowser. Throughout the level, Yoshi must collect four [[key]]s to reach Baby Bowser. The final boss fight is very similar to that of the previous games; Yoshi must throw three eggs at him to proceed. In the second phase, however, Baby Bowser grows giant and attacks from the background, requiring Yoshi to throw [[Mega Eggdozer]]s at him. Once he takes three hits, Yoshi rescues Baby Luigi and the Stork, and the Mario Bros. are delivered to their house. | ||
If the player has completed every level in the game without using [[Flutter Wings]] or [[Golden Flutter Wings]] (excluding special levels), Bowser will travel back in time to serve as the true final boss of the game. During the first phase of the battle, Bowser will attack by rearranging the ground and blowing fire at Yoshi. To defeat him, the player must hit him with [[Metal Eggdozer]]s three times. The second phase of the battle is nearly identical to the second phase of Baby Bowser's battle; however, this time Kamek will cast spells at Yoshi. Once the player throws three Mega Eggdozers at him, Bowser returns to his own time, and Yoshi saves Baby Luigi and the Stork once and for all. | |||
{{br|left}} | |||
===''Super Mario RPG: Legend of the Seven Stars''=== | |||
{{Redirect-distinguish|Bowser's Keep|King Bowser's Keep}} | |||
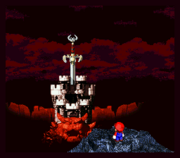
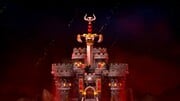
{{multiple image|image1=VistaHillSMRPG.png|image2=SMRPG NS Exor.jpg|width1=180|width2=180|direction=vertical|footer=Bowser's Keep in ''[[Super Mario RPG: Legend of the Seven Stars]]'' (top) and [[Super Mario RPG (Nintendo Switch)|its Switch remake]] (bottom)|align=left}} | |||
{{SMRPG map}} | |||
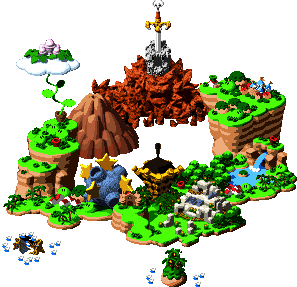
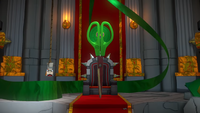
In ''[[Super Mario RPG: Legend of the Seven Stars]]'', the castle is named '''Bowser's Keep''' in English and is isolated on a mountain of red, jagged rocks. The keep rests on the largest rock, which resembles Bowser himself. The castle can only be accessed by a long bridge that connects to the faraway [[Vista Hill]]. The halls of Bowser's Keep are lined with statues of [[hammer]]-holding [[Terrapin]]s, which are the soldiers that originally guard the castle (sans hammer). At the very beginning of the game during a standard princess rescue, Mario goes through an entry room, a heavily guarded hallway, and a lava-filled room with bridges (the second of which collapses, being later replaced with [[Donut Block|Donut Lift]]s), before battling Bowser atop a chandelier in a large room. | |||
The rescue is interrupted by the gigantic sword [[Exor]] crashing into the keep, scattering everyone inside. Exor destroys the bridge and proclaims the keep the new base of the [[Smithy Gang]] in [[Mario World|Mario's world]]. Since Exor is the gateway to Smithy's dimension, the soldiers of the Smithy Gang have an easy time taking control of the castle. In fact, many of Bowser's soldiers defect or run away instead of fighting. | |||
Eventually, Mario and his team make it back to the keep using the [[royal bus]] from [[Nimbus Land]]. After traveling through the original rooms, now full of stronger versions of early-game enemies, such as [[Terra Cotta]]s, [[Pro Goomba]]s, and [[Malakoopa]]s, intermixed with some larger enemies. After passing through the room where Mario and Bowser fought in the beginning, they travel through a dark, twisted hall and meet up with the thief [[Croco]], who offers to sell them items. Following this is a challenge of six doors known as [[the Trial Course]]. After four of the six are completed, they fall from a doorway into a tall room and get into a battle against the brainwashed [[Wizakoopa]]. After being defeated and freed from his mind control, Wizakoopa creates a [[magic treasure box]] and offers free healing, while a nearby Croco sells better items than before. The next room is a long hall filled with [[Thwomp]]s (including a [[Big Thwomp|large one]]), while [[Blazer]]s are shot from off-screen and lead to battle against [[Big Blaster]]s if touched. The final room is a copy of the Bowser fight room and is held by [[Boomer (Super Mario RPG)|Boomer]]. Once Boomer is defeated, the group is taken to the roof, where they battle Exor. | |||
[[ | |||
In the epilogue, Exor crumbles to dust, and the castle is shown being repaired by the reestablished Koopa Troop. | |||
[[ | {{br|left}} | ||
[[ | ;Enemies | ||
*First visit: | |||
**[[Terrapin]] | |||
**[[Lava Bubble]] (background cameo, unfought) | |||
**[[Bowser]] (boss) | |||
***[[Chaindelier]] | |||
*Second visit, pre-[[The Trial Course|Trial Course]]: | |||
**[[Terra Cotta]] | |||
**[[Forkie]]s | |||
**[[Pro Goomba]] | |||
**[[Star Cruster]] | |||
**[[Malakoopa]] | |||
**[[Grand Troopa]] | |||
*Second visit, post-Trial Course: | |||
**[[Wizakoopa]] (boss) | |||
***[[Bahamutt]] | |||
***[[Jinx Clone]] | |||
***[[King Bomb]] | |||
**[[Thwomp]] (obstacle) | |||
**[[Blazer]] (overworld) | |||
**[[Big Blaster]] | |||
**[[Big Thwomp]] (obstacle) | |||
**[[Boomer (Super Mario RPG)|Boomer]] (boss) | |||
***[[Shyndelier]] (background cameo, unfought) | |||
**[[Exor]] (boss) | |||
{{br}} | |||
=== | ===''Yoshi's Story''=== | ||
In ''[[ | {{main|P. 6-Finale}} | ||
[[File:Bowser's Castle (YS).png|thumb|left|Bowser's Castle in ''Yoshi's Story'']] | |||
In ''[[Yoshi's Story]]'', Baby Bowser's Castle is split into four different areas: [[Mecha Castle]], [[Lift Castle]], [[Ghost Castle]], and [[Magma Castle]]. No matter what part of the castle Yoshi decides to go to, he will always meet up with Baby Bowser. The outside of the castle will also be seen whenever one of the Yoshis gets defeated, captured and brought to the castle, along with when [[White Shy Guy]] retrieves one. It is also seen in the ending sequence when Baby Bowser's minions carry him away. | |||
Compared to most of the castle's other appearances, which at least look cartoonish in some way, this iteration of the castle looks much more ominous and menacing. | |||
{{br}} | |||
===''Mario Tennis'' series=== | |||
[[ | [[File:BowsercastleMTO.jpg|thumb|Bowser's Castle is a tennis court in ''Mario Tennis Open'']] | ||
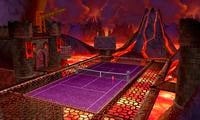
Bowser's Castle | Bowser's Castle has made various appearances throughout the [[Mario Tennis (series)|''Mario Tennis'' series]], usually as the setting of various tennis courses. In ''[[Mario Tennis (Nintendo 64)|Mario Tennis]]'' for [[Nintendo 64]], Bowser's Castle is the location of the [[Bowser Court]]. In ''[[Mario Power Tennis]]'', the [[Bowser Castle Court]] takes place here, and unlike the Bowser Stage in the previous game, it functions as a standard court. In ''[[Mario Tennis Open]]'', Bowser's Castle directly appears as a tennis court of the [[Bowser's Castle (Mario Tennis Open)|same name]]. In ''[[Mario Tennis Aces]]'', Bowser's Castle is located in the center of [[Inferno Island]], and it unusually has a temple-like structure; it is where the [[Battle the Treasure Guardian!]] mission takes place. | ||
{{br}} | |||
===''Paper Mario'' series=== | ===''Paper Mario'' series=== | ||
====''Paper Mario''==== | ====''Paper Mario''==== | ||
In ''[[Paper Mario]]'', a new Bowser's Castle | {{PM map}} | ||
[[File:PM Bowserscastle.png|thumb|left|Bowser's Castle in the sky]] | |||
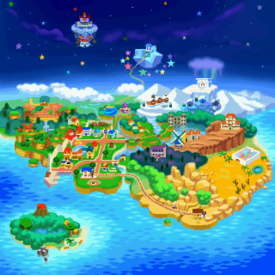
In ''[[Paper Mario]]'', a new Bowser's Castle is secretly built right underneath [[Peach's Castle]] and Bowser lifts it into the sky, kidnapping Princess Peach, along with her castle. The power used to lift the whole castle into the sky is the [[Star Spirits]]' and the [[Star Rod (Paper Mario)|Star Rod's]] power, both of which Bowser had stolen from [[Star Haven]]. Bowser also jails the [[Chancellor|Toad Minister]] and nine other [[Toad (species)|Toad]]s, a [[Dryite]] and a [[Bumpty]] who failed to escape during [[Princess Peach]]'s party. There are two [[Toad House]]s (made from the slate in the prison), a shop run by a [[Spiked Goomba]], [[Storehouse]] and three [[Guard Door]]s. In the end, Mario manages to take back the Star Rod as well as save Princess Peach and her castle. Bowser's Castle, meanwhile, ended up destroyed alongside the nearby [[Power Platform]], the latter due to it undergoing a meltdown due to the intensity of Mario and Bowser's fight. In this game, Bowser's Castle looks bigger than Peach's. | |||
Some notable residents of Bowser's Castle include [[Guard Door]], [[Mr. Hammer]], [[Spiky John]], [[Spiky Tom]], and [[Chancellor|Toad Minister]]. There is also a bored [[Spiked Goomba]] who sells items without Bowser's consent ([[Storehouse]]), and two [[Toad (species)|Toad]]s who make [[Toad House]]s with the slate in the prisons. | |||
{{br|left}} | |||
====''Paper Mario: The Thousand-Year Door''==== | ====''Paper Mario: The Thousand-Year Door''==== | ||
In ''[[Paper Mario: The Thousand-Year Door]]'' Bowser's Castle | In ''[[Paper Mario: The Thousand-Year Door]]'', Bowser's Castle does not play a major role, as only the outside and a hallway are seen. Its appearance is mainly to show [[Kammy Koopa]] explaining to Bowser what happened to the Princess. | ||
====''Super Paper Mario''==== | ====''Super Paper Mario''==== | ||
In ''[[Super Paper Mario]]'', the castle has an equally minimal role, as it is where [[Count Bleck]] kidnaps | In ''[[Super Paper Mario]]'', the castle has an equally minimal role, as it is where [[Count Bleck]] kidnaps Bowser's [[Koopa (species)|Koopa clan]] and [[Tippi]] takes Mario to [[Flipside]]. This is the exact same castle seen in ''Paper Mario: The Thousand-Year Door''. However, in [[The Bitlands]], Bowser found a set of several smaller castles, where several of his minions were located. After Mario destroyed them and defeated the Koopa King, the Princess convinced him to join them on their quest. | ||
====''Paper Mario: Sticker Star''==== | |||
{{main|Bowser's Sky Castle}} | |||
Like in the first ''Paper Mario'', Bowser's castle is the final area in ''[[Paper Mario: Sticker Star]]''. It initally appears disguised in [[Gate Cliff]]. However, after Mario collects five out of the six [[Royal Sticker]]s, he manages to reveal Bowser's Castle from the cliff using [[Paperize|paperization]]. However, the castle floats away almost immediately, although [[Wiggler #Paper Mario: Sticker Star|Flutter]] helps Mario arrive. After arriving in the castle, Mario later defeats Kamek, then Bowser (who is currently using the sixth Royal Sticker after he accidentally obtained it). | |||
{{br|left}} | |||
====''Paper Mario: Color Splash''==== | |||
{{main|Black Bowser's Castle}} | |||
[[File:PMCS BlackBowsersCastle01.png|250px|thumb|Black Bowser's Castle]] | |||
Bowser's Castle, called '''Black Bowser's Castle''' in-game, appears as the final area in ''[[Paper Mario: Color Splash]]''. It is on a floating island with an appearance similar to that of [[Bowser's Sky Castle]], but with warp pipes leading into the rock. | |||
The castle's entry hall consists of a hallway where Princess Peach's portrait is initially seen, just out of reach. When Mario attempts to lower it, a trapdoor opens, leading to a confrontation with [[Roy|Roy Koopa]]. A door in the pit leads to a factory where all of the stolen paint from [[Prism Island]] is brought and mixed into [[black paint]], which is then used to color weapons such as [[Bomber Bill|Banzai Bills]] and [[Bob-omb|Bob-ombs]], which [[Black Bowser]] intends to use to paint the world black. Mario manages to destroy the tank holding the black paint, flooding the factory. The factory also has a warp pipe leading back to the entry hall. | |||
Behind the wall where Peach's portrait was seen is a hallway leading to Bowser's throne room, with the princess now hanging above the throne. After Black Bowser is defeated, the castle begins to collapse from the black paint. Mario, Luigi, and Peach escape while [[Huey]] stays behind and, to ensure the black paint does not fall into the ocean, squeezes the castle, removing the black paint and transforming it into a card. | |||
In battle, the Black Bowser's Castle card summons the castle and crashes it into opponents. It is also powerful enough to instantly defeat Black Bowser in battle. | |||
{{br|left}} | |||
====''Paper Mario: The Origami King''==== | |||
{{PMTOK location infobox | |||
|image=PMTOK Bowsers Castle inside.jpg | |||
|caption=Interior of Bowser's Castle | |||
|toads= | |||
|holes=16 | |||
|treasures=4 | |||
|blocks=7 | |||
|enemies=[[Goomba]]s<br>[[Koopa Troopa]]s<br>[[Shy Guy]]s<br>[[Spiny|Spinies]]<br>[[Hammer Bro]]s.<br>[[Buzzy Beetle]]s<br>[[Spike]]s<br>[[Stone Spike]]s<br>[[Snow Spike]]s<br>[[Big Cutout Soldier]]s<br>[[Li'l Cutout Soldier]]s<br>'''[[Handaconda]]'''<br>'''''[[Paper Mistake Buzzy Beetle]]'''''<br>'''[[Scissors (boss)|Scissors]]''' | |||
|streamer=239D53 | |||
}} | |||
[[File:PMTOK Bowsers Castle.jpg|thumb|left|Bowser's Castle, having crash-landed into the [[Shangri-Spa]] Banquet Hall]] | |||
In ''[[Paper Mario: The Origami King]]'', Bowser's Castle boasts a similar design to that of the previous two games, although the design is about the same as [[Black Bowser's Castle]] from ''[[Paper Mario: Color Splash]]''. When Mario and [[Olivia]] first arrive at [[Shangri-Spa]] on their quest to destroy the green [[streamer]], they catch sight of a fortress with a scary-looking face in the distance that does not blend in with the area, also noticing that the streamer leads into the fortress. They soon meet [[Kamek]], who explains that the fortress is Bowser's Castle, where Bowser had retreated after escaping [[King Olly]]'s attack on [[Peach's Castle]] at the beginning of the game, but it was overrun with [[Folded Soldiers]] upon his arrival. Kamek had attempted to engage an emergency protocol for the castle, but pressed a button that shut down its engines instead, causing the castle to crash-land into Shangri-Spa's banquet hall. As a result, those who managed to avoid getting folded were forced to clean up the spa. | |||
The entrance to the castle is initially guarded by an origami version of [[Boss Sumo Bro.]], who can only be reached with the help of [[Bowser Jr.]] After Mario defeats Boss Sumo Bro., the gang and a whole slew of uncorrupted minions (rallied by Kamek) barge into the castle and fight their way through the opposition. In the foyer, which also doubles as a mess hall, Mario can optionally fight the Folded Soldiers and earn 1,000 coins from each battle if the enemy was not instantly defeated with a [[First Strike]] in the overworld. | |||
After finding that a door on the castle's second floor (where Bowser Jr. is trying to push himself through) is locked, Kamek guides Mario to his room for a key to the door, but mysteriously vanishes along the way, leaving Mario to find his way to Kamek's room himself. Inside a hallway lined with five doors, each leading to a room for a species of the Koopa Troop (from left to right: Goomba, Koopa Troopa, Kamek, Hammer Bro, and Spike) and with a Bowser portrait right above the door, Mario can peek through a small window to the left of each door for a hint of what he can find inside each room. There is a [[Flashy Mushroom]] behind some crates inside the room for Goombas, an Origami Koopa Troopa behind a [[treasure chest]] inside the room for Koopa Troopas, [[Luigi]] inside Kamek's room, an indicator for a [[Hidden Block|hidden]] [[? Block]] behind a toppled chair inside the room for Hammer Bros., and an Origami [[Spike]] inside another Treasure Chest plus a glimpse of a Collectible Treasure behind that chest inside a room for Spikes. The door to Kamek's room is initially camouflaged into a wall with a portrait of [[King Olly]] right above where the door would be; Mario must dislodge that portrait by hammering the wall right below the portrait repeatedly until it falls to the ground, revealing another portrait of Bowser. By doing so, a [[Magic Circle]] appears for Mario to use the [[1,000-Fold Arms]] to peel off the wall, revealing the door to Kamek's room. After Mario enters the room, Luigi hands him a [[Key to Bowser's Castle]]; Mario uses the key to unlock the door on the second floor that leads into another hallway, which is littered with sliced pieces of the Koopa Troop. Here, he is forced into a battle with [[Handaconda]], which has captured Olivia. | |||
[[File:PMTOK Scissors.png|thumb|left|The Dual-Bladed Duelist: Scissors, boss of Bowser's Castle and guardian of the green streamer]] | |||
After defeating Handaconda and freeing Olivia, Mario makes his way into the throne room, where he finds a spool for the green streamer, along with a recaptured [[Bowser]]. In that room, Mario runs into [[Scissors (boss)|Scissors]]; before engaging Mario directly, Scissors sends out [[Paper Mistake Buzzy Beetle]] as a warm-up for Mario. After Mario defeats Scissors in a near-death battle, a Magic Circle appears, allowing him to use the 1,000-Fold Arms to destroy the green streamer's spool. With the streamer cleared, the castle is officially back in Bowser's hands. | |||
After being freed, Bowser directs Mario and Olivia to the castle's hangar on the first floor for a mode of transportation to Peach's Castle. First, in a room with nine Buzzy Beetle pillars arranged in a square, Mario must hammer a red button below a Bowser emblem on the west wall to activate a laser beam and hammer each pillar as necessary to create an S-shaped laser path through all nine pillars to another Bowser emblem on the north wall to unlock a door to the hangar. Inside the hangar, Mario must press a button on the left (next to the one that Kamek had pressed), which makes an [[airship]] emerge from a garage and dock itself at the hangar. Mario can read signs below the two buttons to reveal that their labels, one for "Secret Weapon" and the other for "Cut Engines" are wrong way round, for a very tiny writing on each sign states that the button's function is for the other one. After Bowser, Bowser Jr., Kamek, and the Koopa Troop board the airship, Mario must also get aboard and confirm to Bowser that he is ready to go for the airship to take off into the sky for Peach's Castle. | |||
During the credits, a photo of Bowser Jr. and Bowser soaking in the [[Spring of Sanctuary]] shows Bowser's Castle undergoing repairs in the background. | |||
<gallery> | |||
PMTOK Shangri Spa.jpg|View of Shangri-Spa, with Bowser's Castle in the distance | |||
PMOK Angel Toad Fountain.jpg|The central plaza of Shangri-Spa, with Bowser's Castle in the background | |||
PMTOK Folded Soldiers Feast.jpg|Mario, Olivia, Kamek, and Bowser Jr. find the [[Folded Soldiers]] feasting inside Bowser's Castle | |||
PMTOK Kamek flashback 1.png|Bowser returning to his castle in Kamek's flashback | |||
PMTOK Kamek flashback 2.png|The castle overrun with Folded Soldiers in Kamek's flashback | |||
PMTOK Kamek flashback 3.png|Kamek inside the castle's hanger in his flashback | |||
PMTOK Kamek flashback 4.png|Kamek mistakenly presses "Cut Engines" button for "Secret Weapon" button in his flashback | |||
PMTOK Kamek flashback 5.png|Bowser's Castle about to crash-land into Shangri-Spa in Kamek's flashback | |||
PMTOK credits image 9.png|Bowser's Castle undergoing repairs in the background | |||
</gallery> | |||
===''Mario & Luigi'' series=== | ===''Mario & Luigi'' series=== | ||
====''Mario & Luigi: Superstar Saga''==== | ====''Mario & Luigi: Superstar Saga'' / ''Mario & Luigi: Superstar Saga + Bowser's Minions''==== | ||
[[ | [[File:MLSSBC.PNG|frame|left|The floating castle from ''Mario & Luigi: Superstar Saga'']] | ||
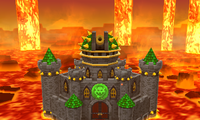
[[ | [[File:MLSSDX BowserCastle.png|thumb|220px|Bowser's Castle in ''Mario & Luigi: Superstar Saga + Bowser's Minions'']] | ||
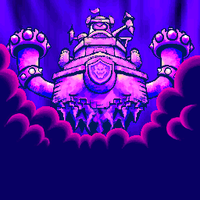
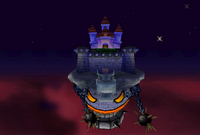
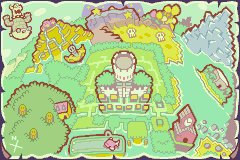
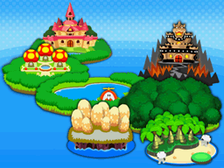
In ''[[Mario & Luigi: Superstar Saga]]'' | In ''[[Mario & Luigi: Superstar Saga]]'' and its [[Nintendo 3DS|3DS]] remake ''[[Mario & Luigi: Superstar Saga + Bowser's Minions]]'', [[Bowletta]] goes back to the [[Mushroom Kingdom]] so she can use Bowser's Castle to attack the [[Beanbean Kingdom]] after being tricked into capturing [[Luigi]] disguised as [[Princess Peach]], which allows him to retrieve the stolen [[Beanstar]] from the repaired [[Koopa Cruiser]]. In this game, the castle is in the sky, can breathe fire, and resembles Bowser. Towers act as the castle's "hands", and around the castle's "torso" are cannons and an opening. This flying castle design is reused in ''[[Yoshi's Island DS]]''. | ||
The | The castle acts as the final area of the game; Mario and Luigi fly there with [[Blablanadon]] near the end of the game to stop Bowletta after the latter hears about the castle attacking the Beanbean Kingdom and [[Prince Peasley]] being sent to stop it. The [[Beanbean Map|map]] of the game hides the castle throughout the majority of the game with a folded upper-left corner until it attacks [[Beanbean Castle Town]]; in the remake, the corner is not folded, and when Bowletta launches her attack, a picture of the castle is taped onto the map instead. Within the castle, the Mario Bros. must battle many of Bowser's troops and fight each of the [[Koopalings]] (some with [[Time Bob-omb]]s on their side) in their respective rooms in order to progress further, until they make it to [[Fawful]]. | ||
== | After defeating Fawful, the Mario Bros. make it into the throne room where Bowletta resides. Bowletta reveals she will not only conquer the Beanbean Kingdom, but the Mushroom Kingdom as well, and attacks the Mario Bros. They fight and seemingly defeat Bowletta after a long battle, but a Time Bob-omb suddenly appears and knocks them out, and she then swallows the brothers. Inside her body, the Bros. must fight and defeat [[Cackletta]][[Cackletta#Soul|'s spirit]]; after they defeat her, they are ejected out of Bowletta's body before she is turned back into Bowser and Cackletta's spirit perishes. The Mario Bros., Peasley and Blablanadon then escape the castle before it blows up, courtesy of a time bomb planted by Prince Peasley. Bowser regains consciousness and begins wondering what he has been doing the whole time, only for the castle to explode moments later and send him flying into the camera. The castle's remains crash into [[Oho Ocean]] in the original game, while it simply explodes and disappears in the remake; Bowser is fortunately saved by Prince Peasley. | ||
The "main" grounded Bowser's Castle appears in the credits when the [[Toad Express]] drops the present containing Bowser through its roof. In the remake, only the exterior walls remain here, and the ''Minion Quest'' ending has the castle being rebuilt after Bowser is dropped. | |||
;Map | |||
<gallery heights=400px widths=800px> | |||
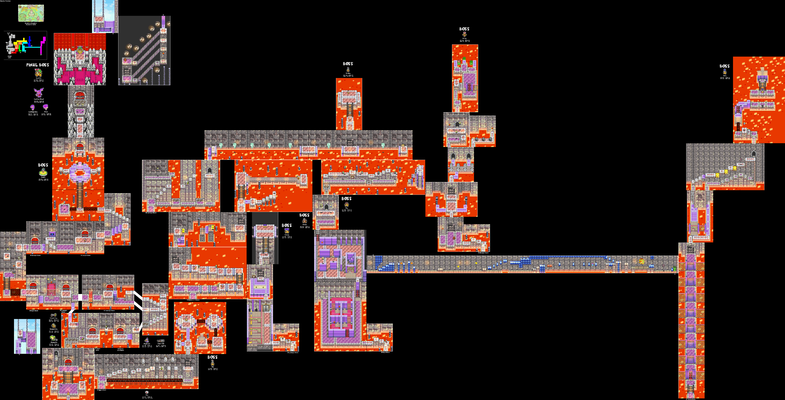
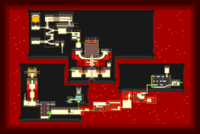
Bowser'sCastle-Map-MLSS.png|Bowser's Castle's full layout. | |||
</gallery> | |||
{{M&LSS map}} | |||
Bordering or connecting locations to Bowser's Castle include: | |||
*[[Hoohoo Village]] | |||
;Enemies | |||
*[[Gunner Guy]] | |||
*[[Hammer Bro#Mario & Luigi: Superstar Saga / Mario & Luigi: Superstar Saga + Bowser's Minions|Hammer Bro]] | |||
*[[Boo]] | *[[Boo]] | ||
*[[Chomp Bro]] | *[[Chomp Bro]] | ||
*[[Iggy]] (boss) | |||
*[[Iggy | |||
*[[Magikoopa]] | *[[Magikoopa]] | ||
*[[Sniper Bill]] | *[[Sniper Bill]] | ||
*[[Roy | *[[Morton]] (boss) | ||
*[[Wendy | *[[Lemmy]] (boss) | ||
*[[Ludwig]] (boss) | |||
*[[Roy]] (boss) | |||
*[[Time Bob-omb]] (background enemy during Roy, Wendy and Larry battles; cannot be fought directly) | |||
*[[Wendy]] (boss) | |||
*[[Larry]] (boss) | |||
*[[Fawful]] (boss) | |||
*[[Bowletta]] (boss) | |||
*[[Flaret]] (with Bowletta) | |||
*[[Cackletta#Soul|Cackletta]] (final boss) | |||
====''Mario & Luigi: Partners in Time''==== | ====''Mario & Luigi: Partners in Time''==== | ||
[[ | {{M&LPIT map}} | ||
In ''[[Mario & Luigi: Partners in Time]]'', the | [[File:BabyBowser Castle.PNG|thumb|left|Baby Bowser's Castle seen in ''Mario & Luigi: Partners in Time''.]] | ||
In ''[[Mario & Luigi: Partners in Time]]'', the Mario Bros. visit [[Baby Bowser]]'s castle in the past, after the [[Koopa Cruiser]] crashes into the castle upon being shot down by the [[Shroob]]s. Though the quartet are initially split up, they eventually reunite there and start their adventure together. Baby Bowser himself is never seen inside the castle during the entire game, though the Mario Bros. discover a Cobalt Shard that he is keeping inside a [[Treasure chest|chest]]. There is also a [[time hole]] there which links to [[Peach's Castle#Mario & Luigi: Partners in Time|Peach's Castle]] in the present. Oddly, the castle on the map in the present looks the exact same as the one in the past and still depicts Baby Bowser. | |||
{{br|left}} | |||
;Area maps | |||
<gallery perrow=5> | |||
BabyCastleMap1.png|Baby Bowser's Castle Area 1 | |||
BabyCastleMap2.png|Baby Bowser's Castle Area 2 | |||
BabyCastleMap3.png|Baby Bowser's Castle Area 3 | |||
ML-PIT-map-Bowser'sCastle.png|Full area map | |||
</gallery> | |||
;Enemies | |||
*[[Goomba]]s | |||
*[[Boo]]s | |||
*[[Boom Guy]]s | |||
====''Mario & Luigi: Bowser's Inside Story'' / ''Mario & Luigi: Bowser's Inside Story + Bowser Jr.'s Journey''==== | |||
{{see also|Fawful Theater}} | |||
{{:Mario & Luigi: Bowser's Inside Story bestiary|transcludesection=Bowser Castle}} | |||
{{multiple image | |||
|align=left | |||
|direction=horizontal | |||
|image1=Bowser's Castle18.png | |||
|alt1=Bowser's Castle18.png | |||
|width1=178 | |||
|caption1=Bowser Castle shortly before Fawful sacked it. | |||
|image2=Bowser's Castle Map.png | |||
|alt2=Bowser's Castle Map.png | |||
|width2=200 | |||
|caption2=Map of Bowser Castle. | |||
}} | |||
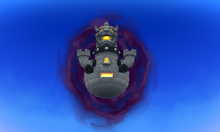
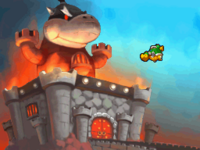
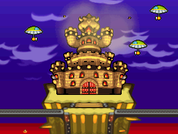
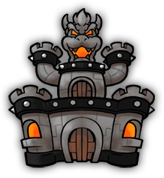
In ''[[Mario & Luigi: Bowser's Inside Story]]'' and ''[[Mario & Luigi: Bowser's Inside Story + Bowser Jr.'s Journey]]'', the castle, here labeled as "Bowser Castle", is taken over by [[Fawful]], with [[Midbus]] taking control of operations. After Bowser helps fire a [[Bomber Bill|Banzai Bill]] at his hijacked castle from [[Dimble Wood]], Midbus commands the castle to elevate, dodging the Banzai Bill, and then lands it on top of Bowser. Mario and Luigi must travel to Bowser's [[Rump Command]] and cause Bowser to [[Super Bowser|grow large enough]] to fight his castle. | |||
In battle, the Castle's main attack is a flying ram, which Bowser must counter by punching. Its main tactic is opening its entrance doors and releasing Spinies, which prevent Bowser from punching. After the castle is defeated, Midbus retreats and the castle is returned to its original location. Later, as Bowser attempts to enter the castle, Midbus commands it to hover out of Bowser's reach. After wandering to the opposite side of the area, Midbus fires a giant cannonball at Bowser, who Mario and Luigi must help by building up energy in his arms. With their assistance, he throws it back at the castle, damaging it badly enough to force it to land. Bowser then gains access to the castle, where he discovers that Fawful has not only brainwashed his minions, but had also turned his training facility into a [[Fawful Theater|theater]]. In the meantime, Bowser decides to see the show Fawful puts on. After a few minutes, the doors to the theater open. Inside, a Goomba acting under the orders of Fawful tricked him into sitting in a VIP chair, which fires Bowser onto the stage and forces him into a fight against Midbus. | |||
After Bowser beats Midbus, Bowser is forced to eat a "victory feast" that Boos feed him. This causes him to become so fat that he gets stuck in the floor. After a strange hand grabs Princess Peach, Bowser falls through the floor and lands on a treadmill, where he manages to lose the excess weight. He is then blasted out by exploding Bob-Ombs and sent into the [[Tunnel]]. | |||
| | Later in the game, Bowser must return here to look for the second Star Cure, which he had stolen before the events of the game. Fawful has blocked the path to his treasure stash, and Bowser must push a Fawful statue off the castle balcony to break the barrier. However, his brainwashed minions begin to push against the statue too, trying to save the statue and push Bowser off the balcony, forcing the Mario Bros. to assist him and provide extra leg strength once more. Bowser finally makes it to his [[Treasure Chamber|treasure vault]] with the assistance of some Monty Moles, only to learn his Monty Mole minions had deserted him for Fawful and turned the tunnel into a railway for the [[Fawful Express]]. | ||
| | |||
[[File:M&LBIS Bowser's Castle Artwork.png|thumb|200px|left|Artwork shown before fighting the Gauntlet version in ''Mario & Luigi: Bowser's Inside Story + Bowser Jr.'s Journey'']] | |||
After battling the Fawful Express, Bowser return to the Treasure Chamber to obtain the Star Cure from the safe. After recalling the combination with Mario, Luigi and [[Starlow]]'s help, Bowser opens the safe and grabs the Star Cure. However, his minions [[Private Goomp]], [[Corporal Paraplonk]] and [[Sergeant Guy]] then push him into the safe and trap him in it, announcing their betrayal and defection to Fawful. The safe is then moved eventually to [[Peach's Castle]]. | |||
Curiously, the castle has a cold-storage vault, in which a large part of the [[Shroob]] invasion force from the events of ''Partners in Time'' is kept frozen, along with [[Elder Princess Shroob|their]] [[Princess Shroob|princesses]], who somehow survived their defeat. If Mario and Luigi find the password required to enter this room, they can fight three of the Shroobs (which they inadvertently defrost) as optional bosses. According to ''Bowser Jr.'s Journey'', the cold-storage vault was originally created by Kamek to store the Ever Ice as a means to preserve it, despite its permanent nature, in the event that Bowser Jr. needed it - which he ultimately did thanks to the [[Blorbs]] outbreak at Bowser's kingdom. | |||
During the credits, Bowser's minions are repairing the damages done to the castle. After being beaten by Mario and Luigi back at Peach's Castle, Bowser is carried back to his castle, and a Magikoopa treats him while he is bedridden. Birdley and Starlow arrive at the castle to deliver a present for him; a [[cake]] from Princess Peach. Before Bowser opens it, Starlow chats with him for a bit, and re-accepts Private Goomp, Corporal Paraplonk and Sergeant Guy back into his troop once they apologize for their betrayal, telling them to work on the repairs of his castle. | |||
In the remake, the castle is labeled as "Bowser's Castle" and in the main game plays the same role as the original. There are no major changes in the rematch in the remake's [[Challenge Node]], other than the fact that the [[Shy Guy]]-manned [[airship]]s move faster and fire faster cannonballs more rapidly. In the ''Bowser Jr.'s Journey'' mode, it is revealed that after Fawful took over Peach's Castle, his treasonous minions the [[Best Fitness Friends]] took control of Bowser's Castle for themselves. In this mode, the castle's basement is labeled as the '''Lava Lair''', which Bowser Jr., Kamek and Morton explore after the Castle had taken off for Dimble Wood. Additionally, Bowser's Castle is the final area for ''Bowser Jr.'s Journey''. In the post game, due to Bowser challenging Bowser Jr. to a personal battle and neither one admitting defeat, the castle's repairs ended up undone. | |||
{{br|left}} | |||
;Enemies | |||
{{M&LBIS map}} | |||
*[[Midbus]] (boss) | *[[Midbus]] (boss) | ||
*[[Jailgoon]] | *[[Jailgoon]] | ||
*[[Sniffle Thwomp]] | *[[Sniffle Thwomp]] | ||
*[[Magifoofa]] | *[[Magifoofa]] | ||
*[[Fawful Guy]] | *[[Fawful Guy]] | ||
*[[Shroob# | *[[Shroob#Mario & Luigi: Bowser's Inside Story|Shroob]]s (optional boss) | ||
*[[Fawful Express]] (boss) | |||
*[[Fawful Mountain]] (boss) | |||
*[[Choomba]] (appears in the Fawful Express boss battle) | |||
{{br}} | |||
<gallery> | |||
ML-BIS-map-BowserCastle.png|The castle | |||
ML-BIS-map-BowserCastleSubway.png|Subway | |||
</gallery> | |||
===''Mario | ====''Mario & Luigi: Dream Team''==== | ||
Bowser's Castle | {{main|Neo Bowser Castle}} | ||
While Bowser's Castle itself does not appear in ''[[Mario & Luigi: Dream Team]]'', [[Neo Bowser Castle|a new castle]] conjured from the [[Dream Stone]] is created during the events of the game, and serves as the stronghold for Bowser and [[Antasma]] on [[Pi'illo Island]]. At the end of the game, this castle is destroyed due to its source, the Dream Stone, being shattered as well as its rulers, Antasma and Bowser, being defeated. | |||
====''Mario & Luigi: Paper Jam''==== | |||
{{see also|Neo Bowser Castle}} | |||
[[File:MLPJ BowserCastle.png|thumb|Bowser's Castle as seen in a cutscene in ''Mario & Luigi: Paper Jam'']] | |||
In ''Mario & Luigi: Paper Jam'', Bowser's Castle appears as an area located near [[Doop Doop Dunes]]. The castle can also be seen off in the distance at several points in the game. The castle also has a cannon built into the roof, which Bowser uses to destroy the bridge connecting his castle to Doop Doop Dunes as well as knock out Mario, Luigi and Paper Mario. | |||
The castle is first seen during the first cutscene involving Bowser, where after a disagreement and then a brawl, he and his paper counterpart decide to team up. They proceed to kidnap their respective [[Princess Peach]]es and return to the castle. The castle is later seen in Doop Doop Dunes, where upon entering the area, the Mario Bros. and [[Paper Mario (character)|Paper Mario]] spot Bowser's Castle in the distance, which they must cross the desert to reach. As they come close, the Bowsers notice and decide to blast the gang with [[cannonball]]s. The first shot misses them, but destroys the bridge connecting the castle to the desert, while the second shot knocks them all out cold. [[Wendy]], [[Roy]], [[Larry]] and [[Ludwig]] then arrive to take them to the [[Twinsy Tropics Dungeon]], while the [[Bowser Jr.]] duo collects the book containing Paper Mario's world. | |||
Much later in the game, the group reaches Bowser's Castle in order to rescue the princesses and get the book back. They learn the [[Trio Glider]] before encountering the two [[Kamek]]s and [[Papercraft King Boo]], who is controlled by [[Morton]] and [[Lemmy]]. [[Toadette]] also arrives just in time with a [[Papercraft Yoshi]] to fight the Papercraft King Boo. After the victory, Kamek kidnaps Toadette to bring the production of papercrafts to a stop, then prepares to build [[Papercraft Bowser]]. The gang later rescues Toadette before encountering the Bowser Juniors on guard duty. | |||
The Princess Peaches then escape and greet the team, but are caught by the Bowser Juniors. They mean to fight, but after accidentally revealing they possessed the book the Bros. are after (which they did not know they had), the pair flee. The group eventually catches them and forces them to hand over the book, but the Juniors escape after giving them a decoy book. The gang chases them down and engages in a battle with them, defeating the pair. Before they can get the book back, the two Bowsers enter the room, enraged at their sons' defeat. They then activate "the boosters", lifting Bowser's Castle out of the lava moat and dubbing it "[[Neo Bowser Castle]]". The gang escapes, forgetting the book, and the Bowsers retaliate for their sons' defeat by firing on [[Peach's Castle]] and ravaging it. The castle is presumably returned to ground level after the Bowsers' defeat. | |||
Unlike other ''Mario & Luigi'' games, the castle's design is based on its designs from ''New Super Mario Bros. Wii'' and ''New Super Mario Bros. 2'' and lacks the Bowser head and "arm towers" of the previous designs. Additionally, Bowser's Castle is located at the edge of a desert instead of a volcanic wasteland, although a giant lava moat is built around the castle. Additionally, this design does not have a stone head of Bowser anywhere, but instead has a green Bowser-like emblem logo in the center. Further reflecting on the designs of contemporary main series incarnations, the castle sports a large number of spiked green domes that resemble Bowser's shell. | |||
After Bowser's Castle becomes Neo Bowser Castle, its original location at the end of Doop Doop Dunes [[Unrevisitable area|can no longer be explored]], even when the game is completed. | |||
;Enemies | |||
<gallery> | |||
MLPJBoomerangBro.png|[[Boomerang Bro]]s. | |||
MLPJPaperBoomerangBro.png|[[Paper Boomerang Bro]]s. | |||
MLPJPaperDryBones.png|[[Paper Dry Bones]] | |||
MLPJFlyGuy.png|[[Fly Guy]]s ([[Toadette in Trouble]] mission only) | |||
MLPJBigTailGoomba.png|[[Big Tail Goomba]]s | |||
King Boo Papercraft.png|[[Papercraft King Boo]] (Papercraft Boss) | |||
MLPJBowserJr.png|[[Bowser Jr.]] (boss) | |||
MLPJPaperBowserJr.png|[[Paper Bowser Jr.]] (boss) | |||
</gallery> | |||
====''Mario & Luigi: Brothership''==== | |||
In ''[[Mario & Luigi: Brothership]]'', the castle is located on [[Wayaway Island]]. The Mario Bros. visit the castle to obtain more [[Ampberry|Ampberries]] for the people affected by the [[Glohm]]. | |||
===''Mario Party'' series=== | |||
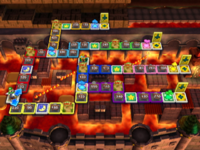
Bowser's Castle makes infrequent appearances in the ''Mario Party'' series. The minigame [[Bowser's Lovely Lift]] in ''[[Mario Party 7]]'' takes place in the castle, although only the tower holding the lift is seen. Several cutscenes in the story mode of ''[[Mario Party DS]]'' take place in Bowser's Castle. It is where [[Bowser's Pinball Machine]] is located and the final boss minigame, [[Bowser's Block Party]], takes place in the throne room of the castle. [[Chaos Castle]] from ''Mario Party 10'' takes place within the castle: The first part of the board takes place on the exterior, the second part takes place inside the castle with a factory theme before ending in the throne room. The [[Bowser Board]] in amiibo Party is also based on the castle. [[World 4 (Mario Party: Star Rush)|World 4]] of ''[[Mario Party Star Rush]]'' is based on Bowser's Castle. | |||
===''Super Smash Bros.'' series=== | |||
Bowser's Castle sometimes appears in the [[Super Smash Bros. (series)|''Super Smash Bros.'' series]]. In ''[[Super Smash Bros. for Nintendo 3DS]]'' and later also ''[[Super Smash Bros. Ultimate]]'', a stage based on [[Bowser's Sky Castle]] from ''Paper Mario: Sticker Star'' appears in the [[Paper Mario (stage)|Paper Mario]] stage, where at certain intervals, the castle's eyes may light up and the castle entrance (modeled after Bowser's head) may turn or close its mouth, heavily damaging any character inside. Additionally, in ''Super Smash Bros. Ultimate'', the [[smashwiki:Molten Fortress|Molten Fortress]] sub-area in [[smashwiki:Adventure Mode: World of Light|World of Light]] is modeled after Bowser's Castle. | |||
===''Mario Pinball Land''=== | |||
{{main|Fiery Stage}} | |||
[[File:MPL Bowser's Castle.png|thumb|Bowser's Castle in ''Mario Pinball Land'']] | |||
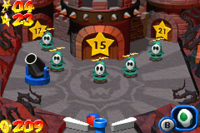
In ''[[Mario Pinball Land]]'', Bowser's Castle appears as the final area, being called the '''Fiery Stage''' by the manual. It is only accessible after Mario has defeated all the other bosses and collected at least 15 stars. The bosses can all be found and battled in the castle once more. Bowser must also be battled and defeated here in order to beat the game. | |||
===''Super Princess Peach''=== | |||
{{main|Bowser's Villa}} | |||
As ''[[Super Princess Peach]]'' takes place on [[Vibe Island]], rather than the Mushroom Kingdom, the castle itself is not seen during the events of the game. However, Bowser built [[Bowser's Villa|a villa]] there, which is considered to be another castle. | |||
===''Mario Hoops 3-on-3''=== | |||
{{main|Bowser's Castle (Mario Hoops 3-on-3)}} | |||
Bowser's Castle appears as a basketball court in ''[[Mario Hoops 3-on-3]]''. The court has many gimmicks, including [[Thwomp]]s, [[Lava Bubble]]s, and [[Bomb (Final Fantasy)|Bomb]]s. | |||
{{br}} | |||
===''Itadaki Street'' series=== | |||
{{main|Bowser's Castle (board)}} | |||
[[File:ISWii18.png|thumb|200px|Bowser's Castle in ''Fortune Street'']] | |||
Bowser's Castle also appears as a game board both in ''[[Itadaki Street DS]]'' and ''[[Fortune Street]]'', based on the castle settings from ''New Super Mario Bros.'' and ''New Super Mario Bros Wii'', respectively. | |||
===''Mario & Sonic'' series=== | |||
Bowser's Castle has made various appearances in the [[Mario & Sonic (series)|''Mario & Sonic'' series]]. In the [[Wii]] version of ''[[Mario & Sonic at the Olympic Winter Games (Wii)|Mario & Sonic at the Olympic Winter Games]]'', Bowser's Castle is where [[Dream Ice Hockey]] takes place, and a background based on it is in the second segment of the Mario World routine in [[Dream Figure Skating]]. In the [[Mario & Sonic at the Olympic Winter Games (Nintendo DS)|Nintendo DS version]], [[Blizland]] has elements of Bowser's Castle, combined with elements of Dr. Eggman's factories. In ''[[Mario & Sonic at the Sochi 2014 Olympic Winter Games]]'', a large portion of [[Mario's Figure Skating Spectacular]] features a layout inspired by Bowser's Castle based on its appearance in ''Super Mario 3D Land''. In the Nintendo 3DS version of ''[[Mario & Sonic at the Rio 2016 Olympic Games (Nintendo 3DS)|Mario & Sonic at the Rio 2016 Olympic Games]]'', Bowser's Castle appears only on the overworld in the [[Mario & Sonic at the Rio 2016 Olympic Games (Nintendo 3DS)#Road to Rio|Road to Rio]] mode. | |||
===''Mario Sports Mix''=== | |||
{{main|Bowser's Castle (Mario Sports Mix)}} | |||
Bowser's Castle is one of the fourteen courts of ''[[Mario Sports Mix]]'' and appears in all of the sports for the players to compete in. | |||
===''Yoshi's Woolly World'' / ''Poochy & Yoshi's Woolly World''=== | |||
{{main|King Bowser's Castle (Yoshi's Woolly World)}} | |||
[[File:KingBowserCastle YWW.png|thumb|Yoshi in Bowser's Castle in ''Yoshi's Woolly World'']] | |||
In ''[[Yoshi's Woolly World]]'' and ''[[Poochy & Yoshi's Woolly World]]'', Yoshi chases after Kamek to Bowser's Castle to save his fellow Yoshis. Once he enters the castle, he must seek [[yarn ball]]s of four different colors to open the door to Baby Bowser. The first phase of the boss fight is very similar to that of previous games. Yoshi must throw a yarn ball at Baby Bowser, stomp him, and repeat the process two more times to proceed. In the second phase, Baby Bowser grows giant and becomes Mega Baby Bowser. He jumps into the background and hurls big yarn balls at Yoshi. To win, Yoshi must throw these big yarn balls back at Mega Baby Bowser. Upon victory, the player unlocks eight new Yoshi colors, as well as [[List of Yoshi designs in Yoshi's Woolly World|Baby Bowser Yoshi]] if all five [[Wonder Wool]] in the level were collected. | |||
===''Mario + Rabbids'' series=== | |||
====''Mario + Rabbids Kingdom Battle''==== | |||
{{main|Bowser's Castle (Mario + Rabbids Kingdom Battle)}} | |||
Bowser's Castle appears in ''[[Mario + Rabbids Kingdom Battle]]'' as the final stage of the [[Lava Pit (Mario + Rabbids Kingdom Battle)|Lava Pit]]. The castle is shown to be flying and appears to be in a ruined state. The only seen room is the throne room where Mario and his team fight [[MegaDragonBowser]] and destroy the [[Megabug]]. | |||
====''Mario + Rabbids Sparks of Hope''==== | |||
Although Bowser's Castle itself does not appear in ''[[Mario + Rabbids Sparks of Hope]]'', the area where [[Darkmess Bowser]] is fought resembles the castle. | |||
===''Yoshi's Crafted World''=== | |||
{{main|The Great King Bowser (level)}} | |||
In ''[[Yoshi's Crafted World]]'', Bowser's Castle reappears in the boss stage [[The Great King Bowser (level)|The Great King Bowser]]. Here, the Yoshis must defeat Baby Bowser. In his first phase, the Yoshis should defeat Baby Bowser's [[The Great King Bowser|robot]]. During the second phase, the Yoshis need to defeat Mega Baby Bowser. This level has to be completed to not only beat the game, but also unlock [[Hidden Hills]]. | |||
===Monopoly Gamer=== | |||
Bowser's Castle is the sixteenth and final property on the game board in [[Monopoly Gamer]]. It is one of two properties in the Dark Blue Color Set (along with [[Peach's Castle]]). | |||
===''The Super Mario Bros. Movie''=== | |||
[[File:Bowser's Castle TSMBM.png|thumb|left|Bowser's Castle in the [[Snow Kingdom (The Super Mario Bros. Movie)|Snow Kingdom]] in ''The Super Mario Bros. Movie'']] | |||
In ''[[The Super Mario Bros. Movie]]'', Bowser's Castle is located on a giant floating [[airship]] (referred to as '''Bowser's ship''' by [[Cranky Kong]], '''Bowser's airship''' in the bonus features,<ref>"Leveling Up: Making ''The Super Mario Bros. Movie''" bonus feature subtitles</ref> and '''Bowser's Island Castle''' in a [[Jakks Pacific]] playset<ref>{{file link|TSMBM Bowser Island Castle Toy.jpg}}</ref>) that [[Bowser]] and [[Bowser's Minions|his forces]] use to travel between kingdoms. The ship consists of a volcano and [[lava]] similar to those seen in the [[Dark Land]]s, as well as a massive figurehead depicting Bowser's head and a giant pool of lava, resembling depictions of Bowser's Castle from ''[[Paper Mario]]'' and ''[[Mario & Luigi: Superstar Saga]]'', respectively, complete with [[Spike Ball]]s attached to [[Ball and chain (windup)|chains]] like the former acting as [[anchor]]s to help it descend. Additionally, the volcano's crater, as seen during Peach and Bowser's wedding held at the castle, is later revealed to also double as a missile silo used to launch the Bomber Bill that Bowser plans to use to destroy the Mushroom Kingdom once the wedding gets thwarted by the heroes. | |||
After Bowser obtains the [[Super Star]] from the [[penguin]] army, he holds a celebration in his castle with his minions. Later in the film, [[Luigi]] is captured by the [[Shy Guy]]s and [[Snifit]] and transported to Bowser's Castle, where he is imprisoned along with the penguin army. The [[Kong army]] is also later captured and imprisoned at the castle after being ambushed by Bowser's minions. After getting sucked into [[Brooklyn]] through the [[mysterious pipe]], the ship and castle are destroyed by [[Mario]] and Luigi with the use of the Super Star. | |||
{{br}} | |||
==Profiles and statistics== | |||
===''Super Mario RPG: Legend of the Seven Stars''=== | |||
====Enemies==== | |||
=====First Visit===== | |||
<gallery> | |||
Terrapin.jpg|[[Terrapin]] | |||
Linkkink.png|[[Chaindelier]] (boss helper) | |||
Bowser Sprite - Super Mario RPG.png|[[Bowser]] (boss) | |||
</gallery> | |||
=====Second Visit===== | |||
<gallery> | |||
Terra Cotta Sprite - Super Mario RPG.png|[[Terra Cotta]] | |||
Forkies Sprite - Super Mario RPG.png|[[Forkie]] | |||
Gu Goomba Sprite - Super Mario RPG.png|[[Pro Goomba]] | |||
Star Crust.png|[[Star Cruster]] | |||
Malakoopa Sprite - Super Mario RPG.png|[[Malakoopa]] | |||
Tub-O-Troopa Sprite - Super Mario RPG.png|[[Grand Troopa]] | |||
Blaster SMRPG art.jpg|[[Big Blaster]] | |||
RMagikoopa SMRPG.jpg|[[Wizakoopa]] (boss) | |||
Bahamutt SMRPG.png|[[Bahamutt]] (boss helper for Wizakoopa) | |||
Jinx SMRPG art.jpg|[[Jinx Clone]] (boss helper for Wizakoopa) | |||
King Bomb Sprite - Super Mario RPG.png|[[King Bomb]] (boss helper for Wizakoopa) | |||
Boomerrpg.png|[[Boomer (Super Mario RPG)|Boomer]] (boss) | |||
SMRPG Exor Artwork.png|[[Exor]] (boss) | |||
</gallery> | |||
====Treasure Boxes==== | |||
{|class=wikitable style="text-align:center" | |||
!rowspan=2|Item | |||
!rowspan=2|Image | |||
!rowspan=2|Location | |||
!colspan=2|Location image | |||
|- | |||
!Original | |||
!Remake | |||
|- | |||
|[[Mushroom#Super_Mario_RPG:_Legend_of_the_Seven_Stars|Mushroom]] | |||
|[[File:SMRPG Mushroom box.png]] | |||
|style="text-align:left"|In the fourth area (the one with most of the screen blacked out), found after going left from the bridge. | |||
|[[File:Bowser's Keep Treasure 1.png|240px]] | |||
|[[File:Bowser's Keep Treasure 1 (Switch).png|300px]] | |||
|- | |||
|Mushroom, 10 [[10-Coin#Super_Mario_RPG:_Legend_of_the_Seven_Stars|10-Coins]] | |||
|[[File:SMRPG Mushroom box.png]] [[File:SMRPG 10 Gold Coin.png]] | |||
|style="text-align:left"|In fifth area is a detour found on the left. After going in, there is a small room with two treasures. | |||
|[[File:Bowser's Keep Treasures 26-27.png|240px]] | |||
|[[File:Bowser's Keep Treasures 2-3 (Switch).png|300px]] | |||
|- | |||
|[[Rock Candy (item)|Rock Candy]] or [[Sonic Cymbals]] or [[Star Gun]] or [[Drill Claw]] or [[Super Slap]] | |||
|[[File:Lucky Jewel.png]] [[File:RPG Bag.png]] | |||
|<nowiki/> | |||
*In the room after completing a course. This room repeats after the second and third courses. This room can be also repeated two more times after Mario leaves the keep and then comes back. | |||
*In the room after completing a fourth/last course. | |||
Depending on which course was completed, the reward is different:<br>Action course ending with rotating platforms gives out Sonic Cymbal.<br>Action course ending with Guerrilla throwing down barrels gives out Super Slap.<br>Battle course ending with six Shamans gives out Star Gun (Drill Claw in the remake).<br>Battle course ending with a Comeon spawning Bahamutts gives out Drill Claw (Star Gun in the remake).<br>Both puzzle courses give out Rock Candy. | |||
|[[File:Bowser's Keep Treasure 23.png|240px]][[File:Bowser's Keep Treasure 24.png|240px]] | |||
|[[File:Bowser's Keep Treasure 25 (Switch).png|300px]][[File:Bowser's Keep Treasure 26 (Switch).png|300px]] | |||
|- | |||
|[[Magic treasure box|Infinite Coins]] | |||
|[[File:SMRPGCoin.png]] | |||
|style="text-align:left"|Created after a boss fight against [[Wizakoopa]]. | |||
|[[File:Bowser's Keep Treasure 25.png|240px]] | |||
|[[File:Bowser's Keep Treasure 27 (Switch).png|300px]] | |||
|} | |||
===''Paper Mario''=== | |||
====Enemies==== | |||
:''For [[List of enemy formations in Paper Mario|enemy formations]] in Bowser's Castle, see [[List of enemy formations in Paper Mario#Bowser's Castle|here]].'' | |||
<gallery widths="100px"heights="80px"> | |||
PMKoopatrol.png|[[Koopatrol]] | |||
HammerBroPM.png|[[Hammer Bro]] | |||
PMMagikoopaGround.png|[[Magikoopa]] | |||
BonyBeetlePM.png|[[Bony Beetle]] | |||
BombshellBill PM.png|[[Bombshell Bill]] | |||
PMBombshellblaster.png|[[Bombshell Bill Blaster|B. Bill Blaster]] | |||
PMDryBones.png|[[Dry Bones]] | |||
PM Anti Guy Sprite.png|[[Black Shy Guy#Paper Mario|Anti Guy]] x3 (Optional Battle) | |||
Duplighost PM.png|[[Duplighost]] x4 (Mini bosses) | |||
JrTroopaPM.png|[[Jr. Troopa]] (in all forms, Boss) | |||
</gallery> | |||
The [[Koopa Bros.]] also appear but are not actually fought, being knocked away by a suddenly appearing [[Jr. Troopa]] before they have a chance to fight Mario. | |||
====Items==== | |||
A "main area" refers to a four-way intersection with a [[Save Block]]. Enemies can drop items and several items can be purchased from the [[Storehouse]]. Other items include: | |||
{|class=wikitable style="text-align:center" | |||
!Item | |||
!Image | |||
!Location | |||
!Location Image | |||
|- | |||
|[[Castle Key (Bowser's Castle)|Castle Key]] | |||
|[[File:PM Bowser Castle Key.png]] | |||
|<nowiki/> | |||
*Held by the [[Koopatrol]] on the sideway near the entrance. | |||
*In a treasure chest to the north in the second lava/moving platform area. | |||
*On a high platform at the northwestern corner of the first water room. | |||
*At the end of the fork road in the third Dry Bones room. | |||
*At the end of the north fork road of the northeastern road of the second main area. | |||
|[[File:Bowser Castle Key 1 PM.png|250px]][[File:Bowser's Castle Treasure Chest.png|250px]][[File:Bowser's Castle Key 3 PM.png|250px]][[File:Bowser's Castle Key 4 PM.png|250px]][[File:Bowser Castle Key 5 PM.png|250px]] | |||
|- | |||
|[[Prison Key]] | |||
|[[File:OddKey PM.png]] | |||
|<nowiki/> | |||
*Held by the Koopatrol guarding the prison to the east in the first main area. | |||
*Held by the Koopatrol guarding the prison to the west in the second main area. | |||
|[[File:Prison Key 1 PM.png|250px]][[File:Prison Key 2 PM.png|250px]] | |||
|- | |||
|[[Super Mushroom|Super Shroom]] | |||
|{{PM item|Super Shroom|text=}} | |||
|<nowiki/> | |||
*In a question block in the first Dry Bones room. | |||
*In the third question block after the quiz room. | |||
|[[File:Bowser's Castle Block 5.png|250px]][[File:Bowser's Castle Block 8.png|250px]] | |||
|- | |||
|[[Life Mushroom (Paper Mario series)|Life Shroom]] and [[Tasty Tonic]] | |||
|{{PM item|Life Mushroom (Paper Mario series)|Life Shroom|text=}} {{PM item|Tasty Tonic|text=}} | |||
|In a crates in the prison under the first [[Guard Door]] room. | |||
|[[File:PM Bowser's Castle prison 1.png|250px]] | |||
|- | |||
|Life Shroom | |||
|{{PM item|Life Mushroom (Paper Mario series)|Life Shroom|text=}} | |||
|In a question block on a platform in the lava area next to the front door scene. | |||
|[[File:Bowser's Castle Block 1.png|250px]] | |||
|- | |||
|[[Maple Syrup]] | |||
|{{PM item|Maple Syrup|text=}} | |||
|<nowiki/> | |||
*In a hidden block in the middle of the high platform in the second water room. | |||
*In a hidden block in the symmetrical position of the first [[Dry Bones]] room. | |||
|[[File:PMHiddenBlock40.png|250px]][[File:PMHiddenBlock41.png|250px]] | |||
|- | |||
|Super Mushroom and Maple Syrup | |||
|{{PM item|Super Shroom|text=}} {{PM item|Maple Syrup|text=}} | |||
|In the first two question blocks after the quiz room. | |||
|[[File:Bowser's Castle Blocks 6-7.png|250px]] | |||
|- | |||
|[[Deep Focus]] | |||
|[[File:Deep Focus Badge.png]] | |||
|In a badge block on a platform in the lava area, near the entrance. | |||
|[[File:Bowser's Castle Block 2.png|250px]] | |||
|- | |||
|[[Thunder Rage]] | |||
|{{PM item|Thunder Rage|text=}} | |||
|On another platform in the third lava/moving platform area. | |||
|[[File:Bowser's Castle (Thunder Rage).png|250px]] | |||
|- | |||
|[[Shooting Star (item)|Shooting Star]] | |||
|{{PM item|Shooting Star (item)|Shooting Star|text=}} | |||
|In a question block at the end of the north fork road in the second grotto scene. | |||
|[[File:Bowser's Castle Block 4.png|250px]] | |||
|- | |||
|[[Mystery|Mystery?]] | |||
|{{PM item|Mystery|text=}} | |||
|On a platform in the third lava/moving platform area. | |||
|[[File:Bowser's Castle (Mystery).png|250px]] | |||
|- | |||
|[[POW Block]] | |||
|{{PM item|POW Block|text=}} | |||
|In a question block at the end of the north fork road in the first grotto scene. | |||
|[[File:Bowser's Castle Block 3.png|250px]] | |||
|- | |||
|[[Jammin' Jelly]] | |||
|{{PM item|Jammin' Jelly|text=}} | |||
|Fall off the stairs in the room after the quiz. | |||
|[[File:Jammin' Jelly Bowser's Castle.png|250px]] | |||
|- | |||
|[[Ultra Mushroom|Ultra Shroom]] | |||
|{{PM item|Ultra Shroom|text=}} | |||
|At the end of the northwestern road from the second main area. | |||
|[[File:Bowser's Castle (Ultra Shroom).png|250px]] | |||
|} | |||
:''For a list of hidden blocks in Bowser's Castle, see [[List of hidden blocks in Paper Mario#Bowser's Castle|here]].'' | |||
====Area tattles==== | |||
*''It's Bowser's Castle. This appears to be the hangar for Bowser's [[Koopa Clown Car|vehicles]]. | |||
*''Boy! Bowser's Castle. Talk about your basic eerie atmosphere, huh? Oh... I'm nervous and excited at the same time. We're headed for the [[Bowser|final fight]] at last! | |||
*''Are we still outside the castle or what? Let's hurry through here. OK, [[Mario]]? | |||
*''I've gotta hand it to him, Bowser's Castle is amazing! Such creative use of lava flows! It's just like that [[Mt. Lavalava|volcano]]! | |||
*''It's a covered hallway in Bowser's Castle. It doesn't look like anything's amiss in here. Let's press on, Mario. | |||
*''Look at the size of that stone Bowser face! He's pretty scary looking. That face gives me the creeps, Mario. | |||
*''It's an underground prison cell, Mario. Are you sure you can find the way back to where we were before? | |||
*''I wonder where all this lava comes from. Don't you think it's odd? | |||
*''Lava, lava, lava! There's such a thing as too much lava, that's for sure. Mario, are you all right in this heat? Boy, it's hot! This adventure has just been one extreme or the other. | |||
*''The only way to cross the lava is to have somebody carry us. If we could find a way to cool the lava off, we could probably walk on it, though. And if we have to pass through lava flows, we can have Bow hide us from danger. | |||
*''Here's the source of the lava. It's miserably hot when it's flowing. It's not so bad when it's cooled off, though. | |||
*''Now we're cooking! I mean, now we're not cooking! It's still hot, but not, you know, burning hot. | |||
*''You know, walking on newly hardened lava is not exactly something that your average Goomba gets to experience. | |||
*''The lava seems to have hardened as it cooled off. | |||
*''There's a treasure chest. Things are looking up. The lava has even cooled. | |||
*''It seems to be a cave. Are we below the castle? It's so dark. They must have had problems setting up lights down here. What a pain for us. | |||
*''It seems to be a cave. Are we below the castle? It's so dark. How long can this darkness possibly last? | |||
*''Ah! We're back inside Bowser's Castle. There's a stone pedestal with Bowser's face carved on it. What poor taste! What an egomaniac! If we push that thing, what do you think will happen? | |||
*''It's a hall in Bowser's Castle. I wonder where it leads. We have to hurry! And yet, we should also be careful. | |||
*''These stairs aren't lighted very well, are they? I wonder how deep below ground they go. Bowser should really look into some ambient lighting. | |||
*''This is a prison cell where Toads are being held. You know... There are Toads here...and beds... It's kind of like a Toad House! Do you think that I'm just an incurable optimist? Well, what's wrong with that? | |||
*''Here's the storage room for Bowser's Castle. It looks like one of his subjects is selling his stuff. Ha ha! | |||
*''It's a covered hallway. I can sum up the decorating in two words: pure Bowser! Such dark colors and drab lighting! What terrible taste! | |||
*''I'm sure Bowser's going to be surprised. I'm sure he'd never believe that we could make it this far. I can't wait to see the expression on his face. | |||
*''If Bombette were about three times bigger, we could just blow all these walls up. It would certainly let us move through these areas a lot faster. But that's probably not a good idea. It would be far too dangerous. | |||
*''We're somewhere inside Bowser's Castle. This hall is quite large. It also looks quite fortified. I wonder if there's anything good around here? An attack item, maybe? | |||
*''Look at all these carvings of Bowser's ugly mug. It's really shameless! I guess he thinks he's cool. Hey, incidentally, about those stone pedestals... Some move and some don't, so check 'em all out. | |||
*''Whoa! This corridor has much lower ceilings, huh? I guess I had gotten used to really high ceilings. | |||
*''In case you don't know by now, some of these Bowser pedestals can be pushed and others can't. In many cases, you can push them from either the right or left side. I wonder where I heard that? | |||
*''This is a hidden passage. It's a bit dark, huh? That's all right. I can sense that something good's in here. | |||
*''Some of these Bowser pedestals can be pushed and others can't. In many cases, you can push them from either the right or left sides. If they move, you can be sure they're covering a hidden passage. | |||
*''See! A hidden passage. This one doesn't seem to be hiding anything interesting. | |||
*''...Nothing. This room's just a dead end. How worthless. Let's go back to the room where the pedestals are and check 'em out! | |||
*''This hidden passage looks promising, doesn't it? It must lead somewhere... You know, I hope we're going in the right direction. I feel kind of disoriented. | |||
*''We've certainly seen many kinds of treasure on our adventures, haven't we, Mario? There's one that I would value above all others, though. I would keep it in the safest place I know... Mario, please give me your autograph!! | |||
*''Again with the Bowser faces! I'm sick of looking at his ugly mug! Let's find the real Bowser and show him who's boss! And then I can meet Princess Peach! | |||
*''It's the outside of Bowser's Castle. Even the outside feels gross and ominous. Maybe he wasn't so bad until he moved here. Living in such a dank place isn't good for the soul. | |||
*''How many halls have we been through? I wonder what this one leads to... To Bowser's room? Maybe? | |||
*''Know what this reminds me of? A ghost story! This would make the perfect setting for a freaky ghost story! We could have Bow and her friends play the scary parts. Remind me to do that some time back at Toad Town! | |||
*''It's a prison cell within Bowser's Castle. A lot of Toads are here. It's a bit strange... Why would Bowser ever need this many prison cells? Do you think there are that many prisoners? | |||
*''I think we've already come really far. But we're not at Bowser's room yet. Where could he be? This place is so complicated! That Bowser... I really don't like him! | |||
*''"I smell treasure!" Isn't that a good Kolorado imitation? Mario? Wasn't that right on? I wonder what Kolorado's doing? | |||
*''It's a covered hallway in Bowser's Castle. There's no place to hide around here, that's for sure. Not that we need one, Mario! Who'd hide? Not me! | |||
*''Do you think those windows open to outside or to the inner part of the castle? I'm getting totally turned around in here. This castle really is huge. | |||
*''It's a room without a window. It also has a chandelier with no lights in it. I'm getting the feeling that Bowser is really going for the dark, gothic look in here. Maybe he hates bright lights. | |||
*''All the torches hanging over there... Doesn't their pattern strike you as sort of suspicious? It's almost as if there's a hidden meaning there. What do you say we try to remember it? | |||
*''I think we keep passing through the same room. Do you think, perhaps, that somebody's messing with us? Well, it's a waste of time to just keep running around with no clue about what we're doing. It's kind of like what happened in Forever Forest. Say...those torches might hold a clue for us. | |||
*''This is a corridor of sorts. I guess it's more like an elevated skyway, though. If a guy were afraid of heights, his legs would probably tremble and he'd probably freak out. Gulp! | |||
*''You know, if I were designing a castle, I wouldn't put in so many corridors. Well, whatever. You can't expect Bowser to have good taste. | |||
*''This room is one big ego massage for Bowser. I wish we could crush all these statues to dust. | |||
*''Stairs again! Do you think Princess Peach's Castle is at the top of 'em? We're almost there, Mario! I can feel it! Onward! The princess awaits! | |||
====Map descriptions==== | |||
*''It's the castle of the wicked King Bowser, of course. To kidnap Princess Peach, he stole the whole castle. Now Princess Peach's Castle teeters atop Bowser's Castle.'' | |||
*''Bowser's Castle used to be right here! That evil Koopa stole Princess Peach's Castle and captured Princess Peach.'' | |||
===Mario & | ===''Mario & Luigi: Superstar Saga''=== | ||
====Items==== | |||
{|class=wikitable style="text-align:center" | |||
!Item | |||
!Icon | |||
!Location | |||
|- | |||
|[[Super Mushroom]] | |||
|[[File:MLSuperstarSagaMushroom.png]] | |||
|align=left|Between the entrance of Ludwig's area and the entrance of Roy's area, there's a cage in the north. The item is in the right ? Block there. | |||
|- | |||
|[[Ultra Mushroom]] (x7) | |||
|[[File:MLSuperstarSagaMushroom.png]] | |||
|align=left| | |||
*In the entrance screen, it is in the ? Block in the left. | |||
*In the third screen on the path to Roy's area, it is in the right ? Block there. | |||
*To the right of the third screen on the path to Roy's area, it is in the left ? Block above the left end of the ceilings. | |||
*In the room between the door to Roy's area and the door to Wendy's area, it is in the ? Block in the left. | |||
*In the room before Wendy's final room, it is in the ? Block in the south. | |||
*In the room before Fawful's area, it is in the left ? Block there. | |||
*In the room before Bowletta's area, it is in the right ? Block there. | |||
|- | |||
|[[1-Up Mushroom]] (x2) | |||
|[[File:MLSuperStarSaga1upshroom.png]] | |||
|align=left| | |||
*Before the door to Ludwig von Koopa's area, there is a path to the south. The item is in the ? Block there. | |||
*In the third screen on the path to Roy's area, it is in the left ? Block there. | |||
|- | |||
|[[1-Up DX|1-Up Super]] | |||
|[[File:MLSuperStarSaga1upshroom.png]] | |||
|align=left|From in front of the door to Lemmy's final area, to the right is a Monty Mole who would give this item. | |||
|- | |||
|[[Ultra Nut]] (x2) | |||
|[[File:MLSuperStarSagaNut.png]] | |||
|align=left| | |||
*To the right of the third screen on the path to Roy's area, it is in the right ? Block above the left end of the ceilings. | |||
*In the room before Fawful's area, it is in the right ? Block there. | |||
|- | |||
|[[Supersyrup Jar|Super Syrup]] | |||
|[[File:MLSuperStarSagaSyrup.png]] | |||
|align=left|In the room between the door to Roy's area and the door to Wendy's area, it is in the ? Block in the right. | |||
|- | |||
|[[Ultrasyrup Jar|Ultra Syrup]] (x5) | |||
|[[File:MLSuperStarSagaSyrup.png]] | |||
|align=left| | |||
*In the entrance screen, it is in the ? Block in the right. | |||
*In the first screen on the path to Ludwig's area, it is in the ? Block there. | |||
*Between the entrance of Ludwig's area and the entrance of Roy's area, there's a cage in the north. The item is in the left ? Block there. | |||
*In the room before Wendy's final room, it is in the ? Block in the northeast. | |||
*In the room before Bowletta's area, it is in the left ? Block there. | |||
|- | |||
|[[Hoo Bean]] (x4) | |||
|[[File:BeansHoo SS.png]] | |||
|align=left|Found in hidden blocks (see below) | |||
|- | |||
|[[Chuckle Bean]] (x5) | |||
|[[File:BeansChuckle SS.png]] | |||
|align=left|Found in beanholes (see below). | |||
|} | |||
:''For a list of hidden blocks in Bowser's Castle, see [[List of hidden blocks in Mario & Luigi: Superstar Saga#Bowser's Castle|here]].'' | |||
:''For a list of beanholes in Bowser's Castle, see [[List of beanholes in Mario & Luigi: Superstar Saga#Bowser's Castle|here]].'' | |||
==='' | ===''Mario & Luigi: Partners in Time''=== | ||
====Items==== | |||
==== | {|class=wikitable style="text-align:center" | ||
!Item | |||
!Icon | |||
!Location | |||
|- | |||
|[[Mushroom]] (x3) | |||
|[[File:MaL PiT Mushroom.png]] | |||
|align=left| | |||
*Two are in the left ? Block near the entrance of the second scene in the first area. | |||
*Two are in the north ? Block in the third scene in the first area. | |||
*Two are in the right ? Block above the north platform in the sixth scene of the first area. | |||
|- | |||
|[[Mushroom Drop]] | |||
|[[File:MushroomDrop.png]] | |||
|align=left|In the left green block above the north platform in the sixth scene in the first area. | |||
|- | |||
|[[1-Up Mushroom]] (x3) | |||
|[[File:Mushroom One Up Pit.png]] | |||
|align=left| | |||
*In the red block in the southeast of the second scene in the first area. | |||
*In the right green block in the gymnasium in the northwest of the sixth scene in the first area. | |||
*In the red block in the west of the cave in the third scene in the second area. | |||
|- | |||
|[[Green Shell]] (x5) | |||
|[[File:Green Shell Pit.png]] | |||
|align=left| | |||
*Eight are in the right green block near the entrance of the second scene in the first area. | |||
*Four are in the ? Block near the exit of the second scene of the first area. | |||
*In the ? Block above the northwest platform in the sixth scene in the first area. | |||
*In the ? Block in the northeast of the eighth scene in the first area. | |||
*Two are in the ? Block in the west of the second scene in the second area. | |||
|- | |||
|[[Bean]] (x8) | |||
|[[File:Bean - MLPiT.png]] | |||
|align=left| | |||
*In the northeast of the third scene of the first area. | |||
*In the east of the fourth scene in the first area. | |||
*At the center of the sixth scene in the first area. | |||
*In the north of the eighth scene in the first area. | |||
*In the west of the second scene in the second area. | |||
*On the platform to the east of the stairs in the third scene of the second area. | |||
*In the northeast of the fourth scene in the second area. | |||
*In the south of the second scene in the third area. | |||
|} | |||
===''Mario & Luigi: Bowser's Inside Story''=== | |||
====Items==== | |||
{|class=wikitable style="text-align:center" | |||
!Item | |||
!Icon | |||
!Location | |||
|- | |||
|[[Fiery Drumstick]] (x2) | |||
|[[File:Drumstick.png]] | |||
|align=left|In a brick on the small passage in [[Fawful Theater]]. (x2) | |||
|- | |||
|[[TNT Drumstick]] (x3) | |||
|[[File:Drumstick.png]] | |||
|align=left| | |||
*In bricks near the hole near the theater. | |||
*In a brick in the {{hover|fourth lava scene|or the first one involving conveyer belts and Bob-ombs}}. | |||
*In a brick by the U-turn platform underground. | |||
|- | |||
|[[Supersyrup Jar]] (x5) | |||
|[[File:Syrup BiS.png]] | |||
|align=left| | |||
*In a brick on the small passage in Fawful Theater. | |||
*In bricks near the hole near the theater. | |||
*In a brick in the first lava scene underground. | |||
*In a brick in the {{hover|fifth lava scene|or the second one involving conveyer belts and Bob-ombs}}. | |||
*In a brick in the scene before the U-turn platform underground. | |||
|- | |||
|[[Star Candy]] | |||
|[[File:StarCandy.png]] | |||
|align=left|In the brick before the area where Bowser is fed food. | |||
|- | |||
|[[Retry Clock]] | |||
|[[File:Retry Clock.png]] | |||
|align=left|In the southwest brick near Bowser's throne. | |||
|- | |||
|[[Attack Piece]] (x10) | |||
|[[File:MLBIS Attack Piece.png]] | |||
|align=left|Mario and Luigi can get these by hitting "□, □, ○, △, △, △" in the Bowser Secret Society Preservation Chamber and fighting the [[Shroob]]s. | |||
|- | |||
|[[Burning Fangs]] | |||
|[[File:MLRPG3 C Fang.png]] | |||
|align=left|In the brick in the lower-left-most scene of the area behind the theater. | |||
|- | |||
|[[Flashy Fangs]] | |||
|[[File:MLRPG3 C Fang.png]] | |||
|align=left|In the northeast brick near Bowser's throne. | |||
|- | |||
|[[Star Cure]] | |||
|[[File:Yellow Star Cure.png]] | |||
|align=left|Found in a safe deep in Bowser's Castle. | |||
|- | |||
|[[Blitty]] (x2) | |||
|[[File:BlittyMLBiS alt.png]] | |||
|align=left| | |||
*From a [[Sniffle Thwomp]] | |||
*From a [[Jailgoon]] | |||
|} | |||
==== | ====Beans found==== | ||
There are 38 [[bean]]s in total. | |||
*Scattered in the lobby of Fawful Theater: <Heart Beans x4, Special Bean x1> | |||
*In the northeastern and southwestern corners of the scene to the east of lobby: <Heart Beans x2> | |||
*In the western part and southeastern corners of the scene to the west of lobby: <Heart Bean x1, Special Bean x1> | |||
*By the path and in the northwestern corner of the scene between lobby and theater: <Heart Beans x2, Special Bean x1> | |||
*Near the south exit and around the switch in the scene west of the theater: <Heart Beans x6, Special Beans x2> | |||
*In the northwestern, northeastern and southern area inside the theater: <Heart Beans x3, Special Bean x1> | |||
*On the curved path and to the left of the pipe in the scene east of the theater: <Heart Bean x1, Special Bean x1> | |||
*In the base of the stairs in the second underground scene (maze-like): <Power Bean x1> | |||
*Scattered in the first underground scene with lava: <Heart Beans x2, Special Bean x1> | |||
*In the scene to the southeast of the previous one (with hints for the puzzle): <Heart Bean x1, Power Bean x1> | |||
*In the northwestern and southeastern corners of the big white scene above the underground lava: <Power Beans x2> | |||
*In the northwestern corner of the first scene beyond the underground lava: <Power Bean x1> | |||
*In the northwestern, northeastern and center area of the second scene beyond underground lava: <Heart Bean x1, Special Bean x1, Power Bean x1> | |||
==== | ====Prima Official Game Guide description==== | ||
Bowser | *"''Bowser finally breaches his own abode, only to discover the joint has been redecorated for its usurper: Fawful The chortling villain has redone the main floor of the castle as a theater where he can perform for his new minions. That simply will not do for the Koopa King. However, Fawful has plans to incorporate Bowser in tonight's big show. If Bowser can survive a bad case of stage f(r)ight, maybe he can wrangle back control of his castle from Fawful?''" | ||
*"''Acting on the tip that the second Star Cure is in the basement of his very own castle, Bowser stomps home. The castle has been completely overrun by Fawful's minions and monsters, so the Koopa King must punch his way though the crowd to get at what is rightfully his. Fawful has locked up the treasure room where Bowser's{{sic}} keeps his best stuff, so Bowser must figure out a way around the locks and traps to get his mitts on the Star Cure.''" (revisit) | |||
=== | ===''Mario & Luigi: Paper Jam''=== | ||
===='' | ====Block locations==== | ||
In ''[[ | {|class=wikitable style="text-align: center;width:100%" | ||
!colspan="4"style="height:2em"|[[Bowser's Castle#Mario & Luigi: Paper Jam|Bowser's Castle]] – 44 Blocks (42 ?, 1 M, 1 L) | |||
|-style="height:2em" | |||
!Item/s | |||
!Location | |||
!Screenshot | |||
|- | |||
|[[File:MLSSBM100Coin.png]] [[File:M&LDT Mushroom.png]][[File:M&LDT Mushroom.png]] [[File:MLPJ50Coin.png]]<br>100-Coin, 2 Ultra Mushrooms, 50-Coin | |||
|In the second scene, on the fourth island. | |||
|[[File:Bowser's Castle (M&LPJ) Blocks 1-3.png]] | |||
|- | |||
|[[File:MLPJ50Coin.png]]<br>50-Coin | |||
|Same scene, on the fifth island. | |||
|[[File:Bowser's Castle (M&LPJ) Block 4.png]] | |||
|- | |||
|[[File:MLSS+BM10Coin.png]][[File:MLSS+BM10Coin.png]][[File:MLSS+BM10Coin.png]][[File:MLSS+BM10Coin.png]][[File:MLSS+BM10Coin.png]][[File:MLSS+BM10Coin.png]][[File:MLSS+BM10Coin.png]][[File:MLSS+BM10Coin.png]][[File:MLSS+BM10Coin.png]][[File:MLSS+BM10Coin.png]]<br>10 10-Coins | |||
|Same scene, at the start of the sixth island. | |||
|[[File:Bowser's Castle (M&LPJ) Block 5.png]] | |||
|- | |||
|[[File:MLPJ50Coin.png]]<br>50-Coin | |||
|In the third scene, in the northeast of the lower part. | |||
|[[File:Bowser's Castle (M&LPJ) Block 6.png]] | |||
|- | |||
|[[File:MLSS+BM10Coin.png]][[File:MLSS+BM10Coin.png]][[File:MLSS+BM10Coin.png]][[File:MLSS+BM10Coin.png]][[File:MLSS+BM10Coin.png]][[File:MLSS+BM10Coin.png]][[File:MLSS+BM10Coin.png]][[File:MLSS+BM10Coin.png]][[File:MLSS+BM10Coin.png]][[File:MLSS+BM10Coin.png]]<br>10 10-Coins | |||
|Same scene, in the northwest of the lower part. | |||
|[[File:Bowser's Castle (M&LPJ) Block 7.png]] | |||
|- | |||
|[[File:Paper Jam Hammer.png]]<br>Spin Hammer | |||
|In the fourth scene, high up in the air, reachable by a platform which is propelled upwards by a gush of lava, all found in the west of the scene. | |||
|[[File:Bowser's Castle (M&LPJ) Block 8.png]] | |||
|- | |||
|[[File:M&LDT Mushroom.png]][[File:M&LDT Mushroom.png]] [[File:MLPJ50Coin.png]]<br>2 Ultra Mushrooms, 50-Coin | |||
|Same scene, in the northwest | |||
|[[File:Bowser's Castle (M&LPJ) Blocks 9-10.png]] | |||
|- | |||
|[[File:MLPJ50Coin.png]]<br>50-Coin | |||
|Same scene, in the north. | |||
|[[File:Bowser's Castle (M&LPJ) Block 11.png]] | |||
|- | |||
|[[File:MLSSBM100Coin.png]] [[File:DreamTeam1up.png]] [[File:MLSS+BM10Coin.png]][[File:MLSS+BM10Coin.png]][[File:MLSS+BM10Coin.png]][[File:MLSS+BM10Coin.png]][[File:MLSS+BM10Coin.png]][[File:MLSS+BM10Coin.png]][[File:MLSS+BM10Coin.png]][[File:MLSS+BM10Coin.png]][[File:MLSS+BM10Coin.png]][[File:MLSS+BM10Coin.png]] [[File:MLSSBM100Coin.png]] [[File:MLSS+BM10Coin.png]][[File:MLSS+BM10Coin.png]][[File:MLSS+BM10Coin.png]][[File:MLSS+BM10Coin.png]][[File:MLSS+BM10Coin.png]][[File:MLSS+BM10Coin.png]][[File:MLSS+BM10Coin.png]][[File:MLSS+BM10Coin.png]][[File:MLSS+BM10Coin.png]][[File:MLSS+BM10Coin.png]]<br>100-Coin, 1-Up DX, 10 10-Coins, 100-Coin, SPEED Mush Jams, 10 10-Coins | |||
|Same scene, on the island in the east, reachable only with Trio Glider. | |||
|[[File:Bowser's Castle (M&LPJ) Blocks 12-17.png]] | |||
|- | |||
|[[File:M&LDT Syrup.png]][[File:M&LDT Syrup.png]]<br>2 Ultrasyrup Jars | |||
|In the third scene, in the west of the upper part. | |||
|[[File:Bowser's Castle (M&LPJ) Block 18.png]] | |||
|- | |||
|[[File:MLPJ50Coin.png]]<br>50-Coin | |||
|Same scene, in the west of the middle part. | |||
|[[File:Bowser's Castle (M&LPJ) Block 19.png]] | |||
|- | |||
|[[File:MLSSBM100Coin.png]]<br>100-Coin | |||
|Same scene, in the east of the middle part. | |||
|[[File:Bowser's Castle (M&LPJ) Block 20.png]] | |||
|- | |||
|[[File:MLPJ50Coin.png]]<br>50-Coin | |||
|In the second scene, on the seventh island, at first reachable only from previous scene. | |||
|[[File:Bowser's Castle (M&LPJ) Block 21.png]] | |||
|- | |||
|[[File:MLSS+BM10Coin.png]][[File:MLSS+BM10Coin.png]][[File:MLSS+BM10Coin.png]][[File:MLSS+BM10Coin.png]][[File:MLSS+BM10Coin.png]][[File:MLSS+BM10Coin.png]][[File:MLSS+BM10Coin.png]][[File:MLSS+BM10Coin.png]][[File:MLSS+BM10Coin.png]][[File:MLSS+BM10Coin.png]]<br>10 10-Coins | |||
|In the third scene, in the east of the upper part. | |||
|[[File:Bowser's Castle (M&LPJ) Block 22.png]] | |||
|- | |||
|[[File:M&LDT Nut.png]] [[File:MLPJ50Coin.png]]<br>Ultra Nut, 50-Coin | |||
|In the sixth scene, in the southwest. | |||
|[[File:Bowser's Castle (M&LPJ) Blocks 23-24.png]] | |||
|- | |||
|[[File:MLSS+BM10Coin.png]][[File:MLSS+BM10Coin.png]][[File:MLSS+BM10Coin.png]][[File:MLSS+BM10Coin.png]][[File:MLSS+BM10Coin.png]][[File:MLSS+BM10Coin.png]][[File:MLSS+BM10Coin.png]][[File:MLSS+BM10Coin.png]][[File:MLSS+BM10Coin.png]][[File:MLSS+BM10Coin.png]] [[File:MLPJ50Coin.png]]<br>10 10-Coins, 50-Coin | |||
|Same scene, in the southeast. | |||
|[[File:Bowser's Castle (M&LPJ) Blocks 25-26.png]] | |||
|- | |||
|[[File:MLPJ50Coin.png]]<br>50-Coin | |||
|Same scene, above the southeast Trio Drill-able ground. | |||
|[[File:Bowser's Castle (M&LPJ) Block 27.png]] | |||
|- | |||
|[[File:MLPJ50Coin.png]]<br>50-Coin | |||
|Same scene, above the southwest Trio Drill-able ground. | |||
|[[File:Bowser's Castle (M&LPJ) Block 28.png]] | |||
|- | |||
|[[File:M&LDT Syrup.png]][[File:M&LDT Syrup.png]][[File:M&LDT Syrup.png]]<br>3 Ultrasyrup Jars | |||
|Same scene, found left of the northwest Trio Drill-able ground. | |||
|[[File:Bowser's Castle (M&LPJ) Block 29.png]] | |||
|- | |||
|[[File:M&LDT Mushroom.png]][[File:M&LDT Mushroom.png]][[File:M&LDT Mushroom.png]]<br>3 Ultra Mushrooms | |||
|Same scene, found right of the northeast Trio Drill-able ground. | |||
|[[File:Bowser's Castle (M&LPJ) Block 30.png]] | |||
|- | |||
|[[File:MLPJ50Coin.png]]<br>50-Coin | |||
|In the seventh scene (east of the previous one), near the entrance, after the bridge. | |||
|[[File:Bowser's Castle (M&LPJ) Block 31.png]] | |||
|- | |||
|[[File:MLSS+BM10Coin.png]][[File:MLSS+BM10Coin.png]][[File:MLSS+BM10Coin.png]][[File:MLSS+BM10Coin.png]][[File:MLSS+BM10Coin.png]][[File:MLSS+BM10Coin.png]][[File:MLSS+BM10Coin.png]][[File:MLSS+BM10Coin.png]][[File:MLSS+BM10Coin.png]][[File:MLSS+BM10Coin.png]]<br>10 10-Coin | |||
|Same scene, in the east. | |||
|[[File:Bowser's Castle (M&LPJ) Block 32.png]] | |||
|- | |||
|[[File:MLSSBM100Coin.png]] [[File:M&LDT Syrup.png]][[File:M&LDT Syrup.png]]<br>100-Coin, 2 Ultrasyrup Jars | |||
|Same scene, on the island in the south. | |||
|[[File:Bowser's Castle (M&LPJ) Blocks 33-34.png]] | |||
|- | |||
|[[File:MLSS+BM10Coin.png]][[File:MLSS+BM10Coin.png]][[File:MLSS+BM10Coin.png]][[File:MLSS+BM10Coin.png]][[File:MLSS+BM10Coin.png]][[File:MLSS+BM10Coin.png]][[File:MLSS+BM10Coin.png]][[File:MLSS+BM10Coin.png]][[File:MLSS+BM10Coin.png]][[File:MLSS+BM10Coin.png]] [[File:MLBISBJJWear.png]]<br>10 10-Coins, Bros. Wear | |||
|In the eighth scene (west of the sixth one), in the northeast. | |||
|[[File:Bowser's Castle (M&LPJ) Blocks 35-36.png]] | |||
|- | |||
|[[File:MLSSBM100Coin.png]] [[File:M&LDT Candy.png]]<br>100-Coin, Ultra Candy | |||
|Same scene, in the north. | |||
|[[File:Bowser's Castle (M&LPJ) Blocks 37-38.png]] | |||
|- | |||
|[[File:MLSS+BM10Coin.png]][[File:MLSS+BM10Coin.png]][[File:MLSS+BM10Coin.png]][[File:MLSS+BM10Coin.png]][[File:MLSS+BM10Coin.png]][[File:MLSS+BM10Coin.png]][[File:MLSS+BM10Coin.png]][[File:MLSS+BM10Coin.png]][[File:MLSS+BM10Coin.png]][[File:MLSS+BM10Coin.png]] [[File:MLPJ50Coin.png]]<br>10 10-Coins, 50-Coin | |||
|Same scene, on the island in the southwest. | |||
|[[File:Bowser's Castle (M&LPJ) Blocks 39-40.png]] | |||
|- | |||
|[[File:MLSS+BM10Coin.png]][[File:MLSS+BM10Coin.png]][[File:MLSS+BM10Coin.png]][[File:MLSS+BM10Coin.png]][[File:MLSS+BM10Coin.png]][[File:MLSS+BM10Coin.png]][[File:MLSS+BM10Coin.png]][[File:MLSS+BM10Coin.png]][[File:MLSS+BM10Coin.png]][[File:MLSS+BM10Coin.png]] [[File:MLPJ50Coin.png]]<br>10 10-Coins, 50-Coin | |||
|In the ninth scene, on the western balcony. Reachable only from tenth scene. | |||
|[[File:Bowser's Castle (M&LPJ) Blocks 41-42.png]] | |||
|- | |||
|[[File:MLSSBM100Coin.png]] [[File:Double1UpMushroom.png]][[File:Double1UpMushroom.png]]<br>100-Coin, 2 Double 1-Up Mushrooms | |||
|Same scene, on the eastern balcony. Reachable only from tenth scene. | |||
|[[File:Bowser's Castle (M&LPJ) Blocks 43-44.png]] | |||
|} | |||
====Drill spot locations==== | |||
{|class=wikitable style="text-align: center;width:100%" | |||
!colspan="4"style="height:2em"|[[Bowser's Castle#Mario & Luigi: Paper Jam|Bowser's Castle]] – 12 drill spots (2 Heart Beans, 2 Bros. Beans, 2 Power Beans, 2 Defense Beans, 2 Speed Beans, 2 Stache Beans) | |||
|-style="height:2em" | |||
!Location | |||
!Item/s | |||
!Screenshot | |||
|- | |||
|In the area north of the area where Papercraft King Boo and Papercraft Yoshi were first seen, these 2 drill spots are found in the south-eastern patch of sand, more specifically in its northern part. The western one is Speed Bean, the eastern one is Stache Bean. | |||
|Speed and Stache Beans | |||
|[[File:M&LPJ Bowser's Castle Spot 1.png|512px]] | |||
|- | |||
|In the area north of the area where Papercraft King Boo and Papercraft Yoshi were first seen, this drill spot is found in the south-eastern patch of sand, more specifically in its southwestern corner. | |||
|Heart Bean | |||
|[[File:M&LPJ Bowser's Castle Spot 2.png|512px]] | |||
|- | |||
|In the area north of the area where Papercraft King Boo and Papercraft Yoshi were first seen, these 2 drill spots is found in the north-western patch of sand, more specifically in its southeastern corner. The western one is Power Bean, the eastern one is Defense Bean. | |||
|Power and Defense Beans | |||
|[[File:M&LPJ Bowser's Castle Spot 3.png|512px]] | |||
|- | |||
|In the area north of the area where Papercraft King Boo and Papercraft Yoshi were first seen, this drill spot is found in the north-western patch of sand, more specifically in its northern part. | |||
|Bros. Bean | |||
|[[File:M&LPJ Bowser's Castle Spot 4.png|512px]] | |||
|- | |||
|In the area with the big fans, these 3 drill spots are found near the north-western entrance in the patch of sand. Going from west to east, beans go as follows: Defense, Speed and Stache. | |||
|Defense, Speed and Stache Beans | |||
|[[File:M&LPJ Bowser's Castle Spot 5.png|512px]] | |||
|- | |||
|In the area where Bros. have to save Toadette from Fly Guy, these 3 drill spots are found on the bottom of the biggest island in the patch of sand. Going from west to east, beans go as follows: Power, Bros. and Heart. | |||
|Power, Bros. and Heart Beans | |||
|[[File:M&LPJ Bowser's Castle Spot 6.png|512px]] | |||
|} | |||
===''Paper Mario: The Origami King''=== | |||
====Collectibles==== | |||
'' | '''NOTE''': Some collectibles are found in areas that are inaccessible until returning later; these entries are highlighted in beige. | ||
==== | ====Not-Bottomless Holes==== | ||
[[ | {|style="text-align:center;width:100%;margin:0 auto;border:#73cb76;border-collapse:collapse;"border="1"cellpadding="4"cellspacing="1" | ||
|-style="background:#239D53;font-size:14pt;color:white" | |||
!Description | |||
!width="20%"|Image | |||
|-style="background: #73cb76;font-size:120%;color:#202122" | |||
!colspan=3|[[Not-Bottomless Hole|{{color|#202122|16 Holes}}]] | |||
|- | |||
|On the ground level of the mess hall, on the right wall. | |||
|[[File:PMTOK Bowser's Castle Not-Bottomless Hole 1.png|250px]] | |||
|- | |||
|Two on the wall in the elevated section of the mess hall. | |||
|[[File:PMTOK Folded Soldiers Feast alt.png|250px]] | |||
|- | |||
|On the wall after going up the right stairs. | |||
|[[File:PMTOK Bowser's Castle Not-Bottomless Hole 4.png|250px]] | |||
|- | |||
|Two on the left side, one on the stairs and second on the wall. | |||
|[[File:PMTOK Bowser's Castle Not-Bottomless Holes 5 and 6.png|250px]] | |||
|- | |||
|Seen right away as Mario enters a room leading to enemy quarters. | |||
|[[File:PMTOK Bowser's Castle Not-Bottomless Hole 7.png|250px]] | |||
|- | |||
|After going through pile of rubble, there are three holes on the left of the red carpet with one on the wall, one on the pillar and one on the ground. | |||
|[[File:PMTOK Bowser's Castle Not-Bottomless Holes 8-10.png|250px]] | |||
|- | |||
|Continuing on the red carpet, another three holes are seen with one on the broken pillar, one on the painting and one on the ground above the carpet. | |||
|[[File:PMTOK Bowser's Castle Not-Bottomless Holes 11-13.png|250px]] | |||
|- | |||
|Two on the last two doors in the enemy quarters. | |||
|[[File:PMTOK Bowser's Castle Not-Bottomless Holes 14 and 15.png|250px]] | |||
|- | |||
|In the room after going through the first door in the enemy quarters. | |||
|[[File:PMTOK Bowser's Castle Not-Bottomless Hole 16.png|250px]] | |||
|} | |||
==== | ====Collectible Treasures==== | ||
{|style="text-align:center;width:100%;margin:0 auto;border:#73cb76;border-collapse:collapse;"border="1"cellpadding="4"cellspacing="1" | |||
|-style="background:#239D53;font-size:14pt;color:white" | |||
!width=10%|Treasure | |||
!Description | |||
!width=20%|Image | |||
|-style="background: #73cb76;font-size:120%;color:#202122" | |||
!colspan=3|[[List of Collectible Treasures in Paper Mario: The Origami King|{{color|#202122|4 treasures}}]] | |||
|- | |||
!style="background-color:#372500;"|[[File:PMTOK Collectible Treasure 109 (Paper Macho Chain Chomp).jpg|80px|link=Paper Macho Chain Chomp]]<br><br>[[Paper Macho Chain Chomp|{{color|white|Paper Macho Chain Chomp}}]] | |||
|Within the quarters of the Koopa Troopas, this chest is found on the left bed, presumably belonging to green Koopa Troopa. | |||
|[[File:PMTOK Bowser's Castle Collectible Treasure 1.png|250px]] | |||
|- | |||
!style="background-color:#372500;"|[[File:PMTOK Collectible Treasure 110 (Paper Macho Piranha Plant).jpg|80px|link=Paper Macho Piranha Plant]]<br><br>[[Paper Macho Piranha Plant|{{color|white|Paper Macho Piranha Plant}}]] | |||
|Within the quarters of the Spikes, this chest is found on the ground. However, the treasure is not inside the chest but behind it and the chest itself is a trap (opening it means being attacked by Origami Spikes). | |||
|[[File:PMTOK Bowser's Castle Collectible Treasure 2.png|250px]] | |||
|- | |||
!style="background-color:#372500;"|[[File:PMTOK Collectible Treasure 111 (Cutout Soldiers).jpg|80px|link=Handaconda]]<br><br>[[Handaconda|{{color|white|Cutout Soldiers}}]] | |||
|Within the airship hangar found in the west side of Bowser's Castle, right of the pile of crates. | |||
|[[File:PMTOK Bowser's Castle Question Block 7.png|250px]] | |||
|- | |||
|-style="background:beige" | |||
!style="background-color:#372500;"|[[File:PMTOK Collectible Treasure 112 (Bowser's Airship).jpg|80px|link=Bowser's Airship]]<br><br>[[Bowser's Airship|{{color|white|Bowser's Airship}}]] | |||
|''Required'': ''Navigate [[Hotfoot Crater]]''<br><br>Mario has to talk to lone Shy Guy in the hangar. | |||
|[[File:PMTOK Bowser's Castle Collectible Treasure 4.png|250px]] | |||
|} | |||
==== | ====? Blocks==== | ||
{|style="text-align:center;width:100%;margin:0 auto;border:#73cb76;border-collapse:collapse;"border="1"cellpadding="4"cellspacing="1" | |||
|-style="background:#239D53;font-size:14pt;color:white" | |||
!width=10%|Hidden | |||
!width=10%|Item | |||
!Description | |||
!width=20%|Image | |||
|-style="background: #73cb76;font-size:120%;color:#202122" | |||
!colspan=4|[[List of ? Blocks in Paper Mario: The Origami King|{{color|#202122|7 blocks}}]] | |||
|- | |||
| | |||
|[[File:Legendary Boots PMTOK icon.png|48px]]<br>[[Legendary Boots]]<br>[[File:Legendary Hammer PMTOK icon.png|48px]]<br>[[Legendary Hammer]] | |||
|At either backwall corner in the mess hall is a ? Block containing a legendary weapon. | |||
|[[File:PMTOK Folded Soldiers Feast.jpg|250px]] | |||
|- | |||
| | |||
|[[File:Flashy Mushroom PMTOK icon.png|48px]]<br>[[Flashy Mushroom]] | |||
|A ? Block can be found to the right of a table on the elevated section of the mess hall. | |||
|[[File:PMTOK Folded Soldiers Feast alt.png|250px]] | |||
|- | |||
|[[File:Hidden Block Alert PMTOK icon.png|48px]] | |||
|[[File:Legendary Iron Boots PMTOK icon.png|48px]]<br>[[Legendary Iron Boots]] | |||
|On the opposite side of the table from the previous ? Block is a Hidden Block above a white tile. | |||
|[[File:PMTOK Bowser's Castle Question Block 4.png|250px]] | |||
|- | |||
| | |||
|[[File:Legendary Iron Boots PMTOK icon.png|48px]]<br>[[Legendary Iron Boots]] | |||
|A ? Block can be found above a Not-Bottomless Hole on the other side of a collapsed pillar, in the room leading to enemy quarters. | |||
|[[File:PMTOK Bowser's Castle Question Block 5.png|250px]] | |||
|- | |||
|[[File:Hidden Block Alert PMTOK icon.png|48px]] | |||
|[[File:Shiny Hurlhammer PMTOK icon.png|48px]]<br>[[Shiny Hurlhammer]] | |||
|Within the quarters of the [[Hammer Bro]]s. there is a [[Hidden Block]], indicated by a red panel visible when peering through a window in the hallway. | |||
|[[File:PMTOK Bowser's Castle Question Block 6.jpg|250px]] | |||
|- | |||
| | |||
|[[File:PMTOK Coin Bag leaf icon.png|48px]]<br>[[Coin|Coin Bag]] | |||
|Within the airship hangar found in the west side of Bowser's Castle, there is a ? Block floating above a pile of crates. | |||
|[[File:PMTOK Bowser's Castle Question Block 7.png|250px]] | |||
|} | |||
== | ==Gallery== | ||
<gallery> | |||
SMW paper castle merch.jpg|Assembled paper craft of Bowser's Castle included in the Vic Tokai plush set for ''[[Super Mario World]]'' | |||
SMK MLBIS Ch1.png|''[[Super Mario-kun]]'' | |||
YS Bowser armored.PNG|''[[Yoshi's Safari]]'' | |||
Bowser's Castle (baby bowser's bedroom).png|[[Baby Bowser]]'s bedroom in ''[[Super Mario World 2: Yoshi's Island]]'' | |||
SMW2 - Bowser's Castle (walls).png|thumb|Bowser's Castle walls in ''Super Mario World 2: Yoshi's Island'' | |||
First Bowser's Castle Grand Hall.png|''[[Paper Mario]]'' | |||
Bowser Gate.png|A [[Guard Door]] in Bowser's Castle in ''Paper Mario'' | |||
PM Storehouse.png|The [[Storehouse]], the shop in Bowser's Castle in ''Paper Mario'' | |||
Bowser's Castle Demolished PM.png|''Paper Mario'' | |||
SMA3-KingBowsersCastleWorldMap.png|''[[Yoshi's Island: Super Mario Advance 3]]'' | |||
SMA3-KingBowsersCastleMap.png|''Yoshi's Island: Super Mario Advance 3'' | |||
SMA3-KingBowsersCastleTitleScreen.png|''Yoshi's Island: Super Mario Advance 3'', seen from the title screen of ''Yoshi's Island'' | |||
Castleinterior.png|The interior of Bowser's Castle in ''[[Mario & Luigi: Superstar Saga]]'' | |||
Bowser landing.png|Bowser's Castle on the ground in ''Mario & Luigi: Superstar Saga'' | |||
PMTTYD Bowser's Castle.png|''[[Paper Mario: The Thousand-Year Door]]'' | |||
PMTTYD Bowser's Castle Hall.png|''Paper Mario: The Thousand-Year Door'' | |||
MP7 Bowsers Castle.png|''[[Mario Party 7]]'' | |||
NSMB0.png|''[[New Super Mario Bros.]]'' | |||
Introducing Bowser SPM.png|''[[Super Paper Mario]]'' | |||
Mario Bros. Encounter Bowser SPM.png|''Super Paper Mario'' | |||
Peach Captured SPM.png|''Super Paper Mario'' | |||
SPM Bowsers Castle.PNG|''Super Paper Mario'' | |||
Bowser's Castle and Food MPDS.png|''[[Mario Party DS]]'' | |||
Bowser in Fawful Castle.png|''[[Mario & Luigi: Bowser's Inside Story]]'' | |||
NSMBW Bowser's Castle Falling Over.png|Bowser's Castle about to collapse on Bowser and the Koopalings in the ending of ''[[New Super Mario Bros. Wii]]'' | |||
NSMB2 World 6 Bowser Castle.png|Bowser's Castle in World 6 as seen in ''[[New Super Mario Bros. 2]]'' | |||
World Castle SM3DW.png|Bowser's Castle as it appears in ''Super Mario 3D World'' | |||
SSB4 3DS Bowsers Sky Castle.jpg|Bowser's Sky Castle in ''[[Super Smash Bros. for Nintendo 3DS]]'' | |||
DefeatBowsersMinions.png|The exterior of Bowser's Castle in ''[[Mario Tennis Aces]]'' | |||
MLBISDX BowserCastle.png|''[[Mario & Luigi: Bowser's Inside Story + Bowser Jr.'s Journey]]'' | |||
TTYDNS Bowser Castle.png|[[Paper Mario: The Thousand-Year Door (Nintendo Switch)|''Paper Mario: The Thousand-Year Door'' (Nintendo Switch)]] | |||
TTYDNS Bowser Entering Throne Room.png|''Paper Mario: The Thousand-Year Door'' (Nintendo Switch) | |||
Super Nintendo World banner.jpg|Webpage banner of [[Super Nintendo World]] | |||
LEGO Super Mario Bowser's Castle Boss Battle.jpg|[[LEGO Super Mario|LEGO ''Super Mario'']] | |||
LEGO SM-71423 Dry Bowser Castle Battle.png|LEGO ''Super Mario'' | |||
</gallery> | |||
== | ==Media== | ||
{{media table | |||
|file1=NSMB Music Castle Theme.oga | |||
|title1=Castle | |||
|description1=The theme that plays in castles in ''[[New Super Mario Bros.]]'', including Bowser's Castle | |||
|length1=0:30 | |||
|file2=StageKoopa.oga | |||
|title2=Bowser Castle | |||
|description2=Plays in [[Bowser Castle (baseball stadium)|Bowser Castle]] in ''[[Mario Super Sluggers]]'', which is an arrangement of the castle theme from ''New Super Mario Bros.'' | |||
|length2=0:30 | |||
|file3=Fortune Street- Bowser's Castle.oga | |||
|title3=Bowser's Castle | |||
|description3=Plays in [[Bowser's Castle (board)|Bowser's Castle]] in ''[[Fortune Street]]'', which is an arrangement of the castle theme from ''New Super Mario Bros.'' | |||
|length3=0:30 | |||
}} | |||
== | ==Names in other languages== | ||
{{ | {{foreign names | ||
| | |Jpn=クッパ{{ruby|城|じょう}} | ||
| | |JpnR=Kuppa Jō | ||
|JpnM=Bowser's Castle | |||
|ChiS=酷霸王城堡 | |||
|ChiSR=Kùbàwáng Chéngbǎo | |||
|ChiSM=Bowser Castle | |||
|ChiS2=酷霸城堡 | |||
|ChiS2N=''Super Mario RPG'' | |||
|ChiS2R=Kùbà Chéngbǎo | |||
|ChiS2M=Bowser Castle | |||
|ChiT=庫巴城堡 | |||
|ChiTR=Kùbā Chéngbǎo | |||
|ChiTM=Bowser Castle | |||
|Cro=Dvorac Koopa | |||
|CroN=''The Adventures of Super Mario Bros. 3'' | |||
|CroM=Castle Koopa | |||
|CroC=<ref>[https://www.youtube.com/watch?v=vH1V6mCATQM Super Mario Bros 3 - Epizoda 2 - Gmizavci u vrtu ruža]</ref> | |||
|Dan=Koopa-Slot | |||
|DanN=''The Adventures of Super Mario Bros. 3'' | |||
|DanM=Castle Koopa | |||
|DanC=<ref>[https://www.youtube.com/watch?v=HawqafbZGDI Super Mario Bros. 3 Never Koop a koopa (Dansk)]</ref> | |||
|Dut=Bowsers Kasteel | |||
|DutM=Bowser's Castle | |||
|Dut2=Kasteel Koopa | |||
|Dut2N=''The Adventures of Super Mario Bros. 3'' | |||
|Dut2M=Castle Koopa | |||
|Dut2C=<ref>[https://www.youtube.com/watch?v=TZ85O3yNh0k The Adventures of Super Mario Bros. 3 Dutch Dub - Bedonder nooit een Koopa DVD (Part 1)]</ref> | |||
|Fin=Koopa-Linna | |||
|FinN=''The Adventures of Super Mario Bros. 3'' | |||
|FinM=Castle Koopa | |||
|FinC=<ref>[https://www.youtube.com/watch?v=bvBrSy_jG0I The Adventures of Super Mario Bros. 3 | Episode 01-08 In Finnish [2013 DVD Version]]</ref> | |||
|Fre=Château de Bowser | |||
|FreM=Bowser's Castle | |||
|Ger=Bowsers Festung | |Ger=Bowsers Festung | ||
|GerM=Bowser's Fortress | |Ger2=Schloss Koopa | ||
|Ger2N=''The Adventures of Super Mario Bros. 3'' | |||
|GerM=Bowser's Fortress | |||
|Ger2M=Castle Koopa | |||
|Ger2C=<ref>[https://www.youtube.com/watch?v=XMmY3CkK39Y&list=PLysMAMA5mZDPK7uUkp94zheRNEtn_WQDG&index=6 Die Abenteuer von Super Mario Bros. 3 - Ninja Koopas]</ref> | |||
|Gre=Κάστρο Κούπα | |||
|GreR=Kástro Koúpa | |||
|GreM=Castle Koopa | |||
|GreC=<ref>[https://www.youtube.com/watch?v=Xc7QQYEZlcs&list=PLXEMWYZPBYovAg5DGRisttsCxVzhZ3prh The Adventures of Super Mario Bros 3 Greek [Επεισόδια 1-2]]</ref> | |||
|Ita=Castello di Bowser | |||
|Ita2=Castello di Attila | |||
|Ita2N=''The Adventures of Super Mario Bros. 3'' | |||
|Ita3=Castilo al Neon di Attila | |||
|Ita3N=''Super Mario World'' television series | |||
|ItaM=Bowser's Castle | |||
|Ita2M=Koopa's Castle | |||
|Ita3M=Koopa's Neon Castle | |||
|Ita2C=<ref>[https://www.youtube.com/watch?v=d6a7zPy9pXY&list=PLWzo2ShQRIik_9vJAjpCtOYPKTMiWfQMb&index=2 Le avventure di Super Mario 2x02 - Rettili alla Casa Bianca]</ref> | |||
|Ita3C=<ref>[https://www.youtube.com/watch?v=2R0kmM5jpK4&list=PLZUe09WWlPLY1AP6s7TIqpxLfkeOxs7xx&index=3 Le avventure di Super Mario - Episodio 3 - Manda dentro il clown]</ref> | |||
|Kor=쿠파 성 | |||
|KorR=Kupa Seong | |||
|KorM=Bowser Castle | |||
|Nor=Koopa-Slott | |||
|NorN=''The Adventures of Super Mario Bros. 3'' | |||
|NorM=Castle Koopa | |||
|NorC=<ref>[https://www.youtube.com/watch?v=8GBG-CcHioI Super Mario Bros 3 VHS#1 - Norsk tale]</ref> | |||
|Pol=Zamek Koopa | |||
|PolN=''The Adventures of Super Mario Bros. 3'' | |||
|PolM=Castle Koopa | |||
|PolC=<ref>[https://www.youtube.com/watch?v=GEA11LODZm4 Nowe Przygody Braci Mario Odcinek 02 - Gady w ogrodzie dobra i zła]</ref> | |||
|Por=Castelo do Bowser | |||
|Por2=Castilo Koopa | |||
|Por2N=''The Adventures of Super Mario Bros. 3'' | |||
|Por3=Castilo Néon do Koopa | |||
|Por3N=''Super Mario World'' television series | |||
|PorM=Bowser's Castle | |||
|Por2M=Castle Koopa | |||
|Por3M=Koopa's Neon Castle | |||
|Por2C=<ref>[https://www.youtube.com/watch?v=z9WSCwHI5Y0&list=PLwzf4mOPE8Bmhgll2-ndwQWhRpiCUMR6G&index=2 Super Mario Bros. 3 - Répteis Ameaçam a Casa Branca (Dublagem Herbert Richers)]</ref> | |||
|Por3C=<ref>[https://www.youtube.com/watch?v=aUIWBdbU8PQ&list=PLwzf4mOPE8BkFgMlj2blKPqgP8WKos3hy&index=3 Super Mario World - Que Venha o Palhaço (Dublado)]</ref> | |||
|Rom=Castelul Koopa | |||
|RomN=''The Adventures of Super Mario Bros. 3'' | |||
|Rom2=Palatul disco de pe Coney Island | |||
|Rom2N=''Super Mario World'' television series, referred to as such by Mario in "Mama Luigi" | |||
|Rom3=Castelul de Neon al Regelui Koopa | |||
|Rom3N=''Super Mario World'' television series, referred to as such by Luigi in "Mama Luigi" | |||
|RomM=Castle Koopa | |||
|Rom2M=The Disco Palace on Coney Island | |||
|Rom3M=King Koopa's Neon Castle | |||
|RomC=<ref>KidsCo TV (January 28, 2018). [https://youtu.be/B5kCpg0q_XQ ''Aventurile Fraților Super Mario'' | Episodul2 - Reptile în Grădina cu Trandafiri]. ''YouTube''. Retrieved May 19, 2019.</ref> | |||
|Rom2C=<ref name="Mama Luigi">May 20, 2015. [http://ok.ru/videoembed/26912754308 "Mama Luigi", dubbed in Romanian by KidsCo]. ''Odnoklassniki (OK.ru).'' Retrieved January 4, 2016.</ref> | |||
|Rom3C=<ref name="Mama Luigi"/> | |||
|Rus=Замок Боузера | |||
|RusR=Zamok Bouzera | |||
|RusM=Bowser's Castle | |||
|Rus2=Замок Купы | |||
|Rus2N=''The Adventures of Super Mario Bros. 3'' | |||
|Rus2R=Zamok Kupy | |||
|Rus2M=Koopa Castle | |||
|Rus2C=<ref>[https://www.youtube.com/watch?v=0DwSbIQkrUo Приключения братьев Супер Марио 3 (все серии) (6+)]</ref> | |||
|Spa=Castillo de Bowser | |Spa=Castillo de Bowser | ||
|Spa2=Castillo Koopa | |||
|Spa2N=''The Adventures of Super Mario Bros. 3'' | |||
|Spa3=Koopa Castillo de Neón | |||
|Spa3N=''Super Mario World'' animated series | |||
|SpaM=Bowser's Castle | |SpaM=Bowser's Castle | ||
< | |Spa2M=Castle Koopa | ||
|Spa3M=Neon Koopa Castle | |||
|Spa2C=<ref>[https://www.youtube.com/watch?v=34-jBYrJhhc&list=PL9SW0yG7n_bnpxH7s64Qgh_Wa4ycVmNpt Las Aventuras de los Super hermanos Mario: 01 - Reptiles En El Jardin De Las Rosas]</ref> | |||
|Spa3C=<ref>[https://www.youtube.com/watch?v=i5FwOByavtE&list=PLCKyBkJveLRL-tn0KJhvXgiokHcWrJgZD&index=3 Super Mario World (Cap.1 - La venta de fuego) español]</ref> | |||
{{ | |Swe=Koopa-Slott | ||
[[ | |SweN=''The Adventures of Super Mario Bros. 3'' | ||
[[ | |SweM=Castle Koopa | ||
[[ | |SweC=<ref>[https://www.youtube.com/watch?v=8QUcEadG-KY&list=PLxFcguXyn2GqZhdcXT2-4r_KUtNLmRb_H&index=2 The Adventures of Super Mario Bros 3 - Episode 2 - Swedish]</ref> | ||
[[Category: | }} | ||
[[Category: | |||
==Trivia== | |||
*In both ''[[Nintendo Comics System]]'' and ''[[Nintendo Adventure Books]]'', Bowser's Castle was infrequently seen and was shown to have a labyrinth like construction, possessing various passages, bridges and doorways. | |||
*In ''[[Mario Golf: Toadstool Tour]]'', a course known as the [[Bowser Badlands]] is located near Bowser's Castle. | |||
*According to an article on [http://www.movoto.com/ Movoto.com], a real-life version of Bowser's Castle based on its appearance in ''[[Super Mario Bros. 3]]'' would be 212 stories high, 52 stories taller than the tallest building in the world, the {{wp|Burj Khalifa}}. However, due to the assumption that the castle should be merely 60 inches wide, it would cost only $455,000.<ref>{{cite|url=www.movoto.com/blog/infographic/real-life-bowsers-castle-jump-on-this-deal-before-mario-does|title=Movoto: Real-Life Bowser’s Castle: Jump on this Deal Before Mario Does|publisher=Movoto|accessdate=February 9, 2015}}{{dead link}}</ref> | |||
*In ''[[Paper Mario: The Thousand-Year Door]]'', Bowser can find an unseen item by checking one of the Bowser statues. A similar occurrence also happens with the bushes in Twilight Town. | |||
==Interwiki links== | |||
*Baby Bowser's Castle — [[:de:Baby Bowsers Festung]] — [[:it:Castello di Bowser (passato)]] | |||
==References== | |||
<references/> | |||
{{navboxes| | |||
{{SMB3}} | |||
{{TSMBSS animation}} | |||
{{TAOSMB3}} | |||
{{SMW TV}} | |||
{{MTM}} | |||
{{SMRPG}} | |||
{{PM}} | |||
{{MPL}} | |||
{{M&LPIT}} | |||
{{M&LBIS}} | |||
{{M&SATOWG}} | |||
{{M&SATSOWG}} | |||
{{M&LPJ}} | |||
{{M&SATROG}} | |||
{{TSMBM}} | |||
{{M&LB}} | |||
}} | |||
[[Category:Bowser's castles|*]] | |||
[[Category:Volcanic areas]] | |||
[[Category:Homes]] | [[Category:Homes]] | ||
[[Category: | [[Category:Levels]] | ||
[[Category: | [[Category:Race courses]] | ||
[[Category:Amiibo tap: Nintendo's Greatest Bits]] | |||
[[Category:Mario & Luigi: Bowser's Inside Story bosses]] | |||
[[Category:Mario & Luigi: Bowser's Inside Story locations]] | |||
[[Category:Mario & Luigi: Partners in Time locations]] | |||
[[Category:Mario & Luigi: Superstar Saga locations]] | |||
[[Category:Mario & Luigi: Brothership locations]] | |||
[[Category:Mario & Sonic at the Olympic Winter Games]] | |||
[[Category:Mario & Sonic at the Rio 2016 Olympic Games]] | |||
[[Category:Mario & Sonic at the Sochi 2014 Olympic Winter Games]] | |||
[[Category:Mario Hoops 3-on-3]] | |||
[[Category:Mario is Missing! locations]] | |||
[[Category:Mario Pinball Land locations]] | |||
[[Category:Mario Power Tennis]] | |||
[[Category:Mario Tennis Open]] | |||
[[Category:Mario Sports Mix]] | |||
[[Category:Mario's Time Machine locations]] | |||
[[Category:New Super Luigi U]] | |||
[[Category:New Super Mario Bros.]] | |||
[[Category:New Super Mario Bros. 2]] | |||
[[Category:New Super Mario Bros. U]] | |||
[[Category:New Super Mario Bros. Wii]] | |||
[[Category:Paper Mario locations]] | |||
[[Category:Paper Mario: The Thousand-Year Door locations]] | |||
[[Category:Super Mario 3D Land]] | |||
[[Category:Super Mario 3D World]] | |||
[[Category:Super Mario Bros.]] | |||
[[Category:Super Mario Bros. 3]] | |||
[[Category:Super Mario Bros.: The Lost Levels]] | |||
[[Category:Super Mario RPG: Legend of the Seven Stars locations]] | |||
[[Category:Super Mario World]] | |||
[[Category:Super Mario World (television series)]] | |||
[[Category:Super Mario World 2: Yoshi's Island]] | |||
[[Category:Super Paper Mario locations]] | |||
[[Category:The Adventures of Super Mario Bros. 3 locations]] | |||
[[Category:The Super Mario Bros. Movie locations]] | |||
[[Category:The Super Mario Bros. Super Show! locations]] | |||
[[Category:Yoshi's Island DS]] | |||
[[Category:Yoshi's Island: Super Mario Advance 3]] | |||
[[de:Bowsers Festung]] | |||
[[it:Castello di Bowser]] | |||
Latest revision as of 21:18, January 14, 2025
- This article is about Bowser's actual castle. For other uses, see Bowser's Castle (disambiguation).
- Not to be confused with Castle Bowser or Neo Bowser Castle.
| Bowser's Castle | |
|---|---|
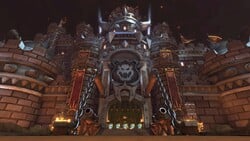 Bowser's Castle in Mario Kart 8/Mario Kart 8 Deluxe | |
| First appearance | Super Mario Bros. (1985) |
| Latest appearance | Mario & Luigi: Brothership (2024) |
| Greater location | Dark Land, Valley of Bowser, Bowser's Kingdom, World 8, etc. |
| Ruler | Bowser |
| Inhabitants | Bowser, Koopalings, Bowser Jr., Bowser's Minions |
- “Gee, it's only the best castle ever made! Take a look from a distance! Powerful and awe-inspiring design choices slap your face! It's like looking at me!”
- —Bowser, Mario & Luigi: Bowser's Inside Story
Bowser's Castle (or simply Bowser Castle) is a recurring location in the Super Mario franchise. It is the domicile of the Koopa villain Bowser and the base of operations for his army. The castle's name, design, and greater location vary from game to game, but the castle is usually a Western-themed castle and situated in a volcanic wasteland, and it is characteristically an important base from which Bowser formulates his plans and summons his minions to take over the Mushroom Kingdom and carry out the capture of Princess Peach. Bowser's Castle is usually the final area that Mario and his friends visit to defeat Bowser and rescue Peach and is usually guarded by Bowser's most powerful minions. In the Super Mario spin-offs, the castle can serve as a go-kart course, a tennis court, a baseball stadium, etc., depending on the sport on which the game is based.
History[edit]
Super Mario series[edit]
Super Mario Bros. / Super Mario Bros.: The Lost Levels[edit]
Bowser's Castle first appears in Super Mario Bros. at the end of World 8. In World 8-3, Mario battles Bowser's forces outside of the castle, which can be seen in the background; in World 8-4, Mario ventures into the castle itself, where he battles and defeats Bowser in order to save Princess Toadstool. It is also the setting of World 8-4 in Super Mario Bros.: The Lost Levels, except is shown to be located in the sky at the end of World 8-3. Additionally, it appears in World D-3 and D-4, where it is instead grounded. In Super Mario All-Stars, Bowser's Castle is easily distinguished from the other castles by having thunder and lightning flash in the background.
Super Mario Bros. 3[edit]
- Main article: World 8-Bowser's Castle (Super Mario Bros. 3)
In Super Mario Bros. 3, Bowser's stronghold (as well as Bowser himself) is not seen until the very end of his kingdom, Dark Land (which is also called "Bowser's Castle" in later remakes). The mentioned castle itself is one of the longest levels in the game and is where Bowser is keeping Princess Toadstool captive. The map icon is animated in Super Mario Advance 4: Super Mario Bros. 3. It is also the only actual castle level in the game.
Super Mario World[edit]
- Main article: Front Door
- Main article: Back Door
In Super Mario World, Bowser's Castle is found in the Valley of Bowser. There are two ways of entering the castle and many ways to reach the end of the level. There are two main corridors where Mario or Luigi will have to choose one of four possible doors. The player can also reach the Castle by using the Star Road that leads them to the front gate, bypassing the rest of the Valley of Bowser entirely. To get to the back gate, the player had to find the secondary exit in Valley of Bowser 2 and go through Valley Fortress. This takes the player straight to Back Door, skipping most of the level. The castle itself featured a neon sign with Bowser's name spelled out. Bowser is also seen flying in the background of the castle in his Koopa Clown Car, albeit in silhouette during occasional thunderclaps and his eyes glowing in the darkness otherwise. In Super Mario Advance 2, he is absent entirely after the level is cleared.
New Super Mario Bros.[edit]
- Main article: World 8-Bowser's Castle (New Super Mario Bros.)
In New Super Mario Bros., Bowser's Castle is relatively similar in appearance to the one in Super Mario World. It is found rising out of a lake of lava and is at the end of a twelve-level-long path. Once inside, Mario/Luigi will encounter Thwomps, Dry Bones, burners, as well as Podoboos. The ? Switches in the castle have an unusual effect; once pressed, the gravity of the castle will invert and the Player, along with any enemies (excluding burners) will have their positions inverted. The second part of the castle is a looping room, similar to Worlds 4-4 and 7-4 of Super Mario Bros., with lots of lava, a single Podoboo and a single Fire Bar. Once the final boss door is reached at the castle's end, Mario/Luigi will have to battle both Bowser Jr. and Bowser to rescue Princess Peach.
New Super Mario Bros. Wii[edit]
- Main article: World 8-Bowser's Castle (New Super Mario Bros. Wii)
Bowser is again fought in his castle in New Super Mario Bros. Wii. After clearing World 8-![]() Airship for the first time, the characters reunite with Princess Peach before Kamek takes her to Bowser's Castle, which was hidden behind a rock wall in the northern part of World 8. The wall then recedes, revealing the castle, and Bowser's evil laugh is heard as Kamek swoops down into the castle with Peach. The characters go through three parts: The first is a normal side-scrolling area with lava, Lava Bubbles and Fire Bars. The second part is a vertical area with draining lava which auto-scrolls downwards, more Fire Bars and some Dry Bones trying to stop Mario. The third is Bowser's lair. In the final battle, Kamek casts a spell to make Bowser grow massive and he chases Mario and the rest of the characters through his castle.
Airship for the first time, the characters reunite with Princess Peach before Kamek takes her to Bowser's Castle, which was hidden behind a rock wall in the northern part of World 8. The wall then recedes, revealing the castle, and Bowser's evil laugh is heard as Kamek swoops down into the castle with Peach. The characters go through three parts: The first is a normal side-scrolling area with lava, Lava Bubbles and Fire Bars. The second part is a vertical area with draining lava which auto-scrolls downwards, more Fire Bars and some Dry Bones trying to stop Mario. The third is Bowser's lair. In the final battle, Kamek casts a spell to make Bowser grow massive and he chases Mario and the rest of the characters through his castle.
Later after the final battle, when six of the Koopalings flip Bowser on his belly, the castle starts collapsing and falling down on top of them.
Super Mario Galaxy 2[edit]
- Main article: Breaking into Bowser's Castle
In Super Mario Galaxy 2, Bowser's Castle appears in the mission Breaking into Bowser's Castle.
Super Mario 3D Land[edit]
- Main article: World 8-Bowser: Part 1
- Main article: World 8-Bowser: Part 2
Bowser has two castles in Super Mario 3D Land, both located in World 8. The first castle is the World 8 Castle. Its appearance is similar to castles of the previous titles, as well as the previous castle levels in the game. At the end of the castle Mario fights Bowser and defeats him by pressing the switch at the end of the bridge, causing Bowser to sink in the lava below. Mario makes his way to Peach (which can previously be seen in the level using a pair of binoculars), only to discover that it is just a cardboard cutout. Bowser then appears with the real Peach in hand and flees to his larger castle, which is the true Bowser's Castle.
The real Bowser's Castle differs from previous castle levels, as Mario spends much of it riding Bone Roller Coasters. Mario then reaches a cannon which launches him to a tower with another cannon on it, which Mario uses to reach Bowser's tower. No Checkpoint Flags are found in this level, although there is an invisible checkpoint at the start of Bowser's fight. Mario then walks to the big red door and enters. Peach is tied up to the flagpole, but before Mario can rescue her, Bowser falls from above and attempts to crush Mario, which causes the floor to collapse and the final battle begins. Bowser attacks Mario with fireballs, spiked balls and barrels as Mario makes his way up the castle until they reach the second bridge. Mario tricks Bowser into clearing the path to the switch, which Mario presses, causing the bridge to collapse and Bowser to fall. However, as Mario continues to make his way up the castle, Bowser returns and pursues Mario, breathing purple flames which jet towards Mario, until they reach the final bridge, in which Bowser chases Mario until Mario reaches the final switch, which he presses, once again causing the bridge to explode, sending Bowser falling into the lava. Mario then rescues Peach and they head back home.
After completing the Special Worlds, Bowser kidnaps Peach again and Mario must return to his castle to defeat him and save Peach once again.
New Super Mario Bros. 2[edit]
- Main article: World 6-Bowser's Castle
Bowser's Castle reappears in World 6 of New Super Mario Bros. 2. Like in New Super Mario Bros. Wii, Mario and Luigi face Bowser through two phases at the end of the castle. Its appearance in this game is again similar to that of New Super Mario Bros.
New Super Mario Bros. U[edit]
- Main article: Peach's Castle (world)
Although Bowser's Castle itself does not appear in New Super Mario Bros. U, Bowser after capturing Peach's Castle in the beginning of the game starts renovating the castle to better resemble his own castle, ultimately succeeding by the time Mario fights Bowser Jr. for the final time at the end of World 7. After he is defeated, the castle returns to its normal state.
Super Mario 3D World / Super Mario 3D World + Bowser's Fury[edit]
- Main article: World Castle
- Main article: The Great Tower of Bowser Land
In Super Mario 3D World, Bowser's Castle reappears as World Castle, the seventh world of the game. The castle appears to be floating high above the Sprixie Kingdom, the game's setting. A second castle appears in World Bowser, the game's final world, and is themed after an amusement park.
Super Mario Maker / Super Mario Maker for Nintendo 3DS[edit]
In Super Mario Maker, Bowser's Castle appears in the 10 Mario Challenges and the 100 Mario Challenges.
Super Mario Odyssey[edit]
- Main article: Bowser's Kingdom
In Super Mario Odyssey, Bowser's Castle is located in Bowser's Kingdom. The castle featured in the game was constructed specifically for Bowser's wedding with Princess Peach.[1] Unlike in most games, in which the castle has a Western design, the castle featured in this game is traditional Japanese castle, with a concentric series of walls and baileys, a traditional garden and tea house, and a central keep. Instead of the usual lava, its moats are filled with poison.
Super Mario Maker 2[edit]
In Super Mario Maker 2, Bowser's Castle appears as a background cameo in castle-themed Super Mario 3D World courses. In the version 3.0.0 update, it also appears as a world part for World Maker.
Super Mario Bros. Wonder[edit]
Although the location itself does not make an appearance, a variation is used for the game where Bowser merged with his Koopa Clown Car and Prince Florian's castle to become Castle Bowser[2] via the Wonder Flower's power. He uses this form to conquer portions of the Flower Kingdom.
Super Mario Bros.: Peach-hime Kyūshutsu Dai Sakusen![edit]
In the anime movie Super Mario Bros.: Peach-hime Kyūshutsu Dai Sakusen!, Bowser turns Peach's Castle into his own after kidnapping Princess Peach and conquering the Mushroom Kingdom. While under his control, the building is situated on a tall mountain and is furnished to Bowser's liking, among other things featuring catacombs filled with traps to stop Mario and Luigi. The castle is destroyed after Luigi accidentally floods it while mining for coins; once Bowser is defeated, his spell on the Mushroom Kingdom is broken, restoring Peach's Castle to its original form.
DIC cartoons[edit]
The Super Mario Bros. Super Show![edit]
In The Super Mario Bros. Super Show!, King Koopa owns a wide range of castles, ranging from fortresses, towers and even an ice palace; most often at the end of an episode, the featured castle of King Koopa would be destroyed and if not, would likely not be seen again. Unlike the games, the various castles seen in The Super Mario Bros. Super Show! lack the abundance of traps that would normally appear in a castle owned by Bowser.
The Adventures of Super Mario Bros. 3[edit]
The Adventures of Super Mario Bros. 3 migrates away from the concept of King Koopa owning several castles and, instead, he only owns one castle, located in Dark Land. This castle is interchangeably referred to by the names "Kastle Koopa" and "Koopa Kastle". Kastle Koopa largely resembles its video game counterpart, with Bowser's image engraved on it, although it is blue in color and lacks the towers. Kastle Koopa also possesses a large hall filled with portraits, as well as bedrooms for the Koopalings and a laboratory most often used by Kooky von Koopa.
Super Mario World television series[edit]
In the Super Mario World cartoon produced by DIC Entertainment and Nintendo, the main base and home for Bowser and the Koopalings is called King Koopa's Neon Castle. Apparently located in a lava filled wasteland, Neon Castle lacks the amount of towers its game counterpart possesses, only having one; Neon Castle also possesses a rectangular shape and, like the Japanese version of the game, has "KOOPA" flashing in neon lights on its front, instead of "BOWSER". The castle carries over many of its game counterpart's traps, like Ball 'N' Chains, lava, fire-breathing statues and various kinds of minions. In the episode "Mama Luigi," Mario refers to it as King Koopa's "Coney Island Disco Palace," possibly based off of the final section of Bowser's Castle in that game, which featured a "disco ball" that illuminated it.
Super Mario Adventures[edit]
In Super Mario Adventures, Bowser's Castle is only seen near the end of the comic and is portrayed as a large fortress, having many spike-covered towers and a large great hall, capable of holding several hundred different creatures. Catacombs and a lava filled chamber inhabited by Blarggs are also depicted in this version of Bowser's Castle.
Mario Kart series[edit]
At least one race course set in Bowser's Castle has appeared in every Mario Kart game to date. It is one of three course settings with this property, alongside Mario Circuit and Rainbow Road. Unlike them, however, this even extends to the arcade games (although these have featured equivalents to Mario Circuit and Rainbow Road in their place). Most games in the series introduce one new Bowser's Castle course each; however, Super Mario Kart introduces three Bowser's Castles, while Mario Kart: Super Circuit introduces four. Mario Kart Tour does not introduce a fully original Bowser's Castle course, though it does introduce RMX Bowser's Castle 1, a remix course based on Super Circuit's versions, particularly GBA Bowser's Castle 1.
Starting from Super Circuit, Bowser's Castle courses are the third course of the Special Cup, before Rainbow Road. They typically include hazards such as lava, Thwomps, dangerous jumps, and giant statues of Bowser attacking the racers. Though most of these courses use the name "Bowser's Castle", those from Super Mario Kart and Mario Kart DS are instead called "Bowser Castle"; this was also true of those from Mario Kart: Super Circuit prior to their appearances in Mario Kart Tour.
| Course | Games | Description |
|---|---|---|
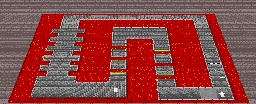 Bowser Castle 1 |
Super Mario Kart Mario Kart: Super Circuit |
The first Bowser Castle of Super Mario Kart, which appears as the fourth course of the Mushroom Cup. It features several long, straight paths, as well as 90° bends, and a couple of jumps. Thwomps also appear here to hinder the racers' path. |
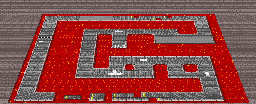 Bowser Castle 2 |
Super Mario Kart Mario Kart: Super Circuit |
The second Bowser Castle of Super Mario Kart, which appears as the fourth course of the Flower Cup. Still featuring 90° bends and Thwomps, is more complicated in design, and includes a dead end that can only be passed over with a Feather. |
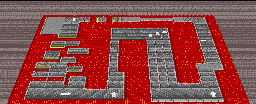 Bowser Castle 3 |
Super Mario Kart Mario Kart: Super Circuit Mario Kart Tour Mario Kart 8 Deluxe (Booster Course Pass) |
The final Bowser Castle of Super Mario Kart, which appears as the fourth course of the Star Cup. It features several split paths on two straightaways, the first of which being made of several differently-sized jumps. In Mario Kart Tour and Mario Kart 8 Deluxe, this first path is bent upwards, which is also in anti-gravity in Mario Kart 8 Deluxe. |
 Bowser's Castle |
Mario Kart 64 Mario Kart Wii |
This iteration appears in Mario Kart 64 at the end of the Star Cup. Starting outside, racers drive into the castle and traverse various rooms while avoiding Thwomps. |
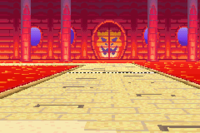 Bowser's Castle 1 |
Mario Kart: Super Circuit Mario Kart 7 Mario Kart Tour |
The first Bowser's Castle of Mario Kart: Super Circuit, appearing as the final course of the Mushroom Cup. It is a short, angular course with various 90° turns and Thwomps. It features a large door with Bowser's emblem in the background. |
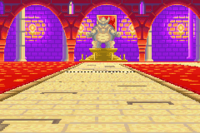 Bowser's Castle 2 |
Mario Kart: Super Circuit Mario Kart DS Mario Kart Tour |
The second Bowser's Castle of Mario Kart: Super Circuit, appearing as the final course of the Flower Cup. A slightly larger course with more 90° turns, as well as holes in the road. The course features a large statue of Bowser in the background, but in Mario Kart Tour, it reuses the same environment from Bowser's Castle 1 instead. |
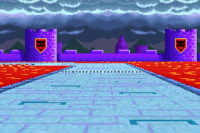 Bowser's Castle 3 |
Mario Kart: Super Circuit Mario Kart Wii Mario Kart Tour |
The third Bowser's Castle of Mario Kart: Super Circuit, appearing as the final course of the Star Cup. The course features a variety of 90° turns. This course takes place outside with blue cobblestone roads, featuring dark clouds and purple towers in the background, but in Mario Kart Tour, it reuses the same environment from Bowser's Castle 1 instead. |
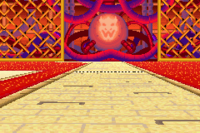 Bowser's Castle 4 |
Mario Kart: Super Circuit Mario Kart Tour |
The final Bowser's Castle of Mario Kart: Super Circuit, appearing as the third course of the Special Cup. The course features a lot of 90° turns and holes. The course features a large statue of Bowser in the background, but in Mario Kart Tour, its environment is instead a more ruinous version of that of Bowser's Castle 1. In Mario Kart Tour, it also has a split path in the second half of the course. |
Bowser's Castle |
Mario Kart: Double Dash!! | This version of Bowser's Castle from Mario Kart: Double Dash!! starts outside and features several turns and elevations, as well as a turning, circular room with Fire Bars. As racers re-emerge outside, a moving Bowser Statue awaits them, shooting fireballs. |
Bowser's Castle |
Mario Kart Arcade GP Mario Kart Arcade GP 2 |
The first course of the Bowser Cup in Mario Kart Arcade GP, as well as Mario Kart Arcade GP 2. Similar in style to the iteration from Mario Kart: Double Dash!!, this one has racers drive through the throne rooms of Bowser and Bowser Jr. The second course in the Bowser Cup, Castle Wall, takes place on the same course, but has racers drive outside on the castle's walls instead. Mario Kart Arcade GP DX revamps this course's layout for Bowser's Factory. |
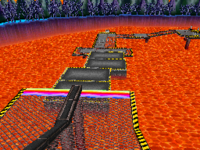 Bowser Castle |
Mario Kart DS | The Bowser's Castle from Mario Kart DS reuses several elements from previous iterations, including a turning circular room and several 90° turns. The second half also features a turning, cylindrical bridge, and moving platforms over lava. |
 Bowser's Castle |
Mario Kart Wii | This iteration from Mario Kart Wii starts outside, like the version from Mario Kart: Double Dash!! Entering the castle, racers drive into a wavy hallway in which tricks can be performed on. This course also features a long, curved Kanaami Road, where drivers can avoid fireballs from a Bowser Statue using half-pipes. |
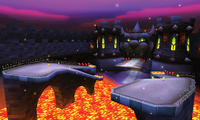 Bowser's Castle |
Mario Kart 7 Mario Kart Tour |
In this iteration from Mario Kart 7, drivers will start outside the castle, requiring to reach the entrance using a Glide Ramp. It also has an underwater section with lava geysers, and the second half of the course has racers drive through volcanic ground. |
 Bowser's Castle |
Mario Kart Arcade GP DX | The second course of the Bowser Cup in Mario Kart Arcade GP DX. Racers drive through dungeons and glide above active volcano ground to a library owned by Kamek. It takes place in the same location as the first course of the Bowser Cup, Bowser's Factory, in which racers drive through a factory where Bob-ombs and Bullet Bills are produced. This course's layout is revamped from that of Castle Wall from Mario Kart Arcade GP and Mario Kart Arcade GP 2. |
 Bowser's Castle |
Mario Kart 8 Mario Kart 8 Deluxe |
This course, debuting in Mario Kart 8, features an anti-gravity section that leads into a split path, where a large Bowser Monument alternates between sides to punch the floor. The outside is volcanic and features rolling boulders, while the inside also features laser-shooting Bowser Statues and a Spinner. |
Bowser's Castle |
Mario Kart Live: Home Circuit | The iteration of Bowser's Castle for Mario Kart Live: Home Circuit appears as the final course of the Shell Cup. Due to the nature of Mario Kart Live: Home Circuit using a remote-controlled car and augmented reality, course layout design depends on what the player has set up. Aside from that, this version has Lava Bars implemented at the gates players have to race through, and adds a reddish tint to the screen. This version of Bowser's Castle reuses the music from Mario Kart 8's version. |
 RMX Bowser's Castle 1 |
Mario Kart Tour | Unlike other remix courses in Mario Kart Tour, RMX Bowser's Castle 1 is based on the GBA Bowser's Castles (using GBA Bowser's Castle 1's environment), rather than the SNES Bowser Castles. It is an angular course with 90° bends, featuring Thwomps and Conveyor Belts. |
Outside of these courses, Bowser's Castle as it appears in Paper Mario can be seen in the background of Mario Kart: Super Circuit's Rainbow Road.
Mario is Missing![edit]
Bowser's Castle is the main setting of Mario is Missing!, and it is unusually located in Antarctica. It contains many doors with portals to various cities around the real world.
Mario's Time Machine[edit]
The castle is the main setting for the MS-DOS and SNES versions of Mario's Time Machine, specifically as the location of Bowser's Museum. In the NES version, Bowser's Museum is instead a separate building.
Yoshi's Safari[edit]
- Main article: Bowser's Castle (Yoshi's Safari)
Bowser's Castle is the last level in the final area in Yoshi's Safari, which is the Dark Realm of Jewelry Land. After being defeated, Bowser retreats.
Yoshi's Island series[edit]
Super Mario World 2: Yoshi's Island[edit]
In Super Mario World 2: Yoshi's Island and its Game Boy Advance version, Bowser's Castle is located atop a tall mountain in World 6. The last level takes place here and it requires the player to go into one of four random doors. Afterward, a giant playroom for Baby Bowser is discovered inside. After defeating Baby Bowser, Kamek will come by and make him extremely large. The player fights on the top of the castle which, throughout the battle, is slowly destroyed. The castle is later entirely destroyed after the final battle.
Yoshi's Island DS[edit]
- Main article: At Last, Bowser's Castle!
In Yoshi's Island DS, Bowser travels back to the past searching for the seven Star Children so he could rule the universe. He takes over the castle of his younger self. After Baby Bowser is defeated, Bowser himself is faced. When he is defeated the first time, Kamek makes Bowser gigantic and destroys the castle in the battle.
Yoshi's New Island[edit]
- Main articles: Bowser's Castle Break-In, Make Way for King Bowser!
In Yoshi's New Island, Yoshi ventures to Bowser's Castle to save Baby Luigi and the Stork from the clutches of Bowser. Throughout the level, Yoshi must collect four keys to reach Baby Bowser. The final boss fight is very similar to that of the previous games; Yoshi must throw three eggs at him to proceed. In the second phase, however, Baby Bowser grows giant and attacks from the background, requiring Yoshi to throw Mega Eggdozers at him. Once he takes three hits, Yoshi rescues Baby Luigi and the Stork, and the Mario Bros. are delivered to their house.
If the player has completed every level in the game without using Flutter Wings or Golden Flutter Wings (excluding special levels), Bowser will travel back in time to serve as the true final boss of the game. During the first phase of the battle, Bowser will attack by rearranging the ground and blowing fire at Yoshi. To defeat him, the player must hit him with Metal Eggdozers three times. The second phase of the battle is nearly identical to the second phase of Baby Bowser's battle; however, this time Kamek will cast spells at Yoshi. Once the player throws three Mega Eggdozers at him, Bowser returns to his own time, and Yoshi saves Baby Luigi and the Stork once and for all.
Super Mario RPG: Legend of the Seven Stars[edit]
- "Bowser's Keep" redirects here. It is not to be confused with King Bowser's Keep.
In Super Mario RPG: Legend of the Seven Stars, the castle is named Bowser's Keep in English and is isolated on a mountain of red, jagged rocks. The keep rests on the largest rock, which resembles Bowser himself. The castle can only be accessed by a long bridge that connects to the faraway Vista Hill. The halls of Bowser's Keep are lined with statues of hammer-holding Terrapins, which are the soldiers that originally guard the castle (sans hammer). At the very beginning of the game during a standard princess rescue, Mario goes through an entry room, a heavily guarded hallway, and a lava-filled room with bridges (the second of which collapses, being later replaced with Donut Lifts), before battling Bowser atop a chandelier in a large room.
The rescue is interrupted by the gigantic sword Exor crashing into the keep, scattering everyone inside. Exor destroys the bridge and proclaims the keep the new base of the Smithy Gang in Mario's world. Since Exor is the gateway to Smithy's dimension, the soldiers of the Smithy Gang have an easy time taking control of the castle. In fact, many of Bowser's soldiers defect or run away instead of fighting.
Eventually, Mario and his team make it back to the keep using the royal bus from Nimbus Land. After traveling through the original rooms, now full of stronger versions of early-game enemies, such as Terra Cottas, Pro Goombas, and Malakoopas, intermixed with some larger enemies. After passing through the room where Mario and Bowser fought in the beginning, they travel through a dark, twisted hall and meet up with the thief Croco, who offers to sell them items. Following this is a challenge of six doors known as the Trial Course. After four of the six are completed, they fall from a doorway into a tall room and get into a battle against the brainwashed Wizakoopa. After being defeated and freed from his mind control, Wizakoopa creates a magic treasure box and offers free healing, while a nearby Croco sells better items than before. The next room is a long hall filled with Thwomps (including a large one), while Blazers are shot from off-screen and lead to battle against Big Blasters if touched. The final room is a copy of the Bowser fight room and is held by Boomer. Once Boomer is defeated, the group is taken to the roof, where they battle Exor.
In the epilogue, Exor crumbles to dust, and the castle is shown being repaired by the reestablished Koopa Troop.
- Enemies
- First visit:
- Terrapin
- Lava Bubble (background cameo, unfought)
- Bowser (boss)
- Second visit, pre-Trial Course:
- Second visit, post-Trial Course:
- Wizakoopa (boss)
- Thwomp (obstacle)
- Blazer (overworld)
- Big Blaster
- Big Thwomp (obstacle)
- Boomer (boss)
- Shyndelier (background cameo, unfought)
- Exor (boss)
Yoshi's Story[edit]
- Main article: P. 6-Finale
In Yoshi's Story, Baby Bowser's Castle is split into four different areas: Mecha Castle, Lift Castle, Ghost Castle, and Magma Castle. No matter what part of the castle Yoshi decides to go to, he will always meet up with Baby Bowser. The outside of the castle will also be seen whenever one of the Yoshis gets defeated, captured and brought to the castle, along with when White Shy Guy retrieves one. It is also seen in the ending sequence when Baby Bowser's minions carry him away.
Compared to most of the castle's other appearances, which at least look cartoonish in some way, this iteration of the castle looks much more ominous and menacing.
Mario Tennis series[edit]
Bowser's Castle has made various appearances throughout the Mario Tennis series, usually as the setting of various tennis courses. In Mario Tennis for Nintendo 64, Bowser's Castle is the location of the Bowser Court. In Mario Power Tennis, the Bowser Castle Court takes place here, and unlike the Bowser Stage in the previous game, it functions as a standard court. In Mario Tennis Open, Bowser's Castle directly appears as a tennis court of the same name. In Mario Tennis Aces, Bowser's Castle is located in the center of Inferno Island, and it unusually has a temple-like structure; it is where the Battle the Treasure Guardian! mission takes place.
Paper Mario series[edit]
Paper Mario[edit]
In Paper Mario, a new Bowser's Castle is secretly built right underneath Peach's Castle and Bowser lifts it into the sky, kidnapping Princess Peach, along with her castle. The power used to lift the whole castle into the sky is the Star Spirits' and the Star Rod's power, both of which Bowser had stolen from Star Haven. Bowser also jails the Toad Minister and nine other Toads, a Dryite and a Bumpty who failed to escape during Princess Peach's party. There are two Toad Houses (made from the slate in the prison), a shop run by a Spiked Goomba, Storehouse and three Guard Doors. In the end, Mario manages to take back the Star Rod as well as save Princess Peach and her castle. Bowser's Castle, meanwhile, ended up destroyed alongside the nearby Power Platform, the latter due to it undergoing a meltdown due to the intensity of Mario and Bowser's fight. In this game, Bowser's Castle looks bigger than Peach's.
Some notable residents of Bowser's Castle include Guard Door, Mr. Hammer, Spiky John, Spiky Tom, and Toad Minister. There is also a bored Spiked Goomba who sells items without Bowser's consent (Storehouse), and two Toads who make Toad Houses with the slate in the prisons.
Paper Mario: The Thousand-Year Door[edit]
In Paper Mario: The Thousand-Year Door, Bowser's Castle does not play a major role, as only the outside and a hallway are seen. Its appearance is mainly to show Kammy Koopa explaining to Bowser what happened to the Princess.
Super Paper Mario[edit]
In Super Paper Mario, the castle has an equally minimal role, as it is where Count Bleck kidnaps Bowser's Koopa clan and Tippi takes Mario to Flipside. This is the exact same castle seen in Paper Mario: The Thousand-Year Door. However, in The Bitlands, Bowser found a set of several smaller castles, where several of his minions were located. After Mario destroyed them and defeated the Koopa King, the Princess convinced him to join them on their quest.
Paper Mario: Sticker Star[edit]
- Main article: Bowser's Sky Castle
Like in the first Paper Mario, Bowser's castle is the final area in Paper Mario: Sticker Star. It initally appears disguised in Gate Cliff. However, after Mario collects five out of the six Royal Stickers, he manages to reveal Bowser's Castle from the cliff using paperization. However, the castle floats away almost immediately, although Flutter helps Mario arrive. After arriving in the castle, Mario later defeats Kamek, then Bowser (who is currently using the sixth Royal Sticker after he accidentally obtained it).
Paper Mario: Color Splash[edit]
- Main article: Black Bowser's Castle
Bowser's Castle, called Black Bowser's Castle in-game, appears as the final area in Paper Mario: Color Splash. It is on a floating island with an appearance similar to that of Bowser's Sky Castle, but with warp pipes leading into the rock.
The castle's entry hall consists of a hallway where Princess Peach's portrait is initially seen, just out of reach. When Mario attempts to lower it, a trapdoor opens, leading to a confrontation with Roy Koopa. A door in the pit leads to a factory where all of the stolen paint from Prism Island is brought and mixed into black paint, which is then used to color weapons such as Banzai Bills and Bob-ombs, which Black Bowser intends to use to paint the world black. Mario manages to destroy the tank holding the black paint, flooding the factory. The factory also has a warp pipe leading back to the entry hall.
Behind the wall where Peach's portrait was seen is a hallway leading to Bowser's throne room, with the princess now hanging above the throne. After Black Bowser is defeated, the castle begins to collapse from the black paint. Mario, Luigi, and Peach escape while Huey stays behind and, to ensure the black paint does not fall into the ocean, squeezes the castle, removing the black paint and transforming it into a card.
In battle, the Black Bowser's Castle card summons the castle and crashes it into opponents. It is also powerful enough to instantly defeat Black Bowser in battle.
Paper Mario: The Origami King[edit]
| Bowser's Castle | |
|---|---|
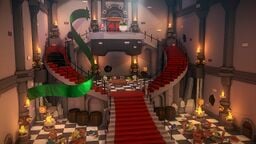 Interior of Bowser's Castle | |
| Not-Bottomless Holes | 16 |
| Collectible Treasures | 4 |
| ? Blocks | 7 |
| Enemies | Goombas Koopa Troopas Shy Guys Spinies Hammer Bros. Buzzy Beetles Spikes Stone Spikes Snow Spikes Big Cutout Soldiers Li'l Cutout Soldiers Handaconda Paper Mistake Buzzy Beetle Scissors |
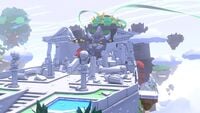
In Paper Mario: The Origami King, Bowser's Castle boasts a similar design to that of the previous two games, although the design is about the same as Black Bowser's Castle from Paper Mario: Color Splash. When Mario and Olivia first arrive at Shangri-Spa on their quest to destroy the green streamer, they catch sight of a fortress with a scary-looking face in the distance that does not blend in with the area, also noticing that the streamer leads into the fortress. They soon meet Kamek, who explains that the fortress is Bowser's Castle, where Bowser had retreated after escaping King Olly's attack on Peach's Castle at the beginning of the game, but it was overrun with Folded Soldiers upon his arrival. Kamek had attempted to engage an emergency protocol for the castle, but pressed a button that shut down its engines instead, causing the castle to crash-land into Shangri-Spa's banquet hall. As a result, those who managed to avoid getting folded were forced to clean up the spa.
The entrance to the castle is initially guarded by an origami version of Boss Sumo Bro., who can only be reached with the help of Bowser Jr. After Mario defeats Boss Sumo Bro., the gang and a whole slew of uncorrupted minions (rallied by Kamek) barge into the castle and fight their way through the opposition. In the foyer, which also doubles as a mess hall, Mario can optionally fight the Folded Soldiers and earn 1,000 coins from each battle if the enemy was not instantly defeated with a First Strike in the overworld.
After finding that a door on the castle's second floor (where Bowser Jr. is trying to push himself through) is locked, Kamek guides Mario to his room for a key to the door, but mysteriously vanishes along the way, leaving Mario to find his way to Kamek's room himself. Inside a hallway lined with five doors, each leading to a room for a species of the Koopa Troop (from left to right: Goomba, Koopa Troopa, Kamek, Hammer Bro, and Spike) and with a Bowser portrait right above the door, Mario can peek through a small window to the left of each door for a hint of what he can find inside each room. There is a Flashy Mushroom behind some crates inside the room for Goombas, an Origami Koopa Troopa behind a treasure chest inside the room for Koopa Troopas, Luigi inside Kamek's room, an indicator for a hidden ? Block behind a toppled chair inside the room for Hammer Bros., and an Origami Spike inside another Treasure Chest plus a glimpse of a Collectible Treasure behind that chest inside a room for Spikes. The door to Kamek's room is initially camouflaged into a wall with a portrait of King Olly right above where the door would be; Mario must dislodge that portrait by hammering the wall right below the portrait repeatedly until it falls to the ground, revealing another portrait of Bowser. By doing so, a Magic Circle appears for Mario to use the 1,000-Fold Arms to peel off the wall, revealing the door to Kamek's room. After Mario enters the room, Luigi hands him a Key to Bowser's Castle; Mario uses the key to unlock the door on the second floor that leads into another hallway, which is littered with sliced pieces of the Koopa Troop. Here, he is forced into a battle with Handaconda, which has captured Olivia.
After defeating Handaconda and freeing Olivia, Mario makes his way into the throne room, where he finds a spool for the green streamer, along with a recaptured Bowser. In that room, Mario runs into Scissors; before engaging Mario directly, Scissors sends out Paper Mistake Buzzy Beetle as a warm-up for Mario. After Mario defeats Scissors in a near-death battle, a Magic Circle appears, allowing him to use the 1,000-Fold Arms to destroy the green streamer's spool. With the streamer cleared, the castle is officially back in Bowser's hands.
After being freed, Bowser directs Mario and Olivia to the castle's hangar on the first floor for a mode of transportation to Peach's Castle. First, in a room with nine Buzzy Beetle pillars arranged in a square, Mario must hammer a red button below a Bowser emblem on the west wall to activate a laser beam and hammer each pillar as necessary to create an S-shaped laser path through all nine pillars to another Bowser emblem on the north wall to unlock a door to the hangar. Inside the hangar, Mario must press a button on the left (next to the one that Kamek had pressed), which makes an airship emerge from a garage and dock itself at the hangar. Mario can read signs below the two buttons to reveal that their labels, one for "Secret Weapon" and the other for "Cut Engines" are wrong way round, for a very tiny writing on each sign states that the button's function is for the other one. After Bowser, Bowser Jr., Kamek, and the Koopa Troop board the airship, Mario must also get aboard and confirm to Bowser that he is ready to go for the airship to take off into the sky for Peach's Castle.
During the credits, a photo of Bowser Jr. and Bowser soaking in the Spring of Sanctuary shows Bowser's Castle undergoing repairs in the background.
Mario, Olivia, Kamek, and Bowser Jr. find the Folded Soldiers feasting inside Bowser's Castle
Mario & Luigi series[edit]
Mario & Luigi: Superstar Saga / Mario & Luigi: Superstar Saga + Bowser's Minions[edit]
In Mario & Luigi: Superstar Saga and its 3DS remake Mario & Luigi: Superstar Saga + Bowser's Minions, Bowletta goes back to the Mushroom Kingdom so she can use Bowser's Castle to attack the Beanbean Kingdom after being tricked into capturing Luigi disguised as Princess Peach, which allows him to retrieve the stolen Beanstar from the repaired Koopa Cruiser. In this game, the castle is in the sky, can breathe fire, and resembles Bowser. Towers act as the castle's "hands", and around the castle's "torso" are cannons and an opening. This flying castle design is reused in Yoshi's Island DS.
The castle acts as the final area of the game; Mario and Luigi fly there with Blablanadon near the end of the game to stop Bowletta after the latter hears about the castle attacking the Beanbean Kingdom and Prince Peasley being sent to stop it. The map of the game hides the castle throughout the majority of the game with a folded upper-left corner until it attacks Beanbean Castle Town; in the remake, the corner is not folded, and when Bowletta launches her attack, a picture of the castle is taped onto the map instead. Within the castle, the Mario Bros. must battle many of Bowser's troops and fight each of the Koopalings (some with Time Bob-ombs on their side) in their respective rooms in order to progress further, until they make it to Fawful.
After defeating Fawful, the Mario Bros. make it into the throne room where Bowletta resides. Bowletta reveals she will not only conquer the Beanbean Kingdom, but the Mushroom Kingdom as well, and attacks the Mario Bros. They fight and seemingly defeat Bowletta after a long battle, but a Time Bob-omb suddenly appears and knocks them out, and she then swallows the brothers. Inside her body, the Bros. must fight and defeat Cackletta's spirit; after they defeat her, they are ejected out of Bowletta's body before she is turned back into Bowser and Cackletta's spirit perishes. The Mario Bros., Peasley and Blablanadon then escape the castle before it blows up, courtesy of a time bomb planted by Prince Peasley. Bowser regains consciousness and begins wondering what he has been doing the whole time, only for the castle to explode moments later and send him flying into the camera. The castle's remains crash into Oho Ocean in the original game, while it simply explodes and disappears in the remake; Bowser is fortunately saved by Prince Peasley.
The "main" grounded Bowser's Castle appears in the credits when the Toad Express drops the present containing Bowser through its roof. In the remake, only the exterior walls remain here, and the Minion Quest ending has the castle being rebuilt after Bowser is dropped.
- Map
Bordering or connecting locations to Bowser's Castle include:
- Enemies
- Gunner Guy
- Hammer Bro
- Boo
- Chomp Bro
- Iggy (boss)
- Magikoopa
- Sniper Bill
- Morton (boss)
- Lemmy (boss)
- Ludwig (boss)
- Roy (boss)
- Time Bob-omb (background enemy during Roy, Wendy and Larry battles; cannot be fought directly)
- Wendy (boss)
- Larry (boss)
- Fawful (boss)
- Bowletta (boss)
- Flaret (with Bowletta)
- Cackletta (final boss)
Mario & Luigi: Partners in Time[edit]
In Mario & Luigi: Partners in Time, the Mario Bros. visit Baby Bowser's castle in the past, after the Koopa Cruiser crashes into the castle upon being shot down by the Shroobs. Though the quartet are initially split up, they eventually reunite there and start their adventure together. Baby Bowser himself is never seen inside the castle during the entire game, though the Mario Bros. discover a Cobalt Shard that he is keeping inside a chest. There is also a time hole there which links to Peach's Castle in the present. Oddly, the castle on the map in the present looks the exact same as the one in the past and still depicts Baby Bowser.
- Area maps
- Enemies
Mario & Luigi: Bowser's Inside Story / Mario & Luigi: Bowser's Inside Story + Bowser Jr.'s Journey[edit]
- See also: Fawful Theater
| Bowser's Inside Story enemy | |||
|---|---|---|---|
| Bowser Castle | |||
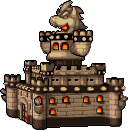
| |||
| Location(s) | Dimble Wood | ||
| Battled by | Giant Bowser | ||
| Role | Giant boss | ||
| Level | 17 | ||
| HP | 535 (803) | ||
| POW | 80 (200) | ||
| DEF | 52 (78) | ||
| SPEED | 23 (35) | ||
| Fire | Normal | ||
| Burn? | Immune | ||
| Dizzy? | Immune | ||
| Stat down? | Normal | ||
| KO? | Immune | ||
| Experience | 380 | ||
| Coins | 200 (300) | ||
| Item drop | Star Candy - 100.0% | ||
| |||
In Mario & Luigi: Bowser's Inside Story and Mario & Luigi: Bowser's Inside Story + Bowser Jr.'s Journey, the castle, here labeled as "Bowser Castle", is taken over by Fawful, with Midbus taking control of operations. After Bowser helps fire a Banzai Bill at his hijacked castle from Dimble Wood, Midbus commands the castle to elevate, dodging the Banzai Bill, and then lands it on top of Bowser. Mario and Luigi must travel to Bowser's Rump Command and cause Bowser to grow large enough to fight his castle.
In battle, the Castle's main attack is a flying ram, which Bowser must counter by punching. Its main tactic is opening its entrance doors and releasing Spinies, which prevent Bowser from punching. After the castle is defeated, Midbus retreats and the castle is returned to its original location. Later, as Bowser attempts to enter the castle, Midbus commands it to hover out of Bowser's reach. After wandering to the opposite side of the area, Midbus fires a giant cannonball at Bowser, who Mario and Luigi must help by building up energy in his arms. With their assistance, he throws it back at the castle, damaging it badly enough to force it to land. Bowser then gains access to the castle, where he discovers that Fawful has not only brainwashed his minions, but had also turned his training facility into a theater. In the meantime, Bowser decides to see the show Fawful puts on. After a few minutes, the doors to the theater open. Inside, a Goomba acting under the orders of Fawful tricked him into sitting in a VIP chair, which fires Bowser onto the stage and forces him into a fight against Midbus.
After Bowser beats Midbus, Bowser is forced to eat a "victory feast" that Boos feed him. This causes him to become so fat that he gets stuck in the floor. After a strange hand grabs Princess Peach, Bowser falls through the floor and lands on a treadmill, where he manages to lose the excess weight. He is then blasted out by exploding Bob-Ombs and sent into the Tunnel.
Later in the game, Bowser must return here to look for the second Star Cure, which he had stolen before the events of the game. Fawful has blocked the path to his treasure stash, and Bowser must push a Fawful statue off the castle balcony to break the barrier. However, his brainwashed minions begin to push against the statue too, trying to save the statue and push Bowser off the balcony, forcing the Mario Bros. to assist him and provide extra leg strength once more. Bowser finally makes it to his treasure vault with the assistance of some Monty Moles, only to learn his Monty Mole minions had deserted him for Fawful and turned the tunnel into a railway for the Fawful Express.
After battling the Fawful Express, Bowser return to the Treasure Chamber to obtain the Star Cure from the safe. After recalling the combination with Mario, Luigi and Starlow's help, Bowser opens the safe and grabs the Star Cure. However, his minions Private Goomp, Corporal Paraplonk and Sergeant Guy then push him into the safe and trap him in it, announcing their betrayal and defection to Fawful. The safe is then moved eventually to Peach's Castle.
Curiously, the castle has a cold-storage vault, in which a large part of the Shroob invasion force from the events of Partners in Time is kept frozen, along with their princesses, who somehow survived their defeat. If Mario and Luigi find the password required to enter this room, they can fight three of the Shroobs (which they inadvertently defrost) as optional bosses. According to Bowser Jr.'s Journey, the cold-storage vault was originally created by Kamek to store the Ever Ice as a means to preserve it, despite its permanent nature, in the event that Bowser Jr. needed it - which he ultimately did thanks to the Blorbs outbreak at Bowser's kingdom.
During the credits, Bowser's minions are repairing the damages done to the castle. After being beaten by Mario and Luigi back at Peach's Castle, Bowser is carried back to his castle, and a Magikoopa treats him while he is bedridden. Birdley and Starlow arrive at the castle to deliver a present for him; a cake from Princess Peach. Before Bowser opens it, Starlow chats with him for a bit, and re-accepts Private Goomp, Corporal Paraplonk and Sergeant Guy back into his troop once they apologize for their betrayal, telling them to work on the repairs of his castle.
In the remake, the castle is labeled as "Bowser's Castle" and in the main game plays the same role as the original. There are no major changes in the rematch in the remake's Challenge Node, other than the fact that the Shy Guy-manned airships move faster and fire faster cannonballs more rapidly. In the Bowser Jr.'s Journey mode, it is revealed that after Fawful took over Peach's Castle, his treasonous minions the Best Fitness Friends took control of Bowser's Castle for themselves. In this mode, the castle's basement is labeled as the Lava Lair, which Bowser Jr., Kamek and Morton explore after the Castle had taken off for Dimble Wood. Additionally, Bowser's Castle is the final area for Bowser Jr.'s Journey. In the post game, due to Bowser challenging Bowser Jr. to a personal battle and neither one admitting defeat, the castle's repairs ended up undone.
- Enemies
- Midbus (boss)
- Jailgoon
- Sniffle Thwomp
- Magifoofa
- Fawful Guy
- Shroobs (optional boss)
- Fawful Express (boss)
- Fawful Mountain (boss)
- Choomba (appears in the Fawful Express boss battle)
Mario & Luigi: Dream Team[edit]
- Main article: Neo Bowser Castle
While Bowser's Castle itself does not appear in Mario & Luigi: Dream Team, a new castle conjured from the Dream Stone is created during the events of the game, and serves as the stronghold for Bowser and Antasma on Pi'illo Island. At the end of the game, this castle is destroyed due to its source, the Dream Stone, being shattered as well as its rulers, Antasma and Bowser, being defeated.
Mario & Luigi: Paper Jam[edit]
- See also: Neo Bowser Castle
In Mario & Luigi: Paper Jam, Bowser's Castle appears as an area located near Doop Doop Dunes. The castle can also be seen off in the distance at several points in the game. The castle also has a cannon built into the roof, which Bowser uses to destroy the bridge connecting his castle to Doop Doop Dunes as well as knock out Mario, Luigi and Paper Mario.
The castle is first seen during the first cutscene involving Bowser, where after a disagreement and then a brawl, he and his paper counterpart decide to team up. They proceed to kidnap their respective Princess Peaches and return to the castle. The castle is later seen in Doop Doop Dunes, where upon entering the area, the Mario Bros. and Paper Mario spot Bowser's Castle in the distance, which they must cross the desert to reach. As they come close, the Bowsers notice and decide to blast the gang with cannonballs. The first shot misses them, but destroys the bridge connecting the castle to the desert, while the second shot knocks them all out cold. Wendy, Roy, Larry and Ludwig then arrive to take them to the Twinsy Tropics Dungeon, while the Bowser Jr. duo collects the book containing Paper Mario's world.
Much later in the game, the group reaches Bowser's Castle in order to rescue the princesses and get the book back. They learn the Trio Glider before encountering the two Kameks and Papercraft King Boo, who is controlled by Morton and Lemmy. Toadette also arrives just in time with a Papercraft Yoshi to fight the Papercraft King Boo. After the victory, Kamek kidnaps Toadette to bring the production of papercrafts to a stop, then prepares to build Papercraft Bowser. The gang later rescues Toadette before encountering the Bowser Juniors on guard duty.
The Princess Peaches then escape and greet the team, but are caught by the Bowser Juniors. They mean to fight, but after accidentally revealing they possessed the book the Bros. are after (which they did not know they had), the pair flee. The group eventually catches them and forces them to hand over the book, but the Juniors escape after giving them a decoy book. The gang chases them down and engages in a battle with them, defeating the pair. Before they can get the book back, the two Bowsers enter the room, enraged at their sons' defeat. They then activate "the boosters", lifting Bowser's Castle out of the lava moat and dubbing it "Neo Bowser Castle". The gang escapes, forgetting the book, and the Bowsers retaliate for their sons' defeat by firing on Peach's Castle and ravaging it. The castle is presumably returned to ground level after the Bowsers' defeat.
Unlike other Mario & Luigi games, the castle's design is based on its designs from New Super Mario Bros. Wii and New Super Mario Bros. 2 and lacks the Bowser head and "arm towers" of the previous designs. Additionally, Bowser's Castle is located at the edge of a desert instead of a volcanic wasteland, although a giant lava moat is built around the castle. Additionally, this design does not have a stone head of Bowser anywhere, but instead has a green Bowser-like emblem logo in the center. Further reflecting on the designs of contemporary main series incarnations, the castle sports a large number of spiked green domes that resemble Bowser's shell.
After Bowser's Castle becomes Neo Bowser Castle, its original location at the end of Doop Doop Dunes can no longer be explored, even when the game is completed.
- Enemies
Fly Guys (Toadette in Trouble mission only)
Papercraft King Boo (Papercraft Boss)
Bowser Jr. (boss)
Paper Bowser Jr. (boss)
Mario & Luigi: Brothership[edit]
In Mario & Luigi: Brothership, the castle is located on Wayaway Island. The Mario Bros. visit the castle to obtain more Ampberries for the people affected by the Glohm.
Mario Party series[edit]
Bowser's Castle makes infrequent appearances in the Mario Party series. The minigame Bowser's Lovely Lift in Mario Party 7 takes place in the castle, although only the tower holding the lift is seen. Several cutscenes in the story mode of Mario Party DS take place in Bowser's Castle. It is where Bowser's Pinball Machine is located and the final boss minigame, Bowser's Block Party, takes place in the throne room of the castle. Chaos Castle from Mario Party 10 takes place within the castle: The first part of the board takes place on the exterior, the second part takes place inside the castle with a factory theme before ending in the throne room. The Bowser Board in amiibo Party is also based on the castle. World 4 of Mario Party Star Rush is based on Bowser's Castle.
Super Smash Bros. series[edit]
Bowser's Castle sometimes appears in the Super Smash Bros. series. In Super Smash Bros. for Nintendo 3DS and later also Super Smash Bros. Ultimate, a stage based on Bowser's Sky Castle from Paper Mario: Sticker Star appears in the Paper Mario stage, where at certain intervals, the castle's eyes may light up and the castle entrance (modeled after Bowser's head) may turn or close its mouth, heavily damaging any character inside. Additionally, in Super Smash Bros. Ultimate, the Molten Fortress sub-area in World of Light is modeled after Bowser's Castle.
Mario Pinball Land[edit]
- Main article: Fiery Stage
In Mario Pinball Land, Bowser's Castle appears as the final area, being called the Fiery Stage by the manual. It is only accessible after Mario has defeated all the other bosses and collected at least 15 stars. The bosses can all be found and battled in the castle once more. Bowser must also be battled and defeated here in order to beat the game.
Super Princess Peach[edit]
- Main article: Bowser's Villa
As Super Princess Peach takes place on Vibe Island, rather than the Mushroom Kingdom, the castle itself is not seen during the events of the game. However, Bowser built a villa there, which is considered to be another castle.
Mario Hoops 3-on-3[edit]
- Main article: Bowser's Castle (Mario Hoops 3-on-3)
Bowser's Castle appears as a basketball court in Mario Hoops 3-on-3. The court has many gimmicks, including Thwomps, Lava Bubbles, and Bombs.
Itadaki Street series[edit]
- Main article: Bowser's Castle (board)
Bowser's Castle also appears as a game board both in Itadaki Street DS and Fortune Street, based on the castle settings from New Super Mario Bros. and New Super Mario Bros Wii, respectively.
Mario & Sonic series[edit]
Bowser's Castle has made various appearances in the Mario & Sonic series. In the Wii version of Mario & Sonic at the Olympic Winter Games, Bowser's Castle is where Dream Ice Hockey takes place, and a background based on it is in the second segment of the Mario World routine in Dream Figure Skating. In the Nintendo DS version, Blizland has elements of Bowser's Castle, combined with elements of Dr. Eggman's factories. In Mario & Sonic at the Sochi 2014 Olympic Winter Games, a large portion of Mario's Figure Skating Spectacular features a layout inspired by Bowser's Castle based on its appearance in Super Mario 3D Land. In the Nintendo 3DS version of Mario & Sonic at the Rio 2016 Olympic Games, Bowser's Castle appears only on the overworld in the Road to Rio mode.
Mario Sports Mix[edit]
- Main article: Bowser's Castle (Mario Sports Mix)
Bowser's Castle is one of the fourteen courts of Mario Sports Mix and appears in all of the sports for the players to compete in.
Yoshi's Woolly World / Poochy & Yoshi's Woolly World[edit]
- Main article: King Bowser's Castle (Yoshi's Woolly World)
In Yoshi's Woolly World and Poochy & Yoshi's Woolly World, Yoshi chases after Kamek to Bowser's Castle to save his fellow Yoshis. Once he enters the castle, he must seek yarn balls of four different colors to open the door to Baby Bowser. The first phase of the boss fight is very similar to that of previous games. Yoshi must throw a yarn ball at Baby Bowser, stomp him, and repeat the process two more times to proceed. In the second phase, Baby Bowser grows giant and becomes Mega Baby Bowser. He jumps into the background and hurls big yarn balls at Yoshi. To win, Yoshi must throw these big yarn balls back at Mega Baby Bowser. Upon victory, the player unlocks eight new Yoshi colors, as well as Baby Bowser Yoshi if all five Wonder Wool in the level were collected.
Mario + Rabbids series[edit]
Mario + Rabbids Kingdom Battle[edit]
- Main article: Bowser's Castle (Mario + Rabbids Kingdom Battle)
Bowser's Castle appears in Mario + Rabbids Kingdom Battle as the final stage of the Lava Pit. The castle is shown to be flying and appears to be in a ruined state. The only seen room is the throne room where Mario and his team fight MegaDragonBowser and destroy the Megabug.
Mario + Rabbids Sparks of Hope[edit]
Although Bowser's Castle itself does not appear in Mario + Rabbids Sparks of Hope, the area where Darkmess Bowser is fought resembles the castle.
Yoshi's Crafted World[edit]
- Main article: The Great King Bowser (level)
In Yoshi's Crafted World, Bowser's Castle reappears in the boss stage The Great King Bowser. Here, the Yoshis must defeat Baby Bowser. In his first phase, the Yoshis should defeat Baby Bowser's robot. During the second phase, the Yoshis need to defeat Mega Baby Bowser. This level has to be completed to not only beat the game, but also unlock Hidden Hills.
Monopoly Gamer[edit]
Bowser's Castle is the sixteenth and final property on the game board in Monopoly Gamer. It is one of two properties in the Dark Blue Color Set (along with Peach's Castle).
The Super Mario Bros. Movie[edit]

In The Super Mario Bros. Movie, Bowser's Castle is located on a giant floating airship (referred to as Bowser's ship by Cranky Kong, Bowser's airship in the bonus features,[3] and Bowser's Island Castle in a Jakks Pacific playset[4]) that Bowser and his forces use to travel between kingdoms. The ship consists of a volcano and lava similar to those seen in the Dark Lands, as well as a massive figurehead depicting Bowser's head and a giant pool of lava, resembling depictions of Bowser's Castle from Paper Mario and Mario & Luigi: Superstar Saga, respectively, complete with Spike Balls attached to chains like the former acting as anchors to help it descend. Additionally, the volcano's crater, as seen during Peach and Bowser's wedding held at the castle, is later revealed to also double as a missile silo used to launch the Bomber Bill that Bowser plans to use to destroy the Mushroom Kingdom once the wedding gets thwarted by the heroes.
After Bowser obtains the Super Star from the penguin army, he holds a celebration in his castle with his minions. Later in the film, Luigi is captured by the Shy Guys and Snifit and transported to Bowser's Castle, where he is imprisoned along with the penguin army. The Kong army is also later captured and imprisoned at the castle after being ambushed by Bowser's minions. After getting sucked into Brooklyn through the mysterious pipe, the ship and castle are destroyed by Mario and Luigi with the use of the Super Star.
Profiles and statistics[edit]
Super Mario RPG: Legend of the Seven Stars[edit]
Enemies[edit]
First Visit[edit]
Chaindelier (boss helper)
Bowser (boss)
Second Visit[edit]
Wizakoopa (boss)
Bahamutt (boss helper for Wizakoopa)
Jinx Clone (boss helper for Wizakoopa)
King Bomb (boss helper for Wizakoopa)
Boomer (boss)
Exor (boss)
Treasure Boxes[edit]
| Item | Image | Location | Location image | |
|---|---|---|---|---|
| Original | Remake | |||
| Mushroom | In the fourth area (the one with most of the screen blacked out), found after going left from the bridge. | 
|
| |
| Mushroom, 10 10-Coins | In fifth area is a detour found on the left. After going in, there is a small room with two treasures. | 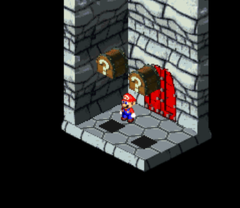
|
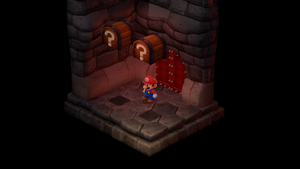
| |
| Rock Candy or Sonic Cymbals or Star Gun or Drill Claw or Super Slap |
Depending on which course was completed, the reward is different: |
|
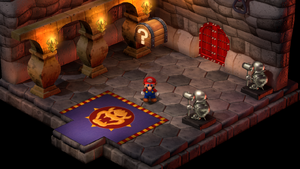 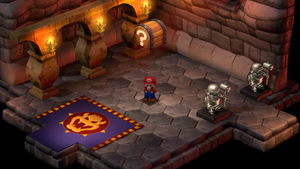
| |
| Infinite Coins | Created after a boss fight against Wizakoopa. | 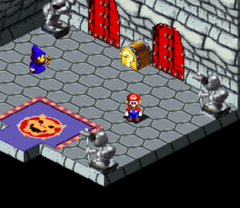
|
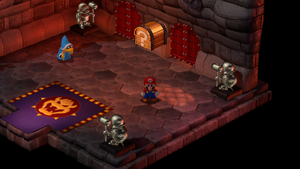
| |
Paper Mario[edit]
Enemies[edit]
- For enemy formations in Bowser's Castle, see here.
Anti Guy x3 (Optional Battle)
Duplighost x4 (Mini bosses)
Jr. Troopa (in all forms, Boss)
The Koopa Bros. also appear but are not actually fought, being knocked away by a suddenly appearing Jr. Troopa before they have a chance to fight Mario.
Items[edit]
A "main area" refers to a four-way intersection with a Save Block. Enemies can drop items and several items can be purchased from the Storehouse. Other items include:
| Item | Image | Location | Location Image |
|---|---|---|---|
| Castle Key |
|
| |
| Prison Key |
|
| |
| Super Shroom |
|
 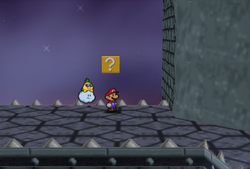
| |
| Life Shroom and Tasty Tonic | In a crates in the prison under the first Guard Door room. | 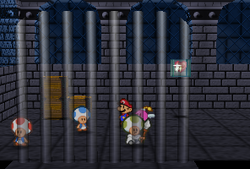
| |
| Life Shroom | In a question block on a platform in the lava area next to the front door scene. | 
| |
| Maple Syrup |
|
 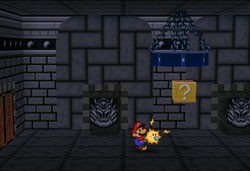
| |
| Super Mushroom and Maple Syrup | In the first two question blocks after the quiz room. | 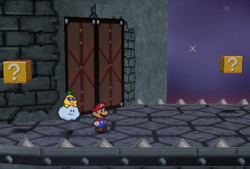
| |
| Deep Focus | In a badge block on a platform in the lava area, near the entrance. | 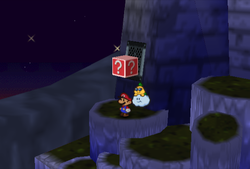
| |
| Thunder Rage | On another platform in the third lava/moving platform area. | 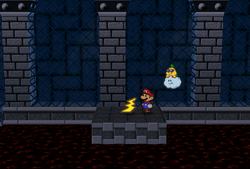
| |
| Shooting Star | In a question block at the end of the north fork road in the second grotto scene. | 
| |
| Mystery? | On a platform in the third lava/moving platform area. | 
| |
| POW Block | In a question block at the end of the north fork road in the first grotto scene. | 
| |
| Jammin' Jelly | Fall off the stairs in the room after the quiz. | 
| |
| Ultra Shroom | At the end of the northwestern road from the second main area. | 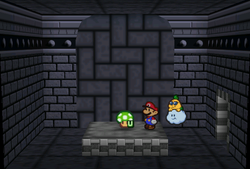
|
- For a list of hidden blocks in Bowser's Castle, see here.
Area tattles[edit]
- It's Bowser's Castle. This appears to be the hangar for Bowser's vehicles.
- Boy! Bowser's Castle. Talk about your basic eerie atmosphere, huh? Oh... I'm nervous and excited at the same time. We're headed for the final fight at last!
- Are we still outside the castle or what? Let's hurry through here. OK, Mario?
- I've gotta hand it to him, Bowser's Castle is amazing! Such creative use of lava flows! It's just like that volcano!
- It's a covered hallway in Bowser's Castle. It doesn't look like anything's amiss in here. Let's press on, Mario.
- Look at the size of that stone Bowser face! He's pretty scary looking. That face gives me the creeps, Mario.
- It's an underground prison cell, Mario. Are you sure you can find the way back to where we were before?
- I wonder where all this lava comes from. Don't you think it's odd?
- Lava, lava, lava! There's such a thing as too much lava, that's for sure. Mario, are you all right in this heat? Boy, it's hot! This adventure has just been one extreme or the other.
- The only way to cross the lava is to have somebody carry us. If we could find a way to cool the lava off, we could probably walk on it, though. And if we have to pass through lava flows, we can have Bow hide us from danger.
- Here's the source of the lava. It's miserably hot when it's flowing. It's not so bad when it's cooled off, though.
- Now we're cooking! I mean, now we're not cooking! It's still hot, but not, you know, burning hot.
- You know, walking on newly hardened lava is not exactly something that your average Goomba gets to experience.
- The lava seems to have hardened as it cooled off.
- There's a treasure chest. Things are looking up. The lava has even cooled.
- It seems to be a cave. Are we below the castle? It's so dark. They must have had problems setting up lights down here. What a pain for us.
- It seems to be a cave. Are we below the castle? It's so dark. How long can this darkness possibly last?
- Ah! We're back inside Bowser's Castle. There's a stone pedestal with Bowser's face carved on it. What poor taste! What an egomaniac! If we push that thing, what do you think will happen?
- It's a hall in Bowser's Castle. I wonder where it leads. We have to hurry! And yet, we should also be careful.
- These stairs aren't lighted very well, are they? I wonder how deep below ground they go. Bowser should really look into some ambient lighting.
- This is a prison cell where Toads are being held. You know... There are Toads here...and beds... It's kind of like a Toad House! Do you think that I'm just an incurable optimist? Well, what's wrong with that?
- Here's the storage room for Bowser's Castle. It looks like one of his subjects is selling his stuff. Ha ha!
- It's a covered hallway. I can sum up the decorating in two words: pure Bowser! Such dark colors and drab lighting! What terrible taste!
- I'm sure Bowser's going to be surprised. I'm sure he'd never believe that we could make it this far. I can't wait to see the expression on his face.
- If Bombette were about three times bigger, we could just blow all these walls up. It would certainly let us move through these areas a lot faster. But that's probably not a good idea. It would be far too dangerous.
- We're somewhere inside Bowser's Castle. This hall is quite large. It also looks quite fortified. I wonder if there's anything good around here? An attack item, maybe?
- Look at all these carvings of Bowser's ugly mug. It's really shameless! I guess he thinks he's cool. Hey, incidentally, about those stone pedestals... Some move and some don't, so check 'em all out.
- Whoa! This corridor has much lower ceilings, huh? I guess I had gotten used to really high ceilings.
- In case you don't know by now, some of these Bowser pedestals can be pushed and others can't. In many cases, you can push them from either the right or left side. I wonder where I heard that?
- This is a hidden passage. It's a bit dark, huh? That's all right. I can sense that something good's in here.
- Some of these Bowser pedestals can be pushed and others can't. In many cases, you can push them from either the right or left sides. If they move, you can be sure they're covering a hidden passage.
- See! A hidden passage. This one doesn't seem to be hiding anything interesting.
- ...Nothing. This room's just a dead end. How worthless. Let's go back to the room where the pedestals are and check 'em out!
- This hidden passage looks promising, doesn't it? It must lead somewhere... You know, I hope we're going in the right direction. I feel kind of disoriented.
- We've certainly seen many kinds of treasure on our adventures, haven't we, Mario? There's one that I would value above all others, though. I would keep it in the safest place I know... Mario, please give me your autograph!!
- Again with the Bowser faces! I'm sick of looking at his ugly mug! Let's find the real Bowser and show him who's boss! And then I can meet Princess Peach!
- It's the outside of Bowser's Castle. Even the outside feels gross and ominous. Maybe he wasn't so bad until he moved here. Living in such a dank place isn't good for the soul.
- How many halls have we been through? I wonder what this one leads to... To Bowser's room? Maybe?
- Know what this reminds me of? A ghost story! This would make the perfect setting for a freaky ghost story! We could have Bow and her friends play the scary parts. Remind me to do that some time back at Toad Town!
- It's a prison cell within Bowser's Castle. A lot of Toads are here. It's a bit strange... Why would Bowser ever need this many prison cells? Do you think there are that many prisoners?
- I think we've already come really far. But we're not at Bowser's room yet. Where could he be? This place is so complicated! That Bowser... I really don't like him!
- "I smell treasure!" Isn't that a good Kolorado imitation? Mario? Wasn't that right on? I wonder what Kolorado's doing?
- It's a covered hallway in Bowser's Castle. There's no place to hide around here, that's for sure. Not that we need one, Mario! Who'd hide? Not me!
- Do you think those windows open to outside or to the inner part of the castle? I'm getting totally turned around in here. This castle really is huge.
- It's a room without a window. It also has a chandelier with no lights in it. I'm getting the feeling that Bowser is really going for the dark, gothic look in here. Maybe he hates bright lights.
- All the torches hanging over there... Doesn't their pattern strike you as sort of suspicious? It's almost as if there's a hidden meaning there. What do you say we try to remember it?
- I think we keep passing through the same room. Do you think, perhaps, that somebody's messing with us? Well, it's a waste of time to just keep running around with no clue about what we're doing. It's kind of like what happened in Forever Forest. Say...those torches might hold a clue for us.
- This is a corridor of sorts. I guess it's more like an elevated skyway, though. If a guy were afraid of heights, his legs would probably tremble and he'd probably freak out. Gulp!
- You know, if I were designing a castle, I wouldn't put in so many corridors. Well, whatever. You can't expect Bowser to have good taste.
- This room is one big ego massage for Bowser. I wish we could crush all these statues to dust.
- Stairs again! Do you think Princess Peach's Castle is at the top of 'em? We're almost there, Mario! I can feel it! Onward! The princess awaits!
Map descriptions[edit]
- It's the castle of the wicked King Bowser, of course. To kidnap Princess Peach, he stole the whole castle. Now Princess Peach's Castle teeters atop Bowser's Castle.
- Bowser's Castle used to be right here! That evil Koopa stole Princess Peach's Castle and captured Princess Peach.
Mario & Luigi: Superstar Saga[edit]
Items[edit]
| Item | Icon | Location |
|---|---|---|
| Super Mushroom | Between the entrance of Ludwig's area and the entrance of Roy's area, there's a cage in the north. The item is in the right ? Block there. | |
| Ultra Mushroom (x7) |
| |
| 1-Up Mushroom (x2) |
| |
| 1-Up Super | From in front of the door to Lemmy's final area, to the right is a Monty Mole who would give this item. | |
| Ultra Nut (x2) |
| |
| Super Syrup | In the room between the door to Roy's area and the door to Wendy's area, it is in the ? Block in the right. | |
| Ultra Syrup (x5) |
| |
| Hoo Bean (x4) | Found in hidden blocks (see below) | |
| Chuckle Bean (x5) | Found in beanholes (see below). |
- For a list of hidden blocks in Bowser's Castle, see here.
- For a list of beanholes in Bowser's Castle, see here.
Mario & Luigi: Partners in Time[edit]
Items[edit]
| Item | Icon | Location |
|---|---|---|
| Mushroom (x3) |
| |
| Mushroom Drop | In the left green block above the north platform in the sixth scene in the first area. | |
| 1-Up Mushroom (x3) |
| |
| Green Shell (x5) |
| |
| Bean (x8) |
|
Mario & Luigi: Bowser's Inside Story[edit]
Items[edit]
| Item | Icon | Location |
|---|---|---|
| Fiery Drumstick (x2) | In a brick on the small passage in Fawful Theater. (x2) | |
| TNT Drumstick (x3) |
| |
| Supersyrup Jar (x5) |
| |
| Star Candy | In the brick before the area where Bowser is fed food. | |
| Retry Clock | In the southwest brick near Bowser's throne. | |
| Attack Piece (x10) | Mario and Luigi can get these by hitting "□, □, ○, △, △, △" in the Bowser Secret Society Preservation Chamber and fighting the Shroobs. | |
| Burning Fangs | In the brick in the lower-left-most scene of the area behind the theater. | |
| Flashy Fangs | In the northeast brick near Bowser's throne. | |
| Star Cure | Found in a safe deep in Bowser's Castle. | |
| Blitty (x2) |
|
Beans found[edit]
There are 38 beans in total.
- Scattered in the lobby of Fawful Theater: <Heart Beans x4, Special Bean x1>
- In the northeastern and southwestern corners of the scene to the east of lobby: <Heart Beans x2>
- In the western part and southeastern corners of the scene to the west of lobby: <Heart Bean x1, Special Bean x1>
- By the path and in the northwestern corner of the scene between lobby and theater: <Heart Beans x2, Special Bean x1>
- Near the south exit and around the switch in the scene west of the theater: <Heart Beans x6, Special Beans x2>
- In the northwestern, northeastern and southern area inside the theater: <Heart Beans x3, Special Bean x1>
- On the curved path and to the left of the pipe in the scene east of the theater: <Heart Bean x1, Special Bean x1>
- In the base of the stairs in the second underground scene (maze-like): <Power Bean x1>
- Scattered in the first underground scene with lava: <Heart Beans x2, Special Bean x1>
- In the scene to the southeast of the previous one (with hints for the puzzle): <Heart Bean x1, Power Bean x1>
- In the northwestern and southeastern corners of the big white scene above the underground lava: <Power Beans x2>
- In the northwestern corner of the first scene beyond the underground lava: <Power Bean x1>
- In the northwestern, northeastern and center area of the second scene beyond underground lava: <Heart Bean x1, Special Bean x1, Power Bean x1>
Prima Official Game Guide description[edit]
- "Bowser finally breaches his own abode, only to discover the joint has been redecorated for its usurper: Fawful The chortling villain has redone the main floor of the castle as a theater where he can perform for his new minions. That simply will not do for the Koopa King. However, Fawful has plans to incorporate Bowser in tonight's big show. If Bowser can survive a bad case of stage f(r)ight, maybe he can wrangle back control of his castle from Fawful?"
- "Acting on the tip that the second Star Cure is in the basement of his very own castle, Bowser stomps home. The castle has been completely overrun by Fawful's minions and monsters, so the Koopa King must punch his way though the crowd to get at what is rightfully his. Fawful has locked up the treasure room where Bowser's[sic] keeps his best stuff, so Bowser must figure out a way around the locks and traps to get his mitts on the Star Cure." (revisit)
Mario & Luigi: Paper Jam[edit]
Block locations[edit]
| Bowser's Castle – 44 Blocks (42 ?, 1 M, 1 L) | |||
|---|---|---|---|
| Item/s | Location | Screenshot | |
100-Coin, 2 Ultra Mushrooms, 50-Coin |
In the second scene, on the fourth island. | 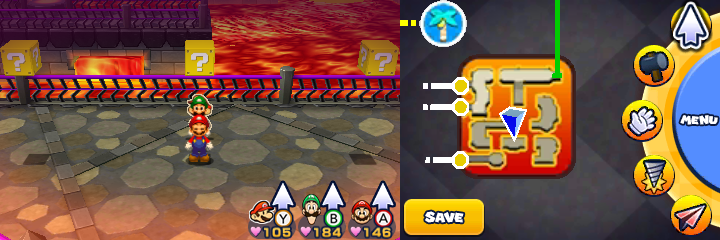
| |
50-Coin |
Same scene, on the fifth island. | 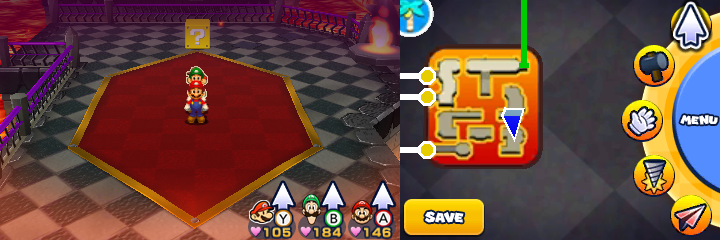
| |
10 10-Coins |
Same scene, at the start of the sixth island. | 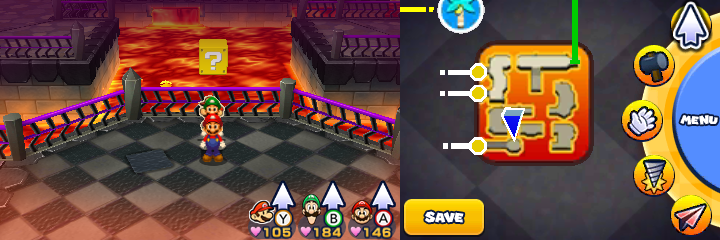
| |
50-Coin |
In the third scene, in the northeast of the lower part. | 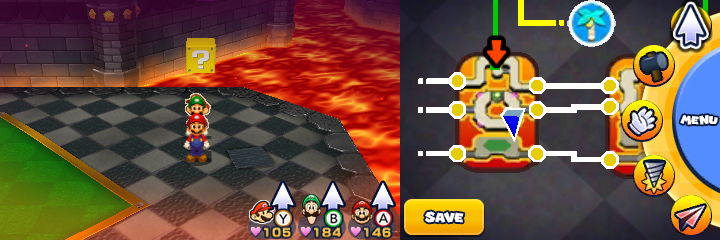
| |
10 10-Coins |
Same scene, in the northwest of the lower part. | 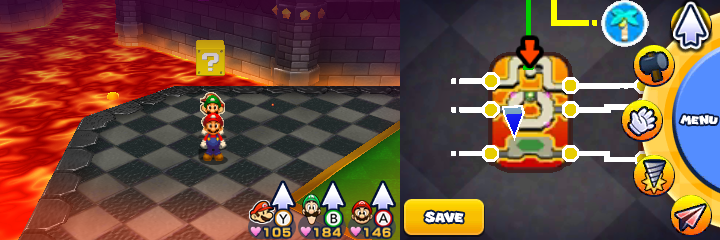
| |
Spin Hammer |
In the fourth scene, high up in the air, reachable by a platform which is propelled upwards by a gush of lava, all found in the west of the scene. | 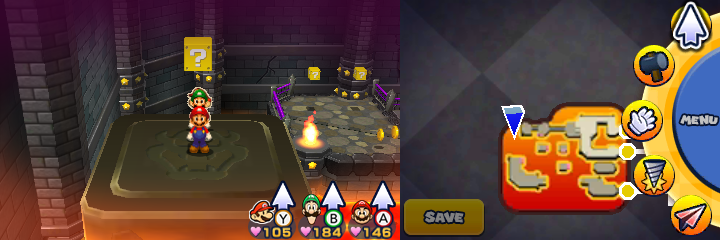
| |
2 Ultra Mushrooms, 50-Coin |
Same scene, in the northwest | 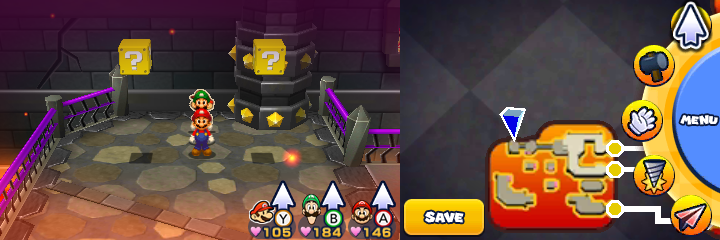
| |
50-Coin |
Same scene, in the north. | 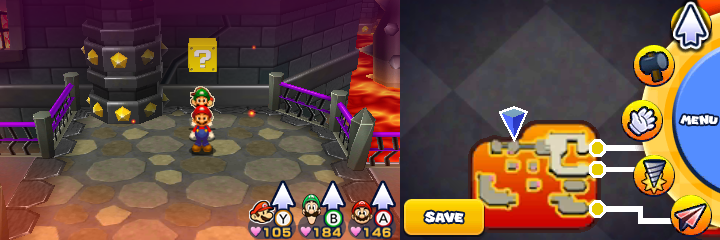
| |
100-Coin, 1-Up DX, 10 10-Coins, 100-Coin, SPEED Mush Jams, 10 10-Coins |
Same scene, on the island in the east, reachable only with Trio Glider. | 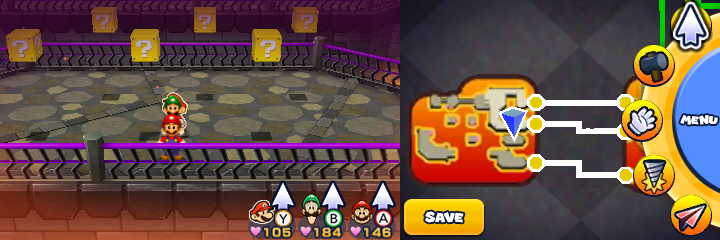
| |
2 Ultrasyrup Jars |
In the third scene, in the west of the upper part. | 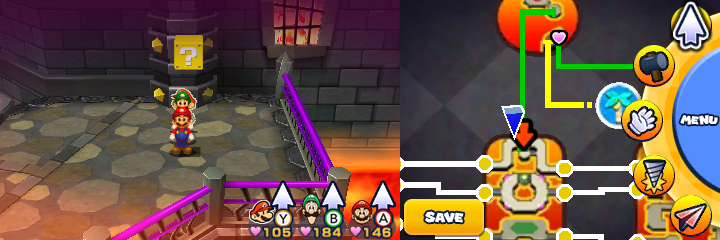
| |
50-Coin |
Same scene, in the west of the middle part. | 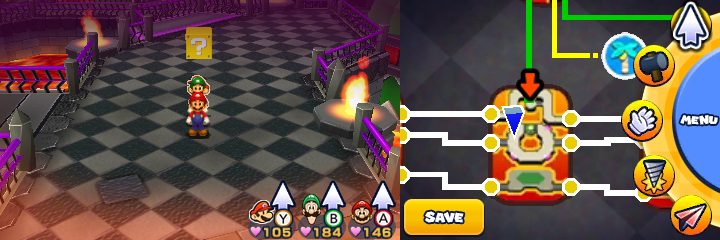
| |
100-Coin |
Same scene, in the east of the middle part. | 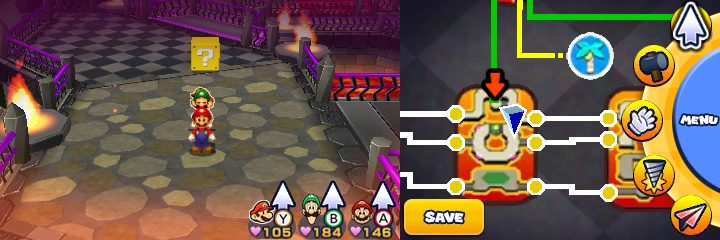
| |
50-Coin |
In the second scene, on the seventh island, at first reachable only from previous scene. | 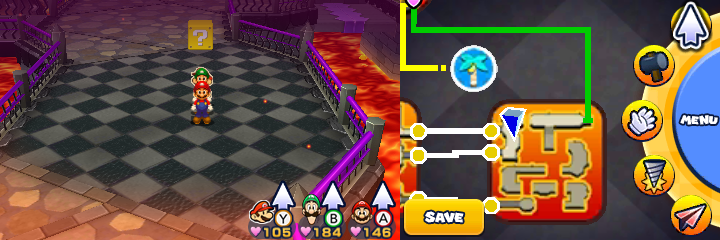
| |
10 10-Coins |
In the third scene, in the east of the upper part. | 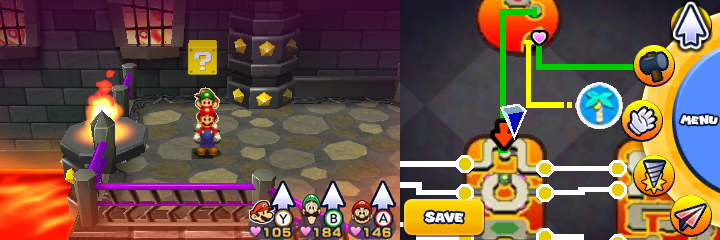
| |
Ultra Nut, 50-Coin |
In the sixth scene, in the southwest. | 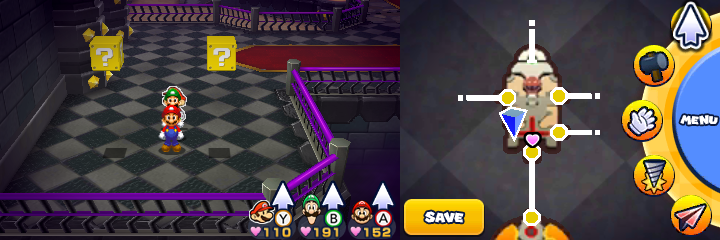
| |
10 10-Coins, 50-Coin |
Same scene, in the southeast. | 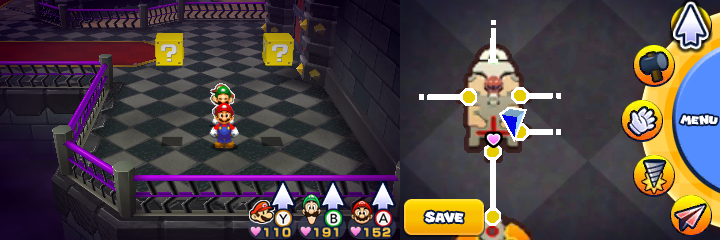
| |
50-Coin |
Same scene, above the southeast Trio Drill-able ground. | 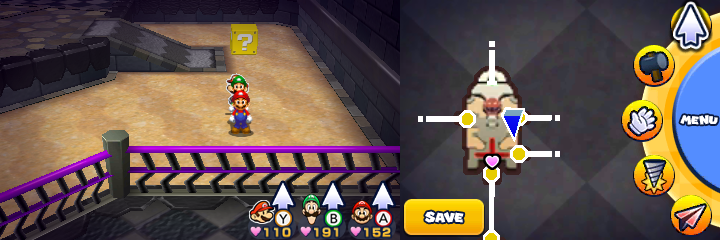
| |
50-Coin |
Same scene, above the southwest Trio Drill-able ground. | 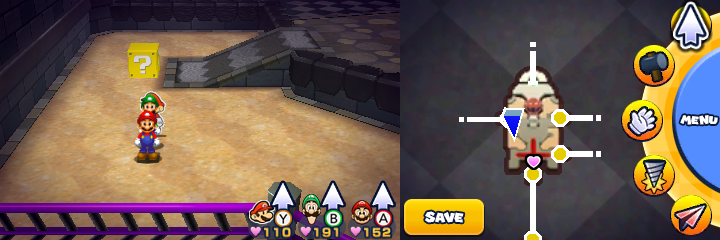
| |
3 Ultrasyrup Jars |
Same scene, found left of the northwest Trio Drill-able ground. | 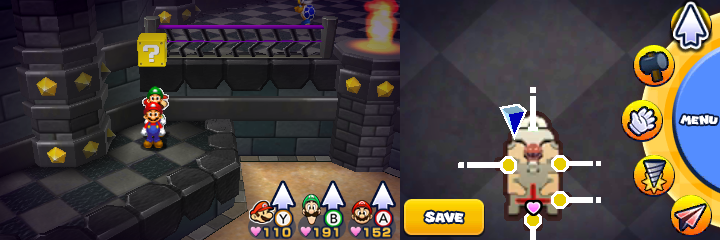
| |
3 Ultra Mushrooms |
Same scene, found right of the northeast Trio Drill-able ground. | 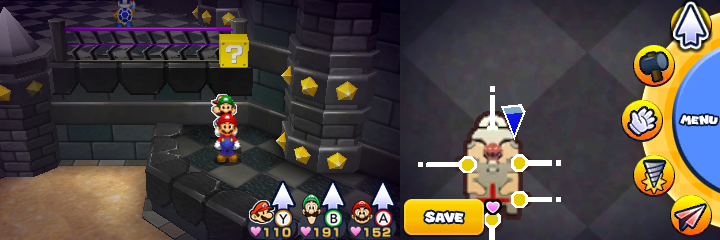
| |
50-Coin |
In the seventh scene (east of the previous one), near the entrance, after the bridge. | 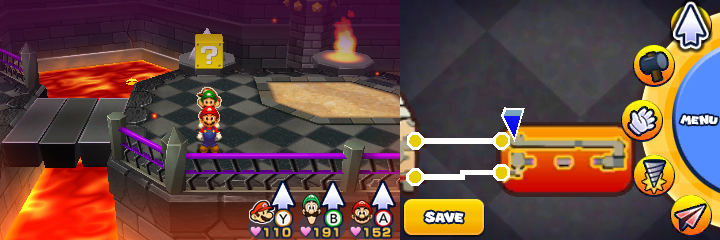
| |
10 10-Coin |
Same scene, in the east. | 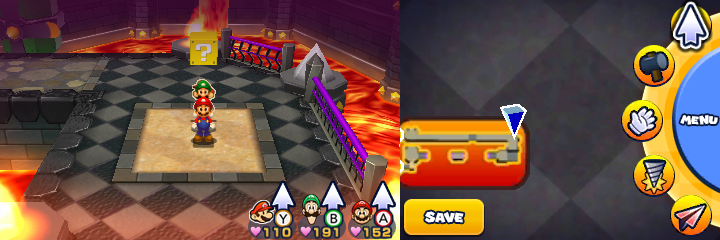
| |
100-Coin, 2 Ultrasyrup Jars |
Same scene, on the island in the south. | 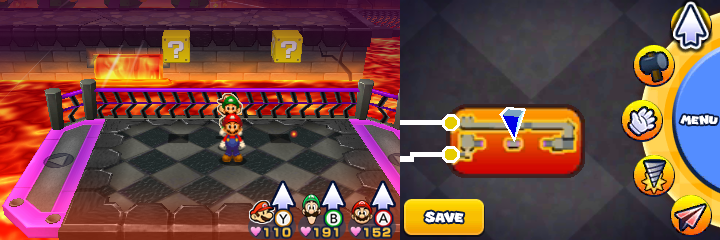
| |
10 10-Coins, Bros. Wear |
In the eighth scene (west of the sixth one), in the northeast. | 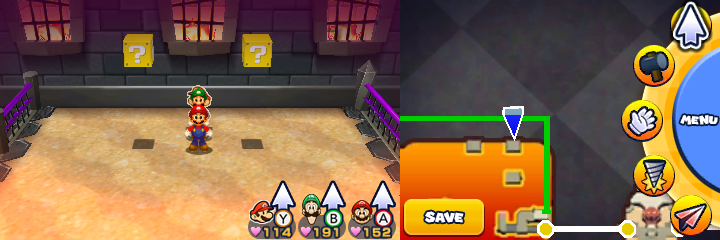
| |
100-Coin, Ultra Candy |
Same scene, in the north. | 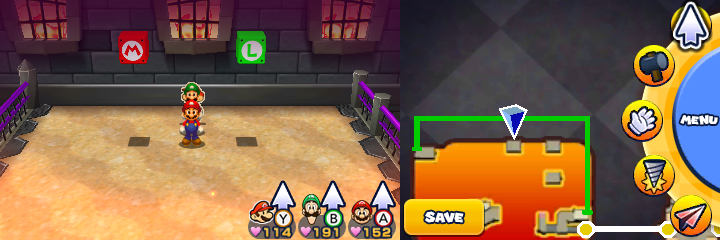
| |
10 10-Coins, 50-Coin |
Same scene, on the island in the southwest. | 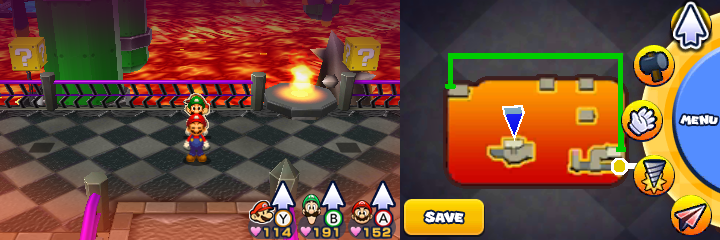
| |
10 10-Coins, 50-Coin |
In the ninth scene, on the western balcony. Reachable only from tenth scene. | 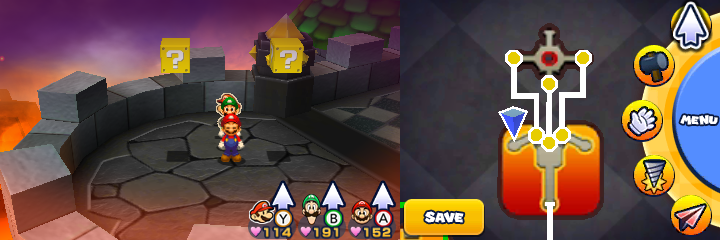
| |
100-Coin, 2 Double 1-Up Mushrooms |
Same scene, on the eastern balcony. Reachable only from tenth scene. | 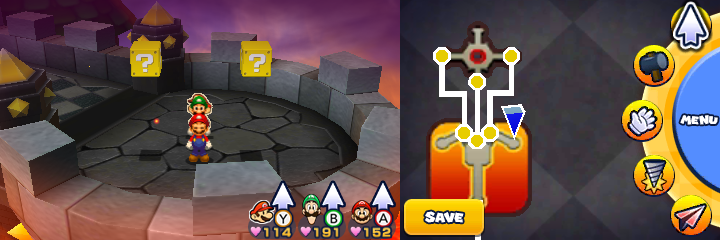
| |
Drill spot locations[edit]
| Bowser's Castle – 12 drill spots (2 Heart Beans, 2 Bros. Beans, 2 Power Beans, 2 Defense Beans, 2 Speed Beans, 2 Stache Beans) | |||
|---|---|---|---|
| Location | Item/s | Screenshot | |
| In the area north of the area where Papercraft King Boo and Papercraft Yoshi were first seen, these 2 drill spots are found in the south-eastern patch of sand, more specifically in its northern part. The western one is Speed Bean, the eastern one is Stache Bean. | Speed and Stache Beans | 
| |
| In the area north of the area where Papercraft King Boo and Papercraft Yoshi were first seen, this drill spot is found in the south-eastern patch of sand, more specifically in its southwestern corner. | Heart Bean | 
| |
| In the area north of the area where Papercraft King Boo and Papercraft Yoshi were first seen, these 2 drill spots is found in the north-western patch of sand, more specifically in its southeastern corner. The western one is Power Bean, the eastern one is Defense Bean. | Power and Defense Beans | 
| |
| In the area north of the area where Papercraft King Boo and Papercraft Yoshi were first seen, this drill spot is found in the north-western patch of sand, more specifically in its northern part. | Bros. Bean | 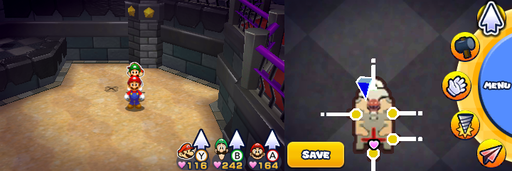
| |
| In the area with the big fans, these 3 drill spots are found near the north-western entrance in the patch of sand. Going from west to east, beans go as follows: Defense, Speed and Stache. | Defense, Speed and Stache Beans | 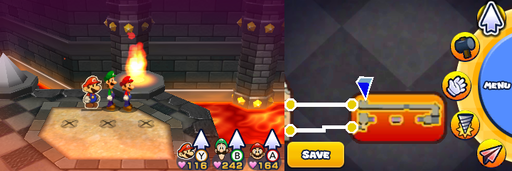
| |
| In the area where Bros. have to save Toadette from Fly Guy, these 3 drill spots are found on the bottom of the biggest island in the patch of sand. Going from west to east, beans go as follows: Power, Bros. and Heart. | Power, Bros. and Heart Beans | 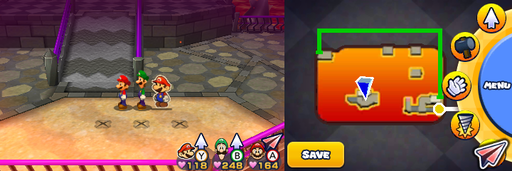
| |
Paper Mario: The Origami King[edit]
Collectibles[edit]
NOTE: Some collectibles are found in areas that are inaccessible until returning later; these entries are highlighted in beige.
Not-Bottomless Holes[edit]
| Description | Image | |
|---|---|---|
| 16 Holes | ||
| On the ground level of the mess hall, on the right wall. | 
| |
| Two on the wall in the elevated section of the mess hall. | 
| |
| On the wall after going up the right stairs. | 
| |
| Two on the left side, one on the stairs and second on the wall. | 
| |
| Seen right away as Mario enters a room leading to enemy quarters. | 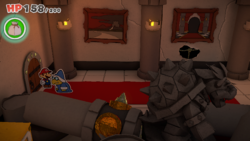
| |
| After going through pile of rubble, there are three holes on the left of the red carpet with one on the wall, one on the pillar and one on the ground. | 
| |
| Continuing on the red carpet, another three holes are seen with one on the broken pillar, one on the painting and one on the ground above the carpet. | 
| |
| Two on the last two doors in the enemy quarters. | 
| |
| In the room after going through the first door in the enemy quarters. | 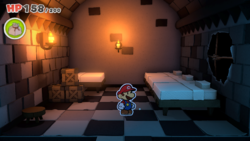
| |
Collectible Treasures[edit]
| Treasure | Description | Image |
|---|---|---|
| 4 treasures | ||
 Paper Macho Chain Chomp |
Within the quarters of the Koopa Troopas, this chest is found on the left bed, presumably belonging to green Koopa Troopa. | 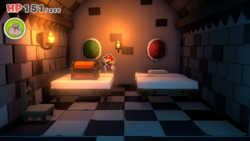
|
 Paper Macho Piranha Plant |
Within the quarters of the Spikes, this chest is found on the ground. However, the treasure is not inside the chest but behind it and the chest itself is a trap (opening it means being attacked by Origami Spikes). | 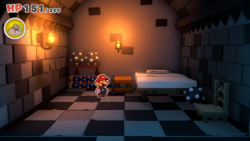
|
 Cutout Soldiers |
Within the airship hangar found in the west side of Bowser's Castle, right of the pile of crates. | 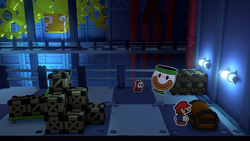
|
 Bowser's Airship |
Required: Navigate Hotfoot Crater Mario has to talk to lone Shy Guy in the hangar. |
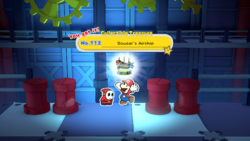
|
? Blocks[edit]
| Hidden | Item | Description | Image |
|---|---|---|---|
| 7 blocks | |||
Legendary Boots Legendary Hammer |
At either backwall corner in the mess hall is a ? Block containing a legendary weapon. | 
| |
Flashy Mushroom |
A ? Block can be found to the right of a table on the elevated section of the mess hall. | 
| |
Legendary Iron Boots |
On the opposite side of the table from the previous ? Block is a Hidden Block above a white tile. | 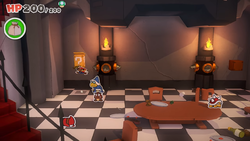
| |
Legendary Iron Boots |
A ? Block can be found above a Not-Bottomless Hole on the other side of a collapsed pillar, in the room leading to enemy quarters. | 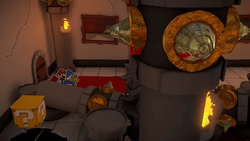
| |
Shiny Hurlhammer |
Within the quarters of the Hammer Bros. there is a Hidden Block, indicated by a red panel visible when peering through a window in the hallway. | 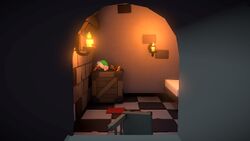
| |
Coin Bag |
Within the airship hangar found in the west side of Bowser's Castle, there is a ? Block floating above a pile of crates. | 
| |
Gallery[edit]
Assembled paper craft of Bowser's Castle included in the Vic Tokai plush set for Super Mario World
Baby Bowser's bedroom in Super Mario World 2: Yoshi's Island
A Guard Door in Bowser's Castle in Paper Mario
The Storehouse, the shop in Bowser's Castle in Paper Mario
The interior of Bowser's Castle in Mario & Luigi: Superstar Saga
Bowser's Castle about to collapse on Bowser and the Koopalings in the ending of New Super Mario Bros. Wii
Bowser's Castle in World 6 as seen in New Super Mario Bros. 2
Bowser's Sky Castle in Super Smash Bros. for Nintendo 3DS
The exterior of Bowser's Castle in Mario Tennis Aces
Webpage banner of Super Nintendo World
Media[edit]
| File info 0:30 |
| File info 0:30 |
| File info 0:30 |
Names in other languages[edit]
| Language | Name | Meaning | Notes |
|---|---|---|---|
| Japanese | クッパ Kuppa Jō |
Bowser's Castle | |
| Chinese (simplified) | 酷霸王城堡[?] Kùbàwáng Chéngbǎo |
Bowser Castle | |
| 酷霸城堡[?] Kùbà Chéngbǎo |
Super Mario RPG | ||
| Chinese (traditional) | 庫巴城堡[?] Kùbā Chéngbǎo |
Bowser Castle | |
| Croatian | Dvorac Koopa[5] | Castle Koopa | The Adventures of Super Mario Bros. 3 |
| Danish | Koopa-Slot[6] | Castle Koopa | The Adventures of Super Mario Bros. 3 |
| Dutch | Bowsers Kasteel[?] | Bowser's Castle | |
| Kasteel Koopa[7] | Castle Koopa | The Adventures of Super Mario Bros. 3 | |
| Finnish | Koopa-Linna[8] | Castle Koopa | The Adventures of Super Mario Bros. 3 |
| French | Château de Bowser[?] | Bowser's Castle | |
| German | Bowsers Festung[?] | Bowser's Fortress | |
| Schloss Koopa[9] | Castle Koopa | The Adventures of Super Mario Bros. 3 | |
| Greek | Κάστρο Κούπα[10] Kástro Koúpa |
Castle Koopa | |
| Italian | Castello di Bowser[?] | Bowser's Castle | |
| Castello di Attila[11] | Koopa's Castle | The Adventures of Super Mario Bros. 3 | |
| Castilo al Neon di Attila[12] | Koopa's Neon Castle | Super Mario World television series | |
| Korean | 쿠파 성[?] Kupa Seong |
Bowser Castle | |
| Norwegian | Koopa-Slott[13] | Castle Koopa | The Adventures of Super Mario Bros. 3 |
| Polish | Zamek Koopa[14] | Castle Koopa | The Adventures of Super Mario Bros. 3 |
| Portuguese | Castelo do Bowser[?] | Bowser's Castle | |
| Castilo Koopa[15] | Castle Koopa | The Adventures of Super Mario Bros. 3 | |
| Castilo Néon do Koopa[16] | Koopa's Neon Castle | Super Mario World television series | |
| Romanian | Castelul Koopa[17] | Castle Koopa | The Adventures of Super Mario Bros. 3 |
| Palatul disco de pe Coney Island[18] | The Disco Palace on Coney Island | Super Mario World television series, referred to as such by Mario in "Mama Luigi" | |
| Castelul de Neon al Regelui Koopa[18] | King Koopa's Neon Castle | Super Mario World television series, referred to as such by Luigi in "Mama Luigi" | |
| Russian | Замок Боузера[?] Zamok Bouzera |
Bowser's Castle | |
| Замок Купы[19] Zamok Kupy |
Koopa Castle | The Adventures of Super Mario Bros. 3 | |
| Spanish | Castillo de Bowser[?] | Bowser's Castle | |
| Castillo Koopa[20] | Castle Koopa | The Adventures of Super Mario Bros. 3 | |
| Koopa Castillo de Neón[21] | Neon Koopa Castle | Super Mario World animated series | |
| Swedish | Koopa-Slott[22] | Castle Koopa | The Adventures of Super Mario Bros. 3 |
Trivia[edit]
- In both Nintendo Comics System and Nintendo Adventure Books, Bowser's Castle was infrequently seen and was shown to have a labyrinth like construction, possessing various passages, bridges and doorways.
- In Mario Golf: Toadstool Tour, a course known as the Bowser Badlands is located near Bowser's Castle.
- According to an article on Movoto.com, a real-life version of Bowser's Castle based on its appearance in Super Mario Bros. 3 would be 212 stories high, 52 stories taller than the tallest building in the world, the Burj Khalifa. However, due to the assumption that the castle should be merely 60 inches wide, it would cost only $455,000.[23]
- In Paper Mario: The Thousand-Year Door, Bowser can find an unseen item by checking one of the Bowser statues. A similar occurrence also happens with the bushes in Twilight Town.
Interwiki links[edit]
- Baby Bowser's Castle — de:Baby Bowsers Festung — it:Castello di Bowser (passato)
References[edit]
- ^ Kanmuri, Yukari Tasai, Rachel Roberts, and Jenny Blenk, editors (November 5, 2019). The Art of Super Mario Odyssey (First English Edition). Milwaukie: Dark Horse Books (American English). ISBN 978-1-50671-375-5. Page 263.
- ^ Super Mario Bros. Wonder trading cards
- ^ "Leveling Up: Making The Super Mario Bros. Movie" bonus feature subtitles
- ^ File:TSMBM Bowser Island Castle Toy.jpg
- ^ Super Mario Bros 3 - Epizoda 2 - Gmizavci u vrtu ruža
- ^ Super Mario Bros. 3 Never Koop a koopa (Dansk)
- ^ The Adventures of Super Mario Bros. 3 Dutch Dub - Bedonder nooit een Koopa DVD (Part 1)
- ^ The Adventures of Super Mario Bros. 3 | Episode 01-08 In Finnish [2013 DVD Version]
- ^ Die Abenteuer von Super Mario Bros. 3 - Ninja Koopas
- ^ The Adventures of Super Mario Bros 3 Greek [Επεισόδια 1-2]
- ^ Le avventure di Super Mario 2x02 - Rettili alla Casa Bianca
- ^ Le avventure di Super Mario - Episodio 3 - Manda dentro il clown
- ^ Super Mario Bros 3 VHS#1 - Norsk tale
- ^ Nowe Przygody Braci Mario Odcinek 02 - Gady w ogrodzie dobra i zła
- ^ Super Mario Bros. 3 - Répteis Ameaçam a Casa Branca (Dublagem Herbert Richers)
- ^ Super Mario World - Que Venha o Palhaço (Dublado)
- ^ KidsCo TV (January 28, 2018). Aventurile Fraților Super Mario | Episodul2 - Reptile în Grădina cu Trandafiri. YouTube. Retrieved May 19, 2019.
- ^ a b May 20, 2015. "Mama Luigi", dubbed in Romanian by KidsCo. Odnoklassniki (OK.ru). Retrieved January 4, 2016.
- ^ Приключения братьев Супер Марио 3 (все серии) (6+)
- ^ Las Aventuras de los Super hermanos Mario: 01 - Reptiles En El Jardin De Las Rosas
- ^ Super Mario World (Cap.1 - La venta de fuego) español
- ^ The Adventures of Super Mario Bros 3 - Episode 2 - Swedish
- ^ Movoto: Real-Life Bowser’s Castle: Jump on this Deal Before Mario Does. Movoto. Retrieved February 9, 2015.[dead link]
- Bowser's castles
- Volcanic areas
- Homes
- Levels
- Race courses
- Amiibo tap: Nintendo's Greatest Bits
- Mario & Luigi: Bowser's Inside Story bosses
- Mario & Luigi: Bowser's Inside Story locations
- Mario & Luigi: Partners in Time locations
- Mario & Luigi: Superstar Saga locations
- Mario & Luigi: Brothership locations
- Mario & Sonic at the Olympic Winter Games
- Mario & Sonic at the Rio 2016 Olympic Games
- Mario & Sonic at the Sochi 2014 Olympic Winter Games
- Mario Hoops 3-on-3
- Mario is Missing! locations
- Mario Pinball Land locations
- Mario Power Tennis
- Mario Tennis Open
- Mario Sports Mix
- Mario's Time Machine locations
- New Super Luigi U
- New Super Mario Bros.
- New Super Mario Bros. 2
- New Super Mario Bros. U
- New Super Mario Bros. Wii
- Paper Mario locations
- Paper Mario: The Thousand-Year Door locations
- Super Mario 3D Land
- Super Mario 3D World
- Super Mario Bros.
- Super Mario Bros. 3
- Super Mario Bros.: The Lost Levels
- Super Mario RPG: Legend of the Seven Stars locations
- Super Mario World
- Super Mario World (television series)
- Super Mario World 2: Yoshi's Island
- Super Paper Mario locations
- The Adventures of Super Mario Bros. 3 locations
- The Super Mario Bros. Movie locations
- The Super Mario Bros. Super Show! locations
- Yoshi's Island DS
- Yoshi's Island: Super Mario Advance 3
