|
|
| (5 intermediate revisions by 4 users not shown) |
| Line 25: |
Line 25: |
|
| |
|
| =====Appearances===== | | =====Appearances===== |
| <div class="contentbox mw-collapsible mw-collapsed"data-expandtext="Show appearances"data-collapsetext="appearances"> | | <div class="contentbox mw-collapsible mw-collapsed"data-expandtext="Show appearances"data-collapsetext="Hide appearances"> |
| '''Note:''' [[File:SMG Asset Sprite Star Cursor.png]] marks missions where they are absent.
| | *[[File:SMG Asset Sprite Star Cursor.png]] marks missions where they are completely absent. |
| {|class="wikitable sortable" style="text-align:center" | | *[[File:Galaxy StarP.png]] marks missions where they are loaded and may be visible, but cannot be encountered directly. |
| | {|class="wikitable" style="text-align:center" |
| |-style="color:white;background:red" | | |-style="color:white;background:red" |
| !colspan=3|'''Normal''' | | !colspan=9|'''Normal''' |
| |-style="color:white;background:red" | | |-style="color:white;background:red" |
| !Domes | | !Domes |
| !Galaxies | | !Galaxies |
| !Missions | | !colspan=7|Missions |
| |- | | |- |
| |rowspan=2|[[Terrace (Super Mario Galaxy)|Terrace]] | | |rowspan=2|[[Terrace (Super Mario Galaxy)|Terrace]] |
| |[[Good Egg Galaxy]] | | |[[Good Egg Galaxy]] |
| |style="text-align:left"|[[File:Smg icon powerstar.png|link=Dino Piranha (mission)]][[File:Smg icon powerstar.png|link=A Snack of Cosmic Proportions]][[File:SMG Asset Sprite Star Cursor.png|link=King Kaliente's Battle Fleet]][[File:SMG Asset Sprite Star Cursor.png|link=Dino Piranha Speed Run]][[File:Smg icon purplecomet.png|link=Purple Coin Omelet]][[File:SMG Asset Sprite Star Cursor.png|link=Luigi on the Roof]]
| | |[[File:Smg icon powerstar.png|link=Dino Piranha (mission)]]||[[File:Smg icon powerstar.png|link=A Snack of Cosmic Proportions]]||[[File:SMG Asset Sprite Star Cursor.png|link=King Kaliente's Battle Fleet]]||[[File:SMG Asset Sprite Star Cursor.png|link=Dino Piranha Speed Run]]||[[File:Smg icon purplecomet.png|link=Purple Coin Omelet]]||[[File:SMG Asset Sprite Star Cursor.png|link=Luigi on the Roof]] |
| |- | | |- |
| |[[Honeyhive Galaxy]] | | |[[Honeyhive Galaxy]] |
| |style="text-align:left"|[[File:Smg icon powerstar.png|link=Bee Mario Takes Flight]][[File:Smg icon powerstar.png|link=Trouble on the Tower]][[File:Smg icon powerstar.png|link=Big Bad Bugaboom]][[File:SMG Asset Sprite Star Cursor.png|link=Honeyhive Cosmic Mario Race]][[File:SMG Asset Sprite Star Cursor.png|link=The Honeyhive's Purple Coins]][[File:Smg icon powerstar.png|link=Luigi in the Honeyhive Kingdom]]
| | |[[File:Smg icon powerstar.png|link=Bee Mario Takes Flight]]||[[File:Smg icon powerstar.png|link=Trouble on the Tower]]||[[File:Smg icon powerstar.png|link=Big Bad Bugaboom]]||[[File:Galaxy StarP.png|link=Honeyhive Cosmic Mario Race]]||[[File:Galaxy StarP.png|link=The Honeyhive's Purple Coins]]||[[File:Smg icon powerstar.png|link=Luigi in the Honeyhive Kingdom]] |
| |- | | |- |
| |rowspan=3|[[Bedroom (Super Mario Galaxy)|Bedroom]] | | |rowspan=3|[[Bedroom (Super Mario Galaxy)|Bedroom]] |
| |[[Gusty Garden Galaxy]] | | |[[Gusty Garden Galaxy]] |
| |style="text-align:left"|[[File:SMG Asset Sprite Star Cursor.png|link=Bunnies in the Wind]][[File:Smg icon powerstar.png|link=The Dirty Tricks of Major Burrows]][[File:Smg icon powerstar.png|link=Gusty Garden's Gravity Scramble]][[File:SMG Asset Sprite Star Cursor.png|link=Major Burrows's Daredevil Run]][[File:SMG Asset Sprite Star Cursor.png|link=Purple Coins on the Puzzle Cube]][[File:Smg icon powerstar.png|link=The Golden Chomp]]
| | |[[File:SMG Asset Sprite Star Cursor.png|link=Bunnies in the Wind]]||[[File:Smg icon powerstar.png|link=The Dirty Tricks of Major Burrows]]||[[File:Smg icon powerstar.png|link=Gusty Garden's Gravity Scramble]]||[[File:SMG Asset Sprite Star Cursor.png|link=Major Burrows's Daredevil Run]]||[[File:SMG Asset Sprite Star Cursor.png|link=Purple Coins on the Puzzle Cube]]||[[File:Smg icon powerstar.png|link=The Golden Chomp]] |
| |- | | |- |
| |[[Freezeflame Galaxy]] | | |[[Freezeflame Galaxy]] |
| |style="text-align:left"|[[File:Smg icon powerstar.png|link=The Frozen Peak of Baron Brrr]][[File:Smg icon powerstar.png|link=Freezeflame's Blistering Core]][[File:SMG Asset Sprite Star Cursor.png|link=Hot and Cold Collide]][[File:SMG Asset Sprite Star Cursor.png|link=Frosty Cosmic Mario Race]][[File:SMG Asset Sprite Star Cursor.png|link=Purple Coins on the Summit]][[File:Smg icon powerstar.png|link=Conquering the Summit]]
| | |[[File:Smg icon powerstar.png|link=The Frozen Peak of Baron Brrr]]||[[File:Smg icon powerstar.png|link=Freezeflame's Blistering Core]]||[[File:SMG Asset Sprite Star Cursor.png|link=Hot and Cold Collide]]||[[File:SMG Asset Sprite Star Cursor.png|link=Frosty Cosmic Mario Race]]||[[File:SMG Asset Sprite Star Cursor.png|link=Purple Coins on the Summit]]||[[File:Smg icon powerstar.png|link=Conquering the Summit]] |
| |- | | |- |
| |[[Dusty Dune Galaxy]] | | |[[Dusty Dune Galaxy]] |
| |style="text-align:left"|[[File:SMG Asset Sprite Star Cursor.png|link=Soaring on the Desert Winds]][[File:Smg icon powerstar.png|link=Blasting through the Sand]][[File:SMG Asset Sprite Star Cursor.png|link=Sunbaked Sand Castle]][[File:Smg icon powerstar.png|link=Sandblast Speed Run]][[File:SMG Asset Sprite Star Cursor.png|link=Purple Coins in the Desert]][[File:SMG Asset Sprite Star Cursor.png|link=Bullet Bill on Your Back]][[File:SMG Asset Sprite Star Cursor.png|link=Treasure of the Pyramid]]
| | |[[File:SMG Asset Sprite Star Cursor.png|link=Soaring on the Desert Winds]]||[[File:Smg icon powerstar.png|link=Blasting through the Sand]]||[[File:SMG Asset Sprite Star Cursor.png|link=Sunbaked Sand Castle]]||[[File:Smg icon powerstar.png|link=Sandblast Speed Run]]||[[File:SMG Asset Sprite Star Cursor.png|link=Purple Coins in the Desert]]||[[File:SMG Asset Sprite Star Cursor.png|link=Bullet Bill on Your Back]]||[[File:Smg icon greenstar.png|link=Treasure of the Pyramid]] |
| |- | | |- |
| |[[Engine Room]] | | |[[Engine Room]] |
| |[[Gold Leaf Galaxy]] | | |[[Gold Leaf Galaxy]] |
| |style="text-align:left"|[[File:SMG Asset Sprite Star Cursor.png|link=Star Bunnies on the Hunt]][[File:Smg icon powerstar.png|link=Cataquack to the Skies]][[File:SMG Asset Sprite Star Cursor.png|link=When It Rains, It Pours]][[File:SMG Asset Sprite Star Cursor.png|link=Cosmic Mario Forest Race]][[File:SMG Asset Sprite Star Cursor.png|link=Purple Coins in the Woods]][[File:Smg icon powerstar.png|link=The Bell on the Big Tree]]
| | |[[File:Galaxy StarP.png|link=Star Bunnies on the Hunt]]||[[File:Smg icon powerstar.png|link=Cataquack to the Skies]]||[[File:Galaxy StarP.png|link=When It Rains, It Pours]]||[[File:Galaxy StarP.png|link=Cosmic Mario Forest Race]]||[[File:Galaxy StarP.png|link=Purple Coins in the Woods]]||[[File:Smg icon powerstar.png|link=The Bell on the Big Tree]] |
| |- | | |- |
| |-style="color:white;background:red" | | |-style="color:white;background:red" |
| !colspan=3|'''Small''' | | !colspan=9|'''Small''' |
| |-style="color:white;background:red" | | |-style="color:white;background:red" |
| !Domes | | !Domes |
| !Galaxies | | !Galaxies |
| !Missions | | !colspan=7|Missions |
| |- | | |- |
| |[[Terrace (Super Mario Galaxy)|Terrace]] | | |[[Terrace (Super Mario Galaxy)|Terrace]] |
| |[[Honeyhive Galaxy]] | | |[[Honeyhive Galaxy]] |
| |style="text-align:left"|[[File:SMG Asset Sprite Star Cursor.png|link=Bee Mario Takes Flight]][[File:Smg icon powerstar.png|link=Trouble on the Tower]][[File:SMG Asset Sprite Star Cursor.png|link=Big Bad Bugaboom]][[File:SMG Asset Sprite Star Cursor.png|link=Honeyhive Cosmic Mario Race]][[File:Smg icon purplecomet.png|link=The Honeyhive's Purple Coins]][[File:SMG Asset Sprite Star Cursor.png|link=Luigi in the Honeyhive Kingdom]]
| | |[[File:SMG Asset Sprite Star Cursor.png|link=Bee Mario Takes Flight]]||[[File:Smg icon powerstar.png|link=Trouble on the Tower]]||[[File:SMG Asset Sprite Star Cursor.png|link=Big Bad Bugaboom]]||[[File:SMG Asset Sprite Star Cursor.png|link=Honeyhive Cosmic Mario Race]]||[[File:Smg icon purplecomet.png|link=The Honeyhive's Purple Coins]]||[[File:SMG Asset Sprite Star Cursor.png|link=Luigi in the Honeyhive Kingdom]] |
| |- | | |- |
| |[[Engine Room]] | | |[[Engine Room]] |
| |[[Gold Leaf Galaxy]] | | |[[Gold Leaf Galaxy]] |
| |style="text-align:left"|[[File:Smg icon powerstar.png|link=Star Bunnies on the Hunt]][[File:Smg icon powerstar.png|link=Cataquack to the Skies]][[File:SMG Asset Sprite Star Cursor.png|link=When It Rains, It Pours]][[File:SMG Asset Sprite Star Cursor.png|link=Cosmic Mario Forest Race]][[File:SMG Asset Sprite Star Cursor.png|link=Purple Coins in the Woods]][[File:Smg icon powerstar.png|link=The Bell on the Big Tree]]
| | |[[File:Smg icon powerstar.png|link=Star Bunnies on the Hunt]]||[[File:Smg icon powerstar.png|link=Cataquack to the Skies]]||[[File:SMG Asset Sprite Star Cursor.png|link=When It Rains, It Pours]]||[[File:SMG Asset Sprite Star Cursor.png|link=Cosmic Mario Forest Race]]||[[File:SMG Asset Sprite Star Cursor.png|link=Purple Coins in the Woods]]||[[File:Smg icon powerstar.png|link=The Bell on the Big Tree]] |
| |- | | |- |
| |[[Garden (Super Mario Galaxy)|Garden]] | | |[[Garden (Super Mario Galaxy)|Garden]] |
| |[[Melty Molten Galaxy]] | | |[[Melty Molten Galaxy]] |
| |style="text-align:left"|[[File:Smg icon powerstar.png|link=The Sinking Lava Spire]][[File:SMG Asset Sprite Star Cursor.png|link=Through the Meteor Storm]][[File:SMG Asset Sprite Star Cursor.png|link=Fiery Dino Piranha]][[File:Smg icon powerstar.png|link=Lava Spire Daredevil Run]][[File:SMG Asset Sprite Star Cursor.png|link=Red-Hot Purple Coins]][[File:SMG Asset Sprite Star Cursor.png|link=Burning Tide]]
| | |[[File:Smg icon powerstar.png|link=The Sinking Lava Spire]]||[[File:SMG Asset Sprite Star Cursor.png|link=Through the Meteor Storm]]||[[File:SMG Asset Sprite Star Cursor.png|link=Fiery Dino Piranha]]||[[File:Smg icon powerstar.png|link=Lava Spire Daredevil Run]]||[[File:SMG Asset Sprite Star Cursor.png|link=Red-Hot Purple Coins]]||[[File:SMG Asset Sprite Star Cursor.png|link=Burning Tide]] |
| |- | | |- |
| |-style="color:white;background:red" | | |-style="color:white;background:red" |
| !colspan=3|'''Big''' | | !colspan=9|'''Big''' |
| |-style="color:white;background:red" | | |-style="color:white;background:red" |
| !Domes | | !Domes |
| !Galaxies | | !Galaxies |
| !Missions | | !colspan=7|Missions |
| |- | | |- |
| |[[Bedroom (Super Mario Galaxy)|Bedroom]] | | |[[Bedroom (Super Mario Galaxy)|Bedroom]] |
| |[[Dusty Dune Galaxy]] | | |[[Dusty Dune Galaxy]] |
| |style="text-align:left"|[[File:Smg icon powerstar.png|link=Soaring on the Desert Winds]][[File:SMG Asset Sprite Star Cursor.png|link=Blasting through the Sand]][[File:SMG Asset Sprite Star Cursor.png|link=Sunbaked Sand Castle]][[File:SMG Asset Sprite Star Cursor.png|link=Sandblast Speed Run]][[File:SMG Asset Sprite Star Cursor.png|link=Purple Coins in the Desert]][[File:SMG Asset Sprite Star Cursor.png|link=Bullet Bill on Your Back]][[File:SMG Asset Sprite Star Cursor.png|link=Treasure of the Pyramid]]
| | |[[File:Smg icon powerstar.png|link=Soaring on the Desert Winds]]||[[File:SMG Asset Sprite Star Cursor.png|link=Blasting through the Sand]]||[[File:SMG Asset Sprite Star Cursor.png|link=Sunbaked Sand Castle]]||[[File:SMG Asset Sprite Star Cursor.png|link=Sandblast Speed Run]]||[[File:SMG Asset Sprite Star Cursor.png|link=Purple Coins in the Desert]]||[[File:SMG Asset Sprite Star Cursor.png|link=Bullet Bill on Your Back]]||[[File:SMG Asset Sprite Star Cursor.png|link=Treasure of the Pyramid]] |
| |} | | |} |
| </div> | | </div> |
| Line 92: |
Line 93: |
|
| |
|
| =====Appearances===== | | =====Appearances===== |
| <div class="contentbox mw-collapsible mw-collapsed"data-expandtext="Show appearances"data-collapsetext="appearances"> | | <div class="contentbox mw-collapsible mw-collapsed"data-expandtext="Show appearances"data-collapsetext="Hide appearances"> |
| '''Note:''' [[File:SMG Asset Sprite Star Cursor.png]] marks missions where they are absent.
| | *[[File:SMG Asset Sprite Star Cursor.png]] marks missions where they are completely absent. |
| {|class="wikitable sortable" style="text-align:center" | | *[[File:Galaxy StarP.png]] marks missions where they are loaded and may be visible, but cannot be encountered directly. |
| | {|class="wikitable" style="text-align:center" |
| |-style="color:white;background:red" | | |-style="color:white;background:red" |
| !Worlds | | !Worlds |
| !Galaxies | | !Galaxies |
| !Missions | | !colspan=3|Missions |
| |- | | |- |
| |rowspan=3|[[World 2 (Super Mario Galaxy 2)|World 2]]
| | |[[World 2 (Super Mario Galaxy 2)|World 2]] |
| |[[Boulder Bowl Galaxy]] | | |[[Boulder Bowl Galaxy]] |
| |style="text-align:left"|[[File:Smg2 icon powerstar.png|link=Rock and Rollodillo]][[File:Smg2 icon powerstar.png|link=C'mere, Goomba]][[File:SMG Asset Sprite Star Cursor.png|link=Rolling Crabber Romp]]
| | |[[File:Smg2 icon powerstar.png|link=Rock and Rollodillo]]||[[File:Smg2 icon powerstar.png|link=C'mere, Goomba]]||[[File:Galaxy StarP.png|link=Rolling Crabber Romp]] |
| |} | | |} |
| </div> | | </div> |
| Line 111: |
Line 113: |
| ====''Super Mario Odyssey''==== | | ====''Super Mario Odyssey''==== |
| [[File:Boulder SMO.png|thumb|left|A boulder captured by Mario in ''Super Mario Odyssey'']] | | [[File:Boulder SMO.png|thumb|left|A boulder captured by Mario in ''Super Mario Odyssey'']] |
| Boulders in ''[[Super Mario Odyssey]]'' have various roles. One specific boulder that takes the form of a large, oblong rock is found in front of a tree in the [[Deep Woods]] in the [[Wooded Kingdom]] and can be [[capture]]d, which allows it to be moved to reveal a tunnel containing a [[Power Moon]]. Many rolling boulders also appear in the [[Underground Moon Caverns]] in the [[Moon Kingdom]] and in the segment where Mario captures Bowser in the cave on the [[Darker Side]] of the [[moon]]. These round boulders can be destroyed by ramming into them as a [[Chargin' Chuck]] or by clawing them as Bowser, and may produce a [[heart (item)|heart]] in the latter case. Additionally, during the first battle against Bowser in the [[Cloud Kingdom]], Bowser occasionally attacks Mario by throwing brick-like boulders at him (the second battle in the Moon Kingdom replaces the brick boulders with burning Bowser shells), and many boulders fall down at the end of the game when Mario captures Bowser in the Moon Kingdom as the caves collapse, serving as obstacles, with yellow markers appearing where they are set to land. | | Boulders in ''[[Super Mario Odyssey]]'' have various roles. One specific boulder that takes the form of a large, oblong rock is found in front of a tree in the [[Deep Woods]] in the [[Wooded Kingdom]] and can be [[capture]]d, which allows it to be moved to reveal a tunnel containing a set of [[regional coin]]s. Many rolling boulders also appear in the [[Underground Moon Caverns]] in the [[Moon Kingdom]] and in the segment where Mario captures Bowser in the cave on the [[Darker Side]] of the [[moon]]. These round boulders can be destroyed by ramming into them as a [[Chargin' Chuck]] or by clawing them as Bowser, and may produce a [[heart (item)|heart]] in the latter case. Additionally, during the first battle against Bowser in the [[Cloud Kingdom]], Bowser occasionally attacks Mario by throwing brick-like boulders at him (the second battle in the Moon Kingdom replaces the brick boulders with burning Bowser shells), and many boulders fall down at the end of the game when Mario captures Bowser in the Moon Kingdom as the caves collapse, serving as obstacles, with yellow markers appearing where they are set to land. |
|
| |
|
| ===''Donkey Kong Land''=== | | ===''Donkey Kong Land''=== |
| Line 206: |
Line 208: |
| ===Boulder=== | | ===Boulder=== |
| {{foreign names | | {{foreign names |
| |Jap=ゴロゴロ岩 | | |Jpn=ゴロゴロ岩 |
| |JapC=<ref>{{cite|author=Sakai, Kazuya (Ambit), kikai, Akinori Sao, Junko Fukuda, Kunio Takayama, and Ko Nakahara (Shogakukan), editors|title="Super Mario 64."『[[Super Mario Bros. Encyclopedia|スーパーマリオブラザーズ百科: 任天堂公式ガイドブック]]』|language=ja|location=Tokyo|publisher=Shogakukan|date=2015|page=92}}</ref><ref>{{cite|author=[[Nintendo|Nintendo Co., Ltd]]|title=スーパーマリオギャラクシー|url=www.nintendo.com/jp/character/mario/history/galaxy/index.html|publisher=Mario Portal|language=ja|accessdate= 7 Mar. 2024}}</ref><ref>{{cite|author=Nintendo Co., Ltd|title=スーパーマリオギャラクシー2|url=www.nintendo.com/jp/character/mario/history/galaxy2/index.html|publisher=Mario Portal|language=ja|accessdate= 7 Mar. 2024}}</ref> | | |JpnC=<ref>{{cite|author=Sakai, Kazuya (Ambit), kikai, Akinori Sao, Junko Fukuda, Kunio Takayama, and Ko Nakahara (Shogakukan), editors|title="Super Mario 64."『[[Super Mario Bros. Encyclopedia|スーパーマリオブラザーズ百科: 任天堂公式ガイドブック]]』|language=ja|location=Tokyo|publisher=Shogakukan|date=2015|page=92}}</ref><ref>{{cite|author=[[Nintendo|Nintendo Co., Ltd]]|title=スーパーマリオギャラクシー|url=www.nintendo.com/jp/character/mario/history/galaxy/index.html|publisher=Mario Portal|language=ja|accessdate= 7 Mar. 2024}}</ref><ref>{{cite|author=Nintendo Co., Ltd|title=スーパーマリオギャラクシー2|url=www.nintendo.com/jp/character/mario/history/galaxy2/index.html|publisher=Mario Portal|language=ja|accessdate= 7 Mar. 2024}}</ref> |
| |JapR=Gorogoro Iwa | | |JpnR=Gorogoro Iwa |
| |JapM=Rolling Rock | | |JpnM=Rolling Rock |
| |Jap2=ゴロゴロいわ | | |Jpn2=ゴロゴロいわ |
| |Jap2R=Gorogoro Iwa | | |Jpn2R=Gorogoro Iwa |
| |Jap2M=Rolling Rock | | |Jpn2M=Rolling Rock |
| |Jap2N=''Super Mario 64'' | | |Jpn2N=''Super Mario 64'' |
| |Jap3={{ruby|落石|らくせき}} | | |Jpn3={{ruby|落石|らくせき}} |
| |Jap3C=<ref>{{cite|url=m1.nintendo.net/docvc/NUS/JPN/NKTJ/NKTJ_J.pdf|title=マリオカート{{ruby|64|六十四}} (''Mario Kāto Rokujūyon'') instruction booklet|format=PDF|page=29|date=1996|language=ja|publisher=Nintendo}}</ref> | | |Jpn3C=<ref>{{cite|url=m1.nintendo.net/docvc/NUS/JPN/NKTJ/NKTJ_J.pdf|title=マリオカート{{ruby|64|六十四}} (''Mario Kāto Rokujūyon'') instruction booklet|format=PDF|page=29|date=1996|language=ja|publisher=Nintendo}}</ref> |
| |Jap3R=Rakuseki | | |Jpn3R=Rakuseki |
| |Jap3M=Rockfall | | |Jpn3M=Rockfall |
| |Jap3N=''Mario Kart 64'' | | |Jpn3N=''Mario Kart 64'' |
| |Jap4=ころがり岩 | | |Jpn4=ころがり岩 |
| |Jap4C=<ref>{{cite|title=「ヨッシーの万有引力任天堂公式ガイドブック」 (''Yoshi Banyū Inryoku Nintendo Kōshiki Guidebook'')|page={{file link|YUG Shogakukan P21.jpg|21}}|language=ja|publisher=Shogakukan}}</ref> | | |Jpn4C=<ref>{{cite|title=「ヨッシーの万有引力任天堂公式ガイドブック」 (''Yoshi Banyū Inryoku Nintendo Kōshiki Guidebook'')|page={{file link|YUG Shogakukan P21.jpg|21}}|language=ja|publisher=Shogakukan}}</ref> |
| |Jap4R=Korogari Iwa | | |Jpn4R=Korogari Iwa |
| |Jap4M=Rolling Rock | | |Jpn4M=Rolling Rock |
| |Jap4N=''Yoshi Topsy-Turvy'' | | |Jpn4N=''Yoshi Topsy-Turvy'' |
| |Jap5={{ruby|大岩|おおいわ}} | | |Jpn5={{ruby|大岩|おおいわ}} |
| |Jap5C=<ref>{{cite|title=ドンキーコング ジャングルクライマー (''Donkī Kongu Janguru Kuraimā'') instruction booklet|page=19|date=2007|publisher=Nintendo}}</ref> | | |Jpn5C=<ref>{{cite|title=ドンキーコング ジャングルクライマー (''Donkī Kongu Janguru Kuraimā'') instruction booklet|page=19|date=2007|publisher=Nintendo}}</ref> |
| |Jap5R=Ō Iwa | | |Jpn5R=Ō Iwa |
| |Jap5M=Big Rock | | |Jpn5M=Big Rock |
| |Jap5N=''Donkey Kong: Jungle Climber'' | | |Jpn5N=''Donkey Kong: Jungle Climber'' |
| |Jap6=大岩 | | |Jpn6=大岩 |
| |Jap6C=<ref>{{cite|author=Sakai et al|title="New Super Mario Bros. 2."『スーパーマリオブラザーズ百科: 任天堂公式ガイドブック』|page=199}}</ref> | | |Jpn6C=<ref>{{cite|author=Sakai et al|title="New Super Mario Bros. 2."『スーパーマリオブラザーズ百科: 任天堂公式ガイドブック』|page=199}}</ref> |
| |Jap6R=Ō Iwa | | |Jpn6R=Ō Iwa |
| |Jap6M=Big Rock | | |Jpn6M=Big Rock |
| |Jap6N=''New Super Mario Bros. 2'' | | |Jpn6N=''New Super Mario Bros. 2'' |
| |Jap7={{ruby|岩|いわ}} | | |Jpn7={{ruby|岩|いわ}} |
| |Jap7R=Iwa | | |Jpn7R=Iwa |
| |Jap7M=Rock | | |Jpn7M=Rock |
| |Jap7N=''Super Mario Odyssey'', ''Mario Kart Tour'' | | |Jpn7N=''Super Mario Odyssey'', ''Mario Kart Tour'' |
| |Chi=岩石<ref name="MKT"/> | | |Chi=岩石<ref name="MKT"/> |
| |ChiR=Yánshí | | |ChiR=Yánshí |
| Line 292: |
Line 294: |
| ===Ruby Rock=== | | ===Ruby Rock=== |
| {{foreign names | | {{foreign names |
| |Jap=ゴロゴロ岩 | | |Jpn=ゴロゴロ岩 |
| |JapN=''Super Mario Galaxy'' | | |JpnN=''Super Mario Galaxy'' |
| |JapR=Gorogoro iwa | | |JpnR=Gorogoro iwa |
| |Jap2=でかゴロ岩 | | |Jpn2=でかゴロ岩 |
| |Jap2C=<ref>{{cite|author=Sakai et al|title="Super Mario Galaxy"『スーパーマリオブラザーズ百科: 任天堂公式ガイドブック』|page=127}}</ref> | | |Jpn2C=<ref>{{cite|author=Sakai et al|title="Super Mario Galaxy"『スーパーマリオブラザーズ百科: 任天堂公式ガイドブック』|page=127}}</ref> |
| |Jap2N=giant type, ''Super Mario Galaxy'' | | |Jpn2N=giant type, ''Super Mario Galaxy'' |
| |Jap2R=Dekagoro iwa | | |Jpn2R=Dekagoro iwa |
| |JapM=Rolling rock | | |JpnM=Rolling rock |
| |Jap2M=Big rolling rock | | |Jpn2M=Big rolling rock |
| |Ita=Massoruota | | |Ita=Massoruota |
| |ItaM=Rockwheel | | |ItaM=Rockwheel |
- This article is about actual boulders that have appeared in various media. For the special move that was seen in Super Mario RPG: Legend of the Seven Stars, see Boulder (move). For the recurring object also known as a rolling rock, see Wobble Rock.
- Not to be confused with Rock, Stone, or Brolder.
Boulders, also referred to as Rolling Boulders,[1] appear in the Super Mario franchise as obstacles that roll down areas, usually sloped ones, and are capable of harming the player characters.
History[edit]
Super Mario series[edit]
Super Mario World[edit]
Rocks[2] in Super Mario World are dug up by Diggin' Chucks to attack the player character.[2] Rocks continue bouncing in a direction, changing direction upon hitting a wall, but either Caped Mario's attack or lava can stop them.
Super Mario Land 2: 6 Golden Coins[edit]
Boulders in Super Mario Land 2: 6 Golden Coins are are dug up and kicked by Gorontos,[3] in the same manner as a Diggin' Chuck.
Super Mario 64 / Super Mario 64 DS[edit]

Appearance in
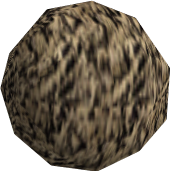
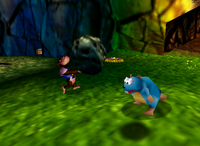
Super Mario 64Rolling rocks[4] are obstacles in Super Mario 64 and Super Mario 64 DS. An endless number of them roll down a corridor in a wide room of Hazy Maze Cave before falling into a pit.[5] Rolling rocks are featured in the mission Watch for Rolling Rocks, where the goal is to avoid them in a corridor and collect the Power Star nearby.[4] In Super Mario 64 DS, five rolling rocks have to be broken by Wario for the Power Star to appear instead.[6] The remake also covers the Power Star in Swimming Beast in the Cavern with a rock,[7] which is breakable by only Wario.
Super Mario Galaxy[edit]
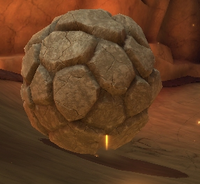
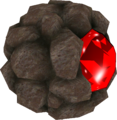
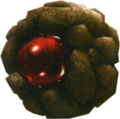
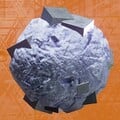
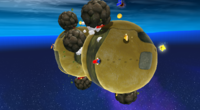
In Super Mario Galaxy, Ruby Rocks[8] and Big Ruby Rocks[8] roll on open or closed circuits, coming out infinitely out of tunnels in the former case and falling into an abyss afterwards. Ruby Rocks are somewhat common and appear in several galaxies, including the Good Egg Galaxy and the Honeyhive Galaxy. If Mario touches a Ruby Rock, it knocks him backward and takes away a wedge of his Health Meter, but hitting the red area of a Ruby Rock destroys it.[9] Boulders can also be destroyed if either Rainbow Mario collides with them, a rubbery bulb is knocked into them, or an improvised tactic of using a Star Pointer to hold a Ruby Rock in place so that a second Ruby Rock can collide with it, destroying both Ruby Rocks. Ruby Rocks have some subtle size differentiation in different levels, though one in the underground section of the Dusty Dune Galaxy is especially large. One of Bowser's attacks in the first part of his final battle involves surrounding himself with rock fragments and rolling around the planet much like a Ruby Rock in an attempt to squash Mario. Bowser's head sticks out of the rock in the same area where the red spot would be on an actual Ruby Rock. Mario must spin Bowser's head to break him out of his rock shell.
Appearances[edit]
 marks missions where they are completely absent.
 marks missions where they are loaded and may be visible, but cannot be encountered directly.
Super Mario Galaxy 2[edit]
In Super Mario Galaxy 2, Ruby Rocks[10] have a highly reduced role compared to the predecessor, only appearing in the Boulder Bowl Galaxy. They can be destroyed by Rock Mario, a form that gives Mario a similar shape to a Ruby Rock, except with his head poking out in place of the red spot. Rock Mario rolls around like a Ruby Rock, but with more movement control.
Appearances[edit]
 marks missions where they are completely absent.
 marks missions where they are loaded and may be visible, but cannot be encountered directly.
New Super Mario Bros. 2[edit]
Boulders appear in New Super Mario Bros. 2 as common obstacles in an underwater level, World 3-5. They are only way to obtain certain Star Coins that are enclosed in blocks.[11][12] Boulders can be destroyed using a Gold Flower[13] or invincibility.
Super Mario Odyssey[edit]

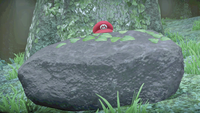
A boulder captured by Mario in
Super Mario OdysseyBoulders in Super Mario Odyssey have various roles. One specific boulder that takes the form of a large, oblong rock is found in front of a tree in the Deep Woods in the Wooded Kingdom and can be captured, which allows it to be moved to reveal a tunnel containing a set of regional coins. Many rolling boulders also appear in the Underground Moon Caverns in the Moon Kingdom and in the segment where Mario captures Bowser in the cave on the Darker Side of the moon. These round boulders can be destroyed by ramming into them as a Chargin' Chuck or by clawing them as Bowser, and may produce a heart in the latter case. Additionally, during the first battle against Bowser in the Cloud Kingdom, Bowser occasionally attacks Mario by throwing brick-like boulders at him (the second battle in the Moon Kingdom replaces the brick boulders with burning Bowser shells), and many boulders fall down at the end of the game when Mario captures Bowser in the Moon Kingdom as the caves collapse, serving as obstacles, with yellow markers appearing where they are set to land.
Donkey Kong Land[edit]
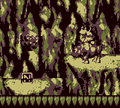
Boulders appear in Donkey Kong Land as indestructible obstacles in Mountain Mayhem and Landslide Leap. They down from above periodically and bounce briefly upon hitting a surface.[14] A boulder damages a Kong on contact.
Mario Kart series[edit]
Mario Kart 64[edit]
Boulders appear as obstacles at the Choco Mountain course in Mario Kart 64. They flatten player characters on contact.[15]
Mario Kart: Double Dash!![edit]
Boulders in Mario Kart: Double Dash!! are obstacles in DK Mountain. They function like in Mario Kart 64.
Mario Kart DS[edit]
Boulders in Mario Kart DS return as obstacles at N64 Choco Mountain. Similar large pinballs appear as obstacles in Waluigi Pinball.
Mario Kart Wii[edit]
Boulders in Mario Kart Wii retain their role in GCN DK Mountain.
Mario Kart 7[edit]
Mario Kart 7 also features boulders as obstacles, this time integrating them at Rock Rock Mountain and Maka Wuhu towards the end of the track. In this game and following Mario Kart games, boulders spin out racers on contact instead of flattening them.
Mario Kart 8 / Mario Kart 8 Deluxe[edit]
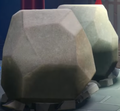
Rolling boulders are obstacles in the Bowser's Castle course of Mario Kart 8 and Mario Kart 8 Deluxe. In these games, their model is an altered version of Rock Mario's model from Super Mario Galaxy 2.[16] Millstones similar to boulders appear in Thwomp Ruins. Rolling boulders also appear in N64 Choco Mountain, 3DS Rock Rock Mountain, Tour Athens Dash, and GCN DK Mountain in the Mario Kart 8 Deluxe – Booster Course Pass DLC.
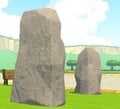
Tour Sydney Sprint features a type of boulder[17] that is stationary and has an elongated shape. Such boulders appear on the grassy, off-road portions of the Barangaroo Reserve segment. They slow down racers when driven into, but do not crash them like rolling rocks do. They can be launched into the air by hitting them with a Spiny Shell or a Super Horn, or by touching them while under the effects of a Bullet Bill or Super Star.
Mario Kart Tour[edit]
In Mario Kart Tour, rolling rocks[17] appear as obstacles at 3DS Rock Rock Mountain, N64 Choco Mountain, GCN DK Mountain and Athens Dash 2. The player can destroy a rolling rock and get bonus points in the process by hitting it with a Spiny Shell, Bowser's Shell, Bob-omb, Super Horn, Giga Bob-omb, or Super Bell, or by ramming into one while under the effects of a Frenzy, Mega Mushroom, Bullet Bill, or Super Star.
The boulders[17] seen in Mario Kart 8 Deluxe's rendition of Tour Sydney Sprint also appear in Mario Kart Tour on Sydney Sprint 3 and its variants. In this game, they can be launched into the air by almost the same means used to destroy rolling rocks, except with Bob-ombs, and they grant bonus points in the process.
Mario Party series[edit]
Boulders appear in some minigames in the Mario Party series. In Boulder Ball in Mario Party 3 and Mario Party Superstars, the solo player must use a machine to fling boulders at the team players to prevent them from reaching the top of a slope. In Granite Getaway in Mario Party 6, the players need to run away from a giant rolling boulder. In Rocky Road in Mario Party 6, Mario Party: The Top 100, and Mario Party Superstars, teams need to punch and kick boulders blocking the road to destroy them so they can reach the finish line. In Block and Roll in Mario Party 9, the rivals must roll boulders down to the solo player to prevent them from transporting three blocks from one side to the other.
Wario Land series[edit]
Wario Land II[edit]
In Wario Land II, boulders fall from holes in the walls of underground areas in Avoid the rocks! and The Final Battle!!. Large ones squash Wario into Flat Wario, but small ones can be held and thrown by him to defeat enemies or Enemy Blocks.
Wario Land 3[edit]
In Wario Land 3, boulders are small, lumpy objects appearing only in Above the Clouds, working as they did in Wario Land II.
Wario Land 4[edit]
In Wario Land 4, boulders are produced by Bowlers from the ground and are indestructible. Once created, they are tossed in the direction of Wario, rolling until hitting a wall or falling into lava. They damage Wario on contact. There are also small, holdable boulders that appear in several levels, working as in previous Wario Land games.
Wario Land: Shake It![edit]
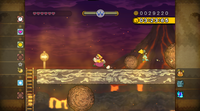
Boulders also appear in Wario Land: Shake It!, acting as obstacles in volcano-related courses. In Mt. Lava Lava, there are enormous boulders held in place either by Hard Blocks or Bomb Blocks. When Wario destroys these, the boulders immediately start chasing him down a path, destroying every enemy and block in its path. If a boulder catches up to Wario, he will remain stuck to its surface and move along with it until the boulder stops somewhere and flings Wario forward due to the momentum. In Sneak Peak, there are small boulders that can also pick up Wario as they roll, but can be jumped on to reach a higher area. They endlessly come out of openings in walls and roll on the ground until they fall into lava.
Donkey Kong 64[edit]
In Donkey Kong 64, boulders can be lifted by Chunky Kong only.[18][19] They are dark green objects that often sit on a pad or a floor switch, which are not usable until the boulder is lifted.
Donkey Kong Country series[edit]
Donkey Kong Country Barrel Maze[edit]
Boulders[20] appear in Donkey Kong Country Barrel Maze as obstacles. They stand still at first but start rolling towards the player's barrel when approached. They roll straight ahead until hitting a wall, a slope, or the playable barrel, at which point they break. If the playable barrel is hit by a boulder, it loses some energy. Boulders appear in most levels.
Donkey Kong Country Returns[edit]
Boulders in Donkey Kong Country Returns appear in varying sizes, and most are covered in spikes. They are encountered primarily in Boulder Roller.
Yoshi Topsy-Turvy[edit]
Boulders appear in Yoshi Topsy-Turvy as interactive objects that can be stood on by Yoshi. The player can tilt the Game Boy Advance to make the boulder to roll, defeating enemies along the way. Boulders have a few holes in them, comparable to a bowling ball.
Donkey Kong Jungle Beat[edit]
Rolling boulders appear as obstacles in Donkey Kong Jungle Beat. They are first encountered in Massive Canyon. Rolling boulders damage Donkey Kong on contact,[21] and can only be jumped over.[21]
Wario: Master of Disguise[edit]
Boulders in Wario: Master of Disguise are created by Poobah the Pharaoh from his nostrils as part of his first attack phase.[22] Boulders remain still for a moment when landing on the ground before rolling towards Wario, breaking when they hit a wall. They can hurt Wario if touched from the sides, but can be destroyed with a jump.
DK: Jungle Climber[edit]
Boulders[23] appear in DK: Jungle Climber. They first appear in Cool Cool Cave and appear in cave areas. Boulders have many pegs on them and are required to reach certain high areas, including Peg Boards and ledges. The boulder can be spun either left or right, depending on which side Donkey Kong is spinning from it.
Princess Peach: Showtime![edit]
Boulders appear obstacles in Princess Peach: Showtime! in the stage A Kung Fu Tale. They exist to block the paths and can only be destroyed by kung fu Theets or with Kung Fu Peach's moves.
Gallery[edit]
Names in other languages[edit]
Boulder[edit]
| Language
|
Name
|
Meaning
|
Notes
|
| Japanese
|
ゴロゴロ岩[24][25][26]
Gorogoro Iwa
|
Rolling Rock
|
|
ゴロゴロいわ[?]
Gorogoro Iwa
|
Super Mario 64
|
落石[27]
Rakuseki
|
Rockfall
|
Mario Kart 64
|
ころがり岩[28]
Korogari Iwa
|
Rolling Rock
|
Yoshi Topsy-Turvy
|
大岩[29]
Ō Iwa
|
Big Rock
|
Donkey Kong: Jungle Climber
|
大岩[30]
Ō Iwa
|
New Super Mario Bros. 2
|
岩[?]
Iwa
|
Rock
|
Super Mario Odyssey, Mario Kart Tour
|
| Chinese
|
岩石[17]
Yánshí
|
Rock
|
|
| Chinese (simplified)
|
滚动岩石[?]
Gǔndòng Yánshí
|
Editing Boulder
|
|
| Chinese (traditional)
|
滾動岩石[?]
Gǔndòng Yánshí
|
Editing Boulder
|
|
| Dutch
|
Rotsblok[?]
|
Rockblock
|
|
| French
|
Rocher[?]
|
Rock
|
|
| Grand rocher[31]
|
Big rock/boulder
|
| Grosse pierre ronde[32]
|
Big round rock
|
| German
|
Felsbrocken[?]
|
Boulder
|
|
| Felsen[?]
|
Rock
|
| Italian
|
Masso/Macigno[?]
|
Boulder
|
|
| Korean
|
바위[17]
Bawi
|
Rock
|
|
| Russian
|
Валун[?]
Valun
|
Boulder
|
|
| Spanish (NOA)
|
Peñasco[?]
|
Boulder
|
|
| Roca[17]
|
Rock
|
Mario Kart Tour
|
| Spanish (NOE)
|
Roca[?]
|
Rock
|
|
Rolling rock[edit]
| Language
|
Name
|
Meaning
|
Notes
|
| Italian
|
Roccia rotolante[17]
|
Rolling rock
|
|
| Portuguese
|
Pedra rolante[17]
|
Rolling stone
|
|
Ruby Rock[edit]
| Language
|
Name
|
Meaning
|
Notes
|
| Japanese
|
ゴロゴロ岩[?]
Gorogoro iwa
|
Rolling rock
|
Super Mario Galaxy
|
でかゴロ岩[33]
Dekagoro iwa
|
Big rolling rock
|
giant type, Super Mario Galaxy
|
| Italian
|
Massoruota[?]
|
Rockwheel
|
|
References[edit]
Boulder coverage on other
NIWA wikis:
- ^ "Rolling Boulders: Near the end of the course, boulders begin to roll downhill towards you." – Musa, Alexander (May 30, 2014). Mario Kart 8 PRIMA Official Game Guide. Prima Games (American English). ISBN 978-0-804-16328-6. Page 130.
- ^ a b "Some Chargin' Chucks in the Dinosaur Land underground dig up rocks and toss them at passing plumbers." – August 1991. Nintendo Mario Mania Player's Guide. Nintendo of America (English). Page 114.
- ^ "Ants can toss objects many times their own weight." – Tilden, Gail, et al. (December 1992). Nintendo Power Volume 43. Nintendo of America (American English). Page 47.
- ^ a b "Find the hidden Star in the room with the rolling rocks." – Course 6 - Star 6: Watch for Rolling Rocks. Nintendo: Super Mario 64 Strategy (American English). Archived June 10, 1998, 06:46:32 UTC from the original via Wayback Machine. Retrieved February 23, 2018.
- ^ "An unlimited supply of huge rolling boulders comes crashing down this corridor to fall into a bottomless pit." – Pelland, Scott, and Dan Owsen (1996). Super Mario 64 Player's Guide. Nintendo of America (English). Page 56.
- ^ NintenU (March 1, 2022). Super Mario 64 DS - 100% Walkthrough - Course 6 Hazy Maze Cave (19:15-19:30). YouTube (English).
- ^ Super Mario 64 DS - 100% Walkthrough - Course 6 Hazy Maze Cave (01:40).
- ^ a b English Super Mario Galaxy entry on the official Mario Portal. nintendo.co.jp. Retrieved August 13, 2022. (Archived August 12, 2022, 23:39:09 UTC via archive.today.)
- ^ "Better yet, spin into the red surface of the boulders to destroy them—they release a lot of star bits." – Black, Fletcher (November 9, 2007). Super Mario Galaxy: PRIMA Official Game Guide (Collector's Edition). Roseville: Prima Games (American English). ISBN 978-0-7615-5713-5. Page 42.
- ^ English Super Mario Galaxy 2 entry on the official Mario Portal. nintendo.co.jp. Retrieved August 13, 2022. (Archived August 12, 2022, 23:39:46 UTC via archive.today.)
- ^ IGN Guides (August 17, 2012). New Super Mario Bros. 2 - Star Coin Guide - World 3-5 - Walkthrough (01:02). YouTube (English).
- ^ New Super Mario Bros. 2 - Star Coin Guide - World 3-5 - Walkthrough (02:31). YouTube.
- ^ Elijah Paskevich (video game enthusiast) (May 2, 2023). New Super Mario Bros. 2: World 3-5 100% Walkthrough (w/ Star Coins) (0:55). YouTube (English).
- ^ VideoGamePhenom (May 9, 2019). Donkey Kong Land - Monkey Mountains & Chimpanzee Clouds - Mountain Mayhem (0:33). YouTube (English).
- ^ Owsen, Dan, et al. (1997). Mario Kart 64 Player's Guide. Nintendo of America (English). Page 42.
- ^ June 5, 2022. The boulders seen in the Bowser’s Castle and Choco Mountain tracks in Mario Kart 8/Deluxe (top) are actually edited versions of Rock Mario’s model from Super Mario Galaxy 2 (middle). The bottom image shows a comparison of the rock model on the left and the back of Rock Mario’s model on the right. Note the exact same configuration of rock plates.. suppermariobroth.com. Retrieved December 10, 2024. (Archived June 7, 2022, 03:32:40 UTC via Wayback Machine.)
- ^ a b c d e f g h Displayed as an action in Mario Kart Tour
- ^ "Can pick up a boulder with relative ease. Makes crushing rocks seem such a breeze!" – DK Rap (1999). Donkey Kong 64. Nintendo (English).
- ^ "You'd think that those big arms of Chunky's would be good for something. In fact, they're ideal for lifting big chunks of rock and throwing them." – Bihldorff, Nate, et al. (1999). Donkey Kong 64 Player's Guide. Nintendo of America (English). Page 34.
- ^ "BOULDER: Pursues your barrel in a straight line and causes damage if it hits you." – "Help" screen. Donkey Kong Country Barrel Maze.
- ^ a b Nintendo Thumb Digest (July 1, 2017). DONKEY KONG JUNGLE BEAT ~ APPLE KINGDOM ~ MASSIVE CANYON - NO COMMENTARY (0:48). YouTube (English).
- ^ Bosscinerator (November 16, 2018). Let's Beat - Poobah the Pharoah, the Ancient Annoyance (05:20). YouTube (English).
- ^ Donkey Kong: Jungle Climber instruction booklet. Nintendo of America (English). Page 14.
- ^ Sakai, Kazuya (Ambit), kikai, Akinori Sao, Junko Fukuda, Kunio Takayama, and Ko Nakahara (Shogakukan), editors (2015). "Super Mario 64."『スーパーマリオブラザーズ百科: 任天堂公式ガイドブック』. Tokyo: Shogakukan (Japanese). Page 92.
- ^ Nintendo Co., Ltd. スーパーマリオギャラクシー. Mario Portal (Japanese). Retrieved 7 Mar. 2024.
- ^ Nintendo Co., Ltd. スーパーマリオギャラクシー2. Mario Portal (Japanese). Retrieved 7 Mar. 2024.
- ^ 1996. マリオカート64 (Mario Kāto Rokujūyon) instruction booklet (PDF). Nintendo (Japanese). Page 29.
- ^ 「ヨッシーの万有引力任天堂公式ガイドブック」 (Yoshi Banyū Inryoku Nintendo Kōshiki Guidebook). Shogakukan (Japanese). Page 21Media:YUG Shogakukan P21.jpg.
- ^ 2007. ドンキーコング ジャングルクライマー (Donkī Kongu Janguru Kuraimā) instruction booklet. Nintendo. Page 19.
- ^ Sakai et al. "New Super Mario Bros. 2."『スーパーマリオブラザーズ百科: 任天堂公式ガイドブック』. Page 199.
- ^ July 4, 2018. Super Mario Encyclopedia. Soleil Productions (French). ISBN 2302070046. Page 127.
- ^ October/November 1997. Le Magazine Nintendo officiel N1. Boulogne-Billancourt: Emap Alpha (French) via archive.org. Page 93. Retrieved May 12, 2023.
- ^ Sakai et al. "Super Mario Galaxy"『スーパーマリオブラザーズ百科: 任天堂公式ガイドブック』. Page 127.
| Links to related articles
|
| Mario Kart Tour
|
| Drivers
|
| Normal
|
Baby Mario • Baby Peach • Baby Daisy • Baby Rosalina • Baby Luigi • Koopa Troopa • Shy Guy • Dry Bones • Iggy • Larry • Lemmy • Ludwig • Morton • Roy • Wendy
|
| Super
|
Mario • Peach • Yoshi • Daisy • Toad • Toadette • Rosalina • Luigi • Toad (Pit Crew) • Red Yoshi • Blue Yoshi • Pink Yoshi • Yellow Toad (Pit Crew) • Light-blue Toad (Pit Crew) • Red Toad (Pit Crew) • Orange Yoshi • Green Toad (Pit Crew) • Pink Toad (Pit Crew) • Light-blue Yoshi • Yellow Yoshi • Purple Toad (Pit Crew) • Bowser • Donkey Kong • Diddy Kong • Lakitu • Bowser Jr. • Wario • Waluigi • King Boo • Black Shy Guy • Red Koopa (Freerunning) • Birdo • Pink Shy Guy • Birdo (Light Blue) • Hammer Bro • Boomerang Bro • Ice Bro • Fire Bro • Birdo (Yellow) • Monty Mole • Green Shy Guy • Blue Koopa (Freerunning) • Birdo (Blue) • Purple Koopa (Freerunning) • Light-blue Shy Guy • Blue Shy Guy • Birdo (Orange) • White Shy Guy • Koopa (Freerunning) • Orange Shy Guy • Birdo (Red) • Yellow Shy Guy • Birdo (Green)
|
| High-End
|
Metal Mario • Peachette • Pauline • Mario (Musician) • Peach (Kimono) • Mario (Hakama) • Rosalina (Halloween) • Peach (Vacation) • Mario (Santa) • Pink Gold Peach • Daisy (Holiday Cheer) • Yoshi (Reindeer) • Pauline (Party Time) • Mario (Happi) • Toad (Party Time) • Peach (Wintertime) • Penguin Luigi • Ice Mario • Baby Peach (Cherub) • Rosalina (Aurora) • Mario (Classic) • Luigi (Classic) • Baby Rosalina (Detective) • Yoshi (Egg Hunt) • Black Yoshi • Builder Mario • Builder Toad • Daisy (Fairy) • Mario (Chef) • Peach (Wedding) • Rosalina (Swimwear) • Mario (Swimwear) • Captain Toad • Toadette (Explorer) • Daisy (Yukata) • Mario (SNES) • Mario (Sunshine) • Mario (Halloween) • Peach (Halloween) • Peach (Explorer) • Builder Luigi • Fire Rosalina • Luigi (Lederhosen) • Cat Peach • Cat Toad • Pauline (Rose) • Penguin Toad • Mario (Racing) • White Yoshi • Baby Mario (Koala) • Builder Toadette • Mario (Tuxedo) • Luigi (Painter) • Daisy (Swimwear) • Mario (Baseball) • Peach (Happi) • Penguin Mario • Yoshi (Kangaroo) • Tanooki Mario • Tanooki Rosalina • Mario (Satellaview) • Penguin Toadette • Cat Rosalina • Luigi (Vacation) • Mario (Golf) • Luigi (Golf) • Mario (Aviator) • Mario (Samurai) • Peach (Yukata) • Yoshi (Gold Egg) • Rosalina (Volendam) • Daisy (Farmer) • Dr. Mario • Dr. Luigi • Dr. Peach • Cat Mario • Cat Luigi • Rosalina (Chef) • Daisy (Thai Dress) • Daisy (Sailor) • Toadette (Sailor) • White Tanooki Mario • Luigi (Knight) • Mario (King) • Luigi (Chef) • Kitsune Luigi • Toad (Astronaut) • Toadette (Astronaut) • Poochy • Toad (Tourist) • Luigi (Gold Knight) • Pauline (Cowgirl) • Mario (Black Suit) • Gold Mario • Dry Bowser • King Boo (Luigi's Mansion) • Shy Guy (Pastry Chef) • Waluigi (Bus Driver) • Gold Koopa (Freerunning) • Wario (Hiker) • Dry Bones (Gold) • Funky Kong • Dixie Kong • Dry Bowser (Gold) • Wario (Cowboy) • Nabbit • Bowser Jr. (Pirate) • King Bob-omb • Donkey Kong Jr. (SNES) • Shy Guy (Gold) • King Boo (Gold) • Bowser (Santa) • Lakitu (Party Time) • Birdo (Black) • Shy Guy (Ninja) • King Bob-omb (Gold) • Kamek • Waluigi (Vampire) • Meowser • Chargin' Chuck • Pink Shy Guy (Ninja) • Birdo (White) • Dr. Bowser • Petey Piranha • Chargin' Chuck (Gold) • Petey Piranha (Gold) • Larry (Wintertime) • Light-blue Shy Guy (Explorer) • Yellow Shy Guy (Explorer) • Donkey Kong (Gladiator) • Wiggler • Wiggler (Gold) • Mii Racing Suits
|
| Vehicle parts
|
| Karts |
Normal
|
Pipe Frame • Birthday Girl • Mushmellow • Koopa Dasher • Biddybuggy • Blue Biddybuggy • Cheep Charger • Pink Mushmellow • Birthday Girl Rosalina • Green Kiddie Kart • Red Kiddie Kart • Bullet Blaster • Bull's-Eye Banzai • Landship • Pipe Buggy • Warship • Green Cheep Charger
|
| Super
|
Mach 8 • Daytripper • Turbo Yoshi • Soda Jet • Super Blooper • Gold Blooper • Royale • Cloud 9 • Poltergust 4000 • Streamliner • White Royale • Zucchini • Red Streamliner • Red Turbo Yoshi • Blue Seven • Super 1 • Dasher II • Tea Coupe • Yellow Turbo Birdo • Egg 1 • Birthday Girl Daisy • Red Standard 8 • Green Standard 8 • Cucumber • Blue Royale • Blue Turbo Yoshi • Orange Turbo Yoshi • Pink Turbo Yoshi • Light-blue Turbo Yoshi • Yellow Turbo Yoshi • Flame Flyer • Barrel Train • DK Jumbo • Chrome DK Jumbo • Koopa Clown • Dark Clown • Para-Wing • Turbo Birdo • Light-blue Turbo Birdo • Bolt Buggy • Rambi Rider • Blue Turbo Birdo • Orange Turbo Birdo • Red Turbo Birdo • Green Turbo Birdo
|
| High-End
|
B Dasher • Black B Dasher • Yellow Taxi • Quickshaw • Kabuki Dasher • Circuit Special • Black Circuit • Bumble V • Queen Bee • Trickster • Ghost Ride • Macharon • Carrot Kart • Cheermellow • Wild Wing • Radish Rider • Wildfire Flyer • Ribbon Rider • Double-Decker • Swift Jack • Red B Dasher • Jingle Bells • Platinum Taxi • Glam Bruiser • Gilded Prancer • Ice-blue Poltergust • P-Wing • Apple Kart • Comet Tail • Bright Bunny • Dozer Dasher • Clanky Kart • Wild Black • Karp Kart • Prancer • Rose Queen • Green Apple Kart • Choco Macharon • Gold Egg • Sweet Daytripper • Red Taxi • Pink Wing • Happy Ride • Blue Soda • Clackety Kart • Gold Clanky Kart • Festival Girl • Black Kabuki Dasher • 8-Bit Pipe Frame • Gold Pipe Frame • Surf Sailer • Star-Spangled Flyer • Green Circuit • Sports Coupe • Pumpkin Kart • Dark Trickster • Sunset Cloud • Steel Driver • Holiday King • Gold Snow Skimmer • Dreamy Egg • Fast Frank • Iron Cucumber • Cat Cruiser • Wild Pink • Rose Taxi • B Dasher Mk. 2 • Decal Streamliner • Orange Streamliner • White Turbo Yoshi • Sakura Quickshaw • Jet Cruiser • Inferno Flyer • Rambi Runner • Pink Dozer • Grand Badwagon • Paintster • Lime Tea Coupe • Sunny Surf Sailer • Pinch Hitter • Cleanup Hitter • Ice Dozer • Green Double-Decker • Black Cat Cruiser • Red B Dasher Mk. 2 • Pink B Dasher Mk. 2 • Classic B Dasher Mk. 2 • Sky-Blue B Dasher Mk. 2 • Metal B Dasher Mk. 2 • Cream B Dasher Mk. 2 • Green B Dasher Mk. 2 • Tanooki Kart • Gold Pumpkin Kart • Lunar Cruiser • Sleigh Rider • White Snow Skimmer • Frosty Bells • Frost Wing • Gray Cat Cruiser • Sports Coupe 2022 • Roaring Racer • Jukebox Buggy • Sneeker • Green Lightning • Cupid's Arrow • Wild Slugger • Prop Kart • Magma Broom • Star Broom • Yellow 8-Bit Pipe Frame • Warrior Wagon • Armored Rider • Black Turbo Yoshi • Gold Bunny • Flower Kart • Dragonfly • Firefly • Daikon Rocket • Capsule Kart • Blue-Green Capsule Kart • White Bruiser • Coconut 1 • Pink Capsule Kart • Cream Cat Cruiser • Green Cat Cruiser • Goo-Goo Buggy • Goo-Goo Pink • Gold Kiddie Kart • Sweet Ride • White Fast Frank • Tuk-Tuk Kart • Tropical Truck • Gold Zucchini • Lightning Streamliner • Flowery Badwagon • Coral Jet Cruiser • Watermelon Kart • Ice-Cream Minibus • Chocolate Banana Minibus • Strawberry Soft Swerve • Shielded Speedster • Gold Standard • Gold Double-Decker • Black Carriage • Green Speeder • Flaming Speeder • Gold Sweet Ride • Streetle • Blue Speeder • Swift Talon • Gold Eagle • Blazing Eagle • Camo Tanooki Kart • Gold Rambi Rider • Moo Moo Offroader • Pink Speeder • Pink Sneeker • Gold Jingle Bell • Holiday Speeder • Wild Gold • Rainbow Taxi • Blooper Shuttle • Gold Lunar Cruiser • Gold Quickshaw • Pineapple 1 • Hot Pot Hot Rod • Rainbow Streetle • Gold Capsule Kart • Gold 8-Bit Pipe Frame • Taiko Drum Dasher • Sakura Sports Coupe • Bright Girl • Huffin Puffin Egg • Jumbo Jetter • Gold Paintster • Silver Flower Kart • Bronze Cucumber • Cream Classic • Red Comet • Pink Comet • Green Comet • Gold Comet • Mach 8-R • Gold Cupid's Arrow • Silver Cupid's Arrow • Silver Warrior Wagon • Gold Warrior Wagon • Black Shielded Speedster • Gold Shielded Speedster • Yeehaw Wagon • Desert Rose Wagon • Yellow Sub Scooter • Blue Sub Scooter • Gold Driver • Dolphin Drifter • Purple Rattle Buggy • Goo-Goo Gold • Gold Wild Slugger • Spicy Zucchini • Chocolate Mint Soft Swerve • Gold Soft Swerve • Monarch Kart • Gold Monarch Kart • Black B Dasher Mk. 2 • Gold B Dasher • Badwagon • Blue Badwagon • Gold Train • Bruiser • Snow Skimmer • Offroader • Banana Master • Poison Apple Kart • Cheep Snorkel • Gold Cheep Snorkel • Gold Cheep Charger • Dark Buggy • Koopa King • Brown Offroader • Cact-X • Pirate Sushi Racer • Silver Bullet Blaster • Head Honcho • DK Maximum • Sushi Racer • Gilded King • Crawly Kart • Black Dozer • Party-Wing • Penguin Slider • Black Penguin Slider • Cact-Ice • Black Turbo Birdo • Purple Bunny • Jade Hop Rod • Crimson Hop Rod • Dark Hop Rod • Kamek's Zoom Broom • Silver King • Vampire Flyer • Red Crawly Kart • Yellow Offroader • Cact-R • Cheership • Candy Clown • Tiger Bruiser • Combo Cruiser • Sakura Hop Rod • White Turbo Birdo • Green-Yellow Capsule Kart • Piranha Pipes • Red Offroader • Goo-Goo Black • Cact-B • Gold Bullet Blaster • Red Vampire Flyer • Gold Trickster • Gold Bruiser • Black Sneeker • Purple Dozer • Blue Crawly Kart • Rainbow Pipe Buggy • Gold Hop Rod • Black Jingle Bell • Gold Sushi Racer • Dry Bones Dasher • Waluigi Racer Mk. 2 • Chain Chomp Chariot • Fish Bone Ferry • Gold Fish Bone Ferry • Wiggler Egg • Boo Pipes • Gold Pipes • Wild Wiggler
|
| Gliders |
Normal
|
Super Glider • Parachute • Parafoil • Paper Glider • Droplet Glider • BBIA Parafoil • Minion Paper Glider • Piston Glider • Piranha Plant Parafoil
|
| Super
|
Peach Parasol • Flower Glider • Oilpaper Umbrella • Lightning Oilpaper • Pink Flower Glider • 8-Bit Jumping Mario • ? Block • Plaid Ribbon • Eggshell Glider • 8-Bit Jumping Luigi • Mushroom Glider • Bob-omb Parafoil • Shell Parachute • Wario Wing • Waluigi Wing • BaNaNa Parafoil • Blue Flower Glider
|
| High-End
|
Gold Glider • Fare Flier • Purple Oilpaper Umbrella • Full Flight • Strawberry Crêpe • Le Tricolore • Starchute • Royal Parachute • Glitter Glider • Soaring Jack • Gift Glider • New Year's 2020 • New Year's Kite • Fireworks Parachute • Crimson Crane • Blizzard Parasol • Blizzard Balloons • Sweetheart Glider • Heart Balloons • Luma Parafoil • Rainbow Starchute • Bright Glider • Safety Glider • Daisy Glider • Pink Gold Paper Glider • Butterfly Sunset • Chocolate Donut • Gold Crane • Chocolate Banana Crêpe • Strawberry Donut • Silver Bells • Silver-and-Gold Hearts • Manta Glider • Treasure Map • Butterfly Wings • Great Sail • Festival Wings • 8-Bit Star • Super Mario Kart Glider • Star-Spangled Glider • Spider Glider • Sunset Balloons • Silver Starchute • Jolly Bells • Butterfly Prism • Planet Glider • New Year's 2021 • Gold New Year's Kite • Toe-Bean Balloons • Calico Parafoil • Black Great Sail • Silver Manta Glider • Rose Parasol • Snow Crystals • 8-Bit Fire Flower • Surf Master • Starry Great Sail • Black Toe-Bean Balloons • 8-Bit Bullet Bill • Glinting Glider • Flying Easel • Sunny Surf Master • Polka-Dot Manta Glider • Home-Field Glider • Gold Home-Field Glider • Springtime Crane • Yukata Ribbon • Silver Surf Master • Ship's Wheel • Tanooki Parafoil • Gold Tanooki Parafoil • Magic Parasol • 8-Bit Super Mushroom • Meteor Balloons • Pink Gold Meteors • Galaxy Glider • Candlelight Flight • Gold Penguin Wingtip • Aurora Balloons • New Year's 2022 • Black Cat Parafoil • Cat Parafoil • Gold Toe-Bean Balloons • Glittering Parasol • Luigi Parafoil • Sky-High Flyer • Record Setter • Mario's Mustache • Luigi's Mustache • Origami Glider • Sakura Origami Glider • Gold Eggshell Glider • Green Sprout • Magniflying Glass • Flybrary Book • Pink Magniflying Glass • Cream Toe-Bean Balloons • Green Cat Parafoil • Candlelight Flight Cake • Pretzel Glider • Tulip Corsage • Red and Gold Umbrella • 8-Bit 1-Up Mushroom • Tropical Balloons • Fire Manta Glider • Mint & Berry Balloons • Vanilla & Chocolate Balloons • Icy Mario's Mustache • Flying Flappers • Silver Luigi's Mustache • Mario's Hat Balloon • Luigi's Hat Balloon • Gold Cloud Balloons • White Waves Origami Glider • Chocolate Pretzel • Para-Panini • Silver Candlelight Flight • Autumn Leaves • Calico Toe-Bean Balloons • Wonderful Garnet • Festive Holly • Yellow Hard Hat Balloon • Fuzzy Kite • Gold Hard Hat Balloon • New Year's 2023 • Gold Meteors • Rainbow Fare Flier • Stealth Glider • Gold Umbrella • Wonderful Diamond • Gold Candlelight Flight • 8-Bit Super Glider • Gold 8-Bit Glider • 8-Bit Block Glider • 8-Bit Goomba • Bright Ribbon • Yoshi's Cookies • Smiley Flower Glider • Golden Glider • Gold Tulips • Gold Manta Glider • Red Checkered Glider • Pink Checkered Glider • Green Checkered Glider • Gold Checkered Glider • Gold Origami Glider • Gold Bells • Glittering Glider • Red Emblem • Green Emblem • Mario Bros. Parafoil • Mosaic Starchute • Jellychute • Wavy Great Sail • Dolphin Great Sail • Pink Bubble Balloon • Mario Golf Cap • Luigi Golf Cap • Gold Mario Golf Cap • Melon & Banana Balloons • Spooky Sprinkle Balloons • Gold Chocolate Balloons • Royal Flush • Rainbow Bells • Gold Mario's Hat Balloon • Swooper • Bullet Bill Parachute • Cloud Glider • Rainy Balloons • Wicked Wings • Gold Swooper • Banana Wingtip • Tropical Glider • Dragon Wings • Blooper Wingtip • Nabbit Oilpaper Umbrella • Cheep Cheep Masks • Dry Bowser Umbrella • Penguin Wingtip • Bright Balloons • Ninja Scroll • Dream Glider • Vampire Wings • Golden Wings • Wario's Mustache • Waluigi's Mustache • Wonderful Wings • Wicked Topaz • Piranha Plant Balloons • Secret Scroll • Lava Rocks • Black Starchute • Boo Masks • Nabbit Parachute • Gold Boo Masks • Roy Oilpaper • Rainbow Flappy Wings • Gold Flappy Wings • Wiggler Parachute • Gold Piranha Plant Balloons • Baby Mario Hanafuda • Yoshi's Egg Hanafuda • Peach Hanafuda • Barrel Hanafuda • Blooper Hanafuda • Cape Mario Hanafuda • Bullet Bill Hanafuda • Boo Hanafuda • Piranha Plant Hanafuda • Goomba Hanafuda • Jumping Mario Hanafuda • Bowser Hanafuda
|
| Tires
|
Blue Standard • Cyber Slick • Gold Tires • Metal • Monster • Mushroom • Off-Road • Red Monster • Retro Off-Road • Roller • Slick • Slim • Sponge • Standard • Wood
|
| Courses
|
| New courses |
City courses
|
New York Minute (R, T, R/T, 2, 2R, 2T, 2R/T, 3, 3R, 3T, 3R/T, 4, 4R, 4T, 4R/T) (tour appearances) • Tokyo Blur (R, T, R/T, 2, 2R, 2T, 2R/T, 3, 3R, 3T, 3R/T, 4, 4R, 4T, 4R/T) (tour appearances) • Paris Promenade (R, T, R/T, 2, 2R, 2T, 2R/T, 3, 3R, 3T, 3R/T) (tour appearances) • London Loop (R, T, R/T, 2, 2R, 2T, 2R/T, 3, 3R, 3T, 3R/T) (tour appearances) • Vancouver Velocity (R, T, R/T, 2, 2R, 2T, 2R/T, 3, 3R, 3T, 3R/T) (tour appearances) • Los Angeles Laps (R, T, R/T, 2, 2R, 2T, 2R/T, 3, 3R, 3T, 3R/T) (tour appearances) • Berlin Byways (R, T, R/T, 2, 2R, 2T, 2R/T, 3, 3R, 3T, 3R/T) (tour appearances) • Sydney Sprint (R, T, R/T, 2, 2R, 2T, 2R/T, 3, 3R, 3T, 3R/T) (tour appearances) • Singapore Speedway (R, T, R/T, 2, 2R, 2T, 2R/T, 3, 3R, 3T, 3R/T) (tour appearances) • Amsterdam Drift (R, T, R/T, 2, 2R, 2T, 2R/T, 3, 3R, 3T, 3R/T) (tour appearances) • Bangkok Rush (R, T, R/T, 2, 2R, 2T, 2R/T, 3, 3R, 3T, 3R/T) (tour appearances) • Athens Dash (R, T, R/T, 2, 2R, 2T, 2R/T, 3, 3R, 3T, 3R/T) (tour appearances) • Rome Avanti (R, T, R/T, 2, 2R, 2T, 2R/T, 3, 3R, 3T, 3R/T) (tour appearances) • Madrid Drive (R, T, R/T, 2, 2R, 2T, 2R/T, 3, 3R, 3T, 3R/T) (tour appearances)
|
| Other
|
Merry Mountain (R, T, R/T) (tour appearances) • Ninja Hideaway (R, T, R/T) (tour appearances) • Sky-High Sundae (R, T, R/T) (tour appearances) • Piranha Plant Cove (R, T, R/T, 2, 2R, 2T, 2R/T, 3, 3R, 3T, 3R/T) (tour appearances) • Yoshi's Island (R, T, R/T) (tour appearances) • Piranha Plant Pipeline (R, T, R/T) (tour appearances) • Squeaky Clean Sprint (R, T, R/T) (tour appearances)
|
| Remix courses
|
RMX Mario Circuit 1 (R, T, R/T) (tour appearances) • RMX Choco Island 1 (R, T, R/T) (tour appearances) • RMX Rainbow Road 1 (R, T, R/T) (tour appearances) • RMX Rainbow Road 2 (R, T, R/T) (tour appearances) • RMX Choco Island 2 (R, T, R/T) (tour appearances) • RMX Vanilla Lake 1 (R, T, R/T) (tour appearances) • RMX Ghost Valley 1 (R, T, R/T) (tour appearances) • RMX Bowser's Castle 1 (R, T, R/T) (tour appearances) • RMX Donut Plains 1 (R, T, R/T) (tour appearances) • RMX Vanilla Lake 2 (R, T, R/T) (tour appearances)
|
| Classic courses |
SNES courses
|
Mario Circuit 1 (R, T, R/T) (tour appearances) • Donut Plains 1 (R, T, R/T) (tour appearances) • Ghost Valley 1 (R, T, R/T) (tour appearances) • Mario Circuit 2 (R, T, R/T) (tour appearances) • Choco Island 1 (R, T, R/T) (tour appearances) • Ghost Valley 2 (R, T, R/T) (tour appearances) • Donut Plains 2 (R, T, R/T) (tour appearances) • Mario Circuit 3 (R, T, R/T) (tour appearances) • Choco Island 2 (R, T, R/T) (tour appearances) • Vanilla Lake 1 (R, T, R/T) (tour appearances) • Bowser Castle 3 (R, T, R/T) (tour appearances) • Donut Plains 3 (R, T, R/T) (tour appearances) • Koopa Troopa Beach 2 (R, T, R/T) (tour appearances) • Vanilla Lake 2 (R, T, R/T) • (tour appearances) • Rainbow Road (R, T, R/T) (tour appearances)
|
| N64 courses
|
Luigi Raceway (R, T, R/T) (tour appearances) • Koopa Troopa Beach (R, T, R/T) (tour appearances) • Kalimari Desert (R, T, R/T, 2, 2R, 2T, 2R/T) (tour appearances) • Frappe Snowland (R, T, R/T) (tour appearances) • Choco Mountain (R, T, R/T) (tour appearances) • Mario Raceway (R, T, R/T) (tour appearances) • Royal Raceway (R, T, R/T) (tour appearances) • Yoshi Valley (R, T, R/T) (tour appearances)
|
| GBA courses
|
Peach Circuit (R, T, R/T) (tour appearances) • Riverside Park (R, T, R/T) (tour appearances) • Bowser's Castle 1 (R, T, R/T) (tour appearances) • Boo Lake (R, T, R/T) (tour appearances) • Bowser's Castle 2 (R, T, R/T) (tour appearances) • Luigi Circuit (R, T, R/T) (tour appearances) • Sky Garden (R, T, R/T) (tour appearances) • Cheep-Cheep Island (R, T, R/T) (tour appearances) • Sunset Wilds (R, T, R/T) (tour appearances) • Snow Land (R, T, R/T) (tour appearances) • Yoshi Desert (R, T, R/T) (tour appearances) • Bowser's Castle 3 (R, T, R/T) (tour appearances) • Lakeside Park (R, T, R/T) (tour appearances) • Bowser's Castle 4 (R) (tour appearances)
|
| GCN courses
|
Baby Park (R, T, R/T) (tour appearances) • Mushroom Bridge (R, T, R/T) (tour appearances) • Daisy Cruiser (R, T, R/T) (tour appearances) • Waluigi Stadium (R, T, R/T) (tour appearances) • Yoshi Circuit (R, T, R/T) (tour appearances) • DK Mountain (R, T, R/T) (tour appearances) • Dino Dino Jungle (R, T, R/T) (tour appearances)
|
| DS courses
|
Luigi's Mansion (R, T, R/T) (tour appearances) • Waluigi Pinball (R, T, R/T) (tour appearances) • Shroom Ridge (R, T, R/T) (tour appearances) • DK Pass (R, T, R/T) (tour appearances) • Mario Circuit (R, T, R/T) (tour appearances) • Airship Fortress (R, T, R/T) (tour appearances) • Peach Gardens (R, T, R/T) (tour appearances)
|
| Wii courses
|
Mushroom Gorge (R, T, R/T) (tour appearances) • Coconut Mall (R, T, R/T) (tour appearances) • DK Summit (R, T, R/T) (tour appearances) • Daisy Circuit (R, T, R/T) (tour appearances) • Koopa Cape (R, T, R/T) (tour appearances) • Maple Treeway (R, T, R/T) (tour appearances) • Dry Dry Ruins (R, T, R/T) (tour appearances) • Moonview Highway (R, T, R/T) (tour appearances) • Rainbow Road (R, T, R/T) (tour appearances)
|
| 3DS courses
|
Toad Circuit (R, T, R/T) (tour appearances) • Daisy Hills (R, T, R/T) (tour appearances) • Cheep Cheep Lagoon (R, T, R/T) (tour appearances) • Shy Guy Bazaar (R, T, R/T) (tour appearances) • Mario Circuit (R, T, R/T) (tour appearances) • Rock Rock Mountain (R, T) (tour appearances) • Piranha Plant Slide (R, T, R/T) (tour appearances) • Wario Shipyard (R, T, R/T) (tour appearances) • Neo Bowser City (R, T, R/T) (tour appearances) • Rosalina's Ice World (R, T, R/T) (tour appearances) • Bowser's Castle (R, T, R/T) (tour appearances) • Rainbow Road (R, T, R/T) (tour appearances)
|
| Battle courses |
New courses
|
New York Minute B (tour appearances) • Paris Promenade B (tour appearances)
|
| Classic courses
|
GBA Battle Course 1 (tour appearances) • GCN Cookie Land (tour appearances) • DS Twilight House (tour appearances)
|
| Other
|
| Bonus challenges
|
Ready, Set, Rocket Start • Ring Race • Do Jump Boosts • Big Reverse Race • Goomba Takedown • Glider Challenge • Steer Clear of Obstacles • Vs. Mega • Smash Small Dry Bones • Break Item Boxes • Time Trial • Combo Attack • Take them out quick! • Snap a Photo • Precision Gliding • Big Reverse Race vs. 100
|
| Cups
|
Baby Daisy Cup • Baby Luigi Cup • Baby Mario Cup • Baby Peach Cup • Baby Rosalina Cup • Birdo Cup • Boomerang Bro Cup • Bowser Cup • Bowser Jr. Cup • Cat Peach Cup • Chargin' Chuck Cup • Daisy Cup • Diddy Kong Cup • Dixie Kong Cup • Donkey Kong Cup • Dry Bones Cup • Dry Bowser Cup • Fire Bro Cup • Fire Rosalina Cup • Funky Kong Cup • Gold Mario Cup • Hammer Bro Cup • Ice Bro Cup • Ice Mario Cup • Iggy Cup • Kamek Cup • King Bob-omb Cup • King Boo Cup • Koopa Troopa Cup • Lakitu Cup • Larry Cup • Lemmy Cup • Ludwig Cup • Luigi Cup • Mario Cup • Metal Mario Cup • Mii Cup • Monty Mole Cup • Morton Cup • Nabbit Cup • Pauline Cup • Peach Cup • Peachette Cup • Pink Gold Peach Cup • Poochy Cup • Rosalina Cup • Roy Cup • Shy Guy Cup • Tanooki Mario Cup • Toad Cup • Toadette Cup • Waluigi Cup • Wario Cup • Wendy Cup • Yoshi Cup
|
| Tours |
2019
|
New York Tour • Tokyo Tour • Halloween Tour • Paris Tour • Winter Tour • London Tour • Holiday Tour
|
| 2020
|
New Year's Tour • Ice Tour • Valentine's Tour • Vancouver Tour • Mario Bros. Tour • Baby Rosalina Tour • Hammer Bro Tour • Yoshi Tour • Trick Tour • Flower Tour • Jungle Tour • Cooking Tour • Peach Tour • Marine Tour • Exploration Tour • Wild West Tour • Pirate Tour • Summer Festival Tour • Super Mario Kart Tour • Los Angeles Tour • 1st Anniversary Tour • Halloween Tour • Sunset Tour • Mario vs. Luigi Tour • Winter Tour • Rosalina Tour • New Year's 2021 Tour
|
| 2021
|
Berlin Tour • Cat Tour • Peach vs. Daisy Tour • Snow Tour • Mario Tour • Yoshi Tour • Ninja Tour • Sydney Tour (April–May) • Bowser vs. DK Tour • Trick Tour • Wedding Tour • Paris Tour • Summer Tour • Los Angeles Tour • Mario vs. Peach Tour • Frost Tour • Kamek Tour • Sydney Tour (September) • 2nd Anniversary Tour • Autumn Tour • Halloween Tour • Toad vs. Toadette Tour • Space Tour • Holiday Tour • Penguin Tour • New Year's 2022 Tour
|
| 2022
|
Singapore Tour • Wario vs. Waluigi Tour • Los Angeles Tour • Sky Tour • Mii Tour • Samurai Tour • Yoshi Tour • Amsterdam Tour • Doctor Tour • Peach vs. Bowser Tour (May) • Cat Tour • Metropolitan Tour • Bangkok Tour • Piranha Plant Tour • Ocean Tour • Sundae Tour • Bowser Tour • Mario vs. Luigi Tour • Anniversary Tour • Battle Tour • Halloween Tour • Autumn Tour • Animal Tour • Peach vs. Bowser Tour (November–December) • Holiday Tour • New Year's Tour
|
| 2023
|
Space Tour • Winter Tour • Exploration Tour • Doctor Tour • Mario Tour • Ninja Tour • Yoshi Tour • Spring Tour • Bowser Tour • Mii Tour • Princess Tour • Mario vs. Luigi Tour • Night Tour • Pipe Tour • Sunshine Tour • Vacation Tour • Summer Tour • Sundae Tour • Anniversary Tour
|
| Items |
Regular items
|
Banana • Green Shell • Red Shell • Spiny Shell • Bob-omb • Mushroom • Mega Mushroom • Bullet Bill • Blooper • Lightning • Super Horn • Coin • Star • Feathera
|
| Special items
|
Triple Bananas • Giant Banana • Triple Green Shells • Bowser's Shell • Double Bob-ombs • Triple Mushrooms • Fire Flower • Boomerang Flower • Ice Flower • Heart • Yoshi's Egg • Birdo's Egg • Bubble • Banana Barrels • Mushroom Cannon • Bob-omb Cannon • Lucky Seven • Dash Ring • Coin Box • Hammer • Giga Bob-omb • Super Bell • Super Leaf • Capsule
|
| Inventory items
|
Coin • Coin Rush ticket • Event tokena • Grand Star • Item ticket • Level-boost ticket • Point-boost ticket • Points-cap ticketa • Ruby • Star ticket • Team tokena • Quick ticket
|
| Course elements |
Interactable
|
Banzai Bill • Barrel • Barrel Bomb • Bath Bomb • Barrel Cannon • Beach Ball • Big egg • Blimp • Bob-omb Car • Bone Piranha Plant • Boulder • Burner • Bus • Cannon • Car • Cargo truck • Ceiling Needle • Chain Chomp • Cheep Cheep • Clampy • Crate • Dash Panel • Dash panel ramp truck • Exploring Shy Guy • Falling Pillar • Festive tree • Fire Piranha Plant • Flipper • Floaty • Flying Shy Guy • Fuzzy • Glide Ramp • Goal Ring • Goat • Goomba • Goomba Tower • Half-pipe • Hoop • Hot-air balloon • Inky Piranha Plant • Jack-o'-lantern • Jar • Jellybeam • Jump Boost field • Kadomatsu • Kanaami Road • Lava Bubble • Lava Geyser • Leaf pile • Maw-Ray • Mecha Cheep • Metal ball • Mud • Mushroom Platform • Mushroom Trampoline • Noshi • Oil slick • Penguin • Pickup truck • Pipe • Piranha Plant • Pokey • Puddle • Ramp • Rocky Wrench • Rolling rock • Shoe • Sidestepper • Skating Shy Guy • Snow block • Snowball • Snowboarding Shy Guy • Snowperson • Soccer Ball • Spider Web • Spring egg • Star Ring • Star Thwomp • Stilt Guy • Swoop • Table • Thwomp • Toy Duck • Toy Goomba • Traffic cone • Train • Walking Tree • Water Geyser • Wiggler • Wiggler Wagon • Whomp • Winged Cloud • Wooden cutout
|
| Non-interactable
|
Big Cheep Cheep • Boo • Boo Buddies • Bulber • Goonie • Huffin Puffin • Ice • Incoming Chomp • Nep-Enut • Note Block • Painting • Petal Guy • Shy Guy Tent • Star Bit • Vase
|
| Techniques
|
Drift • Hop • Jump Boost • Mini-Turbo • Rocket Start • Slipstream
|
| Favored and favorite courses
|
New (Amsterdam Drift · Athens Dash · Bangkok Rush · Berlin Byways · London Loop · Los Angeles Laps · New York Minute · Paris Promenade · Piranha Plant Cove · Rome Avanti · Singapore Speedway · Sydney Sprint · Tokyo Blur · Vancouver Velocity) • Remix • Super Mario Kart (SNES) • Mario Kart 64 (N64) • Mario Kart: Super Circuit (GBA) • Mario Kart: Double Dash!! (GCN) • Mario Kart DS (DS) • Mario Kart Wii (Wii) • Mario Kart 7 (3DS) • Battle
|
| Notable areas, landmarks, and sightings |
City courses
|
Amsterdam (Canal) • Athens (Hadrian's Arch · Parthenon) • Bangkok • Berlin (Berlin Wall · Brandenburg Gate · Charlottenburg Palace) • London (Big Ben · Tower Bridge · Tower of London) • Madrid (Prado Museum · Ventas Bullring) • New York (Empire State Building · Statue of Liberty · Rockefeller Center) • Paris (Arc de Triomphe · Cathedral of Notre Dame · Eiffel Tower · Louvre) • Rome (Colosseum · Spanish Steps · Trevi Fountain) • Sydney • Tokyo • Vancouver
|
| Other
|
Boo Woods • Bowser's Castle • Daisy Cruiser • Hammer Bros. Sphinx • Luigi's Mansion • Peach's Castle
|
| Galleries |
Miscellaneous
|
Artwork • Badges • Screenshots • Sprites and models
|
| Course icons
|
Original courses • Remix courses • SNES courses • N64 courses • GBA courses • GCN courses • DS courses • Wii courses • 3DS courses • Battle courses
|
| Related content on social media
|
"I Love Mario Kart Tour" • #MKTPerfectShot • MKT Report
|
| Miscellaneous
|
Action names in other languages • Badges (Common badges) • Challenge cards • Coin Rush • Emblem • Experience Point • Finish line • Frenzy • In-game statistics • Item probability distributions • Media • Mii Racing Suit profiles and statistics (Red–Dolphin · Cheep Cheep–Pokey · Piranha Plant–Koopa Clown) • Pipe • Pre-release and unused content • Race points system • Special pipe • Special skill • Sponsors • Trick animations • Underwater driving • Update history
|
|
|
|
 marks missions where they are completely absent.
 marks missions where they are loaded and may be visible, but cannot be encountered directly.
 marks missions where they are completely absent.
 marks missions where they are loaded and may be visible, but cannot be encountered directly.