Bonus room: Difference between revisions
(Reverting page) |
|||
| (259 intermediate revisions by 70 users not shown) | |||
| Line 1: | Line 1: | ||
{{ | {{redirect|Bonus Level|other uses|[[Bonus Level (disambiguation)]]}} | ||
A ''' | A '''bonus room'''<ref>{{cite|quote=I'm sure there must be some '''bonus rooms''' you haven't found!|author=[[Cranky Kong]]|title=''Donkey Kong Country''}}</ref><ref>{{cite|deadlink=y|archive=web.archive.org/web/20170110153828/http://www.nintendo.com/consumer/downloads/manual-WiiU-Donkey_Kong_Country_Tropical_Freeze.pdf|title=''Donkey Kong Country: Tropical Freeze'' American English electronic manual, tab 9: "Basic Play"|publisher=nintendo.com|accessdate=June 22, 2024|format=PDF}}</ref><ref>{{cite|date=February 1997|title=''Nintendo Magazine System'' (Australia) issue 47|page=46}}</ref> (also known as a '''Bonus Area''',<ref>{{cite|date=November 1994|title=''Nintendo Power'' volume 66|page=11|publisher=Nintendo of America|language=en-us}}</ref><ref>{{cite|quote=There are plenty of opportunities to score 1-Ups, especially in the '''Bonus Areas''' where you play games of skill.|title=''Donkey Kong Country'' Nintendo Player's Guide|page=22|date=1994|publisher=Nintendo of America|language=en-us}}</ref><ref>{{cite|quote=This special Barrel Kannon will send you through time and space to a '''Bonus Area'''.|title=''Donkey Kong Country 2: Diddy's Kong Quest'' Nintendo Player's Guide|page=18|author=Miller, Kent and Paul Shinoda|date=1995|publisher=Nintendo of America|language=en-us}}</ref> '''Bonus Level''',<ref>{{cite|quote=Bonus Barrels launch you into '''Bonus Levels''' when you jump into them.|title=''Donkey Kong Country 2: Diddy's Kong Quest'' instruction booklet|page=18|date=1995|publisher=Nintendo of America|language=en-us}}</ref><ref>{{cite|language=en-us|date=1996|title=''Donkey Kong Land 2'' instruction booklet|page=15|publisher=Nintendo of America}}</ref><ref>{{cite|title=''Donkey Kong Country 3: Dixie Kong's Double Trouble!'' instruction booklet|page=24|publisher=Nintendo of America|language=en-us|date=1996}}</ref><ref>{{cite|language=en-us|date=1997|title=''Donkey Kong Land III'' instruction booklet|page=18|publisher=Nintendo of America}}</ref><ref>{{cite|quote=There are dozens of '''Bonus Levels''' found in Donkey Kong Country. Some are easy to find, while some are almost impossible. All will give you extra lives, bananas or other surprise items.|title=''Donkey Kong Country'' instruction booklet|page=23|language=en-us|date=1994|publisher=Nintendo of America}}</ref> '''bonus stage''',<ref>{{cite|author=Announcer|quote=Welcome to bonus stage!|title=''Donkey Kong 64''}}</ref><ref>{{cite|deadlink=y|archive=web.archive.org/web/20190402120428/https://www.nintendo.com/consumer/downloads/manual-3DS-donkey-kong-country-returns-3D-en.pdf|format=PDF|title=''Donkey Kong Country Returns 3D'' electronic manual, tab 9: "Basic Play"|publisher=Nintendo of America|language=en-us|date=2013}}</ref><ref>{{cite|url=cdn02.nintendo-europe.com/media/downloads/games_8/emanuals/wii_u_6/donkey_kong_country__tropical_freeze/ElectronicManual_WiiU_DonkeyKongCountryTropicalFreeze_EN.pdf|format=PDF|title=''Donkey Kong Country: Tropical Freeze'' British English electronic manual, tab 9: "Basic Play"|publisher=Nintendo of Europe|accessdate=June 22, 2024|language=en-gb}}</ref> or '''Bonus Game'''<ref>{{cite|language=en-us|date=January 1995|title=''Nintendo Power'' volume 68|page=56|publisher=Nintendo of America}}</ref><ref>{{cite|date=December 1996|title=''Nintendo Power'' volume 91|page=58-59|publisher=Nintendo of America|language=en-us}}</ref>) is a type of location first appearing in ''[[Donkey Kong Country]]''. Bonus rooms are usually revealed either by finding a secret passage or by [[jump]]ing into a [[Bonus Barrel]]. Bonus rooms usually have a challenge that has to be completed to earn a prize, typically a key item for [[Completion|100% completion]]. In the first three ''[[Donkey Kong Country (series)|Donkey Kong Country]]'' games and the ''[[Donkey Kong Land (series)|Donkey Kong Land]]'' series, any level with all of its bonus rooms completed has an exclamation mark applied to it from the world map. | ||
Bonus | ==History== | ||
===''Donkey Kong Country''=== | |||
[[File:Diddytantrum.gif|left|frame|Diddy Kong throwing a tantrum after losing a bonus level. This also happens when the [[banana hoard]] is empty.]] | |||
{{multiple image | |||
|align=right | |||
|direction=horizontal | |||
|width=180 | |||
|image1=X2 Expresso Token.png | |||
|caption1=[[Expresso the Ostrich|Expresso]] stumbling across a [[Big Animal Token]] in his Bonus Level | |||
|image2=BonusArea.png | |||
|caption2=[[Donkey Kong]] in a "Collect the Prizes!" Bonus Level | |||
}} | |||
Bonus Levels are entered by either breaking open certain walls with [[barrel]]s or [[Animal Friend]]s to reveal secret passages, or by jumping into certain [[Blast Barrel]]s (changed to [[Bonus Barrel]]s in the [[Game Boy Advance]] remake). In [[Oil Drum Alley]], there is a Bonus Level entrance hidden within another Bonus Level, which can be entered by using a [[barrel]] to smash open its entrance. These rooms can only be entered once. Bonus Levels appear in every [[level]] except for the underwater stages and [[Mine Cart Carnage]]. [[Orang-utan Gang]] has five Bonus Levels, more than the other levels, which usually have either two or three Bonus Levels. Unlike in subsequent appearances, the main idea of Bonus Levels is to obtain common items, such as [[banana]]s, [[animal token]]s, or even a [[Red Balloon|Life Balloon]]. The Kongs do not have to complete a challenge or collect the items within to add to their completion percentage—this occurs by simply entering the Bonus Level itself. There are 67 Bonus Levels in the game. | |||
The [[Candy's Challenge]]s exclusive to the [[Donkey Kong Country (Game Boy Color)|Game Boy Color version]] are similar to Bonus Levels except a [[Banana Coin]] is rewarded for completing one. | |||
In ''Donkey Kong | There are several types of Bonus Levels. In the Game Boy Advance version, each type received its own distinct title and splash screen: | ||
{{br}} | |||
{|class="wikitable dk"style="width:100%" | |||
|- | |||
!Image and type (GBA) | |||
!style="width:10%"|Level appearances | |||
!Description | |||
|- | |||
|[[File:DKC-bashbaddies.png]]<br>'''Bash the Baddies!''' | |||
|(B) [[Vulture Culture]] <br>[[Temple Tempest]] <br>(B) [[Torchlight Trouble]] <br>(B) [[Trick Track Trek]] <br>[[Manic Mincers]] | |||
|The Kongs must jump on a [[Klaptrap]], sometimes two or three, for it to release [[banana]]s. Each time it is jumped on, the Klaptrap moves faster and releases one more banana (always in the shape of [[banana Bunch]]es) than it did the previous time. They must be jumped on about ten times to be defeated, when they release a whole Banana Bunch. By defeating the Klaptrap(s), the Kongs are usually rewarded with a [[Red Balloon|Life Balloon]]. If a Klaptrap bites Donkey Kong and Diddy, they are sent back into the main level. In [[Trick Track Trek]]'s Bonus Level, the Klaptrap is purple. | |||
|- | |||
|[[File:DKC-collectbananas.png]]<br>'''Collect the Bananas!''' | |||
|[[Reptile Rumble]] (2) <br>(B) [[Bouncy Bonanza]] <br>[[Stop & Go Station]] <br>(B) [[Tree Top Town]] <br>[[Forest Frenzy]] <br>(B) [[Snow Barrel Blast]] <br>(B) [[Slipslide Ride]] <br>(B) [[Ice Age Alley]] <br>[[Oil Drum Alley]] <br>(B) [[Trick Track Trek]] <br>[[Elevator Antics]] <br>(B) [[Mine Cart Madness]] | |||
|The Kongs must collect as many bananas as possible, usually by blasting from a series of [[Barrel Cannon]]s and [[Blast Barrel]]s. | |||
|- | |||
|[[File:DKC-collectprizes.png]]<br>'''Collect the Prizes!''' | |||
|[[Barrel Cannon Canyon]] <br>(B) [[Winky's Walkway]] <br>[[Stop & Go Station]] <br>(B) [[Millstone Mayhem]] <br>[[Orang-utan Gang]] (3) <br>(B) [[Blackout Basement]] | |||
|The Kongs are in a [[Barrel Cannon]] and have to shoot themselves upward to collect various prizes. There always are three vertical lines of individual bananas. Above the bananas are either an animal token, a Life Balloon, or a Banana Bunch. | |||
|- | |||
|[[File:DKC-findexit.png]]<br>'''Find the Exit!''' | |||
|[[Jungle Hijinxs (Donkey Kong Country)|Jungle Hijinxs]] <br>(B) [[Ropey Rampage]] <br> [[Reptile Rumble]] <br>[[Barrel Cannon Canyon]] <br>[[Vulture Culture]] <br>[[Temple Tempest]] <br>[[Orang-utan Gang]]<br>(B) [[Snow Barrel Blast]] <br>(B) [[Rope Bridge Rumble]] <br>(B) [[Oil Drum Alley]] <br>[[Elevator Antics]] <br>[[Mine Cart Madness]] <br>[[Manic Mincers]] <br>[[Misty Mine]] <br>[[Loopy Lights]] | |||
|The Kongs must go through the Bonus Level and reach the exit on the other side. | |||
|- | |||
|[[File:DKC-spellout.png]]<br>'''Spell it Out!''' | |||
|(B) [[Millstone Mayhem]] <br>(B) [[Vulture Culture]] <br>(B) [[Tree Top Town]] <br>[[Orang-utan Gang]] <br>[[Slipslide Ride]] <br>[[Oil Drum Alley]] <br>[[Elevator Antics]] <br>(B) [[Necky Nutmare]] <br>(B) [[Platform Perils]] | |||
|[[KONG Letters|K-O-N-G Letters]] either spin in a circle or switch around in barrels. In the case of the latter, "KONG" is always the word in the barrels. Each letter spells out a word, and the<br> Kongs have to jump at the ones in the right order to win a prize. | |||
|- | |||
|[[File:DKC-stopbarrel.png]]<br>'''Stop the Barrel!''' | |||
|[[Jungle Hijinxs (Donkey Kong Country)|Jungle Hijinxs]] <br>(B) [[Ropey Rampage]] <br>[[Bouncy Bonanza]] <br>[[Millstone Mayhem]] <br>(B) [[Forest Frenzy]] <br>(B) [[Snow Barrel Blast]] <br>[[Slipslide Ride]] <br>(B) [[Ice Age Alley]] <br>[[Torchlight Trouble]] <br>(B) [[Rope Bridge Rumble]] <br>[[Oil Drum Alley]] <br>(B) [[Trick Track Trek]] <br>(B) [[Tanked Up Trouble]] <br> [[Manic Mincers]] <br>[[Misty Mine]] <br>(B) [[Mine Cart Madness]] <br>[[Blackout Basement]] <br>(B) [[Platform Perils]] | |||
|An item ([[banana]], Banana Bunch, [[animal token]], or [[Red Balloon|Life Balloon]]) rapidly moves through multiple barrels. Once the item stops moving, the Kongs must jump at the<br> consisting barrel to win that prize. Sometimes in this variation, the Kongs have to match three barrels depicting the same prize. They have to respectively jump and hit the<br> same object on all of those barrels. | |||
|} | |||
<small>*Levels with a (B) are accessed via a Bonus Barrel. Levels with a number (e.g. 2) tells how many of that type is in the level.</small> | |||
There | <br> | ||
There is also a specific type of Bonus Level that features an [[Animal Friend]], either [[Rambi the Rhino|Rambi]], [[Expresso the Ostrich|Expresso]], [[Winky the Frog|Winky]], or [[Enguarde the Swordfish|Enguarde]]. Each Animal Friend's stage has a unique theme and layout, and some are based on their most common environment. Additionally, just like regular Bonus Levels, each of the Animal Buddy ones also received their own splash screen and title in the Game Boy Advance remake. The Bonus Levels revolving around Animal Friends do not reappear in any of the subsequent ''[[Donkey Kong Country (series)|Donkey Kong Country]]'' or ''[[Donkey Kong Land (series)|Donkey Kong Land]]'' titles. | |||
An Animal Friend's Bonus Level can be accessed by collecting three [[animal token]]s of the same Animal Friend. Upon collecting the third token, the Kongs are warped into a Bonus Level, where they play as the corresponding Animal Friend. The goal of these Bonus Levels is for the Animal Friend to collect as many [[Mini Animal Token]]s within the time limit. A [[Big Animal Token]] is also hiding in the location, which doubles the Kongs' Mini Animal Token total. When the time runs out, the Mini Animal Tokens are subtracted, and the Kongs receive an extra life for every 100 Mini Animal Tokens they have collected (similar to [[banana]]s). Additionally, in the Game Boy Advance version, if an Animal Friend manages to obtain 600 Mini Animal Tokens (400 for Enguarde), a [[photograph]] of that Animal Friend is added into the [[Scrapbook (Donkey Kong Country series)|Scrapbook]]. | |||
{|class="wikitable dk"width=25% | |||
|- | |||
!Image and name (GBA) | |||
!Setting | |||
|- | |||
|[[File:Enguarde Bonus - DKC GBA.png]]<br>'''Enguarde Bonus!''' | |||
|Underwater | |||
|- | |||
|[[File:Expresso Bonus - DKC GBA.png]]<br>'''Expresso Bonus!''' | |||
|Jungle | |||
|- | |||
|[[File:Rambi Bonus - DKC GBA.png]]<br>'''Rambi Bonus!''' | |||
|Snowscape | |||
|- | |||
|[[File:Winky Bonus - DKC GBA.png]]<br>'''Winky Bonus!''' | |||
|Cavern | |||
|} | |||
==== ''Donkey Kong Country | ===''Donkey Kong Land''=== | ||
[[File:Kong Token BA DKL.png|thumb|left|200px|The new type of Bonus Level from ''Donkey Kong Land'' involving Kong Tokens]] | |||
Bonus Levels reappear in ''[[Donkey Kong Land]]''. Just like with ''Donkey Kong Country'', the Bonus Level variations do not have a name, and every Bonus Level must at least be accessed to add to the 100% completion score. While many of the Bonus Levels are accessed via the same methods, some are accessed through a unique method of falling on a ground patch from a height, causing a vertical [[rope]] to fly out. By grabbing on the rope, the Kong is dragged up into a Bonus Level. The game introduces a new Bonus Level variation where the Kongs' collected [[Kong Token]]s are shot out of a revolving [[Barrel Cannon]]. The cannon fires out one Kong Token a time, if DK or Diddy jump on a ground switch. By collecting a Kong Token, the Kongs win an extra life. The only other type, which is also the most common one, involves the active Kong trying to reach the end goal, similarly to a "Find the Exit!" challenge from ''Donkey Kong Country''. | |||
In ''[[Donkey Kong Country 2: Diddy's Kong Quest]]'', Bonus | ===''Donkey Kong Country 2: Diddy's Kong Quest'' / ''Donkey Kong Land 2''=== | ||
[[File:Hot-Head Hop Bonus Area 1.png|thumb|Dixie in a Collect the Stars! challenge in Hot-Head Hop from ''Donkey Kong Country 2'']] | |||
In ''[[Donkey Kong Country 2: Diddy's Kong Quest]]'', Bonus Levels are entered much like in its predecessors, this time from [[Bonus Barrel]]s. Every level has between one to three Bonus Levels. The types of Bonus Levels were narrowed down to three, none of which reappeared from ''Donkey Kong Country''. Each type is a [[Time Limit|time-based]] challenge that the Kongs must complete to be rewarded with a [[Kremkoin]]. In the [[Lost World (Donkey Kong Country 2)|Lost World]], every level only has a single Bonus Level, with a [[DK Coin|Video Game Hero Coin]] as a reward (given that Kremkoins' purpose is to unlock a level of the Lost World). Unlike in the first game, Bonus Levels can now be reentered. Bonus Levels were also featured in ''[[Donkey Kong Land 2]]'' where their role is unchanged, and the same three types were retained. | |||
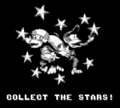
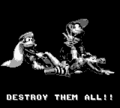
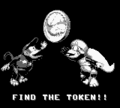
''' | The Bonus Level types first received their own title card each in ''Donkey Kong Country 2: Diddy's Kong Quest'', all of which had been retained in ''Donkey Kong Land 2'': | ||
{|class="wikitable dk"width=70% | |||
|- | |||
!width=45%|Type | |||
!Description | |||
|- | |||
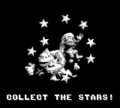
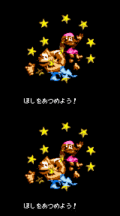
|align=center|[[File:DKC2 Collect the Stars.gif]] [[File:DKL2 Collect the Stars.png]]<br>'''Collect the Stars!''' | |||
|Diddy and Dixie must collect all of the [[star (Donkey Kong franchise)|star]]s in the Bonus Level to make the Kremkoin appear. In a few cases, there are more Stars featured than the amount required; for example, in [[Haunted Hall]]. | |||
|- | |||
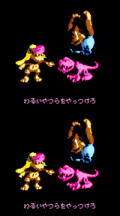
|align=center|[[File:DKC2 Destroy Them All.gif]] [[File:DKL2 Destroy Them All.png]]<br>'''Destroy Them All!''' | |||
|Diddy and Dixie must defeat all of the enemies to make the Kremkoin appear then collect it. This type is the equivalent of "Bash the Baddies!" from ''Donkey Kong Country''. In the Game Boy Advance remake, an enemy counter was added at the top-left corner of the screen (next to the head icon of a [[Kremling]]) to show the number of enemies yet to be defeated. | |||
|- | |||
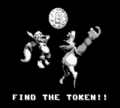
|align=center|[[File:DKC2 Find the Token.gif]] [[File:DKL2 Find the Token.png]]<br>'''Find the Token!''' (SNES) / '''Find the Kremkoin!''' (GBA) | |||
|Based on "Find the Exit!" from ''Donkey Kong Country'', Diddy and [[Dixie Kong|Dixie]] must go through the Bonus Level and collect the Kremkoin at the other side before the time runs out. | |||
|} | |||
<gallery> | |||
DKL2 Collect the Stars GB.png|Collect the Stars! (''Donkey Kong Land II'' GB) | |||
DKL2 Destroy Them All GB.png|Destroy Them All! (''Donkey Kong Land II'' GB) | |||
DKL2 Find the Token GB.png|Find the Token! (''Donkey Kong Land II'' GB) | |||
DKC2 GBA Collect the Stars.png|Collect the Stars! (''Donkey Kong Country 2'' GBA) | |||
DKC2 GBA Destroy Them All.png|Destroy Them All! (''Donkey Kong Country 2'' GBA) | |||
DKC2 GBA Find the Kremkoin.png|Find the Kremkoin! (''Donkey Kong Country 2'' GBA) | |||
</gallery> | |||
''' | ===''Donkey Kong Country 3: Dixie Kong's Double Trouble!'' / ''Donkey Kong Land III''=== | ||
[[File:Lakeside Limbo Bonus Area 1.png|thumb|Dixie and Kiddy in a "Collect 50 Stars!" Bonus Level in Lakeside Limbo from ''Donkey Kong Country 3''.]] | |||
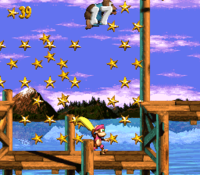
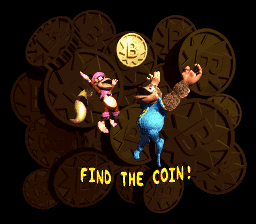
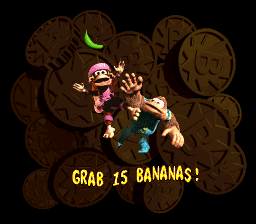
In ''[[Donkey Kong Country 3: Dixie Kong's Double Trouble!]]'', each Bonus Level is accessed from entering a Bonus Barrel, and none from any breakable wall openings like in ''Donkey Kong Country 2: Diddy's Kong Quest'' and ''Donkey Kong Land 2''. The reward for completing a Bonus Level was changed from a Kremkoin to a [[Bonus Coin (Donkey Kong franchise)|Bonus Coin]]. There is always a consistent number of two Bonus Levels per level, except for [[Krematoa]], where the number of Bonus Levels varies from zero to three. [[Rocket Rush (level)|Rocket Rush]] is the only level without any Bonus Levels. All the Bonus Levels from the previous game returned (although with different titles), and a fourth, new type was introduced, "Grab 15 Bananas!". "Collect the Stars!" was renamed to feature the number of stars in the title, for example, "Collect 50 Stars". | |||
''' | Bonus Levels in ''[[Donkey Kong Land III]]'' have a similar role as in ''Donkey Kong Country 3: Dixie Kong's Double Trouble!'', from which every Bonus Level type had been retained except Grab 15 Bananas!. Therefore, every Bonus Level type is the same as in ''Donkey Kong Country 2: Diddy's Kong Quest'' and ''Donkey Kong Land 2'', to the point of even retaining the original names (except for "Bash the Baddies!"). An extra exclamation mark was added in each Bonus Level's title, except "Collect the Stars!". | ||
==== ''Donkey Kong Country | {|class="wikitable dk"width=70% | ||
|- | |||
!width=45%|Type | |||
!Description | |||
|- | |||
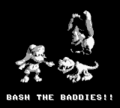
|align=center|[[File:Bash the Baddies.png]] [[File:DKL3 Bash the Baddies.png]]<br>'''Bash the Baddies!''' | |||
|The successor of "Destroy Them All!" from ''Donkey Kong Country 2''. | |||
|- | |||
|align=center|[[File:DKC3 Collect Stars.png]] [[File:DKL3 Collect the Stars.png]]<br>'''Collect __ Stars!''' (''DKC3'') / '''Collect the Stars!''' (''DKL3'') | |||
|The successor to "Collect the Stars!" from ''Donkey Kong Country 2''. The number of stars to collect is displayed from the title card. | |||
|- | |||
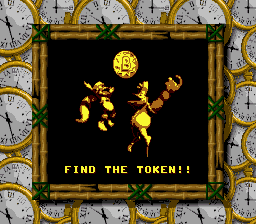
|align=center|[[File:DKC3 Find the Coin.png]] [[File:DKL3 Find the Token.png]]<br>'''Find the Coin!''' (''DKC3'') / '''Find the Token!''' (''DKL3'') | |||
|The successor of "Find the Kremkoin!" from ''Donkey Kong Country 2''. Dixie and Kiddy must go to the end of a Bonus Level and obtain its Bonus Coin. | |||
|- | |||
|align=center|[[File:DKC3 Grab 15 Bananas.png]]<br>'''Grab 15 Bananas!''' | |||
|In this Bonus Level, a green Banana spawns at one of few possible locations. After a few seconds, the banana flickers then disappears, and the next banana appears. When the Kongs collect a banana, the next one automatically spawns for them to collect. After collecting all 15 green bananas, a Bonus Coin appears for the Kongs to collect. | |||
|} | |||
<gallery> | |||
DKLIII Bash the Baddies GB.png|Bash the Baddies! (''Donkey Kong Land III'' GB) | |||
DKLIII Collect the Stars GB.png|Collect the Stars! (''Donkey Kong Land III'' GB) | |||
DKLIII Find the Token GB.png|Find the Token! (''Donkey Kong Land III'' GB) | |||
DKLIII GBC Bash the Baddies.gif|Bash the Baddies! (''Donkey Kong Land III'' GBC) | |||
DKLIII GBC Collect the Stars.gif|Collect the Stars! (''Donkey Kong Land III'' GBC) | |||
DKLIII GBC Find the Token.gif|Find the Token! (''Donkey Kong Land III'' GBC) | |||
DKC3 GBA Bash the Baddies.png|Bash the Baddies! (''Donkey Kong Country 3'' GBA) | |||
DKC3 GBA Collect Bananas.png|Collect Bananas! (''Donkey Kong Country 3'' GBA) | |||
DKC3 GBA Collect Stars.png|Collect Stars! (''Donkey Kong Country 3'' GBA) | |||
DKC3 GBA Find the Coin.png|Find the Coin! (''Donkey Kong Country 3'' GBA) | |||
</gallery> | |||
''' | ===''Donkey Kong 64''=== | ||
{{quote|Welcome to bonus stage!|Narrator|[[Donkey Kong 64]]}} | |||
Bonus Levels return in ''[[Donkey Kong 64]]'', where they were renamed "bonus stages." Most bonus stages are accessible by jumping in a [[Bonus Barrel]]. Only the [[Mine Cart Ride]] can be entered by entering a specific area. After the player has cleared a stage, the player is rewarded with a [[Golden Banana]]. Some of them can be played in [[Snide's H.Q.]] after collecting all [[blueprint]]s. The following is the list of all bonus stages in ''Donkey Kong 64'': | |||
{|class="wikitable dk"style="text-align:center" | |||
|- | |||
!Type | |||
!Snide's H.Q. | |||
!Description | |||
|- | |||
|[[File:DK Batty Barrel Bandit.png|200px]]<br>'''[[Batty Barrel Bandit!]]''' | |||
|[[File:Check mark.svg|17px]] | |||
|style="text-align:left;"|Stop the four reels of the slot machine on four bananas to earn a point. The player must do this a required number of times to win. | |||
|- | |||
|[[File:DK Beaver Bother.png|200px]]<br>'''[[Beaver Bother!]]''' | |||
|[[File:Check mark.svg|17px]] | |||
|style="text-align:left;"|The player controls a Klaptrap and tries to chase the [[Gnawty|Gnawties]] into the hole in the center of the barrel. Klaptrap must be careful not to fall into the hole itself, else it automatically loses at the mini-game. | |||
|- | |||
|[[File:DK Big Bug Bash.png|200px]]<br>'''[[Big Bug Bash!]]''' | |||
|[[File:Check mark.svg|17px]] | |||
|style="text-align:left;"|The player must use a fly swatter to swat a given number of flies within the time limit. | |||
|- | |||
|[[File:DK64 Busy Barrel Barrage.png|200px]]<br>'''[[Busy Barrel Barrage!]]''' | |||
|[[File:X mark.svg|17px]] | |||
|style="text-align:left;"|Standing the middle of a big barrel, the Kong must fire ammo at incoming Kremlings. The Kong loses if hit by an enemy. | |||
|- | |||
|[[File:DK Krazy Kong Klamor.png|200px]]<br>'''[[Krazy Kong Klamour!]]''' | |||
|[[File:Check mark.svg|17px]] | |||
|style="text-align:left;"|Lights repeatedly flicker on and off. When they turn on, the player must shoot at Golden Banana while avoiding the Kongs. | |||
|- | |||
|[[File:DK Kremling Kosh.png|200px]]<br>'''[[Kremling Kosh!]]''' | |||
|[[File:Check mark.svg|17px]] | |||
|style="text-align:left;"|The player uses a watermelon-firing cannon to shoot at [[Kritter]]s who pop out from the barrels. Normal, green Kremlings are worth one point, while red ones are worth two points. The player's objective is to shoot the required number before time runs out. | |||
|- | |||
|[[File:DK Mad Maze Maul.png|200px]]<br>'''[[Mad Maze Maul!]]''' | |||
|[[File:X mark.svg|17px]] | |||
|style="text-align:left;"|The active Kong must defeat every enemy in a maze and then cross the finish line. | |||
|- | |||
|[[File:DK Minecart Mayhem.png|200px]]<br>'''[[Minecart Mayhem!]]''' | |||
|[[File:X mark.svg|17px]] | |||
|style="text-align:left;"|The active Kong rides around in a [[Mine Cart]] and must avoid being hit by moving [[TNT Barrel]]s by switching lanes until time runs out. | |||
|- | |||
|[[File:DK Peril Path Panic.png|200px]]<br>'''[[Peril Path Panic!]]''' | |||
|[[File:Check mark.svg|17px]] | |||
|style="text-align:left;"|The objective is to fire watermelons at the Klaptraps to temporarily subdue them, allowing the [[Banana Fairy|Banana Fairies]] to safely cross the path. | |||
|- | |||
|[[File:DK Searchlight Seek.png|200px]]<br>'''[[Searchlight Seek!]]''' | |||
|[[File:Check mark.svg|17px]] | |||
|style="text-align:left;"|Using a spotlight, the player locate the Klaptraps and then fire at them. | |||
|- | |||
|[[File:DK Speedy Swing Sortie.png|200px]]<br>'''[[Speedy Swing Sortie!]]''' | |||
|[[File:X mark.svg|17px]] | |||
|style="text-align:left;"|The active Kong must climb up a tree and swing from vines to collect the coins. | |||
|- | |||
|[[File:DK Splish Splash Salvage.png|200px]]<br>'''[[Splish Splash Salvage!]]''' | |||
|[[File:X mark.svg|17px]] | |||
|style="text-align:left;"|The active Kong must swim all the way down a large barrel and collect all the coins below. | |||
|- | |||
|[[File:DK Stash Snatch.png|200px]]<br>'''[[Stash Snatch!]]''' | |||
|[[File:X mark.svg|17px]] | |||
|style="text-align:left;"|While going around a maze, the player must collect all the coins while avoiding Kremlings and then cross the finish line. | |||
|- | |||
|[[File:DK64 Stealthy Snoop.png|200px]]<br>'''[[Stealthy Snoop!]]''' | |||
|[[File:X mark.svg|17px]] | |||
|style="text-align:left;"|The player must go through a maze and find the finish line while avoiding the [[Kremling cop]]s, who shine their flashlight onto the Kong. | |||
|- | |||
|[[File:DK Teetering Turtle Trouble.png|200px]]<br>'''[[Teetering Turtle Trouble!]]''' | |||
|[[File:Check mark.svg|17px]] | |||
|style="text-align:left;"|Turtles are spinning around on the snakes' tails. To keep them spinning, the player must shoot a melon into a snake's mouth. | |||
|} | |||
[[Hideout Helm]] additionally has ten unnamed bonus stages (two for each Kong) accessed by entering metal barrels with an image of K. Rool's head on them, all of which must be completed to shut down the [[Blast-o-Matic]]. [[Rambi Arena]] and [[Enguarde Arena]] are unlockable minigames somewhat in the style of a bonus stage that can be played from the main menu. Both games can be unlocked after capturing six [[Banana Fairy|Banana Fairies]] and entering Rambi and Enguarde's respective [[animal crate]]s in the main game. | |||
''' | ===''Donkey Kong Country Returns'' (''3D'' / ''HD'')=== | ||
{{image|more=yes|section=yes|Add image here once uploaded for remaining levels that need them, specifically the Cloud levels from both ''3D'' and ''HD''.}} | |||
Bonus stages return in ''[[Donkey Kong Country Returns]]'' and its [[Donkey Kong Country Returns 3D|Nintendo 3DS]] and [[Donkey Kong Country Returns HD|Nintendo Switch]] ports, once again accessed by Blast Barrels (as Bonus Barrels do not return in this game) and secret passages, although now with only one objective. The Kongs have thirty seconds to get all [[banana]]s, [[Banana Bunch]]es, [[Banana Coin]]s, and [[Red Balloon]]s available. If they successfully collect all of them, the clock stops and a [[Puzzle Piece (Donkey Kong Country Returns)|Puzzle Piece]] appears for them to collect. | |||
''' | Like in previous games of the ''Donkey Kong Country'' series, the setting of a bonus stage depends on the world it can be found in, and it is always set in a cavernous or dimly lit room. Despite the aesthetic changes, bonus stages repeat themselves throughout the course of the game, meaning they are not unique to their levels, unlike in previous games. | ||
<gallery> | |||
DKCR Bonus Room 1.png|[[Jungle Hijinxs (Donkey Kong Country Returns)|Jungle Hijinxs]] | |||
DKCR Bonus Room 2.png|[[King of Cling]] | |||
DKCR Bonus Room 3.png|[[Tree Top Bop]] | |||
DKCR Bonus Room 4.png|Tree Top Bop | |||
DKCR Bonus Room 5.png|[[Canopy Cannons]] | |||
DKCR Bonus Room 6.png|[[Crazy Cart]] | |||
DKCR Poppin' Planks Bonus.png|[[Poppin' Planks]] | |||
DKCR Bonus Room 7.png|[[Sloppy Sands]] | |||
DKCR Peaceful Pier Bonus Room.png|[[Peaceful Pier]] | |||
DKCR Cannon Cluster Bonus Room 1.png|[[Cannon Cluster]] | |||
DKCR Cannon Cluster Bonus Room 2.png|Cannon Cluster | |||
DKCR Stormy Shore Bonus Room.png|[[Stormy Shore]] | |||
DKCR Blowhole Bound Bonus Room.png|[[Blowhole Bound]] | |||
Tidal Terror DKCR Bonus Stage.png|[[Tidal Terror]] | |||
DKCR Wonky Waterway Bonus Room.png|[[Wonky Waterway]] | |||
DKCR Button Bash Bonus Room 1.png|[[Button Bash]] | |||
Button Bash DKCR Bonus Stage 2.png|Button Bash | |||
MastBlastBonus.png|[[Mast Blast]] | |||
DKCR Damp Dungeon Bonus Room 1.png|[[Damp Dungeon]] | |||
DKCR Damp Dungeon Bonus Room 2.png|Damp Dungeon | |||
DKCR Itty Bitty Biters Bonus Room 1.png|[[Itty Bitty Biters]] | |||
DKCR Itty Bitty Biters Bonus Room 2.png|Itty Bitty Biters | |||
Temple Topple DKCR bonus room.png|[[Temple Topple]] | |||
DKCR Rickety Rails Bonus Room 1.png|[[Rickety Rails]] | |||
DKCR Rickety Rails Bonus Room 2.png|Rickety Rails | |||
Grip n Trip 2.png|[[Grip 'n' Trip]] | |||
Bombs Away DKCR Bonus Level.png|[[Bombs Away (level)|Bombs Away]] | |||
Mole Patrol DKCR Bonus Level.png|[[Mole Patrol]] | |||
DKCR Crowded Cavern Bonus Room.png|[[Crowded Cavern]] | |||
DKCR Vine Valley Bonus Room 1.png|[[Vine Valley (level)|Vine Valley]] | |||
DKCR Vine Valley Bonus Room 2.png|Vine Valley | |||
DKCR Clingy Swingy Bonus Room.png|[[Clingy Swingy]] | |||
DKCR Flutter Flyaway Bonus Room.png|[[Flutter Flyaway]] | |||
DKCR Tippin' Totems Bonus Room 1.png|[[Tippin' Totems]] | |||
DKCR Tippin' Totems Bonus Room 2.png|Tippin' Totems | |||
DKCR Longshot Launch Bonus Room.png|[[Longshot Launch]] | |||
DKCR Springy Spores Bonus Room.png|[[Springy Spores]] | |||
DKCR Wigglevine Wonders Bonus Room.png|[[Wigglevine Wonders]] | |||
DKCR Sticky Situation Bonus Room.png|[[Sticky Situation]] | |||
DKCR Prehistoric Path Bonus Room.png|[[Prehistoric Path]] | |||
DKCR Weighty Way Bonus Room.png|[[Weighty Way]] | |||
DKCR Boulder Roller Bonus Room.png|[[Boulder Roller]] | |||
DKCR Precarious Plateau Bonus Room.png|[[Precarious Plateau]] | |||
DKCR Crumble Canyon Bonus Room.png|[[Crumble Canyon]] | |||
DKCR Tippy Shippy Bonus Room 1.png|[[Tippy Shippy]] | |||
DKCR Tippy Shippy Bonus Room 2.png|[[Tippy Shippy]] | |||
DKCR Clifftop Climb Bonus Room 1.png|[[Clifftop Climb]] | |||
DKCR Clifftop Climb Bonus Room 2.png|Clifftop Climb | |||
DKCR Slammin Steel Bonus Room.png|[[Slammin' Steel]] | |||
DKCR Handy Hazards Bonus Room.png|[[Handy Hazards]] | |||
DKCR Gear Getaway Bonus Room.png|[[Gear Getaway]] | |||
DKCR Cog Jog Bonus Room.png|[[Cog Jog (level)|Cog Jog]] | |||
DKCR Switcheroo Bonus Room 1.png|[[Switcheroo]] | |||
DKCR Switcheroo Bonus Room 2.png|Switcheroo | |||
DKCR Music Madness Bonus Room.png|[[Music Madness]] | |||
DKCR Furious Fire Bonus Room.png|[[Furious Fire]] | |||
DKCR Hot Rocket Bonus Room.png|[[Hot Rocket]] | |||
DKCR Roasting Rails Bonus Room.png|[[Roasting Rails]] | |||
DKCR Bobbing Basalt Bonus Room 1.png|[[Bobbing Basalt]] | |||
DKCR Bobbing Basalt Bonus Room 2.png|Bobbing Basalt | |||
DKCR Moving Melters Bonus Room.png|[[Moving Melters]] | |||
DKCR Red Red Rising Bonus Room.png|[[Red Red Rising]] | |||
</gallery> | |||
''' | ===''Donkey Kong Country: Tropical Freeze''=== | ||
[[File:MangroveCove3.PNG|thumb|250px|A bonus room in ''Donkey Kong Country: Tropical Freeze''. This one is from [[Mangrove Cove]], although it reappears in other levels of the game.]] | |||
Bonus stages appear in ''[[Donkey Kong Country: Tropical Freeze]]'', having been renamed "bonus rooms" in the American English version. The objective of bonus rooms remains almost the same as in the previous game – the player character has to collect all 100 bananas on-screen within thirty seconds, receiving an additional [[Banana Coin]] and a [[Red Balloon]] along with the Puzzle Piece. The setting of a bonus room is not related to the world it appears in anymore; instead, all bonus rooms take place in what appears to be a treasury, with some of them being adorned with large statues in the background, suggesting they are connected to or branched off [[Secret Seclusion]]. As in the previous game, bonus rooms repeat themselves. | |||
<gallery> | |||
BonusRoom6.jpg|One of ten bonus room configurations | |||
BonusRoom7.jpg|One of ten bonus room configurations | |||
BonusRoom2.jpg|One of ten bonus room configurations | |||
BonusRoom4.jpg|One of ten bonus room configurations | |||
BonusRoom8.jpg|One of ten bonus room configurations | |||
BonusRoom1.jpg|One of ten bonus room configurations | |||
BonusRoom5.jpg|One of ten bonus room configurations | |||
BonusRoom9.jpg|One of ten bonus room configurations | |||
BonusRoom3.jpg|One of ten bonus room configurations | |||
BonusRoom10.jpg|One of ten bonus room configurations | |||
</gallery> | |||
==Names in other languages== | |||
{{foreign names | |||
|Spa=Salas de bonus | |||
|SpaM=Bonus room | |||
}} | |||
[[Category: Donkey Kong | ==References== | ||
[[Category: | <references/> | ||
{{DKC}} | |||
{{DKC2}} | |||
{{DKC3}} | |||
{{DKL}} | |||
{{DKL2}} | |||
{{DKL3}} | |||
{{DK64}} | |||
{{DKCR}} | |||
{{DKCTF}} | |||
[[Category:Secret areas]] | |||
[[Category:Donkey Kong locations]] | |||
[[Category:Donkey Kong 64 locations]] | |||
[[Category:Donkey Kong Country Returns]] | |||
[[Category:Donkey Kong Country: Tropical Freeze]] | |||
Latest revision as of 17:29, January 23, 2025
- "Bonus Level" redirects here. For other uses, see Bonus Level (disambiguation).
A bonus room[1][2][3] (also known as a Bonus Area,[4][5][6] Bonus Level,[7][8][9][10][11] bonus stage,[12][13][14] or Bonus Game[15][16]) is a type of location first appearing in Donkey Kong Country. Bonus rooms are usually revealed either by finding a secret passage or by jumping into a Bonus Barrel. Bonus rooms usually have a challenge that has to be completed to earn a prize, typically a key item for 100% completion. In the first three Donkey Kong Country games and the Donkey Kong Land series, any level with all of its bonus rooms completed has an exclamation mark applied to it from the world map.
History[edit]
Donkey Kong Country[edit]
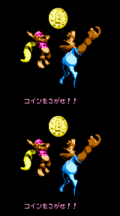
Bonus Levels are entered by either breaking open certain walls with barrels or Animal Friends to reveal secret passages, or by jumping into certain Blast Barrels (changed to Bonus Barrels in the Game Boy Advance remake). In Oil Drum Alley, there is a Bonus Level entrance hidden within another Bonus Level, which can be entered by using a barrel to smash open its entrance. These rooms can only be entered once. Bonus Levels appear in every level except for the underwater stages and Mine Cart Carnage. Orang-utan Gang has five Bonus Levels, more than the other levels, which usually have either two or three Bonus Levels. Unlike in subsequent appearances, the main idea of Bonus Levels is to obtain common items, such as bananas, animal tokens, or even a Life Balloon. The Kongs do not have to complete a challenge or collect the items within to add to their completion percentage—this occurs by simply entering the Bonus Level itself. There are 67 Bonus Levels in the game.
The Candy's Challenges exclusive to the Game Boy Color version are similar to Bonus Levels except a Banana Coin is rewarded for completing one.
There are several types of Bonus Levels. In the Game Boy Advance version, each type received its own distinct title and splash screen:
| Image and type (GBA) | Level appearances | Description |
|---|---|---|
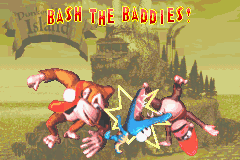 Bash the Baddies! |
(B) Vulture Culture Temple Tempest (B) Torchlight Trouble (B) Trick Track Trek Manic Mincers |
The Kongs must jump on a Klaptrap, sometimes two or three, for it to release bananas. Each time it is jumped on, the Klaptrap moves faster and releases one more banana (always in the shape of banana Bunches) than it did the previous time. They must be jumped on about ten times to be defeated, when they release a whole Banana Bunch. By defeating the Klaptrap(s), the Kongs are usually rewarded with a Life Balloon. If a Klaptrap bites Donkey Kong and Diddy, they are sent back into the main level. In Trick Track Trek's Bonus Level, the Klaptrap is purple. |
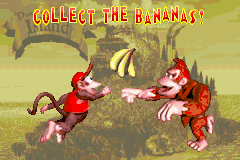 Collect the Bananas! |
Reptile Rumble (2) (B) Bouncy Bonanza Stop & Go Station (B) Tree Top Town Forest Frenzy (B) Snow Barrel Blast (B) Slipslide Ride (B) Ice Age Alley Oil Drum Alley (B) Trick Track Trek Elevator Antics (B) Mine Cart Madness |
The Kongs must collect as many bananas as possible, usually by blasting from a series of Barrel Cannons and Blast Barrels. |
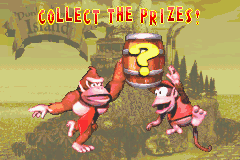 Collect the Prizes! |
Barrel Cannon Canyon (B) Winky's Walkway Stop & Go Station (B) Millstone Mayhem Orang-utan Gang (3) (B) Blackout Basement |
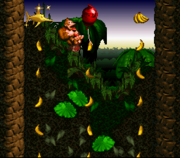
The Kongs are in a Barrel Cannon and have to shoot themselves upward to collect various prizes. There always are three vertical lines of individual bananas. Above the bananas are either an animal token, a Life Balloon, or a Banana Bunch. |
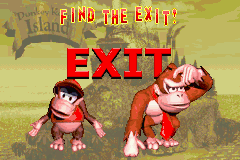 Find the Exit! |
Jungle Hijinxs (B) Ropey Rampage Reptile Rumble Barrel Cannon Canyon Vulture Culture Temple Tempest Orang-utan Gang (B) Snow Barrel Blast (B) Rope Bridge Rumble (B) Oil Drum Alley Elevator Antics Mine Cart Madness Manic Mincers Misty Mine Loopy Lights |
The Kongs must go through the Bonus Level and reach the exit on the other side. |
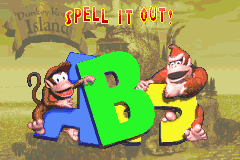 Spell it Out! |
(B) Millstone Mayhem (B) Vulture Culture (B) Tree Top Town Orang-utan Gang Slipslide Ride Oil Drum Alley Elevator Antics (B) Necky Nutmare (B) Platform Perils |
K-O-N-G Letters either spin in a circle or switch around in barrels. In the case of the latter, "KONG" is always the word in the barrels. Each letter spells out a word, and the Kongs have to jump at the ones in the right order to win a prize. |
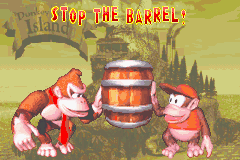 Stop the Barrel! |
Jungle Hijinxs (B) Ropey Rampage Bouncy Bonanza Millstone Mayhem (B) Forest Frenzy (B) Snow Barrel Blast Slipslide Ride (B) Ice Age Alley Torchlight Trouble (B) Rope Bridge Rumble Oil Drum Alley (B) Trick Track Trek (B) Tanked Up Trouble Manic Mincers Misty Mine (B) Mine Cart Madness Blackout Basement (B) Platform Perils |
An item (banana, Banana Bunch, animal token, or Life Balloon) rapidly moves through multiple barrels. Once the item stops moving, the Kongs must jump at the consisting barrel to win that prize. Sometimes in this variation, the Kongs have to match three barrels depicting the same prize. They have to respectively jump and hit the same object on all of those barrels. |
*Levels with a (B) are accessed via a Bonus Barrel. Levels with a number (e.g. 2) tells how many of that type is in the level.
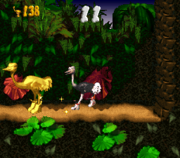
There is also a specific type of Bonus Level that features an Animal Friend, either Rambi, Expresso, Winky, or Enguarde. Each Animal Friend's stage has a unique theme and layout, and some are based on their most common environment. Additionally, just like regular Bonus Levels, each of the Animal Buddy ones also received their own splash screen and title in the Game Boy Advance remake. The Bonus Levels revolving around Animal Friends do not reappear in any of the subsequent Donkey Kong Country or Donkey Kong Land titles.
An Animal Friend's Bonus Level can be accessed by collecting three animal tokens of the same Animal Friend. Upon collecting the third token, the Kongs are warped into a Bonus Level, where they play as the corresponding Animal Friend. The goal of these Bonus Levels is for the Animal Friend to collect as many Mini Animal Tokens within the time limit. A Big Animal Token is also hiding in the location, which doubles the Kongs' Mini Animal Token total. When the time runs out, the Mini Animal Tokens are subtracted, and the Kongs receive an extra life for every 100 Mini Animal Tokens they have collected (similar to bananas). Additionally, in the Game Boy Advance version, if an Animal Friend manages to obtain 600 Mini Animal Tokens (400 for Enguarde), a photograph of that Animal Friend is added into the Scrapbook.
| Image and name (GBA) | Setting |
|---|---|
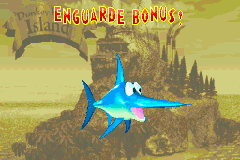 Enguarde Bonus! |
Underwater |
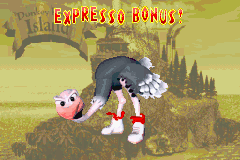 Expresso Bonus! |
Jungle |
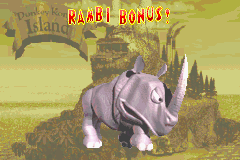 Rambi Bonus! |
Snowscape |
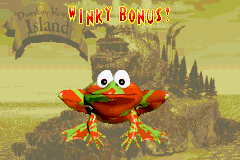 Winky Bonus! |
Cavern |
Donkey Kong Land[edit]
Bonus Levels reappear in Donkey Kong Land. Just like with Donkey Kong Country, the Bonus Level variations do not have a name, and every Bonus Level must at least be accessed to add to the 100% completion score. While many of the Bonus Levels are accessed via the same methods, some are accessed through a unique method of falling on a ground patch from a height, causing a vertical rope to fly out. By grabbing on the rope, the Kong is dragged up into a Bonus Level. The game introduces a new Bonus Level variation where the Kongs' collected Kong Tokens are shot out of a revolving Barrel Cannon. The cannon fires out one Kong Token a time, if DK or Diddy jump on a ground switch. By collecting a Kong Token, the Kongs win an extra life. The only other type, which is also the most common one, involves the active Kong trying to reach the end goal, similarly to a "Find the Exit!" challenge from Donkey Kong Country.
Donkey Kong Country 2: Diddy's Kong Quest / Donkey Kong Land 2[edit]
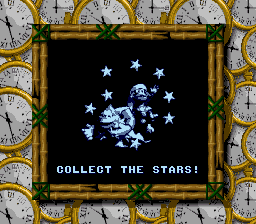
In Donkey Kong Country 2: Diddy's Kong Quest, Bonus Levels are entered much like in its predecessors, this time from Bonus Barrels. Every level has between one to three Bonus Levels. The types of Bonus Levels were narrowed down to three, none of which reappeared from Donkey Kong Country. Each type is a time-based challenge that the Kongs must complete to be rewarded with a Kremkoin. In the Lost World, every level only has a single Bonus Level, with a Video Game Hero Coin as a reward (given that Kremkoins' purpose is to unlock a level of the Lost World). Unlike in the first game, Bonus Levels can now be reentered. Bonus Levels were also featured in Donkey Kong Land 2 where their role is unchanged, and the same three types were retained.
The Bonus Level types first received their own title card each in Donkey Kong Country 2: Diddy's Kong Quest, all of which had been retained in Donkey Kong Land 2:
| Type | Description |
|---|---|
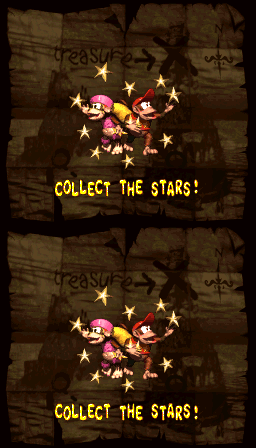 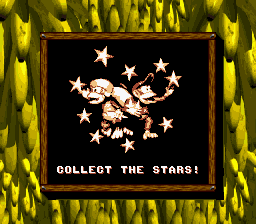 Collect the Stars! |
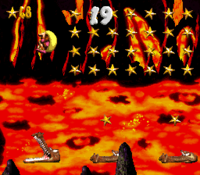
Diddy and Dixie must collect all of the stars in the Bonus Level to make the Kremkoin appear. In a few cases, there are more Stars featured than the amount required; for example, in Haunted Hall. |
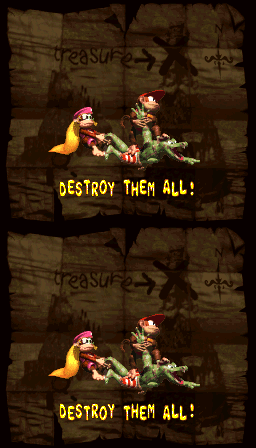 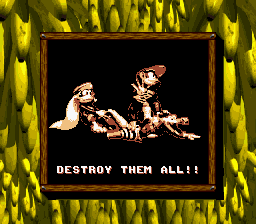 Destroy Them All! |
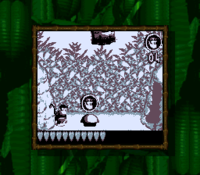
Diddy and Dixie must defeat all of the enemies to make the Kremkoin appear then collect it. This type is the equivalent of "Bash the Baddies!" from Donkey Kong Country. In the Game Boy Advance remake, an enemy counter was added at the top-left corner of the screen (next to the head icon of a Kremling) to show the number of enemies yet to be defeated. |
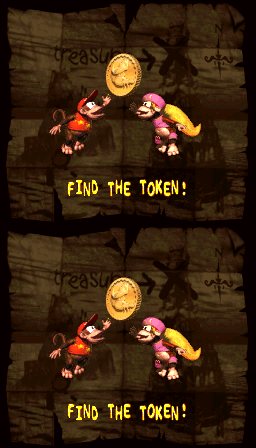 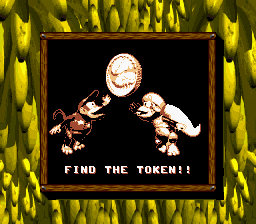 Find the Token! (SNES) / Find the Kremkoin! (GBA) |
Based on "Find the Exit!" from Donkey Kong Country, Diddy and Dixie must go through the Bonus Level and collect the Kremkoin at the other side before the time runs out. |
Donkey Kong Country 3: Dixie Kong's Double Trouble! / Donkey Kong Land III[edit]
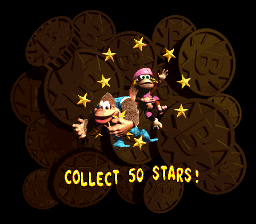
In Donkey Kong Country 3: Dixie Kong's Double Trouble!, each Bonus Level is accessed from entering a Bonus Barrel, and none from any breakable wall openings like in Donkey Kong Country 2: Diddy's Kong Quest and Donkey Kong Land 2. The reward for completing a Bonus Level was changed from a Kremkoin to a Bonus Coin. There is always a consistent number of two Bonus Levels per level, except for Krematoa, where the number of Bonus Levels varies from zero to three. Rocket Rush is the only level without any Bonus Levels. All the Bonus Levels from the previous game returned (although with different titles), and a fourth, new type was introduced, "Grab 15 Bananas!". "Collect the Stars!" was renamed to feature the number of stars in the title, for example, "Collect 50 Stars".
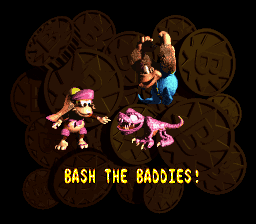
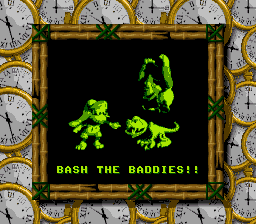
Bonus Levels in Donkey Kong Land III have a similar role as in Donkey Kong Country 3: Dixie Kong's Double Trouble!, from which every Bonus Level type had been retained except Grab 15 Bananas!. Therefore, every Bonus Level type is the same as in Donkey Kong Country 2: Diddy's Kong Quest and Donkey Kong Land 2, to the point of even retaining the original names (except for "Bash the Baddies!"). An extra exclamation mark was added in each Bonus Level's title, except "Collect the Stars!".
Donkey Kong 64[edit]
- “Welcome to bonus stage!”
- —Narrator, Donkey Kong 64
Bonus Levels return in Donkey Kong 64, where they were renamed "bonus stages." Most bonus stages are accessible by jumping in a Bonus Barrel. Only the Mine Cart Ride can be entered by entering a specific area. After the player has cleared a stage, the player is rewarded with a Golden Banana. Some of them can be played in Snide's H.Q. after collecting all blueprints. The following is the list of all bonus stages in Donkey Kong 64:
| Type | Snide's H.Q. | Description |
|---|---|---|
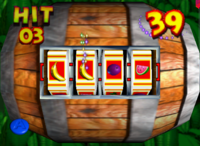 Batty Barrel Bandit! |
Stop the four reels of the slot machine on four bananas to earn a point. The player must do this a required number of times to win. | |
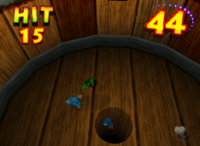 Beaver Bother! |
The player controls a Klaptrap and tries to chase the Gnawties into the hole in the center of the barrel. Klaptrap must be careful not to fall into the hole itself, else it automatically loses at the mini-game. | |
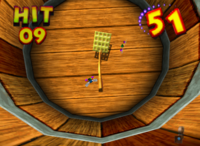 Big Bug Bash! |
The player must use a fly swatter to swat a given number of flies within the time limit. | |
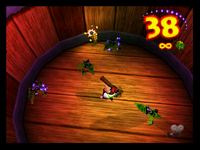 Busy Barrel Barrage! |
Standing the middle of a big barrel, the Kong must fire ammo at incoming Kremlings. The Kong loses if hit by an enemy. | |
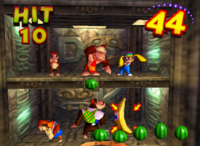 Krazy Kong Klamour! |
Lights repeatedly flicker on and off. When they turn on, the player must shoot at Golden Banana while avoiding the Kongs. | |
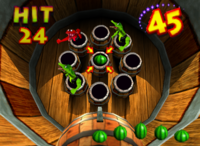 Kremling Kosh! |
The player uses a watermelon-firing cannon to shoot at Kritters who pop out from the barrels. Normal, green Kremlings are worth one point, while red ones are worth two points. The player's objective is to shoot the required number before time runs out. | |
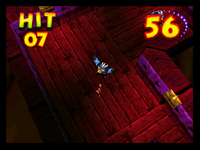 Mad Maze Maul! |
The active Kong must defeat every enemy in a maze and then cross the finish line. | |
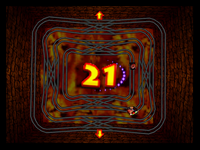 Minecart Mayhem! |
The active Kong rides around in a Mine Cart and must avoid being hit by moving TNT Barrels by switching lanes until time runs out. | |
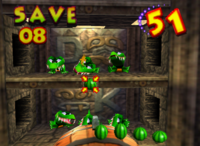 Peril Path Panic! |
The objective is to fire watermelons at the Klaptraps to temporarily subdue them, allowing the Banana Fairies to safely cross the path. | |
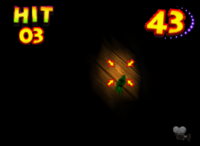 Searchlight Seek! |
Using a spotlight, the player locate the Klaptraps and then fire at them. | |
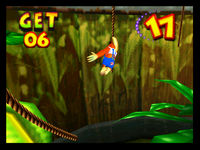 Speedy Swing Sortie! |
The active Kong must climb up a tree and swing from vines to collect the coins. | |
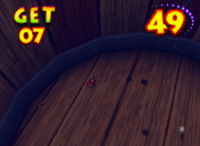 Splish Splash Salvage! |
The active Kong must swim all the way down a large barrel and collect all the coins below. | |
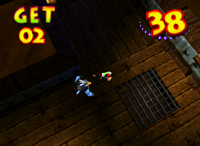 Stash Snatch! |
While going around a maze, the player must collect all the coins while avoiding Kremlings and then cross the finish line. | |
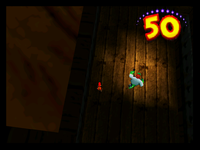 Stealthy Snoop! |
The player must go through a maze and find the finish line while avoiding the Kremling cops, who shine their flashlight onto the Kong. | |
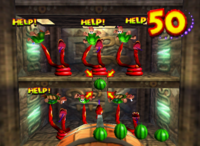 Teetering Turtle Trouble! |
Turtles are spinning around on the snakes' tails. To keep them spinning, the player must shoot a melon into a snake's mouth. |
Hideout Helm additionally has ten unnamed bonus stages (two for each Kong) accessed by entering metal barrels with an image of K. Rool's head on them, all of which must be completed to shut down the Blast-o-Matic. Rambi Arena and Enguarde Arena are unlockable minigames somewhat in the style of a bonus stage that can be played from the main menu. Both games can be unlocked after capturing six Banana Fairies and entering Rambi and Enguarde's respective animal crates in the main game.
Donkey Kong Country Returns (3D / HD)[edit]
It has been requested that more images be uploaded for this section. Remove this notice only after the additional images have been added. Specifics: Add image here once uploaded for remaining levels that need them, specifically the Cloud levels from both 3D and HD.
Bonus stages return in Donkey Kong Country Returns and its Nintendo 3DS and Nintendo Switch ports, once again accessed by Blast Barrels (as Bonus Barrels do not return in this game) and secret passages, although now with only one objective. The Kongs have thirty seconds to get all bananas, Banana Bunches, Banana Coins, and Red Balloons available. If they successfully collect all of them, the clock stops and a Puzzle Piece appears for them to collect.
Like in previous games of the Donkey Kong Country series, the setting of a bonus stage depends on the world it can be found in, and it is always set in a cavernous or dimly lit room. Despite the aesthetic changes, bonus stages repeat themselves throughout the course of the game, meaning they are not unique to their levels, unlike in previous games.
Donkey Kong Country: Tropical Freeze[edit]
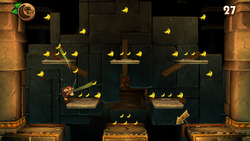
Bonus stages appear in Donkey Kong Country: Tropical Freeze, having been renamed "bonus rooms" in the American English version. The objective of bonus rooms remains almost the same as in the previous game – the player character has to collect all 100 bananas on-screen within thirty seconds, receiving an additional Banana Coin and a Red Balloon along with the Puzzle Piece. The setting of a bonus room is not related to the world it appears in anymore; instead, all bonus rooms take place in what appears to be a treasury, with some of them being adorned with large statues in the background, suggesting they are connected to or branched off Secret Seclusion. As in the previous game, bonus rooms repeat themselves.
Names in other languages[edit]
| Language | Name | Meaning | Notes |
|---|---|---|---|
| Spanish | Salas de bonus[?] | Bonus room |
References[edit]
- ^ "I'm sure there must be some bonus rooms you haven't found!" – Cranky Kong. Donkey Kong Country.
- ^ Donkey Kong Country: Tropical Freeze American English electronic manual, tab 9: "Basic Play" (PDF). nintendo.com. Archived January 10, 2017, 15:38:28 UTC from the original via Wayback Machine. Retrieved June 22, 2024.
- ^ February 1997. Nintendo Magazine System (Australia) issue 47. Page 46.
- ^ November 1994. Nintendo Power volume 66. Nintendo of America (American English). Page 11.
- ^ "There are plenty of opportunities to score 1-Ups, especially in the Bonus Areas where you play games of skill." – 1994. Donkey Kong Country Nintendo Player's Guide. Nintendo of America (American English). Page 22.
- ^ "This special Barrel Kannon will send you through time and space to a Bonus Area." – Miller, Kent and Paul Shinoda (1995). Donkey Kong Country 2: Diddy's Kong Quest Nintendo Player's Guide. Nintendo of America (American English). Page 18.
- ^ "Bonus Barrels launch you into Bonus Levels when you jump into them." – 1995. Donkey Kong Country 2: Diddy's Kong Quest instruction booklet. Nintendo of America (American English). Page 18.
- ^ 1996. Donkey Kong Land 2 instruction booklet. Nintendo of America (American English). Page 15.
- ^ 1996. Donkey Kong Country 3: Dixie Kong's Double Trouble! instruction booklet. Nintendo of America (American English). Page 24.
- ^ 1997. Donkey Kong Land III instruction booklet. Nintendo of America (American English). Page 18.
- ^ "There are dozens of Bonus Levels found in Donkey Kong Country. Some are easy to find, while some are almost impossible. All will give you extra lives, bananas or other surprise items." – 1994. Donkey Kong Country instruction booklet. Nintendo of America (American English). Page 23.
- ^ "Welcome to bonus stage!" – Announcer. Donkey Kong 64.
- ^ 2013. Donkey Kong Country Returns 3D electronic manual, tab 9: "Basic Play" (PDF). Nintendo of America (American English). Archived April 2, 2019, 12:04:28 UTC from the original via Wayback Machine.
- ^ Donkey Kong Country: Tropical Freeze British English electronic manual, tab 9: "Basic Play" (PDF). Nintendo of Europe (British English). Retrieved June 22, 2024.
- ^ January 1995. Nintendo Power volume 68. Nintendo of America (American English). Page 56.
- ^ December 1996. Nintendo Power volume 91. Nintendo of America (American English). Page 58-59.
