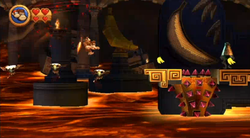
Tumblin' Temple
- Not to be confused with Tumble Temple.
| Level | |
|---|---|
| Tumblin' Temple | |
| |
| Level code | 2-K |
| World | Beach |
| Game | Donkey Kong Country Returns (3D/HD) |
| << Directory of levels >> | |
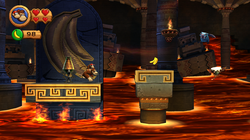
Tumblin' Temple is the fifteenth level in Donkey Kong Country Returns and its Nintendo 3DS and Nintendo Switch ports, as well as the eighth and final level in the Beach world. It is the world's Key Temple, as all of the K-O-N-G Letters in the world must be collected to unlock it.
This level, as its name suggests, takes place inside of a temple, where many falling platforms can be found. Almost every platform and structure seen in this level falls from above, and in many cases, Donkey and Diddy Kong must wait for the platforms to fall to progress. However, they also must move fast, as the platforms are constantly sinking into the lava below them. To avoid being burnt by the lava, they must quickly race up the falling platforms and climb up a grassy turf that is seen along some walls. Spikes also appear as an obstacle in this level, along with some Skellirexes. Several Squeeklys fly through the temple, and they can be bounced on to clear the level quickly.
In the Time Attack mode, a time of 1:06:00 is needed for a shiny gold medal, a time of 1:13:00 for gold, a time of 1:21:00 for silver, and a time of 1:33:00 for bronze.
Overview[edit]
At the beginning of the level, a straight path leads to a gap of lava. A platform is on the other side of the gap with a DK Barrel and a Skellirex on it. There are two smaller platforms with Banana Bunches on them ahead, and they slowly sink into the lava when stepped on. When the Kongs reach the last of these platforms, another platform falls from above and begins to sink into the lava as well. If they travel along this, they can reach two more platforms standing above the lava, which sink when stood on. The platforms have a wide gap between them, but a Tiki Buzz is in it to help them cross. Squeeklys also fly around the area. A long, solid platform is ahead that falls from above. Three Skellirexes are on it, along with bananas and Banana Coins. When they reach the end of the platform, a large structure falls into the lava. It has a few platforms sticking out of it. As it sinks, the heroes must climb the platforms to avoiding hitting the lava. Just as they approach the top of the structure, an even larger structure plummets into the lava. Like before, they must climb up the platforms all around it as it sinks into the lava to survive. Soon, another structure with a solid platform on it appears next to it, with another platform falling by it. The primates must dodge some Squeeklys while moving along the platforms to reach a large gap with three Tiki Buzzes and a Red Balloon above it.
Once they cross it, they can reach a platform with some spikes in the middle of it. A similar platform is right next to it after a gap, and since they are both attached to the same structure, they both sink at the same time when they are landed on. The heroes must travel across them while avoiding a Tiki Buzz and a Skellirex to make another platform fall ahead that they can use. Squeeklys attack them here. After a while, a structure covered in spikes falls in front of the Kongs. When it sinks, a safe platform appears that they can use to progress to a smaller platform that falls soon after it. A small platform connected to a large structure is after a gap with a Tiki Buzz. A platform with sharp spikes in the center of it and some Squeekly enemies are also around the structure. There is also a third platform at the end of the structure that has an urn on it and a Puzzle Piece looming under it. A gap follows, but a Tiki Buzz floats above it to help the duo cross.
A platform is connected to a structure on the other end of the gap. There is a platform ahead of it, which the primates can reach by using the grassy turf on higher platform. After they pass these three platforms, they come up to another small abyss with a Tiki Buzz in it. Two pillar-like platforms follow that sink into the lava when stood on. They are spaced far apart, but a Tiki Buzz is between them to aid Donkey and Diddy in crossing. When they reach the second platform, a large structure falls behind them, with a wall of turf on it. They can climb the turf to find a set of two platforms. The first platform has an urn on it, which contains a Puzzle Piece. Eventually, another turf-covered structure falls near the Kongs. As they reach the end of the turf, it curves to the left towards another platform. Two smaller platforms following it can be used to climb to the top of the structure, which has a section of spikes on it. Two walls covered in turf fall when they jump over the obstacles, and they can ascend with them to avoid sinking into the treacherous lava. As they climb, they must hop between the walls so they can climb to the top of the wall on the right, which has two small platforms above it. As they progress up these platforms, a curved structure covered in turf falls towards them, with a long wall of turf following it to the side. The primates must climb along the curved structure so they can reach the wall with ease. As they mount the wall, it begins to curve to the right, letting them off to the top of the wall. After a small gap of lava, they can access an area with the second Rare Orb in it. When they grab the orb, the level is completed.
Enemies[edit]
| Image | Name | Amount |
|---|---|---|
| Skellirex | 5 | |

|
Squeekly | 24 |

|
Tiki Buzz | 8 |
Items[edit]
| Image | Name | Amount |
|---|---|---|
| Banana Coin | 3 | |
| DK Barrel | 1 | |
| Red Balloon | 1 |
Puzzle Pieces[edit]
| Image | Number | Location |
|---|---|---|
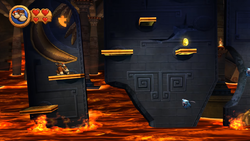
|
1 | The first Puzzle Piece is early in the level. The Kongs must hop up the first tower of platforms and wait on the last one. After a few seconds of the entire platform sinking, the piece appears near the top. The player must now jump up to grab it, and then hop onto the next platform tower. |
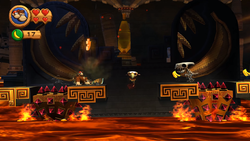
|
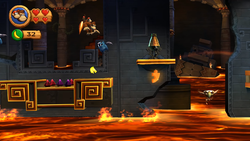
2 | The next Puzzle Piece is on a set of dual platforms with a spiky array in between it. The Kongs must break a vase to release the second Puzzle Piece while rushing, as the platform sinks in the lava. |
|
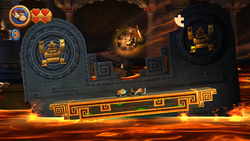
3 | The third Puzzle Piece is on a wide platform tower just a little after the second piece. The player can find it under the last platform, and they must roll into it. As soon as the player grabs it, they must hop up so they do not hit the lava. |
|
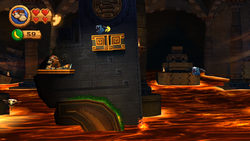
4 | The fourth Puzzle Piece is also found in a vase, much like the second one. After the third Puzzle Piece, there is a hanging platform with grass on the bottom the Kongs can cling onto. When this platform lowers, the Kongs can get a boosted jump from a Squeekly to reach a vace with the Puzzle Piece. |
|
5 | The final Puzzle Piece is on a massive grassy platform tower. After climbing up some grassy platforms, The Kongs can find a vase. They must break open the vase to grab the Puzzle Piece. |
Names in other languages[edit]
| Language | Name | Meaning | Notes |
|---|---|---|---|
| Japanese | ホットリバーラビリンス[?] Hotto Ribā Rabirinsu |
Hot River Labyrinth | |
| Chinese (simplified) | 热河迷宫[?] Rèhé Mígōng |
Hot River Maze | |
| Chinese (traditional) | 熱河迷宮[?] Rèhé Mígōng |
Hot River Maze | |
| French (NOA) | Temple Tombant[?] | Falling Temple | |
| German | Trümmertempel[?] | Debris Temple | |
| Italian | Tempio sprofondo[?] | Collapsing Temple | |
| Spanish | Templo Tambaleante[?] | Swaying Temple |
