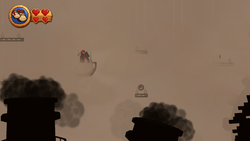
Foggy Fumes
| Level | |
|---|---|
| Foggy Fumes | |
| |
| Level code | 7-1 |
| World | Factory |
| Game | Donkey Kong Country Returns (3D/HD) |
| Music track | Palm Tree Groove |
| << Directory of levels >> | |
Foggy Fumes is the forty-seventh level in Donkey Kong Country Returns and its Nintendo 3DS and Nintendo Switch ports, as well as the first level in the Factory world.
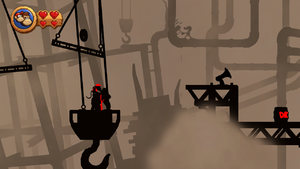
The whole level takes place in an industrial area with fans and cranes and is covered in fog, giving it the same effect as Sunset Shore. The fog obstructs the view of the platforms, but Donkey Kong can blow away some of the fog to reveal the path ahead, or even Puzzle Pieces and Banana Coins. At the end of the level, Donkey Kong must Ground Pound a switch to activate some giant, red fans that blow away all the fog in the level. When the Kongs complete Foggy Fumes the first time, all of the smoke obscuring the Factory is blown away, making the entire area visible.
Completing this level clears the pollution over the rest of the Factory. Additionally, Foggy Fumes features many references to other games. If the player looks at the background around the starting point of the stage, they can see the original 25m stage in the background. Later in the background of the stage, the player can see Mr. Game & Watch using his hammer. Incidentally, Game & Watches were a key element of a deleted retro-style stage, as seen in the Bonus Gallery. A crane seen next to the 25m structure carries a structure that has a resemblance to Crocomire's skull from Super Metroid.
In the Time Attack mode, a time of 1:08:00 is needed for a shiny gold medal, a time of 1:19:00 for gold, a time of 1:36:00 for silver, and a time of 1:54:00 for bronze.
Overview[edit]
The level begins on a straight rocky pathway with a gap soon after it. A taller platform stands in the gap that the Kongs can use to reach a girder with a Tiki Goon on it. A strange object is on the girder that the primates can walk into for an item. A fan with platforms sticking out of it is ahead in a gap. The fan turns left or right, depending on which side the Kongs' weight is on it. A platform with a hook on the bottom of it moves across more of the gap after a small girder platform with a Tiki Zing on it. They can ride on the platform to cross some of the gap and reach another fan with platforms on it. The letter K of the K-O-N-G Letters sits on a hanging platform found above that moves back and forth. A third fan is positioned after a Tiki Buzz nearby. It can help the heroes reach a mechanism that moves up and down slowly. A hanging girder is above this object. Long, stationary girders are ahead, and a Pogobot is on one of them between two walls. If the primates pass the foe and make it to the end of the girder platforms, they find another object with a hook on it moving across a gap. It has two platforms hanging above it, one of which that has a Banana Coin on it.
More girders follow, the first girder with a blow horn on it and the second with a DK Barrel. Additional girders are placed around two objects that slowly move up and down. One of these girders has a Tiki Goon on it, and another farther ahead has two Banana Bunches on it. A long girder near the end of this area also holds two Pogobots that attack the Kongs. A Barrel Cannon is at the end of this set of girders that can shoot the heroes into the background. The background is full of many solid, stationary platforms. However, the area is very cloudy and therefore hard to see in. The Kongs must navigate through the fog on the platforms scattered around to progress. One of these platforms at the bottom of the area has the letter O on it, while another higher up features a Red Balloon. A gap is ahead, but it can be crossed if the duo uses a platform with a hook on it to ride across. Once they cross the gap, they come to some more platforms hidden by fog and a Barrel Cannon at the end of the area. The barrel shoots them into the foreground, where the Tutorial Pig and the first checkpoint can be found.
A straight path of girders is ahead, with Pogobots attacking the Kongs along them as they progress. Several platforms also hang from above on the way through this area, some of which have items on them. Between every girder is also on object that moves up and down, and a Tiki Goon is placed on the last girder in the area before another fan. The fan is connected to a chain that pulls up a nearby wall in Donkey and Diddy's way when they turn the giant fan with their weight. When the wall is pulled upwards, they can reach a Barrel Cannon that shoots them past a trail of bananas to another cannon. Flaming Tiki Buzzes must be avoided as they shoot. The second Barrel Cannon shoots the heroes into the background, where more fog blocks their view. A third Barrel Cannon is placed at the end of the background area. They must reach it by crossing gaps with platforms the move back and forth over the pit below. Solid platforms are between some of these shifting objects the they can stand on and jump along to progress. When they finally reach the Barrel Cannon, it blasts them into the foreground, where there is a long girder with a Pogobot on it. A Tiki Zing also attacks here. There are two hanging platforms swaying over a pit ahead that the primates can use to reach a stationary platform with the Tutorial Pig and the second checkpoint on it.
A long, curvy pathway is ahead. Three spaced-out objects hand over the pathway that drop Tiki Zings on it. The enemies cut through the remaining part of the path ahead of them when they are dropped to the ground from the objects. The heroes must travel across this curvy pathway, coming up to the letter G and some bananas near the end of it. A blow horn sits at the end of the curvy path, which is followed by two hanging platforms located over an abyss. They can jump along them to reach a pair of large fans nearby. A Puzzle Piece is placed on one of the platforms connected to the first fan. A long girder is after the second fan, and two additional fans with a red switch between them are on it. Tiki Goons are located all along the girder, which has two raised platforms on its sides; the raised platform on the far end of it has a blow horn on it. When the Kongs pound on the switch above the middle of the girder, the fog clears, revealing the factory and the Kongs are automatically shot into the background again by an Auto Fire Barrel. They land on a set of girders under the Slot Machine Barrel; when this barrel is hit, the level is complete.
Enemies[edit]
| Image | Name | Count |
|---|---|---|

|
Flaming Tiki Buzz | 2 |
| Pogobot | 7 | |

|
Tiki Buzz | 1 |
| Tiki Goon | 8 | |

|
Tiki Zing | Indefinite |
Items[edit]
| Image | Name | Count |
|---|---|---|
| Banana Coin | 11 | |
| DK Barrel | 1 | |

|
Heart | 1 |
| Red Balloon | 3 |
K-O-N-G Letters[edit]
| Image | Letter | Location |
|---|---|---|
|
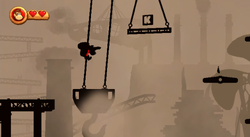
K | Above a hanging platform by the first damaged fan. |
|
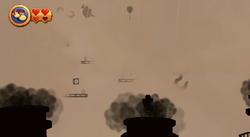
O | On the first platform in the bottom row of platforms in the background. |
|
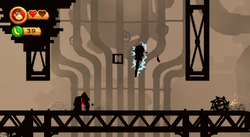
N | After blasting into the foreground following the fourth Puzzle Piece, the letter N can be seen in the air next to a Pogobot. |
|
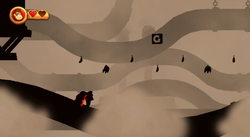
G | At the end of the curved pathway following the second checkpoint. It can be reached if the Kongs roll jump from one of the higher parts of the curved path. |
Puzzle Pieces[edit]
| Image | Number | Location |
|---|---|---|
|
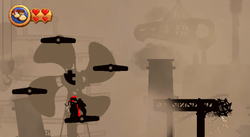
1 | On the first fan, the Kongs must turn the large object by standing on the platforms on it. This causes bananas to appear, and the Kongs must collect all of them and the Banana Coin for a Puzzle Piece to appear in the middle of the fan. |
|
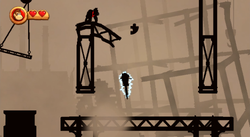
2 | After the third giant fan, on top of a wall that is next to a hanging platform. |
|
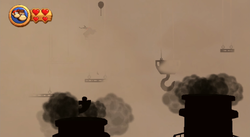
3 | From the first checkpoint, the Kongs must go left and roll-jump over the gap to reach a hidden platform. The Puzzle Piece is hidden behind the smoke of the third exhaust pipe. |
|
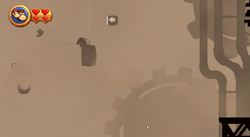
4 | Just before the Barrel Cannon at the end of the second background area, the Kongs must blow above the second swinging platform to reveal the Puzzle Piece. |
|
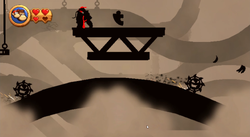
5 | Shortly after the second checkpoint, in a wall next to two hanging platforms. The Kongs must roll jump into the wall to access a hidden area with a Puzzle Piece. |
|
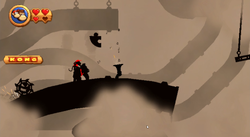
6 | After the letter G, the Kongs can blow on a blow horn to make a Puzzle Piece appear. |
|
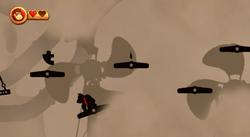
7 | Behind the fog on the top-left platform after reaching the first fan platform from the sixth Puzzle Piece. |
Names in other languages[edit]
| Language | Name | Meaning | Notes |
|---|---|---|---|
| Japanese | フォギーファクトリー[?] Fogī Fakutorī |
Foggy Factory | |
| Chinese (traditional) | 迷霧工廠[?] Míwù Gōngchǎng |
Mist Factory | |
| French (NOA) | Fumeuse Fabrique[?] | Smoking Factory | |
| German | Räucher-Werk[?] | Smoking Factory | |
| Italian | Cupa ciminiera[?] | Dark Chimney | |
| Spanish | Nieblas nocivas[?] | Noxious Mists |
