Gallery:Paper Mario: The Thousand-Year Door: Difference between revisions
mNo edit summary |
|||
| (221 intermediate revisions by 39 users not shown) | |||
| Line 1: | Line 1: | ||
{{italic title}} | {{italic title}} | ||
This is a gallery of images for the game ''[[Paper Mario: The Thousand-Year Door]]''. | This is a gallery of images for the game ''[[Paper Mario: The Thousand-Year Door]]''. For images related to its remake, see [[Gallery:Paper Mario: The Thousand-Year Door (Nintendo Switch)|Gallery:''Paper Mario: The Thousand-Year Door'' (Nintendo Switch)]]. | ||
==Logos== | ==Logos== | ||
<gallery widths="230"> | <gallery widths="230"> | ||
| Line 10: | Line 10: | ||
Paper Mario RPG Logo.png|Japanese logo | Paper Mario RPG Logo.png|Japanese logo | ||
PM2 BetaLogo.jpg|Preliminary logo (E3 2004) | PM2 BetaLogo.jpg|Preliminary logo (E3 2004) | ||
</gallery> | |||
===In-game=== | |||
<gallery widths="195"> | |||
PMTTYD NA In-game Logo.png|English logo | |||
PMTTYD ESP In-game Logo.png|Spanish logo | |||
PMTTYD FRA In-game Logo.png|French logo | |||
PMTTYD ITA In-game Logo.png|Italian logo | |||
PMTTYD DE In-game Logo.png|German logo | |||
PMTTYD JN In-game Logo.png|Japanese logo | |||
PMTTYD E3 In-game Logo.png|Preliminary logo | |||
</gallery> | </gallery> | ||
| Line 18: | Line 28: | ||
PMTTYD Mario Jumping Artwork.png|Mario [[jump]]ing | PMTTYD Mario Jumping Artwork.png|Mario [[jump]]ing | ||
PMTTYD Mario Jumping Artwork E3 2004.png|Mario jumping (early variant) | PMTTYD Mario Jumping Artwork E3 2004.png|Mario jumping (early variant) | ||
PMTTYD Mario with Hammer. | PMTTYD Mario with Hammer.png|Mario with a [[Hammer]] | ||
PMTTYD Mario Swinging Hammer Artwork.png|Mario swinging his hammer | PMTTYD Mario Swinging Hammer Artwork.png|Mario swinging his hammer | ||
PMTTYD Alternate Mario Swinging Hammer Artwork.png|Alternate artwork of Mario with the hammer | PMTTYD Alternate Mario Swinging Hammer Artwork.png|Alternate artwork of Mario with the hammer | ||
Mario Map Artwork.png|Mario with the [[Magical Map]] | Mario Map Artwork.png|Mario with the [[Magical Map]] | ||
PMTTYD Angry Mario Artwork.png|Mario in an angry pose | PMTTYD Angry Mario Artwork.png|Mario in an angry pose | ||
Mario and Yoshi Kid.png|Mario and [[ | Mario and Yoshi Kid.png|Mario and [[Yoshi Kid|Yoshi]] | ||
PMTTYD Mario Thinking Artwork.png|Mario thinking | PMTTYD Mario Thinking Artwork.png|Mario thinking | ||
PMTTYD Curious Mario Artwork.png|Curious Mario | PMTTYD Curious Mario Artwork.png|Curious Mario | ||
PMTTYD Mario Waving Artwork.png|Mario waving | PMTTYD Mario Waving Artwork.png|Mario waving | ||
Mariofaint.png|Mario | Mariofaint.png|Mario knocked out | ||
PMTTYD Princess Peach Artwork.png|[[Princess Peach]] | PMTTYD Princess Peach Artwork.png|[[Princess Peach]] | ||
PMTTYD Professor Frankly Closed Mouth Artwork.jpg|[[Professor Frankly]] | PMTTYD Professor Frankly Closed Mouth Artwork.jpg|[[Professor Frankly]] | ||
| Line 40: | Line 50: | ||
PMTTYD Flurrie Alternate Artwork.jpg|[[Flurrie]] | PMTTYD Flurrie Alternate Artwork.jpg|[[Flurrie]] | ||
PMTTYD Flurrie and Heart Artwork.png|Flurrie | PMTTYD Flurrie and Heart Artwork.png|Flurrie | ||
Yoshikid.jpg|[[ | Yoshikid.jpg|[[Yoshi Kid|Yoshi]] | ||
PMTTYD Vivian Main Artwork.png|[[Vivian]] | PMTTYD Vivian Main Artwork.png|[[Vivian]] | ||
PMTTYD Vivian Alternate Artwork.png|Vivian | PMTTYD Vivian Alternate Artwork.png|Vivian | ||
PMTTYD Bobbery Artwork.png|[[ | PMTTYD Bobbery Artwork.png|[[Bobbery]] | ||
PMTTYD Ms Mowz Artwork.png|[[Ms. Mowz]] | PMTTYD Ms Mowz Artwork.png|[[Ms. Mowz]] | ||
</gallery> | </gallery> | ||
| Line 56: | Line 66: | ||
PMTTYD Smorg Artwork.jpg|[[Smorg]] | PMTTYD Smorg Artwork.jpg|[[Smorg]] | ||
Lord Crump TTYD artwork.jpg|[[Lord Crump]] | Lord Crump TTYD artwork.jpg|[[Lord Crump]] | ||
PMTTYD Grodus Artwork.png|[[ | PMTTYD Grodus Artwork.png|[[Grodus]] | ||
PMTTYD Bowser Artwork.png|[[Bowser]] | PMTTYD Bowser Artwork.png|[[Bowser]] | ||
PMTTYD Kammy Koopa Artwork.jpg|[[Kammy Koopa]] | PMTTYD Kammy Koopa Artwork.jpg|[[Kammy Koopa]] | ||
Beldam.png|[[Beldam]] | Beldam.png|[[Beldam]] | ||
PMTTYD Marilyn Artwork.png|[[Marilyn]] | PMTTYD Marilyn Artwork.png|[[Marilyn]] | ||
ShadowSirens.png|The [[Shadow Sirens]] | ShadowSirens.png|The [[Three Shadows|Shadow Sirens]] | ||
</gallery> | </gallery> | ||
| Line 71: | Line 81: | ||
SMRPG HyperGoomba.jpg|[[Hyper Goomba]] | SMRPG HyperGoomba.jpg|[[Hyper Goomba]] | ||
PMTTYD Gloomba Artwork.jpg|[[Gloomba]] | PMTTYD Gloomba Artwork.jpg|[[Gloomba]] | ||
SPM Red KoopaTroopa.png|[[Koopa Troopa]] | |||
Dull Bones - Paper Mario The Thousand-Year Door.png|[[Dull Bones]] | Dull Bones - Paper Mario The Thousand-Year Door.png|[[Dull Bones]] | ||
PMTTYD Red Bones Artwork.jpg|[[Red Bones]] | PMTTYD Red Bones Artwork.jpg|[[Red Bones]] | ||
| Line 95: | Line 106: | ||
Mayor Dour TTYD artwork.jpg|[[Mayor Dour]] | Mayor Dour TTYD artwork.jpg|[[Mayor Dour]] | ||
Eve TTYD artwork.jpg|[[Eve]] | Eve TTYD artwork.jpg|[[Eve]] | ||
Blue Twilighter TTYD artwork.jpg|Blue [[Twilighter]] (purple) | |||
Blue Twilighter TTYD artwork 2.jpg|Blue Twilighter (orange) | |||
Blue Twilighter TTYD artwork 3.jpg|Blue Twilighter (green) | |||
PMTTYD Twilighter Artwork.jpg|[[Darkly]] | PMTTYD Twilighter Artwork.jpg|[[Darkly]] | ||
PMTTYD Twilight Town Shopkeeper Artwork.jpg| | PMTTYD Twilight Town Shopkeeper Artwork.jpg|[[Twilight Shop manager]] | ||
Twilightshopwife.jpg| | Twilightshopwife.jpg|[[Twilight Shop manager's wife]] | ||
PMTTYD Parrot Artwork.jpg|[[ | PMTTYD Parrot Artwork.jpg|[[Doopliss's parrot]] | ||
PM2 Crow.jpg|[[Crow]] | PM2 Crow.jpg|[[Crow]] | ||
PMTTYD Toadette Artwork.jpg|[[Toadette]] | PMTTYD Toadette Artwork.jpg|[[Toadette]] | ||
| Line 122: | Line 136: | ||
</gallery> | </gallery> | ||
===Japanese character bios=== | ===Japanese website character bios=== | ||
<gallery widths="175"> | <gallery widths="175"> | ||
PMTTYD Japanese Character Bio Mario.jpg|[[Mario]] | PMTTYD Japanese Character Bio Mario.jpg|[[Mario]] | ||
| Line 130: | Line 144: | ||
PMTTYD Japanese Character Bio Koops.jpg|[[Koops]] | PMTTYD Japanese Character Bio Koops.jpg|[[Koops]] | ||
PMTTYD Japanese Character Bio Flurrie.jpg|[[Flurrie]] | PMTTYD Japanese Character Bio Flurrie.jpg|[[Flurrie]] | ||
PMTTYD Japanese Character Bio Mini-Yoshi.jpg|[[ | PMTTYD Japanese Character Bio Mini-Yoshi.jpg|[[Yoshi Kid|Yoshi]] | ||
PMTTYD Japanese Character Bio X-Nauts.jpg|[[X-Nauts (organization)|X-Nauts]] | PMTTYD Japanese Character Bio X-Nauts.jpg|[[X-Nauts (organization)|X-Nauts]] | ||
PMTTYD Japanese Character Bio Hooktail.jpg|[[Hooktail]] | PMTTYD Japanese Character Bio Hooktail.jpg|[[Hooktail]] | ||
PMTTYD Japanese Character Bio Shadow Sirens.jpg|[[Shadow Sirens]] | PMTTYD Japanese Character Bio Shadow Sirens.jpg|[[Three Shadows|Shadow Sirens]] | ||
PMTTYD Japanese Character Bio Magnus von Grapple.jpg|[[Magnus von Grapple]] | PMTTYD Japanese Character Bio Magnus von Grapple.jpg|[[Magnus von Grapple]] | ||
PMTTYD Japanese Character Bio Cortez.jpg|[[Cortez]] | PMTTYD Japanese Character Bio Cortez.jpg|[[Cortez]] | ||
| Line 154: | Line 168: | ||
PMTTYD Goombella Sprite.png|[[Goombella]] | PMTTYD Goombella Sprite.png|[[Goombella]] | ||
KoopsPMTTYD.png|[[Koops]] | KoopsPMTTYD.png|[[Koops]] | ||
PMTTYD Flurrie Sprite.png|[[ | PMTTYD Flurrie Sprite.png|[[Flurrie]] | ||
Yoshi Kids.png|[[ | Yoshi Kids.png|[[Yoshi Kid|Yoshi]] | ||
PMTTYD Vivian Sprite.png|[[Vivian]] | PMTTYD Vivian Sprite.png|[[Vivian]] | ||
PMTTYD Admiral Bobbery Sprite.png|[[ | PMTTYD Admiral Bobbery Sprite.png|[[Bobbery]] | ||
MowzPMTTYD.png|[[Ms. Mowz]] | MowzPMTTYD.png|[[Ms. Mowz]] | ||
8bitMarioPartnersPMTTYD.png|8-bit sprites of Mario and his partners | 8bitMarioPartnersPMTTYD.png|8-bit sprites of Mario and his partners | ||
</gallery> | </gallery> | ||
====Unused==== | ====Unused==== | ||
<gallery> | <gallery> | ||
Admiral Bobbery TTYD early.png|Early sprite of | Admiral Bobbery TTYD early.png|Early sprite of Bobbery. | ||
PMTTYDVivianEarly.png|Early sprite of Vivian. | |||
</gallery> | </gallery> | ||
| Line 179: | Line 193: | ||
Bub-ulb better.PNG|[[Bub-ulb]] (pink) | Bub-ulb better.PNG|[[Bub-ulb]] (pink) | ||
PMTTYDBubulbBlue.png|Bub-ulb (blue) | PMTTYDBubulbBlue.png|Bub-ulb (blue) | ||
PMTTYD Ratooey Businessman Sprite.png|[[Businessman]] | PMTTYD Ratooey Businessman Sprite.png|[[Businessman]] | ||
Charlieton PM.png|[[Charlieton]] | Charlieton PM.png|[[Charlieton]] | ||
| Line 191: | Line 204: | ||
PMTTYD Don Pianta Sprite.png|[[Don Pianta]] | PMTTYD Don Pianta Sprite.png|[[Don Pianta]] | ||
Ton Vin.png|Don Pianta's guards ([[Tony (Paper Mario: The Thousand-Year Door)|Tony]], [[Vinny]] and [[Rocko]]) | Ton Vin.png|Don Pianta's guards ([[Tony (Paper Mario: The Thousand-Year Door)|Tony]], [[Vinny]] and [[Rocko]]) | ||
Doogan.png|[[Doogan]] | Doogan.png|[[Doogan]] (Yellow) | ||
DooganGreen.png|Doogan (Green) | |||
DooganOrange.png|Doogan (Orange) | |||
PMTTYDDupreeSprite.png|[[Dupree]] | PMTTYDDupreeSprite.png|[[Dupree]] | ||
Eve.png|[[Eve]] | Eve.png|[[Eve]] | ||
| Line 213: | Line 228: | ||
PMTTYD Herb T Sprite.png|[[Herb T.]] | PMTTYD Herb T Sprite.png|[[Herb T.]] | ||
Ishnail.png|[[Ishnail]] | Ishnail.png|[[Ishnail]] | ||
Jerry.png|[[ | Jerry.png|[[Jerry]] | ||
PMTTYDJoleneSprite.png|[[Jolene]] | PMTTYDJoleneSprite.png|[[Jolene]] | ||
PMTTYD Jolene Juice Bar Sprite.png|Jolene in casual clothes | PMTTYD Jolene Juice Bar Sprite.png|Jolene in casual clothes | ||
KP Koopa TTYD.png|[[King K]] | |||
PMTTYD Green Koopa Troopa NPC Sprite.png|[[Koopa Troopa]] (NPC) | PMTTYD Green Koopa Troopa NPC Sprite.png|[[Koopa Troopa]] (NPC) | ||
PMTTYD Green Koopa Troopa Audience Sprite.png|Koopa Troopa in the audience | PMTTYD Green Koopa Troopa Audience Sprite.png|Koopa Troopa in the audience | ||
Koopie Koo Sprite.png|[[Koopie Koo]] | Koopie Koo Sprite.png|[[Koopie Koo]] | ||
Kroop.png|[[Kroop]] | Kroop.png|[[Kroop]] | ||
Lady Bow PM2.png|[[Lady Bow]] | Lady Bow PM2.png|[[Lady Bow]] | ||
| Line 226: | Line 241: | ||
PMTTYDLakiSprite.png|[[Laki]] | PMTTYDLakiSprite.png|[[Laki]] | ||
CameraBlueLakitu.png|Lakitu from the Glitz Pit | CameraBlueLakitu.png|Lakitu from the Glitz Pit | ||
Lucky.png|[[Lucky (Paper Mario: The Thousand-Year Door)|Lucky]] | |||
Lucky | |||
PMTTYD Luigi Sprite.png|[[Luigi]] | PMTTYD Luigi Sprite.png|[[Luigi]] | ||
Bob-omb.png|[[Master Crash]] | Bob-omb.png|[[Master Crash]] | ||
| Line 238: | Line 252: | ||
Parakarry.png|[[Parakarry]] | Parakarry.png|[[Parakarry]] | ||
PMTTYD Parrot Sprite.png|[[Parrot (character)|Parrot]] | PMTTYD Parrot Sprite.png|[[Parrot (character)|Parrot]] | ||
PMTTYDBumpty.png|[[Bumpty|Penguin]] | |||
Pennington.png|[[Pennington]] | Pennington.png|[[Pennington]] | ||
PMTTYD Podley and Podler Sprite.png|[[Podley]] / [[Podler]] | PMTTYD Podley and Podler Sprite.png|[[Podley]] / [[Podler]] | ||
PMTTYD Porter.png|[[Porter]] | PMTTYD Porter.png|[[Porter]] | ||
Prince Mush.png|[[Prince Mush]] | Prince Mush.png|[[Prince Mush]] | ||
PMTTYD Peach Sprite.png|[[Princess Peach]] | |||
Lumpy.png|[[Ratooey]] | Lumpy.png|[[Ratooey]] | ||
PMTTYD Screamy Sprite.png|[[Screamy]] | PMTTYD Screamy Sprite.png|[[Screamy]] | ||
| Line 247: | Line 263: | ||
TTYD Swooper.png|[[Sir Swoop]] | TTYD Swooper.png|[[Sir Swoop]] | ||
PMTTYD Red Spike Top Sprite.png|[[Spiky Joe]] | PMTTYD Red Spike Top Sprite.png|[[Spiky Joe]] | ||
MouserPMTTD.png|[[Little Mouser|Squeek]] | |||
PMTTYD Stewart Sprite.png|[[Stewart]] | PMTTYD Stewart Sprite.png|[[Stewart]] | ||
Sylvia.png|[[Sylvia (Paper Mario: The Thousand-Year Door)|Sylvia]] | Sylvia.png|[[Sylvia (Paper Mario: The Thousand-Year Door)|Sylvia]] | ||
Dark Koopatrol.png|[[The Koopinator]] | Dark Koopatrol.png|[[The Koopinator]] | ||
TheTravelingSisters.png|[[Traveling Sisters 3]] | TheTravelingSisters.png|[[Traveling Sisters Three|Traveling Sisters 3]] | ||
TTYD Toad.png|[[Toad (species)|Toad]] (red) | TTYD Toad.png|[[Toad (species)|Toad]] (red) | ||
PMTTYDToadMaleBlue.png|Toad (blue) | PMTTYDToadMaleBlue.png|Toad (blue) | ||
| Line 262: | Line 279: | ||
PMTTYDToadKidGreen.png|Toad child (green) | PMTTYDToadKidGreen.png|Toad child (green) | ||
PMTTYDToadKidChartreuse.png|Toad child (chartreuse) | PMTTYDToadKidChartreuse.png|Toad child (chartreuse) | ||
PMTTYD Toad Inkeeper.png|Toad innkeeper | |||
PMTTYD Toadette Sprite.png|[[Toadette]] | PMTTYD Toadette Sprite.png|[[Toadette]] | ||
Toadsworth PM2.png|[[Toadsworth]] | Toadsworth PM2.png|[[Toadsworth]] | ||
| Line 272: | Line 290: | ||
Zip Toad.png|[[Zip Toad]] | Zip Toad.png|[[Zip Toad]] | ||
</gallery> | </gallery> | ||
====Unused==== | ====Unused==== | ||
<gallery> | <gallery> | ||
| Line 294: | Line 311: | ||
Amazee Dayzee TTYD sprite.png|[[Amazy Dayzee]] | Amazee Dayzee TTYD sprite.png|[[Amazy Dayzee]] | ||
Arantula TTYD sprite.png|[[Arantula]] | Arantula TTYD sprite.png|[[Arantula]] | ||
Bomb Shell Bill.png|[[B. Bill Blaster]] | Bomb Shell Bill.png|[[Bombshell Bill Blaster|B. Bill Blaster]] | ||
Red Bandit.png|[[Bandit]] | Red Bandit.png|[[Bandit]] | ||
Badge Bandit.png|[[Badge Bandit]] | Badge Bandit.png|[[Badge Bandit]] | ||
| Line 390: | Line 407: | ||
Spiny PMTTYD.png|[[Spiny]] | Spiny PMTTYD.png|[[Spiny]] | ||
PMTTYD Spiny Egg Sprite.png|[[Spiny Egg]] | PMTTYD Spiny Egg Sprite.png|[[Spiny Egg]] | ||
Spunia.png|[[Spunia]] | Spunia.png|[[Spunia]] | ||
Swampire.png|[[Swampire]] | Swampire.png|[[Swampire]] | ||
| Line 403: | Line 419: | ||
Z Yux.png|[[Z-Yux]] | Z Yux.png|[[Z-Yux]] | ||
</gallery> | </gallery> | ||
====Unused==== | ====Unused==== | ||
<gallery> | <gallery> | ||
| Line 417: | Line 432: | ||
===Bosses=== | ===Bosses=== | ||
{{more | {{image|more=yes|section=y|Missing Cortez / Rawk Hawk / Magnus von Grapple / Smorg combined form}} | ||
<gallery> | <gallery> | ||
Atomic Boo.png|[[Big Boo|Atomic Boo]] | Atomic Boo.png|[[Big Boo|Atomic Boo]] | ||
| Line 426: | Line 441: | ||
Marilyn.png|[[Marilyn]] | Marilyn.png|[[Marilyn]] | ||
Doopliss.png|[[Doopliss]] | Doopliss.png|[[Doopliss]] | ||
Doopliss as Mario.png|Doopliss (Mario form) | |||
Gloomtail.png|[[Gloomtail]] | Gloomtail.png|[[Gloomtail]] | ||
Gus.png|[[Gus]] | Gus.png|[[Gus]] | ||
| Line 432: | Line 448: | ||
Crump.png|[[Lord Crump]] | Crump.png|[[Lord Crump]] | ||
MachoGrubba.png|[[Macho Grubba]] | MachoGrubba.png|[[Macho Grubba]] | ||
ShadowQueenIDLEsprite.png|[[Shadow Queen]] | ShadowQueenIDLEsprite.png|[[Shadow Queen]] | ||
Smorg small.png|[[Smorg]] | Smorg small.png|[[Smorg]] | ||
MagentaSmorg.png|[[Smorg]] | MagentaSmorg.png|[[Smorg]] | ||
</gallery> | </gallery> | ||
====Unused==== | ====Unused==== | ||
<gallery> | <gallery> | ||
| Line 443: | Line 457: | ||
Bonetail head TTYD early.png|Early sprite of [[Bonetail]]'s head. | Bonetail head TTYD early.png|Early sprite of [[Bonetail]]'s head. | ||
Black Smorg TTYD unused.png|An early design of a black Smorg. | Black Smorg TTYD unused.png|An early design of a black Smorg. | ||
</gallery> | |||
===Tattle Log=== | |||
<gallery widths=216 heights=160> | |||
PMTTYD Tattle Log - Goomba.png|[[Goomba]] | |||
PMTTYD Tattle Log - Paragoomba.png|[[Paragoomba]] | |||
PMTTYD Tattle Log - Spiky Goomba.png|[[Spiky Goomba]] | |||
PMTTYD Tattle Log - Hyper Goomba.png|[[Hyper Goomba]] | |||
PMTTYD Tattle Log - Hyper Paragoomba.png|[[Hyper Paragoomba]] | |||
PMTTYD Tattle Log - Hyper Spiky Goomba.png|[[Hyper Spiky Goomba]] | |||
PMTTYD Tattle Log - Gloomba.png|[[Gloomba]] | |||
PMTTYD Tattle Log - Paragloomba.png|[[Paragloomba]] | |||
PMTTYD Tattle Log - Spiky Gloomba.png|[[Spiky Gloomba]] | |||
PMTTYD Tattle Log - Koopa Troopa.png|[[Koopa Troopa]] | |||
PMTTYD Tattle Log - Paratroopa.png|[[Koopa Paratroopa|Paratroopa]] | |||
PMTTYD Tattle Log - KP Koopa.png|[[KP Koopa]] | |||
PMTTYD Tattle Log - KP Paratroopa.png|[[KP Paratroopa]] | |||
PMTTYD Tattle Log - Shady Koopa.png|[[Shady Koopa]] | |||
PMTTYD Tattle Log - Shady Paratroopa.png|[[Shady Paratroopa]] | |||
PMTTYD Tattle Log - Dark Koopa.png|[[Dark Koopa]] | |||
PMTTYD Tattle Log - Dark Paratroopa.png|[[Dark Paratroopa]] | |||
PMTTYD Tattle Log - Koopatrol.png|[[Koopatrol]] | |||
PMTTYD Tattle Log - Dark Koopatrol.png|[[Dark Koopatrol]] | |||
PMTTYD Tattle Log - Dull Bones.png|[[Dull Bones]] | |||
PMTTYD Tattle Log - Red Bones.png|[[Red Bones]] | |||
PMTTYD Tattle Log - Dry Bones.png|[[Dry Bones]] | |||
PMTTYD Tattle Log - Dark Bones.png|[[Dark Bones]] | |||
PMTTYD Tattle Log - Hammer Bro.png|[[Hammer Bro]] | |||
PMTTYD Tattle Log - Boomerang Bro.png|[[Boomerang Bro]] | |||
PMTTYD Tattle Log - Fire Bro.png|[[Fire Bro]] | |||
PMTTYD Tattle Log - Lakitu.png|[[Lakitu]] | |||
PMTTYD Tattle Log - Dark Lakitu.png|[[Dark Lakitu]] | |||
PMTTYD Tattle Log - Spiny.png|[[Spiny]] | |||
PMTTYD Tattle Log - Sky-Blue Spiny.png|[[Sky-Blue Spiny]] | |||
PMTTYD Tattle Log - Buzzy Beetle.png|[[Buzzy Beetle]] | |||
PMTTYD Tattle Log - Spike Top.png|[[Spike Top]] | |||
PMTTYD Tattle Log - Parabuzzy.png|[[Parabuzzy]] | |||
PMTTYD Tattle Log - Spiky Parabuzzy.png|[[Spiky Parabuzzy]] | |||
PMTTYD Tattle Log - Red Spike Top.png|[[Red Spike Top]] | |||
PMTTYD Tattle Log - Magikoopa.png|[[Magikoopa]] | |||
PMTTYD Tattle Log - Red Magikoopa.png|[[Red Magikoopa]] | |||
PMTTYD Tattle Log - White Magikoopa.png|[[White Magikoopa]] | |||
PMTTYD Tattle Log - Green Magikoopa.png|[[Green Magikoopa]] | |||
PMTTYD Tattle Log - Kammy Koopa.png|[[Kammy Koopa]] | |||
PMTTYD Tattle Log - Bowser.png|[[Bowser]] | |||
PMTTYD Tattle Log - Gus.png|[[Gus]] | |||
PMTTYD Tattle Log - Dark Craw.png|[[Dark Craw]] | |||
PMTTYD Tattle Log - Bandit.png|[[Bandit]] | |||
PMTTYD Tattle Log - Big Bandit.png|[[Big Bandit]] | |||
PMTTYD Tattle Log - Badge Bandit.png|[[Badge Bandit]] | |||
PMTTYD Tattle Log - Spinia.png|[[Spinia]] | |||
PMTTYD Tattle Log - Spania.png|[[Spania]] | |||
PMTTYD Tattle Log - Spunia.png|[[Spunia]] | |||
PMTTYD Tattle Log - Fuzzy.png|[[Fuzzy]] | |||
PMTTYD Tattle Log - Gold Fuzzy.png|[[Gold Fuzzy]] | |||
PMTTYD Tattle Log - Green Fuzzy.png|[[Green Fuzzy]] | |||
PMTTYD Tattle Log - Flower Fuzzy.png|[[Flower Fuzzy]] | |||
PMTTYD Tattle Log - Pokey.png|[[Pokey]] | |||
PMTTYD Tattle Log - Poison Pokey.png|[[Poison Pokey]] | |||
PMTTYD Tattle Log - Pale Piranha.png|[[Pale Piranha]] | |||
PMTTYD Tattle Log - Putrid Piranha.png|[[Putrid Piranha]] | |||
PMTTYD Tattle Log - Frost Piranha.png|[[Frost Piranha]] | |||
PMTTYD Tattle Log - Piranha Plant.png|[[Piranha Plant]] | |||
PMTTYD Tattle Log - Crazee Dayzee.png|[[Crazee Dayzee]] | |||
PMTTYD Tattle Log - Amazy Dayzee.png|[[Amazy Dayzee]] | |||
PMTTYD Tattle Log - Pider.png|[[Pider]] | |||
PMTTYD Tattle Log - Arantula.png|[[Arantula]] | |||
PMTTYD Tattle Log - Swooper.png|[[Swooper]] | |||
PMTTYD Tattle Log - Swoopula.png|[[Swoopula]] | |||
PMTTYD Tattle Log - Swampire.png|[[Swampire]] | |||
PMTTYD Tattle Log - Dark Puff.png|[[Dark Puff]] | |||
PMTTYD Tattle Log - Ruff Puff.png|[[Ruff Puff]] | |||
PMTTYD Tattle Log - Ice Puff.png|[[Ice Puff]] | |||
PMTTYD Tattle Log - Poison Puff.png|[[Poison Puff]] | |||
PMTTYD Tattle Log - Boo.png|[[Boo]] | |||
PMTTYD Tattle Log - Atomic Boo.png|[[Atomic Boo]] | |||
PMTTYD Tattle Log - Dark Boo.png|[[Dark Boo]] | |||
PMTTYD Tattle Log - Ember.png|[[Ember]] | |||
PMTTYD Tattle Log - Lava Bubble.png|[[Lava Bubble]] | |||
PMTTYD Tattle Log - Phantom Ember.png|[[Phantom Ember]] | |||
PMTTYD Tattle Log - Bald Cleft.png|[[Bald Cleft]] | |||
PMTTYD Tattle Log - Hyper Bald Cleft.png|[[Hyper Bald Cleft]] | |||
PMTTYD Tattle Log - Cleft.png|[[Cleft]] | |||
PMTTYD Tattle Log - Iron Cleft Red.png|[[Iron Cleft]] (Red) | |||
PMTTYD Tattle Log - Iron Cleft Green.png|[[Iron Cleft]] (Green) | |||
PMTTYD Tattle Log - Hyper Cleft.png|[[Hyper Cleft]] | |||
PMTTYD Tattle Log - Moon Cleft.png|[[Moon Cleft]] | |||
PMTTYD Tattle Log - Bristle.png|[[Bristle]] | |||
PMTTYD Tattle Log - Dark Bristle.png|[[Dark Bristle]] | |||
PMTTYD Tattle Log - Bob-omb.png|[[Bob-omb]] | |||
PMTTYD Tattle Log - Bulky Bob-omb.png|[[Bulky Bob-omb]] | |||
PMTTYD Tattle Log - Bob-ulk.png|[[Bob-ulk]] | |||
PMTTYD Tattle Log - Chain Chomp.png|[[Chain Chomp]] | |||
PMTTYD Tattle Log - Red Chomp.png|[[Red Chomp]] | |||
PMTTYD Tattle Log - Bill Blaster.png|[[Bill Blaster]] | |||
PMTTYD Tattle Log - Bullet Bill.png|[[Bullet Bill]] | |||
PMTTYD Tattle Log - Bombshell Bill Blaster.png|[[Bombshell Bill Blaster|B. Bill Blaster]] | |||
PMTTYD Tattle Log - Bombshell Bill.png|[[Bombshell Bill]] | |||
PMTTYD Tattle Log - Dark Wizzerd.png|[[Dark Wizzerd]] | |||
PMTTYD Tattle Log - Wizzerd.png|[[Wizzerd]] | |||
PMTTYD Tattle Log - Elite Wizzerd.png|[[Elite Wizzerd]] | |||
PMTTYD Tattle Log - Blooper.png|[[Blooper]] | |||
PMTTYD Tattle Log - Hooktail.png|[[Hooktail]] | |||
PMTTYD Tattle Log - Gloomtail.png|[[Gloomtail]] | |||
PMTTYD Tattle Log - Bonetail.png|[[Bonetail]] | |||
PMTTYD Tattle Log - Rawk Hawk.png|[[Rawk Hawk]] | |||
PMTTYD Tattle Log - Macho Grubba.png|[[Macho Grubba]] | |||
PMTTYD Tattle Log - Doopliss.png|[[Doopliss]] | |||
PMTTYD Tattle Log - Cortez.png|[[Cortez]] | |||
PMTTYD Tattle Log - Smorg.png|[[Smorg]] | |||
PMTTYD Tattle Log - X-Naut.png|[[X-Naut]] | |||
PMTTYD Tattle Log - X-Naut PhD.png|[[X-Naut PhD]] | |||
PMTTYD Tattle Log - Elite X-Naut.png|[[Elite X-Naut]] | |||
PMTTYD Tattle Log - Yux.png|[[Yux]] | |||
PMTTYD Tattle Log - Mini-Yux.png|[[Mini-Yux]] | |||
PMTTYD Tattle Log - Z-Yux.png|[[Z-Yux]] | |||
PMTTYD Tattle Log - Mini-Z-Yux.png|[[Mini-Z-Yux]] | |||
PMTTYD Tattle Log - X-Yux.png|[[X-Yux]] | |||
PMTTYD Tattle Log - Mini-X-Yux.png|[[Mini-X-Yux]] | |||
PMTTYD Tattle Log - Grodus X.png|[[Grodus X]] | |||
PMTTYD Tattle Log - Magnus.png|[[Magnus von Grapple]] | |||
PMTTYD Tattle Log - Magnus 2.png|[[Magnus von Grapple 2.0]] | |||
PMTTYD Tattle Log - Lord Crump.png|[[Lord Crump]] | |||
PMTTYD Tattle Log - Grodus.png|[[Grodus]] | |||
PMTTYD Tattle Log - Beldam.png|[[Beldam]] | |||
PMTTYD Tattle Log - Marilyn.png|[[Marilyn]] | |||
PMTTYD Tattle Log - Vivian.png|[[Vivian]] | |||
Shadow Queen tattle.png|[[Shadow Queen]] ([[Princess Peach|Peach]]) | |||
PMTTYD Tattle Log - Shadow Queen.png|[[Shadow Queen]] | |||
</gallery> | |||
===Crystal Stars=== | |||
<gallery> | |||
Magical Map TTYD overworld.png|[[Magical Map]] (overworld sprite) | |||
Magical Map TTYD menu.png|Magical Map (Menu sprite for [[Sweet Treat]]) | |||
Diamond Star TTYD.png|[[Diamond Star]] | |||
Emerald Star TTYD.png|[[Emerald Star]] | |||
Gold Star TTYD.png|[[Gold Star]] | |||
Ruby Star TTYD.png|[[Ruby Star]] | |||
Sapphire Star TTYD.png|[[Sapphire Star]] | |||
Garnet Star TTYD.png|[[Garnet Star]] | |||
Crystal Star TTYD.png|[[Crystal Star]] | |||
</gallery> | |||
===Equipment=== | |||
<gallery> | |||
Boots TTYD.png|[[Boots]] | |||
Super Boots.png|[[Super Boots]] | |||
Ultra Boots TTYD.png|[[Ultra Boots]] | |||
Hammer TTYD.png|[[Hammer]] | |||
Super Hammer TTYD.png|[[Super Hammer]] | |||
Ultra Hammer TTYD.png|[[Ultra Hammer]] | |||
</gallery> | </gallery> | ||
===Items and objects=== | ===Items and objects=== | ||
<gallery widths=40 heights=40> | <gallery widths=40 heights=40> | ||
Boos Sheet TTYD.png|[[Boo's Sheet]] | Boos Sheet TTYD.png|[[Boo's Sheet]] | ||
Cake TTYD.png|[[Cake]] | Cake TTYD.png|[[Cake]] | ||
Cake Mix TTYD.png|[[Cake Mix]] | Cake Mix TTYD.png|[[Cake Mix]] | ||
Choco Cake TTYD.png|[[Choco Cake]] | |||
Choco Cake TTYD.png|[[ | |||
Coco Candy TTYD.png|[[Coco Candy]] | Coco Candy TTYD.png|[[Coco Candy]] | ||
Coconut TTYD.png|[[Coconut]] | Coconut TTYD.png|[[Coconut]] | ||
Coconut Bomb TTYD.png|[[Coconut Bomb]] | Coconut Bomb TTYD.png|[[Coconut Bomb]] | ||
Couples Cake TTYD.png|[[Couple's Cake]] | Couples Cake TTYD.png|[[Couple's Cake]] | ||
Courage Meal TTYD.png|[[Courage Meal]] | Courage Meal TTYD.png|[[Courage Meal]] | ||
Courage Shell TTYD.png|[[Courage Shell]] | Courage Shell TTYD.png|[[Courage Shell]] | ||
Dizzy Dial TTYD.png|[[Dizzy Dial]] | Dizzy Dial TTYD.png|[[Dizzy Dial]] | ||
Dried Bouquet TTYD.png|[[Dried Bouquet]] | Dried Bouquet TTYD.png|[[Dried Bouquet]] | ||
Dried Shroom TTYD.png|[[Dried Shroom | Dried Shroom TTYD.png|[[Dried Mushroom|Dried Shroom]] | ||
Earth Quake TTYD.png|[[Earth Quake]] | Earth Quake TTYD.png|[[Earth Quake]] | ||
Egg Bomb TTYD.png|[[Egg Bomb]] | Egg Bomb TTYD.png|[[Egg Bomb]] | ||
Electro Pop TTYD.png|[[Electro Pop]] | Electro Pop TTYD.png|[[Electro Pop]] | ||
Fire Flower TTYD.png|[[Fire Flower]] | Fire Flower TTYD.png|[[Fire Flower]] | ||
Fire Pop TTYD.png|[[Fire Pop]] | Fire Pop TTYD.png|[[Fire Pop]] | ||
Fresh Juice TTYD.png|[[Fresh Juice]] | Fresh Juice TTYD.png|[[Fresh Juice]] | ||
Fresh Pasta TTYD.png|[[ | Fresh Pasta TTYD.png|[[Fresh Pasta]] | ||
Fried Egg TTYD.png|[[Fried Egg]] | Fried Egg TTYD.png|[[Fried Egg]] | ||
Fright Mask TTYD.png|[[Fright Mask]] | Fright Mask TTYD.png|[[Fright Mask]] | ||
Fruit Parfait TTYD.png|[[Fruit Parfait]] | Fruit Parfait TTYD.png|[[Fruit Parfait]] | ||
Gold Bar TTYD.png|[[Gold Bar]] | Gold Bar TTYD.png|[[Gold Bar]] | ||
Gold Bar x3 TTYD.png|[[Gold Bar x3]] | Gold Bar x3 TTYD.png|[[Gold Bar x3]] | ||
Golden Leaf TTYD.png|[[Gold Leaf]] | Golden Leaf TTYD.png|[[Gold Leaf]] | ||
Gradual Syrup TTYD.png|[[Gradual Syrup]] | Gradual Syrup TTYD.png|[[Gradual Syrup]] | ||
Healthy Salad TTYD.png|[[Healthy Salad]] | Healthy Salad TTYD.png|[[Healthy Salad]] | ||
Heartful Cake TTYD.png|[[Heartful Cake]] | Heartful Cake TTYD.png|[[Heartful Cake]] | ||
Honey Candy TTYD.png|[[Honey Candy]] | Honey Candy TTYD.png|[[Honey Candy]] | ||
Honey Shroom TTYD.png|[[Honey Shroom]] | Honey Shroom TTYD.png|[[Honey Mushroom|Honey Shroom]] | ||
Honey Super TTYD.png|[[Honey Super]] | Honey Super TTYD.png|[[Honey Super]] | ||
Honey Syrup TTYD.png|[[Honey Syrup]] | Honey Syrup TTYD.png|[[Honey Syrup]] | ||
| Line 522: | Line 650: | ||
Hot Dog TTYD.png|[[Hot Dog (item)|Hot Dog]] | Hot Dog TTYD.png|[[Hot Dog (item)|Hot Dog]] | ||
Hot Sauce TTYD.png|[[Hot Sauce]] | Hot Sauce TTYD.png|[[Hot Sauce]] | ||
HP Drain item.png|[[HP Drain (item)|HP Drain]] | HP Drain item.png|[[HP Drain (item)|HP Drain]] | ||
Ice Storm TTYD.png|[[Ice Storm]] | Ice Storm TTYD.png|[[Ice Storm]] | ||
Icicle Pop TTYD.png|[[Icicle Pop]] | Icicle Pop TTYD.png|[[Icicle Pop]] | ||
Ink Pasta TTYD.png|[[ | Ink Pasta TTYD.png|[[Ink Pasta]] | ||
Inky Sauce TTYD.png|[[Inky Sauce]] | Inky Sauce TTYD.png|[[Inky Sauce]] | ||
Inn Coupon TTYD.png|[[Inn Coupon]] | Inn Coupon TTYD.png|[[Inn Coupon]] | ||
Jammin Jelly TTYD.png|[[Jammin' Jelly]] | Jammin Jelly TTYD.png|[[Jammin' Jelly]] | ||
Jelly Candy TTYD.png|[[Jelly Candy]] | Jelly Candy TTYD.png|[[Jelly Candy]] | ||
Jelly Shroom TTYD.png|[[Jelly Shroom]] | Jelly Shroom TTYD.png|[[Jelly Mushroom|Jelly Shroom]] | ||
Jelly Super TTYD.png|[[Jelly Super]] | Jelly Super TTYD.png|[[Jelly Super]] | ||
Jelly Ultra TTYD.png|[[Jelly Ultra]] | Jelly Ultra TTYD.png|[[Jelly Ultra]] | ||
Keel Mango TTYD.png|[[Keel Mango]] | Keel Mango TTYD.png|[[Keel Mango]] | ||
Koopa Bun TTYD.png|[[ | Koopa Bun TTYD.png|[[Koopa Bun]] | ||
Koopa Tea TTYD.png|[[Koopa Tea]] | Koopa Tea TTYD.png|[[Koopa Tea]] | ||
Koopasta TTYD.png|[[ | Koopasta TTYD.png|[[Koopasta]] | ||
Life Shroom TTYD.png|[[Life Shroom | Life Shroom TTYD.png|[[Life Mushroom (Paper Mario series)|Life Shroom]] | ||
Love Pudding TTYD.png|[[Love Pudding]] | Love Pudding TTYD.png|[[Love Pudding]] | ||
Mango Delight TTYD.png|[[Mango Delight]] | Mango Delight TTYD.png|[[Mango Delight]] | ||
Maple Shroom TTYD.png|[[Maple Shroom]] | Maple Shroom TTYD.png|[[Maple Mushroom|Maple Shroom]] | ||
Maple Super TTYD.png|[[Maple Super]] | Maple Super TTYD.png|[[Maple Super]] | ||
Maple Syrup TTYD.png|[[Maple Syrup]] | Maple Syrup TTYD.png|[[Maple Syrup]] | ||
Maple Ultra TTYD.png|[[Maple Ultra]] | Maple Ultra TTYD.png|[[Maple Ultra]] | ||
Meat.png|[[Meat]] | Meat.png|[[Meat]] | ||
Meteor Meal TTYD.png|[[Meteor Meal]] | Meteor Meal TTYD.png|[[Meteor Meal]] | ||
| Line 553: | Line 677: | ||
Mistake TTYD.png|[[Mistake]] | Mistake TTYD.png|[[Mistake]] | ||
Mr Softener TTYD.png|[[Mr. Softener]] | Mr Softener TTYD.png|[[Mr. Softener]] | ||
Mousse Cake TTYD.png|[[Mousse Cake]] | |||
Mousse Cake TTYD.png|[[ | |||
Mushroom TTYD.png|[[Mushroom]] | Mushroom TTYD.png|[[Mushroom]] | ||
Mystery TTYD.png|[[ | Mystery TTYD.png|[[Mystery]] | ||
Mystic Egg TTYD.png|[[Mystic Egg]] | Mystic Egg TTYD.png|[[Mystic Egg]] | ||
Omelette Meal TTYD.png|[[Omelette Meal]] | |||
Omelette Meal TTYD.png|[[ | |||
Peachy Peach TTYD.png|[[Peachy Peach]] | Peachy Peach TTYD.png|[[Peachy Peach]] | ||
Peach Tart TTYD.png|[[Peach Tart]] | Peach Tart TTYD.png|[[Peach Tart]] | ||
Point Swap TTYD.png|[[Point Swap]] | Point Swap TTYD.png|[[Point Swap]] | ||
Poison Shroom TTYD.png|[[Poison Mushroom|Poison Shroom]] | Poison Shroom TTYD.png|[[Poison Mushroom|Poison Shroom]] | ||
POW Block TTYD.png|[[POW Block]] | POW Block TTYD.png|[[POW Block]] | ||
Power Punch TTYD.png|[[Power Punch]] | Power Punch TTYD.png|[[Power Punch]] | ||
Repel Cape TTYD.png|[[Repel Cape]] | Repel Cape TTYD.png|[[Repel Cape]] | ||
Ruin Powder TTYD.png|[[Ruin Powder]] | Ruin Powder TTYD.png|[[Ruin Powder]] | ||
Shooting Star TTYD.png|[[Shooting Star (item)|Shooting Star]] | Shooting Star TTYD.png|[[Shooting Star (item)|Shooting Star]] | ||
Shroom Broth TTYD.png|[[Mushroom Broth]] | |||
Shroom Broth TTYD.png|[[ | Shroom Cake TTYD.png|[[Mushroom Cake|Shroom Cake]] | ||
Shroom Cake TTYD.png|[[Shroom Cake]] | |||
Shroom Crepe TTYD.png|[[Mushroom Crepe|Shroom Crepe]] | Shroom Crepe TTYD.png|[[Mushroom Crepe|Shroom Crepe]] | ||
Shroom Fry TTYD.png|[[ | Shroom Fry TTYD.png|[[Mushroom Fry|Shroom Fry]] | ||
Shroom Roast TTYD.png|[[Roast | Shroom Roast TTYD.png|[[Mushroom Roast|Shroom Roast]] | ||
Shroom Steak TTYD.png|[[ | Shroom Steak TTYD.png|[[Mushroom Steak]] | ||
Sleepy Sheep TTYD.png|[[Sleepy Sheep]] | Sleepy Sheep TTYD.png|[[Sleepy Sheep]] | ||
Slow Shroom TTYD.png|[[Slow Shroom]] | Slow Shroom TTYD.png|[[Slow Mushroom|Slow Shroom]] | ||
Snow Bunny TTYD.png|[[Snow Bunny]] | Snow Bunny TTYD.png|[[Snow Bunny]] | ||
Space Food TTYD.png|[[Space Food]] | Space Food TTYD.png|[[Space Food]] | ||
Spaghetti TTYD.png|[[ | Spaghetti TTYD.png|[[Spaghetti]] | ||
Spicy Pasta TTYD.png|[[Spicy Pasta]] | |||
Spicy Pasta TTYD.png|[[ | |||
Spicy Soup TTYD.png|[[Spicy Soup]] | Spicy Soup TTYD.png|[[Spicy Soup]] | ||
Spite Pouch TTYD.png|[[Spite Pouch]] | Spite Pouch TTYD.png|[[Spite Pouch]] | ||
Stop Watch TTYD.png|[[Stop Watch]] | Stop Watch TTYD.png|[[Stop Watch]] | ||
Super Shroom TTYD.png|[[Super Mushroom|Super Shroom]] | Super Shroom TTYD.png|[[Super Mushroom|Super Shroom]] | ||
Tasty Tonic TTYD.png|[[Tasty Tonic]] | Tasty Tonic TTYD.png|[[Tasty Tonic]] | ||
Thunder Bolt TTYD.png|[[Thunder Bolt (item)|Thunder Bolt]] | Thunder Bolt TTYD.png|[[Thunder Bolt (item)|Thunder Bolt]] | ||
Thunder Rage TTYD.png|[[Thunder Rage]] | Thunder Rage TTYD.png|[[Thunder Rage]] | ||
Trial Stew TTYD.png|[[Trial Stew]] | Trial Stew TTYD.png|[[Trial Stew]] | ||
Turtley Leaf TTYD.png|[[Turtley Leaf]] | Turtley Leaf TTYD.png|[[Turtley Leaf]] | ||
Ultra Shroom TTYD.png|[[Ultra Mushroom|Ultra Shroom]] | Ultra Shroom TTYD.png|[[Ultra Mushroom|Ultra Shroom]] | ||
Volt Shroom TTYD.png|[[Volt Mushroom|Volt Shroom]] | |||
Whacka Bump TTYD.png|[[Whacka Bump]] | |||
Zess Cookie TTYD.png|[[Zess Cookie]] | |||
Volt | |||
Whacka Bump TTYD.png|[[Whacka Bump | |||
Zess Cookie TTYD.png|[[Zess Cookie]] | |||
Zess Deluxe TTYD.png|[[Zess Deluxe]] | Zess Deluxe TTYD.png|[[Zess Deluxe]] | ||
Zess Dinner TTYD.png|[[Zess Dinner]] | Zess Dinner TTYD.png|[[Zess Dinner]] | ||
| Line 648: | Line 723: | ||
Zess Tea TTYD.png|[[Zess Tea]] | Zess Tea TTYD.png|[[Zess Tea]] | ||
</gallery> | </gallery> | ||
====Important Things==== | |||
==== | |||
<gallery widths=40 heights=40> | <gallery widths=40 heights=40> | ||
Autograph TTYD.png|[[Autograph]] | |||
Battle Trunks TTYD.png|[[Battle Trunks]] | |||
Black Key TTYD.png|[[Black Key]] | |||
Blanket.png|[[Blanket]] | |||
Blimp Ticket.png|[[Blimp Ticket]] | |||
Blue Key TTYD.png|[[Blue Key (Paper Mario: The Thousand-Year Door)|Blue Key]] | |||
Blue Potion.png|[[Blue Potion]] | |||
Box TTYD.png|[[Box]] | |||
Briefcase.png|[[Briefcase]] | |||
Card Key purple.png|[[Security Key|Card Key]] | |||
Card Key yellow.png|Card Key | |||
Card Key green.png|Card Key | |||
Card Key blue.png|Card Key | |||
Castle Key.png|[[Castle Key (Paper Mario: The Thousand-Year Door)|Castle Key]] | |||
PMTTYD Champ's Belt Sprite.png|[[Champ's Belt]] | |||
Chuckola Cola TTYD.png|[[Chuckola Cola (Paper Mario: The Thousand-Year Door)|Chuckola Cola]] | |||
Cog TTYD.png|[[Cog (Paper Mario: The Thousand-Year Door)|Cog]] | |||
Contact Lens.png|[[Contact Lens]] | |||
Cookbook TTYD.png|[[Cookbook]] | |||
Data Disk.png|[[Data Disk]] | |||
Dubious Paper TTYD.png|[[Dubious Documents|Dubious Paper]] | |||
Elevator Key RS TTYD.png|[[Elevator Key (Riverside Station)|Elevator Key]]{{footnote|main|1}} | |||
Elevator Key XNaut TTYD blue.png|[[Elevator Key (X-Naut Fortress)|Elevator Key]]{{footnote|main|2}} | |||
Elevator Key XNaut TTYD red.png|Elevator Key{{footnote|main|3}} | |||
Galley Pot TTYD.png|[[Galley Pot]] | |||
Gate Handle.png|[[Gate Handle]] | |||
Gold Card TTYD.png|[[Gold Card]] | |||
Gold Ring.png|[[Gold Ring (item)|Gold Ring]] | |||
Goldbob Guide.png|[[Goldbob's Pass|Goldbob Guide]] | |||
Green Potion.png|[[Green Potion]] | |||
Grotto Key TTYD.png|[[Grotto Key]] | |||
House Key TTYD.png|[[House Key (Super Paper Mario)|House Key]] | |||
Lottery Pick.png|[[Lottery Ticket|Lottery Pick]] | |||
Mailbox SP TTYD.png|[[Mailbox SP]] | |||
Moon Stone TTYD.png|[[Moon Stone]] | |||
Necklace TTYD.png|[[Necklace (Paper Mario: The Thousand-Year Door)|Necklace]] | |||
Old Letter.png|[[Old Letter]] | |||
Orange Potion TTYD.png|[[Yellow Potion|Orange Potion]] | |||
Box TTYD.png|[[Package (Paper Mario: The Thousand-Year Door)|Package]] | |||
Palace Key gray.png|[[Palace Key (Paper Mario: The Thousand-Year Door)|Palace Key]] (door) | |||
Palace Key blue.png|Palace Key (pedestal) | |||
Platinum Card.png|[[Platinum Card]] | |||
Cake TTYD poisoned.png|[[Poisoned Cake]] | |||
Present TTYD.png|[[Present (Paper Mario: The Thousand-Year Door)|Present]] | |||
Puni Orb TTYD.png|[[Puni Orb]] | |||
Ragged Diary TTYD.png|[[Ragged Diary]] | |||
Red Key TTYD.png|[[Red Key (Paper Mario: The Thousand-Year Door)|Red Key]] | |||
Red Potion.png|[[Red Potion]] | |||
Routing Slip.png|[[Routing Slip]] | |||
Shell Earrings.png|[[Shell Earrings]] | |||
Shine Sprite TTYD.png|[[Shine Sprite]] | |||
Shop Key.png|[[Shop Key]] | |||
Silver Card TTYD.png|[[Silver Card]] | |||
Skull Gem TTYD.png|[[Skull Gem]] | |||
Special Card TTYD.png|[[Special Card]] | |||
Star Key.png|[[Star Stone (Paper Mario: The Thousand-Year Door)|Star Key]] | |||
Star Piece TTYD.gif|[[Star Piece (Paper Mario series)|Star Piece]] | |||
Station Key.png|[[Station Key]] | |||
Station Key alt.png|Station Key (alt) | |||
Steeple Key TTYD.png|[[Steeple Key]] | |||
Steeple Key basement.png|Steeple Key (basement) | |||
Shop Key.png|[[Storage Key]] | |||
Strange Sack TTYD.png|[[Strange Sack]] | |||
Sun Stone TTYD.png|[[Sun Stone]] | |||
Superbombomb.png|[[Superbombomb]] | |||
Super Luigi series Vol 1 TTYD.png|[[Super Luigi (series)#Super Luigi|Super Luigi]] | |||
Super Luigi series Vol 2 TTYD.png|[[Super Luigi (series)#Super Luigi 2|Super Luigi 2]] | |||
Super Luigi series Vol 3 TTYD.png|[[Super Luigi (series)#Super Luigi 3|Super Luigi 3]] | |||
Super Luigi series Vol 4 TTYD.png|[[Super Luigi (series)#Super Luigi 4|Super Luigi 4]] | |||
Super Luigi series Vol 5 TTYD.png|[[Super Luigi (series)#Super Luigi 5|Super Luigi 5]] | |||
Letter P TTYD.png|[[The Letter "p"|The letter "p"]] | |||
Train Ticket.png|[[Train Ticket]] | |||
Ultra Stone TTYD.png|[[Ultra Stone]] | |||
Up Arrow.png|[[Up Arrow]] | |||
Vital Paper TTYD.png|[[Vital Paper]] | |||
Wedding Ring.png|[[Wedding Ring]] | |||
Wrestling Mag.png|[[Wrestling Magazine|Wrestling Mag]] | |||
</gallery> | |||
{{footnote|note|1|Elevator Key from [[Riverside Station]]}} | |||
{{footnote|note|2|Elevator Key from [[X-Naut Fortress]], level 1}} | |||
{{footnote|note|3|Elevator Key from X-Naut Fortress, sublevel 1}} | |||
====Unused==== | |||
<gallery widths=40 heights=40> | |||
Snow Bunny TTYD unused.png|Snow Bunny (unused) | |||
Trade Off TTYD unused.png|Trade Off | |||
Koopa Curse.png|Koopa Curse | |||
Coconut Recipe TTYD unused.png|The unused coconut recipe. | |||
Red Key TTYD early.png|An unused key with [[Hooktail]]'s face embedded in it. | |||
Fire Rod TTYD unused.png|An unused item resembling a Fire Flower with a candy cane-like stick. | |||
Pillow TTYD unused.png|A pillow | |||
Invalid Item TTYD unused.png|Mario Poster | |||
</gallery> | </gallery> | ||
=== | ===Badges=== | ||
<gallery widths=40 heights=40> | <gallery widths=40 heights=40> | ||
All or Nothing | PMTTYD All or Nothing Badge.png|[[All or Nothing]] | ||
Attack FX B TTYD.png|[[Attack FX B (Paper Mario: The Thousand-Year Door)|Attack FX B]] | |||
Attack FX G.png|[[Attack FX G]] | |||
Attack FX P.png|[[Attack FX P]] | |||
Attack FX R.png|[[Attack FX R]] | |||
Attack FX Y.png|[[Attack FX Y]] | |||
Bump Attack.png|[[Bump Attack]] | |||
Charge TTYD.png|[[Charge (badge)|Charge]] | |||
Charge P.png|[[Charge P]] | |||
Chill Out TTYD.png|[[Chill Out (badge)|Chill Out]] | |||
Close Call TTYD.png|[[Close Call (badge)|Close Call]] | |||
Close Call P.png|[[Close Call P]] | |||
Damage Dodge.png|[[Damage Dodge]] | |||
Damage Dodge P.png|[[Damage Dodge P]] | |||
Defend Plus.png|[[Defend Plus]] | |||
Defend Plus P.png|[[Defend Plus P]] | |||
Double Dip.png|[[Double Dip]] | |||
Double Dip P.png|[[Double Dip P]] | |||
Double Pain.png|[[Double Pain]] | |||
Feeling Fine.png|[[Feeling Fine]] | |||
Feeling Fine P.png|[[Feeling Fine P]] | |||
Fire Drive.png|[[Fire Drive]] | |||
First Attack.png|[[First Attack]] | |||
Flower Finder.png|[[Flower Finder]] | |||
Flower Saver.png|[[Flower Saver]] | |||
Flower Saver P.png|[[Flower Saver P]] | |||
FP Drain.png|[[FP Drain]] | |||
FP Plus.png|[[FP Plus]] | |||
Hammer Throw TTYD.png|[[Hammer Throw (badge)|Hammer Throw]] | |||
Hammerman.png|[[Hammerman]] | |||
Happy Flower TTYD.png|[[Happy Flower (badge)|Happy Flower]] | |||
Happy Heart.png|[[Happy Heart]] | |||
Happy Heart P.png|[[Happy Heart P]] | |||
Head Rattle.png|[[Head Rattle]] | |||
Heart Finder.png|[[Heart Finder]] | |||
HP Drain TTYD.png|[[HP Drain (badge)|HP Drain]] | |||
HP Drain P.png|[[HP Drain P]] | |||
HP Plus TTYD.png|[[HP Plus (badge)|HP Plus]] | |||
HP Plus P.png|[[HP Plus P]] | |||
Ice Power.png|[[Ice Power]] | |||
Ice Smash.png|[[Ice Smash]] | |||
Item Hog.png|[[Item Hog]] | |||
Jumpman TTYD.png|[[Jumpman (badge)|Jumpman]] | |||
L Emblem.png|[[L Emblem]] | |||
Last Stand.png|[[Last Stand]] | |||
Last Stand P.png|[[Last Stand P]] | |||
Lucky Day.png|[[Lucky Day]] | |||
PMTTYD_Lucky_Start.png|[[Lucky Start]] | |||
Mega Rush.png|[[Mega Rush]] | |||
Mega Rush P.png|[[Mega Rush P]] | |||
Money Money.png|[[Money Money]] | |||
Multibounce.png|[[Multibounce]] | |||
PDown DUp.png|[[P-Down, D-Up]] | |||
PDown DUp P.png|[[P-Down, D-Up P]] | |||
PUp DDown.png|[[P-Up, D-Down]] | |||
PUp DDown P.png|[[P-Up, D-Down P]] | |||
Peekaboo TTYD.png|[[Peekaboo (badge)|Peekaboo]] | |||
Piercing Blow.png|[[Piercing Blow]] | |||
Pity Flower.png|[[Pity Flower]] | |||
Power Bounce.png|[[Power Bounce]] | |||
Power Jump.png|[[Power Jump]] | |||
Power Plus TTYD.png|[[Power Plus (badge)|Power Plus]] | |||
Power Plus P.png|[[Power Plus P]] | |||
Power Rush.png|[[Power Rush]] | |||
Power Rush P.png|[[Power Rush P]] | |||
Power Smash.png|[[Power Smash]] | |||
Pretty Lucky.png|[[Pretty Lucky]] | |||
Pretty Lucky P.png|[[Pretty Lucky P]] | |||
Quake Hammer.png|[[Quake Hammer]] | |||
PMTTYD_Quick_Change.png|[[Quick Change]] | |||
PMTTYD_Refund.png|[[Refund]] | |||
Return Postage.png|[[Return Postage]] | |||
Shrink Stomp.png|[[Shrink Stomp]] | |||
Simplifier.png|[[Simplifier]] | |||
Sleepy Stomp.png|[[Sleepy Stomp]] | |||
Slow Go.png|[[Slow Go]] | |||
Soft Stomp.png|[[Soft Stomp]] | |||
Spike Shield.png|[[Spike Shield]] | |||
Super Appeal.png|[[Super Appeal]] | |||
Super Appeal P.png|[[Super Appeal P]] | |||
Timing Tutor.png|[[Timing Tutor]] | |||
Tornado Jump TTYD.png|[[Tornado Jump (badge)|Tornado Jump]] | |||
Unsimplifier.png|[[Unsimplifier]] | |||
W Emblem.png|[[W Emblem]] | |||
Zap Tap.png|[[Zap Tap]] | |||
[ | |||
</gallery> | </gallery> | ||
====Unused==== | |||
=== | <gallery widths=40 heights=40> | ||
<gallery widths= | All or Nothing P.png|[[All or Nothing]] P | ||
FP Drain P.png|[[FP Drain]] P | |||
Happy Flower P.png|[[Happy Flower]] P | |||
Lucky Day P.png|[[Lucky Day]] P | |||
Mega Jump.png|[[Mega Jump]] | |||
Mega Quake.png|[[Mega Quake]] | |||
Mega Smash.png|[[Mega Smash]] | |||
Pity Flower P.png|[[Pity Flower]] P | |||
Triple Dip.png|[[Triple Dip]] | |||
Triple Dip P.png|[[Triple Dip]] P | |||
Invalid Item.png|Possible early version of a [[Damage Dodge]] | |||
Invalid Item P.png|Possible early version of a [[Damage Dodge P]] | |||
Super Charge.png|Super Charge | |||
Super Charge P.png|Super Charge P | |||
Unknown Badge TTYD.png|An unknown badge, most likely an early version of an [[Ice Power]] or [[Ice Smash]]. | |||
</gallery> | |||
===Objects=== | |||
{{image|more=yes|section=yes|Crystal stars}} | |||
PMTTYD | <gallery> | ||
PMTTYD | Boat Panel.png|[[Boat panel]] | ||
PMTTYD Jump Pad render (blue).png|Blue [[Trampoline|jump pad]] | |||
PMTTYD | PMTTYD Jump Pad render (red).png|Red jump pad | ||
PMTTYD | PMTTYD Lock render.png|Lock | ||
PMTTYD | Plane Panel.png|[[Plane panel]] | ||
PMTTYD Sign.png|Sign | |||
PMTTYD TattleLog.png|[[Tattle Log]] | |||
File:PMTTYD chest.png|[[Treasure chest]] | |||
PMTTYD | Blue Pipe.png|[[Warp Pipe]] | ||
</gallery> | |||
====Blocks==== | |||
<gallery> | |||
PMTTYD Question Mark Block Sprite.png|[[? Block|? block]] | |||
PMTTYD ! Switch.png|[[! Switch]] | |||
PMTTYD brick block.png|[[Brick block]] | |||
PMTTYDHeartBlock.png|[[Recovery Block|Recovery block]] | |||
Ttyd metalblock.png|[[Metal Block|Metal block]] | |||
PMTTYDSaveBlock.png|[[Save Block]] | |||
PMTTYD | PMTTYD Shine Block.png|[[Shine Block]] | ||
PMTTYD | Ttyd stoneblock.png|[[Stone Block|Stone block]] | ||
Giantstoneblock.png|Stone block (giant) | |||
PMTTYD yellow block.png|[[Yellow Block|Yellow block]] | |||
PMTTYD big yellow block.png|Yellow block (giant) | |||
</gallery> | </gallery> | ||
=== | ===Status effects=== | ||
<gallery widths= | <gallery widths=40 heights=40> | ||
Allergic.gif|[[Allergic]] | |||
Burn.png|[[Burn]] | |||
Confused.png|[[Confused]] | |||
PMTTYD DEF-Up Battle Icon.png|[[DEF-Up]] | |||
PMTTYD | PMTTYD DEF-Down Battle Icon.png|[[DEF-Down]] | ||
Dizzy PMTTYD icon.png|[[Dizzy]] | |||
Dodgy TTYD.png|[[Dodgy]] | |||
Electrifying.png|[[Electrified]] | |||
Fast TTYD Status.png|[[Fast]] | |||
Frozen Block.png|[[Frozen]] | |||
Huge TTYD.png|[[Huge]] | |||
Immobilize.png|[[Immobilized]] | |||
Invisible icon TTYD.png|[[Invisible]] | |||
SpitePaybacktime.png|[[Payback]] | |||
Poison.png|[[Poison (status effect)|Poison]] | |||
PMTTYD | PMTTYD POW-Up Battle Icon.png|[[POW-Up]] | ||
File:POW Down TTYD unused.png|[[POW-Down]] | |||
Sleeping.png|[[Sleep]] | |||
Slowstatus.png|[[Slow]] | |||
Tiny.png|[[Tiny (status effect)|Tiny]] | |||
</gallery> | |||
===Menus and Level up=== | |||
<gallery> | |||
PMTTYD Level up Heart.png|[[Heart Point]] | |||
PMTTYD Level up Flower.png|[[Flower Point]] | |||
PMTTYD Level up Badge.png|[[Badge Point]] | |||
PMTTYD | </gallery> | ||
===Introduction=== | |||
<gallery> | |||
PMTTYD Book Cover.png|Book | |||
PMTTYD | PMTTYD Intro Page 1.png|Page 1 | ||
PMTTYD Intro Page 2.png|Page 2 | |||
PMTTYD Intro Page 3.png|Page 3 | |||
PMTTYD Intro Page 4.png|Page 4 | |||
PMTTYD Intro Page 5.png|Page 5 | |||
</gallery> | |||
===Chapter coins=== | |||
PMTTYD | <gallery widths=160 heights=160> | ||
PMTTYD | Chapter Coin Mario.png|Mario | ||
Chapter Coin Peach.png|Peach | |||
Chapter Coin Bowser.png|Bowser | |||
Chapter Coin X-Naut.png|X-Naut insignia | |||
PMTTYD | </gallery> | ||
===Ending pictures=== | |||
<gallery> | |||
Koops | PMTTYD Staff Credits 1.png|A boat arrives at Rogueport. | ||
PMTTYD | PMTTYD Staff Credits 2.png|Goombella thanks Mario for rescuing her earlier. | ||
PMTTYD Staff Credits 3.png|The Magical Map. | |||
PMTTYD Staff Credits 4.png|A view of Professor Frankly's office at Rogueport. | |||
PMTTYD Staff Credits 5.png|A Blooper emerges from the water at Rogueport Sewers. | |||
PMTTYD Staff Credits 6.png|Mario and Goombella explore Petal Meadows. | |||
PMTTYD | PMTTYD Staff Credits 7.png|Mario and Goombella meet Koops. | ||
PMTTYD Staff Credits 8.png|Mario participates in the 65th Super Fun Quirk Quiz. | |||
PMTTYD Staff Credits 9.png|A horde of Dull Bones push Mario back at Hooktail Castle. | |||
PMTTYD | PMTTYD Staff Credits 10.png|Ms. Mowz smooches Mario in Hooktail Castle. | ||
PMTTYD Staff Credits 11.png|Mario encounters Hooktail at her lair. | |||
PMTTYD Staff Credits 12.png|Peach witnesses TEC-XX turn on. | |||
PMTTYD Staff Credits 12 JP.png|In the Japanese version. | |||
PMTTYD | PMTTYD Staff Credits 13.png|Bowser enters his fortress. | ||
PMTTYD Staff Credits 14.png|The Shadow Sirens unite at the Boogly Woods. | |||
PMTTYD | PMTTYD Staff Credits 15.png|Exterior of the The Great Tree. | ||
PMTTYD | PMTTYD Staff Credits 16.png|Flurrie surrounds herself with roses. | ||
PMTTYD Staff Credits 17.png|Punies are freed from a jail cell inside The Great Tree. | |||
PMTTYD | PMTTYD Staff Credits 18.png|Magnus von Grapple takes shape. | ||
PMTTYD Staff Credits 19.png|Bowser navigates World 1-1. | |||
PMTTYD | PMTTYD Staff Credits 20.png|Zess T. is looking for her missing Contact Lens. | ||
PMTTYD | PMTTYD Staff Credits 21.png|A blimp is heading for Glitzville. | ||
PMTTYD | PMTTYD Staff Credits 22.png|The Koopinator faces off against Rawk Hawk at the Glitz Pit. | ||
PMTTYD Staff Credits 23.png|A Yoshi egg sits atop the roof of the hot dog stand in Glitzville. | |||
PMTTYD Staff Credits 24.png|Jolene and Grubba at the front office of the Glitz Pit. | |||
PMTTYD | PMTTYD Staff Credits 25.png|Grodus at his office in the X-Naut Fortress. | ||
PMTTYD | PMTTYD Staff Credits 26.png|Mario witnesses pigs at Twilight Town. | ||
PMTTYD Staff Credits 27.png|A swarm of Boos surround the entrance hall of the Creepy Steeple. | |||
PMTTYD Staff Credits 28.png|Doopliss sitting on his rocking chair at the top of the Creepy Steeple. | |||
PMTTYD | PMTTYD Staff Credits 29.png|Vivian meets Mario (who had his body stolen) in Twilight Town. | ||
PMTTYD Staff Credits 30.png|Flavio's ship sails through the night. | |||
PMTTYD Staff Credits 31.png|A horde of Embers ambush the ship. | |||
PMTTYD | PMTTYD Staff Credits 32.png|Embers ambush Bobbery and others on a bridge at Keelhaul Key. | ||
PMTTYD | PMTTYD Staff Credits 33.png|Cortez offers some treasure, including the Sapphire Star. | ||
PMTTYD Staff Credits 34.png|Bands between Bowser and Lord Crump clash at Twilight Town. | |||
PMTTYD Staff Credits 35.png|Don Pianta recovers from his illness. | |||
PMTTYD Staff Credits 36.png|Pennington inside a passenger car of the Excess Express. | |||
PMTTYD Staff Credits 37.png|The Excess Express arrives at the Riverside Station. | |||
PMTTYD | PMTTYD Staff Credits 38.png|Smorg captures Excess Express passengers on the train's rooftop. | ||
PMTTYD | PMTTYD Staff Credits 39.png|Mario arrives at Poshley Heights. | ||
PMTTYD | PMTTYD Staff Credits 40.png|Peach takes a shower at the X-Naut Fortress. | ||
PMTTYD | PMTTYD Staff Credits 41.png|The big cannon fires Mario to the moon. | ||
PMTTYD | PMTTYD Staff Credits 42.png|Mario arrives on the moon. | ||
PMTTYD Staff Credits 43.png|Magnus von Grapple 2.0 prepares for battle. | |||
PMTTYD Staff Credits 44.png|TEC-XX. | |||
PMTTYD Staff Credits 44 JP.png|In the Japanese version. | |||
PMTTYD Staff Credits 45.png|The Thousand-Year Door opens. | |||
PMTTYD | PMTTYD Staff Credits 46.png|The tower at the heart of the Palace of Shadow. | ||
PMTTYD Staff Credits 47.png|Bowser about to fall on top of Grodus. | |||
PMTTYD Staff Credits 48.png|Peach possessed by the Shadow Queen. | |||
PMTTYD Staff Credits 49.png|Mario and Peach ride the boat back home. | |||
PMTTYD Staff Credits 50.png|An ocean view of Rogueport. | |||
</gallery> | |||
===Miscellaneous=== | |||
PMTTYD | <gallery> | ||
PMTTYD | PMTTYD Mario Level Icon.png|Mario's level icon in the pause menu | ||
</gallery> | |||
Mario | ==Screenshots== | ||
{{construction|[[:Category:Paper Mario: The Thousand-Year Door images|by finding screenshots elsewhere on the wiki]]|section=yes}} | |||
PMTTYD | ===Non-specific chapters=== | ||
<gallery widths="160"> | |||
BeldamDisguised.png|[[Princess Peach]] meeting with a [[Beldam|mysterious merchant]] | |||
PMTTYD | PMTTYD Peach and the Glowing Box.png|Princess Peach receiving a gift | ||
PMTTYD Title.png|Title screen | |||
Paper Mario RPG Title JP.png|Title screen (Japanese version) | |||
File Screen PMTTYD.png | |||
Paper Mario RPG New Game 1.png | |||
PMTTYD | Paper Mario RPG New Game 2.png | ||
PMTTYD | PMTTYD Badge Equip Menu.png | ||
PMTTYD | PMTTYD Tattle Log Menu.png | ||
PMTTYD | PMTTYD Stage Curtains.png | ||
PMTTYD | PMTTYD Mario Transition Panels.png | ||
PMTTYD | PMTTYD Peach Transition Panels.png | ||
PMTTYD Bowser Transition Panels.png | |||
PMTTYD Garbage Can.png|[[Trash Can|Garbage can]] | |||
Podley's Place.png | |||
Trouble Center.png|[[Trouble Center]] | |||
PMTTYD Trouble Center Back Entrance Reveal.png | |||
PMTTYD Trouble Center Inside Back.png | |||
PMTTYD Grifty Location.png|[[Grifty]] | |||
PMTTYD Rogueport Plaza.png | |||
PMTTYD | PMTTYD Rogueport East.png | ||
PMTTYD | PMTTYD Rogueport West.png | ||
Rogueport crime scene.png | |||
Happy Lucky Lottery.png | |||
PMTTYD Piantaparlor.png | |||
PMTTYD Piantapailor Airplane.png | |||
PMTTYD Piantaparlor Paper.png | |||
PMTTYD Piantaparlor Tube.png | |||
PMTTYD Piantaparlor Boat.png | |||
PPTTYD Cheating Happy Lucky Lottery.png | |||
PMTTYD Rogueport ZessT.png | |||
Zess T Cooking.png | |||
Howzofbadges.png | |||
PMTTYD Which Badge to Toss Prompt.png | |||
PMTTYD Too Many Badges Prompt.png | |||
PMTTYD Lovely Howz of Badges Attack FX B Position.png | |||
LakiTTYD.png | |||
Deepdown Depot.png|[[Deepdown Depot]] | |||
PMTTYD Italian Yoshi Explanation 1.png | |||
PMTTYD Italian Yoshi Explanation 2.png | |||
PMTTYD Italian Yoshi Explanation 3.png | |||
PMTTYD Italian Yoshi Explanation 4.png | |||
PMTTYD Italian Yoshi Explanation 5.png | |||
PMTTYD Italian Yoshi Explanation 6.png | |||
PMTTYDDramalamaPlaque.png | |||
PMTTYD Twilight Town battle.png|[[X-Nauts (organization)|X-Nauts]] vs. [[Bowser's Minions|Koopa Clan]] | |||
Pit Entrance.png | |||
PMTTYD Pit of 100 Trials Gloomba.png | |||
PMTTYD Pit of 100 Trials Healing.png | |||
PMTTYD Pit of 100 Trials Swampire Battle.png | |||
PMTTYD Pit of 100 Trials Bonetail.png | |||
PMTTYD Bonetail Defeated.png|Mario and Bobbery on the lowest floor after defeating [[Bonetail]]. | |||
MeetBonetail.png|[[Bonetail]] | |||
PMTTYD Battle.png|A regular battle | |||
PMTTYD Shy Guy Audience.png | |||
PMTTYD Merlon Power Up.png | |||
PMTTYD Game Over.png|The [[Game Over]] screen / Mario defeated | |||
Sweet Treat.png | |||
PMTTYD EarthTremor.png | |||
ClockoutPM2.png | |||
PMTTYD Power Lift.png | |||
Art attack.png | |||
Sweet feast.png | |||
PMTTYD Showstopper.png | |||
Supernova PM2.png | |||
TEC-XX Face JP.png|TEC-XX in the Japanese version. | |||
TEC-XX Face US.png|TEC-XX in the International version. | |||
</gallery> | |||
===[[Item Shop]]s=== | |||
<gallery widths="160"> | |||
ToadBrosBazaar.png|[[Toad Bros. Bazaar]] | |||
Westside Goods.png|[[Westside Goods]] | |||
PMTTYD Petalburg screenshot.png|Outside | |||
Niff T's Shop.png|[[Niff T.'s shop]] | |||
PungentsShop.png|[[Pungent's Great Tree Shop]] | |||
Souvenirshop.png|[[Souvenir shop (Paper Mario: The Thousand-Year Door)|Souvenir shop]] | |||
PMTTYD Twilight Shop.png|[[Twilight Shop]] | |||
KeelhaulGalleria.png|[[Keelhaul Galleria]] | |||
PMTTYD Outside Sales Stall.png|Outside | |||
PMTTYD Sales Stall.png|[[Sales Stall]] | |||
NorthwindsMart.png|[[Northwinds Mart]] | |||
Deepdown Depot.png|[[Deepdown Depot]] | |||
</gallery> | |||
===[[Inn]]s=== | |||
<gallery widths="160"> | |||
PMTTYD Podley's Place Interior.png|[[Podley's Place]] | |||
PMTTYD Petalburg Inn Interior.png|Petalburg Inn | |||
PMTTYD Twilight Inn Interior.png|Twilight Inn | |||
PMTTYD Seaside Shanty Interior.png|Seaside Shanty | |||
PMTTYD Royal Poshley Park Tower Interior 1.png|Royal Poshley Park Tower | |||
PMTTYD Royal Poshley Park Tower Interior 2.png|Royal Poshley Park Tower | |||
PMTTYD Royal Poshley Park Tower Interior 3.png|Royal Poshley Park Tower | |||
PMTTYD Fahr Outpost Inn Interior.png|Fahr Outpost Inn | |||
</gallery> | |||
===Prologue=== | |||
<gallery widths="160"> | |||
PMTTYDPrologueTitle.png|[[Paper Mario: The Thousand-Year Door#Prologue: A Rogue's Welcome|A Rogue's Welcome]] | |||
Trees In The View PMTTYD.png | |||
Paper Mario TTYD Parakarry Beginning.png | |||
Luigi Getting The Mail PMTTYD.png | |||
They Just Got A Letter! PMTTYD.png | |||
PMTTYD Marioshouse inside.png|Inside the Mario Bros.' house | |||
The Ocean PMTTYD.png | |||
Introducing PAPER MARIO- THE THOUSAND-YEAR DOOR!.png | |||
PMTTYD Prolog Rogueport.png | |||
Rogueport Harbor View Prologue.png | |||
Introduction Of Rogueport.png | |||
PMTTYD prologue screenshot.png|[[Lord Crump]] shouting "PUNISH HIM!" | |||
PMTTYD Goombella Star Points.png | |||
TTYDStarPoints.png | |||
Goombella and Mario PMTTYD.png | |||
Goombella Joins The Party PMTTYD.png | |||
Tattle Information PMTTYD.png | |||
Tattling Tutorial PMTTYD.png | |||
PMTTYD Toadsworth.png | |||
Zess T. in Rogueport.png | |||
PMTTYD Bandit Rushing Mario.png | |||
PMTTYD Mario Confronting Bandit.png | |||
PMTTYD Bingo screenshot.png | |||
PMTTYD Professor Frankly Gate.png | |||
PMTTYD Rogueport Sewers Entrance.png | |||
PMTTYD Goomba trio.png | |||
Goombella Tattling Goomba PMTTYD.png | |||
Goomba Trio Defeated PMTTYD.png | |||
PMTTYD Yellow Blocks.png | |||
PMTTYD Big Yellow Block.png | |||
PM2 BlackChest.png | |||
Rogueport Sewers Black Key PMTTYD.png | |||
Plane Curse PMTTYD.png | |||
PMTTYD The Thousand-Year Door.png | |||
PMTTYD The Thousand-Year Door pedestal.png | |||
Hooktail Castle background.png|Hooktail Castle in the sun | |||
Location Of The First Crystal Star Revealed.png|[[Diamond Star]] revealed | |||
PMTTYD Professor Frankly Discussion Petal Meadows.png | |||
PMTTYD tentacle screenshot.png | |||
PMTTYD Angry Blooper.png | |||
PMTTYD Blooper Battle.png | |||
</gallery> | </gallery> | ||
=== | ===Chapter 1=== | ||
<gallery widths="160"> | <gallery widths="160"> | ||
PMTTYDChapter1Title.png|[[Paper Mario: The Thousand-Year Door#Chapter 1: Castle and Dragon|Chapter 1: Castle and Dragon]] | |||
PMTTYD | Introduction Of Petal Meadows.png|[[Petal Meadows]] | ||
PMTTYD Mario Adventure Unfolds.png | |||
Tattling Petal Meadows.png| | |||
PMTTYD Star Piece PetalMeadowsTree.png | |||
PMTTYD | The Pair Heard Roar.png | ||
Hooktail Shadow PMTTYD.png | |||
PMTTYD | Hooktail Flying.png|Hooktail flying in the background | ||
Petal Meadow Goomba Battle PMTTYD.png | |||
PMTTYD | GoombellaHeadbonkPMTTYD.png | ||
PMTTYD | Levelup PM2.png | ||
Goombella Reminding Mario PMTTYD.png|Use {{button|GCN|X}} to Tattle | |||
PMTTYD Petal Meadows bridge.png|The bridge appearing | |||
PMTTYD Background.png|Mario interacting with the background. | |||
PMTTYD | PMTTYD Star Piece PetalMeadowsBackground.png | ||
PMTTYD | PMTTYD Petalburg Entrance.png | ||
Introduction Of Petalburg.png|The introduction to [[Petalburg]] | |||
Mario arrives in Petalburg.png | |||
Kroop tells the pair the location.png|Mario talking to Kroop | |||
The Koopa fan of Peach in Petalburg PMTTYD.png|The Koopa Troopa that is a fan of [[Peach]] | |||
PMTTYD | Toce T.png|[[Toce T.]] | ||
The Traveling Sisters 3 in Petalburg PMTTYD.png|The [[Traveling Sisters Three|Traveling Sisters 3]] | |||
Dupree in Petalburg PMTTYD.png|[[Dupree]] | |||
Koops shyness.png | |||
PMTTYD | Petal Meadows Darker.png|The duo entering the first 1000-year-old ruins | ||
PMTTYD | Purple Millennium Ruins PMTTYD.png|The ruins with [[Bald Cleft]]s | ||
PMTTYD | PMTTYD Millennium Ruins Bristles.png|The ruins with [[Bristle]]s | ||
PMTTYD | Last Path Petal Meadow PMTTYD.png | ||
PMTTYD Star Piece PetalMeadowsGrass.png | |||
Shhwonk Fortress Entrance PMTTYD.png|The entrance to [[Shhwonk Fortress]] | |||
Shhwonk.png|The above area. | |||
PMTTYD | ThwompPM2.png | ||
PMTTYD | Quirkquiz.png | ||
PMTTYD Failed Quiz Cleft Battle.png|Failed the quiz | |||
Fuzzy Battle PMTTYD.png | |||
Underground Shhwonk Sewers.png|The sewers | |||
PMTTYD | Multibounce Obtained PMTTYD.png | ||
PMTTYD | PMTTYD Red Block Shhwonk Fortress.png | ||
PMTTYD | Shhwonkunderground.png|The underground area. | ||
PMTTYD | Gold Fuzzy Encountering.png|The Gold Fuzzy | ||
PMTTYD | PMTTYD Gold Fuzzy Battle.png | ||
PMTTYD | PMTTYD Fuzzy Horde screenshot.png|[[Fuzzy Horde]] | ||
PMTTYD | PMTTYD Gold Fuzzy Superguard Kill.png | ||
Koops IN Petal Meadows PM.png | |||
Koops Begging.png | |||
PMTTYD | Koops Excited PMTTYD.png | ||
PMTTYD | PMTTYD Koops joins party.png | ||
Shell Toss Info.png | |||
PMTTYD | Koopie Koo Knows PMTTYD.png|[[Koopie Koo]] | ||
PMTTYD | Koops and Mario PMTTYD.png | ||
Koops In Battle.png | |||
PMTTYD | PMTTYD Koops Happy Heart Backtrack.png|With Koops, Mario can reach this [[Happy Heart]] [[badge]] | ||
Secret Warp Pipe Unrevealed.png|The inscription on the stone | |||
Secret Warp Pipe Revealed.png | |||
HooktailCastle CHAPTER 1 Background PMTTYD.png | |||
PMTTYD Before Hooktail Castle 1.png | |||
PMTTYD Before Hooktail Castle 2.png | |||
Introduction Of Hooktail Castle.png|[[Hooktail Castle]] introduction | |||
PMTTYD | Koops HP Plus PMTTYD.png|[[HP Plus (badge)|HP Plus]] | ||
PMTTYD | PMTTYD Mario airplane.png|[[Plane Mode]] | ||
PMTTYD | HooktailCastle Tattle PMTYD.png|Goombella tattling the first corridor of Hooktail Castle | ||
Goombella Tattling Paratroopa PMTTYD.png|Goombella tattling a [[Koopa Paratroopa]] | |||
PMTTYD | Power Bounce Obtained PMTTYD.png|[[Power Bounce]] | ||
PMTTYD | PMTTYD Kolorado's Father.png|The dead body of [[Korvallis]], [[Kolorado]]'s father, on the ground. | ||
Koops and Kolorado's Father.png|[[Koops]] mistakes the [[Dull Bones]] for [[Koopley|his own father]]. | |||
PMTTYD | PMTTYD Kolorado's Father Letter.png | ||
PMTTYD | PMTTYD Koops Admitting Mistake.png | ||
PMTTYD | PMTTYD Red Bones Encounter.png | ||
PMTTYD Dull Bones Swarm.png|The [[Dull Bones]] swarm | |||
RedBones Fight PMTTYD.png|Mid-boss battle | |||
Castle Key 1 PMTTYD.png|The first key | |||
HooktailPuzzle 1 PMTTYD.png|The ! Switch and various blocks | |||
PMTTYD | PMTTYD Hooktail Castle Second Save Block.png | ||
PMTTYD | PMTTYD Paper Curse Black Chest.png | ||
PMTTYD | Hooktail Castle Treasure Chest 1.png | ||
PMTTYD | Hooktail Castle Black Key PMTTYD.png|[[Black Key]] | ||
PMTTYD | Spikes PMTTYD.png|The spiked ceiling is about to lower down. | ||
PMTTYD | PMTTYD Hooktail Castle Spike Maze.png|The spike room | ||
PMTTYD | PM2 BlackChestDemon.png|[[Black Chest Demon]] | ||
PMTTYD | Paper Curse PMTTYD.png|The Black Chest Demon explaining how to use Paper Mode | ||
PMTTYD Paper Curse.png | |||
PMTTYD | PMTTYD Paper Mode First Obstacle.png|Mario slipping past the bars in Hooktail Castle. | ||
AFX obtain.png|Mario obtains the [[Attack FX R]] badge, the key to defeat Hooktail. | |||
PMTTYD | Castle Key 2 PMTTYD.png|The second key | ||
PMTTYD | HooktailPuzzle 2 PMTTYD.png|Koops being shot at a switch | ||
PMTTYD Hooktail Castle Revealing Path.png | |||
PMTTYD | PMTTYD Mario Jumping Through Window.png | ||
PMTTYD | PMTTYD Second Dungeon Area.png | ||
PMTTYD | PMTTYD Hooktail Castle Life Shroom.png | ||
PMTTYD Second Dungeon Top Area.png | |||
MowzHooktailCastle.png | |||
PMTTYD | Ms. Mowz Introduction.png|Encountering Ms. Mowz | ||
PMTTYD | MsMowzMarioKoops.png|Mario meets Ms. Mowz. | ||
PMTTYD | Ms Mowz Kiss 1.png|Mario gets kissed by Ms. Mowz. | ||
PMTTYD | PMTTYD Ms Mowz Window.png | ||
PMTTYD | Hooktail Castle Treasure Chests 2-4.png | ||
PMTTYD | MushroomHooktailCastle.png|[[Mushroom]] | ||
Castle Key 3 PMTTYD.png|The third key | |||
HoneySyrupHooktailCastle.png|[[Honey Syrup]] | |||
Castle Door Unlocked.png|Mario is unlocking the third castle door | |||
PMTTYD Yellow Elevator Block Puzzle.png | |||
MarioYellowBlockUp PMTTYD.png|Mario gets elevated up to the plane panel | |||
PMTTYD Hooktail Castle Indoor Plane Panel.png | |||
PMTTYD | PMTTYD Hooktail Castle Plane Mode Ledge.png | ||
PMTTYD Star Piece HooktailCastleYellowBlock.png|Mario getting the Star Piece in the upper-north-east corner of the plane room | |||
Castle Key 4 PMTTYD.png|The fourth key | |||
PMTTYD | Mario Falling Down PMTTYD.png|Mario and Koops are falling down the fourth area | ||
Last Stand P Platform PMTTYD.png|[[Last Stand P]] | |||
Last Castle Door Chapter 1.png|Mario opened the fourth castle door | |||
PMTTYD | HooktailCastle Bridge.png|The bridge | ||
PMTTYD | PMTTYD Outside Hooktail's Lair.png|Hooktail's lair | ||
PMTTYD | Hooktail PMTTYD encounter.png|Mario and Koops encounter Hooktail | ||
PMTTYD | Hooktail Threatening PMTTYD.png|Hooktail threatens to devour the heroes. | ||
PMTTYD | PMTTYD Hooktail Battle Introduction.png | ||
PMTTYD | PMTTYD Hooktail Battle.png|Mario prepares to swing his hammer at Hooktail | ||
PMTTYD | PMTTYD Hooktail Feeling Ill.png | ||
PMTTYD Hooktail Breath.png|Hooktail breathing her "stinky, fiery breath" at Goombella and Mario | |||
PMTTYD | PMTTYD Hooktail Pleading 1.png | ||
PMTTYD | PMTTYD Hooktail Pleading 2.png | ||
PMTTYD | PMTTYD Hooktail Pleading 3.png | ||
PMTTYD | PMTTYD Hooktail Crowd.png|Hooktail gobbles the [[Toad (species)|Toads]] in the audience and restores 10 HP. | ||
PMTTYD | Hooktail Fainting PMTTYD.png|Hooktail faints. | ||
PMTTYD | Hooktail Finished! PMTTYD.png|Hooktail defeated. | ||
PMTTYD | Hooktail Last Burp.png|Hooktail spitting [[Koopley]]'s shell out | ||
PMTTYD | Koopley Relieved.png|Koopley | ||
Koops and Koopley.png | |||
Koopley and Diamond PMTTYD.png | |||
Diamond Star Souvenir PMTTYD.png | |||
PMTTYD | Koopley Pleads Mario PMTTYD.png | ||
PMTTYD | PMTTYD Crystal Star get.png | ||
PMTTYD | PMTTYD Chapter 1 End.png | ||
PMTTYD | </gallery> | ||
PMTTYD | |||
===Post Chapter 1=== | |||
====Peach==== | |||
<gallery widths="160"> | |||
PMTTYD | PMTTYD TEC-XX Surveillance 1.png|The surveillance camera views Peach and some X-Nauts. | ||
PMTTYD | PMTTYD TEC-XX Surveillance 2.png|The surveillance camera briefly has a static malfunction. | ||
PMTTYD TEC-XX Surveillance 3.png|The surveillance camera goes blank. | |||
GrodusPeach.png|Grodus receives a message while examining Peach. | |||
Lovlies.png|The Shadow Sirens discuss their plans. | |||
PMTTYD | PMTTYD Peach Shower.png|Peach takes a shower. | ||
PMTTYD | PMTTYD Peach Fresh Princess.png|Peach comes out of the shower with her hair tied back into a bun. | ||
PMTTYD | PMTTYD TEC-XX Opens Door 1.png|A door opens. | ||
PMTTYD | PMTTYD TEC-XX Opens Door 2.png|Peach examines the opened door. | ||
PMTTYD | PMTTYD Peach TEC-XX First Encounter.png|Peach enters a room with a mysterious computer. | ||
PMTTYD | PMTTYD Peach Typing on Keyboard.png|Peach writes an email for Mario. | ||
</gallery> | |||
PMTTYD | |||
PMTTYD | ====Bowser==== | ||
<gallery widths="160"> | |||
PMTTYD | PMTTYD Bowser's Castle.png | ||
PMTTYD | PMTTYD Bowser Entrance.png | ||
PMTTYD | PMTTYD Bowser's Castle Hall.png | ||
PMTTYD | PMTTYDBowserJewel.png | ||
PMTTYD | PMTTYD Bowser's Castle End of Hall.png | ||
PMTTYD | PMTTYD Kammy Entrance.png | ||
PMTTYD | PMTTYD Kammy Tired.png | ||
PMTTYD | PMTTYD Bowser Calls Kammy AIRHEAD.png | ||
PMTTYD | PMTTYD Bowser Tantrum.png | ||
PMTTYD | PMTTYD Kammy Intel Magikoopa.png | ||
PMTTYD Koopa Clown Car First Appearance.png|[[Koopa Clown Car]] | |||
PMTTYD | PMTTYD Bowser Storms Off.png | ||
PMTTYD | PMTTYD Kammy Follows.png | ||
PMTTYD Kammy and Bowser Leaving.png | |||
PMTTYD | </gallery> | ||
PMTTYD | |||
PMTTYD | ====Pre-Chapter 2==== | ||
PMTTYD | <gallery widths="160"> | ||
PMTTYD | PMTTYD Koops Friends and Family.png | ||
PMTTYD | PMTTYD Petalburg General White.png|[[General White]] | ||
PMTTYD | Mario Koops and Mailbox SP.png | ||
PMTTYD | PMTTYD Don't Worry About Peach.png | ||
PMTTYD Talking to Luigi.png | |||
PMTTYD | PMTTYD Diamond Star at Door 1.png | ||
PMTTYD | PMTTYD Diamond Star at Door 2.png | ||
PMTTYD | PMTTYD Emerald Star Revealed 1.png | ||
PMTTYD | PMTTYD Emerald Star Revealed 2.png | ||
PMTTYD | PMTTYD Professor Frankly Punies.png | ||
PMTTYD | PMTTYD Professor Frankly Garbage Can.png|The garbage can is great for filling missed [[Tattle Log]] entries for one-time battles only. | ||
PMTTYD | PMTTYD Mario Spots a Puni 1.png | ||
PMTTYD | PMTTYD Mario Spots a Puni 2.png | ||
PMTTYD | PMTTYD Mario Spots a Puni 3.png | ||
PMTTYD | PMTTYD Mario Confronts Puni.png | ||
PMTTYD Punio Intro.png | |||
PMTTYD Punio Navigates 1.png | |||
PMTTYD Punio Navigates 2.png | |||
PMTTYD Punio Navigates 3.png | |||
PMTTYD | PMTTYD Mario Before Boggly Woods 1.png | ||
PMTTYD | PMTTYD Mario Before Boggly Woods 2.png | ||
PMTTYD | </gallery> | ||
PMTTYD | |||
PMTTYD | ===Chapter 2=== | ||
PMTTYD | <gallery widths="160"> | ||
PMTTYD | PMTTYDChapter2Title.png|[[Paper Mario: The Thousand-Year Door#Chapter 2: The Great Boggly Tree|Chapter 2: The Great Boggly Tree]] | ||
PMTTYD | PMTTYD Boggly Woods Intro.png|[[Boggly Woods]] | ||
PMTTYD The Great Tree | PMTTYD Warp Pipe Boggly Woods.png|Out of the [[Warp Pipe]] | ||
PMTTYD | PMTTYD Boggly Woods Save Block.png | ||
PMTTYD | PMTTYD Boggly Woods Team Notice Danger.png | ||
PMTTYD Boggly Woods Shadow Sirens First Encounter.png | |||
PMTTYD The Great Tree | PMTTYD Beldam Silence You Ditz.png | ||
PMTTYD Boggly Woods Sleepy Sheep.png | |||
PMTTYD Boggly Woods Honey Syrup.png | |||
PMTTYD The Great Tree | PMTTYD Boggly Woods The Great Tree Distance.png | ||
PMTTYD The Great Tree | PMTTYD Boggly Woods Punio Background.png | ||
PMTTYD The Great Tree | PMTTYD Boggly Woods Inn Coupon.png | ||
PMTTYD The Great Tree | PMTTYD Boggly Woods Mario Background.png | ||
PMTTYD | PMTTYD The Great Tree Intro.png | ||
The Great Tree Entrance.png|[[The Great Tree]] | |||
PMTTYD | PMTTYD The Great Tree FP Plus.png | ||
PMTTYD | PMTTYD The Great Tree Blocked Entry.png | ||
PMTTYD | PMTTYD The Great Tree Secret Entrance Questioning.png | ||
PMTTYD | PMTTYD The Great Tree Brainstorm.png | ||
PMTTYD The Great Tree | PMTTYD Flurrie's House Exterior.png|[[Flurrie's House]] | ||
PMTTYD | PMTTYD Flurrie's House Angle.png | ||
PMTTYD | PMTTYD Flurrie's House Off-Center Camera.png | ||
PMTTYD | PMTTYD Flurrie's House Flurrie Discovers Necklace Missing.png | ||
PMTTYD | PMTTYD Boggly Woods Vivian Found Necklace.png | ||
PMTTYD | PMTTYD Boggly Woods Baldam Greedy.png | ||
PMTTYD | PMTTYD Boggly Woods Area After The Great Tree.png | ||
PMTTYD | PMTTYD Boggly Woods Hidden Path.png | ||
PMTTYD | PMTTYD Boggly Woods Switch Heightens Plane Panel.png | ||
PMTTYD | PMTTYD Boggly Woods Quake Hammer.png | ||
PMTTYD | PMTTYD Boggly Woods Flying To Flurrie.png | ||
PMTTYD | PMTTYD Boggly Woods Volt Shroom.png | ||
PMTTYD | PMTTYD Boggly Woods Is Flurrie There 1.png | ||
PMTTYD | PMTTYD Boggly Woods Is Flurrie There 2.png | ||
PMTTYD | PMTTYD Boggly Woods Is Flurrie There 3.png | ||
PMTTYD | PMTTYD Boggly Woods Is Flurrie There 4.png | ||
PMTTYD | PMTTYD Boggly Woods Is Flurrie There 5.png | ||
PMTTYD | PMTTYD Boggly Woods Is Flurrie There 6.png | ||
PMTTYD | PMTTYD Boggly Woods Baldam Insists Vivian Fault.png | ||
PMTTYD | PMTTYD Boggly Woods Mario Portrait.png | ||
PMTTYD | PMTTYD Boggly Woods Sirens Finally Confront Mario.png | ||
PMTTYD | PMTTYD Boggly Woods Wait a Second.png | ||
PMTTYD | TheThree.png | ||
PMTTYD | PMTTYD Boggly Woods Shadow Beauties.png | ||
PMTTYD | PMTTYD Boggly Woods Three Shadow Beauties.png | ||
PMTTYD | ShadowSisterBogglyWoods-PMTTYD.png | ||
PMTTYD | PMTTYD Beldam JP Insult.png | ||
PMTTYD | PMTTYD Beldam NA Insult.png | ||
PMTTYD | PMTTYD Boggly Woods Future Punishment.png | ||
PMTTYD | PMTTYD Boggly Woods Might of the Shadow Sirens.png | ||
PMTTYD | PMTTYD Boggly Woods Shadow Sirens Reluctance.png | ||
PMTTYD | PMTTYD Boggly Woods Shadow Sirens Fight.png | ||
PMTTYD | PMTTYD Ice Powers Single Member.png|[[Three Shadows|Shadow Sirens]] fight | ||
PMTTYD | PMTTYD Ice Powers All Members.png | ||
PMTTYD | PMTTYD Boggly Woods Vivian Falls.png | ||
PMTTYD | PMTTYD Boggly Woods Marilyn Falls.png | ||
PMTTYD | PMTTYD Boggly Woods Baldam Falls.png | ||
PMTTYD | PMTTYD Boggly Woods Sirens Defeated.png | ||
PMTTYD Boggly Woods Sirens Drop Necklace.png | |||
PMTTYD | PMTTYD Flurrie's House Flurrie Takes Necklace.png | ||
PMTTYD | PMTTYD Flurrie's House Mood Lighting.png | ||
PMTTYD Flurrie's House Wink.png | |||
PMTTYD | PMTTYD Flurrie kiss.png|[[Flurrie]] kisses Mario | ||
PMTTYD | PMTTYD Flurrie's House Mario Faints.png|Mario faints after being kissed | ||
PMTTYD | PMTTYD Flurrie's House First Encounter.png | ||
PMTTYD The Great Tree | PMTTYD Flurrie Joins the Party.png|Flurrie first joins Mario at [[Flurrie's House|her home]]. | ||
PMTTYD | PMTTYD Flurrie Gale Force Field Move Demo.png | ||
PMTTYD Flurrie ILY Sign.png|Flurrie commonly makes the {{wp|ILY sign}} hand gesture when Mario succeeds at something | |||
PMTTYD The Great Tree | PMTTYD Flurrie's House Main Room.png | ||
PMTTYD The Great Tree | PMTTYD Flurrie's House Bedroom.png | ||
PMTTYD The Great Tree | PMTTYD Flurrie Gale Force Field On Enemy.png|Flurrie using field move on a [[Dark Puff]] | ||
PMTTYD The Great Tree | PMTTYD The Great Tree Revealing Secret Entrance.png | ||
PMTTYD The Great Tree | PMTTYD The Great Tree Revealed Secret Entrance.png | ||
PMTTYD The Great Tree | PMTTYD The Great Tree Punio Going Inside Secret Entrance.png | ||
PMTTYD The Great Tree X- | PMTTYD The Great Tree Flurrie Helps Punies.png | ||
PMTTYD The Great Tree | PMTTYD The Great Tree Punio Opens Locked Door.png | ||
PMTTYD | PMTTYD X-Nauts Appearance The Great Tree.png | ||
PMTTYD | PMTTYD The Great Tree X-Nauts Ambush 1.png | ||
PMTTYD The Great Tree First X-Naut Fight.png | |||
PMTTYD The Great Tree X-Naut Run Away.png | |||
PMTTYD The Great Tree Punies Out of Hiding 1.png | |||
PMTTYD The Great Tree Punies Out of Hiding 2.png | |||
PMTTYD | PMTTYD The Great Tree Punies Out of Hiding 3.png | ||
PMTTYD | PMTTYD The Great Tree Punies Out of Hiding 4.png | ||
PMTTYD | PMTTYD The Great Tree Punies Out of Hiding 5.png | ||
PMTTYD | PMTTYD The Great Tree Punies Out of Hiding 6.png | ||
PMTTYD | PMTTYD The Great Tree Puni Shrine.png | ||
PMTTYD | PMTTYD The Great Tree Power Punch.png | ||
PMTTYD | PMTTYD The Great Tree Yux.png | ||
PMTTYD | PMTTYD The Great Tree Lone X-Naut.png | ||
PMTTYD | PMTTYD The Great Tree Surprise Ms. Mowz 1.png | ||
PMTTYD | PMTTYD The Great Tree Surprise Ms. Mowz 2.png | ||
PMTTYD | PMTTYD The Great Tree Red Cage with Puni Elder.png | ||
PMTTYD | PMTTYD The Great Tree Ignoring Puni Elder.png | ||
PMTTYD The Great Tree Blue Cage Punio Upset.png | |||
PMTTYD The Great Tree Blue Cage With 90 Punies.png | |||
PMTTYD The Great Tree Fainted X-Naut.png | |||
PMTTYD The Great Tree Ms. Mowz 1.png | |||
PMTTYD | PMTTYD The Great Tree Ms. Mowz 2.png | ||
PMTTYD | PMTTYD The Great Tree Ms. Mowz 3.png | ||
PMTTYD | PMTTYD The Great Tree Ms. Mowz 4.png | ||
PMTTYD The Great Tree X-Nauts Ambush 2.png | |||
PMTTYD | PMTTYD The Great Tree Second X-Naut Fight.png | ||
PMTTYD | PMTTYD The Great Tree X-Naut Drops Red Key.png|[[Red Key (Paper Mario: The Thousand-Year Door)|Red Key]] | ||
The Great Tree Treasure Chest 1.png | |||
PMTTYD The Great Tree Ultra Shroom.png | |||
PMTTYD | PMTTYD The Great Tree Punio Confronts Elder.png | ||
PMTTYD | PMTTYD The Great Tree FOOLISH CHILD.png | ||
PMTTYD | PMTTYD The Great Tree Several Hours Later.png | ||
PMTTYD | PMTTYD The Great Tree Sleeping Mario with Elder.png | ||
PMTTYD | PMTTYD The Great Tree Elder Leaves.png | ||
PMTTYD | PMTTYD The Great Tree Puniper with Elder.png | ||
PMTTYD The Great Tree Stubborn MULE.png | |||
PMTTYD The Great Tree 10 Punies Joined.png | |||
PMTTYD The Great Tree Puni Orb.png | |||
PMTTYD | PMTTYD The Great Tree One More Thing.png | ||
PMTTYD The Great Tree Elder Whistle.png | |||
PMTTYD | PMTTYD The Great Tree Shrine Reveals Warp Pipe.png | ||
PMTTYD The Great Tree Elder Dialog Choices.png | |||
PMTTYD The Great Tree Calling Punies.png | |||
PMTTYD The Great Tree I Love You 1.png | |||
PMTTYD | PMTTYD The Great Tree I Love You 2.png | ||
PMTTYD | PMTTYD The Great Tree 10 Puni Bubbles.png | ||
PMTTYD The Great Tree Scared Punies.png | |||
PMTTYD The Great Tree Unblocking Plane Panel.png | |||
PMTTYD The Great Tree Flying 1.png | |||
PMTTYD The Great Tree Flying 2.png | |||
PMTTYD The Great Tree Before Jabbies.png | |||
PMTTYD The Great Tree Jabbi Hive 1.png | |||
PMTTYD The Great Tree Jabbi Whoa Nelly 1.png | |||
PMTTYD The Great Tree Jabbi Fight Over 1.png | |||
PMTTYD The Great Tree Punies Enter Hive 1.png | |||
PMTTYD The Great Tree Punies Destroy Hive 1.png | |||
PMTTYD The Great Tree Wooden Panel.png | |||
The Great Tree Treasure Chest 2.png | |||
PMTTYD The Great Tree Blue Key.png | |||
PMTTYD | PMTTYD The Great Tree Petuni Scene.png | ||
PMTTYD The Great Tree Petuni Dried Shroom Scene.png | |||
PMTTYD The Great Tree Petuni Unlock Blue Cage.png | |||
PMTTYD The Great Tree Petuni Petuni and Punio.png | |||
PMTTYD The Great Tree Petuni Petuni Dried Shroom Punio.png | |||
PMTTYD The Great Tree Punio Eats Dried Shroom.png | |||
PMTTYD The Great Tree Petuni Hugs Punio.png | |||
PMTTYD The Great Tree 90 Punies Joined.png | |||
PMTTYD The Great Tree 101 Puni Bubbles.png | |||
PMTTYD The Great Tree Damage Dodge P.png | |||
PMTTYD | PungentsShop.png | ||
PMTTYD | PMTTYD The Great Tree Jabble 1.png | ||
PMTTYD | PMTTYD The Great Tree Jabble 2.png | ||
PMTTYD The Great Tree Jabble 3.png | |||
PMTTYD The Great Tree Jabble 4.png | |||
PMTTYD | PMTTYD The Great Tree Jabble 5.png | ||
PMTTYD The Great Tree Jabble 6.png | |||
PMTTYD | PMTTYD The Great Tree Jabbi Hive 2.png | ||
PMTTYD The Great Tree Jabbi Whoa Nelly 2.png | |||
PMTTYD The Great Tree Jabbi Fight Over 2.png | |||
PMTTYD | PMTTYD The Great Tree Punies Enter Hive 2.png | ||
PMTTYD The Great Tree Punies Destroy Hive 2.png | |||
PMTTYD The Great Tree Punies Trapped Entrapped.png | |||
PMTTYD | PMTTYD The Great Tree Punies Trapped Lord Crump.png | ||
PMTTYD The Great Tree Four White Switches.png | |||
PMTTYD | PMTTYD The Great Tree Right Order.png | ||
The | PMTTYD The Great Tree Four White Switch Paper Transition.png | ||
PMTTYD The Great Tree Super Boots Room.png | |||
PMTTYD The Great Tree Super Boots.png | |||
PMTTYD | PMTTYD The Great Tree Toadette Demo 1.png | ||
PMTTYD The Great Tree Toadette Demo 2.png | |||
PMTTYD The Great Tree First Ground Pound.png | |||
PMTTYD The Great Tree Charge Badge.png | |||
PMTTYD | PMTTYD The Great Tree Second Ground Pound.png | ||
PMTTYD The Great Tree Freeing Punies.png | |||
PMTTYD The Great Tree Punies Reunite.png | |||
PMTTYD The Great Tree Puni Ground Pound Wind Puzzle 1.png | |||
PMTTYD | PMTTYD The Great Tree Puni Ground Pound Wind Puzzle 2.png | ||
PMTTYD The Great Tree Puni Ground Pound Wind Puzzle 3.png | |||
PMTTYD The Great Tree Puni Ground Pound Wind Puzzle 4.png | |||
PMTTYD | PMTTYD The Great Tree X-Naut.png | ||
PMTTYD The Great Tree Water Puzzle 1.png | |||
PMTTYD The Great Tree Water Puzzle 2.png | |||
PMTTYD The Great Tree Water Puzzle 3.png | |||
PMTTYD | PMTTYD The Great Tree Water Puzzle 4.png | ||
PMTTYD The Great Tree Water Puzzle 5.png | |||
The Great Tree Treasure Chest 4.png | |||
PMTTYD The Great Tree Shrink Stomp.png | |||
PMTTYD The Great Tree Shrine Before Lord Crump 1.png | |||
PMTTYD | PMTTYD The Great Tree Shrine Before Lord Crump 2.png | ||
PMTTYD The Great Tree Shrine Before Lord Crump 3.png | |||
PMTTYD The Great Tree Mushroom.png | |||
PMTTYD The Great Tree Lord Crump Searching.png | |||
PMTTYD The Great Tree Lord Crump Fleeing.png | |||
PMTTYD The Great Tree Last Shrine 1.png | |||
PMTTYD The Great Tree Last Shrine 2.png | |||
PMTTYD | PMTTYD The Great Tree Last Shrine 3.png | ||
PMTTYD The Great Tree Last Shrine 4.png | |||
PMTTYD The Great Tree Last Shrine 5.png | |||
PMTTYD The Great Tree Steal Emerald Star.png | |||
PMTTYD | PMTTYD The Great Tree Remote Control.png | ||
PMTTYD | PMTTYD The Great Tree Countdown Timer.png | ||
PMTTYD | PMTTYD The Great Tree Countdown Flee.png | ||
PMTTYD | PMTTYD The Great Tree Third X-Naut Fight.png | ||
PMTTYD | PMTTYD The Great Tree Puni Bubbles Countdown.png | ||
PMTTYD | PMTTYD The Great Tree Lord Crump Stopped.png | ||
PMTTYD | PMTTYD The Great Tree Elder Shouting Lord Crump.png | ||
PMTTYD | PMTTYD The Great Tree Elder Power Activate.png | ||
PMTTYD The Great Tree Elder and Lord Crump.png | |||
PMTTYD | PMTTYD The Great Tree Lord Crump Stops Timer.png | ||
PMTTYD The Great Tree Magnus von Grapple Assembled.png | |||
PMTTYD Magnus screenshot.png|[[Magnus von Grapple]] | |||
PMTTYD | Magnusbattle.png | ||
PMTTYD The Great Tree Magnus von Grapple Stomp.png | |||
PMTTYD The Great Tree Magnus von Grapple Almost The End.png | |||
PMTTYD The Great Tree Magnus von Grapple Malfunctioning.png | |||
PMTTYD The Great Tree Magnus von Grapple Exploding.png | |||
PMTTYD The Great Tree Lord Crump Drops Emerald Star.png | |||
PMTTYD The Great Tree Lord Crump Flees.png | |||
PMTTYD | PMTTYD The Great Tree X-Nauts Flee.png | ||
PMTTYD The Great Tree X-Naut Trips.png | |||
PMTTYD Emerald Star get.png | |||
PMTTYD Chapter 2 End.png | |||
PMTTYD | |||
PMTTYD | |||
PMTTYD | |||
PMTTYD | |||
PMTTYD | |||
PMTTYD | |||
PMTTYD | |||
PMTTYD | |||
</gallery> | </gallery> | ||
=== Chapter | |||
===Post Chapter 2=== | |||
====Peach==== | |||
<gallery widths="160"> | <gallery widths="160"> | ||
PMTTYD Post Ch2 Sir Grodus Briefed.png|An X-Naut PhD arrives at the office of Grodus. | |||
PMTTYD | PMTTYD Post Ch2 Close Eye Mario.png|Grodus gives instructions to the X-Naut PhD. | ||
PMTTYD Post Ch2 Sir Grodus Close-Up.png | |||
PMTTYD | PMTTYD Post Ch2 Mushroom Ball.png | ||
PMTTYD Post Ch2 TEC-XX Mario Read Mail.png|TEX-XX confirms that Mario received a previous email. | |||
PMTTYD Post Ch2 TEC-XX Eavesdropping.png | |||
PMTTYD Post Ch2 TEC-XX Dance With Peach.png | |||
PMTTYD Post Ch2 TEC-XX Hologram.png|Peach sees a hologram of herself. | |||
PMTTYD | PMTTYD Post Ch2 TEC-XX Peach Dancing.png|Peach dances with the hologram. | ||
PMTTYD | PMTTYD Post Ch2 TEC-XX Pressing Buttons.png|Peach continues dancing with the hologram. | ||
PMTTYD Post Ch2 TEC-XX Fun.png|Peach didn't think that the dance was fun. | |||
PMTTYD Post Ch2 TEC-XX Weeeeird Computer.png|Peach criticizes TEC-XX for being so weird. | |||
</gallery> | |||
====Bowser==== | |||
<gallery widths="160"> | |||
PMTTYD Post Ch2 Bowser Petal Meadows.png | |||
PMTTYD Post Ch2 Bowser and Kammy Petal Meadows.png | |||
PMTTYD Post Ch2 Bowser Side Scroller Lives Screen.png | |||
PMTTYD Bowser intermission.png|[[Bowser]] | |||
Fire Breath TTYD.png | |||
PMTTYD Post Ch2 Bowser Side Scroller Pause.png | |||
PMTTYD Post Ch2 Bowser Side Scroller Goal Post.png | |||
PMTTYD Post Ch2 Bowser Side Scroller Finish.png | |||
PMTTYD Post Ch2 Bowser and Kammy Petalburg.png | |||
PMTTYD Post Ch2 Bowser and Kammy Fear.png | |||
PMTTYD Post Ch2 Bowser and Kammy Peach Poster 1.png | |||
PMTTYD Post Ch2 Bowser and Kammy Peach Poster 2.png | |||
PMTTYD Post Ch2 Bowser and Kammy Peach Poster 3.png | |||
PMTTYD Post Ch2 Bowser and Kammy Peach Poster 4.png | |||
PMTTYD Post Ch2 Bowser and Kammy Peach Poster 5.png | |||
</gallery> | </gallery> | ||
=== Chapter | |||
====Pre-Chapter 3==== | |||
<gallery widths="160"> | <gallery widths="160"> | ||
PMTTYDChapter8Title.png|[[Paper Mario: The Thousand-Year Door#Chapter 8: The Thousand-Year Door|Chapter 8: The Thousand-Year Door]] | Mario Waves Bye Punis.png | ||
Palace of Shadow. | PMTTYD Spend Days Again Peach.png | ||
PMTTYD Palace of Shadow screenshot.png | Flurrie's House Super Appeal P.png | ||
Riddle Tower.png|[[Riddle Tower] | PMTTYD Flurrie's House Main Room.png|Mario and Flurrie inside the house | ||
Chomp Rock TT-YD.png | PMTTYD Flurrie's House Bedroom.png|Mario and Flurrie in the bedroom | ||
Riddle Planetarium.png | PMTTYD Star Piece FlurrieHouse.png | ||
Rematch.png | Rogueport Sewers Happy Heart P.png | ||
PMTTYD Marilyn attack.png | PMTTYD Emerald Star at Door 1.png | ||
PMTTYD Gloomtail Room.png | PMTTYD Emerald Star at Door 2.png | ||
GloomtailBattle. | Location Of The Second Crystal Star Revealed.png | ||
LargeHoleInGloomtailRoom.png | PMTTYD Toad Bros. Bazaar Contact Lens.png | ||
PMTTYD unrevisitable room Gloomtail.png | </gallery> | ||
PMTTYD Sir Grodus battle.png | |||
===Chapter 3=== | |||
PMTTYD | <gallery widths="160"> | ||
Witness.png | PMTTYDChapter3Title.png|[[Paper Mario: The Thousand-Year Door#Chapter 3: Of Glitz and Glory|Chapter 3: Of Glitz and Glory]] | ||
ShadowQueen.jpg | PM TTYD Peeka First Question.png | ||
Shadow Queen holding Peach | Don Pianta TTYD desk.png | ||
CheepCheepBlimp.png|[[Cheep Blimp]] | |||
Glitzpitoutside.png|Outside of the arena | |||
PMTTYD Shadow Queen closeup.png|[[Shadow Queen]] | Glitzville Treasure Chest.png | ||
Souvenirshop.png | |||
MainlobbyTTYD.png|The lobby | |||
Glitz Pit.png|[[Glitz Pit]] | |||
Glitz Pit Fight.png | |||
PMTTYD Champ's Belt Screenshot.png | |||
Rawkhawkfans.png | |||
Glitzpithallway.png|The hallway | |||
Mario and Grubba.png | |||
Grubbapeeking.png | |||
Hotdogstand.png|A mysterious egg sits atop the hot dog stand. | |||
Mini-Yoshi and Mario PMTTYD.png|Mini-Yoshi has recently hatched from the egg. | |||
"Yoshi" Joined The Party PMTTYD.png|The Mini-Yoshi joins the party. | |||
Name the Yoshi! Screen PMTTYD.png|Naming the Mini-Yoshi. | |||
Mario meets the hatched Mini-Yoshi PMTTYD.png | |||
PMTTYD Gulp.png|Mini-Yoshi spits out an Iron Cleft out after using Gulp. | |||
PMTTYD Glitz Pit Storage Room.png|Mario and Mini-Yoshi explore the storage area. | |||
PMTTYD Yoshi Flutter.png|Mini-Yoshi flutters Mario from box to box at the storage area. | |||
Glitzpitminorroom.png|The Minor-League locker room | |||
Majorleagueroom.png|The Major-League locker room | |||
Goomba bros.png | |||
KP Koopas.png | |||
PokeyTriplet.png | |||
PMTTYD Dead Bones.png | |||
SpikeStorm.png | |||
The Hand-It-Overs.png | |||
PMTTYD Mind-Bogglers.png | |||
PMTTYD Punk Rocks Screenshot.png | |||
PMTTYD Bob-omb Squad Screenshot.png | |||
Poker Faces.png | |||
Tiny Spinies.png | |||
PMTTYD Shellshockers Screenshot.png | |||
TheFuzz.png | |||
PMTTYD Magikoopa Masters Screenshot.png | |||
PMTTYD Craw-Daddy.png | |||
HammaBammaFlare.png | |||
PMTTYD Chomp Country Screenshot.png | |||
PMTTYD The Koopinator.png | |||
PM2Fuzz.png | |||
PM2 SpikeStorm.png | |||
PMTTYD Wings of Night screenshot.png | |||
Destructors.png | |||
Rawktauntmario.png | |||
NoskillPM2.png | |||
PMTTYD Rawk Hawk Threat Screenshot.png|Rawk Hawk trash-talks with Mario in the hallway. | |||
ChampionroomPM2.png|The Champion's room | |||
PM2Championroom.png | |||
PMTTYD Flurrie Posters.png |Mario and Flurrie uncovering the hidden key. | |||
ChampionshipBattle.png | |||
PMTTYD Rawk Hawk Battle Screenshot.png | |||
PowerBounceRawkHawk.png | |||
RawkHawkGlitch.png | |||
Powerdrainingmachine.png | |||
PMTTYD Grubba Powers Up.png | |||
MachoGrubbaBattle.png | |||
PM2MachoGrubbacharge.png | |||
Macho Grubba Power-Up.png | |||
PMTTYD Macho Grubba Audience Power-Up.png | |||
Grubbadefeated.png | |||
PMTTYD Chapter 3 ending.png|End-of-chapter storyline text | |||
</gallery> | |||
===Post Chapter 3=== | |||
<gallery widths="160"> | |||
PMTTYD X-Naut Fortress Chapter 3 Elite X-Naut.png | |||
PMTTYD X-Naut Fortress Chapter 3 X-Naut PhD.png | |||
PMTTYD X-Naut Fortress Chapter 3 X-Naut.png | |||
</gallery> | |||
===Chapter 4=== | |||
<gallery widths="160"> | |||
PMTTYD Rejection Pipe.png | |||
Darkly spell MARIO.png | |||
PMTTYDChapter4Title.png|[[Paper Mario: The Thousand-Year Door#Chapter 4: For Pigs the Bell Tolls|Chapter 4: For Pigs the Bell Tolls]] | |||
PMTTYD Pigs.png | |||
PMTTYD Twilight Town First Area.png|[[Twilight Town]] | |||
Maude and Flo.png | |||
Twilight Town Treasure Chest.png | |||
Twilight Trail Battle.png|[[Twilight Trail]] | |||
Tube Mode PMTTYD.png | |||
Twilight Trail Forest.png | |||
Creepy Steeple Treasure Chests 1-2.png | |||
PMTTYD Creepy Steeple Dungeon.png|The dungeon | |||
PMTTYD Creepy Steeple Crystal Star Statue.png|The [[Crystal Star]] statue | |||
PMTTYD Creepy Steeple Moving Staircase.png|The moving staircase | |||
Creepy Steeple Treasure Chest 4 JP.png | |||
Creepy Steeple Treasure Chest 4.png | |||
PMTTYD Creepy Steeple Boo Swarm.png|The unleashed [[Boo]]s | |||
PPTTYD Atomic Boo Attack.png | |||
PMTTYD Creepy Steeple Garden.png|The garden of [[Creepy Steeple]] | |||
PMTTYD Creepy Steeple Springboard.png|A cave | |||
Creepy Steeple Treasure Chest 3.png | |||
PMTTYD Creepy Steeple Doopliss Room.png|[[Doopliss]]'s lair | |||
PMTTYD Doopliss with Mayor Dour.png|[[Mayor Dour]] talking with "Mario" | |||
Vivian joins Mario.png|Vivian is Mario's new (and only) party member. | |||
PMTTYD Creepy Steeple Hidden Storage Room.png|The kitchen | |||
PMTTYD Creepy Steeple Parrot Room.png|The parrot room | |||
Creepy Steeple Treasure Chests 5-8.png | |||
PMTTYD Creepy Steeple Boo Hall.png|The Boo hall | |||
Doopliss Room TTYD.png | |||
Beldam and Marilyn TTYD screenshot.png | |||
PMTTYD Doopliss vs Mario.png | |||
TT-YD Orange Yoshi.png | |||
</gallery> | |||
===Post Chapter 4=== | |||
====Bowser==== | |||
<gallery widths="160"> | |||
PMTTYD Grodus Laughing.png | |||
PMTTYD Bowser World 2.png | |||
</gallery> | |||
===Chapter 5=== | |||
<gallery widths="160"> | |||
PMTTYD Ms. Mowz Joins.png | |||
PMTTYDChapter5Title.png|[[Paper Mario: The Thousand-Year Door#Chapter 5: The Key to Pirates|Chapter 5: The Key to Pirates]] | |||
PMTTYD Professor Frankly fourth wall.png | |||
PMTTYD Flavio at bar.png|[[Flavio]] | |||
S. S. Flavion Chapter 5 Before Maiden Voyage.png | |||
PMTTYD Rogueport Harbor X-Naut.png | |||
S. S. Flavion Chapter 5 Intro.png | |||
S. S. Flavion Chapter 5 Intro Night.png | |||
PM2 Mario Collects Bump.png | |||
PMTTYD Lord Crump fourth wall.png | |||
Keelhaul Key TTYD.png|[[Keelhaul Key]] | |||
PMTTYDHiddenBlocks9R.png | |||
PMTTYD Bobbery Joins.png | |||
PMTTYDPlacingSkullGem.png | |||
PMTTYDstachebrothersbombpanel.png | |||
Boat Mode-Pirate's Grotto Black Chest.png | |||
Boat Mario.png | |||
Pirate's Grotto Treasure Chest.png | |||
PM-TTYD Waves at Pirate's Grotto.png | |||
PMTTYD Pirate's Grotto Talking To Crowd.png | |||
PMTTYD X-Naut Ship.png | |||
PMTTYD Black Skull.png | |||
PMTTYD ship battle.png | |||
PMTTYD X-Naut Platoon.png | |||
</gallery> | |||
===Post Chapter 5=== | |||
<gallery widths="160"> | |||
PMTTYD Red Blue Yellow Green Potions.png | |||
PMTTYD X-Naut Fortress Chapter 5 X-Naut.png | |||
Invisible Peach TT-YD.png | |||
PPTTYD Grodus Office FDS Mario.png | |||
PPTTYD Grodus Office FDS Luigi.png | |||
PMTTYD Twilight Town battle.png | |||
</gallery> | |||
===Chapter 6=== | |||
<gallery widths="160"> | |||
PMTTYD Don Pianta Loneliness.png|Don Pianta didn't like it when Francesca took off. | |||
PMTTYD 100 Times Apology.png | |||
PMTTYDChapter6Title.png|[[Paper Mario: The Thousand-Year Door#Chapter 6: 3 Days of Excess|Chapter 6: 3 Days of Excess]] | |||
PMTTYD Excess Express.png|[[Excess Express]] | |||
PMTTYD Excess Express Dining Car.png | |||
Pennington on Excess Express TTYD.png | |||
PMTTYD Excess Express Engineer.png|Mario and Vivian explore the engineer's front. | |||
PPTTYD Bub GBA.png|[[Game Boy Advance]] | |||
PMTTYD Ghost T Rise.png | |||
WeirdquestionPMTTYD.png | |||
Riverside Office.png|[[Riverside Station]] | |||
Riverside Station Treasure Chest.png | |||
PMTTYD Smorg screenshot.png|[[Smorg]] | |||
Poshley Heights.png|[[Poshley Heights]] | |||
Poshley Heights Treasure Chest.png | |||
StarTheft.png|[[Poshley Sanctum]] | |||
</gallery> | |||
===Post Chapter 6=== | |||
====Bowser==== | |||
<gallery widths="160"> | |||
PMTTYD Grodus Orders TEC Shutdown.png | |||
PMTTYD Bowser World 3.png | |||
PMTTYD Bowser Champs Belt.png | |||
PMTTYD Bowser Rawks Rawk Hawk.png | |||
Rogueport Treasure Chest 3.png | |||
PMTTYD Fahr Outpost Pipe.png | |||
</gallery> | |||
===Chapter 7=== | |||
<gallery widths="160"> | |||
PMTTYDChapter7Title.png|[[Paper Mario: The Thousand-Year Door#Chapter 7: Mario Shoots the Moon|Chapter 7: Mario Shoots the Moon]] | |||
Fahr Outpost Entry.png | |||
NorthwindsMart.png | |||
PMTTYD Fahr Outpost Statue Cannon.png | |||
PMTTYD Goldbob Cannon Permission.png | |||
PMTTYD To Petalburg General White.png|Wild goose chase with [[General White]] | |||
PMTTYD To Keelhaul Key General White.png | |||
PMTTYD Pa-Patch screenshot.png | |||
PMTTYD To The Great Tree General White.png | |||
PMTTYD To Twilight Town General White.png | |||
PMTTYD To Fahr Outpost General White.png | |||
PMTTYD Oblivious To General White.png | |||
PMTTYD Sleeping General White.png|General White sleeping in his house at [[Fahr Outpost]] | |||
PMTTYD General White Looking For Mario.png | |||
PMTTYD Into The Cannon Mario.png | |||
PMTTYD Cannon Clearance.png | |||
PMTTYD Cannon Control Room.png | |||
PMTTYD Cannon Hatch.png | |||
PMTTYD Cannon Guides.png | |||
PMTTYD Cannon Targets Moon.png | |||
PMTTYD Cannon Loaded Bob-ombs.png | |||
Giant Cannon.png | |||
PMTTYD Cannon Fired.png | |||
PMTTYD Soaring to the Moon.png | |||
PMTTYD Almost to the Moon.png | |||
DeathOfYux.png|Battle on the [[moon]] | |||
PMTTYD Moon Landing Area.png|Gravity is low | |||
PMTTYD Moon R1.png | |||
PMTTYD Moon R2.png | |||
PMTTYD Moon X-Naut Fortress Area.png | |||
PMTTYD Moon Warp Pipe Reveal.png | |||
PMTTYD Moon L2.png | |||
PMTTYD Moon L1.png | |||
PMTTYD X-Naut Fortress Entrance.png | |||
PMTTYD X-Naut Fortress Entrance Conveyer.png | |||
PMTTYD Elite X-Nauts Ambush.png | |||
PMTTYD Earth Tremor on Moon.png|Is this ''really'' an "Earth" Tremor? | |||
PMTTYD X-Naut Fortress Foyer.png | |||
PMTTYD X-Naut Fortress Crane Down.png | |||
PMTTYD X-Naut Fortress Yux Lab.png | |||
PMTTYD X-Naut Fortress Vents and Ceiling Panels.png | |||
PMTTYD X-Naut Fortress Party Easter Egg.png | |||
PMTTYD X-Naut Fortress LRM Crane.png | |||
PMTTYD X-Naut Fortress 014029.png | |||
PMTTYD X-Naut Fortress Yux Defense.png | |||
PMTTYD X-Naut Fortress Grodus Office.png | |||
PMTTYD X-Naut Fortress Potion Lab.png | |||
PMTTYD X-Naut Fortress Crane Operational.png | |||
PMTTYD X-Naut Fortress 014029 Entry.png | |||
PMTTYD X-Naut Fortress 66 Statue.png | |||
Cog and teleporter.png | |||
PMTTYD 66th Annual Quirk Quiz.png | |||
PMTTYD JP How Many Feet Pun.png | |||
PMTTYD EN How Many Feet Pun.png | |||
X-Naut Fortress Treasure Chest 1.png | |||
X-Naut Fortress Treasure Chest 2.png | |||
X-Naut Fortress Treasure Chest 3.png | |||
PMTTYD X-Naut Fortress 3 Card Keys Room.png | |||
PMTTYD X-Naut Fortress Mechanical Room 1.png | |||
PMTTYD X-Naut Fortress Mechanical Room 2.png | |||
PMTTYD X-Naut Fortress Mechanical Room 3.png | |||
PMTTYD X-Naut Fortress Mechanical Room 4.png | |||
PMTTYD X-Naut Fortress Mechanical Room 5.png | |||
PMTTYD X-Naut Fortress Mechanical Room 6.png | |||
PMTTYD X-Naut Fortress Mechanical Room 7.png | |||
PMTTYD X-Naut Fortress Mechanical Room 8.png | |||
PMTTYD X-Naut Fortress Hanger.png | |||
PMTTYD X-Naut Fortress Magnus von Grapple 2 Standby.png | |||
PMTTYD X-Naut Fortress Magnus von Grapple 2 Active.png | |||
PMTTYD X-Naut Fortress Magnus von Grapple 2 Approach.png | |||
PMTTYD X-Naut Fortress Magnus von Grapple 2 Destroyed.png | |||
PMTTYD X-Naut Fortress Lord Crump Blasted.png | |||
PMTTYD X-Punch screenshot.png | |||
PMTTYDEXNBathroom.png|Peach's holding quarters in [[X-Naut Fortress]] | |||
PMTTYD X-Naut Fortress Mario TEC.png | |||
PMTTYD X-Naut Fortress TEC Going Dark.png | |||
PMTTYD X-Naut Fortress TEC Mario Surprised.png | |||
PMTTYD X-Naut Fortress TEC Memory.png | |||
PMTTYD X-Naut Fortress Low Power.png | |||
PMTTYD X-Naut Fortress Low Power Leaving.png | |||
PMTTYD X-Naut Fortress TEC Last Line.png | |||
PMTTYD X-Naut Fortress TEC Explosion.png | |||
PMTTYD Rogueport Sewers Moon Base Entrance.png | |||
PMTTYD X-Naut Fortress Frankley.png | |||
</gallery> | |||
===Post Chapter 7=== | |||
<gallery widths="160"> | |||
PMTTYD Poshley Heights Bowser Intermission Penguin.png | |||
PMTTYD Poshley Heights Bowser Intermission Bub Scared.png | |||
PMTTYD Poshley Heights Bowser Intermission Breaking Lock.png | |||
PMTTYD Poshley Heights Bowser Intermission Stealing Fake.png | |||
PMTTYD Poshley Heights Bowser Intermission Success.png | |||
PMTTYD Poshley Heights Bowser Intermission Pennington.png | |||
PMTTYD Poshley Heights Bowser Intermission FAKE.png | |||
PMTTYD Poshley Heights Bowser Intermission Paragoomba.png | |||
</gallery> | |||
===Chapter 8=== | |||
<gallery widths="160"> | |||
PMTTYDChapter8Title.png|[[Paper Mario: The Thousand-Year Door#Chapter 8: The Thousand-Year Door|Chapter 8: The Thousand-Year Door]] | |||
Palace of Shadow.png|Mario and Goombella arrive at the starting corridor at the Palace of Shadow. | |||
PM-TTYD Retractable Spike Trap at the Palace of Shadow.png | |||
PMTTYD Palace of Shadow screenshot.png|Mario bashes through the horde of Dry Bones to find the Dark Bones. | |||
Riddle Tower.png|[[Palace of Shadow Tower|Riddle Tower]] | |||
Chomp Rock TT-YD.png | |||
Riddle Planetarium.png | |||
PMTTYD Palace Key Screenshot.png | |||
Riddle Planetarium Active.png | |||
Rematch.png|Mario and Goombella prepare for a rematch against the Shadow Sirens featuring Doopliss. | |||
PMTTYD Marilyn attack.png|Marilyn casts a bolt of lightning. | |||
PMTTYD Gloomtail Room.png | |||
GloomtailBattle.png|[[Gloomtail]] | |||
LargeHoleInGloomtailRoom.png | |||
PMTTYD unrevisitable room Gloomtail.png | |||
Palace of Shadow Treasure Chest 9.png | |||
Palace of Shadow Treasure Chests 1 and 5.png | |||
Palace of Shadow Treasure Chest 2.png | |||
Palace of Shadow Treasure Chests 3 and 7.png | |||
Palace of Shadow Treasure Chests 4 and 8.png | |||
Palace of Shadow Treasure Chest 6.png | |||
Palace of Shadow Treasure Chest 10.png | |||
Palace of Shadow Treasure Chest 11.png | |||
Palace of Shadow Treasure Chest 12.png | |||
Palace of Shadow Treasure Chest 13.png | |||
PMTTYD Sir Grodus battle.png | |||
PMTTYD Grodus Threat.png | |||
PMTTYD Shadow Queen JAP.png | |||
ProperPlace.png | |||
Witness.png | |||
ShadowQueen.jpg | |||
Shadow Queen holding Peach.png | |||
PMTTYD Shadow Queen closeup.png|[[Shadow Queen]] | |||
PMTTYD Shadow Queen Battle.png | PMTTYD Shadow Queen Battle.png | ||
SQ2.png | SQ2.png | ||
PMTTYD Shadow Hands.png | PMTTYD Shadow Hands.png | ||
PMTTYD Dead Hands.png | PMTTYD Dead Hands.png | ||
PMTTYD Shadow Queen Defeated.png | PMTTYD Shadow Queen Defeated.png | ||
</gallery> | PMTTYD Farewell to friends.png|Farewell | ||
===Places=== | PPTTYD Post Shadow Queen Battle Stage.png|The [[stage]] is used for a cutscene after winning the [[Shadow Queen]] battle. [[Doopliss]] is there. | ||
XNautsinPoshleyHeights.png | |||
</gallery> | |||
===Places=== | |||
<gallery widths="160"> | |||
PMTTYD Marioshouse.png|[[Mario Bros.' House]] | |||
PMTTYD Prolog Rogueport.png|[[Rogueport]] | |||
Rogueport Sewers.png|[[Rogueport Underground|Rogueport Sewers]] | |||
Petalmeadows.png|[[Petal Meadows]] | |||
PMTTYD Petalburg screenshot.png|[[Petalburg]] | |||
BogglyWoods.png|[[Boggly Woods]] | |||
The Great Tree Entrance.png|[[The Great Tree]] | |||
Glitzville.png|[[Glitzville]] | |||
Freshjuicebar.png|[[Fresh Juice Shop]] | |||
Glitz Pit.png|[[Glitz Pit]] | |||
PMTTYD Twilight Town First Area.png|[[Twilight Town]] | |||
Creepy Steeple First Arrival.png|[[Creepy Steeple]] | |||
Keelhaul Key TTYD.png|[[Keelhaul Key]] | |||
PMTTYD Crew of the SS Flavion.png|A nightscape view of the [[S.S. Flavion]] | |||
Cortez head.png|[[Black Skull]] | |||
Boarding Dock.png|[[Excess Express]]/[[Riverside Station]] | |||
PMTTYD Bow Bootler Poshley Heights.png|[[Poshley Heights]] | |||
PMTTYD Shine Sprite PoshleySanctum.png|[[Poshley Sanctum]] | |||
PMTTYD Fahr Outpost.png|[[Fahr Outpost]] | |||
The Moon PMTTYD.png|[[Moon|The Moon]] | |||
PMTTYD X-Naut Fortress screenshot.png|[[X-Naut Fortress]] | |||
PMTTYD POS Firebar.png|[[Palace of Shadow]] | |||
PM2 Riddle Tower.png|Full view of the [[Palace of Shadow Tower|Riddle Tower]] | |||
Pit Entrance.png|[[Pit of 100 Trials (Paper Mario: The Thousand-Year Door)|Pit of 100 Trials]] | |||
</gallery> | |||
===Shine Sprites=== | |||
====Hooktail Castle==== | |||
<gallery widths="160"> | |||
PMTTYD Shine Sprite HooktailCastleCellRoom.png|The first [[Shine Sprite]] | |||
PMTTYD Shine Sprite HooktailCastleStoreroom.png|Mario getting the Shine Sprite in the storeroom of Hooktail Castle. | |||
PMTTYD Star Piece HooktailCastlePurpleBlock.png|Mario getting the Star Piece in the high platform after taking the purple block | |||
PMTTYD Star Piece HooktailCastleWall.png|Mario getting the Star Piece on the wall ledge after taking the big black and yellow block | |||
PMTTYD Star Piece HooktailCastleBehindWindow.png|Mario getting the Star Piece behind the windows in the third area. | |||
PMTTYD Shine Sprite HooktailCastleHighRoom.png| Mario and Koops next to the last Shine Sprite on the fourth floor. | |||
</gallery> | |||
====Rogueport Sewers==== | |||
<gallery widths="160"> | |||
PMTTYD Shine Sprite RogueSewerThousandYearDoor.png|Mario next to the Shine Sprite above the left airplane panel before the Thousand-Year Door | |||
PMTTYD Shine Sprite RogueSewerWest.png|Mario next to the Shine Sprite to the left of the west entrance of Rogueport Sewers | |||
PMTTYD Shine Sprite RogueSewerWarp.png|Mario next to the Shine Sprite in the warp area | |||
PMTTYD Shine Sprite RogueSewerEastSea.png|Mario next to the Shine Sprite above the sea on the east of Rogueport Sewers | |||
PMTTYD Shine Sprite RogueSewerRiver.png|Mario next to the Shine Sprite in the secret room to the very right of Rogueport Sewers | |||
PMTTYD Shine Sprite RogueSewerCenterRoof.png| Mario next to the Shine Sprite on the roof of the rightmost column in the center room of level 1 of Rogueport Sewers | |||
</gallery> | |||
====Boggly Tree==== | |||
<gallery widths="160"> | |||
PMTTYD Shine Sprite BooglyWoods.png|Mario next to the Shine Sprite near the airplane panel | |||
</gallery> | |||
====The Great Tree==== | |||
<gallery widths="160"> | |||
PMTTYD Shine Sprite GreatTreeBubbleRoom.png|Mario next to the Shine Sprite in the bubble room | |||
PMTTYD Shine Sprite GreatTreePlaneRoom.png|Mario next to the Shine Sprite in the airplane room | |||
PMTTYD Shine Sprite GreatTreeSymbolRoom.png|Mario next to the Shine Sprite in the room below the Super Boots area | |||
PMTTYD Shine Sprite GreatTreePond.png|Mario next to the Shine Sprite above water | |||
</gallery> | |||
====Glitzville==== | |||
<gallery widths="160"> | |||
PMTTYD Shine Sprite Glitzville.png|To get this Shine Sprite, Mario must use the Hammer to reveal an invisible block under it. | |||
</gallery> | |||
====Rogueport==== | |||
<gallery widths="160"> | |||
PMTTYD Shine Sprite RogueEastCargo.png|Mario next to the Shine Sprite in the back-east corner of the east Rogueport room | |||
PMTTYD Shine Sprite RogueEastRoof.png|Mario next to the Shine Sprite on the roof of the north house in the east area of Rogueport | |||
PMTTYD Shine Sprite RogueEastBobberyHouse.png|Mario next to the Shine Sprite in Bobbery's house | |||
PMTTYD Shine Sprite RogueWestBackyard.png|Mario next to the Shine Sprite in the backyard of the rightmost house in the west Rogueport | |||
PMTTYD Shine Sprite RogueWestStore.png|Mario next to the Shine Sprite after the wall to the left of the store in west Rogueport | |||
</gallery> | |||
====Glitz Pitz==== | |||
<gallery widths="160"> | |||
PMTTYD Shine Sprite GlitzStoreroom.png|Mario next to the Shine Sprite on the second floor of Glitz Pit's storeroom | |||
</gallery> | |||
====Twilight Trail==== | |||
<gallery widths="160"> | |||
PMTTYD Shine Sprite TwilightTrail.png|Mario next to the Shine Sprite in Twilight Trail behind the last tree | |||
</gallery> | |||
====Creepy Steeple==== | |||
<gallery widths="160"> | |||
PMTTYD Shine Sprite CreepySteepleWellRoom.png|Mario next to the Shine Sprite down the pipe outside Creepy Steeple | |||
PMTTYD Shine Sprite CreepySteepleTreasureRoom.png|Mario next to the Shine Sprite in the treasure room | |||
PMTTYD Shine Sprite CreepySteepleWellPassage.png|Mario next to the Shine Sprite halfway from the outdoor pipe to the inside of Creepy Steeple | |||
</gallery> | |||
====Keelhaul Key==== | |||
<gallery widths="160"> | |||
PMTTYD Shine Sprite KeelhaulKeyCliff.png|Mario next to the Shine Sprite to the left of the piranha room of Keelhaul Key | |||
PMTTYD Shine Sprite KeelhaulKeyTree.png|Mario next to the Shine Sprite behind the leaves of the tree to the right of the bridge | |||
</gallery> | |||
====Pirate's Grotto==== | |||
<gallery widths="160"> | |||
PMTTYD Shine Sprite PiratesGrottoBoat.png|Mario next to the Shine Sprite near the entrance of the Pirate's Grotto | |||
PMTTYD Shine Sprite PiratesGrottoStair.png|Mario next to the Shine Sprite above water | |||
PMTTYD Shine Sprite PiratesGrottoBarrel.png|Mario next to the Shine Sprite in the storeroom with a ! switch | |||
PMTTYD Shine Sprite PiratesGrottoWaveRoomOverwater.png|Mario next to the Shine Sprite above water in the Pirate's Grotto | |||
PMTTYD Shine Sprite PiratesGrottoWaveRoomLeft.png|Mario next to the Shine Sprite in the floating barrel room | |||
</gallery> | |||
====Excess Express==== | |||
<gallery widths="160"> | |||
PMTTYD Shine Sprite ExcessExpressCabin5.png|Mario next to the Shine Sprite in Cabin 5 of Excess Express | |||
PMTTYD Shine Sprite ExcessExpressBub.png|Mario next to the Shine Sprite from Bub | |||
</gallery> | |||
====Riverside Station==== | |||
<gallery widths="160"> | |||
PMTTYD Shine Sprite RiversideStationOutside.png|Mario next to the Shine Sprite in the sunset area of Riverside Station | |||
PMTTYD Shine Sprite RiversideStationStair.png|Mario next to the Shine Sprite over the stairs | |||
</gallery> | |||
====Poshley Heights==== | |||
<gallery widths="160"> | |||
PMTTYD Shine Sprite PoshleyHeights.png|Mario next to the Shine Sprite outside Poshley Sanctum in Poshley Heights | |||
</gallery> | |||
====Poshley Sanctum==== | |||
<gallery widths="160"> | |||
PMTTYD Shine Sprite PoshleySanctum.png|Mario next to the Shine Sprite on the left side of the inner room in Poshley Sanctum | |||
</gallery> | |||
====Fahr Outpost==== | |||
<gallery widths="160"> | |||
PMTTYD Shine Sprite FahrOutpostBehindVillage.png|Mario next to the Shine Sprite at the very right of Fahr Outpost's village | |||
PMTTYD Shine Sprite FahrOutpostBehindTree.png|Mario getting the Shine Sprite behind the first tree | |||
</gallery> | |||
===Hidden Blocks=== | |||
====Rogueport Sewers==== | |||
<gallery widths="160"> | |||
PMTTYDHiddenBlocks1.png|An invisible block can be found where Mario stands. | |||
PMTTYDHiddenBlocks1R.png|The invisible block reveals a Pretty Lucky badge. | |||
</gallery> | |||
====Boggly Woods==== | |||
<gallery widths="160"> | |||
PMTTYDHiddenBlocks2.png|An invisible block can be found where Mario stands. | |||
PMTTYDHiddenBlocks2R.png|The invisible block reveals a P-Down, D-Up P badge. | |||
</gallery> | |||
====The Great Tree==== | |||
<gallery widths="160"> | |||
PMTTYDHiddenBlocks3.png|An invisible block is under a red block, which reveals after Mario hurls Koops. | |||
PMTTYDHiddenBlocks3R.png|The block is revealed, and Mario can mount it to hit the red block to reveal a Damage Dodge P badge. | |||
</gallery> | |||
====Glitzville==== | |||
<gallery widths="160"> | |||
PMTTYDHiddenBlocks4.png|There is an invisible block under the one with a Shine Sprite, which can be revealed by swinging the hammer. | |||
PMTTYDHiddenBlocks4R.png|Now that the block is revealed, Mario and mount it and get the Shine Sprite. | |||
</gallery> | |||
====Twilight Trail==== | |||
<gallery widths="160"> | |||
PMTTYDHiddenBlocks5.png|[[Twilight Trail]] | |||
PMTTYDHiddenBlocks5R.png|Twilight Trail | |||
PMTTYDHiddenBlocks6.png|Twilight Trail | |||
PMTTYDHiddenBlocks6R.png|Twilight Trail | |||
</gallery> | |||
====Creepy Steeple==== | |||
<gallery widths="160"> | |||
PMTTYDHiddenBlocks7.png|[[Creepy Steeple]] | |||
PMTTYDHiddenBlocks7R.png|Creepy Steeple | |||
</gallery> | |||
====Keelhaul Key==== | |||
<gallery widths="160"> | |||
PMTTYDHiddenBlocks8.png|[[Keelhaul Key]] | |||
PMTTYDHiddenBlocks8R.png|Keelhaul Key | |||
PMTTYDHiddenBlocks9.png|Keelhaul Key | |||
PMTTYDHiddenBlocks9R.png|Keelhaul Key | |||
</gallery> | |||
====Pirate's Grotto==== | |||
<gallery widths="160"> | |||
PMTTYDHiddenBlocks10.png|[[Pirate's Grotto]] | |||
PMTTYDHiddenBlocks10R.png|Pirate's Grotto | |||
PMTTYDHiddenBlocks11.png|Pirate's Grotto | |||
PMTTYDHiddenBlocks11R.png|Pirate's Grotto | |||
</gallery> | |||
====Riverside Station==== | |||
<gallery widths="160"> | |||
PMTTYDHiddenBlocks12.png|[[Riverside Station]] | |||
PMTTYDHiddenBlocks12R.png|Riverside Station | |||
</gallery> | |||
====Fahr Outpost==== | |||
<gallery widths="160"> | |||
PMTTYDHiddenBlocks13.png|[[Fahr Outpost]] | |||
PMTTYDHiddenBlocks13R.png|Fahr Outpost | |||
</gallery> | |||
====Palace of Shadow==== | |||
<gallery widths="160"> | <gallery widths="160"> | ||
PMTTYDHiddenBlocks14.png|[[Palace of Shadow]] | |||
PMTTYDHiddenBlocks14R.png|Palace of Shadow | |||
PMTTYDHiddenBlocks15.png|Palace of Shadow | |||
PMTTYDHiddenBlocks15R.png|Palace of Shadow | |||
</gallery> | </gallery> | ||
| Line 1,612: | Line 2,249: | ||
PMTTYD print ad NA.jpg|North American print ad | PMTTYD print ad NA.jpg|North American print ad | ||
PMTTYD print ad NA paper airplane.jpg|The opposite page of the North American print ad which can be made into a Mario paper airplane | PMTTYD print ad NA paper airplane.jpg|The opposite page of the North American print ad which can be made into a Mario paper airplane | ||
PMTTYD print ad MEX.jpg|Mexican print ad | |||
PMTTYD print ad MEX paper aeroplane.jpg|The opposite page of the Mexican print ad which can be made into a Mario paper aeroplane | |||
PaperMario2JPAdvert.jpg|Japanese print ad | PaperMario2JPAdvert.jpg|Japanese print ad | ||
PMTTYD Disc North America.png|North American game disc | PMTTYD Disc North America.png|North American game disc | ||
TTYDMemoryIcon.png|Memory card save data icon | TTYDMemoryIcon.png|Memory card save data icon | ||
Paper Mario The Thousand-Year Door Player's Guide.jpg|[[Nintendo Power]] Player's Guide | Paper Mario The Thousand-Year Door Player's Guide.jpg|[[Nintendo Power]] Player's Guide | ||
TTYD Web 1.jpg| | TTYD Web 1.jpg|Official American website | ||
TTYD Web 2.jpg | TTYD Web 2.jpg | ||
TTYD Web 3.jpg | TTYD Web 3.jpg | ||
PMTTYDBannerJP.png | |||
PMTTYDBannerINT.png | |||
</gallery> | </gallery> | ||
{{Galleries}} | {{Galleries}} | ||
Latest revision as of 07:16, March 3, 2025
This is a gallery of images for the game Paper Mario: The Thousand-Year Door. For images related to its remake, see Gallery:Paper Mario: The Thousand-Year Door (Nintendo Switch).
Logos[edit]
English logo

Spanish logo
French logo
Italian logo
German logo

Japanese logo
Preliminary logo (E3 2004)

In-game[edit]
English logo
Spanish logo
French logo
Italian logo

German logo

Japanese logo
Preliminary logo
Artwork[edit]
Main characters[edit]

Mario jumping

Mario jumping (early variant)
Mario with a Hammer
Mario swinging his hammer

Alternate artwork of Mario with the hammer

Mario with the Magical Map

Mario in an angry pose

Mario and Yoshi

Mario thinking

Curious Mario

Mario waving

Mario knocked out
Professor Frankly


Partners[edit]

Goombella

Flurrie

Vivian


Bosses[edit]

The Shadow Sirens


Enemies[edit]


Other characters[edit]
Blue Twilighter (purple)
Blue Twilighter (orange)
Blue Twilighter (green)
Sailor Toad
Shipwrecked Sailor Toad
Lord Crump as Four Eyes


Items and objects[edit]

Group art[edit]


Japanese website character bios[edit]


Sprites and models[edit]
Mario and partners[edit]

Mario idle

Mario equipped with the L Emblem

Mario equipped with the W Emblem

Mario equipped with the W Emblem and the L Emblem
Mario using his hammer
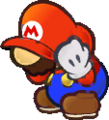
Mario guarding

8-bit sprites of Mario and his partners


Unused[edit]
Early sprite of Bobbery.

Early sprite of Vivian.


NPCs[edit]

Beldam in a hooded cloak

Black Chest Demon's face
Bob-omb from Fahr Outpost

Bub-ulb (pink)

Bub-ulb (blue)

Doogan (Yellow)

Doogan (Green)

Doogan (Orange)

Glitz Pit Reporter

Jolene in casual clothes
Koopa Troopa (NPC)

Koopa Troopa in the audience

Lahla/Peeka (localized versions)

Lakitu from the Glitz Pit

Toad (red)

Toad (blue)

Toad (green)

Toad girl (orange)

Toad girl (red)

Toad girl (green)

Toad girl (purple)

Toad child (red)

Toad child (light blue)

Toad child (green)

Toad child (chartreuse)

Toad innkeeper


Unused[edit]

Bub-ulb (green)

Bub-ulb (white with yellow center)

Bub-ulb (white with pink center)

Toad conductor (green)

Cheep Cheep businessman

Hamburger Spinia

Rainbow Spania


Enemies[edit]

Boo, with its tongue sticking out
Green Magikoopa with broom

Iron Cleft (Green)

Iron Cleft (Red)


Unused[edit]
Okooru

Red Buzzy Beetle
Red Parabuzzy
Red Spiky Parabuzzy
Hyper Bob-omb
Ultra Bob-omb

An enemy resembling Screamy.

A purple version of the Screamy-like enemy.


Bosses[edit]
It has been requested that more images be uploaded for this section. Remove this notice only after the additional images have been added. Specifics: Missing Cortez / Rawk Hawk / Magnus von Grapple / Smorg combined form

Doopliss (Mario form)


Unused[edit]

Dark Atomic Boo
Early sprite of Bonetail's head.
An early design of a black Smorg.


Tattle Log[edit]
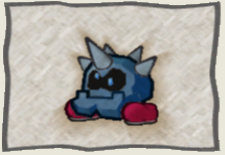
Iron Cleft (Red)
Iron Cleft (Green)


Crystal Stars[edit]

Magical Map (overworld sprite)

Magical Map (Menu sprite for Sweet Treat)


Equipment[edit]


Items and objects[edit]
Important Things[edit]

Card Key

Card Key

Card Key

Elevator Key3

Palace Key (door)

Palace Key (pedestal)

Station Key (alt)

Steeple Key (basement)
1 - Elevator Key from Riverside Station
2 - Elevator Key from X-Naut Fortress, level 1
3 - Elevator Key from X-Naut Fortress, sublevel 1
Unused[edit]

Snow Bunny (unused)

Trade Off

Koopa Curse

The unused coconut recipe.

An unused key with Hooktail's face embedded in it.

An unused item resembling a Fire Flower with a candy cane-like stick.

A pillow

Mario Poster
Badges[edit]
Unused[edit]

FP Drain P

Possible early version of a Damage Dodge

Possible early version of a Damage Dodge P

Super Charge

Super Charge P
Objects[edit]
It has been requested that more images be uploaded for this section. Remove this notice only after the additional images have been added. Specifics: Crystal stars
Blue jump pad
Red jump pad

Lock
Sign

.png)
.png)


Blocks[edit]
Stone block (giant)
Yellow block (giant)


Status effects[edit]
Menus and Level up[edit]


Introduction[edit]
Book
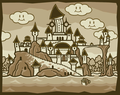
Page 1
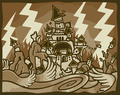
Page 2
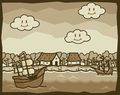
Page 3
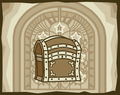
Page 4
Page 5


Chapter coins[edit]

Mario

Peach

Bowser

X-Naut insignia


Ending pictures[edit]
A boat arrives at Rogueport.
Goombella thanks Mario for rescuing her earlier.
The Magical Map.
A view of Professor Frankly's office at Rogueport.
A Blooper emerges from the water at Rogueport Sewers.
Mario and Goombella explore Petal Meadows.
Mario and Goombella meet Koops.
Mario participates in the 65th Super Fun Quirk Quiz.
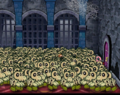
A horde of Dull Bones push Mario back at Hooktail Castle.
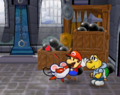
Ms. Mowz smooches Mario in Hooktail Castle.
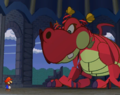
Mario encounters Hooktail at her lair.
Peach witnesses TEC-XX turn on.
In the Japanese version.
Bowser enters his fortress.
The Shadow Sirens unite at the Boogly Woods.
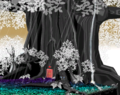
Exterior of the The Great Tree.
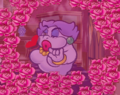
Flurrie surrounds herself with roses.
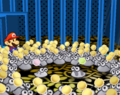
Punies are freed from a jail cell inside The Great Tree.
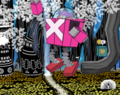
Magnus von Grapple takes shape.

Bowser navigates World 1-1.
Zess T. is looking for her missing Contact Lens.
A blimp is heading for Glitzville.
The Koopinator faces off against Rawk Hawk at the Glitz Pit.
A Yoshi egg sits atop the roof of the hot dog stand in Glitzville.
Jolene and Grubba at the front office of the Glitz Pit.
Grodus at his office in the X-Naut Fortress.
Mario witnesses pigs at Twilight Town.

A swarm of Boos surround the entrance hall of the Creepy Steeple.

Doopliss sitting on his rocking chair at the top of the Creepy Steeple.
Vivian meets Mario (who had his body stolen) in Twilight Town.
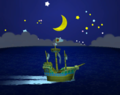
Flavio's ship sails through the night.
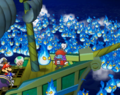
A horde of Embers ambush the ship.
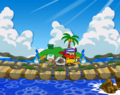
Embers ambush Bobbery and others on a bridge at Keelhaul Key.
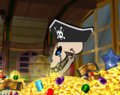
Cortez offers some treasure, including the Sapphire Star.
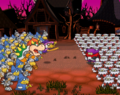
Bands between Bowser and Lord Crump clash at Twilight Town.
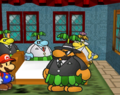
Don Pianta recovers from his illness.
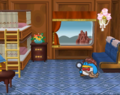
Pennington inside a passenger car of the Excess Express.
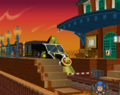
The Excess Express arrives at the Riverside Station.

Smorg captures Excess Express passengers on the train's rooftop.
Mario arrives at Poshley Heights.
Peach takes a shower at the X-Naut Fortress.
The big cannon fires Mario to the moon.
Mario arrives on the moon.
Magnus von Grapple 2.0 prepares for battle.
TEC-XX.
In the Japanese version.
The Thousand-Year Door opens.
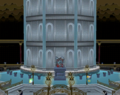
The tower at the heart of the Palace of Shadow.
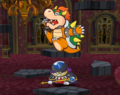
Bowser about to fall on top of Grodus.

Peach possessed by the Shadow Queen.
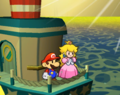
Mario and Peach ride the boat back home.
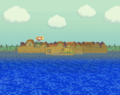
An ocean view of Rogueport.


Miscellaneous[edit]

Mario's level icon in the pause menu
Screenshots[edit]
This section is under construction. Therefore, please excuse its informal appearance while it is being worked on. We hope to have it completed by finding screenshots elsewhere on the wiki.
Non-specific chapters[edit]
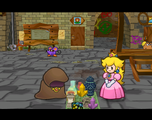
Princess Peach meeting with a mysterious merchant
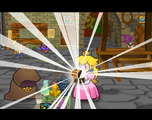
Princess Peach receiving a gift
Title screen
Title screen (Japanese version)
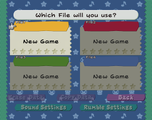


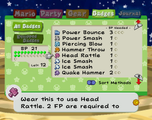
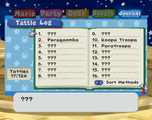


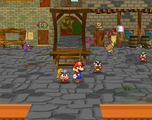
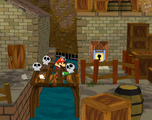
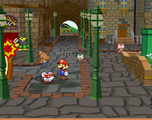
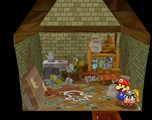
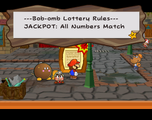
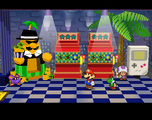
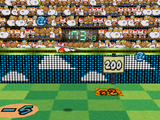
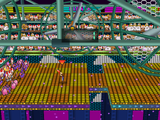
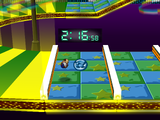
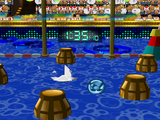
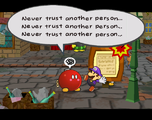
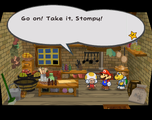
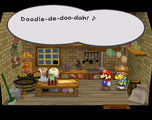
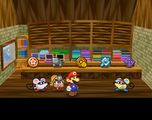
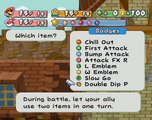
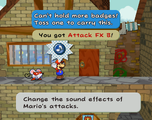
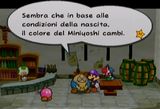
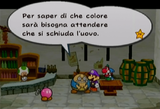
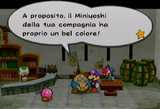
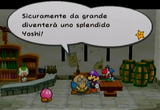
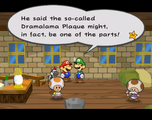
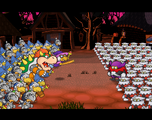
X-Nauts vs. Koopa Clan
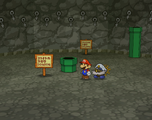
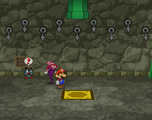
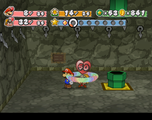
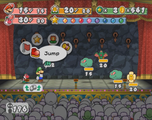
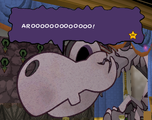
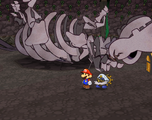
Mario and Bobbery on the lowest floor after defeating Bonetail.
A regular battle
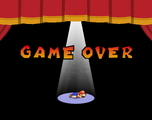
The Game Over screen / Mario defeated
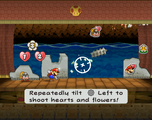
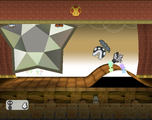
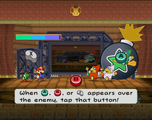
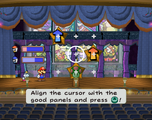
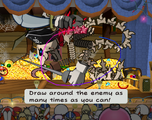
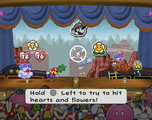
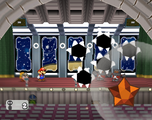
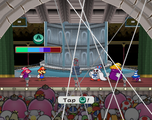
TEC-XX in the Japanese version.
TEC-XX in the International version.


Item Shops[edit]
Outside
Outside


Inns[edit]
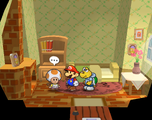
Petalburg Inn
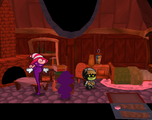
Twilight Inn
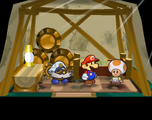
Seaside Shanty
Royal Poshley Park Tower

Royal Poshley Park Tower
Royal Poshley Park Tower
Fahr Outpost Inn


Prologue[edit]
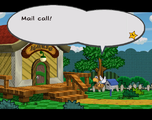
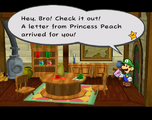
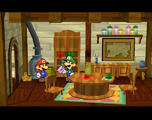
Inside the Mario Bros.' house

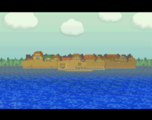
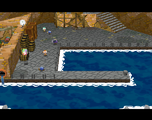
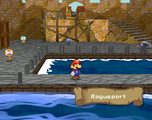
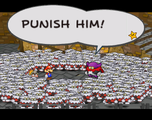
Lord Crump shouting "PUNISH HIM!"
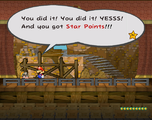
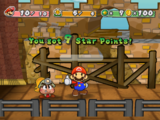
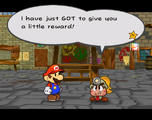
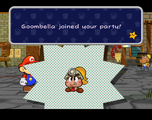
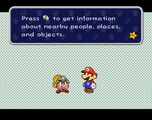
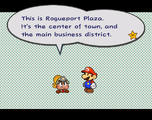
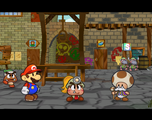
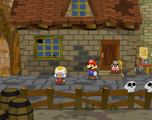
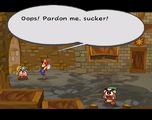
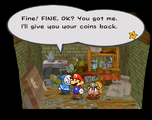
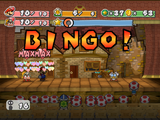
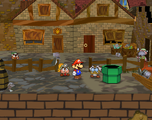
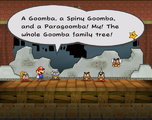
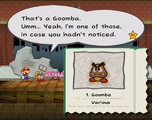
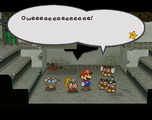

Hooktail Castle in the sun

Diamond Star revealed
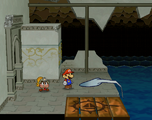
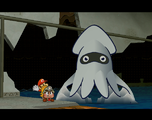
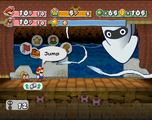


Chapter 1[edit]

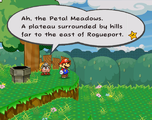
Hooktail flying in the background
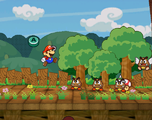
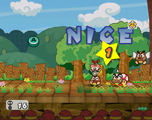
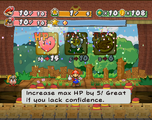
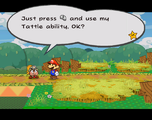
Use
 to Tattle
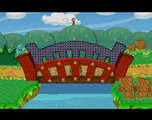
The bridge appearing
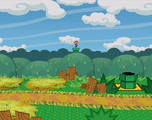
Mario interacting with the background.
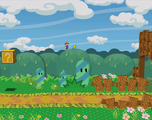
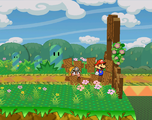
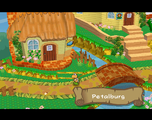
The introduction to Petalburg
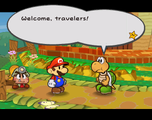
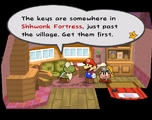
Mario talking to Kroop
The Koopa Troopa that is a fan of Peach
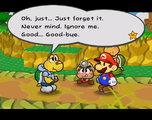
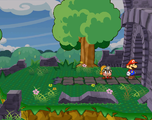
The duo entering the first 1000-year-old ruins
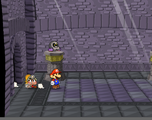
The ruins with Bald Clefts
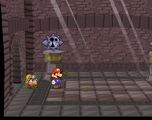
The ruins with Bristles
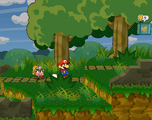
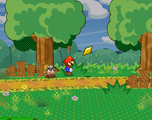
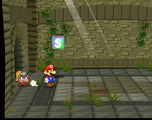
The entrance to Shhwonk Fortress
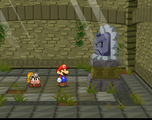
The above area.
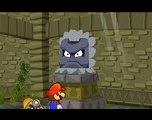
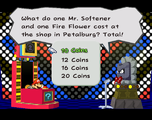
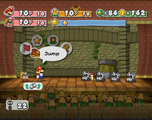
Failed the quiz

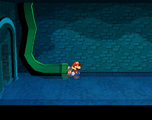
The sewers
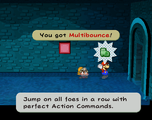
The underground area.
The Gold Fuzzy
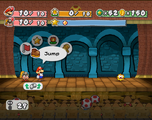
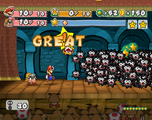
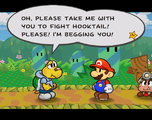
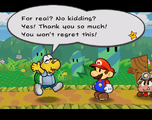
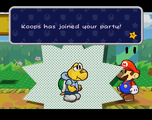
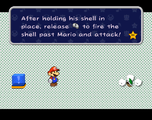
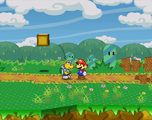
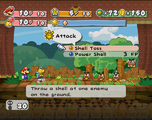
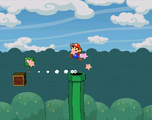
With Koops, Mario can reach this Happy Heart badge
The inscription on the stone
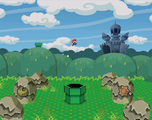
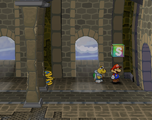
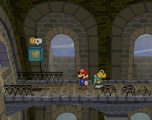
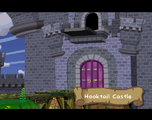
Hooktail Castle introduction
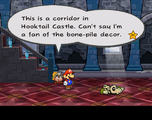
Goombella tattling the first corridor of Hooktail Castle
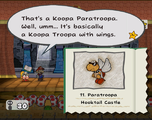
Goombella tattling a Koopa Paratroopa
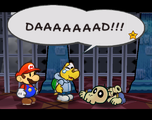
Koops mistakes the Dull Bones for his own father.
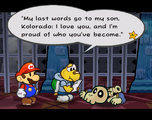
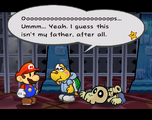
The Dull Bones swarm
Mid-boss battle
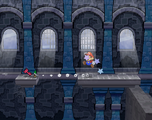
The first key
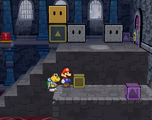
The ! Switch and various blocks
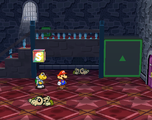

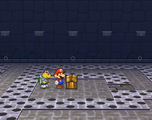
The spiked ceiling is about to lower down.
The spike room
The Black Chest Demon explaining how to use Paper Mode

Mario slipping past the bars in Hooktail Castle.
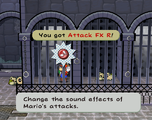
Mario obtains the Attack FX R badge, the key to defeat Hooktail.
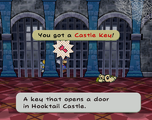
The second key
Koops being shot at a switch

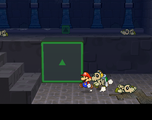
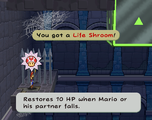
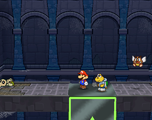

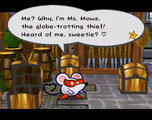
Encountering Ms. Mowz

Mario meets Ms. Mowz.
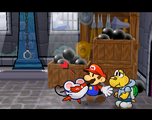
Mario gets kissed by Ms. Mowz.
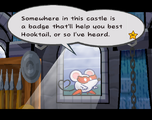
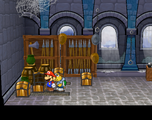
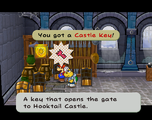
The third key
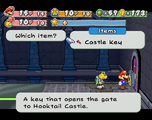
Mario is unlocking the third castle door

Mario gets elevated up to the plane panel

Mario getting the Star Piece in the upper-north-east corner of the plane room
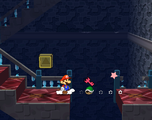
The fourth key

Mario and Koops are falling down the fourth area
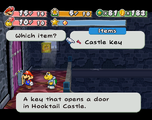
Mario opened the fourth castle door
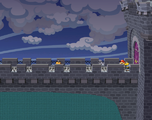
The bridge
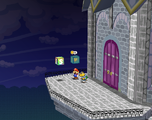
Hooktail's lair
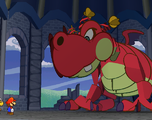
Mario and Koops encounter Hooktail
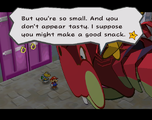
Hooktail threatens to devour the heroes.
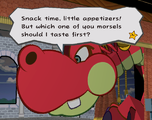
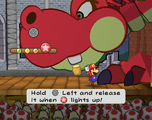
Mario prepares to swing his hammer at Hooktail
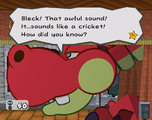

Hooktail breathing her "stinky, fiery breath" at Goombella and Mario
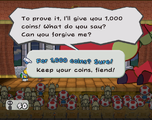
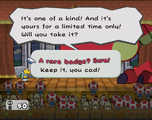
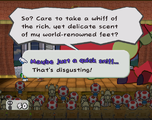
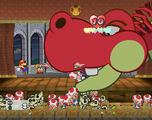
Hooktail gobbles the Toads in the audience and restores 10 HP.
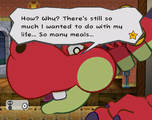
Hooktail faints.
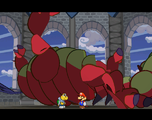
Hooktail defeated.
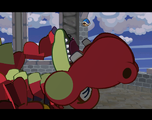
Hooktail spitting Koopley's shell out
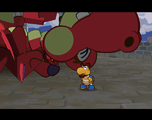
Koopley

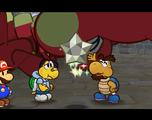
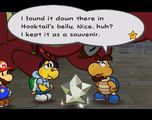
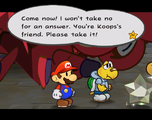
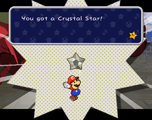
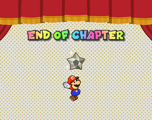


Post Chapter 1[edit]
Peach[edit]
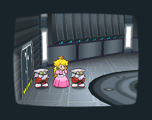
The surveillance camera views Peach and some X-Nauts.
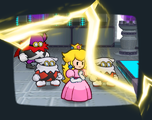
The surveillance camera briefly has a static malfunction.

The surveillance camera goes blank.
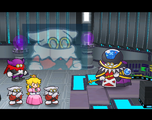
Grodus receives a message while examining Peach.
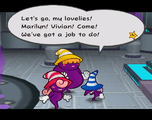
The Shadow Sirens discuss their plans.
Peach takes a shower.
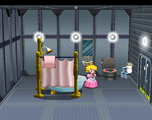
Peach comes out of the shower with her hair tied back into a bun.

A door opens.
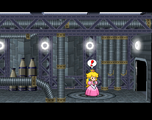
Peach examines the opened door.
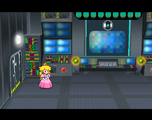
Peach enters a room with a mysterious computer.

Peach writes an email for Mario.


Bowser[edit]


Pre-Chapter 2[edit]

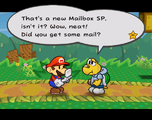
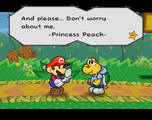
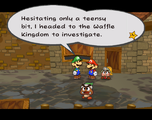
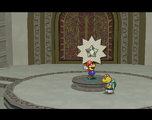

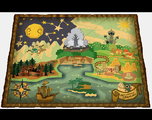

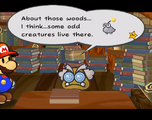
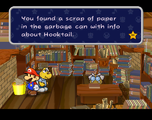
The garbage can is great for filling missed Tattle Log entries for one-time battles only.
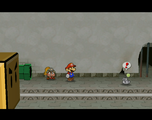
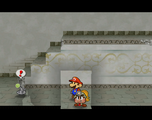
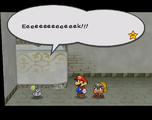
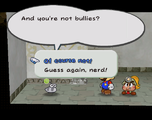
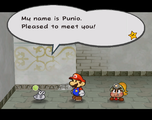


Chapter 2[edit]
Out of the Warp Pipe
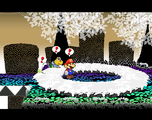
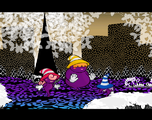
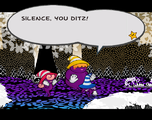
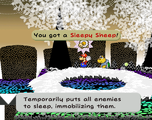
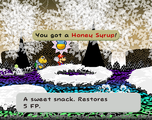
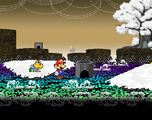
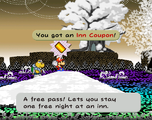
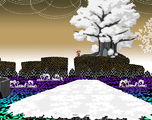
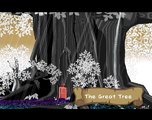
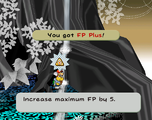
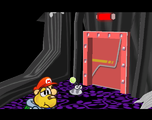
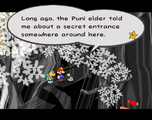
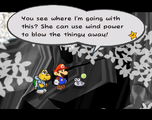
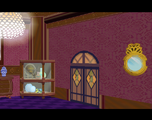

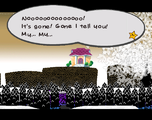
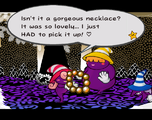
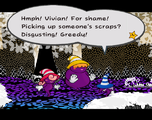
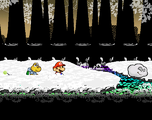

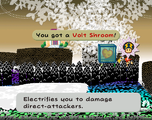

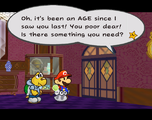
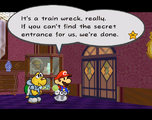
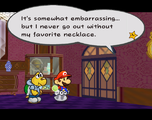

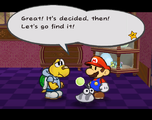


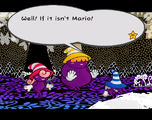
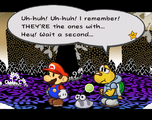

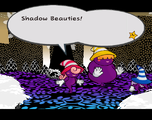
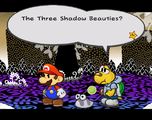

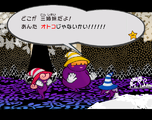
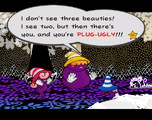
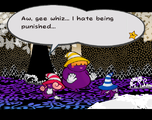
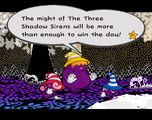
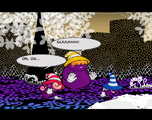
Shadow Sirens fight
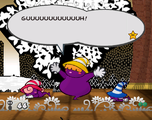
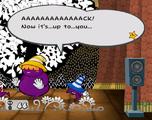
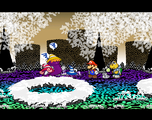
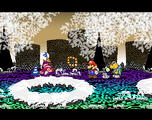
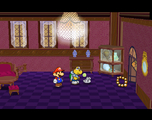

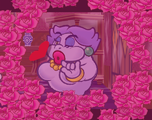
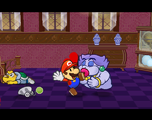
Flurrie kisses Mario

Mario faints after being kissed
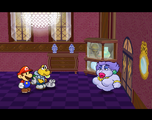
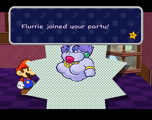
Flurrie first joins Mario at her home.
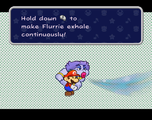
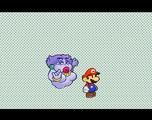
Flurrie commonly makes the ILY sign hand gesture when Mario succeeds at something
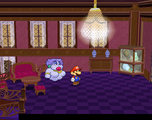
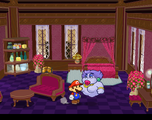
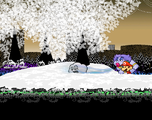
Flurrie using field move on a Dark Puff
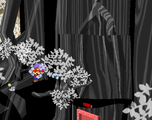
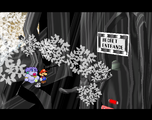
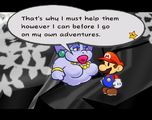

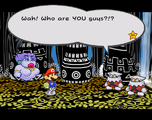
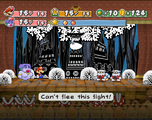
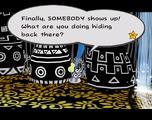
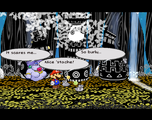
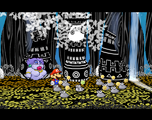
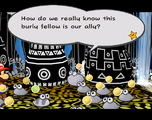
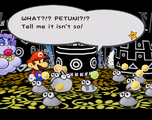
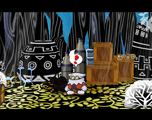
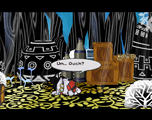
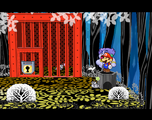
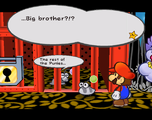
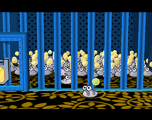
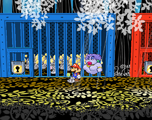
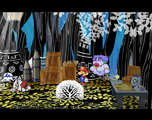
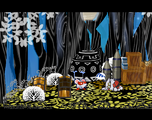
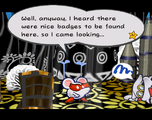

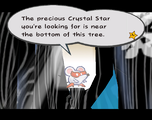
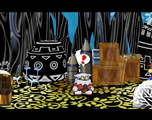
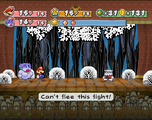

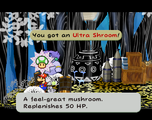
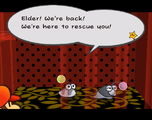
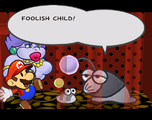
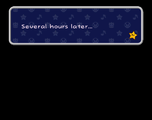
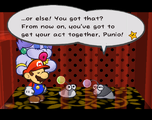
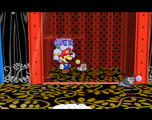

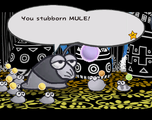
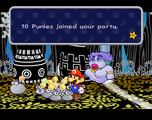
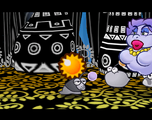
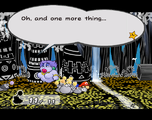
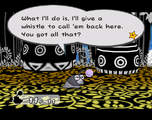
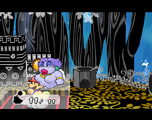
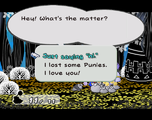
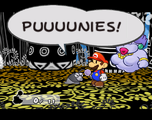
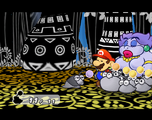
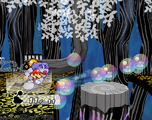

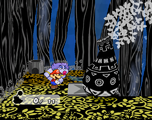
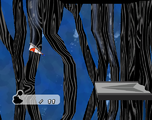
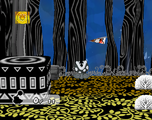
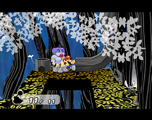
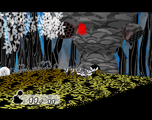
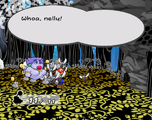
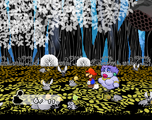
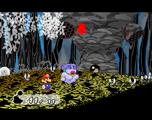
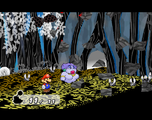
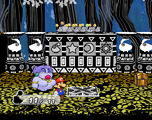
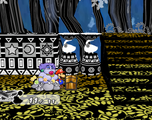
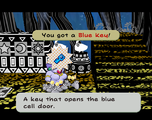
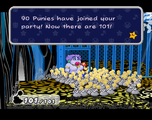
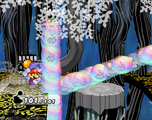
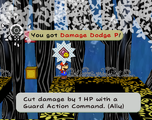
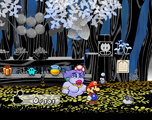
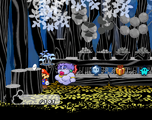
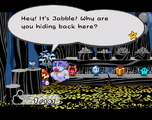
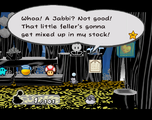

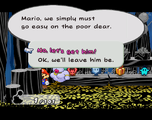
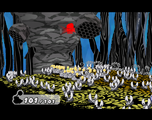

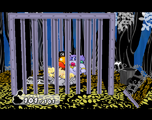
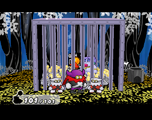
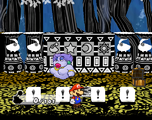

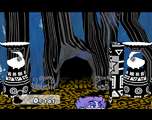
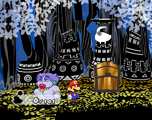
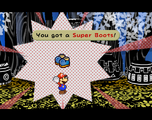
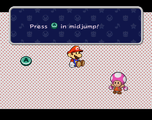
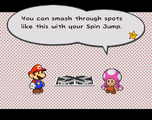
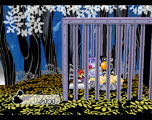

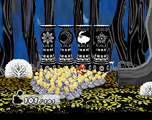
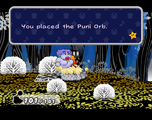

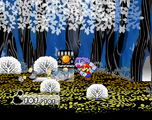
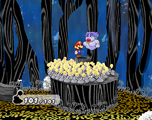
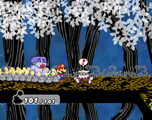
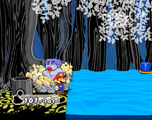
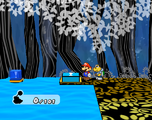
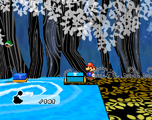
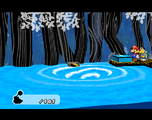
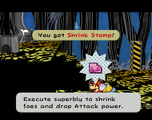


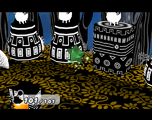
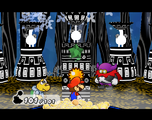

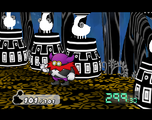
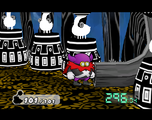
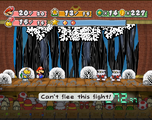
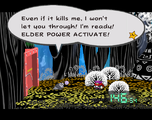
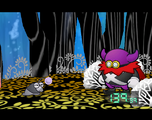
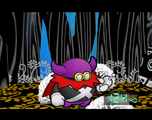
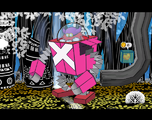
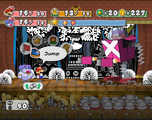
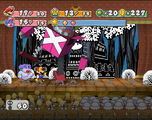
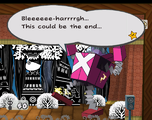
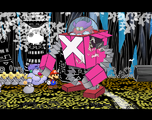
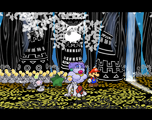
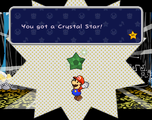
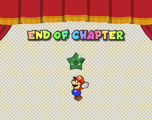


Post Chapter 2[edit]
Peach[edit]
An X-Naut PhD arrives at the office of Grodus.
Grodus gives instructions to the X-Naut PhD.
TEX-XX confirms that Mario received a previous email.
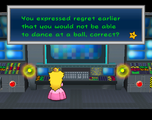
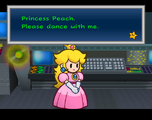
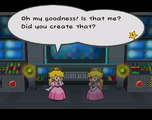
Peach sees a hologram of herself.
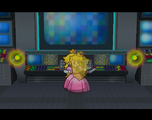
Peach dances with the hologram.
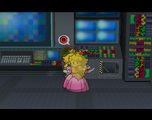
Peach continues dancing with the hologram.
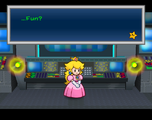
Peach didn't think that the dance was fun.
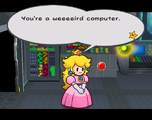
Peach criticizes TEC-XX for being so weird.


Bowser[edit]


Pre-Chapter 3[edit]
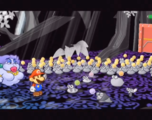

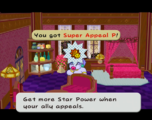
Mario and Flurrie inside the house
Mario and Flurrie in the bedroom
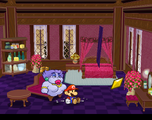
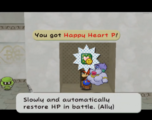
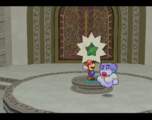
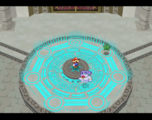
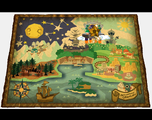
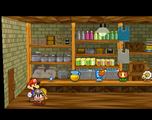


Chapter 3[edit]
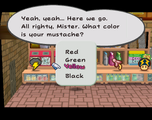
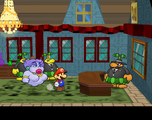
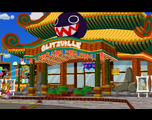
Outside of the arena
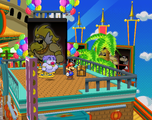
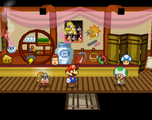
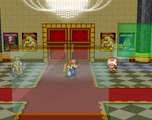
The lobby
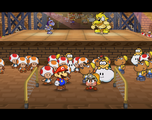
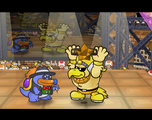
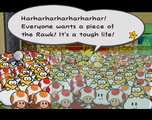
The hallway
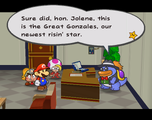
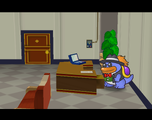
A mysterious egg sits atop the hot dog stand.
Mini-Yoshi has recently hatched from the egg.
The Mini-Yoshi joins the party.
Naming the Mini-Yoshi.
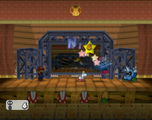
Mini-Yoshi spits out an Iron Cleft out after using Gulp.
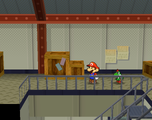
Mario and Mini-Yoshi explore the storage area.
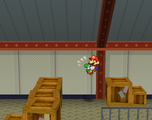
Mini-Yoshi flutters Mario from box to box at the storage area.
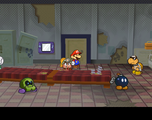
The Minor-League locker room
The Major-League locker room
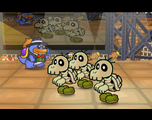
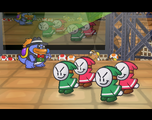

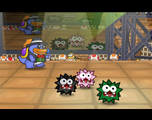

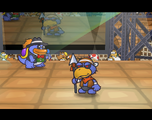
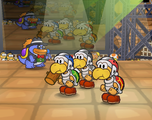
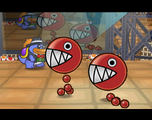
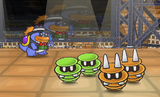
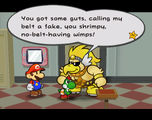

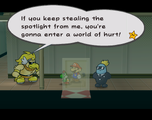
Rawk Hawk trash-talks with Mario in the hallway.
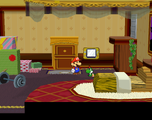
The Champion's room
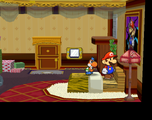
Mario and Flurrie uncovering the hidden key.

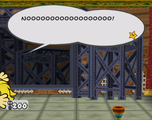
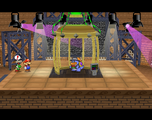
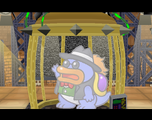

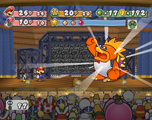
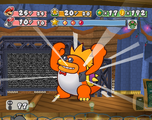
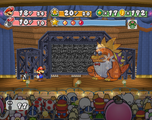

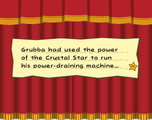
End-of-chapter storyline text


Post Chapter 3[edit]


Chapter 4[edit]

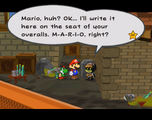
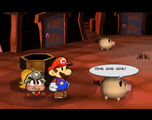
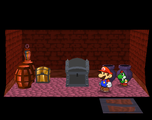

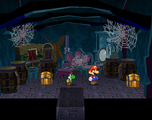
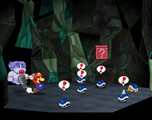
The dungeon
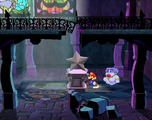
The Crystal Star statue
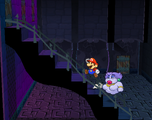
The moving staircase
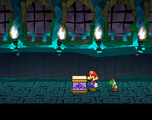

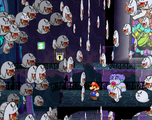
The unleashed Boos

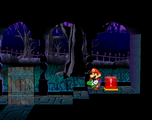
The garden of Creepy Steeple
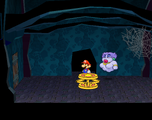
A cave
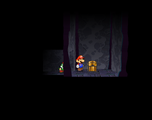
Doopliss's lair
Mayor Dour talking with "Mario"
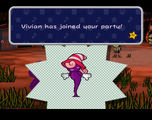
Vivian is Mario's new (and only) party member.

The kitchen

The parrot room
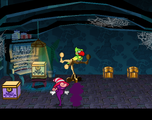
The Boo hall
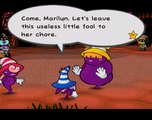
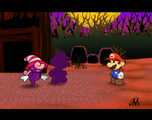
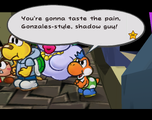


Post Chapter 4[edit]
Bowser[edit]


Chapter 5[edit]


Post Chapter 5[edit]


Chapter 6[edit]
Don Pianta didn't like it when Francesca took off.
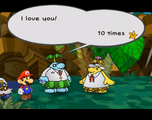
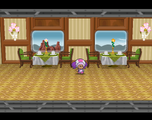

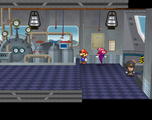
Mario and Vivian explore the engineer's front.
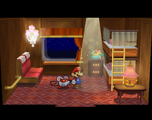
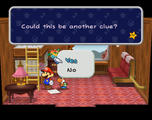
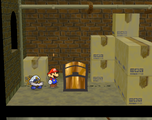


Post Chapter 6[edit]
Bowser[edit]


Chapter 7[edit]
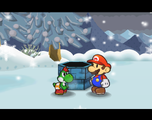
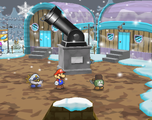
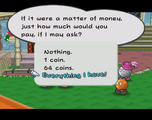
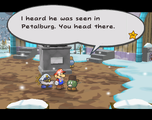
Wild goose chase with General White

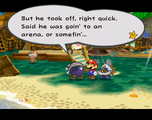
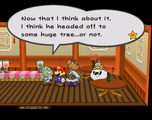


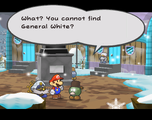
General White sleeping in his house at Fahr Outpost
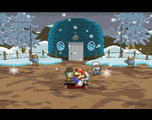
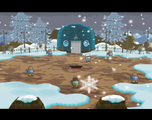
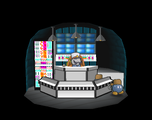
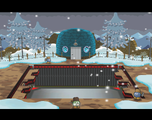
Battle on the moon
Gravity is low

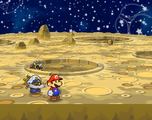
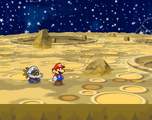
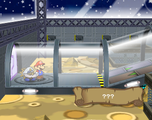
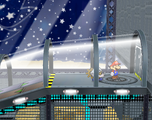
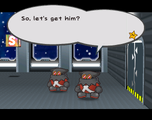
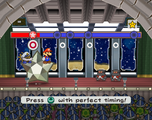
Is this really an "Earth" Tremor?

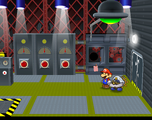
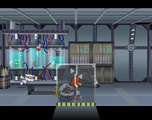
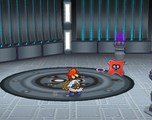
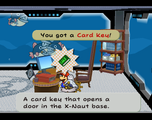
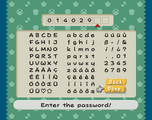
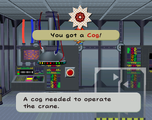
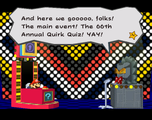

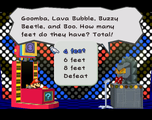

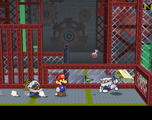
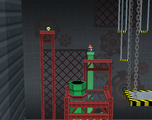
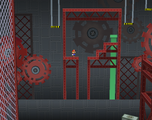
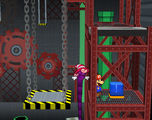
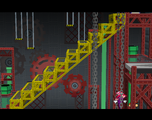
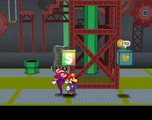
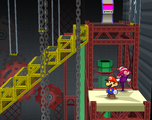
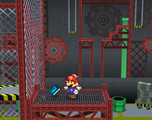
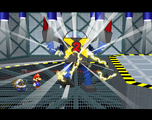
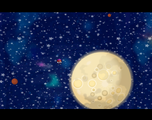
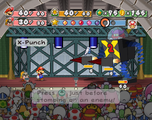
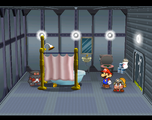
Peach's holding quarters in X-Naut Fortress

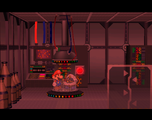

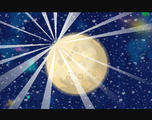


Post Chapter 7[edit]


Chapter 8[edit]
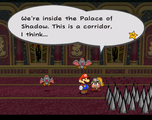
Mario and Goombella arrive at the starting corridor at the Palace of Shadow.
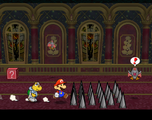
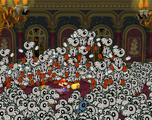
Mario bashes through the horde of Dry Bones to find the Dark Bones.
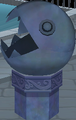
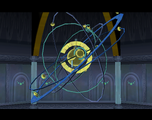
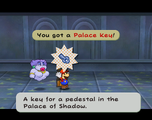
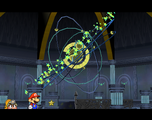
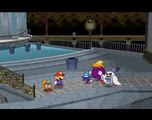
Mario and Goombella prepare for a rematch against the Shadow Sirens featuring Doopliss.

Marilyn casts a bolt of lightning.
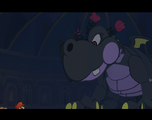
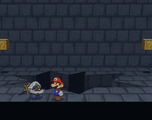

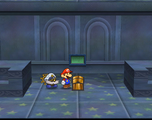


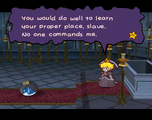
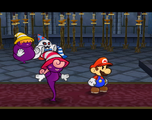
Farewell
The stage is used for a cutscene after winning the Shadow Queen battle. Doopliss is there.


Places[edit]
A nightscape view of the S.S. Flavion
Full view of the Riddle Tower


Shine Sprites[edit]
Hooktail Castle[edit]
The first Shine Sprite
Mario getting the Shine Sprite in the storeroom of Hooktail Castle.
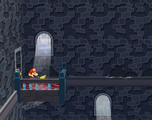
Mario getting the Star Piece in the high platform after taking the purple block
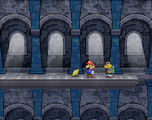
Mario getting the Star Piece on the wall ledge after taking the big black and yellow block
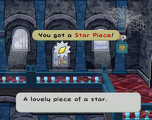
Mario getting the Star Piece behind the windows in the third area.
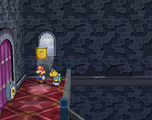
Mario and Koops next to the last Shine Sprite on the fourth floor.


Rogueport Sewers[edit]
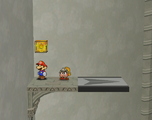
Mario next to the Shine Sprite above the left airplane panel before the Thousand-Year Door
Mario next to the Shine Sprite to the left of the west entrance of Rogueport Sewers
Mario next to the Shine Sprite in the warp area
Mario next to the Shine Sprite above the sea on the east of Rogueport Sewers
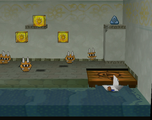
Mario next to the Shine Sprite in the secret room to the very right of Rogueport Sewers
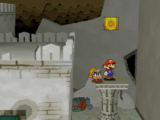
Mario next to the Shine Sprite on the roof of the rightmost column in the center room of level 1 of Rogueport Sewers
Boggly Tree[edit]
Mario next to the Shine Sprite near the airplane panel
The Great Tree[edit]
Mario next to the Shine Sprite in the bubble room
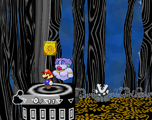
Mario next to the Shine Sprite in the airplane room
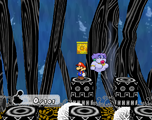
Mario next to the Shine Sprite in the room below the Super Boots area
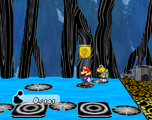
Mario next to the Shine Sprite above water
Glitzville[edit]
To get this Shine Sprite, Mario must use the Hammer to reveal an invisible block under it.
Rogueport[edit]
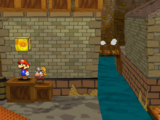
Mario next to the Shine Sprite in the back-east corner of the east Rogueport room
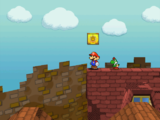
Mario next to the Shine Sprite on the roof of the north house in the east area of Rogueport
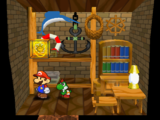
Mario next to the Shine Sprite in Bobbery's house
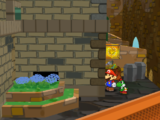
Mario next to the Shine Sprite in the backyard of the rightmost house in the west Rogueport
Mario next to the Shine Sprite after the wall to the left of the store in west Rogueport
Glitz Pitz[edit]
Mario next to the Shine Sprite on the second floor of Glitz Pit's storeroom
Twilight Trail[edit]
Mario next to the Shine Sprite in Twilight Trail behind the last tree
Creepy Steeple[edit]
Mario next to the Shine Sprite down the pipe outside Creepy Steeple
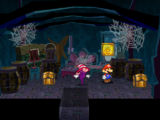
Mario next to the Shine Sprite in the treasure room
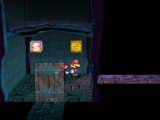
Mario next to the Shine Sprite halfway from the outdoor pipe to the inside of Creepy Steeple
Keelhaul Key[edit]
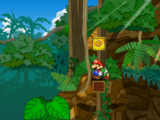
Mario next to the Shine Sprite to the left of the piranha room of Keelhaul Key
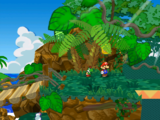
Mario next to the Shine Sprite behind the leaves of the tree to the right of the bridge
Pirate's Grotto[edit]
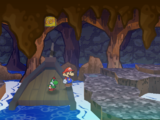
Mario next to the Shine Sprite near the entrance of the Pirate's Grotto
Mario next to the Shine Sprite above water
Mario next to the Shine Sprite in the storeroom with a ! switch
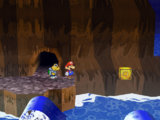
Mario next to the Shine Sprite above water in the Pirate's Grotto
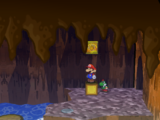
Mario next to the Shine Sprite in the floating barrel room
Excess Express[edit]

Mario next to the Shine Sprite in Cabin 5 of Excess Express
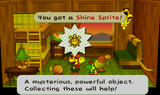
Mario next to the Shine Sprite from Bub
Riverside Station[edit]
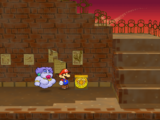
Mario next to the Shine Sprite in the sunset area of Riverside Station
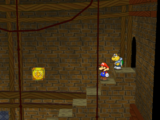
Mario next to the Shine Sprite over the stairs
Poshley Heights[edit]
Mario next to the Shine Sprite outside Poshley Sanctum in Poshley Heights
Poshley Sanctum[edit]
Mario next to the Shine Sprite on the left side of the inner room in Poshley Sanctum
Fahr Outpost[edit]
Mario next to the Shine Sprite at the very right of Fahr Outpost's village
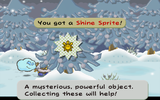
Mario getting the Shine Sprite behind the first tree
Hidden Blocks[edit]
Rogueport Sewers[edit]
An invisible block can be found where Mario stands.

The invisible block reveals a Pretty Lucky badge.


Boggly Woods[edit]
An invisible block can be found where Mario stands.
The invisible block reveals a P-Down, D-Up P badge.


The Great Tree[edit]

An invisible block is under a red block, which reveals after Mario hurls Koops.
The block is revealed, and Mario can mount it to hit the red block to reveal a Damage Dodge P badge.


Glitzville[edit]
There is an invisible block under the one with a Shine Sprite, which can be revealed by swinging the hammer.
Now that the block is revealed, Mario and mount it and get the Shine Sprite.


Twilight Trail[edit]
Twilight Trail
Twilight Trail
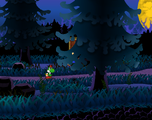
Twilight Trail


Creepy Steeple[edit]
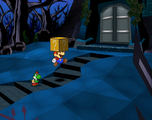
Creepy Steeple


Keelhaul Key[edit]
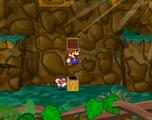
Keelhaul Key
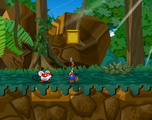
Keelhaul Key
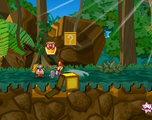
Keelhaul Key


Pirate's Grotto[edit]
Pirate's Grotto
Pirate's Grotto
Pirate's Grotto


Riverside Station[edit]
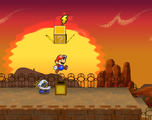
Riverside Station


Fahr Outpost[edit]
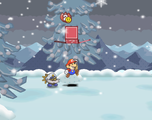
Fahr Outpost


Palace of Shadow[edit]
Palace of Shadow
Palace of Shadow
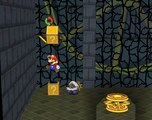
Palace of Shadow


Box art[edit]
North American box art (front)

North American box art (back)
North American box art (Best Seller)
North American box art (Player's Choice)

Canadian box art (Best Seller)
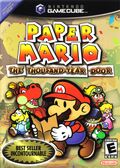
Canadian box art (Best Seller, alternate)
Canadian box art (Player's Choice)
Canadian box art (back)
European box art (front)
European box art (back)
Spanish box art
Italian box art
German box art
Australian box art
Japanese box art (front)
Japanese box art (back)


Instruction booklet covers[edit]
Canadian instruction booklet (front)
Canadian instruction booklet (back)


Miscellaneous[edit]
North American print ad
The opposite page of the North American print ad which can be made into a Mario paper airplane
Mexican print ad
The opposite page of the Mexican print ad which can be made into a Mario paper aeroplane
Japanese print ad
North American game disc

Memory card save data icon

Nintendo Power Player's Guide
Official American website


| Paper Mario: The Thousand-Year Door (Nintendo GameCube / Nintendo Switch) | ||
|---|---|---|
| Main characters | Bobbery • Flurrie • Goombella • Koops • Mario • Ms. Mowz • Princess Peach • Vivian • X-Nauts • Yoshi Kid | |
| Species | Bub-ulb • Craw • Crow • Doogan • Duplighost • Glitz Pit Security • Jabbi • Little Mouser • Nibbles • Para-bomb • Penguin • Pianta • Pig • Puni • Ratooey • Smorg • Toad • Twilighter • Yoshi | |
| Chapters | Prologue • Chapter 1 • Chapter 2 • Chapter 3 • Chapter 4 • Chapter 5 • Chapter 6 • Chapter 7 • Chapter 8 | |
| Crystal Stars | Diamond Star • Emerald Star • Gold Star • Ruby Star • Sapphire Star • Garnet Star • Crystal Star | |
| Bosses | Regular | Blooper • Bowser • Gloomtail • Gold Fuzzy • Grodus • Kammy Koopa • Lord Crump • Rawk Hawk • The Iron Adonis Twins • Three Shadows (Beldam • Marilyn • Vivian/Doopliss) |
| Chapter | Hooktail • Magnus von Grapple • Macho Grubba • Doopliss • Cortez • Smorg • Magnus von Grapple 2.0 • Shadow Queen | |
| Optional | Atomic Boo • Bonetail • Gus • Prince Musha • Whackaa | |
| Non-playable characters | Rogueport | Arfur • Bomberto • Chet Rippo • Darkly • Dazzle • Eddy the Mask • Goomez • Goomfrey • Goomther • Grifty • Herb T. • Ian Foomusa • Lahla • Laki • Larson • Lucky • Luigi and his party (Blooey · Hayzee · Jerry · Screamy · Torque) • Lumpy • McGoomba • Merlee • Merlon • Merluvlee • Mousimilian • Peeka • Pianta syndicate (Don Pianta · Francesca · Frankie · Rocko · Tony · Vinny) • Plenn T. • Podley • Professor Frankly • Robbo Thieves (Garf · Goose · Gus · Ishnail · Pierre) • Swindell • Toadsworth • Wonky • Zess T. |
| Glitz Pit teams | The Bob-omb Squad (Master Crash) • Chomp Country • Craw-Daddy • The Dead Bones • The Destructors • The Fuzz • The Goomba Bros. • Hamma, Bamma, and Flare (Hamma Jamma) • The Hand-It-Overs (Bandy Andy) • The Iron Adonis Twins • The Koopinator • The KP Koopas (King K) • The Magikoopa Masters • The Mind-Bogglers • The Poker Faces • The Pokey Triplets • The Punk Rocks (Cleftor) • Rawk Hawk • The Shellshockers (Shellshock) • Spike Storm • The Tiny Spinies (Spiky Joe) • Wings of Night (Sir Swoop) | |
| Other / wandering | Battle Mastera • Bootler • Bub • Bub-ulber • Businessman • Charlieton • Chef Shimi • Chestnut King • Creepy Steeple Boo • Doe T. • Doopliss's parrot • Dupree • Eve • Excess Express conductor • Excess Express engineer • Excess Express waitress • Fahr Outpost mayor • Flavio • Flo • Francesca • Frankie • Fred • General White • Ghost T. • Glitzville reporter • Gloomer • Gob • Goldbob • Goom Goom • Grubba • Heff T. • Jabble • Johnson • Jolene • Koopie Koo • Koopley • Koopook • Korvallis • Kroop • Lady Bow • Mayor Dour • Maude • Mover • Mr. Hoggle • Niff T. • Nob • Pa-Patch • Parakarry • Pennington • Petuni • Pine T. Jr. • Pine T. Sr. • Podler • Porter • Prince Mush • Pungent • Pungry • Punio • Puniper • Puni elder • Rob • Scarlette • Stewart • Swob • Sylvia • TEC • Thriff T. • Toad sailor • Toad sailor's brother • Toad salesmana • Toadette • Toadia • Toce T. • Toodles • Traveling Sisters Three • Twilight Shop manager • Twilight Shop manager's wife • Whacka • Zip Toad | |
| Enemies |
Bandit (Badge · Big) • Bill Blaster (Bombshell) • Blooper • Bob-omb (Bob-ulk · Bulky) • Boo (Atomic · Dark) • Bristle (Dark) • Bullet Bill (Bombshell) • Buzzy Beetle (Parabuzzy (Spiky) · Spike Top (Red)) • Chain-Chomp (Red) • Cleft (Bald (Hyper) · Hyper · Iron · Moon) • Crazee Dayzee (Amazy) • Dark Craw • Dry Bones (Dark · Dull · Red) • Ember (Lava Bubble · Phantom) • Fire Bar • Fuzzy (Green · Flower · Horde) • Goomba (Gloomba (Para- · Spiky) · Hyper (Para- · Spiky) · Para- · Spiky) • Goomboarda • Hammer Bro (Boomerang · Fire) • Koopa Troopa (Dark (Para-) · Koopatrol (Dark) · KP (Para-) · Para- · Shady (Para-)) • Lakitu (Dark) • Magikoopa (Green · Red · White) • Pale Piranha (Frost · Piranha Plant · Putrid) • Pider (Arantula) • Pokey (Poison) • Ruff Puff (Dark · Ice · Poison) • Spinia (Spania · Spunia) • Spiny (Sky-Blue) • Swooper (Swampire · Swoopula) • Wizzerd (Dark · Elite) • X-Naut (Elite · PhD · platoon) • Yux (Grodus X · Mini · X-Yux (Mini) · Z-Yux (Mini)) | |
| Locations | Rogueport | Lovely Howz of Badges • Niff T.'s shop • Pianta Parlor • Podley's Place • Rogueport Underground (Deepdown Depot · Herb T.'s place · Pit of 100 Trials) • Trouble Center • Toad Bros. Bazaar • Westside Goods |
| Chapter 1 | Petal Meadows • Petalburg • (Path to) Shhwonk Fortress • Hooktail Castle | |
| Chapter 2 | Boggly Woods (Flurrie's House) • Great Tree (Pungent's Great Tree Shop) | |
| Chapter 3 | Glitzville (Fresh Juice Shop · Hot Dog Stand · Souvenir shop) • Glitz Pit | |
| Chapter 4 | Twilight Town (Twilight Shop) • Twilight Trail • Creepy Steeple | |
| Chapter 5 | Keelhaul Key (Keelhaul Galleria) • Pirate's Grotto | |
| Chapter 6 | Excess Express (Sales Stall) • Riverside Station • Poshley Heights (Poshley Sanctum) | |
| Chapter 7 | (Path to) Fahr Outpost (Northwinds Mart) • Moon (X-Naut Fortress) | |
| Chapter 8 | Palace of Shadow (Palace of Shadow Tower) | |
| Bowser | World 1 • World 2 • World 3 | |
| Miscellaneous | Bowser's Castle • Inn • Item Shop • Mario Bros.' House | |
| Items and objects | Items | Badge • Coin • Flower • Heart • Meat • Pianta token • Shine Sprite • Star Piece • Stone keys |
| Objects | Big Bob • Black chest • Black Skull • Boat panel • Brick block • Candy Pop • Cheep Blimp • Chomp Rock • Cog • Coin block • Coral • Crystal Ball • Elevator • Flagpole • Hidden block • Koopa Clown Car • Metal Block • Plane panel • Power-draining machine • Recovery block • S.S. Flavion • Save Block • Shine Block • Stone Block • Switch • Teleporter • The Thousand-Year Door • Treasure chest • Warp Pipe • Waterfall • X-Naut ship • Yellow Block | |
| Moves | General | Action Command • Appeal • Charge • First Strike • Flee • Guard • Stylish move • Superguard |
| Mario | Jump (Spin · Spring) • Hammer (Super · Ultra) • Plane Mode • Paper Mode • Tube Mode • Boat Mode | |
| Special | Sweet Treat • Earth Tremor • Clock Out • Power Lift • Art Attack • Sweet Feast • Showstopper • Supernova | |
| Goombella | Headbonk • Tattle • Multibonk • Rally Wink | |
| Koops | Shell Toss • Power Shell • Shell Shield • Shell Slam | |
| Flurrie | Body Slam • Gale Force • Lip Lock • Dodgy Fog | |
| Yoshi Kid | Ground Pound • Gulp • Mini-Egg • Stampede | |
| Vivian | Shade Fist • Veil • Fiery Jinx • Infatuate | |
| Bobbery | Bomb • Bomb Squad • Hold Fast • Bob-ombast | |
| Ms. Mowz | Love Slap • Kiss Thief • Tease • Smooch | |
| Game mechanics | Stats | Badge Point • Defense • Flower Point • Heart Point • Power • Star Point • Star Power |
| Status effects | Allergic • Burn • Charged • Confused • Danger • DEF-Up • Dizzy • Dodgy • Electrified • Fast • Frozen • Huge • Immobilized • Invisible • Payback • Peril • Poison • POW-Down • POW-Up • Prohibited Command • Regeneration • Sleep • Slow • Soft • Tiny | |
| Battle | Audience • Bingo! • Level up • Stage | |
| Minigames | 65th Trivia Quiz-Off • 66th Trivia Quiz-Off • Happy Lucky Lottery • Pianta Parlor games • Stump Petuni | |
| Lists and sub-articles |
Art Gallerya • Badges • Battle tipsa • Bestiary (Nintendo GameCube · Nintendo Switch) • Block locations (Hidden) • Enemy formations • Gallery (Nintendo GameCube · Nintendo Switch) • Glitches (Nintendo GameCube · Nintendo Switch) • Partner Hintsa • Pre-release and unused content • Quotes (By character: A–F · G–K · L–R · S–Z) • Recipes • Selling prices • Shine Sprites • Shops • Sound Gallerya • Staff (Nintendo GameCube · Nintendo Switch) • Star Pieces • Star Point amounts • Story predictions • Tattles (Nintendo Switch) • Treasure chest locations • Unnamed NPCs | |
| Miscellaneous | Flash game • Parade • Rogueport Direct Mail Service | |
| Related Play Nintendo activities On the paper trail! | ||