List of blocks in Paper Mario: The Thousand-Year Door

From the Super Mario Wiki, the Mario encyclopedia
Jump to navigationJump to search
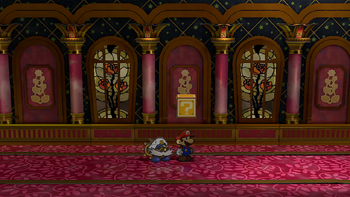
A ? block from Paper Mario: The Thousand-Year Door
Brick Block from Paper Mario: The Thousand-Year Door
This article is about the visible blocks from Paper Mario: The Thousand-Year Door and its remake. For the hidden ones from same games, see List of hidden blocks in Paper Mario: The Thousand-Year Door.

This is a list of blocks from Paper Mario: The Thousand-Year Door and its remake of the same name. There are 42 visible blocks in the original game and 59 in the remake; blocks with no GameCube screenshots in the table are exclusive to the remake. There are two types of blocks:

  • ? Block: Yellow/red block with white question mark on them, contain mostly single coins or items, with occasional Badge. Two blocks in the remake version of Twilight Trail also share the design with Brick Blocks.
  • Coin Block: They have the same design as Brick Blocks and contain 1 or 10 coins.

Rogueport, Petalburg, Flurrie's House, Glitzville, Glitz Pit, Twilight Town, Pirate's Grotto, Excess Express, Poshley Heights, Fahr Outpost and Moon are the only locations without any visible block.

Prologue: A Rogue's Welcome[edit]

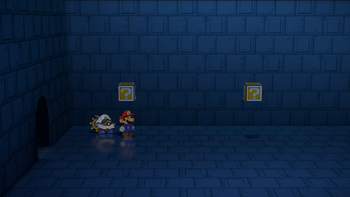
There are a total of 2 ? Blocks to find in Rogueport Underground during the Prologue.

Item/s Description Image (Gamecube) Image (Switch)
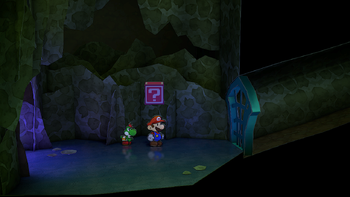
Rogueport Underground ­ ­ ­ ­|­ ­ ­ ­ 2 ? Blocks
Icon of an item from Paper Mario: The Thousand-Year Door (Nintendo Switch) Icon of an item from Paper Mario: The Thousand-Year Door (Nintendo Switch)
Fire Flower, Mushroom
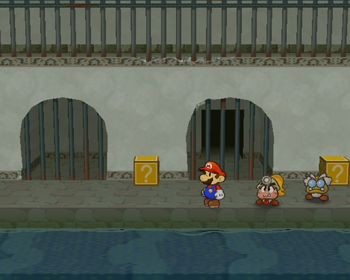
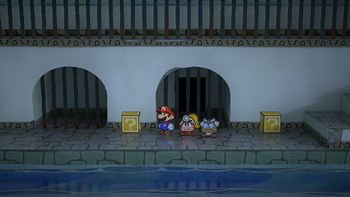
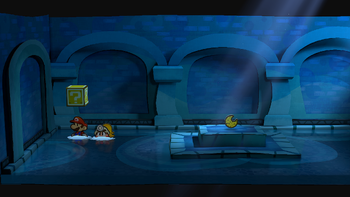
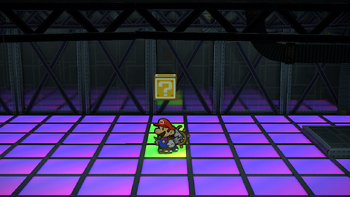
In the eastern corridor on sublevel 2. First two ? Blocks in Rogueport Sewers of Paper Mario: The Thousand-Year Door. First two blocks in the Rogueport Underground in the remake of Paper Mario: The Thousand-Year Door for the Nintendo Switch.

Chapter 1: Castle and Dragon[edit]

There are a total of 10 Blocks to find during Chapter 1:


Item/s Description Image (Gamecube) Image (Switch)
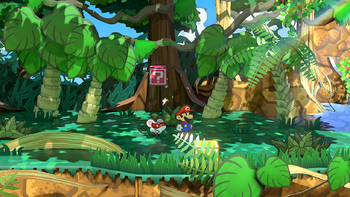
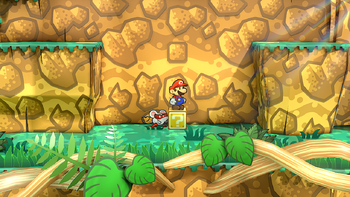
Petal Meadows ­ ­ ­ ­|­ ­ ­ ­ 4 Blocks (3 ?, 1 Coin)
Icon of an item from Paper Mario: The Thousand-Year Door (Nintendo Switch)
Mushroom
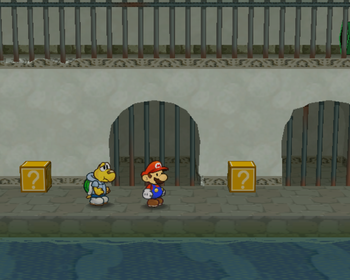
In the right of the first screen. First ? Block in Petal Meadows of Paper Mario: The Thousand-Year Door. First block in the Petal Meadows in the remake of Paper Mario: The Thousand-Year Door for the Nintendo Switch.
Icon of an item from Paper Mario: The Thousand-Year Door (Nintendo Switch)
Close Call
Near the start of the second screen. Second ? Block in Petal Meadows of Paper Mario: The Thousand-Year Door. Second block in the Petal Meadows in the remake of Paper Mario: The Thousand-Year Door for the Nintendo Switch.
Icon of an item from Paper Mario: The Thousand-Year Door (Nintendo Switch)Icon of an item from Paper Mario: The Thousand-Year Door (Nintendo Switch)Icon of an item from Paper Mario: The Thousand-Year Door (Nintendo Switch)Icon of an item from Paper Mario: The Thousand-Year Door (Nintendo Switch)Icon of an item from Paper Mario: The Thousand-Year Door (Nintendo Switch)Icon of an item from Paper Mario: The Thousand-Year Door (Nintendo Switch)Icon of an item from Paper Mario: The Thousand-Year Door (Nintendo Switch)Icon of an item from Paper Mario: The Thousand-Year Door (Nintendo Switch)Icon of an item from Paper Mario: The Thousand-Year Door (Nintendo Switch)Icon of an item from Paper Mario: The Thousand-Year Door (Nintendo Switch)
10 Coins
Same area, between two pipes. Third ? Block in Petal Meadows of Paper Mario: The Thousand-Year Door. Third block in the Petal Meadows in the remake of Paper Mario: The Thousand-Year Door for the Nintendo Switch.
Icon of an item from Paper Mario: The Thousand-Year Door (Nintendo Switch)
Fire Flower
Near the bridge in the third screen. Fourth ? Block in Petal Meadows of Paper Mario: The Thousand-Year Door. Fourth block in the Petal Meadows in the remake of Paper Mario: The Thousand-Year Door for the Nintendo Switch.
Path to Shhwonk Fortress ­ ­ ­ ­|­ ­ ­ ­ 2 ? Blocks
Icon of an item from Paper Mario: The Thousand-Year Door (Nintendo Switch)
POW Block
On the ground in the first screen to the right of Petalburg. Fifth ? Block in Petal Meadows of Paper Mario: The Thousand-Year Door. First block in the Path to Shhwonk Fortress in the remake of Paper Mario: The Thousand-Year Door for the Nintendo Switch.
Icon of an item from Paper Mario: The Thousand-Year Door (Nintendo Switch)
Fire Flower
In the middle of the fifth screen to the right of Petalburg. Sixth ? Block in Petal Meadows of Paper Mario: The Thousand-Year Door. Last block in the Path to Shhwonk Fortress in the remake of Paper Mario: The Thousand-Year Door for the Nintendo Switch.
Shhwonk Fortress ­ ­ ­ ­|­ ­ ­ ­ 3 ? Blocks
Icon of an item from Paper Mario: The Thousand-Year Door (Nintendo Switch)
Multibounce
In the entrance screen underground. Last ? Block in Petal Meadows of Paper Mario: The Thousand-Year Door. First block in the Shhwonk Fortress in the remake of Paper Mario: The Thousand-Year Door for the Nintendo Switch.
Icon of an item from Paper Mario: The Thousand-Year Door (Nintendo Switch)
Mushroom
In the screen two screens to the left of the entrance. N/A Second block in the Shhwonk Fortress in the remake of Paper Mario: The Thousand-Year Door for the Nintendo Switch.
Icon of an item from Paper Mario: The Thousand-Year Door (Nintendo Switch)
Fire Flower
In the screen two screens to the right of the entrance. N/A Last block in the Shhwonk Fortress in the remake of Paper Mario: The Thousand-Year Door for the Nintendo Switch.
Hooktail Castle ­ ­ ­ ­|­ ­ ­ ­ 1 ? Block
Icon of an item from Paper Mario: The Thousand-Year Door (Nintendo Switch)
Power Bounce
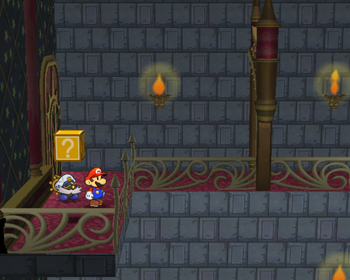
In the first room on the first floor. Only ? Block in Hooktail Castle of Paper Mario: The Thousand-Year Door. Only block in the Hooktail Castle in the remake of Paper Mario: The Thousand-Year Door for the Nintendo Switch.

Between Chapters 1 and 2[edit]

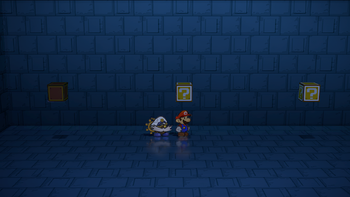
There are a total of 2 ? Blocks to find in Rogueport Underground between Chapters 1 and 2.

Item/s Description Image (Gamecube) Image (Switch)
Rogueport Underground ­ ­ ­ ­|­ ­ ­ ­ 2 ? Blocks
Icon of an item from Paper Mario: The Thousand-Year Door (Nintendo Switch) Icon of an item from Paper Mario: The Thousand-Year Door (Nintendo Switch)
Slow Mushroom, Gradual Syrup
In the western corridor on sublevel 2. Last two ? Blocks in Rogueport Sewers of Paper Mario: The Thousand-Year Door. Last two blocks in the Rogueport Underground in the remake of Paper Mario: The Thousand-Year Door for the Nintendo Switch.

Chapter 2: The Great Boggly Tree[edit]

There are a total of 2 ? Blocks to find during Chapter 2:


Item/s Description Image (Gamecube) Image (Switch)
Boggly Woods ­ ­ ­ ­|­ ­ ­ ­ 1 ? Block
Icon of an item from Paper Mario: The Thousand-Year Door (Nintendo Switch)
Quake Hammer
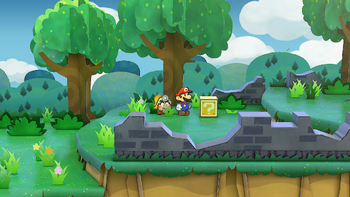
In the fourth screen, on top of the right platform. Only visible ? Block in Boggly Woods of Paper Mario: The Thousand-Year Door. Only block in the Boggly Woods in the remake of Paper Mario: The Thousand-Year Door for the Nintendo Switch.
The Great Tree ­ ­ ­ ­|­ ­ ­ ­ 1 ? Block
Icon of an item from Paper Mario: The Thousand-Year Door (Nintendo Switch)
Damage Dodge P
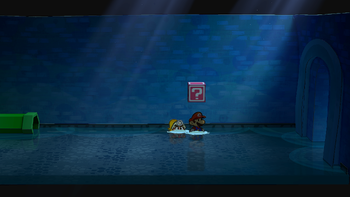
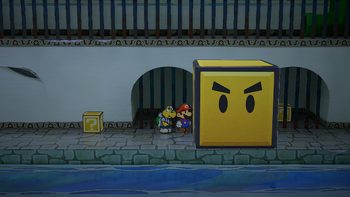
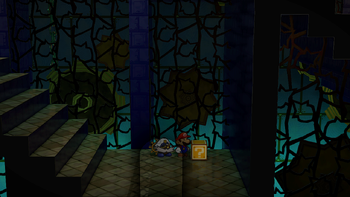
Between the rooms with the Jabbi hives (though it can only be accessed by revealing a hidden block under it by using Koops). Screenshot of Mario at a hidden ? Block location in The Great Tree, in Paper Mario: The Thousand-Year Door. Mario at a hidden ? Block location in The Great Tree, in the remake of the Paper Mario: The Thousand-Year Door for the Nintendo Switch.

Chapter 3: Of Glitz and Glory[edit]

There are a total of 1 Coin Block to find in Petal Meadows during Chapter 3.

Item/s Description Image (Gamecube) Image (Switch)
Petal Meadows ­ ­ ­ ­|­ ­ ­ ­ 1 Coin Block
Icon of an item from Paper Mario: The Thousand-Year Door (Nintendo Switch)
Coin
In the second area, visible by taking the lower pipe. Can be reached by using Yoshi, then performing a Spin Jump. N/A Last block in the Petal Meadows in the remake of Paper Mario: The Thousand-Year Door for the Nintendo Switch.

Chapter 4: For Pigs the Bell Tolls[edit]

There are a total of 9 Blocks to find during Chapter 4:


Item/s Description Image (Gamecube) Image (Switch)
Twilight Trail ­ ­ ­ ­|­ ­ ­ ­ 8 Blocks (4 ?, 4 Coin)
Icon of an item from Paper Mario: The Thousand-Year Door (Nintendo Switch)Icon of an item from Paper Mario: The Thousand-Year Door (Nintendo Switch)Icon of an item from Paper Mario: The Thousand-Year Door (Nintendo Switch)Icon of an item from Paper Mario: The Thousand-Year Door (Nintendo Switch)Icon of an item from Paper Mario: The Thousand-Year Door (Nintendo Switch)Icon of an item from Paper Mario: The Thousand-Year Door (Nintendo Switch)Icon of an item from Paper Mario: The Thousand-Year Door (Nintendo Switch)Icon of an item from Paper Mario: The Thousand-Year Door (Nintendo Switch)Icon of an item from Paper Mario: The Thousand-Year Door (Nintendo Switch)Icon of an item from Paper Mario: The Thousand-Year Door (Nintendo Switch)
10 Coins
In the wooden shack in the first screen. Block in Twilight Trail of Paper Mario: The Thousand-Year Door I have not included before. First block in the Twilight Trail in the remake of Paper Mario: The Thousand-Year Door for the Nintendo Switch.
Icon of an item from Paper Mario: The Thousand-Year Door (Nintendo Switch) Icon of an item from Paper Mario: The Thousand-Year Door (Nintendo Switch)
Mushroom, Super Mushroom
In the second screen, near the entrance. N/A Second and third blocks in the Twilight Trail in the remake of Paper Mario: The Thousand-Year Door for the Nintendo Switch.
Icon of an item from Paper Mario: The Thousand-Year Door (Nintendo Switch)
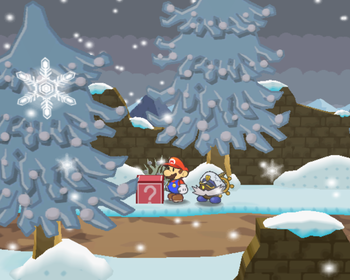
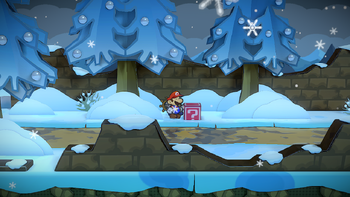
Coin
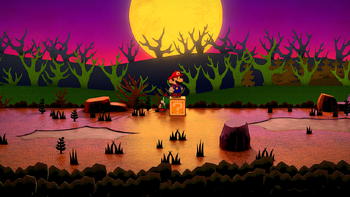
Same screen, in the middle. Screenshot of Mario at a hidden ? Block location in Twilight Trail, in Paper Mario: The Thousand-Year Door. Mario at a hidden ? Block location in Twilight Trail, in the remake of the Paper Mario: The Thousand-Year Door for the Nintendo Switch.
Icon of an item from Paper Mario: The Thousand-Year Door (Nintendo Switch)
Coin
Same area, southeast of the previous one. N/A Fifth block in the Twilight Trail in the remake of Paper Mario: The Thousand-Year Door for the Nintendo Switch.
Icon of an item from Paper Mario: The Thousand-Year Door (Nintendo Switch)Icon of an item from Paper Mario: The Thousand-Year Door (Nintendo Switch)Icon of an item from Paper Mario: The Thousand-Year Door (Nintendo Switch)Icon of an item from Paper Mario: The Thousand-Year Door (Nintendo Switch)Icon of an item from Paper Mario: The Thousand-Year Door (Nintendo Switch)Icon of an item from Paper Mario: The Thousand-Year Door (Nintendo Switch)Icon of an item from Paper Mario: The Thousand-Year Door (Nintendo Switch)Icon of an item from Paper Mario: The Thousand-Year Door (Nintendo Switch)Icon of an item from Paper Mario: The Thousand-Year Door (Nintendo Switch)Icon of an item from Paper Mario: The Thousand-Year Door (Nintendo Switch)
10 Coins
Same area, near the exit. Second ? Block on Twilight Trail of Paper Mario: The Thousand-Year Door. Sixth block in the Twilight Trail in the remake of Paper Mario: The Thousand-Year Door for the Nintendo Switch.
Icon of an item from Paper Mario: The Thousand-Year Door (Nintendo Switch)Icon of an item from Paper Mario: The Thousand-Year Door (Nintendo Switch)Icon of an item from Paper Mario: The Thousand-Year Door (Nintendo Switch)Icon of an item from Paper Mario: The Thousand-Year Door (Nintendo Switch)Icon of an item from Paper Mario: The Thousand-Year Door (Nintendo Switch)Icon of an item from Paper Mario: The Thousand-Year Door (Nintendo Switch)Icon of an item from Paper Mario: The Thousand-Year Door (Nintendo Switch)Icon of an item from Paper Mario: The Thousand-Year Door (Nintendo Switch)Icon of an item from Paper Mario: The Thousand-Year Door (Nintendo Switch)Icon of an item from Paper Mario: The Thousand-Year Door (Nintendo Switch)
10 Coins
In the south of the first forest screen. Third ? Block on Twilight Trail of Paper Mario: The Thousand-Year Door. Seventh block in the Twilight Trail in the remake of Paper Mario: The Thousand-Year Door for the Nintendo Switch.
Icon of an item from Paper Mario: The Thousand-Year Door (Nintendo Switch)
Earth Quake
Same area, in the northeast. Fourth ? Block on Twilight Trail of Paper Mario: The Thousand-Year Door. Eighth block in the Twilight Trail in the remake of Paper Mario: The Thousand-Year Door for the Nintendo Switch.
Icon of an item from Paper Mario: The Thousand-Year Door (Nintendo Switch)
Hammer Throw
On the path in the second forest screen. Last ? Block on Twilight Trail of Paper Mario: The Thousand-Year Door. Last block in the Twilight Trail in the remake of Paper Mario: The Thousand-Year Door for the Nintendo Switch.
Creepy Steeple ­ ­ ­ ­|­ ­ ­ ­ 1 ? Block
Icon of an item from Paper Mario: The Thousand-Year Door (Nintendo Switch)
Tornado Jump
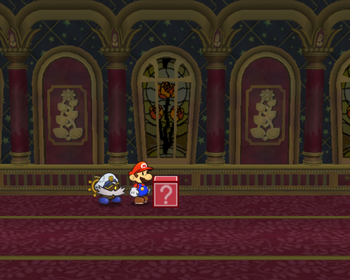
In the second room after jumping down the well outside the steeple. Only ? Block in Creepy Steeple of Paper Mario: The Thousand-Year Door. Only block in the Creepy Steeple in the remake of Paper Mario: The Thousand-Year Door for the Nintendo Switch.

Chapter 5: The Key to Pirates[edit]

There are a total of 5 Blocks to find in Keelhaul Key during Chapter 5.

Item/s Description Image (Gamecube) Image (Switch)
Keelhaul Key ­ ­ ­ ­|­ ­ ­ ­ 5 Blocks (4 ?, 1 Coin)
Icon of an item from Paper Mario: The Thousand-Year Door (Nintendo Switch) Icon of an item from Paper Mario: The Thousand-Year Door (Nintendo Switch)
Head Rattle, Courage Shell
In the first scene to the right of the town. First two ? Blocks in Keelhaul Key of Paper Mario: The Thousand-Year Door. First two blocks in the Keelhaul Key in the remake of Paper Mario: The Thousand-Year Door for the Nintendo Switch.
Icon of an item from Paper Mario: The Thousand-Year Door (Nintendo Switch)
Coin
In the second scene to the right of the town, in the middle of the lower part. Screenshot of Mario at a mandatory hidden ? Block location at Keelhaul Key, in Paper Mario: The Thousand-Year Door. Mario at a mandatory hidden ? Block location at Keelhaul Key, in the remake of the Paper Mario: The Thousand-Year Door for the Nintendo Switch.
Icon of an item from Paper Mario: The Thousand-Year Door (Nintendo Switch)
Coin
Same area, to the left of the left cliff of the upper part. N/A Fourth block in the Keelhaul Key in the remake of Paper Mario: The Thousand-Year Door for the Nintendo Switch.
Icon of an item from Paper Mario: The Thousand-Year Door (Nintendo Switch)
Thunder Rage
Same area, in the middle of the upper part. Last ? Block in Keelhaul Key of Paper Mario: The Thousand-Year Door. Last block in the Keelhaul Key in the remake of Paper Mario: The Thousand-Year Door for the Nintendo Switch.

Chapter 6: Three Days of Excess[edit]

There are a total of 6 Blocks to find during Chapter 6:


Item/s Description Image (Gamecube) Image (Switch)
Riverside Station ­ ­ ­ ­|­ ­ ­ ­ 3 Blocks (2 ?, 1 Coin)
Icon of an item from Paper Mario: The Thousand-Year Door (Nintendo Switch)
Ice Storm
Above a gear in the Machinery Room. N/A First block in the Riverside Station in the remake of Paper Mario: The Thousand-Year Door for the Nintendo Switch.
Icon of an item from Paper Mario: The Thousand-Year Door (Nintendo Switch)
Coin
On the Deck, in the middle of the upper part. N/A Second block in the Riverside Station in the remake of Paper Mario: The Thousand-Year Door for the Nintendo Switch.
Icon of an item from Paper Mario: The Thousand-Year Door (Nintendo Switch)
Maple Syrup
Same area, near the west stairs in the lower part. N/A Last block in the Riverside Station in the remake of Paper Mario: The Thousand-Year Door for the Nintendo Switch.
Poshley Sanctum ­ ­ ­ ­|­ ­ ­ ­ 3 Blocks (2 ?, 1 Coin)
Icon of an item from Paper Mario: The Thousand-Year Door (Nintendo Switch)
Thunder Rage
In the front room, in the east. N/A First block in the Poshley Sanctum in the remake of Paper Mario: The Thousand-Year Door for the Nintendo Switch.
Icon of an item from Paper Mario: The Thousand-Year Door (Nintendo Switch)
Mystery
Same area, in the west N/A Second block in the Poshley Sanctum in the remake of Paper Mario: The Thousand-Year Door for the Nintendo Switch.
Icon of an item from Paper Mario: The Thousand-Year Door (Nintendo Switch)
Coin
In the hidden room, on the highest level on the east side. Can be reached by using Yoshi, then performing a Spin Jump. N/A Last block in the Poshley Sanctum in the remake of Paper Mario: The Thousand-Year Door for the Nintendo Switch.

Chapter 7: Mario Shoots The Moon[edit]

There are a total of 4 ? Blocks to find during Chapter 7:


Item/s Description Image (Gamecube) Image (Switch)
Path to Fahr Outpost ­ ­ ­ ­|­ ­ ­ ­ 1 ? Block
Icon of an item from Paper Mario: The Thousand-Year Door (Nintendo Switch)
HP Plus P
In the third scene of the path. Only visible ? Block in Fahr Outpost of Paper Mario: The Thousand-Year Door. Only block in the Path to Fahr Outpost in the remake of Paper Mario: The Thousand-Year Door for the Nintendo Switch.
X-Naut Fortress ­ ­ ­ ­|­ ­ ­ ­ 3 ? Blocks
Nintendo GameCube: A Super Shroom
Super Mushroom
Nintendo Switch: Icon of an item from Paper Mario: The Thousand-Year Door (Nintendo Switch)
Ultra Mushroom
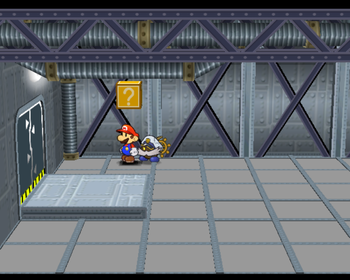
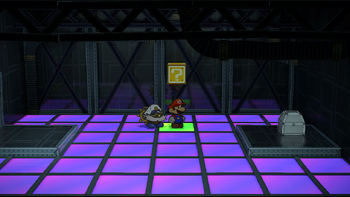
To the right of level 1, on the back side. First ? Block in X-Naut Fortress of Paper Mario: The Thousand-Year Door. First block in the X-Naut Fortress in the remake of Paper Mario: The Thousand-Year Door for the Nintendo Switch.
Icon of an item from Paper Mario: The Thousand-Year Door (Nintendo Switch)
Sleepy Sheep
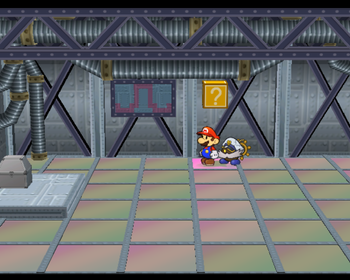
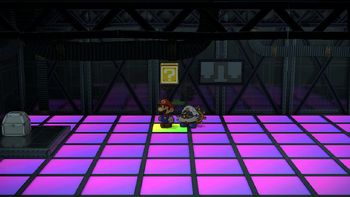
To the left of sublevel 2, on the back side. Second ? Block in X-Naut Fortress of Paper Mario: The Thousand-Year Door. Second block in the X-Naut Fortress in the remake of Paper Mario: The Thousand-Year Door for the Nintendo Switch.
Icon of an item from Paper Mario: The Thousand-Year Door (Nintendo Switch)
HP Drain
To the left of sublevel 3, on the south side. Last ? Block in X-Naut Fortress of Paper Mario: The Thousand-Year Door. Last block in the X-Naut Fortress in the remake of Paper Mario: The Thousand-Year Door for the Nintendo Switch.

Chapter 8: The Thousand-Year Door[edit]

There are a total of 17 ? Blocks to find in Palace of Shadow during the Chapter 8.

Item/s Description Image (Gamecube) Image (Switch)
Palace of Shadow ­ ­ ­ ­|­ ­ ­ ­ 17 ? Blocks
Nintendo GameCube: Paper Mario: The Thousand-Year Door
Shooting Star
Nintendo Switch: Icon of an item from Paper Mario: The Thousand-Year Door (Nintendo Switch)
Mr. Softener
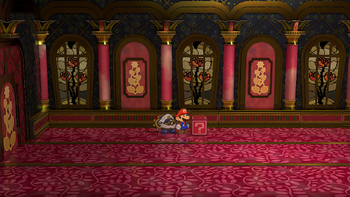
In the third room from the start, near the entrance. First ? Block in Palace of Shadow of Paper Mario: The Thousand-Year Door. First block in the Palace of Shadow in the remake of Paper Mario: The Thousand-Year Door for the Nintendo Switch.
Icon of an item from Paper Mario: The Thousand-Year Door (Nintendo Switch)
All or Nothing
In the fourth room from the start, near the entrance. Second ? Block in Palace of Shadow of Paper Mario: The Thousand-Year Door. Second block in the Palace of Shadow in the remake of Paper Mario: The Thousand-Year Door for the Nintendo Switch.
Icon of an item from Paper Mario: The Thousand-Year Door (Nintendo Switch)
Ultra Mushroom
In the seventh room from the start, near the entrance. Third ? Block in Palace of Shadow of Paper Mario: The Thousand-Year Door. Third block in the Palace of Shadow in the remake of Paper Mario: The Thousand-Year Door for the Nintendo Switch.
Nintendo GameCube: PMTTYD Coin Sprite.png Sprite of the P-Up, D-Down P badge in Paper Mario: The Thousand-Year Door. Jammin Jelly TTYD.png
Coin, P-Up, D-Down P, Jammin' Jelly
Nintendo Switch: Icon of an item from Paper Mario: The Thousand-Year Door (Nintendo Switch) Icon of an item from Paper Mario: The Thousand-Year Door (Nintendo Switch)
P-Up, D-Down P, Ice Storm
In the eighth room from the start, in the north. Fourth, fifth and sixth ? Blocks in Palace of Shadow of Paper Mario: The Thousand-Year Door. Fourth and fifth blocks in the Palace of Shadow in the remake of Paper Mario: The Thousand-Year Door for the Nintendo Switch.
Icon of an item from Paper Mario: The Thousand-Year Door (Nintendo Switch)
Ice Storm
In the third corridor to Gloomtail's lair. Accessible before activating the orrery in the Palace of Shadow Tower. N/A Sixth block in the Palace of Shadow in the remake of Paper Mario: The Thousand-Year Door for the Nintendo Switch.
Nintendo GameCube: An Ultra Shroom from Paper Mario: The Thousand-Year Door.
Ultra Mushroom
Nintendo Switch: Icon of an item from Paper Mario: The Thousand-Year Door (Nintendo Switch)
Gradual Syrup
To the right of Gloomtail's room, near the entrance. Requires Admiral Bobbery. Accessible before activating the solar system in the Palace of Shadow Tower, but not afterwards. Seventh ? Block in Palace of Shadow of Paper Mario: The Thousand-Year Door. Seventh block in the Palace of Shadow in the remake of Paper Mario: The Thousand-Year Door for the Nintendo Switch.
Icon of an item from Paper Mario: The Thousand-Year Door (Nintendo Switch)
Shooting Star
Same room, in the middle. N/A Eighth block in the Palace of Shadow in the remake of Paper Mario: The Thousand-Year Door for the Nintendo Switch.
Nintendo GameCube: Jammin Jelly TTYD.png
Jammin' Jelly
Nintendo Switch: Icon of an item from Paper Mario: The Thousand-Year Door (Nintendo Switch)
Mystery
Same room, at the end. Eighth ? Block in Palace of Shadow of Paper Mario: The Thousand-Year Door. Ninth block in the Palace of Shadow in the remake of Paper Mario: The Thousand-Year Door for the Nintendo Switch.
Icon of an item from Paper Mario: The Thousand-Year Door (Nintendo Switch)
Thunder Rage
In the first descended hallway, right of the stairs, high in the air. Requires Spring Jump. Ninth ? Block in Palace of Shadow of Paper Mario: The Thousand-Year Door. Tenth block in the Palace of Shadow in the remake of Paper Mario: The Thousand-Year Door for the Nintendo Switch.
Icon of an item from Paper Mario: The Thousand-Year Door (Nintendo Switch)
Repel Cape
In Gear Room One, near the exit to hallway 2 in the lower part. On the ground in the remake. Tenth ? Block in Palace of Shadow of Paper Mario: The Thousand-Year Door. Eleventh block in the Palace of Shadow in the remake of Paper Mario: The Thousand-Year Door for the Nintendo Switch.
Nintendo GameCube: Life Shroom TTYD.png
Life Mushroom
Nintendo Switch: Icon of an item from Paper Mario: The Thousand-Year Door (Nintendo Switch)
Power Punch
Same room, near the east entrance in the upper part. Eleventh ? Block in Palace of Shadow of Paper Mario: The Thousand-Year Door. Twelfth block in the Palace of Shadow in the remake of Paper Mario: The Thousand-Year Door for the Nintendo Switch.
Icon of an item from Paper Mario: The Thousand-Year Door (Nintendo Switch)
Life Mushroom
In Gear Room Two, above the spinning wheels. Twelfth ? Block in Palace of Shadow of Paper Mario: The Thousand-Year Door. Thirteenth block in the Palace of Shadow in the remake of Paper Mario: The Thousand-Year Door for the Nintendo Switch.
Icon of an item from Paper Mario: The Thousand-Year Door (Nintendo Switch)
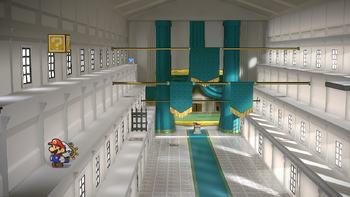
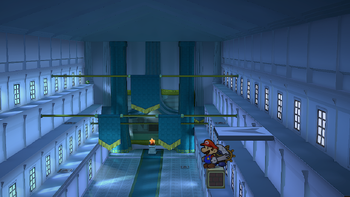
Coin
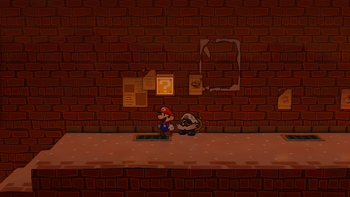
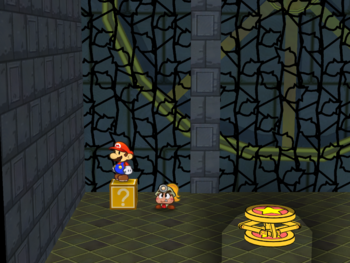
In Gear Room Three, on the ground in the west part. Screenshot of Mario at a hidden ? Block location in the Palace of Shadow, in Paper Mario: The Thousand-Year Door. Mario at a hidden ? Block location in the Palace of Shadow, in the remake of the Paper Mario: The Thousand-Year Door for the Nintendo Switch.
Icon of an item from Paper Mario: The Thousand-Year Door (Nintendo Switch) Icon of an item from Paper Mario: The Thousand-Year Door (Nintendo Switch)
Fire Flower, Ultra Mushroom
First two blocks in the Antechamber. N/A Fifteenth and sixteenth blocks in the Palace of Shadow in the remake of Paper Mario: The Thousand-Year Door for the Nintendo Switch.
Icon of an item from Paper Mario: The Thousand-Year Door (Nintendo Switch)
Jammin' Jelly
Same room, right of the previous two. N/A Last block in the Palace of Shadow in the remake of Paper Mario: The Thousand-Year Door for the Nintendo Switch.

Statistics[edit]

These charts show the number of blocks for each location, with the total amount at the bottom. Locations are listed in the order the player can visit them.

Nintendo GameCube[edit]

Location ? Blocks Coin Blocks Total number of blocks
Rogueport Underground 4 0 4
Petal Meadows 6 1 7
Hooktail Castle 1 0 1
Boggly Woods 1 0 1
The Great Tree 1 0 1
Twilight Trail 3 3 6
Creepy Steeple 1 0 1
Keelhaul Key 4 0 4
Fahr Outpost 1 0 1
X-Naut Fortress 3 0 3
Palace of Shadow 13 0 13
Total 38 4 42

Nintendo Switch[edit]

Location ? Blocks Coin Blocks Total number of blocks
Rogueport Underground 4 0 4
Petal Meadows 3 2 5
Path to Shhwonk Fortress 2 0 2
Shhwonk Fortress 3 0 3
Hooktail Castle 1 0 1
Boggly Woods 1 0 1
The Great Tree 1 0 1
Twilight Trail 5 4 9
Creepy Steeple 1 0 1
Keelhaul Key 4 1 5
Riverside Station 2 1 3
Poshley Sanctum 2 1 3
Path to Fahr Outpost 1 0 1
X-Naut Fortress 3 0 3
Palace of Shadow 17 0 17
Total 50 9 59

See also[edit]