Gallery:Paper Mario: The Thousand-Year Door (Nintendo Switch): Difference between revisions
Technetium (talk | contribs) |
Technetium (talk | contribs) (→Screenshots: I'll organize pics by chapter once more screenshots are added, hope to start uploading some tomorrow or Thursday - not adding screenshots for blocks, Star Pieces, etc to the gallery yet (or ever, not sure)) |
||
| Line 1,070: | Line 1,070: | ||
PMTTYD NS Rogueport Plaza.jpg|Full view of [[Rogueport|Rogueport Plaza]] | PMTTYD NS Rogueport Plaza.jpg|Full view of [[Rogueport|Rogueport Plaza]] | ||
PMTTYDNS Tattle.jpg|Tattling Gus | PMTTYDNS Tattle.jpg|Tattling Gus | ||
PMTTYD screenshot - game over Gus.jpg|Gus threatening Mario | |||
PM2 BlackChest (Switch).png|The Black Chest in Rogueport Underground | |||
PMTTYD Remake Blooper screenshot.jpg|[[Mario]] and [[Goombella]] encountering the [[Big Blooper|Blooper]] | PMTTYD Remake Blooper screenshot.jpg|[[Mario]] and [[Goombella]] encountering the [[Big Blooper|Blooper]] | ||
PMTTYDNS Bingo.jpg|Getting a Bingo! during the Blooper battle | PMTTYDNS Bingo.jpg|Getting a Bingo! during the Blooper battle | ||
| Line 1,088: | Line 1,090: | ||
PMTTYD NS RELATION WITHHELD.png|Beldam refusing to consider Vivian her sister | PMTTYD NS RELATION WITHHELD.png|Beldam refusing to consider Vivian her sister | ||
PMTTYD NS Great Tree.jpg|Mario and Flurrie outside [[the Great Tree]] | PMTTYD NS Great Tree.jpg|Mario and Flurrie outside [[the Great Tree]] | ||
PMTTYDNS Puni Elder.jpg|Angry Puni elder | |||
PMTTYD NS Boggly Woods With Flurrie.jpg|Mario and Flurrie with a group of Punies | PMTTYD NS Boggly Woods With Flurrie.jpg|Mario and Flurrie with a group of Punies | ||
PMTTYD NS Puni Bubbles.jpg|Mario using [[Flurrie]] to blow a group of [[Puni]]es | PMTTYD NS Puni Bubbles.jpg|Mario using [[Flurrie]] to blow a group of [[Puni]]es | ||
| Line 1,123: | Line 1,126: | ||
PMTTYD NS Riverside Station.png|Mario and Goombella in [[Riverside Station]] | PMTTYD NS Riverside Station.png|Mario and Goombella in [[Riverside Station]] | ||
PMTTYD NS Screenshot.jpg|Mario in [[Tube Mode]] inside Riverside Station | PMTTYD NS Screenshot.jpg|Mario in [[Tube Mode]] inside Riverside Station | ||
PMTTYDNS General White.jpg|Waking up General White | |||
Big Bob - Remake.jpg|Big Bob | Big Bob - Remake.jpg|Big Bob | ||
PMTTYDNS Shy Guy.jpg|A Shy Guy going backstage | |||
Pit of 100 trials floor 100.png|Bonetail | Pit of 100 trials floor 100.png|Bonetail | ||
PMTTYDNS Bonetail Defeated.jpg|Bonetail defeated | |||
PMTTYDNS Prince Mush clones.jpg|Prince Mush battle | PMTTYDNS Prince Mush clones.jpg|Prince Mush battle | ||
PMTTYDNS Gloomtail.jpg|Gloomtail | |||
PMTTYDNS Shadow Queen.jpg|The Shadow Queen awakens | |||
PMTTYDNS Shadow Queen battle.jpg|Shadow Queen battle | |||
PMTTYD NS Screenshot of Glitzville Shadow Queen Cutscene.png|The Gold Star traveling to Glitzville during the Shadow Queen battle | PMTTYD NS Screenshot of Glitzville Shadow Queen Cutscene.png|The Gold Star traveling to Glitzville during the Shadow Queen battle | ||
PMTTYD NS Screenshot of Poshley Heights Shadow Queen Cutscene.png|The Garnet Star in Poshley Heights | PMTTYD NS Screenshot of Poshley Heights Shadow Queen Cutscene.png|The Garnet Star in Poshley Heights | ||
Revision as of 11:37, July 30, 2024
This article is under construction by Scrooge200 (talk). Therefore, please excuse its informal appearance while it is being worked on. We hope to have it completed as soon as possible.
This is a gallery of images for the Nintendo Switch remake of Paper Mario: The Thousand-Year Door. For images related to the original version of the game, see Gallery:Paper Mario: The Thousand-Year Door.
Logos
English logo
- TitleLogo fr.png
French logo
- PaperMario TTYD NS TitleLogo EUde.png
German logo
Italian logo
Spanish logo
- Paper Mario TTYD TitleLogo.png
Japanese logo
- PMTTYD NS SCN Logo.png
Simplified Chinese logo

Traditional Chinese logo
Korean logo

English logo (title screen)

French logo (title screen)

German logo (title screen)

Italian logo (title screen)
- TitleLogo Line es.png
Spanish logo (title screen)

Japanese logo (title screen)

Simplified Chinese logo (title screen)

Traditional Chinese logo (title screen)

Korean logo (title screen)


Artwork
Characters
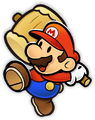
Mario

Mario
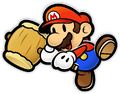
Mario

Mario
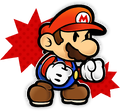
Mario

Mario
Mario
Mario
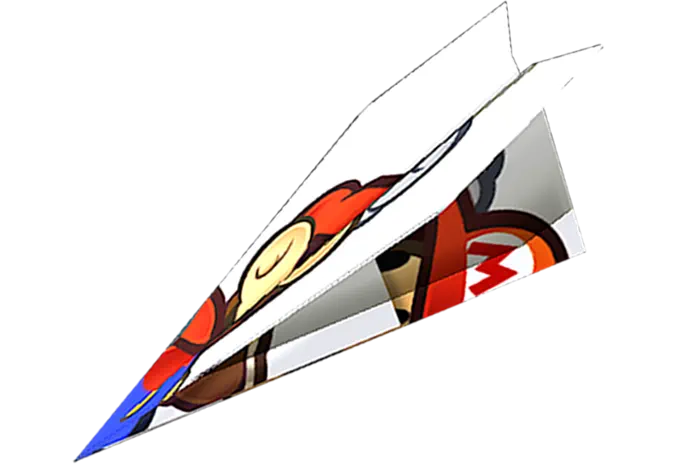
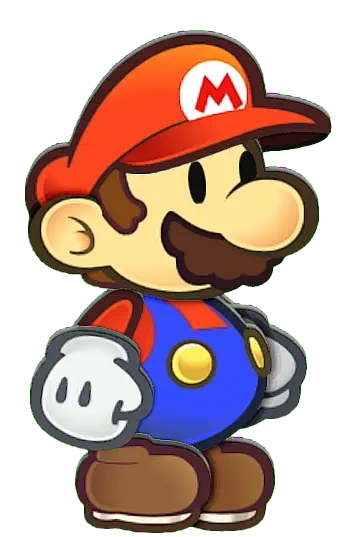
Mario (Plane Mode)
Goombella

Koops

Flurrie
Yoshi Kid

Vivian
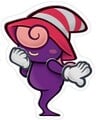
Vivian

Ms. Mowz

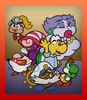
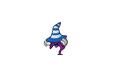
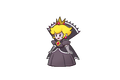
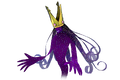
The Three Shadows

Luigi

Group artwork
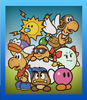
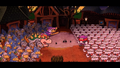
Audience
Audience


Character profile cards


Key artwork
North American key art

Japanese key art
Traditional Chinese key art
Korean key art
Spanish key art
French key art

Italian key art
German key art
North American key art
Japanese key art
Spanish key art

French key art

Italian key art
German key art
Twitter banner

Key art
Japanese key art
Key art
Key art
Key art
Traditional Chinese key art
Nintendo Switch menu icon


Sprites and models
Characters
Mario and partners

Mario idle

Mario with the L Emblem equipped

Mario with the W Emblem equipped

Mario with the L Emblem and W Emblem equipped
Mario guarding


NPCs

Enemies
Bosses

Doopliss

Audiences

Luigi

Luigi

Luigi

Luigi

Luigi

Luigi

Luigi

Luigi

Luigi

Luigi

Toad

Toad

Toad
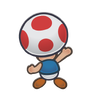
Toad

Toad

Toad
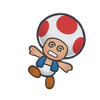
Toad

Toad

Toad
Toad

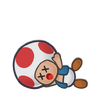
Toad (Devoured)
Shy Guy

Shy Guy
Shy Guy

Shy Guy

Shy Guy

Shy Guy

Shy Guy

Black Shy Guy

Black Shy Guy
Black Shy Guy

Black Shy Guy
Black Shy Guy

Black Shy Guy

Black Shy Guy


Crystal Stars

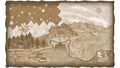
Magical Map (blank)
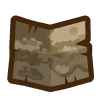
Magical Map (readable)
Equipment
Items and objects
- Gold Leaf PMTTYDNS icon.png
Mario poster

Whacka Bump (strong)
Recipes
Important Things

Castle Key (Green)

Castle Key (Red)

Castle Key (Yellow)
- Champ's Belt PMTTYDNS icon.png

Dubious Documents

Elevator Key (Red)

Palace Key

Palace Key

Security Key (♣)
Security Key (◆)

Security Key (♥)

Security Key (♠)

Security Key (★)

Steeple Key

Storage Key

Superbombomb (broken)

The Letter "p" (Chinese)

The Letter "p" (Japanese)

The Letter "p" (Korean)

The Letter "p" (Taiwanese)

Wedding Ring (large)

Wedding Ring (small)
Badges

Charge (C)

Charge (B)

Charge (O)

Charge P (C/O)

Charge P (B)

Power Rush (A)

Power Rush (D)

Power Rush (K)

Power Rush P (A)

Power Rush P (D)

Power Rush P (K)
Unused

Damage Dodge (unused)

Damage Dodge P (unused)
Conditions

Merlee charm-induced Attack Up

Merlee charm-induced Defense Up
Prohibited Command (Boots)
Prohibited Command (Super Boots)
Prohibited Command (Ultra Boots)
Prohibited Command (Hammer)
Prohibited Command (Super Hammer)
Prohibited Command (Ultra Hammer)
Prohibited Command Partner Skill)


User-interface
Partner ring icons
Goombella

Koops

Flurrie

Yoshi Kid (green)


Character health icons

Mario's health icon

Goombella's health icon

Koops' health icon

Flurrie's health icon

Yoshi Kid's health icon (green)

Yoshi Kid's health icon (black)

Yoshi Kid's health icon (blue)

Yoshi Kid's health icon (orange)

Yoshi Kid's health icon (pink)

Yoshi Kid's health icon (red)

Yoshi Kid's health icon (white)

Vivian's health icon

Bobbery's health icon

Ms. Mowz's health icon
Menu icons and heads-up display

Unknown tattles
Actions
Swap Partner icons

Goombella

Koops

Flurrie

Yoshi Kid (green)

Yoshi Kid (black)

Yoshi Kid (blue)

Yoshi Kid (orange)

Yoshi Kid (pink)

Yoshi Kid (red)

Yoshi Kid (white)

Vivian

Adrimal Bobbery

Ms. Mowz


Bingo! icons

Flower

Mushroom

Poison Mushroom

Shine Sprite

Star
Pianta Parlor matching game icons
Don Pianta

Flower

Mushroom
POW Block

Star
Glitz Pit fighter screens
Other
The picture of Mario's partners from Paper Mario
The picture of Mario's partners from Paper Mario: The Thousand-Year Door
Sign used for Shops

Damage icon


Move previews
- Goombella


- Koops


- Flurrie


- Yoshi


- Vivian


- Bobbery


- Ms. Mowz


- Mario's special moves


Email images


Tattle Log images

Beldam (1)
Beldam (2)
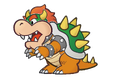
Bowser (1)
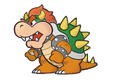
Bowser (2)

Doopliss (1)

Doopliss (2)

Marilyn (1)

Marilyn (2)
Shadow Queen (1)
Shadow Queen (2)


Concept art
- Main article: Art Gallery


Credits images


Magical Map
The map in its initial state
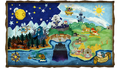
The map in its completed state


Screenshots
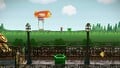
Parakarry arriving at Mario's House during the prologue
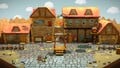
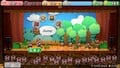
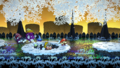
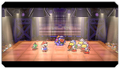
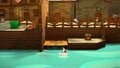
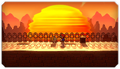
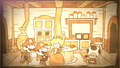
Full view of Rogueport Plaza

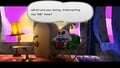
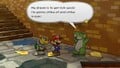
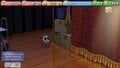
Tattling Gus
- PMTTYD screenshot - game over Gus.jpg
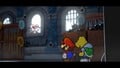
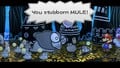
Gus threatening Mario
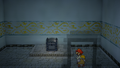
The Black Chest in Rogueport Underground
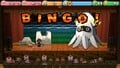
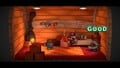
Getting a Bingo! during the Blooper battle
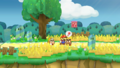
Mario and Goombella encountering a Goomba in Petal Meadows
Mario and Goombella in battle against five Goombas
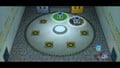
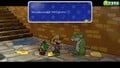
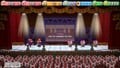
Mario and Goombella in the 65th Trivia Quiz-Off
Mario and Goombella ambushed by a Fuzzy in Shhwonk Fortress
Mario in Plane Mode at Hooktail Castle
Mario and Koops encountering Ms. Mowz in Hooktail Castle
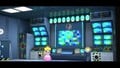
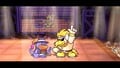
Peach with TEC-XX.
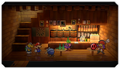
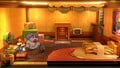
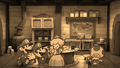
Mario and Koops in Podley's Place
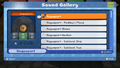
Playing a track in the Sound Gallery

Mario and Koops in Rogueport Underground
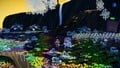
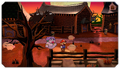
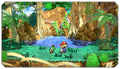
Mario and Goombella in Boggly Woods

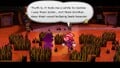
Beldam refusing to consider Vivian her sister
Mario and Flurrie outside the Great Tree
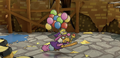
Angry Puni elder

Mario and Flurrie with a group of Punies
Mario and Goombella encountering Ms. Mowz in the Great Tree
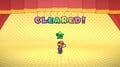
Mario clearing Chapter 2 with the Emerald Star
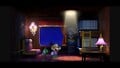
Mario and Flurrie in the Warp Pipe room in Rogueport Underground
Mario in the background, approaching the Cheep Blimp
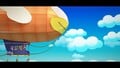
Mario and his partners in the blimp to Glitzville
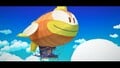
Mario and his partners ride the Cheep Blimp
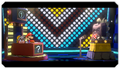
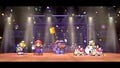
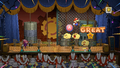
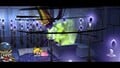
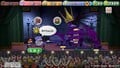
Grubba and Rawk Hawk in the Glitz Pit
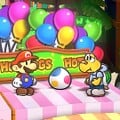
Mario and Koops beat Spike Storm in the Glitz Pit
Mario and Koops with the Yoshi's Egg in Glitzville
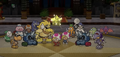
Mario, Yoshi Kid, and Grubba in the Glitz Pit facing off against Hamma, Bamma, and Flare

Mario and Yoshi Kid in the secret area of the minor league locker room

Mario and Goombella facing off against Rawk Hawk
Mario and Flurrie in the Glitz Pit champ's room
Mario and Flurrie in Twilight Town
Mario using Tube Mode at Twilight Trail
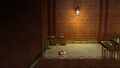
Mario and Goombella in the Creepy Steeple
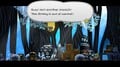
Doopliss speaking
Vivian comes out as transgender
- PMTTYDNS Parrot room.jpg
Doopliss' parrot
Kammy Koopa after her fun day in Glitzville
Bowser's Minions vs. the X-Nauts
Mario and Koops meeting Lumpy
Lumpy pays Mario
Mario and Yoshi Kid in Keelhaul Key
Mario in Boat Mode in the East Side of Rogueport

The Excess Express
Ghost T. ascends to the afterlife
Riverside Station
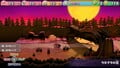
Mario and Vivian battling a trio of Ruff Puffs
Mario and Goombella in Riverside Station
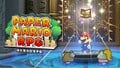
Mario in Tube Mode inside Riverside Station
Waking up General White
Big Bob
A Shy Guy going backstage

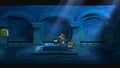
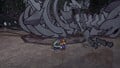
Bonetail
Bonetail defeated
Prince Mush battle

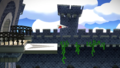
Gloomtail
The Shadow Queen awakens
Shadow Queen battle
The Gold Star traveling to Glitzville during the Shadow Queen battle
The Garnet Star in Poshley Heights
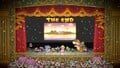
The ending photograph
The ending photograph as the final page of the storybook

Parakarry at the start of the credits
The end of the credits


.png)


Box art
American/Latin American box art

Canadian box art
Mexican box art
Brazilian box art
UK/Pan-European box art

French box art

Spanish box art

Italian box art
Dutch box art
Austrian box art
German box art
Australian box art
South African box art
Saudi Arabian box art
United Arab Emirates box art
Southeast Asian box art
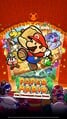
Japanese box art
Korean box art
Hong Kong/Taiwanese box art


Miscellaneous
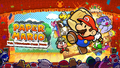
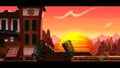
Title card in the September 2023 Nintendo Direct
Title card in the Japanese September 2023 Nintendo Direct
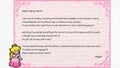
A promotional image of the letter from Princess Peach
May 2024 desktop calendar from My Nintendo
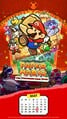
May 2024 smartphone calendar from My Nintendo
Desktop wallpaper from My Nintendo
Smartphone wallpaper from My Nintendo

Code for a Snapchat Paper Mario Lens that turns the user's photograph into an AR paper plane
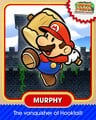
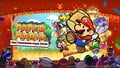
Promotional character card for Mario as "Murphy" in Chapter 1
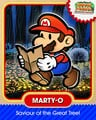
Promotional character card for Mario as "Marty-o" in Chapter 2
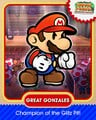
Promotional character card for Mario as the "Great Gonzales" in Chapter 3
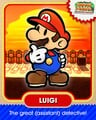
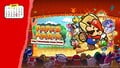
Promotional character card for Mario as "Luigi" in Chapter 6
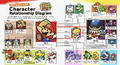
Promotional character relationship diagram from Nintendo Magazine 2024 summer


| Paper Mario: The Thousand-Year Door (Nintendo GameCube / Nintendo Switch) | ||
|---|---|---|
| Main characters | Bobbery • Flurrie • Goombella • Koops • Mario • Ms. Mowz • Princess Peach • Vivian • X-Nauts • Yoshi Kid | |
| Species | Bub-ulb • Craw • Crow • Doogan • Duplighost • Glitz Pit Security • Jabbi • Little Mouser • Nibbles • Para-bomb • Penguin • Pianta • Pig • Puni • Ratooey • Smorg • Toad • Twilighter • Yoshi | |
| Chapters | Prologue • Chapter 1 • Chapter 2 • Chapter 3 • Chapter 4 • Chapter 5 • Chapter 6 • Chapter 7 • Chapter 8 | |
| Crystal Stars | Diamond Star • Emerald Star • Gold Star • Ruby Star • Sapphire Star • Garnet Star • Crystal Star | |
| Bosses | Regular | Blooper • Bowser • Gloomtail • Gold Fuzzy • Grodus • Kammy Koopa • Lord Crump • Rawk Hawk • The Iron Adonis Twins • Three Shadows (Beldam • Marilyn • Vivian/Doopliss) |
| Chapter | Hooktail • Magnus von Grapple • Macho Grubba • Doopliss • Cortez • Smorg • Magnus von Grapple 2.0 • Shadow Queen | |
| Optional | Atomic Boo • Bonetail • Gus • Prince Musha • Whackaa | |
| Non-playable characters | Rogueport | Arfur • Bomberto • Chet Rippo • Darkly • Dazzle • Eddy the Mask • Goomez • Goomfrey • Goomther • Grifty • Herb T. • Ian Foomusa • Lahla • Laki • Larson • Lucky • Luigi and his party (Blooey · Hayzee · Jerry · Screamy · Torque) • Lumpy • McGoomba • Merlee • Merlon • Merluvlee • Mousimilian • Peeka • Pianta syndicate (Don Pianta · Francesca · Frankie · Rocko · Tony · Vinny) • Plenn T. • Podley • Professor Frankly • Robbo Thieves (Garf · Goose · Gus · Ishnail · Pierre) • Swindell • Toadsworth • Wonky • Zess T. |
| Glitz Pit teams | The Bob-omb Squad (Master Crash) • Chomp Country • Craw-Daddy • The Dead Bones • The Destructors • The Fuzz • The Goomba Bros. • Hamma, Bamma, and Flare (Hamma Jamma) • The Hand-It-Overs (Bandy Andy) • The Iron Adonis Twins • The Koopinator • The KP Koopas (King K) • The Magikoopa Masters • The Mind-Bogglers • The Poker Faces • The Pokey Triplets • The Punk Rocks (Cleftor) • Rawk Hawk • The Shellshockers (Shellshock) • Spike Storm • The Tiny Spinies (Spiky Joe) • Wings of Night (Sir Swoop) | |
| Other / wandering | Battle Mastera • Bootler • Bub • Bub-ulber • Businessman • Charlieton • Chef Shimi • Chestnut King • Creepy Steeple Boo • Doe T. • Doopliss's parrot • Dupree • Eve • Excess Express conductor • Excess Express engineer • Excess Express waitress • Fahr Outpost mayor • Flavio • Flo • Francesca • Frankie • Fred • General White • Ghost T. • Glitzville reporter • Gloomer • Gob • Goldbob • Goom Goom • Grubba • Heff T. • Jabble • Johnson • Jolene • Koopie Koo • Koopley • Koopook • Korvallis • Kroop • Lady Bow • Mayor Dour • Maude • Mover • Mr. Hoggle • Niff T. • Nob • Pa-Patch • Parakarry • Pennington • Petuni • Pine T. Jr. • Pine T. Sr. • Podler • Porter • Prince Mush • Pungent • Pungry • Punio • Puniper • Puni elder • Rob • Scarlette • Stewart • Swob • Sylvia • TEC • Thriff T. • Toad sailor • Toad sailor's brother • Toad salesmana • Toadette • Toadia • Toce T. • Toodles • Traveling Sisters Three • Twilight Shop manager • Twilight Shop manager's wife • Whacka • Zip Toad | |
| Enemies |
Bandit (Badge · Big) • Bill Blaster (Bombshell) • Blooper • Bob-omb (Bob-ulk · Bulky) • Boo (Atomic · Dark) • Bristle (Dark) • Bullet Bill (Bombshell) • Buzzy Beetle (Parabuzzy (Spiky) · Spike Top (Red)) • Chain-Chomp (Red) • Cleft (Bald (Hyper) · Hyper · Iron · Moon) • Crazee Dayzee (Amazy) • Dark Craw • Dry Bones (Dark · Dull · Red) • Ember (Lava Bubble · Phantom) • Fire Bar • Fuzzy (Green · Flower · Horde) • Goomba (Gloomba (Para- · Spiky) · Hyper (Para- · Spiky) · Para- · Spiky) • Goomboarda • Hammer Bro (Boomerang · Fire) • Koopa Troopa (Dark (Para-) · Koopatrol (Dark) · KP (Para-) · Para- · Shady (Para-)) • Lakitu (Dark) • Magikoopa (Green · Red · White) • Pale Piranha (Frost · Piranha Plant · Putrid) • Pider (Arantula) • Pokey (Poison) • Ruff Puff (Dark · Ice · Poison) • Spinia (Spania · Spunia) • Spiny (Sky-Blue) • Swooper (Swampire · Swoopula) • Wizzerd (Dark · Elite) • X-Naut (Elite · PhD · platoon) • Yux (Grodus X · Mini · X-Yux (Mini) · Z-Yux (Mini)) | |
| Locations | Rogueport | Lovely Howz of Badges • Niff T.'s shop • Pianta Parlor • Podley's Place • Rogueport Underground (Deepdown Depot · Herb T.'s place · Pit of 100 Trials) • Trouble Center • Toad Bros. Bazaar • Westside Goods |
| Chapter 1 | Petal Meadows • Petalburg • (Path to) Shhwonk Fortress • Hooktail Castle | |
| Chapter 2 | Boggly Woods (Flurrie's House) • Great Tree (Pungent's Great Tree Shop) | |
| Chapter 3 | Glitzville (Fresh Juice Shop · Hot Dog Stand · Souvenir shop) • Glitz Pit | |
| Chapter 4 | Twilight Town (Twilight Shop) • Twilight Trail • Creepy Steeple | |
| Chapter 5 | Keelhaul Key (Keelhaul Galleria) • Pirate's Grotto | |
| Chapter 6 | Excess Express (Sales Stall) • Riverside Station • Poshley Heights (Poshley Sanctum) | |
| Chapter 7 | (Path to) Fahr Outpost (Northwinds Mart) • Moon (X-Naut Fortress) | |
| Chapter 8 | Palace of Shadow (Palace of Shadow Tower) | |
| Bowser | World 1 • World 2 • World 3 | |
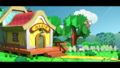
| Miscellaneous | Bowser's Castle • Inn • Item Shop • Mario Bros.' House | |
| Items and objects | Items | Badge • Coin • Flower • Heart • Meat • Pianta token • Shine Sprite • Star Piece • Stone keys |
| Objects | Big Bob • Black chest • Black Skull • Boat panel • Brick block • Candy Pop • Cheep Blimp • Chomp Rock • Cog • Coin block • Coral • Crystal Ball • Elevator • Flagpole • Hidden block • Koopa Clown Car • Metal Block • Plane panel • Power-draining machine • Recovery block • S.S. Flavion • Save Block • Shine Block • Stone Block • Switch • Teleporter • The Thousand-Year Door • Treasure chest • Warp Pipe • Waterfall • X-Naut ship • Yellow Block | |
| Moves | General | Action Command • Appeal • Charge • First Strike • Flee • Guard • Stylish move • Superguard |
| Mario | Jump (Spin · Spring) • Hammer (Super · Ultra) • Plane Mode • Paper Mode • Tube Mode • Boat Mode | |
| Special | Sweet Treat • Earth Tremor • Clock Out • Power Lift • Art Attack • Sweet Feast • Showstopper • Supernova | |
| Goombella | Headbonk • Tattle • Multibonk • Rally Wink | |
| Koops | Shell Toss • Power Shell • Shell Shield • Shell Slam | |
| Flurrie | Body Slam • Gale Force • Lip Lock • Dodgy Fog | |
| Yoshi Kid | Ground Pound • Gulp • Mini-Egg • Stampede | |
| Vivian | Shade Fist • Veil • Fiery Jinx • Infatuate | |
| Bobbery | Bomb • Bomb Squad • Hold Fast • Bob-ombast | |
| Ms. Mowz | Love Slap • Kiss Thief • Tease • Smooch | |
| Game mechanics | Stats | Badge Point • Defense • Flower Point • Heart Point • Power • Star Point • Star Power |
| Status effects | Allergic • Burn • Charged • Confused • Danger • DEF-Up • Dizzy • Dodgy • Electrified • Fast • Frozen • Huge • Immobilized • Invisible • Payback • Peril • Poison • POW-Down • POW-Up • Prohibited Command • Regeneration • Sleep • Slow • Soft • Tiny | |
| Battle | Audience • Bingo! • Level up • Stage | |
| Minigames | 65th Trivia Quiz-Off • 66th Trivia Quiz-Off • Happy Lucky Lottery • Pianta Parlor games • Stump Petuni | |
| Lists and sub-articles |
Art Gallerya • Badges • Battle tipsa • Bestiary (Nintendo GameCube · Nintendo Switch) • Block locations (Hidden) • Enemy formations • Gallery (Nintendo GameCube · Nintendo Switch) • Glitches (Nintendo GameCube · Nintendo Switch) • Partner Hintsa • Pre-release and unused content • Quotes (By character: A–F · G–K · L–R · S–Z) • Recipes • Selling prices • Shine Sprites • Shops • Sound Gallerya • Staff (Nintendo GameCube · Nintendo Switch) • Star Pieces • Star Point amounts • Story predictions • Tattles (Nintendo Switch) • Treasure chest locations • Unnamed NPCs | |
| Miscellaneous | Flash game • Parade • Rogueport Direct Mail Service | |
| Related Play Nintendo activities On the paper trail! | ||