User:Mid188/Sandbox: Difference between revisions
(Made the list of ? Block and Treasure Chests from Paper Mario: The Thousand-Year Door. Only images remain.) Tag: Disambiguation links |
(Added images.) |
||
| Line 46: | Line 46: | ||
|[[File:Fire Flower TTYD.png]] [[File:Mushroom TTYD.png]]<br>[[Fire_Flower#Paper_Mario:_The_Thousand-Year_Door|Fire Flower]], [[Mushroom#Paper_Mario:_The_Thousand-Year_Door|Mushroom]] | |[[File:Fire Flower TTYD.png]] [[File:Mushroom TTYD.png]]<br>[[Fire_Flower#Paper_Mario:_The_Thousand-Year_Door|Fire Flower]], [[Mushroom#Paper_Mario:_The_Thousand-Year_Door|Mushroom]] | ||
|In the eastern corridor on sublevel 2. | |In the eastern corridor on sublevel 2. | ||
|{{anchor|Rogueport Sewers}} | |{{anchor|Rogueport Sewers}}[[File:Rogueport Sewers Blocks 1-2.png|350px]] | ||
|- | |- | ||
|colspan=4 style="background:#2eb249"| | |colspan=4 style="background:#2eb249"| | ||
| Line 55: | Line 55: | ||
|[[File:Mushroom TTYD.png]]<br>Mushroom | |[[File:Mushroom TTYD.png]]<br>Mushroom | ||
|In the right of the first screen. | |In the right of the first screen. | ||
|{{anchor|Petal Meadows}} | |{{anchor|Petal Meadows}}[[File:Petal Meadows Block 1.png|350px]] | ||
|- | |- | ||
|style="background:#8dea6e"|Petal Meadows | |style="background:#8dea6e"|Petal Meadows | ||
|[[File:Close Call TTYD.png]]<br>[[Close Call (badge)|Close Call]] | |[[File:Close Call TTYD.png]]<br>[[Close Call (badge)|Close Call]] | ||
|Near the start of the second screen. | |Near the start of the second screen. | ||
| | |[[File:Petal Meadows Block 2.png|350px]] | ||
|- | |- | ||
|style="background:#8dea6e"|Petal Meadows | |style="background:#8dea6e"|Petal Meadows | ||
|[[File:PMTTYD Coin Sprite.png]][[File:PMTTYD Coin Sprite.png]][[File:PMTTYD Coin Sprite.png]][[File:PMTTYD Coin Sprite.png]][[File:PMTTYD Coin Sprite.png]][[File:PMTTYD Coin Sprite.png]][[File:PMTTYD Coin Sprite.png]][[File:PMTTYD Coin Sprite.png]][[File:PMTTYD Coin Sprite.png]][[File:PMTTYD Coin Sprite.png]]<br>10 [[Coin]]s | |[[File:PMTTYD Coin Sprite.png]][[File:PMTTYD Coin Sprite.png]][[File:PMTTYD Coin Sprite.png]][[File:PMTTYD Coin Sprite.png]][[File:PMTTYD Coin Sprite.png]][[File:PMTTYD Coin Sprite.png]][[File:PMTTYD Coin Sprite.png]][[File:PMTTYD Coin Sprite.png]][[File:PMTTYD Coin Sprite.png]][[File:PMTTYD Coin Sprite.png]]<br>10 [[Coin]]s | ||
|Same area, between two [[Warp_Pipe#Paper_Mario:_The_Thousand-Year_Door|pipe]]s. | |Same area, between two [[Warp_Pipe#Paper_Mario:_The_Thousand-Year_Door|pipe]]s. | ||
| | |[[File:Petal Meadows Block 3.png|350px]] | ||
|- | |- | ||
|style="background:#8dea6e"|Petal Meadows | |style="background:#8dea6e"|Petal Meadows | ||
|[[File:Fire Flower TTYD.png]]<br>Fire Flower | |[[File:Fire Flower TTYD.png]]<br>Fire Flower | ||
|Near the bridge in the third screen. | |Near the bridge in the third screen. | ||
| | |[[File:Petal Meadows Block 4.png|350px]] | ||
|- | |- | ||
|style="background:#8dea6e"|Petal Meadows | |style="background:#8dea6e"|Petal Meadows | ||
|[[File:POW Block TTYD.png]]<br>[[POW_Block#Paper_Mario_series|POW Block]] | |[[File:POW Block TTYD.png]]<br>[[POW_Block#Paper_Mario_series|POW Block]] | ||
|On the ground in the first screen to the right of [[Petalburg]]. | |On the ground in the first screen to the right of [[Petalburg]]. | ||
| | |[[File:Petal Meadows Block 5.png|350px]] | ||
|- | |- | ||
|style="background:#8dea6e"|Petal Meadows | |style="background:#8dea6e"|Petal Meadows | ||
|[[File:Fire Flower TTYD.png]]<br>Fire Flower | |[[File:Fire Flower TTYD.png]]<br>Fire Flower | ||
|In the middle of the fifth screen to the right of Petalburg. | |In the middle of the fifth screen to the right of Petalburg. | ||
| | |[[File:Petal Meadows Block 6.png|350px]] | ||
|- | |- | ||
|style="background:#8dea6e"|Petal Meadows | |style="background:#8dea6e"|Petal Meadows | ||
|[[File:Multibounce.png]]<br>[[Multibounce]] | |[[File:Multibounce.png]]<br>[[Multibounce]] | ||
|In the [[Shhwonk Fortress]] part of Petal Meadows, in the entrance screen underground. | |In the [[Shhwonk Fortress]] part of Petal Meadows, in the entrance screen underground. | ||
| | |[[File:Petal Meadows Block 7.png|350px]] | ||
|- | |- | ||
|style="background:#899dba"|{{color-link|Hooktail Castle|white}} | |style="background:#899dba"|{{color-link|Hooktail Castle|white}} | ||
|[[File:Power Bounce.png]]<br>[[Power Bounce]] | |[[File:Power Bounce.png]]<br>[[Power Bounce]] | ||
|In the first room on the first floor. | |In the first room on the first floor. | ||
|{{anchor|Hooktail Castle}} | |{{anchor|Hooktail Castle}}[[File:Hooktail Castle Block.png|350px]] | ||
|- | |- | ||
|colspan=4 style="background:#ABC"| | |colspan=4 style="background:#ABC"| | ||
| Line 99: | Line 99: | ||
|[[File:Slow Shroom TTYD.png]] [[File:Gradual Syrup TTYD.png]]<br>[[Slow Shroom]], [[Gradual Syrup]] | |[[File:Slow Shroom TTYD.png]] [[File:Gradual Syrup TTYD.png]]<br>[[Slow Shroom]], [[Gradual Syrup]] | ||
|In the western corridor on sublevel 2. | |In the western corridor on sublevel 2. | ||
| | |[[File:Rogueport Sewers Blocks 3-4.png|350px]]] | ||
|- | |- | ||
|colspan=4 style="background:#707070"| | |colspan=4 style="background:#707070"| | ||
| Line 108: | Line 108: | ||
|[[File:Quake Hammer.png]]<br>[[Quake Hammer]] | |[[File:Quake Hammer.png]]<br>[[Quake Hammer]] | ||
|In the fourth screen, on top of the right platform. | |In the fourth screen, on top of the right platform. | ||
|{{anchor|Boggly Woods}} | |{{anchor|Boggly Woods}}[[File:Boggly Woods Block.png|350px]] | ||
|- | |- | ||
|style="background:#dedede"|{{color-link|The Great Tree|black}} | |style="background:#dedede"|{{color-link|The Great Tree|black}} | ||
|[[File:Damage Dodge P.png]]<br>[[Damage Dodge P]] | |[[File:Damage Dodge P.png]]<br>[[Damage Dodge P]] | ||
|Between the rooms with the [[Jabbi]] hives (though it can only be accessed by revealing a [[Hidden Block|hidden block]] under it by using [[Koops]]). | |Between the rooms with the [[Jabbi]] hives (though it can only be accessed by revealing a [[Hidden Block|hidden block]] under it by using [[Koops]]). | ||
|{{anchor|The Great Tree}}[[File:PMTTYDHiddenBlocks3.png| | |{{anchor|The Great Tree}}[[File:PMTTYDHiddenBlocks3.png|350px]] | ||
|- | |- | ||
|colspan=4 style="background:#de3472"| | |colspan=4 style="background:#de3472"| | ||
| Line 122: | Line 122: | ||
|[[File:PMTTYD Coin Sprite.png]]<br>Coin | |[[File:PMTTYD Coin Sprite.png]]<br>Coin | ||
|In the middle of the second screen. | |In the middle of the second screen. | ||
|{{anchor|Twilight Trail}}[[File:PMTTYDHiddenBlocks5.png| | |{{anchor|Twilight Trail}}[[File:PMTTYDHiddenBlocks5.png|350px]] | ||
|- | |- | ||
|style="background:#9448cb"|{{color|Twilight Trail|white}} | |style="background:#9448cb"|{{color|Twilight Trail|white}} | ||
|[[File:PMTTYD Coin Sprite.png]][[File:PMTTYD Coin Sprite.png]][[File:PMTTYD Coin Sprite.png]][[File:PMTTYD Coin Sprite.png]][[File:PMTTYD Coin Sprite.png]][[File:PMTTYD Coin Sprite.png]][[File:PMTTYD Coin Sprite.png]][[File:PMTTYD Coin Sprite.png]][[File:PMTTYD Coin Sprite.png]][[File:PMTTYD Coin Sprite.png]]<br>10 Coins | |[[File:PMTTYD Coin Sprite.png]][[File:PMTTYD Coin Sprite.png]][[File:PMTTYD Coin Sprite.png]][[File:PMTTYD Coin Sprite.png]][[File:PMTTYD Coin Sprite.png]][[File:PMTTYD Coin Sprite.png]][[File:PMTTYD Coin Sprite.png]][[File:PMTTYD Coin Sprite.png]][[File:PMTTYD Coin Sprite.png]][[File:PMTTYD Coin Sprite.png]]<br>10 Coins | ||
|Same area, near the exit. | |Same area, near the exit. | ||
| | |[[File:Twilight Trail Block 2.png|350px]] | ||
|- | |- | ||
|style="background:#9448cb"|{{color|Twilight Trail|white}} | |style="background:#9448cb"|{{color|Twilight Trail|white}} | ||
|[[File:PMTTYD Coin Sprite.png]][[File:PMTTYD Coin Sprite.png]][[File:PMTTYD Coin Sprite.png]][[File:PMTTYD Coin Sprite.png]][[File:PMTTYD Coin Sprite.png]][[File:PMTTYD Coin Sprite.png]][[File:PMTTYD Coin Sprite.png]][[File:PMTTYD Coin Sprite.png]][[File:PMTTYD Coin Sprite.png]][[File:PMTTYD Coin Sprite.png]]<br>10 Coins | |[[File:PMTTYD Coin Sprite.png]][[File:PMTTYD Coin Sprite.png]][[File:PMTTYD Coin Sprite.png]][[File:PMTTYD Coin Sprite.png]][[File:PMTTYD Coin Sprite.png]][[File:PMTTYD Coin Sprite.png]][[File:PMTTYD Coin Sprite.png]][[File:PMTTYD Coin Sprite.png]][[File:PMTTYD Coin Sprite.png]][[File:PMTTYD Coin Sprite.png]]<br>10 Coins | ||
|In the south of the first forest screen. | |In the south of the first forest screen. | ||
| | |[[File:Twilight Trail Block 3.png|350px]] | ||
|- | |- | ||
|style="background:#9448cb"|{{color|Twilight Trail|white}} | |style="background:#9448cb"|{{color|Twilight Trail|white}} | ||
|[[File:Earth Quake TTYD.png]]<br>[[Earth Quake]] | |[[File:Earth Quake TTYD.png]]<br>[[Earth Quake]] | ||
|Same area, in the northeast. | |Same area, in the northeast. | ||
| | |[[File:Twilight Trail Block 4.png|350px]] | ||
|- | |- | ||
|style="background:#9448cb"|{{color|Twilight Trail|white}} | |style="background:#9448cb"|{{color|Twilight Trail|white}} | ||
|[[File:Hammer Throw TTYD.png]]<br>[[Hammer Throw (badge)|Hammer Throw]] | |[[File:Hammer Throw TTYD.png]]<br>[[Hammer Throw (badge)|Hammer Throw]] | ||
|On the path in the second forest screen. | |On the path in the second forest screen. | ||
| | |[[File:Twilight Trail Block 5.png|350px]] | ||
|- | |- | ||
|style="background:#d78fff"|{{color-link|Creepy Steeple|black}} | |style="background:#d78fff"|{{color-link|Creepy Steeple|black}} | ||
|[[File:Tornado Jump TTYD.png]]<br>[[Tornado Jump (badge)|Tornado Jump]] | |[[File:Tornado Jump TTYD.png]]<br>[[Tornado Jump (badge)|Tornado Jump]] | ||
|In the second room after jumping down the well outside the steeple. | |In the second room after jumping down the well outside the steeple. | ||
|{{anchor|Creepy Steeple}} | |{{anchor|Creepy Steeple}}[[File:Creepy Steeple Block.png|350px]] | ||
|- | |- | ||
|colspan=4 style="background:#279465"| | |colspan=4 style="background:#279465"| | ||
| Line 156: | Line 156: | ||
|[[File:Head Rattle.png]] [[File:Courage Shell TTYD.png]]<br>[[Head Rattle]], [[Courage Shell]] | |[[File:Head Rattle.png]] [[File:Courage Shell TTYD.png]]<br>[[Head Rattle]], [[Courage Shell]] | ||
|In the first scene to the right of the town. | |In the first scene to the right of the town. | ||
|{{anchor|Keelhaul Key}} | |{{anchor|Keelhaul Key}}[[File:Keelhaul Key Blocks 1-2.png|350px]] | ||
|- | |- | ||
|style="background:#3cb939"|{{color|Keelhaul Key|white}} | |style="background:#3cb939"|{{color|Keelhaul Key|white}} | ||
|[[File:PMTTYD Coin Sprite.png]]<br>Coin | |[[File:PMTTYD Coin Sprite.png]]<br>Coin | ||
|In the second scene to the right of the town,in the middle of the lower part. | |In the second scene to the right of the town,in the middle of the lower part. | ||
|[[File:PMTTYDHiddenBlocks8.png| | |[[File:PMTTYDHiddenBlocks8.png|350px]] | ||
|- | |- | ||
|style="background:#3cb939"|{{color|Keelhaul Key|white}} | |style="background:#3cb939"|{{color|Keelhaul Key|white}} | ||
|[[File:Thunder Rage TTYD.png]]<br>[[Thunder Rage]] | |[[File:Thunder Rage TTYD.png]]<br>[[Thunder Rage]] | ||
|Same area, in the middle of the upper part. | |Same area, in the middle of the upper part. | ||
| | |[[File:Keelhaul Key Block 4.png|350px]] | ||
|- | |- | ||
|colspan=4 style="background:#ABC"| | |colspan=4 style="background:#ABC"| | ||
| Line 175: | Line 175: | ||
|[[File:HP Plus P.png]]<br>[[HP Plus P]] | |[[File:HP Plus P.png]]<br>[[HP Plus P]] | ||
|In the third scene of the path. | |In the third scene of the path. | ||
|{{anchor|Fahr Outpost}} | |{{anchor|Fahr Outpost}}[[File:Fahr Outpost Block.png|350px]] | ||
|- | |- | ||
|colspan=4 style="background:#1fa4f9"| | |colspan=4 style="background:#1fa4f9"| | ||
| Line 184: | Line 184: | ||
|[[File:Super Shroom TTYD.png]]<br>[[Super_Mushroom#Paper_Mario:_The_Thousand-Year_Door|Super Shroom]] | |[[File:Super Shroom TTYD.png]]<br>[[Super_Mushroom#Paper_Mario:_The_Thousand-Year_Door|Super Shroom]] | ||
|To the right of level 1, on the back side. | |To the right of level 1, on the back side. | ||
|{{anchor|X-Naut Fortress}} | |{{anchor|X-Naut Fortress}}[[File:X-Naut Fortress Block 1.png|350px]] | ||
|- | |- | ||
|style="background:#c8d0d3"|X-Naut Fortress | |style="background:#c8d0d3"|X-Naut Fortress | ||
|[[File:Sleepy Sheep TTYD.png]]<br>[[Sleepy Sheep]] | |[[File:Sleepy Sheep TTYD.png]]<br>[[Sleepy Sheep]] | ||
|To the left of sublevel 2, on the back side. | |To the left of sublevel 2, on the back side. | ||
| | |[[File:X-Naut Fortress Block 2.png|350px]] | ||
|- | |- | ||
|style="background:#c8d0d3"|X-Naut Fortress | |style="background:#c8d0d3"|X-Naut Fortress | ||
|[[File:HP Drain item.png]]<br>[[HP Drain (item)|HP Drain]] | |[[File:HP Drain item.png]]<br>[[HP Drain (item)|HP Drain]] | ||
|To the left of sublevel 3, on the south side. | |To the left of sublevel 3, on the south side. | ||
| | |[[File:X-Naut Fortress Block 3.png|350px]] | ||
|- | |- | ||
|colspan=4 style="background:#900C3F"| | |colspan=4 style="background:#900C3F"| | ||
| Line 203: | Line 203: | ||
|[[File:Shooting Star TTYD.png]]<br>[[Shooting Star (item)|Shooting Star]] | |[[File:Shooting Star TTYD.png]]<br>[[Shooting Star (item)|Shooting Star]] | ||
|In the third room from the start, near the entrance. | |In the third room from the start, near the entrance. | ||
|{{anchor|Palace of Shadow}} | |{{anchor|Palace of Shadow}}[[File:Palace of Shadow Block 1.png|350px]] | ||
|- | |- | ||
|style="background:#CD5C5C"|{{color|Palace of Shadow|white}} | |style="background:#CD5C5C"|{{color|Palace of Shadow|white}} | ||
|[[File:PMTTYD All or Nothing Badge.png]]<br>[[All or Nothing]] | |[[File:PMTTYD All or Nothing Badge.png]]<br>[[All or Nothing]] | ||
|In the fourth room from the start, near the entrance. | |In the fourth room from the start, near the entrance. | ||
| | |[[File:Palace of Shadow Block 2.png|350px]] | ||
|- | |- | ||
|style="background:#CD5C5C"|{{color|Palace of Shadow|white}} | |style="background:#CD5C5C"|{{color|Palace of Shadow|white}} | ||
|[[File:Ultra Shroom TTYD.png]]<br>[[Ultra_Mushroom#Paper_Mario_series|Ultra Shroom]] | |[[File:Ultra Shroom TTYD.png]]<br>[[Ultra_Mushroom#Paper_Mario_series|Ultra Shroom]] | ||
|In the seventh room from the start, near the entrance. | |In the seventh room from the start, near the entrance. | ||
| | |[[File:Palace of Shadow Block 3.png|350px]] | ||
|- | |- | ||
|style="background:#CD5C5C"|{{color|Palace of Shadow|white}} | |style="background:#CD5C5C"|{{color|Palace of Shadow|white}} | ||
|[[File:PMTTYD Coin Sprite.png]] [[File:PUp DDown P.png]] [[File:Jammin Jelly TTYD.png]]<br>Coin, [[P-Up, D-Down P]], [[Jammin' Jelly]] | |[[File:PMTTYD Coin Sprite.png]] [[File:PUp DDown P.png]] [[File:Jammin Jelly TTYD.png]]<br>Coin, [[P-Up, D-Down P]], [[Jammin' Jelly]] | ||
|In the eighth room from the start, in the north. | |In the eighth room from the start, in the north. | ||
| | |[[File:Palace of Shadow Blocks 4-6.png|350px]] | ||
|- | |- | ||
|style="background:#CD5C5C"|{{color|Palace of Shadow|white}} | |style="background:#CD5C5C"|{{color|Palace of Shadow|white}} | ||
|[[File:Ultra Shroom TTYD.png]]<br>Ultra Shroom | |[[File:Ultra Shroom TTYD.png]]<br>Ultra Shroom | ||
|To the right of [[Gloomtail|Gloomtail's]] room, near the entrance. Requires [[Admiral Bobbery]]. Accessible before activating the solar system in the [[Riddle Tower]], but not afterwards. | |To the right of [[Gloomtail|Gloomtail's]] room, near the entrance. Requires [[Admiral Bobbery]]. Accessible before activating the solar system in the [[Riddle Tower]], but not afterwards. | ||
| | |[[File:Palace of Shadow Block 7.png|350px]] | ||
|- | |- | ||
|style="background:#CD5C5C"|{{color|Palace of Shadow|white}} | |style="background:#CD5C5C"|{{color|Palace of Shadow|white}} | ||
|[[File:Jammin Jelly TTYD.png]]<br>Jammin' Jelly | |[[File:Jammin Jelly TTYD.png]]<br>Jammin' Jelly | ||
|Same room, at the end. | |Same room, at the end. | ||
| | |[[File:Palace of Shadow Block 8.png|350px]] | ||
|- | |- | ||
|style="background:#CD5C5C"|{{color|Palace of Shadow|white}} | |style="background:#CD5C5C"|{{color|Palace of Shadow|white}} | ||
|[[File:Thunder Rage TTYD.png]]<br>Thunder Rage | |[[File:Thunder Rage TTYD.png]]<br>Thunder Rage | ||
|In the first descended hallway, right of the stairs, high in the air. Requires [[Spring Jump]]. | |In the first descended hallway, right of the stairs, high in the air. Requires [[Spring Jump]]. | ||
| | |[[File:Palace of Shadow Block 9.png|350px]] | ||
|- | |- | ||
|style="background:#CD5C5C"|{{color|Palace of Shadow|white}} | |style="background:#CD5C5C"|{{color|Palace of Shadow|white}} | ||
|[[File:Repel Cape TTYD.png]]<br>[[Repel Cape]] | |[[File:Repel Cape TTYD.png]]<br>[[Repel Cape]] | ||
|In the room across descended hallways 1 and 2, near the exit to hallway 2 in the lower part. | |In the room across descended hallways 1 and 2, near the exit to hallway 2 in the lower part. | ||
| | |[[File:Palace of Shadow Block 10.png|350px]] | ||
|- | |- | ||
|style="background:#CD5C5C"|{{color|Palace of Shadow|white}} | |style="background:#CD5C5C"|{{color|Palace of Shadow|white}} | ||
|[[File:Life Shroom TTYD.png]]<br>[[Life Shroom]] | |[[File:Life Shroom TTYD.png]]<br>[[Life Shroom]] | ||
|Same room, near the east entrance in the upper part. | |Same room, near the east entrance in the upper part. | ||
| | |[[File:Palace of Shadow Block 11.png|350px]] | ||
|- | |- | ||
|style="background:#CD5C5C"|{{color|Palace of Shadow|white}} | |style="background:#CD5C5C"|{{color|Palace of Shadow|white}} | ||
|[[File:Life Shroom TTYD.png]]<br>Life Shroom | |[[File:Life Shroom TTYD.png]]<br>Life Shroom | ||
|In the room across descended hallways 2 and 3, above the spinning wheels. | |In the room across descended hallways 2 and 3, above the spinning wheels. | ||
| | |[[File:Palace of Shadow Block 12.png|350px]] | ||
|- | |- | ||
|style="background:#CD5C5C"|{{color|Palace of Shadow|white}} | |style="background:#CD5C5C"|{{color|Palace of Shadow|white}} | ||
|[[File:PMTTYD Coin Sprite.png]]<br>Coin | |[[File:PMTTYD Coin Sprite.png]]<br>Coin | ||
|In the room across hallways 3 and 4, on the ground in the west part. | |In the room across hallways 3 and 4, on the ground in the west part. | ||
|[[File:PMTTYDHiddenBlocks15.png| | |[[File:PMTTYDHiddenBlocks15.png|350px]] | ||
|} | |} | ||
| Line 307: | Line 307: | ||
[[Category:Item locations|? Blocks in Paper Mario: The Thousand-Year Door]] | [[Category:Item locations|? Blocks in Paper Mario: The Thousand-Year Door]] | ||
[[Category:Paper Mario: The Thousand-Year Door]] | [[Category:Paper Mario: The Thousand-Year Door]] | ||
{{italic title|List of treasure chests in ''Paper Mario: The Thousand-Year Door''}} | {{italic title|List of treasure chests in ''Paper Mario: The Thousand-Year Door''}} | ||
| Line 369: | Line 368: | ||
|[[File:Black Key TTYD.png]]<br>[[Black Key]] | |[[File:Black Key TTYD.png]]<br>[[Black Key]] | ||
|In the spiky room in the right of the first floor, in the middle. | |In the spiky room in the right of the first floor, in the middle. | ||
|{{anchor|Hooktail Castle}} | |{{anchor|Hooktail Castle}}[[File:Hooktail Castle Treasure Chest 1.png|350px]] | ||
|- | |- | ||
|style="background:#899dba"|{{color|Hooktail Castle|white}} | |style="background:#899dba"|{{color|Hooktail Castle|white}} | ||
|[[File:Mushroom TTYD.png]] [[File:Castle Key.png]] [[File:Honey Syrup TTYD.png]]<br>[[Mushroom#Paper_Mario:_The_Thousand-Year_Door|Mushroom]], [[Castle Key (Paper Mario: The Thousand-Year Door)|Castle Key]], [[Honey Syrup]] | |[[File:Mushroom TTYD.png]] [[File:Castle Key.png]] [[File:Honey Syrup TTYD.png]]<br>[[Mushroom#Paper_Mario:_The_Thousand-Year_Door|Mushroom]], [[Castle Key (Paper Mario: The Thousand-Year Door)|Castle Key]], [[Honey Syrup]] | ||
|In the storeroom on the third floor. | |In the storeroom on the third floor. | ||
| | |[[File:Hooktail Castle Treasure Chests 2-4.png|350px]] | ||
|- | |- | ||
|colspan=4 style="background:#ABC"| | |colspan=4 style="background:#ABC"| | ||
| Line 383: | Line 382: | ||
|[[File:Soft Stomp.png]]<br>[[Soft Stomp]] | |[[File:Soft Stomp.png]]<br>[[Soft Stomp]] | ||
|In the ruins of the 1,000 year old town on sublevel 1, in the left of the south water. | |In the ruins of the 1,000 year old town on sublevel 1, in the left of the south water. | ||
| | |[[File:Rogueport Sewers Treasure Chest 1.png|350px]] | ||
|- | |- | ||
|colspan=4 style="background:#707070"| | |colspan=4 style="background:#707070"| | ||
| Line 392: | Line 391: | ||
|[[File:Super Appeal P.png]]<br>[[Super Appeal P]] | |[[File:Super Appeal P.png]]<br>[[Super Appeal P]] | ||
|In the bedroom. | |In the bedroom. | ||
|{{anchor|Flurrie's House}} | |{{anchor|Flurrie's House}}[[File:Flurrie's House Treasure Chest.png|350px]] | ||
|- | |- | ||
|style="background:#dedede"|{{color-link|The Great Tree|black}} | |style="background:#dedede"|{{color-link|The Great Tree|black}} | ||
|[[File:Ultra Shroom TTYD.png]]<br>[[Ultra_Mushroom#Paper_Mario_series|Ultra Shroom]] | |[[File:Ultra Shroom TTYD.png]]<br>[[Ultra_Mushroom#Paper_Mario_series|Ultra Shroom]] | ||
|In the storeroom in the highest place. | |In the storeroom in the highest place. | ||
|{{anchor|The Great Tree}} | |{{anchor|The Great Tree}}[[File:The Great Tree Treasure Chest 1.png|350px]] | ||
|- | |- | ||
|style="background:#dedede"|{{color|The Great Tree|black}} | |style="background:#dedede"|{{color|The Great Tree|black}} | ||
|[[File:Blue Key TTYD.png]]<br>[[Blue Key (Paper Mario: The Thousand-Year Door)|Blue Key]] | |[[File:Blue Key TTYD.png]]<br>[[Blue Key (Paper Mario: The Thousand-Year Door)|Blue Key]] | ||
|In the second room below the entrance, to the right of the twisty path, on the ground. | |In the second room below the entrance, to the right of the twisty path, on the ground. | ||
| | |[[File:The Great Tree Treasure Chest 2.png|350px]] | ||
|- | |- | ||
|style="background:#dedede"|{{color|The Great Tree|black}} | |style="background:#dedede"|{{color|The Great Tree|black}} | ||
|[[File:Super Boots.png]]<br>[[Super Boots]] | |[[File:Super Boots.png]]<br>[[Super Boots]] | ||
|Same area, in a cave found to the north after removing the statues. | |Same area, in a cave found to the north after removing the statues. | ||
| | |[[File:The Great Tree Treasure Chest 3.png|350px]] | ||
|- | |- | ||
|style="background:#dedede"|{{color|The Great Tree|black}} | |style="background:#dedede"|{{color|The Great Tree|black}} | ||
|[[File:Shrink Stomp.png]]<br>[[Shrink Stomp]] | |[[File:Shrink Stomp.png]]<br>[[Shrink Stomp]] | ||
|In the water-draining room deep in the tree, in front of the stairs in the upper room. | |In the water-draining room deep in the tree, in front of the stairs in the upper room. | ||
| | |[[File:The Great Tree Treasure Chest 4.png|350px]] | ||
|- | |- | ||
|style="background:#afb5a7"|{{color|Rogueport Sewers|black}} | |style="background:#afb5a7"|{{color|Rogueport Sewers|black}} | ||
|[[File:Happy Heart P.png]]<br>[[Happy Heart P]] | |[[File:Happy Heart P.png]]<br>[[Happy Heart P]] | ||
|In the lower corridor on sublevel 3, hidden behind a piece of paper underneath the stairs. Have [[Flurrie]] to blow it up first. | |In the lower corridor on sublevel 3, hidden behind a piece of paper underneath the stairs. Have [[Flurrie]] to blow it up first. | ||
| | |[[File:Rogueport Sewers Treasure Chest 2.png|350px]] | ||
|- | |- | ||
|colspan=4 style="background:#ff8000"| | |colspan=4 style="background:#ff8000"| | ||
| Line 426: | Line 425: | ||
|[[File:Power Plus P.png]]<br>[[Power Plus P]] | |[[File:Power Plus P.png]]<br>[[Power Plus P]] | ||
|On the roof of the juice bar. | |On the roof of the juice bar. | ||
|{{anchor|Glitzville}} | |{{anchor|Glitzville}}[[File:Glitzville Treasure Chest.png|350px]] | ||
|- | |- | ||
|colspan=4 style="background:#9448cb"| | |colspan=4 style="background:#9448cb"| | ||
| Line 435: | Line 434: | ||
|[[File:Defend Plus.png]]<br>[[Defend Plus]] | |[[File:Defend Plus.png]]<br>[[Defend Plus]] | ||
|In the second scene, in the storage room of the shop. | |In the second scene, in the storage room of the shop. | ||
|{{anchor|Twilight Town}} | |{{anchor|Twilight Town}}[[File:Twilight Town Treasure Chest.png|350px]] | ||
|- | |- | ||
|style="background:#d78fff"|{{color-link|Creepy Steeple|black}} | |style="background:#d78fff"|{{color-link|Creepy Steeple|black}} | ||
|[[File:Ice Smash.png]] [[File:Cookbook TTYD.png]]<br>[[Ice Smash]], [[Cookbook]] | |[[File:Ice Smash.png]] [[File:Cookbook TTYD.png]]<br>[[Ice Smash]], [[Cookbook]] | ||
|In the treasure room through a hole on the north wall of the main room. | |In the treasure room through a hole on the north wall of the main room. | ||
|{{anchor|Creepy Steeple}} | |{{anchor|Creepy Steeple}}[[File:Creepy Steeple Treasure Chests 1-2.png|350px]] | ||
|- | |- | ||
|style="background:#d78fff"|{{color-link|Creepy Steeple|black}} | |style="background:#d78fff"|{{color-link|Creepy Steeple|black}} | ||
|[[File:Flower Saver.png]]<br>[[Flower Saver]] | |[[File:Flower Saver.png]]<br>[[Flower Saver]] | ||
|In the room just below the main room, in the secret passage to the back. Have Flurrie blow up the wall. | |In the room just below the main room, in the secret passage to the back. Have Flurrie blow up the wall. | ||
| | |[[File:Creepy Steeple Treasure Chest 3.png|350px]] | ||
|- | |- | ||
|style="background:#d78fff"|{{color-link|Creepy Steeple|black}} | |style="background:#d78fff"|{{color-link|Creepy Steeple|black}} | ||
|TRAP | |TRAP | ||
|In the passage below the main room. This one is a trap chest which releases 200 [[Boo]]s upon opening. Last Boo asks [[Mario]] how many of them were there and if he anwsers correctly, he's rewarded a [[Ultra_Mushroom#Paper_Mario_series|Ultra Shroom]]. | |In the passage below the main room. This one is a trap chest which releases 200 [[Boo]]s upon opening. Last Boo asks [[Mario]] how many of them were there and if he anwsers correctly, he's rewarded a [[Ultra_Mushroom#Paper_Mario_series|Ultra Shroom]]. | ||
| | |[[File:Creepy Steeple Treasure Chest 4.png|350px]] | ||
|- | |- | ||
|style="background:#d78fff"|{{color-link|Creepy Steeple|black}} | |style="background:#d78fff"|{{color-link|Creepy Steeple|black}} | ||
|[[File:Steeple Key basement.png]] [[File:Letter P TTYD.png]] [[File:Power Plus TTYD.png]] [[File:Mr Softener TTYD.png]]<br>[[Steeple Key]], [[The letter "p"]], [[Power Plus (badge)|Power Plus]], [[Mr. Softener]] | |[[File:Steeple Key basement.png]] [[File:Letter P TTYD.png]] [[File:Power Plus TTYD.png]] [[File:Mr Softener TTYD.png]]<br>[[Steeple Key]], [[The letter "p"]], [[Power Plus (badge)|Power Plus]], [[Mr. Softener]] | ||
|In the storeroom with the [[Parrot (character)|parrot]]. | |In the storeroom with the [[Parrot (character)|parrot]]. | ||
| | |[[File:Creepy Steeple Treasure Chests 5-8.png|350px]] | ||
|- | |- | ||
|colspan=4 style="background:#ABC"| | |colspan=4 style="background:#ABC"| | ||
| Line 464: | Line 463: | ||
|[[File:Spike Shield.png]]<br>[[Spike Shield]] | |[[File:Spike Shield.png]]<br>[[Spike Shield]] | ||
|In the spike room on sublevel 2, located behind a series of spikes that can be crossed with [[Vivian]]. | |In the spike room on sublevel 2, located behind a series of spikes that can be crossed with [[Vivian]]. | ||
| | |[[File:Rogueport Sewers Treasure Chest 3.png|350px]] | ||
|- | |- | ||
|style="background:#899dba"|{{color|Hooktail Castle|white}} | |style="background:#899dba"|{{color|Hooktail Castle|white}} | ||
|[[File:Attack FX B TTYD.png]]<br>[[Attack FX B (Paper Mario: The Thousand-Year Door)|Attack FX B]] | |[[File:Attack FX B TTYD.png]]<br>[[Attack FX B (Paper Mario: The Thousand-Year Door)|Attack FX B]] | ||
|Covered by a piece of paper at the center of [[Hooktail|Hooktail's]] room while doing [[Ms. Mowz|Ms. Mowz's]] [[Elusive Badge!|trouble]]. | |Covered by a piece of paper at the center of [[Hooktail|Hooktail's]] room while doing [[Ms. Mowz|Ms. Mowz's]] [[Elusive Badge!|trouble]]. | ||
| | |[[File:Hooktail Castle Treasure Chest 5.png|350px]] | ||
|- | |- | ||
|colspan=4 style="background:#279465"| | |colspan=4 style="background:#279465"| | ||
| Line 478: | Line 477: | ||
|[[File:Defend Plus P.png]]<br>[[Defend Plus P]] (international)<br>[[File:Damage Dodge P.png]]<br>[[Damage Dodge P]] (Japanese) | |[[File:Defend Plus P.png]]<br>[[Defend Plus P]] (international)<br>[[File:Damage Dodge P.png]]<br>[[Damage Dodge P]] (Japanese) | ||
|In the big stair room in the right of the north area, there is a river to the north of the stairs. To the right of the river source is a hidden area behind the waterfall. Accessible using [[Boat Mode]]. | |In the big stair room in the right of the north area, there is a river to the north of the stairs. To the right of the river source is a hidden area behind the waterfall. Accessible using [[Boat Mode]]. | ||
|{{anchor|Pirate's Grotto}} | |{{anchor|Pirate's Grotto}}[[File:Pirate's Grotto Treasure Chest.png|350px]] | ||
|- | |- | ||
|colspan=4 style="background:#ABC"| | |colspan=4 style="background:#ABC"| | ||
| Line 487: | Line 486: | ||
|[[File:HP Drain TTYD.png]]<br>[[HP Drain (badge)|HP Drain]] | |[[File:HP Drain TTYD.png]]<br>[[HP Drain (badge)|HP Drain]] | ||
|In the harbor, in the small house to the left of the sea. | |In the harbor, in the small house to the left of the sea. | ||
|{{anchor|Rogueport}} | |{{anchor|Rogueport}}[[File:Rogueport Treasure Chest 1.png|350px]] | ||
|- | |- | ||
|style="background:#d4bd89"|{{color|Rogueport|black}} | |style="background:#d4bd89"|{{color|Rogueport|black}} | ||
|[[File:Double Dip.png]]<br>[[Double Dip]] | |[[File:Double Dip.png]]<br>[[Double Dip]] | ||
|In the east area guarded by [[Gus]], near the south sea. Accessible from a boat panel near the other side of the river. | |In the east area guarded by [[Gus]], near the south sea. Accessible from a boat panel near the other side of the river. | ||
| | |[[File:Rogueport Treasure Chest 2.png|350px]] | ||
|- | |- | ||
|style="background:#899dba"|{{color|Hooktail Castle|white}} | |style="background:#899dba"|{{color|Hooktail Castle|white}} | ||
|[[File:Up Arrow.png]]<br>[[Up Arrow]] | |[[File:Up Arrow.png]]<br>[[Up Arrow]] | ||
|To the right of the spiky room on the first floor, appears after hitting the [[! Block|! block]]. | |To the right of the spiky room on the first floor, appears after hitting the [[! Block|! block]]. | ||
| | |[[File:Hooktail Castle Treasure Chest 6.png|350px]] | ||
|- | |- | ||
|colspan=4 style="background:#ff8000"| | |colspan=4 style="background:#ff8000"| | ||
| Line 506: | Line 505: | ||
|[[File:Ultra Boots TTYD.png|40px]]<br>[[Ultra Boots]] | |[[File:Ultra Boots TTYD.png|40px]]<br>[[Ultra Boots]] | ||
|In the storeroom area in the deep place, in the rooftop above the storeroom. | |In the storeroom area in the deep place, in the rooftop above the storeroom. | ||
|{{anchor|Riverside Station}} | |{{anchor|Riverside Station}}[[File:Riverside Station Treasure Chest.png|350px]] | ||
|- | |- | ||
|style="background:#8dea6e"|{{color-link|Poshley Heights|black}} | |style="background:#8dea6e"|{{color-link|Poshley Heights|black}} | ||
|[[File:HP Drain P.png]]<br>[[HP Drain P]] | |[[File:HP Drain P.png]]<br>[[HP Drain P]] | ||
|In the first area, in the back room of [[Goldbob|Goldbob's]] house. Accessible using [[Paper Mode]]. | |In the first area, in the back room of [[Goldbob|Goldbob's]] house. Accessible using [[Paper Mode]]. | ||
|{{anchor|Poshley Heights}} | |{{anchor|Poshley Heights}}[[File:Poshley Heights Treasure Chest.png|350px]] | ||
|- | |- | ||
|colspan=4 style="background:#ABC"| | |colspan=4 style="background:#ABC"| | ||
| Line 520: | Line 519: | ||
|[[File:Defend Plus P.png]]<br>[[Defend Plus P]] | |[[File:Defend Plus P.png]]<br>[[Defend Plus P]] | ||
|In the eastern entrance room on sublevel 1, in a highest place just before the sea room. Accessible from the next room. | |In the eastern entrance room on sublevel 1, in a highest place just before the sea room. Accessible from the next room. | ||
| | |[[File:Rogueport Sewers Treasure Chest 4.png|350px]] | ||
|- | |- | ||
|style="background:#afb5a7"|{{color|Rogueport Sewers|black}} | |style="background:#afb5a7"|{{color|Rogueport Sewers|black}} | ||
|[[File:Flower Saver P.png]]<br>[[Flower Saver P]] | |[[File:Flower Saver P.png]]<br>[[Flower Saver P]] | ||
|In the western entrance room on sublevel 1, it is to the left of the X sign on the southwest ground. Requires a [[Spring Jump]]. | |In the western entrance room on sublevel 1, it is to the left of the X sign on the southwest ground. Requires a [[Spring Jump]]. | ||
| | |[[File:Rogueport Sewers Treasure Chest 5.png|350px]] | ||
|- | |- | ||
|style="background:#d4bd89"|{{color|Rogueport|black}} | |style="background:#d4bd89"|{{color|Rogueport|black}} | ||
|[[File:Ultra Hammer TTYD.png|40px]]<br>[[Ultra_Hammer#Paper_Mario:_The_Thousand-Year_Door|Ultra Hammer]] | |[[File:Ultra Hammer TTYD.png|40px]]<br>[[Ultra_Hammer#Paper_Mario:_The_Thousand-Year_Door|Ultra Hammer]] | ||
|In the plaza, near the inn. Requires a Spring Jump. Only chest that despawns after opening it and leaving the area. | |In the plaza, near the inn. Requires a Spring Jump. Only chest that despawns after opening it and leaving the area. | ||
| | |[[File:Rogueport Treasure Chest 3.png|350px]] | ||
|- | |- | ||
|style="background:#afb5a7"|{{color|Rogueport Sewers|black}} | |style="background:#afb5a7"|{{color|Rogueport Sewers|black}} | ||
|[[File:FP Plus.png]]<br>[[FP Plus]] | |[[File:FP Plus.png]]<br>[[FP Plus]] | ||
|In the western blue pipe room on sublevel 2, near the pipe to [[Poshley Heights]]. | |In the western blue pipe room on sublevel 2, near the pipe to [[Poshley Heights]]. | ||
| | |[[File:Rogueport Sewers Treasure Chest 6.png|350px]] | ||
|- | |- | ||
|colspan=4 style="background:#1fa4f9"| | |colspan=4 style="background:#1fa4f9"| | ||
| Line 544: | Line 543: | ||
|[[File:Elevator Key XNaut TTYD blue.png]]<br>[[Elevator Key (X-Naut Fortress)|Elevator Key]] | |[[File:Elevator Key XNaut TTYD blue.png]]<br>[[Elevator Key (X-Naut Fortress)|Elevator Key]] | ||
|To the right of level 1, beyond the electrical floors. | |To the right of level 1, beyond the electrical floors. | ||
|{{anchor|X-Naut Fortress}} | |{{anchor|X-Naut Fortress}}[[File:X-Naut Fortress Treasure Chest 1.png|350px]] | ||
|- | |- | ||
|style="background:#c8d0d3"|X-Naut Fortress | |style="background:#c8d0d3"|X-Naut Fortress | ||
|[[File:Card Key purple.png]]<br>[[Card Key (Paper Mario: The Thousand-Year Door)|Card Key]] | |[[File:Card Key purple.png]]<br>[[Card Key (Paper Mario: The Thousand-Year Door)|Card Key]] | ||
|To the left of sublevel 2, beyond the electrical floors. | |To the left of sublevel 2, beyond the electrical floors. | ||
| | |[[File:X-Naut Fortress Treasure Chest 2.png|350px]] | ||
|- | |- | ||
|style="background:#c8d0d3"|X-Naut Fortress | |style="background:#c8d0d3"|X-Naut Fortress | ||
|[[File:Card Key yellow.png]]<br>Card Key | |[[File:Card Key yellow.png]]<br>Card Key | ||
|To the left of sublevel 3, beyond the electrical floors. | |To the left of sublevel 3, beyond the electrical floors. | ||
| | |[[File:X-Naut Fortress Treasure Chest 3.png|350px]] | ||
|- | |- | ||
|colspan=4 style="background:#900C3F"| | |colspan=4 style="background:#900C3F"| | ||
| Line 563: | Line 562: | ||
|[[File:Palace Key blue.png]]<br>[[Palace Key (Paper Mario: The Thousand-Year Door)|Palace Key]] | |[[File:Palace Key blue.png]]<br>[[Palace Key (Paper Mario: The Thousand-Year Door)|Palace Key]] | ||
|'''Note''': These two chests share the same room layout, so only one image is here.<br>In the northwest room on the first/second floors of [[Riddle Tower]]. Accessible by hitting the ! Block after clearing the blocks. | |'''Note''': These two chests share the same room layout, so only one image is here.<br>In the northwest room on the first/second floors of [[Riddle Tower]]. Accessible by hitting the ! Block after clearing the blocks. | ||
|{{anchor|Palace of Shadow}} | |{{anchor|Palace of Shadow}}[[File:Palace of Shadow Treasure Chests 1 and 5.png|350px]] | ||
|- | |- | ||
|style="background:#CD5C5C"|{{color|Palace of Shadow|white}} | |style="background:#CD5C5C"|{{color|Palace of Shadow|white}} | ||
|[[File:Palace Key blue.png]]<br>Palace Key | |[[File:Palace Key blue.png]]<br>Palace Key | ||
|In the northeast room on the first floor of Riddle Tower. Accessible by hitting the ! Block beyond the fake wall on the right. | |In the northeast room on the first floor of Riddle Tower. Accessible by hitting the ! Block beyond the fake wall on the right. | ||
| | |[[File:Palace of Shadow Treasure Chest 2.png|350px]] | ||
|- | |- | ||
|style="background:#CD5C5C"|{{color|Palace of Shadow|white}} | |style="background:#CD5C5C"|{{color|Palace of Shadow|white}} | ||
|[[File:Palace Key blue.png]]<br>Palace Key | |[[File:Palace Key blue.png]]<br>Palace Key | ||
|'''Note''': These two chests share the same room layout, so only one image is here.<br>In the southwest room on the first floor of Riddle Tower. Accessible by hitting the ! Blocks in this order: left, left, left, right, right.<br>In the southwest room on the second floor of Riddle Tower. Accessible by hitting the ! Block after defeating the bones in the order from weak to strong. | |'''Note''': These two chests share the same room layout, so only one image is here.<br>In the southwest room on the first floor of Riddle Tower. Accessible by hitting the ! Blocks in this order: left, left, left, right, right.<br>In the southwest room on the second floor of Riddle Tower. Accessible by hitting the ! Block after defeating the bones in the order from weak to strong. | ||
| | |[[File:Palace of Shadow Treasure Chests 3 and 7.png|350px]] | ||
|- | |- | ||
|style="background:#CD5C5C"|{{color|Palace of Shadow|white}} | |style="background:#CD5C5C"|{{color|Palace of Shadow|white}} | ||
|[[File:Palace Key blue.png]]<br>Palace Key | |[[File:Palace Key blue.png]]<br>Palace Key | ||
|'''Note''': These two chests share the same room layout, so only one image is here.<br>In the southeast room on the first floor of Riddle Tower, covered by a piece of paper which can be blown away by Flurrie.<br>In the southeast room on second floor of Riddle Tower. Accessible by hitting the invisible ! Block. | |'''Note''': These two chests share the same room layout, so only one image is here.<br>In the southeast room on the first floor of Riddle Tower, covered by a piece of paper which can be blown away by Flurrie.<br>In the southeast room on second floor of Riddle Tower. Accessible by hitting the invisible ! Block. | ||
| | |[[File:Palace of Shadow Treasure Chests 4 and 8.png|350px]] | ||
|- | |- | ||
|style="background:#CD5C5C"|{{color|Palace of Shadow|white}} | |style="background:#CD5C5C"|{{color|Palace of Shadow|white}} | ||
|[[File:Palace Key blue.png]]<br>Palace Key | |[[File:Palace Key blue.png]]<br>Palace Key | ||
|In the northeast room on the second floor of Riddle Tower, beyond the wall on the right which can be blown up by [[Admiral Bobbery|Bobbery]]. | |In the northeast room on the second floor of Riddle Tower, beyond the wall on the right which can be blown up by [[Admiral Bobbery|Bobbery]]. | ||
| | |[[File:Palace of Shadow Treasure Chest 6.png|350px]] | ||
|- | |- | ||
|style="background:#CD5C5C"|{{color|Palace of Shadow|white}} | |style="background:#CD5C5C"|{{color|Palace of Shadow|white}} | ||
|[[File:Star Key.png]]<br>[[Star Key]] | |[[File:Star Key.png]]<br>[[Star Key]] | ||
|In the [[Gloomtail]] room, spit out after Gloomtail is defeated. | |In the [[Gloomtail]] room, spit out after Gloomtail is defeated. | ||
| | |[[File:Palace of Shadow Treasure Chest 9.png|350px]] | ||
|- | |- | ||
|style="background:#CD5C5C"|{{color|Palace of Shadow|white}} | |style="background:#CD5C5C"|{{color|Palace of Shadow|white}} | ||
|[[File:Shooting Star TTYD.png]]<br>[[Shooting Star (item)|Shooting Star]] | |[[File:Shooting Star TTYD.png]]<br>[[Shooting Star (item)|Shooting Star]] | ||
|In the room across descended hallways 2 and 3, in the southwest corner. | |In the room across descended hallways 2 and 3, in the southwest corner. | ||
| | |[[File:Palace of Shadow Treasure Chest 10.png|350px]] | ||
|- | |- | ||
|style="background:#CD5C5C"|{{color|Palace of Shadow|white}} | |style="background:#CD5C5C"|{{color|Palace of Shadow|white}} | ||
|[[File:Palace Key gray.png]]<br>Palace Key | |[[File:Palace Key gray.png]]<br>Palace Key | ||
|In the room across descended hallways 3 and 4, in the east part. | |In the room across descended hallways 3 and 4, in the east part. | ||
| | |[[File:Palace of Shadow Treasure Chest 11.png|350px]] | ||
|- | |- | ||
|style="background:#CD5C5C"|{{color|Palace of Shadow|white}} | |style="background:#CD5C5C"|{{color|Palace of Shadow|white}} | ||
|[[File:Ultra Shroom TTYD.png]]<br>Ultra Shroom | |[[File:Ultra Shroom TTYD.png]]<br>Ultra Shroom | ||
|In the hallway after the [[Sir Grodus]] fight, near the start. | |In the hallway after the [[Sir Grodus]] fight, near the start. | ||
| | |[[File:Palace of Shadow Treasure Chest 12.png|350px]] | ||
|- | |- | ||
|style="background:#CD5C5C"|{{color|Palace of Shadow|white}} | |style="background:#CD5C5C"|{{color|Palace of Shadow|white}} | ||
|[[File:Jammin Jelly TTYD.png]]<br>[[Jammin' Jelly]] | |[[File:Jammin Jelly TTYD.png]]<br>[[Jammin' Jelly]] | ||
|Same area, near the exit. | |Same area, near the exit. | ||
| | |[[File:Palace of Shadow Treasure Chest 13.png|350px]] | ||
|- | |- | ||
|colspan=4 style="background:Lime"| | |colspan=4 style="background:Lime"| | ||
| Line 617: | Line 616: | ||
|[[File:Sleepy Stomp.png]] [[File:Fire Drive.png]] [[File:Zap Tap.png]] [[File:Pity Flower.png]]<br>[[Sleepy Stomp]], [[Fire Drive]], [[Zap Tap]], [[Pity Flower]] | |[[File:Sleepy Stomp.png]] [[File:Fire Drive.png]] [[File:Zap Tap.png]] [[File:Pity Flower.png]]<br>[[Sleepy Stomp]], [[Fire Drive]], [[Zap Tap]], [[Pity Flower]] | ||
|'''Note''': These four chests share the same room layout, so only one image is here.<br>Found north at the floors 10, 20, 30 and 40. | |'''Note''': These four chests share the same room layout, so only one image is here.<br>Found north at the floors 10, 20, 30 and 40. | ||
|{{anchor|Pit of 100 Trials}} | |{{anchor|Pit of 100 Trials}}[[File:Pit of 100 Trials Chests 1-4.png|350px]] | ||
|- | |- | ||
|style="background:#394D3D"|{{color|Pit of 100 Trials|white}} | |style="background:#394D3D"|{{color|Pit of 100 Trials|white}} | ||
|[[File:Strange Sack TTYD.png]] [[File:Double Dip.png]] [[File:Double Dip P.png]]<br>[[Strange Sack]], [[Double Dip]], [[Double Dip P]] | |[[File:Strange Sack TTYD.png]] [[File:Double Dip.png]] [[File:Double Dip P.png]]<br>[[Strange Sack]], [[Double Dip]], [[Double Dip P]] | ||
|'''Note''': These three chests share the same room layout, so only one image is here.<br>Found north at the floors 50, 60 and 70. | |'''Note''': These three chests share the same room layout, so only one image is here.<br>Found north at the floors 50, 60 and 70. | ||
| | |[[File:Pit of 100 Trials Chests 5-7.png|350px]] | ||
|- | |- | ||
|style="background:#394D3D"|{{color|Pit of 100 Trials|white}} | |style="background:#394D3D"|{{color|Pit of 100 Trials|white}} | ||
|[[File:Bump Attack.png]] [[File:Lucky Day.png]]<br>[[Bump Attack]], [[Lucky Day]] | |[[File:Bump Attack.png]] [[File:Lucky Day.png]]<br>[[Bump Attack]], [[Lucky Day]] | ||
|'''Note''': These two chests share the same room layout, so only one image is here.<br>Found north at the floors 80 and 90. | |'''Note''': These two chests share the same room layout, so only one image is here.<br>Found north at the floors 80 and 90. | ||
| | |[[File:Pit of 100 Trials Chests 8-9.png|350px]] | ||
|- | |- | ||
|style="background:#394D3D"|{{color|Pit of 100 Trials|white}} | |style="background:#394D3D"|{{color|Pit of 100 Trials|white}} | ||
|[[File:Return Postage.png]]<br>[[Return Postage]] | |[[File:Return Postage.png]]<br>[[Return Postage]] | ||
|Found at the floor 100, spit out after [[Bonetail]] has been defeated. | |Found at the floor 100, spit out after [[Bonetail]] has been defeated. | ||
| | |[[File:Pit of 100 Trials Chest 10.png|350px]] | ||
|} | |} | ||
Revision as of 19:24, December 19, 2023
- This page is about the visible ? Blocks from Paper Mario: The Thousand-Year Door. For the hidden ones from same game, see List of hidden blocks in Paper Mario: The Thousand-Year Door.
This is a list of ? Blocks from Paper Mario: The Thousand-Year Door. There are 41 visible ? Blocks in the game. They contain mostly single coins or items, with occasional Badge. Some of them are also disguised as Brick Blocks and contain maximum of 10 coins.
Rogueport, Petalburg, Flurrie's House, Glitzville, Twilight Town, Pirate's Grotto, Riverside Station, Poshley Heights, Poshley Sanctum and Moon are the only locations without any visible ? Block.
| Prologue | Rogueport Sewers |
| Chapter 1 | Petal Meadows • Hooktail Castle |
| Between Chapter 1 and Chapter 2 | Rogueport Sewers |
| Chapter 2 | Boggly Woods • The Great Tree |
| Chapter 4 | Twilight Trail • Creepy Steeple |
| Chapter 5 | Keelhaul Key |
| Between Chapter 6 and Chapter 7 | Fahr Outpost |
| Chapter 7 | X-Naut Fortress |
| Chapter 8 | Palace of Shadow |
? Block locations
PrologueA Rogue's Welcome | |||
| Template:Color-link | Fire Flower, Mushroom |
In the eastern corridor on sublevel 2. | 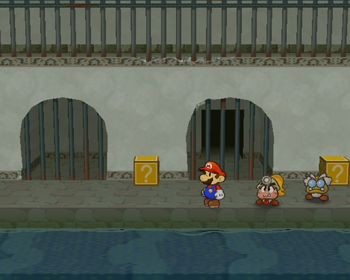
|
Chapter 1white | |||
| Template:Color-link | Mushroom |
In the right of the first screen. | 
|
| Petal Meadows | Close Call |
Near the start of the second screen. | 
|
| Petal Meadows | 10 Coins |
Same area, between two pipes. | 
|
| Petal Meadows | Fire Flower |
Near the bridge in the third screen. | 
|
| Petal Meadows | POW Block |
On the ground in the first screen to the right of Petalburg. | 
|
| Petal Meadows | Fire Flower |
In the middle of the fifth screen to the right of Petalburg. | 
|
| Petal Meadows | Multibounce |
In the Shhwonk Fortress part of Petal Meadows, in the entrance screen underground. | 
|
| Template:Color-link | Power Bounce |
In the first room on the first floor. | 
|
Between Chapter 1 and Chapter 2
| |||
| Rogueport Sewers | Slow Shroom, Gradual Syrup |
In the western corridor on sublevel 2. | 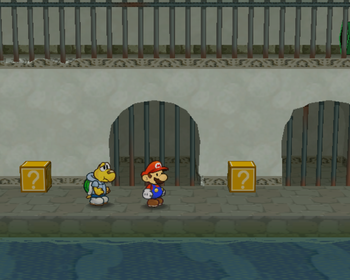 ] ]
|
Chapter 2white | |||
| Template:Color-link | Quake Hammer |
In the fourth screen, on top of the right platform. | 
|
| Template:Color-link | Damage Dodge P |
Between the rooms with the Jabbi hives (though it can only be accessed by revealing a hidden block under it by using Koops). | 
|
Chapter 4white | |||
| Template:Color-link | Coin |
In the middle of the second screen. | 
|
| white | 10 Coins |
Same area, near the exit. | 
|
| white | 10 Coins |
In the south of the first forest screen. | 
|
| white | Earth Quake |
Same area, in the northeast. | 
|
| white | Hammer Throw |
On the path in the second forest screen. | 
|
| Template:Color-link | Tornado Jump |
In the second room after jumping down the well outside the steeple. | 
|
Chapter 5white | |||
| Template:Color-link | Head Rattle, Courage Shell |
In the first scene to the right of the town. | 
|
| white | Coin |
In the second scene to the right of the town,in the middle of the lower part. | 
|
| white | Thunder Rage |
Same area, in the middle of the upper part. | 
|
Between Chapter 6 and Chapter 7
| |||
| Template:Color-link | HP Plus P |
In the third scene of the path. | 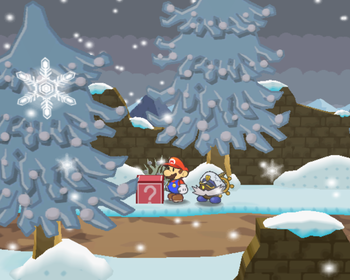
|
Chapter 7white | |||
| Template:Color-link | Super Shroom |
To the right of level 1, on the back side. | 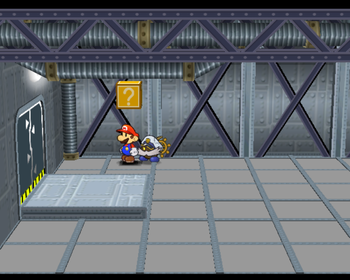
|
| X-Naut Fortress | Sleepy Sheep |
To the left of sublevel 2, on the back side. | 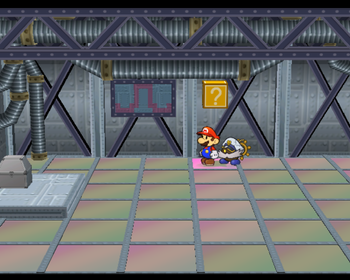
|
| X-Naut Fortress | HP Drain |
To the left of sublevel 3, on the south side. | 
|
Chapter 8white | |||
| Template:Color-link | Shooting Star |
In the third room from the start, near the entrance. | 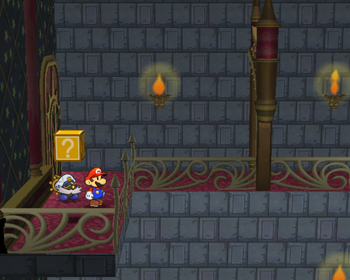
|
| white | All or Nothing |
In the fourth room from the start, near the entrance. | 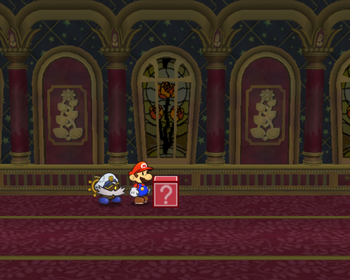
|
| white | Ultra Shroom |
In the seventh room from the start, near the entrance. | 
|
| white | Coin, P-Up, D-Down P, Jammin' Jelly |
In the eighth room from the start, in the north. | 
|
| white | Ultra Shroom |
To the right of Gloomtail's room, near the entrance. Requires Admiral Bobbery. Accessible before activating the solar system in the Riddle Tower, but not afterwards. | 
|
| white | Jammin' Jelly |
Same room, at the end. | 
|
| white | Thunder Rage |
In the first descended hallway, right of the stairs, high in the air. Requires Spring Jump. | 
|
| white | Repel Cape |
In the room across descended hallways 1 and 2, near the exit to hallway 2 in the lower part. | 
|
| white | Life Shroom |
Same room, near the east entrance in the upper part. | 
|
| white | Life Shroom |
In the room across descended hallways 2 and 3, above the spinning wheels. | 
|
| white | Coin |
In the room across hallways 3 and 4, on the ground in the west part. | 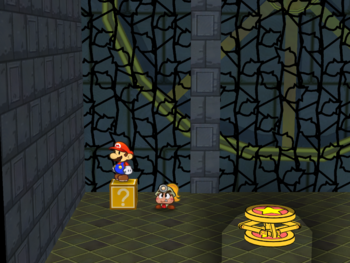
|
? Block count
This chart shows the number of ? Blocks for each location, with the total amount at the bottom. Locations are listed in the order the player can visit them.
| Location | Count |
|---|---|
| Rogueport Sewers | 4 |
| Petal Meadows | 7 |
| Hooktail Castle | 1 |
| Boggly Woods | 1 |
| The Great Tree | 1 |
| Twilight Trail | 5 |
| Creepy Steeple | 1 |
| Keelhaul Key | 4 |
| Fahr Outpost | 1 |
| X-Naut Fortress | 3 |
| Palace of Shadow | 13 |
| Total | 41 |
See also
This is a list of treasure chests from Paper Mario: The Thousand-Year Door. There are 59 treasure chests Blocks in the game.
There are two types of chests: Small ones contain either Badges, items required for progression or usable items. During the story, big ones contain upgrades to Mario's Jump and Hammer abilities, while in the Pit of 100 Trials, they contain badges or a important thing.
Petal Meadows, Petalburg, Boggly Woods, Glitzville, Twilight Trail, Keelhaul Key, Riverside Station, Poshley Sanctum, Fahr Outpost and Moon are the only locations without treasure chests.
| Chapter 1 | Hooktail Castle |
| Between Chapter 1 and Chapter 2 | Rogueport Sewers |
| Chapter 2 | Flurrie's House • The Great Tree • Rogueport Sewers |
| Chapter 3 | Glitzville |
| Chapter 4 | Twilight Town • Creepy Steeple |
| Between Chapter 4 and Chapter 5 | Rogueport Sewers • Hooktail Castle |
| Chapter 5 | Pirate's Grotto |
| Between Chapter 5 and Chapter 6 | Rogueport • Hooktail Castle |
| Chapter 6 | Riverside Station • Poshley Heights |
| Between Chapter 6 and Chapter 7 | Rogueport Sewers • Rogueport |
| Chapter 7 | X-Naut Fortress |
| Chapter 8 | Palace of Shadow |
| Pit of 100 Trials | Pit of 100 Trials |
Treasure Chest locations
Chapter 1white | |||
| Template:Color-link | Black Key |
In the spiky room in the right of the first floor, in the middle. | 
|
| white | Mushroom, Castle Key, Honey Syrup |
In the storeroom on the third floor. | 
|
Between Chapter 1 and Chapter 2
| |||
| Template:Color-link | Soft Stomp |
In the ruins of the 1,000 year old town on sublevel 1, in the left of the south water. | 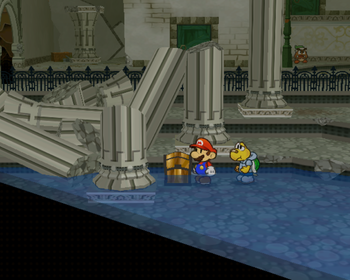
|
Chapter 2white | |||
| Template:Color-link | Super Appeal P |
In the bedroom. | 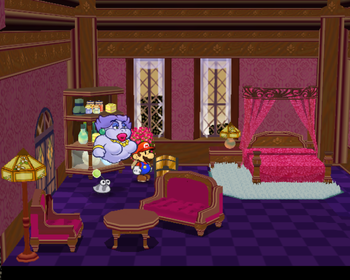
|
| Template:Color-link | Ultra Shroom |
In the storeroom in the highest place. | 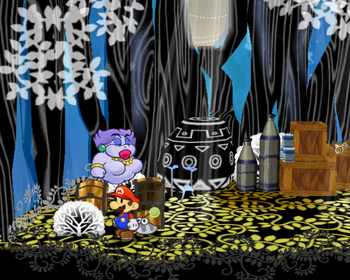
|
| black | Blue Key |
In the second room below the entrance, to the right of the twisty path, on the ground. | 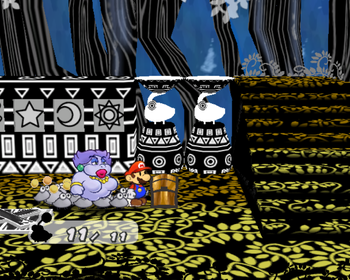
|
| black | Super Boots |
Same area, in a cave found to the north after removing the statues. | File:The Great Tree Treasure Chest 3.png |
| black | Shrink Stomp |
In the water-draining room deep in the tree, in front of the stairs in the upper room. | 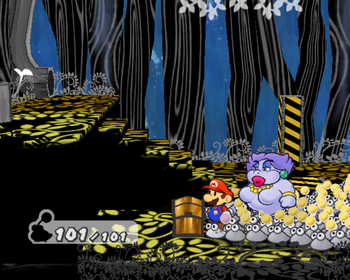
|
| black | Happy Heart P |
In the lower corridor on sublevel 3, hidden behind a piece of paper underneath the stairs. Have Flurrie to blow it up first. | 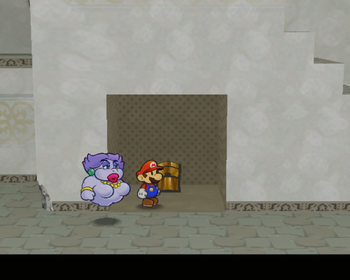
|
Chapter 3Of Glitz and Glory | |||
| Template:Color-link | Power Plus P |
On the roof of the juice bar. | 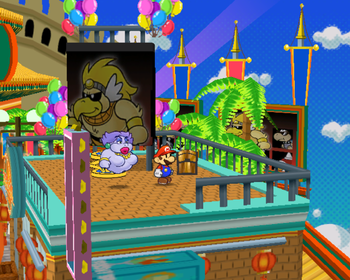
|
Chapter 4white | |||
| Template:Color-link | Defend Plus |
In the second scene, in the storage room of the shop. | 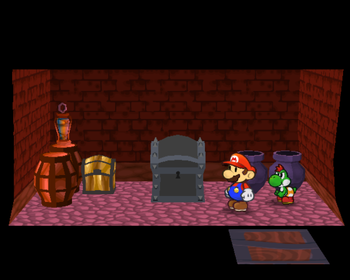
|
| Template:Color-link | Ice Smash, Cookbook |
In the treasure room through a hole on the north wall of the main room. | 
|
| Template:Color-link | Flower Saver |
In the room just below the main room, in the secret passage to the back. Have Flurrie blow up the wall. | 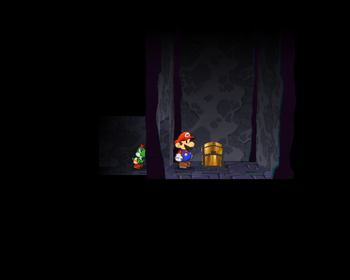
|
| Template:Color-link | TRAP | In the passage below the main room. This one is a trap chest which releases 200 Boos upon opening. Last Boo asks Mario how many of them were there and if he anwsers correctly, he's rewarded a Ultra Shroom. | 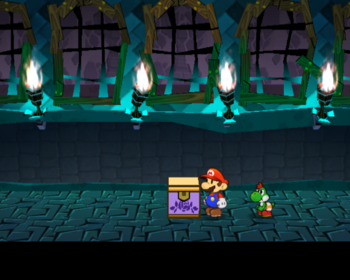
|
| Template:Color-link | Steeple Key, The letter "p", Power Plus, Mr. Softener |
In the storeroom with the parrot. | 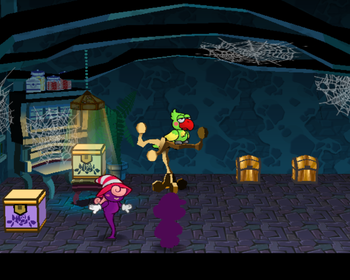
|
Between Chapter 4 and Chapter 5
| |||
| black | Spike Shield |
In the spike room on sublevel 2, located behind a series of spikes that can be crossed with Vivian. | 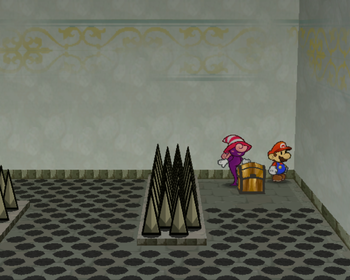
|
| white | Attack FX B |
Covered by a piece of paper at the center of Hooktail's room while doing Ms. Mowz's trouble. | 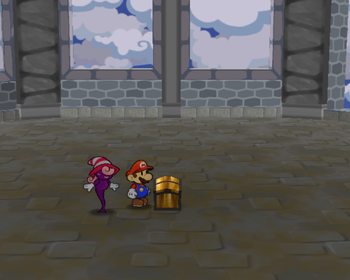
|
Chapter 5white | |||
| Template:Color-link | Defend Plus P (international) Damage Dodge P (Japanese) |
In the big stair room in the right of the north area, there is a river to the north of the stairs. To the right of the river source is a hidden area behind the waterfall. Accessible using Boat Mode. | 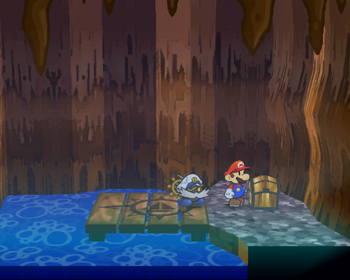
|
Between Chapter 5 and Chapter 6
| |||
| Template:Color-link | HP Drain |
In the harbor, in the small house to the left of the sea. | 
|
| black | Double Dip |
In the east area guarded by Gus, near the south sea. Accessible from a boat panel near the other side of the river. | 
|
| white | Up Arrow |
To the right of the spiky room on the first floor, appears after hitting the ! block. | 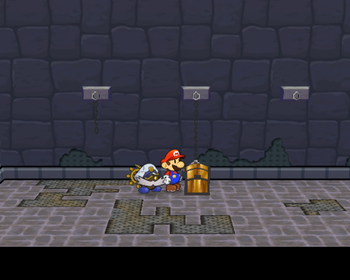
|
Chapter 6white | |||
| Template:Color-link | Ultra Boots |
In the storeroom area in the deep place, in the rooftop above the storeroom. | 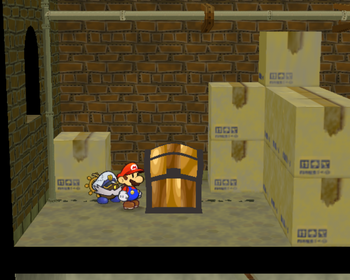
|
| Template:Color-link | HP Drain P |
In the first area, in the back room of Goldbob's house. Accessible using Paper Mode. | 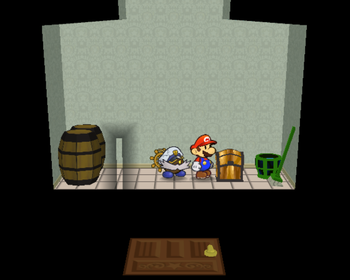
|
Between Chapter 6 and Chapter 7
| |||
| black | Defend Plus P |
In the eastern entrance room on sublevel 1, in a highest place just before the sea room. Accessible from the next room. | 
|
| black | Flower Saver P |
In the western entrance room on sublevel 1, it is to the left of the X sign on the southwest ground. Requires a Spring Jump. | 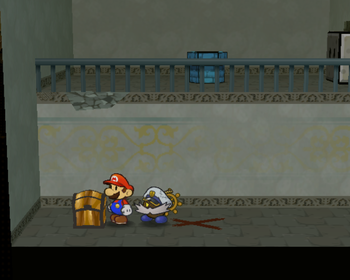
|
| black | Ultra Hammer |
In the plaza, near the inn. Requires a Spring Jump. Only chest that despawns after opening it and leaving the area. | 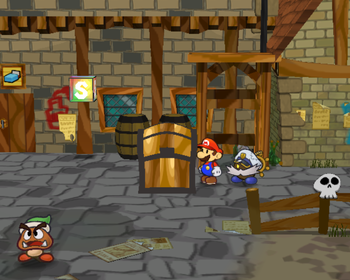
|
| black | FP Plus |
In the western blue pipe room on sublevel 2, near the pipe to Poshley Heights. | 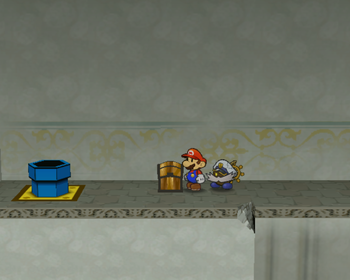
|
Chapter 7white | |||
| Template:Color-link | Elevator Key |
To the right of level 1, beyond the electrical floors. | 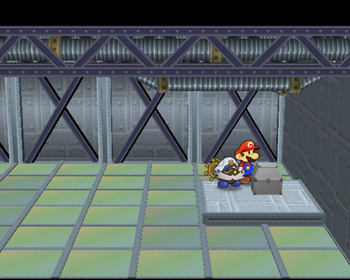
|
| X-Naut Fortress | Card Key |
To the left of sublevel 2, beyond the electrical floors. | 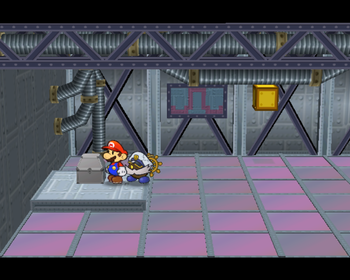
|
| X-Naut Fortress | Card Key |
To the left of sublevel 3, beyond the electrical floors. | 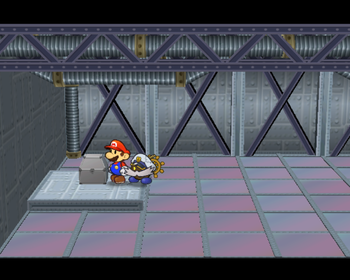
|
Chapter 8white | |||
| Template:Color-link | Palace Key |
Note: These two chests share the same room layout, so only one image is here. In the northwest room on the first/second floors of Riddle Tower. Accessible by hitting the ! Block after clearing the blocks. |
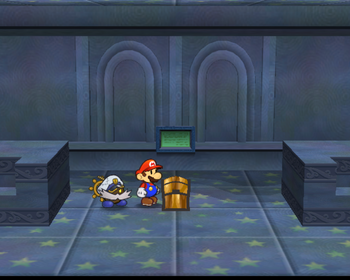
|
| white | Palace Key |
In the northeast room on the first floor of Riddle Tower. Accessible by hitting the ! Block beyond the fake wall on the right. | 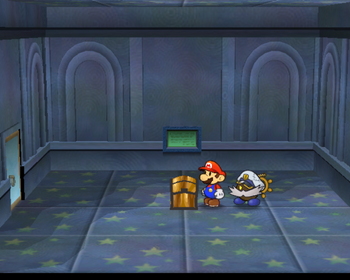
|
| white | Palace Key |
Note: These two chests share the same room layout, so only one image is here. In the southwest room on the first floor of Riddle Tower. Accessible by hitting the ! Blocks in this order: left, left, left, right, right. In the southwest room on the second floor of Riddle Tower. Accessible by hitting the ! Block after defeating the bones in the order from weak to strong. |
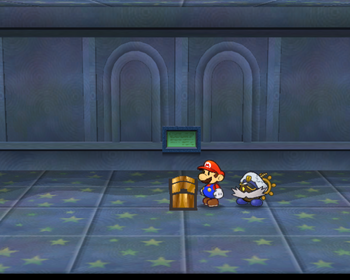
|
| white | Palace Key |
Note: These two chests share the same room layout, so only one image is here. In the southeast room on the first floor of Riddle Tower, covered by a piece of paper which can be blown away by Flurrie. In the southeast room on second floor of Riddle Tower. Accessible by hitting the invisible ! Block. |
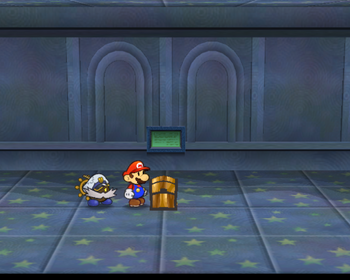
|
| white | Palace Key |
In the northeast room on the second floor of Riddle Tower, beyond the wall on the right which can be blown up by Bobbery. | 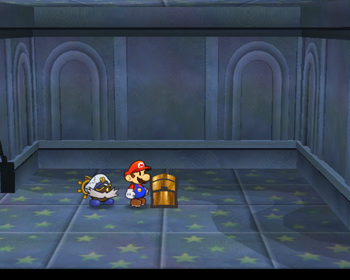
|
| white | Star Key |
In the Gloomtail room, spit out after Gloomtail is defeated. | 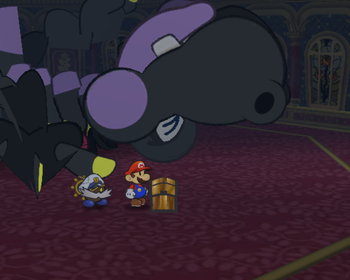
|
| white | Shooting Star |
In the room across descended hallways 2 and 3, in the southwest corner. | 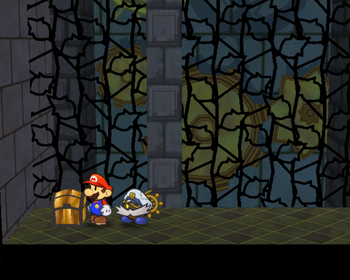
|
| white | Palace Key |
In the room across descended hallways 3 and 4, in the east part. | 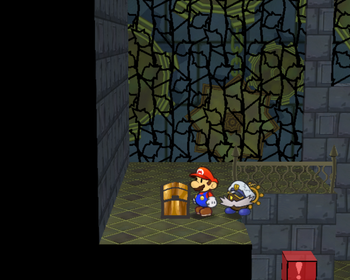
|
| white | Ultra Shroom |
In the hallway after the Sir Grodus fight, near the start. | 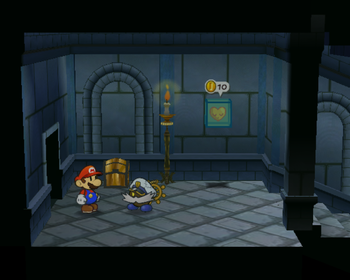
|
| white | Jammin' Jelly |
Same area, near the exit. | 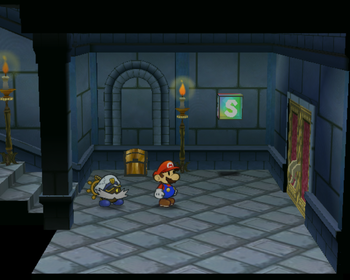
|
Pit of 100 Trials
| |||
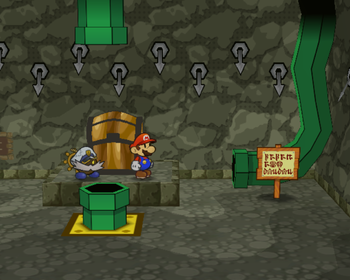
| Template:Color-link | Sleepy Stomp, Fire Drive, Zap Tap, Pity Flower |
Note: These four chests share the same room layout, so only one image is here. Found north at the floors 10, 20, 30 and 40. |
|
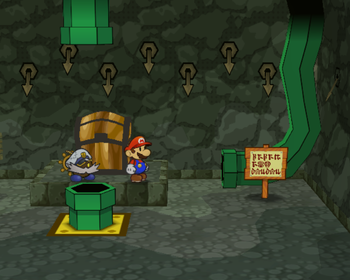
| white | Strange Sack, Double Dip, Double Dip P |
Note: These three chests share the same room layout, so only one image is here. Found north at the floors 50, 60 and 70. |
|
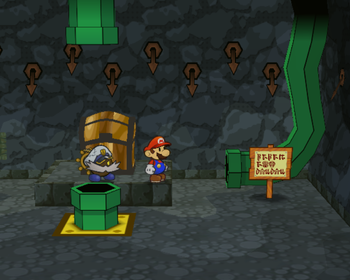
| white | Bump Attack, Lucky Day |
Note: These two chests share the same room layout, so only one image is here. Found north at the floors 80 and 90. |
|
| white | Return Postage |
Found at the floor 100, spit out after Bonetail has been defeated. | 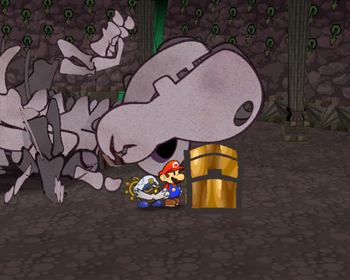
|
Treasure chest count
This chart shows the number of treasure chest for each location, with the total amount at the bottom. Locations are listed in the order the player can access the chests.
| Location | Count |
|---|---|
| Hooktail Castle | 6 |
| Rogueport Sewers | 6 |
| Flurrie's House | 1 |
| The Great Tree | 4 |
| Glitzville | 1 |
| Twilight Town | 1 |
| Creepy Steeple | 8 |
| Pirate's Grotto | 1 |
| Rogueport | 3 |
| Riverside Station | 1 |
| Poshley Heights | 1 |
| X-Naut Fortress | 3 |
| Palace of Shadow | 13 |
| Pit of 100 Trials | 10 |
| Total | 59 |