From the Super Mario Wiki, the Mario encyclopedia
Jump to navigationJump to search
Decalburg
Items
Given/Object
| Item
|
Icon
|
Location
|
Image
|
| Coin
|

|
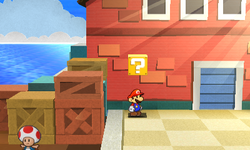
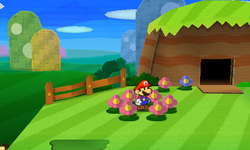
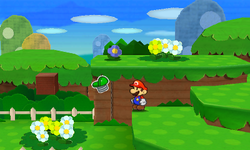
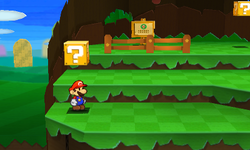
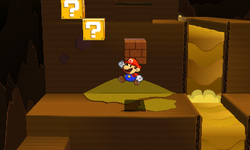
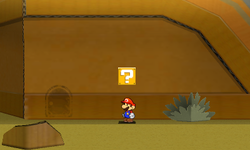
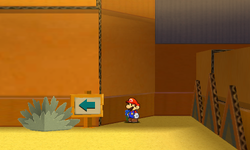
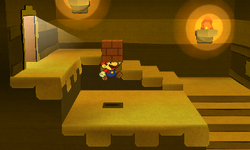
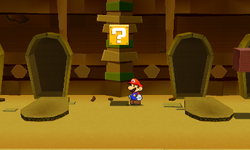
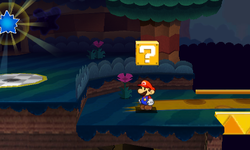
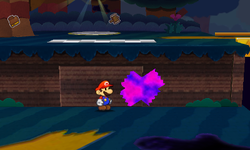
In the first scene, in the crate with 4 nails in front. Available during all visits before finishing Warm Fuzzy Plains.
|
|
| Hammer
|

|
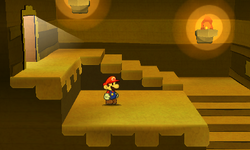
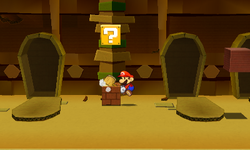
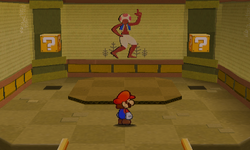
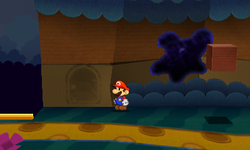
In the first scene, given by a Toad after saving him. This Toad is found sticked onto the middle of the stage by the Bowser Tape.
|
|
| HP-Up Heart
|

|
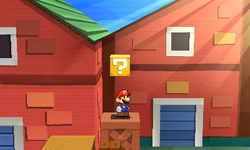
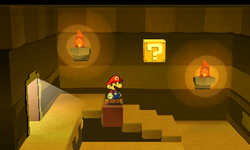
In the the right house found in the second scene, given by a Toad after saving the Traveling Toad 5 times and reading his final postcard.
|
|
| Mushroom
|

|
In the second scene, given by a Crybaby Toad in the middle house after saving him from Hither Thither Hill.
|
|
| Poison Mushroom
|

|
In the scene behind the second and third houses in the second scene, sold by a Swindler Toad. The price can range from 200 down to 25 Coins, depending on how many times Mario refused to buy the item.
|
|
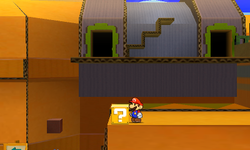
Blocks
| Item
|
Icon
|
Location
|
Image
|
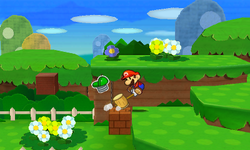
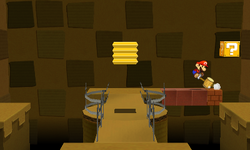
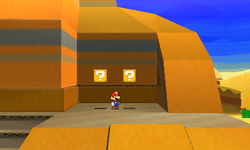
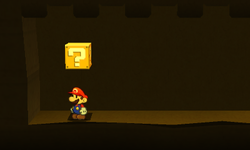
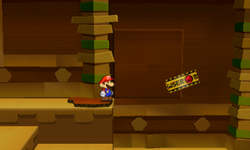
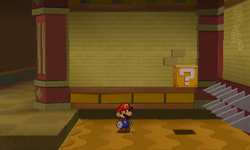
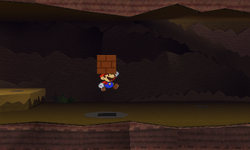
| Coin (first time), Jump (later times)
|

|
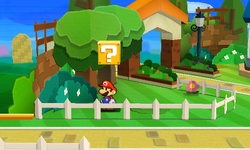
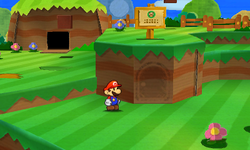
In the second scene, behind the fence in the west.
|
|
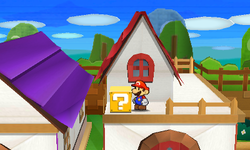
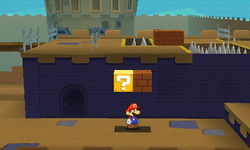
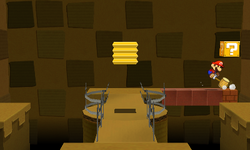
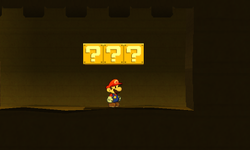
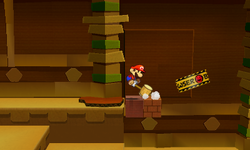
| Shiny Jump (first time), Jump (later times)
|

|
Same scene, on the top of the right house.
|
|
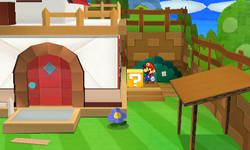
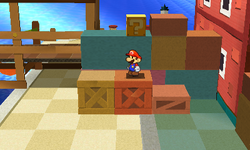
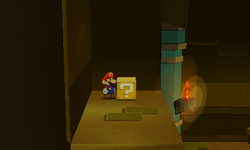
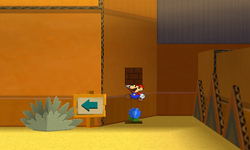
| Baahammer (first time), Hammer (later times)
|
 
|
Same scene, right of the right house, hidden under Brick Blocks and crates.
|
|
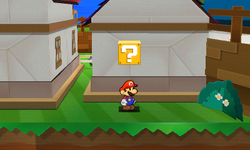
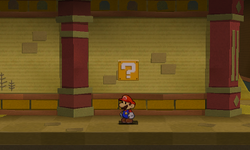
| Jump
|
|
In the scene found behind the middle and right houses, behind the middle house.
|
|
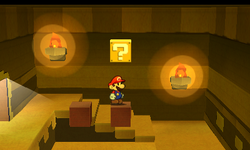
Hidden Blocks
| Item
|
Icon
|
Location
|
Image (Unrevealed)
|
Image (Revealed)
|
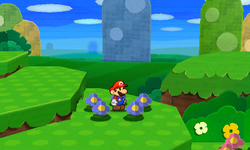
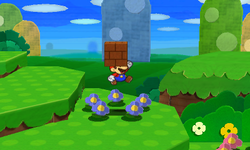
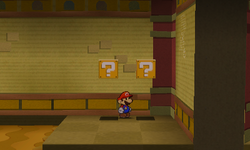
| Jump
|
|
In the second scene, above the small patch of dirt seen right of the entrance to the Sticker Fest.
|
|
|
| Coin
|
|
In the left house of the second scene, above the cabinet reached by stack a paper right of it.
|
|
|
Paperization Spot
Surfshine Harbor
Items
Field
| Item
|
Icon
|
Location
|
Image
|
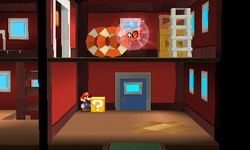
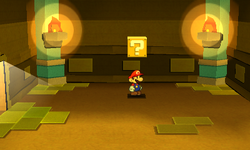
| HP-Up Heart
|
|
On the second floor of the left warehouse.
|
|
| Ship's Wheel
|

|
In the basement of the middle warehouse.
|
|
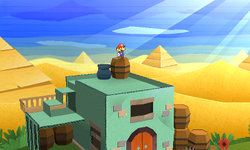
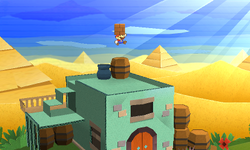
| Vacuum
|

|
On the second floor of the right warehouse.
|
|
Blocks
| Item
|
Icon
|
Location
|
Image
|
| Hopslipper (first time), Coin (later times)
|

|
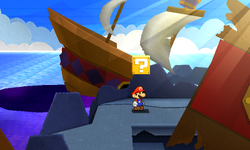
In the first scene, in the west.
|
|
| Shiny Hammer (first time), Coin (later times)
|

|
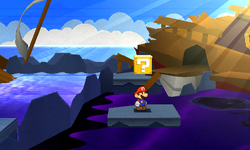
Same scene, above the right crate between two warehouse doors.
|
|
| Shiny Hopslipper (first time), Hopslipper (later times)
|

|
In the scene reached by going under the bridge in the northeast.
|
|
| Shiny Slaphammer (first time), Coin (later times)
|

|
On the first floor of the right warehouse (the one reached by a door that needed to be paperized).
|
|
| Eekhammer (first time), Coin (later times)
|

|
In the scene behind the warehouse, reached by a back door of the right warehouse.
|
|
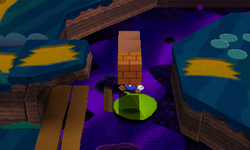
| Frog Suit (first time), Jump (later times)
|

|
On the second floor of the middle warehouse.
|
|
Paperization Spots
| Scrap/Sticker
|
Icon
|
Location
|
Image
|
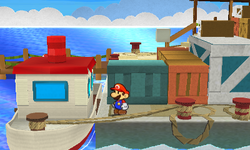
| Warehouse Door
|
|
In the first scene, in the end of the warehouse. Paperize is used twice here: first to remove the door and to turn it the right way, second to put it back. Required to progress.
|
|
| Lightbulb
|

|
In the basement of the middle warehouse. Required to progress.
|
|
| Scissors or Hair Shears
|
|
In the back of the second scene, reached by going between the crates. Required to progress.
|
|
| Ship's Wheel
|

|
Inside the ship. Required to progress.
|
|
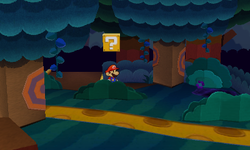
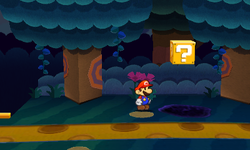
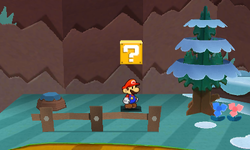
Warm Fuzzy Plains
Items
Field/Objects
| Item
|
Icon
|
Location
|
Image
|
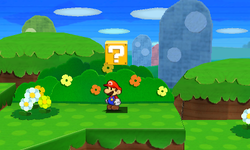
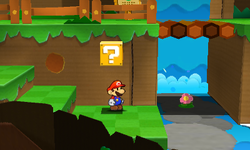
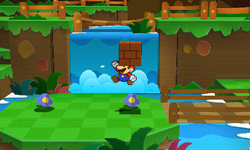
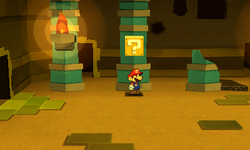
| Coin
|
|
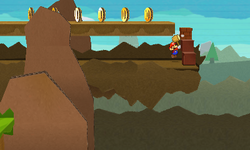
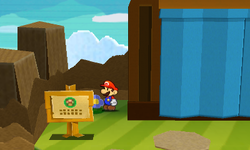
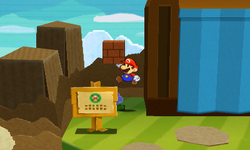
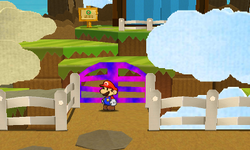
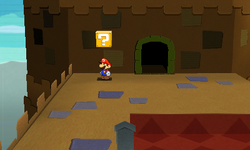
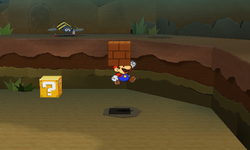
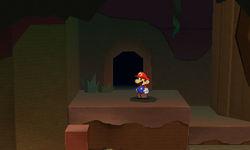
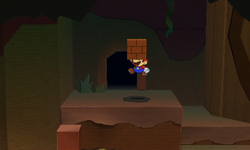
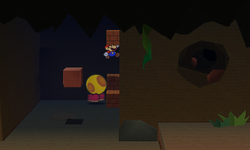
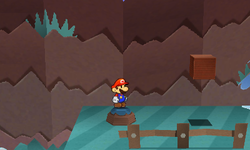
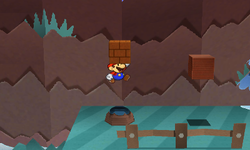
- In the first scene, in the small cave found behind an opening covered with the Bowser Tape. During the first visit, there are 6 Coins. On later visits, there are 3 Coins.
- In the first scene, in the circle, found between the white fence and a sign.
- In the first scene, in the bush, found in front of the opening covered with Bowser Tape.
|
|
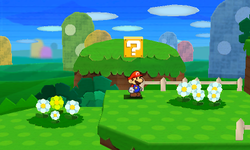
| Heart
|

|
- In the first scene, found in the last bush.
- In the last scene, found in the second bush.
|
|
| Scissors (Sticker)
|

|
In the second scene, in front of the bridge after Troublesome Toad drops it.
|
|
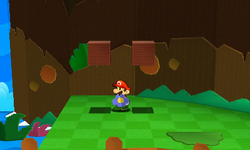
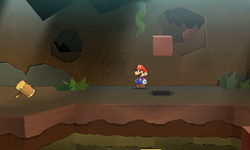
| Scissors (Thing)
|

|
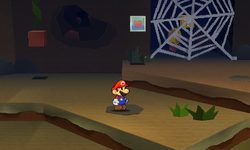
In the scene found behind the opening covered with Bowser Tape in third scene.
|
|
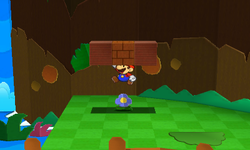
| Thumbtack
|

|
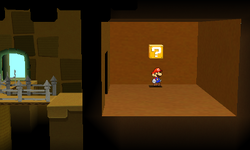
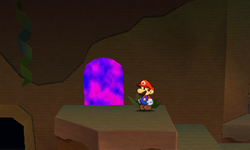
In the scene found behind the Secret Door.
|
|
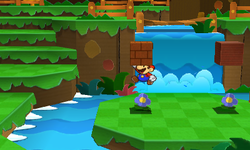
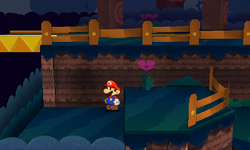
| Wooden Bridge
|
|
In the second scene, on the left elevated ground, next to a waterfall. Reached by taking the Toads from the first scene, so they form stairs here.
|
|
Blocks
| Item
|
Icon
|
Location
|
Image
|
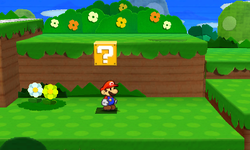
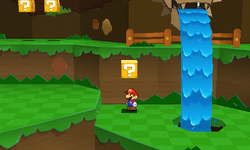
Shiny Hammer (left block, first time), Hammer (left block, later times)
Eekhammer (right block)
|
|
In the first scene, near the entrance, with the second one above the elevated ground.
|
|
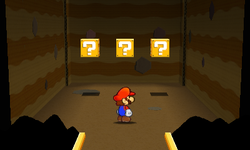
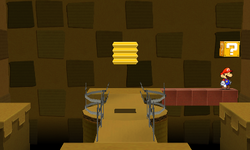
| 3x Baahammer
|
|
In the third scene, in the lower part to the west, in front of the cave with the Scissors thing.
|
|
| 3x Slaphammer
|

|
Same scene, in the east, on the lower middle part.
|
|
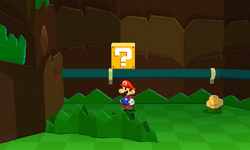
| Eekhammer
|
|
Same scene, in the west of the upper part.
|
|
Paperization Spots
| Scrap/Sticker
|
Icon
|
Location
|
Image
|
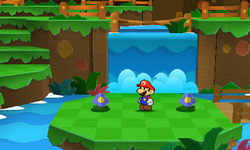
| Wooden Bridge
|
|
In the second scene, in the middle of the lower part. Automatically started after collecting the Wooden Bridge scrap and going close to the spot. Required to progress.
|
|
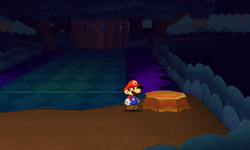
| Random 1x1 Sticker
|
N/A
|
Same scene, in the east, above the stump.
|
|
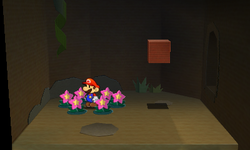
| Random 1x1 Sticker
|
N/A
|
In the third scene, above the circle of flower that can be bloomed by using a hammer that can be found in the lower part in the west.
|
|
| Secret Door
|

|
Same scene, in the middle of the lower part, on the wall. Available only after getting access to Outlook Point and getting Secret Door sticker from there.
|
|
Bouquet Gardens
Items
Field/Given/Objects
| Item
|
Icon
|
Location
|
Image
|
| Cat-o-Luck
|

|
In the fourth scene, picked up from the background by the Travelling Toad after saving him from 2 Goombas.
|
|
| Coin
|
|
- In the second scene, in the third bush.
- In the second scene, in the bush found in the northneastern corner of the lower part.
- In the secret scene found west of the third scene. On the first visit, there are 24 Coins (in form of 4 Five Coins and 4 Coins), on later visits there are 8 Coins.
|
|
| Coin, Five Coin, 10-Coin
|
 
|
In the sixth scene, in the small cave found behind the opening covered with Bowser Tape.
|
|
| Fan
|

|
In the eastern part of the third scene, accessible from the second one.
|
|
| Heart
|
|
In the second scene, in the second-to-last bush found in the south of the lower part.
|
|
HP-Up Heart
Flower Stickers
|
     
|
In the third scene, given by a Toad after rejuvenating his flower garden. HP-Up Heart is given only for the first time, the flower stickers always and it depends on which ones were use used beforehand.
|
|
Blocks
| Item
|
Icon
|
Location
|
Image
|
| Eekhammer
|
|
In the first scene, in the lower west part, in the northeastern corner above the patch of flowers.
|
|
| Fire Flower (first time), Jump (later times)
|
|
Same scene, above the lone Brick Block left of the previous ? Block.
|
|
| Hopslipper
|
|
In the second scene, in the northeast of the lower part.
|
|
| Slaphammer
|
|
Same scene, in the southeastern corner of the upper part.
|
|
| Shiny Fire Flower
|
|
In the secret scene found west of the third scene, in the middle.
|
|
| Shiny Jump
|
|
In the fourth scene, in the northwest, next to the Recovery Block.
|
|
| Heart
|
|
In the sixth scene (the one where Mario is attacked by Goomba Wheel), in the middle of the upper part.
|
|
| 3x Slaphammer
|
|
In the seventh scene, in the northwest, on the elevated ground.
|
|
| Shiny Fire Flower
|
|
Same scene, near the end of the lower part.
|
|
Flashy Ice Flower (first time), Ice Flower (later times)
Flashy POW Block (first time), POW Block (later times)
Flashy Fire Flower (first time), Fire Flower (later times)
|
 
|
In the scene accessible by a Secret Door. Available only after having access to Outlook Point, getting Secret Door sticker there and using it in the seventh scene.
|
|
Hidden Blocks
| Item
|
Icon
|
Location
|
Image (Unrevealed)
|
Image (Revealed)
|
| Coin
|
|
In the first scene, right of the Hopslipper sticker. This block acts as a platform to said sticker, which is otherwise unreachable.
|
|
|
| Coin
|
|
In the fourth scene, above the left circle of flowers that can be bloomed by hammering.
|
|
|
Paperization Spots
| Scrap/Sticker
|
Icon
|
Location
|
Image
|
| Random 1x1 Sticker
|
N/A
|
In the fourth scene, found above the right circle of flowers that can be bloomed by hammering.
|
|
| Random 1x1 Sticker
|
N/A
|
In the fifth scene, found above the circle of flowers that can be bloomed by hammering.
|
|
| Any combination of 3 Flower stickers
|
N/A
|
In the third scene, after getting enough flower stickers. Using any combination of 3 flower stickers causes the garden to bloom, rewarding Mario with 2 of every sticker used. When garden blooms for the first time, Toad next to it is overjoyed and gives Mario a HP-Up Heart.
|

|
| Secret Door
|
|
In the seventh scene, in the middle of the lower part on the wall. Available only after getting access to Outlook Point and getting Secret Door sticker from there.
|
|
Water's Edge Way
Items
Field
| Item
|
Icon
|
Location
|
Image
|
| Bed, 7 Five Coins
|

|
In the scene behind the secret door.
|
|
| Coin
|
|
7 in the third scene, found behind the waterfall.
|
|
| Comet Piece
|

|
In the fifth scene, at the west end. Accessible after removing the Tap in the cave part of the fourth scene.
|
|
| Faucet
|

|
In the cave part of the fourth scene. Automatically picked up after jumping on it three times.
|
|
Blocks
| Item
|
Icon
|
Location
|
Image
|
| Fire Flower (first time), Jump (later times)
|
|
In the first scene, in the northeast of the lower part.
|
|
Jump
Shell (first time), Hammer (later times)
|

|
Same scene, one above the end of the stairs in the west, second above the highest ground in the northwest.
|
|
3x Hurlhammer
POW Block
|

|
In the second scene, above the elevated ground.
|
|
| Hopslipper
|
|
In the third scene, found to the right near the entrance
|
|
| Jump
|
|
Same scene, right of the waterfall.
|
|
| Heart
|
|
Same scene, found left of the bridge, in the lowest part of the scene.
|
|
| Line Jump
|

|
In the fourth scene, in the lower east part, next to a hole.
|
|
Shell
Jump
|
|
Same scene, in the west of the upper part.
|

|
| Fire Flower
|
|
In the third scene, in the upper part, reachable only by a upper opening in the fourth scene.
|
|
Hidden Blocks
| Item
|
Icon
|
Location
|
Image (Unrevealed)
|
Image (Revealed)
|
Shell (first time), Hammer (later times)
Line Jump (first time), Jump (later times)
|
|
In the first scene, above the flowers on the island in the middle of the lower part.
|
|
|
| Iron Jump
|

|
In the second scene, found above the flower and between the 2 visible ? Blocks.
|
|
|
| Shiny Shell
|

|
In the third scene, in the part reachable only by opening in the fourth scene, above the circle of flowers that can be bloomed by hammering.
|
|
|
Paperization Spots
| Scrap/Sticker
|
Icon
|
Location
|
Image
|
| Random 1x1 Sticker
|
N/A
|
In the third scene, above the flower found under the bridge.
|
|
| Comet Piece
|

|
In the second scene, in the northeast. Available only after getting the Comet Piece scrap in the fifth scene (the underground one). Required to progress.
|
|
| Secret Door
|
|
In the fifth scene, in the east part on the wall. Available only after getting access to Outlook Point and getting Secret Door sticker from there.
|
|
Hither Thither Hill
Items
Blocks
| Item
|
Icon
|
Location
|
Image
|
Line Jump (first time), Jump (later times)
Shell (first time), Hammer (later times)
|
|
In the first outdoor scene, in the northwest of the lower part.
|
|
| Jump
|
|
In the first underground scene (reached by going into the left warp pipe of the first scene), near the exit warp pipe to the right.
|
|
| Heart
|
|
In the second outdoor scene, in the part reachable by a exit warp pipe of the first underground scene.
|

|
| Heart
|
|
In the first underground scene, in the part reached by a warp pipe inside the windmill, above the middle platform.
|

|
| POW Block
|
|
In the second underground scene, near the entrance pipe.
|
|
Flashy Jump
Leaf
|


|
In the third outdoor scene, between the red warp pipe and Secret Door outline on the wall.
|
|
Field/Given
| Item
|
Icon
|
Location
|
Image
|
| Coin
|
|
- 5 in the first scene, in the tree after hitting it three times.
- In the first scene, in the last two bushes.
- 5 in the second scene, in the tree after hitting it three times.
- In the second scene, in the last bush.
- 4 at the start of the upper part of the underground scene reached by a left warp pipe in the first scene/warp pipe inside the windmill.
- 6 in the last scene, in the part accessible by a scene accessed by a right pipe in the first scene. One Coin is automatically picked up after entering said part.
|
|
| Green Pipe
|

|
At the end of the upper part of the underground scene reached by a left warp pipe in the first scene/warp pipe inside the windmill.
|
|
| Heart
|
|
In the second scene, found in the second bush.
|
|
| HP-Up Heart
|
|
In the scene accessed by a right warp pipe in the first scene, in the lower part, accessible by using the Green Pipe scrap. Dropped by Big Buzzy Beetle after defeating it.
|
|
| Matches
|

|
In the scene behind the Secret Door.
|
|
Paperization Spots
| Scrap/Sticker
|
Icon
|
Location
|
Image
|
| Fan
|

|
In the first outdoor scene, above the stump left of the windmill. Required to progress.
|
|
| Random 1x1 Sticker
|
N/A
|
In the second outdoor scene, in the lower part, above the circle of flowers that can be bloomed by hammering.
|
|
| Green Warp Pipe
|

|
In the second underground scene, near the entrance warp pipe in the west. Required to progress.
|
|
| Secret Door
|
|
In the third outdoor scene, on the wall of the upper part. Available only after getting access to Outlook Point and getting Secret Door sticker from there.
|
|
Whammino Mountain
Items
Field/Object
| Item
|
Icon
|
Location
|
Image
|
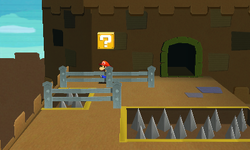
| Bellows
|

|
In the scene behind the Secret Door.
|
|
| Coin
|
|
In the last scene, in the northeastern part, on the platform reachable only after causing the chain reaction. During the first visit, there are 60 Coins (in form of 6 10-Coins), during later times there are 30 Coins (in form of 6 Five Coins).
|
|
| Heart
|
|
In the last scene, in the southeastern part, in a bush next to a tree that causes the chain reaction.
|
|
| Super Star
|

|
In the middle of the second scene.
|

|
| White Gate
|

|
In the second scene, north of the entrance. Available only after causing the chain reaction in the last scene.
|
|
Blocks
| Item
|
Icon
|
Location
|
Image
|
POW Block (left block, first time), Iron Jump (left block, later times)
Iron Jump (right block)
|
|
In the first scene, in the north of the lower part.
|
|
| Shell
|
|
In the second scene, in the lower part.
|
|
| Hurlhammer
|
|
In the fourth scene, in the northwest.
|
|
| Iron Jump
|
|
Same scene, in the north.
|
|
| Slaphammer
|
|
Same scene, in the southeast.
|
|
| Coin
|
|
Same scene, in the northeast. Available only after knocking the tree in the southeast, causing a chain reaction.
|
|
Hidden Blocks
| Item
|
Icon
|
Location
|
Image (Unrevealed)
|
Image (Revealed)
|
| Coin (both)
|
|
In the fourth scene, in the northeastern corner. Available only after knocking down the tree in the southeast. Together with Brick Block also found here, they act as a stairs to reach a platform with coins to the left.
|

|
|
| Fire Flower
|
|
In the third scene, in the northwestern corner, above the flower. Available only after putting back the White Gate scrap via paperization.
|
|
|
Paperization Spots
| Scrap/Sticker
|
Icon
|
Location
|
Image
|
| White Gate
|
|
In the third scene, in the middle of the lower part. Available only after getting the White Gate scrap from the second scene (which in turn is only available after knocking down the tree in the fourth scene, causing a chain reaction). Required to progress.
|
|
| Random 1x1 Sticker
|
N/A
|
Same scene, above the right flower found in the upper part.
|
|
| Secret Door
|
|
In the undeground scene connecting first and fourth scene via warp pipes, in the middle, on the wall. Available only after getting access to Outlook Point and getting Secret Door sticker from there.
|
|
Goomba Fortress
Items
Field/Given
| Item
|
Icon
|
Location
|
Image
|
| Coin
|
|
17 in the southeast scene, in the secret room.
|
|
| Royal Sticker
|

|
In the last scene, dropped by Megasparkle Goomba after defeating it
|
|
| Squirt Gun
|

|
In the scene behind the Secret Door.
|
|
| Trumpet
|

|
In the last scene, right of the entrance.
|
|
Blocks
| Item
|
Icon
|
Location
|
Image
|
Baahammer
Shell
|
|
In the south scene (the one where Bob-ombs start to fall from the sky), near the entrance.
|
|
| Spike Helmet
|

|
In the southeast scene, in the south.
|
|
| Shiny Jump
|
|
Same scene, in the secret room, accessible by hammering a wall on the eastern platform (which can be reached by jumping into Block Switch two times).
|
|
Spike Helmet
Line Jump
|
|
In the east scene, in the middle of the lower part.
|
|
| Poison Mushroom
|
|
Same scene, in the northeastern corner of the upper part.
|
|
| Shiny POW Block
|

|
In the northeastnern scene, in the northeastern corner, in the air. Reachable only by making a platform out of five Hidden Blocks.
|
|
Fire Flower
Hurlhammer
|
|
In the north scene, in the middle.
|

|
| Spike Helmet
|
|
In the west scene, in the northwestern corner.
|
|
Jump
Slaphammer
|
|
In the tower scene, at the start of the stairs.
|

|
Jump
Burnhammer
|

|
Same scene, right of the previous two, also above the stairs.
|

|
| Hopslipper
|
|
Same scene, right of the previous two, also above the stairs.
|
|
| Hammer
|
|
Same scene, right of the previous one, near the exit.
|
|
| Heart
|
|
In the last scene, in the east of the lower part.
|
|
Hidden Blocks
| Item
|
Icon
|
Location
|
Image (Unrevealed)
|
Image (Revealed)
|
| Coin (all 5)
|
|
In the northeastern scene, right of the northern platform. These 5 blocks act as a platform to reach a ? Block hanging in the air.
|
|
|
| Poison Mushroom
|
|
In the tower scene, above the stairs between the last two ? Blocks.
|
|
|
Paperization Spots
| Scrap/Sticker
|
Icon
|
Location
|
Image
|
| 2 Random 1x1 Stickers
|
N/A
|
In the east scene. After activating the fans in the background by stepping on the bridge, Mario can use Paperization to stuck two 1x1 stickers to temporarily stop them, so he can reach the exit. Required to progress.
|
|
| Block Switch
|
|
In the northwest scene, in the middle. Paperize is used two times: first to take out the Block Switch scrap to make it turn in the right direction, second to put it back. Required to progress.
|
|
| Luigi
|

|
In the west scene, seen in the background in the northeast.
|
|
| Random 1x1 Sticker
|
N/A
|
In the tower scene, in the middle of the lowest part.
|
|
| Secret Door
|
|
In the east scene, in the middle of the lower part. Available only after getting access to Outlook Point and getting Secret Door sticker from there.
|
|
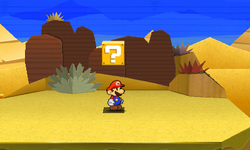
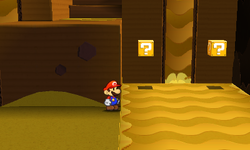
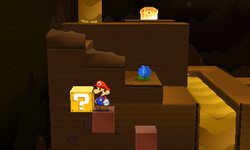
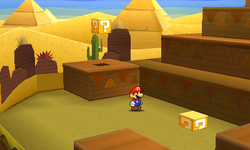
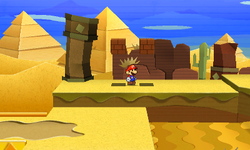
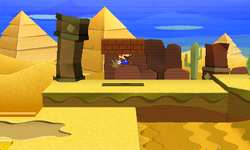
Drybake Desert
Items
Field/Given/Objects
| Item
|
Icon
|
Location
|
Image
|
| 10-Coin
|
|
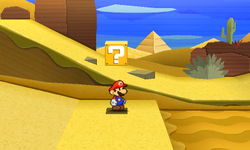
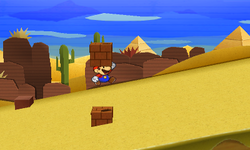
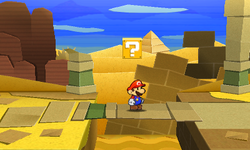
- In the third scene, in the cactus after hitting it 3 times.
- In the fourth scene, in the second cactus after hitting it 3 times
- 2 in the fifth scene, in the cacti found in the foreground.
|
|
| 10-Coin, 4 Coins
|
|
In the fourth scene, in the ruins with the Bowser Tape on its opening found in the middle of the scene.
|
|
| Car Battery
|

|
In the scene behind the Secret Door.
|
|
| Coin
|
|
- In the second scene, left of the entrance. On the first visit, there are 30 Coins (in form of 6 Five Coins). On later visits, there are 6 Coins.
- 6 in the second scene, in the secret corridor found down the stone pipe found near the exit.
- 26 in the last scene, on the back side of the pyramid.
|
|
| 8 Five Coins
|
|
In the secret scene found behind the rocks on the top of the fifth scene.
|
|
| Heart
|
|
- In the fourth scene, in the first cactus after hitting it 3 times.
- In the fifth scene, in the first cactus after hitting it 3 times.
- In the fifth scene, in the last cactus after hitting it 3 times.
|
|
| HP-Up Heart
|
|
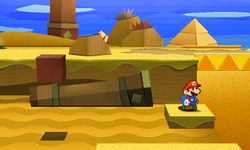
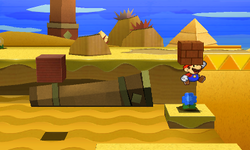
When Mario reaches the top of the pyramid at the end of the level, he must move up the stairs on the left and slide down the ramp, then simply hop onto the next platform to reach it.
|
|
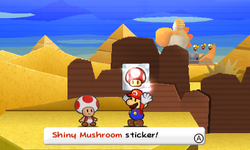
| Shiny Mushroom
|

|
Given by the Travelling Toad after saving him from 5 Paragoombas.
|
|
| Soda
|

|
In the fifth scene, near the end of the right slope, buried in the sand.
|
|
| Tablet Piece
|

|
In the underground scene, found at the top in the treasure chest.
|
|
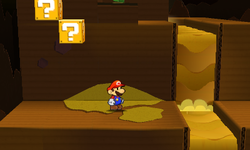
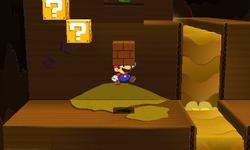
Blocks
| Item
|
Icon
|
Location
|
Image
|
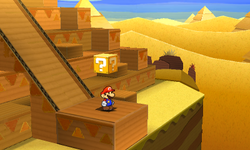
| Hopslipper
|
|
In the first scene, near the entrance.
|
|
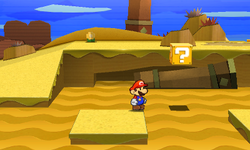
Spike Helmet
Worn-Out Jump, Jump, Hopslipper
|

|
In the second scene, near the entrance. To reach the second one, Mario must jump into a hole in the east and then back through the hole in the west, blocked by a stone slab. By jumping into the slab, it lands under the second block.
|
|
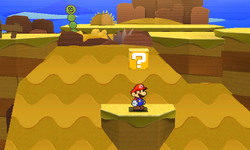
| Hammer
|
|
In the third scene, at the start of the first slope.
|
|
| Hurlhammer
|
|
Same scene, after reaching the highest point of the scene and going into the foreground.
|
|
| Hopslipper
|
|
Same scene, at the end of the second slope.
|
|
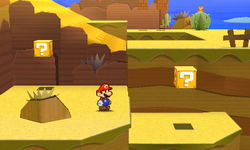
| Iron Jump
|
|
In the fourth scene, before the second quicksand pit.
|
|
| Hammer, Shiny Hammer, Flashy Hammer
|

|
Same scene, above the second quicksand pit, in the east.
|
|
| Line Jump
|
|
In the fifth scene, after reaching the highest point of the scene and going into the foreground, above the highest platform of the sandfall.
|
|
Shiny Hopslipper
Hurlhammer
|
|
Same scene, in the east of the lower part (right of the sandfall).
|
|
| Big 1UP
|

|
In the secret scene found in the north of the highest point of the fifth scene.
|
|
Shiny Jump
Slaphammer
|
|
In the undergound scene, above the lowest quicksand pit.
|
|
| Worn-Out Jump, Jump, Hopslipper
|
|
Same scene, in the northwest, near the upper sandfall.
|
|
Iron Jump
Slaphammer
|
|
In the sixth scene (the pyramid one), in the west from the entrance.
|
|
| Slaphammer
|
|
Same scene, above the platform at the end of the east slope.
|
|
| Hopslipper
|
|
Same scene, near the Comet Piece.
|

|
Hidden Blocks
| Item
|
Icon
|
Location
|
Image (Unrevealed)
|
Image (Revealed)
|
| Shiny Jump
|
|
In the third scene, above the second Brick Block.
|

|
|
| Shiny Jump
|
|
In the fourth scene, above the flower in the east.
|
|
|
| Shiny Jump
|
|
In the fifth scene, near the entrance, between two Brick Blocks.
|
|
|
| Coin (both)
|
|
In the underground scene, near the upper ? Block. Together with a block created by paperization, these 2 blocks as platforms to reach said ? Block.
|
|
|
Paperization Spots
| Scrap/Sticker
|
Icon
|
Location
|
Image
|
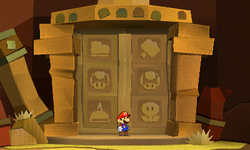
| Jump/Iron Jump/Line Jump (any 1x1 variety)+Hammer/Hurlhammer/Slaphammer (any 1x1 variety)+any 1x1 Mushroom (but Poison Mushroom)+Poison Mushroom+any Spike Helmet+any Flower
|
N/A
|
In the first scene, the exit. Combination of 6 1x1 stickers is required to open the door. Required to progress.
|
|
| Random 1x1 Sticker
|
N/A
|
In the third scene, after reaching the highest point of the scene.
|
|
| Random 1x1 Sticker
|
N/A
|
Same scene, near the exit, behind some flat rocks.
|
|
| Random 1x1 Sticker
|
N/A
|
In the fifth scene, near the exit between two Brick Blocks.
|
|
| Random 1x1 Sticker
|
N/A
|
In the underground scene, near the upper ? Block. Together with two Hidden Blocks right of it, it acts as platforms to reach said ? Block.
|
|
| Random 1x1 Sticker
|
N/A
|
In the sixth scene (pyramid one), near the Comet Piece, to the right.
|

|
| Secret Door
|
|
Same scene, at the back side of the pyramid. Available only after getting access to Outlook Point and getting Secret Door sticker from there.
|

|
Yoshi Sphinx
Items
Field/Objects
| Item
|
Icon
|
Location
|
Image
|
| Coin
|
|
- In the first scene, in the first tree.
- In the first scene, in the cactus after hitting it 3 times.
- In the fifth scene, on the secret slope found in the back of the scene. Seen through the hole in the wall.
|
|
| Coin, Hammer
|
|
In the first scene, in the second tree after hitting it 2 times.
|
|
| HP-Up Heart
|
|
At the top of the Yoshi Sphinx where the piece of the Sticker Comet rests, Mario must move north despite the lack of a path. Mario falls off the sphinx and onto a platform down below containing it.
|
|
| Lightbulb
|

|
In the scene after the scene with the Comet Piece, in the lower part, near the stairs.
|
|
| Paper Fan
|

|
In the scene behind the Secret Door.
|
|
| Tablet Piece
|

|
In the treasure chest found on the tongue of the sphinx. To open it, Kamek must be defeated first.
|
|
Blocks
| Item
|
Icon
|
Location
|
Image
|
| Hopslipper
|
|
In the first scene, in the east.
|
|
| Eekhammer
|
|
In the second scene (the outside of sphinx one), seen after going left from the entrance warp pipe.
|
|
| Iron Jump
|
|
Same scene, on the opposite side of the sphinx.
|
|
Hopslipper
Shiny Jump
|
|
Same scene, right of the stairs in front of the sphinx.
|
|
| Hammer, Slaphammer, Eekhammer
|
|
In the scene accessed by a opening on the left side of the sphinx, in the middle.
|
|
| Shiny Hammer
|
|
In the third sphinx scene, in front of the second pillar from the left.
|
|
| Shiny Line Jump
|

|
In the scene accessed by a opening in the north of the previous scene, at the top, above the block created by paperization.
|
|
| Hammer
|
|
In the second scene, in the part reached by dropping down from the middle part of the sphinx.
|
|
Jump
Hopslipper
Shiny Jump
|
|
In the head scene (two scenes after the scene with Comet Piece., in the east part of the scene, hidden behind collapsible wall.
|
|
| POW Block
|
|
In the previous scene, in the part reached after being swallowed by the sphinx.
|
|
| Hopslipper, Eekhammer, Fire Flower
|
|
Same scene, in the southwest of the upper part.
|
|
Hidden Blocks
| Item
|
Icon
|
Location
|
Image (Unrevealed)
|
Image (Revealed)
|
| Slaphammer
|
|
In the second scene, above the flower near the entrance warp pipe.
|
|
|
| Coin
|
|
In the scene reached by a north opening in the third sphinx scene, at the top, left of the ? Block floating in the air.
|
|
|
Paperization Spots
| Scrap/Sticker
|
Icon
|
Location
|
Image
|
| Random 1x1 Sticker
|
N/A
|
In the first scene, in the north, above the flower.
|
|
| Random 1x1 Sticker
|
N/A
|
In the scene reached by a north opening in the third sphinx scene, at the top, under the ? Block.
|
|
| Secret Door
|
|
In the second scene, at the left side of the sphinx. Available only after getting access to Outlook Point and getting Secret Door sticker from there.
|

|
Sandshifter Ruins
Items
Field/Objects
| Item
|
Icon
|
Location
|
Image
|
| 10-Coin, Heart
|
|
In the scene reached by a door found in the part of the main scene reached either by going left->left/right or right->left from the top, in the last two coffins on the left.
|
|
| Bat
|

|
After using the right, right, left, left slides in the main scene and then going through the door on the right, found in the 4th coffin.
|
|
| Coin
|
|
In the outside scene, in the cactus after hitting it 3 times.
|
|
| Eekhammer
|
|
From the start of the underground maze, Mario must head down the slide on the right, and once again down the next slide on the right. He must then enter the door and open the fourth coffin from the left to find it inside.
|
|
| Heart, Hopslipper
|
|
From the start of the underground maze, Mario must head down the slide on the right, and once again down the next slide on the right. He must then enter the door and open the first and second coffins.
|
|
| Heart, Jump
|
|
In the scene reached by a door by going right from the top and then to the right, in the 2nd and 3rd coffins.
|
|
| HP-Up Heart
|
|
From the start of the underground maze, Mario must head down the slide on the right, and once again down the next slide on the right. He must then enter the door and open the third coffin from the left to find it inside.
|
|
| Jackhammer
|
|
In the main scene, at the bottom after going through the left slides.
|
|
| Lighter
|
|
In the scene behind the Secret Door.
|
|
| Magnifying Glass
|

|
In the scene reached by a door by going right from the top and then to the right, then going through the 3rd coffin.
|
|
| POW Block
|
|
- In the scene reached by a door found in the part of the main scene reached either by going left->left/right or right->left from the top, in the coffin in front of the entrance.
- At the bottom of the main scene by going right->right->left->left (only during the subsequent visits) and going through the door is a scene with multiple sarcophagi. The sticker is found in the middle coffin in the lowest right row.
|
|
| 2 Shiny POW Blocks
|
|
After using the right, right, left, left slides in the main scene and then going through the door on the right, found in the 2nd and 3rd coffins.
|
|
Blocks
| Item
|
Icon
|
Location
|
Image
|
| Line Jump
|
|
In the outside scene, north of the pillar that makes the bridge.
|
|
| Iron Jump
|
|
In the main scene, at the top, to the left.
|
|
| Slaphammer
|
|
Same scene, at the top, to the right.
|
|
Iron Jump
Baahammer, Burnhammer, Chillhammer
|

|
In the scene reached by a door found in the part of the main scene reached either by going left->left/right or right->left from the top.
|
|
| Line Jump
|
|
At the bottom of the main scene, reached by either left->left/right->down or right->left->down from the top.
|
|
| Hopslipper
|
|
Same scene, after going right from the top and found in the west.
|
|
| Line Jump
|
|
In the scene reached by a door by going right from the top and then to the right.
|
|
| Shiny Hammer
|
|
In the main scene, after going right->right from the top, then in the east of the part.
|
|
| Ice Flower
|
|
In the scene reached by a door by going right->right from the top, in the west of the scene.
|
|
| Iron Jump, Hopslipper, Line Jump
|
|
Same scene, in the middle scene, above the Hidden Block.
|
|
| Line Jump
|
|
In the scene west of the previous one.
|
|
| Baahammer
|
|
At the bottom of the main scene by going right->right->left->left (only during the subsequent visits) and going through the door is a scene with multiple sarcophagi. This block is seen above the spikes and can be reached after the spikes under it are covered with sand.
|
|
| Shiny Jump
|
|
Same scene, above the right spikes, reached by creating platforms wiih hidden blocks and block created by paperization between them.
|
|
Hidden Blocks
| Item
|
Icon
|
Location
|
Image (Unrevealed)
|
Image (Revealed)
|
| Coin
|
|
In the outside scene, under the ? Block.
|
|
|
| Coin
|
|
In the scene reached by a door by going right->right from the top of the main scene, under the ? Block high up in the air. Acts as a platform to reach said block.
|
|
|
| Coin (all 4)
|
|
In the scene reached by a door by going right->right->right from the top of the main scene, in front of the wall with Bowser Tape in the east. These 4 blocks act as a platform to reach said tape.
|
|
|
| Coin
|
|
At the bottom of the main scene by going right->right->left->left (only during the subsequent visits) and going through the door is a scene with multiple sarcophagi. On the ground, left of the ? Block above the right spikes.
|
|
|
| Coin
|
|
Same scene, after previous hidden block and a block created by paperization, next to the ? Block. Together with the previously mentioned blocks, these three act as a platforms to reach said ? Block.
|
|
|
| Flashy Clone Jump
|

|
Same scene, above the previously mentioned ? Block.
|
|
|
Paperization Spots
| Scrap/Sticker
|
Icon
|
Location
|
Image
|
| Random 1x1 Sticker
|
N/A
|
At the bottom of the main scene by going right->right->left->left (only during the subsequent visits) and going through the door is a scene with multiple sarcophagi. Between two hidden blocks. Together with them, these three blocks act as platforms to reach a ? Block above the spikes.
|

|
| Secret Door
|
|
In the scene reached by a door by going right->right->right from the top of the main scene, on the wall after entering. Available only after getting access to Outlook Point and getting Secret Door sticker from there.
|
|
Damp Oasis
Items
Field
| Item
|
Icon
|
Location
|
Image
|
| Hair Shears
|

|
In the scene behind the Secret Door.
|
|
| Shaved Ice
|

|
At the roof of the building inside the oasis. Available only after restoring the oasis.
|
|
| Tablet Piece
|

|
In the treasure chest found inside the closet in the building inside the oasis. Available only after restoring the oasis.
|
|
Hidden Block
| Item
|
Icon
|
Location
|
Image (Unrevealed)
|
Image (Revealed)
|
| Burnhammer
|
|
In the second scene, on the roof, above the barrel.
|
|
|
Paperization Spots
| Scrap/Sticker
|
Icon
|
Location
|
Image
|
| Vacuum
|
|
Left of the entrance to the second scene. Required to progress.
|
|
| Faucet
|
|
In the northwest of the second scene. Required to progress.
|
|
| Secret Door
|
|
In the first scene, after going left from the entrance, on the wall. Available only after getting access to Outlook Point and getting Secret Door sticker from there.
|
|
Drybake Stadium
Items
Field/Given
| Item
|
Icon
|
Location
|
Image
|
| Royal Sticker
|

|
In the last scene, dropped by Tower Power Pokey after defeating it.
|
|
| Stone Entry
|

|
On the second floor, at the dead end after going right from the entrance.
|
|
Blocks
| Item
|
Icon
|
Location
|
Image
|
Shiny Jump, Shiny Hammer (first floor)
Baahammer, Spike Helmet (second floor)
Burnhammer, POW Block (third floor)
Chillhammer, Shell (fourth floor)
|
|
NOTE: These 8 blocks share the same room layout, so only one image is used.
There are two ? Blocks in every room with an elevator which goes up (indicated by a mural pointing upwards).
|
|
| Spike Helmet
|
|
On the second floor, going right from the entrance. Found above the quicksand pit, before the spike wall.
|
|
POW Block
Line Jump
|
|
Same fllor, behind the spike wall. Reached by going under the wall, partially submerged in the sand.
|
|
| Ice Flower
|
|
On the fourth floor, near the last exit to the outside.
|
|
| Slaphammer
|
|
In the outside area reached by first exit on the fourth floor, at the end.
|
|
| POW Block
|
|
In the outside area readched by second exit on the fourth floor, left of the entrance.
|
|
| Burnhammer
|
|
Same area, at the end.
|
|
Flashy Eekhammer (first time), Hopslipper (later times)
Flashy Spike Helmet (first time), Spike Helmet (later times)
Flashy Hurlhammer (first time), Line Jump (later times)
|


|
In the scene behind the secret door. Available only after getting access to Outlook Point, getting Secret Door sticker from there and using it in the first scene, right at the beginning.
|
|
Paperization Spots
| Scrap/Sticker
|
Icon
|
Location
|
Image
|
| 3 Tablet Pieces
|
|
In the first scene, at the top. Required to progress.
|
|
| Jump/Iron Jump/Line Jump (any 1x1 variety)+Hammer/Hurlhammer/Slaphammer (any 1x1 variety)
|
N/A
|
On the exit of the first floor. Required to progress.
|
|
| Stone Entry
|
|
At the end of the second floor. Required to progress.
|
|
| Random 1x1 Sticker
|
N/A
|
On the third floor, between the two broken pillars. Acts as a platform to reach the second pillar with Line Jump sticker on it.
|
|
| Hammer/Hurlhammer/Slaphammer (any 1x1 variety)+any Spike Helmet+Jump/Iron Jump/Line Jump (any 1x1 variety)
|
N/A
|
On the exit of the third floor. Required to progress.
|
|
| Luigi
|
|
In the outside area reached by a second exit on the fourth floor, on the right end, in the window.
|
|
| Tower's Outer Wall
|

|
In the outside are reached by a third exit on the fourth floor, at the end. Paperize is used twice here: first to remove the door and to turn it the right way, second to put it back. Required to progress.
|
|
| Any Flower+any POW Block
|
N/A
|
On the exit of the fifth floor. Required to progress.
|
|
| Secret Door
|
|
In the first scene, right next to the entrance. Available only after getting access to Outlook Point and getting Secret Door sticker from there.
|
|
Leaflitter Path
Items
Field/Object
| Item
|
Icon
|
Location
|
Image
|
| Heart
|
|
In the third scene, in the third bush.
|
|
| HP-Up Heart
|
|
Only appears after completing Whitecap Beach. Mario must go through the entire level to find it waiting in front of the piece of the Sticker Comet.
|
|
| Searchlight
|

|
In the scene behidn the Secret Door.
|
|
Blocks
| Item
|
Icon
|
Location
|
Image
|
| Slaphammer
|
|
In the first scene, near the entrance.
|
|
| Iron Jump
|
|
Same scene, in the northwest.
|
|
| Burnhammer
|
|
In the third scene, in the middle.
|
|
| Shiny POW Block
|
|
Same scene, in the northeast, above the elevated ground.
|
|
| Shiny Hurlhammer
|

|
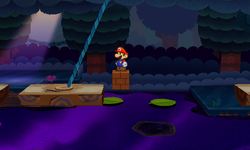
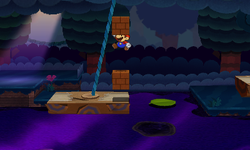
In the fourth scene, near the start of the first poison lake, can be reached with rotating piece of wood.
|
|
| Line Jump
|
|
Same scene, above the elevated ground near the start of the first poison lake.
|
|
| Shiny Fire Flower
|
|
Same scene, near the end of the first poison lake, can be reached with the middle moving piece of wood.
|
|
Hidden Block
| Item
|
Icon
|
Location
|
Image (Unrevealed)
|
Image (Revealed)
|
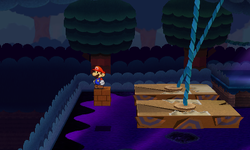
| Line Jump
|
|
In the third scene, above the Brick Block found in the lower poisonous water.
|

|

|
Paperization Spot
| Scrap/Sticker
|
Icon
|
Location
|
Image
|
| Trumpet
|

|
In the second scene, on the stump with partially eaten fruit bush. Required to progress.
|
|
| Random 1x1 Sticker
|
N/A
|
In the fifth scene, in the middle between Recovery Block and Save Block and above circle of flower that can be bloomed by hammering.
|
|
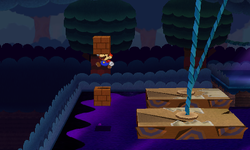
| Secret Door
|
|
In the fourth scene, in the middle, after the first poison lake, on the wall. Available only after getting access to Outlook Point and getting Secret Door sticker from there.
|
|
The Bafflewood
Items
Field/Object
| Item
|
Icon
|
Location
|
Image
|
| Bowling Ball
|

|
After the Wiggler Segment from Stump Glade opens up a new path, in the third scene of said path.
|
|
| Heart
|
|
After the Wiggler Segment from Stump Glade opens up a new path, in the second scene of said path, in the upper right bush.
|
|
| Trophy
|

|
After the Wiggler Segment from Stump Glade opens up a new path, in the third scene of said path. Only available after using Bowling Ball in Strike Lake and then having it in possession.
|
|
| Violin
|

|
In the scene behind the Secret Door.
|
|
Blocks
Paperization Spots
| Scrap/Sticker
|
Icon
|
Location
|
Image
|
| Random 1x1 Sticker
|
N/A
|
In the scene reached by going right from the fourth scene, above the circle of flowers that can be bloomed by hammering.
|
|
| 4 random 1x1 Stickers
|
N/A
|
In the scene reached by going north from the fourth scene, found above the circles of flowers thac can be bloomed by hammering in front of every exit but the southwest one.
|
|
| Secret Door
|
|
In the scene reached by going right from the fourth scene, in the southeast. Available only after getting access to Outlook Point and getting Secret Door sticker from there.
|
|
Wiggler's Tree House
Items
| Item
|
Icon
|
Location
|
Image
|
| Boom Box
|

|
Near the entrance of the third floor.
|
|
| High Heel
|

|
On the ground floor, on the shoe rack. Can be reached by knocking down a fire on the second floor and jumping through the hole.
|
|
| HP-Up Heart
|
|
In the scene behind the Secret Door.
|
|
Paperization Spots
| Scrap/Sticker
|
Icon
|
Location
|
Image
|
| Secret Door
|
|
On the second floor, in the east.
|
|
| Tree Stump
|
|
At the top of the tree. Available after saving the first Wiggler Segment and taking the Tree Stump scrap from Loop Loop River. Required to progress.
|
|
| Tree Stump
|
|
Same scene, available after saving the second Wiggler Segment and taking the Tree Stump scrap from Tree Branch Trail. Required to progress.
|
|
| 4 Wiggler Segments
|
   
|
Same scene, available after saving the third and fourth Wiggler Segments from The Bafflewood and Surfshine Harbor. Required to progress.
|
|
Strike Lake
Items
Field/Objects
| Item
|
Icon
|
Location
|
Image
|
| Coin
|
|
- 2 in the second scene, in the first tree with the targets.
- 3 in the third scene, in the first tree with targets.
- 2 in the third scene, in the second tree with targets.
- 2 in the third scene, in the third tree with targets.
|
|
2 Coins and Hammer
Billiard Ball
|

|
- In the first scene, in the first tree with targets.
- In the second scene, in the sixth tree with targets. During the first visit, a Wiggler Segment is hiding here. On later visits, a Billiard Ball is found instead (granted Mario doesn't have in his possesion).
|
|
| 2 Coins and Jump
|
|
- In the first scene, in the second tree with targets.
- In the second scene, in the fourth tree with targets
|
|
| Bowling Ball
|
|
In the scene north of the second one, appears in the tree trunk after using it on a stump.
|
|
| Coin and Jump
|
|
In the second scene, in the second tree with targets.
|
|
| Coin and Leaf
|
|
In the second scene, in the fifth tree with targets.
|
|
| Coin, Hammer and Shiny Leaf/Leaf
|

|
In the second scene, in the third tree with targets. The Shiny Leaf Sticker appears only for the first time, then it is replace with the regular one for future visits.
|
|
| Coin, Jump and Leaf
|
|
In the first scene, in the third tree with targets.
|
|
| Drum
|

|
In the scene behind the Secret Door.
|
|
| Heart
|
|
- In the first scene, in the second flower bush.
- In the third scene, in the second flower bush.
|
|
Blocks
| Item
|
Icon
|
Location
|
Image
|
| Jump
|
|
In the first scene, in the north.
|
|
Line Jump
Hurlhammer
|
|
In the second scene, in the east part of the poisonous water.
|
|
| Line Jump
|
|
Same scene, right of the northern exit.
|
|
| Hurlhammer
|
|
In the third scene, near the entrance.
|
|
Paperization Spots
| Scrap/Sticker
|
Icon
|
Location
|
Image
|
| Secret Door
|
|
In the third scene, in the southwest. Available only after getting access to Outlook Point and getting Secret Door sticker from there.
|
|
| Bowling Ball
|

|
In the scene north of the second scene, on the stump on the right. Required to progress. Available only after getting the Bowling Ball thing in The Bafflewood (available after the Wiggler Segment from Stump Glade runs there).
|
|
| Random 1x1 Sticker
|
N/A
|
In the second scene, in the southeast, above the circle of flowers that can be bloomed by hammering. Available only after defeating Gooper Blooper.
|

|
Loop Loop River
Items
Field
| Item
|
Icon
|
Location
|
Image
|
| 4 Coins
|
|
In the upper middle scene, above the right part of the river.
|
|
| Pillow
|

|
In the scene behind the Secret Door.
|
|
| Tree Stump
|
|
In the middle part of the west scene.
|
|
Blocks
| Item
|
Icon
|
Location
|
Image
|
| Shiny POW Block
|
|
In the lower middle scene, in the northeast.
|
|
| Baahammer
|
|
In the east scene, in the northeast of the lower part.
|
|
Shiny Hurlhammer
Shell
|
|
In the upper middle scene, in the northwestern corner.
|
|
| Shiny Fire Flower
|
|
Same scene, above the platform made out of cardboard, created by peeling of Bowser Tape beforehand.
|
|
| Shiny Iron Jump
|

|
In the west scene, in the north.
|
|
Hidden Blocks
| Item
|
Icon
|
Location
|
Image (Unrevealed)
|
Image (Revealed)
|
| Coin (all 3)
|
|
In the west scene, between two elevated grounds. Unlike other blocks, these three does not respawn and stay empty for the rest of the game.
|
|
|
| Flashy Jump
|
|
In the upper middle scene, there are four coins floating above the river. The block can be found between them.
|
|
|
Paperization Spots
| Scrap/Sticker
|
Icon
|
Location
|
Image
|
| Random 1x1 Sticker
|
N/A
|
In the west scene, in the middle, in the circle of flowers that can be bloomed by hammering.
|
|
| Secret Door
|
|
In the leower middle scene, in the northeast. Available only after getting access to Outlook Point and getting Secret Door sticker from there.
|
|
Outlook Point
Item
| Item
|
Icon
|
Location
|
Image
|
| Fishhook
|

|
In the scene behind the Secret Door.
|
|
Paperization Spot
| Scrap/Sticker
|
Icon
|
Location
|
Image
|
| Secret Door
|
|
In the shop area, in the low part.
|
|
Rustle Burrow
Items
Blocks
| Item
|
Icon
|
Location
|
Image
|
| Shiny Jump
|
|
In the third scene (second underground one), near the northern exit on the lower part of the scene.
|
|
| Poison Mushroom
|
|
In the scene south of the previous one, found in the north on the middle stairs.
|
|
| Baahammer
|
|
In the scene north of the previous one, in the southeast.
|
|
| Fire Flower
|
|
In the scene north of the third scene, in the northwest.
|
|
| Shiny Hopslipper, Shiny Iron Jump, Shiny Line Jump
|
|
Same scene, in the secret area, found left of the previous ? Block.
|
|
Flashy Hammer
Line Jump
|
|
In the third scene, in the middle of the upper part.
|
|
| Shiny Hurlhammer
|
|
In the second scene, in the north of the lower part.
|
|
| Iron Jump
|
|
In the scene south of the third scene, in the east of the middle part, at first hidden after some Brick Blocks.
|
|
| POW Block
|
|
In the scene north of the third scene, behind the spiderweb.
|
|
Field
| Item
|
Icon
|
Location
|
Image
|
| Burrow Door
|

|
In the scene south of the third scene, on the elevated ground right of the entrance.
|
|
| 7 Five Coins, Upright Vacuum
|

|
In the scene behind the Secret Door.
|
|
| Hammer
|
|
In the second scene, at the end of the upper part.
|
|
| Super Star
|
|
In the third scene, in the lower part.
|
|
Hidden Blocks
| Item
|
Icon
|
Location
|
Image (Unrevealed)
|
Image (Revealed)
|
Shiny Hopslipper
POW Block
|
|
In the second scene, above the stone slabs.
|

|
|
| Hurlhammer
|
|
In the scene south of the third scene, in front of the northern exit.
|
|
|
| Burnhammer
|
|
In the scene north of the third scene, above the stone slab near the entrance.
|
|

|
| Coin (both)
|
|
In the second scene, above the stone slabs in the upper part.
|
|
|
| Shell
|
|
In the scene north of the third scene, behind the spiderweb and above the highest Brick Block.
|
|
|
Paperization Spots
| Scrap/Sticker
|
Icon
|
Location
|
Image
|
| Burrow Door
|
|
In the scene south of the third scene, at the end of the left stairs. Required to progress.
|
|
| Secret Door
|
|
In the second scene, near the end of the upper part.
|
|
| Random 1x1 Sticker
|
N/A
|
In the scene north of the third scene, in the secret area to the left, above the circle of flowers that can be bloomed by hammering.
|
|
Tree Branch Trail
Items
Field/Object
| Item
|
Icon
|
Location
|
Image
|
| 7 Five Coins, Tape
|

|
In the scene behind the Secret Door.
|
|
| Heart
|
|
In the first scene, in the second bush.
|
|
| HP-Up Heart
|
|
Mario must move into the second area and head to the right of the first large tree, where he must hop onto the farthest back ledge and move left to enter a secret cave with it waiting inside.
|
|
| Tree Stump
|
|
In the first scene, at the end of the upper part. Reachable only after beating the Wiggler Segment.
|
|
| Watch Battery
|

|
In the first scene, in the upper hole where poison used to be (World 3-12 completed).
|
|
Blocks
| Item
|
Icon
|
Location
|
Image
|
| Line Jump
|
|
In the first scene, in the middle of the lower part.
|
|
| Shiny Line Jump
|
|
Same scene, on the small island in the second poisonous water.
|
|
| Slaphammer
|
|
Same scene, at the end of the path found behind the tree in the northeast.
|
|
| Line Jump
|
|
In the second scene, found north of the entrance.
|
|
| Iron Jump
|
|
Same scene, in the middle of lower part, above the spiderweb.
|
|
| Eekhammer
|
|
Same scene, right of the right tree.
|
|
| Fire Flower
|
|
Same scene, in the north of upper spiderweb, surrounded by Brick Blocks.
|
|
| Hurlhammer
|
|
Same scene, found above the elevated ground after jumping down from the previous ? Block.
|
|
Paperization Spots
| Scrap/Sticker
|
Icon
|
Location
|
Image
|
| Secret Door
|
|
In the first scene, near the entrance.
|
|
| Random 1x1 Sticker
|
N/A
|
In the second scene, in the southwest. Available only after defeating Gooper Blooper.
|
|
Gauntlet Pond
Items
Field
| Item
|
Icon
|
Location
|
Image
|
| 8 Five Coins, HP-Up Heart
|
|
In the second area, an arrow on the ground can be seen pointing toward the wall, previously concealed by the poison. Mario must follow and enter the hole in the wall to find them.
|
|
| Heart
|
|
- In the second scene, in the left tree.
- In the second scene, in the right tree.
|
|
| Sponge
|

|
In the third scene, in the northwest part of it. Sponge must be hit three times before it can be picked up.
|
|
| Super Star
|
|
In the second scene, at the end of the poisonous water.
|
|
Blocks
Hidden Blocks
| Item
|
Icon
|
Location
|
Image (Unrevealed)
|
Image (Revealed)
|
| Fire Flower
|
|
In the second scene, in the northwest, between two Brick Blocks.
|
|
|
| Chillhammer
|
|
In the third scene, above the first Brick Block.
|
|
|
| Shell
|
|
Same scene, above the second Brick Block.
|
|
|
Paperization Spot
| Scrap/Sticker
|
Icon
|
Location
|
Image
|
| Secret Door
|
|
In the second scene, in the middle of the lower part.
|
|
| Random 1x1 Sticker
|
N/A
|
In the first scene, to the right of the entrance from the third scene. Required to progress.
|
|
| Random 1x1 Sticker
|
N/A
|
In the thid scene, in the northeast. Available only after defeating Gooper Blooper.
|
|
Stump Glade
Items
| Item
|
Icon
|
Location
|
Image
|
| 3 10-Coins, 20 Coins, 10 Five Coins
|
|
In the scene after Big-Bonking-Panic-Pick-And-Choose Snifit Bash. Appears only if Mario doesn't have Radiator in his possession.
|
|
| 6 Five Coins, Square Can
|

|
In the scene behind the Secret Door.
|
|
| Heart
|
|
- During Snifit or Whiffit's Big Bonking Snifit Bash, can appear instead of a Snifit.
- During Snifit or Whiffit's Unrelentingly Exciting Shuffle Game, appears after each correct guess.
|
|
| HP-Up Heart
|
|
In the backstage after the regular rounds of Snifit or Whiffit. Appears only after Gooper Blooper has been defeated.
|
|
| Radiator
|

|
In the scene after Big-Bonking-Panic-Pick-And-Choose Snifit Bash.
|
|
Paperization Spot
Holey Thicket
Items
Field/Given/Object
| Item
|
Icon
|
Location
|
Image
|
| Balloon, 7 Five Coins
|

|
In the scene behind the Secret Door.
|
|
2 Coins, Heart
Bowser Tape
|

|
- In the first scene, at the upper part, in the tree. During the first visit, it also contains Bowser Tape Scrap.
- In the fourth scene, in the upper part, in the tree.
|
|
| Coin and 2 Hearts
|
|
In the second scene, at the end of the middle part, next to the exit to the middle part of the first scene.
|
|
| Shiny Mushroom
|
|
Given by the Traveling Toad after saving him from 2 Poison Bloopers.
|
|
Blocks
| Item
|
Icon
|
Location
|
Image
|
| Shell
|
|
In the second scene, above the elevated ground, created by peeling off two Bowser Tapes.
|
|
| Shiny Jump
|
|
In the first scene, at the end of the upper part.
|
|
| Baahammer
|
|
In the fourth scene, in the north of the lower part.
|
|
| Shell
|
|
Same scene, in the southeast of the lower part.
|
|
| POW Block
|
|
Same scene, in the upper part.
|
|
| Shiny POW Block, Shiny Fire Flower, Shiny Ice Flower
|
|
In the third scene, in the part reachable from the upper part of the fourth scene.
|
|
Hidden Block
| Item
|
Icon
|
Location
|
Image (Unrevealed)
|
Image (Revealed)
|
| Shiny Hammer
|
|
In the first scene, after jumping into the underground area, above the stone slab.
|
|
|
Paperization Spot
| Scrap/Sticker
|
Icon
|
Location
|
Image
|
| Bowser Tape
|
|
In the second scene, found near the exit. Required to progress.
|
|
| Secret Door
|
|
In the fourth scene, in the upper part.
|
|
Whitecap Beach
Items
Field/Given
| Item
|
Icon
|
Location
|
Image
|
| Newspaper
|

|
In the scene behind the Secret Door.
|
|
| Pocket Watch
|

|
In the first scene, in the southwest, buried in the sand.
|
|
| Royal Sticker
|

|
Dropped by Gooper Blooper after defeating it.
|
|
Blocks
| Item
|
Icon
|
Location
|
Image
|
| 2x Line Jump, Shiny Line Jump
|
|
In the second scene, in the north, behind the part of the shipwreck.
|
|
| Shiny Eekhammer
|

|
Same scene, above the platform second-closest to the entrance to of the shipwreck.
|
|
| Shiny Slaphammer
|
|
Same scene, in the east, next to the flower.
|
|
Hidden Block
| Item
|
Icon
|
Location
|
Image (Unrevealed)
|
Image (Revealed)
|
| Flashy Hopslipper
|

|
In the second scene, above the flower found next to the ? Block in the east of the scene.
|

|

|
Paperization Spots
| Scrap/Sticker
|
Icon
|
Location
|
Image
|
| Luigi
|
|
In the first scene, seen in the background from the dock.
|
|
| Secret Door
|
|
In the second scene, found behind the Wiggler, on the wall.
|
|
| Random 1x1 Sticker
|
N/A
|
In the fourth scene, above the flower next to the entrance.
|
|
Snow Rise
Items
Field/Given
| Item
|
Icon
|
Location
|
Image
|
| Cell Phone
|

|
In the scene behind the Secret Door.
|
|
| 4 Five Coins
|
|
In the third scene, on the downwards slope in the southeast of the scene.
|
|
| Goat
|

|
At the top of the scene north of the third scene, given by Birdo after hammering the tree three times.
|
|
| Pipe in a Cave
|

|
In the first scene, in the upper part reachable from the upper part of the second scene. Available after using Paperization with fire-based 1x1 sticker on the "ice-cream like" structure.
|
|
Blocks
| Item
|
Icon
|
Location
|
Image
|
| Shiny Ice Flower
|
|
In the first scene, in the west part, left of the first tree.
|
|
| 3x Shiny Jump
|
|
Same scene, in the east part, right of the second tree.
|

|
| Shiny Spike Helmet
|

|
In the second scene, near the entrance of the lower part.
|
|
| Shiny Slaphammer
|
|
In the third scene, near the first slope.
|
|
| Shiny Shell
|
|
Same scene, above the Hidden Block found above the wilted flower in the southeast.
|

|
| Shiny POW Block
|
|
In the scene north of the second one, next to the Recovery Block at the bottom.
|
|
Hidden Blocks
| Item
|
Icon
|
Location
|
Image (Unrevealed)
|
Image (Revealed)
|
| Shiny Line Jump
|
|
In the first scene, above the first rock.
|
|
|
| Shiny Eekhammer
|
|
In the third scene, above the wilted flower in the southeast.
|
|
|
| Flashy Ice Flower
|
|
Same scene, above the ? Block reached by the previous hidden block.
|

|

|
| Shiny Shell
|
|
In the second scene, above the wilted flower in the west of the upper part.
|

|
|
Shiny Line Jump
Shiny Shell
|
|
In the scene north of the second one, above the ? and Recovery Blocks
|

|
 
|
Paperization Spots
| Scrap/Sticker
|
Icon
|
Location
|
Image
|
| Any Fire Flower or any Burnhammer
|
N/A
|
In the first scene, near the exit. Using any fire based sticker melts the snow of the ice-cream like platform to reveal a Pipe in a Cave scrap. Required to progress.
|

|
| Random 1x1 Sticker
|
N/A
|
In the third scene, near the entrance, above the circle of flowers that can be bloomed after hammering.
|
|
| Radiator
|

|
In the second scene, near the upper right entrance. Required to progress.
|
|
| Secret Door
|
|
Same scene, in the middle of the lower part.
|
|
| Pipe in a Cave
|
|
In the third scene, in the southeast. Required to progress.
|

|
Ice Flow
Items
Field
| Item
|
Icon
|
Location
|
Image
|
| Big 1UP
|
|
In the first scene, it will slide down the frozen river after Mario collects 100 Coins.
|
|
| Big Shiny 1UP
|

|
In the third scene, it will slide down the frozen river after Mario collects 100 Coins.
|
|
| Cat-o-Luck
|
|
In the third scene, it can slide down the frozen river if Mario does not have it in his possession.
|
|
| Coins
|
|
- In the first scene, 100 of them can slide down the frozen river in the form of single Coins, Five Coins and 10-Coins.
- In the third scene, 100 of them can slide down the frozen river in the form of single Coins, Five Coins and 10-Coins.
|
|
| Curling Stone
|

|
In the first scene, it will slide down the frozen rive if Mario does not have it in his possession.
|
|
| Goat
|
|
In the third scene, it can slide down the frozen river if Mario does not have it in his possession.
|
|
| Hair Dryer
|

|
In the scene behind the Secret Door.
|
|
| Heart
|
|
- In the first scene, in the alcove found right of the frozen river.
- In the second scene, in the small space under the ice. Accessible by breaking the ice at its south end.
- In the fourth scene, found right after entering.
|
|
| HP-Up Heart
|
|
In the third scene, found at the end of the elevated ground found on the right in the middle of the frozen river.
|
|
| Rubber Ducky
|

|
In the third scene, it can slide down the frozen river if Mario does not have it in his possession.
|
|
| Trophy
|
|
In the third scene, it can slide down the frozen river if Mario does not have it in his possession.
|
|
Blocks
Hidden Blocks
| Item
|
Icon
|
Location
|
Image (Unrevealed)
|
Image (Revealed)
|
| Burnhammer
|
|
In the third scene, after going on the elevated ground and reaching its top, the perspective changes. The block is above the flower between Recovery Block and a tree.
|
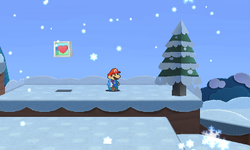
|

|
| Coin (all 3)
|
|
In the fourth scene, above the three wilted flowers in the middle part.
|
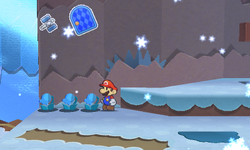
|
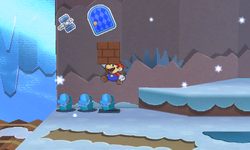 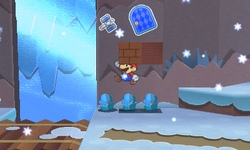 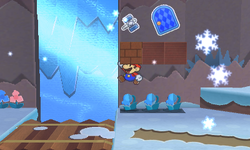
|
| Coin (all 5)
|
|
Same scene, found right of the wilted flower found at the upper part. Together with the last three, these eight blocks serve as platforms to reach a Flashy Slaphammer and Secret Door Stickers.
|
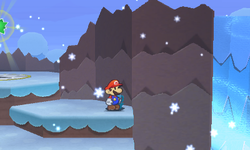
|
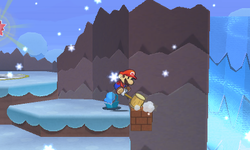 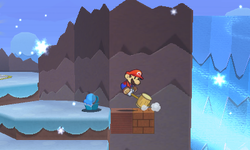 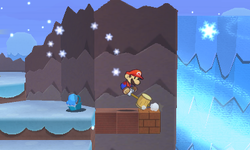 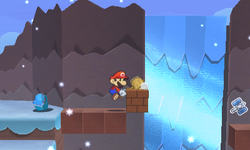 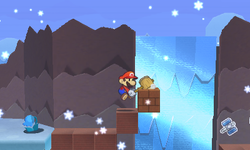
|
Paperization Spots
| Scrap/Sticker
|
Icon
|
Location
|
Image
|
| Secret Door
|
|
In the second scene, in the middle to the west.
|
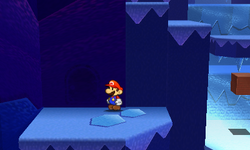
|
| 4 Random 1x1 Stickers
|
N/A
|
In the fourth scene, in the west of the middle part.
|
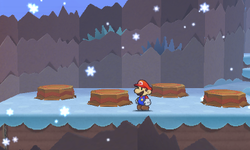
|
The Enigmansion
Items
Field/Given
| Item
|
Icon
|
Location
|
Image
|
| Big Bookcase
|

|
In the upper part of the dining hall are three doors. After entering the left one, opening the cabinet and defeating the Boos inside, this scrap is found on the left cabinet door.
|
|
| Book of Sealing
|

|
Given by Steward after talking to him for the first time.
|
|
| Cake
|

|
In the middle of the dining hall table, accessible after jumping from the upper part onto the table.
|
|
| Forebear's Portrait
|

|
After defeating the Big Boo in the basement and examining the portrait in the room left of the lobby, Steward says that Mario is free to take it.
|
|
| HP-Up Heart
|
|
After completing Whiteout Valley, Mario has return to the room where Steward was lounging. There, Forebear is lounging instead. Mario joins him for a cup of tea, afterwards Steward gives him the heart.
|
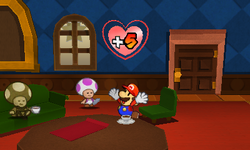
|
| Mansion Door
|

|
In the room right of the lobby, after turning off the light to make the Boos visible and then defeating them, Mario can use the fallen furniture to reach the bookcases. The scrap is found at the end.
|
|
| Mansion Safe
|

|
In the room left of the lobby. Mario has to hammer the picture above the fireplace, so that the scrap falls down and is available to be picked up.
|
|
| Oven
|

|
In the dining hall, on the left side in the back.
|
|
| Refrigerator
|

|
In the dining hall, on the right side in the back. First, a Boo hiding inside must be defeated before the thing can be picked up.
|
|
| Stapler
|

|
In the scene with the hallways, in the east hallway. It bursts onto the scene from the window before it can be picked up.
|
|
| Watering Can
|

|
In the garden, automatically picked up after hammering the shelf with it three times.
|
|
Blocks
| Item
|
Icon
|
Location
|
Image
|
| Shiny Ice Flower
|
|
On the second floor of the first room, in the northeastern corner.
|
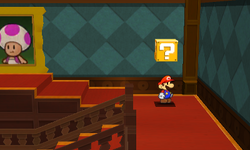
|
| Shiny Hopslipper
|
|
Same room, same floor, in the northwestern corner.
|
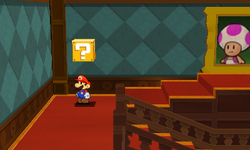
|
| Shiny Hopslipper
|
|
In the outside scene where Comet Piece is, between the second and third windows.
|
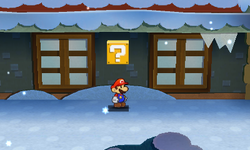
|
| Shiny POW Block
|
|
Same scene, behind the fence, accessed by a door opposite of the greenhouse door.
|
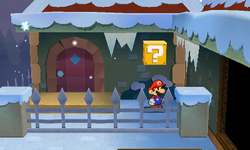
|
| Shiny Ice Flower
|
|
In the room with the shortcut to Decalburg, in the middle of the stairs.
|

|
| Shiny Hopslipper
|
|
Same room, at the end of the stairs.
|
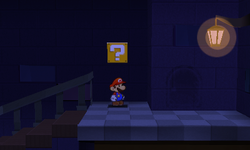
|
Hidden Blocks
| Item
|
Icon
|
Location
|
Image (Unrevealed)
|
Image (Revealed)
|
| Shiny Hopslipper
|
|
On the dining hall table, above the blue wilted flower.
|

|
|
| Tail
|

|
Same room, above the previous block.
|
|
|
| Super Boot
|

|
Same room, above the block created with the paperization.
|
|
|
| 10-Coin
|
|
Same room, in the upper part are 3 doors with rooms mostly identical to the houses in Decalburg. This Hidden Block can be found above the cabinet in the left room.
|
|
|
Paperization Spots
| Scrap/Sticker
|
Icon
|
Location
|
Image
|
| Mansion Safe→Mansion Bookcase
|
↓
|
In the hallway, there is a safe left of the bookcase. Paperize is used twice here: first to take out the Mansion Safe scrap, later to put Mansion Bookcase scrap in its place. Required to progress.
|
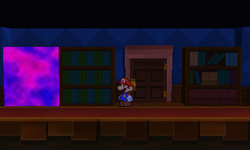
|
| Mansion Door→Mansion Wall
|
↓
|
In the room after going through the door on the left of the hallway. Paperize is used twice here: first to take out the Mansion Door scrap, later to put Mansion Wall scrap in its place. Required to progress.
|

|
| Mansion Wall→Mansion Door
|
↓
|
IIn the room left of the previous one. Paperize is used twice here: first to take out the Mansion Wall scrap, then to put Mansion Door scrap in its place. Required to progress.
|
|
| Mansion Bookcase→Mansion Safe
|
↓
|
In the room after going through the door in the middle of the hallway. Paperize is used twice here: first to take out the Mansion Bookcase scrap, then to put the Mansion Safe scrap in its place. Required to progress.
|
|
| Secret Door
|
|
In the room with the shortcut to Decalburg, at the end of the upper part.
|
|
| Steward's Portrait→Mansion Door
|

↓

|
In the first room, in the north of the second floor. Paperize is used twice here: first to take out Steward's Portrait scrap, then to put Mansion Door scrap in its place. Required to progress.
|
|
| Random 1x1 Sticker
|
N/A
|
In the dining hall, above the red wilted flower.
|
|
| Steward's Portrait
|
|
There are three door in the upper part of the dining hall. This spot is found behind the middle one. Required to progress.
|
|
| Big Bookcase
|
|
In the room right of the first room, in the northeast. Required to progress.
|
|
Whiteout Valley
Items
| Item
|
Icon
|
Location
|
Image
|
| 7 Coins
|
|
Found on the chairlift in the second scene.
|
|
| Heart
|
|
- 2 of them found on the chairlift in the second scene.
- 6 of them found on the chairlift in the fourth scene.
|
|
| Flashlight
|

|
In the scene behind the Secret Door.
|
|
Paperization Spots
| Scrap/Sticker
|
Icon
|
Location
|
Image
|
| Secret Door
|
|
In the first scene, near the start of the cave.
|

|
| Forebear's Portrait
|

|
Same scene, at the end of the cave. Required to progress.
|
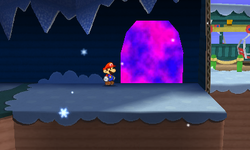
|
| Luigi
|
|
In the fourth scene, found sitting on the chairlift going down.
|
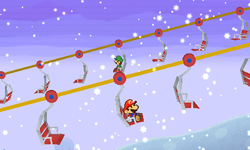
|
Bowser's Snow Fort
Items
Field/Given
| Item
|
Icon
|
Location
|
Image
|
| Coin
|
|
- 83 can be found in the third scene (first minecart scene) in the form of single Coins, Five Coins and 10-Coins.
- 70 can be found in the fourth scene (second minecart scene) in the form of single Coins, Five Coins and 10-Coins.
|
|
| Heart
|
|
In the third scene (first minecart scene), found near the end. Mario falls on it after not jumping onto the rail leading from the scene.
|
|
| Mine-Cart Exit
|

|
In the fourth scene (second minecart scene), after being forcefully stopped near the elevated ground, the scrap is found at the west end of it.
|
|
| Mine-Cart Rail
|

|
In the third scene (first minecart scene), on the rail in front of Mario after being dropped by Shy Guy in the minecart found on the inaccessible rail.
|
|
| Royal Sticker
|

|
In the upper part of the first scene, dropped by Mizzter Blizzard after defeating him.
|
|
| Secret Door
|
|
In the second scene, dropped by 2 Shy Guys who were harrassing the Traveling Toad, after defeating them.
|
|
| Sewing Scissors
|

|
In the second scene, on the wooden crates found on the east side of the scene.
|
|
Blocks
| Item
|
Icon
|
Location
|
Image
|
Megaflash Chillhammer
Flashy Fire Flower
Shiny Fire Flower
|

|
In the second minecart scene, after paperizing with the Diagonal Rail scrap, the minecart stops near the ground. Here, three blocks are seein to the east.
|
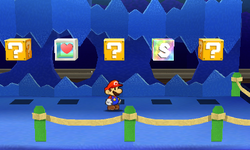
|
| Megaflash Line Jump
|

|
In the first scene, in the upper part. Available only after defeating Mizzter Blizzard and returning to the boss arena. Then the block itself is found after dropping down on the elevated ground in the east.
|

|
Hidden Block
| Item
|
Icon
|
Location
|
Image (Unrevealed)
|
Image (Revealed)
|
| Shiny Shell
|
|
In the first scene, between the two entrances and above the wilted flower.
|
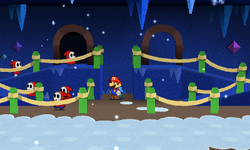
|
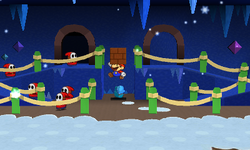
|
Paperization Spots
| Scrap/Sticker
|
Icon
|
Location
|
Image
|
| Secret Door
|
|
In the first scene, in the middle part, the right entrance.
|

|
| Random 1x1 Sticker
|
N/A
|
In the first minecart scene, there is a number of Brick Blocks on the inaccesible rail, with a hole between them. Paperizing here causes the Shy Guy in the minecart who is only on this rail to drop Mine-Cart Rail scrap. Required to progress.
|
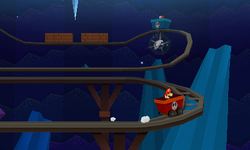
|
| Mine-Cart Rail
|
|
Same scene, near the end. Required to progress.
|

|
| Diagonal Rail
|

|
In the second minecart scene, in the middle of the lowest part. Paperize is used twice here: first to take out the scrap and turn it the right way, second to put it back. Required to progress.
|
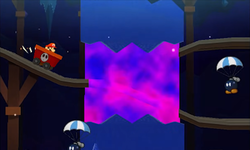
|
| Mine-Cart Exit
|

|
Same scene, at the very end. Required to progress.
|
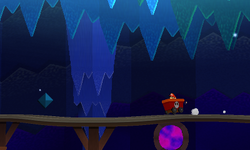
|
Shy Guy Jungle
Items
Field/Given/Object
| Item
|
Icon
|
Location
|
Image
|
| Bridge Part
|
  
|
- In the third scene, after pushing the Spear Guy with the scrap and defeating him, automatically picked up afterwards.
- In the seventh scene (second right one), dropped on the right elevated ground by Spear Guy after he has been eaten by a giant red flower.
- In the fourth scene (first left one), after defeating the Spear Guy, automatically picked up afterwards.
|
|
| Coin
|
|
In the sixth scene (first right one), pops out of the collapsible bush found right of the stairs in the lower part of the scene.
|
|
| 5 Coins and Heart
|
|
In the second scene, found inside the stone structure in the middle.
|
|
| HP-Up Heart
|
|
Mario must proceed into the right exit from the main area with the piece of the Sticker Comet. Instead of whacking the big red flower, he should walk behind it and move to the right to find a secret hole in the wall.
|
|
| Powder Puff
|

|
In the area to the right of the final room with one of the Bridge Parts, rather than hopping across the red, carnivorous flower to the right, Mario must stay on the left side and hop over the bushes toward the background. Moving away to the left reveals a secret area.
|
|
| Tailor Shears
|

|
In the scene behind the Secret Door.
|
|
| Toy Bat
|

|
In a secret area located near the tall grass found in the second scene.
|
|
Blocks
| Item
|
Icon
|
Location
|
Image
|
| Flashy Slaphammer
|

|
In the first scene, near the entrance.
|
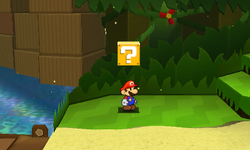
|
| Baahammer
|
|
Same scene, in the west end of the lower middle part.
|
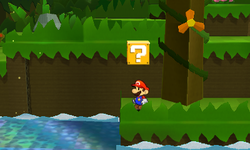
|
Shell
Shiny Eekhammer
|
|
Same scene, in the east end of the lower middle part.
|
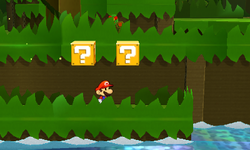
|
| Flashy Fire Flower
|
|
Same scene, above the block created by paperization found in the east upper part.
|
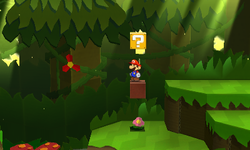
|
| Flashy Jump
|
|
In the second scene, above the first patch of grass.
|
|
| Flashy Hammer
|
|
Same scene, in the north, above the second patch of grass.
|
|
Baahammer
Burnhammer
|
|
Same scene, right of the previous one.
|
|
| Shiny Iron Jump
|
|
Same scene, at the east end.
|
|
| Shiny Iron Jump
|
|
In the third scene, right of the stairs.
|
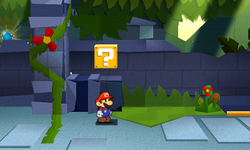
|
Megaflash Hurlhammer
Shiny Shell
|
|
In the sixth scene (first right scene), in the northwest.
|
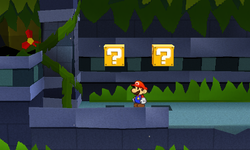
|
| POW Block
|
|
Same scene, in the southeast.
|
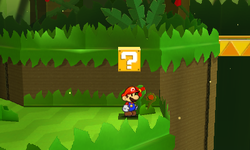
|
| 3x POW Block
|
|
In the seventh scene (second right scene), in the northwest.
|
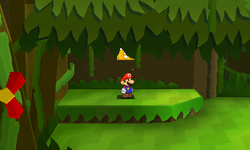
|
| Flashy Clone Jump
|
|
Same scene, in the northeast.
|
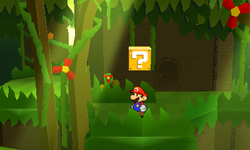
|
Hidden Blocks
| Item
|
Icon
|
Location
|
Image (Unrevealed)
|
Image (Revealed)
|
| Flashy Iron Jump
|

|
In the first scene, above the ? Block found at the west end of the lower part.
|
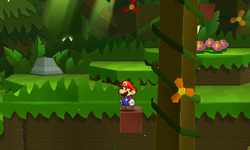
|
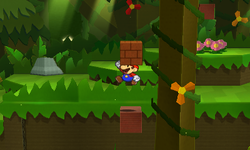
|
| Shiny Shell
|
|
In the third scene, above the circle of flowers that can be bloomed by hammering, found in the southeast.
|

|
|
| Coin
|
|
In the seventh scene, in the northwest of the lower part. Required to progress to reach the big red flower in time.
|
|
|
Paperization Spots
| Scrap/Sticker
|
Icon
|
Location
|
Image
|
| Random 1x1 Sticker
|
N/A
|
In the first scene, above the circle of flowers that can be bloomed by hammering, found in the west upper part.
|
|
| Random 1x1 Sticker
|
N/A
|
Same scene, above the flower in the upper east part.
|
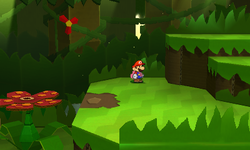
|
| Upright Vacuum or Vacuum or Goat
|
|
In the fourth scene (first left scene), in the middle.
|
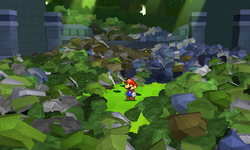
|
| 4 Random 1x1 Stickers
|
N/A
|
In the fifth scene (second left scene), above the stumps.
|
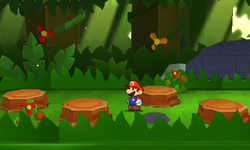
|
| Secret Door
|
|
In the seventh scene (second right scene), in the northeast.
|
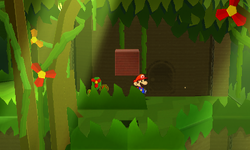
|
| 3 Bridge Parts
|
|
In the third scene, north of the stairs. Required to progress.
|
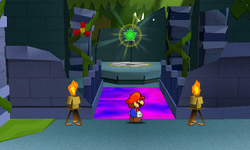
|
Jungle Rapids
Items
Field
| Item
|
Icon
|
Location
|
Image
|
| Coin
|
|
- In the second scene (first river one), there are 23 Coins found along the river.
- In the third scene (second river one), there are 21 Coins found along the river.
|
|
| Mini Vacuum
|

|
In the scene behind the Secret Door.
|
|
| Rubber Ducky
|
|
In the fourth scene (third river one), lands on the raft during the attack of the Fish Bones.
|
|
Block
| Item
|
Icon
|
Location
|
Image
|
| Flashy Clone Jump
|
|
In the ground part of the second scene, reached by using the warp pipe in the fifth scene.
|
|
Paperization Spot
| Scrap/Sticker
|
Icon
|
Location
|
Image
|
| Secret Door
|
|
In the first scene, in the southeast.
|

|
Long Fall Falls
Items
Field
| Item
|
Icon
|
Location
|
Image
|
| Luxurious Bed
|

|
In the scene behind the Secret Door.
|
|
Blocks
| Item
|
Icon
|
Location
|
Image
|
| Big Shiny Infinijump
|

|
In the second scene, after choosing to go forward. After being back on dry land, block can be find in the western corner.
|
|
| Flashy Infinijump
|

|
In the fourth scene (second scene after choosing to go to the left at the crossing).
|
|
Paperization Spot
| Scrap/Sticker
|
Icon
|
Location
|
Image
|
| Secret Door
|
|
In the second scene, after choosing to go forward at the crossing, reaching the dry land and then going to the west end. Outline for the Secret Door is then found on the wall.
|
|
| Jungle Floodgate
|

|
Same scene, after choosing to go left at the crossing. Paperize is used twice here: first to take out the Jungle Floodgate scrap and turn it the right way, second to put it back.
|

|
Chomp Ruins
Items
Field
| Item
|
Icon
|
Location
|
Image
|
| Air Conditioner
|

|
In the scene behind the Secret Door.
|
|
| D-Cell Battery
|

|
In the outside scene, in the part reached from the room where Bomp scrap was used, behind the wall which has to be knocked out first.
|
|
| Heart
|
|
- In the second inside scene, above the third set of sawblades.
- 2 in the secret room found in the second lower part near the end of the middle part of the second inside scene.
|
|
| Ruin Floor
|

|
In the outside scene, in the part reached from the room where Bomp scrap was used, at the end.
|
|
| Teapot
|

|
In the scene reached from behind the waterfall, found at the top of the outside scene.
|
|
Blocks
| Item
|
Icon
|
Location
|
Image
|
| Megaflash Eekhammer
|
|
In the outside area, after the first bridge in the foreground.
|
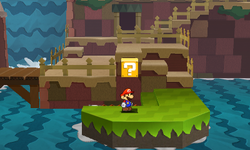
|
| Shiny Hammer
|
|
In the first inside scene, in the west on the lower part.
|
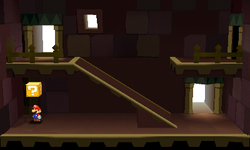
|
| Fire Flower
|
|
In the second inside scene, at the end of the middle part.
|
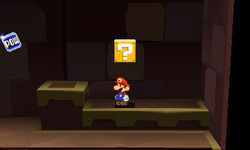
|
| Big Shiny Clone Jump
|

|
Same scene, in the secret room found in the first lower part near the entrance.
|
|
| 2x Baahammer, Chillhammer
|
|
Same scene, in the secret room found in the second lower part near the end of the middle part.
|
|
2x Iron Jump, Shiny Iron Jump
2x Baahammer, Chillhammer
|
|
Back outside, above the bridge created by peeling of Bowser Tape.
|
|
| Flashy Shell
|

|
Above the last of the five Bomps emerging from the waterfall.
|
|
Megaflash Baahammer
Megaflash Hurlhammer
Megaflash Hopslipper
|


|
In the third inside scene, there is a pipe hidden in the east of the lower part. Going through the pipe leads to the secret room with 3 ? Blocks.
|
|
Shiny Jump
Coin
Fire Flower
Coin
|
|
In the fourth inside scene, left and above the first Bomp.
|
|
Hidden Blocks
| Item
|
Icon
|
Location
|
Image (Unrevealed)
|
Image (Revealed)
|
| Coin (all 3)
|
|
In the second inside scene, near the end of the middle part. Required to progress.
|

|
|
| Coin
|
|
In the outside area, left of the last Bomp emerging from the waterfall.
|
|
|
| Coin (all 3)
|
|
Going up the stairs from the previous block, another three are found above the flower. These three act as platform to get the Big Shiny Baahaamer sticker.
|
|
 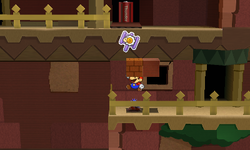 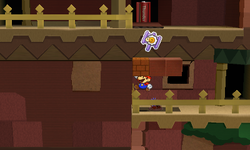
|
| Coin (all 3)
|
|
In the last part of the outside area, there is a flower left of the waterfall. Three blocks can be created in fron of the waterfall.
|
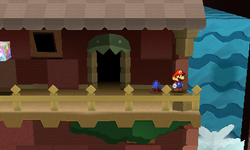
|
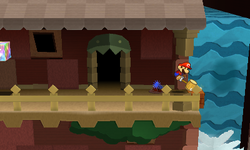 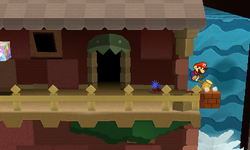 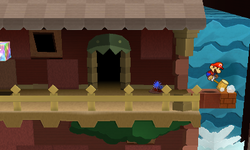
|
Paperization Spots
| Scrap/Sticker
|
Icon
|
Location
|
Image
|
| Ruin Slope
|
|
In the first inside scene. Paperize is used twice here: first to take Ruin Slope scrap and turn it the right way, second to put it back. Required to progress.
|
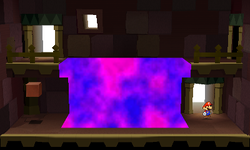
|
| Secret Door
|
|
In the right upper part of second inside scene.
|
|
| Bomp
|

|
In the fourth inside scene, right of the Bomp. Required to progress.
|
|
| Ruin Floor
|
|
In the third inside scene, left of the entrance. Required to progress.
|
|
Rugged Road
Items
Field
| Item
|
Icon
|
Location
|
Image
|
| Basin
|

|
In the scene behind the Secret Door.
|
|
| Car Sponge
|

|
After reaching the part of the second scene reachable only with Mountain Boulder scrap, by going left, Mario finds a secret scene with the thing inside.
|
|
| 3 Coins
|
|
In the second scene, they spawn in after replacing the Mountain Hole scrap with Mountain Boulder scrap.
|
|
| Cracked Boulder
|
|
Found near the exit of the Bubbling Waters Natural Hot Springs scene.
|
|
| Heart
|
|
In the second scene, found at the end of the part reachable from the boulder of the Mountain Boulder scrap.
|
|
| Turkey
|

|
In the secret scene found left of the small frozen lake found in the southwest of the first scene.
|
|
Blocks
| Item
|
Icon
|
Location
|
Image
|
| Line Jump
|
|
In the first scene, in the south.
|
|
| Shiny Jump
|
|
Same scene, in the northwest.
|
|
| Shiny Hammer
|
|
Same scene after lava was turned to ice, in the southwest.
|

|
| Shiny Shell
|
|
Same scene, in the northeast.
|
|
| Megaflash Burnhammer
|

|
In the scene found hidden right the previous ? Block.
|
|
| Flashy Hopslipper
|
|
In the second scene, before the third lava river.
|
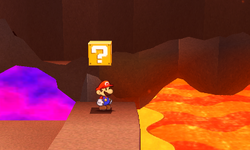
|
| Flashy Jump
|
|
Same scene, after the third lava river.
|
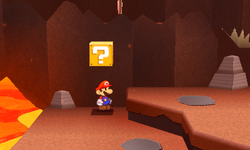
|
| Shiny Hopslipper
|
|
In the third scene, in the upper part, near the Recovery Block.
|
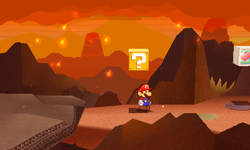
|
| Flashy Iron Jump
|
|
In the fourth scene, in the southwest.
|
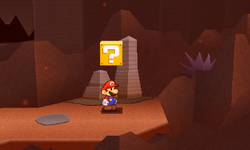
|
| Shiny Eekhammer
|
|
Same scene, in the middle.
|
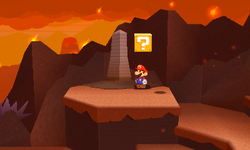
|
| Shiny Hopslipper
|
|
Same scene, before the lava river.
|
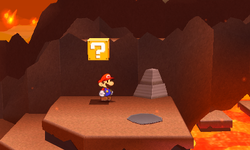
|
| Megaflash Slaphammer
|
|
Same scene, near the entrance is a giant X. After meteor destroys it, a hole is formed. By jumping in, another block can be found.
|
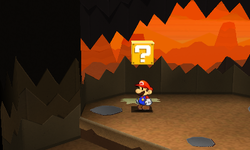
|
| Megaflash Iron Jump
|
|
In the fifth scene, at the end is a giant X. After meteor destroys it, a hole is formed. By jumping in, another block can be found.
|
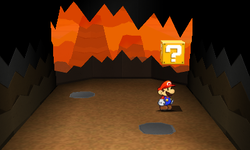
|
Paperization Spots
| Scrap/Sticker
|
Icon
|
Location
|
Image
|
| Any ice-based Thing Sticker
|
N/A
|
In the first scene, there is a rectangle in the volcano in the background. By putting any ice-based Thing sticker there, all lava is frozen solid, creating a path forward. Required to progress.
|
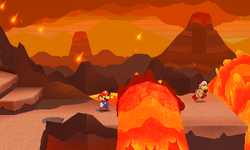
|
| Secret Door
|
|
Same scene after lava is frozen solid, on the wall after the second frozen gush of lava.
|

|
| Mountain Hole→Mountain Boulder
|

↓
|
In the second scene, after the second lava river. Paperize is used twice here: first to take out Mountain Hole scrap, later to put Mountain Boulder in its place. Required to progress.
|

|
| Mountain Boulder→Mountain Hole
|
↓
|
In the third scene, near the entrance of the lower part. Paperize is used twice here: first to take out Mountain Boulder scrap, then to put Mountain Hole in its place. Required to progress.
|
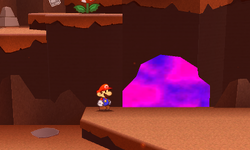
|
| Luigi
|
|
In the Bubbling Waters Natural Hot Springs (area reached by jumping into the second hole in the fourth scene), found in the water.
|

|
| Cracked Boulder
|
|
In the fifth scene, in the middle of the lower part. Required to progress.
|
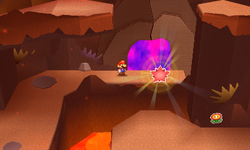
|
| Huge Mountain Slab
|

|
After putting in the previous scrap and then hammering the crack. Paperize is used twice here: first to flip the Huge Mountain Slab scrap, then to put it back. Doing so makes the Comet Piece collectable. Required to progress.
|
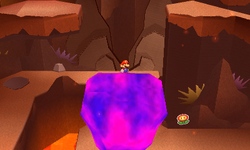
|
Rumble Volcano
Items
Field/Given
| Item
|
Icon
|
Location
|
Image
|
| Big Shiny 1UP, Line Jump, Megaflash Clone Jump, Shiny Fire Flower
|
|
In the lower middle scene (after 2 Big Chain Chomps are stuck to the platform), Mario can gain these for stickers by hammering the first, third, sixth and eight posts, causing them to fall from their chains.
|
|
| Guitar
|

|
In the scene behind the Secret Door.
|
|
| HP-Up Heart
|
|
In the bottom scene, on the bottom of the elevated ground with Petey Piranha on top.
|
|
| Royal Sticker
|

|
In the bottom scene, dropped by Petey Piranha after defeating him.
|
|
Blocks
| Item
|
Icon
|
Location
|
Image
|
| Flashy Jump
|
|
In the first scene, at the top, behind the hole.
|
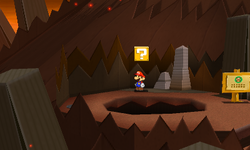
|
| Flashy Hammer
|
|
In the main volcano scene, at the top reached by the platform propelled by lava.
|
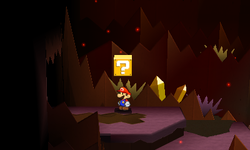
|
| Baahammer
|
|
Same scene, in the middle after weighing down the platform with one Big Chain Chomp.
|
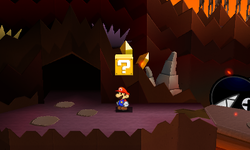
|
Shiny Leaf
Shiny Fire Flower
|
|
In the scene with the sticker shop, in the west.
|
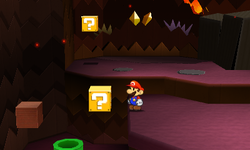
|
Shiny Jump
Flashy Hopslipper
|
|
After weighing down the platform with another Big Chain Chomp and then going into the opeing on the left, Mario reaches an area with platforms being propelled up and down by lava. These blocks are found on the platform after using the fourth rising platform to reach it.
|
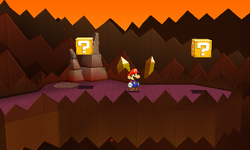
|
| Flashy Fire Flower
|
|
Same scene, on the platform reached by the same rising platform but only halfway.
|
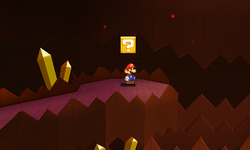
|
| Shiny Leaf
|
|
Same scene, after using the fifth rising platform to drop down, found left of it.
|
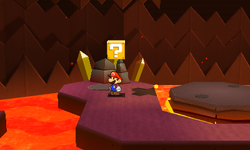
|
Hidden Block
| Item
|
Icon
|
Location
|
Image (Unrevealed)
|
Image (Revealed)
|
| Shiny Jump
|
|
In the scene with the sticker shop, in the southwest, left of the warp pipe and above the flower.
|
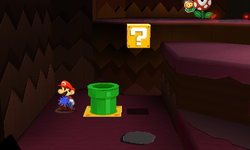
|
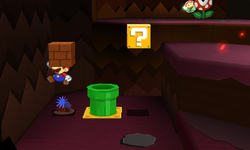
|
Paperization Spot
| Scrap/Sticker
|
Icon
|
Location
|
Image
|
| Secret Door
|
|
In the scene left of the highest point the rising platform can take. Available only after defeating Petey Piranha and returning here.
|
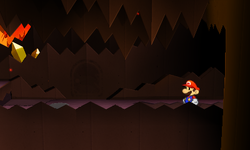
|
Gate Cliff
Paperization Spot
| Scrap/Sticker
|
Icon
|
Location
|
Image
|
| Hidden Bowser Castle
|
|
After collecting five Royal Stickers and activating them in the album. Paperize is used twice here: first to take out the Hidden Bowser Castle scrap and flip it right way, second to put it back. Required to progress.
|

|
Bowser Jr.'s Flotilla
Blocks
Paperization Spots
| Scrap/Sticker
|
Icon
|
Location
|
Image
|
| Secret Door
|
|
In the first inside scene, in the northwest.
|
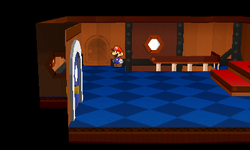
|
| Banzai Bill Cannon
|
|
In the third inside scene, in the left part. Paperize is used twice here: first to take out the Banzai Bill Cannon scrap and flip it around, second to put it back. Required to progress.
|
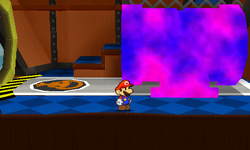
|
Bowser's Sky Castle
Item
| Item
|
Icon
|
Location
|
Image
|
| Royal Sticker
|

|
In the third and last scene, automatically picked up after defeating Bowser.
|
|


.png)


