Lovely Howz of Badges: Difference between revisions
No edit summary |
mNo edit summary |
||
| (18 intermediate revisions by 11 users not shown) | |||
| Line 1: | Line 1: | ||
[[File:Howzofbadges.png | {{Construction|after adding the purchase price for all badges (both versions).}} | ||
{{location infobox | |||
|image=[[File:Howzofbadges.png|200px]]<br>[[Mario]] and [[Goombella]] in the Lovely Howz of Badges | |||
|owner=[[Ms. Mowz]] | |||
|greater_location=[[Rogueport]] | |||
|first_appearance=''[[Paper Mario: The Thousand-Year Door]]'' ([[List of games by date#2004|2004]]) | |||
|latest_appearance=''[[Paper Mario: The Thousand-Year Door (Nintendo Switch)|Paper Mario: The Thousand-Year Door]]'' ([[Nintendo Switch]]) ([[List of games by date#2024|2024]]) | |||
}} | |||
{{quote|A big welcome to you! Welcome to the Lovely Howz of Badges! Welcome!!!|Badge clerk|Paper Mario: The Thousand-Year Door}} | |||
The '''Lovely Howz of Badges''' is a [[badge]] [[shop]] found in [[Rogueport]] in ''[[Paper Mario: The Thousand-Year Door]]''. This shop is located in the town's main square, accessible from the western door on the second floor of the [[inn]]. Once Mario has visited The Thousand-Year Door for the first time, he can enter the shop to buy and sell various badges. | The '''Lovely Howz of Badges''' is a [[badge]] [[shop]] found in [[Rogueport]] in ''[[Paper Mario: The Thousand-Year Door]]''. This shop is located in the town's main square, accessible from the western door on the second floor of the [[inn]]. Once Mario has visited The Thousand-Year Door for the first time, he can enter the shop to buy and sell various badges. | ||
Two shopkeepers work at the Howz of Badges: an | Two shopkeepers work at the Howz of Badges: the [[badge clerk]], an overly-enthusiastic pale yellow [[Little Mouser]]; and [[Ms. Mowz]], the thief that Mario and his allies encounter periodically throughout their adventure. Besides serving as a store manager, Ms. Mowz's other duty at the store may be to search the world for rare badges to sell later. This explains why she appears to be looking for a rare badge at [[Hooktail Castle]]. If and when Ms. Mowz joins Mario's party, she will leave her position at the shop. If Mario defeats the [[Shadow Queen]] with Ms. Mowz in his party, she will return to work at the Lovely Howz of Badges (at least until Mario returns to Rogueport, as she will rejoin him for any further adventures in the region). | ||
If the player decides to solve [[Garf]]'s trouble at the [[Trouble Center]], his house key will be right in front of the store entrance. | |||
If the player somehow maxes out the badges in inventory during [[Elusive badge!]], Ms. Mowz leaves the [[Attack FX B (Paper Mario: The Thousand-Year Door)|Attack FX B]] badge in front of Lovely Howz of Badges. | |||
==Shop== | ==Shop== | ||
The Lovely Howz of Badges adds new badges to its stock after every chapter. Mario can sell badges here, at which point, they will be added to the shop's stock and can be bought back later for twice the price (i.e. if Mario sells a Damage Dodge badge for 75 coins, he can buy it back at 150 coins). If the [[Lucky Start]] badge is lost in the hole in [[Creepy Steeple]], it can be bought for 70 coins. Badges that drop from ordinary enemies that are not collected by Mario before he exits the area are also sold here.<ref>{{cite|author=MuzYoshi|title=Obscure Things you DIDN'T KNOW about Paper Mario: TTYD!|url=https://www.youtube.com/watch?v=60dbfhiJZKY|timestamp=8:50}}</ref> Not including the five badges on sale, up to three of each individual badge can be kept in stock if they are sold back to the shop. | The Lovely Howz of Badges adds new badges to its stock after every chapter. Mario can sell badges here, at which point, they will be added to the shop's stock and can be bought back later for twice the price (i.e. if Mario sells a Damage Dodge badge for 75 coins, he can buy it back at 150 coins). If the [[Lucky Start]] badge is lost in the hole in [[Creepy Steeple]], it can be bought for 70 coins. Badges that drop from ordinary enemies that are not collected by Mario before he exits the area are also sold here.<ref>{{cite|author=MuzYoshi|title=Obscure Things you DIDN'T KNOW about Paper Mario: TTYD!|url=https://www.youtube.com/watch?v=60dbfhiJZKY|timestamp=8:50}}</ref> Not including the five badges on sale, up to three of each individual badge can be kept in stock if they are sold back to the shop. | ||
In the [[Paper Mario: The Thousand-Year Door (Nintendo Switch)|Nintendo Switch remake]], badges not on display | The shop has five badges visible on the counter at any given time. The Little Mouser can be talked to to peruse the full list, although the displayed Badges will be at their cheapest, 30% off their regular price. Leaving Rogueport and reentering changes the selection of Badges on sale. In the [[Paper Mario: The Thousand-Year Door (Nintendo Switch)|Nintendo Switch remake]], badges not on display can be purchased in a box at the end of the counter, rather than speaking to the Little Mouser. | ||
{| class="wikitable" | {| class="wikitable" | ||
|- | |- | ||
! style="width: 160px;" | Item | ! style="width: 160px;" | Item | ||
! style="width: 120px;" | Price | ! style="width: 120px;" | Display Price | ||
! style="width: 120px;" | | ! style="width: 120px;" | Regular Price | ||
! style="width: 180px;" | Availability | ! style="width: 180px;" | Availability | ||
|- | |- | ||
| Line 30: | Line 40: | ||
|- | |- | ||
| {{PMTTYD item|Happy Flower|game=NS}} | | {{PMTTYD item|Happy Flower|game=NS}} | ||
| 150 Coins [[File:Nintendo GameCube symbol.svg|15px|link=Nintendo GameCube]]<br> | | 140 Coins [[File:Nintendo Switch Logo.svg|15px|link=Nintendo Switch]] | ||
| 150 Coins [[File:Nintendo GameCube symbol.svg|15px|link=Nintendo GameCube]]<br>200 Coins [[File:Nintendo Switch Logo.svg|15px|link=Nintendo Switch]] | |||
| From Prologue | | From Prologue | ||
|- | |- | ||
| {{PMTTYD item|Last Stand|game=NS}} | | {{PMTTYD item|Last Stand|game=NS}} | ||
| 50 Coins [[File:Nintendo GameCube symbol.svg|15px|link=Nintendo GameCube]]<br> | | 55 Coins [[File:Nintendo Switch Logo.svg|15px|link=Nintendo Switch]] | ||
| 50 Coins [[File:Nintendo GameCube symbol.svg|15px|link=Nintendo GameCube]]<br>80 Coins [[File:Nintendo Switch Logo.svg|15px|link=Nintendo Switch]] | |||
| From Prologue | | From Prologue | ||
|- | |- | ||
| {{PMTTYD item|Last Stand P|game=NS}} | | {{PMTTYD item|Last Stand P|game=NS}} | ||
| 50 Coins [[File:Nintendo GameCube symbol.svg|15px|link=Nintendo GameCube]]<br> | | 55 Coins [[File:Nintendo Switch Logo.svg|15px|link=Nintendo Switch]] | ||
| 50 Coins [[File:Nintendo GameCube symbol.svg|15px|link=Nintendo GameCube]]<br>80 Coins [[File:Nintendo Switch Logo.svg|15px|link=Nintendo Switch]] | |||
| From Prologue | | From Prologue | ||
|- | |- | ||
| {{PMTTYD item|Piercing Blow|game=NS}} | | {{PMTTYD item|Piercing Blow|game=NS}} | ||
| 75 Coins [[File:Nintendo GameCube symbol.svg|15px|link=Nintendo GameCube]]<br> | | 80 Coins [[File:Nintendo Switch Logo.svg|15px|link=Nintendo Switch]] | ||
| 75 Coins [[File:Nintendo GameCube symbol.svg|15px|link=Nintendo GameCube]]<br>100 Coins [[File:Nintendo Switch Logo.svg|15px|link=Nintendo Switch]] | |||
| From Prologue | | From Prologue | ||
|- | |- | ||
| {{PMTTYD item|Power Jump|game=NS}} | | {{PMTTYD item|Power Jump|game=NS}} | ||
| | | 35 Coins [[File:Nintendo GameCube symbol.svg|15px|link=Nintendo GameCube]]<br>55 Coins [[File:Nintendo Switch Logo.svg|15px|link=Nintendo Switch]] | ||
| 80 Coins | | 50 Coins [[File:Nintendo GameCube symbol.svg|15px|link=Nintendo GameCube]]<br>80 Coins [[File:Nintendo Switch Logo.svg|15px|link=Nintendo Switch]] | ||
| From Prologue | | From Prologue | ||
|- | |- | ||
| {{PMTTYD item|Simplifier|game=NS}} | | {{PMTTYD item|Simplifier|game=NS}} | ||
| 50 Coins [[File:Nintendo GameCube symbol.svg|15px|link=Nintendo GameCube]]<br> | | 70 Coins [[File:Nintendo Switch Logo.svg|15px|link=Nintendo Switch]] | ||
| 50 Coins [[File:Nintendo GameCube symbol.svg|15px|link=Nintendo GameCube]]<br>100 Coins [[File:Nintendo Switch Logo.svg|15px|link=Nintendo Switch]] | |||
| From Prologue | | From Prologue | ||
|- | |- | ||
| {{PMTTYD item|Super Appeal|game=NS}} | | {{PMTTYD item|Super Appeal|game=NS}} | ||
| 50 Coins [[File:Nintendo GameCube symbol.svg|15px|link=Nintendo GameCube]]<br> | | 55 Coins [[File:Nintendo Switch Logo.svg|15px|link=Nintendo Switch]] | ||
| 50 Coins [[File:Nintendo GameCube symbol.svg|15px|link=Nintendo GameCube]]<br>80 Coins [[File:Nintendo Switch Logo.svg|15px|link=Nintendo Switch]] | |||
| From Prologue | | From Prologue | ||
|- | |- | ||
| {{PMTTYD item|Unsimplifier|game=NS}} | | {{PMTTYD item|Unsimplifier|game=NS}} | ||
| 50 Coins [[File:Nintendo GameCube symbol.svg|15px|link=Nintendo GameCube]]<br> | | 70 Coins [[File:Nintendo Switch Logo.svg|15px|link=Nintendo Switch]] | ||
| 50 Coins [[File:Nintendo GameCube symbol.svg|15px|link=Nintendo GameCube]]<br>100 Coins [[File:Nintendo Switch Logo.svg|15px|link=Nintendo Switch]] | |||
| From Prologue | | From Prologue | ||
|- | |- | ||
| {{PMTTYD item|Close Call|game=NS}} | | {{PMTTYD item|Close Call|link=Close Call (badge)|game=NS}} | ||
| 100 Coins | | 100 Coins | ||
| 150 Coins | | 150 Coins | ||
| Line 80: | Line 90: | ||
|- | |- | ||
| {{PMTTYD item|Sleepy Stomp|game=NS}} | | {{PMTTYD item|Sleepy Stomp|game=NS}} | ||
| 75 Coins [[File:Nintendo GameCube symbol.svg|15px|link=Nintendo GameCube]]<br> | | 70 Coins [[File:Nintendo Switch Logo.svg|15px|link=Nintendo Switch]] | ||
| 75 Coins [[File:Nintendo GameCube symbol.svg|15px|link=Nintendo GameCube]]<br>100 Coins [[File:Nintendo Switch Logo.svg|15px|link=Nintendo Switch]] | |||
| After Chapter 1 | | After Chapter 1 | ||
|- | |- | ||
| Line 95: | Line 105: | ||
|- | |- | ||
| {{PMTTYD item|Pretty Lucky P|game=NS}} | | {{PMTTYD item|Pretty Lucky P|game=NS}} | ||
| 150 Coins [[File:Nintendo GameCube symbol.svg|15px|link=Nintendo GameCube]]<br> | | 140 Coins [[File:Nintendo Switch Logo.svg|15px|link=Nintendo Switch]] | ||
| 150 Coins [[File:Nintendo GameCube symbol.svg|15px|link=Nintendo GameCube]]<br>200 Coins [[File:Nintendo Switch Logo.svg|15px|link=Nintendo Switch]] | |||
| After Chapter 2 | | After Chapter 2 | ||
|- | |- | ||
| {{PMTTYD item|Ice Smash|game=NS}} | | {{PMTTYD item|Ice Smash|game=NS}} | ||
| | | 80 Coins [[File:Nintendo Switch Logo.svg|15px|link=Nintendo Switch]] | ||
| 75 Coins [[File:Nintendo GameCube symbol.svg|15px|link=Nintendo GameCube]] | |||
| After Chapter 3 | | After Chapter 3 | ||
|- | |- | ||
| Line 110: | Line 120: | ||
|- | |- | ||
| {{PMTTYD item|Shrink Stomp|game=NS}} | | {{PMTTYD item|Shrink Stomp|game=NS}} | ||
| 75 Coins [[File:Nintendo GameCube symbol.svg|15px|link=Nintendo GameCube]]<br> | | 70 Coins [[File:Nintendo Switch Logo.svg|15px|link=Nintendo Switch]] | ||
| 75 Coins [[File:Nintendo GameCube symbol.svg|15px|link=Nintendo GameCube]]<br>100 Coins [[File:Nintendo Switch Logo.svg|15px|link=Nintendo Switch]] | |||
| After Chapter 3 | | After Chapter 3 | ||
|- | |- | ||
| {{PMTTYD item|Damage Dodge|game=NS}} | | {{PMTTYD item|Damage Dodge|game=NS}} | ||
| 150 Coins [[File:Nintendo GameCube symbol.svg|15px|link=Nintendo GameCube]]<br> | | 140 Coins [[File:Nintendo Switch Logo.svg|15px|link=Nintendo Switch]] | ||
| 150 Coins [[File:Nintendo GameCube symbol.svg|15px|link=Nintendo GameCube]]<br>200 Coins [[File:Nintendo Switch Logo.svg|15px|link=Nintendo Switch]] | |||
| After Chapter 4 | | After Chapter 4 | ||
|- | |- | ||
| Line 125: | Line 135: | ||
|- | |- | ||
| {{PMTTYD item|Soft Stomp|game=NS}} | | {{PMTTYD item|Soft Stomp|game=NS}} | ||
| 75 Coins [[File:Nintendo GameCube symbol.svg|15px|link=Nintendo GameCube]]<br> | | 70 Coins [[File:Nintendo Switch Logo.svg|15px|link=Nintendo Switch]] | ||
| 75 Coins [[File:Nintendo GameCube symbol.svg|15px|link=Nintendo GameCube]]<br>100 Coins [[File:Nintendo Switch Logo.svg|15px|link=Nintendo Switch]] | |||
| After Chapter 4 | | After Chapter 4 | ||
|- | |- | ||
| {{PMTTYD item|Damage Dodge P|game=NS}} | | {{PMTTYD item|Damage Dodge P|game=NS}} | ||
| 150 Coins [[File:Nintendo GameCube symbol.svg|15px|link=Nintendo GameCube]]<br> | | 140 Coins [[File:Nintendo Switch Logo.svg|15px|link=Nintendo Switch]] | ||
| 150 Coins [[File:Nintendo GameCube symbol.svg|15px|link=Nintendo GameCube]]<br>200 Coins [[File:Nintendo Switch Logo.svg|15px|link=Nintendo Switch]] | |||
| After Chapter 5 | | After Chapter 5 | ||
|- | |- | ||
| Line 140: | Line 150: | ||
|- | |- | ||
| {{PMTTYD item|Super Appeal P|game=NS}} | | {{PMTTYD item|Super Appeal P|game=NS}} | ||
| 50 Coins [[File:Nintendo GameCube symbol.svg|15px|link=Nintendo GameCube]]<br> | | 55 Coins [[File:Nintendo Switch Logo.svg|15px|link=Nintendo Switch]] | ||
| 50 Coins [[File:Nintendo GameCube symbol.svg|15px|link=Nintendo GameCube]]<br>80 Coins [[File:Nintendo Switch Logo.svg|15px|link=Nintendo Switch]] | |||
| After Chapter 5 | | After Chapter 5 | ||
|- | |- | ||
| {{PMTTYD item|Attack FX P|game=NS}} [[File:Nintendo GameCube symbol.svg|15px|link=Nintendo GameCube]]<br>{{PMTTYD item|Attack FX R|game=NS}} [[File:Nintendo Switch Logo.svg|15px|link=Nintendo Switch]] | | {{PMTTYD item|Attack FX P|game=NS}} [[File:Nintendo GameCube symbol.svg|15px|link=Nintendo GameCube]]<br>{{PMTTYD item|Attack FX R|game=NS}} [[File:Nintendo Switch Logo.svg|15px|link=Nintendo Switch]] | ||
| 100 Coins [[File:Nintendo GameCube symbol.svg|15px|link=Nintendo GameCube]]<br> | | 80 Coins [[File:Nintendo Switch Logo.svg|15px|link=Nintendo Switch]] | ||
| 100 Coins [[File:Nintendo GameCube symbol.svg|15px|link=Nintendo GameCube]]<br>120 Coins [[File:Nintendo Switch Logo.svg|15px|link=Nintendo Switch]] | |||
| After Chapter 6 | | After Chapter 6 | ||
|- | |- | ||
| Line 154: | Line 164: | ||
| Only if badge falls down hole in the floor in [[Creepy Steeple]] | | Only if badge falls down hole in the floor in [[Creepy Steeple]] | ||
|} | |} | ||
===Sell prices=== | ===Sell prices=== | ||
{| class="wikitable" | {| class="wikitable" | ||
| Line 163: | Line 174: | ||
|data-sort-value="All or Nothing"|[[File:PMTTYD All or Nothing Badge.png]] [[File:All or Nothing PMTTYDNS icon.png|50px]]<br>[[All or Nothing]] | |data-sort-value="All or Nothing"|[[File:PMTTYD All or Nothing Badge.png]] [[File:All or Nothing PMTTYDNS icon.png|50px]]<br>[[All or Nothing]] | ||
|50 | |50 | ||
| | |60 | ||
|- | |- | ||
|data-sort-value="Attack FX B"|[[File:Attack FX B TTYD.png]] [[File:Attack FX B PMTTYDNS icon.png|50px]]<br>[[Attack FX B (Paper Mario: The Thousand-Year Door)|Attack FX B]] | |data-sort-value="Attack FX B"|[[File:Attack FX B TTYD.png]] [[File:Attack FX B PMTTYDNS icon.png|50px]]<br>[[Attack FX B (Paper Mario: The Thousand-Year Door)|Attack FX B]] | ||
| Line 187: | Line 198: | ||
|data-sort-value="Bump Attack"|[[File:Bump Attack.png]] [[File:Bump Attack PMTTYDNS icon.png|50px]]<br>[[Bump Attack]] | |data-sort-value="Bump Attack"|[[File:Bump Attack.png]] [[File:Bump Attack PMTTYDNS icon.png|50px]]<br>[[Bump Attack]] | ||
|150 | |150 | ||
| | |150 | ||
|- | |- | ||
|data-sort-value="Charge"|[[File:Charge TTYD.png]] [[File:Charge PMTTYDNS icon.png|50px]]<br>[[Charge (badge)|Charge]] | |data-sort-value="Charge"|[[File:Charge TTYD.png]] [[File:Charge PMTTYDNS icon.png|50px]]<br>[[Charge (badge)|Charge]] | ||
| Line 274: | Line 285: | ||
|100 | |100 | ||
|- | |- | ||
|data-sort-value="Gold Medal"|[[File:Gold Medal PMTTYDNS icon.png|50px]]<br>[[Gold Medal (Paper Mario: The Thousand-Year Door | |data-sort-value="Gold Medal"|[[File:Gold Medal PMTTYDNS icon.png|50px]]<br>[[Gold Medal (Paper Mario: The Thousand-Year Door)|Gold Medal]] | ||
| | |Unavailable | ||
| | |1 | ||
|- | |- | ||
|data-sort-value="Hammer Throw"|[[File:Hammer Throw TTYD.png]] [[File:Hammer Throw PMTTYDNS icon.png|50px]]<br>[[Hammer Throw (badge)|Hammer Throw]] | |data-sort-value="Hammer Throw"|[[File:Hammer Throw TTYD.png]] [[File:Hammer Throw PMTTYDNS icon.png|50px]]<br>[[Hammer Throw (badge)|Hammer Throw]] | ||
| Line 375: | Line 386: | ||
|- | |- | ||
|data-sort-value="Nostalgic Tunes"|[[File:Nostalgic Tunes PMTTYDNS icon.png|50px]]<br>[[Nostalgic Tunes]] | |data-sort-value="Nostalgic Tunes"|[[File:Nostalgic Tunes PMTTYDNS icon.png|50px]]<br>[[Nostalgic Tunes]] | ||
| | |Unavailable | ||
|1 | |1 | ||
|- | |- | ||
| Line 456: | Line 467: | ||
|data-sort-value="Return Postage"|[[File:Return Postage.png]] [[File:Return Postage PMTTYDNS icon.png|50px]]<br>[[Return Postage]] | |data-sort-value="Return Postage"|[[File:Return Postage.png]] [[File:Return Postage PMTTYDNS icon.png|50px]]<br>[[Return Postage]] | ||
|500 | |500 | ||
| | |400 | ||
|- | |- | ||
|data-sort-value="Shrink Stomp"|[[File:Shrink Stomp.png]] [[File:Shrink Stomp PMTTYDNS icon.png|50px]]<br>[[Shrink Stomp]] | |data-sort-value="Shrink Stomp"|[[File:Shrink Stomp.png]] [[File:Shrink Stomp PMTTYDNS icon.png|50px]]<br>[[Shrink Stomp]] | ||
| Line 511: | Line 522: | ||
|- | |- | ||
|} | |} | ||
==Gallery== | |||
<gallery> | |||
PMTTYD Lovely Howz of Badges Window Contents.png|The window display | |||
PMTTYD Lovely Howz of Badges Attack FX B Position.png|Attack FX B outside of the shop | |||
</gallery> | |||
==Names in other languages== | ==Names in other languages== | ||
{{foreign names | {{foreign names | ||
| | |Jpn=ラブリーチューチュー | ||
| | |JpnR=Raburī Chūchū | ||
| | |JpnM=Lovely Chuchu, where chuchu is onomatopoeia for mice. | ||
|Chi=甜心啾啾 | |||
|ChiR=Tiánxīn Jiūjiū | |||
|ChiM=Sweetheart Squeak | |||
|Dut=De Schatkist | |Dut=De Schatkist | ||
|DutM=The Treasure Chest | |DutM=The Treasure Chest | ||
|Fre=Boutique de Badges Écarlate | |||
|FreM=Scarlet Badge Shop | |||
|Ger=Nagerines Orden-Shop | |Ger=Nagerines Orden-Shop | ||
|GerM=Mowz's Badge Shop | |GerM=Mowz's Badge Shop | ||
|Ita=Bottega | |Ita=Bottega di tessere di Squitty | ||
|ItaM=Mowz's | |ItaM=Mowz's badge Shop | ||
| | |Kor=러블리츄츄 | ||
| | |KorR=Leobeulli Chyuchyu | ||
|KorM=Lovely Chuchu; from the Japanese name | |||
|Spa=Tienda de medallas La Cariñosa | |Spa=Tienda de medallas La Cariñosa | ||
|SpaM=The Loving badges shop | |SpaM=The Loving badges shop | ||
}} | }} | ||
==References== | ==References== | ||
| Line 538: | Line 558: | ||
[[Category:Shops]] | [[Category:Shops]] | ||
[[Category:Paper Mario: The Thousand-Year Door locations]] | [[Category:Paper Mario: The Thousand-Year Door locations]] | ||
[[de:Nagerines Orden-Shop]] | |||
[[it:Bottega delle Tessere di Squitty]] | |||
[[de:Nagerines Orden-Shop]] | [[de:Nagerines Orden-Shop]] | ||
[[it:Bottega delle Tessere di Squitty]] | [[it:Bottega delle Tessere di Squitty]] | ||
Latest revision as of 18:21, February 13, 2025
This article is under construction. Therefore, please excuse its informal appearance while it is being worked on. We hope to have it completed after adding the purchase price for all badges (both versions)..
| Lovely Howz of Badges | |
|---|---|
 Mario and Goombella in the Lovely Howz of Badges | |
| First appearance | Paper Mario: The Thousand-Year Door (2004) |
| Latest appearance | Paper Mario: The Thousand-Year Door (Nintendo Switch) (2024) |
| Greater location | Rogueport |
| Owner | Ms. Mowz |
- “A big welcome to you! Welcome to the Lovely Howz of Badges! Welcome!!!”
- —Badge clerk, Paper Mario: The Thousand-Year Door
The Lovely Howz of Badges is a badge shop found in Rogueport in Paper Mario: The Thousand-Year Door. This shop is located in the town's main square, accessible from the western door on the second floor of the inn. Once Mario has visited The Thousand-Year Door for the first time, he can enter the shop to buy and sell various badges.
Two shopkeepers work at the Howz of Badges: the badge clerk, an overly-enthusiastic pale yellow Little Mouser; and Ms. Mowz, the thief that Mario and his allies encounter periodically throughout their adventure. Besides serving as a store manager, Ms. Mowz's other duty at the store may be to search the world for rare badges to sell later. This explains why she appears to be looking for a rare badge at Hooktail Castle. If and when Ms. Mowz joins Mario's party, she will leave her position at the shop. If Mario defeats the Shadow Queen with Ms. Mowz in his party, she will return to work at the Lovely Howz of Badges (at least until Mario returns to Rogueport, as she will rejoin him for any further adventures in the region).
If the player decides to solve Garf's trouble at the Trouble Center, his house key will be right in front of the store entrance.
If the player somehow maxes out the badges in inventory during Elusive badge!, Ms. Mowz leaves the Attack FX B badge in front of Lovely Howz of Badges.
Shop[edit]
The Lovely Howz of Badges adds new badges to its stock after every chapter. Mario can sell badges here, at which point, they will be added to the shop's stock and can be bought back later for twice the price (i.e. if Mario sells a Damage Dodge badge for 75 coins, he can buy it back at 150 coins). If the Lucky Start badge is lost in the hole in Creepy Steeple, it can be bought for 70 coins. Badges that drop from ordinary enemies that are not collected by Mario before he exits the area are also sold here.[1] Not including the five badges on sale, up to three of each individual badge can be kept in stock if they are sold back to the shop.
The shop has five badges visible on the counter at any given time. The Little Mouser can be talked to to peruse the full list, although the displayed Badges will be at their cheapest, 30% off their regular price. Leaving Rogueport and reentering changes the selection of Badges on sale. In the Nintendo Switch remake, badges not on display can be purchased in a box at the end of the counter, rather than speaking to the Little Mouser.
| Item | Display Price | Regular Price | Availability |
|---|---|---|---|
| 1 Coin |
From Prologue Nintendo Switch version only | ||
| 100 Coins | 150 Coins | From Prologue | |
| 140 Coins |
150 Coins 200 Coins |
From Prologue | |
| 55 Coins |
50 Coins 80 Coins |
From Prologue | |
| 55 Coins |
50 Coins 80 Coins |
From Prologue | |
| 80 Coins |
75 Coins 100 Coins |
From Prologue | |
| 35 Coins 55 Coins |
50 Coins 80 Coins |
From Prologue | |
| 70 Coins |
50 Coins 100 Coins |
From Prologue | |
| 55 Coins |
50 Coins 80 Coins |
From Prologue | |
| 70 Coins |
50 Coins 100 Coins |
From Prologue | |
| 100 Coins | 150 Coins | After Chapter 1 | |
| 100 Coins | 150 Coins | After Chapter 1 | |
| 70 Coins |
75 Coins 100 Coins |
After Chapter 1 | |
| 100 Coins | After Chapter 2 | ||
| 50 Coins | 150 Coins | After Chapter 2 | |
| 140 Coins |
150 Coins 200 Coins |
After Chapter 2 | |
| 80 Coins |
75 Coins |
After Chapter 3 | |
| 50 Coins | 150 Coins | After Chapter 3 | |
| 70 Coins |
75 Coins 100 Coins |
After Chapter 3 | |
| 140 Coins |
150 Coins 200 Coins |
After Chapter 4 | |
| 100 Coins | 150 Coins | After Chapter 4 | |
| 70 Coins |
75 Coins 100 Coins |
After Chapter 4 | |
| 140 Coins |
150 Coins 200 Coins |
After Chapter 5 | |
| 100 Coins | 150 Coins | After Chapter 5 | |
| 55 Coins |
50 Coins 80 Coins |
After Chapter 5 | |
| 80 Coins |
100 Coins 120 Coins |
After Chapter 6 | |
| 70 Coins | Only if badge falls down hole in the floor in Creepy Steeple |
Sell prices[edit]
Gallery[edit]
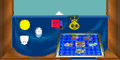
The window display
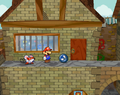
Attack FX B outside of the shop


Names in other languages[edit]
| Language | Name | Meaning | Notes |
|---|---|---|---|
| Japanese | ラブリーチューチュー[?] Raburī Chūchū |
Lovely Chuchu, where chuchu is onomatopoeia for mice. | |
| Chinese | 甜心啾啾[?] Tiánxīn Jiūjiū |
Sweetheart Squeak | |
| Dutch | De Schatkist[?] | The Treasure Chest | |
| French | Boutique de Badges Écarlate[?] | Scarlet Badge Shop | |
| German | Nagerines Orden-Shop[?] | Mowz's Badge Shop | |
| Italian | Bottega di tessere di Squitty[?] | Mowz's badge Shop | |
| Korean | 러블리츄츄[?] Leobeulli Chyuchyu |
Lovely Chuchu; from the Japanese name | |
| Spanish | Tienda de medallas La Cariñosa[?] | The Loving badges shop |
References[edit]
- ^ MuzYoshi. Obscure Things you DIDN'T KNOW about Paper Mario: TTYD! (8:50).