The Great Tree: Difference between revisions
Son of Suns (talk | contribs) mNo edit summary |
(Revamp.) |
||
| (188 intermediate revisions by 91 users not shown) | |||
| Line 1: | Line 1: | ||
[[ | {{location infobox | ||
'''The Great Tree''' is a giant tree in the game ''[[Paper Mario: The Thousand Year Door]]''. It is located in [[Boggly Woods]] and the home | |image=[[File:TTYDNS The Great Tree.png|250px]] | ||
|greater_location=[[Boggly Woods]] | |||
|capital= | |||
|ruler=[[Puni elder]] | |||
|inhabitants=[[Puni]]es, [[Pider]]s, and [[Jabbi]]es | |||
|first_appearance=''[[Paper Mario: The Thousand-Year Door]]'' ([[List of games by date#2004|2004]]) | |||
|latest_appearance=''[[Paper Mario: The Thousand-Year Door (Nintendo Switch)|Paper Mario: The Thousand-Year Door]]'' ([[Nintendo Switch]]) ([[List of games by date#2024|2024]]) | |||
}} | |||
{{quote|There! That's what I was telling you about. That's where the [[Puni|Punies]] live. That's home. Uh, of course, it's not just us in the tree. Lots of [[Jabbi|Jabbies]] and [[Pider|Piders]] too.|Punio|Paper Mario: The Thousand-Year Door}} | |||
{{PMTTYD map}} | |||
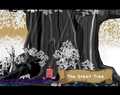
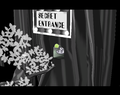
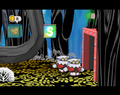
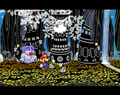
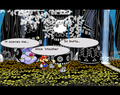
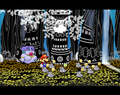
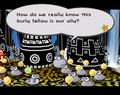
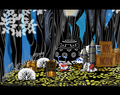
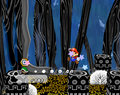
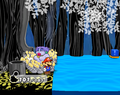
'''The Great Tree''' is a giant tree in the game ''[[Paper Mario: The Thousand-Year Door]]''. Its interior serves as the third main location in the game. It is located in [[Boggly Woods]] and is the home of the [[Puni|Puni tribe]]. When [[Mario]] first arrives here, the entrance is sealed by a strange, metal door, which prompts him to take [[Punio]] to see Flurrie; the door is a result of the [[X-Naut]]s residing in the tree. There is actually a secret entrance to the Great Tree's interior. Mario must use [[Flurrie]] to blow away the "paper" that covers this entrance, which Punio proceeds to enter, prompting him to open the sealed door that Mario can walk through. However, the secret entrance is anything but secret as it is labeled "Secret Entrance" and is surrounded by flashing lights. | |||
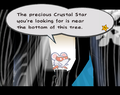
The [[Emerald Star]] is located within the tree since 1,000 years ago after the [[Shadow Queen]] was imprisoned the [[Black Chest Demons|Goomba hero]] gave the Crystal Star to the Punies to keep safe. As such, [[Lord Crump]] and his [[X-Naut]] troops invaded the place to find it, even if that meant teaming up with the [[Jabbi]]es (the rivals of the Punies), and additionally, imprisoning the Punies. [[Punio]] enlisted the help of Mario, [[Goombella]], [[Koops]], and Flurrie to liberate the Punies, take down the Jabbies, retrieve the Emerald Star, and drive the X-Nauts out of the Tree. Mario also obtained the [[Super Boots]] while he and his friends were here. After Mario and his friends find the Emerald Star, Crump steals it and activates a five-minute (300-second) time bomb. With the system active, Crump makes his way to the entrance, but his escape is cut off by the [[Puni elder]]; with her help, Mario, Goombella, Koops, Flurrie and the other Punies are able to catch up with him, demanding that he surrenders the Crystal Star and leave the tree forever. However, instead of surrendering, Crump is forced to deactivate the time bomb and activate his robot, [[Magnus von Grapple]], and attack Mario and company. After defeating the robot, Crump and the X-Nauts are driven out of the tree and Mario is given the Emerald Star as a reward. A [[Pungent's Great Tree Shop|shop]] is also found here. | |||
[[Category: | The in-game map description reads, ''"A very large tree where the reclusive Punies live."'' | ||
{{br|left}} | |||
==Enemies== | |||
*[[Jabbi]] (Mario does not fight them in battle; the [[Puni]]es do.) | |||
*[[Piranha Plant#Paper Mario: The Thousand-Year Door|Pale Piranha]] | |||
*[[Pider]] | |||
*[[Magnus von Grapple]] (Chapter 2) | |||
*[[X-Naut]] (Chapter 2) | |||
*[[Yux]] (Chapter 2) | |||
*[[Mini-Yux]] (Chapter 2) | |||
==Inhabitants== | |||
The tree is inhabited almost exclusively by [[Puni]]s, [[Jabbi]]s, and [[Pider]]s, though it is temporarily invaded by the enemies listed above. | |||
*[[Punio]] | |||
*[[Puni elder]] | |||
*[[Petuni]] | |||
*[[Puniper]] | |||
*[[Jabble]] | |||
*[[Pungent]] | |||
*[[Pungry]] | |||
*[[List of implied characters#Punderton|Punderton]] (presumably) | |||
*[[Lord Crump]] (Chapter 2) | |||
*[[Battle Master]] | |||
===Formations=== | |||
{{main|List of enemy formations in Paper Mario: The Thousand-Year Door#The Great Tree}} | |||
==Items== | |||
Additional items are on sale at [[Pungent's Great Tree Shop]] (+ Shop Point rewards). The shops is at first covered by a piece of paper to the lower-left of the twisty path. Having Flurrie blow it away will allow Mario access to it. In the remake, the white grass can be squished for one Coin at random. | |||
{|class=wikitable style="text-align:center" | |||
!Item | |||
!Location | |||
!Location Image | |||
!Location Image (Remake) | |||
|- | |||
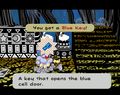
|{{PMTTYD item|link=Blue Key (Paper Mario: The Thousand-Year Door)|Blue Key|game=NS}} | |||
|In the second room below the entrance, to the right of the twisty path, it's inside the chest on the ground. | |||
|[[File:The Great Tree Treasure Chest 2.png|250px]] | |||
|[[File:The Great Tree Treasure Chest 2 (Switch).png|250px]] | |||
|- | |||
|{{PMTTYD item|link=Charge (badge)|Charge|game=NS}} | |||
|In the second room below the entrance, to the right of the twisty path, it's on the left pillar in the underground. | |||
|[[File:PMTTYD The Great Tree Charge Badge.png|250px]] | |||
|[[File:The Great Tree (Charge) (Switch).png|250px]] | |||
|- | |||
|rowspan=21|{{PMTTYD item|Coin|game=NS}} (x5/x20) | |||
|In the entrance scene, in the first bush. | |||
|[[File:The Great Tree (Coin 1).png|250px]] | |||
|[[File:The Great Tree (Coin 1) (Switch).png|250px]] | |||
|- | |||
|In the storeroom in the highest place, in the first bush. [[File:Nintendo GameCube symbol.svg|15px|link=Nintendo GameCube]] | |||
|[[File:The Great Tree (Coin 2).png|250px]] | |||
|N/A | |||
|- | |||
|In the area before the area with the trap, in the lower part, in the second bush. | |||
|[[File:The Great Tree (Coin 3).png|250px]] | |||
|[[File:The Great Tree (Coin 12) (Switch).png|250px]] | |||
|- | |||
|In the next area (accessed by a pipe on the log), in the third bush found on the lower part. | |||
|[[File:The Great Tree (Coin 4).png|250px]] | |||
|[[File:The Great Tree (Coin 14) (Switch).png|250px]] | |||
|- | |||
|In the first area above the entrance, in the second bush. [[File:Nintendo Switch Logo.svg|15px|link=Nintendo Switch]] | |||
|N/A | |||
|[[File:The Great Tree (Coin 2) (Switch).png|250px]] | |||
|- | |||
|In the second area above the entrance, in the fourth bush. [[File:Nintendo Switch Logo.svg|15px|link=Nintendo Switch]] | |||
|N/A | |||
|[[File:The Great Tree (Coin 3) (Switch).png|250px]] | |||
|- | |||
|In the area with the cells, in the second bush. [[File:Nintendo Switch Logo.svg|15px|link=Nintendo Switch]] | |||
|N/A | |||
|[[File:The Great Tree (Coin 4) (Switch).png|250px]] | |||
|- | |||
|In the bubble area, in the lower part of the left, in the foreground bush. [[File:Nintendo Switch Logo.svg|15px|link=Nintendo Switch]] | |||
|N/A | |||
|[[File:The Great Tree (Coin 5) (Switch).png|250px]] | |||
|- | |||
|In the airplane area, in the lower part, in the fifth bush. [[File:Nintendo Switch Logo.svg|15px|link=Nintendo Switch]] | |||
|N/A | |||
|[[File:The Great Tree (Coin 6) (Switch).png|250px]] | |||
|- | |||
|Same area, in the seventh bush. [[File:Nintendo Switch Logo.svg|15px|link=Nintendo Switch]] | |||
|N/A | |||
|[[File:The Great Tree (Coin 7) (Switch).png|250px]] | |||
|- | |||
|In the area with the narrow passageways with Piders, in the lower part, in the middle bush. [[File:Nintendo Switch Logo.svg|15px|link=Nintendo Switch]] | |||
|N/A | |||
|[[File:The Great Tree (Coin 8) (Switch).png|250px]] | |||
|- | |||
|In the area with the 10-Jabbi Squadron, in the last bush. [[File:Nintendo Switch Logo.svg|15px|link=Nintendo Switch]] | |||
|N/A | |||
|[[File:The Great Tree (Coin 9) (Switch).png|250px]] | |||
|- | |||
|In the area with the 100-Jabbi Squadron, in the first bush. [[File:Nintendo Switch Logo.svg|15px|link=Nintendo Switch]] | |||
|N/A | |||
|[[File:The Great Tree (Coin 10) (Switch).png|250px]] | |||
|- | |||
|In the area before the area with the trap, in the upper part, in the middle bush. [[File:Nintendo Switch Logo.svg|15px|link=Nintendo Switch]] | |||
|N/A | |||
|[[File:The Great Tree (Coin 11) (Switch).png|250px]] | |||
|- | |||
|In the area with the trap, in the lower part, in the bush all the way to the left. [[File:Nintendo Switch Logo.svg|15px|link=Nintendo Switch]] | |||
|N/A | |||
|[[File:The Great Tree (Coin 13) (Switch).png|250px]] | |||
|- | |||
|In the next area (accessed by a pipe on the log), in the fourth bush found on the lower part. [[File:Nintendo Switch Logo.svg|15px|link=Nintendo Switch]] | |||
|N/A | |||
|[[File:The Great Tree (Coin 15) (Switch).png|250px]] | |||
|- | |||
|In the area with the an elevator activated by Puni Orb, in the upper part, in the last bush. [[File:Nintendo Switch Logo.svg|15px|link=Nintendo Switch]] | |||
|N/A | |||
|[[File:The Great Tree (Coin 16) (Switch).png|250px]] | |||
|- | |||
|In the area where the Emerald Star is originally located, in the second bush. [[File:Nintendo Switch Logo.svg|15px|link=Nintendo Switch]] | |||
|N/A | |||
|[[File:The Great Tree (Coin 17) (Switch).png|250px]] | |||
|- | |||
|Same area, in the sixth bush. [[File:Nintendo Switch Logo.svg|15px|link=Nintendo Switch]] | |||
|N/A | |||
|[[File:The Great Tree (Coin 18) (Switch).png|250px]] | |||
|- | |||
|In the area between the Emerald Star area and the area with the narrow passageways with Piders, in the bush found in the upper-right corner. [[File:Nintendo Switch Logo.svg|15px|link=Nintendo Switch]] | |||
|N/A | |||
|[[File:The Great Tree (Coin 19) (Switch).png|250px]] | |||
|- | |||
|60 (50 on Switch) given by [[Puni elder|Puni Elder]] after completing her [[Life Mushroom!|trouble]]. | |||
|[[File:The Great Tree (Puni Elder Coins).png|250px]] | |||
|[[File:The Great Tree (Puni Elder Coins) (Switch).png|250px]] | |||
|- | |||
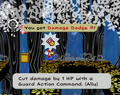
|{{PMTTYD item|Damage Dodge P|game=NS}} | |||
|In the second room below the entrance, it's in a ? Block above an invisible block by the twisty path. | |||
|[[File:PMTTYDHiddenBlocks3.png|250px]] | |||
|[[File:PMTTYDHiddenBlocks3 (Switch).png|250px]] | |||
|- | |||
|{{PMTTYD item|Dizzy Dial|game=NS}} | |||
|In the water-draining room deep in the tree, it's to the back of the stairs in the upper room. | |||
|[[File:The Great Tree (Dizzy Dial).png|250px]] | |||
|[[File:The Great Tree (Dizzy Dial) (Switch).png|250px]] | |||
|- | |||
|{{PMTTYD item|Emerald Star|game=NS}} | |||
|Stolen by [[Lord Crump]] and picked up by Mario after [[Magnus von Grapple]] is defeated. | |||
|[[File:PMTTYD Emerald Star get.png|250px]] | |||
|[[File:TTYDNS Emerald Star Get.png|250px]] | |||
|- | |||
|{{PMTTYD item|FP Plus|game=NS}} | |||
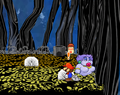
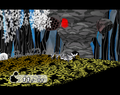
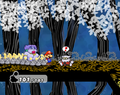
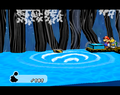
|In the outside area, it's in the waterfall to the right of the tree. | |||
|[[File:PMTTYD The Great Tree FP Plus.png|250px]] | |||
|[[File:The Great Tree (FP Plus) (Switch).png|250px]] | |||
|- | |||
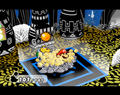
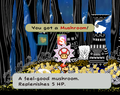
|rowspan=2|{{PMTTYD item|Mushroom|game=NS}} (×2) | |||
|In the room before the Crystal Star room, it's in the left bush. | |||
|[[File:PMTTYD The Great Tree Mushroom.png|250px]] | |||
|[[File:The Great Tree (Mushroom) (Switch).png|250px]] | |||
|- | |||
|In the storeroom in the highest place, it's given by [[Jabble]] when talked to after Chapter 2. | |||
|[[File:The Great Tree (Jabble Mushroom).png|250px]] | |||
|[[File:The Great Tree (Jabble Mushroom) (Switch).png|250px]] | |||
|-style="background:lightgreen" | |||
|{{PMTTYD item|Mystic Egg|game=NS}} | |||
|Given by [[Petuni]] by playing the [[Stump Petuni]] game with her. Available after Chapter 2. (Repeatable + free of charge) | |||
|[[File:The Great Tree (Mystic Egg).png|250px]] | |||
|[[File:The Great Tree (Mystic Egg) (Switch).png|250px]] | |||
|- | |||
|{{PMTTYD item|Power Punch|game=NS}} | |||
|In the second room above the entrance area, it's in the southeast bush on the ground. | |||
|[[File:PMTTYD The Great Tree Power Punch.png|250px]] | |||
|[[File:The Great Tree (Power Punch) (Switch).png|250px]] | |||
|- | |||
|{{PMTTYD item|Puni Orb|game=NS}} | |||
|Given by the [[Puni elder]] in Chapter 2. This is the only key item removable from Mario's inventory at will. | |||
|[[File:The Great Tree (Puni Orb).png|250px]] | |||
|[[File:The Great Tree (Puni Orb) (Switch).png|250px]] | |||
|- | |||
|{{PMTTYD item|link=Red Key (Paper Mario: The Thousand-Year Door)|Red Key|game=NS}} | |||
|In the storeroom in the highest place, it's dropped by the [[X-Naut]] guard. | |||
|[[File:PMTTYD The Great Tree X-Naut Drops Red Key.png|250px]] | |||
|[[File:The Great Tree (Red Key) (Switch).png|250px]] | |||
|- | |||
|{{PMTTYD item|Routing Slip|game=NS}} | |||
|Given to and given back by Puni Elder in the entrance area during [[Newsletter...|Mayor Dour's trouble]] | |||
|[[File:The Great Tree (Routing Slip).png|250px]] | |||
|[[File:The Great Tree (Routing Slip) (Switch).png|250px]] | |||
|- | |||
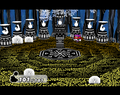
|rowspan=4|{{PMTTYD item|Shine Sprite|game=NS}} (×4) | |||
|In the room to the right of the entrance, it's to the right of the bubble pond. | |||
|[[File:PMTTYD Shine Sprite GreatTreeBubbleRoom.png|250px]] | |||
|[[File:PMTTYD Shine Sprite GreatTreeBubbleRoom (Switch).png|250px]] | |||
|- | |||
|In the first room below the entrance, it's above the big stone in the lower-left of the room. Accessible with the airplane panels. | |||
|[[File:PMTTYD Shine Sprite GreatTreePlaneRoom.png|250px]] | |||
|[[File:PMTTYD Shine Sprite GreatTreePlaneRoom (Switch).png|250px]] | |||
|- | |||
|In the second room below the entrance, to the right of the twisty path, it's on the back pillar in the underground. | |||
|[[File:PMTTYD Shine Sprite GreatTreeSymbolRoom.png|250px]] | |||
|[[File:PMTTYD Shine Sprite GreatTreeSymbolRoom (Switch).png|250px]] | |||
|- | |||
|In the water-draining room deep in the tree, it's above a lily in the lower-room. | |||
|[[File:PMTTYD Shine Sprite GreatTreePond.png|250px]] | |||
|[[File:PMTTYD Shine Sprite GreatTreePond (Switch).png|250px]] | |||
|- | |||
|{{PMTTYD item|Shrink Stomp|game=NS}} | |||
|In the water-draining room deep in the tree, it's inside a chest box in front of the stairs in the upper room. | |||
|[[File:The Great Tree Treasure Chest 4.png|250px]] | |||
|[[File:The Great Tree Treasure Chest 4 (Switch).png|250px]] | |||
|- | |||
|rowspan=6|{{PMTTYD item|Star Piece|game=NS}} (×6) | |||
|In the first room above the entrance area, it's under a panel near the pipe to the up. | |||
|[[File:PMTTYD Star Piece GreatTreeBubbleRoomPanel.png|250px]] | |||
|[[File:PMTTYD Star Piece GreatTreeBubbleRoomPanel (Switch).png|250px]] | |||
|- | |||
|In the third room above the entrance area, it's under a panel in the blue cell. | |||
|[[File:PMTTYD Star Piece GreatTreeBlueCellPanel.png|250px]] | |||
|[[File:PMTTYD Star Piece GreatTreeBlueCellPanel (Switch).png|250px]] | |||
|- | |||
|In the second room below the entrance, it's in the northwest bush below the twisty path. | |||
|[[File:PMTTYD Star Piece GreatTreeMiddleRoomGrass.png|250px]] | |||
|[[File:PMTTYD Star Piece GreatTreeMiddleRoomGrass (Switch).png|250px]] | |||
|- | |||
|In the second room below the entrance, to the left of the twisty path, it's behind the entrance pipe of the lower area. | |||
|[[File:PMTTYD Star Piece GreatTreeDownPipe.png|250px]] | |||
|[[File:PMTTYD Star Piece GreatTreeDownPipe (Switch).png|250px]] | |||
|- | |||
|In the second room below the entrance, to the left of the twisty path, it's behind the pipe in the area below the trap. | |||
|[[File:PMTTYD Star Piece GreatTreePillarRoomPipe.png|250px]] | |||
|[[File:PMTTYD Star Piece GreatTreePillarRoomPipe (Switch).png|250px]] | |||
|- | |||
|In the shortcut room from the tree bottom to the twisty path area, it's in the southwest bush. | |||
|[[File:PMTTYD Star Piece GreatTreeLowRoomGrass.png|250px]] | |||
|[[File:PMTTYD Star Piece GreatTreeLowRoomGrass (Switch).png|250px]] | |||
|- | |||
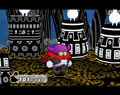
|{{PMTTYD item|Super Boots|game=NS}} | |||
|In the second room below the entrance, to the right of the twisty path, it's in a chest in a north cave. | |||
|[[File:PMTTYD The Great Tree Super Boots Room.png|250px]] | |||
|[[File:The Great Tree Treasure Chest 3 (Switch).png|250px]] | |||
|- | |||
|{{PMTTYD item|Thunder Rage|game=NS}} | |||
|In the bubble room to the right of the entrance, it's in the rightmost bush on the ground. | |||
|[[File:The Great Tree (Thunder Rage).png|250px]] | |||
|[[File:The Great Tree (Thunder Rage) (Switch).png|250px]] | |||
|- | |||
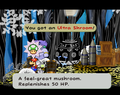
|{{PMTTYD item|Ultra Mushroom|game=NS}} | |||
|In the storeroom in the highest place, it's inside the left chest. (The right chest is opened by Ms. Mowz.) | |||
|[[File:The Great Tree Treasure Chest 1.png|250px]] | |||
|[[File:The Great Tree Treasure Chest 1 (Switch).png|250px]] | |||
|} | |||
===Hidden ? Block=== | |||
{{main|List of hidden blocks in Paper Mario: The Thousand-Year Door}} | |||
{|class=wikitable style="text-align:center" | |||
!Item | |||
!Description | |||
!Block un/revealed ([[File:Nintendo GameCube symbol.svg|15px|link=Nintendo GameCube]]) | |||
!Block un/revealed ([[File:Nintendo Switch Logo.svg|15px|link=Nintendo Switch]]) | |||
|- | |||
|{{PMTTYD item|Coin|game=NS}} | |||
|In the area with the narrow passageways with [[Pider]]s, is a red ? Block. Mario must use [[Koops]] to hit the hidden ? Block directly underneath the block. | |||
|[[File:PMTTYDHiddenBlocks3.png|250px]][[File:PMTTYDHiddenBlocks3R.png|250px]] | |||
|[[File:PMTTYDHiddenBlocks3 (Switch).png|250px]][[File:PMTTYDHiddenBlocks3R (Switch).png|250px]] | |||
|} | |||
==Profiles== | |||
*'''Tattles:''' | |||
**''The base of the Great Tree! It sure is big up close... I mean... Wowser. Seriously. It must have watched over the Boggly Woods for over 1,000 years. That's insane'' (GCN) / ''unbelievable'' (Switch)''...'' | |||
**''It's like another world inside this tree, huh?!? And check out these statues! They must've been left by the ancestors of the Punies. I wonder how many years the Punies have lived in this place, anyway... These are the kind of questions archaeologists have to ask, y'know.'' | |||
**''This is an interesting pedestal, Mario. When the Punies stand on the panel, the machine counts them and responds. The ancient Punies must've been really sophisticated... This is totally fascinating!'' | |||
**''We're inside the Great Tree. Looks like lots of tufts of vegetation around here. Stuff could be hidden in those things, so let's make sure to check each one, OK?'' | |||
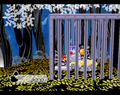
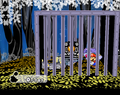
**''There's a red cell and a blue cell here. Crump must've made 'em to hold the Punies. With gaps like those between the bars, I think we could get through, though...'' | |||
**''Looks like Crump left behind lots of the equipment he used to search this tree. [[Ms. Mowz]] was here before, but I think she took the next train to Floozyville'' (GCN) / ''Flirtsville'' (Switch)''.'' | |||
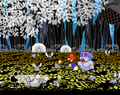
**''We can just jump this gap easily, but I think the Punies will totally plummet down there. If you gather them into a group and blow on them, they should all fall over the edge... But then they'll come back up in bubbles! And then you can blow them across! As for that door on the left, if you use that panel, it'll unlock it, I'm pretty sure.'' (GCN) | |||
***''Bubbles keep floating up from the water at the bottom... Weird. That door on the left is interesting too. If we turn that nearby panel's light green, it should let us enter!'' (Switch) | |||
**''The Punies are totally afraid of these Piders. When a Pider drops, the Punies completely lose it and bolt in every direction. You're gonna have to defeat any Piders near the path you wanna lead the Punies along.'' | |||
**''We're inside the Great Tree. This area has a totally wacked-out topography. Y'know, I think Punio said something about a hidden shop somewhere in this area... If you need any items, we should try to find it, huh?'' | |||
**''This is a shop run by a Puni named [[Pungent]]. I wonder if there are any rare items...'' | |||
**''Hey, there's water running through the inside of the Great Tree! You don't think... Could this be how the tree carries nutrients from root to limb? Y'know, nature is just about the coolest thing ever.'' | |||
**''This area seems to have been laid out for a special reason, don't you think? There must be something super-important hidden here.'' | |||
**''This must be the most wide-open space'' (GCN) / ''one of the most wide-open spaces'' (Switch) ''inside the Great Tree, huh? The tree looks big from out there, but I lose all sense of dimension in here.... I could totally get lost in here for like, days...'' | |||
**''I wonder if the inside of the tree was always like this... I mean, do you think it was, or do you think someone MADE it this way? Hmmm... It's a mystery...'' | |||
**''The structure of this tree is pretty complicated. Looks like we're only gonna move on with the help of the Punies, huh? We're going to seriously need to use our thinking caps as we go forward.'' | |||
***''The structure of this tree is pretty complicated. If we want to move forward, we'll have to make full use of our shared abilities...including the Punies! We're gonna seriously need to use our thinking caps as we go forward...'' (Switch) | |||
**''This is a big treasure chest... The Punies must've left it... What could it be, you think? Well... Only one way to find out, am I right?'' | |||
**''We're inside the Great Tree. Grasses and other plants grow in here. Isn't that cool? You think the Great Tree is like a...host organism? Biology is just SO cool...'' | |||
**''This area makes me feel like I'm exploring a watery swamp even though we're in a tree... Water! I bet we need Koops! ...Um... Or maybe that doesn't make any sense at all...'' | |||
**''We've come down pretty far. The air is a bit colder here, don'tcha think? The technology used here is pretty insane'' (GCN) / ''intense'' (Switch)'', too. I wish I had more time to inspect it.'' | |||
**''This must be the lowest chamber. Saying it's solemn here is an understatement. Under these statues' glares... I feel like the Punies' ancestors are watching us...'' | |||
**''This door was made by Crump and his cronies. It doesn't match the decor at all. As for the door, if you use the panel there, it should unlock the whole thing.'' (GCN) | |||
***''This door was made by Crump and his cronies. It doesn't match the decor of this tree at all. We should be able to pass through it when the lamp over the door is green. Use the controls on that side panel!'' (Switch) | |||
==Notes== | |||
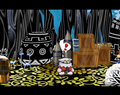
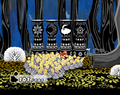
*In the room where the player has to hammer the switches to gain access to the Super Boots room, in the Japanese version the 4 statues all have Punis on them before hitting the switches, but in the international versions the 4 statues have the following (left to right) on them before hitting the switches: Puni, Star, Moon, Sun. | |||
**Additionally, on page 39 of the Official Nintendo Player's Guide, the 4 statues all have Punis on them just like in the Japanese version. | |||
*When unlocking the blue cage in the Great Tree, the game checks for and removes the Strange Sack from the player's inventory if the player has it (which will permanently prevent it from being obtained again as there is only one in the game). Additionally, if the player has more than 10 items in their inventory when they lose the Strange Sack, they can get the normally unused Debug Badge to appear in their inventory. This does not happen in the international versions. | |||
==Gallery== | |||
===''Paper Mario: The Thousand-Year Door''=== | |||
<gallery> | |||
PMTTYD Emerald Star Revealed 1.png | |||
PMTTYD Emerald Star Revealed 2.png | |||
Great Tree icon.png | |||
PMTTYD Boggly Woods The Great Tree Distance.png | |||
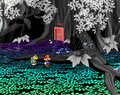
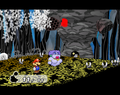
PMTTYD The Great Tree Intro.png|The introduction | |||
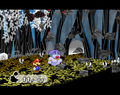
The Great Tree Entrance.png|The Great Tree | |||
PMTTYD The Great Tree FP Plus.png|Mario finds an FP Plus badge. | |||
PMTTYD The Great Tree Blocked Entry.png | |||
PMTTYD The Great Tree Secret Entrance Questioning.png | |||
PMTTYD The Great Tree Brainstorm.png | |||
PMTTYD The Great Tree Revealing Secret Entrance.png | |||
PMTTYD The Great Tree Revealed Secret Entrance.png | |||
PMTTYD The Great Tree Punio Going Inside Secret Entrance.png | |||
PMTTYD The Great Tree Flurrie Helps Punies.png | |||
PMTTYD The Great Tree Punio Opens Locked Door.png | |||
PMTTYD X-Nauts Appearance The Great Tree.png | |||
PMTTYD The Great Tree X-Nauts Ambush 1.png | |||
PMTTYD The Great Tree First X-Naut Fight.png | |||
PMTTYD The Great Tree X-Naut Run Away.png | |||
PMTTYD The Great Tree Punies Out of Hiding 1.png | |||
PMTTYD The Great Tree Punies Out of Hiding 2.png | |||
PMTTYD The Great Tree Punies Out of Hiding 3.png | |||
PMTTYD The Great Tree Punies Out of Hiding 4.png | |||
PMTTYD The Great Tree Punies Out of Hiding 5.png | |||
PMTTYD The Great Tree Punies Out of Hiding 6.png | |||
PMTTYD The Great Tree Puni Shrine.png | |||
PMTTYD The Great Tree Power Punch.png | |||
PMTTYD The Great Tree Yux.png | |||
PMTTYD The Great Tree Lone X-Naut.png | |||
PMTTYD The Great Tree Surprise Ms. Mowz 1.png | |||
PMTTYD The Great Tree Surprise Ms. Mowz 2.png | |||
PMTTYD The Great Tree Red Cage with Puni Elder.png | |||
PMTTYD The Great Tree Ignoring Puni Elder.png | |||
PMTTYD The Great Tree Blue Cage Punio Upset.png | |||
PMTTYD The Great Tree Blue Cage With 90 Punies.png | |||
PMTTYD The Great Tree Fainted X-Naut.png | |||
PMTTYD The Great Tree Ms. Mowz 1.png | |||
PMTTYD The Great Tree Ms. Mowz 2.png | |||
PMTTYD The Great Tree Ms. Mowz 3.png | |||
PMTTYD The Great Tree Ms. Mowz 4.png|Ms. Mowz prepares to take off. | |||
PMTTYD The Great Tree X-Nauts Ambush 2.png | |||
PMTTYD The Great Tree Second X-Naut Fight.png | |||
PMTTYD The Great Tree X-Naut Drops Red Key.png|[[Red Key (Paper Mario: The Thousand-Year Door)|Red Key]] | |||
PMTTYD The Great Tree Ultra Shroom.png | |||
PMTTYD The Great Tree Punio Confronts Elder.png | |||
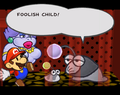
PMTTYD The Great Tree FOOLISH CHILD.png|The Puni elder scolds Punio. | |||
PMTTYD The Great Tree Several Hours Later.png | |||
PMTTYD The Great Tree Sleeping Mario with Elder.png | |||
PMTTYD The Great Tree Elder Leaves.png | |||
PMTTYD The Great Tree Puniper with Elder.png | |||
PMTTYD The Great Tree Stubborn MULE.png | |||
PMTTYD The Great Tree 10 Punies Joined.png | |||
PMTTYD The Great Tree Puni Orb.png | |||
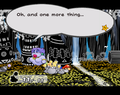
PMTTYD The Great Tree One More Thing.png | |||
PMTTYD The Great Tree Elder Whistle.png | |||
PMTTYD The Great Tree Shrine Reveals Warp Pipe.png | |||
PMTTYD The Great Tree Elder Dialog Choices.png | |||
PMTTYD The Great Tree Calling Punies.png | |||
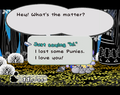
PMTTYD The Great Tree I Love You 1.png | |||
PMTTYD The Great Tree I Love You 2.png | |||
PMTTYD The Great Tree 10 Puni Bubbles.png | |||
PMTTYD The Great Tree Scared Punies.png | |||
PMTTYD The Great Tree Unblocking Plane Panel.png | |||
PMTTYD The Great Tree Flying 1.png | |||
PMTTYD The Great Tree Flying 2.png | |||
PMTTYD The Great Tree Before Jabbies.png | |||
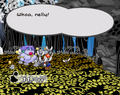
PMTTYD The Great Tree Jabbi Hive 1.png | |||
PMTTYD The Great Tree Jabbi Whoa Nelly 1.png | |||
PMTTYD The Great Tree Jabbi Fight Over 1.png | |||
PMTTYD The Great Tree Punies Enter Hive 1.png | |||
PMTTYD The Great Tree Punies Destroy Hive 1.png | |||
PMTTYD The Great Tree Wooden Panel.png | |||
PMTTYD The Great Tree Blue Key.png | |||
PMTTYD The Great Tree Petuni Scene.png | |||
PMTTYD The Great Tree Petuni Dried Shroom Scene.png | |||
PMTTYD The Great Tree Petuni Unlock Blue Cage.png | |||
PMTTYD The Great Tree Petuni Petuni and Punio.png | |||
PMTTYD The Great Tree Petuni Petuni Dried Shroom Punio.png | |||
PMTTYD The Great Tree Punio Eats Dried Shroom.png | |||
PMTTYD The Great Tree Petuni Hugs Punio.png | |||
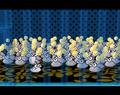
PMTTYD The Great Tree 90 Punies Joined.png | |||
PMTTYD The Great Tree 101 Puni Bubbles.png | |||
PMTTYD The Great Tree Damage Dodge P.png | |||
PungentsShop.png | |||
PMTTYD The Great Tree Jabble 1.png | |||
PMTTYD The Great Tree Jabble 2.png | |||
PMTTYD The Great Tree Jabble 3.png | |||
PMTTYD The Great Tree Jabble 4.png | |||
PMTTYD The Great Tree Jabble 5.png | |||
PMTTYD The Great Tree Jabble 6.png | |||
PMTTYD The Great Tree Jabbi Hive 2.png | |||
PMTTYD The Great Tree Jabbi Whoa Nelly 2.png | |||
PMTTYD The Great Tree Jabbi Fight Over 2.png | |||
PMTTYD The Great Tree Punies Enter Hive 2.png | |||
PMTTYD The Great Tree Punies Destroy Hive 2.png | |||
PMTTYD The Great Tree Punies Trapped Entrapped.png | |||
PMTTYD The Great Tree Punies Trapped Lord Crump.png | |||
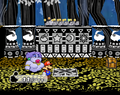
PMTTYD The Great Tree Four White Switches.png | |||
PMTTYD The Great Tree Right Order.png | |||
PMTTYD The Great Tree Four White Switch Paper Transition.png | |||
PMTTYD The Great Tree Super Boots Room.png | |||
PMTTYD The Great Tree Super Boots.png|Mario finds the Super Boots. | |||
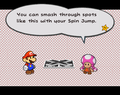
PMTTYD The Great Tree Toadette Demo 1.png|Mario learns how to ground pound. | |||
PMTTYD The Great Tree Toadette Demo 2.png|Toadette gives advice on wooden panels. | |||
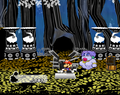
PMTTYD The Great Tree First Ground Pound.png | |||
PMTTYD The Great Tree Charge Badge.png | |||
PMTTYD The Great Tree Second Ground Pound.png | |||
PMTTYD The Great Tree Freeing Punies.png | |||
PMTTYD The Great Tree Punies Reunite.png | |||
PMTTYD The Great Tree Puni Ground Pound Wind Puzzle 1.png | |||
PMTTYD The Great Tree Puni Ground Pound Wind Puzzle 2.png | |||
PMTTYD The Great Tree Puni Ground Pound Wind Puzzle 3.png | |||
PMTTYD The Great Tree Puni Ground Pound Wind Puzzle 4.png | |||
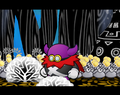
PMTTYD The Great Tree X-Naut.png|Mario encounters an [[X-Naut]] inside the Great Tree. | |||
PMTTYD The Great Tree Water Puzzle 1.png | |||
PMTTYD The Great Tree Water Puzzle 2.png | |||
PMTTYD The Great Tree Water Puzzle 3.png | |||
PMTTYD The Great Tree Water Puzzle 4.png | |||
PMTTYD The Great Tree Water Puzzle 5.png | |||
PMTTYD The Great Tree Shrink Stomp.png|Mario finds a [[Shrink Stomp]] badge. | |||
PMTTYD The Great Tree Shrine Before Lord Crump 1.png | |||
PMTTYD The Great Tree Shrine Before Lord Crump 2.png | |||
PMTTYD The Great Tree Shrine Before Lord Crump 3.png | |||
PMTTYD The Great Tree Mushroom.png | |||
PMTTYD The Great Tree Lord Crump Searching.png | |||
PMTTYD The Great Tree Lord Crump Fleeing.png | |||
PMTTYD The Great Tree Last Shrine 1.png | |||
PMTTYD The Great Tree Last Shrine 2.png | |||
PMTTYD The Great Tree Last Shrine 3.png | |||
PMTTYD The Great Tree Last Shrine 4.png | |||
PMTTYD The Great Tree Last Shrine 5.png | |||
PMTTYD The Great Tree Steal Emerald Star.png | |||
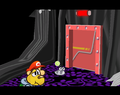
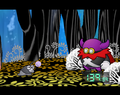
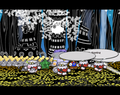
PMTTYD The Great Tree Remote Control.png|Lord Crump activates the timer for the bomb. | |||
PMTTYD The Great Tree Countdown Timer.png|The countdown begins. | |||
PMTTYD The Great Tree Countdown Flee.png|Lord Crump escapes with the countdown ticking. | |||
PMTTYD The Great Tree Third X-Naut Fight.png|Mario must battle a duo of X-Nauts before making his way back. | |||
PMTTYD The Great Tree Puni Bubbles Countdown.png | |||
PMTTYD The Great Tree Lord Crump Stopped.png | |||
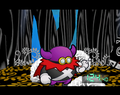
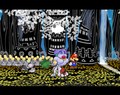
PMTTYD The Great Tree Elder Shouting Lord Crump.png|The Puni elder yells at Lord Crump. | |||
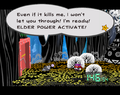
PMTTYD The Great Tree Elder Power Activate.png | |||
PMTTYD The Great Tree Elder and Lord Crump.png | |||
PMTTYD The Great Tree Lord Crump Stops Timer.png | |||
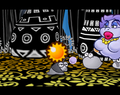
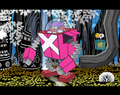
PMTTYD The Great Tree Magnus von Grapple Assembled.png | |||
PMTTYD Magnus screenshot.png|[[Magnus von Grapple]] | |||
Magnusbattle.png | |||
PMTTYD The Great Tree Magnus von Grapple Stomp.png | |||
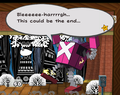
PMTTYD The Great Tree Magnus von Grapple Almost The End.png | |||
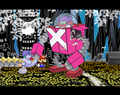
PMTTYD The Great Tree Magnus von Grapple Malfunctioning.png | |||
PMTTYD The Great Tree Magnus von Grapple Exploding.png | |||
PMTTYD The Great Tree Lord Crump Drops Emerald Star.png | |||
PMTTYD The Great Tree Lord Crump Flees.png | |||
PMTTYD The Great Tree X-Nauts Flee.png | |||
PMTTYD The Great Tree X-Naut Trips.png | |||
PMTTYD Emerald Star get.png | |||
PMTTYD Chapter 2 End.png | |||
</gallery> | |||
===''Paper Mario: The Thousand-Year Door'' (Nintendo Switch)=== | |||
<gallery> | |||
PMTTYD NS Great Tree.jpg | |||
TTYDNS Foolish Child.jpg | |||
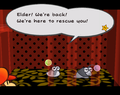
TTYDNS Sneaking into Puni cage.jpg | |||
PMTTYDNS Puni Elder.jpg | |||
TTYDNS Sad Petuni in Cage.jpg | |||
PMTTYD NS Boggly Woods With Flurrie.jpg | |||
PMTTYD NS Puni Bubbles.jpg | |||
TTYDNS Punio Leadership Skills.jpg | |||
TTYDNS Give Me a Hug Petuni.jpg | |||
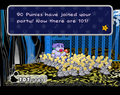
TTYDNS 101 Punies.jpg | |||
TTYDNS Jabbi Battle Win.jpg | |||
PMTTYD NS Not Another Smooch.jpg | |||
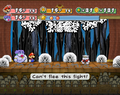
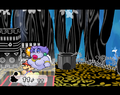
TTYDNS Crump Starts Timer.jpg | |||
TTYDNS Time Bomb Ticking Battle.jpg | |||
TTYDNS Crump Timer Off.jpg | |||
TTYDNS Magnus Battle.jpg | |||
TTYDNS Emerald Star Get.png | |||
</gallery> | |||
==Names in other languages== | |||
{{foreign names | |||
|Jpn={{ruby|大樹|たいじゅ}} | |||
|JpnR=Taiju | |||
|JpnM=Big Tree | |||
|Chi=大樹 | |||
|ChiR=Dàshù | |||
|ChiM=Big Tree | |||
|Dut=De grote boom | |||
|DutM=The great tree | |||
|Fre=Le Grand Arbre | |||
|FreM=The Great Tree | |||
|Ger=Großer Baum | |||
|GerM=Great Tree | |||
|Ita=Grande Quercia | |||
|ItaM=Great Oak | |||
|Kor=거목 | |||
|KorR=Geomok | |||
|KorM=Big Tree | |||
|Spa=Gran Árbol | |||
|SpaM=Great Tree | |||
}} | |||
{{PMTTYD}} | |||
[[Category:Dungeons]] | |||
[[Category:Trees|Great Tree, The]] | |||
[[Category:Paper Mario: The Thousand-Year Door locations|Great Tree, The]] | |||
[[de:Großer Baum]] | |||
Latest revision as of 05:45, February 25, 2025
| The Great Tree | |
|---|---|

| |
| First appearance | Paper Mario: The Thousand-Year Door (2004) |
| Latest appearance | Paper Mario: The Thousand-Year Door (Nintendo Switch) (2024) |
| Greater location | Boggly Woods |
| Ruler | Puni elder |
| Inhabitants | Punies, Piders, and Jabbies |
- “There! That's what I was telling you about. That's where the Punies live. That's home. Uh, of course, it's not just us in the tree. Lots of Jabbies and Piders too.”
- —Punio, Paper Mario: The Thousand-Year Door
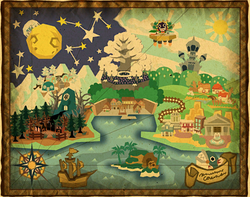
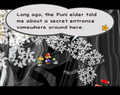
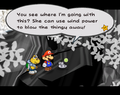
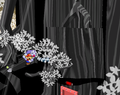
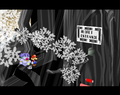
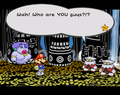
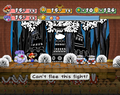
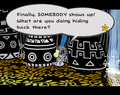
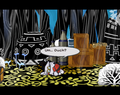
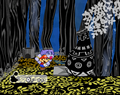
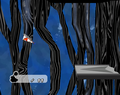
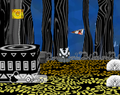
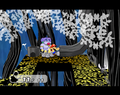
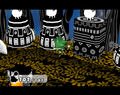
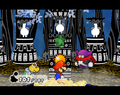
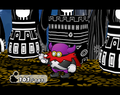
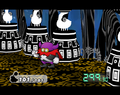
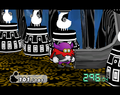
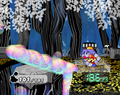
The Great Tree is a giant tree in the game Paper Mario: The Thousand-Year Door. Its interior serves as the third main location in the game. It is located in Boggly Woods and is the home of the Puni tribe. When Mario first arrives here, the entrance is sealed by a strange, metal door, which prompts him to take Punio to see Flurrie; the door is a result of the X-Nauts residing in the tree. There is actually a secret entrance to the Great Tree's interior. Mario must use Flurrie to blow away the "paper" that covers this entrance, which Punio proceeds to enter, prompting him to open the sealed door that Mario can walk through. However, the secret entrance is anything but secret as it is labeled "Secret Entrance" and is surrounded by flashing lights. The Emerald Star is located within the tree since 1,000 years ago after the Shadow Queen was imprisoned the Goomba hero gave the Crystal Star to the Punies to keep safe. As such, Lord Crump and his X-Naut troops invaded the place to find it, even if that meant teaming up with the Jabbies (the rivals of the Punies), and additionally, imprisoning the Punies. Punio enlisted the help of Mario, Goombella, Koops, and Flurrie to liberate the Punies, take down the Jabbies, retrieve the Emerald Star, and drive the X-Nauts out of the Tree. Mario also obtained the Super Boots while he and his friends were here. After Mario and his friends find the Emerald Star, Crump steals it and activates a five-minute (300-second) time bomb. With the system active, Crump makes his way to the entrance, but his escape is cut off by the Puni elder; with her help, Mario, Goombella, Koops, Flurrie and the other Punies are able to catch up with him, demanding that he surrenders the Crystal Star and leave the tree forever. However, instead of surrendering, Crump is forced to deactivate the time bomb and activate his robot, Magnus von Grapple, and attack Mario and company. After defeating the robot, Crump and the X-Nauts are driven out of the tree and Mario is given the Emerald Star as a reward. A shop is also found here.
The in-game map description reads, "A very large tree where the reclusive Punies live."
Enemies[edit]
- Jabbi (Mario does not fight them in battle; the Punies do.)
- Pale Piranha
- Pider
- Magnus von Grapple (Chapter 2)
- X-Naut (Chapter 2)
- Yux (Chapter 2)
- Mini-Yux (Chapter 2)
Inhabitants[edit]
The tree is inhabited almost exclusively by Punis, Jabbis, and Piders, though it is temporarily invaded by the enemies listed above.
- Punio
- Puni elder
- Petuni
- Puniper
- Jabble
- Pungent
- Pungry
- Punderton (presumably)
- Lord Crump (Chapter 2)
- Battle Master
Formations[edit]
Items[edit]
Additional items are on sale at Pungent's Great Tree Shop (+ Shop Point rewards). The shops is at first covered by a piece of paper to the lower-left of the twisty path. Having Flurrie blow it away will allow Mario access to it. In the remake, the white grass can be squished for one Coin at random.
| Item | Location | Location Image | Location Image (Remake) |
|---|---|---|---|
| In the second room below the entrance, to the right of the twisty path, it's inside the chest on the ground. | 
|
.png)
| |
| In the second room below the entrance, to the right of the twisty path, it's on the left pillar in the underground. | _(Switch).png)
| ||
| In the entrance scene, in the first bush. | .png)
|
_(Switch).png)
| |
| In the storeroom in the highest place, in the first bush. |
.png)
|
N/A | |
| In the area before the area with the trap, in the lower part, in the second bush. | .png)
|
_(Switch).png)
| |
| In the next area (accessed by a pipe on the log), in the third bush found on the lower part. | .png)
|
_(Switch).png)
| |
| In the first area above the entrance, in the second bush. |
N/A | _(Switch).png)
| |
| In the second area above the entrance, in the fourth bush. |
N/A | _(Switch).png)
| |
| In the area with the cells, in the second bush. |
N/A | _(Switch).png)
| |
| In the bubble area, in the lower part of the left, in the foreground bush. |
N/A | _(Switch).png)
| |
| In the airplane area, in the lower part, in the fifth bush. |
N/A | _(Switch).png)
| |
| Same area, in the seventh bush. |
N/A | _(Switch).png)
| |
| In the area with the narrow passageways with Piders, in the lower part, in the middle bush. |
N/A | _(Switch).png)
| |
| In the area with the 10-Jabbi Squadron, in the last bush. |
N/A | _(Switch).png)
| |
| In the area with the 100-Jabbi Squadron, in the first bush. |
N/A | _(Switch).png)
| |
| In the area before the area with the trap, in the upper part, in the middle bush. |
N/A | _(Switch).png)
| |
| In the area with the trap, in the lower part, in the bush all the way to the left. |
N/A | _(Switch).png)
| |
| In the next area (accessed by a pipe on the log), in the fourth bush found on the lower part. |
N/A | _(Switch).png)
| |
| In the area with the an elevator activated by Puni Orb, in the upper part, in the last bush. |
N/A | _(Switch).png)
| |
| In the area where the Emerald Star is originally located, in the second bush. |
N/A | _(Switch).png)
| |
| Same area, in the sixth bush. |
N/A | _(Switch).png)
| |
| In the area between the Emerald Star area and the area with the narrow passageways with Piders, in the bush found in the upper-right corner. |
N/A | _(Switch).png)
| |
| 60 (50 on Switch) given by Puni Elder after completing her trouble. | .png)
|
_(Switch).png)
| |
| In the second room below the entrance, it's in a ? Block above an invisible block by the twisty path. | 
|
.png)
| |
| In the water-draining room deep in the tree, it's to the back of the stairs in the upper room. | .png)
|
_(Switch).png)
| |
| Stolen by Lord Crump and picked up by Mario after Magnus von Grapple is defeated. | 
|

| |
| In the outside area, it's in the waterfall to the right of the tree. | 
|
_(Switch).png)
| |
| In the room before the Crystal Star room, it's in the left bush. | 
|
_(Switch).png)
| |
| In the storeroom in the highest place, it's given by Jabble when talked to after Chapter 2. | .png)
|
_(Switch).png)
| |
| Given by Petuni by playing the Stump Petuni game with her. Available after Chapter 2. (Repeatable + free of charge) | .png)
|
_(Switch).png)
| |
| In the second room above the entrance area, it's in the southeast bush on the ground. | 
|
_(Switch).png)
| |
| Given by the Puni elder in Chapter 2. This is the only key item removable from Mario's inventory at will. | .png)
|
_(Switch).png)
| |
| In the storeroom in the highest place, it's dropped by the X-Naut guard. | 
|
_(Switch).png)
| |
| Given to and given back by Puni Elder in the entrance area during Mayor Dour's trouble | .png)
|
_(Switch).png)
| |
| In the room to the right of the entrance, it's to the right of the bubble pond. | |||
| In the first room below the entrance, it's above the big stone in the lower-left of the room. Accessible with the airplane panels. | |||
| In the second room below the entrance, to the right of the twisty path, it's on the back pillar in the underground. | |||
| In the water-draining room deep in the tree, it's above a lily in the lower-room. | |||
| In the water-draining room deep in the tree, it's inside a chest box in front of the stairs in the upper room. | 
|
.png)
| |
| In the first room above the entrance area, it's under a panel near the pipe to the up. | 
|
.png)
| |
| In the third room above the entrance area, it's under a panel in the blue cell. | 
|
.png)
| |
| In the second room below the entrance, it's in the northwest bush below the twisty path. | 
|
.png)
| |
| In the second room below the entrance, to the left of the twisty path, it's behind the entrance pipe of the lower area. | 
|
.png)
| |
| In the second room below the entrance, to the left of the twisty path, it's behind the pipe in the area below the trap. | 
|
.png)
| |
| In the shortcut room from the tree bottom to the twisty path area, it's in the southwest bush. | 
|
.png)
| |
| In the second room below the entrance, to the right of the twisty path, it's in a chest in a north cave. | 
|
.png)
| |
| In the bubble room to the right of the entrance, it's in the rightmost bush on the ground. | .png)
|
_(Switch).png)
| |
| In the storeroom in the highest place, it's inside the left chest. (The right chest is opened by Ms. Mowz.) | 
|
.png)
|
Hidden ? Block[edit]
| Item | Description | Block un/revealed ( |
Block un/revealed ( |
|---|---|---|---|
| In the area with the narrow passageways with Piders, is a red ? Block. Mario must use Koops to hit the hidden ? Block directly underneath the block. | 
|
.png)
|
Profiles[edit]
- Tattles:
- The base of the Great Tree! It sure is big up close... I mean... Wowser. Seriously. It must have watched over the Boggly Woods for over 1,000 years. That's insane (GCN) / unbelievable (Switch)...
- It's like another world inside this tree, huh?!? And check out these statues! They must've been left by the ancestors of the Punies. I wonder how many years the Punies have lived in this place, anyway... These are the kind of questions archaeologists have to ask, y'know.
- This is an interesting pedestal, Mario. When the Punies stand on the panel, the machine counts them and responds. The ancient Punies must've been really sophisticated... This is totally fascinating!
- We're inside the Great Tree. Looks like lots of tufts of vegetation around here. Stuff could be hidden in those things, so let's make sure to check each one, OK?
- There's a red cell and a blue cell here. Crump must've made 'em to hold the Punies. With gaps like those between the bars, I think we could get through, though...
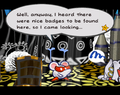
- Looks like Crump left behind lots of the equipment he used to search this tree. Ms. Mowz was here before, but I think she took the next train to Floozyville (GCN) / Flirtsville (Switch).
- We can just jump this gap easily, but I think the Punies will totally plummet down there. If you gather them into a group and blow on them, they should all fall over the edge... But then they'll come back up in bubbles! And then you can blow them across! As for that door on the left, if you use that panel, it'll unlock it, I'm pretty sure. (GCN)
- Bubbles keep floating up from the water at the bottom... Weird. That door on the left is interesting too. If we turn that nearby panel's light green, it should let us enter! (Switch)
- The Punies are totally afraid of these Piders. When a Pider drops, the Punies completely lose it and bolt in every direction. You're gonna have to defeat any Piders near the path you wanna lead the Punies along.
- We're inside the Great Tree. This area has a totally wacked-out topography. Y'know, I think Punio said something about a hidden shop somewhere in this area... If you need any items, we should try to find it, huh?
- This is a shop run by a Puni named Pungent. I wonder if there are any rare items...
- Hey, there's water running through the inside of the Great Tree! You don't think... Could this be how the tree carries nutrients from root to limb? Y'know, nature is just about the coolest thing ever.
- This area seems to have been laid out for a special reason, don't you think? There must be something super-important hidden here.
- This must be the most wide-open space (GCN) / one of the most wide-open spaces (Switch) inside the Great Tree, huh? The tree looks big from out there, but I lose all sense of dimension in here.... I could totally get lost in here for like, days...
- I wonder if the inside of the tree was always like this... I mean, do you think it was, or do you think someone MADE it this way? Hmmm... It's a mystery...
- The structure of this tree is pretty complicated. Looks like we're only gonna move on with the help of the Punies, huh? We're going to seriously need to use our thinking caps as we go forward.
- The structure of this tree is pretty complicated. If we want to move forward, we'll have to make full use of our shared abilities...including the Punies! We're gonna seriously need to use our thinking caps as we go forward... (Switch)
- This is a big treasure chest... The Punies must've left it... What could it be, you think? Well... Only one way to find out, am I right?
- We're inside the Great Tree. Grasses and other plants grow in here. Isn't that cool? You think the Great Tree is like a...host organism? Biology is just SO cool...
- This area makes me feel like I'm exploring a watery swamp even though we're in a tree... Water! I bet we need Koops! ...Um... Or maybe that doesn't make any sense at all...
- We've come down pretty far. The air is a bit colder here, don'tcha think? The technology used here is pretty insane (GCN) / intense (Switch), too. I wish I had more time to inspect it.
- This must be the lowest chamber. Saying it's solemn here is an understatement. Under these statues' glares... I feel like the Punies' ancestors are watching us...
- This door was made by Crump and his cronies. It doesn't match the decor at all. As for the door, if you use the panel there, it should unlock the whole thing. (GCN)
- This door was made by Crump and his cronies. It doesn't match the decor of this tree at all. We should be able to pass through it when the lamp over the door is green. Use the controls on that side panel! (Switch)
Notes[edit]
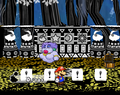
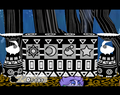
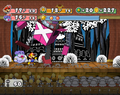
- In the room where the player has to hammer the switches to gain access to the Super Boots room, in the Japanese version the 4 statues all have Punis on them before hitting the switches, but in the international versions the 4 statues have the following (left to right) on them before hitting the switches: Puni, Star, Moon, Sun.
- Additionally, on page 39 of the Official Nintendo Player's Guide, the 4 statues all have Punis on them just like in the Japanese version.
- When unlocking the blue cage in the Great Tree, the game checks for and removes the Strange Sack from the player's inventory if the player has it (which will permanently prevent it from being obtained again as there is only one in the game). Additionally, if the player has more than 10 items in their inventory when they lose the Strange Sack, they can get the normally unused Debug Badge to appear in their inventory. This does not happen in the international versions.
Gallery[edit]
Paper Mario: The Thousand-Year Door[edit]

The introduction
The Great Tree
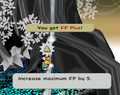
Mario finds an FP Plus badge.


Ms. Mowz prepares to take off.
The Puni elder scolds Punio.


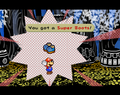
Mario finds the Super Boots.
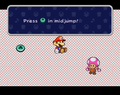
Mario learns how to ground pound.
Toadette gives advice on wooden panels.
Mario encounters an X-Naut inside the Great Tree.

Mario finds a Shrink Stomp badge.
Lord Crump activates the timer for the bomb.
The countdown begins.
Lord Crump escapes with the countdown ticking.
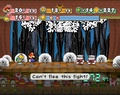
Mario must battle a duo of X-Nauts before making his way back.
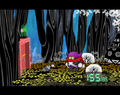
The Puni elder yells at Lord Crump.


Paper Mario: The Thousand-Year Door (Nintendo Switch)[edit]


Names in other languages[edit]
| Language | Name | Meaning | Notes |
|---|---|---|---|
| Japanese | Taiju |
Big Tree | |
| Chinese | 大樹[?] Dàshù |
Big Tree | |
| Dutch | De grote boom[?] | The great tree | |
| French | Le Grand Arbre[?] | The Great Tree | |
| German | Großer Baum[?] | Great Tree | |
| Italian | Grande Quercia[?] | Great Oak | |
| Korean | 거목[?] Geomok |
Big Tree | |
| Spanish | Gran Árbol[?] | Great Tree |