User:Wynn Liaw: Difference between revisions
| (32 intermediate revisions by 2 users not shown) | |||
| Line 1: | Line 1: | ||
{{ | {| class="infobox" cellpadding=2 cellspacing=2 align={{{align|right}}} width=280px style="font-family: verdana, sans-serif; padding: 4px; margin: 0 0 1em 1em; font-size: 10px; background: #f8fff7; border:1px solid #8a8; color:#000" | ||
| align="center" colspan="2" bgcolor="#8afa8a" style="font-size:145%;" | '''Wynn Liaw''' | |||
|- | |||
| | |align="center" colspan="2" |[[File:MarioSMBW.png|200px]]<br>[[Mario]] in ''[[Super Mario Bros. Wonder]]'' (2023) | ||
| | |- | ||
| | |style="background:#afa"|'''Pronouns'''||style="width:17em"|He/him | ||
| | |- style="vertical-align: top" | ||
|style="background:#afa"|'''Species'''||style="width:17em"|[[wikipedia:Human|Human]]<br>[[MarioWiki:Users|User]] (2019-)<br>[[MarioWiki:Autoconfirmed users|Autoconfirmed user]] (2019-)<br>[[MarioWiki:Established users|Established user]] (2024-)<br>[[MarioWiki:Autopatrolled users|Autopatrolled user]] (2021-)<br>[[MarioWiki:Patrollers|Patroller]] (2021-2022, 2024-) | |||
| | |- style="vertical-align: top" | ||
| | |style="background:#afa"|'''First appearance '''||style="width:17em"|[[wikipedia:2007|2007]] | ||
| | |- style="vertical-align: top" | ||
| | |style="background:#afa"|'''Latest appearance'''||style="width:17em"|[[wikipedia:2025|2025]] | ||
| | |- style="vertical-align: top" | ||
| | |style="background:#afa"|'''I agree to the Term and Conditions and Privacy Policy.'''||style="width:17em"|Yes | ||
| | |- style="vertical-align: top" | ||
|style="background:#afa"|https://upload.wikimedia.org/wikipedia/commons/thumb/6/69/Captcha.jpg/50px-Captcha.jpg||style="width:17em"|smwm | |||
|} | |||
This is my user page. I joined this wiki because I wanted to contribute. | |||
{{SSB fighter infobox | |||
|color=green | |||
|emblem= | |||
|image=MarioSMBW.png | |||
|games=[[User:Wynn Liaw|Mario Wiki]]<br>[[Wikipedia:User:Wynn Liaw|Wikipedia]] | |||
|standard=Throw fireball | |||
|side=Whack hammer | |||
|up=Up rocket | |||
|down=Break ground | |||
|final=Explode | |||
|entrance=Time machine | |||
}} | }} | ||
I mainly upload files. | |||
{{userboxtop}} | |||
{{BBL-UBX|lang=en|lvl=n|border=#6ef7a7|mainbkgd=#c5fcdc|codebkgd=#6ef7a7}} | |||
{{BBL-UBX|lang=cmn|lvl=3|border=#6ef7a7|mainbkgd=#c5fcdc|codebkgd=#6ef7a7}} | |||
{{BBL-UBX|lang=ms|lvl=1|border=#6ef7a7|mainbkgd=#c5fcdc|codebkgd=#6ef7a7}} | |||
{{BBL-UBX|lang=hi|lvl=0|border=#6ef7a7|mainbkgd=#c5fcdc|codebkgd=#6ef7a7}} | |||
{{userbox|border=black|mainbkgd=white|codebkgd=#EFEFEF|codecolor=black|code=[[File:Koopatrol sprite PMTTYDNS.png|34px]]|msg=This user is a [[MarioWiki:Patrollers|patroller]] of the Super Mario Wiki.}} | |||
{{userbox|border=#555555|mainbkgd=black|codebkgd=white|codecolor=black|code=[[File:SMP Dash Mushroom.png|50px]]|msg={{color|white|This user can often be found on the [[mb:|Super Mario Boards]].}}}} | |||
{{userbox|border=#555555|mainbkgd=lightblue|codebkgd=white|codecolor=black|code=[[File:Discord icon.svg|50px]]|msg=This user can often be found on the [[MarioWiki:Discord servers|Super Mario Wiki Discord server]].}} | |||
{{userbox|border=#C0C8FF|mainbkgd=#D0F8FF|codebkgd=#77E0E8|codecolor=#000000|code=https://upload.wikimedia.org/wikipedia/en/0/00/Microsoft_Solitaire_Collection_icon.png|msg=This user is an intermediate gamer.}} | |||
{{userbox|border=#C0C8FF|mainbkgd=#D0F8FF|codebkgd=#77E0E8|codecolor=#000000|code=https://upload.wikimedia.org/wikipedia/commons/thumb/f/f1/Scratchlogo.svg/50px-Scratchlogo.svg.png|msg=This user is an intermediate [[Wikipedia:Scratch (Programming Language)|Scratch]]er.}} | |||
{{userbox|border=#C0C8FF|mainbkgd=#D0F8FF|codebkgd=#77E0E8|codecolor=#000000|code=https://upload.wikimedia.org/wikipedia/commons/thumb/c/c3/Python-logo-notext.svg/50px-Python-logo-notext.svg.png|msg=This user is an intermediate [[Wikipedia:Python (Programming Language)|Python]]er.}} | |||
{{userbox|border=#C0C8FF|mainbkgd=#F0F8FF|codebkgd=#C0C8FF|codecolor=#000000|code='''HTML'''|msg=This user is into [[Wikipedia:HTML|HTML]].}} | |||
{{userbox|border=#77E0E8|mainbkgd=#D0F8FF|codebkgd=#77E0E8|codecolor=black|code=[[File:MarioSMBW.png|50px]]|msg=This user is a big fan of the video game character [[Mario]].}} | |||
{{userboxbottom}} | |||
Pages: | |||
*[[User talk:Wynn Liaw/Task Center]] | |||
*[[User:Wynn Liaw/Task Center]] | |||
*[[User:Wynn Liaw/Sandbox]] | |||
==Catch Up== | |||
After June 2021, I was inactive due to work. However, I now have pockets of free time. | |||
==Personal Images== | |||
{{multiple image | |||
|align=center | |||
|direction=horizontal | |||
|footer=<center style="color:#000000;">For tracking purposes.</center> | |||
|width=180 | |||
|image1=Wynn Good Art.jpg | |||
|image2=Wynn Warning.png | |||
|image3=Wynn Hyrule.jpg | |||
}} | |||
{{Wikipedia}} | |||
==Level== | |||
From this section onwards is about a level. | |||
<div class="notice-template" style="display:flex;background:#f88;margin:0 2% 0.75em;padding:0 1em;border:1px solid #840;font-weight:bold"> | |||
It has been decided that this section is outdated. | |||
</div> | |||
<div class="notice-template" style="display:flex;background:#FC5;margin:0 2% 0.75em;padding:0 1em;border:1px solid #f22"> | |||
This section is '''under construction'''. Therefore, please excuse its informal appearance while it is being worked on. We hope to have it completed as soon as possible. | |||
</div> | |||
{{level infobox | |||
|title=Last Stand | |||
|image=https://ssb.wiki.gallery/images/b/b1/MarioShielding-3DS.jpg | |||
|code= | |||
|world=[[Skyworld]] | |||
|id= | |||
|game=''[[Super Mario Maker 2]]'' | |||
|style=''[[Super Smash Bros. Ultimate]]'' | |||
|theme=[[File:SMM2-ThemeIcon-Castle.png|25px]] | |||
|objective=Survive the incoming attack. | |||
|limit=100 years until [[Zeldawiki:The Legend of Zelda: Breath of the Wild|The Legend of Zelda: Breath of the Wild]] | |||
|cr_limit=100 seconds | |||
|squad_level=1000000 | |||
|boss=[[Foreman Spike]]<br>[[Yoshi]]<br>[[Donkey Kong Jr.]]<br>[[Donkey Kong]]<br>[[Boom Boom]]<br>[[Pom Pom]]<br>[[Larry Koopa]]<br>[[Morton Koopa Jr.]]<br>[[Wendy O. Koopa]]<br>[[Iggy Koopa]]<br>[[Roy Koopa]]<br>[[Lemmy Koopa]]<br>[[Ludwig von Koopa]]<br>[[Bowser Jr.]] (Melee)<br>[[King K. Rool]]<br>[[Bowser Jr.]] ([[Junior Clown Car]])<br>[[Bowser]]<br>[[Ganon]]<br>[[Princess Zelda]]<br>[[Link]]<br>[[Wario]]<br>[[Waluigi]]<br>[[Princess Peach]]<br>[[Luigi]]<br>[[Mario]]<br>[[Palutena]]<br>[[Goal Pole]] | |||
|difficulty={{SMM2 difficulty|4}} | |||
|after=[[Palutena's Temple|>>]] | |||
|track=Title Theme - Donkey Kong Country <br>Donkey Kong / Donkey Kong Jr. Medley - Super Smash Bros. Ultimate | |||
}} | |||
'' | The level begins with the player walking while the title theme from ''[[Donkey Kong Country]]'' plays. When the theme gets intense, the player arrives at the castle. The moment the player steps into the castle, the theme switches to '''Donkey Kong / Donkey Kong Jr. Medley''' from ''[[Super Smash Bros. Ultimate]]''. The player is then given two [[Hammer Suit]]s. | ||
The final boss is the [[Goal Pole]]. To defeat it, the player must force it out of its base by pulling the base. Then, grab the flagpole. After this level, the player goes to [[Palutena's Temple]] and fight [[Palutena]], [[Pit]] and [[Icaruspedia:Viridi|Viridi]]. | |||
[[ | |||
===Enemies=== | |||
{|class="wikitable" | |||
|- | |||
!Name | |||
!Count | |||
[[File: | |- | ||
|[[File:WC Eggplant Man.png]]<br>[[Eggplant Man]] | |||
|5 | |||
|- | |||
|[[File:WC Purple Gotchawrench.png]]<br>[[Gotchawrench]] | |||
|2 | |||
|- | |||
|[[File:WCForemanSpikeSprite.png]]<br>[[Foreman Spike]] | |||
|Boss | |||
|- | |||
|[[File:SM64DS Yoshi Artwork.png|50px]]<br>[[Yoshi]] | |||
|Boss | |||
|- | |||
|[[File:MKT Artwork DonkeyKongJrSNES.png|50px]]<br>[[Donkey Kong Jr.]] | |||
|Boss | |||
|- | |||
|[[File:BarrelDKCR.png|50px]]<br>[[Barrel]] | |||
|Thrown by [[Donkey Kong]] | |||
|- | |||
|[[File:DK Arcade Blue Barrel.png]]<br>Blue [[Barrel]] | |||
|Thrown by [[Donkey Kong]] | |||
|- | |||
|[[File:DonkeyKong SSBU.png|50px]]<br>[[Donkey Kong]] | |||
|Boss | |||
|- | |||
|[[File:DMW-BoomBoom.png|50px]]<br>[[Boom Boom]] | |||
|Boss | |||
|- | |||
|[[File:SMP Pom Pom.png|50px]]<br>[[Pom Pom]] | |||
|Boss | |||
|- | |||
|[[File:NSMBU Larry Koopa Artwork.png|50px]]<br>[[Larry Koopa]] | |||
|Boss | |||
|- | |||
|[[File:NSMBW Morton Artwork.jpg|50px]]<br>[[Morton Koopa Jr.]] | |||
|Boss | |||
|- | |||
|[[File:NSMBW Wendy Artwork.png|50px]]<br>[[Wendy O. Koopa]] | |||
|Boss | |||
|- | |||
|[[File:NSMBU Iggy Artwork.png|50px]]<br>[[Iggy Koopa]] | |||
|Boss | |||
|- | |||
|[[File:NSMBW Roy Artwork.png|50px]]<br>[[Roy Koopa]] | |||
|Boss | |||
|- | |||
|[[File:NSMBW Lemmy Artwork.png|50px]]<br>[[Lemmy Koopa]] | |||
|Boss | |||
|- | |||
|[[File:LudwigNSMBU.png|50px]]<br>[[Ludwig von Koopa]] | |||
|Boss | |||
|- | |||
|[[File:NSMB BowserJr.png|50px]]<br>[[Bowser Jr.]] (Melee) | |||
|Boss | |||
|- | |||
|[[File:King K Rool SSBU.png|50px]]<br>[[King K. Rool]] | |||
|Boss | |||
|- | |||
|[[File:BowserJr SSBU.png|50px]]<br>[[Bowser Jr.]] ([[Junior Clown Car]]) | |||
|Boss | |||
|- | |||
|[[File:Bowser SSBU.png|50px]]<br>[[Bowser]] | |||
|Boss | |||
|- | |||
|[[File:BeastGanon.png|50px]]<br>[[Ganon]] | |||
|Boss | |||
|- | |||
|[[File:ZeldaSSBU.png|50px]]<br>[[Princess Zelda]] | |||
|Boss | |||
|- | |||
|[[File:LinkSSBU.png|50px]]<br>[[Link]] | |||
|Boss | |||
|- | |||
|[[File:Goomba-SML2.gif]]<br>[[Goomba]] | |||
|Spawned indefinitely from a [[Warp Pipe|pipe]] | |||
|- | |||
|[[File:WarioSSBU-Alt.png|50px]]<br>[[Wario]] (Classic) | |||
|Boss | |||
|- | |||
|[[File:WarioSSBU.png|50px]]<br>[[Wario]] ([[WarioWare (series)|WarioWare]]) | |||
|Boss | |||
|- | |||
|[[File:WaluigiUltimate.png|50px]]<br>[[Waluigi]] | |||
|Boss | |||
|- | |||
|[[File:PeachSSBU.png|50px]]<br>[[Princess Peach]] | |||
|Boss | |||
|- | |||
|[[File:Mario SSBUltimate.png|50px]]<br>[[Mario]] | |||
|Boss | |||
|- | |||
|[[File:LuigiSSBU.png|50px]]<br>[[Luigi]] | |||
|Boss | |||
|- | |||
|[[File:PalutenaSSBU.png|50px]]<br>[[Palutena]] | |||
|Boss | |||
|- | |||
|[[File:NSMBU Flagpole.png]]<br>[[Goal Pole]] | |||
|Boss | |||
|- | |||
|[[File:PalutenaSSBU.png|50px]]<br>[[Palutena]] | |||
|One of the fighters at [[Palutena's Temple]] | |||
|- | |||
|[[File:Pit SSBU.png|50px]]<br>[[Pit]] | |||
|One of the fighters at [[Palutena's Temple]] | |||
|- | |||
|[[File:SSBU Viridi Spirit.png|50px]]<br>[[Icaruspedia:Viridi|Viridi]] | |||
|One of the fighters at [[Palutena's Temple]] (guest) | |||
|} | |||
===== | ==Sandbox== | ||
<div class="notice-template" style="display:flex;background:#f88;margin:0 2% 0.75em;padding:0 1em;border:1px solid #840;font-weight:bold"> | |||
It has been decided that this section is outdated. | |||
</div> | |||
===[[ | <div class="notice-template" style="display:flex;background:#FC5;margin:0 2% 0.75em;padding:0 1em;border:1px solid #f22"> | ||
=== | This section is '''under construction'''. Therefore, please excuse its informal appearance while it is being worked on. We hope to have it completed as soon as possible. | ||
</div> | |||
{{level infobox | |||
|title=Sandbox | |||
|image=[[File:Super Mario Maker - Mario Artwork 01.png|200px]] | |||
|game=''[[Super Mario Maker 2]]'' | |||
|style=Any | |||
|theme=Any | |||
|objective=Build things and try to survive. | |||
|boss=Other players. | |||
|track='''Build Mode'''<br>Title Theme - Super Mario Maker<br>Title Theme - Super Mario Maker - Super Smash Bros. 4<br>Title Theme - Super Mario Maker 2<br>'''Demolition Mode'''<br>Stage Theme - Wrecking Crew<br>In-game Music - Wrecking Crew '98<br>Wrecking Crew Medley - Super Smash Bros. 4<br>Wrecking Crew Retro Medley - Super Smash Bros. 4<br>Wrecking Crew Medley - Super Smash Bros. Ultimate | |||
}} | |||
In this level, the player can build anything they want. However, the player has to avoid nasty players while trying to survive. The player can change their character to a character from another game using the character importer which can be downloaded for free on this creator's website. The character imported will act exactly like his/her counterpart from his/her game. This level has trees that can be chopped down for wood. The player can also obtain wood by punching the tree. After getting wood, the player can then begin to craft materials. The player can play this level like ''[[Minecraft]]'' since the starting area has everything in ''Minecraft''. The player can approach [[Mario]] for parts (however the player can change Mario's model). If Mario is not there, then the player can go to a place to talk and write commands, like the command to warp to a specific place, spawn something, delete something or someone and much more! | |||
There is also another mode called "Demolition Mode", where the player can destroy another player's creation. | |||
{ | ===Characters=== | ||
| | {|class="wikitable" | ||
| | |- | ||
!Name | |||
| | !Count | ||
| | |- | ||
| | |[[File:Super Mario Maker - Artwork 06.png|50px]]<br>[[Mario]] | ||
| | |Master Builder | ||
|- | |||
|[[File:Super Mario Maker 2 Luigi artwork.png|50px]]<br>[[Luigi]] | |||
|Assistant | |||
|} | |||
==== | ===Gallery=== | ||
====Locations==== | |||
<gallery> | |||
Super Mario Maker - Artwork 14.png|Lava area | |||
SMM2-Toads-Artwork.png|Talking and commands area | |||
</gallery> | |||
==== | ====Examples given to the player==== | ||
<gallery> | |||
Super Mario Maker - Sprite Mario Art - Super Mario Bros..png | |||
SMM2 Pipe Rocket.png | |||
</gallery> | |||
==== | ==''The Ultimate Fighting Game''== | ||
{{redirect|SSBU|this game's [[Wii U]] predecessor|[[Super Smash Bros. for Wii U]]}} | |||
{{game infobox | |||
|title=The Ultimate Fighting Game | |||
|image=[[File:SSB Ultimate box art.png|200px]] | |||
|developer=[[User:Wynn Liaw|Wynn Liaw]] | |||
|publisher=[[User:Wynn Liaw|Wynn Liaw]] | |||
|release=https://upload.wikimedia.org/wikipedia/commons/thumb/0/03/Flag_of_Washington%2C_D.C.svg/25px-Flag_of_Washington%2C_D.C.svg.png January 1, 1988<br>https://upload.wikimedia.org/wikipedia/commons/thumb/2/2f/Flag_of_the_United_Nations.svg/25px-Flag_of_the_United_Nations.svg.png January 1, 1992 | |||
|languages=Afrikaans<br>Akan<br>Albanian<br>Amharic<br>Arabic<br>Armenian<br>Assamese<br>Aymara<br>Azerbaijani<br>Bambara<br>Basque<br>Belarusian<br>Bengali<br>Bhojpuri<br>Bosnian<br>Bulgarian<br>Burmese<br>Catalan<br>Cebuano<br>Chinese (China)<br>Chinese (Taiwan)<br>Corsican<br>Croatian<br>Czech<br>Danish<br>Divehi<br>Dogri<br>Dutch (Belgium)<br>Dutch (Netherlands)<br>English (United Kingdom)<br>English (United States)<br>Esperanto<br>Estonian<br>Ewe<br>Filipino<br>Finnish<br>French (Canada)<br>French (France)<br>Galician<br>Ganda<br>Georgian<br>German<br>Greek<br>Guarani<br>Gujarati<br>Haitian Creole<br>Hausa<br>Hawaiian<br>Hebrew<br>Hindi<br>Hmong<br>Hungarian<br>Icelandic<br>Igbo<br>Ilocano<br>Indonesian<br>Irish<br>Italian<br>Japanese<br>Javanese<br>Kannada<br>Kazakh<br>Khmer<br>Kinyarwanda<br>Konkani<br>Korean<br>Krio<br>Kurdish<br>Kyrgyz<br>Lao<br>Latin<br>Latvian<br>Lingala<br>Lithuanian<br>Luxembourgish<br>Macedonian<br>Maithili<br>Malagasy<br>Malay<br>Malayalam<br>Maltese<br>Māori<br>Marathi<br>Meitei<br>Mizo<br>Mongolian<br>Nepali<br>Norwegian<br>Nyanja<br>Odia<br>Oromo<br>Pashto<br>Persian<br>Polish<br>Portuguese (Brazil)<br>Portuguese (Portugal)<br>Punjabi<br>Quechua<br>Romanian<br>Russian<br>Samoan<br>Sanskrit<br>Scottish Gaelic<br>Sepedi<br>Serbian<br>Shona<br>Sindhi<br>Sinhala<br>Slovak<br>Slovenian<br>Somali<br>Sorani<br>Sotho<br>Spanish (Latin America)<br>Spanish (Spain)<br>Sundanese<br>Swahili<br>Swedish<br>Tajik<br>Tamil<br>Tatar<br>Telugu<br>Thai<br>Tigrinya<br>Tsonga<br>Turkish<br>Turkmen<br>Ukrainian<br>Urdu<br>Uyghur<br>Uzbek<br>Vietnamese<br>Welsh<br>West Frisian<br>Xhosa<br>Yiddish<br>Yoruba<br>Zulu | |||
|genre=[[Genre#Fighting|Fighting]]/Action | |||
|modes=1–8 players | |||
|ratings={{ratings|esrb=E10+|pegi=12|acb=PG|usk=12|classind=10|cero=A|rars=12+|grac=all|gsrr=p|fpb=10-12|gcam=12|nmc=12}} | |||
|platforms=[[wikipedia:MacOS|macOS]]<br>[[wikipedia:Microsoft Windows|Microsoft Windows]]<br>[[wikipedia:IOS|iOS]]<br>[[wikipedia:Android (operating system)|Android]] | |||
|format={{format|switch=1|switchdl=1}} | |||
|input={{input|joy-con=1|switchpro=1|switchgcn=1}} | |||
}} | |||
'''''[[smashwiki:Super Smash Bros. Ultimate|Super Smash Bros. Ultimate]]''''' is the fifth game in the ''[[Super Smash Bros. (series)|Super Smash Bros.]]'' series, released for the [[Nintendo Switch]]. The game was announced through a teaser trailer in the March 2018 Nintendo Direct<ref>[https://twitter.com/NintendoAmerica/status/971879567928381441 Twitter - Nintendo of America] Retrieved on March 8, 2018.</ref> and was released worldwide on December 7, 2018. The game features 103 base stages and 74 base playable characters (with more fighters and stages as downloadable content), the largest respective numbers in the series. | |||
''Super Smash Bros. Ultimate'' was made available for pre-order and pre-loading from the [[Nintendo eShop#Nintendo Switch|Nintendo eShop]] beginning November 1, 2018. The game takes up approximately 14.3 GB of the Nintendo Switch's storage when downloaded from the Nintendo eShop. | |||
''Super Smash Bros. Ultimate'' is the sixth (fifth if ''[[Super Smash Bros. for Nintendo 3DS]]'' and ''[[Super Smash Bros. for Wii U]]'' are counted as one game) ''[[Super Mario (franchise)|Super Mario]]''-related game to receive a {{wp|Pan European Game Information|PEGI}} 12+ rating in Europe, being preceded by the previous three ''Super Smash Bros.'' installments (''[[Super Smash Bros. Brawl]]'', ''Super Smash Bros. for Nintendo 3DS'', and ''Super Smash Bros. for Wii U'') and the [[Wii U]] [[Virtual Console]] releases of ''[[Super Mario 64 DS]]'' and ''[[New Super Mario Bros.]]'' | |||
== | ==Gameplay== | ||
''Super Smash Bros. Ultimate'' retains the series' basic gameplay elements, with several new mechanics and changes. As with previous installments, the objective of the game is to launch opponents off the stage. Players build each other's damage percentage through attacks, and the higher the percentage, the farther they fly when they are hit. This time, the damage display is in decimal notation, adding a tenth to the number. Decimals have always been used for damage calculations since ''Super Smash Bros. Melee'', but the damage percentages were always displayed as an integer on-screen. ''Super Smash Bros. Ultimate'' is the first time that decimal notations are shown in-game. Additionally, when an opponent is launched, their launch speed is the fastest at the start, unlike in previous games in the series. During 1-on-1 battles, all fighters' attacks deal 1.2x their regular damage, which is done to "increase gameplay speed."<ref name=E32018Direct> Nintendo. (June 13, 2018). [https://www.youtube.com/watch?v=akohTFyGu88 Nintendo Direct: E3 2018] ''YouTube''. Retrieved June 13, 2018.</ref> Additionally, characters can use any ground attack out of a run (e.g. standard attacks, tilt attacks, smash attacks), while any aerial attack can be used while climbing a ladder, officially known as a "ladder attack". | |||
Three techniques are also introduced in ''Super Smash Bros. Ultimate'': the Directional [[smashwiki:air dodge|Air Dodge]], Short-Hop Attack, and a new version of the Perfect [[smashwiki:shield|Shield]]. The Directional Air Dodge, a technique carried over from ''Super Smash Bros. Melee'', allows the player to dodge while moving in the direction they tilt {{button|switch|leftstick}}, which can also be used for recovery. However, if a player dodges excessively—whether in the air or on the ground—they become more vulnerable to attacks, with less intangibility and lower dodge speed. The Short-Hop Attack is performed by pressing the attack and jump buttons at the same time, allowing the player to hop a short distance off the ground while performing an air attack; however, all short-hopped aerial attacks deal 0.85x their regular damage (excluding special moves, and certain states such as Peach and Daisy's [[Floating Jump]] attacks and the [[Super Leaf]] item). The Perfect Shield can be used to block attacks without depleting the user's shield. However, unlike in past installments, where it is activated by pressing the shield button before an attack connects, the Perfect Shield is instead performed by releasing the shield button just as an opponent's attack lands, nullifying the attack. | |||
During a match, the fighter that is in the lead occasionally emits a glimmer of light. If a match enters [[Sudden Death]], unlike in previous games where [[Bob-omb]]s begin to drop after some time, the screen slowly zooms in on the center of the stage, shrinking the field of view and stage boundary and thereby making it easier for fighters to be KO'd. The Sudden Death mode is visually accompanied by flames that intensify as the screen zooms in on the stage. Bob-ombs still drop on the stage if enough time passes and no one is KO'd. | |||
As with ''[[Super Smash Bros. for Wii U]]'', ''Super Smash Bros. Ultimate'' also supports [[Nintendo GameCube#Nintendo GameCube Controller|Nintendo GameCube Controllers]]. | |||
''Super Smash Bros. Ultimate'' is available in 11 different languages: Japanese, English, French, Spanish, German, Italian, Dutch, Russian, Simplified Chinese, Traditional Chinese, and Korean, all of which are fully voiced. However, the Chinese versions use the Japanese voice set, and some of the specific names (characters, stages, items, etc.) are also not translated and use their English names instead, probably due to copyright reasons (mostly for third-party games), or they were not intended to have official Chinese versions for the original games. Though, all of the DLC contents so far are fully localized in the Chinese versions. This is the second ''Super Smash Bros.'' game to have a Simplified Chinese localization (the first being the [[iQue|iQue Player]] release of the N64 ''Super Smash Bros.''), and the first game to have a Traditional Chinese localization. The player can also change the dialect for the English, French, and Spanish languages by changing the "Region" setting in the System Settings for the console (though in the case of English, it only changes the names for certain characters, stages, etc., such as Duck Hunt being called "Duck Hunt Duo" and the Find Mii stage into "StreetPass™ Quest", as well as release dates in tips). ''Super Smash Bros. Ultimate'' is the first installment in the series to feature Dutch and Russian announcers. | |||
The player can | |||
=== | ===Smash=== | ||
[[File:SSBU 4 Player Smash.jpg|thumb|200px|left|Mario, Sonic, Mega Man and Pac-Man have a battle.]] | |||
{{quote|Battle up to eight fighters.|'''In-game description'''}} | |||
Before starting a match, the player can create their own preset rules, such as the number of stocks and time limit, which they can quickly select at any time. In addition to Time and Stock modes, Stamina mode is now a standard mode alongside the aforementioned two and is no longer a part of Special Smash. Stocks can also be added to Stamina mode - and it can now be played online.<ref name=AugustDirect>Nintendo. (August 8, 2018). [https://youtu.be/P-kQWJrjRV4 ''Super Smash Bros. Ultimate'' Direct 8.8.2018] ''YouTube''. Retrieved August 8, 2018.</ref> | |||
8-Player Smash also returns from ''Super Smash Bros. for Wii U'', and can now be played on any stage from the start. | |||
A new rule option added to ''Super Smash Bros. Ultimate'' is the Final Smash Meter, which appears below each fighter's damage meter and fills up as the player takes damage from opponent attacks, similar to [[Little Mac]]'s Power Meter. Once it is full, the player can then use a [[Final Smash]]. These Final Smashes deal less damage and knockback than regular Final Smashes obtained from [[Smash Ball]]s, and like them, only one can be used at a time. | |||
=== | ====Squad Strike==== | ||
[[File:Squad Strike SSBU.png|thumb|200px|left|Squad Strike]] | |||
Squad Strike (Japanese: 団体戦 ''Dantaisen'', Team Competition) is an elimination-style battle mode added to ''Super Smash Bros. Ultimate''. The player can choose between 3-on-3 or 5-on-5 Squad Strikes, which can be carried out with one player on each side playing as three or five characters, or three or five players on each side each playing as one character. In a Squad Strike, both sides battle each other as the three or five characters consecutively in one battle. Characters can only be picked once per team, including amiibo fighters. | |||
==== | ====Tourney==== | ||
Tourney returns from ''[[Super Smash Bros. Brawl]]'', allowing up to 32 participants to compete. After selecting the number of total participants, the number of CPU players and tourney type, the game automatically generates a tournament bracket. This mode is also compatible with amiibo fighters. | |||
==== | ====Special Smash==== | ||
Special Smash from previous installments returns, this time with three sub-modes. The first is Custom Smash, which works the same way as in Special Smash from ''Super Smash Bros. Brawl'' and ''Super Smash Bros. for Wii U'', except there is no longer a Stamina option due to it being a part of the basic rule selection. The 300% setting has been split into [[smashwiki:Super Sudden Death|Super Sudden Death]], which works similarly to the rule of the same name in ''Super Smash Bros. Melee''. | |||
== | =====Smashdown===== | ||
In the new, third mode, Smashdown (Japanese: 全員バトル ''Zen'in Batoru'', All-Members Battle), players enter a series of matches selecting a character for each one. After one match ends, however, the characters used in that match are no longer available for subsequent matches, forcing players to select a different character for the next one. Smashdown is the only mode that supports 8-Player Smash. | |||
'' | |||
===[[Spirit (Super Smash Bros. Ultimate)|Spirit]]s=== | |||
====Adventure==== | |||
[[File:World of Light title card.png|thumb|Title card for World of Light]] | |||
The Adventure mode in this game is called '''World of Light'''. It has a board game-like map, and elements and maps based on various games have been shown; [[Warp Pipe]]s and [[! Switch]]es are noticeable. Unlike [[Super Smash Bros. Brawl#The Subspace Emissary|The Subspace Emissary]], which is very plot-heavy, World of Light is used to demonstrate the functionalities of spirits and spirit battles and has a very loose plot to leave the player free to explore the light and dark realms of the Adventure mode. World of Light also has considerably fewer cutscenes than The Subspace Emissary, though most of them are silent, akin to The Subspace Emissary's cutscenes; the lone exception being the introductory scene. | |||
During the events of the Adventure mode, a monster called [[Galeem]] defeats all of the fighters except [[Kirby]], imprisoning them in the eponymous World of Light, where they are cloned and their clones are possessed by [[Spirit (Super Smash Bros. Ultimate)|spirit]]s, which are the other victims of Galeem's attack. Once Kirby has freed Mario and more fighters and spirits in the Light Realm and defeated Galeem, a new monster named [[Dharkon]] appears, opening a path to the Dark Realm, forcing Galeem to retreat. When the remaining fighters and spirits are freed in the Dark Realm (as well as defeating Dharkon), Galeem appears to confront Dharkon, putting the player in a third realm: a mixture of the Light and Dark Realms. | |||
Within the mode, only Kirby is available from start; the rest of the fighters are unlocked through the mode's progress in matches similar to those of Challenger's Approach (the exception being [[Bowser]], who becomes playable after defeating [[Giga Bowser]]). Downloadable characters can be made available to play as in World of Light by freeing 10 fighters in the mode. If the character in question is downloaded with the criteria having been met beforehand, then the character is immediately unlocked. | |||
{{multiple image | |||
|align=right | |||
|direction=vertical | |||
|image1=SSBU Galeem Bad End.jpg | |||
|width1=150 | |||
{ | |image2=SSBU Dharkon Bad End.jpg | ||
|width2=150 | |||
|footer=Mario in Galeem's bad ending (top) and Dharkon's bad ending (bottom) | |||
}} | |||
Three endings exist in Adventure Mode: two bad endings with Galeem or Dharkon respectively, and a true ending with both bosses. The first ending is achieved by defeating too many dark puppet fighters, thus forcing the player to fight Galeem; when Galeem is defeated, Dharkon destroys Galeem and his army, encroaching the universe in darkness. The second ending is achieved by defeating too many light puppet fighters, thus forcing the player to fight Dharkon; when Dharkon is defeated, Galeem unleashes another wave of light, essentially engulfing the universe in light again. The third ending is achieved by defeating an equal number of light and dark puppet fighters, making the player fight both Galeem and Dharkon simultaneously; when the player wins, the universe is restored to its original state, while all spirits fly back to their original worlds. | |||
{{br}} | |||
=== | ====Spirit Board==== | ||
The primary way spirits can be obtained is through the Spirit Board. On the Spirit Board, up to ten random spirits will appear on the board and the player can choose any one to battle against and gain the spirit. When the player wins against that spirit, it will disappear from the Spirit Board, and a timer will appear on that slot. When the timer runs out, a new spirit takes that slot. The spirits themselves also have a time limit for how long they will appear on the Spirit Board. When their time limits run out, new spirits will replace them immediately. Sometimes, there will be events happening on the Spirit Board and certain spirits will appear related to a theme. Defeating spirits during those events rewards more gold and SP than usual. | |||
====DLC Spirits==== | |||
Added in the version 3.0.0 update, a special DLC Spirit Board will appear if the player has purchased any of the Challenger Packs. Unlike the regular Spirit Board, the background and music relate to the series the DLC spirits are from, the player does not need to shoot the Puppet Fighter to obtain the spirit, and they do not disappear from the Spirit Board when they are collected, allowing them to be collected indefinitely. When the player collects all of the spirits from a DLC Spirit Board, they will be rewarded with 10,000 gold. | |||
====Collection==== | |||
This sub-menu is where the player can view and modify their spirits. | |||
*'''Team Setup:''' Players can make teams of primary and support spirits that they can quickly select when choosing spirits. It is also required to make spirit teams to use them in regular Smash matches. | |||
*'''Level Up:''' As the name suggests, the player can use snacks or cores to level up their primary spirits, making them stronger. When certain spirits reach level 99, they can be enhanced into more powerful spirits that grant additional abilities. | |||
*'''Dismiss:''' The player can send spirits back to the real world. They leave behind cores when they do so that pertain to their type (Attack, Shield, Grab, Neutral, or support) that can be used to level up other spirits or summon new spirits. | |||
*'''Summon:''' The player can combine the cores from spirits into new spirits. Each spirit requires a specific combination of spirits that relate to the character to create them. In addition, the player also needs to pay a fee of SP to fuse them. Many spirits can only be obtained via Summon. | |||
*'''Inventory:''' There are two things the player can do in the Inventory. In the Spirit List, they can look at a large list of every spirit they have obtained, while the Items menu allows the player to sell any Spirit Board items and cores that they have and get SP in return. | |||
*'''Activities:''' There are many activities for spirits to do, but the corresponding master spirit must first be unlocked in World of Light. When the player gives away spirits to these facilities, they cannot be used, and the player will wait a period before they are done with their activity. However, they can be pulled out at any time. There are three types of activities: Gym, run by Doc Louis, allows players to place spirits there and they will level up on their own. Dojos allows spirits to gain specific strengths in their stats, but also weaknesses as well. Explore allows spirits to go out and find various items. | |||
*'''Shopping:''' If the player saves a particular spirit in World of Light, they will unlock shops that house certain spirits and items. | |||
===Games & More=== | |||
Unlike other ''Super Smash Bros.'' games, there is no longer a Stadium menu. Mob Smash, along with [[Home-Run Contest]] (as of version 5.0.0) are now sub-modes within the Games & More menu. | |||
====Classic Mode==== | |||
[[File:SSBU Sephiroth Classic Mode Bonus Game.jpg|thumb|200px|Sephiroth flees from a black hole in the Classic Mode's Bonus Game challenge.]] | |||
{{main-wiki|SmashWiki|Classic Mode (SSBU)}} | |||
Classic Mode returns from previous installments, returning to its original format last seen in ''Super Smash Bros. Brawl'', in which the player fights multiple opponents in a linear series of matches to reach the end, while also trying to get a high score. This time, each fighter has a set series of opponents to face. Unlike Classic Mode's previous incarnations, the player is always given one stock, never being able to adjust the stock number before initiating the mode. When the player is KO'd, using a continue no longer causes the current match they are in to restart; instead, the match begins right where it left off, but the player starts with 0% and gets points deducted off their score. At the end of each path, the fighter has a specific boss they are required to fight, though there are variations for some characters' Classic Mode routes. | |||
====Training==== | |||
Training mode lets players practice and experiment with characters' moves, items and the CPU as well as manipulate gameplay elements (such as game speed and damage), also returning from previous installments. The mode now features an exclusive numbered, grid-like stage, which allows the player to measure distances such as jump height and projectile range. In addition, it is now possible to toggle whether or not to show the trajectory at which the CPU would be launched from an attack at 50% damage in the form of a green curve, alongside the trajectory if they would be launched at 0% damage (a red curve) and 100% damage (a blue curve).<ref name=AugustDirect/> Unlike ''Super Smash Bros. for Nintendo 3DS'' / ''Wii U'', this mode is also compatible with amiibo fighters. | |||
====Mob Smash==== | |||
{{main-wiki|SmashWiki|Multi-Man Smash}} | |||
| | Multi-Man Smash returns from previous installments under the name Mob Smash. This time, the mode has three rules: | ||
*'''Century Smash:''' Returns from previous installments (then "100-Man Smash"). The player must KO 100 [[Fighting Mii Team]] enemies. | |||
*'''Cruel Smash:''' Returns from previous installments. The player fights strong Fighting Mii Team enemies that are capable of launching them far with most attacks until they are KO'd, while no items appear. | |||
*'''All-Star Smash:''' A new mode that merges All-Star Mode and Endless Mode from Multi-Man Smash in the previous installment. The player fights all (currently available) playable characters until they are KO'd, in a similar manner to "The True All-Star Battle" Event Match from ''Super Smash Bros. Brawl''. The fighters appear in order of their first appearance (based on Japanese release dates). | |||
====Home-Run Contest==== | |||
{{main|Home-Run Contest}} | |||
Home-Run Contest is a minigame mode from previous ''Super Smash Bros.'' games that was added in the version 5.0.0 update. The player damages a Sandbag within ten seconds and tries to launch it as far as possible using a [[Home-Run Bat]]. It can be played individually, competitively against four people, and cooperatively with two people. There are separate records for each. | |||
====Mii Fighters==== | |||
The player can make and customize Mii Fighters here, including the Mii, name, special moves, voice options, and costumes. | |||
====amiibo==== | |||
amiibo are scanned here and the player can change their name, alternate costume, and equip them with various spirits to help them in battle. If an amiibo is ported over from ''Super Smash Bros. for Nintendo 3DS'' / ''Wii U'', they can be chosen to either start from scratch or at level 12. | |||
| | ====Stage Builder==== | ||
Stage Builder, added in the version 3.0.0 update, is a mode from previous ''Super Smash Bros.'' games where the player can create stages. They can draw out layouts, choose backgrounds, choose what music to play on the stage, and even add gimmicks like lava, cannons, portals, switches to move environments, and more. They can even decorate the stages by drawing ground in various planes of the stage. | |||
====Challenger's Approach==== | |||
{{main-wiki|SmashWiki|Challenger's Approach}} | |||
Challenger's Approach is a unique feature of this game, where the player can rematch with unlockable fighters. This menu appears after a few minutes of failing an unlock match. When selected, the Challenger Approaching screen will appear for the unlockable fighter to which the player lost the match, then the player can choose any character they have unlocked to rematch the unlockable fighter. When all fighters are unlocked, this mode is permanently inaccessible. | |||
===Online=== | |||
Online is a mode where one can fight other players in battle via the Internet. Various modes are available, such as Quickplay, Battle Arenas, Shared Content, and Options. A [[Nintendo Switch#Nintendo Switch Online|Nintendo Switch Online]] subscription is required to access and play all online modes. | |||
====Quickplay==== | |||
Quickplay is a mode where one or two players fight other players online. When playing solo, the player fights to gain GSP (Global Smash Power), a score of sorts, in either a 1-on-1, a 2-on-2 team battle, or a 3 or 4-player free-for-all; each fighter has separate GSP counts, which are all combined and divided by the roster (excluding the three Mii Fighters, who are unusable in Quickplay) for the player's average total GSP. Once reaching a certain amount of GSP (usually a very high number, which itself is subject to change), the player's fighter enters Elite Smash, an advanced sub-mode where only high-GSP players fight. Quickplay's co-op mode functions similarly to a team battle solo, albeit without GSP. | |||
====Battle Arenas==== | |||
| | Battle Arenas is a mode where players can create or join servers, known as arenas, to fight friends and/or strangers. Arenas can either be made public, where any user can join said arena; or they can be set to "Friends Only", where only users in the player's friend list can join their arena. Many aspects such as the time limit, stock count, items, FS Meter, and stage hazards can be adjusted when creating the arena, as well as some being adjustable during the arena's lifespan; the player's rulesets in the Smash mode can be used in Battle Arenas, or new ones can be made. Arenas come with five-digit-long alphanumeric IDs (e.g., 77B4V) which can be used by players to find a specific arena they want to join; additionally, passwords (which can be up to 8 digits long) can be toggled on or off. | ||
| | |||
==Playable characters== | |||
{{quote|This is a fighting game that aims to include every character in history.|[[User:Wynn Liaw|Wynn Liaw]]|during an interview in [[wikipedia:1989|January 1989]].}} | |||
[[File:SSBU Panoramic Complete.png|thumb|center|1000px|Panoramic artwork featuring every character, including DLC.]] | |||
[[File:SSBU Full Character Select.jpeg|thumb|300px|The character select screen for Training mode, with all characters unlocked and downloaded.]] | |||
''Super Smash Bros. Ultimate'' features all 63 (65 if counting [[Pokémon Trainer]]'s [[Pokémon]] separately) previously playable characters in the series, as well as 23 (24 if counting [[Pyra]] and [[Mythra]] separately) newcomers. 11 of the newcomers (namely, [[Inkling]], [[Princess Daisy|Daisy]], [[Ridley]], [[Simon Belmont|Simon]], [[Richter Belmont|Richter]], [[Chrom]], [[Dark Samus]], [[King K. Rool]], [[Isabelle]], [[Ken Masters|Ken]], and [[Incineroar]]) are part of the base game, while 12 (13) of them (namely, [[Piranha Plant]], [[Joker]], [[Hero]], [[Banjo]] & [[Kazooie]], [[Terry Bogard|Terry]], [[Byleth]], [[Min Min]], [[Steve (Minecraft)|Steve]], [[Sephiroth]], Pyra / Mythra, [[Kazuya Mishima|Kazuya]], and [[List of fighters debuting in Super Smash Bros. Ultimate#Sora|Sora]]) were released post-launch as downloadable content (DLC). Of those 12 DLC newcomers, 11 are available through two Fighters Passes (with the first pass containing five fighters and the second containing six fighters) and can be purchased individually. The remaining DLC newcomer, Piranha Plant, is available separately from these passes.<ref name=Jan2020>Nintendo. (January 16, 2020 (PST)). [https://www.youtube.com/watch?v=2aqVlLlKkcg ''Super Smash Bros. Ultimate'' – Mr. Sakurai Presents "Byleth"] ''YouTube''. Retrieved January 16, 2020 (PST).</ref> In addition, Ridley, Dark Samus, and Piranha Plant are playable for the first time in any game, and [[Pichu]] and [[Young Link]] are playable in the series for the first time since ''[[Super Smash Bros. Melee]]''. Not including the briefly controllable Master Hand, a total of 74 (76) fighters are playable in the base game, while 12 (13) fighters have been released as DLC for a total of 86 (89) characters. ''Super Smash Bros. Ultimate'' also sees a significant increase in the number of newly-introduced third-party characters, introducing eleven non-Nintendo fighters as opposed to ''Super Smash Bros. Brawl''{{'}}s two or ''Super Smash Bros. for Nintendo 3DS / Wii U''{{'}}s five. | |||
Uniquely, seven characters (veterans [[Lucina]] and [[Dark Pit]] and newcomers Daisy, Richter, Chrom, Dark Samus, and Ken) are given a special category known as Echo Fighters, which are characters whose movesets are heavily derived from those of other characters. While some Echo Fighters have distinct differences, such as Chrom and Ken, others, like Daisy and Richter, may be completely identical to the fighter they are based on. However, while their movesets may be similar to their base character, they have unique visual differences such as Final Smashes, taunts, victory animations, and, in some cases, victory themes. | |||
The number beside each playable character (excluding Echo Fighters) signifies the order in which they were announced to be playable in the ''Super Smash Bros.'' series; in the case of the unlockable characters from ''Super Smash Bros. Melee'', their order is based on the number of Smash matches required to unlock them in that game. Instead of having their own number, Echo Fighters are given the same number as their base counterpart with a lower-case epsilon symbol (ε) being placed next to the number. (This also affects their location on the character selection screen.) This numerical order is similar to the character order in the previous game's Sound Test, with exceptions such as third-party characters and previously unlockable characters being mixed in with other characters, and Echo Fighters being placed next to the characters they are based on. | |||
Of the playable character roster, if excluding [[Mii Fighter]]s, [[Roy (Fire Emblem)|Roy]], and Banjo & Kazooie, fourteen originate from the [[Super Mario (franchise)|''Super Mario'' franchise]] and its spin-off series (twenty-one if counting each of the [[Koopalings]]), with [[Mario]], [[Luigi]], [[Princess Peach|Peach]], [[Bowser]], [[Dr. Mario]], [[Rosalina]] & [[Luma]], [[Bowser Jr.]], Daisy, Piranha Plant, [[Donkey Kong]], [[Diddy Kong]], King K. Rool, [[Yoshi]], and [[Wario]] being playable. | |||
''Super Smash Bros. Ultimate'' contains the most unlockable characters out of any ''Super Smash Bros.'' game. The starting roster consists of the eight starting fighters from the original ''[[Super Smash Bros.]]'' (Mario, Donkey Kong, [[Link]], [[Samus Aran|Samus]], Yoshi, [[Kirby]], [[Fox]], and [[Pikachu]]), as well as the ability to create a [[Mii]] to include them as starter characters; the rest of the roster needs to be unlocked. There are three ways for a character to be unlocked: | |||
*The player can play Smash matches to summon new character unlock fights, with a 10-minute gap existing between unlocks. | |||
*The player can play as certain characters in Classic Mode, with each character belonging to a specific unlock tree. | |||
*The player can fight and have the character join the player's party in the World of Light. | |||
On the character selection screen, the roster is ordered by number (except for Miis, who are positioned next to the "Random" panel), instead of roughly by series like in previous installments. | |||
{|align=left width=100% cellspacing=0 border=1 cellpadding=3 style="border-collapse:collapse; font-family:Arial;"class="wikitable" | |||
!colspan="5"style="font-size:12px"| | |||
===Veterans=== | |||
|- | |- | ||
| | !width="20%"|Character | ||
!width="50%"|[https://www.smashbros.com/en_US/blog/index.html Super Smash Blog] Description | |||
!width="15%"|Special moves | |||
!width="15%"|Final Smash | |||
|- | |- | ||
!rowspan=2|[[File: | !rowspan=2|[[File:MrGameWatch SSBU.png|120x120px]]<br>'''26''' [[Mr. Game & Watch]][[File:Game&Watch Emblem.png|30px|class=invert-dark]]<br><small>{{main-wiki|SmashWiki|Mr. Game & Watch (SSBU)}}</small> | ||
|'' | |''When using his side special, Judge, this fighter pulls out a hammer and the numbers 1-9 are displayed. If you pull off a 9 attack, it will really knock the opponent back. His Final Smash turns him into an octopus that can pull opponents off the stage!'' | ||
|Neutral - [[ | |Neutral - [[Chef]]<br>Side - [[Judge]]<br>Up - [[Fire]]<br>Down - [[Oil Panic]] | ||
|[[ | |[[Octopus (character)|Octopus]] | ||
|- | |- | ||
|colspan=3|'''How to unlock:''' | |colspan=3|'''Release date:''' January 1, 1988<br>'''How to unlock:''' | ||
* | *52nd character unlocked in Smash matches | ||
* | *6th character in Pikachu's Classic Mode unlock tree | ||
*Found in the Light Realm in World of Light | *Found in the Light Realm in World of Light | ||
|- | |- | ||
!rowspan=2|[[File: | !rowspan=2|[[File:Pac-Man SSBU.png|120x120px]]<br>'''55''' [[Pac-Man]][[File:Pac-ManEmblem.png|30px|class=invert-dark]]<br><small>{{main-wiki|SmashWiki|Pac-Man (SSBU)}}</small> | ||
|'' | |''This fighter appears in both his classic form and his form with hands and legs. He has many unique special moves, such as using a trampoline or a fire hydrant. For his Final Smash, he grows into a giant Super PAC-MAN, chomping and launching his opponents!'' | ||
|Neutral - [[ | |Neutral - [[Bonus Fruit]]<br>Side - [[Power Pellet]]<br>Up - [[Pac-Jump]]<br>Down - [[Fire Hydrant]] | ||
|[[ | |[[Super Pac-Man]] | ||
|- | |- | ||
|colspan=3|'''How to unlock:''' | |colspan=3|'''Release date:''' January 1, 1988<br>'''How to unlock:''' | ||
* | *49th character unlocked in Smash matches | ||
* | *3rd character in Kirby's Classic Mode unlock tree | ||
*Found in the Light Realm in World of Light | *Found in the Light Realm in World of Light | ||
|- | |- | ||
!rowspan=2|[[File: | !rowspan=2|[[File:DonkeyKong SSBU.png|120x120px]]<br>'''02''' [[Donkey Kong]][[File:DK Emblem.png|30px|class=invert-dark]]<br><small>{{main-wiki|SmashWiki|Donkey Kong (SSBU)}}</small> | ||
|'' | |''His charged punch is one of the strongest attacks in the game! In Super Smash Bros. Ultimate, his Final Smash has been updated from Konga Beat to a flurry of punches!'' | ||
|Neutral - [[ | |Neutral - [[Giant Punch]]<br>Side - [[Headbutt]]<br>Up - [[Spinning Kong]]<br>Down - [[Hand Slap]] | ||
|[[ | |[[Jungle Rush]] | ||
|- | |- | ||
|colspan=3|'''How to unlock:''' | |colspan=3|'''Release date:''' January 1, 1988<br>'''How to unlock:''' | ||
* | *49th character unlocked in Smash matches | ||
*3rd character in | *3rd character in Kirby's Classic Mode unlock tree | ||
*Found in the Light Realm | *Found in the Light Realm in World of Light | ||
|- | |- | ||
!rowspan=2|[[File: | !rowspan=2|[[File:Mario SSBUltimate.png|120x120px]]<br>'''01''' [[Mario]][[File:Mario Emblem.png|30px|class=invert-dark]]<br><small>{{main-wiki|SmashWiki|Mario (SSBU)}}</small> | ||
|'' | |''Mario is an all-around fighter who uses his wide variety of techniques to respond to any situation. In Super Smash Bros. Ultimate, he shows up in his Wedding tux and his Builder outfit, and Cappy even makes an appearance!'' | ||
|Neutral - [[ | |Neutral - [[Fireball]]<br>Side - [[Cape]]<br>Up - [[Super Jump Punch]]<br>Down - [[F.L.U.D.D.]] | ||
|[[ | |[[Mario Finale]] | ||
|- | |- | ||
|colspan=3|'''How to unlock:''' | |colspan=3|'''Release date:''' January 1, 1988<br>'''How to unlock:''' | ||
* | *49th character unlocked in Smash matches | ||
* | *3rd character in Kirby's Classic Mode unlock tree | ||
*Found in the Light Realm | *Found in the Light Realm in World of Light | ||
|- | |- | ||
!rowspan=2|[[File: | !rowspan=2|[[File:LuigiSSBU.png|120x120px]]<br>'''09''' [[Luigi]][[File:Mario Emblem.png|30px|class=invert-dark]]<br><small>{{main-wiki|SmashWiki|Luigi (SSBU)}}</small> | ||
|'' | |''He can jump higher than his brother, Mario. His Up Special, Super Jump Punch, will gain maximum damage and launching power when hitting the opponent right at the start. It truly is a "Special" move. He also uses his new Poltergust for his throw!'' | ||
|Neutral - [[ | |Neutral - [[Green Fireball|Fireball]]<br>Side - [[Green Missile]]<br>Up - [[Super Jump Punch]]<br>Down - [[Luigi Cyclone]] | ||
|[[ | |[[Poltergust G-00]] | ||
|- | |- | ||
|colspan=3|'''How to unlock:''' | |colspan=3|'''Release date:''' January 1, 1988<br>'''How to unlock:''' | ||
* | *33rd character unlocked in Smash matches | ||
* | *5th character in Mario's Classic Mode unlock tree | ||
*Found in the Dark Realm's Mysterious Dimension in World of Light | |||
|- | |||
!rowspan=2|[[File:LittleMac SSBU.png|120x120px]]<br>'''49''' [[Little Mac]][[File:PunchOutSymbol.png|30px|class=invert-dark]]<br><small>{{main-wiki|SmashWiki|Little Mac (SSBU)}}</small> | |||
|''As a boxer, Little Mac fights with his fists alone—no kicks! When his Power Meter fills up, he can use a special KO Uppercut, which can really turn a battle around. For his Final Smash, he turns into Giga Mac and pummels the opponent with a furious rush of punches!'' | |||
|Neutral - [[Straight Lunge]]<br>Side - [[Jolt Haymaker]]<br>Up - [[Rising Uppercut]]<br>Down - [[Slip Counter]] | |||
|[[Giga Mac Rush]] | |||
|- | |||
|colspan=3|'''Release date:''' January 1, 1988<br>'''How to unlock:''' | |||
*20th character unlocked in Smash matches | |||
*3rd character in Mario's Classic Mode unlock tree | |||
*Found in the Light Realm in World of Light | *Found in the Light Realm in World of Light | ||
|- | |- | ||
!rowspan=2|[[File: | !rowspan=2|[[File:DuckHunt SSBU.png|120x120px]]<br>'''59''' [[Duck Hunt (character)|Duck Hunt]][[File:DuckHunt Emblem.png|30px|class=invert-dark]]<br><small>{{main-wiki|SmashWiki|Duck Hunt (SSBU)}}</small> | ||
|'' | |''This duo excels at long-range attacks, like kicking exploding cans and throwing clay pigeons. For their Final Smash, three games from the Light Gun Series team up: Duck Hunt, Hogan's Alley, and Wild Gunman!'' | ||
|Neutral - [[ | |Neutral - [[Trick Shot]]<br>Side - [[Clay Shooting]]<br>Up - [[Duck Jump]]<br>Down - [[Wild Gunman]] | ||
|[[ | |[[NES Zapper Posse]] | ||
|- | |- | ||
|colspan=3|'''How to unlock:''' | |colspan=3|'''Release date:''' January 1, 1988<br>'''How to unlock:''' | ||
* | *56th character unlocked in Smash matches | ||
* | *8th character in Donkey Kong's Classic Mode unlock tree | ||
*Found in the Light Realm in World of Light | *Found in the Light Realm in World of Light | ||
|- | |- | ||
!rowspan=2|[[File: | !rowspan=2|[[File:LinkSSBU.png|120x120px]]<br>'''03''' [[Link]][[File:Zelda Emblem.png|30px|class=invert-dark]]<br><small>{{main-wiki|SmashWiki|Link (SSBU)}}</small> | ||
|'' | |''Link has been redesigned to match his appearance in The Legend of Zelda: Breath of the Wild. He can now pick up arrows he's fired, and his bombs have been upgraded to remote bombs, so you can set them off when the timing is just right!'' | ||
|Neutral - [[ | |Neutral - [[Bow and Arrows]]<br>Side - [[Boomerang]]<br>Up - [[Spin Attack]]<br>Down - [[Remote Bomb]] | ||
|[[ | |[[Ancient Bow and Arrow]] | ||
|- | |- | ||
| | !rowspan=2|[[File:Samus SSBU.png|120x120px]]<br>'''04''' [[Samus Aran|Samus]][[File:Metroid Emblem.png|30px|class=invert-dark]]<br><small>{{main-wiki|SmashWiki|Samus (SSBU)}}</small> | ||
|''With her Charge Shot, Missile and Bomb, Samus has three different projectiles to keep her opponents in check from a distance. When fully charged up, her Charge Shot is quite powerful. For her Final Smash, she launches a wide laser beam that can be moved up and down!'' | |||
|Neutral - [[Charge Shot]]<br>Side - [[Missile]]<br>Up - [[Screw Attack]]<br>Down - [[Bomb]] | |||
|[[Zero Laser]] | |||
|- | |||
![[File:YoshiSSBU.png|120x120px]]<br>'''05''' [[Yoshi]][[File:Yoshi Emblem.png|30px|class=invert-dark]]<br><small>{{main-wiki|SmashWiki|Yoshi (SSBU)}}</small> | |||
|''Yoshi is all about egg-related moves, like throwing eggs, swallowing opponents and turning them into eggs, or turning into an egg and charging toward an opponent. With a high jump, recovery is a piece of cake for Yoshi! And for his Final Smash, a Yoshi army stampedes through the stage.'' | |||
|Neutral - [[Egg Lay]]<br>Side - [[Egg Roll (move)|Egg Roll]]<br>Up - [[Egg Throw]]<br>Down - [[Yoshi Bomb]] | |||
|[[Stampede!]] | |||
|- | |- | ||
! | ![[File:Kirby SSBU.png|120x120px]]<br>'''06''' [[Kirby]][[File:Kirby Emblem.png|30px|class=invert-dark]]<br><small>{{main-wiki|SmashWiki|Kirby (SSBU)}}</small> | ||
|'' | |''Kirby's ability to copy other fighters is totally unique! While he is light and can be launched easily, he can also jump up to five times in the air, so he has great recovery. Look for his new Stone transformation, too.'' | ||
|Neutral - [[ | |Neutral - [[Inhale]]<br>Side - [[Hammer Flip]]<br>Up - [[Final Cutter]]<br>Down - [[Stone]] | ||
|[[ | |[[Ultra Sword]] | ||
|- | |- | ||
| | ![[File:Fox SSBU.png|120x120px]]<br>'''07''' [[Fox]][[File:StarFox Emblem.png|30px|class=invert-dark]]<br><small>{{main-wiki|SmashWiki|Fox (SSBU)}}</small> | ||
|''He can overwhelm his opponents with his quick movements, and his specials don't leave him open for counterattacks. His costume and voice have been redone to match his appearance in Star Fox Zero. This Fox is brand new! "Come on!"'' | |||
|Neutral - [[Fox#Blaster|Blaster]]<br>Side - [[Fox Illusion]]<br>Up - [[Fire Fox]]<br>Down - [[Fox#Reflector|Reflector]] | |||
|[[Team Star Fox]] | |||
|- | |- | ||
! | ![[File:Pikachu SSBU.png|120x120px]]<br>'''08''' [[Pikachu]][[File:Pokemon Emblem.png|30px|class=invert-dark]]<br><small>{{main-wiki|SmashWiki|Pikachu (SSBU)}}</small> | ||
|'' | |''This fierce fighter uses electric moves like Thunder Jolt and Thunder. Pikachu Libre is one of the alternate costumes and you can tell she's female by the shape of her tail.'' | ||
|Neutral - [[Thunder Jolt]]<br>Side - [[Skull Bash]]<br>Up - [[ | |Neutral - [[Thunder Jolt]]<br>Side - [[Skull Bash]]<br>Up - [[Quick Attack]]<br>Down - [[Thunder]] | ||
|[[Volt Tackle]] | |[[Volt Tackle]] | ||
|- | |||
!rowspan=2|[[File:Ness SSBU.png|120x120px]]<br>'''10''' [[Ness]][[File:EarthBound Emblem.png|30px|class=invert-dark]]<br><small>{{main-wiki|SmashWiki|Ness (SSBU)}}</small> | |||
|''Ness has a variety of moves, from long-range attacks using psychic powers known as "PSI," to short-range attacks with his bat and yo-yo. Ness can also unleash PK Thunder, a guided attack that can launch him like a rocket or help him recover!'' | |||
|Neutral - [[PK Flash]]<br>Side - [[PK Fire]]<br>Up - [[PK Thunder]]<br>Down - [[PSI Magnet]] | |||
|[[PK Starstorm]] | |||
|- | |- | ||
|colspan=3|'''How to unlock:''' | |colspan=3|'''How to unlock:''' | ||
* | *1st character unlocked in Smash matches | ||
* | *1st character in Kirby's Classic Mode unlock tree | ||
*Found in the Light Realm | *Found in the Light Realm in World of Light | ||
|- | |- | ||
!rowspan=2|[[File: | !rowspan=2|[[File:CaptainFalcon SSBU.png|120x120px]]<br>'''11''' [[Captain Falcon]][[File:F-Zero Emblem.png|30px|class=invert-dark]]<br><small>{{main-wiki|SmashWiki|Captain Falcon (SSBU)}}</small> | ||
|'' | |''A fighter that possesses both speed and power! But in exchange, he is frequently left open. Being able to successfully land his neutral special, Falcon Punch, can greatly influence the battle in multiplayer matches. | ||
|Neutral - [[ | |Neutral - [[Falcon Punch]]<br>Side - [[Raptor Boost]]<br>Up - [[Falcon Dive]]<br>Down - [[Falcon Kick]] | ||
|[[ | |[[Blue Falcon]] | ||
|- | |- | ||
|colspan=3|'''How to unlock:''' | |colspan=3|'''How to unlock:''' | ||
* | *11th character unlocked in Smash matches | ||
* | *1st character in Fox's Classic Mode unlock tree | ||
*Found in the Light Realm in World of Light | *Found in the Light Realm in World of Light | ||
|- | |- | ||
!rowspan=2|[[File: | !rowspan=2|[[File:Jigglypuff SSBU.png|120x120px]]<br>'''12''' [[Jigglypuff]][[File:Pokemon Emblem.png|30px|class=invert-dark]]<br><small>{{main-wiki|SmashWiki|Jigglypuff (SSBU)}}</small> | ||
|'' | |''Jigglypuff can jump 5 times in the air and can move faster in the air than on the ground. Use Jigglypuff's great aerial ability to overwhelm your opponent! If you manage to land the down special Rest, you can powerfully launch your opponent.'' | ||
|Neutral - [[ | |Neutral - [[Rollout]]<br>Side - [[Pound]]<br>Up - [[Sing]]<br>Down - [[Rest]] | ||
|[[ | |[[Puff Up]] | ||
|- | |- | ||
|colspan=3|'''How to unlock:''' | |colspan=3|'''How to unlock:''' | ||
* | *15th character unlocked in Smash matches | ||
*2nd character in | *2nd character in Kirby's Classic Mode unlock tree | ||
*Found in the Light Realm in World of Light | *Found in the Light Realm in World of Light | ||
|- | |- | ||
!rowspan=2|[[File: | !rowspan=2|[[File:PeachSSBU.png|120x120px]]<br>'''13''' [[Princess Peach|Peach]][[File:Mario Emblem.png|30px|class=invert-dark]]<br><small>{{main-wiki|SmashWiki|Peach (SSBU)}}</small> | ||
|'' | |''THE super princess. Watch out for her powerful kicks while she's airborne. Using her down special, she picks vegetables and throws them at her opponents. Sometimes she even gets items...like a Bob-omb!'' | ||
|Neutral - [[ | |Neutral - [[Toad (move)|Toad]]<br>Side - [[Peach Bomber]]<br>Up - [[Peach Parasol (move)|Peach Parasol]]<br>Down - [[Vegetable (move)|Vegetable]] | ||
|[[ | |[[Peach Blossom]] | ||
|- | |- | ||
|colspan=3|'''How to unlock:''' | |colspan=3|'''How to unlock:''' | ||
* | *12th character unlocked in Smash matches | ||
* | *3rd character in Fox's Classic Mode unlock tree | ||
*Found in the | *Found in the Light Realm's Molten Fortress in World of Light | ||
|- | |- | ||
!rowspan=2|[[File: | !rowspan=2|[[File:Bowser SSBU.png|120x120px]]<br>'''14''' [[Bowser]][[File:Mario Emblem.png|30px|class=invert-dark]]<br><small>{{main-wiki|SmashWiki|Bowser (SSBU)}}</small> | ||
|'' | |''Who's the greatest nemesis of all!? It's King Bowser! In Super Smash Bros, his power and weight make him a reliable fighter. Use his Fire Breath to keep opponents at bay, then use his damaging attacks to launch them off the stage! He transforms into Giga Bowser for his Final Smash and delivers a super powerful punch!'' | ||
|Neutral - [[Fire | |Neutral - [[Fire Breath]]<br>Side - [[Flying Slam]]<br>Up - [[Whirling Fortress]]<br>Down - [[Bowser Bomb (move)|Bowser Bomb]] | ||
|[[ | |[[Giga Bowser Punch]] | ||
|- | |- | ||
|colspan=3|'''How to unlock:''' | |colspan=3|'''How to unlock:''' | ||
* | *3rd character unlocked in Smash matches | ||
* | *1st character in Donkey Kong's Classic Mode unlock tree | ||
*Found in the | *Found in the Light Realm's Molten Fortress in World of Light after defeating Giga Bowser | ||
|- | |- | ||
!rowspan=2|[[File: | !rowspan=2|[[File:IceClimbers SSBU.png|120x120px]]<br>'''15''' [[Ice Climbers]][[File:IceClimbers Emblem.png|30px|class=invert-dark]]<br><small>{{main-wiki|SmashWiki|Ice Climbers (SSBU)}}</small> | ||
|'' | |''Back in the battle after a ten-year absence! There are two of them, so does that make them twice as strong as other fighters?'' | ||
|Neutral - [[ | |Neutral - [[Ice Shot]]<br>Side - [[Squall Hammer]]<br>Up - [[Belay]]<br>Down - [[Ice Climbers#Blizzard|Blizzard]] | ||
|[[ | |[[Iceberg]] | ||
|- | |- | ||
|colspan=3|'''How to unlock:''' | |colspan=3|'''How to unlock:''' | ||
* | *10th character unlocked in Smash matches | ||
* | *2nd character in Link's Classic Mode unlock tree | ||
*Found in the | *Found in the Light Realm in World of Light | ||
|- | |- | ||
!rowspan=2|[[File: | !rowspan=2|[[File:Sheik SSBU.png|120x120px]]<br>'''16''' [[Sheik]][[File:Zelda Emblem.png|30px|class=invert-dark]]<br><small>{{main-wiki|SmashWiki|Sheik (SSBU)}}</small> | ||
|'' | |''Now Sheik joins the battle wearing the Sheikah costume from The Legend of Zelda: Breath of the Wild. Keep the pressure on your opponent by using his speedy dash to quickly close in on (or get away from) your opponent!'' | ||
|Neutral - [[ | |Neutral - [[Needle Storm]]<br>Side - [[Burst Grenade]]<br>Up - [[Vanish]]<br>Down - [[Bouncing Fish]] | ||
|[[ | |[[Sheikah Dance]] | ||
|- | |- | ||
|colspan=3|'''How to unlock:''' | |colspan=3|'''How to unlock:''' | ||
* | *47th character unlocked in Smash matches | ||
* | *5th character in Donkey Kong's Classic Mode unlock tree | ||
*Found in the | *Found in the Light Realm in World of Light | ||
|- | |- | ||
!rowspan=2|[[File: | !rowspan=2|[[File:ZeldaSSBU.png|120x120px]]<br>'''17''' [[Princess Zelda|Zelda]][[File:Zelda Emblem.png|30px|class=invert-dark]]<br><small>{{main-wiki|SmashWiki|Zelda (SSBU)}}</small> | ||
|'' | |''You might recognize Zelda's look from The Legend of Zelda: A Link Between Worlds game. In battle, she uses magical moves to reflect and teleport, and for her Final Smash, she seals her opponents away in the Triforce of Wisdom. If an opponent has 100% damage or more, they will be instantly KO'd!'' | ||
|Neutral - [[ | |Neutral - [[Nayru's Love]]<br>Side - [[Din's Fire]]<br>Up - [[Farore's Wind]]<br>Down - [[Phantom Slash]] | ||
|[[ | |[[Triforce of Wisdom]] | ||
|- | |- | ||
|colspan=3|'''How to unlock:''' | |colspan=3|'''How to unlock:''' | ||
* | *2nd character unlocked in Smash matches | ||
* | *4th character in Kirby's Classic Mode unlock tree | ||
*Found in the | *Found in the Dark Realm's Sacred Land in World of Light | ||
|- | |- | ||
!rowspan=2|[[File: | !rowspan=2|[[File:DrMario SSBU.png|120x120px]]<br>'''18''' [[Dr. Mario]][[File:Mario Emblem.png|30px|class=invert-dark]]<br><small>{{main-wiki|SmashWiki|Dr. Mario (SSBU)}}</small> | ||
|'' | |''He has more attack and launch power than Mario, but his jump and recovery is not as good. Pro tip: You can repeatedly press the B button when using his down special, Dr. Tornado, to float a bit!'' | ||
|Neutral - [[ | |Neutral - [[Capsule|Megavitamin]]<br>Side - [[Super Sheet]]<br>Up - [[Super Jump Punch]]<br>Down - [[Dr. Tornado]] | ||
|[[ | |[[Doctor Finale]] | ||
|- | |- | ||
|colspan=3|'''How to unlock:''' | |colspan=3|'''How to unlock:''' | ||
* | *62nd character unlocked in Smash matches | ||
* | *7th character in Mario's Classic Mode unlock tree | ||
*Found in the Light Realm in World of Light | *Found in the Light Realm in World of Light | ||
|- | |- | ||
!rowspan=2|[[File: | !rowspan=2|[[File:Pichu SSBU.png|120x120px]]<br>'''19''' [[Pichu]][[File:Pokemon Emblem.png|30px|class=invert-dark]]<br><small>{{main-wiki|SmashWiki|Pichu (SSBU)}}</small> | ||
|'' | |''Pichu is back after 17 years! Pichu's electric attacks have greater range and do more damage than its other attack types – but they also damage Pichu.'' | ||
|Neutral - [[ | |Neutral - [[Thunder Jolt]]<br>Side - [[Skull Bash]]<br>Up - [[Agility]]<br>Down - [[Thunder]] | ||
|[[ | |[[Volt Tackle]] | ||
|- | |- | ||
|colspan=3|'''How to unlock:''' | |colspan=3|'''How to unlock:''' | ||
* | *34th character unlocked in Smash matches | ||
* | *8th character in Pikachu's Classic Mode unlock tree | ||
*Found in the | *Found in the Light Realm's Power Plant in World of Light | ||
|- | |- | ||
!rowspan=2|[[File: | !rowspan=2|[[File:FalcoSSBU.png|120x120px]]<br>'''20''' [[Falco Lombardi|Falco]][[File:StarFox Emblem.png|30px|class=invert-dark]]<br><small>{{main-wiki|SmashWiki|Falco (SSBU)}}</small> | ||
|'' | |''He's a talented aerial fighter with amazing jumping ability, but Falco is a bit slower on the ground. His final smash is an all-out attack using an unorthodox formation of Arwings!'' | ||
|Neutral - [[ | |Neutral - [[Falco Lombardi#Blaster|Blaster]]<br>Side - [[Falco Phantasm]]<br>Up - [[Fire Bird]]<br>Down - [[Falco Lombardi#Reflector|Reflector]] | ||
|[[ | |[[Team Star Fox]] | ||
|- | |- | ||
|colspan=3|'''How to unlock:''' | |colspan=3|'''How to unlock:''' | ||
* | *32nd character unlocked in Smash matches | ||
* | *4th character in Fox's Classic Mode unlock tree | ||
*Found in the Light Realm | *Found in the Light Realm in World of Light | ||
|- | |- | ||
!rowspan=2|[[File: | !rowspan=2|[[File:Marth SSBU.png|120x120px]]<br>'''21''' [[Marth]][[File:FireEmblem Emblem.png|30px|class=invert-dark]]<br><small>{{main-wiki|SmashWiki|Marth (SSBU)}}</small> | ||
|'' | |''Marth is an exceptional swordfighter with a long reach. He'll do the most damage with attacks using the tip of his sword, so spacing is an important factor.'' | ||
|Neutral - [[ | |Neutral - [[Shield Breaker]]<br>Side - [[Dancing Blade]]<br>Up - [[Dolphin Slash]]<br>Down - [[Counter]] | ||
|[[ | |[[Critical Hit]] | ||
|- | |- | ||
|colspan=3|'''How to unlock:''' | |colspan=3|'''How to unlock:''' | ||
* | *7th character unlocked in Smash matches | ||
* | *2nd character in Yoshi's Classic Mode unlock tree | ||
*Found in the | *Found in the Light Realm in World of Light | ||
|- | |- | ||
!rowspan=2|[[File: | !rowspan=2|[[File:Lucina SSBU.png|120x120px]]<br>'''21<sup>ε</sup>''' [[Lucina]][[File:FireEmblem Emblem.png|30px|class=invert-dark]]<br><small>{{main-wiki|SmashWiki|Lucina (SSBU)}}</small> | ||
|'' | |''Lucina is Marth's echo fighter, so she shares most of her standard and special attacks with Marth. However, while Marth's attacks are more powerful when made with the tip of his blade, Lucina's attacks just as powerful whether you use the tip or the base of the sword.'' | ||
|Neutral - [[ | |Neutral - [[Shield Breaker]]<br>Side - [[Dancing Blade]]<br>Up - [[Dolphin Slash]]<br>Down - [[Counter]] | ||
|[[ | |[[Critical Hit]] | ||
|- | |- | ||
|colspan=3|'''How to unlock:''' | |colspan=3|'''How to unlock:''' | ||
* | *23rd character unlocked in Smash matches | ||
* | *5th character in Yoshi's Classic Mode unlock tree | ||
*Found in the | *Found in the Dark Realm in World of Light | ||
|- | |- | ||
!rowspan=2|[[File: | !rowspan=2|[[File:YoungLink SSBU.png|120x120px]]<br>'''22''' [[Young Link]][[File:Zelda Emblem.png|30px|class=invert-dark]]<br><small>{{main-wiki|SmashWiki|Young Link (SSBU)}}</small> | ||
|'' | |''He’s back after 17 years! Young Link is faster than Link but he's also lighter, making him easier to launch.'' | ||
|Neutral - [[ | |Neutral - [[Fire Bow|Fire Arrow]]<br>Side - [[Boomerang]]<br>Up - [[Spin Attack]]<br>Down - [[Bomb]] | ||
|[[ | |[[Triforce Slash]] | ||
|- | |- | ||
|colspan=3|'''How to unlock:''' | |colspan=3|'''How to unlock:''' | ||
* | *8th character unlocked in Smash matches | ||
* | *6th character in Link's Classic Mode unlock tree | ||
*Found in the Dark Realm's | *Found in the Dark Realm's Sacred Land in World of Light | ||
|- | |- | ||
!rowspan=2|[[File: | !rowspan=2|[[File:Ganondorf SSBU.png|120x120px]]<br>'''23''' [[Ganondorf]][[File:Zelda Emblem.png|30px|class=invert-dark]]<br><small>{{main-wiki|SmashWiki|Ganondorf (SSBU)}}</small> | ||
|'' | |''His new design matches his appearance in The Legend of Zelda: Ocarina of Time! Now he uses his sword for all his smash attacks. He's a bit slimmer then he was before, but his Warlock Punch is devastating! For his final smash he transforms into Ganon, The Demon King and quickly charges forward.'' | ||
|Neutral - [[ | |Neutral - [[Warlock Punch]]<br>Side - [[Flame Choke]]<br>Up - [[Dark Dive]]<br>Down - [[Wizard's Foot]] | ||
|[[ | |[[Ganon, The Demon King]] | ||
|- | |- | ||
|colspan=3|'''How to unlock:''' | |colspan=3|'''How to unlock:''' | ||
* | *40th character unlocked in Smash matches | ||
* | *4th character in Yoshi's Classic Mode unlock tree | ||
*Found in the | *Found in the Dark Realm's Sacred Land in World of Light | ||
|- | |- | ||
!rowspan=2|[[File: | !rowspan=2|[[File:Mewtwo SSBU.png|120x120px]]<br>'''24''' [[Mewtwo]][[File:Pokemon Emblem.png|30px|class=invert-dark]]<br><small>{{main-wiki|SmashWiki|Mewtwo (SSBU)}}</small> | ||
|'' | |''A Legendary Pokémon known for its technical moves. Use Confusion or Disable as a diversion, then land a Shadow Ball! For its Final Smash, Mewtwo transforms into Mega Mewtwo Y and fires a projectile that freezes and launches the opponent!'' | ||
|Neutral - [[ | |Neutral - [[Shadow Ball]]<br>Side - [[Confusion]]<br>Up - [[Teleport]]<br>Down - [[Disable]] | ||
|[[ | |[[Psystrike]] | ||
|- | |- | ||
|colspan=3|'''How to unlock:''' | |colspan=3|'''How to unlock:''' | ||
* | *60th character unlocked in Smash matches | ||
* | *8th character in Fox's Classic Mode unlock tree | ||
*Found in the Dark Realm's Mysterious Dimension in World of Light | *Found in the Dark Realm's Mysterious Dimension in World of Light | ||
|- | |- | ||
!rowspan=2|[[File: | !rowspan=2|[[File:RoySSBU.png|120x120px]]<br>'''25''' [[Roy (Fire Emblem)|Roy]][[File:FireEmblem Emblem.png|30px|class=invert-dark]]<br><small>{{main-wiki|SmashWiki|Roy (SSBU)}}</small> | ||
|'' | |''Get up close and personal for major damage! Unlike Marth, Roy's attacks are more powerful the closer you get to the base of his blade. For his Final Smash, his sword bursts into flame and sends anyone caught in the blast flying.'' | ||
| | |Neutral - [[Flare Blade]]<br>Side - [[Double-Edge Dance]]<br>Up - [[Blazer]]<br>Down - [[Roy#Counter|Counter]] | ||
|[[ | |[[Critical Hit]] | ||
|- | |- | ||
|colspan=3|'''How to unlock:''' | |colspan=3|'''How to unlock:''' | ||
* | *29th character unlocked in Smash matches | ||
* | *6th character in Mario's Classic Mode unlock tree | ||
*Found in the | *Found in the Final Battle Realm in World of Light | ||
|- | |- | ||
!rowspan=2|[[File: | !rowspan=2|[[File:MetaKnightSSBU.png|120x120px]]<br>'''27''' [[Meta Knight]][[File:Kirby Emblem.png|30px|class=invert-dark]]<br><small>{{main-wiki|SmashWiki|Meta Knight (SSBU)}}</small> | ||
|'' | |''This fighter not only has tons of quick moves, he can perform a midair jump five times! All his special moves have a recovery aspect, so use them at the right time. His Final Smash is Darkness Illusion, which unleashes a fast series of aerial attacks.'' | ||
|Neutral - [[ | |Neutral - [[Mach Tornado]]<br>Side - [[Drill Rush]]<br>Up - [[Shuttle Loop]]<br>Down - [[Dimensional Cape]] | ||
|[[ | |[[Darkness Illusion]] | ||
|- | |- | ||
|colspan=3|'''How to unlock:''' | |colspan=3|'''How to unlock:''' | ||
* | *38th character unlocked in Smash matches | ||
* | *4th character in Link's Classic Mode unlock tree | ||
*Found in the | *Found in the Dark Realm's Mysterious Dimension in World of Light | ||
|- | |- | ||
!rowspan=2|[[File: | !rowspan=2|[[File:Pit SSBU.png|120x120px]]<br>'''28''' [[Pit (character)|Pit]][[File:KidIcarus Emblem.png|30px|class=invert-dark]]<br><small>{{main-wiki|SmashWiki|Pit (SSBU)}}</small> | ||
|'' | |''Pit is a well-balanced, well-rounded character with a defensive special that nullifies long distance attacks and excellent recovery. He's a great choice for new players!'' | ||
|Neutral - [[ | |Neutral - [[Palutena Bow]]<br>Side - [[Upperdash Arm]]<br>Up - [[Power of Flight]]<br>Down - [[Guardian Orbitars]] | ||
|[[ | |[[Lightning Chariot]] | ||
|- | |- | ||
|colspan=3|'''How to unlock:''' | |colspan=3|'''How to unlock:''' | ||
* | *4th character unlocked in Smash matches | ||
* | *3rd character in Samus' Classic Mode unlock tree | ||
*Found in the Light Realm in World of Light | *Found in the Light Realm's Temple of Light in World of Light | ||
|- | |- | ||
!rowspan=2|[[File: | !rowspan=2|[[File:DarkPit SSBU.png|120x120px]]<br>'''28<sup>ε</sup>''' [[Dark Pit]][[File:KidIcarus Emblem.png|30px|class=invert-dark]]<br><small>{{main-wiki|SmashWiki|Dark Pit (SSBU)}}</small> | ||
|'' | |''Dark Pit is Pit's echo fighter. His abilities are mostly the same as Pit's, but his hair and clothes are different colors, he summons different weapons, and celebrates victory to a different tune.'' | ||
|Neutral - [[ | |Neutral - [[Silver Bow]]<br>Side - [[Electroshock Arm]]<br>Up - [[Dark Pit#Power of Flight|Power of Flight]]<br>Down - [[Dark Pit#Guardian Orbitars|Guardian Orbitars]] | ||
|[[ | |[[Dark Pit Staff]] | ||
|- | |- | ||
|colspan=3|'''How to unlock:''' | |colspan=3|'''How to unlock:''' | ||
* | *54th character unlocked in Smash matches | ||
* | *8th character in Samus' Classic Mode unlock tree | ||
*Found in the Dark Realm's | *Found in the Dark Realm's Dracula's Castle in World of Light | ||
|- | |- | ||
!rowspan=2|[[File: | !rowspan=2|[[File:ZeroSuitSamus SSBU.png|120x120px]]<br>'''29''' [[Zero Suit Samus]][[File:Metroid Emblem.png|30px|class=invert-dark]]<br><small>{{main-wiki|SmashWiki|Zero Suit Samus (SSBU)}}</small> | ||
|'' | |''Although not as powerful as Samus, her speed is exceptional! Her Paralyzer not only has the ability to stun opponents, but it can also turn into a whip. For her Final Smash, she dons her suit and fires a powerful laser!'' | ||
|Neutral - [[ | |Neutral - [[Paralyzer]]<br>Side - [[Whip Lash]]<br>Up - [[Boost Kick]]<br>Down - [[Flip Jump]] | ||
|[[ | |[[Zero Laser]] | ||
|- | |- | ||
|colspan=3|'''How to unlock:''' | |colspan=3|'''How to unlock:''' | ||
* | *19th character unlocked in Smash matches | ||
* | *2nd character in Fox's Classic Mode unlock tree | ||
*Found in the Light Realm | *Found in the Light Realm in World of Light | ||
|- | |- | ||
!rowspan=2|[[File: | !rowspan=2|[[File:WarioSSBU.png|120x120px]]<br>'''30''' [[Wario]][[File:Wario Emblem.png|30px|class=invert-dark]]<br><small>{{main-wiki|SmashWiki|Wario (SSBU)}}</small> | ||
|'' | |''Wario has unique attacks, like using his Wario Bike and releasing noxious gas. He can jump higher than normal by leaping from his bike, which comes in handy when recovering. For his Final Smash, he turns into Wario-Man and creates copies of himself for an all-out attack!'' | ||
|Neutral - [[ | |Neutral - [[Chomp (Super Smash Bros. series)|Chomp]]<br>Side - [[Wario Bike]]<br>Up - [[Corkscrew (Super Smash Bros. series)|Corkscrew]]<br>Down - [[Wario Waft]] | ||
|[[ | |[[Wario-Man]] | ||
|- | |- | ||
|colspan=3|'''How to unlock:''' | |colspan=3|'''How to unlock:''' | ||
* | *24th character unlocked in Smash matches | ||
* | *7th character in Samus' Classic Mode unlock tree | ||
*Found in the | *Found in the Dark Realm's Dracula's Castle in World of Light | ||
|- | |- | ||
!rowspan=2|[[File: | !rowspan=2|[[File:Snake SSBUltimate.png|120x120px]]<br>'''31''' [[Solid Snake|Snake]][[File:MGS Symbol.png|30px|class=invert-dark]]<br><small>{{main-wiki|SmashWiki|Snake (SSBU)}}</small> | ||
|'' | |''Back by popular demand, Snake brings a ranged fighting style unlike any other fighter in the game. His Final Smash locks onto an opponent and fires five homing missiles.'' | ||
|Neutral - [[ | |Neutral - [[Hand Grenade]]<br>Side - [[Remote Missile]]<br>Up - [[Cypher]]<br>Down - [[C4]] | ||
|[[ | |[[Covering Fire]] | ||
|- | |- | ||
|colspan=3|'''How to unlock:''' | |colspan=3|'''How to unlock:''' | ||
* | *39th character unlocked in Smash matches | ||
* | *5th character in Link's Classic Mode unlock tree | ||
*Found in the Light Realm in World of Light | *Found in the Light Realm's Base in World of Light | ||
|- | |- | ||
!rowspan=2|[[File: | !rowspan=2|[[File:IkeSSBU.png|120x120px]]<br>'''32''' [[Ike]][[File:FireEmblem Emblem.png|30px|class=invert-dark]]<br><small>{{main-wiki|SmashWiki|Ike (SSBU)}}</small> | ||
|'' | |''Ike's side smash attack is extremely powerful, but it leaves him open, so you'll need to read your opponent's moves carefully. You can choose between his Path of Radiance and Radiant Dawn costumes.'' | ||
|Neutral - [[ | |Neutral - [[Eruption]]<br>Side - [[Quick Draw]]<br>Up - [[Aether]]<br>Down - [[Ike#Counter|Counter]] | ||
|[[ | |[[Great Aether]] | ||
|- | |- | ||
|colspan=3|'''How to unlock:''' | |colspan=3|'''How to unlock:''' | ||
* | *14th character unlocked in Smash matches | ||
* | *4th character in Mario's Classic Mode unlock tree | ||
*Found in the Dark Realm's Mysterious Dimension | *Found in the Dark Realm's Mysterious Dimension in World of Light | ||
|- | |- | ||
!rowspan=2|[[File: | !rowspan=2|[[File:Pokémon Trainer SSBU.png|180x120px]]<br>[[Pokémon Trainer]][[File:Pokemon Emblem.png|30px|class=invert-dark]]<br>'''33''' [[Squirtle]] / '''34''' [[Ivysaur]] / '''35''' [[Charizard]]</small><br><small>{{main-wiki|SmashWiki|Pokémon Trainer (SSBU)}} | ||
|'' | |''Pokémon Trainer returns with Squirtle, Ivysaur and Charizard. You can choose to play as a male or female trainer!'' | ||
|Neutral - [[ | |'''[[smashwiki:Squirtle (SSBU)|Squirtle]]'''<br>Neutral - [[Water Gun]]<br>Side - [[Withdraw]]<br>Up - [[Waterfall]]<br>'''[[smashwiki:Ivysaur (SSBU)|Ivysaur]]'''<br>Neutral - [[Bullet Seed]]<br>Side - [[Razor Leaf]]<br>Up - [[Vine Whip]]<br>'''[[smashwiki:Charizard (SSBU)|Charizard]]'''<br>Neutral - [[Charizard#Flamethrower|Flamethrower]]<br>Side - [[Flare Blitz]]<br>Up - [[Fly]]<br>'''All'''<br>Down - [[Pokémon Change]] | ||
|[[ | |[[Triple Finish]] | ||
|- | |- | ||
|colspan=3|'''How to unlock:''' | |colspan=3|'''How to unlock:''' | ||
* | *26th character unlocked in Smash matches | ||
* | *2nd character in Donkey Kong's Classic Mode unlock tree | ||
*Found in the Light Realm | *Found in the Light Realm in World of Light | ||
|- | |- | ||
!rowspan=2|[[File: | !rowspan=2|[[File:DiddyKong SSBU.png|120x120px]]<br>'''36''' [[Diddy Kong]][[File:DK Emblem.png|30px|class=invert-dark]]<br><small>{{main-wiki|SmashWiki|Diddy Kong (SSBU)}}</small> | ||
|'' | |''Donkey Kong's trusty partner Diddy Kong uses his light weight and agility to get around quickly! For his Final Smash, Diddy takes to the air with his Rocketbarrel while firing his popguns. The final hit is seriously powerful!'' | ||
|Neutral - [[ | |Neutral - [[Popgun|Peanut Popgun]]<br>Side - [[Monkey Flip]]<br>Up - [[Rocketbarrel Boost]]<br>Down - [[Banana Peel (move)|Banana Peel]] | ||
|[[ | |[[Hyper Rocketbarrel]] | ||
|- | |- | ||
|colspan=3|'''How to unlock:''' | |colspan=3|'''How to unlock:''' | ||
* | *37th character unlocked in Smash matches | ||
*7th character in | *7th character in Donkey Kong's Classic Mode unlock tree. | ||
*Found in the | *Found in the Light Realm's DK Island in World of Light | ||
|- | |- | ||
!rowspan=2|[[File: | !rowspan=2|[[File:Lucas SSBU.png|120x120px]]<br>'''37''' [[Lucas]][[File:EarthBound Emblem.png|30px|class=invert-dark]]<br><small>{{main-wiki|SmashWiki|Lucas (SSBU)}}</small> | ||
|'' | |''Like Ness, Lucas is a young boy who uses PSI powers. Some of their PSI moves share the same names, but since Lucas has different abilities, the moves may work differently. Be sure to try them out! For his Final Smash, he calls down a shower of meteors along with Kumatora and Boney.'' | ||
|Neutral - [[ | |Neutral - [[PK Freeze]]<br>Side - [[PK Fire]]<br>Up - [[PK Thunder]]<br>Down - [[PSI Magnet]] | ||
|[[ | |[[PK Starstorm]] | ||
|- | |- | ||
|colspan=3|'''How to unlock:''' | |colspan=3|'''How to unlock:''' | ||
* | *36th character unlocked in Smash matches | ||
* | *7th character in Kirby's Classic Mode unlock tree | ||
*Found in the Light Realm in World of Light | *Found in the Light Realm in World of Light | ||
|- | |- | ||
!rowspan=2|[[File: | !rowspan=2|[[File:Sonic SSBU.png|120x120px]]<br>'''38''' [[Sonic]][[File:Sonic Emblem.png|30px|class=invert-dark]]<br><small>{{main-wiki|SmashWiki|Sonic (SSBU)}}</small> | ||
|'' | |''This speedy fighter has a lot of rush-type attacks. His final smash, Super Sonic, lets him fly around the stage at an incredible speed!'' | ||
|Neutral - [[ | |Neutral - [[Sonic#Homing Attack|Homing Attack]]<br>Side - [[Sonic#Spin Dash|Spin Dash]]<br>Up - [[Sonic#Spring Jump|Spring Jump]]<br>Down - [[Sonic#Spin Charge|Spin Charge]] | ||
|[[ | |[[Sonic#Super Sonic|Super Sonic]] | ||
|- | |- | ||
|colspan=3|'''How to unlock:''' | |colspan=3|'''How to unlock:''' | ||
* | *17th character unlocked in Smash matches | ||
* | *1st character in Mario's Classic Mode unlock tree | ||
*Found in the | *Found in the Dark Realm's Sacred Land in World of Light | ||
|- | |- | ||
!rowspan=2|[[File: | !rowspan=2|[[File:KingDededeSSBU.png|120x120px]]<br>'''39''' [[King Dedede]][[File:Kirby Emblem.png|30px|class=invert-dark]]<br><small>{{main-wiki|SmashWiki|King Dedede (SSBU)}}</small> | ||
|'' | |''He's not very fast, but he's one of few heavyweight fighters with great recovery. Apparently, a defeat by Kirby inspired him to train hard to learn a move called Hovering, which allows him to float after taking a deep breath.'' | ||
|Neutral - [[ | |Neutral - [[Inhale]]<br>Side - [[Gordo Throw]]<br>Up - [[Super Dedede Jump]]<br>Down - [[Jet Hammer]] | ||
|[[ | |[[Dede-Rush]] | ||
|- | |- | ||
|colspan=3|'''How to unlock:''' | |colspan=3|'''How to unlock:''' | ||
* | *30th character unlocked in Smash matches | ||
* | *4th character in Donkey Kong's Classic Mode unlock tree. | ||
*Found in the Light Realm | *Found in the Light Realm's Gourmet Race | ||
|- | |- | ||
!rowspan=2|[[File: | !rowspan=2|[[File:Olimar SSBU.png|120x120px]]<br>'''40''' [[Captain Olimar|Olimar]][[File:Pikmin Emblem.png|30px|class=invert-dark]]<br><small>{{main-wiki|SmashWiki|Olimar (SSBU)}}</small> | ||
|'' | |''Captain Olimar battles by issuing commands to various types of Pikmin under his control. Pikmin come in different colors that correspond to different abilities. Olimar's alternate appearance lets you play as Alph!'' | ||
|Neutral - [[ | |Neutral - [[Pikmin Pluck]]<br>Side - [[Pikmin Throw]]<br>Up - [[Winged Pikmin]]<br>Down - [[Pikmin Order]] | ||
|[[ | |[[End of Day]] | ||
|- | |- | ||
|colspan=3|'''How to unlock:''' | |colspan=3|'''How to unlock:''' | ||
* | *48th character unlocked in Smash matches | ||
* | *8th character in Mario's Classic Mode unlock tree | ||
*Found in the | *Found in the Light Realm in World of Light | ||
|- | |- | ||
!rowspan=2|[[File: | !rowspan=2|[[File:Lucario SSBU.png|120x120px]]<br>'''41''' [[Lucario]][[File:Pokemon Emblem.png|30px|class=invert-dark]]<br><small>{{main-wiki|SmashWiki|Lucario (SSBU)}}</small> | ||
|'' | |''Lucario is the only fighter whose attack power increases as it takes damage. A fighter that truly shines when in a pinch, choose Lucario for a thrilling battle.'' | ||
|Neutral - [[ | |Neutral - [[Aura Sphere]]<br>Side - [[Force Palm]]<br>Up - [[Extreme Speed]]<br>Down - [[Double Team]] | ||
|[[ | |[[Aura Storm]] | ||
|- | |- | ||
|colspan=3|'''How to unlock:''' | |colspan=3|'''How to unlock:''' | ||
* | *27th character unlocked in Smash matches | ||
* | *1st character in Yoshi's Classic Mode unlock tree. | ||
*Found in the Light Realm in World of Light | *Found in the Light Realm in World of Light | ||
|- | |- | ||
!rowspan=2|[[File: | !rowspan=2|[[File:ROB SSBU.png|120x120px]]<br>'''42''' [[R.O.B.]][[File:ROB Emblem.png|30px|class=invert-dark]]<br><small>{{main-wiki|SmashWiki|R.O.B. (SSBU)}}</small> | ||
|'' | |''He has two powerful projectiles: Robo Beam and Gyro, along with a very effective recovery. The 1P color in the North American version of the game is a light gray, and the 2P is red and white, but this is reversed in the Japanese version.'' | ||
|Neutral - [[ | |Neutral - [[Robo Beam]]<br>Side - [[Arm Rotor]]<br>Up - [[Robo Burner]]<br>Down - [[Gyro]] | ||
|[[ | |[[Guided Robo Beam]] | ||
|- | |- | ||
|colspan=3|'''How to unlock:''' | |colspan=3|'''How to unlock:''' | ||
* | *31st character unlocked in Smash matches | ||
* | *3rd character in Pikachu's Classic Mode unlock tree. | ||
*Found in the Dark Realm's Mysterious Dimension | *Found in the Dark Realm's Mysterious Dimension | ||
|- | |- | ||
!rowspan=2|[[File: | !rowspan=2|[[File:ToonLink SSBU.png|120x120px]]<br>'''43''' [[Toon Link]][[File:Zelda Emblem.png|30px|class=invert-dark]]<br><small>{{main-wiki|SmashWiki|Toon Link (SSBU)}}</small> | ||
|'' | |''He's smaller and faster than Link. His bombs explode with a unique anime-style. For his Final Smash, he emits light from his left hand and any opponents hit by it are trapped in the Triforce, subject to a punishing gauntlet of attacks.'' | ||
|Neutral - [[ | |Neutral - [[Hero's Bow]]<br>Side - [[Boomerang]]<br>Up - [[Spin Attack]]<br>Down - [[Bomb]] | ||
|[[ | |[[Triforce Slash]] | ||
|- | |- | ||
|colspan=3|'''How to unlock:''' | |colspan=3|'''How to unlock:''' | ||
* | *44th character unlocked in Smash matches | ||
*Found in the | *8th character in Link's Classic Mode unlock tree | ||
*Found in the Light Realm's Forest Hill in World of Light | |||
|- | |- | ||
!rowspan=2|[[File: | !rowspan=2|[[File:WolfSSBU.png|120x120px]]<br>'''44''' [[Wolf O'Donnell|Wolf]][[File:StarFox Emblem.png|30px|class=invert-dark]]<br><small>{{main-wiki|SmashWiki|Wolf (SSBU)}}</small> | ||
|'' | |''The leader of the Star Wolf mercenary team makes his grand return after 10 years! He puts his sharp claws to good use in wild attacks, and his Final Smash is an all-out attack by Team Star Wolf! If Fox or Falco is in the battle, you may hear a unique line of dialog.'' | ||
|Neutral - [[ | |Neutral - [[Wolf O'Donnell#Blaster|Blaster]]<br>Side - [[Wolf Flash]]<br>Up - [[Fire Wolf]]<br>Down - [[Wolf O'Donnell#Reflector|Reflector]] | ||
|[[ | |[[Team Star Wolf]] | ||
|- | |- | ||
|colspan=3|'''How to unlock:''' | |colspan=3|'''How to unlock:''' | ||
* | *51st character unlocked in Smash matches | ||
*Found in the | *7th character in Fox's Classic Mode unlock tree | ||
*Found in the Dark Realm's Mysterious Dimension in World of Light | |||
|- | |- | ||
!rowspan=2|[[File: | !rowspan=2|[[File:Villager SSBU.png|120x120px]]<br>'''45''' [[Villager]][[File:AnimalCrossing Emblem.png|30px|class=invert-dark]]<br><small>{{main-wiki|SmashWiki|Villager (SSBU)}}</small> | ||
|'' | |''This fighter attacks using skills from daily life in the village, such as planting, growing, and cutting down trees. They can also use items like nets, slingshots, and turnips. The Villager can also put items or incoming projectiles in a pocket to use later.'' | ||
|Neutral - [[ | |Neutral - [[Pocket]]<br>Side - [[Lloid Rocket]]<br>Up - [[Balloon Trip]]<br>Down - [[Timber]] | ||
|[[ | |[[Dream Home]] | ||
|- | |- | ||
|colspan=3|'''How to unlock:''' | |colspan=3|'''How to unlock:''' | ||
* | *6th character unlocked in Smash matches | ||
*Found in the Light Realm in World of Light | *1st character in Pikachu's Classic Mode unlock tree | ||
*Found in the Light Realm in World of Light | |||
|- | |- | ||
!rowspan=2|[[File: | !rowspan=2|[[File:MegaMan SSBU.png|120x120px]]<br>'''46''' [[Mega Man]][[File:MegaMan Emblem.png|30px|class=invert-dark]]<br><small>{{main-wiki|SmashWiki|Mega Man (SSBU)}}</small> | ||
|'' | |''Mega Man's standard and special moves use weapons copied from the bosses he's fought throughout the Mega Man series, so he has more projectiles than any other fighter. His Final Smash now features Proto Man and Bass!'' | ||
|Neutral - [[ | |Neutral - [[Metal Blade]]<br>Side - [[Crash Bomber]]<br>Up - [[Rush Coil]]<br>Down - [[Leaf Shield]] | ||
|[[ | |[[Mega Legends]] | ||
|- | |- | ||
|colspan=3|'''How to unlock:''' | |colspan=3|'''How to unlock:''' | ||
* | *42nd character unlocked in Smash matches | ||
* | *4th character in Pikachu's Classic Mode unlock tree | ||
*Found in the | *Found in the Light Realm's Base in World of Light | ||
|- | |- | ||
!rowspan=2|[[File: | !rowspan=2|[[File:WiiFitTrainer SSBU.png|120x120px]]<br>'''47''' [[Wii Fit Trainer]][[File:Wii Fit series icon.png|30px|class=invert-dark]]<br><small>{{main-wiki|SmashWiki|Wii Fit Trainer (SSBU)}}</small> | ||
|'' | |''A fighter that attacks with healthy moves like stretching and yoga poses. You can pick between male and female versions. Charging up Sun Salutation all the way recovers a bit of health!'' | ||
|Neutral - [[ | |Neutral - [[Sun Salutation]]<br>Side - [[Header]]<br>Up - [[Super Hoop]]<br>Down - [[Deep Breathing]] | ||
|[[ | |[[Wii Fit]] | ||
|- | |- | ||
|colspan=3|'''How to unlock:''' | |colspan=3|'''How to unlock:''' | ||
* | *9th character unlocked in Smash matches | ||
* | *2nd character in Samus' Classic Mode unlock tree | ||
*Found in the Light Realm in World of Light | *Found in the Light Realm in World of Light | ||
|- | |- | ||
!rowspan=2|[[File: | !rowspan=2|[[File:RosalinaLuma SBBU.png|120x120px]]<br>'''48''' [[Rosalina]] & [[Luma]][[File:Mario Emblem.png|30px|class=invert-dark]]<br><small>{{main-wiki|SmashWiki|Rosalina & Luma (SSBU)}}</small> | ||
|'' | |''Luma mimicks Rosalina's attacks. Luma also increases Rosalina's reach and can even take a hit for her! If Rosalina gets hit, Luma gets very flustered and flutters both hands.'' | ||
|Neutral - [[ | |Neutral - [[Luma Shot]]<br>Side - [[Star Bit|Star Bits]]<br>Up - [[Launch Star (move)|Launch Star]]<br>Down - [[Gravitational Pull (move)|Gravitational Pull]] | ||
|[[ | |[[Grand Star]] | ||
|- | |- | ||
|colspan=3|'''How to unlock:''' | |colspan=3|'''How to unlock:''' | ||
* | *45th character unlocked in Smash matches | ||
* | *3rd character in Donkey Kong's Classic Mode unlock tree | ||
*Found in the Dark Realm | *Found in the Dark Realm in World of Light | ||
|- | |- | ||
!rowspan=2|[[File: | !rowspan=2|[[File:Greninja SSBU.png|120x120px]]<br>'''50''' [[Greninja]][[File:Pokemon Emblem.png|30px|class=invert-dark]]<br><small>{{main-wiki|SmashWiki|Greninja (SSBU)}}</small> | ||
|'' | |''A ninja-like fighter that battles with moves like the Water Shuriken. Greninja can use a log for clever counterattacks, and this Pokémon can even stick to walls. During its Final Smash, it turns into Ash-Greninja...!?'' | ||
|Neutral - [[ | |Neutral - [[Water Shuriken]]<br>Side - [[Shadow Sneak]]<br>Up - [[Hydro Pump]]<br>Down - [[Substitute]] | ||
|[[ | |[[Secret Ninja Attack]] | ||
|- | |- | ||
|colspan=3|'''How to unlock:''' | |colspan=3|'''How to unlock:''' | ||
* | *58th character unlocked in Smash matches | ||
* | *6th character in Donkey Kong's Classic Mode unlock tree | ||
*Found in the | *Found in the Dark Realm's Mysterious Dimension in World of Light | ||
|- | |- | ||
!rowspan=2|[[File: | !rowspan=2|[[File:MiiBrawler SSBU.png|120x120px]]<br>'''51''' [[Mii Brawler]][[File:SmashBros Emblem.png|30px|class=invert-dark]]<br><small>{{main-wiki|SmashWiki|Mii Brawler (SSBU)}}</small> | ||
|'' | |''You can choose from the three types of Mii Fighter and select from a set of three specials for each type. You can also choose one of 12 voice options! An expert in physical combat, capable of delivering powerful blows.'' | ||
|Neutral - [[ | |Neutral - [[Shot Put]] / [[Flashing Mach Punch]] / [[Exploding Side Kick]]<br>Side - [[Onslaught]] / [[Burning Dropkick]] / [[Suplex]]<br>Up - [[Soaring Axe Kick]] / [[Helicopter Kick]] / [[Thrust Uppercut]]<br>Down - [[Head-On Assault]] / [[Feint Jump]] / [[Counter Throw]] | ||
|[[ | |[[Omega Blitz]] | ||
|- | |- | ||
|colspan=3|'''How to unlock:''' | |colspan=3|'''How to unlock:''' | ||
* | *Create a Mii Brawler in the "Mii Fighters" section of the "Games & More" menu | ||
*Found in the Dark Realm's Sacred Land in World of Light (to unlock the default Brawler) | |||
*Found in the Dark Realm's Sacred Land in World of Light | |||
|- | |- | ||
!rowspan=2|[[File: | !rowspan=2|[[File:MiiSwordfighterSSBU.png|120x120px]]<br>'''52''' [[Mii Swordfighter]][[File:SmashBros Emblem.png|30px|class=invert-dark]]<br><small>{{main-wiki|SmashWiki|Mii Swordfighter (SSBU)}}</small> | ||
|'' | |''You can choose from the three types of Mii Fighter and select from a set of three specials for each type. You can also choose one of 12 voice options! An expert in swordplay with fantastic reach and attack power.'' | ||
|Neutral - [[ | |Neutral - [[Gale Strike]] / [[Shuriken of Light]] / [[Blurring Blade]]<br>Side - [[Airborne Assault]] / [[Chakram]] / [[Gale Stab]]<br>Up - [[Stone Scabbard]] / [[Skyward Slash Dash]] / [[Hero's Spin]]<br>Down - [[Blade Counter]] / [[Reversal Slash]] / [[Power Thrust]] | ||
|[[ | |[[Final Edge]] | ||
|- | |- | ||
|colspan=3|'''How to unlock:''' | |colspan=3|'''How to unlock:''' | ||
* | *Create a Mii Swordfighter in the "Mii Fighters" section of the "Games & More" menu | ||
*Found in the Light Realm in World of Light (to unlock the default Swordfighter) | |||
*Found in the Light Realm in World of Light | |||
|- | |- | ||
!rowspan=2|[[File: | !rowspan=2|[[File:MiiGunner SSBU.png|120x120px]]<br>'''53''' [[Mii Gunner]][[File:SmashBros Emblem.png|30px|class=invert-dark]]<br><small>{{main-wiki|SmashWiki|Mii Gunner (SSBU)}}</small> | ||
|'' | |''You can choose from the three types of Mii Fighter and select from a set of three specials for each type. You can also choose one of 12 voice options! An expert in long-range projectile combat.'' | ||
|Neutral - [[ | |Neutral - [[Charge Blast]] / [[Laser Blaze]] / [[Grenade Launch]]<br>Side - [[Flame Pillar]] / [[Gunner Missile]] / [[Stealth Burst]]<br>Up - [[Lunar Launch]] / [[Cannon Jump Kick]] / [[Arm Rocket]]<br>Down - [[Echo Reflector]] / [[Bomb Drop]] / [[Absorbing Vortex]] | ||
|[[Full Blast]] | |||
|- | |- | ||
|colspan=3|'''How to unlock:''' | |colspan=3|'''How to unlock:''' | ||
* | *Create a Mii Gunner in the "Mii Fighters" section of the Games & More" menu | ||
*Found in the Light Realm in World of Light (to unlock the default Gunner) | |||
*Found in the Light Realm | |||
|- | |- | ||
!rowspan=2|[[File: | !rowspan=2|[[File:PalutenaSSBU.png|120x120px]]<br>'''54''' [[Palutena]][[File:KidIcarus Emblem.png|30px|class=invert-dark]]<br><small>{{main-wiki|SmashWiki|Palutena (SSBU)}}</small> | ||
|'' | |''With her wings and staff, this goddess's attacks cover a wide range. With her up smash, neutral special, and side special, she can create a ranged attack in almost every direction except for directly beneath her! Keep the pressure on your opponents from a distance with ranged attacks!'' | ||
|Neutral - [[ | |Neutral - [[Autoreticle]]<br>Side - [[Explosive Flame]]<br> Up - [[Warp]]<br>Down - [[Counter]]/[[Reflect Barrier]] | ||
|[[ | |[[Black Hole Laser]] | ||
|- | |- | ||
|colspan=3|'''How to unlock:''' | |colspan=3|'''How to unlock:''' | ||
* | *63rd and last character unlocked in Smash matches | ||
* | *8th character in Kirby's Classic Mode unlock tree | ||
*Found in the | *Found in the Final Battle Realm in World of Light | ||
|- | |- | ||
!rowspan=2|[[File: | !rowspan=2|[[File:RobinSSBU.png|120x120px]]<br>'''56''' [[Robin]][[File:FireEmblem Emblem.png|30px|class=invert-dark]]<br><small>{{main-wiki|SmashWiki|Robin (SSBU)}}</small> | ||
|'' | |''A fighter that wields the Levin Sword and four different Tomes! Like in the original game, these weapons can only be used a certain number of times, so keep a close eye on the battle situation. Both the male and female versions of Robin are available, so you can choose your favorite.'' | ||
|Neutral - [[ | |Neutral - [[Robin#Thunder|Thunder]]<br>Side - [[Arcfire]]<br>Up - [[Elwind]]<br>Down - [[Nosferatu]] | ||
|[[ | |[[Pair Up]] | ||
|- | |- | ||
|colspan=3|'''How to unlock:''' | |colspan=3|'''How to unlock:''' | ||
* | *53rd character unlocked in Smash matches | ||
* | *5th character in Kirby's Classic Mode unlock tree | ||
*Found in the Dark Realm's | *Found in the Dark Realm's Dracula's Castle in World of Light | ||
|- | |- | ||
!rowspan=2|[[File: | !rowspan=2|[[File:ShulkSSBU.png|120x120px]]<br>'''57''' [[Shulk]][[File:XenobladeEmblem.png|30px|class=invert-dark]]<br><small>{{main-wiki|SmashWiki|Shulk (SSBU)}}</small> | ||
|'' | |''He is the only fighter that can change his status during battle. His sword, the Monado, allows him to switch between five modes—Jump (Green), Speed (Blue), Shield (Yellow), Buster (Purple) and Smash (Red)—which change his abilities for a short time. Fun fact: Shulk's eighth color variation puts him in a pair of swimming trunks!'' | ||
|Neutral - [[ | |Neutral - [[Monado Arts]]<br>Side - [[Back Slash]]<br>Up - [[Air Slash]]<br>Down - [[Vision]] | ||
|[[ | |[[Chain Attack]] | ||
|- | |- | ||
|colspan=3|'''How to unlock:''' | |colspan=3|'''How to unlock:''' | ||
* | *22nd character unlocked in Smash matches | ||
*2nd character in | *2nd character in Pikachu's Classic Mode unlock tree | ||
*Found in the | *Found in the Light Realm in World of Light | ||
|- | |- | ||
! | !rowspan=2|[[File:BowserJr SSBU.png|120x120px]]<br>'''58''' [[Bowser Jr.]][[File:Mario Emblem.png|30px|class=invert-dark]]<br><small>{{main-wiki|SmashWiki|Bowser Jr. (SSBU)}}</small> | ||
|''The Jr. Clown Car this little fella rides in takes less damage when attacked than Bowser Jr. himself—so try to stay in the car when taking damage. The different color variations are the Koopalings!'' | |||
|Neutral - [[Clown Cannon]]<br>Side - [[Clown Kart Dash]]<br>Up - [[Abandon Ship (move)|Abandon Ship!]]<br>Down - [[Mechakoopa (move)|Mechakoopa]] | |||
|[[Shadow Mario Paint]] | |||
|- | |- | ||
|colspan=3|'''How to unlock:''' | |||
*61st character unlocked in Smash matches | |||
*6th character in Fox's Classic Mod unlock tree | |||
*Found in the Dark Realm's Sacred Land in World of Light | |||
|- | |- | ||
!rowspan=2|[[File: | !rowspan=2|[[File:Ryu SSBU.png|120x120px]]<br>'''60''' [[Ryu]][[File:StreetFighterEmblem.png|30px|class=invert-dark]]<br><small>{{main-wiki|SmashWiki|Ryu (SSBU)}}</small> | ||
|'' | |''Ryu is a special character—you can use directional command inputs to trigger his special moves. Executing moves like his Hadoken and Shoryuken using the command inputs from the original game will raise their power. You can even use a Shakunetsu Hadoken by inputting ←↙↓↘→ then tapping the attack button while facing right!'' | ||
|Neutral - [[ | |Neutral - [[Hadoken]]<br>Side - [[Tatsumaki Senpukyaku]]<br>Up - [[Shoryuken]]<br>Down - [[Focus Attack]] | ||
|[[ | |[[Shin Shoryuken]] / [[Shinku Hadoken]] | ||
|- | |- | ||
|colspan=3|'''How to unlock:''' | |colspan=3|'''How to unlock:''' | ||
* | *13th character unlocked in Smash matches | ||
* | *3rd character in Yoshi's Classic Mode unlock tree | ||
*Found in the | *Found in the Light Realm's World Tour in World of Light | ||
|- | |- | ||
!rowspan=2|[[File: | !rowspan=2|[[File:Cloud SSBU.png|120x120px]]<br>'''61''' [[Cloud Strife|Cloud]][[File:Final Fantasy Symbol.png|30px|class=invert-dark]]<br><small>{{main-wiki|SmashWiki|Cloud (SSBU)}}</small> | ||
|'' | |''He's the protagonist of Final Fantasy VII. You can also select his Advent Children outfit. Charging up his Limit Gauge increases his special move abilities! Land a powerful hit!'' | ||
|Neutral - [[ | |Neutral - [[Blade Beam]]<br>Side - [[Cross Slash]]<br>Up - [[Climhazzard]]<br>Down - [[Cloud#Limit Charge|Limit Charge / Finishing Touch]] | ||
|[[ | |[[Cloud#Omnislash|Omnislash / Omnislash Ver. 5]] | ||
|- | |- | ||
|colspan=3|'''How to unlock:''' | |colspan=3|'''How to unlock:''' | ||
* | *55th character unlocked in Smash matches | ||
* | *6th character unlocked in Smash matches | ||
*Found in the Dark Realm's | *Found in the Dark Realm's Sacred Land in World of Light | ||
|- | |- | ||
!rowspan=2|[[File: | !rowspan=2|[[File:Corrin SSBU.png|120x120px]]<br>'''62''' [[Corrin]][[File:FireEmblem Emblem.png|30px|class=invert-dark]]<br><small>{{main-wiki|SmashWiki|Corrin (SSBU)}}</small> | ||
|'' | |''Corrin was available as a downloadable fighter in the previous version of Super Smash Bros. This fighter uses all kinds of attacks, like Torrential Roar and Dragon Fang Shot. Players can choose male or female versions!'' | ||
|Neutral - [[ | |Neutral - [[Dragon Fang Shot]]<br>Side - [[Dragon Lunge]]<br>Up - [[Dragon Ascent]]<br>Down - [[Counter Surge]] | ||
|[[ | |[[Torrential Roar]] | ||
|- | |- | ||
|colspan=3|'''How to unlock:''' | |colspan=3|'''How to unlock:''' | ||
* | *41st character unlocked in Smash matches | ||
* | *6th character in Kirby's Classic Mode unlock tree | ||
*Found in the Dark Realm's | *Found in the Dark Realm's Mysterious Dimension | ||
|- | |- | ||
!rowspan=2|[[File: | !rowspan=2|[[File:Bayonetta SSBU.png|120x120px]]<br>'''63''' [[Bayonetta]][[File:Bayonetta.png|30px|class=invert-dark]]<br><small>{{main-wiki|SmashWiki|Bayonetta (SSBU)}}</small> | ||
|'' | |''An Umbra Witch who equips guns on her arms and legs, Bayonetta has mastered the beautiful but brutal Bullet Arts fighting style. She can even slow down her opponents with Witch Time!'' | ||
|Neutral - [[ | |Neutral - [[Bullet Climax]]<br>Side - [[Heel Slide]] / [[After Burner Kick]]<br>Up - [[Witch Twist]]<br>Down - [[Witch Time]] | ||
|[[ | |[[Infernal Climax]] | ||
|- | |- | ||
|colspan=3|'''How to unlock:''' | |colspan=3|'''How to unlock:''' | ||
* | *43rd character unlocked in Smash matches | ||
* | *2nd character in Mario's Classic Mode unlock tree | ||
*Found in the | *Found in the Final Battle Realm in World of Light | ||
|- | |- | ||
!rowspan=2|[[File: | !colspan=5 style="font-size:12px"| | ||
|'' | |||
|Neutral - [[ | ===Newcomers=== | ||
|[[ | ====Base game==== | ||
|- | |||
!width="20%"|Character | |||
!width="40%"|Super Smash Blog Description | |||
!width="15%"|Special moves | |||
!width="15%"|Final Smash | |||
|- | |||
!rowspan=2|[[File:Dark Samus SSBU.png|120x120px]]<br>'''04<sup>ε</sup>''' [[Dark Samus]][[File:Metroid Emblem.png|35px|class=invert-dark]]<br><small>{{main-wiki|SmashWiki|Dark Samus (SSBU)}}</small> | |||
|''Dark Samus joins the battle as Samus's echo fighter. With floatier movement, she's a little different from Samus--and she doesn't roll when dodging or jumping. If you look closely, you can see that her bombs and missiles look a little different, too.'' | |||
|Neutral - [[Dark Samus#Charge Shot|Charge Shot]]<br>Side - [[Dark Samus#Missile|Missile]]<br>Up - [[Dark Samus#Screw Attack|Screw Attack]]<br>Down - [[Dark Samus#Bomb|Bomb]] | |||
|[[Phazon Laser]] | |||
|- | |- | ||
|colspan=3|'''How to unlock:''' | |colspan=3|'''How to unlock:''' | ||
* | *50th character unlocked in Smash matches | ||
* | *5th character in Samus' Classic Mode unlock tree | ||
*Found in the | *Found in the Final Battle Realm in World of Light | ||
|- | |- | ||
!rowspan=2|[[File: | !rowspan=2|[[File:Daisy SSBUltimate.png|120x120px]]<br>'''13<sup>ε</sup>''' [[Princess Daisy|Daisy]][[File:Mario Emblem.png|35px|class=invert-dark]]<br><small>{{main-wiki|SmashWiki|Daisy (SSBU)}}</small> | ||
|'' | |''Her basic move set is the same as Peach's, but this princess has her own unique personality. She's known for being upbeat, energetic, and a bit of a tomboy.'' | ||
|Neutral - [[ | |Neutral - [[Toad (move)|Toad]]<br>Side - [[Peach Bomber|Daisy Bomber]]<br>Up - [[Peach Parasol (move)|Daisy Parasol]]<br>Down - [[Vegetable (move)|Vegetable]] | ||
|[[ | |[[Peach Blossom|Daisy Blossom]] | ||
|- | |- | ||
|colspan=3|'''How to unlock:''' | |colspan=3|'''How to unlock:''' | ||
* | *28th character unlocked in Smash matches | ||
* | *5th character in Fox's Classic Mode unlock tree | ||
*Found in the Dark Realm's Dracula's Castle in World of Light | *Found in the Dark Realm's Dracula's Castle in World of Light | ||
|- | |- | ||
!rowspan=2|[[File: | !rowspan=2|[[File:Chrom SSBU.png|120x120px]]<br>'''25<sup>ε</sup>''' [[Chrom]][[File:FireEmblem Emblem.png|35px|class=invert-dark]]<br><small>{{main-wiki|SmashWiki|Chrom (SSBU)}}</small> | ||
|''The protagonist of | |''The protagonist of Fire Emblem Awakening joins the battle as Roy's echo fighter. His Final Smash is Awakening Aether. Like Aether in the original game, this move has Chrom charge toward his opponent, slashing with his sword.'' | ||
|Neutral - [[ | |Neutral - [[Chrom#Flare Blade|Flare Blade]]<br>Side - [[Chrom#Double-Edge Dance|Double-Edge Dance]]<br>Up - [[Soaring Slash]]<br>Down - [[Chrom#Counter|Counter]] | ||
|[[ | |[[Awakening Aether]] | ||
|- | |- | ||
|colspan=3|'''How to unlock:''' | |colspan=3|'''How to unlock:''' | ||
* | *59th character unlocked in Smash matches | ||
* | *7th character in Yoshi's Classic Mode unlock tree | ||
*Found in the | *Found in the Dark Realm's Sacred Land in World of Light | ||
|- | |- | ||
!rowspan=2|[[File: | !rowspan=2|[[File:Ken SSBU.png|120x120px]]<br>'''60<sup>ε</sup>''' [[Ken Masters|Ken]][[File:StreetFighterEmblem.png|35px|class=invert-dark]]<br><small>{{main-wiki|SmashWiki|Ken (SSBU)}}</small> | ||
|'' | |''Ken joins the battle as Ryu's Echo Fighter! Their differences are carried over from the original game: Ken's Hadoken is shaped differently, his strong Shoryuken has flames, and he moves a bit faster. He has two Final Smashes: Shinryuken and Shippu Jinraikyaku.'' | ||
|Neutral - [[ | |Neutral - [[Hadoken]]<br>Side - [[Tatsumaki Senpukyaku]]<br>Up - [[Shoryuken]]<br>Down - [[Focus Attack]] | ||
|[[ | |[[Shippu Jinraikyaku]] / [[Shinryuken]] | ||
|- | |- | ||
|colspan=3|'''How to unlock:''' | |colspan=3|'''How to unlock:''' | ||
* | *57th character unlocked in Smash matches | ||
* | *8th character in Yoshi's Classic Mode unlock tree | ||
*Found in the Dark Realm's Dracula's Castle | *Found in the Dark Realm's Dracula's Castle | ||
|- | |- | ||
!rowspan=2|[[File: | !rowspan=2|[[File:Inkling SSBU.png|120x120px]]<br>'''64''' [[Inkling]][[File:Splatoon Symbol.png|30px|class=invert-dark]]<br><small>{{main-wiki|SmashWiki|Inkling (SSBU)}}</small> | ||
|'' | |''Attacks with a variety of weapons. Covering opponents with ink leads to more and more damage—plus these Inklings are really fashionable!'' | ||
|Neutral - [[ | |Neutral - [[Splattershot]]<br>Side - [[Splat Roller]]<br>Up - [[Super Jump]]<br>Down - [[Splat Bomb]] | ||
|[[ | |[[Killer Wail]] | ||
|- | |- | ||
|colspan=3|'''How to unlock:''' | |colspan=3|'''How to unlock:''' | ||
* | *5th character unlocked in Smash matches | ||
*1st character in | *1st character in Samus' Classic Mode unlock tree | ||
*Found in the | *Found in the Light Realm in World of Light | ||
|- | |- | ||
!rowspan=2|[[File: | !rowspan=2|[[File:Ridley SSBUltimate.png|120x120px]]<br>'''65''' [[Ridley]][[File:Metroid Emblem.png|35px|class=invert-dark]]<br><small>{{main-wiki|SmashWiki|Ridley (SSBU)}}</small> | ||
|'' | |''Joining the battle from the storied Metroid series, Ridley's long tail and sharp claws let him unleash a torrent of devastating attacks. His Final Smash is a powerful stream of plasma breath intense enough to bring down Samus's starship.'' | ||
|Neutral - [[ | |Neutral - [[Plasma Breath]]<br>Side - [[Space Pirate Rush]]<br>Up - [[Wing Blitz]]<br>Down - [[Skewer]] | ||
|[[ | |[[Plasma Scream]] | ||
|- | |- | ||
|colspan=3|'''How to unlock:''' | |colspan=3|'''How to unlock:''' | ||
* | *25th character unlocked in Smash matches | ||
* | *6th character in Yoshi's Classic Mode unlock tree | ||
*Found in the | *Found in the Dark Realm's Dracula's Castle in World of Light | ||
|- | |- | ||
!rowspan=2|[[File: | !rowspan=2|[[File:Simon Belmont SSBU.png|120x120px]]<br> '''66''' [[Simon Belmont|Simon]][[File:Castlevania Symbol.png|35px|class=invert-dark]]<br><small>{{main-wiki|SmashWiki|Simon (SSBU)}}</small> | ||
|'' | |''The protagonist of Castlevania. He uses his holy whip, Vampire Killer, to perform a smash attack with long reach. He also uses projectiles like an axe, holy water and cross.'' | ||
|Neutral - [[ | |Neutral - [[Simon Belmont#Axe|Axe]]<br>Side - [[Simon Belmont#Cross|Cross]]<br>Up - [[Simon Belmont#Uppercut|Uppercut]]<br>Down - [[Simon Belmont#Holy Water|Holy Water]] | ||
|[[ | |[[Grand Cross]] | ||
|- | |- | ||
|colspan=3|'''How to unlock:''' | |colspan=3|'''How to unlock:''' | ||
* | *18th character unlocked in Smash matches | ||
* | *3rd character in Link's Classic Mode unlock tree | ||
*Found in the | *Found in the Light Realm's Temple of Light in World of Light | ||
|- | |- | ||
! | !rowspan=2|[[File:Richter Belmont SSBU.png|120x120px]]<br>'''66<sup>ε</sup>''' [[Richter Belmont|Richter]][[File:Castlevania Symbol.png|35px|class=invert-dark]]<br><small>{{main-wiki|SmashWiki|Richter (SSBU)}}</small> | ||
|''Richter from the Castlevania series joins the battle as Simon's Echo Fighter! His basic attacks are the same as Simon's, but with subtle variations. In addition to that, his Holy Water is a different color.'' | |||
|Neutral - [[Richter Belmont#Axe|Axe]]<br>Side - [[Richter Belmont#Cross|Cross]]<br>Up - [[Richter Belmont#Uppercut|Uppercut]]<br>Down - [[Richter Belmont#Holy Water|Holy Water]] | |||
|[[Grand Cross]] | |||
|- | |- | ||
|colspan=3|'''How to unlock:''' | |||
*35th character unlocked in Smash matches | |||
*7th character in Link's Classic Mode unlock tree | |||
*Found in the Dark Realm's Dracula's Castle in World of Light | |||
|- | |- | ||
!rowspan=2|[[File: | !rowspan=2|[[File:King K Rool SSBU.png|120x120px]]<br>'''67''' [[King K. Rool]][[File:DK Emblem.png|35px|class=invert-dark]]<br><small>{{main-wiki|SmashWiki|King K. Rool (SSBU)}}</small> | ||
|'' | |''With long-distance special moves like the Blunderbuss, and counter moves like Stomach Attack, he is a versatile fighter. His Final Smash, Blast-O-Matic, was apparently a weapon created to destroy DK Island...'' | ||
|Neutral - [[ | |Neutral - [[Blunderbuss]]<br>Side - [[Crownerang]]<br>Up - [[Propellerpack]]<br>Down - [[Gut Check (move)|Gut Check]] | ||
|[[ | |[[Blast-o-Matic]] | ||
|- | |- | ||
|colspan=3|''' | |colspan=3|'''How to unlock:''' | ||
*16th character unlocked in Smash matches | |||
*1st character in Link's Classic Mode unlock tree | |||
*Found in the Dark Realm's Mysterious Dimension in World of Light | |||
|- | |- | ||
!rowspan=2|[[File: | !rowspan=2|[[File:Isabelle SSBU.png|120x120px]]<br>'''68''' [[Isabelle]][[File:AnimalCrossing Emblem.png|35px|class=invert-dark]]<br><small>{{main-wiki|SmashWiki|Isabelle (SSBU)}}</small> | ||
|'' | |''Isabelle joins the battle from Animal Crossing: New Leaf! She uses various trinkets from around the village to battle. Her side special, "Fishing Rod," not only allows her to snag and bring opponents closer, it can also be used as a recovery move.'' | ||
|Neutral - [[ | |Neutral - [[Isabelle#Pocket|Pocket]]<br>Side - [[Isabelle#Fishing Rod|Fishing Rod]]<br>Up - [[Isabelle#Balloon Trip|Balloon Trip]]<br>Down - [[Isabelle#Lloid Trap|Lloid Trap]] | ||
|[[ | |[[Isabelle#Dream Town Hall|Dream Town Hall]] | ||
|- | |- | ||
|colspan=3|''' | |colspan=3|'''How to unlock:''' | ||
*21st character unlocked in Smash matches | |||
*5th character in Pikachu's Classic Mode unlock tree | |||
*Found in the Light Realm in World of Light | |||
|- | |- | ||
!rowspan=2|[[File:Luminary SSBU.png|120x120px]]<br>'''72''' [[Hero]][[File:DragonQuestEmblem.png|30px|class=invert]]<br><small>{{main- | !rowspan=2|[[File:Incineroar SSBU.png|120x120px]]<br>'''69''' [[Incineroar]][[File:Pokemon Emblem.png|30px|class=invert-dark]]<br><small>{{main-wiki|SmashWiki|Incineroar (SSBU)}}</small> | ||
|''The Hero from the DRAGON QUEST series joins Super Smash Bros. Ultimate as a playable fighter! Wielding the Supreme Sword of Light and a trusty shield, he can slice his foes and block incoming attacks. When Hero pulls up his Command Selection screen, he’ll have access to a random selection of spells that could turn the tide of battle in his favor!'' | |''A fighter with many special moves that appear to come from the world of pro wrestling. Incineroar has many moves from its original game, like Darkest Lariat, Cross Chop, and Revenge. Its Final Smash is Max Malicious Moonsault. Let the Z-Power explode and deliver a powerful blow!'' | ||
|Neutral - [[Incineroar#Darkest Lariat|Darkest Lariat]]<br>Side - [[Incineroar#Alolan Whip|Alolan Whip]]<br>Up - [[Incineroar#Cross Chop|Cross Chop]]<br>Down - [[Incineroar#Revenge|Revenge]] | |||
|[[Incineroar#Max Malicious Moonsault|Max Malicious Moonsault]] | |||
|- | |||
|colspan=3|'''How to unlock:''' | |||
*46th character unlocked in Smash matches | |||
*4th character in Samus' Classic Mode unlock tree | |||
*Found in the Dark Realm in World of Light | |||
|- | |||
!colspan=5 style="font-size:12px"| | |||
====Downloadable content==== | |||
|- | |||
!width="20%"|Character | |||
!width="40%"|[[Nintendo eShop]]/[https://smashbros.nintendo.com/buy/dlc/ DLC website] Description | |||
!width="15%"|Special moves | |||
!width="15%"|Final Smash | |||
|- | |||
!rowspan=2|[[File:Piranha Plant SSBU.png|120x120px]]<br>'''70''' [[Piranha Plant]][[File:Mario Emblem.png|30px|class=invert-dark]]<br><small>{{main-wiki|SmashWiki|Piranha Plant (SSBU)}}</small> | |||
|''Piranha Plant joins the battle as a stand-alone fighter in the Super Smash Bros. Ultimate game! With its powerful bite, Poison Breath, and ability to call in Petey Piranha for a larger-than-life Final Smash, this fighter's ferocity is as sharp as it teeth. Ready your pipes and flowerpots; your opponent won't see you coming! (Then again, Piranha Plant doesn't really "see" either. It doesn't have eyes.)'' | |||
|Neutral - [[Ptooie (move)|Ptooie]]<br>Side - [[Poison Breath]]<br>Up - [[Piranhacopter]]<br>Down - [[Long-Stem Strike]] | |||
|[[Petey Piranha]] | |||
|- | |||
|colspan=3|'''Release date:''' January 29, 2019 (Digital version pre-purchase or My Nintendo); February 1, 2019 (General release)<br>'''Price:''' No cost (Digital version pre-purchase or My Nintendo); US$4.99 (after February 1, 2019) | |||
|- | |||
!rowspan=2|[[File:Joker SSBU.png|120x120px]]<br>'''71''' [[Joker]][[File:Persona Symbol.png|30px|class=invert-dark]]<br><small>{{main-wiki|SmashWiki|Joker (SSBU)}}</small> | |||
|''Joker steals the show when he joins the Super Smash Bros. Ultimate game as a playable fighter! This speedy fighter wields a knife and a gun to rack up damage. When his Rebellion Gauge is full, Joker summons his Persona, Arsene, to immediately power up his attacks for a limited time.'' | |||
|Neutral - [[Joker#Gun / Gun Special|Gun / Gun Special]]<br>Side - [[Joker#Eiha / Eigaon|Eiha / Eigaon]]<br>Up - [[Joker#Grappling Hook / Wings of Rebellion|Grappling Hook / Wings of Rebellion]]<br>Down - [[Joker#Rebel's Guard / Tetrakarn / Makarakarn|Rebel's Guard / Tetrakarn / Makarakarn]] | |||
|[[Joker#All-Out Attack|All-Out Attack]] | |||
|- | |||
|colspan=3|'''Release date:''' April 17, 2019<br>'''Price:''' US$5.99 (Challenger Pack 1); US$24.99 (Fighters Pass) | |||
|- | |||
!rowspan=2|[[File:Luminary SSBU.png|120x120px]]<br>'''72''' [[Hero]][[File:DragonQuestEmblem.png|30px|class=invert-dark]]<br><small>{{main-wiki|SmashWiki|Hero (SSBU)}}</small> | |||
|''The Hero from the DRAGON QUEST series joins Super Smash Bros. Ultimate as a playable fighter! Wielding the Supreme Sword of Light and a trusty shield, he can slice his foes and block incoming attacks. When Hero pulls up his Command Selection screen, he’ll have access to a random selection of spells that could turn the tide of battle in his favor!'' | |||
|Neutral - [[Hero#Frizz|Frizz / Frizzle / Kafrizz]]<br>Side - [[Hero#Zap|Zap / Zapple / Kazap]]<br>Up - [[Hero#Woosh|Woosh / Swoosh / Kaswoosh]]<br>Down - [[Hero#Command Selection|Command Selection]] | |Neutral - [[Hero#Frizz|Frizz / Frizzle / Kafrizz]]<br>Side - [[Hero#Zap|Zap / Zapple / Kazap]]<br>Up - [[Hero#Woosh|Woosh / Swoosh / Kaswoosh]]<br>Down - [[Hero#Command Selection|Command Selection]] | ||
|[[Hero#Gigaslash|Gigaslash]] | |[[Hero#Gigaslash|Gigaslash]] | ||
| Line 899: | Line 1,174: | ||
|colspan=3|'''Release date:''' July 30, 2019<br>'''Price:''' US$5.99 (Challenger Pack 2); US$24.99 (Fighters Pass) | |colspan=3|'''Release date:''' July 30, 2019<br>'''Price:''' US$5.99 (Challenger Pack 2); US$24.99 (Fighters Pass) | ||
|- | |- | ||
!rowspan=2|[[File:BanjoKazooie SSBU.png|120x120px]]<br>'''73''' [[Banjo]] & [[Kazooie]][[File:BanjoKazooieEmblem.png|30px|class=invert]]<br><small>{{main- | !rowspan=2|[[File:BanjoKazooie SSBU.png|120x120px]]<br>'''73''' [[Banjo]] & [[Kazooie]][[File:BanjoKazooieEmblem.png|30px|class=invert-dark]]<br><small>{{main-wiki|SmashWiki|Banjo & Kazooie (SSBU)}}</small> | ||
|''The missing piece of the puzzle is found as Banjo & Kazooie join Super Smash Bros. Ultimate as a playable fighter! With Banjo’s bare hands to bruise rivals up close and Kazooie’s egg-cellent shooting skills, your rivals will be singing the blues in no time. For their Final Smash, these perfect partners call upon a flock of Jinjos and the Mighty Jinjonator to deal the final blow to any “feeble jerk” that may stand in their way!'' | |''The missing piece of the puzzle is found as Banjo & Kazooie join Super Smash Bros. Ultimate as a playable fighter! With Banjo’s bare hands to bruise rivals up close and Kazooie’s egg-cellent shooting skills, your rivals will be singing the blues in no time. For their Final Smash, these perfect partners call upon a flock of Jinjos and the Mighty Jinjonator to deal the final blow to any “feeble jerk” that may stand in their way!'' | ||
|Neutral - [[Banjo#Egg Firing / Breegull Blaster|Egg Firing / Breegull Blaster]]<br>Side - [[Banjo#Wonderwing|Wonderwing]]<br>Up - [[Banjo#Shock Spring Jump|Shock Spring Jump]]<br>Down - [[Banjo#Rear Egg|Rear Egg]] | |Neutral - [[Banjo#Egg Firing / Breegull Blaster|Egg Firing / Breegull Blaster]]<br>Side - [[Banjo#Wonderwing|Wonderwing]]<br>Up - [[Banjo#Shock Spring Jump|Shock Spring Jump]]<br>Down - [[Banjo#Rear Egg|Rear Egg]] | ||
| Line 906: | Line 1,181: | ||
|colspan=3|'''Release date:''' September 4, 2019<br>'''Price:''' US$5.99 (Challenger Pack 3); US$24.99 (Fighters Pass) | |colspan=3|'''Release date:''' September 4, 2019<br>'''Price:''' US$5.99 (Challenger Pack 3); US$24.99 (Fighters Pass) | ||
|- | |- | ||
!rowspan=2|[[File:Terry SSBU.png|120x120px]]<br>'''74''' [[Terry Bogard|Terry]][[File:Fatal Fury symbol.png|30px|class=invert]]<br><small>{{main- | !rowspan=2|[[File:Terry SSBU.png|120x120px]]<br>'''74''' [[Terry Bogard|Terry]][[File:Fatal Fury symbol.png|30px|class=invert-dark]]<br><small>{{main-wiki|SmashWiki|Terry (SSBU)}}</small> | ||
|''Terry Bogard faces the fury in the Super Smash Bros. Ultimate game as a new playable fighter! This iconic fighter from the Fatal Fury series of fighting games is the fourth fighter in the Super Smash Bros. Ultimate Fighters Pass. Using his Power Wave and Burning Knuckle, earn your title as The King of Fighters!'' | |''Terry Bogard faces the fury in the Super Smash Bros. Ultimate game as a new playable fighter! This iconic fighter from the Fatal Fury series of fighting games is the fourth fighter in the Super Smash Bros. Ultimate Fighters Pass. Using his Power Wave and Burning Knuckle, earn your title as The King of Fighters!'' | ||
|Neutral - [[Terry Bogard#Power Wave|Power Wave]]<br>Side - [[Terry Bogard#Burning Knuckle / Crack Shoot|Burning Knuckle / Crack Shoot]]<br>Up - [[Terry Bogard#Rising Tackle|Rising Tackle]]<br>Down - [[Terry Bogard#Power Dunk|Power Dunk]]<br>Super Special Move 1 - [[Terry Bogard#Power Geyser|Power Geyser]]<br>Super Special Move 2 - [[Terry Bogard#Buster Wolf|Buster Wolf]] | |Neutral - [[Terry Bogard#Power Wave|Power Wave]]<br>Side - [[Terry Bogard#Burning Knuckle / Crack Shoot|Burning Knuckle / Crack Shoot]]<br>Up - [[Terry Bogard#Rising Tackle|Rising Tackle]]<br>Down - [[Terry Bogard#Power Dunk|Power Dunk]]<br>Super Special Move 1 - [[Terry Bogard#Power Geyser|Power Geyser]]<br>Super Special Move 2 - [[Terry Bogard#Buster Wolf|Buster Wolf]] | ||
| Line 913: | Line 1,188: | ||
|colspan=3|'''Release date:''' November 6, 2019<br>'''Price:''' US$5.99 (Challenger Pack 4); US$24.99 (Fighters Pass) | |colspan=3|'''Release date:''' November 6, 2019<br>'''Price:''' US$5.99 (Challenger Pack 4); US$24.99 (Fighters Pass) | ||
|- | |- | ||
!rowspan=2|[[File:SSBU Male Byleth Artwork.png|120x120px]]<br>'''75''' [[Byleth]][[File:FireEmblem_Emblem.png|30px|class=invert]]<br><small>{{main- | !rowspan=2|[[File:SSBU Male Byleth Artwork.png|120x120px]]<br>'''75''' [[Byleth]][[File:FireEmblem_Emblem.png|30px|class=invert-dark]]<br><small>{{main-wiki|SmashWiki|Byleth (SSBU)}}</small> | ||
|''Byleth is coming to the Super Smash Bros. Ultimate game as a new playable fighter! This iconic fighter is the fifth fighter in the Super Smash Bros. Ultimate Fighters Pass. Using the Heroes’ Relics and the Sword of the Creator, represent the three houses and realize their full potential.'' | |''Byleth is coming to the Super Smash Bros. Ultimate game as a new playable fighter! This iconic fighter is the fifth fighter in the Super Smash Bros. Ultimate Fighters Pass. Using the Heroes’ Relics and the Sword of the Creator, represent the three houses and realize their full potential.'' | ||
|Neutral - [[Byleth#Failnaught|Failnaught]]<br>Side - [[Byleth#Areadbhar|Areadbhar]]<br>Up - [[Byleth#Sword of the Creator|Sword of the Creator]]<br>Down - [[Byleth#Amyr|Amyr]] | |Neutral - [[Byleth#Failnaught|Failnaught]]<br>Side - [[Byleth#Areadbhar|Areadbhar]]<br>Up - [[Byleth#Sword of the Creator|Sword of the Creator]]<br>Down - [[Byleth#Amyr|Amyr]] | ||
| Line 920: | Line 1,195: | ||
|colspan=3|'''Release date:''' January 28, 2020<br>'''Price:''' US$5.99 (Challenger Pack 5); US$24.99 (Fighters Pass) | |colspan=3|'''Release date:''' January 28, 2020<br>'''Price:''' US$5.99 (Challenger Pack 5); US$24.99 (Fighters Pass) | ||
|- | |- | ||
!rowspan=2|[[File:Min Min SSBU.png|120x120px]]<br>'''76''' [[Min Min]][[File:ARMS Symbol.png|30px|class=invert]]<br><small>{{main- | !rowspan=2|[[File:Min Min SSBU.png|120x120px]]<br>'''76''' [[Min Min]][[File:ARMS Symbol.png|30px|class=invert-dark]]<br><small>{{main-wiki|SmashWiki|Min Min (SSBU)}}</small> | ||
|''Min Min from the ARMS game is coming to the Super Smash Bros. Ultimate game as a new playable fighter! This iconic fighter is the first fighter in the Super Smash Bros. Ultimate Fighters Pass Vol 2 DLC. Spring into action using the Ramram, Megawatt, and Dragon ARMS to keep your opponents at bay, distance is the key!'' | |''Min Min from the ARMS game is coming to the Super Smash Bros. Ultimate game as a new playable fighter! This iconic fighter is the first fighter in the Super Smash Bros. Ultimate Fighters Pass Vol 2 DLC. Spring into action using the Ramram, Megawatt, and Dragon ARMS to keep your opponents at bay, distance is the key!'' | ||
|Up - [[Min Min#ARMS Jump / ARM Hook|ARMS Jump / ARM Hook]]<br>Down - [[Min Min#ARMS Change|ARMS Change]] | |Up - [[Min Min#ARMS Jump / ARM Hook|ARMS Jump / ARM Hook]]<br>Down - [[Min Min#ARMS Change|ARMS Change]] | ||
| Line 927: | Line 1,202: | ||
|colspan=3|'''Release date:''' June 29, 2020<br>'''Price:''' US$5.99 (Challenger Pack 6); US$29.99 (Fighters Pass Vol. 2) | |colspan=3|'''Release date:''' June 29, 2020<br>'''Price:''' US$5.99 (Challenger Pack 6); US$29.99 (Fighters Pass Vol. 2) | ||
|- | |- | ||
!rowspan=2|[[File:SSBU Steve.png|120x120px]]<br>'''77''' [[Steve (Minecraft)|Steve]][[File:Minecraft Symbol.png|25px|class=invert]]<br><small>{{main- | !rowspan=2|[[File:SSBU Steve.png|120x120px]]<br>'''77''' [[Steve (Minecraft)|Steve]][[File:Minecraft Symbol.png|25px|class=invert-dark]]<br><small>{{main-wiki|SmashWiki|Steve (SSBU)}}</small> | ||
|''Steve & Alex from the Minecraft game are coming to the Super Smash Bros. Ultimate game as a new playable fighter! This iconic fighter is the second fighter in the Super Smash Bros. Ultimate Fighters Pass Vol 2 DLC. Use Steve and Alex’s various tools to mine and craft your way to victory!'' | |''Steve & Alex from the Minecraft game are coming to the Super Smash Bros. Ultimate game as a new playable fighter! This iconic fighter is the second fighter in the Super Smash Bros. Ultimate Fighters Pass Vol 2 DLC. Use Steve and Alex’s various tools to mine and craft your way to victory!'' | ||
|Neutral - [[Steve (Minecraft)|Mine / Craft / Create Block]]<br>Side - [[Steve (Minecraft)|Minecart]]<br>Up - [[Steve (Minecraft)|Elytra]]<br>Down - [[Steve (Minecraft)|TNT]] | |Neutral - [[Steve (Minecraft)|Mine / Craft / Create Block]]<br>Side - [[Steve (Minecraft)|Minecart]]<br>Up - [[Steve (Minecraft)|Elytra]]<br>Down - [[Steve (Minecraft)|TNT]] | ||
| Line 934: | Line 1,209: | ||
|colspan=3|'''Release date:''' October 13, 2020<br>'''Price:''' US$5.99 (Challenger Pack 7); US$29.99 (Fighters Pass Vol. 2) | |colspan=3|'''Release date:''' October 13, 2020<br>'''Price:''' US$5.99 (Challenger Pack 7); US$29.99 (Fighters Pass Vol. 2) | ||
|- | |- | ||
!rowspan=2|[[File:SSBU Sephiroth.png|120x120px]]<br>'''78''' [[Sephiroth]][[File:Final Fantasy Symbol.png|25px|class=invert]]<br><small>{{main- | !rowspan=2|[[File:SSBU Sephiroth.png|120x120px]]<br>'''78''' [[Sephiroth]][[File:Final Fantasy Symbol.png|25px|class=invert-dark]]<br><small>{{main-wiki|SmashWiki|Sephiroth (SSBU)}}</small> | ||
|''Sephiroth, armed with his ruthless Masamune sword and a desire to destroy, joins the Super Smash Bros. Ultimate game as a part of the Super Smash Bros. Ultimate Fighters Pass Vol 2 DLC! This silver-haired swordsman is Cloud's arch nemesis and one of the most iconic villains in gaming. Don't be fooled by his chillingly calm demeanor, his hard-hitting style can deal some white-hot damage.'' | |''Sephiroth, armed with his ruthless Masamune sword and a desire to destroy, joins the Super Smash Bros. Ultimate game as a part of the Super Smash Bros. Ultimate Fighters Pass Vol 2 DLC! This silver-haired swordsman is Cloud's arch nemesis and one of the most iconic villains in gaming. Don't be fooled by his chillingly calm demeanor, his hard-hitting style can deal some white-hot damage.'' | ||
|Neutral - [[Sephiroth#Flare|Flare / Megaflare / Gigaflare]]<br>Side - [[Sephiroth#Shadow Flare|Shadow Flare]]<br>Up - [[Sephiroth#Blade Dash|Blade Dash / Octoslash]]<br>Down - [[Sephiroth#Scintilla|Scintilla]] | |Neutral - [[Sephiroth#Flare|Flare / Megaflare / Gigaflare]]<br>Side - [[Sephiroth#Shadow Flare|Shadow Flare]]<br>Up - [[Sephiroth#Blade Dash|Blade Dash / Octoslash]]<br>Down - [[Sephiroth#Scintilla|Scintilla]] | ||
| Line 941: | Line 1,216: | ||
|colspan=3|'''Release date:''' December 22, 2020 (available early from December 17, 2020 by clearing the Sephiroth Challenge)<br>'''Price:''' US$5.99 (Challenger Pack 8); US$29.99 (Fighters Pass Vol. 2) | |colspan=3|'''Release date:''' December 22, 2020 (available early from December 17, 2020 by clearing the Sephiroth Challenge)<br>'''Price:''' US$5.99 (Challenger Pack 8); US$29.99 (Fighters Pass Vol. 2) | ||
|- | |- | ||
!rowspan=2|[[File:SSBU Pyra Mythra.png|150x120px]]<br>'''79''' [[Pyra]] / '''80''' [[Mythra]][[File:XenobladeEmblem.png|25px|class=invert]]<br><small>{{main- | !rowspan=2|[[File:SSBU Pyra Mythra.png|150x120px]]<br>'''79''' [[Pyra]] / '''80''' [[Mythra]][[File:XenobladeEmblem.png|25px|class=invert-dark]]<br><small>{{main-wiki|SmashWiki|Pyra (SSBU)}}</small><br><small>{{main-wiki|SmashWiki|Mythra (SSBU)}}</small> | ||
|''Pyra/Mythra from the Xenoblade Chronicles 2 game join the Super Smash Bros. Ultimate game as part of the Fighters Pass Vol 2 DLC! Pyra hits with incredible power and Mythra boasts extreme speed. Swap between the two at any point during battle—or just stick with one.'' | |''Pyra/Mythra from the Xenoblade Chronicles 2 game join the Super Smash Bros. Ultimate game as part of the Fighters Pass Vol 2 DLC! Pyra hits with incredible power and Mythra boasts extreme speed. Swap between the two at any point during battle—or just stick with one.'' | ||
|'''[[smashwiki:Pyra (SSBU)|Pyra]]'''<br>Neutral - [[Pyra#Flare Nova|Flare Nova]]<br>Side - [[Pyra#Blazing End|Blazing End]]<br>Up - [[Pyra#Prominence Revolt|Prominence Revolt]]<br>Down - [[Pyra#Swap to Mythra|Swap to Mythra]]<br>'''[[smashwiki:Mythra (SSBU)|Mythra]]'''<br>Neutral - [[Mythra#Lightning Buster|Lightning Buster]]<br>Side - [[Mythra#Photon Edge|Photon Edge]]<br>Up - [[Mythra#Ray of Punishment / Chroma Dust|Ray of Punishment / Chroma Dust]]<br>Down - [[Mythra#Swap to Pyra|Swap to Pyra]] | |'''[[smashwiki:Pyra (SSBU)|Pyra]]'''<br>Neutral - [[Pyra#Flare Nova|Flare Nova]]<br>Side - [[Pyra#Blazing End|Blazing End]]<br>Up - [[Pyra#Prominence Revolt|Prominence Revolt]]<br>Down - [[Pyra#Swap to Mythra|Swap to Mythra]]<br>'''[[smashwiki:Mythra (SSBU)|Mythra]]'''<br>Neutral - [[Mythra#Lightning Buster|Lightning Buster]]<br>Side - [[Mythra#Photon Edge|Photon Edge]]<br>Up - [[Mythra#Ray of Punishment / Chroma Dust|Ray of Punishment / Chroma Dust]]<br>Down - [[Mythra#Swap to Pyra|Swap to Pyra]] | ||
| Line 948: | Line 1,223: | ||
|colspan=3|'''Release date:''' March 4, 2021<br>'''Price:''' US$5.99 (Challenger Pack 9); US$29.99 (Fighters Pass Vol. 2) | |colspan=3|'''Release date:''' March 4, 2021<br>'''Price:''' US$5.99 (Challenger Pack 9); US$29.99 (Fighters Pass Vol. 2) | ||
|- | |- | ||
!rowspan=2|[[File:SSBU Kazuya.png|120x120px]]<br>'''81''' [[Kazuya Mishima|Kazuya]][[File:Tekken Symbol.png|25px|class=invert]]<br><small>{{main- | !rowspan=2|[[File:SSBU Kazuya.png|120x120px]]<br>'''81''' [[Kazuya Mishima|Kazuya]][[File:Tekken Symbol.png|25px|class=invert-dark]]<br><small>{{main-wiki|SmashWiki|Kazuya (SSBU)}}</small> | ||
|''From the Tekken series, Kazuya Mishima brings his demonic DNA into the fray as a DLC fighter in the Super Smash Bros. Ultimate game. Kazuya’s fighting style captures the distinct style of the Tekken series as he gets up close and personal with heavy strikes and incredible comeback power. His specials tap into his Devil Gene with moves like the beam-shooting Devil Blaster and high-flying Devil Wings. The son of Tekken icon Heihachi Mishima, Kazuya has a chip on his shoulder and destructive power.'' | |''From the Tekken series, Kazuya Mishima brings his demonic DNA into the fray as a DLC fighter in the Super Smash Bros. Ultimate game. Kazuya’s fighting style captures the distinct style of the Tekken series as he gets up close and personal with heavy strikes and incredible comeback power. His specials tap into his Devil Gene with moves like the beam-shooting Devil Blaster and high-flying Devil Wings. The son of Tekken icon Heihachi Mishima, Kazuya has a chip on his shoulder and destructive power.'' | ||
|Neutral - [[Kazuya Mishima#Devil Blaster|Devil Blaster]]<br>Side - [[Kazuya Mishima#Devil Fist|Devil Fist]]<br>Up - [[Kazuya Mishima#Devil Wings|Devil Wings]]<br>Down - [[Kazuya Mishima#Heaven's Door|Heaven's Door]] | |Neutral - [[Kazuya Mishima#Devil Blaster|Devil Blaster]]<br>Side - [[Kazuya Mishima#Devil Fist|Devil Fist]]<br>Up - [[Kazuya Mishima#Devil Wings|Devil Wings]]<br>Down - [[Kazuya Mishima#Heaven's Door|Heaven's Door]] | ||
| Line 955: | Line 1,230: | ||
|colspan=3|'''Release date:''' June 29, 2021<br>'''Price:''' US$5.99 (Challenger Pack 10); US$29.99 (Fighters Pass Vol. 2) | |colspan=3|'''Release date:''' June 29, 2021<br>'''Price:''' US$5.99 (Challenger Pack 10); US$29.99 (Fighters Pass Vol. 2) | ||
|- | |- | ||
!rowspan=2|[[File:Sora SSBU.png|120x120px]]<br>'''82''' [[List of fighters debuting in Super Smash Bros. Ultimate#Sora|Sora]][[File:KingdomHeartsSymbol.png|25px|class=invert]]<br><small>{{main- | !rowspan=2|[[File:Sora SSBU.png|120x120px]]<br>'''82''' [[List of fighters debuting in Super Smash Bros. Ultimate#Sora|Sora]][[File:KingdomHeartsSymbol.png|25px|class=invert-dark]]<br><small>{{main-wiki|SmashWiki|Sora (SSBU)}}</small> | ||
|''Sora from the KINGDOM HEARTS series joins the Super Smash Bros. Ultimate roster! Wielding his Keyblade and an arsenal of spells, Sora is a veteran when it comes to battling enemies and is ready to bring his 3-hit combos and aerial style into the fray.'' | |''Sora from the KINGDOM HEARTS series joins the Super Smash Bros. Ultimate roster! Wielding his Keyblade and an arsenal of spells, Sora is a veteran when it comes to battling enemies and is ready to bring his 3-hit combos and aerial style into the fray.'' | ||
|Neutral - [[List of fighters debuting in Super Smash Bros. Ultimate#Magic|Magic]]<br>Side - [[List of fighters debuting in Super Smash Bros. Ultimate#Sonic Blade|Sonic Blade]]<br>Up - [[List of fighters debuting in Super Smash Bros. Ultimate#Aerial Sweep|Aerial Sweep]]<br>Down - [[List of fighters debuting in Super Smash Bros. Ultimate#Counterattack|Counterattack]] | |Neutral - [[List of fighters debuting in Super Smash Bros. Ultimate#Magic|Magic]]<br>Side - [[List of fighters debuting in Super Smash Bros. Ultimate#Sonic Blade|Sonic Blade]]<br>Up - [[List of fighters debuting in Super Smash Bros. Ultimate#Aerial Sweep|Aerial Sweep]]<br>Down - [[List of fighters debuting in Super Smash Bros. Ultimate#Counterattack|Counterattack]] | ||
| Line 971: | Line 1,246: | ||
!width="15%"|Special moves | !width="15%"|Special moves | ||
|- | |- | ||
![[File:SSBU Master Hand Spirit.png|120x120px]]<br>[[Master Hand]][[File:SmashBros Emblem.png|30px|class=invert]]<br><small>{{main- | ![[File:SSBU Master Hand Spirit.png|120x120px]]<br>[[Master Hand]][[File:SmashBros Emblem.png|30px|class=invert-dark]]<br><small>{{main-wiki|SmashWiki|Master Hand (SSBU)}}</small> | ||
|Master Hand makes a brief playable appearance in the ending of World of Light, where he is playable in the penultimate level before fighting Galeem and Dharkon. In this battle similar to a round of Mob Smash, Master Hand must take out 50 light and dark puppets of various fighters. Unlike regular fighters, Master Hand starts with 700 HP instead of 0% damage, where losing all of his HP results in failure. He also can fly around the stage. The player can use eight different moves as Master Hand, which are derived from his boss counterpart. Once all 50 puppet fighters are defeated, the battle is over and Master Hand is no longer playable. | |Master Hand makes a brief playable appearance in the ending of World of Light, where he is playable in the penultimate level before fighting Galeem and Dharkon. In this battle similar to a round of Mob Smash, Master Hand must take out 50 light and dark puppets of various fighters. Unlike regular fighters, Master Hand starts with 700 HP instead of 0% damage, where losing all of his HP results in failure. He also can fly around the stage. The player can use eight different moves as Master Hand, which are derived from his boss counterpart. Once all 50 puppet fighters are defeated, the battle is over and Master Hand is no longer playable. | ||
|Neutral - Finger Snap<br>Side - Slap<br>Up - Drill<br>Down - Paper Crush | |Neutral - Finger Snap<br>Side - Slap<br>Up - Drill<br>Down - Paper Crush | ||
| Line 984: | Line 1,259: | ||
Wii Fit Trainer (Male) SSBU.png|Male [[Wii Fit Trainer]] | Wii Fit Trainer (Male) SSBU.png|Male [[Wii Fit Trainer]] | ||
Robin (Female) SSBU.png|Female [[Robin]] | Robin (Female) SSBU.png|Female [[Robin]] | ||
Larry SSBU.png| | Larry SSBU.png|[[Larry]]<br>(Bowser Jr.) | ||
Roy SSBU.png| | Roy SSBU.png|[[Roy]]<br>(Bowser Jr.) | ||
Wendy SSBU.png| | Wendy SSBU.png|[[Wendy]]<br>(Bowser Jr.) | ||
Iggy SSBU.png| | Iggy SSBU.png|[[Iggy]]<br>(Bowser Jr.) | ||
Morton SSBU.png| | Morton SSBU.png|[[Morton]]<br>(Bowser Jr.) | ||
Lemmy SSBU.png| | Lemmy SSBU.png|[[Lemmy]]<br>(Bowser Jr.) | ||
Ludwig SSBU.png| | Ludwig SSBU.png|[[Ludwig]]<br>(Bowser Jr.) | ||
Corrin (Female) SSBU.png|Female [[Corrin]] | Corrin (Female) SSBU.png|Female [[Corrin]] | ||
Inkling Boy SSBU.png|[[Inkling]] Boy | Inkling Boy SSBU.png|[[Inkling]] Boy | ||
| Line 1,011: | Line 1,286: | ||
|- | |- | ||
![[File:Galeem SSBU.png|140x140px]] | ![[File:Galeem SSBU.png|140x140px]] | ||
|align=center|[[Galeem]][[File:SmashBros Emblem.png|30px|class=invert]] | |align=center|[[Galeem]][[File:SmashBros Emblem.png|30px|class=invert-dark]] | ||
|The first antagonist of the World of Light mode, Galeem controls the Master Hands and uses light-based attacks, such as a blue orb of energy, laser beams, and mines that explode in a plus formation. Galeem can also use its wings to drill the player. When fought with Dharkon, Galeem will occasionally attack Dharkon instead of the player. | |The first antagonist of the World of Light mode, Galeem controls the Master Hands and uses light-based attacks, such as a blue orb of energy, laser beams, and mines that explode in a plus formation. Galeem can also use its wings to drill the player. When fought with Dharkon, Galeem will occasionally attack Dharkon instead of the player. | ||
|- | |- | ||
![[File:SSBU Master Hand Spirit.png|140x140px]] | ![[File:SSBU Master Hand Spirit.png|140x140px]] | ||
|align=center|[[Master Hand]][[File:SmashBros Emblem.png|30px|class=invert]] | |align=center|[[Master Hand]][[File:SmashBros Emblem.png|30px|class=invert-dark]] | ||
|An army of Master Hands serve Galeem in the World of Light mode. Master Hand attacks by poking and slapping the player, drilling and flying into the arena, and occasionally using magical attacks. Master Hand can also throw spiked balls and blobs of ink at the arena. | |An army of Master Hands serve Galeem in the World of Light mode. Master Hand attacks by poking and slapping the player, drilling and flying into the arena, and occasionally using magical attacks. Master Hand can also throw spiked balls and blobs of ink at the arena. | ||
|- | |- | ||
![[File:Giga Bowser SSBU artwork.png|140x140px]] | ![[File:Giga Bowser SSBU artwork.png|140x140px]] | ||
|align=center|[[Giga Bowser]][[File:SmashBros Emblem.png|30px|class=invert]] | |align=center|[[Giga Bowser]][[File:SmashBros Emblem.png|30px|class=invert-dark]] | ||
|Giga Bowser is a monstrous version of [[Bowser]] that is immune to flinching. Instead of being launched, Giga Bowser's HP bar must be depleted to zero. Giga Bowser possesses all of Bowser's abilities, which are now even stronger but are slower to start. | |Giga Bowser is a monstrous version of [[Bowser]] that is immune to flinching. Instead of being launched, Giga Bowser's HP bar must be depleted to zero. Giga Bowser possesses all of Bowser's abilities, which are now even stronger but are slower to start. | ||
|- | |- | ||
![[File:Galleom SSBU artwork.png|140x140px]] | ![[File:Galleom SSBU artwork.png|140x140px]] | ||
|align=center|[[Galleom]][[File:SmashBros Emblem.png|30px|class=invert]] | |align=center|[[Galleom]][[File:SmashBros Emblem.png|30px|class=invert-dark]] | ||
|Galleom is a giant transforming mecha, possessing both a tank form and an ape-like robot mode. Its attacks include grabbing and crushing the player, firing six homing missiles in tank mode, jumping and stomping the ground, and charging across in tank mode; occasionally making a u-turn to hit the player again. When on low health, Galleom will stomp around in a tantrum, and gain faster attacks. | |Galleom is a giant transforming mecha, possessing both a tank form and an ape-like robot mode. Its attacks include grabbing and crushing the player, firing six homing missiles in tank mode, jumping and stomping the ground, and charging across in tank mode; occasionally making a u-turn to hit the player again. When on low health, Galleom will stomp around in a tantrum, and gain faster attacks. | ||
|- | |- | ||
| Line 1,038: | Line 1,313: | ||
|- | |- | ||
![[File:SSBU Dharkon Spirit.png|140x140px]] | ![[File:SSBU Dharkon Spirit.png|140x140px]] | ||
|align=center|[[Dharkon]][[File:SmashBros Emblem.png|30px|class=invert]] | |align=center|[[Dharkon]][[File:SmashBros Emblem.png|30px|class=invert-dark]] | ||
|The second antagonist of the World of Light mode, Dharkon controls the Crazy Hands and can use its tentacles to attack the player, as well as darkness based attacks such as two giant energy waves. When fought with Galeem, Dharkon will occasionally attack Galeem instead of the player. | |The second antagonist of the World of Light mode, Dharkon controls the Crazy Hands and can use its tentacles to attack the player, as well as darkness based attacks such as two giant energy waves. When fought with Galeem, Dharkon will occasionally attack Galeem instead of the player. | ||
|- | |- | ||
![[File:SSBU Crazy Hand Spirit.png|140x140px]] | ![[File:SSBU Crazy Hand Spirit.png|140x140px]] | ||
|align=center|[[Crazy Hand]][[File:SmashBros Emblem.png|30px|class=invert]] | |align=center|[[Crazy Hand]][[File:SmashBros Emblem.png|30px|class=invert-dark]] | ||
|An army of Crazy Hands serve Dharkon in the World of Light mode. Crazy Hand uses many of the same attacks as Master Hand, but is much more chaotic and unpredictable in his attack pattern, and he has some unique attacks such as spawning bombs and flailing on the ground. | |An army of Crazy Hands serve Dharkon in the World of Light mode. Crazy Hand uses many of the same attacks as Master Hand, but is much more chaotic and unpredictable in his attack pattern, and he has some unique attacks such as spawning bombs and flailing on the ground. | ||
|- | |- | ||
![[File:BeastGanon.png|140x140px]] | ![[File:BeastGanon.png|140x140px]] | ||
|align=center|[[Ganon]][[File:Zelda Emblem.png|30px|class=invert]] | |align=center|[[Ganon]][[File:Zelda Emblem.png|30px|class=invert-dark]] | ||
|Ganon is a demonic pig monster wielding two gigantic swords. Ganon can use his swords to spin and slash the player, and can also summon fire, lightning and malevolent energy. Ganon can only be damaged by striking his tail. | |Ganon is a demonic pig monster wielding two gigantic swords. Ganon can use his swords to spin and slash the player, and can also summon fire, lightning and malevolent energy. Ganon can only be damaged by striking his tail. | ||
|- | |- | ||
![[File:MarxUltimate.png|140x140px]] | ![[File:MarxUltimate.png|140x140px]] | ||
|align=center|[[Marx]][[File:Kirby Emblem.png|30px|class=invert]] | |align=center|[[Marx]][[File:Kirby Emblem.png|30px|class=invert-dark]] | ||
|Marx is a colorful bat creature with a wide array of elemental attacks, as well as teleportation powers. Marx can fire crescent blades, create seeds that form giant thorny plants, spit an ice chunk that spreads horizontally, can split apart to form a black hole, and can spit a giant darkness laser at the player. | |Marx is a colorful bat creature with a wide array of elemental attacks, as well as teleportation powers. Marx can fire crescent blades, create seeds that form giant thorny plants, spit an ice chunk that spreads horizontally, can split apart to form a black hole, and can spit a giant darkness laser at the player. | ||
|- | |- | ||
![[File:Dracula01.png|140x140px]] | ![[File:Dracula01.png|140x140px]] | ||
|align=center|[[Dracula]][[File:Castlevania Symbol.png|30px|class=invert]] | |align=center|[[Dracula]][[File:Castlevania Symbol.png|30px|class=invert-dark]] | ||
|Dracula is a boss with two different forms: a humanoid vampire and a green demon. His first form can summon fire and darkness and can transform into a swarm of bats to travel around. His final form gains claw based attacks, can summon ghosts to chase the player, and can cause jumping shockwave attacks. | |Dracula is a boss with two different forms: a humanoid vampire and a green demon. His first form can summon fire and darkness and can transform into a swarm of bats to travel around. His final form gains claw based attacks, can summon ghosts to chase the player, and can cause jumping shockwave attacks. | ||
|} | |} | ||
| Line 1,065: | Line 1,340: | ||
|- | |- | ||
![[File:SSBU Dark Emperor Spirit.png|140x140px]] | ![[File:SSBU Dark Emperor Spirit.png|140x140px]] | ||
|align=center|[[Dark Emperor]][[File:Find Mii Symbol.png|30px|class=invert]] | |align=center|[[Dark Emperor]][[File:Find Mii Symbol.png|30px|class=invert-dark]] | ||
|The Dark Emperor is a giant bird monster appearing in [[Find Mii]]. He can use magic to lower or increase a player's offensive, defensive, or speed stats. His attacks include causing an earthquake that will temporarily destroy platforms on the stage, flying into the stage to collide with players, and roaring which launches players far away. When defeated, he grants large stat boosts to whoever finished him. | |The Dark Emperor is a giant bird monster appearing in [[Find Mii]]. He can use magic to lower or increase a player's offensive, defensive, or speed stats. His attacks include causing an earthquake that will temporarily destroy platforms on the stage, flying into the stage to collide with players, and roaring which launches players far away. When defeated, he grants large stat boosts to whoever finished him. | ||
|- | |- | ||
![[File:SSBU Metal Face Spirit.png|140x140px]] | ![[File:SSBU Metal Face Spirit.png|140x140px]] | ||
|align=center|[[Metal Face]][[File:XenobladeEmblem.png|30px|class=invert]] | |align=center|[[Metal Face]][[File:XenobladeEmblem.png|30px|class=invert-dark]] | ||
|Metal Face is a humanoid robot that has a chance to show up at nightfall in [[Gaur Plain]]. His attacks are a giant claw swipe, a platform-destroying laser, and a giant dash attack when he leaves the stage. If Metal Face is defeated, he will burst into a series of explosions that damage the other fighters on the stage. | |Metal Face is a humanoid robot that has a chance to show up at nightfall in [[Gaur Plain]]. His attacks are a giant claw swipe, a platform-destroying laser, and a giant dash attack when he leaves the stage. If Metal Face is defeated, he will burst into a series of explosions that damage the other fighters on the stage. | ||
|- | |- | ||
![[File:SSBU Yellow Devil Spirit.png|140x140px]] | ![[File:SSBU Yellow Devil Spirit.png|140x140px]] | ||
|align=center|[[Yellow Devil]][[File:MegaMan Emblem.png|30px|class=invert]] | |align=center|[[Yellow Devil]][[File:MegaMan Emblem.png|30px|class=invert-dark]] | ||
|A yellow robot present at [[Wily Castle]] with the ability to split into yellow blobs which barrage the player, as well as an eye laser attack. Its red eye is its weak point, and when having taken enough damage, it causes a damaging explosion that can be used against other fighters. | |A yellow robot present at [[Wily Castle]] with the ability to split into yellow blobs which barrage the player, as well as an eye laser attack. Its red eye is its weak point, and when having taken enough damage, it causes a damaging explosion that can be used against other fighters. | ||
|} | |} | ||
| Line 1,084: | Line 1,359: | ||
|- | |- | ||
![[File:SSBU Fighting Mii Team.jpg|140x140px]] | ![[File:SSBU Fighting Mii Team.jpg|140x140px]] | ||
|align=center|[[Fighting Mii Team]][[File:SmashBros Emblem.png|30px|class=invert]] | |align=center|[[Fighting Mii Team]][[File:SmashBros Emblem.png|30px|class=invert-dark]] | ||
|A horde of [[Mii|Mii Fighter]]s which swarm the player. They possess all the basic abilities of the three types of Mii Fighter. They have limited AI in most modes but are stronger in Cruel Smash. | |A horde of [[Mii|Mii Fighter]]s which swarm the player. They possess all the basic abilities of the three types of Mii Fighter. They have limited AI in most modes but are stronger in Cruel Smash. | ||
|} | |} | ||
| Line 1,097: | Line 1,372: | ||
===New=== | ===New=== | ||
<gallery> | <gallery> | ||
SSBU Battlefield.jpg|[[File:SmashBros Emblem.png|20px|class=invert]][[Battlefield]] | SSBU Battlefield.jpg|[[File:SmashBros Emblem.png|20px|class=invert-dark]][[Battlefield]] | ||
SSBU Small Battlefield.jpg|[[File:SmashBros Emblem.png|20px|class=invert]][[Battlefield|Small Battlefield]]* | SSBU Small Battlefield.jpg|[[File:SmashBros Emblem.png|20px|class=invert-dark]][[Battlefield|Small Battlefield]]* | ||
Big Battlefield SSBU.png|[[File:SmashBros Emblem.png|20px|class=invert]][[Battlefield|Big Battlefield]] | Big Battlefield SSBU.png|[[File:SmashBros Emblem.png|20px|class=invert-dark]][[Battlefield|Big Battlefield]] | ||
Final Destination light BG SSBU.png|[[File:SmashBros Emblem.png|20px|class=invert]][[Final Destination]] | Final Destination light BG SSBU.png|[[File:SmashBros Emblem.png|20px|class=invert-dark]][[Final Destination]] | ||
New Donk City Hall SSBU entrance.png|[[File:Mario Emblem.png|20px|class=invert]][[New Donk City Hall (stage)|New Donk City Hall]] | New Donk City Hall SSBU entrance.png|[[File:Mario Emblem.png|20px|class=invert-dark]][[New Donk City Hall (stage)|New Donk City Hall]] | ||
SSBU Great Plateau Tower 1.jpg|[[File:Zelda Emblem.png|20px|class=invert]][[Great Plateau Tower]] | SSBU Great Plateau Tower 1.jpg|[[File:Zelda Emblem.png|20px|class=invert-dark]][[Great Plateau Tower]] | ||
SSBU Moray Towers.jpg|[[File:Splatoon Symbol.png|20px|class=invert]][[Moray Towers]] | SSBU Moray Towers.jpg|[[File:Splatoon Symbol.png|20px|class=invert-dark]][[Moray Towers]] | ||
DraculasCastle1.jpg|[[File:Castlevania Symbol.png|20px|class=invert]][[Dracula's Castle]] | DraculasCastle1.jpg|[[File:Castlevania Symbol.png|20px|class=invert-dark]][[Dracula's Castle]] | ||
SSBU-Mementos.jpg|[[File:Persona Symbol.png|20px|class=invert]][[Mementos]]* | SSBU-Mementos.jpg|[[File:Persona Symbol.png|20px|class=invert-dark]][[Mementos]]* | ||
SSBU Yggdrasils Altar.jpg|[[File:DragonQuestEmblem.png|20px|class=invert]][[Yggdrasil's Altar]]* | SSBU Yggdrasils Altar.jpg|[[File:DragonQuestEmblem.png|20px|class=invert-dark]][[Yggdrasil's Altar]]* | ||
SSBU Spiral Mountain.jpg|[[File:BanjoKazooieEmblem.png|20px|class=invert]][[Spiral Mountain]]* | SSBU Spiral Mountain.jpg|[[File:BanjoKazooieEmblem.png|20px|class=invert-dark]][[Spiral Mountain]]* | ||
SSBU King of Fighters Stadium.jpg|[[File:Fatal Fury symbol.png|20px|class=invert]][[King of Fighters Stadium]]* | SSBU King of Fighters Stadium.jpg|[[File:Fatal Fury symbol.png|20px|class=invert-dark]][[King of Fighters Stadium]]* | ||
SSBU Garreg Mach Monastery.jpg|[[File:FireEmblem Emblem.png|20px|class=invert]][[Garreg Mach Monastery]]* | SSBU Garreg Mach Monastery.jpg|[[File:FireEmblem Emblem.png|20px|class=invert-dark]][[Garreg Mach Monastery]]* | ||
SSBU Spring Stadium.jpg|[[File:ARMS Symbol.png|20px|class=invert]][[Spring Stadium]]* | SSBU Spring Stadium.jpg|[[File:ARMS Symbol.png|20px|class=invert-dark]][[Spring Stadium]]* | ||
SSBU Minecraft World.jpg|[[File:Minecraft Symbol.png|20px|class=invert]][[Minecraft World]]* | SSBU Minecraft World.jpg|[[File:Minecraft Symbol.png|20px|class=invert-dark]][[Minecraft World]]* | ||
SSBU-Northern Cave.jpg|[[File:Final Fantasy Symbol.png|20px|class=invert]][[Northern Cave]]* | SSBU-Northern Cave.jpg|[[File:Final Fantasy Symbol.png|20px|class=invert-dark]][[Northern Cave]]* | ||
SSBU Cloud Sea of Alrest.jpg|[[File:XenobladeEmblem.png|20px|class=invert]][[Cloud Sea of Alrest]]* | SSBU Cloud Sea of Alrest.jpg|[[File:XenobladeEmblem.png|20px|class=invert-dark]][[Cloud Sea of Alrest]]* | ||
SSBU Mishima Dojo.jpg|[[File:Tekken Symbol.png|20px|class=invert]][[Mishima Dojo]]* | SSBU Mishima Dojo.jpg|[[File:Tekken Symbol.png|20px|class=invert-dark]][[Mishima Dojo]]* | ||
Hollowbastion1.jpg|[[File:KingdomHeartsSymbol.png|20px|class=invert]][[Hollow Bastion]]* | Hollowbastion1.jpg|[[File:KingdomHeartsSymbol.png|20px|class=invert-dark]][[Hollow Bastion]]* | ||
</gallery> | </gallery> | ||
===''[[Super Smash Bros.]]''=== | ===''[[Super Smash Bros.]]''=== | ||
<gallery> | <gallery> | ||
Peach Castle 64 SSBU.png|[[File:Mario Emblem.png|20px|class=invert]][[Peach's Castle (Super Smash Bros.)|Peach's Castle]] | Peach Castle 64 SSBU.png|[[File:Mario Emblem.png|20px|class=invert-dark]][[Peach's Castle (Super Smash Bros.)|Peach's Castle]] | ||
Mushroom Kingdom SSBU.png|[[File:Mario Emblem.png|20px|class=invert]][[Mushroom Kingdom (Super Smash Bros.)|Mushroom Kingdom]] | Mushroom Kingdom SSBU.png|[[File:Mario Emblem.png|20px|class=invert-dark]][[Mushroom Kingdom (Super Smash Bros.)|Mushroom Kingdom]] | ||
Kongo Jungle 64 SSBU.png|[[File:DK Emblem.png|20px|class=invert]][[Kongo Jungle (Super Smash Bros.)|Kongo Jungle]] | Kongo Jungle 64 SSBU.png|[[File:DK Emblem.png|20px|class=invert-dark]][[Kongo Jungle (Super Smash Bros.)|Kongo Jungle]] | ||
Hyrule Castle SSBU.png|[[File:Zelda Emblem.png|20px|class=invert]][[Hyrule Castle]] | Hyrule Castle SSBU.png|[[File:Zelda Emblem.png|20px|class=invert-dark]][[Hyrule Castle]] | ||
Super Happy Tree SSBU.png|[[File:Yoshi Emblem.png|20px|class=invert]][[Super Happy Tree (stage)|Super Happy Tree]] | Super Happy Tree SSBU.png|[[File:Yoshi Emblem.png|20px|class=invert-dark]][[Super Happy Tree (stage)|Super Happy Tree]] | ||
Dream Land SSBU.png|[[File:Kirby Emblem.png|20px|class=invert]][[Dream Land (Super Smash Bros.)|Dream Land]] | Dream Land SSBU.png|[[File:Kirby Emblem.png|20px|class=invert-dark]][[Dream Land (Super Smash Bros.)|Dream Land]] | ||
Saffron City SSBU.png|[[File:Pokemon Emblem.png|20px|class=invert]][[Saffron City]] | Saffron City SSBU.png|[[File:Pokemon Emblem.png|20px|class=invert-dark]][[Saffron City]] | ||
</gallery> | </gallery> | ||
===''[[Super Smash Bros. Melee]]''=== | ===''[[Super Smash Bros. Melee]]''=== | ||
<gallery> | <gallery> | ||
SSBU Peach's Castle Melee.jpg|[[File:Mario Emblem.png|20px|class=invert]][[Princess Peach's Castle (Super Smash Bros. Melee)|Princess Peach's Castle]] | SSBU Peach's Castle Melee.jpg|[[File:Mario Emblem.png|20px|class=invert-dark]][[Princess Peach's Castle (Super Smash Bros. Melee)|Princess Peach's Castle]] | ||
Rainbow Cruise SSBU.png|[[File:Mario Emblem.png|20px|class=invert]][[Rainbow Cruise]] | Rainbow Cruise SSBU.png|[[File:Mario Emblem.png|20px|class=invert-dark]][[Rainbow Cruise]] | ||
Mushroom Kingdom II SSBU.png|[[File:Mario Emblem.png|20px|class=invert]][[Mushroom Kingdom II]] | Mushroom Kingdom II SSBU.png|[[File:Mario Emblem.png|20px|class=invert-dark]][[Mushroom Kingdom II]] | ||
SSBU Kongo Jungle Melee.jpg|[[File:DK Emblem.png|20px|class=invert]][[Kongo Falls]] | SSBU Kongo Jungle Melee.jpg|[[File:DK Emblem.png|20px|class=invert-dark]][[Kongo Falls]] | ||
Jungle Japes SSBU.png|[[File:DK Emblem.png|20px|class=invert]][[Jungle Japes (stage)|Jungle Japes]] | Jungle Japes SSBU.png|[[File:DK Emblem.png|20px|class=invert-dark]][[Jungle Japes (stage)|Jungle Japes]] | ||
Great Bay SSBU.jpg|[[File:Zelda Emblem.png|20px|class=invert]][[Great Bay]] | Great Bay SSBU.jpg|[[File:Zelda Emblem.png|20px|class=invert-dark]][[Great Bay]] | ||
Temple SSBU.png|[[File:Zelda Emblem.png|20px|class=invert]][[Temple (stage)|Temple]] | Temple SSBU.png|[[File:Zelda Emblem.png|20px|class=invert-dark]][[Temple (stage)|Temple]] | ||
Brinstar SSBU.png|[[File:Metroid Emblem.png|20px|class=invert]][[Brinstar]] | Brinstar SSBU.png|[[File:Metroid Emblem.png|20px|class=invert-dark]][[Brinstar]] | ||
Brinstar Depths SSBU.jpg|[[File:Metroid Emblem.png|20px|class=invert]][[Brinstar Depths]] | Brinstar Depths SSBU.jpg|[[File:Metroid Emblem.png|20px|class=invert-dark]][[Brinstar Depths]] | ||
Melee Yoshi's Island SSBU.png|[[File:Yoshi Emblem.png|20px|class=invert]][[Yoshi's Island (Super Smash Bros. Melee)|Yoshi's Island]] | Melee Yoshi's Island SSBU.png|[[File:Yoshi Emblem.png|20px|class=invert-dark]][[Yoshi's Island (Super Smash Bros. Melee)|Yoshi's Island]] | ||
Yoshi's Story SSBU.png|[[File:Yoshi Emblem.png|20px|class=invert]][[Yoshi's Story (stage)|Yoshi's Story]] | Yoshi's Story SSBU.png|[[File:Yoshi Emblem.png|20px|class=invert-dark]][[Yoshi's Story (stage)|Yoshi's Story]] | ||
Fountain of Dreams SSBU.png|[[File:Kirby Emblem.png|20px|class=invert]][[Fountain of Dreams]] | Fountain of Dreams SSBU.png|[[File:Kirby Emblem.png|20px|class=invert-dark]][[Fountain of Dreams]] | ||
GreenGreensUltimate.jpg|[[File:Kirby Emblem.png|20px|class=invert]][[Green Greens]] | GreenGreensUltimate.jpg|[[File:Kirby Emblem.png|20px|class=invert-dark]][[Green Greens]] | ||
Corneria SSBU.png|[[File:StarFox Emblem.png|20px|class=invert]][[Corneria]] | Corneria SSBU.png|[[File:StarFox Emblem.png|20px|class=invert-dark]][[Corneria]] | ||
Venom SSBU.jpg|[[File:StarFox Emblem.png|20px|class=invert]][[Venom]] | Venom SSBU.jpg|[[File:StarFox Emblem.png|20px|class=invert-dark]][[Venom]] | ||
Pokemon Stadium SSBU.png|[[File:Pokemon Emblem.png|20px|class=invert]][[Pokémon Stadium]] | Pokemon Stadium SSBU.png|[[File:Pokemon Emblem.png|20px|class=invert-dark]][[Pokémon Stadium]] | ||
Onett SSBU.jpg|[[File:EarthBound Emblem.png|20px|class=invert]][[Onett]] | Onett SSBU.jpg|[[File:EarthBound Emblem.png|20px|class=invert-dark]][[Onett]] | ||
Fourside SSBU.jpg|[[File:EarthBound Emblem.png|20px|class=invert]][[Fourside]] | Fourside SSBU.jpg|[[File:EarthBound Emblem.png|20px|class=invert-dark]][[Fourside]] | ||
Big Blue SSBU.png|[[File:F-Zero Emblem.png|20px|class=invert]][[Big Blue (stage)|Big Blue]] | Big Blue SSBU.png|[[File:F-Zero Emblem.png|20px|class=invert-dark]][[Big Blue (stage)|Big Blue]] | ||
</gallery> | </gallery> | ||
===''[[Super Smash Bros. Brawl]]''=== | ===''[[Super Smash Bros. Brawl]]''=== | ||
<gallery> | <gallery> | ||
Delfino Plaza SSBU.jpg|[[File:Mario Emblem.png|20px|class=invert]][[Delfino Plaza (stage)|Delfino Plaza]] | Delfino Plaza SSBU.jpg|[[File:Mario Emblem.png|20px|class=invert-dark]][[Delfino Plaza (stage)|Delfino Plaza]] | ||
Mushroomy Kingdom SSBU.jpg|[[File:Mario Emblem.png|20px|class=invert]][[Mushroomy Kingdom]] | Mushroomy Kingdom SSBU.jpg|[[File:Mario Emblem.png|20px|class=invert-dark]][[Mushroomy Kingdom]] | ||
Brawl Mario Circuit SSBU.jpg|[[File:Mario Emblem.png|20px|class=invert]][[Figure-8 Circuit (stage)|Figure-8 Circuit]] | Brawl Mario Circuit SSBU.jpg|[[File:Mario Emblem.png|20px|class=invert-dark]][[Figure-8 Circuit (stage)|Figure-8 Circuit]] | ||
Luigi's Mansion SSBU.png|[[File:Mario Emblem.png|20px|class=invert]][[Luigi's Mansion (stage)|Luigi's Mansion]] | Luigi's Mansion SSBU.png|[[File:Mario Emblem.png|20px|class=invert-dark]][[Luigi's Mansion (stage)|Luigi's Mansion]] | ||
Mario Bros SSBU.png|[[File:Mario Emblem.png|20px|class=invert]][[Mario Bros. (stage)|Mario Bros.]] | Mario Bros SSBU.png|[[File:Mario Emblem.png|20px|class=invert-dark]][[Mario Bros. (stage)|Mario Bros.]] | ||
75m SSBU.png|[[File:DK Emblem.png|20px|class=invert]][[75 m (stage)|75 m]] | 75m SSBU.png|[[File:DK Emblem.png|20px|class=invert-dark]][[75 m (stage)|75 m]] | ||
Bridge of Eldin SSBU.png|[[File:Zelda Emblem.png|20px|class=invert]][[Bridge of Eldin]] | Bridge of Eldin SSBU.png|[[File:Zelda Emblem.png|20px|class=invert-dark]][[Bridge of Eldin]] | ||
Pirate Ship SSBU.png|[[File:Zelda Emblem.png|20px|class=invert]][[Pirate Ship (stage)|Pirate Ship]] | Pirate Ship SSBU.png|[[File:Zelda Emblem.png|20px|class=invert-dark]][[Pirate Ship (stage)|Pirate Ship]] | ||
Norfair SSBU.png|[[File:Metroid Emblem.png|20px|class=invert]][[Norfair]] | Norfair SSBU.png|[[File:Metroid Emblem.png|20px|class=invert-dark]][[Norfair]] | ||
Frigate Orpheon SSBU.jpg|[[File:Metroid Emblem.png|20px|class=invert]][[Frigate Orpheon]] | Frigate Orpheon SSBU.jpg|[[File:Metroid Emblem.png|20px|class=invert-dark]][[Frigate Orpheon]] | ||
Yoshi's Island SSBU.png|[[File:Yoshi Emblem.png|20px|class=invert]][[Yoshi's Island (Super Smash Bros. Brawl)|Yoshi's Island]] | Yoshi's Island SSBU.png|[[File:Yoshi Emblem.png|20px|class=invert-dark]][[Yoshi's Island (Super Smash Bros. Brawl)|Yoshi's Island]] | ||
HalberdUltimate.jpg|[[File:Kirby Emblem.png|20px|class=invert]][[Halberd]] | HalberdUltimate.jpg|[[File:Kirby Emblem.png|20px|class=invert-dark]][[Halberd]] | ||
SSBU Lylat Cruise.jpg|[[File:StarFox Emblem.png|20px|class=invert]][[Lylat Cruise]] | SSBU Lylat Cruise.jpg|[[File:StarFox Emblem.png|20px|class=invert-dark]][[Lylat Cruise]] | ||
Pokemon Stadium 2 SSBU.png|[[File:Pokemon Emblem.png|20px|class=invert]][[Pokémon Stadium 2]] | Pokemon Stadium 2 SSBU.png|[[File:Pokemon Emblem.png|20px|class=invert-dark]][[Pokémon Stadium 2]] | ||
Spear Pillar SSBU.jpg|[[File:Pokemon Emblem.png|20px|class=invert]][[Spear Pillar]] | Spear Pillar SSBU.jpg|[[File:Pokemon Emblem.png|20px|class=invert-dark]][[Spear Pillar]] | ||
Port Town Aero Dive SSBU.png|[[File:F-Zero Emblem.png|20px|class=invert]][[Port Town Aero Dive]] | Port Town Aero Dive SSBU.png|[[File:F-Zero Emblem.png|20px|class=invert-dark]][[Port Town Aero Dive]] | ||
Castle Siege SSBU.png|[[File:FireEmblem Emblem.png|20px|class=invert]][[Castle Siege]] | Castle Siege SSBU.png|[[File:FireEmblem Emblem.png|20px|class=invert-dark]][[Castle Siege]] | ||
WarioWare Inc SSBU.png|[[File:Wario Emblem.png|20px|class=invert]][[WarioWare, Inc. (stage)|WarioWare, Inc.]] | WarioWare Inc SSBU.png|[[File:Wario Emblem.png|20px|class=invert-dark]][[WarioWare, Inc. (stage)|WarioWare, Inc.]] | ||
Distant Planet SSBU.jpg|[[File:Pikmin Emblem.png|20px|class=invert]][[Distant Planet]] | Distant Planet SSBU.jpg|[[File:Pikmin Emblem.png|20px|class=invert-dark]][[Distant Planet]] | ||
Smashville SSBU.png|[[File:AnimalCrossing Emblem.png|20px|class=invert]][[Smashville]] | Smashville SSBU.png|[[File:AnimalCrossing Emblem.png|20px|class=invert-dark]][[Smashville]] | ||
New Pork City SSBU.jpg|[[File:EarthBound Emblem.png|20px|class=invert]][[New Pork City]] | New Pork City SSBU.jpg|[[File:EarthBound Emblem.png|20px|class=invert-dark]][[New Pork City]] | ||
Summit SSBU.png|[[File:IceClimbers Emblem.png|20px|class=invert]][[Summit]] | Summit SSBU.png|[[File:IceClimbers Emblem.png|20px|class=invert-dark]][[Summit]] | ||
SkyworldUltimate.jpg|[[File:KidIcarus Emblem.png|20px|class=invert]][[Skyworld]] | SkyworldUltimate.jpg|[[File:KidIcarus Emblem.png|20px|class=invert-dark]][[Skyworld]] | ||
Shadow Moses Island SSBU.png|[[File:MGS Symbol.png|20px|class=invert]][[Shadow Moses Island]] | Shadow Moses Island SSBU.png|[[File:MGS Symbol.png|20px|class=invert-dark]][[Shadow Moses Island]] | ||
Green Hill Zone SSBU.jpg|[[File:Sonic Emblem.png|20px|class=invert]][[Green Hill Zone (stage)|Green Hill Zone]] | Green Hill Zone SSBU.jpg|[[File:Sonic Emblem.png|20px|class=invert-dark]][[Green Hill Zone (stage)|Green Hill Zone]] | ||
Hanenbow SSBU.png|[[File:Electroplankton Emblem.png|20px|class=invert]][[Hanenbow]] | Hanenbow SSBU.png|[[File:Electroplankton Emblem.png|20px|class=invert-dark]][[Hanenbow]] | ||
</gallery> | </gallery> | ||
===''Super Smash Bros. for Nintendo 3DS'' / ''Wii U''=== | ===''Super Smash Bros. for Nintendo 3DS'' / ''Wii U''=== | ||
<gallery> | <gallery> | ||
BoxingUltimate.jpg|[[File:PunchOutSymbol.png|20px|class=invert]][[Boxing Ring]] | BoxingUltimate.jpg|[[File:PunchOutSymbol.png|20px|class=invert-dark]][[Boxing Ring]] | ||
Gaur Plain SSBU.png|[[File:XenobladeEmblem.png|20px|class=invert]][[Gaur Plain]] | Gaur Plain SSBU.png|[[File:XenobladeEmblem.png|20px|class=invert-dark]][[Gaur Plain]] | ||
Duck Hunt SSBU.png|[[File:DuckHunt Emblem.png|20px|class=invert]][[Duck Hunt (stage)|Duck Hunt]] | Duck Hunt SSBU.png|[[File:DuckHunt Emblem.png|20px|class=invert-dark]][[Duck Hunt (stage)|Duck Hunt]] | ||
SSBU Wily Castle.jpg|[[File:MegaMan Emblem.png|20px|class=invert]][[Wily Castle]] | SSBU Wily Castle.jpg|[[File:MegaMan Emblem.png|20px|class=invert-dark]][[Wily Castle]] | ||
MakerUltimate.jpg|[[File:Mario Emblem.png|20px|class=invert]][[Super Mario Maker (stage)|Super Mario Maker]] | MakerUltimate.jpg|[[File:Mario Emblem.png|20px|class=invert-dark]][[Super Mario Maker (stage)|Super Mario Maker]] | ||
SuzakuUltimate.jpg|[[File:StreetFighterEmblem.png|20px|class=invert]][[Suzaku Castle]] | SuzakuUltimate.jpg|[[File:StreetFighterEmblem.png|20px|class=invert-dark]][[Suzaku Castle]] | ||
MidgarUltimate.jpg|[[File:Final Fantasy Symbol.png|20px|class=invert]][[Midgar]] | MidgarUltimate.jpg|[[File:Final Fantasy Symbol.png|20px|class=invert-dark]][[Midgar]] | ||
Umbra Clock Tower SSBU.png|[[File:Bayonetta.png|20px|class=invert]][[Umbra Clock Tower]] | Umbra Clock Tower SSBU.png|[[File:Bayonetta.png|20px|class=invert-dark]][[Umbra Clock Tower]] | ||
</gallery> | </gallery> | ||
====[[Super Smash Bros. for Nintendo 3DS|Nintendo 3DS version]]==== | ====[[Super Smash Bros. for Nintendo 3DS|Nintendo 3DS version]]==== | ||
<gallery> | <gallery> | ||
3D Land SSBU.png|[[File:Mario Emblem.png|20px|class=invert]][[3D Land]] | 3D Land SSBU.png|[[File:Mario Emblem.png|20px|class=invert-dark]][[3D Land]] | ||
Golden Plains SSBU.png|[[File:Mario Emblem.png|20px|class=invert]][[Golden Plains]] | Golden Plains SSBU.png|[[File:Mario Emblem.png|20px|class=invert-dark]][[Golden Plains]] | ||
Paper Mario SSBU.png|[[File:Mario Emblem.png|20px|class=invert]][[Paper Mario (stage)|Paper Mario]] | Paper Mario SSBU.png|[[File:Mario Emblem.png|20px|class=invert-dark]][[Paper Mario (stage)|Paper Mario]] | ||
Gerudo Valley SSBU.png|[[File:Zelda Emblem.png|20px|class=invert]][[Gerudo Valley]] | Gerudo Valley SSBU.png|[[File:Zelda Emblem.png|20px|class=invert-dark]][[Gerudo Valley]] | ||
SpiritTrainUltimate.jpg|[[File:Zelda Emblem.png|20px|class=invert]][[Spirit Train]] | SpiritTrainUltimate.jpg|[[File:Zelda Emblem.png|20px|class=invert-dark]][[Spirit Train]] | ||
Dream Land GB SSBU.png|[[File:Kirby Emblem.png|20px|class=invert]][[Dream Land GB]] | Dream Land GB SSBU.png|[[File:Kirby Emblem.png|20px|class=invert-dark]][[Dream Land GB]] | ||
Unova Pokemon League SSBU.png|[[File:Pokemon Emblem.png|20px|class=invert]][[Unova Pokémon League]] | Unova Pokemon League SSBU.png|[[File:Pokemon Emblem.png|20px|class=invert-dark]][[Unova Pokémon League]] | ||
PrismTowerUltimate.jpg|[[File:Pokemon Emblem.png|20px|class=invert]][[Prism Tower]] | PrismTowerUltimate.jpg|[[File:Pokemon Emblem.png|20px|class=invert-dark]][[Prism Tower]] | ||
Mute City SNES SSBU.png|[[File:F-Zero Emblem.png|20px|class=invert]][[Mute City SNES]] | Mute City SNES SSBU.png|[[File:F-Zero Emblem.png|20px|class=invert-dark]][[Mute City SNES]] | ||
Magicant SSBU.png|[[File:EarthBound Emblem.png|20px|class=invert]][[Magicant]] | Magicant SSBU.png|[[File:EarthBound Emblem.png|20px|class=invert-dark]][[Magicant]] | ||
Arena Ferox SSBU.png|[[File:FireEmblem Emblem.png|20px|class=invert]][[Arena Ferox]] | Arena Ferox SSBU.png|[[File:FireEmblem Emblem.png|20px|class=invert-dark]][[Arena Ferox]] | ||
ResetBombUltimate.jpg|[[File:KidIcarus Emblem.png|20px|class=invert]][[Reset Bomb Forest]] | ResetBombUltimate.jpg|[[File:KidIcarus Emblem.png|20px|class=invert-dark]][[Reset Bomb Forest]] | ||
TortimerIslandUltimate.jpg|[[File:AnimalCrossing Emblem.png|20px|class=invert]][[Tortimer Island]] | TortimerIslandUltimate.jpg|[[File:AnimalCrossing Emblem.png|20px|class=invert-dark]][[Tortimer Island]] | ||
Balloon Fight SSBU.png|[[File:SSB4 Balloon Fight Symbol.png|20px|class=invert]][[Balloon Fight (stage)|Balloon Fight]] | Balloon Fight SSBU.png|[[File:SSB4 Balloon Fight Symbol.png|20px|class=invert-dark]][[Balloon Fight (stage)|Balloon Fight]] | ||
LivingRoomUltimate.jpg|[[File:Nintendogs Symbol.png|20px|class=invert]][[Living Room]] | LivingRoomUltimate.jpg|[[File:Nintendogs Symbol.png|20px|class=invert-dark]][[Living Room]] | ||
Find Mii SSBU.png|[[File:Find Mii Symbol.png|20px|class=invert]][[Find Mii]] | Find Mii SSBU.png|[[File:Find Mii Symbol.png|20px|class=invert-dark]][[Find Mii]] | ||
Tomodachi Life SSBU.png|[[File:Tomodachi Emblem.png|20px|class=invert]][[Tomodachi Life (stage)|Tomodachi Life]] | Tomodachi Life SSBU.png|[[File:Tomodachi Emblem.png|20px|class=invert-dark]][[Tomodachi Life (stage)|Tomodachi Life]] | ||
Pictochat2Ultimate.jpg|[[File:NintendoDS Emblem.png|20px|class=invert]][[PictoChat 2]] | Pictochat2Ultimate.jpg|[[File:NintendoDS Emblem.png|20px|class=invert-dark]][[PictoChat 2]] | ||
</gallery> | </gallery> | ||
====[[Super Smash Bros. for Wii U|Wii U version]]==== | ====[[Super Smash Bros. for Wii U|Wii U version]]==== | ||
<gallery> | <gallery> | ||
Mushroom Kingdom U SSBU.png|[[File:Mario Emblem.png|20px|class=invert]][[Mushroom Kingdom U]] | Mushroom Kingdom U SSBU.png|[[File:Mario Emblem.png|20px|class=invert-dark]][[Mushroom Kingdom U]] | ||
MarioGalaxyUltimate.jpg|[[File:Mario Emblem.png|20px|class=invert]][[Mario Galaxy (stage)|Mario Galaxy]] | MarioGalaxyUltimate.jpg|[[File:Mario Emblem.png|20px|class=invert-dark]][[Mario Galaxy (stage)|Mario Galaxy]] | ||
Mario Circuit SSBU.png|[[File:Mario Emblem.png|20px|class=invert]][[Mario Circuit (Super Smash Bros. for Wii U)|Mario Circuit]] | Mario Circuit SSBU.png|[[File:Mario Emblem.png|20px|class=invert-dark]][[Mario Circuit (Super Smash Bros. for Wii U)|Mario Circuit]] | ||
Skyloft SSBU.png|[[File:Zelda Emblem.png|20px|class=invert]][[Skyloft]] | Skyloft SSBU.png|[[File:Zelda Emblem.png|20px|class=invert-dark]][[Skyloft]] | ||
The Great Cave Offensive SSBU.png|[[File:Kirby Emblem.png|20px|class=invert]][[The Great Cave Offensive]] | The Great Cave Offensive SSBU.png|[[File:Kirby Emblem.png|20px|class=invert-dark]][[The Great Cave Offensive]] | ||
Kalos Pokemon League SSBU.png|[[File:Pokemon Emblem.png|20px|class=invert]][[Kalos Pokémon League]] | Kalos Pokemon League SSBU.png|[[File:Pokemon Emblem.png|20px|class=invert-dark]][[Kalos Pokémon League]] | ||
Coliseum SSBU.jpg|[[File:FireEmblem Emblem.png|20px|class=invert]][[Coliseum (stage)|Coliseum]] | Coliseum SSBU.jpg|[[File:FireEmblem Emblem.png|20px|class=invert-dark]][[Coliseum (stage)|Coliseum]] | ||
Flat Zone X SSBU.png|[[File:Game&Watch Emblem.png|20px|class=invert]][[Flat Zone X]] | Flat Zone X SSBU.png|[[File:Game&Watch Emblem.png|20px|class=invert-dark]][[Flat Zone X]] | ||
Palutena's Temple SSBU.png|[[File:KidIcarus Emblem.png|20px|class=invert]][[Palutena's Temple]] | Palutena's Temple SSBU.png|[[File:KidIcarus Emblem.png|20px|class=invert-dark]][[Palutena's Temple]] | ||
Gamer SSBU.png|[[File:Wario Emblem.png|20px|class=invert]][[Gamer (stage)|Gamer]] | Gamer SSBU.png|[[File:Wario Emblem.png|20px|class=invert-dark]][[Gamer (stage)|Gamer]] | ||
Garden of Hope SSBU.png|[[File:Pikmin Emblem.png|20px|class=invert]][[Garden of Hope]] | Garden of Hope SSBU.png|[[File:Pikmin Emblem.png|20px|class=invert-dark]][[Garden of Hope]] | ||
Town and City SSBU.jpg|[[File:AnimalCrossing Emblem.png|20px|class=invert]][[Town and City]] | Town and City SSBU.jpg|[[File:AnimalCrossing Emblem.png|20px|class=invert-dark]][[Town and City]] | ||
Wii Fit Studio SSBU.png|[[File:Wii Fit series icon.png|20px|class=invert]][[Wii Fit Studio]] | Wii Fit Studio SSBU.png|[[File:Wii Fit series icon.png|20px|class=invert-dark]][[Wii Fit Studio]] | ||
Wrecking Crew SSBU.jpg|[[File:WreckingCrew Emblem.png|20px|class=invert]][[Wrecking Crew (stage)|Wrecking Crew]] | Wrecking Crew SSBU.jpg|[[File:WreckingCrew Emblem.png|20px|class=invert-dark]][[Wrecking Crew (stage)|Wrecking Crew]] | ||
Pilotwings SSBU.png|[[File:Pilotwings Symbol.png|20px|class=invert]][[Pilotwings]] | Pilotwings SSBU.png|[[File:Pilotwings Symbol.png|20px|class=invert-dark]][[Pilotwings]] | ||
Wuhu Island SSBU.jpg|[[File:WiiSports Emblem.png|20px|class=invert]][[Wuhu Island]] | Wuhu Island SSBU.jpg|[[File:WiiSports Emblem.png|20px|class=invert-dark]][[Wuhu Island]] | ||
Windy Hill Zone SSBU.jpg|[[File:Sonic Emblem.png|20px|class=invert]][[Windy Hill Zone]] | Windy Hill Zone SSBU.jpg|[[File:Sonic Emblem.png|20px|class=invert-dark]][[Windy Hill Zone]] | ||
Pac-Land SSBU.png|[[File:Pac-ManEmblem.png|20px|class=invert]][[Pac-Land]] | Pac-Land SSBU.png|[[File:Pac-ManEmblem.png|20px|class=invert-dark]][[Pac-Land]] | ||
</gallery> | </gallery> | ||
| Line 1,241: | Line 1,516: | ||
===New=== | ===New=== | ||
<gallery> | <gallery> | ||
BananaGunUltimate.png|[[File:SmashBros Emblem.png|20px|class=invert]][[Banana Gun]] | BananaGunUltimate.png|[[File:SmashBros Emblem.png|20px|class=invert-dark]][[Banana Gun]] | ||
BeastballUltimate.png|[[File:SmashBros Emblem.png|20px|class=invert]][[Beastball]] | BeastballUltimate.png|[[File:SmashBros Emblem.png|20px|class=invert-dark]][[Beastball]] | ||
BlackHoleUltimate.png|[[File:SmashBros Emblem.png|20px|class=invert]][[Black Hole (item)|Black Hole]] | BlackHoleUltimate.png|[[File:SmashBros Emblem.png|20px|class=invert-dark]][[Black Hole (item)|Black Hole]] | ||
BomberUltimate.png|[[File:Kirby Emblem.png|20px|class=invert]][[Bomber]] | BomberUltimate.png|[[File:Kirby Emblem.png|20px|class=invert-dark]][[Bomber]] | ||
DeathScytheUltimate.png|[[File:Castlevania Symbol.png|20px|class=invert]][[Death's Scythe]] | DeathScytheUltimate.png|[[File:Castlevania Symbol.png|20px|class=invert-dark]][[Death's Scythe]] | ||
SSBU Fake Smash Ball artwork.png|[[File:SmashBros Emblem.png|20px|class=invert]][[Fake Smash Ball]] | SSBU Fake Smash Ball artwork.png|[[File:SmashBros Emblem.png|20px|class=invert-dark]][[Fake Smash Ball]] | ||
HealingFieldUltimate.png|[[File:SmashBros Emblem.png|20px|class=invert]][[Healing Field]] | HealingFieldUltimate.png|[[File:SmashBros Emblem.png|20px|class=invert-dark]][[Healing Field]] | ||
HealingSproutUltimate.png|[[File:SmashBros Emblem.png|20px|class=invert]][[Healing Sprout]] | HealingSproutUltimate.png|[[File:SmashBros Emblem.png|20px|class=invert-dark]][[Healing Sprout]] | ||
KillingEdgeUltimate.png|[[File:FireEmblem Emblem.png|20px|class=invert]][[Killing Edge]] | KillingEdgeUltimate.png|[[File:FireEmblem Emblem.png|20px|class=invert-dark]][[Killing Edge]] | ||
RageBlasterUltimate.png|[[File:SmashBros Emblem.png|20px|class=invert]][[Rage Blaster]] | RageBlasterUltimate.png|[[File:SmashBros Emblem.png|20px|class=invert-dark]][[Rage Blaster]] | ||
EvilMushroomUltimate.png|[[File:EarthBound Emblem.png|20px|class=invert]][[Ramblin' Evil Mushroom]] | EvilMushroomUltimate.png|[[File:EarthBound Emblem.png|20px|class=invert-dark]][[Ramblin' Evil Mushroom]] | ||
StaffUltimate.png|[[File:KidIcarus Emblem.png|20px|class=invert]][[Staff (Kid Icarus)|Staff]] | StaffUltimate.png|[[File:KidIcarus Emblem.png|20px|class=invert-dark]][[Staff (Kid Icarus)|Staff]] | ||
SSBU Launch Star artwork.png|[[File:Mario Emblem.png|20px|class=invert]][[Launch Star#Super Smash Bros. Ultimate|Super Launch Star]] | SSBU Launch Star artwork.png|[[File:Mario Emblem.png|20px|class=invert-dark]][[Launch Star#Super Smash Bros. Ultimate|Super Launch Star]] | ||
</gallery> | </gallery> | ||
===Returning=== | ===Returning=== | ||
<gallery> | <gallery> | ||
AssistTrophyUltimate1.png|[[File:SmashBros Emblem.png|20px|class=invert]][[Assist Trophy]] | AssistTrophyUltimate1.png|[[File:SmashBros Emblem.png|20px|class=invert-dark]][[Assist Trophy]] | ||
BackShieldUltimate.png|[[File:KidIcarus Emblem.png|20px|class=invert]][[Back Shield]] | BackShieldUltimate.png|[[File:KidIcarus Emblem.png|20px|class=invert-dark]][[Back Shield]] | ||
BananaPeelUltimate.png|[[File:Mario Emblem.png|20px|class=invert]][[Banana|Banana Peel]] | BananaPeelUltimate.png|[[File:Mario Emblem.png|20px|class=invert-dark]][[Banana|Banana Peel]] | ||
BarrelUltimate.png|[[File:SmashBros Emblem.png|20px|class=invert]][[Barrel]] | BarrelUltimate.png|[[File:SmashBros Emblem.png|20px|class=invert-dark]][[Barrel]] | ||
BeamSwordUltimate.png|[[File:SmashBros Emblem.png|20px|class=invert]][[Beam Sword]] | BeamSwordUltimate.png|[[File:SmashBros Emblem.png|20px|class=invert-dark]][[Beam Sword]] | ||
BeehiveUltimate.png|[[File:AnimalCrossing Emblem.png|20px|class=invert]][[Beehive]] | BeehiveUltimate.png|[[File:AnimalCrossing Emblem.png|20px|class=invert-dark]][[Beehive]] | ||
BeetleUltimate.png|[[File:Zelda Emblem.png|20px|class=invert]][[Beetle (item)|Beetle]] | BeetleUltimate.png|[[File:Zelda Emblem.png|20px|class=invert-dark]][[Beetle (item)|Beetle]] | ||
BlastBoxUltimate.png|[[File:SmashBros Emblem.png|20px|class=invert]][[Blast Box]] | BlastBoxUltimate.png|[[File:SmashBros Emblem.png|20px|class=invert-dark]][[Blast Box]] | ||
Bob-ombUltimate.png|[[File:Mario Emblem.png|20px|class=invert]][[Bob-omb]] | Bob-ombUltimate.png|[[File:Mario Emblem.png|20px|class=invert-dark]][[Bob-omb]] | ||
BombchuUltimate.png|[[File:Zelda Emblem.png|20px|class=invert]][[Bombchu]] | BombchuUltimate.png|[[File:Zelda Emblem.png|20px|class=invert-dark]][[Bombchu]] | ||
BoomerangUltimate.png|[[File:Mario Emblem.png|20px|class=invert]][[Boomerang]] | BoomerangUltimate.png|[[File:Mario Emblem.png|20px|class=invert-dark]][[Boomerang]] | ||
BossGalagaUltimate.png|[[Boss Galaga]] | BossGalagaUltimate.png|[[Boss Galaga]] | ||
BulletBillUltimate.png|[[File:Mario Emblem.png|20px|class=invert]][[Bullet Bill]] | BulletBillUltimate.png|[[File:Mario Emblem.png|20px|class=invert-dark]][[Bullet Bill]] | ||
BumperUltimate.png|[[File:SmashBros Emblem.png|20px|class=invert]][[Bumper (Super Smash Bros. series)|Bumper]] | BumperUltimate.png|[[File:SmashBros Emblem.png|20px|class=invert-dark]][[Bumper (Super Smash Bros. series)|Bumper]] | ||
BunnyHoodUltimate.png|[[File:Zelda Emblem.png|20px|class=invert]][[Bunny Hood]] | BunnyHoodUltimate.png|[[File:Zelda Emblem.png|20px|class=invert-dark]][[Bunny Hood]] | ||
CapsuleUltimate.png|[[File:SmashBros Emblem.png|20px|class=invert]][[Capsule (Super Smash Bros. series)|Capsule]] | CapsuleUltimate.png|[[File:SmashBros Emblem.png|20px|class=invert-dark]][[Capsule (Super Smash Bros. series)|Capsule]] | ||
CrateUltimate.png|[[File:SmashBros Emblem.png|20px|class=invert]][[Crate]] | CrateUltimate.png|[[File:SmashBros Emblem.png|20px|class=invert-dark]][[Crate]] | ||
CuccoUltimate.png|[[File:Zelda Emblem.png|20px|class=invert]][[Cucco]] | CuccoUltimate.png|[[File:Zelda Emblem.png|20px|class=invert-dark]][[Cucco]] | ||
DaybreakPartsUltimate.png|[[File:KidIcarus Emblem.png|20px|class=invert]][[Daybreak]] Parts | DaybreakPartsUltimate.png|[[File:KidIcarus Emblem.png|20px|class=invert-dark]][[Daybreak]] Parts | ||
DekuNutUltimate.png|[[File:Zelda Emblem.png|20px|class=invert]][[Deku Nut]] | DekuNutUltimate.png|[[File:Zelda Emblem.png|20px|class=invert-dark]][[Deku Nut]] | ||
DragoonPartsUltimate.png|[[File:Kirby Emblem.png|20px|class=invert]][[Dragoon]] Parts | DragoonPartsUltimate.png|[[File:Kirby Emblem.png|20px|class=invert-dark]][[Dragoon]] Parts | ||
DrillUltimate.png|[[File:SmashBros Emblem.png|20px|class=invert]][[Drill (item)|Drill]] | DrillUltimate.png|[[File:SmashBros Emblem.png|20px|class=invert-dark]][[Drill (item)|Drill]] | ||
FairyBottleUltimate.png|[[File:Zelda Emblem.png|20px|class=invert]][[Fairy Bottle]] | FairyBottleUltimate.png|[[File:Zelda Emblem.png|20px|class=invert-dark]][[Fairy Bottle]] | ||
FireBarUltimate.png|[[File:Mario Emblem.png|20px|class=invert]][[Fire Bar]] | FireBarUltimate.png|[[File:Mario Emblem.png|20px|class=invert-dark]][[Fire Bar]] | ||
FireFlowerUltimate.png|[[File:Mario Emblem.png|20px|class=invert]][[Fire Flower]] | FireFlowerUltimate.png|[[File:Mario Emblem.png|20px|class=invert-dark]][[Fire Flower]] | ||
FoodUltimate.png|[[File:SmashBros Emblem.png|20px|class=invert]][[Food]] | FoodUltimate.png|[[File:SmashBros Emblem.png|20px|class=invert-dark]][[Food]] | ||
FranklinBadgeUltimate.png|[[File:EarthBound Emblem.png|20px|class=invert]][[Franklin Badge]] | FranklinBadgeUltimate.png|[[File:EarthBound Emblem.png|20px|class=invert-dark]][[Franklin Badge]] | ||
FreezieUltimate.png|[[File:Mario Emblem.png|20px|class=invert]][[Freezie]] | FreezieUltimate.png|[[File:Mario Emblem.png|20px|class=invert-dark]][[Freezie]] | ||
GoldenHammerUltimate.png|[[File:WreckingCrew Emblem.png|20px|class=invert]][[Golden Hammer]] | GoldenHammerUltimate.png|[[File:WreckingCrew Emblem.png|20px|class=invert-dark]][[Golden Hammer]] | ||
GooeyBombUltimate.png|[[File:SmashBros Emblem.png|20px|class=invert]][[Gooey Bomb]] | GooeyBombUltimate.png|[[File:SmashBros Emblem.png|20px|class=invert-dark]][[Gooey Bomb]] | ||
GrassUltimate.png|[[File:Mario Emblem.png|20px|class=invert]][[Grass]] | GrassUltimate.png|[[File:Mario Emblem.png|20px|class=invert-dark]][[Grass]] | ||
GreenShellUltimate.png|[[File:Mario Emblem.png|20px|class=invert]][[Green Shell]] | GreenShellUltimate.png|[[File:Mario Emblem.png|20px|class=invert-dark]][[Green Shell]] | ||
GustBellowsUltimate.png|[[File:Zelda Emblem.png|20px|class=invert]][[Gust Bellows]] | GustBellowsUltimate.png|[[File:Zelda Emblem.png|20px|class=invert-dark]][[Gust Bellows]] | ||
HammerUltimate.png|[[File:DK Emblem.png|20px|class=invert]][[Hammer]] | HammerUltimate.png|[[File:DK Emblem.png|20px|class=invert-dark]][[Hammer]] | ||
HeartContainerUltimate.png|[[File:Zelda Emblem.png|20px|class=invert]][[Heart Container]] | HeartContainerUltimate.png|[[File:Zelda Emblem.png|20px|class=invert-dark]][[Heart Container]] | ||
HocotateBombUltimate.png|[[File:Pikmin Emblem.png|20px|class=invert]][[Hocotate Bomb]] | HocotateBombUltimate.png|[[File:Pikmin Emblem.png|20px|class=invert-dark]][[Hocotate Bomb]] | ||
Home-RunBatUltimate.png|[[File:SmashBros Emblem.png|20px|class=invert]][[Home-Run Bat]] | Home-RunBatUltimate.png|[[File:SmashBros Emblem.png|20px|class=invert-dark]][[Home-Run Bat]] | ||
HotheadUltimate.png|[[File:Mario Emblem.png|20px|class=invert]][[Hothead]] | HotheadUltimate.png|[[File:Mario Emblem.png|20px|class=invert-dark]][[Hothead]] | ||
KillerEyeUltimate.png|[[File:KidIcarus Emblem.png|20px|class=invert]][[Killer Eye]] | KillerEyeUltimate.png|[[File:KidIcarus Emblem.png|20px|class=invert-dark]][[Killer Eye]] | ||
LightningUltimate.png|[[File:Mario Emblem.png|20px|class=invert]][[Lightning]] | LightningUltimate.png|[[File:Mario Emblem.png|20px|class=invert-dark]][[Lightning]] | ||
Lip'sStickUltimate.png|[[Lip's Stick]] | Lip'sStickUltimate.png|[[Lip's Stick]] | ||
MaximTomatoUltimate.png|[[File:Kirby Emblem.png|20px|class=invert]][[Maxim Tomato]] | MaximTomatoUltimate.png|[[File:Kirby Emblem.png|20px|class=invert-dark]][[Maxim Tomato]] | ||
MasterBallUltimate.png|[[File:Pokemon Emblem.png|20px|class=invert]][[Master Ball]] | MasterBallUltimate.png|[[File:Pokemon Emblem.png|20px|class=invert-dark]][[Master Ball]] | ||
MetalBoxUltimate.png|[[File:Mario Emblem.png|20px|class=invert]][[Cap Block#Super Smash Bros. series|Metal Box]] | MetalBoxUltimate.png|[[File:Mario Emblem.png|20px|class=invert-dark]][[Cap Block#Super Smash Bros. series|Metal Box]] | ||
Motion-SensorBombUltimate.png|[[File:SmashBros Emblem.png|20px|class=invert]][[Motion-Sensor Bomb]] | Motion-SensorBombUltimate.png|[[File:SmashBros Emblem.png|20px|class=invert-dark]][[Motion-Sensor Bomb]] | ||
Mr.SaturnUltimate.png|[[File:EarthBound Emblem.png|20px|class=invert]][[Mr. Saturn]] | Mr.SaturnUltimate.png|[[File:EarthBound Emblem.png|20px|class=invert-dark]][[Mr. Saturn]] | ||
OreClubUltimate.png|[[File:KidIcarus Emblem.png|20px|class=invert]][[Ore Club]] | OreClubUltimate.png|[[File:KidIcarus Emblem.png|20px|class=invert-dark]][[Ore Club]] | ||
PartyBallUltimate.png|[[File:SmashBros Emblem.png|20px|class=invert]][[Party Ball (item)|Party Ball]] | PartyBallUltimate.png|[[File:SmashBros Emblem.png|20px|class=invert-dark]][[Party Ball (item)|Party Ball]] | ||
PitfallUltimate.png|[[File:AnimalCrossing Emblem.png|20px|class=invert]][[Pitfall]] | PitfallUltimate.png|[[File:AnimalCrossing Emblem.png|20px|class=invert-dark]][[Pitfall]] | ||
PoisonMushroomUltimate.png|[[File:Mario Emblem.png|20px|class=invert]][[Poison Mushroom]] | PoisonMushroomUltimate.png|[[File:Mario Emblem.png|20px|class=invert-dark]][[Poison Mushroom]] | ||
PokeBallUltimate.png|[[File:Pokemon Emblem.png|20px|class=invert]][[Poké Ball]] | PokeBallUltimate.png|[[File:Pokemon Emblem.png|20px|class=invert-dark]][[Poké Ball]] | ||
POWBlockUltimate.png|[[File:Mario Emblem.png|20px|class=invert]][[POW Block]] | POWBlockUltimate.png|[[File:Mario Emblem.png|20px|class=invert-dark]][[POW Block]] | ||
RayGunUltimate.png|[[File:SmashBros Emblem.png|20px|class=invert]][[Ray Gun]] | RayGunUltimate.png|[[File:SmashBros Emblem.png|20px|class=invert-dark]][[Ray Gun]] | ||
RocketBeltUltimate.png|[[File:Pilotwings Symbol.png|20px|class=invert]][[Rocket Belt]] | RocketBeltUltimate.png|[[File:Pilotwings Symbol.png|20px|class=invert-dark]][[Rocket Belt]] | ||
RollingCrateUltimate.png|[[File:SmashBros Emblem.png|20px|class=invert]][[Rolling Crate]] | RollingCrateUltimate.png|[[File:SmashBros Emblem.png|20px|class=invert-dark]][[Rolling Crate]] | ||
SandbagUltimate.png|[[File:SmashBros Emblem.png|20px|class=invert]][[Sandbag]] | SandbagUltimate.png|[[File:SmashBros Emblem.png|20px|class=invert-dark]][[Sandbag]] | ||
ScrewAttackUltimate.png|[[File:Metroid Emblem.png|20px|class=invert]][[Screw Attack]] | ScrewAttackUltimate.png|[[File:Metroid Emblem.png|20px|class=invert-dark]][[Screw Attack]] | ||
SmartBombUltimate.png|[[File:StarFox Emblem.png|20px|class=invert]][[List of Super Smash Bros. series items#Smart Bomb|Smart Bomb]] | SmartBombUltimate.png|[[File:StarFox Emblem.png|20px|class=invert-dark]][[List of Super Smash Bros. series items#Smart Bomb|Smart Bomb]] | ||
SmashBallUltimate.png|[[File:SmashBros Emblem.png|20px|class=invert]][[Smash Ball]] | SmashBallUltimate.png|[[File:SmashBros Emblem.png|20px|class=invert-dark]][[Smash Ball]] | ||
SmokeBallUltimate.png|[[File:SmashBros Emblem.png|20px|class=invert]][[Smoke Ball]] | SmokeBallUltimate.png|[[File:SmashBros Emblem.png|20px|class=invert-dark]][[Smoke Ball]] | ||
SoccerBallUltimate.png|[[File:SmashBros Emblem.png|20px|class=invert]][[Soccer Ball]] | SoccerBallUltimate.png|[[File:SmashBros Emblem.png|20px|class=invert-dark]][[Soccer Ball]] | ||
SpecialFlagUltimate.png|[[Special Flag]] | SpecialFlagUltimate.png|[[Special Flag]] | ||
SpinyShellUltimate.png|[[File:Mario Emblem.png|20px|class=invert]][[Spiny Shell (blue)|Spiny Shell]] | SpinyShellUltimate.png|[[File:Mario Emblem.png|20px|class=invert-dark]][[Spiny Shell (blue)|Spiny Shell]] | ||
StarRodUltimate.png|[[File:Kirby Emblem.png|20px|class=invert]][[Star Rod (Kirby)|Star Rod]] | StarRodUltimate.png|[[File:Kirby Emblem.png|20px|class=invert-dark]][[Star Rod (Kirby)|Star Rod]] | ||
SteelDiverUltimate.png|[[Steel Diver]] | SteelDiverUltimate.png|[[Steel Diver]] | ||
SuperLeafUltimate.png|[[File:Mario Emblem.png|20px|class=invert]][[Super Leaf]] | SuperLeafUltimate.png|[[File:Mario Emblem.png|20px|class=invert-dark]][[Super Leaf]] | ||
SuperMushroomUltimate.png|[[File:Mario Emblem.png|20px|class=invert]][[Super Mushroom]] | SuperMushroomUltimate.png|[[File:Mario Emblem.png|20px|class=invert-dark]][[Super Mushroom]] | ||
SuperScopeUltimate.png|[[Super Scope]] | SuperScopeUltimate.png|[[Super Scope]] | ||
SuperStarUltimate.png|[[File:Mario Emblem.png|20px|class=invert]][[Super Star]] | SuperStarUltimate.png|[[File:Mario Emblem.png|20px|class=invert-dark]][[Super Star]] | ||
SuperspicyCurryUltimate.png|[[File:Kirby Emblem.png|20px|class=invert]][[Superspicy Curry]] | SuperspicyCurryUltimate.png|[[File:Kirby Emblem.png|20px|class=invert-dark]][[Superspicy Curry]] | ||
TimerUltimate.png|[[File:SmashBros Emblem.png|20px|class=invert]][[Timer (item)|Timer]] | TimerUltimate.png|[[File:SmashBros Emblem.png|20px|class=invert-dark]][[Timer (item)|Timer]] | ||
UniraUltimate.png|[[Unira]] | UniraUltimate.png|[[Unira]] | ||
WarpStarUltimate.png|[[File:Kirby Emblem.png|20px|class=invert]][[Warp Star]] | WarpStarUltimate.png|[[File:Kirby Emblem.png|20px|class=invert-dark]][[Warp Star]] | ||
XBombUltimate.png|[[File:KidIcarus Emblem.png|20px|class=invert]][[X Bomb]] | XBombUltimate.png|[[File:KidIcarus Emblem.png|20px|class=invert-dark]][[X Bomb]] | ||
</gallery> | </gallery> | ||
| Line 1,338: | Line 1,613: | ||
<gallery> | <gallery> | ||
Akira SSBU.png|[[Assist Trophy#Akira|Akira]] | Akira SSBU.png|[[Assist Trophy#Akira|Akira]] | ||
AlucardUltimate.png|[[File:Castlevania Symbol.png|20px|class=invert]][[Assist Trophy#Alucard|Alucard]] | AlucardUltimate.png|[[File:Castlevania Symbol.png|20px|class=invert-dark]][[Assist Trophy#Alucard|Alucard]] | ||
ArcadeUltimate.png|[[Assist Trophy#Arcade Bunny|Arcade Bunny]] | ArcadeUltimate.png|[[Assist Trophy#Arcade Bunny|Arcade Bunny]] | ||
Black Knight SSBU.png|[[File:FireEmblem Emblem.png|20px|class=invert]][[Assist Trophy#Black Knight|Black Knight]] | Black Knight SSBU.png|[[File:FireEmblem Emblem.png|20px|class=invert-dark]][[Assist Trophy#Black Knight|Black Knight]] | ||
BombermanUltimate2.png|[[Bomberman]] | BombermanUltimate2.png|[[Bomberman]] | ||
BurrowingUltimate.png|[[File:Pikmin Emblem.png|20px|class=invert]][[Assist Trophy#Burrowing Snagret|Burrowing Snagret]] | BurrowingUltimate.png|[[File:Pikmin Emblem.png|20px|class=invert-dark]][[Assist Trophy#Burrowing Snagret|Burrowing Snagret]] | ||
ChefUltimate.png|[[File:Kirby Emblem.png|20px|class=invert]][[Assist Trophy#Chef Kawasaki|Chef Kawasaki]] | ChefUltimate.png|[[File:Kirby Emblem.png|20px|class=invert-dark]][[Assist Trophy#Chef Kawasaki|Chef Kawasaki]] | ||
Flies & Hand SSBU.png|[[File:Mario Emblem.png|20px|class=invert]][[Assist Trophy#Flies & Hand|Flies & Hand]] | Flies & Hand SSBU.png|[[File:Mario Emblem.png|20px|class=invert-dark]][[Assist Trophy#Flies & Hand|Flies & Hand]] | ||
Guile SSBU.png|[[File:StreetFighterEmblem.png|20px|class=invert]][[Assist Trophy#Guile|Guile]] | Guile SSBU.png|[[File:StreetFighterEmblem.png|20px|class=invert-dark]][[Assist Trophy#Guile|Guile]] | ||
KappnUltimate.png|[[File:AnimalCrossing Emblem.png|20px|class=invert]][[Assist Trophy#Kapp'n|Kapp'n]] | KappnUltimate.png|[[File:AnimalCrossing Emblem.png|20px|class=invert-dark]][[Assist Trophy#Kapp'n|Kapp'n]] | ||
SSBU Klaptrap artwork.png|[[File:DK Emblem.png|20px|class=invert]][[Klaptrap]] | SSBU Klaptrap artwork.png|[[File:DK Emblem.png|20px|class=invert-dark]][[Klaptrap]] | ||
KnucklesUltimate.png|[[File:Sonic Emblem.png|20px|class=invert]][[Knuckles]] | KnucklesUltimate.png|[[File:Sonic Emblem.png|20px|class=invert-dark]][[Knuckles]] | ||
KrystalUltimate.png|[[File:StarFox Emblem.png|20px|class=invert]][[Assist Trophy#Krystal|Krystal]] | KrystalUltimate.png|[[File:StarFox Emblem.png|20px|class=invert-dark]][[Assist Trophy#Krystal|Krystal]] | ||
MoonUltimate.png|[[File:Zelda Emblem.png|20px|class=invert]][[Assist Trophy#Moon|Moon]] | MoonUltimate.png|[[File:Zelda Emblem.png|20px|class=invert-dark]][[Assist Trophy#Moon|Moon]] | ||
NikkiUltimate.png|[[Assist Trophy#Nikki|Nikki]] | NikkiUltimate.png|[[Assist Trophy#Nikki|Nikki]] | ||
RathalosUltimate.png|[[Assist Trophy#Rathalos|Rathalos]] | RathalosUltimate.png|[[Assist Trophy#Rathalos|Rathalos]] | ||
RodinUltimate.png|[[File:Bayonetta.png|20px|class=invert]][[Assist Trophy#Rodin|Rodin]] | RodinUltimate.png|[[File:Bayonetta.png|20px|class=invert-dark]][[Assist Trophy#Rodin|Rodin]] | ||
ShovelUltimate.png|[[Assist Trophy#Shovel Knight|Shovel Knight]] | ShovelUltimate.png|[[Assist Trophy#Shovel Knight|Shovel Knight]] | ||
Spring Man SSBU.png|[[File:ARMS Symbol.png|20px|class=invert]][[Assist Trophy#Spring Man|Spring Man]] | Spring Man SSBU.png|[[File:ARMS Symbol.png|20px|class=invert-dark]][[Assist Trophy#Spring Man|Spring Man]] | ||
SquidSisters SSBUltimate.png|[[File:Splatoon Symbol.png|20px|class=invert]][[Assist Trophy#Squid Sisters|Squid Sisters]] | SquidSisters SSBUltimate.png|[[File:Splatoon Symbol.png|20px|class=invert-dark]][[Assist Trophy#Squid Sisters|Squid Sisters]] | ||
SukaponUltimate.png|[[Assist Trophy#Sukapon|Sukapon]] | SukaponUltimate.png|[[Assist Trophy#Sukapon|Sukapon]] | ||
Thwomp SSBU.png|[[File:Mario Emblem.png|20px|class=invert]][[Assist Trophy#Thwomp|Thwomp]] | Thwomp SSBU.png|[[File:Mario Emblem.png|20px|class=invert-dark]][[Assist Trophy#Thwomp|Thwomp]] | ||
Tiki SSBU.png|[[File:FireEmblem Emblem.png|20px|class=invert]][[Assist Trophy#Tiki|Tiki]] | Tiki SSBU.png|[[File:FireEmblem Emblem.png|20px|class=invert-dark]][[Assist Trophy#Tiki|Tiki]] | ||
Vince SSBU.png|[[Assist Trophy#Vince|Vince]] | Vince SSBU.png|[[Assist Trophy#Vince|Vince]] | ||
Wily Capsule SSBU.png|[[File:MegaMan Emblem.png|20px|class=invert]][[Assist Trophy#Wily Capsule|Wily Capsule]] | Wily Capsule SSBU.png|[[File:MegaMan Emblem.png|20px|class=invert-dark]][[Assist Trophy#Wily Capsule|Wily Capsule]] | ||
Yuri Kozukata SSBU.png|[[Assist Trophy#Yuri Kozukata|Yuri Kozukata]] | Yuri Kozukata SSBU.png|[[Assist Trophy#Yuri Kozukata|Yuri Kozukata]] | ||
ZeroUltimate.png|[[File:MegaMan_Emblem.png|20px|class=invert]][[Assist Trophy#Zero|Zero]] | ZeroUltimate.png|[[File:MegaMan_Emblem.png|20px|class=invert-dark]][[Assist Trophy#Zero|Zero]] | ||
</gallery> | </gallery> | ||
===Returning=== | ===Returning=== | ||
<gallery> | <gallery> | ||
Andross SSBU.png|[[File:StarFox Emblem.png|20px|class=invert]][[Assist Trophy#Andross SSBU|Andross]] | Andross SSBU.png|[[File:StarFox Emblem.png|20px|class=invert-dark]][[Assist Trophy#Andross SSBU|Andross]] | ||
Ashley SSBU.png|[[File:Wario Emblem.png|20px|class=invert]][[Ashley]] | Ashley SSBU.png|[[File:Wario Emblem.png|20px|class=invert-dark]][[Ashley]] | ||
Chain Chomp SSBU.png|[[File:Mario Emblem.png|20px|class=invert]][[Chain Chomp]] | Chain Chomp SSBU.png|[[File:Mario Emblem.png|20px|class=invert-dark]][[Chain Chomp]] | ||
Color TV-Game 15 SSBU.png|[[Assist Trophy#Color TV-Game 15 SSBU|Color TV-Game 15]] | Color TV-Game 15 SSBU.png|[[Assist Trophy#Color TV-Game 15 SSBU|Color TV-Game 15]] | ||
Devil SSBU.png|[[Assist Trophy#Devil SSBU|Devil]] | Devil SSBU.png|[[Assist Trophy#Devil SSBU|Devil]] | ||
| Line 1,376: | Line 1,651: | ||
Dr. Kawashima SSBU.png|[[Assist Trophy#Dr. Kawashima SSBU|Dr. Kawashima]] | Dr. Kawashima SSBU.png|[[Assist Trophy#Dr. Kawashima SSBU|Dr. Kawashima]] | ||
Dr. Wright SSBU.png|[[Assist Trophy#Dr. Wright SSBU|Dr. Wright]] | Dr. Wright SSBU.png|[[Assist Trophy#Dr. Wright SSBU|Dr. Wright]] | ||
Ghirahim SSBU.png|[[File:Zelda Emblem.png|20px|class=invert]][[Assist Trophy#Ghirahim SSBU|Ghirahim]] | Ghirahim SSBU.png|[[File:Zelda Emblem.png|20px|class=invert-dark]][[Assist Trophy#Ghirahim SSBU|Ghirahim]] | ||
Ghosts SSBU.png|[[File:Pac-ManEmblem.png|20px|class=invert]][[Assist Trophy#Ghosts SSBU|Ghosts]] | Ghosts SSBU.png|[[File:Pac-ManEmblem.png|20px|class=invert-dark]][[Assist Trophy#Ghosts SSBU|Ghosts]] | ||
GrayFoxUltimate.png|[[File:MGS Symbol.png|20px|class=invert]][[Assist Trophy#Gray Fox|Gray Fox]] | GrayFoxUltimate.png|[[File:MGS Symbol.png|20px|class=invert-dark]][[Assist Trophy#Gray Fox|Gray Fox]] | ||
Hammer Bro SSBU.png|[[File:Mario Emblem.png|20px|class=invert]][[Hammer Bro]] | Hammer Bro SSBU.png|[[File:Mario Emblem.png|20px|class=invert-dark]][[Hammer Bro]] | ||
Isaac SSBU.png|[[Assist Trophy#Isaac SSBU|Isaac]] | Isaac SSBU.png|[[Assist Trophy#Isaac SSBU|Isaac]] | ||
Jeff SSBU.png|[[File:EarthBound Emblem.png|20px|class=invert]][[Assist Trophy#Jeff SSBU|Jeff]] | Jeff SSBU.png|[[File:EarthBound Emblem.png|20px|class=invert-dark]][[Assist Trophy#Jeff SSBU|Jeff]] | ||
Knuckle Joe SSBU.png|[[File:Kirby Emblem.png|20px|class=invert]][[Assist Trophy#Knuckle Joe SSBU|Knuckle Joe]] | Knuckle Joe SSBU.png|[[File:Kirby Emblem.png|20px|class=invert-dark]][[Assist Trophy#Knuckle Joe SSBU|Knuckle Joe]] | ||
Lyn SSBU.png|[[File:FireEmblem Emblem.png|20px|class=invert]][[Assist Trophy#Lyn SSBU|Lyn]] | Lyn SSBU.png|[[File:FireEmblem Emblem.png|20px|class=invert-dark]][[Assist Trophy#Lyn SSBU|Lyn]] | ||
Metroid SSBU.png|[[File:Metroid Emblem.png|20px|class=invert]][[Assist Trophy#Metroid SSBU|Metroid]] | Metroid SSBU.png|[[File:Metroid Emblem.png|20px|class=invert-dark]][[Assist Trophy#Metroid SSBU|Metroid]] | ||
MidnaUltimate.png|[[File:Zelda Emblem.png|20px|class=invert]][[Assist Trophy#Midna SSBU|Midna]] | MidnaUltimate.png|[[File:Zelda Emblem.png|20px|class=invert-dark]][[Assist Trophy#Midna SSBU|Midna]] | ||
Mother Brain SSBU.png|[[File:Metroid Emblem.png|20px|class=invert]][[Assist Trophy#Mother Brain SSBU|Mother Brain]] | Mother Brain SSBU.png|[[File:Metroid Emblem.png|20px|class=invert-dark]][[Assist Trophy#Mother Brain SSBU|Mother Brain]] | ||
Nightmare SSBU.png|[[File:Kirby Emblem.png|20px|class=invert]][[Assist Trophy#Nightmare SSBU|Nightmare]] | Nightmare SSBU.png|[[File:Kirby Emblem.png|20px|class=invert-dark]][[Assist Trophy#Nightmare SSBU|Nightmare]] | ||
Nintendog SSBU.png|[[File:Nintendogs Symbol.png|20px|class=invert]][[Assist Trophy#Nintendog SSBU|Nintendog]] | Nintendog SSBU.png|[[File:Nintendogs Symbol.png|20px|class=invert-dark]][[Assist Trophy#Nintendog SSBU|Nintendog]] | ||
Phosphora SSBU.png|[[File:KidIcarus Emblem.png|20px|class=invert]][[Assist Trophy#Phosphora SSBU|Phosphora]] | Phosphora SSBU.png|[[File:KidIcarus Emblem.png|20px|class=invert-dark]][[Assist Trophy#Phosphora SSBU|Phosphora]] | ||
Prince of Sable SSBU.png|[[Assist Trophy#Prince of Sablé|Prince of Sablé]] | Prince of Sable SSBU.png|[[Assist Trophy#Prince of Sablé|Prince of Sablé]] | ||
RikiUltimate.png|[[File:XenobladeEmblem.png|20px|class=invert]][[Assist Trophy#Riki SSBU|Riki]] | RikiUltimate.png|[[File:XenobladeEmblem.png|20px|class=invert-dark]][[Assist Trophy#Riki SSBU|Riki]] | ||
Samurai Goroh SSBU.png|[[File:F-Zero Emblem.png|20px|class=invert]][[Assist Trophy#Samurai Goroh SSBU|Samurai Goroh]] | Samurai Goroh SSBU.png|[[File:F-Zero Emblem.png|20px|class=invert-dark]][[Assist Trophy#Samurai Goroh SSBU|Samurai Goroh]] | ||
Shadow SSBU.png|[[File:Sonic Emblem.png|20px|class=invert]][[Shadow (character)|Shadow]] | Shadow SSBU.png|[[File:Sonic Emblem.png|20px|class=invert-dark]][[Shadow (character)|Shadow]] | ||
Sheriff SSBU.png|[[Assist Trophy#Sheriff SSBU|Sheriff]] | Sheriff SSBU.png|[[Assist Trophy#Sheriff SSBU|Sheriff]] | ||
Skull Kid SSBU.png|[[File:Zelda_Emblem.png|20px|class=invert]][[Assist Trophy#Skull Kid SSBU|Skull Kid]] | Skull Kid SSBU.png|[[File:Zelda_Emblem.png|20px|class=invert-dark]][[Assist Trophy#Skull Kid SSBU|Skull Kid]] | ||
Starfy SSBU.png|[[Assist Trophy#Starfy SSBU|Starfy]] | Starfy SSBU.png|[[Assist Trophy#Starfy SSBU|Starfy]] | ||
Starman SSBU.png|[[File:EarthBound Emblem.png|20px|class=invert]][[Assist Trophy#Starman SSBU|Starman]] | Starman SSBU.png|[[File:EarthBound Emblem.png|20px|class=invert-dark]][[Assist Trophy#Starman SSBU|Starman]] | ||
Takamaru SSBU.png|[[Assist Trophy#Takamaru SSBU|Takamaru]] | Takamaru SSBU.png|[[Assist Trophy#Takamaru SSBU|Takamaru]] | ||
WaluigiUltimate.png|[[File:Mario Emblem.png|20px|class=invert]][[Waluigi]] | WaluigiUltimate.png|[[File:Mario Emblem.png|20px|class=invert-dark]][[Waluigi]] | ||
</gallery> | </gallery> | ||
| Line 1,999: | Line 2,274: | ||
==amiibo== | ==amiibo== | ||
{{construction|section=yes}} | {{construction|section=yes}} | ||
{{more | {{image|more=yes|section=yes|Sora amiibo, art of amiibo within their respective boxes.}} | ||
{{ | {{quote|Have your FP inherit powers from spirits you have.|Text appearing after using amiibo}} | ||
In addition to all previously released [[amiibo]] relating to the playable characters being usable in ''Super Smash Bros. Ultimate'',<ref name="E32018Direct" /> amiibo for every fighter not in ''Super Smash Bros. for Nintendo 3DS'' and ''Super Smash Bros. for Wii U'' (including separate figures for the alternate costume fighter Alex, as well as [[Pokémon Trainer]], [[Squirtle]], [[Ivysaur]], [[Pyra]], and [[Mythra]]) have been released in the ''Super Smash Bros.'' line.<ref>Nintendo. (November 11, 2018). [https://youtu.be/fccgHnBQ0YM Super Smash Bros. Ultimate Direct 11.1.2018]. ''YouTube''. Retrieved June 15, 2021.</ref> Like in ''Super Smash Bros. for Nintendo 3DS'' and ''Super Smash Bros. for Wii U'', amiibo can act as Figure Players (FP) in battle, and amiibo data from the aforementioned games can be transferred to ''Super Smash Bros. Ultimate''.<ref name="E32018Direct" /> [[Spirit (Super Smash Bros. Ultimate)|Spirit]]s can also be used on Figure Players. | In addition to all previously released [[amiibo]] relating to the playable characters being usable in ''Super Smash Bros. Ultimate'',<ref name="E32018Direct" /> amiibo for every fighter not in ''Super Smash Bros. for Nintendo 3DS'' and ''Super Smash Bros. for Wii U'' (including separate figures for the alternate costume fighter Alex, as well as [[Pokémon Trainer]], [[Squirtle]], [[Ivysaur]], [[Pyra]], and [[Mythra]]) have been released in the ''Super Smash Bros.'' line.<ref>Nintendo. (November 11, 2018). [https://youtu.be/fccgHnBQ0YM Super Smash Bros. Ultimate Direct 11.1.2018]. ''YouTube''. Retrieved June 15, 2021.</ref> Like in ''Super Smash Bros. for Nintendo 3DS'' and ''Super Smash Bros. for Wii U'', amiibo can act as Figure Players (FP) in battle, and amiibo data from the aforementioned games can be transferred to ''Super Smash Bros. Ultimate''.<ref name="E32018Direct" /> [[Spirit (Super Smash Bros. Ultimate)|Spirit]]s can also be used on Figure Players. | ||
| Line 2,108: | Line 2,383: | ||
===Critical=== | ===Critical=== | ||
''Super Smash Bros. Ultimate'' has received widespread critical acclaim. | ''Super Smash Bros. Ultimate'' has received widespread critical acclaim. | ||
{| class="wikitable | {| class="wikitable" style="width:100%;text-align:center" | ||
!colspan="4"style="font-size:120%; text-align:center; background-color:silver;"|Reviews | !colspan="4"style="font-size:120%; text-align:center; background-color:silver;"|Reviews | ||
|-style="background-color:#E6E6E6" | |-style="background-color:#E6E6E6" | ||
| Line 2,139: | Line 2,414: | ||
|-style="background-color:#E6E6E6" | |-style="background-color:#E6E6E6" | ||
|colspan=2|Compiler | |colspan=2|Compiler | ||
|colspan=2|{{ | |colspan=2|{{nw|Platform / Score}} | ||
|- | |- | ||
|colspan=2|Metacritic | |colspan=2|Metacritic | ||
| Line 2,180: | Line 2,455: | ||
*''[[Yoshi's Story]]'': [[Don Bongo]], [[Pak E. Derm]], the [[Super Happy Tree]], and [[Blargg]] appear as spirits. | *''[[Yoshi's Story]]'': [[Don Bongo]], [[Pak E. Derm]], the [[Super Happy Tree]], and [[Blargg]] appear as spirits. | ||
*[[Mario Golf (Game Boy Color)|''Mario Golf'' (Game Boy Color)]]: [[Kid]] appears as a spirit using his artwork from this game. | *[[Mario Golf (Game Boy Color)|''Mario Golf'' (Game Boy Color)]]: [[Kid]] appears as a spirit using his artwork from this game. | ||
*''[[Donkey Kong 64]]'': One of K. Rool's attacks involves using his boxing gloves from this game, and his Final Smash recreates the [[Game Over]] scene involving the [[Blast-o-Matic]] being fired from [[ | *''[[Donkey Kong 64]]'': One of K. Rool's attacks involves using his boxing gloves from this game, and his Final Smash recreates the [[Game Over]] scene involving the [[Blast-o-Matic]] being fired from [[Crocodile Isle]] at [[Donkey Kong Island]]. [[Tiny Kong]] and [[Lanky Kong]] appear as spirits using their artwork from this game. King K. Rool briefly appears in the ending of Ken Masters and Incineroar's debut trailer "Clash of Flames" as one of Incineroar's intended challengers, indirectly referencing the final boss battle in that game. | ||
*''[[Paper Mario (series)|Paper Mario]]'' series: Piranha Plant takes on the colors of a [[Putrid Piranha]] for one of its attacks where it spews poison. Additionally, Piranha Plant's black costume resembles the [[Pale Piranha]] and its blue costume resembles the [[Frost Piranha]]. [[Kammy Koopa]] also appears as a spirit. | *''[[Paper Mario (series)|Paper Mario]]'' series: Piranha Plant takes on the colors of a [[Putrid Piranha]] for one of its attacks where it spews poison. Additionally, Piranha Plant's black costume resembles the [[Pale Piranha]] and its blue costume resembles the [[Frost Piranha]]. [[Kammy Koopa]] also appears as a spirit. | ||
*''[[Wario Land 4]]'': [[Princess Shokora]] appears as a spirit. | *''[[Wario Land 4]]'': [[Princess Shokora]] appears as a spirit. | ||
*''[[Luigi's Mansion]]'' / ''[[Luigi's Mansion: Dark Moon]]'': Simon Belmont's debut trailer has [[Luigi]] being present in Dracula's Castle and attempting to ward off various ghostly creatures inside, alluding to the premise of the games. A new arrangement of the main theme from the former game appears in ''Super Smash Bros. Ultimate''. [[Polterpup]] and [[Professor Elvin Gadd]] appear as spirits using their artwork from the latter game. The [[Poltergust 5000]] from the latter game appears as a spirit. Luigi's final boss in Classic Mode being [[Dracula]] is most likely a reference to his dealing with similar spooks in the ''[[Luigi's Mansion (series)|Luigi's Mansion]]'' games. | *''[[Luigi's Mansion]]'' / ''[[Luigi's Mansion: Dark Moon]]'': Simon Belmont's debut trailer has [[Luigi]] being present in Dracula's Castle and attempting to ward off various ghostly creatures inside, alluding to the premise of the games. A new arrangement of the main theme from the former game appears in ''Super Smash Bros. Ultimate''. [[Polterpup]] and [[Professor Elvin Gadd]] appear as spirits using their artwork from the latter game. The [[Poltergust 5000]] from the latter game appears as a spirit. Luigi's final boss in Classic Mode being [[Dracula]] is most likely a reference to his dealing with similar spooks in the ''[[Luigi's Mansion (series)|Luigi's Mansion]]'' games. | ||
*''[[Super Smash Bros. Melee]]'': In the {{ | *''[[Super Smash Bros. Melee]]'': In the {{file link|Super Smash Bros. Ultimate - panoramic.png|panorama group artwork}}, Luigi is seen doing the [[Green Missile]] above the other characters, just like in the {{file link|SSBM.jpg|group artwork}} from this game. [[Yoshi]]'s Final Smash is based on a scene from this game's opening. Giga Bowser also returns as a boss in Classic Mode and Adventure Mode: World of Light. | ||
*''[[Yoshi's Island: Super Mario Advance 3]]'': [[Baby Mario]] appears as a spirit, using artwork from this game. | *''[[Yoshi's Island: Super Mario Advance 3]]'': [[Baby Mario]] appears as a spirit, using artwork from this game. | ||
*''[[Super Mario Sunshine]]'': An arrangement of [[Delfino Plaza]]'s music appears in the game. [[Pianta]]s, a [[Shine Sprite]], and [[F.L.U.D.D.]] appear as spirits using their artwork from this game. | *''[[Super Mario Sunshine]]'': An arrangement of [[Delfino Plaza]]'s music appears in the game. [[Pianta]]s, a [[Shine Sprite]], and [[F.L.U.D.D.]] appear as spirits using their artwork from this game. | ||
| Line 2,215: | Line 2,490: | ||
*''[[Mario Kart 7]]'': One of Daisy's taunts matches the artwork pose she originally had from this game. [[Metal Mario]]'s [[B Dasher]] appears as a spirit. Rosalina's voice clips are taken from this game. | *''[[Mario Kart 7]]'': One of Daisy's taunts matches the artwork pose she originally had from this game. [[Metal Mario]]'s [[B Dasher]] appears as a spirit. Rosalina's voice clips are taken from this game. | ||
*''[[New Super Mario Bros. 2]]'': [[Gold Mario]] appears as a spirit. | *''[[New Super Mario Bros. 2]]'': [[Gold Mario]] appears as a spirit. | ||
*''[[New Super Mario Bros. U]]'': The Koopalings, [[Boo]], and [[Hammer Bro]] appear as spirits using their artwork from this game. [[Nabbit]] appears as a spirit. | *''[[New Super Mario Bros. U]]'': The Koopalings, [[Boo]], and [[Hammer Bro]] appear as spirits using their artwork from this game. [[Nabbit]] appears as a spirit. [[Lemmy]]'s render is based on his artwork from this game. | ||
*''[[Paper Mario: Sticker Star]]'': Bowser appears as a spirit using his artwork from this game, which can be obtained by enhancing [[Paper Bowser]]'s spirit. | *''[[Paper Mario: Sticker Star]]'': Bowser appears as a spirit using his artwork from this game, which can be obtained by enhancing [[Paper Bowser]]'s spirit. | ||
*''[[Mario & Luigi: Dream Team]]'': [[Antasma]] and [[Prince Dreambert]] appear as spirits. | *''[[Mario & Luigi: Dream Team]]'': [[Antasma]] and [[Prince Dreambert]] appear as spirits. | ||
| Line 2,268: | Line 2,543: | ||
==Names in other languages== | ==Names in other languages== | ||
{{foreign names | {{foreign names | ||
| | |Jpn=大乱闘スマッシュブラザーズ SPECIAL | ||
| | |JpnR=Dairantō Sumasshu Burazāzu Supesharu | ||
| | |JpnM=Great Melee Smash Bros. Special | ||
|ChiT=任天堂明星大亂鬥 特別版 | |ChiT=任天堂明星大亂鬥 特別版 | ||
|ChiTR=Rèntiāntáng Míngxīng Dàluàndòu: Tèbiébǎn | |ChiTR=Rèntiāntáng Míngxīng Dàluàndòu: Tèbiébǎn | ||
| Line 2,276: | Line 2,551: | ||
|ChiS=任天堂明星大乱斗 特别版 | |ChiS=任天堂明星大乱斗 特别版 | ||
|ChiSR=Rèntiāntáng Míngxīng Dàluàndòu: Tèbiébǎn | |ChiSR=Rèntiāntáng Míngxīng Dàluàndòu: Tèbiébǎn | ||
|ChiSM=Nintendo Stars Great Melee: Special Edition''; the combination of the Japanese title and [[Super Smash Bros.|the Nintendo 64 game]]'s Japanese name (''Nintendo All-Star! Dairantō Smash Bros.'') | |ChiSM=Nintendo Stars Great Melee: Special Edition''; the combination of the Japanese title and [[Super Smash Bros.|the Nintendo 64 game]]'s Japanese name (''Nintendo All-Star! Dairantō Smash Bros.'') | ||
|Kor=슈퍼 스매시브라더스 얼티밋 | |Kor=슈퍼 스매시브라더스 얼티밋 | ||
|KorR=Syupeo Seumaesi Beuradeoseu Eoltimit | |KorR=Syupeo Seumaesi Beuradeoseu Eoltimit | ||
|KorM=Super Smash Bros. Ultimate | |KorM=Super Smash Bros. Ultimate | ||
}} | }} | ||
==Trivia== | ==Trivia== | ||
[[File:Super Smash Bros Ultimate Germany boxart.png|thumb|The German game cover]] | [[File:Super Smash Bros Ultimate Germany boxart.png|thumb|The German game cover]] | ||
*On the German cover for the game, [[Yoshi]] was omitted from the boxart to fit the USK rating in the bottom left corner, while [[Pikachu]], who was placed lower than Yoshi, was moved up due to its greater popularity.<ref>Iggy. (June 16, 2018). [https://nintendosoup.com/yoshi-vanishes-from-super-smash-bros-ultimates-german-box-art/ Yoshi Vanishes from ''Super Smash Bros. Ultimate''{{'}}s German Box Art]. ''NintendoSoup''. Retrieved June 16, 2018.</ref> | *On the German cover for the game, [[Yoshi]] was omitted from the boxart to fit the USK rating in the bottom left corner, while [[Pikachu]], who was placed lower than Yoshi, was moved up due to its greater popularity.<ref>Iggy. (June 16, 2018). [https://nintendosoup.com/yoshi-vanishes-from-super-smash-bros-ultimates-german-box-art/ Yoshi Vanishes from ''Super Smash Bros. Ultimate''{{'}}s German Box Art]. ''NintendoSoup''. Retrieved June 16, 2018.</ref> | ||
*Luigi supposedly dies during Simon and Richter's announcement trailer after having his soul taken by Death. In response, BBC News made an [https://www.bbc.com/news/amp/newsbeat-45127783 article] on Luigi's death. | *Luigi supposedly dies during Simon and Richter's announcement trailer after having his soul taken by Death. In response, BBC News made an [https://www.bbc.com/news/amp/newsbeat-45127783 article] on Luigi's death. | ||
==External links== | |||
{{NIWA|ARMSWiki=1|Bulbapedia=1|FZeroWiki=1|FireEmblem=1|GoldenSun=1|Icaruspedia=1|Inkipedia=1|KHWiki=1|LylatWiki=1|MetroidWiki=Metroid in Super Smash Bros. Ultimate|NWiki=1|Nookipedia=1|Pikipedia=1|SmashWiki=1|StarfyWiki=1|StrategyWiki=1|WiKirby=1|WikiBound=1|ZeldaWiki=1}} | |||
*[https://www.smashbros.com/ja_JP/index.html Japanese website] | |||
*[https://www.smashbros.com/en_US/index.html North American website] | |||
*[https://www.smashbros.com/es_LA/index.html Mexican website] | |||
*[https://www.smashbros.com/en_GB/index.html European website] | |||
*[https://www.smashbros.com/en_AU/index.html Australian website] | |||
==References== | |||
<references/> | |||
{{SSBU}} | |||
{{Super Mario games}} | |||
{{Switch}} | |||
==''Super Smash Kart''== | |||
{{about|the [[Nintendo Switch]] [[Reissue#Ports|port]] of the Mario Kart 8 game|the game's original version|[[Mario Kart 8]]}} | |||
{{game infobox | |||
|title=Super Smash Kart | |||
|image=[[File:MK8 Deluxe - Box NA.png|250px]] | |||
|developer=[[Nintendo Entertainment Planning and Development|Nintendo EPD]]<br>[[Bandai Namco Entertainment|BANDAI NAMCO Studios Inc.]] | |||
|publisher=[[Nintendo]]<br>Tencent Games (China) | |||
|release={{flag list|Japan|April 28, 2017|USA|April 28, 2017|Mexico|April 28, 2017<ref>{{cite|language=es-419|url=www.nintendo.com/es-mx/store/products/mario-kart-8-deluxe-switch|title=Mario Kart™ 8 Deluxe para la consola Nintendo Switch|publisher=Nintendo.com|accessdate=November 6, 2024}}</ref>|Europe|April 28, 2017|Australia|April 28, 2017|HK|April 28, 2017<ref>{{cite|url=www.nintendo.com.hk/software/switch|title=遊戲軟體一覽 {{!}} 任天堂(香港)有限公司網站|publisher=Nintendo of HK|language=zh-hant|accessdate=November 6, 2024}}</ref>|Singapore|April 28, 2017<ref>{{cite|author=|date=|url=www.nintendo.com/sg/switch/aabp/products/soft.html|title=Mario Kart 8 Deluxe: Product Information|publisher=Nintendo of Singapore|language=en|archive=web.archive.org/web/20240213081537/https://www.nintendo.com/sg/switch/aabp/products/soft.html|accessdate=June 1, 2024}}</ref>|South Korea|December 15, 2017<ref>{{cite|deadlink=y|archive=web.archive.org/web/20170920035442/http://www.nintendo.co.kr/PR/press_list.php?cPage1=1&cPage2=1&idx=274&press_div=P|title=한국닌텐도 홈페이지|language=ko|publisher=Nintendo of Korea|accessdate=November 6, 2024}}</ref>|ROC|December 15, 2017<ref>{{cite|language=zh-hant|url=www.nintendo.tw/pressrelease/switch_20170920.html|title=任天堂(香港)有限公司|publisher=Nintendo of Taiwan|accessdate=November 6, 2024}}</ref>|China|March 16, 2020<ref>{{cite|url=www.nintendoswitch.com.cn/topics/6ff1f459-9281-4706-b7f8-52bab6f45d21|date=March 13, 2020|language=zh-hans|title=《马力欧卡丁车8 豪华版》《超级马力欧 奥德赛》将于3月16日发售 - 腾讯Nintendo Switch官网|publisher=Tencent|accessdate=November 6, 2024}}</ref>}} | |||
|languages={{languages|en_us=y|en_gb=y|fr_fr=y|fr_ca=y|es_es=y|es_latam=y|de=y|it=y|nl=y|ru=y|pt_pt=y|jp=y|kr=y|zh_simp=y|zh_trad=y|zh_simp_note={{footnote|main|SC}}}}{{footnote|note|SC|The global and domestic versions have slightly different localizations.}} | |||
|genre=[[Genre#Racing|Racing]] | |||
|modes=Single Player, Multiplayer, Online Play, Wireless Play, LAN Play | |||
|ratings={{ratings|esrb=E|pegi=3|acb=g|cero=A|usk=0|classind=l|smeccv=A|rars=0+|grac=all|cadpa=8+|gsrr=p|fpb=pg|gcam=3|nmc=3}} | |||
|platforms=[[Nintendo Switch 2]] | |||
|format={{format|switch=1|switchdl=1}} | |||
|input={{input|joy-con=1|joy-con-horizontal=1|switchpro=1}} | |||
|serials={{flag list|USA|HAC-P-AABPA-USA|Europe|LA-H-AABPA-EUR}} | |||
}} | |||
'''''Mario Kart 8 Deluxe''''' is a [[Genre#Racing|racing]] game in the ''[[Mario Kart (series)|Mario Kart]]'' series released worldwide for the [[Nintendo Switch]] on April 28, 2017. It is an enhanced [[Reissue#Ports|port]] of ''[[Mario Kart 8]]'' for the [[Wii U]] and is the first ''[[Super Mario (franchise)|Super Mario]]'' game overall to be released for the Nintendo Switch. The base game contains additional content such as several new characters and an overhauled [[Battle]] mode with new courses and modes. First teased in the Nintendo Switch's announcement video on October 20, 2016, the game was formally announced as part of the Nintendo Switch presentation on January 13, 2017. | |||
Throughout 2022 and 2023, new race courses and returning characters were added to the game via the ''[[Mario Kart 8 Deluxe – Booster Course Pass]]'' paid DLC. An edition of the game that has the ''Booster Course Pass'' activated from the start, titled the '''''Mario Kart 8 Deluxe Bundle (Game + Booster Course Pass)''''', is available for purchase digitally.<ref>{{cite|language=en-us|url=www.nintendo.com/us/store/products/mario-kart-8-deluxe-bundle-game-plus-booster-course-pass-switch|title=Mario Kart™ 8 Deluxe Bundle (Game + Booster Course Pass)|publisher=nintendo.com|accessdate=January 31, 2023|archive=web.archive.org/web/20230128063850/https://www.nintendo.com/store/products/mario-kart-8-deluxe-bundle-game-plus-booster-course-pass-switch}}</ref> | |||
==Controls== | |||
===Dual Joy-Con / Pro Controller=== | |||
{|class="wikitable sortable | |||
|- | |||
!Action | |||
!Dual Joy-Con | |||
!Pro Controller | |||
!Motion | |||
|- | |||
|style="text-align:center"|Steer | |||
|style="text-align:center"|{{button|switch|leftstick}} / {{button|switch|leftright}} | |||
|style="text-align:center"|{{button|switch|leftstick}} / {{button|switch|padleftright}} | |||
|style="text-align:center"|Tilt {{button|switch|joy-con}} / {{button|switch|pro}} | |||
|- | |||
|style="text-align:center"|Accelerate / [[Rocket Start]] (press and hold when the countdown hits 2) | |||
|style="text-align:center"colspan=3|{{button|switch|A}} / {{button|switch|Y}} / {{button|switch|rightstick}}↑ | |||
|- | |||
|style="text-align:center"|Brake / Reverse | |||
|style="text-align:center"colspan=3|{{button|switch|B}} / {{button|switch|rightstick}}↓ | |||
|- | |||
|style="text-align:center"|Item / Horn | |||
|style="text-align:center"colspan=3|{{button|switch|L}} / {{button|switch|ZL}} | |||
|- | |||
|style="text-align:center"|Drift / Hop / Trick | |||
|style="text-align:center"colspan=3|{{button|switch|R}} / {{button|switch|ZR}} | |||
|- | |||
|style="text-align:center"|Rear view | |||
|style="text-align:center" colspan=3|{{button|switch|X}} | |||
|} | |||
===Joy-Con (sideways)=== | |||
*{{button|switch|Stick}} or tilt {{button|switch|joy-con-sideways}}: Steer | |||
*{{button|switch|jc-right}} or {{button|switch|jc-left}}: Accelerate / [[Rocket Start]] (press and hold when the countdown hits 2) | |||
*{{button|switch|jc-bottom}}: Brake/reverse | |||
*{{button|switch|SL}}: Use horn/item | |||
*{{button|switch|SR}}: Hop/drift/trick | |||
*{{button|switch|Stick}} or tilt + {{button|switch|jc-right}} or {{button|switch|jc-left}} or auto-accelerate + {{button|switch|SR}}: Drift | |||
*{{button|switch|jc-top}}: Rear view | |||
===Toy-Con Motorbike=== | |||
*Tilt: Steer | |||
*{{button|switch|joy-con-r}} Forward tilt: Accelerate / [[Rocket Start]] (press and hold when the countdown hits 2) | |||
*{{button|switch|A}}: Brake / reverse | |||
*{{button|switch|ZL}}: Use horn/item | |||
*{{button|switch|R}}: Hop / trick | |||
*Tilt + {{button|switch|joy-con-r}} forward tilt or auto-accelerate + {{button|switch|R}}: Drift | |||
*{{button|switch|left}}: Switch view | |||
===Toy-Con Car=== | |||
*Tilt: Steer | |||
*Pedal half press: Accelerate / [[Rocket Start]] (press and hold when the countdown hits 2) | |||
*{{button|switch|R}}: Use horn/item | |||
*Pedal full press: Hop / trick | |||
*Tilt + pedal full press: Drift | |||
*{{button|switch|X}}: Switch view | |||
==Differences from the original== | |||
The following is a list of changes made to the base ''Mario Kart 8 Deluxe'' game from the latest version of ''Mario Kart 8'', excluding changes that were fixed to be consistent with the original game in future updates. | |||
===General=== | |||
*[[#Characters|Characters]], cups, and [[#Courses|courses]] that were originally unlockable or exclusive to downloadable content in ''Mario Kart 8'' are available from the start in this game; in addition, [[King Boo]], [[Bowser Jr.]], [[Dry Bones]], [[Inkling|Inkling Boy]], and Inkling Girl are added as new characters. This makes for the largest starting character roster or track selection of any home console ''Mario Kart'' game. | |||
*Metal Mario gains an alternate costume known as [[Gold Mario]], which is unlocked by clearing all cups in 200cc. | |||
*A new Inkling Suit has been added to the [[#Mii racing suits|Mii racing suits]] roster. It is usable by scanning an Inkling or ''Splatoon''-series amiibo. In addition, the Animal Crossing Suit can be unlocked with any Isabelle or ''Animal Crossing''-series amiibo. | |||
*The game has reduced loading times. | |||
===Gameplay=== | |||
[[File:MK8D Mario Using Smart Steering.png|thumb|left|Mario driving with Smart Steering activated, indicated by the antenna at the back of the kart]] | |||
*The [[#Battle|Battle]] mode has been revamped. | |||
*The overall game difficulty has been adjusted, as CPUs slow down when close to the player and do not charge Mini-Turbos or Super Mini-Turbos as quickly. | |||
*The default speed of the CPUs in the Normal and Easy difficulties is slightly reduced. | |||
*The [[rival]] system has been expanded: characters that did not have any in the original were given them, and characters who already had them swapped some in place of others. | |||
*Motion controls are now turned on in the pause menu by pressing {{button|switch|y}}, rather than a toggle switching between it and stick controls. | |||
*This game introduces Smart Steering and Auto-Accelerate for beginners; the former makes staying on the track easier by automatically steering the vehicle away from edges on the track, while the latter makes the vehicle automatically accelerate (though this is not available in Battle mode). If the Smart Steering mode is on, the player's vehicle will have a black antenna sticking out of its rear end; this antenna blinks yellow and bends when Smart Steering is in effect. Smart Steering and Auto-Accelerate can be toggled on and off individually for each player in the vehicle part selection menu and in the pause menu. | |||
*The pathfinding and drifting of CPUs in 200cc was reworked. | |||
*The [[#Unlocking criteria|unlock criteria]] for various kart parts have been adjusted; some now have to be unlocked instead of being obtained from the start, while others are now obtained from the start instead of being unlockable. All kart parts that were DLC in the original game are now unlocked in the same manner as non-gold kart parts. New kart parts have been added, such as the [[Koopa Clown]], the [[Inkstriker]], and the [[Splat Buggy]]. | |||
*Turning off the map, which is now turned on by default, is done by pressing {{button|switch|X}} in the pause menu, instead of {{button|wiiu|minus}} at any time like in the original. | |||
*There is an additional level of [[Mini-Turbo]], called Ultra Mini-Turbo, denoted by purple sparks (referred to as pink in the British English version) that appear after the orange sparks. This new level of Mini-Turbo can only be used if Smart Steering is off. | |||
*A 200cc engine class in Time Trials was added; in addition to being separately recorded from the 150cc Time Trials, it features new staff ghosts. | |||
*Some of the staff ghosts in time trials from the Wii U version were adjusted. | |||
*There are more character weight classes than in the original, with several returning characters having different statistics. | |||
*The player can now change controllers on the character selection screen by pressing {{button|switch|minus}} or {{button|switch|plus}}. | |||
*The statistics of vehicle parts have been altered, and certain physics elements, such as the speed increase per stat and the acceleration tiers, were adjusted. | |||
*Wireless and LAN modes were added, the latter returning from ''[[Mario Kart: Double Dash!!]]'' | |||
*Offline "VS Race" now requires a minimum of four races per cup instead of three. | |||
*CPUs choose from a wider variety of kart parts than in the original version. | |||
*Being able to see which items the other drivers have, which was only possible when playing with the Wii U GamePad in the original, has now been removed entirely. | |||
*[[Miiverse]] compatibility is absent, including the ability to upload [[Highlight Reel]]s on YouTube; this feature was also discontinued in the Wii U version when Miiverse was terminated on November 7, 2017. | |||
*An exploit in the original version that allowed players to gain speed by [[Hop (move)|hopping]] after speed boosting has been fixed. | |||
====Items==== | |||
*Characters can now carry up to two items at once, even if they do not equip the first item. | |||
*The game features the return of the [[Item Box#Mario Kart 8 / Mario Kart 8 Deluxe|Double Item Box]] from ''Mario Kart: Double Dash!!'' | |||
*[[Red Shell]]s and [[Spiny Shell (blue)|Spiny Shell]]s are now slower when they lock onto their target, meaning players are able to outrun them in 200cc when they have any kind of speed boost. | |||
*Items are now based on distance and placement, rather than distance alone. | |||
*The Boo is introduced as an item, with the Feather also appearing in Battle mode only. | |||
*If a [[Blooper]] is about to ink the player as they cross the finish line, the player will now still get inked.<ref>{{cite|language=en|author=Nintendo World Report TV|date=January 14, 2017|url=www.youtube.com/watch?v=iaPqoUWLpMc&t=195s|title=Mario Kart 8 Deluxe - Wario's Gold Mine - Nintendo Switch Off-Screen Footage|publisher=YouTube|accessdate=November 6, 2024}}</ref> This is unlike the Wii U version, where the Blooper or the ink disappeared instead. | |||
*CPU players now have a chance to obtain [[Triple Red Shells]] from [[Item Box]]es, but this primarily only happens in the Shells Only item setting. | |||
====Online==== | |||
*Playing online now requires a subscription to [[Nintendo Switch Online]], rather than being tied to [[Nintendo Network]]. | |||
*The dedicated lobbies for DLC copies and non DLC copies from the original game have been removed, as has the option to set whether or not tournament lobbies could be set to only allow the latter. | |||
*Online lobbies have been changed in that a room entirely made up of players between 1000 VR and 3000 VR will be randomized between a 100cc or 150cc race, and a room full of players at over 3000 VR will be randomized among a 150cc, Mirror, or 200cc race, though the game normally selects 150cc. This is unlike the original game, where lobbies full of players between 1000 and over 4000 VR were put in 100cc, and lobbies full of players at over 5000 VR raced in 150cc. | |||
*There is now an option to change character and kart parts in a lobby; this is done by pressing {{button|switch|jc-left}} during the course selection of an online lobby. | |||
*Players are no longer positioned based on the order they joined. | |||
*VR and BR distributions are slightly tweaked. | |||
*Voice chat in private lobbies has been removed due to the Nintendo Switch's lack of a microphone. | |||
===Graphics=== | |||
*The game now mostly renders in native 1920x1080 resolution in TV mode (sometimes switching to native 1728x972), and always renders at native 1280x720 resolution in tabletop and handheld mode, instead of the dynamic 1280x720/1152x648 rendering resolution used in the original Wii U version. | |||
*The game runs at a constant 60 FPS, whereas the Wii U version would frequently dip to 59. | |||
*The shadows present in the game are more detailed in multiplayer. | |||
*Trophies can no longer be rotated, even when in handheld mode. | |||
*All courses that feature confetti flying around the [[Finish line (object)|finish line]], such as [[Mario Circuit (Mario Kart 8)|Mario Circuit]], now also have confetti on the ground of the course near it.<ref>{{cite|url=www.youtube.com/watch?v=9F2djsuZuTg&t=230s|language=en|timestamp=03:50|title=Luigi Wins by Doing Absolutely Nothing - Mario Kart 8 Deluxe|publisher=YouTube|accessdate=November 6, 2024|author=GameXplain|date=April 21, 2017}}</ref> | |||
*When using the rear-view mirror, the character will now move their eyes slightly to the left to look back, like in ''[[Mario Kart Wii]]''; however, their eyes will stay looking to the left as long as the rear-view is active, rather than switching back after a second as they do in ''Mario Kart Wii''. | |||
*When playing with teams, flags colored to correspond to the teams are added behind the vehicles. If Smart Steering is on, then the Smart Steering antenna serves as the pole of the flag. These flags do not appear in Balloon Battle and Bob-omb Blast, as the colors of the balloons represent the teams in these modes. | |||
*The [[Mii]] characters that represent the players in online lobbies wear racing suits, unlike in the original version in which they wore their regular outfits. | |||
*The wireless and LAN modes use a very similar lobby to the online lobby, albeit visually set in a garage rather than on a [[Earth|globe]]. | |||
*In online play, the Mii of the previous race or battle's winner wears a [[crown]] identical to the one worn by the first-place player in Battle mode. | |||
*Motion blur when boosting is added to online play; in earlier builds, it was also present in splitscreen multiplayer.<ref>{{file link|MK8D 4-Player Gameplay Screenshot.png|Screenshot of the starting boost in a four-player split-screen VS Race}}.</ref> | |||
====HUD / interface==== | |||
*The user interface on the title screen and main menu has been revamped. | |||
**All of the Toad icons are now on the left. | |||
**The mode buttons appear longer, wider, and more spaced out. | |||
**The options for playing online with one or two players have been combined, with the mode being renamed to "Online Play" due to this. | |||
**For local multiplayer, there is now a sub-menu to choose the number of players to participate with. | |||
**The new wireless and LAN modes were added to the menu. They use a very similar lobby to the online lobby, albeit set in a garage rather than on a [[Earth|globe]]. | |||
**The [[Nintendo eShop]] icon that led to the DLC's shop page has been removed. | |||
**The stamp counter icon has been removed. | |||
**The status screen and amiibo menu, brought up by pressing {{button|wiiu|minus}} and {{button|wiiu|plus}} on Wii U respectively, now have their own dedicated icons on the bottom, replacing the prompts to open the equivalent menus from the Wii U game. Both menus have also been redesigned. | |||
**The Mario Kart TV icon was relocated from beneath the online play button on Wii U to being on the right of the amiibo icon. | |||
**Much of the artwork on the entire menu was replaced and, after being unlocked, swaps out every time the game is opened. | |||
**The game features an in-game guide, directly accessible from the game's menu; this guide explains various techniques, Battle mode, and the functions of each item. Much of its text is reused from the Wii U version's electronic manual. | |||
*The menu in VS Race was redesigned. | |||
*Scrollbars have been removed from the time trial menu. It also no longer shows Miiverse posts. | |||
*Race rules and the course name are now displayed on loading screens in online matches. | |||
*New tournament icons have been added in online play. | |||
*The game no longer shows the state or province a player is located in on the loading screen of an online match or the loading screen in Mario Kart TV. | |||
*In online matches, the flag displaying the country a player is in has been resized to be as big as the Mii icon next to it, as well as to display at a higher resolution. | |||
*Players can now see the lap count or timer when spectating an online race or battle respectively. | |||
*In races, the lap and coin counters have been moved closer to the bottom left corner. | |||
*It is no longer possible to see the lap count when crossing the finish line or the full results in multiplayer (including online lobbies) at the end of the race while watching Highlight Reels via [[Mario Kart TV]]. | |||
*The mini map features multiple alterations. When playing in local multiplayer, there is only one map in the center of the screen, rather than each player having their own copy of it like in the Wii U version. The color for the race courses in the Wii U version was typically blue, excluding the maps of the [[Rainbow Road]]s and {{classic link|GCN|Baby Park}}, which were rainbow and red, respectively. However, in this version, all minimaps are white, like in ''Mario Kart Wii'' and ''Mario Kart 7''. Battle courses now have color-shaded areas and lines on their maps to serve as a visual representation of where the player is located. In a race, the 1st place player no longer has a crown on their map icon, though they still do in battles. The icons for character and the Spiny Shell on the course map are now slightly larger, more detailed, and of an increased resolution. Explosions caused by Spiny Shells and Bob-ombs are also now shown. | |||
*All notifications use a different font. | |||
*It is now possible to check which kart parts a ghost was using in time trials. | |||
*Inkling Girl, [[Isabelle]], and [[Link]] now appear on the loading screen, replacing the second set of characters from Wario to Bowser. | |||
*The chart on the kart selection screen no longer rounds to the nearest whole number, creating a more accurate representation of the karts' stats.<ref>https://www.ign.com/wikis/mario-kart-8/Switch_Version_Changes</ref> | |||
*The engine class for the upcoming race in an online race lobby is now shown in the lobby as the course is selected, via a "50", "100", "150", mirrored "150" (for Mirror), or "200" icon in the bottom right of the selected course icon. | |||
**This extends to online battle lobbies, which will display a symbol of a yellow balloon (for Balloon Battle), a [[Potted Piranha Plant|potted Piranha Plant]] (for Renegade Roundup), a [[coin]] (for Coin Runners), a [[Shine Sprite]] (for Shine Thief), or a [[Bob-omb]] (for Bob-omb Blast) to denote which Battle mode is about to be played. | |||
===Audio=== | |||
*The game supports 5.1 surround. Effects that can play on the rear speakers include approaching shells, certain vehicles' engines, sceneries (e.g. bats, falling rocks, water, helicopters), and if other drivers are immediately to the side. Background music, Lakitu's countdowns, and menu sounds are mixed to stereo only. Some surround receiver producers' models may default to Standard modes that water out the effect (e.g. playing background music via side speakers), necessitating switching them to Straight/Direct or upmixing modes. | |||
*Characters no longer vocally react to being inked by a Blooper. | |||
*The faster variation of the course's theme in Battle mode now begins a minute before ending, rather than 30 seconds before. | |||
==Battle== | |||
[[File:MK8D Isabelle Inkling and Link.png|left|thumb|upright=1.4|Inkling Girl, [[Link]], Mario, and [[Isabelle]] in Battle Stadium.]] | |||
The biggest change made between ''Mario Kart 8 Deluxe'' and the original release of ''Mario Kart 8'' is the [[Battle]] mode. Battle mode now returns to the arena-based style, adding eight new battle courses, each with its own course intro (replacing the eight Battle mode race tracks from ''Mario Kart 8'') and unlike previous games, each player starts with five balloons, as opposed to three. Another addition to Battle mode is that the character in the lead now wears a crown, unlike in ''Mario Kart 8'' where the crown is displayed only on the HUD map. Additionally, players now start out with zero points instead of ''Mario Kart 8''{{'}}s default three points, and their balloons do not serve as the remaining three points. | |||
Returning from ''[[Mario Kart Wii]]'' and ''[[Mario Kart 7]]'' is the ability to respawn after all balloons are popped; this causes the player's total score to halve and the player respawns with three balloons instead of five. A new addition to this mode is the feature to tell exactly which character hit whom, which appears on the bottom of the screen. After getting hit, players now have about 1.5 seconds of invincibility frames, unlike in ''Mario Kart 8''. The item options also appear to have been updated; alongside the "Frantic Items" option, which chooses powerful items more frequently, a "Skilled Items" option is also available for selection; in this option, powerful items appear less frequently, similar to ''Mario Kart Wii''{{'}}s "Strategic" ("Basic" in the British English version) item option. | |||
{{br}} | |||
There are five different Battle mode types: | |||
*'''Balloon Battle''': The classic mode where players use items to pop opponents' balloons or steal them in order to score points. This mode now uses the point-based set-up seen in ''Mario Kart Wii'', and ''Mario Kart 7'', rather than the survival set-up of ''Mario Kart 8'' and earlier installments prior to ''Mario Kart Wii''. | |||
*'''Renegade Roundup''': A new mode in the vein of "{{wp|Tag (game)|cops and robbers}}", with the racers being divided into two teams. One team, known as "The Authorities", has to use [[Potted Piranha Plant|Piranha Plant]] items (which are permanently attached to the front of their vehicle and only serve to capture the opposing team; they do not operate like the regular item) in order to capture players from the other team, known as "The Renegades". Captured Renegades are placed into one of several jail cells floating above various points on the stage. Remaining Renegades can free their teammates by driving over a key switch placed below the jail cells. The Renegades win if at least one member is still running free when time runs out, and the Authorities win if all of the Renegades get captured. All Authority team members also temporarily lose their ability to capture after being hit by an item and Renegades receive a speed boost and temporary immunity when they are freed from the cells. | |||
*'''Bob-omb Blast''': A returning mode from ''Mario Kart: Double Dash!!'', in which players attack one another using [[Bob-omb]]s to score points and can carry up to 10 Bob-ombs. This version follows nearly all of the same rules as Balloon Battle, the differences being these: the only items are Bob-ombs, players cannot be hurt by their own Bob-ombs exploding, and Bob-ombs thrown forward explode instantly. | |||
*'''Coin Runners''': Originating in ''Mario Kart Wii'', this mode was last seen in ''Mario Kart 7''. Players must collect [[Coin]]s scattered across the course in order to have the most by the end of the match. Plays more akin to the ''Mario Kart Wii'' version of the mode, with players having no limit to the amount of coins they can collect, as opposed to the 10-coin limit in the ''Mario Kart 7'' version. | |||
*'''Shine Thief''': Another returning mode from ''Mario Kart: Double Dash!!'', one player must retrieve a [[Shine Sprite]] and keep hold of it for about 20 seconds, while the opponents use items against whoever has the Shine to force that player to drop it. The driver holding the shine sprite has a slightly reduced top speed. In Team play, one team must collectively manage to hold on to the Shine for about 30 seconds. | |||
There is also the option to randomly select one of the five available modes by choosing "Random Battle". | |||
==Characters== | |||
Excluding character variants, there are a total of 48 playable characters in ''Mario Kart 8 Deluxe'', including 40 in the base game and eight as DLC. All base and DLC characters from ''Mario Kart 8'' are present in the base roster of ''Mario Kart 8 Deluxe'' and are now available from the start, while more characters that were not present in ''Mario Kart 8'' are also added. The base game includes returning characters [[Bowser Jr.]], [[King Boo]], and [[Dry Bones]], who last appeared in the series as playable characters in ''[[Mario Kart Wii]]'', and [[Gold Mario]] (as a variant of [[Metal Mario]]), who was previously playable in ''[[Mario Kart Arcade GP DX]]''. It also introduces a new non-''Super Mario'' character, being the [[Inkling]] from ''{{iw|inkipedia|Splatoon}}''. Both the Inkling Girl and Inkling Boy are playable, and they have three selectable colors each. At the game's launch, Inkling Girl and Inkling Boy took up separate slots on the character selection screen, as did the two Villagers, who were originally present in the same character slot (with the female Villager being a variant of the male one) in ''Mario Kart 8''. However, as of the version 3.0.0 update, Inkling Boy and female Villager are now considered variants of Inkling Girl and male Villager respectively.<ref name=news>{{cite|url=www.nintendo.com/jp/topics/article/ad54329a-2ddc-436d-8e96-43139628e6c3|title=『マリオカート8 デラックス コース追加パス』最後の第6弾は11月9日配信決定。新キャラクターや「ミュージック」機能なども追加。|publisher=Nintendo of Japan|language=ja|author=Nintendo|date=November 1, 2024|accessdate=November 6, 2024}}</ref> | |||
Eight additional characters were added as downloadable content via the ''[[Mario Kart 8 Deluxe – Booster Course Pass|Booster Course Pass]]'', starting with its fourth wave. Characters added include [[Birdo]], who was added in Wave 4 with nine selectable colors, [[Petey Piranha]], [[Wiggler]], and [[Kamek]], who were added in Wave 5, and [[Diddy Kong]], [[Funky Kong]], [[Pauline]], and [[Peachette]], who were added in Wave 6.<ref>{{cite|url=www.youtube.com/watch?v=BiJ7IoeuhXE|title=Mario Kart 8 Deluxe - Booster Course Pass Wave 6 - Nintendo Switch 9.14.2023|language=en-us|author=Nintendo of America|publisher=YouTube|accessdate=November 6, 2024|date=September 14, 2023}}</ref> Wiggler, Gold Mario, Kamek, Pauline, Peachette, and all Birdo variants are playable for the first time in a home console ''Mario Kart'' installment. Kamek, Pauline, Peachette, and almost all Birdo variants were originally introduced in ''[[Mario Kart Tour]]'', which released after ''Mario Kart 8 Deluxe''. With Birdo's inclusion in Wave 4 and Diddy Kong and Funky Kong's inclusion in Wave 6, all playable characters from ''Mario Kart Wii'' are now included in ''Mario Kart 8 Deluxe''. | |||
There is only one unlockable character in this game, that being Gold Mario. He is unlocked by clearing all cups of the 200cc Grand Prix. Additionally, the version 1.6.0 update added a new variant for [[Link]], Champion's Tunic Link,<ref name=ChampionLink>{{cite|language=en-us|author=@NintendoAmerica|date=July 20, 2018|url=x.com/NintendoAmerica/status/1020112660778561536|title=A new update to #MarioKart 8 Deluxe is available now for #NintendoSwitch! Race like a champion with the Master Cycle Zero and Champion’s Tunic Link from The Legend of #Zelda: Breath of the Wild! This update also includes the Ancient Tires and the Paraglider parts!|publisher=X|accessdate=September 12, 2023}}</ref> based on his appearance in ''{{iw|zeldawiki|The Legend of Zelda: Breath of the Wild}}''. When Gold Mario is unlocked and Champion's Tunic Link is downloaded, they become the default variations of their character, while Metal Mario and the version of Link based on his appearance in ''{{iw|zeldawiki|The Legend of Zelda: Skyward Sword}}'' are relegated to alternate costumes. As of the 3.0.0 update, however, the character select screen now remembers the last costume used for characters with alternate costumes. | |||
There are more individual character weight classes when compared to the Wii U game, with several returning characters having different statistics, thus resulting in fewer characters having the same stats as each other. | |||
Characters, variants, and Mii racing suits playable in this game that are not playable in the original ''Mario Kart 8'' are listed in ''italics''. | |||
<center> | |||
<gallery widths=250px> | |||
MK8DX Character Roster.png|Character select screen at launch | |||
MK8DXGoldMarioDLCRoster.jpg|Character select screen with [[Gold Mario]] unlocked and all DLC characters downloaded | |||
</gallery> | |||
{|class="wikitable"style="width:85%" | |||
|- | |||
!colspan=2 width=11% style="background:#EAECF0"|[[File:MK8 Mario Emblem.png|center|30px]] {{color link|black|Mario}} | |||
!colspan=2 width=11% style="background:#EAECF0"|[[File:MK8 Luigi Emblem.png|center|30px]] {{color link|black|Luigi}} | |||
!colspan=2 width=11% style="background:#EAECF0"|[[File:MK8 Peach Emblem.png|center|30px]] {{color link|black|Princess Peach|Peach}} | |||
!colspan=2 width=11% style="background:#EAECF0"|[[File:MK8 Daisy Emblem.png|center|30px]] {{color link|black|Princess Daisy|Daisy}} | |||
!colspan=2 width=11% style="background:#EAECF0"|[[File:MK8 Rosalina Emblem.png|center|30px]] {{color link|black|Rosalina}} | |||
!colspan=2 width=11% style="background:#EAECF0"|[[File:MK8 Tanooki Mario Emblem.png|center|30px]] {{color link|black|Tanooki Mario}} | |||
!colspan=2 width=11% style="background:#EAECF0"|[[File:MK8 Cat Peach Emblem.png|center|30px]] {{color link|black|Cat Mario|Cat Peach}} | |||
!colspan=2 width=11% style="background:#EAECF0"|[[File:MK8D Birdo Emblem.png|center|30px]] ''{{color link|black|Birdo}}'' <small>[[Mario Kart 8 Deluxe – Booster Course Pass#Wave 4|DLC, Wave 4]]</small> | |||
|-align="center"style="background:#FFFFFF" | |||
|colspan=2|[[File:MK8 Mario Icon.png|70px]] | |||
|colspan=2|[[File:MK8 Luigi Icon.png|70px]] | |||
|colspan=2|[[File:MK8 Peach Icon.png|70px]] | |||
|colspan=2|[[File:MK8 Daisy Icon.png|70px]] | |||
|colspan=2|[[File:MK8 Rosalina Icon.png|70px]] | |||
|colspan=2|[[File:MK8 Tanooki Mario Icon.png|70px]] | |||
|colspan=2|[[File:MK8 Cat Peach Icon.png|70px]] | |||
|colspan=2|[[File:MK8D Birdo Icon.png|70px]] | |||
|- | |||
!colspan=2 width=11% style="background:#EAECF0"|[[File:MK8 Green Yoshi Emblem.png|center|30px]] {{color link|black|Yoshi}} | |||
!colspan=2 width=11% style="background:#EAECF0"|[[File:MK8 Toad Emblem.png|center|30px]] {{color link|black|Toad}} | |||
!colspan=2 width=11% style="background:#EAECF0"|[[File:MK8 Koopa Troopa Emblem.png|center|30px]] {{color link|black|Koopa Troopa}} | |||
!colspan=2 width=11% style="background:#EAECF0"|[[File:MK8 Shy Guy Emblem.png|center|30px]] {{color link|black|Shy Guy}} | |||
!colspan=2 width=11% style="background:#EAECF0"|[[File:MK8 Lakitu Emblem.png|center|30px]] {{color link|black|Lakitu}} | |||
!colspan=2 width=11% style="background:#EAECF0"|[[File:MK8 Toadette Emblem.png|center|30px]] {{color link|black|Toadette}} | |||
!colspan=2 width=11% style="background:#EAECF0"|[[File:MK8D King Boo Emblem.png|center|30px]] ''{{color link|black|King Boo}}'' | |||
!colspan=2 width=11% style="background:#EAECF0"|[[File:MK8D Petey Piranha Emblem.png|center|30px]] ''{{color link|black|Petey Piranha}}'' <small>[[Mario Kart 8 Deluxe – Booster Course Pass#Wave 5|DLC, Wave 5]]</small> | |||
|-align="center"style="background:#FFFFFF" | |||
|colspan=2|[[File:MK8 Yoshi Icon.png|70px]] | |||
|colspan=2|[[File:MK8 Toad Icon.png|70px]] | |||
|colspan=2|[[File:MK8 Koopa Icon.png|70px]] | |||
|colspan=2|[[File:MK8 ShyGuy Icon.png|70px]] | |||
|colspan=2|[[File:MK8 Lakitu Icon.png|70px]] | |||
|colspan=2|[[File:MK8 Toadette Icon.png|70px]] | |||
|colspan=2|[[File:MK8DX King Boo Icon.png|70px]] | |||
|colspan=2|[[File:MK8DX Petey Piranha Icon.png|70px]] | |||
|- | |||
!colspan=2 width=11% style="background:#EAECF0"|[[File:MK8 Baby Mario Emblem.png|center|30px]] {{color link|black|Baby Mario}} | |||
!colspan=2 width=11% style="background:#EAECF0"|[[File:MK8 Baby Luigi Emblem.png|center|30px]] {{color link|black|Baby Luigi}} | |||
!colspan=2 width=11% style="background:#EAECF0"|[[File:MK8 Baby Peach Emblem.png|center|30px]] {{color link|black|Baby Peach}} | |||
!colspan=2 width=11% style="background:#EAECF0"|[[File:MK8 Baby Daisy Emblem.png|center|30px]] {{color link|black|Baby Daisy}} | |||
!colspan=2 width=11% style="background:#EAECF0"|[[File:MK8 Baby Rosalina Emblem.png|center|30px]] {{color link|black|Baby Rosalina}} | |||
!colspan=2 width=11% style="background:#EAECF0"|[[File:MK8 Metal Mario Emblem.png|center|30px]] {{color link|black|Metal Mario}} | |||
!colspan=2 width=11% style="background:#EAECF0"|[[File:MK8 Pink Gold Peach Emblem.png|center|30px]] {{color link|black|Pink Gold Peach}} | |||
!colspan=2 width=11% style="background:#EAECF0"|[[File:MK8D Wiggler Emblem.png|center|30px]] ''{{color link|black|Wiggler}}'' <small>[[Mario Kart 8 Deluxe – Booster Course Pass#Wave 5|DLC, Wave 5]]</small> | |||
|-align="center"style="background:#FFFFFF" | |||
|colspan=2|[[File:MK8 BabyMario Icon.png|70px]] | |||
|colspan=2|[[File:MK8 BabyLuigi Icon.png|70px]] | |||
|colspan=2|[[File:MK8 BabyPeach Icon.png|70px]] | |||
|colspan=2|[[File:MK8 BabyDaisy Icon.png|70px]] | |||
|colspan=2|[[File:MK8 BabyRosalina Icon.png|70px]] | |||
|colspan=2|[[File:MK8 MMario Icon.png|70px]] | |||
|colspan=2|[[File:MK8 PGPeach Icon.png|70px]] | |||
|colspan=2|[[File:MK8DX Wiggler Icon.png|70px]] | |||
|- | |||
!colspan=2 width=11% style="background:#EAECF0"|[[File:MK8 Wario Emblem.png|center|30px]] {{color link|black|Wario}} | |||
!colspan=2 width=11% style="background:#EAECF0"|[[File:MK8 Waluigi Emblem.png|center|30px]] {{color link|black|Waluigi}} | |||
!colspan=2 width=11% style="background:#EAECF0"|[[File:MK8 Donkey Kong Emblem.png|center|30px]] {{color link|black|Donkey Kong}} | |||
!colspan=2 width=11% style="background:#EAECF0"|[[File:MK8 Bowser Emblem.png|center|30px]] {{color link|black|Bowser}} | |||
!colspan=2 width=11% style="background:#EAECF0"|[[File:MK8D Dry Bones Emblem.png|center|30px]] ''{{color link|black|Dry Bones}}'' | |||
!colspan=2 width=11% style="background:#EAECF0"|[[File:MK8D Bowser Jr Emblem.png|center|30px]] ''{{color link|black|Bowser Jr.}}'' | |||
!colspan=2 width=11% style="background:#EAECF0"|[[File:MK8 Dry Bowser Emblem.png|center|30px]] {{color link|black|Dry Bowser}} | |||
!colspan=2 width=11% style="background:#EAECF0"|[[File:MK8D Kamek Emblem.png|center|30px]] ''{{color link|black|Kamek}}'' <small>[[Mario Kart 8 Deluxe – Booster Course Pass#Wave 5|DLC, Wave 5]]</small> | |||
|-align="center"style="background:#FFFFFF" | |||
|colspan=2|[[File:MK8 Wario Icon.png|70px]] | |||
|colspan=2|[[File:MK8 Waluigi Icon.png|70px]] | |||
|colspan=2|[[File:MK8 DKong Icon.png|70px]] | |||
|colspan=2|[[File:MK8 Bowser Icon.png|70px]] | |||
|colspan=2|[[File:MK8DX Dry Bones Icon.png|70px]] | |||
|colspan=2|[[File:MK8 Bowser Jr Icon.png|70px]] | |||
|colspan=2|[[File:MK8 Dry Bowser Icon.png|70px]] | |||
|colspan=2|[[File:MK8DX Kamek Icon.png|70px]] | |||
|- | |||
!colspan=2 width=11% style="background:#EAECF0"|[[File:MK8 Lemmy Emblem.png|center|30px]] {{color link|black|Lemmy Koopa|Lemmy}} | |||
!colspan=2 width=11% style="background:#EAECF0"|[[File:MK8 Larry Emblem.png|center|30px]] {{color link|black|Larry Koopa|Larry}} | |||
!colspan=2 width=11% style="background:#EAECF0"|[[File:MK8 Wendy Emblem.png|center|30px]] {{color link|black|Wendy O. Koopa|Wendy}} | |||
!colspan=2 width=11% style="background:#EAECF0"|[[File:MK8 Ludwig Emblem.png|center|30px]] {{color link|black|Ludwig von Koopa|Ludwig}} | |||
!colspan=2 width=11% style="background:#EAECF0"|[[File:MK8 Iggy Emblem.png|center|30px]] {{color link|black|Iggy Koopa|Iggy}} | |||
!colspan=2 width=11% style="background:#EAECF0"|[[File:MK8 Roy Emblem.png|center|30px]] {{color link|black|Roy Koopa|Roy}} | |||
!colspan=2 width=11% style="background:#EAECF0"|[[File:MK8 Morton Jr Emblem.png|center|30px]] {{color link|black|Morton Koopa Jr.|Morton}} | |||
!colspan=2 width=11% style="background:#EAECF0"|[[File:MK8D Peachette Emblem.png|center|30px]] ''{{color link|black|Peachette}}'' <small>[[Mario Kart 8 Deluxe – Booster Course Pass#Wave 6|DLC, Wave 6]]</small> | |||
|-align="center"style="background:#FFFFFF" | |||
|colspan=2|[[File:MK8 Lemmy Icon.png|70px]] | |||
|colspan=2|[[File:MK8 Larry Icon.png|70px]] | |||
|colspan=2|[[File:MK8 Wendy Icon.png|70px]] | |||
|colspan=2|[[File:MK8 Ludwig Icon.png|70px]] | |||
|colspan=2|[[File:MK8 Iggy Icon.png|70px]] | |||
|colspan=2|[[File:MK8 Roy Icon.png|70px]] | |||
|colspan=2|[[File:MK8 Morton Icon.png|70px]] | |||
|colspan=2|[[File:MK8DX Peachette Icon.png|70px]] | |||
|- | |||
!colspan=2 width=11% style="background:#EAECF0"|[[File:MK8D Inkling Girl Emblem.png|center|30px]] ''{{color link|black|Inkling|Inkling Girl}}'' <sup>(new)</sup> | |||
!colspan=2 width=11% style="background:#EAECF0"|[[File:MK8 Villager Emblem.png|center|30px]] {{color link|black|Villager}} | |||
!colspan=2 width=11% style="background:#EAECF0"|[[File:MK8 Isabelle Emblem.png|center|30px]] {{color link|black|Isabelle}} | |||
!colspan=2 width=11% style="background:#EAECF0"|[[File:MK8D BotW Link Emblem.png|center|30px]] ''{{color link|black|Link}}'' | |||
!colspan=2 width=11% style="background:#EAECF0"|[[File:MK8D Diddy Kong Emblem.png|center|30px]] ''{{color link|black|Diddy Kong}}'' <small>[[Mario Kart 8 Deluxe – Booster Course Pass#Wave 6|DLC, Wave 6]]</small> | |||
!colspan=2 width=11% style="background:#EAECF0"|[[File:MK8D Funky Kong Emblem.png|center|30px]] ''{{color link|black|Funky Kong}}'' <small>[[Mario Kart 8 Deluxe – Booster Course Pass#Wave 6|DLC, Wave 6]]</small> | |||
!colspan=2 width=11% style="background:#EAECF0"|[[File:MK8D Pauline Emblem.png|center|30px]] ''{{color link|black|Pauline}}'' <small>[[Mario Kart 8 Deluxe – Booster Course Pass#Wave 6|DLC, Wave 6]]</small> | |||
!colspan=2 width=11% style="background:#EAECF0"|[[File:MK8 Mii Emblem.png|center|30px]] {{color link|black|Mii}} | |||
|-align="center"style="background:#FFFFFF" | |||
|colspan=2|[[File:MK8DX Female Inkling Icon.png|70px]] | |||
|colspan=2|[[File:VillagerMale-Icon-MK8.png|70px]] | |||
|colspan=2|[[File:MK8 Isabelle Icon.png|70px]] | |||
|colspan=2|[[File:MK8D BotW Link Icon.png|70px]] | |||
|colspan=2|[[File:MK8DX Diddy Kong Icon.png|70px]] | |||
|colspan=2|[[File:MK8DX Funky Kong Icon.png|70px]] | |||
|colspan=2|[[File:MK8DX Pauline Icon.png|70px]] | |||
|colspan=2|[[File:Mii MK8.png|70px]] | |||
|} | |||
</center> | |||
===Character variants=== | |||
With the exceptions of [[Link]] and the [[Villager]], the displayed name of the character changes based on the variant that is selected. From version 3.0.0 onwards, the last used variant will have their icon shown on the character selection screen. Unlike in ''Mario Kart 8'', the sub-menu for the two Villagers does not use a unique ''Animal Crossing''-inspired color scheme, instead using the same gray color as the others. | |||
<center> | |||
{|class="wikitable"style="width:85%" | |||
|- | |||
!colspan=2|Character | |||
!colspan=16|Variant(s) | |||
|-align="center"style="background:#FFFFFF" | |||
!colspan=2 width=8% style="background:#EAECF0"|[[File:MK8D Birdo Emblem.png|center|30px]] ''{{color link|black|Birdo}}'' <small>[[Mario Kart 8 Deluxe – Booster Course Pass#Wave 4|DLC, Wave 4]]</small> | |||
!colspan=2 width=8% style="background:#EAECF0"|[[File:MK8D Birdo Light Blue Emblem.png|center|30px]] ''{{color link|black|Birdo|Birdo (Light-Blue)}}'' | |||
!colspan=2 width=8% style="background:#EAECF0"|[[File:MK8D Birdo Black Emblem.png|center|30px]] ''{{color link|black|Birdo|Birdo (Black)}}'' | |||
!colspan=2 width=8% style="background:#EAECF0"|[[File:MK8D Birdo Red Emblem.png|center|30px]] ''{{color link|black|Birdo|Birdo (Red)}}'' <sup>(new)</sup> | |||
!colspan=2 width=8% style="background:#EAECF0"|[[File:MK8D Birdo Yellow Emblem.png|center|30px]] ''{{color link|black|Birdo|Birdo (Yellow)}}'' | |||
!colspan=2 width=8% style="background:#EAECF0"|[[File:MK8D Birdo White Emblem.png|center|30px]] ''{{color link|black|Birdo|Birdo (White)}}'' | |||
!colspan=2 width=8% style="background:#EAECF0"|[[File:MK8D Birdo Blue Emblem.png|center|30px]] ''{{color link|black|Birdo|Birdo (Blue)}}'' | |||
!colspan=2 width=8% style="background:#EAECF0"|[[File:MK8D Birdo Green Emblem.png|center|30px]] ''{{color link|black|Birdo|Birdo (Green)}}'' <sup>(new)</sup> | |||
!colspan=2 width=8% style="background:#EAECF0"|[[File:MK8D Birdo Orange Emblem.png|center|30px]] ''{{color link|black|Birdo|Birdo (Orange)}}'' | |||
|-align="center"style="background:#FFFFFF" | |||
|colspan=2|[[File:MK8D Birdo Icon.png|70px]] | |||
|colspan=2|[[File:MK8D Birdo Light-Blue Icon.png|70px]] | |||
|colspan=2|[[File:MK8D Birdo Black Icon.png|70px]] | |||
|colspan=2|[[File:MK8D Birdo Red Icon.png|70px]] | |||
|colspan=2|[[File:MK8D Birdo Yellow Icon.png|70px]] | |||
|colspan=2|[[File:MK8D Birdo White Icon.png|70px]] | |||
|colspan=2|[[File:MK8D Birdo Blue Icon.png|70px]] | |||
|colspan=2|[[File:MK8D Birdo Green Icon.png|70px]] | |||
|colspan=2|[[File:MK8D Birdo Orange Icon.png|70px]] | |||
|- | |||
!colspan=2 width=8% style="background:#EAECF0"|[[File:MK8 Green Yoshi Emblem.png|center|30px]] {{color link|black|Yoshi}} | |||
!colspan=2 width=8% style="background:#EAECF0"|[[File:MK8 Light-Blue Yoshi Emblem.png|center|30px]] {{color link|black|Yoshi (species)|Light-Blue Yoshi}} | |||
!colspan=2 width=8% style="background:#EAECF0"|[[File:MK8 Black Yoshi Emblem.png|center|30px]] {{color link|black|Yoshi (species)|Black Yoshi}} | |||
!colspan=2 width=8% style="background:#EAECF0"|[[File:MK8 Red Yoshi Emblem.png|center|30px]] {{color link|black|Yoshi (species)|Red Yoshi}} | |||
!colspan=2 width=8% style="background:#EAECF0"|[[File:MK8 Yellow Yoshi Emblem.png|center|30px]] {{color link|black|Yoshi (species)|Yellow Yoshi}} | |||
!colspan=2 width=8% style="background:#EAECF0"|[[File:MK8 White Yoshi Emblem.png|center|30px]] {{color link|black|Yoshi (species)|White Yoshi}} | |||
!colspan=2 width=8% style="background:#EAECF0"|[[File:MK8 Blue Yoshi Emblem.png|center|30px]] {{color link|black|Yoshi (species)|Blue Yoshi}} | |||
!colspan=2 width=8% style="background:#EAECF0"|[[File:MK8 Pink Yoshi Emblem.png|center|30px]] {{color link|black|Yoshi (species)|Pink Yoshi}} | |||
!colspan=2 width=8% style="background:#EAECF0"|[[File:MK8 Orange Yoshi Emblem.png|center|30px]] {{color link|black|Yoshi (species)|Orange Yoshi}} | |||
|-align="center"style="background:#FFFFFF" | |||
|colspan=2|[[File:MK8 Yoshi Icon.png|70px]] | |||
|colspan=2|[[File:MK8 Light-Blue Yoshi Icon.png|70px]] | |||
|colspan=2|[[File:MK8 Black Yoshi Icon.png|70px]] | |||
|colspan=2|[[File:MK8 Red Yoshi Icon.png|70px]] | |||
|colspan=2|[[File:MK8 Yellow Yoshi Icon.png|70px]] | |||
|colspan=2|[[File:MK8 White Yoshi Icon.png|70px]] | |||
|colspan=2|[[File:MK8 Blue Yoshi Icon.png|70px]] | |||
|colspan=2|[[File:MK8 Pink Yoshi Icon.png|70px]] | |||
|colspan=2|[[File:MK8 Orange Yoshi Icon.png|70px]] | |||
|- | |||
!colspan=2 width=8% style="background:#EAECF0"|[[File:MK8 Shy Guy Emblem.png|center|30px]] {{color link|black|Shy Guy}} | |||
!colspan=2 width=8% style="background:#EAECF0"|[[File:MK8 Shy Guy Emblem.png|center|30px]] {{color link|black|Shy Guy|Light-Blue Shy Guy}} | |||
!colspan=2 width=8% style="background:#EAECF0"|[[File:MK8 Shy Guy Emblem.png|center|30px]] {{color link|black|Shy Guy|Black Shy Guy}} | |||
!colspan=2 width=8% style="background:#EAECF0"|[[File:MK8 Shy Guy Emblem.png|center|30px]] {{color link|black|Shy Guy|Green Shy Guy}} | |||
!colspan=2 width=8% style="background:#EAECF0"|[[File:MK8 Shy Guy Emblem.png|center|30px]] {{color link|black|Shy Guy|Yellow Shy Guy}} | |||
!colspan=2 width=8% style="background:#EAECF0"|[[File:MK8 Shy Guy Emblem.png|center|30px]] {{color link|black|Shy Guy|White Shy Guy}} | |||
!colspan=2 width=8% style="background:#EAECF0"|[[File:MK8 Shy Guy Emblem.png|center|30px]] {{color link|black|Shy Guy|Blue Shy Guy}} | |||
!colspan=2 width=8% style="background:#EAECF0"|[[File:MK8 Shy Guy Emblem.png|center|30px]] {{color link|black|Shy Guy|Pink Shy Guy}} | |||
!colspan=2 width=8% style="background:#EAECF0"|[[File:MK8 Shy Guy Emblem.png|center|30px]] {{color link|black|Shy Guy|Orange Shy Guy}} | |||
|-align="center"style="background:#FFFFFF" | |||
|colspan=2|[[File:MK8 ShyGuy Icon.png|70px]] | |||
|colspan=2|[[File:MK8 Light-Blue Shy Guy Icon.png|70px]] | |||
|colspan=2|[[File:MK8 Black Shy Guy Icon.png|70px]] | |||
|colspan=2|[[File:MK8 Green Shy Guy Icon.png|70px]] | |||
|colspan=2|[[File:MK8 Yellow Shy Guy Icon.png|70px]] | |||
|colspan=2|[[File:MK8 White Shy Guy Icon.png|70px]] | |||
|colspan=2|[[File:MK8 Blue Shy Guy Icon.png|70px]] | |||
|colspan=2|[[File:MK8 Pink Shy Guy Icon.png|70px]] | |||
|colspan=2|[[File:MK8 Orange Shy Guy Icon.png|70px]] | |||
|- | |||
!colspan=2 width=8% style="background:#EAECF0"|[[File:MK8 Metal Mario Emblem.png|center|30px]] {{color link|black|Metal Mario}} | |||
!colspan=2 width=8% style="background:#EAECF0"|[[File:MK8D Gold Mario Emblem.png|center|30px]] ''{{color link|black|Gold Mario}}''{{footnote|main|1}} | |||
!rowspan=2 colspan=14| | |||
|-align="center"style="background:#FFFFFF" | |||
|colspan=2|[[File:MK8 MMario Icon.png|70px]] | |||
|colspan=2|[[File:MK8DX Gold Mario Icon.png|70px]] | |||
|- | |||
!colspan=2 width=8% style="background:#EAECF0"|[[File:MK8D Inkling Girl Emblem.png|center|30px]] ''{{color link|black|Inkling|Inkling Girl}}'' | |||
!colspan=2 width=8% style="background:#EAECF0"|[[File:MK8D Green Inkling Girl Emblem.png|center|30px]] ''{{color link|black|Inkling|Inkling Girl}}'' | |||
!colspan=2 width=8% style="background:#EAECF0"|[[File:MK8D Magenta Inkling Girl Emblem.png|center|30px]] ''{{color link|black|Inkling|Inkling Girl}}'' | |||
!colspan=2 width=8% style="background:#EAECF0"|[[File:MK8D Inkling Boy Emblem.png|center|30px]] ''{{color link|black|Inkling|Inkling Boy}}''{{footnote|main|2}} | |||
!colspan=2 width=8% style="background:#EAECF0"|[[File:MK8D Purple Inkling Boy Emblem.png|center|30px]] ''{{color link|black|Inkling|Inkling Boy}}'' | |||
!colspan=2 width=8% style="background:#EAECF0"|[[File:MK8D Cyan Inkling Boy Emblem.png|center|30px]] ''{{color link|black|Inkling|Inkling Boy}}'' | |||
!rowspan=2 colspan=6| | |||
|-align="center"style="background:#FFFFFF" | |||
|colspan=2|[[File:MK8DX Female Inkling Icon.png|70px]] | |||
|colspan=2|[[File:MK8D Green Inkling Icon.png|70px]] | |||
|colspan=2|[[File:MK8D Pink Inkling Icon.png|70px]] | |||
|colspan=2|[[File:MK8DX Male Inkling Icon.png|70px]] | |||
|colspan=2|[[File:MK8D Purple Inkling Icon.png|70px]] | |||
|colspan=2|[[File:MK8D Cyan Inkling Icon.png|70px]] | |||
|- | |||
!colspan=2 width=8% style="background:#EAECF0"|[[File:MK8 Villager Emblem.png|center|30px]] {{color link|black|Villager}} | |||
!colspan=2 width=8% style="background:#EAECF0"|[[File:MK8 Villager Emblem.png|center|30px]] {{color link|black|Villager}}{{footnote|main|2}} | |||
!rowspan=2 colspan=14| | |||
|-align="center"style="background:#FFFFFF" | |||
|colspan=2|[[File:VillagerMale-Icon-MK8.png|70px]] | |||
|colspan=2|[[File:VillagerFemale-Icon-MK8.png|70px]] | |||
|- | |||
!colspan=2 width=8% style="background:#EAECF0"|[[File:MK8D BotW Link Emblem.png|center|30px]] ''{{color link|black|Link}}'' | |||
!colspan=2 width=8% style="background:#EAECF0"|[[File:MK8 Link Emblem.png|center|30px]] {{color link|black|Link}}{{footnote|main|3}} | |||
!rowspan=2 colspan=14| | |||
|-align="center"style="background:#FFFFFF" | |||
|colspan=2|[[File:MK8D BotW Link Icon.png|70px]] | |||
|colspan=2|[[File:MK8 Link Icon.png|70px]] | |||
|} | |||
</center> | |||
{{footnote|note|1|This variant is used as the select icon for the base character on the main select screen once it is available.}} | |||
{{footnote|note|2|Originally a separate character slot before being relegated to a variant in the version 3.0.0 update.}} | |||
{{footnote|note|3|Originally the only version of the character before being relegated to a variant in the version 1.6.0 update.}} | |||
===Mii racing suits=== | |||
All 20 Mii racing suits return from ''Mario Kart 8'', and, like in that game, the color of the Normal Suit matches the favorite color of the selected Mii. There are also two additional Mii racing suits tied to scanning [[amiibo]] - the new Inkling Suit, which is unlocked either by scanning any Inkling or ''Splatoon''-series amiibo, and the Daisy Suit, returning from ''Mario Kart Tour'', which can be unlocked by scanning any Daisy amiibo after installing version 3.0.0. In addition, the Animal Crossing Suit can now be unlocked with any Isabelle or ''Animal Crossing''-series amiibo, and the Pikmin Suit can be unlocked with ''Pikmin''-series amiibo. In version 3.0.0, scanning any amiibo of characters in ''The Legend of Zelda'', ''Metroid'', and ''Kirby'' series unlocks the respective series' Mii racing suits. | |||
{|border="1"cellpadding="3"style="background:#f5f5f5;text-align:center;width:1000px;border-collapse:collapse;margin-bottom:35px;"align=center | |||
|- | |||
!colspan="12"style="background:#9c9c9c"|Normal Suits | |||
|- | |||
!colspan=2 width=11% style="background:#dedede"|Red | |||
!colspan=2 width=11% style="background:#dedede"|Orange | |||
!colspan=2 width=11% style="background:#dedede"|Yellow | |||
!colspan=2 width=11% style="background:#dedede"|Light-green | |||
!colspan=2 width=11% style="background:#dedede"|Green | |||
!colspan=2 width=11% style="background:#dedede"|Blue | |||
|-align="center"style="background:#FFFFFF" | |||
|colspan=2|[[File:MK8D Mii Racing Suit Red.png|70px]] | |||
|colspan=2|[[File:MK8D Mii Racing Suit Orange.png|70px]] | |||
|colspan=2|[[File:MK8D Mii Racing Suit Yellow.png|70px]] | |||
|colspan=2|[[File:MK8D Mii Racing Suit Light Green.png|70px]] | |||
|colspan=2|[[File:MK8D Mii Racing Suit Green.png|70px]] | |||
|colspan=2|[[File:MK8D Mii Racing Suit Blue.png|70px]] | |||
|- | |||
!colspan=2 width=11% style="background:#dedede"|Light-blue | |||
!colspan=2 width=11% style="background:#dedede"|Pink | |||
!colspan=2 width=11% style="background:#dedede"|Purple | |||
!colspan=2 width=11% style="background:#dedede"|Brown | |||
!colspan=2 width=11% style="background:#dedede"|White | |||
!colspan=2 width=11% style="background:#dedede"|Black | |||
|-align="center"style="background:#FFFFFF" | |||
|colspan=2|[[File:MK8D Mii Racing Suit Cyan.png|70px]] | |||
|colspan=2|[[File:MK8D Mii Racing Suit Pink.png|70px]] | |||
|colspan=2|[[File:MK8D Mii Racing Suit Purple.png|70px]] | |||
|colspan=2|[[File:MK8D Mii Racing Suit Brown.png|70px]] | |||
|colspan=2|[[File:MK8D Mii Racing Suit White.png|70px]] | |||
|colspan=2|[[File:MK8D Mii Racing Suit Black.png|70px]] | |||
|} | |||
{|border="1"cellpadding="3"style="background:#f5f5f5;text-align:center;width:1000px;border-collapse:collapse;margin-bottom:5px;"align=center | |||
|- | |||
!colspan="14"style="background:#9c9c9c"|amiibo suits | |||
|- | |||
!colspan=2 width=11% style="background:#dedede"|{{color link|black|Mario|Mario Suit}} | |||
!colspan=2 width=11% style="background:#dedede"|{{color link|black|Luigi|Luigi Suit}} | |||
!colspan=2 width=11% style="background:#dedede"|{{color link|black|Princess Peach|Peach Suit}} | |||
!colspan=2 width=11% style="background:#dedede"|{{color link|black|Yoshi|Yoshi Suit}} | |||
!colspan=2 width=11% style="background:#dedede"|{{color link|black|Donkey Kong|Donkey Kong Suit}} | |||
!colspan=2 width=11% style="background:#dedede"|{{color link|black|Link|Hylian Suit}} | |||
!colspan=2 width=11% style="background:#dedede"|{{color link|black|Captain Falcon|Captain Falcon Suit}} | |||
|-align="center"style="background:#FFFFFF" | |||
|colspan=2|[[File:MK8D Mii Racing Suit Mario.png|70px]] | |||
|colspan=2|[[File:MK8D Mii Racing Suit Luigi.png|70px]] | |||
|colspan=2|[[File:MK8D Mii Racing Suit Peach.png|70px]] | |||
|colspan=2|[[File:MK8D Mii Racing Suit Yoshi.png|70px]] | |||
|colspan=2|[[File:MK8D Mii Racing Suit DK.png|70px]] | |||
|colspan=2|[[File:MK8D Mii Racing Suit Link.png|70px]] | |||
|colspan=2|[[File:MK8D Mii Racing Suit Captain Falcon.png|70px]] | |||
|- | |||
!colspan=2 width=11% style="background:#dedede"|{{color link|black|Kirby|Kirby Suit}} | |||
!colspan=2 width=11% style="background:#dedede"|{{color link|black|Samus|Varia Suit}} | |||
!colspan=2 width=11% style="background:#dedede"|{{color link|black|Fox|Fox Suit}} | |||
!colspan=2 width=11% style="background:#dedede"|{{color link|black|Toad|Toad Suit}} | |||
!colspan=2 width=11% style="background:#dedede"|{{color link|black|Bowser|Bowser Suit}} | |||
!colspan=2 width=11% style="background:#dedede"|{{color link|black|Wario|Wario Suit}} | |||
!colspan=2 width=11% style="background:#dedede"|{{color link|black|Rosalina|Rosalina Suit}} | |||
|-align="center"style="background:#FFFFFF" | |||
|colspan=2|[[File:MK8D Mii Racing Suit Kirby.png|70px]] | |||
|colspan=2|[[File:MK8D Mii Racing Suit Samus.png|70px]] | |||
|colspan=2|[[File:MK8D Mii Racing Suit Fox.png|70px]] | |||
|colspan=2|[[File:MK8D Mii Racing Suit Toad.png|70px]] | |||
|colspan=2|[[File:MK8D Mii Racing Suit Bowser.png|70px]] | |||
|colspan=2|[[File:MK8D Mii Racing Suit Wario.png|70px]] | |||
|colspan=2|[[File:MK8D Mii Racing Suit Rosalina.png|70px]] | |||
|- | |||
!colspan=2 width=11% style="background:#dedede"|{{color link|black|Olimar|Pikmin Suit}} | |||
!colspan=2 width=11% style="background:#dedede"|{{color link|black|Villager|Animal Crossing Suit}} | |||
!colspan=2 width=11% style="background:#dedede"|{{color link|black|Mega Man|Mega Man Suit}} | |||
!colspan=2 width=11% style="background:#dedede"|{{color link|black|Pac-Man|PAC-MAN Suit}} | |||
!colspan=2 width=11% style="background:#dedede"|{{color link|black|Sonic|Sonic Suit}} | |||
!colspan=2 width=11% style="background:#dedede"|''{{color link|black|Inkling|Inkling Suit}}'' | |||
!colspan=2 width=11% style="background:#dedede"|''{{color link|black|Princess Daisy|Daisy Suit}}''<br><small>(ver 3.0.0)</small> | |||
|-align="center"style="background:#FFFFFF" | |||
|colspan=2|[[File:MK8D Mii Racing Suit Olimar.png|70px]] | |||
|colspan=2|[[File:MK8D Mii Racing Suit Animal Crossing.png|70px]] | |||
|colspan=2|[[File:MK8D Mii Racing Suit Mega Man.png|70px]] | |||
|colspan=2|[[File:MK8D Mii Racing Suit Pac-Man.png|70px]] | |||
|colspan=2|[[File:MK8D Mii Racing Suit Sonic.png|70px]] | |||
|colspan=2|[[File:MK8D Mii Racing Suit Inkling.png|70px]] | |||
|colspan=2|[[File:MK8D Mii Racing Suit Daisy.png|70px]] | |||
|} | |||
As part of the sixth wave of the Booster Course Pass, 17 additional Mii racing suits from ''Mario Kart Tour'' were added. These costumes can be unlocked via purchasing the DLC.<ref name=news/> Some [[Jump Boost]] animations from these suits are different from those of the standard and amiibo racing suits. | |||
{|border="1"cellpadding="3"style="background:#f5f5f5;text-align:center;width:1000px;border-collapse:collapse;margin-bottom:5px;"align=center | |||
|- | |||
!colspan="14"style="background:#9c9c9c"|DLC suits <center> <small>(added in ver. 3.0.0) | |||
|- | |||
!colspan=2 width=11% style="background:#dedede"|{{color link|black|? Block|? Block Suit}} | |||
!colspan=2 width=11% style="background:#dedede"|{{color link|black|Castle|Castle Suit}} | |||
!colspan=2 width=11% style="background:#dedede"|{{color link|black|Toadette|Toadette Suit}} | |||
!colspan=2 width=11% style="background:#dedede"|{{color link|black|Dry Bowser|Dry Bowser Suit}} | |||
!colspan=2 width=11% style="background:#dedede"|{{color link|black|Chain Chomp|Chain Chomp Suit}} | |||
!colspan=2 width=11% style="background:#dedede"|{{color link|black|Cheep Cheep|Cheep Cheep Suit}} | |||
|-align="center"style="background: #FFFFFF" | |||
|colspan=2|[[File:MK8D Mii Racing Suit - Block.png|70px]] | |||
|colspan=2|[[File:MK8D Mii Racing Suit Castle.png|70px]] | |||
|colspan=2|[[File:MK8D Mii Racing Suit Toadette.png|70px]] | |||
|colspan=2|[[File:MK8D Mii Racing Suit Dry Bowser.png|70px]] | |||
|colspan=2|[[File:MK8D Mii Racing Suit Chain Chomp.png|70px]] | |||
|colspan=2|[[File:MK8D Mii Racing Suit Cheep Cheep.png|70px]] | |||
|- | |||
!colspan=2 width=11% style="background:#dedede"|{{color link|black|Dolphin|Dolphin Suit}} | |||
!colspan=2 width=11% style="background:#dedede"|{{color link|black|Pokey|Pokey Suit}} | |||
!colspan=2 width=11% style="background:#dedede"|{{color link|black|Blooper|Blooper Suit}} | |||
!colspan=2 width=11% style="background:#dedede"|{{color link|black|Koopa Clown Car|Koopa Clown Car Suit}} | |||
!colspan=2 width=11% style="background:#dedede"|{{color link|black|Para-Biddybud|Para-Biddybud Suit}} | |||
!colspan=2 width=11% style="background:#dedede"|{{color link|black|Sky-High Sundae|Ice Cream Suit}} | |||
|-align="center"style="background:#FFFFFF" | |||
|colspan=2|[[File:MK8D Mii Racing Suit Dolphin.png|70px]] | |||
|colspan=2|[[File:MK8D Mii Racing Suit Pokey.png|70px]] | |||
|colspan=2|[[File:MK8D Mii Racing Suit Blooper.png|70px]] | |||
|colspan=2|[[File:MK8D Mii Racing Suit Koopa Clown Car.png|70px]] | |||
|colspan=2|[[File:MK8D Mii Racing Suit Para-Biddybud.png|70px]] | |||
|colspan=2|[[File:MK8D Mii Racing Suit Ice Cream.png|70px]] | |||
|- | |||
!colspan=2 width=11% style="background:#dedede"|{{color link|black|Birdo|Birdo Suit}} | |||
!colspan=2 width=11% style="background:#dedede"|{{color link|black|Petey Piranha|Petey Piranha Suit}} | |||
!colspan=2 width=11% style="background:#dedede"|{{color link|black|Wiggler|Wiggler Suit}} | |||
!colspan=2 width=11% style="background:#dedede"|{{color link|black|Goomba|Goomba Suit}} | |||
!colspan=2 width=11% style="background:#dedede"|{{color link|black|Moo Moo|Moo Moo Suit}} | |||
!rowspan=2| | |||
|-align="center"style="background: #FFFFFF" | |||
|colspan=2|[[File:MK8D Mii Racing Suit Birdo.png|70px]] | |||
|colspan=2|[[File:MK8D Mii Racing Suit Petey Piranha.png|70px]] | |||
|colspan=2|[[File:MK8D Mii Racing Suit Wiggler.png|70px]] | |||
|colspan=2|[[File:MK8D Mii Racing Suit Goomba.png|70px]] | |||
|colspan=2|[[File:MK8D Mii Racing Suit Moo Moo.png|70px]] | |||
|} | |||
===Rival order=== | |||
Like in ''Mario Kart 8'', characters have set [[Rival|rivals]] that consistently appear when racing in Grand Prix races. They are once again restricted to Grand Prix only, not appearing in single player VS Race or Battle mode. Unlike the previous game, more characters have rivals: the twelve characters from the previous game who had rivals retain their rivals in this game, while most other characters range from having one to two rivals each, though some still have none at all. | |||
{|border="1"cellpadding="3"style="background:#f5f5f5;text-align:center;width:100%;border-collapse:collapse;margin-bottom:2px;"align=center | |||
|- | |||
!colspan="2"style="background:#dedede"width="25%"|Column 1 | |||
!colspan="2"style="background:#dedede"width="25%"|Column 2 | |||
!colspan="2"style="background:#dedede"width="25%"|Column 3 | |||
!colspan="2"style="background:#dedede"width="25%"|Column 4 | |||
|- | |||
!style="background:#dedede"width="4%"|Player | |||
!style="background:#dedede"width="8%"|Rival(s) | |||
!style="background:#dedede"width="4%"|Player | |||
!style="background:#dedede"width="8%"|Rival(s) | |||
!style="background:#dedede"width="4%"|Player | |||
!style="background:#dedede"width="8%"|Rival(s) | |||
!style="background:#dedede"width="4%"|Player | |||
!style="background:#dedede"width="8%"|Rival(s) | |||
|- | |||
!style="background:#dedede"|[[File:MK8 Mario Icon.png|link=Mario|32x32px]]||[[File:MK8 Peach Icon.png|link=Princess Peach|32x32px|Peach]][[File:MK8 Bowser Icon.png|link=Bowser|32x32px]] | |||
!style="background:#dedede"|[[File:MK8 Luigi Icon.png|link=Luigi|32x32px]]||[[File:MK8 Mario Icon.png|link=Mario|32x32px]][[File:MK8 Daisy Icon.png|link=Princess Daisy|32x32px|Daisy]] | |||
!style="background:#dedede"|[[File:MK8 Peach Icon.png|link=Princess Peach|32x32px|Peach]]||[[File:MK8 Toad Icon.png|link=Toad|32x32px]][[File:MK8 DKong Icon.png|link=Donkey Kong|32x32px]] | |||
!style="background:#dedede"|[[File:MK8 Daisy Icon.png|link=Princess Daisy|32x32px|Daisy]]||[[File:MK8 Peach Icon.png|link=Princess Peach|32x32px|Peach]][[File:MK8 Waluigi Icon.png|link=Waluigi|32x32px]] | |||
|- | |||
!style="background:#dedede"|[[File:MK8 Yoshi Icon.png|link=Yoshi|32x32px]]||[[File:MK8 Toad Icon.png|link=Toad|32x32px]][[File:MK8 DKong Icon.png|link=Donkey Kong|32x32px]] | |||
!style="background:#dedede"|[[File:MK8 Toad Icon.png|link=Toad|32x32px]]||[[File:MK8 Koopa Icon.png|link=Koopa|32x32px]][[File:MK8 Waluigi Icon.png|link=Waluigi|32x32px]] | |||
!style="background:#dedede"|[[File:MK8 Koopa Icon.png|link=Koopa Troopa|32x32px]]||[[File:MK8 Yoshi Icon.png|link=Yoshi|32x32px]][[File:MK8 Toad Icon.png|link=Toad|32x32px]] | |||
!style="background:#dedede"|[[File:MK8 ShyGuy Icon.png|link=Shy Guy|32x32px]]||[[File:MK8 Yoshi Icon.png|link=Yoshi|32x32px]] | |||
|- | |||
!style="background:#dedede"|[[File:MK8 BabyMario Icon.png|link=Baby Mario|32x32px]]||[[File:MK8 Bowser Jr Icon.png|link=Bowser Jr.|32x32px]][[File:MK8 BabyPeach Icon.png|link=Baby Peach|32x32px]] | |||
!style="background:#dedede"|[[File:MK8 BabyLuigi Icon.png|link=Baby Luigi|32x32px]]||[[File:MK8 BabyMario Icon.png|link=Baby Mario|32x32px]][[File:MK8 BabyDaisy Icon.png|link=Baby Daisy|32x32px]] | |||
!style="background:#dedede"|[[File:MK8 BabyPeach Icon.png|link=Baby Peach|32x32px]]||[[File:MK8 BabyMario Icon.png|link=Baby Mario|32x32px]][[File:MK8 BabyDaisy Icon.png|link=Baby Daisy|32x32px]] | |||
!style="background:#dedede"|[[File:MK8 BabyDaisy Icon.png|link=Baby Daisy|32x32px]]||[[File:MK8 BabyPeach Icon.png|link=Baby Peach|32x32px]][[File:MK8 BabyLuigi Icon.png|link=Baby Luigi|32x32px]] | |||
|- | |||
!style="background:#dedede"|[[File:MK8 Wario Icon.png|link=Wario|32x32px]]||[[File:MK8 Mario Icon.png|link=Mario|32x32px]][[File:MK8 Daisy Icon.png|link=Princess Daisy|32x32px|Daisy]] | |||
!style="background:#dedede"|[[File:MK8 Waluigi Icon.png|link=Waluigi|32x32px]]||[[File:MK8 Luigi Icon.png|link=Luigi|32x32px]][[File:MK8 Toadette Icon.png|link=Toadette|32x32px]] | |||
!style="background:#dedede"|[[File:MK8 DKong Icon.png|link=Donkey Kong|32x32px]]||[[File:MK8 Bowser Icon.png|link=Bowser|32x32px]][[File:MK8 Wario Icon.png|link=Wario|32x32px]] | |||
!style="background:#dedede"|[[File:MK8 Bowser Icon.png|link=Bowser|32x32px]]||[[File:MK8 Mario Icon.png|link=Mario|32x32px]][[File:MK8 Luigi Icon.png|link=Luigi|32x32px]] | |||
|- | |||
!style="background:#dedede"|[[File:MK8 Lemmy Icon.png|link=Lemmy Koopa|Lemmy|32x32px]]||[[File:MK8 Larry Icon.png|link=Larry Koopa|Larry|32x32px]] | |||
!style="background:#dedede"|[[File:MK8 Larry Icon.png|link=Larry Koopa|Larry|32x32px]]||[[File:MK8 Lemmy Icon.png|link=Lemmy Koopa|Lemmy|32x32px]] | |||
!style="background:#dedede"|[[File:MK8 Wendy Icon.png|link=Wendy O. Koopa|Wendy|32x32px]]||[[File:MK8 Daisy Icon.png|link=Princess Daisy|32x32px|Daisy]][[File:MK8 Peach Icon.png|link=Princess Peach|32x32px|Peach]] | |||
!style="background:#dedede"|[[File:MK8 Ludwig Icon.png|link=Ludwig von Koopa|Ludwig|32x32px]]||[[File:MK8 Iggy Icon.png|link=Iggy Koopa|Iggy|32x32px]] | |||
|- | |||
!style="background:#dedede"|[[File:MK8DX Female Inkling Icon.png|link=Inkling|Inkling Girl|32x32px]]||[[File:MK8DX Male Inkling Icon.png|link=Inkling|Inkling Boy|32x32px]] | |||
!style="background:#dedede"|[[File:VillagerMale-Icon-MK8.png|link=Villager|32x32px]]||[[File:MK8 Isabelle Icon.png|link=Isabelle|32x32px]] | |||
!style="background:#dedede"|[[File:MK8 Isabelle Icon.png|link=Isabelle|32x32px]]||[[File:VillagerFemale-Icon-MK8.png|link=Villager|32x32px]] | |||
!style="background:#dedede"|[[File:MK8D BotW Link Icon.png|link=Link|32x32px]]||None | |||
|- | |||
!style="background:#dedede"|[[File:MK8DX Male Inkling Icon.png|link=Inkling|Inkling Boy|32x32px]]||[[File:MK8DX Female Inkling Icon.png|link=Inkling|Inkling Girl|32x32px]] | |||
!style="background:#dedede"|[[File:VillagerFemale-Icon-MK8.png|link=Villager|32x32px]]||[[File:VillagerMale-Icon-MK8.png|link=Villager|32x32px]] | |||
!colspan="4"style="background:#dedede"| | |||
|- | |||
!colspan="2"style="background:#dedede"width="25%"|Column 5 | |||
!colspan="2"style="background:#dedede"width="25%"|Column 6 | |||
!colspan="2"style="background:#dedede"width="25%"|Column 7 | |||
!colspan="2"style="background:#dedede"width="25%"|Column 8 | |||
|- | |||
!style="background:#dedede"width="4%"|Player | |||
!style="background:#dedede"width="8%"|Rival(s) | |||
!style="background:#dedede"width="4%"|Player | |||
!style="background:#dedede"width="8%"|Rival(s) | |||
!style="background:#dedede"width="4%"|Player | |||
!style="background:#dedede"width="8%"|Rival(s) | |||
!style="background:#dedede"width="4%"|Player | |||
!style="background:#dedede"width="8%"|Rival(s) | |||
|- | |||
!style="background:#dedede"|[[File:MK8 Rosalina Icon.png|link=Rosalina|32x32px]]||[[File:MK8 Toad Icon.png|link=Toad|32x32px]] | |||
!style="background:#dedede"|[[File:MK8 Tanooki Mario Icon.png|link=Tanooki Mario|32x32px]]||[[File:MK8 Cat Peach Icon.png|link=Cat Mario|Cat Peach|32x32px]] | |||
!style="background:#dedede"|[[File:MK8 Cat Peach Icon.png|link=Cat Mario|Cat Peach|32x32px]]||[[File:MK8 Tanooki Mario Icon.png|link=Tanooki Mario|32x32px]] | |||
!style="background:#dedede"|[[File:MK8D Birdo Icon.png|32x32px|link=Birdo|32x32px]]||[[File:MK8 Yoshi Icon.png|link=Yoshi|32x32px|Yoshi]] | |||
|- | |||
!style="background:#dedede"|[[File:MK8 Lakitu Icon.png|link=Lakitu|32x32px]]||None | |||
!style="background:#dedede"|[[File:MK8 Toadette Icon.png|link=Toadette|32x32px]]||[[File:MK8 Yoshi Icon.png|link=Yoshi|32x32px]][[File:MK8 Wario Icon.png|link=Wario|32x32px]] | |||
!style="background:#dedede"|[[File:MK8DX King Boo Icon.png|link=King Boo|32x32px]]||[[File:MK8DX Petey Piranha Icon.png|32x32px|link=Petey Piranha|32x32px]] | |||
!style="background:#dedede"|[[File:MK8DX Petey Piranha Icon.png|32x32px|link=Petey Piranha|32x32px]]||[[File:MK8DX King Boo Icon.png|32x32px|link=King Boo|32x32px]] | |||
|- | |||
!style="background:#dedede"|[[File:MK8 BabyRosalina Icon.png|link=Baby Rosalina|32x32px]]||[[File:MK8 Toadette Icon.png|link=Toadette|32x32px]] | |||
!style="background:#dedede"|[[File:MK8 MMario Icon.png|link=Metal Mario|32x32px]]||[[File:MK8 PGPeach Icon.png|link=Pink Gold Peach|32x32px]] | |||
!style="background:#dedede"|[[File:MK8 PGPeach Icon.png|link=Pink Gold Peach|32x32px]]||[[File:MK8 MMario Icon.png|link=Metal Mario|32x32px]] | |||
!style="background:#dedede"|[[File:MK8DX Wiggler Icon.png|32x32px|link=Wiggler|32x32px]]||[[File:MK8 Yoshi Icon.png|32x32px|link=Yoshi|32x32px]][[File:MK8 ShyGuy Icon.png|32x32px|link=Shy Guy|32x32px]] | |||
|- | |||
!style="background:#dedede"|[[File:MK8DX Dry Bones Icon.png|link=Dry Bones|32x32px]]||[[File:MK8 Koopa Icon.png|link=Koopa Troopa|32x32px]][[File:MK8 Dry Bowser Icon.png|link=Dry Bowser|32x32px]] | |||
!style="background:#dedede"|[[File:MK8 Bowser Jr Icon.png|link=Bowser Jr.|32x32px]]||[[File:MK8 Peach Icon.png|link=Princess Peach|32x32px|Peach]] | |||
!style="background:#dedede"|[[File:MK8 Dry Bowser Icon.png|link=Dry Bowser|32x32px]]||[[File:MK8DX Dry Bones Icon.png|link=Dry Bones|32x32px]] | |||
!style="background:#dedede"|[[File:MK8DX Kamek Icon.png|32x32px|link=Kamek|32x32px]]||[[File:MK8 Bowser Jr Icon.png|link=Bowser Jr.|32x32px]] | |||
|- | |||
!style="background:#dedede"|[[File:MK8 Iggy Icon.png|link=Iggy Koopa|Iggy|32x32px]]||[[File:MK8 Ludwig Icon.png|link=Ludwig von Koopa|Ludwig|32x32px]] | |||
!style="background:#dedede"|[[File:MK8 Roy Icon.png|link=Roy Koopa|Roy|32x32px]]||[[File:MK8 Morton Icon.png|link=Morton Koopa Jr.|Morton|32x32px]] | |||
!style="background:#dedede"|[[File:MK8 Morton Icon.png|link=Morton Koopa Jr.|Morton|32x32px]]||[[File:MK8 Roy Icon.png|link=Roy Koopa|Roy|32x32px]] | |||
!style="background:#dedede"|[[File:MK8DX Peachette Icon.png|link=Peachette|32x32px]]||[[File:MK8 Yoshi Icon.png|32x32px|link=Yoshi|32x32px]][[File:MK8 Wario Icon.png|link=Wario|32x32px]] | |||
|- | |||
!style="background:#dedede"|[[File:MK8DX Diddy Kong Icon.png|link=Diddy Kong|32x32px]]||[[File:MK8 DKong Icon.png|link=Donkey Kong|32x32px]] | |||
!style="background:#dedede"|[[File:MK8DX Funky Kong Icon.png|link=Funky Kong|32x32px]]||[[File:MK8 DKong Icon.png|link=Donkey Kong|32x32px]] | |||
!style="background:#dedede"|[[File:MK8DX Pauline Icon.png|link=Pauline|32x32px]]||[[File:MK8 DKong Icon.png|link=Donkey Kong|32x32px]] | |||
!style="background:#dedede"|[[File:Mii_MK8.png|link=Mii|32x32px]]||None | |||
|} | |||
==Vehicle parts== | |||
''Mario Kart 8 Deluxe'' features six additional vehicle body parts. One is the [[Koopa Clown]], returning from ''[[Mario Kart 7]]''. Two new vehicles are ''Splatoon''-based ATVs; the [[Splat Buggy]] and [[Inkstriker]]. These three change their colors for certain characters: the former for the [[Koopalings]], and the latter two for all [[Inkling]] variations. Version 1.6.0 adds the [[Master Cycle Zero]], [[Ancient Tires]], and [[Paraglider (The Legend of Zelda)|Paraglider]]. In total, there are 41 vehicle bodies, 22 tires, and 15 gliders, resulting in up to 13,530 different combinations. | |||
Computer-controlled characters now choose from a wider variety of kart parts than in the original version, such as the [[Flame Rider]] and the [[Sports Coupe]]. However, they are still restricted to a set amount of body parts per character. A CPU [[Baby Daisy]] has the tendency to use the [[Wild Wiggler]] with [[Wood]] tires, for example. | |||
The vehicle parts that were exclusive to downloadable content in ''Mario Kart 8'' (i.e. parts included within the [[Mercedes-Benz x Mario Kart 8|Mercedes-Benz × ''Mario Kart 8'']], [[The Legend of Zelda x Mario Kart 8|''The Legend of Zelda'' × ''Mario Kart 8'']], and [[Animal Crossing x Mario Kart 8|''Animal Crossing'' × ''Mario Kart 8'']] add-on packs) are now accessible in the base game and are randomly unlocked by collecting [[coin]]s during gameplay. | |||
The statistics of some vehicle parts have been altered, and certain physics elements, such as the speed increase per stat and the acceleration tiers, have been adjusted. | |||
===Available parts=== | |||
The parts available are listed here in the order shown in the vehicle customization screen, with the following notation:<br> | |||
*'''Bold''' = Part is available at the start. | |||
*<nowiki>*</nowiki> = Changes color, depending on the character. | |||
*<nowiki>**</nowiki> = Changes color for the [[Koopalings]]. | |||
*<nowiki>***</nowiki> = Changes color for [[Daisy]], [[Baby Daisy]], [[Rosalina]], [[Baby Rosalina]], [[Wiggler]], [[Kamek]], and [[Funky Kong]]. | |||
*<nowiki>****</nowiki> = Changes color for the [[Inkling]]s. | |||
*<small>(DX)</small> = Part is not available in the original ''[[Mario Kart 8]]''. | |||
*<small>(NEW)</small> = Part is introduced in this game. | |||
The "8" logos on the parts are replaced with the driver's [[emblem]], except on the [[Gold Standard]] and [[Gold Glider]]. | |||
====[[Kart]]s==== | |||
<gallery> | |||
StandardKartBodyMK8.png|'''[[Standard Kart]]'''* | |||
PipeFrameBodyMK8.png|[[Pipe Frame]]* | |||
Mach8BodyMK8.png|[[Mach 8]] | |||
Steel Driver.png|'''[[Steel Driver]]''' | |||
CatCruiserBodyMK8.png|[[Cat Cruiser]] | |||
CircuitSpecialBodyMK8.png|'''[[Circuit Special]]'''* | |||
TrispeederBodyMK8.png|[[Tri-Speeder]] | |||
BadwagonBodyMK8.png|[[Badwagon]] | |||
PrancerBodyMK8.png|[[Prancer]] | |||
BiddybuggyBodyMK8.png|[[Biddybuggy]]*<br>''Buggybud'' | |||
LandshipBodyMK8.png|[[Landship]]** | |||
SneakerBodyMK8.png|'''[[Sneeker]]'''*<br>''Bounder'' | |||
SportsCoupeMK8.png|[[Sports Coupe]]<br>''Sports Coupé'' | |||
Gold Standard.png|[[Gold Standard]]<br>''Gold Kart'' | |||
GLA-MK8.png|[[GLA]]* | |||
W25SilverArrow-MK8.png|[[W 25 Silver Arrow]] | |||
300SLRoadster MK8.png|[[300 SL Roadster]] | |||
MK8BlueFalcon.png|[[Blue Falcon]] | |||
MK8 Tanooki Buggy Sprite.png|[[Tanooki Kart]] | |||
ZeldaMK8Bdasher.png|[[B Dasher]] | |||
MK8Streetle.png|'''[[Streetle]]''' | |||
MK8PWing.png|[[P-Wing (kart)|P-Wing]] | |||
MK8DX Koopa Clown.png|[[Koopa Clown]]** <small>(DX)</small> | |||
</gallery> | |||
====[[Standard bike (vehicle class)|Standard bike]]s==== | |||
<gallery> | |||
StandardBikeBodyMK8.png|'''[[Standard Bike]]'''* | |||
TheDukeBodyMK8.png|[[The Duke]] | |||
FlameRiderBodyMK8.png|[[Flame Rider]] | |||
VarmintBodyMK8.png|[[Varmint]] | |||
MrScootyBodyMK8.png|[[Mr. Scooty]]<br>''Mr Scooty'' | |||
MK8D Master Cycle Zero.png|[[Master Cycle Zero]] <small>(NEW)</small> | |||
MK8 Light-Green City Tripper.png|'''[[City Tripper]]'''* | |||
</gallery> | |||
====[[Sport bike (vehicle class)|Sport bike]]s==== | |||
<gallery> | |||
CometBodyMK8.png|'''[[Comet]]''' | |||
SportBikeBodyMK8.png|[[Sport Bike]]* | |||
JetBikeBodyMK8.png|[[Jet Bike]] | |||
YoshiBikeBodyMK8.png|[[Yoshi Bike]] | |||
MK8MasterCycle.png|[[Master Cycle]] | |||
</gallery> | |||
====[[All-Terrain Vehicle|ATV]]s==== | |||
<gallery> | |||
StandardATVBodyMK8.png|'''[[Standard ATV]]'''*<br>''Standard Quad'' | |||
WildWigglerBodyMK8.png|[[Wild Wiggler]] | |||
TeddyBuggyBodyMK8.png|[[Teddy Buggy]] | |||
MK8BoneRattler.png|[[Bone Rattler]] | |||
MK8DX Splat Buggy.png|'''[[Splat Buggy]]'''**** <small>(NEW)</small> | |||
MK8DX Inkstriker.png|[[Inkstriker]]**** <small>(NEW)</small> | |||
</gallery> | |||
====[[Tire]]s==== | |||
<gallery> | |||
StandardTiresMK8.png|'''[[Standard (tire)|Standard]]'''<br>''Normal'' | |||
MonsterTiresMK8.png|'''[[Monster (tire)|Monster]]''' | |||
RollerTiresMK8.png|'''[[Roller]]''' | |||
SlimTiresMK8.png|'''[[Slim (tire)|Slim]]''' | |||
SlickTiresMK8.png|[[Slick]] | |||
MetalTiresMK8.png|[[Metal]] | |||
ButtonTiresMK8.png|[[Button (tire)|Button]] | |||
Off-Road.png|'''[[Off-Road]]''' | |||
SpongeTiresMK8.png|'''[[Sponge]]''' | |||
WoodTiresMK8.png|[[Wood]]<br>''Wooden'' | |||
CushionTiresMK8.png|[[Cushion]] | |||
Blue Standard.png|[[Blue Standard]]<br>''Normal Blue'' | |||
HotMonsterTiresMK8.png|[[Hot Monster]]<br>''Funky Monster'' | |||
AzureRollerTiresMK8.png|[[Azure Roller]] | |||
CrimsonSlimTiresMK8.png|[[Crimson Slim]] | |||
CyberSlickTiresMK8.png|[[Cyber Slick]] | |||
Retro Off-Road.png|[[Retro Off-Road]] | |||
Gold Tires MK8.png|[[Gold Tires]]<br>''Gold Wheels'' | |||
GLATires-MK8.png|[[GLA Tires]] <br>''GLA Wheels'' | |||
MK8-TriforceTires.png|[[Triforce Tires]] <br>''Triforce Tyres'' | |||
MK8D Ancient Tires.png|[[Ancient Tires]] <small>(NEW)</small> <br>''Ancient Tyres'' | |||
Leaf Tires MK8.png|[[Leaf Tires]] <br>''Leaf Tyres'' | |||
</gallery> | |||
====[[Glider]]s==== | |||
<gallery> | |||
SuperGliderMK8.png|'''[[Super Glider]]'''* | |||
Cloud Glider.png|[[Cloud Glider]] | |||
WarioWingMK8.png|[[Wario Wing]] | |||
WaddleWingMK8.png|[[Waddle Wing]] | |||
PeachParasolGliderMK8.png|[[Peach Parasol (glider)|Peach Parasol]]*** | |||
ParachuteGliderMK8.png|'''[[Parachute (glider)|Parachute]]''' | |||
ParafoilGliderMK8.png|'''[[Parafoil]]''' | |||
FlowerGliderMK8.png|[[Flower Glider]] | |||
BowserKiteMK8.png|[[Bowser Kite]] | |||
PlaneGliderMK8.png|'''[[Plane Glider]]''' | |||
MKTVParafoilGliderMK8.png|[[MKTV Parafoil]] | |||
GoldGliderMK8.png|[[Gold Glider]] | |||
MK8-HylianKite.png|[[Hylian Kite]] | |||
MK8D Paraglider.png|[[Paraglider (The Legend of Zelda)|Paraglider]] <small>(NEW)</small> | |||
PaperGliderIcon-MK8.png|[[Paper Glider]] | |||
</gallery> | |||
===CPU combinations=== | |||
All characters in the game besides Miis and most variants (with the exceptions of blue Inkling Boy, female Villager, and Link's alternate outfit) can be used by CPUs. Each of these characters have four different combinations of vehicle parts that they can use as CPUs: | |||
{|border="1"cellpadding="3"style="background:#f5f5f5;text-align:center;width:100%;border-collapse:collapse;margin-bottom:2px;"align=center | |||
|- | |||
!colspan="5"style="background:#9c9c9c"|CPU combinations | |||
|- | |||
!style="background:#dedede"width="10%"|Character | |||
!style="background:#dedede"width="22%"|Combination 1 | |||
!style="background:#dedede"width="22%"|Combination 2 | |||
!style="background:#dedede"width="22%"|Combination 3 | |||
!style="background:#dedede"width="22%"|Combination 4 | |||
|- | |||
![[File:MK8 Mario Icon.png|link=Mario|32x32px]]||[[File:StandardKartBodyMK8.png|link=Standard Kart|32x32px]][[File:StandardTiresMK8.png|link=Standard (tire)|32x32px]][[File:SuperGliderMK8.png|link=Super Glider|32x32px]]||[[File:ZeldaMK8Bdasher.png|link=B Dasher|32x32px]][[File:StandardTiresMK8.png|link=Standard (tire)|32x32px]][[File:SuperGliderMK8.png|link=Super Glider|32x32px]]||[[File:MK8PWing.png|link=P-Wing (kart)|32x32px]][[File:Blue Standard.png|link=Blue Standard|32x32px]][[File:ParafoilGliderMK8.png|link=Parafoil|32x32px]]||[[File:CometBodyMK8.png|link=Comet|32x32px]][[File:SlimTiresMK8.png|link=Slim (tire)|32x32px]][[File:SuperGliderMK8.png|link=Super Glider|32x32px]] | |||
|- | |||
![[File:MK8 Luigi Icon.png|link=Luigi|32x32px]]||[[File:StandardKartBodyMK8 Luigi.png|link=Standard Kart|32x32px]][[File:StandardTiresMK8.png|link=Standard (tire)|32x32px]][[File:MK8ThumbGreenSG.png|link=Super Glider|32x32px]]||[[File:Mach8BodyMK8.png|link=Mach 8|32x32px]][[File:SlimTiresMK8.png|link=Slim (tire)|32x32px]][[File:MK8ThumbGreenSG.png|link=Super Glider|32x32px]]||[[File:MK8 Green Circuit Special.png|link=Circuit Special|32x32px]][[File:SlickTiresMK8.png|link=Slick|32x32px]][[File:MK8ThumbGreenSG.png|link=Super Glider|32x32px]]||[[File:StandardBikeBodyMK8 Luigi.png|link=Standard Bike|32x32px]][[File:SlimTiresMK8.png|link=Slim (tire)|32x32px]][[File:MK8ThumbGreenSG.png|link=Super Glider|32x32px]] | |||
|- | |||
![[File:MK8 Peach Icon.png|link=Peach|32x32px]]||[[File:StandardKartBodyMK8 Peach.png|link=Standard Kart|32x32px]][[File:StandardTiresMK8.png|link=Standard (tire)|32x32px]][[File:MK8ThumbPinkSG.png|link=Super Glider|32x32px]]||[[File:PrancerBodyMK8.png|link=Prancer|32x32px]][[File:WoodTiresMK8.png|link=Wood|32x32px]][[File:PeachParasolGliderMK8.png|link=Peach Parasol (glider)|32x32px]]||[[File:StandardBikeBodyMK8 Peach.png|link=Standard Bike|32x32px]][[File:SlimTiresMK8.png|link=Slim (tire)|32x32px]][[File:MK8ThumbPinkSG.png|link=Super Glider|32x32px]]||[[File:JetBikeBodyMK8.png|link=Jet Bike|32x32px]][[File:SlimTiresMK8.png|link=Slim (tire)|32x32px]][[File:MK8ThumbPinkSG.png|link=Super Glider|32x32px]] | |||
|- | |||
![[File:MK8 Daisy Icon.png|link=Daisy|32x32px]]||[[File:StandardKartBodyMK8 Daisy.png|link=Standard Kart|32x32px]][[File:StandardTiresMK8.png|link=Standard (tire)|32x32px]][[File:MK8ThumbOrangeSG.png|link=Super Glider|32x32px]]||[[File:CatCruiserBodyMK8.png|link=Cat Cruiser|32x32px]][[File:StandardTiresMK8.png|link=Standard (tire)|32x32px]][[File:MK8ThumbOrangeSG.png|link=Super Glider|32x32px]]||[[File:SportsCoupeMK8.png|link=Sports Coupe|32x32px]][[File:StandardTiresMK8.png|link=Standard (tire)|32x32px]][[File:MK8ThumbOrangeSG.png|link=Super Glider|32x32px]]||[[File:VarmintBodyMK8.png|link=Varmint|32x32px]][[File:HotMonsterTiresMK8.png|link=Hot Monster|32x32px]][[File:MK8ThumbOrangeSG.png|link=Super Glider|32x32px]] | |||
|- | |||
![[File:MK8 Rosalina Icon.png|link=Rosalina|32x32px]]||[[File:StandardKartBodyMK8 Rosalina.png|link=Standard Kart|32x32px]][[File:StandardTiresMK8.png|link=Standard (tire)|32x32px]][[File:MK8ThumbRosalinaSG.png|link=Super Glider|32x32px]]||[[File:CircuitSpecialBodyMK8.png|link=Circuit Special|32x32px]][[File:StandardTiresMK8.png|link=Standard (tire)|32x32px]][[File:MK8ThumbRosalinaSG.png|link=Super Glider|32x32px]]||[[File:SportBikeOrangeYellowVarnishMK8.png|link=Sport Bike|32x32px]][[File:SlimTiresMK8.png|link=Slim (tire)|32x32px]][[File:MK8ThumbRosalinaSG.png|link=Super Glider|32x32px]]||[[File:StandardATVBodyMK8 Rosalina.png|link=Standard ATV|32x32px]][[File:MonsterTiresMK8.png|link=Monster (tire)|32x32px]][[File:MK8ThumbRosalinaSG.png|link=Super Glider|32x32px]] | |||
|- | |||
![[File:MK8 Tanooki Mario Icon.png|link=Tanooki Mario|32x32px]]||[[File:StandardKartBodyMK8 TanookiMario.png|link=Standard Kart|32x32px]][[File:StandardTiresMK8.png|link=Standard (tire)|32x32px]][[File:MK8ThumbTanookiMarioSG.png|link=Super Glider|32x32px]]||[[File:MK8 Tanooki Buggy Sprite.png|link=Tanooki Kart|32x32px]][[File:MonsterTiresMK8.png|link=Monster (tire)|32x32px]][[File:WaddleWingMK8.png|link=Waddle Wing|32x32px]]||[[File:StandardBikeBodyMK8 TanookiMario.png|link=Standard Bike|32x32px]][[File:SlimTiresMK8.png|link=Slim (tire)|32x32px]][[File:MK8ThumbTanookiMarioSG.png|link=Super Glider|32x32px]]||[[File:VarmintBodyMK8.png|link=Varmint|32x32px]][[File:MonsterTiresMK8.png|link=Monster (tire)|32x32px]][[File:WaddleWingMK8.png|link=Waddle Wing|32x32px]] | |||
|- | |||
![[File:MK8 Cat Peach Icon.png|link=Cat Peach|32x32px]]||[[File:StandardKartBodyMK8 CatPeach.png|link=Standard Kart|32x32px]][[File:StandardTiresMK8.png|link=Standard (tire)|32x32px]][[File:MK8ThumbCatPeachSG.png|link=Super Glider|32x32px]]||[[File:CatCruiserBodyMK8.png|link=Cat Cruiser|32x32px]][[File:Retro Off-Road.png|link=Retro Off-Road|32x32px]][[File:MK8ThumbCatPeachSG.png|link=Super Glider|32x32px]]||[[File:PrancerBodyMK8.png|link=Prancer|32x32px]][[File:WoodTiresMK8.png|link=Wood|32x32px]][[File:PeachParasolGliderMK8.png|link=Peach Parasol (glider)|32x32px]]||[[File:StandardBikeBodyMK8 CatPeach.png|link=Standard Bike|32x32px]][[File:SlimTiresMK8.png|link=Slim (tire)|32x32px]][[File:PlaneGliderMK8.png|link=Plane Glider|32x32px]] | |||
|- | |||
![[File:MK8D Birdo Icon.png|link=Birdo|32x32px]]||[[File:StandardKartBodyMK8 Toadette.png|link=Standard Kart|32x32px]][[File:StandardTiresMK8.png|link=Standard (tire)|32x32px]][[File:MK8ThumbToadetteSG.png|link=Super Glider|32x32px]]||[[File:Mach8BodyMK8.png|link=Mach 8|32x32px]][[File:SlimTiresMK8.png|link=Slim (tire)|32x32px]][[File:MK8ThumbToadetteSG.png|link=Super Glider|32x32px]]||[[File:StandardBikeBodyMK8 Toadette.png|link=Standard Bike|32x32px]][[File:SlimTiresMK8.png|link=Slim (tire)|32x32px]][[File:MK8ThumbToadetteSG.png|link=Super Glider|32x32px]]||[[File:WildWigglerBodyMK8.png|link=Wild Wiggler|32x32px]][[File:StandardTiresMK8.png|link=Standard (tire)|32x32px]][[File:FlowerGliderMK8.png|link=Flower Glider|32x32px]] | |||
|- | |||
![[File:MK8 Yoshi Icon.png|link=Yoshi|32x32px]]||[[File:StandardKartBodyMK8 Yoshi.png|link=Standard Kart|32x32px]][[File:StandardTiresMK8.png|link=Standard (tire)|32x32px]][[File:MK8ThumbYoshiSG.png|link=Super Glider|32x32px]]||[[File:Mach8BodyMK8.png|link=Mach 8|32x32px]][[File:SlimTiresMK8.png|link=Slim (tire)|32x32px]][[File:MK8ThumbYoshiSG.png|link=Super Glider|32x32px]]||[[File:StandardBikeBodyMK8 Yoshi.png|link=Standard Bike|32x32px]][[File:SlimTiresMK8.png|link=Slim (tire)|32x32px]][[File:MK8ThumbYoshiSG.png|link=Super Glider|32x32px]]||[[File:WildWigglerBodyMK8.png|link=Wild Wiggler|32x32px]][[File:StandardTiresMK8.png|link=Standard (tire)|32x32px]][[File:FlowerGliderMK8.png|link=Flower Glider|32x32px]] | |||
|- | |||
![[File:MK8 Toad Icon.png|link=Toad|32x32px]]||[[File:StandardKartBodyMK8 Toad.png|link=Standard Kart|32x32px]][[File:StandardTiresMK8.png|link=Standard (tire)|32x32px]][[File:MK8ThumbToadSG.png|link=Super Glider|32x32px]]||[[File:MK8BluePFIcon.png|link=Pipe Frame|32x32px]][[File:SlimTiresMK8.png|link=Slim (tire)|32x32px]][[File:ParafoilGliderMK8.png|link=Parafoil|32x32px]]||[[File:SneakerBodyMK8.png|link=Sneeker|32x32px]][[File:Blue Standard.png|link=Blue Standard|32x32px]][[File:MK8ThumbToadSG.png|link=Super Glider|32x32px]]||[[File:YoshiBikeBodyMK8.png|link=Yoshi Bike|32x32px]][[File:CrimsonSlimTiresMK8.png|link=Crimson Slim|32x32px]][[File:MK8ThumbToadSG.png|link=Super Glider|32x32px]] | |||
|- | |||
![[File:MK8 Koopa Icon.png|link=Koopa Troopa|32x32px]]||[[File:StandardKartBodyMK8 KoopaTroopa.png|link=Standard Kart|32x32px]][[File:StandardTiresMK8.png|link=Standard (tire)|32x32px]][[File:MK8ThumbKoopaTroopaSG.png|link=Super Glider|32x32px]]||[[File:Steel Driver.png|link=Steel Driver|32x32px]][[File:MetalTiresMK8.png|link=Metal|32x32px]][[File:ParafoilGliderMK8.png|link=Parafoil|32x32px]]||[[File:Sport Bike Green.png|link=Sport Bike|32x32px]][[File:StandardTiresMK8.png|link=Standard (tire)|32x32px]][[File:MK8ThumbKoopaTroopaSG.png|link=Super Glider|32x32px]]||[[File:StandardATVBodyMK8 KoopaTroopa.png|link=Standard ATV|32x32px]][[File:StandardTiresMK8.png|link=Standard (tire)|32x32px]][[File:MK8ThumbKoopaTroopaSG.png|link=Super Glider|32x32px]] | |||
|- | |||
![[File:MK8 ShyGuy Icon.png|link=Shy Guy|32x32px]]||[[File:StandardKartBodyMK8 ShyGuy.png|link=Standard Kart|32x32px]][[File:StandardTiresMK8.png|link=Standard (tire)|32x32px]][[File:MK8ThumbShyGuySG.png|link=Super Glider|32x32px]]||[[File:MK8BlackPFIcon.png|link=Pipe Frame|32x32px]][[File:StandardTiresMK8.png|link=Standard (tire)|32x32px]][[File:MK8ThumbShyGuySG.png|link=Super Glider|32x32px]]||[[File:MK8 Gray Sneeker.png|link=Sneeker|32x32px]][[File:Off-Road.png|link=Off-Road|32x32px]][[File:MK8ThumbShyGuySG.png|link=Super Glider|32x32px]]||[[File:FlameRiderBodyMK8.png|link=Flame Rider|32x32px]][[File:Off-Road.png|link=Off-Road|32x32px]][[File:MK8ThumbShyGuySG.png|link=Super Glider|32x32px]] | |||
|- | |||
![[File:MK8 Lakitu Icon.png|link=Lakitu|32x32px]]||[[File:StandardKartBodyMK8 Lakitu.png|link=Standard Kart|32x32px]][[File:StandardTiresMK8.png|link=Standard (tire)|32x32px]][[File:MK8ThumbLakituSG.png|link=Super Glider|32x32px]]||[[File:Biddybuggy-blue.png|link=Biddybuggy|32x32px]][[File:MonsterTiresMK8.png|link=Monster (tire)|32x32px]][[File:ParachuteGliderMK8.png|link=Parachute (glider)|Parachute|32x32px]]||[[File:MrScootyBodyMK8.png|link=Mr. Scooty|32x32px]][[File:StandardTiresMK8.png|link=Standard (tire)|32x32px]][[File:Cloud Glider.png|link=Cloud Glider|32x32px]]||[[File:StandardATVBodyMK8 Lakitu.png|link=Standard ATV|32x32px]][[File:StandardTiresMK8.png|link=Standard (tire)|32x32px]][[File:Cloud Glider.png|link=Cloud Glider|32x32px]] | |||
|- | |||
![[File:MK8 Toadette Icon.png|link=Toadette|32x32px]]||[[File:StandardKartBodyMK8 Toadette.png|link=Standard Kart|32x32px]][[File:StandardTiresMK8.png|link=Standard (tire)|32x32px]][[File:MK8ThumbToadetteSG.png|link=Super Glider|32x32px]]||[[File:CatCruiserBodyMK8.png|link=Cat Cruiser|32x32px]][[File:Retro Off-Road.png|link=Retro Off-Road|32x32px]][[File:MK8ThumbToadetteSG.png|link=Super Glider|32x32px]]||[[File:MrScootyBodyMK8.png|link=Mr. Scooty|32x32px]][[File:AzureRollerTiresMK8.png|link=Azure Roller|32x32px]][[File:MK8ThumbToadetteSG.png|link=Super Glider|32x32px]]||[[File:TeddyBuggyBodyMK8.png|link=Teddy Buggy|32x32px]][[File:ButtonTiresMK8.png|link=Button (tire)|32x32px]][[File:ParafoilGliderMK8.png|link=Parafoil|32x32px]] | |||
|- | |||
![[File:MK8DX King Boo Icon.png|link=King Boo|32x32px]]||[[File:StandardKartBodyMK8D KingBoo.png|link=Standard Kart|32x32px]][[File:MonsterTiresMK8.png|link=Monster (tire)|32x32px]][[File:MK8DThumbKingBooSG.png|link=Super Glider|32x32px]]||[[File:MK8 Black Circuit.png|link=Circuit Special|32x32px]][[File:StandardTiresMK8.png|link=Standard (tire)|32x32px]][[File:MK8DThumbKingBooSG.png|link=Super Glider|32x32px]]||[[File:BadwagonBodyMK8.png|link=Badwagon|32x32px]][[File:Off-Road.png|link=Off-Road|32x32px]][[File:MK8DThumbKingBooSG.png|link=Super Glider|32x32px]]||[[File:FlameRiderBodyMK8.png|link=Flame Rider|32x32px]][[File:MonsterTiresMK8.png|link=Monster (tire)|32x32px]][[File:MK8DThumbKingBooSG.png|link=Super Glider|32x32px]] | |||
|- | |||
![[File:MK8DX Petey Piranha Icon.png|link=Petey Piranha|32x32px]]||[[File:StandardKartBodyMK8 Luigi.png|link=Standard Kart|32x32px]][[File:MonsterTiresMK8.png|link=Monster (tire)|32x32px]][[File:MK8ThumbGreenSG.png|link=Super Glider|32x32px]]||[[File:MK8 Green Circuit Special.png|link=Circuit Special|32x32px]][[File:StandardTiresMK8.png|link=Standard (tire)|32x32px]][[File:MK8ThumbGreenSG.png|link=Super Glider|32x32px]]||[[File:BadwagonBodyMK8.png|link=Badwagon|32x32px]][[File:Off-Road.png|link=Off-Road|32x32px]][[File:MK8ThumbGreenSG.png|link=Super Glider|32x32px]]||[[File:FlameRiderBodyMK8.png|link=Flame Rider|32x32px]][[File:MonsterTiresMK8.png|link=Monster (tire)|32x32px]][[File:MK8ThumbGreenSG.png|link=Super Glider|32x32px]] | |||
|- | |||
![[File:MK8 BabyMario Icon.png|link=Baby Mario|32x32px]]||[[File:StandardKartBodyMK8.png|link=Standard Kart|32x32px]][[File:StandardTiresMK8.png|link=Standard (tire)|32x32px]][[File:SuperGliderMK8.png|link=Super Glider|32x32px]]||[[File:PipeFrameBodyMK8.png|link=Pipe Frame|32x32px]][[File:StandardTiresMK8.png|link=Standard (tire)|32x32px]][[File:ParafoilGliderMK8.png|link=Parafoil|32x32px]]||[[File:BiddybuggyBodyMK8.png|link=Biddybuggy|32x32px]][[File:StandardTiresMK8.png|link=Standard (tire)|32x32px]][[File:SuperGliderMK8.png|link=Super Glider|32x32px]]||[[File:YoshiBikeBodyMK8.png|link=Yoshi Bike|32x32px]][[File:MonsterTiresMK8.png|link=Monster (tire)|32x32px]][[File:SuperGliderMK8.png|link=Super Glider|32x32px]] | |||
|- | |||
![[File:MK8 BabyLuigi Icon.png|link=Baby Luigi|32x32px]]||[[File:StandardKartBodyMK8 Luigi.png|link=Standard Kart|32x32px]][[File:StandardTiresMK8.png|link=Standard (tire)|32x32px]][[File:MK8ThumbGreenSG.png|link=Super Glider|32x32px]]||[[File:MK8GreenPFIcon.png|link=Pipe Frame|32x32px]][[File:StandardTiresMK8.png|link=Standard (tire)|32x32px]][[File:ParafoilGliderMK8.png|link=Parafoil|32x32px]]||[[File:Biddybuggy-green.png|link=Biddybuggy|32x32px]][[File:StandardTiresMK8.png|link=Standard (tire)|32x32px]][[File:MK8ThumbGreenSG.png|link=Super Glider|32x32px]]||[[File:MrScootyBodyMK8.png|link=Mr. Scooty|32x32px]][[File:RollerTiresMK8.png|link=Roller|32x32px]][[File:MK8ThumbGreenSG.png|link=Super Glider|32x32px]] | |||
|- | |||
![[File:MK8 BabyPeach Icon.png|link=Baby Peach|32x32px]]||[[File:StandardKartBodyMK8 Peach.png|link=Standard Kart|32x32px]][[File:StandardTiresMK8.png|link=Standard (tire)|32x32px]][[File:MK8ThumbPinkSG.png|link=Super Glider|32x32px]]||[[File:Biddybuggy-pink.png|link=Biddybuggy|32x32px]][[File:StandardTiresMK8.png|link=Standard (tire)|32x32px]][[File:MK8ThumbPinkSG.png|link=Super Glider|32x32px]]||[[File:StandardBikeBodyMK8 Peach.png|link=Standard Bike|32x32px]][[File:StandardTiresMK8.png|link=Standard (tire)|32x32px]][[File:PlaneGliderMK8.png|link=Plane Glider|32x32px]]||[[File:TeddyBuggyBodyMK8.png|link=Teddy Buggy|32x32px]][[File:WoodTiresMK8.png|link=Wood|32x32px]][[File:ParafoilGliderMK8.png|link=Parafoil|32x32px]] | |||
|- | |||
![[File:MK8 BabyDaisy Icon.png|link=Baby Daisy|32x32px]]||[[File:StandardKartBodyMK8 Daisy.png|link=Standard Kart|32x32px]][[File:StandardTiresMK8.png|link=Standard (tire)|32x32px]][[File:MK8ThumbOrangeSG.png|link=Super Glider|32x32px]]||[[File:Biddybuggy-yellow.png|link=Biddybuggy|32x32px]][[File:StandardTiresMK8.png|link=Standard (tire)|32x32px]][[File:MK8ThumbOrangeSG.png|link=Super Glider|32x32px]]||[[File:StandardBikeBodyMK8 Daisy.png|link=Standard Bike|32x32px]][[File:StandardTiresMK8.png|link=Standard (tire)|32x32px]][[File:PlaneGliderMK8.png|link=Plane Glider|32x32px]]||[[File:WildWigglerBodyMK8.png|link=Wild Wiggler|32x32px]][[File:WoodTiresMK8.png|link=Wood|32x32px]][[File:FlowerGliderMK8.png|link=Flower Glider|32x32px]] | |||
|- | |||
![[File:MK8 BabyRosalina Icon.png|link=Baby Rosalina|32x32px]]||[[File:StandardKartBodyMK8 Rosalina.png|link=Standard Kart|32x32px]][[File:StandardTiresMK8.png|link=Standard (tire)|32x32px]][[File:MK8ThumbRosalinaSG.png|link=Super Glider|32x32px]]||[[File:Biddybuggy-blue.png|link=Biddybuggy|32x32px]][[File:StandardTiresMK8.png|link=Standard (tire)|32x32px]][[File:MK8ThumbRosalinaSG.png|link=Super Glider|32x32px]]||[[File:MrScootyBodyMK8.png|link=Mr. Scooty|32x32px]][[File:StandardTiresMK8.png|link=Standard (tire)|32x32px]][[File:MK8ThumbRosalinaSG.png|link=Super Glider|32x32px]]||[[File:StandardATVBodyMK8 Rosalina.png|link=Standard ATV|32x32px]][[File:Blue Standard.png|link=Blue Standard|32x32px]][[File:MK8ThumbRosalinaSG.png|link=Super Glider|32x32px]] | |||
|- | |||
![[File:MK8 MMario Icon.png|link=Metal Mario|32x32px]]||[[File:StandardKartBodyMK8 MetalMario.png|link=Standard Kart|32x32px]][[File:StandardTiresMK8.png|link=Standard (tire)|32x32px]][[File:MK8ThumbMetalMarioSG.png|link=Super Glider|32x32px]]||[[File:TrispeederBodyMK8.png|link=Tri-Speeder|32x32px]][[File:MetalTiresMK8.png|link=Metal|32x32px]][[File:MK8ThumbMetalMarioSG.png|link=Super Glider|32x32px]]||[[File:JetBikeBodyMK8.png|link=Jet Bike|32x32px]][[File:MetalTiresMK8.png|link=Metal|32x32px]][[File:MK8ThumbMetalMarioSG.png|link=Super Glider|32x32px]]||[[File:StandardATVBodyMK8 MetalMario.png|link=Standard ATV|32x32px]][[File:MonsterTiresMK8.png|link=Monster (tire)|32x32px]][[File:MK8ThumbMetalMarioSG.png|link=Super Glider|32x32px]] | |||
|- | |||
![[File:MK8 PGPeach Icon.png|link=Pink Gold Peach|32x32px]]||[[File:StandardKartBodyMK8 PinkGoldPeach.png|link=Standard Kart|32x32px]][[File:StandardTiresMK8.png|link=Standard (tire)|32x32px]][[File:MK8ThumbPinkGoldPeachSG.png|link=Super Glider|32x32px]]||[[File:MK8 Orange Circuit Special.png|link=Circuit Special|32x32px]][[File:SpongeTiresMK8.png|link=Sponge|32x32px]][[File:MK8ThumbPinkGoldPeachSG.png|link=Super Glider|32x32px]]||[[File:BadwagonBodyMK8.png|link=Badwagon|32x32px]][[File:Off-Road.png|link=Off-Road|32x32px]][[File:MK8ThumbPinkGoldPeachSG.png|link=Super Glider|32x32px]]||[[File:CometBodyMK8.png|link=Comet|32x32px]][[File:MetalTiresMK8.png|link=Metal|32x32px]][[File:MK8ThumbPinkGoldPeachSG.png|link=Super Glider|32x32px]] | |||
|- | |||
![[File:MK8DX Wiggler Icon.png|link=Wiggler|32x32px]]||[[File:StandardKartBodyMK8 Daisy.png|link=Standard Kart|32x32px]][[File:StandardTiresMK8.png|link=Standard (tire)|32x32px]][[File:MK8ThumbOrangeSG.png|link=Super Glider|32x32px]]||[[File:Steel Driver.png|link=Steel Driver|32x32px]][[File:MetalTiresMK8.png|link=Metal|32x32px]][[File:ParafoilGliderMK8.png|link=Parafoil|32x32px]]||[[File:StandardBikeBodyMK8 Daisy.png|link=Standard Bike|32x32px]][[File:StandardTiresMK8.png|link=Standard (tire)|32x32px]][[File:MK8ThumbOrangeSG.png|link=Super Glider|32x32px]]||[[File:StandardATVBodyMK8 Daisy.png|link=Standard ATV|32x32px]][[File:Off-Road.png|link=Off-Road|32x32px]][[File:MK8ThumbOrangeSG.png|link=Super Glider|32x32px]] | |||
|- | |||
![[File:MK8 Wario Icon.png|link=Wario|32x32px]]||[[File:StandardKartBodyMK8 Wario.png|link=Standard Kart|32x32px]][[File:MonsterTiresMK8.png|link=Monster (tire)|32x32px]][[File:MK8ThumbWarioSG.png|link=Super Glider|32x32px]]||[[File:TrispeederBodyMK8.png|link=Tri-Speeder|32x32px]][[File:Off-Road.png|link=Off-Road|32x32px]][[File:WarioWingMK8.png|link=Wario Wing|32x32px]]||[[File:VarmintBodyMK8.png|link=Varmint|32x32px]][[File:HotMonsterTiresMK8.png|link=Hot Monster|32x32px]][[File:WarioWingMK8.png|link=Wario Wing|32x32px]]||[[File:StandardATVBodyMK8 Wario.png|link=Standard ATV|32x32px]][[File:MonsterTiresMK8.png|link=Monster (tire)|32x32px]][[File:MK8ThumbWarioSG.png|link=Super Glider|32x32px]] | |||
|- | |||
![[File:MK8 Waluigi Icon.png|link=Waluigi|32x32px]]||[[File:StandardKartBodyMK8 Waluigi.png|link=Standard Kart|32x32px]][[File:MonsterTiresMK8.png|link=Monster (tire)|32x32px]][[File:MK8ThumbWaluigiSG.png|link=Super Glider|32x32px]]||[[File:TheDukeBodyMK8.png|link=The Duke|32x32px]][[File:MonsterTiresMK8.png|link=Monster (tire)|32x32px]][[File:WarioWingMK8.png|link=Wario Wing|32x32px]]||[[File:FlameRiderBodyMK8.png|link=Flame Rider|32x32px]][[File:SlimTiresMK8.png|link=Slim (tire)|32x32px]][[File:WarioWingMK8.png|link=Wario Wing|32x32px]]||[[File:StandardATVBodyMK8 Waluigi.png|link=Standard ATV|32x32px]][[File:MonsterTiresMK8.png|link=Monster (tire)|32x32px]][[File:MK8ThumbWaluigiSG.png|link=Super Glider|32x32px]] | |||
|- | |||
![[File:MK8 DKong Icon.png|link=Donkey Kong|32x32px]]||[[File:StandardKartBodyMK8 DonkeyKong.png|link=Standard Kart|32x32px]][[File:MonsterTiresMK8.png|link=Monster (tire)|32x32px]][[File:MK8ThumbDonkeyKongSG.png|link=Super Glider|32x32px]]||[[File:SportsCoupeMK8.png|link=Sports Coupe|32x32px]][[File:MonsterTiresMK8.png|link=Monster (tire)|32x32px]][[File:MK8ThumbDonkeyKongSG.png|link=Super Glider|32x32px]]||[[File:VarmintBodyMK8.png|link=Varmint|32x32px]][[File:MonsterTiresMK8.png|link=Monster (tire)|32x32px]][[File:WaddleWingMK8.png|link=Waddle Wing|32x32px]]||[[File:StandardATVBodyMK8 DonkeyKong.png|link=Standard ATV|32x32px]][[File:HotMonsterTiresMK8.png|link=Hot Monster|32x32px]][[File:WaddleWingMK8.png|link=Waddle Wing|32x32px]] | |||
|- | |||
![[File:MK8 Bowser Icon.png|link=Bowser|32x32px]]||[[File:MK8 Black Circuit.png|link=Circuit Special|32x32px]][[File:MonsterTiresMK8.png|link=Monster (tire)|32x32px]][[File:MK8ThumbBowserSG.png|link=Super Glider|32x32px]]||[[File:LandshipBodyMK8.png|link=Landship|32x32px]][[File:WoodTiresMK8.png|link=Wood|32x32px]][[File:BowserKiteMK8.png|link=Bowser Kite|32x32px]]||[[File:MK8DX Koopa Clown.png|link=Koopa Clown|32x32px]][[File:StandardTiresMK8.png|link=Standard (tire)|32x32px]][[File:MK8ThumbBowserSG.png|link=Super Glider|32x32px]]||[[File:FlameRiderBodyMK8.png|link=Flame Rider|32x32px]][[File:MonsterTiresMK8.png|link=Monster (tire)|32x32px]][[File:BowserKiteMK8.png|link=Bowser Kite|32x32px]] | |||
|- | |||
![[File:MK8DX Dry Bones Icon.png|link=Dry Bones|32x32px]]||[[File:StandardKartBodyMK8D DryBones.png|link=Standard Kart|32x32px]][[File:StandardTiresMK8.png|link=Standard (tire)|32x32px]][[File:MK8DThumbDryBonesSG.png|link=Super Glider|32x32px]]||[[File:Steel Driver.png|link=Steel Driver|32x32px]][[File:MetalTiresMK8.png|link=Metal|32x32px]][[File:ParafoilGliderMK8.png|link=Parafoil|32x32px]]||[[File:StandardBikeBodyMK8D DryBones.png|link=Standard Bike|32x32px]][[File:StandardTiresMK8.png|link=Standard (tire)|32x32px]][[File:MK8DThumbDryBonesSG.png|link=Super Glider|32x32px]]||[[File:StandardATVBodyMK8D DryBones.png|link=Standard ATV|32x32px]][[File:Off-Road.png|link=Off-Road|32x32px]][[File:MK8DThumbDryBonesSG.png|link=Super Glider|32x32px]] | |||
|- | |||
![[File:MK8 Bowser Jr Icon.png|link=Bowser Jr.|32x32px]]||[[File:LandshipBodyMK8.png|link=Landship|32x32px]][[File:WoodTiresMK8.png|link=Wood|32x32px]][[File:MK8DThumbBowserJrSG.png|link=Super Glider|32x32px]]||[[File:MK8DX Koopa Clown.png|link=Koopa Clown|32x32px]][[File:StandardTiresMK8.png|link=Standard (tire)|32x32px]][[File:MK8DThumbBowserJrSG.png|link=Super Glider|32x32px]]||[[File:StandardBikeBodyMK8D BowserJr.png|link=Standard Bike|32x32px]][[File:StandardTiresMK8.png|link=Standard (tire)|32x32px]][[File:MK8DThumbBowserJrSG.png|link=Super Glider|32x32px]]||[[File:StandardATVBodyMK8D BowserJr.png|link=Standard ATV|32x32px]][[File:StandardTiresMK8.png|link=Standard (tire)|32x32px]][[File:MK8DThumbBowserJrSG.png|link=Super Glider|32x32px]] | |||
|- | |||
![[File:MK8 Dry Bowser Icon.png|link=Dry Bowser|32x32px]]||[[File:StandardKartBodyMK8 DryBowser.png|link=Standard Kart|32x32px]][[File:MonsterTiresMK8.png|link=Monster (tire)|32x32px]][[File:MK8ThumbDryBowserSG.png|link=Super Glider|32x32px]]||[[File:StandardBikeBodyMK8 DryBowser.png|link=Standard Bike|32x32px]][[File:MonsterTiresMK8.png|link=Monster (tire)|32x32px]][[File:MK8ThumbDryBowserSG.png|link=Super Glider|32x32px]]||[[File:StandardATVBodyMK8 DryBowser.png|link=Standard ATV|32x32px]][[File:MonsterTiresMK8.png|link=Monster (tire)|32x32px]][[File:MK8ThumbDryBowserSG.png|link=Super Glider|32x32px]]||[[File:MK8BoneRattler.png|link=Bone Rattler|32x32px]][[File:MetalTiresMK8.png|link=Metal|32x32px]][[File:MK8ThumbDryBowserSG.png|link=Super Glider|32x32px]] | |||
|- | |||
![[File:MK8DX Kamek Icon.png|link=Kamek|32x32px]]||[[File:LandshipBodyMK8.png|link=Landship|32x32px]][[File:WoodTiresMK8.png|link=Wood|32x32px]][[File:MK8ThumbSkyMiiSG.png|link=Super Glider|32x32px]]||[[File:MK8DX Koopa Clown.png|link=Koopa Clown|32x32px]][[File:StandardTiresMK8.png|link=Standard (tire)|32x32px]][[File:MK8ThumbSkyMiiSG.png|link=Super Glider|32x32px]]||[[File:StandardBikeBodyMK8 Lakitu.png|link=Standard Bike|32x32px]][[File:StandardTiresMK8.png|link=Standard (tire)|32x32px]][[File:MK8ThumbSkyMiiSG.png|link=Super Glider|32x32px]]||[[File:StandardATVBodyMK8 Lakitu.png|link=Standard ATV|32x32px]][[File:StandardTiresMK8.png|link=Standard (tire)|32x32px]][[File:MK8ThumbSkyMiiSG.png|link=Super Glider|32x32px]] | |||
|- | |||
![[File:MK8 Lemmy Icon.png|link=Lemmy Koopa|32x32px]]||[[File:MK8 Green Circuit Special.png|link=Circuit Special|32x32px]][[File:StandardTiresMK8.png|link=Standard (tire)|32x32px]][[File:MK8ThumbLemmySG.png|link=Super Glider|32x32px]]||[[File:Landship-Lemmy.png|link=Landship|32x32px]][[File:WoodTiresMK8.png|link=Wood|32x32px]][[File:MK8ThumbLemmySG.png|link=Super Glider|32x32px]]||[[File:MK8DX Koopa ClownLemmy.png|link=Koopa Clown|32x32px]][[File:StandardTiresMK8.png|link=Standard (tire)|32x32px]][[File:MK8ThumbLemmySG.png|link=Super Glider|32x32px]]||[[File:MrScootyBodyMK8.png|link=Mr. Scooty|32x32px]][[File:StandardTiresMK8.png|link=Standard (tire)|32x32px]][[File:MK8ThumbLemmySG.png|link=Super Glider|32x32px]] | |||
|- | |||
![[File:MK8 Larry Icon.png|link=Larry Koopa|32x32px]]||[[File:Landship-Larry.png|link=Landship|32x32px]][[File:WoodTiresMK8.png|link=Wood|32x32px]][[File:MK8ThumbLarrySG.png|link=Super Glider|32x32px]]||[[File:MK8DX Koopa ClownLarry.png|link=Koopa Clown|32x32px]][[File:StandardTiresMK8.png|link=Standard (tire)|32x32px]][[File:MK8ThumbLarrySG.png|link=Super Glider|32x32px]]||[[File:SportBikeBodyMK8.png|link=Sport Bike|32x32px]][[File:MonsterTiresMK8.png|link=Monster (tire)|32x32px]][[File:MK8ThumbLarrySG.png|link=Super Glider|32x32px]]||[[File:StandardATVBodyMK8 Larry.png|link=Standard ATV|32x32px]][[File:Blue Standard.png|link=Blue Standard|32x32px]][[File:MK8ThumbLarrySG.png|link=Super Glider|32x32px]] | |||
|- | |||
![[File:MK8 Wendy Icon.png|link=Wendy O. Koopa|32x32px]]||[[File:Landship-Wendy.png|link=Landship|32x32px]][[File:WoodTiresMK8.png|link=Wood|32x32px]][[File:MK8ThumbWendySG.png|link=Super Glider|32x32px]]||[[File:MK8 Pink Sneeker.png|link=Sneeker|32x32px]][[File:StandardTiresMK8.png|link=Standard (tire)|32x32px]][[File:MK8ThumbWendySG.png|link=Super Glider|32x32px]]||[[File:MK8DX Koopa ClownWendy.png|link=Koopa Clown|32x32px]][[File:StandardTiresMK8.png|link=Standard (tire)|32x32px]][[File:MK8ThumbWendySG.png|link=Super Glider|32x32px]]||[[File:VarmintBodyMK8.png|link=Varmint|32x32px]][[File:StandardTiresMK8.png|link=Standard (tire)|32x32px]][[File:MK8ThumbWendySG.png|link=Super Glider|32x32px]] | |||
|- | |||
![[File:MK8 Ludwig Icon.png|link=Ludwig von Koopa|32x32px]]||[[File:Biddybuggy-blue.png|link=Biddybuggy|32x32px]][[File:RollerTiresMK8.png|link=Roller|32x32px]][[File:MK8ThumbLudwigSG.png|link=Super Glider|32x32px]]||[[File:Landship-Ludwig.png|link=Landship|32x32px]][[File:WoodTiresMK8.png|link=Wood|32x32px]][[File:MK8ThumbLudwigSG.png|link=Super Glider|32x32px]]||[[File:MK8DX Koopa ClownLudwig.png|link=Koopa Clown|32x32px]][[File:StandardTiresMK8.png|link=Standard (tire)|32x32px]][[File:MK8ThumbLudwigSG.png|link=Super Glider|32x32px]]||[[File:JetBikeBodyMK8.png|link=Jet Bike|32x32px]][[File:SlimTiresMK8.png|link=Slim (tire)|32x32px]][[File:MK8ThumbLudwigSG.png|link=Super Glider|32x32px]] | |||
|- | |||
![[File:MK8 Iggy Icon.png|link=Iggy Koopa|32x32px]]||[[File:Steel Driver.png|link=Steel Driver|32x32px]][[File:MetalTiresMK8.png|link=Metal|32x32px]][[File:ParafoilGliderMK8.png|link=Parafoil|32x32px]]||[[File:Landship-Iggy.png|link=Landship|32x32px]][[File:WoodTiresMK8.png|link=Wood|32x32px]][[File:MK8ThumbIggySG.png|link=Super Glider|32x32px]]||[[File:MK8DX Koopa ClownIggy.png|link=Koopa Clown|32x32px]][[File:StandardTiresMK8.png|link=Standard (tire)|32x32px]][[File:MK8ThumbIggySG.png|link=Super Glider|32x32px]]||[[File:StandardBikeBodyMK8 Iggy.png|link=Standard Bike|32x32px]][[File:SlimTiresMK8.png|link=Slim (tire)|32x32px]][[File:MK8ThumbIggySG.png|link=Super Glider|32x32px]] | |||
|- | |||
![[File:MK8 Roy Icon.png|link=Roy Koopa|32x32px]]||[[File:BadwagonBodyMK8.png|link=Badwagon|32x32px]][[File:Off-Road.png|link=Off-Road|32x32px]][[File:MK8ThumbRoySG.png|link=Super Glider|32x32px]]||[[File:Landship-Roy.png|link=Landship|32x32px]][[File:WoodTiresMK8.png|link=Wood|32x32px]][[File:MK8ThumbRoySG.png|link=Super Glider|32x32px]]||[[File:MK8DX Koopa ClownRoy.png|link=Koopa Clown|32x32px]][[File:StandardTiresMK8.png|link=Standard (tire)|32x32px]][[File:MK8ThumbRoySG.png|link=Super Glider|32x32px]]||[[File:TheDukeBodyMK8.png|link=The Duke|32x32px]][[File:MonsterTiresMK8.png|link=Monster (tire)|32x32px]][[File:MK8ThumbRoySG.png|link=Super Glider|32x32px]] | |||
|- | |||
![[File:MK8 Morton Icon.png|link=Morton Koopa Jr.|32x32px]]||[[File:TrispeederBodyMK8.png|link=Tri-Speeder|32x32px]][[File:MonsterTiresMK8.png|link=Monster (tire)|32x32px]][[File:MK8ThumbMortonSG.png|link=Super Glider|32x32px]]||[[File:Landship-Morton.png|link=Landship|32x32px]][[File:WoodTiresMK8.png|link=Wood|32x32px]][[File:MK8ThumbMortonSG.png|link=Super Glider|32x32px]]||[[File:MK8DX Koopa ClownMorton.png|link=Koopa Clown|32x32px]][[File:StandardTiresMK8.png|link=Standard (tire)|32x32px]][[File:MK8ThumbMortonSG.png|link=Super Glider|32x32px]]||[[File:StandardBikeBodyMK8 Morton.png|link=Standard Bike|32x32px]][[File:MonsterTiresMK8.png|link=Monster (tire)|32x32px]][[File:MK8ThumbMortonSG.png|link=Super Glider|32x32px]] | |||
|- | |||
![[File:MK8DX Peachette Icon.png|link=Peachette|32x32px]]||[[File:StandardKartBodyMK8 Toadette.png|link=Standard Kart|32x32px]][[File:StandardTiresMK8.png|link=Standard (tire)|32x32px]][[File:MK8ThumbToadetteSG.png|link=Super Glider|32x32px]]||[[File:CatCruiserBodyMK8.png|link=Cat Cruiser|32x32px]][[File:Retro Off-Road.png|link=Retro Off-Road|32x32px]][[File:MK8ThumbToadetteSG.png|link=Super Glider|32x32px]]||[[File:MrScootyBodyMK8.png|link=Mr. Scooty|32x32px]][[File:AzureRollerTiresMK8.png|link=Azure Roller|32x32px]][[File:MK8ThumbToadetteSG.png|link=Super Glider|32x32px]]||[[File:TeddyBuggyBodyMK8.png|link=Teddy Buggy|32x32px]][[File:ButtonTiresMK8.png|link=Button (tire)|32x32px]][[File:ParafoilGliderMK8.png|link=Parafoil|32x32px]] | |||
|- | |||
![[File:MK8DX Female Inkling Icon.png|link=Inkling|32x32px]]||[[File:StandardKartBodyMK8D InklingGirl.png|link=Standard Kart|32x32px]][[File:StandardTiresMK8.png|link=Standard (tire)|32x32px]][[File:MK8DThumbInklingGirlSG.png|link=Super Glider|32x32px]]||[[File:StandardBikeBodyMK8D InklingGirl.png|link=Standard Bike|32x32px]][[File:MonsterTiresMK8.png|link=Monster (tire)|32x32px]][[File:MK8DThumbInklingGirlSG.png|link=Super Glider|32x32px]]||[[File:SplatBuggyMK8D InklingGirlOrange.png|link=Splat Buggy|32x32px]][[File:StandardTiresMK8.png|link=Standard (tire)|32x32px]][[File:MK8DThumbInklingGirlSG.png|link=Super Glider|32x32px]]||[[File:InkstrikerMK8D InklingGirlOrange.png|link=Inkstriker|32x32px]][[File:StandardTiresMK8.png|link=Standard (tire)|32x32px]][[File:MK8DThumbInklingGirlSG.png|link=Super Glider|32x32px]] | |||
|- | |||
![[File:MK8DX Male Inkling Icon.png|link=Inkling|32x32px]]||[[File:StandardKartBodyMK8D InklingBoy.png|link=Standard Kart|32x32px]][[File:StandardTiresMK8.png|link=Standard (tire)|32x32px]][[File:MK8DThumbInklingBoySG.png|link=Super Glider|32x32px]]||[[File:StandardBikeBodyMK8D InklingBoy.png|link=Standard Bike|32x32px]][[File:MonsterTiresMK8.png|link=Monster (tire)|32x32px]][[File:MK8DThumbInklingBoySG.png|link=Super Glider|32x32px]]||[[File:SplatBuggyMK8D InklingBoyBlue.png|link=Splat Buggy|32x32px]][[File:StandardTiresMK8.png|link=Standard (tire)|32x32px]][[File:MK8DThumbInklingBoySG.png|link=Super Glider|32x32px]]||[[File:InkstrikerMK8D InklingBoyBlue.png|link=Inkstriker|32x32px]][[File:StandardTiresMK8.png|link=Standard (tire)|32x32px]][[File:MK8DThumbInklingBoySG.png|link=Super Glider|32x32px]] | |||
|- | |||
![[File:VillagerMale-Icon-MK8.png|link=Villager|32x32px]]||[[File:StandardKartBodyMK8 VillagerBoy.png|link=Standard Kart|32x32px]][[File:StandardTiresMK8.png|link=Standard (tire)|32x32px]][[File:MK8ThumbVillagerBoySG.png|link=Super Glider|32x32px]]||[[File:BiddybuggyBodyMK8.png|link=Biddybuggy|32x32px]][[File:StandardTiresMK8.png|link=Standard (tire)|32x32px]][[File:MK8ThumbVillagerBoySG.png|link=Super Glider|32x32px]]||[[File:MK8Streetle.png|link=Streetle|32x32px]][[File:Leaf Tires MK8.png|link=Leaf Tires|32x32px]][[File:PaperGliderIcon-MK8.png|link=Paper Glider|32x32px]]||[[File:MK8 Red City Tripper.png|link=City Tripper|32x32px]][[File:SlimTiresMK8.png|link=Slim (tire)|32x32px]][[File:PaperGliderIcon-MK8.png|link=Paper Glider|32x32px]] | |||
|- | |||
![[File:VillagerFemale-Icon-MK8.png|link=Villager|32x32px]]||[[File:StandardKartBodyMK8 VillagerGirl.png|link=Standard Kart|32x32px]][[File:StandardTiresMK8.png|link=Standard (tire)|32x32px]][[File:MK8ThumbVillagerGirlSG.png|link=Super Glider|32x32px]]||[[File:Biddybuggy-pink.png|link=Biddybuggy|32x32px]][[File:StandardTiresMK8.png|link=Standard (tire)|32x32px]][[File:MK8ThumbVillagerGirlSG.png|link=Super Glider|32x32px]]||[[File:MK8 Pink City Tripper.png|link=City Tripper|32x32px]][[File:SlimTiresMK8.png|link=Slim (tire)|32x32px]][[File:PaperGliderIcon-MK8.png|link=Paper Glider|32x32px]]||[[File:TeddyBuggyBodyMK8.png|link=Teddy Buggy|32x32px]][[File:ButtonTiresMK8.png|link=Button (tire)|32x32px]][[File:PaperGliderIcon-MK8.png|link=Paper Glider|32x32px]] | |||
|- | |||
![[File:MK8 Isabelle Icon.png|link=Isabelle|32x32px]]||[[File:StandardKartBodyMK8 Isabelle.png|link=Standard Kart|32x32px]][[File:StandardTiresMK8.png|link=Standard (tire)|32x32px]][[File:MK8ThumbIsabelleSG.png|link=Super Glider|32x32px]]||[[File:Biddybuggy-green.png|link=Biddybuggy|32x32px]][[File:StandardTiresMK8.png|link=Standard (tire)|32x32px]][[File:PaperGliderIcon-MK8.png|link=Paper Glider|32x32px]]||[[File:SportsCoupeMK8.png|link=Sports Coupe|32x32px]][[File:StandardTiresMK8.png|link=Standard (tire)|32x32px]][[File:MK8ThumbIsabelleSG.png|link=Super Glider|32x32px]]||[[File:MK8 Light-Green City Tripper.png|link=City Tripper|32x32px]][[File:SlimTiresMK8.png|link=Slim (tire)|32x32px]][[File:PaperGliderIcon-MK8.png|link=Paper Glider|32x32px]] | |||
|- | |||
![[File:MK8D BotW Link Icon.png|link=Link|32x32px]]||[[File:StandardKartBodyMK8D BotWLink.png|link=Standard Kart|32x32px]][[File:StandardTiresMK8.png|link=Standard (tire)|32x32px]][[File:MK8ThumbLinkSG.png|link=Super Glider|32x32px]]||[[File:Mach8BodyMK8.png|link=Mach 8|32x32px]][[File:MK8-TriforceTires.png|link=Triforce Tires|32x32px]][[File:MK8ThumbLinkSG.png|link=Super Glider|32x32px]]||[[File:FlameRiderBodyMK8.png|link=Flame Rider|32x32px]][[File:MonsterTiresMK8.png|link=Monster (tire)|32x32px]][[File:ParachuteGliderMK8.png|link=Parachute (glider)|Parachute|32x32px]]||[[File:MK8D Master Cycle Zero.png|link=Master Cycle Zero|32x32px]][[File:MK8D Ancient Tires.png|link=Ancient Tires|32x32px]][[File:MK8D Paraglider.png|link=Paraglider (The Legend of Zelda)|32x32px]] | |||
|- | |||
![[File:MK8 Link Icon.png|link=Link|32x32px]]||[[File:StandardKartBodyMK8 Link.png|link=Standard Kart|32x32px]][[File:StandardTiresMK8.png|link=Standard (tire)|32x32px]][[File:MK8ThumbLinkSG.png|link=Super Glider|32x32px]]||[[File:TrispeederBodyMK8.png|link=Tri-Speeder|32x32px]][[File:MK8-TriforceTires.png|link=Triforce Tires|32x32px]][[File:MK8-HylianKite.png|link=Hylian Kite|32x32px]]||[[File:CometBodyMK8.png|link=Comet|32x32px]][[File:SlimTiresMK8.png|link=Slim (tire)|32x32px]][[File:MK8ThumbLinkSG.png|link=Super Glider|32x32px]]||[[File:MK8MasterCycle.png|link=Master Cycle|32x32px]][[File:MK8-TriforceTires.png|link=Triforce Tires|32x32px]][[File:MK8-HylianKite.png|link=Hylian Kite|32x32px]] | |||
|- | |||
![[File:MK8DX Diddy Kong Icon.png|link=Diddy Kong|32x32px]]||[[File:StandardKartBodyMK8.png|link=Standard Kart|32x32px]][[File:StandardTiresMK8.png|link=Standard (tire)|32x32px]][[File:SuperGliderMK8.png|link=Super Glider|32x32px]]||[[File:PipeFrameBodyMK8.png|link=Pipe Frame|32x32px]][[File:SlimTiresMK8.png|link=Slim (tire)|32x32px]][[File:ParafoilGliderMK8.png|link=Parafoil|32x32px]]||[[File:SneakerBodyMK8.png|link=Sneeker|32x32px]][[File:Blue Standard.png|link=Blue Standard|32x32px]][[File:SuperGliderMK8.png|link=Super Glider|32x32px]]||[[File:YoshiBikeBodyMK8.png|link=Yoshi Bike|32x32px]][[File:CrimsonSlimTiresMK8.png|link=Crimson Slim|32x32px]][[File:SuperGliderMK8.png|link=Super Glider|32x32px]] | |||
|- | |||
![[File:MK8DX Funky Kong Icon.png|link=Funky Kong|32x32px]]||[[File:StandardKartBodyMK8 Lakitu.png|link=Standard Kart|32x32px]][[File:MonsterTiresMK8.png|link=Monster (tire)|32x32px]][[File:SuperGliderMK8.png|link=Super Glider|32x32px]]||[[File:SportsCoupeMK8.png|link=Sports Coupe|32x32px]][[File:MonsterTiresMK8.png|link=Monster (tire)|32x32px]][[File:SuperGliderMK8.png|link=Super Glider|32x32px]]||[[File:VarmintBodyMK8.png|link=Varmint|32x32px]][[File:MonsterTiresMK8.png|link=Monster (tire)|32x32px]][[File:WaddleWingMK8.png|link=Waddle Wing|32x32px]]||[[File:StandardATVBodyMK8 Lakitu.png|link=Standard ATV|32x32px]][[File:HotMonsterTiresMK8.png|link=Hot Monster|32x32px]][[File:WaddleWingMK8.png|link=Waddle Wing|32x32px]] | |||
|- | |||
![[File:MK8DX Pauline Icon.png|link=Pauline|32x32px]]||[[File:StandardKartBodyMK8.png|link=Standard Kart|32x32px]][[File:StandardTiresMK8.png|link=Standard (tire)|32x32px]][[File:SuperGliderMK8.png|link=Super Glider|32x32px]]||[[File:ZeldaMK8Bdasher.png|link=B Dasher|32x32px]][[File:StandardTiresMK8.png|link=Standard (tire)|32x32px]][[File:SuperGliderMK8.png|link=Super Glider|32x32px]]||[[File:MK8PWing.png|link=P-Wing (kart)|32x32px]][[File:Blue Standard.png|link=Blue Standard|32x32px]][[File:ParafoilGliderMK8.png|link=Parafoil|32x32px]]||[[File:CometBodyMK8.png|link=Comet|32x32px]][[File:SlimTiresMK8.png|link=Slim (tire)|32x32px]][[File:SuperGliderMK8.png|link=Super Glider|32x32px]] | |||
|} | |||
==Drivers' and vehicle parts' statistics== | |||
:''For the in-game tables from which these values were derived and for the tables to translate those values into the actual statistics used by the game, see [[Mario Kart 8 Deluxe in-game statistics]].'' | |||
''Mario Kart 8 Deluxe'' features different statistics with respect to ''[[Mario Kart 8]]''. | |||
===Statistics shown in the vehicle customization screen=== | |||
Just like ''[[Mario Kart 7]]'' and ''[[Mario Kart 8#Statistics shown in the vehicle customization screen|Mario Kart 8]]'', the game uses "points" ("PT") which are conferred by characters and vehicle parts to determine the final values of the game's statistics. In each statistics, the points given by the character, body, tires, and glider are summed to obtain a final value called "Level" ("Lv") which is then used by [[Mario Kart 8 Deluxe in-game statistics#Statistics translation tables|a table]] to convert the level into appropriate physical parameters used by the game. There are a total of 8,064 different stat combinations. The Level of five statistics is displayed in the vehicle customization screen: | |||
*'''Speed:''' The top speed of the vehicle on land with normal gravity. | |||
*'''Acceleration:''' How fast the speed increases when holding the acceleration button until top speed has been reached. | |||
*'''Weight:''' The weight of the vehicle. Vehicles with higher weight knock away vehicles with lower weight. | |||
*'''Handling:''' The turning ability of the vehicle on land with normal gravity. A higher stat means vehicles turn sharper, and will continue turning normally for longer before automatically initiating a drift. | |||
*'''Traction (Grip in the British English version):''' The grasp of the vehicle to the ground while off-road. Vehicles with higher traction slip less on certain terrain and can stay stable on the road better. Not to be confused with handling. | |||
Said Level is represented through bars by adding three points to the sum of points, then dividing the result by four, resulting in values ranging from 0.75 to 5.75. As an example, the process through which the statistics of a certain combination of character and vehicle parts are calculated and displayed is shown below: | |||
[[File:MK8D Vehicle Customization Screen.jpg|thumb|center|600px|A combination consisting of [[Dry Bones]], [[Flame Rider]], [[Standard (tire)|Standard Tires]], and [[Super Glider]].]] | |||
{|class="wikitable"style="text-align:center;margin:auto" | |||
!rowspan=2|Element | |||
!colspan=5|Points conferred | |||
|- | |||
!Speed | |||
!Acceleration | |||
!Weight | |||
!Handling | |||
!Traction | |||
|-style="color:red" | |||
![[File:MK8DX Dry Bones Icon.png|64px]]<br>[[Dry Bones]] | |||
|'''2''' | |||
|'''5''' | |||
|'''1''' | |||
|'''8''' | |||
|'''4''' | |||
|-style="color:green" | |||
![[File:FlameRiderBodyMK8.png|64px]]<br>[[File:MK8 Standard Bike Body Icon Inverted.png]][[Flame Rider]] | |||
|'''2''' | |||
|'''5''' | |||
|'''1''' | |||
|'''4''' | |||
|'''5''' | |||
|-style="color:blue" | |||
![[File:StandardTiresMK8.png|64px]]<br>[[File:MK8 Tire Icon Inverted.png]][[Standard (tire)|Standard Tires]] | |||
|'''2''' | |||
|'''4''' | |||
|'''2''' | |||
|'''3''' | |||
|'''5''' | |||
|-style="color:darkorange" | |||
![[File:MK8DThumbDryBonesSG.png|64px]]<br>[[File:MK8 Glider Icon Inverted.png]][[Super Glider]] | |||
|'''1''' | |||
|'''1''' | |||
|'''1''' | |||
|'''1''' | |||
|'''1''' | |||
|- | |||
!Final values | |||
!Speed | |||
!Acceleration | |||
!Weight | |||
!Handling | |||
!Traction | |||
|- | |||
!Level | |||
!<span style="color:red">2</span> + <span style="color:green">2</span> + <span style="color:blue">2</span> + <span style="color:darkorange">1</span> =<br>7 | |||
!<span style="color:red">5</span> + <span style="color:green">5</span> + <span style="color:blue">4</span> + <span style="color:darkorange">1</span> =<br>15 | |||
!<span style="color:red">1</span> + <span style="color:green">1</span> + <span style="color:blue">2</span> + <span style="color:darkorange">1</span> =<br>5 | |||
!<span style="color:red">8</span> + <span style="color:green">4</span> + <span style="color:blue">3</span> + <span style="color:darkorange">1</span> =<br>16 | |||
!<span style="color:red">4</span> + <span style="color:green">5</span> + <span style="color:blue">5</span> + <span style="color:darkorange">1</span> =<br>15 | |||
|- style="font-weight:bold" | |||
!Value shown in the vehicle customization screen | |||
!(7 + 3) / 4 = 10 / 4 =<br>2.5 | |||
!(15 + 3) / 4 = 18 / 4 =<br>4.5 | |||
!(5 + 3) / 4 = 8 / 4 =<br>2 | |||
!(16 + 3) / 4 = 19 / 4 =<br>4.75 | |||
!(15 + 3) / 4 = 18 / 4 =<br>4.5 | |||
|} | |||
[[File:MK8D Vehicle Customization Screen Stats.jpg|thumb|center|600px|The values actually shown in the vehicle customization screen, matching the values calculated.]] | |||
===Drivers' statistics=== | |||
Drivers are still grouped into small groups of characters sharing the same statistics, the number of groups has been increased with respect to ''Mario Kart 8''. | |||
In addition to the statistics shown in the vehicle customization screen, there are the following statistics: | |||
*'''Water Speed:''' The top speed of the vehicle while driving underwater. | |||
*'''Air Speed:''' The top speed of the vehicle while gliding. | |||
*'''Anti-Gravity Speed:''' The top speed of the vehicle in anti-gravity mode. | |||
*'''Water Handling:''' The turning ability of the vehicle while driving underwater. | |||
*'''Air Handling:''' The turning ability of the vehicle while gliding. | |||
*'''Anti-Gravity Handling:''' The turning ability of the vehicle in anti-gravity mode. | |||
*'''Mini-Turbo:''' The length of the vehicle's mini-turbo speed boosts and how fast mini-turbos can be charged. Also affects the length of jump boosts from tricks. | |||
*'''Invincibility:''' The length of time the vehicle is invincible after spinning out. Added in v2.2.0.<ref>{{cite|url=docs.google.com/spreadsheets/u/0/d/1W3G9ih4aBHCjItIFCakWnbw7ATivIUibZmTVUkecS4s/htmlview|title=MK8D Stat sheet (Updated for W6)|publisher=Google Docs|language=en|accessdate=November 6, 2024}}</ref> | |||
Just like in ''[[Mario Kart 8]]'', Miis can be Light, Medium, or Heavy, depending on their height and weight. | |||
The statistics are shown in points. | |||
{|border="1"cellpadding="3"style="background:#f8f9fa;text-align:center;width:94%;border-collapse:collapse;margin-bottom:5px;text-align:center;" | |||
|- | |||
!colspan="15"style="background-color:#eaecf0;"|Drivers' Statistics | |||
|- | |||
!style="width:8%;"rowspan="2"|Vehicle size | |||
!style="width:14%;"rowspan="2"|Character | |||
!style="width:24%;"colspan="4"|Speed | |||
!style="width:6%;"rowspan="2"|Acceleration | |||
!style="width:6%;"rowspan="2"|Weight | |||
!style="width:24%;"colspan="4"|Handling | |||
!style="width:6%;"rowspan="2"|Traction | |||
!style="width:6%;"rowspan="2"|Mini-Turbo | |||
!style="width:6%;"rowspan="2"|Invincibility | |||
|- | |||
!style="width:6%;"|Ground | |||
!style="width:6%;"|Water | |||
!style="width:6%;"|Air | |||
!style="width:6%;"|Anti-Gravity | |||
!style="width:6%;"|Ground | |||
!style="width:6%;"|Water | |||
!style="width:6%;"|Air | |||
!style="width:6%;"|Anti-Gravity | |||
|-style="font-weight:bold" | |||
!rowspan="6"style="background-color:#CCFFFF;color:dodgerblue;border-color:black;"|Small | |||
!width="1%"style="background-color:#CCFFFF;"|[[File:MK8 BabyPeach Icon.png|link=Baby Peach|32x32px]][[File:MK8 BabyDaisy Icon.png|link=Baby Daisy|32x32px]] | |||
|style="background-color:#ffff80;"|1 | |||
|style="background-color:#ffff80;"|1 | |||
|style="background-color:#ffff80;"|1 | |||
|style="background-color:#ffff80;"|1 | |||
|style="background-color:#80b2ff;"|4 | |||
|style="background-color:#ffff80;"|0 | |||
|style="background-color:#8080ff;"|10 | |||
|style="background-color:#8080ff;"|10 | |||
|style="background-color:#8080ff;"|10 | |||
|style="background-color:#8080ff;"|10 | |||
|style="background-color:#8080ff;"|5 | |||
|style="background-color:#8080ff;"|5 | |||
|style="background-color:#8080ff;"|6 | |||
|-style="font-weight:bold" | |||
!width="1%"style="background-color:#CCFFFF;"|[[File:MK8 BabyRosalina Icon.png|link=Baby Rosalina|32x32px]][[File:MK8 Lemmy Icon.png|link=Lemmy|32x32px]] | |||
|style="background-color:#ffff80;"|1 | |||
|style="background-color:#ffff80;"|1 | |||
|style="background-color:#ffff80;"|1 | |||
|style="background-color:#ffff80;"|1 | |||
|style="background-color:#8080ff;"|5 | |||
|style="background-color:#ffff80;"|0 | |||
|style="background-color:#8099ff;"|9 | |||
|style="background-color:#8099ff;"|9 | |||
|style="background-color:#8099ff;"|9 | |||
|style="background-color:#8099ff;"|9 | |||
|style="background-color:#80e5ff;"|3 | |||
|style="background-color:#8080ff;"|5 | |||
|style="background-color:#8080ff;"|6 | |||
|-style="font-weight:bold" | |||
!width="1%"style="background-color:#CCFFFF;"|[[File:MK8 BabyMario Icon.png|link=Baby Mario|32x32px]][[File:MK8 BabyLuigi Icon.png|link=Baby Luigi|32x32px]][[File:MK8DX Dry Bones Icon.png|link=Dry Bones|32x32px]][[File:Mii MK8.png|link=Mii|32x32px|Mii (Light)]] | |||
|style="background-color:#e5ff99;"|2 | |||
|style="background-color:#e5ff99;"|2 | |||
|style="background-color:#e5ff99;"|2 | |||
|style="background-color:#e5ff99;"|2 | |||
|style="background-color:#8080ff;"|5 | |||
|style="background-color:#e5ff99;"|1 | |||
|style="background-color:#80b2ff;"|8 | |||
|style="background-color:#80b2ff;"|8 | |||
|style="background-color:#80b2ff;"|8 | |||
|style="background-color:#80b2ff;"|8 | |||
|style="background-color:#80b2ff;"|4 | |||
|style="background-color:#8080ff;"|5 | |||
|style="background-color:#80b2ff;"|5 | |||
|-style="font-weight:bold" | |||
!width="1%"style="background-color:#CCFFFF;"|[[File:MK8 Koopa Icon.png|link=Koopa Troopa|32x32px]][[File:MK8 Lakitu Icon.png|link=Lakitu|32x32px]][[File:MK8 Bowser Jr Icon.png|link=Bowser Jr.|32x32px]] | |||
|style="background-color:#ccffb2;"|3 | |||
|style="background-color:#ccffb2;"|3 | |||
|style="background-color:#ccffb2;"|3 | |||
|style="background-color:#ccffb2;"|3 | |||
|style="background-color:#80b2ff;"|4 | |||
|style="background-color:#ccffb2;"|2 | |||
|style="background-color:#80b2ff;"|8 | |||
|style="background-color:#80b2ff;"|8 | |||
|style="background-color:#80b2ff;"|8 | |||
|style="background-color:#80b2ff;"|8 | |||
|style="background-color:#8080ff;"|5 | |||
|style="background-color:#80b2ff;"|4 | |||
|style="background-color:#80e5ff;"|4 | |||
|-style="font-weight:bold" | |||
!width="1%"style="background-color:#CCFFFF;"|[[File:MK8 Toadette Icon.png|link=Toadette|32x32px]][[File:MK8 Wendy Icon.png|link=Wendy|32x32px]][[File:MK8 Isabelle Icon.png|link=Isabelle|32x32px]] | |||
|style="background-color:#ccffb2;"|3 | |||
|style="background-color:#ccffb2;"|3 | |||
|style="background-color:#ccffb2;"|3 | |||
|style="background-color:#ccffb2;"|3 | |||
|style="background-color:#8080ff;"|5 | |||
|style="background-color:#ccffb2;"|2 | |||
|style="background-color:#80ccff;"|7 | |||
|style="background-color:#80ccff;"|7 | |||
|style="background-color:#80ccff;"|7 | |||
|style="background-color:#80ccff;"|7 | |||
|style="background-color:#99ffe5;"|2 | |||
|style="background-color:#80b2ff;"|4 | |||
|style="background-color:#99ffe5;"|3 | |||
|-style="font-weight:bold" | |||
!width="1%"style="background-color:#CCFFFF;"|[[File:MK8 Toad Icon.png|link=Toad|32x32px]][[File:MK8 ShyGuy Icon.png|link=Shy Guy|32x32px]][[File:MK8 Larry Icon.png|link=Larry|32x32px]] | |||
|style="background-color:#b2ffcc;"|4 | |||
|style="background-color:#b2ffcc;"|4 | |||
|style="background-color:#b2ffcc;"|4 | |||
|style="background-color:#b2ffcc;"|4 | |||
|style="background-color:#80b2ff;"|4 | |||
|style="background-color:#b2ffcc;"|3 | |||
|style="background-color:#80ccff;"|7 | |||
|style="background-color:#80ccff;"|7 | |||
|style="background-color:#80ccff;"|7 | |||
|style="background-color:#80ccff;"|7 | |||
|style="background-color:#80b2ff;"|4 | |||
|style="background-color:#80b2ff;"|4 | |||
|style="background-color:#99ffe5;"|3 | |||
|-style="font-weight:bold" | |||
!rowspan="7"style="background-color:honeydew; color: green; border-color: black;"|Medium | |||
!width="1%"style="background-color:honeydew;"|[[File:MK8 Cat Peach Icon.png|link=Cat Peach|32x32px]][[File:MK8DX Female Inkling Icon.png|link=Inkling|32x32px]][[File:VillagerFemale-Icon-MK8.png|link=Villager|32x32px]][[File:MK8DX Diddy Kong Icon.png|link=Diddy Kong|32x32px]] | |||
|style="background-color:#99ffe5;"|5 | |||
|style="background-color:#99ffe5;"|5 | |||
|style="background-color:#99ffe5;"|5 | |||
|style="background-color:#99ffe5;"|5 | |||
|style="background-color:#80b2ff;"|4 | |||
|style="background-color:#b2ffcc;"|3 | |||
|style="background-color:#80e5ff;"|6 | |||
|style="background-color:#80e5ff;"|6 | |||
|style="background-color:#80e5ff;"|6 | |||
|style="background-color:#80e5ff;"|6 | |||
|style="background-color:#80e5ff;"|3 | |||
|style="background-color:#80b2ff;"|4 | |||
|style="background-color:#99ffe5;"|3 | |||
|-style="font-weight:bold" | |||
!width="1%"style="background-color:honeydew;"|[[File:MK8 Peach Icon.png|link=Peach|32x32px]][[File:MK8 Daisy Icon.png|link=Daisy|32x32px]][[File:MKT Icon Birdo.png|link=Birdo|32x32px]][[File:MK8 Yoshi Icon.png|link=Yoshi|32x32px]][[File:MK8DX Peachette Icon.png|link=Peachette|32x32px]] | |||
|style="background-color:#80ffff;"|6 | |||
|style="background-color:#80ffff;"|6 | |||
|style="background-color:#80ffff;"|6 | |||
|style="background-color:#80ffff;"|6 | |||
|style="background-color:#80e5ff;"|3 | |||
|style="background-color:#99ffe5;"|4 | |||
|style="background-color:#80ffff;"|5 | |||
|style="background-color:#80ffff;"|5 | |||
|style="background-color:#80ffff;"|5 | |||
|style="background-color:#80ffff;"|5 | |||
|style="background-color:#80e5ff;"|3 | |||
|style="background-color:#80b2ff;"|4 | |||
|style="background-color:#ffff80;"|1 | |||
|-style="font-weight:bold" | |||
!width="1%"style="background-color:honeydew;"|[[File:MK8 Tanooki Mario Icon.png|link=Tanooki Mario|32x32px]][[File:MK8DX Male Inkling Icon.png|link=Inkling|32x32px]][[File:VillagerMale-Icon-MK8.png|link=Villager|32x32px]] | |||
|style="background-color:#80ffff;"|6 | |||
|style="background-color:#80ffff;"|6 | |||
|style="background-color:#80ffff;"|6 | |||
|style="background-color:#80ffff;"|6 | |||
|style="background-color:#80e5ff;"|3 | |||
|style="background-color:#80ffff;"|5 | |||
|style="background-color:#80ffff;"|5 | |||
|style="background-color:#80ffff;"|5 | |||
|style="background-color:#80ffff;"|5 | |||
|style="background-color:#80ffff;"|5 | |||
|style="background-color:#ccffb2;"|1 | |||
|style="background-color:#80b2ff;"|4 | |||
|style="background-color:#ffff80;"|1 | |||
|-style="font-weight:bold" | |||
!width="1%"style="background-color:honeydew;"|[[File:MK8 Luigi Icon.png|link=Luigi|32x32px]][[File:MK8 Iggy Icon.png|link=Iggy|32x32px]][[File:MK8DX Kamek Icon.png|link=Kamek|32x32px]] | |||
|style="background-color:#80e5ff;"|7 | |||
|style="background-color:#80e5ff;"|7 | |||
|style="background-color:#80e5ff;"|7 | |||
|style="background-color:#80e5ff;"|7 | |||
|style="background-color:#99ffe5;"|2 | |||
|style="background-color:#80e5ff;"|6 | |||
|style="background-color:#80ffff;"|5 | |||
|style="background-color:#80ffff;"|5 | |||
|style="background-color:#80ffff;"|5 | |||
|style="background-color:#80ffff;"|5 | |||
|style="background-color:#ccffb2;"|1 | |||
|style="background-color:#80e5ff;"|3 | |||
|style="background-color:#99ffe5;"|3 | |||
|-style="font-weight:bold" | |||
!width="1%"style="background-color:honeydew;"|[[File:MK8 Mario Icon.png|link=Mario|32x32px]][[File:MK8 Ludwig Icon.png|link=Ludwig|32x32px]][[File:Mii MK8.png|link=Mii|32x32px|Mii (Medium)]] | |||
|style="background-color:#80e5ff;"|7 | |||
|style="background-color:#80e5ff;"|7 | |||
|style="background-color:#80e5ff;"|7 | |||
|style="background-color:#80e5ff;"|7 | |||
|style="background-color:#99ffe5;"|2 | |||
|style="background-color:#80e5ff;"|6 | |||
|style="background-color:#99ffe5;"|4 | |||
|style="background-color:#99ffe5;"|4 | |||
|style="background-color:#99ffe5;"|4 | |||
|style="background-color:#99ffe5;"|4 | |||
|style="background-color:#99ffe5;"|2 | |||
|style="background-color:#80e5ff;"|3 | |||
|style="background-color:#99ffe5;"|3 | |||
|-style="font-weight:bold" | |||
!width="1%"style="background-color:honeydew;"|[[File:MK8 MMario Icon.png|link=Metal Mario|32x32px]][[File:MK8DX Gold Mario Icon.png|link=Gold Mario|32x32px]][[File:MK8 PGPeach Icon.png|link=Pink Gold Peach|32x32px]] | |||
|style="background-color:#80bfff;"|8 | |||
|style="background-color:#80bfff;"|8 | |||
|style="background-color:#80bfff;"|8 | |||
|style="background-color:#80bfff;"|8 | |||
|style="background-color:#ccffb2;"|1 | |||
|style="background-color:#8080ff;"|10 | |||
|style="background-color:#b2ffcc;"|3 | |||
|style="background-color:#b2ffcc;"|3 | |||
|style="background-color:#b2ffcc;"|3 | |||
|style="background-color:#b2ffcc;"|3 | |||
|style="background-color:#ccffb2;"|1 | |||
|style="background-color:#ccffb2;"|1 | |||
|style="background-color:#99ffe5;"|3 | |||
|-style="font-weight:bold" | |||
!width="1%"style="background-color:honeydew;"|[[File:MK8DX Wiggler Icon.png|link=Wiggler|32x32px]] | |||
|style="background-color:#8099ff;"|9 | |||
|style="background-color:#8099ff;"|9 | |||
|style="background-color:#8099ff;"|9 | |||
|style="background-color:#8099ff;"|9 | |||
|style="background-color:#ccffb2;"|1 | |||
|style="background-color:#80b2ff;"|8 | |||
|style="background-color:#ccffb2;"|2 | |||
|style="background-color:#ccffb2;"|2 | |||
|style="background-color:#ccffb2;"|2 | |||
|style="background-color:#ccffb2;"|2 | |||
|style="background-color:#ffff80;"|0 | |||
|style="background-color:#ccffb2;"|1 | |||
|style="background-color:#80e5ff;"|4 | |||
|-style="font-weight:bold" | |||
!rowspan="5"style="background-color:mistyrose;color:red;border-color:black;"|Large | |||
!width="1%"style="background-color:mistyrose;"|[[File:MK8 Rosalina Icon.png|link=Rosalina|32x32px]][[File:MK8DX King Boo Icon.png|link=King Boo|32x32px]][[File:MK8D BotW Link Icon.png|link=Link|32x32px]][[File:MK8 Link Icon.png|link=Link|32x32px]][[File:MK8DX Pauline Icon.png|link=Pauline|32x32px]] | |||
|style="background-color:#80bfff;"|8 | |||
|style="background-color:#80bfff;"|8 | |||
|style="background-color:#80bfff;"|8 | |||
|style="background-color:#80bfff;"|8 | |||
|style="background-color:#ccffb2;"|1 | |||
|style="background-color:#80ccff;"|7 | |||
|style="background-color:#b2ffcc;"|3 | |||
|style="background-color:#b2ffcc;"|3 | |||
|style="background-color:#b2ffcc;"|3 | |||
|style="background-color:#b2ffcc;"|3 | |||
|style="background-color:#80e5ff;"|3 | |||
|style="background-color:#99ffe5;"|2 | |||
|style="background-color:#80e5ff;"|4 | |||
|-style="font-weight:bold" | |||
!width="1%"style="background-color:mistyrose;"|[[File:MK8DX Petey Piranha Icon.png|link=Petey Piranha|32x32px]] | |||
|style="background-color:#80bfff;"|8 | |||
|style="background-color:#80bfff;"|8 | |||
|style="background-color:#80bfff;"|8 | |||
|style="background-color:#80bfff;"|8 | |||
|style="background-color:#ccffb2;"|1 | |||
|style="background-color:#8080ff;"|10 | |||
|style="background-color:#b2ffcc;"|3 | |||
|style="background-color:#b2ffcc;"|3 | |||
|style="background-color:#b2ffcc;"|3 | |||
|style="background-color:#b2ffcc;"|3 | |||
|style="background-color:#ccffb2;"|1 | |||
|style="background-color:#ccffb2;"|1 | |||
|style="background-color:#8080ff;"|6 | |||
|-style="font-weight:bold" | |||
!width="1%"style="background-color:mistyrose;"|[[File:MK8 Waluigi Icon.png|link=Waluigi|32x32px]][[File:MK8 DKong Icon.png|link=Donkey Kong|32x32px]][[File:MK8 Roy Icon.png|link=Roy|32x32px]] | |||
|style="background-color:#8099ff;"|9 | |||
|style="background-color:#8099ff;"|9 | |||
|style="background-color:#8099ff;"|9 | |||
|style="background-color:#8099ff;"|9 | |||
|style="background-color:#ccffb2;"|1 | |||
|style="background-color:#80b2ff;"|8 | |||
|style="background-color:#ccffb2;"|2 | |||
|style="background-color:#ccffb2;"|2 | |||
|style="background-color:#ccffb2;"|2 | |||
|style="background-color:#ccffb2;"|2 | |||
|style="background-color:#ffff80;"|0 | |||
|style="background-color:#ccffb2;"|1 | |||
|style="background-color:#80e5ff;"|4 | |||
|-style="font-weight:bold" | |||
!width="1%"style="background-color:mistyrose;"|[[File:MK8 Wario Icon.png|link=Wario|32x32px]][[File:MK8 Dry Bowser Icon.png|link=Dry Bowser|32x32px]][[File:MK8DX Funky Kong Icon.png|link=Funky Kong|32x32px]][[File:Mii_MK8.png|link=Mii|32x32px|Mii (Heavy)]] | |||
|style="background-color:#8080ff;"|10 | |||
|style="background-color:#8080ff;"|10 | |||
|style="background-color:#8080ff;"|10 | |||
|style="background-color:#8080ff;"|10 | |||
|style="background-color:#ffff80;"|0 | |||
|style="background-color:#8099ff;"|9 | |||
|style="background-color:#e5ff99;"|1 | |||
|style="background-color:#e5ff99;"|1 | |||
|style="background-color:#e5ff99;"|1 | |||
|style="background-color:#e5ff99;"|1 | |||
|style="background-color:#ccffb2;"|1 | |||
|style="background-color:#ffff80;"|0 | |||
|style="background-color:#80b2ff;"|5 | |||
|-style="font-weight:bold" | |||
!width="1%"style="background-color:mistyrose;"|[[File:MK8 Bowser Icon.png|link=Bowser|32x32px]][[File:MK8 Morton Icon.png|link=Morton|32x32px]] | |||
|style="background-color:#8080ff;"|10 | |||
|style="background-color:#8080ff;"|10 | |||
|style="background-color:#8080ff;"|10 | |||
|style="background-color:#8080ff;"|10 | |||
|style="background-color:#ffff80;"|0 | |||
|style="background-color:#8080ff;"|10 | |||
|style="background-color:#ffff80;"|0 | |||
|style="background-color:#ffff80;"|0 | |||
|style="background-color:#ffff80;"|0 | |||
|style="background-color:#ffff80;"|0 | |||
|style="background-color:#ffff80;"|0 | |||
|style="background-color:#ffff80;"|0 | |||
|style="background-color:#8080ff;"|6 | |||
|} | |||
===Parts' statistics=== | |||
The number of groups of vehicle parts sharing the same statistics has increased as well when compared with ''Mario Kart 8''. | |||
The statistics are reported in points. The invincibility statistic cells for vehicle bodies and tires are split up according to each part inside that row, from left to right. There is an unused stat for on-road traction, which can be viewed [[Mario Kart 8 Deluxe in-game statistics|here]]. | |||
{|border="1"cellpadding="3"style="background:#f8f9fa;text-align:center;width:94%;border-collapse:collapse;margin-bottom:5px;text-align:center;" | |||
|- | |||
!colspan="17"style="background-color:#eaecf0;"|Bodies' Statistics | |||
|- | |||
!width="22%"rowspan="2"|Body<br>*[[Sport bike (vehicle class)|sport bike]] | |||
!width="24%"colspan="4"|Speed | |||
!width="6%"rowspan="2"|Acceleration | |||
!width="6%"rowspan="2"|Weight | |||
!width="24%"colspan="4"|Handling | |||
!width="6%"rowspan="2"|Traction | |||
!width="6%"rowspan="2"|Mini-Turbo | |||
!style="width: 6%;"rowspan="2;"colspan="4"|Invincibility | |||
|- | |||
!width="6%"|Ground | |||
!width="6%"|Water | |||
!width="6%"|Air | |||
!width="6%"|Anti-Gravity | |||
!width="6%"|Ground | |||
!width="6%"|Water | |||
!width="6%"|Air | |||
!width="6%"|Anti-Gravity | |||
|-style="font-weight:bold" | |||
|width="1%"|[[File:BiddybuggyBodyMK8.png|x32px|link=Biddybuggy|Biddybuggy (Buggybud)]][[File:MrScootyBodyMK8.png|x32px|link=Mr. Scooty|Mr. Scooty (Mr Scooty)]] | |||
|style="background-color:#ffff80;"|0 | |||
|style="background-color:#ffff80;"|1 | |||
|style="background-color:#bfffbf;"|1 | |||
|style="background-color:#99ffe5;"|2 | |||
|style="background-color:#8080ff;"|7 | |||
|style="background-color:#ffff80;"|0 | |||
|style="background-color:#8080ff;"|5 | |||
|style="background-color:#80bfff;"|4 | |||
|style="background-color:#8080ff;"|4 | |||
|style="background-color:#8080ff;"|5 | |||
|style="background-color:#80ecff;"|4 | |||
|style="background-color:#8080ff;"|7 | |||
|style="background-color:#ffff80;"colspan="2"|0 | |||
|style="background-color:#ffff80;"colspan="2"|0 | |||
|-style="font-weight:bold" | |||
|width="1%"|[[File:MK8Streetle.png|x32px|link=Streetle|Streetle]][[File:LandshipBodyMK8.png|x32px|link=Landship|Landship]] | |||
|style="background-color:#99ffe5;"|2 | |||
|style="background-color:#8080ff;"|5 | |||
|style="background-color:#80ffff;"|2 | |||
|style="background-color:#ffff80;"|0 | |||
|style="background-color:#80a4ff;"|6 | |||
|style="background-color:#ffff80;"|0 | |||
|style="background-color:#80b2ff;"|4 | |||
|style="background-color:#8080ff;"|5 | |||
|style="background-color:#80bfff;"|3 | |||
|style="background-color:#bfffbf;"|2 | |||
|style="background-color:#80a4ff;"|6 | |||
|style="background-color:#80a4ff;"|6 | |||
|style="background-color:#92ffec;"colspan="2"|3 | |||
|style="background-color:#b6ffc8;"colspan="2"|2 | |||
|-style="font-weight:bold" | |||
|width="1%"|[[File:PipeFrameBodyMK8.png|x32px|link=Pipe Frame|Pipe Frame]][[File:VarmintBodyMK8.png|x32px|link=Varmint|Varmint]][[File:MK8 Light-Green City Tripper.png|x32px|link=City Tripper|City Tripper]] | |||
|style="background-color:#99ffe5;"|2 | |||
|style="background-color:#80ffff;"|3 | |||
|style="background-color:#bfffbf;"|1 | |||
|style="background-color:#ccffb2;"|1 | |||
|style="background-color:#80a4ff;"|6 | |||
|style="background-color:#bfffbf;"|1 | |||
|style="background-color:#8080ff;"|5 | |||
|style="background-color:#80bfff;"|4 | |||
|style="background-color:#80ffff;"|2 | |||
|style="background-color:#80bfff;"|4 | |||
|style="background-color:#80ecff;"|4 | |||
|style="background-color:#80a4ff;"|6 | |||
|style="background-color:#92ffec;"|3 | |||
|style="background-color:#b6ffc8;"|2 | |||
|style="background-color:#b6ffc8;"colspan="2"|2 | |||
|-style="font-weight:bold" | |||
|width="1%"|[[File:CatCruiserBodyMK8.png|x32px|link=Cat Cruiser|Cat Cruiser]][[File:CometBodyMK8.png|x32px|link=Comet|Comet]]*[[File:YoshiBikeBodyMK8.png|x32px|link=Yoshi Bike|Yoshi Bike]]*[[File:TeddyBuggyBodyMK8.png|x32px|link=Teddy Buggy|Teddy Buggy]] | |||
|style="background-color:#99ffe5;"|2 | |||
|style="background-color:#bfffbf;"|2 | |||
|style="background-color:#8080ff;"|4 | |||
|style="background-color:#80e5ff;"|3 | |||
|style="background-color:#80c8ff;"|5 | |||
|style="background-color:#80ffff;"|2 | |||
|style="background-color:#80b2ff;"|4 | |||
|style="background-color:#bfffbf;"|2 | |||
|style="background-color:#8080ff;"|4 | |||
|style="background-color:#80ffff;"|3 | |||
|style="background-color:#92ffec;"|3 | |||
|style="background-color:#80a4ff;"|6 | |||
|style="background-color:#92ffec;"|3 | |||
|style="background-color:#92ffec;"|3 | |||
|style="background-color:#b6ffc8;"|2 | |||
|style="background-color:#daffa4;"|1 | |||
|-style="font-weight:bold" | |||
|width="1%"|[[File:W25SilverArrow-MK8.png|x32px|link=W 25 Silver Arrow|W 25 Silver Arrow]][[File:StandardBikeBodyMK8.png|x32px|link=Standard Bike|Standard Bike]][[File:FlameRiderBodyMK8.png|x32px|link=Flame Rider|Flame Rider]][[File:WildWigglerBodyMK8.png|x32px|link=Wild Wiggler|Wild Wiggler]] | |||
|style="background-color:#99ffe5;"|2 | |||
|style="background-color:#bfffbf;"|2 | |||
|style="background-color:#80bfff;"|3 | |||
|style="background-color:#80b2ff;"|4 | |||
|style="background-color:#80c8ff;"|5 | |||
|style="background-color:#bfffbf;"|1 | |||
|style="background-color:#80b2ff;"|4 | |||
|style="background-color:#80ffff;"|3 | |||
|style="background-color:#80bfff;"|3 | |||
|style="background-color:#80bfff;"|4 | |||
|style="background-color:#80c8ff;"|5 | |||
|style="background-color:#80c8ff;"|5 | |||
|style="background-color:#80ecff;"|4 | |||
|style="background-color:#80ecff;"|4 | |||
|style="background-color:#80ecff;"|4 | |||
|style="background-color:#80ecff;"|4 | |||
|-style="font-weight:bold" | |||
|width="1%"|[[File:Mach8BodyMK8.png|x32px|link=Mach 8|Mach 8]][[File:SportsCoupeMK8.png|x32px|link=Sports Coupe|Sports Coupe (Sports Coupé)]][[File:MK8DX Inkstriker.png|x32px|link=Inkstriker|Inkstriker]] | |||
|style="background-color:#80e5ff;"|3 | |||
|style="background-color:#80ffff;"|3 | |||
|style="background-color:#8080ff;"|4 | |||
|style="background-color:#8080ff;"|5 | |||
|style="background-color:#92ffec;"|3 | |||
|style="background-color:#80bfff;"|3 | |||
|style="background-color:#99ffe5;"|2 | |||
|style="background-color:#bfffbf;"|2 | |||
|style="background-color:#80ffff;"|2 | |||
|style="background-color:#80bfff;"|4 | |||
|style="background-color:#80ecff;"|4 | |||
|style="background-color:#80c8ff;"|5 | |||
|style="background-color:#92ffec;"|3 | |||
|style="background-color:#92ffec;"|3 | |||
|style="background-color:#daffa4;"colspan="2"|1 | |||
|-style="font-weight:bold" | |||
|width="1%"|[[File:MK8 Tanooki Buggy Sprite.png|x32px|link=Tanooki Kart|Tanooki Kart]][[File:MK8DX Koopa Clown.png|x32px|link=Koopa Clown|Koopa Clown]][[File:MK8D Master Cycle Zero.png|x32px|link=Master Cycle Zero|Master Cycle Zero]] | |||
|style="background-color:#80e5ff;"|3 | |||
|style="background-color:#80bfff;"|4 | |||
|style="background-color:#80bfff;"|3 | |||
|style="background-color:#80e5ff;"|3 | |||
|style="background-color:#b6ffc8;"|2 | |||
|style="background-color:#80bfff;"|3 | |||
|style="background-color:#80b2ff;"|4 | |||
|style="background-color:#80bfff;"|4 | |||
|style="background-color:#80bfff;"|3 | |||
|style="background-color:#80ffff;"|3 | |||
|style="background-color:#8080ff;"|7 | |||
|style="background-color:#80c8ff;"|5 | |||
|style="background-color:#80ecff;"|4 | |||
|style="background-color:#92ffec;"|3 | |||
|style="background-color:#92ffec;"colspan="2"|3 | |||
|-style="font-weight:bold" | |||
|width="1%"|[[File:300SLRoadster MK8.png|x32px|link=300 SL Roadster|300 SL Roadster]][[File:StandardKartBodyMK8.png|x32px|link=Standard Kart|Standard Kart]][[File:TheDukeBodyMK8.png|x32px|link=The Duke|The Duke]] | |||
|style="background-color:#80e5ff;"|3 | |||
|style="background-color:#80ffff;"|3 | |||
|style="background-color:#80bfff;"|3 | |||
|style="background-color:#80e5ff;"|3 | |||
|style="background-color:#80ecff;"|4 | |||
|style="background-color:#80ffff;"|2 | |||
|style="background-color:#80e5ff;"|3 | |||
|style="background-color:#bfffbf;"|2 | |||
|style="background-color:#80bfff;"|3 | |||
|style="background-color:#80ffff;"|3 | |||
|style="background-color:#92ffec;"|3 | |||
|style="background-color:#80c8ff;"|5 | |||
|style="background-color:#80ecff;"|4 | |||
|style="background-color:#92ffec;"|3 | |||
|style="background-color:#92ffec;"colspan="2"|3 | |||
|-style="font-weight:bold" | |||
|width="1%"|[[File:MK8BlueFalcon.png|x32px|link=Blue Falcon|Blue Falcon]][[File:MK8DX Splat Buggy.png|x32px|link=Splat Buggy|Splat Buggy]] | |||
|style="background-color:#80b2ff;"|4 | |||
|style="background-color:#bfffbf;"|2 | |||
|style="background-color:#80bfff;"|3 | |||
|style="background-color:#80b2ff;"|4 | |||
|style="background-color:#92ffec;"|3 | |||
|style="background-color:#ffff80;"|0 | |||
|style="background-color:#99ffe5;"|2 | |||
|style="background-color:#80ffff;"|3 | |||
|style="background-color:#bfffbf;"|1 | |||
|style="background-color:#8080ff;"|5 | |||
|style="background-color:#92ffec;"|3 | |||
|style="background-color:#80ecff;"|4 | |||
|style="background-color:#80ecff;"colspan="2"|4 | |||
|style="background-color:#92ffec;"colspan="2"|3 | |||
|-style="font-weight:bold" | |||
|width="1%"|[[File:PrancerBodyMK8.png|x32px|link=Prancer|Prancer]][[File:SportBikeBodyMK8.png|x32px|link=Sport Bike|Sport Bike]]*[[File:JetBikeBodyMK8.png|x32px|link=Jet Bike|Jet Bike]]* | |||
|style="background-color:#80b2ff;"|4 | |||
|style="background-color:#80ffff;"|3 | |||
|style="background-color:#80bfff;"|3 | |||
|style="background-color:#80e5ff;"|3 | |||
|style="background-color:#b6ffc8;"|2 | |||
|style="background-color:#bfffbf;"|1 | |||
|style="background-color:#80e5ff;"|3 | |||
|style="background-color:#80ffff;"|3 | |||
|style="background-color:#80bfff;"|3 | |||
|style="background-color:#bfffbf;"|2 | |||
|style="background-color:#b6ffc8;"|2 | |||
|style="background-color:#80ecff;"|4 | |||
|style="background-color:#80c8ff;"|5 | |||
|style="background-color:#92ffec;"|3 | |||
|style="background-color:#92ffec;"colspan="2"|3 | |||
|-style="font-weight:bold" | |||
|width="1%"|[[File:SneakerBodyMK8.png|x32px|link=Sneeker|Sneeker (Bounder)]][[File:Gold_Standard.png|x32px|link=Gold Standard|Gold Standard (Gold Kart)]][[File:MK8MasterCycle.png|x32px|link=Master Cycle|Master Cycle]]* | |||
|style="background-color:#80b2ff;"|4 | |||
|style="background-color:#bfffbf;"|2 | |||
|style="background-color:#80bfff;"|3 | |||
|style="background-color:#80e5ff;"|3 | |||
|style="background-color:#b6ffc8;"|2 | |||
|style="background-color:#80ffff;"|2 | |||
|style="background-color:#80e5ff;"|3 | |||
|style="background-color:#bfffbf;"|2 | |||
|style="background-color:#80ffff;"|2 | |||
|style="background-color:#80ffff;"|3 | |||
|style="background-color:#ffff80;"|0 | |||
|style="background-color:#80ecff;"|4 | |||
|style="background-color:#80c8ff;"|5 | |||
|style="background-color:#80ecff;"|4 | |||
|style="background-color:#92ffec;"colspan="2"|3 | |||
|-style="font-weight:bold" | |||
|width="1%"|[[File:Steel Driver.png|x32px|link=Steel Driver|Steel Driver]][[File:TrispeederBodyMK8.png|x32px|link=Tri-Speeder|Tri-Speeder]][[File:MK8BoneRattler.png|x32px|link=Bone Rattler|Bone Rattler]] | |||
|style="background-color:#80b2ff;"|4 | |||
|style="background-color:#8080ff;"|5 | |||
|style="background-color:#ffff80;"|0 | |||
|style="background-color:#99ffe5;"|2 | |||
|style="background-color:#daffa4;"|1 | |||
|style="background-color:#8080ff;"|4 | |||
|style="background-color:#ccffb2;"|1 | |||
|style="background-color:#8080ff;"|5 | |||
|style="background-color:#bfffbf;"|1 | |||
|style="background-color:#ffff80;"|1 | |||
|style="background-color:#92ffec;"|3 | |||
|style="background-color:#92ffec;"|3 | |||
|style="background-color:#80a4ff;"|6 | |||
|style="background-color:#80a4ff;"|6 | |||
|style="background-color:#80c8ff;"colspan="2"|5 | |||
|-style="font-weight:bold" | |||
|width="1%"|[[File:CircuitSpecialBodyMK8.png|x32px|link=Circuit Special|Circuit Special]][[File:ZeldaMK8Bdasher.png|x32px|link=B Dasher|B Dasher]][[File:MK8PWing.png|x32px|link=P-Wing (kart)|P-Wing]] | |||
|style="background-color:#8080ff;"|5 | |||
|style="background-color:#ffff80;"|1 | |||
|style="background-color:#80ffff;"|2 | |||
|style="background-color:#80b2ff;"|4 | |||
|style="background-color:#daffa4;"|1 | |||
|style="background-color:#80bfff;"|3 | |||
|style="background-color:#ccffb2;"|1 | |||
|style="background-color:#ffff80;"|1 | |||
|style="background-color:#ffff80;"|0 | |||
|style="background-color:#bfffbf;"|2 | |||
|style="background-color:#daffa4;"|1 | |||
|style="background-color:#92ffec;"|3 | |||
|style="background-color:#80a4ff;"|6 | |||
|style="background-color:#80a4ff;"|6 | |||
|style="background-color:#80a4ff;"colspan="2"|6 | |||
|-style="font-weight:bold" | |||
|width="1%"|[[File:BadwagonBodyMK8.png|x32px|link=Badwagon|Badwagon]][[File:GLA-MK8.png|x32px|link=GLA|GLA]][[File:StandardATVBodyMK8.png|x32px|link=Standard ATV|Standard ATV (Standard Quad)]] | |||
|style="background-color:#8080ff;"|5 | |||
|style="background-color:#bfffbf;"|2 | |||
|style="background-color:#bfffbf;"|1 | |||
|style="background-color:#80e5ff;"|3 | |||
|style="background-color:#ffff80;"|0 | |||
|style="background-color:#8080ff;"|4 | |||
|style="background-color:#ffff80;"|0 | |||
|style="background-color:#ffff80;"|1 | |||
|style="background-color:#ffff80;"|0 | |||
|style="background-color:#ffff80;"|1 | |||
|style="background-color:#80c8ff;"|5 | |||
|style="background-color:#92ffec;"|3 | |||
|style="background-color:#8080ff;"|7 | |||
|style="background-color:#8080ff;"|7 | |||
|style="background-color:#80a4ff;"colspan="2"|6 | |||
|-style="font-weight:bold" | |||
!colspan="17"style="background-color:#eaecf0;"|Tires' Statistics | |||
|- | |||
!colspan="1"width="10%"rowspan="2"|Tire | |||
!width="24%"colspan="4"|Speed | |||
!width="6%"rowspan="2"|Acceleration | |||
!width="6%"rowspan="2"|Weight | |||
!width="24%"colspan="4"|Handling | |||
!width="6%"rowspan="2"|Traction | |||
!width="6%"rowspan="2"|Mini-Turbo | |||
!style="width: 6%;"rowspan="2;"colspan="4"|Invincibility | |||
|- | |||
!width="6%"|Ground | |||
!width="6%"|Water | |||
!width="6%"|Air | |||
!width="6%"|Anti-Gravity | |||
!width="6%"|Ground | |||
!width="6%"|Water | |||
!width="6%"|Air | |||
!width="6%"|Anti-Gravity | |||
|-style="font-weight:bold" | |||
|width="1%"|[[File:RollerTiresMK8.png|x32px|link=Roller|Roller]][[File:AzureRollerTiresMK8.png|x32px|link=Azure Roller|Azure Roller]] | |||
|style="background-color:#ffff80;"|0 | |||
|style="background-color:#80bfff;"|3 | |||
|style="background-color:#80bfff;"|3 | |||
|style="background-color:#ffff80;"|0 | |||
|style="background-color:#8080ff;"|6 | |||
|style="background-color:#ffff80;"|0 | |||
|style="background-color:#8080ff;"|4 | |||
|style="background-color:#8080ff;"|4 | |||
|style="background-color:#8080ff;"|4 | |||
|style="background-color:#8080ff;"|4 | |||
|style="background-color:#80ecff;"|4 | |||
|style="background-color:#8080ff;"|6 | |||
|style="background-color:#ffff80;"colspan="2"|0 | |||
|style="background-color:#ffff80;"colspan="2"|0 | |||
|-style="font-weight:bold" | |||
|width="1%"|[[File:ButtonTiresMK8.png|x32px|link=Button (tire)|Button]][[File:Leaf Tires MK8.png|x32px|link=Leaf Tires|Leaf Tires (Leaf Tyres)]] | |||
|style="background-color:#bfffbf;"|1 | |||
|style="background-color:#80ffff;"|2 | |||
|style="background-color:#80ffff;"|2 | |||
|style="background-color:#80ffff;"|2 | |||
|style="background-color:#80aaff;"|5 | |||
|style="background-color:#ffff80;"|0 | |||
|style="background-color:#80bfff;"|3 | |||
|style="background-color:#80bfff;"|3 | |||
|style="background-color:#80ffff;"|2 | |||
|style="background-color:#8080ff;"|4 | |||
|style="background-color:#92ffec;"|3 | |||
|style="background-color:#80aaff;"|5 | |||
|style="background-color:#80ffff;"colspan="2"|3 | |||
|style="background-color:#80ffff;"colspan="2"|3 | |||
|-style="font-weight:bold" | |||
|width="1%"|[[File:CushionTiresMK8.png|x32px|link=Cushion|Cushion]][[File:SpongeTiresMK8.png|x32px|link=Sponge|Sponge]] | |||
|style="background-color:#bfffbf;"|1 | |||
|style="background-color:#bfffbf;"|1 | |||
|style="background-color:#8080ff;"|4 | |||
|style="background-color:#bfffbf;"|1 | |||
|style="background-color:#80d4ff;"|4 | |||
|style="background-color:#bfffbf;"|1 | |||
|style="background-color:#80ffff;"|2 | |||
|style="background-color:#bfffbf;"|1 | |||
|style="background-color:#80bfff;"|3 | |||
|style="background-color:#80ffff;"|2 | |||
|style="background-color:#80a4ff;"|6 | |||
|style="background-color:#80aaff;"|5 | |||
|style="background-color:#8080ff;"colspan="2"|6 | |||
|style="background-color:#80d4ff;"colspan="2"|4 | |||
|-style="font-weight:bold" | |||
|width="1%"|[[File:GLATires-MK8.png|x32px|link=GLA Tires|GLA Tires (GLA Wheels)]][[File:StandardTiresMK8.png|x32px|link=Standard (tire)|Standard (Normal)]][[File:Blue_Standard.png|x32px|link=Blue Standard|Blue Standard (Normal Blue)]] | |||
|style="background-color:#80ffff;"|2 | |||
|style="background-color:#80bfff;"|3 | |||
|style="background-color:#80bfff;"|3 | |||
|style="background-color:#80ffff;"|2 | |||
|style="background-color:#80d4ff;"|4 | |||
|style="background-color:#80ffff;"|2 | |||
|style="background-color:#80bfff;"|3 | |||
|style="background-color:#80bfff;"|3 | |||
|style="background-color:#80bfff;"|3 | |||
|style="background-color:#80bfff;"|3 | |||
|style="background-color:#80c8ff;"|5 | |||
|style="background-color:#80ffff;"|4 | |||
|style="background-color:#80aaff;"|5 | |||
|style="background-color:#80d4ff;"|4 | |||
|style="background-color:#80d4ff;"colspan="2"|4 | |||
|-style="font-weight:bold" | |||
|width="1%"|[[File:SlimTiresMK8.png|x32px|link=Slim (tire)|Slim]][[File:WoodTiresMK8.png|x32px|link=Wood|Wood (Wooden)]][[File:CrimsonSlimTiresMK8.png|x32px|link=Crimson Slim|Crimson Slim]] | |||
|style="background-color:#80bfff;"|3 | |||
|style="background-color:#80ffff;"|2 | |||
|style="background-color:#80ffff;"|2 | |||
|style="background-color:#8080ff;"|4 | |||
|style="background-color:#aaffd4;"|2 | |||
|style="background-color:#80ffff;"|2 | |||
|style="background-color:#8080ff;"|4 | |||
|style="background-color:#8080ff;"|4 | |||
|style="background-color:#8080ff;"|4 | |||
|style="background-color:#80bfff;"|3 | |||
|style="background-color:#daffa4;"|1 | |||
|style="background-color:#aaffd4;"|3 | |||
|style="background-color:#80aaff;"|5 | |||
|style="background-color:#80aaff;"|5 | |||
|style="background-color:#80aaff;"colspan="2"|5 | |||
|-style="font-weight:bold" | |||
|width="1%"|[[File:MonsterTiresMK8.png|x32px|link=Monster (tire)|Monster]][[File:HotMonsterTiresMK8.png|x32px|link=Hot Monster|Hot Monster (Funky Monster)]][[File:MK8D Ancient Tires.png|x32px|link=Ancient Tires|Ancient Tires (Ancient Tyres)]] | |||
|style="background-color:#80bfff;"|3 | |||
|style="background-color:#80ffff;"|2 | |||
|style="background-color:#bfffbf;"|1 | |||
|style="background-color:#80ffff;"|2 | |||
|style="background-color:#aaffd4;"|2 | |||
|style="background-color:#8080ff;"|4 | |||
|style="background-color:#ffff80;"|0 | |||
|style="background-color:#bfffbf;"|1 | |||
|style="background-color:#bfffbf;"|1 | |||
|style="background-color:#ffff80;"|0 | |||
|style="background-color:#8080ff;"|7 | |||
|style="background-color:#aaffd4;"|3 | |||
|style="background-color:#8080ff;"|6 | |||
|style="background-color:#8080ff;"|6 | |||
|style="background-color:#80aaff;"colspan="2"|5 | |||
|-style="font-weight:bold" | |||
|width="1%"|[[File:Off-Road.png|x32px|link=Off-Road|Off-Road]][[File:Retro_Off-Road.png|x32px|link=Retro Off-Road|Retro Off-Road]][[File:MK8-TriforceTires.png|x32px|link=Triforce Tires|Triforce Tires (Triforce Tyres)]] | |||
|style="background-color:#80bfff;"|3 | |||
|style="background-color:#8080ff;"|4 | |||
|style="background-color:#bfffbf;"|1 | |||
|style="background-color:#80ffff;"|2 | |||
|style="background-color:#80ffff;"|3 | |||
|style="background-color:#80bfff;"|3 | |||
|style="background-color:#bfffbf;"|1 | |||
|style="background-color:#bfffbf;"|1 | |||
|style="background-color:#80ffff;"|2 | |||
|style="background-color:#80ffff;"|2 | |||
|style="background-color:#80a4ff;"|6 | |||
|style="background-color:#aaffd4;"|3 | |||
|style="background-color:#8080ff;"|6 | |||
|style="background-color:#8080ff;"|6 | |||
|style="background-color:#8080ff;"colspan="2"|6 | |||
|-style="font-weight:bold" | |||
|width="1%"|[[File:SlickTiresMK8.png|x32px|link=Slick|Slick]][[File:CyberSlickTiresMK8.png|x32px|link=Cyber Slick|Cyber Slick]] | |||
|style="background-color:#8080ff;"|4 | |||
|style="background-color:#ffff80;"|0 | |||
|style="background-color:#ffff80;"|0 | |||
|style="background-color:#8080ff;"|4 | |||
|style="background-color:#d4ffaa;"|1 | |||
|style="background-color:#80bfff;"|3 | |||
|style="background-color:#80ffff;"|2 | |||
|style="background-color:#ffff80;"|0 | |||
|style="background-color:#bfffbf;"|1 | |||
|style="background-color:#80ffff;"|2 | |||
|style="background-color:#ffff80;"|0 | |||
|style="background-color:#d4ffaa;"|2 | |||
|style="background-color:#80aaff;"colspan="2"|5 | |||
|style="background-color:#80aaff;"colspan="2"|5 | |||
|-style="font-weight:bold" | |||
|width="1%"|[[File:MetalTiresMK8.png|x32px|link=Metal|Metal]][[File:Gold_Tires_MK8.png|x32px|link=Gold Tires|Gold Tires (Gold Wheels)]] | |||
|style="background-color:#8080ff;"|4 | |||
|style="background-color:#80bfff;"|3 | |||
|style="background-color:#80ffff;"|2 | |||
|style="background-color:#bfffbf;"|1 | |||
|style="background-color:#ffff80;"|0 | |||
|style="background-color:#8080ff;"|4 | |||
|style="background-color:#80ffff;"|2 | |||
|style="background-color:#80ffff;"|2 | |||
|style="background-color:#ffff80;"|0 | |||
|style="background-color:#bfffbf;"|1 | |||
|style="background-color:#b6ffc8;"|2 | |||
|style="background-color:#d4ffaa;"|2 | |||
|style="background-color:#8080ff;"colspan="2"|6 | |||
|style="background-color:#80aaff;"colspan="2"|5 | |||
|-style="font-weight:bold" | |||
!colspan="17"style="background-color:#eaecf0;"|Gliders' Statistics | |||
|- | |||
!colspan="1"width="10%"rowspan="2"|Glider | |||
!width="24%"colspan="4"|Speed | |||
!width="6%"rowspan="2"|Acceleration | |||
!width="6%"rowspan="2"|Weight | |||
!width="24%"colspan="4"|Handling | |||
!width="6%"rowspan="2"|Traction | |||
!width="6%"rowspan="2"|Mini-Turbo | |||
!style="width: 6%;"rowspan="2;"colspan="4"|Invincibility | |||
|- | |||
!width="6%"|Ground | |||
!width="6%"|Water | |||
!width="6%"|Air | |||
!width="6%"|Anti-Gravity | |||
!width="6%"|Ground | |||
!width="6%"|Water | |||
!width="6%"|Air | |||
!width="6%"|Anti-Gravity | |||
|-style="font-weight:bold" | |||
|width="1%"|[[File:Cloud_Glider.png|x32px|link=Cloud Glider|Cloud Glider]][[File:ParachuteGliderMK8.png|x32px|link=Parachute (glider)|Parachute]][[File:FlowerGliderMK8.png|x32px|link=Flower Glider|Flower Glider]][[File:PaperGliderIcon-MK8.png|x32px|link=Paper Glider|Paper Glider]] | |||
|style="background-color:#ffff80;"|0 | |||
|style="background-color:#8080ff;"|1 | |||
|style="background-color:#ffff80;"|1 | |||
|style="background-color:#8080ff;"|1 | |||
|style="background-color:#8080ff;"|2 | |||
|style="background-color:#ffff80;"|0 | |||
|style="background-color:#80ffff;"|1 | |||
|style="background-color:#ffff80;"|0 | |||
|style="background-color:#8080ff;"|2 | |||
|style="background-color:#8080ff;"|1 | |||
|style="background-color:#8080ff;"|1 | |||
|style="background-color:#8080ff;"|2 | |||
|style="background-color:#ffff80;"colspan="4"|0 | |||
|-style="font-weight:bold" | |||
|width="1%"|[[File:PeachParasolGliderMK8.png|x32px|link=Peach Parasol (glider)|Peach Parasol]][[File:ParafoilGliderMK8.png|x32px|link=Parafoil|Parafoil]][[File:BowserKiteMK8.png|x32px|link=Bowser Kite|Bowser Kite]][[File:MKTVParafoilGliderMK8.png|x32px|link=MKTV Parafoil|MKTV Parafoil]] | |||
|style="background-color:#ffff80;"|0 | |||
|style="background-color:#ffff80;"|0 | |||
|style="background-color:#ffff80;"|1 | |||
|style="background-color:#8080ff;"|1 | |||
|style="background-color:#8080ff;"|2 | |||
|style="background-color:#80ffff;"|1 | |||
|style="background-color:#80ffff;"|1 | |||
|style="background-color:#8080ff;"|1 | |||
|style="background-color:#8080ff;"|2 | |||
|style="background-color:#ffff80;"|0 | |||
|style="background-color:#ffff80;"|0 | |||
|style="background-color:#8080ff;"|2 | |||
|style="background-color:#ffff80;"colspan="4"|0 | |||
|-style="font-weight:bold" | |||
|width="1%"|[[File:WarioWingMK8.png|x32px|link=Wario Wing|Wario Wing]][[File:PlaneGliderMK8.png|x32px|link=Plane Glider|Plane Glider]][[File:GoldGliderMK8.png|x32px|link=Gold Glider|Gold Glider]][[File:MK8D Paraglider.png|x32px|link=Paraglider (The Legend of Zelda)|Paraglider (The Legend of Zelda)]] | |||
|style="background-color:#8080ff;"|1 | |||
|style="background-color:#ffff80;"|0 | |||
|style="background-color:#8080ff;"|2 | |||
|style="background-color:#8080ff;"|1 | |||
|style="background-color:#ffff80;"|1 | |||
|style="background-color:#8080ff;"|2 | |||
|style="background-color:#80ffff;"|1 | |||
|style="background-color:#8080ff;"|1 | |||
|style="background-color:#ffff80;"|1 | |||
|style="background-color:#ffff80;"|0 | |||
|style="background-color:#ffff80;"|0 | |||
|style="background-color:#ffff80;"|1 | |||
|style="background-color:#8080ff;"colspan="4"|1 | |||
|-style="font-weight:bold" | |||
|width="1%"|[[File:SuperGliderMK8.png|x32px|link=Super Glider|Super Glider]][[File:WaddleWingMK8.png|x32px|link=Waddle Wing|Waddle Wing]][[File:MK8-HylianKite.png|x32px|link=Hylian Kite|Hylian Kite]] | |||
|style="background-color:#8080ff;"|1 | |||
|style="background-color:#8080ff;"|1 | |||
|style="background-color:#8080ff;"|2 | |||
|style="background-color:#ffff80;"|0 | |||
|style="background-color:#ffff80;"|1 | |||
|style="background-color:#80ffff;"|1 | |||
|style="background-color:#80ffff;"|1 | |||
|style="background-color:#ffff80;"|0 | |||
|style="background-color:#ffff80;"|1 | |||
|style="background-color:#8080ff;"|1 | |||
|style="background-color:#8080ff;"|1 | |||
|style="background-color:#ffff80;"|1 | |||
|style="background-color:#8080ff;"colspan="4"|1 | |||
|} | |||
<nowiki>*</nowiki>[[Sport bike (vehicle class)|sport bike]] | |||
==Unlocking criteria== | |||
===Gold Mario=== | |||
The only unlockable playable character in this game is [[Gold Mario]], who is unlocked by winning all twelve base-game gold cups at 200cc. Once unlocked, he replaces [[Metal Mario]] on the character select screen. Metal Mario is from then on treated as a color variant of Gold Mario. The two differ only in their color scheme and the voice clip used when selecting them. Their other voice clips, horn sounds, animations, and statistics are identical. | |||
===Vehicle parts=== | |||
A vehicle part is randomly unlocked every 30 coins. Once reaching 450 coins this changes to every 50, and once reaching 1500 coins this changes to every 100. Eventually, the last non-gold vehicle part is unlocked on reaching 3100 coins. | |||
===Special parts=== | |||
Special gold parts are unlocked with the following criteria: | |||
*[[Gold Standard]]: Unlocked by achieving at least 1 star ranking on all base-game Mirror Cups. | |||
*[[Gold Tires]]: Unlocked by defeating all 48 base-game staff ghosts in 150cc Time Trials. | |||
*[[Gold Glider]]: Unlocked by collecting 5000 coins. | |||
===Alternate title screens=== | |||
Additional title screens can appear when hovering over the single player and multiplayer options on the main menu. These are unlocked by obtaining a gold trophy in every base-game cup in Mirror and 200cc, after which the title screens used are randomly selected. These alternate title screens can appear on start-up, which causes a different voice clip to play corresponding to the character shown on the screen, replacing the usual clip of [[Mario]] yelling "Mario Kart 8!" | |||
==Courses== | |||
There are 48 race courses in the base game (including all four cups that were DLC in the original ''Mario Kart 8''), these being the 25 courses [[New course|introduced]] in the original game and 23 [[classic course]]s, which includes two courses from ''Super Mario Kart'', three courses each from ''Mario Kart: Super Circuit'', ''Mario Kart DS'', and ''Mario Kart Wii'', and four courses each from ''Mario Kart 64'', ''Mario Kart: Double Dash!!'', and ''Mario Kart 7''. It is also the first ''Mario Kart'' game since ''Mario Kart 64'' to have all courses available from the start. | |||
In the British English version of the game, [[Toad Harbor]] is spelled "Toad Harbour", [[Bone-Dry Dunes]] is formatted "Bone Dry Dunes", and {{classic link|3DS|Music Park}}, {{classic link|3DS|Piranha Plant Slide}}, and {{classic link|3DS|Neo Bowser City}} are respectively known as <small>3DS</small> Melody Motorway, <small>3DS</small> Piranha Plant Pipeway, and <small>3DS</small> Koopa City. | |||
{|width=60% style="border-collapse:collapse;margin-bottom:5px;"align="center"cellpadding="4" | |||
|-valign=top bgcolor= | |||
![[File:MK8 MushroomCup.png|70px]]<br>[[Mushroom Cup]] | |||
![[File:MK8 FlowerCup.png|70px]]<br>[[Flower Cup]] | |||
![[File:MK8 Star Cup Emblem.png|70px]]<br>[[Star Cup]] | |||
![[File:MK8 Special Cup Emblem.png|70px]]<br>[[Special Cup]] | |||
![[File:MK8 Egg Cup Emblem.png|70px]]<br>[[Egg Cup]] | |||
![[File:MK8 Crossing Cup Emblem.png|70px]]<br>[[Crossing Cup]] | |||
|-align=center | |||
|{{course icon|MK8|Mario Kart Stadium}} | |||
|{{course icon|MK8|Mario Circuit|link=Mario Circuit (Mario Kart 8)}} | |||
|{{course icon|MK8|Sunshine Airport}} | |||
|{{course icon|MK8|Cloudtop Cruise}} | |||
|{{course icon|MK8|GCN Yoshi Circuit}} | |||
|{{course icon|MK8|GCN Baby Park}} | |||
|-align=center | |||
|{{course icon|MK8|Water Park}} | |||
|{{course icon|MK8|Toad Harbor}} | |||
|{{course icon|MK8|Dolphin Shoals}} | |||
|{{course icon|MK8|Bone-Dry Dunes}} | |||
|{{course icon|MK8|Excitebike Arena}} | |||
|{{course icon|MK8|GBA Cheese Land}} | |||
|-align=center | |||
|{{course icon|MK8|Sweet Sweet Canyon}} | |||
|{{course icon|MK8|Twisted Mansion}} | |||
|{{course icon|MK8|Electrodrome}} | |||
|{{course icon|MK8|Bowser's Castle|link=Bowser's Castle (Mario Kart 8)}} | |||
|{{course icon|MK8|Dragon Driftway}} | |||
|{{course icon|MK8|Wild Woods}} | |||
|-align=center | |||
|{{course icon|MK8|Thwomp Ruins}} | |||
|{{course icon|MK8|Shy Guy Falls}} | |||
|{{course icon|MK8|Mount Wario}} | |||
|{{course icon|MK8|Rainbow Road|link=Rainbow Road (Mario Kart 8)}} | |||
|{{course icon|MK8|Mute City}} | |||
|{{course icon|MK8|Animal Crossing}} | |||
|} | |||
{|width=60% style="border-collapse:collapse;margin-bottom:5px;"align="center"cellpadding="4" | |||
|-valign=top | |||
![[File:MK8 Shell Cup Emblem.png|70px]]<br>[[Shell Cup]] | |||
![[File:MK8 Banana Cup Emblem.png|70px]]<br>[[Banana Cup]] | |||
![[File:MK8 Leaf Cup Emblem.png|70px]]<br>[[Leaf Cup]] | |||
![[File:MK8 Lightning Cup Emblem.png|70px]]<br>[[Lightning Cup]] | |||
![[File:MK8 Triforce Cup Emblem.png|70px]]<br>[[Triforce Cup]] | |||
![[File:MK8 Bell Cup Emblem.png|70px]]<br>[[Bell Cup]] | |||
|-align=center | |||
|{{course icon|MK8|Wii Moo Moo Meadows}} | |||
|{{course icon|MK8|GCN Dry Dry Desert}} | |||
|{{course icon|MK8|DS Wario Stadium}} | |||
|{{course icon|MK8|DS Tick-Tock Clock}} | |||
|{{course icon|MK8|Wii Wario's Gold Mine}} | |||
|{{course icon|MK8|3DS Neo Bowser City}} | |||
|-align=center | |||
|{{course icon|MK8|GBA Mario Circuit}} | |||
|{{course icon|MK8|SNES Donut Plains 3}} | |||
|{{course icon|MK8|GCN Sherbet Land}} | |||
|{{course icon|MK8|3DS Piranha Plant Slide}} | |||
|{{course icon|MK8|SNES Rainbow Road}} | |||
|{{course icon|MK8|GBA Ribbon Road}} | |||
|-align=center | |||
|{{course icon|MK8|DS Cheep Cheep Beach}} | |||
|{{course icon|MK8|N64 Royal Raceway}} | |||
|{{course icon|MK8|3DS Music Park}} | |||
|{{course icon|MK8|Wii Grumble Volcano}} | |||
|{{course icon|MK8|Ice Ice Outpost}} | |||
|{{course icon|MK8|Super Bell Subway}} | |||
|-align=center | |||
|{{course icon|MK8|N64 Toad's Turnpike}} | |||
|{{course icon|MK8|3DS DK Jungle}} | |||
|{{course icon|MK8|N64 Yoshi Valley}} | |||
|{{course icon|MK8|N64 Rainbow Road}} | |||
|{{course icon|MK8|Hyrule Circuit}} | |||
|{{course icon|MK8|Big Blue}} | |||
|} | |||
===''Booster Course Pass''=== | |||
{{main|Mario Kart 8 Deluxe – Booster Course Pass}} | |||
The ''Mario Kart 8 Deluxe – Booster Course Pass'' DLC includes 48 additional courses (mostly classic courses), released in six waves of eight courses each, increasing the game's total number of courses to 96. The first wave released on March 18, 2022, and the final wave released on November 9, 2023. The classic courses in the DLC include two courses each from ''Super Mario Kart'' and ''Mario Kart 64'', three courses from ''Mario Kart: Double Dash!!'', four courses each from ''Mario Kart DS'' and ''Mario Kart 7'', five courses from ''Mario Kart: Super Circuit'', eight courses from ''Mario Kart Wii'', and seventeen courses from ''[[Mario Kart Tour]]'' (making ''Mario Kart 8 Deluxe'' the first game in the series to feature classic courses of a ''Mario Kart'' game released after it), which increases the total number of courses from each game to four courses from ''Super Mario Kart'', six courses from ''Mario Kart 64'', seven courses each from ''Mario Kart: Double Dash!!'' and ''Mario Kart DS'', eight courses each from ''Mario Kart: Super Circuit'' and ''Mario Kart 7'', and eleven courses from ''Mario Kart Wii''. Three new courses are also included, namely [[Sky-High Sundae]], [[Yoshi's Island (race course)|Yoshi's Island]], and [[Squeaky Clean Sprint]], increasing the total number of new courses to 28. | |||
In the British English version of the game, {{classic link|3DS|Rock Rock Mountain}} and {{classic link|Wii|DK Summit}} are known as {{classic|3DS|Alpine Pass}} and {{classic|Wii|DK's Snowboard Cross}} respectively, as was the case in the British English versions of their original appearances. However, most courses that had different names between European French and Canadian French in previous games instead use their European French names in both versions, with the exceptions of {{classic link|DS|Waluigi Pinball}}, {{classic link|Tour|Amsterdam Drift}}, and {{classic link|3DS|Rosalina's Ice World}}. | |||
{{:Mario Kart 8 Deluxe – Booster Course Pass}} | |||
===Battle courses=== | |||
Eight battle courses are present in ''Mario Kart 8 Deluxe'', five [[New course|new]] and three [[Classic course|classic]], replacing the repurposed race courses used for Battle mode in the Wii U version. | |||
Most battle courses visually resemble race courses from ''Mario Kart 8'': Battle Stadium with [[Mario Kart Stadium]], Sweet Sweet Kingdom with [[Sweet Sweet Canyon]], Dragon Palace with [[Dragon Driftway]], Lunar Colony with [[Rainbow Road (Mario Kart 8)|Rainbow Road]], {{classic|GCN|Luigi's Mansion}} with [[Twisted Mansion]], and {{classic|SNES|Battle Course 1}} with {{classic link|SNES|Donut Plains 3}}, all sharing similar textures and/or assets. | |||
Similar to regular races, a course introduction scene is now added at the start. | |||
{|width=60% style="border-collapse:collapse;margin-bottom:5px;"align="center"cellpadding="4" | |||
|-align=center | |||
|{{course icon|MK8D|Battle Stadium}} | |||
|{{course icon|MK8D|Sweet Sweet Kingdom}} | |||
|{{course icon|MK8D|Dragon Palace}} | |||
|{{course icon|MK8D|Lunar Colony}} | |||
|-align=center | |||
|{{course icon|MK8D|3DS Wuhu Town}} | |||
|{{course icon|MK8D|GCN Luigi's Mansion}} | |||
|{{course icon|MK8D|SNES Battle Course 1}} | |||
|{{course icon|MK8D|Urchin Underpass}} | |||
|} | |||
==Ghosts== | |||
===150cc Staff Ghosts=== | |||
In ''Mario Kart 8 Deluxe'', the times for staff ghosts in 150cc are slightly different from the original ''Mario Kart 8''. Also, unlike the original game, players will not unlock any stamps if they beat the ghosts. | |||
{|border=1 style="text-align:center;border-collapse:collapse;max-width:100em;margin:auto"align=center class="wikitable mw-collapsible mw-collapsed" | |||
|- | |||
!width=15% rowspan=2|Course | |||
!width=10% rowspan=2|Staff Name | |||
!width=10% rowspan=2|Country | |||
!width=5% rowspan=2|Time | |||
!width=10% rowspan=2|Character | |||
!width=30% colspan=3|Vehicle Combination | |||
|- | |||
!width=10%|Body | |||
!width=10%|Tires | |||
!width=10%|Glider | |||
|- | |||
!Mario Kart Stadium | |||
|Nin★Chris | |||
|United Kingdom | |||
|1:53.191 | |||
|Mario | |||
|Sports Coupe | |||
|Standard | |||
|Super Glider | |||
|- | |||
!Water Park | |||
|Nin★Massim | |||
|Italy | |||
|2:02.186 | |||
|Baby Luigi | |||
|Mr. Scooty | |||
|Roller | |||
|Super Glider | |||
|- | |||
!Sweet Sweet Canyon | |||
|Nin★Fausti | |||
|France | |||
|2:07.205 | |||
|Baby Peach | |||
|Teddy Buggy | |||
|Wood | |||
|Peach Parasol | |||
|- | |||
!Thwomp Ruins | |||
|Nin★Sophia | |||
|Germany | |||
|2:12.125 | |||
|Donkey Kong | |||
|Standard ATV | |||
|Monster | |||
|Super Glider | |||
|- | |||
!Mario Circuit | |||
|Nin★Sho | |||
|Japan | |||
|2:08.501 | |||
|Mario | |||
|Standard Kart | |||
|Standard | |||
|Super Glider | |||
|- | |||
!Toad Harbor | |||
|Nin★Alice | |||
|United States | |||
|2:29.282 | |||
|Toadette | |||
|Cat Cruiser | |||
|Retro Off-Road | |||
|Plane Glider | |||
|- | |||
!Twisted Mansion | |||
|Nin★Mark | |||
|Netherlands | |||
|2:14.615 | |||
|Luigi | |||
|Mach 8 | |||
|Slim | |||
|Super Glider | |||
|- | |||
!Shy Guy Falls | |||
|Nin★Frank | |||
|United Kingdom | |||
|2:21.804 | |||
|Shy Guy | |||
|Flame Rider | |||
|Off-Road | |||
|Super Glider | |||
|- | |||
!Sunshine Airport | |||
|Nin★Leonel | |||
|United States | |||
|2:20.447 | |||
|Rosalina | |||
|Circuit Special | |||
|Standard | |||
|Super Glider | |||
|- | |||
!Dolphin Shoals | |||
|Nin★Skip | |||
|United States | |||
|2:14.832 | |||
|Wendy | |||
|Landship | |||
|Wood | |||
|Bowser Kite | |||
|- | |||
!Electrodrome | |||
|Nin★Yuya | |||
|Japan | |||
|2:21.023 | |||
|Larry | |||
|Sport Bike | |||
|Monster | |||
|Super Glider | |||
|- | |||
!Mount Wario | |||
|Nin★Elena | |||
|Russia | |||
|2:03.483 | |||
|Waluigi | |||
|The Duke | |||
|Monster | |||
|Wario Wing | |||
|- | |||
!Cloudtop Cruise | |||
|Nin★Maria | |||
|Portugal | |||
|2:19.568 | |||
|Baby Rosalina | |||
|Biddybuggy | |||
|Standard | |||
|Super Glider | |||
|- | |||
!Bone-Dry Dunes | |||
|Nin★Elena | |||
|Russia | |||
|2:15.338 | |||
|Morton | |||
|Tri-Speeder | |||
|Monster | |||
|Super Glider | |||
|- | |||
!Bowser's Castle | |||
|Nin★Polly | |||
|United Kingdom | |||
|2:21.980 | |||
|Bowser | |||
|Badwagon | |||
|Standard | |||
|Super Glider | |||
|- | |||
!Rainbow Road | |||
|Nin★Mizuho | |||
|Japan | |||
|2:25.267 | |||
|Pink Gold Peach | |||
|Comet | |||
|Slim | |||
|Super Glider | |||
|- | |||
!{{classic|Wii|Moo Moo Meadows}} | |||
|Nin★Chris | |||
|United Kingdom | |||
|1:41.846 | |||
|Daisy | |||
|Varmint | |||
|Hot Monster | |||
|Super Glider | |||
|- | |||
!{{classic|GBA|Mario Circuit}} | |||
|Nin★Rie | |||
|Japan | |||
|1:44.593 | |||
|Baby Mario | |||
|Yoshi Bike | |||
|Standard | |||
|Super Glider | |||
|- | |||
!{{classic|DS|Cheep Cheep Beach}} | |||
|Nin★Massim | |||
|Italy | |||
|2:06.314 | |||
|Koopa Troopa | |||
|Steel Driver | |||
|Metal | |||
|Parachute | |||
|- | |||
!{{classic|N64|Toad's Turnpike}} | |||
|Nin★Alice | |||
|United States | |||
|2:08.966 | |||
|Toad | |||
|Standard Bike | |||
|Standard | |||
|Parachute | |||
|- | |||
!{{classic|GCN|Dry Dry Desert}} | |||
|Nin★Maria | |||
|Portugal | |||
|2:26.614 | |||
|Peach | |||
|Standard Bike | |||
|Slim | |||
|Super Glider | |||
|- | |||
!{{classic|SNES|Donut Plains 3}} | |||
|Nin★Frank | |||
|United Kingdom | |||
|1:35.564 | |||
|Lakitu | |||
|Pipe Frame | |||
|Monster | |||
|MKTV Parafoil | |||
|- | |||
!{{classic|N64|Royal Raceway}} | |||
|Nin★Skip | |||
|United States | |||
|2:18.307 | |||
|Peach | |||
|Prancer | |||
|Wood | |||
|Peach Parasol | |||
|- | |||
!{{classic|3DS|DK Jungle}} | |||
|Nin★Rie | |||
|Japan | |||
|2:20.006 | |||
|Donkey Kong | |||
|Varmint | |||
|Monster | |||
|Waddle Wing | |||
|- | |||
!{{classic|DS|Wario Stadium}} | |||
|Nin★Mizuho | |||
|Japan | |||
|2:09.171 | |||
|Wario | |||
|Tri-Speeder | |||
|Off-Road | |||
|Wario Wing | |||
|- | |||
!{{classic|GCN|Sherbet Land}} | |||
|Nin★Fausti | |||
|France | |||
|2:20.174 | |||
|Lemmy | |||
|Sneeker | |||
|Standard | |||
|Super Glider | |||
|- | |||
!{{classic|3DS|Music Park}} | |||
|Nin★Sho | |||
|Japan | |||
|2:19.675 | |||
|Baby Daisy | |||
|Biddybuggy | |||
|Standard | |||
|Super Glider | |||
|- | |||
!{{classic|N64|Yoshi Valley}} | |||
|Nin★Mark | |||
|Netherlands | |||
|2:23.688 | |||
|Yoshi | |||
|Wild Wiggler | |||
|Standard | |||
|Flower Glider | |||
|- | |||
!{{classic|DS|Tick-Tock Clock}} | |||
|Nin★Sophia | |||
|Germany | |||
|2:06.485 | |||
|Iggy | |||
|Standard Bike | |||
|Monster | |||
|Super Glider | |||
|- | |||
!{{classic|3DS|Piranha Plant Slide}} | |||
|Nin★Polly | |||
|United Kingdom | |||
|2:21.321 | |||
|Ludwig | |||
|Jet Bike | |||
|Slim | |||
|Super Glider | |||
|- | |||
!{{classic|Wii|Grumble Volcano}} | |||
|Nin★Yuya | |||
|Japan | |||
|2:16.524 | |||
|Roy | |||
|Badwagon | |||
|Off-Road | |||
|Super Glider | |||
|- | |||
!{{classic|N64|Rainbow Road}} | |||
|Nin★Leonel | |||
|United States | |||
|1:33.981 | |||
|Metal Mario | |||
|Standard ATV | |||
|Monster | |||
|Super Glider | |||
|- | |||
!{{classic|GCN|Yoshi Circuit}} | |||
|Nin★Adrien | |||
|France | |||
|2:07.557 | |||
|Red Yoshi | |||
|B Dasher | |||
|Standard | |||
|Super Glider | |||
|- | |||
!Excitebike Arena | |||
|Nin★Pedro | |||
|Spain | |||
|1:58.808 | |||
|Mario | |||
|Standard Bike | |||
|Slim | |||
|Super Glider | |||
|- | |||
!Dragon Driftway | |||
|Nin★Mitsu | |||
|Japan | |||
|2:05.957 | |||
|Lakitu | |||
|Varmint | |||
|Monster | |||
|Cloud Glider | |||
|- | |||
!Mute City | |||
|Nin★Laura | |||
|United States | |||
|2:10.167 | |||
|Mario | |||
|Blue Falcon | |||
|Roller | |||
|Super Glider | |||
|- | |||
!{{classic|Wii|Wario's Gold Mine}} | |||
|Nin★Pit | |||
|Germany | |||
|2:22.119 | |||
|Wario | |||
|Standard Kart | |||
|Monster | |||
|Super Glider | |||
|- | |||
!{{classic|SNES|Rainbow Road}} | |||
|Nin★Anne | |||
|Netherlands | |||
|1:40.711 | |||
|Cat Peach | |||
|Cat Cruiser | |||
|Retro Off-Road | |||
|Super Glider | |||
|- | |||
!Ice Ice Outpost | |||
|Nin★Pavel | |||
|Russia | |||
|2:09.427 | |||
|Tanooki Mario | |||
|Tanooki Kart | |||
|Monster | |||
|Super Glider | |||
|- | |||
!Hyrule Circuit | |||
|Nin★Mitsu | |||
|Japan | |||
|2:08.616 | |||
|Link | |||
|Master Cycle | |||
|Triforce Tires | |||
|Hylian Kite | |||
|- | |||
!{{classic|GCN|Baby Park}} | |||
|Nin★Joost | |||
|Netherlands | |||
|1:16.561 | |||
|Baby Mario | |||
|Biddybuggy | |||
|Standard | |||
|Super Glider | |||
|- | |||
!{{classic|GBA|Cheese Land}} | |||
|Nin★Aracel | |||
|Spain | |||
|2:06.316 | |||
|Orange Yoshi | |||
|Pipe Frame | |||
|Monster | |||
|Parafoil | |||
|- | |||
!Wild Woods | |||
|Nin★Akira | |||
|Japan | |||
|2:05.396 | |||
|Villager (Boy) | |||
|Streetle | |||
|Leaf Tires | |||
|Paper Glider | |||
|- | |||
!Animal Crossing | |||
|Nin★Marie | |||
|United States | |||
|1:53.584 | |||
|Isabelle | |||
|City Tripper | |||
|Slim | |||
|Paper Glider | |||
|- | |||
!{{classic|3DS|Neo Bowser City}} | |||
|Nin★Rui | |||
|Portugal | |||
|2:13.138 | |||
|Dry Bowser | |||
|Bone Rattler | |||
|Metal | |||
|Super Glider | |||
|- | |||
!{{classic|GBA|Ribbon Road}} | |||
|Nin★Giulia | |||
|Italy | |||
|2:07.152 | |||
|Villager (Girl) | |||
|Teddy Buggy | |||
|Button | |||
|Super Glider | |||
|- | |||
!Super Bell Subway | |||
|Nin★Juliet | |||
|France | |||
|2:06.487 | |||
|Pink Shy Guy | |||
|City Tripper | |||
|Slim | |||
|Super Glider | |||
|- | |||
!Big Blue | |||
|Nin★Dylan | |||
|United Kingdom | |||
|1:37.316 | |||
|Mario | |||
|P-Wing | |||
|Blue Standard | |||
|Super Glider | |||
|- | |||
!{{classic|Tour|Paris Promenade}} | |||
|Nin★Adrien | |||
|France | |||
|2:07.401 | |||
|Peach | |||
|Standard Kart | |||
|Slim | |||
|Peach Parasol | |||
|- | |||
!{{classic|3DS|Toad Circuit}} | |||
|Nin★Sho | |||
|Japan | |||
|1:33.670 | |||
|Toad | |||
|Mr. Scooty | |||
|Azure Roller | |||
|Super Glider | |||
|- | |||
!{{classic|N64|Choco Mountain}} | |||
|Nin★Massim | |||
|Italy | |||
|2:08.949 | |||
|Koopa Troopa | |||
|Biddybuggy | |||
|Standard | |||
|Super Glider | |||
|- | |||
!{{classic|Wii|Coconut Mall}} | |||
|Nin★Skip | |||
|United States | |||
|1:58.401 | |||
|Baby Mario | |||
|Sneeker | |||
|Metal | |||
|Super Glider | |||
|- | |||
!{{classic|Tour|Tokyo Blur}} | |||
|Nin★Yuya | |||
|Japan | |||
|1:36.317 | |||
|Blue Inkling Boy | |||
|Splat Buggy | |||
|Blue Standard | |||
|Super Glider | |||
|- | |||
!{{classic|DS|Shroom Ridge}} | |||
|Nin★Frank | |||
|United Kingdom | |||
|2:09.148 | |||
|Bowser | |||
|Bone Rattler | |||
|Off-Road | |||
|Super Glider | |||
|- | |||
!{{classic|GBA|Sky Garden}} | |||
|Nin★Pedro | |||
|Spain | |||
|1:42.267 | |||
|Lakitu | |||
|P-Wing | |||
|Retro Off-Road | |||
|Cloud Glider | |||
|- | |||
!Ninja Hideaway | |||
|Nin★Fausti | |||
|France | |||
|2:20.813 | |||
|Black Shy Guy | |||
|Standard ATV | |||
|Standard | |||
|Super Glider | |||
|- | |||
!{{classic|Tour|New York Minute}} | |||
|Nin★Leonel | |||
|United States | |||
|1:34.573 | |||
|Donkey Kong | |||
|Varmint | |||
|Monster | |||
|Super Glider | |||
|- | |||
!{{classic|SNES|Mario Circuit 3}} | |||
|Nin★Mark | |||
|Netherlands | |||
|1:46.806 | |||
|Mario | |||
|B Dasher | |||
|Standard | |||
|Super Glider | |||
|- | |||
!{{classic|N64|Kalimari Desert}} | |||
|Nin★Pit | |||
|Germany | |||
|1:40.363 | |||
|Dry Bones | |||
|Standard Kart | |||
|Monster | |||
|Super Glider | |||
|- | |||
!{{classic|DS|Waluigi Pinball}} | |||
|Nin★Chris | |||
|United Kingdom | |||
|2:36.450 | |||
|Waluigi | |||
|The Duke | |||
|Monster | |||
|Super Glider | |||
|- | |||
!{{classic|Tour|Sydney Sprint}} | |||
|Nin★Rie | |||
|Japan | |||
|2:16.617 | |||
|Baby Mario | |||
|Biddybuggy | |||
|Standard | |||
|Super Glider | |||
|- | |||
!{{classic|GBA|Snow Land}} | |||
|Nin★Maria | |||
|Portugal | |||
|1:46.763 | |||
|Tanooki Mario | |||
|Tanooki Kart | |||
|Standard | |||
|Super Glider | |||
|- | |||
!{{classic|Wii|Mushroom Gorge}} | |||
|Nin★Massim | |||
|Italy | |||
|1:50.666 | |||
|Toadette | |||
|Teddy Buggy | |||
|Wood | |||
|Super Glider | |||
|- | |||
!Sky-High Sundae | |||
|Nin★Akira | |||
|Japan | |||
|2:07.380 | |||
|Rosalina | |||
|Circuit Special | |||
|Standard | |||
|Super Glider | |||
|- | |||
!{{classic|Tour|London Loop}} | |||
|Nin★Frank | |||
|United Kingdom | |||
|2:20.500 | |||
|Mario | |||
|Comet | |||
|Slim | |||
|Super Glider | |||
|- | |||
!{{classic|GBA|Boo Lake}} | |||
|Nin★Rie | |||
|Japan | |||
|1:36.212 | |||
|King Boo | |||
|Circuit Special | |||
|Monster | |||
|Super Glider | |||
|- | |||
!{{classic|3DS|Rock Rock Mountain}} | |||
|Nin★Fausti | |||
|France | |||
|2:24.730 | |||
|Morton | |||
|Pipe Frame | |||
|Monster | |||
|Super Glider | |||
|- | |||
!{{classic|Wii|Maple Treeway}} | |||
|Nin★Pavel | |||
|Russia | |||
|2:36.581 | |||
|Daisy | |||
|Prancer | |||
|Off-Road | |||
|Super Glider | |||
|- | |||
!{{classic|Tour|Berlin Byways}} | |||
|Nin★Sophia | |||
|Germany | |||
|2:11.001 | |||
|Donkey Kong | |||
|Varmint | |||
|Monster | |||
|Super Glider | |||
|- | |||
!{{classic|DS|Peach Gardens}} | |||
|Nin★Marie | |||
|United States | |||
|2:19.534 | |||
|Peach | |||
|Prancer | |||
|Wood | |||
|Super Glider | |||
|- | |||
!Merry Mountain | |||
|Nin★Elena | |||
|Russia | |||
|2:09.693 | |||
|Shy Guy | |||
|Flame Rider | |||
|Off-Road | |||
|Super Glider | |||
|- | |||
!{{classic|3DS|Rainbow Road}} | |||
|Nin★Mizuho | |||
|Japan | |||
|1:52.015 | |||
|Rosalina | |||
|Circuit Special | |||
|Standard | |||
|Super Glider | |||
|- | |||
!{{classic|Tour|Amsterdam Drift}} | |||
|Nin★Mark | |||
|Netherlands | |||
|1:48.580 | |||
|Daisy | |||
|Prancer | |||
|Wood | |||
|Super Glider | |||
|- | |||
!{{classic|GBA|Riverside Park}} | |||
|Nin★Frank | |||
|United Kingdom | |||
|1:34.480 | |||
|Toad | |||
|Standard ATV | |||
|Standard | |||
|Super Glider | |||
|- | |||
!{{classic|Wii|DK Summit}} | |||
|Nin★Fausti | |||
|France | |||
|2:22.680 | |||
|Donkey Kong | |||
|Varmint | |||
|Monster | |||
|Super Glider | |||
|- | |||
!Yoshi's Island | |||
|Nin★Skip | |||
|United States | |||
|2:20.116 | |||
|Baby Mario | |||
|Biddybuggy | |||
|Standard | |||
|Super Glider | |||
|- | |||
!{{classic|Tour|Bangkok Rush}} | |||
|Nin★Yuya | |||
|Japan | |||
|1:54.995 | |||
|Blue Inkling Boy | |||
|Inkstriker | |||
|Monster | |||
|Super Glider | |||
|- | |||
!{{classic|DS|Mario Circuit}} | |||
|Nin★Pit | |||
|Germany | |||
|1:50.550 | |||
|Mario | |||
|B Dasher | |||
|Standard | |||
|Super Glider | |||
|- | |||
!{{classic|GCN|Waluigi Stadium}} | |||
|Nin★Maria | |||
|Portugal | |||
|2:16.894 | |||
|Waluigi | |||
|The Duke | |||
|Monster | |||
|Super Glider | |||
|- | |||
!{{classic|Tour|Singapore Speedway}} | |||
|Nin★Alice | |||
|United States | |||
|2:08.954 | |||
|Bowser | |||
|Badwagon | |||
|Monster | |||
|Super Glider | |||
|- | |||
!{{classic|Tour|Athens Dash}} | |||
|Nin★Pedro | |||
|Spain | |||
|1:52.892 | |||
|Wiggler | |||
|Circuit Special | |||
|Sponge | |||
|Super Glider | |||
|- | |||
!{{classic|GCN|Daisy Cruiser}} | |||
|Nin★Chris | |||
|United Kingdom | |||
|1:47.238 | |||
|Daisy | |||
|Jet Bike | |||
|Slim | |||
|Super Glider | |||
|- | |||
!{{classic|Wii|Moonview Highway}} | |||
|Nin★Yuya | |||
|Japan | |||
|1:54.655 | |||
|Waluigi | |||
|The Duke | |||
|Monster | |||
|Wario Wing | |||
|- | |||
!Squeaky Clean Sprint | |||
|Nin★Fausti | |||
|France | |||
|2:17.580 | |||
|Kamek | |||
|City Tripper | |||
|Cushion | |||
|Cloud Glider | |||
|- | |||
!{{classic|Tour|Los Angeles Laps}} | |||
|Nin★Alice | |||
|United States | |||
|1:57.938 | |||
|Mario | |||
|Comet | |||
|Slim | |||
|Super Glider | |||
|- | |||
!{{classic|GBA|Sunset Wilds}} | |||
|Nin★Pit | |||
|Germany | |||
|1:48.993 | |||
|Petey Piranha | |||
|Flame Rider | |||
|Off-Road | |||
|Flower Glider | |||
|- | |||
!{{classic|Wii|Koopa Cape}} | |||
|Nin★Massim | |||
|Italy | |||
|2:18.943 | |||
|Koopa Troopa | |||
|Steel Driver | |||
|Metal | |||
|Super Glider | |||
|- | |||
!{{classic|Tour|Vancouver Velocity}} | |||
|Nin★Skip | |||
|United States | |||
|2:11.072 | |||
|Rosalina | |||
|Sport Bike | |||
|Slim | |||
|Super Glider | |||
|- | |||
!{{classic|Tour|Rome Avanti}} | |||
|Nin★Giulia | |||
|Italy | |||
|1:57.329 | |||
|Pauline | |||
|Badwagon | |||
|Metal | |||
|Super Glider | |||
|- | |||
!{{classic|GCN|DK Mountain}} | |||
|Nin★Laura | |||
|United States | |||
|2:35.917 | |||
|Funky Kong | |||
|Standard ATV | |||
|Monster | |||
|Parafoil | |||
|- | |||
!{{classic|Wii|Daisy Circuit}} | |||
|Nin★Adrien | |||
|France | |||
|2:01.099 | |||
|Daisy | |||
|Sports Coupe | |||
|Standard | |||
|Super Glider | |||
|- | |||
!Piranha Plant Cove | |||
|Nin★Sophia | |||
|Germany | |||
|2:17.775 | |||
|Petey Piranha | |||
|Flame Rider | |||
|Slim | |||
|Flower Glider | |||
|- | |||
!{{classic|Tour|Madrid Drive}} | |||
|Nin★Aracel | |||
|Spain | |||
|2:10.689 | |||
|Peachette | |||
|Biddybuggy | |||
|Standard | |||
|Cloud Glider | |||
|- | |||
!{{classic|3DS|Rosalina's Ice World}} | |||
|Nin★Pavel | |||
|Russia | |||
|2:10.993 | |||
|Rosalina | |||
|Sport Bike | |||
|Slim | |||
|Super Glider | |||
|- | |||
!{{classic|SNES|Bowser Castle 3}} | |||
|Nin★Polly | |||
|United Kingdom | |||
|1:54.632 | |||
|Bowser | |||
|Landship | |||
|Wood | |||
|Super Glider | |||
|- | |||
!{{classic|Wii|Rainbow Road}} | |||
|Nin★Leonel | |||
|United States | |||
|2:49.574 | |||
|Mario | |||
|Standard Kart | |||
|Standard | |||
|Super Glider | |||
|} | |||
===200cc Staff Ghosts=== | |||
''Mario Kart 8 Deluxe'' features a new option for players to race in Time Trials in the 200cc engine class. This option also features entirely new staff ghosts for each of the courses. | |||
{|border=1 style="text-align:center;border-collapse:collapse;max-width:100em;margin:auto"align=center class="wikitable mw-collapsible mw-collapsed" | |||
|- | |||
!width=15% rowspan=2|Course | |||
!width=10% rowspan=2|Staff Name | |||
!width=10% rowspan=2|Country | |||
!width=5% rowspan=2|Time | |||
!width=10% rowspan=2|Character | |||
!width=30% colspan=3|Vehicle Combination | |||
|- | |||
!width=10%|Body | |||
!width=10%|Tires | |||
!width=10%|Glider | |||
|- | |||
!Mario Kart Stadium | |||
|Nin★Sophia | |||
|Germany | |||
|1:21.984 | |||
|Gold Mario | |||
|Gold Standard | |||
|Gold Tires | |||
|Gold Glider | |||
|- | |||
!Water Park | |||
|Nin★Yuya | |||
|Japan | |||
|1:22.799 | |||
|Baby Mario | |||
|Biddybuggy | |||
|Standard | |||
|Super Glider | |||
|- | |||
!Sweet Sweet Canyon | |||
|Nin★Alice | |||
|United States | |||
|1:40.972 | |||
|Peach | |||
|Prancer | |||
|Wood | |||
|Peach Parasol | |||
|- | |||
!Thwomp Ruins | |||
|Nin★Skip | |||
|United States | |||
|1:31.436 | |||
|Bowser | |||
|Badwagon | |||
|Standard | |||
|Bowser Kite | |||
|- | |||
!Mario Circuit | |||
|Nin★Joost | |||
|Netherlands | |||
|1:23.243 | |||
|Pink Gold Peach | |||
|Standard Bike | |||
|Slim | |||
|Super Glider | |||
|- | |||
!Toad Harbor | |||
|Nin★Adrien | |||
|France | |||
|1:43.003 | |||
|Toad | |||
|Sports Coupe | |||
|Standard | |||
|Super Glider | |||
|- | |||
!Twisted Mansion | |||
|Nin★Rui | |||
|Portugal | |||
|1:38.244 | |||
|King Boo | |||
|Wild Wiggler | |||
|Sponge | |||
|Flower Glider | |||
|- | |||
!Shy Guy Falls | |||
|Nin★Anne | |||
|Netherlands | |||
|1:40.698 | |||
|White Yoshi | |||
|Standard ATV | |||
|Retro Off-Road | |||
|Parafoil | |||
|- | |||
!Sunshine Airport | |||
|Nin★Sho | |||
|Japan | |||
|1:45.437 | |||
|Luigi | |||
|Jet Bike | |||
|Metal | |||
|Plane Glider | |||
|- | |||
!Dolphin Shoals | |||
|Nin★Polly | |||
|United Kingdom | |||
|1:38.911 | |||
|Ludwig | |||
|Steel Driver | |||
|Blue Standard | |||
|Bowser Kite | |||
|- | |||
!Electrodrome | |||
|Nin★Laura | |||
|United States | |||
|1:40.943 | |||
|Roy | |||
|The Duke | |||
|Cushion | |||
|Parafoil | |||
|- | |||
!Mount Wario | |||
|Nin★Massim | |||
|Italy | |||
|1:37.266 | |||
|Wario | |||
|Standard ATV | |||
|Crimson Slim | |||
|Wario Wing | |||
|- | |||
!Cloudtop Cruise | |||
|Nin★Giulia | |||
|Italy | |||
|1:44.120 | |||
|Bowser Jr. | |||
|Koopa Clown | |||
|Cyber Slick | |||
|Cloud Glider | |||
|- | |||
!Bone-Dry Dunes | |||
|Nin★Pavel | |||
|Russia | |||
|1:39.330 | |||
|Dry Bones | |||
|Pipe Frame | |||
|Wood | |||
|Plane Glider | |||
|- | |||
!Bowser's Castle | |||
|Nin★Mark | |||
|Netherlands | |||
|1:40.953 | |||
|Dry Bowser | |||
|Flame Rider | |||
|Slim | |||
|Bowser Kite | |||
|- | |||
!Rainbow Road | |||
|Nin★Pedro | |||
|Spain | |||
|1:55.767 | |||
|Rosalina | |||
|Mach 8 | |||
|Blue Standard | |||
|MKTV Parafoil | |||
|- | |||
!{{classic|Wii|Moo Moo Meadows}} | |||
|Nin★Leonel | |||
|United States | |||
|1:09.980 | |||
|Baby Daisy | |||
|Sneeker | |||
|Cyber Slick | |||
|MKTV Parafoil | |||
|- | |||
!{{classic|GBA|Mario Circuit}} | |||
|Nin★Pit | |||
|Germany | |||
|1:10.475 | |||
|Baby Luigi | |||
|Sport Bike | |||
|Slick | |||
|Parachute | |||
|- | |||
!{{classic|DS|Cheep Cheep Beach}} | |||
|Nin★Mizuho | |||
|Japan | |||
|1:25.089 | |||
|Lakitu | |||
|Landship | |||
|Metal | |||
|Cloud Glider | |||
|- | |||
!{{classic|N64|Toad's Turnpike}} | |||
|Nin★Rie | |||
|Japan | |||
|1:21.156 | |||
|Toadette | |||
|Sports Coupe | |||
|Slick | |||
|Super Glider | |||
|- | |||
!{{classic|GCN|Dry Dry Desert}} | |||
|Nin★Chris | |||
|United Kingdom | |||
|1:45.087 | |||
|Lemmy | |||
|Tanooki Kart | |||
|Off-Road | |||
|Super Glider | |||
|- | |||
!{{classic|SNES|Donut Plains 3}} | |||
|Nin★Mizuho | |||
|Japan | |||
|1:11.794 | |||
|Koopa Troopa | |||
|Streetle | |||
|Monster | |||
|Flower Glider | |||
|- | |||
!{{classic|N64|Royal Raceway}} | |||
|Nin★Dylan | |||
|United Kingdom | |||
|1:43.120 | |||
|Baby Peach | |||
|Circuit Special | |||
|Cyber Slick | |||
|Parafoil | |||
|- | |||
!{{classic|3DS|DK Jungle}} | |||
|Nin★Polly | |||
|United Kingdom | |||
|1:46.758 | |||
|Yellow Yoshi | |||
|City Tripper | |||
|Hot Monster | |||
|Paper Glider | |||
|- | |||
!{{classic|DS|Wario Stadium}} | |||
|Nin★Massim | |||
|Italy | |||
|1:39.724 | |||
|Waluigi | |||
|Varmint | |||
|Hot Monster | |||
|Wario Wing | |||
|- | |||
!{{classic|GCN|Sherbet Land}} | |||
|Nin★Sophia | |||
|Germany | |||
|1:34.370 | |||
|Iggy | |||
|Bone Rattler | |||
|Monster | |||
|Bowser Kite | |||
|- | |||
!{{classic|3DS|Music Park}} | |||
|Nin★Mitsu | |||
|Japan | |||
|1:36.529<br>1:38.847{{footnote|main|TC}} | |||
|Daisy | |||
|Badwagon | |||
|GLA Tires<br>Off-Road{{footnote|main|TC}} | |||
|MKTV Parafoil | |||
|- | |||
!{{classic|N64|Yoshi Valley}} | |||
|Nin★Yuya | |||
|Japan | |||
|1:35.628 | |||
|Green Shy Guy | |||
|Comet | |||
|Slim | |||
|Super Glider | |||
|- | |||
!{{classic|DS|Tick-Tock Clock}} | |||
|Nin★Elena | |||
|Russia | |||
|1:32.483 | |||
|Larry | |||
|Standard Kart | |||
|Sponge | |||
|Paper Glider | |||
|- | |||
!{{classic|3DS|Piranha Plant Slide}} | |||
|Nin★Frank | |||
|United Kingdom | |||
|1:48.454 | |||
|Wendy | |||
|Mr. Scooty | |||
|Metal | |||
|Peach Parasol | |||
|- | |||
!{{classic|Wii|Grumble Volcano}} | |||
|Nin★Maria | |||
|Portugal | |||
|1:44.284 | |||
|Morton | |||
|Standard Bike | |||
|Cushion | |||
|Parachute | |||
|- | |||
!{{classic|N64|Rainbow Road}} | |||
|Nin★Fausti | |||
|France | |||
|1:08.128 | |||
|Mario | |||
|Tri-Speeder | |||
|Monster | |||
|Super Glider | |||
|- | |||
!{{classic|GCN|Yoshi Circuit}} | |||
|Nin★Elena | |||
|Russia | |||
|1:38.869 | |||
|Light-blue Shy Guy | |||
|P-Wing | |||
|Slick | |||
|Parachute | |||
|- | |||
!Excitebike Arena | |||
|Nin★Akira | |||
|Japan | |||
|1:29.202 | |||
|Inkling Girl | |||
|Inkstriker | |||
|Leaf Tires | |||
|Super Glider | |||
|- | |||
!Dragon Driftway | |||
|Nin★Aracel | |||
|Spain | |||
|1:34.873 | |||
|Purple Inkling Boy | |||
|Splat Buggy | |||
|Blue Standard | |||
|Super Glider | |||
|- | |||
!Mute City | |||
|Nin★Sho | |||
|Japan | |||
|1:34.273 | |||
|Metal Mario | |||
|Blue Falcon | |||
|Azure Roller | |||
|Parafoil | |||
|- | |||
!{{classic|Wii|Wario's Gold Mine}} | |||
|Nin★Alice | |||
|United States | |||
|1:41.168 | |||
|Waluigi | |||
|Standard Bike | |||
|Retro Off-Road | |||
|Wario Wing | |||
|- | |||
!{{classic|SNES|Rainbow Road}} | |||
|Nin★Marie | |||
|United States | |||
|1:12.762<br>1:12.696{{footnote|main|TC}} | |||
|Tanooki Mario | |||
|GLA<br>Pipe Frame{{footnote|main|TC}} | |||
|GLA Tires<br>Standard{{footnote|main|TC}} | |||
|Parachute | |||
|- | |||
!Ice Ice Outpost | |||
|Nin★Juliet | |||
|France | |||
|1:32.435 | |||
|Cat Peach | |||
|Sneeker | |||
|Off-Road | |||
|Peach Parasol | |||
|- | |||
!Hyrule Circuit | |||
|Nin★Mark | |||
|Netherlands | |||
|1:40.394 | |||
|Link | |||
|Master Cycle | |||
|Triforce Tires | |||
|Hylian Kite | |||
|- | |||
!{{classic|GCN|Baby Park}} | |||
|Nin★Leonel | |||
|United States | |||
|0:59.765 | |||
|Baby Rosalina | |||
|Teddy Buggy | |||
|Cyber Slick | |||
|Waddle Wing | |||
|- | |||
!{{classic|GBA|Cheese Land}} | |||
|Nin★Chris | |||
|United Kingdom | |||
|1:41.248 | |||
|Donkey Kong | |||
|Streetle | |||
|Roller | |||
|Flower Glider | |||
|- | |||
!Wild Woods | |||
|Nin★Mitsu | |||
|Japan | |||
|1:27.555 | |||
|Villager (Girl) | |||
|City Tripper | |||
|Leaf Tires | |||
|Paper Glider | |||
|- | |||
!Animal Crossing | |||
|Nin★Fausti | |||
|France | |||
|1:23.417<br>1:23.491{{footnote|main|TC}} | |||
|Villager (Boy) | |||
|300 SL Roadster<br>Streetle{{footnote|main|TC}} | |||
|GLA Tires<br>Standard{{footnote|main|TC}} | |||
|Super Glider | |||
|- | |||
!{{classic|3DS|Neo Bowser City}} | |||
|Nin★Massim | |||
|Italy | |||
|1:37.526 | |||
|Bowser | |||
|Bone Rattler | |||
|Standard | |||
|Super Glider | |||
|- | |||
!{{classic|GBA|Ribbon Road}} | |||
|Nin★Maria | |||
|Portugal | |||
|1:31.220 | |||
|Isabelle | |||
|Cat Cruiser | |||
|Crimson Slim | |||
|Paper Glider | |||
|- | |||
!Super Bell Subway | |||
|Nin★Skip | |||
|United States | |||
|1:23.304 | |||
|Blue Yoshi | |||
|Yoshi Bike | |||
|Blue Standard | |||
|Super Glider | |||
|- | |||
!Big Blue | |||
|Nin★Rie | |||
|Japan | |||
|1:13.516<br>1:13.200{{footnote|main|TC}} | |||
|Luigi | |||
|W 25 Silver Arrow<br>Blue Falcon{{footnote|main|TC}} | |||
|Slim | |||
|Plane Glider | |||
|- | |||
!{{classic|Tour|Paris Promenade}} | |||
|Nin★Joost | |||
|Netherlands | |||
|1:27.101 | |||
|Rosalina | |||
|Comet | |||
|Slim | |||
|Super Glider | |||
|- | |||
!{{classic|3DS|Toad Circuit}} | |||
|Nin★Aracel | |||
|Spain | |||
|1:03.969 | |||
|Toadette | |||
|Prancer | |||
|Wood | |||
|Super Glider | |||
|- | |||
!{{classic|N64|Choco Mountain}} | |||
|Nin★Alice | |||
|United States | |||
|1:31.715 | |||
|Tanooki Mario | |||
|Tanooki Kart | |||
|Monster | |||
|Super Glider | |||
|- | |||
!{{classic|Wii|Coconut Mall}} | |||
|Nin★Polly | |||
|United Kingdom | |||
|1:29.009 | |||
|Baby Luigi | |||
|Yoshi Bike | |||
|Slick | |||
|Parachute | |||
|- | |||
!{{classic|Tour|Tokyo Blur}} | |||
|Nin★Aracel | |||
|Spain | |||
|1:07.560 | |||
|Inkling Girl | |||
|Inkstriker | |||
|Metal | |||
|Super Glider | |||
|- | |||
!{{classic|DS|Shroom Ridge}} | |||
|Nin★Akira | |||
|Japan | |||
|1:37.626 | |||
|Morton | |||
|Standard Bike | |||
|Cushion | |||
|Parachute | |||
|- | |||
!{{classic|GBA|Sky Garden}} | |||
|Nin★Rui | |||
|Portugal | |||
|1:13.606 | |||
|Ludwig | |||
|Steel Driver | |||
|Blue Standard | |||
|Bowser Kite | |||
|- | |||
!Ninja Hideaway | |||
|Nin★Giulia | |||
|Italy | |||
|1:37.815 | |||
|Black Yoshi | |||
|Teddy Buggy | |||
|Standard | |||
|Super Glider | |||
|- | |||
!{{classic|Tour|New York Minute}} | |||
|Nin★Sho | |||
|Japan | |||
|1:07.562 | |||
|Yoshi | |||
|Sports Coupe | |||
|Standard | |||
|Super Glider | |||
|- | |||
!{{classic|SNES|Mario Circuit 3}} | |||
|Nin★Giulia | |||
|Italy | |||
|1:17.075 | |||
|Luigi | |||
|Mach 8 | |||
|Slim | |||
|Super Glider | |||
|- | |||
!{{classic|N64|Kalimari Desert}} | |||
|Nin★Juliet | |||
|France | |||
|1:10.511 | |||
|Dry Bowser | |||
|Bone Rattler | |||
|Monster | |||
|Super Glider | |||
|- | |||
!{{classic|DS|Waluigi Pinball}} | |||
|Nin★Pavel | |||
|Russia | |||
|2:00.942 | |||
|Morton | |||
|Pipe Frame | |||
|Monster | |||
|Super Glider | |||
|- | |||
!{{classic|Tour|Sydney Sprint}} | |||
|Nin★Giulia | |||
|Italy | |||
|1:37.367 | |||
|Bowser Jr. | |||
|Koopa Clown | |||
|Standard | |||
|Super Glider | |||
|- | |||
!{{classic|GBA|Snow Land}} | |||
|Nin★Leonel | |||
|United States | |||
|1:21.826 | |||
|King Boo | |||
|Circuit Special | |||
|Monster | |||
|Super Glider | |||
|- | |||
!{{classic|Wii|Mushroom Gorge}} | |||
|Nin★Chris | |||
|United Kingdom | |||
|1:21.194 | |||
|Toad | |||
|Standard ATV | |||
|Standard | |||
|Super Glider | |||
|- | |||
!Sky-High Sundae | |||
|Nin★Mitsu | |||
|Japan | |||
|1:30.777 | |||
|Peach | |||
|Standard Bike | |||
|Slim | |||
|Super Glider | |||
|- | |||
!{{classic|Tour|London Loop}} | |||
|Nin★Alice | |||
|United States | |||
|1:38.896 | |||
|Red Yoshi | |||
|Sports Coupe | |||
|Standard | |||
|Super Glider | |||
|- | |||
!{{classic|GBA|Boo Lake}} | |||
|Nin★Joost | |||
|Netherlands | |||
|1:09.576 | |||
|Dry Bones | |||
|Standard Kart | |||
|Monster | |||
|Super Glider | |||
|- | |||
!{{classic|3DS|Rock Rock Mountain}} | |||
|Nin★Juliet | |||
|France | |||
|1:39.664 | |||
|Bowser | |||
|Landship | |||
|Wood | |||
|Super Glider | |||
|- | |||
!{{classic|Wii|Maple Treeway}} | |||
|Nin★Sho | |||
|Japan | |||
|1:58.543 | |||
|Wario | |||
|Tri-Speeder | |||
|Monster | |||
|Super Glider | |||
|- | |||
!{{classic|Tour|Berlin Byways}} | |||
|Nin★Skip | |||
|United States | |||
|1:35.467 | |||
|Toad | |||
|Standard ATV | |||
|Standard | |||
|Super Glider | |||
|- | |||
!{{classic|DS|Peach Gardens}} | |||
|Nin★Aracel | |||
|Spain | |||
|1:39.851 | |||
|Toadette | |||
|Teddy Buggy | |||
|Button | |||
|Super Glider | |||
|- | |||
!Merry Mountain | |||
|Nin★Mark | |||
|Netherlands | |||
|1:31.642 | |||
|Luigi | |||
|Mach 8 | |||
|Slim | |||
|Super Glider | |||
|- | |||
!{{classic|3DS|Rainbow Road}} | |||
|Nin★Dylan | |||
|United Kingdom | |||
|1:19.545 | |||
|Waluigi | |||
|The Duke | |||
|Monster | |||
|Super Glider | |||
|- | |||
!{{classic|Tour|Amsterdam Drift}} | |||
|Nin★Rie | |||
|Japan | |||
|1:19.135 | |||
|Shy Guy | |||
|Flame Rider | |||
|Off-Road | |||
|Super Glider | |||
|- | |||
!{{classic|GBA|Riverside Park}} | |||
|Nin★Elena | |||
|Russia | |||
|1:13.455 | |||
|Bowser Jr. | |||
|Koopa Clown | |||
|Slim | |||
|Super Glider | |||
|- | |||
!{{classic|Wii|DK Summit}} | |||
|Nin★Massim | |||
|Italy | |||
|1:53.372 | |||
|Rosalina | |||
|Circuit Special | |||
|Standard | |||
|Super Glider | |||
|- | |||
!Yoshi's Island | |||
|Nin★Polly | |||
|United Kingdom | |||
|1:40.731 | |||
|Yoshi | |||
|Wild Wiggler | |||
|Standard | |||
|Super Glider | |||
|- | |||
!{{classic|Tour|Bangkok Rush}} | |||
|Nin★Leonel | |||
|United States | |||
|1:24.201 | |||
|Wario | |||
|Standard Kart | |||
|Monster | |||
|Wario Wing | |||
|- | |||
!{{classic|DS|Mario Circuit}} | |||
|Nin★Sho | |||
|Japan | |||
|1:24.282 | |||
|Peach | |||
|Standard Bike | |||
|Slim | |||
|Super Glider | |||
|- | |||
!{{classic|GCN|Waluigi Stadium}} | |||
|Nin★Aracel | |||
|Spain | |||
|1:43.781 | |||
|Luigi | |||
|Mach 8 | |||
|Slim | |||
|Super Glider | |||
|- | |||
!{{classic|Tour|Singapore Speedway}} | |||
|Nin★Mizuho | |||
|Japan | |||
|1:32.160 | |||
|Mario | |||
|Comet | |||
|Slim | |||
|Super Glider | |||
|- | |||
!{{classic|Tour|Athens Dash}} | |||
|Nin★Massim | |||
|Italy | |||
|1:21.362 | |||
|Dry Bones | |||
|Standard Kart | |||
|Monster | |||
|Super Glider | |||
|- | |||
!{{classic|GCN|Daisy Cruiser}} | |||
|Nin★Elena | |||
|Russia | |||
|1:21.241 | |||
|Bowser | |||
|Flame Rider | |||
|Monster | |||
|Super Glider | |||
|- | |||
!{{classic|Wii|Moonview Highway}} | |||
|Nin★Sophia | |||
|Germany | |||
|1:19.973 | |||
|Donkey Kong | |||
|Varmint | |||
|Monster | |||
|Super Glider | |||
|- | |||
!Squeaky Clean Sprint | |||
|Nin★Leonel | |||
|United States | |||
|1:38.459 | |||
|Yoshi | |||
|Wild Wiggler | |||
|Monster | |||
|Super Glider | |||
|- | |||
!{{classic|Tour|Los Angeles Laps}} | |||
|Nin★Mitsu | |||
|Japan | |||
|1:25.694 | |||
|Birdo (Red) | |||
|Pipe Frame | |||
|Monster | |||
|Super Glider | |||
|- | |||
!{{classic|GBA|Sunset Wilds}} | |||
|Nin★Juliet | |||
|France | |||
|1:20.411 | |||
|Shy Guy | |||
|Flame Rider | |||
|Off-Road | |||
|Super Glider | |||
|- | |||
!{{classic|Wii|Koopa Cape}} | |||
|Nin★Frank | |||
|United Kingdom | |||
|1:41.749 | |||
|Toad | |||
|Standard ATV | |||
|Standard | |||
|Super Glider | |||
|- | |||
!{{classic|Tour|Vancouver Velocity}} | |||
|Nin★Joost | |||
|Netherlands | |||
|1:32.752 | |||
|Peach | |||
|Standard Bike | |||
|Slim | |||
|Super Glider | |||
|- | |||
!{{classic|Tour|Rome Avanti}} | |||
|Nin★Akira | |||
|Japan | |||
|1:25.406 | |||
|Yoshi | |||
|Wild Wiggler | |||
|Standard | |||
|Super Glider | |||
|- | |||
!{{classic|GCN|DK Mountain}} | |||
|Nin★Dylan | |||
|United Kingdom | |||
|2:06.814 | |||
|Diddy Kong | |||
|Mr. Scooty | |||
|Button | |||
|Waddle Wing | |||
|- | |||
!{{classic|Wii|Daisy Circuit}} | |||
|Nin★Pit | |||
|Germany | |||
|1:25.861 | |||
|Donkey Kong | |||
|Varmint | |||
|Monster | |||
|Super Glider | |||
|- | |||
!Piranha Plant Cove | |||
|Nin★Alice | |||
|United States | |||
|1:41.315 | |||
|Koopa Troopa | |||
|Steel Driver | |||
|Metal | |||
|Super Glider | |||
|- | |||
!{{classic|Tour|Madrid Drive}} | |||
|Nin★Fausti | |||
|France | |||
|1:33.156 | |||
|Toad | |||
|Sneeker | |||
|Standard | |||
|Super Glider | |||
|- | |||
!{{classic|3DS|Rosalina's Ice World}} | |||
|Nin★Leonel | |||
|United States | |||
|1:38.735 | |||
|King Boo | |||
|Circuit Special | |||
|Monster | |||
|Super Glider | |||
|- | |||
!{{classic|SNES|Bowser Castle 3}} | |||
|Nin★Mark | |||
|Netherlands | |||
|1:22.052 | |||
|Dry Bones | |||
|Standard Kart | |||
|Monster | |||
|Super Glider | |||
|- | |||
!{{classic|Wii|Rainbow Road}} | |||
|Nin★Yuya | |||
|Japan | |||
|2:06.146 | |||
|Luigi | |||
|Mach 8 | |||
|Slim | |||
|Super Glider | |||
|} | |||
{{footnote|note|TC|Used in the Tencent Chinese release<ref>{{cite|language=en|author=@zachruff|date=May 22, 2022|url=x.com/Zachruff/status/1528386463632658434|title=So it turns out that there are 4 staff ghosts in the Tencent Chinese version of MK8D that are actually different to the global version. It seems that they really did not like the Mercedes car parts so any ghost that used them had to be redone.|publisher=X|accessdate=May 24, 2022}}</ref>}} | |||
==New items== | |||
[[File:Items from MK8DX.jpg|thumb|right|300px|The items found in the Tips mode]] | |||
The [[Boo]] item makes a return in this game, functioning as it had previously. The [[Cape Feather]] was added to Battle mode only, and is impossible to obtain otherwise. All other items from the Wii U version return as well, with their item distributions altered. | |||
<center> | |||
{|class="wikitable"width=75% | |||
!colspan="2"| | |||
===Coins=== | |||
|- | |||
|align=center|[[File:MK8D Cash.png|x75px]]<br>[[Cash]] | |||
|The equivalent of a coin, used for [[Urchin Underpass]]. They replace coins both as an item and on the track. | |||
|- | |||
|align=center|[[File:MK8D CoinYoshi.png|x75px]]<br>[[Coin]] ([[Yoshi's Island (race course)|Yoshi's Island]]) | |||
|In the [[Yoshi's Island (race course)|Yoshi's Island]] course, coins have an altered appearance that resembles their design in the ''[[Yoshi's Island (series)|Yoshi's Island]]'' series, both as an item and on the track. | |||
|- | |||
!colspan="2"| | |||
===New items=== | |||
|- | |||
|align=center|[[File:NSMBW Boo Artwork.png|x75px]]<br>[[Boo]] | |||
|Allows the player to become invisible to other racers for 10 seconds. While invisible, players will also be granted immunity to items and obstacles. Activating the item will also allow Boo to steal an item from a randomly selected racer in front of the player. If there are no items to steal, Boo will bring back a single Mushroom by default. If Boo steals a multiple usage item or a timed item, it will be returned to the player fresh. Boo cannot steal Crazy 8s or Piranha Plants and Bullet Bills already in use. Only one Boo can be in play at a time; once it brings back an item, another can appear in Item Boxes again, even while a player is still invisible. Players who are under the effect of a Super Star or a Boo are not immune to Boo's item stealing. | |||
|- | |||
|align=center|[[File:MK8 Deluxe Art - Cape Feather.png|x75px]]<br>[[Cape Feather|Feather]] | |||
|Causes the player to spin and leap in the air, providing a small speed boost upon landing, akin to a regular trick (characters will also perform a trick animation during the jump). When used near an opponent, the player steals a balloon, 3 coins, or the Shine Sprite from them, depending on the mode; however, the player needs to touch the opponent to steal from them, either by touching them upon use, or upon landing. Can be used on trickable places to gain more height, though does not grant more height if used while airborne, and cancels the gliding immediately. Exclusive to Battle mode. | |||
|} | |||
</center> | |||
==New course elements== | |||
All of the course elements from the original ''Mario Kart 8'', including enemies and obstacles, are retained in this game, along with several elements exclusive to the ''Booster Course Pass'' courses. | |||
{|border="1"cellpadding="3"style="background:#f5f5f5;text-align:left;border-collapse:collapse;margin-bottom:5px;width:100%;"align=center | |||
|- | |||
!colspan="3"style="background:#9c9c9c"align=center|Characters and elements | |||
|- | |||
!width="15%"style="background:#dedede"align=center|Character/element | |||
!width="20%"style="background:#dedede"align=center|Location | |||
!width="65%"style="background:#dedede"align=center|Description | |||
|- | |||
|align=center|[[File:MK8D Arrow Field.png|150px]][[File:MK8DX KalimariDesert Arrow.png|150px]]<br>{{conjectural|[[Arrow field]]}} | |||
|align=center|{{classic link|Tour|Paris Promenade}}<br>{{classic link|Tour|Tokyo Blur}}<br>{{classic link|Tour|New York Minute}}<br>{{classic link|N64|Kalimari Desert}}<br>{{classic link|Tour|Sydney Sprint}}<br>{{classic link|Tour|London Loop}}<br>{{classic link|Tour|Berlin Byways}}<br>{{classic link|DS|Peach Gardens}}<br>{{classic link|Tour|Amsterdam Drift}}<br>{{classic link|Tour|Bangkok Rush}}<br>{{classic link|Tour|Singapore Speedway}}<br>{{classic link|Tour|Athens Dash}}<br>{{classic link|Tour|Los Angeles Laps}}<br>{{classic link|Tour|Vancouver Velocity}}<br>{{classic link|Tour|Rome Avanti}}<br>[[Piranha Plant Cove]]<br>{{classic link|Tour|Madrid Drive}} | |||
|Large, holographic, floating arrows that point in the direction that the players should go and change position each lap (or only in the last lap in {{classic|Tour|Paris Promenade}} and {{classic|DS|Peach Gardens}}), altering the path of the course. If the player goes past them, they will be considered out of bounds and taken back onto the track by [[Lakitu (Mario Kart referee)|Lakitu]]. In multiplayer, the arrow fields are independent to each player, meaning that if multiple players are on different laps, the arrow fields will be different for each of them to match what lap they are on. Arrow fields are red in most of the city courses and {{classic|DS|Peach Gardens}} and are teal in {{classic|N64|Kalimari Desert}} and {{classic|Tour|Bangkok Rush}}, though this is simply a visual difference. | |||
|- | |||
|align=center|[[File:MK8D BathBomb.png|150px]]<br>[[Bath Bomb]] | |||
|align=center|[[Squeaky Clean Sprint]] | |||
|Large, opal colored bath bombs that fizz underwater. Players can trick whilst inside the bubbles produced, similarly to a geyser. | |||
|- | |||
|align=center|[[File:MK8D Wii Moonview Highway.png|150px]]<br>[[Bob-omb Car]] | |||
|align=center|{{classic link|Wii|Moonview Highway}} | |||
|Bob-omb-based vehicles that explode upon contact. If a player drives into one, they spin out in the same way as if they were caught in the blast of a regular Bob-omb. | |||
|- | |||
|align=center|[[File:MK8D Boulder TourSydneySprint.jpg|150px]]<br>[[Boulder]] | |||
|align=center|{{classic link|Tour|Sydney Sprint}} | |||
|Objects scattered around grassy portions of the course. They slow down drivers on contact. | |||
|- | |||
|align=center|[[File:MK8DX WaluigiPinball Bumper.png|150px]]<br>[[Bumper (Mario Kart series)|Bumper]] | |||
|align=center|{{classic link|DS|Waluigi Pinball}} | |||
|Obstacles that bounce players and [[metal ball]]s that touch them away from themselves. Some are stationary, while others move in circles. | |||
|- | |||
|align=center|[[File:MK8 Ninja Hideaway Ceiling.png|150px]]<br>[[Ceiling Needle]]s | |||
|align=center|[[Ninja Hideaway]] | |||
|Giant shuriken stuck to broad ceilings that slowly rise and fall at set intervals, serving as obstacles for players on the course's lower route, while the ceilings themselves serve as platforms for players on the upper route, with a [[ramp]] on one of them. | |||
|- | |||
|align=center|[[File:MK8 Clampy.png|150px]]<br>[[Clampy]] | |||
|align=center|{{classic link|GCN|Daisy Cruiser}}<br>[[Piranha Plant Cove]] | |||
|Clampys open and shut periodically. They contain Item Boxes. | |||
|- | |||
|align=center|[[File:MK8D GBA Sunset Wilds.png|150px]]<br>[[Exploring Shy Guy]] | |||
|align=center|{{classic link|GBA|Sunset Wilds}} | |||
|Exploring Shy Guys skip back and forth across the track. If a player makes contact with one, the player spins out. If they hit one with an item, they will drop 3 coins. | |||
|- | |||
|align=center|[[File:MK8D_DS_Mario_Circuit_Scene_6.jpg|150px]]<br>[[Fire Piranha Plant]] | |||
|align=center|{{classic link|DS|Mario Circuit}} | |||
|Piranha Plant variants that shoot [[fireball]]s that bounce across the course, causing racers to spin out. | |||
|- | |||
|align=center|[[File:MK8DX Flipper.png|150px]]<br>[[Flipper (Mario Kart series)|Flipper]] | |||
|align=center|{{classic link|DS|Waluigi Pinball}} | |||
|Large obstacles that can swing back and forth and push back [[metal ball]]s that collide with them. Players who collide with them are knocked over. | |||
|- | |||
|align=center|[[File:MK8D_Tour_Rome_Avanti_Scene_2.png|150px]]<br>[[Fuzzy]] | |||
|align=center|{{classic link|Tour|Rome Avanti}} | |||
|Black furry creatures on circular [[track]]s. They circle around coins, and spin players out when collided with. | |||
|- | |||
|align=center|[[File:MK8D Yoshis Island Finish Line.png|150px]]<br>[[Goal Ring]] | |||
|align=center|[[Yoshi's Island (race course)|Yoshi's Island]] | |||
|A decorative item that appears near the finish line. | |||
|- | |||
|align=center|[[File:MK8 Yoshis Island view.png|150px]]<br>[[Goonie]] | |||
|align=center|[[Yoshi's Island (race course)|Yoshi's Island]] | |||
|Spectators who appear in the background during the volcano ascent. | |||
|- | |||
|align=center|[[File:MK8D Merry Mountain Half-pipe.png|150px]]<br>[[Half-pipe (object)|Half-pipe]] | |||
|align=center|{{classic link|Wii|Maple Treeway}}<br>[[Merry Mountain]]<br>{{classic link|Wii|DK Summit}}<br>{{classic link|GCN|Waluigi Stadium}}<br>{{classic link|Tour|Athens Dash}}<br>[[Squeaky Clean Sprint]]<br>{{classic link|Tour|Los Angeles Laps}}<br>{{classic link|Wii|Koopa Cape}}<br>{{classic link|GCN|DK Mountain}}<br>{{classic link|3DS|Rosalina's Ice World}}<br>{{classic link|Wii|Rainbow Road}} | |||
|Vertical ramps that allow players to jump off the side of a course and perform a [[Jump Boost]] to gain a speed boost upon landing. They resemble [[Antigravity Panel]]s and briefly put the player into [[anti-gravity]] mode while they are airborne. | |||
|- | |||
|align=center|[[File:MK8D Yoshis Island Huffin Puffins.png|150px]]<br>[[Huffin Puffin]] | |||
|align=center|[[Yoshi's Island (race course)|Yoshi's Island]] | |||
|Enemies who wander around near the starting line, occasionally onto the track. Players who collide with them will stop but not spin out. | |||
|- | |||
|align=center|[[File:MK8_Icicle.png|150px]]<br>[[Icicle]] | |||
|align=center|{{classic link|3DS|Rosalina's Ice World}} | |||
|Upward-pointing icicles on the ground that break when driven into, but will also slow the driver down. | |||
|- | |||
|align=center|[[File:MK8D GCN Daisy Cruiser Scene 2.jpg|150px]]<br>[[Innertube Goomba]] | |||
|align=center|{{classic link|Tour|Singapore Speedway}}<br>{{classic link|GCN|Daisy Cruiser}} | |||
|Innertube Goombas float above water. If made contact with, the player spins out. | |||
|- | |||
|align=center|[[File:MK8D GCN Waluigi Stadium.png|200px]]<br>[[Mecha Piranha Plant]] | |||
|align=center|{{classic link|GCN|Waluigi Stadium}} | |||
|Large retracting obstacles that act like moving walls and stop any players who run into them. | |||
|- | |||
|align=center|[[File:MK8DX Pinball.png|150px]]<br>[[Metal ball]] | |||
|align=center|{{classic link|DS|Waluigi Pinball}} | |||
|Giant spherical obstacles that roll throughout the course and knock over players they collide with. In the pinball table section at the end of the course, they are bounced around in different directions by [[Bumper (Mario Kart series)|bumper]]s and [[Flipper (Mario Kart series)|flipper]]s. | |||
|- | |||
|align=center|[[File:MK8 Green Mushroom.png|150px]]<br>[[Mushroom Platform]] | |||
|align=center|{{classic link|Wii|Mushroom Gorge}} | |||
|Large, green mushrooms with white spots. Though shaped identically to [[Mushroom Trampoline]]s, they are functionally different in that they act like regular surfaces rather than bouncing players into the air. A [[Jump Boost]] can be performed when driving off the edge of a Mushroom Platform. | |||
|- | |||
|align=center|[[File:MK8D Mushroom Trampoline.png|150px]][[File:MK8 Blue Mushroom.png|150px]][[File:MultiMushroom.png|150px]]<br>[[Mushroom Trampoline]] | |||
|align=center|{{classic link|GBA|Sky Garden}}<br>{{classic link|Wii|Mushroom Gorge}}<br>{{classic link|3DS|Rainbow Road}}<br>[[Squeaky Clean Sprint]] | |||
|Large mushrooms that bounce the player into the air, allowing them to perform a [[Jump Boost]]. They are red with white spots in <small>GBA</small> Sky Garden and <small>Wii</small> Mushroom Gorge and are white with multi-colored spots in <small>3DS</small> Rainbow Road. <small>Wii</small> Mushroom Gorge also contains one Mushroom Trampoline that is blue with white spots and functions differently to the others: it bounces the player upwards and activates their [[glider]] on contact, also giving them an opportunity to perform a Jump Boost. In <small>GBA</small> Sky Garden, there are also leaves that have the same properties of bouncing the player into the air as regular Mushroom Trampolines. | |||
|- | |||
|align=center|[[File:MK8D GBA Snow Land.png|200px]]<br>[[Penguin]] | |||
|align=center|{{classic link|GBA|Snow Land}}<br>{{classic link|3DS|Rosalina's Ice World}} | |||
|Enemies that either waddle or slide on their bellies around the course. Players who collide with them spin out. | |||
|- | |||
|align=center|[[File:MK8D GBA Riverside Park Scene 9.jpg|200px]]<br>[[Ptooie]] | |||
|align=center|{{classic link|GBA|Riverside Park}} | |||
|Enemies that walk around the course. They are shown to be carrying Mushrooms and Bananas which they will drop if bumped into them or hit with another item. | |||
|- | |||
|align=center|[[File:MK8D_Tour_Rome_Avanti_Scene_2.png|150px]]<br>[[Rocky Wrench]] | |||
|align=center|{{classic link|Tour|Rome Avanti}} | |||
|Mole-like creatures who hide in [[manhole]]s. They occasionally pop up out of the ground, stopping players who drive into them. When underground, racers can drive over them with no consequences. If they're half above the ground, they can be tricked off. | |||
|- | |||
|align=center|[[File:MK8D ShoeGoomba.png|150px]]<br>[[Shoe Goomba]] | |||
|align=center|{{classic link|Tour|Madrid Drive}} | |||
|Big Goombas wearing bright yellow [[Goomba's Shoe|Shoes]]. They kick [[Soccer Ball]]s around. | |||
|- | |||
|align=center|[[File:MK8D Shy Guy Ninja Obstacles.png|200px]]<br>[[Shy Guy|Shy Guy (Ninja)]] | |||
|align=center|[[Ninja Hideaway]] | |||
|Shy Guys clad in ninja outfits. They stand in place and act as hazards, causing players who collide with them to spin out. They will also occasionally transform into a [[Banana]]. There are also Shy Guys that fly with kites during the glider section and touching one will cause the player to lose their glider, making them fall. | |||
|- | |||
|align=center|[[File:MK8D SoccerBall.png|150px]]<br>[[Soccer Ball]] | |||
|align=center|{{classic link|Tour|Madrid Drive}} | |||
|Big balls kicked around by [[Shoe Goomba]]s. They bounce on the floor, spinning out racers who they collide with. | |||
|- | |||
|align=center|[[File:MK8D Yoshis Island Stilt Guys.png|150px]]<br>[[Stilt Guy]] | |||
|align=center|[[Yoshi's Island (race course)|Yoshi's Island]] | |||
|Enemies that slowly move back and forth across the track at the beginning of the course. Touching them causes the player to spin out. | |||
|- | |||
|align=center|[[File:MK8D Wii DK Summit.png|200px]]<br>[[Snowboarding Shy Guy]] | |||
|align=center|{{classic link|Wii|DK Summit}} | |||
|Shy Guys that snowboard across the snow and perform tricks on half-pipes. Driving into them will cause the player to spin out. | |||
|- | |||
|align=center|[[File:MK8D Table.png|150px]]<br>[[Table]] | |||
|align=center|{{classic link|GCN|Daisy Cruiser}} | |||
|Tables, decorated with cloths, candles, and plates. They rock side-to-side, and act as a wall for players. Spectators may be seated at these tables. | |||
|- | |||
|align=center|[[File:MK8D N64 Kalimari Desert.png|150px]]<br>[[Train (obstacle)|Train]] | |||
|align=center|{{classic link|N64|Kalimari Desert}} | |||
|A moderately fast train which follows a set railway. Hitting it on impact results in the player being knocked over. | |||
|- | |||
|align="center"|[[File:MK8D New York Minute Scene 2.jpg|200px]]<br>[[Water Geyser]] | |||
|align="center"|{{classic link|Tour|New York Minute}}<br>{{classic link|Tour|Singapore Speedway}}<br>[[Yoshi's Island (race course)|Yoshi's Island]]<br>[[Squeaky Clean Sprint]]<br>[[Piranha Plant Cove]]<br>{{classic link|Tour|Madrid Drive}} | |||
|Geysers that occasionally burst out from the ground for a few seconds before disappearing. Coming into contact with one boosts the player upwards, at which point they can perform a [[Jump Boost]]. In {{classic|Tour|New York Minute}}, they emerge under manhole covers, which function as platforms. | |||
|- | |||
|align=center|[[File:MK8DBerlinByways1.jpg|200px]]<br>[[Whomp]] | |||
|align=center|{{classic link|Tour|Berlin Byways}} | |||
|Enemies that stand in gaps in the [[Berlin Wall]]. They slam their faces onto the track and flatten any players caught under them, but their edges can then be used to perform [[Jump Boost]]s before they get back up. | |||
|- | |||
|align=center|[[File:MK8 Wiggler.png|150px]]<br>[[Mega Wiggler|Big Wiggler]] | |||
|align=center|{{classic link|Wii|Maple Treeway}}<br>{{classic link|DS|Mario Circuit}}<br>{{classic link|Tour|Madrid Drive}} | |||
|Enemies that walk around at a slow speed with occasional stops. Driving into them results in the player spinning out. Sometimes they can be seen sleeping. | |||
|- | |||
|align=center|[[File:MK8DX Winged Cloud.png|150px]]<br>[[Winged Cloud]] | |||
|align=center|[[Yoshi's Island (race course)|Yoshi's Island]] | |||
|An item that appears during the second glider section. When touched, it bursts and causes a red bridge shortcut to appear. | |||
|} | |||
==New amiibo compatibility== | |||
[[File:MK8 DX amiibo Press 2.jpg|thumb|250px|Some of the Mii racing suits and amiibo that can be used to unlock them in ''Mario Kart 8 Deluxe'']] | |||
In addition to all of the compatible [[amiibo]] in ''Mario Kart 8'' and their respective Mii racing suits, ''Mario Kart 8 Deluxe'' adds compatibility with amiibo from the ''Splatoon'' line, which unlock a Mii racing suit based on ''Splatoon''. Additionally, more amiibo can be used to unlock the returning Mii racing suits, with all ''[[nookipedia:Animal Crossing (series)|Animal Crossing]]''-related amiibo unlocking the Animal Crossing Suit and the [[Pikmin]] amiibo unlocking the Pikmin Suit. Version 3.0.0 adds compatibility with the Daisy amiibo to unlock the Daisy Mii racing suit, as well as any amiibo from the ''Legend of Zelda'', ''Metroid'', and ''Kirby'' series to unlock their respective suits. | |||
==Update history== | |||
{{main|Mario Kart 8 Deluxe update history}} | |||
''Mario Kart 8 Deluxe'' has received many updates since launch. Most of them addressed technical aspects of the game, while others expanded controller support (e.g. [[Nintendo Switch#Nintendo Labo|Toy-Con Motorbike and Toy-Con Car]]) or delivered new content, such as a variant of Link wearing his [[zeldawiki:Tunic of Memories|Champion's Tunic]] from ''[[zeldawiki:The Legend of Zelda: Breath of the Wild|The Legend of Zelda: Breath of the Wild]]'', support for the ''Mario Kart 8 Deluxe – Booster Course Pass'' DLC, a Custom Items setting, and a menu for listening to the music of each of the game's courses. In order to play online, players must have downloaded the most recent software update.<ref>{{cite|url=en-americas-support.nintendo.com/app/answers/detail/a_id/26098/~/how-to-update-mario-kart-8-deluxe|language=en-us|title=How to Update Mario Kart 8 Deluxe|publisher=Nintendo of America|accessdate=November 6, 2024}}</ref> | |||
==Official tournaments== | |||
:''For official competitions held in the game's [[Wii U]] version, see [[Mario Kart 8#Official competitions|''Mario Kart 8'' § Official competitions]].'' | |||
Nintendo has sponsored many ''Mario Kart 8 Deluxe'' tournaments, held either online or at special events, with prizes ranging from virtual [[My Nintendo]] points to physical merchandise and memorabilia. Nintendo's online tournaments are restricted to one country or region, and may be recurrent on a weekly, monthly, or seasonal basis as part of a named series. | |||
The following is a list of ''Mario Kart 8 Deluxe'' competitions held or sanctioned by Nintendo. | |||
===Worldwide=== | |||
{|class="wikitable" style="text-align:center"width=40% width=40%width=40% | |||
|- | |||
!width=25%|Title | |||
!width=25%|Location | |||
!width=50%|Banner | |||
|- | |||
![[My Nintendo Mario Kart 8 Deluxe Community Challenge|My Nintendo ''Mario Kart 8 Deluxe'' Community Challenge]] | |||
|Online | |||
|[[File:MN MK8D Community Challenge pic1.jpg|300px]] | |||
|} | |||
===North America=== | |||
{|class="wikitable" style="text-align:center"width=40% width=40%width=40% | |||
|- | |||
!width=25%|Title | |||
!width=25%|Location | |||
!width=50%|Banner | |||
|- | |||
![[NOA 150cc Tournament and NOA Battlethon|NOA 150cc Tournament<br>NOA Battlethon]] | |||
|Online | |||
|N/A | |||
|- | |||
![[Mario Kart North American Open|''Mario Kart'' North American Open]] | |||
|Online | |||
|[[File:MK NA Open 2022-07 banner.jpg|300px]] | |||
|- | |||
![[Mario Kart 8 Deluxe Holiday Fun Run|''Mario Kart 8 Deluxe'' Holiday Fun Run]] | |||
|Online | |||
|[[File:MK8D Holiday Fun Run 2021.jpg|300px]] | |||
|- | |||
![[Mario Kart 8 Deluxe Championship Cup 2022|''Mario Kart 8 Deluxe'' Championship Cup 2022]] | |||
|{{wp|Seattle Convention Center}}<br>({{wp|PAX (event)|PAX West 2022}}) | |||
|[[File:MK8D Championship Cup 2022 promo pic Twitter.png|300px]] | |||
|- | |||
![[Mario Kart 8 Deluxe North American Qualifier 2022|''Mario Kart 8 Deluxe'' North American Qualifier 2022]] | |||
|Online | |||
|[[File:MK8D North American Qualifier 2022 banner.jpg|300px]] | |||
|- | |||
![[Mario Kart 8 Deluxe North American Qualifier 2023|''Mario Kart 8 Deluxe'' North American Qualifier 2023]] | |||
|{{wp|Boston Convention and Exhibition Center}}<br>({{wp|PAX (event)|PAX East 2023}}) | |||
|[[File:MK8D NA Qualifier 2023 promo pic Twitter.jpg|300px]] | |||
|- | |||
![[Mario Kart 8 Deluxe Championship Cup 2023|''Mario Kart 8 Deluxe'' Championship Cup 2023]] | |||
|Boston Convention and Exhibition Center<br>(PAX East 2023) | |||
|[[File:MK8D Championship Cup 2023 promo pic Twitter.jpg|300px]] | |||
|- | |||
![[Mario Kart 8 Deluxe Championship 2023 Qualifier|''Mario Kart 8 Deluxe'' Championship 2023 Qualifier]] | |||
|Online | |||
|[[File:MK8D Championship 2023 Qualifier online c.jpg|300px]] | |||
|- | |||
![[Mario Kart 8 Deluxe Championship 2023 Qualifier#Second qualifier|''Mario Kart 8 Deluxe'' Championship 2023 Qualifier at Nintendo Live]] | |||
|{{wp|Seattle Convention Center}}<br>([[Nintendo Live 2023]]) | |||
|[[File:MK8D Championship 2023 Qualifier at Nintendo Live banner b.jpg|300px]] | |||
|- | |||
![[Mario Kart 8 Deluxe Championship 2023|''Mario Kart 8 Deluxe'' Championship 2023]] | |||
|Seattle Convention Center<br>(Nintendo Live 2023) | |||
|[[File:MK8D Championship 2023 banner a.jpg|300px]] | |||
|} | |||
===Australia and New Zealand=== | |||
{|class="wikitable"style="text-align:center"width=40% | |||
|- | |||
!width=25%|Title | |||
!width=25%|Location | |||
!width=50%|Banner/logo | |||
|- | |||
![[Mario Kart 8 Deluxe Super Saturdays|''Mario Kart 8 Deluxe'' Super Saturdays]] | |||
|Online | |||
|N/A | |||
|- | |||
![[Mario Kart AU/NZ My Nintendo Cup|''Mario Kart'' AU/NZ My Nintendo Cup]] | |||
|Online | |||
|[[File:MK AUNZ My Nintendo Cup.png|300px]] | |||
|- | |||
![[Mario Kart 8 Deluxe: AU/NZ Grand Prix|''Mario Kart 8 Deluxe'': AU/NZ Grand Prix]] | |||
|Online | |||
|[[File:MK8D AUNZ Grand Prix 2022 Summer logo w bg.jpg|300px]] | |||
|} | |||
===China=== | |||
{|class="wikitable"style="text-align:center"width=40% | |||
|- | |||
!width=25%|Title | |||
!width=25%|Location | |||
!width=50%|Banner | |||
|- | |||
![[Mario Kart 8 Deluxe Summit Invitational Tournament|''Mario Kart 8 Deluxe'' Summit Invitational Tournament]] | |||
|Online | |||
|[[File:MK8D Tencent Invitation Tournament banner.jpg|300px]] | |||
|- | |||
![[Mario Kart 8 Deluxe Online Tournaments (2021 Tencent series)|''Mario Kart 8 Deluxe'' Online Tournaments]] | |||
|Online | |||
|[[File:Tencent MK8D Online Tournaments 2021.jpg|300px]] | |||
|- | |||
![[Mario Kart 8 Deluxe National Battle Team Open Tournament|''Mario Kart 8 Deluxe'' National Battle Team Open Tournament]] | |||
|Online | |||
|N/A | |||
|- | |||
![[Mario Kart 8 Deluxe National Battle Team Open Tournament#Mario Kart 8 Deluxe Open Team Championship|''Mario Kart 8 Deluxe'' Open Team Championship]] | |||
|{{wp|Shanghai}} (exact location TBD) | |||
|N/A | |||
|} | |||
===Europe=== | |||
{|class="wikitable"style="text-align:center"width=40% width=40%width=40% | |||
|- | |||
!width=25%|Title | |||
!width=25%|Location | |||
!width=50%|Banner/logo | |||
|- | |||
![[Mario Kart 8 Deluxe Seasonal Circuit|''Mario Kart 8 Deluxe'' Seasonal Circuit]] | |||
|Mostly online. The sole exception is the ''gran final'' of the 2022 [[Mario Kart 8 Deluxe Seasonal Circuit#Spain|''Mario Kart 8 Deluxe'' Seasonal Circuit Spain]] event, which took place at the Gamergy event in {{wp|Madrid}}. | |||
|[[File:MK8D Seasonal Circuit Benelux promo Twitter.jpg|300px]] | |||
|- | |||
![[Mario Kart 8 Deluxe European Championship 2023|''Mario Kart 8 Deluxe'' European Championship 2023]] | |||
|The qualifiers were held online. The final rounds were held at the VILCO convention center in {{wp|Bad Vilbel}}, {{wp|Germany}}. | |||
|[[File:MK8D European Championship 2023 logo.png|300px]] | |||
|} | |||
===Hong Kong=== | |||
{|class="wikitable"style="text-align:center"width=40% | |||
|- | |||
!width=25%|Title | |||
!width=25%|Location | |||
!width=50%|Banner | |||
|- | |||
![[Nintendo HK 2021 Cup]] | |||
|Online | |||
|[[File:MK8D Nintendo HK 2021 Cup.png|300px]] | |||
|} | |||
===Japan=== | |||
{|class="wikitable"style="text-align:center"width=40% | |||
|- | |||
!width=25%|Title | |||
!width=25%|Location | |||
!width=50%|Logo | |||
|- | |||
![[Mario Kart 8 Deluxe Online Challenge|''Mario Kart 8 Deluxe'' Online Challenge]] | |||
|Online | |||
|[[File:MK8D Online Challenge logo.png|300px]] | |||
|- | |||
![[Mario Kart 8 Deluxe Online Challenge#Mario Kart 8 Deluxe Online Challenge Final Stage|''Mario Kart 8 Deluxe'' Online Challenge Final Stage]] | |||
|{{wp|Tokyo Big Sight|Tokyo International Exhibition Center}}<br>(Nintendo Live 2022) | |||
|[[File:MK8D Online Challenge Final Stage logo2.png|300px]] | |||
|- | |||
![[Mario Kart 8 Deluxe World Championship 2024|''Mario Kart 8 Deluxe'' World Championship 2024]] | |||
|TBD | |||
|[[File:MK8D World Championship 2024 logo.jpg|300px]] | |||
|} | |||
===Spain=== | |||
{|class="wikitable"style="text-align:center"width=40% | |||
|- | |||
!width=25%|Title | |||
!width=25%|Location | |||
!width=50%|Banner | |||
|- | |||
![[TorneoMK8D|#TorneoMK8D]] | |||
|Online | |||
|[[File:MK8D TorneoMK8D a.jpg|300px]] | |||
|} | |||
===United Kingdom and Ireland=== | |||
{|class="wikitable"style="text-align:center"width=40% | |||
|- | |||
!width=25%|Title | |||
!width=25%|Location | |||
!width=50%|Banner | |||
|- | |||
!''Mario Kart 8 Deluxe'' Insomnia63 Grand Prix<ref>{{cite|quote='''Monday 27th August – Mario Kart 8 Deluxe Insomnia63 Grand Prix'''—Think you’ve got what it takes to get on the podium in the Mario Kart 8 Deluxe Insomnia63 Grand Prix? Race in a 150cc single elimination tournament taking place across increasingly trickier tracks, with the top two racers advancing to the next stage each time!|date=August 9, 2018|url=www.nintendo.com/en-gb/News/2018/August/Go-hands-on-with-Super-Smash-Bros-Ultimate-at-Insomnia63-later-this-month--1416147.html|title=Go hands-on with Super Smash Bros. Ultimate at Insomnia63 later this month!|publisher=nintendo.com|language=en-gb|accessdate=February 10, 2025|archive=web.archive.org/web/20250124151936/https://www.nintendo.com/en-gb/News/2018/August/Go-hands-on-with-Super-Smash-Bros-Ultimate-at-Insomnia63-later-this-month--1416147.html}}</ref> | |||
|{{wp|National Exhibition Centre}}, {{wp|Birmingham}}<br>(Insomnia63) | |||
|N/A | |||
|- | |||
![[Nintendo UK VS Cup]] | |||
|Online | |||
|N/A | |||
|- | |||
![[Nintendo VS UK Cup]] | |||
|Online | |||
|N/A | |||
|} | |||
==Pre-release and unused content== | |||
===Early ''Booster Course Pass'' course designs=== | |||
Some of the courses in the ''[[Mario Kart 8 Deluxe – Booster Course Pass]]'' had several differences between promotional material and their final release, some of which made the courses further resemble their ''[[Mario Kart Tour]]'' counterparts: | |||
*Prior to Wave 1's launch, {{classic link|Tour|Paris Promenade}} had simpler detailing overall, most notably in the lighting, trees, and the road. At the left turn that leads to the Luxor Obelisk at the end of the track, the right path, which is used in the final lap, was blocked by fences, some of which have arrows, rather than the backside of a metal ramp like in the final version. The optional [[Glide Ramp|glide ramp]] featured in the final lap was also not present, and consequently neither was the coin on top of the parasol. The ramp in front of the [[Eiffel Tower]], though still functioning like a glide ramp, had the appearance of a normal ramp, similar to Paris Promenade 3. Likewise, the [[Dash Panel|dash panel]] underneath the Eiffel Tower appears to have been invisible, as while seemingly not present, drivers are still seen driving towards it in multiple clips. The Piranha Plant [[Wooden cutout|cutouts]] blocking the shortcut through the [[Arc de Triomphe]] were not present. There was an arrow on the Eiffel Tower pointing towards the path from Paris Promenade 3 not present in the final version. | |||
*Prior to Wave 1's launch, the sand in {{classic link|3DS|Toad Circuit}} was a very dark yellow color, as opposed to the bright sand-like color in the final version. The starting banner was significantly different, with the objects at the top corners being smaller, less round and generally less detailed, the bolts not being present and the horizontal shafts being missing from the columns. There was no confetti present around the starting line, despite confetti still falling there. The checkered line on the road continued onto where the starting grid is, instead of ending before it. There were significantly fewer flowers and plants present around the course. The coins present on the course differ in multiple ways, such as there being a row of them shortly after the starting line, an extra coin present at the final turn, there not being a coin on the ramp shortcut and coins having different positions in general. The final row of Item Boxes did not feature a Double Item Box. | |||
*Prior to Wave 1's launch, {{classic link|N64|Choco Mountain}} had a significantly different road texture, while the walls and rocks lacked the detail they have in the final version. The cracks on the road around where the rocks fall were completely absent, and the coins present after where the second rock falls were instead after the first rock. There appear to have originally been coins leading up to the cave, while conversely the coins on the final turn appear to have been missing. Some of the lights within the cave emitted light onto the ceiling similarly to the crystals, unlike in the final version. The glide ramp leading out of the cave was invisible. Certain wooden elements like fences and the boards at the end of the gliding section had different coloring. | |||
*Prior to Wave 1's launch, {{classic link|Wii|Coconut Mall}}'s exterior was a bright, pale peachy color, but in the time between its reveal and release, it was updated to be a more vibrant orange. This also applied to certain parts of the interior. Likewise, the stone floor in the center of the mall was originally gray, while it was changed to orange in the final version. The reflections on the windows had also been changed during this time. The flower bushes present around the mall's exterior were a lot less detailed and had a mix of white and purple flowers instead of the yellow ones the final version uses. The [[Mario Kart TV]] vans were not present. There was no row of Item Boxes at the entrance to the courtyard. The escalator rails were significantly less glossy, and all escalators seem to have had coins at the bottom of them. Similarly, both dash panels in the courtyard had a coin following them. The coins on the turn following the gliding section were instead on the road leading to it. Oddly, the results screen following a Grand Prix or a VS match uses an image of the old design despite the existence of an updated version of said image. | |||
*Prior to Wave 1's launch, the Kaminarimon's lantern in {{classic link|Tour|Tokyo Blur}} looked less saturated and lacked the ridges it has in the final version. The sun was not present over Mount Fuji, and the different lighting made the clock on the Wako store appear significantly brighter. The bushes were less detailed, having a less rough texture and much simpler flowers. The platform which the flower bushes leading to the Kaminarimon are on did not have its outer layer raised. The cracks on the road that appear underneath the Thwomps were completely absent. The text on the "Welcome to Tokyo" sign was significantly dimmer. The roadside barriers with arrows had much simpler designs, with the arrows being 2D instead of fully modeled like they are in the final version. There is also footage of this course showing an early design for the [[Arrow field|arrow field]], in which the arrows have an identical design to the green arrow holograms in {{classic link|SNES|Rainbow Road}}.<ref>{{cite|date=December 25, 2022|timestamp=0:23|url=www.youtube.com/watch?v=_NIQxr42pZA&t=23s|author=Nintendo|title=マリオカート8 デラックス コース追加パス TVCM3|publisher=YouTube|language=ja|accessdate=November 6, 2024}}</ref> | |||
*Prior to Wave 1's launch, {{classic link|DS|Shroom Ridge}} did not have the glide ramp shortcut on the grass patch. The wind shortcut was also not present in trailer footage despite appearing in a released screenshot. Flowers, bushes and other plants had different, less detailed designs and appeared in different locations. Some notable examples include how the grass patch with the glide ramp featured alternating groups of blue and orange flowers instead of the multicolored ones present in the final version, and how the flower bushes were significantly less detailed and had red flowers and in smaller quantities compared to the pink flowers the final version has (oddly, future waves would exclusively use these lesser detailed flower bushes). The dividing stripes on the road continued through the starting grid instead of ending before it. The starting banner lacked details it has in the final version, such as the bolts on the columns, the lights across the top and most of the metal strips holding up the logo. The static coins at the turn adjacent to the wind shortcut appear to have initially been on the opposite side of the road. | |||
*Prior to Wave 1's launch, {{classic link|GBA|Sky Garden}}'s textures for the road and the vine bridges were significantly larger. The final row of Item Boxes was slightly further into the course, and the Double Item Box was on the opposite side of the road. There was one more [[Mushroom Trampoline]] present underneath the course compared to the final version. The glide ramp at the end of the course was invisible. There were far less grass blades around the course. The flowers were blue with a much simpler design, while the flower bushes had less distinct and detailed shapes with multiple colors of flowers instead of just pink flowers like in the final version. | |||
*Prior to Wave 2's launch, the first row of Item Boxes in {{classic link|Tour|New York Minute}} was on the bridge leading into Central Park instead of being before it like in the final version. There were no Toads behind the front desk of 30 Rockefeller Plaza. | |||
*Prior to Wave 2's launch, {{classic link|SNES|Mario Circuit 3}} had an additional coin in both the first turn and the turn with the first oil slick. | |||
*Prior to Wave 2's launch, {{classic link|N64|Kalimari Desert}} had a floating group of coins that would have been reached by taking the first glide ramp shortcut. The second row of Item Boxes was shown as only having single Item Boxes in what appears to be the first lap, with the same clip showing Item Boxes present on the train tracks similarly to lap 3 of the final version. An arrow fence was present beside the road shortly after the second overlap between the road and the train tracks. | |||
*Prior to Wave 2's launch, the helicopter in {{classic link|DS|Waluigi Pinball}} was missing the beam of light eminating from its flashlight. The padels had the electricity effect at all times unlike the final version in which they only exhibit it upon activating. | |||
*Prior to Wave 2's launch, {{classic link|GBA|Snow Land}} had a row of Item Boxes after the starting line, in place of the moving Item Boxes present in the final version. The coins on the sheet of ice were in different positions. The row of Item Boxes on the ramp at the end of the sheet of ice were instead placed later on the following road with differing Double Item Box placements, and the ramp instead had a row of coins which are substituted by coins shortly after it in the final version. Some of the snow such as that present on the starting banner had significantly less detail. Some of the trees present on the course used simpler models. | |||
*Prior to Wave 2's launch, {{classic link|Wii|Mushroom Gorge}} had various differences in the placements of flowers throughout the course. The first row of Item Boxes was placed slightly earlier. | |||
*Prior to Wave 2's launch, [[Sky-High Sundae]] did not have coins on the first two giant pieces of ice. The left split path only had 3 Item Boxes and they were placed earlier. The second coin on the path of ice-cream cones was placed slightly earlier. | |||
*Prior to Wave 3's launch, the clock hands of [[Big Ben]] in {{classic link|Tour|London Loop}} appeared perceptibly darker and less reflective in screenshots of the course. The row of coins in the area with the first Chain Chomp appears to have had at least one additional coin. | |||
*When {{classic link|DS|Peach Gardens}} was shown in the September 2022 Nintendo Direct, the loop at the beginning of the course lacked the barriers blocking off the right side, similar to previous iterations of the course, and even had at least one coin present. The arrow on the Mario topiary was also not present. The first flowerbed shortcut was much smaller. The route used to turn around on lap three was completely blocked off by a fountain, and the ramps at the mansion were also not present, though there was seemingly nothing else blocking that path. The Mario Kart TV van, spectators and benches were also not in that section at the time. The first row of Item Boxes was closer to the start of the bridge. The row of coins at the entrance to the maze was not present. In the Direct, the row of Item Boxes in the maze was replaced with a row of coins. However, in a screenshot released shortly after, there was a row of Item Boxes like in the final version, but with the addition of at least one more Double Item Box. There were no spectators after the starting line, nor on the windowsills close to it. The coins on the left of the mansion were gone in favor of a row of coins at the top of the stairs, and the coins around the [[Piranha Plant]] were gone in favor of there being coins in the following section with the [[Monty Mole|Monty Moles]]. | |||
*When [[Merry Mountain]] was shown in the September 2022 Nintendo Direct, there was one shot in which there were no [[Spin Boost Pillar|Spin Boost Pillars]] on the mountain, with there instead only being a dash panel at the start of the descent. Screenshots would later show the mountain having both the dash panel and the Spin Boost Pillars, whereas the final version only has the latter. The suspended railroad had the ramp at the end angled more upwards than the rest of it, and was missing the wooden boards that are nailed onto it in the final version. The first row of Item Boxes was shown both not being present at all and being besides the grass shortcut, in which case taking the cut would not allow players to collect an item. The row of Item Boxes on the bridge were also not present. The Item Boxes at the top of the mountain were all lined up in a row, but with the Double Item Boxes still requiring drivers to take the [[Half-pipe (object)|half-pipe]] to collect them, and there was also a higher number of coins placed above the half-pipe. There was one less coin in the row before the split paths. There were no sitting spectators at the train station, nor besides the later part of the train track. The Toads on the mountain did not wear coats, and there were no spectators around the half-pipe. The [[Snowman|snowman]] following the bridge was not present. | |||
*When [[Yoshi's Island (race course)|Yoshi's Island]] was shown in the February 2023 Nintendo Direct, [[Poochy]] was not present on the mailbox. The first row of Item Boxes was even closer to the bridge. Every arrow sign was double-sided, and the waterfalls had white outlines. There were less Yoshi spectators at in the first section of the course, but there was an additional [[Petal Guy]] next to where the second [[Stilt Guy]] is. The ramp leading into the underwater section had an additional coin, and the Yoshi spectator to the left of it was on the ground instead of on the tree root like it is in the final version. The underwater geysers had an effect at the bottom that resembled water splashing out of them, appeared less transparent and had fewer, smaller bubbles. The Yoshi spectator on the tower atop the clouds was not present, while the Paratroopas in this section were static instead of flying from side-to-side as in the final version. The animation for the pieces of the red bridge falling into place was simpler, with them already being in a horizontal position instead of flipping over like they do in the final version. | |||
*When [[Squeaky Clean Sprint]] was shown in the June 2023 Nintendo Direct, there were no coins on top of the sink and the [[Yoshi's Egg]] soap dispenser. The nails on the wooden shelf had a darker color and were less reflective. | |||
*When {{classic link|Wii|Daisy Circuit}} was shown in the September 2023 Nintendo Direct, the objects to the left of the statue of Daisy and Luigi were arranged differently. The row of Item Boxes was in the opposite order, while the cones and coins were on the left half of the road. The cones and coins to the right of the statue of Baby Daisy and Baby Luigi were a little earlier. The glide ramp shortcut only had one Double Item Box. The two groups of coins around the lighthouse were both missing a coin. There were no coins in front of the [[List of sponsors debuting in Mario Kart Wii#Daisy Candy|Daisy Candy]] sign. | |||
===Original order of courses in Waves 3 to 6=== | |||
In version 2.1.0 and onwards, the internal file names for some of the courses in the ''Booster Course Pass'' suggest that the release order in their respective cups differs from the originally planned order. Every course's internal file name has two digits, with the first indicating its intended wave and the second indicating its position in said wave (for example, {{classic link|Tour|Berlin Byways}}' file name is "Cnsw_35", indicating that it is the fifth track in Wave 3, or the first track in the [[Moon Cup]]). In addition to several courses changing their order within their wave, several courses also switched waves entirely, such as {{classic link|GCN|Waluigi Stadium}}, which was set to be in Wave 3's Moon Cup but was delayed to Wave 4 in favor of {{classic link|Wii|Maple Treeway}}, whose internal file name suggests that it was once slated for Wave 6's Acorn Cup. Additionally, Wave 6 was originally intended to have 3 tracks without prefixes, but two of them were replaced by {{classic link|Wii|Moonview Highway}} and {{classic link|3DS|Rosalina's Ice World}}, as indicated by their filenames. It was also originally intended to have a fourth GCN course, but this was replaced by {{classic link|Wii|Daisy Circuit}}, as indicated by its filename. | |||
Further evidence appears in an advertisement for Wave 3 posted by Nintendo of America on YouTube, which displays the courses in their original order, albeit with {{classic|Wii|Maple Treeway}} in place of {{classic|GCN|Waluigi Stadium}}; this advertisement was unlisted soon after its release.<ref>{{cite|url=www.youtube.com/watch?v=TBCHkZ15MUM|title=Mario Kart 8 Deluxe - Booster Course Pass DLC Wave 3 - Nintendo Switch|author=Nintendo of America|language=en-us|publisher=YouTube|date=November 22, 2022|accessdate=November 6, 2024}}</ref> | |||
{|align=center width="75%" | |||
| | |||
{|class="wikitable"width="100%" ; | |||
|- | |||
!Wave 3 (pre-release) | |||
!Wave 3 (final) | |||
|- | |||
|{{classic link|Tour|London Loop}} | |||
|{{classic|Tour|London Loop}} | |||
|- | |||
|{{classic link|DS|Peach Gardens}} | |||
|{{classic|GBA|Boo Lake}} | |||
|- | |||
|{{classic link|GBA|Boo Lake}} | |||
|{{classic|3DS|Rock Rock Mountain}} | |||
|- | |||
|{{classic link|3DS|Rock Rock Mountain}} | |||
|{{classic link|Wii|Maple Treeway}} | |||
|- | |||
|{{classic link|Tour|Berlin Byways}} | |||
|{{classic|Tour|Berlin Byways}} | |||
|- | |||
|{{classic link|GCN|Waluigi Stadium}} | |||
|{{classic|DS|Peach Gardens}} | |||
|- | |||
|[[Merry Mountain]] | |||
|Merry Mountain | |||
|- | |||
|{{classic link|3DS|Rainbow Road}} | |||
|{{classic|3DS|Rainbow Road}} | |||
|} | |||
|width="50%"style="margin:center;"| | |||
{|class="wikitable"width="100%"; | |||
|- | |||
!Wave 4 (pre-release) | |||
!Wave 4 (final) | |||
|- | |||
|{{classic link|Tour|Amsterdam Drift}} | |||
|{{classic|Tour|Amsterdam Drift}} | |||
|- | |||
|{{classic link|Wii|DK Summit}} | |||
|{{classic|GBA|Riverside Park}} | |||
|- | |||
|{{classic link|DS|Mario Circuit}} | |||
|{{classic|Wii|DK Summit}} | |||
|- | |||
|[[Yoshi's Island (race course)|Yoshi's Island]] | |||
|Yoshi's Island | |||
|- | |||
|{{classic link|Tour|Singapore Speedway}} | |||
|{{classic link|Tour|Bangkok Rush}} | |||
|- | |||
|{{classic link|GCN|Daisy Cruiser}} | |||
|{{classic|DS|Mario Circuit}} | |||
|- | |||
|{{classic link|GBA|Riverside Park}} | |||
|{{classic|GCN|Waluigi Stadium}} | |||
|- | |||
|{{classic link|Tour|Los Angeles Laps}} | |||
|{{classic|Tour|Singapore Speedway}} | |||
|} | |||
|} | |||
{|align=center width="75%" | |||
| | |||
{|class="wikitable"width="100%"; | |||
|- | |||
!Wave 5 (pre-release) | |||
!Wave 5 (final) | |||
|- | |||
|{{classic link|Tour|Madrid Drive}} | |||
|{{classic link|Tour|Athens Dash}} | |||
|- | |||
|{{classic link|Wii|Koopa Cape}} | |||
|{{classic|GCN|Daisy Cruiser}} | |||
|- | |||
|{{classic link|GBA|Sunset Wilds}} | |||
|{{classic link|Wii|Moonview Highway}} | |||
|- | |||
|{{classic link|Tour|Rome Avanti}} | |||
|Squeaky Clean Sprint | |||
|- | |||
|{{classic|Tour|Bangkok Rush}} | |||
|{{classic|Tour|Los Angeles Laps}} | |||
|- | |||
|{{classic link|GCN|DK Mountain}} | |||
|{{classic|GBA|Sunset Wilds}} | |||
|- | |||
|{{classic link|SNES|Bowser Castle 3}} | |||
|{{classic|Wii|Koopa Cape}} | |||
|- | |||
|[[Squeaky Clean Sprint]] | |||
|{{classic link|Tour|Vancouver Velocity}} | |||
|} | |||
|width="50%"style="margin:center;"| | |||
{|class="wikitable"width="100%"; | |||
|- | |||
!Wave 6 (pre-release) | |||
!Wave 6 (final) | |||
|- | |||
|{{classic|Tour|Vancouver Velocity}} | |||
|{{classic|Tour|Rome Avanti}} | |||
|- | |||
|{{classic|Wii|Maple Treeway}} | |||
|{{classic|GCN|DK Mountain}} | |||
|- | |||
|???{{footnote|note|a}} | |||
|{{classic link|Wii|Daisy Circuit}} | |||
|- | |||
|[[Piranha Plant Cove]] | |||
|Piranha Plant Cove | |||
|- | |||
|{{classic|Tour|Athens Dash}} | |||
|{{classic|Tour|Madrid Drive}} | |||
|- | |||
|{{classic|GCN|???}}{{footnote|note|b}} | |||
|{{classic link|3DS|Rosalina's Ice World}} | |||
|- | |||
|???{{footnote|note|c}} | |||
|{{classic|SNES|Bowser Castle 3}} | |||
|- | |||
|{{classic link|Wii|Rainbow Road}} | |||
|{{classic|Wii|Rainbow Road}} | |||
|} | |||
|} | |||
{{footnote|note|a|Although this slot originally lacked a prefix, {{classic|Wii|Moonview Highway}}'s internal name assigns it to this slot.}} | |||
{{footnote|note|b|Although this slot originally had a "GCN" prefix assigned to it, {{classic|Wii|Daisy Circuit}}'s internal name assigns it to this slot.}} | |||
{{footnote|note|c|Although this slot originally lacked a prefix, {{classic|3DS|Rosalina's Ice World}}'s internal name assigns it to this slot.}} | |||
===Music prefetches=== | |||
In the 2.1.0 update, several prefetch music tracks of unreleased race courses were added to the game's files. They all sound different from their arrangements in ''Mario Kart Tour'' and the final arrangements used in the ''Booster Course Pass''. | |||
====Wave 3==== | |||
{{media table | |||
|file1=MK8D Tour LondonLoop prefetch.oga | |||
|title1={{classic|Tour|London Loop}} | |||
|length1=0:01 | |||
|file2=MK8D GBA BooLakeBrokenPier prefetch.oga | |||
|title2={{classic|GBA|Boo Lake}} | |||
|length2=0:02 | |||
|file3=MK8D 3DS AlpinePass prefetch.oga | |||
|title3={{classic|3DS|Rock Rock Mountain}} | |||
|length3=0:02 | |||
|file4=MK8D Wii MapleTreeway prefatch.oga | |||
|title4={{classic|Wii|Maple Treeway}} | |||
|length4=0:02 | |||
|file5=MK8D Tour BerlinByways prefetch.oga | |||
|title5={{classic|Tour|Berlin Byways}} | |||
|length5=0:02 | |||
|file6=MK8D DS PeachGardens prefetch.oga | |||
|title6={{classic|DS|Peach Gardens}} | |||
|length6=0:02 | |||
|file7=MK8D Tour MerryMountain prefetch.oga | |||
|title7=Merry Mountain | |||
|length7=0:02 | |||
|file8=MK8D 3DS RainbowRoad prefatch.oga | |||
|title8={{classic|3DS|Rainbow Road}} | |||
|length8=0:02 | |||
|file9=MK8D 3DS RainbowRoad Moon prefatch.oga | |||
|title9={{classic|3DS|Rainbow Road}} (Moon) | |||
|length9=0:02 | |||
}} | |||
====Wave 4==== | |||
{{media table | |||
|file1=MK8D Tour AmsterdamDrift prefatch.oga | |||
|title1={{classic|Tour|Amsterdam Drift}} | |||
|length1=0:02 | |||
|file2=MK8D Tour BangkokRush prefatch.oga | |||
|title2={{classic|Tour|Bangkok Rush}} | |||
|length2=0:02 | |||
|file3=MK8D GCN WaluigiStadium prefetch.oga | |||
|title3={{classic|GCN|Waluigi Stadium}} | |||
|length3=0:02 | |||
|file4=MK8D Tour SingaporeSpeedway prefatch.oga | |||
|title4={{classic|Tour|Singapore Speedway}} | |||
|length4=0:02 | |||
|file5=MK8D Tour SingaporeSpeedway Chinatown prefatch.oga | |||
|title5={{classic|Tour|Singapore Speedway}} (Chinatown) | |||
|length5=0:02 | |||
}} | |||
====Wave 5==== | |||
{{media table | |||
|file1=MK8D Tour LosAngelesLaps prefatch.oga | |||
|title1={{classic|Tour|Los Angeles Laps}} | |||
|length1=0:02 | |||
|file2=MK8D GBA SunsetWilds prefatch.oga | |||
|title2={{classic|GBA|Sunset Wilds}} | |||
|length2=0:02 | |||
|file3=MK8D Tour VancouverVelocity prefatch.oga | |||
|title3={{classic|Tour|Vancouver Velocity}} | |||
|length3=0:02 | |||
}} | |||
===Gallery=== | |||
<gallery widths=250px> | |||
MK8D 3DS Toad Circuit.png|Pre-release screenshot of {{classic|3DS|Toad Circuit}} | |||
MK8D Tokyo Blur Early Arrow Field.png|{{classic|Tour|Tokyo Blur}} with an early arrow field design | |||
MK8-Course-Wii CoconutMall.jpg|{{classic|Wii|Coconut Mall}}'s early design | |||
MK8D Peach Gardens Birds Eye.png|Pre-release birds-eye view of {{classic|DS|Peach Gardens}} | |||
MK8DPeachGardens3.jpg|Pre-release screenshot of the roundabout in {{classic|DS|Peach Gardens}}, without the barrier | |||
BCP_Wave_3_Original_Order.png|Original order for the Rock and Moon Cups, as shown in an unlisted video by Nintendo | |||
</gallery> | |||
==Reception== | |||
===Critical reception=== | |||
''Mario Kart 8 Deluxe'' has been received with universal acclaim, garnering higher aggregate scores than the original ''Mario Kart 8''. The game has been praised for being well-suited to the Switch's portability, the increased performance, and particularly the redesigned Battle mode, although several reviews noted ''Mario Kart 8 Deluxe'' would not be as appealing of a proposition to players who already own ''Mario Kart 8'' and its downloadable content. | |||
{|class="wikitable" style="width:100%;text-align:center" | |||
!colspan="4"style="font-size:120%;text-align:center;background-color:silver"|Reviews | |||
|-style="background-color:#E6E6E6;" | |||
|Release | |||
|Reviewer, Publication | |||
|Score | |||
|Comment | |||
|- | |||
|[[Nintendo Switch]] | |||
|Laurely Birba, [https://www.jeuxactu.com/test-mario-kart-8-deluxe-sur-nintendo-switch-109030.htm Jeux Actu] | |||
|18/20 | |||
|align=left|''While purists may accuse Mario Kart 8 of being a opportunistic rehash, Nintendo's goal was to give the Switch a racing game that is fun, polished, filled with content, and able to showcase the Switch's hybrid nature. These four objectives are mostly accomplished, and the game will have no problem seducing newcomers considering how well the formula has been mastered. | |||
|- | |||
|Nintendo Switch | |||
|Kallie Plagge, [https://www.gamespot.com/reviews/mario-kart-8-deluxe-review/1900-6416660/ GameSpot] | |||
|9/10 | |||
|align=left|''Even if you didn't really care about Battle Mode, the smallest changes in Mario Kart 8 Deluxe refine an already great racing game. But the huge overhaul to the original's afterthought of a Battle Mode is a chaotic, varied opportunity to play very differently than in Grand Prix mode and well worth reinvesting yourself in Mario Kart 8 on Switch.'' | |||
|- | |||
|Nintendo Switch | |||
|Matthew Sainsbury, [https://www.digitallydownloaded.net/2017/04/review-mario-kart-8-deluxe-nintendo.html Digitally Downloaded] | |||
|4.5/5 | |||
|align=left|''Thanks to substantial DLC releases, Mario Kart 8 on the Wii U went from being a game with plenty of content, to one with an overload of it. Mario Kart 8 Deluxe on the Nintendo Switch has all of that, plus the return of the battle mode (which should never have left), and while it won't be a '''new''' game as such for the people who actually bought a Wii U (we're a special club), having this game on a portable console is reason enough to buy it all over again.'' | |||
|- | |||
!colspan="4"style="background-color:silver;font-size:120%;text-align:center;"|Aggregators | |||
|-style="background-color:#E6E6E6;" | |||
|colspan=2|Compiler | |||
|colspan=2|Platform / Score | |||
|- | |||
|colspan=2|Metacritic | |||
|colspan=2 style="background-color:LimeGreen"|[http://www.metacritic.com/game/switch/mario-kart-8-deluxe 92] | |||
|- | |||
|colspan=2|GameRankings | |||
|colspan=2|[https://web.archive.org/web/20190226113229/https://www.gamerankings.com/switch/200276-mario-kart-8-deluxe/index.html 92.39%] | |||
|} | |||
{{br}} | |||
===Sales=== | |||
In the United Kingdom, ''Mario Kart 8 Deluxe'' debuted at No. 1 on the sales chart, making it the first Nintendo game to be No. 1 in the UK since 2011's ''[[bulbapedia:Pokémon Black and White Versions|Pokémon Black and White]]'', and the first ''Super Mario'' game to place such since ''Mario Kart Wii''.<ref>{{cite|author=Dring, Christopher|language=en|date=April 30, 2017|url=www.gamesindustry.biz/mario-kart-8-deluxe-is-nintendos-first-uk-no-1-since-2011|title=Mario Kart 8 Deluxe is Nintendo's first UK No.1 since 2011|publisher=GameIndustryBiz|accessdate=November 6, 2024}}</ref> | |||
The game sold 459,000 copies for its US launch day, making it the fastest-selling ''Mario Kart'' game in the US and meaning 45% of US Switch owners purchased the game.<ref>{{cite|language=en|author=Brian|date=May 1, 2017|url=nintendoeverything.com/mario-kart-8-deluxe-sells-459000-copies-in-the-us-on-launch-day-fastest-selling-mario-kart-game|title=Mario Kart 8 Deluxe sells 459,000 copies in the US on launch day, fastest-selling Mario Kart game|publisher=Nintendo Everything|accessdate=November 6, 2024}}</ref> | |||
As of December 31, 2017, ''Mario Kart 8 Deluxe'' had sold 7.33 million units worldwide. As of March 31, 2018, it reached 9.22 million units, exceeding the original ''Mario Kart 8''{{'}}s 8.42 million and making it the second best-selling game on the Nintendo Switch behind ''[[Super Mario Odyssey]]''.<ref>{{cite|deadlink=y|archive=web.archive.org/web/20180507005730/https://www.nintendo.co.jp/ir/en/finance/software/index.html|title=IR Information : Sales Data - Top Selling Title Sales Units|publisher=Nintendo of Japan|language=en|author=Nintendo|accessdate=November 6, 2024}}</ref> As of December 31, 2018, ''Mario Kart 8 Deluxe'' had sold 15.02 million units worldwide, exceeding ''Super Mario Odyssey''{{'}}s sales and making it the best-selling game on the Nintendo Switch.<ref name=Jansales>{{cite|language=en|author=GameXplain|date=February 1, 2019|deadlink=y|url=www.youtube.com/watch?v=cVJnzoW-E6w|title=Nintendo's Financial Report - 30 Million Switches Sold Worldwide, Doubled Software Sales, & More!|publisher=YouTube|accessdate=December 22, 2020}}</ref> As of September 30, 2021, the game had sold 38.74 million units worldwide, surpassing ''Mario Kart Wii'' as the best-selling game in the series.<ref>{{cite|language=en|author=Nintendo|date=November 4, 2021|title=Top Selling Title Sales Unites|publisher=Nintendo Japan|accessdate=November 8, 2021|archive=web.archive.org/web/20211108090438/https://www.nintendo.co.jp/ir/en/finance/software/index.html|deadlink=y}}</ref> As of December 31, 2021, the game had sold 43.35 million units worldwide, making it the single best-selling game in the ''Super Mario'' franchise, surpassing ''[[Super Mario Bros.]]'' for the [[Nintendo Entertainment System]].<ref>{{cite|author=Nintendo|language=en|deadlink=y|date=|title=Top Selling Title Sales Unites|publisher=Nintendo Japan|archive=web.archive.org/web/20220203073454/https://www.nintendo.co.jp/ir/en/finance/software/index.html|accessdate=February 3, 2022}}</ref> As of December 31, 2024, the game had sold 67.35 million units worldwide.<ref>Nintendo (February 4, 2025) [https://www.nintendo.co.jp/ir/pdf/2025/250204_3e.pdf]. ''Financial Results Explanatory Material, Nintendo Co., Ltd''. Retrieved February 4, 2025.</ref> | |||
===Awards and acknowledgements=== | |||
''Mario Kart 8 Deluxe'' was nominated for the "Best Family Game" and "Best Multiplayer" awards at The Game Awards 2017.<ref name="The Game Awards">{{cite|deadlink=y|archive=web.archive.org/web/20171114202345/http://thegameawards.com/awards|title=Awards - The Game Awards 2017|publisher=The Game Awards|accessdate=November 6, 2024}}</ref> However, it won neither, losing the former to ''[[Super Mario Odyssey]]'' and the latter to ''{{wp|PlayerUnknown's Battlegrounds}}''.<ref name="The Game Awards" /> | |||
==References to other games== | |||
*''[[Donkey Kong (game)|Donkey Kong]]'': Pauline's horn noise is based on the stage clear jingle from this game. | |||
*''[[Super Mario Kart]]'': The [[Cape Feather|Feather]] item returns from this game, with the same function. [[SNES Battle Course 1|Battle Course 1]] reappears as a classic battle course; a billboard in the course background is modeled after the player select screen from this game. [[SNES Mario Circuit 3|Mario Circuit 3]] and [[SNES Bowser Castle 3|Bowser Castle 3]] are included among the courses in the ''[[Mario Kart 8 Deluxe – Booster Course Pass|Booster Course Pass]]''. The end credits theme is arranged for the Booster Course Pass end credits theme. | |||
*[[Yoshi's Island (series)|''Yoshi's Island'' series]]: Bowser Jr. being both one of Baby Mario's rivals and Kamek's rival in this game is a reference to both [[Baby Bowser]] being Baby Mario's arch-nemesis and Kamek being Baby Bowser's caretaker. | |||
**''[[Super Mario World 2: Yoshi's Island]]'': [[Yoshi's Island (race course)|Yoshi's Island]], a course appearing in the ''Booster Course Pass'', is heavily based on this game. Kamek's horn noise sounds like his speaking sound effect in this game. | |||
*''[[Mario Kart 64]]'': Similar to this game, all courses in ''Mario Kart 8 Deluxe'' are unlocked from the start. [[N64 Choco Mountain|Choco Mountain]] and [[N64 Kalimari Desert|Kalimari Desert]] are included among the courses in the ''Booster Course Pass''. | |||
*''[[Mario Kart: Super Circuit]]'': [[GBA Sky Garden|Sky Garden]], [[GBA Snow Land|Snow Land]], [[GBA Boo Lake|Boo Lake]], [[GBA Riverside Park|Riverside Park]], and [[GBA Sunset Wilds|Sunset Wilds]] are included among the courses in the ''Booster Course Pass''. | |||
*''[[Super Mario Sunshine]]'': King Boo's horn noise uses the sound of the [[King Boo (Super Mario Sunshine)|King Boo]] from this game being hit by a pepper. | |||
*''[[Mario Kart: Double Dash!!]]'': [[GCN Luigi's Mansion|Luigi's Mansion]] reappears as a classic battle course. The [[Item Box#Mario Kart 8 / Mario Kart 8 Deluxe|Double Item Box]]es and the two Battle sub-modes, Bob-omb Blast and Shine Thief, return. [[GCN Waluigi Stadium|Waluigi Stadium]], [[GCN Daisy Cruiser|Daisy Cruiser]], and [[GCN DK Mountain|DK Mountain]] are included among the courses in the ''Booster Course Pass''. | |||
*''[[Yoshi Touch & Go]]'': Artwork of Baby Mario and Yoshi is reused from the game in the Yoshi's Island course on the mural outside of Yoshi's House. | |||
*''[[Mario Kart DS]]'': An arrangement of [[DS Luigi's Mansion|Luigi's Mansion]]'s music is used in {{classic link|GCN|Luigi's Mansion}}. [[DS Shroom Ridge|Shroom Ridge]], [[DS Waluigi Pinball|Waluigi Pinball]], [[DS Peach Gardens|Peach Gardens]], and [[DS Mario Circuit|Mario Circuit]] are included among the courses in the ''Booster Course Pass''. | |||
*''[[Mario Kart Wii]]'': [[Wii Coconut Mall|Coconut Mall]], [[Wii Mushroom Gorge|Mushroom Gorge]], [[Wii Maple Treeway|Maple Treeway]], [[Wii DK Summit|DK Summit]], [[Wii Koopa Cape|Koopa Cape]], [[Wii Moonview Highway|Moonview Highway]], [[Wii Daisy Circuit|Daisy Circuit]], and [[Wii Rainbow Road|Rainbow Road]] are included among the courses in the ''Booster Course Pass''. | |||
*''[[New Super Mario Bros. Wii]]'': Boo's artwork from this game is reused for King Boo's character select icon, albeit with the addition of the latter's crown. | |||
*''[[Mario & Sonic at the Olympic Winter Games (Wii)|Mario & Sonic at the Olympic Winter Games]]'': Canada Hockey Place re-appears in the Vancouver Velocity track, now referred to by its sponsored name Rogers Arena. | |||
*''[[Mario Kart 7]]'': The [[Koopa Clown]] kart returns from this game. [[3DS Wuhu Town|Wuhu Town]] reappears as a classic battle course, and [[3DS Toad Circuit|Toad Circuit]], [[3DS Rock Rock Mountain|Rock Rock Mountain]], [[3DS Rainbow Road|Rainbow Road]], and [[3DS Rosalina's Ice World|Rosalina's Ice World]] are included among the courses in the ''Booster Course Pass''. [[Lunar Colony]] has a moon section with low gravity just like Rainbow Road from this game. | |||
*''[[Super Mario 3D World]]'': The crown mechanic in Battle mode is similar to the mechanic in this game's multi-player, where the player with the highest score from one stage will be wearing a crown in the next stage. | |||
*''[[Donkey Kong Country: Tropical Freeze]]'': Funky Kong's character select icon is reused from this game. | |||
*''[[Super Smash Bros. for Nintendo 3DS / Wii U]]'': The [[Koopa Clown]]'s propellers in anti-gravity sections emerge from circular panels on the side of the vehicle, much like the [[Junior Clown Car]]'s weapons. Also, the Koopalings' Koopa Clowns match the Clown Car colors they use in this game. | |||
*''[[Super Mario Odyssey]]'': A ring similar to the [[Binding Band]] appears inside the drain in [[Squeaky Clean Sprint]]. | |||
*''[[Mario Kart Tour]]'': [[Tour New York Minute|New York Minute]], [[Tour Tokyo Blur|Tokyo Blur]], [[Tour Paris Promenade|Paris Promenade]], [[Tour London Loop|London Loop]], [[Tour Vancouver Velocity|Vancouver Velocity]], [[Tour Los Angeles Laps|Los Angeles Laps]], [[Merry Mountain]], [[Tour Berlin Byways|Berlin Byways]], [[Ninja Hideaway]], [[Tour Sydney Sprint|Sydney Sprint]], [[Tour Singapore Speedway|Singapore Speedway]], [[Tour Amsterdam Drift|Amsterdam Drift]], [[Tour Bangkok Rush|Bangkok Rush]], [[Piranha Plant Cove]], [[Tour Athens Dash|Athens Dash]], [[Tour Rome Avanti|Rome Avanti]], and [[Tour Madrid Drive|Madrid Drive]] are included among the courses in the ''Booster Course Pass''. Additionally, the designs of the courses in the ''Booster Course Pass'' are based on their designs from ''Mario Kart Tour'', and {{classic link|N64|Kalimari Desert}}'s second and third laps are based on the variant Kalimari Desert 2 from this game. The ''Booster Course Pass'' characters except for Funky Kong reuse their face icons from this game. All the Mii racing suits included in Wave 6 come from this game; some of their unique trick animations are also reused. | |||
==References in other games== | |||
*''[[Super Mario Run]]'': Key art for the game appears when tapping on the Nintendo Switch collectible in Kingdom Builder. | |||
*''[[Mario Kart Tour]]'': The third level of [[Mini-Turbo]]s, Ultra Mini-Turbos, returns. The [[Koopa Clown]] retains its appearance from this game. [[King Boo]] reuses his face icon from this game. [[Sky-High Sundae]], [[Yoshi's Island (race course)|Yoshi's Island]], and [[Squeaky Clean Sprint]] all reappear, though they are considered new courses in both games. {{classic link|SNES|Battle Course 1}}'s music arrangement is used in Balloon Battles. | |||
==Staff== | |||
{{main|List of Mario Kart 8 Deluxe staff}} | |||
==Gallery== | |||
{{main-gallery}} | |||
<gallery widths=160px> | |||
MK8 Deluxe Art - Mario (transparent).png|[[Mario]] | |||
Mario Kart 8 Deluxe Art - Link.png|[[Link]] | |||
MK8DX Isabelle.png|[[Isabelle]] | |||
MK8 Deluxe Art - Inkling.png|[[Inkling]] and a [[Blooper]] | |||
MK8DX Lakitu.png|[[Lakitu (Mario Kart referee)|Lakitu]] | |||
</gallery> | |||
==Media== | |||
{{main-media|List of Mario Kart 8 Deluxe media}} | |||
{{media table | |||
|file1=MK8D-BattleStadium-music.oga | |||
|title1=[[Battle Stadium]] theme | |||
|file2=MK8D-SweetSweetKingdom-music.oga | |||
|title2=[[Sweet Sweet Kingdom]] theme | |||
|file3=MK8D-DragonPalace-music.oga | |||
|title3=[[Dragon Palace]] theme | |||
|file4=MK8D-LunarColony-music.oga | |||
|title4=[[Lunar Colony]] theme | |||
|file5=MK8D-3DS-WuhuTown-music.oga | |||
|title5={{classic link|3DS|Wuhu Town}} theme | |||
|file6=MK8D-GCN-LuigisMansion-music.oga | |||
|title6={{classic link|GCN|Luigi's Mansion}} theme | |||
|file7=MK8D-SNES-BattleCourse1-music.oga | |||
|title7={{classic link|SNES|Battle Course 1}} theme | |||
|file8=MK8D-UrchinUnderpass-music.oga | |||
|title8=[[Urchin Underpass]] theme | |||
}} | |||
==Names in other languages== | |||
{{foreign names | |||
|Jpn=マリオカート8 デラックス | |||
|JpnR=Mario Kāto 8 Derakkusu | |||
|JpnM=Mario Kart 8 Deluxe | |||
|Kor=마리오 카트 8 디럭스 | |||
|KorR=Mario Kateu 8 Direokseu | |||
|KorM=Mario Kart 8 Deluxe | |||
|ChiS=马力欧卡丁车8 豪华版 | |||
|ChiSR=Mǎlìōu Kǎdīngchē 8 Háohuábǎn | |||
|ChiSM=Mario Kart 8 Deluxe Edition | |||
|ChiT=瑪利歐賽車8 豪華版 | |||
|ChiTR=Mǎlìōu Sàichē 8 Háohuábǎn | |||
|ChiTM=Mario Racing 8 Deluxe Edition | |||
}} | |||
==Notes== | |||
*As the Nintendo Switch is not region-locked like previous Nintendo consoles (excluding console and game units officially sold in mainland China), this is the first ''Super Mario'' game to be playable in the same build in all regions. | |||
*In the music menu, in addition to the usual method of pressing {{button|switch|Y}} to cycle through the different song variants of a course, it is possible to select a specific one via the shoulder buttons, similarly to selecting the season of [[Animal Crossing]]. Depending on the number of song variants a course has, holding {{button|switch|L}} selects the first variant, {{button|switch|R}} selects the second variant, {{button|switch|ZL}} selects the third variant, {{button|switch|ZR}} selects the fourth variant, and both {{button|switch|L}} and {{button|switch|R}} selects the fifth variant. | |||
==References== | |||
<references/> | |||
==External links== | ==External links== | ||
{{ | {{TCRF}} | ||
*[https://www. | *[https://www.nintendo.co.jp/switch/aabpa/ Official Japanese site] | ||
*[https:// | *[https://mariokart8.nintendo.com Official North American site] | ||
*[https://www. | *[https://mariokart8.nintendo.com/fr/ Official Canadian site] | ||
*[https://www. | *[https://mariokart8.nintendo.com/es/ Official Latin American site] | ||
*[https://www. | *[https://www.nintendo.co.uk/Games/Nintendo-Switch/Mario-Kart-8-Deluxe-1173281.html Official European site] | ||
*[https://www.nintendo.com.au/games/nintendo-switch/mario-kart-8-deluxe Official Oceanian site] | |||
*[https://www.nintendo.co.kr/software/switch/aabpa/ Official Korean site] | |||
*[https://www.nintendo.com.hk/switch/mario_kart_8_deluxe/ Official Chinese (Hong Kong) site] | |||
*[https://www.nintendo.tw/switch/mario_kart_8_deluxe/ Official Chinese (Taiwan) site] | |||
{{ | *[https://www.nintendoswitch.com.cn/mario_kart_8_deluxe/ Official Chinese (Mainland) site] | ||
{{MK8}} | |||
{{Super Mario games}} | {{Super Mario games}} | ||
{{Switch}} | {{Switch}} | ||
Latest revision as of 10:33, March 9, 2025
| Wynn Liaw | |
 Mario in Super Mario Bros. Wonder (2023) | |
| Pronouns | He/him |
| Species | Human User (2019-) Autoconfirmed user (2019-) Established user (2024-) Autopatrolled user (2021-) Patroller (2021-2022, 2024-) |
| First appearance | 2007 |
| Latest appearance | 2025 |
| I agree to the Term and Conditions and Privacy Policy. | Yes |
 |
smwm |
This is my user page. I joined this wiki because I wanted to contribute.
| Super Smash Bros. fighter Wynn Liaw |
|
|
| Game appearances |
|---|
| Mario Wiki Wikipedia |
| Special moves |
| Neutral: Throw fireball Side: Whack hammer Up: Up rocket Down: Break ground Final Smash: Explode |
| Battle entrance |
| Time machine |
I mainly upload files.
| Wynn Liaw's Userbox Tower | ||
|---|---|---|
| ||
| ||
| ||
| ||
| ||
| ||
| ||
| ||
| ||
| ||
|


Pages:
Catch Up
After June 2021, I was inactive due to work. However, I now have pockets of free time.
Personal Images


Level
From this section onwards is about a level.
It has been decided that this section is outdated.
This section is under construction. Therefore, please excuse its informal appearance while it is being worked on. We hope to have it completed as soon as possible.
| Level | |
|---|---|
| Last Stand | |
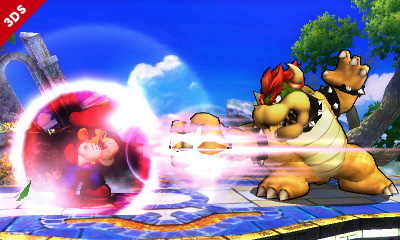
| |
| World | Skyworld |
| Game | Super Mario Maker 2 |
| Game style | Super Smash Bros. Ultimate |
| Theme(s) | |
| Difficulty | ★★★★ |
| Objective | Survive the incoming attack. |
| Time limit | 100 years until The Legend of Zelda: Breath of the Wild |
| Coin Rush limit | 100 seconds |
| Enemy squad level | 1000000 |
| Boss | Foreman Spike Yoshi Donkey Kong Jr. Donkey Kong Boom Boom Pom Pom Larry Koopa Morton Koopa Jr. Wendy O. Koopa Iggy Koopa Roy Koopa Lemmy Koopa Ludwig von Koopa Bowser Jr. (Melee) King K. Rool Bowser Jr. (Junior Clown Car) Bowser Ganon Princess Zelda Link Wario Waluigi Princess Peach Luigi Mario Palutena Goal Pole |
| Music track | Title Theme - Donkey Kong Country Donkey Kong / Donkey Kong Jr. Medley - Super Smash Bros. Ultimate |
| << Directory of levels >> | |
The level begins with the player walking while the title theme from Donkey Kong Country plays. When the theme gets intense, the player arrives at the castle. The moment the player steps into the castle, the theme switches to Donkey Kong / Donkey Kong Jr. Medley from Super Smash Bros. Ultimate. The player is then given two Hammer Suits.
The final boss is the Goal Pole. To defeat it, the player must force it out of its base by pulling the base. Then, grab the flagpole. After this level, the player goes to Palutena's Temple and fight Palutena, Pit and Viridi.
Enemies
| Name | Count |
|---|---|
Eggplant Man |
5 |
Gotchawrench |
2 |
Foreman Spike |
Boss |
 Yoshi |
Boss |
 Donkey Kong Jr. |
Boss |
 Barrel |
Thrown by Donkey Kong |
Blue Barrel |
Thrown by Donkey Kong |
 Donkey Kong |
Boss |
Boom Boom |
Boss |
Pom Pom |
Boss |
 Larry Koopa |
Boss |
Morton Koopa Jr. |
Boss |
 Wendy O. Koopa |
Boss |
 Iggy Koopa |
Boss |
 Roy Koopa |
Boss |
 Lemmy Koopa |
Boss |
Ludwig von Koopa |
Boss |
Bowser Jr. (Melee) |
Boss |
 King K. Rool |
Boss |
 Bowser Jr. (Junior Clown Car) |
Boss |
 Bowser |
Boss |
Ganon |
Boss |
 Princess Zelda |
Boss |
 Link |
Boss |
Goomba |
Spawned indefinitely from a pipe |
 Wario (Classic) |
Boss |
 Wario (WarioWare) |
Boss |
 Waluigi |
Boss |
 Princess Peach |
Boss |
 Mario |
Boss |
 Luigi |
Boss |
 Palutena |
Boss |
 Goal Pole |
Boss |
Palutena |
One of the fighters at Palutena's Temple |
 Pit |
One of the fighters at Palutena's Temple |
 Viridi |
One of the fighters at Palutena's Temple (guest) |
Sandbox
It has been decided that this section is outdated.
This section is under construction. Therefore, please excuse its informal appearance while it is being worked on. We hope to have it completed as soon as possible.
| Level | |
|---|---|
| Sandbox | |

| |
| Game | Super Mario Maker 2 |
| Game style | Any |
| Theme(s) | Any |
| Objective | Build things and try to survive. |
| Boss | Other players. |
| Music track | Build Mode Title Theme - Super Mario Maker Title Theme - Super Mario Maker - Super Smash Bros. 4 Title Theme - Super Mario Maker 2 Demolition Mode Stage Theme - Wrecking Crew In-game Music - Wrecking Crew '98 Wrecking Crew Medley - Super Smash Bros. 4 Wrecking Crew Retro Medley - Super Smash Bros. 4 Wrecking Crew Medley - Super Smash Bros. Ultimate |
| << Directory of levels >> | |
In this level, the player can build anything they want. However, the player has to avoid nasty players while trying to survive. The player can change their character to a character from another game using the character importer which can be downloaded for free on this creator's website. The character imported will act exactly like his/her counterpart from his/her game. This level has trees that can be chopped down for wood. The player can also obtain wood by punching the tree. After getting wood, the player can then begin to craft materials. The player can play this level like Minecraft since the starting area has everything in Minecraft. The player can approach Mario for parts (however the player can change Mario's model). If Mario is not there, then the player can go to a place to talk and write commands, like the command to warp to a specific place, spawn something, delete something or someone and much more!
There is also another mode called "Demolition Mode", where the player can destroy another player's creation.
Characters
| Name | Count |
|---|---|
 Mario |
Master Builder |
 Luigi |
Assistant |
Gallery
Locations
Lava area

Talking and commands area


Examples given to the player
The Ultimate Fighting Game
- "SSBU" redirects here. For this game's Wii U predecessor, see Super Smash Bros. for Wii U.
| The Ultimate Fighting Game | |||||||||||||||||||||||||
|---|---|---|---|---|---|---|---|---|---|---|---|---|---|---|---|---|---|---|---|---|---|---|---|---|---|

| |||||||||||||||||||||||||
| Developer | Wynn Liaw | ||||||||||||||||||||||||
| Publisher | Wynn Liaw | ||||||||||||||||||||||||
| Platform(s) | macOS Microsoft Windows iOS Android | ||||||||||||||||||||||||
| Release date |  January 1, 1988 January 1, 1988 January 1, 1992 January 1, 1992
| ||||||||||||||||||||||||
| Language(s) | Afrikaans Akan Albanian Amharic Arabic Armenian Assamese Aymara Azerbaijani Bambara Basque Belarusian Bengali Bhojpuri Bosnian Bulgarian Burmese Catalan Cebuano Chinese (China) Chinese (Taiwan) Corsican Croatian Czech Danish Divehi Dogri Dutch (Belgium) Dutch (Netherlands) English (United Kingdom) English (United States) Esperanto Estonian Ewe Filipino Finnish French (Canada) French (France) Galician Ganda Georgian German Greek Guarani Gujarati Haitian Creole Hausa Hawaiian Hebrew Hindi Hmong Hungarian Icelandic Igbo Ilocano Indonesian Irish Italian Japanese Javanese Kannada Kazakh Khmer Kinyarwanda Konkani Korean Krio Kurdish Kyrgyz Lao Latin Latvian Lingala Lithuanian Luxembourgish Macedonian Maithili Malagasy Malay Malayalam Maltese Māori Marathi Meitei Mizo Mongolian Nepali Norwegian Nyanja Odia Oromo Pashto Persian Polish Portuguese (Brazil) Portuguese (Portugal) Punjabi Quechua Romanian Russian Samoan Sanskrit Scottish Gaelic Sepedi Serbian Shona Sindhi Sinhala Slovak Slovenian Somali Sorani Sotho Spanish (Latin America) Spanish (Spain) Sundanese Swahili Swedish Tajik Tamil Tatar Telugu Thai Tigrinya Tsonga Turkish Turkmen Ukrainian Urdu Uyghur Uzbek Vietnamese Welsh West Frisian Xhosa Yiddish Yoruba Zulu | ||||||||||||||||||||||||
| Genre | Fighting/Action | ||||||||||||||||||||||||
| Rating(s) |
| ||||||||||||||||||||||||
| Mode(s) | 1–8 players | ||||||||||||||||||||||||
| Format | Nintendo Switch: | ||||||||||||||||||||||||
| Input | Nintendo Switch:
| ||||||||||||||||||||||||
Super Smash Bros. Ultimate is the fifth game in the Super Smash Bros. series, released for the Nintendo Switch. The game was announced through a teaser trailer in the March 2018 Nintendo Direct[1] and was released worldwide on December 7, 2018. The game features 103 base stages and 74 base playable characters (with more fighters and stages as downloadable content), the largest respective numbers in the series.
Super Smash Bros. Ultimate was made available for pre-order and pre-loading from the Nintendo eShop beginning November 1, 2018. The game takes up approximately 14.3 GB of the Nintendo Switch's storage when downloaded from the Nintendo eShop.
Super Smash Bros. Ultimate is the sixth (fifth if Super Smash Bros. for Nintendo 3DS and Super Smash Bros. for Wii U are counted as one game) Super Mario-related game to receive a PEGI 12+ rating in Europe, being preceded by the previous three Super Smash Bros. installments (Super Smash Bros. Brawl, Super Smash Bros. for Nintendo 3DS, and Super Smash Bros. for Wii U) and the Wii U Virtual Console releases of Super Mario 64 DS and New Super Mario Bros.
Gameplay
Super Smash Bros. Ultimate retains the series' basic gameplay elements, with several new mechanics and changes. As with previous installments, the objective of the game is to launch opponents off the stage. Players build each other's damage percentage through attacks, and the higher the percentage, the farther they fly when they are hit. This time, the damage display is in decimal notation, adding a tenth to the number. Decimals have always been used for damage calculations since Super Smash Bros. Melee, but the damage percentages were always displayed as an integer on-screen. Super Smash Bros. Ultimate is the first time that decimal notations are shown in-game. Additionally, when an opponent is launched, their launch speed is the fastest at the start, unlike in previous games in the series. During 1-on-1 battles, all fighters' attacks deal 1.2x their regular damage, which is done to "increase gameplay speed."[2] Additionally, characters can use any ground attack out of a run (e.g. standard attacks, tilt attacks, smash attacks), while any aerial attack can be used while climbing a ladder, officially known as a "ladder attack".
Three techniques are also introduced in Super Smash Bros. Ultimate: the Directional Air Dodge, Short-Hop Attack, and a new version of the Perfect Shield. The Directional Air Dodge, a technique carried over from Super Smash Bros. Melee, allows the player to dodge while moving in the direction they tilt ![]() , which can also be used for recovery. However, if a player dodges excessively—whether in the air or on the ground—they become more vulnerable to attacks, with less intangibility and lower dodge speed. The Short-Hop Attack is performed by pressing the attack and jump buttons at the same time, allowing the player to hop a short distance off the ground while performing an air attack; however, all short-hopped aerial attacks deal 0.85x their regular damage (excluding special moves, and certain states such as Peach and Daisy's Floating Jump attacks and the Super Leaf item). The Perfect Shield can be used to block attacks without depleting the user's shield. However, unlike in past installments, where it is activated by pressing the shield button before an attack connects, the Perfect Shield is instead performed by releasing the shield button just as an opponent's attack lands, nullifying the attack.
, which can also be used for recovery. However, if a player dodges excessively—whether in the air or on the ground—they become more vulnerable to attacks, with less intangibility and lower dodge speed. The Short-Hop Attack is performed by pressing the attack and jump buttons at the same time, allowing the player to hop a short distance off the ground while performing an air attack; however, all short-hopped aerial attacks deal 0.85x their regular damage (excluding special moves, and certain states such as Peach and Daisy's Floating Jump attacks and the Super Leaf item). The Perfect Shield can be used to block attacks without depleting the user's shield. However, unlike in past installments, where it is activated by pressing the shield button before an attack connects, the Perfect Shield is instead performed by releasing the shield button just as an opponent's attack lands, nullifying the attack.
During a match, the fighter that is in the lead occasionally emits a glimmer of light. If a match enters Sudden Death, unlike in previous games where Bob-ombs begin to drop after some time, the screen slowly zooms in on the center of the stage, shrinking the field of view and stage boundary and thereby making it easier for fighters to be KO'd. The Sudden Death mode is visually accompanied by flames that intensify as the screen zooms in on the stage. Bob-ombs still drop on the stage if enough time passes and no one is KO'd.
As with Super Smash Bros. for Wii U, Super Smash Bros. Ultimate also supports Nintendo GameCube Controllers.
Super Smash Bros. Ultimate is available in 11 different languages: Japanese, English, French, Spanish, German, Italian, Dutch, Russian, Simplified Chinese, Traditional Chinese, and Korean, all of which are fully voiced. However, the Chinese versions use the Japanese voice set, and some of the specific names (characters, stages, items, etc.) are also not translated and use their English names instead, probably due to copyright reasons (mostly for third-party games), or they were not intended to have official Chinese versions for the original games. Though, all of the DLC contents so far are fully localized in the Chinese versions. This is the second Super Smash Bros. game to have a Simplified Chinese localization (the first being the iQue Player release of the N64 Super Smash Bros.), and the first game to have a Traditional Chinese localization. The player can also change the dialect for the English, French, and Spanish languages by changing the "Region" setting in the System Settings for the console (though in the case of English, it only changes the names for certain characters, stages, etc., such as Duck Hunt being called "Duck Hunt Duo" and the Find Mii stage into "StreetPass™ Quest", as well as release dates in tips). Super Smash Bros. Ultimate is the first installment in the series to feature Dutch and Russian announcers.
Smash

- “Battle up to eight fighters.”
- —In-game description
Before starting a match, the player can create their own preset rules, such as the number of stocks and time limit, which they can quickly select at any time. In addition to Time and Stock modes, Stamina mode is now a standard mode alongside the aforementioned two and is no longer a part of Special Smash. Stocks can also be added to Stamina mode - and it can now be played online.[3]
8-Player Smash also returns from Super Smash Bros. for Wii U, and can now be played on any stage from the start.
A new rule option added to Super Smash Bros. Ultimate is the Final Smash Meter, which appears below each fighter's damage meter and fills up as the player takes damage from opponent attacks, similar to Little Mac's Power Meter. Once it is full, the player can then use a Final Smash. These Final Smashes deal less damage and knockback than regular Final Smashes obtained from Smash Balls, and like them, only one can be used at a time.
Squad Strike

Squad Strike (Japanese: 団体戦 Dantaisen, Team Competition) is an elimination-style battle mode added to Super Smash Bros. Ultimate. The player can choose between 3-on-3 or 5-on-5 Squad Strikes, which can be carried out with one player on each side playing as three or five characters, or three or five players on each side each playing as one character. In a Squad Strike, both sides battle each other as the three or five characters consecutively in one battle. Characters can only be picked once per team, including amiibo fighters.
Tourney
Tourney returns from Super Smash Bros. Brawl, allowing up to 32 participants to compete. After selecting the number of total participants, the number of CPU players and tourney type, the game automatically generates a tournament bracket. This mode is also compatible with amiibo fighters.
Special Smash
Special Smash from previous installments returns, this time with three sub-modes. The first is Custom Smash, which works the same way as in Special Smash from Super Smash Bros. Brawl and Super Smash Bros. for Wii U, except there is no longer a Stamina option due to it being a part of the basic rule selection. The 300% setting has been split into Super Sudden Death, which works similarly to the rule of the same name in Super Smash Bros. Melee.
Smashdown
In the new, third mode, Smashdown (Japanese: 全員バトル Zen'in Batoru, All-Members Battle), players enter a series of matches selecting a character for each one. After one match ends, however, the characters used in that match are no longer available for subsequent matches, forcing players to select a different character for the next one. Smashdown is the only mode that supports 8-Player Smash.
Spirits
Adventure

The Adventure mode in this game is called World of Light. It has a board game-like map, and elements and maps based on various games have been shown; Warp Pipes and ! Switches are noticeable. Unlike The Subspace Emissary, which is very plot-heavy, World of Light is used to demonstrate the functionalities of spirits and spirit battles and has a very loose plot to leave the player free to explore the light and dark realms of the Adventure mode. World of Light also has considerably fewer cutscenes than The Subspace Emissary, though most of them are silent, akin to The Subspace Emissary's cutscenes; the lone exception being the introductory scene.
During the events of the Adventure mode, a monster called Galeem defeats all of the fighters except Kirby, imprisoning them in the eponymous World of Light, where they are cloned and their clones are possessed by spirits, which are the other victims of Galeem's attack. Once Kirby has freed Mario and more fighters and spirits in the Light Realm and defeated Galeem, a new monster named Dharkon appears, opening a path to the Dark Realm, forcing Galeem to retreat. When the remaining fighters and spirits are freed in the Dark Realm (as well as defeating Dharkon), Galeem appears to confront Dharkon, putting the player in a third realm: a mixture of the Light and Dark Realms.
Within the mode, only Kirby is available from start; the rest of the fighters are unlocked through the mode's progress in matches similar to those of Challenger's Approach (the exception being Bowser, who becomes playable after defeating Giga Bowser). Downloadable characters can be made available to play as in World of Light by freeing 10 fighters in the mode. If the character in question is downloaded with the criteria having been met beforehand, then the character is immediately unlocked.


Three endings exist in Adventure Mode: two bad endings with Galeem or Dharkon respectively, and a true ending with both bosses. The first ending is achieved by defeating too many dark puppet fighters, thus forcing the player to fight Galeem; when Galeem is defeated, Dharkon destroys Galeem and his army, encroaching the universe in darkness. The second ending is achieved by defeating too many light puppet fighters, thus forcing the player to fight Dharkon; when Dharkon is defeated, Galeem unleashes another wave of light, essentially engulfing the universe in light again. The third ending is achieved by defeating an equal number of light and dark puppet fighters, making the player fight both Galeem and Dharkon simultaneously; when the player wins, the universe is restored to its original state, while all spirits fly back to their original worlds.
Spirit Board
The primary way spirits can be obtained is through the Spirit Board. On the Spirit Board, up to ten random spirits will appear on the board and the player can choose any one to battle against and gain the spirit. When the player wins against that spirit, it will disappear from the Spirit Board, and a timer will appear on that slot. When the timer runs out, a new spirit takes that slot. The spirits themselves also have a time limit for how long they will appear on the Spirit Board. When their time limits run out, new spirits will replace them immediately. Sometimes, there will be events happening on the Spirit Board and certain spirits will appear related to a theme. Defeating spirits during those events rewards more gold and SP than usual.
DLC Spirits
Added in the version 3.0.0 update, a special DLC Spirit Board will appear if the player has purchased any of the Challenger Packs. Unlike the regular Spirit Board, the background and music relate to the series the DLC spirits are from, the player does not need to shoot the Puppet Fighter to obtain the spirit, and they do not disappear from the Spirit Board when they are collected, allowing them to be collected indefinitely. When the player collects all of the spirits from a DLC Spirit Board, they will be rewarded with 10,000 gold.
Collection
This sub-menu is where the player can view and modify their spirits.
- Team Setup: Players can make teams of primary and support spirits that they can quickly select when choosing spirits. It is also required to make spirit teams to use them in regular Smash matches.
- Level Up: As the name suggests, the player can use snacks or cores to level up their primary spirits, making them stronger. When certain spirits reach level 99, they can be enhanced into more powerful spirits that grant additional abilities.
- Dismiss: The player can send spirits back to the real world. They leave behind cores when they do so that pertain to their type (Attack, Shield, Grab, Neutral, or support) that can be used to level up other spirits or summon new spirits.
- Summon: The player can combine the cores from spirits into new spirits. Each spirit requires a specific combination of spirits that relate to the character to create them. In addition, the player also needs to pay a fee of SP to fuse them. Many spirits can only be obtained via Summon.
- Inventory: There are two things the player can do in the Inventory. In the Spirit List, they can look at a large list of every spirit they have obtained, while the Items menu allows the player to sell any Spirit Board items and cores that they have and get SP in return.
- Activities: There are many activities for spirits to do, but the corresponding master spirit must first be unlocked in World of Light. When the player gives away spirits to these facilities, they cannot be used, and the player will wait a period before they are done with their activity. However, they can be pulled out at any time. There are three types of activities: Gym, run by Doc Louis, allows players to place spirits there and they will level up on their own. Dojos allows spirits to gain specific strengths in their stats, but also weaknesses as well. Explore allows spirits to go out and find various items.
- Shopping: If the player saves a particular spirit in World of Light, they will unlock shops that house certain spirits and items.
Games & More
Unlike other Super Smash Bros. games, there is no longer a Stadium menu. Mob Smash, along with Home-Run Contest (as of version 5.0.0) are now sub-modes within the Games & More menu.
Classic Mode

- SmashWiki article: Classic Mode (SSBU)
Classic Mode returns from previous installments, returning to its original format last seen in Super Smash Bros. Brawl, in which the player fights multiple opponents in a linear series of matches to reach the end, while also trying to get a high score. This time, each fighter has a set series of opponents to face. Unlike Classic Mode's previous incarnations, the player is always given one stock, never being able to adjust the stock number before initiating the mode. When the player is KO'd, using a continue no longer causes the current match they are in to restart; instead, the match begins right where it left off, but the player starts with 0% and gets points deducted off their score. At the end of each path, the fighter has a specific boss they are required to fight, though there are variations for some characters' Classic Mode routes.
Training
Training mode lets players practice and experiment with characters' moves, items and the CPU as well as manipulate gameplay elements (such as game speed and damage), also returning from previous installments. The mode now features an exclusive numbered, grid-like stage, which allows the player to measure distances such as jump height and projectile range. In addition, it is now possible to toggle whether or not to show the trajectory at which the CPU would be launched from an attack at 50% damage in the form of a green curve, alongside the trajectory if they would be launched at 0% damage (a red curve) and 100% damage (a blue curve).[3] Unlike Super Smash Bros. for Nintendo 3DS / Wii U, this mode is also compatible with amiibo fighters.
Mob Smash
- SmashWiki article: Multi-Man Smash
Multi-Man Smash returns from previous installments under the name Mob Smash. This time, the mode has three rules:
- Century Smash: Returns from previous installments (then "100-Man Smash"). The player must KO 100 Fighting Mii Team enemies.
- Cruel Smash: Returns from previous installments. The player fights strong Fighting Mii Team enemies that are capable of launching them far with most attacks until they are KO'd, while no items appear.
- All-Star Smash: A new mode that merges All-Star Mode and Endless Mode from Multi-Man Smash in the previous installment. The player fights all (currently available) playable characters until they are KO'd, in a similar manner to "The True All-Star Battle" Event Match from Super Smash Bros. Brawl. The fighters appear in order of their first appearance (based on Japanese release dates).
Home-Run Contest
- Main article: Home-Run Contest
Home-Run Contest is a minigame mode from previous Super Smash Bros. games that was added in the version 5.0.0 update. The player damages a Sandbag within ten seconds and tries to launch it as far as possible using a Home-Run Bat. It can be played individually, competitively against four people, and cooperatively with two people. There are separate records for each.
Mii Fighters
The player can make and customize Mii Fighters here, including the Mii, name, special moves, voice options, and costumes.
amiibo
amiibo are scanned here and the player can change their name, alternate costume, and equip them with various spirits to help them in battle. If an amiibo is ported over from Super Smash Bros. for Nintendo 3DS / Wii U, they can be chosen to either start from scratch or at level 12.
Stage Builder
Stage Builder, added in the version 3.0.0 update, is a mode from previous Super Smash Bros. games where the player can create stages. They can draw out layouts, choose backgrounds, choose what music to play on the stage, and even add gimmicks like lava, cannons, portals, switches to move environments, and more. They can even decorate the stages by drawing ground in various planes of the stage.
Challenger's Approach
- SmashWiki article: Challenger's Approach
Challenger's Approach is a unique feature of this game, where the player can rematch with unlockable fighters. This menu appears after a few minutes of failing an unlock match. When selected, the Challenger Approaching screen will appear for the unlockable fighter to which the player lost the match, then the player can choose any character they have unlocked to rematch the unlockable fighter. When all fighters are unlocked, this mode is permanently inaccessible.
Online
Online is a mode where one can fight other players in battle via the Internet. Various modes are available, such as Quickplay, Battle Arenas, Shared Content, and Options. A Nintendo Switch Online subscription is required to access and play all online modes.
Quickplay
Quickplay is a mode where one or two players fight other players online. When playing solo, the player fights to gain GSP (Global Smash Power), a score of sorts, in either a 1-on-1, a 2-on-2 team battle, or a 3 or 4-player free-for-all; each fighter has separate GSP counts, which are all combined and divided by the roster (excluding the three Mii Fighters, who are unusable in Quickplay) for the player's average total GSP. Once reaching a certain amount of GSP (usually a very high number, which itself is subject to change), the player's fighter enters Elite Smash, an advanced sub-mode where only high-GSP players fight. Quickplay's co-op mode functions similarly to a team battle solo, albeit without GSP.
Battle Arenas
Battle Arenas is a mode where players can create or join servers, known as arenas, to fight friends and/or strangers. Arenas can either be made public, where any user can join said arena; or they can be set to "Friends Only", where only users in the player's friend list can join their arena. Many aspects such as the time limit, stock count, items, FS Meter, and stage hazards can be adjusted when creating the arena, as well as some being adjustable during the arena's lifespan; the player's rulesets in the Smash mode can be used in Battle Arenas, or new ones can be made. Arenas come with five-digit-long alphanumeric IDs (e.g., 77B4V) which can be used by players to find a specific arena they want to join; additionally, passwords (which can be up to 8 digits long) can be toggled on or off.
Playable characters
- “This is a fighting game that aims to include every character in history.”
- —Wynn Liaw, during an interview in January 1989.


Super Smash Bros. Ultimate features all 63 (65 if counting Pokémon Trainer's Pokémon separately) previously playable characters in the series, as well as 23 (24 if counting Pyra and Mythra separately) newcomers. 11 of the newcomers (namely, Inkling, Daisy, Ridley, Simon, Richter, Chrom, Dark Samus, King K. Rool, Isabelle, Ken, and Incineroar) are part of the base game, while 12 (13) of them (namely, Piranha Plant, Joker, Hero, Banjo & Kazooie, Terry, Byleth, Min Min, Steve, Sephiroth, Pyra / Mythra, Kazuya, and Sora) were released post-launch as downloadable content (DLC). Of those 12 DLC newcomers, 11 are available through two Fighters Passes (with the first pass containing five fighters and the second containing six fighters) and can be purchased individually. The remaining DLC newcomer, Piranha Plant, is available separately from these passes.[4] In addition, Ridley, Dark Samus, and Piranha Plant are playable for the first time in any game, and Pichu and Young Link are playable in the series for the first time since Super Smash Bros. Melee. Not including the briefly controllable Master Hand, a total of 74 (76) fighters are playable in the base game, while 12 (13) fighters have been released as DLC for a total of 86 (89) characters. Super Smash Bros. Ultimate also sees a significant increase in the number of newly-introduced third-party characters, introducing eleven non-Nintendo fighters as opposed to Super Smash Bros. Brawl's two or Super Smash Bros. for Nintendo 3DS / Wii U's five.
Uniquely, seven characters (veterans Lucina and Dark Pit and newcomers Daisy, Richter, Chrom, Dark Samus, and Ken) are given a special category known as Echo Fighters, which are characters whose movesets are heavily derived from those of other characters. While some Echo Fighters have distinct differences, such as Chrom and Ken, others, like Daisy and Richter, may be completely identical to the fighter they are based on. However, while their movesets may be similar to their base character, they have unique visual differences such as Final Smashes, taunts, victory animations, and, in some cases, victory themes.
The number beside each playable character (excluding Echo Fighters) signifies the order in which they were announced to be playable in the Super Smash Bros. series; in the case of the unlockable characters from Super Smash Bros. Melee, their order is based on the number of Smash matches required to unlock them in that game. Instead of having their own number, Echo Fighters are given the same number as their base counterpart with a lower-case epsilon symbol (ε) being placed next to the number. (This also affects their location on the character selection screen.) This numerical order is similar to the character order in the previous game's Sound Test, with exceptions such as third-party characters and previously unlockable characters being mixed in with other characters, and Echo Fighters being placed next to the characters they are based on.
Of the playable character roster, if excluding Mii Fighters, Roy, and Banjo & Kazooie, fourteen originate from the Super Mario franchise and its spin-off series (twenty-one if counting each of the Koopalings), with Mario, Luigi, Peach, Bowser, Dr. Mario, Rosalina & Luma, Bowser Jr., Daisy, Piranha Plant, Donkey Kong, Diddy Kong, King K. Rool, Yoshi, and Wario being playable.
Super Smash Bros. Ultimate contains the most unlockable characters out of any Super Smash Bros. game. The starting roster consists of the eight starting fighters from the original Super Smash Bros. (Mario, Donkey Kong, Link, Samus, Yoshi, Kirby, Fox, and Pikachu), as well as the ability to create a Mii to include them as starter characters; the rest of the roster needs to be unlocked. There are three ways for a character to be unlocked:
- The player can play Smash matches to summon new character unlock fights, with a 10-minute gap existing between unlocks.
- The player can play as certain characters in Classic Mode, with each character belonging to a specific unlock tree.
- The player can fight and have the character join the player's party in the World of Light.
On the character selection screen, the roster is ordered by number (except for Miis, who are positioned next to the "Random" panel), instead of roughly by series like in previous installments.
Veterans | ||||
|---|---|---|---|---|
| Character | Super Smash Blog Description | Special moves | Final Smash | |
 26 Mr. Game & Watch
|
When using his side special, Judge, this fighter pulls out a hammer and the numbers 1-9 are displayed. If you pull off a 9 attack, it will really knock the opponent back. His Final Smash turns him into an octopus that can pull opponents off the stage! | Neutral - Chef Side - Judge Up - Fire Down - Oil Panic |
Octopus | |
| Release date: January 1, 1988 How to unlock:
| ||||
 55 Pac-Man
|
This fighter appears in both his classic form and his form with hands and legs. He has many unique special moves, such as using a trampoline or a fire hydrant. For his Final Smash, he grows into a giant Super PAC-MAN, chomping and launching his opponents! | Neutral - Bonus Fruit Side - Power Pellet Up - Pac-Jump Down - Fire Hydrant |
Super Pac-Man | |
| Release date: January 1, 1988 How to unlock:
| ||||
02 Donkey Kong
|
His charged punch is one of the strongest attacks in the game! In Super Smash Bros. Ultimate, his Final Smash has been updated from Konga Beat to a flurry of punches! | Neutral - Giant Punch Side - Headbutt Up - Spinning Kong Down - Hand Slap |
Jungle Rush | |
| Release date: January 1, 1988 How to unlock:
| ||||
01 Mario
|
Mario is an all-around fighter who uses his wide variety of techniques to respond to any situation. In Super Smash Bros. Ultimate, he shows up in his Wedding tux and his Builder outfit, and Cappy even makes an appearance! | Neutral - Fireball Side - Cape Up - Super Jump Punch Down - F.L.U.D.D. |
Mario Finale | |
| Release date: January 1, 1988 How to unlock:
| ||||
09 Luigi
|
He can jump higher than his brother, Mario. His Up Special, Super Jump Punch, will gain maximum damage and launching power when hitting the opponent right at the start. It truly is a "Special" move. He also uses his new Poltergust for his throw! | Neutral - Fireball Side - Green Missile Up - Super Jump Punch Down - Luigi Cyclone |
Poltergust G-00 | |
| Release date: January 1, 1988 How to unlock:
| ||||
 49 Little Mac
|
As a boxer, Little Mac fights with his fists alone—no kicks! When his Power Meter fills up, he can use a special KO Uppercut, which can really turn a battle around. For his Final Smash, he turns into Giga Mac and pummels the opponent with a furious rush of punches! | Neutral - Straight Lunge Side - Jolt Haymaker Up - Rising Uppercut Down - Slip Counter |
Giga Mac Rush | |
| Release date: January 1, 1988 How to unlock:
| ||||
 59 Duck Hunt
|
This duo excels at long-range attacks, like kicking exploding cans and throwing clay pigeons. For their Final Smash, three games from the Light Gun Series team up: Duck Hunt, Hogan's Alley, and Wild Gunman! | Neutral - Trick Shot Side - Clay Shooting Up - Duck Jump Down - Wild Gunman |
NES Zapper Posse | |
| Release date: January 1, 1988 How to unlock:
| ||||
03 Link
|
Link has been redesigned to match his appearance in The Legend of Zelda: Breath of the Wild. He can now pick up arrows he's fired, and his bombs have been upgraded to remote bombs, so you can set them off when the timing is just right! | Neutral - Bow and Arrows Side - Boomerang Up - Spin Attack Down - Remote Bomb |
Ancient Bow and Arrow | |
 04 Samus
|
With her Charge Shot, Missile and Bomb, Samus has three different projectiles to keep her opponents in check from a distance. When fully charged up, her Charge Shot is quite powerful. For her Final Smash, she launches a wide laser beam that can be moved up and down! | Neutral - Charge Shot Side - Missile Up - Screw Attack Down - Bomb |
Zero Laser | |
 05 Yoshi
|
Yoshi is all about egg-related moves, like throwing eggs, swallowing opponents and turning them into eggs, or turning into an egg and charging toward an opponent. With a high jump, recovery is a piece of cake for Yoshi! And for his Final Smash, a Yoshi army stampedes through the stage. | Neutral - Egg Lay Side - Egg Roll Up - Egg Throw Down - Yoshi Bomb |
Stampede! | |
 06 Kirby
|
Kirby's ability to copy other fighters is totally unique! While he is light and can be launched easily, he can also jump up to five times in the air, so he has great recovery. Look for his new Stone transformation, too. | Neutral - Inhale Side - Hammer Flip Up - Final Cutter Down - Stone |
Ultra Sword | |
 07 Fox
|
He can overwhelm his opponents with his quick movements, and his specials don't leave him open for counterattacks. His costume and voice have been redone to match his appearance in Star Fox Zero. This Fox is brand new! "Come on!" | Neutral - Blaster Side - Fox Illusion Up - Fire Fox Down - Reflector |
Team Star Fox | |
 08 Pikachu
|
This fierce fighter uses electric moves like Thunder Jolt and Thunder. Pikachu Libre is one of the alternate costumes and you can tell she's female by the shape of her tail. | Neutral - Thunder Jolt Side - Skull Bash Up - Quick Attack Down - Thunder |
Volt Tackle | |
 10 Ness
|
Ness has a variety of moves, from long-range attacks using psychic powers known as "PSI," to short-range attacks with his bat and yo-yo. Ness can also unleash PK Thunder, a guided attack that can launch him like a rocket or help him recover! | Neutral - PK Flash Side - PK Fire Up - PK Thunder Down - PSI Magnet |
PK Starstorm | |
How to unlock:
| ||||
 11 Captain Falcon
|
A fighter that possesses both speed and power! But in exchange, he is frequently left open. Being able to successfully land his neutral special, Falcon Punch, can greatly influence the battle in multiplayer matches. | Neutral - Falcon Punch Side - Raptor Boost Up - Falcon Dive Down - Falcon Kick |
Blue Falcon | |
How to unlock:
| ||||
 12 Jigglypuff
|
Jigglypuff can jump 5 times in the air and can move faster in the air than on the ground. Use Jigglypuff's great aerial ability to overwhelm your opponent! If you manage to land the down special Rest, you can powerfully launch your opponent. | Neutral - Rollout Side - Pound Up - Sing Down - Rest |
Puff Up | |
How to unlock:
| ||||
13 Peach
|
THE super princess. Watch out for her powerful kicks while she's airborne. Using her down special, she picks vegetables and throws them at her opponents. Sometimes she even gets items...like a Bob-omb! | Neutral - Toad Side - Peach Bomber Up - Peach Parasol Down - Vegetable |
Peach Blossom | |
How to unlock:
| ||||
14 Bowser
|
Who's the greatest nemesis of all!? It's King Bowser! In Super Smash Bros, his power and weight make him a reliable fighter. Use his Fire Breath to keep opponents at bay, then use his damaging attacks to launch them off the stage! He transforms into Giga Bowser for his Final Smash and delivers a super powerful punch! | Neutral - Fire Breath Side - Flying Slam Up - Whirling Fortress Down - Bowser Bomb |
Giga Bowser Punch | |
How to unlock:
| ||||
 15 Ice Climbers
|
Back in the battle after a ten-year absence! There are two of them, so does that make them twice as strong as other fighters? | Neutral - Ice Shot Side - Squall Hammer Up - Belay Down - Blizzard |
Iceberg | |
How to unlock:
| ||||
 16 Sheik
|
Now Sheik joins the battle wearing the Sheikah costume from The Legend of Zelda: Breath of the Wild. Keep the pressure on your opponent by using his speedy dash to quickly close in on (or get away from) your opponent! | Neutral - Needle Storm Side - Burst Grenade Up - Vanish Down - Bouncing Fish |
Sheikah Dance | |
How to unlock:
| ||||
17 Zelda
|
You might recognize Zelda's look from The Legend of Zelda: A Link Between Worlds game. In battle, she uses magical moves to reflect and teleport, and for her Final Smash, she seals her opponents away in the Triforce of Wisdom. If an opponent has 100% damage or more, they will be instantly KO'd! | Neutral - Nayru's Love Side - Din's Fire Up - Farore's Wind Down - Phantom Slash |
Triforce of Wisdom | |
How to unlock:
| ||||
 18 Dr. Mario
|
He has more attack and launch power than Mario, but his jump and recovery is not as good. Pro tip: You can repeatedly press the B button when using his down special, Dr. Tornado, to float a bit! | Neutral - Megavitamin Side - Super Sheet Up - Super Jump Punch Down - Dr. Tornado |
Doctor Finale | |
How to unlock:
| ||||
 19 Pichu
|
Pichu is back after 17 years! Pichu's electric attacks have greater range and do more damage than its other attack types – but they also damage Pichu. | Neutral - Thunder Jolt Side - Skull Bash Up - Agility Down - Thunder |
Volt Tackle | |
How to unlock:
| ||||
 20 Falco
|
He's a talented aerial fighter with amazing jumping ability, but Falco is a bit slower on the ground. His final smash is an all-out attack using an unorthodox formation of Arwings! | Neutral - Blaster Side - Falco Phantasm Up - Fire Bird Down - Reflector |
Team Star Fox | |
How to unlock:
| ||||
 21 Marth
|
Marth is an exceptional swordfighter with a long reach. He'll do the most damage with attacks using the tip of his sword, so spacing is an important factor. | Neutral - Shield Breaker Side - Dancing Blade Up - Dolphin Slash Down - Counter |
Critical Hit | |
How to unlock:
| ||||
 21ε Lucina
|
Lucina is Marth's echo fighter, so she shares most of her standard and special attacks with Marth. However, while Marth's attacks are more powerful when made with the tip of his blade, Lucina's attacks just as powerful whether you use the tip or the base of the sword. | Neutral - Shield Breaker Side - Dancing Blade Up - Dolphin Slash Down - Counter |
Critical Hit | |
How to unlock:
| ||||
 22 Young Link
|
He’s back after 17 years! Young Link is faster than Link but he's also lighter, making him easier to launch. | Neutral - Fire Arrow Side - Boomerang Up - Spin Attack Down - Bomb |
Triforce Slash | |
How to unlock:
| ||||
 23 Ganondorf
|
His new design matches his appearance in The Legend of Zelda: Ocarina of Time! Now he uses his sword for all his smash attacks. He's a bit slimmer then he was before, but his Warlock Punch is devastating! For his final smash he transforms into Ganon, The Demon King and quickly charges forward. | Neutral - Warlock Punch Side - Flame Choke Up - Dark Dive Down - Wizard's Foot |
Ganon, The Demon King | |
How to unlock:
| ||||
 24 Mewtwo
|
A Legendary Pokémon known for its technical moves. Use Confusion or Disable as a diversion, then land a Shadow Ball! For its Final Smash, Mewtwo transforms into Mega Mewtwo Y and fires a projectile that freezes and launches the opponent! | Neutral - Shadow Ball Side - Confusion Up - Teleport Down - Disable |
Psystrike | |
How to unlock:
| ||||
 25 Roy
|
Get up close and personal for major damage! Unlike Marth, Roy's attacks are more powerful the closer you get to the base of his blade. For his Final Smash, his sword bursts into flame and sends anyone caught in the blast flying. | Neutral - Flare Blade Side - Double-Edge Dance Up - Blazer Down - Counter |
Critical Hit | |
How to unlock:
| ||||
 27 Meta Knight
|
This fighter not only has tons of quick moves, he can perform a midair jump five times! All his special moves have a recovery aspect, so use them at the right time. His Final Smash is Darkness Illusion, which unleashes a fast series of aerial attacks. | Neutral - Mach Tornado Side - Drill Rush Up - Shuttle Loop Down - Dimensional Cape |
Darkness Illusion | |
How to unlock:
| ||||
28 Pit
|
Pit is a well-balanced, well-rounded character with a defensive special that nullifies long distance attacks and excellent recovery. He's a great choice for new players! | Neutral - Palutena Bow Side - Upperdash Arm Up - Power of Flight Down - Guardian Orbitars |
Lightning Chariot | |
How to unlock:
| ||||
 28ε Dark Pit
|
Dark Pit is Pit's echo fighter. His abilities are mostly the same as Pit's, but his hair and clothes are different colors, he summons different weapons, and celebrates victory to a different tune. | Neutral - Silver Bow Side - Electroshock Arm Up - Power of Flight Down - Guardian Orbitars |
Dark Pit Staff | |
How to unlock:
| ||||
 29 Zero Suit Samus
|
Although not as powerful as Samus, her speed is exceptional! Her Paralyzer not only has the ability to stun opponents, but it can also turn into a whip. For her Final Smash, she dons her suit and fires a powerful laser! | Neutral - Paralyzer Side - Whip Lash Up - Boost Kick Down - Flip Jump |
Zero Laser | |
How to unlock:
| ||||
30 Wario
|
Wario has unique attacks, like using his Wario Bike and releasing noxious gas. He can jump higher than normal by leaping from his bike, which comes in handy when recovering. For his Final Smash, he turns into Wario-Man and creates copies of himself for an all-out attack! | Neutral - Chomp Side - Wario Bike Up - Corkscrew Down - Wario Waft |
Wario-Man | |
How to unlock:
| ||||
 31 Snake
|
Back by popular demand, Snake brings a ranged fighting style unlike any other fighter in the game. His Final Smash locks onto an opponent and fires five homing missiles. | Neutral - Hand Grenade Side - Remote Missile Up - Cypher Down - C4 |
Covering Fire | |
How to unlock:
| ||||
 32 Ike
|
Ike's side smash attack is extremely powerful, but it leaves him open, so you'll need to read your opponent's moves carefully. You can choose between his Path of Radiance and Radiant Dawn costumes. | Neutral - Eruption Side - Quick Draw Up - Aether Down - Counter |
Great Aether | |
How to unlock:
| ||||
 Pokémon Trainer 33 Squirtle / 34 Ivysaur / 35 Charizard
|
Pokémon Trainer returns with Squirtle, Ivysaur and Charizard. You can choose to play as a male or female trainer! | Squirtle Neutral - Water Gun Side - Withdraw Up - Waterfall Ivysaur Neutral - Bullet Seed Side - Razor Leaf Up - Vine Whip Charizard Neutral - Flamethrower Side - Flare Blitz Up - Fly All Down - Pokémon Change |
Triple Finish | |
How to unlock:
| ||||
 36 Diddy Kong
|
Donkey Kong's trusty partner Diddy Kong uses his light weight and agility to get around quickly! For his Final Smash, Diddy takes to the air with his Rocketbarrel while firing his popguns. The final hit is seriously powerful! | Neutral - Peanut Popgun Side - Monkey Flip Up - Rocketbarrel Boost Down - Banana Peel |
Hyper Rocketbarrel | |
How to unlock:
| ||||
 37 Lucas
|
Like Ness, Lucas is a young boy who uses PSI powers. Some of their PSI moves share the same names, but since Lucas has different abilities, the moves may work differently. Be sure to try them out! For his Final Smash, he calls down a shower of meteors along with Kumatora and Boney. | Neutral - PK Freeze Side - PK Fire Up - PK Thunder Down - PSI Magnet |
PK Starstorm | |
How to unlock:
| ||||
 38 Sonic
|
This speedy fighter has a lot of rush-type attacks. His final smash, Super Sonic, lets him fly around the stage at an incredible speed! | Neutral - Homing Attack Side - Spin Dash Up - Spring Jump Down - Spin Charge |
Super Sonic | |
How to unlock:
| ||||
 39 King Dedede
|
He's not very fast, but he's one of few heavyweight fighters with great recovery. Apparently, a defeat by Kirby inspired him to train hard to learn a move called Hovering, which allows him to float after taking a deep breath. | Neutral - Inhale Side - Gordo Throw Up - Super Dedede Jump Down - Jet Hammer |
Dede-Rush | |
How to unlock:
| ||||
 40 Olimar
|
Captain Olimar battles by issuing commands to various types of Pikmin under his control. Pikmin come in different colors that correspond to different abilities. Olimar's alternate appearance lets you play as Alph! | Neutral - Pikmin Pluck Side - Pikmin Throw Up - Winged Pikmin Down - Pikmin Order |
End of Day | |
How to unlock:
| ||||
 41 Lucario
|
Lucario is the only fighter whose attack power increases as it takes damage. A fighter that truly shines when in a pinch, choose Lucario for a thrilling battle. | Neutral - Aura Sphere Side - Force Palm Up - Extreme Speed Down - Double Team |
Aura Storm | |
How to unlock:
| ||||
 42 R.O.B.
|
He has two powerful projectiles: Robo Beam and Gyro, along with a very effective recovery. The 1P color in the North American version of the game is a light gray, and the 2P is red and white, but this is reversed in the Japanese version. | Neutral - Robo Beam Side - Arm Rotor Up - Robo Burner Down - Gyro |
Guided Robo Beam | |
How to unlock:
| ||||
 43 Toon Link
|
He's smaller and faster than Link. His bombs explode with a unique anime-style. For his Final Smash, he emits light from his left hand and any opponents hit by it are trapped in the Triforce, subject to a punishing gauntlet of attacks. | Neutral - Hero's Bow Side - Boomerang Up - Spin Attack Down - Bomb |
Triforce Slash | |
How to unlock:
| ||||
 44 Wolf
|
The leader of the Star Wolf mercenary team makes his grand return after 10 years! He puts his sharp claws to good use in wild attacks, and his Final Smash is an all-out attack by Team Star Wolf! If Fox or Falco is in the battle, you may hear a unique line of dialog. | Neutral - Blaster Side - Wolf Flash Up - Fire Wolf Down - Reflector |
Team Star Wolf | |
How to unlock:
| ||||
 45 Villager
|
This fighter attacks using skills from daily life in the village, such as planting, growing, and cutting down trees. They can also use items like nets, slingshots, and turnips. The Villager can also put items or incoming projectiles in a pocket to use later. | Neutral - Pocket Side - Lloid Rocket Up - Balloon Trip Down - Timber |
Dream Home | |
How to unlock:
| ||||
 46 Mega Man
|
Mega Man's standard and special moves use weapons copied from the bosses he's fought throughout the Mega Man series, so he has more projectiles than any other fighter. His Final Smash now features Proto Man and Bass! | Neutral - Metal Blade Side - Crash Bomber Up - Rush Coil Down - Leaf Shield |
Mega Legends | |
How to unlock:
| ||||
 47 Wii Fit Trainer
|
A fighter that attacks with healthy moves like stretching and yoga poses. You can pick between male and female versions. Charging up Sun Salutation all the way recovers a bit of health! | Neutral - Sun Salutation Side - Header Up - Super Hoop Down - Deep Breathing |
Wii Fit | |
How to unlock:
| ||||
 48 Rosalina & Luma
|
Luma mimicks Rosalina's attacks. Luma also increases Rosalina's reach and can even take a hit for her! If Rosalina gets hit, Luma gets very flustered and flutters both hands. | Neutral - Luma Shot Side - Star Bits Up - Launch Star Down - Gravitational Pull |
Grand Star | |
How to unlock:
| ||||
 50 Greninja
|
A ninja-like fighter that battles with moves like the Water Shuriken. Greninja can use a log for clever counterattacks, and this Pokémon can even stick to walls. During its Final Smash, it turns into Ash-Greninja...!? | Neutral - Water Shuriken Side - Shadow Sneak Up - Hydro Pump Down - Substitute |
Secret Ninja Attack | |
How to unlock:
| ||||
 51 Mii Brawler
|
You can choose from the three types of Mii Fighter and select from a set of three specials for each type. You can also choose one of 12 voice options! An expert in physical combat, capable of delivering powerful blows. | Neutral - Shot Put / Flashing Mach Punch / Exploding Side Kick Side - Onslaught / Burning Dropkick / Suplex Up - Soaring Axe Kick / Helicopter Kick / Thrust Uppercut Down - Head-On Assault / Feint Jump / Counter Throw |
Omega Blitz | |
How to unlock:
| ||||
 52 Mii Swordfighter
|
You can choose from the three types of Mii Fighter and select from a set of three specials for each type. You can also choose one of 12 voice options! An expert in swordplay with fantastic reach and attack power. | Neutral - Gale Strike / Shuriken of Light / Blurring Blade Side - Airborne Assault / Chakram / Gale Stab Up - Stone Scabbard / Skyward Slash Dash / Hero's Spin Down - Blade Counter / Reversal Slash / Power Thrust |
Final Edge | |
How to unlock:
| ||||
 53 Mii Gunner
|
You can choose from the three types of Mii Fighter and select from a set of three specials for each type. You can also choose one of 12 voice options! An expert in long-range projectile combat. | Neutral - Charge Blast / Laser Blaze / Grenade Launch Side - Flame Pillar / Gunner Missile / Stealth Burst Up - Lunar Launch / Cannon Jump Kick / Arm Rocket Down - Echo Reflector / Bomb Drop / Absorbing Vortex |
Full Blast | |
How to unlock:
| ||||
54 Palutena
|
With her wings and staff, this goddess's attacks cover a wide range. With her up smash, neutral special, and side special, she can create a ranged attack in almost every direction except for directly beneath her! Keep the pressure on your opponents from a distance with ranged attacks! | Neutral - Autoreticle Side - Explosive Flame Up - Warp Down - Counter/Reflect Barrier |
Black Hole Laser | |
How to unlock:
| ||||
 56 Robin
|
A fighter that wields the Levin Sword and four different Tomes! Like in the original game, these weapons can only be used a certain number of times, so keep a close eye on the battle situation. Both the male and female versions of Robin are available, so you can choose your favorite. | Neutral - Thunder Side - Arcfire Up - Elwind Down - Nosferatu |
Pair Up | |
How to unlock:
| ||||
 57 Shulk
|
He is the only fighter that can change his status during battle. His sword, the Monado, allows him to switch between five modes—Jump (Green), Speed (Blue), Shield (Yellow), Buster (Purple) and Smash (Red)—which change his abilities for a short time. Fun fact: Shulk's eighth color variation puts him in a pair of swimming trunks! | Neutral - Monado Arts Side - Back Slash Up - Air Slash Down - Vision |
Chain Attack | |
How to unlock:
| ||||
58 Bowser Jr.
|
The Jr. Clown Car this little fella rides in takes less damage when attacked than Bowser Jr. himself—so try to stay in the car when taking damage. The different color variations are the Koopalings! | Neutral - Clown Cannon Side - Clown Kart Dash Up - Abandon Ship! Down - Mechakoopa |
Shadow Mario Paint | |
How to unlock:
| ||||
 60 Ryu
|
Ryu is a special character—you can use directional command inputs to trigger his special moves. Executing moves like his Hadoken and Shoryuken using the command inputs from the original game will raise their power. You can even use a Shakunetsu Hadoken by inputting ←↙↓↘→ then tapping the attack button while facing right! | Neutral - Hadoken Side - Tatsumaki Senpukyaku Up - Shoryuken Down - Focus Attack |
Shin Shoryuken / Shinku Hadoken | |
How to unlock:
| ||||
 61 Cloud
|
He's the protagonist of Final Fantasy VII. You can also select his Advent Children outfit. Charging up his Limit Gauge increases his special move abilities! Land a powerful hit! | Neutral - Blade Beam Side - Cross Slash Up - Climhazzard Down - Limit Charge / Finishing Touch |
Omnislash / Omnislash Ver. 5 | |
How to unlock:
| ||||
 62 Corrin
|
Corrin was available as a downloadable fighter in the previous version of Super Smash Bros. This fighter uses all kinds of attacks, like Torrential Roar and Dragon Fang Shot. Players can choose male or female versions! | Neutral - Dragon Fang Shot Side - Dragon Lunge Up - Dragon Ascent Down - Counter Surge |
Torrential Roar | |
How to unlock:
| ||||
 63 Bayonetta
|
An Umbra Witch who equips guns on her arms and legs, Bayonetta has mastered the beautiful but brutal Bullet Arts fighting style. She can even slow down her opponents with Witch Time! | Neutral - Bullet Climax Side - Heel Slide / After Burner Kick Up - Witch Twist Down - Witch Time |
Infernal Climax | |
How to unlock:
| ||||
NewcomersBase game | ||||
| Character | Super Smash Blog Description | Special moves | Final Smash | |
 04ε Dark Samus
|
Dark Samus joins the battle as Samus's echo fighter. With floatier movement, she's a little different from Samus--and she doesn't roll when dodging or jumping. If you look closely, you can see that her bombs and missiles look a little different, too. | Neutral - Charge Shot Side - Missile Up - Screw Attack Down - Bomb |
Phazon Laser | |
How to unlock:
| ||||
 13ε Daisy
|
Her basic move set is the same as Peach's, but this princess has her own unique personality. She's known for being upbeat, energetic, and a bit of a tomboy. | Neutral - Toad Side - Daisy Bomber Up - Daisy Parasol Down - Vegetable |
Daisy Blossom | |
How to unlock:
| ||||
 25ε Chrom
|
The protagonist of Fire Emblem Awakening joins the battle as Roy's echo fighter. His Final Smash is Awakening Aether. Like Aether in the original game, this move has Chrom charge toward his opponent, slashing with his sword. | Neutral - Flare Blade Side - Double-Edge Dance Up - Soaring Slash Down - Counter |
Awakening Aether | |
How to unlock:
| ||||
 60ε Ken
|
Ken joins the battle as Ryu's Echo Fighter! Their differences are carried over from the original game: Ken's Hadoken is shaped differently, his strong Shoryuken has flames, and he moves a bit faster. He has two Final Smashes: Shinryuken and Shippu Jinraikyaku. | Neutral - Hadoken Side - Tatsumaki Senpukyaku Up - Shoryuken Down - Focus Attack |
Shippu Jinraikyaku / Shinryuken | |
How to unlock:
| ||||
 64 Inkling
|
Attacks with a variety of weapons. Covering opponents with ink leads to more and more damage—plus these Inklings are really fashionable! | Neutral - Splattershot Side - Splat Roller Up - Super Jump Down - Splat Bomb |
Killer Wail | |
How to unlock:
| ||||
 65 Ridley
|
Joining the battle from the storied Metroid series, Ridley's long tail and sharp claws let him unleash a torrent of devastating attacks. His Final Smash is a powerful stream of plasma breath intense enough to bring down Samus's starship. | Neutral - Plasma Breath Side - Space Pirate Rush Up - Wing Blitz Down - Skewer |
Plasma Scream | |
How to unlock:
| ||||
 66 Simon
|
The protagonist of Castlevania. He uses his holy whip, Vampire Killer, to perform a smash attack with long reach. He also uses projectiles like an axe, holy water and cross. | Neutral - Axe Side - Cross Up - Uppercut Down - Holy Water |
Grand Cross | |
How to unlock:
| ||||
 66ε Richter
|
Richter from the Castlevania series joins the battle as Simon's Echo Fighter! His basic attacks are the same as Simon's, but with subtle variations. In addition to that, his Holy Water is a different color. | Neutral - Axe Side - Cross Up - Uppercut Down - Holy Water |
Grand Cross | |
How to unlock:
| ||||
67 King K. Rool
|
With long-distance special moves like the Blunderbuss, and counter moves like Stomach Attack, he is a versatile fighter. His Final Smash, Blast-O-Matic, was apparently a weapon created to destroy DK Island... | Neutral - Blunderbuss Side - Crownerang Up - Propellerpack Down - Gut Check |
Blast-o-Matic | |
How to unlock:
| ||||
 68 Isabelle
|
Isabelle joins the battle from Animal Crossing: New Leaf! She uses various trinkets from around the village to battle. Her side special, "Fishing Rod," not only allows her to snag and bring opponents closer, it can also be used as a recovery move. | Neutral - Pocket Side - Fishing Rod Up - Balloon Trip Down - Lloid Trap |
Dream Town Hall | |
How to unlock:
| ||||
 69 Incineroar
|
A fighter with many special moves that appear to come from the world of pro wrestling. Incineroar has many moves from its original game, like Darkest Lariat, Cross Chop, and Revenge. Its Final Smash is Max Malicious Moonsault. Let the Z-Power explode and deliver a powerful blow! | Neutral - Darkest Lariat Side - Alolan Whip Up - Cross Chop Down - Revenge |
Max Malicious Moonsault | |
How to unlock:
| ||||
Downloadable content | ||||
| Character | Nintendo eShop/DLC website Description | Special moves | Final Smash | |
 70 Piranha Plant
|
Piranha Plant joins the battle as a stand-alone fighter in the Super Smash Bros. Ultimate game! With its powerful bite, Poison Breath, and ability to call in Petey Piranha for a larger-than-life Final Smash, this fighter's ferocity is as sharp as it teeth. Ready your pipes and flowerpots; your opponent won't see you coming! (Then again, Piranha Plant doesn't really "see" either. It doesn't have eyes.) | Neutral - Ptooie Side - Poison Breath Up - Piranhacopter Down - Long-Stem Strike |
Petey Piranha | |
| Release date: January 29, 2019 (Digital version pre-purchase or My Nintendo); February 1, 2019 (General release) Price: No cost (Digital version pre-purchase or My Nintendo); US$4.99 (after February 1, 2019) | ||||
 71 Joker
|
Joker steals the show when he joins the Super Smash Bros. Ultimate game as a playable fighter! This speedy fighter wields a knife and a gun to rack up damage. When his Rebellion Gauge is full, Joker summons his Persona, Arsene, to immediately power up his attacks for a limited time. | Neutral - Gun / Gun Special Side - Eiha / Eigaon Up - Grappling Hook / Wings of Rebellion Down - Rebel's Guard / Tetrakarn / Makarakarn |
All-Out Attack | |
| Release date: April 17, 2019 Price: US$5.99 (Challenger Pack 1); US$24.99 (Fighters Pass) | ||||
 72 Hero
|
The Hero from the DRAGON QUEST series joins Super Smash Bros. Ultimate as a playable fighter! Wielding the Supreme Sword of Light and a trusty shield, he can slice his foes and block incoming attacks. When Hero pulls up his Command Selection screen, he’ll have access to a random selection of spells that could turn the tide of battle in his favor! | Neutral - Frizz / Frizzle / Kafrizz Side - Zap / Zapple / Kazap Up - Woosh / Swoosh / Kaswoosh Down - Command Selection |
Gigaslash | |
| Release date: July 30, 2019 Price: US$5.99 (Challenger Pack 2); US$24.99 (Fighters Pass) | ||||
 73 Banjo & Kazooie
|
The missing piece of the puzzle is found as Banjo & Kazooie join Super Smash Bros. Ultimate as a playable fighter! With Banjo’s bare hands to bruise rivals up close and Kazooie’s egg-cellent shooting skills, your rivals will be singing the blues in no time. For their Final Smash, these perfect partners call upon a flock of Jinjos and the Mighty Jinjonator to deal the final blow to any “feeble jerk” that may stand in their way! | Neutral - Egg Firing / Breegull Blaster Side - Wonderwing Up - Shock Spring Jump Down - Rear Egg |
The Mighty Jinjonator | |
| Release date: September 4, 2019 Price: US$5.99 (Challenger Pack 3); US$24.99 (Fighters Pass) | ||||
 74 Terry
|
Terry Bogard faces the fury in the Super Smash Bros. Ultimate game as a new playable fighter! This iconic fighter from the Fatal Fury series of fighting games is the fourth fighter in the Super Smash Bros. Ultimate Fighters Pass. Using his Power Wave and Burning Knuckle, earn your title as The King of Fighters! | Neutral - Power Wave Side - Burning Knuckle / Crack Shoot Up - Rising Tackle Down - Power Dunk Super Special Move 1 - Power Geyser Super Special Move 2 - Buster Wolf |
Triple Wolf | |
| Release date: November 6, 2019 Price: US$5.99 (Challenger Pack 4); US$24.99 (Fighters Pass) | ||||
 75 Byleth
|
Byleth is coming to the Super Smash Bros. Ultimate game as a new playable fighter! This iconic fighter is the fifth fighter in the Super Smash Bros. Ultimate Fighters Pass. Using the Heroes’ Relics and the Sword of the Creator, represent the three houses and realize their full potential. | Neutral - Failnaught Side - Areadbhar Up - Sword of the Creator Down - Amyr |
Progenitor God Ruptured Heaven | |
| Release date: January 28, 2020 Price: US$5.99 (Challenger Pack 5); US$24.99 (Fighters Pass) | ||||
 76 Min Min
|
Min Min from the ARMS game is coming to the Super Smash Bros. Ultimate game as a new playable fighter! This iconic fighter is the first fighter in the Super Smash Bros. Ultimate Fighters Pass Vol 2 DLC. Spring into action using the Ramram, Megawatt, and Dragon ARMS to keep your opponents at bay, distance is the key! | Up - ARMS Jump / ARM Hook Down - ARMS Change |
ARMS Rush | |
| Release date: June 29, 2020 Price: US$5.99 (Challenger Pack 6); US$29.99 (Fighters Pass Vol. 2) | ||||
 77 Steve
|
Steve & Alex from the Minecraft game are coming to the Super Smash Bros. Ultimate game as a new playable fighter! This iconic fighter is the second fighter in the Super Smash Bros. Ultimate Fighters Pass Vol 2 DLC. Use Steve and Alex’s various tools to mine and craft your way to victory! | Neutral - Mine / Craft / Create Block Side - Minecart Up - Elytra Down - TNT |
House of Boom | |
| Release date: October 13, 2020 Price: US$5.99 (Challenger Pack 7); US$29.99 (Fighters Pass Vol. 2) | ||||
 78 Sephiroth
|
Sephiroth, armed with his ruthless Masamune sword and a desire to destroy, joins the Super Smash Bros. Ultimate game as a part of the Super Smash Bros. Ultimate Fighters Pass Vol 2 DLC! This silver-haired swordsman is Cloud's arch nemesis and one of the most iconic villains in gaming. Don't be fooled by his chillingly calm demeanor, his hard-hitting style can deal some white-hot damage. | Neutral - Flare / Megaflare / Gigaflare Side - Shadow Flare Up - Blade Dash / Octoslash Down - Scintilla |
Supernova | |
| Release date: December 22, 2020 (available early from December 17, 2020 by clearing the Sephiroth Challenge) Price: US$5.99 (Challenger Pack 8); US$29.99 (Fighters Pass Vol. 2) | ||||
 79 Pyra / 80 Mythra
|
Pyra/Mythra from the Xenoblade Chronicles 2 game join the Super Smash Bros. Ultimate game as part of the Fighters Pass Vol 2 DLC! Pyra hits with incredible power and Mythra boasts extreme speed. Swap between the two at any point during battle—or just stick with one. | Pyra Neutral - Flare Nova Side - Blazing End Up - Prominence Revolt Down - Swap to Mythra Mythra Neutral - Lightning Buster Side - Photon Edge Up - Ray of Punishment / Chroma Dust Down - Swap to Pyra |
Burning Sword (Pyra) Sacred Arrow (Mythra) | |
| Release date: March 4, 2021 Price: US$5.99 (Challenger Pack 9); US$29.99 (Fighters Pass Vol. 2) | ||||
 81 Kazuya
|
From the Tekken series, Kazuya Mishima brings his demonic DNA into the fray as a DLC fighter in the Super Smash Bros. Ultimate game. Kazuya’s fighting style captures the distinct style of the Tekken series as he gets up close and personal with heavy strikes and incredible comeback power. His specials tap into his Devil Gene with moves like the beam-shooting Devil Blaster and high-flying Devil Wings. The son of Tekken icon Heihachi Mishima, Kazuya has a chip on his shoulder and destructive power. | Neutral - Devil Blaster Side - Devil Fist Up - Devil Wings Down - Heaven's Door |
Final Blaster | |
| Release date: June 29, 2021 Price: US$5.99 (Challenger Pack 10); US$29.99 (Fighters Pass Vol. 2) | ||||
 82 Sora
|
Sora from the KINGDOM HEARTS series joins the Super Smash Bros. Ultimate roster! Wielding his Keyblade and an arsenal of spells, Sora is a veteran when it comes to battling enemies and is ready to bring his 3-hit combos and aerial style into the fray. | Neutral - Magic Side - Sonic Blade Up - Aerial Sweep Down - Counterattack |
Sealing the Keyhole | |
| Release date: October 18, 2021[5] Price: US$5.99 (Challenger Pack 11); US$29.99 (Fighters Pass Vol. 2) | ||||
Other | ||||
| Character | Notes | Standard attacks | Special moves | |
 Master Hand
|
Master Hand makes a brief playable appearance in the ending of World of Light, where he is playable in the penultimate level before fighting Galeem and Dharkon. In this battle similar to a round of Mob Smash, Master Hand must take out 50 light and dark puppets of various fighters. Unlike regular fighters, Master Hand starts with 700 HP instead of 0% damage, where losing all of his HP results in failure. He also can fly around the stage. The player can use eight different moves as Master Hand, which are derived from his boss counterpart. Once all 50 puppet fighters are defeated, the battle is over and Master Hand is no longer playable. | Neutral - Finger Snap Side - Slap Up - Drill Down - Paper Crush |
Neutral - Finger Gun Side - Chakram Up - Iron Ball Roll Down - Finger Beam | |
Alternate characters and gender swaps
Several characters can change their gender in their alternate costumes, while other characters have alternate costumes that turn them into completely different characters. In the latter case, the game recognizes these characters individually as they get announcer calls, crowd chants, and Boxing Ring titles (except for Hero in the former two), but in-game, they have the same attributes as their default character.
Female Pokémon Trainer

Alph
(Olimar)
Male Wii Fit Trainer
Female Robin
Larry
(Bowser Jr.)
Roy
(Bowser Jr.)
Wendy
(Bowser Jr.)
Iggy
(Bowser Jr.)
Morton
(Bowser Jr.)
Lemmy
(Bowser Jr.)
Ludwig
(Bowser Jr.)
Female Corrin
Inkling Boy
Hero (Dragon Quest III)
(Hero)
Hero (Dragon Quest IV)
(Hero)
Hero (Dragon Quest VIII)
(Hero)
Female Byleth
Alex
(Steve)
Zombie
(Steve)
Enderman
(Steve)
_SSBU.png)

_SSBU.png)
_SSBU.png)


_SSBU.png)


Bosses
All Light Realm and Dark Realm bosses, except for Galeem and Dharkon, appear as Classic Mode bosses as well. The stage bosses listed are found in Gaur Plain, Wily Castle, and Find Mii respectively.
Light Realm bosses
| Image | Boss | Description |
|---|---|---|

|
Galeem |
The first antagonist of the World of Light mode, Galeem controls the Master Hands and uses light-based attacks, such as a blue orb of energy, laser beams, and mines that explode in a plus formation. Galeem can also use its wings to drill the player. When fought with Dharkon, Galeem will occasionally attack Dharkon instead of the player. |
|
|
Master Hand |
An army of Master Hands serve Galeem in the World of Light mode. Master Hand attacks by poking and slapping the player, drilling and flying into the arena, and occasionally using magical attacks. Master Hand can also throw spiked balls and blobs of ink at the arena. |

|
Giga Bowser |
Giga Bowser is a monstrous version of Bowser that is immune to flinching. Instead of being launched, Giga Bowser's HP bar must be depleted to zero. Giga Bowser possesses all of Bowser's abilities, which are now even stronger but are slower to start. |

|
Galleom |
Galleom is a giant transforming mecha, possessing both a tank form and an ape-like robot mode. Its attacks include grabbing and crushing the player, firing six homing missiles in tank mode, jumping and stomping the ground, and charging across in tank mode; occasionally making a u-turn to hit the player again. When on low health, Galleom will stomp around in a tantrum, and gain faster attacks. |

|
Rathalos | Rathalos is a giant wyvern that can fly, breath fire, and swipe using its poisonous claws. Rathalos also can roar, dizzying the player. Rathalos' weak points are its tail and breaking through its hide, which may cause it to drop an item and become stunned respectively. |
Dark Realm bosses
| Image | Boss | Description |
|---|---|---|

|
Dharkon |
The second antagonist of the World of Light mode, Dharkon controls the Crazy Hands and can use its tentacles to attack the player, as well as darkness based attacks such as two giant energy waves. When fought with Galeem, Dharkon will occasionally attack Galeem instead of the player. |

|
Crazy Hand |
An army of Crazy Hands serve Dharkon in the World of Light mode. Crazy Hand uses many of the same attacks as Master Hand, but is much more chaotic and unpredictable in his attack pattern, and he has some unique attacks such as spawning bombs and flailing on the ground. |

|
Ganon |
Ganon is a demonic pig monster wielding two gigantic swords. Ganon can use his swords to spin and slash the player, and can also summon fire, lightning and malevolent energy. Ganon can only be damaged by striking his tail. |

|
Marx |
Marx is a colorful bat creature with a wide array of elemental attacks, as well as teleportation powers. Marx can fire crescent blades, create seeds that form giant thorny plants, spit an ice chunk that spreads horizontally, can split apart to form a black hole, and can spit a giant darkness laser at the player. |

|
Dracula |
Dracula is a boss with two different forms: a humanoid vampire and a green demon. His first form can summon fire and darkness and can transform into a swarm of bats to travel around. His final form gains claw based attacks, can summon ghosts to chase the player, and can cause jumping shockwave attacks. |
Stage bosses
| Image | Boss | Description |
|---|---|---|

|
Dark Emperor |
The Dark Emperor is a giant bird monster appearing in Find Mii. He can use magic to lower or increase a player's offensive, defensive, or speed stats. His attacks include causing an earthquake that will temporarily destroy platforms on the stage, flying into the stage to collide with players, and roaring which launches players far away. When defeated, he grants large stat boosts to whoever finished him. |

|
Metal Face |
Metal Face is a humanoid robot that has a chance to show up at nightfall in Gaur Plain. His attacks are a giant claw swipe, a platform-destroying laser, and a giant dash attack when he leaves the stage. If Metal Face is defeated, he will burst into a series of explosions that damage the other fighters on the stage. |

|
Yellow Devil |
A yellow robot present at Wily Castle with the ability to split into yellow blobs which barrage the player, as well as an eye laser attack. Its red eye is its weak point, and when having taken enough damage, it causes a damaging explosion that can be used against other fighters. |
Minor bosses
| Image | Boss | Description |
|---|---|---|

|
Fighting Mii Team |
A horde of Mii Fighters which swarm the player. They possess all the basic abilities of the three types of Mii Fighter. They have limited AI in most modes but are stronger in Cruel Smash. |
Stages
Unlike in previous installments, stages are selected before characters in Super Smash Bros. Ultimate. All stages can not only be played in their Final Destination form (known as Omega (Ω) form) as in Super Smash Bros. for Nintendo 3DS / Wii U, but also in a new Battlefield form, which adds three floating, pass-through platforms. Like the original Final Destination and Battlefield, in both forms for all stages, the stage is set on a large platform floating over an abyss, as opposed to a large pillar with walls leading down to the bottom, as is the case with several Omega stages in the previous installments. The player is also given the option to turn off stage hazards.
A new feature added to Super Smash Bros. Ultimate is Stage Morph, which causes the stage on which players are currently fighting to transform into another stage in the middle of the match. The player can choose two stages for this function, and can also set the frequency at which they transform between each other.
There are 103 stages in the base game, all of which are available from the start. There are also twelve stages released through DLC, with each DLC fighter (except Piranha Plant) having a stage of their own, and the addition of Small Battlefield in the version 8.1.0 update. The following list is sorted by the original Super Smash Bros. games in which they first appear. Stages marked with an asterisk (*) are downloadable content.
New


Super Smash Bros.


Super Smash Bros. Melee


Super Smash Bros. Brawl


Super Smash Bros. for Nintendo 3DS / Wii U


Nintendo 3DS version


Wii U version


Items
New


Returning


Assist Trophies
New


Returning


Poké Ball Pokémon
New


Returning


Nintendo Labo VR
After downloading the version 3.1.0 update released on May 30, 2019, the Nintendo Labo's Toy-Con VR Goggles can be used in the "VR" mode (found in "Games & More"), which allows a single player to play regular matches against CPUs or spectate CPU-controlled matches in virtual reality.[6] VR mode does not include the same rules and stages as Smash mode, as only Time matches of up to 10 minutes can be played, and only the CPU levels, launch rates, score/damage displays, and stage selection mode can be modified. Items also cannot be used.
The following 50 stages are available in VR:
Update history
This section is under construction. Therefore, please excuse its informal appearance while it is being worked on. We hope to have it completed as soon as possible.
Note that the most recently released software update must be downloaded to access Online. In addition, most updates invalidate replay data created before that update, making them unplayable, due to replays reading game data and inputting recordings of data live, rather than actual footage. Release dates are in Pacific Standard Time.
1.1.0
Release date: December 7, 2018
- Offline Gameplay
- Added a Hard difficulty to Adventure mode.
- Incorporated team colors when fighting false characters in the final battle.
- Online Gameplay
- Online now includes Quickplay, Battle Arenas, Spectate, and Background Matchmaking.
- Global Smash Power will now be displayed.
- Note that the above requires a Nintendo Switch Online membership.
- Game Data Adjustments
- The ability to receive spirit event data has been added.
- The ability to receive presents has been added.
- DLC
- The Fighters Pass special bonuses, based on the character Rex from Xenoblade Chronicles 2, have been added. Said bonus items are listed below:
- Rex Wig (Mii Fighter headgear, usable by all Mii Fighter types)
- Rex Outfit (Mii Swordfighter outfit)
- The Fighters Pass special bonuses, based on the character Rex from Xenoblade Chronicles 2, have been added. Said bonus items are listed below:
- Miscellaneous
- Game balance adjustments
- Various gameplay fixes
1.2.0
Release date: December 13, 2018
- Offline Gameplay
- Adjusted difficulty of approaching challengers.
- Online Gameplay
- When matchmaking in Quickplay, the Format setting of one's Preferred Rules will be more highly prioritized. This may cause matchmaking to take more time, and there's still no guarantee that players find a match that has their exact Preferred Rules.
- Increased the stability of the synchronous connection within Battle Arenas.
NOTE: Online features require a Nintendo Switch Online membership.
- Misc.
- Game balance adjustments.
- The fighters that had specific adjustments are listed below.
- Donkey Kong, Link, Kirby, Luigi, Ice Climbers, Young Link, Olimar, Toon Link, Villager, Greninja, Pac-Man, Duck Hunt, and Isabelle
- Bug fixes
- The player can no longer Z-drop items out of hitstun, weakening characters who were previously able to escape true combos by dropping their items.
- Fixed a glitch causing the 0.85× damage multiplier for short-hopped aerial attacks to still be active during a full hop if the player performed a short hop and landed without attacking out of it.
1.2.1
Release date: December 21, 2018
- Misc.
- Game balance adjustments.
- Various gameplay fixes.
2.0.0
Release date: January 30, 2019
- Offline Gameplay
- Spirit Board can now be played with up to four players offline
- The following spirits can now appear in the shop:
- Partner Pikachu
- Partner Eevee
- Dice Block
- River Survival
- Golden Dash Mushroom
- Online Mode
- GSP calculation method has been adjusted
- General
- Piranha Plant added as a playable fighter, a fighter spirit, and two smash tags. This content is DLC.
- Pressing both jump buttons now inputs a short hop.
- Fixed an issue where the KO score included one's teammate KO when Team Attack is on.
- Characters now respawn in the center of omega-form stages instead of to the left.
- Bug fixes
- Patched out the infinite Assist Trophy glitch.
- Fixed a glitch where if Olimar had any Attack-increasing Spirits equipped, the Attack multiplier would be applied twice for any of his attacks involving Pikmin, causing extremely large damage outputs.
- The song "Bein' Friend" was renamed "Bein' Friends".
- Game-balance adjustments.
- Misc.
- The fighters that had specific adjustments are listed below:
- Mario, Donkey Kong, Link, Samus, Dark Samus, Yoshi, Kirby, Pikachu, Luigi, Ness, Jigglypuff, Peach, Daisy, Bowser, Ice Climbers, Sheik, Pichu, Ganondorf, Mewtwo, Roy, Chrom, Mr. Game & Watch, Pit, Zero Suit Samus, Wario, Snake, Ike, Pokémon Trainer (Charizard), Diddy Kong, Lucas, Sonic, King Dedede, Lucario, R.O.B., Toon Link, Mega Man, Rosalina & Luma, Little Mac, Greninja, Palutena, Pac-Man, Robin, Shulk, Duck Hunt, Ryu, Ken, Cloud, Corrin, Bayonetta, Inkling, Ridley, King K. Rool, Isabelle, Incineroar, Mii Brawler, and Mii Gunner[7]
- Reversed the function of hiding models when the camera gets too close to the fighters in camera mode.
- Various gameplay fixes.
- The fighters that had specific adjustments are listed below:
2.0.1
Release date: February 22, 2019
- General
- Bug fixes
- A bug where the King K. Rool Adventure Challenge would not be noted as "completed", even if the player has completed said challenge, has been fixed.
- Bug fixes
- Misc.
- Various gameplay fixes.
2.0.2
Release date: April 2, 2019
- Offline Gameplay
- Added compatibility with the Young Link, Daisy, and Ken amiibo from the Super Smash Bros. line.
3.0.0
Release date: April 17, 2019
- Offline Gameplay
- Stage Builder added.
- DLC Spirit Board added. The spirits on this spirit board are only available to those who have downloaded applicable DLC, and these spirits never leave the board. The following spirits, based on characters from Persona 5, are available on the DLC Spirit Board for those who have downloaded Challenger Pack 1:
- Phantom Thieves of Hearts
- Igor
- Caroline & Justine
- Morgana
- Ryuji Sakamoto
- Ann Takamaki
- Yusuke Kitagawa
- Makoto Niijima
- Futaba Sakura
- Haru Okumura
- Goro Akechi
- If Challenger Pack 1 has been downloaded, the Joker (Student) Fighter Spirit can appear in the Vault Shop.
- Replays that have been converted into videos can now be edited.
- Online Gameplay
- Stages, Mii Fighters, replays, and videos can now be uploaded online and downloaded.
- Synchronization with Smash World (a service available through the Nintendo Switch Online mobile app) is now possible.
- Players with similar Global Smash Power are matched more often in Quickplay.
- General
- Joker added as a playable fighter, two fighter spirits (Joker (Phantom Thief) and Joker (Student)), and two smash tags. Challenger Pack 1 is required to access this content.
- Mementos added as a stage, with music from the Persona series (Challenger Pack 1 required).
- Chrom's victory theme changed to a partial remix of the Fire Emblem: Awakening music "Id (Purpose)", which also serves as the victory theme for Lucina and Robin.
- The announcer now calls out "Stamina Battle" in the character select screen for stamina-type matches.
- DLC items for Mii Fighters are available:
- Persona 3 Protagonist Wig
- Persona 3 Protagonist Outfit (exclusive to Swordfighters)
- Persona 4 Protagonist Wig
- Persona 4 Protagonist Outfit (exclusive to Swordfighters)
- Teddie Hat
- Morgana Hat
- Tails Hat
- Tails Outfit (exclusive to Gunners)
- Knuckles Hat
- Knuckles Outfit (exclusive to Brawlers)
- Miscellaneous
- Game balance adjustments.
3.0.1
Release date: April 25, 2019
- General
- Bug fixes
- Fixed a bug that caused the game to freeze when Joker's Final Smash is used in Classic Mode.
- Bug fixes
3.1.0
Release date: May 31, 2019
- Offline Gameplay
- Added support for the Nintendo Labo: VR Kit, alongside the new VR mode.
- Online Gameplay
- amiibo can be used in Battle Arenas.
- Added an option for the amiibo to send on a journey, which the figure player train with other figure players via the internet.
- Preferred rules for Quickplay have been adjusted.
- General
- Game balance adjustments.
4.0.0
Release Date: July 07, 2019
- Offline Gameplay
- Very Easy difficulty has been added to Adventure mode.
- Snapshots can be added to the timeline in Edit Video.
- Steel, grass, sponge, paper, and yarn terrains have been adjusted in Stage Builder.
- Following spirits added to the DLC Spirit Board if the player has downloaded Challenger Pack 2.
- Slime
- enhances to King Slime
- Dracky
- Great Sabrecub
- Golem
- Liquid Metal Slime
- Cetacea
- Hero's Comrades
- Slime
- Online Gameplay
- Online Tourney Mode has been added.
- The player can predict who wins a Spectate Battle and earn points.
- Videos can be played repeatedly in Shared Content. Also, whenever you save posted content, a Yeah! will be added automatically.
- General
- Hero is now a playable fighter, four fighter spirits (Hero (DRAGON QUEST XI S), Hero (DRAGON QUEST III), (Hero (DRAGON QUEST IV), and Hero (DRAGON QUEST VIIII)) have been added. Challenger Pack 2 is required to access this content.
- Yggdrasil's Altar added as a stage with music from the Dragon Quest series. (Challenger Pack 2 required)
- DLC items for Mii Fighters are available:
- Erdrick's Helmet + Armor
- Martial Artist Wig + Gi
- Veronica's Hat + Outfit
- Slime Hat
- When the FS Meter is fully charged, the player will need to use it in a set amount of time before it ends.
- Hero is now a playable fighter, four fighter spirits (Hero (DRAGON QUEST XI S), Hero (DRAGON QUEST III), (Hero (DRAGON QUEST IV), and Hero (DRAGON QUEST VIIII)) have been added. Challenger Pack 2 is required to access this content.
5.0.0
Release Date: September 4, 2019
- Offline Gameplay
- Home-Run Contest has been added
- Milestones related to Home-Run Contest added.
- Players who have save data for Dragon Quest XI S: Echoes of an Elusive Age - Definitive Edition or its demo on their Switch will be gifted with the Tockles spirit.
- The following spirits will appear in the DLC Spirit Board if the player has downloaded Challenger Pack 3:
- Tooty
- Bottles
- Mumbo Jumbo
- Jinjos
- enhances to The Mighty Jinjonator
- Jiggy
- Gruntilda
- Buzzbomb
- Home-Run Contest has been added
- General
- Banjo & Kazooie are now a playable fighter, and one new fighter spirit (Banjo & Kazooie) has been added. Challenger Pack 3 needed to access this content.
- Spiral Mountain added as a stage, with new music tracks from the Banjo-Kazooie series (Challenger Pack 3 needed).
- DLC items for Mii Fighters are available:
- Team Rocket Hat + Outfit
- Sans Mask + Outfit + MEGALOVANIA track
- Goemon Wig + Outfit
- Proto Man's Helmet + Armor
- Zero's Helmet + Armor
- Banjo & Kazooie are now a playable fighter, and one new fighter spirit (Banjo & Kazooie) has been added. Challenger Pack 3 needed to access this content.
6.0.0
Release Date: November 6, 2019
- Offline Gameplay
- The following spirits will appear in the DLC Spirit Board if the player purchased Challenger Pack 4:
- Andy Bogard
- Joe Higashi
- Kim Kaphwan
- Geese Howard
- Ryo Sakazaki
- Kyo Kusanagi
- Iori Yagami
- Haohmaru
- Nakoruru
- Athena Asamiya
- Ralf & Clark
- The Tockles Spirit will now appear on the Dragon Quest Spirit Board, as well as in the Vault Shop. (Challenger Pack 2 needed to access the Dragon Quest Spirit Board).
- The following spirits will appear in the DLC Spirit Board if the player purchased Challenger Pack 4:
- Online Gameplay
- The following features have been added to Battle Arena mode:
- The "Elite Only" arena type has been added
- Friend's arenas can now be found more easily
- The Host player can now change some rules without having to exit the arena
- The option to choose which form the stage can be in has been added
- The player can now send set messages to other people inside the arena
- The following features have been added to Battle Arena mode:
- General
- Added support for the upcoming Simon and Incineroar amiibo figures.
- Terry is now an available fighter, one new fighter spirit (Terry Bogard) has been added. Challenger Pack 4 is needed to access this content
- King of Fighters Stadium stage has been added, with new music tracks from several SNK series.
- DLC items for Mii Fighters are available:
- Ryo Sakazaki Wig + Outfit
- Nakoruru Wig + Outfit
- Iori Yagami Wig + Outfit
- Akira Wig + Outfit
- Jacy Wig + Outfit
6.1.0
Release Date: December 14, 2019
- General
- Fixed an issue where Terry's Super Special Move "Buster Wolf" connects with an opposing fighter, causing both players to be unable to move.
6.1.1
Release Date: January 7, 2020
- General
- Added support for the upcoming Dark Samus and Richter amiibo figures.
7.0.0
Release Date: January 28th, 2020 (January 29th in some time zones)
- Offline Gameplay
- The following spirits will appear in the DLC Spirit Board if the player purchased Challenger Pack 5:
- Edelgard
- Dimitri (Fire Emblem)
- Claude
- Sothis
- Rhea
- Seteth
- Dorothea
- Ingrid
- Hilda (Fire Emblem)
- The following spirits will appear in the DLC Spirit Board if the player purchased Challenger Pack 5:
- General
- Byleth is now an available fighter, and two new fighter spirits (Byleth (Male) and Byleth (Female)) have been added. Challenger Pack 5 is needed to access this content.
- The Garreg Mach Monastery stage has been added, with new music tracks from Fire Emblem: Three Houses.
- DLC items for Mii Fighters are available:
- Rabbid Hat
- Altaïr Ibn-La'Ahad|Altaïr Hat + Outfit
- X (Mega Man) Helmet
- MegaMan.EXE Helmet + Armor
- Cuphead Mask + Outfit + Floral Fury track
- The special bonus for the Fighters Pass Vol. 2, the Ancient Armor from The Legend of Zelda: Breath of the Wild set for the Mii Swordfighter, has been added.
- The Techniques menu has been updated with three new sections for Failnaught, Sword of the Creator, and Aymr. They are the 90th, 91st, and 92nd options.
- Four new Smash Tag icons have been added, all relating to Byleth: the default male and female skins, and the Enlightened One male and female skins.
- The default music rate for MEGALOVANIA has been increased in all stages it is available on except Hanenbow.
- Byleth is now an available fighter, and two new fighter spirits (Byleth (Male) and Byleth (Female)) have been added. Challenger Pack 5 is needed to access this content.
- Misc
- The Dimitri and Hilda spirits in the base game were renamed to “Dimitri (The Legend of Zelda)” and “Hilda (The Legend of Zelda)” respectively to differentiate them from the Dimitri (Fire Emblem) and Hilda (Fire Emblem) spirits.
- Game balance adjustments have been made.
- The fighters that had specific adjustments are listed below.
- Samus, Dark Samus, Captain Falcon, Sheik, Zelda, Dr. Mario, Young Link, Zero Suit Samus, Toon Link, Mii Brawler, Palutena, Duck Hunt, Ryu, Ken, Cloud, Incineroar, Joker.[8]
8.0.0
Release Date: June 29th, 2020 (June 30th in some time zones)
- General
- The following content is now available for purchase:
- Challenger Pack 6
- Character: Min Min
- Stage: Spring Stadium
- Music: ARMS music
- Ninjara Wig + Outfit
- Heihachi Wig + Outfit
- Callie Wig + Outfit
- Marie Wig + Outfit
- Vault Boy Wig + Outfit
- Challenger Pack 6
- Kirby has been given a new copy ability where he wears Min Min's hair and orange beanie and his usual neutral special is replaced with the dragon version of the punch move. This move can be angled up and down and can fire a laser beam if the button is held down.
- The Techniques menu has been updated with four new sections for "ARM Attack", "Three ARMS in One", "Transforming into a Dragon", and "ARMS Jump / ARM Hook". They are the 93rd, 94th, 95th, and 96th options.
- Three new Smash Tag icons have been added, all relating to Min Min: her default skin, her "black and orange" skin, and her series symbol, an extended fist.
- The following content is now available for purchase:
- Offline
- New features for Spirits mode.
- Rematches/High-scores: Appears on an obtained spirit in the Spirit List, being unlocked by pressing X or + on the controller.
- Completing a rematch will give a score and some spirit points.
- The score and number of spirit points obtained are dependent on the power level of the Spirit Team used in battle.
- Rematches/High-scores: Appears on an obtained spirit in the Spirit List, being unlocked by pressing X or + on the controller.
- The following spirits will appear in the Shop on the Vault menu:
- Master Mummy
- Mechanica
- Byte & Barq
- Kid Cobra
- Helix
- Max Brass
- New features for Spirits mode.
- Misc
- Fountain of Dreams' lag spikes were fixed, however, the lag that comes from Wario turning while using Wario Bike persists.
- Lylat Cruise's ledges were made larger and various collisions near the underside of the stage were modified to make it easier for certain characters to recover.
- Garreg Mach Monastery's Ω and Battlefield forms' lower blast zones and camera bounds were adjusted to match other Ω forms.
- Game balance adjustments have been made.
- The fighters that had specific adjustments are listed below.
- Mario, Kirby, Captain Falcon, Jigglypuff, Ice Climbers, Sheik, Dr. Mario, Falco, Marth, Mewtwo, Meta Knight, Pit, Dark Pit, Zero Suit Samus, Ike, Diddy Kong, Sonic, King Dedede, Olimar, Villager, Mega Man, Wii Fit Trainer, Rosalina & Luma, Little Mac, Palutena, Corrin, Bayonetta, Ridley, King K. Rool, Isabelle, Incineroar, Piranha Plant, Hero, Banjo & Kazooie and Terry.
- Hero's placement in All-Star Smash was changed to match the release date of Dragon Quest III rather than Dragon Quest XI: Echoes of an Elusive Age.
- Fatal Fury's friend icons had their backgrounds changed from red to light blue, matching Terry's page on the Super Smash Bros. Ultimate website.
- Spring Man's friend icon had its background color changed from gray to chartreuse, matching the icons bundled with Min Min.
- Fixed several Sound Test-related oddities, most relating to victory quotes:
- Fox's victory quote against Falco ("Better luck next time, Falco!") is now listed.
- Wolf's victory quote against Fox ("Playtime's over, Star Fox!") is now listed.
- Lucina's victory quote against Ike ("And they call you the Radiant Hero?") is now listed.
- Palutena's victory quote against Pit ("Oh, so sorry about that, Pit.") is now listed.
- Simon's victory quote against dark-related characters ("To darkness!") is now listed.
- Byleth's sound test tags now show the respective gender, much like the rest of the characters with selectable genders and in the Spirit List.
- Balance Changes
8.1.0
Release date: August 4th, 2020 (August 5th in some time zones)
- Stage
- The Small Battlefield stage has been added. Players can also set Small Battlefield as a Preferred rule in Online battles.
- Players can now select any stage-specific music for the Battlefield, Small Battlefield, Big Battlefield, and Final Destination stages.
- If a particular song is not selected, a random song from all music is chosen based on an average of the My Music settings for each stage.
- Players can no longer access the My Music interface for all four stages from the stage select in Smash Mode, Training, and Mob Smash.
- If a particular song is not selected, a random song from all music is chosen based on an average of the My Music settings for each stage.
- The "Random" option on the Stage Select screen has been split into individual icons for Random, Random Battlefield, and Random Omega.
- Random Custom Stages also has a unique icon now as well.
- Online
- The online user experience has been adjusted.
- The tick rate of 1-on-1 battles not involving spectators has been increased from 30Hz to 60Hz, matching the in-game frame rate. This improves responsiveness but decreases stability on low-quality connections.[9]
- Average input delay of 1-on-1 battles not involving spectators has been reduced from roughly 5 frames to 4 frames.[10]
- The way matching is determined when using Preferred Rules has been adjusted.
- Following a look at the current number of players eligible for Elite Smash, the threshold for entry has been recalculated to allow more players. Additionally, the way initial values for Global Smash Power are calculated has also been adjusted.
- The online user experience has been adjusted.
Further investigations and adjustments to Online mode are expected for future patches.
- General
- Several issues have been fixed to improve the gameplay experience.
- Fixed Min Min's T-Pose glitch.
- Misc
- The display for Spring Man on Spring Stadium's billboard now properly shows his "S" logo instead of Springtron's "T" logo.
- The render of the Question Mark icon has its black border removed in Battle Arenas.[11]
9.0.0
Release date: October 13th, 2020 (October 14th in some time zones)
- General
- The following content is now available for purchase:
- Challenger Pack 7
- Character: Steve
- Stage: Minecraft World
- Music: Minecraft series music
- Creeper Mask + Outfit
- Pig Mask + Outfit
- Diamond Armor Helmet + Armor
- Gil Helmet + Armor
- Bomberman Mask + Outfit
- Travis Mask + Outfit
- Challenger Pack 7
- Kirby has been given a new copy ability where he becomes completely cuboidal. This appearance is reminiscent of the square Kirby model made by Hal Laboratory as an April Fool's prank in 2019. Kirby's usual neutral special is replaced with the mine ability on the ground and the create block ability while airborne. However, he does not gain the ability to craft at a table.
- The Techniques menu has been updated with six new sections for "Materials and Mining", "Material Gauge", "Craft", "Create Block", "Minecart", and "Elytra". They are the 97th, 98th, 99th, 100th, 101st, and 102nd options.
- Five new Smash Tag icons have been added, all relating to Steve: Steve, Alex, Zombie, Enderman, and his series symbol, a Block.
- The following content is now available for purchase:
- Offline
- The following spirits will appear in the Shop on the Vault menu:
- Zombie
- Creeper
- Skeleton
- Slime (Minecraft)
- Enderman
- Villager & Iron Golem
- Ghast
- Piglin
- Ender Dragon
- The following spirits will appear in the Shop on the Vault menu:
- Online
- The controls during combat in battle arenas while spectators are present have been adjusted
- Adjustments have been made to the way Global Smash Power is calculated.
- Misc
- The Slime spirit added in Version 4.0.0 was renamed to “Slime (Dragon Quest)” to differentiate it from the Slime (Minecraft) spirit.
- Several issues have been fixed to improve the gameplay experience.
- An issue where the movement delay after a perfect shield was behaving incorrectly under certain rules has been fixed.
- Game-balance adjustments, stability fixes, and other minor adjustments have been made.
- The fighters that had specific adjustments are listed below:
- Donkey Kong, Link, Pikachu, Ness, Captain Falcon, Ice Climbers, Sheik, Young Link, Meta Knight, Wario, Ivysaur, Charizard, Sonic, Lucario, Mii Swordfighter, Robin, Shulk, Bowser Jr., Ken, Bayonetta, Ridley, Simon, Richter, Piranha Plant, Banjo & Kazooie, and Min Min.
- Balance Changes
9.0.1
Release date: October 21st, 2020 (October 22nd in some time zones)
- General
- Several glitches related to Steve have been removed:
- Fixed an issue in which characters could fall through the stage when breaking Blocks.
- Fixed an issue in which characters could fall through the stage when caught between the anvil from Steve's down aerial and a Block.
- Fixed an issue in which fighters could be frozen if hit with Minecart.
- Fixed an issue in which Minecart does not hit opponents when reflected off a wall.
- Fixed an issue in which a fighter caught by Minecart teleports to the position in which they were caught.
- Fixed an issue in which Meta Knight would clip through any terrain which wasn't native to a stage, including those generated by fighters, items and Poké Ball Pokémon after losing a stock.
- Steve's up victory pose was changed to remove the Steak after he eats it.
- Several glitches related to Steve have been removed:
9.0.2
Release date: November 11th, 2020 (November 12th in some time zones)
- General
- Various glitches that persisted from versions 9.0.0 and 9.0.1 have been removed.
- Fixed an issue where the player could not use the stick to jump while falling after creating an anvil using Steve's down air attack.
- Fixed an issue where the gunman from Duck Hunt's down special and the phantom from Zelda's down special were not behaving as intended.
- Fixed an issue where the initial velocity of Samus's and Dark Samus's Screw Attack, when used on the ground, was not behaving as intended. This allows them to once again reach the top platform on Yoshi's Story.
- Fixed an issue where fighters would sometimes warp on the Venom stage.
- Fixed an issue where sometimes fighters would pass through landscapes when they were launched on some stages.
- Fixed an issue where sometimes the player would be forced to end a battle on a stage created in Stage Builder.
- Various gameplay fixes.
- Various glitches that persisted from versions 9.0.0 and 9.0.1 have been removed.
10.0.0
Release date: December 17th, 2020 (December 18th, 2020 in some time zones).
- General
- The following content will be available for purchase:
- Challenger Pack 8
- Fighter: Sephiroth
- Music: Final Fantasy music
- Stage: Northern Cave
- Challenger Pack 8
- Kirby has been given a new copy ability where he gains Sephiroth's hair and his Neutral special is replaced with Flare / Megaflare / Gigaflare.
- The Techniques menu has been updated with four new sections for "Wall Stab", "Shadow Flare", "Scintilla", and "Winged Form". They are the 103rd, 104th, 105th, and 106th options.
- Two new Smash Tag icons have been added, both relating to Sephiroth: his original outfit and his coatless outfit.
- Several issues have been fixed to improve the gameplay experience.
- Fixed an issue where getting hit by a Hammer right before Zoroark's final attack connects would result in a fighter getting stuck in midair. Summoning Zoroark again would proceed to crash the game.
- Fixed an issue where some characters would remain at their T-pose model by performing an attack before Zoroark's Fury Swipes.[12]
- Fixed an issue where after using Winged Pikmin, trying to attack in midair with a Pikmin would not work.[13]
- The following content will be available for purchase:
- Sephiroth Challenge: A limited-time event from December 17th-22nd where players can fight Sephiroth on Northern Cave in 3 difficulties: Easy, Normal, and Very Hard. Winning this fight will grant the player access to both ahead of the official release date of December 22nd (December 23rd in some time zones).
- Misc
- The Spirit List now lists Final Fantasy spirits as being from the "FINAL FANTASY Series" rather than "FINAL FANTASY VII".
- The Songs List now lists Final Fantasy music as being from the "FINAL FANTASY VII Series" rather than "FINAL FANTASY VII".
10.1.0
Release date: December 22nd, 2020 (December 23rd in some time zones).
- General
- The following content will be available for purchase:
- Barret Outfit
- Tifa Outfit
- Aerith Outfit
- Chocobo Hat
- Geno Hat + Outfit
- The player can now switch between "Random from all songs" and "Random from My Music" for the Battlefield, Small Battlefield, Big Battlefield and Final Destination stages.
- To switch between options, the player can access My Music via the Options or the Vault, and then press the X Button.
- The following content will be available for purchase:
- Offline
- The following spirits will appear in the Shop on the Vault menu:
- Tifa
- Barret
- Aerith
- Red XIII
- Cait Sith
- Cid
- Vincent
- Yuffie
- Chocobo & Moogle
- Ifrit
- Shiva
- Bahamut ZERO
- The Turks & Rufus Shinra
- The following spirits will appear in the Shop on the Vault menu:
- Misc
- The player can now switch between "Random from all songs" and "Random from My Music" for the Battlefield, Small Battlefield, Big Battlefield and Final Destination stages.
- To switch between options, access My Music via the Options or the Vault and then press the X Button.
- Sephiroth Challenge is no longer available.
- Cloud obtains a new variant of his Final Smash, Omnislash Ver. 5, if the player chooses one of his Advent Children (P2, P4, P6 and P8) costumes.
- A new entry regarding Omnislash Ver. 5 was added to the Tips, while the tip for regular Omnislash has been slightly changed to accommodate.
- Cloud's Final Smash is now listed as "Omnislash / Omnislash Ver. 5" in the Move List.
- Cloud's fighter spirit for his default costume now uses artwork from Final Fantasy VII, whereas it previously only had his Ultimate art.
- Cloud now has a new Sound Test section with his Advent Children costume, which features the new voice clips used in Omnislash Ver. 5.
- Bayonetta now turns her head during her left-inputted victory pose in the Japanese version of the game, matching the animation on the Global version.
- The fighters that had specific adjustments are listed below:
- Fox, Luigi, Zelda, Pichu, Young Link, Toon Link, Olimar, Rosalina & Luma, Mii Gunner, Duck Hunt
- The player can now switch between "Random from all songs" and "Random from My Music" for the Battlefield, Small Battlefield, Big Battlefield and Final Destination stages.
- Balance Changes
amiibo
This section is under construction. Therefore, please excuse its informal appearance while it is being worked on. We hope to have it completed as soon as possible.
It has been requested that more images be uploaded for this section. Remove this notice only after the additional images have been added. Specifics: Sora amiibo, art of amiibo within their respective boxes.
- “Have your FP inherit powers from spirits you have.”
- —Text appearing after using amiibo
In addition to all previously released amiibo relating to the playable characters being usable in Super Smash Bros. Ultimate,[2] amiibo for every fighter not in Super Smash Bros. for Nintendo 3DS and Super Smash Bros. for Wii U (including separate figures for the alternate costume fighter Alex, as well as Pokémon Trainer, Squirtle, Ivysaur, Pyra, and Mythra) have been released in the Super Smash Bros. line.[14] Like in Super Smash Bros. for Nintendo 3DS and Super Smash Bros. for Wii U, amiibo can act as Figure Players (FP) in battle, and amiibo data from the aforementioned games can be transferred to Super Smash Bros. Ultimate.[2] Spirits can also be used on Figure Players.
In addition to the fighter amiibo, some other amiibo can summon spirits. For example, if the player uses the Boo amiibo figure, the Boo spirit can be summoned.
The following is a list of released amiibo for fighters introduced in Super Smash Bros. Ultimate:
Released
December 7, 2018
![Wolf[15]](/File:Wolf_amiibo.png)
![Inkling[15]](/File:Inkling_amiibo_(Smash_Series).png)
![Ridley[15]](/File:Ridley_amiibo.png)
February 15, 2019
![Ice Climbers[16]](/File:Ice_Climbers_amiibo.png)
![King K. Rool[16]](/File:King_K._Rool_amiibo.png)
![Piranha Plant[16]](/File:Piranha_Plant_amiibo.png)
April 12, 2019
![Young Link[17]](/File:Young_Link_amiibo.png)
![Daisy[17]](/File:Daisy_amiibo.png)
![Ken[17]](/File:Ken_amiibo.png)
July 26, 2019
![Pichu[18]](/File:Pichu_amiibo.png)
![Pokémon Trainer[18]](/File:Pok%C3%A9mon_Trainer_amiibo.png)
![Isabelle[18]](/File:Isabelle_amiibo.png)
September 20, 2019
![Snake[19]](/File:Snake_amiibo.png)
![Squirtle[19]](/File:Squirtle_amiibo.png)
![Ivysaur[19]](/File:Ivysaur_amiibo.png)
November 15, 2019
![Simon[20]](/File:Simon_amiibo.png)
![Chrom[21]](/File:Chrom_amiibo.png)
![Incineroar[22]](/File:Incineroar_amiibo.png)
January 17, 2020
![Richter[23]](/File:Richter_amiibo.png)
![Dark Samus[24]](/File:Dark_Samus_amiibo.png)
October 2, 2020
![Joker[25]](/File:Joker_amiibo.png)
![Hero[26]](/File:Hero_amiibo.png)
March 26, 2021


April 29, 2022

September 9, 2022


January 13, 2023
![Sephiroth[27]](/File:Sephiroth_amiibo.png)
![Kazuya[27]](/File:Kazuya_amiibo.png)
July 21, 2023
![Pyra[28]](/File:Pyra_amiibo.png)
![Mythra[28]](/File:Mythra_amiibo.png)
February 16, 2024
![Sora[29][30]](/File:Sora_amiibo.png)
Release


A Super Smash Bros. Ultimate-themed Nintendo Switch Pro Controller has been available since launch; it can be purchased individually or as part of a bundle that also includes the game and a black steel case with the flaming Super Smash Bros. emblem seen in the game's March 2018 teaser.[31][32] A silver 1.5" coin will also be included in the bundle as a bonus item when purchased at Best Buy.[33]
A bundle containing a specially designed Nintendo Switch console and a download code for the game was released on November 2, 2018, though the download code couldn't be used until the game's release on December 7, 2018. The console features a design of the original eight Super Smash Bros. series characters on the front of the dock, as well as the Super Smash Bros. symbol printed across the Joy-Con. A Super Smash Bros. Ultimate-edition Nintendo GameCube Controller and the GameCube Controller Adapter previously released for Super Smash Bros. for Wii U also released on the same day.
Reception
Critical
Super Smash Bros. Ultimate has received widespread critical acclaim.
| Reviews | |||
|---|---|---|---|
| Release | Reviewer, Publication | Score | Comment |
| Nintendo Switch | Alex Olney, Nintendo Life |
10/10 | So how does it all stack up? Vocal concerns about past games have been actively addressed, every single fighter from the series is present (even Pichu), the customisability is overwhelmingly vast and it's all topped off with super-solid single-player modes to boot. We're not sure how you could make a more robust or pleasing Smash game. Super Smash Bros. Ultimate truly is the ultimate instalment in the series, and it makes you wonder where Sakurai can possibly take this franchise next. |
| Nintendo Switch | Chris Carter, Destructoid |
9.5/10 | For the first time in a long time, I'm overwhelmed. There's so much to do either by yourself or with a group, not accounting for the fact that I needed to bring every single character into the lab (training) and try out each stage, which I did for this review. I didn't even mention the music player (which kids in Japan will love) that pops 800 tracks off like a boom box. The score is its own achievement with famous collaborators in tow and beautiful remixes aplenty. I spent an hour making Mii fighters for chrissake. I've used phrases that evoke the monumental achievement that is Super Smash Bros. Ultimate a few times in this review and I can assure you it's not hyperbolic. Despite that a lot of the old content isn't as hard-hitting the second, third, fourth, or even fifth time around, the fact that it's all here, and in a manageable file size, is more than enough. After this (and Geno/Waluigi DLC) Sakurai can rest easy. |
| Nintendo Switch | Tom Marks, IGN |
9.4/10 | Super Smash Bros. Ultimate lives up to its name, offering the most comprehensive game in the series to date. It has an absurd amount to play, fight, and unlock – though that can be to its detriment at times. While the World of Light adventure mode isn't reason alone to get Smash Bros., it's still a consistently amusing and shockingly large campaign, and a worthy compliment to Ultimate's incredible multiplayer core. The Smash Bros. series has always maintained a wonderful balance of chaotic beat-em-up fun and tense fighting game action, and Super Smash Bros. Ultimate refines and improves on both sides of itself without abandoning either one. |
| Nintendo Switch | Edmond Tran, GameSpot |
9/10 | An inconsistent online mode and situational downers don't stop Super Smash Bros. Ultimate from shining as a flexible multiplayer game that can be as freewheeling or as firm as you want it to be. Its entertaining single-player content helps keep the game rich with interesting things to do, as well as bolstering its spirit of loving homage to the games that have graced Nintendo consoles. Ultimate's diverse content is compelling, its strong mechanics are refined, and the encompassing collection is simply superb. |
| Aggregators | |||
| Compiler | Platform / Score | ||
| Metacritic | 93 | ||
| GameRankings | 92.17% | ||
Sales
By September 30, 2022, Super Smash Bros. Ultimate had sold 29.53 million units worldwide, making it the third best-selling game on the Nintendo Switch (after Mario Kart 8 Deluxe and Animal Crossing: New Horizons).[34] In addition, the game is also the best-selling fighting game of all time.
Pre-release and unused content
Quotes
- Main article: List of Super Smash Bros. Ultimate quotes
Staff
- Main article: List of Super Smash Bros. Ultimate staff
Like previous entries in the Super Smash Bros. series, Masahiro Sakurai directed this game. Several companies collaborated to produce the game, including Digital Frontier Inc., who created the cinematics, and Bandai Namco Games, who co-developed the game. Xander Mobus returns as the announcer, making this game the first Super Smash Bros. game to use the same announcer as in a previous game. This game marks the 100th performance credit of Charles Martinet as the voice of Mario, a landmark for which he received a Guinness World Record for the most video game voice-over performances of a single character.
References to other games
- Donkey Kong: Donkey Kong and Lady appear as a spirit. A new medley of songs from this game, "Donkey Kong / Donkey Kong Jr.", is featured.
- Donkey Kong Jr.: Donkey Kong Jr. appears as a spirit using his artwork from this game. A new medley of songs from this game, "Donkey Kong / Donkey Kong Jr.", is featured.
- Mario Bros.: Sidestepper appears as a spirit.
- Donkey Kong 3: Stanley appears as a spirit.
- Wrecking Crew: A new medley of the main background music and Golden Hammer theme from this game appears in Super Smash Bros. Ultimate. Eggplant Man appears as a spirit using its sprite from this game.
- Super Mario Bros. / Super Mario Bros.: The Lost Levels: One of Simon Belmont's teaser screencaps depicts him about to use his Axe special attack on Bowser, indirectly alluding to how Bowser in the classic games was defeated with an axe destroying the bridge. Piranha Plant's green costume resembles its appearance in this game. Additionally, its blue costume resembles its appearance in underground levels. As with past games, several sound effects from the NES releases of these games can be heard.
- Super Mario Bros. 2: Pidgit, Wart, and Mouser appear as spirits, using artwork from this game. An arrangement of the "Ground Theme" is featured. As with past games, the sound effect when the Vegetable special move is activated is taken directly from the NES release of this game.
- Super Mario Bros. 3: Arrangements of the overworld theme, regular boss battle theme and Bowser's battle theme appear in the game.
- Super Mario Land: Tatanga appears as a spirit, using artwork from this game.
- Super Mario World: Chargin' Chuck appears as a spirit, using artwork from this game.
- Wario Land: Super Mario Land 3: Wario's Dash Attack that debuted in this game now appears as his new dash attack. Wario's down throw now reflects the animation of the Ground Pound that debuted in this game as well.
- Donkey Kong Country: One of K. Rool's attacks involves throwing his crown as a boomerang, like in this game. A Klaptrap appears as an Assist Trophy, having the same behavior as in this game. It also appears as a spirit using its artwork from this game. A medley of "Bonus Room Blitz" (the Bonus Area theme) and "Simian Segue" (the map theme) and an arrangement of "Gang-Plank Galleon" appear in the game. In addition, King K. Rool's gameplay trailer's opening segment features him aboard a ship in a reference to Gangplank Galleon. Winky the Frog appears as a spirit, using artwork from this game. "Funky's Fugue" and "Ice Cave Chant" are available as tracks. A recreation of the Kongo Jungle map appears in World of Light under the name DK Island.
- Super Mario World 2: Yoshi's Island: Bowser's appearance during his Final Smash is based on Baby Bowser's boss battle.
- Donkey Kong Country 2: Diddy's Kong Quest: One of K. Rool's attacks involves shooting with the blunderbuss he has in this game, and when he does so he dons a pirate hat like in his appearance as Kaptain K. Rool. Rattly the Rattlesnake, Squitter the Spider, Kaptain K. Rool, and Swanky Kong appear as spirits, using their artwork from this game. "Crocodile Cacophony" (Kaptain K. Rool's boss battle theme) gets a remix in this game as well. An arrangement of "Snakey Chantey", a song that plays in the level Rattle Battle, is featured as a track. In King K. Rool's announce trailer "The Rivals", Donkey Kong and Diddy Kong when witnessing King K. Rool knock away King Dedede (who had posed as the Kremling leader as a prank) had their eyes comically bulge out far enough to shatter part of the windows of the treehouse in horror, referencing Diddy and Dixie Kong's reactions when about to face a boss in that game (and to a lesser extent, Donkey Kong's reaction whenever Kaptain K. Rool regains consciousness and starts the next phase of the final boss battle).
- Super Mario RPG: Legend of the Seven Stars: Geno appears as both a spirit and a smash tag icon. Mallow also appears as a spirit.
- Donkey Kong Country 3: Dixie Kong's Double Trouble!: One of K. Rool's attacks involves using his helicopter pack from this game. Artwork of Dixie Kong and Kiddy Kong in the Hover Craft appears as Dixie Kong's enhanced spirit. Ellie the Elephant appears as a spirit.
- Yoshi's Story: Don Bongo, Pak E. Derm, the Super Happy Tree, and Blargg appear as spirits.
- Mario Golf (Game Boy Color): Kid appears as a spirit using his artwork from this game.
- Donkey Kong 64: One of K. Rool's attacks involves using his boxing gloves from this game, and his Final Smash recreates the Game Over scene involving the Blast-o-Matic being fired from Crocodile Isle at Donkey Kong Island. Tiny Kong and Lanky Kong appear as spirits using their artwork from this game. King K. Rool briefly appears in the ending of Ken Masters and Incineroar's debut trailer "Clash of Flames" as one of Incineroar's intended challengers, indirectly referencing the final boss battle in that game.
- Paper Mario series: Piranha Plant takes on the colors of a Putrid Piranha for one of its attacks where it spews poison. Additionally, Piranha Plant's black costume resembles the Pale Piranha and its blue costume resembles the Frost Piranha. Kammy Koopa also appears as a spirit.
- Wario Land 4: Princess Shokora appears as a spirit.
- Luigi's Mansion / Luigi's Mansion: Dark Moon: Simon Belmont's debut trailer has Luigi being present in Dracula's Castle and attempting to ward off various ghostly creatures inside, alluding to the premise of the games. A new arrangement of the main theme from the former game appears in Super Smash Bros. Ultimate. Polterpup and Professor Elvin Gadd appear as spirits using their artwork from the latter game. The Poltergust 5000 from the latter game appears as a spirit. Luigi's final boss in Classic Mode being Dracula is most likely a reference to his dealing with similar spooks in the Luigi's Mansion games.
- Super Smash Bros. Melee: In the panorama group artwork, Luigi is seen doing the Green Missile above the other characters, just like in the group artwork from this game. Yoshi's Final Smash is based on a scene from this game's opening. Giga Bowser also returns as a boss in Classic Mode and Adventure Mode: World of Light.
- Yoshi's Island: Super Mario Advance 3: Baby Mario appears as a spirit, using artwork from this game.
- Super Mario Sunshine: An arrangement of Delfino Plaza's music appears in the game. Piantas, a Shine Sprite, and F.L.U.D.D. appear as spirits using their artwork from this game.
- Mario & Luigi: Superstar Saga: Prince Peasley appears as a spirit.
- Mario Kart: Double Dash!!: Baby Mario and Baby Luigi's artwork is used for the Goo-Goo Buggy spirit.
- Paper Mario: The Thousand-Year Door: Vivian and the Shadow Queen (in her form when possessing Peach) appear as spirits.
- Yoshi Topsy-Turvy: Hongo, the Spirit Who Loves Surprises, and Tap-Tap appear as spirits, using artwork from this game.
- Donkey Kong Jungle Beat: Donkey Kong's Final Smash is based on his combo punch attacks in this game. Karate Kong and Ninja Kong appear as spirits.
- Donkey Konga: King K. Rool's opening animation is taken from this game.
- Dance Dance Revolution: Mario Mix: Mario's down smash animation has been changed from the Sweep Kick move to his breakdance from this game.
- Super Princess Peach: Perry appears as a spirit.
- Mario & Luigi: Partners in Time: Princess Shroob appears as a spirit.
- New Super Mario Bros.: Lakitu and Spiny appear as a spirit, using their artwork from this game.
- Wario: Master of Disguise: Count Cannoli appears as a spirit.
- Super Paper Mario: Mr. L and Dimentio appear as spirits.
- Mario Strikers Charged: Petey Piranha and Waluigi appear as spirits, using their artwork from this game.
- Mario Party 8: Daisy's fighter spirit uses her artwork from this game. MC Ballyhoo and Big Top also appear as a spirit.
- DK: Jungle Climber: Zinger and Wrinkly Kong appear as spirits, using their artwork from this game. The second boss theme is featured as a track.
- Donkey Kong Barrel Blast: Kip and Kalypso appear as spirits.
- Super Mario Galaxy / Super Mario Galaxy 2: A Grand Star appears in Rosalina & Luma's Final Smash. The Launch Star, which is renamed Super Launch Star, appears as an item. The music that plays in the Melty Monster Galaxy appears as a track. Piranha Plant becomes a Prickly Piranha Plant when using its forward smash. Rock Mario, Lubba, and the Starship Mario appear as spirits.
- Super Smash Bros. Brawl: Petey Piranha's appearance in Piranha Plant's Final Smash is derived from his appearance in this game, where he holds cages. Galleom reappears as a boss in the World of Light: Adventure Mode and Classic Mode, while the Ancient Minister, the Fighting Alloy Team, Shadow Bug, a Primid, Mite, Bytans, Roturret, Subspace Bomb, Duon, and Tabuu appear as spirits. As in Super Smash Bros. for Nintendo 3DS / Wii U, many of the characters' voices, including those of Mario, Luigi, Peach, Yoshi and Wario, originate from this game.
- Mario Kart Wii: Waluigi on the Standard Bike, Toad in the Cheep Charger, Koopa Troopa in the Standard Kart, and Dry Bowser all appear as spirits using their respective artwork from this game. Most of Bowser Jr. and Daisy's voice clips are recycled from this game.
- Mario Super Sluggers: Petey Piranha appears as a spirit using artwork from this game.
- Wario Land: Shake It!: Captain Syrup and the Shake King appear as spirits using artwork from this game.
- Mario & Luigi: Bowser's Inside Story: Fawful appears as a spirit, which depicts his artwork from this game. Starlow and Broque Monsieur also appear as spirits.
- Bird & Beans: Pyoro appears as a spirit using his artwork from this game.
- New Super Mario Bros. Wii: Mechakoopa appears as a spirit using artwork from this game. The Koopalings' voice clips are taken from this game.
- Donkey Kong Country Returns: Rambi the Rhino, Cranky Kong, and Squawks the Parrot appear as spirits using their artwork from this game.
- Super Mario 3D Land: Boom Boom and Pom Pom appear as a spirit using their artwork from this game.
- Mario Kart 7: One of Daisy's taunts matches the artwork pose she originally had from this game. Metal Mario's B Dasher appears as a spirit. Rosalina's voice clips are taken from this game.
- New Super Mario Bros. 2: Gold Mario appears as a spirit.
- New Super Mario Bros. U: The Koopalings, Boo, and Hammer Bro appear as spirits using their artwork from this game. Nabbit appears as a spirit. Lemmy's render is based on his artwork from this game.
- Paper Mario: Sticker Star: Bowser appears as a spirit using his artwork from this game, which can be obtained by enhancing Paper Bowser's spirit.
- Mario & Luigi: Dream Team: Antasma and Prince Dreambert appear as spirits.
- Mario Party: Island Tour: The title screen music and Rocket Road theme from this game appear.
- Super Mario 3D World: Piranha Plant is in a pot for half of its costumes, resembling the Potted Piranha Plant. Cat Peach and Plessie appear as spirits.
- Super Mario 3D World + Bowser's Fury: Giga Cat Mario, Kittens, and Fury Bowser appear as spirits added post-launch.
- Donkey Kong Country: Tropical Freeze: Dixie Kong and Lord Fredrik appear as spirits using their artwork from this game.
- Yoshi's New Island: An arrangement of this game's main theme appears in Super Smash Bros. Ultimate. Yoshi carrying Baby Mario and a Mega Eggdozer, the Stork, and Little Mouser appear as spirits using artwork from this game.
- Mario Golf: World Tour: One of Daisy's victory animations is inspired by her birdie animation from this game. Similarly, one of Peach's victory animations resembles her hole-in-one/eagle animation, albeit without the parasol.
- Mario Kart 8 / Mario Kart 8 Deluxe: Luigi's Mach 8 appears as a spirit. The music for Excitebike Arena and Ice Ice Outpost are available as tracks. In World of Light, one of the available locations in Light Realm is based on a Mario Kart racetrack, with the MKTV logo visible in the background.
- Super Smash Bros. for Nintendo 3DS / Wii U: Super Smash Bros. Ultimate uses a modified engine based on these games. Big Urchin appears as a spirit using its trophy render from the Wii U version. Master Giant, Master Beast, Master Edge, and Master Core appears as spirits. Most of the returning fighters and announcer's voice clips are recycled from this game.
- Captain Toad: Treasure Tracker: Shy Guy appears as a spirit using its artwork from this game. "Plucky Pass Beginnings", the theme of the Toad Brigade, as it is heard in this game, and "The King of Pyropuff Peak", the music played when Captain Toad is fighting a Draggadon, appear as tracks in the "Super Mario" series playlist.
- Mario vs. Donkey Kong: Tipping Stars: The title theme and the first track of Rolling Hills appear as tracks in the "Super Mario" series playlist.
- Mario Party 10: Yoshi has a new victory animation based on his 2nd-place winning animation from this game. Mario's fighter spirit uses artwork from this game.
- Yoshi's Woolly World: Yarn Yoshi and Yarn Poochy appear as spirits. A Woolly Yoshi Mii hat along with an outfit appear.
- Super Mario Maker: Mario has a new costume based on his builder outfit from this game.
- Mario Tennis: Ultra Smash: "Classic Tennis", a song in this game, is playable.
- Mario & Luigi: Paper Jam: Paper Bowser appears as a Battle Arena counter icon. The papercraft battle theme also appears in the game.
- Paper Mario: Color Splash: Paper Mario's spirit artwork comes from this game, albeit with the white outline removed. Huey also appears as a spirit. The battle theme from this game appears as a selectable song.
- Mario Sports Superstars: "Kingdom Stadium: Night", a song in this game, is featured.
- Mario + Rabbids Kingdom Battle: Rabbid Peach, Mega Rabbid Kong (named "Rabbid Kong"), and Rabbid Mario appear as spirits.
- Mario & Luigi: Superstar Saga + Bowser's Minions: A song played during Minion Quest: The Search for Bowser battles is featured.
- Super Mario Odyssey: Cappy makes an appearance as Mario's Cap; one of Mario's new taunts features him tossing Cappy. Cappy also appears as a spirit. Occasionally, Mario's Super Jump Punch will feature the regional coins found in the Metro Kingdom in place of the standard coins, and plays the same sound effect as the one that plays when a new regional coin is collected. New Donk City Hall appears as a stage. Mario has a new costume based on his wedding tuxedo. The Odyssey, Peach and Bowser (wearing their wedding attire) appear as spirits.
- Mario Tennis Aces: Mario and Luigi have spirits using their artwork from this game.
- WarioWare Gold: Wario, 5-Volt, 9-Volt & 18-Volt, Ashley, Dr. Crygor, Dribble & Spitz, Fronk, Jimmy T, Kat & Ana, Mona, Orbulon, and Young Cricket appear as spirits, using their artwork from this game. Also, a drawing of Penny resembling her artwork from this game appears on the sketchbook in the Gamer stage.
- Super Mario Party: King Bob-omb appears as a spirit using his artwork from this game. In addition, Peach's new yellow alternate costume resembles the effect she gets from drinking a Golden Drink. Additionally, Mario's Dice Block and River Survival have been added as spirits post-launch.
- New Super Mario Bros. U Deluxe: Peachette appears as a spirit added post-launch.
- Yoshi's Crafted World: Yoshi has a new costume based on his appearance from this game, which also makes an appearance as a spirit.
- Luigi's Mansion 3: Luigi's new Poltergust G-00 was first shown off during Simon and Richter's reveal trailer, boasting its new design and the ability to fire plungers, and is used in his grab and throws.
- Paper Mario: The Origami King: Origami Peach, Olivia, and King Olly appear as spirits added post-launch.
- Mario Golf: Super Rush: Mario, Luigi, and Peach as they appear in this game are spirits added post-launch.
Glitches
- Main article: List of Super Smash Bros. Ultimate glitches
Gallery
- For this subject's image gallery, see Gallery:Wynn Liaw.
_SSBU.png)
_SSBU.png)


Media
Names in other languages
| Language | Name | Meaning | Notes |
|---|---|---|---|
| Japanese | 大乱闘スマッシュブラザーズ SPECIAL Dairantō Sumasshu Burazāzu Supesharu |
Great Melee Smash Bros. Special | |
| Chinese (simplified) | 任天堂明星大乱斗 特别版 Rèntiāntáng Míngxīng Dàluàndòu: Tèbiébǎn |
Nintendo Stars Great Melee: Special Edition; the combination of the Japanese title and the Nintendo 64 game's Japanese name (Nintendo All-Star! Dairantō Smash Bros.) | |
| Chinese (traditional) | 任天堂明星大亂鬥 特別版 Rèntiāntáng Míngxīng Dàluàndòu: Tèbiébǎn |
Nintendo Stars Great Melee: Special Edition; the combination of the Japanese title and the Nintendo 64 game's Japanese name (Nintendo All-Star! Dairantō Smash Bros.) | |
| Korean | 슈퍼 스매시브라더스 얼티밋 Syupeo Seumaesi Beuradeoseu Eoltimit |
Super Smash Bros. Ultimate |
Trivia

- On the German cover for the game, Yoshi was omitted from the boxart to fit the USK rating in the bottom left corner, while Pikachu, who was placed lower than Yoshi, was moved up due to its greater popularity.[35]
- Luigi supposedly dies during Simon and Richter's announcement trailer after having his soul taken by Death. In response, BBC News made an article on Luigi's death.
External links
References
- ^ Twitter - Nintendo of America Retrieved on March 8, 2018.
- ^ a b c Nintendo. (June 13, 2018). Nintendo Direct: E3 2018 YouTube. Retrieved June 13, 2018.
- ^ a b Nintendo. (August 8, 2018). Super Smash Bros. Ultimate Direct 8.8.2018 YouTube. Retrieved August 8, 2018.
- ^ Nintendo. (January 16, 2020 (PST)). Super Smash Bros. Ultimate – Mr. Sakurai Presents "Byleth" YouTube. Retrieved January 16, 2020 (PST).
- ^ Nintendo (October 18, 2021). Super Smash Bros. Ultimate – The Final “Mr. Sakurai Presents”. YouTube. Retrieved October 18, 2021.
- ^ Nintendo (May 30, 2019). Nintendo Labo: VR Kit + Super Smash Bros. UItimate. YouTube. Retrieved May 30, 2019.
- ^ Nintendo. Super Smash Bros. Ultimate Update Ver. 2.0.0 - Fighter Adjustments Nintendo Support. Retrieved January 30, 2019 (PST).
- ^ Nintendo. Super Smash Bros. Ultimate Update Ver. 7.0.0 - Fighter Adjustments Nintendo Support. Retrieved July 12, 2020 (PST).
- ^ "Thanks to @Humanbomb & @EmJay10_ we discovered a big change in 8.1! The Tickrate/Hertz in a 1v1 with no spectators has changed to 60 instead of the old 30 packets a second. Lobbies 3+ still run at 30. In theory, quick play and 1v1 lobbies should feel better.". Nerf_0. (2020-08-05). Twitter post. Twitter. Retrieved 2020-10-15.
- ^ "スマブラSP ver8.1.0 オンライン遅延検証結果【その1】ver8.1.0のオンライン入力遅延は、オフライン比で +3.98F
なお、3月(アプデ前)に測定した結果は +5.07 F(※いずれも4人の平均)よって、「今回のアプデでオンライン遅延は 約1.1 F 改善された」ことになる。" drafix570.(2020-08-08). DRAFIX/ドラフィ on Twitter. Twitter. Retrieved 2020-10-15. - ^ "Now at first I thought this was placebo but then I went back and took a look and YES! They ACTUALLY CHANGED the render of the Question Mark for random in 8.1.0. Left is pre-patch and right is 8.1.0". SmashMarioPro. (2020-08-05). SpookMarioPro2000 on Twitter. Twitter. Retrieved 2020-10-15.
- ^ Can Sephiroth's FAIR Stick onto Steve's BLOCKS? -- Random Smash Ultimate Facts, PKBeats (December 20, 2020)
- ^ Smash Ultimate Patch Notes 10.1.0 - Side by Side Comparison, Beefy Smash Doods (December 23, 2020)
- ^ Nintendo. (November 11, 2018). Super Smash Bros. Ultimate Direct 11.1.2018. YouTube. Retrieved June 15, 2021.
- ^ a b c Nintendo. (2018) [1] Australian amiibo Line-Up website. Retrieved October 18, 2018.
- ^ a b c Nintendo. [2] North American amiibo Line-Up website. Retrieved February 13, 2019 (PST).
- ^ a b c Nintendo of America. (February 14, 2019) [3] Twitter post. Retrieved February 14, 2019 (PST).
- ^ a b c Nintendo of America. (April 16, 2019) [4] Twitter post. Retrieved April 16, 2019 (PST).
- ^ a b c https://nintendoeverything.com/nintendo-provides-release-dates-and-release-windows-for-upcoming-amiibo/
- ^ https://twitter.com/AmiiboNews/status/1169663187031154690
- ^ https://twitter.com/AmiiboNews/status/1169663187031154690
- ^ https://twitter.com/AmiiboNews/status/1169663187031154690
- ^ https://twitter.com/NintendoAmerica/status/1192087002453336065
- ^ https://twitter.com/NintendoAmerica/status/1192087002453336065
- ^ https://twitter.com/NintendoAmerica/status/1283205531226669057
- ^ https://twitter.com/NintendoAmerica/status/1283205531226669057
- ^ a b @NintendoAmerica (December 14, 2022). "Super Smash Bros. #amiibo for DLC fighters Kazuya and Sephiroth will be released on 1/13/23. Plus, look forward to the release of Pyra and Mythra in 2023!" Twitter. Retrieved December 15, 2022.
- ^ a b @NintendoAmerica (April 19, 2023). "The Pyra and Mythra #SmashBros #amiibo will launch as a double pack on 7/21. Each amiibo unlocks a unique Aegis Sword weapon skin that characters using the Swordfighter class can wield in #XenobladeChronicles3." Twitter. Retrieved April 19, 2023.
- ^ @NintendoAmerica (September 15, 2023). "Sora from #KingdomHearts will join the Super #SmashBrosUltimate #amiibo line-up in 2024! #NintendoDirect" X. Retrieved September 15, 2023.
- ^ @NintendoAmerica (December 7, 2023). The #SmashBros #amiibo of Sora will be released on 2/16/2024! #KingdomHearts X. Retrieved December 7, 2023.
- ^ Super Smash Bros. Ultimate Buy Page
- ^ Tweet by Nintendo of America
- ^ Best Buy. Super Smash Bros. Ultimate Special Edition - Nintendo Switch. Retrieved September 3, 2018.
- ^ Nintendo (August 3, 2022) Top Selling Title Sales Unites. Nintendo Japan. Retrieved August 3, 2022. Archived from the original on August 3, 2022.
- ^ Iggy. (June 16, 2018). Yoshi Vanishes from Super Smash Bros. Ultimate's German Box Art. NintendoSoup. Retrieved June 16, 2018.
Super Smash Kart
- This page is about the Nintendo Switch port of the Mario Kart 8 game. For the game's original version, see Mario Kart 8.
| Super Smash Kart | |||||||||||||||||||||||||||||
|---|---|---|---|---|---|---|---|---|---|---|---|---|---|---|---|---|---|---|---|---|---|---|---|---|---|---|---|---|---|

| |||||||||||||||||||||||||||||
| Developer | Nintendo EPD BANDAI NAMCO Studios Inc. | ||||||||||||||||||||||||||||
| Publisher | Nintendo Tencent Games (China) | ||||||||||||||||||||||||||||
| Platform(s) | Nintendo Switch 2 | ||||||||||||||||||||||||||||
| Release date | |||||||||||||||||||||||||||||
| Language(s) | English (United Kingdom) English (United States) French (France) French (Canada) German Spanish (Spain) Spanish (Latin America) Italian Dutch Portuguese (Portugal) Russian Japanese Simplified ChineseSC Traditional Chinese Korean SC - The global and domestic versions have slightly different localizations. | ||||||||||||||||||||||||||||
| Genre | Racing | ||||||||||||||||||||||||||||
| Rating(s) |
| ||||||||||||||||||||||||||||
| Mode(s) | Single Player, Multiplayer, Online Play, Wireless Play, LAN Play | ||||||||||||||||||||||||||||
| Format | Nintendo Switch: | ||||||||||||||||||||||||||||
| Input | Nintendo Switch: | ||||||||||||||||||||||||||||
| Serial code(s) | |||||||||||||||||||||||||||||
Mario Kart 8 Deluxe is a racing game in the Mario Kart series released worldwide for the Nintendo Switch on April 28, 2017. It is an enhanced port of Mario Kart 8 for the Wii U and is the first Super Mario game overall to be released for the Nintendo Switch. The base game contains additional content such as several new characters and an overhauled Battle mode with new courses and modes. First teased in the Nintendo Switch's announcement video on October 20, 2016, the game was formally announced as part of the Nintendo Switch presentation on January 13, 2017.
Throughout 2022 and 2023, new race courses and returning characters were added to the game via the Mario Kart 8 Deluxe – Booster Course Pass paid DLC. An edition of the game that has the Booster Course Pass activated from the start, titled the Mario Kart 8 Deluxe Bundle (Game + Booster Course Pass), is available for purchase digitally.[7]
Controls
Dual Joy-Con / Pro Controller
| Action | Dual Joy-Con | Pro Controller | Motion |
|---|---|---|---|
| Steer | Tilt | ||
| Accelerate / Rocket Start (press and hold when the countdown hits 2) | |||
| Brake / Reverse | |||
| Item / Horn | |||
| Drift / Hop / Trick | |||
| Rear view | |||
Joy-Con (sideways)
 or tilt
 ") : Steer
: Steer or
or  : Accelerate / Rocket Start (press and hold when the countdown hits 2)
 : Brake/reverse
 : Use horn/item
 : Hop/drift/trick
- or tilt + or or auto-accelerate + : Drift
 : Rear view
Toy-Con Motorbike
- Tilt: Steer
") Forward tilt: Accelerate / Rocket Start (press and hold when the countdown hits 2)
Forward tilt: Accelerate / Rocket Start (press and hold when the countdown hits 2) : Brake / reverse
 : Use horn/item
 : Hop / trick
- Tilt + forward tilt or auto-accelerate + : Drift
 : Switch view
Toy-Con Car
- Tilt: Steer
- Pedal half press: Accelerate / Rocket Start (press and hold when the countdown hits 2)
- : Use horn/item
- Pedal full press: Hop / trick
- Tilt + pedal full press: Drift
 : Switch view
Differences from the original
The following is a list of changes made to the base Mario Kart 8 Deluxe game from the latest version of Mario Kart 8, excluding changes that were fixed to be consistent with the original game in future updates.
General
- Characters, cups, and courses that were originally unlockable or exclusive to downloadable content in Mario Kart 8 are available from the start in this game; in addition, King Boo, Bowser Jr., Dry Bones, Inkling Boy, and Inkling Girl are added as new characters. This makes for the largest starting character roster or track selection of any home console Mario Kart game.
- Metal Mario gains an alternate costume known as Gold Mario, which is unlocked by clearing all cups in 200cc.
- A new Inkling Suit has been added to the Mii racing suits roster. It is usable by scanning an Inkling or Splatoon-series amiibo. In addition, the Animal Crossing Suit can be unlocked with any Isabelle or Animal Crossing-series amiibo.
- The game has reduced loading times.
Gameplay

- The Battle mode has been revamped.
- The overall game difficulty has been adjusted, as CPUs slow down when close to the player and do not charge Mini-Turbos or Super Mini-Turbos as quickly.
- The default speed of the CPUs in the Normal and Easy difficulties is slightly reduced.
- The rival system has been expanded: characters that did not have any in the original were given them, and characters who already had them swapped some in place of others.
- Motion controls are now turned on in the pause menu by pressing
 , rather than a toggle switching between it and stick controls.
 - This game introduces Smart Steering and Auto-Accelerate for beginners; the former makes staying on the track easier by automatically steering the vehicle away from edges on the track, while the latter makes the vehicle automatically accelerate (though this is not available in Battle mode). If the Smart Steering mode is on, the player's vehicle will have a black antenna sticking out of its rear end; this antenna blinks yellow and bends when Smart Steering is in effect. Smart Steering and Auto-Accelerate can be toggled on and off individually for each player in the vehicle part selection menu and in the pause menu.
- The pathfinding and drifting of CPUs in 200cc was reworked.
- The unlock criteria for various kart parts have been adjusted; some now have to be unlocked instead of being obtained from the start, while others are now obtained from the start instead of being unlockable. All kart parts that were DLC in the original game are now unlocked in the same manner as non-gold kart parts. New kart parts have been added, such as the Koopa Clown, the Inkstriker, and the Splat Buggy.
- Turning off the map, which is now turned on by default, is done by pressing in the pause menu, instead of
 at any time like in the original.
 - There is an additional level of Mini-Turbo, called Ultra Mini-Turbo, denoted by purple sparks (referred to as pink in the British English version) that appear after the orange sparks. This new level of Mini-Turbo can only be used if Smart Steering is off.
- A 200cc engine class in Time Trials was added; in addition to being separately recorded from the 150cc Time Trials, it features new staff ghosts.
- Some of the staff ghosts in time trials from the Wii U version were adjusted.
- There are more character weight classes than in the original, with several returning characters having different statistics.
- The player can now change controllers on the character selection screen by pressing
 or
or  .
. - The statistics of vehicle parts have been altered, and certain physics elements, such as the speed increase per stat and the acceleration tiers, were adjusted.
- Wireless and LAN modes were added, the latter returning from Mario Kart: Double Dash!!
- Offline "VS Race" now requires a minimum of four races per cup instead of three.
- CPUs choose from a wider variety of kart parts than in the original version.
- Being able to see which items the other drivers have, which was only possible when playing with the Wii U GamePad in the original, has now been removed entirely.
- Miiverse compatibility is absent, including the ability to upload Highlight Reels on YouTube; this feature was also discontinued in the Wii U version when Miiverse was terminated on November 7, 2017.
- An exploit in the original version that allowed players to gain speed by hopping after speed boosting has been fixed.
Items
- Characters can now carry up to two items at once, even if they do not equip the first item.
- The game features the return of the Double Item Box from Mario Kart: Double Dash!!
- Red Shells and Spiny Shells are now slower when they lock onto their target, meaning players are able to outrun them in 200cc when they have any kind of speed boost.
- Items are now based on distance and placement, rather than distance alone.
- The Boo is introduced as an item, with the Feather also appearing in Battle mode only.
- If a Blooper is about to ink the player as they cross the finish line, the player will now still get inked.[8] This is unlike the Wii U version, where the Blooper or the ink disappeared instead.
- CPU players now have a chance to obtain Triple Red Shells from Item Boxes, but this primarily only happens in the Shells Only item setting.
Online
- Playing online now requires a subscription to Nintendo Switch Online, rather than being tied to Nintendo Network.
- The dedicated lobbies for DLC copies and non DLC copies from the original game have been removed, as has the option to set whether or not tournament lobbies could be set to only allow the latter.
- Online lobbies have been changed in that a room entirely made up of players between 1000 VR and 3000 VR will be randomized between a 100cc or 150cc race, and a room full of players at over 3000 VR will be randomized among a 150cc, Mirror, or 200cc race, though the game normally selects 150cc. This is unlike the original game, where lobbies full of players between 1000 and over 4000 VR were put in 100cc, and lobbies full of players at over 5000 VR raced in 150cc.
- There is now an option to change character and kart parts in a lobby; this is done by pressing during the course selection of an online lobby.
- Players are no longer positioned based on the order they joined.
- VR and BR distributions are slightly tweaked.
- Voice chat in private lobbies has been removed due to the Nintendo Switch's lack of a microphone.
Graphics
- The game now mostly renders in native 1920x1080 resolution in TV mode (sometimes switching to native 1728x972), and always renders at native 1280x720 resolution in tabletop and handheld mode, instead of the dynamic 1280x720/1152x648 rendering resolution used in the original Wii U version.
- The game runs at a constant 60 FPS, whereas the Wii U version would frequently dip to 59.
- The shadows present in the game are more detailed in multiplayer.
- Trophies can no longer be rotated, even when in handheld mode.
- All courses that feature confetti flying around the finish line, such as Mario Circuit, now also have confetti on the ground of the course near it.[9]
- When using the rear-view mirror, the character will now move their eyes slightly to the left to look back, like in Mario Kart Wii; however, their eyes will stay looking to the left as long as the rear-view is active, rather than switching back after a second as they do in Mario Kart Wii.
- When playing with teams, flags colored to correspond to the teams are added behind the vehicles. If Smart Steering is on, then the Smart Steering antenna serves as the pole of the flag. These flags do not appear in Balloon Battle and Bob-omb Blast, as the colors of the balloons represent the teams in these modes.
- The Mii characters that represent the players in online lobbies wear racing suits, unlike in the original version in which they wore their regular outfits.
- The wireless and LAN modes use a very similar lobby to the online lobby, albeit visually set in a garage rather than on a globe.
- In online play, the Mii of the previous race or battle's winner wears a crown identical to the one worn by the first-place player in Battle mode.
- Motion blur when boosting is added to online play; in earlier builds, it was also present in splitscreen multiplayer.[10]
HUD / interface
- The user interface on the title screen and main menu has been revamped.
- All of the Toad icons are now on the left.
- The mode buttons appear longer, wider, and more spaced out.
- The options for playing online with one or two players have been combined, with the mode being renamed to "Online Play" due to this.
- For local multiplayer, there is now a sub-menu to choose the number of players to participate with.
- The new wireless and LAN modes were added to the menu. They use a very similar lobby to the online lobby, albeit set in a garage rather than on a globe.
- The Nintendo eShop icon that led to the DLC's shop page has been removed.
- The stamp counter icon has been removed.
- The status screen and amiibo menu, brought up by pressing and
 on Wii U respectively, now have their own dedicated icons on the bottom, replacing the prompts to open the equivalent menus from the Wii U game. Both menus have also been redesigned.
 - The Mario Kart TV icon was relocated from beneath the online play button on Wii U to being on the right of the amiibo icon.
- Much of the artwork on the entire menu was replaced and, after being unlocked, swaps out every time the game is opened.
- The game features an in-game guide, directly accessible from the game's menu; this guide explains various techniques, Battle mode, and the functions of each item. Much of its text is reused from the Wii U version's electronic manual.
- The menu in VS Race was redesigned.
- Scrollbars have been removed from the time trial menu. It also no longer shows Miiverse posts.
- Race rules and the course name are now displayed on loading screens in online matches.
- New tournament icons have been added in online play.
- The game no longer shows the state or province a player is located in on the loading screen of an online match or the loading screen in Mario Kart TV.
- In online matches, the flag displaying the country a player is in has been resized to be as big as the Mii icon next to it, as well as to display at a higher resolution.
- Players can now see the lap count or timer when spectating an online race or battle respectively.
- In races, the lap and coin counters have been moved closer to the bottom left corner.
- It is no longer possible to see the lap count when crossing the finish line or the full results in multiplayer (including online lobbies) at the end of the race while watching Highlight Reels via Mario Kart TV.
- The mini map features multiple alterations. When playing in local multiplayer, there is only one map in the center of the screen, rather than each player having their own copy of it like in the Wii U version. The color for the race courses in the Wii U version was typically blue, excluding the maps of the Rainbow Roads and GCN Baby Park, which were rainbow and red, respectively. However, in this version, all minimaps are white, like in Mario Kart Wii and Mario Kart 7. Battle courses now have color-shaded areas and lines on their maps to serve as a visual representation of where the player is located. In a race, the 1st place player no longer has a crown on their map icon, though they still do in battles. The icons for character and the Spiny Shell on the course map are now slightly larger, more detailed, and of an increased resolution. Explosions caused by Spiny Shells and Bob-ombs are also now shown.
- All notifications use a different font.
- It is now possible to check which kart parts a ghost was using in time trials.
- Inkling Girl, Isabelle, and Link now appear on the loading screen, replacing the second set of characters from Wario to Bowser.
- The chart on the kart selection screen no longer rounds to the nearest whole number, creating a more accurate representation of the karts' stats.[11]
- The engine class for the upcoming race in an online race lobby is now shown in the lobby as the course is selected, via a "50", "100", "150", mirrored "150" (for Mirror), or "200" icon in the bottom right of the selected course icon.
- This extends to online battle lobbies, which will display a symbol of a yellow balloon (for Balloon Battle), a potted Piranha Plant (for Renegade Roundup), a coin (for Coin Runners), a Shine Sprite (for Shine Thief), or a Bob-omb (for Bob-omb Blast) to denote which Battle mode is about to be played.
Audio
- The game supports 5.1 surround. Effects that can play on the rear speakers include approaching shells, certain vehicles' engines, sceneries (e.g. bats, falling rocks, water, helicopters), and if other drivers are immediately to the side. Background music, Lakitu's countdowns, and menu sounds are mixed to stereo only. Some surround receiver producers' models may default to Standard modes that water out the effect (e.g. playing background music via side speakers), necessitating switching them to Straight/Direct or upmixing modes.
- Characters no longer vocally react to being inked by a Blooper.
- The faster variation of the course's theme in Battle mode now begins a minute before ending, rather than 30 seconds before.
Battle

The biggest change made between Mario Kart 8 Deluxe and the original release of Mario Kart 8 is the Battle mode. Battle mode now returns to the arena-based style, adding eight new battle courses, each with its own course intro (replacing the eight Battle mode race tracks from Mario Kart 8) and unlike previous games, each player starts with five balloons, as opposed to three. Another addition to Battle mode is that the character in the lead now wears a crown, unlike in Mario Kart 8 where the crown is displayed only on the HUD map. Additionally, players now start out with zero points instead of Mario Kart 8's default three points, and their balloons do not serve as the remaining three points.
Returning from Mario Kart Wii and Mario Kart 7 is the ability to respawn after all balloons are popped; this causes the player's total score to halve and the player respawns with three balloons instead of five. A new addition to this mode is the feature to tell exactly which character hit whom, which appears on the bottom of the screen. After getting hit, players now have about 1.5 seconds of invincibility frames, unlike in Mario Kart 8. The item options also appear to have been updated; alongside the "Frantic Items" option, which chooses powerful items more frequently, a "Skilled Items" option is also available for selection; in this option, powerful items appear less frequently, similar to Mario Kart Wii's "Strategic" ("Basic" in the British English version) item option.
There are five different Battle mode types:
- Balloon Battle: The classic mode where players use items to pop opponents' balloons or steal them in order to score points. This mode now uses the point-based set-up seen in Mario Kart Wii, and Mario Kart 7, rather than the survival set-up of Mario Kart 8 and earlier installments prior to Mario Kart Wii.
- Renegade Roundup: A new mode in the vein of "cops and robbers", with the racers being divided into two teams. One team, known as "The Authorities", has to use Piranha Plant items (which are permanently attached to the front of their vehicle and only serve to capture the opposing team; they do not operate like the regular item) in order to capture players from the other team, known as "The Renegades". Captured Renegades are placed into one of several jail cells floating above various points on the stage. Remaining Renegades can free their teammates by driving over a key switch placed below the jail cells. The Renegades win if at least one member is still running free when time runs out, and the Authorities win if all of the Renegades get captured. All Authority team members also temporarily lose their ability to capture after being hit by an item and Renegades receive a speed boost and temporary immunity when they are freed from the cells.
- Bob-omb Blast: A returning mode from Mario Kart: Double Dash!!, in which players attack one another using Bob-ombs to score points and can carry up to 10 Bob-ombs. This version follows nearly all of the same rules as Balloon Battle, the differences being these: the only items are Bob-ombs, players cannot be hurt by their own Bob-ombs exploding, and Bob-ombs thrown forward explode instantly.
- Coin Runners: Originating in Mario Kart Wii, this mode was last seen in Mario Kart 7. Players must collect Coins scattered across the course in order to have the most by the end of the match. Plays more akin to the Mario Kart Wii version of the mode, with players having no limit to the amount of coins they can collect, as opposed to the 10-coin limit in the Mario Kart 7 version.
- Shine Thief: Another returning mode from Mario Kart: Double Dash!!, one player must retrieve a Shine Sprite and keep hold of it for about 20 seconds, while the opponents use items against whoever has the Shine to force that player to drop it. The driver holding the shine sprite has a slightly reduced top speed. In Team play, one team must collectively manage to hold on to the Shine for about 30 seconds.
There is also the option to randomly select one of the five available modes by choosing "Random Battle".
Characters
Excluding character variants, there are a total of 48 playable characters in Mario Kart 8 Deluxe, including 40 in the base game and eight as DLC. All base and DLC characters from Mario Kart 8 are present in the base roster of Mario Kart 8 Deluxe and are now available from the start, while more characters that were not present in Mario Kart 8 are also added. The base game includes returning characters Bowser Jr., King Boo, and Dry Bones, who last appeared in the series as playable characters in Mario Kart Wii, and Gold Mario (as a variant of Metal Mario), who was previously playable in Mario Kart Arcade GP DX. It also introduces a new non-Super Mario character, being the Inkling from Splatoon. Both the Inkling Girl and Inkling Boy are playable, and they have three selectable colors each. At the game's launch, Inkling Girl and Inkling Boy took up separate slots on the character selection screen, as did the two Villagers, who were originally present in the same character slot (with the female Villager being a variant of the male one) in Mario Kart 8. However, as of the version 3.0.0 update, Inkling Boy and female Villager are now considered variants of Inkling Girl and male Villager respectively.[12]
Eight additional characters were added as downloadable content via the Booster Course Pass, starting with its fourth wave. Characters added include Birdo, who was added in Wave 4 with nine selectable colors, Petey Piranha, Wiggler, and Kamek, who were added in Wave 5, and Diddy Kong, Funky Kong, Pauline, and Peachette, who were added in Wave 6.[13] Wiggler, Gold Mario, Kamek, Pauline, Peachette, and all Birdo variants are playable for the first time in a home console Mario Kart installment. Kamek, Pauline, Peachette, and almost all Birdo variants were originally introduced in Mario Kart Tour, which released after Mario Kart 8 Deluxe. With Birdo's inclusion in Wave 4 and Diddy Kong and Funky Kong's inclusion in Wave 6, all playable characters from Mario Kart Wii are now included in Mario Kart 8 Deluxe.
There is only one unlockable character in this game, that being Gold Mario. He is unlocked by clearing all cups of the 200cc Grand Prix. Additionally, the version 1.6.0 update added a new variant for Link, Champion's Tunic Link,[14] based on his appearance in The Legend of Zelda: Breath of the Wild. When Gold Mario is unlocked and Champion's Tunic Link is downloaded, they become the default variations of their character, while Metal Mario and the version of Link based on his appearance in The Legend of Zelda: Skyward Sword are relegated to alternate costumes. As of the 3.0.0 update, however, the character select screen now remembers the last costume used for characters with alternate costumes.
There are more individual character weight classes when compared to the Wii U game, with several returning characters having different statistics, thus resulting in fewer characters having the same stats as each other.
Characters, variants, and Mii racing suits playable in this game that are not playable in the original Mario Kart 8 are listed in italics.
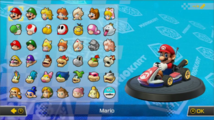
Character select screen at launch
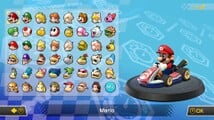
Character select screen with Gold Mario unlocked and all DLC characters downloaded


Character variants
With the exceptions of Link and the Villager, the displayed name of the character changes based on the variant that is selected. From version 3.0.0 onwards, the last used variant will have their icon shown on the character selection screen. Unlike in Mario Kart 8, the sub-menu for the two Villagers does not use a unique Animal Crossing-inspired color scheme, instead using the same gray color as the others.
1 - This variant is used as the select icon for the base character on the main select screen once it is available.
2 - Originally a separate character slot before being relegated to a variant in the version 3.0.0 update.
3 - Originally the only version of the character before being relegated to a variant in the version 1.6.0 update.
Mii racing suits
All 20 Mii racing suits return from Mario Kart 8, and, like in that game, the color of the Normal Suit matches the favorite color of the selected Mii. There are also two additional Mii racing suits tied to scanning amiibo - the new Inkling Suit, which is unlocked either by scanning any Inkling or Splatoon-series amiibo, and the Daisy Suit, returning from Mario Kart Tour, which can be unlocked by scanning any Daisy amiibo after installing version 3.0.0. In addition, the Animal Crossing Suit can now be unlocked with any Isabelle or Animal Crossing-series amiibo, and the Pikmin Suit can be unlocked with Pikmin-series amiibo. In version 3.0.0, scanning any amiibo of characters in The Legend of Zelda, Metroid, and Kirby series unlocks the respective series' Mii racing suits.
| Normal Suits | |||||||||||
|---|---|---|---|---|---|---|---|---|---|---|---|
| Red | Orange | Yellow | Light-green | Green | Blue | ||||||

|

|

|

|

|

| ||||||
| Light-blue | Pink | Purple | Brown | White | Black | ||||||

|

|

|

|

|

| ||||||


As part of the sixth wave of the Booster Course Pass, 17 additional Mii racing suits from Mario Kart Tour were added. These costumes can be unlocked via purchasing the DLC.[12] Some Jump Boost animations from these suits are different from those of the standard and amiibo racing suits.


Rival order
Like in Mario Kart 8, characters have set rivals that consistently appear when racing in Grand Prix races. They are once again restricted to Grand Prix only, not appearing in single player VS Race or Battle mode. Unlike the previous game, more characters have rivals: the twelve characters from the previous game who had rivals retain their rivals in this game, while most other characters range from having one to two rivals each, though some still have none at all.
| Column 1 | Column 2 | Column 3 | Column 4 | ||||
|---|---|---|---|---|---|---|---|
| Player | Rival(s) | Player | Rival(s) | Player | Rival(s) | Player | Rival(s) |
| None | |||||||
| Column 5 | Column 6 | Column 7 | Column 8 | ||||
| Player | Rival(s) | Player | Rival(s) | Player | Rival(s) | Player | Rival(s) |
| None | |||||||
| None | |||||||
Vehicle parts
Mario Kart 8 Deluxe features six additional vehicle body parts. One is the Koopa Clown, returning from Mario Kart 7. Two new vehicles are Splatoon-based ATVs; the Splat Buggy and Inkstriker. These three change their colors for certain characters: the former for the Koopalings, and the latter two for all Inkling variations. Version 1.6.0 adds the Master Cycle Zero, Ancient Tires, and Paraglider. In total, there are 41 vehicle bodies, 22 tires, and 15 gliders, resulting in up to 13,530 different combinations.
Computer-controlled characters now choose from a wider variety of kart parts than in the original version, such as the Flame Rider and the Sports Coupe. However, they are still restricted to a set amount of body parts per character. A CPU Baby Daisy has the tendency to use the Wild Wiggler with Wood tires, for example.
The vehicle parts that were exclusive to downloadable content in Mario Kart 8 (i.e. parts included within the Mercedes-Benz × Mario Kart 8, The Legend of Zelda × Mario Kart 8, and Animal Crossing × Mario Kart 8 add-on packs) are now accessible in the base game and are randomly unlocked by collecting coins during gameplay.
The statistics of some vehicle parts have been altered, and certain physics elements, such as the speed increase per stat and the acceleration tiers, have been adjusted.
Available parts
The parts available are listed here in the order shown in the vehicle customization screen, with the following notation:
- Bold = Part is available at the start.
- * = Changes color, depending on the character.
- ** = Changes color for the Koopalings.
- *** = Changes color for Daisy, Baby Daisy, Rosalina, Baby Rosalina, Wiggler, Kamek, and Funky Kong.
- **** = Changes color for the Inklings.
- (DX) = Part is not available in the original Mario Kart 8.
- (NEW) = Part is introduced in this game.
The "8" logos on the parts are replaced with the driver's emblem, except on the Gold Standard and Gold Glider.
Karts
Biddybuggy*
Buggybud
Landship**
Sneeker*
Bounder
Sports Coupe
Sports Coupé
Gold Standard
Gold Kart
GLA*
Koopa Clown** (DX)


Standard bikes
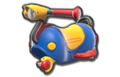
Mr. Scooty
Mr Scooty
Master Cycle Zero (NEW)


Sport bikes


ATVs
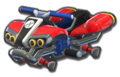
Standard ATV*
Standard Quad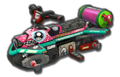
Splat Buggy**** (NEW)
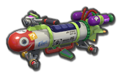
Inkstriker**** (NEW)


Tires
Standard
Normal
Wood
Wooden
Blue Standard
Normal Blue
Hot Monster
Funky Monster
Gold Tires
Gold Wheels
GLA Tires
GLA Wheels
Triforce Tires
Triforce Tyres
Ancient Tires (NEW)
Ancient Tyres
Leaf Tires
Leaf Tyres


Gliders
Paraglider (NEW)


CPU combinations
All characters in the game besides Miis and most variants (with the exceptions of blue Inkling Boy, female Villager, and Link's alternate outfit) can be used by CPUs. Each of these characters have four different combinations of vehicle parts that they can use as CPUs:
| CPU combinations | ||||
|---|---|---|---|---|
| Character | Combination 1 | Combination 2 | Combination 3 | Combination 4 |
Drivers' and vehicle parts' statistics
- For the in-game tables from which these values were derived and for the tables to translate those values into the actual statistics used by the game, see Mario Kart 8 Deluxe in-game statistics.
Mario Kart 8 Deluxe features different statistics with respect to Mario Kart 8.
Statistics shown in the vehicle customization screen
Just like Mario Kart 7 and Mario Kart 8, the game uses "points" ("PT") which are conferred by characters and vehicle parts to determine the final values of the game's statistics. In each statistics, the points given by the character, body, tires, and glider are summed to obtain a final value called "Level" ("Lv") which is then used by a table to convert the level into appropriate physical parameters used by the game. There are a total of 8,064 different stat combinations. The Level of five statistics is displayed in the vehicle customization screen:
- Speed: The top speed of the vehicle on land with normal gravity.
- Acceleration: How fast the speed increases when holding the acceleration button until top speed has been reached.
- Weight: The weight of the vehicle. Vehicles with higher weight knock away vehicles with lower weight.
- Handling: The turning ability of the vehicle on land with normal gravity. A higher stat means vehicles turn sharper, and will continue turning normally for longer before automatically initiating a drift.
- Traction (Grip in the British English version): The grasp of the vehicle to the ground while off-road. Vehicles with higher traction slip less on certain terrain and can stay stable on the road better. Not to be confused with handling.
Said Level is represented through bars by adding three points to the sum of points, then dividing the result by four, resulting in values ranging from 0.75 to 5.75. As an example, the process through which the statistics of a certain combination of character and vehicle parts are calculated and displayed is shown below:

| Element | Points conferred | ||||
|---|---|---|---|---|---|
| Speed | Acceleration | Weight | Handling | Traction | |
Dry Bones |
2 | 5 | 1 | 8 | 4 |
| 2 | 5 | 1 | 4 | 5 | |
| 2 | 4 | 2 | 3 | 5 | |
| 1 | 1 | 1 | 1 | 1 | |
| Final values | Speed | Acceleration | Weight | Handling | Traction |
| Level | 2 + 2 + 2 + 1 = 7 |
5 + 5 + 4 + 1 = 15 |
1 + 1 + 2 + 1 = 5 |
8 + 4 + 3 + 1 = 16 |
4 + 5 + 5 + 1 = 15 |
| Value shown in the vehicle customization screen | (7 + 3) / 4 = 10 / 4 = 2.5 |
(15 + 3) / 4 = 18 / 4 = 4.5 |
(5 + 3) / 4 = 8 / 4 = 2 |
(16 + 3) / 4 = 19 / 4 = 4.75 |
(15 + 3) / 4 = 18 / 4 = 4.5 |

Drivers' statistics
Drivers are still grouped into small groups of characters sharing the same statistics, the number of groups has been increased with respect to Mario Kart 8.
In addition to the statistics shown in the vehicle customization screen, there are the following statistics:
- Water Speed: The top speed of the vehicle while driving underwater.
- Air Speed: The top speed of the vehicle while gliding.
- Anti-Gravity Speed: The top speed of the vehicle in anti-gravity mode.
- Water Handling: The turning ability of the vehicle while driving underwater.
- Air Handling: The turning ability of the vehicle while gliding.
- Anti-Gravity Handling: The turning ability of the vehicle in anti-gravity mode.
- Mini-Turbo: The length of the vehicle's mini-turbo speed boosts and how fast mini-turbos can be charged. Also affects the length of jump boosts from tricks.
- Invincibility: The length of time the vehicle is invincible after spinning out. Added in v2.2.0.[15]
Just like in Mario Kart 8, Miis can be Light, Medium, or Heavy, depending on their height and weight.
The statistics are shown in points.
| Drivers' Statistics | ||||||||||||||
|---|---|---|---|---|---|---|---|---|---|---|---|---|---|---|
| Vehicle size | Character | Speed | Acceleration | Weight | Handling | Traction | Mini-Turbo | Invincibility | ||||||
| Ground | Water | Air | Anti-Gravity | Ground | Water | Air | Anti-Gravity | |||||||
| Small | 1 | 1 | 1 | 1 | 4 | 0 | 10 | 10 | 10 | 10 | 5 | 5 | 6 | |
| 1 | 1 | 1 | 1 | 5 | 0 | 9 | 9 | 9 | 9 | 3 | 5 | 6 | ||
| 2 | 2 | 2 | 2 | 5 | 1 | 8 | 8 | 8 | 8 | 4 | 5 | 5 | ||
| 3 | 3 | 3 | 3 | 4 | 2 | 8 | 8 | 8 | 8 | 5 | 4 | 4 | ||
| 3 | 3 | 3 | 3 | 5 | 2 | 7 | 7 | 7 | 7 | 2 | 4 | 3 | ||
| 4 | 4 | 4 | 4 | 4 | 3 | 7 | 7 | 7 | 7 | 4 | 4 | 3 | ||
| Medium | 5 | 5 | 5 | 5 | 4 | 3 | 6 | 6 | 6 | 6 | 3 | 4 | 3 | |
| 6 | 6 | 6 | 6 | 3 | 4 | 5 | 5 | 5 | 5 | 3 | 4 | 1 | ||
| 6 | 6 | 6 | 6 | 3 | 5 | 5 | 5 | 5 | 5 | 1 | 4 | 1 | ||
| 7 | 7 | 7 | 7 | 2 | 6 | 5 | 5 | 5 | 5 | 1 | 3 | 3 | ||
| 7 | 7 | 7 | 7 | 2 | 6 | 4 | 4 | 4 | 4 | 2 | 3 | 3 | ||
| 8 | 8 | 8 | 8 | 1 | 10 | 3 | 3 | 3 | 3 | 1 | 1 | 3 | ||
| 9 | 9 | 9 | 9 | 1 | 8 | 2 | 2 | 2 | 2 | 0 | 1 | 4 | ||
| Large | 8 | 8 | 8 | 8 | 1 | 7 | 3 | 3 | 3 | 3 | 3 | 2 | 4 | |
| 8 | 8 | 8 | 8 | 1 | 10 | 3 | 3 | 3 | 3 | 1 | 1 | 6 | ||
| 9 | 9 | 9 | 9 | 1 | 8 | 2 | 2 | 2 | 2 | 0 | 1 | 4 | ||
| 10 | 10 | 10 | 10 | 0 | 9 | 1 | 1 | 1 | 1 | 1 | 0 | 5 | ||
| 10 | 10 | 10 | 10 | 0 | 10 | 0 | 0 | 0 | 0 | 0 | 0 | 6 | ||
Parts' statistics
The number of groups of vehicle parts sharing the same statistics has increased as well when compared with Mario Kart 8.
The statistics are reported in points. The invincibility statistic cells for vehicle bodies and tires are split up according to each part inside that row, from left to right. There is an unused stat for on-road traction, which can be viewed here.
| Bodies' Statistics | ||||||||||||||||
|---|---|---|---|---|---|---|---|---|---|---|---|---|---|---|---|---|
| Body *sport bike |
Speed | Acceleration | Weight | Handling | Traction | Mini-Turbo | Invincibility | |||||||||
| Ground | Water | Air | Anti-Gravity | Ground | Water | Air | Anti-Gravity | |||||||||
| 0 | 1 | 1 | 2 | 7 | 0 | 5 | 4 | 4 | 5 | 4 | 7 | 0 | 0 | |||
| 2 | 5 | 2 | 0 | 6 | 0 | 4 | 5 | 3 | 2 | 6 | 6 | 3 | 2 | |||
| 2 | 3 | 1 | 1 | 6 | 1 | 5 | 4 | 2 | 4 | 4 | 6 | 3 | 2 | 2 | ||
| 2 | 2 | 4 | 3 | 5 | 2 | 4 | 2 | 4 | 3 | 3 | 6 | 3 | 3 | 2 | 1 | |
| 2 | 2 | 3 | 4 | 5 | 1 | 4 | 3 | 3 | 4 | 5 | 5 | 4 | 4 | 4 | 4 | |
| 3 | 3 | 4 | 5 | 3 | 3 | 2 | 2 | 2 | 4 | 4 | 5 | 3 | 3 | 1 | ||
| 3 | 4 | 3 | 3 | 2 | 3 | 4 | 4 | 3 | 3 | 7 | 5 | 4 | 3 | 3 | ||
| 3 | 3 | 3 | 3 | 4 | 2 | 3 | 2 | 3 | 3 | 3 | 5 | 4 | 3 | 3 | ||
| 4 | 2 | 3 | 4 | 3 | 0 | 2 | 3 | 1 | 5 | 3 | 4 | 4 | 3 | |||
| 4 | 3 | 3 | 3 | 2 | 1 | 3 | 3 | 3 | 2 | 2 | 4 | 5 | 3 | 3 | ||
| 4 | 2 | 3 | 3 | 2 | 2 | 3 | 2 | 2 | 3 | 0 | 4 | 5 | 4 | 3 | ||
| 4 | 5 | 0 | 2 | 1 | 4 | 1 | 5 | 1 | 1 | 3 | 3 | 6 | 6 | 5 | ||
| 5 | 1 | 2 | 4 | 1 | 3 | 1 | 1 | 0 | 2 | 1 | 3 | 6 | 6 | 6 | ||
| 5 | 2 | 1 | 3 | 0 | 4 | 0 | 1 | 0 | 1 | 5 | 3 | 7 | 7 | 6 | ||
| Tires' Statistics | ||||||||||||||||
| Tire | Speed | Acceleration | Weight | Handling | Traction | Mini-Turbo | Invincibility | |||||||||
| Ground | Water | Air | Anti-Gravity | Ground | Water | Air | Anti-Gravity | |||||||||
| 0 | 3 | 3 | 0 | 6 | 0 | 4 | 4 | 4 | 4 | 4 | 6 | 0 | 0 | |||
| 1 | 2 | 2 | 2 | 5 | 0 | 3 | 3 | 2 | 4 | 3 | 5 | 3 | 3 | |||
| 1 | 1 | 4 | 1 | 4 | 1 | 2 | 1 | 3 | 2 | 6 | 5 | 6 | 4 | |||
| 2 | 3 | 3 | 2 | 4 | 2 | 3 | 3 | 3 | 3 | 5 | 4 | 5 | 4 | 4 | ||
| 3 | 2 | 2 | 4 | 2 | 2 | 4 | 4 | 4 | 3 | 1 | 3 | 5 | 5 | 5 | ||
| 3 | 2 | 1 | 2 | 2 | 4 | 0 | 1 | 1 | 0 | 7 | 3 | 6 | 6 | 5 | ||
| 3 | 4 | 1 | 2 | 3 | 3 | 1 | 1 | 2 | 2 | 6 | 3 | 6 | 6 | 6 | ||
| 4 | 0 | 0 | 4 | 1 | 3 | 2 | 0 | 1 | 2 | 0 | 2 | 5 | 5 | |||
| 4 | 3 | 2 | 1 | 0 | 4 | 2 | 2 | 0 | 1 | 2 | 2 | 6 | 5 | |||
| Gliders' Statistics | ||||||||||||||||
| Glider | Speed | Acceleration | Weight | Handling | Traction | Mini-Turbo | Invincibility | |||||||||
| Ground | Water | Air | Anti-Gravity | Ground | Water | Air | Anti-Gravity | |||||||||
| 0 | 1 | 1 | 1 | 2 | 0 | 1 | 0 | 2 | 1 | 1 | 2 | 0 | ||||
| 0 | 0 | 1 | 1 | 2 | 1 | 1 | 1 | 2 | 0 | 0 | 2 | 0 | ||||
| 1 | 0 | 2 | 1 | 1 | 2 | 1 | 1 | 1 | 0 | 0 | 1 | 1 | ||||
| 1 | 1 | 2 | 0 | 1 | 1 | 1 | 0 | 1 | 1 | 1 | 1 | 1 | ||||
Unlocking criteria
Gold Mario
The only unlockable playable character in this game is Gold Mario, who is unlocked by winning all twelve base-game gold cups at 200cc. Once unlocked, he replaces Metal Mario on the character select screen. Metal Mario is from then on treated as a color variant of Gold Mario. The two differ only in their color scheme and the voice clip used when selecting them. Their other voice clips, horn sounds, animations, and statistics are identical.
Vehicle parts
A vehicle part is randomly unlocked every 30 coins. Once reaching 450 coins this changes to every 50, and once reaching 1500 coins this changes to every 100. Eventually, the last non-gold vehicle part is unlocked on reaching 3100 coins.
Special parts
Special gold parts are unlocked with the following criteria:
- Gold Standard: Unlocked by achieving at least 1 star ranking on all base-game Mirror Cups.
- Gold Tires: Unlocked by defeating all 48 base-game staff ghosts in 150cc Time Trials.
- Gold Glider: Unlocked by collecting 5000 coins.
Alternate title screens
Additional title screens can appear when hovering over the single player and multiplayer options on the main menu. These are unlocked by obtaining a gold trophy in every base-game cup in Mirror and 200cc, after which the title screens used are randomly selected. These alternate title screens can appear on start-up, which causes a different voice clip to play corresponding to the character shown on the screen, replacing the usual clip of Mario yelling "Mario Kart 8!"
Courses
There are 48 race courses in the base game (including all four cups that were DLC in the original Mario Kart 8), these being the 25 courses introduced in the original game and 23 classic courses, which includes two courses from Super Mario Kart, three courses each from Mario Kart: Super Circuit, Mario Kart DS, and Mario Kart Wii, and four courses each from Mario Kart 64, Mario Kart: Double Dash!!, and Mario Kart 7. It is also the first Mario Kart game since Mario Kart 64 to have all courses available from the start.
In the British English version of the game, Toad Harbor is spelled "Toad Harbour", Bone-Dry Dunes is formatted "Bone Dry Dunes", and 3DS Music Park, 3DS Piranha Plant Slide, and 3DS Neo Bowser City are respectively known as 3DS Melody Motorway, 3DS Piranha Plant Pipeway, and 3DS Koopa City.
 Mushroom Cup |
 Flower Cup |
 Star Cup |
 Special Cup |
 Egg Cup |
 Crossing Cup |
|---|---|---|---|---|---|
 Shell Cup |
 Banana Cup |
 Leaf Cup |
 Lightning Cup |
 Triforce Cup |
 Bell Cup |
|---|---|---|---|---|---|
Booster Course Pass
- Main article: Mario Kart 8 Deluxe – Booster Course Pass
The Mario Kart 8 Deluxe – Booster Course Pass DLC includes 48 additional courses (mostly classic courses), released in six waves of eight courses each, increasing the game's total number of courses to 96. The first wave released on March 18, 2022, and the final wave released on November 9, 2023. The classic courses in the DLC include two courses each from Super Mario Kart and Mario Kart 64, three courses from Mario Kart: Double Dash!!, four courses each from Mario Kart DS and Mario Kart 7, five courses from Mario Kart: Super Circuit, eight courses from Mario Kart Wii, and seventeen courses from Mario Kart Tour (making Mario Kart 8 Deluxe the first game in the series to feature classic courses of a Mario Kart game released after it), which increases the total number of courses from each game to four courses from Super Mario Kart, six courses from Mario Kart 64, seven courses each from Mario Kart: Double Dash!! and Mario Kart DS, eight courses each from Mario Kart: Super Circuit and Mario Kart 7, and eleven courses from Mario Kart Wii. Three new courses are also included, namely Sky-High Sundae, Yoshi's Island, and Squeaky Clean Sprint, increasing the total number of new courses to 28.
In the British English version of the game, 3DS Rock Rock Mountain and Wii DK Summit are known as 3DS Alpine Pass and Wii DK's Snowboard Cross respectively, as was the case in the British English versions of their original appearances. However, most courses that had different names between European French and Canadian French in previous games instead use their European French names in both versions, with the exceptions of DS Waluigi Pinball, Tour Amsterdam Drift, and 3DS Rosalina's Ice World.
 Golden Dash Cup |
 Lucky Cat Cup |
 Turnip Cup |
 Propeller Cup |
 Rock Cup |
 Moon Cup |
|---|---|---|---|---|---|
 Fruit Cup |
 Boomerang Cup |
 Feather Cup |
 Cherry Cup |
 Acorn Cup |
 Spiny Cup |
|---|---|---|---|---|---|
Battle courses
Eight battle courses are present in Mario Kart 8 Deluxe, five new and three classic, replacing the repurposed race courses used for Battle mode in the Wii U version.
Most battle courses visually resemble race courses from Mario Kart 8: Battle Stadium with Mario Kart Stadium, Sweet Sweet Kingdom with Sweet Sweet Canyon, Dragon Palace with Dragon Driftway, Lunar Colony with Rainbow Road, GCN Luigi's Mansion with Twisted Mansion, and SNES Battle Course 1 with SNES Donut Plains 3, all sharing similar textures and/or assets.
Similar to regular races, a course introduction scene is now added at the start.
Ghosts
150cc Staff Ghosts
In Mario Kart 8 Deluxe, the times for staff ghosts in 150cc are slightly different from the original Mario Kart 8. Also, unlike the original game, players will not unlock any stamps if they beat the ghosts.
| Course | Staff Name | Country | Time | Character | Vehicle Combination | ||
|---|---|---|---|---|---|---|---|
| Body | Tires | Glider | |||||
| Mario Kart Stadium | Nin★Chris | United Kingdom | 1:53.191 | Mario | Sports Coupe | Standard | Super Glider |
| Water Park | Nin★Massim | Italy | 2:02.186 | Baby Luigi | Mr. Scooty | Roller | Super Glider |
| Sweet Sweet Canyon | Nin★Fausti | France | 2:07.205 | Baby Peach | Teddy Buggy | Wood | Peach Parasol |
| Thwomp Ruins | Nin★Sophia | Germany | 2:12.125 | Donkey Kong | Standard ATV | Monster | Super Glider |
| Mario Circuit | Nin★Sho | Japan | 2:08.501 | Mario | Standard Kart | Standard | Super Glider |
| Toad Harbor | Nin★Alice | United States | 2:29.282 | Toadette | Cat Cruiser | Retro Off-Road | Plane Glider |
| Twisted Mansion | Nin★Mark | Netherlands | 2:14.615 | Luigi | Mach 8 | Slim | Super Glider |
| Shy Guy Falls | Nin★Frank | United Kingdom | 2:21.804 | Shy Guy | Flame Rider | Off-Road | Super Glider |
| Sunshine Airport | Nin★Leonel | United States | 2:20.447 | Rosalina | Circuit Special | Standard | Super Glider |
| Dolphin Shoals | Nin★Skip | United States | 2:14.832 | Wendy | Landship | Wood | Bowser Kite |
| Electrodrome | Nin★Yuya | Japan | 2:21.023 | Larry | Sport Bike | Monster | Super Glider |
| Mount Wario | Nin★Elena | Russia | 2:03.483 | Waluigi | The Duke | Monster | Wario Wing |
| Cloudtop Cruise | Nin★Maria | Portugal | 2:19.568 | Baby Rosalina | Biddybuggy | Standard | Super Glider |
| Bone-Dry Dunes | Nin★Elena | Russia | 2:15.338 | Morton | Tri-Speeder | Monster | Super Glider |
| Bowser's Castle | Nin★Polly | United Kingdom | 2:21.980 | Bowser | Badwagon | Standard | Super Glider |
| Rainbow Road | Nin★Mizuho | Japan | 2:25.267 | Pink Gold Peach | Comet | Slim | Super Glider |
| Wii Moo Moo Meadows | Nin★Chris | United Kingdom | 1:41.846 | Daisy | Varmint | Hot Monster | Super Glider |
| GBA Mario Circuit | Nin★Rie | Japan | 1:44.593 | Baby Mario | Yoshi Bike | Standard | Super Glider |
| DS Cheep Cheep Beach | Nin★Massim | Italy | 2:06.314 | Koopa Troopa | Steel Driver | Metal | Parachute |
| N64 Toad's Turnpike | Nin★Alice | United States | 2:08.966 | Toad | Standard Bike | Standard | Parachute |
| GCN Dry Dry Desert | Nin★Maria | Portugal | 2:26.614 | Peach | Standard Bike | Slim | Super Glider |
| SNES Donut Plains 3 | Nin★Frank | United Kingdom | 1:35.564 | Lakitu | Pipe Frame | Monster | MKTV Parafoil |
| N64 Royal Raceway | Nin★Skip | United States | 2:18.307 | Peach | Prancer | Wood | Peach Parasol |
| 3DS DK Jungle | Nin★Rie | Japan | 2:20.006 | Donkey Kong | Varmint | Monster | Waddle Wing |
| DS Wario Stadium | Nin★Mizuho | Japan | 2:09.171 | Wario | Tri-Speeder | Off-Road | Wario Wing |
| GCN Sherbet Land | Nin★Fausti | France | 2:20.174 | Lemmy | Sneeker | Standard | Super Glider |
| 3DS Music Park | Nin★Sho | Japan | 2:19.675 | Baby Daisy | Biddybuggy | Standard | Super Glider |
| N64 Yoshi Valley | Nin★Mark | Netherlands | 2:23.688 | Yoshi | Wild Wiggler | Standard | Flower Glider |
| DS Tick-Tock Clock | Nin★Sophia | Germany | 2:06.485 | Iggy | Standard Bike | Monster | Super Glider |
| 3DS Piranha Plant Slide | Nin★Polly | United Kingdom | 2:21.321 | Ludwig | Jet Bike | Slim | Super Glider |
| Wii Grumble Volcano | Nin★Yuya | Japan | 2:16.524 | Roy | Badwagon | Off-Road | Super Glider |
| N64 Rainbow Road | Nin★Leonel | United States | 1:33.981 | Metal Mario | Standard ATV | Monster | Super Glider |
| GCN Yoshi Circuit | Nin★Adrien | France | 2:07.557 | Red Yoshi | B Dasher | Standard | Super Glider |
| Excitebike Arena | Nin★Pedro | Spain | 1:58.808 | Mario | Standard Bike | Slim | Super Glider |
| Dragon Driftway | Nin★Mitsu | Japan | 2:05.957 | Lakitu | Varmint | Monster | Cloud Glider |
| Mute City | Nin★Laura | United States | 2:10.167 | Mario | Blue Falcon | Roller | Super Glider |
| Wii Wario's Gold Mine | Nin★Pit | Germany | 2:22.119 | Wario | Standard Kart | Monster | Super Glider |
| SNES Rainbow Road | Nin★Anne | Netherlands | 1:40.711 | Cat Peach | Cat Cruiser | Retro Off-Road | Super Glider |
| Ice Ice Outpost | Nin★Pavel | Russia | 2:09.427 | Tanooki Mario | Tanooki Kart | Monster | Super Glider |
| Hyrule Circuit | Nin★Mitsu | Japan | 2:08.616 | Link | Master Cycle | Triforce Tires | Hylian Kite |
| GCN Baby Park | Nin★Joost | Netherlands | 1:16.561 | Baby Mario | Biddybuggy | Standard | Super Glider |
| GBA Cheese Land | Nin★Aracel | Spain | 2:06.316 | Orange Yoshi | Pipe Frame | Monster | Parafoil |
| Wild Woods | Nin★Akira | Japan | 2:05.396 | Villager (Boy) | Streetle | Leaf Tires | Paper Glider |
| Animal Crossing | Nin★Marie | United States | 1:53.584 | Isabelle | City Tripper | Slim | Paper Glider |
| 3DS Neo Bowser City | Nin★Rui | Portugal | 2:13.138 | Dry Bowser | Bone Rattler | Metal | Super Glider |
| GBA Ribbon Road | Nin★Giulia | Italy | 2:07.152 | Villager (Girl) | Teddy Buggy | Button | Super Glider |
| Super Bell Subway | Nin★Juliet | France | 2:06.487 | Pink Shy Guy | City Tripper | Slim | Super Glider |
| Big Blue | Nin★Dylan | United Kingdom | 1:37.316 | Mario | P-Wing | Blue Standard | Super Glider |
| Tour Paris Promenade | Nin★Adrien | France | 2:07.401 | Peach | Standard Kart | Slim | Peach Parasol |
| 3DS Toad Circuit | Nin★Sho | Japan | 1:33.670 | Toad | Mr. Scooty | Azure Roller | Super Glider |
| N64 Choco Mountain | Nin★Massim | Italy | 2:08.949 | Koopa Troopa | Biddybuggy | Standard | Super Glider |
| Wii Coconut Mall | Nin★Skip | United States | 1:58.401 | Baby Mario | Sneeker | Metal | Super Glider |
| Tour Tokyo Blur | Nin★Yuya | Japan | 1:36.317 | Blue Inkling Boy | Splat Buggy | Blue Standard | Super Glider |
| DS Shroom Ridge | Nin★Frank | United Kingdom | 2:09.148 | Bowser | Bone Rattler | Off-Road | Super Glider |
| GBA Sky Garden | Nin★Pedro | Spain | 1:42.267 | Lakitu | P-Wing | Retro Off-Road | Cloud Glider |
| Ninja Hideaway | Nin★Fausti | France | 2:20.813 | Black Shy Guy | Standard ATV | Standard | Super Glider |
| Tour New York Minute | Nin★Leonel | United States | 1:34.573 | Donkey Kong | Varmint | Monster | Super Glider |
| SNES Mario Circuit 3 | Nin★Mark | Netherlands | 1:46.806 | Mario | B Dasher | Standard | Super Glider |
| N64 Kalimari Desert | Nin★Pit | Germany | 1:40.363 | Dry Bones | Standard Kart | Monster | Super Glider |
| DS Waluigi Pinball | Nin★Chris | United Kingdom | 2:36.450 | Waluigi | The Duke | Monster | Super Glider |
| Tour Sydney Sprint | Nin★Rie | Japan | 2:16.617 | Baby Mario | Biddybuggy | Standard | Super Glider |
| GBA Snow Land | Nin★Maria | Portugal | 1:46.763 | Tanooki Mario | Tanooki Kart | Standard | Super Glider |
| Wii Mushroom Gorge | Nin★Massim | Italy | 1:50.666 | Toadette | Teddy Buggy | Wood | Super Glider |
| Sky-High Sundae | Nin★Akira | Japan | 2:07.380 | Rosalina | Circuit Special | Standard | Super Glider |
| Tour London Loop | Nin★Frank | United Kingdom | 2:20.500 | Mario | Comet | Slim | Super Glider |
| GBA Boo Lake | Nin★Rie | Japan | 1:36.212 | King Boo | Circuit Special | Monster | Super Glider |
| 3DS Rock Rock Mountain | Nin★Fausti | France | 2:24.730 | Morton | Pipe Frame | Monster | Super Glider |
| Wii Maple Treeway | Nin★Pavel | Russia | 2:36.581 | Daisy | Prancer | Off-Road | Super Glider |
| Tour Berlin Byways | Nin★Sophia | Germany | 2:11.001 | Donkey Kong | Varmint | Monster | Super Glider |
| DS Peach Gardens | Nin★Marie | United States | 2:19.534 | Peach | Prancer | Wood | Super Glider |
| Merry Mountain | Nin★Elena | Russia | 2:09.693 | Shy Guy | Flame Rider | Off-Road | Super Glider |
| 3DS Rainbow Road | Nin★Mizuho | Japan | 1:52.015 | Rosalina | Circuit Special | Standard | Super Glider |
| Tour Amsterdam Drift | Nin★Mark | Netherlands | 1:48.580 | Daisy | Prancer | Wood | Super Glider |
| GBA Riverside Park | Nin★Frank | United Kingdom | 1:34.480 | Toad | Standard ATV | Standard | Super Glider |
| Wii DK Summit | Nin★Fausti | France | 2:22.680 | Donkey Kong | Varmint | Monster | Super Glider |
| Yoshi's Island | Nin★Skip | United States | 2:20.116 | Baby Mario | Biddybuggy | Standard | Super Glider |
| Tour Bangkok Rush | Nin★Yuya | Japan | 1:54.995 | Blue Inkling Boy | Inkstriker | Monster | Super Glider |
| DS Mario Circuit | Nin★Pit | Germany | 1:50.550 | Mario | B Dasher | Standard | Super Glider |
| GCN Waluigi Stadium | Nin★Maria | Portugal | 2:16.894 | Waluigi | The Duke | Monster | Super Glider |
| Tour Singapore Speedway | Nin★Alice | United States | 2:08.954 | Bowser | Badwagon | Monster | Super Glider |
| Tour Athens Dash | Nin★Pedro | Spain | 1:52.892 | Wiggler | Circuit Special | Sponge | Super Glider |
| GCN Daisy Cruiser | Nin★Chris | United Kingdom | 1:47.238 | Daisy | Jet Bike | Slim | Super Glider |
| Wii Moonview Highway | Nin★Yuya | Japan | 1:54.655 | Waluigi | The Duke | Monster | Wario Wing |
| Squeaky Clean Sprint | Nin★Fausti | France | 2:17.580 | Kamek | City Tripper | Cushion | Cloud Glider |
| Tour Los Angeles Laps | Nin★Alice | United States | 1:57.938 | Mario | Comet | Slim | Super Glider |
| GBA Sunset Wilds | Nin★Pit | Germany | 1:48.993 | Petey Piranha | Flame Rider | Off-Road | Flower Glider |
| Wii Koopa Cape | Nin★Massim | Italy | 2:18.943 | Koopa Troopa | Steel Driver | Metal | Super Glider |
| Tour Vancouver Velocity | Nin★Skip | United States | 2:11.072 | Rosalina | Sport Bike | Slim | Super Glider |
| Tour Rome Avanti | Nin★Giulia | Italy | 1:57.329 | Pauline | Badwagon | Metal | Super Glider |
| GCN DK Mountain | Nin★Laura | United States | 2:35.917 | Funky Kong | Standard ATV | Monster | Parafoil |
| Wii Daisy Circuit | Nin★Adrien | France | 2:01.099 | Daisy | Sports Coupe | Standard | Super Glider |
| Piranha Plant Cove | Nin★Sophia | Germany | 2:17.775 | Petey Piranha | Flame Rider | Slim | Flower Glider |
| Tour Madrid Drive | Nin★Aracel | Spain | 2:10.689 | Peachette | Biddybuggy | Standard | Cloud Glider |
| 3DS Rosalina's Ice World | Nin★Pavel | Russia | 2:10.993 | Rosalina | Sport Bike | Slim | Super Glider |
| SNES Bowser Castle 3 | Nin★Polly | United Kingdom | 1:54.632 | Bowser | Landship | Wood | Super Glider |
| Wii Rainbow Road | Nin★Leonel | United States | 2:49.574 | Mario | Standard Kart | Standard | Super Glider |
200cc Staff Ghosts
Mario Kart 8 Deluxe features a new option for players to race in Time Trials in the 200cc engine class. This option also features entirely new staff ghosts for each of the courses.
| Course | Staff Name | Country | Time | Character | Vehicle Combination | ||
|---|---|---|---|---|---|---|---|
| Body | Tires | Glider | |||||
| Mario Kart Stadium | Nin★Sophia | Germany | 1:21.984 | Gold Mario | Gold Standard | Gold Tires | Gold Glider |
| Water Park | Nin★Yuya | Japan | 1:22.799 | Baby Mario | Biddybuggy | Standard | Super Glider |
| Sweet Sweet Canyon | Nin★Alice | United States | 1:40.972 | Peach | Prancer | Wood | Peach Parasol |
| Thwomp Ruins | Nin★Skip | United States | 1:31.436 | Bowser | Badwagon | Standard | Bowser Kite |
| Mario Circuit | Nin★Joost | Netherlands | 1:23.243 | Pink Gold Peach | Standard Bike | Slim | Super Glider |
| Toad Harbor | Nin★Adrien | France | 1:43.003 | Toad | Sports Coupe | Standard | Super Glider |
| Twisted Mansion | Nin★Rui | Portugal | 1:38.244 | King Boo | Wild Wiggler | Sponge | Flower Glider |
| Shy Guy Falls | Nin★Anne | Netherlands | 1:40.698 | White Yoshi | Standard ATV | Retro Off-Road | Parafoil |
| Sunshine Airport | Nin★Sho | Japan | 1:45.437 | Luigi | Jet Bike | Metal | Plane Glider |
| Dolphin Shoals | Nin★Polly | United Kingdom | 1:38.911 | Ludwig | Steel Driver | Blue Standard | Bowser Kite |
| Electrodrome | Nin★Laura | United States | 1:40.943 | Roy | The Duke | Cushion | Parafoil |
| Mount Wario | Nin★Massim | Italy | 1:37.266 | Wario | Standard ATV | Crimson Slim | Wario Wing |
| Cloudtop Cruise | Nin★Giulia | Italy | 1:44.120 | Bowser Jr. | Koopa Clown | Cyber Slick | Cloud Glider |
| Bone-Dry Dunes | Nin★Pavel | Russia | 1:39.330 | Dry Bones | Pipe Frame | Wood | Plane Glider |
| Bowser's Castle | Nin★Mark | Netherlands | 1:40.953 | Dry Bowser | Flame Rider | Slim | Bowser Kite |
| Rainbow Road | Nin★Pedro | Spain | 1:55.767 | Rosalina | Mach 8 | Blue Standard | MKTV Parafoil |
| Wii Moo Moo Meadows | Nin★Leonel | United States | 1:09.980 | Baby Daisy | Sneeker | Cyber Slick | MKTV Parafoil |
| GBA Mario Circuit | Nin★Pit | Germany | 1:10.475 | Baby Luigi | Sport Bike | Slick | Parachute |
| DS Cheep Cheep Beach | Nin★Mizuho | Japan | 1:25.089 | Lakitu | Landship | Metal | Cloud Glider |
| N64 Toad's Turnpike | Nin★Rie | Japan | 1:21.156 | Toadette | Sports Coupe | Slick | Super Glider |
| GCN Dry Dry Desert | Nin★Chris | United Kingdom | 1:45.087 | Lemmy | Tanooki Kart | Off-Road | Super Glider |
| SNES Donut Plains 3 | Nin★Mizuho | Japan | 1:11.794 | Koopa Troopa | Streetle | Monster | Flower Glider |
| N64 Royal Raceway | Nin★Dylan | United Kingdom | 1:43.120 | Baby Peach | Circuit Special | Cyber Slick | Parafoil |
| 3DS DK Jungle | Nin★Polly | United Kingdom | 1:46.758 | Yellow Yoshi | City Tripper | Hot Monster | Paper Glider |
| DS Wario Stadium | Nin★Massim | Italy | 1:39.724 | Waluigi | Varmint | Hot Monster | Wario Wing |
| GCN Sherbet Land | Nin★Sophia | Germany | 1:34.370 | Iggy | Bone Rattler | Monster | Bowser Kite |
| 3DS Music Park | Nin★Mitsu | Japan | 1:36.529 1:38.847TC |
Daisy | Badwagon | GLA Tires Off-RoadTC |
MKTV Parafoil |
| N64 Yoshi Valley | Nin★Yuya | Japan | 1:35.628 | Green Shy Guy | Comet | Slim | Super Glider |
| DS Tick-Tock Clock | Nin★Elena | Russia | 1:32.483 | Larry | Standard Kart | Sponge | Paper Glider |
| 3DS Piranha Plant Slide | Nin★Frank | United Kingdom | 1:48.454 | Wendy | Mr. Scooty | Metal | Peach Parasol |
| Wii Grumble Volcano | Nin★Maria | Portugal | 1:44.284 | Morton | Standard Bike | Cushion | Parachute |
| N64 Rainbow Road | Nin★Fausti | France | 1:08.128 | Mario | Tri-Speeder | Monster | Super Glider |
| GCN Yoshi Circuit | Nin★Elena | Russia | 1:38.869 | Light-blue Shy Guy | P-Wing | Slick | Parachute |
| Excitebike Arena | Nin★Akira | Japan | 1:29.202 | Inkling Girl | Inkstriker | Leaf Tires | Super Glider |
| Dragon Driftway | Nin★Aracel | Spain | 1:34.873 | Purple Inkling Boy | Splat Buggy | Blue Standard | Super Glider |
| Mute City | Nin★Sho | Japan | 1:34.273 | Metal Mario | Blue Falcon | Azure Roller | Parafoil |
| Wii Wario's Gold Mine | Nin★Alice | United States | 1:41.168 | Waluigi | Standard Bike | Retro Off-Road | Wario Wing |
| SNES Rainbow Road | Nin★Marie | United States | 1:12.762 1:12.696TC |
Tanooki Mario | GLA Pipe FrameTC |
GLA Tires StandardTC |
Parachute |
| Ice Ice Outpost | Nin★Juliet | France | 1:32.435 | Cat Peach | Sneeker | Off-Road | Peach Parasol |
| Hyrule Circuit | Nin★Mark | Netherlands | 1:40.394 | Link | Master Cycle | Triforce Tires | Hylian Kite |
| GCN Baby Park | Nin★Leonel | United States | 0:59.765 | Baby Rosalina | Teddy Buggy | Cyber Slick | Waddle Wing |
| GBA Cheese Land | Nin★Chris | United Kingdom | 1:41.248 | Donkey Kong | Streetle | Roller | Flower Glider |
| Wild Woods | Nin★Mitsu | Japan | 1:27.555 | Villager (Girl) | City Tripper | Leaf Tires | Paper Glider |
| Animal Crossing | Nin★Fausti | France | 1:23.417 1:23.491TC |
Villager (Boy) | 300 SL Roadster StreetleTC |
GLA Tires StandardTC |
Super Glider |
| 3DS Neo Bowser City | Nin★Massim | Italy | 1:37.526 | Bowser | Bone Rattler | Standard | Super Glider |
| GBA Ribbon Road | Nin★Maria | Portugal | 1:31.220 | Isabelle | Cat Cruiser | Crimson Slim | Paper Glider |
| Super Bell Subway | Nin★Skip | United States | 1:23.304 | Blue Yoshi | Yoshi Bike | Blue Standard | Super Glider |
| Big Blue | Nin★Rie | Japan | 1:13.516 1:13.200TC |
Luigi | W 25 Silver Arrow Blue FalconTC |
Slim | Plane Glider |
| Tour Paris Promenade | Nin★Joost | Netherlands | 1:27.101 | Rosalina | Comet | Slim | Super Glider |
| 3DS Toad Circuit | Nin★Aracel | Spain | 1:03.969 | Toadette | Prancer | Wood | Super Glider |
| N64 Choco Mountain | Nin★Alice | United States | 1:31.715 | Tanooki Mario | Tanooki Kart | Monster | Super Glider |
| Wii Coconut Mall | Nin★Polly | United Kingdom | 1:29.009 | Baby Luigi | Yoshi Bike | Slick | Parachute |
| Tour Tokyo Blur | Nin★Aracel | Spain | 1:07.560 | Inkling Girl | Inkstriker | Metal | Super Glider |
| DS Shroom Ridge | Nin★Akira | Japan | 1:37.626 | Morton | Standard Bike | Cushion | Parachute |
| GBA Sky Garden | Nin★Rui | Portugal | 1:13.606 | Ludwig | Steel Driver | Blue Standard | Bowser Kite |
| Ninja Hideaway | Nin★Giulia | Italy | 1:37.815 | Black Yoshi | Teddy Buggy | Standard | Super Glider |
| Tour New York Minute | Nin★Sho | Japan | 1:07.562 | Yoshi | Sports Coupe | Standard | Super Glider |
| SNES Mario Circuit 3 | Nin★Giulia | Italy | 1:17.075 | Luigi | Mach 8 | Slim | Super Glider |
| N64 Kalimari Desert | Nin★Juliet | France | 1:10.511 | Dry Bowser | Bone Rattler | Monster | Super Glider |
| DS Waluigi Pinball | Nin★Pavel | Russia | 2:00.942 | Morton | Pipe Frame | Monster | Super Glider |
| Tour Sydney Sprint | Nin★Giulia | Italy | 1:37.367 | Bowser Jr. | Koopa Clown | Standard | Super Glider |
| GBA Snow Land | Nin★Leonel | United States | 1:21.826 | King Boo | Circuit Special | Monster | Super Glider |
| Wii Mushroom Gorge | Nin★Chris | United Kingdom | 1:21.194 | Toad | Standard ATV | Standard | Super Glider |
| Sky-High Sundae | Nin★Mitsu | Japan | 1:30.777 | Peach | Standard Bike | Slim | Super Glider |
| Tour London Loop | Nin★Alice | United States | 1:38.896 | Red Yoshi | Sports Coupe | Standard | Super Glider |
| GBA Boo Lake | Nin★Joost | Netherlands | 1:09.576 | Dry Bones | Standard Kart | Monster | Super Glider |
| 3DS Rock Rock Mountain | Nin★Juliet | France | 1:39.664 | Bowser | Landship | Wood | Super Glider |
| Wii Maple Treeway | Nin★Sho | Japan | 1:58.543 | Wario | Tri-Speeder | Monster | Super Glider |
| Tour Berlin Byways | Nin★Skip | United States | 1:35.467 | Toad | Standard ATV | Standard | Super Glider |
| DS Peach Gardens | Nin★Aracel | Spain | 1:39.851 | Toadette | Teddy Buggy | Button | Super Glider |
| Merry Mountain | Nin★Mark | Netherlands | 1:31.642 | Luigi | Mach 8 | Slim | Super Glider |
| 3DS Rainbow Road | Nin★Dylan | United Kingdom | 1:19.545 | Waluigi | The Duke | Monster | Super Glider |
| Tour Amsterdam Drift | Nin★Rie | Japan | 1:19.135 | Shy Guy | Flame Rider | Off-Road | Super Glider |
| GBA Riverside Park | Nin★Elena | Russia | 1:13.455 | Bowser Jr. | Koopa Clown | Slim | Super Glider |
| Wii DK Summit | Nin★Massim | Italy | 1:53.372 | Rosalina | Circuit Special | Standard | Super Glider |
| Yoshi's Island | Nin★Polly | United Kingdom | 1:40.731 | Yoshi | Wild Wiggler | Standard | Super Glider |
| Tour Bangkok Rush | Nin★Leonel | United States | 1:24.201 | Wario | Standard Kart | Monster | Wario Wing |
| DS Mario Circuit | Nin★Sho | Japan | 1:24.282 | Peach | Standard Bike | Slim | Super Glider |
| GCN Waluigi Stadium | Nin★Aracel | Spain | 1:43.781 | Luigi | Mach 8 | Slim | Super Glider |
| Tour Singapore Speedway | Nin★Mizuho | Japan | 1:32.160 | Mario | Comet | Slim | Super Glider |
| Tour Athens Dash | Nin★Massim | Italy | 1:21.362 | Dry Bones | Standard Kart | Monster | Super Glider |
| GCN Daisy Cruiser | Nin★Elena | Russia | 1:21.241 | Bowser | Flame Rider | Monster | Super Glider |
| Wii Moonview Highway | Nin★Sophia | Germany | 1:19.973 | Donkey Kong | Varmint | Monster | Super Glider |
| Squeaky Clean Sprint | Nin★Leonel | United States | 1:38.459 | Yoshi | Wild Wiggler | Monster | Super Glider |
| Tour Los Angeles Laps | Nin★Mitsu | Japan | 1:25.694 | Birdo (Red) | Pipe Frame | Monster | Super Glider |
| GBA Sunset Wilds | Nin★Juliet | France | 1:20.411 | Shy Guy | Flame Rider | Off-Road | Super Glider |
| Wii Koopa Cape | Nin★Frank | United Kingdom | 1:41.749 | Toad | Standard ATV | Standard | Super Glider |
| Tour Vancouver Velocity | Nin★Joost | Netherlands | 1:32.752 | Peach | Standard Bike | Slim | Super Glider |
| Tour Rome Avanti | Nin★Akira | Japan | 1:25.406 | Yoshi | Wild Wiggler | Standard | Super Glider |
| GCN DK Mountain | Nin★Dylan | United Kingdom | 2:06.814 | Diddy Kong | Mr. Scooty | Button | Waddle Wing |
| Wii Daisy Circuit | Nin★Pit | Germany | 1:25.861 | Donkey Kong | Varmint | Monster | Super Glider |
| Piranha Plant Cove | Nin★Alice | United States | 1:41.315 | Koopa Troopa | Steel Driver | Metal | Super Glider |
| Tour Madrid Drive | Nin★Fausti | France | 1:33.156 | Toad | Sneeker | Standard | Super Glider |
| 3DS Rosalina's Ice World | Nin★Leonel | United States | 1:38.735 | King Boo | Circuit Special | Monster | Super Glider |
| SNES Bowser Castle 3 | Nin★Mark | Netherlands | 1:22.052 | Dry Bones | Standard Kart | Monster | Super Glider |
| Wii Rainbow Road | Nin★Yuya | Japan | 2:06.146 | Luigi | Mach 8 | Slim | Super Glider |
TC - Used in the Tencent Chinese release[16]
New items

The Boo item makes a return in this game, functioning as it had previously. The Cape Feather was added to Battle mode only, and is impossible to obtain otherwise. All other items from the Wii U version return as well, with their item distributions altered.
Coins | |
|---|---|
 Cash |
The equivalent of a coin, used for Urchin Underpass. They replace coins both as an item and on the track. |
 Coin (Yoshi's Island) |
In the Yoshi's Island course, coins have an altered appearance that resembles their design in the Yoshi's Island series, both as an item and on the track. |
New items | |
 Boo |
Allows the player to become invisible to other racers for 10 seconds. While invisible, players will also be granted immunity to items and obstacles. Activating the item will also allow Boo to steal an item from a randomly selected racer in front of the player. If there are no items to steal, Boo will bring back a single Mushroom by default. If Boo steals a multiple usage item or a timed item, it will be returned to the player fresh. Boo cannot steal Crazy 8s or Piranha Plants and Bullet Bills already in use. Only one Boo can be in play at a time; once it brings back an item, another can appear in Item Boxes again, even while a player is still invisible. Players who are under the effect of a Super Star or a Boo are not immune to Boo's item stealing. |
 Feather |
Causes the player to spin and leap in the air, providing a small speed boost upon landing, akin to a regular trick (characters will also perform a trick animation during the jump). When used near an opponent, the player steals a balloon, 3 coins, or the Shine Sprite from them, depending on the mode; however, the player needs to touch the opponent to steal from them, either by touching them upon use, or upon landing. Can be used on trickable places to gain more height, though does not grant more height if used while airborne, and cancels the gliding immediately. Exclusive to Battle mode. |
New course elements
All of the course elements from the original Mario Kart 8, including enemies and obstacles, are retained in this game, along with several elements exclusive to the Booster Course Pass courses.
| Characters and elements | ||
|---|---|---|
| Character/element | Location | Description |
Arrow field |
Tour Paris Promenade Tour Tokyo Blur Tour New York Minute N64 Kalimari Desert Tour Sydney Sprint Tour London Loop Tour Berlin Byways DS Peach Gardens Tour Amsterdam Drift Tour Bangkok Rush Tour Singapore Speedway Tour Athens Dash Tour Los Angeles Laps Tour Vancouver Velocity Tour Rome Avanti Piranha Plant Cove Tour Madrid Drive |
Large, holographic, floating arrows that point in the direction that the players should go and change position each lap (or only in the last lap in Tour Paris Promenade and DS Peach Gardens), altering the path of the course. If the player goes past them, they will be considered out of bounds and taken back onto the track by Lakitu. In multiplayer, the arrow fields are independent to each player, meaning that if multiple players are on different laps, the arrow fields will be different for each of them to match what lap they are on. Arrow fields are red in most of the city courses and DS Peach Gardens and are teal in N64 Kalimari Desert and Tour Bangkok Rush, though this is simply a visual difference. |
 Bath Bomb |
Squeaky Clean Sprint | Large, opal colored bath bombs that fizz underwater. Players can trick whilst inside the bubbles produced, similarly to a geyser. |
 Bob-omb Car |
Wii Moonview Highway | Bob-omb-based vehicles that explode upon contact. If a player drives into one, they spin out in the same way as if they were caught in the blast of a regular Bob-omb. |
 Boulder |
Tour Sydney Sprint | Objects scattered around grassy portions of the course. They slow down drivers on contact. |
 Bumper |
DS Waluigi Pinball | Obstacles that bounce players and metal balls that touch them away from themselves. Some are stationary, while others move in circles. |
 Ceiling Needles |
Ninja Hideaway | Giant shuriken stuck to broad ceilings that slowly rise and fall at set intervals, serving as obstacles for players on the course's lower route, while the ceilings themselves serve as platforms for players on the upper route, with a ramp on one of them. |
 Clampy |
GCN Daisy Cruiser Piranha Plant Cove |
Clampys open and shut periodically. They contain Item Boxes. |
 Exploring Shy Guy |
GBA Sunset Wilds | Exploring Shy Guys skip back and forth across the track. If a player makes contact with one, the player spins out. If they hit one with an item, they will drop 3 coins. |
 Fire Piranha Plant |
DS Mario Circuit | Piranha Plant variants that shoot fireballs that bounce across the course, causing racers to spin out. |
 Flipper |
DS Waluigi Pinball | Large obstacles that can swing back and forth and push back metal balls that collide with them. Players who collide with them are knocked over. |
 Fuzzy |
Tour Rome Avanti | Black furry creatures on circular tracks. They circle around coins, and spin players out when collided with. |
 Goal Ring |
Yoshi's Island | A decorative item that appears near the finish line. |
 Goonie |
Yoshi's Island | Spectators who appear in the background during the volcano ascent. |
 Half-pipe |
Wii Maple Treeway Merry Mountain Wii DK Summit GCN Waluigi Stadium Tour Athens Dash Squeaky Clean Sprint Tour Los Angeles Laps Wii Koopa Cape GCN DK Mountain 3DS Rosalina's Ice World Wii Rainbow Road |
Vertical ramps that allow players to jump off the side of a course and perform a Jump Boost to gain a speed boost upon landing. They resemble Antigravity Panels and briefly put the player into anti-gravity mode while they are airborne. |
 Huffin Puffin |
Yoshi's Island | Enemies who wander around near the starting line, occasionally onto the track. Players who collide with them will stop but not spin out. |
 Icicle |
3DS Rosalina's Ice World | Upward-pointing icicles on the ground that break when driven into, but will also slow the driver down. |
 Innertube Goomba |
Tour Singapore Speedway GCN Daisy Cruiser |
Innertube Goombas float above water. If made contact with, the player spins out. |
 Mecha Piranha Plant |
GCN Waluigi Stadium | Large retracting obstacles that act like moving walls and stop any players who run into them. |
 Metal ball |
DS Waluigi Pinball | Giant spherical obstacles that roll throughout the course and knock over players they collide with. In the pinball table section at the end of the course, they are bounced around in different directions by bumpers and flippers. |
 Mushroom Platform |
Wii Mushroom Gorge | Large, green mushrooms with white spots. Though shaped identically to Mushroom Trampolines, they are functionally different in that they act like regular surfaces rather than bouncing players into the air. A Jump Boost can be performed when driving off the edge of a Mushroom Platform. |
   Mushroom Trampoline |
GBA Sky Garden Wii Mushroom Gorge 3DS Rainbow Road Squeaky Clean Sprint |
Large mushrooms that bounce the player into the air, allowing them to perform a Jump Boost. They are red with white spots in GBA Sky Garden and Wii Mushroom Gorge and are white with multi-colored spots in 3DS Rainbow Road. Wii Mushroom Gorge also contains one Mushroom Trampoline that is blue with white spots and functions differently to the others: it bounces the player upwards and activates their glider on contact, also giving them an opportunity to perform a Jump Boost. In GBA Sky Garden, there are also leaves that have the same properties of bouncing the player into the air as regular Mushroom Trampolines. |
 Penguin |
GBA Snow Land 3DS Rosalina's Ice World |
Enemies that either waddle or slide on their bellies around the course. Players who collide with them spin out. |
 Ptooie |
GBA Riverside Park | Enemies that walk around the course. They are shown to be carrying Mushrooms and Bananas which they will drop if bumped into them or hit with another item. |
Rocky Wrench |
Tour Rome Avanti | Mole-like creatures who hide in manholes. They occasionally pop up out of the ground, stopping players who drive into them. When underground, racers can drive over them with no consequences. If they're half above the ground, they can be tricked off. |
 Shoe Goomba |
Tour Madrid Drive | Big Goombas wearing bright yellow Shoes. They kick Soccer Balls around. |
 Shy Guy (Ninja) |
Ninja Hideaway | Shy Guys clad in ninja outfits. They stand in place and act as hazards, causing players who collide with them to spin out. They will also occasionally transform into a Banana. There are also Shy Guys that fly with kites during the glider section and touching one will cause the player to lose their glider, making them fall. |
 Soccer Ball |
Tour Madrid Drive | Big balls kicked around by Shoe Goombas. They bounce on the floor, spinning out racers who they collide with. |
 Stilt Guy |
Yoshi's Island | Enemies that slowly move back and forth across the track at the beginning of the course. Touching them causes the player to spin out. |
 Snowboarding Shy Guy |
Wii DK Summit | Shy Guys that snowboard across the snow and perform tricks on half-pipes. Driving into them will cause the player to spin out. |
 Table |
GCN Daisy Cruiser | Tables, decorated with cloths, candles, and plates. They rock side-to-side, and act as a wall for players. Spectators may be seated at these tables. |
 Train |
N64 Kalimari Desert | A moderately fast train which follows a set railway. Hitting it on impact results in the player being knocked over. |
 Water Geyser |
Tour New York Minute Tour Singapore Speedway Yoshi's Island Squeaky Clean Sprint Piranha Plant Cove Tour Madrid Drive |
Geysers that occasionally burst out from the ground for a few seconds before disappearing. Coming into contact with one boosts the player upwards, at which point they can perform a Jump Boost. In Tour New York Minute, they emerge under manhole covers, which function as platforms. |
 Whomp |
Tour Berlin Byways | Enemies that stand in gaps in the Berlin Wall. They slam their faces onto the track and flatten any players caught under them, but their edges can then be used to perform Jump Boosts before they get back up. |
 Big Wiggler |
Wii Maple Treeway DS Mario Circuit Tour Madrid Drive |
Enemies that walk around at a slow speed with occasional stops. Driving into them results in the player spinning out. Sometimes they can be seen sleeping. |
 Winged Cloud |
Yoshi's Island | An item that appears during the second glider section. When touched, it bursts and causes a red bridge shortcut to appear. |
New amiibo compatibility

In addition to all of the compatible amiibo in Mario Kart 8 and their respective Mii racing suits, Mario Kart 8 Deluxe adds compatibility with amiibo from the Splatoon line, which unlock a Mii racing suit based on Splatoon. Additionally, more amiibo can be used to unlock the returning Mii racing suits, with all Animal Crossing-related amiibo unlocking the Animal Crossing Suit and the Pikmin amiibo unlocking the Pikmin Suit. Version 3.0.0 adds compatibility with the Daisy amiibo to unlock the Daisy Mii racing suit, as well as any amiibo from the Legend of Zelda, Metroid, and Kirby series to unlock their respective suits.
Update history
- Main article: Mario Kart 8 Deluxe update history
Mario Kart 8 Deluxe has received many updates since launch. Most of them addressed technical aspects of the game, while others expanded controller support (e.g. Toy-Con Motorbike and Toy-Con Car) or delivered new content, such as a variant of Link wearing his Champion's Tunic from The Legend of Zelda: Breath of the Wild, support for the Mario Kart 8 Deluxe – Booster Course Pass DLC, a Custom Items setting, and a menu for listening to the music of each of the game's courses. In order to play online, players must have downloaded the most recent software update.[17]
Official tournaments
- For official competitions held in the game's Wii U version, see Mario Kart 8 § Official competitions.
Nintendo has sponsored many Mario Kart 8 Deluxe tournaments, held either online or at special events, with prizes ranging from virtual My Nintendo points to physical merchandise and memorabilia. Nintendo's online tournaments are restricted to one country or region, and may be recurrent on a weekly, monthly, or seasonal basis as part of a named series.
The following is a list of Mario Kart 8 Deluxe competitions held or sanctioned by Nintendo.
Worldwide
| Title | Location | Banner |
|---|---|---|
| My Nintendo Mario Kart 8 Deluxe Community Challenge | Online | 
|
North America
| Title | Location | Banner |
|---|---|---|
| NOA 150cc Tournament NOA Battlethon |
Online | N/A |
| Mario Kart North American Open | Online | 
|
| Mario Kart 8 Deluxe Holiday Fun Run | Online | 
|
| Mario Kart 8 Deluxe Championship Cup 2022 | Seattle Convention Center (PAX West 2022) |

|
| Mario Kart 8 Deluxe North American Qualifier 2022 | Online | 
|
| Mario Kart 8 Deluxe North American Qualifier 2023 | Boston Convention and Exhibition Center (PAX East 2023) |

|
| Mario Kart 8 Deluxe Championship Cup 2023 | Boston Convention and Exhibition Center (PAX East 2023) |

|
| Mario Kart 8 Deluxe Championship 2023 Qualifier | Online | 
|
| Mario Kart 8 Deluxe Championship 2023 Qualifier at Nintendo Live | Seattle Convention Center (Nintendo Live 2023) |

|
| Mario Kart 8 Deluxe Championship 2023 | Seattle Convention Center (Nintendo Live 2023) |

|
Australia and New Zealand
| Title | Location | Banner/logo |
|---|---|---|
| Mario Kart 8 Deluxe Super Saturdays | Online | N/A |
| Mario Kart AU/NZ My Nintendo Cup | Online | 
|
| Mario Kart 8 Deluxe: AU/NZ Grand Prix | Online |
China
| Title | Location | Banner |
|---|---|---|
| Mario Kart 8 Deluxe Summit Invitational Tournament | Online | 
|
| Mario Kart 8 Deluxe Online Tournaments | Online | 
|
| Mario Kart 8 Deluxe National Battle Team Open Tournament | Online | N/A |
| Mario Kart 8 Deluxe Open Team Championship | Shanghai (exact location TBD) | N/A |
Europe
| Title | Location | Banner/logo |
|---|---|---|
| Mario Kart 8 Deluxe Seasonal Circuit | Mostly online. The sole exception is the gran final of the 2022 Mario Kart 8 Deluxe Seasonal Circuit Spain event, which took place at the Gamergy event in Madrid. | 
|
| Mario Kart 8 Deluxe European Championship 2023 | The qualifiers were held online. The final rounds were held at the VILCO convention center in Bad Vilbel, Germany. |
Hong Kong
| Title | Location | Banner |
|---|---|---|
| Nintendo HK 2021 Cup | Online | 
|
Japan
| Title | Location | Logo |
|---|---|---|
| Mario Kart 8 Deluxe Online Challenge | Online | |
| Mario Kart 8 Deluxe Online Challenge Final Stage | Tokyo International Exhibition Center (Nintendo Live 2022) |
|
| Mario Kart 8 Deluxe World Championship 2024 | TBD |
Spain
| Title | Location | Banner |
|---|---|---|
| #TorneoMK8D | Online | 
|
United Kingdom and Ireland
| Title | Location | Banner |
|---|---|---|
| Mario Kart 8 Deluxe Insomnia63 Grand Prix[18] | National Exhibition Centre, Birmingham (Insomnia63) |
N/A |
| Nintendo UK VS Cup | Online | N/A |
| Nintendo VS UK Cup | Online | N/A |
Pre-release and unused content
Early Booster Course Pass course designs
Some of the courses in the Mario Kart 8 Deluxe – Booster Course Pass had several differences between promotional material and their final release, some of which made the courses further resemble their Mario Kart Tour counterparts:
- Prior to Wave 1's launch, Tour Paris Promenade had simpler detailing overall, most notably in the lighting, trees, and the road. At the left turn that leads to the Luxor Obelisk at the end of the track, the right path, which is used in the final lap, was blocked by fences, some of which have arrows, rather than the backside of a metal ramp like in the final version. The optional glide ramp featured in the final lap was also not present, and consequently neither was the coin on top of the parasol. The ramp in front of the Eiffel Tower, though still functioning like a glide ramp, had the appearance of a normal ramp, similar to Paris Promenade 3. Likewise, the dash panel underneath the Eiffel Tower appears to have been invisible, as while seemingly not present, drivers are still seen driving towards it in multiple clips. The Piranha Plant cutouts blocking the shortcut through the Arc de Triomphe were not present. There was an arrow on the Eiffel Tower pointing towards the path from Paris Promenade 3 not present in the final version.
- Prior to Wave 1's launch, the sand in 3DS Toad Circuit was a very dark yellow color, as opposed to the bright sand-like color in the final version. The starting banner was significantly different, with the objects at the top corners being smaller, less round and generally less detailed, the bolts not being present and the horizontal shafts being missing from the columns. There was no confetti present around the starting line, despite confetti still falling there. The checkered line on the road continued onto where the starting grid is, instead of ending before it. There were significantly fewer flowers and plants present around the course. The coins present on the course differ in multiple ways, such as there being a row of them shortly after the starting line, an extra coin present at the final turn, there not being a coin on the ramp shortcut and coins having different positions in general. The final row of Item Boxes did not feature a Double Item Box.
- Prior to Wave 1's launch, N64 Choco Mountain had a significantly different road texture, while the walls and rocks lacked the detail they have in the final version. The cracks on the road around where the rocks fall were completely absent, and the coins present after where the second rock falls were instead after the first rock. There appear to have originally been coins leading up to the cave, while conversely the coins on the final turn appear to have been missing. Some of the lights within the cave emitted light onto the ceiling similarly to the crystals, unlike in the final version. The glide ramp leading out of the cave was invisible. Certain wooden elements like fences and the boards at the end of the gliding section had different coloring.
- Prior to Wave 1's launch, Wii Coconut Mall's exterior was a bright, pale peachy color, but in the time between its reveal and release, it was updated to be a more vibrant orange. This also applied to certain parts of the interior. Likewise, the stone floor in the center of the mall was originally gray, while it was changed to orange in the final version. The reflections on the windows had also been changed during this time. The flower bushes present around the mall's exterior were a lot less detailed and had a mix of white and purple flowers instead of the yellow ones the final version uses. The Mario Kart TV vans were not present. There was no row of Item Boxes at the entrance to the courtyard. The escalator rails were significantly less glossy, and all escalators seem to have had coins at the bottom of them. Similarly, both dash panels in the courtyard had a coin following them. The coins on the turn following the gliding section were instead on the road leading to it. Oddly, the results screen following a Grand Prix or a VS match uses an image of the old design despite the existence of an updated version of said image.
- Prior to Wave 1's launch, the Kaminarimon's lantern in Tour Tokyo Blur looked less saturated and lacked the ridges it has in the final version. The sun was not present over Mount Fuji, and the different lighting made the clock on the Wako store appear significantly brighter. The bushes were less detailed, having a less rough texture and much simpler flowers. The platform which the flower bushes leading to the Kaminarimon are on did not have its outer layer raised. The cracks on the road that appear underneath the Thwomps were completely absent. The text on the "Welcome to Tokyo" sign was significantly dimmer. The roadside barriers with arrows had much simpler designs, with the arrows being 2D instead of fully modeled like they are in the final version. There is also footage of this course showing an early design for the arrow field, in which the arrows have an identical design to the green arrow holograms in SNES Rainbow Road.[19]
- Prior to Wave 1's launch, DS Shroom Ridge did not have the glide ramp shortcut on the grass patch. The wind shortcut was also not present in trailer footage despite appearing in a released screenshot. Flowers, bushes and other plants had different, less detailed designs and appeared in different locations. Some notable examples include how the grass patch with the glide ramp featured alternating groups of blue and orange flowers instead of the multicolored ones present in the final version, and how the flower bushes were significantly less detailed and had red flowers and in smaller quantities compared to the pink flowers the final version has (oddly, future waves would exclusively use these lesser detailed flower bushes). The dividing stripes on the road continued through the starting grid instead of ending before it. The starting banner lacked details it has in the final version, such as the bolts on the columns, the lights across the top and most of the metal strips holding up the logo. The static coins at the turn adjacent to the wind shortcut appear to have initially been on the opposite side of the road.
- Prior to Wave 1's launch, GBA Sky Garden's textures for the road and the vine bridges were significantly larger. The final row of Item Boxes was slightly further into the course, and the Double Item Box was on the opposite side of the road. There was one more Mushroom Trampoline present underneath the course compared to the final version. The glide ramp at the end of the course was invisible. There were far less grass blades around the course. The flowers were blue with a much simpler design, while the flower bushes had less distinct and detailed shapes with multiple colors of flowers instead of just pink flowers like in the final version.
- Prior to Wave 2's launch, the first row of Item Boxes in Tour New York Minute was on the bridge leading into Central Park instead of being before it like in the final version. There were no Toads behind the front desk of 30 Rockefeller Plaza.
- Prior to Wave 2's launch, SNES Mario Circuit 3 had an additional coin in both the first turn and the turn with the first oil slick.
- Prior to Wave 2's launch, N64 Kalimari Desert had a floating group of coins that would have been reached by taking the first glide ramp shortcut. The second row of Item Boxes was shown as only having single Item Boxes in what appears to be the first lap, with the same clip showing Item Boxes present on the train tracks similarly to lap 3 of the final version. An arrow fence was present beside the road shortly after the second overlap between the road and the train tracks.
- Prior to Wave 2's launch, the helicopter in DS Waluigi Pinball was missing the beam of light eminating from its flashlight. The padels had the electricity effect at all times unlike the final version in which they only exhibit it upon activating.
- Prior to Wave 2's launch, GBA Snow Land had a row of Item Boxes after the starting line, in place of the moving Item Boxes present in the final version. The coins on the sheet of ice were in different positions. The row of Item Boxes on the ramp at the end of the sheet of ice were instead placed later on the following road with differing Double Item Box placements, and the ramp instead had a row of coins which are substituted by coins shortly after it in the final version. Some of the snow such as that present on the starting banner had significantly less detail. Some of the trees present on the course used simpler models.
- Prior to Wave 2's launch, Wii Mushroom Gorge had various differences in the placements of flowers throughout the course. The first row of Item Boxes was placed slightly earlier.
- Prior to Wave 2's launch, Sky-High Sundae did not have coins on the first two giant pieces of ice. The left split path only had 3 Item Boxes and they were placed earlier. The second coin on the path of ice-cream cones was placed slightly earlier.
- Prior to Wave 3's launch, the clock hands of Big Ben in Tour London Loop appeared perceptibly darker and less reflective in screenshots of the course. The row of coins in the area with the first Chain Chomp appears to have had at least one additional coin.
- When DS Peach Gardens was shown in the September 2022 Nintendo Direct, the loop at the beginning of the course lacked the barriers blocking off the right side, similar to previous iterations of the course, and even had at least one coin present. The arrow on the Mario topiary was also not present. The first flowerbed shortcut was much smaller. The route used to turn around on lap three was completely blocked off by a fountain, and the ramps at the mansion were also not present, though there was seemingly nothing else blocking that path. The Mario Kart TV van, spectators and benches were also not in that section at the time. The first row of Item Boxes was closer to the start of the bridge. The row of coins at the entrance to the maze was not present. In the Direct, the row of Item Boxes in the maze was replaced with a row of coins. However, in a screenshot released shortly after, there was a row of Item Boxes like in the final version, but with the addition of at least one more Double Item Box. There were no spectators after the starting line, nor on the windowsills close to it. The coins on the left of the mansion were gone in favor of a row of coins at the top of the stairs, and the coins around the Piranha Plant were gone in favor of there being coins in the following section with the Monty Moles.
- When Merry Mountain was shown in the September 2022 Nintendo Direct, there was one shot in which there were no Spin Boost Pillars on the mountain, with there instead only being a dash panel at the start of the descent. Screenshots would later show the mountain having both the dash panel and the Spin Boost Pillars, whereas the final version only has the latter. The suspended railroad had the ramp at the end angled more upwards than the rest of it, and was missing the wooden boards that are nailed onto it in the final version. The first row of Item Boxes was shown both not being present at all and being besides the grass shortcut, in which case taking the cut would not allow players to collect an item. The row of Item Boxes on the bridge were also not present. The Item Boxes at the top of the mountain were all lined up in a row, but with the Double Item Boxes still requiring drivers to take the half-pipe to collect them, and there was also a higher number of coins placed above the half-pipe. There was one less coin in the row before the split paths. There were no sitting spectators at the train station, nor besides the later part of the train track. The Toads on the mountain did not wear coats, and there were no spectators around the half-pipe. The snowman following the bridge was not present.
- When Yoshi's Island was shown in the February 2023 Nintendo Direct, Poochy was not present on the mailbox. The first row of Item Boxes was even closer to the bridge. Every arrow sign was double-sided, and the waterfalls had white outlines. There were less Yoshi spectators at in the first section of the course, but there was an additional Petal Guy next to where the second Stilt Guy is. The ramp leading into the underwater section had an additional coin, and the Yoshi spectator to the left of it was on the ground instead of on the tree root like it is in the final version. The underwater geysers had an effect at the bottom that resembled water splashing out of them, appeared less transparent and had fewer, smaller bubbles. The Yoshi spectator on the tower atop the clouds was not present, while the Paratroopas in this section were static instead of flying from side-to-side as in the final version. The animation for the pieces of the red bridge falling into place was simpler, with them already being in a horizontal position instead of flipping over like they do in the final version.
- When Squeaky Clean Sprint was shown in the June 2023 Nintendo Direct, there were no coins on top of the sink and the Yoshi's Egg soap dispenser. The nails on the wooden shelf had a darker color and were less reflective.
- When Wii Daisy Circuit was shown in the September 2023 Nintendo Direct, the objects to the left of the statue of Daisy and Luigi were arranged differently. The row of Item Boxes was in the opposite order, while the cones and coins were on the left half of the road. The cones and coins to the right of the statue of Baby Daisy and Baby Luigi were a little earlier. The glide ramp shortcut only had one Double Item Box. The two groups of coins around the lighthouse were both missing a coin. There were no coins in front of the Daisy Candy sign.
Original order of courses in Waves 3 to 6
In version 2.1.0 and onwards, the internal file names for some of the courses in the Booster Course Pass suggest that the release order in their respective cups differs from the originally planned order. Every course's internal file name has two digits, with the first indicating its intended wave and the second indicating its position in said wave (for example, Tour Berlin Byways' file name is "Cnsw_35", indicating that it is the fifth track in Wave 3, or the first track in the Moon Cup). In addition to several courses changing their order within their wave, several courses also switched waves entirely, such as GCN Waluigi Stadium, which was set to be in Wave 3's Moon Cup but was delayed to Wave 4 in favor of Wii Maple Treeway, whose internal file name suggests that it was once slated for Wave 6's Acorn Cup. Additionally, Wave 6 was originally intended to have 3 tracks without prefixes, but two of them were replaced by Wii Moonview Highway and 3DS Rosalina's Ice World, as indicated by their filenames. It was also originally intended to have a fourth GCN course, but this was replaced by Wii Daisy Circuit, as indicated by its filename.
Further evidence appears in an advertisement for Wave 3 posted by Nintendo of America on YouTube, which displays the courses in their original order, albeit with Wii Maple Treeway in place of GCN Waluigi Stadium; this advertisement was unlisted soon after its release.[20]
|
|
|
|
a - Although this slot originally lacked a prefix, Wii Moonview Highway's internal name assigns it to this slot.
b - Although this slot originally had a "GCN" prefix assigned to it, Wii Daisy Circuit's internal name assigns it to this slot.
c - Although this slot originally lacked a prefix, 3DS Rosalina's Ice World's internal name assigns it to this slot.
Music prefetches
In the 2.1.0 update, several prefetch music tracks of unreleased race courses were added to the game's files. They all sound different from their arrangements in Mario Kart Tour and the final arrangements used in the Booster Course Pass.
Wave 3
| File info 0:01 |
| File info 0:02 |
| File info 0:02 |
| File info 0:02 |
| File info 0:02 |
| File info 0:02 |
| File info 0:02 |
| File info 0:02 |
| File info 0:02 |
Wave 4
| File info 0:02 |
| File info 0:02 |
| File info 0:02 |
| File info 0:02 |
| File info 0:02 |
Wave 5
| File info 0:02 |
| File info 0:02 |
| File info 0:02 |
Gallery
Pre-release screenshot of 3DS Toad Circuit
Tour Tokyo Blur with an early arrow field design
Wii Coconut Mall's early design
Pre-release birds-eye view of DS Peach Gardens
Pre-release screenshot of the roundabout in DS Peach Gardens, without the barrier
Original order for the Rock and Moon Cups, as shown in an unlisted video by Nintendo


Reception
Critical reception
Mario Kart 8 Deluxe has been received with universal acclaim, garnering higher aggregate scores than the original Mario Kart 8. The game has been praised for being well-suited to the Switch's portability, the increased performance, and particularly the redesigned Battle mode, although several reviews noted Mario Kart 8 Deluxe would not be as appealing of a proposition to players who already own Mario Kart 8 and its downloadable content.
| Reviews | |||
|---|---|---|---|
| Release | Reviewer, Publication | Score | Comment |
| Nintendo Switch | Laurely Birba, Jeux Actu | 18/20 | While purists may accuse Mario Kart 8 of being a opportunistic rehash, Nintendo's goal was to give the Switch a racing game that is fun, polished, filled with content, and able to showcase the Switch's hybrid nature. These four objectives are mostly accomplished, and the game will have no problem seducing newcomers considering how well the formula has been mastered. |
| Nintendo Switch | Kallie Plagge, GameSpot | 9/10 | Even if you didn't really care about Battle Mode, the smallest changes in Mario Kart 8 Deluxe refine an already great racing game. But the huge overhaul to the original's afterthought of a Battle Mode is a chaotic, varied opportunity to play very differently than in Grand Prix mode and well worth reinvesting yourself in Mario Kart 8 on Switch. |
| Nintendo Switch | Matthew Sainsbury, Digitally Downloaded | 4.5/5 | Thanks to substantial DLC releases, Mario Kart 8 on the Wii U went from being a game with plenty of content, to one with an overload of it. Mario Kart 8 Deluxe on the Nintendo Switch has all of that, plus the return of the battle mode (which should never have left), and while it won't be a new game as such for the people who actually bought a Wii U (we're a special club), having this game on a portable console is reason enough to buy it all over again. |
| Aggregators | |||
| Compiler | Platform / Score | ||
| Metacritic | 92 | ||
| GameRankings | 92.39% | ||
Sales
In the United Kingdom, Mario Kart 8 Deluxe debuted at No. 1 on the sales chart, making it the first Nintendo game to be No. 1 in the UK since 2011's Pokémon Black and White, and the first Super Mario game to place such since Mario Kart Wii.[21]
The game sold 459,000 copies for its US launch day, making it the fastest-selling Mario Kart game in the US and meaning 45% of US Switch owners purchased the game.[22]
As of December 31, 2017, Mario Kart 8 Deluxe had sold 7.33 million units worldwide. As of March 31, 2018, it reached 9.22 million units, exceeding the original Mario Kart 8's 8.42 million and making it the second best-selling game on the Nintendo Switch behind Super Mario Odyssey.[23] As of December 31, 2018, Mario Kart 8 Deluxe had sold 15.02 million units worldwide, exceeding Super Mario Odyssey's sales and making it the best-selling game on the Nintendo Switch.[24] As of September 30, 2021, the game had sold 38.74 million units worldwide, surpassing Mario Kart Wii as the best-selling game in the series.[25] As of December 31, 2021, the game had sold 43.35 million units worldwide, making it the single best-selling game in the Super Mario franchise, surpassing Super Mario Bros. for the Nintendo Entertainment System.[26] As of December 31, 2024, the game had sold 67.35 million units worldwide.[27]
Awards and acknowledgements
Mario Kart 8 Deluxe was nominated for the "Best Family Game" and "Best Multiplayer" awards at The Game Awards 2017.[28] However, it won neither, losing the former to Super Mario Odyssey and the latter to PlayerUnknown's Battlegrounds.[28]
References to other games
- Donkey Kong: Pauline's horn noise is based on the stage clear jingle from this game.
- Super Mario Kart: The Feather item returns from this game, with the same function. Battle Course 1 reappears as a classic battle course; a billboard in the course background is modeled after the player select screen from this game. Mario Circuit 3 and Bowser Castle 3 are included among the courses in the Booster Course Pass. The end credits theme is arranged for the Booster Course Pass end credits theme.
- Yoshi's Island series: Bowser Jr. being both one of Baby Mario's rivals and Kamek's rival in this game is a reference to both Baby Bowser being Baby Mario's arch-nemesis and Kamek being Baby Bowser's caretaker.
- Super Mario World 2: Yoshi's Island: Yoshi's Island, a course appearing in the Booster Course Pass, is heavily based on this game. Kamek's horn noise sounds like his speaking sound effect in this game.
- Mario Kart 64: Similar to this game, all courses in Mario Kart 8 Deluxe are unlocked from the start. Choco Mountain and Kalimari Desert are included among the courses in the Booster Course Pass.
- Mario Kart: Super Circuit: Sky Garden, Snow Land, Boo Lake, Riverside Park, and Sunset Wilds are included among the courses in the Booster Course Pass.
- Super Mario Sunshine: King Boo's horn noise uses the sound of the King Boo from this game being hit by a pepper.
- Mario Kart: Double Dash!!: Luigi's Mansion reappears as a classic battle course. The Double Item Boxes and the two Battle sub-modes, Bob-omb Blast and Shine Thief, return. Waluigi Stadium, Daisy Cruiser, and DK Mountain are included among the courses in the Booster Course Pass.
- Yoshi Touch & Go: Artwork of Baby Mario and Yoshi is reused from the game in the Yoshi's Island course on the mural outside of Yoshi's House.
- Mario Kart DS: An arrangement of Luigi's Mansion's music is used in GCN Luigi's Mansion. Shroom Ridge, Waluigi Pinball, Peach Gardens, and Mario Circuit are included among the courses in the Booster Course Pass.
- Mario Kart Wii: Coconut Mall, Mushroom Gorge, Maple Treeway, DK Summit, Koopa Cape, Moonview Highway, Daisy Circuit, and Rainbow Road are included among the courses in the Booster Course Pass.
- New Super Mario Bros. Wii: Boo's artwork from this game is reused for King Boo's character select icon, albeit with the addition of the latter's crown.
- Mario & Sonic at the Olympic Winter Games: Canada Hockey Place re-appears in the Vancouver Velocity track, now referred to by its sponsored name Rogers Arena.
- Mario Kart 7: The Koopa Clown kart returns from this game. Wuhu Town reappears as a classic battle course, and Toad Circuit, Rock Rock Mountain, Rainbow Road, and Rosalina's Ice World are included among the courses in the Booster Course Pass. Lunar Colony has a moon section with low gravity just like Rainbow Road from this game.
- Super Mario 3D World: The crown mechanic in Battle mode is similar to the mechanic in this game's multi-player, where the player with the highest score from one stage will be wearing a crown in the next stage.
- Donkey Kong Country: Tropical Freeze: Funky Kong's character select icon is reused from this game.
- Super Smash Bros. for Nintendo 3DS / Wii U: The Koopa Clown's propellers in anti-gravity sections emerge from circular panels on the side of the vehicle, much like the Junior Clown Car's weapons. Also, the Koopalings' Koopa Clowns match the Clown Car colors they use in this game.
- Super Mario Odyssey: A ring similar to the Binding Band appears inside the drain in Squeaky Clean Sprint.
- Mario Kart Tour: New York Minute, Tokyo Blur, Paris Promenade, London Loop, Vancouver Velocity, Los Angeles Laps, Merry Mountain, Berlin Byways, Ninja Hideaway, Sydney Sprint, Singapore Speedway, Amsterdam Drift, Bangkok Rush, Piranha Plant Cove, Athens Dash, Rome Avanti, and Madrid Drive are included among the courses in the Booster Course Pass. Additionally, the designs of the courses in the Booster Course Pass are based on their designs from Mario Kart Tour, and N64 Kalimari Desert's second and third laps are based on the variant Kalimari Desert 2 from this game. The Booster Course Pass characters except for Funky Kong reuse their face icons from this game. All the Mii racing suits included in Wave 6 come from this game; some of their unique trick animations are also reused.
References in other games
- Super Mario Run: Key art for the game appears when tapping on the Nintendo Switch collectible in Kingdom Builder.
- Mario Kart Tour: The third level of Mini-Turbos, Ultra Mini-Turbos, returns. The Koopa Clown retains its appearance from this game. King Boo reuses his face icon from this game. Sky-High Sundae, Yoshi's Island, and Squeaky Clean Sprint all reappear, though they are considered new courses in both games. SNES Battle Course 1's music arrangement is used in Balloon Battles.
Staff
- Main article: List of Mario Kart 8 Deluxe staff
Gallery
- For this subject's image gallery, see Gallery:Wynn Liaw.
.png)


Media
- For a complete list of media for this subject, see List of Mario Kart 8 Deluxe media.
| File info |
| File info |
| File info |
| File info |
| File info |
| File info |
| File info |
| File info |
Names in other languages
| Language | Name | Meaning | Notes |
|---|---|---|---|
| Japanese | マリオカート8 デラックス Mario Kāto 8 Derakkusu |
Mario Kart 8 Deluxe | |
| Chinese (simplified) | 马力欧卡丁车8 豪华版 Mǎlìōu Kǎdīngchē 8 Háohuábǎn |
Mario Kart 8 Deluxe Edition | |
| Chinese (traditional) | 瑪利歐賽車8 豪華版 Mǎlìōu Sàichē 8 Háohuábǎn |
Mario Racing 8 Deluxe Edition | |
| Korean | 마리오 카트 8 디럭스 Mario Kateu 8 Direokseu |
Mario Kart 8 Deluxe |
Notes
- As the Nintendo Switch is not region-locked like previous Nintendo consoles (excluding console and game units officially sold in mainland China), this is the first Super Mario game to be playable in the same build in all regions.
- In the music menu, in addition to the usual method of pressing to cycle through the different song variants of a course, it is possible to select a specific one via the shoulder buttons, similarly to selecting the season of Animal Crossing. Depending on the number of song variants a course has, holding
 selects the first variant, selects the second variant, selects the third variant,
  selects the fourth variant, and both and selects the fifth variant.
References
- ^ Mario Kart™ 8 Deluxe para la consola Nintendo Switch. Nintendo.com (Latin American Spanish). Retrieved November 6, 2024.
- ^ 遊戲軟體一覽 | 任天堂(香港)有限公司網站. Nintendo of HK (Traditional Chinese). Retrieved November 6, 2024.
- ^ Mario Kart 8 Deluxe: Product Information. Nintendo of Singapore (English). Retrieved June 1, 2024. (Archived February 13, 2024, 08:15:37 UTC via Wayback Machine.)
- ^ 한국닌텐도 홈페이지. Nintendo of Korea (Korean). Archived September 20, 2017, 03:54:42 UTC from the original via Wayback Machine. Retrieved November 6, 2024.
- ^ 任天堂(香港)有限公司. Nintendo of Taiwan (Traditional Chinese). Retrieved November 6, 2024.
- ^ March 13, 2020. 《马力欧卡丁车8 豪华版》《超级马力欧 奥德赛》将于3月16日发售 - 腾讯Nintendo Switch官网. Tencent (Simplified Chinese). Retrieved November 6, 2024.
- ^ Mario Kart™ 8 Deluxe Bundle (Game + Booster Course Pass). nintendo.com (American English). Retrieved January 31, 2023. (Archived January 28, 2023, 06:38:50 UTC via Wayback Machine.)
- ^ Nintendo World Report TV (January 14, 2017). Mario Kart 8 Deluxe - Wario's Gold Mine - Nintendo Switch Off-Screen Footage. YouTube (English). Retrieved November 6, 2024.
- ^ GameXplain (April 21, 2017). Luigi Wins by Doing Absolutely Nothing - Mario Kart 8 Deluxe (03:50). YouTube (English). Retrieved November 6, 2024.
- ^ Screenshot of the starting boost in a four-player split-screen VS Race.
- ^ https://www.ign.com/wikis/mario-kart-8/Switch_Version_Changes
- ^ a b Nintendo (November 1, 2024). 『マリオカート8 デラックス コース追加パス』最後の第6弾は11月9日配信決定。新キャラクターや「ミュージック」機能なども追加。. Nintendo of Japan (Japanese). Retrieved November 6, 2024.
- ^ Nintendo of America (September 14, 2023). Mario Kart 8 Deluxe - Booster Course Pass Wave 6 - Nintendo Switch 9.14.2023. YouTube (American English). Retrieved November 6, 2024.
- ^ @NintendoAmerica (July 20, 2018). A new update to #MarioKart 8 Deluxe is available now for #NintendoSwitch! Race like a champion with the Master Cycle Zero and Champion’s Tunic Link from The Legend of #Zelda: Breath of the Wild! This update also includes the Ancient Tires and the Paraglider parts!. X (American English). Retrieved September 12, 2023.
- ^ MK8D Stat sheet (Updated for W6). Google Docs (English). Retrieved November 6, 2024.
- ^ @zachruff (May 22, 2022). So it turns out that there are 4 staff ghosts in the Tencent Chinese version of MK8D that are actually different to the global version. It seems that they really did not like the Mercedes car parts so any ghost that used them had to be redone.. X (English). Retrieved May 24, 2022.
- ^ How to Update Mario Kart 8 Deluxe. Nintendo of America (American English). Retrieved November 6, 2024.
- ^ "Monday 27th August – Mario Kart 8 Deluxe Insomnia63 Grand Prix—Think you’ve got what it takes to get on the podium in the Mario Kart 8 Deluxe Insomnia63 Grand Prix? Race in a 150cc single elimination tournament taking place across increasingly trickier tracks, with the top two racers advancing to the next stage each time!" – August 9, 2018. Go hands-on with Super Smash Bros. Ultimate at Insomnia63 later this month!. nintendo.com (British English). Retrieved February 10, 2025. (Archived January 24, 2025, 15:19:36 UTC via Wayback Machine.)
- ^ Nintendo (December 25, 2022). マリオカート8 デラックス コース追加パス TVCM3 (0:23). YouTube (Japanese). Retrieved November 6, 2024.
- ^ Nintendo of America (November 22, 2022). Mario Kart 8 Deluxe - Booster Course Pass DLC Wave 3 - Nintendo Switch. YouTube (American English). Retrieved November 6, 2024.
- ^ Dring, Christopher (April 30, 2017). Mario Kart 8 Deluxe is Nintendo's first UK No.1 since 2011. GameIndustryBiz (English). Retrieved November 6, 2024.
- ^ Brian (May 1, 2017). Mario Kart 8 Deluxe sells 459,000 copies in the US on launch day, fastest-selling Mario Kart game. Nintendo Everything (English). Retrieved November 6, 2024.
- ^ Nintendo. IR Information : Sales Data - Top Selling Title Sales Units. Nintendo of Japan (English). Archived May 7, 2018, 00:57:30 UTC from the original via Wayback Machine. Retrieved November 6, 2024.
- ^ GameXplain (February 1, 2019). Nintendo's Financial Report - 30 Million Switches Sold Worldwide, Doubled Software Sales, & More!. YouTube (English). Retrieved December 22, 2020.[dead link]
- ^ Nintendo (November 4, 2021). Top Selling Title Sales Unites. Nintendo Japan (English). Archived November 8, 2021, 09:04:38 UTC from the original via Wayback Machine. Retrieved November 8, 2021.
- ^ Nintendo. Top Selling Title Sales Unites. Nintendo Japan (English). Archived February 3, 2022, 07:34:54 UTC from the original via Wayback Machine. Retrieved February 3, 2022.
- ^ Nintendo (February 4, 2025) [5]. Financial Results Explanatory Material, Nintendo Co., Ltd. Retrieved February 4, 2025.
- ^ a b Awards - The Game Awards 2017. The Game Awards. Archived November 14, 2017, 20:23:45 UTC from the original via Wayback Machine. Retrieved November 6, 2024.
External links
- Official Japanese site
- Official North American site
- Official Canadian site
- Official Latin American site
- Official European site
- Official Oceanian site
- Official Korean site
- Official Chinese (Hong Kong) site
- Official Chinese (Taiwan) site
- Official Chinese (Mainland) site