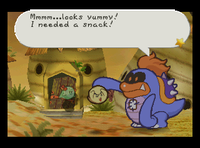
Paper Mario: Difference between revisions
m (Reverted edits by 73.155.185.239 (talk) to last revision by PhGuy12) Tag: Rollback |
m (Text replacement - "(\| *)Jap([RMCN\d]* *=)" to "$1Jpn$2") |
||
| (462 intermediate revisions by more than 100 users not shown) | |||
| Line 1: | Line 1: | ||
{{italic title}} | {{italic title}} | ||
{{FA}} | {{FA}} | ||
{{about|the first | {{about|the first Paper Mario game for the [[Nintendo 64]]|other uses|[[Paper Mario (disambiguation)]]}} | ||
{{ | {{game infobox | ||
|image=[[File:Paper Mario 64 box.png|300px]] | |image=[[File:Paper Mario 64 box.png|300px]] | ||
|developer=[[Intelligent Systems]] | |developer=[[Intelligent Systems]] | ||
|publisher=[[Nintendo]] | |publisher=[[Nintendo]] | ||
| | |release='''Nintendo 64:'''<br>{{flag list|Japan|August 11, 2000|USA|February 5, 2001|Europe|October 5, 2001|Australia|October 5, 2001|China|June 8, 2004 (iQue Player)}} '''Virtual Console (Wii):'''<br>{{flag list|Japan|July 10, 2007|Europe|July 13, 2007|Australia|July 13, 2007|USA|July 16, 2007}} '''Virtual Console (Wii U):'''<br>{{flag list|USA|April 30, 2015|Europe|May 21, 2015<ref>{{cite|url=www.nintendo.com/en-gb/Games/Nintendo-64/Paper-Mario-269624.html|title=Paper Mario {{!}} Nintendo 64 {{!}} Games {{!}} Nintendo|publisher=Nintendo of UK|language=en-gb|accessdate=June 22, 2024}}</ref>|Australia|May 22, 2015|Japan|July 15, 2015}} '''Nintendo 64 - Nintendo Switch Online:'''<br>{{flag list|Japan|December 10, 2021<ref>{{cite|language=ja|author=Nintendo 公式チャンネル|date=December 3, 2021|url=youtu.be/93b79KTyU-4|title=『マリオストーリー』 3つのポイント <nowiki>[12月10日配信] [Nintendo 64 Nintendo Switch Online 追加タイトル]</nowiki>|publisher=YouTube|accessdate=June 22, 2024}}</ref>|USA|December 10, 2021<ref>{{cite|author=Nintendo of America|language=en-us|date=December 2, 2021|url=www.youtube.com/watch?v=mZU9sbtU0mc|title=''Paper Mario'' Trailer - Nintendo 64 - Nintendo Switch Online|publisher=YouTube|accessdate=June 22, 2024}}</ref>|Europe|December 10, 2021<ref>{{cite|language=en-gb|author=@NintendoEurope|date=December 2, 2021|url=x.com/NintendoEurope/status/1466708800816119810?s=20|title=Unfold a hilarious role-playing quest when Paper Mario joins the growing library of #Nintendo64 games available to #NintendoSwitchOnline + Expansion Pack members on 10/12.|publisher=X|accessdate=June 22, 2024}}</ref>|Australia|December 10, 2021|HK|December 10, 2021|South Korea|December 10, 2021}} | ||
|genre=RPG | |genre=[[Genre#Role-playing games|RPG]] | ||
|modes=Single player | |modes=Single player | ||
|ratings={{ratings|acb=g|esrb=e|pegi=3|cero=a}} | |languages={{languages|en_us=y|fr_fr=y|es_es=y|de=y|jp=y|zh_simp=y}} | ||
|platforms=[[Nintendo 64]], [[Virtual Console]] ([[Wii]], [[Wii U]]) | |ratings={{ratings|acb=g|esrb=e|elspa=3+|pegi=3|cero=a|sell=all}} | ||
| | |platforms=[[Nintendo 64]], [[iQue|iQue Player]], [[Virtual Console]] ([[Wii]], [[Wii U]]), [[Nintendo 64 - Nintendo Switch Online]] | ||
|input={{input|n64=1|iqp=1|classic=1|wiigcn=1|wiiu=1|wiiupro=1|wiiuclassic=1}} | |format={{format|n64=1|iqp=1|wiidl=1|wiiudl=1|switchdl=1}} | ||
|input={{input|n64=1|iqp=1|classic=1|wiigcn=1|wiiu=1|wiiupro=1|wiiuclassic=1|joy-con=1|joy-con-horizontal=1|switchpro=1|switchn64=1}} | |||
|serials={{flag list|Japan|NUS-NMQJ-JPN}} | |||
}} | }} | ||
{{Quote|Thinner [[Mario]], Bigger Adventure!|Slogan}} | |||
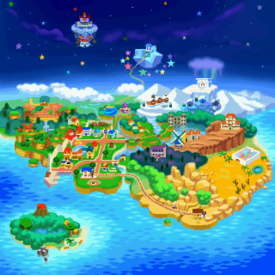
'''''Paper Mario''''' is a 2000 [[Genre#Role-playing games|role-playing game]] developed by [[Intelligent Systems]] for the [[Nintendo 64]]. It was later re-released for the [[iQue|iQue Player]] in 2004, the [[Wii]]'s [[Virtual Console#Wii|Virtual Console]] in 2007, the [[Wii U]]'s [[Virtual Console#Wii U|Virtual Console]] in 2015, and [[Nintendo 64 - Nintendo Switch Online]] in 2021. | |||
''Paper Mario'' has the player taking control of [[Mario]] on his quest to rescue [[Princess Peach]] and save the [[Mushroom Kingdom]] from [[Bowser]], who has stolen the mythical [[Star Rod (Paper Mario)|Star Rod]] of [[Star Haven]] and used its wish granting powers to make himself invincible. To stop Bowser and rescue Princess Peach, Mario and company must save the seven [[Star Spirits]]; magical beings who have been sealed in cards by Bowser with the power to nullify the Star Rod, as well as the original owners of the Star Rod. | ''Paper Mario'' has the player taking control of [[Mario]] on his quest to rescue [[Princess Peach]] and save the [[Mushroom Kingdom]] from [[Bowser]], who has stolen the mythical [[Star Rod (Paper Mario)|Star Rod]] of [[Star Haven]] and used its wish-granting powers to make himself invincible. To stop Bowser and rescue Princess Peach, Mario and company must save the seven [[Star Spirits]]; magical beings who have been sealed in cards by Bowser with the power to nullify the Star Rod, as well as the original owners of the Star Rod. | ||
''Paper Mario''{{'}}s gameplay is a blend of traditional Japanese role-playing games and ''Mario''-esque platforming features; Mario has the ability to jump in both the overworld and in battle, and jumping remains one of the most important actions in the game. The player controls Mario and a party of followers as they journey through the [[Mushroom Kingdom]], exploring dungeons, managing stats, and battling enemies. The title refers to the game's arts and crafts aesthetic; nearly every character in the game is drawn as a flat 2D sprite, revealing itself as paper-thin when turning around, and many elements of the environments are also depicted as 2D sprites. | ''Paper Mario''{{'}}s gameplay is a blend of traditional Japanese role-playing games and ''Super Mario''-esque [[Genre#Platform games|platforming]] features; Mario has the ability to jump in both the overworld and in battle, and jumping remains one of the most important actions in the game. The player controls Mario and a party of followers as they journey through the [[Mushroom Kingdom]], exploring dungeons, managing stats, and battling enemies. The title refers to the game's arts and crafts aesthetic; nearly every character in the game is drawn as a flat 2D sprite, revealing itself as paper-thin when turning around, and many elements of the environments are also depicted as 2D sprites. | ||
''Paper Mario'' was initially in development for the [[Nintendo 64DD]] | ''Paper Mario'' was initially in development for the [[Nintendo 64DD]] as a proposed sequel to ''[[Super Mario RPG: Legend of the Seven Stars]]'', initially titled ''Super Mario RPG 2''<ref>{{cite|author=Owsen, Dan|date=January 1998|title=''Nintendo Power'' Volume 104|format=Insider Collector's Edition"|page={{file link|Nintendo Power NSider Collector's Edition Volume 104 Page 16.png|16}}}}</ref> (or alternatively, ''Mario RPG 2''<ref>{{cite|url=www.ign.com/articles/1997/07/30/miyamoto-reveals-secrets-fire-emblem-mario-paint-64|title=Miyamoto Reveals Secrets: Fire Emblem, Mario Paint 64|date=July 29, 1997|publisher=IGN|accessdate=June 22, 2024|author=IGN Staff|language=en}}</ref> or ''Mario RPG 64''<ref>{{cite|url=iwataasks.nintendo.com/interviews/3ds/papermario/0/1|title=''Paper Mario: Sticker Star'': "Going All Out with Stickers"|publisher=Nintendo of America|language=en-us|accessdate=June 22, 2024}}</ref>); concept art posted by ''Super Mario RPG'' artist Kazuyuki Kurashima on his {{wp|Instagram}} account in 2019 indicated that [[Samus|Samus Aran]] from ''Metroid'' and [[Link]] from ''The Legend of Zelda'' would have appeared alongside ''Super Mario'' characters.<ref>{{file link|SMRPG2 Concept Artwork 1.jpg}}</ref> | ||
''Paper Mario'' later became the first installment of the [[Paper Mario (series)|same-named series]] and would go on to receive several sequels; the first in the same style of gameplay (''[[Paper Mario: The Thousand-Year Door]]''), followed by four differing games; ''[[Super Paper Mario]]'' changed the style of gameplay into a platformer, while ''[[Paper Mario: Sticker Star]]'', ''[[Paper Mario: Color Splash]]'', and ''[[Paper Mario: The Origami King]]'' went back to turn-based gameplay, albeit not exactly like the first entries in the series. | |||
==Storyline== | ==Storyline== | ||
===Opening=== | ===Opening=== | ||
The story opens with a place that lies far beyond the sky and far above the clouds, called [[Star Haven]]. Within the sanctuary of Star Haven lies the Star Rod, which can grant any and all wishes. The seven [[Star | The story opens with a place that lies far beyond the sky and far above the clouds, called [[Star Haven]]. Within the sanctuary of Star Haven lies the Star Rod, which can grant any and all wishes. The seven [[Star Spirits]] use this artifact to watch over and protect [[Mushroom Kingdom]], until one day, when [[Bowser]] and [[Kammy Koopa]] appear in the sanctuary. Bowser shatters the protective seal over the Star Rod and grabs it in hopes of using its power to defeat Mario. The Star Spirits are then trapped inside cards by Kammy Koopa. | ||
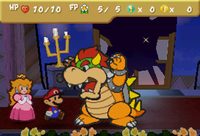
[[File:PMBowserBattle1.png|thumb|Bowser attacking Mario in Peach's Castle.]] | [[File:PMBowserBattle1.png|thumb|Bowser attacking Mario in Peach's Castle.]] | ||
| Line 33: | Line 36: | ||
===Prologue: A Plea from the Stars=== | ===Prologue: A Plea from the Stars=== | ||
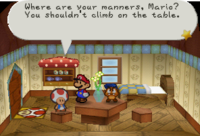
The prologue begins with the seven Star Spirits manifesting over Mario on the ground, and | The prologue begins with the seven Star Spirits manifesting over Mario on the ground, and using their remaining power to save his life. Mario's unconscious body is then found by a family of friendly [[Goomba]]s, who carry him back to their [[Goomba Village (location)|village]]. While knocked out, he receives a vision from one of the Star Spirits, [[Eldstar]], urging him to go to [[Star Hill|Shooting Star Summit]]. After waking up, Mario meets the Goomba family who found him, including [[Goombario]], the family's son. Kammy Koopa appears to confirm that Mario is still alive, and blocks the gate out of Goomba Village with a [[Yellow Block]]. When Mario goes to get a hammer from [[Goompa]], the family's grandfather, the balcony behind the house is missing. After a short venture that involves Mario saving Goompa and a battle with a local troublemaker called [[Jr. Troopa]], Goompa requests that Goombario join Mario on his quest and together they leave Goomba Village by breaking the block using Goompa's hammer. While traveling [[Goomba Road]], the connecting strip of land between Goomba Village and Toad Town, Mario and Goombario are confronted by the [[Goomboss|Goomba King]] and his two lackeys, the [[Red & Blue Goomba Bros.]] The protagonists manage to defeat them and reach Toad Town, where they continue on towards Shooting Star Summit. | ||
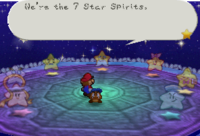
[[File:PM Star Spirits At Shooting Star Summit.png|thumb|left|Mario conversing with the Star Spirits on Shooting Star Summit.]] | [[File:PM Star Spirits At Shooting Star Summit.png|thumb|left|Mario conversing with the Star Spirits on Shooting Star Summit.]] | ||
Atop the summit, Mario is greeted by manifestations of the Star Spirits, who tell Mario the story of how Bowser stole the Star Rod. They further explain that the cards in which they have been trapped are now divided among Bowser's forces, and that Mario must save and release them. In doing that, Mario will gain a power called the [[Star Beam]], which can be used to break Bowser's invincibility and allows Mario to defeat him. | Atop the summit, Mario is greeted by manifestations of the Star Spirits, who tell Mario the story of how Bowser stole the Star Rod. They further explain that the cards in which they have been trapped are now divided among Bowser's forces, and that Mario must save and release them. In doing that, Mario will gain a power called the [[Star Beam]], which can be used to break Bowser's invincibility and allows Mario to defeat him. | ||
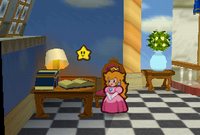
Meanwhile, in the sky, Princess Peach finds herself trapped in her room. Not knowing what to do, she wishes for someone to help her, which summons [[Twink]], a Star Kid who only recently ascended to Star Haven. Though unable to help Peach deal with Bowser directly, he agrees to deliver the [[Lucky Star (Paper Mario)|Lucky Star]], Peach's magical pendant, to Mario and help in | Meanwhile, in the sky, Princess Peach finds herself trapped in her room. Not knowing what to do, she wishes for someone to help her, which summons [[Twink]], a Star Kid who only recently ascended to Star Haven. Though unable to help Peach deal with Bowser directly, he agrees to deliver the [[Lucky Star (Paper Mario)|Lucky Star]], Peach's magical pendant, to Mario and help in whatever way he can. | ||
As Mario returns from Shooting Star Summit, Twink runs into him and delivers the Lucky Star which enables Mario to use [[Action Command]]s. Upon re-entering Toad Town, Mario learns that [[Merlon]], the local fortune-teller, is looking for him. Merlon informs Mario that his search for the Star Spirits will lead him to the [[Koopa Bros. Fortress|fortress east of Toad Town]], where the Koopa Bros. are holding a Star Spirit captive. | As Mario returns from Shooting Star Summit, Twink runs into him and delivers the Lucky Star which enables Mario to use [[Action Command]]s. Upon re-entering Toad Town, Mario learns that [[Merlon]], the local fortune-teller, is looking for him. Merlon informs Mario that his search for the Star Spirits will lead him to the [[Koopa Bros. Fortress|fortress east of Toad Town]], where the [[Koopa Bros.]] are holding a Star Spirit captive. | ||
{{br}} | {{br}} | ||
;Names in other languages | ;Names in other languages | ||
{{foreign names | {{foreign names | ||
| | |Jpn=プロローグ 星とマリオとクリボーと・・・ | ||
| | |JpnR=Purorōgu: Hoshi to Mario to Kuribō to... | ||
| | |JpnM=Prologue: The Stars and Mario and the Goombas and... | ||
|Spa=Prólogo: La Súplica de las Estrellas | |Spa=Prólogo: La Súplica de las Estrellas | ||
|SpaM=Prologue: The Plea of the Stars | |SpaM=Prologue: The Plea of the Stars | ||
| Line 54: | Line 56: | ||
|Ger=Prolog: Das Flehen der Sterne | |Ger=Prolog: Das Flehen der Sterne | ||
|GerM=Prologue: The Pleading of the Stars | |GerM=Prologue: The Pleading of the Stars | ||
| | |Fre=Prologue: L'appel des Etoiles | ||
| | |FreM=Prologue: The call of the Stars | ||
|Chi=序言 来自星星的请求 | |Chi=序言 来自星星的请求 | ||
|ChiR=Xùyán: Láizì | |ChiR=Xùyán: Láizì Xīngxīng de Qǐngqiú | ||
|ChiM=Prologue: The | |ChiM=Prologue: The Request from the Stars | ||
}} | }} | ||
===Chapter 1: Storming Koopa Bros. Fortress=== | ===Chapter 1: Storming Koopa Bros. Fortress=== | ||
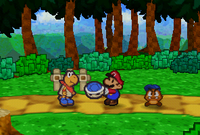
[[File:Kooper Without Shell.png|thumb|Mario returning Kooper's shell.]] | [[File:Kooper Without Shell.png|thumb|Mario returning Kooper's shell.]] | ||
After leaving town, Mario finds the way to the Koopa Bros. Fortress inaccessible to him | After leaving town, Mario follows [[Pleasant Path]], but finds the way to the Koopa Bros. Fortress inaccessible to him; so he takes another path to [[Koopa Village]]. He arrives to see the local [[Koopa Troopa]]s being harassed by [[Fuzzy|Fuzzies]], who are stealing their shells. One of the victims is [[Kooper]], who asks Mario for assistance in getting his shell back. Upon returning it, Kooper is so grateful that he joins Mario's group. | ||
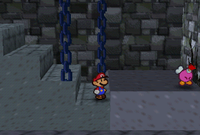
[[File:KoopaFort.png|thumb|left|Mario and Bombette inside the Koopa Bros. Fortress.]] | [[File:KoopaFort.png|thumb|left|Mario and Bombette inside the Koopa Bros. Fortress.]] | ||
With the help of Kooper's special ability, Mario is able to reach the Koopa Bros. Fortress. During his assault on the fortress, he triggers a trapdoor which drops him into a prison cell full of [[Bob-omb]]s. One of them, [[Bombette]], explains that they were working for the Koopa Bros. but then later got locked up for revolting against them. She helps Mario and his friends escape by blowing up a crack in the cell wall and decides to accompany him. The group travels to the top of the fortress where they confront the Koopa Bros. They initially try to scare Mario off with a fake Bowser suit, but their attempt fails, so they decide to fight Mario in a direct battle. They are eventually defeated and knocked off the arena into the prison cell from earlier. With the Koopa Bros. defeated, Eldstar is released and adds his powers to Mario, teaching him the ability to use [[Focus]], as well as the special move [[Refresh]]. | With the help of Kooper's special ability, Mario is able to reach the Koopa Bros. Fortress. During his assault on the fortress, he triggers a trapdoor which drops him into a prison cell full of [[Bob-omb]]s. One of them, [[Bombette]], explains that they were working for the Koopa Bros. but then later got locked up for revolting against them. She helps Mario and his friends escape by blowing up a crack in the cell wall and decides to accompany him. The group travels to the top of the fortress where they confront the Koopa Bros.. They initially try to scare Mario off with a fake Bowser suit, but their attempt fails, so they decide to fight Mario in a direct battle. They are eventually defeated and knocked off the arena into the prison cell from earlier. With the Koopa Bros. defeated, [[Eldstar]] is released and adds his powers to Mario, teaching him the ability to use [[Focus]], as well as the special move [[Refresh]]. | ||
[[File:Bowser diary.png|thumb|Peach and Twink finding Bowser's Diary.]] | [[File:Bowser diary.png|thumb|Peach and Twink finding Bowser's Diary.]] | ||
Trapped in her castle in the sky, Peach remembers the existence of a secret passage that leads out of her room. She and Twink use it to leave the room and move to another room in the castle, where they find Bowser's diary. By reading it, Peach and Twink learn that another Star Spirit is being held captive in [[Dry Dry Desert]]. At that moment, Bowser enters the room and catches the Princess reading his diary. Enraged, he summons two [[Koopatrol|guardsmen]] to escort her back to her room, while Twink quietly leaves the scene undetected to inform Mario of the next Star Spirit's location. | Trapped in her castle in the sky, Peach remembers the existence of a secret passage that leads out of her room. She and Twink use it to leave the room and move to another room in the castle, where they find Bowser's diary. By reading it, Peach and Twink learn that another Star Spirit is being held captive in [[Dry Dry Desert (Paper Mario)|Dry Dry Desert]]. At that moment, Bowser enters the room and catches the Princess reading his diary. Enraged, he summons two [[Koopatrol|guardsmen]] to escort her back to her room, while Twink quietly leaves the scene undetected to inform Mario of the next Star Spirit's location. | ||
After returning to Toad Town, Mario and his friends head towards the train station in the south district of Toad Town, where [[Dry Dry Railroad]] leads to [[Mt. Rugged]]. | After returning to Toad Town, Mario and his friends head towards the train station in the south district of Toad Town, where [[Dry Dry Railroad]] leads to [[Mt. Rugged]]. | ||
{{br}} | {{br}} | ||
;Names in other languages | ;Names in other languages | ||
{{foreign names | {{foreign names | ||
| | |Jpn=ステージ1 こうりゃく!ノコブロスのとりで | ||
| | |JpnR=Sutēji 1: Kōryaku! Nokoburosu no Toride | ||
| | |JpnM=Stage 1: Strike! Koopa Bros. Fortress | ||
|Spa=Capítulo 1: A por la Fortaleza | |Spa=Capítulo 1: A por la Fortaleza | ||
|SpaM=Chapter 1: To the Fortress | |SpaM=Chapter 1: To the Fortress | ||
| Line 85: | Line 86: | ||
|Ger=Kapitel 1: Schnapp Dir die Koopa Brüder | |Ger=Kapitel 1: Schnapp Dir die Koopa Brüder | ||
|GerM=Chapter 1: Get the Koopa Brothers | |GerM=Chapter 1: Get the Koopa Brothers | ||
| | |Fre=Chapitre 1: A l'assaut de la forteresse! | ||
| | |FreM=Chapter 1: Assaulting the fortress! | ||
|Chi=第1章 夺取喏库兄弟要塞 | |Chi=第1章 夺取喏库兄弟要塞 | ||
|ChiR=Dì 1 Zhāng: Duóqǔ Nuòkù Xiōngdì Yàosài | |ChiR=Dì 1 Zhāng: Duóqǔ Nuòkù Xiōngdì Yàosài | ||
| Line 97: | Line 98: | ||
[[File:Dry Dry Ruins rises PM.png|thumb|left|Dry Dry Ruins rising out of the sand.]] | [[File:Dry Dry Ruins rises PM.png|thumb|left|Dry Dry Ruins rising out of the sand.]] | ||
After crossing Dry Dry Desert, Mario enters a settlement called Dry Dry Outpost. After exchanging some items for information, he meets with the town leader Moustafa, who hands him a [[Pulse Stone]] and tells him to let it guide him to the resting place of [[Dry Dry Ruins]]. Following the Pulse Stone's signal through the desert, Mario finds a stone pedestal to set the stone into. The entrance to Dry Dry Ruins rises out of the sand before Mario, and he enters the ruins. | After crossing [[Dry Dry Desert (Paper Mario)|Dry Dry Desert]], Mario enters a settlement called [[Dry Dry Outpost]]. After exchanging some items for information, he meets with the town leader [[Moustafa]], who hands him a [[Pulse Stone]] and tells him to let it guide him to the resting place of [[Dry Dry Ruins (Paper Mario)|Dry Dry Ruins]]. Following the Pulse Stone's signal through the desert, Mario finds a stone pedestal to set the stone into. The entrance to Dry Dry Ruins rises out of the sand before Mario, and he enters the ruins. | ||
[[File:Tutankoopa chased PM.png|thumb|Tutankoopa getting chased off by his own Chomp.]] | [[File:Tutankoopa chased PM.png|thumb|Tutankoopa getting chased off by his own Chomp.]] | ||
Inside, a ghostly wail tries to warn Mario against continuing his descent. Mario keeps going until he finds [[Tutankoopa]], the source of the voice and the guardian of the second Star Spirit. After battling Mario and losing, he is chased out by his Chomp, allowing Mario to free the Star Spirit Mamar. | Inside, a ghostly wail tries to warn Mario against continuing his descent. Mario keeps going until he finds [[Tutankoopa]], the source of the voice and the guardian of the second Star Spirit. After battling Mario and losing, he is chased out by his Chomp, allowing Mario to free the Star Spirit [[Mamar]]. | ||
In Peach's Castle, Bowser visits the Princess in her room. He tells her that, with Tutankoopa defeated, he now intends to stop Mario by using [[Tubba Blubba]], who is allegedly invincible. However, Kammy Koopa rushes in to tell Bowser that the Star Spirit guarded by Tubba Blubba has escaped. Once they leave, Peach and Twink hypothesize that even an invincible person must have a weakness. After some investigating, their theory is confirmed by an overheard conversation between Bowser's men, though Peach never learns what the weakness is exactly. | In Peach's Castle, Bowser visits the Princess in her room. He tells her that, with Tutankoopa defeated, he now intends to stop Mario by using [[Tubba Blubba]], who is allegedly invincible. However, Kammy Koopa rushes in to tell Bowser that the Star Spirit guarded by Tubba Blubba has escaped. Once they leave, Peach and Twink hypothesize that even an invincible person must have a weakness. After some investigating, their theory is confirmed by an overheard conversation between Bowser's men, though Peach never learns what the weakness is exactly. | ||
| Line 106: | Line 107: | ||
After returning to Toad Town, Mario finds [[Fice T.|a cowardly Toad guard]] who claims he saw a ghost vanish into [[Forever Forest]]. Mario investigates and meets [[Bootler]], a servant of [[Lady Bow]] who requests Mario's presence in her mansion in the heart of the forest. | After returning to Toad Town, Mario finds [[Fice T.|a cowardly Toad guard]] who claims he saw a ghost vanish into [[Forever Forest]]. Mario investigates and meets [[Bootler]], a servant of [[Lady Bow]] who requests Mario's presence in her mansion in the heart of the forest. | ||
{{br}} | {{br}} | ||
;Names in other languages | ;Names in other languages | ||
{{foreign names | {{foreign names | ||
| | |Jpn=ステージ2 アラビンいせきのなぞ | ||
| | |JpnR=Sutēji 2: Arabin Iseki no Nazo | ||
| | |JpnM=Stage 2: The Mystery of Dry Dry Ruins | ||
|Spa=Capítulo 2: El Misterio de las Ruinas | |Spa=Capítulo 2: El Misterio de las Ruinas | ||
|SpaM=Chapter 2: The Mystery of the Ruins | |SpaM=Chapter 2: The Mystery of the Ruins | ||
| Line 118: | Line 118: | ||
|Ger=Kapitel 2: Wie der Wind der Wüste | |Ger=Kapitel 2: Wie der Wind der Wüste | ||
|GerM=Chapter 2: Like the Wind of the Desert | |GerM=Chapter 2: Like the Wind of the Desert | ||
| | |Fre=Chapitre 2: Le mystère des Ruines Sec Sec | ||
| | |FreM=Chapter 2: The mystery of Dry Dry Ruins | ||
|Chi=第2章 干旱废墟的秘密 | |Chi=第2章 干旱废墟的秘密 | ||
|ChiR=Dì 2 Zhāng: Gānhàn Fèixū de | |ChiR=Dì 2 Zhāng: Gānhàn Fèixū de Mìmì | ||
|ChiM=Chapter 2: The secret of Dry Dry Ruins | |ChiM=Chapter 2: The secret of Dry Dry Ruins | ||
}} | }} | ||
| Line 127: | Line 127: | ||
===Chapter 3: The "Invincible" Tubba Blubba=== | ===Chapter 3: The "Invincible" Tubba Blubba=== | ||
[[File:PM Bow and Bootler.png|thumb|Lady Bow and Bootler welcoming Mario.]] | [[File:PM Bow and Bootler.png|thumb|Lady Bow and Bootler welcoming Mario.]] | ||
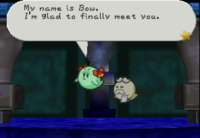
Mario follows the invitation through the maze-like forest and finds the mansion he was referred to. After overcoming the challenges inside, Mario meets Lady Bow. He is told about Tubba Blubba, the threat he poses, and the secret that may be related to his weakness. Bow then uses the Star Spirit Skolar the Boos found and captured as leverage to get Mario to defeat Tubba Blubba. She also joins Mario because she is tired of seeing her fellow Boos suffering, and because Mario will need her to get to Tubba Blubba's Castle. | Mario follows the invitation through the maze-like forest and finds [[Boo's Mansion|the mansion he was referred to]]. After overcoming the challenges inside, Mario meets Lady Bow. He is told about [[Tubba Blubba]], the threat he poses, and the secret that may be related to his weakness. Bow then uses the Star Spirit Skolar the Boos found and captured as leverage to get Mario to defeat Tubba Blubba. She also joins Mario because she is tired of seeing her fellow Boos suffering, and because Mario will need her to get to Tubba Blubba's Castle. | ||
[[File:Tubba Blubba Eating Boo.png|thumb|left|Tubba Blubba, about to eat a Boo.]] | [[File:PM Tubba Blubba Eating Boo.png|thumb|left|Tubba Blubba, about to eat a Boo.]] | ||
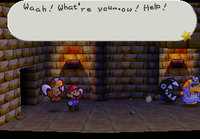
The group leaves Forever Forest and heads towards Gusty Gulch. There, they witness Tubba Blubba attacking a ghost village and devouring [[Stanley (Paper Mario)|a Boo]]. Mario and his friends follow Tubba Blubba to his castle and sneak their way up to the master bedroom. In a chest next to the bed, Mario finds [[Yakkey]], a talkative key who tells them that he is the literal key to Tubba Blubba's secret inside [[Windy Mill]]. Yakkey concludes that Mario must be a thief, so he alerts Tubba Blubba of them. With a furious Tubba Blubba chasing them, Mario and his friends escape the castle, run all the way down to Windy Mill, and unlock it with the key. | The group leaves Forever Forest and heads towards [[Gusty Gulch]]. There, they witness Tubba Blubba attacking a ghost village and devouring [[Stanley (Paper Mario)|a Boo]]. Mario and his friends follow Tubba Blubba to his castle and sneak their way up to the master bedroom. In a chest next to the bed, Mario finds [[Yakkey]], a talkative key who tells them that he is the literal key to Tubba Blubba's secret inside [[Windy Mill]]. Yakkey concludes that Mario must be a thief, so he alerts Tubba Blubba of them. With a furious Tubba Blubba chasing them, Mario and his friends escape the castle, run all the way down to Windy Mill, and unlock it with the key. | ||
[[File:PM Tubba's Heart.png|thumb|Tubba | [[File:PM Tubba's Heart.png|thumb|Tubba's Heart.]] | ||
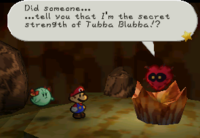
Inside Windy Mill they find Tubba Blubba's secret, which turns out to be his heart that has been controlling the body remotely. After Mario beats it, the heart escapes outside the mill, where Tubba Blubba's body has caught up with Mario. Heart and body re-unite and attempt to fight Mario again, but with the heart being back inside Tubba Blubba's body, he is vulnerable again. After his defeat, Tubba Blubba decides to release all the Boos he has eaten, and reveals he is really a sensitive guy who did not like being scared by the Boos. Lady Bow, pleased with the outcome, holds up her part of the bargain and frees Skolar. | Inside Windy Mill they find Tubba Blubba's secret, which turns out to be [[Tubba's Heart|his heart]] that has been controlling the body remotely. After Mario beats it, the heart escapes outside the mill, where Tubba Blubba's body has caught up with Mario. Heart and body re-unite and attempt to fight Mario again, but with the heart being back inside Tubba Blubba's body, he is vulnerable again. After his defeat, Tubba Blubba decides to release all the Boos he has eaten, and reveals he is really a sensitive guy who did not like being scared by the Boos. Lady Bow, pleased with the outcome, holds up her part of the bargain and frees [[Skolar]]. | ||
In Peach's Castle, Twink and the Princess decide to sneak out of the bedroom again. They immediately run into Bowser and Kammy Koopa, who are discussing how Mario's next target will be [[Shy Guy's Toy Box]], and pondering what the best way to defeat him there would be. Bowser then tries to coax Peach into telling him about Mario's secret weaknesses, and sends Kammy Koopa to impede his progress using this information. | In Peach's Castle, Twink and the Princess decide to sneak out of the bedroom again. They immediately run into Bowser and Kammy Koopa, who are discussing how Mario's next target will be [[Shy Guy's Toy Box]], and pondering what the best way to defeat him there would be. Bowser then tries to coax Peach into telling him about Mario's secret weaknesses, and sends Kammy Koopa to impede his progress using this information. | ||
[[File: | [[File:PM Shy Guy Stealing Key Screenshot.png|thumb|left|A Shy Guy stealing the storeroom key.]] | ||
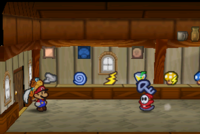
After returning to Toad Town from his trip to Forever Forest, Mario finds the town overrun with [[Shy Guy]]s stealing people's belongings. Mario and his friends are able to trace the source of the Shy Guy attacks to one of the vacant houses in the residential area. By hiding inside with Lady Bow's ability, Mario is able to observe one of the Shy Guys | After returning to Toad Town from his trip to Forever Forest, Mario finds the town overrun with [[Shy Guy]]s stealing people's belongings. Mario and his friends are able to trace the source of the Shy Guy attacks to one of the vacant houses in the residential area. By hiding inside with Lady Bow's ability, Mario is able to observe one of the Shy Guys opening a hidden door to a secret back room hiding the Shy Guy's Toy Box. | ||
{{br}} | {{br}} | ||
;Names in other languages | ;Names in other languages | ||
{{foreign names | {{foreign names | ||
| | |Jpn=ステージ3 ふじみのドガボン | ||
| | |JpnR=Sutēji 3: Fujimi no Dogabon | ||
| | |JpnM=Stage 3: Dogabon the Immortal<br>(''Dogabon'' is [[Tubba Blubba]]'s Japanese name.) | ||
|Spa=Capítulo 3: El "Invencible" Tubba Blubba | |Spa=Capítulo 3: El "Invencible" Tubba Blubba | ||
|SpaM=Chapter 3: The "Invincible" Tubba Blubba | |SpaM=Chapter 3: The "Invincible" Tubba Blubba | ||
| Line 152: | Line 151: | ||
|Ger=Kapitel 3: Der Unbezwingbare | |Ger=Kapitel 3: Der Unbezwingbare | ||
|GerM=Chapter 3: The Invincible | |GerM=Chapter 3: The Invincible | ||
| | |Fre=Chapitre 3: L'Invincible Tubba Blubba | ||
| | |FreM=Chapter 3: The Invincible Tubba Blubba | ||
|Chi= | |Chi=第3章 “无敌的”图巴・布路巴 | ||
|ChiR=Dì 3 Zhāng: "Wúdí de" Túbā Bùlùbā | |ChiR=Dì 3 Zhāng: "Wúdí de" Túbā Bùlùbā | ||
|ChiM=Chapter 3: The "Invincible" Tubba Blubba | |ChiM=Chapter 3: The "Invincible" Tubba Blubba | ||
| Line 160: | Line 159: | ||
===Chapter 4: Trials in the Toy Box=== | ===Chapter 4: Trials in the Toy Box=== | ||
Inside the toy box, Mario runs into obstacles he cannot overcome by himself, such as the railway system missing a train, or [[Gourmet Guy]] blocking the way. In these cases | Inside the toy box, Mario runs into obstacles he cannot overcome by himself, such as the railway system missing a train, or [[Gourmet Guy]] blocking the way. In these cases, Mario must fight Shy Guys, retrieve items that were stolen from Toad Town citizens, and return them to their owners. At certain points, Kammy Koopa appears and attempts to execute Bowser's plan by summoning obstacles related to the answers Peach gave as Mario's weaknesses. | ||
[[File:PM Watt Is Freed.png|thumb|Watt, freed from the lantern.]] | [[File:PM Watt Is Freed.png|thumb|Watt, freed from the lantern.]] | ||
Eventually, Mario reaches Red Station, where he encounters and battles the [[Big Lantern Ghost]], who upon defeat drops his lantern and flees. Inside the lantern is [[Watt]], a [[Li'l Sparky]] who was captured by the Shy Guys and used as a light source. Being grateful for being rescued, Watt joins Mario's group. | Eventually, Mario reaches the Red Station, where he encounters and battles the [[Big Lantern Ghost]], who upon defeat drops his lantern and flees. Inside the lantern is [[Watt]], a [[Lil Sparky|Li'l Sparky]] who was captured by the Shy Guys and used as a light source. Being grateful for being rescued, Watt joins Mario's group. | ||
[[File:PM General Guy Launches Attack.png|thumb|left|General Guy, ready for battle.]] | [[File:PM General Guy Launches Attack.png|thumb|left|General Guy, ready for battle.]] | ||
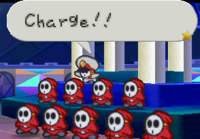
After that, Mario locates the Shy Guys' central base of operations, where he meets their leader, [[General Guy]]. He rallies his men and sends several waves of Shy Guy infantry against Mario and his friends, who dispatch them one after another, | After that, Mario locates the Shy Guys' central base of operations, where he meets their leader, [[General Guy]]. He rallies his men and sends several waves of Shy Guy infantry against Mario and his friends, who dispatch them one after another. Eventually, General Guy fights Mario himself. After defeat, General Guy and his Shy Guys flee, leaving Mario able to rescue [[Muskular]], the fourth Star Spirit. | ||
[[File:Pm chap4 peachcake.png|thumb|Peach and Twink inside the castle kitchen.]] | [[File:Pm chap4 peachcake.png|thumb|Peach and Twink inside the castle kitchen.]] | ||
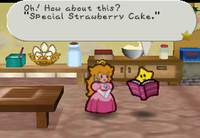
In Peach's Castle, the Princess encounters Gourmet Guy during one of her secret trips outside of her room. Gourmet Guy tells Peach that he is technically obligated to let the guards know he saw her wandering around, but | In Peach's Castle, the Princess encounters Gourmet Guy during one of her secret trips outside of her room. Gourmet Guy tells Peach that he is technically obligated to let the guards know he saw her wandering around, but he might look the other way if she went into the castle kitchen and baked him a cake. Peach complies, and, with Twink's help, bakes a strawberry cake, which makes Gourmet Guy ecstatic. Once he regains his composure, he informs Peach that the next Star Spirit is being held on [[Lavalava Island]], an island to the south. The Princess ends up being spotted by Kammy Koopa and escorted back to her room. | ||
[[File:Pm chap5 whaleferry.png|thumb|left|Mario riding the whale to Lavalava Island.]] | [[File:Pm chap5 whaleferry.png|thumb|left|Mario riding the whale to Lavalava Island.]] | ||
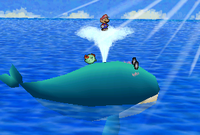
Mario heads to the Toad Town harbor where he meets [[Kolorado]] the archeologist and a [[Whale (character)|whale]]. The whale offers to carry Mario and his friends over the ocean, but only if Mario enters | Mario heads to the Toad Town harbor, where he meets [[Kolorado]] the archeologist and a [[Whale (character)|whale]]. The whale offers to carry Mario and his friends over the ocean, but only if Mario enters his belly to cure a bellyache he has been having. Inside, Mario finds a [[Fuzzipede]] irritating the whale's belly. After fighting the Fuzzipede and getting it out of the whale's belly, Mario's group rides the whale to Lavalava Island, with Kolorado joining them to find treasure. | ||
{{br}} | {{br}} | ||
;Names in other languages | ;Names in other languages | ||
{{foreign names | {{foreign names | ||
| | |Jpn=ステージ4 とつげき!おもちゃばこ | ||
| | |JpnR=Sutēji 4: Totsugeki! Omochabako | ||
| | |JpnM=Stage 4: Assault inside the Toy Box! | ||
|Spa=Capítulo 4: La Misteriosa Caja de Juguetes | |Spa=Capítulo 4: La Misteriosa Caja de Juguetes | ||
|SpaM=Chapter 4: The Mysterious Toy Box | |SpaM=Chapter 4: The Mysterious Toy Box | ||
| Line 186: | Line 184: | ||
|Ger=Kapitel 4: Spiel mit dem Zeug | |Ger=Kapitel 4: Spiel mit dem Zeug | ||
|GerM=Chapter 4: Playing with the stuff | |GerM=Chapter 4: Playing with the stuff | ||
| | |Fre=Chapitre 4: Joujou dans le Coffre à jouets | ||
| | |FreM=Chapter 4: Toy in the Toy Box | ||
|Chi=第4章 玩具盒里的历练 | |Chi=第4章 玩具盒里的历练 | ||
|ChiR=Dì 4 Zhāng: Wánjùhé lǐ de Lìliàn | |ChiR=Dì 4 Zhāng: Wánjùhé lǐ de Lìliàn | ||
| Line 195: | Line 193: | ||
===Chapter 5: Hot, Hot Times on Lavalava Island=== | ===Chapter 5: Hot, Hot Times on Lavalava Island=== | ||
[[File:Pm chap5 raphaelultra.png|thumb|Mario and Raphael the Raven.]] | [[File:Pm chap5 raphaelultra.png|thumb|Mario and Raphael the Raven.]] | ||
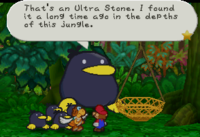
On | On [[Lavalava Island]], Mario and Kolorado find the entrance to [[Mt. Lavalava]] inaccessible due to a lava river. They head to the nearby [[Yoshi's Village]] to ask the locals for information, but the village is in a state of panic because their kids went missing in [[Jade Jungle]]. Mario heads into the jungle to search for the missing children and finds their caretaker, [[Sushie]], stuck in a tree. After being freed, she joins Mario to locate all of the missing Yoshis and bring them back to their parents. With the kids returned and the villagers pacified, Mario is able to talk to the [[Village Leader]] about reaching Mt. Lavalava. The Yoshi suggests seeking out [[Raphael the Raven]] in Jade Jungle. Mario finds Raphael on top of a large tree in an area accessible only with the [[Jade Raven]]. Raphael offers his assistance by summoning his Raven followers to construct a set of ropeways to help Mario across the lava river. | ||
[[File:PM Escaping Mt Lavalava.png|thumb|left|Mario narrowly escaping the volcanic eruption with Misstar's help.]] | [[File:PM Escaping Mt Lavalava.png|thumb|left|Mario narrowly escaping the volcanic eruption with Misstar's help.]] | ||
Inside, Mario and Kolorado explore the caverns of Mt. Lavalava, with the former doing most of the work and the latter suffering various injuries while trying to be useful. Deep inside the | Inside, Mario and Kolorado explore the caverns of Mt. Lavalava, with the former doing most of the work and the latter suffering various injuries while trying to be useful. Deep inside the volcano, they meet Lava Piranha, the guardian of the Star Spirit. Mario defeats it and releases [[Misstar]], but at that moment the volcano starts to erupt. As they flee, Kolorado notices a [[treasure chest]] which he presumes contains the treasure he has been looking for. Before the lava reaches them, Misstar grabs him and Mario's group and escapes the volcano through the caldera. The treasure chest gets blown out of Mt. Lavalava and into Jade Jungle. | ||
[[File: | [[File:PM 64th Trivia Quiz-Off.png|thumb|Peach in the [[64th Trivia Quiz-Off]].]] | ||
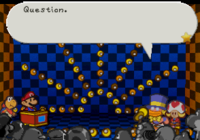
In the meantime, Peach encounters Bowser's minions setting up a [[64th Trivia Quiz-Off|quiz show]]. Since they are one player short, they ask Peach to participate. During the show, several of the questions reveal that there is a Star Spirit held captive in a place called [[Flower Fields]]. For her participation in the game she is handed a [[Sneaky Parasol]], an item that can copy the appearance of whoever the holder is facing. Before she can make any use of it, Bowser enters the room, spots the Princess, and has her escorted back to her room. | In the meantime, Peach encounters Bowser's minions setting up a [[64th Trivia Quiz-Off|quiz show]]. Since they are one player short, they ask Peach to participate. During the show, several of the questions reveal that there is a Star Spirit held captive in a place called [[Flower Fields]]. For her participation in the game she is handed a [[Sneaky Parasol]], an item that can copy the appearance of whoever the holder is facing. Before she can make any use of it, Bowser enters the room, spots the Princess, and has her escorted back to her room. | ||
In Toad Town, Twink informs Mario that the sixth Star Spirit is hidden in [[Flower Fields]]. To get there, Mario must find the four Magical Seeds from the [[Bub-ulb]]s across the world. Kolorado has found one, which he trades for Mt. Lavalava's treasure in the chest, the Volcano Vase. Planting the Magical Seeds in Toad Town creates the doorway to Flower Fields. | In Toad Town, Twink informs Mario that the sixth Star Spirit is hidden in [[Flower Fields]]. To get there, Mario must find the four Magical Seeds from the [[Bub-ulb]]s across the world. Kolorado has found one, which he trades for Mt. Lavalava's treasure in the chest, the Volcano Vase. Planting the Magical Seeds in Toad Town creates the doorway to Flower Fields. | ||
{{br}} | {{br}} | ||
;Names in other languages | ;Names in other languages | ||
{{foreign names | {{foreign names | ||
| | |Jpn=ステージ5 南の海のジャンボル島 | ||
| | |JpnR=Sutēji 5: Minami no umi no Janboru Tō | ||
| | |JpnM=Stage 5: Jambol Island of the south sea | ||
|Spa=Capítulo 5: Calor en la Isla Lavalava | |Spa=Capítulo 5: Calor en la Isla Lavalava | ||
|SpaM=Chapter 5: Heat in Lavalava Island | |SpaM=Chapter 5: Heat in Lavalava Island | ||
| Line 217: | Line 214: | ||
|Ger=Kapitel 5: Aloha auf Lavalava-Eiland | |Ger=Kapitel 5: Aloha auf Lavalava-Eiland | ||
|GerM=Chapter 5: Welcome to Lavalava Island<br>(''Aloha'' is Hawaiian for "welcome".) | |GerM=Chapter 5: Welcome to Lavalava Island<br>(''Aloha'' is Hawaiian for "welcome".) | ||
| | |Fre=Chapitre 5: Ça chauffe sur l'Île Lavelave | ||
| | |FreM=Chapter 5: Hot on Lavelave Island | ||
|Chi=第5章 南海中的火山岛 | |Chi=第5章 南海中的火山岛 | ||
|ChiR=Dì 5 Zhāng: Nánhǎi Zhōng de Huǒshān Dǎo | |ChiR=Dì 5 Zhāng: Nánhǎi Zhōng de Huǒshān Dǎo | ||
| Line 226: | Line 223: | ||
===Chapter 6: Dark Days in Flower Fields=== | ===Chapter 6: Dark Days in Flower Fields=== | ||
[[File:FlowerFieldsPM.png|thumb|200px|Mario and Lakilester in Flower Fields after the clouds are dispelled.]] | [[File:FlowerFieldsPM.png|thumb|200px|Mario and Lakilester in Flower Fields after the clouds are dispelled.]] | ||
When Mario enters the Flower Fields, he sees | When Mario enters the Flower Fields, he sees the place shrouded in clouds. The [[Wise Wisterwood]] tells Mario that the clouds are the result of [[Huff N. Puff]], who is using his Puff Puff Machine to cover Flower Fields in clouds. Because of this, the Sun cannot rise to the sky. Mario thus needs to destroy the Puff Puff Machine to make the Sun rise to the sky, and help the local flowers to acquire a [[Magical Bean]], [[Miracle Water]] and [[Fertile Soil]]. These will create a beanstalk up to the [[Cloudy Climb]] where Huff N. Puff is hiding with the Star Spirit. Mario also meets a strange Lakitu called [[Lakilester]] who insists his name is Michael, and then Spike. He fights Mario under the orders of Huff N. Puff, but after losing, he decides to join Mario because he sees no reason in working for Huff N. Puff. He then fights a group of Lakitus and destroys the Puff Puff Machine, before planting the Magical Bean. When the [[beanstalk]] is grown, Mario heads to the [[Cloudy Climb]] and defeats Huff N. Puff for the sixth Star Spirit, [[Klevar]]. | ||
Back at the castle, Peach uses the [[Sneaky Parasol]] to turn herself into one of the guards, allowing her to move around the castle without fear of getting caught. Peach then learns that Kammy Koopa has finished preparations for something to defeat Mario. Before she can find out what it is, however, Kammy notices a peculiar smell coming from her disguise and turns her back to normal with a spell. She is then taken back to her room yet again. | Back at the castle, Peach uses the [[Sneaky Parasol]] to turn herself into one of the guards, allowing her to move around the castle without fear of getting caught. Peach then learns that Kammy Koopa has finished preparations for something to defeat Mario. Before she can find out what it is, however, Kammy notices a peculiar smell coming from her disguise and turns her back to normal with a spell. She is then taken back to her room yet again. | ||
Back in Toad Town, Mario finds a [[Ninji]] waiting for him at Merlon's house. The Ninji informs that [[Merle]] of [[Starborn Valley]] has something important to tell Mario, and that he must go there. Mario finds | Back in Toad Town, Mario finds a [[Ninji]] waiting for him at Merlon's house. The Ninji informs that [[Merle]] of [[Starborn Valley]] has something important to tell Mario, and that he must go there. Mario finds a Warp Pipe to [[Shiver City]] in [[Toad Town Tunnels]]. | ||
{{br}} | {{br}} | ||
;Names in other languages | ;Names in other languages | ||
{{foreign names | {{foreign names | ||
| | |Jpn=ステージ6 花と雲につつまれて | ||
| | |JpnR=Sutēji 6: Hana to Kumo ni Tsutsumarete | ||
| | |JpnM=Stage 6: Shrouded in clouds and flowers | ||
|Spa=Capítulo 6: Flores y Nubes... | |Spa=Capítulo 6: Flores y Nubes... | ||
|SpaM=Chapter 6: Flowers and Clouds... | |SpaM=Chapter 6: Flowers and Clouds... | ||
| Line 244: | Line 240: | ||
|Ger=Kapitel 6: Tränen auf Blütenblättern | |Ger=Kapitel 6: Tränen auf Blütenblättern | ||
|GerM=Chapter 6: Tears on Petals | |GerM=Chapter 6: Tears on Petals | ||
| | |Fre=Chapitre 6: Sale temps au Champ de Fleurs | ||
| | |FreM=Chapter 6: Bad weather in the Flower Field | ||
|Chi=第6章 黑暗中的鲜花原野 | |Chi=第6章 黑暗中的鲜花原野 | ||
|ChiR=Dì 6 Zhāng: | |ChiR=Dì 6 Zhāng: Hēi'àn Zhōng de Xiānhuā Yuányě | ||
|ChiM=Chapter 6: Flower Fields in the Darkness | |ChiM=Chapter 6: Flower Fields in the Darkness | ||
}} | }} | ||
| Line 253: | Line 249: | ||
===Chapter 7: A Star Spirit on Ice=== | ===Chapter 7: A Star Spirit on Ice=== | ||
[[File:Crystal Palace.png|thumb|left||200px|Mario and Bombette inside the Crystal Palace.]] | [[File:Crystal Palace.png|thumb|left||200px|Mario and Bombette inside the Crystal Palace.]] | ||
In Shiver City, Mario finds out that he cannot go to [[Starborn Valley]] unless the [[Mayor Penguin| | In Shiver City, Mario finds out that he cannot go to [[Starborn Valley]] unless the [[Mayor Penguin|Mayor]] grants him permission. However, he finds the Mayor unconscious on the floor and becomes a suspect for the Mayor's murder. With novelist [[Herringway]]'s help, the truth is revealed: the Mayor was knocked out by the falling box containing a gift for the novelist. With the mystery solved, the Mayor allows Mario to go to Starborn Valley. | ||
On the way to Starborn Valley, Mario faces Jr. Troopa again, as well as a mini-boss called [[Monstar]]. | On the way to Starborn Valley, Mario faces Jr. Troopa again, as well as a mini-boss called [[Monstar]]. | ||
Once Mario reaches the Starborn Valley, he meets [[Merle]] who tells Mario to go to the Crystal Palace where the seventh Star Spirit is being held. He then gives Mario a [[scarf]], telling him to use it on something special, then telling Mario to go and ask Mayor Penguin for the other special item, a [[bucket]]. Mario goes a line of snowmen on the path between Shiver City and Starborn Valley, one missing a scarf and the other missing a hat. Mario gives the items to the respective owners. The snowmen thank him and open the way to the Crystal Palace. Along the way to the palace, they meet the spirit of [[Madam Merlar]], who gives Mario the [[Star Stone]], to reach the palace. Once they reach the [[Crystal King]] at the palace's back, Mario defeats him for the final Star Spirit, [[Kalmar]]. | Once Mario reaches the Starborn Valley, he meets [[Merle]], who tells Mario to go to the [[Crystal Palace]], where the seventh Star Spirit is being held. He then gives Mario a [[scarf]], telling him to use it on something special, then telling Mario to go and ask Mayor Penguin for the other special item, a [[bucket]]. Mario goes to a line of snowmen on the path between Shiver City and Starborn Valley, one missing a scarf and the other missing a hat. Mario gives the items to the respective owners. The snowmen thank him and open the way to the Crystal Palace. Along the way to the palace, they meet the spirit of [[Merlumina|Madam Merlar]], who gives Mario the [[Star Stone]], to reach the palace. Once they reach the [[Crystal King]] at the palace's back, Mario defeats him for the final Star Spirit, [[Kalmar]]. | ||
In Peach's Castle, Kammy Koopa informs Bowser that Mario now has all seven Star Spirits. Bowser orders the Koopa Troop to their battle stations and has the princess tied up to keep her out of mischief. Twink tries attacking him, but Bowser simply swats him out of the window. | In Peach's Castle, Kammy Koopa informs Bowser that Mario now has all seven Star Spirits. Bowser orders the Koopa Troop to their battle stations and has the princess tied up to keep her out of mischief. Twink tries attacking him, but Bowser simply swats him out of the window. | ||
Meanwhile, Mario and the team reach Star Haven with the help of the seven Star Spirits, acquire the [[Star Beam]], and use the power of the Star Spirits to travel to [[Bowser's Castle]]. | Meanwhile, Mario and the team reach [[Star Haven]] with the help of the seven Star Spirits, acquire the [[Star Beam]], and use the power of the Star Spirits to travel to [[Bowser's Castle]]. | ||
{{br}} | {{br}} | ||
;Names in other languages | ;Names in other languages | ||
{{foreign names | {{foreign names | ||
| | |Jpn=ステージ7 さいはての地へ | ||
| | |JpnR=Sutēji 7: Saihate no chi e | ||
| | |JpnM=Stage 7: To the end of the Earth | ||
|Spa=Capítulo 7: Una Estrella Congelada | |Spa=Capítulo 7: Una Estrella Congelada | ||
|SpaM=Chapter 7: A Frozen Star | |SpaM=Chapter 7: A Frozen Star | ||
| Line 275: | Line 270: | ||
|Ger=Kapitel 7: Kristallene Träume | |Ger=Kapitel 7: Kristallene Träume | ||
|GerM=Chapter 7: Crystalline Dreams | |GerM=Chapter 7: Crystalline Dreams | ||
| | |Fre=Chapitre 7: Etoile des neiges | ||
| | |FreM=Chapter 7: Snow star | ||
|Chi=第7章 冰雪中的星之魂 | |Chi=第7章 冰雪中的星之魂 | ||
|ChiR=Dì 7 Zhāng: Bīngxuě Zhōng de Xīngzhīhún | |ChiR=Dì 7 Zhāng: Bīngxuě Zhōng de Xīngzhīhún | ||
| Line 283: | Line 278: | ||
===Chapter 8: A Star-Powered Showdown!=== | ===Chapter 8: A Star-Powered Showdown!=== | ||
[[File:FinalBattlePM.png|thumb | [[File:FinalBattlePM.png|thumb|200px|Kammy Koopa activates the [[Power Platform]] as the final battle begins.]] | ||
After going through Bowser's Castle, falling for traps, solving puzzles and getting attacked by Jr. Troopa one last time in the process, Mario and his team find Princess Peach and Bowser. The Star Beam lets Mario negate Bowser's invincibility and beat him, but Bowser takes his loss as a warm-up and flees with Peach to the castle roof, followed by Mario. Kammy Koopa activates her creation, the [[Power Platform]], to pump Bowser up in both power and size; when he powers up with the Star Rod, Mario finds that the Star Beam is now ineffective. | After going through Bowser's Castle, falling for traps, solving puzzles and getting attacked by Jr. Troopa one last time in the process, Mario and his team find Princess Peach and Bowser in the same place where Mario first encountered Bowser at the start of the game. The Star Beam lets Mario negate Bowser's invincibility and beat him, but Bowser takes his loss as a warm-up and flees with Peach to the castle roof, followed by Mario. Kammy Koopa activates her creation, the [[Power Platform]], to pump Bowser up in both power and size; when he powers up with the Star Rod, Mario finds that the Star Beam is now ineffective. | ||
Meanwhile, Twink frees the Princess, and the two battle Kammy. As Peach uses Focus, Twink slowly becomes stronger to the point where he becomes immune to Kammy's attacks. Kammy remembers before her defeat that the Stars get their power from the wishes of ordinary people. Twink urges the Princess to make a wish for everyone in the Mushroom Kingdom while he goes to help Mario and the Star Spirits. Peach's wish fills the Star Spirits with more power, | Meanwhile, Twink frees the Princess, and the two battle Kammy. As Peach uses Focus, Twink slowly becomes stronger to the point where he becomes immune to Kammy's attacks. Kammy remembers before her defeat that the Stars get their power from the wishes of ordinary people. Twink urges the Princess to make a wish for everyone in the Mushroom Kingdom while he goes to help Mario and the Star Spirits. Peach's wish fills the Star Spirits with more power; thus enabled, as Mario recovers, the Spirits upgrade the Star Beam to [[Peach Beam]], which cuts through Bowser's enhanced power. After a lengthy battle with Bowser that ultimately leaves the Koopa King defeated, Mario returns the Star Rod to the Star Spirits. The Power Platform and Bowser's Castle begin to self-destruct, but the Star Spirits protect Peach's Castle from the explosion and restore it to its spot. | ||
[[File:Paper Mario Ending.png|thumb|left|200px|Mario and Peach riding a float at the end of the game.]] | [[File:Paper Mario Ending.png|thumb|left|200px|Mario and Peach riding a float at the end of the game.]] | ||
Several days later, Mario, his partners, and many others receive invitations from Princess Peach for another party. After a speech by Peach where she thanks everyone for their collective effort in restoring the peace to the Mushroom Kingdom, the [[list of Paper Mario staff|staff credits]] begin to roll as the scene switches to a [[victory parade|parade]] with nearly the entire cast participating. At the end, Mario and Peach walk to Mario's House and watch a fireworks display, which continues on until the player turns off or resets the game console. | |||
{{br}} | {{br}} | ||
;Names in other languages | ;Names in other languages | ||
{{foreign names | {{foreign names | ||
| | |Jpn=ステージ8 たいけつ!大魔王クッパ | ||
| | |JpnR=Sutēji 8: Taiketsu! Daimaō Kuppa | ||
| | |JpnM=Stage 8: Showdown! Demon King Koopa | ||
|Spa=Capítulo 8: ¡El Malvado Rey Bowser! | |Spa=Capítulo 8: ¡El Malvado Rey Bowser! | ||
|SpaM=Chapter 8: The Evil King Bowser! | |SpaM=Chapter 8: The Evil King Bowser! | ||
| Line 303: | Line 297: | ||
|Ger=Kapitel 8: Showdown unter Sternen | |Ger=Kapitel 8: Showdown unter Sternen | ||
|GerM=Chapter 8: Showdown under the Stars | |GerM=Chapter 8: Showdown under the Stars | ||
| | |Fre=Chapitre 8: Final des Etoiles | ||
| | |FreM=Chapter 8: Finale of the Stars | ||
|Chi=第8章 与酷霸王的最后决战! | |Chi=第8章 与酷霸王的最后决战! | ||
|ChiR=Dì 8 Zhāng: Yǔ Kùbàwáng de Zuìhòu Juézhàn! | |ChiR=Dì 8 Zhāng: Yǔ Kùbàwáng de Zuìhòu Juézhàn! | ||
| Line 311: | Line 305: | ||
==Gameplay== | ==Gameplay== | ||
[[File:PM Boo Mansion Interior.png|thumb|Mario, his | [[File:PM Boo Mansion Interior.png|thumb|Mario, his party member [[Lady Bow]], and a [[Boo]] NPC.]] | ||
For the majority of the game, the player controls Mario as he travels through various locations in the [[Mushroom Kingdom]]. The game is divided into chapters, with each chapter generally being set in a different area. Many of these areas contain NPCs and/or enemies. Some NPCs, such as [[Tayce T.]], can provide Mario and his party with services. | For the majority of the game, the player controls Mario as he travels through various locations in the [[Mushroom Kingdom]]. The game is divided into chapters, with each chapter generally being set in a different area. Many of these areas contain NPCs and/or enemies. Some NPCs, such as [[Tayce T.]], can provide Mario and his party with services. | ||
On his way, Mario and his friends use various abilities that help them progress on their adventure. Mario can jump to reach higher ground, traverse gaps, or reach blocks floating above his head. Early on, Mario obtains a hammer that is used to break larger blocks and other obstacles. Throughout the game, the player will obtain special items that upgrade Mario's jump and hammer and give him new abilities. | On his way, Mario and his friends use various abilities that help them progress on their adventure. Mario can jump to reach higher ground, traverse gaps, or reach blocks floating above his head. Early on, Mario obtains a hammer that is used to break larger blocks and other obstacles. Throughout the game, the player will obtain special items that upgrade Mario's jump and hammer and give him new abilities. | ||
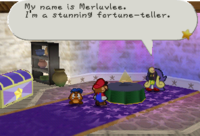
At the end of each chapter, an interlude occurs in which the player takes control of Princess Peach. Peach does not have access to Mario's abilities, party members, or inventory. Items picked up as Peach can be deposited in the [[Treasure Chest | At the end of each chapter, an interlude occurs in which the player takes control of Princess Peach. Peach does not have access to Mario's abilities, party members, or inventory. Items picked up as Peach can be deposited in the [[Mysterious Treasure Chest]] in the castle storage room so they can later be picked up by Mario from the chest's counterpart at [[Merluvlee|Merluvlee's Place]]. | ||
===Controls=== | ===Controls=== | ||
{| | {| | ||
|style="vertical-align:top;"| | |style="vertical-align:top;"| | ||
'''Overworld''' | '''Overworld''' | ||
*{{button|n64|Stick}} – Move | *{{button|n64|Stick}} – Move | ||
*{{button|n64|A}} – Jump / Talk / Investigate | *{{button|n64|A}} – Jump / Talk / Investigate | ||
| Line 328: | Line 320: | ||
*{{button|n64|Z}} – [[Spin Dash]] | *{{button|n64|Z}} – [[Spin Dash]] | ||
*{{button|n64|Cup}} – Toggle HUD | *{{button|n64|Cup}} – Toggle HUD | ||
*{{button|n64|Cright}} – Open | *{{button|n64|Cright}} – Open Party Member menu | ||
*{{button|n64|Cleft}} – Open inventory | *{{button|n64|Cleft}} – Open inventory | ||
*{{button|n64|Cdown}} – | *{{button|n64|Cdown}} – Party Member ability | ||
*{{button|n64|Start}} – Open game menu | *{{button|n64|Start}} – Open game menu | ||
|style="vertical-align:top;"| | |style="vertical-align:top;"| | ||
'''Menu''' | '''Menu''' | ||
*{{button|n64|Stick}} – Move cursor | *{{button|n64|Stick}} – Move cursor | ||
*{{button|n64|A}} – Confirm | *{{button|n64|A}} – Confirm | ||
| Line 343: | Line 334: | ||
|style="vertical-align:top;"| | |style="vertical-align:top;"| | ||
'''Battle''' | '''Battle''' | ||
*{{button|n64|Stick}} – Move cursor / Used in Action Commands | |||
*{{button|n64|Stick}} – Move cursor | *{{button|n64|A}} – Confirm / Used in Action Commands | ||
*{{button|n64|A}} – Confirm / | *{{button|n64|B}} – Cancel / Used in Action Commands | ||
*{{button|n64|B}} – Cancel | |||
*{{button|n64|Z}} – Change attack order | *{{button|n64|Z}} – Change attack order | ||
*{{button|n64|Cdown}} – Used | *{{button|n64|Cdown}} – Used in Action Commands | ||
|style="vertical-align:top;"| | |style="vertical-align:top;"| | ||
'''As Princess Peach''' | '''As Princess Peach''' | ||
*{{button|n64|Stick}} – Move | *{{button|n64|Stick}} – Move | ||
*{{button|n64|A}} – Talk / Investigate | *{{button|n64|A}} – Talk / Investigate | ||
| Line 358: | Line 347: | ||
===Mario's stats=== | ===Mario's stats=== | ||
{|width=100% class="wikitable" style="text-align:center;" | {|width=100% class="wikitable"style="text-align:center;" | ||
|- | |- | ||
!width=15%| | !width=15%| | ||
| Line 364: | Line 353: | ||
!width=6%|Initial value | !width=6%|Initial value | ||
!width=6%|Min. value | !width=6%|Min. value | ||
!width=6%| | !width=6%|Max. value | ||
!Function | !Function | ||
|- | |- | ||
|rowspan=9|[[File:Go Mario.png]]<br>[[Mario]] | |rowspan=9|[[File:Go Mario.png|75px]]<br>[[Mario]] | ||
|style="text-align:left;"|[[File:PM Mario Level Battle Sprite.png|26px]] Level | |style="text-align:left;"|[[File:PM Mario Level Battle Sprite.png|26px]] Level | ||
|1 | |1 | ||
| Line 377: | Line 366: | ||
|10 | |10 | ||
|5 | |5 | ||
|50 | |{{hover|50|Can be increased to 65 with up to three HP Plus Badges}} | ||
|style="text-align:left;"|Denote Mario's health. If they reach zero, the game is over. | |style="text-align:left;"|Denote Mario's health. If they reach zero, [[Game Over|the game is over]]. | ||
|- | |- | ||
|style="text-align:left;"|[[File:PM Flower Point Battle Sprite.png|24px]] [[Flower Point]]s (FP) | |style="text-align:left;"|[[File:PM Flower Point Battle Sprite.png|24px]] [[Flower Point]]s (FP) | ||
|5 | |5 | ||
|5 | |5 | ||
|50 | |{{hover|50|Can be increased to 65 with up to three FP Plus Badges}} | ||
|style="text-align:left;"|Allow Mario and his | |style="text-align:left;"|Allow Mario and his party members to perform more potent moves. | ||
|- | |- | ||
|style="text-align:left;"|[[File:PaperMarioBP.png]] [[Badge Point]]s (BP) | |style="text-align:left;"|[[File:PaperMarioBP.png]] [[Badge Point]]s (BP) | ||
| Line 390: | Line 379: | ||
|3 | |3 | ||
|30 | |30 | ||
|style="text-align:left;"|Determine which and how many | |style="text-align:left;"|Determine which and how many Badges Mario can equip. | ||
|- | |- | ||
|style="text-align:left;"|[[File:PM Star Energy Battle Sprite.gif|40px]] [[Star Power|Star Energy]] | |style="text-align:left;"|[[File:PM Star Energy Battle Sprite.gif|40px]] [[Star Power|Star Energy]] | ||
| Line 396: | Line 385: | ||
|0 | |0 | ||
|7 | |7 | ||
|style="text-align:left;"|Used to fuel Special Moves. Unavailable until at least one Star Spirit has been rescued. | |style="text-align:left;"|Used to fuel Special Moves. Unavailable until at least one Star Spirit (Eldstar) has been rescued. | ||
|- | |- | ||
|style="text-align:left;"|[[File:PMStarPoint.png]] [[Star Point]]s | |style="text-align:left;"|[[File:PMStarPoint.png]] [[Star Point]]s | ||
| Line 410: | Line 399: | ||
|style="text-align:left;"|Dropped by enemies, found in ? Blocks and other places. They are used to purchase items. | |style="text-align:left;"|Dropped by enemies, found in ? Blocks and other places. They are used to purchase items. | ||
|- | |- | ||
|style="text-align:left;"|[[File:PM StarPiece.gif]] [[Star Piece (Paper Mario)|Star Piece]]s | |style="text-align:left;"|[[File:PM StarPiece.gif]] [[Star Piece (Paper Mario series)|Star Piece]]s | ||
|0 | |0 | ||
|0 | |0 | ||
|160 | |160 | ||
|style="text-align:left;"|Can be found in hidden places or received from NPCs. Mario can exchange them for | |style="text-align:left;"|Can be found in hidden places or received from NPCs. Mario can exchange them for Badges with Merlow. | ||
|- | |- | ||
|style="text-align:left;"|[[File:PM Play Time Sprite.png|26px]] Play Time | |style="text-align:left;"|[[File:PM Play Time Sprite.png|26px]] Play Time | ||
| Line 424: | Line 413: | ||
===Upgrades=== | ===Upgrades=== | ||
{|width=95% cellspacing=0 border=1 cellpadding=3 class="wikitable" style="border-collapse:collapse;" | {|width=95% cellspacing=0 border=1 cellpadding=3 class="wikitable"style="border-collapse:collapse;" | ||
|- | |- | ||
!width=15%|Item | !width=15%|Item | ||
| Line 432: | Line 421: | ||
|style="text-align:center;"|[[File:PM Normal Boots Sprite.png]]<br>[[Boots]] | |style="text-align:center;"|[[File:PM Normal Boots Sprite.png]]<br>[[Boots]] | ||
|Available from the start | |Available from the start | ||
|The Boots allow Mario to use the jump command in battle. His jump attack deals 1 point of damage | |The Boots allow Mario to use the jump command in battle. His jump attack deals 1 point of damage without attack modifiers and hits twice if timed correctly. | ||
|- | |- | ||
|style="text-align:center;"|[[File:SuperBoots PM.png]]<br>[[Super Boots]] | |style="text-align:center;"|[[File:SuperBoots PM.png]]<br>[[Super Boots]] | ||
|[[Boo's Mansion]] | |[[Boo's Mansion]] | ||
|The Super Boots allow Mario to use the [[Spin Jump]] which can break through wooden floor panels and reveal hidden panels containing Star Pieces. They also upgrade the strength of his jump attack, making it deal 2 points of damage | |The Super Boots allow Mario to use the [[Ground Pound|Spin Jump]] which can break through wooden floor panels and reveal hidden panels containing Star Pieces. They also upgrade the strength of his jump attack, making it deal 2 points of damage per hit at base power. The jump hits twice if the action command is executed. | ||
|- | |- | ||
|style="text-align:center;"|[[File:UltraBoots PM.png]]<br>[[Ultra Boots]] | |style="text-align:center;"|[[File:UltraBoots PM.png]]<br>[[Ultra Boots]] | ||
|[[Toad Town Tunnels]] | |[[Toad Town Tunnels]] | ||
|The Ultra Boots upgrade the Spin Jump to the [[Tornado Jump (move)|Tornado Jump]] which retains its previous ability and allows Mario to get some extra height for his jumps. They also upgrade the strength of his jump attack, making it deal 3 points of damage | |The Ultra Boots upgrade the Spin Jump to the [[Tornado Jump (move)|Tornado Jump]] which retains its previous ability and allows Mario to get some extra height for his jumps. They also upgrade the strength of his jump attack, making it deal 3 points of damage per hit at base power. The jump hits twice if the action command is executed. | ||
|- | |- | ||
|style="text-align:center;"|[[File:PM Normal Hammer Sprite.png]]<br>[[Hammer]] | |style="text-align:center;"|[[File:PM Normal Hammer Sprite.png]]<br>[[Hammer]] | ||
|[[Goomba Village ( | |[[Goomba Village (location)|Goomba Village]] | ||
|The Hammer allows Mario to break | |The Hammer allows Mario to break [[Yellow Block]]s and use the hammer command in battle. His base hammer attack deals 1 point of damage (2 if timed correctly). | ||
|- | |- | ||
|style="text-align:center;"|[[File:PM Super Hammer Sprite.png]]<br>[[Super Hammer]] | |style="text-align:center;"|[[File:PM Super Hammer Sprite.png]]<br>[[Super Hammer]] | ||
|[[Dry Dry Ruins]] | |[[Dry Dry Ruins (Paper Mario)|Dry Dry Ruins]] | ||
|The Super Hammer allows Mario to break | |The Super Hammer allows Mario to break [[Stone Block]]s and upgrades the base strength of his hammer attack power to 2 (4 if timed correctly). | ||
|- | |- | ||
|style="text-align:center;"|[[File:PM Ultra Hammer Sprite.png]]<br>[[Ultra Hammer]] | |style="text-align:center;"|[[File:PM Ultra Hammer Sprite.png]]<br>[[Ultra Hammer]] | ||
|[[Mt. Lavalava]] | |[[Mt. Lavalava]] | ||
|The Ultra Hammer allows Mario to break | |The Ultra Hammer allows Mario to break [[Metal Block]]s, reveal hidden panels containing Star Pieces, and upgrades the base strength of his hammer attack power to 3 (6 if timed correctly). | ||
|- | |- | ||
|style="text-align:center;"|[[File:UltraStone PM.png]]<br>[[Ultra Stone]] | |style="text-align:center;"|[[File:UltraStone PM.png]]<br>[[Ultra Stone]] | ||
|[[Jade Jungle]] | |[[Jade Jungle]] | ||
|The Ultra Stone enables Mario to use Super | |The Ultra Stone enables Mario to use [[Super Block]]s to upgrade party members to Ultra Rank. | ||
|- | |- | ||
|style="text-align:center;"|[[File:PM Sneaky Parasol.png]]<br>[[Sneaky Parasol]] | |style="text-align:center;"|[[File:PM Sneaky Parasol.png]]<br>[[Sneaky Parasol]] | ||
|[[Peach's Castle]] | |[[Peach's Castle]] | ||
|With this item, Princess Peach can copy the appearance of any NPC she is facing. | |With this item, Princess Peach can copy the appearance of any NPC she is facing in her castle. | ||
|} | |} | ||
===Objects=== | ===Objects=== | ||
A list of reoccurring devices that Mario can encounter during his quest. Some of them are beneficial and help the player by making traveling easier, containing items, or making Mario and his friends stronger. Others serve as obstacles and require a specific ability, item, or party member to overcome. | A list of reoccurring devices that Mario can encounter during his quest. Some of them are beneficial and help the player by making traveling easier, containing items, or making Mario and his friends stronger. Others serve as obstacles and require a specific ability, item, or party member to overcome. | ||
{|width=100%| | {|width=100%| | ||
|width=50% style="vertical-align:top;"| | |width=50% style="vertical-align:top;"| | ||
'''Beneficial objects''' | '''Beneficial objects''' | ||
{|width=95% cellspacing=0 border=1 cellpadding=3 class="wikitable"style="border-collapse:collapse;" | |||
{|width=95% cellspacing=0 border=1 cellpadding=3 class="wikitable" style="border-collapse:collapse;" | |||
|- | |- | ||
!width=25%|Object | !width=25%|Object | ||
| Line 485: | Line 472: | ||
|- | |- | ||
|style="text-align:center;"|[[File:PM Chest Render.png]]<br>[[Treasure Chest]] | |style="text-align:center;"|[[File:PM Chest Render.png]]<br>[[Treasure Chest]] | ||
|Treasure chests contain valuable items, | |Treasure chests contain valuable items, Badges, or keys. The bigger variants contain upgrades for Mario's jump and hammer abilities. | ||
|- | |- | ||
|style="text-align:center;"|[[File:PM Question Mark Block Render.png]][[File:PM Badge Block Render.png]]<br>[[? Block]] | |style="text-align:center;"|[[File:PM Question Mark Block Render.png]][[File:PM Badge Block Render.png]]<br>[[? Block]] | ||
|Mario can reveal the contents of these blocks by jumping beneath them or hitting them with a hammer. The yellow ones contain coins or items, while the red ones contain | |Mario can reveal the contents of these blocks by jumping beneath them or hitting them with a hammer. The yellow ones contain coins or items, while the red ones contain Badges. | ||
|- | |- | ||
|style="text-align:center;"|[[File:PM Hidden Block Render.png]]<br>[[Hidden Block]] | |style="text-align:center;"|[[File:PM Hidden Block Render.png]]<br>[[Hidden Block]] | ||
| Line 496: | Line 483: | ||
|These can be broken by jumping beneath them or with the hammer. Some ? Blocks are disguised as Brick Blocks. | |These can be broken by jumping beneath them or with the hammer. Some ? Blocks are disguised as Brick Blocks. | ||
|- | |- | ||
|style="text-align:center;"|[[File:PM Tram.png]]<br>[[Springboard]] | |style="text-align:center;"|[[File:PM Tram.png]]<br>[[Springboard|Jump pad]] | ||
|By jumping on a | |By jumping on a jump pad, Mario's jump gains some extra height. The blue ones allow the player to retain control of Mario's jump while the red ones launch him towards a fixed location. | ||
|- | |- | ||
|style="text-align:center;"|[[File:PM Warp Pipe Render.png]]<br>[[Warp Pipe]] | |style="text-align:center;"|[[File:PM Warp Pipe Render.png]]<br>[[Warp Pipe]] | ||
|Warp Pipes can be used for traveling between certain areas. Blue pipes serve as shortcuts to remote towns and have to be unlocked in Toad Town Tunnels before they can be used. | |Warp Pipes can be used for traveling between certain areas. Blue pipes serve as shortcuts to remote towns and have to be unlocked in Toad Town Tunnels before they can be used. | ||
|- | |||
|style="text-align:center;"|[[File:Paper Mario Crate.gif]]<br>[[Crate|Wooden box]] | |||
|These can be broken with the [[Ground Pound|Spin Jump]] or [[Tornado Jump (move)|Tornado Jump]]. They sometimes contain items. | |||
|} | |} | ||
|width=50% style="vertical-align:top;"| | |width=50% style="vertical-align:top;"| | ||
'''Obstacles''' | '''Obstacles''' | ||
{|width=95% cellspacing=0 border=1 cellpadding=3 class="wikitable"style="border-collapse:collapse;" | |||
{|width=95% cellspacing=0 border=1 cellpadding=3 class="wikitable" style="border-collapse:collapse;" | |||
|- | |- | ||
!width=25%|Object | !width=25%|Object | ||
!Effect | !Effect | ||
|- | |- | ||
|style="text-align:center;"|[[File:PM Yellow Block Render.png]]<br>[[Yellow | |style="text-align:center;"|[[File:PM Yellow Block Render.png|60px]]<br>[[Yellow Block]] | ||
|Requires Hammer to break. | |Requires Hammer to break. | ||
|- | |- | ||
|style="text-align:center;"|[[File:PM Stone Block Render.png]]<br>[[Stone | |style="text-align:center;"|[[File:PM Stone Block Render.png]]<br>[[Stone Block]] | ||
|Requires Super Hammer to break. | |Requires Super Hammer to break. | ||
|- | |- | ||
|style="text-align:center;"|[[File:PM Metal Block.png]]<br>[[Metal | |style="text-align:center;"|[[File:PM Metal Block.png]]<br>[[Metal Block]] | ||
|Requires Ultra Hammer to break. | |Requires Ultra Hammer to break. | ||
|- | |- | ||
| Line 531: | Line 520: | ||
|Walls or other objects with visible cracks in them can be blown up by Bombette's Bomb ability. | |Walls or other objects with visible cracks in them can be blown up by Bombette's Bomb ability. | ||
|- | |- | ||
|style="text-align:center;"|[[File:PM Wooden Platform Render.png]]<br>Wooden | |style="text-align:center;"|[[File:PM Wooden Platform Render.png]]<br>[[Wooden dock]] | ||
|These can be found on the edges of bodies of water. When near them, Mario can use Sushie's overworld ability to swim. | |These can be found on the edges of bodies of water. When near them, Mario can use Sushie's overworld ability to swim. | ||
|} | |} | ||
|} | |} | ||
== | ==Party members== | ||
An important part of ''Paper Mario'' is the | An important part of ''Paper Mario'' is the party member system. Throughout his journey, Mario befriends various residents of the Mushroom Kingdom who join him on his quest, known as [[party member]]s. Every party member has an overworld ability that can be used by pressing {{button|n64|Cdown}} and usually serves to aid in traversing the landscape in some way, such as Parakarry's flight or Watt's ability to light up dark areas and reveal hidden blocks. Additionally, party members can aid Mario in battle by using various moves, many of which are based on their overworld abilities. | ||
===Ranking-up party members=== | |||
===Ranking up | Each party member joins Mario at their most basic rank and is able to choose from two moves in battle. If the player manages to locate a [[Super Block]], they may upgrade one of their currently available party members to the next rank, which increases the damage output of all their attacks and lets them learn a new move. | ||
Each | |||
The first time a party member is upgraded, they advance to Super Rank. To upgrade them even further, Mario needs to be in possession of the [[Ultra Stone]], which allows party members to reach Ultra Rank. At Ultra Rank, each party member has four moves and cannot be upgraded further. There are 16 Super Blocks in the game in total, enough to advance every party member to their final rank. | |||
===List of party members=== | |||
<center> | <center> | ||
{| float=center width="850px" class="wikitable" style="border-collapse:collapse;" | {|float=center width="850px"class="wikitable"style="border-collapse:collapse;" | ||
|- | |- | ||
! width="100px" | Name | !width="100px"|Name | ||
! width="375px" | Info | !width="375px"|Info | ||
! width="375px" | Overworld ability | !width="375px"|Overworld ability | ||
|- | |- | ||
! width="100px" rowspan=2 style="vertical-align:top;" | [[File:Goombario Sprite.png|56px]]<br>[[Goombario]] | !width="100px"rowspan=2 style="vertical-align:top;"|[[File:Goombario Sprite.png|56px]]<br>[[Goombario]] | ||
| valign=top | | |valign=top| | ||
* Goombario is a young [[Goomba]] from Goomba Village and Mario's self-proclaimed biggest fan. | *Goombario is a young [[Goomba]] from Goomba Village and Mario's self-proclaimed biggest fan. | ||
* Very eager to impress his idol, he joins Mario immediately after his grandfather [[Goompa]] requests it. | *Very eager to impress his idol, he joins Mario immediately after his grandfather [[Goompa]] requests it. | ||
* '''Joins in:''' [[Goomba Village ( | *'''Joins in:''' [[Goomba Village (location)|Goomba Village]] | ||
| valign=top | | |valign=top| | ||
* Goombario can be asked for information about the area he and Mario are standing in at the time. | *Goombario can be asked for information about the area he and Mario are standing in at the time. | ||
* When this is used while Mario faces someone else, Goombario shares his knowledge or impression of the character. | *When this is used while Mario faces someone else, Goombario shares his knowledge or impression of the character. | ||
|- | |- | ||
| colspan=2 | | |colspan=2| | ||
{|width=100% class="wikitable mw-collapsible mw-collapsed" style="border-collapse:collapse; margin:0;" | {|width=100% class="wikitable mw-collapsible mw-collapsed"style="border-collapse:collapse; margin:0;" | ||
|- | |- | ||
! colspan=5 | Goombario's Battle information | !colspan=5|Goombario's Battle information | ||
|- | |- | ||
! width=90px | [[Headbonk]] <br> (0 FP) | !width=90px|[[Headbonk]]<br>(0 FP) | ||
| valign=top | | |valign=top| | ||
* Attacks 1 enemy with a headbutt. | *Attacks 1 enemy with a headbutt. | ||
* Spiked or burning enemies will injure Goombario. | *Spiked or burning enemies will injure Goombario. | ||
* '''Action command:''' Pressing {{button|n64|A}} just before making contact with the enemy. | *'''Action command:''' Pressing {{button|n64|A}} just before making contact with the enemy. | ||
|- | |- | ||
! [[Tattle]] <br> (0 FP) | ![[Tattle]]<br>(0 FP) | ||
| valign=top | | |valign=top| | ||
* Provides information about the targeted enemy type. | *Provides information about the targeted enemy type. | ||
* Displays HP of all subsequently encountered enemies of that type. | *Displays HP of all subsequently encountered enemies of that type. | ||
|- | |- | ||
! [[Charge (move)|Charge]] <br> (1 FP) | ![[Charge (move)|Charge]]<br>(1 FP) | ||
| valign=top | | |valign=top| | ||
* Raises Goombario's next attack power by 2. | *Raises Goombario's next attack power by 2. | ||
* Stackable. | *Stackable. | ||
|- | |- | ||
! [[Multibonk]] <br> (3 FP) | ![[Multibonk]]<br>(3 FP) | ||
| valign=top | | |valign=top| | ||
* Attacks one enemy consecutively until the action command is failed. | *Attacks one enemy consecutively until the action command is failed. | ||
* Spiked or burning enemies will injure Goombario. | *Spiked or burning enemies will injure Goombario. | ||
* '''Action command:''' Pressing {{button|n64|A}} every hit just before making contact with the enemy. | *'''Action command:''' Pressing {{button|n64|A}} every hit just before making contact with the enemy. | ||
** Missing a button press cancels the attack. | **Missing a button press cancels the attack. | ||
|} | |} | ||
|- | |- | ||
! rowspan=2 style="vertical-align:top;" | [[File:Kooper Sprite.png|64px]] <br> [[Kooper]] | !rowspan=2 style="vertical-align:top;"|[[File:Kooper Sprite.png|64px]]<br>[[Kooper]] | ||
| valign=top | | |valign=top| | ||
* Kooper is an aspiring [[Koopa Troopa]] adventurer from Koopa Village. | *Kooper is an aspiring [[Koopa Troopa]] adventurer from Koopa Village. | ||
* He greatly admires his neighbor [[Kolorado]] and joins Mario to follow in the archeologist's footsteps. | *He greatly admires his neighbor [[Kolorado]] and joins Mario to follow in the archeologist's footsteps. | ||
* '''Joins in:''' [[Koopa Village]] | *'''Joins in:''' [[Koopa Village]] | ||
| valign=top | | |valign=top| | ||
* Kooper withdraws into his shell and allows Mario to launch him forward in a straight line. | *Kooper withdraws into his shell and allows Mario to launch him forward in a straight line. | ||
* This ability can activate switches, attack enemies, and grab items remotely. | *This ability can activate switches, attack enemies, and grab items remotely. | ||
|- | |- | ||
| colspan=2 | | |colspan=2| | ||
{|width=100% class="wikitable mw-collapsible mw-collapsed" style="border-collapse:collapse; margin:0;" | {|width=100% class="wikitable mw-collapsible mw-collapsed"style="border-collapse:collapse; margin:0;" | ||
|- | |- | ||
! colspan=5 | Kooper's Battle information | !colspan=5|Kooper's Battle information | ||
|- | |- | ||
! width=90px | [[Shell Toss]] <br> (0 FP) | !width=90px|[[Shell Toss]]<br>(0 FP) | ||
| valign=top | | |valign=top| | ||
* Attacks one enemy on the ground. | *Attacks one enemy on the ground. | ||
* Can only target the first ground-bound enemy. | *Can only target the first ground-bound enemy. | ||
* '''Action command:''' Holding {{button|n64|Stickleft}} until the red star mark appears, then releasing it. | *'''Action command:''' Holding {{button|n64|Stickleft}} until the red star mark appears, then releasing it. | ||
|- | |- | ||
! [[Power Shell]] <br> (3 FP) | ![[Power Shell]]<br>(3 FP) | ||
| valign=top | | |valign=top| | ||
* Attacks all enemies on the ground. | *Attacks all enemies on the ground. | ||
* '''Action command:''' Holding {{button|n64|Stickleft}} until the red star mark appears, then releasing it. | *'''Action command:''' Holding {{button|n64|Stickleft}} until the red star mark appears, then releasing it. | ||
|- | |- | ||
! [[Dizzy Shell]] <br> (4 FP) | ![[Dizzy Shell]]<br>(4 FP) | ||
| valign=top | | |valign=top| | ||
* Targets all enemies on the ground and has a chance to inflict dizziness. | *Targets all enemies on the ground and has a chance to inflict dizziness. | ||
* '''Action command:''' Pressing {{button|n64|A}} repeatedly to fill up gauge. | *'''Action command:''' Pressing {{button|n64|A}} repeatedly to fill up gauge. | ||
|- | |- | ||
! [[ | ![[Fire Shell]]<br>(5 FP) | ||
| valign=top | | |valign=top| | ||
* Attacks all enemies on the ground. | *Attacks all enemies on the ground. | ||
* Does two points of bonus damage to ice enemies and permanently defeats [[Dry Bones]]. | *Does two points of bonus damage to ice enemies and permanently defeats [[Dry Bones]]. | ||
* '''Action command:''' Pressing {{button|n64|A}} repeatedly to fill up gauge. | *'''Action command:''' Pressing {{button|n64|A}} repeatedly to fill up gauge. | ||
|} | |} | ||
|- | |- | ||
! rowspan=2 style="vertical-align:top;" | [[File:Bombette Sprite.png|82px]] <br> [[Bombette]] | !rowspan=2 style="vertical-align:top;"|[[File:Bombette Sprite.png|82px]]<br>[[Bombette]] | ||
| valign=top | | |valign=top| | ||
* Bombette is a rebellious [[Bob-omb]] who was thrown into the Koopa Bros. Fortress dungeon after violently disagreeing with her poor work conditions. | *Bombette is a rebellious [[Bob-omb]] who was thrown into the Koopa Bros. Fortress dungeon after violently disagreeing with her poor work conditions. | ||
* She joins Mario as thanks for helping her escape her predicament. | *She joins Mario as thanks for helping her escape her predicament. | ||
* '''Joins in:''' [[Koopa Bros. Fortress]] | *'''Joins in:''' [[Koopa Bros. Fortress]] | ||
| valign=top | | |valign=top| | ||
* Bombette walks forward for a while and then explodes. | *Bombette walks forward for a while and then explodes. | ||
* The explosion can destroy cracked walls or boulders and can also attack enemies. | *The explosion can destroy cracked walls or boulders and can also attack enemies. | ||
|- | |- | ||
| colspan=2 | | |colspan=2| | ||
{|width=100% class="wikitable mw-collapsible mw-collapsed" style="border-collapse:collapse; margin:0;" | {|width=100% class="wikitable mw-collapsible mw-collapsed"style="border-collapse:collapse; margin:0;" | ||
|- | |- | ||
! colspan=5 | Bombette's Battle information | !colspan=5|Bombette's Battle information | ||
|- | |- | ||
! width=90px | [[Body Slam (Paper Mario)|Body Slam]] <br> (0 FP) | !width=90px|[[Body Slam (Paper Mario)|Body Slam]]<br>(0 FP) | ||
| valign=top | | |valign=top| | ||
* Attacks 1 enemy on the ground. | *Attacks 1 enemy on the ground. | ||
* Can only target the first ground-bound enemy. | *Can only target the first ground-bound enemy. | ||
* '''Action command:''' Holding {{button|n64|A}} until the red star mark appears, then releasing it. | *'''Action command:''' Holding {{button|n64|A}} until the red star mark appears, then releasing it. | ||
|- | |- | ||
! [[Bomb (Paper Mario series)|Bomb]] <br> (3 FP) | ![[Bomb (Paper Mario series)|Bomb]]<br>(3 FP) | ||
| valign=top | | |valign=top| | ||
* Attacks 1 enemy on the ground. | *Attacks 1 enemy on the ground. | ||
* Can only target the first ground-bound enemy. | *Can only target the first ground-bound enemy. | ||
* '''Action command:''' Pressing {{button|n64|A}} repeatedly to fill up gauge. | *'''Action command:''' Pressing {{button|n64|A}} repeatedly to fill up gauge. | ||
|- | |- | ||
! [[Power Bomb]] <br> (6 FP) | ![[Power Bomb]]<br>(6 FP) | ||
| valign=top | | |valign=top| | ||
* Attacks all enemies on the ground | *Attacks all enemies on the ground. | ||
* '''Action command:''' Pressing {{button|n64|A}} repeatedly to fill up gauge. | *'''Action command:''' Pressing {{button|n64|A}} repeatedly to fill up gauge. | ||
|- | |- | ||
! [[Mega Bomb]] <br> (8 FP) | ![[Mega Bomb]]<br>(8 FP) | ||
| valign=top | | |valign=top| | ||
* Attacks all enemies regardless of their position. | *Attacks all enemies regardless of their position. | ||
* '''Action command:''' Pressing {{button|n64|A}} repeatedly to fill up gauge. | *'''Action command:''' Pressing {{button|n64|A}} repeatedly to fill up gauge. | ||
|} | |} | ||
|- | |- | ||
! rowspan=2 style="vertical-align:top;" | [[File:Parakarry Sprite.png|88px]] <br> [[Parakarry]] | !rowspan=2 style="vertical-align:top;"|[[File:Parakarry Sprite.png|88px]]<br>[[Parakarry]] | ||
| valign=top | | |valign=top| | ||
* Parakarry is a [[Paratroopa]] mailman working for the Toad Town | *Parakarry is a [[Koopa Paratroopa|Paratroopa]] mailman working for the Toad Town Post Office. | ||
* He has a reputation for being slow and tends to drop the letters he is supposed to deliver. | *He has a reputation for being slow and tends to drop the letters he is supposed to deliver. | ||
* He joins Mario in exchange for help with looking for his lost letters. | *He joins Mario in exchange for help with looking for his lost letters. | ||
* '''Joins in:''' [[Mt. Rugged]] | *'''Joins in:''' [[Mt. Rugged]] | ||
| valign=top | | |valign=top| | ||
* Parakarry grabs hold of Mario and carries him over gaps that are too wide for him to jump over by himself. | *Parakarry grabs hold of Mario and carries him over gaps that are too wide for him to jump over by himself. | ||
|- | |- | ||
| colspan=2 | | |colspan=2| | ||
{|width=100% class="wikitable mw-collapsible mw-collapsed" style="border-collapse:collapse; margin:0;" | {|width=100% class="wikitable mw-collapsible mw-collapsed"style="border-collapse:collapse; margin:0;" | ||
|- | |- | ||
! colspan=5 | Parakarry's Battle information | !colspan=5|Parakarry's Battle information | ||
|- | |- | ||
! width=90px | [[Sky Dive ( | !width=90px|[[Sky Dive (Paper Mario)|Sky Dive]]<br>(0 FP) | ||
| valign=top | | |valign=top| | ||
* Attacks one enemy with a kick regardless of position. | *Attacks one enemy with a kick regardless of position. | ||
* Spiked or burning enemies will injure Parakarry. | *Spiked or burning enemies will injure Parakarry. | ||
* '''Action command:''' Pressing {{button|n64|A}} just before making contact with the enemy. | *'''Action command:''' Pressing {{button|n64|A}} just before making contact with the enemy. | ||
|- | |- | ||
! [[Shell Shot]] <br> (3 FP) | ![[Shell Shot]]<br>(3 FP) | ||
| valign=top | | |valign=top| | ||
* | *Parakarry withdraws into his shell and attacks one enemy regardless of position. | ||
* '''Action command:''' Holding {{button|n64|Stickleft}} until targeting reticule lines up with the enemy. | *'''Action command:''' Holding {{button|n64|Stickleft}} until targeting reticule lines up with the enemy. | ||
** Failing the action command causes this attack to miss. | **Failing the action command causes this attack to miss. | ||
|- | |- | ||
! [[Air Lift]] <br> (3 FP) | ![[Air Lift]]<br>(3 FP) | ||
| valign=top | | |valign=top| | ||
* May remove one enemy from the battle. | *May remove one enemy from the battle. | ||
* Bosses and spiked or burning enemies are unaffected by this attack. | *Bosses and spiked or burning enemies are unaffected by this attack. | ||
* '''Action command:''' Pressing {{button|n64|A}} repeatedly to fill up gauge. | *'''Action command:''' Pressing {{button|n64|A}} repeatedly to fill up gauge. | ||
|- | |- | ||
! [[Air Raid]] <br> (6 FP) | ![[Air Raid]]<br>(6 FP) | ||
| valign=top | | |valign=top| | ||
* | *Parakarry withdraws into his shell and attacks all enemies regardless of their position. | ||
* '''Action command:''' Tapping {{button|n64|Stickleft}} repeatedly to fill up gauge. | *'''Action command:''' Tapping {{button|n64|Stickleft}} repeatedly to fill up gauge. | ||
|} | |} | ||
|- | |- | ||
! rowspan=2 style="vertical-align:top;" | [[File:Lady Bow Sprite.png|82px]] <br> [[Lady Bow]] | !rowspan=2 style="vertical-align:top;"|[[File:Lady Bow Sprite.png|82px]]<br>[[Lady Bow]] | ||
| valign=top | | |valign=top| | ||
* Lady Bow is an aristocratic [[Boo]] who owns the haunted mansion in [[Forever Forest]]. | *Lady Bow is an aristocratic [[Boo]] who owns the haunted mansion in [[Forever Forest]]. | ||
* She first enlists Mario's help against [[Tubba Blubba]] by blackmailing him and then stays with him because she feels like it. | *She first enlists Mario's help against [[Tubba Blubba]] by blackmailing him and then stays with him because she feels like it. | ||
* '''Joins in:''' [[Boo's Mansion]] | *'''Joins in:''' [[Boo's Mansion]] | ||
| valign=top | | |valign=top| | ||
* Lady Bow can make Mario and herself intangible and undetectable. | *Lady Bow can make Mario and herself intangible and undetectable. | ||
* This can be used to sneak past enemies or in some cases move through solid objects. | *This can be used to sneak past enemies or in some cases move through solid objects. | ||
|- | |- | ||
| colspan=2 | | |colspan=2| | ||
{|width=100% class="wikitable mw-collapsible mw-collapsed" style="border-collapse:collapse; margin:0;" | {|width=100% class="wikitable mw-collapsible mw-collapsed"style="border-collapse:collapse; margin:0;" | ||
|- | |- | ||
! colspan=5 | Lady Bow's Battle information | !colspan=5|Lady Bow's Battle information | ||
|- | |- | ||
! width=90px | [[Smack]] <br> (0 FP) | !width=90px|[[Smack]]<br>(0 FP) | ||
| valign=top | | |valign=top| | ||
* Repeatedly attacks one enemy regardless of position. | *Repeatedly attacks one enemy regardless of position. | ||
* '''Action command:''' Tapping {{button|n64|Stickleft}} repeatedly to fill up gauge. | *'''Action command:''' Tapping {{button|n64|Stickleft}} repeatedly to fill up gauge. | ||
|- | |- | ||
! [[Outta Sight]] <br> (2 FP) | ![[Outta Sight]]<br>(2 FP) | ||
| valign=top | | |valign=top| | ||
* Makes Mario and herself immune to all enemy attacks. | *Makes Mario and herself immune to all enemy attacks. | ||
* Using this move renders her unable to act during the following turn. | *Using this move renders her unable to act during the following turn. | ||
|- | |- | ||
! [[Spook (move)|Spook]] <br> (3 FP) | ![[Spook (move)|Spook]]<br>(3 FP) | ||
| valign=top | | |valign=top| | ||
* Targets all enemies and may scare them from the battle. | *Targets all enemies and may scare them from the battle. | ||
* Bosses are unaffected by this attack. | *Bosses are unaffected by this attack. | ||
* '''Action command:''' Tapping {{button|n64|Stickleft}} repeatedly to fill up gauge. | *'''Action command:''' Tapping {{button|n64|Stickleft}} repeatedly to fill up gauge. | ||
|- | |- | ||
! [[Fan Smack]] <br> (5 FP) | ![[Fan Smack]]<br>(5 FP) | ||
| valign=top | | |valign=top| | ||
* Repeatedly attacks one enemy regardless of position. | *Repeatedly attacks one enemy regardless of position. | ||
* '''Action command:''' Tapping {{button|n64|Stickleft}} repeatedly to fill up gauge. | *'''Action command:''' Tapping {{button|n64|Stickleft}} repeatedly to fill up gauge. | ||
|} | |} | ||
|- | |- | ||
! rowspan=2 style="vertical-align:top;" | [[File:Watt | !rowspan=2 style="vertical-align:top;"|[[File:PM Watt Sprite.png|72px]]<br>[[Watt]] | ||
| valign=top | | |valign=top| | ||
* Watt is a [[Li'l Sparky]] who, during the [[Shy | *Watt is a [[Lil Sparky|Li'l Sparky]] who, during the [[Shy Guy]]s' attack on Toad Town, gets kidnapped by the [[Big Lantern Ghost]] and used as a light source. | ||
* She joins Mario after he defeats her kidnapper and breaks the lantern imprisoning her. | *She joins Mario after he defeats her kidnapper and breaks the lantern imprisoning her. | ||
* '''Joins in:''' [[Shy Guy's Toy Box]] | *'''Joins in:''' [[Shy Guy's Toy Box]] | ||
| valign=top | | |valign=top| | ||
* Mario holds Watt in front of him, which illuminates dark areas and reveals the positions of hidden blocks. | *Mario holds Watt in front of him, which illuminates dark areas and reveals the positions of hidden blocks. | ||
|- | |- | ||
| colspan=2 | | |colspan=2| | ||
{|width=100% class="wikitable mw-collapsible mw-collapsed" style="border-collapse:collapse; margin:0;" | {|width=100% class="wikitable mw-collapsible mw-collapsed"style="border-collapse:collapse; margin:0;" | ||
|- | |- | ||
! colspan=5 | Watt's Battle information | !colspan=5|Watt's Battle information | ||
|- | |- | ||
! width=90px | [[Electro Dash]] <br> (0 FP) | !width=90px|[[Electro Dash]]<br>(0 FP) | ||
| valign=top | | |valign=top| | ||
* Attacks one enemy regardless of position. | *Attacks one enemy regardless of position. | ||
* The attack ignores the enemy's defense rating. | *The attack ignores the enemy's defense rating. | ||
* '''Action command:''' Holding {{button|n64|A}} until the red star mark appears, then releasing it. | *'''Action command:''' Holding {{button|n64|A}} until the red star mark appears, then releasing it. | ||
|- | |- | ||
! [[Power Shock]] <br> (2 FP) | ![[Power Shock]]<br>(2 FP) | ||
| valign=top | | |valign=top| | ||
* Targets one enemy and may immobilize it. | *Targets one enemy and may immobilize it. | ||
* '''Action command:''' Pressing {{button|n64|A}} repeatedly to fill up gauge. | *'''Action command:''' Pressing {{button|n64|A}} repeatedly to fill up gauge. | ||
|- | |- | ||
! [[Turbo Charge]] <br> (3 FP) | ![[Turbo Charge]]<br>(3 FP) | ||
| valign=top | | |valign=top| | ||
* Temporarily raises the damage of all of Mario's attacks by one point. | *Temporarily raises the damage of all of Mario's attacks by one point. | ||
* '''Action command:''' Pressing {{button|n64|A}} every time a red star mark lights up. | *'''Action command:''' Pressing {{button|n64|A}} every time a red star mark lights up. | ||
|- | |- | ||
! [[Mega Shock]] <br> (5 FP) | ![[Mega Shock]]<br>(5 FP) | ||
| valign=top | | |valign=top| | ||
* Targets all enemies and may immobilize them. | *Targets all enemies and may immobilize them. | ||
* '''Action command:''' Pressing both {{button|n64|A}} and {{button|n64|B}} together repeatedly to fill up gauge. | *'''Action command:''' Pressing both {{button|n64|A}} and {{button|n64|B}} together repeatedly to fill up gauge. | ||
|} | |} | ||
|- | |- | ||
! rowspan=2 style="vertical-align:top;" | [[File:PM Sushie Sprite.png|80px]] <br> [[Sushie]] | !rowspan=2 style="vertical-align:top;"|[[File:PM Sushie Sprite.png|80px]]<br>[[Sushie]] | ||
| valign=top | | |valign=top| | ||
* Sushie is a mother [[Cheep Cheep]] who lives on [[Lavalava Island]] and serves as a caretaker for the local [[Yoshi]] children. | *Sushie is a mother [[Cheep Cheep]] who lives on [[Lavalava Island]] and serves as a caretaker for the local [[Yoshi (species)|Yoshi]] children. | ||
* Enamored by Mario's quest to rescue his love interest, she decides to accompany him. | *Enamored by Mario's quest to rescue his love interest, she decides to accompany him. | ||
* '''Joins in:''' [[Jade Jungle]] | *'''Joins in:''' [[Jade Jungle]] | ||
| valign=top | | |valign=top| | ||
* When standing at a wooden | *When standing at a [[wooden dock]] near water, Mario can jump on Sushie's back and ride her through the water. | ||
* Pressing {{button|n64|Cdown}} again makes her dive underwater. | *Pressing {{button|n64|Cdown}} again makes her dive underwater. | ||
|- | |- | ||
| colspan=2 | | |colspan=2| | ||
{|width=100% class="wikitable mw-collapsible mw-collapsed" style="border-collapse:collapse; margin:0;" | {|width=100% class="wikitable mw-collapsible mw-collapsed"style="border-collapse:collapse; margin:0;" | ||
|- | |- | ||
! colspan=5 | Sushie's Battle information | !colspan=5|Sushie's Battle information | ||
|- | |- | ||
! width=90px | [[Belly Flop]] <br> (0 FP) | !width=90px|[[Belly Flop]]<br>(0 FP) | ||
| valign=top | | |valign=top| | ||
* Attacks one enemy on the ground or in the air | *Attacks one enemy on the ground or in the air. | ||
* '''Action command:''' Holding {{button|n64|Stickleft}} until the red star mark appears, then releasing it. | *'''Action command:''' Holding {{button|n64|Stickleft}} until the red star mark appears, then releasing it. | ||
|- | |- | ||
! [[Squirt (move)|Squirt]] <br> (3 FP) | ![[Squirt (move)|Squirt]]<br>(3 FP) | ||
| valign=top | | |valign=top| | ||
* Attacks one enemy with water. | *Attacks one enemy with water. | ||
* It causes 2 points of bonus damage to fire-based enemies. | *It causes 2 points of bonus damage to fire-based enemies. | ||
* '''Action command:''' Holding {{button|n64|A}} to fill up gauge without letting it overflow. | *'''Action command:''' Holding {{button|n64|A}} to fill up gauge without letting it overflow. | ||
|- | |- | ||
! [[Water Block]] <br> (3 FP) | ![[Water Block]]<br>(3 FP) | ||
| valign=top | | |valign=top| | ||
* Temporarily raises Mario's defense by one point. | *Temporarily raises Mario's defense by one point. | ||
* Raises Mario's defense by two for fiery attacks. | *Raises Mario's defense by two for fiery attacks. | ||
* '''Action command:''' Pressing {{button|n64|A}} every time a red star mark lights up. | *'''Action command:''' Pressing {{button|n64|A}} every time a red star mark lights up. | ||
|- | |- | ||
! [[Tidal Wave]] <br> (6 FP) | ![[Tidal Wave]]<br>(6 FP) | ||
| valign=top | | |valign=top| | ||
* Attacks all enemies regardless of position. | *Attacks all enemies regardless of position. | ||
* It causes 2 points of bonus damage to fire-based enemies. | *It causes 2 points of bonus damage to fire-based enemies. | ||
* '''Action command:''' Pressing {{button|n64|A}}, {{button|n64|B}}, and {{button|n64|Cdown}} as shown. | *'''Action command:''' Pressing {{button|n64|A}}, {{button|n64|B}}, and {{button|n64|Cdown}} as shown. | ||
|} | |} | ||
|- | |- | ||
! rowspan=2 style="vertical-align:top;" | [[File:Lakilester Sprite.png|78px]] <br> [[Lakilester]] | !rowspan=2 style="vertical-align:top;"|[[File:Lakilester Sprite.png|78px]]<br>[[Lakilester]] | ||
| valign=top | | |valign=top| | ||
* Lakilester starts out as a [[Lakitu]] in service to [[Huff N. Puff]] and fights Mario trying to help the [[Flower Fields]] denizens. | *Lakilester starts out as a [[Lakitu]] in service to [[Huff N. Puff]] and fights Mario trying to help the [[Flower Fields]] denizens. | ||
* Mario defeats Lakilester and after some convincing from his girlfriend [[Lakilulu]], he switches sides. | *Mario defeats Lakilester and after some convincing from his girlfriend [[Lakilulu]], he switches sides. | ||
* '''Joins in:''' [[Flower Fields]] | *'''Joins in:''' [[Flower Fields]] | ||
| valign=top | | |valign=top| | ||
* Lakilester allows Mario to ride on his back, moving faster than Mario's walking speed. | *Lakilester allows Mario to ride on his back, moving faster than Mario's walking speed. | ||
* His cloud can transport them over hazardous surfaces such as spikes or lava. | *His cloud can transport them over hazardous surfaces such as spikes or lava. | ||
|- | |- | ||
| colspan=2 | | |colspan=2| | ||
{|width=100% class="wikitable mw-collapsible mw-collapsed" style="border-collapse:collapse; margin:0;" | {|width=100% class="wikitable mw-collapsible mw-collapsed"style="border-collapse:collapse; margin:0;" | ||
|- | |- | ||
! colspan=5 | Lakilester's Battle information | !colspan=5|Lakilester's Battle information | ||
|- | |- | ||
! width=90px | [[Spiny Flip]] <br> (0 FP) | !width=90px|[[Spiny Flip]]<br>(0 FP) | ||
| valign=top | | |valign=top| | ||
* Attacks one enemy regardless of position. | *Attacks one enemy regardless of position. | ||
* '''Action command:''' Moving a cursor with {{button|n64|Stick}} and aligning it with the enemy. | *'''Action command:''' Moving a cursor with {{button|n64|Stick}} and aligning it with the enemy. | ||
** If the cursor is not properly aligned, the attack fails. | **If the cursor is not properly aligned, the attack fails. | ||
|- | |- | ||
! [[Spiny Surge]] <br> (4 FP) | ![[Spiny Surge]]<br>(4 FP) | ||
| valign=top | | |valign=top| | ||
* Attacks all enemies regardless of position. | *Attacks all enemies regardless of position. | ||
* '''Action command:''' Tapping {{button|n64|Stickleft}} repeatedly to fill up gauge. | *'''Action command:''' Tapping {{button|n64|Stickleft}} repeatedly to fill up gauge. | ||
|- | |- | ||
! [[Cloud Nine]] <br> (4 FP) | ![[Cloud Nine]]<br>(4 FP) | ||
| valign=top | | |valign=top| | ||
* Temporarily boosts Mario's evasiveness, making enemy attacks miss randomly. | *Temporarily boosts Mario's evasiveness, making enemy attacks miss randomly. | ||
* '''Action command:''' Pressing {{button|n64|A}} every time a red star mark lights up. | *'''Action command:''' Pressing {{button|n64|A}} every time a red star mark lights up. | ||
|- | |- | ||
! [[Hurricane]] <br> (5 FP) | ![[Hurricane (move)|Hurricane]]<br>(5 FP) | ||
| valign=top | | |valign=top| | ||
* Targets all enemies and may | *Targets all enemies and may blow them from the battle. | ||
* Bosses are unaffected by this attack. | *Bosses are unaffected by this attack. | ||
* '''Action command:''' Pressing both {{button|n64|A}} and {{button|n64|B}} together repeatedly to fill up gauge. | *'''Action command:''' Pressing both {{button|n64|A}} and {{button|n64|B}} together repeatedly to fill up gauge. | ||
|} | |} | ||
|} | |} | ||
</center> | </center> | ||
==Battle system== | ==Battle system== | ||
[[File:Tubba Blubba's Heart Attack.png|thumb | [[File:Tubba Blubba's Heart Attack.png|thumb|The battle interface of ''Paper Mario''.]] | ||
''Paper Mario'' uses a turn-based side-view battle system. Enemies are visible on the overworld and initiate a battle if the player makes contact with them. The manner in which this happens also determines whether the battle starts in Mario's or the enemies' favor; | ''Paper Mario'' uses a turn-based side-view battle system. Enemies are visible on the overworld and initiate a battle if the player makes contact with them. The manner in which this happens also determines whether the battle starts in Mario's or the enemies' favor; successfully attacking an enemy on the overworld nets Mario a preemptive hit on an enemy, referred to as a first strike, whereas getting hit by an enemy attack gives the enemy a free turn to damage Mario before the fight starts proper. | ||
On the battle screen itself, Mario and one | On the battle screen itself, Mario and one party member of his choice find themselves on the left side of the screen, with the enemy group occupying the right side. What kind of enemies Mario faces is determined by which type of enemy initiated the battle on the overworld, with several [[List of enemy formations in Paper Mario|different formations]] being possible. | ||
[[File:Peril.png|thumb|left|Mario with low health.]] | [[File:Peril.png|thumb|left|Mario with low health.]] | ||
To win a battle, the player must eliminate all enemies on the opposite side, either by defeating them or by making them run away. An enemy counts as defeated if their [[Heart Point]]s (HP) are dropped to zero. Likewise, if Mario's HP drop to zero without a [[Life Shroom]] in his inventory, the battle is lost. The player can keep track of Mario's HP and various other stats with the battle statistic on the top side of the screen | To win a battle, the player must eliminate all enemies on the opposite side, either by defeating them or by making them run away. An enemy counts as defeated if their [[Heart Point]]s (HP) are dropped to zero. Likewise, if Mario's HP drop to zero without a [[Life Mushroom (Paper Mario series)|Life Shroom]] in his inventory, the battle is lost. The player can keep track of Mario's HP and various other stats with the battle statistic on the top side of the screen. | ||
During battle, the player and the enemies take turns attacking. The damage an attack will do is determined by the attack's power minus the target's defense rating. During the player's turn, Mario and the currently active party member each get an action, the order being changeable by pressing {{button|n64|Z}}. | |||
===Mario's action=== | ===Mario's action=== | ||
Mario's main attack options all fall into the two categories of "hammer" and "jump". The condition of the targeted enemy may make one or both of these options either inaccessible or inadvisable. Hammer attacks have a limited range and can only attack the first ground-bound enemy of a group. Jump attacks on the other hand can reach past enemies standing in the way, or attack enemies flying out of reach, but jumping on a spiked or otherwise hazardous foe cancels the attack and makes Mario take 1 HP of damage. | Mario's main attack options all fall into the two categories of "hammer" and "jump". The condition of the targeted enemy may make one or both of these options either inaccessible or inadvisable. Hammer attacks have a limited range and can only attack the first ground-bound enemy of a group. Jump attacks on the other hand can reach past enemies standing in the way, or attack enemies flying out of reach, but jumping on a spiked or otherwise hazardous foe cancels the attack and makes Mario take 1 HP of damage. | ||
Both hammer and jump attacks can be customized by outfitting Mario with certain | Both hammer and jump attacks can be customized by outfitting Mario with certain Badges. Custom hammer or jump attacks usually consume [[Flower Point]]s (FP) and cannot be used if the required amount is not available. | ||
[[File:Star Storm.png|thumb|Mario using the special move [[Star Storm]]]] | [[File:Star Storm.png|thumb|Mario using the special move [[Star Storm]]]] | ||
| Line 873: | Line 858: | ||
Aside from hammer and jump attacks or special moves, Mario can also use items from his inventory, do nothing, or attempt to run away. During an escape attempt, a bar appears that may be anywhere between empty and completely full, depending on the number and level of enemies. The player can slowly fill the bar by repeatedly tapping {{button|n64|A}}. While escaping is in progress, an indicator slides back and forth between the right and left side of the bar until it stops. If it stops on the filled portion of the bar, the escape attempt is successful and Mario returns to the overworld (while losing a few coins in the process). Otherwise Mario wastes his action and the battle continues. | Aside from hammer and jump attacks or special moves, Mario can also use items from his inventory, do nothing, or attempt to run away. During an escape attempt, a bar appears that may be anywhere between empty and completely full, depending on the number and level of enemies. The player can slowly fill the bar by repeatedly tapping {{button|n64|A}}. While escaping is in progress, an indicator slides back and forth between the right and left side of the bar until it stops. If it stops on the filled portion of the bar, the escape attempt is successful and Mario returns to the overworld (while losing a few coins in the process). Otherwise Mario wastes his action and the battle continues. | ||
=== | ===Party member action=== | ||
[[File:PM Tattle.png|thumb|left|Goombario using his [[Tattle]] ability]] | [[File:PM Tattle.png|thumb|left|Goombario using his [[Tattle]] ability]] | ||
The | The party member's options are more limited than Mario's, but can be increased by equipping Badges. Under normal circumstances, a party member can either attack or do nothing, the latter of which skips their action. Depending on their level, a party member can have up to four attacks in their repertoire. At least one of these attacks is always free to use, whereas other, more potent attacks cost Flower Points. | ||
The | The party members do not have their own FP and instead draw from the same pool as Mario does. Special care has to be taken with party members who use jump-type attacks, because they are susceptible to the same hazards as Mario's jump command, which means the party member can get injured by jumping on certain enemies. | ||
Only one | Only one party member can be used during battle, but the currently active one can be swapped out for a different party member during battle. This uses a turn unless the [[Quick Change]] Badge is equipped. | ||
===Enemy action=== | ===Enemy action=== | ||
[[File:PM Pokey Battle.png|thumb|Mario being hit by an attack.]] | [[File:PM Pokey Battle.png|thumb|Mario being hit by an attack.]] | ||
After both Mario and his | After both Mario and his party member have taken their actions, all able enemies will then attack one after another. In most cases, enemies will target Mario, but some attacks can hit the party member, either separately or additionally to Mario. Since Mario's party members do not have HP themselves, every time they get hit, they will acquire the injured status effect, which prevents them from taking action for a few turns. | ||
Once all enemies have attacked, the current turn ends and the next one starts from the beginning again, with the player choosing Mario and his | Once all enemies have attacked, the current turn ends and the next one starts from the beginning again, with the player choosing Mario and his party member's actions. | ||
===Status effects=== | ===Status effects=== | ||
| Line 892: | Line 877: | ||
'''Regular effects''' | '''Regular effects''' | ||
<center> | <center> | ||
{|width=90% cellspacing=0 border=1 cellpadding=3 class="wikitable" style="border-collapse:collapse; text-align:center;" | {|width=90% cellspacing=0 border=1 cellpadding=3 class="wikitable"style="border-collapse:collapse;text-align:center;" | ||
|- | |- | ||
!width=15%|Appearance | !width=15%|Appearance | ||
| Line 940: | Line 925: | ||
</center> | </center> | ||
'''Unique effects''' | '''Unique effects''' | ||
<center> | <center> | ||
{|width=90% cellspacing=0 border=1 cellpadding=3 class="wikitable" style="border-collapse:collapse; text-align:center;" | {|width=90% cellspacing=0 border=1 cellpadding=3 class="wikitable"style="border-collapse:collapse;text-align:center;" | ||
|- | |- | ||
!width=15%|Appearance | !width=15%|Appearance | ||
| Line 954: | Line 938: | ||
|[[File:PM Mario Danger Icon.png|50px]]<br><br>[[File:PM tired Mario.png]] | |[[File:PM Mario Danger Icon.png|50px]]<br><br>[[File:PM tired Mario.png]] | ||
|[[Danger]] | |[[Danger]] | ||
|style="text-align:left;"|This state triggers when Mario's HP are equal to or less than 5. It has no immediate effect on battle, but some | |style="text-align:left;"|This state triggers when Mario's HP are equal to or less than 5. It has no immediate effect on battle, but some Badges require him to be in this state to work. | ||
|- | |- | ||
|[[File:PM Flipped Koopa Sprite.png|70px]] | |[[File:PM Flipped Koopa Sprite.png|70px]] | ||
| Line 962: | Line 946: | ||
|[[File:PM Goombario Injured Sprite.png|62px]] | |[[File:PM Goombario Injured Sprite.png|62px]] | ||
|[[Injured]] | |[[Injured]] | ||
|style="text-align:left;"|This state is exclusive to | |style="text-align:left;"|This state is exclusive to party members and triggers every time they take damage. An injured party member is immobilized and cannot be switched out until the effect wears off. | ||
|- | |- | ||
|[[File:PM Mario Peril Icon.png|50px]]<br><br>[[File:PM tired Mario.png]] | |[[File:PM Mario Peril Icon.png|50px]]<br><br>[[File:PM tired Mario.png]] | ||
|[[Peril]] | |[[Peril]] | ||
|style="text-align:left;"|This state triggers when Mario's HP drops down to 1. It has no immediate effect on battle, but some | |style="text-align:left;"|This state triggers when Mario's HP drops down to 1. It has no immediate effect on battle, but some Badges require him to be in this state to work. | ||
|- | |- | ||
|[[File:PM Mario Stone Battle Effect.png|44px]] | |[[File:PM Mario Stone Battle Effect.png|44px]] | ||
| Line 975: | Line 959: | ||
===Action Commands=== | ===Action Commands=== | ||
After Mario receives the Lucky Star at the foot of Shooting Star Summit, the player is able to use action commands in battle. From then on, whenever Mario or his | After Mario receives the Lucky Star at the foot of Shooting Star Summit, the player is able to use action commands in battle. From then on, whenever Mario or his party member execute an attack, a prompt shows up and input from the player is required. If the action command is successful, attacks will do bonus damage or have other additional effects. | ||
Likewise, if during an enemy's turn the player presses {{button|n64|A}} right before an attack connects, Mario will guard against it and the damage will be reduced by 1. Additionally, if an enemy attack would cause a status effect, successfully guarding against it cancels the effect. | Likewise, if during an enemy's turn the player presses {{button|n64|A}} right before an attack connects, Mario will guard against it and the damage will be reduced by 1. Additionally, if an enemy attack would cause a status effect, successfully guarding against it cancels the effect. | ||
| Line 981: | Line 965: | ||
===End of battle=== | ===End of battle=== | ||
[[File:PM Level Up.png|thumb|With every 100th Star Point comes a new level.]] | [[File:PM Level Up.png|thumb|With every 100th Star Point comes a new level.]] | ||
Once all enemies have been eliminated, Mario receives experience in form of [[Star Point]]s. The amount of Star Points received depends on the levels of the defeated enemies as well as that of Mario himself, and may be anywhere between none and 100. Whenever Mario's Star Point count reaches 100, his level increases by one and the player gets to choose whether to increase Heart Points, Flower Points, or Badge Points. | Once all enemies have been eliminated, Mario receives experience in form of [[Star Point]]s. The amount of Star Points received depends on the levels of the defeated enemies as well as that of Mario himself, and may be anywhere between none and 100. Whenever Mario's Star Point count reaches 100, his level increases by one and the player gets to choose whether to increase Heart Points, Flower Points, or Badge Points. Once any statistic is maxed out, it is impossible to give further points to that specific statistic. | ||
After the battle ends, the game shifts back to the overworld. The enemy that triggered the battle disappears and leaves behind coins, hearts or flowers that restore HP and FP respectively, or items. | After the battle ends, the game shifts back to the overworld. The enemy that triggered the battle disappears and leaves behind coins, hearts or flowers that restore HP and FP respectively, or items. | ||
| Line 994: | Line 978: | ||
Key items are unique objects that are used to progress through the story, or for the completion of sidequests. They are listed separately from regular items and do not affect Mario's carrying capacity. If a situation requires a key item and Mario has said item in his possession, a prompt shows up and the item can be given away. Key items stay with Mario until they are needed; They cannot be dropped, sold, or stored. | Key items are unique objects that are used to progress through the story, or for the completion of sidequests. They are listed separately from regular items and do not affect Mario's carrying capacity. If a situation requires a key item and Mario has said item in his possession, a prompt shows up and the item can be given away. Key items stay with Mario until they are needed; They cannot be dropped, sold, or stored. | ||
===Regular items=== | ===Regular items=== | ||
{|width=100% | {|width=100% | ||
|width=50% style="vertical-align:top;"| | |width=50% style="vertical-align:top;"| | ||
{|width=95% cellspacing=0 border=1 cellpadding=3 class="wikitable" style="border-collapse:collapse;" | {|width=95% cellspacing=0 border=1 cellpadding=3 class="wikitable"style="border-collapse:collapse;" | ||
|- | |- | ||
!width=25%|Item | !width=25%|Item | ||
| Line 1,031: | Line 1,014: | ||
|- | |- | ||
|style="text-align:center;"|[[File:PaperMario Items Coconut.png]]<br>[[Coconut]] | |style="text-align:center;"|[[File:PaperMario Items Coconut.png]]<br>[[Coconut]] | ||
|Deals 3 HP of damage to a single enemy. | |Deals 3 HP of damage to a single enemy, ignoring its Defense Power. | ||
|- | |- | ||
|style="text-align:center;"|[[File:PaperMario Items CocoPop.png]]<br>[[Coco Pop]] | |style="text-align:center;"|[[File:PaperMario Items CocoPop.png]]<br>[[Coco Candy|Coco Pop]] | ||
|Restores 3 HP and 15 FP. | |Restores 3 HP and 15 FP. | ||
|- | |- | ||
| Line 1,048: | Line 1,031: | ||
|Restores 3 HP and 2 FP. | |Restores 3 HP and 2 FP. | ||
|- | |- | ||
|style="text-align:center;"|[[File:PaperMario Items DriedShroom.png]]<br>[[Dried Shroom]] | |style="text-align:center;"|[[File:PaperMario Items DriedShroom.png]]<br>[[Dried Mushroom|Dried Shroom]] | ||
|Restores 1 HP. | |Restores 1 HP. | ||
|- | |- | ||
|style="text-align:center;"|[[File:PaperMario Items DustyHammer.png]]<br>[[Dusty Hammer]] | |style="text-align:center;"|[[File:PaperMario Items DustyHammer.png]]<br>[[Dusty Hammer]] | ||
|Deals 1 HP of damage to a single enemy. | |Deals 1 HP of damage to a single enemy, ignoring its Defense Power. | ||
|- | |- | ||
|style="text-align:center;"|[[File:PaperMario Items Egg.png]]<br>[[Egg]] | |style="text-align:center;"|[[File:PaperMario Items Egg.png]]<br>[[Egg]] | ||
|Restores 5 HP. | |Restores 5 HP. | ||
|- | |- | ||
|style="text-align:center;"|[[File:PaperMario Items EggMissile.png]]<br>[[Egg Missile]] | |style="text-align:center;"|[[File:PaperMario Items EggMissile.png]]<br>[[Egg Bomb|Egg Missile]] | ||
|Deals 6 HP of explosion damage to a single enemy. | |Deals 6 HP of explosion damage to a single enemy, ignoring its Defense Power. | ||
|- | |- | ||
|style="text-align:center;"|[[File:PaperMario Items ElectroPop.png]]<br>[[Electro Pop]] | |style="text-align:center;"|[[File:PaperMario Items ElectroPop.png]]<br>[[Electro Pop]] | ||
|Restores 15 HP and [[Electrified|electrifies]] | |Restores 15 FP outside of battle, or sets Mario's FP equal to his current HP plus 15<ref>{{cite|author=Fatguy703|date=October 29, 2019|url=www.youtube.com/watch?v=LUd5242Ghow|title=The Sweet Lies of Paper Mario 64|publisher=YouTube|accessdate=October 29, 2024}}</ref> and [[Electrified|electrifies]] him if used in battle. | ||
|- | |- | ||
|style="text-align:center;"|[[File:PaperMario Items FireFlower.png]]<br>[[Fire Flower]] | |style="text-align:center;"|[[File:PaperMario Items FireFlower.png]]<br>[[Fire Flower]] | ||
|Deals 3 HP of fire damage to all enemies. | |Deals 3 HP of fire damage to all enemies, ignoring their Defense Power. | ||
|- | |- | ||
|style="text-align:center;"|[[File:PaperMario Items FirePop.png]]<br>[[Fire Pop]] | |style="text-align:center;"|[[File:PaperMario Items FirePop.png]]<br>[[Fire Pop]] | ||
| Line 1,072: | Line 1,055: | ||
|Restores 10 HP. | |Restores 10 HP. | ||
|- | |- | ||
|style="text-align:center;"|[[File:PaperMario Items FriedShroom.png]]<br>[[Fried Shroom]] | |style="text-align:center;"|[[File:PaperMario Items FriedShroom.png]]<br>[[Mushroom Fry|Fried Shroom]] | ||
|Restores 6 HP and 2 FP. | |Restores 6 HP and 2 FP. | ||
|- | |- | ||
|style="text-align:center;"|[[File:PaperMario Items FrightJar.png]]<br>[[Fright Mask|Fright Jar]] | |style="text-align:center;"|[[File:PaperMario Items FrightJar.png]]<br>[[Fright Mask|Fright Jar]] | ||
| | |May make all enemies flee. | ||
|- | |- | ||
|style="text-align:center;"|[[File:PaperMario Items FrozenFries.png]]<br>[[Frozen Fries]] | |style="text-align:center;"|[[File:PaperMario Items FrozenFries.png]]<br>[[Frozen Fries]] | ||
| Line 1,090: | Line 1,073: | ||
|Restores 20 FP. | |Restores 20 FP. | ||
|- | |- | ||
|style="text-align:center;"|[[File:PaperMario Items HoneyShroom.png]]<br>[[Honey Shroom]] | |style="text-align:center;"|[[File:PaperMario Items HoneyShroom.png]]<br>[[Honey Mushroom|Honey Shroom]] | ||
|Restores 5 HP and 5 FP. | |Restores 5 HP and 5 FP. | ||
|- | |- | ||
| Line 1,114: | Line 1,097: | ||
|Restores 64 FP. | |Restores 64 FP. | ||
|- | |- | ||
|style="text-align:center;"|[[File:PaperMario Items JellyShroom.png]]<br>[[Jelly Shroom]] | |style="text-align:center;"|[[File:PaperMario Items JellyShroom.png]]<br>[[Jelly Mushroom|Jelly Shroom]] | ||
|Restores 5 HP and 50 FP. | |Restores 5 HP and 50 FP. | ||
|- | |- | ||
| Line 1,124: | Line 1,107: | ||
|- | |- | ||
|style="text-align:center;"|[[File:PaperMario Items KookyCookie.png]]<br>[[Kooky Cookie]] | |style="text-align:center;"|[[File:PaperMario Items KookyCookie.png]]<br>[[Kooky Cookie]] | ||
|Restores 15 | |Restores 15 FP outside of battle, or 30 FP inside of battle<ref>{{cite|author=Fatguy703|date=October 29, 2019|url=www.youtube.com/watch?v=LUd5242Ghow|title=The Sweet Lies of Paper Mario 64|publisher=YouTube|accessdate=June 22, 2024}}</ref> and makes Mario either [[Electrified]], [[Invisible]], or [[Sleepy]]. | ||
|- | |- | ||
|style="text-align:center;"|[[File:PaperMario Items KoopaLeaf.png]]<br>[[Turtley Leaf|Koopa Leaf]] | |style="text-align:center;"|[[File:PaperMario Items KoopaLeaf.png]]<br>[[Turtley Leaf|Koopa Leaf]] | ||
|Restores 3 FP. | |Restores 3 FP. | ||
|- | |- | ||
|style="text-align:center;"|[[File:PaperMario Items Koopasta.png]]<br>[[Koopasta Dish| Koopasta]] | |style="text-align:center;"|[[File:PaperMario Items Koopasta.png]]<br>[[Koopasta Dish|Koopasta]] | ||
|Restores 7 HP and FP. | |Restores 7 HP and FP. | ||
|- | |- | ||
| Line 1,137: | Line 1,120: | ||
|} | |} | ||
|width=50% style="vertical-align:top;"| | |width=50% style="vertical-align:top;"| | ||
{|width=95% cellspacing=0 border=1 cellpadding=3 class="wikitable" style="border-collapse:collapse;" | {|width=95% cellspacing=0 border=1 cellpadding=3 class="wikitable"style="border-collapse:collapse;" | ||
|- | |- | ||
!width=25%|Item | !width=25%|Item | ||
| Line 1,146: | Line 1,129: | ||
|- | |- | ||
|style="text-align:center;"|[[File:PaperMario Items LemonCandy.png]]<br>[[Lemon Candy]] | |style="text-align:center;"|[[File:PaperMario Items LemonCandy.png]]<br>[[Lemon Candy]] | ||
|Restores 5 HP and 15 FP. It can be used to bribe [[Anti Guy]] and get access to his [[Power Plus (badge)|Power Plus | |Restores 5 HP and 15 FP. It can be used to bribe [[Black Shy Guy#Paper Mario|Anti Guy]] and get access to his [[Power Plus (badge)|Power Plus]] Badge without a fight. | ||
|- | |- | ||
|style="text-align:center;"|[[File:PaperMario Items LifeShroom.png]]<br>[[Life Shroom]] | |style="text-align:center;"|[[File:PaperMario Items LifeShroom.png]]<br>[[Life Mushroom (Paper Mario series)|Life Shroom]] | ||
| | |If this item is in Mario's inventory, it is consumed and automatically revives Mario with 10 HP whenever his HP run out in battle. | ||
|- | |- | ||
|style="text-align:center;"|[[File:PaperMario Items Lime.png]]<br>[[Lime]] | |style="text-align:center;"|[[File:PaperMario Items Lime.png]]<br>[[Lime]] | ||
| Line 1,157: | Line 1,140: | ||
|Restores 20 FP. | |Restores 20 FP. | ||
|- | |- | ||
|style="text-align:center;"|[[File:PaperMario Items MapleShroom.png]]<br>[[Maple Shroom]] | |style="text-align:center;"|[[File:PaperMario Items MapleShroom.png]]<br>[[Maple Mushroom|Maple Shroom]] | ||
|Restores 5 HP and 10 FP. | |Restores 5 HP and 10 FP. | ||
|- | |- | ||
| Line 1,179: | Line 1,162: | ||
|- | |- | ||
|style="text-align:center;"|[[File:PaperMario Items Mystery.png]]<br>[[Mystery Box (item)|Mystery?]] | |style="text-align:center;"|[[File:PaperMario Items Mystery.png]]<br>[[Mystery Box (item)|Mystery?]] | ||
|When used in battle, it takes on the effects of one of several items or | |When used in battle, it takes on the effects of one of several items or deals 1 HP of damage to Mario. | ||
|- | |- | ||
|style="text-align:center;"|[[File:PaperMario Items NuttyCake.png]]<br>[[Nutty Cake]] | |style="text-align:center;"|[[File:PaperMario Items NuttyCake.png]]<br>[[Nutty Cake]] | ||
|Restores 10 | |Restores 10 FP. | ||
|- | |- | ||
|style="text-align:center;"|[[File:PaperMario Items Pebble.png]]<br>[[Pebble]] | |style="text-align:center;"|[[File:PaperMario Items Pebble.png]]<br>[[Pebble]] | ||
| Line 1,190: | Line 1,173: | ||
|Restores 10 HP. | |Restores 10 HP. | ||
|- | |- | ||
|style="text-align:center;"|[[File:POWBlock | |style="text-align:center;"|[[File:PaperMario Items POWBlock.png]]<br>[[POW Block]] | ||
|Deals | |Deals 2 HP of damage to all enemies, ignoring their Defense Power. It also causes enemies with shells to flip over. | ||
|- | |- | ||
|style="text-align:center;"|[[File:PaperMario Items RedBerry.png]]<br>[[Red Berry]] | |style="text-align:center;"|[[File:PaperMario Items RedBerry.png]]<br>[[Red Berry]] | ||
| Line 1,200: | Line 1,183: | ||
|- | |- | ||
|style="text-align:center;"|[[File:PaperMario Items ShootingStar.png]]<br>[[Shooting Star (item)|Shooting Star]] | |style="text-align:center;"|[[File:PaperMario Items ShootingStar.png]]<br>[[Shooting Star (item)|Shooting Star]] | ||
|Deals 6 HP of damage to all enemies. | |Deals 6 HP of damage to all enemies, ignoring their Defense Power. | ||
|- | |- | ||
|style="text-align:center;"|[[File:PaperMario Items ShroomCake.png]]<br>[[Shroom Cake]] | |style="text-align:center;"|[[File:PaperMario Items ShroomCake.png]]<br>[[Mushroom Cake|Shroom Cake]] | ||
|Restores 10 HP and FP. | |Restores 10 HP and FP. | ||
|- | |- | ||
|style="text-align:center;"|[[File:PaperMario Items ShroomSteak.png]]<br>[[Shroom Steak]] | |style="text-align:center;"|[[File:PaperMario Items ShroomSteak.png]]<br>[[Mushroom Steak|Shroom Steak]] | ||
|Restores 30 HP and 10 FP. | |Restores 30 HP and 10 FP. | ||
|- | |- | ||
|style="text-align:center;"|[[File:PaperMario Items SleepySheep.png]]<br>[[Sleepy Sheep]] | |style="text-align:center;"|[[File:PaperMario Items SleepySheep.png]]<br>[[Sleepy Sheep]] | ||
| | |May cause all enemies to [[Sleepy|fall asleep]]. | ||
|- | |- | ||
|style="text-align:center;"|[[File:PaperMario Items SnowmanDoll.png]]<br>[[Snowman Doll]] | |style="text-align:center;"|[[File:PaperMario Items SnowmanDoll.png]]<br>[[Snowman Doll]] | ||
|Deals 4 HP of ice damage to all enemies. | |Deals 4 HP of ice damage to all enemies, ignoring their Defense Power. | ||
|- | |- | ||
|style="text-align:center;"|[[File:PaperMario Items Spaghetti.png]]<br>[[Spaghetti]] | |style="text-align:center;"|[[File:PaperMario Items Spaghetti.png]]<br>[[Spaghetti Plate|Spaghetti]] | ||
|Restores 6 HP and 4 FP. | |Restores 6 HP and 4 FP. | ||
|- | |- | ||
|style="text-align:center;"|[[File:PaperMario Items SpecialShake.png]]<br>[[Special Shake]] | |style="text-align:center;"|[[File:PaperMario Items SpecialShake.png]]<br>[[Special Shake]] | ||
|Restores 20 | |Restores 20 FP. | ||
|- | |- | ||
|style="text-align:center;"|[[File:PaperMario Items SpicySoup.png]]<br>[[Spicy Soup]] | |style="text-align:center;"|[[File:PaperMario Items SpicySoup.png]]<br>[[Spicy Soup]] | ||
| Line 1,238: | Line 1,221: | ||
|Restores 5 HP. | |Restores 5 HP. | ||
|- | |- | ||
|style="text-align:center;"|[[File:PaperMario Items SuperShroom.png]]<br>[[Super Shroom]] | |style="text-align:center;"|[[File:PaperMario Items SuperShroom.png]]<br>[[Super Mushroom|Super Shroom]] | ||
|Restores 10 HP. | |Restores 10 HP. | ||
|- | |- | ||
|style="text-align:center;"|[[File:PaperMario Items SuperSoda.png]]<br>[[Super Soda]] | |style="text-align:center;"|[[File:PaperMario Items SuperSoda.png]]<br>[[Fresh Juice|Super Soda]] | ||
|Restores 5 FP. | |Restores 5 FP. | ||
|- | |- | ||
| Line 1,251: | Line 1,234: | ||
|- | |- | ||
|style="text-align:center;"|[[File:PaperMario Items ThunderBolt.png]]<br>[[Thunder Bolt (item)|Thunder Bolt]] | |style="text-align:center;"|[[File:PaperMario Items ThunderBolt.png]]<br>[[Thunder Bolt (item)|Thunder Bolt]] | ||
|Deals 5 HP of electric damage to one enemy. | |Deals 5 HP of electric damage to one enemy, ignoring its Defense Power. | ||
|- | |- | ||
|style="text-align:center;"|[[File:PaperMario Items ThunderRage.png]]<br>[[Thunder Rage]] | |style="text-align:center;"|[[File:PaperMario Items ThunderRage.png]]<br>[[Thunder Rage]] | ||
|Deals 5 HP of electric damage to all enemies. | |Deals 5 HP of electric damage to all enemies, ignoring their Defense Power. | ||
|- | |- | ||
|style="text-align:center;"|[[File:PaperMario Items UltraShroom.png]]<br>[[Ultra Shroom]] | |style="text-align:center;"|[[File:PaperMario Items UltraShroom.png]]<br>[[Ultra Mushroom|Ultra Shroom]] | ||
|Restores 50 HP. | |Restores 50 HP. | ||
|- | |- | ||
|style="text-align:center;"|[[File:PaperMario Items VoltShroom.png]]<br>[[Volt Shroom]] | |style="text-align:center;"|[[File:PaperMario Items VoltShroom.png]]<br>[[Volt Mushroom|Volt Shroom]] | ||
|[[Electrified|Electrifies]] Mario for four turns. | |[[Electrified|Electrifies]] Mario for four turns. | ||
|- | |- | ||
| Line 1,277: | Line 1,260: | ||
===Key items=== | ===Key items=== | ||
{|width=95% cellspacing=0 border=1 cellpadding=3 class="wikitable" style="border-collapse:collapse;" | {|width=95% cellspacing=0 border=1 cellpadding=3 class="wikitable"style="border-collapse:collapse;" | ||
|- | |- | ||
!width=20%|Item | !width=20%|Item | ||
| Line 1,284: | Line 1,267: | ||
|- | |- | ||
|style="text-align:center;"|[[File:Artifact PM.png]]<br>[[Artifact]] | |style="text-align:center;"|[[File:Artifact PM.png]]<br>[[Artifact]] | ||
|style="text-align:center;"|[[Dry Dry Ruins]] | |style="text-align:center;"|[[Dry Dry Ruins (Paper Mario)|Dry Dry Ruins]] | ||
|Can be brought to Kolorado in exchange for a Star Piece. | |Can be brought to Kolorado in exchange for a Star Piece. | ||
|- | |- | ||
| Line 1,301: | Line 1,284: | ||
|style="text-align:center;"|[[File:Boo'sPortrait PM.png]]<br>[[Boo's Portrait]] | |style="text-align:center;"|[[File:Boo'sPortrait PM.png]]<br>[[Boo's Portrait]] | ||
|style="text-align:center;"|[[Boo's Mansion]] | |style="text-align:center;"|[[Boo's Mansion]] | ||
|A sentient painting of | |A sentient painting of an old [[Boo]]. Mario needs to return it to its picture frame to access the mansion's third floor. | ||
|- | |- | ||
|style="text-align:center;"|[[File:Bucket PM.png]]<br>[[Bucket]] | |style="text-align:center;"|[[File:Bucket PM.png]]<br>[[Bucket (Paper Mario)|Bucket]] | ||
|style="text-align:center;"|[[Shiver City]] | |style="text-align:center;"|[[Shiver City]] | ||
|rowspan=2|These two items are necessary to open the path to Shiver Mountain. | |rowspan=2|These two items are necessary to open the path to Shiver Mountain. | ||
| Line 1,312: | Line 1,295: | ||
|style="text-align:center;"|[[File:Calculator PM.png]]<br>[[Calculator]] | |style="text-align:center;"|[[File:Calculator PM.png]]<br>[[Calculator]] | ||
|style="text-align:center;"|[[Shy Guy's Toy Box]] | |style="text-align:center;"|[[Shy Guy's Toy Box]] | ||
|Stolen from Rowf, the owner of the | |Stolen from Rowf, the owner of the Badge Shop, during the events of Chapter 4. It can be returned for an I Spy Badge. | ||
|- | |- | ||
|style="text-align:center;"|[[File:Tubba Blubba Castle Key.png]]<br>[[Castle Key (Tubba Blubba's Castle)|Castle Key]] | |style="text-align:center;"|[[File:Tubba Blubba Castle Key.png]]<br>[[Castle Key (Tubba Blubba's Castle)|Castle Key]] | ||
| Line 1,328: | Line 1,311: | ||
|style="text-align:center;"|[[File:Butter PM.png]]<br>[[Butter]] | |style="text-align:center;"|[[File:Butter PM.png]]<br>[[Butter]] | ||
|rowspan=10 style="text-align:center;"|[[Peach's Castle]] | |rowspan=10 style="text-align:center;"|[[Peach's Castle]] | ||
|rowspan=10| | |rowspan=10|One of the ingredients available for Princess Peach to bake a cake for Gourmet Guy during one of her interludes. | ||
|- | |- | ||
|style="text-align:center;"|[[File:PMCleanser.png]]<br>[[Cleanser]] | |style="text-align:center;"|[[File:PMCleanser.png]]<br>[[Cleanser]] | ||
| Line 1,346: | Line 1,329: | ||
|style="text-align:center;"|[[File:PM Sugar.png]]<br>[[Sugar (item)|Sugar]] | |style="text-align:center;"|[[File:PM Sugar.png]]<br>[[Sugar (item)|Sugar]] | ||
|- | |- | ||
|style="text-align:center;"|[[File:PMWater.png]]<br>[[Water]] | |style="text-align:center;"|[[File:PMWater.png]]<br>[[Water (item)|Water]] | ||
|- | |- | ||
|style="text-align:center;"|[[File:Cook Book Paper Mario.png]]<br>[[Cookbook]] | |style="text-align:center;"|[[File:Cook Book Paper Mario.png]]<br>[[Cookbook]] | ||
|style="text-align:center;"|[[Shy Guy's Toy Box]] | |style="text-align:center;"|[[Shy Guy's Toy Box]] | ||
|Once this book is returned to Tayce T. during | |Once this book is returned to Tayce T. during Chapter 4, she will be able to cook with two ingredients at once. | ||
|- | |- | ||
|style="text-align:center;"|[[File:Crystal Ball PM.png]]<br>[[Crystal Ball]] | |style="text-align:center;"|[[File:Crystal Ball PM.png]]<br>[[Crystal Ball]] | ||
| Line 1,358: | Line 1,341: | ||
|style="text-align:center;"|[[File:CrystalBerry PM.png]]<br>[[Crystal Berry]] | |style="text-align:center;"|[[File:CrystalBerry PM.png]]<br>[[Crystal Berry]] | ||
|style="text-align:center;"|[[Flower Fields]]<br>(Posie area) | |style="text-align:center;"|[[Flower Fields]]<br>(Posie area) | ||
|Given to Mario by Posie during | |Given to Mario by Posie during Chapter 6. Mario can bring this item to Rosie and exchange it for the Water Stone. | ||
|- | |- | ||
|style="text-align:center;"|[[File:DiamondStone PM.png]]<br>[[Diamond Stone]] | |style="text-align:center;"|[[File:DiamondStone PM.png]]<br>[[Diamond Stone]] | ||
|rowspan=3 style="text-align:center;"|[[Dry Dry Ruins]] | |rowspan=3 style="text-align:center;"|[[Dry Dry Ruins (Paper Mario)|Dry Dry Ruins]] | ||
|rowspan=3|A set of stone carvings that act as keys to Tutankoopa's chamber. | |rowspan=3|A set of stone carvings that act as keys to Tutankoopa's chamber. | ||
|- | |- | ||
| Line 1,370: | Line 1,353: | ||
|style="text-align:center;"|[[File:UltraStone PM.png]]<br>[[Ultra Stone]] | |style="text-align:center;"|[[File:UltraStone PM.png]]<br>[[Ultra Stone]] | ||
|style="text-align:center;"|[[Jade Jungle]] | |style="text-align:center;"|[[Jade Jungle]] | ||
|The Ultra Stone enables Mario to use Super Blocks to upgrade | |The Ultra Stone enables Mario to use Super Blocks to upgrade party members to Ultra Rank. | ||
|- | |- | ||
|style="text-align:center;"|[[File:PM Sneaky Parasol.png]]<br>[[Sneaky Parasol]] | |style="text-align:center;"|[[File:PM Sneaky Parasol.png]]<br>[[Sneaky Parasol]] | ||
| Line 1,378: | Line 1,361: | ||
|style="text-align:center;"|[[File:PM Dictionary.png]]<br>[[Dictionary]] | |style="text-align:center;"|[[File:PM Dictionary.png]]<br>[[Dictionary]] | ||
|style="text-align:center;"|[[Shy Guy's Toy Box]] | |style="text-align:center;"|[[Shy Guy's Toy Box]] | ||
|Stolen from Russ T. during the events of | |Stolen from Russ T. during the events of Chapter 4. It can be returned for a Star Piece. | ||
|- | |- | ||
|style="text-align:center;"|[[File:Diploma.png]]<br>[[Diploma]] | |style="text-align:center;"|[[File:Diploma.png]]<br>[[Diploma]] | ||
| Line 1,393: | Line 1,376: | ||
|- | |- | ||
|style="text-align:center;"|[[File:PeachDoll PM.png]]<br>[[Dolly]] | |style="text-align:center;"|[[File:PeachDoll PM.png]]<br>[[Dolly]] | ||
|style="text-align:center;"|[[Goomba Village ( | |style="text-align:center;"|[[Goomba Village (location)|Goomba Village]] | ||
|Goombaria lost this doll before the events of the game. It can be returned to her for a Star Piece. | |Goombaria lost this doll before the events of the game. It can be returned to her for a Star Piece. | ||
|- | |- | ||
| Line 1,416: | Line 1,399: | ||
|style="text-align:center;"|[[File:PM Frying Pan.png]]<br>[[Frying Pan]] | |style="text-align:center;"|[[File:PM Frying Pan.png]]<br>[[Frying Pan]] | ||
|style="text-align:center;"|[[Shy Guy's Toy Box]] | |style="text-align:center;"|[[Shy Guy's Toy Box]] | ||
|Stolen from Tayce T. during the events of | |Stolen from Tayce T. during the events of Chapter 4. It is necessary to return it to her so she will bake a Cake for Gourmet Guy. | ||
|- | |- | ||
|style="text-align:center;"|[[File:Glasses PM.png]]<br>[[Glasses]] | |style="text-align:center;"|[[File:Glasses PM.png]]<br>[[Glasses]] | ||
|style="text-align:center;"|[[Koopa Village]] | |style="text-align:center;"|[[Koopa Village]] | ||
|Appears during one of | |Appears during one of Koopa Koot's favors. | ||
|- | |- | ||
|style="text-align:center;"|[[File:GoldCredit PM.png]]<br>[[Gold Credit]] | |style="text-align:center;"|[[File:GoldCredit PM.png]]<br>[[Golden Card|Gold Credit]] | ||
|style="text-align:center;"|[[Koopa Village]] | |style="text-align:center;"|[[Koopa Village]] | ||
|Allows Mario to play the game [[Smash Attack]] in the [[Playroom|Toad Town Playroom]]. | |Allows Mario to play the game [[Smash Attack]] in the [[Playroom|Toad Town Playroom]]. | ||
| Line 1,444: | Line 1,427: | ||
|style="text-align:center;"|[[File:Lyrics PM.png]]<br>[[Lyrics]] | |style="text-align:center;"|[[File:Lyrics PM.png]]<br>[[Lyrics]] | ||
|style="text-align:center;"|[[Toad Town]]<br>([[Club 64]]) | |style="text-align:center;"|[[Toad Town]]<br>([[Club 64]]) | ||
|Involved in the quest to make | |Involved in the quest to make Pop Diva sing again. Mario must deliver this item to the Composer in Dry Dry Outpost to receive the Melody in return. | ||
|- | |- | ||
|style="text-align:center;"|[[File:PM Magical Seed cyan.png]][[File:PM Magical Seed brown.png]][[File:PM Magical Seed pink.png]][[File:PM Magical Seed purple.png]]<br>[[Magical Seed]] | |style="text-align:center;"|[[File:PM Magical Seed cyan.png]][[File:PM Magical Seed brown.png]][[File:PM Magical Seed pink.png]][[File:PM Magical Seed purple.png]]<br>[[Magical Seed]] | ||
| Line 1,452: | Line 1,435: | ||
|style="text-align:center;"|[[File:Mailbag PM.png]]<br>[[Mailbag]] | |style="text-align:center;"|[[File:Mailbag PM.png]]<br>[[Mailbag]] | ||
|style="text-align:center;"|[[Shy Guy's Toy Box]] | |style="text-align:center;"|[[Shy Guy's Toy Box]] | ||
|Stolen from the Postmaster during the events of | |Stolen from the Postmaster during the events of Chapter 4. It can be returned for a Star Piece. | ||
|- | |- | ||
|style="text-align:center;"|[[File:PM Melody.png]]<br>[[Melody (item)|Melody]] | |style="text-align:center;"|[[File:PM Melody.png]]<br>[[Melody (item)|Melody]] | ||
|style="text-align:center;"|[[Dry Dry Outpost]] | |style="text-align:center;"|[[Dry Dry Outpost]] | ||
|Involved in the quest to make | |Involved in the quest to make Pop Diva sing again. Mario receives this item in exchange for the Lyrics and must return it to the Master Poet in Club 64. | ||
|- | |- | ||
|style="text-align:center;"|[[File:MysteryNote.png]]<br>[[Mystery Note]] | |style="text-align:center;"|[[File:MysteryNote.png]]<br>[[Mystery Note]] | ||
| Line 1,472: | Line 1,455: | ||
|style="text-align:center;"|[[File:OldPhoto PM.png]]<br>[[Old Photo]] | |style="text-align:center;"|[[File:OldPhoto PM.png]]<br>[[Old Photo]] | ||
|style="text-align:center;"|[[Boo's Mansion]] | |style="text-align:center;"|[[Boo's Mansion]] | ||
|Required in one of | |Required in one of Koopa Koot's favors. | ||
|- | |- | ||
|style="text-align:center;"|[[File:PM Package.png]]<br>[[Package (Paper Mario)|Package]] | |style="text-align:center;"|[[File:PM Package.png]]<br>[[Package (Paper Mario)|Package]] | ||
| Line 1,503: | Line 1,486: | ||
|- | |- | ||
|style="text-align:center;"|[[File:RuinsKey PM.png]]<br>[[Ruins Key (Paper Mario)|Ruins Key]] | |style="text-align:center;"|[[File:RuinsKey PM.png]]<br>[[Ruins Key (Paper Mario)|Ruins Key]] | ||
|style="text-align:center;"|[[Dry Dry Ruins]] | |style="text-align:center;"|[[Dry Dry Ruins (Paper Mario)|Dry Dry Ruins]] | ||
|Opens a door in Dry Dry Ruins. | |Opens a door in Dry Dry Ruins. | ||
|- | |- | ||
|style="text-align:center;"|[[File:PM Silver Credit.png]]<br>[[Silver Credit]] | |style="text-align:center;"|[[File:PM Silver Credit.png]]<br>[[Silver Card|Silver Credit]] | ||
|style="text-align:center;"|[[Koopa Village]] | |style="text-align:center;"|[[Koopa Village]] | ||
|Allows Mario to play the game [[Jump Attack]] in the [[Playroom|Toad Town Playroom]]. | |Allows Mario to play the game [[Jump Attack]] in the [[Playroom|Toad Town Playroom]]. | ||
| Line 1,518: | Line 1,501: | ||
|Opens the door to the storage room in Harry's Shop. | |Opens the door to the storage room in Harry's Shop. | ||
|- | |- | ||
|style="text-align:center;"|[[File:Tape PM.png]]<br>[[Tape]] | |style="text-align:center;"|[[File:Tape PM.png]]<br>[[Tape (Paper Mario)|Tape]] | ||
|style="text-align:center;"|[[Goomba Village ( | |style="text-align:center;"|[[Goomba Village (location)|Goomba Village]] | ||
|Involved in one of Koopa Koot's favors. Mario must fetch this item from Goompa to complete it. | |Involved in one of Koopa Koot's favors. Mario must fetch this item from Goompa to complete it. | ||
|- | |- | ||
|style="text-align:center;"|[[File:ToyTrain PM.png]]<br>[[Toy Train]] | |style="text-align:center;"|[[File:ToyTrain PM.png]]<br>[[Toy Train]] | ||
|style="text-align:center;"|[[Toad Town]]<br>([[Harry's Shop]]) | |style="text-align:center;"|[[Toad Town]]<br>([[Harry's Shop]]) | ||
|Received during | |Received during Chapter 4. Mario must place it into Shy Guy's Toy Box from the outside to be able to ride it. | ||
|- | |- | ||
|style="text-align:center;"|[[File:VolcanoVase PM.png]]<br>[[Volcano Vase]] | |style="text-align:center;"|[[File:VolcanoVase PM.png]]<br>[[Volcano Vase]] | ||
| Line 1,544: | Line 1,527: | ||
==Badges== | ==Badges== | ||
{{main|List of | {{main|List of Badges in Paper Mario}} | ||
Badges are helpful items that grant Mario and his friends a number of active or passive bonuses when he equips them. The effects can range from changing the way Mario's overworld abilities work, to affecting his stats or giving him new attacks, to increasing the versatility of his party members. | Badges are helpful items that grant Mario and his friends a number of active or passive bonuses when he equips them. The effects can range from changing the way Mario's overworld abilities work, to affecting his stats or giving him new attacks, to increasing the versatility of his party members. | ||
Mario has a stat called Badge Points (BP), which affects how many | Mario has a stat called Badge Points (BP), which affects how many Badges can be equipped at the same time. Every Badge has also a BP rating, which tells the player how many free BP are needed to equip the Badge in question. Equipping a Badge will disable an amount of Mario's BP equal to the Badge's BP rating, and unequipping it will free those BP up again. Mario starts the game with three BP and gains an additional three every time the player chooses to upgrade BP during a level up. | ||
Badges can be found in red ? Blocks, in some treasure chests, or lying around in dungeons. They can also be purchased from Rowf's Badge Shop in central Toad Town, gotten as rewards from side quests, and traded in exchange for Star Pieces by Merlow at Merluvlee's Place. | Badges can be found in red ? Blocks, in some treasure chests, or lying around in dungeons. They can also be purchased from Rowf's Badge Shop in central Toad Town, gotten as rewards from side quests, and traded in exchange for Star Pieces by Merlow at Merluvlee's Place. | ||
===List of Badges=== | ===List of Badges=== | ||
{|width=100% | {|width=100% | ||
|width=33% style="vertical-align:top;"| | |width=33% style="vertical-align:top;"| | ||
*[[File:PM All or Nothing Badge.png]] [[All or Nothing]] | *[[File:PM All or Nothing Badge.png]][[All or Nothing]] | ||
*[[File:Attack FX A Badge.png]] [[Attack FX A]] | *[[File:Attack FX A Badge.png]][[Attack FX A]] | ||
*[[File:Attack FX B Badge.png]] [[Attack FX B (Paper Mario)|Attack FX B]] | *[[File:Attack FX B Badge.png]][[Attack FX B (Paper Mario)|Attack FX B]] | ||
*[[File:Attack FX C Badge.png]] [[Attack FX C]] | *[[File:Attack FX C Badge.png]][[Attack FX C]] | ||
*[[File:Attack FX D Badge.png]] [[Attack FX D]] | *[[File:Attack FX D Badge.png]][[Attack FX D]] | ||
*[[File:Attack FX E Badge.png]] [[Attack FX E]] | *[[File:Attack FX E Badge.png]][[Attack FX E]] | ||
*[[File:Bump Attack Badge.png]] [[Bump Attack]] | *[[File:Bump Attack Badge.png]][[Bump Attack]] | ||
*[[File:Chill Out Badge.png]] [[Chill Out (badge)|Chill Out]] | *[[File:Chill Out Badge.png]][[Chill Out (badge)|Chill Out]] | ||
*[[File:Close Call Badge.png]] [[Close Call (badge)|Close Call]] | *[[File:Close Call Badge.png]][[Close Call (badge)|Close Call]] | ||
*[[File:D-Down Jump Badge.png]] [[D-Down Jump]] | *[[File:D-Down Jump Badge.png]][[D-Down Jump]] | ||
*[[File:D-Down Pound Badge.png]] [[D-Down Pound]] | *[[File:D-Down Pound Badge.png]][[Piercing Blow|D-Down Pound]] | ||
*[[File:Damage Dodge Badge.png]] [[Damage Dodge]] | *[[File:Damage Dodge Badge.png]][[Damage Dodge]] | ||
*[[File:Deep Focus Badge.png]] [[Deep Focus]] | *[[File:Deep Focus Badge.png]][[Deep Focus (Badge)|Deep Focus]] | ||
*[[File:Defend Plus Badge.png]] [[Defend Plus]]{{anchor|Defend Plus}} | *[[File:Defend Plus Badge.png]][[Defend Plus]]{{anchor|Defend Plus}} | ||
*[[File:Dizzy Attack Badge.png]] [[Dizzy Attack]] | *[[File:Dizzy Attack Badge.png]][[Dizzy Attack]] | ||
*[[File:Dizzy Stomp Badge.png]] [[Dizzy Stomp]] | *[[File:Dizzy Stomp Badge.png]][[Dizzy Stomp]] | ||
*[[File:Dodge Master Badge.png]] [[Dodge Master]] | *[[File:Dodge Master Badge.png]][[Dodge Master]] | ||
*[[File:Double Dip Badge.png]] [[Double Dip]] | *[[File:Double Dip Badge.png]][[Double Dip]] | ||
*[[File:Feeling Fine Badge.png]] [[Feeling Fine]] | *[[File:Feeling Fine Badge.png]][[Feeling Fine]] | ||
*[[File:Fire Shield Badge.png]] [[Fire Shield]] | *[[File:Fire Shield Badge.png]][[Fire Shield]] | ||
*[[File:First Attack Badge.png]] [[First Attack]] | *[[File:First Attack Badge.png]][[First Attack]] | ||
*[[File:Flower Finder Badge.png]] [[Flower Finder]] | *[[File:Flower Finder Badge.png]][[Flower Finder]] | ||
*[[File:Flower Saver Badge.png]] [[Flower Saver]] | *[[File:Flower Saver Badge.png]][[Flower Saver]] | ||
|width=33% style="vertical-align:top;"| | |width=33% style="vertical-align:top;"| | ||
*[[File:FP Plus Badge.png]] [[FP Plus]] | *[[File:FP Plus Badge.png]][[FP Plus]] | ||
*[[File:Group Focus Badge.png]] [[Group Focus]] | *[[File:Group Focus Badge.png]][[Group Focus]] | ||
*[[File:Hammer Throw Badge.png]] [[Hammer Throw (badge)|Hammer Throw]] | *[[File:Hammer Throw Badge.png]][[Hammer Throw (badge)|Hammer Throw]] | ||
*[[File:Happy Flower Badge.png]] [[Happy Flower (badge)|Happy Flower]] | *[[File:Happy Flower Badge.png]][[Happy Flower (badge)|Happy Flower]] | ||
*[[File:Happy Heart Badge.png]] [[Happy Heart]] | *[[File:Happy Heart Badge.png]][[Happy Heart]] | ||
*[[File:Heart Finder Badge.png]] [[Heart Finder]] | *[[File:Heart Finder Badge.png]][[Heart Finder]] | ||
*[[File:HP Drain Badge.png]] [[HP Drain (badge)|HP Drain]] | *[[File:HP Drain Badge.png]][[HP Drain (badge)|HP Drain]] | ||
*[[File:HP Plus Badge.png]] [[HP Plus (badge)|HP Plus]] | *[[File:HP Plus Badge.png]][[HP Plus (badge)|HP Plus]] | ||
*[[File:I-Spy Badge.png]] [[I Spy]] | *[[File:I-Spy Badge.png]][[I Spy]] | ||
*[[File:Ice Power Badge.png]] [[Ice Power]] | *[[File:Ice Power Badge.png]][[Ice Power]] | ||
*[[File:Jump Charge Badge.png]] [[Jump Charge]] | *[[File:Jump Charge Badge.png]][[Jump Charge]] | ||
*[[File:Last Stand Badge.png]] [[Last Stand]] | *[[File:Last Stand Badge.png]][[Last Stand]] | ||
*[[File:Lucky Day Badge.png]] [[Lucky Day]] | *[[File:Lucky Day Badge.png]][[Lucky Day]] | ||
*[[File:Mega Jump Badge.png]] [[Mega Jump]] | *[[File:Mega Jump Badge.png]][[Mega Jump]] | ||
*[[File:Mega Quake Badge.png]] [[Mega Quake]] | *[[File:Mega Quake Badge.png]][[Mega Quake]] | ||
*[[File:Mega Rush Badge.png]] [[Mega Rush]] | *[[File:Mega Rush Badge.png]][[Mega Rush]] | ||
*[[File:Mega Smash Badge.png]] [[Mega Smash]] | *[[File:Mega Smash Badge.png]][[Mega Smash]] | ||
*[[File:Money Money Badge.png]] [[Money Money]] | *[[File:Money Money Badge.png]][[Money Money]] | ||
*[[File:Multibounce Badge.png]] [[Multibounce]] | *[[File:Multibounce Badge.png]][[Multibounce]] | ||
*[[File:P-Down D-Up Badge.png]] [[P-Down, D-Up]] | *[[File:P-Down D-Up Badge.png]][[P-Down, D-Up]] | ||
*[[File:P-Up D-Down Badge.png]] [[P-Up, D-Down]] | *[[File:P-Up D-Down Badge.png]][[P-Up, D-Down]] | ||
*[[File:Pay Off Badge.png]] [[Pay-Off]] | *[[File:Pay Off Badge.png]][[Pay-Off]] | ||
*[[File:Peekaboo Badge.png]] [[Peekaboo (badge)|Peekaboo]] | *[[File:Peekaboo Badge.png]][[Peekaboo (badge)|Peekaboo]] | ||
|width=33% style="vertical-align:top;"| | |width=33% style="vertical-align:top;"| | ||
*[[File:Power Bounce Badge.png]] [[Power Bounce]] | *[[File:Power Bounce Badge.png]][[Power Bounce]] | ||
*[[File:Power Jump Badge.png]] [[Power Jump]] | *[[File:Power Jump Badge.png]][[Power Jump]] | ||
*[[File:Power Plus Badge.png]] [[Power Plus (badge)|Power Plus]] | *[[File:Power Plus Badge.png]][[Power Plus (badge)|Power Plus]] | ||
*[[File:Power Quake Badge.png]] [[Power Quake]] | *[[File:Power Quake Badge.png]][[Power Quake]] | ||
*[[File:Power Rush Badge.png]] [[Power Rush]] | *[[File:Power Rush Badge.png]][[Power Rush]] | ||
*[[File:Power Smash Badge.png]] [[Power Smash]] | *[[File:Power Smash Badge.png]][[Power Smash]] | ||
*[[File:Pretty Lucky Badge.png]] [[Pretty Lucky]] | *[[File:Pretty Lucky Badge.png]][[Pretty Lucky]] | ||
*[[File:Quake Hammer Badge.png]] [[Quake Hammer]] | *[[File:Quake Hammer Badge.png]][[Quake Hammer]] | ||
*[[File:Quick Change Badge.png]] [[Quick Change]] | *[[File:Quick Change Badge.png]][[Quick Change]] | ||
*[[File:Refund Badge.png]] [[Refund]] | *[[File:Refund Badge.png]][[Refund]] | ||
*[[File:Runaway Pay Badge.png]] [[Runaway Pay]] | *[[File:Runaway Pay Badge.png]][[Runaway Pay]] | ||
*[[File:S-Jump Charge Badge.png]] [[S. Jump | *[[File:S-Jump Charge Badge.png]][[S. Jump Charge]] | ||
*[[File:S-Smash Charge Badge.png]] [[S. Smash | *[[File:S-Smash Charge Badge.png]][[S. Smash Charge]] | ||
*[[File:Shrink Stomp Badge.png]] [[Shrink Stomp]] | *[[File:Shrink Stomp Badge.png]][[Shrink Stomp]] | ||
*[[File:Sleep Stomp Badge.png]] [[Sleep Stomp]] | *[[File:Sleep Stomp Badge.png]][[Sleepy Stomp|Sleep Stomp]] | ||
*[[File:Slow Go Badge.png]] [[Slow Go]] | *[[File:Slow Go Badge.png]][[Slow Go]] | ||
*[[File:Smash Charge Badge.png]] [[Smash Charge]] | *[[File:Smash Charge Badge.png]][[Smash Charge]] | ||
*[[File:Speedy Spin Badge.png]] [[Speedy Spin]] | *[[File:Speedy Spin Badge.png]][[Speedy Spin]] | ||
*[[File:Spike Shield Badge PM.png]] [[Spike Shield]] | *[[File:Spike Shield Badge PM.png]][[Spike Shield]] | ||
*[[File:Spin Attack Badge.png]] [[Spin Attack ( | *[[File:Spin Attack Badge.png]][[Spin Attack (Badge)|Spin Attack]] | ||
*[[File:Spin Smash Badge.png]] [[Spin Smash]] | *[[File:Spin Smash Badge.png]][[Super Hammer (move)|Spin Smash]] | ||
*[[File:Triple Dip Badge.png]] [[Triple Dip]] | *[[File:Triple Dip Badge.png]][[Triple Dip]] | ||
*[[File:Zap Tap Badge.png]] [[Zap Tap]] | *[[File:Zap Tap Badge.png]][[Zap Tap]] | ||
|} | |} | ||
| Line 1,632: | Line 1,614: | ||
The captured Star Spirits are kept separately and spread all over the Mushroom Kingdom. Mario rescues one Star Spirit at the end of every chapter, bar the final one, after defeating the chapter boss. With every Star Spirit returning to Star Haven, Mario's [[Star Power]] increases by one and he learns a new Special Move. | The captured Star Spirits are kept separately and spread all over the Mushroom Kingdom. Mario rescues one Star Spirit at the end of every chapter, bar the final one, after defeating the chapter boss. With every Star Spirit returning to Star Haven, Mario's [[Star Power]] increases by one and he learns a new Special Move. | ||
Once every Star Spirit has been rescued, Mario gains access to Star Haven, where he obtains the ultimate star power: the Star Beam. The spirits also permit him to use the [[ | Once every Star Spirit has been rescued, Mario gains access to Star Haven, where he obtains the ultimate star power: the Star Beam. The spirits also permit him to use the [[Star Ship]], a vessel able to reach Bowser's Castle in the sky. | ||
===Regular powers=== | ===Regular powers=== | ||
Special Moves gained at the end of every chapter, except chapter 8. | Special Moves gained at the end of every chapter, except chapter 8. | ||
<center> | <center> | ||
{|width=95% class="wikitable" style="text-align:center;" | {|width=95% class="wikitable"style="text-align:center;" | ||
|- | |- | ||
!width=20%|Special Move | !width=20%|Special Move | ||
| Line 1,649: | Line 1,630: | ||
|Chapter 1:<br>Storming Koopa Bros. Fortress | |Chapter 1:<br>Storming Koopa Bros. Fortress | ||
|[[Koopa Bros.]] | |[[Koopa Bros.]] | ||
|Restores 5 HP and FP, and cures status effects. | |Restores 5 HP and FP, and cures negative status effects. | ||
|- | |- | ||
|[[Lullaby]]<br>(1 SP) | |[[Lullaby]]<br>(1 SP) | ||
| Line 1,655: | Line 1,636: | ||
|Chapter 2:<br>The Mystery of Dry, Dry Ruins | |Chapter 2:<br>The Mystery of Dry, Dry Ruins | ||
|[[Tutankoopa]] | |[[Tutankoopa]] | ||
| | |May put enemies to sleep for a few turns. | ||
|- | |- | ||
|[[Star Storm]]<br> (2 SP) | |[[Star Storm]]<br> (2 SP) | ||
| Line 1,661: | Line 1,642: | ||
|Chapter 3:<br>The "Invincible" Tubba Blubba | |Chapter 3:<br>The "Invincible" Tubba Blubba | ||
|[[Tubba Blubba]] | |[[Tubba Blubba]] | ||
| | |Deals 7 HP of damage to all enemies, ignoring their Defense Power. | ||
|- | |- | ||
|[[Chill Out (move)|Chill Out]]<br>(2 SP) | |[[Chill Out (move)|Chill Out]]<br>(2 SP) | ||
| Line 1,667: | Line 1,648: | ||
|Chapter 4:<br>Trials in the Toy Box | |Chapter 4:<br>Trials in the Toy Box | ||
|[[General Guy]] | |[[General Guy]] | ||
|Decreases enemies' | |Decreases enemies' Attack Power by 3. | ||
|- | |- | ||
|[[Smooch (Paper Mario)|Smooch]]<br>(3 SP) | |[[Smooch (Paper Mario)|Smooch]]<br>(3 SP) | ||
| Line 1,679: | Line 1,660: | ||
|Chapter 6:<br>Dark Days in Flower Fields | |Chapter 6:<br>Dark Days in Flower Fields | ||
|[[Huff N. Puff]] | |[[Huff N. Puff]] | ||
| | |May immobilize enemies for a few turns. | ||
|- | |- | ||
|[[Up and Away]]<br>(2 SP) | |[[Up and Away]]<br>(2 SP) | ||
| Line 1,692: | Line 1,673: | ||
Special Moves that cost no SP to use and serve a unique purpose. | Special Moves that cost no SP to use and serve a unique purpose. | ||
<center> | <center> | ||
{|width=95% class="wikitable" style="text-align:center;" | {|width=95% class="wikitable"style="text-align:center;" | ||
|- | |- | ||
!width=20%|Special Move | !width=20%|Special Move | ||
| Line 1,720: | Line 1,701: | ||
</center> | </center> | ||
==Enemies and | ==Enemies and bosses== | ||
{{main|Paper Mario bestiary}} | {{main|Paper Mario bestiary}} | ||
===Chapter bosses=== | ===Chapter bosses=== | ||
<center> | <center> | ||
{|width=95% class="wikitable" style="border-collapse:collapse; text-align:center;" | {|width=95% class="wikitable"style="border-collapse:collapse;text-align:center;" | ||
|- | |- | ||
!width=35%|Enemy | !width=35%|Enemy | ||
| Line 1,732: | Line 1,712: | ||
!width=10%|Defense | !width=10%|Defense | ||
!Location | !Location | ||
!width=10%|Chapter | |||
|- | |- | ||
|[[File:PM Bowser idle.gif]]<br>[[Bowser]] (1) | |||
|10 | |10 | ||
|1 | |1 | ||
|0 | |0 | ||
|[[Peach's Castle]] | |[[Peach's Castle]] | ||
|- | |Pre-prologue | ||
|- | |- | ||
|[[File: | |[[File:PM Goomba King idle.gif]]<br>[[Goomboss|Goomba King]] | ||
|10 | |10 | ||
|1 | |1 | ||
|0 | |0 | ||
|[[Goomba Road]] | |[[Goomba Road]] | ||
|Prologue | |||
|- | |- | ||
|[[File:PMKoopaBrosBowser.png]]<br>[[Bowser???]] | |[[File:PMKoopaBrosBowser.png]]<br>[[Bowser???]] | ||
| Line 1,760: | Line 1,733: | ||
|1 | |1 | ||
|[[Koopa Bros. Fortress]] | |[[Koopa Bros. Fortress]] | ||
|rowspan=2|Chapter 1 | |||
|- | |- | ||
|[[File: | |[[File:PM Red Ninjakoopa idle.gif]] [[File:PM Black Ninjakoopa idle.gif]] [[File:PM Yellow Ninjakoopa idle.gif]] [[File:PM Green Ninjakoopa idle.gif]]<br>[[Koopa Bros.]] | ||
|5 | |5 | ||
|1 | |1 | ||
| Line 1,767: | Line 1,741: | ||
|[[Koopa Bros. Fortress]] | |[[Koopa Bros. Fortress]] | ||
|- | |- | ||
|[[File:Tutankoopa | |[[File:PM Tutankoopa idle.gif]]<br>[[Tutankoopa]] | ||
|30 | |30 | ||
|3 | |3 | ||
|0 | |0 | ||
|[[Dry Dry Ruins]] | |[[Dry Dry Ruins (Paper Mario)|Dry Dry Ruins]] | ||
|Chapter 2 | |||
|- | |- | ||
|[[File:PM Tubba's Heart idle.gif]]<br>[[Tubba's Heart]] | |||
| | |50 | ||
| | |6/12 | ||
| | |0 | ||
|[[ | |[[Windy Mill]] | ||
|rowspan=2|Chapter 3 | |||
|- | |- | ||
|[[File:PM Tubba Blubba weakened idle.gif]]<br>[[Tubba Blubba]] | |||
|10 | |10 | ||
|4 | |4 | ||
| Line 1,784: | Line 1,761: | ||
|[[Gusty Gulch]] | |[[Gusty Gulch]] | ||
|- | |- | ||
|[[File:PM | |[[File:PM Shy Squad idle.gif]]<br>[[Shy Squad]] | ||
| | |15 | ||
| | |Equal to the amount of their HP remaining, in increments of 1 | ||
|0 | |0 | ||
|[[ | |[[Shy Guy's Toy Box]] | ||
|rowspan=4|Chapter 4 | |||
|- | |- | ||
|[[File: | |[[File:PM Stilt Guy idle.gif]]<br>[[Stilt Guy]] | ||
| | |7 | ||
|4 | |4 | ||
|2 | |0 | ||
|[[Shy Guy's Toy Box]] | |||
|- | |||
|[[File:PM Shy Stack idle.gif]]<br>[[Shy Guy Tower|Shy Stack]] | |||
|10 | |||
|1 | |||
|0 | |||
|[[Shy Guy's Toy Box]] | |||
|- | |||
|[[File:PMToyTank.png]]<br>[[General Guy]] | |||
|30 | |||
|4 | |||
|2 | |||
|[[Shy Guy's Toy Box]] | |[[Shy Guy's Toy Box]] | ||
|- | |- | ||
|[[File:PMLavaPiranha1.png]]<br>[[Lava Piranha]] (1) | |||
|40 | |40 | ||
|5 | |5 | ||
|0 | |0 | ||
|[[Mt. Lavalava]] | |[[Mt. Lavalava]] | ||
|rowspan=2|Chapter 5 | |||
|- | |- | ||
|[[File:PMLavaPiranha2.png]]<br>Lava Piranha (2) | |||
|40 | |40 | ||
|7 | |7 | ||
| Line 1,807: | Line 1,799: | ||
|[[Mt. Lavalava]] | |[[Mt. Lavalava]] | ||
|- | |- | ||
|[[File: | |[[File:PM Huff N. Puff idle.gif]]<br>[[Huff N. Puff]] | ||
|60 | |60 | ||
|5 | |5 | ||
|0 | |0 | ||
|[[Cloudy Climb]] | |[[Cloudy Climb]] | ||
|Chapter 6 | |||
|- | |- | ||
|[[File: | |[[File:PM Crystal King idle.gif]]<br>[[Crystal King]] | ||
|70 | |70 | ||
|6 | |6 | ||
|2 | |2 | ||
|[[Crystal Palace]] | |[[Crystal Palace]] | ||
|Chapter 7 | |||
|- | |||
|[[File:PM Bowser idle.gif]]<br>[[Bowser]] (2) | |||
|50 | |||
|6 | |||
|1 | |||
|[[Peach's Castle]] | |||
|rowspan=3|Chapter 8 | |||
|- | |||
|[[File:PM Kammy Koopa idle.gif]]<br>[[Kammy Koopa]] | |||
|10 | |||
|4 | |||
|0 | |||
|[[Peach's Castle]]<br>(Power Platform) | |||
|- | |||
|[[File:PM Big Bowser idle.gif]]<br>[[Giant Bowser|Bowser]] (big) | |||
|99 | |||
|8 | |||
|2 | |||
|[[Peach's Castle]]<br>(Power Platform) | |||
|- | |||
|} | |} | ||
</center> | </center> | ||
=== | ===Jr. Troopa=== | ||
The game's most recurring boss, [[Jr. Troopa]] has his own theme music and subplot, and as such is treated separately from standard miniboss encounters. | |||
<center> | <center> | ||
{|width=95% class="wikitable" style="border-collapse:collapse; text-align:center;" | {|width=95% class="wikitable"style="border-collapse:collapse;text-align:center;" | ||
|- | |- | ||
!width=35%|Enemy | !width=35%|Enemy | ||
| Line 1,831: | Line 1,846: | ||
!Location | !Location | ||
|- | |- | ||
|[[File: | |[[File:PM Jr Troopa A idle.gif]]<br>[[Jr. Troopa]] (1) | ||
|5 | |5 | ||
|1 | |1 | ||
|0 | |0 | ||
|[[Goomba Village ( | |[[Goomba Village (location)|Goomba Village]] | ||
|- | |- | ||
|[[File:PM Jr Troopa | |[[File:PM Jr Troopa B idle.gif]]<br>Jr. Troopa (2) | ||
|15 | |15 | ||
|2 | |2 | ||
| Line 1,843: | Line 1,858: | ||
|[[Pleasant Path]] | |[[Pleasant Path]] | ||
|- | |- | ||
|[[File:PM Jr Troopa | |[[File:PM Jr Troopa C idle.gif]]<br>Jr. Troopa (3) | ||
|40 | |40 | ||
|5 | |5 | ||
| Line 1,849: | Line 1,864: | ||
|[[Forever Forest]] | |[[Forever Forest]] | ||
|- | |- | ||
|[[File:PM Jr Troopa | |[[File:PM Jr Troopa D idle.gif]]<br>Jr. Troopa (4) | ||
|20 | |40 (starts with 20) | ||
|6 | |6 | ||
|1 | |1 | ||
|[[Toad Town|Toad Town port]] | |[[Toad Town|Toad Town port]] | ||
|- | |- | ||
|[[File:PM Jr Troopa | |[[File:PM Jr Troopa E idle.gif]]<br>Jr. Troopa (5) | ||
|50 | |50 | ||
|8 | |8 | ||
| Line 1,861: | Line 1,876: | ||
|[[Shiver Snowfield]] | |[[Shiver Snowfield]] | ||
|- | |- | ||
|[[File: | |[[File:PM Jr Troopa A idle.gif]] [[File:PM Jr Troopa D idle.gif]] [[File:PM Jr Troopa E idle.gif]]<br>Jr. Troopa (6) | ||
|60 | |60 | ||
|8 | |8 | ||
|2 | |2 | ||
|[[Bowser's Castle]] | |[[Bowser's Castle]] | ||
|} | |||
</center> | |||
===Toad Town Dojo=== | |||
Five battles are fought at the Toad Town Dojo. After fighting [[Chan]] and [[Lee]], Mario can fight [[The Master]] for three unique battles. The Master acts as the game's "superboss," an optional boss that is far stronger than any other fight in the game, including the standard final boss. Like Jr. Troopa, he has his own battle theme. He can be fought multiple times at virtually any point in the game, being stronger for each fight. | |||
<center> | |||
{|width=95% class="wikitable"style="border-collapse:collapse;text-align:center;" | |||
|- | |||
!width=35%|Enemy | |||
!width=10%|Heart Points | |||
!width=10%|Attack | |||
!width=10%|Defense | |||
!Location | |||
|- | |- | ||
|[[File:PM Chan idle.gif]]<br>[[Chan]]<br> | |||
| | |15 | ||
| | |2 | ||
|2 | |2 | ||
| | |[[Toad Town Dojo]] | ||
|- | |||
|[[File:PM Lee idle.gif]]<br>[[Lee]]<br> | |||
|20 | |||
|5 | |||
|0 | |0 | ||
|[[ | |[[Toad Town Dojo]] | ||
|- | |- | ||
|[[File:PM The Master idle.gif]]<br>[[The Master]] (1) | |||
| | |50 | ||
| | |6 | ||
|0 | |0 | ||
|[[ | |[[Toad Town Dojo]] | ||
|- | |- | ||
|2 | |[[File:PM The Master saiyan idle.gif]]<br>The Master (2) | ||
| | |75 | ||
|8 | |||
|0 | |0 | ||
|[[ | |[[Toad Town Dojo]] | ||
|- | |- | ||
|[[File: | |[[File:PM The Master saiyan idle.gif]]<br>The Master (3) | ||
| | |99 | ||
| | |10 | ||
|1 | |||
|[[Toad Town Dojo]] | |||
|} | |||
</center> | |||
===Minibosses=== | |||
Note that at several points throughout the game, groups of standard enemies are treated as minibosses; as such, this list is for those which are exclusively treated as such. Additionally, some minibosses are optional, and as such may be skipped entirely or fought later when Mario is at a higher level. | |||
<center> | |||
{|width=95% class="wikitable"style="border-collapse:collapse;text-align:center;" | |||
|- | |||
!width=35%|Enemy | |||
!width=10%|Heart Points | |||
!width=10%|Attack | |||
!width=10%|Defense | |||
!Location | |||
|- | |||
|[[File:PM Blue Goomba idle.gif]]<br>[[Red & Blue Goomba Bros.|Blue Goomba]] | |||
|6 | |||
|1 | |||
|0 | |||
|[[Goomba Road]] | |||
|- | |||
|[[File:PM Red Goomba idle.gif]]<br>[[Red & Blue Goomba Bros.|Red Goomba]] | |||
|7 | |||
|1 | |||
|0 | |0 | ||
|[[ | |[[Goomba Road]] | ||
|- | |- | ||
|[[File: | |[[File:PM Magikoopa idle.gif]] [[File:PM Magikoopa flying idle.gif]]<br>[[Magikoopa]] (1) | ||
| | |8 | ||
|3 | |3 | ||
|0 | |0 | ||
|[[ | |[[Star Hill|Shooting Star Summit]] | ||
|- | |- | ||
|[[File: | |[[File:PM Bill Blaster idle.gif]]<br>[[Bill Blaster]] | ||
|4 | |4 | ||
|0 | |0 | ||
|1 | |1 | ||
|[[Koopa Bros. Fortress]] | |||
|[[ | |||
|- | |- | ||
|[[File: | |[[File:PM Blooper idle.gif]]<br>[[Blooper]] | ||
| | |30 | ||
| | |3 | ||
|0 | |0 | ||
|[[ | |[[Toad Town Tunnels]] | ||
|- | |- | ||
|[[File: | |[[File:PM Buzzar idle.gif]]<br>[[Buzzar]]<br>(optional) | ||
|40 | |40 | ||
|3 | |3 | ||
| Line 1,925: | Line 1,974: | ||
|[[Mt. Rugged]] | |[[Mt. Rugged]] | ||
|- | |- | ||
|[[File:PM | |[[File:PM Stone Chomp idle.gif]]<br>[[Stone Chomp]] | ||
| | |4 | ||
|3 | |3 | ||
| | |1 | ||
|[[ | |[[Dry Dry Ruins (Paper Mario)|Dry Dry Ruins]] | ||
|- | |- | ||
|[[File:Electro Blooper. | |[[File:PM Electro Blooper idle.gif]]<br>[[Electro Blooper]]<br>(optional unless the [[Blooper]] is fought elsewhere before Chapter 7) | ||
|50 | |50 | ||
|4 | |4 | ||
| Line 1,949: | Line 1,986: | ||
|[[Toad Town Tunnels]] | |[[Toad Town Tunnels]] | ||
|- | |- | ||
|[[File: | |[[File:PM Tubba Blubba invincible idle.gif]]<br>[[Tubba Blubba]] | ||
| | |10 | ||
| | |4 | ||
|? | |||
|[[Tubba Blubba's Castle]] | |||
|- | |||
|[[File:PM Anti Guy idle.gif]]<br>[[Black Shy Guy#Paper Mario|Anti Guy]]<br>(optional) | |||
|50 | |||
|10 | |||
|0 | |0 | ||
|[[ | |[[Shy Guy's Toy Box]]<br>[[Bowser's Castle]] | ||
|- | |- | ||
|[[File: | |[[File:PM Big Lantern Ghost idle.gif]]<br>[[Big Lantern Ghost]] | ||
| | |40 | ||
| | |5 | ||
| | |0 | ||
|[[ | |[[Shy Guy's Toy Box]] | ||
|- | |- | ||
|[[File: | |[[File:PM Fuzzipede idle.gif]]<br>[[Fuzzipede]] | ||
|20 | |20 | ||
|3 | |||
|0 | |||
|[[Toad Town]] | |||
|- | |||
|[[File:PM Super Blooper idle.gif]]<br>[[Super Blooper (boss)|Super Blooper]]<br>(optional unless the [[Blooper]] and the [[Electro Blooper]] are fought elsewhere before Chapter 7) | |||
|70 | |||
|5 | |5 | ||
|0 | |0 | ||
|[[Toad Town | |[[Toad Town Tunnels]] | ||
|- | |- | ||
|[[File:PM Kent C Koopa idle.gif]]<br>[[Kent C. Koopa]]<br>(optional) | |||
| | |70 | ||
|10 | |||
|6 | |6 | ||
|[[Pleasant Path]]<br>(After chapter 5) | |||
|[[ | |||
|- | |- | ||
| | |[[File:PM Lakilester enemy idle.gif]]<br>[[Lakilester|Spike?]] | ||
| | |50 | ||
|4 | |||
|0 | |0 | ||
|[[ | |[[Flower Fields]] | ||
|- | |- | ||
| | |[[File:PM Monstar idle.gif]]<br>[[Monstar]] | ||
| | |20 | ||
|1 | |1 | ||
|[[ | |0 | ||
|[[Shiver Snowfield]] | |||
|} | |} | ||
</center> | </center> | ||
=== | ===Boss helpers=== | ||
<center> | <center> | ||
{|width=95% class="wikitable" style="border-collapse:collapse; text-align:center;" | {|width=95% class="wikitable"style="border-collapse:collapse;text-align:center;" | ||
|- | |- | ||
!width=35%|Enemy | !width=35%|Enemy | ||
| Line 1,993: | Line 2,044: | ||
!width=10%|Attack | !width=10%|Attack | ||
!width=10%|Defense | !width=10%|Defense | ||
!Superordinate | !Superordinate of | ||
|- | |||
|[[File:PM Blue Goomba idle.gif]]<br>[[Red & Blue Goomba Bros.|Blue Goomba]] | |||
|6 (starts with 2) | |||
|1 | |||
|0 | |||
|[[Goomboss|Goomba King]] | |||
|- | |||
|[[File:PM Red Goomba idle.gif]]<br>[[Red & Blue Goomba Bros.|Red Goomba]] | |||
|7 (starts with 2) | |||
|1 | |||
|0 | |||
|[[Goomboss|Goomba King]] | |||
|- | |- | ||
|[[File: | |[[File:PM Chomp idle.gif]]<br>[[Chain Chomp|Chomp]] | ||
|4 | |4 | ||
|3 | |3 | ||
| Line 2,001: | Line 2,064: | ||
|[[Tutankoopa]] | |[[Tutankoopa]] | ||
|- | |- | ||
|[[File: | |[[File:PMGeneralGuyBulb.png]]<br>[[General Guy|Bulb]] | ||
|8 | |||
| | |||
| | |||
|0 | |0 | ||
|1 | |1 | ||
|[[General Guy]] | |[[General Guy]] | ||
|- | |- | ||
|[[File: | |[[File:PM Blooper Baby idle.gif]]<br>[[Blooper Baby]] | ||
| | |6 | ||
|2 | |||
|0 | |0 | ||
|[[Super Blooper (boss)|Super Blooper]] | |||
|[[ | |||
|- | |- | ||
|[[File:PMLavaBud1.png]]<br>[[Lava Bud]] (1) | |||
|8 | |8 | ||
|4 | |4 | ||
| Line 2,031: | Line 2,082: | ||
|[[Lava Piranha]] | |[[Lava Piranha]] | ||
|- | |- | ||
|[[File:PMLavaBud2.png]]<br>Lava Bud (2) | |||
|8 | |8 | ||
|0 | |0 | ||
| Line 2,036: | Line 2,088: | ||
|[[Lava Piranha]] | |[[Lava Piranha]] | ||
|- | |- | ||
|[[File: | |[[File:PM Petit Piranha idle.gif]]<br>[[Petit Piranha]] | ||
|1 | |1 | ||
|6 | |6 | ||
| Line 2,042: | Line 2,094: | ||
|[[Lava Bud]] | |[[Lava Bud]] | ||
|- | |- | ||
|[[File: | |[[File:PM Tuff Puff small idle.gif]] [[File:PM Tuff Puff big idle.gif]]<br>[[Tuff Puff]] | ||
|1 | |1 | ||
|2 | |2 | ||
| Line 2,048: | Line 2,100: | ||
|[[Huff N. Puff]] | |[[Huff N. Puff]] | ||
|- | |- | ||
|[[File: | |[[File:PM Crystal Bit i idle.gif]] [[File:PM Crystal Bit ii idle.gif]] [[File:PM Crystal Bit iii idle.gif]]<br>[[Crystal Bit]] | ||
|1 | |1 | ||
|0 | |0 | ||
|0 | |0 | ||
|[[Crystal King]] | |[[Crystal King]] | ||
|} | |||
|} | |||
</center> | </center> | ||
===Regular | ===Regular enemies=== | ||
<center> | <center> | ||
{|width=95% class="wikitable" style="border-collapse:collapse; text-align:center;" | {|width=95% class="wikitable"style="border-collapse:collapse;text-align:center;" | ||
|- | |- | ||
!width=35%|Enemy | !width=35%|Enemy | ||
| Line 2,072: | Line 2,118: | ||
!Location | !Location | ||
|- | |- | ||
|[[File: | |[[File:PM Goomba idle.gif]]<br>[[Goomba]] | ||
|2 | |2 | ||
|1 | |1 | ||
|0 | |0 | ||
|[[Goomba Village ( | |[[Goomba Village (location)|Goomba Village]]<br>[[Goomba Road]]<br>[[Pleasant Path]]<br>[[Shy Guy's Toy Box]] | ||
|- | |- | ||
|[[File: | |[[File:PM Spiked Goomba idle.gif]]<br>[[Spiked Goomba]] | ||
|2 | |2 | ||
|2 | |2 | ||
|0 | |0 | ||
|[[Goomba Village ( | |[[Goomba Village (location)|Goomba Village]]<br>[[Goomba Road]]<br>[[Pleasant Path]] | ||
|- | |- | ||
|[[File: | |[[File:PM Paragoomba idle.gif]]<br>[[Paragoomba]] | ||
|2 | |2 | ||
|1 | |1 | ||
|0 | |0 | ||
|[[Goomba Village ( | |[[Goomba Village (location)|Goomba Village]]<br>[[Goomba Road]]<br>[[Pleasant Path]] | ||
|- | |- | ||
|[[File: | |[[File:PM Koopa Troopa idle.gif]]<br>[[Koopa Troopa]] | ||
|4 | |4 | ||
|1 | |1 | ||
| Line 2,096: | Line 2,142: | ||
|[[Pleasant Path]]<br>[[Koopa Bros. Fortress]] | |[[Pleasant Path]]<br>[[Koopa Bros. Fortress]] | ||
|- | |- | ||
|[[File: | |[[File:PM Paratroopa idle.gif]]<br>[[Koopa Paratroopa|Paratroopa]] | ||
|4 | |4 | ||
|1 | |1 | ||
| Line 2,102: | Line 2,148: | ||
|[[Pleasant Path]]<br>[[Koopa Bros. Fortress]] | |[[Pleasant Path]]<br>[[Koopa Bros. Fortress]] | ||
|- | |- | ||
|[[File: | |[[File:PM Fuzzy idle.gif]]<br>[[Fuzzy]] | ||
|3 | |3 | ||
|1 | |1 | ||
| Line 2,108: | Line 2,154: | ||
|[[Koopa Village]]<br>[[Shy Guy's Toy Box]] | |[[Koopa Village]]<br>[[Shy Guy's Toy Box]] | ||
|- | |- | ||
|[[File: | |[[File:PM Bob-omb idle.gif]]<br>[[Bob-omb]] | ||
|3 | |3 | ||
|1 | |1 | ||
| Line 2,114: | Line 2,160: | ||
|[[Koopa Bros. Fortress]] | |[[Koopa Bros. Fortress]] | ||
|- | |- | ||
|[[File: | |[[File:PM Bullet Bill idle.gif]]<br>[[Bullet Bill]] | ||
|2 | |2 | ||
|2 | |2 | ||
| Line 2,120: | Line 2,166: | ||
|[[Koopa Bros. Fortress]] | |[[Koopa Bros. Fortress]] | ||
|- | |- | ||
|[[File: | |[[File:PM Gloomba idle.gif]]<br>[[Gloomba]] | ||
| | |7 | ||
|2 | |||
|0 | |||
|[[Toad Town Tunnels]] | |||
|- | |||
|[[File:PM Spiked Gloomba idle.gif]]<br>[[Spiky Gloomba|Spiked Gloomba]] | |||
|7 | |||
|3 | |||
|0 | |0 | ||
|[[Toad Town Tunnels]] | |||
|[[ | |||
|- | |- | ||
|[[File:Monty | |[[File:PM Monty Mole idle.gif]]<br>[[Monty Mole]] | ||
|3 | |3 | ||
|2 | |2 | ||
| Line 2,132: | Line 2,184: | ||
|[[Mt. Rugged]] | |[[Mt. Rugged]] | ||
|- | |- | ||
|[[File:PM Cleft. | |[[File:PM Cleft idle.gif]]<br>[[Cleft]] | ||
|2 | |2 | ||
|2 | |2 | ||
| Line 2,138: | Line 2,190: | ||
|[[Mt. Rugged]] | |[[Mt. Rugged]] | ||
|- | |- | ||
|[[File: | |[[File:PM Bandit idle.gif]]<br>[[Bandit]] | ||
|5 | |5 | ||
|2 | |2 | ||
|0 | |0 | ||
|[[Dry Dry Desert]] | |[[Dry Dry Desert (Paper Mario)|Dry Dry Desert]] | ||
|- | |- | ||
|[[File: | |[[File:PM Pokey idle.gif]]<br>[[Pokey]] | ||
|4 | |4 | ||
|2 | |2 | ||
|0 | |0 | ||
|[[Dry Dry Desert]]<br>[[Shy Guy's Toy Box]] | |[[Dry Dry Desert (Paper Mario)|Dry Dry Desert]]<br>[[Shy Guy's Toy Box]] | ||
|- | |- | ||
|[[File:Pokey Mummy. | |[[File:PM Pokey Mummy idle.gif]]<br>[[Pokey Mummy]] | ||
|4 | |4 | ||
|2 | |2 | ||
|0 | |0 | ||
|[[Dry Dry Ruins]] | |[[Dry Dry Ruins (Paper Mario)|Dry Dry Ruins]] | ||
|- | |- | ||
|[[File: | |[[File:PM Buzzy Beetle idle.gif]]<br>[[Buzzy Beetle]] | ||
|3 | |3 | ||
|2 | |2 | ||
|2 | |2 | ||
|[[Dry Dry Ruins]]<br>[[Toad Town Tunnels]] | |[[Dry Dry Ruins (Paper Mario)|Dry Dry Ruins]]<br>[[Toad Town Tunnels]] | ||
|- | |- | ||
|[[File: | |[[File:PM Swooper fly idle.gif]] [[File:PM Swooper hang idle.gif]]<br>[[Swoop|Swooper]] | ||
|4 | |4 | ||
|2 | |2 | ||
|0 | |0 | ||
|[[Dry Dry Ruins]] | |[[Dry Dry Ruins (Paper Mario)|Dry Dry Ruins]] | ||
|- | |- | ||
|[[File: | |[[File:PM Paragloomba idle.gif]]<br>[[Paragloomba]] | ||
| | |7 | ||
| | |2 | ||
| | |0 | ||
|[[ | |[[Toad Town Tunnels]] | ||
|- | |- | ||
|[[File: | |[[File:PM Piranha Plant idle.gif]]<br>[[Piranha Plant]] | ||
|5 | |5 | ||
|3 | |3 | ||
| Line 2,180: | Line 2,232: | ||
|[[Forever Forest]] | |[[Forever Forest]] | ||
|- | |- | ||
|[[File: | |[[File:PM Forest Fuzzy idle.gif]]<br>[[Forest Fuzzy]] | ||
|6 | |6 | ||
|1 | |1 | ||
| Line 2,186: | Line 2,238: | ||
|[[Forever Forest]] | |[[Forever Forest]] | ||
|- | |- | ||
|[[File:Bzzap. | |[[File:PM Bzzap! idle.gif]]<br>[[Bzzap!]] | ||
|3 | |3 | ||
|6 | |6 | ||
| Line 2,192: | Line 2,244: | ||
|[[Forever Forest]]<br>[[Flower Fields]] | |[[Forever Forest]]<br>[[Flower Fields]] | ||
|- | |- | ||
|[[File: | |[[File:PM Hyper Goomba idle.gif]]<br>[[Hyper Goomba]] | ||
|7 | |7 | ||
|1 | |1 | ||
| Line 2,198: | Line 2,250: | ||
|[[Gusty Gulch]] | |[[Gusty Gulch]] | ||
|- | |- | ||
|[[File: | |[[File:PM Hyper Paragoomba idle.gif]]<br>[[Hyper Paragoomba]] | ||
|7 | |7 | ||
|1 | |1 | ||
| Line 2,204: | Line 2,256: | ||
|[[Gusty Gulch]] | |[[Gusty Gulch]] | ||
|- | |- | ||
|[[File:PM | |[[File:PM Hyper Cleft idle.gif]]<br>[[Hyper Cleft]] | ||
|4 | |4 | ||
|3 | |3 | ||
| Line 2,210: | Line 2,262: | ||
|[[Gusty Gulch]] | |[[Gusty Gulch]] | ||
|- | |- | ||
|[[File: | |[[File:PM Clubba idle.gif]]<br>[[Clubba]] | ||
|8 | |8 | ||
|3 | |3 | ||
| Line 2,216: | Line 2,268: | ||
|[[Tubba Blubba's Castle]]<br>[[Shy Guy's Toy Box]] | |[[Tubba Blubba's Castle]]<br>[[Shy Guy's Toy Box]] | ||
|- | |- | ||
|[[File: | |[[File:PM Dark Koopa idle.gif]] [[File:PM Dark Koopa grin idle.gif]]<br>[[Dark Koopa]] | ||
| | |8 | ||
|3 | |||
|2 | |2 | ||
|[[Toad Town Tunnels]] | |[[Toad Town Tunnels]] | ||
|- | |- | ||
|[[File: | |[[File:PM Shy Guy red idle.gif]] [[File:PM Shy Guy yellow idle.gif]] [[File:PM Shy Guy green idle.gif]] [[File:PM Shy Guy blue idle.gif]] [[File:PM Shy Guy pink idle.gif]]<br>[[Shy Guy]] | ||
|7 | |7 | ||
|2 | |2 | ||
|0 | |0 | ||
|[[ | |[[Shy Guy's Toy Box]] | ||
|- | |- | ||
|[[File: | |[[File:PM Groove Guy idle.gif]]<br>[[Groove Guy]] | ||
|7 | |7 | ||
|2 | |||
|2 | |||
|0 | |0 | ||
|[[Shy Guy's Toy Box]] | |[[Shy Guy's Toy Box]] | ||
|- | |- | ||
|[[File: | |[[File:PM Sky Guy idle.gif]]<br>[[Sky Guy]] | ||
|7 | |7 | ||
|3 | |3 | ||
| Line 2,258: | Line 2,292: | ||
|[[Shy Guy's Toy Box]] | |[[Shy Guy's Toy Box]] | ||
|- | |- | ||
|[[File: | |[[File:PM Spy Guy slingshot idle.gif]] [[File:PM Spy Guy hammer idle.gif]]<br>[[Spy Guy]] | ||
|7 | |7 | ||
|2 | |2 | ||
| Line 2,264: | Line 2,298: | ||
|[[Shy Guy's Toy Box]] | |[[Shy Guy's Toy Box]] | ||
|- | |- | ||
|[[File: | |[[File:PM Medi Guy idle.gif]]<br>[[Medi Guy]] | ||
|7 | |7 | ||
|1 | |1 | ||
| Line 2,270: | Line 2,304: | ||
|[[Shy Guy's Toy Box]] | |[[Shy Guy's Toy Box]] | ||
|- | |- | ||
|[[File: | |[[File:PM Pyro Guy idle.gif]]<br>[[Pyro Guy]] | ||
|7 | |7 | ||
|4 | |4 | ||
| Line 2,276: | Line 2,310: | ||
|[[Shy Guy's Toy Box]] | |[[Shy Guy's Toy Box]] | ||
|- | |- | ||
|[[File: | |[[File:PM Jungle Fuzzy idle.gif]]<br>[[Jungle Fuzzy]] | ||
|7 | |7 | ||
|2 | |2 | ||
| Line 2,282: | Line 2,316: | ||
|[[Jade Jungle]] | |[[Jade Jungle]] | ||
|- | |- | ||
|[[File: | |[[File:PM Spear Guy vertical idle.gif|bottom]] [[File:PM Spear Guy horizontal idle.gif|bottom]]<br>[[Spear Guy]] | ||
|7 | |7 | ||
|3 | |3 | ||
| Line 2,288: | Line 2,322: | ||
|[[Jade Jungle]] | |[[Jade Jungle]] | ||
|- | |- | ||
|[[File:Hurt Plant. | |[[File:PM Hurt Plant idle.gif]]<br>[[Hurt Plant]] | ||
|8 | |8 | ||
|2 | |2 | ||
| Line 2,294: | Line 2,328: | ||
|[[Jade Jungle]] | |[[Jade Jungle]] | ||
|- | |- | ||
|[[File: | |[[File:PM M. Bush idle.gif]]<br>[[M. Bush]] | ||
|8 | |8 | ||
|3 | |3 | ||
| Line 2,300: | Line 2,334: | ||
|[[Jade Jungle]] | |[[Jade Jungle]] | ||
|- | |- | ||
|[[File:Putrid Piranha | |[[File:PM Putrid Piranha idle.gif]]<br>[[Putrid Piranha]] | ||
|12 | |12 | ||
|3 | |3 | ||
| Line 2,306: | Line 2,340: | ||
|[[Jade Jungle]]<br>[[Mt. Lavalava]] | |[[Jade Jungle]]<br>[[Mt. Lavalava]] | ||
|- | |- | ||
|[[File: | |[[File:PM White Magikoopa idle.gif]] [[File:PM White Magikoopa flying idle.gif]]<br>[[White Magikoopa|W Magikoopa]] | ||
|11 | |11 | ||
|3 | |3 | ||
| Line 2,312: | Line 2,346: | ||
|[[Jade Jungle]]<br>[[Mt. Lavalava]]<br>[[Flower Fields]]<br>[[Crystal Palace]] | |[[Jade Jungle]]<br>[[Mt. Lavalava]]<br>[[Flower Fields]]<br>[[Crystal Palace]] | ||
|- | |- | ||
|[[File: | |[[File:PM Lava Bubble idle.gif]]<br>[[Lava Bubble]] | ||
|9 | |9 | ||
|4 | |4 | ||
| Line 2,318: | Line 2,352: | ||
|[[Mt. Lavalava]] | |[[Mt. Lavalava]] | ||
|- | |- | ||
|[[File: | |[[File:PM Spike Top idle.gif]]<br>[[Spike Top]] | ||
|4 | |4 | ||
|3 | |3 | ||
| Line 2,324: | Line 2,358: | ||
|[[Mt. Lavalava]]<br>[[Toad Town Tunnels]] | |[[Mt. Lavalava]]<br>[[Toad Town Tunnels]] | ||
|- | |- | ||
|[[File: | |[[File:PM Red Magikoopa idle.gif]] [[File:PM Red Magikoopa flying idle.gif]]<br>[[Red Magikoopa|R Magikoopa]] | ||
|11 | |11 | ||
|3 | |3 | ||
| Line 2,330: | Line 2,364: | ||
|[[Mt. Lavalava]]<br>[[Flower Fields]]<br>[[Crystal Palace]] | |[[Mt. Lavalava]]<br>[[Flower Fields]]<br>[[Crystal Palace]] | ||
|- | |- | ||
|[[File: | |[[File:PM Crazee Dayzee idle.gif]]<br>[[Crazee Dayzee]] | ||
|8 | |8 | ||
|4 | |4 | ||
| Line 2,336: | Line 2,370: | ||
|[[Flower Fields]] | |[[Flower Fields]] | ||
|- | |- | ||
|[[File:Amazy | |[[File:PM Amazy Dayzee idle.gif]]<br>[[Amazy Dayzee]] | ||
|20 | |20 | ||
|20 | |20 | ||
| Line 2,342: | Line 2,376: | ||
|[[Flower Fields]] | |[[Flower Fields]] | ||
|- | |- | ||
|[[File: | |[[File:PM Monty Mole green idle.gif]]<br>[[Monty Mole (green)|Monty Mole]] | ||
|12 | |12 | ||
|3 | |3 | ||
| Line 2,348: | Line 2,382: | ||
|[[Flower Fields]] | |[[Flower Fields]] | ||
|- | |- | ||
|[[File: | |[[File:PM Ruff Puff idle.gif]]<br>[[Ruff Puff]] | ||
|10 | |10 | ||
|4 | |4 | ||
| Line 2,354: | Line 2,388: | ||
|[[Flower Fields]] | |[[Flower Fields]] | ||
|- | |- | ||
|[[File: | |[[File:PM Spiny idle.gif]]<br>[[Spiny]] | ||
|5 | |5 | ||
|4 | |4 | ||
| Line 2,360: | Line 2,394: | ||
|[[Flower Fields]]<br>[[Toad Town Tunnels]] | |[[Flower Fields]]<br>[[Toad Town Tunnels]] | ||
|- | |- | ||
|[[File: | |[[File:PM Lakitu idle.gif]]<br>[[Lakitu]] | ||
|12 | |12 | ||
|3 | |3 | ||
| Line 2,366: | Line 2,400: | ||
|[[Flower Fields]] | |[[Flower Fields]] | ||
|- | |- | ||
|[[File:PM | |[[File:PM Green Magikoopa idle.gif]] [[File:PM Green Magikoopa flying idle.gif]]<br>[[Green Magikoopa|GRN Magikoopa]] | ||
|11 | |11 | ||
|3 | |3 | ||
| Line 2,372: | Line 2,406: | ||
|[[Flower Fields]]<br>[[Crystal Palace]] | |[[Flower Fields]]<br>[[Crystal Palace]] | ||
|- | |- | ||
|[[File: | |[[File:PM Yellow Magikoopa idle.gif]] [[File:PM Yellow Magikoopa flying idle.gif]]<br>[[Yellow Magikoopa|Y Magikoopa]] | ||
|11 | |11 | ||
|3 | |3 | ||
| Line 2,378: | Line 2,412: | ||
|[[Flower Fields]]<br>[[Crystal Palace]] | |[[Flower Fields]]<br>[[Crystal Palace]] | ||
|- | |- | ||
|[[File: | |[[File:PM Frost Piranha idle.gif]]<br>[[Frost Piranha]] | ||
|10 | |10 | ||
|4 | |4 | ||
| Line 2,384: | Line 2,418: | ||
|[[Shiver Snowfield]]<br>[[Shiver Mountain]] | |[[Shiver Snowfield]]<br>[[Shiver Mountain]] | ||
|- | |- | ||
|[[File: | |[[File:PM Gulpit idle.gif]]<br>[[Gulpit]] | ||
|12 | |12 | ||
|2 | |2 | ||
| Line 2,390: | Line 2,424: | ||
|[[Shiver Snowfield]], [[Shiver Mountain]] | |[[Shiver Snowfield]], [[Shiver Mountain]] | ||
|- | |- | ||
|[[File:Duplighost | |[[File:PM Duplighost idle.gif]]<br>[[Duplighost]] | ||
|15 | |15 | ||
|4 | |4 | ||
| Line 2,396: | Line 2,430: | ||
|[[Shiver Mountain]]<br>[[Crystal Palace]]<br>[[Bowser's Castle]] | |[[Shiver Mountain]]<br>[[Crystal Palace]]<br>[[Bowser's Castle]] | ||
|- | |- | ||
|[[File: | |[[File:PM White Clubba idle.gif]]<br>[[White Clubba]] | ||
|12 | |12 | ||
|5 | |5 | ||
| Line 2,402: | Line 2,436: | ||
|[[Shiver Mountain]]<br>[[Crystal Palace]] | |[[Shiver Mountain]]<br>[[Crystal Palace]] | ||
|- | |- | ||
|[[File:Swoopula | |[[File:PM Swoopula fly idle.gif]] [[File:PM Swoopula hang idle.gif]]<br>[[Swoopula]] | ||
|8 | |8 | ||
|2 | |2 | ||
| Line 2,408: | Line 2,442: | ||
|[[Crystal Palace]] | |[[Crystal Palace]] | ||
|- | |- | ||
|[[File: | |[[File:PM Gray Magikoopa idle.gif]]<br>[[Gray Magikoopa|GRY Magikoopa]] | ||
|11 | |11 | ||
|3 | |3 | ||
| Line 2,414: | Line 2,448: | ||
|[[Crystal Palace]] | |[[Crystal Palace]] | ||
|- | |- | ||
|[[File: | |[[File:PM Ember idle.gif]]<br>[[Ember]] | ||
|10 | |10 | ||
|4 | |4 | ||
| Line 2,420: | Line 2,454: | ||
|[[Star Way]] | |[[Star Way]] | ||
|- | |- | ||
|[[File: | |[[File:PM Koopatrol idle.gif]]<br>[[Koopatrol]] | ||
|8 | |8 | ||
|4 | |4 | ||
| Line 2,426: | Line 2,460: | ||
|[[Shy Guy's Toy Box]]<br>[[Bowser's Castle]] | |[[Shy Guy's Toy Box]]<br>[[Bowser's Castle]] | ||
|- | |- | ||
|[[File: | |[[File:PM Hammer Bro idle.gif]]<br>[[Hammer Bro]] | ||
|12 | |12 | ||
|5 | |5 | ||
| Line 2,432: | Line 2,466: | ||
|[[Shy Guy's Toy Box]]<br>[[Bowser's Castle]] | |[[Shy Guy's Toy Box]]<br>[[Bowser's Castle]] | ||
|- | |- | ||
|[[File:PM Magikoopa idle.gif]] [[File:PM Magikoopa flying idle.gif]]<br>[[Magikoopa]] (2) | |||
|11 | |11 | ||
|6 | |6 | ||
| Line 2,443: | Line 2,472: | ||
|[[Bowser's Castle]] | |[[Bowser's Castle]] | ||
|- | |- | ||
|[[File: | |[[File:PM Bony Beetle idle.gif|bottom]] [[File:PM Bony Beetle spiked idle.gif|bottom]]<br>[[Bony Beetle]] | ||
|8 | |8 | ||
|3 | |3 | ||
| Line 2,449: | Line 2,478: | ||
|[[Bowser's Castle]] | |[[Bowser's Castle]] | ||
|- | |- | ||
|[[File: | |[[File:PM Bombshell Bill idle.gif]]<br>[[Bombshell Bill]] | ||
|3 | |3 | ||
|6 | |6 | ||
| Line 2,455: | Line 2,484: | ||
|[[Bowser's Castle]] | |[[Bowser's Castle]] | ||
|- | |- | ||
|[[File: | |[[File:PM B Bill Blaster idle.gif]]<br>[[Bombshell Bill Blaster|B. Bill Blaster]] | ||
|10 | |10 | ||
|0 | |0 | ||
| Line 2,461: | Line 2,490: | ||
|[[Bowser's Castle]] | |[[Bowser's Castle]] | ||
|- | |- | ||
|[[File: | |[[File:PM Dry Bones idle.gif]]<br>[[Dry Bones]] | ||
|8 | |8 | ||
|4 | |4 | ||
| Line 2,471: | Line 2,500: | ||
===Unused enemies=== | ===Unused enemies=== | ||
<center> | <center> | ||
{|width=95% class="wikitable" style="border-collapse:collapse; text-align:center;" | {|width=95% class="wikitable"style="border-collapse:collapse;text-align:center;" | ||
|- | |- | ||
!width=35%|Enemy | !width=35%|Enemy | ||
| Line 2,496: | Line 2,525: | ||
[[File:Mort T.png|thumb|Mario talking to Mort T.]] | [[File:Mort T.png|thumb|Mario talking to Mort T.]] | ||
The overworld of ''Paper Mario'' is filled with many characters that Mario can talk to. When approached, a speech bubble icon will appear above their head which signifies they can be spoken to. | The overworld of ''Paper Mario'' is filled with many characters that Mario can talk to. When approached, a speech bubble icon will appear above their head which signifies they can be spoken to. | ||
===List of named / notable NPCs in ''Paper Mario''=== | ===List of named / notable NPCs in ''Paper Mario''=== | ||
{|width=80% | {|width=80% | ||
|width=25% style="vertical-align:top;"| | |width=25% style="vertical-align:top;"| | ||
'''Goomba Village''' | '''Goomba Village''' | ||
*[[Gooma]] | *[[Gooma]] | ||
*[[Goomama]] | *[[Goomama]] | ||
| Line 2,507: | Line 2,534: | ||
*[[Goompa]] | *[[Goompa]] | ||
*[[Goompapa]] | *[[Goompapa]] | ||
'''Toad Town''' | '''Toad Town''' | ||
*[[Chan]] | *[[Chan]] | ||
*[[ | *[[Pop Diva]] | ||
*[[Chet Rippo]] | *[[Chet Rippo]] | ||
*[[Club 64 | *[[Club 64 bartender]] | ||
*[[Dane T.]] | *[[Dane T.]] | ||
*[[Fice T.]] | *[[Fice T.]] | ||
*[[Fishmael]] | *[[Fishmael]] | ||
*[[Fuzzipede]] | *[[Fuzzipede]] | ||
*[[Harry | *[[Great Gossip Trio]] | ||
*[[Harry (Paper Mario)|Harry]] | |||
*[[Lee]] | *[[Lee]] | ||
*[[Master Poet]] | *[[Master Poet]] | ||
*[[Merlon]] | *[[Merlon]] | ||
*[[Minh T.]] | *[[Minh T.]] | ||
*[[Mini T.]] | |||
*[[Muss T.]] | *[[Muss T.]] | ||
*[[Postmaster]] | *[[Postmaster]] | ||
*The [[Rangers]] | |||
*[[Rip Cheato]] | *[[Rip Cheato]] | ||
*[[Rowf and Rhuff]] | *[[Rowf and Rhuff]] | ||
| Line 2,530: | Line 2,558: | ||
*[[Tayce T.]] | *[[Tayce T.]] | ||
*[[The Master]] | *[[The Master]] | ||
*[[Three Beautiful Sisters]] | |||
*[[Whale (character)|Whale]] | *[[Whale (character)|Whale]] | ||
'''Mario's House''' | '''Mario's House''' | ||
*[[Luigi]] | *[[Luigi]] | ||
| Line 2,538: | Line 2,566: | ||
*[[Merlow]] | *[[Merlow]] | ||
*[[Merluvlee]] | *[[Merluvlee]] | ||
'''Koopa Village''' | '''Koopa Village''' | ||
*[[Bruce]] | *[[Bruce]] | ||
*[[Kolorado's wife]] | *[[Kolorado's wife]] | ||
*[[Koopa Koot]] | *[[Koopa Koot]] | ||
*[[Koover]] | *[[Koover]] | ||
*[[Mort T.]] | *[[Mort T.]] | ||
'''Mt. Rugged''' | '''Mt. Rugged''' | ||
*[[Whacka]] | *[[Whacka]] | ||
'''Dry Dry Desert''' | '''Dry Dry Desert''' | ||
*[[Nomadimouse (character)|Nomadimouse]] | *[[Nomadimouse (character)|Nomadimouse]] | ||
'''Dry Dry Outpost''' | '''Dry Dry Outpost''' | ||
*[[Little Mouser (character)|Little Mouser]] | *[[Little Mouser (character)|Little Mouser]] | ||
| Line 2,559: | Line 2,582: | ||
*[[Mr. E (Paper Mario)|Mr. E]] | *[[Mr. E (Paper Mario)|Mr. E]] | ||
*[[Toad in the Desert]] | *[[Toad in the Desert]] | ||
'''Forever Forest''' | '''Forever Forest''' | ||
*[[Oaklie]] | *[[Oaklie]] | ||
'''Boo's Mansion''' | '''Boo's Mansion''' | ||
*[[Bootler]] | *[[Bootler]] | ||
| Line 2,571: | Line 2,592: | ||
*[[Herbert]] | *[[Herbert]] | ||
*[[Stanley (Paper Mario)|Stanley]] | *[[Stanley (Paper Mario)|Stanley]] | ||
'''Tubba Blubba's Castle''' | '''Tubba Blubba's Castle''' | ||
*[[Yakkey]] | *[[Yakkey]] | ||
'''Shy Guy's Toy Box''' | '''Shy Guy's Toy Box''' | ||
*[[Gourmet Guy]] | *[[Gourmet Guy]] | ||
'''Yoshi's Village''' | '''Yoshi's Village''' | ||
*[[Fearsome 5]] | *[[Fearsome 5]] | ||
*[[Village Leader]] | *[[Village Leader]] | ||
'''Jade Jungle''' | '''Jade Jungle''' | ||
*[[Raphael the Raven]] | *[[Raphael the Raven]] | ||
'''Flower Fields''' | '''Flower Fields''' | ||
*[[Bubble Plant]] | *[[Bubble Plant]] | ||
| Line 2,595: | Line 2,611: | ||
*[[Tolielip]] | *[[Tolielip]] | ||
*[[Wise Wisterwood]] | *[[Wise Wisterwood]] | ||
'''Shiver City''' | '''Shiver City''' | ||
*[[Herringway]] | *[[Herringway]] | ||
*[[Mayor Penguin]] | *[[Mayor Penguin]] | ||
*[[Mayor Penguin's wife]] | |||
*[[Penguin patrol]] | *[[Penguin patrol]] | ||
|width=25% style="vertical-align:top;"| | |width=25% style="vertical-align:top;"| | ||
| Line 2,604: | Line 2,620: | ||
*[[Frost T.]] | *[[Frost T.]] | ||
*[[Merle]] | *[[Merle]] | ||
'''Shiver Mountain''' | '''Shiver Mountain''' | ||
*[[Madam Merlar]] | *[[Merlumina|Madam Merlar]] | ||
'''Bowser's Castle''' | '''Bowser's Castle''' | ||
*[[Guard Door]] | *[[Guard Door]] | ||
| Line 2,613: | Line 2,627: | ||
*[[Spiky John]] | *[[Spiky John]] | ||
*[[Spiky Tom]] | *[[Spiky Tom]] | ||
*[[Toad Minister]] | *[[Chancellor|Toad Minister]] | ||
'''Roaming characters''' | '''Roaming characters''' | ||
*[[Chuck Quizmo]] | *[[Chuck Quizmo]] | ||
*[[Kolorado]] | |||
*[[Trading Event Toad]]{{conjectural|*}} | *[[Trading Event Toad]]{{conjectural|*}} | ||
*[[Vanna T.]] | *[[Vanna T.]] | ||
|} | |} | ||
==Locations== | ==Locations== | ||
{{PM | {{PM map}} | ||
{|width=60% | {|width=60% | ||
|colspan=3|''Paper Mario'' takes place in the Mushroom Kingdom, spanning several different areas around Princess Peach's Castle. [[Toad Town]] serves as the game's central hub and gives Mario a place to return to after every chapter. | |colspan=3|''Paper Mario'' takes place in the Mushroom Kingdom, spanning several different areas around Princess Peach's Castle. [[Toad Town]] serves as the game's central hub and gives Mario a place to return to after every chapter. | ||
| Line 2,629: | Line 2,642: | ||
|width=35% style="vertical-align:top;"| | |width=35% style="vertical-align:top;"| | ||
'''Settlements''' | '''Settlements''' | ||
*[[Mario Bros.' House|Mario's House]] | *[[Mario Bros.' House|Mario's House]] | ||
*[[Toad Town]] | *[[Toad Town]] | ||
| Line 2,635: | Line 2,647: | ||
**[[Harry's Shop]] | **[[Harry's Shop]] | ||
**[[Playroom]] | **[[Playroom]] | ||
**[[Post Office]] | **[[Toad Town Post Office]] | ||
**[[Shroom Grocery]] | **[[Shroom Grocery]] | ||
*[[Goomba Village ( | *[[Goomba Village (location)|Goomba Village]] | ||
*[[Koopa Village]] | *[[Koopa Village]] | ||
**[[Koopa's Shop]] | **[[Koopa's Shop]] | ||
| Line 2,653: | Line 2,665: | ||
|width=38% style="vertical-align:top;"| | |width=38% style="vertical-align:top;"| | ||
'''Transitional Areas''' | '''Transitional Areas''' | ||
*[[Goomba Road]] | *[[Goomba Road]] | ||
**[[Goomba King's Fortress]] | **[[Goomba King's Fortress]] | ||
| Line 2,659: | Line 2,670: | ||
*[[Pleasant Path]] | *[[Pleasant Path]] | ||
*[[Mt. Rugged]] | *[[Mt. Rugged]] | ||
*[[Dry Dry Desert]] | *[[Dry Dry Desert (Paper Mario)|Dry Dry Desert]] | ||
**[[Dry Dry Railroad]] | **[[Dry Dry Railroad]] | ||
*[[Forever Forest]] | *[[Forever Forest]] | ||
| Line 2,674: | Line 2,685: | ||
|style="vertical-align:top;"| | |style="vertical-align:top;"| | ||
'''Dungeons/Boss arenas''' | '''Dungeons/Boss arenas''' | ||
*[[Peach's Castle]] | *[[Peach's Castle]] | ||
**[[Peach's Bedroom]] | **[[Peach's Bedroom]] | ||
*[[Koopa Bros. Fortress]] | *[[Koopa Bros. Fortress]] | ||
*[[Dry Dry Ruins]] | *[[Dry Dry Ruins (Paper Mario)|Dry Dry Ruins]] | ||
*[[Tubba Blubba's Castle]] | *[[Tubba Blubba's Castle]] | ||
*[[Windy Mill]] | *[[Windy Mill]] | ||
| Line 2,693: | Line 2,703: | ||
[[File:PM Star Piece Goombaria.png|thumb|Mario earning a Star Piece from Goombaria.]] | [[File:PM Star Piece Goombaria.png|thumb|Mario earning a Star Piece from Goombaria.]] | ||
{{main|List of Star Pieces in Paper Mario}} | {{main|List of Star Pieces in Paper Mario}} | ||
[[Star Piece (Paper Mario series)|Star Piece]]s are golden octahedral star fragments that can be found all over the Mushroom Kingdom. There are 160 in total. They can be collected and brought to Merlow at Shooting Star Summit in exchange for Badges. | |||
[[Star Piece (Paper Mario)|Star Piece]]s are golden octahedral star fragments that can be found all over the Mushroom Kingdom. There are 160 in total. They can be collected and brought to Merlow at Shooting Star Summit in exchange for Badges. | |||
A lot of Star Pieces can be found lying around in the overworld, usually hidden behind objects. Some Star Pieces are buried beneath hidden floor panels that require either the [[Spin Jump]] or the [[Ultra Hammer]] to collect. Star Pieces are also often given away as rewards or sold as wares by NPCs. | A lot of Star Pieces can be found lying around in the overworld, usually hidden behind objects. Some Star Pieces are buried beneath hidden floor panels that require either the [[Spin Jump]] or the [[Ultra Hammer]] to collect. Star Pieces are also often given away as rewards or sold as wares by NPCs. | ||
| Line 2,702: | Line 2,711: | ||
[[File:ChuckQuizmo'sQuiz.png|thumb|left|Chuck Quizmo's trivia quiz.]] | [[File:ChuckQuizmo'sQuiz.png|thumb|left|Chuck Quizmo's trivia quiz.]] | ||
{{main|Chuck Quizmo}} | {{main|Chuck Quizmo}} | ||
Chuck Quizmo is a character who can randomly be encountered in one of the game's many towns, along with his assistant Vanna T. Upon finding him, the player has the opportunity to partake in a quiz show. Chuck Quizmo will ask the player a trivia question about the game and present them with three possible answers. If the correct choice is selected, the player receives a Star Piece. Otherwise Chuck Quizmo has to be found again for another try. There are 64 questions in total the player can answer. | |||
Chuck Quizmo is a character who can randomly be encountered in one of the game's many towns. Upon finding him, the player has the opportunity to partake in a quiz show. Chuck Quizmo will ask the player a trivia question about the game and present them with three possible answers. If the correct choice is selected, the player receives a Star Piece. Otherwise Chuck Quizmo has to be found again for another try. There are 64 questions in total the player can answer. | |||
{{br}} | {{br}} | ||
| Line 2,715: | Line 2,723: | ||
===Koopa Koot's favors=== | ===Koopa Koot's favors=== | ||
[[File:PM Talking to Koopa Koot Screenshot.png|thumb|left|Koopa Koot requesting a favor from Mario.]] | [[File:PM Talking to Koopa Koot Screenshot.png|thumb|left|Koopa Koot requesting a favor from Mario.]] | ||
{{main|Koopa Koot | {{main|Koopa Koot}} | ||
Once the player reaches [[Koopa Village]] in chapter 1, they have the opportunity to meet Koopa Koot, an elderly [[Koopa Troopa]] infamous among his acquaintances for asking favors of people. | |||
Once the player reaches [[Koopa Village]] in chapter 1, they have the opportunity to meet | |||
When speaking to Koopa Koot after resolving Koopa Village's Fuzzy problem, he will ask Mario for a favor, which usually entails obtaining a specific item and bringing it to him. Upon completion of the favor, Koopa Koot will usually reward Mario with a single coin. In some cases however, the reward will be three Star Pieces in a bulk, or an item that unlocks new minigames in the [[Playroom|Toad Town Playroom]]. | When speaking to Koopa Koot after resolving Koopa Village's Fuzzy problem, he will ask Mario for a favor, which usually entails obtaining a specific item and bringing it to him. Upon completion of the favor, Koopa Koot will usually reward Mario with a single coin. In some cases however, the reward will be three Star Pieces in a bulk, or an item that unlocks new minigames in the [[Playroom|Toad Town Playroom]]. | ||
| Line 2,723: | Line 2,730: | ||
===Tayce T.'s recipes=== | ===Tayce T.'s recipes=== | ||
[[File: | [[File:PM Tayce T Screenshot.png|thumb|Mario visiting Tayce T.]] | ||
{{main|List of Tayce T. recipes}} | {{main|List of Tayce T. recipes}} | ||
[[Tayce T.]] is an elderly Toad woman who lives in Toad Town. She is initially inaccessible due to debris blocking the road to her house, but can be talked to after the Koopa Bros. have been defeated. | [[Tayce T.]] is an elderly Toad woman who lives in Toad Town. She is initially inaccessible due to debris blocking the road to her house, but can be talked to after the Koopa Bros. have been defeated. | ||
Mario can give Tayce T. ingredients which she will turn into new items by cooking them. At first only one item can be given to her at a time, but after bringing her the [[Cookbook]] from Shy Guy's Toy Box in | Mario can give Tayce T. ingredients which she will turn into new items by cooking them. At first only one item can be given to her at a time, but after bringing her the [[Cookbook]] from Shy Guy's Toy Box in Chapter 4, the player unlocks the ability to have her use two ingredients. The blackboard in Mario's House is keeping track of how many recipes have been found and can be checked at any time. | ||
{{br}} | {{br}} | ||
===Letter delivery=== | ===Letter delivery=== | ||
{{main|List of letters in Paper Mario#Normal Letters}} | {{main|List of letters in Paper Mario#Normal Letters}} | ||
In various locations of the Mushroom Kingdom, Mario can find letters that have been dropped by Parakarry. Once Parakarry has joined Mario's group, Mario can deliver these lost letters to their intended recipients by talking to them while Parakarry is the active | [[File:Parakarry and Kolorado PM.jpg|thumb|left|Parakarry delivering mail to [[Kolorado]].]] | ||
In various locations of the Mushroom Kingdom, Mario can find letters that have been dropped by Parakarry. Once Parakarry has joined Mario's group, Mario can deliver these lost letters to their intended recipients by talking to them while Parakarry is the active party member. Doing so rewards the player with Star Pieces, another letter, or other items. | |||
{{br}} | {{br}} | ||
==Services== | ==Services== | ||
A lot of different vendors, establishments, and merchants can be found all over the Mushroom Kingdom. Most of them offer their services for [[Coin|coins]] which can be found inside ?-Blocks or earned from battling enemies. | A lot of different vendors, establishments, and merchants can be found all over the Mushroom Kingdom. Most of them offer their services for [[Coin|coins]] which can be found inside ?-Blocks or earned from battling enemies. | ||
===Toad Houses=== | ===Toad Houses=== | ||
[[File:PM Goomba Village Toad House.png|thumb | [[File:PM Goomba Village Toad House.png|thumb|Toad House in [[Goomba Village (location)|Goomba Village]].]] | ||
[[Toad Houses]] are establishments that can be found in all major towns featured in ''Paper Mario''. They can be recognized by their signs which show a picture of a Toad's head. Toad Houses serve as hotels and Mario and his friends can rest in them to restore Heart Points, Flower Points, and Star Power. Unlike inns in traditional RPGs, they do not charge money for this service. | [[Toad Houses]] are establishments that can be found in all major towns featured in ''Paper Mario''. They can be recognized by their signs which show a picture of a Toad's head. Toad Houses serve as hotels and Mario and his friends can rest in them to restore Heart Points, Flower Points, and Star Power. Unlike inns in traditional RPGs, they do not charge money for this service. | ||
| Line 2,749: | Line 2,755: | ||
[[File:ShroomGrocery.png|thumb|left|The [[Shroom Grocery]] in Toad Town.]] | [[File:ShroomGrocery.png|thumb|left|The [[Shroom Grocery]] in Toad Town.]] | ||
{{main|List of shops in Paper Mario}} | {{main|List of shops in Paper Mario}} | ||
Scattered across the Mushroom Kingdom are various common goods stores, identifiable by their [[Fire Flower]] sign. Here the player can take their coins to buy items that cause different effects in and out of battles. Additionally, they may get a coin refund by [[List of selling prices in Paper Mario|selling items]] they do not want. | Scattered across the Mushroom Kingdom are various common goods stores, identifiable by their [[Fire Flower]] sign. Here the player can take their coins to buy items that cause different effects in and out of battles. Additionally, they may get a coin refund by [[List of selling prices in Paper Mario|selling items]] they do not want. | ||
| Line 2,756: | Line 2,761: | ||
Item Shops also offer a check system that allows the player to store and withdraw items. This storage space is shared by all stores, which means the player can store an item in one shop and then later withdraw it from another. Up to 32 items can be stored that way. | Item Shops also offer a check system that allows the player to store and withdraw items. This storage space is shared by all stores, which means the player can store an item in one shop and then later withdraw it from another. Up to 32 items can be stored that way. | ||
{{br}} | {{br}} | ||
===Merlon's house=== | ===Merlon's house=== | ||
[[File:Paper Mario Merlon Tells a Story.png|thumb | [[File:Paper Mario Merlon Tells a Story.png|thumb|Inside Merlon's house.]] | ||
[[Merlon]] is Toad Town's local fortune-teller. His services become available after Mario has visited Shooting Star Summit and gotten the Lucky Star. For a fee of five coins, Merlon will foresee Mario's future and give the player a hint about the next game objective. | [[Merlon]] is Toad Town's local fortune-teller. His services become available after Mario has visited Shooting Star Summit and gotten the Lucky Star. For a fee of five coins, Merlon will foresee Mario's future and give the player a hint about the next game objective. | ||
{{br}} | {{br}} | ||
| Line 2,765: | Line 2,771: | ||
[[Merluvlee]] is another fortune-teller who lives at the foot of Shooting Star Summit. She will divine the locations of Star Pieces, Badges, and Super Blocks. She charges 5 coins, 20 coins, and 30 coins for each of them respectively. | [[Merluvlee]] is another fortune-teller who lives at the foot of Shooting Star Summit. She will divine the locations of Star Pieces, Badges, and Super Blocks. She charges 5 coins, 20 coins, and 30 coins for each of them respectively. | ||
Her house also contains the counterpart to the [[Treasure Chest | Her house also contains the counterpart to the [[Mysterious Treasure Chest]] in Peach's Castle. Any items that Princess Peach puts into the chest on her end can be retrieved by Mario here. | ||
Merluvlee's brother [[Merlow]] can be found on the second floor of the house. He informs Mario that he collects Star Pieces and is willing to trade Badges for them. Getting Badges from Merlow is the main purpose of collecting Star Pieces. | Merluvlee's brother [[Merlow]] can be found on the second floor of the house. He informs Mario that he collects Star Pieces and is willing to trade Badges for them. Getting Badges from Merlow is the main purpose of collecting Star Pieces. | ||
{{br}} | {{br}} | ||
===Toad Town | |||
===Toad Town Post Office=== | |||
{{main|List of letters in Paper Mario}} | {{main|List of letters in Paper Mario}} | ||
[[File:Post Office.png|thumb|Mario inside the '''Post Office'''.]] | [[File:Post Office.png|thumb|Mario inside the '''Toad Town Post Office'''.]] | ||
The [[Post Office]] is a building located in central Toad Town, across the street from Merlon's house. Over the course of the game, letters addressed at Mario's | The [[Toad Town Post Office]] is a building located in central Toad Town, across the street from Merlon's house. Over the course of the game, letters addressed at Mario's party members arrive there, written by different characters Mario met on his journey. The player can visit the post office at any time and talk to the postal worker in charge to view the letters. There is no benefit to reading the letters, but the service is free and reveals what became of the sender after their encounter with Mario. | ||
Mario himself also receives letters during the game. These letters are not stored at the post office and can be found in the bedroom of Mario's House. | Mario himself also receives letters during the game. These letters are not stored at the post office and can be found in the bedroom of Mario's House. | ||
{{br}} | {{br}} | ||
===Badge Shop=== | ===Badge Shop=== | ||
{{main|Rowf and Rhuff}} | {{main|Rowf and Rhuff}} | ||
[[File:Rowf and Rhuff.png|thumb|left|Badge Shop.]] | [[File:Rowf and Rhuff.png|thumb|left|Badge Shop.]] | ||
The | The Badge Shop is an open-air store located in the central part of Toad Town, across the street from the gate to [[Flower Fields]]. It opens for business after the Koopa Bros. have been defeated in Chapter 1. The player can purchase Badges in exchange for coins. | ||
Sixteen different | Sixteen different Badges can be purchased from the Badge Shop, although only three will be available at a time. The selection changes randomly over time until all Badges have been bought. | ||
{{br}} | {{br}} | ||
=== | |||
[[File:Lil Oinks.png|thumb| | ===Li'l Oink Farm=== | ||
[[File:Lil Oinks.png|thumb| Li'l Oinks in their pen.]] | |||
{{main|Li'l Oink}} | {{main|Li'l Oink}} | ||
Once the Koopa Bros. have been defeated and the road to the southern part of Toad Town has been cleared of debris, Mario can visit the Li'l Oink Farm. For 10 coins, the player can purchase an egg that will hatch into a Li'l Oink and move into the nearby pigpen. | |||
Once the Koopa Bros. have been defeated and the road to the southern part of Toad Town has been cleared of debris, Mario can visit | |||
The pen can hold a maximum of 10 animals. If an additional egg is bought while the pen is full, the oldest Li'l Oink will escape and leave behind an item correlating to its color. The player can use this to obtain various items, including ones that are hard to obtain otherwise. | The pen can hold a maximum of 10 animals. If an additional egg is bought while the pen is full, the oldest Li'l Oink will escape and leave behind an item correlating to its color. The player can use this to obtain various items, including ones that are hard to obtain otherwise. | ||
| Line 2,797: | Line 2,805: | ||
From the moment it is cast until it runs out, the spell will randomly take effect before or after certain actions, mostly during battles. | From the moment it is cast until it runs out, the spell will randomly take effect before or after certain actions, mostly during battles. | ||
*If it takes effect before Mario attacks, the damage of his attack will increase by three. | *If it takes effect before Mario attacks, the damage of his attack will increase by three. | ||
*If it takes effect during the enemies' turn, Mario's defense will increase by three. | *If it takes effect during the enemies' turn, Mario's defense will increase by three. | ||
*If it takes effect once all enemies have been defeated, it doubles the amount of Star Points received. | *If it takes effect once all enemies have been defeated, it doubles the amount of Star Points received. | ||
*If it takes effect right after a battle, it will increase the amount of coins dropped by the enemy. | *If it takes effect right after a battle, it will increase the amount of coins dropped by the enemy. | ||
Once the spell has ran out, the player has to return to Merlee and pay her again if they wish to keep the beneficial effects. | Once the spell has ran out, the player has to return to Merlee and pay her again if they wish to keep the beneficial effects. | ||
{{br}} | {{br}} | ||
| Line 2,819: | Line 2,825: | ||
The Wii U Virtual Console version is darker throughout the whole game, but has a smoother framerate not unlike the Nintendo 64 version. Fire/explosion effects match that of the original version (albeit darker), but the magic/transformation wave effects are altered, but in a different way than in the Wii version. In addition, the light effects are malformed and have a black glow. Loading is as fast as the Wii version. | The Wii U Virtual Console version is darker throughout the whole game, but has a smoother framerate not unlike the Nintendo 64 version. Fire/explosion effects match that of the original version (albeit darker), but the magic/transformation wave effects are altered, but in a different way than in the Wii version. In addition, the light effects are malformed and have a black glow. Loading is as fast as the Wii version. | ||
=== | The Wii release requires 270 blocks (34.5 MB) to be installed, while the Wii U release requires 101 MB to be installed. | ||
===Wii Shop Channel Description=== | |||
''Paper Mario is a graphically innovative game that breaks the confines of the RPG genre. Now slimmed down, everyone's favorite plumber flips, spins, jumps, and hammers his way through scads of exotic worlds that teem with a huge and hugely entertaining supporting cast. Players control numerous characters, both old and new, in a complex, nonlinear story that follows different scenarios depending on player choices. A dizzying collection of spells, attacks, skills, and special items can be collected by players willing to thoroughly explore the lush 3-D environments!'' | ''Paper Mario is a graphically innovative game that breaks the confines of the RPG genre. Now slimmed down, everyone's favorite plumber flips, spins, jumps, and hammers his way through scads of exotic worlds that teem with a huge and hugely entertaining supporting cast. Players control numerous characters, both old and new, in a complex, nonlinear story that follows different scenarios depending on player choices. A dizzying collection of spells, attacks, skills, and special items can be collected by players willing to thoroughly explore the lush 3-D environments!'' | ||
===[[ | ===Wii U [[Nintendo eShop#Wii U|eShop]] Description=== | ||
''After Bowser™ steals the Star Rod and kidnaps Princess Peach™, Mario™ plots to rescue the seven Star Spirits and free the Mushroom Kingdom from the Koopa's rule. As Mario travels from the tropical jungles of Lavalava Island to the frosty heights of Shiver Mountain, he'll need all the help he can get.<p>Master the abilities of the seven Star Spirits and the other allies joining the adventure to aid our hero on the battlefield. There are over 50 Badges to locate that, when equipped, will grant special abilities and powerful attacks. The turn-based battle system will make fighting Bowser's baddies equal parts strategy and timing. Discover over 100 items, mix them together, and cook up fantastic creations that will send your enemies' spinning and fleeing.</p>Close the book on Bowser's story before his evil deeds turn the world upside down and only his wishes come true! | ''After Bowser™ steals the Star Rod and kidnaps Princess Peach™, Mario™ plots to rescue the seven Star Spirits and free the Mushroom Kingdom from the Koopa's rule. As Mario travels from the tropical jungles of Lavalava Island to the frosty heights of Shiver Mountain, he'll need all the help he can get.<p>Master the abilities of the seven Star Spirits and the other allies joining the adventure to aid our hero on the battlefield. There are over 50 Badges to locate that, when equipped, will grant special abilities and powerful attacks. The turn-based battle system will make fighting Bowser's baddies equal parts strategy and timing. Discover over 100 items, mix them together, and cook up fantastic creations that will send your enemies' spinning and fleeing.</p>Close the book on Bowser's story before his evil deeds turn the world upside down and only his wishes come true! | ||
| Line 2,828: | Line 2,835: | ||
===Similarities with ''Super Mario RPG: Legend of the Seven Stars''=== | ===Similarities with ''Super Mario RPG: Legend of the Seven Stars''=== | ||
''Paper Mario'' shares many elements with its spiritual predecessor ''[[Super Mario RPG: Legend of the Seven Stars]]'', seeing as it was initially intended to be a sequel. These similarities include: | ''Paper Mario'' shares many elements with its spiritual predecessor ''[[Super Mario RPG: Legend of the Seven Stars]]'', seeing as it was initially intended to be a sequel. These similarities include: | ||
*'' Paper Mario'' was originally going to be called ''Super Mario RPG 2'', but was later renamed "''Super Mario Adventure''" (while still in development) due to legal reasons. Eventually, it received its finalized international title to emphasize the unique graphical style of the game. | |||
*''Paper Mario'' was originally going to be called '' | |||
*As with ''Super Mario RPG'', Bowser is the very first boss to be fought in the game. | *As with ''Super Mario RPG'', Bowser is the very first boss to be fought in the game. | ||
*After the cutscene that takes place when Mario is defeated by Bowser, the ''Paper Mario'' logo is displayed | *After the cutscene that takes place when Mario is defeated by Bowser, the ''Paper Mario'' logo is displayed similarly to how the ''Super Mario RPG'' logo (sans subtitle) is displayed after [[Exor]] crashes into [[Bowser's Castle|Bowser's Keep]] and destroys the [[Star Road (Super Mario RPG)|Star Road]]. | ||
* | *Revised versions of [[Star Hill]] and the [[Chancellor]] from ''Super Mario RPG'' reappear, although this is lost in translation in the international versions, with the former being renamed Shooting Star Summit and the latter the Toad Minister. | ||
*The [[Shy Guy]] riot in [[Toad Town]] is similar to [[Mack]] and the [[Shyster]]s' takeover of the Mushroom Kingdom in ''Super Mario RPG | *The [[Shy Guy]] riot in [[Toad Town]] is similar to [[Claymorton|Mack]] and the [[Shymore|Shyster]]s' takeover of the Mushroom Kingdom in ''Super Mario RPG''. | ||
*Both ''Paper Mario'' and ''Super Mario RPG'' contain karate dojos. | *Both ''Paper Mario'' and ''Super Mario RPG'' contain karate dojos. | ||
*[[The Master]] is ''Paper Mario'''s equivalent of [[Jinx]], as they are both powerful senseis that are fought three times (with each battle getting harder), and are completely optional. The Master also shares the role of an optional boss harder than the final, main boss, like [[Culex]]. | *[[The Master]] is ''Paper Mario'''s equivalent of [[Jinx]], as they are both powerful senseis that are fought three times (with each battle getting harder), and are completely optional. The Master also shares the role of an optional boss harder than the final, main boss, like [[Culex]]. | ||
*Both games have plots that involve finding seven stars | *Both games have plots that involve finding seven stars and have something to do with wishes not being granted due to what the games' main antagonists have done. | ||
*The opening storylines of both games begin with the usual "Mario battling Bowser to save Peach" scenario | *The opening storylines of both games begin with the usual "Mario battling Bowser to save Peach" scenario when Mario suddenly becomes overpowered and sent hurtling a great distance away. In ''Super Mario RPG'', as Mario goes to free Peach after defeating Bowser, Smithy's gang sends Exor crashing into the castle, the impact sending Mario flying, landing back at his house. In ''Paper Mario'', as Mario is fighting Bowser, Bowser makes himself invincible with the Star Rod, then dispatches Mario out a window, and he crash lands in a field just outside Goomba Village. | ||
*In both games, Bowser's castle is unreachable throughout most of the story. In ''Super Mario RPG'', it cannot be reached because the bridge is down; in ''Paper Mario'', the castle is | *In both games, Bowser's castle is unreachable throughout most of the story. In ''Super Mario RPG'', it cannot be reached because the bridge is down; in ''Paper Mario'', the castle is up in the sky. Also, both games feature a special vehicle that is used to reach the castle (the [[royal bus]] and [[Star Ship]], respectively). | ||
*Mario uses jump and hammer attacks, which in both games have regular, super, and ultra variations. Both have the | *Mario uses [[jump]] and [[hammer]] attacks, which in both games have regular, super, and ultra variations. Both have the three hammer variants, but the jump variants in ''Super Mario RPG'' are special moves Mario learns, whereas ''Paper Mario'' has these variants as the [[boots]] Mario finds to improve his jumping ability. | ||
*The [[Power Bounce]] | *The [[Power Bounce]] Badge is reminiscent of Mario's Super Jump ability in ''Super Mario RPG''. | ||
*Mario's first | *Mario's first party member in both games has a special move that identifies the enemy (Mallow's "Psychopath" and Goombario's "Tattle"). | ||
*Both games feature a special area where Mario can turn into 8-bit Mario, complete with 8-bit sounds and music. | *Both games feature a special area where Mario can turn into 8-bit Mario, complete with 8-bit sounds and music. | ||
*In both games, Mario can travel to an island where [[Yoshi]]s live. | *In both games, Mario can travel to an island where [[Yoshi (species)|Yoshi]]s live. | ||
*During the second boss battle with Bowser, he | *During the second boss battle with Bowser, he can temporarily disable some of Mario's commands, similar to how [[Bowyer]] disables certain button commands during his battle in ''Super Mario RPG''. | ||
*When [[Lava Piranha]] re-emerges from the lava after the first phase of the battle, it resembles [[Czar Dragon]]'s resurrection as [[Zombone]]. | *When [[Lava Piranha]] re-emerges from the lava after the first phase of the battle, it resembles [[Czar Dragon]]'s resurrection as [[Zombone]]. | ||
*Both games feature a volcano as a location where a star is hidden. Both areas have an escape sequence after locating the | *Both games feature a volcano as a location where a star is hidden. Both areas have an escape sequence after locating the star, though the reason behind it is different (in ''Super Mario RPG'', the Axem Rangers are escaping with the Star; in ''Paper Mario'', the volcano is erupting). | ||
*The endings in both games feature a parade that is led by Luigi and ends with a fireworks display. | *The endings in both games feature a parade that is led by Luigi and ends with a fireworks display. | ||
*Both ''Super Mario RPG'' and ''Paper Mario'' feature a [[Hammer Bro]] who hosts a quiz game. | *Both ''Super Mario RPG'' and ''Paper Mario'' feature a [[Hammer Bro]] who hosts a quiz game. | ||
*During the parade in the ending of ''Paper Mario'', Twink flies by with Mario and Peach waving at him on a starlit float, as [[Geno]] does in ''Super Mario RPG''. | *During the parade in the ending of ''Paper Mario'', Twink flies by with Mario and Peach waving at him on a starlit float, as [[Geno]] does in ''Super Mario RPG''. | ||
*Both games feature antagonist groups that are based on characters from TV series (the Koopa Bros. are based on the {{wp|Teenage Mutant Ninja Turtles}}, while the [[Axem Rangers]] are based on | *Both games feature antagonist groups that are based on characters from TV series (the Koopa Bros. are based on the {{wp|Teenage Mutant Ninja Turtles}}, while the [[Axem Rangers]] are based on ''{{wp|Super Sentai}}''). | ||
*In both games, the battle for the sixth star takes place in the sky (the Axem Rangers battle and the Huff N. Puff battle). | *In both games, the battle for the sixth star takes place in the sky (the Axem Rangers battle and the Huff N. Puff battle). | ||
*Both games have a party member who fights against Mario first before joining him (Bowser and Lakilester). | *Both games have a party member who fights against Mario first before joining him (Bowser and Lakilester). | ||
*Both ''Super Mario RPG'' and ''Paper Mario'' have three-headed [[Piranha Plant]] bosses ([[ | *Both ''Super Mario RPG'' and ''Paper Mario'' have three-headed [[Piranha Plant]] bosses ([[Smilax]] and [[Lava Piranha]]). | ||
*The battle systems of both games contain a feature where correctly timed player input makes the protagonists perform better overall. ''Super Mario RPG'' has "timed hits", while ''Paper Mario'' has "action commands". | *The battle systems of both games contain a feature where correctly timed player input makes the protagonists perform better overall. ''Super Mario RPG'' has "timed hits", while ''Paper Mario'' has "action commands". | ||
*Both games | *Both games feature a sidequest involving helping an artist ([[Toadofsky]] in ''Super Mario RPG'' and the [[Master Poet]] in ''Paper Mario'') complete a piece of music, though the specifics of how they are resolved is different. | ||
===References to other games=== | ===References to other games=== | ||
In addition to its many similarities to ''Super Mario RPG'', ''Paper Mario'' has many elements that reference other games: | In addition to its many similarities to ''Super Mario RPG'', ''Paper Mario'' has many elements that reference other games: | ||
*''[[Donkey Kong (game)|Donkey Kong]]'' - The opening theme plays when confronting the [[Koopa Bros.]] in [[Koopa Bros. Fortress]], followed by the Koopa Bros. theme. Also, Mario's pixel form's colors is based on his colors from the game's artwork and sprite. | *''[[Donkey Kong (game)|Donkey Kong]]'' - The opening theme plays when confronting the [[Koopa Bros.]] in [[Koopa Bros. Fortress]], followed by the Koopa Bros. theme. Also, [[Mario]]'s pixel form's colors is based on his colors from the game's artwork and sprite. | ||
*''[[Super Mario Bros.]]'' - By entering a vase in Boo's Mansion, Mario can assume his appearance from this game's sprites, albeit with the color scheme used for him in the game's artwork. Also, if the player waits fifteen or more seconds when a chapter title is shown on screen, the overworld theme will play. There is a | *''[[Super Mario Bros.]]'' - By entering a vase in Boo's Mansion, Mario can assume his appearance from this game's sprites, albeit with the color scheme used for him in the game's artwork. Also, if the player waits fifteen or more seconds when a chapter title is shown on screen, the overworld theme will play. There is a [[Candy Pop]] on [[Pleasant Path]] which will give free hearts and play the [[Super Star|invincibility]] theme if Mario runs around it. The coloration of [[Luigi]]'s parade outfit during the credits matches his outfit from this game, including the gold-colored emblem on his cap. The opening theme for the [[64th Trivia Quiz-Off]] features the jingle for clearing a course in this game at the beginning. Bowser's Castle in ''Paper Mario'' features a segment similar to the maze featured in [[World 7-4 (Super Mario Bros.)|World 7-4]], where Mario must choose the correct path to continue or be sent back to its start. | ||
* ''[[Super Mario Bros.: The Lost Levels]]'' - The ending theme for the [[64th Trivia Quiz-Off]] has the same beginning notes as the bonus theme from the ''All-Stars'' version of this game. Additionally, at the end of the game, when Peach thanks all of the friendly characters for helping restore peace to the Mushroom Kingdom, the music that plays is this game's ending theme. | * ''[[Super Mario Bros.: The Lost Levels]]'' - The ending theme for the [[64th Trivia Quiz-Off]] has the same beginning notes as the bonus theme from the ''All-Stars'' version of this game. Additionally, at the end of the game, when Peach thanks all of the friendly characters for helping restore peace to the Mushroom Kingdom, the music that plays is this game's ending theme. | ||
*''[[Super Mario Bros. 2]]'' - After saving | *''[[Super Mario Bros. 2]]'' - After saving Luigi from a [[Shy Guy]], he says "I'm a great jumper, but my running needs some work", referencing his higher jumps and lower speed from this game. | ||
*''[[Super Mario Bros. 3]]'' - When the Koopa Bros. fire [[Bullet Bill]]s at Mario and his | *''[[Super Mario Bros. 3]]'' - Elements from the castle theme is incorporated in the background music for the Koopa Bros. Fortress. When the Koopa Bros. fire [[Bullet Bill]]s at Mario and his party members, a cover of the [[Koopalings]]' [[Airship]] theme plays. The Koopa Bros. fight theme is a cover of the Hammer Bros. theme from this game. The level up music is a cover of the overworld theme from World 1. When Mario finds a new hammer or pair of boots, an arrangement of the boss clear theme plays. When Mario rescues a Star Spirit, an arrangement of the "King Saved" theme is played. Another arrangement plays when Mario wins the Star Rod back from Bowser. | ||
*''[[Dr. Mario (game)|Dr. Mario]]'' - When Mario defeats the [[Fuzzipede]] boss, the whale exclaims that "they should call | *''[[Dr. Mario (game)|Dr. Mario]]'' - When Mario defeats the [[Fuzzipede]] boss, the whale exclaims that "they should call him Dr. Mario!" | ||
*''[[Super Mario World]]'' - The Attack FX E | *''[[Super Mario World]]'' - The [[Attack FX E]] Badge makes the same sound that Yoshi makes when Mario jumps on his back. Also, the main melody for the overworld, underwater, and athletic themes is a cover for ''Paper Mario''{{'}}s title screen music, with notable modifications. This melody can also be heard during the first half of the parade during the game's ending. The switch theme can be heard as part of the battle music during the fight with [[Bowser???]]. The song that plays on the Golden Oldies station of the radio is a cover of the credits theme. The sound effect heard when the player presses Start and brings up the file select is similar to the sound effect for [[Message Block]]s in this game. Lastly, [[Dry Bones]] borrow their style and behavior from their ''Super Mario World'' iteration, including red shoes and the ability to throw bones at Mario. | ||
*''[[Super Mario World 2: Yoshi's Island]]'' - [[Bandit]]s (the red kind, that only take coins), [[ | *''[[Super Mario World 2: Yoshi's Island]]'' - [[Bandit]]s (the red kind, that only take coins), [[Spear Guy]]s, [[Pyro Guy]]s, a [[Big Lantern Ghost|Lantern Ghost]], forward-facing [[Piranha Plant]]s, and [[Crazee Dayzee]]s appear as enemies. [[Goomba]]s, [[Boo]]s, and [[Chain Chomp]]s use their designs from this game, with the Boos and Chomps closely resembling [[Bigger Boo]]'s artwork and [[Big Chain Chomp|Chomp Shark]]s respectively. The [[Clubba]]s' face design resemble the Spikes' design from this game, with the [[White Clubba]]s closely resembling to them. [[Sushie]]'s coloration and Squirt attack favor the appearance and abilities of the [[Spray Fish]], [[Spy Guy]]s wear flowers on their heads like [[Petal Guy]]s. [[Stone Chomp]]s appear similar to the brown [[Chomp Rock]]s. The music used for Yoshi's Village and when the [[Fearsome 5]] are missing is a cover of this game's title screen music. [[Little Mouser]]s (being blue based on their in-game sprite and purple based on their artwork), [[Raven]]s (including [[Raphael the Raven|Raphael]]) and [[Bumpty|Bumpties]] (simply called "penguins" in-game) make an appearance as NPCs. [[Lava Piranha]] and [[Kent C. Koopa]] are similar in appearance to [[Naval Piranha]] and [[Hookbill the Koopa]] respectively. The final boss battle against Bowser had some similarities to the final boss fight in ''Yoshi's Island'', namely that his right-hand minion enchants Bowser to become larger in order to increase the odds of beating his nemesis (with the only notable difference being that Kamek cast the spell on Bowser directly, while Kammy Koopa merely activated the [[Power Platform]] to have Bowser become larger). [[Poochy]], a blue-colored Bandit, and a [[Nep-Enut]] appear in one of [[List of Paper Mario pre-release and unused content#Early builds|the game's early builds]]. | ||
*''[[Super Mario 64]]'' - Peach's Castle design is similar to that used in this game's box art and is near identical inside, but without the paintings. Both games begin with a letter from Peach. Also, Mario jumps into a painting to access the third floor of Boo's Mansion similar to the way he accessed areas in this game. The Stone Cap is an item based on the powered-up caps and it functions similar to the [[Metal Cap]]. | *''[[Super Mario 64]]'' - Peach's Castle design is similar to that used in this game's box art and is near identical inside, but without the paintings. Both games begin with a letter from Peach. Also, Mario jumps into a painting to access the third floor of Boo's Mansion similar to the way he accessed areas in this game. The Stone Cap is an item based on the powered-up caps and it functions similar to the [[Metal Cap]]. | ||
*''[[Mario Kart 64]]'' - | *''[[Mario Kart 64]]'' - Both the [[K64]] and [[Dry Dry Desert (Paper Mario)|Dry Dry Desert]] are directly inspired by [[N64 Kalimari Desert|Kalimari Desert]], with both locations sharing the same name in Japanese (カラカラさばく, ''Karakara Sabaku'') but being translated differently. When riding the train, a cover of the Kalimari Desert theme plays. | ||
*''[[Mario Golf (Nintendo 64)|Mario Golf]]'', ''[[Mario Tennis (Nintendo 64)|Mario Tennis]]'', and | *''[[Mario Golf (Nintendo 64)|Mario Golf]]'', ''[[Mario Tennis (Nintendo 64)|Mario Tennis]]'', and [[Mario Party (series)|''Mario Party'' series]] - On page 1 of [[Luigi's Diary]], it says, ''"I remember the carefree days when we played Golf and Tennis and had Parties."'' The capital letters specifically hint at their respective games. | ||
*[[zeldawiki:The Legend of Zelda (Series)|''The Legend of Zelda'' series]] - If [[Goombario]] uses [[tattle]] on [[Sheek]] after he reveals his true identity, he will start his tattle with "da da da dum", a reference to the "item get" theme from this series. Also, Sheek himself is a reference to [[Sheik]] from ''[[zeldawiki:The Legend of Zelda: Ocarina of Time|The Legend of Zelda: Ocarina of Time]]''. | *[[zeldawiki:The Legend of Zelda (Series)|''The Legend of Zelda'' series]] - If [[Goombario]] uses [[tattle]] on [[Sheek]] after he reveals his true identity, he will start his tattle with "da da da dum", a reference to the "item get" theme from this series. Also, Sheek himself is a reference to [[Sheik]] from ''[[zeldawiki:The Legend of Zelda: Ocarina of Time|The Legend of Zelda: Ocarina of Time]]''. | ||
*''[[Luigi's Mansion]]'' - On page 2 of Luigi's Diary, he talks about how much he is afraid of ghosts. On page 7, it says, ''"I want to play the lead in an adventure! Of course, my name would have to be in the title. That'd be sweet... But I know it'll never happen..."'' Less than year after ''Paper Mario'', ''Luigi's Mansion'' was released for the [[Nintendo GameCube]], with Luigi as the main character tasked with fighting ghosts. | *''[[Luigi's Mansion]]'' - On page 2 of Luigi's Diary, he talks about how much he is afraid of ghosts. On page 7, it says, ''"I want to play the lead in an adventure! Of course, my name would have to be in the title. That'd be sweet... But I know it'll never happen..."'' Less than year after ''Paper Mario'', ''Luigi's Mansion'' was released for the [[Nintendo GameCube]], with Luigi as the main character tasked with fighting ghosts. | ||
===References in later games=== | ===References in later games=== | ||
[[File:MKSC Rainbow Road Starting Line.png|240px | [[File:MKSC Rainbow Road Starting Line.png|240px|thumb|The castle in the background of Rainbow Road.]] | ||
*''[[Mario Kart: Super Circuit]]'' - Peach's castle is seen on top of Bowser's castle just like in ''Paper Mario'', located in the background of the course [[Rainbow Road ( | *''[[Super Smash Bros. Melee]]'' - There is a [[Trophy (Super Smash Bros. series)|trophy]] of Mario in his [[List of Mario profiles and statistics#Super Smash Bros. Melee|Paper form]]. | ||
*''[[Mario Party 5]]'' - The Star Spirits return as hosts. | *''[[Mario Kart: Super Circuit]]'' - Peach's castle is seen on top of Bowser's castle just like in ''Paper Mario'', located in the background of the course [[Rainbow Road (Mario Kart: Super Circuit)|Rainbow Road]]. The [[Goomba]]s and [[Hammer Bro]]s. at the award ceremony use their design from ''Paper Mario''. | ||
*''[[Mario Party 5]]'' - The Star Spirits return as hosts, but here are named the Star ''Guards'' instead. | |||
*''[[Mario & Luigi: Superstar Saga]]'' / ''[[Mario & Luigi: Superstar Saga + Bowser's Minions]]'' - A block from ''Paper Mario'' appears in Woohoo Hooniversity, along with blocks from other games. The name of the game is even mentioned in the block's description. | *''[[Mario & Luigi: Superstar Saga]]'' / ''[[Mario & Luigi: Superstar Saga + Bowser's Minions]]'' - A block from ''Paper Mario'' appears in Woohoo Hooniversity, along with blocks from other games. The name of the game is even mentioned in the block's description. | ||
*''[[Paper Mario: The Thousand-Year Door]]'' - Parakarry makes a brief cameo at the beginning of the game, and delivers a letter to Mario from Peach, just like the previous game. Lady Bow also makes a cameo appearance, and makes a direct reference to Boo's Mansion, as well as the adventure they had. There is also a random [[Toad]] at the [[Excess Express]] (after Chapter 6 is completed) that will ask Mario a quiz question, ("What did Bowser steal in the first Paper Mario?"), and the answer is, "Star Rod". The | *''[[Paper Mario: The Thousand-Year Door]]'' - Parakarry makes a brief cameo at the beginning of the game, and delivers a letter to Mario from Peach, just like the previous game. Lady Bow also makes a cameo appearance, and makes a direct reference to Boo's Mansion, as well as the adventure they had. There is also a random [[Toad]] at the [[Excess Express]] (after Chapter 6 is completed) that will ask Mario a quiz question, ("What did Bowser steal in the first Paper Mario?"), and the answer is, "Star Rod". The videogame-obsessed Toad kid from [[Petalburg]] also mentions that he has been playing this game, describing Bow as the "cutest Boo of ALL TIME!!!" Jr. Troopa also appears in the background in the picture that [[Zip Toad]] attached to his e-mail. Additionally, several parallels exist between bosses and other critical elements in the two games: | ||
**The first chapter boss is known to terrorize the denizens of the nearby town in both games and resides in a fortress. The two bosses also have lore that explains a relationship to later, stronger bosses; [[Kent C. Koopa]] is said to have trained the Koopa Bros., while [[Gloomtail]] and [[Bonetail]] are relatives of Hooktail. | |||
**The second chapter's boss features an enemy hired by the main villain to occupy a historically significant, ancient location. | |||
**The third chapter boss in both games is a member of the [[Spike]] species with an inferiority complex, stemming from an actualized lack of strength, that they "solve" through nefarious means. | |||
**The fifth chapter involves Mario and friends traveling to a tropical island. The boss in both games has "parts" with their own attack patterns and HP, and is found inside the cave of a tropical island. Additionally, both bosses are fought in multiple "stages." | |||
**The sixth chapter boss in both games is one entity consisting of multiple, smaller members of their species (and both explode when defeated, releasing the smaller units toward the screen). | |||
**The seventh chapter involves traveling far away to an icy world which contains a town whose denizens at one point are distrustful of Mario and his friends, preventing him from accessing the chapter's "dungeon." | |||
**In chapter eight, [[Palace of Shadow Tower]] has many of the same puzzles from [[Shiver Mountain]] and [[Crystal Palace]], including walking through or blowing up seemingly solid walls, and the [[Palace of Shadow]] has puzzles and traps from [[Bowser's Castle]], including an area wherein Mario only makes progress by following a pattern (though this is actually taken from [[World 7-4 (Super Mario Bros.)|World 7-4]] in ''Super Mario Bros.'') and rooms with stairs where Mario has to defeat [[Bullet Bill Blaster]]s to reach the next level. | |||
*''[[Mario Pinball Land]]'' - [[Koopatrols]] appear as enemies in Bowser's castle. | *''[[Mario Pinball Land]]'' - [[Koopatrols]] appear as enemies in Bowser's castle. | ||
*''[[Super Mario 64 DS]]'' - The Goomba King returns in this game, | *''[[Super Mario 64 DS]]'' - The Goomba King returns in this game, now named [[Goomboss]]. | ||
*''[[Super Princess Peach]]'' - [[Koopatrols]] appear as statues in [[Bowser's Villa]]. | *''[[Super Princess Peach]]'' - [[Koopatrols]] appear as statues in [[Bowser's Villa]]. | ||
*''[[Mario Party 7]]'' - The board [[Pyramid Park]] has a Bowser Sphinx whose crown has the same colors and Chain Chomp ornament as [[Tutankoopa]]'s crown. | *''[[Mario Party 7]]'' - The board [[Pyramid Park]] has a Bowser Sphinx whose crown has the same colors and Chain Chomp ornament as [[Tutankoopa]]'s crown. | ||
*''[[Mario Kart DS]]'' - Goomboss also appears in this game's [[Mario Kart DS#Missions|Mission mode]]. | *''[[Mario Kart DS]]'' - Goomboss also appears in this game's [[Mario Kart DS#Missions|Mission mode]]. | ||
*''[[Mario & Luigi: Partners in Time]]'' - Star Hill appears once again and is north of the castle just like in this game. | *''[[Mario & Luigi: Partners in Time]]'' - Star Hill appears once again and is north of the castle just like in this game. | ||
*''[[Super Paper Mario]]'' - Every | *''[[Super Paper Mario]]'' - Every party member here returns as a [[Catch Card]] in this game. [[Francis]] also has posters of Lady Bow and Bootler in his castle. Tubba Blubba was also mentioned, and had his own TV show called, "''The Blubbening''". At the beginning of this game, all of Mario's party members, as well as his ones from ''Paper Mario: The Thousand-Year Door'', are all seen together in a photo. The "chapter parallels" return, though to a lesser extent. For Chapter 3 in both games, Mario travels through a castle with chambers/rooms similar to those of real-world large homes and castles, and both contain security entities that will remove Mario from the area if he is caught. For Chapter 5 in both games, the bosses once again have "cognizant limbs", and both happen to be plant-based. | ||
*''[[Itadaki Street DS]]'' - Three of the Chance Cards feature screenshots from ''Paper Mario''. | |||
*''[[Super Mario Galaxy]]'' - Both games begin with a letter from Peach to Mario, also Bowser's way of kidnapping Peach (by lifting her castle into the sky) is reused here. | *''[[Super Mario Galaxy]]'' - Both games begin with a letter from Peach to Mario, also Bowser's way of kidnapping Peach (by lifting her castle into the sky) is reused here. | ||
*''[[Super Smash Bros. Brawl]]'' - Kooper, Lady Bow, General Guy, and Kammy Koopa appear as [[Sticker (Super Smash Bros. Brawl)|Sticker]]s. Three of the Star Spirits - Eldstar, Muskular, and Misstar - are also represented by Stickers, but use their ''Mario Party 5'' artworks. | *''[[Super Smash Bros. Brawl]]'' - Kooper, Lady Bow, General Guy, and Kammy Koopa appear as [[Sticker (Super Smash Bros. Brawl)|Sticker]]s. Three of the Star Spirits - Eldstar, Muskular, and Misstar - are also represented by Stickers, but use their ''Mario Party 5'' artworks. | ||
| Line 2,892: | Line 2,906: | ||
*''[[Super Smash Bros. for Nintendo 3DS]]'' - In the [[Paper Mario (stage)|Paper Mario]] stage, the [[Whale (character)|whale]] from Chapter 5 appears under the [[S.S. Flavion]] variation of the stage lifting the ship up above the water. | *''[[Super Smash Bros. for Nintendo 3DS]]'' - In the [[Paper Mario (stage)|Paper Mario]] stage, the [[Whale (character)|whale]] from Chapter 5 appears under the [[S.S. Flavion]] variation of the stage lifting the ship up above the water. | ||
*''[[Paper Mario: Color Splash]]'' - When Mario collects a [[Big Paint Star]], an arrangement of the first few notes of this game's title theme is played. | *''[[Paper Mario: Color Splash]]'' - When Mario collects a [[Big Paint Star]], an arrangement of the first few notes of this game's title theme is played. | ||
*''[[Mario Party: The Top 100]]'' - The Star Spirits appear as a collectible representing ''Mario Party 5'', this time using their original name from this game. Star Haven is also mentioned in their profile. | |||
*''[[Super Smash Bros. Ultimate]]'' - Piranha Plant turns into a [[Putrid Piranha]] during its Poison Breath move, and spits poisonous gas to damage other fighters. It is also mentioned briefly by Viridi during Palutena's Guidance dialogue for Piranha Plant. Frost Piranha is also mentioned in Piranha Plant's Palutena's Guidance. | |||
*''[[Paper Mario: The Origami King]]'' - Peach's Castle is once again lifted into the sky, this time placed on top of a volcano. A picture of Peach's sprite from this game can be seen on the bridge of [[The Princess Peach]]. | |||
*''[[Paper Mario: The Thousand-Year Door (Nintendo Switch)|Paper Mario: The Thousand-Year Door]]'' ([[Nintendo Switch]]) - The map on the wall in the [[Mario Bros.' House]] has been changed to resemble the world map from this game. An arranged version of this game's title screen theme plays when Parakarry delivers the Magical Map to the Mario Bros.' House, and when talking to [[Lady Bow]] in [[Poshley Heights]]. [[Kooper]] is an incorrect answer in one of [[The Creepy Steeple Boo]]’s quizzes. Lastly, while the Riverside Station premises featured no background music in the GameCube version, it now plays blues rock music that heavily resembles the themes of [[Lakilester]] and [[Huff N' Puff]]. | |||
==Development== | |||
''Paper Mario'' started development as a sequel to ''[[Super Mario RPG: Legend of the Seven Stars]]'' and production was initially handled by staff that worked on the game, along with director [[Ryota Kawade]] who joined in an advisor position,<ref name="Shmuplations">{{cite|url=shmuplations.com/papermario|title=''Paper Mario'' – 2000 Developer Interview" (GSLA) (translated)|publisher=Shmuplations|accessdate=June 22, 2024|language=en}}</ref> and [[Shigeru Miyamoto]] who returned as a co-producer. Early in development, it was decided to divorce the project from ''Super Mario RPG'' and the developers took a year and a half to experiment with character and graphical style ideas, including pre-rendered sprites akin to ''Super Mario RPG''. Although development was initially done with {{wp|Silicon Graphics}} workstations as with most first-party Nintendo 64 games, the final game's graphics were done with internal [[Super Nintendo Entertainment System|Super Famicom]] tools. According to Nintendo producer Hiroyasu Sasano, the series' distinct paper-like style for character graphics came about from the belief that players "might be getting tired" of the computer-generated 3D graphics seen on consoles like the {{wp|PlayStation (console)|PlayStation}} as it was difficult for polygons to bring out the characters' "cuteness".<ref name="twenty">{{cite|author=Thor Jenson, K.|url=www.pcmag.com/news/20-years-ago-nintendo-transformed-the-rpg-genre-with-paper-mario|title=20 Years Ago, Nintendo Transformed the RPG Genre With ''Paper Mario''|date=August 11, 2020|publisher={{iw|wikipedia|PCMag}}|accessdate=June 22, 2024}}</ref> | |||
The original characters introduced in ''Super Mario RPG'' were not featured as the developers felt it was better to stick to "the main road" of the ''Super Mario'' franchise.<ref name="Shmuplations"/> The story was conceived early in development and the developers decided to focus on making other aspects of the game appealing to all players in the long run rather than making it "about some grand enticing story", especially as it was felt serious and dramatic themes would be at odd with the lighthearted feel of the franchise.<ref name="Shmuplations"/> Originally the main story was developed by [[HAL Laboratory]], which is best known for the ''[[wikirby:Kirby (series)|Kirby]]'' series, before development was handed over to Intelligent Systems.<ref>{{cite|deadlink=y|archive=web.archive.org/web/19990420174513/http://www.nintendo.com/n64/mariorpg2/index.html|title=''Super Mario RPG 2''|publisher=Nintendo.com|language=en-us|accessdate=June 22, 2024}}</ref> | |||
== | The development of ''Paper Mario'' took four years, a very long development cycle for the time.<ref name="Shmuplations"/> Particular focus was placed on the battle system, its designing taking up about half of the game's production time.<ref name="Shmuplations"/> As the developers were aware the game would be primarily played by a young audience, the game was balanced around the idea that combat would not be so easy as to be mindless but not so difficult that it would discourage players. The [[Action Command]]s were included to appeal to more seasoned players and the [[Badge]] system was put in place to simulate the traditional RPG feeling of growing stronger as the game progresses without featuring equipable weapons or a large amount of stats.<ref name="Shmuplations"/> | ||
==Soundtrack== | |||
The main soundtrack was composed by [[Yuka Tsujiyoko]], with event jingles and music-based sound effects written by Taishi Senda, while [[Koji Kondo]] was credited as the original composer of themes arranged from previous ''Super Mario'' and ''Yoshi'' games. Tsujiyoko stated that she used pieces of music that originated from games like ''[[Super Mario Bros.]]'', ''[[Super Mario Bros. 3]]'', and ''[[Super Mario World]]'', and expanded them to make the theme music fit in the game.<ref>{{cite|author=Kohler, Chris|url=www.wired.com/2007/07/paper-mario-the|title=''Paper Mario'': Then and Now|date=July 26, 2007|accessdate=June 22, 2024|language=en}}</ref> [[Paper Mario Game Music Soundtrack CD|A soundtrack for ''Paper Mario'']] was issued in 2001 by Nintendo of America in limited quantities as a bonus gift for subscribers to ''[[Nintendo Power]]''. 78 of the game's 167 music cues appear here, stored across two discs. Before that, another soundtrack for the game had been released in Japan only by {{iw|wikipedia|Enterbrain}}, which offered it to subscribers of its magazine ''{{iw|wikipedia|Famitsu}}''. | |||
|} | |||
==Media== | The musical score was entirely sequenced using instrumentation from the {{wp|Roland Sound Canvas}} SC-88 module.<ref>https://docs.google.com/spreadsheets/d/1JJBlHHDc65fhZmKUGLrDTLCm6rfUU83-kbuD8Y0zU0o/edit?pli=1#gid=717751203</ref> | ||
{{ | ===Media=== | ||
{{main-media}} | |||
{{media table | {{media table | ||
| | |file1=PM Prologue.ogv | ||
|title1=''{{FULLPAGENAME}}'' | |||
| | |||
|description1=Prologue | |description1=Prologue | ||
|length1= | |length1=0:30 | ||
| | |file2=PM-Title Screen Theme.oga | ||
|title2=''{{FULLPAGENAME}}'' | |||
| | |||
|description2=Title screen theme | |description2=Title screen theme | ||
|length2= | |length2=0:30 | ||
| | |file3=KoopaBrosAttack.oga | ||
|title3=''{{FULLPAGENAME}}'' | |||
| | |||
|description3=Attack of the Koopa Bros. | |description3=Attack of the Koopa Bros. | ||
|length3= | |length3=0:30 | ||
| | |file4=KoopaBrosKeepCool.oga | ||
|title4=''{{FULLPAGENAME}}'' | |||
| | |||
|description4=Koopa Bros. Keep Cool | |description4=Koopa Bros. Keep Cool | ||
}} | }} | ||
==Reception== | ==Reception== | ||
{| class="wikitable | ''Paper Mario'' received critical acclaim, with praise directed at its battle system, graphics, and soundtrack. Numerous critics compared ''Paper Mario'' to ''[[Super Mario RPG: Legend of the Seven Stars]]'', owing to their similar RPG mechanics. | ||
!colspan="4" style="font-size:120%; text-align:center; background-color:silver;"|Reviews | {|class="wikitable reviews" | ||
!colspan="4"style="font-size:120%;text-align:center;background-color:silver;"|Reviews | |||
|-style="background-color:#E6E6E6" | |-style="background-color:#E6E6E6" | ||
|Release | |Release | ||
| Line 2,965: | Line 2,952: | ||
|Comment | |Comment | ||
|- | |- | ||
|N64 | |[[Nintendo 64|N64]] | ||
|Adam Riley, [http://www.cubed3.com/review/182/1/paper-mario-nintendo-64.html Cubed3] | |Adam Riley, [http://www.cubed3.com/review/182/1/paper-mario-nintendo-64.html Cubed3] | ||
|9/10 | |9/10 | ||
|align="left"|"'It really is a difficult task for a team of game makers to follow on from what was already a brilliant game, but Intelligent Systems did just that. Taking their vast amount of previous experience, it built upon the Nintendo-Squaresoft foundation and made tweaks to the gameplay and length that move the series from entry-level role-playing to out-and-out RPG heaven, but still without the heavy statistics. Want a fun, but not too brief RPG adventure? Get this, get it now!''" | |align="left"|"''It really is a difficult task for a team of game makers to follow on from what was already a brilliant game, but Intelligent Systems did just that. Taking their vast amount of previous experience, it built upon the Nintendo-Squaresoft foundation and made tweaks to the gameplay and length that move the series from entry-level role-playing to out-and-out RPG heaven, but still without the heavy statistics. Want a fun, but not too brief RPG adventure? Get this, get it now!''" | ||
|- | |- | ||
|N64 | |N64 | ||
|Marcel van Duyn, [http://www.nintendolife.com/reviews/vc/paper_mario_n64 Nintendo Life] | |Marcel van Duyn, [http://www.nintendolife.com/reviews/vc/paper_mario_n64 Nintendo Life] | ||
|10/10 | |10/10 | ||
|align="left"|'' | |align="left"|"''Paper Mario was, much like Super Mario RPG was to the [[Super Nintendo Entertainment System|SNES]], the swansong of the N64. It was followed by a sequel, Paper Mario: The Thousand-Year Door, in 2004. It's still a frequent debate which of the two is better, though I would have to go with the sequel. Still, the original Paper Mario is also brilliant! Since the Wii can play GameCube games, you can just buy Paper Mario on VC and hunt down a copy of the sequel if you don't already own it. Any self-respecting Nintendo fan should play at least one of them.''" | ||
|- | |- | ||
|N64 | |N64 | ||
|Ben Stahl, [https://www.gamespot.com/reviews/paper-mario-review/1900-2682319/ GameSpot] | |Ben Stahl, [https://www.gamespot.com/reviews/paper-mario-review/1900-2682319/ GameSpot] | ||
|9.5/10 | |9.5/10 | ||
|align="left"|"'With stunning graphics, excellent sound, and extremely solid gameplay, Paper Mario is a quality game on all fronts. The sprite-based graphics combined with classic Mario gameplay make this a must-own for any Mario lover, and the simplified RPG system makes this a compelling game for both RPG fans and non-fans alike. Games of this caliber are few and far between, and it's too bad that Paper Mario might be the last great 2D Mario game.''" | |align="left"|"''With stunning graphics, excellent sound, and extremely solid gameplay, Paper Mario is a quality game on all fronts. The sprite-based graphics combined with classic Mario gameplay make this a must-own for any Mario lover, and the simplified RPG system makes this a compelling game for both RPG fans and non-fans alike. Games of this caliber are few and far between, and it's too bad that Paper Mario might be the last great 2D Mario game.''" | ||
|- | |- | ||
!colspan="4" style="background-color:silver; font-size:120%; text-align:center;"|Aggregators | !colspan="4"style="background-color:silver;font-size:120%;text-align:center;"|Aggregators | ||
|-style="background-color:#E6E6E6" | |-style="background-color:#E6E6E6" | ||
|colspan=2|Compiler | |colspan=2|Compiler | ||
| Line 2,994: | Line 2,981: | ||
==Staff== | ==Staff== | ||
{{main|List of Paper Mario staff}} | {{main|List of Paper Mario staff}} | ||
''Paper Mario'' was developed by [[Intelligent Systems]], an affiliate studio of Nintendo. [[Shigeru Miyamoto]] was the game's co-producer, alongside [[Kenji Miki]]. [[Ryota Kawade]] was the chief director and game designer, with sub-directors including Toshitaka Muramatsu, Takahiro Ōgi, and Hironobu Suzuki. Kumiko Takeda and Kaori Aoki wrote the game's script, while [[Naohiko Aoyama]] was the art director and character designer. The programming team was led by Kenji Nakajima and Kaoru Kita. | |||
''Paper Mario'' was developed by [[Intelligent Systems]], | |||
==Quotes== | ==Quotes== | ||
{{main|List of Paper Mario quotes}} | {{main|List of Paper Mario quotes}} | ||
*"''I came from Star Haven to grant your wish! It's our job to grant wishes, you know.''" – [[Twink]] | |||
*'' | *"''Welcome to Boo's Shop. How can I scare you today?''" – [[Igor]] | ||
*'' | *"''Hm! You have great hidden strength for one clothed like a plumber.''" – [[The Master]] | ||
*'' | *"''I'm actually a really sensitive guy, trapped in a huge body. I don't wanna be invincible anymore if I have to fight guys like you!''" – [[Tubba Blubba]] | ||
*'' | *"''You!! You ignored all those very scary warnings! Don't you have the common sense to get scared and run away? What's wrong with you!?''" – [[Tutankoopa]] | ||
*'' | *"''Oh no! I can't believe I left my secret diary lying out! It would be totally embarrassing if someone were to read that thing.''" – [[Bowser]] | ||
*'' | *"''Kaaaa-wiiiizzz! It's everyone's favorite quizmaster, Chuck Quizmo!''" – [[Chuck Quizmo]] | ||
*'' | *"''Shucks! First I think I get away from that ol' fishin' man... and then I get all swallowed up by some huge fish... and then this fella with the mustache goes upside my head.''" – [[Fuzzipede]] | ||
*'' | *"''Nyeah heh heh heh!!! Ooh, I can't wait until Mario gets here! He's gonna get beaten so bad! He'll probably start crying!''" – [[Kammy Koopa]] | ||
*'' | *"''Old man, you are simply the cat's meow!''" – [[Kolorado]] | ||
*'' | *"''I see. Great, just great. You're on an exciting adventure with Mario. Talk about unfair.''" – [[Luigi]] | ||
==Pre-release and unused content== | ==Pre-release and unused content== | ||
{{main|List of Paper Mario pre-release and unused content}} | {{main|List of Paper Mario pre-release and unused content}} | ||
Early screenshots of ''Paper Mario'' showed that [[Poochy]] was originally intended to play some sort of role in the game. Another screenshot showed that [[Nep-Enut]]s were going to be in the game (indicating that [[Lavalava Island]] was going to be more like Yoshi's Island). Also, a pre-release screenshot of Forever Forest showed that it would have originally been much smaller than it is in the final game, and that all of the forest's trees would have had sinister faces. | Early screenshots of ''Paper Mario'' showed that [[Poochy]] was originally intended to play some sort of role in the game. Another screenshot showed that [[Nep-Enut]]s were going to be in the game (indicating that [[Lavalava Island]] was going to be more like Yoshi's Island). Also, a pre-release screenshot of Forever Forest showed that it would have originally been much smaller than it is in the final game, and that all of the forest's trees would have had sinister faces. | ||
<gallery> | <gallery> | ||
PM Prerelease Poochy. | PM Prerelease Poochy.png|An early screenshot of ''Paper Mario'' with Poochy in it. | ||
PM Prerelease | PM Prerelease Nep-Enut.png|A [[Nep-Enut]] as seen in an early screenshot of the game. | ||
PM Prerelease Forever Forest 2. | PM Prerelease Forever Forest 2.png|A pre-release screenshot of Forever Forest, with different trees from the final game. | ||
</gallery> | </gallery> | ||
==Glitches== | ==Glitches== | ||
{{main|List of Paper Mario glitches}} | {{main|List of Paper Mario glitches}} | ||
==={{conjectural|Herringway glitch}}=== | |||
==={{conjectural|Herringway | [[Herringway]] can be morphed into a normal [[Bumpty]] or become invisible if the player pauses the game right after Mario and Herringway go into the Mayor's room and right before initiating the conversation with the detective during Chapter 7. If invisible, he will reappear when the room is left. If Herringway becomes a normal Bumpty, the game will freeze when the Mayor gives him the present. Upon freezing, a debug screen will appear. | ||
[[Herringway]] can be morphed into a normal [[Bumpty]] or become invisible if the player pauses the game right after Mario and Herringway go into the | |||
<gallery> | <gallery> | ||
Herringway Bumpty.png|[[Herringway]] as a normal [[Bumpty]]. | Herringway Bumpty.png|[[Herringway]] as a normal [[Bumpty]]. | ||
| Line 3,035: | Line 3,018: | ||
==Gallery== | ==Gallery== | ||
{{main-gallery|Paper Mario}} | {{main-gallery|Paper Mario}} | ||
<gallery> | <gallery> | ||
Mario Paper.jpg|[[Mario]] | Mario Paper.jpg|[[Mario]] | ||
| Line 3,048: | Line 3,030: | ||
==Names in other languages== | ==Names in other languages== | ||
{{foreign names | {{foreign names | ||
| | |Jpn=マリオストーリー | ||
| | |JpnR=Mario Sutōrī | ||
| | |JpnM=Mario Story | ||
| | |ChiS=纸片马力欧 | ||
| | |ChiSR=Zhǐpiàn Mǎlì'ōu | ||
| | |ChiSM=Paper Mario | ||
| | |ChiT=Mario Story<ref>{{cite|url=www.nintendo.com.hk/switch/mario/history/index.html|title=瑪利歐歷史|超級瑪利歐兄弟 35週年|任天堂|publisher=Nintendo of HK|language=zh-hant|accessdate=June 22, 2024}}</ref> | ||
| | |ChiT2=紙片瑪利歐 | ||
| | |ChiT2R=Zhǐpiàn Mǎlì'ōu | ||
|ChiTM=Same as Japanese | |||
|ChiT2M=Paper Mario | |||
|Ger=Paper Mario | |Ger=Paper Mario | ||
|Ita=Paper Mario | |Ita=Paper Mario | ||
|Kor=마리오 스토리 | |Kor=마리오 스토리 | ||
|KorR= | |KorR=Mario Seutori | ||
|KorM=Mario Story | |KorM=Mario Story | ||
}} | }} | ||
==Trivia== | ==Trivia== | ||
*The name "Paper Mario" appears in transcribed form in certain Japanese materials related to this game, including on the back of that region's packaging, despite it not being the title of the game itself there. | *The name "Paper Mario" appears in transcribed form in certain Japanese materials related to this game, including on the back of that region's packaging, despite it not being the title of the game itself there. It is also said aloud in Japanese advertisements for the game.<ref>{{cite|language=ja|url=www.youtube.com/watch?v=K95QKgD1s-g|title=CM 任天堂 マリオストーリー (N64) <nowiki>[ Paper Mario ]</nowiki>|publisher=YouTube|date=November 24, 2011|accessdate=June 22, 2024}}</ref> | ||
*''Paper Mario'' was released in China on the iQue Player just one month before ''Paper Mario: The Thousand-Year Door'' was released in Japan. | *''Paper Mario'' was released in China on the iQue Player just one month before ''Paper Mario: The Thousand-Year Door'' was released in Japan. | ||
*''Paper Mario'' was the final ''[[Mario (franchise)|Mario]]'' game released for the Nintendo 64 in [[Australia]], while in the rest of the world, ''[[Mario Party 3]]'' was the last ''Mario'' game to be released for said console. | *''Paper Mario'' was the final ''[[Super Mario (franchise)|Super Mario]]'' game released for the Nintendo 64 in [[Australia]], while in the rest of the world, ''[[Mario Party 3]]'' was the last ''Super Mario'' game to be released for said console. | ||
* | *Several tracks were adjusted between the Japanese and American releases. The theme for Mt. Rugged uses slightly different instruments, and the themes for Bowser's Castle and the final Bowser fight after gaining the Peach Beam have been pitch-corrected. The music played when a party member joins Mario has also been changed, although the credits theme was not adjusted to match. | ||
*A [[LodgeNet]] version of ''Paper Mario'' was made, which added a note in the splash screens that pressing the LodgeNet controller's Reset button (A black button closest to the cord) would delete all save data.<ref>{{Cite|url=https://youtu.be/Sw3oQIKj02o?t=9|title=Paper Mario (LodgeNet 64 version)|publisher=YouTube @birby100|date=June 19, 2023|accessdate=July 9, 2024|quote=''If Reset button on Controller is pressed during game, all previously saved data will be lost. Press {{button|n64|A}} to continue.''}}</ref> | |||
==References== | ==References== | ||
<references/> | <references/> | ||
==External links== | |||
{{NIWA|NWiki=1|SmashWiki=1|StrategyWiki=1}} | |||
{{TCRF}} | |||
*[https://web.archive.org/web/20001006022402/http://www.nintendo.com/n64/papermario/index.html Official North American website] | |||
**[https://www.nintendo.com/games/detail/paper-mario-wii-u/ Wii U Virtual Console website] | |||
*[https://www.nintendo.com/en-gb/Games/Nintendo-64/Paper-Mario-269624.html British English website] | |||
*[https://www.nintendo.co.jp/n01/n64/software/nus_p_nmqj/index.html Official Japanese website] | |||
**[https://www.nintendo.co.jp/wii/vc/vc_ms/index.html Wii U Virtual Console website] | |||
*[http://www.ique.com/games/21021.htm Official mainland Chinese website] | |||
*[https://m1.nintendo.net/docvc/NUS/USA/NMQE/NMQE_E.pdf American English instruction booklet] | |||
*[https://m1.nintendo.net/docvc/NUS/EUR/NMQP/NMQP_E.pdf European English instruction booklet] | |||
*[https://m1.nintendo.net/docvc/NUS/JPN/NMQJ/NMQJ_J.pdf Japanese instruction booklet] | |||
{{PM}} | {{PM}} | ||
{{ | {{Super Mario games}} | ||
{{N64}} | {{N64}} | ||
{{ | {{Virtual Console}} | ||
{{NSO}} | |||
[[Category:Paper Mario|*]] | [[Category:Paper Mario|*]] | ||
[[Category:Games]] | [[Category:Games]] | ||
[[Category:Nintendo 64 | [[Category:Nintendo 64 games]] | ||
[[Category:Virtual Console | [[Category:Virtual Console games]] | ||
[[Category: | [[Category:Role-playing games]] | ||
[[Category:2000 games]] | [[Category:2000 games]] | ||
[[Category:2001 games]] | [[Category:2001 games]] | ||
[[Category:2004 games]] | [[Category:2004 games]] | ||
[[Category:Player's Choice]] | [[Category:Player's Choice]] | ||
[[de:Paper Mario]] | |||
[[it:Paper Mario]] | |||
Latest revision as of 15:16, January 7, 2025
- This article is about the first Paper Mario game for the Nintendo 64. For other uses, see Paper Mario (disambiguation).
| Paper Mario | |||||||||||||
|---|---|---|---|---|---|---|---|---|---|---|---|---|---|
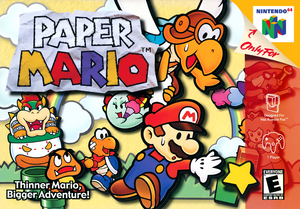 For alternate box art, see the game's gallery. | |||||||||||||
| Developer | Intelligent Systems | ||||||||||||
| Publisher | Nintendo | ||||||||||||
| Platform(s) | Nintendo 64, iQue Player, Virtual Console (Wii, Wii U), Nintendo 64 - Nintendo Switch Online | ||||||||||||
| Release date | Nintendo 64: Virtual Console (Wii): Virtual Console (Wii U): Nintendo 64 - Nintendo Switch Online: | ||||||||||||
| Language(s) | English (United States) French (France) German Spanish (Spain) Japanese Simplified Chinese | ||||||||||||
| Genre | RPG | ||||||||||||
| Rating(s) |
| ||||||||||||
| Mode(s) | Single player | ||||||||||||
| Format | Nintendo 64:
iQue Player:
Wii: Wii U: Nintendo Switch: | ||||||||||||
| Input | Nintendo 64: iQue Player: Wii: Wii U: Nintendo Switch: | ||||||||||||
| Serial code(s) | |||||||||||||
- “Thinner Mario, Bigger Adventure!”
- —Slogan
Paper Mario is a 2000 role-playing game developed by Intelligent Systems for the Nintendo 64. It was later re-released for the iQue Player in 2004, the Wii's Virtual Console in 2007, the Wii U's Virtual Console in 2015, and Nintendo 64 - Nintendo Switch Online in 2021.
Paper Mario has the player taking control of Mario on his quest to rescue Princess Peach and save the Mushroom Kingdom from Bowser, who has stolen the mythical Star Rod of Star Haven and used its wish-granting powers to make himself invincible. To stop Bowser and rescue Princess Peach, Mario and company must save the seven Star Spirits; magical beings who have been sealed in cards by Bowser with the power to nullify the Star Rod, as well as the original owners of the Star Rod.
Paper Mario's gameplay is a blend of traditional Japanese role-playing games and Super Mario-esque platforming features; Mario has the ability to jump in both the overworld and in battle, and jumping remains one of the most important actions in the game. The player controls Mario and a party of followers as they journey through the Mushroom Kingdom, exploring dungeons, managing stats, and battling enemies. The title refers to the game's arts and crafts aesthetic; nearly every character in the game is drawn as a flat 2D sprite, revealing itself as paper-thin when turning around, and many elements of the environments are also depicted as 2D sprites.
Paper Mario was initially in development for the Nintendo 64DD as a proposed sequel to Super Mario RPG: Legend of the Seven Stars, initially titled Super Mario RPG 2[5] (or alternatively, Mario RPG 2[6] or Mario RPG 64[7]); concept art posted by Super Mario RPG artist Kazuyuki Kurashima on his Instagram account in 2019 indicated that Samus Aran from Metroid and Link from The Legend of Zelda would have appeared alongside Super Mario characters.[8]
Paper Mario later became the first installment of the same-named series and would go on to receive several sequels; the first in the same style of gameplay (Paper Mario: The Thousand-Year Door), followed by four differing games; Super Paper Mario changed the style of gameplay into a platformer, while Paper Mario: Sticker Star, Paper Mario: Color Splash, and Paper Mario: The Origami King went back to turn-based gameplay, albeit not exactly like the first entries in the series.
Storyline[edit]
Opening[edit]
The story opens with a place that lies far beyond the sky and far above the clouds, called Star Haven. Within the sanctuary of Star Haven lies the Star Rod, which can grant any and all wishes. The seven Star Spirits use this artifact to watch over and protect Mushroom Kingdom, until one day, when Bowser and Kammy Koopa appear in the sanctuary. Bowser shatters the protective seal over the Star Rod and grabs it in hopes of using its power to defeat Mario. The Star Spirits are then trapped inside cards by Kammy Koopa.
Mario and Luigi receive an invitation to a party from Princess Peach. Upon arriving at the castle full of guests from all over the Mushroom Kingdom, Mario proceeds to meet the Princess. However, their meeting is interrupted by Bowser's Castle rising from the earth beneath Peach's Castle and lifting both buildings into space. Bowser and Kammy Koopa then appear to kidnap the princess. Mario attempts to fight off Bowser, but finds himself outmatched when Bowser takes out the Star Rod and uses it to make himself invincible. Mario is then cast out of a window and plummets back towards the ground, which allows Bowser to kidnap the Princess.
Prologue: A Plea from the Stars[edit]
The prologue begins with the seven Star Spirits manifesting over Mario on the ground, and using their remaining power to save his life. Mario's unconscious body is then found by a family of friendly Goombas, who carry him back to their village. While knocked out, he receives a vision from one of the Star Spirits, Eldstar, urging him to go to Shooting Star Summit. After waking up, Mario meets the Goomba family who found him, including Goombario, the family's son. Kammy Koopa appears to confirm that Mario is still alive, and blocks the gate out of Goomba Village with a Yellow Block. When Mario goes to get a hammer from Goompa, the family's grandfather, the balcony behind the house is missing. After a short venture that involves Mario saving Goompa and a battle with a local troublemaker called Jr. Troopa, Goompa requests that Goombario join Mario on his quest and together they leave Goomba Village by breaking the block using Goompa's hammer. While traveling Goomba Road, the connecting strip of land between Goomba Village and Toad Town, Mario and Goombario are confronted by the Goomba King and his two lackeys, the Red & Blue Goomba Bros. The protagonists manage to defeat them and reach Toad Town, where they continue on towards Shooting Star Summit.
Atop the summit, Mario is greeted by manifestations of the Star Spirits, who tell Mario the story of how Bowser stole the Star Rod. They further explain that the cards in which they have been trapped are now divided among Bowser's forces, and that Mario must save and release them. In doing that, Mario will gain a power called the Star Beam, which can be used to break Bowser's invincibility and allows Mario to defeat him.
Meanwhile, in the sky, Princess Peach finds herself trapped in her room. Not knowing what to do, she wishes for someone to help her, which summons Twink, a Star Kid who only recently ascended to Star Haven. Though unable to help Peach deal with Bowser directly, he agrees to deliver the Lucky Star, Peach's magical pendant, to Mario and help in whatever way he can.
As Mario returns from Shooting Star Summit, Twink runs into him and delivers the Lucky Star which enables Mario to use Action Commands. Upon re-entering Toad Town, Mario learns that Merlon, the local fortune-teller, is looking for him. Merlon informs Mario that his search for the Star Spirits will lead him to the fortress east of Toad Town, where the Koopa Bros. are holding a Star Spirit captive.
- Names in other languages
| Language | Name | Meaning | Notes |
|---|---|---|---|
| Japanese | プロローグ 星とマリオとクリボーと・・・[?] Purorōgu: Hoshi to Mario to Kuribō to... |
Prologue: The Stars and Mario and the Goombas and... | |
| Chinese | 序言 来自星星的请求[?] Xùyán: Láizì Xīngxīng de Qǐngqiú |
Prologue: The Request from the Stars | |
| French | Prologue: L'appel des Etoiles[?] | Prologue: The call of the Stars | |
| German | Prolog: Das Flehen der Sterne[?] | Prologue: The Pleading of the Stars | |
| Spanish | Prólogo: La Súplica de las Estrellas[?] | Prologue: The Plea of the Stars |
Chapter 1: Storming Koopa Bros. Fortress[edit]
After leaving town, Mario follows Pleasant Path, but finds the way to the Koopa Bros. Fortress inaccessible to him; so he takes another path to Koopa Village. He arrives to see the local Koopa Troopas being harassed by Fuzzies, who are stealing their shells. One of the victims is Kooper, who asks Mario for assistance in getting his shell back. Upon returning it, Kooper is so grateful that he joins Mario's group.
With the help of Kooper's special ability, Mario is able to reach the Koopa Bros. Fortress. During his assault on the fortress, he triggers a trapdoor which drops him into a prison cell full of Bob-ombs. One of them, Bombette, explains that they were working for the Koopa Bros. but then later got locked up for revolting against them. She helps Mario and his friends escape by blowing up a crack in the cell wall and decides to accompany him. The group travels to the top of the fortress where they confront the Koopa Bros.. They initially try to scare Mario off with a fake Bowser suit, but their attempt fails, so they decide to fight Mario in a direct battle. They are eventually defeated and knocked off the arena into the prison cell from earlier. With the Koopa Bros. defeated, Eldstar is released and adds his powers to Mario, teaching him the ability to use Focus, as well as the special move Refresh.
Trapped in her castle in the sky, Peach remembers the existence of a secret passage that leads out of her room. She and Twink use it to leave the room and move to another room in the castle, where they find Bowser's diary. By reading it, Peach and Twink learn that another Star Spirit is being held captive in Dry Dry Desert. At that moment, Bowser enters the room and catches the Princess reading his diary. Enraged, he summons two guardsmen to escort her back to her room, while Twink quietly leaves the scene undetected to inform Mario of the next Star Spirit's location.
After returning to Toad Town, Mario and his friends head towards the train station in the south district of Toad Town, where Dry Dry Railroad leads to Mt. Rugged.
- Names in other languages
| Language | Name | Meaning | Notes |
|---|---|---|---|
| Japanese | ステージ1 こうりゃく!ノコブロスのとりで[?] Sutēji 1: Kōryaku! Nokoburosu no Toride |
Stage 1: Strike! Koopa Bros. Fortress | |
| Chinese | 第1章 夺取喏库兄弟要塞[?] Dì 1 Zhāng: Duóqǔ Nuòkù Xiōngdì Yàosài |
Chapter 1: Capture Koopa Bros. Fortress | |
| French | Chapitre 1: A l'assaut de la forteresse![?] | Chapter 1: Assaulting the fortress! | |
| German | Kapitel 1: Schnapp Dir die Koopa Brüder[?] | Chapter 1: Get the Koopa Brothers | |
| Spanish | Capítulo 1: A por la Fortaleza[?] | Chapter 1: To the Fortress |
Chapter 2: The Mystery of Dry, Dry Ruins[edit]
At Mt. Rugged, a mountain beyond which the desert lies, Mario runs into Parakarry, a distressed mailman who has dropped letters all over the area and asks Mario for assistance. Mario accepts to find the letters, and Parakarry joins Mario's group out of gratitude.
After crossing Dry Dry Desert, Mario enters a settlement called Dry Dry Outpost. After exchanging some items for information, he meets with the town leader Moustafa, who hands him a Pulse Stone and tells him to let it guide him to the resting place of Dry Dry Ruins. Following the Pulse Stone's signal through the desert, Mario finds a stone pedestal to set the stone into. The entrance to Dry Dry Ruins rises out of the sand before Mario, and he enters the ruins.
Inside, a ghostly wail tries to warn Mario against continuing his descent. Mario keeps going until he finds Tutankoopa, the source of the voice and the guardian of the second Star Spirit. After battling Mario and losing, he is chased out by his Chomp, allowing Mario to free the Star Spirit Mamar.
In Peach's Castle, Bowser visits the Princess in her room. He tells her that, with Tutankoopa defeated, he now intends to stop Mario by using Tubba Blubba, who is allegedly invincible. However, Kammy Koopa rushes in to tell Bowser that the Star Spirit guarded by Tubba Blubba has escaped. Once they leave, Peach and Twink hypothesize that even an invincible person must have a weakness. After some investigating, their theory is confirmed by an overheard conversation between Bowser's men, though Peach never learns what the weakness is exactly.
After returning to Toad Town, Mario finds a cowardly Toad guard who claims he saw a ghost vanish into Forever Forest. Mario investigates and meets Bootler, a servant of Lady Bow who requests Mario's presence in her mansion in the heart of the forest.
- Names in other languages
| Language | Name | Meaning | Notes |
|---|---|---|---|
| Japanese | ステージ2 アラビンいせきのなぞ[?] Sutēji 2: Arabin Iseki no Nazo |
Stage 2: The Mystery of Dry Dry Ruins | |
| Chinese | 第2章 干旱废墟的秘密[?] Dì 2 Zhāng: Gānhàn Fèixū de Mìmì |
Chapter 2: The secret of Dry Dry Ruins | |
| French | Chapitre 2: Le mystère des Ruines Sec Sec[?] | Chapter 2: The mystery of Dry Dry Ruins | |
| German | Kapitel 2: Wie der Wind der Wüste[?] | Chapter 2: Like the Wind of the Desert | |
| Spanish | Capítulo 2: El Misterio de las Ruinas[?] | Chapter 2: The Mystery of the Ruins |
Chapter 3: The "Invincible" Tubba Blubba[edit]
Mario follows the invitation through the maze-like forest and finds the mansion he was referred to. After overcoming the challenges inside, Mario meets Lady Bow. He is told about Tubba Blubba, the threat he poses, and the secret that may be related to his weakness. Bow then uses the Star Spirit Skolar the Boos found and captured as leverage to get Mario to defeat Tubba Blubba. She also joins Mario because she is tired of seeing her fellow Boos suffering, and because Mario will need her to get to Tubba Blubba's Castle.
The group leaves Forever Forest and heads towards Gusty Gulch. There, they witness Tubba Blubba attacking a ghost village and devouring a Boo. Mario and his friends follow Tubba Blubba to his castle and sneak their way up to the master bedroom. In a chest next to the bed, Mario finds Yakkey, a talkative key who tells them that he is the literal key to Tubba Blubba's secret inside Windy Mill. Yakkey concludes that Mario must be a thief, so he alerts Tubba Blubba of them. With a furious Tubba Blubba chasing them, Mario and his friends escape the castle, run all the way down to Windy Mill, and unlock it with the key.
Inside Windy Mill they find Tubba Blubba's secret, which turns out to be his heart that has been controlling the body remotely. After Mario beats it, the heart escapes outside the mill, where Tubba Blubba's body has caught up with Mario. Heart and body re-unite and attempt to fight Mario again, but with the heart being back inside Tubba Blubba's body, he is vulnerable again. After his defeat, Tubba Blubba decides to release all the Boos he has eaten, and reveals he is really a sensitive guy who did not like being scared by the Boos. Lady Bow, pleased with the outcome, holds up her part of the bargain and frees Skolar.
In Peach's Castle, Twink and the Princess decide to sneak out of the bedroom again. They immediately run into Bowser and Kammy Koopa, who are discussing how Mario's next target will be Shy Guy's Toy Box, and pondering what the best way to defeat him there would be. Bowser then tries to coax Peach into telling him about Mario's secret weaknesses, and sends Kammy Koopa to impede his progress using this information.
After returning to Toad Town from his trip to Forever Forest, Mario finds the town overrun with Shy Guys stealing people's belongings. Mario and his friends are able to trace the source of the Shy Guy attacks to one of the vacant houses in the residential area. By hiding inside with Lady Bow's ability, Mario is able to observe one of the Shy Guys opening a hidden door to a secret back room hiding the Shy Guy's Toy Box.
- Names in other languages
| Language | Name | Meaning | Notes |
|---|---|---|---|
| Japanese | ステージ3 ふじみのドガボン[?] Sutēji 3: Fujimi no Dogabon |
Stage 3: Dogabon the Immortal (Dogabon is Tubba Blubba's Japanese name.) |
|
| Chinese | 第3章 “无敌的”图巴・布路巴[?] Dì 3 Zhāng: "Wúdí de" Túbā Bùlùbā |
Chapter 3: The "Invincible" Tubba Blubba | |
| French | Chapitre 3: L'Invincible Tubba Blubba[?] | Chapter 3: The Invincible Tubba Blubba | |
| German | Kapitel 3: Der Unbezwingbare[?] | Chapter 3: The Invincible | |
| Spanish | Capítulo 3: El "Invencible" Tubba Blubba[?] | Chapter 3: The "Invincible" Tubba Blubba |
Chapter 4: Trials in the Toy Box[edit]
Inside the toy box, Mario runs into obstacles he cannot overcome by himself, such as the railway system missing a train, or Gourmet Guy blocking the way. In these cases, Mario must fight Shy Guys, retrieve items that were stolen from Toad Town citizens, and return them to their owners. At certain points, Kammy Koopa appears and attempts to execute Bowser's plan by summoning obstacles related to the answers Peach gave as Mario's weaknesses.
Eventually, Mario reaches the Red Station, where he encounters and battles the Big Lantern Ghost, who upon defeat drops his lantern and flees. Inside the lantern is Watt, a Li'l Sparky who was captured by the Shy Guys and used as a light source. Being grateful for being rescued, Watt joins Mario's group.
After that, Mario locates the Shy Guys' central base of operations, where he meets their leader, General Guy. He rallies his men and sends several waves of Shy Guy infantry against Mario and his friends, who dispatch them one after another. Eventually, General Guy fights Mario himself. After defeat, General Guy and his Shy Guys flee, leaving Mario able to rescue Muskular, the fourth Star Spirit.
In Peach's Castle, the Princess encounters Gourmet Guy during one of her secret trips outside of her room. Gourmet Guy tells Peach that he is technically obligated to let the guards know he saw her wandering around, but he might look the other way if she went into the castle kitchen and baked him a cake. Peach complies, and, with Twink's help, bakes a strawberry cake, which makes Gourmet Guy ecstatic. Once he regains his composure, he informs Peach that the next Star Spirit is being held on Lavalava Island, an island to the south. The Princess ends up being spotted by Kammy Koopa and escorted back to her room.
Mario heads to the Toad Town harbor, where he meets Kolorado the archeologist and a whale. The whale offers to carry Mario and his friends over the ocean, but only if Mario enters his belly to cure a bellyache he has been having. Inside, Mario finds a Fuzzipede irritating the whale's belly. After fighting the Fuzzipede and getting it out of the whale's belly, Mario's group rides the whale to Lavalava Island, with Kolorado joining them to find treasure.
- Names in other languages
| Language | Name | Meaning | Notes |
|---|---|---|---|
| Japanese | ステージ4 とつげき!おもちゃばこ[?] Sutēji 4: Totsugeki! Omochabako |
Stage 4: Assault inside the Toy Box! | |
| Chinese | 第4章 玩具盒里的历练[?] Dì 4 Zhāng: Wánjùhé lǐ de Lìliàn |
Chapter 4: Trials in the Toy Box | |
| French | Chapitre 4: Joujou dans le Coffre à jouets[?] | Chapter 4: Toy in the Toy Box | |
| German | Kapitel 4: Spiel mit dem Zeug[?] | Chapter 4: Playing with the stuff | |
| Spanish | Capítulo 4: La Misteriosa Caja de Juguetes[?] | Chapter 4: The Mysterious Toy Box |
Chapter 5: Hot, Hot Times on Lavalava Island[edit]
On Lavalava Island, Mario and Kolorado find the entrance to Mt. Lavalava inaccessible due to a lava river. They head to the nearby Yoshi's Village to ask the locals for information, but the village is in a state of panic because their kids went missing in Jade Jungle. Mario heads into the jungle to search for the missing children and finds their caretaker, Sushie, stuck in a tree. After being freed, she joins Mario to locate all of the missing Yoshis and bring them back to their parents. With the kids returned and the villagers pacified, Mario is able to talk to the Village Leader about reaching Mt. Lavalava. The Yoshi suggests seeking out Raphael the Raven in Jade Jungle. Mario finds Raphael on top of a large tree in an area accessible only with the Jade Raven. Raphael offers his assistance by summoning his Raven followers to construct a set of ropeways to help Mario across the lava river.
Inside, Mario and Kolorado explore the caverns of Mt. Lavalava, with the former doing most of the work and the latter suffering various injuries while trying to be useful. Deep inside the volcano, they meet Lava Piranha, the guardian of the Star Spirit. Mario defeats it and releases Misstar, but at that moment the volcano starts to erupt. As they flee, Kolorado notices a treasure chest which he presumes contains the treasure he has been looking for. Before the lava reaches them, Misstar grabs him and Mario's group and escapes the volcano through the caldera. The treasure chest gets blown out of Mt. Lavalava and into Jade Jungle.
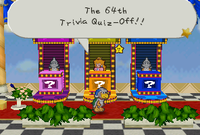
In the meantime, Peach encounters Bowser's minions setting up a quiz show. Since they are one player short, they ask Peach to participate. During the show, several of the questions reveal that there is a Star Spirit held captive in a place called Flower Fields. For her participation in the game she is handed a Sneaky Parasol, an item that can copy the appearance of whoever the holder is facing. Before she can make any use of it, Bowser enters the room, spots the Princess, and has her escorted back to her room.
In Toad Town, Twink informs Mario that the sixth Star Spirit is hidden in Flower Fields. To get there, Mario must find the four Magical Seeds from the Bub-ulbs across the world. Kolorado has found one, which he trades for Mt. Lavalava's treasure in the chest, the Volcano Vase. Planting the Magical Seeds in Toad Town creates the doorway to Flower Fields.
- Names in other languages
| Language | Name | Meaning | Notes |
|---|---|---|---|
| Japanese | ステージ5 南の海のジャンボル島[?] Sutēji 5: Minami no umi no Janboru Tō |
Stage 5: Jambol Island of the south sea | |
| Chinese | 第5章 南海中的火山岛[?] Dì 5 Zhāng: Nánhǎi Zhōng de Huǒshān Dǎo |
Chapter 5: Volcano Island in the South Sea | |
| French | Chapitre 5: Ça chauffe sur l'Île Lavelave[?] | Chapter 5: Hot on Lavelave Island | |
| German | Kapitel 5: Aloha auf Lavalava-Eiland[?] | Chapter 5: Welcome to Lavalava Island (Aloha is Hawaiian for "welcome".) |
|
| Spanish | Capítulo 5: Calor en la Isla Lavalava[?] | Chapter 5: Heat in Lavalava Island |
Chapter 6: Dark Days in Flower Fields[edit]
When Mario enters the Flower Fields, he sees the place shrouded in clouds. The Wise Wisterwood tells Mario that the clouds are the result of Huff N. Puff, who is using his Puff Puff Machine to cover Flower Fields in clouds. Because of this, the Sun cannot rise to the sky. Mario thus needs to destroy the Puff Puff Machine to make the Sun rise to the sky, and help the local flowers to acquire a Magical Bean, Miracle Water and Fertile Soil. These will create a beanstalk up to the Cloudy Climb where Huff N. Puff is hiding with the Star Spirit. Mario also meets a strange Lakitu called Lakilester who insists his name is Michael, and then Spike. He fights Mario under the orders of Huff N. Puff, but after losing, he decides to join Mario because he sees no reason in working for Huff N. Puff. He then fights a group of Lakitus and destroys the Puff Puff Machine, before planting the Magical Bean. When the beanstalk is grown, Mario heads to the Cloudy Climb and defeats Huff N. Puff for the sixth Star Spirit, Klevar.
Back at the castle, Peach uses the Sneaky Parasol to turn herself into one of the guards, allowing her to move around the castle without fear of getting caught. Peach then learns that Kammy Koopa has finished preparations for something to defeat Mario. Before she can find out what it is, however, Kammy notices a peculiar smell coming from her disguise and turns her back to normal with a spell. She is then taken back to her room yet again.
Back in Toad Town, Mario finds a Ninji waiting for him at Merlon's house. The Ninji informs that Merle of Starborn Valley has something important to tell Mario, and that he must go there. Mario finds a Warp Pipe to Shiver City in Toad Town Tunnels.
- Names in other languages
| Language | Name | Meaning | Notes |
|---|---|---|---|
| Japanese | ステージ6 花と雲につつまれて[?] Sutēji 6: Hana to Kumo ni Tsutsumarete |
Stage 6: Shrouded in clouds and flowers | |
| Chinese | 第6章 黑暗中的鲜花原野[?] Dì 6 Zhāng: Hēi'àn Zhōng de Xiānhuā Yuányě |
Chapter 6: Flower Fields in the Darkness | |
| French | Chapitre 6: Sale temps au Champ de Fleurs[?] | Chapter 6: Bad weather in the Flower Field | |
| German | Kapitel 6: Tränen auf Blütenblättern[?] | Chapter 6: Tears on Petals | |
| Spanish | Capítulo 6: Flores y Nubes...[?] | Chapter 6: Flowers and Clouds... |
Chapter 7: A Star Spirit on Ice[edit]
In Shiver City, Mario finds out that he cannot go to Starborn Valley unless the Mayor grants him permission. However, he finds the Mayor unconscious on the floor and becomes a suspect for the Mayor's murder. With novelist Herringway's help, the truth is revealed: the Mayor was knocked out by the falling box containing a gift for the novelist. With the mystery solved, the Mayor allows Mario to go to Starborn Valley.
On the way to Starborn Valley, Mario faces Jr. Troopa again, as well as a mini-boss called Monstar.
Once Mario reaches the Starborn Valley, he meets Merle, who tells Mario to go to the Crystal Palace, where the seventh Star Spirit is being held. He then gives Mario a scarf, telling him to use it on something special, then telling Mario to go and ask Mayor Penguin for the other special item, a bucket. Mario goes to a line of snowmen on the path between Shiver City and Starborn Valley, one missing a scarf and the other missing a hat. Mario gives the items to the respective owners. The snowmen thank him and open the way to the Crystal Palace. Along the way to the palace, they meet the spirit of Madam Merlar, who gives Mario the Star Stone, to reach the palace. Once they reach the Crystal King at the palace's back, Mario defeats him for the final Star Spirit, Kalmar.
In Peach's Castle, Kammy Koopa informs Bowser that Mario now has all seven Star Spirits. Bowser orders the Koopa Troop to their battle stations and has the princess tied up to keep her out of mischief. Twink tries attacking him, but Bowser simply swats him out of the window.
Meanwhile, Mario and the team reach Star Haven with the help of the seven Star Spirits, acquire the Star Beam, and use the power of the Star Spirits to travel to Bowser's Castle.
- Names in other languages
| Language | Name | Meaning | Notes |
|---|---|---|---|
| Japanese | ステージ7 さいはての地へ[?] Sutēji 7: Saihate no chi e |
Stage 7: To the end of the Earth | |
| Chinese | 第7章 冰雪中的星之魂[?] Dì 7 Zhāng: Bīngxuě Zhōng de Xīngzhīhún |
Chapter 7: Star Spirit in the Ice | |
| French | Chapitre 7: Etoile des neiges[?] | Chapter 7: Snow star | |
| German | Kapitel 7: Kristallene Träume[?] | Chapter 7: Crystalline Dreams | |
| Spanish | Capítulo 7: Una Estrella Congelada[?] | Chapter 7: A Frozen Star |
Chapter 8: A Star-Powered Showdown![edit]
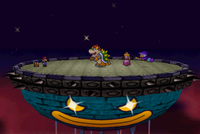
After going through Bowser's Castle, falling for traps, solving puzzles and getting attacked by Jr. Troopa one last time in the process, Mario and his team find Princess Peach and Bowser in the same place where Mario first encountered Bowser at the start of the game. The Star Beam lets Mario negate Bowser's invincibility and beat him, but Bowser takes his loss as a warm-up and flees with Peach to the castle roof, followed by Mario. Kammy Koopa activates her creation, the Power Platform, to pump Bowser up in both power and size; when he powers up with the Star Rod, Mario finds that the Star Beam is now ineffective.
Meanwhile, Twink frees the Princess, and the two battle Kammy. As Peach uses Focus, Twink slowly becomes stronger to the point where he becomes immune to Kammy's attacks. Kammy remembers before her defeat that the Stars get their power from the wishes of ordinary people. Twink urges the Princess to make a wish for everyone in the Mushroom Kingdom while he goes to help Mario and the Star Spirits. Peach's wish fills the Star Spirits with more power; thus enabled, as Mario recovers, the Spirits upgrade the Star Beam to Peach Beam, which cuts through Bowser's enhanced power. After a lengthy battle with Bowser that ultimately leaves the Koopa King defeated, Mario returns the Star Rod to the Star Spirits. The Power Platform and Bowser's Castle begin to self-destruct, but the Star Spirits protect Peach's Castle from the explosion and restore it to its spot.
Several days later, Mario, his partners, and many others receive invitations from Princess Peach for another party. After a speech by Peach where she thanks everyone for their collective effort in restoring the peace to the Mushroom Kingdom, the staff credits begin to roll as the scene switches to a parade with nearly the entire cast participating. At the end, Mario and Peach walk to Mario's House and watch a fireworks display, which continues on until the player turns off or resets the game console.
- Names in other languages
| Language | Name | Meaning | Notes |
|---|---|---|---|
| Japanese | ステージ8 たいけつ!大魔王クッパ[?] Sutēji 8: Taiketsu! Daimaō Kuppa |
Stage 8: Showdown! Demon King Koopa | |
| Chinese | 第8章 与酷霸王的最后决战![?] Dì 8 Zhāng: Yǔ Kùbàwáng de Zuìhòu Juézhàn! |
Chapter 8: Final Battle with Bowser! | |
| French | Chapitre 8: Final des Etoiles[?] | Chapter 8: Finale of the Stars | |
| German | Kapitel 8: Showdown unter Sternen[?] | Chapter 8: Showdown under the Stars | |
| Spanish | Capítulo 8: ¡El Malvado Rey Bowser![?] | Chapter 8: The Evil King Bowser! |
Gameplay[edit]
For the majority of the game, the player controls Mario as he travels through various locations in the Mushroom Kingdom. The game is divided into chapters, with each chapter generally being set in a different area. Many of these areas contain NPCs and/or enemies. Some NPCs, such as Tayce T., can provide Mario and his party with services.
On his way, Mario and his friends use various abilities that help them progress on their adventure. Mario can jump to reach higher ground, traverse gaps, or reach blocks floating above his head. Early on, Mario obtains a hammer that is used to break larger blocks and other obstacles. Throughout the game, the player will obtain special items that upgrade Mario's jump and hammer and give him new abilities.
At the end of each chapter, an interlude occurs in which the player takes control of Princess Peach. Peach does not have access to Mario's abilities, party members, or inventory. Items picked up as Peach can be deposited in the Mysterious Treasure Chest in the castle storage room so they can later be picked up by Mario from the chest's counterpart at Merluvlee's Place.
Controls[edit]
|
Overworld
|
Menu
|
Battle
|
As Princess Peach
|
Mario's stats[edit]
| Stat | Initial value | Min. value | Max. value | Function | |
|---|---|---|---|---|---|
 Mario |
1 | 1 | 27 | Indicates Mario's progress overall. With each new level, the player may increase HP, FP, or BP. | |
| 10 | 5 | 50 | Denote Mario's health. If they reach zero, the game is over. | ||
| 5 | 5 | 50 | Allow Mario and his party members to perform more potent moves. | ||
| 3 | 3 | 30 | Determine which and how many Badges Mario can equip. | ||
| 0 | 0 | 7 | Used to fuel Special Moves. Unavailable until at least one Star Spirit (Eldstar) has been rescued. | ||
| 0 | 0 | 100 | Denote Mario's progress towards the next level. They are awarded after battles and collecting 100 of them makes Mario level up. | ||
| 0 | 0 | 999 | Dropped by enemies, found in ? Blocks and other places. They are used to purchase items. | ||
| 0 | 0 | 160 | Can be found in hidden places or received from NPCs. Mario can exchange them for Badges with Merlow. | ||
| 0:00 | 0:00 | 99:59 | Measures for how long the player has played the game. It has no effect on gameplay. |
Upgrades[edit]
| Item | Location | Effect |
|---|---|---|
Boots |
Available from the start | The Boots allow Mario to use the jump command in battle. His jump attack deals 1 point of damage without attack modifiers and hits twice if timed correctly. |
Super Boots |
Boo's Mansion | The Super Boots allow Mario to use the Spin Jump which can break through wooden floor panels and reveal hidden panels containing Star Pieces. They also upgrade the strength of his jump attack, making it deal 2 points of damage per hit at base power. The jump hits twice if the action command is executed. |
Ultra Boots |
Toad Town Tunnels | The Ultra Boots upgrade the Spin Jump to the Tornado Jump which retains its previous ability and allows Mario to get some extra height for his jumps. They also upgrade the strength of his jump attack, making it deal 3 points of damage per hit at base power. The jump hits twice if the action command is executed. |
Hammer |
Goomba Village | The Hammer allows Mario to break Yellow Blocks and use the hammer command in battle. His base hammer attack deals 1 point of damage (2 if timed correctly). |
Super Hammer |
Dry Dry Ruins | The Super Hammer allows Mario to break Stone Blocks and upgrades the base strength of his hammer attack power to 2 (4 if timed correctly). |
Ultra Hammer |
Mt. Lavalava | The Ultra Hammer allows Mario to break Metal Blocks, reveal hidden panels containing Star Pieces, and upgrades the base strength of his hammer attack power to 3 (6 if timed correctly). |
Ultra Stone |
Jade Jungle | The Ultra Stone enables Mario to use Super Blocks to upgrade party members to Ultra Rank. |
Sneaky Parasol |
Peach's Castle | With this item, Princess Peach can copy the appearance of any NPC she is facing in her castle. |
Objects[edit]
A list of reoccurring devices that Mario can encounter during his quest. Some of them are beneficial and help the player by making traveling easier, containing items, or making Mario and his friends stronger. Others serve as obstacles and require a specific ability, item, or party member to overcome.
|
Beneficial objects
|
Obstacles
|
Party members[edit]
An important part of Paper Mario is the party member system. Throughout his journey, Mario befriends various residents of the Mushroom Kingdom who join him on his quest, known as party members. Every party member has an overworld ability that can be used by pressing ![]() and usually serves to aid in traversing the landscape in some way, such as Parakarry's flight or Watt's ability to light up dark areas and reveal hidden blocks. Additionally, party members can aid Mario in battle by using various moves, many of which are based on their overworld abilities.
and usually serves to aid in traversing the landscape in some way, such as Parakarry's flight or Watt's ability to light up dark areas and reveal hidden blocks. Additionally, party members can aid Mario in battle by using various moves, many of which are based on their overworld abilities.
Ranking-up party members[edit]
Each party member joins Mario at their most basic rank and is able to choose from two moves in battle. If the player manages to locate a Super Block, they may upgrade one of their currently available party members to the next rank, which increases the damage output of all their attacks and lets them learn a new move.
The first time a party member is upgraded, they advance to Super Rank. To upgrade them even further, Mario needs to be in possession of the Ultra Stone, which allows party members to reach Ultra Rank. At Ultra Rank, each party member has four moves and cannot be upgraded further. There are 16 Super Blocks in the game in total, enough to advance every party member to their final rank.
List of party members[edit]
| Name | Info | Overworld ability | ||||||||||||
|---|---|---|---|---|---|---|---|---|---|---|---|---|---|---|
Goombario |
|
| ||||||||||||
| ||||||||||||||
Kooper |
|
| ||||||||||||
| ||||||||||||||
Bombette |
|
| ||||||||||||
| ||||||||||||||
Parakarry |
|
| ||||||||||||
| ||||||||||||||
Lady Bow |
|
| ||||||||||||
| ||||||||||||||
Watt |
|
| ||||||||||||
| ||||||||||||||
Sushie |
|
| ||||||||||||
| ||||||||||||||
Lakilester |
|
| ||||||||||||
| ||||||||||||||
Battle system[edit]
Paper Mario uses a turn-based side-view battle system. Enemies are visible on the overworld and initiate a battle if the player makes contact with them. The manner in which this happens also determines whether the battle starts in Mario's or the enemies' favor; successfully attacking an enemy on the overworld nets Mario a preemptive hit on an enemy, referred to as a first strike, whereas getting hit by an enemy attack gives the enemy a free turn to damage Mario before the fight starts proper.
On the battle screen itself, Mario and one party member of his choice find themselves on the left side of the screen, with the enemy group occupying the right side. What kind of enemies Mario faces is determined by which type of enemy initiated the battle on the overworld, with several different formations being possible.
To win a battle, the player must eliminate all enemies on the opposite side, either by defeating them or by making them run away. An enemy counts as defeated if their Heart Points (HP) are dropped to zero. Likewise, if Mario's HP drop to zero without a Life Shroom in his inventory, the battle is lost. The player can keep track of Mario's HP and various other stats with the battle statistic on the top side of the screen.
During battle, the player and the enemies take turns attacking. The damage an attack will do is determined by the attack's power minus the target's defense rating. During the player's turn, Mario and the currently active party member each get an action, the order being changeable by pressing ![]() .
.
Mario's action[edit]
Mario's main attack options all fall into the two categories of "hammer" and "jump". The condition of the targeted enemy may make one or both of these options either inaccessible or inadvisable. Hammer attacks have a limited range and can only attack the first ground-bound enemy of a group. Jump attacks on the other hand can reach past enemies standing in the way, or attack enemies flying out of reach, but jumping on a spiked or otherwise hazardous foe cancels the attack and makes Mario take 1 HP of damage.
Both hammer and jump attacks can be customized by outfitting Mario with certain Badges. Custom hammer or jump attacks usually consume Flower Points (FP) and cannot be used if the required amount is not available.
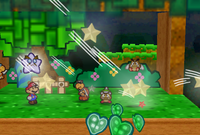
Once unlocked by finding the correlating Star Spirits, Mario is also able to use special moves. These can have a wide variety of effects depending on the move used, but all of them consume a certain amount of Star Power (SP). Mario's SP is represented by a series of colored bars at the top of the screen, and each bar equals one unit. A small amount of SP is regained with each turn, but more may be restored by using the Focus command.
Aside from hammer and jump attacks or special moves, Mario can also use items from his inventory, do nothing, or attempt to run away. During an escape attempt, a bar appears that may be anywhere between empty and completely full, depending on the number and level of enemies. The player can slowly fill the bar by repeatedly tapping ![]() . While escaping is in progress, an indicator slides back and forth between the right and left side of the bar until it stops. If it stops on the filled portion of the bar, the escape attempt is successful and Mario returns to the overworld (while losing a few coins in the process). Otherwise Mario wastes his action and the battle continues.
. While escaping is in progress, an indicator slides back and forth between the right and left side of the bar until it stops. If it stops on the filled portion of the bar, the escape attempt is successful and Mario returns to the overworld (while losing a few coins in the process). Otherwise Mario wastes his action and the battle continues.
Party member action[edit]
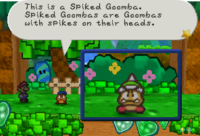
The party member's options are more limited than Mario's, but can be increased by equipping Badges. Under normal circumstances, a party member can either attack or do nothing, the latter of which skips their action. Depending on their level, a party member can have up to four attacks in their repertoire. At least one of these attacks is always free to use, whereas other, more potent attacks cost Flower Points.
The party members do not have their own FP and instead draw from the same pool as Mario does. Special care has to be taken with party members who use jump-type attacks, because they are susceptible to the same hazards as Mario's jump command, which means the party member can get injured by jumping on certain enemies.
Only one party member can be used during battle, but the currently active one can be swapped out for a different party member during battle. This uses a turn unless the Quick Change Badge is equipped.
Enemy action[edit]
After both Mario and his party member have taken their actions, all able enemies will then attack one after another. In most cases, enemies will target Mario, but some attacks can hit the party member, either separately or additionally to Mario. Since Mario's party members do not have HP themselves, every time they get hit, they will acquire the injured status effect, which prevents them from taking action for a few turns.
Once all enemies have attacked, the current turn ends and the next one starts from the beginning again, with the player choosing Mario and his party member's actions.
Status effects[edit]
Some items and attacks afflict their targets with conditions that affect their battle performance. In most cases, these status effects are temporary and the number of turns they will last is denoted along with an icon that indicates what the status effect is. Status effects only apply in battle and wear off once the player returns to the overworld.
Regular effects
| Appearance | Name | Effect |
|---|---|---|
| Attack power up | Boosts the damage of all attacks by the specified amount. | |
| Defense up | Reduces damage from incoming attacks by the specified amount. | |
| Dizzy | The target is unable to execute actions until the effect wears off. | |
| Frozen | ||
| Immobilized | ||
| Paralyzed | ||
| Sleepy | ||
| Electrified | If the target is hit by a contact attack, the attacker receives one point of damage. If the attack is part of a sequence, it will be canceled after the first hit. | |
| Invisible | Forces all attacks against the target to miss. | |
| Poison | The target's sprite gets a green tint and they take one point of damage every turn. | |
| Tiny | The target is shrunk and the power of their attacks is cut in half. |
Unique effects
| Appearance | Name | Effect |
|---|---|---|

|
Cloud Nine | Mario is encased in a cloud which randomly causes enemy attacks to miss. |
| Danger | This state triggers when Mario's HP are equal to or less than 5. It has no immediate effect on battle, but some Badges require him to be in this state to work. | |
| Flipped | A state unique to shell-wearing enemies and Clefts. An enemy that has been flipped upside-down has reduced defense and may not be able to attack for one or more turns. | |
| Injured | This state is exclusive to party members and triggers every time they take damage. An injured party member is immobilized and cannot be switched out until the effect wears off. | |
| Peril | This state triggers when Mario's HP drops down to 1. It has no immediate effect on battle, but some Badges require him to be in this state to work. | |
| Stone | Mario becomes impervious to all enemy attacks, but also cannot move. |
Action Commands[edit]
After Mario receives the Lucky Star at the foot of Shooting Star Summit, the player is able to use action commands in battle. From then on, whenever Mario or his party member execute an attack, a prompt shows up and input from the player is required. If the action command is successful, attacks will do bonus damage or have other additional effects.
Likewise, if during an enemy's turn the player presses ![]() right before an attack connects, Mario will guard against it and the damage will be reduced by 1. Additionally, if an enemy attack would cause a status effect, successfully guarding against it cancels the effect.
right before an attack connects, Mario will guard against it and the damage will be reduced by 1. Additionally, if an enemy attack would cause a status effect, successfully guarding against it cancels the effect.
End of battle[edit]
Once all enemies have been eliminated, Mario receives experience in form of Star Points. The amount of Star Points received depends on the levels of the defeated enemies as well as that of Mario himself, and may be anywhere between none and 100. Whenever Mario's Star Point count reaches 100, his level increases by one and the player gets to choose whether to increase Heart Points, Flower Points, or Badge Points. Once any statistic is maxed out, it is impossible to give further points to that specific statistic.
After the battle ends, the game shifts back to the overworld. The enemy that triggered the battle disappears and leaves behind coins, hearts or flowers that restore HP and FP respectively, or items.
Items[edit]
Items in Paper Mario come in two categories: Regular items and key items.
Regular items are helpful goodies with a variety of effects, like restoring HP or FP, or dealing damage to enemies. This type of item is commonly sold in shops. They also occasionally get dropped by defeated enemies, can be found in ? Blocks, or acquired by having Tayce T. cook.
Mario can carry up to ten of these items, and they can be used by pressing ![]() . If an eleventh item is picked up, one of the other 10 has to be discarded before it can be added to the inventory. Up to 32 regular items can be stored by using the check system in shops.
. If an eleventh item is picked up, one of the other 10 has to be discarded before it can be added to the inventory. Up to 32 regular items can be stored by using the check system in shops.
Key items are unique objects that are used to progress through the story, or for the completion of sidequests. They are listed separately from regular items and do not affect Mario's carrying capacity. If a situation requires a key item and Mario has said item in his possession, a prompt shows up and the item can be given away. Key items stay with Mario until they are needed; They cannot be dropped, sold, or stored.
Regular items[edit]
|
|
Key items[edit]
| Item | Location | Effect |
|---|---|---|
Artifact |
Dry Dry Ruins | Can be brought to Kolorado in exchange for a Star Piece. |
Autograph |
Mario's House | Luigi's signature, requested by Koopa Koot as one of his favors. |
Autograph |
Shooting Star Summit | Merluvlee's signature, requested by Koopa Koot as one of his favors. |
Blue Key |
Crystal Palace | Opens the blue door inside Crystal Palace. |
Boo's Portrait |
Boo's Mansion | A sentient painting of an old Boo. Mario needs to return it to its picture frame to access the mansion's third floor. |
Bucket |
Shiver City | These two items are necessary to open the path to Shiver Mountain. |
Scarf |
Starborn Valley | |
Calculator |
Shy Guy's Toy Box | Stolen from Rowf, the owner of the Badge Shop, during the events of Chapter 4. It can be returned for an I Spy Badge. |
Castle Key |
Tubba Blubba's Castle | Opens a door in Tubba Blubba's Castle. |
Castle Key |
Peach's Castle | Opens a door in Princess Peach's Castle. |
Castle Key |
Bowser's Castle | Opens a door in Bowser's Castle. |
Butter |
Peach's Castle | One of the ingredients available for Princess Peach to bake a cake for Gourmet Guy during one of her interludes. |
Cleanser | ||
Cream | ||
Egg | ||
Flour | ||
Milk | ||
Salt | ||
Strawberry | ||
Sugar | ||
Water | ||
Cookbook |
Shy Guy's Toy Box | Once this book is returned to Tayce T. during Chapter 4, she will be able to cook with two ingredients at once. |
Crystal Ball |
Dry Dry Outpost | Involved in one of Koopa Koot's favors. Mario needs to fetch this item from Merlee to get Merluvlee's autograph. |
Crystal Berry |
Flower Fields (Posie area) |
Given to Mario by Posie during Chapter 6. Mario can bring this item to Rosie and exchange it for the Water Stone. |
Diamond Stone |
Dry Dry Ruins | A set of stone carvings that act as keys to Tutankoopa's chamber. |
Lunar Stone | ||
Pyramid Stone | ||
Ultra Stone |
Jade Jungle | The Ultra Stone enables Mario to use Super Blocks to upgrade party members to Ultra Rank. |
Sneaky Parasol |
Peach's Castle | With this item, Princess Peach can copy the appearance of any NPC she is facing. |
Dictionary |
Shy Guy's Toy Box | Stolen from Russ T. during the events of Chapter 4. It can be returned for a Star Piece. |
Diploma |
Toad Town Dojo | Documents that certify Mario's victory over the challenges of the Toad Town Dojo. |
Fourth-Degree Card | ||
Third-Degree Card | ||
Second-Degree Card | ||
First-Degree Card | ||
Dolly |
Goomba Village | Goombaria lost this doll before the events of the game. It can be returned to her for a Star Piece. |
Empty Wallet |
Koopa Village | Dropped by Koopa Koot during a shopping trip. One of his favors involves returning it to him. |
Fertile Soil |
Flower Fields (Posie area) |
Used to grow a giant beanstalk and access Cloudy Climb, where Huff N. Puff is fought. |
Magical Bean |
Flower Fields (Petunia area) | |
Miracle Water |
Flower Fields (Lily area) | |
Fortress Key |
Koopa Bros. Fortress | Opens a door in the Koopa Bros. Fortress. |
Frying Pan |
Shy Guy's Toy Box | Stolen from Tayce T. during the events of Chapter 4. It is necessary to return it to her so she will bake a Cake for Gourmet Guy. |
Glasses |
Koopa Village | Appears during one of Koopa Koot's favors. |
Gold Credit |
Koopa Village | Allows Mario to play the game Smash Attack in the Toad Town Playroom. |
Jade Raven |
Yoshi's Village | Given to Mario for finding the Yoshi kids in Jade Jungle. Must be placed inside the Raven statue in Jade Jungle to meet Raphael the Raven. |
Koopa Legends |
Koopa Village | Involved in one of Koopa Koot's favors. Mario needs to fetch this item from Kolorado's wife. |
Kooper's Shell |
Koopa Village | One of the shells stolen during the Fuzzy attack in Koopa Village. Kooper needs this item before he can join Mario. |
Lucky Star |
Shooting Star Summit | Allows Mario and his friends to perform action commands. |
Lyrics |
Toad Town (Club 64) |
Involved in the quest to make Pop Diva sing again. Mario must deliver this item to the Composer in Dry Dry Outpost to receive the Melody in return. |
Magical Seed |
Toad Town Mt. Rugged Forever Forest Yoshi's Village |
Four seeds given to Mario by the Bub-ulbs strewn about the Mushroom Kingdom, as well as Kolorado. They open the path to Flower Fields when planted in the Toad Town garden. |
Mailbag |
Shy Guy's Toy Box | Stolen from the Postmaster during the events of Chapter 4. It can be returned for a Star Piece. |
Melody |
Dry Dry Outpost | Involved in the quest to make Pop Diva sing again. Mario receives this item in exchange for the Lyrics and must return it to the Master Poet in Club 64. |
Mystery Note |
Shy Guy's Toy Box | A note that reveals the order to hit the four colored boxes in Shy Guy's Toy Box. |
Mystical Key |
Tubba Blubba's Castle | A sentient key that guards the secret to Tubba Blubba's invincibility. It unlocks Windy Mill. |
Odd Key |
Toad Town | Unlocks the house next to Tayce T.'s. |
Old Photo |
Boo's Mansion | Required in one of Koopa Koot's favors. |
Package |
Boo's Mansion | Involved in one of Koopa Koot's favors. Mario must fetch this item from one of the Boos in the mansion to complete it. |
Palace Key |
Crystal Palace | Opens the last locked door in Crystal Palace. |
Prison Key |
Bowser's Castle | Unlocks a prison in Bowser's Castle. |
Pulse Stone |
Dry Dry Outpost | Given to Mario by Moustafa. It is needed to enter Dry Dry Ruins. |
Record |
Boo's Mansion | A record for the phonograph on the mansion's second floor. It is necessary for using the phonograph to obtain the Weight. |
Red Jar |
Dry Dry Outpost | Involved in one of Koopa Koot's favors. Mario must travel to Little Mouser's shop and buy a series of items to obtain the jar. |
Red Key |
Crystal Palace | Opens the red door in Crystal Palace. |
Ruins Key |
Dry Dry Ruins | Opens a door in Dry Dry Ruins. |
Silver Credit |
Koopa Village | Allows Mario to play the game Jump Attack in the Toad Town Playroom. |
Star Stone |
Shiver Mountain | Opens the way to Crystal Palace. Mario receives this item from Madam Merlar after meeting with her. |
Storeroom Key |
Shy Guy's Toy Box | Opens the door to the storage room in Harry's Shop. |
Tape |
Goomba Village | Involved in one of Koopa Koot's favors. Mario must fetch this item from Goompa to complete it. |
Toy Train |
Toad Town (Harry's Shop) |
Received during Chapter 4. Mario must place it into Shy Guy's Toy Box from the outside to be able to ride it. |
Volcano Vase |
Jade Jungle | Originally hidden in Mt. Lavalava, it lands in Jade Jungle after the volcano erupts. If given to Kolorado, he will trade it for a Magical Seed. |
Warehouse Key |
Shiver City | Opens the door to the Shiver City warehouse. |
Water Stone |
Flower Fields (Rosie area) |
A gemstone that was once situated in Lily's pond and supplied her with water. Mario needs to retrieve it from Rosie by giving her a Crystal Berry, so he can return it to its original owner. |
Weight |
Boo's Mansion | Stored inside a treasure chest on the mansion's second floor. It must be attached to the main room's chandelier to open the door to the basement. |
Badges[edit]
- Main article: List of Badges in Paper Mario
Badges are helpful items that grant Mario and his friends a number of active or passive bonuses when he equips them. The effects can range from changing the way Mario's overworld abilities work, to affecting his stats or giving him new attacks, to increasing the versatility of his party members.
Mario has a stat called Badge Points (BP), which affects how many Badges can be equipped at the same time. Every Badge has also a BP rating, which tells the player how many free BP are needed to equip the Badge in question. Equipping a Badge will disable an amount of Mario's BP equal to the Badge's BP rating, and unequipping it will free those BP up again. Mario starts the game with three BP and gains an additional three every time the player chooses to upgrade BP during a level up.
Badges can be found in red ? Blocks, in some treasure chests, or lying around in dungeons. They can also be purchased from Rowf's Badge Shop in central Toad Town, gotten as rewards from side quests, and traded in exchange for Star Pieces by Merlow at Merluvlee's Place.
List of Badges[edit]
Star Spirits and Special Moves[edit]
The seven Star Spirits live in Star Haven as the guardians of the Star Rod. The story of Paper Mario begins with their fall from power, when Bowser and Kammy Koopa attack Star Haven, steal the Star Rod, and capture the Star Spirits. Rescuing them is one of the main objectives of the game, as they are the only ones who can counter the Star Rod's power and help Mario triumph over Bowser.
The captured Star Spirits are kept separately and spread all over the Mushroom Kingdom. Mario rescues one Star Spirit at the end of every chapter, bar the final one, after defeating the chapter boss. With every Star Spirit returning to Star Haven, Mario's Star Power increases by one and he learns a new Special Move.
Once every Star Spirit has been rescued, Mario gains access to Star Haven, where he obtains the ultimate star power: the Star Beam. The spirits also permit him to use the Star Ship, a vessel able to reach Bowser's Castle in the sky.
Regular powers[edit]
Special Moves gained at the end of every chapter, except chapter 8.
| Special Move | Star Spirit | Chapter | Boss | Effect |
|---|---|---|---|---|
| Refresh (1 SP) |
Eldstar |
Chapter 1: Storming Koopa Bros. Fortress |
Koopa Bros. | Restores 5 HP and FP, and cures negative status effects. |
| Lullaby (1 SP) |
Mamar |
Chapter 2: The Mystery of Dry, Dry Ruins |
Tutankoopa | May put enemies to sleep for a few turns. |
| Star Storm (2 SP) |
Skolar |
Chapter 3: The "Invincible" Tubba Blubba |
Tubba Blubba | Deals 7 HP of damage to all enemies, ignoring their Defense Power. |
| Chill Out (2 SP) |
Muskular |
Chapter 4: Trials in the Toy Box |
General Guy | Decreases enemies' Attack Power by 3. |
| Smooch (3 SP) |
 Misstar |
Chapter 5: Hot, Hot Times on Lavalava Island |
Lava Piranha | Replenishes Mario's HP by 20 with a kiss. |
| Time Out (2 SP) |
Klevar |
Chapter 6: Dark Days in Flower Fields |
Huff N. Puff | May immobilize enemies for a few turns. |
| Up and Away (2 SP) |
Kalmar |
Chapter 7: A Star Spirit on Ice |
Crystal King | Turns enemies into stars, removing them from battle. Does not work on bosses. |
Special case powers[edit]
Special Moves that cost no SP to use and serve a unique purpose.
| Special Move | Star Spirit | Chapter | Circumstance | Effect |
|---|---|---|---|---|
| Focus | Eldstar |
Chapter 1: Storming Koopa Bros. Fortress |
Usable after receiving the ability to use Special Moves. | Used to refill SP at a faster rate. |
| Star Beam |  All together |
Chapter 8: A Star-Powered Showdown! |
Granted by the Star Spirits in Star Haven | Removes any status buffs on all enemies, and negates the effects of the Star Rod after Bowser uses it. |
| Peach Beam |  All together + Twink |
Chapter 8: A Star-Powered Showdown! |
Upgraded form of the Star Beam, obtained after Twink defeats Kammy Koopa. | Negates the combined effects of the Star Rod and the Power Platform. |
Enemies and bosses[edit]
- Main article: Paper Mario bestiary
Chapter bosses[edit]
| Enemy | Heart Points | Attack | Defense | Location | Chapter |
|---|---|---|---|---|---|
 Bowser (1) |
10 | 1 | 0 | Peach's Castle | Pre-prologue |
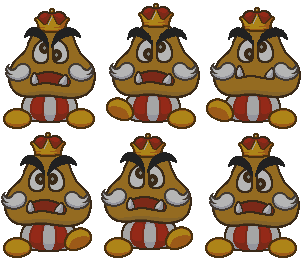 Goomba King |
10 | 1 | 0 | Goomba Road | Prologue |
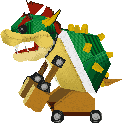 Bowser??? |
10 | 1 | 1 | Koopa Bros. Fortress | Chapter 1 |
Koopa Bros. |
5 | 1 | 1 | Koopa Bros. Fortress | |
Tutankoopa |
30 | 3 | 0 | Dry Dry Ruins | Chapter 2 |
Tubba's Heart |
50 | 6/12 | 0 | Windy Mill | Chapter 3 |
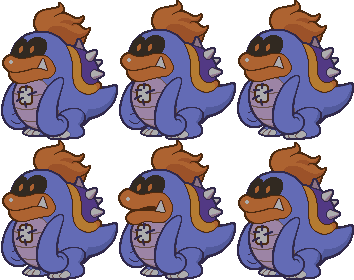 Tubba Blubba |
10 | 4 | 0 | Gusty Gulch | |
 Shy Squad |
15 | Equal to the amount of their HP remaining, in increments of 1 | 0 | Shy Guy's Toy Box | Chapter 4 |
Stilt Guy |
7 | 4 | 0 | Shy Guy's Toy Box | |
Shy Stack |
10 | 1 | 0 | Shy Guy's Toy Box | |
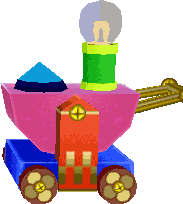 General Guy |
30 | 4 | 2 | Shy Guy's Toy Box | |
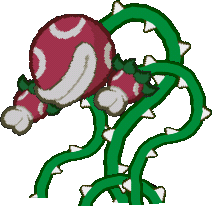 Lava Piranha (1) |
40 | 5 | 0 | Mt. Lavalava | Chapter 5 |
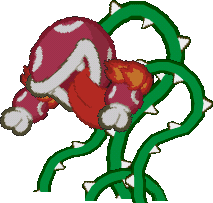 Lava Piranha (2) |
40 | 7 | 0 | Mt. Lavalava | |
 Huff N. Puff |
60 | 5 | 0 | Cloudy Climb | Chapter 6 |
 Crystal King |
70 | 6 | 2 | Crystal Palace | Chapter 7 |
 Bowser (2) |
50 | 6 | 1 | Peach's Castle | Chapter 8 |
 Kammy Koopa |
10 | 4 | 0 | Peach's Castle (Power Platform) | |
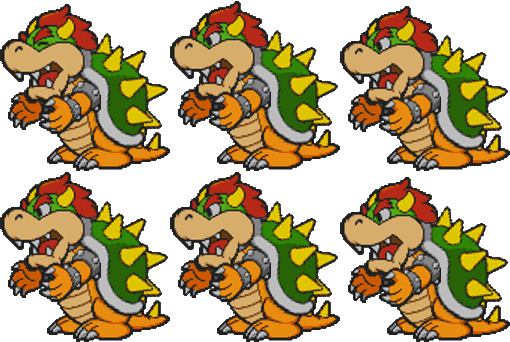 Bowser (big) |
99 | 8 | 2 | Peach's Castle (Power Platform) |
Jr. Troopa[edit]
The game's most recurring boss, Jr. Troopa has his own theme music and subplot, and as such is treated separately from standard miniboss encounters.
| Enemy | Heart Points | Attack | Defense | Location |
|---|---|---|---|---|
Jr. Troopa (1) |
5 | 1 | 0 | Goomba Village |
Jr. Troopa (2) |
15 | 2 | 1 | Pleasant Path |
 Jr. Troopa (3) |
40 | 5 | 1 | Forever Forest |
 Jr. Troopa (4) |
40 (starts with 20) | 6 | 1 | Toad Town port |
Jr. Troopa (5) |
50 | 8 | 1 | Shiver Snowfield |
 Jr. Troopa (6) |
60 | 8 | 2 | Bowser's Castle |
Toad Town Dojo[edit]
Five battles are fought at the Toad Town Dojo. After fighting Chan and Lee, Mario can fight The Master for three unique battles. The Master acts as the game's "superboss," an optional boss that is far stronger than any other fight in the game, including the standard final boss. Like Jr. Troopa, he has his own battle theme. He can be fought multiple times at virtually any point in the game, being stronger for each fight.
| Enemy | Heart Points | Attack | Defense | Location |
|---|---|---|---|---|
Chan |
15 | 2 | 2 | Toad Town Dojo |
Lee |
20 | 5 | 0 | Toad Town Dojo |
The Master (1) |
50 | 6 | 0 | Toad Town Dojo |
The Master (2) |
75 | 8 | 0 | Toad Town Dojo |
The Master (3) |
99 | 10 | 1 | Toad Town Dojo |
Minibosses[edit]
Note that at several points throughout the game, groups of standard enemies are treated as minibosses; as such, this list is for those which are exclusively treated as such. Additionally, some minibosses are optional, and as such may be skipped entirely or fought later when Mario is at a higher level.
| Enemy | Heart Points | Attack | Defense | Location |
|---|---|---|---|---|
Blue Goomba |
6 | 1 | 0 | Goomba Road |
Red Goomba |
7 | 1 | 0 | Goomba Road |
  Magikoopa (1) |
8 | 3 | 0 | Shooting Star Summit |
Bill Blaster |
4 | 0 | 1 | Koopa Bros. Fortress |
 Blooper |
30 | 3 | 0 | Toad Town Tunnels |
 Buzzar (optional) |
40 | 3 | 0 | Mt. Rugged |
 Stone Chomp |
4 | 3 | 1 | Dry Dry Ruins |
 Electro Blooper (optional unless the Blooper is fought elsewhere before Chapter 7) |
50 | 4 | 0 | Toad Town Tunnels |
 Tubba Blubba |
10 | 4 | ? | Tubba Blubba's Castle |
Anti Guy (optional) |
50 | 10 | 0 | Shy Guy's Toy Box Bowser's Castle |
 Big Lantern Ghost |
40 | 5 | 0 | Shy Guy's Toy Box |
Fuzzipede |
20 | 3 | 0 | Toad Town |
 Super Blooper (optional unless the Blooper and the Electro Blooper are fought elsewhere before Chapter 7) |
70 | 5 | 0 | Toad Town Tunnels |
 Kent C. Koopa (optional) |
70 | 10 | 6 | Pleasant Path (After chapter 5) |
Spike? |
50 | 4 | 0 | Flower Fields |
 Monstar |
20 | 1 | 0 | Shiver Snowfield |
Boss helpers[edit]
| Enemy | Heart Points | Attack | Defense | Superordinate of |
|---|---|---|---|---|
Blue Goomba |
6 (starts with 2) | 1 | 0 | Goomba King |
Red Goomba |
7 (starts with 2) | 1 | 0 | Goomba King |
 Chomp |
4 | 3 | 3 | Tutankoopa |
Bulb |
8 | 0 | 1 | General Guy |
Blooper Baby |
6 | 2 | 0 | Super Blooper |
 Lava Bud (1) |
8 | 4 | 0 | Lava Piranha |
 Lava Bud (2) |
8 | 0 | 0 | Lava Piranha |
Petit Piranha |
1 | 6 | 0 | Lava Bud |
Tuff Puff |
1 | 2 | 0 | Huff N. Puff |
Crystal Bit |
1 | 0 | 0 | Crystal King |
Regular enemies[edit]
Unused enemies[edit]
| Enemy | Heart Points | Attack | Defense | Location |
|---|---|---|---|---|
 Albino Dino |
8 | 4 | 4 | Crystal Palace |
Dark Paratroopa |
8 | 3 | 2 | Toad Town Tunnels |
Friendly NPCs[edit]
The overworld of Paper Mario is filled with many characters that Mario can talk to. When approached, a speech bubble icon will appear above their head which signifies they can be spoken to.
List of named / notable NPCs in Paper Mario[edit]
|
Goomba Village Toad Town
Mario's House |
Shooting Star Summit Koopa Village Mt. Rugged Dry Dry Desert Dry Dry Outpost Forever Forest Boo's Mansion |
Gusty Gulch Tubba Blubba's Castle Shy Guy's Toy Box Yoshi's Village Jade Jungle Flower Fields Shiver City |
Starborn Valley Shiver Mountain Bowser's Castle Roaming characters |
Locations[edit]
| Paper Mario takes place in the Mushroom Kingdom, spanning several different areas around Princess Peach's Castle. Toad Town serves as the game's central hub and gives Mario a place to return to after every chapter. | ||
|
Settlements |
Transitional Areas |
Dungeons/Boss arenas |
Side activities[edit]
Star Pieces[edit]
- Main article: List of Star Pieces in Paper Mario
Star Pieces are golden octahedral star fragments that can be found all over the Mushroom Kingdom. There are 160 in total. They can be collected and brought to Merlow at Shooting Star Summit in exchange for Badges.
A lot of Star Pieces can be found lying around in the overworld, usually hidden behind objects. Some Star Pieces are buried beneath hidden floor panels that require either the Spin Jump or the Ultra Hammer to collect. Star Pieces are also often given away as rewards or sold as wares by NPCs.
Chuck Quizmo's quizzes[edit]
- Main article: Chuck Quizmo
Chuck Quizmo is a character who can randomly be encountered in one of the game's many towns, along with his assistant Vanna T. Upon finding him, the player has the opportunity to partake in a quiz show. Chuck Quizmo will ask the player a trivia question about the game and present them with three possible answers. If the correct choice is selected, the player receives a Star Piece. Otherwise Chuck Quizmo has to be found again for another try. There are 64 questions in total the player can answer.
Toad Town Dojo[edit]
After Mario talks to the Star Spirits on Shooting Star Summit and obtains the Lucky Star, the Toad Town Dojo opens. The dojo is located on the second story of the Shroom Grocery building. Here Mario can fight against Chan and Lee, as well as the dojo's Master himself.
Fighting in the dojo does not give Mario Star Points, but with each win the player receives a degree and unlocks the next fight. Defeating the Master's third form earns Mario the Diploma for besting the strongest enemy in Paper Mario.
Koopa Koot's favors[edit]
- Main article: Koopa Koot
Once the player reaches Koopa Village in chapter 1, they have the opportunity to meet Koopa Koot, an elderly Koopa Troopa infamous among his acquaintances for asking favors of people.
When speaking to Koopa Koot after resolving Koopa Village's Fuzzy problem, he will ask Mario for a favor, which usually entails obtaining a specific item and bringing it to him. Upon completion of the favor, Koopa Koot will usually reward Mario with a single coin. In some cases however, the reward will be three Star Pieces in a bulk, or an item that unlocks new minigames in the Toad Town Playroom.
Tayce T.'s recipes[edit]
- Main article: List of Tayce T. recipes
Tayce T. is an elderly Toad woman who lives in Toad Town. She is initially inaccessible due to debris blocking the road to her house, but can be talked to after the Koopa Bros. have been defeated.
Mario can give Tayce T. ingredients which she will turn into new items by cooking them. At first only one item can be given to her at a time, but after bringing her the Cookbook from Shy Guy's Toy Box in Chapter 4, the player unlocks the ability to have her use two ingredients. The blackboard in Mario's House is keeping track of how many recipes have been found and can be checked at any time.
Letter delivery[edit]
- Main article: List of letters in Paper Mario § Normal Letters
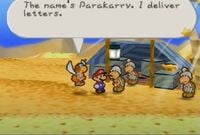
In various locations of the Mushroom Kingdom, Mario can find letters that have been dropped by Parakarry. Once Parakarry has joined Mario's group, Mario can deliver these lost letters to their intended recipients by talking to them while Parakarry is the active party member. Doing so rewards the player with Star Pieces, another letter, or other items.
Services[edit]
A lot of different vendors, establishments, and merchants can be found all over the Mushroom Kingdom. Most of them offer their services for coins which can be found inside ?-Blocks or earned from battling enemies.
Toad Houses[edit]
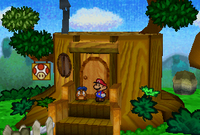
Toad Houses are establishments that can be found in all major towns featured in Paper Mario. They can be recognized by their signs which show a picture of a Toad's head. Toad Houses serve as hotels and Mario and his friends can rest in them to restore Heart Points, Flower Points, and Star Power. Unlike inns in traditional RPGs, they do not charge money for this service.
Almost all Toad Houses are managed by Toads, the sole exception being the one in Star Haven which is owned by a Star instead.
Item Shops[edit]
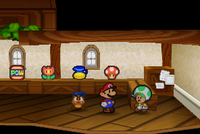
- Main article: List of shops in Paper Mario
Scattered across the Mushroom Kingdom are various common goods stores, identifiable by their Fire Flower sign. Here the player can take their coins to buy items that cause different effects in and out of battles. Additionally, they may get a coin refund by selling items they do not want.
Most items can be sold to the shopkeepers for a set price at every shop, however, some items will sell at a higher price depending on the location of the shop and the item itself. Mario can make a profit by purchasing an item at a low price from one store and selling it to another that will buy it at a higher price.
Item Shops also offer a check system that allows the player to store and withdraw items. This storage space is shared by all stores, which means the player can store an item in one shop and then later withdraw it from another. Up to 32 items can be stored that way.
Merlon's house[edit]
Merlon is Toad Town's local fortune-teller. His services become available after Mario has visited Shooting Star Summit and gotten the Lucky Star. For a fee of five coins, Merlon will foresee Mario's future and give the player a hint about the next game objective.
Merluvlee's Place[edit]
Merluvlee is another fortune-teller who lives at the foot of Shooting Star Summit. She will divine the locations of Star Pieces, Badges, and Super Blocks. She charges 5 coins, 20 coins, and 30 coins for each of them respectively.
Her house also contains the counterpart to the Mysterious Treasure Chest in Peach's Castle. Any items that Princess Peach puts into the chest on her end can be retrieved by Mario here.
Merluvlee's brother Merlow can be found on the second floor of the house. He informs Mario that he collects Star Pieces and is willing to trade Badges for them. Getting Badges from Merlow is the main purpose of collecting Star Pieces.
Toad Town Post Office[edit]
- Main article: List of letters in Paper Mario
The Toad Town Post Office is a building located in central Toad Town, across the street from Merlon's house. Over the course of the game, letters addressed at Mario's party members arrive there, written by different characters Mario met on his journey. The player can visit the post office at any time and talk to the postal worker in charge to view the letters. There is no benefit to reading the letters, but the service is free and reveals what became of the sender after their encounter with Mario.
Mario himself also receives letters during the game. These letters are not stored at the post office and can be found in the bedroom of Mario's House.
Badge Shop[edit]
- Main article: Rowf and Rhuff
The Badge Shop is an open-air store located in the central part of Toad Town, across the street from the gate to Flower Fields. It opens for business after the Koopa Bros. have been defeated in Chapter 1. The player can purchase Badges in exchange for coins.
Sixteen different Badges can be purchased from the Badge Shop, although only three will be available at a time. The selection changes randomly over time until all Badges have been bought.
Li'l Oink Farm[edit]
- Main article: Li'l Oink
Once the Koopa Bros. have been defeated and the road to the southern part of Toad Town has been cleared of debris, Mario can visit the Li'l Oink Farm. For 10 coins, the player can purchase an egg that will hatch into a Li'l Oink and move into the nearby pigpen.
The pen can hold a maximum of 10 animals. If an additional egg is bought while the pen is full, the oldest Li'l Oink will escape and leave behind an item correlating to its color. The player can use this to obtain various items, including ones that are hard to obtain otherwise.
Merlee's tent[edit]
Merlee is a wizard who set up her shop in the back alley of Dry Dry Outpost. For a fee of either 5, 20, or 50 coins she can cast a magic spell on Mario that has a variety of positive effects. The amount of coins paid determines how long the spell is going to last; The more coins were paid, the longer the spell remains.
From the moment it is cast until it runs out, the spell will randomly take effect before or after certain actions, mostly during battles.
- If it takes effect before Mario attacks, the damage of his attack will increase by three.
- If it takes effect during the enemies' turn, Mario's defense will increase by three.
- If it takes effect once all enemies have been defeated, it doubles the amount of Star Points received.
- If it takes effect right after a battle, it will increase the amount of coins dropped by the enemy.
Once the spell has ran out, the player has to return to Merlee and pay her again if they wish to keep the beneficial effects.
Chet Rippo[edit]
Chet Rippo is a pudgy bird-like creature located in the residential area of Toad Town. When talked to, he informs Mario that he is able to increase one of his stats for 39 coins. If the player decides to use Chet Rippo's services, the stat they selected will increase by two stages, while the two stats that weren't selected each drop by one stage. This service can be used to re-adjust Mario's stats in case the player does not feel content with their past level up choices.
Rip Cheato[edit]
Rip Cheato is a merchant living underneath the blue house next to Tayce T.'s. Initially the front door to his domicile is locked and thus it has to be accessed through Toad Town Tunnels by having Bombette destroy a wall. After Rip Cheato has been found, his house can be unlocked from the inside for easier access.
The merchant's services are similar to that of a regular item shop, offering wares in exchange for coins. However, Rip Cheato only sells one item at a time, all of his goods cost 64 coins, and the player does not know in advance what is being offered. Rip Cheato's offers follow a certain order and once his stock is exhausted after ten purchases, he only sells Dried Shrooms from then on.
Virtual Console differences[edit]
The Wii Virtual Console version has more framerate drops than the Nintendo 64 version, but also loads more quickly when moving between areas. Special effect attributes have been altered to reduce the risk of seizure or are different due to emulation issues: the brightness of light effects from Super Blocks have been reduced, the screen dims when an explosion occurs, fire/explosion effects are now solid colors, and magic/transformation wave effects no longer have flashing colors of white and yellow and are waves of purple and pink.
The Wii U Virtual Console version is darker throughout the whole game, but has a smoother framerate not unlike the Nintendo 64 version. Fire/explosion effects match that of the original version (albeit darker), but the magic/transformation wave effects are altered, but in a different way than in the Wii version. In addition, the light effects are malformed and have a black glow. Loading is as fast as the Wii version.
The Wii release requires 270 blocks (34.5 MB) to be installed, while the Wii U release requires 101 MB to be installed.
Wii Shop Channel Description[edit]
Paper Mario is a graphically innovative game that breaks the confines of the RPG genre. Now slimmed down, everyone's favorite plumber flips, spins, jumps, and hammers his way through scads of exotic worlds that teem with a huge and hugely entertaining supporting cast. Players control numerous characters, both old and new, in a complex, nonlinear story that follows different scenarios depending on player choices. A dizzying collection of spells, attacks, skills, and special items can be collected by players willing to thoroughly explore the lush 3-D environments!
Wii U eShop Description[edit]
After Bowser™ steals the Star Rod and kidnaps Princess Peach™, Mario™ plots to rescue the seven Star Spirits and free the Mushroom Kingdom from the Koopa's rule. As Mario travels from the tropical jungles of Lavalava Island to the frosty heights of Shiver Mountain, he'll need all the help he can get.
Master the abilities of the seven Star Spirits and the other allies joining the adventure to aid our hero on the battlefield. There are over 50 Badges to locate that, when equipped, will grant special abilities and powerful attacks. The turn-based battle system will make fighting Bowser's baddies equal parts strategy and timing. Discover over 100 items, mix them together, and cook up fantastic creations that will send your enemies' spinning and fleeing.
Close the book on Bowser's story before his evil deeds turn the world upside down and only his wishes come true!
Relation to other games[edit]
Similarities with Super Mario RPG: Legend of the Seven Stars[edit]
Paper Mario shares many elements with its spiritual predecessor Super Mario RPG: Legend of the Seven Stars, seeing as it was initially intended to be a sequel. These similarities include:
- Paper Mario was originally going to be called Super Mario RPG 2, but was later renamed "Super Mario Adventure" (while still in development) due to legal reasons. Eventually, it received its finalized international title to emphasize the unique graphical style of the game.
- As with Super Mario RPG, Bowser is the very first boss to be fought in the game.
- After the cutscene that takes place when Mario is defeated by Bowser, the Paper Mario logo is displayed similarly to how the Super Mario RPG logo (sans subtitle) is displayed after Exor crashes into Bowser's Keep and destroys the Star Road.
- Revised versions of Star Hill and the Chancellor from Super Mario RPG reappear, although this is lost in translation in the international versions, with the former being renamed Shooting Star Summit and the latter the Toad Minister.
- The Shy Guy riot in Toad Town is similar to Mack and the Shysters' takeover of the Mushroom Kingdom in Super Mario RPG.
- Both Paper Mario and Super Mario RPG contain karate dojos.
- The Master is Paper Mario's equivalent of Jinx, as they are both powerful senseis that are fought three times (with each battle getting harder), and are completely optional. The Master also shares the role of an optional boss harder than the final, main boss, like Culex.
- Both games have plots that involve finding seven stars and have something to do with wishes not being granted due to what the games' main antagonists have done.
- The opening storylines of both games begin with the usual "Mario battling Bowser to save Peach" scenario when Mario suddenly becomes overpowered and sent hurtling a great distance away. In Super Mario RPG, as Mario goes to free Peach after defeating Bowser, Smithy's gang sends Exor crashing into the castle, the impact sending Mario flying, landing back at his house. In Paper Mario, as Mario is fighting Bowser, Bowser makes himself invincible with the Star Rod, then dispatches Mario out a window, and he crash lands in a field just outside Goomba Village.
- In both games, Bowser's castle is unreachable throughout most of the story. In Super Mario RPG, it cannot be reached because the bridge is down; in Paper Mario, the castle is up in the sky. Also, both games feature a special vehicle that is used to reach the castle (the royal bus and Star Ship, respectively).
- Mario uses jump and hammer attacks, which in both games have regular, super, and ultra variations. Both have the three hammer variants, but the jump variants in Super Mario RPG are special moves Mario learns, whereas Paper Mario has these variants as the boots Mario finds to improve his jumping ability.
- The Power Bounce Badge is reminiscent of Mario's Super Jump ability in Super Mario RPG.
- Mario's first party member in both games has a special move that identifies the enemy (Mallow's "Psychopath" and Goombario's "Tattle").
- Both games feature a special area where Mario can turn into 8-bit Mario, complete with 8-bit sounds and music.
- In both games, Mario can travel to an island where Yoshis live.
- During the second boss battle with Bowser, he can temporarily disable some of Mario's commands, similar to how Bowyer disables certain button commands during his battle in Super Mario RPG.
- When Lava Piranha re-emerges from the lava after the first phase of the battle, it resembles Czar Dragon's resurrection as Zombone.
- Both games feature a volcano as a location where a star is hidden. Both areas have an escape sequence after locating the star, though the reason behind it is different (in Super Mario RPG, the Axem Rangers are escaping with the Star; in Paper Mario, the volcano is erupting).
- The endings in both games feature a parade that is led by Luigi and ends with a fireworks display.
- Both Super Mario RPG and Paper Mario feature a Hammer Bro who hosts a quiz game.
- During the parade in the ending of Paper Mario, Twink flies by with Mario and Peach waving at him on a starlit float, as Geno does in Super Mario RPG.
- Both games feature antagonist groups that are based on characters from TV series (the Koopa Bros. are based on the Teenage Mutant Ninja Turtles, while the Axem Rangers are based on Super Sentai).
- In both games, the battle for the sixth star takes place in the sky (the Axem Rangers battle and the Huff N. Puff battle).
- Both games have a party member who fights against Mario first before joining him (Bowser and Lakilester).
- Both Super Mario RPG and Paper Mario have three-headed Piranha Plant bosses (Smilax and Lava Piranha).
- The battle systems of both games contain a feature where correctly timed player input makes the protagonists perform better overall. Super Mario RPG has "timed hits", while Paper Mario has "action commands".
- Both games feature a sidequest involving helping an artist (Toadofsky in Super Mario RPG and the Master Poet in Paper Mario) complete a piece of music, though the specifics of how they are resolved is different.
References to other games[edit]
In addition to its many similarities to Super Mario RPG, Paper Mario has many elements that reference other games:
- Donkey Kong - The opening theme plays when confronting the Koopa Bros. in Koopa Bros. Fortress, followed by the Koopa Bros. theme. Also, Mario's pixel form's colors is based on his colors from the game's artwork and sprite.
- Super Mario Bros. - By entering a vase in Boo's Mansion, Mario can assume his appearance from this game's sprites, albeit with the color scheme used for him in the game's artwork. Also, if the player waits fifteen or more seconds when a chapter title is shown on screen, the overworld theme will play. There is a Candy Pop on Pleasant Path which will give free hearts and play the invincibility theme if Mario runs around it. The coloration of Luigi's parade outfit during the credits matches his outfit from this game, including the gold-colored emblem on his cap. The opening theme for the 64th Trivia Quiz-Off features the jingle for clearing a course in this game at the beginning. Bowser's Castle in Paper Mario features a segment similar to the maze featured in World 7-4, where Mario must choose the correct path to continue or be sent back to its start.
- Super Mario Bros.: The Lost Levels - The ending theme for the 64th Trivia Quiz-Off has the same beginning notes as the bonus theme from the All-Stars version of this game. Additionally, at the end of the game, when Peach thanks all of the friendly characters for helping restore peace to the Mushroom Kingdom, the music that plays is this game's ending theme.
- Super Mario Bros. 2 - After saving Luigi from a Shy Guy, he says "I'm a great jumper, but my running needs some work", referencing his higher jumps and lower speed from this game.
- Super Mario Bros. 3 - Elements from the castle theme is incorporated in the background music for the Koopa Bros. Fortress. When the Koopa Bros. fire Bullet Bills at Mario and his party members, a cover of the Koopalings' Airship theme plays. The Koopa Bros. fight theme is a cover of the Hammer Bros. theme from this game. The level up music is a cover of the overworld theme from World 1. When Mario finds a new hammer or pair of boots, an arrangement of the boss clear theme plays. When Mario rescues a Star Spirit, an arrangement of the "King Saved" theme is played. Another arrangement plays when Mario wins the Star Rod back from Bowser.
- Dr. Mario - When Mario defeats the Fuzzipede boss, the whale exclaims that "they should call him Dr. Mario!"
- Super Mario World - The Attack FX E Badge makes the same sound that Yoshi makes when Mario jumps on his back. Also, the main melody for the overworld, underwater, and athletic themes is a cover for Paper Mario's title screen music, with notable modifications. This melody can also be heard during the first half of the parade during the game's ending. The switch theme can be heard as part of the battle music during the fight with Bowser???. The song that plays on the Golden Oldies station of the radio is a cover of the credits theme. The sound effect heard when the player presses Start and brings up the file select is similar to the sound effect for Message Blocks in this game. Lastly, Dry Bones borrow their style and behavior from their Super Mario World iteration, including red shoes and the ability to throw bones at Mario.
- Super Mario World 2: Yoshi's Island - Bandits (the red kind, that only take coins), Spear Guys, Pyro Guys, a Lantern Ghost, forward-facing Piranha Plants, and Crazee Dayzees appear as enemies. Goombas, Boos, and Chain Chomps use their designs from this game, with the Boos and Chomps closely resembling Bigger Boo's artwork and Chomp Sharks respectively. The Clubbas' face design resemble the Spikes' design from this game, with the White Clubbas closely resembling to them. Sushie's coloration and Squirt attack favor the appearance and abilities of the Spray Fish, Spy Guys wear flowers on their heads like Petal Guys. Stone Chomps appear similar to the brown Chomp Rocks. The music used for Yoshi's Village and when the Fearsome 5 are missing is a cover of this game's title screen music. Little Mousers (being blue based on their in-game sprite and purple based on their artwork), Ravens (including Raphael) and Bumpties (simply called "penguins" in-game) make an appearance as NPCs. Lava Piranha and Kent C. Koopa are similar in appearance to Naval Piranha and Hookbill the Koopa respectively. The final boss battle against Bowser had some similarities to the final boss fight in Yoshi's Island, namely that his right-hand minion enchants Bowser to become larger in order to increase the odds of beating his nemesis (with the only notable difference being that Kamek cast the spell on Bowser directly, while Kammy Koopa merely activated the Power Platform to have Bowser become larger). Poochy, a blue-colored Bandit, and a Nep-Enut appear in one of the game's early builds.
- Super Mario 64 - Peach's Castle design is similar to that used in this game's box art and is near identical inside, but without the paintings. Both games begin with a letter from Peach. Also, Mario jumps into a painting to access the third floor of Boo's Mansion similar to the way he accessed areas in this game. The Stone Cap is an item based on the powered-up caps and it functions similar to the Metal Cap.
- Mario Kart 64 - Both the K64 and Dry Dry Desert are directly inspired by Kalimari Desert, with both locations sharing the same name in Japanese (カラカラさばく, Karakara Sabaku) but being translated differently. When riding the train, a cover of the Kalimari Desert theme plays.
- Mario Golf, Mario Tennis, and Mario Party series - On page 1 of Luigi's Diary, it says, "I remember the carefree days when we played Golf and Tennis and had Parties." The capital letters specifically hint at their respective games.
- The Legend of Zelda series - If Goombario uses tattle on Sheek after he reveals his true identity, he will start his tattle with "da da da dum", a reference to the "item get" theme from this series. Also, Sheek himself is a reference to Sheik from The Legend of Zelda: Ocarina of Time.
- Luigi's Mansion - On page 2 of Luigi's Diary, he talks about how much he is afraid of ghosts. On page 7, it says, "I want to play the lead in an adventure! Of course, my name would have to be in the title. That'd be sweet... But I know it'll never happen..." Less than year after Paper Mario, Luigi's Mansion was released for the Nintendo GameCube, with Luigi as the main character tasked with fighting ghosts.
References in later games[edit]
- Super Smash Bros. Melee - There is a trophy of Mario in his Paper form.
- Mario Kart: Super Circuit - Peach's castle is seen on top of Bowser's castle just like in Paper Mario, located in the background of the course Rainbow Road. The Goombas and Hammer Bros. at the award ceremony use their design from Paper Mario.
- Mario Party 5 - The Star Spirits return as hosts, but here are named the Star Guards instead.
- Mario & Luigi: Superstar Saga / Mario & Luigi: Superstar Saga + Bowser's Minions - A block from Paper Mario appears in Woohoo Hooniversity, along with blocks from other games. The name of the game is even mentioned in the block's description.
- Paper Mario: The Thousand-Year Door - Parakarry makes a brief cameo at the beginning of the game, and delivers a letter to Mario from Peach, just like the previous game. Lady Bow also makes a cameo appearance, and makes a direct reference to Boo's Mansion, as well as the adventure they had. There is also a random Toad at the Excess Express (after Chapter 6 is completed) that will ask Mario a quiz question, ("What did Bowser steal in the first Paper Mario?"), and the answer is, "Star Rod". The videogame-obsessed Toad kid from Petalburg also mentions that he has been playing this game, describing Bow as the "cutest Boo of ALL TIME!!!" Jr. Troopa also appears in the background in the picture that Zip Toad attached to his e-mail. Additionally, several parallels exist between bosses and other critical elements in the two games:
- The first chapter boss is known to terrorize the denizens of the nearby town in both games and resides in a fortress. The two bosses also have lore that explains a relationship to later, stronger bosses; Kent C. Koopa is said to have trained the Koopa Bros., while Gloomtail and Bonetail are relatives of Hooktail.
- The second chapter's boss features an enemy hired by the main villain to occupy a historically significant, ancient location.
- The third chapter boss in both games is a member of the Spike species with an inferiority complex, stemming from an actualized lack of strength, that they "solve" through nefarious means.
- The fifth chapter involves Mario and friends traveling to a tropical island. The boss in both games has "parts" with their own attack patterns and HP, and is found inside the cave of a tropical island. Additionally, both bosses are fought in multiple "stages."
- The sixth chapter boss in both games is one entity consisting of multiple, smaller members of their species (and both explode when defeated, releasing the smaller units toward the screen).
- The seventh chapter involves traveling far away to an icy world which contains a town whose denizens at one point are distrustful of Mario and his friends, preventing him from accessing the chapter's "dungeon."
- In chapter eight, Palace of Shadow Tower has many of the same puzzles from Shiver Mountain and Crystal Palace, including walking through or blowing up seemingly solid walls, and the Palace of Shadow has puzzles and traps from Bowser's Castle, including an area wherein Mario only makes progress by following a pattern (though this is actually taken from World 7-4 in Super Mario Bros.) and rooms with stairs where Mario has to defeat Bullet Bill Blasters to reach the next level.
- Mario Pinball Land - Koopatrols appear as enemies in Bowser's castle.
- Super Mario 64 DS - The Goomba King returns in this game, now named Goomboss.
- Super Princess Peach - Koopatrols appear as statues in Bowser's Villa.
- Mario Party 7 - The board Pyramid Park has a Bowser Sphinx whose crown has the same colors and Chain Chomp ornament as Tutankoopa's crown.
- Mario Kart DS - Goomboss also appears in this game's Mission mode.
- Mario & Luigi: Partners in Time - Star Hill appears once again and is north of the castle just like in this game.
- Super Paper Mario - Every party member here returns as a Catch Card in this game. Francis also has posters of Lady Bow and Bootler in his castle. Tubba Blubba was also mentioned, and had his own TV show called, "The Blubbening". At the beginning of this game, all of Mario's party members, as well as his ones from Paper Mario: The Thousand-Year Door, are all seen together in a photo. The "chapter parallels" return, though to a lesser extent. For Chapter 3 in both games, Mario travels through a castle with chambers/rooms similar to those of real-world large homes and castles, and both contain security entities that will remove Mario from the area if he is caught. For Chapter 5 in both games, the bosses once again have "cognizant limbs", and both happen to be plant-based.
- Itadaki Street DS - Three of the Chance Cards feature screenshots from Paper Mario.
- Super Mario Galaxy - Both games begin with a letter from Peach to Mario, also Bowser's way of kidnapping Peach (by lifting her castle into the sky) is reused here.
- Super Smash Bros. Brawl - Kooper, Lady Bow, General Guy, and Kammy Koopa appear as Stickers. Three of the Star Spirits - Eldstar, Muskular, and Misstar - are also represented by Stickers, but use their Mario Party 5 artworks.
- Paper Mario: Sticker Star - Similar to Bowser's role in this game, Bowser ends up being the main villain as well as being superpowered by a wish-granting object. Unlike in Paper Mario, however, his gaining the object was completely accidental.
- Super Smash Bros. for Nintendo 3DS - In the Paper Mario stage, the whale from Chapter 5 appears under the S.S. Flavion variation of the stage lifting the ship up above the water.
- Paper Mario: Color Splash - When Mario collects a Big Paint Star, an arrangement of the first few notes of this game's title theme is played.
- Mario Party: The Top 100 - The Star Spirits appear as a collectible representing Mario Party 5, this time using their original name from this game. Star Haven is also mentioned in their profile.
- Super Smash Bros. Ultimate - Piranha Plant turns into a Putrid Piranha during its Poison Breath move, and spits poisonous gas to damage other fighters. It is also mentioned briefly by Viridi during Palutena's Guidance dialogue for Piranha Plant. Frost Piranha is also mentioned in Piranha Plant's Palutena's Guidance.
- Paper Mario: The Origami King - Peach's Castle is once again lifted into the sky, this time placed on top of a volcano. A picture of Peach's sprite from this game can be seen on the bridge of The Princess Peach.
- Paper Mario: The Thousand-Year Door (Nintendo Switch) - The map on the wall in the Mario Bros.' House has been changed to resemble the world map from this game. An arranged version of this game's title screen theme plays when Parakarry delivers the Magical Map to the Mario Bros.' House, and when talking to Lady Bow in Poshley Heights. Kooper is an incorrect answer in one of The Creepy Steeple Boo’s quizzes. Lastly, while the Riverside Station premises featured no background music in the GameCube version, it now plays blues rock music that heavily resembles the themes of Lakilester and Huff N' Puff.
Development[edit]
Paper Mario started development as a sequel to Super Mario RPG: Legend of the Seven Stars and production was initially handled by staff that worked on the game, along with director Ryota Kawade who joined in an advisor position,[11] and Shigeru Miyamoto who returned as a co-producer. Early in development, it was decided to divorce the project from Super Mario RPG and the developers took a year and a half to experiment with character and graphical style ideas, including pre-rendered sprites akin to Super Mario RPG. Although development was initially done with Silicon Graphics workstations as with most first-party Nintendo 64 games, the final game's graphics were done with internal Super Famicom tools. According to Nintendo producer Hiroyasu Sasano, the series' distinct paper-like style for character graphics came about from the belief that players "might be getting tired" of the computer-generated 3D graphics seen on consoles like the PlayStation as it was difficult for polygons to bring out the characters' "cuteness".[12]
The original characters introduced in Super Mario RPG were not featured as the developers felt it was better to stick to "the main road" of the Super Mario franchise.[11] The story was conceived early in development and the developers decided to focus on making other aspects of the game appealing to all players in the long run rather than making it "about some grand enticing story", especially as it was felt serious and dramatic themes would be at odd with the lighthearted feel of the franchise.[11] Originally the main story was developed by HAL Laboratory, which is best known for the Kirby series, before development was handed over to Intelligent Systems.[13]
The development of Paper Mario took four years, a very long development cycle for the time.[11] Particular focus was placed on the battle system, its designing taking up about half of the game's production time.[11] As the developers were aware the game would be primarily played by a young audience, the game was balanced around the idea that combat would not be so easy as to be mindless but not so difficult that it would discourage players. The Action Commands were included to appeal to more seasoned players and the Badge system was put in place to simulate the traditional RPG feeling of growing stronger as the game progresses without featuring equipable weapons or a large amount of stats.[11]
Soundtrack[edit]
The main soundtrack was composed by Yuka Tsujiyoko, with event jingles and music-based sound effects written by Taishi Senda, while Koji Kondo was credited as the original composer of themes arranged from previous Super Mario and Yoshi games. Tsujiyoko stated that she used pieces of music that originated from games like Super Mario Bros., Super Mario Bros. 3, and Super Mario World, and expanded them to make the theme music fit in the game.[14] A soundtrack for Paper Mario was issued in 2001 by Nintendo of America in limited quantities as a bonus gift for subscribers to Nintendo Power. 78 of the game's 167 music cues appear here, stored across two discs. Before that, another soundtrack for the game had been released in Japan only by Enterbrain, which offered it to subscribers of its magazine Famitsu.
The musical score was entirely sequenced using instrumentation from the Roland Sound Canvas SC-88 module.[15]
Media[edit]
- For a complete list of media for this subject, see List of Paper Mario media.
| File info 0:30 |
| File info 0:30 |
| File info 0:30 |
| File info |
Reception[edit]
Paper Mario received critical acclaim, with praise directed at its battle system, graphics, and soundtrack. Numerous critics compared Paper Mario to Super Mario RPG: Legend of the Seven Stars, owing to their similar RPG mechanics.
| Reviews | |||
|---|---|---|---|
| Release | Reviewer, Publication | Score | Comment |
| N64 | Adam Riley, Cubed3 | 9/10 | "It really is a difficult task for a team of game makers to follow on from what was already a brilliant game, but Intelligent Systems did just that. Taking their vast amount of previous experience, it built upon the Nintendo-Squaresoft foundation and made tweaks to the gameplay and length that move the series from entry-level role-playing to out-and-out RPG heaven, but still without the heavy statistics. Want a fun, but not too brief RPG adventure? Get this, get it now!" |
| N64 | Marcel van Duyn, Nintendo Life | 10/10 | "Paper Mario was, much like Super Mario RPG was to the SNES, the swansong of the N64. It was followed by a sequel, Paper Mario: The Thousand-Year Door, in 2004. It's still a frequent debate which of the two is better, though I would have to go with the sequel. Still, the original Paper Mario is also brilliant! Since the Wii can play GameCube games, you can just buy Paper Mario on VC and hunt down a copy of the sequel if you don't already own it. Any self-respecting Nintendo fan should play at least one of them." |
| N64 | Ben Stahl, GameSpot | 9.5/10 | "With stunning graphics, excellent sound, and extremely solid gameplay, Paper Mario is a quality game on all fronts. The sprite-based graphics combined with classic Mario gameplay make this a must-own for any Mario lover, and the simplified RPG system makes this a compelling game for both RPG fans and non-fans alike. Games of this caliber are few and far between, and it's too bad that Paper Mario might be the last great 2D Mario game." |
| Aggregators | |||
| Compiler | Platform / Score | ||
| Metacritic | 93 | ||
| GameRankings | 88.81% | ||
Staff[edit]
- Main article: List of Paper Mario staff
Paper Mario was developed by Intelligent Systems, an affiliate studio of Nintendo. Shigeru Miyamoto was the game's co-producer, alongside Kenji Miki. Ryota Kawade was the chief director and game designer, with sub-directors including Toshitaka Muramatsu, Takahiro Ōgi, and Hironobu Suzuki. Kumiko Takeda and Kaori Aoki wrote the game's script, while Naohiko Aoyama was the art director and character designer. The programming team was led by Kenji Nakajima and Kaoru Kita.
Quotes[edit]
- Main article: List of Paper Mario quotes
- "I came from Star Haven to grant your wish! It's our job to grant wishes, you know." – Twink
- "Welcome to Boo's Shop. How can I scare you today?" – Igor
- "Hm! You have great hidden strength for one clothed like a plumber." – The Master
- "I'm actually a really sensitive guy, trapped in a huge body. I don't wanna be invincible anymore if I have to fight guys like you!" – Tubba Blubba
- "You!! You ignored all those very scary warnings! Don't you have the common sense to get scared and run away? What's wrong with you!?" – Tutankoopa
- "Oh no! I can't believe I left my secret diary lying out! It would be totally embarrassing if someone were to read that thing." – Bowser
- "Kaaaa-wiiiizzz! It's everyone's favorite quizmaster, Chuck Quizmo!" – Chuck Quizmo
- "Shucks! First I think I get away from that ol' fishin' man... and then I get all swallowed up by some huge fish... and then this fella with the mustache goes upside my head." – Fuzzipede
- "Nyeah heh heh heh!!! Ooh, I can't wait until Mario gets here! He's gonna get beaten so bad! He'll probably start crying!" – Kammy Koopa
- "Old man, you are simply the cat's meow!" – Kolorado
- "I see. Great, just great. You're on an exciting adventure with Mario. Talk about unfair." – Luigi
Pre-release and unused content[edit]
- Main article: List of Paper Mario pre-release and unused content
Early screenshots of Paper Mario showed that Poochy was originally intended to play some sort of role in the game. Another screenshot showed that Nep-Enuts were going to be in the game (indicating that Lavalava Island was going to be more like Yoshi's Island). Also, a pre-release screenshot of Forever Forest showed that it would have originally been much smaller than it is in the final game, and that all of the forest's trees would have had sinister faces.
A Nep-Enut as seen in an early screenshot of the game.
Glitches[edit]
- Main article: List of Paper Mario glitches
Herringway glitch[edit]
Herringway can be morphed into a normal Bumpty or become invisible if the player pauses the game right after Mario and Herringway go into the Mayor's room and right before initiating the conversation with the detective during Chapter 7. If invisible, he will reappear when the room is left. If Herringway becomes a normal Bumpty, the game will freeze when the Mayor gives him the present. Upon freezing, a debug screen will appear.
Herringway as a normal Bumpty.
Gallery[edit]
- For this subject's image gallery, see Gallery:Paper Mario.
General Guy and two Shy Guys
Names in other languages[edit]
| Language | Name | Meaning | Notes |
|---|---|---|---|
| Japanese | マリオストーリー[?] Mario Sutōrī |
Mario Story | |
| Chinese (simplified) | 纸片马力欧[?] Zhǐpiàn Mǎlì'ōu |
Paper Mario | |
| Chinese (traditional) | Mario Story[16] | Same as Japanese | |
| 紙片瑪利歐[?] Zhǐpiàn Mǎlì'ōu |
Paper Mario | ||
| German | Paper Mario[?] | - | |
| Italian | Paper Mario[?] | - | |
| Korean | 마리오 스토리[?] Mario Seutori |
Mario Story |
Trivia[edit]
- The name "Paper Mario" appears in transcribed form in certain Japanese materials related to this game, including on the back of that region's packaging, despite it not being the title of the game itself there. It is also said aloud in Japanese advertisements for the game.[17]
- Paper Mario was released in China on the iQue Player just one month before Paper Mario: The Thousand-Year Door was released in Japan.
- Paper Mario was the final Super Mario game released for the Nintendo 64 in Australia, while in the rest of the world, Mario Party 3 was the last Super Mario game to be released for said console.
- Several tracks were adjusted between the Japanese and American releases. The theme for Mt. Rugged uses slightly different instruments, and the themes for Bowser's Castle and the final Bowser fight after gaining the Peach Beam have been pitch-corrected. The music played when a party member joins Mario has also been changed, although the credits theme was not adjusted to match.
- A LodgeNet version of Paper Mario was made, which added a note in the splash screens that pressing the LodgeNet controller's Reset button (A black button closest to the cord) would delete all save data.[18]
References[edit]
- ^ Paper Mario | Nintendo 64 | Games | Nintendo. Nintendo of UK (British English). Retrieved June 22, 2024.
- ^ Nintendo 公式チャンネル (December 3, 2021). 『マリオストーリー』 3つのポイント [12月10日配信] [Nintendo 64 Nintendo Switch Online 追加タイトル]. YouTube (Japanese). Retrieved June 22, 2024.
- ^ Nintendo of America (December 2, 2021). Paper Mario Trailer - Nintendo 64 - Nintendo Switch Online. YouTube (American English). Retrieved June 22, 2024.
- ^ @NintendoEurope (December 2, 2021). Unfold a hilarious role-playing quest when Paper Mario joins the growing library of #Nintendo64 games available to #NintendoSwitchOnline + Expansion Pack members on 10/12.. X (British English). Retrieved June 22, 2024.
- ^ Owsen, Dan (January 1998). Nintendo Power Volume 104 (Insider Collector's Edition"). Page 16.
- ^ IGN Staff (July 29, 1997). Miyamoto Reveals Secrets: Fire Emblem, Mario Paint 64. IGN (English). Retrieved June 22, 2024.
- ^ Paper Mario: Sticker Star: "Going All Out with Stickers". Nintendo of America (American English). Retrieved June 22, 2024.
- ^ File:SMRPG2 Concept Artwork 1.jpg
- ^ Fatguy703 (October 29, 2019). The Sweet Lies of Paper Mario 64. YouTube. Retrieved October 29, 2024.
- ^ Fatguy703 (October 29, 2019). The Sweet Lies of Paper Mario 64. YouTube. Retrieved June 22, 2024.
- ^ a b c d e f Paper Mario – 2000 Developer Interview" (GSLA) (translated). Shmuplations (English). Retrieved June 22, 2024.
- ^ Thor Jenson, K. (August 11, 2020). 20 Years Ago, Nintendo Transformed the RPG Genre With Paper Mario. PCMag. Retrieved June 22, 2024.
- ^ Super Mario RPG 2. Nintendo.com (American English). Archived April 20, 1999, 17:45:13 UTC from the original via Wayback Machine. Retrieved June 22, 2024.
- ^ Kohler, Chris (July 26, 2007). Paper Mario: Then and Now. Retrieved June 22, 2024.
- ^ https://docs.google.com/spreadsheets/d/1JJBlHHDc65fhZmKUGLrDTLCm6rfUU83-kbuD8Y0zU0o/edit?pli=1#gid=717751203
- ^ 瑪利歐歷史|超級瑪利歐兄弟 35週年|任天堂. Nintendo of HK (Traditional Chinese). Retrieved June 22, 2024.
- ^ November 24, 2011. CM 任天堂 マリオストーリー (N64) [ Paper Mario ]. YouTube (Japanese). Retrieved June 22, 2024.
- ^ "If Reset button on Controller is pressed during game, all previously saved data will be lost. Press
 to continue." – June 19, 2023. Paper Mario (LodgeNet 64 version). YouTube @birby100. Retrieved July 9, 2024.
External links[edit]
- Official North American website
- British English website
- Official Japanese website
- Official mainland Chinese website
- American English instruction booklet
- European English instruction booklet
- Japanese instruction booklet
| Nintendo 64 games | ||
|---|---|---|
| Super Mario franchise | Super Mario 64 (1996) • Mario Kart 64 (1996) • Mario no Photopi (1998) • Mario Party (1998) • Mario Golf (1999) • Mario Artist: Paint Studio* (1999) • Mario Party 2 (1999) • Mario Artist: Talent Studio* (2000) • Mario Artist: Communication Kit* (2000) • Mario Tennis (2000) • Paper Mario (2000) • Mario Artist: Polygon Studio* (2000) • Mario Party 3 (2000) • Dr. Mario 64 (2001) | |
| Donkey Kong franchise | Diddy Kong Racing (1997) • Donkey Kong 64 (1999) | |
| Yoshi franchise | Yoshi's Story (1997) | |
| Crossovers | Super Smash Bros. (1999) | |
