Hold That Train!: Difference between revisions
mNo edit summary |
m (Text replacement - "{{M+RSOH Quests}}" to "{{M+RSOH quests}}") |
||
| Line 44: | Line 44: | ||
|ItaM=Don't let the train go! | |ItaM=Don't let the train go! | ||
}} | }} | ||
{{M+RSOH | {{M+RSOH quests}} | ||
{{M+RSOH}} | {{M+RSOH}} | ||
[[Category:Mario + Rabbids Sparks of Hope battles]] | [[Category:Mario + Rabbids Sparks of Hope battles]] | ||
Revision as of 10:25, February 11, 2023
| Mario + Rabbids Sparks of Hope battle | |
|---|---|
| Hold That Train! | |

| |
| World | Terra Flora |
| Sullivan's Despair | |
| Objective | |
| 125 | |
| 75 | |
| 220 | |
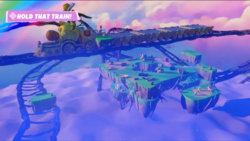
Hold That Train! is a Spark quest battle in Mario + Rabbids Sparks of Hope, located on the planet Terra Flora. It is part of the side-quest Sullivan's Despair, in which Sullivan asks the heroes to help get the Wiggler Train to the repair shop after the Wiggler damaged it during the battle. The Spark Oozer Master wants to help and guides the heroes to destroy 3 Darkmess Thorns, that are blocking the tracks. At the repair shop, there is a Darkmess Puddle, which must be stopped in this battle. The objective is to reach the area, which is the Wiggler Train. The heroes must add platforms by activating switches. After the battle, Sullivan fixes the train, and Oozer Master joins the heroes on their adventure.
Layout
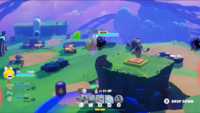
The starting layout of the battlefield consists of many floating platforms scatters throughout the battlefield. The heroes start at a small platform at the bottom of the battlefield, with two floating platforms that are of higher grounds at the left and right, each consisting of a single Sea Stooge and barrel that contains the Shock Super Effect. The starting platform also has a switch which is needed to be pressed to allow more ground to appear. The middle area is a square shape with a + shape cut out in the middle. This area has 3 Magnafowls, 4 barrels contains the Burn Super Effect around the edges of the hole, and 9 Bob-ombs scattered throughout. The north part has a Jump Panel. There are floating platforms of higher ground to the left and right, each having a switch. The Wiggler Train is seen in the background, with a platform of very high ground next to it, being the area that the heroes need to reach to. Activating switches causes more ground to appear.
First switch
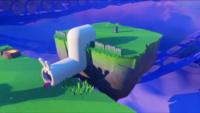
After the first switch is pressed, platforms appear on the right side of the battlefield, adding a pipe to reach to the second switch. A bridge of ground close to the starting area is also added to allow the heroes to get across to the middle.
Second switch
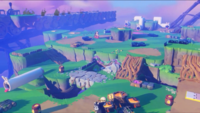
After the second switch is pressed, new ground appears throughout the battlefield: 2 Jump Panels appear next to the right side, higher ground appears in the middle, along with 4 more barrels that contain the Burn Super Effect close to the first 4, a platform of higher ground with a Jump Panel is added to the north, and ground is added to the left side, containing 3 barrels with the Burn Super Effect, along with a pipe that leads to the third switch.
Third switch
Much more ground is added after activating the third switch, which consists of another platform of higher ground with a Jump Panel is added close to the Wiggler Train, allowing the heroes to reach the end. More ground to the left area is added as well, unlocking a Jump Panel close to the switch, along with adding more ground close to the left area. A pipe is added the to north side of it, close to a ramp, and another path consisting of 2 Jump Panels, along with a ramp that leads closer to the starting area.
Battle
As the heroes make progress, Darkmess Portals containing Sea Stooges, Bob-ombs, and Magnafowls will appear throughout the battlefield. After the heroes reach to the area close to the Wiggler Train, the battle is won.
Enemies
Names in other languages
| Language | Name | Meaning | Notes |
|---|---|---|---|
| Japanese | 列車を止めろ![?] Ressha o Tomero! |
Stop the train! | |
| Italian | Non fate partire il treno![?] | Don't let the train go! |


