Mario & Luigi: Superstar Saga: Difference between revisions
(→Trivia: It makes no sense to say that the first game in a series is the first to have a specific trait.) |
|||
| (241 intermediate revisions by 97 users not shown) | |||
| Line 1: | Line 1: | ||
{{italic title}} | {{italic title}} | ||
{{about|the original game for the [[Game Boy Advance]]|the remake of this game for the [[Nintendo 3DS]]|[[Mario & Luigi: Superstar Saga + Bowser's Minions]]}} | {{about|the original game for the [[Game Boy Advance]]|the remake of this game for the [[Nintendo 3DS]]|[[Mario & Luigi: Superstar Saga + Bowser's Minions]]}} | ||
{{ | {{game infobox | ||
|image=[[File:Mario & Luigi Superstar Saga Box NA.png|250px]] | |image=[[File:Mario & Luigi Superstar Saga Box NA.png|250px]]<br>North American box art | ||
|developer=[[AlphaDream]]<br>Vanpool (minigames) | |developer=[[AlphaDream]]<br>Vanpool (minigames) | ||
|publisher=[[Nintendo]] | |publisher=[[Nintendo]] | ||
| | |release='''Game Boy Advance:'''<br>{{flag list|USA|November 17, 2003|UK|November 20, 2003<ref>{{cite|url=https://www.nintendo.com/en-gb/Games/Game-Boy-Advance/Mario-Luigi-Superstar-Saga-267024.html|title=''Mario & Luigi: Superstar Saga'' {{!}} Game Boy Advance {{!}} Games {{!}} Nintendo UK|publisher=Nintendo UK|accessdate=December 17, 2024}}</ref>|Germany|November 20, 2003<ref>{{cite|url=https://www.nintendo.com/de-de/Spiele/Game-Boy-Advance/Mario-Luigi-Superstar-Saga-267024.html|title=''Mario & Luigi: Superstar Saga'' {{!}} Game Boy Advance {{!}} Spiele {{!}} Nintendo DE|publisher=Nintendo DE|language=de|accessdate=December 17, 2024}}</ref>|Japan|November 21, 2003|Europe|November 21, 2003<ref>{{cite|url=https://www.nintendo.com/es-es/Juegos/Game-Boy-Advance/Mario-Luigi-Superstar-Saga-267024.html|title=''Mario & Luigi: Superstar Saga'' {{!}} Game Boy Advance {{!}} Juegos {{!}} Nintendo ES|language=es|publisher=Nintendo ES|accessdate=December 17, 2024}}</ref><ref>{{cite|url=https://www.nintendo.com/fr-fr/Jeux/Game-Boy-Advance/Mario-Luigi-Superstar-Saga-267024.html|title=''Mario & Luigi: Superstar Saga'' {{!}} Game Boy Advance {{!}} Jeux {{!}} Nintendo FR|publisher=Nintendo FR|language=fr|accessdate=December 17, 2024}}</ref>|Australia|November 28, 2003<ref>{{cite|url=themushroomkingdom.net/games/mlss|title=''Mario & Luigi: Superstar Saga''|publisher=The Mushroom Kingdom|language=en|accessdate=June 25, 2024}}{{better source}}</ref>}}'''[[Player's Choice]]:'''<br>{{flag list|USA|April 2, 2006<ref>{{cite|url=https://www.ign.com/articles/2006/03/10/gba-gets-players-choice|language=en|author=Craig Harris|publisher=IGN|title=GBA Gets Player's Choice|date=March 9, 2006|accessdate=November 10, 2024}}</ref>}}'''Virtual Console (Wii U):'''<br>{{flag list|USA|April 3, 2014|Europe|April 3, 2014|Australia|April 3, 2014|Japan|April 30, 2014}}'''Game Boy Advance - Nintendo Switch Online:'''<br>{{flag list|USA|February 8, 2023|Japan|February 9, 2023|Europe|February 9, 2023|Australia|February 9, 2023|South Korea|February 9, 2023|HK|February 9, 2023}} | ||
|genre=RPG, action-adventure | |languages={{languages|en_us=y|es_es=y|fr_fr=y|de=y|it=y|jp=y}} | ||
|modes=Single player, multiplayer | |genre=[[Genre#Role-playing|RPG]], action-adventure | ||
|ratings={{ratings|acb=g|cero=a|esrb=e|pegi=3}} | |modes=Single-player, multiplayer | ||
|platforms=[[Game Boy Advance]], [[Virtual Console]] ([[Wii U]]) | |ratings={{ratings|acb=g|cero=a|esrb=e|pegi=3|usk=0}} | ||
| | |platforms=[[Game Boy Advance]], [[Virtual Console]] ([[Wii U]]), [[Game Boy Advance - Nintendo Switch Online]] | ||
|input={{input|gba=1|wiiu=1|wiiupro=1|wiiusideways=1|wiiuclassic=1}} | |format={{format|gba=1|wiiudl=1|switchdl=1}} | ||
|input={{input|gba=1|wiiu=1|wiiupro=1|wiiusideways=1|wiiuclassic=1|joy-con=1|joy-con-horizontal=1|switchpro=1}} | |||
|serials={{flag list|USA|AGB-A88E-USA|Japan|AGB-A88J-JPN|Europe|AGB-A88P-EUR|Australia|AGB-A88U-AUS|China|AGB-A88C-CHN}} | |||
}} | }} | ||
'''''Mario & Luigi: Superstar Saga''''' | '''''Mario & Luigi: Superstar Saga''''' is a [[Genre#Turn-based tactics|turn-based]] action [[Genre#Role Playing|RPG]] for the [[Game Boy Advance]], developed by [[AlphaDream]] and published by [[Nintendo]]. It was released in November of 2003 for the Game Boy Advance and later as a [[Virtual Console]] title for the [[Wii U]] in April of 2014 and as one of the launch titles for [[Game Boy Advance - Nintendo Switch Online]] in February of 2023. The plot revolves around [[Mario]] and [[Luigi]] traveling to and exploring the [[Beanbean Kingdom]] to recover [[Princess Peach]]'s voice from an evil witch, [[Cackletta]], and her pupil, [[Fawful]]. | ||
This game | In addition to being the first installment in the [[Mario & Luigi (series)|''Mario & Luigi'']] series, this game is also the third ''Super Mario'' RPG following ''[[Super Mario RPG: Legend of the Seven Stars]]'' and ''[[Paper Mario]]'' respectively. It would itself be succeeded by ''[[Mario & Luigi: Partners in Time]]'' for the [[Nintendo DS]] in 2005. Like ''Paper Mario'', the game is a spiritual successor to ''Super Mario RPG''. It also takes heavy inspiration from ''{{iw|nwiki|Tomato Adventure}}'', AlphaDream's first role-playing game for Game Boy Advance systems, featuring very similar graphics, sound effects, and even allusions to certain characters. This game features rumble support if played on a [[Game Boy Player]]. The [[Mario Bros. (Game Boy Advance)|remake of the ''Mario Bros.'']] arcade game featured in the [[Super Mario Advance (series)|''Super Mario Advance'']] series of games was also included with ''Mario & Luigi: Superstar Saga''. | ||
A remake of this game for the [[Nintendo 3DS]], titled ''[[Mario & Luigi: Superstar Saga + Bowser's Minions]]'', was released in October of 2017, featuring a new, exclusive sidequest mode coinciding with the main story. As such, it is the first installment in the ''Mario & Luigi'' series to receive a remake. The second would be ''[[Mario & Luigi: Bowser's Inside Story]]'', which received a remake titled ''[[Mario & Luigi: Bowser's Inside Story + Bowser Jr.'s Journey]]'' a decade later. | |||
==Story== | ==Story== | ||
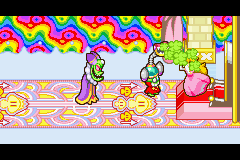
[[File:Cackletta2.png|frame|Cackletta and Fawful stealing Princess Peach's voice]] | [[File:Cackletta2.png|frame|Cackletta and Fawful stealing Princess Peach's voice]] | ||
The Goodwill Ambassador from the [[Beanbean Kingdom]] and her assistant arrive at the [[Mushroom Kingdom]] to bring a gift from [[Queen Bean]] for [[Princess Peach]]. However, it turns out to be an act of deceit; the ambassador and her assistant are actually villains named [[Cackletta]] and [[Fawful]], who quickly steal Peach's voice and escape with it into the dark sky. | The Goodwill Ambassador from the [[Beanbean Kingdom]] and her assistant arrive at the [[Mushroom Kingdom]] to bring a gift from [[Queen Bean]] for [[Princess Peach]]. However, it turns out to be an act of deceit; the ambassador and her assistant are actually villains respectively named [[Cackletta]] and [[Fawful]], who quickly steal Peach's voice and escape with it into the dark sky. | ||
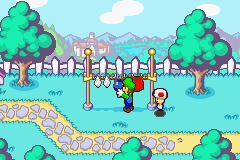
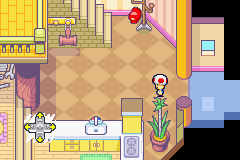
[[File:M&LSSToadLuigi.png|frame|left|Toad trying to alert Luigi of the danger in front of the Mario Bros. residence]] | [[File:M&LSSToadLuigi.png|frame|left|Toad trying to alert Luigi of the danger in front of the Mario Bros. residence]] | ||
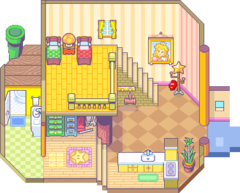
Meanwhile, Mario and Luigi are at [[Mario Bros.' House|their house]] when [[Toad]] runs by to alert Mario to the ordeal; Mario runs off to [[Peach's Castle]] while inadvertently dragging [[Luigi]] behind him. Inside, the Bros. run into [[Bowser]] trying to kidnap Peach. After Mario defeats Bowser, a Toad then tells them that Peach's voice was replaced with | Meanwhile, Mario and Luigi are at [[Mario Bros.' House|their house]] when [[Toad]] runs by to alert Mario to the ordeal; Mario runs off to [[Peach's Castle|Princess Peach's Castle]] while inadvertently dragging [[Luigi]] behind him. Inside, the Bros. run into [[Bowser]] trying to kidnap Peach. After Mario defeats Bowser, a Toad then tells them that Peach's voice was replaced with explosives that drop from her speech balloon when she talks. Bowser, scared the princess might wreck [[Bowser's Castle|his castle]] if kidnapped, reluctantly agrees to help Mario retrieve Peach's voice. | ||
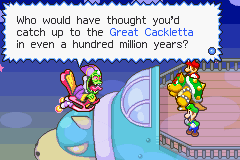
[[File:Cackletta3.PNG|frame|left|The Bros. and Bowser meeting Cackletta]] | [[File:Cackletta3.PNG|frame|left|The Bros. and Bowser meeting Cackletta]] | ||
Mario and Bowser get ready to leave in the [[Koopa Cruiser]] along with the crew of [[ | Mario and Bowser get ready to leave in the [[Koopa Cruiser]] along with the crew of [[Bowser's Minions|Bowser Baddies]]. As they are about to leave, Luigi comes to say his final goodbye.<ref>{{cite|url=www.youtube.com/watch?v=AlXPcxE5bGs|title=M&LSS Luigi Bye Bye - Japanese|date=April 5, 2017|publisher=YouTube|language=ja|author=Alex95|accessdate=June 25, 2024}}{{better source}}<!--Tagging because the uploader admits in the video description that he stole the video from elsewhere, so find the original source instead.--></ref> Bowser mistakenly thinks Luigi wants to join his Baddies, so he takes him along. Along the way, the group encounters Cackletta, who sends Fawful in to fight the Bros. After a brief battle, Fawful uses his headgear to destroy the cruiser, sending everyone onboard plummeting down to [[Stardust Fields]]. | ||
[[File:TolstarBattleMLSS.png|frame|Mario and Luigi battling [[Tolstar]]]] | [[File:TolstarBattleMLSS.png|frame|Mario and Luigi battling [[Tolstar]]]] | ||
Mario and Luigi crash land in | Mario and Luigi crash land in [[Stardust Fields|Beanbean Borderland]]. They soon meet the [[Border Bro]]s., who let them pass after they play the [[Border Jump]] game. Mario and Luigi soon find Bowser stuck in a cannon; its operator, [[Tolstar]], tells the Bros. to get 100 [[Beanbean coin]]s in order to secure Bowser's release. While doing that, they learn the [[High Jump]] and [[Spin Jump (Mario & Luigi series)|Spin Jump]] from the [[Starshade Bros.]] After getting enough coins, Tolstar decides to attack the brothers, but is soon defeated. Soon after, one of the Starshade Bros. arrives and lights the fuse of the cannon Bowser is stuck in, [[Mario & Luigi: Superstar Saga + Bowser's Minions|shooting him across the kingdom]]. | ||
[[File:Dragohoho.png|left|frame|Mario and Luigi battling [[Dragohoho]]]] | [[File:Dragohoho.png|left|frame|Mario and Luigi battling [[Dragohoho]]]] | ||
The brothers soon make it to [[Hoohoo Village]], where some [[Beanish]] soldiers mistake them for foes. | The brothers soon make it to [[Hoohoo Village]], where some [[Beanish]] soldiers mistake them for foes. Tolstar tells the soldiers the brothers are not lying, and they are permitted entry to the town. They soon leave to find Fawful tormenting a soldier. He mocks the brothers by placing a rock statue in front of them, blocking their path to [[Beanbean Castle]]. They decide to visit the [[Hammerhead Bros.]] back at the village to obtain [[Hammer]]s from them. However, the Hammerhead Bros. cannot make hammers because the material that they have is too brittle. They need a Hoohoo Stone, so the brothers climb up [[Hoohoo Mountain]] to retrieve one from the summit. | ||
Midway, they confront a statue named [[Hoohooros]] whom challenges the Bros. to a battle. Once they overcome Hoohooros, it allows them to continue up the mountain. When the Bros. finally reach the summit, they find a Hoohoo Stone, but it falls off the mountain. This awakens [[Blablanadon]], who is mad at what they did. After the Bros. explain the incident, Blablanadon apologizes and explains that he has been sitting on a strange egg for some time. Suddenly, the egg hatches, revealing [[Dragohoho]]; the creature knocks Blablanadon away and fights the brothers. They defeat the monster, and it transforms into [[Prince Peasley]], the prince of the kingdom, who thanks the Bros. for freeing him. Blablanadon flies the Bros. back to Hoohoo Village, where they meet the Hammerhead Bros. again. With the Hoohoo Stone that fell into their cabin, the Hammerhead Bros. are able to make them the hammers they require. | Midway, they confront a statue named [[Hoohooros]] whom challenges the Bros. to a battle. Once they overcome Hoohooros, it allows them to continue up the mountain. When the Bros. finally reach the summit, they find a Hoohoo Stone, but it falls off the mountain. This awakens [[Blablanadon]], who is mad at what they did. After the Bros. explain the incident, Blablanadon apologizes and explains that he has been sitting on a strange egg for some time. Suddenly, the egg hatches, revealing [[Dragohoho]]; the creature knocks Blablanadon away and fights the brothers. They defeat the monster, and it transforms into [[Prince Peasley]], the prince of the kingdom, who thanks the Bros. for freeing him and gives them a [[Peasley's Rose|rose]]. Blablanadon flies the Bros. back to Hoohoo Village, where they meet the Hammerhead Bros. again. With the Hoohoo Stone that fell into their cabin, the Hammerhead Bros. are able to make them the hammers they require. | ||
Using their hammers, they demolish Fawful's statue and travel down Hoohoo Mountain towards [[Beanbean Castle Town]]. Along the way, they find a cave with an old man and his Beanish dog, who asks them to ride the [[Mysterious Mine Carts]]. Afterwards, the Mario Bros. reach Beanbean Castle Town, but they find the town in ruins because of an attack from Cackletta and Fawful. The brothers quickly go to [[Beanbean Castle]], where they meet up with [[Lady Lima]], the kingdom's ambassador. They tell her what's going on, but she does not believe their story, and decides to test them by sending them down to the castle sewer to fix a leaking pipe problem. | Using their hammers, they demolish Fawful's statue and travel down Hoohoo Mountain towards [[Beanbean Castle Town]]. Along the way, they find a cave with an old man and his Beanish dog, who asks them to ride the [[Mysterious Mine Carts]]. Afterwards, the Mario Bros. reach Beanbean Castle Town, but they find the town in ruins because of an attack from Cackletta and Fawful. The brothers quickly go to [[Beanbean Castle]], where they meet up with two soldiers who refuse to let them in. Luigi shows them the rose that Peasley gave and the soldiers allow the brothers to enter. Inside, they meet [[Lady Lima]], the kingdom's ambassador. They tell her what's going on, but she does not believe their story, and decides to test them by sending them down to the castle sewer to fix a leaking pipe problem. | ||
Once it has been fixed, the brothers meet up with the real Lady Lima and some servants, where they learn that the Lady Lima they met earlier was actually Cackletta in disguise, and fixing the castle's plumbing disabled the security system which protects the [[Beanstar]]. The brothers catch up with her, but arrive too late as Cackletta takes the Beanstar away and sends a deranged muscular [[Queen Bean]] to attack them. After defeating her, Mario and Luigi are then sent by Lady Lima to get the [[Chuckola Reserve]] to allow Queen Bean to spit out the [[Belly Blech]] that caused her to become muscular. | Once it has been fixed, the brothers meet up with the real Lady Lima and some servants, where they learn that the Lady Lima they met earlier was actually Cackletta in disguise, and fixing the castle's plumbing disabled the security system which protects the [[Beanstar]]. The brothers catch up with her, but arrive too late as Cackletta takes the Beanstar away and sends a deranged muscular [[Queen Bean]] to attack them. After defeating her, Mario and Luigi are then sent by Lady Lima to get the [[Chuckola Reserve]] to allow Queen Bean to spit out the [[Belly Blech]] that caused her to become muscular. | ||
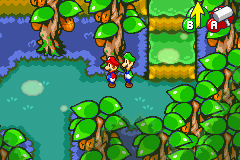
[[File:Chucklehuck Woods MLSS.png|frame|The Mario Bros. in Chucklehuck Woods]] | [[File:Chucklehuck Woods MLSS.png|frame|The Mario Bros. in Chucklehuck Woods]] | ||
Later, the Mario Bros. make it to [[Chateau de Chucklehuck]] to find the reserve. They end up in an unexpected fight with [[Popple]], the shadow thief, and his partner, [[Rookie]], who are both defeated. The brothers soon meet [[Cork and Cask]], the owners of the brewery, who teach them [[Mini-Mario]] and [[Luigi Dunk]]. Mario and Luigi later retrieve three [[Chuckola Fruit]] to give to [[Chuckleroot]]. When they reach Mother Chuckola, they find the creator of [[Chuckola Cola (Mario & Luigi series)|Chuckola Cola]], Bubbles, who is busy telling jokes to the Chuckola Reserve. The soda then transforms into the [[Chuckolator]]. After a battle with the Bros., it is defeated and reverts into normal soda, causing an enraged Bubbles to create a tremor that sends the brothers and the soda underground. Mario lands in the soda and Luigi heads back to Beanbean Castle by doing a barrel run. | Later, the Mario Bros. make it to [[Chateau de Chucklehuck]] to find the reserve. They end up in an unexpected fight with [[Popple]], the shadow thief, and his partner, [[Rookie]], who are both defeated. The brothers soon meet [[Cork and Cask]], the owners of the brewery, who teach them [[Mini-Mario (form)|Mini-Mario]] and [[Dunk Hammer|Luigi Dunk]]. Mario and Luigi later retrieve three [[Chuckola Fruit]] to give to [[Chuckleroot]]. When they reach Mother Chuckola, they find the creator of [[Chuckola Cola (Mario & Luigi series)|Chuckola Cola]], Bubbles, who is busy telling jokes to the Chuckola Reserve. The soda then transforms into the [[Chuckolator]]. After a battle with the Bros., it is defeated and reverts into normal soda, causing an enraged Bubbles to create a tremor that sends the brothers and the soda underground. Mario lands in the soda and Luigi heads back to Beanbean Castle by doing a barrel run. | ||
[[File:Woohoo Hooniversity MLSS.png|frame|left|Mario and Luigi in | [[File:Woohoo Hooniversity MLSS.png|frame|left|Mario and Luigi in Woohoo Hooniversity]] | ||
Back at the castle, Luigi jumps on Mario to squirt out the Chuckola Reserve into Queen Bean, returning her to normal. Peasley then arrives to inform everyone of Cackletta's presence in [[Woohoo Hooniversity]], prompting Queen Bean to send the Mario Bros. there to investigate. At the Hooniversity, they solve a series of puzzles to unlock the Sun Door and reach Cackletta and Fawful. The evil duo are about to awaken the Beanstar using [[Peach-bot]]s that are installed with Peach's voice. When Cackletta activates them, however, they make a strange noise that drives the Beanstar crazy. The star causes a tremor, sending the robots and itself falling to the floor below. The Mario Bros. then appear, and Luigi bashes Fawful into the ground with his hammer, leaving Cackletta to fight them alone. | Back at the castle, Luigi jumps on Mario to squirt out the Chuckola Reserve into Queen Bean, returning her to normal. Peasley then arrives to inform everyone of Cackletta's presence in [[Woohoo Hooniversity]], prompting Queen Bean to send the Mario Bros. there to investigate. At the Hooniversity, they solve a series of puzzles to unlock the Sun Door and reach Cackletta and Fawful. The evil duo are about to awaken the Beanstar using [[Peach-bot]]s that are installed with Peach's voice. When Cackletta activates them, however, they make a strange noise that drives the Beanstar crazy. The star causes a tremor, sending the robots and itself falling to the floor below. The Mario Bros. then appear, and Luigi bashes Fawful into the ground with his hammer, leaving Cackletta to fight them alone. | ||
After the Bros. | After the Bros. beat Cackletta, Fawful gets back up, and uses his headgear to suck up her essence, dissolving her body. As he is about to battle the brothers, Peasley arrives and throws him out of the building. The prince departs, leaving the brothers to go down to the basement to retrieve the Beanstar. There, they find Popple and Rookie with the Beanstar, and fight for it. As the Bros. finish dealing with the thieves, a Peach-bot falls down and makes the strange noise again, irritating the Beanstar. Mario, Luigi, Popple, and Rookie grab a hold of it as it flies out of the Hooniversity. They soon each let go and fall in turn; Rookie suddenly remembers that he is really [[Bowser]] before he is the last to fall, along with the Beanstar itself when it breaks into four pieces. | ||
[[File:MLSS-Oho Oasis Screenshot.png|frame|Mario and Luigi in Oho Oasis]] | [[File:MLSS-Oho Oasis Screenshot.png|frame|Mario and Luigi in Oho Oasis]] | ||
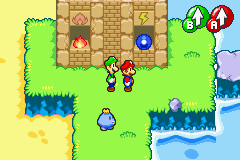
Mario and Luigi land at [[Oho Oasis]], where they learn the [[Firebrand]] and [[Thunderhand]] moves in the [[Fire Palace|Fire]] and [[Thunder Palace|Thunder]] temples. Meanwhile, Fawful finds the injured Bowser lying on the ground and implants Cackletta's soul inside him. The Mario Bros. soon meet Peasley again, saying that Princess Peach is arriving at | Mario and Luigi land at [[Oho Oasis]], where they learn the [[Firebrand]] and [[Thunderhand]] moves in the [[Fire Palace|Fire]] and [[Thunder Palace|Thunder]] temples. Meanwhile, Fawful finds the injured Bowser lying on the ground and implants Cackletta's soul inside, turning him into [[Bowletta]]. The Mario Bros. soon meet Peasley again, saying that Princess Peach is arriving at [[Beanbean International Airport]]. They arrive and find that [[Piranha Plant]]s led by [[Mom Piranha]] are infesting the runway, and set out to take care of this problem, allowing the [[Toad Express]] to land safely. | ||
Back at the castle, the Mario Brothers find out that Peach's voice had never been stolen. It was really [[Birdo]] disguised as the princess at the time who lost her voice. Peach knew about this all along, as Peasley came and told her about Cackletta's plan beforehand. Later, Peach decides to visit [[Little Fungitown]], with the Mario Bros. escorting her. | Back at the castle, the Mario Brothers find out that Peach's voice had never been stolen. It was really [[Birdo]] disguised as the princess at the time who lost her voice, hence why the Beanstar reacted so adversely at Woohoo Hooniversity. Peach knew about this all along, as Peasley came and told her about Cackletta's plan beforehand, but she had been unable to explain things to the Mario Brothers due to Bowser's arrival. Later, Peach decides to visit [[Little Fungitown]], with the Mario Bros. escorting her. | ||
[[File:Little Fungitown MLSS.png|frame|left|Mario and Luigi in Little Fungitown]] | [[File:Little Fungitown MLSS.png|frame|left|Mario and Luigi in Little Fungitown]] | ||
They arrive at the only known route to Little Fungitown, [[Teehee Valley]]. Before reaching the town, they are confronted by the rock creature, [[Trunkle]], whom they overcome. At Little Fungitown, the Bros. decide to go to the arcade, where Mario plays [[Star 'Stache Smash]] and wins an "[[Invincishroom]]" - which is actually a misidentified [[Poison Mushroom]]. He eats it, but ends up in the hospital, where he has contracted [[Bean Fever]]. The only cure for this disease is [[Crabbie Grass]] from [[Guffawha Ruins]]. Luigi intends to travel to the area to find the grass, but loses his nerve when he finds out about [[ | They arrive at the only known route to Little Fungitown, [[Teehee Valley]]. Before reaching the town, they are confronted by the rock creature, [[Trunkle]], whom they overcome. At Little Fungitown, the Bros. decide to go to the arcade, where Mario plays [[Star 'Stache Smash]] and wins an "[[Invincishroom]]" - which is actually a misidentified [[Poison Mushroom]]. He eats it, but ends up in the hospital, where he has contracted [[Bean Fever]]. The only cure for this disease is [[Crabbie Grass]] from [[Guffawha Ruins]]. Luigi intends to travel to the area to find the grass, but loses his nerve when he finds out about [[moai|a bone-crushing monster]] living there. To try and calm himself, he goes to [[Psycho Kamek]] ([[Dr. Toadley]] in the remake), who hypnotizes him into thinking that he is Mario. The newly-emboldened Luigi goes to Guffawha Ruins. | ||
Soon after confronting the "monster", who is actually just a stone head wishing people would stop making rumors about him, Luigi finds some Crabbie Grass. He goes back to the Little Fungitown hospital, but is struck by lightning. He then spots Peach in the [[Koopa Clown Car]]. The fiend in the vehicle is Cackletta, who has possessed Bowser's body to become [[Bowletta]]. She makes off with Peach, and Luigi rushes into the hospital to revive Mario. Luigi tells Mario about what had just happened, and both of them quickly return to Beanbean Castle. | Soon after confronting the "monster", who is actually just a stone head wishing people would stop making rumors about him, Luigi finds some Crabbie Grass. He goes back to the Little Fungitown hospital, but is struck by lightning. He then spots Peach in the [[Koopa Clown Car]]. The fiend in the vehicle is Cackletta, who has possessed Bowser's body to become [[Bowletta]]. She makes off with Peach, and Luigi rushes into the hospital to revive Mario. Luigi tells Mario about what had just happened, and both of them quickly return to Beanbean Castle. | ||
| Line 62: | Line 63: | ||
[[File:MLSS-Yoshi Theater Screenshot.png|frame|Mario and Luigi in the [[Yoshi Theater (Mario & Luigi: Superstar Saga)|Yoshi Theater]]]] | [[File:MLSS-Yoshi Theater Screenshot.png|frame|Mario and Luigi in the [[Yoshi Theater (Mario & Luigi: Superstar Saga)|Yoshi Theater]]]] | ||
Mario and Luigi go out to get the first Beanstar piece, which is in the [[S.S. Chuckola]] back at Teehee Valley. After the ship is sent into | Mario and Luigi go out to get the first Beanstar piece, which is in the [[S.S. Chuckola]] back at Teehee Valley. After the ship is sent into [[Oho Ocean]], the Mario Brothers follow the floating Beanstar to [[Gwarhar Lagoon]]. Here, they learn [[Dash (Mario & Luigi: Superstar Saga)|Dash]] and [[Tickle]] from the [[Jellyfish Sisters]]. They later discover that the Beanstar piece is being used as an ornament for [[Hermie III]]. The brothers soon receive the piece after a battle with Hermie. | ||
The next piece is from the fashion stylist [[Harhall]], who gives Mario and Luigi the piece after they [[Splart|color fabric]] with [[Designbomb]]s. The third piece is back at Chucklehuck Woods, where they have to play a game in | The next piece is from the fashion stylist [[Harhall]], who gives Mario and Luigi the piece after they [[Splart|color fabric]] with [[Designbomb]]s. The third piece is back at Chucklehuck Woods, where they have to play a game in [[Winkle Colosseum]] and surpass the [[Winkle]]s. They soon find Popple again, and defeat him to retrieve the third piece of the Beanstar. The last piece comes from [[Boddle]] after they get [[Neon Egg]]s for his [[Yoshi Theater (Mario & Luigi: Superstar Saga)|Yoshi Theater]] sign. | ||
They return to the castle with the star, where Lima has brought another message from Bowletta. She now wants them to bring the Beanstar to her at [[Joke's End]]. Prince Peasley gives them a [[Fake Beanstar]] to try | They return to the castle with the star, where Lima has brought another message from Bowletta. She now wants them to bring the Beanstar to her at [[Joke's End]]. Prince Peasley gives them a [[Fake Beanstar]] to try to fool the villains, and the Bros. then surf to Joke's End. | ||
[[File:Joke's End MLSS.png|frame|left|Mario and Luigi at Joke's End]] | [[File:Joke's End MLSS.png|frame|left|Mario and Luigi at Joke's End]] | ||
There, they meet a fairy-like girl named [[Jojora]]. Eventually, the brothers reach Jojora's room at the top floor, where she is having a tea party. She requests that the brothers invite one of [[Jojora's | There, they meet a fairy-like girl named [[Jojora]]. Eventually, the brothers reach Jojora's room at the top floor, where she is having a tea party. She requests that the brothers invite one of [[Jojora's friends|her friends]] over, who is a snow woman that attacks Mario and Luigi. They defeat her, and Jojora flees from the scene. Soon after, Mario and Luigi find Fawful, who is waiting for them to hand over the Beanstar. Luigi approaches him, and gives him the fake one, but Fawful is not fooled; he blasts Luigi and takes the real Beanstar. Mario comes up with a plan involving the extra dress Toadsworth gave to them before they went to Joke's End. Bowletta, who has the real Peach, soon spots Mario with another Peach. The other Peach says that the one the villains have is fake. Angered, Bowletta tosses what she believes to be the "fake" Peach overboard and takes the "real" one back to the repaired Koopa Crusier. | ||
[[File:MLSS-Princess Deception.PNG|frame|right| | [[File:MLSS-Princess Deception.PNG|frame|right|Bowletta and Fawful believing they have the real princess]] | ||
Back at the Cruiser, Bowletta and Fawful are celebrating their success, until Bowletta finds out that the princess is really Luigi in disguise. Fawful chases him, followed by Bowletta, until he manages to escape the cruiser with the Beanstar. Upset, Bowletta decides that she and Fawful will go to the Mushroom Kingdom for something. | Back at the Koopa Cruiser, Bowletta and Fawful are celebrating their success, until Bowletta finds out that the princess is really Luigi in disguise. Fawful chases him, followed by Bowletta, until he manages to escape the cruiser with the Beanstar. Upset, Bowletta decides that she and Fawful will go to the Mushroom Kingdom for something. | ||
Back at Teehee Valley, Luigi crash-lands into a sand pit and sinks in. Mario manages to find him underground, but the two end up fighting Popple again. Popple is defeated, along with his new partner, Birdo. Afterwards, | Back at Teehee Valley, Luigi crash-lands into a sand pit and sinks in. Mario manages to find him underground, but the two end up fighting Popple again. Popple is defeated, along with his new partner, Birdo. Afterwards, the brothers head back to Beanbean Castle Town. | ||
The brothers find that the town is under fire again. It appears that Bowletta is using [[Bowser's Castle]] to attack the town, in retaliation for the brothers getting the Beanstar back from her, and then having it returned to Beanbean Castle. At Beanbean Castle, Lima suggests that they should try and find something to help them fly to reach Bowser's Castle. The brothers head back to Hoohoo Village to ask for Blablanadon's help. He accepts, and takes them up to Bowser's Castle. | |||
[[File:Bowser landing.png|frame|left|The plane, with Bowser in tow, flying over the Koopa King's land-based castle]] | [[File:Bowser landing.png|frame|left|The plane, with Bowser in tow, flying over the Koopa King's land-based castle]] | ||
At the castle, Mario and Luigi meet the [[Koopalings]], along with Fawful, who possesses some new gadgets. After trumping them and several other foes with the ranks of Bowletta's new army, the Bros. make their way to Bowletta herself; she reveals her plan to take over the Mushroom Kingdom after she is done gaining control of the Beanbean Kingdom. The brothers fight her and supposedly win, until a [[Time Bob-omb]] comes and suddenly takes them out. Bowletta reveals that she had been only faking her defeat, and eats them alive. In her body, the Mario Bros. fight Cackletta again, this time in her [[Cackletta's Spirit|spirit form]]. Mario and Luigi soon manage to defeat Cackletta once and for all. She spits them out of Bowser's body and vanishes, reverting Bowser to normal. Peasley then comes to address the brothers, saying that he has planted a detonator in the castle, and it will explode shortly. The brothers escape the castle via Blablanadon in time, but Bowser crashes into | At the castle, Mario and Luigi meet the [[Koopalings]], along with Fawful, who possesses some new gadgets. After trumping them and several other foes with the ranks of Bowletta's new army, the Bros. make their way to Bowletta herself; she reveals her plan to take over the Mushroom Kingdom after she is done gaining control of the Beanbean Kingdom. The brothers fight her and supposedly win, until a [[Time Bob-omb]] comes and suddenly takes them out. Bowletta reveals that she had been only faking her defeat, and eats them alive. In her body, the Mario Bros. fight Cackletta again, this time in her [[Cackletta's Spirit|spirit form]]. Mario and Luigi soon manage to defeat Cackletta once and for all. She spits them out of Bowser's body and vanishes, reverting Bowser to normal. Peasley then comes to address the brothers, saying that he has planted a detonator in the castle, and it will explode shortly. The brothers escape the castle via Blablanadon in time, but Bowser crashes into Oho Ocean, only to be later rescued by [[Prince Peasley]]. | ||
Later on, Peasley drops by with a huge present for the brothers. As the heroes return to the Mushroom Kingdom via Peach's airplane, Peasley's present turns out to be Bowser, who is dropped off at his other castle. The plane lands at Peach's Castle, and fireworks erupt. It is then shown that the adventure was made into a movie being shown in the Yoshi Theater, where the screen zooms out to show the Yoshis sitting in the theater and applauding. | Later on, Peasley drops by with a huge present for the brothers. As the heroes return to the Mushroom Kingdom via Peach's airplane, Peasley's present turns out to be Bowser, who is dropped off at his other castle. The plane lands at Princess Peach's Castle, and fireworks erupt. It is then shown that the adventure was made into a movie being shown in the Yoshi Theater, where the screen zooms out to show the Yoshis sitting in the theater and applauding. | ||
{{br|left}} | |||
==Main characters== | ==Main characters== | ||
===Playable characters=== | ===Playable characters=== | ||
*[[Mario]] - The well-known hero. | *[[Mario]] - The well-known hero of the Mushroom Kingdom. | ||
*[[Luigi]] - The not-as-famous brother of Mario. | *[[Luigi]] - The not-as-famous brother of Mario. | ||
*[[Toad]] - Sent to deliver word to Mario. | *[[Toad]] - Sent to deliver word to Mario. He is only briefly playable at the very beginning of the game. | ||
===Supporting cast=== | ===Supporting cast=== | ||
*[[Princess Peach]] - The damsel-in-distress. | *[[Princess Peach]] - The damsel-in-distress. | ||
*[[Toadsworth]] - Peach's | *[[Toadsworth]] - Peach's advisor and steward who accompanies her to the Beanbean Kingdom. | ||
*[[Prince Peasley]] - Beanbean Kingdom | *[[Prince Peasley]] - A hero from the Beanbean Kingdom. | ||
*[[Queen Bean]] - The | *[[Queen Bean]] - The queen of the Beanbean Kingdom. | ||
*[[Lady Lima]] - Queen Bean's most trusted advisor. | |||
===Villains=== | ===Villains=== | ||
*[[Cackletta]]/[[Bowletta]] - | *[[Cackletta]]/[[Bowletta]] - An evil witch, the main villain, and the final boss. | ||
*[[Fawful]] - Cackletta's | *[[Fawful]] - Cackletta's tech-savvy pupil, the secondary villain, and the penultimate boss. | ||
*[[Popple]] - | *[[Popple]] - A self-proclaimed master thief, and a recurring boss. | ||
*[[Bowser]]/[[Rookie]] - | *[[Bowser]]/[[Rookie]] - A minor villain who, for the first half of the game, suffers from amnesia and works for Popple. During the second half, Cackletta's spirit possesses his body. | ||
==Locations== | ==Locations== | ||
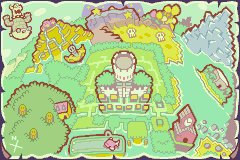
Though much of the action of this game takes place in the Beanbean Kingdom, Mario and Luigi can still venture around several areas in the Mushroom Kingdom. All of the Beanbean Kingdom locations' names, except for [[Yoshi Theater (Mario & Luigi: Superstar Saga)|Yoshi Theater]] and [[Little Fungitown]], have different names pertaining to laughter. The following is a list of various areas the brothers journey to throughout the course of the game: | Though much of the action of this game takes place in the Beanbean Kingdom, Mario and Luigi can still venture around several areas in the Mushroom Kingdom. All of the Beanbean Kingdom locations' names, except for [[Yoshi Theater (Mario & Luigi: Superstar Saga)|Yoshi Theater]] and [[Little Fungitown]], have different names pertaining to laughter. The following is a list of various areas the brothers journey to throughout the course of the game: | ||
{{ | {{M&LSS map}} | ||
*[[Toad Town#Mario & Luigi: Superstar Saga / Mario & Luigi: Superstar Saga + Bowser's Minions|Toadtown Square]] | *[[Toad Town#Mario & Luigi: Superstar Saga / Mario & Luigi: Superstar Saga + Bowser's Minions|Toadtown Square]] | ||
*[[Koopa Cruiser]] | *[[Koopa Cruiser]] | ||
| Line 109: | Line 112: | ||
*[[Hoohoo Village]] | *[[Hoohoo Village]] | ||
*[[Hoohoo Mountain]] | *[[Hoohoo Mountain]] | ||
*[[Beanbean Fields]] | |||
*[[Beanbean Castle Town]] | *[[Beanbean Castle Town]] | ||
*[[Beanbean Castle]] | *[[Beanbean Castle]] | ||
*[[Chateau de Chucklehuck]] | |||
*[[Chucklehuck Woods]] | *[[Chucklehuck Woods]] | ||
*[[Woohoo Hooniversity]] | *[[Woohoo Hooniversity]] | ||
| Line 119: | Line 124: | ||
*[[Oho Oasis]] | *[[Oho Oasis]] | ||
*[[Oho Ocean]] | *[[Oho Ocean]] | ||
*[[ | *[[Seabed]] | ||
*[[Gwarhar Lagoon]] | *[[Gwarhar Lagoon]] | ||
*[[Yoshi Theater (Mario & Luigi: Superstar Saga)|Yoshi Theater]] | *[[Yoshi Theater (Mario & Luigi: Superstar Saga)|Yoshi Theater]] | ||
*[[Joke's End]] | *[[Joke's End]] | ||
*[[Bowser's Castle#Mario & Luigi: Superstar Saga / Mario & Luigi: Superstar Saga + Bowser's Minions|Bowser's Castle]] | *[[Bowser's Castle#Mario & Luigi: Superstar Saga / Mario & Luigi: Superstar Saga + Bowser's Minions|Bowser's Castle]] | ||
The game also has several secret caves which can only be visited by either Mario or Luigi acting separately from one another. These areas start as 2-dimensional, side-scrolling levels in the traditional platforming style. A rare item can be obtained from a [[mole (presenter)|mole]] if the caves are completed. | |||
The game also has several secret caves which can only be visited by either Mario or Luigi acting separately from one another. These areas start as 2-dimensional, side-scrolling levels in the traditional platforming style. A rare item can be obtained from a [[ | |||
==Battle system== | ==Battle system== | ||
To start a battle, Mario or Luigi must touch an enemy. They can also perform a [[First Strike]] by jumping on or hammering the enemy in the over-world. Respectively, this will damage or stun the enemy before the battle starts. Since the game is a turn-based [[RPG]], Mario, Luigi, and enemies take turns attacking each other. The player can use good [[Action Command|timed attacks]] to deal more damage. If Mario and Luigi take damage from enemies in the overworld or their backs are touched, they [[trip]] and are unable to move until their turn.<ref> | To start a battle, Mario or Luigi must touch an enemy. They can also perform a [[First Strike]] by jumping on or hammering the enemy in the over-world. Respectively, this will damage or stun the enemy before the battle starts. Since the game is a turn-based [[RPG]], Mario, Luigi, and enemies take turns attacking each other. The player can use good [[Action Command|timed attacks]] to deal more damage. If Mario and Luigi take damage from enemies in the overworld or their backs are touched, they [[trip]] and are unable to move until their turn.<ref>{{cite|url=www.youtube.com/watch?v=3xMiHYIwIeU|title=M&LSS Battle - Japanese|publisher=YouTube|language=ja|accessdate=June 25, 2024|author=Alex95}}{{better source}}<!--Tagging for better source because the uploader says in the description that the video was was stolen from elsewhere.--></ref> | ||
===Stats=== | ===Stats=== | ||
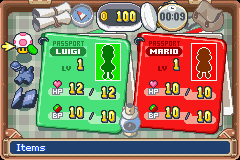
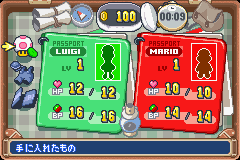
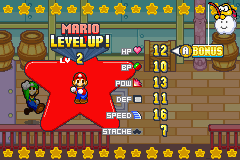
Each brother has their own [[Heart Point]]s, [[Bros. Point]]s, [[Power|POW]], [[Defense|DEF]], [[Speed|SPEED]], and [[Stache|STACHE]] points. When they finish a battle, they each gain [[Experience Point]]s. With enough Experience Points, they can level-up and increase each respective statistic.<ref> | Each brother has their own [[Heart Point]]s, [[Bros. Point]]s, [[Power|POW]], [[Defense|DEF]], [[Speed|SPEED]], and [[Stache|STACHE]] points. When they finish a battle, they each gain [[Experience Point]]s. With enough Experience Points, they can level-up and increase each respective statistic.<ref>{{cite|date=April 5, 2017|author=Alex95|title=M&LSS Level Up - Japanese|publisher=YouTube|language=ja|url=www.youtube.com/watch?v=H_ZJO_5yB_o|accessdate=June 25, 2024}}{{better source}}<!--Tagging for better source because the uploader says in the description that the video was stolen from elsewhere.--></ref> | ||
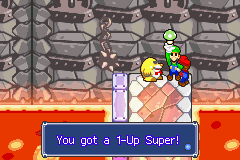
*HP (abbreviation of Heart Points) is the amount of life Mario and Luigi | *HP (abbreviation of Heart Points) is the amount of life that Mario and Luigi have. When an enemy hits either of them, they lose HP. When their HP reaches zero, they lose consciousness, but can be revived with a [[1-Up Mushroom]] or [[1-Up DX|1-Up Super]]. | ||
*BP (abbreviation of Bros. Points) indicates how many times Mario and Luigi can use a Bros. Attack. Each attack uses a certain amount of BP, draining the total. BP can be restored by using a [[Syrup Jar]], [[Golden Mushroom]], or a | *BP (abbreviation of Bros. Points) indicates how many times Mario and Luigi can use a Bros. Attack. Each attack uses a certain amount of BP, draining the total. BP can be restored by using a [[Syrup Jar]], [[Golden Mushroom (crownless)|Golden Mushroom]], or a 1-Up Super. | ||
*POW (abbreviation of Power) is how strong either Mario or Luigi is. The higher their POW stats are, the more damage they will perform. | *POW (abbreviation of Power) is how strong either Mario or Luigi is. The higher their POW stats are, the more damage they will perform. | ||
*DEF (abbreviation of Defense) is how much damage either Mario or Luigi can block from an enemy hit. The higher their DEF stats are, the less damage they will take. | *DEF (abbreviation of Defense) is how much damage either Mario or Luigi can block from an enemy hit. The higher their DEF stats are, the less damage they will take. | ||
| Line 142: | Line 145: | ||
===Moves=== | ===Moves=== | ||
During battle, Mario and Luigi have four options when it is their turn: Use a Solo Move, use a [[Bros. Attack]], use an [[List of items|item]], or [[Flee|run]]. | During battle, Mario and Luigi have four options when it is their turn: Use a Solo Move, use a [[Bros. Attack]], use an [[List of items|item]], or [[Flee|run]]. | ||
====Solo Moves==== | ====Solo Moves==== | ||
[[File:M&LSS Solo Attack Command Block.png|frame|left]] | [[File:M&LSS Solo Attack Command Block.png|frame|left]] | ||
During a Solo Move, Mario or Luigi use one of their basic attacks solo. Both bros. have solo move techniques that they can use in any battle in the game. Note that all of these techniques listed below must be learned by progressing through the game except for Mario and Luigi's [[Jump]]. | During a Solo Move, Mario or Luigi use one of their basic attacks solo. Both bros. have solo move techniques that they can use in any battle in the game. Note that all of these techniques listed below must be learned by progressing through the game except for Mario and Luigi's [[Jump]]. | ||
=====Solo Techniques===== | =====Solo Techniques===== | ||
;Mario's Solo Techniques | ;Mario's Solo Techniques | ||
| Line 152: | Line 153: | ||
*[[Hammer]] - Mario can use his hammer to hit enemies. | *[[Hammer]] - Mario can use his hammer to hit enemies. | ||
*[[Firebrand|Hand]] - Mario can use his Firebrand ability to burn enemies. | *[[Firebrand|Hand]] - Mario can use his Firebrand ability to burn enemies. | ||
;Luigi's Solo Techniques | ;Luigi's Solo Techniques | ||
*Jump - Luigi can jump to crush enemies. | *Jump - Luigi can jump to crush enemies. | ||
| Line 162: | Line 162: | ||
Bros. Attacks are attacks that Mario and Luigi can use in battle by working together to deliver more damage. They all use a different combination of buttons to hit. | Bros. Attacks are attacks that Mario and Luigi can use in battle by working together to deliver more damage. They all use a different combination of buttons to hit. | ||
There are three different modes present for | There are three different modes present for each Bros. Attack. Mode 1 consists of slow motion and visual button commands appearing when the command needs to be pressed, acting as a guideline for players. Mode 2 removes the slow motion, but retains the visual button commands. Mode 3 removes both the slow motion and visual button commands, and in turn, fewer [[Bros. Point]]s are used for the Bros. Attack and depending on the move it will deal more damage. | ||
[[File:Splash Bros.png|frame|Mario and Luigi using the Bros. Attack, [[Splash Bros.]]]] | [[File:Splash Bros.png|frame|Mario and Luigi using the Bros. Attack, [[Splash Bros.]]]] | ||
;Mario's Bros. Attacks | ;Mario's Bros. Attacks | ||
| Line 169: | Line 169: | ||
*[[Fire Bros. (move)|Fire Bros.]] | *[[Fire Bros. (move)|Fire Bros.]] | ||
*[[Swing Bros.]] (secret) | *[[Swing Bros.]] (secret) | ||
;Luigi's Bros. Attacks | ;Luigi's Bros. Attacks | ||
*[[Bounce Bros.]] | *[[Bounce Bros.]] | ||
| Line 178: | Line 177: | ||
====Items==== | ====Items==== | ||
[[File:M&LSS Item Command Block.png|frame|left]] | [[File:M&LSS Item Command Block.png|frame|left]] | ||
When choosing the item icon, Mario or Luigi can use an item to recover [[Heart Point|HP]] or [[Bros. Point|BP]]. Other items, such as Refreshing Herbs, can heal status effects, and red or green peppers will raise POW and gain weight or raise DEF and lose weight respectively. When one of the bros. passes out, the other bros. can use a [[1-Up Mushroom]] or [[1-Up DX|1-Up Super]] | When choosing the item icon, Mario or Luigi can use an item to recover [[Heart Point|HP]] or [[Bros. Point|BP]]. Other items, such as Refreshing Herbs, can heal status effects, and red or green peppers will raise POW and gain weight or raise DEF and lose weight respectively. When one of the bros. passes out, the other bros. can use a [[1-Up Mushroom]] or [[1-Up DX|1-Up Super]] to revive them. However, once an item is used, the bro's. turn is over. | ||
====Run==== | ====Run==== | ||
| Line 191: | Line 190: | ||
==Out-of-battle techniques== | ==Out-of-battle techniques== | ||
Mario and Luigi can also use some techniques out of battle. Once again, all of the following techniques must be learned by progressing in the game, except for jumping. | Mario and Luigi can also use some techniques out of battle. Once again, all of the following techniques must be learned by progressing in the game, except for jumping. | ||
===Techniques when in the front=== | ===Techniques when in the front=== | ||
{|width=100% | {|width=100% class=wikitable | ||
|- | |- | ||
!Image | !Image | ||
| Line 217: | Line 215: | ||
===Techniques when in the back=== | ===Techniques when in the back=== | ||
{|width=100% | {|width=100% class=wikitable | ||
!Image | !Image | ||
!Action | !Action | ||
| Line 232: | Line 229: | ||
|- | |- | ||
|align="center"|[[File:SS. High L.png]] | |align="center"|[[File:SS. High L.png]] | ||
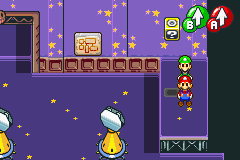
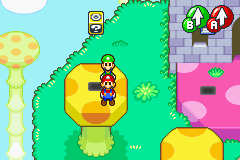
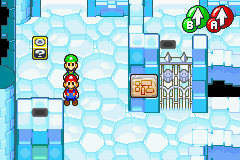
|Luigi can do a "High Jump," by jumping on top of Mario and bouncing up high. This is necessary for | |Luigi can do a "High Jump," by jumping on top of Mario and bouncing up high. This is necessary for reaching very high places. | ||
|{{button|gba|L}} then {{button|gba|B}} | |{{button|gba|L}} then {{button|gba|B}} | ||
|- | |- | ||
|align="center"|[[File:SS Dunk L.png]] | |align="center"|[[File:SS Dunk L.png]] | ||
|With [[Luigi Dunk]], Mario can hit Luigi with his hammer, knocking him into the ground. Luigi can move under fences using this technique; and if he comes up under suspicious spots of ground, he may get a Chuckle Bean. | |With [[Dunk Hammer|Luigi Dunk]], Mario can hit Luigi with his hammer, knocking him into the ground. Luigi can move under fences using this technique; and if he comes up under suspicious spots of ground, he may get a Chuckle Bean. | ||
|{{button|gba|Start}} to swap, {{button|gba|L}} twice, then {{button|gba|B}} | |{{button|gba|Start}} to swap, {{button|gba|L}} twice, then {{button|gba|B}} | ||
|- | |- | ||
|align="center"|[[File:SS Mini M.png]] | |align="center"|[[File:SS Mini M.png]] | ||
|Luigi can hit Mario with his hammer, squishing him into [[Mini-Mario]]. Using this technique, Mario can move into small openings. He can also sense hidden Chuckle Beans and other treasures buried under the ground. | |Luigi can hit Mario with his hammer, squishing him into [[Mini-Mario (form)|Mini-Mario]]. Using this technique, Mario can move into small openings. He can also sense hidden Chuckle Beans and other treasures buried under the ground. | ||
|{{button|gba|L}} twice, then {{button|gba|B}} | |{{button|gba|L}} twice, then {{button|gba|B}} | ||
|- | |- | ||
|align="center"|[[File:SS Firebrand Burn M.png]] | |align="center"|[[File:SS Firebrand Burn M.png]] | ||
|Mario can set Luigi on fire. Luigi will panic, and [[Dash (Mario & Luigi: Superstar Saga)|start running fast]]. This technique can use this to knock heavy objects, such as [[ | |Mario can set Luigi on fire. Luigi will panic, and [[Dash (Mario & Luigi: Superstar Saga)|start running fast]]. This technique can use this to knock heavy objects, such as [[Ankoopa]]s blocking paths. | ||
| | |{{button|gba|Start}} to swap,{{button|gba|L}} three times, hold {{button|gba|B}}, then release. | ||
|- | |- | ||
|align="center"|[[File:SS Thunderhand Shock L.png]] | |align="center"|[[File:SS Thunderhand Shock L.png]] | ||
|Luigi can electrocute Mario. Mario and Luigi will be joined together, and they can [[Tickle|walk side-to-side]]. This can be used to move the mysterious [[Boo Statue]]s, which disappear when anyone looks directly at them. | |Luigi can electrocute Mario. Mario and Luigi will be joined together, and they can [[Tickle|walk side-to-side]]. This can be used to move the mysterious [[Boo Statue]]s, which disappear when anyone looks directly at them. | ||
| | |{{button|gba|L}} three times, hold {{button|gba|B}}, then release. | ||
|} | |} | ||
| Line 255: | Line 252: | ||
{{main|Mario & Luigi: Superstar Saga bestiary}} | {{main|Mario & Luigi: Superstar Saga bestiary}} | ||
Please note that some of these enemies are variations of a single enemy or were fought in a grouped-battle. For convenience, these variations are listed as separate enemies. Statistics listed are from the North American and European versions, with stats from the Japanese version in parentheses if they differ. Statistics from [[Mario & Luigi: Superstar Saga + Bowser's Minions|the remake]] may vary. | Please note that some of these enemies are variations of a single enemy or were fought in a grouped-battle. For convenience, these variations are listed as separate enemies. Statistics listed are from the North American and European versions, with stats from the Japanese version in parentheses if they differ. Statistics from [[Mario & Luigi: Superstar Saga + Bowser's Minions|the remake]] may vary. | ||
===Normal enemies=== | ===Normal enemies=== | ||
{|width=100% | {|width=100% class=wikitable | ||
|- | |- | ||
!Image | !Image | ||
| Line 263: | Line 259: | ||
![[Heart Point|HP]] | ![[Heart Point|HP]] | ||
![[Experience Point|EXP]] | ![[Experience Point|EXP]] | ||
![[Coin]]s | ![[Coin]]s dropped | ||
!Location | !Location | ||
|- | |- | ||
| align="center" |[[File:Goomba SSS.png]] | |align="center"|[[File:Goomba SSS.png]] | ||
![[Goomba]] | ![[Goomba]] | ||
| align="center" |4 | |align="center"|4 | ||
| align="center" |2 | |align="center"|2 | ||
| align="center" |0 | |align="center"|0 | ||
| [[Koopa Cruiser]] | |[[Koopa Cruiser]] | ||
|- | |- | ||
| align="center" |[[File:Fighter FlySSS.png]] | |align="center"|[[File:Fighter FlySSS.png]] | ||
![[Fighter Fly]] | ![[Fighter Fly]] | ||
| align="center" |5 | |align="center"|5 | ||
| align="center" |2 | |align="center"|2 | ||
| align="center" |2 | |align="center"|2 | ||
| [[Stardust Fields]] | |[[Stardust Fields]] | ||
|- | |- | ||
| align="center" |[[File:Bill Blaster SSS.png]] | |align="center"|[[File:Bill Blaster SSS.png]] | ||
![[Bill Blaster]] | ![[Bill Blaster]] | ||
| align="center" |5 | |align="center"|5 | ||
| align="center" |3 | |align="center"|3 | ||
| align="center" |2 | |align="center"|2 | ||
| [[Stardust Fields]] | |[[Stardust Fields]] | ||
|- | |- | ||
| align="center" |[[File:Beanie.png]] | |align="center"|[[File:Beanie.png]] | ||
![[Beanie]] | ![[Beanie]] | ||
| align="center" |6 | |align="center"|6 | ||
| align="center" |4 | |align="center"|4 | ||
| align="center" |2 (1) | |align="center"|2 (1) | ||
| [[Hoohoo Mountain]]<br>[[Beanbean Castle]]<br>[[Beanbean Fields|Beanbean Outskirts]]<br>[[Beanbean Castle]]<br>[[Chucklehuck Woods]]<br>[[ | |[[Hoohoo Mountain]]<br>[[Beanbean Castle]]<br>[[Beanbean Fields|Beanbean Outskirts]]<br>[[Beanbean Castle]]<br>[[Chucklehuck Woods]]<br>[[Seabed]]<br>[[Gwarhar Lagoon]] | ||
|- | |- | ||
| align="center" |[[File:MLSSDryBones.png]] | |align="center"|[[File:MLSSDryBones.png]] | ||
![[Dry Bones]] (1) | ![[Dry Bones]] (1) | ||
| align="center" |8 | |align="center"|8 | ||
| align="center" |6 | |align="center"|6 | ||
| align="center" |2 | |align="center"|2 | ||
| [[Hoohoo Mountain]] | |[[Hoohoo Mountain]] | ||
|- | |- | ||
| align="center" |[[File:MnL Rex.png]] | |align="center"|[[File:MnL Rex.png]] | ||
![[Rex]] | ![[Rex]] | ||
| align="center" |16 | |align="center"|16 | ||
| align="center" |8 | |align="center"|8 | ||
| align="center" |3 | |align="center"|3 | ||
| [[Hoohoo Mountain]] | |[[Hoohoo Mountain]] | ||
|- | |- | ||
| align="center" |[[File:Sharpea.png]] | |align="center"|[[File:Sharpea.png]] | ||
![[Sharpea]] | ![[Sharpea]] | ||
| align="center" |8 | |align="center"|8 | ||
| align="center" |2 | |align="center"|2 | ||
| align="center" |1 (2) | |align="center"|1 (2) | ||
| [[Beanbean Fields|Beanbean Outskirts]] | |[[Beanbean Fields|Beanbean Outskirts]] | ||
|- | |- | ||
| align="center" |[[File:Sworm MLSS sprite.png]] | |align="center"|[[File:Sworm MLSS sprite.png]] | ||
![[Sworm]] | ![[Sworm]] | ||
| align="center" |14 | |align="center"|14 | ||
| align="center" |14 (2) | |align="center"|14 (2) | ||
| align="center" |4 (8) | |align="center"|4 (8) | ||
| [[Beanbean Fields|Beanbean Outskirts]] | |[[Beanbean Fields|Beanbean Outskirts]] | ||
|- | |- | ||
| align="center" |[[File:Parabeanie battle.png]] | |align="center"|[[File:Parabeanie battle.png]] | ||
![[Parabeanie]] | ![[Parabeanie]] | ||
| align="center" |20 | |align="center"|20 | ||
| align="center" |9 (8) | |align="center"|9 (8) | ||
| align="center" |2 (5) | |align="center"|2 (5) | ||
| [[Beanbean Fields|Beanbean Outskirts]] | |[[Beanbean Fields|Beanbean Outskirts]] | ||
|- | |- | ||
| align="center" |[[File:Troopea.PNG]] | |align="center"|[[File:Troopea.PNG]] | ||
![[Troopea]] | ![[Troopea]] | ||
| align="center" |20 | |align="center"|20 | ||
| align="center" |16 (4) | |align="center"|16 (4) | ||
| align="center" |3 | |align="center"|3 | ||
| [[Beanbean Fields|Beanbean Outskirts]] | |[[Beanbean Fields|Beanbean Outskirts]] | ||
|- | |- | ||
| align="center" |[[File:Tanoomba.png]] | |align="center"|[[File:Tanoomba.png]] | ||
![[Tanoomba]] | ![[Tanoomba]] | ||
| align="center" |30 (70) | |align="center"|30 (70) | ||
| align="center" |20 (14) | |align="center"|20 (14) | ||
| align="center" |0 (20) | |align="center"|0 (20) | ||
| [[Beanbean Fields|Beanbean Outskirts]] | |[[Beanbean Fields|Beanbean Outskirts]] | ||
|- | |- | ||
| align="center" |[[File:Lakipea.png]] | |align="center"|[[File:Lakipea.png]] | ||
![[Lakipea]] | ![[Lakipea]] | ||
| align="center" |40 (50) | |align="center"|40 (50) | ||
| align="center" |20 (10) | |align="center"|20 (10) | ||
| align="center" |12 | |align="center"|12 | ||
| [[Beanbean Fields|Beanbean Outskirts]] | |[[Beanbean Fields|Beanbean Outskirts]] | ||
|- | |- | ||
| align="center" |[[File:Bob-omb SSS.png]] | |align="center"|[[File:Bob-omb SSS.png]] | ||
![[Bob-omb]] | ![[Bob-omb]] | ||
| align="center" |30 | |align="center"|30 | ||
| align="center" |16 (7) | |align="center"|16 (7) | ||
| align="center" |1 (5) | |align="center"|1 (5) | ||
| [[Beanbean Fields|Beanbean Outskirts]] | |[[Beanbean Fields|Beanbean Outskirts]] | ||
|- | |- | ||
| align="center" |[[File:Paratroopea.png]] | |align="center"|[[File:Paratroopea.png]] | ||
![[Paratroopea]] | ![[Paratroopea]] | ||
| align="center" |40 | |align="center"|40 | ||
| align="center" |20 (9) | |align="center"|20 (9) | ||
| align="center" |4 (8) | |align="center"|4 (8) | ||
| [[Beanbean Fields|Beanbean Outskirts]] | |[[Beanbean Fields|Beanbean Outskirts]] | ||
|- | |- | ||
| align="center" |[[File:Super Fly.PNG]] | |align="center"|[[File:Super Fly.PNG]] | ||
![[Super Fly (enemy)|Super Fly]] | ![[Super Fly (enemy)|Super Fly]] | ||
| align="center" |10 | |align="center"|10 | ||
| align="center" |12 | |align="center"|12 | ||
| align="center" |2 (4) | |align="center"|2 (4) | ||
| [[Beanbean Castle Sewer | |[[Beanbean Castle Sewer]]s | ||
|- | |- | ||
| align="center" |[[File:MLSpiny.png]] | |align="center"|[[File:MLSpiny.png]] | ||
![[Spiny]] | ![[Spiny]] | ||
| align="center" |14 | |align="center"|14 | ||
| align="center" |15 | |align="center"|15 | ||
| align="center" |1 (2) | |align="center"|1 (2) | ||
| [[Beanbean Castle]] | |[[Beanbean Castle]] | ||
|- | |- | ||
| align="center" |[[File:MnL Pestnut.png]] | |align="center"|[[File:MnL Pestnut.png]] | ||
![[Pestnut]] (1) | ![[Pestnut]] (1) | ||
| align="center" |15 | |align="center"|15 | ||
| align="center" |15 (10) | |align="center"|15 (10) | ||
| align="center" |2 (3) | |align="center"|2 (3) | ||
| [[Chucklehuck Woods]] | |[[Chucklehuck Woods]] | ||
|- | |- | ||
| align="center" |[[File:Gold Beanie.PNG]] | |align="center"|[[File:Gold Beanie.PNG]] | ||
![[Gold Beanie]] | ![[Gold Beanie]] | ||
| align="center" |11 | |align="center"|11 | ||
| align="center" |50 | |align="center"|50 | ||
| align="center" |30 (100) | |align="center"|30 (100) | ||
| [[Chucklehuck Woods]]<br>[[ | |[[Chucklehuck Woods]]<br>[[Seabed]]<br>[[Gwarhar Lagoon]] | ||
|- | |- | ||
| align="center" |[[File:MLSSChuckGuy.png]] | |align="center"|[[File:MLSSChuckGuy.png]] | ||
![[Chuck Guy]] (1) | ![[Chuck Guy]] (1) | ||
| align="center" |22 | |align="center"|22 | ||
| align="center" |15 | |align="center"|15 | ||
| align="center" |3 (5) | |align="center"|3 (5) | ||
| [[Chucklehuck Woods]] | |[[Chucklehuck Woods]] | ||
|- | |- | ||
| align="center" |[[File:Fuzzbush.png]] | |align="center"|[[File:Fuzzbush.png]] | ||
![[Fuzzbush]] | ![[Fuzzbush]] | ||
| align="center" |15 | |align="center"|15 | ||
| align="center" |24 | |align="center"|24 | ||
| align="center" |5 (10) | |align="center"|5 (10) | ||
| [[Chucklehuck Woods]] | |[[Chucklehuck Woods]] | ||
|- | |- | ||
| align="center" |[[File:Laser Snifit MLSS.png]] | |align="center"|[[File:Laser Snifit MLSS.png]] | ||
![[Laser Snifit]] | ![[Laser Snifit]] | ||
| align="center" |20 | |align="center"|20 | ||
| align="center" |20 (18) | |align="center"|20 (18) | ||
| align="center" |4 | |align="center"|4 | ||
| [[Woohoo Hooniversity]] | |[[Woohoo Hooniversity]] | ||
|- | |- | ||
| align="center" |[[File:Eeeker.png]] | |align="center"|[[File:Eeeker.png]] | ||
![[Eeker]] | ![[Eeker]] | ||
| align="center" |20 | |align="center"|20 | ||
| align="center" |24 (25) | |align="center"|24 (25) | ||
| align="center" |0 (5) | |align="center"|0 (5) | ||
| [[Woohoo Hooniversity]] | |[[Woohoo Hooniversity]] | ||
|- | |- | ||
| align="center" |[[File:YoBro MLSS.png]] | |align="center"|[[File:YoBro MLSS.png]] | ||
![[Yo Bro]] | ![[Yo Bro]] | ||
| align="center" |40 (30) | |align="center"|40 (30) | ||
| align="center" |30 (25) | |align="center"|30 (25) | ||
| align="center" |10 (8) | |align="center"|10 (8) | ||
| [[Woohoo Hooniversity]] | |[[Woohoo Hooniversity]] | ||
|- | |- | ||
| align="center" |[[File:Virus SSS.png]] | |align="center"|[[File:Virus SSS.png]] | ||
![[Virus]] | ![[Virus]] | ||
| align="center" |36 | |align="center"|36 | ||
| align="center" |22 (20) | |align="center"|22 (20) | ||
| align="center" |4 | |align="center"|4 | ||
| [[Woohoo Hooniversity]] | |[[Woohoo Hooniversity]] | ||
|- | |- | ||
| align="center" |[[File:Mecha-Chomp_MnL.png]] | |align="center"|[[File:Mecha-Chomp_MnL.png]] | ||
![[Mecha-Chomp]] | ![[Mecha-Chomp]] | ||
| align="center" |36 (46) | |align="center"|36 (46) | ||
| align="center" |26 (35) | |align="center"|26 (35) | ||
| align="center" |6 (12) | |align="center"|6 (12) | ||
| [[Woohoo Hooniversity]] | |[[Woohoo Hooniversity]] | ||
|- | |- | ||
| align="center" |[[File:Oho G.png]] | |align="center"|[[File:Oho G.png]] | ||
![[Oho Jee]] | ![[Oho Jee]] | ||
| align="center" |75 | |align="center"|75 | ||
| align="center" |4 | |align="center"|4 | ||
| align="center" |1 | |align="center"|1 | ||
| [[Oho Oasis]]<br>[[Fire Palace]]<br>[[Thunder Palace]] | |[[Oho Oasis]]<br>[[Fire Palace]]<br>[[Thunder Palace]] | ||
|- | |- | ||
| align="center" |[[File: | |align="center"|[[File:MnL Oho Ocean Pestnut.png]] | ||
![[Elite Pestnut|Pestnut]] (2) | ![[Elite Pestnut|Pestnut]] (2) | ||
| align="center" |40 (30) | |align="center"|40 (30) | ||
| align="center" |35 (25) | |align="center"|35 (25) | ||
| align="center" |5 (6) | |align="center"|5 (6) | ||
| [[ | |[[Seabed]]<br>[[Gwarhar Lagoon]] | ||
|- | |- | ||
| align="center" |[[File:MnL Goomdiver.png]] | |align="center"|[[File:MnL Goomdiver.png]] | ||
![[Goomdiver]] | ![[Goomdiver]] | ||
| align="center" |30 | |align="center"|30 | ||
| align="center" |25 | |align="center"|25 | ||
| align="center" |8 | |align="center"|8 | ||
| [[ | |[[Seabed]]<br>[[Gwarhar Lagoon]] | ||
|- | |- | ||
| align="center" |[[File:Blooper SSS.png]] | |align="center"|[[File:Blooper SSS.png]] | ||
![[Blooper]] | ![[Blooper]] | ||
| align="center" |60 (40) | |align="center"|60 (40) | ||
| align="center" |35 | |align="center"|35 | ||
| align="center" |10 (12) | |align="center"|10 (12) | ||
| [[ | |[[Seabed]] | ||
|- | |- | ||
| align="center" |[[File:Blue and Red Piranha Plants.png]] | |align="center"|[[File:Blue and Red Piranha Plants.png]] | ||
![[Piranha Plant]] | ![[Piranha Plant]] | ||
| align="center" |30 | |align="center"|30 | ||
| align="center" |6 (4) | |align="center"|6 (4) | ||
| align="center" |1 (2) | |align="center"|1 (2) | ||
| [[Beanbean International Airport]] | |[[Beanbean International Airport]] | ||
|- | |- | ||
| align="center" |[[File:Gritty Goomba.png]] | |align="center"|[[File:Gritty Goomba.png]] | ||
![[Gritty Goomba]] (1) | ![[Gritty Goomba]] (1) | ||
| align="center" |30 | |align="center"|30 | ||
| align="center" |30 (25) | |align="center"|30 (25) | ||
| align="center" |4 | |align="center"|4 | ||
| [[Teehee Valley]] | |[[Teehee Valley]] | ||
|- | |- | ||
| align="center" |[[File:SpikySnifit MLSS.png]] | |align="center"|[[File:SpikySnifit MLSS.png]] | ||
![[Spiky Snifit]] | ![[Spiky Snifit]] | ||
| align="center" |80 | |align="center"|80 | ||
| align="center" |67 (45) | |align="center"|67 (45) | ||
| align="center" |5 (6) | |align="center"|5 (6) | ||
| [[Teehee Valley]] | |[[Teehee Valley]] | ||
|- | |- | ||
| align="center" |[[File:MnL ChuckGuy.png]] | |align="center"|[[File:MnL ChuckGuy.png]] | ||
![[Elite Chuck Guy|Chuck Guy]] (2) | ![[Elite Chuck Guy|Chuck Guy]] (2) | ||
| align="center" |30 | |align="center"|30 | ||
| align="center" |60 (30) | |align="center"|60 (30) | ||
| align="center" |20 (12) | |align="center"|20 (12) | ||
| [[Guffawha Ruins]] | |[[Guffawha Ruins]] | ||
|- | |- | ||
| align="center" |[[File:Oucherglass MLSS.png]][[File:MLSSOucherGlass2.png]] | |align="center"|[[File:Oucherglass MLSS.png]][[File:MLSSOucherGlass2.png]] | ||
![[Oucher Glass]] | ![[Oucher Glass]] | ||
| align="center" |40 | |align="center"|40 | ||
| align="center" |60 (40) | |align="center"|60 (40) | ||
| align="center" |5 (8) | |align="center"|5 (8) | ||
| [[Guffawha Ruins]] | |[[Guffawha Ruins]] | ||
|- | |- | ||
| align="center" |[[File:Limbo Bros. Yellow.png]] | |align="center"|[[File:Limbo Bros. Yellow.png]] | ||
![[Limbo Bro]] (1) | ![[Limbo Bro]] (1) | ||
| align="center" |40 | |align="center"|40 | ||
| align="center" |60 (35) | |align="center"|60 (35) | ||
| align="center" |18 (15) | |align="center"|18 (15) | ||
| [[Guffawha Ruins]] | |[[Guffawha Ruins]] | ||
|- | |- | ||
| align="center" |[[File:MnL Anuboo.png]] | |align="center"|[[File:MnL Anuboo.png]] | ||
![[Anuboo]] | ![[Anuboo]] | ||
| align="center" |60 | |align="center"|60 | ||
| align="center" |60 | |align="center"|60 | ||
| align="center" |15 (18) | |align="center"|15 (18) | ||
| [[Teehee Valley]] | |[[Teehee Valley]] | ||
|- | |- | ||
| align="center" |[[File:Cheep CheepSSS.png]] | |align="center"|[[File:Cheep CheepSSS.png]] | ||
![[Cheep Cheep]] | ![[Cheep Cheep]] | ||
| align="center" |40 | |align="center"|40 | ||
| align="center" |60 | |align="center"|60 | ||
| align="center" |15 (6) | |align="center"|15 (6) | ||
| [[ | |[[Seabed]]<br>[[Gwarhar Lagoon]] | ||
|- | |- | ||
| align="center" |[[File:PufferCheep.png]] | |align="center"|[[File:PufferCheep.png]] | ||
![[Puffer-Cheep]] | ![[Puffer-Cheep]] | ||
| align="center" |40 | |align="center"|40 | ||
| align="center" |80 (60) | |align="center"|80 (60) | ||
| align="center" |10 (6) | |align="center"|10 (6) | ||
| [[ | |[[Seabed]]<br>[[Gwarhar Lagoon]] | ||
|- | |- | ||
| align="center" |[[File:Starkiss.png]] | |align="center"|[[File:Starkiss.png]] | ||
![[Starkiss]] | ![[Starkiss]] | ||
| align="center" |35 | |align="center"|35 | ||
| align="center" |58 (50) | |align="center"|58 (50) | ||
| align="center" |1 (6) | |align="center"|1 (6) | ||
| [[ | |[[Seabed]]<br>[[Gwarhar Lagoon]] | ||
|- | |- | ||
| align="center" |[[File:Malibut.png]] | |align="center"|[[File:Malibut.png]] | ||
![[Malibut]] | ![[Malibut]] | ||
| align="center" |60 (50) | |align="center"|60 (50) | ||
| align="center" |68 (70) | |align="center"|68 (70) | ||
| align="center" |8 (12) | |align="center"|8 (12) | ||
| [[ | |[[Seabed]]<br>[[Gwarhar Lagoon]] | ||
|- | |- | ||
| align="center" |[[File:Mecha Blooper.png]] | |align="center"|[[File:Mecha Blooper.png]] | ||
![[Mecha-Blooper]] | ![[Mecha-Blooper]] | ||
| align="center" |80 | |align="center"|80 | ||
| align="center" |92 (80) | |align="center"|92 (80) | ||
| align="center" |12 (25) | |align="center"|12 (25) | ||
| [[ | |[[Seabed]]<br>[[Gwarhar Lagoon]] | ||
|- | |- | ||
| align="center" |[[File:Elite Troopea.png]] | |align="center"|[[File:Elite Troopea.png]] | ||
![[Elite Troopea]] | ![[Elite Troopea]] | ||
| align="center" |40 | |align="center"|40 | ||
| align="center" |40 (70) | |align="center"|40 (70) | ||
| align="center" |12 | |align="center"|12 | ||
| [[Gwarhar Lagoon]] | |[[Gwarhar Lagoon]] | ||
|- | |- | ||
| align="center" |[[File:GrittyGoombaB_MnL.png]] | |align="center"|[[File:GrittyGoombaB_MnL.png]] | ||
![[Elite Gritty Goomba|Gritty Goomba]] (2) | ![[Elite Gritty Goomba|Gritty Goomba]] (2) | ||
| align="center" |50 | |align="center"|50 | ||
| align="center" |68 (55) | |align="center"|68 (55) | ||
| align="center" |8 | |align="center"|8 | ||
| [[Gwarhar Lagoon]] | |[[Gwarhar Lagoon]] | ||
|- | |- | ||
| align="center" |[[File:MnL BoomerangBro.png]] | |align="center"|[[File:MnL BoomerangBro.png]] | ||
![[Beanerang Bro|Boomerang Bro]] | ![[Beanerang Bro|Boomerang Bro]] | ||
| align="center" |60 | |align="center"|60 | ||
| align="center" |100 | |align="center"|100 | ||
| align="center" |20 | |align="center"|20 | ||
| [[Gwarhar Lagoon]] | |[[Gwarhar Lagoon]] | ||
|- | |- | ||
| align="center" |[[File:MLSS Sand Cheep.png]] | |align="center"|[[File:MLSS Sand Cheep.png]] | ||
![[Sand Cheep|????]] (Sand Cheep) | ![[Sand Cheep|????]] (Sand Cheep) | ||
| align="center" |50 | |align="center"|50 | ||
| align="center" |80 (50) | |align="center"|80 (50) | ||
| align="center" |10 | |align="center"|10 | ||
| [[Gwarhar Lagoon]] | |[[Gwarhar Lagoon]] | ||
|- | |- | ||
| align="center" |[[File:Sharkbone.png]] | |align="center"|[[File:Sharkbone.png]] | ||
![[Sharkbone|????]] (Sharkbone) | ![[Sharkbone|????]] (Sharkbone) | ||
| align="center" |25 | |align="center"|25 | ||
| align="center" |120 (80) | |align="center"|120 (80) | ||
| align="center" |14 (10) | |align="center"|14 (10) | ||
| [[Gwarhar Lagoon]] | |[[Gwarhar Lagoon]] | ||
|- | |- | ||
| align="center" |[[File:Ice Snifit.png]] | |align="center"|[[File:Ice Snifit.png]] | ||
![[Ice Snifit (Mario & Luigi: Superstar Saga)|Ice Snifit]] | ![[Ice Snifit (Mario & Luigi: Superstar Saga)|Ice Snifit]] | ||
| align="center" |60 | |align="center"|60 | ||
| align="center" |68 (75) | |align="center"|68 (75) | ||
| align="center" |18 (15) | |align="center"|18 (15) | ||
| [[Joke's End]] | |[[Joke's End]] | ||
|- | |- | ||
| align="center" |[[File:Glurp.png]] | |align="center"|[[File:Glurp.png]] | ||
![[Glurp]] | ![[Glurp]] | ||
| align="center" |50 | |align="center"|50 | ||
| align="center" |70 | |align="center"|70 | ||
| align="center" |10 | |align="center"|10 | ||
| [[Joke's End]] | |[[Joke's End]] | ||
|- | |- | ||
| align="center" |[[File:Clumph.png]] | |align="center"|[[File:Clumph.png]] | ||
![[Clumph]] | ![[Clumph]] | ||
| align="center" |200 (150) | |align="center"|200 (150) | ||
| align="center" |100 (120) | |align="center"|100 (120) | ||
| align="center" |8 (30) | |align="center"|8 (30) | ||
| [[Joke's End]] | |[[Joke's End]] | ||
|- | |- | ||
| align="center" |[[File:Scaratroopea.png]] | |align="center"|[[File:Scaratroopea.png]] | ||
![[Scaratroopea]] | ![[Scaratroopea]] | ||
| align="center" |70 | |align="center"|70 | ||
| align="center" |48 (90) | |align="center"|48 (90) | ||
| align="center" |20 (12) | |align="center"|20 (12) | ||
| [[Joke's End]] | |[[Joke's End]] | ||
|- | |- | ||
| align="center" |[[File:Elite Dry Bones.png]] | |align="center"|[[File:Elite Dry Bones.png]] | ||
![[Elite Dry Bones|Dry Bones]] (2) | ![[Elite Dry Bones|Dry Bones]] (2) | ||
| align="center" |40 | |align="center"|40 | ||
| align="center" |68 (70) | |align="center"|68 (70) | ||
| align="center" |13 (8) | |align="center"|13 (8) | ||
| [[Teehee Valley]] | |[[Teehee Valley]] | ||
|- | |- | ||
| align="center" |[[File:Limbo Bros. Green.png]] | |align="center"|[[File:Limbo Bros. Green.png]] | ||
![[Elite Limbo Bro|Limbo Bro]] (2) | ![[Elite Limbo Bro|Limbo Bro]] (2) | ||
| align="center" |45 | |align="center"|45 | ||
| align="center" |80 | |align="center"|80 | ||
| align="center" |14 (15) | |align="center"|14 (15) | ||
| [[Teehee Valley]] | |[[Teehee Valley]] | ||
|- | |- | ||
| align="center" |[[File:MnL GunnerGuy.png]] | |align="center"|[[File:MnL GunnerGuy.png]] | ||
![[Gunner Guy]] | ![[Gunner Guy]] | ||
| align="center" |60 | |align="center"|60 | ||
| align="center" |90 | |align="center"|90 | ||
| align="center" |25 (10) | |align="center"|25 (10) | ||
| [[Bowser's Castle]] | |[[Bowser's Castle]] | ||
|- | |- | ||
| align="center" |[[File:Superstar Saga Hammer Bros.png]] | |align="center"|[[File:Superstar Saga Hammer Bros.png]] | ||
![[Hammer Bro#Mario & Luigi: Superstar Saga|Hammer Bro]] | ![[Hammer Bro#Mario & Luigi: Superstar Saga / Mario & Luigi: Superstar Saga + Bowser's Minions|Hammer Bro]] | ||
| align="center" |100 | |align="center"|100 | ||
| align="center" |132 (120) | |align="center"|132 (120) | ||
| align="center" |25 | |align="center"|25 | ||
| [[Bowser's Castle]] | |[[Bowser's Castle]] | ||
|- | |- | ||
| align="center" |[[File:Boo SSS.png]] | |align="center"|[[File:Boo SSS.png]] | ||
![[Boo]] | ![[Boo]] | ||
| align="center" |10 | |align="center"|10 | ||
| align="center" |40 (110) | |align="center"|40 (110) | ||
| align="center" |10 (8) | |align="center"|10 (8) | ||
| [[Bowser's Castle]] | |[[Bowser's Castle]] | ||
|- | |- | ||
| align="center" |[[File: | |align="center"|[[File:ChompBro MLSS.png]] | ||
![[Chomp Bro]] | ![[Chomp Bro]] | ||
| align="center" |120 | |align="center"|120 | ||
| align="center" |128 (120) | |align="center"|128 (120) | ||
| align="center" |8; 1 without chomp (always 15) | |align="center"|8; 1 without chomp (always 15) | ||
| [[Bowser's Castle]] | |[[Bowser's Castle]] | ||
|- | |- | ||
| align="center" |[[File:Magikoopa SSS.png]] | |align="center"|[[File:Magikoopa SSS.png]] | ||
![[Magikoopa]] | ![[Magikoopa]] | ||
| align="center" |100 | |align="center"|100 | ||
| align="center" |110 (130) | |align="center"|110 (130) | ||
| align="center" |20 (25) | |align="center"|20 (25) | ||
| [[Bowser's Castle]] | |[[Bowser's Castle]] | ||
|- | |- | ||
| align="center" |[[File:Sniper Bill.png]] | |align="center"|[[File:Sniper Bill.png]] | ||
![[Sniper Bill]] | ![[Sniper Bill]] | ||
| align="center" |80 | |align="center"|80 | ||
| align="center" |80 (100) | |align="center"|80 (100) | ||
| align="center" |10 (8) | |align="center"|10 (8) | ||
| [[Bowser's Castle]] | |[[Bowser's Castle]] | ||
|} | |} | ||
<br> | <br> | ||
===Bosses=== | ===Bosses=== | ||
There are 28 bosses in the game. They are listed below in chronological order | There are 28 bosses in the game. They are listed below in chronological order, although Hermie III, Popple (third encounter), and Piranha Bean can be fought in any order. | ||
{|width=100% | The stats of the derivatives of bosses are shown if they are not zero. | ||
{|width=100% class=wikitable | |||
|- | |- | ||
!Image | !Image | ||
| Line 686: | Line 680: | ||
![[Heart Point|HP]] | ![[Heart Point|HP]] | ||
![[Experience Point|EXP]] | ![[Experience Point|EXP]] | ||
!Coins | !Coins dropped | ||
!Location | !Location | ||
|- | |- | ||
| align="center" |[[File:BowserSSS.png]] | |align="center"|[[File:BowserSSS.png]] | ||
| align="center" |'''[[Bowser]]'''{{footnote|main|1}} | |align="center"|'''[[Bowser]]'''{{footnote|main|1}} | ||
| align="center" |6 | |align="center"|6 | ||
| align="center" |0 | |align="center"|0 | ||
| align="center" |0 | |align="center"|0 | ||
| [[Peach's Castle]] | |[[Peach's Castle|Princess Peach's Castle]] | ||
|- | |- | ||
| align="center" |[[File:Superstarsagafawfulheadgear.PNG]] | |align="center"|[[File:Superstarsagafawfulheadgear.PNG]] | ||
| align="center" |'''[[Fawful]] (1)''' | |align="center"|'''[[Fawful]] (1)''' | ||
| align="center" |18 (first phase)<br>12 (second phase) | |align="center"|18 (first phase)<br>12 (second phase) | ||
| align="center" |0 | |align="center"|0 | ||
| align="center" |2 (0) | |align="center"|2 (0) | ||
| [[Koopa Cruiser]] | |[[Koopa Cruiser]] | ||
|- | |- | ||
| align="center" |[[File:Tolstar battle.png]] | |align="center"|[[File:Tolstar battle.png]] | ||
| align="center" |'''[[Tolstar]]''' | |align="center"|'''[[Tolstar]]''' | ||
| align="center" |52 | |align="center"|52 | ||
| align="center" |30 | |align="center"|30 | ||
| align="center" | | |align="center"|Same as the coins that the player paid before battle | ||
| [[Stardust Fields]] | |[[Stardust Fields]] | ||
|- | |- | ||
| align="center" |[[File:Hoohooros battle.png]][[File:HoohoorosPillarMLSS.png]] | |align="center"|[[File:Hoohooros battle.png]][[File:HoohoorosPillarMLSS.png]] | ||
| align="center" |'''[[Hoohooros]]''' | |align="center"|'''[[Hoohooros]]''' | ||
| align="center" |Hoohooros - 45<br>Pillar - 2 | |align="center"|Hoohooros - 45<br>Pillar - 2 | ||
| align="center" |30 | |align="center"|30 | ||
| align="center" |Hoohooros - 20<br>Pillar - 2 (0) | |align="center"|Hoohooros - 20<br>Pillar - 2 (0) | ||
| [[Hoohoo Mountain]] | |[[Hoohoo Mountain]] | ||
|- | |- | ||
| align="center" |[[File:MnL Dragohoho.png]][[File:Hoho Stone SSS.png]] | |align="center"|[[File:MnL Dragohoho.png]][[File:Hoho Stone SSS.png]] | ||
| align="center" |'''[[Dragohoho]]''' | |align="center"|'''[[Dragohoho]]''' | ||
| align="center" |Dragohoho - 80<br>Hoho Stone - 4 | |align="center"|Dragohoho - 80<br>Hoho Stone - 4 | ||
| align="center" |50 | |align="center"|50 | ||
| align="center" |Dragohoho - 30<br>Hoho Stone - 2 (0) | |align="center"|Dragohoho - 30<br>Hoho Stone - 2 (0) | ||
| [[Hoohoo Mountain]] | |[[Hoohoo Mountain]] | ||
|- | |- | ||
| align="center" |[[File:QueenBeanBattle.PNG]] | |align="center"|[[File:QueenBeanBattle.PNG]] | ||
| align="center" |'''[[Queen Bean]]''' | |align="center"|'''[[Queen Bean]]''' | ||
| align="center" |Main - 120 (100)<br>Arms - 22 (10) | |align="center"|Main - 120 (100)<br>Arms - 22 (10) | ||
| align="center" |142 (150) | |align="center"|142 (150) | ||
| align="center" |10 (50) | |align="center"|10 (50) | ||
| [[Beanbean Castle]] | |[[Beanbean Castle]] | ||
|- | |- | ||
| align="center" |[[File:Popplesprite MnL.png]][[File:Rookie Bowser MLSS sprite.png]] | |align="center"|[[File:Popplesprite MnL.png]][[File:Rookie Bowser MLSS sprite.png]] | ||
| align="center" |'''[[Popple]] & [[Rookie]] (1)''' | |align="center"|'''[[Popple]] & [[Rookie]] (1)''' | ||
| align="center" |Popple - 100<br>Rookie - 120 | |align="center"|Popple - 100<br>Rookie - 120 | ||
| align="center" |Popple - 50<br>Rookie - 110 (120) | |align="center"|Popple - 50<br>Rookie - 110 (120) | ||
| align="center" |Popple - 30 (40)<br>Rookie - 34 (30) | |align="center"|Popple - 30 (40)<br>Rookie - 34 (30) | ||
| [[Chateau de Chucklehuck]] | |[[Chateau de Chucklehuck]] | ||
|- | |- | ||
| align="center" |[[File:Wiggler Superstar Saga.png]] | |align="center"|[[File:Wiggler Superstar Saga.png]] | ||
| align="center" |'''[[Wiggler]]''' | |align="center"|'''[[Wiggler]]''' | ||
| align="center" |34 | |align="center"|34 | ||
| align="center" |120 | |align="center"|120 | ||
| align="center" |0 (87) | |align="center"|0 (87) | ||
| [[Chucklehuck Woods]] | |[[Chucklehuck Woods]] | ||
|- | |- | ||
| align="center" |[[File: | |align="center"|[[File:Chuckolator MLSS.png]] | ||
| align="center" |'''[[Chuckolator]]''' | |align="center"|'''[[Chuckolator]]''' | ||
| align="center" |300 | |align="center"|300 | ||
| align="center" |260 | |align="center"|260 | ||
| align="center" |0 (100) | |align="center"|0 (100) | ||
| [[Chucklehuck Woods]] | |[[Chucklehuck Woods]] | ||
|- | |- | ||
| align="center" |[[File:Cackletta battle.png]] | |align="center"|[[File:Cackletta battle.png]] | ||
| align="center" |'''[[Cackletta]] (1)''' | |align="center"|'''[[Cackletta]] (1)''' | ||
| align="center" |300 | |align="center"|300 | ||
| align="center" |300{{footnote|main|2}} (320) | |align="center"|300{{footnote|main|2}} (320) | ||
| align="center" |100 | |align="center"|100 | ||
| [[Woohoo Hooniversity]] | |[[Woohoo Hooniversity]] | ||
|- | |- | ||
| align="center" |[[File:Popplesprite MnL.png]][[File:Rookie Bowser MLSS sprite.png]] | |align="center"|[[File:Popplesprite MnL.png]][[File:Rookie Bowser MLSS sprite.png]] | ||
| align="center" |'''Popple & Rookie (2)''' | |align="center"|'''Popple & Rookie (2)''' | ||
| align="center" |Popple - 150<br>Rookie - 250 | |align="center"|Popple - 150<br>Rookie - 250 | ||
| align="center" |Popple - 120 (100)<br>Rookie - 180 (250) | |align="center"|Popple - 120 (100)<br>Rookie - 180 (250) | ||
| align="center" |Popple - 33 (50)<br>Rookie - 33 (30) | |align="center"|Popple - 33 (50)<br>Rookie - 33 (30) | ||
| [[Woohoo Hooniversity]] | |[[Woohoo Hooniversity]] | ||
|- | |- | ||
| align="center" |[[File:Mom Piranha battle.png]][[File:Mom Piranha B SSS.png]] | |align="center"|[[File:Mom Piranha battle.png]][[File:Mom Piranha B SSS.png]] | ||
| align="center" |'''[[Mom Piranha]]''' | |align="center"|'''[[Mom Piranha]]''' | ||
| align="center" |220 | |align="center"|220 | ||
| align="center" |400 (420) | |align="center"|400 (420) | ||
| align="center" |50 in red; 0 in blue (always 130) | |align="center"|50 in red; 0 in blue (always 130) | ||
| [[Beanbean Airport]] | |[[Beanbean Airport]] | ||
|- | |- | ||
| align="center" |[[File:Trunkle.PNG]][[File:Trunkle Small SSS.png]] | |align="center"|[[File:Trunkle.PNG]][[File:Trunkle Small SSS.png]] | ||
| align="center" |'''[[Trunkle]]''' | |align="center"|'''[[Trunkle]]''' | ||
| align="center" |Body - 110 (180)<br>Tree - 60 (140) | |align="center"|Body - 110 (180)<br>Tree - 60 (140) | ||
| align="center" |Body - 440 (500)<br>Tree - 150 (0)<br>Small - 110 (0) | |align="center"|Body - 440 (500)<br>Tree - 150 (0)<br>Small - 110 (0) | ||
| align="center" |Body - 88 (150)<br>Tree - 12 (0)<br>Small - 22 (0) | |align="center"|Body - 88 (150)<br>Tree - 12 (0)<br>Small - 22 (0) | ||
| [[Teehee Valley]] | |[[Teehee Valley]] | ||
|- | |- | ||
| align="center" |[[File:MLSS-Hermie III Sprite.png]] | |align="center"|[[File:MLSS-Hermie III Sprite.png]] | ||
| align="center" |'''[[Hermie III]]''' | |align="center"|'''[[Hermie III]]''' | ||
| align="center" |Main - 400 (380)<br>Claws - 70 (40) | |align="center"|Main - 400 (380)<br>Claws - 70 (40) | ||
| align="center" |450 (600) | |align="center"|450 (600) | ||
| align="center" |80 (200) | |align="center"|80 (200) | ||
| [[Gwarhar Lagoon]] | |[[Gwarhar Lagoon]] | ||
|- | |- | ||
| align="center" |[[File:Popplesprite_MnL.png]] | |align="center"|[[File:Popplesprite_MnL.png]] | ||
| align="center" |'''Popple''' | |align="center"|'''Popple''' | ||
| align="center" |520 (620) | |align="center"|520 (620) | ||
| align="center" |600 | |align="center"|600 | ||
| align="center" |120 (200) | |align="center"|120 (200) | ||
| [[Chucklehuck Woods]] | |[[Chucklehuck Woods]] | ||
|- | |- | ||
| align="center" |[[File:Piranha Bean.png]] | |align="center"|[[File:Piranha Bean.png]] | ||
| align="center" |'''[[Piranha Bean]]'''{{footnote|main|3}} | |align="center"|'''[[Piranha Bean]]'''{{footnote|main|3}} | ||
| align="center" |180 (280) | |align="center"|180 (280) | ||
| align="center" |150 (250) | |align="center"|150 (250) | ||
| align="center" |1 (150) | |align="center"|1 (150) | ||
| [[Beanbean Fields|Beanbean Outskirts]] | |[[Beanbean Fields|Beanbean Outskirts]] | ||
|- | |- | ||
| align="center" |[[File:Jojora MnL.png]] [[File:Jojorasfriend.png]] | |align="center"|[[File:Jojora MnL.png]] [[File:Jojorasfriend.png]] | ||
| align="center" |'''[[Jojora]] & one of [[Jojora's | |align="center"|'''[[Jojora]] & one of [[Jojora's friends]]''' | ||
| align="center" |Jojora - 50<br>Friend - 500 | |align="center"|Jojora - 50<br>Friend - 500 | ||
| align="center" |Jojora - 500<br>Friend - 800 | |align="center"|Jojora - 500<br>Friend - 800 | ||
| align="center" |Jojora - 200 (260)<br>Friend - 180 (240) | |align="center"|Jojora - 200 (260)<br>Friend - 180 (240) | ||
| [[Joke's End]] | |[[Joke's End]] | ||
|- | |- | ||
| align="center" |[[File:BirdoMLSS.png]][[File:Popplesprite_MnL.png]][[File:Egg SSS.png]] | |align="center"|[[File:BirdoMLSS.png]][[File:Popplesprite_MnL.png]][[File:Egg SSS.png]] | ||
| align="center" |'''Popple & [[Birdo]] with [[Egg]]s''' | |align="center"|'''Popple & [[Birdo]] with [[Egg]]s''' | ||
| align="center" |Popple - 500 (600)<br>Birdo - 450 (500)<br>Eggs - 20 | |align="center"|Popple - 500 (600)<br>Birdo - 450 (500)<br>Eggs - 20 | ||
| align="center" |Popple - 500 (300)<br>Birdo - 900 | |align="center"|Popple - 500 (300)<br>Birdo - 900 | ||
| align="center" |Popple - 99 (200)<br>Birdo - 99 (180)<br>Eggs - 99 (0) | |align="center"|Popple - 99 (200)<br>Birdo - 99 (180)<br>Eggs - 99 (0) | ||
| [[Teehee Valley]] | |[[Teehee Valley]] | ||
|- | |- | ||
| align="center" |[[File:Iggy-MLSS.png]] | |align="center"|[[File:Iggy-MLSS.png]] | ||
| align="center" |'''[[ | |align="center"|'''[[Iggy]]''' | ||
| align="center" |550 (650) | |align="center"|550 (650) | ||
| align="center" |800 (550) | |align="center"|800 (550) | ||
| align="center" |99 (200) | |align="center"|99 (200) | ||
| [[Bowser's Castle]] | |[[Bowser's Castle]] | ||
|- | |- | ||
| align="center" |[[File:Morton-MLSS.png]] | |align="center"|[[File:Morton-MLSS.png]] | ||
| align="center" |'''[[ | |align="center"|'''[[Morton]]''' | ||
| align="center" |500 (900) | |align="center"|500 (900) | ||
| align="center" |800 (600) | |align="center"|800 (600) | ||
| align="center" |99 (200) | |align="center"|99 (200) | ||
| [[Bowser's Castle]] | |[[Bowser's Castle]] | ||
|- | |- | ||
| align="center" |[[File:Lemmy-MLSS.png]] | |align="center"|[[File:Lemmy-MLSS.png]] | ||
| align="center" |'''[[ | |align="center"|'''[[Lemmy]]''' | ||
| align="center" |Lemmy - 380 (600)<br>Fake - 1 | |align="center"|Lemmy - 380 (600)<br>Fake - 1 | ||
| align="center" |800 (650) | |align="center"|800 (650) | ||
| align="center" |Lemmy - 99 (200)<br>Fake - 1 (0) | |align="center"|Lemmy - 99 (200)<br>Fake - 1 (0) | ||
| [[Bowser's Castle]] | |[[Bowser's Castle]] | ||
|- | |- | ||
| align="center" |[[File:Ludwig-MLSS.png]] | |align="center"|[[File:Ludwig-MLSS.png]] | ||
| align="center" |'''[[ | |align="center"|'''[[Ludwig]]''' | ||
| align="center" |550 (700) | |align="center"|550 (700) | ||
| align="center" |800 (700) | |align="center"|800 (700) | ||
| align="center" |99 (200) | |align="center"|99 (200) | ||
| [[Bowser's Castle]] | |[[Bowser's Castle]] | ||
|- | |- | ||
| align="center" |[[File:Roy-MLSS.png]] | |align="center"|[[File:Roy-MLSS.png]] | ||
| align="center" |'''[[ | |align="center"|'''[[Roy]]''' | ||
| align="center" |550 (920) | |align="center"|550 (920) | ||
| align="center" |800 (750) | |align="center"|800 (750) | ||
| align="center" |99 (200) | |align="center"|99 (200) | ||
| [[Bowser's Castle]] | |[[Bowser's Castle]] | ||
|- | |- | ||
| align="center" |[[File:Wendy-MLSS.png]] | |align="center"|[[File:Wendy-MLSS.png]] | ||
| align="center" |'''[[ | |align="center"|'''[[Wendy]]''' | ||
| align="center" |Wendy - 350 (500)<br>Fake - 1 | |align="center"|Wendy - 350 (500)<br>Fake - 1 | ||
| align="center" |800 | |align="center"|800 | ||
| align="center" |Wendy - 99 (200)<br>Fake - 1 (0) | |align="center"|Wendy - 99 (200)<br>Fake - 1 (0) | ||
| [[Bowser's Castle]] | |[[Bowser's Castle]] | ||
|- | |- | ||
| align="center" |[[File:Larry-MLSS.png]] | |align="center"|[[File:Larry-MLSS.png]] | ||
| align="center" |'''[[ | |align="center"|'''[[Larry]]''' | ||
| align="center" |550 (600) | |align="center"|550 (600) | ||
| align="center" |800 (850) | |align="center"|800 (850) | ||
| align="center" |99 (200) | |align="center"|99 (200) | ||
| [[Bowser's Castle]] | |[[Bowser's Castle]] | ||
|- | |- | ||
| align="center" |[[File:Fawful Battle 2nd time.png]][[File:Fawful Dome SSS.png]] | |align="center"|[[File:Fawful Battle 2nd time.png]][[File:Fawful Dome SSS.png]] | ||
| align="center" |'''Fawful (2)''' | |align="center"|'''Fawful (2)''' | ||
| align="center" |Fawful - 400 (430)<br>Dome - 0 | |align="center"|Fawful - 400 (430)<br>Dome - 0 | ||
| align="center" |1500 (1000) | |align="center"|1500 (1000) | ||
| align="center" |Fawful - 365 (350)<br>Dome - 0 | |align="center"|Fawful - 365 (350)<br>Dome - 0 | ||
| [[Bowser's Castle]] | |[[Bowser's Castle]] | ||
|- | |- | ||
| align="center" |[[File:Bowletta.png]][[File:Darkbowletta.PNG]][[File:Flaret Sprite.png]] | |align="center"|[[File:Bowletta.png]][[File:Darkbowletta.PNG]][[File:Flaret Sprite.png]] | ||
| align="center" |'''[[Bowletta]] with [[Flaret]]s''' | |align="center"|'''[[Bowletta]] with [[Flaret]]s''' | ||
| align="center" |Bowletta - 500 (700)<br>Flaret - 10 | |align="center"|Bowletta - 500 (700)<br>Flaret - 10 | ||
| align="center" |Bowletta - 5000{{footnote|main|4}} (0)<br>Flaret - 0 | |align="center"|Bowletta - 5000{{footnote|main|4}} (0)<br>Flaret - 0 | ||
| align="center" |Bowletta - 2004{{footnote|main|4}} (0)<br>Flaret - 0 | |align="center"|Bowletta - 2004{{footnote|main|4}} (0)<br>Flaret - 0 | ||
| [[Bowser's Castle]] | |[[Bowser's Castle]] | ||
|- | |- | ||
| align="center" |[[File:CacklettasSpirit MLSS.png]] | |align="center"|[[File:CacklettasSpirit MLSS.png]] | ||
| align="center" |'''Cackletta (2)''' | |align="center"|'''Cackletta (2)''' | ||
| align="center" |Head - 200 (180)<br>Arms - 80 (90)<br>Heart - 1200 (800) | |align="center"|Head - 200 (180)<br>Arms - 80 (90)<br>Heart - 1200 (800) | ||
| align="center" |0 | |align="center"|0 | ||
| align="center" |Head - 8{{footnote|main|4}} (0)<br> Arms - 0<br> Heart - 0<br> | |align="center"|Head - 8{{footnote|main|4}} (0)<br> Arms - 0<br> Heart - 0<br> | ||
| [[Bowser's Castle]] | |[[Bowser's Castle]] | ||
|} | |} | ||
{{footnote|note|1|Can only be fought by Mario}} | {{footnote|note|1|Can only be fought by Mario}} | ||
{{footnote|note|2|In North American and European versions, it is multiplied by 3 becoming 900 in game due to a glitch.}} | {{footnote|note|2|In North American and European versions, it is multiplied by 3 becoming 900 in game due to a glitch.}} | ||
{{footnote|note|3|Can only be fought by Luigi}} | {{footnote|note|3|Can only be fought by Luigi}} | ||
{{footnote|note|4|In North American and European versions, this is only | {{footnote|note|4|In North American and European versions, this is only possible if the player manages to perform the [[List of Mario & Luigi: Superstar Saga glitches#5000 Damage Glitch|5000 damage glitch]].}} | ||
<br> | <br> | ||
==Items== | ==Items== | ||
The following are items that are used in only battle. | The following are items that are used in only battle. | ||
{|width=100% class=wikitable | |||
{|width=100% | |||
|- | |- | ||
!Image | !Image | ||
| Line 902: | Line 893: | ||
!Effect | !Effect | ||
|- | |- | ||
| align="center" |[[File:MLSuperstarSagaMushroom.png]] | |align="center"|[[File:MLSuperstarSagaMushroom.png]] | ||
| align="center" |[[Mushroom]] | |align="center"|[[Mushroom]] | ||
| Restores 25 HP to a single bro. | |Restores 25 HP to a single bro. | ||
|- | |- | ||
| align="center" |[[File:MLSuperstarSagaMushroom.png]] | |align="center"|[[File:MLSuperstarSagaMushroom.png]] | ||
| align="center" |[[ | |align="center"|[[Super Mushroom]] | ||
| Restores 50 HP to a single bro. | |Restores {{hover|50 HP|45 HP in the Japanese version}} to a single bro. | ||
|- | |- | ||
| align="center" |[[File:MLSuperstarSagaMushroom.png]] | |align="center"|[[File:MLSuperstarSagaMushroom.png]] | ||
| align="center" |[[Ultra Mushroom]] | |align="center"|[[Ultra Mushroom]] | ||
| Restores 120 HP to a single bro. | |Restores {{hover|120 HP|75 HP in the Japanese version}} to a single bro. | ||
|- | |- | ||
| align="center" |[[File:MLSuperstarSagaMushroom.png]] | |align="center"|[[File:MLSuperstarSagaMushroom.png]] | ||
| align="center" |[[Max Mushroom]] | |align="center"|[[Max Mushroom]] | ||
| Restores full HP to a single bro. | |Restores full HP to a single bro. | ||
|- | |- | ||
| align="center" |[[File:MLSuperStarSagaNut.png]] | |align="center"|[[File:MLSuperStarSagaNut.png]] | ||
| align="center" |[[Nut]] | |align="center"|[[Nut]] | ||
| Restores 20 HP to both Mario and Luigi. | |Restores {{hover|20 HP|25 HP in the Japanese version}} to both Mario and Luigi. | ||
|- | |- | ||
| align="center" |[[File:MLSuperStarSagaNut.png]] | |align="center"|[[File:MLSuperStarSagaNut.png]] | ||
| align="center" |[[Super Nut]] | |align="center"|[[Super Nut]] | ||
| Restores 40 HP to both Mario and Luigi. | |Restores {{hover|40 HP|45 HP in the Japanese version}} to both Mario and Luigi. | ||
|- | |- | ||
| align="center" |[[File:MLSuperStarSagaNut.png]] | |align="center"|[[File:MLSuperStarSagaNut.png]] | ||
| align="center" |[[Ultra Nut]] | |align="center"|[[Ultra Nut]] | ||
| Restores 100 HP to both Mario and Luigi. | |Restores {{hover|100 HP|75 HP in the Japanese version}} to both Mario and Luigi. | ||
|- | |- | ||
| align="center" |[[File:MLSuperStarSagaNut.png]] | |align="center"|[[File:MLSuperStarSagaNut.png]] | ||
| align="center" |[[Max Nut]] | |align="center"|[[Max Nut]] | ||
| Restores full HP to both Mario and Luigi. | |Restores full HP to both Mario and Luigi. | ||
|- | |- | ||
| align="center" |[[File:MLSuperStarSagaSyrup.png]] | |align="center"|[[File:MLSuperStarSagaSyrup.png]] | ||
| align="center" |[[Syrup Jar]] | |align="center"|[[Syrup Jar|Syrup]] | ||
| Restores 20 BP to a single bro. | |Restores 20 BP to a single bro. | ||
|- | |- | ||
| align="center" |[[File:MLSuperStarSagaSyrup.png]] | |align="center"|[[File:MLSuperStarSagaSyrup.png]] | ||
| align="center" |[[Supersyrup Jar]] | |align="center"|[[Supersyrup Jar|Super Syrup]] | ||
| Restores 40 BP to a single bro. | |Restores {{hover|40 BP|35 BP in the Japanese version}} to a single bro. | ||
|- | |- | ||
| align="center" |[[File:MLSuperStarSagaSyrup.png]] | |align="center"|[[File:MLSuperStarSagaSyrup.png]] | ||
| align="center" |[[Ultrasyrup Jar]] | |align="center"|[[Ultrasyrup Jar|Ultra Syrup]] | ||
| Restores 100 BP to a single bro. | |Restores {{hover|100 BP|55 BP in the Japanese version}} to a single bro. | ||
|- | |- | ||
| align="center" |[[File:MLSuperStarSagaSyrup.png]] | |align="center"|[[File:MLSuperStarSagaSyrup.png]] | ||
| align="center" |[[Max Syrup Jar]] | |align="center"|[[Max Syrup Jar|Max Syrup]] | ||
| Restores full BP to a single bro. | |Restores full BP to a single bro. | ||
|- | |- | ||
| align="center" |[[File:MLSuperStarSagaGoldenShroom.png]] | |align="center"|[[File:MLSuperStarSagaGoldenShroom.png]] | ||
| align="center" |[[Golden Mushroom]] | |align="center"|[[Golden Mushroom (crownless)|Golden Mushroom]] | ||
| Restores full HP and BP to a single bro. | |Restores full HP and BP to a single bro. | ||
|- | |- | ||
| align="center" |[[File:MLSuperStarSagaRefreshHerb.png]] | |align="center"|[[File:MLSuperStarSagaRefreshHerb.png]] | ||
| align="center" |[[Refreshing Herb]] | |align="center"|[[Refreshing Herb]] | ||
| Cures negative status effects, such as [[Poison (status effect)|Poison]] and Dizzy. | |Cures negative status effects, such as [[Poison (status effect)|Poison]] and Dizzy. | ||
|- | |- | ||
| align="center" |[[File:MLSuperStarSaga1upshroom.png]] | |align="center"|[[File:MLSuperStarSaga1upshroom.png]] | ||
| align="center" |[[1-Up Mushroom]] | |align="center"|[[1-Up Mushroom]] | ||
| Revives the single bro with half HP. | |Revives the single bro with half HP. | ||
|- | |- | ||
| align="center" |[[File:MLSuperStarSaga1upshroom.png]] | |align="center"|[[File:MLSuperStarSaga1upshroom.png]] | ||
| align="center" |[[1-Up DX|1-Up Super]] | |align="center"|[[1-Up DX|1-Up Super]] | ||
| Revives the single bro with full HP and BP. | |Revives the single bro with full HP and BP. | ||
|- | |- | ||
| align="center" |[[File:Red Pepper MLSS.png]] | |align="center"|[[File:Red Pepper MLSS.png]] | ||
| align="center" |[[Red Pepper]] | |align="center"|[[Red Pepper]] | ||
| Increases a bro's POW by 50% and makes him heavier. | |Increases a bro's POW by {{hover|50%|25% in the Japanese version}} and makes him heavier. | ||
|- | |- | ||
| align="center" |[[File:Green Pepper MLSS.png]] | |align="center"|[[File:Green Pepper MLSS.png]] | ||
| align="center" |[[Green Pepper]] | |align="center"|[[Green Pepper]] | ||
| Increases a bro's DEF by 50% and makes him lighter. | |Increases a bro's DEF by {{hover|50%|25% in the Japanese version}} and makes him lighter. | ||
|} | |} | ||
<br> | <br> | ||
The following are key items that are not used in battle: | The following are key items that are not used in battle: | ||
{|width=100% | {|width=100% class=wikitable | ||
|- | |- | ||
!Image | !Image | ||
| Line 984: | Line 974: | ||
!Found in | !Found in | ||
|- | |- | ||
| align="center" |[[File:MLSS Azure Neon Egg.png]] | |align="center"|[[File:MLSS Azure Neon Egg.png]] | ||
| align="center" |[[Azure Neon Egg]] | |align="center"|[[Azure Neon Egg]] | ||
| A bright azure egg laid by a Yoshi. | |A bright azure egg laid by a Yoshi. | ||
| Yoshi Theater | |Yoshi Theater | ||
|- | |- | ||
| align="center" |[[File:Beanbean Brooch.png]] | |align="center"|[[File:Beanbean Brooch.png]] | ||
| align="center" |[[Beanbean Brooch]] | |align="center"|[[Beanbean Brooch]] | ||
| A pass to Chateau de Chucklehuck | |A pass to Chateau de Chucklehuck | ||
| Obtained from Lady Lima before Mario and Luigi head to Chateau de Chucklehuck | |Obtained from Lady Lima before Mario and Luigi head to Chateau de Chucklehuck | ||
|- | |- | ||
| align="center" |[[File:MLSS Beanbean Map icon.png]] | |align="center"|[[File:MLSS Beanbean Map icon.png]] | ||
| align="center" |[[Beanbean Map]] | |align="center"|[[Beanbean Map]] | ||
| A map of Beanbean Kingdom. | |A map of Beanbean Kingdom. | ||
| Obtained from a Border Bro | |Obtained from a Border Bro after Mario and Luigi complete the first stage of the Border Jump minigame | ||
|- | |- | ||
| align="center" |[[File:Beanlet.PNG]] | |align="center"|[[File:Beanlet.PNG]] | ||
| align="center" |[[Beanlet]] | |align="center"|[[Beanlet]] | ||
| A small, cute, green pet. | |A small, cute, green pet. | ||
| Beanbean Castle Town | |Beanbean Castle Town | ||
|- | |- | ||
| align="center" |[[File:MLSS-Beanstar Sprite.gif]] | |align="center"|[[File:MLSS-Beanstar Sprite.gif]] | ||
| align="center" |[[Beanstar]] | |align="center"|[[Beanstar]] | ||
| A powerful, sleeping granter of wishes. | |A powerful, sleeping granter of wishes. | ||
| Woohoo Hooniversity; formed when all four Beanstar shards are found. | |Woohoo Hooniversity; formed when all four Beanstar shards are found. | ||
|- | |- | ||
| align="center" |[[File:MLSS-Beanstar Top Left.PNG]] | |align="center"|[[File:MLSS-Beanstar Top Left.PNG]] | ||
| align="center" |[[Beanstar Piece]] | |align="center"|[[Beanstar Piece]] | ||
| The top-left part of the Beanstar. | |The top-left part of the Beanstar. | ||
| Gwharhar Lagoon after battling Hermie III, who uses it as an ornament for his shell. | |Gwharhar Lagoon after battling Hermie III, who uses it as an ornament for his shell. | ||
|- | |- | ||
| align="center" |[[File:MLSS-Beanstar Top Right.PNG]] | |align="center"|[[File:MLSS-Beanstar Top Right.PNG]] | ||
| align="center" |[[Beanstar Piece]] | |align="center"|[[Beanstar Piece]] | ||
| The top-right part of the Beanstar. | |The top-right part of the Beanstar. | ||
| Obtained from Harhall, after Mario and Luigi color fabric with Designbombs. | |Obtained from Harhall, after Mario and Luigi color fabric with Designbombs. | ||
|- | |- | ||
| align="center" |[[File:MLSS-Beanstar Bottom Left.PNG]] | |align="center"|[[File:MLSS-Beanstar Bottom Left.PNG]] | ||
| align="center" |[[Beanstar Piece]] | |align="center"|[[Beanstar Piece]] | ||
| The bottom-left part of the Beanstar. | |The bottom-left part of the Beanstar. | ||
| | |Winkle Colosseum after battling Popple for the third time. | ||
|- | |- | ||
| align="center" |[[File:MLSS-Beanstar Bottom Right.PNG]] | |align="center"|[[File:MLSS-Beanstar Bottom Right.PNG]] | ||
| align="center" |[[Beanstar Piece]] | |align="center"|[[Beanstar Piece]] | ||
| The bottom-right part of the Beanstar. | |The bottom-right part of the Beanstar. | ||
| Obtained from Boddle after Mario and Luigi give him seven neon Yoshi eggs for his Yoshi Theater sign. | |Obtained from Boddle after Mario and Luigi give him seven neon Yoshi eggs for his Yoshi Theater sign. | ||
|- | |- | ||
| align="center" |[[File:Beanstone.png]] | |align="center"|[[File:Beanstone.png]] | ||
| align="center" |[[Beanstone]] | |align="center"|[[Beanstone]] | ||
| A Soybean civilization jewel. | |A Soybean civilization jewel. | ||
| Beanbean Castle Town | |Beanbean Castle Town | ||
|- | |- | ||
| align="center" |[[File:Bean Fruit.png]] | |align="center"|[[File:Bean Fruit.png]] | ||
| align="center" |[[Bean Fruit]] | |align="center"|[[Bean Fruit]] | ||
| A juicy bean grown in the ground. | |A juicy bean grown in the ground. | ||
| Beanbean Outskirts | |Beanbean Outskirts | ||
|- | |- | ||
| align="center" |[[File:MLSS Blue Neon Egg.png]] | |align="center"|[[File:MLSS Blue Neon Egg.png]] | ||
| align="center" |[[Blue Neon Egg]] | |align="center"|[[Blue Neon Egg]] | ||
| A bright blue egg laid by a Yoshi. | |A bright blue egg laid by a Yoshi. | ||
| Yoshi Theater | |Yoshi Theater | ||
|- | |- | ||
| align="center" |[[File:Crabbie Grass.png]] | |align="center"|[[File:Crabbie Grass.png]] | ||
| align="center" |[[Crabbie Grass]] | |align="center"|[[Crabbie Grass]] | ||
| Bitter medicine for Bean Fever. | |Bitter medicine for Bean Fever. | ||
| Guffawha Ruins | |Guffawha Ruins | ||
|- | |- | ||
| align="center" |[[File:Fake Beanstar.png]] | |align="center"|[[File:Fake Beanstar.png]] | ||
| align="center" |[[Fake Beanstar]] | |align="center"|[[Fake Beanstar]] | ||
| A cheap-looking, plastic fake. | |A cheap-looking, plastic fake. | ||
| Obtained from Prince Peasley before Mario and Luigi head to Joke's End. | |Obtained from Prince Peasley before Mario and Luigi head to Joke's End. | ||
|- | |- | ||
| align="center" |[[File:Green Goblet.PNG]] | |align="center"|[[File:Green Goblet.PNG]] | ||
| align="center" |[[Green Goblet]] | |align="center"|[[Green Goblet]] | ||
| A dazzlingly beautiful green glass. | |A dazzlingly beautiful green glass. | ||
| Chateau de Chucklehuck | |Chateau de Chucklehuck | ||
|- | |- | ||
| align="center" |[[File:MLSS Green Neon Egg.png]] | |align="center"|[[File:MLSS Green Neon Egg.png]] | ||
| align="center" |[[Green Neon Egg]] | |align="center"|[[Green Neon Egg]] | ||
| A bright green egg laid by a Yoshi. | |A bright green egg laid by a Yoshi. | ||
| Yoshi Theater | |Yoshi Theater | ||
|- | |- | ||
| align="center" |[[File:MLSS Green Pearl Bean.png]] | |align="center"|[[File:MLSS Green Pearl Bean.png]] | ||
| align="center" |[[Green Pearl Bean]] | |align="center"|[[Green Pearl Bean]] | ||
| A refreshingly green bean. | |A refreshingly green bean. | ||
| Gwarhar Lagoon | |Gwarhar Lagoon | ||
|- | |- | ||
| align="center" |[[File:Membershipcard.png]] | |align="center"|[[File:Membershipcard.png]] | ||
| align="center" |[[Membership Card]] | |align="center"|[[Membership Card (Mario & Luigi: Superstar Saga)|Membership Card]] | ||
| An S.S. Chuckola membership card. | |An S.S. Chuckola membership card. | ||
| The S.S Chuckola soda cellar after winning Bink's barrel minigame. | |The S.S. Chuckola soda cellar after winning Bink's barrel minigame. | ||
|- | |- | ||
| align="center" |[[File:MLSS Orange Neon Egg.png]] | |align="center"|[[File:MLSS Orange Neon Egg.png]] | ||
| align="center" |[[Orange Neon Egg]] | |align="center"|[[Orange Neon Egg]] | ||
| A bright orange egg laid by a Yoshi. | |A bright orange egg laid by a Yoshi. | ||
| Yoshi Theater | |Yoshi Theater | ||
|- | |- | ||
| align="center" |[[File:MLSS Peach's Extra Dress.png]] | |align="center"|[[File:MLSS Peach's Extra Dress.png]] | ||
| align="center" |[[Peach's Extra Dress]] | |align="center"|[[Peach's Extra Dress]] | ||
| Princess Peach's lovely dress. | |Princess Peach's lovely dress. | ||
| Obtained from Toadsworth before Mario and Luigi head to Joke's End. | |Obtained from Toadsworth before Mario and Luigi head to Joke's End. | ||
|- | |- | ||
| align="center" |[[File:Peasley's Rose.PNG]] | |align="center"|[[File:Peasley's Rose.PNG]] | ||
| align="center" |[[Peasley's Rose]] | |align="center"|[[Peasley's Rose]] | ||
| A keepsake pass to Beanbean Castle. | |A keepsake pass to Beanbean Castle. | ||
| Obtained from Prince Peasley after Mario and Luigi defeat Dragohoho. | |Obtained from Prince Peasley after Mario and Luigi defeat Dragohoho. | ||
|- | |- | ||
| align="center" |[[File:MLSS Purple Chuckola Fruit.png]] | |align="center"|[[File:MLSS Purple Chuckola Fruit.png]] | ||
| align="center" |[[Purple Chuckola Fruit]] | |align="center"|[[Purple Chuckola Fruit]] | ||
| A fruit with a refreshing flavor. | |A fruit with a refreshing flavor. | ||
| Chucklehuck Woods | |Chucklehuck Woods | ||
|- | |- | ||
| align="center" |[[File:MLSS Purple Neon Egg.png]] | |align="center"|[[File:MLSS Purple Neon Egg.png]] | ||
| align="center" |[[Purple Neon Egg]] | |align="center"|[[Purple Neon Egg]] | ||
| A bright purple egg laid by a Yoshi. | |A bright purple egg laid by a Yoshi. | ||
| Yoshi Theater | |Yoshi Theater | ||
|- | |- | ||
| align="center" |[[File:MLSS Red Chuckola Fruit.png]] | |align="center"|[[File:MLSS Red Chuckola Fruit.png]] | ||
| align="center" |[[Red Chuckola Fruit]] | |align="center"|[[Red Chuckola Fruit]] | ||
| A fruit with a robust flavor. | |A fruit with a robust flavor. | ||
| Chucklehuck Woods | |Chucklehuck Woods | ||
|- | |- | ||
| align="center" |[[File:Red Goblet.PNG]] | |align="center"|[[File:Red Goblet.PNG]] | ||
| align="center" |[[Red Goblet]] | |align="center"|[[Red Goblet]] | ||
| An eye-piercingly beautiful glass. | |An eye-piercingly beautiful glass. | ||
| Chateau de Chucklehuck | |Chateau de Chucklehuck | ||
|- | |- | ||
| align="center" |[[File:MLSS Red Neon Egg.png]] | |align="center"|[[File:MLSS Red Neon Egg.png]] | ||
| align="center" |[[Red Neon Egg]] | |align="center"|[[Red Neon Egg]] | ||
| A bright red egg laid by a Yoshi. | |A bright red egg laid by a Yoshi. | ||
| Yoshi Theater | |Yoshi Theater | ||
|- | |- | ||
| align="center" |[[File:MLSS Red Pearl Bean.png]] | |align="center"|[[File:MLSS Red Pearl Bean.png]] | ||
| align="center" |[[Red Pearl Bean]] | |align="center"|[[Red Pearl Bean]] | ||
| A bean that burns red with passion. | |A bean that burns red with passion. | ||
| Gwarhar Lagoon | |Gwarhar Lagoon | ||
|- | |- | ||
| align="center" |[[File:MLSS Secret Scroll 1.png]] | |align="center"|[[File:MLSS Secret Scroll 1.png]] | ||
| align="center" |[[Secret Scroll 1]] | |align="center"|[[Secret Scroll 1]] | ||
| A scroll inscribed with jumping secrets. | |A scroll inscribed with jumping secrets. | ||
| Obtained from the first Thwomp in Beanbean Outskirts after winning his hammer minigame. | |Obtained from the first Thwomp in Beanbean Outskirts after winning his hammer minigame. | ||
|- | |- | ||
| align="center" |[[File:MLSS Secret Scroll 2.png]] | |align="center"|[[File:MLSS Secret Scroll 2.png]] | ||
| align="center" |[[Secret Scroll 2]] | |align="center"|[[Secret Scroll 2]] | ||
| A scroll inscribed with Hammer secrets. | |A scroll inscribed with Hammer secrets. | ||
| Obtained from the second Thwomp in Beanbean Outskirts after winning his hammer minigame. | |Obtained from the second Thwomp in Beanbean Outskirts after winning his hammer minigame. | ||
|- | |- | ||
| align="center" |[[File:Spangle.PNG]] | |align="center"|[[File:Spangle.PNG]] | ||
| align="center" |[[Spangle]]??? | |align="center"|[[Spangle]]??? | ||
| Show me the stage, baby! | |Show me the stage, baby! | ||
| Gwarhar Lagoon | |Gwarhar Lagoon | ||
|- | |- | ||
| align="center" |[[File:MLSS White Chuckola Fruit.png]] | |align="center"|[[File:MLSS White Chuckola Fruit.png]] | ||
| align="center" |[[White Chuckola Fruit]] | |align="center"|[[White Chuckola Fruit]] | ||
| A fruit with a tangy flavor. | |A fruit with a tangy flavor. | ||
| Chucklehuck Woods | |Chucklehuck Woods | ||
|- | |- | ||
| align="center" |[[File:Winkle Card.PNG]] | |align="center"|[[File:Winkle Card.PNG]] | ||
| align="center" |[[Winkle Card]] | |align="center"|[[Winkle Card]] | ||
| The trophy of the Winkles. | |The trophy of the Winkles. | ||
| Obtained after winning the minigame in | |Obtained after winning the minigame in Winkle Colosseum. | ||
|- | |- | ||
| align="center" |[[File:MLSS Yellow Neon Egg.png]] | |align="center"|[[File:MLSS Yellow Neon Egg.png]] | ||
| align="center" |[[Yellow Neon Egg]] | |align="center"|[[Yellow Neon Egg]] | ||
| A bright yellow egg laid by a Yoshi. | |A bright yellow egg laid by a Yoshi. | ||
| Yoshi Theater | |Yoshi Theater | ||
|} | |} | ||
<br> | <br> | ||
==Sidequests== | ==Sidequests== | ||
{{ | {{construction|y=section}} | ||
There are various sidequests | There are various sidequests Mario and Luigi can complete outside the main story. These quests vary in results. Certain sidequests become unavailable at a certain point in the game. There are a few sidequests available in [[Toad Town#Mario & Luigi: Superstar Saga / Mario & Luigi: Superstar Saga + Bowser's Minions|Toadtown Square]] before they leave the Mushroom Kingdom, after which they cannot be completed. | ||
{|class="wikitable" | |||
|- | |||
!Image | |||
!Description | |||
|- | |||
|[[File:SuperstarSagaSidequestA.png]] | |||
|Near the start of the game, while [[Mario]] is exploring Toadtown Square, there is a [[Mushroom]] atop a hedge next to a [[Toad (species)|Toad]] in the southeast corner of the plaza. If Mario jumps onto the hedge and collects the Mushroom, the Toad asks for it. If Mario refuses to give it back, the Toad starts to panic. Mario can talk to the Toad again and again and refuse to give it back over and over. If Mario decides to return the Mushroom, the Toad decides to let him keep it and gives him a [[Super Mushroom]] as a going-away gift before wishing him luck in the [[Beanbean Kingdom]]. | |||
|- | |||
|[[File:SuperstarSagaSidequestB.png]] | |||
|Atop the long hedge in the west side of the plaza, in the northwest corner, there is a blue Toad who claims to have lost an [[Precious belonging|important belonging]]. He then asks Mario to help him look for it. If Mario agrees, the Toad informs him he dropped it somewhere along the hedge and to talk to the Toad near the fountain for advice on action icons. Mario then simply needs to walk south to the end of the hedge where the action icon changes. Mario then needs to press {{button|gba|a}} to pick up the item, walk to the north end of the hedge, and give it back to the Toad. He then rewards Mario with a [[1-Up Mushroom]]. | |||
|} | |||
*Before going to the Koopa Cruiser, a lost minion asks Mario and Luigi for directions to the ship. If given correct directions, he rewards Mario and Luigi with a 1-Up Mushroom when found later on the ship. | *Before going to the Koopa Cruiser, a lost minion asks Mario and Luigi for directions to the ship. If given correct directions, he rewards Mario and Luigi with a 1-Up Mushroom when found later on the ship. | ||
*Hundreds of [[bean]]s are hidden throughout the overworld that Mario and Luigi can find and spend at | *Hundreds of [[bean]]s are hidden throughout the overworld that Mario and Luigi can find and spend at [[Starbeans Cafe]] in the castle town. There are four different kinds of beans: Woo beans ([[File:BeansWoo SS.png]]), Hoo beans ([[File:BeansHoo SS.png]]), Chuckle beans ([[File:BeansChuckle SS.png]]), and Hee beans ([[File:BeansHee SS.png]]). Depending on which kinds of beans Mario and Luigi spend, different blends will be produced. When Mario and Luigi produce a blend, Professor E. Gadd will give them a prize. When the Bros. drink the blend, they will also gain a stat boost. The possible blends, beans required, stat boosts, and prizes are listed below. | ||
{|width=100% class=wikitable style="text-align:center" | |||
{|width=100% | |||
|- | |- | ||
! | !Name | ||
!Image | !Image | ||
!Beans | !Beans required | ||
!Stat Boost | !Stat Boost | ||
|- | |- | ||
|[[Woohoo Blend]] | |||
|[[File:BlendyWoohoo SS.png]] | |||
|25 Woo Beans | |||
| | |<nowiki>+</nowiki>4 Hit Points | ||
|- | |- | ||
|[[Hoohoo Blend]] | |||
|[[File:BlendyHooHoo SS.png]] | |||
|25 Hoo Beans | |||
| | |<nowiki>+</nowiki>4 Brother Points | ||
|- | |- | ||
|[[Chuckle Blend]] | |||
|[[File:BlendyChuckle SS.png]] | |||
|25 Chuckle Beans | |||
| | |<nowiki>+</nowiki>4 Speed | ||
|- | |- | ||
|[[Teehee Blend]] | |||
|[[File:BlendyTeehee SS.png]] | |||
| | |25 Hee Beans | ||
| | |<nowiki>+</nowiki>4 Stache Points | ||
|- | |- | ||
|[[Hoolumbian]] | |||
|[[File:BlendyHoolumbian SS.png]] | |||
|15 Woo Beans + 10 Hoo Beans | |||
| | |<nowiki>+</nowiki>4 Power | ||
|- | |- | ||
|[[Chuckoccino]] | |||
|[[File:BlendyChuckoccino.png]] | |||
|15 Woo Beans + 10 Chuckle Beans | |||
| | |<nowiki>+</nowiki>4 Defense | ||
|- | |- | ||
|[[Teeheespresso]] | |||
|[[File:BlendyTeeheespresso.png]] | |||
|15 Woo Beans + 10 Hee Beans | |||
|<nowiki>+</nowiki>6 of a random stat | |||
|} | |} | ||
{|width=100% | {|width=100% class=wikitable | ||
|- | |- | ||
!Blends | !Blends processed | ||
!Prize | !Prize | ||
|- | |- | ||
|1 | |||
|[[Greed Wallet]] | |||
|- | |- | ||
| | |2 | ||
|[[Bonus Ring]] | |||
|- | |- | ||
| | |3 | ||
|[[Excite Spring]] | |||
|- | |- | ||
| | |4 | ||
|[[Great Force]] | |||
|- | |- | ||
| | |5 | ||
|[[Power Grip]] | |||
|- | |- | ||
| | |6 | ||
|[[Cobalt Necktie]] | |||
|- | |- | ||
|7 | |||
|[[Game Boy Horror SP]] | |||
|} | |} | ||
*Some caves near | *Some caves near Beanbean Castle Town are underground courses that resemble those found in ''[[Super Mario Bros.]]'' There are three such caverns; two of them are north of Beanbean Castle, while the third is found to the west of Beanbean Castle. At the end of each course is a [[mole (presenter)|mole]] who gives him a rare item such as a [[High-End Badge]] or the [[Iron Pants]]. | ||
*A citizen on the east side of Beanbean | *A citizen on the east side of Beanbean Castle Town is searching for five [[Beanlet]]s; when spoken to, he will ask Mario and Luigi to find them for him. If they find the Beanlets and give them back to their proprietor, he gives them a [[Golden Mushroom (crownless)|Golden Mushroom]]. | ||
*In Beanbean Castle Town's west side, there is an old Beanish scholar | *In Beanbean Castle Town's west side, there is an old Beanish scholar who asks Mario and Luigi to find ten jewels called "[[Beanstone]]s", five of which are on each side of town. To find these, Luigi must hit Mario with the hammer to shrink him and walk around town. If Mini-Mario is standing over a beanstone, a small "!" symbol appears over his head. When Mario gets directly to the area bearing a beanstone, a larger "!" will appear. Luigi must then dig in this spot to retrieve it. If all ten are found, the old citizen gives them a rare item, the [[Bros. Rock]]. | ||
*There are [[ | *There are [[Ankoopa]]s in some caves; Mario can use his [[Firebrand]] power to knock them over, allowing Mario and Luigi to pass and reach moles that give them a special item, such as a Golden Mushroom. | ||
*There is a cave where Mario and Luigi's hammers can be improved by the [[Hammerhead Bros.]] In this cave, there are also [[Thwomp]]s who host a guessing | *There is a cave where Mario and Luigi's hammers can be improved by the [[Hammerhead Bros.]] In this cave, there are also [[Thwomp]]s who host a guessing game. Mario and Luigi have to pay 200 coins (500 for the second Thwomp game) and use their upgraded hammers to smash one out of three boulders. If they are lucky, they can find the scrolls wielding hidden Bros. Attacks. | ||
*There is an island called "Surfing Game Island" where Mario and Luigi can get free beans by completing a minigame, in which they are given a set time to break as many balloons via surfing as possible. The faster they complete the course, the more (or different) beans they will receive. To find it, enter the green pipe leading to Gwarhar Lagoon, break the black brick, and turn Luigi into a surfing board. Enter the ocean above and move 3 areas right, and two up. | *There is an island called "Surfing Game Island" where Mario and Luigi can get free beans by completing a minigame, in which they are given a set time to break as many balloons via surfing as possible. The faster they complete the course, the more (or different) beans they will receive. To find it, enter the green pipe leading to Gwarhar Lagoon, break the black brick, and turn Luigi into a surfing board. Enter the ocean above and move 3 areas right, and two up. | ||
*After the Bros. receive Ultra Hammers, they can go to an area of Gwarhar Lagoon blocked by rocks that were previously indestructible. They will find Spangle there. Giving Hermie Spangle will make him happy, and he will give them the [[Soulful Bros.]] badge. | *After the Bros. receive Ultra Hammers, they can go to an area of Gwarhar Lagoon blocked by rocks that were previously indestructible. They will find Spangle there. Giving Hermie Spangle will make him happy, and he will give them the [[Soulful Bros.]] badge. | ||
*After the Bros. receive the Bean Star Piece from [[Harhall]], Harhall opens his store and the Bros. can work for him to create all of the outfits. Mario and Luigi are able to create a possible maximum of 28 designs: 7 different shirt colors and 4 patterns for each one. When a new outfit is created, Harhall will give Mario and Luigi a Woo bean. When Mario and Luigi complete all 28 different designs, they will earn [[Harhall's Pants]]. | *After the Bros. receive the Bean Star Piece from [[Harhall]], Harhall opens his store and the Bros. can work for him to create all of the outfits. Mario and Luigi are able to create a possible maximum of 28 designs: 7 different shirt colors and 4 patterns for each one. When a new outfit is created, Harhall will give Mario and Luigi a Woo bean. When Mario and Luigi complete all 28 different designs, they will earn [[Harhall's Pants]]. | ||
==Green Warp Pipes== | ==Green Warp Pipes== | ||
| Line 1,284: | Line 1,242: | ||
[[File:MLSSBS29.png|right|frame|Beanhole near Beanbean Castle Town.]] | [[File:MLSSBS29.png|right|frame|Beanhole near Beanbean Castle Town.]] | ||
{{main|List of beanholes in Mario & Luigi: Superstar Saga}} | {{main|List of beanholes in Mario & Luigi: Superstar Saga}} | ||
In the game, Mario and Luigi can collect [[Bean|Chuckle Beans]] by coming across beanholes -- Xs or other distinguishing features on the ground -- all throughout the Beanbean Kingdom. There are 197 Chuckle Beans from | In the game, Mario and Luigi can collect [[Bean|Chuckle Beans]] by coming across beanholes -- Xs or other distinguishing features on the ground -- all throughout the Beanbean Kingdom. There are 197 Chuckle Beans from Beanholes. Beans can only be collected out of the ground after the player learns the Luigi Dunk move at Chateau de Chucklehuck. [[Chuckleroot's granddaughter]] also explains how to drill into the ground and pick up beans. | ||
==Hidden ? Block locations== | ==Hidden ? Block locations== | ||
[[File:MLSSHiddenBlocks0.png|right|frame|Hidden ? Blocks | [[File:MLSSHiddenBlocks0.png|right|frame|Hidden ? Blocks inside Beanbean Castle.]] | ||
{{main|List of hidden blocks in Mario & Luigi: Superstar Saga}} | {{main|List of hidden blocks in Mario & Luigi: Superstar Saga}} | ||
In the game, Mario and Luigi can also discover hidden [[? Block]]s containing elusive [[Bean|Hoo Beans]] throughout the Beanbean Kingdom. By jumping around at suspicious platforms or patterns, or in seemingly "empty" dead-ends, the Mario Bros. can uncover invisible blocks containing single Hoo Beans. There are 42 hidden blocks in all. | In the game, Mario and Luigi can also discover hidden [[? Block]]s containing elusive [[Bean|Hoo Beans]] throughout the Beanbean Kingdom. By jumping around at suspicious platforms or patterns, or in seemingly "empty" dead-ends, the Mario Bros. can uncover invisible blocks containing single Hoo Beans. There are 42 hidden blocks in all. | ||
== | ==Mole locations== | ||
[[File:MLSS-Gold Monty Mole Screenshot.png|frame|left|A [[ | [[File:MLSS-Gold Monty Mole Screenshot.png|frame|left|A [[mole (presenter)|mole]] giving [[Mario]] and [[Luigi]] a [[1-Up DX|1-Up Super]] in [[Bowser's Castle]].]] | ||
{{main| | {{main|Mole (presenter)}} | ||
In the game, Mario and Luigi can find | In the game, Mario and Luigi can find moles throughout the Beanbean Kingdom that will reward them with items, clothing, or badges when found. | ||
{{br}} | {{br}} | ||
==Profiles== | |||
*'''Wii U [[Nintendo eShop#Wii U|eShop]] description''' | |||
'''''An adventure so big, you'll need both Bros.!'''<p>Prepare for an epic journey beyond the borders of the Mushroom Kingdom as Mario™ and Luigi™ team up for a hilarious, action-filled adventure!</p>During a normal day of royal duties, Princess Peach meets with the ambassador of the neighboring Beanbean Kingdom. However, an act of amnesty turns into an act of theft! The evil Cackletta and her awful assistant, Fawful, disguised themselves for the chance to steal Princess Peach's voice. Before the Mushroom Kingdom can fall under Princess Peach's despair, Mario and Luigi will need to work together as they cross the border to the lands of Beanbean Kingdom. Take a break from the adventure and play a quick game in Mario Bros. mode, featuring an enhanced version of the original [[Nintendo Entertainment System|NES]] game. With all this awesome action, you'll have hours of fun! | |||
==Quotes== | |||
{{main|List of Mario & Luigi: Superstar Saga quotes}} | |||
Some notable quotes in the game include: | |||
*"''We'll take my Koopa Cruiser and reach the Beanbean Kingdom in no time! Mario! We leave immediately!!''" - [[Bowser]] | |||
*"''Who would have thought you'd catch up to the Great [[Cackletta]] in even a hundred million years?''" - Cackletta | |||
*"''I am the great Cackletta's most best pupil, who is named Fawful! I am here, laughing at you! If you are giving us the chase, just to get your silly princess's voice, then you are idiots of foolishness! Princess Peach's sweet voice will soon be the bread that makes the sandwich of Cackletta's desires! And this battle shall be the delicious mustard on that bread! The mustard of your doom!''" - [[Fawful]] | |||
*"''C-Could you be the Mario bros. from the Mushroom Kingdom? What are the Mario bros. doing in a place like this?''" - [[Lady Lima]] | |||
*"''My new country has no need for old superstars! It will do just fine with only one: the Great Bowletta!!!''" - [[Bowletta]] | |||
==Regional differences== | |||
{{multiple image | |||
|align=center | |||
|direction=horizontal | |||
|width=240 | |||
|image1=MLSS Peach's Castle.png | |||
|caption1=Western | |||
|image2=MLSS Peach's Castle (Japan).png | |||
|caption2=Japanese | |||
}} | |||
The mushroom emblem seen on and in [[Peach's Castle|Princess Peach's Castle]] is modified in the Japanese version to better resemble a [[Golden Dash Mushroom]]. | |||
{{multiple image | |||
|align=center | |||
|direction=horizontal | |||
|width=240 | |||
|image1=MLSS Toad in Mario Bros House.png | |||
|caption1=Western | |||
|image2=MSSToadQuest.png | |||
|caption2=Japanese | |||
}} | |||
In the Japanese version, when [[Toad]] has entered [[Mario Bros.' House|Mario and Luigi's house]], a directional pad appears on-screen to the bottom-left. | |||
{{multiple image | |||
|align=center | |||
|direction=horizontal | |||
|width=240 | |||
|image1=MALSS Marioshouse inside.png | |||
|caption1=Western | |||
|image2=MALRPG Marioshouse inside.png | |||
|caption2=Japanese | |||
}} | |||
The portrait of [[Princess Peach]] in Mario and Luigi's house has been touched up in the Japanese version. | |||
{{multiple image | |||
|align=center | |||
|direction=horizontal | |||
|width=240 | |||
|image1=MLSS starting BP.png | |||
|caption1=Western | |||
|image2=MLSS starting BP Japan.png | |||
|caption2=Japanese | |||
}} | |||
In the Western version, [[Mario]] and [[Luigi]] both start with 10 BP. In the Japanese version, Mario and Luigi respectively start out with 14 and 16 BP. | |||
{{multiple image | |||
|align=center | |||
|direction=horizontal | |||
|width=240 | |||
|image1=MLSS Mario level up.png | |||
|caption1=Western | |||
|image2=MLSS Japan Mario level up.png | |||
|caption2=Japanese | |||
}} | |||
In the Japanese version, whenever Mario or Luigi level up, a {{button|GBA|pad}} in [[Lakitu]]'s speech bubble was added to indicate that up or down is used to select a stat. If one is selected, a {{button|GBA|B}} appears in the speech bubble, indicating that said button cancels the selection. | |||
{{multiple image | |||
|align=center | |||
|direction=horizontal | |||
|width=240 | |||
|image1=MLSS Hammerhead Bros tutorial.png | |||
|caption1=Western | |||
|image2=MLSS JP Hammerhead Bros tutorial.png | |||
|caption2=Japanese | |||
}} | |||
In the Western version, [[Hammerhead Bros.]]' tutorial shows [[Beanbean Fields|Beanbean Outskirts]] setting, but [[Hoohoo Mountain]] in the Japanese version. The button sprites in the dialogue box are also different. | |||
{{multiple image | |||
|align=center | |||
|direction=horizontal | |||
|width=240 | |||
|image1=MLSS Sign screenshot.png | |||
|caption1=Western | |||
|image2=MLSS Japan Sign screenshot.png | |||
|caption2=Japanese | |||
}} | |||
In the Western version, arrow signs are smaller to accommodate for more directions. In the Japanese version, the sign found directly north of [[Beanbean Castle Town]] does not give directions for Beanbean Castle Town, and it only has one arrow for Hoohoo Mountain. | |||
{{multiple image | |||
|align=center | |||
|direction=horizontal | |||
|width=240 | |||
|image1=Heart Block in Beanbean Castle Sewers MLSS.png | |||
|image2=Heart Block in Oho Oasis MLSS.png | |||
|image3=Heart Block in Teehee Valley MLSS.png | |||
|caption1=Beanbean Castle Sewers | |||
|caption2=Oho Oasis | |||
|caption3=Teehee Valley | |||
}} | |||
In the Japanese version, there are three [[Recovery Block|Heart Block]]s, which are found in [[Beanbean Castle Sewer]]s, [[Oho Oasis]], and [[Teehee Valley]] respectively. | |||
{{multiple image | |||
|align=center | |||
|direction=horizontal | |||
|width=240 | |||
|image1=StarStacheSmash.png | |||
|caption1=Western | |||
|image2=Star Stache Smash MLSS JP.png | |||
|caption2=Japanese | |||
}} | |||
Mario and Luigi's heads in [[Star 'Stache Smash]] are different for the Western and Japanese releases. | |||
{{multiple image | |||
|align=center | |||
|direction=horizontal | |||
|width=240 | |||
|image1=MLSS Starbeans Cafe Menu.png | |||
|caption1=Western | |||
|image2=MLSS JP Starbeans Cafe Menu.png | |||
|caption2=Japanese | |||
}} | |||
In the [[Starbeans Cafe]] menu, there is a red E. Gadd icon next to each drink that Mario and Luigi have already made. | |||
===Other differences=== | |||
*[[Trunkle]] has a different battle strategy between the Western and Japanese releases. | |||
*[[Bubbles]]'s jokes are different depending on the game's language. This is because many of the jokes are based around the use of puns. | |||
==Pre-release and unused content== | |||
[[File:SuperstarsagaBetaSprites.png|frame|The characters who were supposed to appear in [[Starbeans Cafe]], but were replaced by [[Professor Elvin Gadd|E. Gadd]].]] | |||
{{main|List of Mario & Luigi: Superstar Saga pre-release and unused content}} | |||
Many characters from other [[Nintendo]] franchises were apparently going to appear in [[Starbeans Cafe]], such as [[Fox|Fox McCloud]], [[Link]], and [[Captain Olimar|Olimar]]. These characters were replaced by [[Professor Elvin Gadd|E. Gadd]] in the final game; the dialogue of the characters can still be seen in the game's code. | |||
A mysterious, cloaked [[Beanish]] character was also left unused. Its purpose in the game is unknown. | |||
==Glitches== | |||
{{main|List of Mario & Luigi: Superstar Saga glitches}} | |||
Most of the glitches found in the game are graphical related, such as misplaced [[Bob-omb]] sprites and incorrect action icons being shown when facing [[Bowletta]]. A notable graphical glitch is seen in [[Little Fungitown]], where Mario and Luigi are able to stand on thin air. Some other glitches cause the game to play incorrect music or sound effects. For example, in the northeast of the [[Teehee Valley]] entrance, instead of Luigi making his normal sound effect when he empties himself of water, the sound of an Oho Jee speaking will play instead. There is also a glitch to go out of bounds in Oho Ocean that can be done by hammering Mario or Luigi and playing the surfing minigame, then at the start of the minigame going back to the island. | |||
==Staff== | |||
{{main|List of Mario & Luigi: Superstar Saga staff}} | |||
The Japanese video game development studio [[AlphaDream]] developed ''Mario & Luigi: Superstar Saga''. Both of ''[[Super Mario RPG]]'' co-directors were involved with the game, as they left [[Square]] alongside various other former employees to join AlphaDream, Yoshihiko Maekawa was the game's director while Chihiro Fujioka is listed under Special Thanks. [[Satoru Iwata]] was the executive producer, while [[Takashi Tezuka]] was the production supervisor. The music heard in the game was produced by [[Yoko Shimomura]], like in ''Super Mario RPG''. | |||
==Reception== | ==Reception== | ||
{|class="wikitable | {|class="wikitable reviews" | ||
!colspan="4" style="font-size:120%; text-align: center; background-color:silver"|Reviews | !colspan="4"style="font-size:120%; text-align: center; background-color:silver"|Reviews | ||
|-style="background-color:#E6E6E6" | |-style="background-color:#E6E6E6" | ||
|Release | |Release | ||
| Line 1,306: | Line 1,399: | ||
|Comment | |Comment | ||
|- | |- | ||
|Game Boy Advance | |[[Game Boy Advance]] | ||
|Jeremy Parish, [https://web.archive.org/web/20031229045201/http://www.1up.com/article2/0,4364,1386143,00.asp 1UP] | |Jeremy Parish, [https://web.archive.org/web/20031229045201/http://www.1up.com/article2/0,4364,1386143,00.asp 1UP] | ||
|8.5/10 | |8.5/10 | ||
| Line 1,314: | Line 1,407: | ||
|Tom Bramwell, [https://www.eurogamer.net/articles/r_marioandluigi_gba Eurogamer] | |Tom Bramwell, [https://www.eurogamer.net/articles/r_marioandluigi_gba Eurogamer] | ||
|9/10 | |9/10 | ||
|align="left"|"'' Fans of strictly traditional RPGs, where the most energetic or reaction-based aspect of the whole enterprise is ripping the cellophane off and vigorously digesting the manual, probably won't find what they're looking for here. For everyone else though, it gets three whole OOTBs - it's One Of The Best GBA games of the year, Nintendo games on the GBA, and RPGs in existence. Simple, fun and rewarding, this is for everyone who ever ogled but never played the original Mario RPG, and everyone else besides.''" | |align="left"|"''Fans of strictly traditional RPGs, where the most energetic or reaction-based aspect of the whole enterprise is ripping the cellophane off and vigorously digesting the manual, probably won't find what they're looking for here. For everyone else though, it gets three whole OOTBs - it's One Of The Best GBA games of the year, Nintendo games on the GBA, and RPGs in existence. Simple, fun and rewarding, this is for everyone who ever ogled but never played the original Mario RPG, and everyone else besides.''" | ||
|- | |- | ||
|Game Boy Advance | |Game Boy Advance | ||
|Ricardo Torres, [https://web.archive.org/web/20060624081534/http://www.gamespot.com/gba/rpg/marioandluigi/review.html GameSpot] | |Ricardo Torres, [https://web.archive.org/web/20060624081534/http://www.gamespot.com/gba/rpg/marioandluigi/review.html GameSpot] | ||
|9.2/10 | |9.2/10 | ||
|align="left"|"''In the end, Mario and Luigi: Superstar Saga is an impressive new entry in the Mario franchise that is not to be missed. Strong visuals, a goofy story, rich gameplay, and a lengthy quest all combine to make one of the best experiences on the Game Boy Advance this year. It's also one that has some merits when played on the GameCube as well, thanks to the game's support of rumble when used with the Game Boy Player. The only beef to be had is with the lack of any kind of multiplayer support, but that's a minor point. As the first entry in what may well be a Game Boy Advance series, Mario and Luigi delivers in every way.''" | |align="left"|"''In the end, Mario and Luigi: Superstar Saga is an impressive new entry in the Mario franchise that is not to be missed. Strong visuals, a goofy story, rich gameplay, and a lengthy quest all combine to make one of the best experiences on the Game Boy Advance this year. It's also one that has some merits when played on the [[Nintendo GameCube|GameCube]] as well, thanks to the game's support of rumble when used with the Game Boy Player. The only beef to be had is with the lack of any kind of multiplayer support, but that's a minor point. As the first entry in what may well be a Game Boy Advance series, Mario and Luigi delivers in every way.''" | ||
|- | |- | ||
!colspan="4" style="background-color:silver; font-size:120%; text-align: center;"|Aggregators | !colspan="4"style="background-color:silver; font-size:120%; text-align: center;"|Aggregators | ||
|-style="background-color:#E6E6E6" | |-style="background-color:#E6E6E6" | ||
|colspan=2|Compiler | |colspan=2|Compiler | ||
| Line 1,332: | Line 1,425: | ||
|colspan=2|[https://www.gamerankings.com/gba/914980-mario-and-luigi-superstar-saga/index.html 90.41%] | |colspan=2|[https://www.gamerankings.com/gba/914980-mario-and-luigi-superstar-saga/index.html 90.41%] | ||
|} | |} | ||
== | ==Promotion== | ||
{{ | [[File:M&LSS Joke Contest.png|thumb|An image promoting the contest]] | ||
The | For a month, a knock-knock joke contest was held on the game's website.<ref>{{cite|deadlink=y|archive=web.archive.org/web/20031204042721/http://marioandluigi.gameboy.com:80/contest/home.jsp|title=Mario and Luigi: Knock-Knock Joke Contest|accessdate=June 25, 2024|publisher=Nintendo of America|language=en-us}}</ref> Each week for four weeks, a submitted joke was chosen to advance to the Grand Prize round. The semifinalists received a [[Game Boy Advance#Game Boy Advance SP|Game Boy Advance SP]] and a copy of the game. In the Grand Prize round, the winning joke was chosen by the contest's celebrity judge, {{wp|Kathy Griffin}}. The grand prize of the contest consists of a [[Nintendo GameCube]], ''[[Wario World]]'', ''[[Mario Golf: Toadstool Tour]]'', ''{{iw|fzerowiki|F-Zero GX}}'', {{iw|bulbapedia|Pokémon Pinball: Ruby & Sapphire}}, ''[[Super Mario Advance 4: Super Mario Bros. 3]]'', ''[[Donkey Kong Country (Game Boy Advance)|Donkey Kong Country]]'', a [[Game Boy Player]], a [[Nintendo GameCube#Nintendo GameCube–Game Boy Advance Link Cable|Nintendo GameCube–Game Boy Advance Link Cable]], a Memory Card 251, a GameCube messenger bag, and "a year's worth of online comedy-writing classes at Writer's Village". The grand prize-winning knock-knock joke was the third week's winning joke and goes as follows: | ||
<blockquote>Knock, Knock.<br>Who's There?<br>Pencil.<br>Pencil who?<br>Your pencil fall down if you don't wear a belt.</blockquote> | |||
==Gallery== | ==Gallery== | ||
{{main-gallery}} | {{main-gallery}} | ||
<gallery> | <gallery> | ||
MLSS MarioBros.jpg|[[Mario]] and [[Luigi]] | MLSS MarioBros.jpg|[[Mario]] and [[Luigi]] | ||
| Line 1,347: | Line 1,439: | ||
Bowser MLSS.jpg|[[Bowser]] | Bowser MLSS.jpg|[[Bowser]] | ||
MLSS - Princess Peach Artwork.png|[[Princess Peach]] | MLSS - Princess Peach Artwork.png|[[Princess Peach]] | ||
MLSS Art - Popple.png|[[Popple]] | |||
</gallery> | </gallery> | ||
| Line 1,353: | Line 1,446: | ||
===Videos=== | ===Videos=== | ||
{{media table | {{media table | ||
| | |file1=MLSS-Intro.ogv | ||
|title1=Princess Peach's voice | |||
| | |||
|description1=Peach's voice being stolen at the outset of the game. | |description1=Peach's voice being stolen at the outset of the game. | ||
|length1=1:01 | |length1=1:01 | ||
|file2=MLSS-The Beanstar Story.ogv | |||
|title2=The Beanstar Story | |||
| | |||
| | |||
|description2=Queen Bean telling the Mario Bros. about the Beanstar. | |description2=Queen Bean telling the Mario Bros. about the Beanstar. | ||
|length2=0:56 | |length2=0:56 | ||
|file3=MLSS-Peachbot Plot.ogv | |||
|title3=Peach-bot Plot | |||
| | |||
| | |||
|description3=The Peach-bots being used to try and awaken the Beanstar. | |description3=The Peach-bots being used to try and awaken the Beanstar. | ||
|length3=0:56 | |length3=0:56 | ||
|file4=MLSS-The Secret Of Peachs Voice.ogv | |||
|title4=The Secret of Peach's Voice | |||
| | |description4=Toadsworth and Prince Peasley revealing what really happened at Princess Peach's Castle. | ||
| | |||
|description4=Toadsworth and Prince Peasley revealing what really happened at Peach's Castle. | |||
|length4=2:02 | |length4=2:02 | ||
|file5=MLSS-Just Steal The Real Deal.ogv | |||
|title5=Just Steal the Real Deal | |||
| | |||
| | |||
|description5=Bowletta kidnapping Princess Peach. | |description5=Bowletta kidnapping Princess Peach. | ||
|length5=1:01 | |length5=1:01 | ||
|file6=MLSS-Princess Deception.ogv | |||
|title6=Princess Deception | |||
| | |||
| | |||
|description6=Bowletta and Fawful getting tricked into abducting Luigi instead of Peach. | |description6=Bowletta and Fawful getting tricked into abducting Luigi instead of Peach. | ||
|length6=2:43 | |length6=2:43 | ||
}} | }} | ||
===Audio=== | ===Audio=== | ||
{{media table | {{media table | ||
| | |file1=M&LSS A New Adventure Begins.oga | ||
|title1=A New Adventure Begins | |||
|file2=M&LSS Beanish People.oga | |||
|title2=Beanish People | |||
|file3=M&LSS Let's Go!.oga | |||
|title3=Let's Go! | |||
| | |file4=M&LSS Jump! (Ground Theme).oga | ||
|title4=Jump! (Ground Theme) | |||
| | |||
| | |||
| | |||
| | |||
| | |||
| | |||
}} | }} | ||
== | ==References to other media== | ||
[[File:M&LSS Mario Bros.png|thumb|240px|Title screen of the ''Mario Bros.'' sub-game.]] | |||
*''[[Donkey Kong (game)|Donkey Kong]]'': When the [[Border Bro]]s. tell Luigi to jump and then Mario jumps again, they will say "Simmer down, Mario. Give the "Jumpman" routine a rest", Jumpman being one of Mario's development names. Also, at one point Mario rescues Luigi at Woohoo Hooniversity by traversing a stage full of rolling barrels as well as a Skeletal Pirate that resembles [[Donkey Kong]] in charge of [[Barrel (minigame)|Barrel]]. | |||
*''[[Donkey Kong 3]]'': The Belly Blech worm is based on the [[Creepy]] enemy from this game. | |||
*''[[Mario Bros. (game)|Mario Bros.]]'': In addition to the remake of this game being included, [[Fighter Fly|Fighter Flies]] return as enemies in the main game. [[Sidestepper]]s also make a cameo in the battle against [[Hermie III]]. | |||
*[[Nintendo Entertainment System]]: [[Hammerhead Bros.|Sledge]] says, "Now you're playin' with power!" after he and Mallet make the hammers, referencing the slogan of this system. | |||
*''[[Super Mario Bros.]]'': A cover of the [[Ground Theme (Super Mario Bros.)|Ground Theme]] from this game is often heard as tutorial music, and it also plays in Little Fungitown. Also, a type of block from ''Super Mario Bros.'' can be seen in Woohoo Hooniversity. There are secret caves which bear resemblance to the underground platforming stages of this game. Also, one of the platforming sections in [[Bowser's Castle#Mario & Luigi: Superstar Saga / Mario & Luigi: Superstar Saga + Bowser's Minions|Bowser's Castle]] is modelled after a typical [[castle]] level, complete with Mario using the [[axe]] on the bridge and dropping a Bowser cutout into lava. The music played in caverns, the [[Mysterious Mine Carts]] minigame, and Beanbean Castle Sewers is a cover of the underground theme from this game. Finally, the Border Jump minigame uses a background with the castle and flagpole from the game. In addition, [[Rookie]]'s movesets indirectly referenced the attacks Bowser used in later worlds. | |||
*''[[zeldawiki:The Legend of Zelda (Series)|The Legend of Zelda]]'': In [[Bink]]'s minigame, the [[zeldawiki:Stalfos|Stalfos]] sprite from this game appears on the right for a few seconds once the player gets 30 points. | |||
*''{{wp|Final Fantasy}}'' series: [[Psycho Kamek]]'s white and red-trimmed robe is the same often worn by White Mages in many of the ''Final Fantasy'' games. | |||
*''[[Dr. Mario (game)|Dr. Mario]]'': Blue, Red, and Yellow Viruses are seen in Woohoo Hooniversity, and can be defeated in a method similar to their appearance in ''Dr. Mario''. | |||
*''[[Super Mario World]]'': Bowletta uses the [[Koopa Clown Car]] in Little Fungitown. Also, a ? Block from ''Super Mario World'' can be seen in Woohoo Hooniversity, and the [[Koopalings]] are fought in the order in which they are fought in this game, including [[Wendy]]'s pre-fight challenge being similar to her boss fight from ''Super Mario World''. Likewise, both Wendy and [[Lemmy]]'s boss fights themselves have them using cloned doppelgangers, similar to their boss battles in ''Super Mario World'' where they used [[Decoy (obstacle)|decoys]]. A cover of the overworld theme from this game can also be heard during some of the minigames. The Japanese commercials for ''Mario & Luigi: Superstar Saga'' also have a rearrangement of this game's theme playing in the background. | |||
*''[[wikirby:Kirby (series)|Kirby]]'' series: A poster in the [[Yoshi Theater (Mario & Luigi: Superstar Saga)|Yoshi Theater]] references this series. | |||
*''[[Super Mario Adventures]]'': At some point in the game, Luigi dresses as Princess Peach, like in the comics. | |||
*''[[Super Mario Land 2: 6 Golden Coins]]'': The battle start sound is the same as the power-up sound effect from this game. | |||
*''[[Super Mario World 2: Yoshi's Island]]'': A cover of the "Powerful Infant" theme is played during the [[Star 'Stache Smash]] minigame in this game. | |||
*''[[Yoshi's Safari]]'': The [[Sniper Bill]]s use [[Super Scope]]s to attack Mario and Luigi. | |||
*''[[Super Mario RPG: Legend of the Seven Stars]]'': The [[Geno]] doll returns as a cameo in the Star 'Stache Smash minigame (but he does not return in the remake). Additionally, Mario humming the ''Super Mario Bros.'' theme in the shower is first seen in ''Super Mario RPG'', when he is showering in the [[Marrymore]] Suite. Also, "Mario is Everyone's Star", the music played at Mario and Luigi's house as well as the Warp Pipe zones is a cover of "Super Pipe House", the theme from Mario's Pad. | |||
*''[[Super Mario 64]]'': [[Inside the Castle Walls]] is arranged in the game's soundtrack, and a [[! Block]] from it can be seen in Woohoo Hooniversity. Several of Mario's voice clips are recycled. | |||
*''[[Yoshi's Story]]'': [[Boddle]] uses an attack similar to the [[Yoshi (species)|Yoshis]]' [[Tulip (Yoshi's Story)|egg launch]] against [[Tuki|his assistant]]. When Yoshis eat [[Bean Fruit]], they become incredibly happy, which is based on Yoshis eating [[fruit]] to become happy in this game. | |||
*''[[Mario Tennis (Nintendo 64)|Mario Tennis]]'': [[Larry]] uses a spiky tennis racquet before his fight that resembles Bowser's in this game. | |||
*''[[Paper Mario]]'': A type of block from this game is seen in Woohoo Hooniversity. Also, the [[Hammer]], [[Super Hammer]], and [[Ultra Hammer]] return. | |||
*''[[Super Mario Advance]]'': If [[Popple]] is defeated before [[Birdo]] in his final fight, Birdo says, "You may have defeated my darling, but this is as far as you go!", as a reference to her quote in ''Super Mario Advance'': "This is as far as you go". | |||
*''[[Luigi's Mansion]]'': [[Ghost (Luigi's Mansion series)|Ghosts]] from this game appear in Starbeans Cafe, as does E. Gadd. The [[Main Theme (Luigi's Mansion)|Main Theme]] can be heard when the ghosts arrive. The Game Boy Horror SP is also a reference to both the [[Game Boy Advance#Game Boy Advance SP|Game Boy Advance SP]] and standard [[Game Boy Horror]]. | |||
*''[[Super Mario Sunshine]]'': One of the Border Jump challenges is known as the "Super Border Jump Sunshine", a reference to this game's title. Additionally when the player first controls Mario, the Toad that first speaks with Mario says, "So off on an adventure yet again! ...I just hope your long vacation hasn't left you out of shape," which is in reference to the vacation Mario took in ''Super Mario Sunshine''. In [[Beanbean International Airport]], the infesting [[Piranha Plant]]s are removed by blasting them with water (and [[Thunderhand|electrocuting]] them), which allows Princess Peach's plane to land. This is similar to the beginning of ''Super Mario Sunshine'', where Mario and Peach land in the [[Delfino Airstrip]], and Mario fights a [[Proto Piranha|Piranha Plant creature]] by washing its [[goop]] away with [[F.L.U.D.D.|water]]. The [[Piranha Bean]] is designed after [[Petey Piranha]], who debuted here. | |||
*''[[starfywiki:The Legendary Starfy (series)|The Legendary Starfy]]'' series: A poster in the Yoshi Theater references this series. | |||
*''[[WarioWare, Inc.: Mega Microgame$!]]'': A poster in the Yoshi Theater references the Japanese box art for this game. | |||
*''[[Super Smash Bros. Melee]]'': [[Peach]]'s portrait in [[Mario Bros.' House|Mario's house]] is a pixel version of her official artwork in this game. | |||
*'' | ==References in later games== | ||
*''[[Paper Mario: The Thousand-Year Door]]'': [[Admiral Bobbery]]'s final request was to have [[Chuckola Cola (Mario & Luigi series)|Chuckola Cola]], an item found in this game. Also, after beating Chapter 7, Bowser has the option of telling Pennington that he is the Shadow Thief (a reference to Popple). | |||
*''[[Mario & Luigi: Partners in Time]]'': Prince Peasley appears on a poster about beans in the Castle's item shop, along with Chuckola Fruit. [[Fawful]] returns to run [[Fawful's Bean 'n' Badge]]. Bowser affectionately calls Baby Bowser a 'little [[Firebrand]]', Mario's skill from this game. When fighting the Hammer Bros in the Vim Factory, they use an attack that is identical to the Bros. move, "Knockback Bros". The ending theme of ''Mario & Luigi: Superstar Saga'' was reused as the ending theme for ''Mario & Luigi: Partners in Time''. | |||
*'' | *''[[Super Paper Mario]]'': One [[Sammer Guy]] is named "Mustard of Doom", which is a reference to Fawful's "mustard of your doom" line. Mustard of Doom also shouts, "MY SWORD HAS FURY!", which is a reference to Fawful's catchphrase, and even speaks with grammatically incorrect English, just as Fawful does. After the player beats him, he shouts "Be off, awful person!" which when said aloud sounds like "Be a Fawful person!". | ||
*''[[Super Smash Bros. Brawl]]'': One of the names that shows up when the player chooses the random name button is "FWFUL", which is a possible reference to Fawful. | |||
*''[[Mario & Luigi: Bowser's Inside Story]]'': Fawful returns as the main villain. Also, some of the posters around Bowser's Castle show Fawful's image from ''Mario & Luigi: Superstar Saga'' instead of his appearance in ''Mario & Luigi: Bowser's Inside Story''. Parts of Cackletta's theme can be heard in the music heard inside Princess Peach's Castle (after Fawful's takeover). | |||
*''[[Mario & Luigi: Dream Team]]'': Many [[Beanish]] characters return in this game, including Popple, who also returns as a boss. Also, Mario and Luigi have different special/Bros. attacks. Part of [[Driftwood Shore]]'s music is an arrangement of the music that plays in [[Gwarhar Lagoon]] and [[Oho Oasis]] in this game. | |||
[[ | *''[[Nintendo Badge Arcade]]'': The Pixel Collection badge set contains a badge depicting the ''Mario & Luigi: Superstar Saga'' Game Pak. | ||
*''[[Mario & Luigi: Paper Jam]]'': A cover of ''Mario & Luigi: Superstar Saga''{{'}}s battle theme plays when Mario and Luigi battle together, before [[Paper Mario (character)|Paper Mario]] joins the team. | |||
*''[[Super Smash Bros. Ultimate]]'': Prince Peasley appears in this game as a [[Spirit (Super Smash Bros. Ultimate)|spirit]]. [[Mom Piranha]] and [[Piranha Bean]] are mentioned in [[List of Palutena's Guidance conversations#Piranha Plant|Palutena's Guidance]] for [[Piranha Plant]]. | |||
*''[[Yoshi's Crafted World]]'': Certain level elements from this game are made from Starbeans Iced Coffee boxes. | |||
==Names in other languages== | ==Names in other languages== | ||
{{foreign names | {{foreign names | ||
|Jap= | |Jap=マリオ&ルイージRPG | ||
|JapR=Mario | |JapR=Mario ando Ruīji Āru Pī Jī | ||
|JapM=Mario & Luigi RPG | |JapM=Mario & Luigi RPG | ||
| | |ChiS=马力欧与路易吉RPG<ref>From the unreleased iQue prototype.</ref> | ||
| | |ChiSR=Mǎlì'ōu yǔ Lùyìjí RPG | ||
| | |ChiSM=Mario & Luigi RPG | ||
|ChiT=瑪利歐&路易吉RPG<ref>{{cite|url=www.nintendo.com.hk/switch/mario/history/index.html|title=瑪利歐歷史|超級瑪利歐兄弟 35週年|任天堂|publisher=Nintendo Taiwan|language=zh-hant|accessdate=June 25, 2024}}</ref> | |||
|ChiTR=Mǎlì'ōu & Lùyìjí RPG | |||
|ChiTM=Mario & Luigi RPG | |||
}} | }} | ||
==Trivia== | ==Trivia== | ||
*This game was featured in the Playback section of the 263rd issue of ''[[Nintendo Power]]''. | *This game was featured in the Playback section of the 263rd issue of ''[[Nintendo Power]]''. | ||
*This game was planned to be released in Mainland China by [[iQue]], but was left unreleased due to the huge scene of piracy in China at that time. The unreleased Chinese prototype received an ISBN, meaning it was approved for distribution despite the ban on video games from the Chinese government. | |||
*This game was planned to | *Coincidentally, the [[Super Mario RPG (Nintendo Switch)|remake]] of ''[[Super Mario RPG]]'' for the Nintendo Switch, supervised by ''Mario & Luigi: Superstar Saga'' director Yoshiko Maekawa and also composed by [[Yoko Shimomura]], was released on the same day as this game's 20th anniversary. | ||
*[ | |||
==References== | ==References== | ||
<references/> | <references/> | ||
==External links== | |||
{{NIWA|StarfyWiki=List of references to The Legendary Starfy series in non-Starfy games#Mario & Luigi: Superstar Saga|NWiki=1|StrategyWiki=1}} | |||
{{TCRF}} | |||
*[http://microsite.nintendo-europe.com/marioluigi/COMMON/flash_en.html Official website]{{dead link}} | |||
*[https://www.nintendo.co.jp/data/software/manual/manual_PAEJ_00.pdf Japanese manual] | |||
{{M&LSS}} | {{M&LSS}} | ||
{{ | {{Super Mario games}} | ||
{{GBA}} | {{GBA}} | ||
{{ | {{Virtual Console}} | ||
{{NSO}} | |||
[[de:Mario & Luigi: Superstar Saga]] | [[de:Mario & Luigi: Superstar Saga]] | ||
[[it:Mario & Luigi: Superstar Saga]] | [[it:Mario & Luigi: Superstar Saga]] | ||
[[Category:Mario & Luigi: Superstar Saga|*]] | [[Category:Mario & Luigi: Superstar Saga|*]] | ||
[[Category:Games]] | [[Category:Games]] | ||
[[Category:Game Boy Advance | [[Category:Game Boy Advance games]] | ||
[[Category: | [[Category:Role-playing games]] | ||
[[Category:2003 games]] | [[Category:2003 games]] | ||
[[Category:Player's Choice]] | [[Category:Player's Choice]] | ||
[[Category:Virtual Console | [[Category:Virtual Console games]] | ||
Latest revision as of 08:20, December 24, 2024
- This article is about the original game for the Game Boy Advance. For the remake of this game for the Nintendo 3DS, see Mario & Luigi: Superstar Saga + Bowser's Minions.
| Mario & Luigi: Superstar Saga | |||||||||||
|---|---|---|---|---|---|---|---|---|---|---|---|
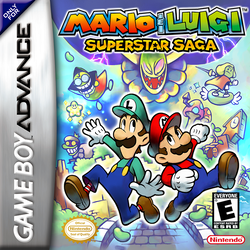 North American box art For alternate box art, see the game's gallery. | |||||||||||
| Developer | AlphaDream Vanpool (minigames) | ||||||||||
| Publisher | Nintendo | ||||||||||
| Platform(s) | Game Boy Advance, Virtual Console (Wii U), Game Boy Advance - Nintendo Switch Online | ||||||||||
| Release date | Game Boy Advance: Player's Choice: Virtual Console (Wii U): Game Boy Advance - Nintendo Switch Online: | ||||||||||
| Language(s) | English (United States) French (France) German Spanish (Spain) Italian Japanese | ||||||||||
| Genre | RPG, action-adventure | ||||||||||
| Rating(s) |
| ||||||||||
| Mode(s) | Single-player, multiplayer | ||||||||||
| Format | Wii U: Nintendo Switch: Game Boy Advance: | ||||||||||
| Input | Wii U: Nintendo Switch: Game Boy Advance:
| ||||||||||
| Serial code(s) | |||||||||||
Mario & Luigi: Superstar Saga is a turn-based action RPG for the Game Boy Advance, developed by AlphaDream and published by Nintendo. It was released in November of 2003 for the Game Boy Advance and later as a Virtual Console title for the Wii U in April of 2014 and as one of the launch titles for Game Boy Advance - Nintendo Switch Online in February of 2023. The plot revolves around Mario and Luigi traveling to and exploring the Beanbean Kingdom to recover Princess Peach's voice from an evil witch, Cackletta, and her pupil, Fawful.
In addition to being the first installment in the Mario & Luigi series, this game is also the third Super Mario RPG following Super Mario RPG: Legend of the Seven Stars and Paper Mario respectively. It would itself be succeeded by Mario & Luigi: Partners in Time for the Nintendo DS in 2005. Like Paper Mario, the game is a spiritual successor to Super Mario RPG. It also takes heavy inspiration from Tomato Adventure, AlphaDream's first role-playing game for Game Boy Advance systems, featuring very similar graphics, sound effects, and even allusions to certain characters. This game features rumble support if played on a Game Boy Player. The remake of the Mario Bros. arcade game featured in the Super Mario Advance series of games was also included with Mario & Luigi: Superstar Saga.
A remake of this game for the Nintendo 3DS, titled Mario & Luigi: Superstar Saga + Bowser's Minions, was released in October of 2017, featuring a new, exclusive sidequest mode coinciding with the main story. As such, it is the first installment in the Mario & Luigi series to receive a remake. The second would be Mario & Luigi: Bowser's Inside Story, which received a remake titled Mario & Luigi: Bowser's Inside Story + Bowser Jr.'s Journey a decade later.
Story[edit]
The Goodwill Ambassador from the Beanbean Kingdom and her assistant arrive at the Mushroom Kingdom to bring a gift from Queen Bean for Princess Peach. However, it turns out to be an act of deceit; the ambassador and her assistant are actually villains respectively named Cackletta and Fawful, who quickly steal Peach's voice and escape with it into the dark sky.
Meanwhile, Mario and Luigi are at their house when Toad runs by to alert Mario to the ordeal; Mario runs off to Princess Peach's Castle while inadvertently dragging Luigi behind him. Inside, the Bros. run into Bowser trying to kidnap Peach. After Mario defeats Bowser, a Toad then tells them that Peach's voice was replaced with explosives that drop from her speech balloon when she talks. Bowser, scared the princess might wreck his castle if kidnapped, reluctantly agrees to help Mario retrieve Peach's voice.
Mario and Bowser get ready to leave in the Koopa Cruiser along with the crew of Bowser Baddies. As they are about to leave, Luigi comes to say his final goodbye.[7] Bowser mistakenly thinks Luigi wants to join his Baddies, so he takes him along. Along the way, the group encounters Cackletta, who sends Fawful in to fight the Bros. After a brief battle, Fawful uses his headgear to destroy the cruiser, sending everyone onboard plummeting down to Stardust Fields.
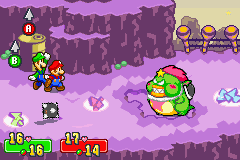
Mario and Luigi crash land in Beanbean Borderland. They soon meet the Border Bros., who let them pass after they play the Border Jump game. Mario and Luigi soon find Bowser stuck in a cannon; its operator, Tolstar, tells the Bros. to get 100 Beanbean coins in order to secure Bowser's release. While doing that, they learn the High Jump and Spin Jump from the Starshade Bros. After getting enough coins, Tolstar decides to attack the brothers, but is soon defeated. Soon after, one of the Starshade Bros. arrives and lights the fuse of the cannon Bowser is stuck in, shooting him across the kingdom.
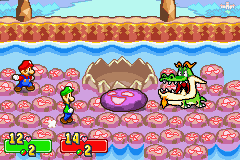
The brothers soon make it to Hoohoo Village, where some Beanish soldiers mistake them for foes. Tolstar tells the soldiers the brothers are not lying, and they are permitted entry to the town. They soon leave to find Fawful tormenting a soldier. He mocks the brothers by placing a rock statue in front of them, blocking their path to Beanbean Castle. They decide to visit the Hammerhead Bros. back at the village to obtain Hammers from them. However, the Hammerhead Bros. cannot make hammers because the material that they have is too brittle. They need a Hoohoo Stone, so the brothers climb up Hoohoo Mountain to retrieve one from the summit.
Midway, they confront a statue named Hoohooros whom challenges the Bros. to a battle. Once they overcome Hoohooros, it allows them to continue up the mountain. When the Bros. finally reach the summit, they find a Hoohoo Stone, but it falls off the mountain. This awakens Blablanadon, who is mad at what they did. After the Bros. explain the incident, Blablanadon apologizes and explains that he has been sitting on a strange egg for some time. Suddenly, the egg hatches, revealing Dragohoho; the creature knocks Blablanadon away and fights the brothers. They defeat the monster, and it transforms into Prince Peasley, the prince of the kingdom, who thanks the Bros. for freeing him and gives them a rose. Blablanadon flies the Bros. back to Hoohoo Village, where they meet the Hammerhead Bros. again. With the Hoohoo Stone that fell into their cabin, the Hammerhead Bros. are able to make them the hammers they require.
Using their hammers, they demolish Fawful's statue and travel down Hoohoo Mountain towards Beanbean Castle Town. Along the way, they find a cave with an old man and his Beanish dog, who asks them to ride the Mysterious Mine Carts. Afterwards, the Mario Bros. reach Beanbean Castle Town, but they find the town in ruins because of an attack from Cackletta and Fawful. The brothers quickly go to Beanbean Castle, where they meet up with two soldiers who refuse to let them in. Luigi shows them the rose that Peasley gave and the soldiers allow the brothers to enter. Inside, they meet Lady Lima, the kingdom's ambassador. They tell her what's going on, but she does not believe their story, and decides to test them by sending them down to the castle sewer to fix a leaking pipe problem.
Once it has been fixed, the brothers meet up with the real Lady Lima and some servants, where they learn that the Lady Lima they met earlier was actually Cackletta in disguise, and fixing the castle's plumbing disabled the security system which protects the Beanstar. The brothers catch up with her, but arrive too late as Cackletta takes the Beanstar away and sends a deranged muscular Queen Bean to attack them. After defeating her, Mario and Luigi are then sent by Lady Lima to get the Chuckola Reserve to allow Queen Bean to spit out the Belly Blech that caused her to become muscular.
Later, the Mario Bros. make it to Chateau de Chucklehuck to find the reserve. They end up in an unexpected fight with Popple, the shadow thief, and his partner, Rookie, who are both defeated. The brothers soon meet Cork and Cask, the owners of the brewery, who teach them Mini-Mario and Luigi Dunk. Mario and Luigi later retrieve three Chuckola Fruit to give to Chuckleroot. When they reach Mother Chuckola, they find the creator of Chuckola Cola, Bubbles, who is busy telling jokes to the Chuckola Reserve. The soda then transforms into the Chuckolator. After a battle with the Bros., it is defeated and reverts into normal soda, causing an enraged Bubbles to create a tremor that sends the brothers and the soda underground. Mario lands in the soda and Luigi heads back to Beanbean Castle by doing a barrel run.
Back at the castle, Luigi jumps on Mario to squirt out the Chuckola Reserve into Queen Bean, returning her to normal. Peasley then arrives to inform everyone of Cackletta's presence in Woohoo Hooniversity, prompting Queen Bean to send the Mario Bros. there to investigate. At the Hooniversity, they solve a series of puzzles to unlock the Sun Door and reach Cackletta and Fawful. The evil duo are about to awaken the Beanstar using Peach-bots that are installed with Peach's voice. When Cackletta activates them, however, they make a strange noise that drives the Beanstar crazy. The star causes a tremor, sending the robots and itself falling to the floor below. The Mario Bros. then appear, and Luigi bashes Fawful into the ground with his hammer, leaving Cackletta to fight them alone.
After the Bros. beat Cackletta, Fawful gets back up, and uses his headgear to suck up her essence, dissolving her body. As he is about to battle the brothers, Peasley arrives and throws him out of the building. The prince departs, leaving the brothers to go down to the basement to retrieve the Beanstar. There, they find Popple and Rookie with the Beanstar, and fight for it. As the Bros. finish dealing with the thieves, a Peach-bot falls down and makes the strange noise again, irritating the Beanstar. Mario, Luigi, Popple, and Rookie grab a hold of it as it flies out of the Hooniversity. They soon each let go and fall in turn; Rookie suddenly remembers that he is really Bowser before he is the last to fall, along with the Beanstar itself when it breaks into four pieces.
Mario and Luigi land at Oho Oasis, where they learn the Firebrand and Thunderhand moves in the Fire and Thunder temples. Meanwhile, Fawful finds the injured Bowser lying on the ground and implants Cackletta's soul inside, turning him into Bowletta. The Mario Bros. soon meet Peasley again, saying that Princess Peach is arriving at Beanbean International Airport. They arrive and find that Piranha Plants led by Mom Piranha are infesting the runway, and set out to take care of this problem, allowing the Toad Express to land safely.
Back at the castle, the Mario Brothers find out that Peach's voice had never been stolen. It was really Birdo disguised as the princess at the time who lost her voice, hence why the Beanstar reacted so adversely at Woohoo Hooniversity. Peach knew about this all along, as Peasley came and told her about Cackletta's plan beforehand, but she had been unable to explain things to the Mario Brothers due to Bowser's arrival. Later, Peach decides to visit Little Fungitown, with the Mario Bros. escorting her.
They arrive at the only known route to Little Fungitown, Teehee Valley. Before reaching the town, they are confronted by the rock creature, Trunkle, whom they overcome. At Little Fungitown, the Bros. decide to go to the arcade, where Mario plays Star 'Stache Smash and wins an "Invincishroom" - which is actually a misidentified Poison Mushroom. He eats it, but ends up in the hospital, where he has contracted Bean Fever. The only cure for this disease is Crabbie Grass from Guffawha Ruins. Luigi intends to travel to the area to find the grass, but loses his nerve when he finds out about a bone-crushing monster living there. To try and calm himself, he goes to Psycho Kamek (Dr. Toadley in the remake), who hypnotizes him into thinking that he is Mario. The newly-emboldened Luigi goes to Guffawha Ruins.
Soon after confronting the "monster", who is actually just a stone head wishing people would stop making rumors about him, Luigi finds some Crabbie Grass. He goes back to the Little Fungitown hospital, but is struck by lightning. He then spots Peach in the Koopa Clown Car. The fiend in the vehicle is Cackletta, who has possessed Bowser's body to become Bowletta. She makes off with Peach, and Luigi rushes into the hospital to revive Mario. Luigi tells Mario about what had just happened, and both of them quickly return to Beanbean Castle.
Back at the castle, Lady Lima comes with a message from Bowletta, who is requesting that they retrieve the four pieces of the broken Beanstar, and bring them to her in exchange for the princess. The Mario Bros. and Prince Peasley agree to do this task.
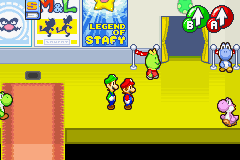
Mario and Luigi go out to get the first Beanstar piece, which is in the S.S. Chuckola back at Teehee Valley. After the ship is sent into Oho Ocean, the Mario Brothers follow the floating Beanstar to Gwarhar Lagoon. Here, they learn Dash and Tickle from the Jellyfish Sisters. They later discover that the Beanstar piece is being used as an ornament for Hermie III. The brothers soon receive the piece after a battle with Hermie.
The next piece is from the fashion stylist Harhall, who gives Mario and Luigi the piece after they color fabric with Designbombs. The third piece is back at Chucklehuck Woods, where they have to play a game in Winkle Colosseum and surpass the Winkles. They soon find Popple again, and defeat him to retrieve the third piece of the Beanstar. The last piece comes from Boddle after they get Neon Eggs for his Yoshi Theater sign.
They return to the castle with the star, where Lima has brought another message from Bowletta. She now wants them to bring the Beanstar to her at Joke's End. Prince Peasley gives them a Fake Beanstar to try to fool the villains, and the Bros. then surf to Joke's End.
There, they meet a fairy-like girl named Jojora. Eventually, the brothers reach Jojora's room at the top floor, where she is having a tea party. She requests that the brothers invite one of her friends over, who is a snow woman that attacks Mario and Luigi. They defeat her, and Jojora flees from the scene. Soon after, Mario and Luigi find Fawful, who is waiting for them to hand over the Beanstar. Luigi approaches him, and gives him the fake one, but Fawful is not fooled; he blasts Luigi and takes the real Beanstar. Mario comes up with a plan involving the extra dress Toadsworth gave to them before they went to Joke's End. Bowletta, who has the real Peach, soon spots Mario with another Peach. The other Peach says that the one the villains have is fake. Angered, Bowletta tosses what she believes to be the "fake" Peach overboard and takes the "real" one back to the repaired Koopa Crusier.
Back at the Koopa Cruiser, Bowletta and Fawful are celebrating their success, until Bowletta finds out that the princess is really Luigi in disguise. Fawful chases him, followed by Bowletta, until he manages to escape the cruiser with the Beanstar. Upset, Bowletta decides that she and Fawful will go to the Mushroom Kingdom for something.
Back at Teehee Valley, Luigi crash-lands into a sand pit and sinks in. Mario manages to find him underground, but the two end up fighting Popple again. Popple is defeated, along with his new partner, Birdo. Afterwards, the brothers head back to Beanbean Castle Town.
The brothers find that the town is under fire again. It appears that Bowletta is using Bowser's Castle to attack the town, in retaliation for the brothers getting the Beanstar back from her, and then having it returned to Beanbean Castle. At Beanbean Castle, Lima suggests that they should try and find something to help them fly to reach Bowser's Castle. The brothers head back to Hoohoo Village to ask for Blablanadon's help. He accepts, and takes them up to Bowser's Castle.
At the castle, Mario and Luigi meet the Koopalings, along with Fawful, who possesses some new gadgets. After trumping them and several other foes with the ranks of Bowletta's new army, the Bros. make their way to Bowletta herself; she reveals her plan to take over the Mushroom Kingdom after she is done gaining control of the Beanbean Kingdom. The brothers fight her and supposedly win, until a Time Bob-omb comes and suddenly takes them out. Bowletta reveals that she had been only faking her defeat, and eats them alive. In her body, the Mario Bros. fight Cackletta again, this time in her spirit form. Mario and Luigi soon manage to defeat Cackletta once and for all. She spits them out of Bowser's body and vanishes, reverting Bowser to normal. Peasley then comes to address the brothers, saying that he has planted a detonator in the castle, and it will explode shortly. The brothers escape the castle via Blablanadon in time, but Bowser crashes into Oho Ocean, only to be later rescued by Prince Peasley.
Later on, Peasley drops by with a huge present for the brothers. As the heroes return to the Mushroom Kingdom via Peach's airplane, Peasley's present turns out to be Bowser, who is dropped off at his other castle. The plane lands at Princess Peach's Castle, and fireworks erupt. It is then shown that the adventure was made into a movie being shown in the Yoshi Theater, where the screen zooms out to show the Yoshis sitting in the theater and applauding.
Main characters[edit]
Playable characters[edit]
- Mario - The well-known hero of the Mushroom Kingdom.
- Luigi - The not-as-famous brother of Mario.
- Toad - Sent to deliver word to Mario. He is only briefly playable at the very beginning of the game.
Supporting cast[edit]
- Princess Peach - The damsel-in-distress.
- Toadsworth - Peach's advisor and steward who accompanies her to the Beanbean Kingdom.
- Prince Peasley - A hero from the Beanbean Kingdom.
- Queen Bean - The queen of the Beanbean Kingdom.
- Lady Lima - Queen Bean's most trusted advisor.
Villains[edit]
- Cackletta/Bowletta - An evil witch, the main villain, and the final boss.
- Fawful - Cackletta's tech-savvy pupil, the secondary villain, and the penultimate boss.
- Popple - A self-proclaimed master thief, and a recurring boss.
- Bowser/Rookie - A minor villain who, for the first half of the game, suffers from amnesia and works for Popple. During the second half, Cackletta's spirit possesses his body.
Locations[edit]
Though much of the action of this game takes place in the Beanbean Kingdom, Mario and Luigi can still venture around several areas in the Mushroom Kingdom. All of the Beanbean Kingdom locations' names, except for Yoshi Theater and Little Fungitown, have different names pertaining to laughter. The following is a list of various areas the brothers journey to throughout the course of the game:
- Toadtown Square
- Koopa Cruiser
- Stardust Fields
- Hoohoo Village
- Hoohoo Mountain
- Beanbean Fields
- Beanbean Castle Town
- Beanbean Castle
- Chateau de Chucklehuck
- Chucklehuck Woods
- Woohoo Hooniversity
- Beanbean Airport
- Teehee Valley
- Little Fungitown
- Guffawha Ruins
- Oho Oasis
- Oho Ocean
- Seabed
- Gwarhar Lagoon
- Yoshi Theater
- Joke's End
- Bowser's Castle
The game also has several secret caves which can only be visited by either Mario or Luigi acting separately from one another. These areas start as 2-dimensional, side-scrolling levels in the traditional platforming style. A rare item can be obtained from a mole if the caves are completed.
Battle system[edit]
To start a battle, Mario or Luigi must touch an enemy. They can also perform a First Strike by jumping on or hammering the enemy in the over-world. Respectively, this will damage or stun the enemy before the battle starts. Since the game is a turn-based RPG, Mario, Luigi, and enemies take turns attacking each other. The player can use good timed attacks to deal more damage. If Mario and Luigi take damage from enemies in the overworld or their backs are touched, they trip and are unable to move until their turn.[8]
Stats[edit]
Each brother has their own Heart Points, Bros. Points, POW, DEF, SPEED, and STACHE points. When they finish a battle, they each gain Experience Points. With enough Experience Points, they can level-up and increase each respective statistic.[9]
- HP (abbreviation of Heart Points) is the amount of life that Mario and Luigi have. When an enemy hits either of them, they lose HP. When their HP reaches zero, they lose consciousness, but can be revived with a 1-Up Mushroom or 1-Up Super.
- BP (abbreviation of Bros. Points) indicates how many times Mario and Luigi can use a Bros. Attack. Each attack uses a certain amount of BP, draining the total. BP can be restored by using a Syrup Jar, Golden Mushroom, or a 1-Up Super.
- POW (abbreviation of Power) is how strong either Mario or Luigi is. The higher their POW stats are, the more damage they will perform.
- DEF (abbreviation of Defense) is how much damage either Mario or Luigi can block from an enemy hit. The higher their DEF stats are, the less damage they will take.
- SPEED is how fast Mario or Luigi are. If an enemy has a greater speed, they will attack first. If Mario and/or Luigi has a higher speed, they will attack first.
- STACHE is the most unique of Mario and Luigi's stats. The higher their STACHE stats are, the greater there is a chance of a Critical or Lucky hit, which doubles POW, and it also lowers the prices of items bought at shops and increases the worth of items sold (caps at 50%).
Moves[edit]
During battle, Mario and Luigi have four options when it is their turn: Use a Solo Move, use a Bros. Attack, use an item, or run.
Solo Moves[edit]
During a Solo Move, Mario or Luigi use one of their basic attacks solo. Both bros. have solo move techniques that they can use in any battle in the game. Note that all of these techniques listed below must be learned by progressing through the game except for Mario and Luigi's Jump.
Solo Techniques[edit]
- Mario's Solo Techniques
- Jump - Mario jumps to squash enemies.
- Hammer - Mario can use his hammer to hit enemies.
- Hand - Mario can use his Firebrand ability to burn enemies.
- Luigi's Solo Techniques
- Jump - Luigi can jump to crush enemies.
- Hammer - Luigi can use his hammer to hit enemies.
- Hand - Luigi can use his Thunderhand ability to electrocute enemies.
Bros. Attacks[edit]
Bros. Attacks are attacks that Mario and Luigi can use in battle by working together to deliver more damage. They all use a different combination of buttons to hit.
There are three different modes present for each Bros. Attack. Mode 1 consists of slow motion and visual button commands appearing when the command needs to be pressed, acting as a guideline for players. Mode 2 removes the slow motion, but retains the visual button commands. Mode 3 removes both the slow motion and visual button commands, and in turn, fewer Bros. Points are used for the Bros. Attack and depending on the move it will deal more damage.
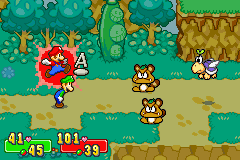
- Mario's Bros. Attacks
- Splash Bros.
- Chopper Bros.
- Fire Bros.
- Swing Bros. (secret)
- Luigi's Bros. Attacks
Items[edit]
When choosing the item icon, Mario or Luigi can use an item to recover HP or BP. Other items, such as Refreshing Herbs, can heal status effects, and red or green peppers will raise POW and gain weight or raise DEF and lose weight respectively. When one of the bros. passes out, the other bros. can use a 1-Up Mushroom or 1-Up Super to revive them. However, once an item is used, the bro's. turn is over.
Run[edit]
Mario and Luigi can both run from battle when they choose the run icon. When getting away, the player must hit either the ![]() or
or ![]() to make a Bro run. However, if they do not do this quickly, one of the bros. will drop a large amount of coins. When both bros. have left the screen, the player will end up back in the overworld and continue their adventure. This feature works better if one of the brothers has passed out. Instead of running, the remaining brother picks him up and carries him away, halving the number of coins lost.
to make a Bro run. However, if they do not do this quickly, one of the bros. will drop a large amount of coins. When both bros. have left the screen, the player will end up back in the overworld and continue their adventure. This feature works better if one of the brothers has passed out. Instead of running, the remaining brother picks him up and carries him away, halving the number of coins lost.
Avoiding attacks[edit]
Mario & Luigi: Superstar Saga allows the player to completely avoid enemy attacks. Mario and Luigi can either use their hammer or jump moves to avoid attacks. With their Jump move, Mario or Luigi can simply jump over the attacking enemy. When using the Hammer to avoid attacks, the player must hold Mario or Luigi's respective button (Mario is ![]() , Luigi is
, Luigi is ![]() ) and release just as the enemy or their weapon hits.
) and release just as the enemy or their weapon hits.
Mario and Luigi can also use these moves to counterattack. When they jump over an enemy, they may land on them, causing damage. Mario or Luigi can also hit enemies with their Hammer during their turn.
Out-of-battle techniques[edit]
Mario and Luigi can also use some techniques out of battle. Once again, all of the following techniques must be learned by progressing in the game, except for jumping.
Techniques when in the front[edit]
| Image | Action | Controls |
|---|---|---|
| Mario and Luigi can both jump to reach high places and hit blocks. | ||
| Mario and Luigi can both whack with their hammers. | ||
| Mario can burn using his Firebrand ability. | ||
| Luigi can electrocute using his Thunderhand ability. |
Techniques when in the back[edit]
| Image | Action | Controls |
|---|---|---|
| Mario and Luigi can both jump to reach high places and hit blocks. | ||
| Mario can do a "Spin Jump," by jumping on top of Luigi and spinning through the air. This is necessary for crossing large gaps. | ||
| Luigi can do a "High Jump," by jumping on top of Mario and bouncing up high. This is necessary for reaching very high places. | ||
| With Luigi Dunk, Mario can hit Luigi with his hammer, knocking him into the ground. Luigi can move under fences using this technique; and if he comes up under suspicious spots of ground, he may get a Chuckle Bean. | ||
| Luigi can hit Mario with his hammer, squishing him into Mini-Mario. Using this technique, Mario can move into small openings. He can also sense hidden Chuckle Beans and other treasures buried under the ground. | ||
| Mario can set Luigi on fire. Luigi will panic, and start running fast. This technique can use this to knock heavy objects, such as Ankoopas blocking paths. | ||
| Luigi can electrocute Mario. Mario and Luigi will be joined together, and they can walk side-to-side. This can be used to move the mysterious Boo Statues, which disappear when anyone looks directly at them. |
Enemies[edit]
- Main article: Mario & Luigi: Superstar Saga bestiary
Please note that some of these enemies are variations of a single enemy or were fought in a grouped-battle. For convenience, these variations are listed as separate enemies. Statistics listed are from the North American and European versions, with stats from the Japanese version in parentheses if they differ. Statistics from the remake may vary.
Normal enemies[edit]
Bosses[edit]
There are 28 bosses in the game. They are listed below in chronological order, although Hermie III, Popple (third encounter), and Piranha Bean can be fought in any order.
The stats of the derivatives of bosses are shown if they are not zero.
| Image | Name | HP | EXP | Coins dropped | Location |
|---|---|---|---|---|---|

|
Bowser1 | 6 | 0 | 0 | Princess Peach's Castle |
| Fawful (1) | 18 (first phase) 12 (second phase) |
0 | 2 (0) | Koopa Cruiser | |
| Tolstar | 52 | 30 | Same as the coins that the player paid before battle | Stardust Fields | |
| Hoohooros | Hoohooros - 45 Pillar - 2 |
30 | Hoohooros - 20 Pillar - 2 (0) |
Hoohoo Mountain | |
 |
Dragohoho | Dragohoho - 80 Hoho Stone - 4 |
50 | Dragohoho - 30 Hoho Stone - 2 (0) |
Hoohoo Mountain |

|
Queen Bean | Main - 120 (100) Arms - 22 (10) |
142 (150) | 10 (50) | Beanbean Castle |
| Popple & Rookie (1) | Popple - 100 Rookie - 120 |
Popple - 50 Rookie - 110 (120) |
Popple - 30 (40) Rookie - 34 (30) |
Chateau de Chucklehuck | |
| Wiggler | 34 | 120 | 0 (87) | Chucklehuck Woods | |

|
Chuckolator | 300 | 260 | 0 (100) | Chucklehuck Woods |
| Cackletta (1) | 300 | 3002 (320) | 100 | Woohoo Hooniversity | |
| Popple & Rookie (2) | Popple - 150 Rookie - 250 |
Popple - 120 (100) Rookie - 180 (250) |
Popple - 33 (50) Rookie - 33 (30) |
Woohoo Hooniversity | |
 
|
Mom Piranha | 220 | 400 (420) | 50 in red; 0 in blue (always 130) | Beanbean Airport |
 |
Trunkle | Body - 110 (180) Tree - 60 (140) |
Body - 440 (500) Tree - 150 (0) Small - 110 (0) |
Body - 88 (150) Tree - 12 (0) Small - 22 (0) |
Teehee Valley |
| Hermie III | Main - 400 (380) Claws - 70 (40) |
450 (600) | 80 (200) | Gwarhar Lagoon | |
| Popple | 520 (620) | 600 | 120 (200) | Chucklehuck Woods | |
| Piranha Bean3 | 180 (280) | 150 (250) | 1 (150) | Beanbean Outskirts | |

|
Jojora & one of Jojora's friends | Jojora - 50 Friend - 500 |
Jojora - 500 Friend - 800 |
Jojora - 200 (260) Friend - 180 (240) |
Joke's End |
| Popple & Birdo with Eggs | Popple - 500 (600) Birdo - 450 (500) Eggs - 20 |
Popple - 500 (300) Birdo - 900 |
Popple - 99 (200) Birdo - 99 (180) Eggs - 99 (0) |
Teehee Valley | |
| Iggy | 550 (650) | 800 (550) | 99 (200) | Bowser's Castle | |
| Morton | 500 (900) | 800 (600) | 99 (200) | Bowser's Castle | |
| Lemmy | Lemmy - 380 (600) Fake - 1 |
800 (650) | Lemmy - 99 (200) Fake - 1 (0) |
Bowser's Castle | |
| Ludwig | 550 (700) | 800 (700) | 99 (200) | Bowser's Castle | |
| Roy | 550 (920) | 800 (750) | 99 (200) | Bowser's Castle | |
| Wendy | Wendy - 350 (500) Fake - 1 |
800 | Wendy - 99 (200) Fake - 1 (0) |
Bowser's Castle | |
| Larry | 550 (600) | 800 (850) | 99 (200) | Bowser's Castle | |

|
Fawful (2) | Fawful - 400 (430) Dome - 0 |
1500 (1000) | Fawful - 365 (350) Dome - 0 |
Bowser's Castle |
  |
Bowletta with Flarets | Bowletta - 500 (700) Flaret - 10 |
Bowletta - 50004 (0) Flaret - 0 |
Bowletta - 20044 (0) Flaret - 0 |
Bowser's Castle |
|
Cackletta (2) | Head - 200 (180) Arms - 80 (90) Heart - 1200 (800) |
0 | Head - 84 (0) Arms - 0 Heart - 0 |
Bowser's Castle |
1 - Can only be fought by Mario
2 - In North American and European versions, it is multiplied by 3 becoming 900 in game due to a glitch.
3 - Can only be fought by Luigi
4 - In North American and European versions, this is only possible if the player manages to perform the 5000 damage glitch.
Items[edit]
The following are items that are used in only battle.
| Image | Name | Effect |
|---|---|---|
| Mushroom | Restores 25 HP to a single bro. | |
| Super Mushroom | Restores 50 HP to a single bro. | |
| Ultra Mushroom | Restores 120 HP to a single bro. | |
| Max Mushroom | Restores full HP to a single bro. | |
| Nut | Restores 20 HP to both Mario and Luigi. | |
| Super Nut | Restores 40 HP to both Mario and Luigi. | |
| Ultra Nut | Restores 100 HP to both Mario and Luigi. | |
| Max Nut | Restores full HP to both Mario and Luigi. | |
| Syrup | Restores 20 BP to a single bro. | |
| Super Syrup | Restores 40 BP to a single bro. | |
| Ultra Syrup | Restores 100 BP to a single bro. | |
| Max Syrup | Restores full BP to a single bro. | |
| Golden Mushroom | Restores full HP and BP to a single bro. | |
| Refreshing Herb | Cures negative status effects, such as Poison and Dizzy. | |
| 1-Up Mushroom | Revives the single bro with half HP. | |
| 1-Up Super | Revives the single bro with full HP and BP. | |
| Red Pepper | Increases a bro's POW by 50% and makes him heavier. | |
| Green Pepper | Increases a bro's DEF by 50% and makes him lighter. |
The following are key items that are not used in battle:
| Image | Name | In-game description | Found in |
|---|---|---|---|
| Azure Neon Egg | A bright azure egg laid by a Yoshi. | Yoshi Theater | |
| Beanbean Brooch | A pass to Chateau de Chucklehuck | Obtained from Lady Lima before Mario and Luigi head to Chateau de Chucklehuck | |
| Beanbean Map | A map of Beanbean Kingdom. | Obtained from a Border Bro after Mario and Luigi complete the first stage of the Border Jump minigame | |
| Beanlet | A small, cute, green pet. | Beanbean Castle Town | |
| Beanstar | A powerful, sleeping granter of wishes. | Woohoo Hooniversity; formed when all four Beanstar shards are found. | |
| Beanstar Piece | The top-left part of the Beanstar. | Gwharhar Lagoon after battling Hermie III, who uses it as an ornament for his shell. | |
| Beanstar Piece | The top-right part of the Beanstar. | Obtained from Harhall, after Mario and Luigi color fabric with Designbombs. | |
| Beanstar Piece | The bottom-left part of the Beanstar. | Winkle Colosseum after battling Popple for the third time. | |
| Beanstar Piece | The bottom-right part of the Beanstar. | Obtained from Boddle after Mario and Luigi give him seven neon Yoshi eggs for his Yoshi Theater sign. | |
| Beanstone | A Soybean civilization jewel. | Beanbean Castle Town | |
| Bean Fruit | A juicy bean grown in the ground. | Beanbean Outskirts | |
| Blue Neon Egg | A bright blue egg laid by a Yoshi. | Yoshi Theater | |
| Crabbie Grass | Bitter medicine for Bean Fever. | Guffawha Ruins | |
| Fake Beanstar | A cheap-looking, plastic fake. | Obtained from Prince Peasley before Mario and Luigi head to Joke's End. | |
| Green Goblet | A dazzlingly beautiful green glass. | Chateau de Chucklehuck | |
| Green Neon Egg | A bright green egg laid by a Yoshi. | Yoshi Theater | |
| Green Pearl Bean | A refreshingly green bean. | Gwarhar Lagoon | |
| Membership Card | An S.S. Chuckola membership card. | The S.S. Chuckola soda cellar after winning Bink's barrel minigame. | |
| Orange Neon Egg | A bright orange egg laid by a Yoshi. | Yoshi Theater | |
| Peach's Extra Dress | Princess Peach's lovely dress. | Obtained from Toadsworth before Mario and Luigi head to Joke's End. | |
| Peasley's Rose | A keepsake pass to Beanbean Castle. | Obtained from Prince Peasley after Mario and Luigi defeat Dragohoho. | |
| Purple Chuckola Fruit | A fruit with a refreshing flavor. | Chucklehuck Woods | |
| Purple Neon Egg | A bright purple egg laid by a Yoshi. | Yoshi Theater | |
| Red Chuckola Fruit | A fruit with a robust flavor. | Chucklehuck Woods | |
| Red Goblet | An eye-piercingly beautiful glass. | Chateau de Chucklehuck | |
| Red Neon Egg | A bright red egg laid by a Yoshi. | Yoshi Theater | |
| Red Pearl Bean | A bean that burns red with passion. | Gwarhar Lagoon | |
| Secret Scroll 1 | A scroll inscribed with jumping secrets. | Obtained from the first Thwomp in Beanbean Outskirts after winning his hammer minigame. | |
| Secret Scroll 2 | A scroll inscribed with Hammer secrets. | Obtained from the second Thwomp in Beanbean Outskirts after winning his hammer minigame. | |
| Spangle??? | Show me the stage, baby! | Gwarhar Lagoon | |
| White Chuckola Fruit | A fruit with a tangy flavor. | Chucklehuck Woods | |
| Winkle Card | The trophy of the Winkles. | Obtained after winning the minigame in Winkle Colosseum. | |
| Yellow Neon Egg | A bright yellow egg laid by a Yoshi. | Yoshi Theater |
Sidequests[edit]
This article is under construction. Therefore, please excuse its informal appearance while it is being worked on. We hope to have it completed as soon as possible.
There are various sidequests Mario and Luigi can complete outside the main story. These quests vary in results. Certain sidequests become unavailable at a certain point in the game. There are a few sidequests available in Toadtown Square before they leave the Mushroom Kingdom, after which they cannot be completed.
| Image | Description |
|---|---|
|
Near the start of the game, while Mario is exploring Toadtown Square, there is a Mushroom atop a hedge next to a Toad in the southeast corner of the plaza. If Mario jumps onto the hedge and collects the Mushroom, the Toad asks for it. If Mario refuses to give it back, the Toad starts to panic. Mario can talk to the Toad again and again and refuse to give it back over and over. If Mario decides to return the Mushroom, the Toad decides to let him keep it and gives him a Super Mushroom as a going-away gift before wishing him luck in the Beanbean Kingdom. |
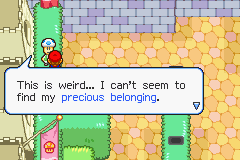
|
Atop the long hedge in the west side of the plaza, in the northwest corner, there is a blue Toad who claims to have lost an important belonging. He then asks Mario to help him look for it. If Mario agrees, the Toad informs him he dropped it somewhere along the hedge and to talk to the Toad near the fountain for advice on action icons. Mario then simply needs to walk south to the end of the hedge where the action icon changes. Mario then needs to press |
- Before going to the Koopa Cruiser, a lost minion asks Mario and Luigi for directions to the ship. If given correct directions, he rewards Mario and Luigi with a 1-Up Mushroom when found later on the ship.
- Hundreds of beans are hidden throughout the overworld that Mario and Luigi can find and spend at Starbeans Cafe in the castle town. There are four different kinds of beans: Woo beans (
 ), Hoo beans (
 ), Chuckle beans (
 ), and Hee beans (
 ). Depending on which kinds of beans Mario and Luigi spend, different blends will be produced. When Mario and Luigi produce a blend, Professor E. Gadd will give them a prize. When the Bros. drink the blend, they will also gain a stat boost. The possible blends, beans required, stat boosts, and prizes are listed below.
| Name | Image | Beans required | Stat Boost |
|---|---|---|---|
| Woohoo Blend | 25 Woo Beans | +4 Hit Points | |
| Hoohoo Blend | 25 Hoo Beans | +4 Brother Points | |
| Chuckle Blend | 25 Chuckle Beans | +4 Speed | |
| Teehee Blend | 25 Hee Beans | +4 Stache Points | |
| Hoolumbian | 15 Woo Beans + 10 Hoo Beans | +4 Power | |
| Chuckoccino | 15 Woo Beans + 10 Chuckle Beans | +4 Defense | |
| Teeheespresso | 15 Woo Beans + 10 Hee Beans | +6 of a random stat |
| Blends processed | Prize |
|---|---|
| 1 | Greed Wallet |
| 2 | Bonus Ring |
| 3 | Excite Spring |
| 4 | Great Force |
| 5 | Power Grip |
| 6 | Cobalt Necktie |
| 7 | Game Boy Horror SP |
- Some caves near Beanbean Castle Town are underground courses that resemble those found in Super Mario Bros. There are three such caverns; two of them are north of Beanbean Castle, while the third is found to the west of Beanbean Castle. At the end of each course is a mole who gives him a rare item such as a High-End Badge or the Iron Pants.
- A citizen on the east side of Beanbean Castle Town is searching for five Beanlets; when spoken to, he will ask Mario and Luigi to find them for him. If they find the Beanlets and give them back to their proprietor, he gives them a Golden Mushroom.
- In Beanbean Castle Town's west side, there is an old Beanish scholar who asks Mario and Luigi to find ten jewels called "Beanstones", five of which are on each side of town. To find these, Luigi must hit Mario with the hammer to shrink him and walk around town. If Mini-Mario is standing over a beanstone, a small "!" symbol appears over his head. When Mario gets directly to the area bearing a beanstone, a larger "!" will appear. Luigi must then dig in this spot to retrieve it. If all ten are found, the old citizen gives them a rare item, the Bros. Rock.
- There are Ankoopas in some caves; Mario can use his Firebrand power to knock them over, allowing Mario and Luigi to pass and reach moles that give them a special item, such as a Golden Mushroom.
- There is a cave where Mario and Luigi's hammers can be improved by the Hammerhead Bros. In this cave, there are also Thwomps who host a guessing game. Mario and Luigi have to pay 200 coins (500 for the second Thwomp game) and use their upgraded hammers to smash one out of three boulders. If they are lucky, they can find the scrolls wielding hidden Bros. Attacks.
- There is an island called "Surfing Game Island" where Mario and Luigi can get free beans by completing a minigame, in which they are given a set time to break as many balloons via surfing as possible. The faster they complete the course, the more (or different) beans they will receive. To find it, enter the green pipe leading to Gwarhar Lagoon, break the black brick, and turn Luigi into a surfing board. Enter the ocean above and move 3 areas right, and two up.
- After the Bros. receive Ultra Hammers, they can go to an area of Gwarhar Lagoon blocked by rocks that were previously indestructible. They will find Spangle there. Giving Hermie Spangle will make him happy, and he will give them the Soulful Bros. badge.
- After the Bros. receive the Bean Star Piece from Harhall, Harhall opens his store and the Bros. can work for him to create all of the outfits. Mario and Luigi are able to create a possible maximum of 28 designs: 7 different shirt colors and 4 patterns for each one. When a new outfit is created, Harhall will give Mario and Luigi a Woo bean. When Mario and Luigi complete all 28 different designs, they will earn Harhall's Pants.
Green Warp Pipes[edit]
There are nine green Warp Pipes in the game. These pipes help Mario and Luigi travel faster around the Beanbean Kingdom. The pipes are at Stardust Fields, Beanbean Castle Town, Beanbean Outskirts (north, south and east), Chucklehuck Woods, Gwarhar Lagoon, Joke's End, and Little Fungitown.
Beanhole locations[edit]
- Main article: List of beanholes in Mario & Luigi: Superstar Saga
In the game, Mario and Luigi can collect Chuckle Beans by coming across beanholes -- Xs or other distinguishing features on the ground -- all throughout the Beanbean Kingdom. There are 197 Chuckle Beans from Beanholes. Beans can only be collected out of the ground after the player learns the Luigi Dunk move at Chateau de Chucklehuck. Chuckleroot's granddaughter also explains how to drill into the ground and pick up beans.
Hidden ? Block locations[edit]
- Main article: List of hidden blocks in Mario & Luigi: Superstar Saga
In the game, Mario and Luigi can also discover hidden ? Blocks containing elusive Hoo Beans throughout the Beanbean Kingdom. By jumping around at suspicious platforms or patterns, or in seemingly "empty" dead-ends, the Mario Bros. can uncover invisible blocks containing single Hoo Beans. There are 42 hidden blocks in all.
Mole locations[edit]
- Main article: Mole (presenter)
In the game, Mario and Luigi can find moles throughout the Beanbean Kingdom that will reward them with items, clothing, or badges when found.
Profiles[edit]
- Wii U eShop description
An adventure so big, you'll need both Bros.!
Prepare for an epic journey beyond the borders of the Mushroom Kingdom as Mario™ and Luigi™ team up for a hilarious, action-filled adventure!
During a normal day of royal duties, Princess Peach meets with the ambassador of the neighboring Beanbean Kingdom. However, an act of amnesty turns into an act of theft! The evil Cackletta and her awful assistant, Fawful, disguised themselves for the chance to steal Princess Peach's voice. Before the Mushroom Kingdom can fall under Princess Peach's despair, Mario and Luigi will need to work together as they cross the border to the lands of Beanbean Kingdom. Take a break from the adventure and play a quick game in Mario Bros. mode, featuring an enhanced version of the original NES game. With all this awesome action, you'll have hours of fun!
Quotes[edit]
- Main article: List of Mario & Luigi: Superstar Saga quotes
Some notable quotes in the game include:
- "We'll take my Koopa Cruiser and reach the Beanbean Kingdom in no time! Mario! We leave immediately!!" - Bowser
- "Who would have thought you'd catch up to the Great Cackletta in even a hundred million years?" - Cackletta
- "I am the great Cackletta's most best pupil, who is named Fawful! I am here, laughing at you! If you are giving us the chase, just to get your silly princess's voice, then you are idiots of foolishness! Princess Peach's sweet voice will soon be the bread that makes the sandwich of Cackletta's desires! And this battle shall be the delicious mustard on that bread! The mustard of your doom!" - Fawful
- "C-Could you be the Mario bros. from the Mushroom Kingdom? What are the Mario bros. doing in a place like this?" - Lady Lima
- "My new country has no need for old superstars! It will do just fine with only one: the Great Bowletta!!!" - Bowletta
Regional differences[edit]
The mushroom emblem seen on and in Princess Peach's Castle is modified in the Japanese version to better resemble a Golden Dash Mushroom.
In the Japanese version, when Toad has entered Mario and Luigi's house, a directional pad appears on-screen to the bottom-left.
The portrait of Princess Peach in Mario and Luigi's house has been touched up in the Japanese version.
In the Western version, Mario and Luigi both start with 10 BP. In the Japanese version, Mario and Luigi respectively start out with 14 and 16 BP.
In the Japanese version, whenever Mario or Luigi level up, a ![]() in Lakitu's speech bubble was added to indicate that up or down is used to select a stat. If one is selected, a
in Lakitu's speech bubble was added to indicate that up or down is used to select a stat. If one is selected, a ![]() appears in the speech bubble, indicating that said button cancels the selection.
appears in the speech bubble, indicating that said button cancels the selection.
In the Western version, Hammerhead Bros.' tutorial shows Beanbean Outskirts setting, but Hoohoo Mountain in the Japanese version. The button sprites in the dialogue box are also different.
In the Western version, arrow signs are smaller to accommodate for more directions. In the Japanese version, the sign found directly north of Beanbean Castle Town does not give directions for Beanbean Castle Town, and it only has one arrow for Hoohoo Mountain.
In the Japanese version, there are three Heart Blocks, which are found in Beanbean Castle Sewers, Oho Oasis, and Teehee Valley respectively.
Mario and Luigi's heads in Star 'Stache Smash are different for the Western and Japanese releases.
In the Starbeans Cafe menu, there is a red E. Gadd icon next to each drink that Mario and Luigi have already made.
Other differences[edit]
- Trunkle has a different battle strategy between the Western and Japanese releases.
- Bubbles's jokes are different depending on the game's language. This is because many of the jokes are based around the use of puns.
Pre-release and unused content[edit]
Many characters from other Nintendo franchises were apparently going to appear in Starbeans Cafe, such as Fox McCloud, Link, and Olimar. These characters were replaced by E. Gadd in the final game; the dialogue of the characters can still be seen in the game's code.
A mysterious, cloaked Beanish character was also left unused. Its purpose in the game is unknown.
Glitches[edit]
- Main article: List of Mario & Luigi: Superstar Saga glitches
Most of the glitches found in the game are graphical related, such as misplaced Bob-omb sprites and incorrect action icons being shown when facing Bowletta. A notable graphical glitch is seen in Little Fungitown, where Mario and Luigi are able to stand on thin air. Some other glitches cause the game to play incorrect music or sound effects. For example, in the northeast of the Teehee Valley entrance, instead of Luigi making his normal sound effect when he empties himself of water, the sound of an Oho Jee speaking will play instead. There is also a glitch to go out of bounds in Oho Ocean that can be done by hammering Mario or Luigi and playing the surfing minigame, then at the start of the minigame going back to the island.
Staff[edit]
- Main article: List of Mario & Luigi: Superstar Saga staff
The Japanese video game development studio AlphaDream developed Mario & Luigi: Superstar Saga. Both of Super Mario RPG co-directors were involved with the game, as they left Square alongside various other former employees to join AlphaDream, Yoshihiko Maekawa was the game's director while Chihiro Fujioka is listed under Special Thanks. Satoru Iwata was the executive producer, while Takashi Tezuka was the production supervisor. The music heard in the game was produced by Yoko Shimomura, like in Super Mario RPG.
Reception[edit]
| Reviews | |||
|---|---|---|---|
| Release | Reviewer, Publication | Score | Comment |
| Game Boy Advance | Jeremy Parish, 1UP | 8.5/10 | "Gamers seeking a hardcore RPG experience would admittedly be better off with something like Golden Sun or Fire Emblem. But if you're after some lighthearted, lightweight gaming, or if you're simply a Mario fan, you'll have a hard time finding a better buy than Mario & Luigi. It's not the most inventive game you'll play this year, but it just might be the most fun." |
| Game Boy Advance | Tom Bramwell, Eurogamer | 9/10 | "Fans of strictly traditional RPGs, where the most energetic or reaction-based aspect of the whole enterprise is ripping the cellophane off and vigorously digesting the manual, probably won't find what they're looking for here. For everyone else though, it gets three whole OOTBs - it's One Of The Best GBA games of the year, Nintendo games on the GBA, and RPGs in existence. Simple, fun and rewarding, this is for everyone who ever ogled but never played the original Mario RPG, and everyone else besides." |
| Game Boy Advance | Ricardo Torres, GameSpot | 9.2/10 | "In the end, Mario and Luigi: Superstar Saga is an impressive new entry in the Mario franchise that is not to be missed. Strong visuals, a goofy story, rich gameplay, and a lengthy quest all combine to make one of the best experiences on the Game Boy Advance this year. It's also one that has some merits when played on the GameCube as well, thanks to the game's support of rumble when used with the Game Boy Player. The only beef to be had is with the lack of any kind of multiplayer support, but that's a minor point. As the first entry in what may well be a Game Boy Advance series, Mario and Luigi delivers in every way." |
| Aggregators | |||
| Compiler | Platform / Score | ||
| Metacritic | 90 | ||
| GameRankings | 90.41% | ||
Promotion[edit]
For a month, a knock-knock joke contest was held on the game's website.[10] Each week for four weeks, a submitted joke was chosen to advance to the Grand Prize round. The semifinalists received a Game Boy Advance SP and a copy of the game. In the Grand Prize round, the winning joke was chosen by the contest's celebrity judge, Kathy Griffin. The grand prize of the contest consists of a Nintendo GameCube, Wario World, Mario Golf: Toadstool Tour, F-Zero GX, Pokémon Pinball: Ruby & Sapphire, Super Mario Advance 4: Super Mario Bros. 3, Donkey Kong Country, a Game Boy Player, a Nintendo GameCube–Game Boy Advance Link Cable, a Memory Card 251, a GameCube messenger bag, and "a year's worth of online comedy-writing classes at Writer's Village". The grand prize-winning knock-knock joke was the third week's winning joke and goes as follows:
Knock, Knock.
Who's There?
Pencil.
Pencil who?
Your pencil fall down if you don't wear a belt.
Gallery[edit]
- For this subject's image gallery, see Gallery:Mario & Luigi: Superstar Saga.
Media[edit]
- For a complete list of media for this subject, see List of Mario & Luigi: Superstar Saga media.
Videos[edit]
| File info 1:01 |
| File info 0:56 |
| File info 0:56 |
| File info 2:02 |
| File info 1:01 |
| File info 2:43 |
Audio[edit]
| File info |
| File info |
| File info |
| File info |
References to other media[edit]
- Donkey Kong: When the Border Bros. tell Luigi to jump and then Mario jumps again, they will say "Simmer down, Mario. Give the "Jumpman" routine a rest", Jumpman being one of Mario's development names. Also, at one point Mario rescues Luigi at Woohoo Hooniversity by traversing a stage full of rolling barrels as well as a Skeletal Pirate that resembles Donkey Kong in charge of Barrel.
- Donkey Kong 3: The Belly Blech worm is based on the Creepy enemy from this game.
- Mario Bros.: In addition to the remake of this game being included, Fighter Flies return as enemies in the main game. Sidesteppers also make a cameo in the battle against Hermie III.
- Nintendo Entertainment System: Sledge says, "Now you're playin' with power!" after he and Mallet make the hammers, referencing the slogan of this system.
- Super Mario Bros.: A cover of the Ground Theme from this game is often heard as tutorial music, and it also plays in Little Fungitown. Also, a type of block from Super Mario Bros. can be seen in Woohoo Hooniversity. There are secret caves which bear resemblance to the underground platforming stages of this game. Also, one of the platforming sections in Bowser's Castle is modelled after a typical castle level, complete with Mario using the axe on the bridge and dropping a Bowser cutout into lava. The music played in caverns, the Mysterious Mine Carts minigame, and Beanbean Castle Sewers is a cover of the underground theme from this game. Finally, the Border Jump minigame uses a background with the castle and flagpole from the game. In addition, Rookie's movesets indirectly referenced the attacks Bowser used in later worlds.
- The Legend of Zelda: In Bink's minigame, the Stalfos sprite from this game appears on the right for a few seconds once the player gets 30 points.
- Final Fantasy series: Psycho Kamek's white and red-trimmed robe is the same often worn by White Mages in many of the Final Fantasy games.
- Dr. Mario: Blue, Red, and Yellow Viruses are seen in Woohoo Hooniversity, and can be defeated in a method similar to their appearance in Dr. Mario.
- Super Mario World: Bowletta uses the Koopa Clown Car in Little Fungitown. Also, a ? Block from Super Mario World can be seen in Woohoo Hooniversity, and the Koopalings are fought in the order in which they are fought in this game, including Wendy's pre-fight challenge being similar to her boss fight from Super Mario World. Likewise, both Wendy and Lemmy's boss fights themselves have them using cloned doppelgangers, similar to their boss battles in Super Mario World where they used decoys. A cover of the overworld theme from this game can also be heard during some of the minigames. The Japanese commercials for Mario & Luigi: Superstar Saga also have a rearrangement of this game's theme playing in the background.
- Kirby series: A poster in the Yoshi Theater references this series.
- Super Mario Adventures: At some point in the game, Luigi dresses as Princess Peach, like in the comics.
- Super Mario Land 2: 6 Golden Coins: The battle start sound is the same as the power-up sound effect from this game.
- Super Mario World 2: Yoshi's Island: A cover of the "Powerful Infant" theme is played during the Star 'Stache Smash minigame in this game.
- Yoshi's Safari: The Sniper Bills use Super Scopes to attack Mario and Luigi.
- Super Mario RPG: Legend of the Seven Stars: The Geno doll returns as a cameo in the Star 'Stache Smash minigame (but he does not return in the remake). Additionally, Mario humming the Super Mario Bros. theme in the shower is first seen in Super Mario RPG, when he is showering in the Marrymore Suite. Also, "Mario is Everyone's Star", the music played at Mario and Luigi's house as well as the Warp Pipe zones is a cover of "Super Pipe House", the theme from Mario's Pad.
- Super Mario 64: Inside the Castle Walls is arranged in the game's soundtrack, and a ! Block from it can be seen in Woohoo Hooniversity. Several of Mario's voice clips are recycled.
- Yoshi's Story: Boddle uses an attack similar to the Yoshis' egg launch against his assistant. When Yoshis eat Bean Fruit, they become incredibly happy, which is based on Yoshis eating fruit to become happy in this game.
- Mario Tennis: Larry uses a spiky tennis racquet before his fight that resembles Bowser's in this game.
- Paper Mario: A type of block from this game is seen in Woohoo Hooniversity. Also, the Hammer, Super Hammer, and Ultra Hammer return.
- Super Mario Advance: If Popple is defeated before Birdo in his final fight, Birdo says, "You may have defeated my darling, but this is as far as you go!", as a reference to her quote in Super Mario Advance: "This is as far as you go".
- Luigi's Mansion: Ghosts from this game appear in Starbeans Cafe, as does E. Gadd. The Main Theme can be heard when the ghosts arrive. The Game Boy Horror SP is also a reference to both the Game Boy Advance SP and standard Game Boy Horror.
- Super Mario Sunshine: One of the Border Jump challenges is known as the "Super Border Jump Sunshine", a reference to this game's title. Additionally when the player first controls Mario, the Toad that first speaks with Mario says, "So off on an adventure yet again! ...I just hope your long vacation hasn't left you out of shape," which is in reference to the vacation Mario took in Super Mario Sunshine. In Beanbean International Airport, the infesting Piranha Plants are removed by blasting them with water (and electrocuting them), which allows Princess Peach's plane to land. This is similar to the beginning of Super Mario Sunshine, where Mario and Peach land in the Delfino Airstrip, and Mario fights a Piranha Plant creature by washing its goop away with water. The Piranha Bean is designed after Petey Piranha, who debuted here.
- The Legendary Starfy series: A poster in the Yoshi Theater references this series.
- WarioWare, Inc.: Mega Microgame$!: A poster in the Yoshi Theater references the Japanese box art for this game.
- Super Smash Bros. Melee: Peach's portrait in Mario's house is a pixel version of her official artwork in this game.
References in later games[edit]
- Paper Mario: The Thousand-Year Door: Admiral Bobbery's final request was to have Chuckola Cola, an item found in this game. Also, after beating Chapter 7, Bowser has the option of telling Pennington that he is the Shadow Thief (a reference to Popple).
- Mario & Luigi: Partners in Time: Prince Peasley appears on a poster about beans in the Castle's item shop, along with Chuckola Fruit. Fawful returns to run Fawful's Bean 'n' Badge. Bowser affectionately calls Baby Bowser a 'little Firebrand', Mario's skill from this game. When fighting the Hammer Bros in the Vim Factory, they use an attack that is identical to the Bros. move, "Knockback Bros". The ending theme of Mario & Luigi: Superstar Saga was reused as the ending theme for Mario & Luigi: Partners in Time.
- Super Paper Mario: One Sammer Guy is named "Mustard of Doom", which is a reference to Fawful's "mustard of your doom" line. Mustard of Doom also shouts, "MY SWORD HAS FURY!", which is a reference to Fawful's catchphrase, and even speaks with grammatically incorrect English, just as Fawful does. After the player beats him, he shouts "Be off, awful person!" which when said aloud sounds like "Be a Fawful person!".
- Super Smash Bros. Brawl: One of the names that shows up when the player chooses the random name button is "FWFUL", which is a possible reference to Fawful.
- Mario & Luigi: Bowser's Inside Story: Fawful returns as the main villain. Also, some of the posters around Bowser's Castle show Fawful's image from Mario & Luigi: Superstar Saga instead of his appearance in Mario & Luigi: Bowser's Inside Story. Parts of Cackletta's theme can be heard in the music heard inside Princess Peach's Castle (after Fawful's takeover).
- Mario & Luigi: Dream Team: Many Beanish characters return in this game, including Popple, who also returns as a boss. Also, Mario and Luigi have different special/Bros. attacks. Part of Driftwood Shore's music is an arrangement of the music that plays in Gwarhar Lagoon and Oho Oasis in this game.
- Nintendo Badge Arcade: The Pixel Collection badge set contains a badge depicting the Mario & Luigi: Superstar Saga Game Pak.
- Mario & Luigi: Paper Jam: A cover of Mario & Luigi: Superstar Saga's battle theme plays when Mario and Luigi battle together, before Paper Mario joins the team.
- Super Smash Bros. Ultimate: Prince Peasley appears in this game as a spirit. Mom Piranha and Piranha Bean are mentioned in Palutena's Guidance for Piranha Plant.
- Yoshi's Crafted World: Certain level elements from this game are made from Starbeans Iced Coffee boxes.
Names in other languages[edit]
| Language | Name | Meaning | Notes |
|---|---|---|---|
| Japanese | マリオ&ルイージRPG[?] Mario ando Ruīji Āru Pī Jī |
Mario & Luigi RPG | |
| Chinese (simplified) | 马力欧与路易吉RPG[11] Mǎlì'ōu yǔ Lùyìjí RPG |
Mario & Luigi RPG | |
| Chinese (traditional) | 瑪利歐&路易吉RPG[12] Mǎlì'ōu & Lùyìjí RPG |
Mario & Luigi RPG |
Trivia[edit]
- This game was featured in the Playback section of the 263rd issue of Nintendo Power.
- This game was planned to be released in Mainland China by iQue, but was left unreleased due to the huge scene of piracy in China at that time. The unreleased Chinese prototype received an ISBN, meaning it was approved for distribution despite the ban on video games from the Chinese government.
- Coincidentally, the remake of Super Mario RPG for the Nintendo Switch, supervised by Mario & Luigi: Superstar Saga director Yoshiko Maekawa and also composed by Yoko Shimomura, was released on the same day as this game's 20th anniversary.
References[edit]
- ^ Mario & Luigi: Superstar Saga | Game Boy Advance | Games | Nintendo UK. Nintendo UK. Retrieved December 17, 2024.
- ^ Mario & Luigi: Superstar Saga | Game Boy Advance | Spiele | Nintendo DE. Nintendo DE (German). Retrieved December 17, 2024.
- ^ Mario & Luigi: Superstar Saga | Game Boy Advance | Juegos | Nintendo ES. Nintendo ES (Spanish). Retrieved December 17, 2024.
- ^ Mario & Luigi: Superstar Saga | Game Boy Advance | Jeux | Nintendo FR. Nintendo FR (French). Retrieved December 17, 2024.
- ^ Mario & Luigi: Superstar Saga. The Mushroom Kingdom (English). Retrieved June 25, 2024.[better source needed]
- ^ Craig Harris (March 9, 2006). GBA Gets Player's Choice. IGN (English). Retrieved November 10, 2024.
- ^ Alex95 (April 5, 2017). M&LSS Luigi Bye Bye - Japanese. YouTube (Japanese). Retrieved June 25, 2024.[better source needed]
- ^ Alex95. M&LSS Battle - Japanese. YouTube (Japanese). Retrieved June 25, 2024.[better source needed]
- ^ Alex95 (April 5, 2017). M&LSS Level Up - Japanese. YouTube (Japanese). Retrieved June 25, 2024.[better source needed]
- ^ Mario and Luigi: Knock-Knock Joke Contest. Nintendo of America (American English). Archived December 4, 2003, 04:27:21 UTC from the original via Wayback Machine. Retrieved June 25, 2024.
- ^ From the unreleased iQue prototype.
- ^ 瑪利歐歷史|超級瑪利歐兄弟 35週年|任天堂. Nintendo Taiwan (Traditional Chinese). Retrieved June 25, 2024.
