Quest: Difference between revisions
m (Text replacement - "(\| *)Jap([RMCN\d]* *=)" to "$1Jpn$2") |
|||
| (13 intermediate revisions by 4 users not shown) | |||
| Line 1: | Line 1: | ||
[[File:Quest icon MRSOH.png|thumb | [[File:Quest icon MRSOH.png|thumb|40px]] | ||
'''Quests''' are the tasks that the player completes in ''[[Mario + Rabbids Sparks of Hope]]'', whether they are for the main story plot or as sidequests. | '''Quests''' are the tasks that the player completes in ''[[Mario + Rabbids Sparks of Hope]]'', whether they are for the main story plot or as sidequests. | ||
When taking on Quests, an on-screen notification appears on the left side of the screen. The player can view the progress of accepted and current Quests by opening the Orientation Menu with {{button|switch|minus}}, then pressing {{button|switch|x}} to open the Quest Menu. The player will receive notifications each time progress has been made on a Quest until its completion. Once a Quest is completed, the player receives a notification, and any rewards are added directly to the player's inventory. | |||
[[File:Main Quest icon MRSOH.png|thumb | ==Main Quest== | ||
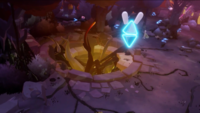
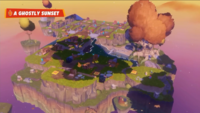
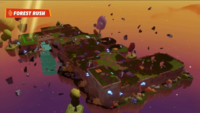
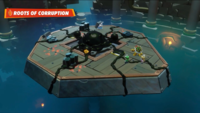
'''Main Quests''' are Quests regarding the story plot. On each of the five planets, the player must eliminate [[Darkmess]] at sources, usually in the form of [[Darkmess Tentacle]]s, to obtain a [[Purified Darkmess Energy Crystal]]. Collecting two of these crystals is required to allow progression to the next planet until the player reaches the final world, [[Cursa's stronghold]]. Clearing a Main Quest on each of the five planets rewards the player with [[Experience Point|XP]] and [[Star Bit]]s. | [[File:Main Quest icon MRSOH.png|thumb|40px]] | ||
'''Main Quests''' are Quests regarding the story plot. On each of the five planets, the player must eliminate [[Darkmess]] at sources, usually in the form of [[Darkmess Tentacle]]s, to obtain a [[Purified Darkmess Energy Crystal]]. Collecting two of these crystals is required to allow progression to the next planet until the player reaches the final world, [[Cursa's stronghold]]. Clearing a Main Quest on each of the five planets rewards the player with [[Experience Point|XP]] and [[Star Bit]]s. Main Quest battles can be fought again from the Quest Menu. | |||
There are twelve Main Quests, one for the prologue and final world, and two for each planet. | There are twelve Main Quests, one for the prologue and final world, and two for each planet. | ||
| Line 14: | Line 15: | ||
!Battles | !Battles | ||
!Darkmess Tentacle battle | !Darkmess Tentacle battle | ||
|- | |- style="background:#ffccc8" | ||
!style="background:#ff7b71"|[[File:M+RSOH-PrologueIcon.png|15px]] [[Peach's Castle]] | !style="background:#ff7b71"|[[File:M+RSOH-PrologueIcon.png|15px]] [[Peach's Castle]] | ||
| | ||[[File:MRSOH An Overall Nice Day.png|200px]]<br>[[An "Overall" Nice Day]] | ||
| | |||
{| width=100% style="text-align: center" | {| width=100% style="text-align: center" | ||
|- | |- | ||
| Line 25: | Line 26: | ||
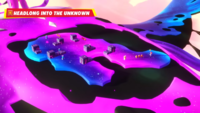
|[[File:Headlong into the Unknown.png|200px]]<br>[[Headlong into the Unknown]] | |[[File:Headlong into the Unknown.png|200px]]<br>[[Headlong into the Unknown]] | ||
|} | |} | ||
|style="background:# | |N/A | ||
|- style="background:#fff3c8" | |||
!rowspan=2 style="background:#fdeb74"|[[File:M+RSOH-BeaconBeachIcon.png|15px]] [[Beacon Beach]] | !rowspan=2 style="background:#fdeb74"|[[File:M+RSOH-BeaconBeachIcon.png|15px]] [[Beacon Beach]] | ||
|[[File:MRSOH In Deep Water.png|200px]]<br>[[In Deep Water]] | |||
| | |||
{| width=100% style="text-align: center" | {| width=100% style="text-align: center" | ||
|- | |- | ||
| Line 35: | Line 36: | ||
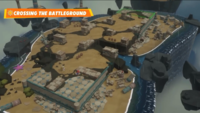
|[[File:MRSOH Crossing the Battleground.png|200px]]<br>[[Crossing the Battleground]] | |[[File:MRSOH Crossing the Battleground.png|200px]]<br>[[Crossing the Battleground]] | ||
|} | |} | ||
| | |||
{| width=100% style="text-align: center" | {| width=100% style="text-align: center" | ||
|- | |- | ||
| Line 41: | Line 42: | ||
|[[File:Driven to the Edge.png|200px]]<br>[[Driven to the Edge]] | |[[File:Driven to the Edge.png|200px]]<br>[[Driven to the Edge]] | ||
|} | |} | ||
|- | |- style="background:#fff3c8" | ||
|[[File:MRSOH Come Rain or Shine.png|200px]]<br>[[Come Rain or Shine]] | |||
|[[File:MRSOH Light Your Fire.png|200px]]<br>[[Light Your Fire]] | |||
|[[File:A Light in the Darkmess.png|200px]]<br>[[A Light in the Darkmess]] | |||
|- | |- style="background:#dcfbff" | ||
!rowspan=2 style="background:#a3efff"|[[File:M+RSOH-PristinePeaks-Icon.png|15px]] [[Pristine Peaks]] | !rowspan=2 style="background:#a3efff"|[[File:M+RSOH-PristinePeaks-Icon.png|15px]] [[Pristine Peaks]] | ||
|style="background:#dcfbff"|[[File:MRSOH Cold Mouth of the Mountain.png|200px]]<br>[[Cold Mouth of the Mountain]] | |style="background:#dcfbff"|[[File:MRSOH Cold Mouth of the Mountain.png|200px]]<br>[[Cold Mouth of the Mountain]] | ||
| | || | ||
{| width=100% style="text-align: center" | {| width=100% style="text-align: center" | ||
|- | |- | ||
|[[File:MRSOH Freeze in Your Tracks.png|200px]]<br>[[Freeze in Your Tracks]] | |[[File:MRSOH Freeze in Your Tracks.png|200px]]<br>[[Freeze in Your Tracks]] | ||
|[[File:MRSOH Wolf at the Door.png|200px]]<br>[[Wolf at the Door]] | |[[File:MRSOH Wolf at the Door.png|200px]]<br>[[Wolf at the Door]] | ||
|} | |} | ||
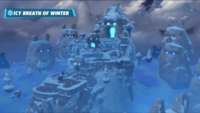
|[[File:Icy Breath of Winter.png|200px]]<br>[[Icy Breath of Winter]] | |||
|- | |- style="background:#dcfbff" | ||
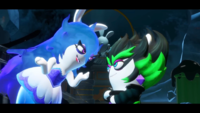
|[[File:Edge & Midnite.png|200px]]<br>[[The Winter Palace]] | |||
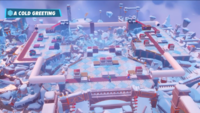
|[[File:MRSOH A Cold Greeting.png|200px]]<br>[[A Cold Greeting]] | |||
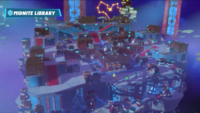
|[[File:Midnite Library first phase.png|200px]]<br>[[Midnite Library]] | |||
|- | |- style="background:#ffe0c9" | ||
!rowspan=2 style="background:#ffbc98"|[[File:M+RSOH-PalettePrime-Icon.png|15px]] [[Palette Prime]] | !rowspan=2 style="background:#ffbc98"|[[File:M+RSOH-PalettePrime-Icon.png|15px]] [[Palette Prime]] | ||
| | ||[[File:MRSOH Off-Color.png|200px]]<br>[[Off-Color]]{{footnote|main|1}} | ||
| | |||
{| width=100% style="text-align: center" | {| width=100% style="text-align: center" | ||
|- | |- | ||
|[[File:MRSOH A Ghostly Sunset.png|200px]]<br>[[A Ghostly Sunset]] | |[[File:MRSOH A Ghostly Sunset.png|200px]]<br>[[A Ghostly Sunset]] | ||
|[[File:MRSOH Forest Rush.png|200px]]<br>[[Forest Rush]] | |[[File:MRSOH Forest Rush.png|200px]]<br>[[Forest Rush]] | ||
|} | |} | ||
|style="background:#ffe0c9"|[[File:Roots of Corruption phase one.png|200px]]<br>[[Roots of Corruption]] | |style="background:#ffe0c9"|[[File:Roots of Corruption phase one.png|200px]]<br>[[Roots of Corruption]] | ||
|- | |- style="background:#ffe0c9" | ||
|[[File:Bedrock & Bowser.png|200px]]<br>[[The Fallen King]]{{footnote|main|1}} | |||
| | |||
{| width=100% style="text-align: center" | {| width=100% style="text-align: center" | ||
|- | |- | ||
| Line 78: | Line 79: | ||
|} | |} | ||
|style="background:#ffe0c9"|[[File:Blast through the Bedrock.png|200px]]<br>[[Blast Through the Bedrock]] | |style="background:#ffe0c9"|[[File:Blast through the Bedrock.png|200px]]<br>[[Blast Through the Bedrock]] | ||
|- | |- style="background:#fbebfc" | ||
!rowspan=2 style="background:#f8e0fd"|[[File:M+RSOH-TerraFlora-Icon.png|15px]] [[Terra Flora]] | !rowspan=2 style="background:#f8e0fd"|[[File:M+RSOH-TerraFlora-Icon.png|15px]] [[Terra Flora]] | ||
|[[File:Wiggler attacking the train.png|200px]]<br>[[Stay on Track]] | |||
| | |||
{| width=100% style="text-align: center" | {| width=100% style="text-align: center" | ||
|- | |- | ||
| Line 87: | Line 88: | ||
|[[File:MRSOH Ooze Inside the Everbloom.png|200px]]<br>[[Ooze Inside the Everbloom]] | |[[File:MRSOH Ooze Inside the Everbloom.png|200px]]<br>[[Ooze Inside the Everbloom]] | ||
|} | |} | ||
|[[File:One angry Wiggler.png|200px]]<br>[[One Angry Wiggler]] | |||
|- | |- style="background:#fbebfc" | ||
|[[File:MRSOH Uncork the Volcano.png|200px]]<br>[[Uncork the Volcano]] | |||
|[[File:MRSOH Metalheads.png|200px]]<br>[[Metalheads]] | |||
|[[File:Spout Forth.png|200px]]<br>[[Spout Forth]] | |||
|- | |- style="background:#ffe3ea" | ||
!rowspan=2 style="background:#fcbfcf"|[[File:M+RSOH-BarrendaleMesa-Icon.png|15px]] [[Barrendale Mesa]] | !rowspan=2 style="background:#fcbfcf"|[[File:M+RSOH-BarrendaleMesa-Icon.png|15px]] [[Barrendale Mesa]] | ||
|[[File:MRSOH It's an Ill Wind that Blows.png|200px]]<br>[[It's an Ill Wind that Blows]] | |||
| | |||
{| width=100% style="text-align: center" | {| width=100% style="text-align: center" | ||
|- | |- | ||
| Line 102: | Line 103: | ||
|[[File:MRSOH Magikoopa Mayhem.png|200px]]<br>[[Magikoopa Mayhem]] | |[[File:MRSOH Magikoopa Mayhem.png|200px]]<br>[[Magikoopa Mayhem]] | ||
|} | |} | ||
|[[File:A Foul Windmill Blows.png|200px]]<br>[[A Foul Windmill Blows]] | |||
|- | |- style="background:#ffe3ea" | ||
|[[File:MRSOH Momma's Payback.png|200px]]<br>[[Momma's Payback]] | |||
|N/A | |||
|[[File:The Hunter of the Mesa phase one.png|200px]]<br>[[The Hunter of the Mesa]] | |||
|- | |- style="background:#e9d7f4" | ||
!style="background:#cba8e2"|[[File:M+RSOH-CursasStronghold-Icon.png|15px]] [[Cursa's stronghold]] | !style="background:#cba8e2"|[[File:M+RSOH-CursasStronghold-Icon.png|15px]] [[Cursa's stronghold]] | ||
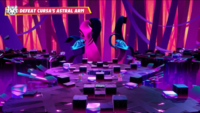
|[[File:M+RSOH Cursa's stronghold.png|200px]]<br>[[Cursa the Destroyer]] | |||
| | |||
{| width=100% style="text-align: center" | {| width=100% style="text-align: center" | ||
|- | |- | ||
| Line 116: | Line 117: | ||
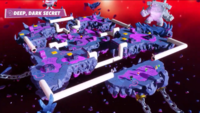
|[[File:MRSOH Deep, Dark Secret.png|200px]]<br>[[Deep, Dark Secret]] | |[[File:MRSOH Deep, Dark Secret.png|200px]]<br>[[Deep, Dark Secret]] | ||
|} | |} | ||
|[[File:MRSOH Cursa first phase.png|200px]]<br>[[Cursa!!!]] | |||
|} | |} | ||
{{footnote|note|1| | {{footnote|note|1|The Palette Prime Main Quests can be completed in any order}} | ||
==Spark Quest== | |||
[[File:Spark Quest icon MRSOH.png|thumb | [[File:Spark Quest icon MRSOH.png|thumb|40px]] | ||
Spark Quests are sidequests not part of the main plot that involves recruiting a [[Spark (Mario + Rabbids Sparks of Hope)|Spark]] by completing certain tasks and then engaging in a battle. They are found on each of the five planets. In addition to the Spark joining the Heroes, the player is also rewarded XP and Star Bits. | Spark Quests are sidequests not part of the main plot that involves recruiting a [[Spark (Mario + Rabbids Sparks of Hope)|Spark]] by completing certain tasks and then engaging in a battle. They are found on each of the five planets. In addition to the Spark joining the Heroes, the player is also rewarded XP and Star Bits. | ||
Some Spark Quests involve entering a [[Secret Zone]] on a planet and clearing the obstacles therein to reach the Spark at the end. Talking to them makes them join the player's party. These Spark Quests do not reward XP or Star Bits upon completion. Spark Quest battles can be fought again from the Quest Menu. | Some Spark Quests involve entering a [[Secret Zone]] on a planet and clearing the obstacles therein to reach the Spark at the end. Talking to them makes them join the player's party. These Spark Quests do not reward XP or Star Bits upon completion. | ||
Spark Quest battles can be fought again from the Quest Menu. | |||
{|class="wikitable" width=50% border=1 style="text-align:center;" | {|class="wikitable" width=50% border=1 style="text-align:center;" | ||
| Line 152: | Line 155: | ||
|- style="background:#dcfbff" | |- style="background:#dcfbff" | ||
|[[File:Hide N' Squeak 1.png|200px]]<br>[[Hide N' Squeak]] | |[[File:Hide N' Squeak 1.png|200px]]<br>[[Hide N' Squeak]] | ||
|[[File:MRSOH View From the Lake.png|200px]]<br>[[View | |[[File:MRSOH View From the Lake.png|200px]]<br>[[View from the Lake]] | ||
|[[File:Regenesis icon 2 MRSOH.png|70px]]<br>[[Regenesis]] | |[[File:Regenesis icon 2 MRSOH.png|70px]]<br>[[Regenesis]] | ||
|- style="background:#dcfbff" | |- style="background:#dcfbff" | ||
| Line 195: | Line 198: | ||
|} | |} | ||
==Side Quest== | |||
Side Quests are not part of the main plot and involve completing various tasks. They are found on each of the five planets. Completing a Side Quest rewards the player with a [[Planet Coin]] from that planet, currency used to buy certain items from shops run by [[SALESBOT 9.99+TX]]. | Side Quests are not part of the main plot and involve completing various tasks. They are found on each of the five planets, most of which can be picked up by talking to the inhabitants there. Completing a Side Quest rewards the player with a [[Planet Coin]] from that planet, currency used to buy certain items from shops run by [[SALESBOT 9.99+TX]]. | ||
The types of Side Quests found on each planet are as follows: | The types of Side Quests found on each planet are as follows: | ||
{|class="wikitable" border=1 style="text-align:center;" | |||
!Side Quest | |||
!Icon | |||
!Description | |||
!Reward(s) | |||
|- | |||
|{{hover|Enemy Hunt|Name is conjectural.}} | |||
|[[File:Defeat All icon MRSOH.png|50px]] | |||
|Defeat three of an enemy type on the field. There are two of such Quests—one for a different type of enemy, each found on a different map on a planet. | |||
|Planet Coin x1 | |||
|- | |||
|{{hover|Hidden Chest|Name is conjectural.}} | |||
|[[File:Hidden Quest icon MRSOH.png|45px]] | |||
|Find hovering chests, either in hidden spots or after clearing obstacles. | |||
|Planet Coin x1, Star Bits, coins | |||
|- | |||
|[[Darkmess Puddle]] battle | |||
|[[File:Darkmess Puddle icon MRSOH.png|50px]] | |||
|Clear the battle from the Darkmess Puddle. There are three types of battles: a general battle; a battle where the player must rescue [[Toad (species)|Toads]]/[[Toadette]] by reaching the goal; and a battle with only two selected Heroes. These battles can be replayed from the Quest Log. | |||
|Planet Coin x1<br>Two-Hero battle-only: Memory, Weapon Skin | |||
|- | |||
|[[Red Coin Challenge]] | |||
|[[File:Red Coin icon MRSOH.png|45px]] | |||
|Collect all eight [[Red Coin]]s from a [[Red Ring]]. | |||
|Planet Coin x1; Chest containing coins | |||
|- | |||
|[[Green Coin Challenge]] | |||
|[[File:Green Coin icon MRSOH.png|45px]] | |||
|Collect all five [[Green Coin]] clusters from a [[Green Ring]]. | |||
|Planet Coin x1; Chest containing coins | |||
|- | |||
|[[Blue Coin Challenge]] | |||
|[[File:Blue Coin icon MRSOH.png|45px]] | |||
|Collect all the [[Blue Coin]]s in a hidden room from a blue [[Warp Pipe]]. | |||
|Planet Coin x1; Chest containing coins; [[Probe]] containing Memory | |||
|- | |||
|Riddle | |||
|[[File:Prof Backpack icon MRSOH.png|50px]] | |||
|Clear a riddle from [[Professor Backpack]]. | |||
|Planet Coin x1; Chest containing [[Star Potion]] | |||
|- | |||
|Gateway Challenge | |||
|[[File:Madame Bwahstrella icon MRSOH.png|45px]] | |||
|Clear a Gateway battle offered by [[Madame Bwahstrella (character)|Madame Bwahstrella]]. | |||
|Planet Coin x1; [[Skill Prism]]s for every Hero (excluding from Palette Prime) | |||
|- | |||
|Chuck Challenge | |||
|[[File:Victor icon MRSOH.png|45px]] | |||
|Clear a Chuck Challenge from [[Victor]] by reaching a specific goal. | |||
|Planet Coin x1; Chest containing coins; Chest containing Star Potion when matching or beating Victor's high score | |||
|- | |||
|[[Giant Enemy]] battle | |||
|[[File:Giant Enemy icon MRSOH.png|45px]] | |||
|Defeat an optional Giant Enemy boss after unlocking a golden Warp Pipe when obtaining a certain amount of [[Spark (Mario + Rabbids Sparks of Hope)|Sparks]]. These battles can be replayed from the Quest Log. | |||
|Planet Coin x1; Gold Prism (1x from Beacon Beach, 2x from the other planets) | |||
|} | |||
===List of Side Quests=== | |||
====Beacon Beach==== | |||
*[[Green Coin Challenge]] | |||
*[[The Riddle of the Sunrise Temple]] | |||
*[[Red Coin Challenge]] | |||
*[[Basement Treasures]] | |||
*[[Blue Coin Challenge]] | |||
*[[Sunrise Gateway]] | |||
*[[The Dopest Catch]] | |||
*[[The Secret of the Statues]] | |||
*[[Cannonball! (mission)|Cannonball!]] | |||
*[[Behind the Clay Jars]] | |||
*[[Arch of Darkmess]] | |||
*[[The Bottom Rung of Darkmess]] | |||
*[[Bob-omb Hunt]] | |||
*[[Goomba Hunt]] | |||
*[[Ceramic Panic]] | |||
*[[The Pugilist and the Princess]] | |||
*[[The Darkmess Outside the Lighthouse]] | |||
*[[Atoll of Darkmess]] | |||
*[[The Goomba with the Pot on its Head]] | |||
*[[A Truly Ginormous Goomba]] | |||
====Pristine Peaks==== | |||
*[[Red Coin Challenge]] | |||
*[[Green Coin Challenge]] | |||
*[[Blue Coin Challenge]] | |||
*[[Brawl at the Falls]] | |||
*[[Brothers in Arms]] | |||
*[[Darkmess at the Foot of the Mountain]] | |||
*[[Flamin' Stooge Hunt]] | |||
*[[Icy Cave of Darkmess]] | |||
*[[Igloo Breakthrough]] | |||
*[[Island of Darkmess]] | |||
*[[Midwinter Gateway]] | |||
*[[Path of Faith]] | |||
*[[Puzzle Cave on Pristine Peaks]] | |||
*[[Squasher Hunt]] | |||
*[[The Chillest Challenge]] | |||
*[[The Diva and the Bookworm]] | |||
*[[The Vertigo Trail]] | |||
*[[Toad Trouble on Pristine Peaks]] | |||
*[[Who You Gonna Call?]] | |||
**[[Surviving Chills]] | |||
*[[Winter Palace Hidden Hallway]] | |||
*[[The Riddle of Pristine Peaks]] | |||
*[[Secret of the Cave]] | |||
**[[Ice Cave Expedition]] | |||
*[[Tiny Dancer]] | |||
====Palette Prime==== | |||
*[[Red Coin Challenge]] | |||
*[[Green Coin Challenge]] | |||
*[[Blue Coin Challenge]] | |||
*[[Evil By the Lake]] | |||
*[[Darkmess Near the Woodshed]] | |||
*[[Victor's Palette Prime Invitational]] | |||
*[[Fungi Frenzy (Mario + Rabbids Sparks of Hope)|Fungi Frenzy]] | |||
*[[Medician Hunt]] | |||
*[[Bridge to Darkmess]] | |||
*[[The Kid and the King]] | |||
*[[Closing the Gap]] | |||
*[[Pond Scum]] | |||
*[[The Princess and the Prima Donna]] | |||
*[[Ghostly Walker Hunt]] | |||
*[["Well"-Hidden]] | |||
*[[Spellbound Gateway]] | |||
*[[Sweetlopek's Workshop]] | |||
*[[Height Fright]] | |||
*[[Creepy Hollow]] | |||
*[[The Riddle of Palette Prime]] | |||
*[[Palette Prime Pipe]] | |||
*[[Giant Surprise]] | |||
====Terra Flora==== | |||
*[[Red Coin Challenge]] | |||
*[[Green Coin Challenge]] | |||
*[[Blue Coin Challenge]] | |||
*[[Bottlenecked]] | |||
*[[Corps de Battle]] | |||
*[[The Sluggish and the Puckish]] | |||
*[[The Warrior and the Windbag]] | |||
*[[Oozer Hunt]] | |||
*[[In Full Gloom]] | |||
*[[Treasure Hunters]] | |||
*[[Magnafowl Hunt]] | |||
*[[Album Cover]] | |||
*[[Obstacles to Victor(y)]] | |||
*[[Swallowing Sound]] | |||
*[[Bridges and Blinkers]] | |||
*[[Efflorescent Gateway]] | |||
*[[Clandestine Cliffs]] | |||
*[[Dive Into Darkmess]] | |||
*[[Over the Hills and Far Away]] | |||
*[[Victor's Terra Flora Invitational]] | |||
*[[Toad Trouble on Terra Flora]] | |||
*[[The Riddle of the Engineer's Guild]] | |||
*[[Magikoopa the Magnificent]] | |||
====Barrendale Mesa==== | |||
*[[Red Coin Challenge]] | |||
*[[Green Coin Challenge]] | |||
*[[Blue Coin Challenge]] | |||
*[[Stuck at Work]] | |||
*[[Desert Highway Darkmess]] | |||
*[[Gate to the Abandoned Settlement]] | |||
*[[Toadette Trouble]] | |||
*[[Build Bridges]] | |||
*[[Launch Site Secrets]] | |||
*[[Cannon Front]] | |||
*[[The Brawn and the Brain]] | |||
*[[Courageous Duo]] | |||
*[[Barren Gateway]] | |||
*[[Darkmess, Uncontained]] | |||
*[[Be a Depleter Defeater!]] | |||
*[[Worksite Hazard]] | |||
*[[A Lost Art]] | |||
*[[Magikoopa Hunt]] | |||
*[[Spellraiser Hunt]] | |||
*[[Victor's Barrendale Mesa Invitational]] | |||
*[[Generator Investigator]] | |||
*[[The Riddle of Barrendale Mesa]] | |||
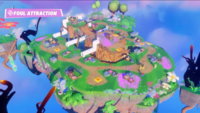
*[[A "Fowl" Attraction]] | |||
The | ====[[Melodic Gardens]]==== | ||
*[[Darkmess in the Jungle]] | |||
*[[Blue Coin Challenge]] | |||
*[[A Two-Pipe Puzzle]] | |||
*[[Red Coin Challenge]] | |||
*[[Green Coin Challenge]] | |||
*[[Toad's Cacophony]] | |||
*[[On the Road Back to the Jungle]] | |||
*[[Jingle Jungle]] | |||
*[[The Warrior and the Beast]] | |||
*[[Darkmess on the Beach]] | |||
*[[Fieldbreaker Hunt]] | |||
*[[Marimba Madness]] | |||
*[[Melodic Gateway]] | |||
*[[Riddle of the Melodic Gardens]] | |||
*[[Golem Hunt]] | |||
*[[Surviving the Outcasts]] | |||
*[[Labyrinthine Darkmess]] | |||
*[[ | ====[[Space Opera Network]]==== | ||
*[[ | * [[A Bridge to Love]] | ||
*[[ | * [[Art at Stake]] | ||
*[[ | * [[Atop the Pirate Watchtower]] | ||
*[[ | * [[Behind the Counter]] | ||
* [[Cooking with Alkementor]] | |||
* [[Couple Affinity]] | |||
* [[Cutout Bandits' Treasure]] | |||
* [[Darkmess Waves]] | |||
* [[Fantasy Loot]] | |||
* [[Green Screen Scene]] | |||
* [[Main Studio Blue Key Challenge]] | |||
* [[Pirate Set Blue Key Challenge]] | |||
* [[Punch Pals]] | |||
* [[Royal Pain]] | |||
* [[Space Opera Network Drifting Gateway]] | |||
* [[Space Opera Network Invitational]] | |||
* [[Train Wreck]] | |||
* [[Western Set Blue Key Challenge]] | |||
==Names in other languages== | ==Names in other languages== | ||
===Quest=== | ===Quest=== | ||
{{foreign names | {{foreign names | ||
| | |Jpn=クエスト | ||
| | |JpnR=Kuesuto | ||
| | |JpnM=Quest | ||
|Ita=Missione | |Ita=Missione | ||
|ItaM=Mission | |ItaM=Mission | ||
| Line 233: | Line 435: | ||
===Main Quest=== | ===Main Quest=== | ||
{{foreign names | {{foreign names | ||
| | |Jpn=メインクエスト | ||
| | |JpnR=Mein Kuesuto | ||
| | |JpnM=Main Quest | ||
|Ita=Missione principale | |Ita=Missione principale | ||
|ItaM=Main Mission | |ItaM=Main Mission | ||
| Line 242: | Line 444: | ||
===Spark Quest=== | ===Spark Quest=== | ||
{{foreign names | {{foreign names | ||
| | |Jpn=スパークズクエスト | ||
| | |JpnR=Supākuzu Kuesuto | ||
| | |JpnM=Spark Quest | ||
|Ita=Missione Spark | |Ita=Missione Spark | ||
|ItaM=Spark Mission | |ItaM=Spark Mission | ||
Latest revision as of 15:35, January 7, 2025
Quests are the tasks that the player completes in Mario + Rabbids Sparks of Hope, whether they are for the main story plot or as sidequests.
When taking on Quests, an on-screen notification appears on the left side of the screen. The player can view the progress of accepted and current Quests by opening the Orientation Menu with , then pressing
to open the Quest Menu. The player will receive notifications each time progress has been made on a Quest until its completion. Once a Quest is completed, the player receives a notification, and any rewards are added directly to the player's inventory.
Main Quest[edit]
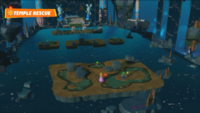
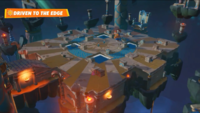
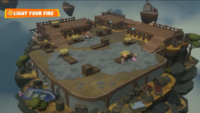
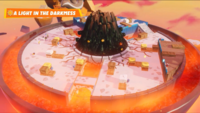
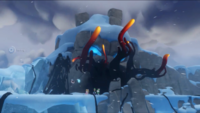
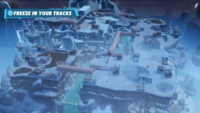
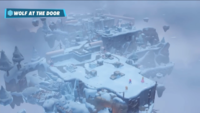
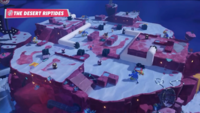
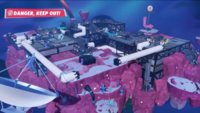
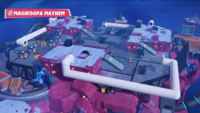
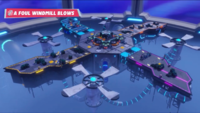
Main Quests are Quests regarding the story plot. On each of the five planets, the player must eliminate Darkmess at sources, usually in the form of Darkmess Tentacles, to obtain a Purified Darkmess Energy Crystal. Collecting two of these crystals is required to allow progression to the next planet until the player reaches the final world, Cursa's stronghold. Clearing a Main Quest on each of the five planets rewards the player with XP and Star Bits. Main Quest battles can be fought again from the Quest Menu.
There are twelve Main Quests, one for the prologue and final world, and two for each planet.
1 - The Palette Prime Main Quests can be completed in any order
Spark Quest[edit]
Spark Quests are sidequests not part of the main plot that involves recruiting a Spark by completing certain tasks and then engaging in a battle. They are found on each of the five planets. In addition to the Spark joining the Heroes, the player is also rewarded XP and Star Bits.
Some Spark Quests involve entering a Secret Zone on a planet and clearing the obstacles therein to reach the Spark at the end. Talking to them makes them join the player's party. These Spark Quests do not reward XP or Star Bits upon completion.
Spark Quest battles can be fought again from the Quest Menu.
| Location | Spark Quest | Battle | Spark |
|---|---|---|---|
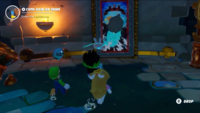 From Bad to Worse |
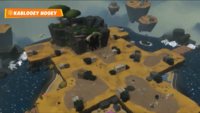 Kablooey Hooey |
Electrodash | |
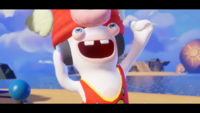 Cheep Beats and Bleepstreets |
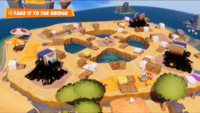 Take it to the Bridge |
Aquadash | |
Beacon Beach Secret Zone |
N/A | Screech | |
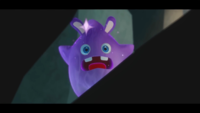 Dr. Vent's Frozen Oddity |
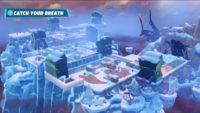 Catch Your Breath |
Zephystar | |
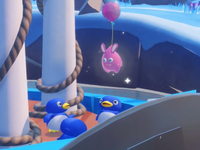 Hide N' Squeak |
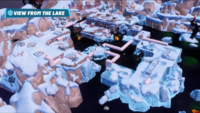 View from the Lake |
Regenesis | |
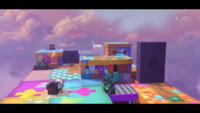 Pristine Peaks Secret Zone |
N/A | Vampdash | |
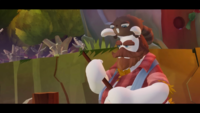 Bury the Hatchet |
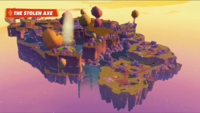 The Stolen Axe |
Vampastra | |
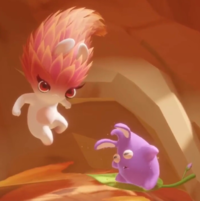 A Dryad's Dream |
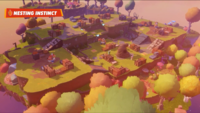 Nesting Instinct |
Zephyrdash | |
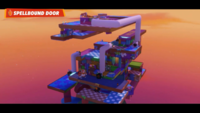 Palette Prime Secret Zone |
N/A | Wildclaw Master | |
 Sullivan's Despair |
 Hold That Train! |
Oozer Master | |
 The Quest for Courage |
 Darkmess in the Cauldron |
Toxicomet | |
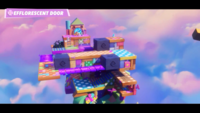 Terra Flora Secret Zone |
N/A | Cryogeddon | |
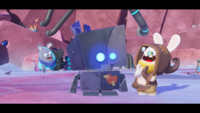 Tortured Artist |
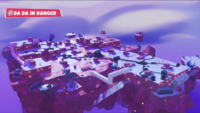 Da Da in Danger |
Scoper Master | |
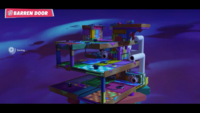 Barrendale Mesa Secret Zone |
N/A | Squashette Master |
Side Quest[edit]
Side Quests are not part of the main plot and involve completing various tasks. They are found on each of the five planets, most of which can be picked up by talking to the inhabitants there. Completing a Side Quest rewards the player with a Planet Coin from that planet, currency used to buy certain items from shops run by SALESBOT 9.99+TX.
The types of Side Quests found on each planet are as follows:
| Side Quest | Icon | Description | Reward(s) |
|---|---|---|---|
| Enemy Hunt | Defeat three of an enemy type on the field. There are two of such Quests—one for a different type of enemy, each found on a different map on a planet. | Planet Coin x1 | |
| Hidden Chest | Find hovering chests, either in hidden spots or after clearing obstacles. | Planet Coin x1, Star Bits, coins | |
| Darkmess Puddle battle | Clear the battle from the Darkmess Puddle. There are three types of battles: a general battle; a battle where the player must rescue Toads/Toadette by reaching the goal; and a battle with only two selected Heroes. These battles can be replayed from the Quest Log. | Planet Coin x1 Two-Hero battle-only: Memory, Weapon Skin | |
| Red Coin Challenge | Collect all eight Red Coins from a Red Ring. | Planet Coin x1; Chest containing coins | |
| Green Coin Challenge | Collect all five Green Coin clusters from a Green Ring. | Planet Coin x1; Chest containing coins | |
| Blue Coin Challenge | Collect all the Blue Coins in a hidden room from a blue Warp Pipe. | Planet Coin x1; Chest containing coins; Probe containing Memory | |
| Riddle | Clear a riddle from Professor Backpack. | Planet Coin x1; Chest containing Star Potion | |
| Gateway Challenge | Clear a Gateway battle offered by Madame Bwahstrella. | Planet Coin x1; Skill Prisms for every Hero (excluding from Palette Prime) | |
| Chuck Challenge | Clear a Chuck Challenge from Victor by reaching a specific goal. | Planet Coin x1; Chest containing coins; Chest containing Star Potion when matching or beating Victor's high score | |
| Giant Enemy battle | Defeat an optional Giant Enemy boss after unlocking a golden Warp Pipe when obtaining a certain amount of Sparks. These battles can be replayed from the Quest Log. | Planet Coin x1; Gold Prism (1x from Beacon Beach, 2x from the other planets) |
List of Side Quests[edit]
Beacon Beach[edit]
- Green Coin Challenge
- The Riddle of the Sunrise Temple
- Red Coin Challenge
- Basement Treasures
- Blue Coin Challenge
- Sunrise Gateway
- The Dopest Catch
- The Secret of the Statues
- Cannonball!
- Behind the Clay Jars
- Arch of Darkmess
- The Bottom Rung of Darkmess
- Bob-omb Hunt
- Goomba Hunt
- Ceramic Panic
- The Pugilist and the Princess
- The Darkmess Outside the Lighthouse
- Atoll of Darkmess
- The Goomba with the Pot on its Head
- A Truly Ginormous Goomba
Pristine Peaks[edit]
- Red Coin Challenge
- Green Coin Challenge
- Blue Coin Challenge
- Brawl at the Falls
- Brothers in Arms
- Darkmess at the Foot of the Mountain
- Flamin' Stooge Hunt
- Icy Cave of Darkmess
- Igloo Breakthrough
- Island of Darkmess
- Midwinter Gateway
- Path of Faith
- Puzzle Cave on Pristine Peaks
- Squasher Hunt
- The Chillest Challenge
- The Diva and the Bookworm
- The Vertigo Trail
- Toad Trouble on Pristine Peaks
- Who You Gonna Call?
- Winter Palace Hidden Hallway
- The Riddle of Pristine Peaks
- Secret of the Cave
- Tiny Dancer
Palette Prime[edit]
- Red Coin Challenge
- Green Coin Challenge
- Blue Coin Challenge
- Evil By the Lake
- Darkmess Near the Woodshed
- Victor's Palette Prime Invitational
- Fungi Frenzy
- Medician Hunt
- Bridge to Darkmess
- The Kid and the King
- Closing the Gap
- Pond Scum
- The Princess and the Prima Donna
- Ghostly Walker Hunt
- "Well"-Hidden
- Spellbound Gateway
- Sweetlopek's Workshop
- Height Fright
- Creepy Hollow
- The Riddle of Palette Prime
- Palette Prime Pipe
- Giant Surprise
Terra Flora[edit]
- Red Coin Challenge
- Green Coin Challenge
- Blue Coin Challenge
- Bottlenecked
- Corps de Battle
- The Sluggish and the Puckish
- The Warrior and the Windbag
- Oozer Hunt
- In Full Gloom
- Treasure Hunters
- Magnafowl Hunt
- Album Cover
- Obstacles to Victor(y)
- Swallowing Sound
- Bridges and Blinkers
- Efflorescent Gateway
- Clandestine Cliffs
- Dive Into Darkmess
- Over the Hills and Far Away
- Victor's Terra Flora Invitational
- Toad Trouble on Terra Flora
- The Riddle of the Engineer's Guild
- Magikoopa the Magnificent
Barrendale Mesa[edit]
- Red Coin Challenge
- Green Coin Challenge
- Blue Coin Challenge
- Stuck at Work
- Desert Highway Darkmess
- Gate to the Abandoned Settlement
- Toadette Trouble
- Build Bridges
- Launch Site Secrets
- Cannon Front
- The Brawn and the Brain
- Courageous Duo
- Barren Gateway
- Darkmess, Uncontained
- Be a Depleter Defeater!
- Worksite Hazard
- A Lost Art
- Magikoopa Hunt
- Spellraiser Hunt
- Victor's Barrendale Mesa Invitational
- Generator Investigator
- The Riddle of Barrendale Mesa
- A "Fowl" Attraction
Melodic Gardens[edit]
- Darkmess in the Jungle
- Blue Coin Challenge
- A Two-Pipe Puzzle
- Red Coin Challenge
- Green Coin Challenge
- Toad's Cacophony
- On the Road Back to the Jungle
- Jingle Jungle
- The Warrior and the Beast
- Darkmess on the Beach
- Fieldbreaker Hunt
- Marimba Madness
- Melodic Gateway
- Riddle of the Melodic Gardens
- Golem Hunt
- Surviving the Outcasts
- Labyrinthine Darkmess
Space Opera Network[edit]
- A Bridge to Love
- Art at Stake
- Atop the Pirate Watchtower
- Behind the Counter
- Cooking with Alkementor
- Couple Affinity
- Cutout Bandits' Treasure
- Darkmess Waves
- Fantasy Loot
- Green Screen Scene
- Main Studio Blue Key Challenge
- Pirate Set Blue Key Challenge
- Punch Pals
- Royal Pain
- Space Opera Network Drifting Gateway
- Space Opera Network Invitational
- Train Wreck
- Western Set Blue Key Challenge
Names in other languages[edit]
Quest[edit]
| Language | Name | Meaning | Notes |
|---|---|---|---|
| Japanese | クエスト[?] Kuesuto |
Quest | |
| Italian | Missione[?] | Mission |
Main Quest[edit]
| Language | Name | Meaning | Notes |
|---|---|---|---|
| Japanese | メインクエスト[?] Mein Kuesuto |
Main Quest | |
| Italian | Missione principale[?] | Main Mission |
Spark Quest[edit]
| Language | Name | Meaning | Notes |
|---|---|---|---|
| Japanese | スパークズクエスト[?] Supākuzu Kuesuto |
Spark Quest | |
| Italian | Missione Spark[?] | Spark Mission |
| Mario + Rabbids Sparks of Hope | ||
|---|---|---|
| Protagonists | Heroes | Beep-0 • Bowser • Edge • JEANIE • Luigi • Mario • Peach • Rabbid Luigi • Rabbid Mario • Rabbid Peach • Rabbid Rosalina • Rayman* |
| Sparks | Aquadash • Aquanox • Aquaquake • Berserk* • Cryobolide • Cryodash* • Cryogeddon • Cryoquake* • Decibel • Drizzle • Electrodash • Electroid • Electrogeddon • Electroquake* • Ethering • Exosphere • Gargantu-fan • Glitter • Mayhem* • Movie Director* • Oozer Master • Pulser • Pyrogeddon • Pyrostar • Quiz Host* • Reflector • Regenesis • Scoper Master • Screech • Selfie* • Squashette Master • Starburst • Toxicomet • Toxiquake • Twinkle • Vampastra • Vampdash • Vampgeddon* • Wildclaw Master • Zephyrdash • Zephyrquake • Zephystar | |
| Antagonists | Cursa • Darkmess Manta • Phantom* • Spark Hunters (Bedrock, Daphne, Kanya*, Midnite) | |
| Supporting/minor characters | Alkementor • Allegra* • Augie • Bea • Bloopers • Captain Orion • Chain Chomps • Cheep Cheeps • Coin Coffers • Conkdors • Crowber • Da Da • DJ Cheep Tuna • Dorrie* • Dragoneel • Dr. Vent • Dryad • Genius Girl • Gerspard • Hinky • Lumas • Madame Bwahstrella • Megabug (MegaDragonBowser) • Melospheres* • Momma • Penguins • Pokey • Professor Backpack • Rabbid Kong • Rabbid Mechakoopas • Rabbids • Rosalina • SALESBOT 9.99+TX • Sillyfishes • Sparks • Spawny* • Sullivan • Sweetlopek • Telesio • The Fork • Toads • Toadette • Victor • Woodrow | |
| Enemies and obstacles | Bob-omb • Darkmess Eye • Darkmess portal • Darkmess Puddle • Depleter • Flamin' Golem* • Fieldbreaker* • Ghostly Walker • Goomba (Armored) • Magikoopa • Medician • Oozer • Scoper (Lone Wolf, Bravado*) • Spellraiser • Squasher (Squashette) • Stone Mask • Stooge (Flamin', Sea) • Shockin' Golem* • Tidal Golem* • Wildclaw (Deep Freeze, Magnafowl, Riptide) | |
| Bosses | Giant Wildclaw • Giant Goomba • Midnite • Giant Squashette • Bedrock • Giant Depleter • Wiggler • Giant Magikoopa • Daphne • Giant Magnafowl • Darkmess Bowser (Darkmess Rabbid Mechakoopa) • Darkmess Edge • Cursa • Proto Mecha King Bob-omb* • Mecha King Bob-omb* • Kraken* • Giant Flamin' Stooge* • Phantom* | |
| Items and objects | Blue Coin • Blue Key Ring* • Boat* • Cleansing Elixir • Coin (Stack) • Cooldown Clock • Darkmess Egg • Green Coin • Green Ring • Immunity Charm • Jump Panel • Move Boost • Multi Dash • P Switch • Planet Coin • Planet Key • POW Block • Purified Darkmess Energy Crystal • Red Coin • Red Ring • Ring* • Star Bit • Star Potion • Super Mushroom • Super Mushroom Bag • Super Mushroom Chest • Super Mushroom Chest DX • Teleport Flag • Treasure Chest • Warp Pipe • Wiggler Train • WM ARC | |
| Weapons | Blaster* • Boom-Brella • Bowzooka • Discruptor • Dual Slinger • Flying Blade • Kaboomer • Sharpshooter • The Dukes • Triple-Troll | |
| Movement abilities | Dash • Punch* • Glide • Stomp • Team Jump | |
| Techniques | Counter Blow • Ennui • Exhaust • Heal • Hero Sight • Plunger Guard* • Rabbid Mechakoopas • Steely Stare • Stormblade • Team Barrier | |
| Super Effects | Burn • Empowered • Invisible • DEF-Up • Shock • Frostbite • Gust • Ooze • Sleep • Splash • Vamp • Exhaust | |
| Spark abilities | Powers | Burn Attack • Fortify • Frenzy* • Frostbite Attack • Frostbite Dash* • Gather 'Round • Gust Attack • Gust Dash • Hypnotize* • Kong Cameo • Ooze Attack • Reflect • Regen • Revive • Self-Service* • Shock Attack • Shock Dash • Shockwave Frostbite* • Shockwave Gust • Shockwave Ooze • Shockwave Shock* • Shockwave Splash • Skyrain Burn • Skyrain Frostbite* • Skyrain Lifesteal* • Skyrain Shock • Splash Attack • Splash Dash • Summon Oozer • Summon Scoper • Summon Squashette • Summon Wildclaw • Turbocharge • Unseen • Vamp Attack • Vamp Dash • Whoopsgottago |
| Bonuses | Athlete • Attack Master • Burn Protector • Critical Buddy • Frostbite Protector • Gust Protector • Healing Amplifier • Healing Booster • Ooze Protector • Physical Protector • Shock Protector • Splash Protector | |
| Beep-0 Powers | Scan Power • Wave Power | |
| Planets and locations | Mushroom Kingdom | Peach's Castle • Darkmess Manta |
| Beacon Beach | Beacon Town • Lighthouse • Sunrise Temple • Beacon Beach Secret Zone | |
| Pristine Peaks | Winter Palace • Pristine Peaks Secret Zone | |
| Palette Prime | Paletteville • Spellbound Woods • Abandoned Well • Palette Prime Secret Zone | |
| Terra Flora | Everbloom Tree • Mt. Spout • Terra Flora Secret Zone | |
| Barrendale Mesa | Momma's Garage • Windmill • Barrendale Mesa Secret Zone | |
| Cursa's stronghold | Comet Observatory | |
| Melodic Gardens* | Music Jungle* • Concert Pond* • Swamp* • Flooded Ruins* | |
| Space Opera Network* | Network Reception* • Main TV Studio* • Backing Studio* • Western Set* • Pirate Set* • Medieval Set* | |
| Other | Darkmess Dimension | |
| Miscellaneous | Bestiary • Darkmess • Gallery • Glitches • Level up progressions • Small birds • Memories • Quests • Quotes • Rayman in the Phantom Show* • Secret Zone • Skill Prism • "Phantom Returns"* • Probes • Skill Trees • Spark statistics • Soundtrack (DLC) • Tacticam • The Last Spark Hunter* • The Tower of Doooom* • Staff • Weapon Skins | |
