Tour Tokyo Blur: Difference between revisions
mNo edit summary |
m (As per proposal; the four Tokyo Blur articles will be edited into redirects. Chose this page because it has the Tour prefix.) |
||
| Line 1: | Line 1: | ||
{{classic title}} | {{classic title}} | ||
{{race course infobox | {{race course infobox | ||
|title=Tokyo Blur | |title=Tokyo Blur | ||
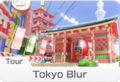
|image=[[File: | |image=[[File:MKT Tokyo Blur Scene.jpg|300px]]<br>View of the Tokyo Tower | ||
|appears_in=''[[Mario Kart 8 Deluxe]]'' ([[Mario Kart 8 Deluxe – Booster Course Pass|Booster Course Pass]]) (2022) | |appears_in=''[[Mario Kart Tour]]'' ([[List of games by date#2019|2019]] <small>(1)</small>, 2020 <small>(2, 3)</small>, 2021 <small>(4)</small>)<br>''[[Mario Kart 8 Deluxe]]'' ([[Mario Kart 8 Deluxe – Booster Course Pass|Booster Course Pass]]) (2022) | ||
| | |cups=[[Lucky Cat Cup]] (''8 Deluxe'') | ||
|tours='''''Tokyo Blur:'''''<br>[[Tokyo Tour]]<br>[[New Year's Tour]] (challenge only)<br>[[Summer Festival Tour]]<br>[[1st Anniversary Tour]]<br>[[Mario vs. Peach Tour]]<br>[[2nd Anniversary Tour]]<br>'''''Tokyo Blur 2:'''''<br>[[New Year's Tour]]<br>[[Summer Festival Tour]]<br>[[Mario vs. Peach Tour]]<br>'''''Tokyo Blur 3:'''''<br>[[Summer Festival Tour]]<br>[[Mario vs. Peach Tour]]<br>'''''Tokyo Blur 4:'''''<br>[[Mario Tour]]<br>[[Yoshi Tour (2021)]]<br>[[Mario vs. Peach Tour]] | |||
|ghost=1:36.317 by Nin★Yuya<br>(as [[Inkling|Blue Inkling Boy]]) (150cc) <br>1:07.560 by Nin★Aracel<br>(as [[Inkling|Inkling Girl]]) (200cc) | |ghost=1:36.317 by Nin★Yuya (''8 Deluxe'')<br>(as [[Inkling|Blue Inkling Boy]]) (150cc) <br>1:07.560 by Nin★Aracel (''8 Deluxe'')<br>(as [[Inkling|Inkling Girl]]) (200cc) | ||
|wifi=Available ([[Nintendo Switch|Switch]]) | |wifi=Available ([[Nintendo Switch|Switch]]) | ||
|sample=''Mario Kart | |sample=''Mario Kart Tour''[[File:MKT Tokyo Blur Theme.oga]] | ||
|map=[[File:MK8DX Tokyo Blur Map.png| | ''Mario Kart 8 Deluxe''[[File:TourTokyoBlur_MK8DXBCP.oga]] | ||
|map=''Mario Kart Tour (Tokyo Blur)''<br>[[File:MKT Map TokyoBlur.png|120px]]<br>''Mario Kart Tour (Tokyo Blur 2)''<br>[[File:MKT Map TokyoBlur2.png|120px]]<br>''Mario Kart Tour (Tokyo Blur 3)''<br>[[File:MKT Map TokyoBlur3.png|120px]]<br>''Mario Kart Tour (Tokyo Blur 4)''<br>[[File:MKT Map TokyoBlur4.png|140px]]<br>''Mario Kart 8 Deluxe''<br>[[File:MK8DX Tokyo Blur Map.png|120px]] | |||
}} | }} | ||
'''Tokyo Blur''' is a race course in ''[[Mario Kart Tour]]''. It is named after and inspired by [[Tokyo]], Japan and makes its debut in the tour in the city’s namesake tour, the [[Tokyo Tour]]. The course's music is based on the theme of [[3DS Toad Circuit]] and [[3DS Mario Circuit]]. This course has four different routes, the most out of any city course alongside [[New York Minute]]: '''Tokyo Blur''', '''Tokyo Blur 2''', '''Tokyo Blur 3''', and '''Tokyo Blur 4''', the latter three of which were introduced in the [[New Year's Tour]], [[Summer Festival Tour]], and [[Mario Tour]], respectively. The fourth iteration of this course differs from the others, in that it is two sections as opposed to two laps. | |||
The first layout is a favorite of [[Toad|Toad (Pit Crew)]], [[Mario|Mario (Hakama)]], [[Toad|Toad (Party Time)]], [[Princess Daisy|Daisy (Yukata)]], [[Princess Peach|Peach (Happi)]], and [[Bowser Jr.|Bowser Jr. (Pirate)]], the second route is a favorite of [[Pink Shy Guy]], [[Cat Mario|Cat Peach]], [[Nabbit]], [[Mario|Mario (Happi)]], [[Baby Rosalina|Baby Rosalina (Detective)]], [[Cat Mario|Cat Toad]], and [[Bowser|Bowser (Santa)]]. It can also be a favorite of [[Princess Peach|Peach (Happi)]] if she is at level 6, the third route is a favorite of [[Birdo (species)|Birdo (Black)]], [[Yoshi|Yoshi (Reindeer)]], [[Mario|Mario (Happi)]], [[Mario|Mario (Chef)]], [[Princess Daisy|Daisy (Yukata)]], [[Luigi|Luigi (Painter)]], and [[Princess Daisy|Daisy (Swimwear)]] and the fourth route is a favorite of [[Yoshi (species)|Blue Yoshi]], [[Nabbit]], [[Princess Daisy|Daisy (Yukata)]], [[Cat Mario|Cat Toad]], [[Mario|Mario (Racing)]], and [[Yoshi (species)|White Yoshi]].. | |||
Tokyo Blur | Tokyo Blur reappears in the [[Mario Kart 8 Deluxe – Booster Course Pass|Booster Course Pass]] DLC for ''[[Mario Kart 8 Deluxe]]'' as the first course in the [[Lucky Cat Cup]]. The course combines the first three versions of Tokyo Blur together, with a lap dedicated to each variant. | ||
== | ==''Mario Kart Tour''== | ||
{{multiframe | |||
|align=right | |||
|1=<div style=background:#999999>[[File:MKT FullMap TokyoBlur.png|120px]][[File:MKT FullMap TokyoBlur2.png|120px]]</div><div style=background:#999999>[[File:MKT FullMap TokyoBlur3.png|120px]][[File:MKT FullMap TokyoBlur4.png|120px]]</div> | |||
|2=The city course's layouts in relation to<br>each other. | |||
}} | |||
===Course layouts=== | |||
====Tokyo Blur==== | |||
In the standard layout, all of the racers start the course on the central span of the {{wp|Rainbow Bridge (Tokyo)|Rainbow Bridge}}. Just after the starting line, the road curves to the right through {{wp|Ginza}}, then makes a slight left before the {{wp|Wako (retailer)|Wako}} store. Not long after, the course makes a right U-turn near the {{wp|National Diet Building}} and the {{wp|Miraikan}}, then goes through a tunnel. As the {{wp|Tokyo Skytree}}, {{wp|Asahi Beer Hall}}, and {{wp|Tokyo Big Sight}} come into view, the road makes a wide right turn back onto Rainbow Bridge. {{wp|Fuji TV}}'s headquarters can be seen on the left. | |||
The course also appears as '''Tokyo Blur R''' (reverse), '''Tokyo Blur T''' (with ramps), and '''Tokyo Blur R/T''' (reverse and with ramps). This route is used as the layout for the first lap of ''Mario Kart 8 Deluxe's'' variation of Tokyo Blur in the Booster Course Pass. | |||
The course is also a favorite of [[Toad|Toad (Pit Crew)]], [[Mario|Mario (Hakama)]], [[Toad|Toad (Party Time)]], [[Princess Daisy|Daisy (Yukata)]], [[Princess Peach|Peach (Happi)]], and [[Bowser Jr.|Bowser Jr. (Pirate)]]. | |||
====Tokyo Blur 2==== | |||
In the standard layout, all of the racers start the course on the central span of the {{wp|Rainbow Bridge (Tokyo)|Rainbow Bridge}}. Just after the starting line, the road curves to the right through {{wp|Ginza}}, then makes a slight right before the {{wp|Wako (retailer)|Wako}} store. After passing by two [[Thwomp]]s, the course shifts left at a roundabout and continues straight (with a {{wp|Tokyo subway|subway}} entrance and {{wp|Akihabara}} shops visible on the left), then goes under an archway left of the {{wp|Sensō-ji}}, where a [[kadomatsu]] can be found. As the player slights right then turns left at a signalized intersection, the road makes a wide right turn back onto Rainbow Bridge. {{wp|Fuji TV}}'s headquarters can be seen on the left. | |||
The course also appears as '''Tokyo Blur 2R''' (reverse), '''Tokyo Blur 2T''' (with ramps), and '''Tokyo Blur 2R/T''' (reverse and with ramps). This route is used as the layout for the second lap of ''Mario Kart 8 Deluxe's'' variation of Tokyo Blur in the Booster Course Pass. | |||
====Tokyo Blur 3==== | |||
In the standard layout, all of the racers start the course on the central span of the {{wp|Rainbow Bridge (Tokyo)|Rainbow Bridge}}. Just after the starting line, the road curves to the right through {{wp|Ginza}}, then makes a slight right before the {{wp|Wako (retailer)|Wako}} store. After passing by some [[Thwomp]]s, the course shifts left at a roundabout and continues straight to the {{wp|Shuto Expressway}}, which is built along the {{wp|Nihonbashi River}}. The toll plaza bar only opens when a driver passes through; the course then curves to the right. After passing by two Thwomps and after a wide turn up the spiral loop around the {{wp|Tokyo Big Sight}}, a [[Glide Ramp]] enables the driver to fly out of Shuto Expressway and back onto Rainbow Bridge. {{wp|Fuji TV}}'s headquarters can be seen on the left. | |||
In the trick variant, ramps are added on the Rainbow Bridge. Near the end of the bridge is a ramp with a [[Dash Panel]] on it. The Thwomps in the city are replaced with small ramps. After entering Shuto Expressway, there are ramps that replace the Thwomps on the expressway. The spiral loops around the Tokyo Big Sight has added ramps on it. The gliding section at the end of the course is replaced by a normal ramp. | |||
When configured for Coin Rush, cars and buses will block off a lane in the highway and toll booth, making the collection of coins easier. | |||
The course also appears as '''Tokyo Blur 3R''' (reverse), '''Tokyo Blur 3T''' (with ramps), and '''Tokyo Blur 3R/T''' (reverse and with ramps). This route is used as the layout for the third lap of ''Mario Kart 8 Deluxe's'' variation of Tokyo Blur in the Booster Course Pass. | |||
====Tokyo Blur 4==== | |||
In the standard layout, the track starts out following the same path as [[Tokyo Blur]]. All of the racers start the course on the central span of the {{wp|Rainbow Bridge (Tokyo)|Rainbow Bridge}}. Just after the starting line, the road curves to the right through {{wp|Ginza}}, then makes a slight left before the {{wp|Wako (retailer)|Wako}} store. Not long after, the course makes a right U-turn near the {{wp|National Diet Building}} and the {{wp|Miraikan}}, then goes through a tunnel. The course then makes a sharp left to follow a small portion of [[Tokyo Blur 2]] in reverse, going under the {{wp|Kaminarimon}} next to the {{wp|Sensō-ji}}, where the second segment of the course begins. The track then immediately makes a U-turn toward the {{wp|Shuto Expressway}}; the remainder of the course follows the path of [[Tokyo Blur 3]], entering the expressway through a set of toll gates before rounding the spiral loop around the {{wp|Tokyo Big Sight}}. A [[Glide Ramp]] sends the player back onto the Rainbow Bridge, where a set of [[Thwomp]]s on either side threatens the players just before the finish line. | |||
The course also appears as '''Tokyo Blur 4R''' (reverse), '''Tokyo Blur 4T''' (with ramps), and '''Tokyo Blur 4R/T''' (reverse and with ramps). | |||
The | ===Appearances=== | ||
The first layout of Tokyo Blur is currently the only course based on a real world city to have appeared in five different tours: the Tokyo Tour, the Summer Festival Tour, the 1st Anniversary Tour, the Mario vs. Peach Tour, and the 2nd Anniversary Tour. It also made a minor appearance in the [[New Year's Tour]] as the location of a bonus challenge and in the [[Mario Tour]] as the third and final race in the [[Mario Tour#2-Player Challenge|2-Player Challenge]] mode. | |||
For this course's tour appearances, see [[List of Tokyo Blur tour appearances in Mario Kart Tour|List of Tokyo Blur tour appearances in ''Mario Kart Tour'']]. | |||
==''Mario Kart 8 Deluxe''== | |||
[[File:MK8-Course-Tour TokyoBlur.jpg|thumb|right|250px|Tokyo Blur in ''Mario Kart 8 Deluxe'']] | |||
Tokyo Blur makes its console debut in ''[[Mario Kart 8 Deluxe]]'' via the [[Mario Kart 8 Deluxe – Booster Course Pass|Booster Course Pass]]. It is the first course of the [[Lucky Cat Cup]], and as such was added as part of the first wave of the DLC. Similarly to Tokyo Blur 4, it is an expanded and combined version of the first three routes for this course; however, this version dedicates one lap to each variation. The first lap is based on Tokyo Blur, the second lap is based on Tokyo Blur 2, and the third lap is based on Tokyo Blur 3, with each lap visiting the respective landmarks of those stages. The minimap has been rotated 90 degrees compared to the equivalent minimaps for the variants in ''Tour''. Unlike [[Paris Promenade]], its hazards - [[Thwomp]]s - have been retained. | |||
Tokyo Blur is one of three courses to originate from ''[[Mario Kart Tour]]'' to appear in the first wave of the DLC, alongside Paris Promenade and [[Ninja Hideaway]]. This is also one of four tracks in ''Mario Kart 8 Deluxe'' where players can hit the banner (causing it to spin), like [[Mario Circuit (Mario Kart 8)|Mario Circuit]], {{classic-link|DS|Wario Stadium}} and {{classic-link|3DS|Neo Bowser City}}. Unlike the other courses mentioned, this is only possible during the final lap. | |||
==Sponsors== | |||
*[[List of sponsors debuting in Mario Kart Tour#Mario Electrical Equipment|Mario Electrical Equipment]] (posters) | |||
*[[List of sponsors debuting in Mario Kart Tour#Bowser Technology|Bowser Technology]] (posters) | |||
*[[List of sponsors debuting in Mario Kart Tour#Shell Books|Shell Books]] (posters) | |||
*[[List of sponsors debuting in Mario Kart Tour#Kingdom Café|Kingdom Café]] (posters) | |||
*[[List of sponsors debuting in Mario Kart 8 and Mario Kart 8 Deluxe#Galaxy Air|Galaxy Air]] (signs) | |||
*[[List of sponsors debuting in Mario Kart 8 and Mario Kart 8 Deluxe#Mario Work Gear|Mario Work Gear]] (signs) | |||
*[[List of sponsors debuting in Mario Kart 8 and Mario Kart 8 Deluxe#Bullet Bill Speed Trial|Bullet Bill Speed Trial]] (signs) | |||
*[[List of sponsors debuting in Mario Kart 8 and Mario Kart 8 Deluxe#Mushroom Piston|Mushroom Piston]] (signs) | |||
*[[List of sponsors debuting in Mario Kart 8 and Mario Kart 8 Deluxe#Princess Orange|Princess Orange]] (signs, vending machines) | |||
*[[List of sponsors debuting in Mario Kart 8 and Mario Kart 8 Deluxe#Boomerang Bros. International Airlines|Boomerang Bros. International Airlines]] (signs) | |||
==Profiles== | |||
===''Mario Kart Tour''=== | |||
*'''''Mario Kart Tour'' Twitter:''' ''Take a tour of a Japanese city in the Tokyo Blur course! Enjoy the sights as you take in iconic landmarks, including Mt. Fuji off in the distance!''<ref>mariokarttourEN (October 15, 2019). [https://twitter.com/mariokarttourEN/status/1184114202337828864 ''Twitter'']. Retrieved March 16, 2020.</ref> | |||
*'''''Mario Kart Tour'' Twitter:''' ''A giant dinosaur stomping around in the middle of a city? The Tokyo Blur course is like something straight out of a movie! The tricked-out Tokyo Blur R/T is waiting for you in the Peachette Cup!''<ref name="dinosaur">mariokarttourEN (October 19, 2019). [https://twitter.com/mariokarttourEN/status/1185586405537304576 ''Twitter'']. Retrieved December 7, 2019.</ref> | |||
*'''''Mario Kart Tour'' Twitter:''' ''Japan's most famous city is back for for another lap with the Tokyo Blur 2 course. Those traditional kadomatsu decorations aren't just for show—hitting them with an item is a great way to rack up some extra points!''<ref>mariokarttourEN (January 1, 2020). [https://twitter.com/mariokarttourEN/status/1212523902674583553 ''Twitter'']. Retrieved March 13, 2020.</ref> | |||
*'''''Mario Kart Tour'' Twitter:''' ''It's time for the Summer Festival Tour! Return to the sizzling streets of Tokyo for some sunny fun. Blaze new paths in the Tokyo Blur course, but don't overheat!''<ref>mariokarttourEN (August 26, 2020). [https://twitter.com/mariokarttourEN/status/1298502938587955200 ''Twitter'']. Retrieved August 26, 2020.</ref> | |||
*'''''Mario Kart Tour'' Twitter:''' ''The Snow Tour is wrapping up in {{color|#MarioKartTour|blue}}. Next up is the Mario Tour featuring Tokyo Blur 4, a brand-new variant of the existing Tokyo-based course!''<ref>mariokarttourEN (March 4, 2021). [https://twitter.com/mariokarttourEN/status/1367724372765642753 ''Twitter'']. Retrieved March 4, 2021.</ref> | |||
==Gallery== | ==Gallery== | ||
===''Mario Kart Tour''=== | |||
====Tokyo Blur==== | |||
=====Course icons===== | |||
<gallery> | |||
MKT Icon TokyoBlur.png|Course icon of Tokyo Blur with Mario (Hakama) | |||
MKT Icon TokyoBlur ToadPitCrew.png|Course icon of Tokyo Blur with Toad (Pit Crew) | |||
MKT Icon TokyoBlur BabyPeach.png|Course icon of Tokyo Blur with Baby Peach | |||
MKT Icon TokyoBlur DaisyYukata.png|Course icon of Tokyo Blur with Daisy (Yukata) | |||
MKT Icon TokyoBlur Lakitu.png|Course icon of Tokyo Blur with Lakitu | |||
MKT Icon TokyoBlurR.png|Course icon of Tokyo Blur R with Peach (Kimono) | |||
MKT Icon TokyoBlurR BabyRosalinaDetective.png|Course icon of Tokyo Blur R with Baby Rosalina (Detective) | |||
MKT Icon TokyoBlurR MarioHappi.png|Course icon of Tokyo Blur R with Mario (Happi) | |||
MKT Icon TokyoBlurT.png|Course icon of Tokyo Blur T with Peach (Kimono) | |||
MKT Icon TokyoBlurT MarioHakama.png|Course icon of Tokyo Blur T with Mario (Hakama) | |||
MKT Icon TokyoBlurT Lakitu.png|Course icon of Tokyo Blur T with Lakitu | |||
MKT Icon TokyoBlurRT.png|Course icon of Tokyo Blur R/T with Mario (Hakama) | |||
MKT Icon TokyoBlurRT DiddyKong.png|Course icon of Tokyo Blur R/T with Diddy Kong | |||
MKT Tour2 LakituCupChallenge.png|The icon of the [[Ring Race]] bonus challenge set in Tokyo Blur | |||
MKT Tour2 PeachetteCupChallenge.png|The icon of the [[Do Jump Boosts]] bonus challenge set in Tokyo Blur | |||
MKT Tour8 DaisyCupChallenge.png|The icon of the [[Glider Challenge]] bonus challenge set in Tokyo Blur | |||
MKT Tour28 LakituCupChallenge.png|The icon of the [[Goomba Takedown]] bonus challenge set in Tokyo Blur | |||
</gallery> | |||
=====Screenshots===== | |||
<gallery> | |||
MKT Tokyo Blur Scene 2.jpg|View of the starting line | |||
Tokyo View.png|View of the finish line area | |||
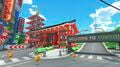
MKT Tokyo Blur Website Scene.png|View of the {{wp|Tokyo Tower}} and some buildings | |||
MKT Tokyo Blur R.jpg|View of the National Diet Building | |||
MKT Tokyo Blur Sponsors 1.jpg|View of various [[Gallery:Sponsors in the Mario Kart series|sponsors]] | |||
MKT Tokyo Blur Sponsors 2.jpg|Ginza section | |||
MKT Mario Hakama Kabuki Dasher.jpg|[[Mario|Mario (Hakama)]] tricking in the [[Kabuki Dasher]] | |||
MKT Peach Kimono Jumping.jpg|[[Princess Peach|Peach (Kimono)]] tricking in the [[Quickshaw]] in Tokyo Blur R/T | |||
MKT Mario Hakama Quickshaw.jpg|Mario (Hakama) cheering in the Quickshaw | |||
MKT 2-Player Challenge.jpg|Mario, [[Luigi]], [[Roving Racers|Red Koopa (Freerunning)]], and [[Gold Koopa|Gold Koopa (Freerunning)]] racing on the course | |||
MKT 2nd Anniversary Tour Week 1 Drivers.jpg|Mario (Hakama), Peach (Kimono), Peach (Vacation), Luigi (Painter), and Pauline tricking in Tokyo Blur T | |||
</gallery> | |||
====Tokyo Blur 2==== | |||
=====Course icons===== | |||
<gallery> | |||
MKT Icon TokyoBlur2.png|Course icon of Tokyo Blur 2 with Mario (Happi) | |||
MKT Icon TokyoBlur2 PinkShyGuy.png|Course icon of Tokyo Blur 2 with Pink Shy Guy | |||
MKT Icon TokyoBlur2R.png|Course icon of Tokyo Blur 2R with Toad (Party Time) | |||
MKT Icon TokyoBlur2R Wario.png|Course icon of Tokyo Blur 2R with Wario | |||
MKT Icon TokyoBlur2R KingBoo.png|Course icon of Tokyo Blur 2R with King Boo | |||
MKT Icon TokyoBlur2R MarioTuxedo.png|Course icon of Tokyo Blur 2R with Mario (Tuxedo) | |||
MKT Icon TokyoBlur2T.png|Course icon of Tokyo Blur 2T with Lakitu | |||
MKT Icon TokyoBlur2T ToadPartyTime.png|Course icon of Tokyo Blur 2T with Toad (Party Time) | |||
MKT Icon TokyoBlur2T PeachKimono.png|Course icon of Tokyo Blur 2T with Peach (Kimono) | |||
MKT Icon TokyoBlur2T BuilderToadette.png|Course icon of Tokyo Blur 2T with Builder Toadette | |||
MKT Icon TokyoBlur2RT.png|Course icon of Tokyo Blur 2R/T with Iggy | |||
MKT Icon TokyoBlur2RT RedYoshi.png|Course icon of Tokyo Blur 2R/T with Red Yoshi | |||
MKT Tour8 BabyRosalinaCupChallenge.png|The icon of the [[Break Item Boxes]] bonus challenge set in Tokyo Blur 2 | |||
MKT Tour8 PeachCupChallenge.png|The icon of the [[Steer Clear of Obstacles]] bonus challenge set in Tokyo Blur 2 | |||
MKT Tour8 PaulineCupChallenge.png|The icon of the [[Vs. Mega#Vs. Mega Donkey Kong Tokyo Blur 2|Vs. Mega Donkey Kong]] bonus challenge set in Tokyo Blur 2 | |||
</gallery> | |||
=====Screenshots===== | |||
<gallery> | |||
MKT Tokyo Blur 2 Website Scene.png|View of a [[Thwomp]] near a shortcut and the {{wp|Sensō-ji}} | |||
MKT New Year's Tour Racers.jpg|[[Toad|Toad (Party Time)]] and [[Mario|Mario (Happi)]] driving | |||
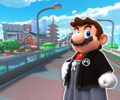
MKT Mario Happi.jpg|Mario (Happi) tricking in the [[Quickshaw]] | |||
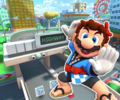
MKT Mario Hakama New Year's Kite.jpg|[[Mario|Mario (Hakama)]] gliding in the [[Kabuki Dasher]] with the [[New Year's Kite]] | |||
MKT Baby Mario Hanafuda.jpg|[[Baby Mario]] gliding in the [[Turbo Yoshi]] with the [[Baby Mario Hanafuda]] | |||
MKT Twitter NewYearTour ThankYou.jpg|Mario (Happi) gliding in the Quickshaw with the New Year's Kite | |||
</gallery> | |||
====Tokyo Blur 3==== | |||
=====Course icons===== | |||
<gallery> | |||
MKT Icon TokyoBlur3.png|Course icon of Tokyo Blur 3 with Mario (Happi) | |||
MKT Icon TokyoBlur3 MarioChef.png|Course icon of Tokyo Blur 3 with Mario (Chef) | |||
MKT Icon TokyoBlur3R.png|Course icon of Tokyo Blur 3R with Mario (Hakama) | |||
MKT Icon TokyoBlur3R Lakitu.png|Course icon of Tokyo Blur 3R with Lakitu | |||
MKT Icon TokyoBlur3R BlackYoshi.png|Course icon of Tokyo Blur 3R with Black Yoshi | |||
MKT Icon TokyoBlur3T.png|Course icon of Tokyo Blur 3T with Mario (Hakama) | |||
MKT Icon TokyoBlur3T DaisyYukata.png|Course icon of Tokyo Blur 3T with Daisy (Yukata) | |||
MKT Icon TokyoBlur3T BuilderToad.png|Course icon of Tokyo Blur 3T with Builder Toad | |||
MKT Icon TokyoBlur3RT.png|Course icon of Tokyo Blur 3R/T with Shy Guy (Ninja) | |||
MKT Tour25 MortonCupChallenge.png|The icon of the [[Ring Race]] bonus challenge set in Tokyo Blur 3 | |||
MKT Tour25 PeachetteCupChallenge.png|The icon of the [[Big Reverse Race]] bonus challenge set in Tokyo Blur 3 | |||
MKT Tour49 DiddyKongCupChallenge.png|The icon of the [[Snap a Photo]] bonus challenge set in Tokyo Blur 3R/T | |||
MKT Tour49 BowserCupChallenge.png|The icon of the [[Combo Attack]] bonus challenge set in Tokyo Blur 3T | |||
</gallery> | |||
=====Screenshots===== | |||
<gallery> | |||
MKT Tokyo Blur 3 Scene.jpg|View of the course | |||
MKT Summer Festival Tour Drivers.jpg|[[Mario|Mario (Happi)]], [[Princess Peach|Peach (Kimono)]], [[Mario|Mario (Hakama)]], and [[Princess Daisy|Daisy (Yukata)]] gliding in Tokyo Blur 3R | |||
MKT Daisy Yukata.jpg|Daisy (Yukata) tricking in the [[Festival Girl]] | |||
MKT Summer Festival Tour Week 2 Drivers.jpg|Peach (Kimono), Mario (Happi), and Mario (Hakama) gliding | |||
MKT Summer Festival Tour End.jpg|Mario (Hakama), Daisy (Yukata), Peach (Kimono), and Mario (Happi) tricking | |||
</gallery> | |||
====Tokyo Blur 4==== | |||
=====Course icons===== | |||
<gallery> | |||
MKT Icon TokyoBlur4.png|Course icon of Tokyo Blur 4 with Mario (Racing) | |||
MKT Icon TokyoBlur4 Nabbit.png|Course icon of Tokyo Blur 4 with Nabbit | |||
MKT Icon TokyoBlur4R.png|Course icon of Tokyo Blur 4R with Metal Mario | |||
MKT Icon TokyoBlur4R BirdoBlack.png|Course icon of Tokyo Blur 4R with Birdo (Black) | |||
MKT Icon TokyoBlur4R PeachWintertime.png|Course icon of Tokyo Blur 4R with Peach (Wintertime) | |||
MKT Icon TokyoBlur4T.png|Course icon of Tokyo Blur 4T with Mario (Happi) | |||
MKT Icon TokyoBlur4T FunkyKong.png|Course icon of Tokyo Blur 4T with Funky Kong | |||
MKT Icon TokyoBlur4RT.png|Course icon of Tokyo Blur 4R/T with Mario (SNES) | |||
MKT Tour39 BabyPeachCupChallenge.png|The icon of the [[Combo Attack]] bonus challenge set in Tokyo Blur 4T | |||
MKT Tour39 BabyRosalinaCupChallenge.png|The icon of the [[Time Trial (Mario Kart Tour)|Time Trial]] bonus challenge set in Tokyo Blur 4 | |||
MKT Tour40 WaluigiCupChallenge.png|The icon of the Time Trial bonus challenge set in Tokyo Blur 4R | |||
</gallery> | |||
=====Screenshots===== | |||
<gallery> | |||
MKT Tokyo Blur 4 Scene 2.jpg|View of the course | |||
MKT Mario Tour Teaser.jpg|[[Mario|Mario (SNES)]], Mario (Hakama), and Mario (Happi) tricking, with Mario (Racing) driving ahead | |||
MKT Mario Racing.jpg|Mario (Racing) drifting in the [[B Dasher Mk. 2]] | |||
MKT Banana Pipe Drivers.jpg|[[Dixie Kong]], Mario (Sunshine), [[Donkey Kong Jr.|Donkey Kong Jr. (SNES)]], and [[Funky Kong]] gliding in [[Pipe Frame]]s | |||
</gallery> | |||
===''Mario Kart 8 Deluxe''=== | |||
<gallery> | <gallery> | ||
MK8D Tour Tokyo Blur Course Icon.png|The course icon | MK8D Tour Tokyo Blur Course Icon.png|The course icon | ||
| Line 48: | Line 220: | ||
|Fre=Traversée de Tokyo | |Fre=Traversée de Tokyo | ||
|FreM= Crossing Tokyo | |FreM= Crossing Tokyo | ||
|Ger=Tokio-Tempotour | |Ger=Tokio-Tempotour<br>Tokyo-Tempotour <small>(before the Summer Festival Tour)</small> | ||
|GerM=Tokyo Speed Tour | |GerM=Tokyo Speed Tour | ||
|Ita=Neon di Tokyo | |Ita=Neon di Tokyo | ||
| Line 64: | Line 236: | ||
}} | }} | ||
==Trivia== | |||
*The minimap for Tokyo Blur 1 resembles that of [[DS Yoshi Falls|Yoshi Falls]] from ''[[Mario Kart DS]]'' and [[Luigi Circuit (Mario Kart Wii)|Luigi Circuit]] from ''[[Mario Kart Wii]]''. | |||
*The presence of [[Noshi]]s in the R/T variant of this course references the {{wp|kaiju}}.<ref name="dinosaur"/> | |||
*Before the Summer Festival Tour, no kart had Tokyo Blur R listed as a favorite course; instead, its appearances in the Mario Cup and Toadette Cup relied on the spotlight bonus to raise the [[Kabuki Dasher]] and the [[Quickshaw]], respectively, to the top tier. | |||
*In the trailer for the Tokyo Tour, [[Princess Peach|Peach (Kimono)]] can be seen driving in the {{wp|Sensō-ji}} section, which is only accessible in Tokyo Blur 2 and Tokyo Blur 4.<ref>[https://www.youtube.com/shorts/lKsgYxTXoCI Tokyo Tour trailer]</ref> | |||
*Tokyo Blur 2 is the first city course in the game to reuse its [[Coin Rush (Mario Kart Tour)|Coin Rush]] in a later tour. | |||
*Tokyo Blur 3 is one of three city courses that did not have an R/T variant in the course's debut tour, and was the first city course to do so. This course's R/T variant would later debut in the [[Mario vs. Peach Tour]] after the course's debut in the [[Summer Festival Tour]], and it would remain the only city course with this characteristic until the [[Metropolitan Tour]], with the introduction of [[Berlin Byways]] and [[Amsterdam Drift 2]]. | |||
==References== | |||
<references/> | |||
{{MKT}} | |||
{{MK8}} | |||
{{MK race courses}} | {{MK race courses}} | ||
[[it:Neon di Tokyo 1]] | |||
[[Category:Mario Kart 8 Deluxe – Booster Course Pass race courses]] | [[Category:Mario Kart 8 Deluxe – Booster Course Pass race courses]] | ||
[[Category:Mario Kart Tour race courses]] | |||
[[Category:Cities]] | |||
[[Category:Unlockable race courses]] | |||
Revision as of 08:56, August 14, 2022
| Tokyo Blur | |||
|---|---|---|---|
 View of the Tokyo Tower | |||
| Information | |||
| Appears in | Mario Kart Tour (2019 (1), 2020 (2, 3), 2021 (4)) Mario Kart 8 Deluxe (Booster Course Pass) (2022) | ||
| Cup(s) | Lucky Cat Cup (8 Deluxe) | ||
| Tour(s) |
Tokyo Blur:
Tokyo Tour New Year's Tour (challenge only) Summer Festival Tour 1st Anniversary Tour Mario vs. Peach Tour 2nd Anniversary Tour Tokyo Blur 2: New Year's Tour Summer Festival Tour Mario vs. Peach Tour Tokyo Blur 3: Summer Festival Tour Mario vs. Peach Tour Tokyo Blur 4: Mario Tour Yoshi Tour (2021) Mario vs. Peach Tour | ||
| |||
| |||
| |||


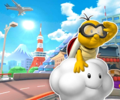
Tokyo Blur is a race course in Mario Kart Tour. It is named after and inspired by Tokyo, Japan and makes its debut in the tour in the city’s namesake tour, the Tokyo Tour. The course's music is based on the theme of 3DS Toad Circuit and 3DS Mario Circuit. This course has four different routes, the most out of any city course alongside New York Minute: Tokyo Blur, Tokyo Blur 2, Tokyo Blur 3, and Tokyo Blur 4, the latter three of which were introduced in the New Year's Tour, Summer Festival Tour, and Mario Tour, respectively. The fourth iteration of this course differs from the others, in that it is two sections as opposed to two laps.
The first layout is a favorite of Toad (Pit Crew), Mario (Hakama), Toad (Party Time), Daisy (Yukata), Peach (Happi), and Bowser Jr. (Pirate), the second route is a favorite of Pink Shy Guy, Cat Peach, Nabbit, Mario (Happi), Baby Rosalina (Detective), Cat Toad, and Bowser (Santa). It can also be a favorite of Peach (Happi) if she is at level 6, the third route is a favorite of Birdo (Black), Yoshi (Reindeer), Mario (Happi), Mario (Chef), Daisy (Yukata), Luigi (Painter), and Daisy (Swimwear) and the fourth route is a favorite of Blue Yoshi, Nabbit, Daisy (Yukata), Cat Toad, Mario (Racing), and White Yoshi..
Tokyo Blur reappears in the Booster Course Pass DLC for Mario Kart 8 Deluxe as the first course in the Lucky Cat Cup. The course combines the first three versions of Tokyo Blur together, with a lap dedicated to each variant.
Mario Kart Tour


each other.
Course layouts
Tokyo Blur
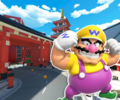
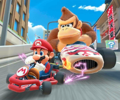
In the standard layout, all of the racers start the course on the central span of the Rainbow Bridge. Just after the starting line, the road curves to the right through Ginza, then makes a slight left before the Wako store. Not long after, the course makes a right U-turn near the National Diet Building and the Miraikan, then goes through a tunnel. As the Tokyo Skytree, Asahi Beer Hall, and Tokyo Big Sight come into view, the road makes a wide right turn back onto Rainbow Bridge. Fuji TV's headquarters can be seen on the left.
The course also appears as Tokyo Blur R (reverse), Tokyo Blur T (with ramps), and Tokyo Blur R/T (reverse and with ramps). This route is used as the layout for the first lap of Mario Kart 8 Deluxe's variation of Tokyo Blur in the Booster Course Pass.
The course is also a favorite of Toad (Pit Crew), Mario (Hakama), Toad (Party Time), Daisy (Yukata), Peach (Happi), and Bowser Jr. (Pirate).
Tokyo Blur 2
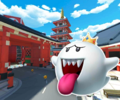
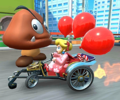
In the standard layout, all of the racers start the course on the central span of the Rainbow Bridge. Just after the starting line, the road curves to the right through Ginza, then makes a slight right before the Wako store. After passing by two Thwomps, the course shifts left at a roundabout and continues straight (with a subway entrance and Akihabara shops visible on the left), then goes under an archway left of the Sensō-ji, where a kadomatsu can be found. As the player slights right then turns left at a signalized intersection, the road makes a wide right turn back onto Rainbow Bridge. Fuji TV's headquarters can be seen on the left.
The course also appears as Tokyo Blur 2R (reverse), Tokyo Blur 2T (with ramps), and Tokyo Blur 2R/T (reverse and with ramps). This route is used as the layout for the second lap of Mario Kart 8 Deluxe's variation of Tokyo Blur in the Booster Course Pass.
Tokyo Blur 3
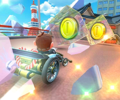
In the standard layout, all of the racers start the course on the central span of the Rainbow Bridge. Just after the starting line, the road curves to the right through Ginza, then makes a slight right before the Wako store. After passing by some Thwomps, the course shifts left at a roundabout and continues straight to the Shuto Expressway, which is built along the Nihonbashi River. The toll plaza bar only opens when a driver passes through; the course then curves to the right. After passing by two Thwomps and after a wide turn up the spiral loop around the Tokyo Big Sight, a Glide Ramp enables the driver to fly out of Shuto Expressway and back onto Rainbow Bridge. Fuji TV's headquarters can be seen on the left.
In the trick variant, ramps are added on the Rainbow Bridge. Near the end of the bridge is a ramp with a Dash Panel on it. The Thwomps in the city are replaced with small ramps. After entering Shuto Expressway, there are ramps that replace the Thwomps on the expressway. The spiral loops around the Tokyo Big Sight has added ramps on it. The gliding section at the end of the course is replaced by a normal ramp.
When configured for Coin Rush, cars and buses will block off a lane in the highway and toll booth, making the collection of coins easier.
The course also appears as Tokyo Blur 3R (reverse), Tokyo Blur 3T (with ramps), and Tokyo Blur 3R/T (reverse and with ramps). This route is used as the layout for the third lap of Mario Kart 8 Deluxe's variation of Tokyo Blur in the Booster Course Pass.
Tokyo Blur 4
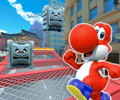
In the standard layout, the track starts out following the same path as Tokyo Blur. All of the racers start the course on the central span of the Rainbow Bridge. Just after the starting line, the road curves to the right through Ginza, then makes a slight left before the Wako store. Not long after, the course makes a right U-turn near the National Diet Building and the Miraikan, then goes through a tunnel. The course then makes a sharp left to follow a small portion of Tokyo Blur 2 in reverse, going under the Kaminarimon next to the Sensō-ji, where the second segment of the course begins. The track then immediately makes a U-turn toward the Shuto Expressway; the remainder of the course follows the path of Tokyo Blur 3, entering the expressway through a set of toll gates before rounding the spiral loop around the Tokyo Big Sight. A Glide Ramp sends the player back onto the Rainbow Bridge, where a set of Thwomps on either side threatens the players just before the finish line.
The course also appears as Tokyo Blur 4R (reverse), Tokyo Blur 4T (with ramps), and Tokyo Blur 4R/T (reverse and with ramps).
Appearances
The first layout of Tokyo Blur is currently the only course based on a real world city to have appeared in five different tours: the Tokyo Tour, the Summer Festival Tour, the 1st Anniversary Tour, the Mario vs. Peach Tour, and the 2nd Anniversary Tour. It also made a minor appearance in the New Year's Tour as the location of a bonus challenge and in the Mario Tour as the third and final race in the 2-Player Challenge mode.
For this course's tour appearances, see List of Tokyo Blur tour appearances in Mario Kart Tour.
Mario Kart 8 Deluxe
Tokyo Blur makes its console debut in Mario Kart 8 Deluxe via the Booster Course Pass. It is the first course of the Lucky Cat Cup, and as such was added as part of the first wave of the DLC. Similarly to Tokyo Blur 4, it is an expanded and combined version of the first three routes for this course; however, this version dedicates one lap to each variation. The first lap is based on Tokyo Blur, the second lap is based on Tokyo Blur 2, and the third lap is based on Tokyo Blur 3, with each lap visiting the respective landmarks of those stages. The minimap has been rotated 90 degrees compared to the equivalent minimaps for the variants in Tour. Unlike Paris Promenade, its hazards - Thwomps - have been retained.
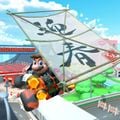
Tokyo Blur is one of three courses to originate from Mario Kart Tour to appear in the first wave of the DLC, alongside Paris Promenade and Ninja Hideaway. This is also one of four tracks in Mario Kart 8 Deluxe where players can hit the banner (causing it to spin), like Mario Circuit, Template:Classic-link and Template:Classic-link. Unlike the other courses mentioned, this is only possible during the final lap.
Sponsors
- Mario Electrical Equipment (posters)
- Bowser Technology (posters)
- Shell Books (posters)
- Kingdom Café (posters)
- Galaxy Air (signs)
- Mario Work Gear (signs)
- Bullet Bill Speed Trial (signs)
- Mushroom Piston (signs)
- Princess Orange (signs, vending machines)
- Boomerang Bros. International Airlines (signs)
Profiles
Mario Kart Tour
- Mario Kart Tour Twitter: Take a tour of a Japanese city in the Tokyo Blur course! Enjoy the sights as you take in iconic landmarks, including Mt. Fuji off in the distance![1]
- Mario Kart Tour Twitter: A giant dinosaur stomping around in the middle of a city? The Tokyo Blur course is like something straight out of a movie! The tricked-out Tokyo Blur R/T is waiting for you in the Peachette Cup![2]
- Mario Kart Tour Twitter: Japan's most famous city is back for for another lap with the Tokyo Blur 2 course. Those traditional kadomatsu decorations aren't just for show—hitting them with an item is a great way to rack up some extra points![3]
- Mario Kart Tour Twitter: It's time for the Summer Festival Tour! Return to the sizzling streets of Tokyo for some sunny fun. Blaze new paths in the Tokyo Blur course, but don't overheat![4]
- Mario Kart Tour Twitter: The Snow Tour is wrapping up in blue. Next up is the Mario Tour featuring Tokyo Blur 4, a brand-new variant of the existing Tokyo-based course![5]
Gallery
Mario Kart Tour
Tokyo Blur
Course icons
Course icon of Tokyo Blur with Mario (Hakama)
Course icon of Tokyo Blur with Toad (Pit Crew)
Course icon of Tokyo Blur with Baby Peach
Course icon of Tokyo Blur with Daisy (Yukata)
Course icon of Tokyo Blur with Lakitu
Course icon of Tokyo Blur R with Peach (Kimono)
Course icon of Tokyo Blur R with Baby Rosalina (Detective)

Course icon of Tokyo Blur R with Mario (Happi)
Course icon of Tokyo Blur T with Peach (Kimono)

Course icon of Tokyo Blur T with Mario (Hakama)
Course icon of Tokyo Blur T with Lakitu
Course icon of Tokyo Blur R/T with Mario (Hakama)
Course icon of Tokyo Blur R/T with Diddy Kong
The icon of the Ring Race bonus challenge set in Tokyo Blur
The icon of the Do Jump Boosts bonus challenge set in Tokyo Blur
The icon of the Glider Challenge bonus challenge set in Tokyo Blur

The icon of the Goomba Takedown bonus challenge set in Tokyo Blur


Screenshots
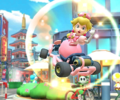
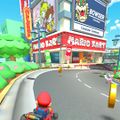
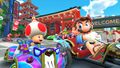
View of the starting line
View of the finish line area
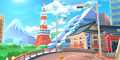
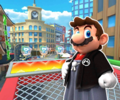
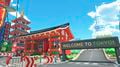
View of the Tokyo Tower and some buildings
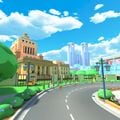
View of the National Diet Building
View of various sponsors
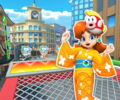
Ginza section
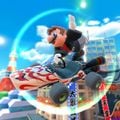
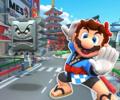
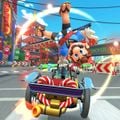
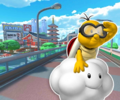
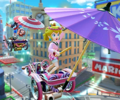
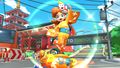
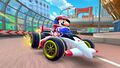
Mario (Hakama) tricking in the Kabuki Dasher
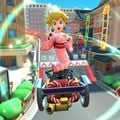
Peach (Kimono) tricking in the Quickshaw in Tokyo Blur R/T
Mario (Hakama) cheering in the Quickshaw
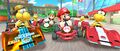
Mario, Luigi, Red Koopa (Freerunning), and Gold Koopa (Freerunning) racing on the course
Mario (Hakama), Peach (Kimono), Peach (Vacation), Luigi (Painter), and Pauline tricking in Tokyo Blur T


Tokyo Blur 2
Course icons
Course icon of Tokyo Blur 2 with Mario (Happi)
Course icon of Tokyo Blur 2 with Pink Shy Guy
Course icon of Tokyo Blur 2R with Toad (Party Time)
Course icon of Tokyo Blur 2R with Wario
Course icon of Tokyo Blur 2R with King Boo
Course icon of Tokyo Blur 2R with Mario (Tuxedo)
Course icon of Tokyo Blur 2T with Lakitu
Course icon of Tokyo Blur 2T with Toad (Party Time)
Course icon of Tokyo Blur 2T with Peach (Kimono)
Course icon of Tokyo Blur 2T with Builder Toadette
Course icon of Tokyo Blur 2R/T with Iggy
Course icon of Tokyo Blur 2R/T with Red Yoshi
The icon of the Break Item Boxes bonus challenge set in Tokyo Blur 2
The icon of the Steer Clear of Obstacles bonus challenge set in Tokyo Blur 2
The icon of the Vs. Mega Donkey Kong bonus challenge set in Tokyo Blur 2


Screenshots
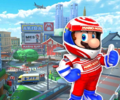
Toad (Party Time) and Mario (Happi) driving
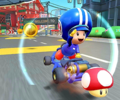
Mario (Happi) tricking in the Quickshaw
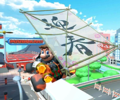
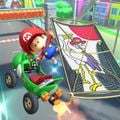
Mario (Hakama) gliding in the Kabuki Dasher with the New Year's Kite
Baby Mario gliding in the Turbo Yoshi with the Baby Mario Hanafuda
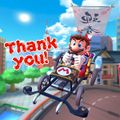
Mario (Happi) gliding in the Quickshaw with the New Year's Kite


Tokyo Blur 3
Course icons
Course icon of Tokyo Blur 3 with Mario (Happi)
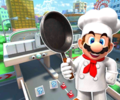
Course icon of Tokyo Blur 3 with Mario (Chef)
Course icon of Tokyo Blur 3R with Mario (Hakama)
Course icon of Tokyo Blur 3R with Lakitu
Course icon of Tokyo Blur 3R with Black Yoshi
Course icon of Tokyo Blur 3T with Mario (Hakama)
Course icon of Tokyo Blur 3T with Daisy (Yukata)
Course icon of Tokyo Blur 3T with Builder Toad
Course icon of Tokyo Blur 3R/T with Shy Guy (Ninja)
The icon of the Ring Race bonus challenge set in Tokyo Blur 3
The icon of the Big Reverse Race bonus challenge set in Tokyo Blur 3
The icon of the Snap a Photo bonus challenge set in Tokyo Blur 3R/T
The icon of the Combo Attack bonus challenge set in Tokyo Blur 3T


Screenshots
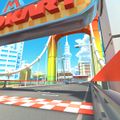
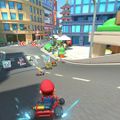
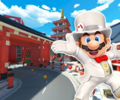
View of the course
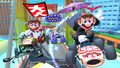
Mario (Happi), Peach (Kimono), Mario (Hakama), and Daisy (Yukata) gliding in Tokyo Blur 3R
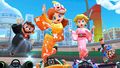
Daisy (Yukata) tricking in the Festival Girl
Peach (Kimono), Mario (Happi), and Mario (Hakama) gliding
Mario (Hakama), Daisy (Yukata), Peach (Kimono), and Mario (Happi) tricking


Tokyo Blur 4
Course icons
Course icon of Tokyo Blur 4 with Mario (Racing)
Course icon of Tokyo Blur 4 with Nabbit
Course icon of Tokyo Blur 4R with Metal Mario
Course icon of Tokyo Blur 4R with Birdo (Black)
Course icon of Tokyo Blur 4R with Peach (Wintertime)
Course icon of Tokyo Blur 4T with Mario (Happi)
Course icon of Tokyo Blur 4T with Funky Kong
Course icon of Tokyo Blur 4R/T with Mario (SNES)
The icon of the Combo Attack bonus challenge set in Tokyo Blur 4T
The icon of the Time Trial bonus challenge set in Tokyo Blur 4
The icon of the Time Trial bonus challenge set in Tokyo Blur 4R


Screenshots
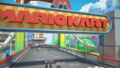
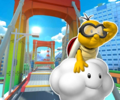
View of the course
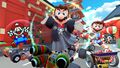
Mario (SNES), Mario (Hakama), and Mario (Happi) tricking, with Mario (Racing) driving ahead
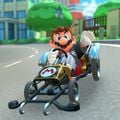
Mario (Racing) drifting in the B Dasher Mk. 2
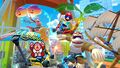
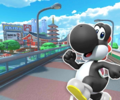
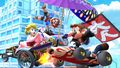
Dixie Kong, Mario (Sunshine), Donkey Kong Jr. (SNES), and Funky Kong gliding in Pipe Frames


Mario Kart 8 Deluxe
The course icon
Names in other languages
| Language | Name | Meaning | Notes |
|---|---|---|---|
| Chinese (simplified) | 东京赛道[?] Dōngjīng Sàidào |
Tokyo Speedway | |
| Chinese (traditional) | 東京賽道[?] Dōngjīng Sàidào |
Tokyo Speedway | |
| Dutch | Tokio-Toer[?] | Tokyo Tour | |
| French | Traversée de Tokyo[?] | Crossing Tokyo | |
| German | Tokio-Tempotour Tokyo-Tempotour (before the Summer Festival Tour)[?] |
Tokyo Speed Tour | |
| Italian | Neon di Tokyo[?] | Tokyo Neon | |
| Korean | 도쿄 블러[?] Dokyo Beulleo |
Tokyo Blur | |
| Portuguese | Velocidade em Tóquio[?] | Speed in Tokyo | |
| Russian | Токийское ралли[?] Tokiyskoye ralli |
Tokyo Rally | |
| Spanish | Circuito Tokio[?] | Tokyo Circuit |
Trivia
- The minimap for Tokyo Blur 1 resembles that of Yoshi Falls from Mario Kart DS and Luigi Circuit from Mario Kart Wii.
- The presence of Noshis in the R/T variant of this course references the kaiju.[2]
- Before the Summer Festival Tour, no kart had Tokyo Blur R listed as a favorite course; instead, its appearances in the Mario Cup and Toadette Cup relied on the spotlight bonus to raise the Kabuki Dasher and the Quickshaw, respectively, to the top tier.
- In the trailer for the Tokyo Tour, Peach (Kimono) can be seen driving in the Sensō-ji section, which is only accessible in Tokyo Blur 2 and Tokyo Blur 4.[6]
- Tokyo Blur 2 is the first city course in the game to reuse its Coin Rush in a later tour.
- Tokyo Blur 3 is one of three city courses that did not have an R/T variant in the course's debut tour, and was the first city course to do so. This course's R/T variant would later debut in the Mario vs. Peach Tour after the course's debut in the Summer Festival Tour, and it would remain the only city course with this characteristic until the Metropolitan Tour, with the introduction of Berlin Byways and Amsterdam Drift 2.
References
- ^ mariokarttourEN (October 15, 2019). Twitter. Retrieved March 16, 2020.
- ^ a b mariokarttourEN (October 19, 2019). Twitter. Retrieved December 7, 2019.
- ^ mariokarttourEN (January 1, 2020). Twitter. Retrieved March 13, 2020.
- ^ mariokarttourEN (August 26, 2020). Twitter. Retrieved August 26, 2020.
- ^ mariokarttourEN (March 4, 2021). Twitter. Retrieved March 4, 2021.
- ^ Tokyo Tour trailer