Sand Kingdom: Difference between revisions
Nintendo101 (talk | contribs) m (→Bonus areas) |
|||
| (45 intermediate revisions by 28 users not shown) | |||
| Line 1: | Line 1: | ||
{{distinguish|Desert Kingdom}} | {{distinguish|Desert Kingdom}} | ||
{{ | {{Course infobox | ||
|image=[[File:SMO Art - Sand Kingdom.jpg|280px]] | |||
|image=SMO Sand | |missions=[[Atop the Highest Tower]]<br>[[Moon Shards in the Sand]]<br>[[Showdown on the Inverted Pyramid]]<br>[[The Hole in the Desert]] | ||
| | |boss=[[Harriet]]<br>[[Knucklotec]] | ||
| | |moons=93 | ||
|regionalcoins=100 | |||
| | |||
| | |||
}} | }} | ||
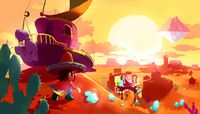
The '''Sand Kingdom''' is the third kingdom visited in ''[[Super Mario Odyssey]]''. It is the greater location of '''Tostarena''', which is a desert village featuring a small town and a large ruins area. This kingdom's main landmark is the [[Inverted Pyramid]], which is an upside-down pyramid located in the north-east section of the area. When [[Mario]] first visits here, the kingdom is covered with large pillars of ice and [[Bowser]] is found atop the Inverted Pyramid. The player's first objective in this kingdom is to reach the "highest tower". From there, the player must find [[Moon Shard]]s in the Moe-Eye habitat. After that, they reach the top of the Inverted Pyramid and fight [[Hariet]], one of the [[Broodals]], which will grant the player a [[Multi Moon]]. When collected, the player is teleported back to the Odyssey, and the kingdom cycles to a night-time version, where the Inverted Pyramid floats into the air, revealing a large hole underneath. The kingdom is also overrun by [[Chincho]]s during the night-time, which Mario must avoid as he heads to the large hole under the Inverted Pyramid. Once the player enters, he must traverse through an icy Underground Temple and then fight [[Knucklotec]] at the end of the Temple. Defeating this boss rewards Mario with another Multi Moon, which (when collected) reverts the kingdom back to daytime and causes almost all the ice on the surface of the kingdom to melt, allowing access to more Power Moons. Once Mario has collected enough Power Moons, he can head off to the next kingdom - either the [[Lake Kingdom]] or the [[Wooded Kingdom]] may be chosen, but not both at this point. | |||
The '''Sand Kingdom''' is the third kingdom visited in ''[[Super Mario Odyssey]]''. It is the greater location of '''Tostarena''', which is a desert village featuring a small town and a large ruins area. This kingdom's main landmark is the Inverted Pyramid, which is an upside-down pyramid located in the north-east section of the area. When Mario first visits here, the kingdom is covered with large pillars of ice and [[Bowser]] is found atop the Inverted Pyramid. The player's first objective in this kingdom is to reach the "highest tower". From there, the player must find [[Moon Shard]]s in the Moe-Eye habitat. After that, they reach the top of the Inverted Pyramid and fight [[Hariet]], one of the [[Broodals]], which will grant the player a [[Multi Moon]]. When collected, the player is teleported back to the Odyssey, and the kingdom cycles to a night-time version, where the Inverted Pyramid floats into the air, revealing a large hole underneath. The kingdom is also overrun by [[Chincho]]s during the night-time, which Mario must avoid as he heads to the large hole under the Inverted Pyramid. Once the player enters, he must traverse through an icy Underground Temple and then fight [[Knucklotec]] at the end of the Temple. Defeating this boss rewards Mario with another Multi Moon, which (when collected) reverts the kingdom back to daytime and causes almost all the ice on the surface of the kingdom to melt, allowing access to more Power Moons. Once Mario has collected enough Power Moons, he can head off to the next kingdom - either the [[Lake Kingdom]] or the [[Wooded Kingdom]] may be chosen, but not both at this point. | |||
The Sand Kingdom was the first location shown in the game, dating back to the first [[Nintendo Switch]] reveal trailer. It is located east of the [[Cascade Kingdom]], southwest of the Lake Kingdom, and northwest of the Wooded Kingdom. These three kingdoms are all located on a large landmass resembling Pangaea. | The Sand Kingdom was the first location shown in the game, dating back to the first [[Nintendo Switch]] reveal trailer. It is located east of the [[Cascade Kingdom]], southwest of the Lake Kingdom, and northwest of the Wooded Kingdom. These three kingdoms are all located on a large landmass resembling Pangaea. | ||
The location is primarily based off of {{wp|Mesoamerica}}, particularly {{wp|Mexico}}. However, other aspects allude to different countries, with [[Moe-Eye]]s inspired by the {{wp|moai|moai statues}} from {{wp|Easter Island}} and the [[Jaxi]]s presumably inspired by the {{wp|komainu}} from [[Japan]]. The name "Tostarena" is likely from the Spanish words | The location is primarily based off of {{wp|Mesoamerica}}, particularly {{wp|Mexico}}. For example, [[Tostarenan]]s feature elements associated with the {{wp|Day of the Dead}}, and the [[Inverted Pyramid]] resembles an upside down octagonal version of the {{wp|Chichén Itzá}}. However, other aspects allude to different countries, with [[Moe-Eye]]s inspired by the {{wp|moai|moai statues}} from {{wp|Easter Island}} and the [[Jaxi]]s presumably inspired by the {{wp|komainu}} from [[Japan]]. The name "Tostarena" is likely from the Spanish words ''tostado'' ("toasted") and ''arena'' ("sand"). | ||
==Concept and creation== | ==Concept and creation== | ||
| Line 41: | Line 33: | ||
==Brochure details== | ==Brochure details== | ||
{{SMO kingdom | |||
|subtitle=Home of Red Sands and Lively Locals | |||
|image=SMO Sand Brochure Art.png | |||
|area=Tostarena | |||
|area_subtitle=Gateway to the stark beauty of the desert. | |||
|population=Middling | |||
|size=Expansive | |||
|locals=[[Tostarenan]]s, [[Moe-Eye]]s | |||
|currency=Pyramid-shaped | |||
|industry=Tourism, Precious stones | |||
|temperature=Average 104°F (40°C) | |||
|first_appearance=''[[Super Mario Odyssey]]'' ([[List of games by date#2017|2017]]) | |||
|latest_appearance=''[[The Super Mario Bros. Movie]]'' (2023) | |||
}} | |||
[[File:SMO Sand Brochure A.png|thumb|left|150px|''The bright colors of Tostarena.'']] | [[File:SMO Sand Brochure A.png|thumb|left|150px|''The bright colors of Tostarena.'']] | ||
<big>Tostarenan Town</big> | |||
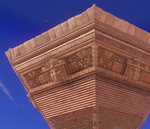
''A small town that serves as the hub for tourists planning to visit the Inverted Pyramid. The colorful buildings and cheerful people provide a warm welcome for visitors. They're happy to provide direction, so don't hesitate to say hello.'' | ''A small town that serves as the hub for tourists planning to visit the Inverted Pyramid. The colorful buildings and cheerful people provide a warm welcome for visitors. They're happy to provide direction, so don't hesitate to say hello.'' | ||
[[File:SMO Sand Brochure B.png|thumb|200px|''The ruins greet you with an impressive gate.'']] | [[File:SMO Sand Brochure B.png|thumb|200px|''The ruins greet you with an impressive gate.'']] | ||
<big>Mysterious Ancient Ruins</big> | |||
''Head north from town and you'll be greeted by ancient ruins that dot the expansive desert. Though many have become conflict regions patrolled by Bullet Bills, their status as important heritage sites is undeniable.'' | ''Head north from town and you'll be greeted by ancient ruins that dot the expansive desert. Though many have become conflict regions patrolled by Bullet Bills, their status as important heritage sites is undeniable.'' | ||
| Line 52: | Line 60: | ||
{{br}} | {{br}} | ||
[[File: SMO Sand Brochure D.png|thumb|left|150px|''Like a precious gem itself.'']] | [[File:SMO Sand Brochure D.png|thumb|left|150px|''Like a precious gem itself.'']] | ||
<big>Inverted Pyramid</big> | |||
''The true "can't miss" of this region, the Inverted Pyramid may look unstable, but rest assured it never topples and has thrilled tourists for years. It is said that a legendary artifact called the Binding Band lies within, and the upside-down pyramid symbolizes how those joined by it will never part even if the world turns upside down.'' | ''The true "can't miss" of this region, the Inverted Pyramid may look unstable, but rest assured it never topples and has thrilled tourists for years. It is said that a legendary artifact called the Binding Band lies within, and the upside-down pyramid symbolizes how those joined by it will never part even if the world turns upside down.'' | ||
[[File: SMO Sand Brochure E.png|thumb|150px|''Payment required in advance.'']] | [[File:SMO Sand Brochure E.png|thumb|150px|''Payment required in advance.'']] | ||
<big>Jaxi</big> | |||
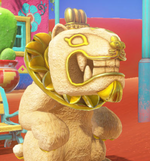
''Let's have a look at the curious local transport method known as the Jaxi.'' | ''Let's have a look at the curious local transport method known as the Jaxi.'' | ||
| Line 65: | Line 74: | ||
''Make good use of them and you'll be exploring this unforgiving desert in comfort and style.'' | ''Make good use of them and you'll be exploring this unforgiving desert in comfort and style.'' | ||
[[File: SMO Sand Brochure F.png|thumb|left|150px|''So beautiful you'll think you're at a resort.'']] | [[File:SMO Sand Brochure F.png|thumb|left|150px|''So beautiful you'll think you're at a resort.'']] | ||
<big>Living Heart of the Desert</big> | |||
''Here's a spot to moisten your dried and withered heart, with greenery and water to make you forget you're in the desert. The fish and birds are plentiful and well worth a visit.'' | ''Here's a spot to moisten your dried and withered heart, with greenery and water to make you forget you're in the desert. The fish and birds are plentiful and well worth a visit.'' | ||
{{br}} | {{br}} | ||
[[File: SMO Sand Brochure C.png|thumb|left|50px]] | [[File:SMO Sand Brochure C.png|thumb|left|50px]] | ||
<big>The Moe-Eyes love their shades.</big> | |||
''They'll run if chased, but they're a proud people who have long inhabited these ruins. Please be polite.'' | ''They'll run if chased, but they're a proud people who have long inhabited these ruins. Please be polite.'' | ||
{{br}} | {{br}} | ||
[[File: SMO Sand Brochure G.png|thumb|350px]] | [[File: SMO Sand Brochure G.png|thumb|350px]] | ||
<big>Three Keys to the Kingdom</big> | |||
# ''Enjoy the small but lively desert village and its charming inhabitants.'' | # ''Enjoy the small but lively desert village and its charming inhabitants.'' | ||
# ''Wonder at the Inverted Pyramid and its upside-down magic.'' | # ''Wonder at the Inverted Pyramid and its upside-down magic.'' | ||
| Line 82: | Line 93: | ||
{{br}} | {{br}} | ||
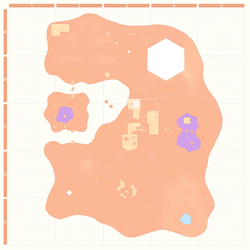
<big>Map</big> | |||
[[File:SMO Sand Brochure Map.png|thumb|left|250px]] | [[File:SMO Sand Brochure Map.png|thumb|left|250px]] | ||
{{br}} | {{br}} | ||
==Checkpoint Flag locations== | ==Checkpoint Flag locations== | ||
===Odyssey=== | ===Odyssey=== | ||
[[File:SMO Shot - Red Airship.png|thumb]] | [[File:SMO Shot - Red Airship.png|thumb|The Odyssey arrives at the kingdom.]] | ||
{{main|Odyssey}} | {{main|Odyssey}} | ||
The Odyssey lands at the southern end of the map and can be warped back to at any time. | The Odyssey lands at the southern end of the map and can be warped back to at any time. | ||
===Tostarena Town=== | ===Tostarena Town=== | ||
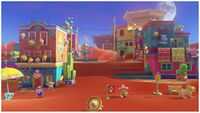
[[File:TostarenaTown.jpg|thumb|left]] | [[File:TostarenaTown.jpg|thumb|left|An overview of the town with a checkpoint and the town's inhabitants.]] | ||
{{main|Tostarena Town}} | {{main|Tostarena Town}} | ||
Tostarena Town is a small civilization found just north of the Odyssey's landing site. It is home to a [[Crazy Cap]] and a [[Slots]] minigame. [[Talkatoo]] and [[Luigi]] can be found here. A | Tostarena Town is a small civilization found just north of the Odyssey's landing site. It is home to a [[Crazy Cap]] and a [[Slots]] minigame. [[Talkatoo]] and [[Luigi]] can be found here. A circuit of [[spark pylon|power lines]] run around the town, and a Tostarenan eventually sets more power lines that Mario can use as a shortcut to the Tostarena Ruins Round Tower and the top of the Inverted Pyramid. The Checkpoint Flag is at the town's southern entrance next to a [[Jaxi Stand]]. | ||
{{br}} | {{br}} | ||
===Tostarena Ruins Entrance=== | ===Tostarena Ruins Entrance=== | ||
[[File:SMO Sand Brochure B.png|thumb]] | [[File:SMO Sand Brochure B.png|thumb|The entrance to the ruins.]] | ||
The entrance to [[Tostarena Ruins]] is located north of Tostarena Town and is marked by a large stone gate. Behind the Checkpoint Flag are a few [[Mini Goomba]]s (later replaced with ordinary [[Goomba]]s wearing sombreros), with a few more up ahead, as well as the start of the first platforming section of the ruins. Mario may reach the top of the arch via [[Bullet Bill]] or spark pylon to find a Power Moon on top of it. In front of the ruins entrance is a [[Jaxi]] station. | The entrance to [[Tostarena Ruins]] is located north of Tostarena Town and is marked by a large stone gate. Behind the Checkpoint Flag are a few [[Mini Goomba]]s (later replaced with ordinary [[Goomba]]s wearing sombreros), with a few more up ahead, as well as the start of the first platforming section of the ruins. Mario may reach the top of the arch via [[Bullet Bill]] or spark pylon to find a Power Moon on top of it. In front of the ruins entrance is a [[Jaxi]] station. | ||
| Line 113: | Line 124: | ||
===Tostarena Ruins Sand Pillar=== | ===Tostarena Ruins Sand Pillar=== | ||
[[File:SMO Sand Moon 35.png|thumb]] | [[File:SMO Sand Moon 35.png|thumb|A Goomba Tower impresses Goombette.]] | ||
This Checkpoint Flag is found on the platform shortly after the Tostarena Ruins Entrance, starting off the second level of the ruins. Aside from the Checkpoint Flag, there are a few signs directing toward the sand geysers up ahead, a bump in the ground that Mario may [[Ground Pound]] to unearth a circle of [[coin]]s, and a small group of coins circling a chunk of ice. Later on, [[Goombette]] appears on this platform, overlooking the area just below. Mario must bring a [[Goomba Tower]] of reasonable size over to her to receive a Power Moon. Aside from this, there are not many other Power Moons next to the sand pillar, though there are quite a few surrounding it. The area below this platform has a [[Bullet Bill]] cannon, which serves as helpful for finding and collecting some of these Power Moons. | This Checkpoint Flag is found on the platform shortly after the Tostarena Ruins Entrance, starting off the second level of the ruins. Aside from the Checkpoint Flag, there are a few signs directing toward the sand geysers up ahead, a bump in the ground that Mario may [[Ground Pound]] to unearth a circle of [[coin]]s, and a small group of coins circling a chunk of ice. Later on, [[Goombette]] appears on this platform, overlooking the area just below. Mario must bring a [[Goomba Tower]] of reasonable size over to her to receive a Power Moon. Aside from this, there are not many other Power Moons next to the sand pillar, though there are quite a few surrounding it. The area below this platform has a [[Bullet Bill]] cannon, which serves as helpful for finding and collecting some of these Power Moons. | ||
| Line 128: | Line 139: | ||
===Tostarena Ruins Round Tower=== | ===Tostarena Ruins Round Tower=== | ||
[[File:SMO Sand Moon 1.png|thumb]] | [[File:SMO Sand Moon 1.png|thumb|Mario in front of the checkpoint atop the round tower.]] | ||
This tower is the highest point of Tostarena Ruins. It is crucial to the Sand Kingdom's first story mission, [[Atop the Highest Tower]], as reaching the top of it is the goal. When Mario makes it to the end of the ruins, he must enter an [[8- | This tower is the highest point of Tostarena Ruins. It is crucial to the Sand Kingdom's first story mission, [[Atop the Highest Tower]], as reaching the top of it is the goal. When Mario makes it to the end of the ruins, he must enter an [[8-bit pipe]] leading to an 8-bit section around the side of the tower. Mario must make his way up the tower while avoiding [[Bullet Bill]]s. A small group of [[regional coin]]s can be found in a secret alcove down below, with a Power Moon in another hidden alcove left of the [[lift]]s near the top of the tower. Once Mario does make it out of the 8-bit section and on top of the tower, he finds a [[Checkpoint Flag]] and a Power Moon he must collect to complete this mission. From here, Mario must head to the Moe-Eye Habitat for the next objective. | ||
After completing [[The Hole in the Desert]], [[Glydon]] appears on the ledge at the top of the tower. Mario must capture him and glide toward a Power Moon above a column in the distance to collect it. | |||
====Names in other languages==== | ====Names in other languages==== | ||
| Line 145: | Line 156: | ||
===Moe-Eye Habitat=== | ===Moe-Eye Habitat=== | ||
[[File:Moe-Eye Habitat Checkpoint.jpg|thumb]] | [[File:Moe-Eye Habitat Checkpoint.jpg|thumb|Mario encounters a Moe-Eye near the checkpoint.]] | ||
{{main|Moe-Eye Habitat}} | {{main|Moe-Eye Habitat}} | ||
The Moe-Eye Habitat is an isolated area west of Tostarena Ruins with a pool of poison in the middle. Several pillars are sticking out of the ground. The story mission [[Moon Shards in the Sand]] takes place here. Mario can capture one of the [[Moe-Eye]]s found here and use them to see the invisible platforms found throughout the area. | The Moe-Eye Habitat is an isolated area west of Tostarena Ruins with a pool of poison in the middle. Several pillars are sticking out of the ground. The story mission [[Moon Shards in the Sand]] takes place here. Mario can capture one of the [[Moe-Eye]]s found here and use them to see the invisible platforms found throughout the area. | ||
===Jaxi Ruins=== | ===Jaxi Ruins=== | ||
This Checkpoint Flag is on the roof of Jaxi Ruins, which sits in the middle of a poison pond east of Tostarena Ruins. Mario can reach it by going through the Ice Cave or from the top of the Tostarena Ruins Round Tower using Glydon. There is a Jaxi | [[File:Jaxi Ruins.jpg|thumb|Mario at the Jaxi Ruins.]] | ||
This Checkpoint Flag is on the roof of Jaxi Ruins, which sits in the middle of a poison pond east of Tostarena Ruins. Mario can reach it by going through the Ice Cave or from the top of the Tostarena Ruins Round Tower using Glydon. There is a Jaxi Stand and two [[treasure chest]]s here, one of which contains a Power Moon. Jaxi appears here before [[The Hole in the Desert]], enabling Mario to gain access to their service early. The Jaxi Ruins can be entered by riding Jaxi through the poison, leading into a bonus area. | |||
====Names in other languages==== | ====Names in other languages==== | ||
| Line 156: | Line 168: | ||
|Ger=Miauxi-Ruinen | |Ger=Miauxi-Ruinen | ||
|GerM=Jaxi Ruins | |GerM=Jaxi Ruins | ||
|SpaE=Ruinas de los Jaxi | |||
|SpaEM=Jaxi Ruins | |||
}} | }} | ||
===Tostarena Northwest Reaches=== | ===Tostarena Northwest Reaches=== | ||
[[File: | [[File:Tostarena Northwest Reaches.jpg|thumb|Mario at the northwestern building.]] | ||
The Checkpoint Flag for this region is, as its name suggests, placed in the far northwestern portion of the map, in front of a building containing a maze with poison and [[Bullet Bill]]s, the end of which leads to the roof via a [[Warp Pipe]]. In front of the building, Mario may also find a Jaxi | The Checkpoint Flag for this region is, as its name suggests, placed in the far northwestern portion of the map, in front of a building containing a maze with poison and [[Bullet Bill]]s, the end of which leads to the roof via a [[Warp Pipe]]. In front of the building, Mario may also find a Jaxi Stand (with two [[New Donker]]s sitting on its bench after the story is completed) and the leader of the [[Roving Racers]]. Behind the building is a small alcove with three [[regional coin]]s. | ||
Atop the building is a [[spark pylon]], as well as a [[scarecrow (object)|scarecrow]] Mario may [[Cap Throw|throw]] Cappy onto to initiate this kingdom's first timer challenge. After this kingdom's [[Moon Rock]] has been opened up, two more [[Power Moon]]s become available here. One is obtained as a reward from a Tostarenan for clearing away the many posters advertising Bowser's wedding that have appeared on the back of the building, while the other requires bringing a [[Goomba]] to the area from the ruins via capturing to find Goombette. The building's roof is also where the Sand Kingdom's [[Koopa Freerunning]] race starts. | Atop the building is a [[spark pylon]], as well as a [[scarecrow (object)|scarecrow]] Mario may [[Cap Throw|throw]] Cappy onto to initiate this kingdom's first timer challenge. After this kingdom's [[Moon Rock]] has been opened up, two more [[Power Moon]]s become available here. One is obtained as a reward from a Tostarenan for clearing away the many posters advertising Bowser's wedding that have appeared on the back of the building, while the other requires bringing a [[Goomba]] to the area from the ruins via capturing to find Goombette. The building's roof is also where the Sand Kingdom's [[Koopa Freerunning]] race starts. | ||
| Line 176: | Line 190: | ||
===Desert Oasis=== | ===Desert Oasis=== | ||
[[File:DesertOasisSMO.jpg|thumb|left]] | [[File:DesertOasisSMO.jpg|thumb|left|Mario stands by the spring at the oasis.]] | ||
{{main|Desert Oasis (Super Mario Odyssey)}} | {{main|Desert Oasis (Super Mario Odyssey)}} | ||
This oasis lies on the southeast end of the map and is frozen over upon first arriving in the kingdom. After Knucklotec's defeat, the oasis thaws. Mario can capture a Lakitu and fish for [[Cheep Cheep]]s here; reeling in a [[Big Cheep Cheep]] yields a Power Moon. | This oasis lies on the southeast end of the map and is frozen over upon first arriving in the kingdom. After Knucklotec's defeat, the oasis thaws. Mario can capture a Lakitu and fish for [[Cheep Cheep]]s here; reeling in a [[Big Cheep Cheep]] yields a Power Moon. | ||
{{br}} | {{br}} | ||
===Southwestern Floating Island=== | ===Southwestern Floating Island=== | ||
[[File:SMO Sand Moon 62.png|thumb]] | [[File:SMO Sand Moon 62.png|thumb|Mario stands by a checkpoint atop a floating island.]] | ||
The Southwestern Floating Island is accessed by using a [[painting]] found in either the [[Lake Kingdom]] or the [[Wooded Kingdom]], depending on which kingdom the player chooses to go to first; the one that is visited first will contain the painting leading here. The [[List of Power Moons in the Sand Kingdom#Secret Path to Tostarena!|Secret Path to Tostarena!]] [[Power Moon]] is found here. A ring of coins is found circling around the platform. A pixelated [[Luigi]] is located in the sand directly beneath the platform, which was hinted at in the first additional piece of [[Hint Art]] that was posted on social media. | The Southwestern Floating Island is accessed by using a [[painting]] found in either the [[Lake Kingdom]] or the [[Wooded Kingdom]], depending on which kingdom the player chooses to go to first; the one that is visited first will contain the painting leading here. The [[List of Power Moons in the Sand Kingdom#Secret Path to Tostarena!|Secret Path to Tostarena!]] [[Power Moon]] is found here. A ring of coins is found circling around the platform. A pixelated [[Luigi]] is located in the sand directly beneath the platform, which was hinted at in the first additional piece of [[Hint Art]] that was posted on social media. | ||
| Line 251: | Line 265: | ||
|[[Mini Rocket]] | |[[Mini Rocket]] | ||
|On the northeastern building of [[Tostarena Town]] | |On the northeastern building of [[Tostarena Town]] | ||
|A platforming area featuring rotating building-like structures. | |A platforming area featuring rotating building-like structures. Mario can throw Cappy onto a [[Scarecrow (object)|scarecrow]] to activate a road leading to the rotating platforms, then traverse them without Cappy's help. | ||
|- | |- | ||
|align=center|[[File:SMO Sand Moon 84.png|200px]]<br>The Transparent Platforms | |align=center|[[File:SMO Sand Moon 84.png|200px]]<br>The Transparent Platforms | ||
| Line 261: | Line 275: | ||
|Moon Pipe | |Moon Pipe | ||
|At the Tostarena Ruins Entrance | |At the Tostarena Ruins Entrance | ||
|After capturing a [[spark pylon]], Mario will arrive at a racetrack-like area over a sea of poison featuring several [[Rocket Flower]]s which Mario must use to get a Power Moon at the end, as well as grabbing a [[key]] to reveal another Power Moon before the ruins completely sink into the poison. Unlike in other bonus areas, collecting the key does not interrupt gameplay to show the [[ | |After capturing a [[spark pylon]], Mario will arrive at a racetrack-like area over a sea of poison featuring several [[Rocket Flower]]s which Mario must use to get a Power Moon at the end, as well as grabbing a [[key]] to reveal another Power Moon before the ruins completely sink into the poison. Unlike in other bonus areas, collecting the key does not interrupt gameplay to show the [[Keyhole Pedestal]] opening the Power Moon, instead causing it to open immediately; this is likely to prevent the player from losing control with the Rocket Flowers and falling off the level, similar to [[Champion's Road]] from ''[[Super Mario 3D World]]''. | ||
|- | |- | ||
|align=center|[[File:SMO Sand Moon 88.png|200px]]<br>Freezing Waterway | |align=center|[[File:SMO Sand Moon 88.png|200px]]<br>Freezing Waterway | ||
| Line 287: | Line 301: | ||
==Objectives== | ==Objectives== | ||
#'''[[Atop the Highest Tower]]''': The goal is to reach the top of the tower in the Tostarena Ruins. | #'''[[Atop the Highest Tower]]''': The goal is to reach the top of the tower in the Tostarena Ruins. | ||
#'''[[Moon Shards in the Sand]]''': The goal is to collect the [[Moon Shard]]s | #'''[[Moon Shards in the Sand]]''': The goal is to collect the [[Moon Shard]]s in the Moe-Eye Habitat. | ||
#'''[[Showdown on the Inverted Pyramid]]''': The goal is to reach the top of the Inverted Pyramid and defeat Hariet. | #'''[[Showdown on the Inverted Pyramid]]''': The goal is to reach the top of the Inverted Pyramid and defeat Hariet. | ||
#'''[[The Hole in the Desert]]''': This objective takes place at night. The goal is to enter the hole beneath the Inverted Pyramid and defeat Knucklotec. | #'''[[The Hole in the Desert]]''': This objective takes place at night. The goal is to enter the hole beneath the Inverted Pyramid and defeat Knucklotec. | ||
| Line 315: | Line 329: | ||
{|class="wikitable"style="text-align:center" | {|class="wikitable"style="text-align:center" | ||
|- | |- | ||
! | !Item | ||
!Description | !Description | ||
!Price | !Price | ||
!Note | !Note | ||
|- | |- | ||
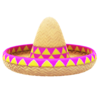
|[[File:SMO Sombrero.png|100px]] | |[[File:SMO Sombrero.png|100px]]<br>Sombrero | ||
|{{anchor|Sombrero}}''Traditional Tostarenan hat. Keeps the sun out of your eyes and just plain fun to wear.'' | |{{anchor|Sombrero}}''Traditional Tostarenan hat. Keeps the sun out of your eyes and just plain fun to wear.'' | ||
|[[File:SMO_Art_-_Regional_Coin_(Sand).svg|20px]] 5 | |[[File:SMO_Art_-_Regional_Coin_(Sand).svg|20px]] 5 | ||
|Required for "Dancing with New Friends" | |Required for "Dancing with New Friends" | ||
|- | |- | ||
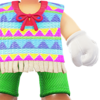
|[[File:SMO Poncho.png|100px]] | |[[File:SMO Poncho.png|100px]]<br>Poncho | ||
|{{anchor|Poncho}}''Traditional folk dress of the Tostarena region. Keeps the sun off and the breezes on.'' | |{{anchor|Poncho}}''Traditional folk dress of the Tostarena region. Keeps the sun off and the breezes on.'' | ||
|[[File:SMO_Art_-_Regional_Coin_(Sand).svg|20px]] 10 | |[[File:SMO_Art_-_Regional_Coin_(Sand).svg|20px]] 10 | ||
|Required for "Dancing with New Friends" | |Required for "Dancing with New Friends" | ||
|- | |- | ||
|[[File:SMO Cowboy Hat.png|100px]] | |[[File:SMO Cowboy Hat.png|100px]]<br>Cowboy Hat | ||
|{{anchor|Cowboy Hat}}''A classic hat, perfectly suited for wearing as you ride into sunsets.'' | |{{anchor|Cowboy Hat}}''A classic hat, perfectly suited for wearing as you ride into sunsets.'' | ||
|[[File:SMO_Art_-_Regional_Coin_(Sand).svg|20px]] 20 | |[[File:SMO_Art_-_Regional_Coin_(Sand).svg|20px]] 20 | ||
|Required for "That 'Old West' Style" | |Required for "That 'Old West' Style" | ||
|- | |- | ||
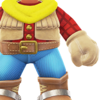
|[[File:SMO Cowboy Outfit.png|100px]] | |[[File:SMO Cowboy Outfit.png|100px]]<br>Cowboy Outfit | ||
|{{anchor|Cowboy Outfit}}''Old-fashioned duds with a frontier feel. Gunslinging and cow-punching optional.'' | |{{anchor|Cowboy Outfit}}''Old-fashioned duds with a frontier feel. Gunslinging and cow-punching optional.'' | ||
| [[File:SMO_Art_-_Regional_Coin_(Sand).svg|20px]] 25 | | [[File:SMO_Art_-_Regional_Coin_(Sand).svg|20px]] 25 | ||
|Required for "That 'Old West' Style" | |Required for "That 'Old West' Style" | ||
|- | |- | ||
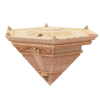
|[[File:SMO Inverted Pyramid Model Souvenir.png|100px]] | |[[File:SMO Inverted Pyramid Model Souvenir.png|100px]]<br>Inverted Pyramid Model | ||
|{{anchor|Inverted Pyramid Model}}''A famous location in the Tostarena ruins. Even the tiniest details are faithfully re-created, like the reliefs etched onto the walls.'' | |{{anchor|Inverted Pyramid Model}}''A famous location in the Tostarena ruins. Even the tiniest details are faithfully re-created, like the reliefs etched onto the walls.'' | ||
|[[File:SMO Art - Regional Coin (Sand).svg|20px]] 25 | |[[File:SMO Art - Regional Coin (Sand).svg|20px]] 25 | ||
|N/A | |N/A | ||
|- | |- | ||
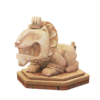
|[[File:SMO Jaxi Statue Souvenir.png|100px]] | |[[File:SMO Jaxi Statue Souvenir.png|100px]]<br>Jaxi Statue | ||
|{{anchor|Jaxi Statue}}''In the Tostarena region, the Jaxi has lived alongside the people since the ancient times. This statue is made from the stones of the ruins!'' | |{{anchor|Jaxi Statue}}''In the Tostarena region, the Jaxi has lived alongside the people since the ancient times. This statue is made from the stones of the ruins!'' | ||
|[[File:SMO Art - Regional Coin (Sand).svg|20px]] 5 | |[[File:SMO Art - Regional Coin (Sand).svg|20px]] 5 | ||
|N/A | |N/A | ||
|- | |- | ||
|[[File:SMO Sand Kingdom Sticker Souvenir.png|100px]] | |[[File:SMO Sand Kingdom Sticker Souvenir.png|100px]]<br>Sand Kingdom Sticker | ||
|{{anchor|Sand Kingdom Sticker}}''A sticker inspired by the Inverted Pyramid.'' | |{{anchor|Sand Kingdom Sticker}}''A sticker inspired by the Inverted Pyramid.'' | ||
|[[File:SMO Art - Regional Coin (Sand).svg|20px]] 10 | |[[File:SMO Art - Regional Coin (Sand).svg|20px]] 10 | ||
|N/A | |N/A | ||
|- | |- | ||
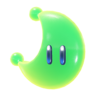
|[[File:SMO Power Moon Green.png|100px]] | |[[File:SMO Power Moon Green.png|100px]]<br>Sand Kingdom Power Moon | ||
|''A Power Moon that was discovered in Tostarena.'' | |''A Power Moon that was discovered in Tostarena.'' | ||
|[[File:SMO_coin.png|20px]] 100 | |[[File:SMO_coin.png|20px]] 100 | ||
| Line 386: | Line 391: | ||
===''The Super Mario Bros. Movie''=== | ===''The Super Mario Bros. Movie''=== | ||
[[File:Tostarena.jpg|thumb|The | [[File:Tostarena.jpg|thumb|The Desert Area in ''The Super Mario Bros. Movie'']] | ||
In ''[[The Super Mario Bros. Movie]]'', [[Toad]]'s backpack has three pins on it that have the designs of stickers from ''Super Mario Odyssey'', with one of them being based on the Tostarena sticker. Additionally, the Sand Kingdom itself, known as the '''Desert Area''',<ref>{{file link|TSMBM Monopoly Board.jpg|Monopoly ''The Super Mario Bros. Movie'' Edition board}}</ref> can be seen on a map showing areas surrounding the [[Mushroom Kingdom]] and is later shown in the film for a few seconds during a montage of [[Mario]], [[Princess Peach|Peach]], and [[Toad]] journeying to the [[Donkey Kong Island|Jungle Kingdom]]. [[Stone-Eye]]s can be seen in the area. Unlike its version in ''Super Mario Odyssey'', which has only one pyramid with a hexagonal base, this version features multiple square pyramids in the sky. | |||
In ''[[The Super Mario Bros. Movie]]'', [[Toad]]'s backpack has three pins on it that have the designs of stickers from ''Super Mario Odyssey'', with one of them being based on the Tostarena sticker. | |||
{{br}} | {{br}} | ||
==Gallery== | ==Gallery== | ||
===Artwork=== | |||
<gallery> | <gallery> | ||
SMO Icon - Sand Kingdom.svg| | SMO Art - Sand Kingdom.jpg|Artwork | ||
SMO Sticker - Tostarena.png| | SMO Art - Sand Kingdom Card.jpg|Postcard | ||
Regional Coin Sand.png| | SMO Icon - Sand Kingdom.svg|Icon | ||
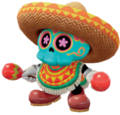
SMO Art - Regional Coin (Sand).svg| | SMO Artwork Tostarenan (Blue).png|Blue [[Tostarenan]] | ||
SMO Art - Regional Coin Outline (Sand).svg| | SMO Artwork Tostarenan (Green).png|Green Tostarenan | ||
SMO Sticker - Tostarena.png|Sand Kingdom Sticker | |||
SMO Artwork Regional Coin (Sand Kingdom).png|[[Regional coin]] | |||
SMO Art - Regional Coin (Sand).svg|Regional coin | |||
SMO Art - Regional Coin Outline (Sand).svg|Regional coin | |||
</gallery> | </gallery> | ||
<gallery | ===Screenshots=== | ||
<gallery> | |||
SMO Shot - Red Airship.png|The [[Odyssey]] landing in the Sand Kingdom | SMO Shot - Red Airship.png|The [[Odyssey]] landing in the Sand Kingdom | ||
SMO E3 2017 screenshot 2.png|Mario and Cappy | SMO E3 2017 screenshot 2.png|Mario and Cappy | ||
| Line 422: | Line 429: | ||
SMO-Chinchos.jpg|Tostarena Town at night | SMO-Chinchos.jpg|Tostarena Town at night | ||
SMO - Olmec-Boss.jpg|[[Knucklotec]] attacking Mario | SMO - Olmec-Boss.jpg|[[Knucklotec]] attacking Mario | ||
SMO Sand Kingdom 8-Bit Luigi.jpg|Mario standing next to | SMO Sand Kingdom 8-Bit Luigi.jpg|Mario standing next to a [[8-bit character|Pixel Luigi]] | ||
Tostarena Map.jpg|The full Japanese brochure for the Sand Kingdom | Tostarena Map.jpg|The full Japanese brochure for the Sand Kingdom | ||
SMB 35th Anniversary Lineup TVCM.jpg|A Japanese commercial promoting the [[Super Mario Bros. 35th Anniversary|''Super Mario Bros.'' 35th Anniversary]] | SMB 35th Anniversary Lineup TVCM.jpg|A Japanese commercial promoting the [[Super Mario Bros. 35th Anniversary|''Super Mario Bros.'' 35th Anniversary]] | ||
TSMBM map.png|[[Toad (species)|Toads]] also looking at a map of the [[Mushroom Kingdom]] and surrounding areas | TSMBM map.png|[[Toad (species)|Toads]] also looking at a map of the [[Mushroom Kingdom]] and surrounding areas | ||
| Line 443: | Line 449: | ||
|Dut=Woestijnrijk | |Dut=Woestijnrijk | ||
|DutM=Desert Realm | |DutM=Desert Realm | ||
| | |Fre=Pays des Sables | ||
| | |FreM=Sands Country | ||
|Ger=Wüstenland | |Ger=Wüstenland | ||
|GerM=Desert Country | |GerM=Desert Country | ||
|Ita=Regno delle Sabbie | |Ita=Regno delle Sabbie | ||
|ItaM=Sands Kingdom | |ItaM=Sands Kingdom | ||
|Ita2=Regione desertica | |||
|Ita2M=Desert region <small>(''The Super Mario Bros. Movie - Monopoly'')</small> | |||
|Kor=모래 왕국 | |Kor=모래 왕국 | ||
|KorR=Morae Wangguk | |KorR=Morae Wangguk | ||
| Line 462: | Line 470: | ||
{{foreign names | {{foreign names | ||
|Jap=アッチーニャ<ref>[https://twitter.com/mario_odysseyJP/status/874853322393563136 Official Japanese Mario Odyssey Twitter]</ref> | |Jap=アッチーニャ<ref>[https://twitter.com/mario_odysseyJP/status/874853322393563136 Official Japanese Mario Odyssey Twitter]</ref> | ||
|JapR= | |JapR=Atchīnya | ||
|JapM= | |JapM=From「あっちい」(''atchii''), a diminutive form of「暑い」(''atsui'', "hot"), and the suffix for place names "-nia"; officially romanized as "Atchinya"<ref>''[[The Art of Super Mario Odyssey]]'', page 322</ref> | ||
|ChiS=阿炽尼亚 | |ChiS=阿炽尼亚 | ||
|ChiSR=Āchìníyǎ | |ChiSR=Āchìníyǎ | ||
|ChiSM=From | |ChiSM=From the Japanese name;「炽/熾」(''chì'') also means "burning hot" | ||
|ChiT=阿熾尼亞 | |ChiT=阿熾尼亞 | ||
|ChiTR=Āchìníyǎ | |ChiTR=Āchìníyǎ | ||
| Line 472: | Line 480: | ||
|Dut=Zonnesteekstad | |Dut=Zonnesteekstad | ||
|DutM=Sunstroke City | |DutM=Sunstroke City | ||
| | |Fre=Ifézèc | ||
| | |FreM=From ''il fait sec'' (a French phrase meaning "it is dry") | ||
|Ger=Brutzelebene | |Ger=Brutzelebene | ||
|GerM=Sizzle Plain | |GerM=Sizzle Plain | ||
|Ita=Tostalandia | |Ita=Tostalandia | ||
|ItaM=From " | |ItaM=From ''tostato'' ("toasted") and the place names suffix ''-landia'' ("land") | ||
|Kor=아뜨레나 | |Kor=아뜨레나 | ||
|KorR=Atteurena | |KorR=Atteurena | ||
|KorM=From "아뜨" (''atteu'', a Korean expression meaning "hot") and | |KorM=From "아뜨" (''atteu'', a Korean expression meaning "hot") and ''arena'' (Spanish for "sand") | ||
|Rus=Тостарена | |Rus=Тостарена | ||
|RusR=Tostarena | |RusR=Tostarena | ||
|RusM=Tostarena | |RusM=Tostarena | ||
|Spa=Soltitlán | |Spa=Soltitlán | ||
|SpaM=From | |SpaM=From ''sol'' ("sun") and the Nahuatl suffix ''-tlān'' (hispanicized as ''-titlán''; meaning "place of"), commonly found in town names in Mexico and some countries of Central America | ||
}} | }} | ||
| Line 493: | Line 501: | ||
{{SMO}} | {{SMO}} | ||
{{SMO kingdoms}} | {{SMO kingdoms}} | ||
{{TSMBM}} | |||
[[Category:Deserts]] | [[Category:Deserts]] | ||
[[Category:Super Mario Odyssey kingdoms]] | [[Category:Super Mario Odyssey kingdoms]] | ||
Latest revision as of 23:09, December 7, 2024
- Not to be confused with Desert Kingdom.
| Sand Kingdom | |
|---|---|
| |
| Boss(es) | Harriet Knucklotec |
| Mission(s) | Atop the Highest Tower Moon Shards in the Sand Showdown on the Inverted Pyramid The Hole in the Desert |
| Power Moons | 93 |
| Regional coins | 100 |
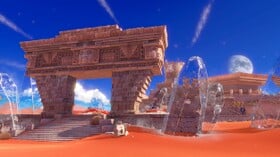
The Sand Kingdom is the third kingdom visited in Super Mario Odyssey. It is the greater location of Tostarena, which is a desert village featuring a small town and a large ruins area. This kingdom's main landmark is the Inverted Pyramid, which is an upside-down pyramid located in the north-east section of the area. When Mario first visits here, the kingdom is covered with large pillars of ice and Bowser is found atop the Inverted Pyramid. The player's first objective in this kingdom is to reach the "highest tower". From there, the player must find Moon Shards in the Moe-Eye habitat. After that, they reach the top of the Inverted Pyramid and fight Hariet, one of the Broodals, which will grant the player a Multi Moon. When collected, the player is teleported back to the Odyssey, and the kingdom cycles to a night-time version, where the Inverted Pyramid floats into the air, revealing a large hole underneath. The kingdom is also overrun by Chinchos during the night-time, which Mario must avoid as he heads to the large hole under the Inverted Pyramid. Once the player enters, he must traverse through an icy Underground Temple and then fight Knucklotec at the end of the Temple. Defeating this boss rewards Mario with another Multi Moon, which (when collected) reverts the kingdom back to daytime and causes almost all the ice on the surface of the kingdom to melt, allowing access to more Power Moons. Once Mario has collected enough Power Moons, he can head off to the next kingdom - either the Lake Kingdom or the Wooded Kingdom may be chosen, but not both at this point.
The Sand Kingdom was the first location shown in the game, dating back to the first Nintendo Switch reveal trailer. It is located east of the Cascade Kingdom, southwest of the Lake Kingdom, and northwest of the Wooded Kingdom. These three kingdoms are all located on a large landmass resembling Pangaea.
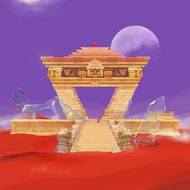
The location is primarily based off of Mesoamerica, particularly Mexico. For example, Tostarenans feature elements associated with the Day of the Dead, and the Inverted Pyramid resembles an upside down octagonal version of the Chichén Itzá. However, other aspects allude to different countries, with Moe-Eyes inspired by the moai statues from Easter Island and the Jaxis presumably inspired by the komainu from Japan. The name "Tostarena" is likely from the Spanish words tostado ("toasted") and arena ("sand").
Concept and creation[edit]
Tostarena was based on Mexico because the director of Super Mario Odyssey, Kenta Motokura, liked the country and his trip there had left a strong impression on him.[1] Initially, it was considered whether Tostarena should be visited during the sunset.[2] The sketch of the early design showed that the poncho and sombrero were already considered as the location's typical outfits, even though the motif of the sombrero was different and the poncho was supposed to be worn over Mario's usual suit and to be paired with boots. The concept art already included Tostarena Town, Tostarena Ruins and the Inverted Pyramid, as well as the ice pillars covering parts of the desert. The main visible differences are the town having just two rows of buildings forming one street while featuring a wooden gate at the entrance and the Inverted Pyramid being actually a floating pyramid resembling that of Chichen Itza. Some elements featured in Tostarena were reportedly influenced by Super Mario Land, another game that features desert sphinxes and moai-like beings.[3]
Tostarena Town in particular was designed to create a contrast between the curved lines of the dunes and the more linear design of the buildings.[4] Furthermore, the color of the building was chosen to reflect the cheerful nature of the Tostarenans.[4] The concept art also shows that initially the town was supposed to have a bridge built over a road.
On the other hand, the gate to Tostarena Ruins was designed to resemble an inverted triangle as a recall to the Inverted Pyramid.[5] The concept artwork showed how the Power Moons of Tostarena were initially intended to be red instead of the final green color.
Brochure details[edit]
|
Sand Kingdom "Home of Red Sands and Lively Locals" | |||
| Tostarena "Gateway to the stark beauty of the desert." | ||||
| Population | Middling | Size | Expansive | |
| Locals | Tostarenans, Moe-Eyes | Currency | Pyramid-shaped | |
| Industry | Tourism, Precious stones | Temperature | Average 104°F (40°C) | |
Tostarenan Town
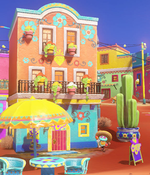
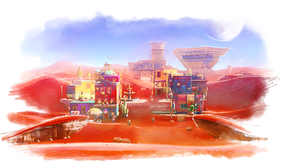
A small town that serves as the hub for tourists planning to visit the Inverted Pyramid. The colorful buildings and cheerful people provide a warm welcome for visitors. They're happy to provide direction, so don't hesitate to say hello.
Mysterious Ancient Ruins
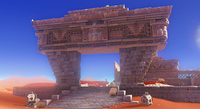
Head north from town and you'll be greeted by ancient ruins that dot the expansive desert. Though many have become conflict regions patrolled by Bullet Bills, their status as important heritage sites is undeniable.
Your eye will be drawn to the large stone tower at the heart of the ruins. Due to extensive hollowing underground, quicksand has become prevalent in this area, so watch out.
Inverted Pyramid
The true "can't miss" of this region, the Inverted Pyramid may look unstable, but rest assured it never topples and has thrilled tourists for years. It is said that a legendary artifact called the Binding Band lies within, and the upside-down pyramid symbolizes how those joined by it will never part even if the world turns upside down.
Jaxi
Let's have a look at the curious local transport method known as the Jaxi.
Just hop on the back of one, and as you might guess from their appearance, you'll be in for a wild but completely reliable ride.
Make good use of them and you'll be exploring this unforgiving desert in comfort and style.
Living Heart of the Desert
Here's a spot to moisten your dried and withered heart, with greenery and water to make you forget you're in the desert. The fish and birds are plentiful and well worth a visit.
The Moe-Eyes love their shades.
They'll run if chased, but they're a proud people who have long inhabited these ruins. Please be polite.
Three Keys to the Kingdom
- Enjoy the small but lively desert village and its charming inhabitants.
- Wonder at the Inverted Pyramid and its upside-down magic.
- Watch for the gem iconography carved in relief on the ruins.
Map
Checkpoint Flag locations[edit]
Odyssey[edit]
- Main article: Odyssey
The Odyssey lands at the southern end of the map and can be warped back to at any time.
Tostarena Town[edit]
- Main article: Tostarena Town
Tostarena Town is a small civilization found just north of the Odyssey's landing site. It is home to a Crazy Cap and a Slots minigame. Talkatoo and Luigi can be found here. A circuit of power lines run around the town, and a Tostarenan eventually sets more power lines that Mario can use as a shortcut to the Tostarena Ruins Round Tower and the top of the Inverted Pyramid. The Checkpoint Flag is at the town's southern entrance next to a Jaxi Stand.
Tostarena Ruins Entrance[edit]
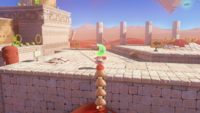
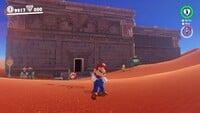
The entrance to Tostarena Ruins is located north of Tostarena Town and is marked by a large stone gate. Behind the Checkpoint Flag are a few Mini Goombas (later replaced with ordinary Goombas wearing sombreros), with a few more up ahead, as well as the start of the first platforming section of the ruins. Mario may reach the top of the arch via Bullet Bill or spark pylon to find a Power Moon on top of it. In front of the ruins entrance is a Jaxi station.
Names in other languages[edit]
| Language | Name | Meaning | Notes |
|---|---|---|---|
| Japanese | アッチーニャ遺跡 入口[?] Acchīnya Iseki Iriguchi |
Tostarena Ruins Entrance | |
| German | Brutzelebene: Ruinen - Eingang[?] | Tostarena: Ruins Entrance | |
| Spanish (NOE) | Entrada a las ruinas de Soltitlán[?] | Tostarena ruins entrance |
Tostarena Ruins Sand Pillar[edit]
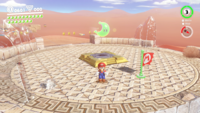
This Checkpoint Flag is found on the platform shortly after the Tostarena Ruins Entrance, starting off the second level of the ruins. Aside from the Checkpoint Flag, there are a few signs directing toward the sand geysers up ahead, a bump in the ground that Mario may Ground Pound to unearth a circle of coins, and a small group of coins circling a chunk of ice. Later on, Goombette appears on this platform, overlooking the area just below. Mario must bring a Goomba Tower of reasonable size over to her to receive a Power Moon. Aside from this, there are not many other Power Moons next to the sand pillar, though there are quite a few surrounding it. The area below this platform has a Bullet Bill cannon, which serves as helpful for finding and collecting some of these Power Moons.
Names in other languages[edit]
| Language | Name | Meaning | Notes |
|---|---|---|---|
| Japanese | アッチーニャ遺跡 砂柱[?] Acchīnya Iseki Sunabashira |
Tostarena Ruins Sand Pillar | |
| German | Brutzelebene: Ruinen - Sandsäule[?] | Tostarena: Ruins Sand Pillar | |
| Spanish (NOE) | Columna de arena en las ruinas de Soltitlán[?] | Tostarena Ruins Sand Pillar |
Tostarena Ruins Round Tower[edit]
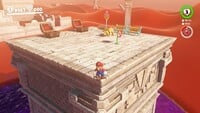
This tower is the highest point of Tostarena Ruins. It is crucial to the Sand Kingdom's first story mission, Atop the Highest Tower, as reaching the top of it is the goal. When Mario makes it to the end of the ruins, he must enter an 8-bit pipe leading to an 8-bit section around the side of the tower. Mario must make his way up the tower while avoiding Bullet Bills. A small group of regional coins can be found in a secret alcove down below, with a Power Moon in another hidden alcove left of the lifts near the top of the tower. Once Mario does make it out of the 8-bit section and on top of the tower, he finds a Checkpoint Flag and a Power Moon he must collect to complete this mission. From here, Mario must head to the Moe-Eye Habitat for the next objective.
After completing The Hole in the Desert, Glydon appears on the ledge at the top of the tower. Mario must capture him and glide toward a Power Moon above a column in the distance to collect it.
Names in other languages[edit]
| Language | Name | Meaning | Notes |
|---|---|---|---|
| Japanese | アッチーニャ遺跡 円塔[?] Acchīnya Iseki Entō |
Tostarena Ruins Round Tower | |
| German | Brutzelebene: Ruinen - Runder Turm[?] | Tostarena: Ruins Round Tower | |
| Spanish (NOE) | Torre redonda en las ruinas de Soltitlán[?] | Tostarena Ruins Round Tower |
Moe-Eye Habitat[edit]
- Main article: Moe-Eye Habitat
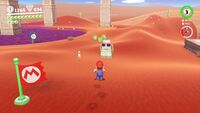
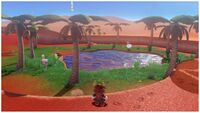
The Moe-Eye Habitat is an isolated area west of Tostarena Ruins with a pool of poison in the middle. Several pillars are sticking out of the ground. The story mission Moon Shards in the Sand takes place here. Mario can capture one of the Moe-Eyes found here and use them to see the invisible platforms found throughout the area.
Jaxi Ruins[edit]
This Checkpoint Flag is on the roof of Jaxi Ruins, which sits in the middle of a poison pond east of Tostarena Ruins. Mario can reach it by going through the Ice Cave or from the top of the Tostarena Ruins Round Tower using Glydon. There is a Jaxi Stand and two treasure chests here, one of which contains a Power Moon. Jaxi appears here before The Hole in the Desert, enabling Mario to gain access to their service early. The Jaxi Ruins can be entered by riding Jaxi through the poison, leading into a bonus area.
Names in other languages[edit]
| Language | Name | Meaning | Notes |
|---|---|---|---|
| German | Miauxi-Ruinen[?] | Jaxi Ruins | |
| Spanish (NOE) | Ruinas de los Jaxi[?] | Jaxi Ruins |
Tostarena Northwest Reaches[edit]
The Checkpoint Flag for this region is, as its name suggests, placed in the far northwestern portion of the map, in front of a building containing a maze with poison and Bullet Bills, the end of which leads to the roof via a Warp Pipe. In front of the building, Mario may also find a Jaxi Stand (with two New Donkers sitting on its bench after the story is completed) and the leader of the Roving Racers. Behind the building is a small alcove with three regional coins.
Atop the building is a spark pylon, as well as a scarecrow Mario may throw Cappy onto to initiate this kingdom's first timer challenge. After this kingdom's Moon Rock has been opened up, two more Power Moons become available here. One is obtained as a reward from a Tostarenan for clearing away the many posters advertising Bowser's wedding that have appeared on the back of the building, while the other requires bringing a Goomba to the area from the ruins via capturing to find Goombette. The building's roof is also where the Sand Kingdom's Koopa Freerunning race starts.
Names in other languages[edit]
| Language | Name | Meaning | Notes |
|---|---|---|---|
| Japanese | アッチーニャ 北西の果て[?] Acchīnya Hokusei no Hate |
Tostarena Northwestern Limit | |
| German | Brutzelebene - Nordwestlagen[?] | Tostarena Northwest Locations | |
| Spanish (NOE) | Frontera noroeste de Soltitlán[?] | Tostarena Northwestern Border |
Desert Oasis[edit]
- Main article: Desert Oasis (Super Mario Odyssey)
This oasis lies on the southeast end of the map and is frozen over upon first arriving in the kingdom. After Knucklotec's defeat, the oasis thaws. Mario can capture a Lakitu and fish for Cheep Cheeps here; reeling in a Big Cheep Cheep yields a Power Moon.
Southwestern Floating Island[edit]
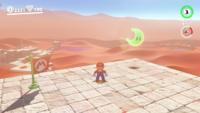
The Southwestern Floating Island is accessed by using a painting found in either the Lake Kingdom or the Wooded Kingdom, depending on which kingdom the player chooses to go to first; the one that is visited first will contain the painting leading here. The Secret Path to Tostarena! Power Moon is found here. A ring of coins is found circling around the platform. A pixelated Luigi is located in the sand directly beneath the platform, which was hinted at in the first additional piece of Hint Art that was posted on social media.
Names in other languages[edit]
| Language | Name | Meaning | Notes |
|---|---|---|---|
| Japanese | アッチーニャ 南西の浮島[?] Acchīnya Nansei no Ukishima |
Tostarena: Southwestern Floating Island | |
| Chinese | 阿炽尼亚 西南的浮岛 (Simplified) 阿熾尼亞 西南的浮島 (Traditional)[?] Āchìníyǎ xīnán de fúdǎo |
Tostarena: Southwestern Floating Island | |
| German | Südwestliche Treibinsel[?] | Southwest Drift Island | |
| Russian | Парящий остров на юго-западе[?] Paryaschiy ostrov na yugo-zapade |
Floating Island on the Southwest | |
| Spanish (NOE) | Isla flotante al sudoeste[?] | Southwestern Floating Island |
Bonus areas[edit]
| Bonus area | Accessed via | Location | Description |
|---|---|---|---|
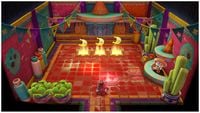 Sand Kingdom Slots Room |
Door | In the building east of the Tostarena Town fountain | A small room with a slots minigame. Three of the same picture must be lined up to win. |
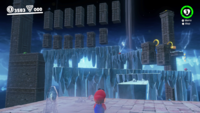 Ice Cave[6] |
Sinkhole | At the northeastern part of Tostarena Ruins | An underground area with icy, narrow platforms and moving columns. |
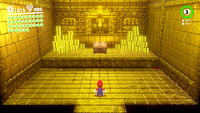 Sphynx's Treasure Vault |
Sphynx | Behind Tostarena Ruins | A small, golden treasure vault with many coin piles and a treasure chest containing a Power Moon. Mario can only access this room after answering the Sphynx's question correctly. The coins do not reappear if Mario revisits the vault after he has already collected them. |
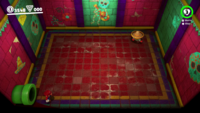 Rumbling Floor Room |
Warp Pipe | On the balcony of the pink building northwest of the Tostarena Town fountain | A small room where the player must locate a Power Moon by feeling a vibration from the floor through the controller. |
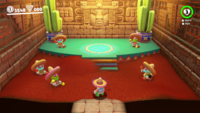 Dance Room |
Locked door guarded by a Tostarenan | In the small tower at Tostarena Town's northwestern corner | A small room with dancing Tostarenans where Mario performs a song on the stage to earn a Power Moon. Mario can only enter this room while wearing the sombrero and poncho or the Skeleton Suit. |
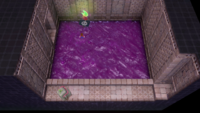 The Invisible Maze |
Red door | Northeast of Moe-Eye Habitat on the other side of the chasm | A temple-like area featuring an invisible path within corridors filled with poison and Moe-Eyes, which Mario must capture to reveal the path forward. |
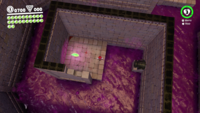 The Bullet Bill Maze |
Red door | At the Tostarena Northwest Reaches | A maze-like area filled with poison which Mario must capture a Bullet Bill to traverse. |
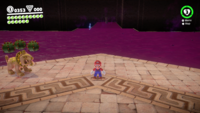 Jaxi Ruins Underground |
Tunnel | Underneath the Jaxi Ruins Checkpoint Flag | An underground temple-like area filled with poison which Mario must ride a Jaxi to traverse. |
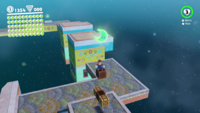 The Strange Neighborhood |
Mini Rocket | On the northeastern building of Tostarena Town | A platforming area featuring rotating building-like structures. Mario can throw Cappy onto a scarecrow to activate a road leading to the rotating platforms, then traverse them without Cappy's help. |
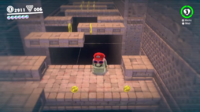 The Transparent Platforms |
Moon Pipe | On the left raised platform in front of Tostarena Town | A narrow area featuring invisible platforms and lifts over a wide chasm through which Mario must travel as a Moe-Eye. |
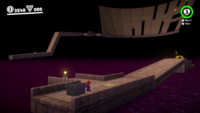 Colossal Ruins |
Moon Pipe | At the Tostarena Ruins Entrance | After capturing a spark pylon, Mario will arrive at a racetrack-like area over a sea of poison featuring several Rocket Flowers which Mario must use to get a Power Moon at the end, as well as grabbing a key to reveal another Power Moon before the ruins completely sink into the poison. Unlike in other bonus areas, collecting the key does not interrupt gameplay to show the Keyhole Pedestal opening the Power Moon, instead causing it to open immediately; this is likely to prevent the player from losing control with the Rocket Flowers and falling off the level, similar to Champion's Road from Super Mario 3D World. |
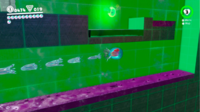 Freezing Waterway |
Moon Pipe | At the northeastern edge of the desert, east of the Inverted Pyramid and the Underground Temple entrance | A tunnel-like area featuring pools of both poison and cold water. It also features Gushens, which Mario must capture to traverse. There are several places of cold water so Mario can regenerate the Gushen's water reserve. |
Enemies and obstacles[edit]
Enemies marked with an asterisk (*) are only found in bonus areas.
Knucklotec (boss)
Objectives[edit]
- Atop the Highest Tower: The goal is to reach the top of the tower in the Tostarena Ruins.
- Moon Shards in the Sand: The goal is to collect the Moon Shards in the Moe-Eye Habitat.
- Showdown on the Inverted Pyramid: The goal is to reach the top of the Inverted Pyramid and defeat Hariet.
- The Hole in the Desert: This objective takes place at night. The goal is to enter the hole beneath the Inverted Pyramid and defeat Knucklotec.
Paintings[edit]
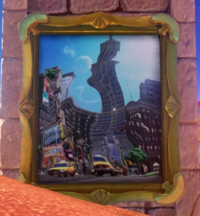
There are two paintings in this kingdom. One can be found near the east side of the Tostarena Ruins, in a tilted pillar next to a Jaxi calling post. The painting leads to the Isolated Rooftop at the Metro Kingdom. It can only be accessed after completing the "Showdown on the Inverted Pyramid" mission.
The other painting is located at the Southwestern Floating Island, which can be accessed from the Wooded Kingdom or the Lake Kingdom.
Power Moons[edit]
- Main article: List of Power Moons in the Sand Kingdom
There are a total of 93 Power Moons (87 regular Power Moons and 2 Multi Moons) in the Sand Kingdom, the second-highest amount in the game after the Mushroom Kingdom. During the player's first visit to this kingdom, they can collect 59 of the Power Moons and the 2 Multi Moons. The player can also collect a Power Moon if they travel to this kingdom using a painting found in a future kingdom (either the Lake or Wooded Kingdom). One additional Power Moon can also be found when the player encounters the Desert Wanderer in the kingdom (after meeting him in all of the other locations he appears in). After the player defeats Bowser in the Moon Kingdom, 6 more Power Moons become available to collect. The Moon Rock will also be available to destroy, causing 20 additional Power Moons to be accessible.
In order to progress to the next kingdom, the player must collect at least 16 Power Moons.
Regional coins[edit]
- Main article: List of regional coins in the Sand Kingdom
The Sand Kingdom contains 100 regional coins, which take the form of triangles with designs of the Inverted Pyramid engraved on them.
Crazy Cap items[edit]
Appearances in other media[edit]
Captain Toad: Treasure Tracker[edit]
- Main article: Secret of the Inverted Pyramid
A new level inspired by the Sand Kingdom appears in the Nintendo 3DS and Nintendo Switch versions of Captain Toad: Treasure Tracker, which features miniature versions of the Tostarena Ruins, Inverted Pyramid and ice cave. Bullet Bills and Goombas appear as enemies in the level. A Pull Switch can be found on top of the Inverted Pyramid which causes it to rise from the ground and turn the level to nighttime.
The Sand Kingdom also appears after the credits, where Captain Toad and Toadette arrive in a minecart. The Odyssey flies over, and Captain Toad chases after it.
The kingdom is accidentally referred to as the Desert Kingdom in the Captain Toad: Treasure Tracker overview trailer, posted by Nintendo on their North American YouTube channel.[7]
The Super Mario Bros. Movie[edit]
In The Super Mario Bros. Movie, Toad's backpack has three pins on it that have the designs of stickers from Super Mario Odyssey, with one of them being based on the Tostarena sticker. Additionally, the Sand Kingdom itself, known as the Desert Area,[8] can be seen on a map showing areas surrounding the Mushroom Kingdom and is later shown in the film for a few seconds during a montage of Mario, Peach, and Toad journeying to the Jungle Kingdom. Stone-Eyes can be seen in the area. Unlike its version in Super Mario Odyssey, which has only one pyramid with a hexagonal base, this version features multiple square pyramids in the sky.
Gallery[edit]
Artwork[edit]
Blue Tostarenan
Screenshots[edit]
The Odyssey landing in the Sand Kingdom
Tostarena Town's Crazy Cap shop
Mario passing by a Tostarenan
Bowser's airship above the Inverted Pyramid
The Broodals in their airship
Mario riding a Jaxi through the desert
Knucklotec attacking Mario
Mario standing next to a Pixel Luigi
A Japanese commercial promoting the Super Mario Bros. 35th Anniversary
Toads also looking at a map of the Mushroom Kingdom and surrounding areas
Names in other languages[edit]
Sand Kingdom[edit]
| Language | Name | Meaning | Notes |
|---|---|---|---|
| Japanese | 砂の国[?] Suna no kuni |
Sand Country | |
| Chinese (simplified) | 沙之国[?] Shā zhī guó |
Sand Country | |
| Chinese (traditional) | 沙之國[?] Shā zhī guó |
Sand Country | |
| Dutch | Woestijnrijk[?] | Desert Realm | |
| French | Pays des Sables[?] | Sands Country | |
| German | Wüstenland[?] | Desert Country | |
| Italian | Regno delle Sabbie[?] | Sands Kingdom | |
| Regione desertica[?] | Desert region (The Super Mario Bros. Movie - Monopoly) | ||
| Korean | 모래 왕국[?] Morae Wangguk |
Sand Kingdom | |
| Russian | Песчаное царство[?] Peschanoye tsarstvo |
Sand Kingdom | |
| Spanish | Reino de las Arenas[?] | Sands Kingdom |
Tostarena[edit]
| Language | Name | Meaning | Notes |
|---|---|---|---|
| Japanese | アッチーニャ[9] Atchīnya |
From「あっちい」(atchii), a diminutive form of「暑い」(atsui, "hot"), and the suffix for place names "-nia"; officially romanized as "Atchinya"[10] | |
| Chinese (simplified) | 阿炽尼亚[?] Āchìníyǎ |
From the Japanese name;「炽/熾」(chì) also means "burning hot" | |
| Chinese (traditional) | 阿熾尼亞[?] Āchìníyǎ |
Same as in simplified Chinese | |
| Dutch | Zonnesteekstad[?] | Sunstroke City | |
| French | Ifézèc[?] | From il fait sec (a French phrase meaning "it is dry") | |
| German | Brutzelebene[?] | Sizzle Plain | |
| Italian | Tostalandia[?] | From tostato ("toasted") and the place names suffix -landia ("land") | |
| Korean | 아뜨레나[?] Atteurena |
From "아뜨" (atteu, a Korean expression meaning "hot") and arena (Spanish for "sand") | |
| Russian | Тостарена[?] Tostarena |
Tostarena | |
| Spanish | Soltitlán[?] | From sol ("sun") and the Nahuatl suffix -tlān (hispanicized as -titlán; meaning "place of"), commonly found in town names in Mexico and some countries of Central America |
References[edit]
- ^ Brian (November 25, 2017). Super Mario Odyssey producer on approach to development, theme song, Pauline, higher age rating, more. Nintendo Everything. retrieved January 11, 2018.
- ^ Post about the concept art of Tostarena's early design from the Japanese Super Mario Odyssey official Twitter account. Retrieved January 11, 2018.
- ^ Game Informer Staff. (June 17, 2017). Mario's Developers On Hat Capture And Peach's Love For Mario. Game Informer. Retrieved January 11, 2018.
- ^ a b Post about the concept art of Tostarena Town's early design from the Japanese Super Mario Odyssey official Twitter account. Retrieved January 19, 2018.
- ^ Post about the concept art of the gate to Tostarena Ruins from the Japanese Super Mario Odyssey official Twitter account. Retrieved February 7, 2018.
- ^ Nintendo World Report TV. (June 17, 2017). Super Mario Odyssey - Jaxi Driving + Ice Ice Baby (DIRECT FEED). YouTube. Retrieved August 19, 2018.
- ^ Nintendo (July 13, 2018). Captain Toad Treasure Tracker - Overview Trailer - Nintendo Switch. YouTube. Retrieved July 13, 2018.
- ^ Monopoly The Super Mario Bros. Movie Edition board
- ^ Official Japanese Mario Odyssey Twitter
- ^ The Art of Super Mario Odyssey, page 322
