|
Tags: Rollback Mobile edit Advanced mobile edit |
| (24 intermediate revisions by 19 users not shown) |
| Line 19: |
Line 19: |
| ==''Super Mario Kart''== | | ==''Super Mario Kart''== |
| ===Course layout=== | | ===Course layout=== |
| [[File:SMK Bowser Castle 3 Screenshot.jpg|thumb|left|[[Luigi]] approaching a split path on Bowser Castle 3]] | | [[File:SMK Bowser Castle 3.png|thumb|left|[[Luigi]] approaching a split path on Bowser Castle 3]] |
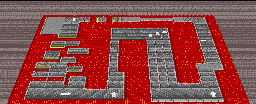
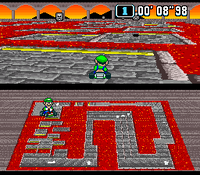
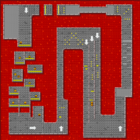
| As with the other Bowser Castle tracks, Bowser Castle 3 is composed entirely of straightaways and 90° turns. There are also [[Thwomp]]s as obstacles, which remain airborne on the first lap. The course begins with a left turn, a straightaway with a row of four Thwomps at the end, and another left turn. Racers then encounter the first fork where they must continuously jump over the lava onto various platforms while dodging four individual Thwomps. The platforms also have individual [[? Panel]]s. After two left turns, a brief straightaway with another row of four Thwomps, and two right turns, racers encounter the track's second fork; here there are three distinct paths separated by walls. The leftmost has six [[coin]]s and a [[Dash Panel|zipper]], but is farthest away and narrows the following turn into a hairpin. The easiest path to reach is the right one, which has a jump pad and a zipper directly behind such that a player who hits the jump line passes over the zipper. To reach the zipper, racers must time a hop over the jump pad. The middle path has six coins and two jump pads with ? Panels positioned behind them. At the end of the left and rights paths is an individual Thwomp. After two more left turns, racers pass a pair of Thwomps and soon reach the finish line. | | As with the other Bowser Castle tracks, Bowser Castle 3 is composed entirely of straightaways and 90° turns. There are also [[Thwomp]]s as obstacles, which remain airborne on the first lap. The course begins with a left turn, a straightaway with a row of four Thwomps at the end, and another left turn. Racers then encounter the first fork where they must continuously jump over the lava onto various platforms while dodging four individual Thwomps. The platforms also have individual [[? Panel]]s. After two left turns, a brief straightaway with another row of four Thwomps, and two right turns, racers encounter the track's second fork; here there are three distinct paths separated by walls. The leftmost has six [[coin]]s and a [[Dash Panel|zipper]], but is farthest away and narrows the following turn into a hairpin. The easiest path to reach is the right one, which has a jump pad and a zipper directly behind such that a player who hits the jump line passes over the zipper. To reach the zipper, racers must time a hop over the jump pad. The middle path has six coins and two jump pads with ? Panels positioned behind them. At the end of the left and rights paths is an individual Thwomp. After two more left turns, racers pass a pair of Thwomps and soon reach the finish line. |
|
| |
| {{br|left}} | | {{br|left}} |
|
| |
|
| ==''Mario Kart: Super Circuit''== | | ==''Mario Kart: Super Circuit''== |
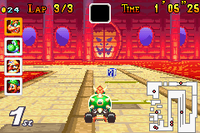
| [[File:MKSC Bowser Castle 3 SNES.png|thumb|[[Bowser]] near an item box]] | | [[File:MKSC Bowser Castle 3 SNES.png|thumb|Bowser racing on the course in ''Mario Kart: Super Circuit'']] |
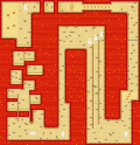
| Bowser Castle 3 reappeared in ''[[Mario Kart: Super Circuit]]'', and is the second track of the [[Extra Cup|Extra Star Cup]]. It uses the background from [[GBA Bowser's Castle 1|that game's Bowser Castle 1]]. The Thwomps and zippers were removed from the track, along with the jump pad in the rightmost path at the end. Also, the Question Blocks in the first split path were reduced to just three [[Item Box]]es (one on both sides early on, and one in the middle afterwards). | | Bowser Castle 3 reappeared in ''[[Mario Kart: Super Circuit]]'', and is the second track of the [[Extra Cup|Extra Star Cup]]. It uses the background from [[GBA Bowser's Castle 1|that game's Bowser Castle 1]]. The Thwomps and zippers were removed from the track, along with the jump pad in the rightmost path at the end. Also, the Question Blocks in the first split path were reduced to just three [[Item Box]]es (one on both sides early on, and one in the middle afterwards). |
| {{br}} | | {{br}} |
|
| |
|
| ==''Mario Kart Tour''== | | ==''Mario Kart Tour''== |
| [[File:MKT SNES BowserCastle3 Scene.jpg|thumb|left|250px|The course in ''Mario Kart Tour'']] | | [[File:MKT SNES BowserCastle3 Scene.jpg|thumb|left|250px|The view of the course in ''Mario Kart Tour'']] |
| Bowser Castle 3 returns in ''[[Mario Kart Tour]]'' starting with the [[Bowser Tour (2023)|2023 Bowser Tour]], marking the first reappearance of an SNES Bowser Castle course in a ''Mario Kart'' title since ''Mario Kart: Super Circuit''. It was the final SNES course added to the game. Unlike any other SNES courses that reappeared before it, the course has received a major visual and gameplay overhaul, including a new starting banner, being the first SNES remake in the ''Mario Kart'' series to feature any kind of dynamic elevation. Unlike the [[GBA Bowser's Castle 1|GBA]] [[GBA Bowser's Castle 2|Bowser's]] [[GBA Bowser's Castle 3|Castle]] [[GBA Bowser's Castle 4|courses]] in ''Mario Kart Tour'', this course retains its original name, Bowser Castle, as opposed to being changed to read "Bowser's Castle". | | Bowser Castle 3 returns in ''[[Mario Kart Tour]]'' starting with the [[Bowser Tour (2023)|2023 Bowser Tour]], marking the first reappearance of an SNES Bowser Castle course in a ''Mario Kart'' title since ''Mario Kart: Super Circuit''. It was the final SNES course added to the game. Unlike any other SNES courses that reappeared before it, the course has received a major visual and gameplay overhaul, including a new starting banner, being the first SNES remake in the ''Mario Kart'' series to feature any kind of dynamic elevation. Unlike the [[GBA Bowser's Castle 1|GBA]] [[GBA Bowser's Castle 2|Bowser's]] [[GBA Bowser's Castle 3|Castle]] [[GBA Bowser's Castle 4|courses]] in ''Mario Kart Tour'', this course retains its original name, Bowser Castle, as opposed to being changed to read "Bowser's Castle". |
|
| |
|
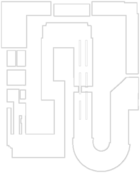
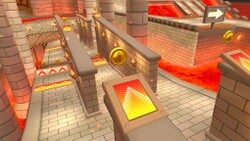
| Large stretches of the course are now angled vertically, including segments of lava. The course now features more walls, pillars, and ramps. Offroad has been added all throughout the course, similar in appearance to the offroad present in GBA Bowser's Castles. Unlike in most other ''Tour'' courses, the offroad is not blocked off at all through the game's Smart Steering, even for the patches that do not serve as opportunities for shortcuts. The layout of the jump section has been streamlined, with the platforms all being fully aligned and offroad now breaking up the platforms. [[Lava Geyser]]s now erupt from the lava. An extra turn has been added before the U-bend where the track previously only got thinner, marked with an arrow sign. The walls separating the three roads towards the end are now aligned and can now be driven on, and gaps have been added between sections of the walls. The final turn is now a curved bend as opposed to two 90 degree turns. [[Bone Piranha Plant]]s have been added to the end of the course. The background is more open, since the arches in the background have been trimmed down and do not fill the entire horizon. A volcano similar to that of [[3DS Bowser's Castle]] has been added to the course's background. | | Large stretches of the course are now angled vertically, including segments of lava. The course now features more walls, pillars, and ramps. Offroad has been added all throughout the course, similar in appearance to the offroad present in GBA Bowser's Castles. Unlike in most other ''Tour'' courses, the offroad is not blocked off at all through the game's Smart Steering, even for the patches that do not serve as opportunities for shortcuts. The layout of the jump section has been streamlined, with the platforms all being fully aligned and offroad now breaking up the platforms. [[Lava Geyser]]s now erupt from the lava. An extra turn has been added before the U-bend where the track previously only got thinner, marked with an arrow sign. The walls separating the three roads towards the end are now aligned and can now be driven on, and gaps have been added between sections of the walls. The final turn is now a curved bend as opposed to two 90° turns. [[Bone Piranha Plant]]s have been added to the end of the course. The background is more open, since the arches in the background have been trimmed down and do not fill the entire horizon. A volcano similar to that of [[3DS Bowser's Castle]] has been added to the course's background. |
|
| |
|
| The course also appears as '''Bowser Castle 3R''' (reversed), '''Bowser Castle 3T''' (with ramps), and '''Bowser Castle 3R/T''' (reversed with ramps). In the R variant, there is a [[Glide Ramp|glide ramp]] at the beginning of the last straightaway, allowing racers to cut off the final turn. In the T and R/T variants, a glide ramp is located at the fork with the numerous jumps. In the R/T variant this allows racers to cut off the second to last turn if they can dodge the additional Bone Piranha Plants that are present. | | The course also appears as '''Bowser Castle 3R''' (reversed), '''Bowser Castle 3T''' (with ramps), and '''Bowser Castle 3R/T''' (reversed with ramps). In the R variant, there is a [[Glide Ramp|glide ramp]] at the beginning of the last straightaway, allowing racers to cut off the final turn. In the T and R/T variants, a glide ramp is located at the fork with the numerous jumps. In the R/T variant this allows racers to cut off the second to last turn if they can dodge the additional Bone Piranha Plants that are present. |
| Line 53: |
Line 52: |
|
| |
|
| ==''Mario Kart 8 Deluxe''== | | ==''Mario Kart 8 Deluxe''== |
| [[File:MK8D SNES Bowser Castle 3 Scene 1.png|250px|thumb|right|Bowser Castle 3 in ''Mario Kart 8 Deluxe'']] | | [[File:MK8D SNES Bowser Castle 3 Scene 1.png|thumb|250px|The course in ''Mario Kart 8 Deluxe'']] |
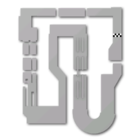
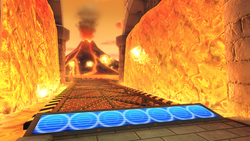
| Bowser Castle 3 reappears in ''[[Mario Kart 8 Deluxe]]'' as part of the sixth and final wave of the ''[[Mario Kart 8 Deluxe – Booster Course Pass|Booster Course Pass]]'' DLC. It appears as the third course of the [[Spiny Cup]], marking the first time an SNES Bowser Castle course has been present in a cup since ''[[Mario Kart: Super Circuit]]''. It and {{classic-link|SNES|Mario Circuit 3}} are the only courses from ''Super Mario Kart'' to appear in the Booster Course Pass. It is also the first and only classic [[Bowser's Castle]] to appear in ''Mario Kart 8 Deluxe''. It is based on its appearance in ''Mario Kart Tour'', but with significant visual upgrades. [[Anti-gravity]] has been added starting from the first jump, continuing up until the end of the slanted section, making it the first SNES course to use anti-gravity. The Thwomp in this section was removed. The ground at the top of the incline is now a metal grate, instead of stone. Fireballs have been added as an obstacle, while more Thwomps appear along various parts of the course. Some of the added offroad from the ''Tour'' version was removed, while all the offroad was removed from the minimap. The turn following the antigravity section has been made slanted instead of following 90 degree angles. Metal blocks were added along the inner edge of the curved turn. Two Thwomps are added at the final jump with coins that lay atop them, which can be collected by players passing over them. The left side of the course in this final stretch has been widened. The music was also arranged as a metal composition; the only retained instruments from the original SNES version of the track are the sampled AKAI S1000 brass hits. Like [[3DS Rock Rock Mountain|Rock Rock Mountain]] in ''[[Mario Kart 7]]'', [[Toad Harbor]], {{classic-link|3DS|DK Jungle}}, [[Mute City]], and {{classic-link|GBA|Ribbon Road}}, the final lap version of the music uses a different, shorter intro than the normal version. It is the only Booster Course to do so. | | Bowser Castle 3 reappears in ''[[Mario Kart 8 Deluxe]]'' as part of the sixth and final wave of the ''[[Mario Kart 8 Deluxe – Booster Course Pass|Booster Course Pass]]'' DLC. It appears as the third course of the [[Spiny Cup]], marking the first time an SNES Bowser Castle course has been present in a cup since ''[[Mario Kart: Super Circuit]]''. It and {{classic-link|SNES|Mario Circuit 3}} are the only courses from ''Super Mario Kart'' to appear in the ''Booster Course Pass''. It is also the only classic [[Bowser's Castle]] to appear in ''Mario Kart 8 Deluxe''. It is based on its appearance in ''Mario Kart Tour'', but with significant visual upgrades. [[Anti-gravity]] has been added starting from the first jump, continuing up until the end of the slanted section, making it the first SNES course to use anti-gravity. The Thwomp in this section was removed. The ground at the top of the incline is now a metal grate, instead of stone. Fireballs have been added as an obstacle, while more Thwomps appear along various parts of the course. Some of the added offroad from the ''Tour'' version was removed, while all the offroad was removed from the minimap. The turn following the antigravity section has been made slanted instead of following 90° angles. Metal blocks were added along the inner edge of the curved turn. Two Thwomps are added at the final jump with coins that lay atop them, which can be collected by players passing over them. The left side of the course in this final stretch has been widened. The music was also arranged as a metal composition; the only retained instruments from the original SNES version of the track are the sampled AKAI S1000 brass hits, though at times, their sound also deviates from the original. Like [[3DS Rock Rock Mountain|Rock Rock Mountain]] in ''[[Mario Kart 7]]'', [[Toad Harbor]], {{classic-link|3DS|DK Jungle}}, [[Mute City]], and {{classic-link|GBA|Ribbon Road}}, the final lap version of the music uses a different, shorter intro than the normal version; it is the only Booster Course to do so. |
|
| |
|
| Although the course's name in-game and in the Wave 6 reveal trailer reads as "Bowser Castle", like in its previous appearances, the official North American website for the ''Booster Course Pass'' names the course as '''Bowser's Castle 3''', matching most modern Bowser's Castle courses. Bowser Castle 3 is the only SNES course in the game to not be the second course of its cup, as {{classic-link|SNES|Donut Plains 3}}, {{classic-link|SNES|Rainbow Road}}, and {{classic-link|SNES|Mario Circuit 3}} are respectively the second courses of the [[Banana Cup|Banana]], [[Triforce Cup|Triforce]], and [[Turnip Cup|Turnip]] cups. | | Although the course's name in-game and in the Wave 6 reveal trailer reads as "Bowser Castle", like in its previous appearances, the official North American website for the ''Booster Course Pass'' names the course as '''Bowser's Castle 3''', matching most modern Bowser's Castle courses. Bowser Castle 3 is the only SNES course in the game to not be the second course of its cup, as {{classic-link|SNES|Donut Plains 3}}, {{classic-link|SNES|Rainbow Road}}, and {{classic-link|SNES|Mario Circuit 3}} are respectively the second courses of the [[Banana Cup|Banana]], [[Triforce Cup|Triforce]], and [[Turnip Cup|Turnip]] cups. |
| Line 62: |
Line 61: |
| ==Profiles== | | ==Profiles== |
| ===''Mario Kart 8 Deluxe''=== | | ===''Mario Kart 8 Deluxe''=== |
| *'''Nintendo Switch News app (UK): ''Burn up the track in Bowser Castle 3!'''<br>Today we'd like to present another course released as part of the sixth wave, which is available now: {{Color|Bowser Castle 3|blue}}.<br>This course, first introduced in the Super NES game {{Color|Super Mario Kart|blue}}, is hosted in the imposing, lava-encircled environs of Bowser Castle, on a track further complicated by Thwomps and Bone Piranha Plants. You'll need to drift deftly to navigate the course's many right-angle corners, and make good use of Spin Boosts in the antigravity zones of the latter half if you're aiming for a decent time!'' | | *'''Nintendo Switch News app (UK): ''Burn up the track in Bowser Castle 3!'''<br>Today we'd like to present another course released as part of the sixth wave, which is available now: {{Color|blue|Bowser Castle 3}}.<br>This course, first introduced in the Super NES game {{Color|blue|Super Mario Kart}}, is hosted in the imposing, lava-encircled environs of Bowser Castle, on a track further complicated by Thwomps and Bone Piranha Plants. You'll need to drift deftly to navigate the course's many right-angle corners, and make good use of Spin Boosts in the antigravity zones of the latter half if you're aiming for a decent time!'' |
| | |
| | *'''Nintendo Switch News app (US)''': |
| | **''This course first appeared in the Super Mario Kart™ game on the Super NES™ System.'' |
| | **''Welcome to Bowser Castle! For those who lava good obstacle, this course is littered with Thwomps and Bone Piranha Plants looking to stand in your way. Oh, and of course watch out for lava!'' |
| | **''You’ll need to flex your drifting skills to tackle the many sharp 90° curves here. You can try to shorten your time by using the spin turbos in the anti-gravity areas in the first half of the course.'' |
|
| |
|
| ==Gallery== | | ==Gallery== |
| ===''Mario Kart Tour''=== | | ===''Mario Kart Tour''=== |
| ====Course icons==== | | ====Course icons==== |
| | {{main-gallery|Mario Kart Tour race course icons (SNES courses)#Bowser Castle 3|Mario Kart Tour race course icons (SNES courses) § Bowser Castle 3}} |
| <gallery> | | <gallery> |
| MKT Icon BowserCastle3SNES Meowser.png|The course icon with Meowser | | MKT Icon BowserCastle3SNES Meowser.png|The course icon |
| MKT Icon BowserCastle3RSNES LudwigMiiRacingSuit.png|The course icon of the R variant with the Ludwig Mii Racing Suit | | MKT Icon BowserCastle3RSNES LudwigMiiRacingSuit.png|The course icon of the R variant |
| MKT Icon BowserCastle3TSNES IggyMiiRacingSuit.png|The course icon of the T variant with the Iggy Mii Racing Suit | | MKT Icon BowserCastle3TSNES IggyMiiRacingSuit.png|The course icon of the T variant |
| MKT Icon BowserCastle3RTSNES DrLuigi.png|The course icon of the R/T variant with Dr. Luigi
| | MKT Icon BowserCastle3RTSNES CatLuigi.png|The course icon of the R/T variant |
| MKT Icon BowserCastle3RTSNES CatLuigi.png|The course icon of the R/T variant with Cat Luigi | |
| </gallery> | | </gallery> |
|
| |
|
| Line 79: |
Line 83: |
| MKT SNESBowserCastle3 Scene.png|View of the starting line | | MKT SNESBowserCastle3 Scene.png|View of the starting line |
| MKT SNESBowserCastle3.png|Alternative view of the starting line | | MKT SNESBowserCastle3.png|Alternative view of the starting line |
| | MKT SNES Bowser Castle 3 Flowing Lava.jpg|View of lava waterfalls on the course |
| MKT SNESBowserCastle3 Scene2.png|View of the ramps section | | MKT SNESBowserCastle3 Scene2.png|View of the ramps section |
| | MKT SNES Bowser Castle 3 Ascent.jpg|Alternate view of the ramps section |
| | MKT SNES Bowser Castle 3 Descent.jpg|View from the slanted section of the course |
| | MKT SNES Bowser Castle 3 View.jpg|View of the first fortress |
| | MKT SNES Bowser Castle 3 View 2.jpg|View of the second fortress |
| MKT SNESBowserCastle3 Scene3.png|View of the walled off road | | MKT SNESBowserCastle3 Scene3.png|View of the walled off road |
| </gallery> | | </gallery> |
| | |
| ===''Mario Kart 8 Deluxe''=== | | ===''Mario Kart 8 Deluxe''=== |
| <gallery> | | <gallery> |
| Line 94: |
Line 104: |
| ==Names in other languages== | | ==Names in other languages== |
| {{foreign names | | {{foreign names |
| |Jap=クッパじょうコース 3 <small>(''Super Mario Kart'')</small> | | |Jap=クッパじょうコース 3 |
| | |JapN=''Super Mario Kart'' |
| |JapR=Kuppa Jō Kōsu 3 | | |JapR=Kuppa Jō Kōsu 3 |
| |JapM=Bowser Castle Course 3 | | |JapM=Bowser Castle Course 3 |
- This article is about the race course from Super Mario Kart. For the race course from Mario Kart: Super Circuit and retro course in Mario Kart Wii and Mario Kart Tour, see GBA Bowser's Castle 3.
Bowser Castle 3 is the fourth course of the Star Cup in Super Mario Kart. Like every Bowser Castle course, the entire race is held inside a large castle room filled with a big lava pool.
The course returns in Mario Kart: Super Circuit as the second track of the Extra Star Cup, in Mario Kart Tour starting with the 2023 Bowser Tour, and the Booster Course Pass for Mario Kart 8 Deluxe as the third course of the Spiny Cup, as well as being the penultimate course of the game overall.
Super Mario Kart[edit]
Course layout[edit]

Luigi approaching a split path on Bowser Castle 3
As with the other Bowser Castle tracks, Bowser Castle 3 is composed entirely of straightaways and 90° turns. There are also Thwomps as obstacles, which remain airborne on the first lap. The course begins with a left turn, a straightaway with a row of four Thwomps at the end, and another left turn. Racers then encounter the first fork where they must continuously jump over the lava onto various platforms while dodging four individual Thwomps. The platforms also have individual ? Panels. After two left turns, a brief straightaway with another row of four Thwomps, and two right turns, racers encounter the track's second fork; here there are three distinct paths separated by walls. The leftmost has six coins and a zipper, but is farthest away and narrows the following turn into a hairpin. The easiest path to reach is the right one, which has a jump pad and a zipper directly behind such that a player who hits the jump line passes over the zipper. To reach the zipper, racers must time a hop over the jump pad. The middle path has six coins and two jump pads with ? Panels positioned behind them. At the end of the left and rights paths is an individual Thwomp. After two more left turns, racers pass a pair of Thwomps and soon reach the finish line.
Mario Kart: Super Circuit[edit]

Bowser racing on the course in
Mario Kart: Super CircuitBowser Castle 3 reappeared in Mario Kart: Super Circuit, and is the second track of the Extra Star Cup. It uses the background from that game's Bowser Castle 1. The Thwomps and zippers were removed from the track, along with the jump pad in the rightmost path at the end. Also, the Question Blocks in the first split path were reduced to just three Item Boxes (one on both sides early on, and one in the middle afterwards).
Mario Kart Tour[edit]

The view of the course in
Mario Kart TourBowser Castle 3 returns in Mario Kart Tour starting with the 2023 Bowser Tour, marking the first reappearance of an SNES Bowser Castle course in a Mario Kart title since Mario Kart: Super Circuit. It was the final SNES course added to the game. Unlike any other SNES courses that reappeared before it, the course has received a major visual and gameplay overhaul, including a new starting banner, being the first SNES remake in the Mario Kart series to feature any kind of dynamic elevation. Unlike the GBA Bowser's Castle courses in Mario Kart Tour, this course retains its original name, Bowser Castle, as opposed to being changed to read "Bowser's Castle".
Large stretches of the course are now angled vertically, including segments of lava. The course now features more walls, pillars, and ramps. Offroad has been added all throughout the course, similar in appearance to the offroad present in GBA Bowser's Castles. Unlike in most other Tour courses, the offroad is not blocked off at all through the game's Smart Steering, even for the patches that do not serve as opportunities for shortcuts. The layout of the jump section has been streamlined, with the platforms all being fully aligned and offroad now breaking up the platforms. Lava Geysers now erupt from the lava. An extra turn has been added before the U-bend where the track previously only got thinner, marked with an arrow sign. The walls separating the three roads towards the end are now aligned and can now be driven on, and gaps have been added between sections of the walls. The final turn is now a curved bend as opposed to two 90° turns. Bone Piranha Plants have been added to the end of the course. The background is more open, since the arches in the background have been trimmed down and do not fill the entire horizon. A volcano similar to that of 3DS Bowser's Castle has been added to the course's background.
The course also appears as Bowser Castle 3R (reversed), Bowser Castle 3T (with ramps), and Bowser Castle 3R/T (reversed with ramps). In the R variant, there is a glide ramp at the beginning of the last straightaway, allowing racers to cut off the final turn. In the T and R/T variants, a glide ramp is located at the fork with the numerous jumps. In the R/T variant this allows racers to cut off the second to last turn if they can dodge the additional Bone Piranha Plants that are present.
Like with the Donut Plains, Koopa Beach, and Vanilla Lake courses, this course reuses its original musical arrangement from Super Mario Kart.
Appearances[edit]
For this course's tour appearances, see List of SNES Bowser Castle 3 tour appearances in Mario Kart Tour.
Top-tier and middle-tier items[edit]
Select "show" to reveal the drivers, karts, and gliders for which SNES Bowser Castle 3 and its variants are always favored or favorite courses. For instances in which additional drivers, karts, and gliders temporarily had this course and its variants as favored or favorite courses, see List of SNES Bowser Castle 3 tour appearances in Mario Kart Tour.
| Course
|
Three-item drivers
|
Bonus points ×2 karts
|
Combo bonus ×3 gliders
|
Two-item drivers
|
Bonus points ×1.5 karts
|
Combo bonus ×2 gliders
|

Normal variant
|
       
|
           
|
           
|
          
|
                  
|
               
|
|
|
|
|
   
|
|
|
|
|
|
|

|

|

|

R variant
|
           
|
                 
|
           
|
           
|
           *** ***         
|
             
|
  
|

|
|
  
|

|
|

|
|
|
|
|
|

T variant
|
                 
|
                
|
           
|
                  *** ***   
|
                   
|
            *** ***  
|
|
|

|
|
  
|

|
|
|
|
|
|
|
|
|

R/T variant
|
         
|
            
|
         
|
        *** ***     
|
    *** ***          
|
     *** ***       
|
|
|
|
|
|
 
|

|
|
|
|
|

|
|
|
* indicates a favored course upgraded to a favorite course after reaching level 3.
** indicates a favored course upgraded to a favorite course after reaching level 6.
*** indicates a favored course upgraded to a favorite course after reaching level 8 for High-End items.
|
Bonus challenges[edit]
Mario Kart 8 Deluxe[edit]

The course in
Mario Kart 8 DeluxeBowser Castle 3 reappears in Mario Kart 8 Deluxe as part of the sixth and final wave of the Booster Course Pass DLC. It appears as the third course of the Spiny Cup, marking the first time an SNES Bowser Castle course has been present in a cup since Mario Kart: Super Circuit. It and SNES Mario Circuit 3 are the only courses from Super Mario Kart to appear in the Booster Course Pass. It is also the only classic Bowser's Castle to appear in Mario Kart 8 Deluxe. It is based on its appearance in Mario Kart Tour, but with significant visual upgrades. Anti-gravity has been added starting from the first jump, continuing up until the end of the slanted section, making it the first SNES course to use anti-gravity. The Thwomp in this section was removed. The ground at the top of the incline is now a metal grate, instead of stone. Fireballs have been added as an obstacle, while more Thwomps appear along various parts of the course. Some of the added offroad from the Tour version was removed, while all the offroad was removed from the minimap. The turn following the antigravity section has been made slanted instead of following 90° angles. Metal blocks were added along the inner edge of the curved turn. Two Thwomps are added at the final jump with coins that lay atop them, which can be collected by players passing over them. The left side of the course in this final stretch has been widened. The music was also arranged as a metal composition; the only retained instruments from the original SNES version of the track are the sampled AKAI S1000 brass hits, though at times, their sound also deviates from the original. Like Rock Rock Mountain in Mario Kart 7, Toad Harbor, 3DS DK Jungle, Mute City, and GBA Ribbon Road, the final lap version of the music uses a different, shorter intro than the normal version; it is the only Booster Course to do so.
Although the course's name in-game and in the Wave 6 reveal trailer reads as "Bowser Castle", like in its previous appearances, the official North American website for the Booster Course Pass names the course as Bowser's Castle 3, matching most modern Bowser's Castle courses. Bowser Castle 3 is the only SNES course in the game to not be the second course of its cup, as SNES Donut Plains 3, SNES Rainbow Road, and SNES Mario Circuit 3 are respectively the second courses of the Banana, Triforce, and Turnip cups.
Internally, the course is referred to as "Cnsw_57", implying it may have originally been intended to be the third course of the Cherry Cup.
Profiles[edit]
Mario Kart 8 Deluxe[edit]
- Nintendo Switch News app (UK): Burn up the track in Bowser Castle 3!
Today we'd like to present another course released as part of the sixth wave, which is available now: Bowser Castle 3.
This course, first introduced in the Super NES game Super Mario Kart, is hosted in the imposing, lava-encircled environs of Bowser Castle, on a track further complicated by Thwomps and Bone Piranha Plants. You'll need to drift deftly to navigate the course's many right-angle corners, and make good use of Spin Boosts in the antigravity zones of the latter half if you're aiming for a decent time!
- Nintendo Switch News app (US):
- This course first appeared in the Super Mario Kart™ game on the Super NES™ System.
- Welcome to Bowser Castle! For those who lava good obstacle, this course is littered with Thwomps and Bone Piranha Plants looking to stand in your way. Oh, and of course watch out for lava!
- You’ll need to flex your drifting skills to tackle the many sharp 90° curves here. You can try to shorten your time by using the spin turbos in the anti-gravity areas in the first half of the course.
Gallery[edit]
Mario Kart Tour[edit]
Course icons[edit]
- For this subject's image gallery, see Gallery:Mario Kart Tour race course icons (SNES courses) § Bowser Castle 3.
The course icon of the R variant
The course icon of the T variant
The course icon of the R/T variant
Screenshots[edit]
View of the starting line
Alternative view of the starting line
View of lava waterfalls on the course
View of the ramps section
Alternate view of the ramps section
View from the slanted section of the course
View of the first fortress
View of the second fortress
View of the walled off road
Mario Kart 8 Deluxe[edit]
Names in other languages[edit]
| Language
|
Name
|
Meaning
|
Notes
|
| Japanese
|
クッパじょうコース 3[?]
Kuppa Jō Kōsu 3
|
Bowser Castle Course 3
|
Super Mario Kart
|
クッパじょう3[?]
Kuppa Jō 3
|
Bowser Castle 3
|
|
| Chinese (simplified)
|
酷霸王城堡 3[?]
Kùbàwáng Chéngbǎo 3
|
Bowser Castle 3
|
|
| Chinese (traditional)
|
庫巴城堡 3[?]
Kùbā Chéngbǎo 3
|
Bowser Castle 3
|
|
| Dutch
|
Bowsers Kasteel 3[?]
|
Bowser's Castle 3
|
|
| French
|
Château de Bowser 3[?]
|
Bowser’s Castle 3
|
|
| German
|
Bowsers Festung 3[?]
|
Bowser’s Castle 3
|
|
| Italian
|
Castello di Bowser 3[?]
|
Bowser's Castle 3
|
|
| Korean
|
쿠파 성 3[?]
Kupa Seong 3
|
Bowser Castle 3
|
|
| Portuguese
|
Castelo do Bowser 3[?]
|
Bowser's Castle 3
|
|
| Russian
|
Замок Боузера 3[?]
Zamok Bouzera 3
|
Bowser's Castle 3
|
|
| Spanish
|
Castillo de Bowser 3[?]
|
Bowser's Castle 3
|
|
References[edit]
| Mario Kart Tour
|
| Drivers
|
| Normal
|
Baby Mario • Baby Peach • Baby Daisy • Baby Rosalina • Baby Luigi • Koopa Troopa • Shy Guy • Dry Bones • Iggy • Larry • Lemmy • Ludwig • Morton • Roy • Wendy
|
| Super
|
Mario • Peach • Yoshi • Daisy • Toad • Toadette • Rosalina • Luigi • Toad (Pit Crew) • Red Yoshi • Blue Yoshi • Pink Yoshi • Yellow Toad (Pit Crew) • Light-blue Toad (Pit Crew) • Red Toad (Pit Crew) • Orange Yoshi • Green Toad (Pit Crew) • Pink Toad (Pit Crew) • Light-blue Yoshi • Yellow Yoshi • Purple Toad (Pit Crew) • Bowser • Donkey Kong • Diddy Kong • Lakitu • Bowser Jr. • Wario • Waluigi • King Boo • Black Shy Guy • Red Koopa (Freerunning) • Birdo • Pink Shy Guy • Birdo (Light Blue) • Hammer Bro • Boomerang Bro • Ice Bro • Fire Bro • Birdo (Yellow) • Monty Mole • Green Shy Guy • Blue Koopa (Freerunning) • Birdo (Blue) • Purple Koopa (Freerunning) • Light-blue Shy Guy • Blue Shy Guy • Birdo (Orange) • White Shy Guy • Koopa (Freerunning) • Orange Shy Guy • Birdo (Red) • Yellow Shy Guy • Birdo (Green)
|
| High-End
|
Metal Mario • Peachette • Pauline • Mario (Musician) • Peach (Kimono) • Mario (Hakama) • Rosalina (Halloween) • Peach (Vacation) • Mario (Santa) • Pink Gold Peach • Daisy (Holiday Cheer) • Yoshi (Reindeer) • Pauline (Party Time) • Mario (Happi) • Toad (Party Time) • Peach (Wintertime) • Penguin Luigi • Ice Mario • Baby Peach (Cherub) • Rosalina (Aurora) • Mario (Classic) • Luigi (Classic) • Baby Rosalina (Detective) • Yoshi (Egg Hunt) • Black Yoshi • Builder Mario • Builder Toad • Daisy (Fairy) • Mario (Chef) • Peach (Wedding) • Rosalina (Swimwear) • Mario (Swimwear) • Captain Toad • Toadette (Explorer) • Daisy (Yukata) • Mario (SNES) • Mario (Sunshine) • Mario (Halloween) • Peach (Halloween) • Peach (Explorer) • Builder Luigi • Fire Rosalina • Luigi (Lederhosen) • Cat Peach • Cat Toad • Pauline (Rose) • Penguin Toad • Mario (Racing) • White Yoshi • Baby Mario (Koala) • Builder Toadette • Mario (Tuxedo) • Luigi (Painter) • Daisy (Swimwear) • Mario (Baseball) • Peach (Happi) • Penguin Mario • Yoshi (Kangaroo) • Tanooki Mario • Tanooki Rosalina • Mario (Satellaview) • Penguin Toadette • Cat Rosalina • Luigi (Vacation) • Mario (Golf) • Luigi (Golf) • Mario (Aviator) • Mario (Samurai) • Peach (Yukata) • Yoshi (Gold Egg) • Rosalina (Volendam) • Daisy (Farmer) • Dr. Mario • Dr. Luigi • Dr. Peach • Cat Mario • Cat Luigi • Rosalina (Chef) • Daisy (Thai Dress) • Daisy (Sailor) • Toadette (Sailor) • White Tanooki Mario • Luigi (Knight) • Mario (King) • Luigi (Chef) • Kitsune Luigi • Toad (Astronaut) • Toadette (Astronaut) • Poochy • Toad (Tourist) • Luigi (Gold Knight) • Pauline (Cowgirl) • Mario (Black Suit) • Gold Mario • Dry Bowser • King Boo (Luigi's Mansion) • Shy Guy (Pastry Chef) • Waluigi (Bus Driver) • Gold Koopa (Freerunning) • Wario (Hiker) • Dry Bones (Gold) • Funky Kong • Dixie Kong • Dry Bowser (Gold) • Wario (Cowboy) • Nabbit • Bowser Jr. (Pirate) • King Bob-omb • Donkey Kong Jr. (SNES) • Shy Guy (Gold) • King Boo (Gold) • Bowser (Santa) • Lakitu (Party Time) • Birdo (Black) • Shy Guy (Ninja) • King Bob-omb (Gold) • Kamek • Waluigi (Vampire) • Meowser • Chargin' Chuck • Pink Shy Guy (Ninja) • Birdo (White) • Dr. Bowser • Petey Piranha • Chargin' Chuck (Gold) • Petey Piranha (Gold) • Larry (Wintertime) • Light-blue Shy Guy (Explorer) • Yellow Shy Guy (Explorer) • Donkey Kong (Gladiator) • Wiggler • Wiggler (Gold) • Mii Racing Suits
|
| Vehicle parts
|
| Karts |
Normal
|
Pipe Frame • Birthday Girl • Mushmellow • Koopa Dasher • Biddybuggy • Blue Biddybuggy • Cheep Charger • Pink Mushmellow • Birthday Girl Rosalina • Green Kiddie Kart • Red Kiddie Kart • Bullet Blaster • Bull's-Eye Banzai • Landship • Pipe Buggy • Warship • Green Cheep Charger
|
| Super
|
Mach 8 • Daytripper • Turbo Yoshi • Soda Jet • Super Blooper • Gold Blooper • Royale • Cloud 9 • Poltergust 4000 • Streamliner • White Royale • Zucchini • Red Streamliner • Red Turbo Yoshi • Blue Seven • Super 1 • Dasher II • Tea Coupe • Yellow Turbo Birdo • Egg 1 • Birthday Girl Daisy • Red Standard 8 • Green Standard 8 • Cucumber • Blue Royale • Blue Turbo Yoshi • Orange Turbo Yoshi • Pink Turbo Yoshi • Light-blue Turbo Yoshi • Yellow Turbo Yoshi • Flame Flyer • Barrel Train • DK Jumbo • Chrome DK Jumbo • Koopa Clown • Dark Clown • Para-Wing • Turbo Birdo • Light-blue Turbo Birdo • Bolt Buggy • Rambi Rider • Blue Turbo Birdo • Orange Turbo Birdo • Red Turbo Birdo • Green Turbo Birdo
|
| High-End
|
B Dasher • Black B Dasher • Yellow Taxi • Quickshaw • Kabuki Dasher • Circuit Special • Black Circuit • Bumble V • Queen Bee • Trickster • Ghost Ride • Macharon • Carrot Kart • Cheermellow • Wild Wing • Radish Rider • Wildfire Flyer • Ribbon Rider • Double-Decker • Swift Jack • Red B Dasher • Jingle Bells • Platinum Taxi • Glam Bruiser • Gilded Prancer • Ice-blue Poltergust • P-Wing • Apple Kart • Comet Tail • Bright Bunny • Dozer Dasher • Clanky Kart • Wild Black • Karp Kart • Prancer • Rose Queen • Green Apple Kart • Choco Macharon • Gold Egg • Sweet Daytripper • Red Taxi • Pink Wing • Happy Ride • Blue Soda • Clackety Kart • Gold Clanky Kart • Festival Girl • Black Kabuki Dasher • 8-Bit Pipe Frame • Gold Pipe Frame • Surf Sailer • Star-Spangled Flyer • Green Circuit • Sports Coupe • Pumpkin Kart • Dark Trickster • Sunset Cloud • Steel Driver • Holiday King • Gold Snow Skimmer • Dreamy Egg • Fast Frank • Iron Cucumber • Cat Cruiser • Wild Pink • Rose Taxi • B Dasher Mk. 2 • Decal Streamliner • Orange Streamliner • White Turbo Yoshi • Sakura Quickshaw • Jet Cruiser • Inferno Flyer • Rambi Runner • Pink Dozer • Grand Badwagon • Paintster • Lime Tea Coupe • Sunny Surf Sailer • Pinch Hitter • Cleanup Hitter • Ice Dozer • Green Double-Decker • Black Cat Cruiser • Red B Dasher Mk. 2 • Pink B Dasher Mk. 2 • Classic B Dasher Mk. 2 • Sky-Blue B Dasher Mk. 2 • Metal B Dasher Mk. 2 • Cream B Dasher Mk. 2 • Green B Dasher Mk. 2 • Tanooki Kart • Gold Pumpkin Kart • Lunar Cruiser • Sleigh Rider • White Snow Skimmer • Frosty Bells • Frost Wing • Gray Cat Cruiser • Sports Coupe 2022 • Roaring Racer • Jukebox Buggy • Sneeker • Green Lightning • Cupid's Arrow • Wild Slugger • Prop Kart • Magma Broom • Star Broom • Yellow 8-Bit Pipe Frame • Warrior Wagon • Armored Rider • Black Turbo Yoshi • Gold Bunny • Flower Kart • Dragonfly • Firefly • Daikon Rocket • Capsule Kart • Blue-Green Capsule Kart • White Bruiser • Coconut 1 • Pink Capsule Kart • Cream Cat Cruiser • Green Cat Cruiser • Goo-Goo Buggy • Goo-Goo Pink • Gold Kiddie Kart • Sweet Ride • White Fast Frank • Tuk-Tuk Kart • Tropical Truck • Gold Zucchini • Lightning Streamliner • Flowery Badwagon • Coral Jet Cruiser • Watermelon Kart • Ice-Cream Minibus • Chocolate Banana Minibus • Strawberry Soft Swerve • Shielded Speedster • Gold Standard • Gold Double-Decker • Black Carriage • Green Speeder • Flaming Speeder • Gold Sweet Ride • Streetle • Blue Speeder • Swift Talon • Gold Eagle • Blazing Eagle • Camo Tanooki Kart • Gold Rambi Rider • Moo Moo Offroader • Pink Speeder • Pink Sneeker • Gold Jingle Bell • Holiday Speeder • Wild Gold • Rainbow Taxi • Blooper Shuttle • Gold Lunar Cruiser • Gold Quickshaw • Pineapple 1 • Hot Pot Hot Rod • Rainbow Streetle • Gold Capsule Kart • Gold 8-Bit Pipe Frame • Taiko Drum Dasher • Sakura Sports Coupe • Bright Girl • Huffin Puffin Egg • Jumbo Jetter • Gold Paintster • Silver Flower Kart • Bronze Cucumber • Cream Classic • Red Comet • Pink Comet • Green Comet • Gold Comet • Mach 8-R • Gold Cupid's Arrow • Silver Cupid's Arrow • Silver Warrior Wagon • Gold Warrior Wagon • Black Shielded Speedster • Gold Shielded Speedster • Yeehaw Wagon • Desert Rose Wagon • Yellow Sub Scooter • Blue Sub Scooter • Gold Driver • Dolphin Drifter • Purple Rattle Buggy • Goo-Goo Gold • Gold Wild Slugger • Spicy Zucchini • Chocolate Mint Soft Swerve • Gold Soft Swerve • Monarch Kart • Gold Monarch Kart • Black B Dasher Mk. 2 • Gold B Dasher • Badwagon • Blue Badwagon • Gold Train • Bruiser • Snow Skimmer • Offroader • Banana Master • Poison Apple Kart • Cheep Snorkel • Gold Cheep Snorkel • Gold Cheep Charger • Dark Buggy • Koopa King • Brown Offroader • Cact-X • Pirate Sushi Racer • Silver Bullet Blaster • Head Honcho • DK Maximum • Sushi Racer • Gilded King • Crawly Kart • Black Dozer • Party-Wing • Penguin Slider • Black Penguin Slider • Cact-Ice • Black Turbo Birdo • Purple Bunny • Jade Hop Rod • Crimson Hop Rod • Dark Hop Rod • Kamek's Zoom Broom • Silver King • Vampire Flyer • Red Crawly Kart • Yellow Offroader • Cact-R • Cheership • Candy Clown • Tiger Bruiser • Combo Cruiser • Sakura Hop Rod • White Turbo Birdo • Green-Yellow Capsule Kart • Piranha Pipes • Red Offroader • Goo-Goo Black • Cact-B • Gold Bullet Blaster • Red Vampire Flyer • Gold Trickster • Gold Bruiser • Black Sneeker • Purple Dozer • Blue Crawly Kart • Rainbow Pipe Buggy • Gold Hop Rod • Black Jingle Bell • Gold Sushi Racer • Dry Bones Dasher • Waluigi Racer Mk. 2 • Chain Chomp Chariot • Fish Bone Ferry • Gold Fish Bone Ferry • Wiggler Egg • Boo Pipes • Gold Pipes • Wild Wiggler
|
| Gliders |
Normal
|
Super Glider • Parachute • Parafoil • Paper Glider • Droplet Glider • BBIA Parafoil • Minion Paper Glider • Piston Glider • Piranha Plant Parafoil
|
| Super
|
Peach Parasol • Flower Glider • Oilpaper Umbrella • Lightning Oilpaper • Pink Flower Glider • 8-Bit Jumping Mario • ? Block • Plaid Ribbon • Eggshell Glider • 8-Bit Jumping Luigi • Mushroom Glider • Bob-omb Parafoil • Shell Parachute • Wario Wing • Waluigi Wing • BaNaNa Parafoil • Blue Flower Glider
|
| High-End
|
Gold Glider • Fare Flier • Purple Oilpaper Umbrella • Full Flight • Strawberry Crêpe • Le Tricolore • Starchute • Royal Parachute • Glitter Glider • Soaring Jack • Gift Glider • New Year's 2020 • New Year's Kite • Fireworks Parachute • Crimson Crane • Blizzard Parasol • Blizzard Balloons • Sweetheart Glider • Heart Balloons • Luma Parafoil • Rainbow Starchute • Bright Glider • Safety Glider • Daisy Glider • Pink Gold Paper Glider • Butterfly Sunset • Chocolate Donut • Gold Crane • Chocolate Banana Crêpe • Strawberry Donut • Silver Bells • Silver-and-Gold Hearts • Manta Glider • Treasure Map • Butterfly Wings • Great Sail • Festival Wings • 8-Bit Star • Super Mario Kart Glider • Star-Spangled Glider • Spider Glider • Sunset Balloons • Silver Starchute • Jolly Bells • Butterfly Prism • Planet Glider • New Year's 2021 • Gold New Year's Kite • Toe-Bean Balloons • Calico Parafoil • Black Great Sail • Silver Manta Glider • Rose Parasol • Snow Crystals • 8-Bit Fire Flower • Surf Master • Starry Great Sail • Black Toe-Bean Balloons • 8-Bit Bullet Bill • Glinting Glider • Flying Easel • Sunny Surf Master • Polka-Dot Manta Glider • Home-Field Glider • Gold Home-Field Glider • Springtime Crane • Yukata Ribbon • Silver Surf Master • Ship's Wheel • Tanooki Parafoil • Gold Tanooki Parafoil • Magic Parasol • 8-Bit Super Mushroom • Meteor Balloons • Pink Gold Meteors • Galaxy Glider • Candlelight Flight • Gold Penguin Wingtip • Aurora Balloons • New Year's 2022 • Black Cat Parafoil • Cat Parafoil • Gold Toe-Bean Balloons • Glittering Parasol • Luigi Parafoil • Sky-High Flyer • Record Setter • Mario's Mustache • Luigi's Mustache • Origami Glider • Sakura Origami Glider • Gold Eggshell Glider • Green Sprout • Magniflying Glass • Flybrary Book • Pink Magniflying Glass • Cream Toe-Bean Balloons • Green Cat Parafoil • Candlelight Flight Cake • Pretzel Glider • Tulip Corsage • Red and Gold Umbrella • 8-Bit 1-Up Mushroom • Tropical Balloons • Fire Manta Glider • Mint & Berry Balloons • Vanilla & Chocolate Balloons • Icy Mario's Mustache • Flying Flappers • Silver Luigi's Mustache • Mario's Hat Balloon • Luigi's Hat Balloon • Gold Cloud Balloons • White Waves Origami Glider • Chocolate Pretzel • Para-Panini • Silver Candlelight Flight • Autumn Leaves • Calico Toe-Bean Balloons • Wonderful Garnet • Festive Holly • Yellow Hard Hat Balloon • Fuzzy Kite • Gold Hard Hat Balloon • New Year's 2023 • Gold Meteors • Rainbow Fare Flier • Stealth Glider • Gold Umbrella • Wonderful Diamond • Gold Candlelight Flight • 8-Bit Super Glider • Gold 8-Bit Glider • 8-Bit Block Glider • 8-Bit Goomba • Bright Ribbon • Yoshi's Cookies • Smiley Flower Glider • Golden Glider • Gold Tulips • Gold Manta Glider • Red Checkered Glider • Pink Checkered Glider • Green Checkered Glider • Gold Checkered Glider • Gold Origami Glider • Gold Bells • Glittering Glider • Red Emblem • Green Emblem • Mario Bros. Parafoil • Mosaic Starchute • Jellychute • Wavy Great Sail • Dolphin Great Sail • Pink Bubble Balloon • Mario Golf Cap • Luigi Golf Cap • Gold Mario Golf Cap • Melon & Banana Balloons • Spooky Sprinkle Balloons • Gold Chocolate Balloons • Royal Flush • Rainbow Bells • Gold Mario's Hat Balloon • Swooper • Bullet Bill Parachute • Cloud Glider • Rainy Balloons • Wicked Wings • Gold Swooper • Banana Wingtip • Tropical Glider • Dragon Wings • Blooper Wingtip • Nabbit Oilpaper Umbrella • Cheep Cheep Masks • Dry Bowser Umbrella • Penguin Wingtip • Bright Balloons • Ninja Scroll • Dream Glider • Vampire Wings • Golden Wings • Wario's Mustache • Waluigi's Mustache • Wonderful Wings • Wicked Topaz • Piranha Plant Balloons • Secret Scroll • Lava Rocks • Black Starchute • Boo Masks • Nabbit Parachute • Gold Boo Masks • Roy Oilpaper • Rainbow Flappy Wings • Gold Flappy Wings • Wiggler Parachute • Gold Piranha Plant Balloons • Baby Mario Hanafuda • Yoshi's Egg Hanafuda • Peach Hanafuda • Barrel Hanafuda • Blooper Hanafuda • Cape Mario Hanafuda • Bullet Bill Hanafuda • Boo Hanafuda • Piranha Plant Hanafuda • Goomba Hanafuda • Jumping Mario Hanafuda • Bowser Hanafuda
|
| Tires
|
Blue Standard • Cyber Slick • Gold Tires • Metal • Monster • Mushroom • Off-Road • Red Monster • Retro Off-Road • Roller • Slick • Slim • Sponge • Standard • Wood
|
| Courses
|
| New courses |
City courses
|
New York Minute (R, T, R/T, 2, 2R, 2T, 2R/T, 3, 3R, 3T, 3R/T, 4, 4R, 4T, 4R/T) (tour appearances) • Tokyo Blur (R, T, R/T, 2, 2R, 2T, 2R/T, 3, 3R, 3T, 3R/T, 4, 4R, 4T, 4R/T) (tour appearances) • Paris Promenade (R, T, R/T, 2, 2R, 2T, 2R/T, 3, 3R, 3T, 3R/T) (tour appearances) • London Loop (R, T, R/T, 2, 2R, 2T, 2R/T, 3, 3R, 3T, 3R/T) (tour appearances) • Vancouver Velocity (R, T, R/T, 2, 2R, 2T, 2R/T, 3, 3R, 3T, 3R/T) (tour appearances) • Los Angeles Laps (R, T, R/T, 2, 2R, 2T, 2R/T, 3, 3R, 3T, 3R/T) (tour appearances) • Berlin Byways (R, T, R/T, 2, 2R, 2T, 2R/T, 3, 3R, 3T, 3R/T) (tour appearances) • Sydney Sprint (R, T, R/T, 2, 2R, 2T, 2R/T, 3, 3R, 3T, 3R/T) (tour appearances) • Singapore Speedway (R, T, R/T, 2, 2R, 2T, 2R/T, 3, 3R, 3T, 3R/T) (tour appearances) • Amsterdam Drift (R, T, R/T, 2, 2R, 2T, 2R/T, 3, 3R, 3T, 3R/T) (tour appearances) • Bangkok Rush (R, T, R/T, 2, 2R, 2T, 2R/T, 3, 3R, 3T, 3R/T) (tour appearances) • Athens Dash (R, T, R/T, 2, 2R, 2T, 2R/T, 3, 3R, 3T, 3R/T) (tour appearances) • Rome Avanti (R, T, R/T, 2, 2R, 2T, 2R/T, 3, 3R, 3T, 3R/T) (tour appearances) • Madrid Drive (R, T, R/T, 2, 2R, 2T, 2R/T, 3, 3R, 3T, 3R/T) (tour appearances)
|
| Other
|
Merry Mountain (R, T, R/T) (tour appearances) • Ninja Hideaway (R, T, R/T) (tour appearances) • Sky-High Sundae (R, T, R/T) (tour appearances) • Piranha Plant Cove (R, T, R/T, 2, 2R, 2T, 2R/T, 3, 3R, 3T, 3R/T) (tour appearances) • Yoshi's Island (R, T, R/T) (tour appearances) • Piranha Plant Pipeline (R, T, R/T) (tour appearances) • Squeaky Clean Sprint (R, T, R/T) (tour appearances)
|
| Remix courses
|
RMX Mario Circuit 1 (R, T, R/T) (tour appearances) • RMX Choco Island 1 (R, T, R/T) (tour appearances) • RMX Rainbow Road 1 (R, T, R/T) (tour appearances) • RMX Rainbow Road 2 (R, T, R/T) (tour appearances) • RMX Choco Island 2 (R, T, R/T) (tour appearances) • RMX Vanilla Lake 1 (R, T, R/T) (tour appearances) • RMX Ghost Valley 1 (R, T, R/T) (tour appearances) • RMX Bowser's Castle 1 (R, T, R/T) (tour appearances) • RMX Donut Plains 1 (R, T, R/T) (tour appearances) • RMX Vanilla Lake 2 (R, T, R/T) (tour appearances)
|
| Classic courses |
SNES courses
|
Mario Circuit 1 (R, T, R/T) (tour appearances) • Donut Plains 1 (R, T, R/T) (tour appearances) • Ghost Valley 1 (R, T, R/T) (tour appearances) • Mario Circuit 2 (R, T, R/T) (tour appearances) • Choco Island 1 (R, T, R/T) (tour appearances) • Ghost Valley 2 (R, T, R/T) (tour appearances) • Donut Plains 2 (R, T, R/T) (tour appearances) • Mario Circuit 3 (R, T, R/T) (tour appearances) • Choco Island 2 (R, T, R/T) (tour appearances) • Vanilla Lake 1 (R, T, R/T) (tour appearances) • Bowser Castle 3 (R, T, R/T) (tour appearances) • Donut Plains 3 (R, T, R/T) (tour appearances) • Koopa Troopa Beach 2 (R, T, R/T) (tour appearances) • Vanilla Lake 2 (R, T, R/T) • (tour appearances) • Rainbow Road (R, T, R/T) (tour appearances)
|
| N64 courses
|
Luigi Raceway (R, T, R/T) (tour appearances) • Koopa Troopa Beach (R, T, R/T) (tour appearances) • Kalimari Desert (R, T, R/T, 2, 2R, 2T, 2R/T) (tour appearances) • Frappe Snowland (R, T, R/T) (tour appearances) • Choco Mountain (R, T, R/T) (tour appearances) • Mario Raceway (R, T, R/T) (tour appearances) • Royal Raceway (R, T, R/T) (tour appearances) • Yoshi Valley (R, T, R/T) (tour appearances)
|
| GBA courses
|
Peach Circuit (R, T, R/T) (tour appearances) • Riverside Park (R, T, R/T) (tour appearances) • Bowser's Castle 1 (R, T, R/T) (tour appearances) • Boo Lake (R, T, R/T) (tour appearances) • Bowser's Castle 2 (R, T, R/T) (tour appearances) • Luigi Circuit (R, T, R/T) (tour appearances) • Sky Garden (R, T, R/T) (tour appearances) • Cheep-Cheep Island (R, T, R/T) (tour appearances) • Sunset Wilds (R, T, R/T) (tour appearances) • Snow Land (R, T, R/T) (tour appearances) • Yoshi Desert (R, T, R/T) (tour appearances) • Bowser's Castle 3 (R, T, R/T) (tour appearances) • Lakeside Park (R, T, R/T) (tour appearances) • Bowser's Castle 4 (R) (tour appearances)
|
| GCN courses
|
Baby Park (R, T, R/T) (tour appearances) • Mushroom Bridge (R, T, R/T) (tour appearances) • Daisy Cruiser (R, T, R/T) (tour appearances) • Waluigi Stadium (R, T, R/T) (tour appearances) • Yoshi Circuit (R, T, R/T) (tour appearances) • DK Mountain (R, T, R/T) (tour appearances) • Dino Dino Jungle (R, T, R/T) (tour appearances)
|
| DS courses
|
Luigi's Mansion (R, T, R/T) (tour appearances) • Waluigi Pinball (R, T, R/T) (tour appearances) • Shroom Ridge (R, T, R/T) (tour appearances) • DK Pass (R, T, R/T) (tour appearances) • Mario Circuit (R, T, R/T) (tour appearances) • Airship Fortress (R, T, R/T) (tour appearances) • Peach Gardens (R, T, R/T) (tour appearances)
|
| Wii courses
|
Mushroom Gorge (R, T, R/T) (tour appearances) • Coconut Mall (R, T, R/T) (tour appearances) • DK Summit (R, T, R/T) (tour appearances) • Daisy Circuit (R, T, R/T) (tour appearances) • Koopa Cape (R, T, R/T) (tour appearances) • Maple Treeway (R, T, R/T) (tour appearances) • Dry Dry Ruins (R, T, R/T) (tour appearances) • Moonview Highway (R, T, R/T) (tour appearances) • Rainbow Road (R, T, R/T) (tour appearances)
|
| 3DS courses
|
Toad Circuit (R, T, R/T) (tour appearances) • Daisy Hills (R, T, R/T) (tour appearances) • Cheep Cheep Lagoon (R, T, R/T) (tour appearances) • Shy Guy Bazaar (R, T, R/T) (tour appearances) • Mario Circuit (R, T, R/T) (tour appearances) • Rock Rock Mountain (R, T) (tour appearances) • Piranha Plant Slide (R, T, R/T) (tour appearances) • Wario Shipyard (R, T, R/T) (tour appearances) • Neo Bowser City (R, T, R/T) (tour appearances) • Rosalina's Ice World (R, T, R/T) (tour appearances) • Bowser's Castle (R, T, R/T) (tour appearances) • Rainbow Road (R, T, R/T) (tour appearances)
|
| Battle courses |
New courses
|
New York Minute B (tour appearances) • Paris Promenade B (tour appearances)
|
| Classic courses
|
GBA Battle Course 1 (tour appearances) • GCN Cookie Land (tour appearances) • DS Twilight House (tour appearances)
|
| Other
|
| Bonus challenges
|
Ready, Set, Rocket Start • Ring Race • Do Jump Boosts • Big Reverse Race • Goomba Takedown • Glider Challenge • Steer Clear of Obstacles • Vs. Mega • Smash Small Dry Bones • Break Item Boxes • Time Trial • Combo Attack • Take them out quick! • Snap a Photo • Precision Gliding • Big Reverse Race vs. 100
|
| Cups
|
Baby Daisy Cup • Baby Luigi Cup • Baby Mario Cup • Baby Peach Cup • Baby Rosalina Cup • Birdo Cup • Boomerang Bro Cup • Bowser Cup • Bowser Jr. Cup • Cat Peach Cup • Chargin' Chuck Cup • Daisy Cup • Diddy Kong Cup • Dixie Kong Cup • Donkey Kong Cup • Dry Bones Cup • Dry Bowser Cup • Fire Bro Cup • Fire Rosalina Cup • Funky Kong Cup • Gold Mario Cup • Hammer Bro Cup • Ice Bro Cup • Ice Mario Cup • Iggy Cup • Kamek Cup • King Bob-omb Cup • King Boo Cup • Koopa Troopa Cup • Lakitu Cup • Larry Cup • Lemmy Cup • Ludwig Cup • Luigi Cup • Mario Cup • Metal Mario Cup • Mii Cup • Monty Mole Cup • Morton Cup • Nabbit Cup • Pauline Cup • Peach Cup • Peachette Cup • Pink Gold Peach Cup • Poochy Cup • Rosalina Cup • Roy Cup • Shy Guy Cup • Tanooki Mario Cup • Toad Cup • Toadette Cup • Waluigi Cup • Wario Cup • Wendy Cup • Yoshi Cup
|
| Tours |
2019
|
New York Tour • Tokyo Tour • Halloween Tour • Paris Tour • Winter Tour • London Tour • Holiday Tour
|
| 2020
|
New Year's Tour • Ice Tour • Valentine's Tour • Vancouver Tour • Mario Bros. Tour • Baby Rosalina Tour • Hammer Bro Tour • Yoshi Tour • Trick Tour • Flower Tour • Jungle Tour • Cooking Tour • Peach Tour • Marine Tour • Exploration Tour • Wild West Tour • Pirate Tour • Summer Festival Tour • Super Mario Kart Tour • Los Angeles Tour • 1st Anniversary Tour • Halloween Tour • Sunset Tour • Mario vs. Luigi Tour • Winter Tour • Rosalina Tour • New Year's 2021 Tour
|
| 2021
|
Berlin Tour • Cat Tour • Peach vs. Daisy Tour • Snow Tour • Mario Tour • Yoshi Tour • Ninja Tour • Sydney Tour (April–May) • Bowser vs. DK Tour • Trick Tour • Wedding Tour • Paris Tour • Summer Tour • Los Angeles Tour • Mario vs. Peach Tour • Frost Tour • Kamek Tour • Sydney Tour (September) • 2nd Anniversary Tour • Autumn Tour • Halloween Tour • Toad vs. Toadette Tour • Space Tour • Holiday Tour • Penguin Tour • New Year's 2022 Tour
|
| 2022
|
Singapore Tour • Wario vs. Waluigi Tour • Los Angeles Tour • Sky Tour • Mii Tour • Samurai Tour • Yoshi Tour • Amsterdam Tour • Doctor Tour • Peach vs. Bowser Tour (May) • Cat Tour • Metropolitan Tour • Bangkok Tour • Piranha Plant Tour • Ocean Tour • Sundae Tour • Bowser Tour • Mario vs. Luigi Tour • Anniversary Tour • Battle Tour • Halloween Tour • Autumn Tour • Animal Tour • Peach vs. Bowser Tour (November–December) • Holiday Tour • New Year's Tour
|
| 2023
|
Space Tour • Winter Tour • Exploration Tour • Doctor Tour • Mario Tour • Ninja Tour • Yoshi Tour • Spring Tour • Bowser Tour • Mii Tour • Princess Tour • Mario vs. Luigi Tour • Night Tour • Pipe Tour • Sunshine Tour • Vacation Tour • Summer Tour • Sundae Tour • Anniversary Tour
|
| Items |
Regular items
|
Banana • Green Shell • Red Shell • Spiny Shell • Bob-omb • Mushroom • Mega Mushroom • Bullet Bill • Blooper • Lightning • Super Horn • Coin • Star • Feathera
|
| Special items
|
Triple Bananas • Giant Banana • Triple Green Shells • Bowser's Shell • Double Bob-ombs • Triple Mushrooms • Fire Flower • Boomerang Flower • Ice Flower • Heart • Yoshi's Egg • Birdo's Egg • Bubble • Banana Barrels • Mushroom Cannon • Bob-omb Cannon • Lucky Seven • Dash Ring • Coin Box • Hammer • Giga Bob-omb • Super Bell • Super Leaf • Capsule
|
| Inventory items
|
Coin • Coin Rush ticket • Event tokena • Grand Star • Item ticket • Level-boost ticket • Point-boost ticket • Points-cap ticketa • Ruby • Star ticket • Team tokena • Quick ticket
|
| Course elements |
Interactable
|
Banzai Bill • Barrel • Barrel Bomb • Bath Bomb • Barrel Cannon • Beach Ball • Big egg • Blimp • Bob-omb Car • Bone Piranha Plant • Boulder • Burner • Bus • Cannon • Car • Cargo truck • Ceiling Needle • Chain Chomp • Cheep Cheep • Clampy • Crate • Dash Panel • Dash panel ramp truck • Exploring Shy Guy • Falling Pillar • Festive tree • Fire Piranha Plant • Flipper • Floaty • Flying Shy Guy • Fuzzy • Glide Ramp • Goal Ring • Goat • Goomba • Goomba Tower • Half-pipe • Hoop • Hot-air balloon • Inky Piranha Plant • Jack-o'-lantern • Jar • Jellybeam • Jump Boost field • Kadomatsu • Kanaami Road • Lava Bubble • Lava Geyser • Leaf pile • Maw-Ray • Mecha Cheep • Metal ball • Mud • Mushroom Platform • Mushroom Trampoline • Noshi • Oil slick • Penguin • Pickup truck • Pipe • Piranha Plant • Pokey • Puddle • Ramp • Rocky Wrench • Rolling rock • Shoe • Sidestepper • Skating Shy Guy • Snow block • Snowball • Snowboarding Shy Guy • Snowperson • Soccer Ball • Spider Web • Spring egg • Star Ring • Star Thwomp • Stilt Guy • Swoop • Table • Thwomp • Toy Duck • Toy Goomba • Traffic cone • Train • Walking Tree • Water Geyser • Wiggler • Wiggler Wagon • Whomp • Winged Cloud • Wooden cutout
|
| Non-interactable
|
Big Cheep Cheep • Boo • Boo Buddies • Bulber • Goonie • Huffin Puffin • Incoming Chomp • Nep-Enut • Note Block • Painting • Petal Guy • Shy Guy Tent • Star Bit • Vase
|
| Techniques
|
Drift • Hop • Jump Boost • Mini-Turbo • Rocket Start • Slipstream
|
| Favored and favorite courses
|
New (Amsterdam Drift · Athens Dash · Bangkok Rush · Berlin Byways · London Loop · Los Angeles Laps · New York Minute · Paris Promenade · Piranha Plant Cove · Rome Avanti · Singapore Speedway · Sydney Sprint · Tokyo Blur · Vancouver Velocity) • Remix • Super Mario Kart (SNES) • Mario Kart 64 (N64) • Mario Kart: Super Circuit (GBA) • Mario Kart: Double Dash!! (GCN) • Mario Kart DS (DS) • Mario Kart Wii (Wii) • Mario Kart 7 (3DS) • Battle
|
| Notable areas, landmarks, and sightings |
City courses
|
Amsterdam (Canal) • Athens (Hadrian's Arch · Parthenon) • Bangkok • Berlin (Berlin Wall · Brandenburg Gate · Charlottenburg Palace) • London (Big Ben · Tower Bridge · Tower of London) • Madrid (Prado Museum · Ventas Bullring) • New York (Empire State Building · Statue of Liberty · Rockefeller Center) • Paris (Arc de Triomphe · Cathedral of Notre Dame · Eiffel Tower · Louvre) • Rome (Colosseum · Spanish Steps · Trevi Fountain) • Sydney • Tokyo • Vancouver
|
| Other
|
Boo Woods • Bowser's Castle • Daisy Cruiser • Hammer Bros. Sphinx • Luigi's Mansion • Peach's Castle
|
| Galleries |
Miscellaneous
|
Artwork • Badges • Screenshots • Sprites and models
|
| Course icons
|
Original courses • Remix courses • SNES courses • N64 courses • GBA courses • GCN courses • DS courses • Wii courses • 3DS courses • Battle courses
|
| Related content on social media
|
"I Love Mario Kart Tour" • #MKTPerfectShot • MKT Report
|
| Miscellaneous
|
Action names in other languages • Badges (Common badges) • Challenge cards • Coin Rush • Emblem • Experience Point • Finish line • Frenzy • In-game statistics • Item probability distributions • Media • Mii Racing Suit profiles and statistics (Red–Dolphin · Cheep Cheep–Pokey · Piranha Plant–Koopa Clown) • Pipe • Pre-release and unused content • Race points system • Special pipe • Special skill • Sponsors • Trick animations • Underwater driving • Update history
|
|
|
