Gallery:Super Mario World 2: Yoshi's Island: Difference between revisions
LinkTheLefty (talk | contribs) mNo edit summary |
m (Reorganization) |
||
| (52 intermediate revisions by 19 users not shown) | |||
| Line 14: | Line 14: | ||
==Artwork== | ==Artwork== | ||
{{more | {{image|more=yes|Actual boss and enemy images for this game that are not the retouched SMA ones, as seen [https://hit930.sakura.ne.jp/hitjapan/book2/P1209040095.JPG here,] [https://hit930.sakura.ne.jp/hitjapan/book10/P140929108.JPG here,] [http://asmario.egloos.com/m/5609042 here,] and [https://pbs.twimg.com/media/CuFt4BAUsAEIxpB.jpg:small here]}} | ||
===Yoshis and Baby Mario=== | ===Yoshis and Baby Mario=== | ||
<gallery> | <gallery> | ||
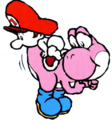
SMW2-YoshiManualBack.png|[[Yoshi]] standing | SMW2-YoshiManualBack.png|[[Yoshi]] standing | ||
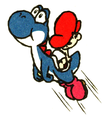
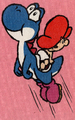
SMW2 Light Blue Yoshi Leap.jpg|Light Blue Yoshi leaping | |||
SMW2Art1.png|Yoshi licking | SMW2Art1.png|Yoshi licking | ||
SMW2RareArt2.png|Yoshi swallowing something | SMW2RareArt2.png|Yoshi swallowing something | ||
| Line 23: | Line 24: | ||
SMW2-RedYoshiEggLay.png|Red Yoshi laying an egg | SMW2-RedYoshiEggLay.png|Red Yoshi laying an egg | ||
Yoshi Aims An Egg.png|Yoshi aiming an Egg projectile | Yoshi Aims An Egg.png|Yoshi aiming an Egg projectile | ||
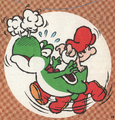
SMW2 Green Yoshi Throw Egg.jpg|Yoshi aiming an Egg projectile | |||
SMW2-LightBlueYoshiEggThrow.png|Light Blue Yoshi aiming an Egg projectile | SMW2-LightBlueYoshiEggThrow.png|Light Blue Yoshi aiming an Egg projectile | ||
SMW2-GreenYoshiEggThrow.png|Yoshi throwing an egg | SMW2-GreenYoshiEggThrow.png|Yoshi throwing an egg | ||
| Line 28: | Line 30: | ||
SMW2-GreenYoshiJump.png|Yoshi jumping | SMW2-GreenYoshiJump.png|Yoshi jumping | ||
SMW2-BlueYoshiJump.png|Blue Yoshi jumping | SMW2-BlueYoshiJump.png|Blue Yoshi jumping | ||
SMW2 Blue Yoshi Jump.png|Blue Yoshi jumping | |||
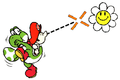
SMW2 Green Yoshi Flutter Jump.png|Yoshi [[Flutter Jump]]ing | |||
YoshiFlutterJump.png|Yellow Yoshi Flutter Jumping | |||
SMW2-BrownYoshiFlutterJump.png|Brown Yoshi Flutter Jumping | SMW2-BrownYoshiFlutterJump.png|Brown Yoshi Flutter Jumping | ||
SMW2-OrangeYoshiFlutterJump.png|Orange Yoshi Flutter Jumping | SMW2-OrangeYoshiFlutterJump.png|Orange Yoshi Flutter Jumping | ||
SMW2-YellowYoshiGroundPound.png|Yellow Yoshi Ground Pounding | SMW2-YellowYoshiGroundPound.png|Yellow Yoshi Ground Pounding | ||
SMW2-LightBlueYoshiGroundPound.png|Light Blue Yoshi Ground Pounding | SMW2-LightBlueYoshiGroundPound.png|Light Blue Yoshi Ground Pounding | ||
SMW2 Green Yoshi Confused.jpg|Green Yoshi thinking | |||
PurpleYoshibabymario.jpg|Purple Yoshi thinking | PurpleYoshibabymario.jpg|Purple Yoshi thinking | ||
SMW2RareArt3.png|Yoshi spitting watermelon seeds | SMW2RareArt3.png|Yoshi spitting watermelon seeds | ||
| Line 54: | Line 59: | ||
SMW2 Baby Mario calm bubble art.png|Baby Mario in a bubble | SMW2 Baby Mario calm bubble art.png|Baby Mario in a bubble | ||
BubblyFreak.png|Baby Mario in a bubble | BubblyFreak.png|Baby Mario in a bubble | ||
SMW2 Baby Mario Bubble Cry alt.jpg|Baby Mario in a bubble | |||
Banditartwork2.png|A [[Bandit]] carrying Baby Mario | Banditartwork2.png|A [[Bandit]] carrying Baby Mario | ||
SMW2 Superstar Mario.png|[[Superstar Mario|Powerful Mario]] | SMW2 Superstar Mario.png|[[Superstar Mario|Powerful Mario]] | ||
| Line 62: | Line 68: | ||
SMW2-LightBlueYoshiBabyMarioIcon.png|Icon with a Light Blue Yoshi and Baby Mario | SMW2-LightBlueYoshiBabyMarioIcon.png|Icon with a Light Blue Yoshi and Baby Mario | ||
SMW2-YellowYoshiBabyMarioIcon.png|Icon with a Yellow Yoshi and Baby Mario | SMW2-YellowYoshiBabyMarioIcon.png|Icon with a Yellow Yoshi and Baby Mario | ||
SMW2-PurpleYoshiBabyMarioIcon.png|Icon with a Purple Yoshi and Baby Mario | SMW2-PurpleYoshiBabyMarioIcon.png|Icon with a Purple Yoshi and Baby Mario | ||
SMW2-BrownYoshiBabyMarioIcon.png|Icon with a Brown Yoshi and Baby Mario | SMW2-BrownYoshiBabyMarioIcon.png|Icon with a Brown Yoshi and Baby Mario (English manual) | ||
SMW2-OrangeYoshiBabyMarioIcon.png|Icon with an Orange Yoshi and Baby Mario (Japanese manual) | SMW2-OrangeYoshiBabyMarioIcon.png|Icon with an Orange Yoshi and Baby Mario (Japanese manual) | ||
SMW2-RedYoshiBabyMarioIcon.png|Icon with a Red Yoshi and Baby Mario | SMW2-RedYoshiBabyMarioIcon.png|Icon with a Red Yoshi and Baby Mario | ||
| Line 70: | Line 76: | ||
====Transformations==== | ====Transformations==== | ||
<gallery> | <gallery> | ||
Helicopter SMW2 art.jpg|[[Helicopter Yoshi|Helicopter]] | Helicopter SMW2 art.jpg|[[Helicopter Yoshi|Helicopter]] | ||
YoshSubmarine.jpg|[[Submarine Yoshi|Submarine]] | SMW2 Green Helicopter Yoshi.jpg|Helicopter | ||
Train | SMW2 Green Mole Tank Yoshi.jpg|[[Mole Tank]] | ||
Moletank.jpg|Mole Tank (yellow) | |||
YoshSubmarine.jpg|[[Submarine Yoshi|Submarine]] (brown) | |||
SMW2 Red Submarine Yoshi.jpg|Submarine (red) | |||
SMW2 Green Train Yoshi.jpg|[[Train (form)|Train]] | |||
Train SMW2 art.jpg|Train (purple) | |||
SMW2 Green Car Yoshi.jpg|[[Car Yoshi|Car]] | |||
Yoshvehicle.jpg|Car (light blue) | |||
</gallery> | </gallery> | ||
| Line 80: | Line 91: | ||
<gallery> | <gallery> | ||
SMW2 Huffin Puffins art.png|[[Huffin Puffin]]s | SMW2 Huffin Puffins art.png|[[Huffin Puffin]]s | ||
SMW2 | SMW2 Melon Bug alt.jpg|[[Melon Bug]] | ||
SMW2 YI Melon Bug.png|Melon Bug | |||
Muddybuddy.png|[[Muddy Buddy]] | Muddybuddy.png|[[Muddy Buddy]] | ||
SMW2 Poochy art.png|[[Poochy]] | SMW2 Poochy art.png|[[Poochy]] | ||
SMW2 Poochy alt.jpg|Poochy | |||
SMW2 Poochy chiaroscuro art.png|Poochy | SMW2 Poochy chiaroscuro art.png|Poochy | ||
</gallery> | </gallery> | ||
| Line 91: | Line 104: | ||
SMW2YI - Barney Bubble Artwork.png|[[Barney Bubble]] | SMW2YI - Barney Bubble Artwork.png|[[Barney Bubble]] | ||
SMW2 Yoshis Island Blow Hard.png|[[Blow Hard]] | SMW2 Yoshis Island Blow Hard.png|[[Blow Hard]] | ||
SMW2 Blow Hard alt.jpg|Blow Hard | |||
Booblah.png|[[Boo Blah]] | Booblah.png|[[Boo Blah]] | ||
SMW2 Boo Blah.png|Boo Blah | |||
SMW2 Yoshis Island Boo Guy.png|[[Boo Guy]] | SMW2 Yoshis Island Boo Guy.png|[[Boo Guy]] | ||
SMW2 Boo Guy.png|Boo Guy | |||
SMW2 Bumpty.jpg|[[Bumpty]] | SMW2 Bumpty.jpg|[[Bumpty]] | ||
SMW2 YI Burts.png|[[Burt]]s | SMW2 YI Burts.png|[[Burt]]s | ||
SMW2 Burts alternate artwork.jpg|Burts | SMW2 Burts alternate artwork.jpg|Burts | ||
SMW2 Burt Single.jpg|Burt | |||
CrazeeSMW2.png|[[Crazee Dayzee]] | CrazeeSMW2.png|[[Crazee Dayzee]] | ||
SMW2 Crazee Dayzee Pink.jpg|Crazee Daysee (pink) | |||
SMW2 Dancing Spear Guy.jpg|[[Dancing Spear Guy]] | SMW2 Dancing Spear Guy.jpg|[[Dancing Spear Guy]] | ||
SMW2 Eggo-Dil.png|[[Eggo-Dil]] | SMW2 Eggo-Dil.png|[[Eggo-Dil]] | ||
SMW2 Eggo-Dil alt.jpg|Eggo-Dil | |||
SMW2 YI Fang.png|[[Fang]] | SMW2 YI Fang.png|[[Fang]] | ||
SMW2 Fang alt.png|Fang | |||
SMW2 Fat Guy.jpg|[[Fat Guy]] | |||
SMW2 YI Cheep Cheep.png|[[Cheep Cheep|Flopsy Fish]] | SMW2 YI Cheep Cheep.png|[[Cheep Cheep|Flopsy Fish]] | ||
SMW2 Flopsy Fish alt.jpg|Flopsy Fish | |||
FlutterSMWYI.png|[[Flutter|Flying Wiggler]] | FlutterSMWYI.png|[[Flutter|Flying Wiggler]] | ||
SMW2 Flutter.png|Flying Wiggler | |||
SMW2 Fuzzies.png|[[Fuzzy (Super Mario World 2: Yoshi's Island)|Fuzzies]] | SMW2 Fuzzies.png|[[Fuzzy (Super Mario World 2: Yoshi's Island)|Fuzzies]] | ||
SMW2 Fuzzy alt.png|Fuzzy | |||
SMW2 Gargantua Blargg alt.jpg|[[Gargantua Blargg]] | |||
Blargg-SMW2.png|Gargantua Blargg | |||
SMW2 Gargantua Blargg alt art.png|Gargantua Blargg | SMW2 Gargantua Blargg alt art.png|Gargantua Blargg | ||
SMW2 Yoshis Island Goomba.png|[[Goomba]] | SMW2 Yoshis Island Goomba.png|[[Goomba]] | ||
SMW2 Goonies art.png|[[Goonie]]s | SMW2 Goonies art.png|[[Goonie]]s | ||
SMW2 Goonie alt.jpg|Goonie | |||
GreenGlove.png|[[Green Glove]] | GreenGlove.png|[[Green Glove]] | ||
SMW2 Green Glove.png|Green Glove | |||
SMW2 YI Grinder.png|[[Ukiki|Grinder]] | SMW2 YI Grinder.png|[[Ukiki|Grinder]] | ||
SMW2 Grinder alt.jpg|Grinder | |||
SMW2 Gusty art.png|[[Gusty]] | SMW2 Gusty art.png|[[Gusty]] | ||
SMW2 Gusty duo art.png|Gusties | SMW2 Gusty duo art.png|Gusties | ||
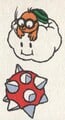
SMW2 Harry Hedgehog.jpg|[[Harry Hedgehog]] | SMW2 Harry Hedgehog.jpg|[[Harry Hedgehog]] | ||
SMW2 Yoshis Island Very Goonie.png|[[Hefty Goonie]] | SMW2 Yoshis Island Very Goonie.png|[[Hefty Goonie]] | ||
SMW2 Hefty Goonie alt.jpg|Hefty Goonie | |||
SMW2 Incoming Chomp.png|[[Incoming Chomp]] | |||
SMW2 YI Chomp Shark.png|[[Big Chain Chomp|Shark Chomp]] | |||
SMW2 YI Kaboomba.png|[[Kaboomba]] | SMW2 YI Kaboomba.png|[[Kaboomba]] | ||
SMW2 Kaboomba alt.png|Kaboomba | |||
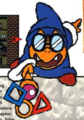
SMW2 Kamek fly art.png|[[Kamek]] | SMW2 Kamek fly art.png|[[Kamek]] | ||
SMW2 Kamek fly alt.png|Kamek | |||
SMW2 Kamek spell art.png|Kamek | SMW2 Kamek spell art.png|Kamek | ||
SMW2 Yoshis Island Toadies.png|[[Kamek's Toadies]] | SMW2 Yoshis Island Toadies.png|[[Kamek's Toadies]] | ||
SMW2 Toady.jpg|[[Toady]] | |||
YIKoopa.jpg| [[Koopa Troopa]] | YIKoopa.jpg| [[Koopa Troopa]] | ||
SMW2 Koopa Troopa alt.jpg|Koopa Troopa | |||
SMW2 YI Lakitu.png|[[Lakitu]] | SMW2 YI Lakitu.png|[[Lakitu]] | ||
SMW2 Lakitu Spiny Egg.jpg|Lakitu and [[Spiny Egg]] | SMW2 Lakitu Spiny Egg.jpg|Lakitu and [[Spiny Egg]] | ||
SMW2 Yoshis Island Lantern Ghost.png|[[Lantern Ghost]] | SMW2 Yoshis Island Lantern Ghost.png|[[Lantern Ghost]] | ||
SMW2 Lantern Ghost Brown.jpg|Lantern Ghost (brown) | |||
SMW2 YI Lava Drops.png|[[Lava Drop]] and [[Cloud Drop]] | SMW2 YI Lava Drops.png|[[Lava Drop]] and [[Cloud Drop]] | ||
SMW2 | SMW2 Lava Drop.jpg|Lava Drop | ||
SMW2 Cloud Drop.jpg|Cloud Drop | |||
SMW2 Slime Drop.jpg|[[Slime Drop|Lemon Drop]] | |||
SMW2 Little Mouser.jpg|[[Little Mouser]] | SMW2 Little Mouser.jpg|[[Little Mouser]] | ||
SMW2 Little Skull Mouser.jpg|[[Little Skull Mouser]] | SMW2 Little Skull Mouser.jpg|[[Little Skull Mouser]] | ||
SMW2 YI Mace Guy.png|[[Mace Guy]] | SMW2 YI Mace Guy.png|[[Mace Guy]] | ||
SMW2 Mace Guy.png|Mace Guy | |||
SMW2 Mildes art.png|[[Milde]]s | SMW2 Mildes art.png|[[Milde]]s | ||
SMW2 Milde alt.jpg|Milde | |||
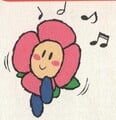
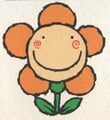
SMW2 YI Mufti Guy.png|[[Petal Guy|Mufti Guy]] | SMW2 YI Mufti Guy.png|[[Petal Guy|Mufti Guy]] | ||
SMW2 Mufti Guy Pink.jpg|Mufti Guy (pink) | |||
SMW2 Nipper Plant and Spore art.png|[[Nipper Plant]]s and [[Nipper Spore]]s | SMW2 Nipper Plant and Spore art.png|[[Nipper Plant]]s and [[Nipper Spore]]s | ||
SMW2 Nipper Plant.jpg|Nipper Plant | |||
SMW2 Nipper Spore.jpg|Nipper Spore | |||
Paratroopayoshisisland.png|[[Koopa Paratroopa|Para-Koopa]] | Paratroopayoshisisland.png|[[Koopa Paratroopa|Para-Koopa]] | ||
SMW2 Pokey.jpg|[[Pokey (heading)|Pokey]] | SMW2 Pokey.jpg|[[Pokey (heading)|Pokey]] | ||
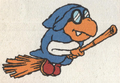
SMW2 | SMW2 Raven.png|[[Raven]] | ||
SMW2 Shy-Guy art.png|[[Shy Guy|Shy-Guy]] | SMW2 Shy-Guy art.png|[[Shy Guy|Shy-Guy]] | ||
SMW2 Shy Guy Pink.jpg|Shy-Guy (pink) | |||
Shyguystilts.jpg|[[Stilt Guy|Shy-Guy on Stilts]] | Shyguystilts.jpg|[[Stilt Guy|Shy-Guy on Stilts]] | ||
SMW2 Stilt Guy.jpg|Shy-Guy on Stilts | SMW2 Stilt Guy.jpg|Shy-Guy on Stilts | ||
SMW2 YI Skeleton Goonie.png|[[Skeleton Goonie]] | SMW2 YI Skeleton Goonie.png|[[Skeleton Goonie]] | ||
SMW2 Skeleton Goonie alt.png|Skeleton Goonie | |||
SMW2 Slugger.jpg|[[Slugger]] | SMW2 Slugger.jpg|[[Slugger]] | ||
SMW2 Sluggy.jpg|[[Sluggy]] | SMW2 Sluggy.jpg|[[Sluggy]] | ||
| Line 141: | Line 186: | ||
SMW2 Yoshis Island Spear Guy.png|[[Spear Guy]] | SMW2 Yoshis Island Spear Guy.png|[[Spear Guy]] | ||
SMW2 Spear Guy.jpg|Spear Guy | SMW2 Spear Guy.jpg|Spear Guy | ||
SMW2 Tap-Tap alt.png|[[Tap-Tap]] | |||
SMW2 YI Zeus Guy.png|[[Zeus Guy]] | SMW2 YI Zeus Guy.png|[[Zeus Guy]] | ||
</gallery> | </gallery> | ||
| Line 150: | Line 196: | ||
SMW2 Salvo the Slime chiaroscuro art.png|Salvo the Slime | SMW2 Salvo the Slime chiaroscuro art.png|Salvo the Slime | ||
Bigger Boo SMW2YI Artwork.png|[[Bigger Boo]] | Bigger Boo SMW2YI Artwork.png|[[Bigger Boo]] | ||
The Potted Ghost.png| | SMW2 Roger alt.jpg|[[Roger the Potted Ghost]] | ||
The Potted Ghost.png|Roger the Potted Ghost | |||
SMW2 Roger the Potted Ghost chiaroscuro art.png|Roger the Potted Ghost | SMW2 Roger the Potted Ghost chiaroscuro art.png|Roger the Potted Ghost | ||
Prince Froggy.png|[[ | Prince Froggy.png|[[Froggy]] | ||
Naval Piranha | SMW2 Naval Piranha.jpg|[[Naval Piranha]] | ||
Naval Piranha SMW2YI Artwork.png|Naval Piranha | |||
SMW2 Naval Piranha chiaroscuro art.png|Naval Piranha | SMW2 Naval Piranha chiaroscuro art.png|Naval Piranha | ||
Marching Milde artwork.png|[[Marching Milde]] | Marching Milde artwork.png|[[Marching Milde]] | ||
Hookbill. | SMW2 Hookbill alt.jpg|[[Hookbill the Koopa]] | ||
Hookbill.png|Hookbill the Koopa | |||
SMW2 Hookbill the Koopa chiaroscuro art.png|Hookbill the Koopa | SMW2 Hookbill the Koopa chiaroscuro art.png|Hookbill the Koopa | ||
Sluggy the Unshaven SMW2YI Artwork.png|[[Sluggy the Unshaven]] | Sluggy the Unshaven SMW2YI Artwork.png|[[Sluggy the Unshaven]] | ||
| Line 162: | Line 211: | ||
SMW2 Raphael the Raven chiaroscuro art.png|Raphael the Raven | SMW2 Raphael the Raven chiaroscuro art.png|Raphael the Raven | ||
TapTap.png|[[Tap-Tap the Red Nose]] | TapTap.png|[[Tap-Tap the Red Nose]] | ||
Baby Bowser | SMW2 Baby Bowser alt.jpg|[[Baby Bowser]] | ||
Baby Bowser SMW2YI Artwork.png|Baby Bowser | |||
SMW2 Baby Bowser chiaroscuro art.png|Baby Bowser | SMW2 Baby Bowser chiaroscuro art.png|Baby Bowser | ||
</gallery> | </gallery> | ||
| Line 195: | Line 245: | ||
===Miscellaneous=== | ===Miscellaneous=== | ||
<gallery> | <gallery> | ||
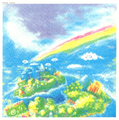
SMW2-YoshisIslandIllustration.png|Illustration of [[Yoshi's Island (location)|Yoshi's Island]] from the | SMW2-YoshisIslandIllustration.png|Illustration of [[Yoshi's Island (location)|Yoshi's Island]] from the instruction booklet. | ||
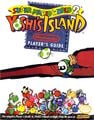
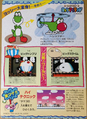
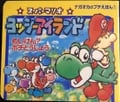
SMW2YI-Japanese Guide Cover.png|Cover of the official Japanese guide, featuring [[Yoshi (species)|Green Yoshi]], [[Baby Mario]], and [[Poochy]] | SMW2YI-Japanese Guide Cover.png|Cover of the official Japanese guide, featuring [[Yoshi (species)|Green Yoshi]], [[Baby Mario]], and [[Poochy]] | ||
SMW2 Bonus Challenge art.png|[[Bonus Challenge]] alert | SMW2 Bonus Challenge art.png|[[Bonus Challenge]] alert | ||
| Line 203: | Line 253: | ||
===Yoshis and Baby Mario=== | ===Yoshis and Baby Mario=== | ||
<gallery> | <gallery> | ||
SMW2YIBabyMarioSprite.png|[[Baby Mario]] | SMW2YIBabyMarioSprite.png|[[Baby Mario]] | ||
SMW2yoshi.gif|[[Yoshi (species)|Green Yoshi]] | SMW2yoshi.gif|[[Yoshi (species)|Green Yoshi]] | ||
GreenYoshi-SMW2YI.png|Green Yoshi | GreenYoshi-SMW2YI.png|Green Yoshi | ||
Run2-wbm.gif|Yoshi running | Run2-wbm.gif|Yoshi running | ||
SMW2YI Yoshi flutter jump.gif|Yoshi [[Flutter Jump|flutter-jumping]] | |||
YI Yoshi and Mario.gif|Green Yoshi with Baby Mario | YI Yoshi and Mario.gif|Green Yoshi with Baby Mario | ||
Yoshijumpjoy.gif|Green Yoshi after winning mini-game | Yoshijumpjoy.gif|Green Yoshi after winning mini-game | ||
| Line 283: | Line 333: | ||
SMW2 Poochy.png|[[Poochy]] | SMW2 Poochy.png|[[Poochy]] | ||
Hung Stork.png|[[Stork]] | Hung Stork.png|[[Stork]] | ||
BabyLuigi - SMW2YI.png|[[Baby Luigi]] | |||
</gallery> | </gallery> | ||
| Line 288: | Line 339: | ||
<gallery> | <gallery> | ||
SMW2-AquaLakitu.png|[[Aqua Lakitu]] | SMW2-AquaLakitu.png|[[Aqua Lakitu]] | ||
SMW2 Ball 'N' Chain.png|[[Spinner|Ball 'N' Chain]] | |||
SMW2 Ball 'N' Chain double.png|Ball 'N' Chains | |||
Shy Guy mace.png|[[Ball and chain (windup)|Ball and chain]] | |||
Bandit-SMW2.png|[[Bandit]] | Bandit-SMW2.png|[[Bandit]] | ||
SMW2 Bandit hide.png|Bandit | SMW2 Bandit hide.png|Bandit | ||
| Line 297: | Line 351: | ||
BaronVonZepplin.png|Baron von Zeppelin | BaronVonZepplin.png|Baron von Zeppelin | ||
SMW2 Baron von Zeppelin M.png|Baron von Zeppelin | SMW2 Baron von Zeppelin M.png|Baron von Zeppelin | ||
SMW2YI - Beach Koopa.png|[[Beach Koopa]] | SMW2YI - Beach Koopa.png|[[Unshelled Koopa|Beach Koopa]] | ||
SMW2-BeachKoopaRed.png|Beach Koopa | SMW2-BeachKoopaRed.png|Beach Koopa | ||
SMW2YI - Big Boo.png|[[Big Boo]] | SMW2YI - Big Boo.png|[[Big Boo]] | ||
| Line 303: | Line 357: | ||
Boo.gif|Big Boo | Boo.gif|Big Boo | ||
SMW2 Big and Little Boos.png|Big Boo and [[Boo|Boo Buddies]] | SMW2 Big and Little Boos.png|Big Boo and [[Boo|Boo Buddies]] | ||
SMW2 Big Shy Guy red.png|[[Mega Guy|Big Shy Guy]] | |||
SMW2 Big Shy Guy green.png|Big Shy Guy | |||
Blow hard.png|[[Blow Hard]] | Blow hard.png|[[Blow Hard]] | ||
SMW2 Blow Hard puffed.png|Blow Hard | SMW2 Blow Hard puffed.png|Blow Hard | ||
| Line 331: | Line 387: | ||
SMW2 Caged Ghost tunnel brown.png|Caged Ghost | SMW2 Caged Ghost tunnel brown.png|Caged Ghost | ||
SMW2 Chain Chomp.png|[[Chain Chomp]] | SMW2 Chain Chomp.png|[[Chain Chomp]] | ||
Makiage Dosun.png|[[Chain Gate]] | Makiage Dosun.png|[[Spiked weight|Chain Gate]] | ||
Clawdaddy SMW2.png|[[Clawdaddy]] | Clawdaddy SMW2.png|[[Clawdaddy]] | ||
SMW2 Clawdaddy attack.png|Clawdaddy | SMW2 Clawdaddy attack.png|Clawdaddy | ||
| Line 349: | Line 405: | ||
SMW2 Fat Guy green.png|Fat Guy | SMW2 Fat Guy green.png|Fat Guy | ||
Mbad3.gif|Fat Guy | Mbad3.gif|Fat Guy | ||
SMW2YI - Fire Bar.png|[[Fire Bar|Fire-Bar]] | |||
SMW2 Fire-Bar double.png|Fire-Bar | |||
SMW2YI - Fishin Lakitu.png|[[Fishin' Lakitu|Fishing Lakitu]] | SMW2YI - Fishin Lakitu.png|[[Fishin' Lakitu|Fishing Lakitu]] | ||
Fishinlakitu.gif|Fishing Lakitu | Fishinlakitu.gif|Fishing Lakitu | ||
| Line 396: | Line 454: | ||
SMW2 Toady.png|[[Kamek's Toadies|Kamek's Toady]] | SMW2 Toady.png|[[Kamek's Toadies|Kamek's Toady]] | ||
SMW2 Kamek's Toadies.png|Kamek's Toadies | SMW2 Kamek's Toadies.png|Kamek's Toadies | ||
SMW2 Kamek's Toadies and Mario.png|Kamek's Toadies | SMW2 Kamek's Toadies and Mario.png|Kamek's Toadies with Baby Mario | ||
SMW2 Sprite Koopa.png|[[Koopa Troopa]] | SMW2 Sprite Koopa.png|[[Koopa Troopa]] | ||
SMW2-RedKoopaTroopa.png|Koopa Troopa | SMW2-RedKoopaTroopa.png|Koopa Troopa | ||
| Line 421: | Line 479: | ||
SMW2 Spike.png|[[Spike|Mace Penguin]] | SMW2 Spike.png|[[Spike|Mace Penguin]] | ||
SMW2 Mace Penguin throw.png|Mace Penguin | SMW2 Mace Penguin throw.png|Mace Penguin | ||
Milde.png|[[Milde]] | Milde.png|[[Milde]] | ||
BitingBulletBill SMW2.png|[[Bull's-Eye Bill|Missile Bill]] (unused on SNES) | BitingBulletBill SMW2.png|[[Bull's-Eye Bill|Missile Bill]] (unused on SNES) | ||
| Line 431: | Line 487: | ||
SMW2 Mufti Guy green.png|Mufti Guy | SMW2 Mufti Guy green.png|Mufti Guy | ||
SMW2 Mufti Guy magenta.png|Mufti Guy | SMW2 Mufti Guy magenta.png|Mufti Guy | ||
Needlenose SMW2.png|[[Pokey (projectile)|Needlenose]] | Needlenose SMW2.png|[[Pokey (projectile)|Needlenose]] | ||
SMW2 Needlenose yellow.png|Needlenose | SMW2 Needlenose yellow.png|Needlenose | ||
| Line 452: | Line 507: | ||
Raven sprite.png|[[Raven]] | Raven sprite.png|[[Raven]] | ||
Mini-raven.png|[[Raven (chick)]] | Mini-raven.png|[[Raven (chick)]] | ||
CoBlargg.png|[[Red Blargg]] | CoBlargg.png|[[Blargg (small)|Red Blargg]] | ||
SMW2 Relay Heyho.png|[[Relay Heihō]] | SMW2 Relay Heyho.png|[[Relay Heihō]] | ||
SMW2 Relay Heyho fail.png|Relay Heihō | SMW2 Relay Heyho fail.png|Relay Heihō | ||
Egg-Plant SMW2.png|[[Sanbo Flower]] | |||
Seedy sally.png|[[Ukiki|Seedy Sally]] | Seedy sally.png|[[Ukiki|Seedy Sally]] | ||
SMW2 Chomp Shark.png|[[Big Chain Chomp|Shark Chomp]] | SMW2 Chomp Shark.png|[[Big Chain Chomp|Shark Chomp]] | ||
| Line 485: | Line 541: | ||
YISpooky.png|[[Spooky (enemy)|Spooky]] | YISpooky.png|[[Spooky (enemy)|Spooky]] | ||
Spray Fish.PNG|[[Spray Fish]] | Spray Fish.PNG|[[Spray Fish]] | ||
SMW2 Stretch yellow.png|[[Stretch ( | SMW2 Stretch yellow.png|[[Stretch (Super Mario World 2: Yoshi's Island)|Stretch]] | ||
SMW2 Stretch.png|Stretch | SMW2 Stretch.png|Stretch | ||
SMW2 Stretch magenta.png|Stretch | SMW2 Stretch magenta.png|Stretch | ||
| Line 491: | Line 547: | ||
SMW2YI Orange Tap-Tap sprite.png|Tap-Tap | SMW2YI Orange Tap-Tap sprite.png|Tap-Tap | ||
Tap-tap the golden.png|[[Tap-Tap the Golden]] | Tap-tap the golden.png|[[Tap-Tap the Golden]] | ||
ThunderLakitu SMW2.png|[[Thunder Lakitu]] | ThunderLakitu SMW2.png|[[Thunder Lakitu]] | ||
Wall Lakitu.PNG|[[Wall Lakitu]] | Wall Lakitu.PNG|[[Wall Lakitu]] | ||
| Line 519: | Line 574: | ||
BiggerBoo'sFort.png|Bigger Boo | BiggerBoo'sFort.png|Bigger Boo | ||
SMW2YI - Roger the Potted Ghost.png|[[Roger the Potted Ghost]] | SMW2YI - Roger the Potted Ghost.png|[[Roger the Potted Ghost]] | ||
Froggy.png|[[ | Froggy.png|[[Froggy]] | ||
SMW2 Prince Froggy inside.png| | SMW2 Prince Froggy inside.png|Froggy | ||
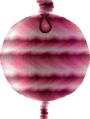
SMW2 Naval.png|[[Naval Piranha]] | SMW2 Naval.png|[[Naval Piranha]] | ||
Navalbudsprite.png|Naval Piranha's bud | |||
SMW2YI - Marching Milde.png|[[Marching Milde]] | SMW2YI - Marching Milde.png|[[Marching Milde]] | ||
Hookbill-SMW2.png|[[Hookbill the Koopa]] | Hookbill-SMW2.png|[[Hookbill the Koopa]] | ||
| Line 539: | Line 595: | ||
SnesBabyBowser.PNG|[[Baby Bowser]] | SnesBabyBowser.PNG|[[Baby Bowser]] | ||
SMW2 Kamek and Baby Bowser escape.png|Baby Bowser and [[Kamek]] | SMW2 Kamek and Baby Bowser escape.png|Baby Bowser and [[Kamek]] | ||
SMW2 Big Baby Bowser far.png|[[Mega Baby Bowser|Big | SMW2 Big Baby Bowser far.png|[[Mega Baby Bowser|Big Baby Bowser]] | ||
SMW2 Baby Bowser 2.png|Big | SMW2 Baby Bowser 2.png|Big Baby Bowser | ||
</gallery> | </gallery> | ||
| Line 553: | Line 609: | ||
SMW2YI - Watermelon blue.png|[[Ice watermelon|Blue watermelon]] | SMW2YI - Watermelon blue.png|[[Ice watermelon|Blue watermelon]] | ||
SMW2YI - Coin.png|[[Coin]] | SMW2YI - Coin.png|[[Coin]] | ||
Coin.gif|Coin | Coin.gif|Coin | ||
SMW2DragonCoin.png|[[Dragon Coin]] (unused) | SMW2DragonCoin.png|[[Dragon Coin]] (unused) | ||
| Line 564: | Line 619: | ||
SMW2YI Boss Key.png|Key | SMW2YI Boss Key.png|Key | ||
Magnifying Glass SMW2YI sprite.png|[[Magnifying Glass (Super Mario World 2: Yoshi's Island)|Magnifying Glass]] | Magnifying Glass SMW2YI sprite.png|[[Magnifying Glass (Super Mario World 2: Yoshi's Island)|Magnifying Glass]] | ||
SMW2 Red Coin.png|[[Red Coin|Red coin]] | SMW2 Coin alt.png|[[Red Coin|Red coin]] (hidden) | ||
SMW2 Red Coin.png|[[Red Coin|Red coin]] (unhidden) | |||
SMW2 Red Egg.png|[[Red Egg]] | SMW2 Red Egg.png|[[Red Egg]] | ||
SMW2 Red Shell.png|[[Red Shell]] | SMW2 Red Shell.png|[[Red Shell]] | ||
| Line 588: | Line 644: | ||
SMW2 ! Block.png|[[! Block]] | SMW2 ! Block.png|[[! Block]] | ||
SMW2 Air pump.png|Air pump | SMW2 Air pump.png|Air pump | ||
SMW2YI Switch Block green.png|[[ | SMW2YI Switch Block green.png|[[Arrow block]] | ||
SMW2YI Switch Block red.png|Arrow block | SMW2YI Switch Block red.png|Arrow block | ||
SMW2 Arrow Cloud red.png|[[Arrow Cloud]] | SMW2 Arrow Cloud red.png|[[Arrow Cloud]] | ||
| Line 596: | Line 652: | ||
SMW2 Arrow Sign board.png|[[Arrow Sign]] | SMW2 Arrow Sign board.png|[[Arrow Sign]] | ||
SMW2 Arrow Sign float.png|Arrow Sign | SMW2 Arrow Sign float.png|Arrow Sign | ||
SMW2 Balloon battle red.png|[[Balloon (Mini Battle)]] | SMW2 Balloon battle red.png|[[Balloon (Mini Battle)]] | ||
SMW2 Balloon battle magenta.png|Balloon (Mini Battle) | SMW2 Balloon battle magenta.png|Balloon (Mini Battle) | ||
| Line 604: | Line 658: | ||
SMW2 Balloon green.png|Balloon (platform) | SMW2 Balloon green.png|Balloon (platform) | ||
SMW2 Balloon magenta.png|Balloon (platform) | SMW2 Balloon magenta.png|Balloon (platform) | ||
SMW2 Beanstalk.png|[[Beanstalk]] | SMW2 Beanstalk.png|[[Giant sunflower|Beanstalk]] | ||
SMW2 Sunflower seed.png|Beanstalk seed | SMW2 Sunflower seed.png|Beanstalk seed | ||
SMW2 Bobbing rock.png|Bobbing rock | SMW2 Bobbing rock.png|Bobbing rock | ||
| Line 657: | Line 711: | ||
SMW2 Expansion Block.png|[[Expansion Block]] | SMW2 Expansion Block.png|[[Expansion Block]] | ||
SMW2 Falling Rock.png|[[Cascading Stone|Falling stone block]] | SMW2 Falling Rock.png|[[Cascading Stone|Falling stone block]] | ||
SMW2 Fireball Roger.png|[[Fireball (obstacle)|Fireball] ([[Roger the Potted Ghost]]) | |||
SMW2 Fireball Bowser.png|Fireball ([[Mega Baby Bowser|Big Baby Bowser]]) | |||
SMW2 Fireball Roger.png|[[Fireball (obstacle)|Fireball]] | |||
SMW2 Fireball Bowser.png|Fireball | |||
Flatbed Ferry.png|[[Flatbed Ferry]] | Flatbed Ferry.png|[[Flatbed Ferry]] | ||
SMW2 Flatbed Ferry yellow.png|Flatbed Ferry | SMW2 Flatbed Ferry yellow.png|Flatbed Ferry | ||
| Line 678: | Line 730: | ||
SMW2 Icicle longer.png|Icicle | SMW2 Icicle longer.png|Icicle | ||
SMW2 Lakitu's Cloud.png|[[Lakitu's Cloud]] | SMW2 Lakitu's Cloud.png|[[Lakitu's Cloud]] | ||
SMW2 Door locked.png|[[Key Door|Locked Door]] | SMW2 Door locked.png|[[Key Door|Locked Door]] | ||
SMW2 Wobbling log small.png|[[Makeshift surfboard]] | |||
SMW2 Wobbling log vertical.png|Makeshift surfboard | |||
SMW2 Message Block.png|[[Message Block]] | SMW2 Message Block.png|[[Message Block]] | ||
YI Hintblock.gif|Message Block | YI Hintblock.gif|Message Block | ||
| Line 696: | Line 748: | ||
SMW2 Paddle wheel blue.png|Paddle wheel | SMW2 Paddle wheel blue.png|Paddle wheel | ||
SMW2 Paddle wheel green single.png|Paddle wheel | SMW2 Paddle wheel green single.png|Paddle wheel | ||
SMW2 Track ball.png|[[Pinwheel (object)|Pinwheel]] | |||
SMW2 Post.png|[[Post]] | SMW2 Post.png|[[Post]] | ||
Vase SMW2.png|[[Vase|Pot]] | Vase SMW2.png|[[Vase|Pot]] | ||
| Line 701: | Line 754: | ||
SMW2 Flimsy Ferry.png|[[Red-and-yellow bridge]] | SMW2 Flimsy Ferry.png|[[Red-and-yellow bridge]] | ||
SMW2 Red Balloon.png|[[Red balloon (object)|Red balloon]] | SMW2 Red Balloon.png|[[Red balloon (object)|Red balloon]] | ||
SMW2 Wobble Rock.png|[[Wobble Rock|Rolling rock]] | SMW2 Wobble Rock.png|[[Wobble Rock|Rolling rock]] | ||
SMW2 Shack.png|Shack | SMW2 Shack.png|Shack | ||
SMW2 Shockwave.png|Shockwave | SMW2 Shockwave.png|Shockwave | ||
SMW2 Ski Lift.png|[[ | SMW2 Ski Lift.png|[[Ski Lift]] | ||
Snowball.PNG|[[Snowball]] | Snowball.PNG|[[Snowball]] | ||
SMW2 Snowball biggest.png|Snowball | SMW2 Snowball biggest.png|Snowball | ||
SMW2 Spike Trap.png|[[Spike Trap]] | SMW2 Breakable rock yellow.png|Soft rock | ||
SMW2 Spike Trap.png|[[Spike Trap|Spike]] | |||
SMW2 Door carousel.png|Spinning doors | SMW2 Door carousel.png|Spinning doors | ||
SMW2 Spinning Log.png|[[Spinning Log]] | SMW2 Spinning Log.png|[[Spinning Log]] | ||
| Line 716: | Line 769: | ||
SMW2 Spiny Egg 1.png|[[Spiny Egg]] | SMW2 Spiny Egg 1.png|[[Spiny Egg]] | ||
SMW2 Spiny Egg 2.png|Spiny Egg | SMW2 Spiny Egg 2.png|Spiny Egg | ||
SMW2 Pudding ceiling.png|Spongy | SMW2 Pudding ceiling.png|Spongy ground | ||
SMW2 Spiked Ferry green.png|[[Spotted platform]] | SMW2 Spiked Ferry green.png|[[Rough platform|Spotted platform]] | ||
SMW2 Spiked Ferry red.png|Spotted platform | SMW2 Spiked Ferry red.png|Spotted platform | ||
Springball.PNG|[[Spring Ball|Spring ball]] | Springball.PNG|[[Spring Ball|Spring ball]] | ||
| Line 730: | Line 783: | ||
SMW2 Thorn.png|[[Thorn]] | SMW2 Thorn.png|[[Thorn]] | ||
SMW2 Track.png|[[Track]] | SMW2 Track.png|[[Track]] | ||
SMW2 Tulip.png|[[Tulip]] | SMW2 Tulip.png|[[Tulip]] | ||
SMW2 Bolt Lift.png|[[Bolt Lift|Tumbler]] | SMW2 Bolt Lift.png|[[Bolt Lift|Tumbler]] | ||
| Line 802: | Line 854: | ||
===Level icons=== | ===Level icons=== | ||
====World 1==== | ====World 1==== | ||
<gallery widths="72"heights="72"> | <gallery widths="72" heights="72"> | ||
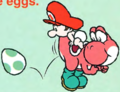
Icon SMW2-YI - Make Eggs, Throw Eggs.png|[[Make Eggs, Throw Eggs]] | Icon SMW2-YI - Make Eggs, Throw Eggs.png|[[Make Eggs, Throw Eggs]] | ||
Icon SMW2-YI - Watch Out Below!.png|[[Watch Out Below!]] | Icon SMW2-YI - Watch Out Below!.png|[[Watch Out Below!]] | ||
Icon SMW2-YI - The Cave Of Chomp Rock.png|[[The Cave Of Chomp Rock]] | Icon SMW2-YI - The Cave Of Chomp Rock.png|[[The Cave Of Chomp Rock]] | ||
Icon SMW2-YI - Burt The Bashful's Fort.png|[[Burt | Icon SMW2-YI - Burt The Bashful's Fort.png|[[Burt The Bashful's Fort]] | ||
Icon SMW2-YI - Hop! Hop! Donut Lifts.png|[[Hop! Hop! Donut Lifts]] | Icon SMW2-YI - Hop! Hop! Donut Lifts.png|[[Hop! Hop! Donut Lifts]] | ||
Icon SMW2-YI - Shy-Guys On Stilts.png|[[Shy-Guys On Stilts]] | Icon SMW2-YI - Shy-Guys On Stilts.png|[[Shy-Guys On Stilts]] | ||
Icon SMW2-YI - Touch Fuzzy, Get Dizzy.png|[[Touch Fuzzy, Get Dizzy]] | Icon SMW2-YI - Touch Fuzzy, Get Dizzy.png|[[Touch Fuzzy, Get Dizzy]] | ||
Icon SMW2-YI - Salvo The Slime's Castle.png|[[Salvo | Icon SMW2-YI - Salvo The Slime's Castle.png|[[Salvo The Slime's Castle]] | ||
Icon SMW2-YI - Poochy Ain't Stupid.png|[[Poochy Ain't Stupid]] | Icon SMW2-YI - Poochy Ain't Stupid.png|[[Poochy Ain't Stupid]] | ||
SMW2-FlipCardsIcon.png|[[Flip Cards]] | SMW2-FlipCardsIcon.png|[[Flip Cards]] | ||
| Line 816: | Line 868: | ||
====World 2==== | ====World 2==== | ||
<gallery widths="72"heights="72"> | <gallery widths="72" heights="72"> | ||
Icon SMW2-YI - Visit Koopa And Para-Koopa.png|[[Visit Koopa And Para-Koopa]] | Icon SMW2-YI - Visit Koopa And Para-Koopa.png|[[Visit Koopa And Para-Koopa]] | ||
Icon SMW2-YI - The Baseball Boys.png|[[The Baseball Boys]] | Icon SMW2-YI - The Baseball Boys.png|[[The Baseball Boys]] | ||
| Line 830: | Line 882: | ||
====World 3==== | ====World 3==== | ||
<gallery widths="72"heights="72"> | <gallery widths="72" heights="72"> | ||
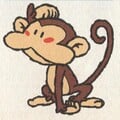
Icon SMW2-YI - Welcome To Monkey World!.png|[[Welcome To Monkey World!]] | Icon SMW2-YI - Welcome To Monkey World!.png|[[Welcome To Monkey World!]] | ||
Icon SMW2-YI - Jungle Rhythm....png|[[Jungle Rhythm...]] | Icon SMW2-YI - Jungle Rhythm....png|[[Jungle Rhythm...]] | ||
| Line 844: | Line 896: | ||
====World 4==== | ====World 4==== | ||
<gallery widths="72"heights="72"> | <gallery widths="72" heights="72"> | ||
Icon SMW2-YI - GO! GO! MARIO!!.png|[[GO! GO! MARIO!!]] | Icon SMW2-YI - GO! GO! MARIO!!.png|[[GO! GO! MARIO!!]] | ||
Icon SMW2-YI - The Cave Of The Lakitus.png|[[The Cave Of The Lakitus]] | Icon SMW2-YI - The Cave Of The Lakitus.png|[[The Cave Of The Lakitus]] | ||
| Line 859: | Line 911: | ||
====World 5==== | ====World 5==== | ||
<gallery widths="72"heights="72"> | <gallery widths="72" heights="72"> | ||
Icon SMW2-YI - BLIZZARD!!!.png|[[BLIZZARD!!!]] | Icon SMW2-YI - BLIZZARD!!!.png|[[BLIZZARD!!!]] | ||
Icon SMW2-YI - Ride The Ski Lifts.png|[[Ride The Ski Lifts]] | Icon SMW2-YI - Ride The Ski Lifts.png|[[Ride The Ski Lifts]] | ||
| Line 873: | Line 925: | ||
====World 6==== | ====World 6==== | ||
<gallery widths="72"heights="72"> | <gallery widths="72" heights="72"> | ||
Icon SMW2-YI - Scary Skeleton Goonies!.png|[[Scary Skeleton Goonies!]] | Icon SMW2-YI - Scary Skeleton Goonies!.png|[[Scary Skeleton Goonies!]] | ||
Icon SMW2-YI - The Cave Of The Bandits.png|[[The Cave Of The Bandits]] | Icon SMW2-YI - The Cave Of The Bandits.png|[[The Cave Of The Bandits]] | ||
| Line 905: | Line 957: | ||
==Screenshots== | ==Screenshots== | ||
<gallery widths="128"heights="112"> | <gallery widths="128" heights="112"> | ||
SMW2YI Language select.png|Language selection screen | |||
Yoshi's Island.PNG|Title screen | Yoshi's Island.PNG|Title screen | ||
Yoshi's Island 2.PNG|Second title screen | Yoshi's Island 2.PNG|Second title screen | ||
Yoshi's Island Jp title screen.jpg|Japanese title screen | Yoshi's Island Jp title screen.jpg|Japanese title screen | ||
Yoshi's Island sixstars Jp title screen.jpg|Japanese title screen with six stars | Yoshi's Island sixstars Jp title screen.jpg|Japanese title screen with six stars | ||
YI Boss Key.png|Obtaining the Big Key after the battle at [[Salvo The Slime's Castle]] | |||
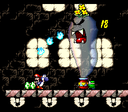
The Baseball Boys SMW2YI.png|[[The Baseball Boys]] | The Baseball Boys SMW2YI.png|[[The Baseball Boys]] | ||
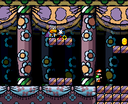
2-7Wall.png|[[Lakitu's Wall]] | 2-7Wall.png|[[Lakitu's Wall]] | ||
| Line 931: | Line 985: | ||
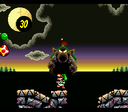
SMW2YI Raven.png|[[Raphael The Raven's Castle]] | SMW2YI Raven.png|[[Raphael The Raven's Castle]] | ||
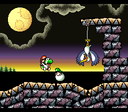
Pinwheel(Yoshi'sIsland).png|[[Shifting Platforms Ahead]] | Pinwheel(Yoshi'sIsland).png|[[Shifting Platforms Ahead]] | ||
ScarySkeltonGoonies!.png | ScarySkeltonGoonies!.png|[[Scary Skeleton Goonies!]] | ||
Tap-Tap the Red Nose's Fort.png | Tap-Tap the Red Nose's Fort.png|[[Tap-Tap The Red Nose's Fort]] | ||
TheVeryLoooooongCave.png | TheVeryLoooooongCave.png|[[The Very Loooooong Cave]] | ||
KeepMoving!!!!.png|[[KEEP MOVING!!!!]] | KeepMoving!!!!.png|[[KEEP MOVING!!!!]] | ||
BowsersCastleSMW2.png|[[King Bowser's Castle (Super Mario World 2: Yoshi's Island)|King Bowser's Castle]] | BowsersCastleSMW2.png|[[King Bowser's Castle (Super Mario World 2: Yoshi's Island)|King Bowser's Castle]] | ||
Kamek.png|King Bowser's Castle | |||
FinalBattleSMW2.png|Final battle | |||
BluigiSMW2.png|Ending | |||
SMW2 Mushroom House.png|Ending | SMW2 Mushroom House.png|Ending | ||
SMW2 Ending.png|Ending | SMW2 Ending.png|Ending | ||
| Line 954: | Line 1,011: | ||
==Box art== | ==Box art== | ||
<gallery> | <gallery> | ||
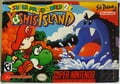
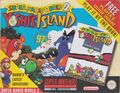
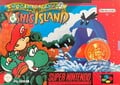
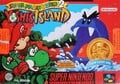
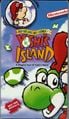
SMW2.jpg|North American box art | SMW2.jpg|North American box art | ||
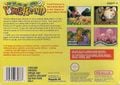
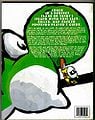
YIBackAmerica.jpg|North American box art (back) | YIBackAmerica.jpg|North American box art (back) | ||
Super Mario World 2 Yoshi's Island pal box art.jpg|UK Box art | SMW2 Box BR.jpg|Brazilian box art | ||
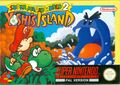
SMW2YI box ESP.png|European box art | |||
SMW2YI Box SCN.jpg|Scandinavian box art | |||
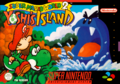
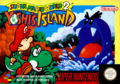
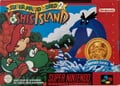
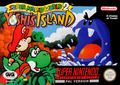
Super Mario World 2 Yoshi's Island pal box art.jpg|UK Box art | |||
YIBackEurope.jpg|UK Box art (back) | YIBackEurope.jpg|UK Box art (back) | ||
SMW2YI box UK Players Guide.jpg|UK box art (Player's Guide bundle) | SMW2YI box UK Players Guide.jpg|UK box art (Player's Guide bundle) | ||
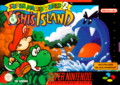
SMW2YI box FRA.png|French and Dutch box art | SMW2YI box FRA.png|French and Dutch box art | ||
Nintendo Classics SMW2 Box FR.jpg|French and Dutch box art ([[Nintendo Classics]]) | |||
SMW2YI | SMW2YI Box NEAI Nintendo Classics.jpg|Spanish box art (Nintendo Classics) | ||
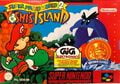
YI-Italian-boxart-GIG.png|Italian box art | YI-Italian-boxart-GIG.png|Italian box art | ||
SMW2YI box ITA Nintendo Classics.jpg|Italian box art (Nintendo Classics) | SMW2YI box ITA Nintendo Classics.jpg|Italian box art (Nintendo Classics) | ||
SMW2YI box AU.png| | SMW2YI box DE.png|German box art | ||
YossyIsland JP cover.jpg|Japanese box art | Super Classic Series SMW2 Box DE.jpg|German box art (Nintendo Classics) | ||
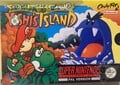
SMW2YI box AU.png|Australasian box art | |||
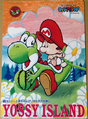
YossyIsland JP cover.jpg|Japanese box art | |||
YIBackJapan.jpg|Japanese box art (back) | YIBackJapan.jpg|Japanese box art (back) | ||
SMW2YI Box KOR.jpg|Korean box art | |||
SMW2YI Box HKG.jpg|Hong Kong box art | |||
</gallery> | </gallery> | ||
==Promotional material== | ==Promotional material== | ||
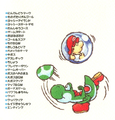
{{more | {{image|more=yes|Artworks of how to defeat bosses in ''All Hyakka''}} | ||
<gallery> | <gallery> | ||
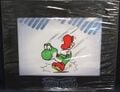
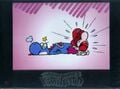
SNES Japanese Yoshi's Island commercial 01.png|Japanese commercial | SNES Japanese Yoshi's Island commercial 01.png|Japanese commercial | ||
| Line 979: | Line 1,043: | ||
SMW2YI magazine ad.jpg|North American magazine advert | SMW2YI magazine ad.jpg|North American magazine advert | ||
CulverCityYoshisIsland.jpg|Flyer advertising the Culver event and the game's launch | CulverCityYoshisIsland.jpg|Flyer advertising the Culver event and the game's launch | ||
SMW2YI Collectibles.jpg|Japanese collectibles | |||
Super nintendo sns-101 box.jpg|[[Super Nintendo Entertainment System]] bundle | Super nintendo sns-101 box.jpg|[[Super Nintendo Entertainment System]] bundle | ||
SuperMarioWorld2YoshisIsland.jpg|PAL bundle | SuperMarioWorld2YoshisIsland.jpg|PAL bundle | ||
| Line 990: | Line 1,054: | ||
YI CDcover.JPG|''[[Super Mario: Yossy Island Original Sound Version]]'' | YI CDcover.JPG|''[[Super Mario: Yossy Island Original Sound Version]]'' | ||
Super Mario Yoshi Island Original Sound Version CD.jpg|''[[Super Mario: Yossy Island Original Sound Version]]'' | Super Mario Yoshi Island Original Sound Version CD.jpg|''[[Super Mario: Yossy Island Original Sound Version]]'' | ||
YI CD materials.jpg|'' | YI CD materials.jpg|''Super Mario: Yossy Island Original Sound Version'' | ||
YI CD cover 2.png|''Super Mario: Yossy Island Original Sound Version'' | |||
YI CD cover 3.png|''Super Mario: Yossy Island Original Sound Version'' | |||
Yoshi's Island Zen Hyakka Salvo.jpg | Yoshi's Island Zen Hyakka Salvo.jpg | ||
Zen Hyakka Yoshi's Island Lava Bubble.jpg | Zen Hyakka Yoshi's Island Lava Bubble.jpg | ||
| Line 1,013: | Line 1,079: | ||
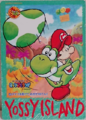
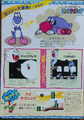
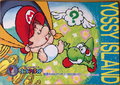
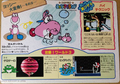
Yossy Island Carddass6 Back.png|''Yossy Island'' Jumbo Carddass 6 | Yossy Island Carddass6 Back.png|''Yossy Island'' Jumbo Carddass 6 | ||
Yoshi's Island Coloring Book Cover.png|Japanese coloring book | Yoshi's Island Coloring Book Cover.png|Japanese coloring book | ||
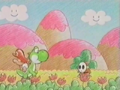
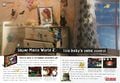
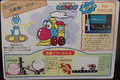
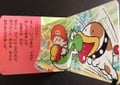
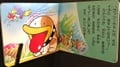
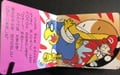
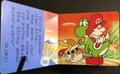
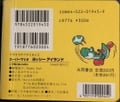
Yossy Island Mini Ehon.jpg|''Nagaoka's Petit Picture Book ① Super Mario Yoshi Island: Famous Dog? Poochy Appearance'' | |||
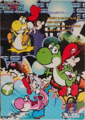
YIPB Scene 1.jpg|''Nagaoka's Petit Picture Book ① Super Mario Yoshi Island: Famous Dog? Poochy Appearance'' | |||
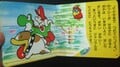
YIPB Scene 2.jpg|''Nagaoka's Petit Picture Book ① Super Mario Yoshi Island: Famous Dog? Poochy Appearance'' | |||
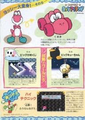
YIPB Pages 6-7.jpg|''Nagaoka's Petit Picture Book ① Super Mario Yoshi Island: Famous Dog? Poochy Appearance'' | |||
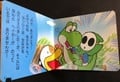
YIPB Scene 3.jpg|''Nagaoka's Petit Picture Book ① Super Mario Yoshi Island: Famous Dog? Poochy Appearance'' | |||
YIPB Scene 4.jpg|''Nagaoka's Petit Picture Book ① Super Mario Yoshi Island: Famous Dog? Poochy Appearance'' | |||
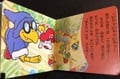
YIPB Scene 5.jpg|''Nagaoka's Petit Picture Book ① Super Mario Yoshi Island: Famous Dog? Poochy Appearance'' | |||
YIPB Scene 6.jpg|''Nagaoka's Petit Picture Book ① Super Mario Yoshi Island: Famous Dog? Poochy Appearance'' | |||
YIPB Scene 7.jpg|''Nagaoka's Petit Picture Book ① Super Mario Yoshi Island: Famous Dog? Poochy Appearance'' | |||
YIPB Back Cover.jpg|''Nagaoka's Petit Picture Book ① Super Mario Yoshi Island: Famous Dog? Poochy Appearance'' | |||
</gallery> | </gallery> | ||
{{Galleries}} | {{Galleries}} | ||
Latest revision as of 12:40, March 13, 2025
This is a gallery of images for the game Super Mario World 2: Yoshi's Island. For a gallery of images released with the remake included in Yoshi's Island: Super Mario Advance 3, see Gallery:Yoshi's Island: Super Mario Advance 3.
Logos
International logo
Japanese logo
Preliminary logo
In-game

In-game logo (International)
In-game logo (Japanese)
Artwork
It has been requested that more images be uploaded for this article. Remove this notice only after the additional images have been added. Specifics: Actual boss and enemy images for this game that are not the retouched SMA ones, as seen here, here, here, and here
Yoshis and Baby Mario
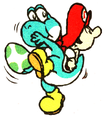
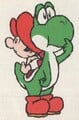
Yoshi standing
Light Blue Yoshi leaping
Yoshi licking
Yoshi swallowing something
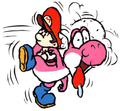
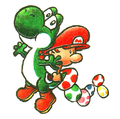
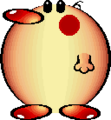
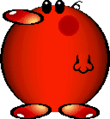
Pink Yoshi laying an egg
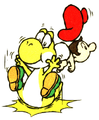
Red Yoshi laying an egg
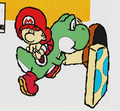
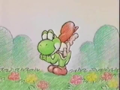
Yoshi aiming an Egg projectile
Yoshi aiming an Egg projectile
Light Blue Yoshi aiming an Egg projectile
Yoshi throwing an egg
Purple Yoshi throwing an egg
Yoshi jumping
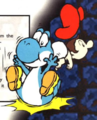
Blue Yoshi jumping
Blue Yoshi jumping
Yoshi Flutter Jumping
Yellow Yoshi Flutter Jumping
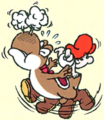
Brown Yoshi Flutter Jumping
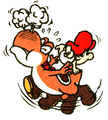
Orange Yoshi Flutter Jumping
Yellow Yoshi Ground Pounding
Light Blue Yoshi Ground Pounding
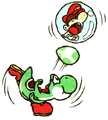
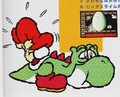
Green Yoshi thinking
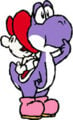
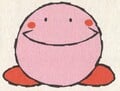
Purple Yoshi thinking
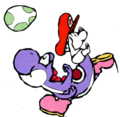
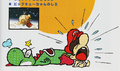
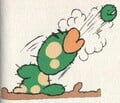
Yoshi spitting watermelon seeds
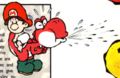
Red Yoshi spitting seeds
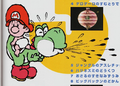
Purple Yoshi spitting seeds (English manual)
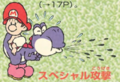
Purple Yoshi spitting seeds (Japanese manual)
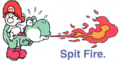
Yoshi spitting fire
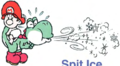
Yoshi spitting ice
Yoshi entering a door
Yoshi crouching
Yoshi defeated
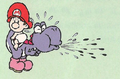
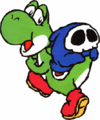
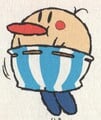
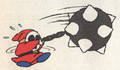
Pink Yoshi spitting out a Shy-Guy
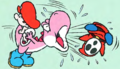
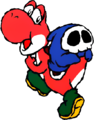
Pink Yoshi, after touching a Fuzzy
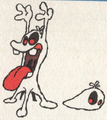
Yoshi and Grim Leecher
Red Yoshi and a Grim Leecher
Purple Yoshi, two Boo Buddies, and a Big Boo
Yoshi and several Yoshi's Eggs

The Yoshi group
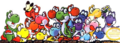
A bigger Yoshi group
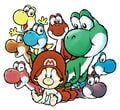
Baby Mario with all of the Yoshies
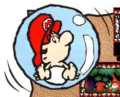
Baby Mario in a bubble

Baby Mario in a bubble
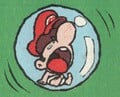
Baby Mario in a bubble
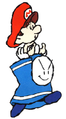
A Bandit carrying Baby Mario

Powerful Mario dashing
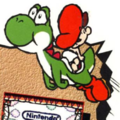
Powerful Mario climbing up a wall
Icon with Yoshi and Baby Mario
Icon with a Pink Yoshi and Baby Mario
Icon with a Light Blue Yoshi and Baby Mario
Icon with a Yellow Yoshi and Baby Mario
Icon with a Purple Yoshi and Baby Mario
Icon with a Brown Yoshi and Baby Mario (English manual)
Icon with an Orange Yoshi and Baby Mario (Japanese manual)
Icon with a Red Yoshi and Baby Mario
Icon with a Blue Yoshi and Baby Mario


Transformations

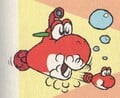
Helicopter
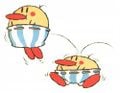
Mole Tank (yellow)
Submarine (brown)
Submarine (red)
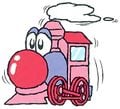
Train (purple)
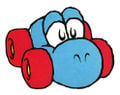
Car (light blue)


Allies
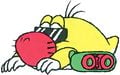
Melon Bug
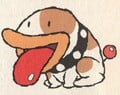
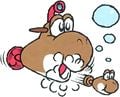
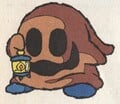
Poochy
Poochy


Enemies
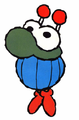
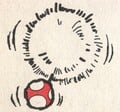
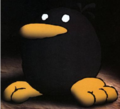
Blow Hard
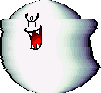
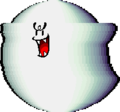
Boo Blah
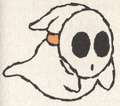
Boo Guy
Burts
Burt
Crazee Daysee (pink)
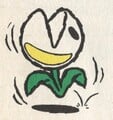
Eggo-Dil
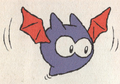
Fang
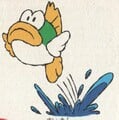
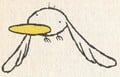
Flopsy Fish

Flying Wiggler
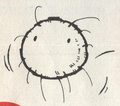
Fuzzy
Gargantua Blargg

Gargantua Blargg
Goonie

Green Glove
Grinder
Gusties
Hefty Goonie
Kaboomba
Kamek
Kamek
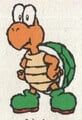
Koopa Troopa
Lakitu and Spiny Egg
Lantern Ghost (brown)
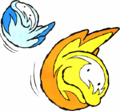
Lava Drop and Cloud Drop
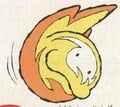
Lava Drop
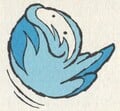
Cloud Drop
Mace Guy
Milde
Mufti Guy (pink)
Nipper Plant
Nipper Spore
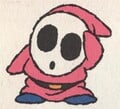
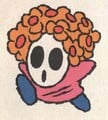
Shy-Guy (pink)
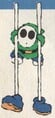
Shy-Guy on Stilts
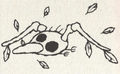
Skeleton Goonie
Spear Guy


Bosses
Salvo the Slime
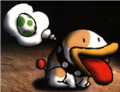
Roger the Potted Ghost
Roger the Potted Ghost
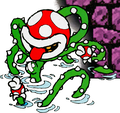
Naval Piranha
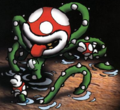
Naval Piranha
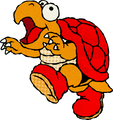
Hookbill the Koopa
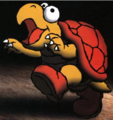
Hookbill the Koopa
Raphael the Raven

Baby Bowser

Baby Bowser


Items and objects

Arrow Sign

Egg Blocks
Star
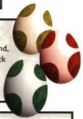
Yoshi's Egg, Yellow Egg, and Red Egg


Miscellaneous
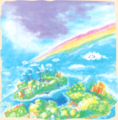
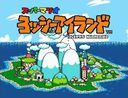
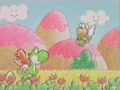
Illustration of Yoshi's Island from the instruction booklet.
Cover of the official Japanese guide, featuring Green Yoshi, Baby Mario, and Poochy
Bonus Challenge alert


Sprites and models
Yoshis and Baby Mario

Green Yoshi

Yoshi running

Yoshi flutter-jumping

Green Yoshi with Baby Mario

Green Yoshi after winning mini-game

Green Yoshi in the introduction

Pink Yoshi

Pink Yoshi

Pink Yoshi in the introduction

Light Blue Yoshi

Light Blue Yoshi

Light Blue Yoshi

Light Blue Yoshi in the introduction

Yellow Yoshi

Yellow Yoshi

Yellow Yoshi in the introduction

Purple Yoshi

Purple Yoshi

Purple Yoshi in the introduction

Brown Yoshi

Brown Yoshi

Brown Yoshi

Brown Yoshi in the introduction

Red Yoshi

Red Yoshi

Red Yoshi in the introduction

Blue Yoshi

Blue Yoshi

Blue Yoshi in the introduction


Map screen

Green Yoshi on a selected level

Green Yoshi waving

Green Yoshi on an unselected level

"Pink" Yoshi on a selected level

Light Blue Yoshi on a selected level

Yellow Yoshi on a selected level

Purple Yoshi on a selected level

Brown Yoshi on a selected level

"Red" Yoshi on a selected level

Blue Yoshi on a selected level


Transformations

Helicopter Yoshi

Helicopter Yoshi

Helicopter Yoshi

Helicopter Yoshi

Mole Tank

Mole Tank

Mole Tank

Submarine

Submarine

Train

Ski Yoshi

Snowball Yoshi


Allies

Melon Bug


Enemies

Ball 'N' Chains

Bandit

A shocked Bandit (unused)

Bandit with Yoshi Mask

Baron von Zeppelin

Baron von Zeppelin

Baron von Zeppelin

Beach Koopa

Big Boo

Big Boo

Big Boo and Boo Buddies

Big Shy Guy

Blow Hard

Boo Balloon

Boo Balloon

Boo Balloon

Boo Blah

Boo Buddy

Boo Guys

Boo Man Bluff

Bumpty

Bumpty

Burts
Caged Ghost
Caged Ghost

Clawdaddy

Cloud Drop

Crazee Dayzee

Dancing Spear Guy

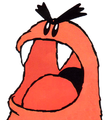
Fat Guy

Fat Guy
Fire-Bar

Fishing Lakitu

Flamer Guy

Flopsy Fish

Flopsy Fish

Flying Wiggler

Fuzzy

Grinder

Grinder

Grinder

Grunt

Grunt

Harry Hedgehog

Hootie the Blue Fish

Incoming Chomp

Itsunomanika Heihō and Bandit

Kamek

Kamek

Kamek's Toadies

Kamek's Toadies with Baby Mario

Koopa Troopa

Lakitu

Lantern Ghost

Lantern Ghost

Lantern Ghost

Lava Bubble

Lava Drop

Little Mouser

Loch Nestor

Loch Nestor

Loch Nestor

Mace Penguin

Missile Bill (unused on SNES)

Mock Up

Mufti Guy

Mufti Guy

Mufti Guy

Needlenose

Para-Koopa

Para-Koopa

Piscatory Pete

Piro Dangle

Piro Dangle

Puchipuchi L

Relay Heihō
Shark Chomp

Shy-Guy

Shy-Guy

Shy-Guy

Shy-Guy
Shy-Guys

Shy-Guy

Skeleton Goonie

Slime

Sluggy (pink)

Sluggy (yellow)

Snifit

Spear Guy

Stretch

Stretch

Tap-Tap

Wild Ptooie Piranha

Woozy Guy

Woozy Guy

Woozy Guy

Woozy Guy


Bosses
Burt the Bashful
Burt the Bashful
Burt the Bashful
Bigger Boo

Bigger Boo

Bigger Boo
Bigger Boo
Froggy

Naval Piranha's bud

Hookbill the Koopa
Hookbill the Koopa

Hookbill the Koopa
Hookbill the Koopa
Hookbill the Koopa
Hookbill the Koopa

Raphael the Raven

Raphael the Raven

Raphael the Raven

Tap-Tap the Red Nose

Baby Bowser and Kamek

Big Baby Bowser


Items

1up

Coin

Dragon Coin (unused)

Giant Egg

Key

Red coin (hidden)

Red coin (unhidden)

Special Flower

Watermelon

Watermelon seed

Yoshi's Egg


Objects

Air pump

Arrow block

Arrow Cloud

Arrow Cloud

Arrow Cloud

Arrow Sign

Balloon (Mini Battle)

Balloon (platform)

Balloon (platform)

Balloon (platform)

Beanstalk seed

Bobbing rock

Bomb

Breakable block

Breakable block

Brick lift

Chomp Rock

Chomp sign

Countdown Platform

Countdown Platform

Countdown Platform

Countdown Platform

Countdown Platform

Countdown Platform

Countdown Platform

Countdown Platform

Countdown Platform

Cracked block

Cracked block

Cracked block

Cracked block

Cracked block

Cracked block

Donut Lift

Door

Door

Door

Drawbridge

Egg Block (green)

Egg Block (yellow)

Egg Block (red)

Egg Block (flashing)
![Fireball] (Roger the Potted Ghost)](https://mario.wiki.gallery/images/f/f4/SMW2_Fireball_Roger.png)
Fireball] (Roger the Potted Ghost)

Fireball (Big Baby Bowser)

Flatbed Ferry

Flatbed Ferry

Flatbed Ferry

Flatbed Ferry

Flatbed Ferry

Flip bridge

Hard Block

Hard Block

Hard Block

Icicle

Icicle

Makeshift surfboard

Message Block

Moving block

Moving block

Moving block

Moving platform
Paddle wheel

Paddle wheel
Paddle wheel
Paddle wheel

Shack

Shockwave

Snowball

Soft rock

Spinning doors

Spinning wheel

Spinning wheel

Spiny Egg

Spongy ground

Spotted platform

Spring ball

Squishy block

Step

Stomache acid

Sway bridge

Teeter-totter

Turtle Cannon
Twirling tier

Watermelon jar

Winged Cloud

Wooden Ferry

Yoshi Block

Yoshi Block

Yoshi Block

Yoshi Block

Yoshi Block

Yoshi Block

Yoshi Block


![Fireball] (Roger the Potted Ghost)](/File:SMW2_Fireball_Roger.png)


Bonus Challenge icons
Cards

20 Point Star

2UP

3UP

10UP

Kamek's Toady

Hidden panel from Flip Cards

Hidden panel from Flip Cards

Hidden panel from Scratch and Match

Hidden panel from Drawing Lots

Hidden panel from Match Cards


Slot Machine

Lucky 7


File icons

Icon before starting a file

Icon upon starting World 1

Icon upon starting World 2

Icon upon starting World 3

Icon upon starting World 4

Icon upon starting World 5

Icon upon starting World 6
.png)
.png)
.png)
.png)
.png)
.png)
Level icons
World 1


World 2


World 3


World 4

Lake Shore Paradise (Japanese version)

Lake Shore Paradise (international versions)


World 5


World 6


Mini Battle icons

Throwing Balloons (6)

Throwing Balloons (VS. 2P)

Popping Balloons (Japanese version)

Popping Balloons (international versions)


Miscellaneous
Bonus Challenge alert

Kamek revealed, from Flip Cards

Kamek (Flip Cards)


Screenshots
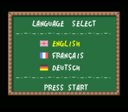
Language selection screen
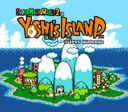
Title screen
Second title screen
Japanese title screen
Japanese title screen with six stars
Obtaining the Big Key after the battle at Salvo The Slime's Castle
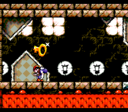
Yoshi battling Roger the Potted Ghost
King Bowser's Castle
Final battle
Ending
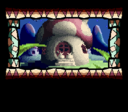
Ending
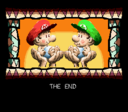
Ending


.png)


Maps


Box art
North American box art
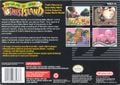
North American box art (back)
Brazilian box art
European box art
Scandinavian box art
UK Box art
UK Box art (back)
UK box art (Player's Guide bundle)
French and Dutch box art
French and Dutch box art (Nintendo Classics)
Spanish box art (Nintendo Classics)
Italian box art
Italian box art (Nintendo Classics)
German box art
German box art (Nintendo Classics)
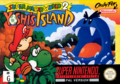
Australasian box art
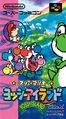
Japanese box art
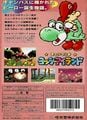
Japanese box art (back)
Korean box art
Hong Kong box art


Promotional material
It has been requested that more images be uploaded for this article. Remove this notice only after the additional images have been added. Specifics: Artworks of how to defeat bosses in All Hyakka
Japanese commercial
Japanese commercial
Japanese commercial
Japanese commercial
Super Power Club cards
North American magazine advert

Flyer advertising the Culver event and the game's launch

Japanese collectibles

PAL bundle
VHS tour of the game
Nintendo Power promotion
Official Nintendo Player's Guide front
Official Nintendo Player's Guide back
Japanese guide
PAL version game box contents
Super Mario: Yossy Island Original Sound Version
Super Mario: Yossy Island Original Sound Version
Super Mario: Yossy Island Original Sound Version
Player's Guide
Rare promotional cel
Rare promotional cel


Merchandise
Yossy Island Jumbo Carddass 1
Yossy Island Jumbo Carddass 1
Yossy Island Jumbo Carddass 2
Yossy Island Jumbo Carddass 2
Yossy Island Jumbo Carddass 3
Yossy Island Jumbo Carddass 3
Yossy Island Jumbo Carddass 4
Yossy Island Jumbo Carddass 4
Yossy Island Jumbo Carddass 5
Yossy Island Jumbo Carddass 5
Yossy Island Jumbo Carddass 6
Yossy Island Jumbo Carddass 6

Japanese coloring book
Nagaoka's Petit Picture Book ① Super Mario Yoshi Island: Famous Dog? Poochy Appearance
Nagaoka's Petit Picture Book ① Super Mario Yoshi Island: Famous Dog? Poochy Appearance
Nagaoka's Petit Picture Book ① Super Mario Yoshi Island: Famous Dog? Poochy Appearance
Nagaoka's Petit Picture Book ① Super Mario Yoshi Island: Famous Dog? Poochy Appearance
Nagaoka's Petit Picture Book ① Super Mario Yoshi Island: Famous Dog? Poochy Appearance
Nagaoka's Petit Picture Book ① Super Mario Yoshi Island: Famous Dog? Poochy Appearance
Nagaoka's Petit Picture Book ① Super Mario Yoshi Island: Famous Dog? Poochy Appearance
Nagaoka's Petit Picture Book ① Super Mario Yoshi Island: Famous Dog? Poochy Appearance
Nagaoka's Petit Picture Book ① Super Mario Yoshi Island: Famous Dog? Poochy Appearance
Nagaoka's Petit Picture Book ① Super Mario Yoshi Island: Famous Dog? Poochy Appearance


| Super Mario World 2: Yoshi's Island / Yoshi's Island: Super Mario Advance 3 | |||
|---|---|---|---|
| Characters | Yoshis • Baby Mario • Baby Luigi • Baby Bowser • Kamek • Stork • Poochy • Huffin Puffin • Liquid lift • Melon Bug • Muddy Buddy • Support Ghost | ||
| Worlds | Welcome To Yoshi's Island • World 1 • World 2 • World 3 • World 4 • World 5 • World 6 | ||
| Items | Regular items | Blue watermelon • Coin • Green Shell • Green watermelon • Key • Red coin • Red Shell • Red watermelon • Special Flower • Star • Super Star • Yoshi's egg (Flashing Egg · Giant Egg · Red Egg · Yellow Egg) | |
| Special Items | 10-Point Star • 20-Point Star • Anytime Egg • Anywhere POW • Magnifying Glass • Super Blue Watermelon • Super Green Watermelon • Super Red Watermelon • Winged Cloud Maker | ||
| Objects | ! Block • Arrow block • Arrow Cloud • Balloon (Mini Battle) • Balloon (platform) • Beanstalk • Breakable block • Bubble • Bucket • Chomp Rock • Coin Block • Cork • Countdown Platform • Cracked block • Current • Donut Lift • Dotted-Line Block • Egg Block • Egg Plant • Expansion Block • Falling stone block • Flatbed Ferry • Flipper • Goal Ring • Ice Block • Icicle • Makeshift surfboard • Message Block • Middle Ring • Morph bubble • Moving block • Paddle wheel • Pinwheel • Post • Pot • POW Block • Red-and-yellow bridge • Red balloon • Rolling rock • Seesaw • Ski Lift • Snowball • Soft rock • Spinning Log • Spinning wheel • Spotted platform • Spring ball • Squishy block • Switch • Teeter-totter • Tulip • Tumbler • Warp Pipe • Winged Cloud • Yoshi Block | ||
| Bosses | Burt the Bashful • Salvo the Slime • Bigger Boo • Roger the Potted Ghost • Froggy • Naval Piranha • Marching Milde • Hookbill the Koopa • Sluggy the Unshaven • Raphael the Raven • Tap-Tap the Red Nose • Baby Bowser • Big Baby Bowser | ||
| Enemy classes | Edibilis Boringus • Harrassimentia Phlyoverus • Projectilia Ritebakatchia • Ucantia Defeatus • Dudim Phreykunoutonthis • Mostosti Vomitonus | ||
| Enemies | Aqua Lakitu • Bandit • Baron von Zeppelin • Barney Bubble • Beach Koopa • Big Boo • Blow Hard • Boo Balloon • Boo Blah • Boo • Boo Guy • Boo Man Bluff • Bouncing Bullet Bill • Bowling Goonie • Bubble Dayzee • Bullet Bill • Bumpty • Burt • Cactus Jack • Caged Ghost • Chain Chomp • Clawdaddy • Cloud Drop • Coin Bandit • Crazee Dayzee • Dancing Spear Guy • Dangling Ghost • Dizzy Dandy • Dr. Freezegood • Eggo-Dil • Fang • Fat Guy • Fishing Lakitu • Flamer Guy • Flightless Goonie • Flightless Skeleton Goonie • Flopsy Fish • Fly Guy • Flying Wiggler • Frog Pirate • Fuzzy • Gargantua Blargg • Georgette Jelly • Goomba • Goonie • Green Glove • Green Toady • Grim Leecher • Grinder • Grunt • Gusty • Harry Hedgehog • Hefty Goonie • Hootie the Blue Fish • Hot Lips • Incoming Chomp • Itsunomanika Heihō • Jean de Fillet • Kaboomba • Kamek • Kamek's Toadies • Koopa Troopa • Lakitu • Lantern Ghost • Lava Bubble • Lava Drop • Little Mouser • Little Skull Mouser • Loch Nestor • Lunge Fish • Mace Guy • Mace Penguin • Milde • Missile Billa • Mock Up • Mufti Guy • Needle • Nep-Enut • Nipper Plant • Nipper Spore • Para-Koopa • Piro Dangle • Piscatory Pete • Pokey • Preying Mantas • Puchipuchi L • Raven • Raven (chick) • Red Blargg • Relay Heihō • Sanbo Flower • Shark Chomp • Shy-Guy • Shy-Guy on Stilts • Skeleton Goonie • Slime • Slime Drop • Slugger • Sluggy • Snifit • Solo Toady • Spear Guy • Spiked Fun Guy • Spooky • Spray Fish • Stretch • Tap-Tap • Tap-Tap the Golden • Thunder Lakitu • Train Bandit • Wall Lakitu • Whirly Fly Guy • Wild Piranha • Wild Ptooie Piranha • Woozy Guy • Zeus Guy | ||
| Obstacles | Ball 'N' Chain • Ball and chain • Cannonball • Fire-Bar • Lava • Spike • Spiked ball • Spiked weight • Thorn • Turtle Cannon | ||
| Mini Battles | Gather Coins • Popping Balloons • Throwing Balloons • Watermelon Seed Spitting Contest | ||
| Bonus Challenges | Flip Cards • Scratch and Match • Drawing Lots • Match Cards • Roulette • Slot Machine | ||
| Music | Athletic BGM • Flower Field BGM | ||
| Miscellaneous | Countdown Timer • Yoshi's Island | ||
| Further info | Gallery (SNES · GBA) • Glitches • Mario Bros.a • Baby Mario's A-Maze-ing Gamea • Multimedia • Nintendo Music • Pre-release and unused content • Staff (SNES · GBA) • Super Mario: Yossy Island Original Sound Version | ||