Yoshi's Island DS: Difference between revisions
Bowserbros (talk | contribs) |
m (→Minigames) |
||
| (83 intermediate revisions by 28 users not shown) | |||
| Line 4: | Line 4: | ||
|developer=[[Artoon]] | |developer=[[Artoon]] | ||
|publisher=[[Nintendo]] | |publisher=[[Nintendo]] | ||
|release='''Nintendo DS:'''<br>{{ | |release='''Nintendo DS:'''<br>{{flag list|USA|November 13, 2006<ref>''Super Smash Bros. Brawl'' {{iw|smashwiki|Chronicle}}</ref>|Australia|November 23, 2006<ref>{{cite|deadlink=y|archive=https://web.archive.org/web/20061114225545/http://games.nintendo.com.au/title.php?id=1128|url=http://games.nintendo.com.au/title.php?id=1128|language=en-au|accessdate=January 23, 2025|title=Yoshi's Island DS|publisher=Nintendo of Australia}}</ref>|Europe|December 1, 2006|Japan|March 8, 2007<ref>{{cite|url=www.nintendo.co.jp/ds/aywj/index.html|title=ヨッシーアイランドDS|publisher=Nintendo Co., Ltd.|language=ja|accessdate=May 11, 2023}}</ref>|ROC|March 8, 2007|South Korea|November 8, 2007<ref>{{cite|deadlink=y|archive=web.archive.org/web/20190823162124/http://www.nintendo.co.kr/DS/soft/yoshi/main.php|title=요시 아일랜드 DS|publisher=Nintendo of Korea|language=ko|accessdate=May 11, 2023}}</ref>}}'''Virtual Console (Wii U):'''<br>{{flag list|USA|April 1, 2015|Japan|April 8, 2015<ref>{{cite|url=www.nintendo.co.jp/wiiu/software/vc/daej/index.html?_ga=1.78412180.1818326145.1407870473|title=ヨッシーアイランドDS {{!}} Wii U {{!}} Nintendo|publisher=Nintendo|language=ja|accessdate=October 30, 2024}}</ref>|Europe|May 7, 2015<ref>{{cite|language=en-gb|author=Nintendo UK|date=April 1, 2015|url=youtu.be/sMWGe657t8g?t=20m51s|timestamp=20:51|title=Nintendo Direct Presentation - 01.04.2015|publisher=YouTube|accessdate=October 30, 2024}}</ref>|Australia|May 8, 2015}} | ||
|languages={{languages| | |languages={{languages|en=y|es_es=y|fr_fr=y|de=y|it=y|jp=y|kr=y}} | ||
|genre=[[Genre#Platform|Platformer]] | |genre=[[Genre#Platform games|Platformer]] | ||
|modes=Single | |modes=Single player | ||
|ratings={{ratings|esrb=E|cero=A|pegi=3|acb=G|grac=All}} | |ratings={{ratings|esrb=E|cero=A|pegi=3|acb=G|grac=All|usk=0}} | ||
|platforms=[[Nintendo DS]], [[Virtual Console]] ([[Wii U]]) | |platforms=[[Nintendo DS]], [[Virtual Console]] ([[Wii U]]) | ||
| | |format={{format|ds=1|wiiudl=1}} | ||
|input={{input|ds=1|wiiu=1}} | |input={{input|ds=1|wiiu=1}} | ||
|serials={{flag list|USA|NTR-AYWE-USA|Europe|NTR-AYWP-EUR|Australia|NTR-AYWE-AUS{{ref needed}}|Japan|NTR-AYWJ-JPN|South Korea|NTR-AYWK-KOR}} | |||
}} | }} | ||
'''''Yoshi's Island DS''''' is a 2D [[Genre#Platform|platformer]] for the [[Nintendo DS]] in the ''[[Yoshi's Island (series)|Yoshi's Island]]'' series. It is the sequel to ''[[Super Mario World 2: Yoshi's Island]]'' | '''''Yoshi's Island DS''''' is a 2D [[Genre#Platform games|platformer]] for the [[Nintendo DS]]. Being the second original installment in the ''[[Yoshi's Island (series)|Yoshi's Island]]'' series, the game was released in North America on November 13, 2006; in Australia on November 23, 2006; in Europe on December 1, 2006; in Japan and Taiwan on March 8, 2007; and in South Korea on November 8, 2007. It is the sequel to ''[[Super Mario World 2: Yoshi's Island]]'' and tells the story of the [[Yoshi (species)|Yoshi]]s rescuing all the babies in the world that [[Kamek]] and the [[Toady|Toadies]] have kidnapped in search for the [[star children]], a group of seven babies who possess powerful stars in their hearts. This is the first ''Yoshi's Island'' game to be developed by a third party studio, [[Artoon]], instead of by [[Nintendo EAD]]. | ||
''Yoshi's Island DS'' was rereleased for the [[Wii U]]'s [[Virtual Console#Wii U|Virtual Console]] in | While the game is heavily derivative from ''Super Mario World 2: Yoshi's Island'', including general gameplay, themes, and graphics, the game primarily differentiates itself from its predecessor by taking advantage of the Nintendo DS's dual screen to display levels while introducing multiple babies to carry on a Yoshi's back, all of whom special abilities that are required to make it through levels. Besides [[Baby Mario]], there are a few other [[#Babies|babies]] whom the Yoshis can carry during their adventure, and of them, [[Baby DK]] and [[Baby Wario]] make their first appearance in ''Yoshi's Island DS'' overall. | ||
A third original game, ''[[Yoshi's New Island]]'', was released in 2014 for the [[Nintendo 3DS]] and continues the story told before ''Yoshi's Island DS''. The game was rereleased for the [[Wii U]]'s [[Virtual Console#Wii U|Virtual Console]] in North America on April 1, 2015; in Japan on April 8, 2015; in Europe on May 7, 2015; and in Australia on May 8, 2015. | |||
==Story== | ==Story== | ||
[[File:YIDS-Intro Background.png|thumb|250px|The beginning of the game's intro, which shows the events that previously occurred in ''Super Mario World 2: Yoshi's Island'', the events being displayed from right to left.]] | [[File:YIDS-Intro Background.png|thumb|250px|The beginning of the game's intro, which shows the events that previously occurred in ''Super Mario World 2: Yoshi's Island'', the events being displayed from right to left.]] | ||
| Line 28: | Line 31: | ||
[[Kamek]] and his army of [[Toady|Toadies]] steal all of the babies in the [[Mushroom Kingdom]], as well as in other nearby areas. The Toadies take the babies to [[Bowser's Castle]], but the [[stork]] comes in and attacks two Toadies, making them drop the babies they are carrying. The two babies land on [[Yoshi's Island (location)|Yoshi's Island]] and are revealed to be [[Baby Mario]] and [[Baby Peach]]. | [[Kamek]] and his army of [[Toady|Toadies]] steal all of the babies in the [[Mushroom Kingdom]], as well as in other nearby areas. The Toadies take the babies to [[Bowser's Castle]], but the [[stork]] comes in and attacks two Toadies, making them drop the babies they are carrying. The two babies land on [[Yoshi's Island (location)|Yoshi's Island]] and are revealed to be [[Baby Mario]] and [[Baby Peach]]. | ||
The Yoshis find the babies and decide to help them. They figure out that Baby Mario, once again, wants to save [[Baby Luigi]] and the other babies from Kamek and his Toadies. The Yoshis take the babies with them and go to rescue the kidnapped babies. Later on in the adventure, | The Yoshis find the babies and decide to help them. They figure out that Baby Mario, once again, wants to save [[Baby Luigi]] and the other babies from Kamek and his Toadies. The Yoshis take the babies with them and go to rescue the kidnapped babies. Later on in the adventure, after [[Gilbert the Gooey]] is defeated, a group of [[Ukiki|monkey]]s kidnaps Baby Peach. The Yoshis and Baby Mario find another baby, [[Baby DK]], who was left behind when the Toadies were kidnapping all the other babies. With the help of Baby DK, Yoshi is able to rescue Baby Peach from the monkeys. Baby DK joins the team when the monkeys are defeated. | ||
Promptly after defeating [[Bessie Bass]] on a battleship, the Yoshis and the babies are swept away by a tidal wave in a storm. They eventually find [[Baby Wario]], who is also left behind. Baby Wario then decides to join the party. | Promptly after defeating [[Bessie Bass]] on a battleship, the Yoshis and the babies are swept away by a tidal wave in a storm. They eventually find [[Baby Wario]], who is also left behind. Baby Wario then decides to join the party. | ||
| Line 45: | Line 48: | ||
==Gameplay== | ==Gameplay== | ||
Gameplay typically consists of platforming throughout the game's levels, where a Yoshi needs to navigate through the various obstacles in order to reach the [[Goal Ring|Goal roulette]]. Yoshis have various means of dealing with the obstacles, with basic actions being running, [[jump]]ing either to dodge obstacles or defeat enemies, and [[Ground Pound]]ing harder to defeat enemies or [[stump|post]]s. Yoshis can [[Flutter Jump]] repeatedly in the air to increase distance and slow down descent speed. Unique to Yoshis and their primary method of dealing with enemies and obstacles are their extendable, sticky tongues, which allows them to swallow most enemies and turn them into essential, versatile projectiles: [[Yoshi's Egg|Yoshi Eggs]]. Eggs have a wide variety of purposes, whether they activate [[Winged Cloud]]s, defeat enemies that cannot be eaten or stomped on, open up traps and obstacles, retrieve coins, reveal hidden Winged Clouds, and more. Eggs by default come in green, changes color when bouncing off walls and the color indicates how many times eggs bounce off walls before they are destroyed. Green eggs can bounce off walls three times, [[Yellow Egg]]s two, and [[Red Egg]]s instantly get destroyed when they touch a wall. If a Yellow or Red Egg hits an enemy, it spawns [[coin]]s or a [[Star (Yoshi's Island series)|star]] respectively. Yoshis can retrieve bounced eggs by using their tongue at them before they get destroyed, though some items such as colored [[Egg Block]]s can give Yoshis different colored eggs. Yoshis can carry up to six eggs, and eggs get discarded if a Yoshi creates more eggs. In addition, Yoshis can obtain eggs by hitting Egg Blocks or retrieving them from [[Egg Plant]]s. | Gameplay typically consists of platforming throughout the game's levels, where a Yoshi needs to navigate through the various obstacles in order to reach the [[Goal Ring|Goal roulette]]. Yoshis have various means of dealing with the obstacles, with basic actions being running, [[jump]]ing either to dodge obstacles or defeat enemies, and [[Ground Pound]]ing harder to defeat enemies or [[stump|post]]s. Yoshis can [[Flutter Jump]] repeatedly in the air to increase distance and slow down descent speed. Unique to Yoshis and their primary method of dealing with enemies and obstacles are their extendable, sticky tongues, which allows them to swallow most enemies and turn them into essential, versatile projectiles: [[Yoshi's Egg|Yoshi Eggs]]. Eggs have a wide variety of purposes, whether they activate [[Winged Cloud]]s, defeat enemies that cannot be eaten or stomped on, open up traps and obstacles, retrieve coins, reveal hidden Winged Clouds, and more. Eggs by default come in green, changes color when bouncing off walls and the color indicates how many times eggs bounce off walls before they are destroyed. Green eggs can bounce off walls three times, [[Yellow Egg]]s two, and [[Red Egg]]s instantly get destroyed when they touch a wall. If a Yellow or Red Egg hits an enemy, it spawns [[coin]]s or a [[Star (Yoshi's Island series)|star]] respectively. Yoshis can retrieve bounced eggs by using their tongue at them before they get destroyed, though some items such as colored [[Egg Block]]s can give Yoshis different colored eggs. Yoshis can carry up to six eggs, and eggs get discarded if a Yoshi creates more eggs. In addition, Yoshis can obtain eggs by hitting Egg Blocks or retrieving them from [[Egg Plant]]s. Like in ''Super Mario World 2: Yoshi's Island'', collecting every [[Red Coin]], [[Star (Yoshi's Island series)|Star]], and [[Smiley Flower]] is required for 100% [[completion]]. | ||
''Yoshi's Island DS'' retains the health system in ''Super Mario World 2: Yoshi's Island''. When a Yoshi is hit by an enemy or an obstacle, the baby is knocked loose from his back, crying, and the [[star (Yoshi's Island series)|star]] power–the source of the protective bubble that keeps the Toadies from taking the baby–goes down by one star per second. If that number goes down to zero, Toadies take away the baby and a life is lost. The Yoshi, however, still has a small amount of time to recover the baby even after the Toadies have grabbed. The Yoshi can rescue the baby by touching the bubble with its body or its tongue. If the Yoshi hits the bubble with an egg, the bubble gets knocked down, making the baby easier to reach. The star power starts at ten in each level. If a baby is recovered with less than ten stars, the star power slowly increases to ten. Additionally, groups of five stars can be found in [[Winged Cloud]]s and [[crate]]s, and [[Goal Ring|goal roulette]]s give twenty additional star power, allowing the star power to max at thirty. Remaining star power also counts toward the score at the completion of the level. Although Yoshis cannot be defeated in normal circumstances, they instantly lose a life if they touch [[Spike (obstacle)|spike]]s, [[lava]], fall into bottomless [[pit]]s, get crushed, or eaten by [[Lunge Fish]] or [[Cheep Chomp|Boss Basses]]. | ''Yoshi's Island DS'' retains the health system in ''Super Mario World 2: Yoshi's Island''. When a Yoshi is hit by an enemy or an obstacle, the baby is knocked loose from his back, crying, and the [[star (Yoshi's Island series)|star]] power–the source of the protective bubble that keeps the Toadies from taking the baby–goes down by one star per second. If that number goes down to zero, Toadies take away the baby and a life is lost. The Yoshi, however, still has a small amount of time to recover the baby even after the Toadies have grabbed. The Yoshi can rescue the baby by touching the bubble with its body or its tongue. If the Yoshi hits the bubble with an egg, the bubble gets knocked down, making the baby easier to reach. The star power starts at ten in each level. If a baby is recovered with less than ten stars, the star power slowly increases to ten. Additionally, groups of five stars can be found in [[Winged Cloud]]s and [[crate]]s, and [[Goal Ring|goal roulette]]s give twenty additional star power, allowing the star power to max at thirty. Remaining star power also counts toward the score at the completion of the level. Although Yoshis cannot be defeated in normal circumstances, they instantly lose a life if they touch [[Spike (obstacle)|spike]]s, [[lava]], fall into bottomless [[pit]]s, get crushed, or eaten by [[Lunge Fish]] or [[Cheep Chomp|Boss Basses]]. | ||
A Yoshi can morph into several certain types of vehicles using a [[Morph Bubble]]. Yoshi can return to his regular self by either touching a [[Yoshi Block]] or waiting for time to expire. Touching the Yoshi Block is required to progress, as Yoshi is directed back to the Morph Bubble otherwise. Yoshi cannot attack while in a Morph Bubble form, and if he is hit, Yoshi is stunned and knocked a certain direction. | |||
New to ''Yoshi's Island DS'' is the addition of extra babies and [[Stork Stop]]s, who affect the gameplay in various ways. By default, Yoshis carry Baby Mario, who retains gameplay most similar to the original entry and allows Yoshis to hit [[M Block]]s. At Stork Stops, Yoshis can swap out babies once they have been unlocked. Carrying [[Baby Peach]], for example, allows Yoshis to flutter jump further and ride winds thanks to the use of her parasol while [[Baby DK]] allows Yoshis to climb [[swinging vine|vines]], explode eggs, and use the [[DK Dash Attack]] to charge through rocks and enemies; however, Baby Peach causes a Yoshi to lose the ability to bounce eggs while Baby DK is heavier to carry and thus reduces flutter jump distance. Regular enemies can appear in the [[Island Museum]] after being hit by an egg. | |||
===Controls=== | ===Controls=== | ||
[[File:Yoshiisland2-9.png|200px|thumb|The controls menu in which the player can choose from Hasty to Patient]] | [[File:Yoshiisland2-9.png|200px|thumb|The controls menu in which the player can choose from Hasty to Patient]] | ||
From the Options menu, players can change the controls of the game. The player can choose from two sets of controls: {{Button|ds|A}}{{Button|ds|B}}{{Button|ds|X}}{{Button|ds|Y}} and {{Button|ds|A}}{{Button|ds|B}}{{Button|ds|L}}{{Button|ds|R}}, and two modes: Hasty and Patient, Below are the controls of the game: | From the Options menu, players can change the controls of the game. The player can choose from two sets of controls: {{Button|ds|A}}{{Button|ds|B}}{{Button|ds|X}}{{Button|ds|Y}} and {{Button|ds|A}}{{Button|ds|B}}{{Button|ds|L}}{{Button|ds|R}}, and two modes: Hasty and Patient, Below are the controls of the game: | ||
;Shared controls | |||
*{{Button|ds|Pad}}: Used to move the Yoshis. Pressing it down makes Yoshi crouch or make eggs. If the down arrow is pressed in the air, Yoshi ground pounds. | *{{Button|ds|Pad}}: Used to move the Yoshis. Pressing it down makes Yoshi crouch or make eggs. If the down arrow is pressed in the air, Yoshi ground pounds. | ||
*{{button|gba|start}}: Pauses the game and opens the "Options" menu. | *{{button|gba|start}}: Pauses the game and opens the "Options" menu. | ||
*{{Button|ds|R}}: Used to make Yoshi throw a Yoshi's Egg. In Hasty mode: Holding the button, makes Yoshi aim at his target. Letting go of the button makes Yoshi throw the egg, in Patient mode the player has to press the button again to make Yoshi throw the egg. | *{{Button|ds|R}}: Used to make Yoshi throw a Yoshi's Egg. In Hasty mode: Holding the button, makes Yoshi aim at his target. Letting go of the button makes Yoshi throw the egg, in Patient mode the player has to press the button again to make Yoshi throw the egg. | ||
*{{Button|ds|L}}: While Yoshi is aiming up and down, pressing the {{Button|ds|L}} button makes Yoshi lock on a specific location. | *{{Button|ds|L}}: While Yoshi is aiming up and down, pressing the {{Button|ds|L}} button makes Yoshi lock on a specific location. | ||
;First set<nowiki>:</nowiki> {{Button|ds|A}}{{Button|ds|B}}{{Button|ds|X}}{{Button|ds|Y}} | |||
*{{Button|ds|B}}: Used to jump, pressing it again makes Yoshi [[Flutter Jump]]. | *{{Button|ds|B}}: Used to jump, pressing it again makes Yoshi [[Flutter Jump]]. | ||
*{{Button|ds|Y}}: Used to Eat or spit an enemy. With [[Baby Mario]], the player can dash by holding the button. | *{{Button|ds|Y}}: Used to Eat or spit an enemy. With [[Baby Mario]], the player can dash by holding the button. | ||
In this set: the {{button|ds|A}} and {{button|ds|X}} can be used instead of the {{button|ds|R}} and {{button|ds|L}} respectively. | In this set: the {{button|ds|A}} and {{button|ds|X}} can be used instead of the {{button|ds|R}} and {{button|ds|L}} respectively. | ||
;Second set<nowiki>:</nowiki> {{Button|ds|A}}{{Button|ds|B}}{{Button|ds|L}}{{Button|ds|R}} | |||
*{{Button|ds|A}}: Used to jump, pressing it again makes Yoshi Flutter Jump. | *{{Button|ds|A}}: Used to jump, pressing it again makes Yoshi Flutter Jump. | ||
*{{Button|ds|B}}: Used to Eat or spit an enemy. With Baby Mario, the player can dash by holding the button. | *{{Button|ds|B}}: Used to Eat or spit an enemy. With Baby Mario, the player can dash by holding the button. | ||
| Line 74: | Line 76: | ||
*[[Flutter Challenge]] - Yoshi must try to flutter-jump as far as possible. | *[[Flutter Challenge]] - Yoshi must try to flutter-jump as far as possible. | ||
*[[Bouncy Maze]] - Yoshi must maneuver his way through a simple maze of [[Bouncy|Bouncie]]s. | *[[Bouncy Maze]] - Yoshi must maneuver his way through a simple maze of [[Bouncy|Bouncie]]s. | ||
*[[Speed | *[[Speed Eating]] - Yoshi must try to swallow as many enemies as possible. | ||
*[[Egg Toss]] - Yoshi must hit targets with [[Yoshi's Egg|egg]]s. | *[[Egg Toss]] - Yoshi must hit targets with [[Yoshi's Egg|egg]]s. | ||
All minigames have a set time limit. Achieving a high score in any minigame awards Yoshi with lives. Harder versions of all the minigames can be unlocked by collecting all the [[character coin]]s in a world. | All minigames have a set time limit. Achieving a high score in any minigame awards Yoshi with lives. Harder versions of all the minigames can be unlocked by collecting all the [[character coin]]s in a world. | ||
| Line 81: | Line 83: | ||
Time Trial is unlocked once Adventure Mode has been beaten. It is similar to Adventure Mode, but the player is timed. Yoshi has 100 minutes to finish each level - even when the player presses the Start Button, the time keeps going. [[Red Coin|Red coin]]s, [[Smiley Flower|flower]]s and [[star (Yoshi's Island series)|star]]s, when collected, each subtract a set amount of time taken to finish the level: -1 second per star, -2 seconds per red coin, and -10 seconds per flower. | Time Trial is unlocked once Adventure Mode has been beaten. It is similar to Adventure Mode, but the player is timed. Yoshi has 100 minutes to finish each level - even when the player presses the Start Button, the time keeps going. [[Red Coin|Red coin]]s, [[Smiley Flower|flower]]s and [[star (Yoshi's Island series)|star]]s, when collected, each subtract a set amount of time taken to finish the level: -1 second per star, -2 seconds per red coin, and -10 seconds per flower. | ||
===Island | ===Island Museum=== | ||
Accessible in Adventure mode, the [[Island Museum]] is a live bestiary of the enemies in the game. Any enemies hit by [[Yoshi's Egg]]s appear in exhibits and are organized by the class they are in (eg, many water-based enemies appear in the aquatic-based exhibit). | Accessible in Adventure mode, the [[Island Museum]] is a live bestiary of the enemies in the game. Any enemies hit by [[Yoshi's Egg]]s appear in exhibits and are organized by the class they are in (eg, many water-based enemies appear in the aquatic-based exhibit). | ||
==Worlds and levels== | ==Worlds and levels== | ||
The | The set up of levels and worlds is largely based on ''[[Super Mario World 2: Yoshi's Island]]''. There is a total of five worlds, with each one having eight normal levels, one secret level, and one extra level. The secret levels are unlocked when all the normal levels are cleared. The extra levels are unlocked by scoring a total of 800 points for each world. Throughout the five worlds, a different colored Yoshi takes on one out of eight levels, with a mid-boss in the fourth level and the world boss in the eighth level. | ||
{|width=100% class="wikitable" | |||
{| | !colspan="4"style="background:#DE7BA0;"|Worlds and levels | ||
!colspan= | |||
|- | |- | ||
|align=center style="background:# | |colspan="4"align=center style="background:#3CE565"|[[File:Yoshi's House YIDS.png]]<hr>'''{{color link|white|World 0}}''' | ||
|- | |- | ||
|align=center | |colspan="4"align=center|[[File:Welcome Back To Yoshi's Island.png]]<hr>[[Welcome Back to Yoshi's Island!]] (0-0) | ||
|- | |- | ||
|align=center style="background:# | |colspan="4"align=center style="background:#CAC3FF"|[[File:World 1 Map - Yoshi's Island DS.png]]<hr>'''{{color link|black|World 1 (Yoshi's Island DS)|World 1}}''' | ||
|- | |- | ||
|align=center | |align=center|[[File:Ba-Dum BUM!.png]]<hr>[[File:Icon YIDS - Ba-dum BUM!.png]] [[Ba-dum BUM!]] (1-1) | ||
|align=center|[[File:Hit the M Blocks! YIDS.png]]<hr>[[File:Icon YIDS - Hit the M Blocks.png]] [[Hit the M Blocks!]] (1-2) | |||
|align=center|[[File:Level1-3 YIDS.png]]<hr>[[File:Icon YIDS - Mario's Fleet Feet.png]] [[Mario's Fleet Feet]] (1-3) | |||
|align=center|[[File:Yoshiisland2-33.png]]<hr>[[File:Icon YIDS - Castle of the Big Burt Bros.png]] [[Castle of the Big Burt Bros.]] (1-4) | |||
|- | |- | ||
|align=center | |align=center|[[File:Catch the Breeze.png]]<hr>[[File:Icon YIDS Catch the Breeze.png]] [[Catch the Breeze!]] (1-5) | ||
|align=center|[[File:YIDS Glide Guys Take to the Skies.png]]<hr>[[File:Icon YIDS - Glide Guys Take to the Skies.png]] [[Glide Guys Take to the Skies]] (1-6) | |||
|align=center|[[File:Dynamic Duo YIDS.png]]<hr>[[File:Icon YIDS - Baby Mario and Baby Peach- Dynamic Duo.png]] [[Baby Mario and Baby Peach: Dynamic Duo]] (1-7) | |||
|align=center|[[File:YIDS Gilbert the Gooey fight.png]]<hr>[[File:Icon YIDS Gilbert the Gooey's Castle.png]] [[Gilbert the Gooey's Castle]] (1-8) | |||
|- | |- | ||
|align=center | |colspan="2"align=center|[[File:Welcome to Yoshi Tower! YIDS.png]]<hr>[[File:Icon YIDS Secret1.png]] [[Welcome to Yoshi Tower!]] (Secret 1) | ||
|colspan="2"align=center|[[File:Return of the Moving Chomp Rock! YIDS.png]]<hr>[[File:Icon YIDS - Extra1.png]] [[Return of the Moving Chomp Rock!]] (Extra 1) | |||
|- | |- | ||
|align=center | |colspan="4"align=center|[[File:Flip Cards (DS).png]]<hr>[[File:Icon YIDS - Flip.png]] [[Flip Cards]] (Flip){{footnote|main|a}} | ||
|- | |- | ||
|align=center style="background:# | |colspan="4"align=center style="background:#32E691"|[[File:World 2 Map - Yoshi's Island DS.png]]<hr>'''{{color link|black|World 2 (Yoshi's Island DS)|World 2}}''' | ||
|- | |- | ||
! | |align=center|[[File:YIDS-Baby DK Screenshot.png]]<hr>[[File:Icon YIDS - Baby DK, the Jungle King!.png]] [[Baby DK, the Jungle King!]] (2-1) | ||
|align=center|[[File:Underground Mysteries.png]]<hr>[[File:Icon YIDS - Underground Mysteries.png]] [[Underground Mysteries]] (2-2) | |||
|align=center|[[File:Windblown Wilderness.png]]<hr>[[File:Icon YIDS - Wildblown Wilderness.png]] [[Windblown Wilderness]] (2-3) | |||
|align=center|[[File:Hector the Reflector's Haunted House YIDS.png]]<hr>[[File:Icon YIDS - Hector the Reflector's Haunted House.png]] [[Hector the Reflector's Haunted House]] (2-4) | |||
|- | |- | ||
| | |align=center|[[File:Boing! (YIDS).png]]<hr>[[File:Icon YIDS - Boing!.png]] [[Boing! (level)|Boing!]] (2-5) | ||
| | |align=center|[[File:Donuts and Eggs.png]]<hr>[[File:Icon YIDS - Donuts and Eggs.png]] [[Donuts and Eggs]] (2-6) | ||
|align=center|[[File:Yoshi on Stilts.png]]<hr>[[File:Icon YIDS - Yoshi on Stilts.png]] [[Yoshi on Stilts]] (2-7) | |||
|align=center|[[File:Big Bungee Piranha.png]]<hr>[[File:Icon YIDS - Big Bungee Piranha's Lair.png]] [[Big Bungee Piranha's Lair]] (2-8) | |||
|- | |- | ||
|align=center | |colspan="2"align=center|[[File:Yikes! Boiling Hot!.png]]<hr>[[File:Icon YIDS - Secret2.png]] [[Yikes! Boiling Hot!]] (Secret 2) | ||
|colspan="2"align=center|[[File:Moving Statues, Standing Statues YIDS.png]]<hr>[[File:Icon YIDS - Extra2.png]] [[Moving Statues, Standing Statues]] (Extra 2) | |||
|- | |- | ||
|align=center | |colspan="4"align=center|[[File:Scratch and Match (DS).png]]<hr>[[File:Icon YIDS - Scratch.png]] [[Scratch and Match (minigame)|Scratch and Match]] (Scratch){{footnote|main|a}} | ||
|- | |- | ||
|align=center style="background:# | |colspan="4"align=center style="background:#CBFE7C"|[[File:World 3 Map - Yoshi's Island DS.png]]<hr>'''{{color link|black|World 3 (Yoshi's Island DS)|World 3}}''' | ||
|- | |- | ||
|align=center | |align=center|[[File:Up the Creek.png]]<hr>[[File:Icon YIDS - Up the Creek.png]] [[Up the Creek]] (3-1) | ||
|align=center|[[File:The Goonie Coast Isn't Clear!.png]]<hr>[[File:Icon YIDS - The Goonie Coast Isn't Clear!.png]] [[The Goonie Coast Isn't Clear!]] (3-2) | |||
|align=center|[[File:Island of Peril.png]]<hr>[[File:Icon YIDS - Island of Peril.png]] [[Island of Peril]] (3-3) | |||
|align=center|[[File:BessieBassBattleship.png]]<hr>[[File:Icon YIDS - Bessie Bass's Battleship.png]] [[Bessie Bass's Battleship]] (3-4) | |||
|- | |- | ||
|align=center | |align=center|[[File:YIDS Here's Wario!.png]]<hr>[[File:Icon YIDS - Here's Wario.png]] [[Heeeeeeere's Wario!]] (3-5) | ||
|align=center|[[File:Use the Magnet to Get Rich Quick!.png]]<hr>[[File:Icon YIDS - Use the Magnet to Get Rich Quick.png]] [[Use the Magnet to Get Rich Quick!]] (3-6) | |||
|align=center|[[File:Tap-Tap's Sunken Cave.png]]<hr>[[File:Icon YIDS - Tap Tap's Sunken Cave.png]] [[Tap-Tap's Sunken Cave]] (3-7) | |||
|align=center|[[File:Castle of Priscilla the Peckish.png]]<hr>[[File:Icon YIDS - Castle of Priscilla the Peckish.png]] [[Castle of Priscilla the Peckish]] (3-8) | |||
|- | |- | ||
|align=center | |colspan="2"align=center|[[File:A Light in the Dark.png]]<hr>[[File:Icon YIDS - Secret3.png]] [[A Light in the Dark]] (Secret 3) | ||
|colspan="2"align=center|[[File:Number Ball Special.png]]<hr>[[File:Icon YIDS - Extra3.png]] [[Number Ball Special]] (Extra 3) | |||
|- | |- | ||
|align=center | |colspan="4"align=center|[[File:Match Cards (DS).png]]<hr>[[File:Icon YIDS - Match.png]] [[Match Cards]] (Match){{footnote|main|a}} | ||
|- | |- | ||
|align=center style="background:# | |colspan="4"align=center style="background:#F7AD7B"|[[File:World 4 Map - Yoshi's Island DS.png]]<hr>'''{{color link|black|World 4 (Yoshi's Island DS)|World 4}}''' | ||
|- | |- | ||
|align=center | |align=center|[[File:Rock 'n' Fall.png]]<hr>[[File:Icon YIDS - Rock 'n' Fall.png]] [[Rock 'n' Fall]] (4-1) | ||
|align=center|[[File:YIDS Cart.png]]<hr>[[File:Icon YIDS - High-Speed Cart Race.png]] [[High-Speed Cart Race]] (4-2) | |||
|align=center|[[File:InTheClouds.png]]<hr>[[File:Icon YIDS - In the Clouds.png]] [[In the Clouds]] (4-3) | |||
|align=center|[[File:Six Face Sal's Fort.png]]<hr>[[File:Icon YIDS Six Face Sal's Fort.png]] [[Six-Face Sal's Fort]] (4-4) | |||
|- | |- | ||
|align=center | |align=center|[[File:Friend or Foe.png]]<hr>[[File:Icon YIDS - Friend of Foe.png]] [[Friend or Foe? (Yoshi's Island DS)|Friend or Foe?]] (4-5) | ||
|align=center|[[File:Slip Slidin' Away.png]]<hr>[[File:Icon YIDS - Slip Slidin' Away.png]] [[Slip Slidin' Away (Yoshi's Island DS)|Slip Slidin' Away]] (4-6) | |||
|align=center|[[File:Teeth-Chattering Chill Zone.png]]<hr>[[File:Icon YIDS - Teeth-Chattering Chill Zone.png]] [[Teeth-Chattering Chill Zone]] (4-7) | |||
|align=center|[[File:YIDS Big Guy the Stilted screenshot.png]]<hr>[[File:Icon YIDS - Castle of Big Guy the Stilted.png]] [[Castle of Big Guy the Stilted]] (4-8) | |||
|- | |- | ||
|align=center | |colspan="2"align=center|[[File:Hurry and Throw!.png]]<hr>[[File:Icon YIDS - Secret4.png]] [[Hurry and Throw!]] (Secret 4) | ||
|colspan="2"align=center|[[File:Let There Be Light!.png]]<hr>[[File:Icon YIDS - Extra4.png]] [[Let There Be Light!]] (Extra 4) | |||
|- | |- | ||
|colspan="4"align=center|[[File:Roulette (DS).png]]<hr>[[File:Icon YIDS - Roulette.png]] [[Roulette]] (Roulette){{footnote|main|a}} | |||
|- | |- | ||
|colspan= | |colspan="4"align=center style="background:#AB85EF"|[[File:World 5 Map - Yoshi's Island DS.png]]<hr>'''{{color link|black|World 5 (Yoshi's Island DS)|World 5}}''' | ||
| | |||
|- | |- | ||
|align=center | |align=center|[[File:Rompin', Stompin' Chomps.png]]<hr>[[File:Icon YIDS - Rompin' Stompin' Chomps.png]] [[Rompin', Stompin' Chomps]] (5-1) | ||
|align=center|[[File:Goonie Heights.png]]<hr>[[File:Icon YIDS - Goonie Heights.png]] [[Goonie Heights]] (5-2) | |||
|align=center|[[File:SpearGuysVillage.png]]<hr>[[File:Icon YIDS - Spear Guys' Village Found!.png]] [[Spear Guys' Village Found!]] (5-3) | |||
|align=center|[[File:The Fort of Moltz the Very Goonie.png]]<hr>[[File:Icon YIDS - The Fort of Moltz the Very Goonie.png]] [[The Fort of Moltz the Very Goonie]] (5-4) | |||
|- | |- | ||
|align=center | |align=center|[[File:The Cave That Never Ends.png]]<hr>[[File:Icon YIDS - The Cave That Never Ends.png]] [[The Cave That Never Ends]] (5-5) | ||
|align=center|[[File:Find the Number Ball!.png]]<hr>[[File:Icon YIDS - Find the Number Ball!.png]] [[Find the Number Ball!]] (5-6) | |||
|align=center|[[File:Superhard Acrobatics.png]]<hr>[[File:Icon YIDS - Superhard Acrobatics.png]] [[Superhard Acrobatics!]] (5-7) | |||
|align=center|[[File:At Last, Bowser's Castle!.png]]<hr>[[File:Icon YIDS - At Last Bowser's Castle!.png]] [[At Last, Bowser's Castle!]] (5-8) | |||
|- | |- | ||
|align=center | |colspan="2"align=center|[[File:Yoshi's Island Easter Eggs.png]]<hr>[[File:Icon YIDS - Secret5.png]] [[Yoshi's Island Easter Eggs]] (Secret 5) | ||
|colspan="2"align=center|[[File:Quit it Already, Tap-Tap!.png]]<hr>[[File:Icon YIDS - Extra5.png]] [[Quit it Already, Tap-Tap!]] (Extra 5) | |||
|- | |- | ||
| | |colspan="4"align=center|[[File:Slot Machine (DS).png]]<hr>[[File:Icon YIDS - Slot.png]] [[Slot Machine (Yoshi's Island series)|Slot Machine]] (Slot){{footnote|main|a}} | ||
|} | |} | ||
{{footnote|note|a|[[Bonus Challenge]]}} | |||
==Characters== | ==Characters== | ||
===Playable characters=== | ===Playable characters=== | ||
{| | Just like in ''[[Super Mario World 2: Yoshi's Island]]'', the Yoshi species are the primary playable characters of the game. All Yoshis in that game return (except Brown Yoshi, who is replaced by Orange Yoshi) and are played in the same level order. Green Yoshi is no longer playable in secret and extra levels, with those levels being reserved for Black and White Yoshis (who return from ''[[Yoshi's Story]]'') respectively. | ||
| | {|class="wikitable"style="text-align:center" | ||
! | !style="background:#AFFFAA"|Sprite | ||
! | !style="background:#AFFFAA"|Yoshi | ||
!style="background:#AFFFAA"|Level order | |||
!style="background:#AFFFAA"|Debut level | |||
!style="background:#AFFFAA"|Last level | |||
|- | |- | ||
|[[File:Green Yoshi YIDS.png]] | |||
| | |[[Yoshi|Green Yoshi]] | ||
|First stage of a world and [[At Last, Bowser's Castle!|the final stage]] | |||
|[[Welcome Back to Yoshi's Island!]] | |||
|[[At Last, Bowser's Castle!]] | |||
|- | |- | ||
|[[File:PinkYoshi YIDS.png]] | |||
| | |[[Yoshi (species)|Pink Yoshi]] | ||
|Second stage of a world | |||
|[[Hit the M Blocks!]] | |||
|[[Goonie Heights]] | |||
|- | |- | ||
|[[File:LightBlueYoshi YIDS.png]] | |||
| | |[[Yoshi (species)|Light Blue Yoshi]] | ||
|Third stage of a world | |||
|[[Mario's Fleet Feet]] | |||
|[[Spear Guys' Village Found!]] | |||
|- | |- | ||
|[[File:YellowYoshi YIDS.png]] | |||
| | |[[Yoshi (species)|Yellow Yoshi]] | ||
|[[Fortress|Fourth stage]] of a world | |||
|[[Castle of the Big Burt Bros.]] | |||
|{{sort|Fort of Moltz the Very Goonie, The|[[The Fort of Moltz the Very Goonie]]}} | |||
|- | |- | ||
|[[File:PurpleYoshi YIDS.png]] | |||
| | |[[Yoshi (species)|Purple Yoshi]] | ||
|Fifth stage of a world | |||
|[[Catch the Breeze!]] | |||
|{{sort|Cave That Never Ends, The|[[The Cave That Never Ends]]}} | |||
|- | |- | ||
|[[File:OrangeYoshi YIDS.png]] | |||
| | |[[Yoshi (species)|Orange Yoshi]] | ||
|Sixth stage of a world | |||
|[[Glide Guys Take to the Skies]] | |||
|[[Find the Number Ball!]] | |||
|- | |- | ||
|[[File:RedYoshi YIDS.png]] | |||
| | |[[Yoshi (species)|Red Yoshi]] | ||
|Seventh stage of a world | |||
|[[Baby Mario and Baby Peach: Dynamic Duo]] | |||
|[[Superhard Acrobatics!]] | |||
|- | |- | ||
|[[File:BlueYoshi YIDS.png]] | |||
| | |[[Yoshi (species)|Blue Yoshi]] | ||
|[[Castle|Eighth and final stage]] of a world | |||
|[[Gilbert the Gooey's Castle]] | |||
|[[Castle of Big Guy the Stilted]] | |||
|- | |- | ||
|[[File:BlackYoshi YIDS.png]] | |||
| | |[[Yoshi (species)|Black Yoshi]] | ||
|Secret Stages | |||
|[[Welcome to Yoshi Tower!]] | |||
|[[Yoshi's Island Easter Eggs]] | |||
|- | |- | ||
|[[File:WhiteYoshi YIDS.png]] | |||
| | |[[Yoshi (species)|White Yoshi]] | ||
|Extra Stages | |||
|[[Return of the Moving Chomp Rock!]] | |||
|[[Quit it Already, Tap-Tap!]] | |||
|} | |} | ||
===Babies=== | ===Babies=== | ||
{|class="wikitable"style="text-align:center" | |||
{| | !style="background:#AFFFAA"|Sprite | ||
!style="background:#AFFFAA"|Baby | |||
! | !style="background:#AFFFAA"|Gameplay effects | ||
! | !style="background:#AFFFAA"|Debut level | ||
! | !style="background:#AFFFAA"|Last level | ||
|- | |- | ||
|[[File:Baby Mario Yoshi's Island DS.png]] | |||
|[[Baby Mario]] | |||
|align=left|<nowiki/> | |||
*Yoshi can run faster than normal. | |||
*Yoshi's Flutter Jump travels at a normal distance and height. | |||
*Yoshi can swallow enemies to get eggs like normal. | |||
*Yoshi's Eggs bounce off of any walls they are thrown at. | |||
*[[M Block]]s become tangible. | |||
|[[Ba-dum BUM!]] | |[[Ba-dum BUM!]] | ||
|[[ | |[[Yoshi's Island Easter Eggs]] | ||
|- | |- | ||
|[[File:Baby Peach Yoshi's Island DS.png]] | |||
| | |[[Baby Peach]] | ||
|align=left|<nowiki/> | |||
*Yoshi runs at normal speed. | |||
*Yoshi's Flutter Jump travels further and higher than normal. | |||
*Yoshi can swallow enemies to get eggs like normal. | |||
*Yoshi's Eggs do not bounce off of walls. | |||
*Baby Peach's parasol can ride wind. | |||
|[[Catch the Breeze!]] | |||
|[[Yoshi's Island Easter Eggs]] | |||
|- | |- | ||
|[[File:Baby DK YIDS Sprite.png]] | |||
|[[Baby DK]] | |||
|align=left|<nowiki/> | |||
*Yoshi runs at normal speed. | |||
*Yoshi's Flutter Jump travels at a normal distance and height. | |||
*Yoshi can swallow enemies to get eggs like normal. | |||
*Yoshi's Eggs do not bounce off walls, but they are faster and capable of making a small explosion that defeats enemies and activates winged clouds nearby. | |||
*Baby DK can take Yoshi along while climbing [[swinging vine|vines]] and [[chain (object)|chains]]. | |||
*Baby DK can use [[DK Dash Attack]] to defeat most enemies and cross gaps which can't happen with jumps. | |||
|[[Baby DK, the Jungle King!]] | |[[Baby DK, the Jungle King!]] | ||
| | |[[Yoshi's Island Easter Eggs]] | ||
|- | |- | ||
|[[File:YIDS-Baby Wario Sprite.PNG]] | |||
|[[Baby Wario]] | |||
|align=left|<nowiki/> | |||
*Yoshi runs at normal speed. | |||
*Yoshi's Flutter jumps at a normal distance and height. | |||
*Yoshi can swallow enemies to get eggs like normal. | |||
*Yoshi's Eggs bounce off of any walls they are thrown at, like Baby Mario. | |||
*Uses a magnet that draws nearby coins in, even those behind solid walls. | |||
*His magnet can move [[Magnet Platform]]s and [[Magnet Block]]s. | |||
|[[Heeeeeeere's Wario!]] | |[[Heeeeeeere's Wario!]] | ||
| | |[[At Last, Bowser's Castle!]] | ||
|- | |- | ||
|[[File:Baby Bowser YIDS Sprite.png]] | |||
|[[Baby Bowser]] | |||
|align=left| | |||
*Yoshi runs at normal speed. | |||
*Yoshi's Flutter jumps at a normal distance and height. | |||
*Yoshi cannot swallow enemies to get eggs, but can still get them from [[Egg Block]]s and [[Egg Plant]]s. | |||
*Yoshi's Eggs bounce off of any walls they are thrown at, like Baby Mario. | |||
*Baby Bowser can use his Fire Breath as projectiles, which melt ice, break winged clouds, and destroy dirt walls. | |||
|[[Friend or Foe? (Yoshi's Island DS)|Friend or Foe?]] | |[[Friend or Foe? (Yoshi's Island DS)|Friend or Foe?]] | ||
| | |[[At Last, Bowser's Castle!]] | ||
|} | |} | ||
===Other characters=== | ===Other characters=== | ||
{| | {|class="wikitable"style="text-align:center" | ||
!style="background:#AFFFAA"|Sprite | |||
!style="background:#AFFFAA"|Character | |||
! | !style="background:#AFFFAA"|Summary | ||
|- | |- | ||
|[[File:Stork YIDS Sprite.png]] | |||
| | |[[Stork]] | ||
|Delivers a baby to a Yoshi at a Stork Stop | |||
|- | |- | ||
|[[File:BabyLuigi - YIDS.png]] | |||
|The | |[[Baby Luigi]] | ||
|The goal of the journey is to rescue Baby Luigi. | |||
|} | |} | ||
===Normal enemies=== | ===Normal enemies=== | ||
{|class="wikitable"style="text-align:center;width:100%" | |||
!style="background:#7edf7e"colspan=5|Aquatic enemies | |||
{| | |||
! | |||
|- | |- | ||
!rowspan=2 style="background:#AFFFAA"|Sprite | |||
!rowspan=2 style="background:#AFFFAA"|Enemy | |||
!rowspan=2 style="background:#AFFFAA"|Summary | |||
!colspan=2 style="background:#AFFFAA"|Levels | |||
|- | |- | ||
!style="background:#AFFFAA"|Debut | |||
!style="background:#AFFFAA"|Last | |||
|- | |- | ||
| | |[[File:BlooperYIDS.png]] | ||
| | |[[Blooper]] | ||
|align= | |align=left|One of the aquatic enemies that may jump out of water | ||
| | |colspan=2|[[Use the Magnet to Get Rich Quick!]] | ||
|- | |- | ||
|[[File:BigCheepCheep YIDS.png]] | |||
| | |[[Cheep Chomp|Boss Bass]] | ||
|align=left|Undefeatable enemies that jump out of water while trying to eat the player. | |||
|[[Moving Statues, Standing Statues]] | |||
|[[Use the Magnet to Get Rich Quick!]] | |||
|- | |- | ||
| | |[[File:YIDS White Piscatory Pete.png]] [[File:YIDS Yellow Piscatory Pete.png]] | ||
| | |[[Cheep Cheep]] | ||
|align=left|Encountered by [[Submarine Yoshi|Submarine]] only, blue Cheep Cheeps swim forward whilst the gold ones go after Yoshi. | |||
|[[Island of Peril]] | |||
|[[Bessie Bass's Battleship]] | |||
|- | |- | ||
|[[File:EggEnut-YIDS.png]] | |||
| | |[[Egg-enut]] | ||
|align=left|They use a fake Yoshi's Egg to bait Yoshi, flailing it as he approaches. | |||
|[[Up the Creek]] | |||
|[[The Cave That Never Ends]] | |||
|- | |- | ||
|[[File:CheepCheep YIDS.png]] | |||
| | |[[Cheep Cheep|Flopsy Fish]] | ||
|align=left|They either swim in patterns or jump out of water. | |||
|[[Yoshi on Stilts]] | |||
|[[Bessie Bass's Battleship]] | |||
|- | |- | ||
|[[File:LungeFish YIDS.png]] | |||
| | |[[Lunge Fish]] | ||
|align=left|Undefeatable enemies that try to eat Yoshi, like Boss Basses, but hide in the water before striking. | |||
| | |[[Yoshi on Stilts]] | ||
|[[Castle of Priscilla the Peckish]] | |||
|- | |- | ||
|[[File:Nep-Enut DS.png]] | |||
| | |[[Nep-Enut]] | ||
| | |align=left|Large, blue creatures that rise out of water to block the path until being hit with an egg | ||
|colspan=2|[[Up the Creek]] | |||
|- | |- | ||
|[[File:YIDS Red Pirate Guy.png]] [[File:YIDS Blue Pirate Guy.png]] [[File:YIDS Green Pirate Guy.png]] [[File:YIDS Yellow Pirate Guy.png]] | |||
| | |[[Pirate Guy]] | ||
| | |align=left|Cosmetic alterations of Shy Guys wearing a white robe and a colored bandana | ||
|[[The Goonie Coast Isn't Clear!]]<br>(all colors) | |||
|[[Use the Magnet to Get Rich Quick!]]<br>(all colors) | |||
|- | |- | ||
|[[File:SprayFish YIDS.png]] | |||
| | |[[Spray Fish]] | ||
|align=left|Has a looped pattern of spraying harmless water at Yoshi for few seconds | |||
|colspan=2|[[Big Bungee Piranha's Lair]] | |||
|- | |- | ||
| | |[[File:YIDS Red Toober Guy.png]] [[File:YIDS Blue Toober Guy.png]] [[File:YIDS Green Toober Guy.png]] [[File:YIDS Yellow Toober Guy.png]] | ||
| | |[[Toober Guy]] | ||
|align= | |align=left|Floating Shy Guys usually encountered in one spot | ||
|[[Big Bungee Piranha's Lair]]<br>(all colors) | |||
|[[Bessie Bass's Battleship]]<br>(all colors) | |||
|- | |- | ||
!style="background:#7edf7e"colspan=5|Botanical enemies | |||
|- | |- | ||
|[[File:YIDS Blow Hard.png]] | |||
|[[Blow Hard]] | |||
|align= | |align=left|Spits [[Pokey (projectile)|Pokey]]s at Yoshi | ||
|[[Return of the Moving Chomp Rock!]] | |||
|[[Yoshi's Island Easter Eggs]] | |||
|- | |- | ||
|[[File:BungeePiranha YIDS.png]] | |||
| | |[[Bungee Piranha]] | ||
|align=left|They fall from the ceiling, attempting to grab Yoshi. | |||
|[[Return of the Moving Chomp Rock!]] | |||
|[[Superhard Acrobatics!]] | |||
|- | |- | ||
|[[File:YIDS Yellow Crazee Dayzee.png]] [[File:YIDS White Crazee Dayzee.png]] | |||
| | |[[Crazee Dayzee]] | ||
|align= | |align=left|Calm enemies that walk slowly towards Yoshi | ||
| | |[[Ba-dum BUM!]]<br>(yellow)<br>[[Hit the M Blocks!]]<br>(white) | ||
|[[Donuts and Eggs]]<br>(yellow)<br>[[Donuts and Eggs]]<br>(white) | |||
|- | |- | ||
|[[File:DroolHard.PNG]] | |||
| | |[[Drool Hard]] | ||
|align=left|They try to drop Pokeys on Yoshi. | |||
|[[Return of the Moving Chomp Rock!]] | |||
|[[At Last, Bowser's Castle!]] | |||
|- | |- | ||
|[[File:EggoDill YIDS.png]] | |||
|[[Eggo-Dil]] | |||
|align= | |align=left|Attacks by launching petals in all five directions | ||
|[[Return of the Moving Chomp Rock!]] | |||
|[[Superhard Acrobatics!]] | |||
|- | |- | ||
|[[File:SwingHard.PNG]] | |||
|[[Hanging Blow Hard]] | |||
|align= | |align=left|Spits Pokeys that move down its vine-like tongue | ||
|[[Up the Creek]] | |||
|[[At Last, Bowser's Castle!]] | |||
|- | |- | ||
|[[File:NipperDandelion YIDS.png]] | |||
|Nipper | |[[Nipper Dandelion]] | ||
|align=left|Idle entities that release Nipper Spores if blown by a gust of wind. | |||
|[[Ba-dum BUM!]] | |||
|[[Number Ball Special]] | |||
|- | |- | ||
|[[File:NipperPlant YIDS.png]] | |||
|Nipper Spores | |[[Nipper Plant]] | ||
|align=left|Slow-moving enemies that spawn from Nipper Spores upon touching the ground. | |||
|[[Ba-dum BUM!]] | |||
|[[Goonie Heights]] | |||
|- | |- | ||
|[[File:NipperSpore YIDS.png]] | |||
| | |[[Nipper Spore]] | ||
|align=left|Slowly floats towards the ground before hatching into a Nipper Plant | |||
|[[Ba-dum BUM!]] | |||
|[[In the Clouds]] | |||
|- | |- | ||
|[[File:PiranhaPlantYIDS.png]] | |||
| | |[[Piranha Plant]] | ||
|align=left|They hide in the ground, growing larger when Yoshi is close; if Yoshi enters one's mouth, he is spit out a few seconds later. | |||
|[[Ba-dum BUM!]] | |||
|[[Yoshi's Island Easter Eggs]] | |||
|- | |- | ||
|[[File:Pointey YIDS.png]] | |||
| | |[[Pointey]] | ||
|align=left|Harmless enemies that rise from the ground when approached | |||
|[[Hit the M Blocks!]] | |||
|[[Baby DK, the Jungle King!]] | |||
|- | |- | ||
|[[File:YIDS Needlenose.png]] | |||
| | |[[Pokey (projectile)|Pokey]] | ||
|align=left|Projectiles released by Blow Hards and other enemies | |||
|[[Hit the M Blocks!]] | |||
|[[Yoshi's Island Easter Eggs]] | |||
|- | |- | ||
|[[File:YIDS Egg-Plant.png]] | |||
| | |[[Sanbo Flower]]s | ||
|align= | |align=left|They spit out Pokeys if Yoshi does not have six eggs. | ||
|[[Ba-dum BUM!]] | |||
|[[At Last, Bowser's Castle!]] | |||
|- | |- | ||
|[[File:WildPtooiePiranha YIDS.png]] | |||
| | |[[Wild Ptooie Piranha]] | ||
! | |align=left|They are another enemy that spit Pokeys, but three hits are required to defeat them. | ||
|[[Welcome to Yoshi Tower!]] | |||
|[[Yoshi's Island Easter Eggs]] | |||
|- | |- | ||
|[[File:Windbagpic.png]] | |||
| | |[[Windbag (enemy)|Windbag]] | ||
|align=left|They blow gusts of wind, typically towards Nipper Dandelions, and shrink briefly if an egg hits them. | |||
|[[Ba-dum BUM!]] | |||
|[[Number Ball Special]] | |||
|- | |- | ||
!style="background:#7edf7e"colspan=5|Shy Guy enemies | |||
|- | |- | ||
|[[File:DacingSpearGuy YIDS.png]] | |||
| | |[[Dancing Spear Guy]] | ||
|align=left|They have a pattern of dancing and jumping, as well as damaging spears. | |||
|[[Moving Statues, Standing Statues]] | |||
|[[Spear Guys' Village Found!]] | |||
|- | |- | ||
|[[File:YIDS Red Fat Guy.png]] [[File:YIDS Green Fat Guy.png]] | |||
| | |[[Fat Guy]] | ||
|align= | |align=left|Large Shy Guys that Yoshi can eat to receive larger eggs. | ||
| | |colspan=2|[[Teeth-Chattering Chill Zone]] (both colors) | ||
|- | |- | ||
|[[File:FlyGuy YIDS.png]] | |||
|[[Fly Guy]] | |||
|align=left|They do not attack Yoshi directly but do carry items, such as [[Red Coin|red coin]]s. | |||
|align= | |[[Ba-dum BUM!]] | ||
| | |[[Rompin', Stompin' Chomps]] | ||
| | |||
|- | |- | ||
| | |[[File:YIDS Red Glide Guy.png]] [[File:YIDS Yellow Glide Guy.png]] [[File:YIDS Green Glide Guy.png]] [[File:YIDS Blue Glide Guy.png]] | ||
| | |[[Glide Guy]] | ||
| | |align=left|They are blown into the air upon encountering a [[wind]] current. | ||
| | |[[Ba-dum BUM!]]<br>(red)<br>[[Ba-dum BUM!]]<br>(yellow)<br>[[Catch the Breeze!]]<br>(green)<br>[[Baby Mario and Baby Peach: Dynamic Duo]]<br>(blue) | ||
|[[Teeth-Chattering Chill Zone]]<br>(blue)<br>[[Superhard Acrobatics!]]<br>(red)<br>[[Superhard Acrobatics!]]<br>(green)<br>[[Superhard Acrobatics!]]<br>(yellow) | |||
|- | |- | ||
|[[File:PetalGuy YIDS.png]] | |||
| | |[[Petal Guy]] | ||
|align=left|They disguise themselves as flower patches until Yoshi approaches. | |||
|[[In the Clouds]] | |||
|[[Goonie Heights]] | |||
|- | |- | ||
| | |[[File:YIDS Red Shy Guy.png]] [[File:YIDS Green Shy Guy.png]] [[File:YIDS Yellow Shy Guy.png]] [[File:YIDS Blue Shy Guy.png]] | ||
| | |[[Shy Guy]] | ||
|align= | |align=left|Basic enemies that walk in a line as well as spawn from certain pipes | ||
|[[Ba-dum BUM!]]<br>(red)<br>[[Ba-dum BUM!]]<br>(green)<br>[[Ba-dum BUM!]]<br>(yellow)<br>[[Mario's Fleet Feet]]<br>(blue) | |||
|[[Yoshi's Island Easter Eggs]]<br>(red)<br>[[Yoshi's Island Easter Eggs]]<br>(green)<br>[[Yoshi's Island Easter Eggs]]<br>(yellow)<br>[[Yoshi's Island Easter Eggs]]<br>(blue) | |||
|- | |- | ||
|[[File:YIDS Red Stilt Guy.png]] [[File:YIDS Blue Stilt Guy.png]] [[File:YIDS Green Stilt Guy.png]] [[File:YIDS Yellow Stilt Guy.png]] | |||
| | |[[Stilt Guy|Shy Guy on Stilts]] | ||
! | |align=left|They are just like regular Shy Guys, except they move around on stilts. | ||
! | |[[Underground Mysteries]]<br>(red)<br>[[Underground Mysteries]]<br>(blue)<br>[[Underground Mysteries]]<br>(green)<br>[[Underground Mysteries]]<br>(yellow) | ||
! | |[[Superhard Acrobatics!]]<br>(red)<br>[[Superhard Acrobatics!]]<br>(blue)<br>[[Superhard Acrobatics!]]<br>(green)<br>[[Superhard Acrobatics!]]<br>(yellow) | ||
! | |||
|- | |- | ||
|[[File:YIDS Shy Stack.png]] | |||
| | |[[Shy Guy Tower|Shy Stack]] | ||
|align=left|An idle stack of Shy Guys, where if one of them is eaten, the others fall off of the stack. | |||
|[[The Goonie Coast Isn't Clear!]] | |||
|[[Superhard Acrobatics!]] | |||
|- | |- | ||
|[[File:SpearGuy YIDS.png]] | |||
| | |[[Spear Guy]] | ||
|align=left|Carries a spear in front that also prevents Yoshi from eating it from the front | |||
|[[Welcome to Yoshi Tower!]] | |||
|[[Spear Guys' Village Found!]] | |||
|- | |- | ||
|[[File:YIDS Woozy Guy.png]] | |||
| | |[[Woozy Guy]] | ||
| | |align=left|They flip forward every few seconds. | ||
|[[Ba-dum BUM!]]<br>(blue)<br>[[Castle of the Big Burt Bros.]]<br>(red)<br>[[Catch the Breeze!]]<br>(green)<br>[[Catch the Breeze!]]<br>(yellow) | |||
|[[Rompin', Stompin' Chomps]]<br>(green)<br>[[Goonie Heights]]<br>(blue)<br>[[Superhard Acrobatics!]]<br>(yellow)<br>[[Yoshi's Island Easter Eggs]]<br>(red) | |||
|- | |- | ||
!style="background:#7edf7e"colspan=5|Subterranean enemies | |||
|- | |- | ||
|[[File:BillBlaster YIDS.png]] | |||
|[[Bill Blaster]] | |||
|align= | |align=left|Cannons that launch Bullet Bills | ||
|[[Welcome to Yoshi Tower!]] | |||
|[[Superhard Acrobatics!]] | |||
|- | |- | ||
|[[File:Kounbaba YIDS.png]] | |||
| | |[[Blargg (small)|Blargg]] | ||
|align=left|They rise out of the lava, attempting to damage Yoshi. | |||
|[[Castle of the Big Burt Bros.]] | |||
|[[Find the Number Ball!]] | |||
|- | |- | ||
|[[File:BulletBill YIDS.png]] | |||
| | |[[Bullet Bill]] | ||
|align=left|Travels forwards after being shot out of a Bill Blaster | |||
|[[Welcome to Yoshi Tower!]] | |||
|[[Superhard Acrobatics!]] | |||
|- | |- | ||
|[[File:DizzyDandy YIDS.png]] | |||
|[[Fooly Flower|Dizzy Dandy]] | |||
|align= | |align=left|They look similar to [[Smiley Flower|flower]]s, though roll straightforward at Yoshi when approached. | ||
| | |[[Welcome to Yoshi Tower!]] | ||
|[[The Cave That Never Ends]] | |||
|- | |- | ||
|[[File:YIDS Gargantua Blargg.png]] | |||
|[[Gargantua Blargg]] | |||
|align= | |align=left|Functions the same as Nep-Enuts but found in lava only. | ||
| | |colspan=2|[[Gilbert the Gooey's Castle]] | ||
|- | |- | ||
|[[File:Gobblin.png]] | |||
| | |[[Gobblin]] | ||
|align=left|Blocks Warp Pipes but can be defeated from six eggs. | |||
|[[Big Bungee Piranha's Lair]] | |||
|[[Superhard Acrobatics!]] | |||
|- | |- | ||
|[[File:YIDS Red Gooey Goon.png]] [[File:YIDS Blue Gooey Goon.png]] [[File:YIDS Green Gooey Goon.png]] [[File:YIDS Yellow Gooey Goon.png]] [[File:YIDS Purple Gooey Goon.png]] | |||
|[[Gooey Goon]] | |||
|align=left|They drop from the ceiling and swing at Yoshi. | |||
|align= | |[[Gilbert the Gooey's Castle]] | ||
|[[Castle of Priscilla the Peckish]] | |||
|- | |- | ||
|[[File:HotLips YIDS.png]] | |||
| | |[[Hot Lips]] | ||
|align=left|Functions like a Spray Fish but spits a stream of boiling lava. | |||
|[[Six-Face Sal's Fort]] | |||
|[[Find the Number Ball!]] | |||
! | |||
|- | |- | ||
| | |[[File:YIDS White Lantern Ghost.png]] [[File:YIDS Red Lantern Ghost.png]] [[File:YIDS Green Lantern Ghost.png]] | ||
| | |[[Lantern Ghost]] | ||
|align= | |align=left|They act the same as Shy Guys and are found generally in cave areas. | ||
| | |[[Hit the M Blocks!]]<br>(white)<br>[[Hit the M Blocks!]]<br>(red)<br>[[Hit the M Blocks!]]<br>(green) | ||
|[[Find the Number Ball!]]<br>(white)<br>[[Find the Number Ball!]]<br>(red)<br>[[Find the Number Ball!]]<br>(green) | |||
|- | |- | ||
|[[File:LavaBubble YIDS.png]] | |||
| | |[[Lava Bubble|Podoboo]] | ||
|align=left|They jump out of lava at regular intervals. | |||
|[[Yoshi on Stilts]] | |||
|[[Hurry and Throw!]] | |||
|- | |- | ||
|[[File:Zeus Guy YIDS.png]] | |||
| | |[[Scorchit]] | ||
|align=left|They shoot a stream of fire that can melt ice. | |||
|[[Welcome to Yoshi Tower!]] | |||
|[[At Last, Bowser's Castle!]] | |||
|- | |- | ||
!style="background:#7edf7e"colspan=5|Land enemies | |||
|- | |- | ||
|[[File:YIDS Bandit.png]] | |||
| | |[[Bandit]] | ||
|align=left|They run into a Yoshi when encountered and try to steal the baby from it. | |||
|[[Welcome to Yoshi Tower!]] | |||
|[[High-Speed Cart Race]] | |||
|- | |- | ||
|[[File:Bumpty-YIDS.png]] | |||
| | |[[Bumpty]] | ||
|align=left|They can bounce back Yoshi when touched, which also does not harm the Yoshi. | |||
|[[Slip Slidin' Away (Yoshi's Island DS)|Slip Slidin' Away]] | |||
|[[Teeth-Chattering Chill Zone]] | |||
|- | |- | ||
|[[File:Burt-YIDS.png]] | |||
| | |[[Burt|Burt Brother]] | ||
| | |align=left|They bounce in a direction and can be defeated only from a ground pound. | ||
|colspan=2|[[Castle of the Big Burt Bros.]] | |||
|- | |- | ||
|[[File:YIDS Blue Crabble.png]] [[File:YIDS Green Crabble.png]] [[File:YIDS Red Crabble.png]] | |||
| | |[[Crabble]] | ||
|align=left|Endurant crabs that require three hits to defeat. | |||
|[[Big Bungee Piranha's Lair]] | |||
|[[A Light in the Dark]] | |||
|- | |- | ||
|[[File:Debull.png]] | |||
| | |[[Debull]] | ||
|align=left|They charge into the direction of Yoshi, though can be stunned by hitting a wall. | |||
|[[Boing! (level)|Boing!]] | |||
|[[Superhard Acrobatics!]] | |||
|- | |- | ||
|[[File:Fleeper.png]] | |||
| | |[[Fleeper]] | ||
|align=left|Acts like a Bandit except jumps onto a Yoshi's back to steal the baby. | |||
|[[Boing! (level)|Boing!]] | |||
|[[Rompin', Stompin' Chomps]] | |||
|- | |- | ||
|[[File:GreenGlove YIDS.png]] | |||
| | |[[Green Glove]] | ||
|align=left|Attacks Yoshi by targeting and throwing eggs at him | |||
|[[Glide Guys Take to the Skies]] | |||
|[[Superhard Acrobatics!]] | |||
|- | |- | ||
|[[File:KoopaTroopaRed YIDS.png]] | |||
| | |[[Koopa Troopa]] | ||
|align=left|They can have their shells eaten and spit right back out. | |||
|[[Glide Guys Take to the Skies]] | |||
|[[At Last, Bowser's Castle!]] | |||
|- | |- | ||
|[[File:KoopaParatroopaRed YIDS.png]] | |||
| | |[[Koopa Paratroopa|Para-Koopa]] | ||
|align=left|They either fly or walk in Yoshi's direction, though can be stomped to become regular Koopas. | |||
|[[Glide Guys Take to the Skies]] | |||
|[[At Last, Bowser's Castle!]] | |||
|- | |- | ||
|[[File:Slugger YIDS.png]] | |||
| | |[[Slugger]] | ||
|align=left|They attack by batting eggs at Yoshi. | |||
|[[Glide Guys Take to the Skies]] | |||
|[[Superhard Acrobatics!]] | |||
|- | |- | ||
|[[File:Snapjaw-YIDS.png]] | |||
| | |[[Snap Jaw]] | ||
|align=left|They climb down [[swinging vine|vines]] slowly while approaching Yoshi. | |||
|[[Yoshi on Stilts]] | |||
|[[Use the Magnet to Get Rich Quick!]] | |||
! | |||
|- | |- | ||
|[[File:YIDS Gray Tap-Tap.png]] [[File:YIDS Orange Tap-Tap.png]] | |||
| | |[[Tap-Tap]] | ||
| | |align=left|The orange type walks off of platforms, while the gray type turns around upon reaching the edge of a platform. | ||
| | |[[Baby Mario and Baby Peach: Dynamic Duo]]<br>(gray)<br>[[Baby Mario and Baby Peach: Dynamic Duo]]<br>(orange) | ||
|[[Quit it Already, Tap-Tap!]]<br>(gray)<br>[[Quit it Already, Tap-Tap!]]<br>(orange) | |||
|- | |- | ||
|[[File:YIDS Grinder.png]] | |||
| | |[[Ukiki]] | ||
| | |align=left|Harmless enemies that run away from Yoshi. | ||
|colspan=2|[[Baby DK, the Jungle King!]] | |||
|- | |- | ||
|[[File:YIDS Beach Koopa.png]] | |||
|[[Unshelled Koopa Troopa|Unshelled Koopa]] | |||
|align= | |align=left|They are Koopa Troopas that are vulnerable to attack or defeat, but they can become one by entering an empty Koopa shell. | ||
| | |colspan=2|[[Bessie Bass's Battleship]] | ||
|- | |- | ||
!style="background:#7edf7e"colspan=5|Airborne enemies | |||
|- | |- | ||
| | |[[File:ClouddropSprite.png]] [[File:CloudDrop YIDS.png]] | ||
| | |[[Cloud Drop]] | ||
|align=left|Small, weak enemies that fly in a set horizontal or vertical pattern. | |||
|[[Glide Guys Take to the Skies]] | |||
|[[The Cave That Never Ends]] | |||
|- | |- | ||
|[[File:Fang YIDS.png]] | |||
| | |[[Fang]] | ||
|align= | |align=left|Enemies that are generally stil at first before trying to fly into Yoshi if he approaches them. | ||
|[[Yikes! Boiling Hot!]] | |||
|[[Find the Number Ball!]] | |||
|- | |- | ||
|[[File:FlightlessGoonie YIDS.png]] | |||
| | |[[Flightless Goonie]] | ||
|align= | |align=left|Fast enemies that are encountered either by themselves or from Yoshi eating a Goonie then spitting it out. | ||
|[[Welcome to Yoshi Tower!]] | |||
|[[Goonie Heights]] | |||
|- | |- | ||
|[[File:Goonie YIDS.png]] | |||
|Shy | |[[Goonie]] | ||
| | |align=left|Birds that drop hazards, such as [[Shy Guy]]s and [[bomb (object)|bomb]]s, and can be spit out to become a Flightless Goonie. | ||
|[[Welcome to Yoshi Tower!]] | |||
|[[The Fort of Moltz the Very Goonie]] | |||
|- | |- | ||
|[[File:Gusty YIDS.png]] | |||
| | |[[Gusty]] | ||
|align=left|Fast enenemies that fly forward in a single direction. | |||
|[[Welcome to Yoshi Tower!]] | |||
|[[At Last, Bowser's Castle!]] | |||
|- | |- | ||
|[[File:YIDS Baron von Zeppelin.png]] | |||
| | |[[Item Balloon]] | ||
|align=left|They generally drop hazards, such as bombs or [[Pokey (projectile)|Pokey]]s, but some drop useful objects like a [[key]]. | |||
|[[Hit the M Blocks!]] | |||
! | |[[At Last, Bowser's Castle!]] | ||
|- | |- | ||
|[[File:Lakitu YIDS.png]] | |||
| | |[[Lakitu]] | ||
|align=left|They ride a [[Lakitu's Cloud|cloud]], throwing Spiny Eggs to attack, though can be stomped for Yoshi to begin using their cloud. | |||
|[[High-Speed Cart Race]] | |||
|[[Yoshi's Island Easter Eggs]] | |||
|- | |- | ||
|[[File:RocketGuy.PNG]] | |||
| | |[[Rocket Guy]] | ||
|align=left|They ride rockets that can take away a life from a Yoshi if he is riding a [[Mini Rocket|rocket]]. | |||
|[[The Fort of Moltz the Very Goonie]] | |||
|[[At Last, Bowser's Castle!]] | |||
|- | |- | ||
|[[File:YIDS Wall Lakitu.png]] | |||
| | |[[Wall Lakitu]] | ||
|align=left|They act like Lakitus except hide in walls instead of clouds. | |||
|[[Big Bungee Piranha's Lair]] | |||
|[[Rock 'n' Fall]] | |||
|- | |- | ||
!style="background:#7edf7e"colspan=5|Haunted House enemies | |||
|- | |- | ||
|[[File:BigBoo YIDS.png]] | |||
|[[Big Boo]] | |||
|align= | |align=left|Behaves just like Boos, but are a larger size. | ||
| | |colspan=2|[[Bessie Bass's Battleship]] | ||
|- | |- | ||
|[[File:Boo YIDS.png]] | |||
| | |[[Boo]] | ||
|align=left|They float at Yoshi only while his back is turned, covering their face otherwise. | |||
|[[Bessie Bass's Battleship]] | |||
|[[Yoshi's Island Easter Eggs]] | |||
|- | |- | ||
|[[File:BooGuy YIDS.png]] | |||
| | |[[Boo Guy]] | ||
| | |align=left|Like Shy Guys, except they float around, and appear from some pipes if Yoshi does not have six eggs. | ||
|colspan=2|[[Hector the Reflector's Haunted House]] | |||
|- | |- | ||
|[[File:FlightlessSkeletonGoonie YIDS.png]] | |||
| | |[[Flightless Skeleton Goonie]] | ||
|align=left|Skeletal enemies that run into Yoshi | |||
|[[Number Ball Special]] | |||
|[[The Cave That Never Ends]] | |||
|- | |- | ||
|[[File:YIDS Invisighoul Chair.png]] [[File:YIDS Invisighoul Flower Pot.png]] [[File:YIDS Invisighoul Table.png]] | |||
| | |[[Invisighoul]] | ||
|align=left|They attack by throwing furniture at Yoshi, though he can turn the thrown furniture into eggs. | |||
|colspan=2|[[Hector the Reflector's Haunted House]] | |||
|- | |- | ||
| | |[[File:YIDS Potted Ghost.png]] [[File:YIDS Upside-down Potted Ghost.png]] | ||
| | |[[Potted Ghost]] | ||
|align=left|They rise from a pot, though hitting the pot with an egg flips it over, turning into a usable platform. | |||
|[[Bessie Bass's Battleship]] | |||
|[[Superhard Acrobatics!]] | |||
|- | |- | ||
|[[File:GhostPiranha YIDS.png]] | |||
| | |[[Polterpiranha]] | ||
|align=left|Ghostly Piranha Plants that fly around, attempting to chew on Yoshi, before spitting him out. | |||
|[[Hector the Reflector's Haunted House]] | |||
|[[The Cave That Never Ends]] | |||
|- | |- | ||
|[[File:SkeletonGoonie YIDS.png]] | |||
| | |[[Skeleton Goonie]] | ||
|align=left|They drop bombs, and can turn into Flightless Skeleton Goonies if stomped. | |||
|[[Rompin', Stompin' Chomps]] | |||
|[[At Last, Bowser's Castle!]] | |||
|- | |- | ||
!style="background:#7edf7e"colspan=5|Giant enemies | |||
|- | |- | ||
|[[File:StompinChomp.png]] | |||
| | |[[Chomp (stomping)|Chomp]] | ||
|align=left|They bounce around either left and right or up and down. | |||
|[[Rompin', Stompin' Chomps]] | |||
|[[The Cave That Never Ends]] | |||
|- | |- | ||
|[[File:YIDS Tall Gargantua Blargg Sprite.png]] | |||
| | |[[Gargantua Blargg (tall)|Gargantua Blargg]] | ||
! | |align=left|Very tall Gargantua Blarggs that can break certain rock platforms. | ||
! | |[[Yikes! Boiling Hot!]] | ||
|[[Number Ball Special]] | |||
|- | |- | ||
|[[File:IncomingChomp YIDS.png]] | |||
| | |[[Incoming Chomp]] | ||
|align= | |align=left|They appear in the background at first before jumping to where Yosh is and plowing through the ground. | ||
| | |colspan=2|[[Rompin', Stompin' Chomps]] | ||
|- | |- | ||
|[[File:ChompShark YIDS.png]] | |||
|[[Big Chain Chomp|Shark Chomp]] | |||
|align=left|They chomp along the ground while chasing Yoshi, and Baby Mario is required to outrun them. | |||
|align= | |colspan=2|[[Rompin', Stompin' Chomps]] | ||
|- | |- | ||
|[[File:TapTapHuge.PNG|150px]] | |||
|[[Super Big Tap-Tap]] | |||
|align=left|Similar to Shark Chomps, except they roll after Yoshi | |||
|align= | |[[Mario's Fleet Feet]] | ||
|[[Quit it Already, Tap-Tap!]] | |||
|} | |} | ||
===Bosses=== | ===Bosses=== | ||
{|class="wikitable"style="text-align:center;width:100%" | |||
{| | !style="background:#7edf7e"colspan=5|Mid-bosses | ||
|- | |- | ||
!style="background:#AFFFAA"|# | |||
!style="background:#AFFFAA"|Sprite | |||
!style="background:#AFFFAA"|Boss | |||
!style="background:#AFFFAA"|Stage | |||
| | !style="background:#AFFFAA"|Description | ||
|- | |- | ||
| | |1 | ||
|[[File:YIDS Burt Bros.png]] | |||
|[[Big Burt Bros.]] | |||
|[[World 1 (Yoshi's Island DS)|World 1]] - [[Castle of the Big Burt Bros.]] | |||
| | |align=left|They attempt to jump on Yoshi, and can be defeated after being hit by six eggs. | ||
|- | |- | ||
| | |2 | ||
|[[File:YIDS Hector the Reflector.png]] | |||
|[[Hector the Reflector]] | |||
|[[World 2 (Yoshi's Island DS)|World 2]] - [[Hector the Reflector's Haunted House]] | |||
| | |align=left|A boss visible from the mirror on the touch screen only, breaking part of it after each hit. The boss requires six hits to defeat. | ||
|- | |- | ||
| | |3 | ||
|[[File:YIDS Bessie Bass Sprite.png]] | |||
|[[Bessie Bass]] | |||
|[[World 3 (Yoshi's Island DS)|World 3]] - [[Bessie Bass's Battleship]] | |||
| | |align=left|Her attack is jumping out of the water while trying to eat Yoshi, though hitting Bessie Bass' lips three times defeats her. | ||
|- | |- | ||
| | |4 | ||
|[[File:YIDS Six-Face Sal.png]] | |||
|[[Six-Face Sal]] | |||
|[[World 4 (Yoshi's Island DS)|World 4]] - [[Six-Face Sal's Fort]] | |||
| | |align=left|Attacks by spitting Pokeys and requires four hits to defeat. | ||
|- | |- | ||
| | |5 | ||
|[[File:Moltz YIDS.png]] | |||
|[[Moltz the Very Goonie]] | |||
|[[World 5 (Yoshi's Island DS)|World 5]] - [[The Fort of Moltz the Very Goonie]] | |||
| | |align=left|A mini-boss who tries to land on Yoshi, and must be ground pounded three times to become defeated. | ||
|- | |- | ||
!style="background:#7edf7e"colspan=5|Big bosses | |||
| | |||
|- | |- | ||
| | |1 | ||
|[[File:YIDS Gilbert the Gooey.png]] | |||
|[[Gilbert the Gooey]] | |||
|[[World 1 (Yoshi's Island DS)|World 1]] - [[Gilbert the Gooey's Castle]] | |||
| | |align=left|A boss springs up and down and swings from side to side. The boss is defeated after destroying every sphere on him. | ||
|- | |- | ||
| | |2 | ||
|[[File:YIDS Big Bungee Piranha.png]] | |||
|[[Big Bungee Piranha]] | |||
|align= | |[[World 2 (Yoshi's Island DS)|World 2]] - [[Big Bungee Piranha's Lair]] | ||
|align=left|Attacks by lunging down at Yoshi and eating him, but is defeated after three hits to the tongue, after exposing it with a [[Chomp Rock]] each time. | |||
|- | |- | ||
| | |3 | ||
|[[File:YIDS Priscilla the Peckish.png]] | |||
|[[Priscilla the Peckish]] | |||
|align= | |[[World 3 (Yoshi's Island DS)|World 3]] - [[Castle of Priscilla the Peckish]] | ||
|align=left|Jumps out of a hole while spitting [[Pokey (projectile)|Pokey]]s at Yoshi. The boss is defeated after three hits. | |||
|- | |- | ||
| | |4 | ||
|[[File:YIDS Big Guy the Stilted.png]] | |||
|[[Big Guy the Stilted]] | |||
|[[World 4 (Yoshi's Island DS)|World 4]] - [[Castle of Big Guy the Stilted]] | |||
| | |align=left|The boss tries to push Yoshi into lava, but must be pushed into lava instead and ground pounded three times to be defeated. | ||
|- | |- | ||
| | |5 | ||
|[[File:Baby Bowser YIDS Sprite.png]] | |||
| | |[[Baby Bowser]] | ||
|rowspan=3|[[World 5 (Yoshi's Island DS)|World 5]] - [[At Last, Bowser's Castle!]] | |||
| | |align=left|Attacks by ground pounding the floor, and can be defeated after being hit by eggs three times. | ||
|- | |||
|6 | |||
|[[File:BowserYIDS.png]] | |||
|[[Bowser]] | |||
|align=left|Jumps around and spits fireballs. Hitting Bowser with Giant Eggs and ground pounding him three times ends this part of the battle. | |||
|- | |||
|7 | |||
|[[File:YIDS Giant Bowser.png]] | |||
|[[Giant Bowser|Bowser (giant)]] | |||
|align=left|A form that Bowser becomes after three hits, and can be defeated after being hit by six Giant Eggs. | |||
|} | |} | ||
==Yoshi's | ==Yoshi's abilities== | ||
===Morph Yoshi=== | ===Morph Yoshi=== | ||
{|class="wikitable"style="text-align:center" | |||
!rowspan=2 style="background:#AFFFAA"|Sprite | |||
{| | !rowspan=2 style="background:#AFFFAA"|Form | ||
!rowspan=2 style="background:#AFFFAA"|Description | |||
!colspan=2 style="background:#AFFFAA"|Levels | |||
! | |- | ||
! | !style="background:#AFFFAA"|Debut | ||
!style="background:#AFFFAA"|Last | |||
|- | |- | ||
|[[File:HelicopterDS.png]] | |||
|[[Helicopter Yoshi|Helicopter]] | |||
| | |align=left|Enables a Yoshi to fly for a short time | ||
|colspan=2|[[Glide Guys Take to the Skies]] | |||
|- | |- | ||
|[[File:Mole TankDS.png]] | |||
|[[Mole Tank]] | |||
| | |align=left|Enables a Yoshi to dig through small openings and crawl on walls. | ||
|[[Baby Mario and Baby Peach: Dynamic Duo]] | |||
|[[Quit it Already, Tap-Tap!]] | |||
|- | |- | ||
|[[File:SubmarineDS.png]] | |||
|[[Submarine Yoshi|Submarine]] | |||
| | |align=left|Enables a Yoshi to swim underwater. | ||
|colspan=2|[[Island of Peril]] | |||
|} | |} | ||
===Vehicles=== | ===Vehicles=== | ||
{|class="wikitable"style="text-align:center" | |||
!rowspan=2 style="background:#AFFFAA"|Sprite | |||
{| | !rowspan=2 style="background:#AFFFAA"|Vehicle | ||
|-style="background: | !rowspan=2 style="background:#AFFFAA"|Description | ||
! | !colspan=2 style="background:#AFFFAA"|Levels | ||
|- | |||
!style="background:#AFFFAA"|Debut | |||
!style="background:#AFFFAA"|Last | |||
|- | |- | ||
|[[File:YIDSKangaroo.png]] | |||
| | |[[Kangaroo]] | ||
|align=left|Though Kangaroo moves automatically, the player can press and hold left or right to determine its direction and distance traveled, or hold {{button|ds|B}} to make it float. | |||
|[[Mario's Fleet Feet]] | |||
|[[Windblown Wilderness]] | |||
|- | |- | ||
|[[File:YIDSStilts.png]] | |||
| | |[[Stilts]] | ||
|align=left|Allows a Yoshi to walk move across hazardous terrain safely. | |||
|[[Yoshi on Stilts]] | |||
|[[Castle of Big Guy the Stilted]] | |||
|- | |- | ||
|[[File:YIDSCart.png]] | |||
| | |[[Mine Cart|Cart]] | ||
|align=left|Moves on a track automatically, with Yoshi only being able to jump (though not flutter), before landing back in the cart or on a higher track. | |||
|[[High-Speed Cart Race]] | |||
|[[Quit it Already, Tap-Tap!]] | |||
|- | |- | ||
|[[File:YIDSSki.png]] | |||
| | |[[Ski]]s | ||
|align=left|They are used to ski in some snow areas. Skis travel only in a single direction, but the Yoshis can still jump while using them. | |||
|[[A Light in the Dark]] | |||
|[[Teeth-Chattering Chill Zone]] | |||
|- | |- | ||
|[[File:YIDSRocket.png]] | |||
| | |[[Rocket]] | ||
|align=left|Entering certain huts allows Yoshi to enter a rocket and blast off. The rocket can be turned by pressing left, or given an extra thrust with {{button|ds|Y}} or {{button|ds|B}}. If the rocket touches anything, Yoshi loses a life instantly. | |||
|{{sort|Fort of Moltz the Very Goonie, The|[[The Fort of Moltz the Very Goonie]]}} | |||
|[[At Last, Bowser's Castle!]] | |||
|} | |} | ||
==Items and objects== | ==Items and objects== | ||
{{ | {{stub|Missing various objects for the sections|section=yes}} | ||
===Blocks=== | ===Blocks=== | ||
{| | {|class="wikitable"style="text-align:center" | ||
!style="background:#AFFFAA"|Sprite | |||
!style="background:#AFFFAA"|Block | |||
! | !style="background:#AFFFAA"|Summary | ||
|- | |- | ||
|[[File:YIDS Egg Block.png]] | |||
| | |[[Egg Block]] | ||
|align=left|Releases [[Yoshi's Egg|eggs]] up until six are present | |||
|- | |- | ||
|[[File:YIDS Expansion Block.png]] | |||
| | |[[Expansion Block]] | ||
|align=left|Grows larger temporarily when hit | |||
|- | |- | ||
|[[File:YIDS Hint Block.png]] | |||
| | |[[Message Block]] | ||
|align=left|Each one tells how to use a certain move. | |||
|- | |- | ||
|[[File:YIDS M Block.png]] | |||
| | |[[M Block]] | ||
|align=left|They appear only if Baby Mario is present, and may contain coins or a seed that forms into a giant sunflower. | |||
|- | |- | ||
|[[File:YIDS Yoshi Block.png]] | |||
| | |[[Yoshi Block]] | ||
|align=left|If Yoshi is under a morph bubble transformation, he can touch one to return to normal and continue progressing through the level. | |||
|} | |} | ||
===Collectibles=== | ===Collectibles=== | ||
{| | {|class="wikitable"style="text-align:center" | ||
!style="background:#AFFFAA"|Sprite | |||
! | !style="background:#AFFFAA"|Item | ||
!style="background:#AFFFAA"|Summary | |||
|- | |- | ||
|[[File:YIDS Character Coin.png]] | |||
| | |[[Character coin]] | ||
|align=left|They are hidden in different levels, each requiring a certain baby to collect, and can unlock harder versions of minigames. | |||
|- | |- | ||
|[[File:YIDSsprite Coin.png]] | |||
| | |[[Coin]] | ||
|align=left|Collecting 100 earns the player an extra life. | |||
|- | |- | ||
|[[File:YIDSsprite Flower.png]] | |||
| | |[[Smiley Flower|Flower]] | ||
|align=left|Five appear in each level, and are used only to increase the score at the end of the level. | |||
|- | |- | ||
|[[File:YIDS Red Coin.png]] | |||
| | |[[Red Coin|Red coin]] | ||
|align=left|They have the same purpose as flowers, except twenty red coins appear in each level. | |||
|- | |- | ||
|[[File:YIDSsprite Star.png]] | |||
| | |[[Star (Yoshi's Island series)|Star]]s | ||
|align=left|Each star represents a second of the baby being safe inside of a bubble if it has been knocked off of Yoshi's back. One can have up to thirty stars in a level, each also contributing to the score at the end. | |||
|} | |} | ||
===Eggs=== | ===Eggs=== | ||
{| | {|class="wikitable"style="text-align:center" | ||
|-style="background: | !style="background:#AFFFAA"|Sprite | ||
! | !style="background:#AFFFAA"|Egg | ||
! | !style="background:#AFFFAA"|Summary | ||
|- | |||
|[[File:YIDS Red Egg.png]] | |||
|[[Red Egg]] | |||
|align=left|Functions similarly to a Yoshi's Egg but can rebound off of a wall only once. Two stars can be revealed if a Red Egg hits an enemy. | |||
|- | |||
|[[File:YIDS Yellow Egg.png]] | |||
|[[Yellow Egg]] | |||
|align=left|Functions similarly to a Yoshi's Egg but can rebound off walls only twice, becoming a Red Egg after the first bounce. Throwing a Yellow Egg at an enemy makes a coin appear. | |||
|- | |||
|[[File:YIDS Yoshi Egg.png]] | |||
|[[Yoshi's Egg]] | |||
|align=left|These are created from either swallowing enemies or from [[Egg Block]]s, but only six Yoshi's Eggs can be present at once. Yoshi's Eggs can defeat enemies, activate Winged Clouds, hit switches, and destroy gravel. With Baby Mario, Yoshi's Eggs can be rebounded off walls three times, changing from green to yellow to lastly red. | |||
|} | |||
===Hazards=== | |||
{|class="wikitable"style="text-align:center" | |||
!rowspan=2 style="background:#AFFFAA"|Sprite | |||
!rowspan=2 style="background:#AFFFAA"|Hazard | |||
!rowspan=2 style="background:#AFFFAA"|Description | |||
!colspan=2 style="background:#AFFFAA"|Levels | |||
|- | |- | ||
!style="background:#AFFFAA"|Debut | |||
| | !style="background:#AFFFAA"|Last | ||
|- | |- | ||
|[[File:YIDS Big Guy the Stilted screenshot.png|150px]] | |||
| | |[[Lava]] | ||
|align=left|Molten rock that costs Yoshi a life immediately when touched. | |||
|[[Castle of the Big Burt Bros.]] | |||
|[[Castle of Big Guy the Stilted]] | |||
|- | |- | ||
|align= | |[[File:No image.png]] | ||
| | |Lava fall | ||
|align=left|Lava that flows out of a pipe | |||
|colspan=2|[[Castle of Big Guy the Stilted]] | |||
|- | |||
|[[File:BigBurtBros.png|150px]] | |||
|[[Spinner|Spinning Spikes]] | |||
|align=left|Giant, slow-moving flails that are usually operated by several [[Shy Guy]]s. | |||
|[[Castle of the Big Burt Bros.]] | |||
|[[Gilbert the Gooey's Castle]] | |||
|- | |||
|[[File:No image.png]] | |||
|Waterfall | |||
|align=left|Water that flows out of a pipe | |||
|colspan=2|[[Big Bungee Piranha's Lair]] | |||
|} | |} | ||
===Miscellaneous=== | ===Miscellaneous=== | ||
{| | {|class="wikitable"style="text-align:center" | ||
!style="background:#7edf7e"colspan=3|Items | |||
|- | |- | ||
| | !style="background:#AFFFAA"|Sprite | ||
| | !style="background:#AFFFAA"|Name | ||
!style="background:#AFFFAA"|Description | |||
|- | |- | ||
|[[File:YIDSsprite Key.png]] | |||
| | |[[Key]] | ||
|align=left|Single-use items that can unlock any locked doors. | |||
|- | |- | ||
|[[File:YIDS Morph Bubble.png]] | |||
| | |[[Morph bubble]] | ||
|align=left|Transforms Yoshi into the vehicle depicted inside | |||
|- | |- | ||
|[[File:YIDS Super Star.png]] | |||
| | |[[Super Star]] | ||
|align=left|Usable only by Baby Mario, a Super Star transforms him into [[Superstar Mario]] temporarily | |||
|- | |- | ||
!style="background:#7edf7e"colspan=3|Objects | |||
|- | |- | ||
|[[File:Bouncy.png]] | |||
| | |[[Bouncy]] | ||
|align=left|Giant pink spheres that bounce Yoshis around | |||
|- | |- | ||
|[[File:YIDS Crate.png]] | |||
| | |[[Crate]] | ||
|align=left|Usable and pushable platforms that may contain either stars, coins, or a key when ground pounded. | |||
|- | |- | ||
|[[File:YIDS Beanstalk.png]] | |||
| | |[[Giant sunflower]] | ||
|align=left|It grows from a seed, which can be revealed from M Blocks or Winged Clouds. Once the giant sunflower has grown fully, Yoshi can jump from its leaves to go upward. | |||
|- | |- | ||
|[[File:YIDS GOAL! Ring.png]] | |||
| | |[[Goal Ring|Goal roulette]] | ||
|align=left|A Goal that appears at the end of every level except fortresses and castles. | |||
|- | |- | ||
|[[File:Magnet Block YIDS sprite.png|32px]] | |||
| | |[[Magnet Block]] | ||
|align=left|A giant metal block that Baby Wario can move with his magnet. | |||
|- | |- | ||
|[[File:Magnet Platform.PNG|50px]] | |||
| | |[[Magnet Platform]] | ||
|align=left|Reacts to Baby Wario's magnet by either raising or lowering. | |||
|- | |- | ||
|align= | |[[File:YIDS Middle Ring.png]] | ||
| | |[[Checkpoint Ring|Middle Ring]] | ||
|align=left|A [[checkpoint]] in each level that also adds ten stars when activated. | |||
|- | |||
|[[File:YIDS Stork Stop.png]] | |||
|[[Stork Stop]] | |||
|align=left|Activating it summons the [[stork]], allowing Yoshi to change which baby it is carrying. | |||
|- | |||
|[[File:YIDS Winged Cloud.png]] | |||
|[[Winged Cloud]] | |||
|align=left|They can be hit with an egg for a variety of effects, such as forming a pathway or releasing either coins, stars, a switch, or an extra life. Some function like switches. | |||
|} | |} | ||
==Bonus Challenges== | ==Bonus Challenges== | ||
Any [[Smiley Flower|flower]]s | Any [[Smiley Flower|flower]]s collected appear in the [[Goal Ring|goal roulette]] at the end of a level, and if a goal roulette stops on a flower after spinning, the Yoshi can play a mini-game to possibly earn 1-Ups. These are the Mini-games that may be played if a Yoshi gets a flower in the goal roulette, and they are unlockable for play from the World Map screen if at least 700 points are obtained in a world. | ||
These are the Mini-games that may | |||
*[[Flip Cards]] | *[[Flip Cards]] | ||
*[[Scratch and Match (minigame)|Scratch and Match]] | *[[Scratch and Match (minigame)|Scratch and Match]] | ||
| Line 1,090: | Line 1,171: | ||
*In both [[Watch Out For Lakitu]] and [[Spear Guys' Village Found!]], an [[Itsunomanika Heihō]] can be encountered in a bush just before the [[Goal Ring|goal roulette]]. | *In both [[Watch Out For Lakitu]] and [[Spear Guys' Village Found!]], an [[Itsunomanika Heihō]] can be encountered in a bush just before the [[Goal Ring|goal roulette]]. | ||
*The first mid-boss, [[Big Burt Bros.]], is a dual version of [[Burt the Bashful]], the first mid-boss in the original game. | *The first mid-boss, [[Big Burt Bros.]], is a dual version of [[Burt the Bashful]], the first mid-boss in the original game. | ||
*The first world boss is a blob-like creature | *The first world boss ([[Salvo the Slime]]/[[Gilbert the Gooey]]) is a blob-like creature, parts of whom can be eaten by Yoshi. | ||
*The second mid-boss ([[Bigger Boo]]/[[Hector the Reflector]]) is a ghost whose size changes throughout the battle. | |||
*The second mid-boss is a ghost whose size changes throughout the battle. | *The third mid-boss ([[Froggy]]/[[Bessie Bass]]) is an aquatic enemy capable of eating Yoshi, and both fights require Yoshi to fire eggs at a part of the mid-boss' gastrointestinal tract directly above him. | ||
*The third mid-boss is an aquatic enemy capable of eating Yoshi. | *The jungle world boss ([[Naval Piranha]]/[[Big Bungee Piranha]]) is a [[Piranha Plant]], and [[Nipper Plant]]s are present during the battle. Both bosses also turn gray and crumble into dust upon defeat. | ||
*The jungle world boss is a [[Piranha Plant]], and [[Nipper Plant]]s are present during the battle. | *The fourth World Boss ([[Hookbill the Koopa]]/[[Big Guy the Stilted]]) is a giant variation of an enemy that appeared in earlier levels. | ||
*In the fifth world, one of the bosses that Yoshi fights ([[Raphael the Raven]]/[[Moltz the Very Goonie]]) is a bird enemy, and the battle takes place in the sky rather than an enclosed environment. | |||
*The fourth World Boss is a giant variation of an enemy that appeared in earlier levels. | *One boss (Hookbill the Koopa/[[Bowser]]) is a giant [[Koopa (species)|Koopa]] who Yoshi defeats by throwing eggs at his face to flip him on his back before ground-pounding his belly. | ||
*In the fifth world, | *At least one world boss ([[Roger the Potted Ghost]]/[[Priscilla the Peckish]] & [[Six-Face Sal]]) is a completely unique species, not based off of any particular enemy in the game. Incidentally, ''Yoshi's Island DS'' introduces [[Potted Ghost|a regular enemy]] based on the unique boss from the first game. | ||
* | *Multiple similarities exist with the final normal levels of each game: | ||
*The first part of each final battle is against [[Baby Bowser]], who creates shockwaves as an attack, and the last is against a giant version of [[Bowser]], age unconsidered, who uses falling boulders and fireballs as attacks. | **The final level is set in [[Bowser's Castle]], and is explored by Green Yoshi instead of Blue Yoshi. | ||
**Both levels start outside the castle walls and require Yoshi to clear through a flock of [[Skeleton Goonie]]s and use an aircraft-themed power to get inside. | |||
**Both levels require Yoshi to choose one of several different pathways, each with their own gimmick. | |||
**One path requires Yoshi to flee from a giant golden [[Tap-Tap]] in a volcanic cavern. | |||
**The first part of each final battle is against [[Baby Bowser]], who creates shockwaves as an attack, and the last is against a giant version of [[Bowser]], age unconsidered, who uses falling boulders and fireballs as attacks. | |||
**Both final battles require the use of [[Giant Egg]]s carried into the field by [[Item Balloon]]s, and Bowser's castle is destroyed during the transition to the final phase of both battles. | |||
==References to other games== | ==References to other games== | ||
*''[[Donkey Kong Country]]'': [[ | *''[[Donkey Kong Country]]'': [[DK's Tree House]] appears as it does in that game. | ||
*''[[Super Mario World 2: Yoshi's Island]]'': The game is the sequel to this game, and also takes place on the same titular island, and most of the enemy sprites are from this game, albeit with updated shading. Its events are mentioned at the start of the game. | *''[[Super Mario World 2: Yoshi's Island]]'': The game is the sequel to this game, and also takes place on the same titular island, and most of the enemy sprites are from this game, albeit with updated shading. Its events are mentioned at the start of the game. | ||
**''[[Yoshi's Island: Super Mario Advance 3]]'': Each world has a secret course. | **''[[Yoshi's Island: Super Mario Advance 3]]'': Each world has a secret course. | ||
| Line 1,111: | Line 1,196: | ||
==References in later games== | ==References in later games== | ||
*''[[Super Smash Bros. Brawl]]'': The game's "above ground" theme has been remastered and included in this game, and has been given the title "Wildlands" | *''[[Super Smash Bros. Brawl]]'': The game's "above ground" theme has been remastered and included in this game, and has been given the title "Wildlands." The [[Yoshi's Island (Super Smash Bros. Brawl)|Yoshi's Island]] stage is based on ''Yoshi's Island DS'''s graphics. | ||
*''[[Mario Super Sluggers]]'': [[ | *''[[Mario Super Sluggers]]'': [[Baby DK]] returns, along with all of the other babies, with the exception of [[Baby Wario]] and [[Baby Bowser]]. [[Wario]] uses his baby counterpart's magnet in Challenge Mode. | ||
*''[[New Super Mario Bros. Wii]]'': [[Kamek]] turns Bowser into a giant for the final battle. | *''[[New Super Mario Bros. Wii]]'': [[Kamek]] turns Bowser into a giant for the final battle. | ||
*''[[Yoshi's New Island]]'': This game continues the events told before ''Yoshi's Island DS''. | |||
*''[[Super Smash Bros. Ultimate]]'': Baby Mario (Superstar Mario) and Crazee Dayzee appear as spirits, using their artwork from ''Yoshi's Island DS''. | *''[[Super Smash Bros. Ultimate]]'': Baby Mario (Superstar Mario) and Crazee Dayzee appear as spirits, using their artwork from ''Yoshi's Island DS''. | ||
*''[[Dr. Mario World]]'': [[Baby Wario]] returns as a playable doctor, and he uses his magnet from ''Yoshi's Island DS'' as his special skill. | *''[[Dr. Mario World]]'': [[Baby Wario]] returns as a playable doctor, and he uses his magnet from ''Yoshi's Island DS'' as his special skill. | ||
| Line 1,119: | Line 1,205: | ||
==Staff== | ==Staff== | ||
{{main|List of Yoshi's Island DS staff}} | {{main|List of Yoshi's Island DS staff}} | ||
''Yoshi's Island DS'' was developed by the company [[Artoon]], instead of [[Nintendo Entertainment Analysis and Development|Nintendo EAD]] like other ''Yoshi'' games were. The game was directed by Hidetoshi Takeshita and the lead programmer was Yuki Hatakeyama. [[Takashi Tezuka]], served as one of the senior producers of the game, with Naoto Ohshima being the other one. | ''Yoshi's Island DS'' was developed by the company [[Artoon]], instead of [[Nintendo Entertainment Analysis and Development|Nintendo EAD]] like other ''Yoshi'' games were. The game was directed by Hidetoshi Takeshita and the lead programmer was Yuki Hatakeyama. [[Takashi Tezuka]], served as one of the senior producers of the game, with [[Sonic the Hedgehog]] co-creator Naoto Ohshima being the other one. | ||
==Reception== | ==Reception== | ||
''Yoshi's Island DS'' received mainly positive reviews from critics. It was praised for having similar gameplay to its predecessor, as well as the artwork, although the gameplay's being too similar to its predecessor is frequently cited. Some critics also considered it the best portable ''Yoshi'' game released. | ''Yoshi's Island DS'' received mainly positive reviews from critics. It was praised for having similar gameplay to its predecessor, as well as the artwork, although the gameplay's being too similar to its predecessor is frequently cited. Some critics also considered it the best portable ''Yoshi'' game released. | ||
The game has been praised for its design.<ref>{{cite|author=Harris, Craig|date=November 14, 2006|url=ign.com/articles/2006/11/14/yoshis-island-ds-review|title=Yoshi's Island DS Review|publisher=IGN|language=en|accessdate=October 30, 2024}}</ref> He has described the game more of a nostalgic reminder of ''Super Mario World 2: Yoshi's Island'' rather than an advancement of the series. As a result, he suggested that the designs stuck too close to original formula, ruining surprises for veteran players of ''Yoshi's Island''. He praised the different babies, although he felt that Baby Wario "was a last-minute edition and not tested properly". Although he noted that the dual screen gave the players a bigger view, but criticized the blind spot between the dual screens. | |||
Tom Bramwell of Eurogamer was reluctant to praise ''Yoshi's Island DS'' in the same way as ''Super Mario World 2: Yoshi's Island'', as he considered the game to be a "distended version of Yoshi". He acknowledges Artoon's effort in the game and the variety of babies and levels. He also criticizes the developers' abuse of the blind spot between the two screens and that the developers failed to establish trust for the player to explore. He finally stated that "Artoon is cribbing from the same notes. It's a shame, because there are times when you catch glimpses of the sort of thing the Japanese team is really capable of[...]." | Tom Bramwell of Eurogamer was reluctant to praise ''Yoshi's Island DS'' in the same way as ''Super Mario World 2: Yoshi's Island'', as he considered the game to be a "distended version of Yoshi". He acknowledges Artoon's effort in the game and the variety of babies and levels. He also criticizes the developers' abuse of the blind spot between the two screens and that the developers failed to establish trust for the player to explore. He finally stated that "Artoon is cribbing from the same notes. It's a shame, because there are times when you catch glimpses of the sort of thing the Japanese team is really capable of[...]." | ||
''Yoshi's Island DS'' was placed 46 on Gamesradar's Top 50 DS games. The small feature called it a fresh and new experience, a beautiful 2D world, and that they'd never tire of playing the game.<ref> | ''Yoshi's Island DS'' was placed 46 on Gamesradar's Top 50 DS games. The small feature called it a fresh and new experience, a beautiful 2D world, and that they'd never tire of playing the game.<ref>{{cite|author=GamesRadar Staff|date=September 15, 2012|deadlink=y|archive=web.archive.org/web/20120519140521/http://www.gamesradar.com/best-ds-games|publisher=GamesRadar|language=en|title=Best DS Games|accessdate=October 30, 2024}}</ref> | ||
{| class="wikitable | {|class="wikitable" style="width:100%;text-align:center" | ||
!colspan="4"style="font-size:120%; text-align: center; background-color:silver"|Reviews | !colspan="4"style="font-size:120%;text-align:center;background-color:silver"|Reviews | ||
|-style="background-color:#E6E6E6;" | |-style="background-color:#E6E6E6;" | ||
|Release | |Release | ||
| Line 1,162: | Line 1,248: | ||
|"''Yoshi's Island DS might be too similar to the first game, but that's not entirely a bad thing - the original was amazing and so is this. One of the best platformers on the DS.''" | |"''Yoshi's Island DS might be too similar to the first game, but that's not entirely a bad thing - the original was amazing and so is this. One of the best platformers on the DS.''" | ||
|- | |- | ||
!colspan="4"style="background-color:silver; font-size:120%; text-align: center;"|Aggregators | !colspan="4"style="background-color:silver;font-size:120%;text-align:center;"|Aggregators | ||
|-style="background-color:#E6E6E6;" | |-style="background-color:#E6E6E6;" | ||
|colspan=2|Compiler | |colspan=2|Compiler | ||
| Line 1,173: | Line 1,259: | ||
|colspan=2|[https://www.gamerankings.com/ds/933006-yoshis-island-ds/index.html 81.15%] | |colspan=2|[https://www.gamerankings.com/ds/933006-yoshis-island-ds/index.html 81.15%] | ||
|} | |} | ||
===Sales=== | ===Sales=== | ||
In its first week in Japan, the game sold approximately 300,000 copies. As of March 31, 2008 ''Yoshi's Island DS'' has sold 2.91 million copies worldwide.<ref> | In its first week in Japan, the game sold approximately 300,000 copies. As of March 31, 2008, ''Yoshi's Island DS'' has sold 2.91 million copies worldwide.<ref>{{cite|url=www.nintendo.co.jp/ir/pdf/2008/080425e.pdf#page=6|format=PDF|title=Financial Results Briefing for Fiscal Year Ended March 2008|publisher=Nintendo Co., Ltd.|language=en|page=6|accessdate=October 30, 2024}}</ref> | ||
==Media== | ==Media== | ||
{{more | {{media missing|more=yes|section=yes|At least 2 or 3 more tracks}} | ||
{{media table | {{media table | ||
|file1=Yoshi island ds title theme.oga | |file1=Yoshi island ds title theme.oga | ||
| Line 1,192: | Line 1,278: | ||
BabyMario YIDS.png|[[Baby Mario]] and [[Yoshi]] | BabyMario YIDS.png|[[Baby Mario]] and [[Yoshi]] | ||
Baby Peach on Yoshi YIDS artwork.jpg|[[Baby Peach]] and [[Yoshi (species)|Pink Yoshi]] | Baby Peach on Yoshi YIDS artwork.jpg|[[Baby Peach]] and [[Yoshi (species)|Pink Yoshi]] | ||
Baby DK on Yoshi YIDS artwork.jpg|[[Baby DK]] and [[Yoshi (species)|Red Yoshi]] | |||
Baby Wario on Yoshi YIDS artwork.jpg|[[Baby Wario]] and [[Yoshi (species)|Light Blue Yoshi]] | Baby Wario on Yoshi YIDS artwork.jpg|[[Baby Wario]] and [[Yoshi (species)|Light Blue Yoshi]] | ||
Baby Bowser on Yoshi YIDS artwork.jpg|[[Baby Bowser]] and [[Yoshi (species)|Yellow Yoshi]] | Baby Bowser on Yoshi YIDS artwork.jpg|[[Baby Bowser]] and [[Yoshi (species)|Yellow Yoshi]] | ||
| Line 1,209: | Line 1,295: | ||
==Names in other languages== | ==Names in other languages== | ||
{{foreign names | {{foreign names | ||
| | |Jpn=ヨッシーアイランドDS | ||
| | |JpnR=Yosshī Airando DS | ||
| | |JpnM=Yoshi Island DS | ||
|Spa=''Yoshi's Island DS'' | |Spa=''Yoshi's Island DS'' | ||
|Fre=''Yoshi's Island DS'' | |Fre=''Yoshi's Island DS'' | ||
|Kor=요시 아일랜드 DS | |Kor=요시 아일랜드 DS | ||
|KorR=Yosi Aillaendeu DS | |KorR=Yosi Aillaendeu DS | ||
|KorM=Yoshi Island DS | |KorM=Yoshi Island DS | ||
|ChiT=耀西之島DS<ref> | |ChiT=耀西之島DS | ||
|ChiTC=<ref>{{cite|deadlink=y|archive=web.archive.org/web/20190313011008/http://www.nintendo.tw/ds/ds_software2007.htm|title=Nintendo DS 遊戯軟體|publisher=Nintendo Taiwan|language=zh-hant|accessdate=October 30, 2024}}</ref> | |||
|ChiTR=Yàoxī zhī Dǎo DS | |ChiTR=Yàoxī zhī Dǎo DS | ||
|ChiTM=Yoshi's Island DS | |ChiTM=Yoshi's Island DS | ||
}} | }} | ||
== | ==Notes== | ||
*The box art shows [[Baby Bowser]] riding Yellow Yoshi, and [[Baby Wario]] riding Light Blue Yoshi; they do not ride these Yoshis in the game other than when Baby Wario is in the final boss fight, however. This is because the babies are only playable in the last four levels on the world map, as opposed to the Yoshis they ride, which are in the first four. | *The box art shows [[Baby Bowser]] riding Yellow Yoshi, and [[Baby Wario]] riding Light Blue Yoshi; they do not ride these Yoshis in the game other than when Baby Wario is in the final boss fight, however. This is because the babies are only playable in the last four levels on the world map, as opposed to the Yoshis they ride, which are in the first four. | ||
*The instruction booklet erroneously states [[Baby DK]] is the only baby with more than one special ability, as [[Baby Mario]] has three abilities. | |||
==References== | ==References== | ||
| Line 1,232: | Line 1,318: | ||
==External links== | ==External links== | ||
{{NIWA|StrategyWiki=1}} | {{NIWA|StrategyWiki=1}} | ||
{{TCRF}} | |||
*[https://web.archive.org/web/20071011023230/http://yoshisisland.nintendods.com/ North American website] | *[https://web.archive.org/web/20071011023230/http://yoshisisland.nintendods.com/ North American website] | ||
*[https://www.nintendo.co.uk/Games/Nintendo-DS/Yoshi-s-Island-DS-273630.html European website] | *[https://www.nintendo.co.uk/Games/Nintendo-DS/Yoshi-s-Island-DS-273630.html European website] | ||
*[https://web.archive.org/web/20190823162124/ | *[https://web.archive.org/web/20190823162124/http://www.nintendo.co.kr/DS/soft/yoshi/main.php Korean website] | ||
*[https://www.nintendo.co.jp/ds/aywj/index.html Japanese website] | *[https://www.nintendo.co.jp/ds/aywj/index.html Japanese website] | ||
*[https://m1.nintendo.net/docvc/NTR/JPN/AYWJ/AYWJ_J.pdf Japanese | *[https://m1.nintendo.net/docvc/NTR/JPN/AYWJ/AYWJ_J.pdf Japanese instruction booklet] | ||
*[https://www.nintendo.com/eu/media/downloads/games_8/emanuals/nintendo_ds_21/Manual_NintendoDS_YoshisIslandDS_EN.pdf European English instruction booklet] | |||
*[https://cdn02.nintendo-europe.com/media/downloads/games_8/emanuals/nintendo_ds_21/Manual_NintendoDS_YoshisIslandDS_ES.pdf European Spanish instruction booklet] | |||
*[https://www.nintendo.com/eu/media/downloads/games_8/emanuals/nintendo_ds_21/Manual_NintendoDS_YoshisIslandDS_FR.pdf European French instruction booklet] | |||
{{YIDS}} | {{YIDS}} | ||
{{Yoshi games}} | {{Yoshi games}} | ||
Latest revision as of 22:49, March 6, 2025
| Yoshi's Island DS | |||||||||||||
|---|---|---|---|---|---|---|---|---|---|---|---|---|---|
 For alternate box art, see the game's gallery. | |||||||||||||
| Developer | Artoon | ||||||||||||
| Publisher | Nintendo | ||||||||||||
| Platform(s) | Nintendo DS, Virtual Console (Wii U) | ||||||||||||
| Release date | Nintendo DS: Virtual Console (Wii U): | ||||||||||||
| Language(s) | English French (France) German Spanish (Spain) Italian Japanese Korean | ||||||||||||
| Genre | Platformer | ||||||||||||
| Rating(s) |
| ||||||||||||
| Mode(s) | Single player | ||||||||||||
| Format | Wii U: Nintendo DS:
Game Card
| ||||||||||||
| Input | Wii U: Nintendo DS:
| ||||||||||||
| Serial code(s) | |||||||||||||
Yoshi's Island DS is a 2D platformer for the Nintendo DS. Being the second original installment in the Yoshi's Island series, the game was released in North America on November 13, 2006; in Australia on November 23, 2006; in Europe on December 1, 2006; in Japan and Taiwan on March 8, 2007; and in South Korea on November 8, 2007. It is the sequel to Super Mario World 2: Yoshi's Island and tells the story of the Yoshis rescuing all the babies in the world that Kamek and the Toadies have kidnapped in search for the star children, a group of seven babies who possess powerful stars in their hearts. This is the first Yoshi's Island game to be developed by a third party studio, Artoon, instead of by Nintendo EAD.
While the game is heavily derivative from Super Mario World 2: Yoshi's Island, including general gameplay, themes, and graphics, the game primarily differentiates itself from its predecessor by taking advantage of the Nintendo DS's dual screen to display levels while introducing multiple babies to carry on a Yoshi's back, all of whom special abilities that are required to make it through levels. Besides Baby Mario, there are a few other babies whom the Yoshis can carry during their adventure, and of them, Baby DK and Baby Wario make their first appearance in Yoshi's Island DS overall.
A third original game, Yoshi's New Island, was released in 2014 for the Nintendo 3DS and continues the story told before Yoshi's Island DS. The game was rereleased for the Wii U's Virtual Console in North America on April 1, 2015; in Japan on April 8, 2015; in Europe on May 7, 2015; and in Australia on May 8, 2015.
Story[edit]


From the instruction booklet:
Baby Luigi has been kidnapped!
Our adventure begins one sunny day on Yoshi's Island. Yoshi is out enjoying the day with a leisurely stroll when, all of a sudden, two babies drop out of the sky. One of them looks very familiar to Yoshi. With a forlorn look on his face, the baby just gazes longingly at a mysterious castle that has appeared in the sky. Yoshi wonders if the castle holds other babies.
Once again, it's up to the Yoshi clan to save the day. This time, the stork is coming with them too.
A new journey begins. Can the Yoshis and babies triumph over Kamek and save Baby Luigi?
Kamek and his army of Toadies steal all of the babies in the Mushroom Kingdom, as well as in other nearby areas. The Toadies take the babies to Bowser's Castle, but the stork comes in and attacks two Toadies, making them drop the babies they are carrying. The two babies land on Yoshi's Island and are revealed to be Baby Mario and Baby Peach.
The Yoshis find the babies and decide to help them. They figure out that Baby Mario, once again, wants to save Baby Luigi and the other babies from Kamek and his Toadies. The Yoshis take the babies with them and go to rescue the kidnapped babies. Later on in the adventure, after Gilbert the Gooey is defeated, a group of monkeys kidnaps Baby Peach. The Yoshis and Baby Mario find another baby, Baby DK, who was left behind when the Toadies were kidnapping all the other babies. With the help of Baby DK, Yoshi is able to rescue Baby Peach from the monkeys. Baby DK joins the team when the monkeys are defeated.
Promptly after defeating Bessie Bass on a battleship, the Yoshis and the babies are swept away by a tidal wave in a storm. They eventually find Baby Wario, who is also left behind. Baby Wario then decides to join the party.
When Priscilla the Peckish is defeated, Baby Wario decides to join a team of Bandits in hope of getting money. Meanwhile, after the Yoshis defeat Six-Face Sal, it is revealed that future Bowser and future Kamek are the ones kidnapping the babies and that they are looking for the seven star children. The star children are young children that have magical stars in them. If one collects all the stars, then they become the ruler of the universe. Kamek kidnaps Baby Bowser (while Kamek of the past tries to stop him), and Baby Bowser and Bowser get into a fight, ending with Bowser causing his infant self to fall out of a window of the castle. Baby Bowser lands on Yoshi's back and joins their team, although they are worried that he might attack them.
Baby Bowser does not stay for the rest of the adventure. When Big Guy the Stilted is defeated, he leaves with Kamek, who then returns to Bowser's Castle and uses a Crystal Ball to check every baby they have kidnapped (with the exception of Baby Luigi, who hides from it) to determine if they are star children, which they are not. Bowser becomes furious, and he sends the Toadies to keep looking for more babies.
The team finally arrives at Bowser's Castle where Baby Wario and Baby Bowser are arguing over who gets to keep some treasure. They then notice the Yoshis and help them travel through the castle. When they finally get to the top of the castle, however, Baby Bowser tells the Yoshis to leave. When they do not leave, Baby Bowser thinks Yoshi is there to steal his treasure. Baby Bowser fights Yoshi, but Yoshi defeats him.
Bowser then comes in the room and is angry at what Yoshi did to his younger self. He then fights Yoshi, but gets defeated just like his younger self. Kamek then uses magic to help Bowser become giant. The four babies with four Yoshis fight against the Giant Bowser using Giant Eggs and are eventually able to defeat him. Kamek escapes when Bowser is defeated, with four Toadies carrying Bowser right behind him. Baby Bowser decides to escape with Bowser and Kamek, and holds on to his broomstick.
The Yoshis save all the kidnapped babies, and the storks take all the kidnapped babies back to their homes, except for Baby Wario, who gets the Stork to land so he can play on a raft holding the treasure stolen from Bowser's Castle. A flying rock hits Kamek's broomstick, and Baby Bowser lets go and falls down right in his treasure. Baby Wario and Baby Bowser start arguing about who gets to keep the treasure again.
It is then revealed that the seven star children are Baby Mario, Baby Luigi, Baby Peach, Baby DK, Baby Wario, Baby Bowser, and a newborn Baby Yoshi, who hatches from a Yoshi's Egg at the end of the game.
Gameplay[edit]
Gameplay typically consists of platforming throughout the game's levels, where a Yoshi needs to navigate through the various obstacles in order to reach the Goal roulette. Yoshis have various means of dealing with the obstacles, with basic actions being running, jumping either to dodge obstacles or defeat enemies, and Ground Pounding harder to defeat enemies or posts. Yoshis can Flutter Jump repeatedly in the air to increase distance and slow down descent speed. Unique to Yoshis and their primary method of dealing with enemies and obstacles are their extendable, sticky tongues, which allows them to swallow most enemies and turn them into essential, versatile projectiles: Yoshi Eggs. Eggs have a wide variety of purposes, whether they activate Winged Clouds, defeat enemies that cannot be eaten or stomped on, open up traps and obstacles, retrieve coins, reveal hidden Winged Clouds, and more. Eggs by default come in green, changes color when bouncing off walls and the color indicates how many times eggs bounce off walls before they are destroyed. Green eggs can bounce off walls three times, Yellow Eggs two, and Red Eggs instantly get destroyed when they touch a wall. If a Yellow or Red Egg hits an enemy, it spawns coins or a star respectively. Yoshis can retrieve bounced eggs by using their tongue at them before they get destroyed, though some items such as colored Egg Blocks can give Yoshis different colored eggs. Yoshis can carry up to six eggs, and eggs get discarded if a Yoshi creates more eggs. In addition, Yoshis can obtain eggs by hitting Egg Blocks or retrieving them from Egg Plants. Like in Super Mario World 2: Yoshi's Island, collecting every Red Coin, Star, and Smiley Flower is required for 100% completion.
Yoshi's Island DS retains the health system in Super Mario World 2: Yoshi's Island. When a Yoshi is hit by an enemy or an obstacle, the baby is knocked loose from his back, crying, and the star power–the source of the protective bubble that keeps the Toadies from taking the baby–goes down by one star per second. If that number goes down to zero, Toadies take away the baby and a life is lost. The Yoshi, however, still has a small amount of time to recover the baby even after the Toadies have grabbed. The Yoshi can rescue the baby by touching the bubble with its body or its tongue. If the Yoshi hits the bubble with an egg, the bubble gets knocked down, making the baby easier to reach. The star power starts at ten in each level. If a baby is recovered with less than ten stars, the star power slowly increases to ten. Additionally, groups of five stars can be found in Winged Clouds and crates, and goal roulettes give twenty additional star power, allowing the star power to max at thirty. Remaining star power also counts toward the score at the completion of the level. Although Yoshis cannot be defeated in normal circumstances, they instantly lose a life if they touch spikes, lava, fall into bottomless pits, get crushed, or eaten by Lunge Fish or Boss Basses.
A Yoshi can morph into several certain types of vehicles using a Morph Bubble. Yoshi can return to his regular self by either touching a Yoshi Block or waiting for time to expire. Touching the Yoshi Block is required to progress, as Yoshi is directed back to the Morph Bubble otherwise. Yoshi cannot attack while in a Morph Bubble form, and if he is hit, Yoshi is stunned and knocked a certain direction.
New to Yoshi's Island DS is the addition of extra babies and Stork Stops, who affect the gameplay in various ways. By default, Yoshis carry Baby Mario, who retains gameplay most similar to the original entry and allows Yoshis to hit M Blocks. At Stork Stops, Yoshis can swap out babies once they have been unlocked. Carrying Baby Peach, for example, allows Yoshis to flutter jump further and ride winds thanks to the use of her parasol while Baby DK allows Yoshis to climb vines, explode eggs, and use the DK Dash Attack to charge through rocks and enemies; however, Baby Peach causes a Yoshi to lose the ability to bounce eggs while Baby DK is heavier to carry and thus reduces flutter jump distance. Regular enemies can appear in the Island Museum after being hit by an egg.
Controls[edit]

From the Options menu, players can change the controls of the game. The player can choose from two sets of controls: ![]()
![]()
![]()
![]() and
and ![]()
![]()
![]()
![]() , and two modes: Hasty and Patient, Below are the controls of the game:
, and two modes: Hasty and Patient, Below are the controls of the game:
- Shared controls
 : Used to move the Yoshis. Pressing it down makes Yoshi crouch or make eggs. If the down arrow is pressed in the air, Yoshi ground pounds.
 : Pauses the game and opens the "Options" menu.
 : Used to make Yoshi throw a Yoshi's Egg. In Hasty mode: Holding the button, makes Yoshi aim at his target. Letting go of the button makes Yoshi throw the egg, in Patient mode the player has to press the button again to make Yoshi throw the egg.
 : While Yoshi is aiming up and down, pressing the button makes Yoshi lock on a specific location.
- First set:


- : Used to jump, pressing it again makes Yoshi Flutter Jump.
- : Used to Eat or spit an enemy. With Baby Mario, the player can dash by holding the button.
In this set: the ![]() and
and ![]() can be used instead of the
can be used instead of the ![]() and
and ![]() respectively.
respectively.
- Second set:
- : Used to jump, pressing it again makes Yoshi Flutter Jump.
- : Used to Eat or spit an enemy. With Baby Mario, the player can dash by holding the button.
Minigames[edit]
Minigames are unlocked in Adventure Mode:
- Tulip Shooter - Yoshi must grab and spit enemies into a tulip.
- Flutter Challenge - Yoshi must try to flutter-jump as far as possible.
- Bouncy Maze - Yoshi must maneuver his way through a simple maze of Bouncies.
- Speed Eating - Yoshi must try to swallow as many enemies as possible.
- Egg Toss - Yoshi must hit targets with eggs.
All minigames have a set time limit. Achieving a high score in any minigame awards Yoshi with lives. Harder versions of all the minigames can be unlocked by collecting all the character coins in a world.
Time Trial[edit]
Time Trial is unlocked once Adventure Mode has been beaten. It is similar to Adventure Mode, but the player is timed. Yoshi has 100 minutes to finish each level - even when the player presses the Start Button, the time keeps going. Red coins, flowers and stars, when collected, each subtract a set amount of time taken to finish the level: -1 second per star, -2 seconds per red coin, and -10 seconds per flower.
Island Museum[edit]
Accessible in Adventure mode, the Island Museum is a live bestiary of the enemies in the game. Any enemies hit by Yoshi's Eggs appear in exhibits and are organized by the class they are in (eg, many water-based enemies appear in the aquatic-based exhibit).
Worlds and levels[edit]
The set up of levels and worlds is largely based on Super Mario World 2: Yoshi's Island. There is a total of five worlds, with each one having eight normal levels, one secret level, and one extra level. The secret levels are unlocked when all the normal levels are cleared. The extra levels are unlocked by scoring a total of 800 points for each world. Throughout the five worlds, a different colored Yoshi takes on one out of eight levels, with a mid-boss in the fourth level and the world boss in the eighth level.


.png)


.png)


.png)


.png)


.png)


.png)
Characters[edit]
Playable characters[edit]
Just like in Super Mario World 2: Yoshi's Island, the Yoshi species are the primary playable characters of the game. All Yoshis in that game return (except Brown Yoshi, who is replaced by Orange Yoshi) and are played in the same level order. Green Yoshi is no longer playable in secret and extra levels, with those levels being reserved for Black and White Yoshis (who return from Yoshi's Story) respectively.
| Sprite | Yoshi | Level order | Debut level | Last level |
|---|---|---|---|---|
| Green Yoshi | First stage of a world and the final stage | Welcome Back to Yoshi's Island! | At Last, Bowser's Castle! | |
| Pink Yoshi | Second stage of a world | Hit the M Blocks! | Goonie Heights | |
| Light Blue Yoshi | Third stage of a world | Mario's Fleet Feet | Spear Guys' Village Found! | |
| Yellow Yoshi | Fourth stage of a world | Castle of the Big Burt Bros. | The Fort of Moltz the Very Goonie | |
| Purple Yoshi | Fifth stage of a world | Catch the Breeze! | The Cave That Never Ends | |
| Orange Yoshi | Sixth stage of a world | Glide Guys Take to the Skies | Find the Number Ball! | |
| Red Yoshi | Seventh stage of a world | Baby Mario and Baby Peach: Dynamic Duo | Superhard Acrobatics! | |
| Blue Yoshi | Eighth and final stage of a world | Gilbert the Gooey's Castle | Castle of Big Guy the Stilted | |
| Black Yoshi | Secret Stages | Welcome to Yoshi Tower! | Yoshi's Island Easter Eggs | |
| White Yoshi | Extra Stages | Return of the Moving Chomp Rock! | Quit it Already, Tap-Tap! |
Babies[edit]
| Sprite | Baby | Gameplay effects | Debut level | Last level |
|---|---|---|---|---|
| Baby Mario |
|
Ba-dum BUM! | Yoshi's Island Easter Eggs | |
| Baby Peach |
|
Catch the Breeze! | Yoshi's Island Easter Eggs | |
| Baby DK |
|
Baby DK, the Jungle King! | Yoshi's Island Easter Eggs | |
| Baby Wario |
|
Heeeeeeere's Wario! | At Last, Bowser's Castle! | |
| Baby Bowser |
|
Friend or Foe? | At Last, Bowser's Castle! |
Other characters[edit]
| Sprite | Character | Summary |
|---|---|---|
| Stork | Delivers a baby to a Yoshi at a Stork Stop | |
| Baby Luigi | The goal of the journey is to rescue Baby Luigi. |
Normal enemies[edit]
| Aquatic enemies | ||||
|---|---|---|---|---|
| Sprite | Enemy | Summary | Levels | |
| Debut | Last | |||
| Blooper | One of the aquatic enemies that may jump out of water | Use the Magnet to Get Rich Quick! | ||

|
Boss Bass | Undefeatable enemies that jump out of water while trying to eat the player. | Moving Statues, Standing Statues | Use the Magnet to Get Rich Quick! |
| Cheep Cheep | Encountered by Submarine only, blue Cheep Cheeps swim forward whilst the gold ones go after Yoshi. | Island of Peril | Bessie Bass's Battleship | |

|
Egg-enut | They use a fake Yoshi's Egg to bait Yoshi, flailing it as he approaches. | Up the Creek | The Cave That Never Ends |
| Flopsy Fish | They either swim in patterns or jump out of water. | Yoshi on Stilts | Bessie Bass's Battleship | |

|
Lunge Fish | Undefeatable enemies that try to eat Yoshi, like Boss Basses, but hide in the water before striking. | Yoshi on Stilts | Castle of Priscilla the Peckish |

|
Nep-Enut | Large, blue creatures that rise out of water to block the path until being hit with an egg | Up the Creek | |
| Pirate Guy | Cosmetic alterations of Shy Guys wearing a white robe and a colored bandana | The Goonie Coast Isn't Clear! (all colors) |
Use the Magnet to Get Rich Quick! (all colors) | |
| Spray Fish | Has a looped pattern of spraying harmless water at Yoshi for few seconds | Big Bungee Piranha's Lair | ||
| Toober Guy | Floating Shy Guys usually encountered in one spot | Big Bungee Piranha's Lair (all colors) |
Bessie Bass's Battleship (all colors) | |
| Botanical enemies | ||||
| Blow Hard | Spits Pokeys at Yoshi | Return of the Moving Chomp Rock! | Yoshi's Island Easter Eggs | |
| Bungee Piranha | They fall from the ceiling, attempting to grab Yoshi. | Return of the Moving Chomp Rock! | Superhard Acrobatics! | |
| Crazee Dayzee | Calm enemies that walk slowly towards Yoshi | Ba-dum BUM! (yellow) Hit the M Blocks! (white) |
Donuts and Eggs (yellow) Donuts and Eggs (white) | |
| Drool Hard | They try to drop Pokeys on Yoshi. | Return of the Moving Chomp Rock! | At Last, Bowser's Castle! | |

|
Eggo-Dil | Attacks by launching petals in all five directions | Return of the Moving Chomp Rock! | Superhard Acrobatics! |
| Hanging Blow Hard | Spits Pokeys that move down its vine-like tongue | Up the Creek | At Last, Bowser's Castle! | |
| Nipper Dandelion | Idle entities that release Nipper Spores if blown by a gust of wind. | Ba-dum BUM! | Number Ball Special | |
| Nipper Plant | Slow-moving enemies that spawn from Nipper Spores upon touching the ground. | Ba-dum BUM! | Goonie Heights | |
| Nipper Spore | Slowly floats towards the ground before hatching into a Nipper Plant | Ba-dum BUM! | In the Clouds | |
| Piranha Plant | They hide in the ground, growing larger when Yoshi is close; if Yoshi enters one's mouth, he is spit out a few seconds later. | Ba-dum BUM! | Yoshi's Island Easter Eggs | |
| Pointey | Harmless enemies that rise from the ground when approached | Hit the M Blocks! | Baby DK, the Jungle King! | |
| Pokey | Projectiles released by Blow Hards and other enemies | Hit the M Blocks! | Yoshi's Island Easter Eggs | |
| Sanbo Flowers | They spit out Pokeys if Yoshi does not have six eggs. | Ba-dum BUM! | At Last, Bowser's Castle! | |
| Wild Ptooie Piranha | They are another enemy that spit Pokeys, but three hits are required to defeat them. | Welcome to Yoshi Tower! | Yoshi's Island Easter Eggs | |

|
Windbag | They blow gusts of wind, typically towards Nipper Dandelions, and shrink briefly if an egg hits them. | Ba-dum BUM! | Number Ball Special |
| Shy Guy enemies | ||||
| Dancing Spear Guy | They have a pattern of dancing and jumping, as well as damaging spears. | Moving Statues, Standing Statues | Spear Guys' Village Found! | |
| Fat Guy | Large Shy Guys that Yoshi can eat to receive larger eggs. | Teeth-Chattering Chill Zone (both colors) | ||
| Fly Guy | They do not attack Yoshi directly but do carry items, such as red coins. | Ba-dum BUM! | Rompin', Stompin' Chomps | |
| Glide Guy | They are blown into the air upon encountering a wind current. | Ba-dum BUM! (red) Ba-dum BUM! (yellow) Catch the Breeze! (green) Baby Mario and Baby Peach: Dynamic Duo (blue) |
Teeth-Chattering Chill Zone (blue) Superhard Acrobatics! (red) Superhard Acrobatics! (green) Superhard Acrobatics! (yellow) | |
| Petal Guy | They disguise themselves as flower patches until Yoshi approaches. | In the Clouds | Goonie Heights | |
| Shy Guy | Basic enemies that walk in a line as well as spawn from certain pipes | Ba-dum BUM! (red) Ba-dum BUM! (green) Ba-dum BUM! (yellow) Mario's Fleet Feet (blue) |
Yoshi's Island Easter Eggs (red) Yoshi's Island Easter Eggs (green) Yoshi's Island Easter Eggs (yellow) Yoshi's Island Easter Eggs (blue) | |
| Shy Guy on Stilts | They are just like regular Shy Guys, except they move around on stilts. | Underground Mysteries (red) Underground Mysteries (blue) Underground Mysteries (green) Underground Mysteries (yellow) |
Superhard Acrobatics! (red) Superhard Acrobatics! (blue) Superhard Acrobatics! (green) Superhard Acrobatics! (yellow) | |
| Shy Stack | An idle stack of Shy Guys, where if one of them is eaten, the others fall off of the stack. | The Goonie Coast Isn't Clear! | Superhard Acrobatics! | |
| Spear Guy | Carries a spear in front that also prevents Yoshi from eating it from the front | Welcome to Yoshi Tower! | Spear Guys' Village Found! | |
| Woozy Guy | They flip forward every few seconds. | Ba-dum BUM! (blue) Castle of the Big Burt Bros. (red) Catch the Breeze! (green) Catch the Breeze! (yellow) |
Rompin', Stompin' Chomps (green) Goonie Heights (blue) Superhard Acrobatics! (yellow) Yoshi's Island Easter Eggs (red) | |
| Subterranean enemies | ||||
| Bill Blaster | Cannons that launch Bullet Bills | Welcome to Yoshi Tower! | Superhard Acrobatics! | |
| Blargg | They rise out of the lava, attempting to damage Yoshi. | Castle of the Big Burt Bros. | Find the Number Ball! | |
| Bullet Bill | Travels forwards after being shot out of a Bill Blaster | Welcome to Yoshi Tower! | Superhard Acrobatics! | |
| Dizzy Dandy | They look similar to flowers, though roll straightforward at Yoshi when approached. | Welcome to Yoshi Tower! | The Cave That Never Ends | |

|
Gargantua Blargg | Functions the same as Nep-Enuts but found in lava only. | Gilbert the Gooey's Castle | |

|
Gobblin | Blocks Warp Pipes but can be defeated from six eggs. | Big Bungee Piranha's Lair | Superhard Acrobatics! |
| Gooey Goon | They drop from the ceiling and swing at Yoshi. | Gilbert the Gooey's Castle | Castle of Priscilla the Peckish | |
| Hot Lips | Functions like a Spray Fish but spits a stream of boiling lava. | Six-Face Sal's Fort | Find the Number Ball! | |
| Lantern Ghost | They act the same as Shy Guys and are found generally in cave areas. | Hit the M Blocks! (white) Hit the M Blocks! (red) Hit the M Blocks! (green) |
Find the Number Ball! (white) Find the Number Ball! (red) Find the Number Ball! (green) | |
| Podoboo | They jump out of lava at regular intervals. | Yoshi on Stilts | Hurry and Throw! | |
| Scorchit | They shoot a stream of fire that can melt ice. | Welcome to Yoshi Tower! | At Last, Bowser's Castle! | |
| Land enemies | ||||
| Bandit | They run into a Yoshi when encountered and try to steal the baby from it. | Welcome to Yoshi Tower! | High-Speed Cart Race | |
| Bumpty | They can bounce back Yoshi when touched, which also does not harm the Yoshi. | Slip Slidin' Away | Teeth-Chattering Chill Zone | |
| Burt Brother | They bounce in a direction and can be defeated only from a ground pound. | Castle of the Big Burt Bros. | ||
| Crabble | Endurant crabs that require three hits to defeat. | Big Bungee Piranha's Lair | A Light in the Dark | |
| Debull | They charge into the direction of Yoshi, though can be stunned by hitting a wall. | Boing! | Superhard Acrobatics! | |
| Fleeper | Acts like a Bandit except jumps onto a Yoshi's back to steal the baby. | Boing! | Rompin', Stompin' Chomps | |
| Green Glove | Attacks Yoshi by targeting and throwing eggs at him | Glide Guys Take to the Skies | Superhard Acrobatics! | |
| Koopa Troopa | They can have their shells eaten and spit right back out. | Glide Guys Take to the Skies | At Last, Bowser's Castle! | |
| Para-Koopa | They either fly or walk in Yoshi's direction, though can be stomped to become regular Koopas. | Glide Guys Take to the Skies | At Last, Bowser's Castle! | |
| Slugger | They attack by batting eggs at Yoshi. | Glide Guys Take to the Skies | Superhard Acrobatics! | |
| Snap Jaw | They climb down vines slowly while approaching Yoshi. | Yoshi on Stilts | Use the Magnet to Get Rich Quick! | |
| Tap-Tap | The orange type walks off of platforms, while the gray type turns around upon reaching the edge of a platform. | Baby Mario and Baby Peach: Dynamic Duo (gray) Baby Mario and Baby Peach: Dynamic Duo (orange) |
Quit it Already, Tap-Tap! (gray) Quit it Already, Tap-Tap! (orange) | |
| Ukiki | Harmless enemies that run away from Yoshi. | Baby DK, the Jungle King! | ||
| Unshelled Koopa | They are Koopa Troopas that are vulnerable to attack or defeat, but they can become one by entering an empty Koopa shell. | Bessie Bass's Battleship | ||
| Airborne enemies | ||||
| Cloud Drop | Small, weak enemies that fly in a set horizontal or vertical pattern. | Glide Guys Take to the Skies | The Cave That Never Ends | |
| Fang | Enemies that are generally stil at first before trying to fly into Yoshi if he approaches them. | Yikes! Boiling Hot! | Find the Number Ball! | |
| Flightless Goonie | Fast enemies that are encountered either by themselves or from Yoshi eating a Goonie then spitting it out. | Welcome to Yoshi Tower! | Goonie Heights | |
| Goonie | Birds that drop hazards, such as Shy Guys and bombs, and can be spit out to become a Flightless Goonie. | Welcome to Yoshi Tower! | The Fort of Moltz the Very Goonie | |
| Gusty | Fast enenemies that fly forward in a single direction. | Welcome to Yoshi Tower! | At Last, Bowser's Castle! | |
| Item Balloon | They generally drop hazards, such as bombs or Pokeys, but some drop useful objects like a key. | Hit the M Blocks! | At Last, Bowser's Castle! | |
| Lakitu | They ride a cloud, throwing Spiny Eggs to attack, though can be stomped for Yoshi to begin using their cloud. | High-Speed Cart Race | Yoshi's Island Easter Eggs | |
| Rocket Guy | They ride rockets that can take away a life from a Yoshi if he is riding a rocket. | The Fort of Moltz the Very Goonie | At Last, Bowser's Castle! | |
| Wall Lakitu | They act like Lakitus except hide in walls instead of clouds. | Big Bungee Piranha's Lair | Rock 'n' Fall | |
| Haunted House enemies | ||||
| Big Boo | Behaves just like Boos, but are a larger size. | Bessie Bass's Battleship | ||
| Boo | They float at Yoshi only while his back is turned, covering their face otherwise. | Bessie Bass's Battleship | Yoshi's Island Easter Eggs | |
| Boo Guy | Like Shy Guys, except they float around, and appear from some pipes if Yoshi does not have six eggs. | Hector the Reflector's Haunted House | ||
| Flightless Skeleton Goonie | Skeletal enemies that run into Yoshi | Number Ball Special | The Cave That Never Ends | |
| Invisighoul | They attack by throwing furniture at Yoshi, though he can turn the thrown furniture into eggs. | Hector the Reflector's Haunted House | ||
| Potted Ghost | They rise from a pot, though hitting the pot with an egg flips it over, turning into a usable platform. | Bessie Bass's Battleship | Superhard Acrobatics! | |

|
Polterpiranha | Ghostly Piranha Plants that fly around, attempting to chew on Yoshi, before spitting him out. | Hector the Reflector's Haunted House | The Cave That Never Ends |
| Skeleton Goonie | They drop bombs, and can turn into Flightless Skeleton Goonies if stomped. | Rompin', Stompin' Chomps | At Last, Bowser's Castle! | |
| Giant enemies | ||||

|
Chomp | They bounce around either left and right or up and down. | Rompin', Stompin' Chomps | The Cave That Never Ends |
| Gargantua Blargg | Very tall Gargantua Blarggs that can break certain rock platforms. | Yikes! Boiling Hot! | Number Ball Special | |

|
Incoming Chomp | They appear in the background at first before jumping to where Yosh is and plowing through the ground. | Rompin', Stompin' Chomps | |

|
Shark Chomp | They chomp along the ground while chasing Yoshi, and Baby Mario is required to outrun them. | Rompin', Stompin' Chomps | |

|
Super Big Tap-Tap | Similar to Shark Chomps, except they roll after Yoshi | Mario's Fleet Feet | Quit it Already, Tap-Tap! |
Bosses[edit]
| Mid-bosses | ||||
|---|---|---|---|---|
| # | Sprite | Boss | Stage | Description |
| 1 | 
|
Big Burt Bros. | World 1 - Castle of the Big Burt Bros. | They attempt to jump on Yoshi, and can be defeated after being hit by six eggs. |
| 2 | 
|
Hector the Reflector | World 2 - Hector the Reflector's Haunted House | A boss visible from the mirror on the touch screen only, breaking part of it after each hit. The boss requires six hits to defeat. |
| 3 | Bessie Bass | World 3 - Bessie Bass's Battleship | Her attack is jumping out of the water while trying to eat Yoshi, though hitting Bessie Bass' lips three times defeats her. | |
| 4 | 
|
Six-Face Sal | World 4 - Six-Face Sal's Fort | Attacks by spitting Pokeys and requires four hits to defeat. |
| 5 | 
|
Moltz the Very Goonie | World 5 - The Fort of Moltz the Very Goonie | A mini-boss who tries to land on Yoshi, and must be ground pounded three times to become defeated. |
| Big bosses | ||||
| 1 | 
|
Gilbert the Gooey | World 1 - Gilbert the Gooey's Castle | A boss springs up and down and swings from side to side. The boss is defeated after destroying every sphere on him. |
| 2 | 
|
Big Bungee Piranha | World 2 - Big Bungee Piranha's Lair | Attacks by lunging down at Yoshi and eating him, but is defeated after three hits to the tongue, after exposing it with a Chomp Rock each time. |
| 3 | 
|
Priscilla the Peckish | World 3 - Castle of Priscilla the Peckish | Jumps out of a hole while spitting Pokeys at Yoshi. The boss is defeated after three hits. |
| 4 | 
|
Big Guy the Stilted | World 4 - Castle of Big Guy the Stilted | The boss tries to push Yoshi into lava, but must be pushed into lava instead and ground pounded three times to be defeated. |
| 5 | Baby Bowser | World 5 - At Last, Bowser's Castle! | Attacks by ground pounding the floor, and can be defeated after being hit by eggs three times. | |
| 6 | 
|
Bowser | Jumps around and spits fireballs. Hitting Bowser with Giant Eggs and ground pounding him three times ends this part of the battle. | |
| 7 | 
|
Bowser (giant) | A form that Bowser becomes after three hits, and can be defeated after being hit by six Giant Eggs. | |
Yoshi's abilities[edit]
Morph Yoshi[edit]
| Sprite | Form | Description | Levels | |
|---|---|---|---|---|
| Debut | Last | |||
| Helicopter | Enables a Yoshi to fly for a short time | Glide Guys Take to the Skies | ||
| Mole Tank | Enables a Yoshi to dig through small openings and crawl on walls. | Baby Mario and Baby Peach: Dynamic Duo | Quit it Already, Tap-Tap! | |
| Submarine | Enables a Yoshi to swim underwater. | Island of Peril | ||
Vehicles[edit]
| Sprite | Vehicle | Description | Levels | |
|---|---|---|---|---|
| Debut | Last | |||
| Kangaroo | Though Kangaroo moves automatically, the player can press and hold left or right to determine its direction and distance traveled, or hold |
Mario's Fleet Feet | Windblown Wilderness | |
| Stilts | Allows a Yoshi to walk move across hazardous terrain safely. | Yoshi on Stilts | Castle of Big Guy the Stilted | |

|
Cart | Moves on a track automatically, with Yoshi only being able to jump (though not flutter), before landing back in the cart or on a higher track. | High-Speed Cart Race | Quit it Already, Tap-Tap! |
| Skis | They are used to ski in some snow areas. Skis travel only in a single direction, but the Yoshis can still jump while using them. | A Light in the Dark | Teeth-Chattering Chill Zone | |
| Rocket | Entering certain huts allows Yoshi to enter a rocket and blast off. The rocket can be turned by pressing left, or given an extra thrust with |
The Fort of Moltz the Very Goonie | At Last, Bowser's Castle! | |
Items and objects[edit]
This section is a stub. Please consider expanding it to include any missing information. Specifics: Missing various objects for the sections
Blocks[edit]
| Sprite | Block | Summary |
|---|---|---|
| Egg Block | Releases eggs up until six are present | |
| Expansion Block | Grows larger temporarily when hit | |
| Message Block | Each one tells how to use a certain move. | |
| M Block | They appear only if Baby Mario is present, and may contain coins or a seed that forms into a giant sunflower. | |
| Yoshi Block | If Yoshi is under a morph bubble transformation, he can touch one to return to normal and continue progressing through the level. |
Collectibles[edit]
| Sprite | Item | Summary |
|---|---|---|
| Character coin | They are hidden in different levels, each requiring a certain baby to collect, and can unlock harder versions of minigames. | |
| Coin | Collecting 100 earns the player an extra life. | |
| Flower | Five appear in each level, and are used only to increase the score at the end of the level. | |
| Red coin | They have the same purpose as flowers, except twenty red coins appear in each level. | |
| Stars | Each star represents a second of the baby being safe inside of a bubble if it has been knocked off of Yoshi's back. One can have up to thirty stars in a level, each also contributing to the score at the end. |
Eggs[edit]
| Sprite | Egg | Summary |
|---|---|---|
| Red Egg | Functions similarly to a Yoshi's Egg but can rebound off of a wall only once. Two stars can be revealed if a Red Egg hits an enemy. | |
| Yellow Egg | Functions similarly to a Yoshi's Egg but can rebound off walls only twice, becoming a Red Egg after the first bounce. Throwing a Yellow Egg at an enemy makes a coin appear. | |
| Yoshi's Egg | These are created from either swallowing enemies or from Egg Blocks, but only six Yoshi's Eggs can be present at once. Yoshi's Eggs can defeat enemies, activate Winged Clouds, hit switches, and destroy gravel. With Baby Mario, Yoshi's Eggs can be rebounded off walls three times, changing from green to yellow to lastly red. |
Hazards[edit]
| Sprite | Hazard | Description | Levels | |
|---|---|---|---|---|
| Debut | Last | |||

|
Lava | Molten rock that costs Yoshi a life immediately when touched. | Castle of the Big Burt Bros. | Castle of Big Guy the Stilted |

|
Lava fall | Lava that flows out of a pipe | Castle of Big Guy the Stilted | |

|
Spinning Spikes | Giant, slow-moving flails that are usually operated by several Shy Guys. | Castle of the Big Burt Bros. | Gilbert the Gooey's Castle |
|
|
Waterfall | Water that flows out of a pipe | Big Bungee Piranha's Lair | |
Miscellaneous[edit]
| Items | ||
|---|---|---|
| Sprite | Name | Description |
| Key | Single-use items that can unlock any locked doors. | |
| Morph bubble | Transforms Yoshi into the vehicle depicted inside | |
| Super Star | Usable only by Baby Mario, a Super Star transforms him into Superstar Mario temporarily | |
| Objects | ||

|
Bouncy | Giant pink spheres that bounce Yoshis around |
| Crate | Usable and pushable platforms that may contain either stars, coins, or a key when ground pounded. | |

|
Giant sunflower | It grows from a seed, which can be revealed from M Blocks or Winged Clouds. Once the giant sunflower has grown fully, Yoshi can jump from its leaves to go upward. |

|
Goal roulette | A Goal that appears at the end of every level except fortresses and castles. |
| Magnet Block | A giant metal block that Baby Wario can move with his magnet. | |
| Magnet Platform | Reacts to Baby Wario's magnet by either raising or lowering. | |

|
Middle Ring | A checkpoint in each level that also adds ten stars when activated. |
| Stork Stop | Activating it summons the stork, allowing Yoshi to change which baby it is carrying. | |
| Winged Cloud | They can be hit with an egg for a variety of effects, such as forming a pathway or releasing either coins, stars, a switch, or an extra life. Some function like switches. | |
Bonus Challenges[edit]
Any flowers collected appear in the goal roulette at the end of a level, and if a goal roulette stops on a flower after spinning, the Yoshi can play a mini-game to possibly earn 1-Ups. These are the Mini-games that may be played if a Yoshi gets a flower in the goal roulette, and they are unlockable for play from the World Map screen if at least 700 points are obtained in a world.
Similarities to Super Mario World 2: Yoshi's Island[edit]
- The first piece of Ba-dum BUM! is same as the one from Make Eggs, Throw Eggs.
- In both Watch Out For Lakitu and Spear Guys' Village Found!, an Itsunomanika Heihō can be encountered in a bush just before the goal roulette.
- The first mid-boss, Big Burt Bros., is a dual version of Burt the Bashful, the first mid-boss in the original game.
- The first world boss (Salvo the Slime/Gilbert the Gooey) is a blob-like creature, parts of whom can be eaten by Yoshi.
- The second mid-boss (Bigger Boo/Hector the Reflector) is a ghost whose size changes throughout the battle.
- The third mid-boss (Froggy/Bessie Bass) is an aquatic enemy capable of eating Yoshi, and both fights require Yoshi to fire eggs at a part of the mid-boss' gastrointestinal tract directly above him.
- The jungle world boss (Naval Piranha/Big Bungee Piranha) is a Piranha Plant, and Nipper Plants are present during the battle. Both bosses also turn gray and crumble into dust upon defeat.
- The fourth World Boss (Hookbill the Koopa/Big Guy the Stilted) is a giant variation of an enemy that appeared in earlier levels.
- In the fifth world, one of the bosses that Yoshi fights (Raphael the Raven/Moltz the Very Goonie) is a bird enemy, and the battle takes place in the sky rather than an enclosed environment.
- One boss (Hookbill the Koopa/Bowser) is a giant Koopa who Yoshi defeats by throwing eggs at his face to flip him on his back before ground-pounding his belly.
- At least one world boss (Roger the Potted Ghost/Priscilla the Peckish & Six-Face Sal) is a completely unique species, not based off of any particular enemy in the game. Incidentally, Yoshi's Island DS introduces a regular enemy based on the unique boss from the first game.
- Multiple similarities exist with the final normal levels of each game:
- The final level is set in Bowser's Castle, and is explored by Green Yoshi instead of Blue Yoshi.
- Both levels start outside the castle walls and require Yoshi to clear through a flock of Skeleton Goonies and use an aircraft-themed power to get inside.
- Both levels require Yoshi to choose one of several different pathways, each with their own gimmick.
- One path requires Yoshi to flee from a giant golden Tap-Tap in a volcanic cavern.
- The first part of each final battle is against Baby Bowser, who creates shockwaves as an attack, and the last is against a giant version of Bowser, age unconsidered, who uses falling boulders and fireballs as attacks.
- Both final battles require the use of Giant Eggs carried into the field by Item Balloons, and Bowser's castle is destroyed during the transition to the final phase of both battles.
References to other games[edit]
- Donkey Kong Country: DK's Tree House appears as it does in that game.
- Super Mario World 2: Yoshi's Island: The game is the sequel to this game, and also takes place on the same titular island, and most of the enemy sprites are from this game, albeit with updated shading. Its events are mentioned at the start of the game.
- Yoshi's Island: Super Mario Advance 3: Each world has a secret course.
- Yoshi Topsy-Turvy: Bowser's sprites seem to have been drawn over the prerendered sprites of him from this game. Much of the artwork is also borrowed from this game.
- Yoshi Touch & Go: Many of the game's sprites are redrawn from Yoshi Touch & Go, such as Yoshi, Baby Mario, Baby Luigi, and Kamek's sprites. Artwork is reused as well, including the Baby Mario and Yoshi artwork on the box artwork.
- Mario & Luigi: Partners in Time: M Blocks appear again. Baby Peach originates from this game, too.
References in later games[edit]
- Super Smash Bros. Brawl: The game's "above ground" theme has been remastered and included in this game, and has been given the title "Wildlands." The Yoshi's Island stage is based on Yoshi's Island DS's graphics.
- Mario Super Sluggers: Baby DK returns, along with all of the other babies, with the exception of Baby Wario and Baby Bowser. Wario uses his baby counterpart's magnet in Challenge Mode.
- New Super Mario Bros. Wii: Kamek turns Bowser into a giant for the final battle.
- Yoshi's New Island: This game continues the events told before Yoshi's Island DS.
- Super Smash Bros. Ultimate: Baby Mario (Superstar Mario) and Crazee Dayzee appear as spirits, using their artwork from Yoshi's Island DS.
- Dr. Mario World: Baby Wario returns as a playable doctor, and he uses his magnet from Yoshi's Island DS as his special skill.
Staff[edit]
- Main article: List of Yoshi's Island DS staff
Yoshi's Island DS was developed by the company Artoon, instead of Nintendo EAD like other Yoshi games were. The game was directed by Hidetoshi Takeshita and the lead programmer was Yuki Hatakeyama. Takashi Tezuka, served as one of the senior producers of the game, with Sonic the Hedgehog co-creator Naoto Ohshima being the other one.
Reception[edit]
Yoshi's Island DS received mainly positive reviews from critics. It was praised for having similar gameplay to its predecessor, as well as the artwork, although the gameplay's being too similar to its predecessor is frequently cited. Some critics also considered it the best portable Yoshi game released.
The game has been praised for its design.[7] He has described the game more of a nostalgic reminder of Super Mario World 2: Yoshi's Island rather than an advancement of the series. As a result, he suggested that the designs stuck too close to original formula, ruining surprises for veteran players of Yoshi's Island. He praised the different babies, although he felt that Baby Wario "was a last-minute edition and not tested properly". Although he noted that the dual screen gave the players a bigger view, but criticized the blind spot between the dual screens.
Tom Bramwell of Eurogamer was reluctant to praise Yoshi's Island DS in the same way as Super Mario World 2: Yoshi's Island, as he considered the game to be a "distended version of Yoshi". He acknowledges Artoon's effort in the game and the variety of babies and levels. He also criticizes the developers' abuse of the blind spot between the two screens and that the developers failed to establish trust for the player to explore. He finally stated that "Artoon is cribbing from the same notes. It's a shame, because there are times when you catch glimpses of the sort of thing the Japanese team is really capable of[...]."
Yoshi's Island DS was placed 46 on Gamesradar's Top 50 DS games. The small feature called it a fresh and new experience, a beautiful 2D world, and that they'd never tire of playing the game.[8]
| Reviews | |||
|---|---|---|---|
| Release | Reviewer, Publication | Score | Comment |
| Nintendo DS | Tom Bramwell, Eurogamer | 7/10 | "The problem is that it's a sensation that you felt all the time in Yoshi's Island. You gave up counting the ways. Counting them here would result in a much smaller number, like, ooh..." |
| Nintendo DS | Frank Provo, Gamespot | 9.1/10 | "It's hard to top a masterpiece, but that's just what Nintendo and Artoon have done with Yoshi's Island DS. By incorporating one major new feature and leaving everything else alone, they've produced a sequel that seems fresh and new while remaining every bit as awesome as the original. If you enjoy side-scrolling platformers, you have to play this one." |
| Nintendo DS | Craig Harris, IGN | 8/10 | "Don't let the negative tone throw you -- Yoshi's Island DS is a great game. It's just a egg throw's distance away from having the same impact the original Yoshi's Island did more than a decade ago. It sets out to emulate everything that made the first game so great, and does a really good job doing that. But it runs into the problem of not doing enough to make it its own game. No huge surprises, and no significant additions to the genre...it's just a solid recreation of the Yoshi's Island elements in a two-screen-high format. It's fun and challenging with a couple of unpolished quirks." |
| Nintendo DS | Kaes Delgrego, Nintendo Life | 7/10 | "As a stand-alone game, Yoshi's Island DS is an enjoyable platformer. But to compare it to the SNES classic would be akin to comparing Sean Lennon to his father: expecting him to live up to the walrus would be entirely unrealistic." |
| Nintendo DS | Tom East, Official Nintendo Magazine | 87% | "Yoshi's Island DS might be too similar to the first game, but that's not entirely a bad thing - the original was amazing and so is this. One of the best platformers on the DS." |
| Aggregators | |||
| Compiler | Platform / Score | ||
| Metacritic | 81 | ||
| GameRankings | 81.15% | ||
Sales[edit]
In its first week in Japan, the game sold approximately 300,000 copies. As of March 31, 2008, Yoshi's Island DS has sold 2.91 million copies worldwide.[9]
Media[edit]
| It has been requested that more audio and/or video files related to this section be uploaded. Specifics: At least 2 or 3 more tracks Please upload music, sound effects, voice clips, or any videos for this section. See the help page for help getting started. |
| File info 0:29 |
Gallery[edit]
- For this subject's image gallery, see Gallery:Yoshi's Island DS.
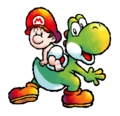
Baby Mario and Yoshi
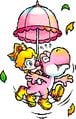
Baby Peach and Pink Yoshi
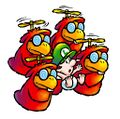
Baby Luigi being kidnapped by a group of Toadies.


Pre-release and unused content[edit]
- Main article: List of Yoshi's Island DS pre-release and unused content
- Yoshi's Island DS, initially titled Yoshi's Island 2, was originally going to be compatible with Nintendo Wi-Fi Connection. This, however, was scrapped from the game for unknown reasons.
- Early screenshots showcasing a battle with Big Guy the Stilted seemed to suggest that Big Guy was once going to be organic, as he had no patches on him in that picture (although one patch is visible near his right foot, which may mean his graphics were slightly incomplete).
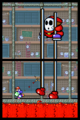
An early battle with Big Guy the Stilted, who appears to lack mechanical features.

Names in other languages[edit]
| Language | Name | Meaning | Notes |
|---|---|---|---|
| Japanese | ヨッシーアイランドDS[?] Yosshī Airando DS |
Yoshi Island DS | |
| Chinese (traditional) | 耀西之島DS[10] Yàoxī zhī Dǎo DS |
Yoshi's Island DS | |
| French | Yoshi's Island DS[?] | - | |
| Korean | 요시 아일랜드 DS[?] Yosi Aillaendeu DS |
Yoshi Island DS | |
| Spanish | Yoshi's Island DS[?] | - |
Notes[edit]
- The box art shows Baby Bowser riding Yellow Yoshi, and Baby Wario riding Light Blue Yoshi; they do not ride these Yoshis in the game other than when Baby Wario is in the final boss fight, however. This is because the babies are only playable in the last four levels on the world map, as opposed to the Yoshis they ride, which are in the first four.
- The instruction booklet erroneously states Baby DK is the only baby with more than one special ability, as Baby Mario has three abilities.
References[edit]
- ^ Super Smash Bros. Brawl Chronicle
- ^ Yoshi's Island DS. Nintendo of Australia (Australian English). Archived November 14, 2006, 22:55:45 UTC from the original via Wayback Machine. Retrieved January 23, 2025.
- ^ ヨッシーアイランドDS. Nintendo Co., Ltd. (Japanese). Retrieved May 11, 2023.
- ^ 요시 아일랜드 DS. Nintendo of Korea (Korean). Archived August 23, 2019, 16:21:24 UTC from the original via Wayback Machine. Retrieved May 11, 2023.
- ^ ヨッシーアイランドDS | Wii U | Nintendo. Nintendo (Japanese). Retrieved October 30, 2024.
- ^ Nintendo UK (April 1, 2015). Nintendo Direct Presentation - 01.04.2015 (20:51). YouTube (British English). Retrieved October 30, 2024.
- ^ Harris, Craig (November 14, 2006). Yoshi's Island DS Review. IGN (English). Retrieved October 30, 2024.
- ^ GamesRadar Staff (September 15, 2012). Best DS Games. GamesRadar (English). Archived May 19, 2012, 14:05:21 UTC from the original via Wayback Machine. Retrieved October 30, 2024.
- ^ Financial Results Briefing for Fiscal Year Ended March 2008 (PDF). Nintendo Co., Ltd. (English). Page 6. Retrieved October 30, 2024.
- ^ Nintendo DS 遊戯軟體. Nintendo Taiwan (Traditional Chinese). Archived March 13, 2019, 01:10:08 UTC from the original via Wayback Machine. Retrieved October 30, 2024.
External links[edit]
- North American website
- European website
- Korean website
- Japanese website
- Japanese instruction booklet
- European English instruction booklet
- European Spanish instruction booklet
- European French instruction booklet