User:Mid188/Sandbox: Difference between revisions
(Part seven of creating pages for Super Paper Mario (Descripitons for Treasure chests and Hidden Blocks).) |
(Part eight of creating pages for Super Paper Mario (Enabling links and changing resolution of uploaded images). Now to move them.) |
||
| Line 1: | Line 1: | ||
{{italic title|List of ? Blocks in ''Super Paper Mario''}} | {{italic title|List of ? Blocks in ''Super Paper Mario''}} | ||
{{about|the visible ? Blocks from ''[[Super Paper Mario]]''|the hidden ones from same game|[[List of hidden blocks in Super Paper Mario|List of hidden blocks in ''Super Paper Mario'']}} | {{about|the visible ? Blocks from ''[[Super Paper Mario]]''|the hidden ones from same game|[[List of hidden blocks in Super Paper Mario|List of hidden blocks in ''Super Paper Mario'']]}} | ||
This is a list of [[? Block]]s from ''[[Super Paper Mario]]''. There are 363 visible ? Blocks in the game. They contain coins or items. Some of them are also disguised as [[Brick Block]]s and contain a number of coins. | This is a list of [[? Block]]s from ''[[Super Paper Mario]]''. There are 363 visible ? Blocks in the game. They contain coins or items. Some of them are also disguised as [[Brick Block]]s and contain a number of coins. | ||
| Line 45: | Line 45: | ||
|[[File:PMTTYD Coin Sprite.png]] [[File:Mushroom SPM.png]] [[File:PMTTYD Coin Sprite.png]] [[File:PMTTYD Coin Sprite.png]]<br>[[Mushroom#Super_Paper_Mario|Mushroom]] (2nd), [[Coin]] (rest) | |[[File:PMTTYD Coin Sprite.png]] [[File:Mushroom SPM.png]] [[File:PMTTYD Coin Sprite.png]] [[File:PMTTYD Coin Sprite.png]]<br>[[Mushroom#Super_Paper_Mario|Mushroom]] (2nd), [[Coin]] (rest) | ||
|In the first scene, left of the first [[Warp_Pipe#Super_Paper_Mario|pipe]]. | |In the first scene, left of the first [[Warp_Pipe#Super_Paper_Mario|pipe]]. | ||
|{{anchor|Lineland Road}}[[File:Lineland Road Blocks 1-4.png] | |{{anchor|Lineland Road}}[[File:Lineland Road Blocks 1-4.png|350px]] | ||
|- | |- | ||
|Lineland Road | |Lineland Road | ||
|[[File:PMTTYD Coin Sprite.png]]<br>Coin | |[[File:PMTTYD Coin Sprite.png]]<br>Coin | ||
|Same scene, left of the door with a star. | |Same scene, left of the door with a star. | ||
|[[File:Lineland Road Block 5.png] | |[[File:Lineland Road Block 5.png|350px]] | ||
|- | |- | ||
|Lineland Road | |Lineland Road | ||
|[[File:PMTTYD Coin Sprite.png]] [[File:Pal Pill SPM.png]] [[File:PMTTYD Coin Sprite.png]]<br>[[Pal Pills]] (middle), Coin (rest) | |[[File:PMTTYD Coin Sprite.png]] [[File:Pal Pill SPM.png]] [[File:PMTTYD Coin Sprite.png]]<br>[[Pal Pills]] (middle), Coin (rest) | ||
|Same scene, at the end, right of the [[Bestovius|Bestovius']] house. [[Mario]] needs to [[Flip|flip]] to 3-D to see the blocks. | |Same scene, at the end, right of the [[Bestovius|Bestovius']] house. [[Mario]] needs to [[Flip|flip]] to 3-D to see the blocks. | ||
|[[File:Lineland Road Blocks 6-8.png] | |[[File:Lineland Road Blocks 6-8.png|350px]] | ||
|- | |- | ||
|Lineland Road | |Lineland Road | ||
|[[File:Mushroom SPM.png]]<br>Mushroom | |[[File:Mushroom SPM.png]]<br>Mushroom | ||
|In the second scene, after the 3 pipes. Also accessible during the [[Dimentio]] chase in chapter 8-3. | |In the second scene, after the 3 pipes. Also accessible during the [[Dimentio]] chase in chapter 8-3. | ||
|[[File:Lineland Road Block 9.png] | |[[File:Lineland Road Block 9.png|350px]] | ||
|- | |- | ||
|Lineland Road | |Lineland Road | ||
|12x[[File:PMTTYD Coin Sprite.png]] [[File:PMTTYD Coin Sprite.png]] [[File:PMTTYD Coin Sprite.png]] [[File:PMTTYD Coin Sprite.png]] [[File:Happy Flower SPM.png]] [[File:PMTTYD Coin Sprite.png]]<br>12 Coins (lower first), [[Happy Flower (Super Paper Mario)|Happy Flower]] (upper 2nd), Coin (rest) | |12x[[File:PMTTYD Coin Sprite.png]] [[File:PMTTYD Coin Sprite.png]] [[File:PMTTYD Coin Sprite.png]] [[File:PMTTYD Coin Sprite.png]] [[File:Happy Flower SPM.png]] [[File:PMTTYD Coin Sprite.png]]<br>12 Coins (lower first), [[Happy Flower (Super Paper Mario)|Happy Flower]] (upper 2nd), Coin (rest) | ||
|Same scene, right and across the gap from the previous one. Also accessible during the Dimentio chase in chapter 8-3. | |Same scene, right and across the gap from the previous one. Also accessible during the Dimentio chase in chapter 8-3. | ||
|[[File:Lineland Road Blocks 10-15.png] | |[[File:Lineland Road Blocks 10-15.png|350px]] | ||
|- | |- | ||
|Lineland Road | |Lineland Road | ||
|[[File:Mushroom SPM.png]]<br>Mushroom | |[[File:Mushroom SPM.png]]<br>Mushroom | ||
|Same scene, above the second pipe in 3-D. Also accessible during the Dimentio chase in chapter 8-3. | |Same scene, above the second pipe in 3-D. Also accessible during the Dimentio chase in chapter 8-3. | ||
|[[File:Lineland Road Block 16.png] | |[[File:Lineland Road Block 16.png|350px]] | ||
|- | |- | ||
|Lineland Road | |Lineland Road | ||
|[[File:PMTTYD Coin Sprite.png]]<br>Coin or Random Item | |[[File:PMTTYD Coin Sprite.png]]<br>Coin or Random Item | ||
|In the third scene, between the two elevated grounds. | |In the third scene, between the two elevated grounds. | ||
|[[File:Lineland Road Block 17.png] | |[[File:Lineland Road Block 17.png|350px]] | ||
|- | |- | ||
|Lineland Road | |Lineland Road | ||
|[[File:PMTTYD Coin Sprite.png]]<br>Coin | |[[File:PMTTYD Coin Sprite.png]]<br>Coin | ||
|Same scene, right of the second elevated ground. | |Same scene, right of the second elevated ground. | ||
|[[File:Lineland Road Block 18.png] | |[[File:Lineland Road Block 18.png|350px]] | ||
|- | |- | ||
|Lineland Road | |Lineland Road | ||
|[[File:PMTTYD Coin Sprite.png]][[File:PMTTYD Coin Sprite.png]][[File:PMTTYD Coin Sprite.png]][[File:PMTTYD Coin Sprite.png]][[File:PMTTYD Coin Sprite.png]][[File:PMTTYD Coin Sprite.png]][[File:PMTTYD Coin Sprite.png]][[File:PMTTYD Coin Sprite.png]]<br>8 Coins | |[[File:PMTTYD Coin Sprite.png]][[File:PMTTYD Coin Sprite.png]][[File:PMTTYD Coin Sprite.png]][[File:PMTTYD Coin Sprite.png]][[File:PMTTYD Coin Sprite.png]][[File:PMTTYD Coin Sprite.png]][[File:PMTTYD Coin Sprite.png]][[File:PMTTYD Coin Sprite.png]]<br>8 Coins | ||
|Same scene, above the second elevated ground. | |Same scene, above the second elevated ground. | ||
|[[File:Lineland Road Block 19.png] | |[[File:Lineland Road Block 19.png|350px]] | ||
|- | |- | ||
|Lineland Road | |Lineland Road | ||
|[[File:Pal Pill SPM.png]]<br>Pal Pills | |[[File:Pal Pill SPM.png]]<br>Pal Pills | ||
|Same scene, behind the first elevated ground in 3-D. | |Same scene, behind the first elevated ground in 3-D. | ||
|[[File:Lineland Road Block 20.png] | |[[File:Lineland Road Block 20.png|350px]] | ||
|- | |- | ||
|Lineland Road | |Lineland Road | ||
|[[File:Mega Star SPM.png]]<br>[[Mega Star]] | |[[File:Mega Star SPM.png]]<br>[[Mega Star]] | ||
|In the last/fourth scene, near the beginning. | |In the last/fourth scene, near the beginning. | ||
|[[File:Lineland Road Block 21.png] | |[[File:Lineland Road Block 21.png|350px]] | ||
|- | |- | ||
|colspan=4 style="background:red"| | |colspan=4 style="background:red"| | ||
| Line 104: | Line 104: | ||
|[[File:Mushroom SPM.png]] [[File:PMTTYD Coin Sprite.png]] [[File:PMTTYD Coin Sprite.png]] [[File:PMTTYD Coin Sprite.png]]<br>Mushroom (1st), Coin (rest) | |[[File:Mushroom SPM.png]] [[File:PMTTYD Coin Sprite.png]] [[File:PMTTYD Coin Sprite.png]] [[File:PMTTYD Coin Sprite.png]]<br>Mushroom (1st), Coin (rest) | ||
|In the first scene, near the beginning. | |In the first scene, near the beginning. | ||
|{{anchor|Mount Lineland}}[[File:Mount Lineland Blocks 1-4.png] | |{{anchor|Mount Lineland}}[[File:Mount Lineland Blocks 1-4.png|350px]] | ||
|- | |- | ||
|Mount Lineland | |Mount Lineland | ||
|[[File:PMTTYD Coin Sprite.png]]<br>Coin | |[[File:PMTTYD Coin Sprite.png]]<br>Coin | ||
|Same scene, near the exit door. | |Same scene, near the exit door. | ||
|[[File:Mount Lineland Block 5.png] | |[[File:Mount Lineland Block 5.png|350px]] | ||
|- | |- | ||
|Mount Lineland | |Mount Lineland | ||
|[[File:PMTTYD Coin Sprite.png]] [[File:PMTTYD Coin Sprite.png]] [[File:PMTTYD Coin Sprite.png]] [[File:PMTTYD Coin Sprite.png]]<br>Coin (all) | |[[File:PMTTYD Coin Sprite.png]] [[File:PMTTYD Coin Sprite.png]] [[File:PMTTYD Coin Sprite.png]] [[File:PMTTYD Coin Sprite.png]]<br>Coin (all) | ||
|In the second scene, after coming across the first wall and the flipping to 3-D. | |In the second scene, after coming across the first wall and the flipping to 3-D. | ||
|[[File:Mount Lineland Blocks 6-9.png] | |[[File:Mount Lineland Blocks 6-9.png|350px]] | ||
|- | |- | ||
|Mount Lineland | |Mount Lineland | ||
|[[File:PMTTYD Coin Sprite.png]] [[File:PMTTYD Coin Sprite.png]] [[File:PMTTYD Coin Sprite.png]] [[File:PMTTYD Coin Sprite.png]] [[File:PMTTYD Coin Sprite.png]] [[File:PMTTYD Coin Sprite.png]] [[File:PMTTYD Coin Sprite.png]] [[File:PMTTYD Coin Sprite.png]]<br>Coin (all) | |[[File:PMTTYD Coin Sprite.png]] [[File:PMTTYD Coin Sprite.png]] [[File:PMTTYD Coin Sprite.png]] [[File:PMTTYD Coin Sprite.png]] [[File:PMTTYD Coin Sprite.png]] [[File:PMTTYD Coin Sprite.png]] [[File:PMTTYD Coin Sprite.png]] [[File:PMTTYD Coin Sprite.png]]<br>Coin (all) | ||
|Same scene, on the top of the second wall in 3-D, right of the platform. | |Same scene, on the top of the second wall in 3-D, right of the platform. | ||
|[[File:Mount Lineland Blocks 10-17.png] | |[[File:Mount Lineland Blocks 10-17.png|350px]] | ||
|- | |- | ||
|Mount Lineland | |Mount Lineland | ||
|[[File:Mushroom SPM.png]]<br>Mushroom | |[[File:Mushroom SPM.png]]<br>Mushroom | ||
|In the last/third/town scene, between the first and second houses. | |In the last/third/town scene, between the first and second houses. | ||
|[[File:Mount Lineland Block 18.png] | |[[File:Mount Lineland Block 18.png|350px]] | ||
|- | |- | ||
|colspan=4 style="background:red"| | |colspan=4 style="background:red"| | ||
| Line 134: | Line 134: | ||
[[File:PMTTYD Coin Sprite.png]]<br>Pal Pills (southwest), Happy Flower (northwest), [[Speed Flower]] (northeast), Coin (rest) | [[File:PMTTYD Coin Sprite.png]]<br>Pal Pills (southwest), Happy Flower (northwest), [[Speed Flower]] (northeast), Coin (rest) | ||
|In the first scene, between the first and second rocks. Mario must flip to see all 16 blocks. | |In the first scene, between the first and second rocks. Mario must flip to see all 16 blocks. | ||
|{{anchor|Yold Desert}}[[File:Yold Desert Blocks 1-16.png] | |{{anchor|Yold Desert}}[[File:Yold Desert Blocks 1-16.png|350px]] | ||
|- | |- | ||
|Yold Desert | |Yold Desert | ||
|[[File:PMTTYD Coin Sprite.png]] [[File:PMTTYD Coin Sprite.png]] [[File:SPMZombieShroom.png|39px]] [[File:Mushroom SPM.png]]<br>Coin (left ones), [[Zombie Shroom]] (south-right), Mushroom (north-right) | |[[File:PMTTYD Coin Sprite.png]] [[File:PMTTYD Coin Sprite.png]] [[File:SPMZombieShroom.png|39px]] [[File:Mushroom SPM.png]]<br>Coin (left ones), [[Zombie Shroom]] (south-right), Mushroom (north-right) | ||
|Same scene, right of the previous ones, near the red palm tree. Mario must flip to see all 4 blocks. | |Same scene, right of the previous ones, near the red palm tree. Mario must flip to see all 4 blocks. | ||
|[[File:Yold Desert Blocks 17-20.png] | |[[File:Yold Desert Blocks 17-20.png|350px]] | ||
|- | |- | ||
|Yold Desert | |Yold Desert | ||
|[[File:Mushroom SPM.png]] [[File:PMTTYD Coin Sprite.png]]<br>Mushroom, Coin | |[[File:Mushroom SPM.png]] [[File:PMTTYD Coin Sprite.png]]<br>Mushroom, Coin | ||
|Same scene, after the first quicksand pit, above the group of [[Brick Block|brick blocks]]. | |Same scene, after the first quicksand pit, above the group of [[Brick Block|brick blocks]]. | ||
|[[File:Yold Desert Blocks 21-22.png] | |[[File:Yold Desert Blocks 21-22.png|350px]] | ||
|- | |- | ||
|Yold Desert | |Yold Desert | ||
|[[File:PMTTYD Coin Sprite.png]]<br>Coin | |[[File:PMTTYD Coin Sprite.png]]<br>Coin | ||
|In the third scene (accessed by a door right of the red palm tree), left of the first flipping rectangles. | |In the third scene (accessed by a door right of the red palm tree), left of the first flipping rectangles. | ||
|[[File:Yold Desert Block 23.png] | |[[File:Yold Desert Block 23.png|350px]] | ||
|- | |- | ||
|Yold Desert | |Yold Desert | ||
|[[File:SPMZombieShroom.png|39px]] [[File:PMTTYD Coin Sprite.png]]<br>Zombie Mushroom, Coin | |[[File:SPMZombieShroom.png|39px]] [[File:PMTTYD Coin Sprite.png]]<br>Zombie Mushroom, Coin | ||
|Same scene, left after being dropped from the first flipping rectangles. | |Same scene, left after being dropped from the first flipping rectangles. | ||
|[[File:Yold Desert Blocks 24-25.png] | |[[File:Yold Desert Blocks 24-25.png|350px]] | ||
|- | |- | ||
|Yold Desert | |Yold Desert | ||
|[[File:Mushroom SPM.png]]<br>Mushroom | |[[File:Mushroom SPM.png]]<br>Mushroom | ||
|Same scene, right after being dropped from the second flipping rectangles. | |Same scene, right after being dropped from the second flipping rectangles. | ||
|[[File:Yold Desert Block 26.png] | |[[File:Yold Desert Block 26.png|350px]] | ||
|- | |- | ||
|Yold Desert | |Yold Desert | ||
|[[File:PMTTYD Coin Sprite.png]] [[File:PMTTYD Coin Sprite.png]] [[File:PMTTYD Coin Sprite.png]] [[File:PMTTYD Coin Sprite.png]] [[File:PMTTYD Coin Sprite.png]] [[File:PMTTYD Coin Sprite.png]] [[File:PMTTYD Coin Sprite.png]] [[File:PMTTYD Coin Sprite.png]] [[File:PMTTYD Coin Sprite.png]] [[File:PMTTYD Coin Sprite.png]] [[File:PMTTYD Coin Sprite.png]] [[File:PMTTYD Coin Sprite.png]] [[File:Super Shroom SPM.png]]<br>[[Super_Mushroom#Super_Paper_Mario|Super Shroom]] (upper-last), Coin (rest) | |[[File:PMTTYD Coin Sprite.png]] [[File:PMTTYD Coin Sprite.png]] [[File:PMTTYD Coin Sprite.png]] [[File:PMTTYD Coin Sprite.png]] [[File:PMTTYD Coin Sprite.png]] [[File:PMTTYD Coin Sprite.png]] [[File:PMTTYD Coin Sprite.png]] [[File:PMTTYD Coin Sprite.png]] [[File:PMTTYD Coin Sprite.png]] [[File:PMTTYD Coin Sprite.png]] [[File:PMTTYD Coin Sprite.png]] [[File:PMTTYD Coin Sprite.png]] [[File:Super Shroom SPM.png]]<br>[[Super_Mushroom#Super_Paper_Mario|Super Shroom]] (upper-last), Coin (rest) | ||
|Same scene, after entering the pipe near the end and then flipping to 3-D. | |Same scene, after entering the pipe near the end and then flipping to 3-D. | ||
|[[File:Yold Desert Blocks 27-39.png] | |[[File:Yold Desert Blocks 27-39.png|350px]] | ||
|- | |- | ||
|Yold Desert | |Yold Desert | ||
|[[File:PMTTYD Coin Sprite.png]] [[File:PMTTYD Coin Sprite.png]] [[File:PMTTYD Coin Sprite.png]] [[File:PMTTYD Coin Sprite.png]] [[File:PMTTYD Coin Sprite.png]]<br>Coin (all) | |[[File:PMTTYD Coin Sprite.png]] [[File:PMTTYD Coin Sprite.png]] [[File:PMTTYD Coin Sprite.png]] [[File:PMTTYD Coin Sprite.png]] [[File:PMTTYD Coin Sprite.png]]<br>Coin (all) | ||
|In the sixth scene (the one with the signpost with the instructions how to access the end of the area), left of the signpost. Mario must flip into 3-D to see the blocks. | |In the sixth scene (the one with the signpost with the instructions how to access the end of the area), left of the signpost. Mario must flip into 3-D to see the blocks. | ||
|[[File:Yold Desert Blocks 40-44.png] | |[[File:Yold Desert Blocks 40-44.png|350px]] | ||
|- | |- | ||
|colspan=4 style="background:red"| | |colspan=4 style="background:red"| | ||
| Line 178: | Line 178: | ||
|[[File:Mushroom SPM.png]]<br>Mushroom | |[[File:Mushroom SPM.png]]<br>Mushroom | ||
|In the second scene, above the [[Fire_Bar#Super_Paper_Mario|fire bar]]. | |In the second scene, above the [[Fire_Bar#Super_Paper_Mario|fire bar]]. | ||
|{{anchor|Yold Ruins}}[[File:Yold Ruins Block 1.png] | |{{anchor|Yold Ruins}}[[File:Yold Ruins Block 1.png|350px]] | ||
|- | |- | ||
|Yold Ruins | |Yold Ruins | ||
|[[File:PMTTYD Coin Sprite.png]] [[File:PMTTYD Coin Sprite.png]] [[File:PMTTYD Coin Sprite.png]] [[File:PMTTYD Coin Sprite.png]]<br>Coin (all) | |[[File:PMTTYD Coin Sprite.png]] [[File:PMTTYD Coin Sprite.png]] [[File:PMTTYD Coin Sprite.png]] [[File:PMTTYD Coin Sprite.png]]<br>Coin (all) | ||
|In the fifth scene, above the quicksand pit. | |In the fifth scene, above the quicksand pit. | ||
|[[File:Yold Ruins Blocks 2-5.png] | |[[File:Yold Ruins Blocks 2-5.png|350px]] | ||
|- | |- | ||
|Yold Ruins | |Yold Ruins | ||
|[[File:PMTTYD Coin Sprite.png]]<br>Coin | |[[File:PMTTYD Coin Sprite.png]]<br>Coin | ||
|Same scene, near the end, left of the doors. Mario must flip into 3-D to see it. | |Same scene, near the end, left of the doors. Mario must flip into 3-D to see it. | ||
|[[File:Yold Ruins Block 6.png] | |[[File:Yold Ruins Block 6.png|350px]] | ||
|- | |- | ||
|Yold Ruins | |Yold Ruins | ||
|[[File:Super Shroom SPM.png]]<br>Super Shroom | |[[File:Super Shroom SPM.png]]<br>Super Shroom | ||
|In the last scene before the outside, above the pipe. | |In the last scene before the outside, above the pipe. | ||
|[[File:Yold Ruins Block 7.png] | |[[File:Yold Ruins Block 7.png|350px]] | ||
|- | |- | ||
|colspan=4 style="background:orange"| | |colspan=4 style="background:orange"| | ||
| Line 202: | Line 202: | ||
|[[File:PMTTYD Coin Sprite.png]]<br>Coin | |[[File:PMTTYD Coin Sprite.png]]<br>Coin | ||
|In the first scene, above the first platform. | |In the first scene, above the first platform. | ||
|{{anchor|Gloam Valley}}[[File:Gloam Valley Block 1.png] | |{{anchor|Gloam Valley}}[[File:Gloam Valley Block 1.png|350px]] | ||
|- | |- | ||
|Gloam Valley | |Gloam Valley | ||
|[[File:PMTTYD Coin Sprite.png]]<br>Coin | |[[File:PMTTYD Coin Sprite.png]]<br>Coin | ||
|Same scene, after gliding with [[Princess Peach|Peach]] from the second platform. | |Same scene, after gliding with [[Princess Peach|Peach]] from the second platform. | ||
|[[File:Gloam Valley Block 2.png] | |[[File:Gloam Valley Block 2.png|350px]] | ||
|- | |- | ||
|Gloam Valley | |Gloam Valley | ||
|[[File:PMTTYD Coin Sprite.png]]<br>Coin | |[[File:PMTTYD Coin Sprite.png]]<br>Coin | ||
|Same scene, right before the water with sinking platforms. | |Same scene, right before the water with sinking platforms. | ||
|[[File:Gloam Valley Block 3.png] | |[[File:Gloam Valley Block 3.png|350px]] | ||
|- | |- | ||
|Gloam Valley | |Gloam Valley | ||
|[[File:Pal Pill SPM.png]]<br>Pal Pills | |[[File:Pal Pill SPM.png]]<br>Pal Pills | ||
|In the second scene, behind the entrance door. | |In the second scene, behind the entrance door. | ||
|[[File:Gloam Valley Block 4.png] | |[[File:Gloam Valley Block 4.png|350px]] | ||
|- | |- | ||
|Gloam Valley | |Gloam Valley | ||
|[[File:PMTTYD Coin Sprite.png]]<br>Coin | |[[File:PMTTYD Coin Sprite.png]]<br>Coin | ||
|In the fourth scene, right of the entrance door. | |In the fourth scene, right of the entrance door. | ||
|[[File:Gloam Valley Block 5.png] | |[[File:Gloam Valley Block 5.png|350px]] | ||
|- | |- | ||
|Gloam Valley | |Gloam Valley | ||
|[[File:Mega Star SPM.png]]<br>Mega Star | |[[File:Mega Star SPM.png]]<br>Mega Star | ||
|Same scene, above the previous one | |Same scene, above the previous one | ||
|[[File:Gloam Valley Block 6.png] | |[[File:Gloam Valley Block 6.png|350px]] | ||
|- | |- | ||
|Gloam Valley | |Gloam Valley | ||
|[[File:Slow Flower SPM.png]]<br>[[Slow Flower]] | |[[File:Slow Flower SPM.png]]<br>[[Slow Flower]] | ||
|In the fifth scene, right of the entrance door. | |In the fifth scene, right of the entrance door. | ||
|[[File:Gloam Valley Block 7.png] | |[[File:Gloam Valley Block 7.png|350px]] | ||
|- | |- | ||
|Gloam Valley | |Gloam Valley | ||
|[[File:Happy Flower SPM.png]]<br>Happy Flower | |[[File:Happy Flower SPM.png]]<br>Happy Flower | ||
|Same scene, right after the water. | |Same scene, right after the water. | ||
|[[File:Gloam Valley Block 8.png] | |[[File:Gloam Valley Block 8.png|350px]] | ||
|- | |- | ||
|colspan=4 style="background:orange"| | |colspan=4 style="background:orange"| | ||
| Line 246: | Line 246: | ||
|[[File:PMTTYD Coin Sprite.png]][[File:PMTTYD Coin Sprite.png]][[File:PMTTYD Coin Sprite.png]][[File:PMTTYD Coin Sprite.png]][[File:PMTTYD Coin Sprite.png]][[File:PMTTYD Coin Sprite.png]][[File:PMTTYD Coin Sprite.png]][[File:PMTTYD Coin Sprite.png]][[File:PMTTYD Coin Sprite.png]][[File:PMTTYD Coin Sprite.png]][[File:PMTTYD Coin Sprite.png]][[File:PMTTYD Coin Sprite.png]]<br>12 Coins | |[[File:PMTTYD Coin Sprite.png]][[File:PMTTYD Coin Sprite.png]][[File:PMTTYD Coin Sprite.png]][[File:PMTTYD Coin Sprite.png]][[File:PMTTYD Coin Sprite.png]][[File:PMTTYD Coin Sprite.png]][[File:PMTTYD Coin Sprite.png]][[File:PMTTYD Coin Sprite.png]][[File:PMTTYD Coin Sprite.png]][[File:PMTTYD Coin Sprite.png]][[File:PMTTYD Coin Sprite.png]][[File:PMTTYD Coin Sprite.png]]<br>12 Coins | ||
|In the outside scene, found right away to the left after flipping to 3-D. | |In the outside scene, found right away to the left after flipping to 3-D. | ||
|{{anchor|Merlee's Mansion}}[[File:Merlee's Mansion (2-2) Block 1.png] | |{{anchor|Merlee's Mansion}}[[File:Merlee's Mansion (2-2) Block 1.png|350px]] | ||
|- | |- | ||
|Merlee's Mansion | |Merlee's Mansion | ||
|[[File:Slow Flower SPM.png]]<br>Slow Flower | |[[File:Slow Flower SPM.png]]<br>Slow Flower | ||
|In the room with a spike ceiling trap (accessed by a door on the second floor in the second room of the mansion), after flipping to 3-D and jumping on top of the trap, then flipping back and reaching its east end. | |In the room with a spike ceiling trap (accessed by a door on the second floor in the second room of the mansion), after flipping to 3-D and jumping on top of the trap, then flipping back and reaching its east end. | ||
|[[File:Merlee's Mansion (2-2) Block 2.png] | |[[File:Merlee's Mansion (2-2) Block 2.png|350px]] | ||
|- | |- | ||
|colspan=4 style="background:orange"| | |colspan=4 style="background:orange"| | ||
| Line 260: | Line 260: | ||
|[[File:PMTTYD Coin Sprite.png]]<br>Coin | |[[File:PMTTYD Coin Sprite.png]]<br>Coin | ||
|In the middle of the first floor on the first room. This block is required to be hit to progress through the game. Also accessible during the Dimentio chase in chapter 8-3. | |In the middle of the first floor on the first room. This block is required to be hit to progress through the game. Also accessible during the Dimentio chase in chapter 8-3. | ||
|[[File:Merlee's Mansion (2-3) Block 1.png] | |[[File:Merlee's Mansion (2-3) Block 1.png|350px]] | ||
|- | |- | ||
|Merlee's Mansion | |Merlee's Mansion | ||
|[[File:Mushroom SPM.png]]<br>Empty or Mushroom | |[[File:Mushroom SPM.png]]<br>Empty or Mushroom | ||
|In the room behind the door on the second floor. Contents of the block depend on if the group has at least 10 [[Rubee]]s: If they don't have them, striking this block does nothing. But if they have them, striking this block spawns a Mushroom. Leaving the room respawns the block. | |In the room behind the door on the second floor. Contents of the block depend on if the group has at least 10 [[Rubee]]s: If they don't have them, striking this block does nothing. But if they have them, striking this block spawns a Mushroom. Leaving the room respawns the block. | ||
|[[File:Merlee's Mansion (2-3) Block 2.png] | |[[File:Merlee's Mansion (2-3) Block 2.png|350px]] | ||
|- | |- | ||
|colspan=4 style="background:orange"| | |colspan=4 style="background:orange"| | ||
| Line 274: | Line 274: | ||
|[[File:Mushroom SPM.png]]<br>Mushroom | |[[File:Mushroom SPM.png]]<br>Mushroom | ||
|In the first room, under the stairs. To reach it, Mario must flip into 3-D. | |In the first room, under the stairs. To reach it, Mario must flip into 3-D. | ||
|{{anchor|Merlee's Basement}}[[File:Merlee's Basement Block 1.png] | |{{anchor|Merlee's Basement}}[[File:Merlee's Basement Block 1.png|350px]] | ||
|- | |- | ||
|Merlee's Basement | |Merlee's Basement | ||
|[[File:PMTTYD Coin Sprite.png]] [[File:SPMZombieShroom.png|39px]]<br>Coin, Zombie Shroom | |[[File:PMTTYD Coin Sprite.png]] [[File:SPMZombieShroom.png|39px]]<br>Coin, Zombie Shroom | ||
|In the lower part of Room 02. | |In the lower part of Room 02. | ||
|[[File:Merlee's Basement Blocks 2-3.png] | |[[File:Merlee's Basement Blocks 2-3.png|350px]] | ||
|- | |- | ||
|Merlee's Basement | |Merlee's Basement | ||
|[[File:PMTTYD Coin Sprite.png]]<br>Coin | |[[File:PMTTYD Coin Sprite.png]]<br>Coin | ||
|In the lower part of Room 04. | |In the lower part of Room 04. | ||
|[[File:Merlee's Basement Block 4.png] | |[[File:Merlee's Basement Block 4.png|350px]] | ||
|- | |- | ||
|Merlee's Basement | |Merlee's Basement | ||
|[[File:PMTTYD Coin Sprite.png]] [[File:PMTTYD Coin Sprite.png]] [[File:PMTTYD Coin Sprite.png]] [[File:PMTTYD Coin Sprite.png]]<br>Coin (all) | |[[File:PMTTYD Coin Sprite.png]] [[File:PMTTYD Coin Sprite.png]] [[File:PMTTYD Coin Sprite.png]] [[File:PMTTYD Coin Sprite.png]]<br>Coin (all) | ||
|In the lower part of Room 06. To see all 4, Mario must flip into 3-D. | |In the lower part of Room 06. To see all 4, Mario must flip into 3-D. | ||
|[[File:Merlee's Basement Blocks 5-8.png] | |[[File:Merlee's Basement Blocks 5-8.png|350px]] | ||
|- | |- | ||
|Merlee's Basement | |Merlee's Basement | ||
|[[File:Mushroom SPM.png]] [[File:Super Shroom SPM.png]]<br>Mushroom, Super Shroom | |[[File:Mushroom SPM.png]] [[File:Super Shroom SPM.png]]<br>Mushroom, Super Shroom | ||
|In the room before the bathrooms, between the entrance and men's room. To see both, Mario must flip into 3-D. | |In the room before the bathrooms, between the entrance and men's room. To see both, Mario must flip into 3-D. | ||
|[[File:Merlee's Basement Blocks 9-10.png] | |[[File:Merlee's Basement Blocks 9-10.png|350px]] | ||
|- | |- | ||
|colspan=4 style="background:yellow"| | |colspan=4 style="background:yellow"| | ||
| Line 303: | Line 303: | ||
|[[File:PMTTYD Coin Sprite.png]]<br>Coin | |[[File:PMTTYD Coin Sprite.png]]<br>Coin | ||
|In the first scene, above the first platform. | |In the first scene, above the first platform. | ||
|{{anchor|The Bitlands}}[[File:The Bitlands Block 1.png] | |{{anchor|The Bitlands}}[[File:The Bitlands Block 1.png|350px]] | ||
|- | |- | ||
|The Bitlands | |The Bitlands | ||
|[[File:PMTTYD Coin Sprite.png]]<br>Coin | |[[File:PMTTYD Coin Sprite.png]]<br>Coin | ||
|Same scene, left of the first pipe. | |Same scene, left of the first pipe. | ||
|[[File:The Bitlands Block 2.png] | |[[File:The Bitlands Block 2.png|350px]] | ||
|- | |- | ||
|The Bitlands | |The Bitlands | ||
|[[File:Mega Star SPM.png]]<br>Mega Star | |[[File:Mega Star SPM.png]]<br>Mega Star | ||
|In the scene accessed by a door, right of the entrance door. | |In the scene accessed by a door, right of the entrance door. | ||
|[[File:The Bitlands Block 3.png] | |[[File:The Bitlands Block 3.png|350px]] | ||
|- | |- | ||
|The Bitlands | |The Bitlands | ||
|[[File:Mega Star SPM.png]]<br>Mega Star | |[[File:Mega Star SPM.png]]<br>Mega Star | ||
|In the next scene, found after going left. | |In the next scene, found after going left. | ||
|[[File:The Bitlands Block 4.png] | |[[File:The Bitlands Block 4.png|350px]] | ||
|- | |- | ||
|The Bitlands | |The Bitlands | ||
|[[File:Pal Pill SPM.png]] [[File:PMTTYD Coin Sprite.png]] [[File:PMTTYD Coin Sprite.png]] [[File:PMTTYD Coin Sprite.png]] [[File:PMTTYD Coin Sprite.png]]<br>Pal Pills (1st), Coin (rest) | |[[File:Pal Pill SPM.png]] [[File:PMTTYD Coin Sprite.png]] [[File:PMTTYD Coin Sprite.png]] [[File:PMTTYD Coin Sprite.png]] [[File:PMTTYD Coin Sprite.png]]<br>Pal Pills (1st), Coin (rest) | ||
|In the underground scene, found near the beginning. | |In the underground scene, found near the beginning. | ||
|[[File:The Bitlands Blocks 5-9.png] | |[[File:The Bitlands Blocks 5-9.png|350px]] | ||
|- | |- | ||
|The Bitlands | |The Bitlands | ||
|[[File:PMTTYD Coin Sprite.png]][[File:PMTTYD Coin Sprite.png]][[File:PMTTYD Coin Sprite.png]][[File:PMTTYD Coin Sprite.png]][[File:PMTTYD Coin Sprite.png]][[File:PMTTYD Coin Sprite.png]][[File:PMTTYD Coin Sprite.png]][[File:PMTTYD Coin Sprite.png]][[File:PMTTYD Coin Sprite.png]][[File:PMTTYD Coin Sprite.png]][[File:PMTTYD Coin Sprite.png]][[File:PMTTYD Coin Sprite.png]][[File:PMTTYD Coin Sprite.png]][[File:PMTTYD Coin Sprite.png]]<br>14 Coins | |[[File:PMTTYD Coin Sprite.png]][[File:PMTTYD Coin Sprite.png]][[File:PMTTYD Coin Sprite.png]][[File:PMTTYD Coin Sprite.png]][[File:PMTTYD Coin Sprite.png]][[File:PMTTYD Coin Sprite.png]][[File:PMTTYD Coin Sprite.png]][[File:PMTTYD Coin Sprite.png]][[File:PMTTYD Coin Sprite.png]][[File:PMTTYD Coin Sprite.png]][[File:PMTTYD Coin Sprite.png]][[File:PMTTYD Coin Sprite.png]][[File:PMTTYD Coin Sprite.png]][[File:PMTTYD Coin Sprite.png]]<br>14 Coins | ||
|Same scene, in the largest gap between the collumns. | |Same scene, in the largest gap between the collumns. | ||
|[[File:The Bitlands Block 10.png] | |[[File:The Bitlands Block 10.png|350px]] | ||
|- | |- | ||
|The Bitlands | |The Bitlands | ||
|[[File:SPMZombieShroom.png|39px]]<br>Zombie Shroom | |[[File:SPMZombieShroom.png|39px]]<br>Zombie Shroom | ||
|Same scene, after the collumns. | |Same scene, after the collumns. | ||
|[[File:The Bitlands Block 11.png] | |[[File:The Bitlands Block 11.png|350px]] | ||
|- | |- | ||
|The Bitlands | |The Bitlands | ||
|[[File:Mushroom SPM.png]]<br>Mushroom | |[[File:Mushroom SPM.png]]<br>Mushroom | ||
|Same scene, above the ground between moving platforms | |Same scene, above the ground between moving platforms | ||
|[[File:The Bitlands Block 12.png] | |[[File:The Bitlands Block 12.png|350px]] | ||
|- | |- | ||
|The Bitlands | |The Bitlands | ||
|[[File:PMTTYD Coin Sprite.png]][[File:PMTTYD Coin Sprite.png]][[File:PMTTYD Coin Sprite.png]][[File:PMTTYD Coin Sprite.png]][[File:PMTTYD Coin Sprite.png]][[File:PMTTYD Coin Sprite.png]][[File:PMTTYD Coin Sprite.png]][[File:PMTTYD Coin Sprite.png]][[File:PMTTYD Coin Sprite.png]][[File:PMTTYD Coin Sprite.png]][[File:PMTTYD Coin Sprite.png]][[File:PMTTYD Coin Sprite.png]][[File:PMTTYD Coin Sprite.png]][[File:PMTTYD Coin Sprite.png]]<br>14 Coins | |[[File:PMTTYD Coin Sprite.png]][[File:PMTTYD Coin Sprite.png]][[File:PMTTYD Coin Sprite.png]][[File:PMTTYD Coin Sprite.png]][[File:PMTTYD Coin Sprite.png]][[File:PMTTYD Coin Sprite.png]][[File:PMTTYD Coin Sprite.png]][[File:PMTTYD Coin Sprite.png]][[File:PMTTYD Coin Sprite.png]][[File:PMTTYD Coin Sprite.png]][[File:PMTTYD Coin Sprite.png]][[File:PMTTYD Coin Sprite.png]][[File:PMTTYD Coin Sprite.png]][[File:PMTTYD Coin Sprite.png]]<br>14 Coins | ||
|In the scene after using the first pipe. | |In the scene after using the first pipe. | ||
|[[File:The Bitlands Block 13.png] | |[[File:The Bitlands Block 13.png|350px]] | ||
|- | |- | ||
|The Bitlands | |The Bitlands | ||
|[[File:PMTTYD Coin Sprite.png]]<br>Coin | |[[File:PMTTYD Coin Sprite.png]]<br>Coin | ||
|In the scene after using the rightmost pipe in the secret section of the scene. | |In the scene after using the rightmost pipe in the secret section of the scene. | ||
|[[File:The Bitlands Block 14.png] | |[[File:The Bitlands Block 14.png|350px]] | ||
|- | |- | ||
|The Bitlands | |The Bitlands | ||
|[[File:PMTTYD Coin Sprite.png]] [[File:PMTTYD Coin Sprite.png]] [[File:Super Shroom SPM.png]] [[File:PMTTYD Coin Sprite.png]] [[File:PMTTYD Coin Sprite.png]]<br>Super Shroom (middle), Coin (rest) | |[[File:PMTTYD Coin Sprite.png]] [[File:PMTTYD Coin Sprite.png]] [[File:Super Shroom SPM.png]] [[File:PMTTYD Coin Sprite.png]] [[File:PMTTYD Coin Sprite.png]]<br>Super Shroom (middle), Coin (rest) | ||
|In the scene after using the pipe accessible only in 3-D. | |In the scene after using the pipe accessible only in 3-D. | ||
|[[File:The Bitlands | |[[File:The Bitlands Block 15-19.png|350px]] | ||
|- | |- | ||
|The Bitlands | |The Bitlands | ||
|[[File:PMTTYD Coin Sprite.png]] [[File:PMTTYD Coin Sprite.png]] [[File:PMTTYD Coin Sprite.png]] [[File:PMTTYD Coin Sprite.png]] [[File:PMTTYD Coin Sprite.png]] [[File:PMTTYD Coin Sprite.png]]<br>Coin (all) | |[[File:PMTTYD Coin Sprite.png]] [[File:PMTTYD Coin Sprite.png]] [[File:PMTTYD Coin Sprite.png]] [[File:PMTTYD Coin Sprite.png]] [[File:PMTTYD Coin Sprite.png]] [[File:PMTTYD Coin Sprite.png]]<br>Coin (all) | ||
|In the last scene, found right of the second pipe. | |In the last scene, found right of the second pipe. | ||
|[[File:The Bitlands Blocks 20-25.png] | |[[File:The Bitlands Blocks 20-25.png|350px]] | ||
|- | |- | ||
|colspan=4 style="background:yellow"| | |colspan=4 style="background:yellow"| | ||
| Line 367: | Line 367: | ||
|[[File:Mushroom SPM.png]]<br>Mushroom | |[[File:Mushroom SPM.png]]<br>Mushroom | ||
|In the first scene, near the beginning. Also accessible during the Dimentio chase in chapter 8-3. | |In the first scene, near the beginning. Also accessible during the Dimentio chase in chapter 8-3. | ||
|{{anchor|The Tile Pool}}[[File:The Tile Pool Block 1.png] | |{{anchor|The Tile Pool}}[[File:The Tile Pool Block 1.png|350px]] | ||
|- | |- | ||
|The Tile Pool | |The Tile Pool | ||
|[[File:Happy Flower SPM.png]]<br>Happy Flower | |[[File:Happy Flower SPM.png]]<br>Happy Flower | ||
|Same scene, near the whirlpool. Also accessible during the Dimentio chase in chapter 8-3. | |Same scene, near the whirlpool. Also accessible during the Dimentio chase in chapter 8-3. | ||
|[[File:The Tile Pool Block 2.png] | |[[File:The Tile Pool Block 2.png|350px]] | ||
|- | |- | ||
|colspan=4 style="background:yellow"| | |colspan=4 style="background:yellow"| | ||
| Line 381: | Line 381: | ||
|[[File:Slow Flower SPM.png]]<br>Slow Flower | |[[File:Slow Flower SPM.png]]<br>Slow Flower | ||
|In the outside scene, found above the third leaf platform. | |In the outside scene, found above the third leaf platform. | ||
|{{anchor|The Dotwood Tree}}[[File:The Dotwood Tree Block 1.png] | |{{anchor|The Dotwood Tree}}[[File:The Dotwood Tree Block 1.png|350px]] | ||
|- | |- | ||
|The Dotwood Tree | |The Dotwood Tree | ||
|[[File:Speed Flower SPM.png]]<br>Speed Flower | |[[File:Speed Flower SPM.png]]<br>Speed Flower | ||
|Same scene, above the third block platform. | |Same scene, above the third block platform. | ||
|[[File:The Dotwood Tree Block 2.png] | |[[File:The Dotwood Tree Block 2.png|350px]] | ||
|- | |- | ||
|The Dotwood Tree | |The Dotwood Tree | ||
|[[File:PMTTYD Coin Sprite.png]]<br>Coin | |[[File:PMTTYD Coin Sprite.png]]<br>Coin | ||
|Same scene, found above the previous one. | |Same scene, found above the previous one. | ||
|[[File:The Dotwood Tree Block 3.png] | |[[File:The Dotwood Tree Block 3.png|350px]] | ||
|- | |- | ||
|The Dotwood Tree | |The Dotwood Tree | ||
|[[File:Mushroom SPM.png]]<br>Mushroom | |[[File:Mushroom SPM.png]]<br>Mushroom | ||
|Same scene, found between eight and ninth block platforms | |Same scene, found between eight and ninth block platforms | ||
|[[File:The Dotwood Tree Block 4.png] | |[[File:The Dotwood Tree Block 4.png|350px]] | ||
|- | |- | ||
|The Dotwood Tree | |The Dotwood Tree | ||
|[[File:Super Shroom SPM.png]]<br>Super Shroom | |[[File:Super Shroom SPM.png]]<br>Super Shroom | ||
|In the inside scene, found near the top, left of the [[! Switch|! switch]]. | |In the inside scene, found near the top, left of the [[! Switch|! switch]]. | ||
|[[File:The Dotwood Tree Block 5.png] | |[[File:The Dotwood Tree Block 5.png|350px]] | ||
|- | |- | ||
|The Dotwood Tree | |The Dotwood Tree | ||
|[[File:PMTTYD Coin Sprite.png]][[File:PMTTYD Coin Sprite.png]][[File:PMTTYD Coin Sprite.png]][[File:PMTTYD Coin Sprite.png]][[File:PMTTYD Coin Sprite.png]][[File:PMTTYD Coin Sprite.png]][[File:PMTTYD Coin Sprite.png]][[File:PMTTYD Coin Sprite.png]][[File:PMTTYD Coin Sprite.png]][[File:PMTTYD Coin Sprite.png]][[File:PMTTYD Coin Sprite.png]][[File:PMTTYD Coin Sprite.png]][[File:PMTTYD Coin Sprite.png]][[File:PMTTYD Coin Sprite.png]]<br>14 Coins | |[[File:PMTTYD Coin Sprite.png]][[File:PMTTYD Coin Sprite.png]][[File:PMTTYD Coin Sprite.png]][[File:PMTTYD Coin Sprite.png]][[File:PMTTYD Coin Sprite.png]][[File:PMTTYD Coin Sprite.png]][[File:PMTTYD Coin Sprite.png]][[File:PMTTYD Coin Sprite.png]][[File:PMTTYD Coin Sprite.png]][[File:PMTTYD Coin Sprite.png]][[File:PMTTYD Coin Sprite.png]][[File:PMTTYD Coin Sprite.png]][[File:PMTTYD Coin Sprite.png]][[File:PMTTYD Coin Sprite.png]]<br>14 Coins | ||
|In the top of the tree scene, found above the tenth block platform. | |In the top of the tree scene, found above the tenth block platform. | ||
|[[File:The Dotwood Tree Block 6.png] | |[[File:The Dotwood Tree Block 6.png|350px]] | ||
|- | |- | ||
|The Dotwood Tree | |The Dotwood Tree | ||
|[[File:PMTTYD Coin Sprite.png]][[File:PMTTYD Coin Sprite.png]][[File:PMTTYD Coin Sprite.png]][[File:PMTTYD Coin Sprite.png]][[File:PMTTYD Coin Sprite.png]][[File:PMTTYD Coin Sprite.png]][[File:PMTTYD Coin Sprite.png]][[File:PMTTYD Coin Sprite.png]][[File:PMTTYD Coin Sprite.png]][[File:PMTTYD Coin Sprite.png]][[File:PMTTYD Coin Sprite.png]][[File:PMTTYD Coin Sprite.png]][[File:PMTTYD Coin Sprite.png]][[File:PMTTYD Coin Sprite.png]]<br>14 Coins | |[[File:PMTTYD Coin Sprite.png]][[File:PMTTYD Coin Sprite.png]][[File:PMTTYD Coin Sprite.png]][[File:PMTTYD Coin Sprite.png]][[File:PMTTYD Coin Sprite.png]][[File:PMTTYD Coin Sprite.png]][[File:PMTTYD Coin Sprite.png]][[File:PMTTYD Coin Sprite.png]][[File:PMTTYD Coin Sprite.png]][[File:PMTTYD Coin Sprite.png]][[File:PMTTYD Coin Sprite.png]][[File:PMTTYD Coin Sprite.png]][[File:PMTTYD Coin Sprite.png]][[File:PMTTYD Coin Sprite.png]]<br>14 Coins | ||
|In the last scene, found left of the entrance pipe. | |In the last scene, found left of the entrance pipe. | ||
|[[File:The Dotwood Tree Block 7.png] | |[[File:The Dotwood Tree Block 7.png|350px]] | ||
|- | |- | ||
|colspan=4 style="background:yellow"| | |colspan=4 style="background:yellow"| | ||
| Line 420: | Line 420: | ||
|[[File:Mushroom SPM.png]]<br>Mushroom | |[[File:Mushroom SPM.png]]<br>Mushroom | ||
|In the room accessed by an outside bridge. | |In the room accessed by an outside bridge. | ||
|{{anchor|Fort Francis}}[[File:Fort Francis Block 1 and Treasure Chest 2.png] | |{{anchor|Fort Francis}}[[File:Fort Francis Block 1 and Treasure Chest 2.png|350px]] | ||
|- | |- | ||
|Fort Francis | |Fort Francis | ||
|[[File:Super Shroom SPM.png]]<br>Super Shroom | |[[File:Super Shroom SPM.png]]<br>Super Shroom | ||
|In the room accessed by an elevator. | |In the room accessed by an elevator. | ||
|[[File:Fort Francis Block 2 and Treasure Chest 3.png] | |[[File:Fort Francis Block 2 and Treasure Chest 3.png|350px]] | ||
|- | |- | ||
|colspan=4 style="background:green"| | |colspan=4 style="background:green"| | ||
| Line 434: | Line 434: | ||
|[[File:PMTTYD Coin Sprite.png]]<br>Coin | |[[File:PMTTYD Coin Sprite.png]]<br>Coin | ||
|In the last scene, there is an [[Squarp hole]] hidden behind an asteroid. This hole takes Mario into the background, near the pipe. Block is found after entering said pipe. | |In the last scene, there is an [[Squarp hole]] hidden behind an asteroid. This hole takes Mario into the background, near the pipe. Block is found after entering said pipe. | ||
|{{anchor|Outer Space}}[[File:Outer Space Block.png] | |{{anchor|Outer Space}}[[File:Outer Space Block.png|350px]] | ||
|- | |- | ||
|colspan=4 style="background:green"| | |colspan=4 style="background:green"| | ||
| Line 443: | Line 443: | ||
|[[File:PMTTYD Coin Sprite.png]] [[File:Mushroom SPM.png]]<br>Coin, Mushroom | |[[File:PMTTYD Coin Sprite.png]] [[File:Mushroom SPM.png]]<br>Coin, Mushroom | ||
|In the first scene, above the blocks above the ground with the first [[Longator]]. | |In the first scene, above the blocks above the ground with the first [[Longator]]. | ||
|{{anchor|Planet Blobule}}[[File:Planet Blobule Blocks 1-2.png] | |{{anchor|Planet Blobule}}[[File:Planet Blobule Blocks 1-2.png|350px]] | ||
|- | |- | ||
|Planet Blobule | |Planet Blobule | ||
|[[File:PMTTYD Coin Sprite.png]]<br>Coin | |[[File:PMTTYD Coin Sprite.png]]<br>Coin | ||
|Same scene, right of the locked door. | |Same scene, right of the locked door. | ||
|[[File:Planet Blobule Block 3.png] | |[[File:Planet Blobule Block 3.png|350px]] | ||
|- | |- | ||
|Planet Blobule | |Planet Blobule | ||
|[[File:PMTTYD Coin Sprite.png]][[File:PMTTYD Coin Sprite.png]][[File:PMTTYD Coin Sprite.png]][[File:PMTTYD Coin Sprite.png]][[File:PMTTYD Coin Sprite.png]]<br>5 Coins | |[[File:PMTTYD Coin Sprite.png]][[File:PMTTYD Coin Sprite.png]][[File:PMTTYD Coin Sprite.png]][[File:PMTTYD Coin Sprite.png]][[File:PMTTYD Coin Sprite.png]]<br>5 Coins | ||
|Same scene, right of the ground with a dimensional rift above it, at the bottom. | |Same scene, right of the ground with a dimensional rift above it, at the bottom. | ||
|[[File:Planet Blobule Block 4.png] | |[[File:Planet Blobule Block 4.png|350px]] | ||
|- | |- | ||
|Planet Blobule | |Planet Blobule | ||
|[[File:PMTTYD Coin Sprite.png]] [[File:PMTTYD Coin Sprite.png]]<br>Coin (both) | |[[File:PMTTYD Coin Sprite.png]] [[File:PMTTYD Coin Sprite.png]]<br>Coin (both) | ||
|In the second scene, in the upper part of the area first accessible only with [[Slim (Pixl)|Slim]]. Also accessible during the Dimentio chase in chapter 8-3. | |In the second scene, in the upper part of the area first accessible only with [[Slim (Pixl)|Slim]]. Also accessible during the Dimentio chase in chapter 8-3. | ||
|[[File:Planet Blobule Blocks 5-6.png] | |[[File:Planet Blobule Blocks 5-6.png|350px]] | ||
|- | |- | ||
|Planet Blobule | |Planet Blobule | ||
|[[File:Speed Flower SPM.png]]<br>Speed Flower | |[[File:Speed Flower SPM.png]]<br>Speed Flower | ||
|Same scene, on the ground, right of the previous two. Also accessible during the Dimentio chase in chapter 8-3. | |Same scene, on the ground, right of the previous two. Also accessible during the Dimentio chase in chapter 8-3. | ||
|[[File:Planet Blobule Block 7.png] | |[[File:Planet Blobule Block 7.png|350px]] | ||
|- | |- | ||
|Planet Blobule | |Planet Blobule | ||
|[[File:PMTTYD Coin Sprite.png]]<br>Coin | |[[File:PMTTYD Coin Sprite.png]]<br>Coin | ||
|Same scene, right of the second pipe. Also accessible during the Dimentio chase in chapter 8-3. | |Same scene, right of the second pipe. Also accessible during the Dimentio chase in chapter 8-3. | ||
|[[File:Planet Blobule Block 8.png] | |[[File:Planet Blobule Block 8.png|350px]] | ||
|- | |- | ||
|Planet Blobule | |Planet Blobule | ||
|[[File:PMTTYD Coin Sprite.png]]<br>Coin | |[[File:PMTTYD Coin Sprite.png]]<br>Coin | ||
|Same scene, right of the third pipe. Also accessible during the Dimentio chase in chapter 8-3. | |Same scene, right of the third pipe. Also accessible during the Dimentio chase in chapter 8-3. | ||
|[[File:Planet Blobule Block 9.png] | |[[File:Planet Blobule Block 9.png|350px]] | ||
|- | |- | ||
|Planet Blobule | |Planet Blobule | ||
|[[File:PMTTYD Coin Sprite.png]] [[File:PMTTYD Coin Sprite.png]] [[File:PMTTYD Coin Sprite.png]] [[File:SPMZombieShroom.png|39px]]<br>Zombie Shroom (last), Coin (rest) | |[[File:PMTTYD Coin Sprite.png]] [[File:PMTTYD Coin Sprite.png]] [[File:PMTTYD Coin Sprite.png]] [[File:SPMZombieShroom.png|39px]]<br>Zombie Shroom (last), Coin (rest) | ||
|Same scene, near the end, left of the second star door. Also accessible during the Dimentio chase in chapter 8-3. | |Same scene, near the end, left of the second star door. Also accessible during the Dimentio chase in chapter 8-3. | ||
|[[File:Planet Blobule Blocks 10-13.png] | |[[File:Planet Blobule Blocks 10-13.png|350px]] | ||
|- | |- | ||
|Planet Blobule | |Planet Blobule | ||
|[[File:Pal Pill SPM.png]]<br>Pal Pills | |[[File:Pal Pill SPM.png]]<br>Pal Pills | ||
|Same scene, found after flipping to 3-D near the first futuristic door and crossing the gap. Also accessible during the Dimentio chase in chapter 8-3. | |Same scene, found after flipping to 3-D near the first futuristic door and crossing the gap. Also accessible during the Dimentio chase in chapter 8-3. | ||
|[[File:Planet Blobule Block 14.png] | |[[File:Planet Blobule Block 14.png|350px]] | ||
|- | |- | ||
|Planet Blobule | |Planet Blobule | ||
|[[File:Slow Flower SPM.png]] [[File:PMTTYD Coin Sprite.png]]<br>Slow Flower, Coin | |[[File:Slow Flower SPM.png]] [[File:PMTTYD Coin Sprite.png]]<br>Slow Flower, Coin | ||
|In the scene accessed by the first star door, near the end, left of the futuristic door. | |In the scene accessed by the first star door, near the end, left of the futuristic door. | ||
|[[File:Planet Blobule Blocks 15-16.png] | |[[File:Planet Blobule Blocks 15-16.png|350px]] | ||
|- | |- | ||
|Planet Blobule | |Planet Blobule | ||
|[[File:PMTTYD Coin Sprite.png]] [[File:PMTTYD Coin Sprite.png]] [[File:PMTTYD Coin Sprite.png]] [[File:Super Shroom SPM.png]] [[File:Mega Star SPM.png]]<br>Super Shroom (upper), Mega Star (last), Coin (rest) | |[[File:PMTTYD Coin Sprite.png]] [[File:PMTTYD Coin Sprite.png]] [[File:PMTTYD Coin Sprite.png]] [[File:Super Shroom SPM.png]] [[File:Mega Star SPM.png]]<br>Super Shroom (upper), Mega Star (last), Coin (rest) | ||
|In the scene accessed by the second star door, near the beginning. | |In the scene accessed by the second star door, near the beginning. | ||
|[[File:Planet Blobule Blocks 17-21.png] | |[[File:Planet Blobule Blocks 17-21.png|350px]] | ||
|- | |- | ||
|colspan=4 style="background:green"| | |colspan=4 style="background:green"| | ||
| Line 502: | Line 502: | ||
|[[File:Super Shroom SPM.png]]<br>Super Shroom | |[[File:Super Shroom SPM.png]]<br>Super Shroom | ||
|In the first scene, found between three [[Hedron]]s. | |In the first scene, found between three [[Hedron]]s. | ||
|{{anchor|Outer Limits}}[[File:Outer Limits Block 1.png] | |{{anchor|Outer Limits}}[[File:Outer Limits Block 1.png|350px]] | ||
|- | |- | ||
|Outer Limits | |Outer Limits | ||
|30x[[File:PMTTYD Coin Sprite.png]]<br>30 Coins | |30x[[File:PMTTYD Coin Sprite.png]]<br>30 Coins | ||
|In the scene with [[Twinkle Mart]], found right of the sign. | |In the scene with [[Twinkle Mart]], found right of the sign. | ||
|[[File:Outer Limits Block 2.png] | |[[File:Outer Limits Block 2.png|350px]] | ||
|- | |- | ||
|colspan=4 style="background:green"| | |colspan=4 style="background:green"| | ||
| Line 516: | Line 516: | ||
|[[File:Happy Flower SPM.png]]<br>Happy Flower | |[[File:Happy Flower SPM.png]]<br>Happy Flower | ||
|In the second scene, in the west part. | |In the second scene, in the west part. | ||
|{{anchor|Whoa Zone}}[[File:The Whoa Zone Block 1.png] | |{{anchor|Whoa Zone}}[[File:The Whoa Zone Block 1.png|350px]] | ||
|- | |- | ||
|Whoa Zone | |Whoa Zone | ||
|[[File:Mushroom SPM.png]]<br>Mushroom | |[[File:Mushroom SPM.png]]<br>Mushroom | ||
|Same scene, in the east part. | |Same scene, in the east part. | ||
|[[File:The Whoa Zone Block 2.png] | |[[File:The Whoa Zone Block 2.png|350px]] | ||
|- | |- | ||
|Whoa Zone | |Whoa Zone | ||
|[[File:Happy Flower SPM.png]] [[File:Slow Flower SPM.png]]<br>Happy Flower, Slow Flower | |[[File:Happy Flower SPM.png]] [[File:Slow Flower SPM.png]]<br>Happy Flower, Slow Flower | ||
|In the scene accessed by a door only visible in 3-D, found in 3-D near the entrance. | |In the scene accessed by a door only visible in 3-D, found in 3-D near the entrance. | ||
|[[File:The Whoa Zone Blocks 3-4.png] | |[[File:The Whoa Zone Blocks 3-4.png|350px]] | ||
|- | |- | ||
|Whoa Zone | |Whoa Zone | ||
|[[File:PMTTYD Coin Sprite.png]][[File:PMTTYD Coin Sprite.png]][[File:PMTTYD Coin Sprite.png]][[File:PMTTYD Coin Sprite.png]][[File:PMTTYD Coin Sprite.png]][[File:PMTTYD Coin Sprite.png]][[File:PMTTYD Coin Sprite.png]][[File:PMTTYD Coin Sprite.png]][[File:PMTTYD Coin Sprite.png]]<br>9 Coins | |[[File:PMTTYD Coin Sprite.png]][[File:PMTTYD Coin Sprite.png]][[File:PMTTYD Coin Sprite.png]][[File:PMTTYD Coin Sprite.png]][[File:PMTTYD Coin Sprite.png]][[File:PMTTYD Coin Sprite.png]][[File:PMTTYD Coin Sprite.png]][[File:PMTTYD Coin Sprite.png]][[File:PMTTYD Coin Sprite.png]]<br>9 Coins | ||
|In the scene after using the pipe in the scene with a second locked door. | |In the scene after using the pipe in the scene with a second locked door. | ||
|[[File:The Whoa Zone Block 5.png] | |[[File:The Whoa Zone Block 5.png|350px]] | ||
|- | |- | ||
|Whoa Zone | |Whoa Zone | ||
|[[File:Super Shroom SPM.png]] [[File:SPMZombieShroom.png|39px]] [[File:Super Shroom SPM.png]]<br>Zombie Shroom (middle), Super Shroom (rest) | |[[File:Super Shroom SPM.png]] [[File:SPMZombieShroom.png|39px]] [[File:Super Shroom SPM.png]]<br>Zombie Shroom (middle), Super Shroom (rest) | ||
|In the scene where gravity is changed by 90° thanks to a [[Gravity switch|gravity switch]], Mario should enter the third door. Here, he should enter the second door to walk out of the third one with normal gravity. Blocks are then seen between the third and fourth doors. | |In the scene where gravity is changed by 90° thanks to a [[Gravity switch|gravity switch]], Mario should enter the third door. Here, he should enter the second door to walk out of the third one with normal gravity. Blocks are then seen between the third and fourth doors. | ||
|[[File:Whoa Zone | |[[File:The Whoa Zone Blocks 6-8.png|350px]] | ||
|- | |- | ||
|colspan=4 style="background:blue"| | |colspan=4 style="background:blue"| | ||
| Line 545: | Line 545: | ||
|[[File:Happy Flower SPM.png]]<br>Happy Flower | |[[File:Happy Flower SPM.png]]<br>Happy Flower | ||
|In the second scene, found left of the door and a pipe. | |In the second scene, found left of the door and a pipe. | ||
|{{anchor|Downtown of Crag}}[[File:Downtown of Crag Block 1.png] | |{{anchor|Downtown of Crag}}[[File:Downtown of Crag Block 1.png|350px]] | ||
|- | |- | ||
|Downtown of Crag | |Downtown of Crag | ||
|[[File:PMTTYD Coin Sprite.png]]<br>Coin | |[[File:PMTTYD Coin Sprite.png]]<br>Coin | ||
|Same scene, at the top after gliding with Peach from the highest pipe. | |Same scene, at the top after gliding with Peach from the highest pipe. | ||
|[[File:Downtown of Crag Block 2.png] | |[[File:Downtown of Crag Block 2.png|350px]] | ||
|- | |- | ||
|colspan=4 style="background:blue"| | |colspan=4 style="background:blue"| | ||
| Line 559: | Line 559: | ||
|[[File:PMTTYD Coin Sprite.png]] [[File:PMTTYD Coin Sprite.png]]<br>Coin (both) | |[[File:PMTTYD Coin Sprite.png]] [[File:PMTTYD Coin Sprite.png]]<br>Coin (both) | ||
|In the first scene, found in 3-D, under the water. | |In the first scene, found in 3-D, under the water. | ||
|{{anchor|Gap of Crag}}[[File:Gap of Crag Blocks 1-2.png] | |{{anchor|Gap of Crag}}[[File:Gap of Crag Blocks 1-2.png|350px]] | ||
|- | |- | ||
|Gap of Crag | |Gap of Crag | ||
|[[File:Slow Flower SPM.png]] [[File:PMTTYD Coin Sprite.png]] [[File:Mushroom SPM.png]] [[File:PMTTYD Coin Sprite.png]] [[File:Speed Flower SPM.png]] [[File:PMTTYD Coin Sprite.png]] [[File:SPMGhoulShroom.png|39px]] [[File:PMTTYD Coin Sprite.png]] [[File:PMTTYD Coin Sprite.png]] [[File:Happy Flower SPM.png]] [[File:SPMZombieShroom.png|39px]] [[File:PMTTYD Coin Sprite.png]] [[File:PMTTYD Coin Sprite.png]] [[File:PMTTYD Coin Sprite.png]] [[File:Pal Pill SPM.png]]<br>Slow Flower (1st), Mushroom (3rd), Speed Flower (5th), [[Ghoul Shroom]] (7th), Happy Flower (10th), Zombie Shroom (11th), Pal Pills (15th), Coin (rest) | |[[File:Slow Flower SPM.png]] [[File:PMTTYD Coin Sprite.png]] [[File:Mushroom SPM.png]] [[File:PMTTYD Coin Sprite.png]] [[File:Speed Flower SPM.png]] [[File:PMTTYD Coin Sprite.png]] [[File:SPMGhoulShroom.png|39px]] [[File:PMTTYD Coin Sprite.png]] [[File:PMTTYD Coin Sprite.png]] [[File:Happy Flower SPM.png]] [[File:SPMZombieShroom.png|39px]] [[File:PMTTYD Coin Sprite.png]] [[File:PMTTYD Coin Sprite.png]] [[File:PMTTYD Coin Sprite.png]] [[File:Pal Pill SPM.png]]<br>Slow Flower (1st), Mushroom (3rd), Speed Flower (5th), [[Ghoul Shroom]] (7th), Happy Flower (10th), Zombie Shroom (11th), Pal Pills (15th), Coin (rest) | ||
|In the scene with [[Fire Tablet]], found in upper western part of the scene. To see all 15, Mario has to flip into 3-D. Also accessible during the Dimentio chase in chapter 8-3. | |In the scene with [[Fire Tablet]], found in upper western part of the scene. To see all 15, Mario has to flip into 3-D. Also accessible during the Dimentio chase in chapter 8-3. | ||
|[[File:Gap of Crag Blocks 3-17.png] | |[[File:Gap of Crag Blocks 3-17.png|350px]] | ||
|- | |- | ||
|colspan=4 style="background:blue"| | |colspan=4 style="background:blue"| | ||
| Line 573: | Line 573: | ||
|[[File:Super Shroom SPM.png]]<br>Super Shroom | |[[File:Super Shroom SPM.png]]<br>Super Shroom | ||
|In the first scene, above the last block platform. | |In the first scene, above the last block platform. | ||
|{{anchor|Floro Caverns}}[[File:Floro Caverns (5-3) Block 1.png] | |{{anchor|Floro Caverns}}[[File:Floro Caverns (5-3) Block 1.png|350px]] | ||
|- | |- | ||
|Floro Caverns | |Floro Caverns | ||
|[[File:Pal Pill SPM.png]]<br>Pal Pills | |[[File:Pal Pill SPM.png]]<br>Pal Pills | ||
|In the third scene, near the entrance pipe. | |In the third scene, near the entrance pipe. | ||
|[[File:Floro Caverns (5-3) Block 2.png] | |[[File:Floro Caverns (5-3) Block 2.png|350px]] | ||
|- | |- | ||
|Floro Caverns | |Floro Caverns | ||
|[[File:Mushroom SPM.png]] [[File:PMTTYD Coin Sprite.png]] [[File:PMTTYD Coin Sprite.png]] [[File:PMTTYD Coin Sprite.png]] [[File:PMTTYD Coin Sprite.png]] [[File:PMTTYD Coin Sprite.png]] [[File:PMTTYD Coin Sprite.png]] [[File:PMTTYD Coin Sprite.png]] [[File:PMTTYD Coin Sprite.png]] [[File:PMTTYD Coin Sprite.png]] [[File:Speed Flower SPM.png]]<br>Mushroom (1st lower), Speed Flower (brick one), Coin (rest) | |[[File:Mushroom SPM.png]] [[File:PMTTYD Coin Sprite.png]] [[File:PMTTYD Coin Sprite.png]] [[File:PMTTYD Coin Sprite.png]] [[File:PMTTYD Coin Sprite.png]] [[File:PMTTYD Coin Sprite.png]] [[File:PMTTYD Coin Sprite.png]] [[File:PMTTYD Coin Sprite.png]] [[File:PMTTYD Coin Sprite.png]] [[File:PMTTYD Coin Sprite.png]] [[File:Speed Flower SPM.png]]<br>Mushroom (1st lower), Speed Flower (brick one), Coin (rest) | ||
|Same scene, right of the second pipe. | |Same scene, right of the second pipe. | ||
|[[File:Floro Caverns (5-3) Blocks 3-13.png] | |[[File:Floro Caverns (5-3) Blocks 3-13.png|350px]] | ||
|- | |- | ||
|Floro Caverns | |Floro Caverns | ||
|[[File:PMTTYD Coin Sprite.png]] [[File:PMTTYD Coin Sprite.png]] [[File:PMTTYD Coin Sprite.png]] [[File:PMTTYD Coin Sprite.png]] [[File:PMTTYD Coin Sprite.png]] [[File:PMTTYD Coin Sprite.png]] [[File:PMTTYD Coin Sprite.png]]<br>Coin (all) | |[[File:PMTTYD Coin Sprite.png]] [[File:PMTTYD Coin Sprite.png]] [[File:PMTTYD Coin Sprite.png]] [[File:PMTTYD Coin Sprite.png]] [[File:PMTTYD Coin Sprite.png]] [[File:PMTTYD Coin Sprite.png]] [[File:PMTTYD Coin Sprite.png]]<br>Coin (all) | ||
|Same scene, right of the third pipe. | |Same scene, right of the third pipe. | ||
|[[File:Floro Caverns (5-3) Blocks 14-20.png] | |[[File:Floro Caverns (5-3) Blocks 14-20.png|350px]] | ||
|- | |- | ||
|Floro Caverns | |Floro Caverns | ||
|[[File:Slow Flower SPM.png]]<br>Slow Flower | |[[File:Slow Flower SPM.png]]<br>Slow Flower | ||
|Same scene, above the seventh pipe. | |Same scene, above the seventh pipe. | ||
|[[File:Floro Caverns (5-3) Block 21.png] | |[[File:Floro Caverns (5-3) Block 21.png|350px]] | ||
|- | |- | ||
|Floro Caverns | |Floro Caverns | ||
|14x[[File:PMTTYD Coin Sprite.png]] [[File:PMTTYD Coin Sprite.png]] [[File:Mushroom SPM.png]]<br>14 Coins, Coin, Mushroom | |14x[[File:PMTTYD Coin Sprite.png]] [[File:PMTTYD Coin Sprite.png]] [[File:Mushroom SPM.png]]<br>14 Coins, Coin, Mushroom | ||
|Same scene, left of the ninth pipe. | |Same scene, left of the ninth pipe. | ||
|[[File:Floro Caverns (5-3) Blocks 22-24.png] | |[[File:Floro Caverns (5-3) Blocks 22-24.png|350px]] | ||
|- | |- | ||
|Floro Caverns | |Floro Caverns | ||
|[[File:PMTTYD Coin Sprite.png]]<br>Coin | |[[File:PMTTYD Coin Sprite.png]]<br>Coin | ||
|In the scene accessed by going through first door, using a minecart and going through another door, found in the upper part of the scene. | |In the scene accessed by going through first door, using a minecart and going through another door, found in the upper part of the scene. | ||
|[[File:Floro Caverns (5-3) Block 25.png] | |[[File:Floro Caverns (5-3) Block 25.png|350px]] | ||
|- | |- | ||
|Floro Caverns | |Floro Caverns | ||
|[[File:SPMZombieShroom.png|39px]]<br>Zombie Shroom | |[[File:SPMZombieShroom.png|39px]]<br>Zombie Shroom | ||
|Same scene, in the middle part. | |Same scene, in the middle part. | ||
|[[File:Floro Caverns (5-3) Block 26.png] | |[[File:Floro Caverns (5-3) Block 26.png|350px]] | ||
|- | |- | ||
|Floro Caverns | |Floro Caverns | ||
|[[File:SPMZombieShroom.png|39px]]<br>Zombie Shroom | |[[File:SPMZombieShroom.png|39px]]<br>Zombie Shroom | ||
|In the scene accessed by going through third door, using a minecart and going through another door, found in the lower western part. | |In the scene accessed by going through third door, using a minecart and going through another door, found in the lower western part. | ||
|[[File:Floro Caverns (5-3) Block 27.png] | |[[File:Floro Caverns (5-3) Block 27.png|350px]] | ||
|- | |- | ||
|Floro Caverns | |Floro Caverns | ||
|[[File:Mega Star SPM.png]]<br>Mega Star | |[[File:Mega Star SPM.png]]<br>Mega Star | ||
|In the scene accessed by going through locked door, using the minecart and going through another door, found near the beginning. | |In the scene accessed by going through locked door, using the minecart and going through another door, found near the beginning. | ||
|[[File:Floro Caverns (5-3) Block 28.png] | |[[File:Floro Caverns (5-3) Block 28.png|350px]] | ||
|- | |- | ||
|colspan=4 style="background:blue"| | |colspan=4 style="background:blue"| | ||
| Line 627: | Line 627: | ||
|[[File:PMTTYD Coin Sprite.png]]<br>Coin | |[[File:PMTTYD Coin Sprite.png]]<br>Coin | ||
|In the first scene, found right of the first pipe. | |In the first scene, found right of the first pipe. | ||
|[[File:Floro Caverns (5-4) Block 1.png] | |[[File:Floro Caverns (5-4) Block 1.png|350px]] | ||
|- | |- | ||
|Floro Caverns | |Floro Caverns | ||
|[[File:PMTTYD Coin Sprite.png]] [[File:SPMZombieShroom.png|39px]] [[File:Mushroom SPM.png]]<br>Coin, Zombie Shroom, Mushroom | |[[File:PMTTYD Coin Sprite.png]] [[File:SPMZombieShroom.png|39px]] [[File:Mushroom SPM.png]]<br>Coin, Zombie Shroom, Mushroom | ||
|Same scene, right of the second pipe. | |Same scene, right of the second pipe. | ||
|[[File:Floro Caverns (5-4) Blocks 2-4.png] | |[[File:Floro Caverns (5-4) Blocks 2-4.png|350px]] | ||
|- | |- | ||
|Floro Caverns | |Floro Caverns | ||
|[[File:Pal Pill SPM.png]]<br>Pal Pills | |[[File:Pal Pill SPM.png]]<br>Pal Pills | ||
|In the second scene, in the lower part of the scene. | |In the second scene, in the lower part of the scene. | ||
|[[File:Floro Caverns (5-4) Block 5.png] | |[[File:Floro Caverns (5-4) Block 5.png|350px]] | ||
|- | |- | ||
|Floro Caverns | |Floro Caverns | ||
|[[File:Super Shroom SPM.png]]<br>Super Shroom | |[[File:Super Shroom SPM.png]]<br>Super Shroom | ||
|In the second scene of the Processing Center. | |In the second scene of the Processing Center. | ||
|[[File:Floro Caverns (5-4) Block 6.png] | |[[File:Floro Caverns (5-4) Block 6.png|350px]] | ||
|- | |- | ||
|Floro Caverns | |Floro Caverns | ||
|[[File:Pal Pill SPM.png]] [[File:Super Shroom SPM.png]] 26x[[File:PMTTYD Coin Sprite.png]]<br>Pal Pills (1st lower), Super Shroom (13th upper), Coin (rest) | |[[File:Pal Pill SPM.png]] [[File:Super Shroom SPM.png]] 26x[[File:PMTTYD Coin Sprite.png]]<br>Pal Pills (1st lower), Super Shroom (13th upper), Coin (rest) | ||
|In the scene accessed by a [[Small pipe|Small Pipe]] found in the first scene. | |In the scene accessed by a [[Small pipe|Small Pipe]] found in the first scene. | ||
|[[File:Floro Caverns (5-4) Blocks 7-34.png] | |[[File:Floro Caverns (5-4) Blocks 7-34.png|350px]] | ||
|- | |- | ||
|Floro Caverns | |Floro Caverns | ||
|[[File:Ultra Shroom SPM.png]]<br>[[Ultra_Mushroom#Paper_Mario_series|Ultra Shroom]] | |[[File:Ultra Shroom SPM.png]]<br>[[Ultra_Mushroom#Paper_Mario_series|Ultra Shroom]] | ||
|In the portrait room, specifically in the hole under the portrait of the first king. | |In the portrait room, specifically in the hole under the portrait of the first king. | ||
|[[File:Floro Caverns (5-4) Block 35.png] | |[[File:Floro Caverns (5-4) Block 35.png|350px]] | ||
|- | |- | ||
|colspan=4 style="background:#ABC"| | |colspan=4 style="background:#ABC"| | ||
| Line 660: | Line 660: | ||
|[[File:PMTTYD Coin Sprite.png]] [[File:PMTTYD Coin Sprite.png]] [[File:PMTTYD Coin Sprite.png]] [[File:PMTTYD Coin Sprite.png]] [[File:PMTTYD Coin Sprite.png]] [[File:PMTTYD Coin Sprite.png]] [[File:PMTTYD Coin Sprite.png]] 12x[[File:PMTTYD Coin Sprite.png]]<br>12 Coins (last), Coin (rest) | |[[File:PMTTYD Coin Sprite.png]] [[File:PMTTYD Coin Sprite.png]] [[File:PMTTYD Coin Sprite.png]] [[File:PMTTYD Coin Sprite.png]] [[File:PMTTYD Coin Sprite.png]] [[File:PMTTYD Coin Sprite.png]] [[File:PMTTYD Coin Sprite.png]] 12x[[File:PMTTYD Coin Sprite.png]]<br>12 Coins (last), Coin (rest) | ||
|In the scene accessed by a pipe found in the scene before the scene with [[Luigi]]. | |In the scene accessed by a pipe found in the scene before the scene with [[Luigi]]. | ||
|{{anchor|The Underwhere}}[[File:The Underwhere Blocks 1-8.png] | |{{anchor|The Underwhere}}[[File:The Underwhere Blocks 1-8.png|350px]] | ||
|- | |- | ||
|The Underwhere | |The Underwhere | ||
|[[File:PMTTYD Coin Sprite.png]]<br>Coin | |[[File:PMTTYD Coin Sprite.png]]<br>Coin | ||
|In the second scene, right of the second pipe in the upper part of the scene. | |In the second scene, right of the second pipe in the upper part of the scene. | ||
|[[File:The Underwhere Block 9.png] | |[[File:The Underwhere Block 9.png|350px]] | ||
|- | |- | ||
|The Underwhere | |The Underwhere | ||
|[[File:Happy Flower SPM.png]]<br>Happy Flower | |[[File:Happy Flower SPM.png]]<br>Happy Flower | ||
|Same scene, right of the third pipe in the upper part of the scene. | |Same scene, right of the third pipe in the upper part of the scene. | ||
|[[File:The Underwhere Block 10.png] | |[[File:The Underwhere Block 10.png|350px]] | ||
|- | |- | ||
|colspan=4 style="background:violet"| | |colspan=4 style="background:violet"| | ||
| Line 679: | Line 679: | ||
|[[File:Mushroom SPM.png]]<br>Mushroom | |[[File:Mushroom SPM.png]]<br>Mushroom | ||
|In the second scene, found above the platform above the door. Also accessible during the Dimentio chase in chapter 8-3. | |In the second scene, found above the platform above the door. Also accessible during the Dimentio chase in chapter 8-3. | ||
|{{anchor|Underwhere Road}}[[File:Underwhere Road Block 1.png] | |{{anchor|Underwhere Road}}[[File:Underwhere Road Block 1.png|350px]] | ||
|- | |- | ||
|Underwhere Road | |Underwhere Road | ||
|[[File:PMTTYD Coin Sprite.png]]<br>Coin | |[[File:PMTTYD Coin Sprite.png]]<br>Coin | ||
|Same scene, found right of the third flipping rectangles. Also accessible during the Dimentio chase in chapter 8-3. | |Same scene, found right of the third flipping rectangles. Also accessible during the Dimentio chase in chapter 8-3. | ||
|[[File:Underwhere Road Block 2.png] | |[[File:Underwhere Road Block 2.png|350px]] | ||
|- | |- | ||
|Underwhere Road | |Underwhere Road | ||
|[[File:Mushroom SPM.png]]<br>Mushroom | |[[File:Mushroom SPM.png]]<br>Mushroom | ||
|Same scene, above the platform above the third flipping rectangles. Also accessible during the Dimentio chase in chapter 8-3. | |Same scene, above the platform above the third flipping rectangles. Also accessible during the Dimentio chase in chapter 8-3. | ||
|[[File:Underwhere Road Block 3.png] | |[[File:Underwhere Road Block 3.png|350px]] | ||
|- | |- | ||
|colspan=4 style="background:violet"| | |colspan=4 style="background:violet"| | ||
| Line 698: | Line 698: | ||
|[[File:PMTTYD Coin Sprite.png]] [[File:Super Shroom SPM.png]] [[File:PMTTYD Coin Sprite.png]] [[File:PMTTYD Coin Sprite.png]] [[File:PMTTYD Coin Sprite.png]]<br>Super Shroom (middle-low), Coin (rest) | |[[File:PMTTYD Coin Sprite.png]] [[File:Super Shroom SPM.png]] [[File:PMTTYD Coin Sprite.png]] [[File:PMTTYD Coin Sprite.png]] [[File:PMTTYD Coin Sprite.png]]<br>Super Shroom (middle-low), Coin (rest) | ||
|In the first scene, above the cloud 12. | |In the first scene, above the cloud 12. | ||
|{{anchor|Overthere Stair}}[[File:Overthere Stair Blocks 1-5.png] | |{{anchor|Overthere Stair}}[[File:Overthere Stair Blocks 1-5.png|350px]] | ||
|- | |- | ||
|Overthere Stair | |Overthere Stair | ||
|[[File:Slow Flower SPM.png]]<br>Slow Flower | |[[File:Slow Flower SPM.png]]<br>Slow Flower | ||
|Same scene, above the cloud 17. | |Same scene, above the cloud 17. | ||
|[[File:Overthere Stair Block 6.png] | |[[File:Overthere Stair Block 6.png|350px]] | ||
|- | |- | ||
|Overthere Stair | |Overthere Stair | ||
|[[File:SPMZombieShroom.png|39px]] [[File:Speed Flower SPM.png]] [[File:SPMZombieShroom.png|39px]] [[File:SPMZombieShroom.png|39px]] [[File:SPMZombieShroom.png|39px]] [[File:SPMZombieShroom.png|39px]]<br>Speed Flower (2nd), Zombie Shroom (rest) | |[[File:SPMZombieShroom.png|39px]] [[File:Speed Flower SPM.png]] [[File:SPMZombieShroom.png|39px]] [[File:SPMZombieShroom.png|39px]] [[File:SPMZombieShroom.png|39px]] [[File:SPMZombieShroom.png|39px]]<br>Speed Flower (2nd), Zombie Shroom (rest) | ||
|In the second scene, above the cloud 21. | |In the second scene, above the cloud 21. | ||
|[[File:Overthere Stair | |[[File:Overthere Stair Blocks 7-12.png|350px]] | ||
|- | |- | ||
|Overthere Stair | |Overthere Stair | ||
|[[File:PMTTYD Coin Sprite.png]]<br>Coin | |[[File:PMTTYD Coin Sprite.png]]<br>Coin | ||
|Same scene, above the cloud 22. | |Same scene, above the cloud 22. | ||
|[[File:Overthere Stair Block 13.png] | |[[File:Overthere Stair Block 13.png|350px]] | ||
|- | |- | ||
|Overthere Stair | |Overthere Stair | ||
|[[File:PMTTYD Coin Sprite.png]] [[File:PMTTYD Coin Sprite.png]] [[File:PMTTYD Coin Sprite.png]]<br>Coin (all) | |[[File:PMTTYD Coin Sprite.png]] [[File:PMTTYD Coin Sprite.png]] [[File:PMTTYD Coin Sprite.png]]<br>Coin (all) | ||
|Same scene, under the cloud 24. | |Same scene, under the cloud 24. | ||
|[[File:Overthere Stair Blocks 14-16.png] | |[[File:Overthere Stair Blocks 14-16.png|350px]] | ||
|- | |- | ||
|Overthere Stair | |Overthere Stair | ||
|[[File:PMTTYD Coin Sprite.png]] [[File:PMTTYD Coin Sprite.png]]<br>Coin (both) | |[[File:PMTTYD Coin Sprite.png]] [[File:PMTTYD Coin Sprite.png]]<br>Coin (both) | ||
|In the third scene, above the cloud 31. | |In the third scene, above the cloud 31. | ||
|[[File:Overthere Stair Blocks 17-18.png] | |[[File:Overthere Stair Blocks 17-18.png|350px]] | ||
|- | |- | ||
|Overthere Stair | |Overthere Stair | ||
|[[File:PMTTYD Coin Sprite.png]] [[File:Mushroom SPM.png]]<br>Coin, Mushroom | |[[File:PMTTYD Coin Sprite.png]] [[File:Mushroom SPM.png]]<br>Coin, Mushroom | ||
|Same scene, between the clouds 36 and 37. | |Same scene, between the clouds 36 and 37. | ||
|[[File:Overthere Stair Blocks 19-20.png] | |[[File:Overthere Stair Blocks 19-20.png|350px]] | ||
|- | |- | ||
|Overthere Stair | |Overthere Stair | ||
|23x[[File:PMTTYD Coin Sprite.png]]<br>Coin (all) | |23x[[File:PMTTYD Coin Sprite.png]]<br>Coin (all) | ||
|Same scene, Mario has to flip on the cloud 37 to reveal a row of 23 blocks. | |Same scene, Mario has to flip on the cloud 37 to reveal a row of 23 blocks. | ||
|[[File:Overthere Stair Blocks 21-43.png] | |[[File:Overthere Stair Blocks 21-43.png|350px]] | ||
|- | |- | ||
|Overthere Stair | |Overthere Stair | ||
|[[File:Happy Flower SPM.png]]<br>Happy Flower | |[[File:Happy Flower SPM.png]]<br>Happy Flower | ||
|In the fourth scene, there is a door on the cloud 46. In the following scene is a tree with red apples. Block is found on the way to the tree. | |In the fourth scene, there is a door on the cloud 46. In the following scene is a tree with red apples. Block is found on the way to the tree. | ||
|[[File:Overthere Stair Block 44.png] | |[[File:Overthere Stair Block 44.png|350px]] | ||
|- | |- | ||
|Overthere Stair | |Overthere Stair | ||
|[[File:Mushroom SPM.png]] 13x[[File:PMTTYD Coin Sprite.png]]<br>Mushroom, 13 Coins | |[[File:Mushroom SPM.png]] 13x[[File:PMTTYD Coin Sprite.png]]<br>Mushroom, 13 Coins | ||
|In the fifth scene, above the cloud 52. | |In the fifth scene, above the cloud 52. | ||
|[[File:Overthere Stair Blocks 45-46.png] | |[[File:Overthere Stair Blocks 45-46.png|350px]] | ||
|- | |- | ||
|Overthere Stair | |Overthere Stair | ||
|[[File:Super Shroom SPM.png]]<br>Super Shroom | |[[File:Super Shroom SPM.png]]<br>Super Shroom | ||
|In the sixth scene, above the cloud 61. | |In the sixth scene, above the cloud 61. | ||
|[[File:Overthere Stair Block 47.png] | |[[File:Overthere Stair Block 47.png|350px]] | ||
|- | |- | ||
|Overthere Stair | |Overthere Stair | ||
|13x[[File:PMTTYD Coin Sprite.png]] 13x[[File:PMTTYD Coin Sprite.png]]<br>13 Coins (both) | |13x[[File:PMTTYD Coin Sprite.png]] 13x[[File:PMTTYD Coin Sprite.png]]<br>13 Coins (both) | ||
|Same scene, above the cloud 67. | |Same scene, above the cloud 67. | ||
|[[File:Overthere Stair Blocks 48-49.png] | |[[File:Overthere Stair Blocks 48-49.png|350px]] | ||
|- | |- | ||
|Overthere Stair | |Overthere Stair | ||
|[[File:PMTTYD Coin Sprite.png]] [[File:PMTTYD Coin Sprite.png]] [[File:PMTTYD Coin Sprite.png]] [[File:PMTTYD Coin Sprite.png]] [[File:PMTTYD Coin Sprite.png]] [[File:PMTTYD Coin Sprite.png]] [[File:PMTTYD Coin Sprite.png]] [[File:PMTTYD Coin Sprite.png]]<br>Coin (all) | |[[File:PMTTYD Coin Sprite.png]] [[File:PMTTYD Coin Sprite.png]] [[File:PMTTYD Coin Sprite.png]] [[File:PMTTYD Coin Sprite.png]] [[File:PMTTYD Coin Sprite.png]] [[File:PMTTYD Coin Sprite.png]] [[File:PMTTYD Coin Sprite.png]] [[File:PMTTYD Coin Sprite.png]]<br>Coin (all) | ||
|Same scene, in the lower part of the scene, above the arches in 3-D. | |Same scene, in the lower part of the scene, above the arches in 3-D. | ||
|[[File:Overthere Stair Blocks 50-57.png] | |[[File:Overthere Stair Blocks 50-57.png|350px]] | ||
|- | |- | ||
|Overthere Stair | |Overthere Stair | ||
|[[File:PMTTYD Coin Sprite.png]] [[File:PMTTYD Coin Sprite.png]]<br>Coin (both) | |[[File:PMTTYD Coin Sprite.png]] [[File:PMTTYD Coin Sprite.png]]<br>Coin (both) | ||
|In the seventh scene, above the cloud 71. | |In the seventh scene, above the cloud 71. | ||
|[[File:Overthere Stair Blocks 58-59.png] | |[[File:Overthere Stair Blocks 58-59.png|350px]] | ||
|- | |- | ||
|Overthere Stair | |Overthere Stair | ||
|[[File:Super Shroom SPM.png]]<br>Super Shroom | |[[File:Super Shroom SPM.png]]<br>Super Shroom | ||
|Same scene, found between the previous two in 3-D. | |Same scene, found between the previous two in 3-D. | ||
|[[File:Overthere Stair Block 60.png] | |[[File:Overthere Stair Block 60.png|350px]] | ||
|- | |- | ||
|colspan=4 style="background:violet"| | |colspan=4 style="background:violet"| | ||
| Line 777: | Line 777: | ||
|[[File:Mushroom SPM.png]] [[File:Speed Flower SPM.png]] [[File:PMTTYD Coin Sprite.png]]<br>Mushroom, Speed Flower, Coin | |[[File:Mushroom SPM.png]] [[File:Speed Flower SPM.png]] [[File:PMTTYD Coin Sprite.png]]<br>Mushroom, Speed Flower, Coin | ||
|In sector 1, found near the door to sectors 2 and 3. | |In sector 1, found near the door to sectors 2 and 3. | ||
|{{anchor|The Overthere}}[[File:The Overthere Blocks 1-3.png] | |{{anchor|The Overthere}}[[File:The Overthere Blocks 1-3.png|350px]] | ||
|- | |- | ||
|The Overthere | |The Overthere | ||
|[[File:Pal Pill SPM.png]]<br>Pal Pills | |[[File:Pal Pill SPM.png]]<br>Pal Pills | ||
|In sector 2, near the eastern end of the lower part. | |In sector 2, near the eastern end of the lower part. | ||
|[[File:The Overthere Block 4.png] | |[[File:The Overthere Block 4.png|350px]] | ||
|- | |- | ||
|The Overthere | |The Overthere | ||
|[[File:Super Shroom SPM.png]] [[File:SPMGhoulShroom.png|39px]]<br>Super Shroom, Ghoul Shroom | |[[File:Super Shroom SPM.png]] [[File:SPMGhoulShroom.png|39px]]<br>Super Shroom, Ghoul Shroom | ||
|Same sector, left of the previous one are two clouds. These two blocks are above the higher one. | |Same sector, left of the previous one are two clouds. These two blocks are above the higher one. | ||
|[[File:The Overthere Blocks 5-6.png] | |[[File:The Overthere Blocks 5-6.png|350px]] | ||
|- | |- | ||
|The Overthere | |The Overthere | ||
|[[File:Super Shroom SPM.png]]<br>Super Shroom | |[[File:Super Shroom SPM.png]]<br>Super Shroom | ||
|Same sector, above the highest collumn in 3-D. | |Same sector, above the highest collumn in 3-D. | ||
|[[File:The Overthere Block 7.png] | |[[File:The Overthere Block 7.png|350px]] | ||
|- | |- | ||
|The Overthere | |The Overthere | ||
|[[File:PMTTYD Coin Sprite.png]]<br>Coin | |[[File:PMTTYD Coin Sprite.png]]<br>Coin | ||
|In sector 3, above the cloud with the [[Flip block|flip block]] in 3-D. | |In sector 3, above the cloud with the [[Flip block|flip block]] in 3-D. | ||
|[[File:The Overthere Block 8.png] | |[[File:The Overthere Block 8.png|350px]] | ||
|- | |- | ||
|The Overthere | |The Overthere | ||
|[[File:PMTTYD Coin Sprite.png]] [[File:Mushroom SPM.png]]<br>Coin, Mushroom | |[[File:PMTTYD Coin Sprite.png]] [[File:Mushroom SPM.png]]<br>Coin, Mushroom | ||
|In sector 6, above the smallest collumn. | |In sector 6, above the smallest collumn. | ||
|[[File:The Overthere Blocks 9-10.png] | |[[File:The Overthere Blocks 9-10.png|350px]] | ||
|- | |- | ||
|The Overthere | |The Overthere | ||
|[[File:Mega Star SPM.png]]<br>Mega Star | |[[File:Mega Star SPM.png]]<br>Mega Star | ||
|Same sector, at the start of the foreground part accessed by Mario's 3-D flipping. | |Same sector, at the start of the foreground part accessed by Mario's 3-D flipping. | ||
|[[File:The Overthere Block 11.png] | |[[File:The Overthere Block 11.png|350px]] | ||
|- | |- | ||
|The Overthere | |The Overthere | ||
|[[File:Slow Flower SPM.png]]<br>Slow Flower | |[[File:Slow Flower SPM.png]]<br>Slow Flower | ||
|In sector 8, above the second cloud. | |In sector 8, above the second cloud. | ||
|[[File:The Overthere Block 12.png] | |[[File:The Overthere Block 12.png|350px]] | ||
|- | |- | ||
|The Overthere | |The Overthere | ||
|[[File:Happy Flower SPM.png]]<br>Happy Flower | |[[File:Happy Flower SPM.png]]<br>Happy Flower | ||
|Same sector, avove the brick block above the second arch. | |Same sector, avove the brick block above the second arch. | ||
|[[File:The Overthere Block 13.png] | |[[File:The Overthere Block 13.png|350px]] | ||
|- | |- | ||
|The Overthere | |The Overthere | ||
|[[File:Ultra Shroom SPM.png]]<br>Ultra Shroom | |[[File:Ultra Shroom SPM.png]]<br>Ultra Shroom | ||
|In the last outside scene, left of the door to [[Bonechill]]'s arena. | |In the last outside scene, left of the door to [[Bonechill]]'s arena. | ||
|[[File:The Overthere Block 14.png] | |[[File:The Overthere Block 14.png|350px]] | ||
|- | |- | ||
|colspan=4 style="background:white"| | |colspan=4 style="background:white"| | ||
| Line 831: | Line 831: | ||
|[[File:Ultra Shroom SPM.png]]<br>Ultra Shroom | |[[File:Ultra Shroom SPM.png]]<br>Ultra Shroom | ||
|At the end of the second stairwell room. | |At the end of the second stairwell room. | ||
|{{anchor|Castle Bleck Entry}}[[File:Castle Bleck Entry Block.png] | |{{anchor|Castle Bleck Entry}}[[File:Castle Bleck Entry Block.png|350px]] | ||
|- | |- | ||
|colspan=4 style="background:white"| | |colspan=4 style="background:white"| | ||
| Line 840: | Line 840: | ||
|[[File:Speed Flower SPM.png]]<br>Speed Flower | |[[File:Speed Flower SPM.png]]<br>Speed Flower | ||
|In the first scene, near the beginning. | |In the first scene, near the beginning. | ||
|{{anchor|Castle Bleck Interior}}[[File:Castle Bleck Interior Block 1.png] | |{{anchor|Castle Bleck Interior}}[[File:Castle Bleck Interior Block 1.png|350px]] | ||
|- | |- | ||
|Castle Bleck Interior | |Castle Bleck Interior | ||
|[[File:Pal Pill SPM.png]]<br>Pal Pills | |[[File:Pal Pill SPM.png]]<br>Pal Pills | ||
|Same scene, found by continuing to go right. | |Same scene, found by continuing to go right. | ||
|[[File:Castle Bleck Interior Block 2.png] | |[[File:Castle Bleck Interior Block 2.png|350px]] | ||
|- | |- | ||
|Castle Bleck Interior | |Castle Bleck Interior | ||
|[[File:Slow Flower SPM.png]]<br>Slow Flower | |[[File:Slow Flower SPM.png]]<br>Slow Flower | ||
|Same scene, found by continuing to go right. | |Same scene, found by continuing to go right. | ||
|[[File:Castle Bleck Interior Block 3.png] | |[[File:Castle Bleck Interior Block 3.png|350px]] | ||
|- | |- | ||
|Castle Bleck Interior | |Castle Bleck Interior | ||
|[[File:Mushroom SPM.png]]<br>Mushroom | |[[File:Mushroom SPM.png]]<br>Mushroom | ||
|In the fourth scene, near the beginning. | |In the fourth scene, near the beginning. | ||
|[[File:Castle Bleck Interior Block 4.png] | |[[File:Castle Bleck Interior Block 4.png|350px]] | ||
|- | |- | ||
|Castle Bleck Interior | |Castle Bleck Interior | ||
|[[File:Happy Flower SPM.png]]<br>Happy Flower | |[[File:Happy Flower SPM.png]]<br>Happy Flower | ||
|Same scene, in the middle. | |Same scene, in the middle. | ||
|[[File:Castle Bleck Interior Block 5.png] | |[[File:Castle Bleck Interior Block 5.png|350px]] | ||
|- | |- | ||
|Castle Bleck Interior | |Castle Bleck Interior | ||
|[[File:SPMGhoulShroom.png|39px]]<br>Ghoul Shroom | |[[File:SPMGhoulShroom.png|39px]]<br>Ghoul Shroom | ||
|Same scene, near the end. | |Same scene, near the end. | ||
|[[File:Castle Bleck Interior Block 6.png] | |[[File:Castle Bleck Interior Block 6.png|350px]] | ||
|- | |- | ||
|Castle Bleck Interior | |Castle Bleck Interior | ||
|[[File:Super Shroom SPM.png]]<br>Super Shroom | |[[File:Super Shroom SPM.png]]<br>Super Shroom | ||
|In the sixth scene, after going through the fake mirror in 3-D and then flippin back, Mario should go to the east end. | |In the sixth scene, after going through the fake mirror in 3-D and then flippin back, Mario should go to the east end. | ||
|[[File:Castle Bleck Interior Block 7 and Treasure Chest 4.png] | |[[File:Castle Bleck Interior Block 7 and Treasure Chest 4.png|350px]] | ||
|- | |- | ||
|Castle Bleck Interior | |Castle Bleck Interior | ||
|[[File:Super Shroom SPM.png]]<br>Super Shroom | |[[File:Super Shroom SPM.png]]<br>Super Shroom | ||
|Same scene, but at the west end. | |Same scene, but at the west end. | ||
|[[File:Castle Bleck Interior Block 8 and Treasure Chest 5.png] | |[[File:Castle Bleck Interior Block 8 and Treasure Chest 5.png|350px]] | ||
|- | |- | ||
|colspan=4 style="background:white"| | |colspan=4 style="background:white"| | ||
| Line 884: | Line 884: | ||
|[[File:Mushroom SPM.png]] [[File:PMTTYD Coin Sprite.png]] [[File:Mushroom SPM.png]]<br>Coin (middle), Mushroom (rest) | |[[File:Mushroom SPM.png]] [[File:PMTTYD Coin Sprite.png]] [[File:Mushroom SPM.png]]<br>Coin (middle), Mushroom (rest) | ||
|In the first scene, near the beginning. | |In the first scene, near the beginning. | ||
|{{anchor|Castle Bleck Inner Sanctum}}[[File:Castle Bleck Inner Sanctum Blocks 1-3.png] | |{{anchor|Castle Bleck Inner Sanctum}}[[File:Castle Bleck Inner Sanctum Blocks 1-3.png|350px]] | ||
|- | |- | ||
|Castle Bleck Inner Sanctum | |Castle Bleck Inner Sanctum | ||
|[[File:Ultra Shroom SPM.png]]<br>Ultra Shroom | |[[File:Ultra Shroom SPM.png]]<br>Ultra Shroom | ||
|In the third scene, above the highest collumn. | |In the third scene, above the highest collumn. | ||
|[[File:Castle Bleck Inner Sanctum Block 4.png] | |[[File:Castle Bleck Inner Sanctum Block 4.png|350px]] | ||
|- | |- | ||
|Castle Bleck Inner Sanctum | |Castle Bleck Inner Sanctum | ||
|[[File:Ultra Shroom SPM.png]]<br>Ultra Shroom | |[[File:Ultra Shroom SPM.png]]<br>Ultra Shroom | ||
|In the second-to-last scene, found right after the stairs. | |In the second-to-last scene, found right after the stairs. | ||
|[[File:Castle Bleck Inner Sanctum Block 5.png] | |[[File:Castle Bleck Inner Sanctum Block 5.png|350px]] | ||
|} | |} | ||
| Line 991: | Line 991: | ||
==See also== | ==See also== | ||
*[[List of hidden blocks in Super Paper Mario|List of hidden blocks in ''Super Paper Mario''] | *[[List of hidden blocks in Super Paper Mario|List of hidden blocks in ''Super Paper Mario'']] | ||
{{SPM}} | {{SPM}} | ||
| Line 1,060: | Line 1,060: | ||
|[[File:Shroom Shake SPM.png]]<br>[[Shroom Shake]] | |[[File:Shroom Shake SPM.png]]<br>[[Shroom Shake]] | ||
|In the underground scene after entering the second [[Warp_Pipe#Super_Paper_Mario|pipe]] in the first scene. | |In the underground scene after entering the second [[Warp_Pipe#Super_Paper_Mario|pipe]] in the first scene. | ||
|{{anchor|Lineland Road}}[[File:Lineland Road Treasure Chest 1.png] | |{{anchor|Lineland Road}}[[File:Lineland Road Treasure Chest 1.png|350px]] | ||
|- | |- | ||
|Lineland Road | |Lineland Road | ||
|[[File:CatchCardOrangeSPM.png]]<br>[[Koopa Troopa]] [[Catch Card]] | |[[File:CatchCardOrangeSPM.png]]<br>[[Koopa Troopa]] [[Catch Card]] | ||
|In the last scene, found by [[Flip|flipping]] to 3-D at the very end and going to secret section. | |In the last scene, found by [[Flip|flipping]] to 3-D at the very end and going to secret section. | ||
|[[File:Lineland Road Treasure Chest 2.png] | |[[File:Lineland Road Treasure Chest 2.png|350px]] | ||
|- | |- | ||
|colspan=4 style="background:red"| | |colspan=4 style="background:red"| | ||
| Line 1,074: | Line 1,074: | ||
|[[File:CatchCardOrangeSPM.png]]<br>[[Koopa_Paratroopa#Super_Paper_Mario|Paratroopa]] Catch Card | |[[File:CatchCardOrangeSPM.png]]<br>[[Koopa_Paratroopa#Super_Paper_Mario|Paratroopa]] Catch Card | ||
|In the first scene, there is a secret path visible after flipping to 3-D near the start of the area. | |In the first scene, there is a secret path visible after flipping to 3-D near the start of the area. | ||
|{{anchor|Mount Lineland}}[[File:Mount Lineland Treasure Chest 1.png] | |{{anchor|Mount Lineland}}[[File:Mount Lineland Treasure Chest 1.png|350px]] | ||
|- | |- | ||
|Mount Lineland | |Mount Lineland | ||
|[[File:SPM Thoreau Sprite.png|50px]]<br>[[Thoreau]] | |[[File:SPM Thoreau Sprite.png|50px]]<br>[[Thoreau]] | ||
|In the room after reaching the end of the second house in [[Yold Town]]. | |In the room after reaching the end of the second house in [[Yold Town]]. | ||
|[[File:Mount Lineland Treasure Chest 2.png] | |[[File:Mount Lineland Treasure Chest 2.png|350px]] | ||
|- | |- | ||
|colspan=4 style="background:red"| | |colspan=4 style="background:red"| | ||
| Line 1,088: | Line 1,088: | ||
|[[File:Life Shroom SPM.png]]<br>[[Life Shroom]] | |[[File:Life Shroom SPM.png]]<br>[[Life Shroom]] | ||
|In the second scene, found by going to the upper east and then down the ladder which is found there. | |In the second scene, found by going to the upper east and then down the ladder which is found there. | ||
|{{anchor|Yold Ruins}}[[File:Yold Ruins Treasure Chest 1.png] | |{{anchor|Yold Ruins}}[[File:Yold Ruins Treasure Chest 1.png|350px]] | ||
|- | |- | ||
|Yold Ruins | |Yold Ruins | ||
|[[File:Ruins Key SPM.png]]<br>[[Ruins Key (Super Paper Mario)|Ruins Key]] | |[[File:Ruins Key SPM.png]]<br>[[Ruins Key (Super Paper Mario)|Ruins Key]] | ||
|In the upper part of fourth scene. | |In the upper part of fourth scene. | ||
|[[File:Yold Ruins Treasure Chest 2.png] | |[[File:Yold Ruins Treasure Chest 2.png|350px]] | ||
|- | |- | ||
|Yold Ruins | |Yold Ruins | ||
|[[File:CatchCardOrangeSPM.png]]<br>[[Buzzy_Beetle#Super_Paper_Mario|Buzzy Beetle]] Catch Card | |[[File:CatchCardOrangeSPM.png]]<br>[[Buzzy_Beetle#Super_Paper_Mario|Buzzy Beetle]] Catch Card | ||
|In the eighth scene, after reaching the east end and then flipping to 3-D, a secret path is revealed. Chest is found at the end of it. | |In the eighth scene, after reaching the east end and then flipping to 3-D, a secret path is revealed. Chest is found at the end of it. | ||
|[[File:Yold Ruins Treasure Chest 3.png] | |[[File:Yold Ruins Treasure Chest 3.png|350px]] | ||
|- | |- | ||
|colspan=4 style="background:#ABC"| | |colspan=4 style="background:#ABC"| | ||
| Line 1,106: | Line 1,106: | ||
|[[File:CatchCardSilverSPM.png]] [[File:CatchCardSilverSPM.png]]<br>[[Merlon#Super_Paper_Mario|Merlon]] and [[Merluvlee#Super_Paper_Mario|Merluvlee]] Catch Cards | |[[File:CatchCardSilverSPM.png]] [[File:CatchCardSilverSPM.png]]<br>[[Merlon#Super_Paper_Mario|Merlon]] and [[Merluvlee#Super_Paper_Mario|Merluvlee]] Catch Cards | ||
|After getting the [[Old Key]] from [[Merlon#Super_Paper_Mario|Merlon]], used to reach 1st Floor Outskirts, found after falling in the first hole. | |After getting the [[Old Key]] from [[Merlon#Super_Paper_Mario|Merlon]], used to reach 1st Floor Outskirts, found after falling in the first hole. | ||
|{{anchor|Flipside}}[[File:Flipside Treasure Chests 1-2.png] | |{{anchor|Flipside}}[[File:Flipside Treasure Chests 1-2.png|350px]] | ||
|- | |- | ||
|colspan=4 style="background:orange"| | |colspan=4 style="background:orange"| | ||
| Line 1,115: | Line 1,115: | ||
|[[File:Door Key SPM.png]]<br>[[Door Key]] | |[[File:Door Key SPM.png]]<br>[[Door Key]] | ||
|In the first scene, there is a pipe found above the exit door. By entering it and defeating the enemies inside, a chest spawns. | |In the first scene, there is a pipe found above the exit door. By entering it and defeating the enemies inside, a chest spawns. | ||
|{{anchor|Gloam Valley}}[[File:Gloam Valley Treasure Chest 1.png] | |{{anchor|Gloam Valley}}[[File:Gloam Valley Treasure Chest 1.png|350px]] | ||
|- | |- | ||
|Gloam Valley | |Gloam Valley | ||
|[[File:SPM Boomer Sprite.png|75px]]<br>[[Boomer (Super Paper Mario)|Boomer]] | |[[File:SPM Boomer Sprite.png|75px]]<br>[[Boomer (Super Paper Mario)|Boomer]] | ||
|In the fifth scene, there is a pipe found near the end. By entering it, pushing a [[!_Switch#Super_Paper_Mario|! switch]] in the first room and defeating a [[Growmeba]] in the second one, a chest spawns. | |In the fifth scene, there is a pipe found near the end. By entering it, pushing a [[!_Switch#Super_Paper_Mario|! switch]] in the first room and defeating a [[Growmeba]] in the second one, a chest spawns. | ||
|[[File:Gloam Valley Treasure Chest 2.png] | |[[File:Gloam Valley Treasure Chest 2.png|350px]] | ||
|- | |- | ||
|Gloam Valley | |Gloam Valley | ||
|[[File:CatchCardSilverSPM.png]]<br>[[Old Man Watchitt|Watchitt]] Catch Card | |[[File:CatchCardSilverSPM.png]]<br>[[Old Man Watchitt|Watchitt]] Catch Card | ||
|After getting [[Boomer (Super Paper Mario)|Boomer]] from the previous chest, he can be used to blow up a cracked wall behind the chest. Then by flipping into 3-D with [[Mario]], another chest can be reached | |After getting [[Boomer (Super Paper Mario)|Boomer]] from the previous chest, he can be used to blow up a cracked wall behind the chest. Then by flipping into 3-D with [[Mario]], another chest can be reached | ||
|[[File:Gloam Valley Treasure Chest 3.png] | |[[File:Gloam Valley Treasure Chest 3.png|350px]] | ||
|- | |- | ||
|Gloam Valley | |Gloam Valley | ||
|[[File:CatchCardOrangeSPM.png]] [[File:CatchCardOrangeSPM.png]]<br>[[Shlurp]] and [[Swoop#Super_Paper_Mario|Swooper]] Catch Cards | |[[File:CatchCardOrangeSPM.png]] [[File:CatchCardOrangeSPM.png]]<br>[[Shlurp]] and [[Swoop#Super_Paper_Mario|Swooper]] Catch Cards | ||
|In the last scene, there is a hole visible only after flipping into 3-D. Chests can be found at the bottom of said hole. | |In the last scene, there is a hole visible only after flipping into 3-D. Chests can be found at the bottom of said hole. | ||
|[[File:Gloam Valley Treasure Chests 4-5.png] | |[[File:Gloam Valley Treasure Chests 4-5.png|350px]] | ||
|- | |- | ||
|colspan=4 style="background:orange"| | |colspan=4 style="background:orange"| | ||
| Line 1,139: | Line 1,139: | ||
|[[File:Stop Watch SPM.png]]<br>[[Stop_Watch#Super_Paper_Mario|Stop Watch]] | |[[File:Stop Watch SPM.png]]<br>[[Stop_Watch#Super_Paper_Mario|Stop Watch]] | ||
|In the outside scene, found at the top of the roof. | |In the outside scene, found at the top of the roof. | ||
|{{anchor|Merlee's Mansion}}[[File:Merlee's Mansion (2-2) Treasure Chest 1.png] | |{{anchor|Merlee's Mansion}}[[File:Merlee's Mansion (2-2) Treasure Chest 1.png|350px]] | ||
|- | |- | ||
|Merlee's Mansion | |Merlee's Mansion | ||
|[[File:CatchCardOrangeSPM.png]]<br>[[Cursya]] Catch Card | |[[File:CatchCardOrangeSPM.png]]<br>[[Cursya]] Catch Card | ||
|Same scene, found on the balcony above the entrance door. | |Same scene, found on the balcony above the entrance door. | ||
|[[File:Merlee's Mansion (2-2) Treasure Chest 2.png] | |[[File:Merlee's Mansion (2-2) Treasure Chest 2.png|350px]] | ||
|- | |- | ||
|Merlee's Mansion | |Merlee's Mansion | ||
|[[File:Door Key SPM.png]]<br>[[House Key (Super Paper Mario)|House Key]] | |[[File:Door Key SPM.png]]<br>[[House Key (Super Paper Mario)|House Key]] | ||
|After reaching the the room with spike ceiling trap (last door on the second floor of the second room), found at the end of the path above the trap. | |After reaching the the room with spike ceiling trap (last door on the second floor of the second room), found at the end of the path above the trap. | ||
|[[File:Merlee's Mansion (2-2) Treasure Chest 3.png] | |[[File:Merlee's Mansion (2-2) Treasure Chest 3.png|350px]] | ||
|- | |- | ||
|colspan=4 style="background:orange"| | |colspan=4 style="background:orange"| | ||
| Line 1,158: | Line 1,158: | ||
|[[File:CatchCardOrangeSPM.png]]<br>[[Boo]] Catch Card | |[[File:CatchCardOrangeSPM.png]]<br>[[Boo]] Catch Card | ||
|In the secret section of the first room found after going to east part of the second floor, flipping into 3-D and blowing up the [[Brick Block]]s with Boomer. | |In the secret section of the first room found after going to east part of the second floor, flipping into 3-D and blowing up the [[Brick Block]]s with Boomer. | ||
|[[File:Merlee's Mansion (2-3) Treasure Chest 1.png] | |[[File:Merlee's Mansion (2-3) Treasure Chest 1.png|350px]] | ||
|- | |- | ||
|Merlee's Mansion | |Merlee's Mansion | ||
|[[File:SPM Slim Sprite.png|50px]]<br>[[Slim (Pixl)|Slim]] | |[[File:SPM Slim Sprite.png|50px]]<br>[[Slim (Pixl)|Slim]] | ||
|In the secret section of the first room found after going to west part of the second floor and flipping into 3-D. | |In the secret section of the first room found after going to west part of the second floor and flipping into 3-D. | ||
|[[File:Merlee's Mansion (2-3) Treasure Chest 2.png] | |[[File:Merlee's Mansion (2-3) Treasure Chest 2.png|350px]] | ||
|- | |- | ||
|colspan=4 style="background:#ABC"| | |colspan=4 style="background:#ABC"| | ||
| Line 1,171: | Line 1,171: | ||
|[[File:Cooking Disk R SPM.png]]<br>[[Cooking Disk]] R/2 (PAL) | |[[File:Cooking Disk R SPM.png]]<br>[[Cooking Disk]] R/2 (PAL) | ||
|After reaching the middle part of the 2nd Floor, going left, then destroying the brick blocks with Boomer to reach a pipe to the foreground part of 3rd Floor. Here, Mario must use [[Tippi]]'s ability to make a path out of [[Hard Block]]s. Chest is found at the end of the path, at the large block platform. | |After reaching the middle part of the 2nd Floor, going left, then destroying the brick blocks with Boomer to reach a pipe to the foreground part of 3rd Floor. Here, Mario must use [[Tippi]]'s ability to make a path out of [[Hard Block]]s. Chest is found at the end of the path, at the large block platform. | ||
|[[File:Flipside Treasure Chest 3.png] | |[[File:Flipside Treasure Chest 3.png|350px]] | ||
|- | |- | ||
|Flipside | |Flipside | ||
|[[File:CatchCardSilverSPM.png]]<br>[[The InterNed]] Catch Card | |[[File:CatchCardSilverSPM.png]]<br>[[The InterNed]] Catch Card | ||
|After using the newly functional elevator from 1st Floor to B1, then going right to the water and flipping into 3-D, found in the alcove in the wall. | |After using the newly functional elevator from 1st Floor to B1, then going right to the water and flipping into 3-D, found in the alcove in the wall. | ||
|[[File:Flipside Treasure Chest 4.png] | |[[File:Flipside Treasure Chest 4.png|350px]] | ||
|- | |- | ||
|colspan=4 style="background:yellow"| | |colspan=4 style="background:yellow"| | ||
| Line 1,185: | Line 1,185: | ||
|[[File:CatchCardOrangeSPM.png]]<br>[[Piranha_Plant#Super_Paper_Mario|Piranha Plant]] Catch Card | |[[File:CatchCardOrangeSPM.png]]<br>[[Piranha_Plant#Super_Paper_Mario|Piranha Plant]] Catch Card | ||
|In the first scene, found at the end on the block platform. | |In the first scene, found at the end on the block platform. | ||
|{{anchor|The Bitlands}}[[File:The Bitlands Treasure Chest 1.png] | |{{anchor|The Bitlands}}[[File:The Bitlands Treasure Chest 1.png|350px]] | ||
|- | |- | ||
|The Bitlands | |The Bitlands | ||
|[[File:Thunder Rage SPM.png]]<br>[[Thunder Rage]] | |[[File:Thunder Rage SPM.png]]<br>[[Thunder Rage]] | ||
|Same scene, after going through the pipe at the very end, Mario is taken into the background. Chest is found after entering the next pipe there. | |Same scene, after going through the pipe at the very end, Mario is taken into the background. Chest is found after entering the next pipe there. | ||
|[[File:The Bitlands Treasure Chest 2.png] | |[[File:The Bitlands Treasure Chest 2.png|350px]] | ||
|- | |- | ||
|The Bitlands | |The Bitlands | ||
|[[File:CatchCardSilverSPM.png]]<br>[[Magikoopa#Super_Paper_Mario|Magikoopa]] Catch Card | |[[File:CatchCardSilverSPM.png]]<br>[[Magikoopa#Super_Paper_Mario|Magikoopa]] Catch Card | ||
|In the underground scene, after reaching the very end, going through the rightmost pipe in the secret section. Found at the ground after flipping to 3-D. | |In the underground scene, after reaching the very end, going through the rightmost pipe in the secret section. Found at the ground after flipping to 3-D. | ||
|[[File:The Bitlands Treasure Chest 3.png] | |[[File:The Bitlands Treasure Chest 3.png|350px]] | ||
|- | |- | ||
|colspan=4 style="background:yellow"| | |colspan=4 style="background:yellow"| | ||
| Line 1,204: | Line 1,204: | ||
|[[File:Gold Bar SPM.png]]<br>[[Gold_Bar#Paper_Mario_series|Gold Bar]] | |[[File:Gold Bar SPM.png]]<br>[[Gold_Bar#Paper_Mario_series|Gold Bar]] | ||
|In the second scene, after reaching the first dry part (the one in the pipe), found behind said pipe after flipping into 3-D. | |In the second scene, after reaching the first dry part (the one in the pipe), found behind said pipe after flipping into 3-D. | ||
|{{anchor|The Tile Pool}}[[File:The Tile Pool Treasure Chest 1.png] | |{{anchor|The Tile Pool}}[[File:The Tile Pool Treasure Chest 1.png|350px]] | ||
|- | |- | ||
|The Tile Pool | |The Tile Pool | ||
|[[File:SPM Thudley Sprite.png|50px]]<br>[[Thudley]] | |[[File:SPM Thudley Sprite.png|50px]]<br>[[Thudley]] | ||
|After going through the pipe near the previous chest and the door at the end of the new scene, a door locks. Enemies in this room must be defeated to make the chest appear. | |After going through the pipe near the previous chest and the door at the end of the new scene, a door locks. Enemies in this room must be defeated to make the chest appear. | ||
|[[File:The Tile Pool Treasure Chest 2.png] | |[[File:The Tile Pool Treasure Chest 2.png|350px]] | ||
|- | |- | ||
|colspan=4 style="background:yellow"| | |colspan=4 style="background:yellow"| | ||
| Line 1,218: | Line 1,218: | ||
|[[File:CatchCardSilverSPM.png]]<br>[[Princess Peach|Peach]] (2) Catch Card | |[[File:CatchCardSilverSPM.png]]<br>[[Princess Peach|Peach]] (2) Catch Card | ||
|In the inside scene, found in the room accessed by a pipe jutting out of the right wall. Here, two [[Chain_Chomp#Super_Paper_Mario|Chain Chomp]]s must be defeated for chest to appear. | |In the inside scene, found in the room accessed by a pipe jutting out of the right wall. Here, two [[Chain_Chomp#Super_Paper_Mario|Chain Chomp]]s must be defeated for chest to appear. | ||
|{{anchor|The Dotwood Tree}}[[File:The Dotwood Tree Treasure Chest.png] | |{{anchor|The Dotwood Tree}}[[File:The Dotwood Tree Treasure Chest.png|350px]] | ||
|- | |- | ||
|colspan=4 style="background:yellow"| | |colspan=4 style="background:yellow"| | ||
| Line 1,227: | Line 1,227: | ||
|[[File:Fort Key SPM.png]]<br>[[Fort Key]] | |[[File:Fort Key SPM.png]]<br>[[Fort Key]] | ||
|In the first scene, there is a pipe only visible after reaching the east end and flipping into 3-D. Chest is in the room reached by the said pipe. | |In the first scene, there is a pipe only visible after reaching the east end and flipping into 3-D. Chest is in the room reached by the said pipe. | ||
|{{anchor|Fort Francis}}[[File:Fort Francis Treasure Chest 1.png] | |{{anchor|Fort Francis}}[[File:Fort Francis Treasure Chest 1.png|350px]] | ||
|- | |- | ||
|Fort Francis | |Fort Francis | ||
|[[File:Fort Key SPM.png]]<br>Fort Key | |[[File:Fort Key SPM.png]]<br>Fort Key | ||
|In the room reached by a outdoor bridge and going past the [[SecuriMeow]]. | |In the room reached by a outdoor bridge and going past the [[SecuriMeow]]. | ||
|[[File:Fort Francis Block 1 and Treasure Chest 2.png] | |[[File:Fort Francis Block 1 and Treasure Chest 2.png|350px]] | ||
|- | |- | ||
|Fort Francis | |Fort Francis | ||
|[[File:Fort Key SPM.png]]<br>Fort Key | |[[File:Fort Key SPM.png]]<br>Fort Key | ||
|In the room reach by going past the SecuriMeow and the elevator. | |In the room reach by going past the SecuriMeow and the elevator. | ||
|[[File:Fort Francis Block 2 and Treasure Chest 3.png] | |[[File:Fort Francis Block 2 and Treasure Chest 3.png|350px]] | ||
|- | |- | ||
|colspan=4 style="background:green"| | |colspan=4 style="background:green"| | ||
| Line 1,246: | Line 1,246: | ||
|[[File:Dimension Key SPM.png]]<br>[[Dimension Key]] | |[[File:Dimension Key SPM.png]]<br>[[Dimension Key]] | ||
|At the end of the fourth scene. | |At the end of the fourth scene. | ||
|{{anchor|Whoa Zone}}[[File:The Whoa Zone Treasure Chest 1.png] | |{{anchor|Whoa Zone}}[[File:The Whoa Zone Treasure Chest 1.png|350px]] | ||
|- | |- | ||
|Whoa Zone | |Whoa Zone | ||
|[[File:Dimension Key SPM.png]]<br>Dimension Key | |[[File:Dimension Key SPM.png]]<br>Dimension Key | ||
|At the ceiling of the scene with the second locked door. | |At the ceiling of the scene with the second locked door. | ||
|[[File:The Whoa Zone Treasure Chest 2.png] | |[[File:The Whoa Zone Treasure Chest 2.png|350px]] | ||
|- | |- | ||
|Whoa Zone | |Whoa Zone | ||
|[[File:Dimension Key SPM.png]]<br>Dimension Key | |[[File:Dimension Key SPM.png]]<br>Dimension Key | ||
|In the scene reached by the third door in the room with 90° [[Gravity switch|gravity switches]]. | |In the scene reached by the third door in the room with 90° [[Gravity switch|gravity switches]]. | ||
|[[File:The Whoa Zone Treasure Chest 3.png] | |[[File:The Whoa Zone Treasure Chest 3.png|350px]] | ||
|- | |- | ||
|colspan=4 style="background:#ABC"| | |colspan=4 style="background:#ABC"| | ||
| Line 1,264: | Line 1,264: | ||
|[[File:Cooking Disk W SPM.png]]<br>Cooking Disk W/3 (PAL) | |[[File:Cooking Disk W SPM.png]]<br>Cooking Disk W/3 (PAL) | ||
|After reaching the foreground part of the 3rd Floor. Here, Mario must use Tippi's ability to make a path out of Hard Blocks. Chest is found at the end of the path, at the large block platform. | |After reaching the foreground part of the 3rd Floor. Here, Mario must use Tippi's ability to make a path out of Hard Blocks. Chest is found at the end of the path, at the large block platform. | ||
|{{anchor|Flopside}}[[File:Flopside Treasure Chest 1.png] | |{{anchor|Flopside}}[[File:Flopside Treasure Chest 1.png|350px]] | ||
|- | |- | ||
|Flopside | |Flopside | ||
|[[File:SPM Piccolo Sprite.png|50px]]<br>[[Piccolo]] | |[[File:SPM Piccolo Sprite.png|50px]]<br>[[Piccolo]] | ||
|In the house with the locked door in the back part of 1st Floor. Key to it is granted after the trading sidequest available after placing the blue [[Pure Heart]] into its [[Heart Pillar|pillar]]. | |In the house with the locked door in the back part of 1st Floor. Key to it is granted after the trading sidequest available after placing the blue [[Pure Heart]] into its [[Heart Pillar|pillar]]. | ||
|[[File:Flopside Treasure Chest 2.png] | |[[File:Flopside Treasure Chest 2.png|350px]] | ||
|- | |- | ||
|Flopside | |Flopside | ||
|[[File:CatchCardSilverSPM.png]]<br>[[Nolrem]] Carch Card | |[[File:CatchCardSilverSPM.png]]<br>[[Nolrem]] Carch Card | ||
|Found at the end of the foreground part of the 3rd Floor, after using [[Piccolo]]'s ability to remove certain blocks. | |Found at the end of the foreground part of the 3rd Floor, after using [[Piccolo]]'s ability to remove certain blocks. | ||
|[[File:Flopside Treasure Chest 3.png] | |[[File:Flopside Treasure Chest 3.png|350px]] | ||
|- | |- | ||
|Flipside | |Flipside | ||
|[[File:CatchCardSilverSPM.png]]<br>[[Merlee#Super_Paper_Mario|Merlee]] Catch Card | |[[File:CatchCardSilverSPM.png]]<br>[[Merlee#Super_Paper_Mario|Merlee]] Catch Card | ||
|Found at the end of the foreground part of the 3rd Floor, after using Piccolo's ability to remove certain blocks. | |Found at the end of the foreground part of the 3rd Floor, after using Piccolo's ability to remove certain blocks. | ||
|[[File:Flipside Treasure Chest 5.png] | |[[File:Flipside Treasure Chest 5.png|350px]] | ||
|- | |- | ||
|colspan=4 style="background:blue"| | |colspan=4 style="background:blue"| | ||
| Line 1,288: | Line 1,288: | ||
|[[File:CatchCardOrangeSPM.png]]<br>[[Moon Cleft]] Catch Card | |[[File:CatchCardOrangeSPM.png]]<br>[[Moon Cleft]] Catch Card | ||
|In the second scene, found in the alcove after jumping down between the two elevated grounds to the west and flipping to 3-D. | |In the second scene, found in the alcove after jumping down between the two elevated grounds to the west and flipping to 3-D. | ||
|{{anchor|Downtown of Crag}}[[File:Downtown of Crag Treasure Chest 1.png] | |{{anchor|Downtown of Crag}}[[File:Downtown of Crag Treasure Chest 1.png|350px]] | ||
|- | |- | ||
|Downtown of Crag | |Downtown of Crag | ||
|[[File:CatchCardSilverSPM.png]]<br>[[Bowser]] (2) Carch Card | |[[File:CatchCardSilverSPM.png]]<br>[[Bowser]] (2) Carch Card | ||
|Same scene, after entering the easternmost pipe and defeating the enemies there, a chest spawns. | |Same scene, after entering the easternmost pipe and defeating the enemies there, a chest spawns. | ||
|[[File:Downtown of Crag Treasure Chest 2.png] | |[[File:Downtown of Crag Treasure Chest 2.png|350px]] | ||
|- | |- | ||
|colspan=4 style="background:blue"| | |colspan=4 style="background:blue"| | ||
| Line 1,302: | Line 1,302: | ||
|[[File:Water Tablet SPM.png]]<br>[[Water Tablet]] | |[[File:Water Tablet SPM.png]]<br>[[Water Tablet]] | ||
|In the first scene, found under the water. | |In the first scene, found under the water. | ||
|{{anchor|Gap of Crag}}[[File:Gap of Crag Treasure Chest 1.png] | |{{anchor|Gap of Crag}}[[File:Gap of Crag Treasure Chest 1.png|350px]] | ||
|- | |- | ||
|Gap of Crag | |Gap of Crag | ||
|[[File:CatchCardOrangeSPM.png]]<br>[[Stone Buzzy]] Catch Card | |[[File:CatchCardOrangeSPM.png]]<br>[[Stone Buzzy]] Catch Card | ||
|In the last scene, found after reaching the east end and flipping to 3-D. | |In the last scene, found after reaching the east end and flipping to 3-D. | ||
|[[File:Gap of Crag Treasure Chest 2.png] | |[[File:Gap of Crag Treasure Chest 2.png|350px]] | ||
|- | |- | ||
|colspan=4 style="background:blue"| | |colspan=4 style="background:blue"| | ||
| Line 1,316: | Line 1,316: | ||
|[[File:Shroom Shake SPM.png]]<br>Shroom Shake | |[[File:Shroom Shake SPM.png]]<br>Shroom Shake | ||
|Found after entering the third pipe in the third scene and the flipping to 3-D to find a secret section of the room. | |Found after entering the third pipe in the third scene and the flipping to 3-D to find a secret section of the room. | ||
|{{anchor|Floro Caverns}}[[File:Floro Caverns (5-3) Treasure Chest.png] | |{{anchor|Floro Caverns}}[[File:Floro Caverns (5-3) Treasure Chest.png|350px]] | ||
|- | |- | ||
|colspan=4 style="background:blue"| | |colspan=4 style="background:blue"| | ||
| Line 1,325: | Line 1,325: | ||
|[[File:CatchCardSilverSPM.png]]<br>[[Floro Cragnien]] Catch Card | |[[File:CatchCardSilverSPM.png]]<br>[[Floro Cragnien]] Catch Card | ||
|Found at the west end of the third scene of the Processing Center. | |Found at the west end of the third scene of the Processing Center. | ||
|[[File:Floro Caverns (5-4) Treasure Chest.png] | |[[File:Floro Caverns (5-4) Treasure Chest.png|350px]] | ||
|- | |- | ||
|colspan=4 style="background:#ABC"| | |colspan=4 style="background:#ABC"| | ||
| Line 1,333: | Line 1,333: | ||
|[[File:Power Plus SPM.png]]<br>[[Power Plus (Super Paper Mario)|Power Plus]] | |[[File:Power Plus SPM.png]]<br>[[Power Plus (Super Paper Mario)|Power Plus]] | ||
|After breaking the block in B2 Outskirts and then pressing newly revealed ! Switch, a secret part of the room with a chest is revealed. | |After breaking the block in B2 Outskirts and then pressing newly revealed ! Switch, a secret part of the room with a chest is revealed. | ||
|[[File:Flopside Treasure Chest 4.png] | |[[File:Flopside Treasure Chest 4.png|350px]] | ||
|- | |- | ||
|Flopside | |Flopside | ||
|[[File:CatchCardGoldSPM.png]]<br>[[Barry]] Catch Card | |[[File:CatchCardGoldSPM.png]]<br>[[Barry]] Catch Card | ||
|After falling through the hole in B2 Outskirts and then reaching the end. | |After falling through the hole in B2 Outskirts and then reaching the end. | ||
|[[File:Flopside Treasure Chest 5.png] | |[[File:Flopside Treasure Chest 5.png|350px]] | ||
|- | |- | ||
|Flopside | |Flopside | ||
|[[File:Golden Card SPM.png]] [[File:Cooking Disk B SPM.png]]<br>[[Golden Card]], Cooking Disk B/5 (PAL) | |[[File:Golden Card SPM.png]] [[File:Cooking Disk B SPM.png]]<br>[[Golden Card]], Cooking Disk B/5 (PAL) | ||
|In the secret room of [[The Overthere (bar)|The Overthere Bar]], accessible by flipping to 3-D. | |In the secret room of [[The Overthere (bar)|The Overthere Bar]], accessible by flipping to 3-D. | ||
|[[File:Flopside Treasure Chests 6-7.png] | |[[File:Flopside Treasure Chests 6-7.png|350px]] | ||
|- | |- | ||
|Flipside | |Flipside | ||
|[[File:CatchCardSilverSPM.png]]<br>[[The InterChet]] Catch Card | |[[File:CatchCardSilverSPM.png]]<br>[[The InterChet]] Catch Card | ||
|After breaking the block in B1 Outskirts of [[Flopside]], the block in B1 Outskirts of [[Flipside]] is broken too. Chest is found at the end of the new path. | |After breaking the block in B1 Outskirts of [[Flopside]], the block in B1 Outskirts of [[Flipside]] is broken too. Chest is found at the end of the new path. | ||
|[[File:Flipside Treasure Chest 6.png] | |[[File:Flipside Treasure Chest 6.png|350px]] | ||
|- | |- | ||
|Flipside | |Flipside | ||
|[[File:HP Plus SPM.png]]<br>[[HP Plus (Super Paper Mario)|HP Plus]] | |[[File:HP Plus SPM.png]]<br>[[HP Plus (Super Paper Mario)|HP Plus]] | ||
|After breaking the block in B2 Outskirts of Flopside, the block in B2 Outskirts of Flipside is broken too. A ! Switch is revealed there and by pressing it a secret part of the room with a chest is revealed. | |After breaking the block in B2 Outskirts of Flopside, the block in B2 Outskirts of Flipside is broken too. A ! Switch is revealed there and by pressing it a secret part of the room with a chest is revealed. | ||
|[[File:Flipside Treasure Chest 7.png] | |[[File:Flipside Treasure Chest 7.png|350px]] | ||
|- | |- | ||
|Downtown of Crag | |Downtown of Crag | ||
|[[File:Cooking Disk G SPM.png]]<br>Cooking Disk G/6 (PAL) | |[[File:Cooking Disk G SPM.png]]<br>Cooking Disk G/6 (PAL) | ||
|In the first scene, at the end, after flipping to 3-D, there is a small opening accessible only by using [[Dottie]]'s ability. There, Mario must go through the pipe to reach the other side of the water and then flip into 3-D to see the chest. | |In the first scene, at the end, after flipping to 3-D, there is a small opening accessible only by using [[Dottie]]'s ability. There, Mario must go through the pipe to reach the other side of the water and then flip into 3-D to see the chest. | ||
|[[File:Downtown of Crag Treasure Chest 3.png] | |[[File:Downtown of Crag Treasure Chest 3.png|350px]] | ||
|- | |- | ||
|colspan=4 style="background:indigo"| | |colspan=4 style="background:indigo"| | ||
| Line 1,367: | Line 1,367: | ||
|[[Bomb#Super_Paper_Mario|Bomb]] Trap Dud | |[[Bomb#Super_Paper_Mario|Bomb]] Trap Dud | ||
|In the middle of the first scene. This chest is required to be opened to progress through the game. It contains a bomb, which turns out to be a dud. Afterwards the chest despawns. | |In the middle of the first scene. This chest is required to be opened to progress through the game. It contains a bomb, which turns out to be a dud. Afterwards the chest despawns. | ||
|{{anchor|Sammer's Early Duels}}[[File:Sammer's Early Duels Treasure Chest.png] | |{{anchor|Sammer's Early Duels}}[[File:Sammer's Early Duels Treasure Chest.png|350px]] | ||
|- | |- | ||
|colspan=4 style="background:#ABC"| | |colspan=4 style="background:#ABC"| | ||
| Line 1,375: | Line 1,375: | ||
|[[File:CatchCardOrangeSPM.png]]<br>[[Dry_Bones#Super_Paper_Mario|Dry Bones]] Catch Card | |[[File:CatchCardOrangeSPM.png]]<br>[[Dry_Bones#Super_Paper_Mario|Dry Bones]] Catch Card | ||
|Found in the scene where Luigi is recruited, in the foreground after flipping to 3-D in the alcove. | |Found in the scene where Luigi is recruited, in the foreground after flipping to 3-D in the alcove. | ||
|{{anchor|The Underwhere}}[[File:The Underwhere Treasure Chest 1.png] | |{{anchor|The Underwhere}}[[File:The Underwhere Treasure Chest 1.png|350px]] | ||
|- | |- | ||
|The Underwhere | |The Underwhere | ||
|[[File:CatchCardSilverSPM.png]]<br>Peach (3) Catch Card | |[[File:CatchCardSilverSPM.png]]<br>Peach (3) Catch Card | ||
|In the second scene, found after entering fourth pipe in the upper part of the scene, then the last pipe in the background. Here, a [[Gigabite]] must be defeated for chest to appear. | |In the second scene, found after entering fourth pipe in the upper part of the scene, then the last pipe in the background. Here, a [[Gigabite]] must be defeated for chest to appear. | ||
|[[File:The Underwhere Treasure Chest 2.png] | |[[File:The Underwhere Treasure Chest 2.png|350px]] | ||
|- | |- | ||
|Flopside | |Flopside | ||
|[[File:CatchCardGoldSPM.png]]<br>Piccolo Catch Card | |[[File:CatchCardGoldSPM.png]]<br>Piccolo Catch Card | ||
|After returning from [[The Underwhere]] with Luigi, he can be used in B1 Outskirts to reach the top of the wall. Here, Mario must flip to 3-D to see an opening. He should go there to see a chest on the ground. | |After returning from [[The Underwhere]] with Luigi, he can be used in B1 Outskirts to reach the top of the wall. Here, Mario must flip to 3-D to see an opening. He should go there to see a chest on the ground. | ||
|[[File:Flopside Treasure Chest 8.png] | |[[File:Flopside Treasure Chest 8.png|350px]] | ||
|- | |- | ||
|colspan=4 style="background:violet"| | |colspan=4 style="background:violet"| | ||
| Line 1,394: | Line 1,394: | ||
|[[File:CatchCardOrangeSPM.png]]<br>[[Dark_Boo#Super_Paper_Mario|Dark Boo]] Catch Card | |[[File:CatchCardOrangeSPM.png]]<br>[[Dark_Boo#Super_Paper_Mario|Dark Boo]] Catch Card | ||
|In the second scene, found under the platform reached by the third flipping rectangles. | |In the second scene, found under the platform reached by the third flipping rectangles. | ||
|{{anchor|Underwhere Road}}[[File:Underwhere Road Treasure Chest.png] | |{{anchor|Underwhere Road}}[[File:Underwhere Road Treasure Chest.png|350px]] | ||
|- | |- | ||
|colspan=4 style="background:violet"| | |colspan=4 style="background:violet"| | ||
| Line 1,403: | Line 1,403: | ||
|[[File:CatchCardSilverSPM.png]]<br>[[Rawbus]] Catch Card | |[[File:CatchCardSilverSPM.png]]<br>[[Rawbus]] Catch Card | ||
|In the second scene, found at the end of the cloud next to the cloud 25. | |In the second scene, found at the end of the cloud next to the cloud 25. | ||
|{{anchor|Overthere Stair}}[[File:Overthere Stair Treasure Chest 1.png] | |{{anchor|Overthere Stair}}[[File:Overthere Stair Treasure Chest 1.png|350px]] | ||
|- | |- | ||
|Overthere Stair | |Overthere Stair | ||
|[[File:CatchCardOrangeSPM.png]]<br>[[Ruff_Puff#Super_Paper_Mario|Ruff Puff]] Catch Card | |[[File:CatchCardOrangeSPM.png]]<br>[[Ruff_Puff#Super_Paper_Mario|Ruff Puff]] Catch Card | ||
|In the third scene, found at the end of the cloud 34. | |In the third scene, found at the end of the cloud 34. | ||
|[[File:Overthere Stair Treasure Chest 2.png] | |[[File:Overthere Stair Treasure Chest 2.png|350px]] | ||
|- | |- | ||
|Overthere Stair | |Overthere Stair | ||
|[[File:Shroom Shake SPM.png]]<br>Shroom Shake | |[[File:Shroom Shake SPM.png]]<br>Shroom Shake | ||
|In the fourth scene, found on the cloud reached by the platforms left of the cloud 43. | |In the fourth scene, found on the cloud reached by the platforms left of the cloud 43. | ||
|[[File:Overthere Stair Treasure Chest 3.png] | |[[File:Overthere Stair Treasure Chest 3.png|350px]] | ||
|- | |- | ||
|Overthere Stair | |Overthere Stair | ||
|[[File:Long-Last Shake SPM.png]]<br>[[Long-Last Shake]] | |[[File:Long-Last Shake SPM.png]]<br>[[Long-Last Shake]] | ||
|In the sixth scene, found on the cloud 68. | |In the sixth scene, found on the cloud 68. | ||
|[[File:Overthere Stair Treasure Chest 4.png] | |[[File:Overthere Stair Treasure Chest 4.png|350px]] | ||
|- | |- | ||
|Overthere Stair | |Overthere Stair | ||
|[[File:Thunder Rage SPM.png]]<br>Thunder Rage | |[[File:Thunder Rage SPM.png]]<br>Thunder Rage | ||
|Same scene, found at the end of cloud 69. | |Same scene, found at the end of cloud 69. | ||
|[[File:Overthere Stair Treasure Chest 5.png] | |[[File:Overthere Stair Treasure Chest 5.png|350px]] | ||
|- | |- | ||
|Overthere Stair | |Overthere Stair | ||
|[[File:Life Shroom SPM.png]]<br>Life Shroom | |[[File:Life Shroom SPM.png]]<br>Life Shroom | ||
|In the seventh scene, found on the cloud under the cloud 75. | |In the seventh scene, found on the cloud under the cloud 75. | ||
|[[File:Overthere Stair Treasure Chest 6.png] | |[[File:Overthere Stair Treasure Chest 6.png|350px]] | ||
|- | |- | ||
|Overthere Stair | |Overthere Stair | ||
|[[File:Gold Bar SPM.png]]<br>Gold Bar | |[[File:Gold Bar SPM.png]]<br>Gold Bar | ||
|Same scene, found on the roof of the structure found on the cloud 80. | |Same scene, found on the roof of the structure found on the cloud 80. | ||
|[[File:Overthere Stair Treasure Chest 7.png] | |[[File:Overthere Stair Treasure Chest 7.png|350px]] | ||
|- | |- | ||
|Overthere Stair | |Overthere Stair | ||
|[[File:CatchCardSilverSPM.png]]<br>Zombie Shroom Catch Card | |[[File:CatchCardSilverSPM.png]]<br>Zombie Shroom Catch Card | ||
|In the last scene, found at the end of the last cloud. | |In the last scene, found at the end of the last cloud. | ||
|[[File:Overthere Stair Treasure Chest 8.png] | |[[File:Overthere Stair Treasure Chest 8.png|350px]] | ||
|- | |- | ||
|colspan=4 style="background:violet"| | |colspan=4 style="background:violet"| | ||
| Line 1,447: | Line 1,447: | ||
|[[File:Cooking Disk PU SPM.png]]<br>Cooking Disk PU/7 (PAL) | |[[File:Cooking Disk PU SPM.png]]<br>Cooking Disk PU/7 (PAL) | ||
|In sector 2, there is a pipe hidden behind the easternmost collumn in 3-D. Mario should enter it and defeat a Gigabite there to make the chest appear. | |In sector 2, there is a pipe hidden behind the easternmost collumn in 3-D. Mario should enter it and defeat a Gigabite there to make the chest appear. | ||
|{{anchor|The Overthere}}[[File:The Overthere Treasure Chest 1.png] | |{{anchor|The Overthere}}[[File:The Overthere Treasure Chest 1.png|350px]] | ||
|- | |- | ||
|The Overthere | |The Overthere | ||
|[[File:CatchCardOrangeSPM.png]] [[File:CatchCardOrangeSPM.png]]<br>[[Skellobit]] and [[Skellobomber]] Catch Cards | |[[File:CatchCardOrangeSPM.png]] [[File:CatchCardOrangeSPM.png]]<br>[[Skellobit]] and [[Skellobomber]] Catch Cards | ||
|In sector 5, there is a pipe found on the cloud under the entrance door. Chests are found on the highest cloud in this secret scene. | |In sector 5, there is a pipe found on the cloud under the entrance door. Chests are found on the highest cloud in this secret scene. | ||
|[[File:The Overthere Treasure Chests 2-3.png] | |[[File:The Overthere Treasure Chests 2-3.png|350px]] | ||
|- | |- | ||
|The Overthere | |The Overthere | ||
|[[File:Nimbi Boy.png|39px]]+[[File:Ultra Shroom Shake SPM.png]]<br>Male [[Nimbi]] holding [[Ultra Shroom Shake]] | |[[File:Nimbi Boy.png|39px]]+[[File:Ultra Shroom Shake SPM.png]]<br>Male [[Nimbi]] holding [[Ultra Shroom Shake]] | ||
|In sector 7, found at the end of the lowest cloud. Inside the chest is a male [[Nimbi]], who gives the group an [[Ultra Shroom Shake]]. He then goes back and closes the chest. The chest then stays closed for the remainder of the game. | |In sector 7, found at the end of the lowest cloud. Inside the chest is a male [[Nimbi]], who gives the group an [[Ultra Shroom Shake]]. He then goes back and closes the chest. The chest then stays closed for the remainder of the game. | ||
|[[File:The Overthere Treasure Chest 4.png] | |[[File:The Overthere Treasure Chest 4.png|350px]] | ||
|- | |- | ||
|The Overthere | |The Overthere | ||
|[[File:CatchCardOrangeSPM.png]]<br>[[Spiky Skellobit]] Catch Card | |[[File:CatchCardOrangeSPM.png]]<br>[[Spiky Skellobit]] Catch Card | ||
|In the last outside scene, Mario should flip into 3-D right before the stairs and then go left to find another chest hidden there. | |In the last outside scene, Mario should flip into 3-D right before the stairs and then go left to find another chest hidden there. | ||
|[[File:The Overthere Treasure Chest 5.png] | |[[File:The Overthere Treasure Chest 5.png|350px]] | ||
|- | |- | ||
|The Overthere | |The Overthere | ||
|[[File:Ultra Shroom Shake SPM.png]]<br>Ultra Shroom Shake | |[[File:Ultra Shroom Shake SPM.png]]<br>Ultra Shroom Shake | ||
|Same scene, at the east end of the scene, at the bottom. | |Same scene, at the east end of the scene, at the bottom. | ||
|[[File:The Overthere Treasure Chest 6.png] | |[[File:The Overthere Treasure Chest 6.png|350px]] | ||
|- | |- | ||
|colspan=4 style="background:white"| | |colspan=4 style="background:white"| | ||
| Line 1,476: | Line 1,476: | ||
|[[File:Stop Watch SPM.png]] [[File:Long-Last Shake SPM.png]]<br>Stop Watch, Long-Last Shake | |[[File:Stop Watch SPM.png]] [[File:Long-Last Shake SPM.png]]<br>Stop Watch, Long-Last Shake | ||
|After going through the door on the top of the fourth scene, these chests can be found at the west end of the scene. | |After going through the door on the top of the fourth scene, these chests can be found at the west end of the scene. | ||
|{{anchor|Castle Bleck Entry}}[[File:Castle Bleck Entry Treasure Chests 1-2.png] | |{{anchor|Castle Bleck Entry}}[[File:Castle Bleck Entry Treasure Chests 1-2.png|350px]] | ||
|- | |- | ||
|Castle Bleck Entry | |Castle Bleck Entry | ||
|[[File:Castle Bleck Key SPM.png]]<br>[[Castle Bleck Key]] | |[[File:Castle Bleck Key SPM.png]]<br>[[Castle Bleck Key]] | ||
|Same scene, there is a pipe at the east end of the scene. Chest is found at the end of the room accessed by said pipe. | |Same scene, there is a pipe at the east end of the scene. Chest is found at the end of the room accessed by said pipe. | ||
|[[File:Castle Bleck Entry Treasure Chest 3.png] | |[[File:Castle Bleck Entry Treasure Chest 3.png|350px]] | ||
|- | |- | ||
|colspan=4 style="background:white"| | |colspan=4 style="background:white"| | ||
| Line 1,490: | Line 1,490: | ||
|[[File:Courage Shell SPM.png]] [[File:Castle Bleck Key SPM.png]] [[File:Life Shroom SPM.png]]<br>[[Courage Shell]], Castle Bleck Key, Life Shroom | |[[File:Courage Shell SPM.png]] [[File:Castle Bleck Key SPM.png]] [[File:Life Shroom SPM.png]]<br>[[Courage Shell]], Castle Bleck Key, Life Shroom | ||
|At the upper part of the second scene, accessed by a pipe from the prison scene. | |At the upper part of the second scene, accessed by a pipe from the prison scene. | ||
|{{anchor|Castle Bleck Foyer}}[[File:Castle Bleck Foyer Treasure Chests 1-3.png] | |{{anchor|Castle Bleck Foyer}}[[File:Castle Bleck Foyer Treasure Chests 1-3.png|350px]] | ||
|- | |- | ||
|Castle Bleck Foyer | |Castle Bleck Foyer | ||
|[[File:Ultra Shroom Shake SPM.png]]<br>Ultra Shroom Shake | |[[File:Ultra Shroom Shake SPM.png]]<br>Ultra Shroom Shake | ||
|After going through the middle door in the third scene, the group reaches outside. Here, Mario should flip into 3-D to see a hidden path. Chest is at the end of said path. | |After going through the middle door in the third scene, the group reaches outside. Here, Mario should flip into 3-D to see a hidden path. Chest is at the end of said path. | ||
|[[File:Castle Bleck Foyer Treasure Chest 4.png] | |[[File:Castle Bleck Foyer Treasure Chest 4.png|350px]] | ||
|- | |- | ||
|colspan=4 style="background:white"| | |colspan=4 style="background:white"| | ||
| Line 1,504: | Line 1,504: | ||
|[[File:Ice Storm SPM.png]]<br>[[Ice Storm]] | |[[File:Ice Storm SPM.png]]<br>[[Ice Storm]] | ||
|In the third scene, after going through the mirror in 3-D, found at the east end. | |In the third scene, after going through the mirror in 3-D, found at the east end. | ||
|{{anchor|Castle Bleck Interior}}[[File:Castle Bleck Interior Treasure Chest 1.png] | |{{anchor|Castle Bleck Interior}}[[File:Castle Bleck Interior Treasure Chest 1.png|350px]] | ||
|- | |- | ||
|Castle Bleck Interior | |Castle Bleck Interior | ||
|[[File:Castle Bleck Key SPM.png]]<br>Castle Bleck Key | |[[File:Castle Bleck Key SPM.png]]<br>Castle Bleck Key | ||
|Same scene, found at the west end. | |Same scene, found at the west end. | ||
|[[File:Castle Bleck Interior Treasure Chest 2.png] | |[[File:Castle Bleck Interior Treasure Chest 2.png|350px]] | ||
|- | |- | ||
|Castle Bleck Interior | |Castle Bleck Interior | ||
|[[File:Castle Bleck Key SPM.png]]<br>Castle Bleck Key | |[[File:Castle Bleck Key SPM.png]]<br>Castle Bleck Key | ||
|In the seventh scene, in the middle. | |In the seventh scene, in the middle. | ||
|[[File:Castle Bleck Interior Treasure Chest 3.png] | |[[File:Castle Bleck Interior Treasure Chest 3.png|350px]] | ||
|- | |- | ||
|Castle Bleck Interior | |Castle Bleck Interior | ||
|[[File:Castle Bleck Key SPM.png]]<br>Castle Bleck Key | |[[File:Castle Bleck Key SPM.png]]<br>Castle Bleck Key | ||
|In the ninth scene (the second one with mirrors), after going through the mirror in 3-D, found at the east end. | |In the ninth scene (the second one with mirrors), after going through the mirror in 3-D, found at the east end. | ||
|[[File:Castle Bleck Interior Block 7 and Treasure Chest 4.png] | |[[File:Castle Bleck Interior Block 7 and Treasure Chest 4.png|350px]] | ||
|- | |- | ||
|Castle Bleck Interior | |Castle Bleck Interior | ||
|[[File:Thunder Rage SPM.png]]<br>Thunder Rage | |[[File:Thunder Rage SPM.png]]<br>Thunder Rage | ||
|Same scene, at the west end. | |Same scene, at the west end. | ||
|[[File:Castle Bleck Interior Block 8 and Treasure Chest 5.png] | |[[File:Castle Bleck Interior Block 8 and Treasure Chest 5.png|350px]] | ||
|- | |- | ||
|colspan=4 style="background:white"| | |colspan=4 style="background:white"| | ||
| Line 1,533: | Line 1,533: | ||
|[[File:Castle Bleck Key SPM.png]]<br>Castle Bleck Key | |[[File:Castle Bleck Key SPM.png]]<br>Castle Bleck Key | ||
|After reaching the middle of the fourth scene, flipping into 3-D and going through the pipe, the chest is found at the end of the room, accessed by Dottie's ability. | |After reaching the middle of the fourth scene, flipping into 3-D and going through the pipe, the chest is found at the end of the room, accessed by Dottie's ability. | ||
|{{anchor|Castle Bleck Inner Sanctum}}[[File:Castle Bleck Inner Sanctum Treasure Chest 1.png] | |{{anchor|Castle Bleck Inner Sanctum}}[[File:Castle Bleck Inner Sanctum Treasure Chest 1.png|350px]] | ||
|- | |- | ||
|Castle Bleck Inner Sanctum | |Castle Bleck Inner Sanctum | ||
|[[File:Shooting Star SPM.png]]<br>[[Shooting Star (item)|Shooting Star]] | |[[File:Shooting Star SPM.png]]<br>[[Shooting Star (item)|Shooting Star]] | ||
|In the sixth scene (first maze scene), after flipping into 3-D and goin into the eastern most hallway, found at the end of said hallway. | |In the sixth scene (first maze scene), after flipping into 3-D and goin into the eastern most hallway, found at the end of said hallway. | ||
|[[File:Castle Bleck Inner Sanctum Treasure Chest 2.png] | |[[File:Castle Bleck Inner Sanctum Treasure Chest 2.png|350px]] | ||
|- | |- | ||
|Castle Bleck Inner Sanctum | |Castle Bleck Inner Sanctum | ||
|[[File:Super Shroom Shake SPM.png]]<br>[[Super Shroom Shake]] | |[[File:Super Shroom Shake SPM.png]]<br>[[Super Shroom Shake]] | ||
|In the seventh scene (second maze scene), found at the end of the hallway accessed from the lower opening in the right wall of the first hallway. | |In the seventh scene (second maze scene), found at the end of the hallway accessed from the lower opening in the right wall of the first hallway. | ||
|[[File:Castle Bleck Inner Sanctum Treasure Chest 3.png] | |[[File:Castle Bleck Inner Sanctum Treasure Chest 3.png|350px]] | ||
|- | |- | ||
|Castle Bleck Inner Sanctum | |Castle Bleck Inner Sanctum | ||
|[[File:Ultra Shroom Shake SPM.png]]<br>Ultra Shroom Shake | |[[File:Ultra Shroom Shake SPM.png]]<br>Ultra Shroom Shake | ||
|In the eighth secene (third maze scene), found at the end of the hallway accessed by going to the upper opening in the right wall of the first hallway and then lower opening in the right wall of the second hallway. | |In the eighth secene (third maze scene), found at the end of the hallway accessed by going to the upper opening in the right wall of the first hallway and then lower opening in the right wall of the second hallway. | ||
|[[File:Castle Bleck Inner Sanctum Treasure Chest 4.png] | |[[File:Castle Bleck Inner Sanctum Treasure Chest 4.png|350px]] | ||
|- | |- | ||
|colspan=4 style="background:black"| | |colspan=4 style="background:black"| | ||
| Line 1,556: | Line 1,556: | ||
|[[File:CatchCardGoldSPM.png]] [[File:CatchCardGoldSPM.png]]<br>[[Tippi]] and Thoreau Catch Cards | |[[File:CatchCardGoldSPM.png]] [[File:CatchCardGoldSPM.png]]<br>[[Tippi]] and Thoreau Catch Cards | ||
|'''NOTE''': These two chests share the same layout, so only one image is here.<br>In the middle of the rooms 10 and 20. | |'''NOTE''': These two chests share the same layout, so only one image is here.<br>In the middle of the rooms 10 and 20. | ||
|{{anchor|Flipside Pit of 100 Trials}}[[File:Flipside Pit of 100 Trials Treasure Chests 1-2.png] | |{{anchor|Flipside Pit of 100 Trials}}[[File:Flipside Pit of 100 Trials Treasure Chests 1-2.png|350px]] | ||
|- | |- | ||
|Flipside Pit of 100 Trials | |Flipside Pit of 100 Trials | ||
|[[File:CatchCardGoldSPM.png]] [[File:CatchCardGoldSPM.png]]<br>Boomer and Slim Catch Cards | |[[File:CatchCardGoldSPM.png]] [[File:CatchCardGoldSPM.png]]<br>Boomer and Slim Catch Cards | ||
|'''NOTE''': These two chests share the same layout, so only one image is here.<br>In the middle of the rooms 30 and 40. | |'''NOTE''': These two chests share the same layout, so only one image is here.<br>In the middle of the rooms 30 and 40. | ||
|[[File:Flipside Pit of 100 Trials Treasure Chests 3-4.png] | |[[File:Flipside Pit of 100 Trials Treasure Chests 3-4.png|350px]] | ||
|- | |- | ||
|Flipside Pit of 100 Trials | |Flipside Pit of 100 Trials | ||
|[[File:CatchCardGoldSPM.png]] [[File:CatchCardGoldSPM.png]]<br>Thudley ands [[Carrie]] Catch Cards | |[[File:CatchCardGoldSPM.png]] [[File:CatchCardGoldSPM.png]]<br>Thudley ands [[Carrie]] Catch Cards | ||
|'''NOTE''': These two chests share the same layout, so only one image is here.<br>In the middle of the rooms 50 and 60. | |'''NOTE''': These two chests share the same layout, so only one image is here.<br>In the middle of the rooms 50 and 60. | ||
|[[File:Flipside Pit of 100 Trials Treasure Chests 5-6.png] | |[[File:Flipside Pit of 100 Trials Treasure Chests 5-6.png|350px]] | ||
|- | |- | ||
|Flipside Pit of 100 Trials | |Flipside Pit of 100 Trials | ||
|[[File:CatchCardGoldSPM.png]] [[File:CatchCardGoldSPM.png]] [[File:CatchCardGoldSPM.png]]<br>[[Fleep]], [[Cudge]] and [[Dottie]] Catch Cards | |[[File:CatchCardGoldSPM.png]] [[File:CatchCardGoldSPM.png]] [[File:CatchCardGoldSPM.png]]<br>[[Fleep]], [[Cudge]] and [[Dottie]] Catch Cards | ||
|'''NOTE''': These three chests share the same layout, so only one image is here.<br>In the middle of the rooms 70, 80 and 90. | |'''NOTE''': These three chests share the same layout, so only one image is here.<br>In the middle of the rooms 70, 80 and 90. | ||
|[[File:Flipside Pit of 100 Trials Treasure Chests 7-9.png] | |[[File:Flipside Pit of 100 Trials Treasure Chests 7-9.png|350px]] | ||
|- | |- | ||
|Flipside Pit of 100 Trials | |Flipside Pit of 100 Trials | ||
|[[File:SPM Dashell Srite.png|50px]]<br>[[Dashell]] | |[[File:SPM Dashell Srite.png|50px]]<br>[[Dashell]] | ||
|In the romm 100, spawns in after defeating [[Wracktail]]. | |In the romm 100, spawns in after defeating [[Wracktail]]. | ||
|[[File:Flipside Pit of 100 Trials Treasure Chest 10.png] | |[[File:Flipside Pit of 100 Trials Treasure Chest 10.png|350px]] | ||
|- | |- | ||
|colspan=4 style="background:black"| | |colspan=4 style="background:black"| | ||
| Line 1,584: | Line 1,584: | ||
|[[File:CatchCardGoldSPM.png]] [[File:CatchCardGoldSPM.png]]<br>Dashell and [[Goombario#Super_Paper_Mario|Goombario]] Catch Cards | |[[File:CatchCardGoldSPM.png]] [[File:CatchCardGoldSPM.png]]<br>Dashell and [[Goombario#Super_Paper_Mario|Goombario]] Catch Cards | ||
|'''NOTE''': These two chests share the same layout, so only one image is here.<br>In the middle of the rooms 10 and 20. | |'''NOTE''': These two chests share the same layout, so only one image is here.<br>In the middle of the rooms 10 and 20. | ||
|{{anchor|Flopside Pit of 100 Trials}}[[File:Flopside Pit of 100 Trials | |{{anchor|Flopside Pit of 100 Trials}}[[File:Flopside Pit of 100 Trials Chests 1-2.png|350px]] | ||
|- | |- | ||
|Flopside Pit of 100 Trials | |Flopside Pit of 100 Trials | ||
|[[File:CatchCardGoldSPM.png]] [[File:CatchCardGoldSPM.png]]<br>[[Kooper#Super_Paper_Mario|Kooper]] and [[Bombette#Super_Paper_Mario|Bombette]] Catch Cards | |[[File:CatchCardGoldSPM.png]] [[File:CatchCardGoldSPM.png]]<br>[[Kooper#Super_Paper_Mario|Kooper]] and [[Bombette#Super_Paper_Mario|Bombette]] Catch Cards | ||
|'''NOTE''': These two chests share the same layout, so only one image is here.<br>In the middle of the rooms 30 and 40. | |'''NOTE''': These two chests share the same layout, so only one image is here.<br>In the middle of the rooms 30 and 40. | ||
|[[File:Flopside Pit of 100 Trials | |[[File:Flopside Pit of 100 Trials Chests 3-4.png|350px]] | ||
|- | |- | ||
|Flopside Pit of 100 Trials | |Flopside Pit of 100 Trials | ||
|[[File:CatchCardGoldSPM.png]] [[File:CatchCardGoldSPM.png]]<br>[[Parakarry#Super_Paper_Mario|Parakarry]] and [[Lady_Bow#Super_Paper_Mario|Bow]] Catch Cards | |[[File:CatchCardGoldSPM.png]] [[File:CatchCardGoldSPM.png]]<br>[[Parakarry#Super_Paper_Mario|Parakarry]] and [[Lady_Bow#Super_Paper_Mario|Bow]] Catch Cards | ||
|'''NOTE''': These two chests share the same layout, so only one image is here.<br>In the middle of the rooms 50 and 60. | |'''NOTE''': These two chests share the same layout, so only one image is here.<br>In the middle of the rooms 50 and 60. | ||
|[[File:Flopside Pit of 100 Trials | |[[File:Flopside Pit of 100 Trials Chests 5-6.png|350px]] | ||
|- | |- | ||
|Flopside Pit of 100 Trials | |Flopside Pit of 100 Trials | ||
|[[File:CatchCardGoldSPM.png]] [[File:CatchCardGoldSPM.png]] [[File:CatchCardGoldSPM.png]]<br>[[Watt#Super_Paper_Mario|Watt]], [[Sushie#Super_Paper_Mario|Sushie]] and [[Lakilester#Super_Paper_Mario|Lakilester]] Catch Cards | |[[File:CatchCardGoldSPM.png]] [[File:CatchCardGoldSPM.png]] [[File:CatchCardGoldSPM.png]]<br>[[Watt#Super_Paper_Mario|Watt]], [[Sushie#Super_Paper_Mario|Sushie]] and [[Lakilester#Super_Paper_Mario|Lakilester]] Catch Cards | ||
|'''NOTE''': These three chests share the same layout, so only one image is here.<br>In the middle of the rooms 70, 80 and 90. | |'''NOTE''': These three chests share the same layout, so only one image is here.<br>In the middle of the rooms 70, 80 and 90. | ||
|[[File:Flopside Pit of 100 Trials | |[[File:Flopside Pit of 100 Trials Chests 7-9.png|350px]] | ||
|- | |- | ||
|Flopside Pit of 100 Trials | |Flopside Pit of 100 Trials | ||
|[[File:CatchCardGoldSPM.png]] [[File:CatchCardGoldSPM.png]] [[File:CatchCardGoldSPM.png]] [[File:CatchCardGoldSPM.png]]<br>[[Mario]], [[Shadoo|Dark Mario]], Peach (1) and Dark Peach Catch Cards | |[[File:CatchCardGoldSPM.png]] [[File:CatchCardGoldSPM.png]] [[File:CatchCardGoldSPM.png]] [[File:CatchCardGoldSPM.png]]<br>[[Mario]], [[Shadoo|Dark Mario]], Peach (1) and Dark Peach Catch Cards | ||
|After reaching the room 100 for the second time and defeating [[Shadoo]], 8 chests spawn in. On the image are the first four. | |After reaching the room 100 for the second time and defeating [[Shadoo]], 8 chests spawn in. On the image are the first four. | ||
|[[File:Flopside Pit of 100 Trials Treasure Chests 10-13.png] | |[[File:Flopside Pit of 100 Trials Treasure Chests 10-13.png|350px]] | ||
|- | |- | ||
|Flopside Pit of 100 Trials | |Flopside Pit of 100 Trials | ||
|[[File:CatchCardGoldSPM.png]] [[File:CatchCardGoldSPM.png]] [[File:CatchCardGoldSPM.png]] [[File:CatchCardGoldSPM.png]]<br>Bowser (1), Dark Bowser, [[Luigi]] and Dark Luigi Cards | |[[File:CatchCardGoldSPM.png]] [[File:CatchCardGoldSPM.png]] [[File:CatchCardGoldSPM.png]] [[File:CatchCardGoldSPM.png]]<br>Bowser (1), Dark Bowser, [[Luigi]] and Dark Luigi Cards | ||
|Same room, right of the previous four. | |Same room, right of the previous four. | ||
|[[File:Flopside Pit of 100 Trials Treasure Chests 14-17.png] | |[[File:Flopside Pit of 100 Trials Treasure Chests 14-17.png|350px]] | ||
|} | |} | ||
| Line 1,718: | Line 1,718: | ||
{|border=1 cellpadding=2 style="text-align: center; border-collapse: collapse; border: 1px solid black" | {|border=1 cellpadding=2 style="text-align: center; border-collapse: collapse; border: 1px solid black" | ||
|-style="background:Peru" | |-style="background:Peru" | ||
!Location | !width=10%|Location | ||
!Item | !width=48%|Item | ||
!Description | !width=40%|Description | ||
!Image | !width=1%|Image | ||
!Image (block/s revealed) | !width=1%|Image (block/s revealed) | ||
|- | |- | ||
|[[Lineland Road]] | |[[Lineland Road]] | ||
|[[File:Mushroom SPM.png]]<br>[[Mushroom#Super_Paper_Mario|Mushroom]] | |[[File:Mushroom SPM.png]]<br>[[Mushroom#Super_Paper_Mario|Mushroom]] | ||
|In the third scene, near the end is the group of five blocks (1 ? and 4 brick), this hidden block can be found above the last [[Brick Block|brick block]]. | |In the third scene, near the end is the group of five blocks (1 ? and 4 brick), this hidden block can be found above the last [[Brick Block|brick block]]. | ||
|[[File:SPM Hidden Block 1A.png] | |[[File:SPM Hidden Block 1A.png|350px]] | ||
|[[File:SPM Hidden Block 1B.png] | |[[File:SPM Hidden Block 1B.png|350px]] | ||
|- | |- | ||
|[[Yold Desert]] | |[[Yold Desert]] | ||
|[[File:PMTTYD Coin Sprite.png]] [[File:PMTTYD Coin Sprite.png]]<br>[[Coin]] (both) | |[[File:PMTTYD Coin Sprite.png]] [[File:PMTTYD Coin Sprite.png]]<br>[[Coin]] (both) | ||
|In the third scene, after being dropped from the first flipping rectangles, these two blocks can be found as 2nd and 4th blocks in the 4 block row directly behind [[Mario]]. | |In the third scene, after being dropped from the first flipping rectangles, these two blocks can be found as 2nd and 4th blocks in the 4 block row directly behind [[Mario]]. | ||
|[[File:SPM Hidden Blocks 2A-3A.png] | |[[File:SPM Hidden Blocks 2A-3A.png|350px]] | ||
|[[File:SPM Hidden Block 2B.png][[File:SPM Hidden Block 3B.png] | |[[File:SPM Hidden Block 2B.png|350px]][[File:SPM Hidden Block 3B.png|350px]] | ||
|- | |- | ||
|Yold Desert | |Yold Desert | ||
|[[File:PMTTYD Coin Sprite.png]][[File:PMTTYD Coin Sprite.png]][[File:PMTTYD Coin Sprite.png]][[File:PMTTYD Coin Sprite.png]][[File:PMTTYD Coin Sprite.png]][[File:PMTTYD Coin Sprite.png]][[File:PMTTYD Coin Sprite.png]][[File:PMTTYD Coin Sprite.png]][[File:PMTTYD Coin Sprite.png]][[File:PMTTYD Coin Sprite.png]][[File:PMTTYD Coin Sprite.png]][[File:PMTTYD Coin Sprite.png]]<br>12 Coins | |[[File:PMTTYD Coin Sprite.png]][[File:PMTTYD Coin Sprite.png]][[File:PMTTYD Coin Sprite.png]][[File:PMTTYD Coin Sprite.png]][[File:PMTTYD Coin Sprite.png]][[File:PMTTYD Coin Sprite.png]][[File:PMTTYD Coin Sprite.png]][[File:PMTTYD Coin Sprite.png]][[File:PMTTYD Coin Sprite.png]][[File:PMTTYD Coin Sprite.png]][[File:PMTTYD Coin Sprite.png]][[File:PMTTYD Coin Sprite.png]]<br>12 Coins | ||
|Same scene, near the end of the scene is a pipe on the block platform. In the room after the pipe is a row of 7 ? Blocks. This hidden block can be found above the fourth one. | |Same scene, near the end of the scene is a pipe on the block platform. In the room after the pipe is a row of 7 ? Blocks. This hidden block can be found above the fourth one. | ||
|[[File:SPM Hidden Block 4A.png] | |[[File:SPM Hidden Block 4A.png|350px]] | ||
|[[File:SPM Hidden Block | |[[File:SPM Hidden Block 4B.png|350px]] | ||
|- | |- | ||
|[[Gloam Valley]] | |[[Gloam Valley]] | ||
|[[File:PMTTYD Coin Sprite.png]]<br>Coin | |[[File:PMTTYD Coin Sprite.png]]<br>Coin | ||
|In the fifth scene, after crossing the water, there is a ? Block and block collumn. This hidden block is found between said collumn and two brick blocks. | |In the fifth scene, after crossing the water, there is a ? Block and block collumn. This hidden block is found between said collumn and two brick blocks. | ||
|[[File:SPM Hidden Block 5A.png] | |[[File:SPM Hidden Block 5A.png|350px]] | ||
|[[File:SPM Hidden Block 5B.png] | |[[File:SPM Hidden Block 5B.png|350px]] | ||
|- | |- | ||
|[[Planet Blobule]] | |[[Planet Blobule]] | ||
|[[File:PMTTYD Coin Sprite.png]]<br>Coin | |[[File:PMTTYD Coin Sprite.png]]<br>Coin | ||
|In the first scene, after falling down after second [[Longator]]. | |In the first scene, after falling down after second [[Longator]]. | ||
|[[File:SPM Hidden Block 6A.png] | |[[File:SPM Hidden Block 6A.png|350px]] | ||
|[[File:SPM Hidden Block 6B.png] | |[[File:SPM Hidden Block 6B.png|350px]] | ||
|- | |- | ||
|Planet Blobule | |Planet Blobule | ||
|[[File:Mushroom SPM.png]]<br>Mushroom | |[[File:Mushroom SPM.png]]<br>Mushroom | ||
|In the [[Blollop]]'s house, accessed by a futuristic door in the second scene. | |In the [[Blollop]]'s house, accessed by a futuristic door in the second scene. | ||
|[[File:SPM Hidden Block 7A.png] | |[[File:SPM Hidden Block 7A.png|350px]] | ||
|[[File:SPM Hidden Block 7B.png] | |[[File:SPM Hidden Block 7B.png|350px]] | ||
|- | |- | ||
|Planet Blobule | |Planet Blobule | ||
|[[File:Speed Flower SPM.png]] [[File:PMTTYD Coin Sprite.png]] [[File:PMTTYD Coin Sprite.png]]<br>[[Speed Flower]] (1st), Coin (rest) | |[[File:Speed Flower SPM.png]] [[File:PMTTYD Coin Sprite.png]] [[File:PMTTYD Coin Sprite.png]]<br>[[Speed Flower]] (1st), Coin (rest) | ||
|In the scene accessed by a first star door in the second scene, near the end. | |In the scene accessed by a first star door in the second scene, near the end. | ||
|[[File:SPM Hidden Blocks 8A-10A.png] | |[[File:SPM Hidden Blocks 8A-10A.png|350px]] | ||
|[[File:SPM Hidden Block 8B.png][[File:SPM Hidden Block 9B.png][[File:SPM Hidden Block 10B.png] | |[[File:SPM Hidden Block 8B.png|350px]][[File:SPM Hidden Block 9B.png|350px]][[File:SPM Hidden Block 10B.png|350px]] | ||
|- | |- | ||
|Planet Blobule | |Planet Blobule | ||
|[[File:PMTTYD Coin Sprite.png]][[File:PMTTYD Coin Sprite.png]][[File:PMTTYD Coin Sprite.png]][[File:PMTTYD Coin Sprite.png]][[File:PMTTYD Coin Sprite.png]][[File:PMTTYD Coin Sprite.png]][[File:PMTTYD Coin Sprite.png]]<br>7 Coins | |[[File:PMTTYD Coin Sprite.png]][[File:PMTTYD Coin Sprite.png]][[File:PMTTYD Coin Sprite.png]][[File:PMTTYD Coin Sprite.png]][[File:PMTTYD Coin Sprite.png]][[File:PMTTYD Coin Sprite.png]][[File:PMTTYD Coin Sprite.png]]<br>7 Coins | ||
|In the [[Blarfle]]'s house, accessed by a futuristic door in the scene accessed by a first star door in the second scene. | |In the [[Blarfle]]'s house, accessed by a futuristic door in the scene accessed by a first star door in the second scene. | ||
|[[File:SPM Hidden Block 11A.png] | |[[File:SPM Hidden Block 11A.png|350px]] | ||
|[[File:SPM Hidden Block 11B.png] | |[[File:SPM Hidden Block 11B.png|350px]] | ||
|- | |- | ||
|Planet Blobule | |Planet Blobule | ||
|[[File:PMTTYD Coin Sprite.png]][[File:PMTTYD Coin Sprite.png]][[File:PMTTYD Coin Sprite.png]][[File:PMTTYD Coin Sprite.png]][[File:PMTTYD Coin Sprite.png]][[File:PMTTYD Coin Sprite.png]][[File:PMTTYD Coin Sprite.png]]<br>7 Coins | |[[File:PMTTYD Coin Sprite.png]][[File:PMTTYD Coin Sprite.png]][[File:PMTTYD Coin Sprite.png]][[File:PMTTYD Coin Sprite.png]][[File:PMTTYD Coin Sprite.png]][[File:PMTTYD Coin Sprite.png]][[File:PMTTYD Coin Sprite.png]]<br>7 Coins | ||
|In the [[Blappy]]'s house, accessed by a futuristic door in the fourth scene. | |In the [[Blappy]]'s house, accessed by a futuristic door in the fourth scene. | ||
|[[File:SPM Hidden Block 12A.png] | |[[File:SPM Hidden Block 12A.png|350px]] | ||
|[[File:SPM Hidden Block 12B.png] | |[[File:SPM Hidden Block 12B.png|350px]] | ||
|- | |- | ||
|[[Gap of Crag]] | |[[Gap of Crag]] | ||
|[[File:Mushroom SPM.png]] [[File:Mushroom SPM.png]]<br>Mushroom (both) | |[[File:Mushroom SPM.png]] [[File:Mushroom SPM.png]]<br>Mushroom (both) | ||
|In the second scene, left of the rightmost door, above the block platforms. | |In the second scene, left of the rightmost door, above the block platforms. | ||
|[[File:SPM Hidden Blocks 13A-14A.png] | |[[File:SPM Hidden Blocks 13A-14A.png|350px]] | ||
|[[File:SPM Hidden Block 13B.png][[File:SPM Hidden Block 14B.png] | |[[File:SPM Hidden Block 13B.png|350px]][[File:SPM Hidden Block 14B.png|350px]] | ||
|- | |- | ||
|[[Floro Caverns]] (5-3) | |[[Floro Caverns]] (5-3) | ||
|[[File:PMTTYD Coin Sprite.png]] [[File:Mushroom SPM.png]]<br>Coin, Mushroom | |[[File:PMTTYD Coin Sprite.png]] [[File:Mushroom SPM.png]]<br>Coin, Mushroom | ||
|In the third scene, near the beginning between two stairs made out of hard blocks, left of the group of 3 brick blocks in the air. | |In the third scene, near the beginning between two stairs made out of hard blocks, left of the group of 3 brick blocks in the air. | ||
|[[File:SPM Hidden Blocks 15A-16A.png] | |[[File:SPM Hidden Blocks 15A-16A.png|350px]] | ||
|[[File:SPM Hidden Block 15B.png][[File:SPM Hidden Block 16B.png] | |[[File:SPM Hidden Block 15B.png|350px]][[File:SPM Hidden Block 16B.png|350px]] | ||
|- | |- | ||
|Floro Caverns (5-3) | |Floro Caverns (5-3) | ||
|[[File:PMTTYD Coin Sprite.png]]<br>Coin | |[[File:PMTTYD Coin Sprite.png]]<br>Coin | ||
|Same scene, near the end of the scene, left of the last trampoline, above two brick blocks. | |Same scene, near the end of the scene, left of the last trampoline, above two brick blocks. | ||
|[[File:SPM Hidden Block 17A.png] | |[[File:SPM Hidden Block 17A.png|350px]] | ||
|[[File:SPM Hidden Block 17B.png] | |[[File:SPM Hidden Block 17B.png|350px]] | ||
|- | |- | ||
|[[Overthere Stair]] | |[[Overthere Stair]] | ||
|[[File:SPMGhoulShroom.png|39px]]<br>[[Ghoul Shroom]] | |[[File:SPMGhoulShroom.png|39px]]<br>[[Ghoul Shroom]] | ||
|In the third scene, above the cloud 31, between two visible ? Blocks. | |In the third scene, above the cloud 31, between two visible ? Blocks. | ||
|[[File:SPM Hidden Block 18A.png] | |[[File:SPM Hidden Block 18A.png|350px]] | ||
|[[File:SPM Hidden Block 18B.png] | |[[File:SPM Hidden Block 18B.png|350px]] | ||
|} | |} | ||
Revision as of 20:49, January 13, 2024
- This page is about the visible ? Blocks from Super Paper Mario. For the hidden ones from same game, see List of hidden blocks in Super Paper Mario.
This is a list of ? Blocks from Super Paper Mario. There are 363 visible ? Blocks in the game. They contain coins or items. Some of them are also disguised as Brick Blocks and contain a number of coins.
Flipside, Flopside, the entirety of Chapter 6 (Sammer's Kingdom, Sammer's Early Duels, World of Nothing, Sammer's Proving Grounds and Sammer's Endgame) and Castle Bleck Foyer are the only locations without any visible ? Block.
Unlike the previous two entries, the ? Blocks respawn upon leaving the area, so subsequent visits allow the contents of the blocks to be collected again.
| Chapter 1 | Lineland Road • Mount Lineland • Yold Desert • Yold Ruins |
| Chapter 2 | Gloam Valley • Merlee's Mansion (2-2) • Merlee's Mansion (2-3) • Merlee's Basement |
| Chapter 3 | The Bitlands • The Tile Pool • The Dotwood Tree • Fort Francis |
| Chapter 4 | Outer Space • Planet Blobule • Outer Limits • Whoa Zone |
| Chapter 5 | Downtown of Crag • Gap of Crag • Floro Caverns (5-3) • Floro Caverns (5-4) |
| Between Chapter 6 and Chapter 7 | The Underwhere |
| Chapter 7 | Underwhere Road • Overthere Stair • The Overthere |
| Chapter 8 | Castle Bleck Entry • Castle Bleck Interior • Castle Bleck Inner Sanctum |
? Block locations
Chapter 1-1The Adventure Unfolds | |||
| Lineland Road | Mushroom (2nd), Coin (rest) |
In the first scene, left of the first pipe. | 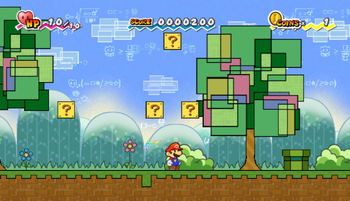
|
| Lineland Road | Coin |
Same scene, left of the door with a star. | 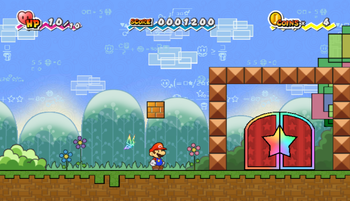
|
| Lineland Road | Pal Pills (middle), Coin (rest) |
Same scene, at the end, right of the Bestovius' house. Mario needs to flip to 3-D to see the blocks. | 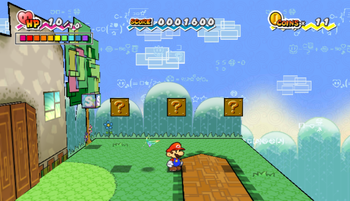
|
| Lineland Road | Mushroom |
In the second scene, after the 3 pipes. Also accessible during the Dimentio chase in chapter 8-3. | 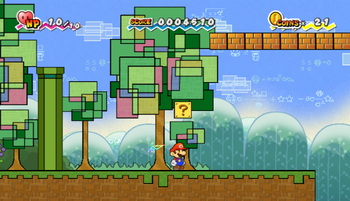
|
| Lineland Road | 12x 12 Coins (lower first), Happy Flower (upper 2nd), Coin (rest) |
Same scene, right and across the gap from the previous one. Also accessible during the Dimentio chase in chapter 8-3. | 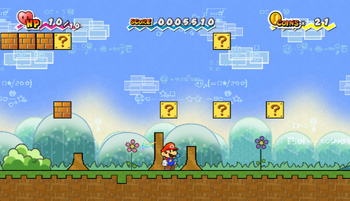
|
| Lineland Road | Mushroom |
Same scene, above the second pipe in 3-D. Also accessible during the Dimentio chase in chapter 8-3. | 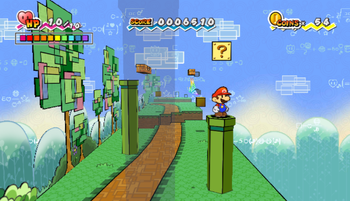
|
| Lineland Road | Coin or Random Item |
In the third scene, between the two elevated grounds. | 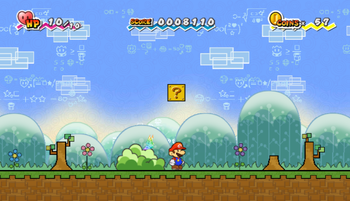
|
| Lineland Road | Coin |
Same scene, right of the second elevated ground. | 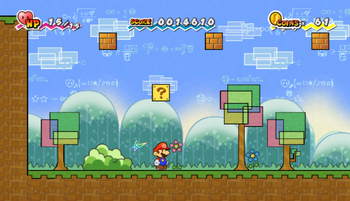
|
| Lineland Road | 8 Coins |
Same scene, above the second elevated ground. | 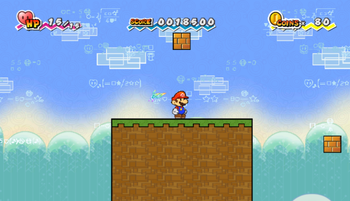
|
| Lineland Road | Pal Pills |
Same scene, behind the first elevated ground in 3-D. | 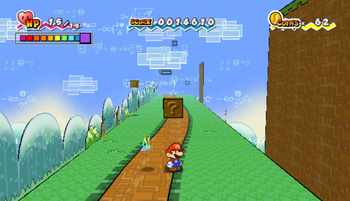
|
| Lineland Road | Mega Star |
In the last/fourth scene, near the beginning. | 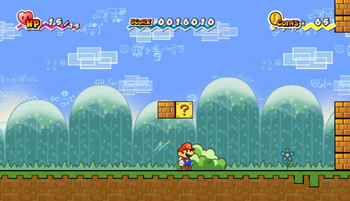
|
Chapter 1-2Afoot in the Foothills | |||
| Mount Lineland | Mushroom (1st), Coin (rest) |
In the first scene, near the beginning. | 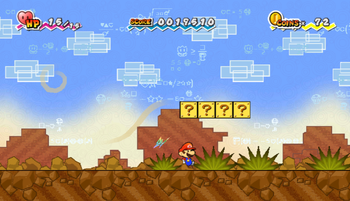
|
| Mount Lineland | Coin |
Same scene, near the exit door. | 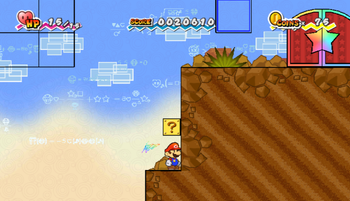
|
| Mount Lineland | Coin (all) |
In the second scene, after coming across the first wall and the flipping to 3-D. | 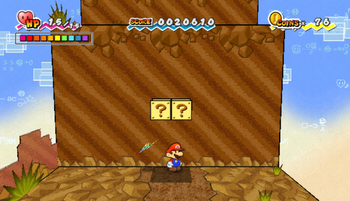
|
| Mount Lineland | Coin (all) |
Same scene, on the top of the second wall in 3-D, right of the platform. | 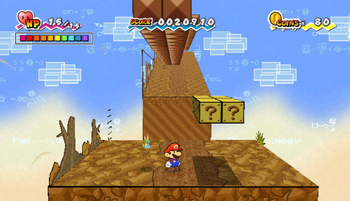
|
| Mount Lineland | Mushroom |
In the last/third/town scene, between the first and second houses. | 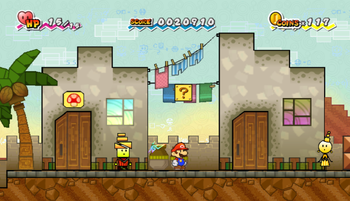
|
Chapter 1-3The Sands of Yold | |||
| Yold Desert |
|
In the first scene, between the first and second rocks. Mario must flip to see all 16 blocks. | 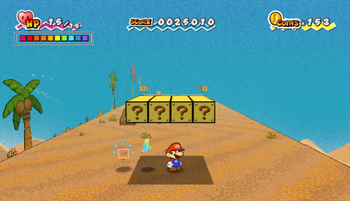
|
| Yold Desert | Coin (left ones), Zombie Shroom (south-right), Mushroom (north-right) |
Same scene, right of the previous ones, near the red palm tree. Mario must flip to see all 4 blocks. | 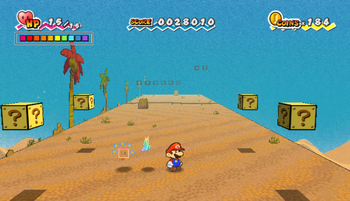
|
| Yold Desert | Mushroom, Coin |
Same scene, after the first quicksand pit, above the group of brick blocks. | 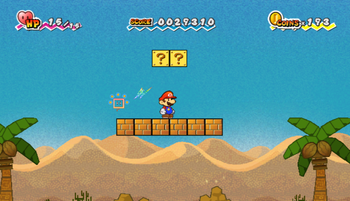
|
| Yold Desert | Coin |
In the third scene (accessed by a door right of the red palm tree), left of the first flipping rectangles. | 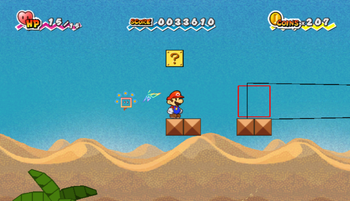
|
| Yold Desert | Zombie Mushroom, Coin |
Same scene, left after being dropped from the first flipping rectangles. | 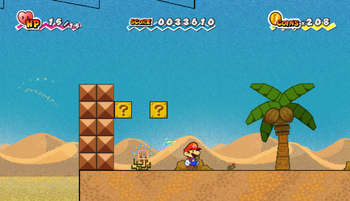
|
| Yold Desert | Mushroom |
Same scene, right after being dropped from the second flipping rectangles. | 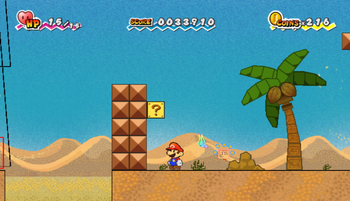
|
| Yold Desert | Super Shroom (upper-last), Coin (rest) |
Same scene, after entering the pipe near the end and then flipping to 3-D. | 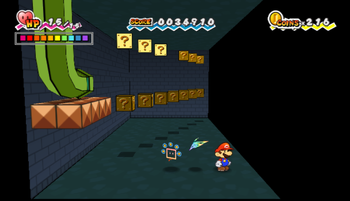
|
| Yold Desert | Coin (all) |
In the sixth scene (the one with the signpost with the instructions how to access the end of the area), left of the signpost. Mario must flip into 3-D to see the blocks. | 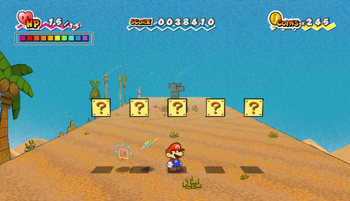
|
Chapter 1-4Monster of the Ruins | |||
| Yold Ruins | Mushroom |
In the second scene, above the fire bar. | 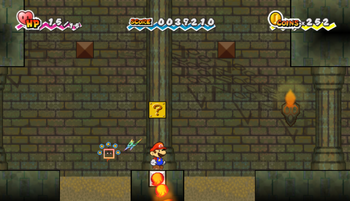
|
| Yold Ruins | Coin (all) |
In the fifth scene, above the quicksand pit. | 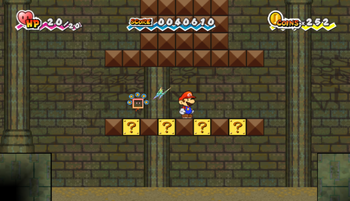
|
| Yold Ruins | Coin |
Same scene, near the end, left of the doors. Mario must flip into 3-D to see it. | 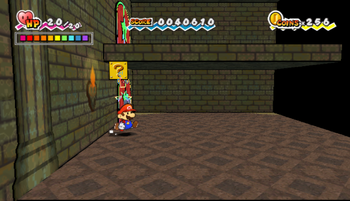
|
| Yold Ruins | Super Shroom |
In the last scene before the outside, above the pipe. | 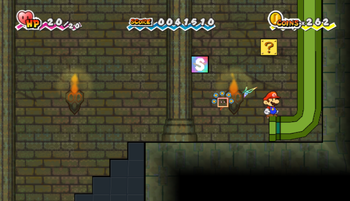
|
Chapter 2-1Bogging to Merlee's | |||
| Gloam Valley | Coin |
In the first scene, above the first platform. | 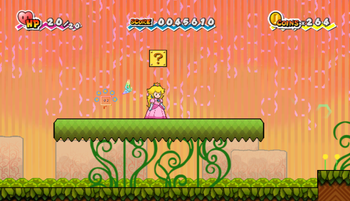
|
| Gloam Valley | Coin |
Same scene, after gliding with Peach from the second platform. | 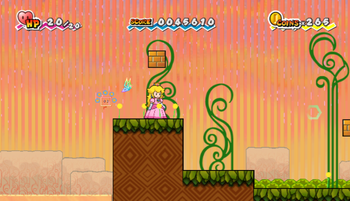
|
| Gloam Valley | Coin |
Same scene, right before the water with sinking platforms. | 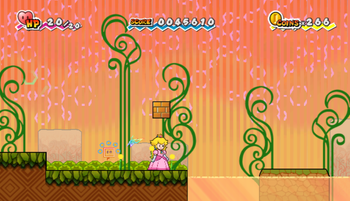
|
| Gloam Valley | Pal Pills |
In the second scene, behind the entrance door. | 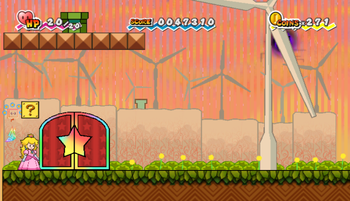
|
| Gloam Valley | Coin |
In the fourth scene, right of the entrance door. | 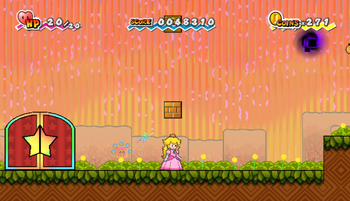
|
| Gloam Valley | Mega Star |
Same scene, above the previous one | 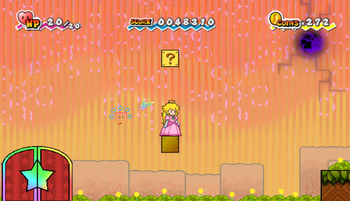
|
| Gloam Valley | Slow Flower |
In the fifth scene, right of the entrance door. | 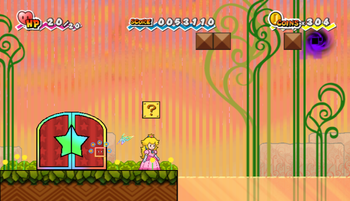
|
| Gloam Valley | Happy Flower |
Same scene, right after the water. | 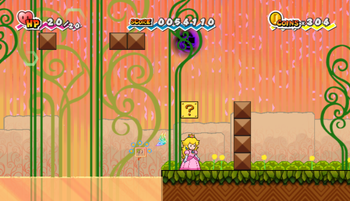
|
Chapter 2-2Tricks, Treats, Traps | |||
| Merlee's Mansion | 12 Coins |
In the outside scene, found right away to the left after flipping to 3-D. | 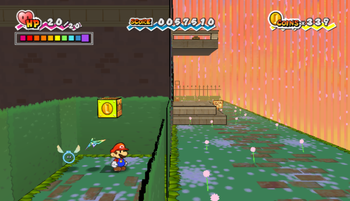
|
| Merlee's Mansion | Slow Flower |
In the room with a spike ceiling trap (accessed by a door on the second floor in the second room of the mansion), after flipping to 3-D and jumping on top of the trap, then flipping back and reaching its east end. | 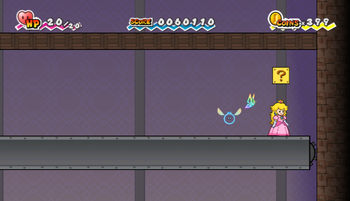
|
Chapter 2-3Breaking the Bank | |||
| Merlee's Mansion | Coin |
In the middle of the first floor on the first room. This block is required to be hit to progress through the game. Also accessible during the Dimentio chase in chapter 8-3. | 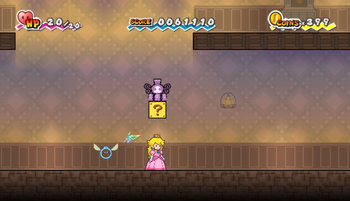
|
| Merlee's Mansion | Empty or Mushroom |
In the room behind the door on the second floor. Contents of the block depend on if the group has at least 10 Rubees: If they don't have them, striking this block does nothing. But if they have them, striking this block spawns a Mushroom. Leaving the room respawns the block. | 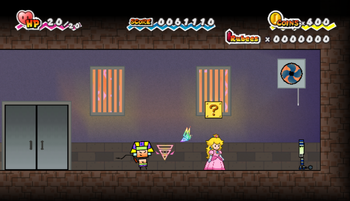
|
Chapter 2-4The Basement Face-off | |||
| Merlee's Basement | Mushroom |
In the first room, under the stairs. To reach it, Mario must flip into 3-D. | 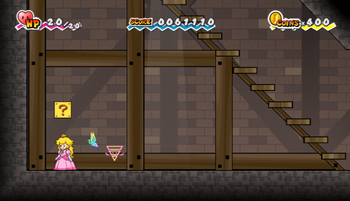
|
| Merlee's Basement | Coin, Zombie Shroom |
In the lower part of Room 02. | 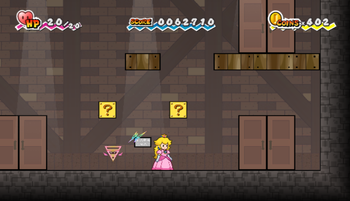
|
| Merlee's Basement | Coin |
In the lower part of Room 04. | 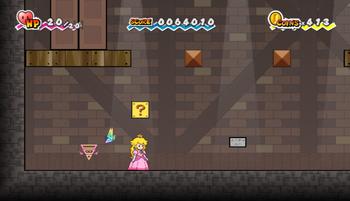
|
| Merlee's Basement | Coin (all) |
In the lower part of Room 06. To see all 4, Mario must flip into 3-D. | 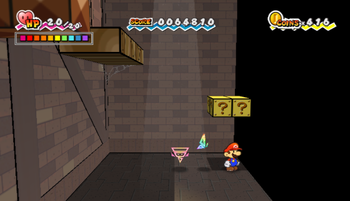
|
| Merlee's Basement | Mushroom, Super Shroom |
In the room before the bathrooms, between the entrance and men's room. To see both, Mario must flip into 3-D. | 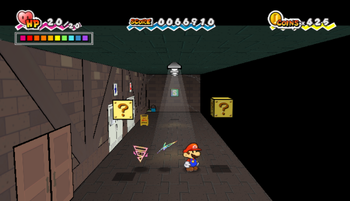
|
Chapter 3-1When Geeks Attack | |||
| The Bitlands | Coin |
In the first scene, above the first platform. | 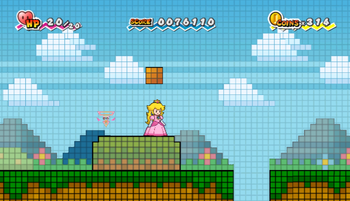
|
| The Bitlands | Coin |
Same scene, left of the first pipe. | 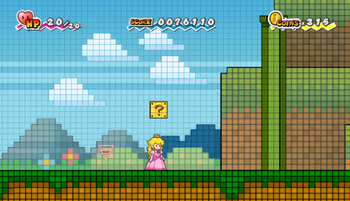
|
| The Bitlands | Mega Star |
In the scene accessed by a door, right of the entrance door. | 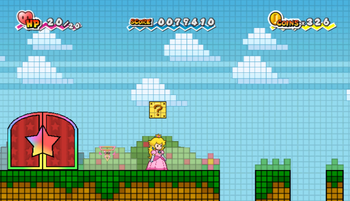
|
| The Bitlands | Mega Star |
In the next scene, found after going left. | 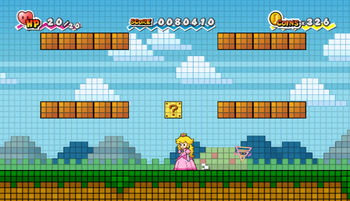
|
| The Bitlands | Pal Pills (1st), Coin (rest) |
In the underground scene, found near the beginning. | 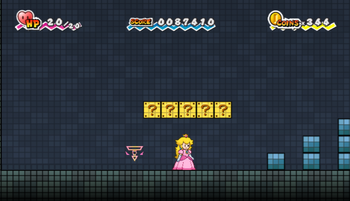
|
| The Bitlands | 14 Coins |
Same scene, in the largest gap between the collumns. | 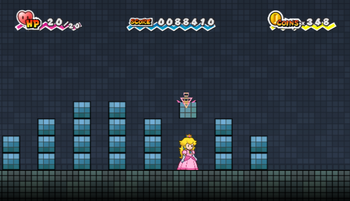
|
| The Bitlands | Zombie Shroom |
Same scene, after the collumns. | 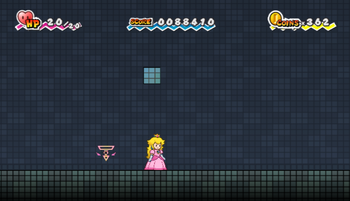
|
| The Bitlands | Mushroom |
Same scene, above the ground between moving platforms | 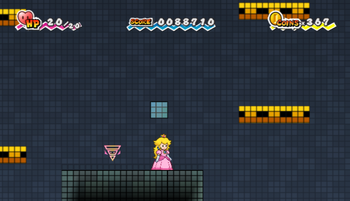
|
| The Bitlands | 14 Coins |
In the scene after using the first pipe. | 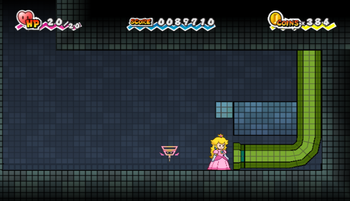
|
| The Bitlands | Coin |
In the scene after using the rightmost pipe in the secret section of the scene. | 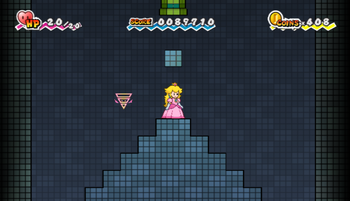
|
| The Bitlands | Super Shroom (middle), Coin (rest) |
In the scene after using the pipe accessible only in 3-D. | 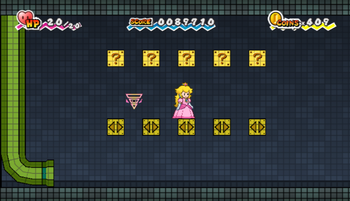
|
| The Bitlands | Coin (all) |
In the last scene, found right of the second pipe. | 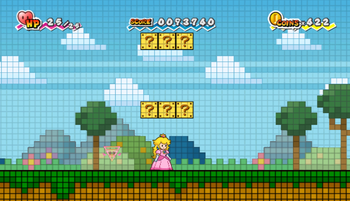
|
Chapter 3-2Bloops Ahoy | |||
| The Tile Pool | Mushroom |
In the first scene, near the beginning. Also accessible during the Dimentio chase in chapter 8-3. | 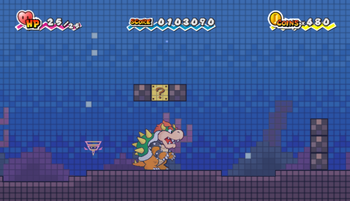
|
| The Tile Pool | Happy Flower |
Same scene, near the whirlpool. Also accessible during the Dimentio chase in chapter 8-3. | 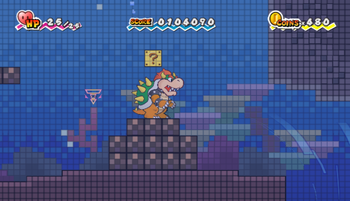
|
Chapter 3-3Up, Up, and a Tree | |||
| The Dotwood Tree | Slow Flower |
In the outside scene, found above the third leaf platform. | 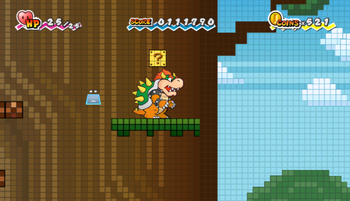
|
| The Dotwood Tree | Speed Flower |
Same scene, above the third block platform. | 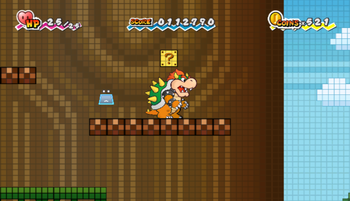
|
| The Dotwood Tree | Coin |
Same scene, found above the previous one. | 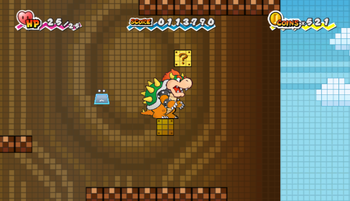
|
| The Dotwood Tree | Mushroom |
Same scene, found between eight and ninth block platforms | 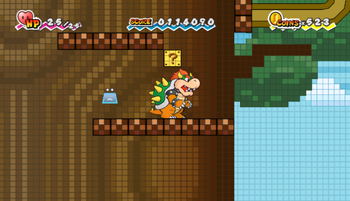
|
| The Dotwood Tree | Super Shroom |
In the inside scene, found near the top, left of the ! switch. | 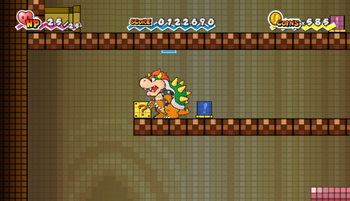
|
| The Dotwood Tree | 14 Coins |
In the top of the tree scene, found above the tenth block platform. | 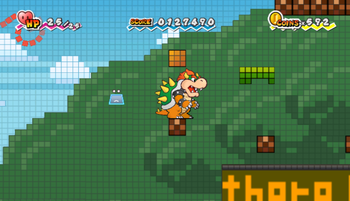
|
| The Dotwood Tree | 14 Coins |
In the last scene, found left of the entrance pipe. | 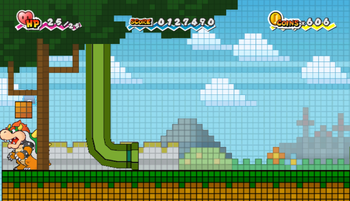
|
Chapter 3-4The Battle of Fort Francis | |||
| Fort Francis | Mushroom |
In the room accessed by an outside bridge. | 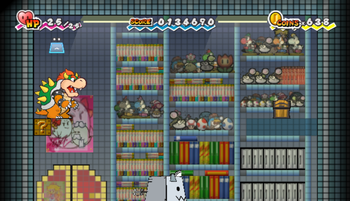
|
| Fort Francis | Super Shroom |
In the room accessed by an elevator. | 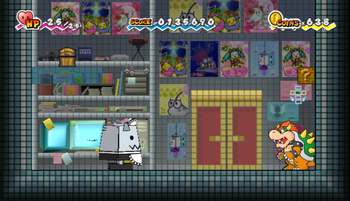
|
Chapter 4-1Into Outer Space | |||
| Outer Space | Coin |
In the last scene, there is an Squarp hole hidden behind an asteroid. This hole takes Mario into the background, near the pipe. Block is found after entering said pipe. | 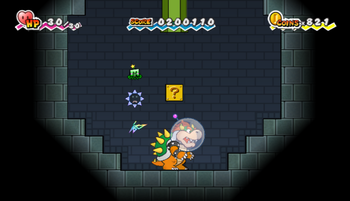
|
Chapter 4-2A Paper Emergency | |||
| Planet Blobule | Coin, Mushroom |
In the first scene, above the blocks above the ground with the first Longator. | 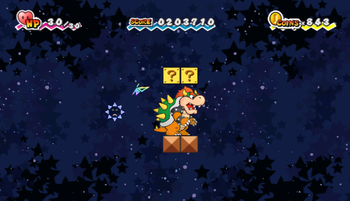
|
| Planet Blobule | Coin |
Same scene, right of the locked door. | 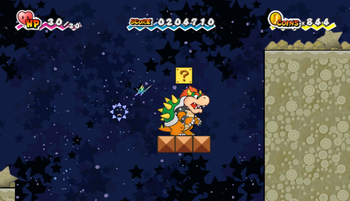
|
| Planet Blobule | 5 Coins |
Same scene, right of the ground with a dimensional rift above it, at the bottom. | 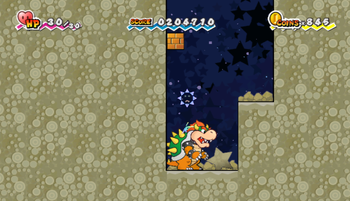
|
| Planet Blobule | Coin (both) |
In the second scene, in the upper part of the area first accessible only with Slim. Also accessible during the Dimentio chase in chapter 8-3. | 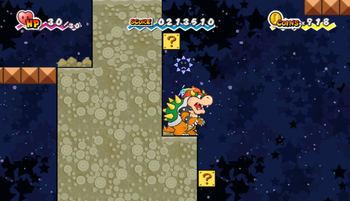
|
| Planet Blobule | Speed Flower |
Same scene, on the ground, right of the previous two. Also accessible during the Dimentio chase in chapter 8-3. | 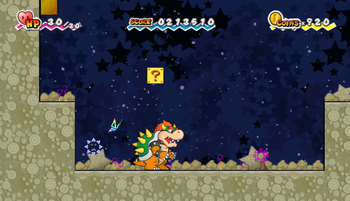
|
| Planet Blobule | Coin |
Same scene, right of the second pipe. Also accessible during the Dimentio chase in chapter 8-3. | 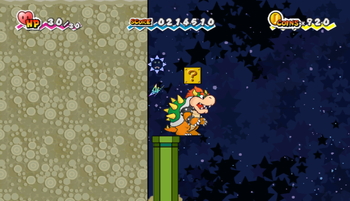
|
| Planet Blobule | Coin |
Same scene, right of the third pipe. Also accessible during the Dimentio chase in chapter 8-3. | 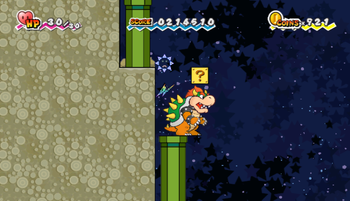
|
| Planet Blobule | Zombie Shroom (last), Coin (rest) |
Same scene, near the end, left of the second star door. Also accessible during the Dimentio chase in chapter 8-3. | 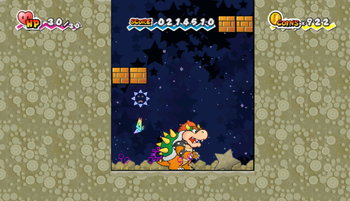
|
| Planet Blobule | Pal Pills |
Same scene, found after flipping to 3-D near the first futuristic door and crossing the gap. Also accessible during the Dimentio chase in chapter 8-3. | 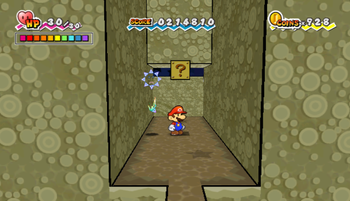
|
| Planet Blobule | Slow Flower, Coin |
In the scene accessed by the first star door, near the end, left of the futuristic door. | 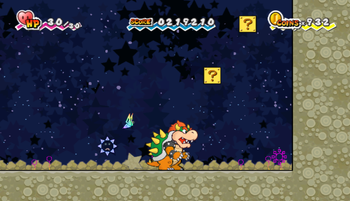
|
| Planet Blobule | Super Shroom (upper), Mega Star (last), Coin (rest) |
In the scene accessed by the second star door, near the beginning. | 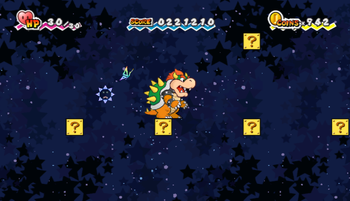
|
Chapter 4-3The Gates of Space | |||
| Outer Limits | Super Shroom |
In the first scene, found between three Hedrons. | 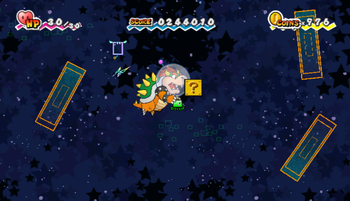
|
| Outer Limits | 30x 30 Coins |
In the scene with Twinkle Mart, found right of the sign. | 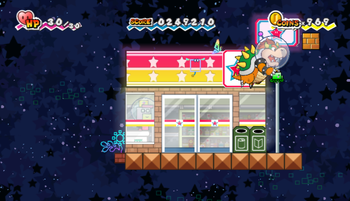
|
Chapter 4-4The Mysterious Mr. L | |||
| Whoa Zone | Happy Flower |
In the second scene, in the west part. | 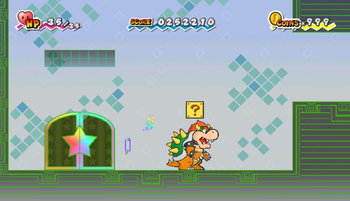
|
| Whoa Zone | Mushroom |
Same scene, in the east part. | 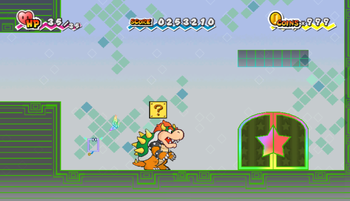
|
| Whoa Zone | Happy Flower, Slow Flower |
In the scene accessed by a door only visible in 3-D, found in 3-D near the entrance. | 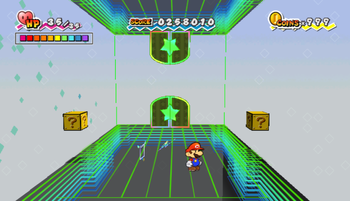
|
| Whoa Zone | 9 Coins |
In the scene after using the pipe in the scene with a second locked door. | 
|
| Whoa Zone | Zombie Shroom (middle), Super Shroom (rest) |
In the scene where gravity is changed by 90° thanks to a gravity switch, Mario should enter the third door. Here, he should enter the second door to walk out of the third one with normal gravity. Blocks are then seen between the third and fourth doors. | 
|
whitewhite | |||
| Downtown of Crag | Happy Flower |
In the second scene, found left of the door and a pipe. | 
|
| Downtown of Crag | Coin |
Same scene, at the top after gliding with Peach from the highest pipe. | 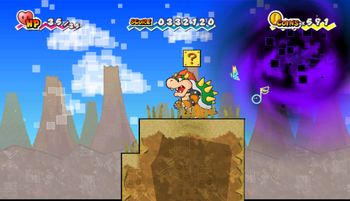
|
whitewhite | |||
| Gap of Crag | Coin (both) |
In the first scene, found in 3-D, under the water. | 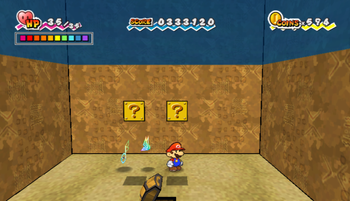
|
| Gap of Crag | Slow Flower (1st), Mushroom (3rd), Speed Flower (5th), Ghoul Shroom (7th), Happy Flower (10th), Zombie Shroom (11th), Pal Pills (15th), Coin (rest) |
In the scene with Fire Tablet, found in upper western part of the scene. To see all 15, Mario has to flip into 3-D. Also accessible during the Dimentio chase in chapter 8-3. | 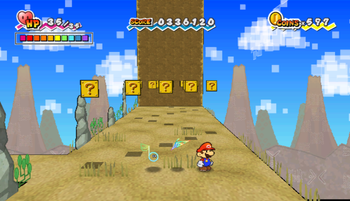
|
whitewhite | |||
| Floro Caverns | Super Shroom |
In the first scene, above the last block platform. | 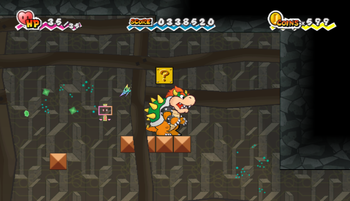
|
| Floro Caverns | Pal Pills |
In the third scene, near the entrance pipe. | 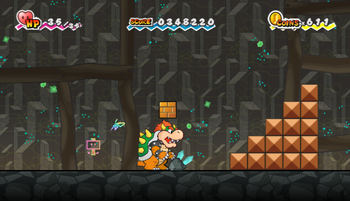
|
| Floro Caverns | Mushroom (1st lower), Speed Flower (brick one), Coin (rest) |
Same scene, right of the second pipe. | 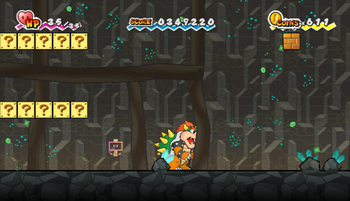
|
| Floro Caverns | Coin (all) |
Same scene, right of the third pipe. | 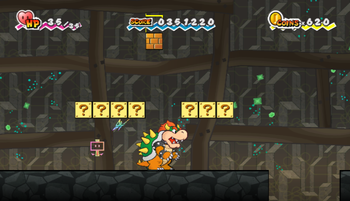
|
| Floro Caverns | Slow Flower |
Same scene, above the seventh pipe. | 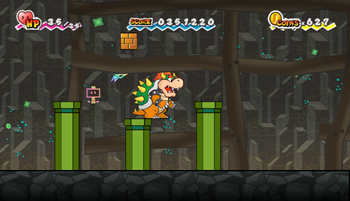
|
| Floro Caverns | 14x 14 Coins, Coin, Mushroom |
Same scene, left of the ninth pipe. | 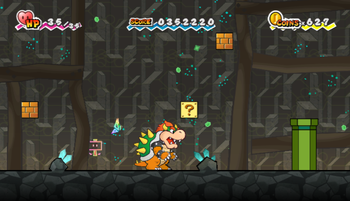
|
| Floro Caverns | Coin |
In the scene accessed by going through first door, using a minecart and going through another door, found in the upper part of the scene. | 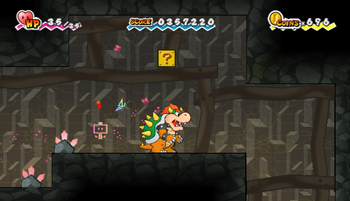
|
| Floro Caverns | Zombie Shroom |
Same scene, in the middle part. | 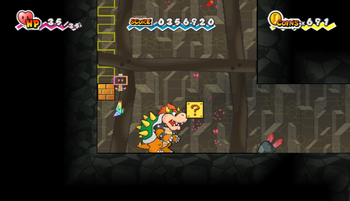
|
| Floro Caverns | Zombie Shroom |
In the scene accessed by going through third door, using a minecart and going through another door, found in the lower western part. | 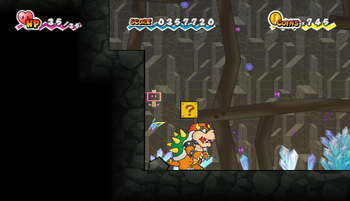
|
| Floro Caverns | Mega Star |
In the scene accessed by going through locked door, using the minecart and going through another door, found near the beginning. | 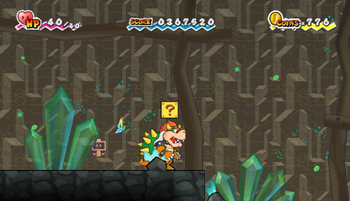
|
whitewhite | |||
| Floro Caverns | Coin |
In the first scene, found right of the first pipe. | 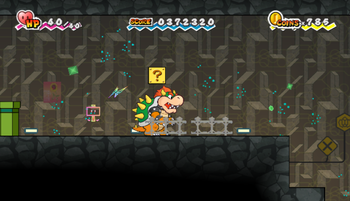
|
| Floro Caverns | Coin, Zombie Shroom, Mushroom |
Same scene, right of the second pipe. | 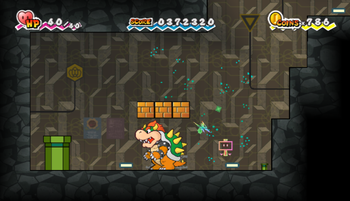
|
| Floro Caverns | Pal Pills |
In the second scene, in the lower part of the scene. | 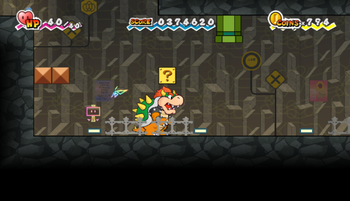
|
| Floro Caverns | Super Shroom |
In the second scene of the Processing Center. | 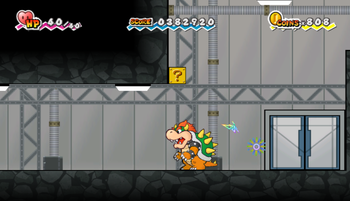
|
| Floro Caverns | Pal Pills (1st lower), Super Shroom (13th upper), Coin (rest) |
In the scene accessed by a Small Pipe found in the first scene. | 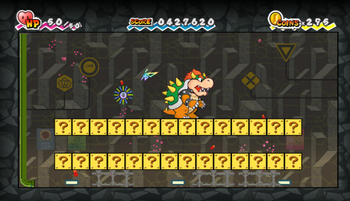
|
| Floro Caverns | Ultra Shroom |
In the portrait room, specifically in the hole under the portrait of the first king. | 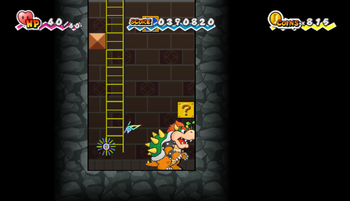
|
Between Chapter 6 and Chapter 7 | |||
| The Underwhere | 12 Coins (last), Coin (rest) |
In the scene accessed by a pipe found in the scene before the scene with Luigi. | 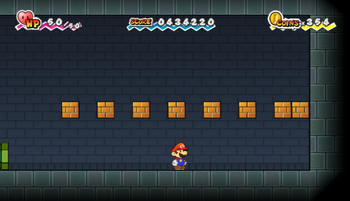
|
| The Underwhere | Coin |
In the second scene, right of the second pipe in the upper part of the scene. | 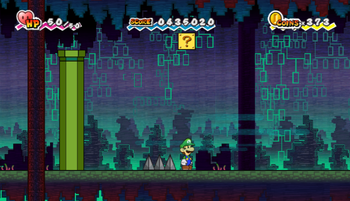
|
| The Underwhere | Happy Flower |
Same scene, right of the third pipe in the upper part of the scene. | 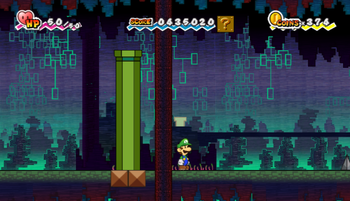
|
Chapter 7-2The Sealed Doors Three | |||
| Underwhere Road | Mushroom |
In the second scene, found above the platform above the door. Also accessible during the Dimentio chase in chapter 8-3. | 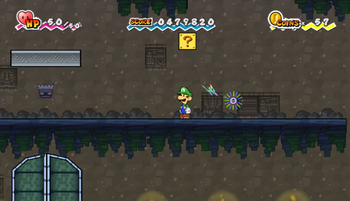
|
| Underwhere Road | Coin |
Same scene, found right of the third flipping rectangles. Also accessible during the Dimentio chase in chapter 8-3. | 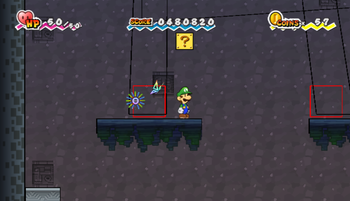
|
| Underwhere Road | Mushroom |
Same scene, above the platform above the third flipping rectangles. Also accessible during the Dimentio chase in chapter 8-3. | 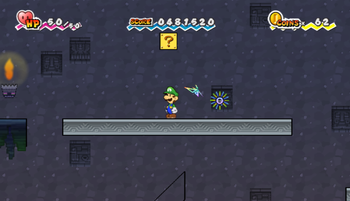
|
Chapter 7-3The Forbidden Apple | |||
| Overthere Stair | Super Shroom (middle-low), Coin (rest) |
In the first scene, above the cloud 12. | 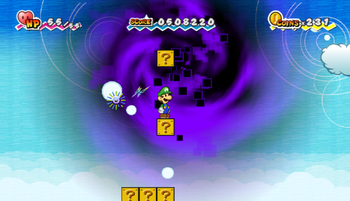
|
| Overthere Stair | Slow Flower |
Same scene, above the cloud 17. | 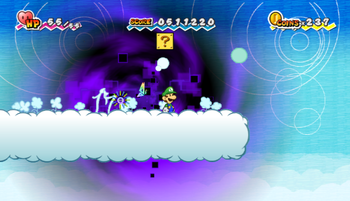
|
| Overthere Stair | Speed Flower (2nd), Zombie Shroom (rest) |
In the second scene, above the cloud 21. | 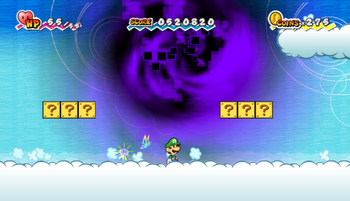
|
| Overthere Stair | Coin |
Same scene, above the cloud 22. | 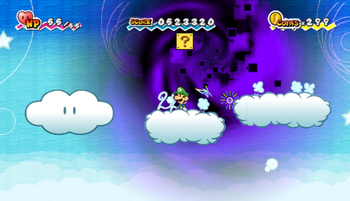
|
| Overthere Stair | Coin (all) |
Same scene, under the cloud 24. | 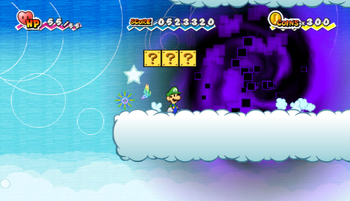
|
| Overthere Stair | Coin (both) |
In the third scene, above the cloud 31. | 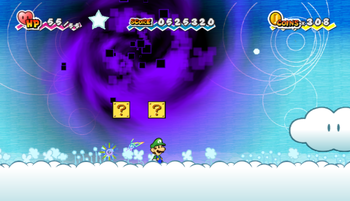
|
| Overthere Stair | Coin, Mushroom |
Same scene, between the clouds 36 and 37. | 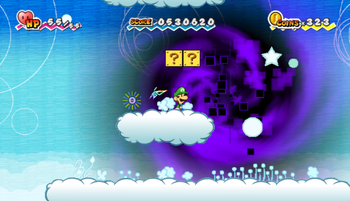
|
| Overthere Stair | 23x Coin (all) |
Same scene, Mario has to flip on the cloud 37 to reveal a row of 23 blocks. | 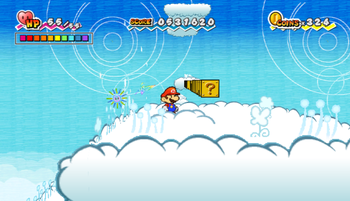
|
| Overthere Stair | Happy Flower |
In the fourth scene, there is a door on the cloud 46. In the following scene is a tree with red apples. Block is found on the way to the tree. | 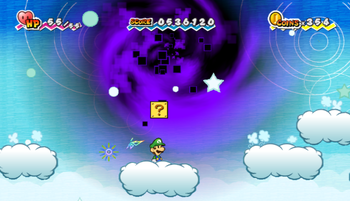
|
| Overthere Stair | Mushroom, 13 Coins |
In the fifth scene, above the cloud 52. | 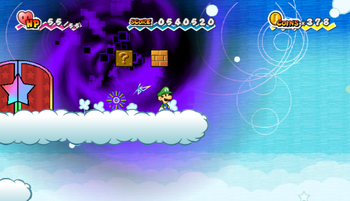
|
| Overthere Stair | Super Shroom |
In the sixth scene, above the cloud 61. | 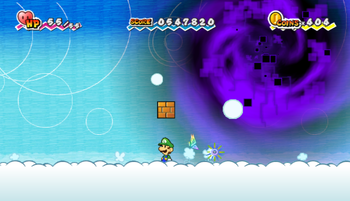
|
| Overthere Stair | 13x 13 Coins (both) |
Same scene, above the cloud 67. | 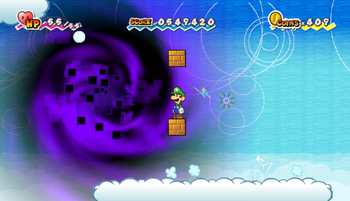
|
| Overthere Stair | Coin (all) |
Same scene, in the lower part of the scene, above the arches in 3-D. | 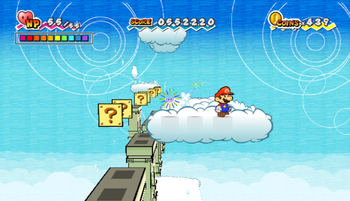
|
| Overthere Stair | Coin (both) |
In the seventh scene, above the cloud 71. | 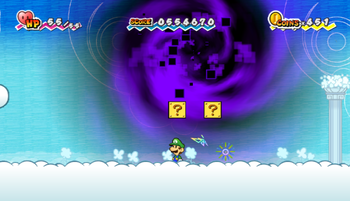
|
| Overthere Stair | Super Shroom |
Same scene, found between the previous two in 3-D. | 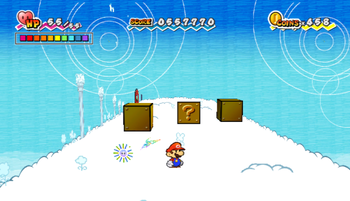
|
Chapter 7-4A Bone-Chilling Tale | |||
| The Overthere | Mushroom, Speed Flower, Coin |
In sector 1, found near the door to sectors 2 and 3. | 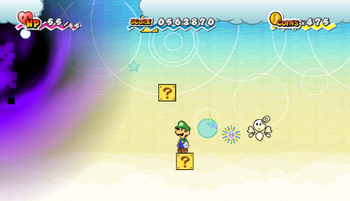
|
| The Overthere | Pal Pills |
In sector 2, near the eastern end of the lower part. | 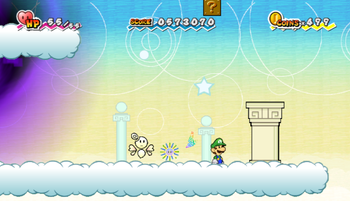
|
| The Overthere | Super Shroom, Ghoul Shroom |
Same sector, left of the previous one are two clouds. These two blocks are above the higher one. | 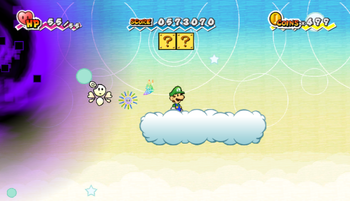
|
| The Overthere | Super Shroom |
Same sector, above the highest collumn in 3-D. | 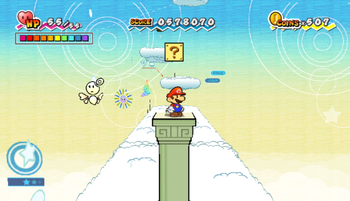
|
| The Overthere | Coin |
In sector 3, above the cloud with the flip block in 3-D. | 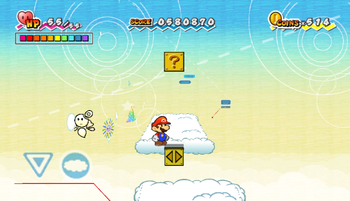
|
| The Overthere | Coin, Mushroom |
In sector 6, above the smallest collumn. | 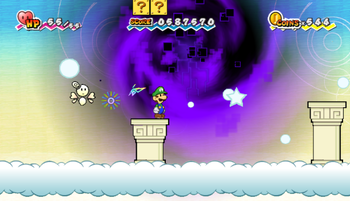
|
| The Overthere | Mega Star |
Same sector, at the start of the foreground part accessed by Mario's 3-D flipping. | 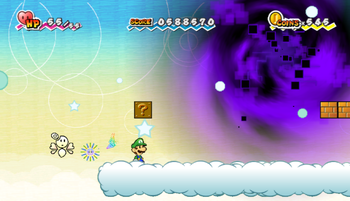
|
| The Overthere | Slow Flower |
In sector 8, above the second cloud. | 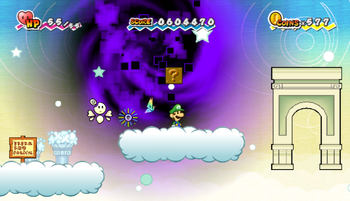
|
| The Overthere | Happy Flower |
Same sector, avove the brick block above the second arch. | 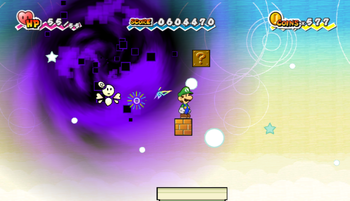
|
| The Overthere | Ultra Shroom |
In the last outside scene, left of the door to Bonechill's arena. | 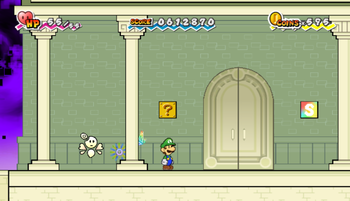
|
Chapter 8-1The Impending Darkness | |||
| Castle Bleck Entry | Ultra Shroom |
At the end of the second stairwell room. | 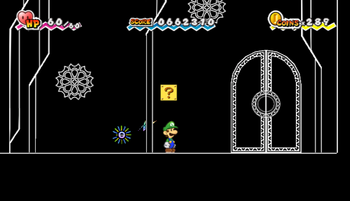
|
Chapter 8-3Countdown to Destruction | |||
| Castle Bleck Interior | Speed Flower |
In the first scene, near the beginning. | 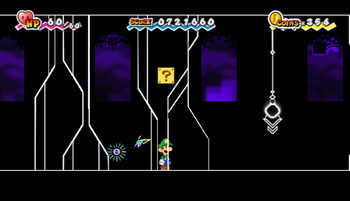
|
| Castle Bleck Interior | Pal Pills |
Same scene, found by continuing to go right. | 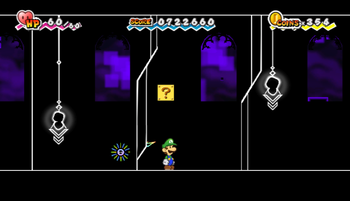
|
| Castle Bleck Interior | Slow Flower |
Same scene, found by continuing to go right. | 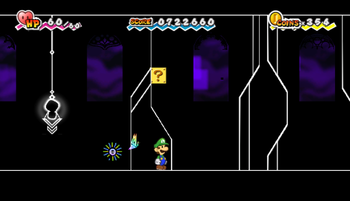
|
| Castle Bleck Interior | Mushroom |
In the fourth scene, near the beginning. | 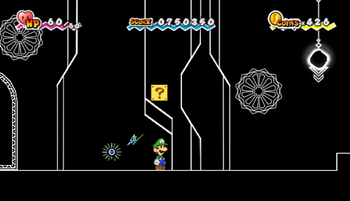
|
| Castle Bleck Interior | Happy Flower |
Same scene, in the middle. | 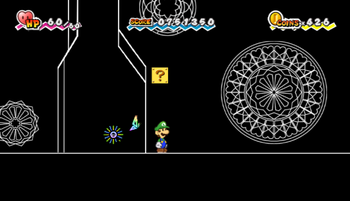
|
| Castle Bleck Interior | Ghoul Shroom |
Same scene, near the end. | 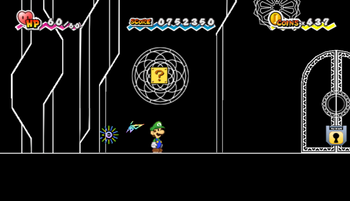
|
| Castle Bleck Interior | Super Shroom |
In the sixth scene, after going through the fake mirror in 3-D and then flippin back, Mario should go to the east end. | 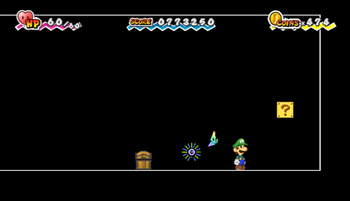
|
| Castle Bleck Interior | Super Shroom |
Same scene, but at the west end. | 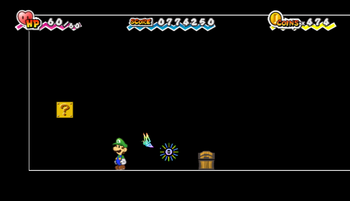
|
Chapter 8-4Tippi and Count Bleck | |||
| Castle Bleck Inner Sanctum | Coin (middle), Mushroom (rest) |
In the first scene, near the beginning. | 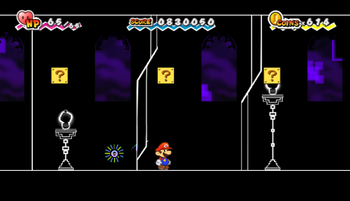
|
| Castle Bleck Inner Sanctum | Ultra Shroom |
In the third scene, above the highest collumn. | 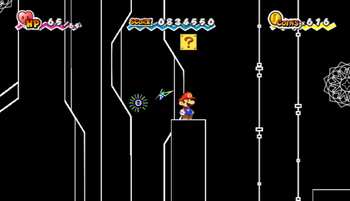
|
| Castle Bleck Inner Sanctum | Ultra Shroom |
In the second-to-last scene, found right after the stairs. | 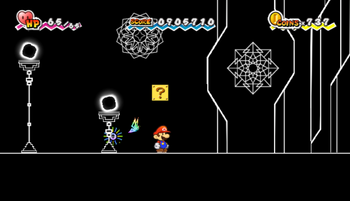
|
? Block count
This chart shows the number of ? Blocks for each location, with the total amount at the bottom. Locations are listed in the order the player can visit them.
| Location | Count |
|---|---|
| Lineland Road | 21 |
| Mount Lineland | 18 |
| Yold Desert | 44 |
| Yold Ruins | 7 |
| Gloam Valley | 8 |
| Merlee's Mansion (2-2) | 2 |
| Merlee's Mansion (2-3) | 2 |
| Merlee's Basement | 10 |
| The Bitlands | 25 |
| The Tile Pool | 2 |
| The Dotwood Tree | 7 |
| Fort Francis | 2 |
| Outer Space | 1 |
| Planet Blobule | 21 |
| Outer Limits | 2 |
| Whoa Zone | 8 |
| Downtown of Crag | 2 |
| Gap of Crag | 17 |
| Floro Caverns (5-3) | 28 |
| Floro Caverns (5-4) | 35 |
| The Underwhere | 10 |
| Underwhere Road | 3 |
| Overthere Stair | 60 |
| The Overthere | 14 |
| Castle Bleck Entry | 1 |
| Castle Bleck Interior | 8 |
| Castle Bleck Inner Sanctum | 5 |
| Total | 363 |
See also
This is a list of treasure chests from Super Paper Mario. There are 111 treasure chests in the game.
There are two types of chests: Small ones contain either generic items, side-quest important things, Catch Cards or items required for progression. During the story, the big ones contain Pixls, while in the Pits of 100 Trials, they contain Catch Cards.
Yold Desert, Merlee's Basement, Outer Space, Planet Blobule, Outer Limits, Sammer's Kingdom, World of Nothing, Sammer's Proving Grounds and Sammer's Endgame are the only locations without any treasure chests.
| Chapter 1 | Lineland Road • Mount Lineland • Yold Ruins |
| Between Chapter 1 and Chapter 2 | Flipside |
| Chapter 2 | Gloam Valley • Merlee's Mansion (2-2) • Merlee's Mansion (2-3) |
| Between Chapter 2 and Chapter 3 | Flipside |
| Chapter 3 | The Bitlands • The Tile Pool • The Dotwood Tree • Fort Francis |
| Chapter 4 | Whoa Zone |
| Between Chapter 4 and Chapter 5 | Flopside • Flipside |
| Chapter 5 | Downtown of Crag • Gap of Crag • Floro Caverns (5-3) • Floro Caverns (5-4) |
| Between Chapter 5 and Chapter 6 | Flipside • Flopside • Downtown of Crag |
| Chapter 6 | Sammer's Early Duels |
| Between Chapter 6 and Chapter 7 | The Underwhere • Flopside |
| Chapter 7 | Underwhere Road • Overthere Stair • The Overthere |
| Chapter 8 | Castle Bleck Entry • Castle Bleck Foyer • Castle Bleck Interior • Castle Bleck Inner Sanctum |
| Pits of 100 Trials | Flipside Pit of 100 Trials • Flopside Pit of 100 Trials |
Treasure chest locations
Chapter 1-1The Adventure Unfolds | |||
| Lineland Road | Shroom Shake |
In the underground scene after entering the second pipe in the first scene. | 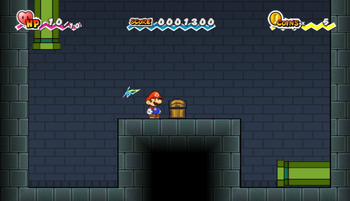
|
| Lineland Road | Koopa Troopa Catch Card |
In the last scene, found by flipping to 3-D at the very end and going to secret section. | 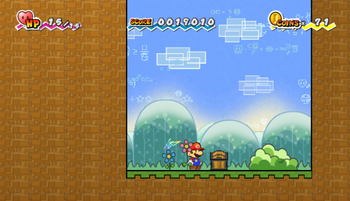
|
Chapter 1-2Afoot in the Foothills | |||
| Mount Lineland | Paratroopa Catch Card |
In the first scene, there is a secret path visible after flipping to 3-D near the start of the area. | 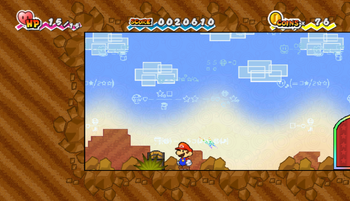
|
| Mount Lineland | Thoreau |
In the room after reaching the end of the second house in Yold Town. | 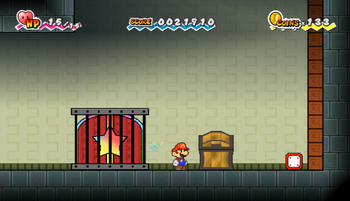
|
Chapter 1-4Monster of the Ruins | |||
| Yold Ruins | Life Shroom |
In the second scene, found by going to the upper east and then down the ladder which is found there. | 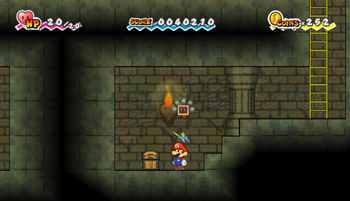
|
| Yold Ruins | Ruins Key |
In the upper part of fourth scene. | 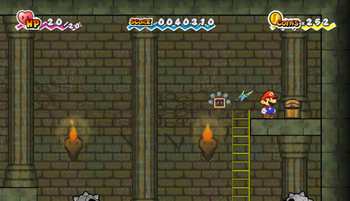
|
| Yold Ruins | Buzzy Beetle Catch Card |
In the eighth scene, after reaching the east end and then flipping to 3-D, a secret path is revealed. Chest is found at the end of it. | 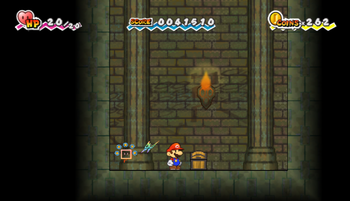
|
Between Chapter 1 and Chapter 2 | |||
| Flipside | Merlon and Merluvlee Catch Cards |
After getting the Old Key from Merlon, used to reach 1st Floor Outskirts, found after falling in the first hole. | 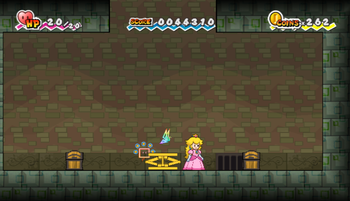
|
Chapter 2-1Bogging to Merlee's | |||
| Gloam Valley | Door Key |
In the first scene, there is a pipe found above the exit door. By entering it and defeating the enemies inside, a chest spawns. | 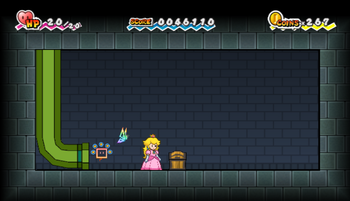
|
| Gloam Valley | Boomer |
In the fifth scene, there is a pipe found near the end. By entering it, pushing a ! switch in the first room and defeating a Growmeba in the second one, a chest spawns. | 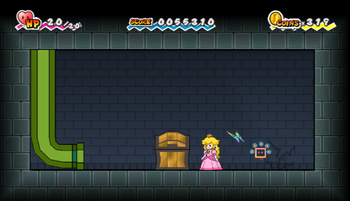
|
| Gloam Valley | Watchitt Catch Card |
After getting Boomer from the previous chest, he can be used to blow up a cracked wall behind the chest. Then by flipping into 3-D with Mario, another chest can be reached | 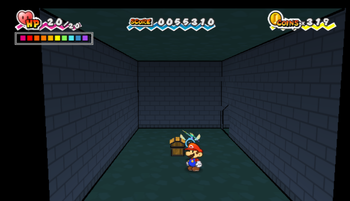
|
| Gloam Valley | Shlurp and Swooper Catch Cards |
In the last scene, there is a hole visible only after flipping into 3-D. Chests can be found at the bottom of said hole. | 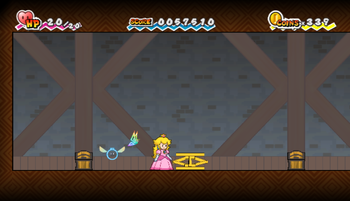
|
Chapter 2-2Tricks, Treats, Traps | |||
| Merlee's Mansion | Stop Watch |
In the outside scene, found at the top of the roof. | 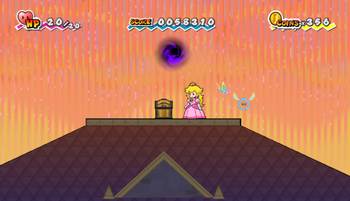
|
| Merlee's Mansion | Cursya Catch Card |
Same scene, found on the balcony above the entrance door. | 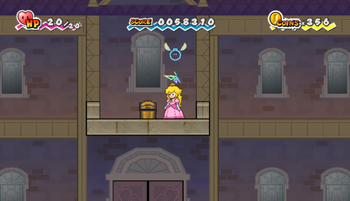
|
| Merlee's Mansion | House Key |
After reaching the the room with spike ceiling trap (last door on the second floor of the second room), found at the end of the path above the trap. | 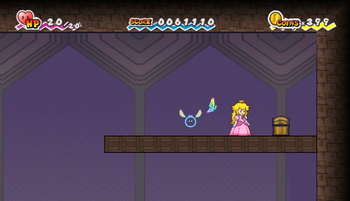
|
Chapter 2-3Breaking the Bank | |||
| Merlee's Mansion | Boo Catch Card |
In the secret section of the first room found after going to east part of the second floor, flipping into 3-D and blowing up the Brick Blocks with Boomer. | 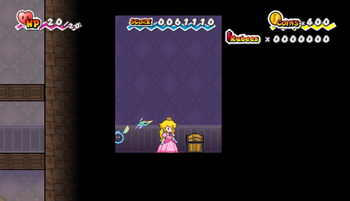
|
| Merlee's Mansion | Slim |
In the secret section of the first room found after going to west part of the second floor and flipping into 3-D. | 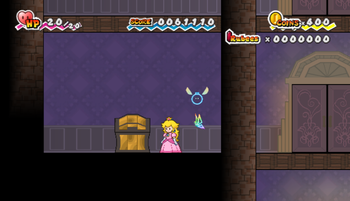
|
Between Chapter 2 and Chapter 3 | |||
| Flipside | Cooking Disk R/2 (PAL) |
After reaching the middle part of the 2nd Floor, going left, then destroying the brick blocks with Boomer to reach a pipe to the foreground part of 3rd Floor. Here, Mario must use Tippi's ability to make a path out of Hard Blocks. Chest is found at the end of the path, at the large block platform. | 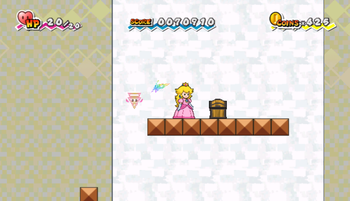
|
| Flipside | The InterNed Catch Card |
After using the newly functional elevator from 1st Floor to B1, then going right to the water and flipping into 3-D, found in the alcove in the wall. | 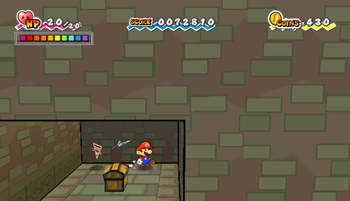
|
Chapter 3-1When Geeks Attack | |||
| The Bitlands | Piranha Plant Catch Card |
In the first scene, found at the end on the block platform. | 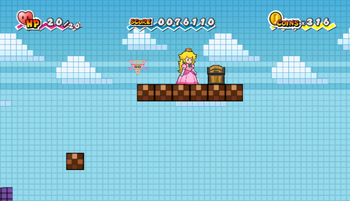
|
| The Bitlands | Thunder Rage |
Same scene, after going through the pipe at the very end, Mario is taken into the background. Chest is found after entering the next pipe there. | 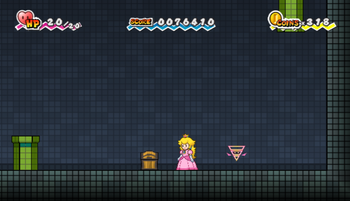
|
| The Bitlands | Magikoopa Catch Card |
In the underground scene, after reaching the very end, going through the rightmost pipe in the secret section. Found at the ground after flipping to 3-D. | 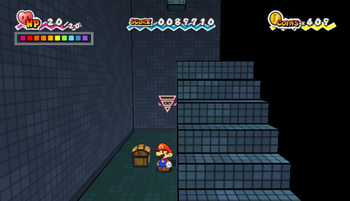
|
Chapter 3-2Bloops Ahoy | |||
| The Tile Pool | Gold Bar |
In the second scene, after reaching the first dry part (the one in the pipe), found behind said pipe after flipping into 3-D. | 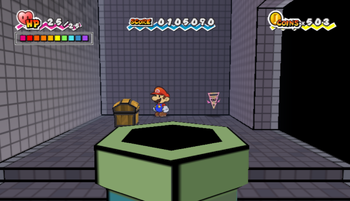
|
| The Tile Pool | Thudley |
After going through the pipe near the previous chest and the door at the end of the new scene, a door locks. Enemies in this room must be defeated to make the chest appear. | 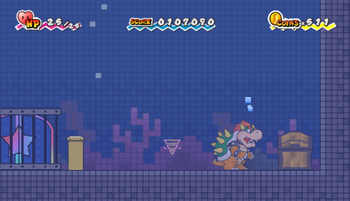
|
Chapter 3-3Up, Up, and a Tree | |||
| The Dotwood Tree | Peach (2) Catch Card |
In the inside scene, found in the room accessed by a pipe jutting out of the right wall. Here, two Chain Chomps must be defeated for chest to appear. | 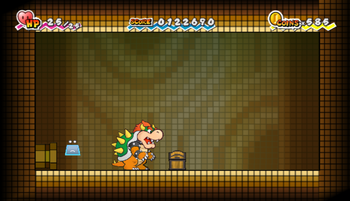
|
Chapter 3-4The Battle of Fort Francis | |||
| Fort Francis | Fort Key |
In the first scene, there is a pipe only visible after reaching the east end and flipping into 3-D. Chest is in the room reached by the said pipe. | 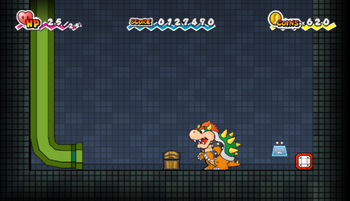
|
| Fort Francis | Fort Key |
In the room reached by a outdoor bridge and going past the SecuriMeow. | 
|
| Fort Francis | Fort Key |
In the room reach by going past the SecuriMeow and the elevator. | 
|
Chapter 4-4The Mysterious Mr. L | |||
| Whoa Zone | Dimension Key |
At the end of the fourth scene. | 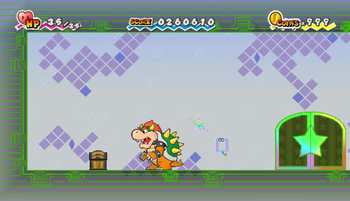
|
| Whoa Zone | Dimension Key |
At the ceiling of the scene with the second locked door. | 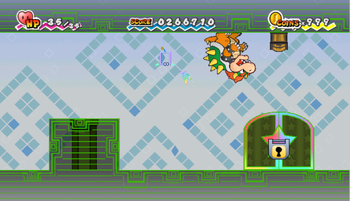
|
| Whoa Zone | Dimension Key |
In the scene reached by the third door in the room with 90° gravity switches. | 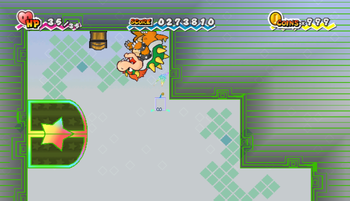
|
Between Chapter 4 and Chapter 5 | |||
| Flopside | Cooking Disk W/3 (PAL) |
After reaching the foreground part of the 3rd Floor. Here, Mario must use Tippi's ability to make a path out of Hard Blocks. Chest is found at the end of the path, at the large block platform. | 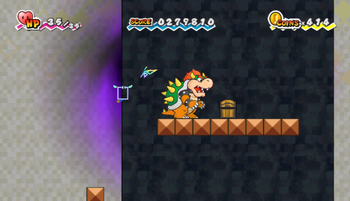
|
| Flopside | Piccolo |
In the house with the locked door in the back part of 1st Floor. Key to it is granted after the trading sidequest available after placing the blue Pure Heart into its pillar. | 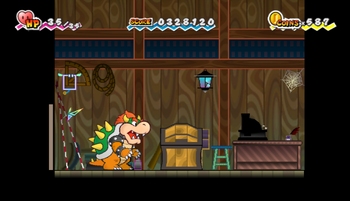
|
| Flopside | Nolrem Carch Card |
Found at the end of the foreground part of the 3rd Floor, after using Piccolo's ability to remove certain blocks. | 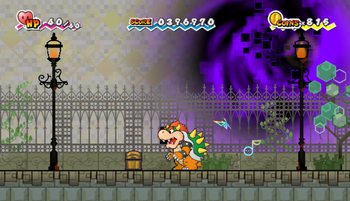
|
| Flipside | Merlee Catch Card |
Found at the end of the foreground part of the 3rd Floor, after using Piccolo's ability to remove certain blocks. | 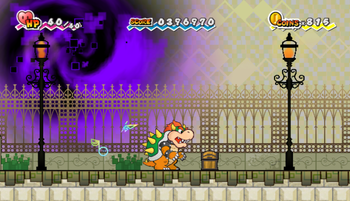
|
whitewhite | |||
| Downtown of Crag | Moon Cleft Catch Card |
In the second scene, found in the alcove after jumping down between the two elevated grounds to the west and flipping to 3-D. | 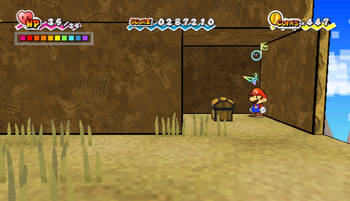
|
| Downtown of Crag | Bowser (2) Carch Card |
Same scene, after entering the easternmost pipe and defeating the enemies there, a chest spawns. | 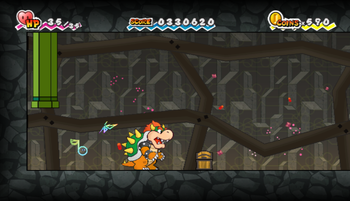
|
whitewhite | |||
| Gap of Crag | Water Tablet |
In the first scene, found under the water. | 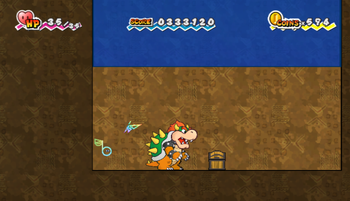
|
| Gap of Crag | Stone Buzzy Catch Card |
In the last scene, found after reaching the east end and flipping to 3-D. | 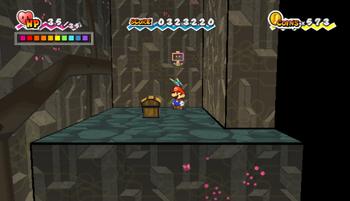
|
whitewhite | |||
| Floro Caverns | Shroom Shake |
Found after entering the third pipe in the third scene and the flipping to 3-D to find a secret section of the room. | 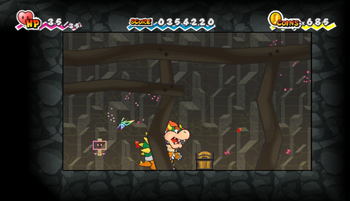
|
whitewhite | |||
| Floro Caverns | Floro Cragnien Catch Card |
Found at the west end of the third scene of the Processing Center. | 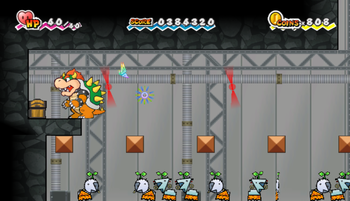
|
Between Chapter 5 and Chapter 6 | |||
| Flopside | Power Plus |
After breaking the block in B2 Outskirts and then pressing newly revealed ! Switch, a secret part of the room with a chest is revealed. | 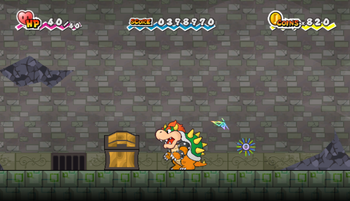
|
| Flopside | Barry Catch Card |
After falling through the hole in B2 Outskirts and then reaching the end. | 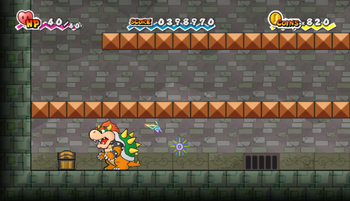
|
| Flopside | Golden Card, Cooking Disk B/5 (PAL) |
In the secret room of The Overthere Bar, accessible by flipping to 3-D. | 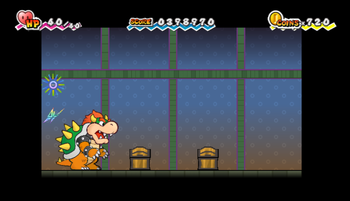
|
| Flipside | The InterChet Catch Card |
After breaking the block in B1 Outskirts of Flopside, the block in B1 Outskirts of Flipside is broken too. Chest is found at the end of the new path. | 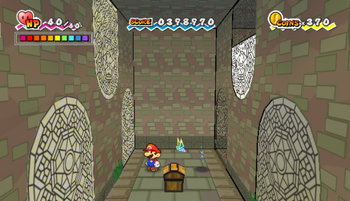
|
| Flipside | HP Plus |
After breaking the block in B2 Outskirts of Flopside, the block in B2 Outskirts of Flipside is broken too. A ! Switch is revealed there and by pressing it a secret part of the room with a chest is revealed. | 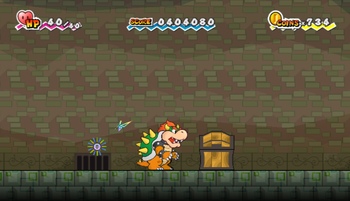
|
| Downtown of Crag | Cooking Disk G/6 (PAL) |
In the first scene, at the end, after flipping to 3-D, there is a small opening accessible only by using Dottie's ability. There, Mario must go through the pipe to reach the other side of the water and then flip into 3-D to see the chest. | 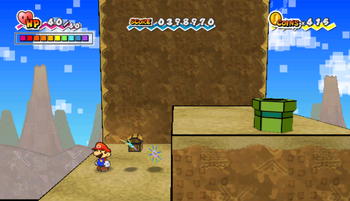
|
whitewhite | |||
| Sammer's Early Duels | Bomb Trap Dud | In the middle of the first scene. This chest is required to be opened to progress through the game. It contains a bomb, which turns out to be a dud. Afterwards the chest despawns. | 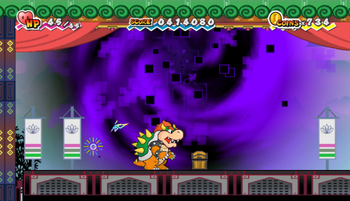
|
Between Chapter 6 and Chapter 7 | |||
| The Underwhere | Dry Bones Catch Card |
Found in the scene where Luigi is recruited, in the foreground after flipping to 3-D in the alcove. | 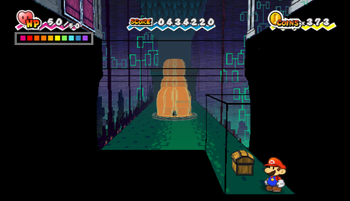
|
| The Underwhere | Peach (3) Catch Card |
In the second scene, found after entering fourth pipe in the upper part of the scene, then the last pipe in the background. Here, a Gigabite must be defeated for chest to appear. | 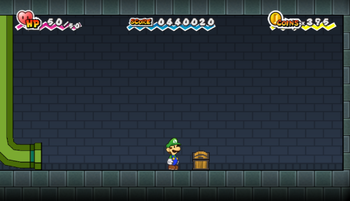
|
| Flopside | Piccolo Catch Card |
After returning from The Underwhere with Luigi, he can be used in B1 Outskirts to reach the top of the wall. Here, Mario must flip to 3-D to see an opening. He should go there to see a chest on the ground. | 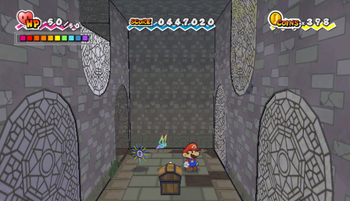
|
Chapter 7-2The Sealed Doors Three | |||
| Underwhere Road | Dark Boo Catch Card |
In the second scene, found under the platform reached by the third flipping rectangles. | 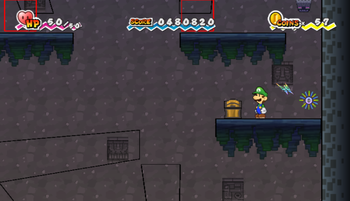
|
Chapter 7-3The Forbidden Apple | |||
| Overthere Stair | Rawbus Catch Card |
In the second scene, found at the end of the cloud next to the cloud 25. | 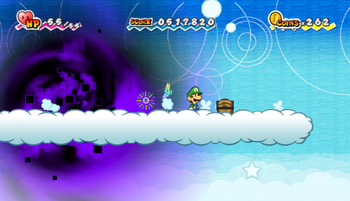
|
| Overthere Stair | Ruff Puff Catch Card |
In the third scene, found at the end of the cloud 34. | 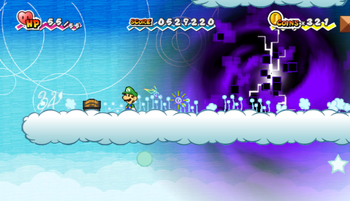
|
| Overthere Stair | Shroom Shake |
In the fourth scene, found on the cloud reached by the platforms left of the cloud 43. | 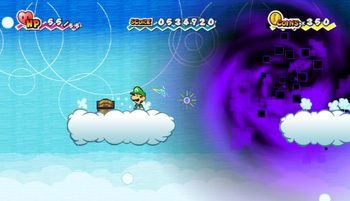
|
| Overthere Stair | Long-Last Shake |
In the sixth scene, found on the cloud 68. | 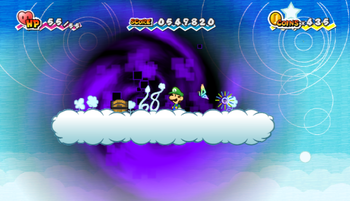
|
| Overthere Stair | Thunder Rage |
Same scene, found at the end of cloud 69. | 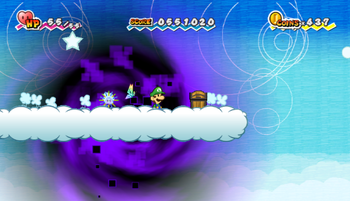
|
| Overthere Stair | Life Shroom |
In the seventh scene, found on the cloud under the cloud 75. | 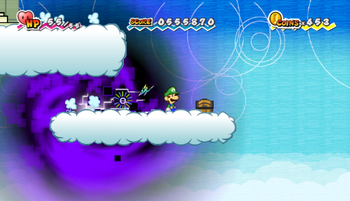
|
| Overthere Stair | Gold Bar |
Same scene, found on the roof of the structure found on the cloud 80. | 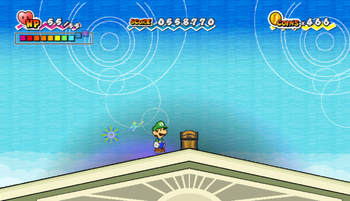
|
| Overthere Stair | Zombie Shroom Catch Card |
In the last scene, found at the end of the last cloud. | 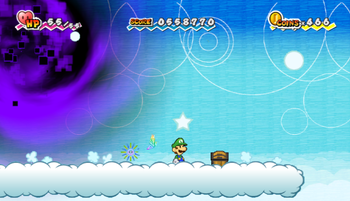
|
Chapter 7-4A Bone-Chilling Tale | |||
| The Overthere | Cooking Disk PU/7 (PAL) |
In sector 2, there is a pipe hidden behind the easternmost collumn in 3-D. Mario should enter it and defeat a Gigabite there to make the chest appear. | 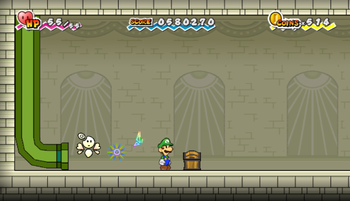
|
| The Overthere | Skellobit and Skellobomber Catch Cards |
In sector 5, there is a pipe found on the cloud under the entrance door. Chests are found on the highest cloud in this secret scene. | 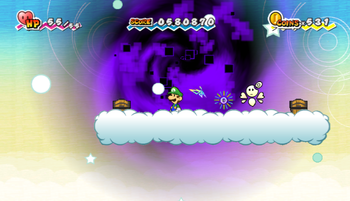
|
| The Overthere | Male Nimbi holding Ultra Shroom Shake |
In sector 7, found at the end of the lowest cloud. Inside the chest is a male Nimbi, who gives the group an Ultra Shroom Shake. He then goes back and closes the chest. The chest then stays closed for the remainder of the game. | 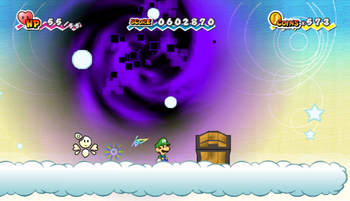
|
| The Overthere | Spiky Skellobit Catch Card |
In the last outside scene, Mario should flip into 3-D right before the stairs and then go left to find another chest hidden there. | 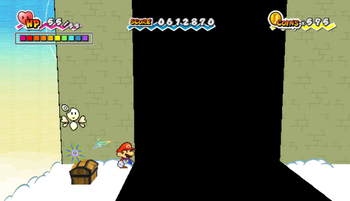
|
| The Overthere | Ultra Shroom Shake |
Same scene, at the east end of the scene, at the bottom. | 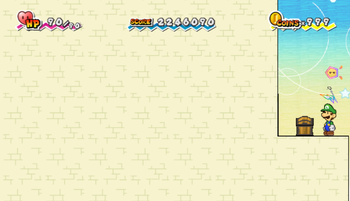
|
Chapter 8-1The Impending Darkness | |||
| Castle Bleck Entry | Stop Watch, Long-Last Shake |
After going through the door on the top of the fourth scene, these chests can be found at the west end of the scene. | 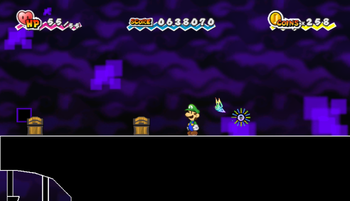
|
| Castle Bleck Entry | Castle Bleck Key |
Same scene, there is a pipe at the east end of the scene. Chest is found at the end of the room accessed by said pipe. | 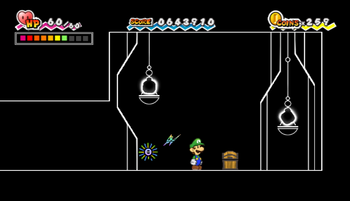
|
Chapter 8-2The Crash | |||
| Castle Bleck Foyer | Courage Shell, Castle Bleck Key, Life Shroom |
At the upper part of the second scene, accessed by a pipe from the prison scene. | 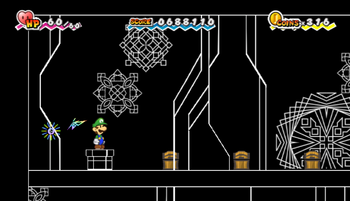
|
| Castle Bleck Foyer | Ultra Shroom Shake |
After going through the middle door in the third scene, the group reaches outside. Here, Mario should flip into 3-D to see a hidden path. Chest is at the end of said path. | 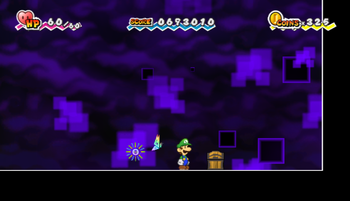
|
Chapter 8-3Countdown to Destruction | |||
| Castle Bleck Interior | Ice Storm |
In the third scene, after going through the mirror in 3-D, found at the east end. | 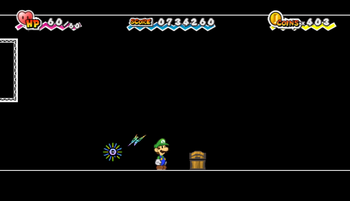
|
| Castle Bleck Interior | Castle Bleck Key |
Same scene, found at the west end. | 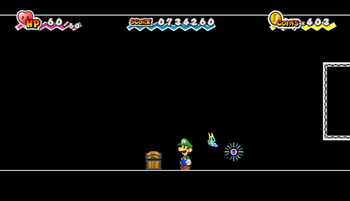
|
| Castle Bleck Interior | Castle Bleck Key |
In the seventh scene, in the middle. | 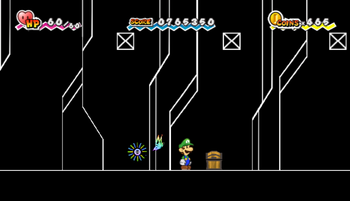
|
| Castle Bleck Interior | Castle Bleck Key |
In the ninth scene (the second one with mirrors), after going through the mirror in 3-D, found at the east end. | 
|
| Castle Bleck Interior | Thunder Rage |
Same scene, at the west end. | 
|
Chapter 8-4Tippi and Count Bleck | |||
| Castle Bleck Inner Sanctum | Castle Bleck Key |
After reaching the middle of the fourth scene, flipping into 3-D and going through the pipe, the chest is found at the end of the room, accessed by Dottie's ability. | 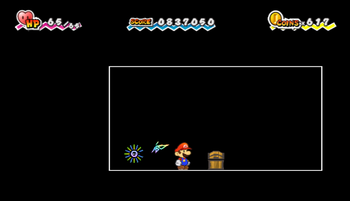
|
| Castle Bleck Inner Sanctum | Shooting Star |
In the sixth scene (first maze scene), after flipping into 3-D and goin into the eastern most hallway, found at the end of said hallway. | 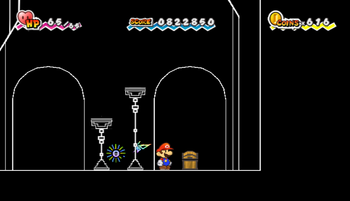
|
| Castle Bleck Inner Sanctum | Super Shroom Shake |
In the seventh scene (second maze scene), found at the end of the hallway accessed from the lower opening in the right wall of the first hallway. | 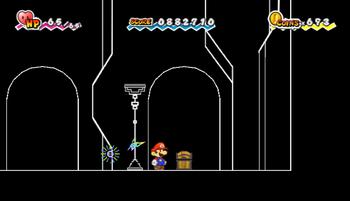
|
| Castle Bleck Inner Sanctum | Ultra Shroom Shake |
In the eighth secene (third maze scene), found at the end of the hallway accessed by going to the upper opening in the right wall of the first hallway and then lower opening in the right wall of the second hallway. | 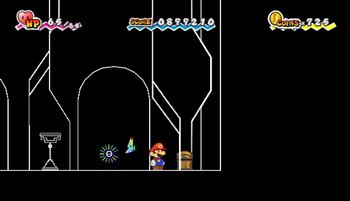
|
white | |||
| Flipside Pit of 100 Trials | Tippi and Thoreau Catch Cards |
NOTE: These two chests share the same layout, so only one image is here. In the middle of the rooms 10 and 20. |
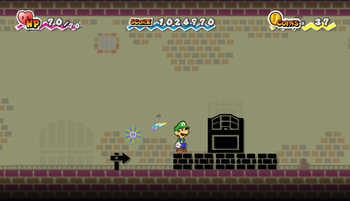
|
| Flipside Pit of 100 Trials | Boomer and Slim Catch Cards |
NOTE: These two chests share the same layout, so only one image is here. In the middle of the rooms 30 and 40. |
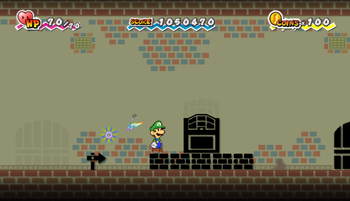
|
| Flipside Pit of 100 Trials | Thudley ands Carrie Catch Cards |
NOTE: These two chests share the same layout, so only one image is here. In the middle of the rooms 50 and 60. |
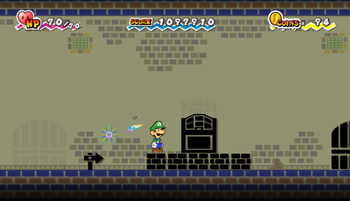
|
| Flipside Pit of 100 Trials | Fleep, Cudge and Dottie Catch Cards |
NOTE: These three chests share the same layout, so only one image is here. In the middle of the rooms 70, 80 and 90. |
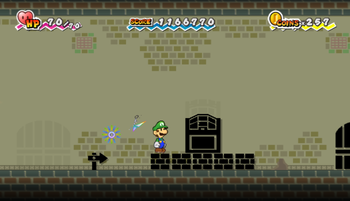
|
| Flipside Pit of 100 Trials | Dashell |
In the romm 100, spawns in after defeating Wracktail. | 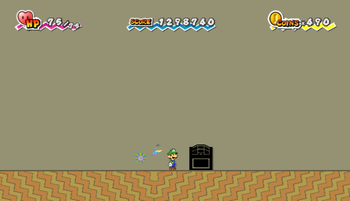
|
white | |||
| Flopside Pit of 100 Trials | Dashell and Goombario Catch Cards |
NOTE: These two chests share the same layout, so only one image is here. In the middle of the rooms 10 and 20. |
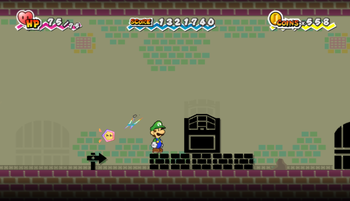
|
| Flopside Pit of 100 Trials | Kooper and Bombette Catch Cards |
NOTE: These two chests share the same layout, so only one image is here. In the middle of the rooms 30 and 40. |
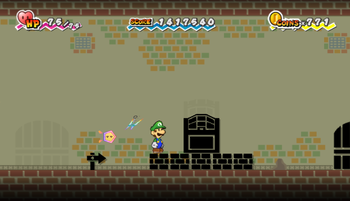
|
| Flopside Pit of 100 Trials | Parakarry and Bow Catch Cards |
NOTE: These two chests share the same layout, so only one image is here. In the middle of the rooms 50 and 60. |
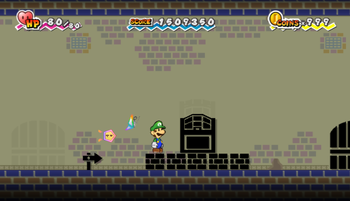
|
| Flopside Pit of 100 Trials | Watt, Sushie and Lakilester Catch Cards |
NOTE: These three chests share the same layout, so only one image is here. In the middle of the rooms 70, 80 and 90. |
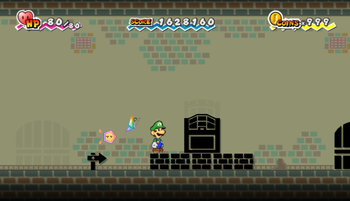
|
| Flopside Pit of 100 Trials | Mario, Dark Mario, Peach (1) and Dark Peach Catch Cards |
After reaching the room 100 for the second time and defeating Shadoo, 8 chests spawn in. On the image are the first four. | 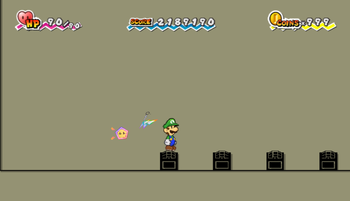
|
| Flopside Pit of 100 Trials | Bowser (1), Dark Bowser, Luigi and Dark Luigi Cards |
Same room, right of the previous four. | 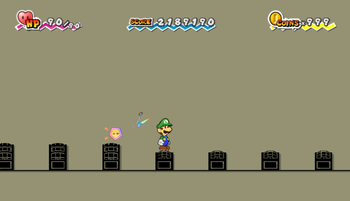
|
Treasure chest count
This chart shows the number of ? Blocks for each location, with the total amount at the bottom. Locations are listed in the order the player can open up the chests.
| Location | Count |
|---|---|
| Lineland Road | 2 |
| Mount Lineland | 2 |
| Yold Ruins | 3 |
| Flipside | 7 |
| Gloam Valley | 4 |
| Merlee's Mansion (2-2) | 3 |
| Merlee's Mansion (2-3) | 2 |
| The Bitlands | 3 |
| The Tile Pool | 2 |
| The Dotwood Tree | 1 |
| Fort Francis | 3 |
| Whoa Zone | 3 |
| Flopside | 8 |
| Downtown of Crag | 3 |
| Gap of Crag | 2 |
| Floro Caverns (5-3) | 1 |
| Floro Caverns (5-4) | 1 |
| Sammer's Early Duels | 1 |
| The Underwhere | 2 |
| Underwhere Road | 1 |
| Overthere Stair | 8 |
| The Overthere | 6 |
| Castle Bleck Entry | 3 |
| Castle Bleck Foyer | 4 |
| Castle Bleck Interior | 5 |
| Castle Bleck Inner Sanctum | 4 |
| Flipside Pit of 100 Trials | 10 |
| Flopside Pit of 100 Trials | 17 |
| Total | 111 |
In Super Paper Mario, Mario can discover Hidden Blocks throughout the areas he visits. Like regular ? Blocks, these invisible blocks contain coins, items, and even one enemy. Mario can locate them by using Tippi's ability (by pointing the Wii Remote at the screen). However, Mario can still uncover them himself without her. Unlike the previous two entries, the ? Blocks (which includes hidden blocks) respawn upon leaving the area, so subsequent visits allow the contents of the blocks to be collected again. Some invisible blocks are used as stepping stones to reach new places or other items. There are 18 hidden blocks in the game. This page lists the location of each hidden block, the contents, and how to get to them.
Hidden Blocks
| Location | Item | Description | Image | Image (block/s revealed) |
|---|---|---|---|---|
| Lineland Road | Mushroom |
In the third scene, near the end is the group of five blocks (1 ? and 4 brick), this hidden block can be found above the last brick block. | 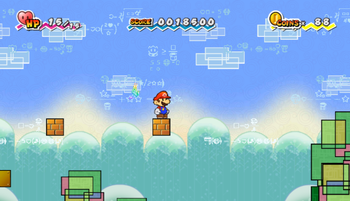
|
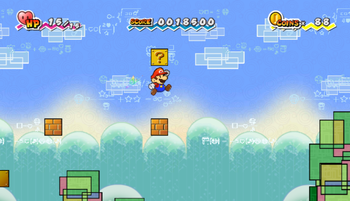
|
| Yold Desert | Coin (both) |
In the third scene, after being dropped from the first flipping rectangles, these two blocks can be found as 2nd and 4th blocks in the 4 block row directly behind Mario. | 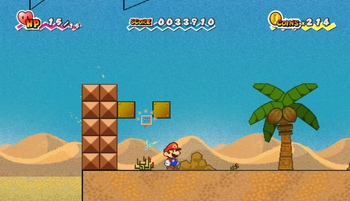
|
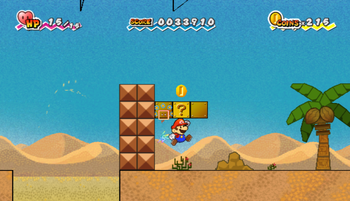 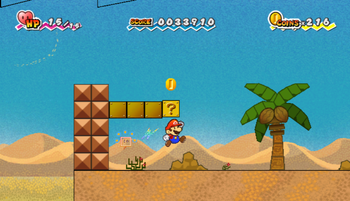
|
| Yold Desert | 12 Coins |
Same scene, near the end of the scene is a pipe on the block platform. In the room after the pipe is a row of 7 ? Blocks. This hidden block can be found above the fourth one. | 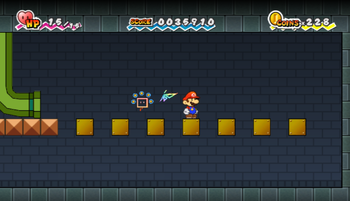
|
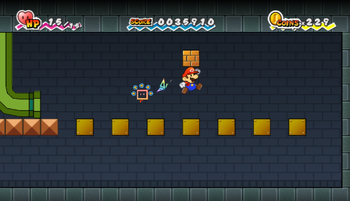
|
| Gloam Valley | Coin |
In the fifth scene, after crossing the water, there is a ? Block and block collumn. This hidden block is found between said collumn and two brick blocks. | 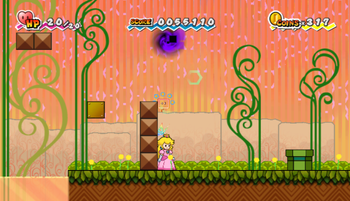
|
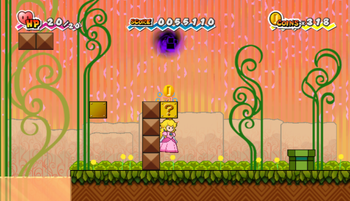
|
| Planet Blobule | Coin |
In the first scene, after falling down after second Longator. | 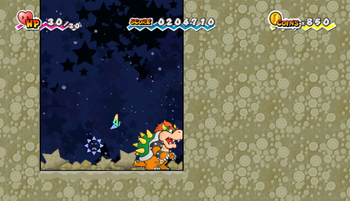
|
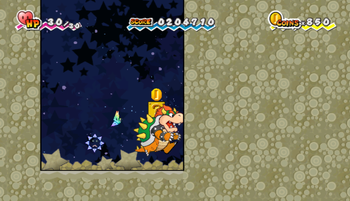
|
| Planet Blobule | Mushroom |
In the Blollop's house, accessed by a futuristic door in the second scene. | 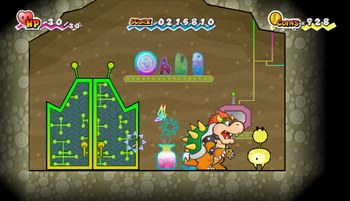
|
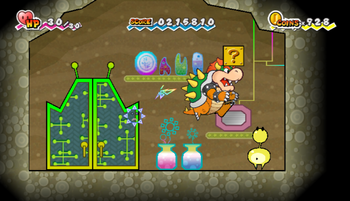
|
| Planet Blobule | Speed Flower (1st), Coin (rest) |
In the scene accessed by a first star door in the second scene, near the end. | 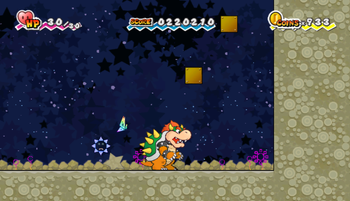
|
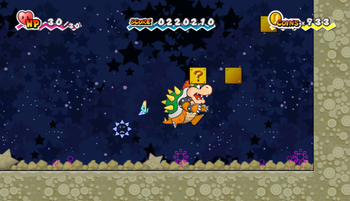 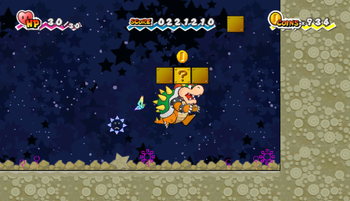 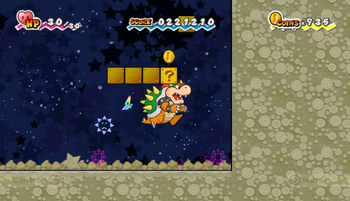
|
| Planet Blobule | 7 Coins |
In the Blarfle's house, accessed by a futuristic door in the scene accessed by a first star door in the second scene. | 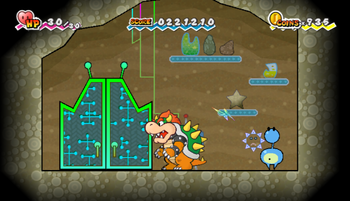
|
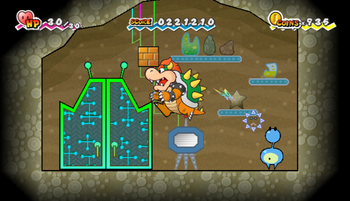
|
| Planet Blobule | 7 Coins |
In the Blappy's house, accessed by a futuristic door in the fourth scene. | 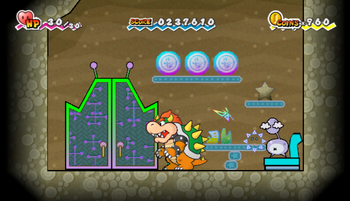
|
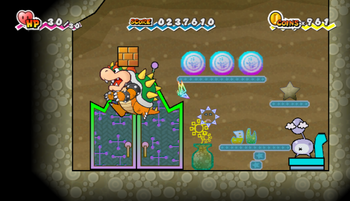
|
| Gap of Crag | Mushroom (both) |
In the second scene, left of the rightmost door, above the block platforms. | 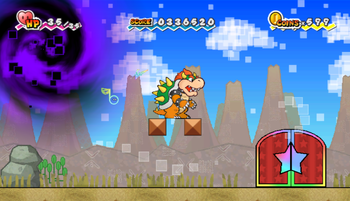
|
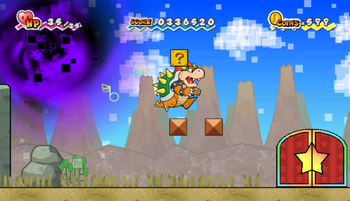 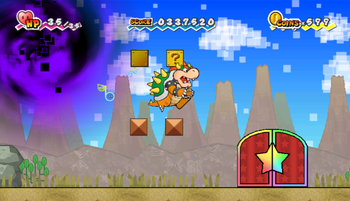
|
| Floro Caverns (5-3) | Coin, Mushroom |
In the third scene, near the beginning between two stairs made out of hard blocks, left of the group of 3 brick blocks in the air. | 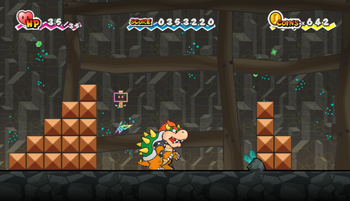
|
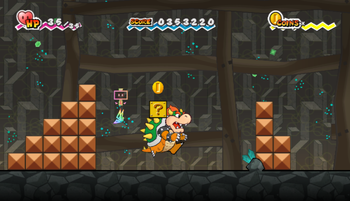 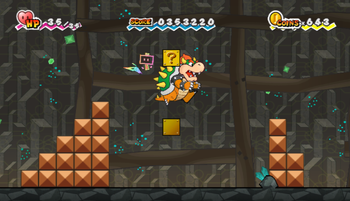
|
| Floro Caverns (5-3) | Coin |
Same scene, near the end of the scene, left of the last trampoline, above two brick blocks. | 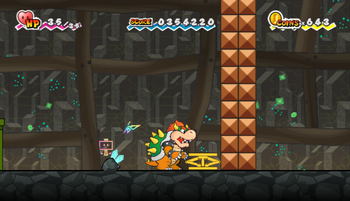
|
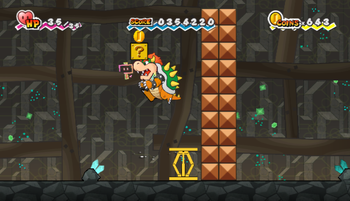
|
| Overthere Stair | Ghoul Shroom |
In the third scene, above the cloud 31, between two visible ? Blocks. | 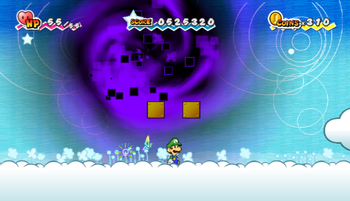
|
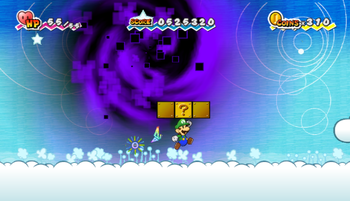
|
Hidden Block count
This chart shows the number of Hidden Blocks for each location, with the total amount at the bottom. Locations are listed in the order the player can visit them.
| Location | Count |
|---|---|
| Lineland Road | 1 |
| Yold Desert | 4 |
| Gloam Valley | 1 |
| Planet Blobule | 6 |
| Gap of Crag | 2 |
| Floro Caverns (5-3) | 3 |
| Overthere Stair | 1 |
| Total | 18 |