Super Mario Galaxy 2: Difference between revisions
Tag: Mobile edit |
LinkTheLefty (talk | contribs) No edit summary |
||
| Line 50: | Line 50: | ||
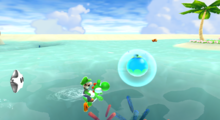
[[File:Luigi yoshi.png|thumb|upright=1.1|[[Luigi]] and [[Yoshi]] about to get a [[Blimp Fruit]] in [[Starshine Beach Galaxy]].]] | [[File:Luigi yoshi.png|thumb|upright=1.1|[[Luigi]] and [[Yoshi]] about to get a [[Blimp Fruit]] in [[Starshine Beach Galaxy]].]] | ||
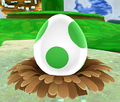
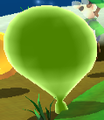
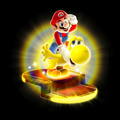
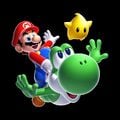
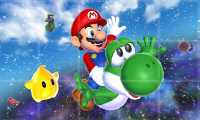
One of the more notable additions in ''Super Mario Galaxy 2'' is the inclusion of [[Yoshi (species)|Yoshi]]. When Mario finds a [[Yoshi Egg]], he can crack it to release and use Yoshi. Yoshi will change colors when eating either a [[Dash Pepper]], [[Blimp Berry]] or [[Bulb Berry]]; a [[Dash Yoshi]] darts at rapid speeds, a [[Blimp Yoshi]] inflates and floats upwards, and a [[Bulb Yoshi]] lights up and shows hidden paths for a certain amount of time, respectively. When utilizing Yoshi, the player's Wii Remote cursor turns into a red sphere that detects targets for Yoshi's tongue. Using the cursor allows Yoshi to swallow enemies and swing from special flowers. | One of the more notable additions in ''Super Mario Galaxy 2'' is the inclusion of [[Yoshi (species)|Yoshi]]. When Mario finds a [[Yoshi's Egg|Yoshi egg]], he can crack it to release and use Yoshi. Yoshi will change colors when eating either a [[Dash Pepper]], [[Blimp Berry]] or [[Bulb Berry]]; a [[Dash Yoshi]] darts at rapid speeds, a [[Blimp Yoshi]] inflates and floats upwards, and a [[Bulb Yoshi]] lights up and shows hidden paths for a certain amount of time, respectively. When utilizing Yoshi, the player's Wii Remote cursor turns into a red sphere that detects targets for Yoshi's tongue. Using the cursor allows Yoshi to swallow enemies and swing from special flowers. | ||
Elements from older games are also included in the new game. These elements include a remix of ''[[Super Mario Bros.]]''{{'}}s overworld theme (which is originally heard in [[Toy Time Galaxy]] from the predecessor, ''Super Mario Galaxy''), [[Supermassive Galaxy]], a galaxy that is reminiscent of [[Giant Land]] from ''[[Super Mario Bros. 3]]'', a remix of the second overworld theme from ''[[Super Mario World]]'', the checkpoint flag from ''[[New Super Mario Bros. Wii]]'', [[Throwback Galaxy]], a galaxy based on [[Whomp's Fortress]] from ''[[Super Mario 64]]'', and a remix of the main theme and slide theme from ''Super Mario 64''. | Elements from older games are also included in the new game. These elements include a remix of ''[[Super Mario Bros.]]''{{'}}s overworld theme (which is originally heard in [[Toy Time Galaxy]] from the predecessor, ''Super Mario Galaxy''), [[Supermassive Galaxy]], a galaxy that is reminiscent of [[Giant Land]] from ''[[Super Mario Bros. 3]]'', a remix of the second overworld theme from ''[[Super Mario World]]'', the checkpoint flag from ''[[New Super Mario Bros. Wii]]'', [[Throwback Galaxy]], a galaxy based on [[Whomp's Fortress]] from ''[[Super Mario 64]]'', and a remix of the main theme and slide theme from ''Super Mario 64''. | ||
| Line 77: | Line 77: | ||
==Characters== | ==Characters== | ||
===Playable characters=== | ===Playable characters=== | ||
{| width=100% cellspacing=0 border=1 cellpadding=3 style="border-collapse:collapse; background:#f5f5f5" | {|width=100% cellspacing=0 border=1 cellpadding=3 style="border-collapse:collapse; background:#f5f5f5" | ||
|-style="background:#347BDD; color:white;" | |-style="background:#347BDD; color:white;" | ||
! width=12%| Name | !width=12%|Name | ||
! Description | !Description | ||
|- | |- | ||
|align=center style="background:#f4a9ae"| [[File:SMG Asset Model Mario.png|90px]]<br>'''[[Mario]]''' | |align=center style="background:#f4a9ae"| [[File:SMG Asset Model Mario.png|90px]]<br>'''[[Mario]]''' | ||
| Line 87: | Line 86: | ||
|- | |- | ||
|align=center style="background:#c0eabd"| [[File:SMG Asset Model Luigi (Playable).png|90px]]<br>'''[[Luigi]]''' | |align=center style="background:#c0eabd"| [[File:SMG Asset Model Luigi (Playable).png|90px]]<br>'''[[Luigi]]''' | ||
| style="background:#def3df"|Mario's younger twin brother. He can jump higher and run faster than Mario, but at the cost of reduced traction and increased startup. This causes Luigi to skid as he moves, and increases the risk of him falling off of a platform or colliding with an obstacle. Luigi is periodically encountered at the start of various missions after Mario has collected thirty Power Stars and clears "[[Bowser's Big Lava Power Party]]". He offers to swap places with Mario for the mission when prompted, allowing the player to temporarily control him. Clearing "[[Bowser's Fortified Fortress]]" makes Luigi permanently available. He can be swapped with Mario by entering a door beneath the stern of [[Starship Mario]]. | |style="background:#def3df"|Mario's younger twin brother. He can jump higher and run faster than Mario, but at the cost of reduced traction and increased startup. This causes Luigi to skid as he moves, and increases the risk of him falling off of a platform or colliding with an obstacle. Luigi is periodically encountered at the start of various missions after Mario has collected thirty Power Stars and clears "[[Bowser's Big Lava Power Party]]". He offers to swap places with Mario for the mission when prompted, allowing the player to temporarily control him. Clearing "[[Bowser's Fortified Fortress]]" makes Luigi permanently available. He can be swapped with Mario by entering a door beneath the stern of [[Starship Mario]]. | ||
|- | |- | ||
|align=center style="background:#FEC776"| [[File:SMG2 Transparent Co Star Luma Artwork.png|90px]]<br>'''[[Co-Star Luma]]''' | |align=center style="background:#FEC776"| [[File:SMG2 Transparent Co Star Luma Artwork.png|90px]]<br>'''[[Co-Star Luma]]''' | ||
| style="background:#FEDAA4"|A young [[Luma]] that can be controlled by a second player during Co-Star Mode. It cannot be moved independently: it automatically trails behind Mario<ref name=weegee group=note>Unless explicitly specified otherwise, any mentioning of Mario is equally applicable to Luigi while the player is controlling him.</ref> as he progresses through levels. However, using the [[Star Cursor]], Co-Star Luma can collect far-off items (e.g. [[coin]]s, [[1-Up Mushroom]]s) and hold enemies in place. It can still perform the [[Spin]] move and collect [[Star Bit]]s like Mario. Controlling Co-Star Luma does not require using a [[Wii#Nunchuck|Nunchuck]]. | |style="background:#FEDAA4"|A young [[Luma]] that can be controlled by a second player during Co-Star Mode. It cannot be moved independently: it automatically trails behind Mario<ref name=weegee group=note>Unless explicitly specified otherwise, any mentioning of Mario is equally applicable to Luigi while the player is controlling him.</ref> as he progresses through levels. However, using the [[Star Cursor]], Co-Star Luma can collect far-off items (e.g. [[coin]]s, [[1-Up Mushroom]]s) and hold enemies in place. It can still perform the [[Spin]] move and collect [[Star Bit]]s like Mario. Controlling Co-Star Luma does not require using a [[Wii#Nunchuck|Nunchuck]]. | ||
|} | |} | ||
<br> | <br> | ||
===Rideable characters=== | ===Rideable characters=== | ||
{| width=100% cellspacing=0 border=1 cellpadding=3 style="border-collapse:collapse; background:#f5f5f5" | {|width=100% cellspacing=0 border=1 cellpadding=3 style="border-collapse:collapse; background:#f5f5f5" | ||
|-style="background:#347BDD; color:white;" | |-style="background:#347BDD; color:white;" | ||
! width=12%| Name | !width=12%|Name | ||
! Description | !Description | ||
! width=15%| Locations | !width=15%|Locations | ||
|- | |- | ||
|align=center style="background:#AFFFAA"| [[File:MarioYoshiAssistLumaBerry.png|x90px]]<br>'''[[Yoshi]]''' | |align=center style="background:#AFFFAA"| [[File:MarioYoshiAssistLumaBerry.png|x90px]]<br>'''[[Yoshi]]''' | ||
| style="background:#ECFFEC"|A dinosaur-like creature with a long tongue that can be ridden by Mario. He was recruited by the Lumas to help collect Power Stars, but he became too overwhelmed and was locked within an [[Yoshi's Egg|egg]] by a [[Magikoopa]]. Yoshi can eat enemies and latch onto [[Flower (Super Mario Galaxy 2)|flower]]s by pointing at them on-screen with the [[Wii#Wii Remote|Wii Remote]]'s cursor. He can [[Flutter Jump]] to gain height and prolong his fall. Yoshi has many of the same abilities as Mario, including the [[Spin]], [[Side Somersault]], and [[Backward Somersault|Back-flip]]. When the player gets damaged, Mario falls off Yoshi and Yoshi runs off. Yoshi has a [[Yoshi's House|house]] on the starting planet of [[Sky Station Galaxy]] and refers to himself as a "space dragon". | |style="background:#ECFFEC"|A dinosaur-like creature with a long tongue that can be ridden by Mario. He was recruited by the Lumas to help collect Power Stars, but he became too overwhelmed and was locked within an [[Yoshi's Egg|egg]] by a [[Magikoopa]]. Yoshi can eat enemies and latch onto [[Flower (Super Mario Galaxy 2)|flower]]s by pointing at them on-screen with the [[Wii#Wii Remote|Wii Remote]]'s cursor. He can [[Flutter Jump]] to gain height and prolong his fall. Yoshi has many of the same abilities as Mario, including the [[Spin]], [[Side Somersault]], and [[Backward Somersault|Back-flip]]. When the player gets damaged, Mario falls off Yoshi and Yoshi runs off. Yoshi has a [[Yoshi's House|house]] on the starting planet of [[Sky Station Galaxy]] and refers to himself as a "space dragon". | ||
| align=center style="background:#ECFFEC"| [[Yoshi Star Galaxy]]<br>[[Hightail Falls Galaxy]]<br>[[Tall Trunk Galaxy]]<br>[[Haunty Halls Galaxy]]<br>[[Beat Block Galaxy]]<br>[[Bowser Jr.'s Fearsome Fleet]]<br>[[Starshine Beach Galaxy]]<br>[[Sweet Mystery Galaxy]]<br>[[Flash Black Galaxy]]<br>[[Bowser's Galaxy Generator]]<br>[[Twisty Trials Galaxy]]<br>[[Grandmaster Galaxy]]<br>[[Starship Mario]] | |align=center style="background:#ECFFEC"| [[Yoshi Star Galaxy]]<br>[[Hightail Falls Galaxy]]<br>[[Tall Trunk Galaxy]]<br>[[Haunty Halls Galaxy]]<br>[[Beat Block Galaxy]]<br>[[Bowser Jr.'s Fearsome Fleet]]<br>[[Starshine Beach Galaxy]]<br>[[Sweet Mystery Galaxy]]<br>[[Flash Black Galaxy]]<br>[[Bowser's Galaxy Generator]]<br>[[Twisty Trials Galaxy]]<br>[[Grandmaster Galaxy]]<br>[[Starship Mario]] | ||
|- | |- | ||
|align=center style="background:#EFB3C6"| [[File:FluzzardBird.png|x90px]]<br>'''[[Fluzzard]]''' | |align=center style="background:#EFB3C6"| [[File:FluzzardBird.png|x90px]]<br>'''[[Fluzzard]]''' | ||
| style="background:#F9E3EA"|A big bird similar to a {{wp|Paragliding|paraglider}}. Mario holds onto his talons and glides with him during the [[Fluzzard Gliding]] minigame. He is spoken for by the [[Jibberjay]]s. One states that Fluzzard has taken a liking to Mario. He is apparently quite shy. | |style="background:#F9E3EA"|A big bird similar to a {{wp|Paragliding|paraglider}}. Mario holds onto his talons and glides with him during the [[Fluzzard Gliding]] minigame. He is spoken for by the [[Jibberjay]]s. One states that Fluzzard has taken a liking to Mario. He is apparently quite shy. | ||
| align=center style="background:#F9E3EA"| [[Wild Glide Galaxy]]<br>[[Fleet Glide Galaxy]] | |align=center style="background:#F9E3EA"| [[Wild Glide Galaxy]]<br>[[Fleet Glide Galaxy]] | ||
|} | |} | ||
<br> | <br> | ||
| Line 114: | Line 112: | ||
===Non-playable characters=== | ===Non-playable characters=== | ||
A star symbol (★) denotes a character that was not in the first ''[[Super Mario Galaxy]]''. | A star symbol (★) denotes a character that was not in the first ''[[Super Mario Galaxy]]''. | ||
{| width=100% cellspacing=0 border=1 cellpadding=3 style="border-collapse:collapse; background:#f5f5f5" | {|width=100% cellspacing=0 border=1 cellpadding=3 style="border-collapse:collapse; background:#f5f5f5" | ||
|-style="background:#347BDD; color:white;" | |-style="background:#347BDD; color:white;" | ||
! width=12%| Name | !width=12%|Name | ||
! Description | !Description | ||
! width=15%| Locations | !width=15%|Locations | ||
|- | |- | ||
|align=center style="background:#FFFFFF"| [[File:SMG2 Artwork Baby Luma.png|x100px]]<br>[[Baby Luma]] | |align=center style="background:#FFFFFF"|[[File:SMG2 Artwork Baby Luma.png|x100px]]<br>[[Baby Luma]] | ||
|Mario's traveling companion – a young Luma who resides under [[Mario Cap|his cap]]. He grants Mario the ability to [[Spin]] and travel through space. Mario first encounters him collapsed on a road leading to [[Peach's Castle]] and he immediately takes a liking to him. At the end of the game, Baby Luma keeps his cap as a memento. | |Mario's traveling companion – a young Luma who resides under [[Mario Cap|his cap]]. He grants Mario the ability to [[Spin]] and travel through space. Mario first encounters him collapsed on a road leading to [[Peach's Castle]] and he immediately takes a liking to him. At the end of the game, Baby Luma keeps his cap as a memento. | ||
|align=center| All galaxies | |align=center|All galaxies | ||
|- | |- | ||
|align=center style="background:#FFFFFF"| [[File:Princess Peach Artwork - Super Mario Galaxy 2.png|x100px]]<br>[[Princess Peach]] | |align=center style="background:#FFFFFF"|[[File:Princess Peach Artwork - Super Mario Galaxy 2.png|x100px]]<br>[[Princess Peach]] | ||
|The ruler of the [[Mushroom Kingdom]]. She invites Mario to her castle to watch the shooting stars fall from the sky. However, upon arriving, he finds her in Bowser's grasp. She is whisked away to the [[Bowser's Galaxy Generator|center of the universe]]. The game follows Mario's quest to save her. She periodically sends letters of encouragement to Mario that contain five [[1-Up Mushroom]]s, even when the player is controlling Luigi. Lubba refers to Peach as Mario's "[[Princess Peach#Friends and love interests|special one]]". | |The ruler of the [[Mushroom Kingdom]]. She invites Mario to her castle to watch the shooting stars fall from the sky. However, upon arriving, he finds her in Bowser's grasp. She is whisked away to the [[Bowser's Galaxy Generator|center of the universe]]. The game follows Mario's quest to save her. She periodically sends letters of encouragement to Mario that contain five [[1-Up Mushroom]]s, even when the player is controlling Luigi. Lubba refers to Peach as Mario's "[[Princess Peach#Friends and love interests|special one]]". | ||
|align=center| [[Bowser's Galaxy Generator]] | |align=center|[[Bowser's Galaxy Generator]] | ||
|- | |- | ||
|align=center style="background:#FFFFFF"| [[File:SSBU Lubba Spirit.png|x100px]]<br>[[Lubba]] ★ | |align=center style="background:#FFFFFF"|[[File:SSBU Lubba Spirit.png|x100px]]<br>[[Lubba]] ★ | ||
|A portly, wisecracking Luma. He is the leader of a band of young Lumas who travel through space on a [[Starship Mario|starship]] that they built themselves. As an innocent bystander to Bowser's galactic conquests, Lubba's ship was damaged by [[meteorite]]s. This causes several of his Lumas to become lost in space and the ship to lose its source of energy – the [[Power Star]]s. Lubba cuts a deal with Mario after he is rescued by some of his Lumas: if he collects Power Stars for him, he allows Mario to use his ship and take him to rescue Princess Peach. Once in agreement, Lubba turns the starship into Mario's image and starts to affectionately call him "captain". Lubba reacts to the player's actions in-game even though he remains on Starship Mario. For example, if the player is having a difficult time completing a course, he provides words of assurance and appreciation. Lubba considers the Lumas he travels with to be his family. | |A portly, wisecracking Luma. He is the leader of a band of young Lumas who travel through space on a [[Starship Mario|starship]] that they built themselves. As an innocent bystander to Bowser's galactic conquests, Lubba's ship was damaged by [[meteorite]]s. This causes several of his Lumas to become lost in space and the ship to lose its source of energy – the [[Power Star]]s. Lubba cuts a deal with Mario after he is rescued by some of his Lumas: if he collects Power Stars for him, he allows Mario to use his ship and take him to rescue Princess Peach. Once in agreement, Lubba turns the starship into Mario's image and starts to affectionately call him "captain". Lubba reacts to the player's actions in-game even though he remains on Starship Mario. For example, if the player is having a difficult time completing a course, he provides words of assurance and appreciation. Lubba considers the Lumas he travels with to be his family. | ||
|align=center| [[Starship Mario]] | |align=center|[[Starship Mario]] | ||
|- | |- | ||
|align=center style="background:#FFFFFF"| [[File:SMG Blue Luma Alt Artwork.png|x100px]]<br>[[Luma]]s | |align=center style="background:#FFFFFF"|[[File:SMG Blue Luma Alt Artwork.png|x100px]]<br>[[Luma]]s | ||
|Star children that make their home on Starship Mario. Lumas appear trapped in several galaxies. Freeing them enables Mario to progress through the level. They otherwise appear in missions in order to help Mario, either by transforming into [[Launch Star]]s, directing him towards the right path, or giving him tips on progression. Lumas become celestial bodies when they grow up, and which ones they become is dependent on their color. They eat [[Star Bit]]s and squeal with delight when fed via the [[Star Cursor]]. The Lumas encountered at the start of the game are [[Super Mario Galaxy#Story|already familiar]] with Mario. | |Star children that make their home on Starship Mario. Lumas appear trapped in several galaxies. Freeing them enables Mario to progress through the level. They otherwise appear in missions in order to help Mario, either by transforming into [[Launch Star]]s, directing him towards the right path, or giving him tips on progression. Lumas become celestial bodies when they grow up, and which ones they become is dependent on their color. They eat [[Star Bit]]s and squeal with delight when fed via the [[Star Cursor]]. The Lumas encountered at the start of the game are [[Super Mario Galaxy#Story|already familiar]] with Mario. | ||
|align=center| [[Sky Station Galaxy]]<br>[[Yoshi Star Galaxy]]<br>[[Spin-Dig Galaxy]]<br>[[Cosmic Cove Galaxy]]<br>[[Bowser's Lava Lair]]<br>[[Bowser's Gravity Gauntlet]]<br>[[Space Storm Galaxy]]<br>[[Clockwork Ruins Galaxy]]<br>[[Bowser's Galaxy Generator]]<br>[[Starship Mario]] | |align=center|[[Sky Station Galaxy]]<br>[[Yoshi Star Galaxy]]<br>[[Spin-Dig Galaxy]]<br>[[Cosmic Cove Galaxy]]<br>[[Bowser's Lava Lair]]<br>[[Bowser's Gravity Gauntlet]]<br>[[Space Storm Galaxy]]<br>[[Clockwork Ruins Galaxy]]<br>[[Bowser's Galaxy Generator]]<br>[[Starship Mario]] | ||
|- | |- | ||
|align=center style="background:#FFFFFF"| [[File:Giant Luma Artwork - Super Mario Galaxy 2.png|x100px]]<br>[[Luma|Giant | |align=center style="background:#FFFFFF"|[[File:Giant Luma Artwork - Super Mario Galaxy 2.png|x100px]]<br>[[Luma|Giant Luma]]s ★ | ||
|Enormous Lumas. Unlike normal-sized Lumas, these ones do not twirl if [[spin|spun]] against and speak at a slightly lower octave. While Lumas can be many different colors, the Giant Lumas are all yellow. | |Enormous Lumas. Unlike normal-sized Lumas, these ones do not twirl if [[spin|spun]] against and speak at a slightly lower octave. While Lumas can be many different colors, the Giant Lumas are all yellow. | ||
|align=center| [[Supermassive Galaxy]] | |align=center|[[Supermassive Galaxy]] | ||
|- | |- | ||
|align=center style="background:#FFFFFF"| [[File:Hungry Coin Luma Artwork - Super Mario Galaxy 2.png|x100px]]<br>[[Hungry Luma]]s | |align=center style="background:#FFFFFF"|[[File:Hungry Coin Luma Artwork - Super Mario Galaxy 2.png|x100px]]<br>[[Hungry Luma]]s | ||
|Big, voracious Lumas that can be encountered on the world map. They transform into galaxies when fed a specified number of Star Bits. Hungry Lumas that only eat [[coin|coinage]] can be encountered in levels and transform into new planets if fed a specified amount of coins. These new planets always give Mario access to a hidden Power Star. | |Big, voracious Lumas that can be encountered on the world map. They transform into galaxies when fed a specified number of Star Bits. Hungry Lumas that only eat [[coin|coinage]] can be encountered in levels and transform into new planets if fed a specified amount of coins. These new planets always give Mario access to a hidden Power Star. | ||
|align=center| [[Fluffy Bluff Galaxy]]<br>[[Puzzle Plank Galaxy]]<br>[[Hightail Falls Galaxy]]<br>[[Cosmic Cove Galaxy]]<br>[[Cloudy Court Galaxy]]<br>[[Clockwork Ruins Galaxy]]<br>[[Battle Belt Galaxy]]<br>[[Starship Mario]] | |align=center|[[Fluffy Bluff Galaxy]]<br>[[Puzzle Plank Galaxy]]<br>[[Hightail Falls Galaxy]]<br>[[Cosmic Cove Galaxy]]<br>[[Cloudy Court Galaxy]]<br>[[Clockwork Ruins Galaxy]]<br>[[Battle Belt Galaxy]]<br>[[Starship Mario]] | ||
|- | |- | ||
|align=center style="background:#FFFFFF"| [[File:SMG2 Chance Cube Lumalee Artwork.png|x90px]]<br>[[Lumalee]]s | |align=center style="background:#FFFFFF"|[[File:SMG2 Chance Cube Lumalee Artwork.png|x90px]]<br>[[Lumalee]]s | ||
|Big Lumas that run the Luma Shops. One typically proceeds a boss encounter and transforms into a Mushroom of choice in exchange for thirty Star Bits. A pair of Lumalees live inside Starship Mario's left ear. One transforms into a [[Chance Cube]] if fed thirty Star Bits. The other transforms into five if fed one-hundred coins. | |Big Lumas that run the Luma Shops. One typically proceeds a boss encounter and transforms into a Mushroom of choice in exchange for thirty Star Bits. A pair of Lumalees live inside Starship Mario's left ear. One transforms into a [[Chance Cube]] if fed thirty Star Bits. The other transforms into five if fed one-hundred coins. | ||
|align=center| [[Spin-Dig Galaxy]]<br>[[Puzzle Plank Galaxy]]<br>[[Boulder Bowl Galaxy]]<br>[[Freezy Flake Galaxy]]<br>[[Bowser Jr.'s Fiery Flotilla]]<br>[[Flipsville Galaxy]]<br>[[Slipsand Galaxy]]<br>[[Shiverburn Galaxy]]<br>[[Battle Belt Galaxy]]<br>[[Boss Blitz Galaxy]]<br>[[Starship Mario]] | |align=center|[[Spin-Dig Galaxy]]<br>[[Puzzle Plank Galaxy]]<br>[[Boulder Bowl Galaxy]]<br>[[Freezy Flake Galaxy]]<br>[[Bowser Jr.'s Fiery Flotilla]]<br>[[Flipsville Galaxy]]<br>[[Slipsand Galaxy]]<br>[[Shiverburn Galaxy]]<br>[[Battle Belt Galaxy]]<br>[[Boss Blitz Galaxy]]<br>[[Starship Mario]] | ||
|- | |- | ||
|align=center style="background:#FFFFFF"| [[File:TipNetwork.png|x100px]]<br>[[Tip Network]] ★ | |align=center style="background:#FFFFFF"|[[File:TipNetwork.png|x100px]]<br>[[Tip Network]] ★ | ||
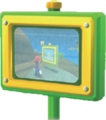
|A talking television monitor that provides brief tutorials when prompted. It typically appears in difficult parts of a galaxy. | |A talking television monitor that provides brief tutorials when prompted. It typically appears in difficult parts of a galaxy. | ||
|align=center| All galaxies | |align=center|All galaxies | ||
|- | |- | ||
|align=center style="background:#FFFFFF"| [[File:SMG Asset Model Toad Brigade (Captain Toad).png|x100px]]<br>[[Captain Toad|Toad Brigade Captain]] | |align=center style="background:#FFFFFF"|[[File:SMG Asset Model Toad Brigade (Captain Toad).png|x100px]]<br>[[Captain Toad|Toad Brigade Captain]] | ||
|The captain of the [[Toad Brigade]] – a five-member team of [[Toad (species)| | |The captain of the [[Toad Brigade]] – a five-member team of [[Toad (species)|Toad]]s on a quest to help find Princess Peach. This Red Toad self-designated himself as the brigade captain. Though cowardly, he sometimes puts himself into dangerous situations out in the field and pushes himself farther than his teammates. Comments made by some of the other Toads indicate they believe his position as the leader is not untenable and that he can be quite lazy. | ||
|align=center| [[Fluffy Bluff Galaxy]]<br>[[Flip-Swap Galaxy]]<br>[[Rightside Down Galaxy]]<br>[[Boulder Bowl Galaxy]]<br>[[Bowser's Lava Lair]]<br>[[Flipsville Galaxy]]<br>[[Bowser Jr.'s Boom Bunker]]<br>[[Battle Belt Galaxy]]<br>[[Slimy Spring Galaxy]]<br>[[Rolling Coaster Galaxy]]<br>[[Grandmaster Galaxy]]<br>[[Starship Mario]] | |align=center|[[Fluffy Bluff Galaxy]]<br>[[Flip-Swap Galaxy]]<br>[[Rightside Down Galaxy]]<br>[[Boulder Bowl Galaxy]]<br>[[Bowser's Lava Lair]]<br>[[Flipsville Galaxy]]<br>[[Bowser Jr.'s Boom Bunker]]<br>[[Battle Belt Galaxy]]<br>[[Slimy Spring Galaxy]]<br>[[Rolling Coaster Galaxy]]<br>[[Grandmaster Galaxy]]<br>[[Starship Mario]] | ||
|- | |- | ||
|align=center style="background:#FFFFFF"| [[File:SMG Asset Model Toad Brigade (Banktoad).png|x100px]]<br>[[Banktoad]] | |align=center style="background:#FFFFFF"|[[File:SMG Asset Model Toad Brigade (Banktoad).png|x100px]]<br>[[Banktoad]] | ||
|A member of the Toad Brigade who sets up a bank for Star Bits on the Starship Mario. He gives Mario [[1-Up Mushroom]]s in exchange for storing Star Bits. When out on missions with their brigade, he typically is equipped with a pickaxe. | |A member of the Toad Brigade who sets up a bank for Star Bits on the Starship Mario. He gives Mario [[1-Up Mushroom]]s in exchange for storing Star Bits. When out on missions with their brigade, he typically is equipped with a pickaxe. | ||
|align=center| [[Fluffy Bluff Galaxy]]<br>[[Flip-Swap Galaxy]]<br>[[Rightside Down Galaxy]]<br>[[Boulder Bowl Galaxy]]<br>[[Bowser's Lava Lair]]<br>[[Flipsville Galaxy]]<br>[[Bowser Jr.'s Boom Bunker]]<br>[[Rolling Coaster Galaxy]]<br>[[Grandmaster Galaxy]]<br>[[Starship Mario]] | |align=center|[[Fluffy Bluff Galaxy]]<br>[[Flip-Swap Galaxy]]<br>[[Rightside Down Galaxy]]<br>[[Boulder Bowl Galaxy]]<br>[[Bowser's Lava Lair]]<br>[[Flipsville Galaxy]]<br>[[Bowser Jr.'s Boom Bunker]]<br>[[Rolling Coaster Galaxy]]<br>[[Grandmaster Galaxy]]<br>[[Starship Mario]] | ||
|- | |- | ||
|align=center style="background:#FFFFFF"| [[File:SMG Asset Model Toad Brigade (Mailtoad).png|x100px]]<br>[[Mailtoad]] | |align=center style="background:#FFFFFF"|[[File:SMG Asset Model Toad Brigade (Mailtoad).png|x100px]]<br>[[Mailtoad]] | ||
|A member of the Toad Brigade who runs a postal service on the Starship Mario. He delivers mail for Mario, Luigi, and the baby Luma. He can be prompted to view all letters previously received. | |A member of the Toad Brigade who runs a postal service on the Starship Mario. He delivers mail for Mario, Luigi, and the baby Luma. He can be prompted to view all letters previously received. | ||
|align=center| [[Fluffy Bluff Galaxy]]<br>[[Flip-Swap Galaxy]]<br>[[Rightside Down Galaxy]]<br>[[Boulder Bowl Galaxy]]<br>[[Bowser's Lava Lair]]<br>[[Flipsville Galaxy]]<br>[[Bowser Jr.'s Boom Bunker]]<br>[[Battle Belt Galaxy]]<br>[[Rolling Coaster Galaxy]]<br>[[Grandmaster Galaxy]]<br>[[Starship Mario]] | |align=center|[[Fluffy Bluff Galaxy]]<br>[[Flip-Swap Galaxy]]<br>[[Rightside Down Galaxy]]<br>[[Boulder Bowl Galaxy]]<br>[[Bowser's Lava Lair]]<br>[[Flipsville Galaxy]]<br>[[Bowser Jr.'s Boom Bunker]]<br>[[Battle Belt Galaxy]]<br>[[Rolling Coaster Galaxy]]<br>[[Grandmaster Galaxy]]<br>[[Starship Mario]] | ||
|- | |- | ||
|align=center style="background:#FFFFFF"| [[File:SMG Asset Model Toad Brigade (Hint Toad).png|x100px]]<br>[[Hint Toad|Blue Toad]] | |align=center style="background:#FFFFFF"|[[File:SMG Asset Model Toad Brigade (Hint Toad).png|x100px]]<br>[[Hint Toad|Blue Toad]] | ||
|A knowledgeable member of the Toad Brigade. He provides words of advice and tips on progression to Mario when prompted. He cannot see well without his glasses. | |A knowledgeable member of the Toad Brigade. He provides words of advice and tips on progression to Mario when prompted. He cannot see well without his glasses. | ||
|align=center| [[Fluffy Bluff Galaxy]]<br>[[Flip-Swap Galaxy]]<br>[[Rightside Down Galaxy]]<br>[[Boulder Bowl Galaxy]]<br>[[Bowser's Lava Lair]]<br>[[Flipsville Galaxy]]<br>[[Bowser Jr.'s Boom Bunker]]<br>[[Rolling Coaster Galaxy]]<br>[[Grandmaster Galaxy]]<br>[[Starship Mario]] | |align=center|[[Fluffy Bluff Galaxy]]<br>[[Flip-Swap Galaxy]]<br>[[Rightside Down Galaxy]]<br>[[Boulder Bowl Galaxy]]<br>[[Bowser's Lava Lair]]<br>[[Flipsville Galaxy]]<br>[[Bowser Jr.'s Boom Bunker]]<br>[[Rolling Coaster Galaxy]]<br>[[Grandmaster Galaxy]]<br>[[Starship Mario]] | ||
|- | |- | ||
|align=center style="background:#FFFFFF"| [[File:SMG Asset Model Toad Brigade (Yellow Toad).png|x100px]]<br>[[Yellow Toad (Toad Brigade)|Yellow Toad]] | |align=center style="background:#FFFFFF"|[[File:SMG Asset Model Toad Brigade (Yellow Toad).png|x100px]]<br>[[Yellow Toad (Toad Brigade)|Yellow Toad]] | ||
|A very sleepy member of the Toad Brigade. He is typically found sleeping or wishing to be [[Mushroom Kingdom|home]] when out in the field. | |A very sleepy member of the Toad Brigade. He is typically found sleeping or wishing to be [[Mushroom Kingdom|home]] when out in the field. | ||
|align=center| [[Fluffy Bluff Galaxy]]<br>[[Flip-Swap Galaxy]]<br>[[Rightside Down Galaxy]]<br>[[Boulder Bowl Galaxy]]<br>[[Bowser's Lava Lair]]<br>[[Flipsville Galaxy]]<br>[[Bowser Jr.'s Boom Bunker]]<br>[[Battle Belt Galaxy]]<br>[[Rolling Coaster Galaxy]]<br>[[Grandmaster Galaxy]]<br>[[Starship Mario]] | |align=center|[[Fluffy Bluff Galaxy]]<br>[[Flip-Swap Galaxy]]<br>[[Rightside Down Galaxy]]<br>[[Boulder Bowl Galaxy]]<br>[[Bowser's Lava Lair]]<br>[[Flipsville Galaxy]]<br>[[Bowser Jr.'s Boom Bunker]]<br>[[Battle Belt Galaxy]]<br>[[Rolling Coaster Galaxy]]<br>[[Grandmaster Galaxy]]<br>[[Starship Mario]] | ||
|- | |- | ||
|align=center style="background:#FFFFFF"| [[File:The Chimp Artwork.png|x100px]]<br>[[The Chimp]] ★ | |align=center style="background:#FFFFFF"|[[File:The Chimp Artwork.png|x100px]]<br>[[The Chimp]] ★ | ||
|A conceited [[monkey]] who considers himself the "best in the universe". He recognizes Mario as his greatest rival and periodically challenges him to a contest via mail. The Chimp is the host of the [[The Chimp's Skating Challenge|skating]] minigame and the 10,000-point jumping challenge. He expresses his admiration for Mario and awards him with a Power Star if he beats his high-score in either. | |A conceited [[monkey]] who considers himself the "best in the universe". He recognizes Mario as his greatest rival and periodically challenges him to a contest via mail. The Chimp is the host of the [[The Chimp's Skating Challenge|skating]] minigame and the 10,000-point jumping challenge. He expresses his admiration for Mario and awards him with a Power Star if he beats his high-score in either. | ||
|align=center| [[Fluffy Bluff Galaxy]]<br>[[Freezy Flake Galaxy]]<br>[[Honeyhop Galaxy]]<br>[[Shiverburn Galaxy]]<br>[[Melty Monster Galaxy]]<br>[[Slimy Spring Galaxy]] | |align=center|[[Fluffy Bluff Galaxy]]<br>[[Freezy Flake Galaxy]]<br>[[Honeyhop Galaxy]]<br>[[Shiverburn Galaxy]]<br>[[Melty Monster Galaxy]]<br>[[Slimy Spring Galaxy]] | ||
|- | |- | ||
|align=center style="background:#FFFFFF"| [[File:Bunny Blue SMG2.png|x100px]]<br>[[Star Bunny|Star Bunnies]] | |align=center style="background:#FFFFFF"|[[File:Bunny Blue SMG2.png|x100px]]<br>[[Star Bunny|Star Bunnies]] | ||
|Spacefaring [[rabbit]]s that like to play. They teach Mario how to use his spin ability after jumping to gain extra height. A community of rabbits live on [[Freezy Flake Galaxy]], where at least one is seen living in a miniature log cabin. They often end their sentences with "boiyoing" and sport Toad-like vests. | |Spacefaring [[rabbit]]s that like to play. They teach Mario how to use his spin ability after jumping to gain extra height. A community of rabbits live on [[Freezy Flake Galaxy]], where at least one is seen living in a miniature log cabin. They often end their sentences with "boiyoing" and sport Toad-like vests. | ||
|align=center| [[Flip-Swap Galaxy]]<br>[[Cosmic Cove Galaxy]]<br>[[Freezy Flake Galaxy]]<br>[[Flip-Out Galaxy]]<br>[[Starship Mario]] | |align=center|[[Flip-Swap Galaxy]]<br>[[Cosmic Cove Galaxy]]<br>[[Freezy Flake Galaxy]]<br>[[Flip-Out Galaxy]]<br>[[Starship Mario]] | ||
|- | |- | ||
|align=center style="background:#FFFFFF"| [[File:Gold and Silver Gearmo.png|x100px]]<br>[[Gearmo]]s | |align=center style="background:#FFFFFF"|[[File:Gold and Silver Gearmo.png|x100px]]<br>[[Gearmo]]s | ||
|Maintenance robots with an obsession for orderliness. They run a [[Chompworks Galaxy|facility that destroys Chomps]] and teach the player how to make the most out of their [[Spring Mario|spring form]]. An overworked individual hosts the [[Crate Burning|crate burning]] minigame. There are [[Gold Gearmo| | |Maintenance robots with an obsession for orderliness. They run a [[Chompworks Galaxy|facility that destroys Chomps]] and teach the player how to make the most out of their [[Spring Mario|spring form]]. An overworked individual hosts the [[Crate Burning|crate burning]] minigame. There are [[Gold Gearmo|Gold]] and [[Silver Gearmo]]s who give Mario a Power Star in exchange for bringing them a [[Goomba]] and [[Spiky Topman]], respectively. | ||
|align=center| [[Rightside Down Galaxy]]<br>[[Boulder Bowl Galaxy]]<br>[[Tall Trunk Galaxy]]<br>[[Chompworks Galaxy]]<br>[[Space Storm Galaxy]]<br>[[Upside Dizzy Galaxy]]<br>[[Starship Mario]] | |align=center|[[Rightside Down Galaxy]]<br>[[Boulder Bowl Galaxy]]<br>[[Tall Trunk Galaxy]]<br>[[Chompworks Galaxy]]<br>[[Space Storm Galaxy]]<br>[[Upside Dizzy Galaxy]]<br>[[Starship Mario]] | ||
|- | |- | ||
|align=center style="background:#FFFFFF"| [[File:SMG Asset Model Penguin.png|x100px]]<br>[[Penguin]]s | |align=center style="background:#FFFFFF"|[[File:SMG Asset Model Penguin.png|x100px]]<br>[[Penguin]]s | ||
|Carefree, flightless birds who love swimming. They share swimming techniques with Mario when prompted. Most penguins are young birds that are a little shorter than Mario, but the two adults in the game – Penguru and Coach – tower over him. | |Carefree, flightless birds who love swimming. They share swimming techniques with Mario when prompted. Most penguins are young birds that are a little shorter than Mario, but the two adults in the game – Penguru and Coach – tower over him. | ||
|align=center| [[Cosmic Cove Galaxy]]<br>[[Starship Mario]] | |align=center|[[Cosmic Cove Galaxy]]<br>[[Starship Mario]] | ||
|- | |- | ||
|align=center style="background:#FFFFFF"| [[File:Penguru SMG.png|x100px]]<br>[[Penguru]] | |align=center style="background:#FFFFFF"|[[File:Penguru SMG.png|x100px]]<br>[[Penguru]] | ||
|A knowledgeable, elderly penguin. He shares cryptic hints on level progression when prompted. | |A knowledgeable, elderly penguin. He shares cryptic hints on level progression when prompted. | ||
|align=center| [[Hightail Falls Galaxy]]<br>[[Cosmic Cove Galaxy]] | |align=center|[[Hightail Falls Galaxy]]<br>[[Cosmic Cove Galaxy]] | ||
|- | |- | ||
|align=center style="background:#FFFFFF"| [[File:Coach Artwork - Super Mario Galaxy 2.png|x100px]]<br>[[Coach (Super Mario Galaxy)|Coach]] | |align=center style="background:#FFFFFF"|[[File:Coach Artwork - Super Mario Galaxy 2.png|x100px]]<br>[[Coach (Super Mario Galaxy)|Coach]] | ||
|A big penguin that teaches young birds how to swim. During the "[[Exploring the Cosmic Cavern]]" mission, he keeps watch over a trapped Luma while his students search for a key to free it. He has a kind and paternal disposition. | |A big penguin that teaches young birds how to swim. During the "[[Exploring the Cosmic Cavern]]" mission, he keeps watch over a trapped Luma while his students search for a key to free it. He has a kind and paternal disposition. | ||
|align=center| [[Cosmic Cove Galaxy]] | |align=center|[[Cosmic Cove Galaxy]] | ||
|- | |- | ||
|align=center style="background:#FFFFFF"| [[File:Jibberjay.png|100px]]<br>[[Jibberjay]]s ★ | |align=center style="background:#FFFFFF"|[[File:Jibberjay.png|100px]]<br>[[Jibberjay]]s ★ | ||
|Excitable birds that host the [[Fluzzard Gliding]] minigame. One of the orange Jibberjays gives Mario a tutorial on how to fly with Fluzzard. They recognize Mario as their leader if he out-glides the competitive black Jibberjay, who periodically challenges him to a race via postage. | |Excitable birds that host the [[Fluzzard Gliding]] minigame. One of the orange Jibberjays gives Mario a tutorial on how to fly with Fluzzard. They recognize Mario as their leader if he out-glides the competitive black Jibberjay, who periodically challenges him to a race via postage. | ||
|align=center| [[Wild Glide Galaxy]]<br>[[Fleet Glide Galaxy]]<br>[[Starship Mario]] | |align=center|[[Wild Glide Galaxy]]<br>[[Fleet Glide Galaxy]]<br>[[Starship Mario]] | ||
|- | |- | ||
|align=center style="background:#FFFFFF"| [[File:Bee Artwork - Super Mario Galaxy.png|x100px]]<br>[[Honeybee]]s | |align=center style="background:#FFFFFF"|[[File:Bee Artwork - Super Mario Galaxy.png|x100px]]<br>[[Honeybee]]s | ||
|[[Bee]] people in search of Power Stars for their queen. They teach the player how to use their [[Bee Mario|bee form]]. They award Mario with a "Certificate of Commendation" for locating the hidden Power Star in [[Honeybloom Galaxy]]. | |[[Bee]] people in search of Power Stars for their queen. They teach the player how to use their [[Bee Mario|bee form]]. They award Mario with a "Certificate of Commendation" for locating the hidden Power Star in [[Honeybloom Galaxy]]. | ||
|align=center| [[Honeybloom Galaxy]]<br>[[Honeyhop Galaxy]]<br>[[Starship Mario]] | |align=center|[[Honeybloom Galaxy]]<br>[[Honeyhop Galaxy]]<br>[[Starship Mario]] | ||
|- | |- | ||
|align=center style="background:#FFFFFF"| [[File:QueenBee.png|x100px]]<br>[[Honey Queen|Queen Bee]] | |align=center style="background:#FFFFFF"|[[File:QueenBee.png|x100px]]<br>[[Honey Queen|Queen Bee]] | ||
|The ruler of the Honeybees and [[Honeyhop Galaxy]]. She mistakes Mario for a new bee, even if he is not in his bee form, and ask him to take care of an "itchiness" for her. Her body can be clung to by the player. Queen Bee's gentle and calm disposition contrasts with her large size. | |The ruler of the Honeybees and [[Honeyhop Galaxy]]. She mistakes Mario for a new bee, even if he is not in his bee form, and ask him to take care of an "itchiness" for her. Her body can be clung to by the player. Queen Bee's gentle and calm disposition contrasts with her large size. | ||
|align=center| [[Honeyhop Galaxy]] | |align=center|[[Honeyhop Galaxy]] | ||
|- | |- | ||
|align=center style="background:#FFFFFF"| [[File:Whittle Artwork - Super Mario Galaxy 2.png|x100px]]<br>[[Whittle]]s ★ | |align=center style="background:#FFFFFF"|[[File:Whittle Artwork - Super Mario Galaxy 2.png|x100px]]<br>[[Whittle]]s ★ | ||
|Wise wood people similar to {{wp| | |Wise wood people similar to {{wp|kodama (spirit)|kodama}}. They teach Mario how to use his [[Cloud Mario|cloud form]], the [[Dash Pepper]], and the [[Blimp Fruit]]. The giant tree of [[Tall Trunk Galaxy]] is sacred to them. A [[:File:Whittle with orange leaf.png|Whittle with an oblong head]] has some position of authority. It recognizes Mario's bravery with a Power Star if he ventures down [[Tall Trunk's Big Slide]]. | ||
|align=center| [[Fluffy Bluff Galaxy]]<br>[[Hightail Falls Galaxy]]<br>[[Tall Trunk Galaxy]]<br>[[Clockwork Ruins Galaxy]]<br>[[Starship Mario]] | |align=center|[[Fluffy Bluff Galaxy]]<br>[[Hightail Falls Galaxy]]<br>[[Tall Trunk Galaxy]]<br>[[Clockwork Ruins Galaxy]]<br>[[Starship Mario]] | ||
|- | |- | ||
|align=center style="background:#FFFFFF"| [[File:SMG Asset Model Board.png|x100px]]<br>[[Bill Board]] | |align=center style="background:#FFFFFF"|[[File:SMG Asset Model Board.png|x100px]]<br>[[Bill Board]] | ||
|A talking board that calls out to Mario and teaches him how to use the [[Star Ball]]. | |A talking board that calls out to Mario and teaches him how to use the [[Star Ball]]. | ||
|align=center| [[Rolling Masterpiece Galaxy]]<br>[[Battle Belt Galaxy]] | |align=center|[[Rolling Masterpiece Galaxy]]<br>[[Battle Belt Galaxy]] | ||
|- | |- | ||
|align=center style="background:#FFFFFF"| [[File:Pianta Artwork - Super Mario Galaxy 2.png|x100px]]<br>[[Pianta]]s ★ | |align=center style="background:#FFFFFF"|[[File:Pianta Artwork - Super Mario Galaxy 2.png|x100px]]<br>[[Pianta]]s ★ | ||
|Cheerful mountain people that wear grass skirts and grow palms from their heads. During the [[Climbing the Cloudy Tower|Strongest Pianta Competition]], some individuals toss Mario to great heights if approached. A green Pianta runs a [[Leaf Raft|leaf raft]] shop and allows Mario to use it. | |Cheerful mountain people that wear grass skirts and grow palms from their heads. During the [[Climbing the Cloudy Tower|Strongest Pianta Competition]], some individuals toss Mario to great heights if approached. A green Pianta runs a [[Leaf Raft|leaf raft]] shop and allows Mario to use it. | ||
|align=center| [[Starshine Beach Galaxy]] | |align=center|[[Starshine Beach Galaxy]] | ||
|- | |- | ||
|align=center style="background:#FFFFFF"| [[File:Bomb omb Buddy Artwork - Super Mario Galaxy 2.png|x100px]]<br>[[Bob-omb Buddy|Bob-omb Buddies]] ★ | |align=center style="background:#FFFFFF"|[[File:Bomb omb Buddy Artwork - Super Mario Galaxy 2.png|x100px]]<br>[[Bob-omb Buddy|Bob-omb Buddies]] ★ | ||
|Friendly [[Bob-omb]]s that lack fuses. Their Power Star was stolen by the [[Whomp King]]. They affectionately refer to Mario as "'stache man" and at least one seems to [[Super Mario 64#Storyline|recognize him]]. The Bob-omb Buddy who boards Starship Mario speaks of a [[World S (Super Mario Galaxy 2)|mythical world]] prior to the final showdown with Bowser. | |Friendly [[Bob-omb]]s that lack fuses. Their Power Star was stolen by the [[Whomp King]]. They affectionately refer to Mario as "'stache man" and at least one seems to [[Super Mario 64#Storyline|recognize him]]. The Bob-omb Buddy who boards Starship Mario speaks of a [[World S (Super Mario Galaxy 2)|mythical world]] prior to the final showdown with Bowser. | ||
|align=center| [[Throwback Galaxy]]<br>[[Starship Mario]] | |align=center|[[Throwback Galaxy]]<br>[[Starship Mario]] | ||
|- | |- | ||
|align=center style="background:#FFFFFF"| [[File:Rosalinasmg2.png|x100px]]<br>[[Rosalina]] | |align=center style="background:#FFFFFF"|[[File:Rosalinasmg2.png|x100px]]<br>[[Rosalina]] | ||
|A mysterious woman who serves as the guardian of the cosmos. She travels through space via the [[Comet Observatory]], a vessel she built for the Lumas. Her observatory is encountered before reaching the center of the universe, where Bowser's Galaxy Generator is attempting to consume it. The baby Luma considers Rosalina to be his mother and she periodically sends letters containing fifty Star Bits to him throughout the course of the game. When encountered in-person, she [[Super Mario Galaxy#Story|already knows who Mario is]] and Lubba mentions having met her before. It is revealed towards the end of the game that she is the narrator of its story. Rosalina appears at the very end of [[Grandmaster Galaxy]], where she gives Mario the final Power Star. | |A mysterious woman who serves as the guardian of the cosmos. She travels through space via the [[Comet Observatory]], a vessel she built for the Lumas. Her observatory is encountered before reaching the center of the universe, where Bowser's Galaxy Generator is attempting to consume it. The baby Luma considers Rosalina to be his mother and she periodically sends letters containing fifty Star Bits to him throughout the course of the game. When encountered in-person, she [[Super Mario Galaxy#Story|already knows who Mario is]] and Lubba mentions having met her before. It is revealed towards the end of the game that she is the narrator of its story. Rosalina appears at the very end of [[Grandmaster Galaxy]], where she gives Mario the final Power Star. | ||
|align=center| [[Grandmaster Galaxy]]<br>[[Starship Mario]] | |align=center|[[Grandmaster Galaxy]]<br>[[Starship Mario]] | ||
|- | |- | ||
|align=center style="background:#FFFFFF"| [[File:SMG2 Cosmic Spirit Artwork.png|x100px]]<br>[[Cosmic Spirit]] ★ | |align=center style="background:#FFFFFF"|[[File:SMG2 Cosmic Spirit Artwork.png|x100px]]<br>[[Cosmic Spirit]] ★ | ||
|An entity in the form of Rosalina. It appears in a galaxy if Mario loses a significant amount of lives and offers to "guide" him to the Power Star. Agreeing causes it to take control of Mario's body and progress through the level. The player can press {{button|wii|+}} on the [[Wii#Wii Remote|Wii Remote]] to regain control of Mario at any point. The cost of using the Cosmic Spirit is that the Power Star of the level is replaced with a [[Bronze Star]]. While this star does contribute to the total amount of accumulated stars, it prevents the player from unlocking the final level, [[Grandmaster Galaxy]]. To access it requires the player to complete every level without the Cosmic Spirit. | |An entity in the form of Rosalina. It appears in a galaxy if Mario loses a significant amount of lives and offers to "guide" him to the Power Star. Agreeing causes it to take control of Mario's body and progress through the level. The player can press {{button|wii|+}} on the [[Wii#Wii Remote|Wii Remote]] to regain control of Mario at any point. The cost of using the Cosmic Spirit is that the Power Star of the level is replaced with a [[Bronze Star]]. While this star does contribute to the total amount of accumulated stars, it prevents the player from unlocking the final level, [[Grandmaster Galaxy]]. To access it requires the player to complete every level without the Cosmic Spirit. | ||
|align=center| [[Sky Station Galaxy]]<br>[[Fluffy Bluff Galaxy]]<br>[[Flip-Swap Galaxy]]<br>[[Bowser Jr.'s Fiery Flotilla]]<br>[[Hightail Falls Galaxy]]<br>[[Boulder Bowl Galaxy]]<br>[[Tall Trunk Galaxy]]<br>[[Haunty Halls Galaxy]]<br>[[Supermassive Galaxy]]<br>[[Flipsville Galaxy]]<br>[[Chompworks Galaxy]]<br>[[Slipsand Galaxy]]<br>[[Melty Monster Galaxy]]<br>[[Battle Belt Galaxy]]<br>[[Mario Squared Galaxy]]<br>[[Rolling Coaster Galaxy]]<br>[[Twisty Trials Galaxy]]<br>[[Stone Cyclone Galaxy]]<br>[[Boss Blitz Galaxy]]<br>[[Flip-Out Galaxy]] | |align=center|[[Sky Station Galaxy]]<br>[[Fluffy Bluff Galaxy]]<br>[[Flip-Swap Galaxy]]<br>[[Bowser Jr.'s Fiery Flotilla]]<br>[[Hightail Falls Galaxy]]<br>[[Boulder Bowl Galaxy]]<br>[[Tall Trunk Galaxy]]<br>[[Haunty Halls Galaxy]]<br>[[Supermassive Galaxy]]<br>[[Flipsville Galaxy]]<br>[[Chompworks Galaxy]]<br>[[Slipsand Galaxy]]<br>[[Melty Monster Galaxy]]<br>[[Battle Belt Galaxy]]<br>[[Mario Squared Galaxy]]<br>[[Rolling Coaster Galaxy]]<br>[[Twisty Trials Galaxy]]<br>[[Stone Cyclone Galaxy]]<br>[[Boss Blitz Galaxy]]<br>[[Flip-Out Galaxy]] | ||
|} | |} | ||
<br> | <br> | ||
| Line 238: | Line 235: | ||
==Enemies== | ==Enemies== | ||
===New enemies=== | ===New enemies=== | ||
{| width=100% cellspacing=0 border=1 cellpadding=3 style="border-collapse:collapse; background:#FFFFFF" | {|width=100% cellspacing=0 border=1 cellpadding=3 style="border-collapse:collapse; background:#FFFFFF" | ||
|-style="background:#000000; color:white;" | |-style="background:#000000; color:white;" | ||
! width=13%| Name | !width=13%|Name | ||
! [[File:MK8 Bowser Emblem.png|20px|link=List of enemies]] | ![[File:MK8 Bowser Emblem.png|20px|link=List of enemies]] Description [[File:MK8 Bowser Emblem.png|20px|link=List of enemies]] | ||
! width=15%| Locations | !width=15%|Locations | ||
! width=6%| Possible spoils | !width=6%|Possible spoils | ||
|- | |- | ||
|align=center| [[File:SMG2 Bee Eater.png|x70px]]<br>'''[[Bee Eater]]''' | |align=center|[[File:SMG2 Bee Eater.png|x70px]]<br>'''[[Bee Eater]]''' | ||
| Variants of the [[Rubbery bulb|rubbery bulb plant]] with protractible spines. When in proximity to [[Mario]],<ref name=weegee group=note>Unless explicitly specified otherwise, any mentioning of Mario is equally applicable to [[Luigi]] during his playthrough.</ref> their spines extend and they sling their bulbs towards him. Some Bee Eaters are rooted upside-down. | |Variants of the [[Rubbery bulb|rubbery bulb plant]] with protractible spines. When in proximity to [[Mario]],<ref name=weegee group=note>Unless explicitly specified otherwise, any mentioning of Mario is equally applicable to [[Luigi]] during his playthrough.</ref> their spines extend and they sling their bulbs towards him. Some Bee Eaters are rooted upside-down. | ||
|align=center| [[Honeybloom Galaxy]] | |align=center|[[Honeybloom Galaxy]] | ||
|align=center| Indestructible | |align=center|Indestructible | ||
|- | |- | ||
|align=center| [[File:SMG2 Giantparagoomba.png|x70px]]<br>'''[[Big Paragoomba]]''' | |align=center|[[File:SMG2 Giantparagoomba.png|x70px]]<br>'''[[Big Paragoomba]]''' | ||
| Giant [[Paragoomba]]s that float back-and-forth. [[Spin]]ning into them leaves them upside-down and dazed, with their wings fallen off. [[Kick]]ing them in this state defeats them. If left undisturbed, they right themselves and behave as [[Big Goomba]]s. | |Giant [[Paragoomba]]s that float back-and-forth. [[Spin]]ning into them leaves them upside-down and dazed, with their wings fallen off. [[Kick]]ing them in this state defeats them. If left undisturbed, they right themselves and behave as [[Big Goomba|Giant Goomba]]s. | ||
|align=center| [[Supermassive Galaxy]] | |align=center|[[Supermassive Galaxy]] | ||
|align=center| [[File:SMG Asset Sprite UI Star Bit.png|15px|link=Star Bit]]×7<br>[[File:SMG2 Asset Sprite UI Goomba.png|15px|link=Big Goomba]]×1 | |align=center|[[File:SMG Asset Sprite UI Star Bit.png|15px|link=Star Bit]]×7<br>[[File:SMG2 Asset Sprite UI Goomba.png|15px|link=Big Goomba]]×1 | ||
|- | |- | ||
|align=center| [[File:Choppah.png|x70px]]<br>'''[[Choppah]]''' | |align=center|[[File:Choppah.png|x70px]]<br>'''[[Choppah]]''' | ||
| Helmeted creatures that hover in midair. They fly in set horizontal or vertical trajectories. Mario cannot defeat them himself and making contact damages him, but [[Yoshi]] can eat them. Shooting one with a [[Star Bit]] stuns it in-place for three seconds. | |Helmeted creatures that hover in midair. They fly in set horizontal or vertical trajectories. Mario cannot defeat them himself and making contact damages him, but [[Yoshi]] can eat them. Shooting one with a [[Star Bit]] stuns it in-place for three seconds. | ||
|align=center| [[Honeybloom Galaxy]]<br>[[Sweet Mystery Galaxy]]<br>[[Honeyhop Galaxy]]<br>[[Flip-Out Galaxy]]<br>[[Grandmaster Galaxy]] | |align=center|[[Honeybloom Galaxy]]<br>[[Sweet Mystery Galaxy]]<br>[[Honeyhop Galaxy]]<br>[[Flip-Out Galaxy]]<br>[[Grandmaster Galaxy]] | ||
|align=center| [[File:SMG Asset Sprite UI Star Bit.png|15px|link=Star Bit]]×3 | |align=center|[[File:SMG Asset Sprite UI Star Bit.png|15px|link=Star Bit]]×3 | ||
|- | |- | ||
|align=center| [[File:CosmicCloneSMG2.png|x70px]]<br>'''[[Cosmic Clone]]''' | |align=center|[[File:CosmicCloneSMG2.png|x70px]]<br>'''[[Cosmic Clone]]''' | ||
| Dark entities in the form of Mario. They appear in sections of galaxies and trail Mario, mimicking his every move and positioning. Crossing paths with a Cosmic Clone causes damage to Mario and makes the clone disappear. Cosmic Clones continuously emerge from a small rupture of shadow in an area. Completing a necessary objective (i.e. activating all [[Flipswitch Panel]]s) in the area closes the rupture and defeats all of the clones at once. | |Dark entities in the form of Mario. They appear in sections of galaxies and trail Mario, mimicking his every move and positioning. Crossing paths with a Cosmic Clone causes damage to Mario and makes the clone disappear. Cosmic Clones continuously emerge from a small rupture of shadow in an area. Completing a necessary objective (i.e. activating all [[Flipswitch Panel]]s) in the area closes the rupture and defeats all of the clones at once. | ||
|align=center| [[Sky Station Galaxy]]<br>[[Spin-Dig Galaxy]]<br>[[Fluffy Bluff Galaxy]]<br>[[Puzzle Plank Galaxy]]<br>[[Cloudy Court Galaxy]]<br>[[Haunty Halls Galaxy]]<br>[[Chompworks Galaxy]]<br>[[Mario Squared Galaxy]]<br>[[Flip-Out Galaxy]] | |align=center|[[Sky Station Galaxy]]<br>[[Spin-Dig Galaxy]]<br>[[Fluffy Bluff Galaxy]]<br>[[Puzzle Plank Galaxy]]<br>[[Cloudy Court Galaxy]]<br>[[Haunty Halls Galaxy]]<br>[[Chompworks Galaxy]]<br>[[Mario Squared Galaxy]]<br>[[Flip-Out Galaxy]] | ||
|align=center| [[File:SMG Asset Sprite UI Star Bit.png|15px|link=Star Bit]]×3 | |align=center|[[File:SMG Asset Sprite UI Star Bit.png|15px|link=Star Bit]]×3 | ||
|- | |- | ||
|align=center| [[File:Digga.png|x70px]]<br>'''[[Digga]]''' | |align=center|[[File:Digga.png|x70px]]<br>'''[[Digga]]''' | ||
| Drill enemies that tunnel through earth. Jumping on their backs or attacking them with a [[Spin Drill]] defeats them. [[Digga-Leg]] expels Diggas from its head during its boss fight. | |Drill enemies that tunnel through earth. Jumping on their backs or attacking them with a [[Spin Drill]] defeats them. [[Digga-Leg]] expels Diggas from its head during its boss fight. | ||
|align=center| [[Spin-Dig Galaxy]] | |align=center|[[Spin-Dig Galaxy]] | ||
|align=center| [[File:SMG Asset Sprite UI Coin.png|15px|link=Coin]]×1 | |align=center|[[File:SMG Asset Sprite UI Coin.png|15px|link=Coin]]×1 | ||
|- | |- | ||
|align=center| [[File:ElectricPressure.png|70px]]<br>'''[[Electric Pressure]]''' | |align=center|[[File:ElectricPressure.png|70px]]<br>'''[[Electric Pressure]]''' | ||
| Suspended electroshock devices that discharge balls of electricity from their nozzles. The balls slowly trail after Mario and electrocute him on contact. | |Suspended electroshock devices that discharge balls of electricity from their nozzles. The balls slowly trail after Mario and electrocute him on contact. | ||
|align=center| [[Space Storm Galaxy]] | |align=center|[[Space Storm Galaxy]] | ||
|align=center| Indestructible | |align=center|Indestructible | ||
|- | |- | ||
|align=center| [[File:Elite Octoomba.png|x70px]]<br>'''[[Elite Octoomba]]''' | |align=center|[[File:Elite Octoomba.png|x70px]]<br>'''[[Elite Octoomba]]''' | ||
| Strong [[Octoomba]]s that fire two consecutive rocks from their siphon. Though they sidestep back-and-forth along set paths, they turn to face Mario as he moves. If the first rock misses, the second one may strike him if he does not keep moving. | |Strong [[Octoomba]]s that fire two consecutive rocks from their siphon. Though they sidestep back-and-forth along set paths, they turn to face Mario as he moves. If the first rock misses, the second one may strike him if he does not keep moving. | ||
|align=center| [[Sky Station Galaxy]]<br>[[Fluffy Bluff Galaxy]]<br>[[Boulder Bowl Galaxy]]<br>[[Cloudy Court Galaxy]]<br>[[Honeyhop Galaxy]]<br>[[Shiverburn Galaxy]]<br>[[Clockwork Ruins Galaxy]] | |align=center|[[Sky Station Galaxy]]<br>[[Fluffy Bluff Galaxy]]<br>[[Boulder Bowl Galaxy]]<br>[[Cloudy Court Galaxy]]<br>[[Honeyhop Galaxy]]<br>[[Shiverburn Galaxy]]<br>[[Clockwork Ruins Galaxy]] | ||
|align=center| [[File:SMG Asset Sprite UI Coin.png|15px|link=Coin]]×1<br>[[File:SMG Asset Sprite UI Star Bit.png|15px|link=Star Bit]]×3 | |align=center|[[File:SMG Asset Sprite UI Coin.png|15px|link=Coin]]×1<br>[[File:SMG Asset Sprite UI Star Bit.png|15px|link=Star Bit]]×3 | ||
|- | |- | ||
|align=center| [[File:SMG2 Asset Model Fizzlit.png|x70px]]<br>'''[[Fizzlit]]''' | |align=center|[[File:SMG2 Asset Model Fizzlit.png|x70px]]<br>'''[[Fizzlit]]''' | ||
| Amorphous creatures that bounce around Mario. They periodically halt and flatten themselves into yellow pubbles which discharge electricity. They cannot be harmed in this state, and direct contact electrocutes Mario. Yoshi is forced back into [[Yoshi Egg|his egg]] if he attempts to eat a Fizzlit in this state. | |Amorphous creatures that bounce around Mario. They periodically halt and flatten themselves into yellow pubbles which discharge electricity. They cannot be harmed in this state, and direct contact electrocutes Mario. Yoshi is forced back into [[Yoshi's Egg|his egg]] if he attempts to eat a Fizzlit in this state. | ||
|align=center| [[Cosmic Cove Galaxy]]<br>[[Bowser Jr.'s Fearsome Fleet]]<br>[[Space Storm Galaxy]]<br>[[Bowser Jr.'s Boom Bunker]] | |align=center|[[Cosmic Cove Galaxy]]<br>[[Bowser Jr.'s Fearsome Fleet]]<br>[[Space Storm Galaxy]]<br>[[Bowser Jr.'s Boom Bunker]] | ||
|align=center| [[File:SMG Asset Sprite UI Coin.png|15px|link=Coin]]×1<br>[[File:SMG Asset Sprite UI Star Bit.png|15px|link=Star Bit]]×3 | |align=center|[[File:SMG Asset Sprite UI Coin.png|15px|link=Coin]]×1<br>[[File:SMG Asset Sprite UI Star Bit.png|15px|link=Star Bit]]×3 | ||
|- | |- | ||
|align=center| [[File:Flaptack.png|x70px]]<br>'''[[Flaptack]]''' | |align=center|[[File:Flaptack.png|x70px]]<br>'''[[Flaptack]]''' | ||
| Squat birds with a horn on their head. They idly flutter in place. When in proximity to Mario, they fly towards him, turn upside down, and slam themselves into the ground below in an attempt to strike him. They are temporarily stuck into the ground and can be defeated. Flaptacks sometimes are not within the player's field of view, but they can still be spotted by their large shadow they cast. Shooting a Flaptack dazes it and makes it fall to the ground. | |Squat birds with a horn on their head. They idly flutter in place. When in proximity to Mario, they fly towards him, turn upside down, and slam themselves into the ground below in an attempt to strike him. They are temporarily stuck into the ground and can be defeated. Flaptacks sometimes are not within the player's field of view, but they can still be spotted by their large shadow they cast. Shooting a Flaptack dazes it and makes it fall to the ground. | ||
|align=center| [[Fluffy Bluff Galaxy]]<br>[[Cloudy Court Galaxy]]<br>[[Flash Black Galaxy]] | |align=center|[[Fluffy Bluff Galaxy]]<br>[[Cloudy Court Galaxy]]<br>[[Flash Black Galaxy]] | ||
|align=center| [[File:SMG Asset Sprite UI Coin.png|15px|link=Coin]]×1<br>[[File:SMG Asset Sprite UI Star Bit.png|15px|link=Star Bit]]×3 | |align=center|[[File:SMG Asset Sprite UI Coin.png|15px|link=Coin]]×1<br>[[File:SMG Asset Sprite UI Star Bit.png|15px|link=Star Bit]]×3 | ||
|- | |- | ||
|align=center| [[File:SMG2 Flomp.png|70px]]<br>[[File:SMG2 Angry Flomp.png|70px]]<br>'''[[Flomp]]''' | |align=center|[[File:SMG2 Flomp.png|70px]]<br>[[File:SMG2 Angry Flomp.png|70px]]<br>'''[[Flomp]]''' | ||
| Suspended stone platforms. They rapidly spin for one second in three second intervals. If Mario is on top of a Flomp when it spins, he falls through it. They appear in pairs or more. | |Suspended stone platforms. They rapidly spin for one second in three second intervals. If Mario is on top of a Flomp when it spins, he falls through it. They appear in pairs or more. | ||
|align=center| [[Bowser's Lava Lair]]<br>[[Grandmaster Galaxy]] | |align=center|[[Bowser's Lava Lair]]<br>[[Grandmaster Galaxy]] | ||
|align=center| Indestructible | |align=center|Indestructible | ||
|- | |- | ||
|align=center| [[File:SMG2 Open Flower Mimic.png|x80px]]<br>[[File:SMG2 Closed Flower Mimic.png|x50px]]<br>'''[[Flower Mimic]]''' | |align=center|[[File:SMG2 Open Flower Mimic.png|x80px]]<br>[[File:SMG2 Closed Flower Mimic.png|x50px]]<br>'''[[Flower Mimic]]''' | ||
| Hovering | |Hovering flowers which can be boarded like platforms. When idle, they look like broad, pink flowers. When Mario stands on one, a white rim protrudes from the edges of the flower and snaps shut after three seconds. Mario is damaged if he is on top of it when it closes. | ||
|align=center| [[Honeybloom Galaxy]]<br>[[Honeyhop Galaxy]] | |align=center|[[Honeybloom Galaxy]]<br>[[Honeyhop Galaxy]] | ||
|align=center| Indestructible | |align=center|Indestructible | ||
|- | |- | ||
|align=center| [[File:Gummit SMG2.png|x70px]]<br>'''[[Gummit]]''' | |align=center|[[File:Gummit SMG2.png|x70px]]<br>'''[[Gummit]]''' | ||
| Creatures like the smackable moles in the {{wp|Whac-A-Mole}} arcade game. They appear during [[The Chimp's Skating Challenge]]. During the challenge, they periodically pop out of holes in the ice. Mario accumulates points by [[ | |Creatures like the smackable moles in the {{wp|Whac-A-Mole}} arcade game. They appear during [[The Chimp's Skating Challenge]]. During the challenge, they periodically pop out of holes in the ice. Mario accumulates points by [[skate|skating]] into Gummits and kicking them. | ||
|align=center| [[Freezy Flake Galaxy]]<br>[[Shiverburn Galaxy]] | |align=center|[[Freezy Flake Galaxy]]<br>[[Shiverburn Galaxy]] | ||
|align=center| 10 pts. | |align=center|10 pts. | ||
|- | |- | ||
|align=center| [[File:GoldGummit SMG2.png|x70px]]<br>'''[[Golden Gummit]]''' | |align=center|[[File:GoldGummit SMG2.png|x70px]]<br>'''[[Golden Gummit]]''' | ||
| Gold Gummits. They appear in fewer numbers and retreat down their holes faster than the other Gummits. | |Gold Gummits. They appear in fewer numbers and retreat down their holes faster than the other Gummits. | ||
|align=center| [[Freezy Flake Galaxy]]<br>[[Shiverburn Galaxy]] | |align=center|[[Freezy Flake Galaxy]]<br>[[Shiverburn Galaxy]] | ||
|align=center| 50 pts. | |align=center|50 pts. | ||
|- | |- | ||
|align=center| [[File:Kleptoad Art.png|x70px]]<br>'''[[Kleptoad]]''' | |align=center|[[File:Kleptoad Art.png|x70px]]<br>'''[[Kleptoad]]''' | ||
| [[Frog]]s that pop out of the ground indefinitely. They carry coins and [[Silver Star]]s in [[bubble]]s above their heads. | |[[Frog]]s that pop out of the ground indefinitely. They carry coins and [[Silver Star]]s in [[bubble]]s above their heads. | ||
|align=center| [[Hightail Falls Galaxy]] | |align=center|[[Hightail Falls Galaxy]] | ||
|align=center| [[File:SMG Asset Sprite UI Coin.png|15px|link=Coin]]×1<br>[[File:Smg2 icon silverstar.png|15px|link=Silver Star]]×1 | |align=center|[[File:SMG Asset Sprite UI Coin.png|15px|link=Coin]]×1<br>[[File:Smg2 icon silverstar.png|15px|link=Silver Star]]×1 | ||
|- | |- | ||
|align=center| [[File:Magmaargh Artwork - Super Mario Galaxy 2.png|x70px]]<br>'''[[Magmaargh]]''' | |align=center|[[File:Magmaargh Artwork - Super Mario Galaxy 2.png|x70px]]<br>'''[[Magmaargh]]''' | ||
| Enormous [[Blargg]]s submerged in [[lava]]. They idly lie deep in lava with only their eyes, nostrils, and ears exposed like {{wp|:File:Hippopotamus amphibius - Karlsruhe Zoo.jpg|hippopotamuses}}. When in proximity to Mario, they burst to the surface with their jaws open wide and slam their faces forward to strike him. Direct contact burns Mario. They can phase through solid platforms. | |Enormous [[Blargg]]s submerged in [[lava]]. They idly lie deep in lava with only their eyes, nostrils, and ears exposed like {{wp|:File:Hippopotamus amphibius - Karlsruhe Zoo.jpg|hippopotamuses}}. When in proximity to Mario, they burst to the surface with their jaws open wide and slam their faces forward to strike him. Direct contact burns Mario. They can phase through solid platforms. | ||
|align=center| [[Fleet Glide Galaxy]]<br>[[Melty Monster Galaxy]] | |align=center|[[Fleet Glide Galaxy]]<br>[[Melty Monster Galaxy]] | ||
|align=center| Indestructible | |align=center|Indestructible | ||
|- | |- | ||
|align=center| [[File:Magmaw Artwork - Super Mario Galaxy 2.png|x70px]]<br>'''[[Magmaw]]''' | |align=center|[[File:Magmaw Artwork - Super Mario Galaxy 2.png|x70px]]<br>'''[[Magmaw]]''' | ||
| Small Magmaarghs that endlessly shuffle through lava. They can pass through solid platforms. | |Small Magmaarghs that endlessly shuffle through lava. They can pass through solid platforms. | ||
|align=center| [[Melty Monster Galaxy]] | |align=center|[[Melty Monster Galaxy]] | ||
|align=center| Indestructible | |align=center|Indestructible | ||
|- | |- | ||
|align=center| [[File:Mattermouth art SMG2.png|x70px]]<br>'''[[Mattermouth]]''' | |align=center|[[File:Mattermouth art SMG2.png|x70px]]<br>'''[[Mattermouth]]''' | ||
| Disembodied skulls that chomp through matter. They leave a trail of empty space behind them that Mario can fall through, but it gradually reemerges. Jumping on a Mattermouth causes it to change direction. | |Disembodied skulls that chomp through matter. They leave a trail of empty space behind them that Mario can fall through, but it gradually reemerges. Jumping on a Mattermouth causes it to change direction. | ||
|align=center| [[Bowser's Lava Lair]]<br>[[Haunty Halls Galaxy]] | |align=center|[[Bowser's Lava Lair]]<br>[[Haunty Halls Galaxy]] | ||
|align=center| Indestructible | |align=center|Indestructible | ||
|- | |- | ||
|align=center| [[File:SMG2 Octoboo Artwork.png|x70px]]<br>'''[[Octoboo]]''' | |align=center|[[File:SMG2 Octoboo Artwork.png|x70px]]<br>'''[[Octoboo]]''' | ||
| Ghostly Octoombas that hover in set paths. They appear in groups, usually hovering in a circular path, but in some instances they hover in continuous paths. Making direct contact damages Mario. Spinning into Octoombas makes them safely permiable for one second. | |Ghostly Octoombas that hover in set paths. They appear in groups, usually hovering in a circular path, but in some instances they hover in continuous paths. Making direct contact damages Mario. Spinning into Octoombas makes them safely permiable for one second. | ||
|align=center| [[Haunty Halls Galaxy]]<br>[[Boo Moon Galaxy]]<br>[[Flash Black Galaxy]] | |align=center|[[Haunty Halls Galaxy]]<br>[[Boo Moon Galaxy]]<br>[[Flash Black Galaxy]] | ||
|align=center| Indestructible | |align=center|Indestructible | ||
|- | |- | ||
|align=center| [[File:Whimp.png|x70px]]<br>'''[[Pattan]]''' | |align=center|[[File:Whimp.png|x70px]]<br>'''[[Pattan]]''' | ||
| Diminutive [[Whomp]]s. They appear in groups of three or five and rush down Mario. When close, they fling themselves face first to strike him. A successful strike damages Mario. They fall apart after attacking. The [[Whomp King]] summons them during his boss fight. | |Diminutive [[Whomp]]s. They appear in groups of three or five and rush down Mario. When close, they fling themselves face first to strike him. A successful strike damages Mario. They fall apart after attacking. The [[Whomp King]] summons them during his boss fight. | ||
|align=center| [[Throwback Galaxy]] | |align=center|[[Throwback Galaxy]] | ||
|align=center| None | |align=center|None | ||
|- | |- | ||
|align=center| [[File:SMG2 Pinhead Artwork.png|x70px]]<br>'''[[Pinhead]]''' | |align=center|[[File:SMG2 Pinhead Artwork.png|x70px]]<br>'''[[Pinhead]]''' | ||
| Stationary bowling pin creatures. Pinheads are skittish: they sit above trapdoors that they fall through when approached by Mario. They can only be defeated by Mario when he rolls into them in his [[Rock Mario|rock form]]. They typically [[:File:SMG2 Screenshot Boulder Bowl Galaxy (Pinheads).png|sit in groups of six]]. | |Stationary bowling pin creatures. Pinheads are skittish: they sit above trapdoors that they fall through when approached by Mario. They can only be defeated by Mario when he rolls into them in his [[Rock Mario|rock form]]. They typically [[:File:SMG2 Screenshot Boulder Bowl Galaxy (Pinheads).png|sit in groups of six]]. | ||
|align=center| [[Boulder Bowl Galaxy]]<br>[[Melty Monster Galaxy]] | |align=center|[[Boulder Bowl Galaxy]]<br>[[Melty Monster Galaxy]] | ||
|align=center| [[File:SMG Asset Sprite UI Star Bit.png|15px|link=Star Bit]]×3<br>100 pts. | |align=center|[[File:SMG Asset Sprite UI Star Bit.png|15px|link=Star Bit]]×3<br>100 pts. | ||
|- | |- | ||
|align=center| [[File:Prickly Piranha Plant.png|x70px]]<br>'''[[Prickly Piranha Plant]]''' | |align=center|[[File:Prickly Piranha Plant.png|x70px]]<br>'''[[Prickly Piranha Plant]]''' | ||
| A [[Spiny Piranha Plant]] with additional spines on its head. The spines damage Mario on contact and prevent its body from direct harm. Spinning a rubbery bulb plant into it defeats it. There is only one in the game. | |A [[Spiny Piranha Plant]] with additional spines on its head. The spines damage Mario on contact and prevent its body from direct harm. Spinning a rubbery bulb plant into it defeats it. There is only one in the game. | ||
|align=center| [[Sky Station Galaxy]] | |align=center|[[Sky Station Galaxy]] | ||
|align=center| [[File:SMG Asset Model Key.png|15px|link=Key]]×1 | |align=center|[[File:SMG Asset Model Key.png|15px|link=Key]]×1 | ||
|- | |- | ||
|align=center| [[File:SMG2 Pupdozer Artwork.png|x70px]]<br>'''[[Pupdozer]]''' | |align=center|[[File:SMG2 Pupdozer Artwork.png|x70px]]<br>'''[[Pupdozer]]''' | ||
| Squat [[dinosaur]] creatures. Their backs are covered in spikes that protect them from harm and damages Mario on contact. Their bellies are unguarded: [[Ground Pound|Ground-Pound]]ing through a [[grate]] while a Pupdozer is above it defeats it. | |Squat [[dinosaur]] creatures. Their backs are covered in spikes that protect them from harm and damages Mario on contact. Their bellies are unguarded: [[Ground Pound|Ground-Pound]]ing through a [[grate]] while a Pupdozer is above it defeats it. | ||
|align=center| [[Flipsville Galaxy]] | |align=center|[[Flipsville Galaxy]] | ||
|align=center| [[File:SMG Asset Sprite UI Coin.png|15px|link=Coin]]×1 | |align=center|[[File:SMG Asset Sprite UI Coin.png|15px|link=Coin]]×1 | ||
|- | |- | ||
|align=center| [[File:RhompRoller.png|x70px]]<br>'''[[Rhomp]]''' | |align=center|[[File:RhompRoller.png|x70px]]<br>'''[[Rhomp]]''' | ||
| Rolling stone beings. A rolling Rhomp flattens Mario and completely depletes his [[life meter]]. | |Rolling stone beings. A rolling Rhomp flattens Mario and completely depletes his [[life meter]]. | ||
|align=center| [[Slipsand Galaxy]] | |align=center|[[Slipsand Galaxy]] | ||
|align=center| Indestructible | |align=center|Indestructible | ||
|- | |- | ||
|align=center| [[File:Silver Chomp Artwork - Super Mario Galaxy 2.png|x70px]]<br>'''[[Silver Chomp]]''' | |align=center|[[File:Silver Chomp Artwork - Super Mario Galaxy 2.png|x70px]]<br>'''[[Silver Chomp]]''' | ||
| [[Chain Chomp| | |[[Chain Chomp|Chomp]]s with crazed eyes. They home-in on Mario. Contact damages Mario. They can only be defeated by spinning rubbery bulb plants into them, or by knocking them into [[pit|bottomless pit]]s. | ||
|align=center| [[Rolling Masterpiece Galaxy]]<br>[[Slipsand Galaxy]]<br>[[Battle Belt Galaxy]] | |align=center|[[Rolling Masterpiece Galaxy]]<br>[[Slipsand Galaxy]]<br>[[Battle Belt Galaxy]] | ||
|align=center| [[File:SMG Asset Sprite UI Star Bit.png|15px|link=Star Bit]]×10 | |align=center|[[File:SMG Asset Sprite UI Star Bit.png|15px|link=Star Bit]]×10 | ||
|- | |- | ||
|align=center| [[File:Smeech.png|x70px]]<br>'''[[Smeech]]''' | |align=center|[[File:Smeech.png|x70px]]<br>'''[[Smeech]]''' | ||
| Winged creatures. They quickly fly away from Mario if approached by him. If approached by Yoshi, they will pursue him with smacking lips and latch onto his mouth. This prevents Yoshi from using his tongue or eating [[ | |Winged creatures. They quickly fly away from Mario if approached by him. If approached by Yoshi, they will pursue him with smacking lips and latch onto his mouth. This prevents Yoshi from using his tongue or eating [[berry|fruit]]s. Spinning while a Smeech is attached dislodge it from Yoshi's mouth and defeats it. | ||
|align=center| [[Yoshi Star Galaxy]]<br>[[Hightail Falls Galaxy]]<br>[[Haunty Halls Galaxy]]<br>[[Starshine Beach Galaxy]]<br>[[Sweet Mystery Galaxy]] | |align=center|[[Yoshi Star Galaxy]]<br>[[Hightail Falls Galaxy]]<br>[[Haunty Halls Galaxy]]<br>[[Starshine Beach Galaxy]]<br>[[Sweet Mystery Galaxy]] | ||
|align=center| [[File:SMG Asset Sprite UI Coin.png|15px|link=Coin]]×1<br>[[File:SMG Asset Sprite UI Star Bit.png|15px|link=Star Bit]]×3 | |align=center|[[File:SMG Asset Sprite UI Coin.png|15px|link=Coin]]×1<br>[[File:SMG Asset Sprite UI Star Bit.png|15px|link=Star Bit]]×3 | ||
|- | |- | ||
|align=center| [[File:SMG2 Snoodle.png|x70px]]<br>'''[[Snoodle]]''' | |align=center|[[File:SMG2 Snoodle.png|x70px]]<br>'''[[Snoodle]]''' | ||
| Benthic creatures that look like the {{wp|Riftia pachyptila|giant tube worm}}. They protrude from holes on the seafloor and extend their heads towards Mario to strike him. They are vulnerable to beacons of light from [[Green Shell]]s, but they are defeatable through typical means as well (i.e. spin, or thrown projectile). | |Benthic creatures that look like the {{wp|Riftia pachyptila|giant tube worm}}. They protrude from holes on the seafloor and extend their heads towards Mario to strike him. They are vulnerable to beacons of light from [[Green Shell]]s, but they are defeatable through typical means as well (i.e. spin, or thrown projectile). | ||
|align=center| [[Cosmic Cove Galaxy]]<br>[[Slimy Spring Galaxy]] | |align=center|[[Cosmic Cove Galaxy]]<br>[[Slimy Spring Galaxy]] | ||
|align=center| [[File:SMG Asset Sprite UI Star Bit.png|15px|link=Star Bit]]×3 | |align=center|[[File:SMG Asset Sprite UI Star Bit.png|15px|link=Star Bit]]×3 | ||
|- | |- | ||
|align=center| [[File:Spiky Gummit.png|x70px]]<br>'''[[Spiky Gummit]]''' | |align=center|[[File:Spiky Gummit.png|x70px]]<br>'''[[Spiky Gummit]]''' | ||
| Gummits covered in spikes. Making contact does not damage Mario, but it causes knockback that costs Mario at least one second of time in The Chimp's Skating Challenge. | |Gummits covered in spikes. Making contact does not damage Mario, but it causes knockback that costs Mario at least one second of time in The Chimp's Skating Challenge. | ||
|align=center| [[Freezy Flake Galaxy]]<br>[[Shiverburn Galaxy]] | |align=center|[[Freezy Flake Galaxy]]<br>[[Shiverburn Galaxy]] | ||
|align=center| Indestructible | |align=center|Indestructible | ||
|- | |- | ||
|align=center| [[File:Swaphopper.png|x70px]]<br>'''[[Swaphopper]]''' | |align=center|[[File:Swaphopper.png|x70px]]<br>'''[[Swaphopper]]''' | ||
| Insect creatures that hop from side-to-side. Their tops are protected by a spiked shell that damages Mario on contact, but their undersides are defenseless. Shifting the [[Gravity|gravitational plane]] using [[Arrow Switch]]es alters which side points upward, which is the only way Mario can gain access to their damageable undersides. While right-side up, a Swaphopper looks aggressive and slowly pursues Mario. When flipped over, it looks cowardly and tries to move away. | |Insect creatures that hop from side-to-side. Their tops are protected by a spiked shell that damages Mario on contact, but their undersides are defenseless. Shifting the [[Gravity|gravitational plane]] using [[Arrow Switch]]es alters which side points upward, which is the only way Mario can gain access to their damageable undersides. While right-side up, a Swaphopper looks aggressive and slowly pursues Mario. When flipped over, it looks cowardly and tries to move away. | ||
|align=center| [[Rightside Down Galaxy]]<br>[[Upside Dizzy Galaxy]]<br>[[Battle Belt Galaxy]] | |align=center|[[Rightside Down Galaxy]]<br>[[Upside Dizzy Galaxy]]<br>[[Battle Belt Galaxy]] | ||
|align=center| [[File:SMG Asset Sprite UI Coin.png|15px|link=Coin]]×1 | |align=center|[[File:SMG Asset Sprite UI Coin.png|15px|link=Coin]]×1 | ||
|- | |- | ||
|align=center| [[File:SpinyHermits.png|x70px]]<br>'''[[Tongari]]''' | |align=center|[[File:SpinyHermits.png|x70px]]<br>'''[[Tongari]]''' | ||
| Slow-moving {{wp| | |Slow-moving {{wp|turbo cornutus|turbo snail}} enemies. They move in unilateral directions. Some can be found outside of water on ceilings and walls. | ||
|align=center| [[Starshine Beach Galaxy]]<br>[[Boo Moon Galaxy]] | |align=center|[[Starshine Beach Galaxy]]<br>[[Boo Moon Galaxy]] | ||
|align=center| Indestructible | |align=center|Indestructible | ||
|- | |- | ||
|align=center| [[File:Twirlip.png|x70px]]<br>'''[[Twirlip]]''' | |align=center|[[File:Twirlip.png|x70px]]<br>'''[[Twirlip]]''' | ||
| Spinning flower enemies. They periodically open their flowers and spin rapidly in circles. Twirlips can only be jumped on while they are twirling, and they can only be spun into when they are closed. | |Spinning flower enemies. They periodically open their flowers and spin rapidly in circles. Twirlips can only be jumped on while they are twirling, and they can only be spun into when they are closed. | ||
|align=center| [[Spin-Dig Galaxy]]<br>[[Flipsville Galaxy]]<br>[[Starshine Beach Galaxy]] | |align=center|[[Spin-Dig Galaxy]]<br>[[Flipsville Galaxy]]<br>[[Starshine Beach Galaxy]] | ||
|align=center| [[File:SMG Asset Sprite UI Coin.png|15px|link=Coin]]×1<br>[[File:SMG Asset Sprite UI Star Bit.png|15px|link=Star Bit]]×3 | |align=center|[[File:SMG Asset Sprite UI Coin.png|15px|link=Coin]]×1<br>[[File:SMG Asset Sprite UI Star Bit.png|15px|link=Star Bit]]×3 | ||
|} | |} | ||
===Returning enemies=== | ===Returning enemies=== | ||
A star symbol (★) denotes a character that was not in the first ''[[Super Mario Galaxy]]''. | A star symbol (★) denotes a character that was not in the first ''[[Super Mario Galaxy]]''. | ||
{| width=100% cellspacing=0 border=1 cellpadding=3 style="border-collapse:collapse; background:#FFFFFF" | {|width=100% cellspacing=0 border=1 cellpadding=3 style="border-collapse:collapse; background:#FFFFFF" | ||
|-style="background:#000000; color:white;" | |-style="background:#000000; color:white;" | ||
! width=13%| Name | !width=13%|Name | ||
! [[File:MK8 Bowser Emblem.png|20px|link=List of enemies]] | ![[File:MK8 Bowser Emblem.png|20px|link=List of enemies]] Description [[File:MK8 Bowser Emblem.png|20px|link=List of enemies]] | ||
! width=15%| Locations | !width=15%|Locations | ||
! width=6%| Possible spoils | !width=6%|Possible spoils | ||
|- | |- | ||
|align=center| [[File:SMG Asset Model Amp.png|x70px]]<br>'''[[Amp]]''' | |align=center|[[File:SMG Asset Model Amp.png|x70px]]<br>'''[[Amp]]''' | ||
| Magnetic orbs with smiling faces. They discharge electricity and shock [[Mario]] on contact. They move in a fixed direction, typically in a circular pattern. | |Magnetic orbs with smiling faces. They discharge electricity and shock [[Mario]] on contact. They move in a fixed direction, typically in a circular pattern. | ||
|align=center| [[Sky Station Galaxy]]<br>[[Spin-Dig Galaxy]]<br>[[Space Storm Galaxy]] | |align=center|[[Sky Station Galaxy]]<br>[[Spin-Dig Galaxy]]<br>[[Space Storm Galaxy]] | ||
|align=center| Indestructible | |align=center|Indestructible | ||
|- | |- | ||
|align=center| [[File:BanzaiBillSMG.png|x70px]]<br>'''[[Banzai Bill]]''' | |align=center|[[File:BanzaiBillSMG.png|x70px]]<br>'''[[Banzai Bill]]''' | ||
|Giant, slow-moving missiles with {{wp|Nose art|sharkmouth}}s. Their line of trajectory is fixed in one direction, and they slowly rotate as they move. | |Giant, slow-moving missiles with {{wp|Nose art|sharkmouth}}s. Their line of trajectory is fixed in one direction, and they slowly rotate as they move. | ||
|align=center| [[Sky Station Galaxy]]<br>[[Bowser Jr.'s Fearsome Fleet]]<br>[[Fleet Glide Galaxy]]<br>[[Bowser's Galaxy Generator]] | |align=center|[[Sky Station Galaxy]]<br>[[Bowser Jr.'s Fearsome Fleet]]<br>[[Fleet Glide Galaxy]]<br>[[Bowser's Galaxy Generator]] | ||
|align=center| None | |align=center|None | ||
|- | |- | ||
|align=center| [[File:SMG Bat Artwork.png|x70px]]<br>'''[[Bat (Super Mario Galaxy)|Bat]]''' | |align=center|[[File:SMG Bat Artwork.png|x70px]]<br>'''[[Bat (Super Mario Galaxy)|Bat]]''' | ||
| Winged creatures that roost in caves and swoop down to attack Mario. They fly-in-place and cackle when they make successful strikes. Bats can be defeated with a spin or stomp. | |Winged creatures that roost in caves and swoop down to attack Mario. They fly-in-place and cackle when they make successful strikes. Bats can be defeated with a spin or stomp. | ||
|align=center| [[Fleet Glide Galaxy]]<br>[[Slimy Spring Galaxy]]<br> | |align=center|[[Fleet Glide Galaxy]]<br>[[Slimy Spring Galaxy]]<br> | ||
|align=center| [[File:SMG Asset Sprite UI Coin.png|15px|link=Coin]]×1<br>[[File:SMG Asset Sprite UI Star Bit.png|15px|link=Star Bit]]×3 | |align=center|[[File:SMG Asset Sprite UI Coin.png|15px|link=Coin]]×1<br>[[File:SMG Asset Sprite UI Star Bit.png|15px|link=Star Bit]]×3 | ||
|- | |- | ||
|align=center| [[File:SMG Asset Model Big Amp.png|x70px]]<br>'''[[Big Amp]]''' | |align=center|[[File:SMG Asset Model Big Amp.png|x70px]]<br>'''[[Big Amp]]''' | ||
| Large Amps. They are typically in pairs. Unlike normal-sized Amps, the big ones lack faces. | |Large Amps. They are typically in pairs. Unlike normal-sized Amps, the big ones lack faces. | ||
|align=center| [[Space Storm Galaxy]] | |align=center|[[Space Storm Galaxy]] | ||
|align=center| Indestructible | |align=center|Indestructible | ||
|- | |- | ||
|align=center| [[File: | |align=center|[[File:Big Thwomp SMG2.png|x70px]]<br>'''[[Big Thwomp]]''' ★ | ||
| | |Enormous Thwomps. The pair found in the game are close enough to be [[Wall Jump]]ed between. | ||
|align=center| [[Supermassive Galaxy]] | |align=center|[[Supermassive Galaxy]] | ||
|align=center| | |align=center|Indestructible | ||
|- | |- | ||
|align=center| [[File: | |align=center|[[File:SMG2 Giant Wigglers.png|x70px]]<br>'''[[Big Wiggler]]''' ★ | ||
| Giant | |Giant Wigglers. They are too large to harm. Some are in a permanent state of anger that makes them faster and harder to avoid. | ||
|align=center| [[Supermassive Galaxy]] | |align=center|[[Supermassive Galaxy]] | ||
|align=center| | |align=center|Indestructible | ||
|- | |- | ||
|align=center| [[File: | |align=center|[[File:BlooperSMG.png|x70px]]<br>'''[[Blooper]]''' | ||
| | |White squids. They swim erratically when approached by Mario in an attempt to strike him. They can be defeated with a spin or a projectile [[Green Shell]]. Bloopers release a cloud of ink when defeated. | ||
|align=center| [[ | |align=center|[[Starshine Beach Galaxy]] | ||
|align=center| | |align=center|[[File:SMG Asset Sprite UI Star Bit.png|15px|link=Star Bit]]×3 | ||
|- | |- | ||
|align=center| [[File: | |align=center|[[File:SMG Bob-Omb Model.png|x70px]]<br>'''[[Bob-omb]]''' | ||
| | |Walking bombs that look like wind-up toys. There are two varieties: Bob-ombs that actively pursue Mario until they explode and legless bombs than can be picked up and thrown. The legless variety can be used to destroy cages and enemies. Jumping on a walking Bob-omb causes its legs to retract and become this second variant. | ||
|align=center| [[ | |align=center|[[Rolling Masterpiece Galaxy]]<br>[[Space Storm Galaxy]]<br>[[Rolling Coaster Galaxy]] | ||
|align=center| | |align=center|None | ||
|- | |- | ||
|align=center| [[File: | |align=center|[[File:SMG Asset Model Bomb Boo.png|x70px]]<br>'''[[Bomb Boo]]''' | ||
| | |Explosive Boos. Unlike normal Boos, Bomb Boos do not cower when faced by Mario. They charge directly towards him on sight. Spinning near a Bomb Boo causes Mario to grab onto its tongue and swing it in circles, like a {{wp|lasso}}. It detonates if it is swung into an object or wall. If Mario does not release the Bomb Boo, it is pulled in closer and explodes in his face. Bomb Boos are conjured by [[Bouldergeist]] and can be used to destroy the boss's stone armor. | ||
|align=center| [[ | |align=center|[[Boss Blitz Galaxy]] | ||
|align=center| | |align=center|None | ||
|- | |- | ||
|align=center| [[File:SMG | |align=center|[[File:SMG Asset Model Bomp.png|x70px]]<br>'''[[Bomp]]''' | ||
| | |Large, moving stones that shift in-and-out of crevices found on walls. They do not damage Mario directly, but they are positioned to push him off of platforms and solid ground. The tops of their bodies can be walked on. | ||
|align=center| [[ | |align=center|[[Fluffy Bluff Galaxy]]<br>[[Throwback Galaxy]] | ||
|align=center| | |align=center|Indestructible | ||
|- | |- | ||
|align=center| [[File: | |align=center|[[File:BooSMG.png|x70px]]<br>'''[[Boo]]''' | ||
| | |Round [[ghost]]s with long tongues. They pursue Mario when his back is turned towards them. If Mario looks directly at Boos, they sheepishly shield their their eyes and stop moving. Spinning them causes them to shift their position and forces them to phase through nearby walls, but they cannot be damaged this way. Boos are only weak to beacons of light. Some can be found underwater. Mario can transform into one via the [[Boo Mushroom]]. | ||
|align=center| [[ | |align=center|[[Haunty Halls Galaxy]]<br>[[Boo Moon Galaxy]]<br>[[Battle Belt Galaxy]]<br>[[Slimy Spring Galaxy]] | ||
|align=center| | |align=center|[[File:SMG Asset Sprite UI Coin.png|15px|link=Coin]]×1 | ||
|- | |- | ||
|align=center| [[File: | |align=center|[[File:SMG2 Boomerang Bro Artwork.png|x60px]]<br>'''[[Boomerang Bro]]''' ★ | ||
| | |Hammer Bros. relatives that wield boomerangs. The boomerangs can be swallowed by [[Yoshi]] and spitted out as a projectile. | ||
|align=center| [[ | |align=center|[[Bowser Jr.'s Boom Bunker]]<br>[[Bowser's Galaxy Generator]]<br>[[Grandmaster Galaxy]] | ||
|align=center| | |align=center|[[File:SMG Asset Sprite UI Coin.png|15px|link=Coin]]×1<br>[[File:SMG Asset Sprite UI Star Bit.png|15px|link=Star Bit]]×3 | ||
|- | |- | ||
|align=center| [[File: | |align=center|[[File:SMG2 Boulder Artwork.png|x70px]]<br>'''[[Boulder]]''' | ||
| | |Giant, rolling rocks. They are composed of cragged stones with a red gem in their centers. Boulders roll around in circles, damaging Mario on contact. Striking them in their red gem with a spin destroys them. | ||
|align=center| [[ | |align=center|[[Boulder Bowl Galaxy]] | ||
|align=center| [[File:SMG Asset Sprite UI | |align=center|[[File:SMG Asset Sprite UI Star Bit.png|15px|link=Star Bit]]×7 | ||
|- | |- | ||
|align=center| [[File: | |align=center|[[File:SMG Asset Model Bowser Statue.png|x60px]]<br>'''[[Bowser Statue]]''' ★ | ||
| | |Stone statues of [[Bowser]]. Most statues are inanimate objects that contain items, but a few have glowing eyes and shoot beams of energy that damage Mario on contact. | ||
|align=center| | |align=center|[[Bowser's Lava Lair]] | ||
|align=center| | |align=center|Indestructible | ||
|- | |- | ||
|align=center| [[File: | |align=center|[[File:SMG Asset Model Bullet Bill.png|x70px]]<br>'''[[Bullet Bill]]''' | ||
| | |Angry-looking bullets fired from [[Bill Blaster]]s. They normally fly in a straight line, but most can change course and directly target Mario if he is within their proximity. Mario can lure Bullet Bills towards cages and fences in order to destroy them. Their eyes flash with red light and their bodies twirl when they lock onto Mario. Yoshi cannot swallow Bullet Bills, but he can hold them in his mouth and fire them. The Bullet Bill explodes and damages Mario if held in Yoshi's mouth for too long. | ||
|align=center| [[ | |align=center|[[Bowser Jr.'s Fearsome Fleet]]<br>[[Fleet Glide Galaxy]]<br>[[Bowser Jr.'s Boom Bunker]]<br>[[Bowser's Galaxy Generator]]<br>[[Grandmaster Galaxy]] | ||
|align=center| | |align=center|None | ||
|- | |- | ||
|align=center| [[File:SMG Asset Model | |align=center|[[File:SMG Asset Model Cannonball.png|x70px]]<br>'''[[Cannonball]]''' | ||
| | |Round ammunition shot from enemy [[cannon]]s. They maintain a straight, horizontal trajectory and move relatively slowly. They burst when they make contact with Mario. | ||
|align=center| [[ | |align=center|[[Fleet Glide Galaxy]] | ||
|align=center| | |align=center|None | ||
|- | |- | ||
|align=center| [[File:SMG Asset Model | |align=center| [[File:SMG Asset Model Cheep Cheep.png|x70px]]<br>'''[[Cheep Cheep]]''' | ||
| | |Pudgy red fish that swim through water. In 2D areas, they swim underwater in set trajectories. In 3D areas, they swim at the surface. | ||
|align=center| [[ | |align=center|[[Cosmic Cove Galaxy]]<br>[[Starshine Beach Galaxy]]<br>[[Bowser's Gravity Gauntlet]] | ||
|align=center|[[File:SMG Asset Sprite UI Coin.png|15px|link=Coin]]×1<br>[[File:SMG Asset Sprite UI Star Bit.png|15px|link=Star Bit]]×3 | |||
|align=center| [[File:SMG Asset | |||
| | |||
| | |||
|- | |- | ||
|align=center| [[File:SMG Asset Model | |align=center|[[File:SMG Asset Model Chomp.png|x70px]]<br>'''[[Chain Chomp|Chomp]]''' | ||
| | |Toothy, metal monsters that roll in a set trajectory. A Chomp breaks when they make contact with an unmovable obstacle or another Chomp. There are diminishing returns with Chomps: if Mario stays in an area where Chomps are continuously breaking, they will drop fewer [[Star Bit]]s each time and eventually stop all together. Chomps bark like dogs when in close proximity. | ||
|align=center| [[ | |align=center|[[Flip-Swap Galaxy]]<br>[[Rightside Down Galaxy]]<br>[[Boulder Bowl Galaxy]]<br>[[Flipsville Galaxy]]<br>[[Chompworks Galaxy]] | ||
|align=center|[[File:SMG Asset Sprite UI Star Bit.png|15px|link=Star Bit]]×7 | |||
|- | |- | ||
|align=center| [[File: | |align=center|[[File:SMG2 Clampy Artwork.png|x60px]]<br>'''[[Clampy]]''' | ||
| | |A giant clam that periodically opens and shuts its {{wp|valve (mollusc)|valves}}. Items are found within them. Snapping shut with Mario inside damages him. | ||
|align=center| [[ | |align=center|[[Starshine Beach Galaxy]] | ||
|align=center| | |align=center|Indestructible | ||
|- | |- | ||
|align=center| [[File: | |align=center|[[File:Cluckboom Artwork - Super Mario Galaxy 2.png|x70px]]<br>'''[[Cluckboom]]''' | ||
| | |Red [[Coo Coo]]s that lay explosive eggs. They fly in a continuous set path, fluttering back-and-forth. They fall to the ground if shot at with [[Star Bit]]s, which leaves them dazed and open to attack. | ||
|align=center| [[ | |align=center|[[Slipsand Galaxy]] | ||
|align=center| | |align=center|[[File:SMG Asset Sprite UI Coin.png|15px|link=Coin]]×1<br>[[File:SMG Asset Sprite UI Star Bit.png|15px|link=Star Bit]]×3 | ||
|- | |- | ||
|align=center| [[File: | |align=center|[[File:SMG Asset Model Crabber (Red).png|70px]]<br>'''[[Crabber]]''' (red) | ||
| | |Aggressive, sidestepping [[crab]]s. Crabbers have hard shells that protect them from jumps and spins head-on, but their fleshy rears are exposed and can be struck. Red Crabbers directly move in to attack Mario, but move slowly. | ||
|align=center| [[ | |align=center|[[Boulder Bowl Galaxy]]<br>[[Starshine Beach Galaxy]]<br>[[Battle Belt Galaxy]] | ||
|align=center|[[File:SMG Asset Sprite UI Star Bit.png|15px|link=Star Bit]]×3 | |||
|- | |- | ||
|align=center| [[File:SMG Asset Model Crabber ( | |align=center|[[File:SMG Asset Model Crabber (Blue).png|70px]]<br>'''Crabber''' (turquoise) | ||
| | |Evasive Crabbers that frantically scuttle away from Mario. They bury themselves underground in an attempt to escape and resurface seconds after. | ||
|align=center| [[Boulder Bowl | |align=center|[[Boulder Bowl Galaxy]]<br>[[Battle Belt Galaxy]] | ||
|align=center| [[File:SMG Asset Sprite UI | |align=center|[[File:SMG Asset Sprite UI 1-Up Mushroom.png|15px|link=1-Up Mushroom]]×1 | ||
|- | |- | ||
|align=center| [[File:SMG | |align=center|[[File:SMG Dry Bones Artwork.png|x70px]]<br>'''[[Dry Bones]]''' | ||
| | |Undead Koopa Troopas. They chase down and tackle Mario on sight. Damaging a Dry Bones causes it to crumble into a pile of bones, but it is reanimated after a few seconds. There are only permenetly when lured into [[lava]]. | ||
|align=center| [[ | |align=center|[[Bowser Jr.'s Fiery Flotilla]]<br>[[Bowser's Lava Lair]]<br>[[Bowser's Gravity Gauntlet]]<br>[[Slipsand Galaxy]]<br>[[Bowser Jr.'s Boom Bunker]]<br>[[Bowser's Galaxy Generator]] | ||
|align=center| [[File:SMG Asset Sprite UI | |align=center|[[File:SMG Asset Sprite UI Star Bit.png|15px|link=Star Bit]]×3 | ||
|- | |- | ||
|align=center| [[File: | |align=center|[[File:Firearc.png|x70px]]<br>'''[[Fire Pressure]]''' | ||
| | |Mounted flamethrowers that periodically shoot balls of flame. The flames are expelled in set intervals that can be timed. | ||
|align=center| | |align=center|[[Bowser's Galaxy Generator]] | ||
|align=center| | |align=center|Indestructible | ||
|- | |- | ||
|align=center| [[File: | |align=center|[[File:SMG Asset Model Flipbug.png|70px]]<br>'''[[Flipbug]]''' | ||
| | |Skittish beetles. When Mario is in close proximity, they cowardly try to fly away before tiring out and falling to the ground, flailing helplessly. If spotted in his [[Bee Mario|bee form]], they aggressively pursue him. | ||
|align=center| [[ | |align=center|[[Yoshi Star Galaxy]]<br>[[Puzzle Plank Galaxy]]<br>[[Tall Trunk Galaxy]]<br>[[Honeyhop Galaxy]] | ||
|align=center| | |align=center|[[File:SMG Asset Sprite UI Coin.png|15px|link=Coin]]×1<br>[[File:SMG Asset Sprite UI Star Bit.png|15px|link=Star Bit]]×3 | ||
|- | |- | ||
|align=center| [[File: | |align=center|[[File:Mine Artwork SMG2.png|x70px]]<br>'''[[Floating Mine]]''' | ||
| | |Spiked bombs suspended in mid-air. They are usually fixed in one spot, but some move in vertical and horizontal trajectories in a few galaxies. Making contact with a mine causes it to explode in Mario's face, causing damage. They can be destroyed by shooting them with a Star Bit. | ||
|align=center| [[ | |align=center|[[Bowser Jr.'s Fearsome Fleet]]<br>[[Bowser Jr.'s Boom Bunker]]<br>[[Flash Black Galaxy]]<br>[[Slimy Spring Galaxy]]<br>[[Grandmaster Galaxy]] | ||
|align=center| | |align=center|[[File:SMG Asset Sprite UI Star Bit.png|15px|link=Star Bit]]×3 | ||
|- | |- | ||
|align=center| [[File:Mine Artwork | |align=center|[[File:SMG Underwater Mine Artwork.png|x70px]]<br>'''[[Floating Mine]]''' (underwater) | ||
| | |{{wp|Naval mine}}s that have eyes. They keep their eyes shut unless Mario is in close proximity. They regenerate after detonating. | ||
|align=center| [[ | |align=center|[[Cosmic Cove Galaxy]] | ||
|align=center| | |align=center|None | ||
|- | |- | ||
|align=center| [[File: | |align=center|[[File:Fuzzy Artwork - Super Mario Galaxy 2.png|x70px]]<br>'''[[Fuzzy]]''' ★ | ||
| | |Black, furry creatures. They are obstacles that move along suspended treaded paths. | ||
|align=center| [[ | |align=center|[[Honeybloom Galaxy]]<br>[[Flipsville Galaxy]] | ||
|align=center| | |align=center|[[File:SMG Asset Sprite UI Star Bit.png|15px|link=Star Bit]]×3 | ||
|- | |- | ||
|align=center| [[File: | |align=center|[[File:SMG Asset Model Big Goomba.png|x70px]]<br>'''[[Big Goomba|Giant Goomba]]''' | ||
| | |Giant Goombas. They are too large to be stomped. They can only be defeated with a spin and a kick. [[Big Paragoomba]]s become Giant Goombas if they recover from being dazed. | ||
|align=center| [[ | |align=center|[[Supermassive Galaxy]] | ||
|align=center| [[File:SMG Asset Sprite UI Star Bit.png|15px|link=Star Bit]] | |align=center|[[File:SMG Asset Sprite UI Star Bit.png|15px|link=Star Bit]]×7 | ||
|- | |- | ||
|align=center| [[File: | |align=center|[[File:GargantuaKoopa.png|x70px]]<br>'''[[Big Koopa Troopa|Giant Koopa]]''' ★ | ||
| | |Giant Koopa Troopas. Striking them with a [[Spin Drill]] defeats them. They are not vulnerable to being stomped and do not retract into their shells. | ||
|align=center| [[ | |align=center|[[Supermassive Galaxy]] | ||
|align=center| [[File:SMG Asset Sprite UI | |align=center|[[File:SMG Asset Sprite UI Coin.png|15px|link=Coin]]×1 | ||
|- | |- | ||
|align=center| [[File: | |align=center|[[File:SMG2 Gold Chomp Artwork.png|x70px]]<br>'''[[Gold Chomp]]''' | ||
| | |A rolling Chomp made of gold. | ||
|align=center| [[ | |align=center|[[Chompworks Galaxy]] | ||
|align=center| [[File:SMG Asset Sprite UI | |align=center|[[File:SMG Asset Sprite UI Power Star.png|15px|link=Power Star]]×1 | ||
|- | |- | ||
|align=center| [[File:SMG | |align=center|[[File:SMG Goomba Model.png|x70px]]<br>'''[[Goomba]]''' | ||
| | |Squat mushroom beings that rushdown Mario when he is in their line of sight. Goombas can be defeated with a single jump. Spinning or shooting them with Star Bits causes them to flip over and spin like a top. They can be kicked or stomped on in this state. Paragoombas and Jack O'Goombas become these if not fully defeated. The [[Gold Gearmo]] asks Mario to lure one to her so she can keep it as a pet. | ||
|align=center| [[Bowser | |align=center|[[Sky Station Galaxy]]<br>[[Yoshi Star Galaxy]]<br>[[Spin-Dig Galaxy]]<br>[[Fluffy Bluff Galaxy]]<br>[[Flip-Swap Galaxy]]<br>[[Rightside Down Galaxy]]<br>[[Boulder Bowl Galaxy]]<br>[[Cosmic Cove Galaxy]]<br>[[Honeybloom Galaxy]]<br>[[Tall Trunk Galaxy]]<br>[[Cloudy Court Galaxy]]<br>[[Haunty Halls Galaxy]]<br>[[Freezy Flake Galaxy]]<br>[[Rolling Masterpiece Galaxy]]<br>[[Beat Block Galaxy]]<br>[[Bowser's Gravity Gauntlet]]<br>[[Boo Moon Galaxy]]<br>[[Upside Dizzy Galaxy]]<br>[[Throwback Galaxy]]<br>[[Battle Belt Galaxy]]<br>[[Flash Black Galaxy]]<br>[[Slimy Spring Galaxy]] | ||
|align=center| [[File:SMG Asset Sprite UI Coin.png|15px|link=Coin]]×1 | |align=center|[[File:SMG Asset Sprite UI Coin.png|15px|link=Coin]]×1<br>[[File:SMG Asset Sprite UI Star Bit.png|15px|link=Star Bit]]×3 | ||
|- | |- | ||
|align=center| [[File: | |align=center|[[File:SMG Asset Model Goombeetle.png|x70px]]<br>'''[[Goombeetle]]''' | ||
| | |Goombas in metal helmets. The helmets protect them from being stomped. Spinning ito them makes them fall upside down. They can be defeated in this state. | ||
|align=center| [[ | |align=center|[[Bowser Jr.'s Fiery Flotilla]]<br>[[Beat Block Galaxy]]<br>[[Chompworks Galaxy]] | ||
|align=center| | |align=center|[[File:SMG Asset Sprite UI Coin.png|15px|link=Coin]]×1 | ||
|- | |- | ||
|align=center| [[File: | |align=center|[[File:SMG2 Asset Model Grinder.png|x70px]]<br>'''[[Grinder]]''' ★ | ||
| | |Big saw blades. They damage Mario on contact and destroy wooden platforms. | ||
|align=center| [[ | |align=center|[[Puzzle Plank Galaxy]]<br>[[Rolling Masterpiece Galaxy]] | ||
|align=center| | |align=center|Indestructible | ||
|- | |- | ||
|align=center| [[File: | |align=center|[[File:SMG Asset Model Gringill.png|x70px]]<br>'''[[Gringill]]''' | ||
| | |Giant eels. They nestle in caves and swim in open waters with snapping jaws. Nesting Gringills snap at Mario if he approaches the mouth of their caves. They can only be defeated with projectile shells. | ||
|align=center| [[ | |align=center|[[Cosmic Cove Galaxy]]<br>[[Slimy Spring Galaxy]] | ||
|align=center| [[File:SMG Asset Sprite UI | |align=center|[[File:SMG Asset Sprite UI Star Bit.png|15px|link=Star Bit]]×7 | ||
|- | |- | ||
|align=center| [[File: | |align=center|[[File:GiantGringill.png|x70px]]<br>'''Gringill''' (big) | ||
|Enormous Gringills found in underwater caves. They bite Mario if he approaches the mouth of their caves. | |||
|align=center| [[ | |align=center|[[Starshine Beach Galaxy]] | ||
|align=center| [[File:SMG Asset Sprite UI | |align=center|[[File:SMG Asset Sprite UI 1-Up Mushroom.png|15px|link=1-Up Mushroom]]×1 | ||
|- | |- | ||
|align=center| [[File: | |align=center|[[File:SMG2 Hammer Bro Artwork.png|x70px]]<br>'''[[Hammer Bro]]''' ★ | ||
| | |Helmeted [[Koopa (species)|Koopa]]s that throw hammers. They toss three hammers in succession before hoping to a new position. Yoshi can swallow a hammer and spit it back as a projectile. Jumping on a Hammer Bro leaves it incapacitated and vulnerable to attack. | ||
|align=center| [[ | |align=center|[[Bowser's Lava Lair]]<br>[[Bowser Jr.'s Fearsome Fleet]]<br>[[Bowser's Galaxy Generator]]<br>[[Grandmaster Galaxy]] | ||
|align=center| [[File:SMG Asset Sprite UI Coin.png|15px|link=Coin]]×1<br>[[File: | |align=center|[[File:SMG Asset Sprite UI Coin.png|15px|link=Coin]]×1<br>[[File:SMG Asset Sprite UI Star Bit.png|15px|link=Star Bit]]×3 | ||
|- | |- | ||
|align=center| [[File: | |align=center|[[File:JackO'GoombaSMG.png|x70px]]<br>'''[[Jack O'Goomba]]''' | ||
| | |Slow-moving Goombas wearing jack o'lanterns. They periodically leave blue flames behind them that damage Mario on contact. Jack O'Goombas can be defeated in one hit with a Ground-Pound. Spinning into one breaks the pumpkin and turns it into a regular Goomba. | ||
|align=center| [[ | |align=center|[[Haunty Halls Galaxy]]<br>[[Boo Moon Galaxy]]<br>[[Clockwork Ruins Galaxy]]<br>[[Battle Belt Galaxy]]<br>[[Flash Black Galaxy]] | ||
|align=center| [[File:SMG Asset Sprite UI Coin.png|15px|link=Coin]]×1 | |align=center|[[File:SMG Asset Sprite UI Coin.png|15px|link=Coin]]×1<br>[[File:SMG2 Asset Sprite UI Goomba.png|15px|link=Goomba]]×1 | ||
|- | |- | ||
|align=center| [[File: | |align=center|[[File:SMG2 Artwork Jammyfish.jpg|x70px]]<br>'''[[Jammyfish]]''' | ||
| | |[[Jellyfish]] creatures that idly swim in set trajectory. They damage Mario on contact, but do not actively pursue him. | ||
|align=center| [[Cosmic Cove Galaxy]] | |align=center|[[Cosmic Cove Galaxy]] | ||
|align=center| [[File:SMG Asset Sprite UI Coin.png|15px|link=Coin]]×1 | |align=center|[[File:SMG Asset Sprite UI Coin.png|15px|link=Coin]]×1 | ||
|- | |- | ||
|align=center| [[File:SMG | |align=center|[[File:SMG Jellyfish artwork.jpg|x70px]]<br>'''[[Jellyfish (Super Mario Galaxy)|Jellyfish]]''' | ||
| | |An adult Jammyfish that electrocutes Mario on contact. It idly pulsates in-place and emits a low, otherworldly sound. Jellyfish can be defeated by throwing two shells at them. The first strike turns it green, but its behavior does not chang. | ||
|align=center| [[ | |align=center|[[Cosmic Cove Galaxy]] | ||
|align=center| | |align=center|[[File:SMG Asset Sprite UI Coin.png|15px|link=Coin]]×1 | ||
|- | |- | ||
|align=center| [[File:SMG | |align=center|[[File:SMG Sentry Beam model.png|x70px]]<br>'''[[Jump Beamer]]''' | ||
| | |Spring-like robots that discharge circular shockwaves. One can be used as a [[trampoline|spring]] after jumping on its head, allowing Mario to reach great heights. | ||
|align=center| [[ | |align=center|[[Space Storm Galaxy]] | ||
|align=center| | |align=center|None | ||
|- | |- | ||
|align=center| [[File: | |align=center|[[File:SMG Koopa Troopa Models.png|x70px]]<br>'''[[Koopa Troopa]]''' | ||
| | |Green-shelled turtles. They walk back-and-forth in a straight line. When jumped on, they retreat into their shells. Mario can pick one up and use it as a projectile or as an aide for swimming. | ||
|align=center| [[ | |align=center|[[Cosmic Cove Galaxy]] | ||
|align=center| [[File: | |align=center|[[File:Green Shell - 2D shaded.png|15px|link=Green Shell]]×1 | ||
|- | |- | ||
|align=center| [[File: | |align=center|[[File:SMG2 Lakitu.png|x70px]]<br>'''[[Lakitu]]''' ★ | ||
| | |[[Lakitu's Cloud|Cloud]]-riding Koopas. They closely follow Mario and toss [[Spiny Egg]]s at him. Yoshi can eat the cloud, leaving the Lakitu helplessly flailing on the ground. When in proximity, Lakitus emit a consecutive high-pitched ringing sound. | ||
|align=center| [[ | |align=center|[[Yoshi Star Galaxy]]<br>[[Starshine Beach Galaxy]] | ||
|align=center| | |align=center|[[File:SMG Asset Sprite UI Star Bit.png|15px|link=Star Bit]]×3 | ||
|- | |- | ||
|align=center| [[File: | |align=center|[[File:SMG Asset Model Lava Bubble.png|x70px]]<br>'''[[Lava Bubble]]''' (blue) | ||
| | |Floating drops of lava that propel themselves towards Mario. They appear during the boss battle with [[King Kaliente]]. They can only be defeated by shooting them with a Star Bit and otherwise burn out on their own. | ||
|align=center| [[ | |align=center|[[Boss Blitz Galaxy]] | ||
|align=center| | |align=center|None | ||
|- | |- | ||
|align=center| [[File: | |align=center|[[File:PodobooSMG2.png|x70px]]<br>'''Lava Bubble''' (red) ★ | ||
| | |Lava Bubbles that act as obstacles. They appear between gaps in platforms that cover lava. | ||
|align=center| [[ | |align=center|[[Bowser's Lava Lair]]<br>[[Bowser's Gravity Gauntlet]]<br>[[Melty Monster Galaxy]] | ||
|align=center| | |align=center|Indestructible | ||
|- | |- | ||
|align=center| [[File:Li'l | |align=center|[[File:Li'l Brrr Artwork.png|x70px]]<br>'''[[Li'l Brr]]''' | ||
| Floating | |Floating ice enemies that freeze Mario on contact. Spinning near them neutralizes their icy cloud and forces them to the ground. This leaves them vulnerable to being kicked. | ||
|align=center| [[ | |align=center|[[Cosmic Cove Galaxy]]<br>[[Freezy Flake Galaxy]]<br>[[Battle Belt Galaxy]] | ||
|align=center| [[File: | |align=center|[[File:SMG Asset Sprite UI Coin.png|15px|link=Coin]]×1 | ||
|- | |- | ||
|align=center| [[File: | |align=center|[[File:Li'l Cinder Artwork.png|x70px]]<br>'''[[Li'l Cinder]]''' | ||
| | |Floating fire enemies that burn Mario on contact. Spinning near them extinguishes their flame and leave them vulnerable to being kicked. Extinguished Li'l Cinders hop towards the nearest pool of lava to reignite. | ||
|align=center| | |align=center|[[Bowser's Lava Lair]]<br>[[Freezy Flake Galaxy]]<br>[[Melty Monster Galaxy]]<br>[[Battle Belt Galaxy]]<br>[[Mario Squared Galaxy]] | ||
|align=center| [[File: | |align=center|[[File:SMS Asset Sprite UI Coin.png|15px|link=Coin]]×1 | ||
|- | |- | ||
|align=center| [[File: | |align=center|[[File:Magikoopa Artwork - Super Mario Galaxy 2.png|x70px]]<br>'''[[Magikoopa]]''' | ||
| | |Robed Koopas that can teleport. They can summon small enemies or shoot magical projectiles at Mario with their wand. Shooting a Magikoopa with a Star Bit does not daze it, but it does make it stall. | ||
|align=center| [[ | |align=center|[[Yoshi Star Galaxy]]<br>[[Bowser Jr.'s Fiery Flotilla]]<br>[[Bowser's Lava Lair]]<br>[[Bowser's Gravity Gauntlet]]<br>[[Slipsand Galaxy]]<br>[[Bowser's Galaxy Generator]] | ||
|align=center| [[File:SMG Asset Sprite UI Coin.png|15px|link=Coin]]×1 | |align=center|[[File:SMG Asset Sprite UI Coin.png|15px|link=Coin]]×1 | ||
|- | |- | ||
|align=center| [[File: | |align=center|[[File:SMG Asset Model Mandibug.png|x70px]]<br>'''[[Mandibug]]''' | ||
| | |Large stink bug creatures. They quickly charge towards Mario in a straight line after making visual contact, snapping at him with their {{wp|Mandible (insect mouthpart)|mandibles}}. They can be defeated by Ground-Pounding their abdomens. Mandibugs cower in fear if Mario stands on their back but eventually shake him off. | ||
|align=center| [[ | |align=center|[[Puzzle Plank Galaxy]] | ||
|align=center| | |align=center|[[File:SMG Asset Sprite UI Coin.png|15px|link=Coin]]×1 | ||
|- | |- | ||
|align=center| [[File: | |align=center|[[File:SMG2 Asset Model Big Boo.png|x60px]]<br>'''[[Big Boo|Mega Boo]]''' | ||
| | |Giant Boos. They appear once Mario crosses a specific corridor and slowly follow him. They cannot be defeated. | ||
|align=center| [[ | |align=center|[[Haunty Halls Galaxy]] | ||
|align=center| | |align=center|Indestructible | ||
|- | |- | ||
|align=center| [[File: | |align=center|[[File:SMG Asset Model Meteor.png|x70px]]<br>'''[[Meteor]]''' | ||
| | |Fiery space rocks. They typically appear raining from the sky. | ||
|align=center| [[ | |align=center|[[Hightail Falls Galaxy]]<br>[[Shiverburn Galaxy]] | ||
|align=center| | |align=center|None | ||
|- | |- | ||
|align=center| [[File:SMG2 Micro Mecha Bowser Artwork.png|x70px]]<br>'''[[Micro Mecha-Bowser]]''' | |align=center| [[File:SMG2 Micro Mecha Bowser Artwork.png|x70px]]<br>'''[[Micro Mecha-Bowser]]''' | ||
| Mechanical Koopas that breath fire. They can only be defeated with a Ground-Pound. Spinning them causes their heads to swing back and briefly delays their fire breath attack. | |Mechanical Koopas that breath fire. They can only be defeated with a Ground-Pound. Spinning them causes their heads to swing back and briefly delays their fire breath attack. | ||
|align=center| [[Cosmic Cove Galaxy]]<br>[[Flipsville Galaxy]] | |align=center|[[Cosmic Cove Galaxy]]<br>[[Flipsville Galaxy]] | ||
|align=center| [[File:SMG Asset Sprite UI Coin.png|15px|link=Coin]]×1 | |align=center|[[File:SMG Asset Sprite UI Coin.png|15px|link=Coin]]×1 | ||
|- | |||
|align=center|[[File:Microgoomba SMG.png|x70px]]<br>'''[[Mini Goomba]]''' | |||
|Diminutive and weak Goombas. Like normal-sized Goombas, they charge towards Mario if he is near. They can can be defeated with a single spin. | |||
|align=center|[[Sky Station Galaxy]]<br>[[Bowser Jr.'s Fiery Flotilla]]<br>[[Cloudy Court Galaxy]]<br>[[Battle Belt Galaxy]]<br>[[Rolling Coaster Galaxy]] | |||
|align=center|[[File:SMG Asset Sprite UI Star Bit.png|15px|link=Star Bit]]×1 | |||
|- | |- | ||
|align=center| [[File:SMG Asset Model Mini Wanwan.png|x70px]]<br>'''[[Mini Wanwan]]''' | |align=center|[[File:SMG Asset Model Mini Wanwan.png|x70px]]<br>'''[[Mini Wanwan]]''' | ||
| Small Chomps that roll in circles. Mini Wanwans cannot be damaged directly: they are only defeated if a rubbery bulb plant is spun into them. | |Small Chomps that roll in circles. Mini Wanwans cannot be damaged directly: they are only defeated if a rubbery bulb plant is spun into them. | ||
|align=center| [[Sky Station Galaxy]]<br>[[Chompworks Galaxy]] | |align=center|[[Sky Station Galaxy]]<br>[[Chompworks Galaxy]] | ||
|align=center| [[File:SMG Asset Sprite UI Star Bit.png|15px|link=Star Bit]]×3<br>[[File:SMG Asset Model Key.png|15px|link=Key]]×1 | |align=center|[[File:SMG Asset Sprite UI Star Bit.png|15px|link=Star Bit]]×3<br>[[File:SMG Asset Model Key.png|15px|link=Key]]×1 | ||
|- | |- | ||
|align=center| [[File:SMG Asset Model Octoguy.png|x70px]]<br>'''[[Octoguy]]''' | |align=center|[[File:SMG Asset Model Octoguy.png|x70px]]<br>'''[[Octoguy]]''' | ||
| Small Octoombas that shuffle backwards from Mario when approached. They periodically stop to shoot a rock at him from their siphons. They often appear in large groups. | |Small Octoombas that shuffle backwards from Mario when approached. They periodically stop to shoot a rock at him from their siphons. They often appear in large groups. | ||
|align=center| [[Boulder Bowl Galaxy]]<br>[[Honeyhop Galaxy]]<br>[[Shiverburn Galaxy]] | |align=center|[[Boulder Bowl Galaxy]]<br>[[Honeyhop Galaxy]]<br>[[Shiverburn Galaxy]] | ||
|align=center| [[File:SMG Asset Sprite UI Coin.png|15px|link=Coin]]×1<br>[[File:SMG Asset Sprite UI Star Bit.png|15px|link=Star Bit]]×3 | |align=center|[[File:SMG Asset Sprite UI Coin.png|15px|link=Coin]]×1<br>[[File:SMG Asset Sprite UI Star Bit.png|15px|link=Star Bit]]×3 | ||
|- | |- | ||
|align=center| [[File:SMG Asset Model Octooomba.png|x70px]]<br>'''[[Octoomba]]''' | |align=center|[[File:SMG Asset Model Octooomba.png|x70px]]<br>'''[[Octoomba]]''' | ||
| Goomba-like octopus | |Goomba-like octopus aliens. They sidestep back-and-forth along a set back and keep their eyes locked onto Mario when he is nearby. If in close proximity, they fire a single rock from their siphons. | ||
|align=center| [[Sky Station Galaxy]]<br>[[Yoshi Star Galaxy]]<br>[[Fluffy Bluff Galaxy]]<br>[[Flip-Swap Galaxy]]<br>[[Puzzle Plank Galaxy]]<br>[[Beat Block Galaxy]]<br>[[Flipsville Galaxy]]<br>[[Chompworks Galaxy]]<br>[[Honeyhop Galaxy]]<br>[[Shiverburn Galaxy]]<br>[[Melty Monster Galaxy]]<br>[[Clockwork Ruins Galaxy]]<br>[[Flash Black Galaxy]]<br>[[Bowser's Galaxy Generator]]<br>[[Stone Cyclone Galaxy]] | |align=center|[[Sky Station Galaxy]]<br>[[Yoshi Star Galaxy]]<br>[[Fluffy Bluff Galaxy]]<br>[[Flip-Swap Galaxy]]<br>[[Puzzle Plank Galaxy]]<br>[[Beat Block Galaxy]]<br>[[Flipsville Galaxy]]<br>[[Chompworks Galaxy]]<br>[[Honeyhop Galaxy]]<br>[[Shiverburn Galaxy]]<br>[[Melty Monster Galaxy]]<br>[[Clockwork Ruins Galaxy]]<br>[[Flash Black Galaxy]]<br>[[Bowser's Galaxy Generator]]<br>[[Stone Cyclone Galaxy]] | ||
|align=center| [[File:SMG Asset Sprite UI Coin.png|15px|link=Coin]]×1<br>[[File:SMG Asset Sprite UI Star Bit.png|15px|link=Star Bit]]×3 | |align=center|[[File:SMG Asset Sprite UI Coin.png|15px|link=Coin]]×1<br>[[File:SMG Asset Sprite UI Star Bit.png|15px|link=Star Bit]]×3 | ||
|- | |- | ||
|align=center| [[File:SMG Octopus Artwork.png|x70px]]<br>'''[[Ota Rock]]''' | |align=center|[[File:SMG Octopus Artwork.png|x70px]]<br>'''[[Ota Rock]]''' | ||
| Large, stationary | |Large, stationary aliens that hide in [[barrel]]s. They shoot [[coconut]]s<ref name="melon" group="note">Any mentioning of coconuts is equally applicable to [[watermelon]]s, which replace all coconuts if the player accumulates 9999 [[Star Bit]]s.</ref> and flaming rocks at Mario from their siphons. The coconuts can be deflected back at them if spun against. Ota Rocks are always found in pairs or more. | ||
|align=center| [[Shiverburn Galaxy]]<br>[[Grandmaster Galaxy]] | |align=center|[[Shiverburn Galaxy]]<br>[[Grandmaster Galaxy]] | ||
|align=center| None | |align=center|None | ||
|- | |- | ||
|align=center| [[File:SMG2 Paragoomba.png|x70px]]<br>'''[[Paragoomba]]''' ★ | |align=center|[[File:SMG2 Paragoomba.png|x70px]]<br>'''[[Paragoomba]]''' ★ | ||
| Winged Goombas. They fly back-and-forth in set trajectories. Spinning one causes its wings to fall off and reverts it back to a normal Goomba. | |Winged Goombas. They fly back-and-forth in set trajectories. Spinning one causes its wings to fall off and reverts it back to a normal Goomba. | ||
|align=center| [[Sky Station Galaxy]]<br>[[Yoshi Star Galaxy]]<br>[[Spin-Dig Galaxy]]<br>[[Rightside Down Galaxy]]<br>[[Hightail Falls Galaxy]]<br>[[Cosmic Cove Galaxy]]<br>[[Tall Trunk Galaxy]]<br>[[Cloudy Court Galaxy]]<br>[[Chompworks Galaxy]]<br>[[Upside Dizzy Galaxy]]<br>[[Throwback Galaxy]]<br>[[Flash Black Galaxy]]<br>[[Slimy Spring Galaxy]]<br>[[Grandmaster Galaxy]] | |align=center|[[Sky Station Galaxy]]<br>[[Yoshi Star Galaxy]]<br>[[Spin-Dig Galaxy]]<br>[[Rightside Down Galaxy]]<br>[[Hightail Falls Galaxy]]<br>[[Cosmic Cove Galaxy]]<br>[[Tall Trunk Galaxy]]<br>[[Cloudy Court Galaxy]]<br>[[Chompworks Galaxy]]<br>[[Upside Dizzy Galaxy]]<br>[[Throwback Galaxy]]<br>[[Flash Black Galaxy]]<br>[[Slimy Spring Galaxy]]<br>[[Grandmaster Galaxy]] | ||
|align=center| [[File:SMG Asset Sprite UI Coin.png|15px|link=Coin]]×1<br>[[File:SMG Asset Sprite UI Star Bit.png|15px|link=Star Bit]]×3<br>[[File:SMG2 Asset Sprite UI Goomba.png|15px|link=Goomba]]×1 | |align=center|[[File:SMG Asset Sprite UI Coin.png|15px|link=Coin]]×1<br>[[File:SMG Asset Sprite UI Star Bit.png|15px|link=Star Bit]]×3<br>[[File:SMG2 Asset Sprite UI Goomba.png|15px|link=Goomba]]×1 | ||
|- | |- | ||
|align=center| [[File:SMG2 Petapeta.png|x70px]]<br>'''[[Petapeta]]''' | |align=center|[[File:SMG2 Petapeta.png|x70px]]<br>'''[[Petapeta]]''' | ||
| Sandal-wearing sack creatures that turn invisible when moving. Petapetas are harmless, but can be defeated to recover a large number of Star Bits. Their movement can be tracked by following their footsteps. | |Sandal-wearing sack creatures that turn invisible when moving. Petapetas are harmless, but can be defeated to recover a large number of Star Bits. Their movement can be tracked by following their footsteps. | ||
|align=center| [[Starshine Beach Galaxy]] | |align=center|[[Starshine Beach Galaxy]] | ||
|align=center| [[File:SMG Asset Sprite UI Star Bit.png|15px|link=Star Bit]]×20 | |align=center|[[File:SMG Asset Sprite UI Star Bit.png|15px|link=Star Bit]]×20 | ||
|- | |- | ||
|align=center| [[File:SMG Piranha Plant Artwork.png|x70px]]<br>'''[[Piranha Plant]]''' | |align=center|[[File:SMG Piranha Plant Artwork.png|x70px]]<br>'''[[Piranha Plant]]''' | ||
| Carnivorous plants that lunge out at Mario with snapping jaws if approached. They scoffingly laugh if they make a successful bite. [[Sproutle Vine]]s sometimes grow from where a Piranha Plant is defeated. They idly keep their heads raised skyward when unapproached. | |Carnivorous plants that lunge out at Mario with snapping jaws if approached. They scoffingly laugh if they make a successful bite. [[Sproutle Vine]]s sometimes grow from where a Piranha Plant is defeated. They idly keep their heads raised skyward when unapproached. | ||
|align=center| [[Sky Station Galaxy]]<br>[[Yoshi Star Galaxy]]<br>[[Spin-Dig Galaxy]]<br>[[Fluffy Bluff Galaxy]]<br>[[Tall Trunk Galaxy]]<br>[[Honeyhop Galaxy]]<br>[[Throwback Galaxy]] | |align=center|[[Sky Station Galaxy]]<br>[[Yoshi Star Galaxy]]<br>[[Spin-Dig Galaxy]]<br>[[Fluffy Bluff Galaxy]]<br>[[Tall Trunk Galaxy]]<br>[[Honeyhop Galaxy]]<br>[[Throwback Galaxy]] | ||
|align=center| [[File:SMG Asset Sprite UI Coin.png|15px|link=Coin]]×1<br>[[File:SMG Asset Sprite UI Star Bit.png|15px|link=Star Bit]]×3<br>[[File:SMG Asset Model Sproutle Vine (Segment).png|15px|link=Sproutle Vine]]×1 | |align=center|[[File:SMG Asset Sprite UI Coin.png|15px|link=Coin]]×1<br>[[File:SMG Asset Sprite UI Star Bit.png|15px|link=Star Bit]]×3<br>[[File:SMG Asset Model Sproutle Vine (Segment).png|15px|link=Sproutle Vine]]×1 | ||
|- | |- | ||
|align=center| [[File:SMG2 Pokey Sprout Artwork.png|x70px]]<br>'''[[Pokey Head]]''' | |align=center|[[File:SMG2 Pokey Sprout Artwork.png|x70px]]<br>'''[[Pokey Head]]''' | ||
| Disembodied [[Pokey]]s. They are buried with only their flowers visible. When approached by Mario, they burst out of the ground and start hopping after them. A Pokey Head gleefully bounces in-place if it successfully strikes Mario. | |Disembodied [[Pokey]]s. They are buried with only their flowers visible. When approached by Mario, they burst out of the ground and start hopping after them. A Pokey Head gleefully bounces in-place if it successfully strikes Mario. | ||
|align=center| [[Slipsand Galaxy]] | |align=center|[[Slipsand Galaxy]] | ||
|align=center| [[File:SMG Asset Sprite UI Coin.png|15px|link=Coin]]×1<br>[[File:SMG Asset Sprite UI Star Bit.png|15px|link=Star Bit]]×3 | |align=center|[[File:SMG Asset Sprite UI Coin.png|15px|link=Coin]]×1<br>[[File:SMG Asset Sprite UI Star Bit.png|15px|link=Star Bit]]×3 | ||
|- | |- | ||
|align=center| [[File:SMG Asset Model Prickly Thorn Plant.png|x70px]]<br>'''[[Thorny flower|Prickly plant]]''' | |align=center|[[File:SMG Asset Model Prickly Thorn Plant.png|x70px]]<br>'''[[Thorny flower|Prickly plant]]''' | ||
| Idle plants with sharp, needle-like flowers. They damage Mario on contact. Destroying them without a power-up usually requires striking them with another object, such as a coconut or [[rubbery bulb|rubbery bulb plant]]. They can be eaten by Yoshi. | |Idle plants with sharp, needle-like flowers. They damage Mario on contact. Destroying them without a power-up usually requires striking them with another object, such as a coconut or [[rubbery bulb|rubbery bulb plant]]. They can be eaten by Yoshi. | ||
|align=center| [[Yoshi Star Galaxy]]<br>[[Boulder Bowl Galaxy]]<br>[[Cosmic Cove Galaxy]]<br>[[Tall Trunk Galaxy]]<br>[[Cloudy Court Galaxy]]<br>[[Slipsand Galaxy]]<br>[[Melty Monster Galaxy]]<br>[[Boss Blitz Galaxy]] | |align=center|[[Yoshi Star Galaxy]]<br>[[Boulder Bowl Galaxy]]<br>[[Cosmic Cove Galaxy]]<br>[[Tall Trunk Galaxy]]<br>[[Cloudy Court Galaxy]]<br>[[Slipsand Galaxy]]<br>[[Melty Monster Galaxy]]<br>[[Boss Blitz Galaxy]] | ||
|align=center| [[File:SMG Asset Sprite UI Star Bit.png|15px|link=Star Bit]]×3<br>[[File:Sling Star.png|15px|link=Sling Star]]×1 | |align=center|[[File:SMG Asset Sprite UI Star Bit.png|15px|link=Star Bit]]×3<br>[[File:Sling Star.png|15px|link=Sling Star]]×1 | ||
|- | |- | ||
|align=center| [[File:SMG Ring Beam model.png|x70px]]<br>'''[[Ring Beamer]]''' | |align=center|[[File:SMG Ring Beam model.png|x70px]]<br>'''[[Ring Beamer]]''' | ||
| Domed machines covered in spikes that emit circular shockwaves. The shockwaves cause electrical damage. They cannot be damaged or halted by any means. Unlike Ball Beamers, attempting to jump on Ring Beamers damages him. | |Domed machines covered in spikes that emit circular shockwaves. The shockwaves cause electrical damage. They cannot be damaged or halted by any means. Unlike Ball Beamers, attempting to jump on Ring Beamers damages him. | ||
|align=center| [[Shiverburn Galaxy]]<br>[[Grandmaster Galaxy]] | |align=center|[[Shiverburn Galaxy]]<br>[[Grandmaster Galaxy]] | ||
|align=center| Indestructible | |align=center|Indestructible | ||
|- | |- | ||
|align=center| [[File:LaserRobot.png|x70px]]<br>'''[[Sentry Beam]]''' | |align=center|[[File:LaserRobot.png|x70px]]<br>'''[[Sentry Beam]]''' | ||
| Stationary robots suspended above ground via a propeller. They shoot electric lasers from their maw. Sentry Beams are completely invincible, although standing on top of them temporarily prevent it from firing. They follow Mario's position when he is close. | |Stationary robots suspended above ground via a propeller. They shoot electric lasers from their maw. Sentry Beams are completely invincible, although standing on top of them temporarily prevent it from firing. They follow Mario's position when he is close. | ||
|align=center| [[Mario Squared Galaxy]]<br>[[Grandmaster Galaxy]] | |align=center|[[Mario Squared Galaxy]]<br>[[Grandmaster Galaxy]] | ||
|align=center| Indestructible | |align=center|Indestructible | ||
|- | |- | ||
|align=center| [[File:Skeeterartwork SMG2.png|x70px]]<br>'''[[Skeeter]]''' ★ | |align=center|[[File:Skeeterartwork SMG2.png|x70px]]<br>'''[[Skeeter]]''' ★ | ||
| Insect enemies that look like {{wp|Gerridae|water striders}}. They skim on the surface on the water and make short bursts of movement by contracting their legs. | |Insect enemies that look like {{wp|Gerridae|water striders}}. They skim on the surface on the water and make short bursts of movement by contracting their legs. | ||
|align=center| [[Cosmic Cove Galaxy]]<br>[[Starshine Beach Galaxy]]<br>[[Throwback Galaxy]] | |align=center|[[Cosmic Cove Galaxy]]<br>[[Starshine Beach Galaxy]]<br>[[Throwback Galaxy]] | ||
|align=center| [[File:SMG Asset Sprite UI Coin.png|15px|link=Coin]]×1<br>[[File:SMG Asset Sprite UI Star Bit.png|15px|link=Star Bit]]×3 | |align=center|[[File:SMG Asset Sprite UI Coin.png|15px|link=Coin]]×1<br>[[File:SMG Asset Sprite UI Star Bit.png|15px|link=Star Bit]]×3 | ||
|- | |- | ||
|align=center| [[File:SMG Asset Model Slurple.png|x70px]]<br>'''[[Slurple]]''' | |align=center|[[File:SMG Asset Model Slurple.png|x70px]]<br>'''[[Slurple]]''' | ||
| Leech-like | |Leech-like parasites. They latch onto Mario and gradually deplete life meter. Slurples are easily disposed of with a spin. | ||
|align=center| [[Puzzle Plank Galaxy]]<br>[[Upside Dizzy Galaxy]] | |align=center|[[Puzzle Plank Galaxy]]<br>[[Upside Dizzy Galaxy]] | ||
|align=center| [[File:SMG Asset Sprite UI Star Bit.png|15px|link=Star Bit]]×1 | |align=center|[[File:SMG Asset Sprite UI Star Bit.png|15px|link=Star Bit]]×1 | ||
|- | |- | ||
|align=center| [[File:SMG2 Asset Model Spiny.png|x70px]]<br>'''[[Spiny]]''' ★ | |align=center|[[File:SMG2 Asset Model Spiny.png|x70px]]<br>'''[[Spiny]]''' ★ | ||
| Stout Koopas with spikes on their carrapaces. The spikes protect them from being jumped on and damage Mario on contact. They charge towards him if he is in proximity. Yoshi cannot swallow Spinies, but he can shoot them out as projectile Spiny Eggs. | |Stout Koopas with spikes on their carrapaces. The spikes protect them from being jumped on and damage Mario on contact. They charge towards him if he is in proximity. Yoshi cannot swallow Spinies, but he can shoot them out as projectile Spiny Eggs. | ||
|align=center| [[Yoshi Star Galaxy]]<br>[[Tall Trunk Galaxy]]<br>[[Starshine Beach Galaxy]] | |align=center|[[Yoshi Star Galaxy]]<br>[[Tall Trunk Galaxy]]<br>[[Starshine Beach Galaxy]] | ||
|align=center| [[File:Spiny Egg SMB artwork.jpg|15px|link=Spiny Egg]]×1 | |align=center|[[File:Spiny Egg SMB artwork.jpg|15px|link=Spiny Egg]]×1 | ||
|- | |- | ||
|align=center| [[File:SMG Asset Model Spiny Cheep Cheep.png|x70px]]<br>[[File:SMG Spiny Cheep Cheep Deflated Model.png|x42px]]<br>'''[[Spiny Cheep Cheep]]''' | |align=center|[[File:SMG Asset Model Spiny Cheep Cheep.png|x70px]]<br>[[File:SMG Spiny Cheep Cheep Deflated Model.png|x42px]]<br>'''[[Spiny Cheep Cheep]]''' | ||
| Cheep Cheeps that look like pufferfish. They protract their spines and charge towards Mario on sight. | |Cheep Cheeps that look like pufferfish. They protract their spines and charge towards Mario on sight. | ||
|align=center| [[Cosmic Cove Galaxy]] | |align=center|[[Cosmic Cove Galaxy]] | ||
|align=center| [[File:SMG Asset Sprite UI Star Bit.png|15px|link=Star Bit]]×7 | |align=center|[[File:SMG Asset Sprite UI Star Bit.png|15px|link=Star Bit]]×7 | ||
|- | |- | ||
|align=center| [[File:SMG2 Asset Model Spiny Egg.png|x70px]]<br>'''[[Spiny Egg]]''' ★ | |align=center|[[File:SMG2 Asset Model Spiny Egg.png|x70px]]<br>'''[[Spiny Egg]]''' ★ | ||
| The retracted form of Spinies. They are tossed by [[Lakitu]]s and spit out as projectiles by Yoshi. Direct contact damages Mario. | |The retracted form of Spinies. They are tossed by [[Lakitu]]s and spit out as projectiles by Yoshi. Direct contact damages Mario. | ||
|align=center| [[Yoshi Star Galaxy]]<br>[[Starshine Beach Galaxy]] | |align=center|[[Yoshi Star Galaxy]]<br>[[Starshine Beach Galaxy]] | ||
|align=center| None | |align=center|None | ||
|- | |- | ||
|align=center| [[File:SMG Spiny Piranha Render.png|x70px]]<br>'''[[Spiny Piranha Plant]]''' | |align=center|[[File:SMG Spiny Piranha Render.png|x70px]]<br>'''[[Spiny Piranha Plant]]''' | ||
| Giant Piranha Plants that forcefully slam their heads into the ground. They can be defeated by jumping on their heads, or stunned by spinning into them. | |Giant Piranha Plants that forcefully slam their heads into the ground. They can be defeated by jumping on their heads, or stunned by spinning into them. | ||
|align=center| [[Rightside Down Galaxy]]<br>[[Throwback Galaxy]] | |align=center|[[Rightside Down Galaxy]]<br>[[Throwback Galaxy]] | ||
|align=center| [[File:SMG Asset Sprite UI Star Bit.png|15px|link=Star Bit]]×7 | |align=center|[[File:SMG Asset Sprite UI Star Bit.png|15px|link=Star Bit]]×7 | ||
|- | |- | ||
|align=center| [[File:SMG2 Spoing.png|x70px]]<br>'''[[Spoing]]''' | |align=center|[[File:SMG2 Spoing.png|x70px]]<br>'''[[Spoing]]''' | ||
| Spiders that hop up-and-down in-place. They stop jumping and laugh if they successfully damage Mario. | |Spiders that hop up-and-down in-place. They stop jumping and laugh if they successfully damage Mario. | ||
|align=center| [[Tall Trunk Galaxy]]<br>[[Flip-Out Galaxy]] | |align=center|[[Tall Trunk Galaxy]]<br>[[Flip-Out Galaxy]] | ||
|align=center| [[File:SMG Asset Sprite UI Coin.png|15px|link=Coin]]×1<br>[[File:SMG Asset Sprite UI Star Bit.png|15px|link=Star Bit]]×3 | |align=center|[[File:SMG Asset Sprite UI Coin.png|15px|link=Coin]]×1<br>[[File:SMG Asset Sprite UI Star Bit.png|15px|link=Star Bit]]×3 | ||
|- | |- | ||
|align=center| [[File:SMG2 Sprangler.png|x70px]]<br>'''[[Sprangler]]''' | |align=center|[[File:SMG2 Sprangler.png|x70px]]<br>'''[[Sprangler]]''' | ||
| | |Spiders that hang from silk. They sway back-and-forth in an attempt to strike Mario. Spranglers become briefly incapacitated if spun into and can be kicked to defeat them. They otherwise can be jumped on. | ||
|align=center| [[Yoshi Star Galaxy]]<br>[[Tall Trunk Galaxy]] | |align=center|[[Yoshi Star Galaxy]]<br>[[Tall Trunk Galaxy]] | ||
|align=center| [[File:SMG Asset Sprite UI Coin.png|15px|link=Coin]]×1<br>[[File:SMG Asset Sprite UI Star Bit.png|15px|link=Star Bit]]×3 | |align=center|[[File:SMG Asset Sprite UI Coin.png|15px|link=Coin]]×1<br>[[File:SMG Asset Sprite UI Star Bit.png|15px|link=Star Bit]]×3 | ||
|- | |- | ||
|align=center| [[File:Spring Topman.png|x70px]]<br>'''[[Spring Topman]]''' | |align=center|[[File:Spring Topman.png|x70px]]<br>'''[[Spring Topman]]''' | ||
| Green Topmen. Colliding with Mario causes him to spin out of control. Jumping on one's head leaves it stunned and exposes the spring underneath its head. It can be jumped on while in this state to reach great heights. Some Spring Topmen can produce single Topminis. | |Green Topmen. Colliding with Mario causes him to spin out of control. Jumping on one's head leaves it stunned and exposes the spring underneath its head. It can be jumped on while in this state to reach great heights. Some Spring Topmen can produce single Topminis. | ||
|align=center| [[Space Storm Galaxy]] | |align=center|[[Space Storm Galaxy]] | ||
|align=center| None | |align=center|None | ||
|- | |- | ||
|align=center| [[File:SMG2 Super Piranha Plant.png|x70px]]<br>'''[[Big Piranha Plant|Super Piranha Plant]]''' ★ | |align=center|[[File:SMG2 Super Piranha Plant.png|x70px]]<br>'''[[Big Piranha Plant|Super Piranha Plant]]''' ★ | ||
| Giant Piranha Plants. They rest in giant [[Warp Pipe| | |Giant Piranha Plants. They rest in giant [[Warp Pipe|pipe]]s filled with soil. They burst from the soil in set intervals that can be timed. | ||
|align=center| [[Supermassive Galaxy]] | |align=center|[[Supermassive Galaxy]] | ||
|align=center| Indestructible | |align=center|Indestructible | ||
|- | |- | ||
|align=center| [[File:SMG Thwomp Alternate Render.png|x70px]]<br>'''[[Thwomp]]''' | |align=center|[[File:SMG Thwomp Alternate Render.png|x70px]]<br>'''[[Thwomp]]''' | ||
| Giant, grimacing stones. They hang suspended in mid-air, but periodically slam down towards the ground with violent force. Crushing Mario completely depletes his [[Health Meter|life meter]]. The tops and sides of their bodies can be used as platforms and walls, respectively. | |Giant, grimacing stones. They hang suspended in mid-air, but periodically slam down towards the ground with violent force. Crushing Mario completely depletes his [[Health Meter|life meter]]. The tops and sides of their bodies can be used as platforms and walls, respectively. | ||
|align=center| [[Rightside Down Galaxy]]<br>[[Bowser Jr.'s Fiery Flotilla]]<br>[[Space Storm Galaxy]]<br>[[Fleet Glide Galaxy]]<br>[[Throwback Galaxy]]<br>[[Stone Cyclone Galaxy]] | |align=center|[[Rightside Down Galaxy]]<br>[[Bowser Jr.'s Fiery Flotilla]]<br>[[Space Storm Galaxy]]<br>[[Fleet Glide Galaxy]]<br>[[Throwback Galaxy]]<br>[[Stone Cyclone Galaxy]] | ||
|align=center| Indestructible | |align=center|Indestructible | ||
|- | |- | ||
|align=center| [[File:SMG Asset Model Spiky Topman.png|x70px]]<br>'''[[Spiky Topman|Topman]]''' | |align=center|[[File:SMG Asset Model Spiky Topman.png|x70px]]<br>'''[[Spiky Topman|Topman]]''' | ||
| Top enemies that spin into Mario. Topmen do not directly harm him, but they can push him into hazards or off of a platform. The spike on their heads protects them from being stomped on and damage him on contact. Topmen can only be defeated if knocked into an electric rail or off the side of a platform. The [[Silver Gearmo]] asks Mario to lure her one so she can keep it as a pet. | |Top enemies that spin into Mario. Topmen do not directly harm him, but they can push him into hazards or off of a platform. The spike on their heads protects them from being stomped on and damage him on contact. Topmen can only be defeated if knocked into an electric rail or off the side of a platform. The [[Silver Gearmo]] asks Mario to lure her one so she can keep it as a pet. | ||
|align=center| [[Space Storm Galaxy]] | |align=center|[[Space Storm Galaxy]] | ||
|align=center| [[File:SMG Asset Sprite UI Coin.png|15px|link=Coin]]×1 | |align=center|[[File:SMG Asset Sprite UI Coin.png|15px|link=Coin]]×1 | ||
|- | |- | ||
|align=center| [[File:SMG Asset Model Topmini.png|x70px]]<br>'''[[Topmini]]''' | |align=center|[[File:SMG Asset Model Topmini.png|x70px]]<br>'''[[Topmini]]''' | ||
| Tiny Topmen that can be defeated by spinning into them. Topminis are incapable of damaging Mario and can only push them around. There are dark voids continuously produce Topminis. | |Tiny Topmen that can be defeated by spinning into them. Topminis are incapable of damaging Mario and can only push them around. There are dark voids continuously produce Topminis. | ||
|align=center| [[Space Storm Galaxy]] | |align=center|[[Space Storm Galaxy]] | ||
|align=center| [[File:SMG Asset Sprite UI Star Bit.png|15px|link=Star Bit]]×1 | |align=center|[[File:SMG Asset Sprite UI Star Bit.png|15px|link=Star Bit]]×1 | ||
|- | |- | ||
|align=center| [[File:SMG Asset Model Tox Box.png|x70px]]<br> | |align=center|[[File:SMG Asset Model Tox Box.png|x70px]]<br>'''[[Tox Box]]''' | ||
| Giant, solemn-looking boxes made out of stone. They roll around in set trajectories. One of their sides is open and can be safely stood under. All other sides crush Mario. Tox Boxes are the same width of the paths they travel, making them difficult to avoid. | |Giant, solemn-looking boxes made out of stone. They roll around in set trajectories. One of their sides is open and can be safely stood under. All other sides crush Mario. Tox Boxes are the same width of the paths they travel, making them difficult to avoid. | ||
|align=center| [[Stone Cyclone Galaxy]] | |align=center|[[Stone Cyclone Galaxy]] | ||
|align=center| Indestructible | |align=center|Indestructible | ||
|- | |- | ||
|align=center| [[File:SMG Asset Model Undergrunt.png|x70px]]<br>'''[[Undergrunt]]''' | |align=center|[[File:SMG Asset Model Undergrunt.png|x70px]]<br>'''[[Undergrunt]]''' | ||
| Burrowing [[Monty (Super Mario Galaxy)| | |Burrowing [[Monty (Super Mario Galaxy)|Monty]]s. They leave trails of disturbed dirt as they burrow through the ground. They can be defeated by ground-pounding approximal earth. This forces them to the surface dazed, leaving them vulnerable to being spun. Their spiked helmets damage Mario if he tries to jump on them. The helmets protrude from the ground as the Undergrunts burrow, enabling the player to track their movements. | ||
|align=center| [[Battle Belt Galaxy]] | |align=center|[[Battle Belt Galaxy]] | ||
|align=center| [[File:SMG Asset Sprite UI Star Bit.png|15px|link=Star Bit]]×3 | |align=center|[[File:SMG Asset Sprite UI Star Bit.png|15px|link=Star Bit]]×3 | ||
|- | |- | ||
|align=center| [[File:SMG2 Undergrunt Gunner.png|x70px]]<br>'''[[Undergrunt Gunner]]''' ★ | |align=center|[[File:SMG2 Undergrunt Gunner.png|x70px]]<br>'''[[Undergrunt Gunner]]''' ★ | ||
| Blue Undergrunts piloting hovercrafts. Each hovercraft is equipped with Bill Blaster. They can only be defeated if struck by Bullet Bills themselves. | |Blue Undergrunts piloting hovercrafts. Each hovercraft is equipped with Bill Blaster. They can only be defeated if struck by Bullet Bills themselves. | ||
|align=center| [[Bowser Jr.'s Fearsome Fleet]]<br>[[Fleet Glide Galaxy]] | |align=center|[[Bowser Jr.'s Fearsome Fleet]]<br>[[Fleet Glide Galaxy]] | ||
|align=center| [[File:SMG Asset Sprite UI Star Bit.png|15px|link=Star Bit]]×5 | |align=center|[[File:SMG Asset Sprite UI Star Bit.png|15px|link=Star Bit]]×5 | ||
|- | |- | ||
|align=center| [[File:SMG Urchin model.png|x70px]]<br>'''[[Urchin]]''' | |align=center|[[File:SMG Urchin model.png|x70px]]<br>'''[[Urchin]]''' | ||
| Benthic creatures with protractible spines. They aggressively roll towards Mario when he is in close proximity. They can only be damaged by shells and fireballs. | |Benthic creatures with protractible spines. They aggressively roll towards Mario when he is in close proximity. They can only be damaged by shells and fireballs. | ||
|align=center| [[Starshine Beach Galaxy]]<br>[[Slimy Spring Galaxy]] | |align=center|[[Starshine Beach Galaxy]]<br>[[Slimy Spring Galaxy]] | ||
|align=center| [[File:SMG Asset Sprite UI Star Bit.png|15px|link=Star Bit]]×5 | |align=center|[[File:SMG Asset Sprite UI Star Bit.png|15px|link=Star Bit]]×5 | ||
|- | |- | ||
|align=center| [[File:SMG2 Land Urchin.png|x70px]]<br>[[Urchin (land)|'''Urchin''' (land)]] | |align=center|[[File:SMG2 Land Urchin.png|x70px]]<br>[[Urchin (land)|'''Urchin''' (land)]] | ||
| Red [[Urchin]]s only found on land. One protracts its spines and rolls towards Mario if he approaches it. They are immune to spinning or being stomped. They can only be damaged by fire and lava. | |Red [[Urchin]]s only found on land. One protracts its spines and rolls towards Mario if he approaches it. They are immune to spinning or being stomped. They can only be damaged by fire and lava. | ||
|align=center| [[Battle Belt Galaxy]] | |align=center|[[Battle Belt Galaxy]] | ||
|align=center| [[File:SMG Asset Sprite UI Star Bit.png|15px|link=Star Bit]]×5 | |align=center|[[File:SMG Asset Sprite UI Star Bit.png|15px|link=Star Bit]]×5 | ||
|- | |- | ||
|align=center| [[File:Watershooter.png|x70px]]<br>'''[[Water Shooter]]''' | |align=center|[[File:Watershooter.png|x70px]]<br>'''[[Water Shooter]]''' | ||
| Mounted nozzles that shoot large drops of water over great distances. A drop traps Mario if within its trajectory and carries him with it. He is freed if he spins. | |Mounted nozzles that shoot large drops of water over great distances. A drop traps Mario if within its trajectory and carries him with it. He is freed if he spins. | ||
|align=center| [[Starshine Beach Galaxy]]<br>[[Honeyhop Galaxy]]<br>[[Space Storm Galaxy]] | |align=center|[[Starshine Beach Galaxy]]<br>[[Honeyhop Galaxy]]<br>[[Space Storm Galaxy]] | ||
|align=center| Indestructible | |align=center|Indestructible | ||
|- | |- | ||
|align=center| [[File:Whomp.png|x70px]]<br>'''[[Whomp]]''' ★ | |align=center|[[File:Whomp.png|x70px]]<br>'''[[Whomp]]''' ★ | ||
| Walking stone walls similar to {{wp|nurikabe}}. When Mario is before them, they quicken their pace and slam down face first to crush him. A successful strike completely depletes Mario's life meter, costing him a life. Their attack leaves them lying on the ground and vulnerable for a few seconds. Their weak point is a cylindrical button with a ground-pound symbol on it. | |Walking stone walls similar to {{wp|nurikabe}}. When Mario is before them, they quicken their pace and slam down face first to crush him. A successful strike completely depletes Mario's life meter, costing him a life. Their attack leaves them lying on the ground and vulnerable for a few seconds. Their weak point is a cylindrical button with a ground-pound symbol on it. | ||
|align=center| [[Bowser's Lava Lair]]<br>[[Bowser's Gravity Gauntlet]]<br>[[Throwback Galaxy]] | |align=center|[[Bowser's Lava Lair]]<br>[[Bowser's Gravity Gauntlet]]<br>[[Throwback Galaxy]] | ||
|align=center| [[File:SMG Asset Sprite UI Star Bit.png|15px|link=Star Bit]]×7 | |align=center|[[File:SMG Asset Sprite UI Star Bit.png|15px|link=Star Bit]]×7 | ||
|- | |- | ||
|align=center| [[File:SMG2 Wiggler Artwork.png|x70px]]<br>'''[[Wiggler]]''' | |align=center|[[File:SMG2 Wiggler Artwork.png|x70px]]<br>'''[[Wiggler]]''' | ||
| Caterpillars that amble around in circles. Performing a ground-pound on nearby earth or directly spinning one flips a Wiggler on its back. If the incapacitated Wiggler is not defeated within five seconds, it becomes angry and uprights itself. An enraged Wiggler is much faster and cannot be harmed. It returns to its original disposition after a few seconds. Wigglers can be defeated in a single hit by ground-pounding them. | |Caterpillars that amble around in circles. Performing a ground-pound on nearby earth or directly spinning one flips a Wiggler on its back. If the incapacitated Wiggler is not defeated within five seconds, it becomes angry and uprights itself. An enraged Wiggler is much faster and cannot be harmed. It returns to its original disposition after a few seconds. Wigglers can be defeated in a single hit by ground-pounding them. | ||
|align=center| [[Puzzle Plank Galaxy]]<br>[[Tall Trunk Galaxy]]<br>[[Throwback Galaxy]] | |align=center|[[Puzzle Plank Galaxy]]<br>[[Tall Trunk Galaxy]]<br>[[Throwback Galaxy]] | ||
|align=center| [[File:SMG Asset Sprite UI Star Bit.png|15px|link=Star Bit]]×7 | |align=center|[[File:SMG Asset Sprite UI Star Bit.png|15px|link=Star Bit]]×7 | ||
|} | |} | ||
<br> | <br> | ||
| Line 838: | Line 833: | ||
<center> | <center> | ||
{|width=65% class="wikitable" | {|width=65% class="wikitable" | ||
! colspan="12" style="background:#000000; color:white;"|[[File:MK8 Bowser Emblem.png|20px|link=List of bosses]] | !colspan="12" style="background:#000000; color:white;"|[[File:MK8 Bowser Emblem.png|20px|link=List of bosses]] Bosses [[File:MK8 Bowser Emblem.png|20px|link=List of bosses]] | ||
|- | |- | ||
!colspan="3" style="background:#E3728F"| [[Peewee Piranha]] | !colspan="3" style="background:#E3728F"|[[Peewee Piranha]] | ||
!colspan="3" style="background:#DDC301"| [[King Lakitu]] | !colspan="3" style="background:#DDC301"|[[King Lakitu]] | ||
!colspan="3" style="background:#916C38"| [[Digga-Leg]] | !colspan="3" style="background:#916C38"|[[Digga-Leg]] | ||
!colspan="3" style="background:#5ABC66"| [[Gobblegut]] | !colspan="3" style="background:#5ABC66"|[[Gobblegut]] | ||
|- | |- | ||
|colspan="3" align=center style="background:#FFFFFF"| [[File:Peewee.png|x80px]] | |colspan="3" align=center style="background:#FFFFFF"| [[File:Peewee.png|x80px]] | ||
| Line 860: | Line 855: | ||
!colspan="3" style="background:#85CD8E"|Missions | !colspan="3" style="background:#85CD8E"|Missions | ||
|- | |- | ||
|colspan="3" align=center style="background:#F7D9E1"| [[Peewee Piranha's Temper Tantrum]]<br>[[Peewee Piranha's Speed Run]] | |colspan="3" align=center style="background:#F7D9E1"|[[Peewee Piranha's Temper Tantrum]]<br>[[Peewee Piranha's Speed Run]] | ||
|colspan="3" align=center style="background:#FFF49F"| [[Spiny Control]] | |colspan="3" align=center style="background:#FFF49F"|[[Spiny Control]] | ||
|colspan="3" align=center style="background:#DDC7A7"| [[Digga-Leg's Planet]]<br>[[Digga-Leg's Daredevil Run]] | |colspan="3" align=center style="background:#DDC7A7"|[[Digga-Leg's Planet]]<br>[[Digga-Leg's Daredevil Run]] | ||
|colspan="3" align=center style="background:#BBE3C0"| [[Gobblegut's Aching Belly]]<br>[[Fiery Flotilla Speed Run]] | |colspan="3" align=center style="background:#BBE3C0"|[[Gobblegut's Aching Belly]]<br>[[Fiery Flotilla Speed Run]] | ||
|- | |- | ||
!colspan="3" style="background:#8459AD"| [[Stink Bug Parent]] | !colspan="3" style="background:#8459AD"|[[Stink Bug Parent]] | ||
!colspan="3" style="background:#50A6CC"| [[Rollodillo]] | !colspan="3" style="background:#50A6CC"|[[Rollodillo]] | ||
!colspan="3" style="background:#B2E1F8"| [[Sorbetti]] | !colspan="3" style="background:#B2E1F8"|[[Sorbetti]] | ||
!colspan="3" style="background:#EA5622"| [[Megahammer]] | !colspan="3" style="background:#EA5622"|[[Megahammer]] | ||
|- | |- | ||
|colspan="3" align=center style="background:#FFFFFF"| [[File:SMG Asset Model Mandibug (Parent and Child).png|x100px]] | |colspan="3" align=center style="background:#FFFFFF"|[[File:SMG Asset Model Mandibug (Parent and Child).png|x100px]] | ||
|colspan="3" align=center style="background:#FFFFFF"| [[File:Rollodillo Artwork - Super Mario Galaxy 2.png|x80px]] | |colspan="3" align=center style="background:#FFFFFF"|[[File:Rollodillo Artwork - Super Mario Galaxy 2.png|x80px]] | ||
|colspan="3" align=center style="background:#FFFFFF"| [[File:Sorbetti Profile 2.png|x100px]] | |colspan="3" align=center style="background:#FFFFFF"|[[File:Sorbetti Profile 2.png|x100px]] | ||
|colspan="3" align=center style="background:#FFFFFF"| [[File:Megahammer Artwork - Super Mario Galaxy 2.png|x80px]] | |colspan="3" align=center style="background:#FFFFFF"|[[File:Megahammer Artwork - Super Mario Galaxy 2.png|x80px]] | ||
|- | |- | ||
|colspan="3" align=center style="background:#FFFFFF"| A [[Mandibug]] that carries its child on its back. Both can be defeated by performing a [[Ground Pound|Ground-Pound]]. Defeating the child enrages the parent and makes it harder to strike. | |colspan="3" align=center style="background:#FFFFFF"|A [[Mandibug]] that carries its child on its back. Both can be defeated by performing a [[Ground Pound|Ground-Pound]]. Defeating the child enrages the parent and makes it harder to strike. | ||
|colspan="3" align=center style="background:#FFFFFF"| A giant armadillo creature that rolls like [[Rock Mario]] and gallops. It rapidly charges towards Mario but tires out after three rolls. Its behind is unprotected and vulnerable to strikes. | |colspan="3" align=center style="background:#FFFFFF"|A giant armadillo creature that rolls like [[Rock Mario]] and gallops. It rapidly charges towards Mario but tires out after three rolls. Its behind is unprotected and vulnerable to strikes. | ||
|colspan="3" align=center style="background:#FFFFFF"| A malevolent [[snowman]] that frightens local [[Star Bunny|Star Bunnies]]. It slowly rolls its head towards Mario and laughs with a successful hit. Its red nose is its weak point. Its movement quickens after being struck twice. | |colspan="3" align=center style="background:#FFFFFF"|A malevolent [[snowman]] that frightens local [[Star Bunny|Star Bunnies]]. It slowly rolls its head towards Mario and laughs with a successful hit. Its red nose is its weak point. Its movement quickens after being struck twice. | ||
|colspan="3" align=center style="background:#FFFFFF"| [[Bowser Jr.]]'s clown mech, equipped with [[Bill Blaster]]s. It discharges electric shockwaves and has hammerheads in place of hands to crush Mario. Breaking the glass orbs on its body weakens it. | |colspan="3" align=center style="background:#FFFFFF"|[[Bowser Jr.]]'s clown mech, equipped with [[Bill Blaster]]s. It discharges electric shockwaves and has hammerheads in place of hands to crush Mario. Breaking the glass orbs on its body weakens it. | ||
|- | |- | ||
!colspan="3" style="background:#AD91C9"|Missions | !colspan="3" style="background:#AD91C9"|Missions | ||
| Line 885: | Line 880: | ||
!colspan="3" style="background:#EF855F"|Missions | !colspan="3" style="background:#EF855F"|Missions | ||
|- | |- | ||
|colspan="3" align=center style="background:#CFBFDF"| [[The Puzzling Picture Block]] | |colspan="3" align=center style="background:#CFBFDF"|[[The Puzzling Picture Block]] | ||
|colspan="3" align=center style="background:#A8D3E6"| [[Rock and Rollodillo]] | |colspan="3" align=center style="background:#A8D3E6"|[[Rock and Rollodillo]] | ||
|colspan="3" align=center style="background:#E0F3FC"| [[Sorbetti's Chilly Reception]] | |colspan="3" align=center style="background:#E0F3FC"|[[Sorbetti's Chilly Reception]] | ||
|colspan="3" align=center style="background:#F4AA90"| [[Bowser Jr.'s Mighty Megahammer]]<br>[[Megahammer's Daredevil Bash]] | |colspan="3" align=center style="background:#F4AA90"|[[Bowser Jr.'s Mighty Megahammer]]<br>[[Megahammer's Daredevil Bash]] | ||
|- | |- | ||
!colspan="3" style="background:#E2898D"| [[Glamdozer]] | !colspan="3" style="background:#E2898D"|[[Glamdozer]] | ||
!colspan="3" style="background:#D19D24"| [[Squizzard]] | !colspan="3" style="background:#D19D24"|[[Squizzard]] | ||
!colspan="3" style="background:#D35335"| [[Prince Pikante]] | !colspan="3" style="background:#D35335"|[[Prince Pikante]] | ||
!colspan="3" style="background:#97C93D"| [[Boomsday Machine]] | !colspan="3" style="background:#97C93D"|[[Boomsday Machine]] | ||
|- | |- | ||
|colspan="3" align=center style="background:#FFFFFF"| [[File:Glamdozer Artwork - Super Mario Galaxy 2.png|x80px]] | |colspan="3" align=center style="background:#FFFFFF"|[[File:Glamdozer Artwork - Super Mario Galaxy 2.png|x80px]] | ||
|colspan="3" align=center style="background:#FFFFFF"| [[File:SMG2 Screenshot Slipsand Galaxy (Squizzard).png|x100px]] | |colspan="3" align=center style="background:#FFFFFF"|[[File:SMG2 Screenshot Slipsand Galaxy (Squizzard).png|x100px]] | ||
|colspan="3" align=center style="background:#FFFFFF"| [[File:SMG2 Prince Pikante Artwork.png|x100px]] | |colspan="3" align=center style="background:#FFFFFF"|[[File:SMG2 Prince Pikante Artwork.png|x100px]] | ||
|colspan="3" align=center style="background:#FFFFFF"| [[File:Boomsday Machine.png|x100px]] | |colspan="3" align=center style="background:#FFFFFF"|[[File:Boomsday Machine.png|x100px]] | ||
|- | |- | ||
|colspan="3" align=center style="background:#FFFFFF"| A maternal [[Pupdozer]]. She climbs back-and-over the sides of a disc-shaped planet in pursuit of Mario. Her backside is protected by spiky armor, but her belly is soft and vulnerable. After being struck once, she starts spewing balls of melting goo. | |colspan="3" align=center style="background:#FFFFFF"|A maternal [[Pupdozer]]. She climbs back-and-over the sides of a disc-shaped planet in pursuit of Mario. Her backside is protected by spiky armor, but her belly is soft and vulnerable. After being struck once, she starts spewing balls of melting goo. | ||
|colspan="3" align=center style="background:#FFFFFF"| A lizard-like {{wp|antlion}} creature sitting at the center of a sinkhole. It tosses explosive knobby balls at Mario. After being struck twice, it erects two [[cannon]]s to fire balls alongside it. It can only be damaged by [[fireball]]s launched by [[Fire Mario]]. | |colspan="3" align=center style="background:#FFFFFF"|A lizard-like {{wp|antlion}} creature sitting at the center of a sinkhole. It tosses explosive knobby balls at Mario. After being struck twice, it erects two [[cannon]]s to fire balls alongside it. It can only be damaged by [[fireball]]s launched by [[Fire Mario]]. | ||
|colspan="3" align=center style="background:#FFFFFF"| A wagon-riding [[Ota Rock]]s that fires [[coconut]]s and enflamed rocks from his siphon. The wagon is equipped with three cannons that also shoot rocks in tandem with Prince Pikante. Spinning into the coconuts parries them back at him. | |colspan="3" align=center style="background:#FFFFFF"|A wagon-riding [[Ota Rock]]s that fires [[coconut]]s and enflamed rocks from his siphon. The wagon is equipped with three cannons that also shoot rocks in tandem with Prince Pikante. Spinning into the coconuts parries them back at him. | ||
|colspan="3" align=center style="background:#FFFFFF"| Bowser Jr.'s battle tank, piloted during his last stand. Its top is a tower equipped with [[Fire Bar]]s and cannons that shoot homing electrical orbs. Its lined with vents that pull Mario towards it. Its weak point is Bowser Jr.'s glass cockpit. | |colspan="3" align=center style="background:#FFFFFF"|Bowser Jr.'s battle tank, piloted during his last stand. Its top is a tower equipped with [[Fire Bar]]s and cannons that shoot homing electrical orbs. Its lined with vents that pull Mario towards it. Its weak point is Bowser Jr.'s glass cockpit. | ||
|- | |- | ||
!colspan="3" style="background:#EAACAF"|Missions | !colspan="3" style="background:#EAACAF"|Missions | ||
| Line 910: | Line 905: | ||
!colspan="3" style="background:#B8DA7C"|Missions | !colspan="3" style="background:#B8DA7C"|Missions | ||
|- | |- | ||
|colspan="3" align=center style="background:#F3CDCF"| [[Flip-Flopping in Flipsville]] | |colspan="3" align=center style="background:#F3CDCF"|[[Flip-Flopping in Flipsville]] | ||
|colspan="3" align=center style="background:#EBCE8D"| [[Squizzard's Sandy Sinkhole]]<br>[[Squizzard's Daredevil Run]] | |colspan="3" align=center style="background:#EBCE8D"|[[Squizzard's Sandy Sinkhole]]<br>[[Squizzard's Daredevil Run]] | ||
|colspan="3" align=center style="background:#EBB1A3"| [[Prince Pikante's Peppery Mood]] | |colspan="3" align=center style="background:#EBB1A3"|[[Prince Pikante's Peppery Mood]] | ||
|colspan="3" align=center style="background:#D2E7AB"| [[Bowser Jr.'s Boomsday Machine]]<br>[[Boomsday Machine Daredevil Run]] | |colspan="3" align=center style="background:#D2E7AB"|[[Bowser Jr.'s Boomsday Machine]]<br>[[Boomsday Machine Daredevil Run]] | ||
|- | |- | ||
!colspan="6" style="background:#AEB498"| [[Whomp King]] | !colspan="6" style="background:#AEB498"|[[Whomp King]] | ||
!colspan="6" style="background:#32765C"| [[Giant Bowser|Bowser]] | !colspan="6" style="background:#32765C"|[[Giant Bowser|Bowser]] | ||
|- | |- | ||
|colspan="6" align=center style="background:#FFFFFF"| [[File:King Whomp.png|x100px]] | |colspan="6" align=center style="background:#FFFFFF"|[[File:King Whomp.png|x100px]] | ||
|colspan="6" align=center style="background:#FFFFFF"| [[File:Bowsersmg2.png|x100px]] | |colspan="6" align=center style="background:#FFFFFF"|[[File:Bowsersmg2.png|x100px]] | ||
|- | |- | ||
|colspan="6" align=center style="background:#FFFFFF"| The giant king of the [[Whomp]]s, who stole a [[Power Star]] from the [[Bob-omb Buddy|Bob-omb Buddies]]. When Mario is before him, he slams his body face first to crush him. His attack makes the ground quake: if Mario is on the ground when he evades the Whomp King's attack, the quake leaves him stunned in place for two seconds. [[Pattan]]s are summoned during the fight. | |colspan="6" align=center style="background:#FFFFFF"|The giant king of the [[Whomp]]s, who stole a [[Power Star]] from the [[Bob-omb Buddy|Bob-omb Buddies]]. When Mario is before him, he slams his body face first to crush him. His attack makes the ground quake: if Mario is on the ground when he evades the Whomp King's attack, the quake leaves him stunned in place for two seconds. [[Pattan]]s are summoned during the fight. | ||
|colspan="6" align=center style="background:#FFFFFF"| Mario's arch-nemesis: the fire-breathing king of [[Koopa (species)| | |colspan="6" align=center style="background:#FFFFFF"|Mario's arch-nemesis: the fire-breathing king of [[Koopa (species)|Koopa]]s. Bowser is unnaturally large from ingesting [[Grand Star]]s. He fights Mario on a planetoid he dwarfs in size and attacks with an onslaught of punches, shockwaves, and fire breath. Bowser summons a storm of [[meteorite]]s with a roar. Ground-Pounding them into him is the only way to damage him. | ||
|- | |- | ||
!colspan="6" style="background:#CACEBC"|Missions | !colspan="6" style="background:#CACEBC"|Missions | ||
!colspan="6" style="background:#66BE9C"|Missions | !colspan="6" style="background:#66BE9C"|Missions | ||
|- | |- | ||
|colspan="6" align=center style="background:#E1E3D9"| [[Return of the Whomp King]] | |colspan="6" align=center style="background:#E1E3D9"|[[Return of the Whomp King]] | ||
|colspan="6" align=center style="background:#B6E0D0"| [[Bowser's Big Lava Power Party]]<br>[[Breaking into Bowser's Castle]]<br>[[Bowser's Fortified Fortress]] | |colspan="6" align=center style="background:#B6E0D0"|[[Bowser's Big Lava Power Party]]<br>[[Breaking into Bowser's Castle]]<br>[[Bowser's Fortified Fortress]] | ||
|} | |} | ||
</center> | </center> | ||
| Line 936: | Line 931: | ||
! colspan="12" style="background:#000000; color:white;"|[[File:MK8 Bowser Emblem.png|20px|link=List of bosses]] Secret Bosses [[File:MK8 Bowser Emblem.png|20px|link=List of bosses]] | ! colspan="12" style="background:#000000; color:white;"|[[File:MK8 Bowser Emblem.png|20px|link=List of bosses]] Secret Bosses [[File:MK8 Bowser Emblem.png|20px|link=List of bosses]] | ||
|- | |- | ||
!colspan="3" style="background:#70AB3F"| [[Bugaboom]] | !colspan="3" style="background:#70AB3F"|[[Bugaboom]] | ||
!colspan="3" style="background:#CF2713"| [[Gobblegut (fiery)]] | !colspan="3" style="background:#CF2713"|[[Gobblegut (fiery)]] | ||
!colspan="3" style="background:#02AC85"| [[Dino Piranha]] | !colspan="3" style="background:#02AC85"|[[Dino Piranha]] | ||
!colspan="3" style="background:#FF8E2F"| [[King Kaliente]] | !colspan="3" style="background:#FF8E2F"|[[King Kaliente]] | ||
|- | |- | ||
|colspan="3" align=center style="background:#FFFFFF"| [[File:SMG Bugaboom Artwork.png|x80px]] | |colspan="3" align=center style="background:#FFFFFF"|[[File:SMG Bugaboom Artwork.png|x80px]] | ||
|colspan="3" align=center style="background:#FFFFFF"| [[File:Fire Gobblegut Artwork - Super Mario Galaxy 2.png|x100px]] | |colspan="3" align=center style="background:#FFFFFF"|[[File:Fire Gobblegut Artwork - Super Mario Galaxy 2.png|x100px]] | ||
|colspan="3" align=center style="background:#FFFFFF"| [[File:DinoPiranha.png|100px]] | |colspan="3" align=center style="background:#FFFFFF"|[[File:DinoPiranha.png|100px]] | ||
|colspan="3" align=center style="background:#FFFFFF"| [[File:KingKalienteProfile.png|x100px]] | |colspan="3" align=center style="background:#FFFFFF"|[[File:KingKalienteProfile.png|x100px]] | ||
|- | |- | ||
|colspan="3" align=center style="background:#FFFFFF"| An enormous, winged Mandibug. It tries to bite Mario with its mandibles. Ground pounding its abdomen damages it. Bugaboom takes flight after being struck once and starts releasing explosive droppings as it flies. | |colspan="3" align=center style="background:#FFFFFF"|An enormous, winged Mandibug. It tries to bite Mario with its mandibles. Ground pounding its abdomen damages it. Bugaboom takes flight after being struck once and starts releasing explosive droppings as it flies. | ||
|colspan="3" align=center style="background:#FFFFFF"| A fast-moving [[Gobblegut]] covered in flames. His bellyache bulges are his weak points. Once half of them burst, he moves faster and summons a [[Volcanic debris|rain of fireballs]] that leave pools of [[lava]] on his planet. | |colspan="3" align=center style="background:#FFFFFF"|A fast-moving [[Gobblegut]] covered in flames. His bellyache bulges are his weak points. Once half of them burst, he moves faster and summons a [[Volcanic debris|rain of fireballs]] that leave pools of [[lava]] on his planet. | ||
|colspan="3" align=center style="background:#FFFFFF"| A [[Piranha Plant]] monster with a clubbed tail. It charges down Mario when he is in its line of sight. [[Spin]]ning into its club slingshots it towards its head, damaging it. Its charges more quickly after the first strike. | |colspan="3" align=center style="background:#FFFFFF"|A [[Piranha Plant]] monster with a clubbed tail. It charges down Mario when he is in its line of sight. [[Spin]]ning into its club slingshots it towards its head, damaging it. Its charges more quickly after the first strike. | ||
|colspan="3" align=center style="background:#FFFFFF"| A giant [[Ota Rock]] that dwells in [[lava]]. He shoots coconuts and flaming rocks at Mario from his siphon. Spinning into a coconut smacks it back towards him and damages him. He starts to parry these attacks as the fight progresses. | |colspan="3" align=center style="background:#FFFFFF"|A giant [[Ota Rock]] that dwells in [[lava]]. He shoots coconuts and flaming rocks at Mario from his siphon. Spinning into a coconut smacks it back towards him and damages him. He starts to parry these attacks as the fight progresses. | ||
|- | |- | ||
!colspan="3" style="background:#9BCB73"|Missions | !colspan="3" style="background:#9BCB73"|Missions | ||
| Line 956: | Line 951: | ||
!colspan="3" style="background:#FFAD69"|Missions | !colspan="3" style="background:#FFAD69"|Missions | ||
|- | |- | ||
|colspan="3" align=center style="background:#C5E1AD"| [[Bugaboom's Back]] | |colspan="3" align=center style="background:#C5E1AD"|[[Bugaboom's Back]] | ||
|colspan="3" align=center style="background:#F8BCB6"| [[Snacktime for Gobblegut]] | |colspan="3" align=center style="background:#F8BCB6"|[[Snacktime for Gobblegut]] | ||
|colspan="3" align=center style="background:#94FEE5"| [[Throwback Throwdown]] ([[File:Smg2 icon greencomet.png|15px|link=Boss Blitz Galaxy#Green Star 1]] '''∙''' [[File:Smg2 icon greencomet.png|15px|link=Boss Blitz Galaxy#Green Star 2]])<br>[[Throwback Throwdown Speed Run]] | |colspan="3" align=center style="background:#94FEE5"|[[Throwback Throwdown]] ([[File:Smg2 icon greencomet.png|15px|link=Boss Blitz Galaxy#Green Star 1]] '''∙''' [[File:Smg2 icon greencomet.png|15px|link=Boss Blitz Galaxy#Green Star 2]])<br>[[Throwback Throwdown Speed Run]] | ||
|colspan="3" align=center style="background:#FFD9B9"| [[Throwback Throwdown]] ([[File:Smg2 icon greencomet.png|15px|link=Boss Blitz Galaxy#Green Star 1]] '''∙''' [[File:Smg2 icon greencomet.png|15px|link=Boss Blitz Galaxy#Green Star 2]])<br>[[Throwback Throwdown Speed Run]] | |colspan="3" align=center style="background:#FFD9B9"|[[Throwback Throwdown]] ([[File:Smg2 icon greencomet.png|15px|link=Boss Blitz Galaxy#Green Star 1]] '''∙''' [[File:Smg2 icon greencomet.png|15px|link=Boss Blitz Galaxy#Green Star 2]])<br>[[Throwback Throwdown Speed Run]] | ||
|- | |- | ||
!colspan="4" style="background:#068CF5"| [[Major Burrows]] | !colspan="4" style="background:#068CF5"|[[Major Burrows]] | ||
!colspan="4" style="background:#E2C806"| [[Bouldergeist]] | !colspan="4" style="background:#E2C806"|[[Bouldergeist]] | ||
!colspan="4" style="background:#CD5D05"| [[Fiery Dino Piranha]] | !colspan="4" style="background:#CD5D05"|[[Fiery Dino Piranha]] | ||
|- | |- | ||
|colspan="4" align=center style="background:#FFFFFF"| [[File:Major Burrows Artwork.png|x100px]] | |colspan="4" align=center style="background:#FFFFFF"|[[File:Major Burrows Artwork.png|x100px]] | ||
|colspan="4" align=center style="background:#FFFFFF"| [[File:Bouldergeist SMG.png|x80px]] | |colspan="4" align=center style="background:#FFFFFF"|[[File:Bouldergeist SMG.png|x80px]] | ||
|colspan="4" align=center style="background:#FFFFFF"| [[File:Firey Dino Piranha.png|100px]] | |colspan="4" align=center style="background:#FFFFFF"|[[File:Firey Dino Piranha.png|100px]] | ||
|- | |- | ||
|colspan="4" align=center style="background:#FFFFFF"| A giant [[Undergrunt]]. He burrows towards Mario before bursting from the ground with swiping claws. Performing a [[Ground Pound]] on the earth when his head is exposed forces him to the surface and leaves him vulnerable to a spin attack. | |colspan="4" align=center style="background:#FFFFFF"|A giant [[Undergrunt]]. He burrows towards Mario before bursting from the ground with swiping claws. Performing a [[Ground Pound]] on the earth when his head is exposed forces him to the surface and leaves him vulnerable to a spin attack. | ||
|colspan="4" align=center style="background:#FFFFFF"| A large ghost covered in rocks. It launches rocks and erects stone spikes to damage Mario. Attacking it with [[Bomb Boo]]s destroys its armor and leaves it vulnerable to attack. During the second phase, it constructs giant hands to attack Mario and protect its body. | |colspan="4" align=center style="background:#FFFFFF"|A large ghost covered in rocks. It launches rocks and erects stone spikes to damage Mario. Attacking it with [[Bomb Boo]]s destroys its armor and leaves it vulnerable to attack. During the second phase, it constructs giant hands to attack Mario and protect its body. | ||
|colspan="4" align=center style="background:#FFFFFF"| A fast-moving Dino Piranha. Its clubbed tail periodically catches fire. The flames burn Mario and prevent him from spinning the club. After landing a hit, Fiery Dino Piranha becomes faster; leaves walls of fire in its wake; and spews balls of flame. Defeating this boss without being damaged requires well-timed precision. | |colspan="4" align=center style="background:#FFFFFF"|A fast-moving Dino Piranha. Its clubbed tail periodically catches fire. The flames burn Mario and prevent him from spinning the club. After landing a hit, Fiery Dino Piranha becomes faster; leaves walls of fire in its wake; and spews balls of flame. Defeating this boss without being damaged requires well-timed precision. | ||
|- | |- | ||
!colspan="4" style="background:#96D0FC"|Missions | !colspan="4" style="background:#96D0FC"|Missions | ||
| Line 977: | Line 972: | ||
!colspan="4" style="background:#FA832A"|Missions | !colspan="4" style="background:#FA832A"|Missions | ||
|- | |- | ||
|colspan="4" align=center style="background:#C6E6FE"| [[Throwback Throwdown]] ([[File:Smg2 icon greencomet.png|15px|link=Boss Blitz Galaxy#Green Star 1]] '''∙''' [[File:Smg2 icon greencomet.png|15px|link=Boss Blitz Galaxy#Green Star 2]])<br>[[Throwback Throwdown Speed Run]] | |colspan="4" align=center style="background:#C6E6FE"|[[Throwback Throwdown]] ([[File:Smg2 icon greencomet.png|15px|link=Boss Blitz Galaxy#Green Star 1]] '''∙''' [[File:Smg2 icon greencomet.png|15px|link=Boss Blitz Galaxy#Green Star 2]])<br>[[Throwback Throwdown Speed Run]] | ||
|colspan="4" align=center style="background:#FCEF8C"| [[Throwback Throwdown]] ([[File:Smg2 icon greencomet.png|15px|link=Boss Blitz Galaxy#Green Star 2]])<br>[[Throwback Throwdown Speed Run]] | |colspan="4" align=center style="background:#FCEF8C"|[[Throwback Throwdown]] ([[File:Smg2 icon greencomet.png|15px|link=Boss Blitz Galaxy#Green Star 2]])<br>[[Throwback Throwdown Speed Run]] | ||
|colspan="4" align=center style="background:#FCBD8E"| [[Throwback Throwdown]]<br>[[Throwback Throwdown Speed Run]] | |colspan="4" align=center style="background:#FCBD8E"|[[Throwback Throwdown]]<br>[[Throwback Throwdown Speed Run]] | ||
|} | |} | ||
</center> | </center> | ||
| Line 1,022: | Line 1,017: | ||
Star chip yellow.png|[[Star Chip]] | Star chip yellow.png|[[Star Chip]] | ||
SMG2 Star Crystal.png|[[Star Piece Cluster]] | SMG2 Star Crystal.png|[[Star Piece Cluster]] | ||
SMG2 Yoshi Egg Screenshot.png|[[Yoshi Egg]] | SMG2 Yoshi Egg Screenshot.png|[[Yoshi's Egg|Yoshi egg]] | ||
</gallery> | </gallery> | ||
| Line 1,761: | Line 1,756: | ||
{|width=100% class="wikitable" style="align:center;" | {|width=100% class="wikitable" style="align:center;" | ||
! colspan="12" style="background:#347BDD; color:white;"| Galaxies | !colspan="12" style="background:#347BDD; color:white;"|Galaxies | ||
|- | |- | ||
| colspan="12" style="background:#7EACEA; color:white;"| [[File:SMG2 Asset Texture World Banner (World 1).png|45px|link=World 1 (Super Mario Galaxy 2)]] '''World 1. The Great Space Journey Begins''' | |colspan="12" style="background:#7EACEA; color:white;"|[[File:SMG2 Asset Texture World Banner (World 1).png|45px|link=World 1 (Super Mario Galaxy 2)]] '''World 1. The Great Space Journey Begins''' | ||
|- | |- | ||
!colspan="4" style="background:#BFE465" width=20%| 01. [[Sky Station Galaxy]]<br>[[File:SMG Asset Sprite UI Power Star.png|15px|Total number of obtainable Power Stars.]]×6 [[File:SMG Asset Model Good Egg Galaxy (Dino Piranha Planet).png|15px|Total number of reachable areas.]]×9 [[File:SMG2 Asset Sprite UI Bowser.png|15px|Total number of boss battles.]]×1 | !colspan="4" style="background:#BFE465" width=20%|01. [[Sky Station Galaxy]]<br>[[File:SMG Asset Sprite UI Power Star.png|15px|Total number of obtainable Power Stars.]]×6 [[File:SMG Asset Model Good Egg Galaxy (Dino Piranha Planet).png|15px|Total number of reachable areas.]]×9 [[File:SMG2 Asset Sprite UI Bowser.png|15px|Total number of boss battles.]]×1 | ||
!colspan="2" style="background:#BFE465" width=30%| Missions | !colspan="2" style="background:#BFE465" width=30%|Missions | ||
!colspan="4" style="background:#F7BE25" width=20%| 02. [[Yoshi Star Galaxy]]<br>[[File:SMG Asset Sprite UI Power Star.png|15px|Total number of obtainable Power Stars.]]×6 [[File:SMG Asset Model Good Egg Galaxy (Dino Piranha Planet).png|15px|Total number of reachable areas.]]×8 [[File:SMG2 Asset Sprite UI Bowser.png|15px|Total number of boss battles.]]×1 | !colspan="4" style="background:#F7BE25" width=20%|02. [[Yoshi Star Galaxy]]<br>[[File:SMG Asset Sprite UI Power Star.png|15px|Total number of obtainable Power Stars.]]×6 [[File:SMG Asset Model Good Egg Galaxy (Dino Piranha Planet).png|15px|Total number of reachable areas.]]×8 [[File:SMG2 Asset Sprite UI Bowser.png|15px|Total number of boss battles.]]×1 | ||
!colspan="2" style="background:#F7BE25" width=30%| Missions | !colspan="2" style="background:#F7BE25" width=30%|Missions | ||
|- | |- | ||
| colspan="4" rowspan="3" align=center style="background:#FFFFFF"| [[File:SMG2 Yoshi Door.png|x90px]] | |colspan="4" rowspan="3" align=center style="background:#FFFFFF"|[[File:SMG2 Yoshi Door.png|x90px]] | ||
| align=left style="background:#ECF7D1"| [[File:Smg2 icon powerstar.png|14px|link=Power Star]] [[Peewee Piranha's Temper Tantrum]] | |align=left style="background:#ECF7D1"|[[File:Smg2 icon powerstar.png|14px|link=Power Star]] [[Peewee Piranha's Temper Tantrum]] | ||
| align=left style="background:#ECF7D1"| [[File:Smg2 icon powerstar.png|14px|link=Power Star]] [[Storming the Sky Fleet]] | |align=left style="background:#ECF7D1"|[[File:Smg2 icon powerstar.png|14px|link=Power Star]] [[Storming the Sky Fleet]] | ||
| colspan="4" rowspan="3" align=center style="background:#FFFFFF"| [[File:Yoshi Star Luigi.png|x90px]] | |colspan="4" rowspan="3" align=center style="background:#FFFFFF"|[[File:Yoshi Star Luigi.png|x90px]] | ||
| align=left style="background:#FCE8AE"| [[File:Smg2 icon powerstar.png|14px|link=Power Star]] [[Saddle Up with Yoshi]] | |align=left style="background:#FCE8AE"|[[File:Smg2 icon powerstar.png|14px|link=Power Star]] [[Saddle Up with Yoshi]] | ||
| align=left style="background:#FCE8AE"| [[File:Smg2 icon powerstar.png|14px|link=Power Star]] [[Spiny Control]] | |align=left style="background:#FCE8AE"|[[File:Smg2 icon powerstar.png|14px|link=Power Star]] [[Spiny Control]] | ||
|- | |- | ||
| align=left style="background:#E1F2B8"| [[File:Smg2 icon prankstercomet.png|14px|link=Power Star]] [[Peewee Piranha's Speed Run]] | |align=left style="background:#E1F2B8"|[[File:Smg2 icon prankstercomet.png|14px|link=Power Star]] [[Peewee Piranha's Speed Run]] | ||
| align=left style="background:#E1F2B8"| [[File:Smg2 icon greencomet.png|14px|link=Green Power Star]] [[Sky Station Galaxy#Green Star 1|Green Star 1]] | |align=left style="background:#E1F2B8"|[[File:Smg2 icon greencomet.png|14px|link=Green Power Star]] [[Sky Station Galaxy#Green Star 1|Green Star 1]] | ||
| align=left style="background:#FBDD89"| [[File:Smg2 icon prankstercomet.png|14px|link=Power Star]] [[Spiny Rainbow Romp]] | |align=left style="background:#FBDD89"|[[File:Smg2 icon prankstercomet.png|14px|link=Power Star]] [[Spiny Rainbow Romp]] | ||
| align=left style="background:#FBDD89"| [[File:Smg2 icon greencomet.png|14px|link=Green Power Star]] [[Yoshi Star Galaxy#Green Star 1|Green Star 1]] | |align=left style="background:#FBDD89"|[[File:Smg2 icon greencomet.png|14px|link=Green Power Star]] [[Yoshi Star Galaxy#Green Star 1|Green Star 1]] | ||
|- | |- | ||
| align=left style="background:#ECF7D1"| [[File:Smg2 icon greencomet.png|14px|link=Green Power Star]] [[Sky Station Galaxy#Green Star 2|Green Star 2]] | |align=left style="background:#ECF7D1"|[[File:Smg2 icon greencomet.png|14px|link=Green Power Star]] [[Sky Station Galaxy#Green Star 2|Green Star 2]] | ||
| align=left style="background:#ECF7D1"| [[File:Smg2 icon greencomet.png|14px|link=Green Power Star]] [[Sky Station Galaxy#Green Star 3|Green Star 3]] | |align=left style="background:#ECF7D1"|[[File:Smg2 icon greencomet.png|14px|link=Green Power Star]] [[Sky Station Galaxy#Green Star 3|Green Star 3]] | ||
| align=left style="background:#FCE8AE"| [[File:Smg2 icon greencomet.png|14px|link=Green Power Star]] [[Yoshi Star Galaxy#Green Star 2|Green Star 2]] | |align=left style="background:#FCE8AE"|[[File:Smg2 icon greencomet.png|14px|link=Green Power Star]] [[Yoshi Star Galaxy#Green Star 2|Green Star 2]] | ||
| align=left style="background:#FCE8AE"| [[File:Smg2 icon greencomet.png|14px|link=Green Power Star]] [[Yoshi Star Galaxy#Green Star 3|Green Star 3]] | |align=left style="background:#FCE8AE"|[[File:Smg2 icon greencomet.png|14px|link=Green Power Star]] [[Yoshi Star Galaxy#Green Star 3|Green Star 3]] | ||
|- | |- | ||
|colspan="6" align=center style="background:#E1F2B8"| The first location visited on the adventure. Features various structures on planets, as well as various enemies [[Goomba]]s, [[Octoomba]]s, and a boss, [[Peewee Piranha]].<br>'''Unlock criterion''': None | |colspan="6" align=center style="background:#E1F2B8"|The first location visited on the adventure. Features various structures on planets, as well as various enemies [[Goomba]]s, [[Octoomba]]s, and a boss, [[Peewee Piranha]].<br>'''Unlock criterion''': None | ||
|colspan="6" align=center style="background:#FBDD89"| A volcano and prehistoric-based land which houses enemies such as Goombas and [[Spiny|Spinies]]. Yoshi makes his first appearance here, being guarded by a [[Magikoopa]].<br>'''Unlock criterion''': Complete "Peewee Piranha's Temper Tantrum" | |colspan="6" align=center style="background:#FBDD89"|A volcano and prehistoric-based land which houses enemies such as Goombas and [[Spiny|Spinies]]. Yoshi makes his first appearance here, being guarded by a [[Magikoopa]].<br>'''Unlock criterion''': Complete "Peewee Piranha's Temper Tantrum" | ||
|- | |- | ||
!colspan="4" style="background:#A1803C"| 03. [[Spin-Dig Galaxy]]<br>[[File:SMG Asset Sprite UI Power Star.png|15px|Total number of obtainable Power Stars.]]×6 [[File:SMG Asset Model Good Egg Galaxy (Dino Piranha Planet).png|15px|Total number of reachable areas.]]×7 [[File:SMG2 Asset Sprite UI Bowser.png|15px|Total number of boss battles.]]×1 | !colspan="4" style="background:#A1803C"|03. [[Spin-Dig Galaxy]]<br>[[File:SMG Asset Sprite UI Power Star.png|15px|Total number of obtainable Power Stars.]]×6 [[File:SMG Asset Model Good Egg Galaxy (Dino Piranha Planet).png|15px|Total number of reachable areas.]]×7 [[File:SMG2 Asset Sprite UI Bowser.png|15px|Total number of boss battles.]]×1 | ||
!colspan="2" style="background:#A1803C"| Missions | !colspan="2" style="background:#A1803C"|Missions | ||
!colspan="4" style="background:#73C9C7"| 04. [[Fluffy Bluff Galaxy]]<br>[[File:SMG Asset Sprite UI Power Star.png|15px|Total number of obtainable Power Stars.]]×6 [[File:SMG Asset Model Good Egg Galaxy (Dino Piranha Planet).png|15px|Total number of reachable areas.]]×4 | !colspan="4" style="background:#73C9C7"|04. [[Fluffy Bluff Galaxy]]<br>[[File:SMG Asset Sprite UI Power Star.png|15px|Total number of obtainable Power Stars.]]×6 [[File:SMG Asset Model Good Egg Galaxy (Dino Piranha Planet).png|15px|Total number of reachable areas.]]×4 | ||
!colspan="2" style="background:#73C9C7"| Missions | !colspan="2" style="background:#73C9C7"|Missions | ||
|- | |- | ||
| colspan="4" rowspan="3" align=center style="background:#FFFFFF"| [[File:SMG2 Spin Dig Drill Zone Planet.png|x90px]] | |colspan="4" rowspan="3" align=center style="background:#FFFFFF"|[[File:SMG2 Spin Dig Drill Zone Planet.png|x90px]] | ||
| align=left style="background:#DBC69D"| [[File:Smg2 icon powerstar.png|14px|link=Power Star]] [[Digga-Leg's Planet]] | |align=left style="background:#DBC69D"|[[File:Smg2 icon powerstar.png|14px|link=Power Star]] [[Digga-Leg's Planet]] | ||
| align=left style="background:#DBC69D"| [[File:Smg2 icon powerstar.png|14px|link=Power Star]] [[Silver Stars Down Deep]] | |align=left style="background:#DBC69D"|[[File:Smg2 icon powerstar.png|14px|link=Power Star]] [[Silver Stars Down Deep]] | ||
| colspan="4" rowspan="3" align=center style="background:#FFFFFF"| [[File:FluffyBluff StoneMountainsPlanet.png|x90px]] | |colspan="4" rowspan="3" align=center style="background:#FFFFFF"|[[File:FluffyBluff StoneMountainsPlanet.png|x90px]] | ||
| align=left style="background:#C6E9E8"| [[File:Smg2 icon powerstar.png|14px|link=Power Star]] [[Search for the Toad Brigade Captain]] | |align=left style="background:#C6E9E8"|[[File:Smg2 icon powerstar.png|14px|link=Power Star]] [[Search for the Toad Brigade Captain]] | ||
| align=left style="background:#C6E9E8"| [[File:Smg2 icon powerstar.png|14px|link=Power Star]] [[The Chimp's Stomp Challenge]] | |align=left style="background:#C6E9E8"|[[File:Smg2 icon powerstar.png|14px|link=Power Star]] [[The Chimp's Stomp Challenge]] | ||
|- | |- | ||
| align=left style="background:#C9AA6D"| [[File:Smg2 icon prankstercomet.png|14px|link=Power Star]] [[Digga-Leg's Daredevil Run]] | |align=left style="background:#C9AA6D"|[[File:Smg2 icon prankstercomet.png|14px|link=Power Star]] [[Digga-Leg's Daredevil Run]] | ||
| align=left style="background:#C9AA6D"| [[File:Smg2 icon greencomet.png|14px|link=Green Power Star]] [[Spin-Dig Galaxy#Green Star 1|Green Star 1]] | |align=left style="background:#C9AA6D"|[[File:Smg2 icon greencomet.png|14px|link=Green Power Star]] [[Spin-Dig Galaxy#Green Star 1|Green Star 1]] | ||
| align=left style="background:#A5DCDB"| [[File:SMG Asset Sprite LS Secret Star.png|14px|link=Power Star]] [[Every Planet Has Its Price]] | |align=left style="background:#A5DCDB"|[[File:SMG Asset Sprite LS Secret Star.png|14px|link=Power Star]] [[Every Planet Has Its Price]] | ||
| align=left style="background:#A5DCDB"| [[File:Smg2 icon greencomet.png|14px|link=Green Power Star]] [[Fluffy Bluff Galaxy#Green Star 1|Green Star 1]] | |align=left style="background:#A5DCDB"|[[File:Smg2 icon greencomet.png|14px|link=Green Power Star]] [[Fluffy Bluff Galaxy#Green Star 1|Green Star 1]] | ||
|- | |- | ||
| align=left style="background:#DBC69D"| [[File:Smg2 icon greencomet.png|14px|link=Green Power Star]] [[Spin-Dig Galaxy#Green Star 2|Green Star 2]] | |align=left style="background:#DBC69D"|[[File:Smg2 icon greencomet.png|14px|link=Green Power Star]] [[Spin-Dig Galaxy#Green Star 2|Green Star 2]] | ||
| align=left style="background:#DBC69D"| [[File:Smg2 icon greencomet.png|14px|link=Green Power Star]] [[Spin-Dig Galaxy#Green Star 3|Green Star 3]] | |align=left style="background:#DBC69D"|[[File:Smg2 icon greencomet.png|14px|link=Green Power Star]] [[Spin-Dig Galaxy#Green Star 3|Green Star 3]] | ||
| align=left style="background:#C6E9E8"| [[File:Smg2 icon greencomet.png|14px|link=Green Power Star]] [[Fluffy Bluff Galaxy#Green Star 2|Green Star 2]] | |align=left style="background:#C6E9E8"|[[File:Smg2 icon greencomet.png|14px|link=Green Power Star]] [[Fluffy Bluff Galaxy#Green Star 2|Green Star 2]] | ||
| align=left style="background:#C6E9E8"| [[File:Smg2 icon greencomet.png|14px|link=Green Power Star]] [[Fluffy Bluff Galaxy#Green Star 3|Green Star 3]] | |align=left style="background:#C6E9E8"|[[File:Smg2 icon greencomet.png|14px|link=Green Power Star]] [[Fluffy Bluff Galaxy#Green Star 3|Green Star 3]] | ||
|- | |- | ||
|colspan="6" align=center style="background:#C9AA6D"| A galaxy with planets made of dirt. The [[Spin Drill]] is introduced here and is used to bury through the dirt.<br>'''Unlock criterion''': Complete "Saddle Up with Yoshi" and have 3 Power Stars in possession | |colspan="6" align=center style="background:#C9AA6D"|A galaxy with planets made of dirt. The [[Spin Drill]] is introduced here and is used to bury through the dirt.<br>'''Unlock criterion''': Complete "Saddle Up with Yoshi" and have 3 Power Stars in possession | ||
|colspan="6" align=center style="background:#A5DCDB"| A land made of water and clouds. The player meets [[The Chimp]] here, and is also introduced to the [[Cloud Flower]].<br>'''Unlock criterion''': Complete "Digga-Leg's Planet" | |colspan="6" align=center style="background:#A5DCDB"|A land made of water and clouds. The player meets [[The Chimp]] here, and is also introduced to the [[Cloud Flower]].<br>'''Unlock criterion''': Complete "Digga-Leg's Planet" | ||
|- | |- | ||
!colspan="4" style="background:#008AFF"| 05. [[File:SMG Asset Sprite UI Hungry Luma.png|14px|link=Hungry Luma]] [[Flip-Swap Galaxy]]<br>[[File:SMG Asset Sprite UI Power Star.png|15px|Total number of obtainable Power Stars.]]×4 [[File:SMG Asset Model Good Egg Galaxy (Dino Piranha Planet).png|15px|Total number of reachable areas.]]×1 | !colspan="4" style="background:#008AFF"|05. [[File:SMG Asset Sprite UI Hungry Luma.png|14px|link=Hungry Luma]] [[Flip-Swap Galaxy]]<br>[[File:SMG Asset Sprite UI Power Star.png|15px|Total number of obtainable Power Stars.]]×4 [[File:SMG Asset Model Good Egg Galaxy (Dino Piranha Planet).png|15px|Total number of reachable areas.]]×1 | ||
!colspan="2" style="background:#008AFF"| Missions | !colspan="2" style="background:#008AFF"|Missions | ||
!colspan="4" style="background:#C5314D"| 06. [[Rightside Down Galaxy]]<br>[[File:SMG Asset Sprite UI Power Star.png|15px|Total number of obtainable Power Stars.]]×4 [[File:SMG Asset Model Good Egg Galaxy (Dino Piranha Planet).png|15px|Total number of reachable areas.]]×2 | !colspan="4" style="background:#C5314D"|06. [[Rightside Down Galaxy]]<br>[[File:SMG Asset Sprite UI Power Star.png|15px|Total number of obtainable Power Stars.]]×4 [[File:SMG Asset Model Good Egg Galaxy (Dino Piranha Planet).png|15px|Total number of reachable areas.]]×2 | ||
!colspan="2" style="background:#C5314D"| Missions | !colspan="2" style="background:#C5314D"|Missions | ||
|- | |- | ||
| colspan="4" rowspan="2" align=center style="background:#FFFFFF"| [[File:SMG2 Flip Swap Starting Section.png|x90px]] | |colspan="4" rowspan="2" align=center style="background:#FFFFFF"|[[File:SMG2 Flip Swap Starting Section.png|x90px]] | ||
| align=left style="background:#57B3FF"| [[File:Smg2 icon powerstar.png|14px|link=Power Star]] [[Think Before You Shake]] | |align=left style="background:#57B3FF"|[[File:Smg2 icon powerstar.png|14px|link=Power Star]] [[Think Before You Shake]] | ||
| align=left style="background:#57B3FF"| [[File:Smg2 icon prankstercomet.png|14px|link=Power Star]] [[Purple Coin Flip 'n' Sprint]] | |align=left style="background:#57B3FF"|[[File:Smg2 icon prankstercomet.png|14px|link=Power Star]] [[Purple Coin Flip 'n' Sprint]] | ||
| colspan="4" rowspan="2" align=center style="background:#FFFFFF"| [[File:SMG2 Rightside Down Swaphopper.png|x90px]] | |colspan="4" rowspan="2" align=center style="background:#FFFFFF"|[[File:SMG2 Rightside Down Swaphopper.png|x90px]] | ||
| align=left style="background:#DA6C81"| [[File:Smg2 icon powerstar.png|14px|link=Power Star]] [[Breaking the Laws of Gravity]] | |align=left style="background:#DA6C81"|[[File:Smg2 icon powerstar.png|14px|link=Power Star]] [[Breaking the Laws of Gravity]] | ||
| align=left style="background:#DA6C81"| [[File:SMG Asset Sprite LS Secret Star.png|14px|link=Power Star]] [[The Great Crate Incinerator]] | |align=left style="background:#DA6C81"|[[File:SMG Asset Sprite LS Secret Star.png|14px|link=Power Star]] [[The Great Crate Incinerator]] | ||
|- | |- | ||
| align=left style="background:#81C6FF"| [[File:Smg2 icon greencomet.png|14px|link=Green Power Star]] [[Flip-Swap Galaxy#Green Star 1|Green Star 1]] | |align=left style="background:#81C6FF"|[[File:Smg2 icon greencomet.png|14px|link=Green Power Star]] [[Flip-Swap Galaxy#Green Star 1|Green Star 1]] | ||
| align=left style="background:#81C6FF"| [[File:Smg2 icon greencomet.png|14px|link=Green Power Star]] [[Flip-Swap Galaxy#Green Star 2|Green Star 2]] | |align=left style="background:#81C6FF"|[[File:Smg2 icon greencomet.png|14px|link=Green Power Star]] [[Flip-Swap Galaxy#Green Star 2|Green Star 2]] | ||
| align=left style="background:#E597A6"| [[File:Smg2 icon greencomet.png|14px|link=Green Power Star]] [[Rightside Down Galaxy#Green Star 1|Green Star 1]] | |align=left style="background:#E597A6"|[[File:Smg2 icon greencomet.png|14px|link=Green Power Star]] [[Rightside Down Galaxy#Green Star 1|Green Star 1]] | ||
| align=left style="background:#E597A6"| [[File:Smg2 icon greencomet.png|14px|link=Green Power Star]] [[Rightside Down Galaxy#Green Star 2|Green Star 2]] | |align=left style="background:#E597A6"|[[File:Smg2 icon greencomet.png|14px|link=Green Power Star]] [[Rightside Down Galaxy#Green Star 2|Green Star 2]] | ||
|- | |- | ||
|colspan="6" align=center style="background:#57B3FF"| A trial of red and blue platforms that flip around whenever the player spins. Various hazards like [[Chain Chomp]]s and electric fences are present on the course.<br>'''Unlock criterion''': Complete "Saddle Up with Yoshi" and feed the Hungry Luma 300 Star Bits | |colspan="6" align=center style="background:#57B3FF"|A trial of red and blue platforms that flip around whenever the player spins. Various hazards like [[Chain Chomp]]s and electric fences are present on the course.<br>'''Unlock criterion''': Complete "Saddle Up with Yoshi" and feed the Hungry Luma 300 Star Bits | ||
|colspan="6" align=center style="background:#DA6C81"| A building where gravity will switch around depending on what direction the arrows are facing.<br>'''Unlock criterion''': Complete "Digga-Leg's Planet" | |colspan="6" align=center style="background:#DA6C81"|A building where gravity will switch around depending on what direction the arrows are facing.<br>'''Unlock criterion''': Complete "Digga-Leg's Planet" | ||
|- | |- | ||
!colspan="4" style="background:#F56F02"| 07. [[Bowser Jr.'s Fiery Flotilla]]<br>[[File:SMG Asset Sprite UI Power Star.png|15px|Total number of obtainable Power Stars.]]×4 [[File:SMG Asset Model Good Egg Galaxy (Dino Piranha Planet).png|15px|Total number of reachable areas.]]×3 [[File:SMG2 Asset Sprite UI Bowser.png|15px|Total number of boss battles.]]×1 | !colspan="4" style="background:#F56F02"|07. [[Bowser Jr.'s Fiery Flotilla]]<br>[[File:SMG Asset Sprite UI Power Star.png|15px|Total number of obtainable Power Stars.]]×4 [[File:SMG Asset Model Good Egg Galaxy (Dino Piranha Planet).png|15px|Total number of reachable areas.]]×3 [[File:SMG2 Asset Sprite UI Bowser.png|15px|Total number of boss battles.]]×1 | ||
!colspan="8" style="background:#F56F02"| Missions | !colspan="8" style="background:#F56F02"|Missions | ||
|- | |- | ||
| colspan="4" rowspan=2 align=center style="background:#FFFFFF"| [[File:SMG2 Fiery Flotilla Lava Planet.png|x90px]] | |colspan="4" rowspan=2 align=center style="background:#FFFFFF"|[[File:SMG2 Fiery Flotilla Lava Planet.png|x90px]] | ||
| colspan="4" align=left style="background:#FEA55C"| [[File:Smg2 icon grandstar.png|14px|link=Power Star]] [[Gobblegut's Aching Belly]] | |colspan="4" align=left style="background:#FEA55C"|[[File:Smg2 icon grandstar.png|14px|link=Power Star]] [[Gobblegut's Aching Belly]] | ||
| colspan="4" align=left style="background:#FEA55C"| [[File:Smg2 icon prankstercomet.png|14px|link=Power Star]] [[Fiery Flotilla Speed Run]] | |colspan="4" align=left style="background:#FEA55C"|[[File:Smg2 icon prankstercomet.png|14px|link=Power Star]] [[Fiery Flotilla Speed Run]] | ||
|- | |- | ||
| colspan="4" align=left style="background:#FECFA8"| [[File:Smg2 icon greencomet.png|14px|link=Green Power Star]] [[Bowser Jr.'s Fiery Flotilla#Green Star 1|Green Star 1]] | |colspan="4" align=left style="background:#FECFA8"|[[File:Smg2 icon greencomet.png|14px|link=Green Power Star]] [[Bowser Jr.'s Fiery Flotilla#Green Star 1|Green Star 1]] | ||
| colspan="4" align=left style="background:#FECFA8"| [[File:Smg2 icon greencomet.png|14px|link=Green Power Star]] [[Bowser Jr.'s Fiery Flotilla#Green Star 2|Green Star 2]] | |colspan="4" align=left style="background:#FECFA8"|[[File:Smg2 icon greencomet.png|14px|link=Green Power Star]] [[Bowser Jr.'s Fiery Flotilla#Green Star 2|Green Star 2]] | ||
|- | |- | ||
|colspan="12" align=center style="background:#FEA55C"| A fortress with various enemies and lava. Mario encounters [[Bowser Jr.]] for the first time, who sends out [[Gobblegut]] to finish Mario off.<br>'''Unlock criterion''': Complete either "Search for the Toad Brigade Captain" or "Every Planet Has Its Price" and have 9 Power Stars in possession | |colspan="12" align=center style="background:#FEA55C"|A fortress with various enemies and lava. Mario encounters [[Bowser Jr.]] for the first time, who sends out [[Gobblegut]] to finish Mario off.<br>'''Unlock criterion''': Complete either "Search for the Toad Brigade Captain" or "Every Planet Has Its Price" and have 9 Power Stars in possession | ||
|- | |- | ||
| colspan="12" style="background:#7EACEA; color:white;"| [[File:SMG2 Asset Texture World Banner (World 2).png|45px|link=World 2 (Super Mario Galaxy 2)]] '''World 2. Shooting Through the Stars''' | |colspan="12" style="background:#7EACEA; color:white;"|[[File:SMG2 Asset Texture World Banner (World 2).png|45px|link=World 2 (Super Mario Galaxy 2)]] '''World 2. Shooting Through the Stars''' | ||
|- | |- | ||
!colspan="4" style="background:#DE9E36"| 08. [[Puzzle Plank Galaxy]]<br>[[File:SMG Asset Sprite UI Power Star.png|15px|Total number of obtainable Power Stars.]]×6 [[File:SMG Asset Model Good Egg Galaxy (Dino Piranha Planet).png|15px|Total number of reachable areas.]]×6 [[File:SMG2 Asset Sprite UI Bowser.png|15px|Total number of boss battles.]]×1 | !colspan="4" style="background:#DE9E36"|08. [[Puzzle Plank Galaxy]]<br>[[File:SMG Asset Sprite UI Power Star.png|15px|Total number of obtainable Power Stars.]]×6 [[File:SMG Asset Model Good Egg Galaxy (Dino Piranha Planet).png|15px|Total number of reachable areas.]]×6 [[File:SMG2 Asset Sprite UI Bowser.png|15px|Total number of boss battles.]]×1 | ||
!colspan="2" style="background:#DE9E36"| Missions | !colspan="2" style="background:#DE9E36"|Missions | ||
!colspan="4" style="background:#C788D2"| 09. [[Hightail Falls Galaxy]]<br>[[File:SMG Asset Sprite UI Power Star.png|15px|Total number of obtainable Power Stars.]]×6 [[File:SMG Asset Model Good Egg Galaxy (Dino Piranha Planet).png|15px|Total number of reachable areas.]]×7 | !colspan="4" style="background:#C788D2"|09. [[Hightail Falls Galaxy]]<br>[[File:SMG Asset Sprite UI Power Star.png|15px|Total number of obtainable Power Stars.]]×6 [[File:SMG Asset Model Good Egg Galaxy (Dino Piranha Planet).png|15px|Total number of reachable areas.]]×7 | ||
!colspan="2" style="background:#C788D2"| Missions | !colspan="2" style="background:#C788D2"|Missions | ||
|- | |- | ||
| colspan="4" rowspan="3" align=center style="background:#FFFFFF"| [[File:SMG2 Puzzle Plank Picture Block.png|x90px]] | |colspan="4" rowspan="3" align=center style="background:#FFFFFF"|[[File:SMG2 Puzzle Plank Picture Block.png|x90px]] | ||
| align=left style="background:#F1D6A9"| [[File:Smg2 icon powerstar.png|14px|link=Power Star]] [[The Puzzling Picture Block]] | |align=left style="background:#F1D6A9"|[[File:Smg2 icon powerstar.png|14px|link=Power Star]] [[The Puzzling Picture Block]] | ||
| align=left style="background:#F1D6A9"| [[File:Smg2 icon prankstercomet.png|14px|link=Power Star]] [[Purple Coin Shadow Vault]] | |align=left style="background:#F1D6A9"|[[File:Smg2 icon prankstercomet.png|14px|link=Power Star]] [[Purple Coin Shadow Vault]] | ||
| colspan="4" rowspan="3" align=center style="background:#FFFFFF"| [[File:SMG2 Hightail Falls Starting Planet.png|x90px]] | |colspan="4" rowspan="3" align=center style="background:#FFFFFF"|[[File:SMG2 Hightail Falls Starting Planet.png|x90px]] | ||
| align=left style="background:#E1BFE7"| [[File:Smg2 icon powerstar.png|14px|link=Power Star]] [[Hot-Stepping Dash Pepper]] | |align=left style="background:#E1BFE7"|[[File:Smg2 icon powerstar.png|14px|link=Power Star]] [[Hot-Stepping Dash Pepper]] | ||
| align=left style="background:#E1BFE7"| [[File:Smg2 icon prankstercomet.png|14px|link=Power Star]] [[Hightail Falls Speed Run]] | |align=left style="background:#E1BFE7"|[[File:Smg2 icon prankstercomet.png|14px|link=Power Star]] [[Hightail Falls Speed Run]] | ||
|- | |- | ||
| align=left style="background:#E9BE77"| [[File:SMG Asset Sprite LS Secret Star.png|14px|link=Power Star]] [[Bugaboom's Back]] | |align=left style="background:#E9BE77"|[[File:SMG Asset Sprite LS Secret Star.png|14px|link=Power Star]] [[Bugaboom's Back]] | ||
| align=left style="background:#E9BE77"| [[File:Smg2 icon greencomet.png|14px|link=Green Power Star]] [[Puzzle Plank Galaxy#Green Star 1|Green Star 1]] | |align=left style="background:#E9BE77"|[[File:Smg2 icon greencomet.png|14px|link=Green Power Star]] [[Puzzle Plank Galaxy#Green Star 1|Green Star 1]] | ||
| align=left style="background:#D5A3DD"| [[File:SMG Asset Sprite LS Secret Star.png|14px|link=Power Star]] [[Silver Stars in Hightail Falls]] | |align=left style="background:#D5A3DD"|[[File:SMG Asset Sprite LS Secret Star.png|14px|link=Power Star]] [[Silver Stars in Hightail Falls]] | ||
| align=left style="background:#D5A3DD"| [[File:Smg2 icon greencomet.png|14px|link=Green Power Star]] [[Hightail Falls Galaxy#Green Star 1|Green Star 1]] | |align=left style="background:#D5A3DD"|[[File:Smg2 icon greencomet.png|14px|link=Green Power Star]] [[Hightail Falls Galaxy#Green Star 1|Green Star 1]] | ||
|- | |- | ||
| align=left style="background:#F1D6A9"| [[File:Smg2 icon greencomet.png|14px|link=Green Power Star]] [[Puzzle Plank Galaxy#Green Star 2|Green Star 2]] | |align=left style="background:#F1D6A9"|[[File:Smg2 icon greencomet.png|14px|link=Green Power Star]] [[Puzzle Plank Galaxy#Green Star 2|Green Star 2]] | ||
| align=left style="background:#F1D6A9"| [[File:Smg2 icon greencomet.png|14px|link=Green Power Star]] [[Puzzle Plank Galaxy#Green Star 3|Green Star 3]] | |align=left style="background:#F1D6A9"|[[File:Smg2 icon greencomet.png|14px|link=Green Power Star]] [[Puzzle Plank Galaxy#Green Star 3|Green Star 3]] | ||
| align=left style="background:#E1BFE7"| [[File:Smg2 icon greencomet.png|14px|link=Green Power Star]] [[Hightail Falls Galaxy#Green Star 2|Green Star 2]] | |align=left style="background:#E1BFE7"|[[File:Smg2 icon greencomet.png|14px|link=Green Power Star]] [[Hightail Falls Galaxy#Green Star 2|Green Star 2]] | ||
| align=left style="background:#E1BFE7"| [[File:Smg2 icon greencomet.png|14px|link=Green Power Star]] [[Hightail Falls Galaxy#Green Star 3|Green Star 3]] | |align=left style="background:#E1BFE7"|[[File:Smg2 icon greencomet.png|14px|link=Green Power Star]] [[Hightail Falls Galaxy#Green Star 3|Green Star 3]] | ||
|- | |- | ||
|colspan="6" align=center style="background:#E9BE77"| A galaxy with planets made of wood to form puzzle-like shapes. [[Grinder|Buzz saw]]s also appear and cut off certain parts of wood.<br>'''Unlock criterion''': Complete "Gobblegut's Aching Belly" | |colspan="6" align=center style="background:#E9BE77"|A galaxy with planets made of wood to form puzzle-like shapes. [[Grinder|Buzz saw]]s also appear and cut off certain parts of wood.<br>'''Unlock criterion''': Complete "Gobblegut's Aching Belly" | ||
|colspan="6" align=center style="background:#D5A3DD"| A large waterfall with steep platforms that can only be traversed with the power of Yoshi's new [[Dash Pepper]].<br>'''Unlock criterion''': Complete either "The Puzzling Picture Block" or "Bugaboom's Back" | |colspan="6" align=center style="background:#D5A3DD"|A large waterfall with steep platforms that can only be traversed with the power of Yoshi's new [[Dash Pepper]].<br>'''Unlock criterion''': Complete either "The Puzzling Picture Block" or "Bugaboom's Back" | ||
|- | |- | ||
!colspan="4" style="background:#A1803C"| 10. [[Boulder Bowl Galaxy]]<br>[[File:SMG Asset Sprite UI Power Star.png|15px|Total number of obtainable Power Stars.]]×6 [[File:SMG Asset Model Good Egg Galaxy (Dino Piranha Planet).png|15px|Total number of reachable areas.]]×6 [[File:SMG2 Asset Sprite UI Bowser.png|15px|Total number of boss battles.]]×1 | !colspan="4" style="background:#A1803C"|10. [[Boulder Bowl Galaxy]]<br>[[File:SMG Asset Sprite UI Power Star.png|15px|Total number of obtainable Power Stars.]]×6 [[File:SMG Asset Model Good Egg Galaxy (Dino Piranha Planet).png|15px|Total number of reachable areas.]]×6 [[File:SMG2 Asset Sprite UI Bowser.png|15px|Total number of boss battles.]]×1 | ||
!colspan="2" style="background:#A1803C"| Missions | !colspan="2" style="background:#A1803C"|Missions | ||
!colspan="4" style="background:#7B9DFD"| 11. [[Cosmic Cove Galaxy]]<br>[[File:SMG Asset Sprite UI Power Star.png|15px|Total number of obtainable Power Stars.]]×6 [[File:SMG Asset Model Good Egg Galaxy (Dino Piranha Planet).png|15px|Total number of reachable areas.]]×4 | !colspan="4" style="background:#7B9DFD"|11. [[Cosmic Cove Galaxy]]<br>[[File:SMG Asset Sprite UI Power Star.png|15px|Total number of obtainable Power Stars.]]×6 [[File:SMG Asset Model Good Egg Galaxy (Dino Piranha Planet).png|15px|Total number of reachable areas.]]×4 | ||
!colspan="2" style="background:#7B9DFD"| Missions | !colspan="2" style="background:#7B9DFD"|Missions | ||
|- | |- | ||
| colspan="4" rowspan="3" align=center style="background:#FFFFFF"| [[File:SMG2 Boulder Bowl Rolling Rocks Planet.png|x90px]] | |colspan="4" rowspan="3" align=center style="background:#FFFFFF"|[[File:SMG2 Boulder Bowl Rolling Rocks Planet.png|x90px]] | ||
| align=left style="background:#DBC69D"| [[File:Smg2 icon powerstar.png|14px|link=Power Star]] [[Rock and Rollodillo]] | |align=left style="background:#DBC69D"|[[File:Smg2 icon powerstar.png|14px|link=Power Star]] [[Rock and Rollodillo]] | ||
| align=left style="background:#DBC69D"| [[File:Smg2 icon prankstercomet.png|14px|link=Power Star]] [[Rolling Crabber Romp]] | |align=left style="background:#DBC69D"|[[File:Smg2 icon prankstercomet.png|14px|link=Power Star]] [[Rolling Crabber Romp]] | ||
| colspan="4" rowspan="3" align=center style="background:#FFFFFF"| [[File:Cosmic cove.png|x90px]] | |colspan="4" rowspan="3" align=center style="background:#FFFFFF"| [[File:Cosmic cove.png|x90px]] | ||
| align=left style="background:#B8CAFE"| [[File:Smg2 icon powerstar.png|14px|link=Power Star]] [[Twin Falls Hideaway]] | |align=left style="background:#B8CAFE"|[[File:Smg2 icon powerstar.png|14px|link=Power Star]] [[Twin Falls Hideaway]] | ||
| align=left style="background:#B8CAFE"| [[File:Smg2 icon powerstar.png|14px|link=Power Star]] [[Exploring the Cosmic Cavern]] | |align=left style="background:#B8CAFE"|[[File:Smg2 icon powerstar.png|14px|link=Power Star]] [[Exploring the Cosmic Cavern]] | ||
|- | |- | ||
| align=left style="background:#C9AA6D"| [[File:SMG Asset Sprite LS Secret Star.png|14px|link=Power Star]] [[C'mere, Goomba]] | |align=left style="background:#C9AA6D"|[[File:SMG Asset Sprite LS Secret Star.png|14px|link=Power Star]] [[C'mere, Goomba]] | ||
| align=left style="background:#C9AA6D"| [[File:Smg2 icon greencomet.png|14px|link=Green Power Star]] [[Boulder Bowl Galaxy#Green Star 1|Green Star 1]] | |align=left style="background:#C9AA6D"|[[File:Smg2 icon greencomet.png|14px|link=Green Power Star]] [[Boulder Bowl Galaxy#Green Star 1|Green Star 1]] | ||
| align=left style="background:#98B3FE"| [[File:SMG Asset Sprite LS Secret Star.png|14px|link=Power Star]] [[Catch that Star Bunny]] | |align=left style="background:#98B3FE"|[[File:SMG Asset Sprite LS Secret Star.png|14px|link=Power Star]] [[Catch that Star Bunny]] | ||
| align=left style="background:#98B3FE"| [[File:Smg2 icon greencomet.png|14px|link=Green Power Star]] [[Cosmic Cove Galaxy#Green Star 1|Green Star 1]] | |align=left style="background:#98B3FE"|[[File:Smg2 icon greencomet.png|14px|link=Green Power Star]] [[Cosmic Cove Galaxy#Green Star 1|Green Star 1]] | ||
|- | |- | ||
| align=left style="background:#DBC69D"| [[File:Smg2 icon greencomet.png|14px|link=Green Power Star]] [[Boulder Bowl Galaxy#Green Star 2|Green Star 2]] | |align=left style="background:#DBC69D"|[[File:Smg2 icon greencomet.png|14px|link=Green Power Star]] [[Boulder Bowl Galaxy#Green Star 2|Green Star 2]] | ||
| align=left style="background:#DBC69D"| [[File:Smg2 icon greencomet.png|14px|link=Green Power Star]] [[Boulder Bowl Galaxy#Green Star 3|Green Star 3]] | |align=left style="background:#DBC69D"|[[File:Smg2 icon greencomet.png|14px|link=Green Power Star]] [[Boulder Bowl Galaxy#Green Star 3|Green Star 3]] | ||
| align=left style="background:#B8CAFE"| [[File:Smg2 icon greencomet.png|14px|link=Green Power Star]] [[Cosmic Cove Galaxy#Green Star 2|Green Star 2]] | |align=left style="background:#B8CAFE"|[[File:Smg2 icon greencomet.png|14px|link=Green Power Star]] [[Cosmic Cove Galaxy#Green Star 2|Green Star 2]] | ||
| align=left style="background:#B8CAFE"| [[File:Smg2 icon greencomet.png|14px|link=Green Power Star]] [[Cosmic Cove Galaxy#Green Star 3|Green Star 3]] | |align=left style="background:#B8CAFE"|[[File:Smg2 icon greencomet.png|14px|link=Green Power Star]] [[Cosmic Cove Galaxy#Green Star 3|Green Star 3]] | ||
|- | |- | ||
|colspan="6" align=center style="background:#C9AA6D"| A galaxy containing many rock-based obstacles, including boulders, [[Octoomba]]s, and [[Octoguy]]s. The new [[Rock Mushroom]] is used in order to take down large obstacles that cannot be taken down normally.<br>'''Unlock criterion''': Complete either "The Puzzling Picture Block" or "Bugaboom's Back" | |colspan="6" align=center style="background:#C9AA6D"|A galaxy containing many rock-based obstacles, including boulders, [[Octoomba]]s, and [[Octoguy]]s. The new [[Rock Mushroom]] is used in order to take down large obstacles that cannot be taken down normally.<br>'''Unlock criterion''': Complete either "The Puzzling Picture Block" or "Bugaboom's Back" | ||
|colspan="6" align=center style="background:#98B3FE"| A mysterious undersea cavern that leads to many special areas. The water on the main planet can be turned into ice.<br>'''Unlock criterion''': Collect a Power Star from either the Boulder Bowl or Hightail Falls Galaxy | |colspan="6" align=center style="background:#98B3FE"|A mysterious undersea cavern that leads to many special areas. The water on the main planet can be turned into ice.<br>'''Unlock criterion''': Collect a Power Star from either the Boulder Bowl or Hightail Falls Galaxy | ||
|- | |- | ||
!colspan="4" style="background:#459F45"| 12. [[Wild Glide Galaxy]]<br>[[File:SMG Asset Sprite UI Power Star.png|15px|Total number of obtainable Power Stars.]]x4 [[File:SMG Asset Model Good Egg Galaxy (Dino Piranha Planet).png|15px|Total number of reachable areas.]]×1 | !colspan="4" style="background:#459F45"|12. [[Wild Glide Galaxy]]<br>[[File:SMG Asset Sprite UI Power Star.png|15px|Total number of obtainable Power Stars.]]x4 [[File:SMG Asset Model Good Egg Galaxy (Dino Piranha Planet).png|15px|Total number of reachable areas.]]×1 | ||
!colspan="2" style="background:#459F45"| Missions | !colspan="2" style="background:#459F45"|Missions | ||
!colspan="4" style="background:#76A925"| 13. [[File:SMG Asset Sprite UI Hungry Luma.png|14px|link=Hungry Luma]] [[Honeybloom Galaxy]]<br>[[File:SMG Asset Sprite UI Power Star.png|15px|Total number of obtainable Power Stars.]]×4 [[File:SMG Asset Model Good Egg Galaxy (Dino Piranha Planet).png|15px|Total number of reachable areas.]]×2 | !colspan="4" style="background:#76A925"|13. [[File:SMG Asset Sprite UI Hungry Luma.png|14px|link=Hungry Luma]] [[Honeybloom Galaxy]]<br>[[File:SMG Asset Sprite UI Power Star.png|15px|Total number of obtainable Power Stars.]]×4 [[File:SMG Asset Model Good Egg Galaxy (Dino Piranha Planet).png|15px|Total number of reachable areas.]]×2 | ||
!colspan="2" style="background:#76A925"| Missions | !colspan="2" style="background:#76A925"|Missions | ||
|- | |- | ||
| colspan="4" rowspan="2" align=center style="background:#FFFFFF"| [[File:SMG2 Jibberjay Overview.png|x90px]] | |colspan="4" rowspan="2" align=center style="background:#FFFFFF"|[[File:SMG2 Jibberjay Overview.png|x90px]] | ||
| align=left style="background:#5FB95F"| [[File:Smg2 icon powerstar.png|14px|link=Power Star]] [[Fluzzard's First Flight]] | |align=left style="background:#5FB95F"|[[File:Smg2 icon powerstar.png|14px|link=Power Star]] [[Fluzzard's First Flight]] | ||
| align=left style="background:#5FB95F"| [[File:Smg2 icon powerstar.png|14px|link=Power Star]] [[Jungle Fluzzard Race]] | |align=left style="background:#5FB95F"|[[File:Smg2 icon powerstar.png|14px|link=Power Star]] [[Jungle Fluzzard Race]] | ||
| colspan="4" rowspan="2" align=center style="background:#FFFFFF"| [[File:SMG2 Honeybloom Log Wood Planet.png|x90px]] | |colspan="4" rowspan="2" align=center style="background:#FFFFFF"|[[File:SMG2 Honeybloom Log Wood Planet.png|x90px]] | ||
| align=left style="background:#B3DF6B"| [[File:Smg2 icon powerstar.png|14px|link=Power Star]] [[Bumble Beginnings]] | |align=left style="background:#B3DF6B"|[[File:Smg2 icon powerstar.png|14px|link=Power Star]] [[Bumble Beginnings]] | ||
| align=left style="background:#B3DF6B"| [[File:SMG Asset Sprite LS Secret Star.png|14px|link=Power Star]] [[The Secret Wall Jump]] | |align=left style="background:#B3DF6B"|[[File:SMG Asset Sprite LS Secret Star.png|14px|link=Power Star]] [[The Secret Wall Jump]] | ||
|- | |- | ||
| align=left style="background:#95D095"| [[File:Smg2 icon greencomet.png|14px|link=Green Power Star]] [[Wild Glide Galaxy#Green Star 1|Green Star 1]] | |align=left style="background:#95D095"|[[File:Smg2 icon greencomet.png|14px|link=Green Power Star]] [[Wild Glide Galaxy#Green Star 1|Green Star 1]] | ||
| align=left style="background:#95D095"| [[File:Smg2 icon greencomet.png|14px|link=Green Power Star]] [[Wild Glide Galaxy#Green Star 2|Green Star 2]] | |align=left style="background:#95D095"|[[File:Smg2 icon greencomet.png|14px|link=Green Power Star]] [[Wild Glide Galaxy#Green Star 2|Green Star 2]] | ||
| align=left style="background:#C8E894"| [[File:Smg2 icon greencomet.png|14px|link=Green Power Star]] [[Honeybloom Galaxy#Green Star 1|Green Star 1]] | |align=left style="background:#C8E894"|[[File:Smg2 icon greencomet.png|14px|link=Green Power Star]] [[Honeybloom Galaxy#Green Star 1|Green Star 1]] | ||
| align=left style="background:#C8E894"| [[File:Smg2 icon greencomet.png|14px|link=Green Power Star]] [[Honeybloom Galaxy#Green Star 2|Green Star 2]] | |align=left style="background:#C8E894"|[[File:Smg2 icon greencomet.png|14px|link=Green Power Star]] [[Honeybloom Galaxy#Green Star 2|Green Star 2]] | ||
|- | |- | ||
|colspan="6" align=center style="background:#5FB95F"| A jungle racecourse where a [[Jibberjay]] teaches Mario how to fly with [[Fluzzard]].<br>'''Unlock criterion''': Collect a Power Star from either the Boulder Bowl or Hightail Falls Galaxy | |colspan="6" align=center style="background:#5FB95F"|A jungle racecourse where a [[Jibberjay]] teaches Mario how to fly with [[Fluzzard]].<br>'''Unlock criterion''': Collect a Power Star from either the Boulder Bowl or Hightail Falls Galaxy | ||
|colspan="6" align=center style="background:#B3DF6B"| A bee-themed level that takes place entirely in the 2D side-scrolling perspective. Mario should use the [[Bee Mushroom]] to fly around dangerous hazards.<br>'''Unlock criterion''': Collect a Power Star from either the Boulder Bowl or Hightail Falls Galaxy and feed the Hungry Luma 700 Star Bits | |colspan="6" align=center style="background:#B3DF6B"|A bee-themed level that takes place entirely in the 2D side-scrolling perspective. Mario should use the [[Bee Mushroom]] to fly around dangerous hazards.<br>'''Unlock criterion''': Collect a Power Star from either the Boulder Bowl or Hightail Falls Galaxy and feed the Hungry Luma 700 Star Bits | ||
|- | |- | ||
!colspan="4" style="background:#C7331C"| 14. [[Bowser's Lava Lair]]<br>[[File:SMG Asset Sprite UI Power Star.png|15px|Total number of obtainable Power Stars.]]×4 [[File:SMG Asset Model Good Egg Galaxy (Dino Piranha Planet).png|15px|Total number of reachable areas.]]×7 [[File:SMG2 Asset Sprite UI Bowser.png|15px|Total number of boss battles.]]×1 | !colspan="4" style="background:#C7331C"|14. [[Bowser's Lava Lair]]<br>[[File:SMG Asset Sprite UI Power Star.png|15px|Total number of obtainable Power Stars.]]×4 [[File:SMG Asset Model Good Egg Galaxy (Dino Piranha Planet).png|15px|Total number of reachable areas.]]×7 [[File:SMG2 Asset Sprite UI Bowser.png|15px|Total number of boss battles.]]×1 | ||
!colspan="8" style="background:#C7331C"| Missions | !colspan="8" style="background:#C7331C"|Missions | ||
|- | |- | ||
| colspan="4" rowspan=2 align=center style="background:#FFFFFF"| [[File:SMG2 Bowsers Lava Lair Cylindrical Planet.png|x90px]] | |colspan="4" rowspan=2 align=center style="background:#FFFFFF"|[[File:SMG2 Bowsers Lava Lair Cylindrical Planet.png|x90px]] | ||
| colspan="4" align=left style="background:#F0A194"| [[File:Smg2 icon grandstar.png|14px|link=Power Star]] [[Bowser's Big Lava Power Party]] | |colspan="4" align=left style="background:#F0A194"|[[File:Smg2 icon grandstar.png|14px|link=Power Star]] [[Bowser's Big Lava Power Party]] | ||
| colspan="4" align=left style="background:#F0A194"| [[File:Smg2 icon prankstercomet.png|14px|link=Power Star]] [[Lava Lair Speed Run]] | |colspan="4" align=left style="background:#F0A194"|[[File:Smg2 icon prankstercomet.png|14px|link=Power Star]] [[Lava Lair Speed Run]] | ||
|- | |- | ||
| colspan="4" align=left style="background:#F7CCC5"| [[File:Smg2 icon greencomet.png|14px|link=Green Power Star]] [[Bowser's Lava Lair#Green Star 1|Green Star 1]] | |colspan="4" align=left style="background:#F7CCC5"|[[File:Smg2 icon greencomet.png|14px|link=Green Power Star]] [[Bowser's Lava Lair#Green Star 1|Green Star 1]] | ||
| colspan="4" align=left style="background:#F7CCC5"| [[File:Smg2 icon greencomet.png|14px|link=Green Power Star]] [[Bowser's Lava Lair#Green Star 2|Green Star 2]] | |colspan="4" align=left style="background:#F7CCC5"|[[File:Smg2 icon greencomet.png|14px|link=Green Power Star]] [[Bowser's Lava Lair#Green Star 2|Green Star 2]] | ||
|- | |- | ||
|colspan="12" align=center style="background:#F0A194"| A volcanic fortress prominently featuring [[Whomp]]s and fiery enemies. Mario fights [[Super Bowser|Giant Bowser]] for the first time, who attacks by punching the ground and summoning [[meteorite]]s.<br>'''Unlock criterion''': Collect a Power Star from either the Wild Glide, Honeybloom, or Cosmic Cove Galaxy and have 16 Power Stars in possession | |colspan="12" align=center style="background:#F0A194"|A volcanic fortress prominently featuring [[Whomp]]s and fiery enemies. Mario fights [[Super Bowser|Giant Bowser]] for the first time, who attacks by punching the ground and summoning [[meteorite]]s.<br>'''Unlock criterion''': Collect a Power Star from either the Wild Glide, Honeybloom, or Cosmic Cove Galaxy and have 16 Power Stars in possession | ||
|- | |- | ||
| colspan="12" style="background:#7EACEA; color:white;"| [[File:SMG2 Asset Texture World Banner (World 3).png|45px|link=World 3 (Super Mario Galaxy 2)]] '''World 3. The Far Reaches of the Universe''' | |colspan="12" style="background:#7EACEA; color:white;"|[[File:SMG2 Asset Texture World Banner (World 3).png|45px|link=World 3 (Super Mario Galaxy 2)]] '''World 3. The Far Reaches of the Universe''' | ||
|- | |- | ||
!colspan="4" style="background:#B9B257"| 15. [[Tall Trunk Galaxy]]<br>[[File:SMG Asset Sprite UI Power Star.png|15px|Total number of obtainable Power Stars.]]×6 [[File:SMG Asset Model Good Egg Galaxy (Dino Piranha Planet).png|15px|Total number of reachable areas.]]×5 | !colspan="4" style="background:#B9B257"|15. [[Tall Trunk Galaxy]]<br>[[File:SMG Asset Sprite UI Power Star.png|15px|Total number of obtainable Power Stars.]]×6 [[File:SMG Asset Model Good Egg Galaxy (Dino Piranha Planet).png|15px|Total number of reachable areas.]]×5 | ||
!colspan="2" style="background:#B9B257"| Missions | !colspan="2" style="background:#B9B257"|Missions | ||
!colspan="4" style="background:#A4AAB4"| 16. [[Cloudy Court Galaxy]]<br>[[File:SMG Asset Sprite UI Power Star.png|15px|Total number of obtainable Power Stars.]]×6 [[File:SMG Asset Model Good Egg Galaxy (Dino Piranha Planet).png|15px|Total number of reachable areas.]]×5 | !colspan="4" style="background:#A4AAB4"|16. [[Cloudy Court Galaxy]]<br>[[File:SMG Asset Sprite UI Power Star.png|15px|Total number of obtainable Power Stars.]]×6 [[File:SMG Asset Model Good Egg Galaxy (Dino Piranha Planet).png|15px|Total number of reachable areas.]]×5 | ||
!colspan="2" style="background:#A4AAB4"| Missions | !colspan="2" style="background:#A4AAB4"|Missions | ||
|- | |- | ||
| colspan="4" rowspan="3" align=center style="background:#FFFFFF"| [[File:SMG2 Tall Trunk Slide.png|x90px]] | |colspan="4" rowspan="3" align=center style="background:#FFFFFF"|[[File:SMG2 Tall Trunk Slide.png|x90px]] | ||
| align=left style="background:#E1DEB5"| [[File:Smg2 icon powerstar.png|14px|link=Power Star]] [[The Flotacious Blimp Fruit]] | |align=left style="background:#E1DEB5"|[[File:Smg2 icon powerstar.png|14px|link=Power Star]] [[The Flotacious Blimp Fruit]] | ||
| align=left style="background:#E1DEB5"| [[File:Smg2 icon powerstar.png|14px|link=Power Star]] [[Tall Trunk's Big Slide]] | |align=left style="background:#E1DEB5"|[[File:Smg2 icon powerstar.png|14px|link=Power Star]] [[Tall Trunk's Big Slide]] | ||
| colspan="4" rowspan="3" align=center style="background:#FFFFFF"| [[File:SMG2 Cloudy Court Starting Planet.png|x90px]] | |colspan="4" rowspan="3" align=center style="background:#FFFFFF"|[[File:SMG2 Cloudy Court Starting Planet.png|x90px]] | ||
| align=left style="background:#DBDDE1"| [[File:Smg2 icon powerstar.png|14px|link=Power Star]] [[Head in the Clouds (mission)|Head in the Clouds]] | |align=left style="background:#DBDDE1"|[[File:Smg2 icon powerstar.png|14px|link=Power Star]] [[Head in the Clouds (mission)|Head in the Clouds]] | ||
| align=left style="background:#DBDDE1"| [[File:Smg2 icon prankstercomet.png|14px|link=Power Star]] [[The Shadow Lining]] | |align=left style="background:#DBDDE1"|[[File:Smg2 icon prankstercomet.png|14px|link=Power Star]] [[The Shadow Lining]] | ||
|- | |- | ||
| align=left style="background:#D7D39D"| [[File:Smg2 icon prankstercomet.png|14px|link=Power Star]] [[Tall Trunk's Purple Coin Slide]] | |align=left style="background:#D7D39D"|[[File:Smg2 icon prankstercomet.png|14px|link=Power Star]] [[Tall Trunk's Purple Coin Slide]] | ||
| align=left style="background:#D7D39D"| [[File:Smg2 icon greencomet.png|14px|link=Green Power Star]] [[Tall Trunk Galaxy#Green Star 1|Green Star 1]] | |align=left style="background:#D7D39D"|[[File:Smg2 icon greencomet.png|14px|link=Green Power Star]] [[Tall Trunk Galaxy#Green Star 1|Green Star 1]] | ||
| align=left style="background:#C4C8CE"| [[File:SMG Asset Sprite LS Secret Star.png|14px|link=Power Star]] [[Silver Stars in the Purple Pond]] | |align=left style="background:#C4C8CE"|[[File:SMG Asset Sprite LS Secret Star.png|14px|link=Power Star]] [[Silver Stars in the Purple Pond]] | ||
| align=left style="background:#C4C8CE"| [[File:Smg2 icon greencomet.png|14px|link=Green Power Star]] [[Cloudy Court Galaxy#Green Star 1|Green Star 1]] | |align=left style="background:#C4C8CE"|[[File:Smg2 icon greencomet.png|14px|link=Green Power Star]] [[Cloudy Court Galaxy#Green Star 1|Green Star 1]] | ||
|- | |- | ||
| align=left style="background:#E1DEB5"| [[File:Smg2 icon greencomet.png|14px|link=Green Power Star]] [[Tall Trunk Galaxy#Green Star 2|Green Star 2]] | |align=left style="background:#E1DEB5"|[[File:Smg2 icon greencomet.png|14px|link=Green Power Star]] [[Tall Trunk Galaxy#Green Star 2|Green Star 2]] | ||
| align=left style="background:#E1DEB5"| [[File:Smg2 icon greencomet.png|14px|link=Green Power Star]] [[Tall Trunk Galaxy#Green Star 3|Green Star 3]] | |align=left style="background:#E1DEB5"|[[File:Smg2 icon greencomet.png|14px|link=Green Power Star]] [[Tall Trunk Galaxy#Green Star 3|Green Star 3]] | ||
| align=left style="background:#DBDDE1"| [[File:Smg2 icon greencomet.png|14px|link=Green Power Star]] [[Cloudy Court Galaxy#Green Star 2|Green Star 2]] | |align=left style="background:#DBDDE1"|[[File:Smg2 icon greencomet.png|14px|link=Green Power Star]] [[Cloudy Court Galaxy#Green Star 2|Green Star 2]] | ||
| align=left style="background:#DBDDE1"| [[File:Smg2 icon greencomet.png|14px|link=Green Power Star]] [[Cloudy Court Galaxy#Green Star 3|Green Star 3]] | |align=left style="background:#DBDDE1"|[[File:Smg2 icon greencomet.png|14px|link=Green Power Star]] [[Cloudy Court Galaxy#Green Star 3|Green Star 3]] | ||
|- | |- | ||
|colspan="6" align=center style="background:#D7D39D"| A galaxy consisting of many trees floating in the sky. This galaxy introduces the [[Blimp Fruit]] for Yoshi and contains a planet homaging ''[[Super Mario 64]]''<nowiki>'</nowiki>s slide levels.<br>'''Unlock criterion''': Complete "Bowser's Big Lava Power Party" | |colspan="6" align=center style="background:#D7D39D"|A galaxy consisting of many trees floating in the sky. This galaxy introduces the [[Blimp Fruit]] for Yoshi and contains a planet homaging ''[[Super Mario 64]]''<nowiki>'</nowiki>s slide levels.<br>'''Unlock criterion''': Complete "Bowser's Big Lava Power Party" | ||
|colspan="6" align=center style="background:#C4C8CE"| A cloud-themed galaxy featuring medieval buildings. Much like Fluffy Bluff Galaxy, the Cloud Flower is prominently used for traversing its planets.<br>'''Unlock criterion''': Complete "Bowser's Big Lava Power Party" | |colspan="6" align=center style="background:#C4C8CE"|A cloud-themed galaxy featuring medieval buildings. Much like Fluffy Bluff Galaxy, the Cloud Flower is prominently used for traversing its planets.<br>'''Unlock criterion''': Complete "Bowser's Big Lava Power Party" | ||
|- | |- | ||
!colspan="4" style="background:#9B68C6"| 17. [[Haunty Halls Galaxy]]<br>[[File:SMG Asset Sprite UI Power Star.png|15px|Total number of obtainable Power Stars.]]×6 [[File:SMG Asset Model Good Egg Galaxy (Dino Piranha Planet).png|15px|Total number of reachable areas.]]×4 | !colspan="4" style="background:#9B68C6"|17. [[Haunty Halls Galaxy]]<br>[[File:SMG Asset Sprite UI Power Star.png|15px|Total number of obtainable Power Stars.]]×6 [[File:SMG Asset Model Good Egg Galaxy (Dino Piranha Planet).png|15px|Total number of reachable areas.]]×4 | ||
!colspan="2" style="background:#9B68C6"| Missions | !colspan="2" style="background:#9B68C6"|Missions | ||
!colspan="4" style="background:#D4D8F1"| 18. [[Freezy Flake Galaxy]]<br>[[File:SMG Asset Sprite UI Power Star.png|15px|Total number of obtainable Power Stars.]]×6 [[File:SMG Asset Model Good Egg Galaxy (Dino Piranha Planet).png|15px|Total number of reachable areas.]]×6 [[File:SMG2 Asset Sprite UI Bowser.png|15px|Total number of boss battles.]]×1 | !colspan="4" style="background:#D4D8F1"|18. [[Freezy Flake Galaxy]]<br>[[File:SMG Asset Sprite UI Power Star.png|15px|Total number of obtainable Power Stars.]]×6 [[File:SMG Asset Model Good Egg Galaxy (Dino Piranha Planet).png|15px|Total number of reachable areas.]]×6 [[File:SMG2 Asset Sprite UI Bowser.png|15px|Total number of boss battles.]]×1 | ||
!colspan="2" style="background:#D4D8F1"| Missions | !colspan="2" style="background:#D4D8F1"|Missions | ||
|- | |- | ||
| colspan="4" rowspan="3" align=center style="background:#FFFFFF"| [[File:SMG2 Haunty Halls Sneaking Down the Creepy Corridor.png|x90px]] | |colspan="4" rowspan="3" align=center style="background:#FFFFFF"|[[File:SMG2 Haunty Halls Sneaking Down the Creepy Corridor.png|x90px]] | ||
| align=left style="background:#CFB6E4"| [[File:Smg2 icon powerstar.png|14px|link=Power Star]] [[A Glimmer of Bulb Berry]] | |align=left style="background:#CFB6E4"|[[File:Smg2 icon powerstar.png|14px|link=Power Star]] [[A Glimmer of Bulb Berry]] | ||
| align=left style="background:#CFB6E4"| [[File:Smg2 icon powerstar.png|14px|link=Power Star]] [[Sneaking Down the Creepy Corridor]] | |align=left style="background:#CFB6E4"|[[File:Smg2 icon powerstar.png|14px|link=Power Star]] [[Sneaking Down the Creepy Corridor]] | ||
| colspan="4" rowspan="3" align=center style="background:#FFFFFF"| [[File:Fire Luigi SMG2 photo.png|x90px]] | |colspan="4" rowspan="3" align=center style="background:#FFFFFF"|[[File:Fire Luigi SMG2 photo.png|x90px]] | ||
| align=left style="background:#F6F7FC"| [[File:Smg2 icon powerstar.png|14px|link=Power Star]] [[Bowser on Ice]] | |align=left style="background:#F6F7FC"|[[File:Smg2 icon powerstar.png|14px|link=Power Star]] [[Bowser on Ice]] | ||
| align=left style="background:#F6F7FC"| [[File:Smg2 icon powerstar.png|14px|link=Power Star]] [[Sorbetti's Chilly Reception]] | |align=left style="background:#F6F7FC"|[[File:Smg2 icon powerstar.png|14px|link=Power Star]] [[Sorbetti's Chilly Reception]] | ||
|- | |- | ||
| align=left style="background:#B58FD5"| [[File:Smg2 icon prankstercomet.png|14px|link=Power Star]] [[Spooky Cosmic Clone Chase]] | |align=left style="background:#B58FD5"|[[File:Smg2 icon prankstercomet.png|14px|link=Power Star]] [[Spooky Cosmic Clone Chase]] | ||
| align=left style="background:#B58FD5"| [[File:Smg2 icon greencomet.png|14px|link=Green Power Star]] [[Haunty Halls Galaxy#Green Star 1|Green Star 1]] | |align=left style="background:#B58FD5"|[[File:Smg2 icon greencomet.png|14px|link=Green Power Star]] [[Haunty Halls Galaxy#Green Star 1|Green Star 1]] | ||
| align=left style="background:#E5E8F7"| [[File:SMG Asset Sprite LS Secret Star.png|14px|link=Power Star]] [[The Chimp's Skating Challenge]] | |align=left style="background:#E5E8F7"|[[File:SMG Asset Sprite LS Secret Star.png|14px|link=Power Star]] [[The Chimp's Skating Challenge]] | ||
| align=left style="background:#E5E8F7"| [[File:Smg2 icon greencomet.png|14px|link=Green Power Star]] [[Freezy Flake Galaxy#Green Star 1|Green Star 1]] | |align=left style="background:#E5E8F7"|[[File:Smg2 icon greencomet.png|14px|link=Green Power Star]] [[Freezy Flake Galaxy#Green Star 1|Green Star 1]] | ||
|- | |- | ||
| align=left style="background:#CFB6E4"| [[File:Smg2 icon greencomet.png|14px|link=Green Power Star]] [[Haunty Halls Galaxy#Green Star 2|Green Star 2]] | |align=left style="background:#CFB6E4"|[[File:Smg2 icon greencomet.png|14px|link=Green Power Star]] [[Haunty Halls Galaxy#Green Star 2|Green Star 2]] | ||
| align=left style="background:#CFB6E4"| [[File:Smg2 icon greencomet.png|14px|link=Green Power Star]] [[Haunty Halls Galaxy#Green Star 3|Green Star 3]] | |align=left style="background:#CFB6E4"|[[File:Smg2 icon greencomet.png|14px|link=Green Power Star]] [[Haunty Halls Galaxy#Green Star 3|Green Star 3]] | ||
| align=left style="background:#F6F7FC"| [[File:Smg2 icon greencomet.png|14px|link=Green Power Star]] [[Freezy Flake Galaxy#Green Star 2|Green Star 2]] | |align=left style="background:#F6F7FC"|[[File:Smg2 icon greencomet.png|14px|link=Green Power Star]] [[Freezy Flake Galaxy#Green Star 2|Green Star 2]] | ||
| align=left style="background:#F6F7FC"| [[File:Smg2 icon greencomet.png|14px|link=Green Power Star]] [[Freezy Flake Galaxy#Green Star 3|Green Star 3]] | |align=left style="background:#F6F7FC"|[[File:Smg2 icon greencomet.png|14px|link=Green Power Star]] [[Freezy Flake Galaxy#Green Star 3|Green Star 3]] | ||
|- | |- | ||
|colspan="6" align=center style="background:#B58FD5"| A haunted galaxy containing [[Octoboo]]s and [[Boo]]s. The [[Bulb Berry]] is introduced here, allowing Yoshi to light up hidden platforms.<br>'''Unlock criterion''': Collect a Power Star from either the Tall Trunk Galaxy or Freezy Flake Galaxy | |colspan="6" align=center style="background:#B58FD5"|A haunted galaxy containing [[Octoboo]]s and [[Boo]]s. The [[Bulb Berry]] is introduced here, allowing Yoshi to light up hidden platforms.<br>'''Unlock criterion''': Collect a Power Star from either the Tall Trunk Galaxy or Freezy Flake Galaxy | ||
|colspan="6" align=center style="background:#E5E8F7"| A snowy galaxy containing [[Li'l Brr]]s and [[Li'l Cinder]]s, and featuring both the [[Fire Flower]] and Rock Mushroom power-ups. The boss of this galaxy is [[Sorbetti]], a giant snowman's head.<br>'''Unlock criterion''': Collect a Power Star from either the Cloudy Court Galaxy or Haunty Halls Galaxy | |colspan="6" align=center style="background:#E5E8F7"|A snowy galaxy containing [[Li'l Brr]]s and [[Li'l Cinder]]s, and featuring both the [[Fire Flower]] and Rock Mushroom power-ups. The boss of this galaxy is [[Sorbetti]], a giant snowman's head.<br>'''Unlock criterion''': Collect a Power Star from either the Cloudy Court Galaxy or Haunty Halls Galaxy | ||
|- | |- | ||
!colspan="4" style="background:#DC3834"| 19. [[Rolling Masterpiece Galaxy]]<br>[[File:SMG Asset Sprite UI Power Star.png|15px|Total number of obtainable Power Stars.]]x4 [[File:SMG Asset Model Good Egg Galaxy (Dino Piranha Planet).png|15px|Total number of reachable areas.]]×8 | !colspan="4" style="background:#DC3834"|19. [[Rolling Masterpiece Galaxy]]<br>[[File:SMG Asset Sprite UI Power Star.png|15px|Total number of obtainable Power Stars.]]x4 [[File:SMG Asset Model Good Egg Galaxy (Dino Piranha Planet).png|15px|Total number of reachable areas.]]×8 | ||
!colspan="2" style="background:#DC3834"| Missions | !colspan="2" style="background:#DC3834"|Missions | ||
!colspan="4" style="background:#9BF40A"| 20. [[File:SMG Asset Sprite UI Hungry Luma.png|14px|link=Hungry Luma]] [[Beat Block Galaxy]]<br>[[File:SMG Asset Sprite UI Power Star.png|15px|Total number of obtainable Power Stars.]]×4 [[File:SMG Asset Model Good Egg Galaxy (Dino Piranha Planet).png|15px|Total number of reachable areas.]]×1 | !colspan="4" style="background:#9BF40A"|20. [[File:SMG Asset Sprite UI Hungry Luma.png|14px|link=Hungry Luma]] [[Beat Block Galaxy]]<br>[[File:SMG Asset Sprite UI Power Star.png|15px|Total number of obtainable Power Stars.]]×4 [[File:SMG Asset Model Good Egg Galaxy (Dino Piranha Planet).png|15px|Total number of reachable areas.]]×1 | ||
!colspan="2" style="background:#9BF40A"| Missions | !colspan="2" style="background:#9BF40A"|Missions | ||
|- | |- | ||
| colspan="4" rowspan="2" align=center style="background:#FFFFFF"| [[File:SMG2 Rolling Masterpiece Galaxy 2.png|x90px]] | |colspan="4" rowspan="2" align=center style="background:#FFFFFF"|[[File:SMG2 Rolling Masterpiece Galaxy 2.png|x90px]] | ||
| align=left style="background:#E9827F"| [[File:Smg2 icon powerstar.png|14px|link=Power Star]] [[Silver Chomp Grudge Match]] | |align=left style="background:#E9827F"|[[File:Smg2 icon powerstar.png|14px|link=Power Star]] [[Silver Chomp Grudge Match]] | ||
| align=left style="background:#E9827F"| [[File:Smg2 icon prankstercomet.png|14px|link=Power Star]] [[Masterpiece Speed Run]] | |align=left style="background:#E9827F"|[[File:Smg2 icon prankstercomet.png|14px|link=Power Star]] [[Masterpiece Speed Run]] | ||
| colspan="4" rowspan="2" align=center style="background:#FFFFFF"| [[File:SMG2 Beat Block Blinking Block Pyramid.png|x90px]] | |colspan="4" rowspan="2" align=center style="background:#FFFFFF"|[[File:SMG2 Beat Block Blinking Block Pyramid.png|x90px]] | ||
| align=left style="background:#CEFA86"| [[File:Smg2 icon powerstar.png|14px|link=Power Star]] [[Step to the Beep]] | |align=left style="background:#CEFA86"|[[File:Smg2 icon powerstar.png|14px|link=Power Star]] [[Step to the Beep]] | ||
| align=left style="background:#CEFA86"| [[File:Smg2 icon prankstercomet.png|14px|link=Power Star]] [[Silver Stars in Double Time]] | |align=left style="background:#CEFA86"|[[File:Smg2 icon prankstercomet.png|14px|link=Power Star]] [[Silver Stars in Double Time]] | ||
|- | |- | ||
| align=left style="background:#F1AFAD"| [[File:Smg2 icon greencomet.png|14px|link=Green Power Star]] [[Rolling Masterpiece Galaxy#Green Star 1|Green Star 1]] | |align=left style="background:#F1AFAD"|[[File:Smg2 icon greencomet.png|14px|link=Green Power Star]] [[Rolling Masterpiece Galaxy#Green Star 1|Green Star 1]] | ||
| align=left style="background:#F1AFAD"| [[File:Smg2 icon greencomet.png|14px|link=Green Power Star]] [[Rolling Masterpiece Galaxy#Green Star 2|Green Star 2]] | |align=left style="background:#F1AFAD"|[[File:Smg2 icon greencomet.png|14px|link=Green Power Star]] [[Rolling Masterpiece Galaxy#Green Star 2|Green Star 2]] | ||
| align=left style="background:#E4FCBC"| [[File:Smg2 icon greencomet.png|14px|link=Green Power Star]] [[Beat Block Galaxy#Green Star 1|Green Star 1]] | |align=left style="background:#E4FCBC"|[[File:Smg2 icon greencomet.png|14px|link=Green Power Star]] [[Beat Block Galaxy#Green Star 1|Green Star 1]] | ||
| align=left style="background:#E4FCBC"| [[File:Smg2 icon greencomet.png|14px|link=Green Power Star]] [[Beat Block Galaxy#Green Star 2|Green Star 2]] | |align=left style="background:#E4FCBC"|[[File:Smg2 icon greencomet.png|14px|link=Green Power Star]] [[Beat Block Galaxy#Green Star 2|Green Star 2]] | ||
|- | |- | ||
|colspan="6" align=center style="background:#E9827F"| A galaxy themed after arts and craft supplies, which introduces the [[Star Ball]] for Mario to roll around on. Goombas and [[Bob-omb]]s appear as enemies here.<br>'''Unlock criterion''': Complete either "Bowser on Ice" or "The Chimp's Skating Challenge" | |colspan="6" align=center style="background:#E9827F"|A galaxy themed after arts and craft supplies, which introduces the [[Star Ball]] for Mario to roll around on. Goombas and [[Bob-omb]]s appear as enemies here.<br>'''Unlock criterion''': Complete either "Bowser on Ice" or "The Chimp's Skating Challenge" | ||
|colspan="6" align=center style="background:#CEFA86"| A small galaxy featuring green and yellow [[Blinking Block|Beat Block]]s which disappear and reappear at short intervals. Octoombas appear on the green blocks while [[Goombeetle]]s appear on the yellow blocks.<br>'''Unlock criterion''': Complete "A Glimmer of Bulb Berry" and feed the Hungry Luma 1000 Star Bits | |colspan="6" align=center style="background:#CEFA86"|A small galaxy featuring green and yellow [[Blinking Block|Beat Block]]s which disappear and reappear at short intervals. Octoombas appear on the green blocks while [[Goombeetle]]s appear on the yellow blocks.<br>'''Unlock criterion''': Complete "A Glimmer of Bulb Berry" and feed the Hungry Luma 1000 Star Bits | ||
|- | |- | ||
!colspan="4" style="background:#49AD87"| 21. [[Bowser Jr.'s Fearsome Fleet]]<br>[[File:SMG Asset Sprite UI Power Star.png|15px|Total number of obtainable Power Stars.]]×4 [[File:SMG Asset Model Good Egg Galaxy (Dino Piranha Planet).png|15px|Total number of reachable areas.]]×5 [[File:SMG2 Asset Sprite UI Bowser.png|15px|Total number of boss battles.]]×1 | !colspan="4" style="background:#49AD87"|21. [[Bowser Jr.'s Fearsome Fleet]]<br>[[File:SMG Asset Sprite UI Power Star.png|15px|Total number of obtainable Power Stars.]]×4 [[File:SMG Asset Model Good Egg Galaxy (Dino Piranha Planet).png|15px|Total number of reachable areas.]]×5 [[File:SMG2 Asset Sprite UI Bowser.png|15px|Total number of boss battles.]]×1 | ||
!colspan="8" style="background:#49AD87"| Missions | !colspan="8" style="background:#49AD87"|Missions | ||
|- | |- | ||
| colspan="4" rowspan=2 align=center style="background:#FFFFFF"| [[File:SMG2 Fearsome Fleet Gunner Path.png|x90px]] | |colspan="4" rowspan=2 align=center style="background:#FFFFFF"|[[File:SMG2 Fearsome Fleet Gunner Path.png|x90px]] | ||
| colspan="4" align=left style="background:#66BE9C"| [[File:Smg2 icon grandstar.png|14px|link=Power Star]] [[Bowser Jr.'s Mighty Megahammer]] | |colspan="4" align=left style="background:#66BE9C"|[[File:Smg2 icon grandstar.png|14px|link=Power Star]] [[Bowser Jr.'s Mighty Megahammer]] | ||
| colspan="4" align=left style="background:#66BE9C"| [[File:Smg2 icon prankstercomet.png|14px|link=Power Star]] [[Megahammer's Daredevil Bash]] | |colspan="4" align=left style="background:#66BE9C"|[[File:Smg2 icon prankstercomet.png|14px|link=Power Star]] [[Megahammer's Daredevil Bash]] | ||
|- | |- | ||
| colspan="4" align=left style="background:#B6E0D0"| [[File:Smg2 icon greencomet.png|14px|link=Green Power Star]] [[Bowser Jr.'s Fearsome Fleet#Green Star 1|Green Star 1]] | |colspan="4" align=left style="background:#B6E0D0"|[[File:Smg2 icon greencomet.png|14px|link=Green Power Star]] [[Bowser Jr.'s Fearsome Fleet#Green Star 1|Green Star 1]] | ||
| colspan="4" align=left style="background:#B6E0D0"| [[File:Smg2 icon greencomet.png|14px|link=Green Power Star]] [[Bowser Jr.'s Fearsome Fleet#Green Star 2|Green Star 2]] | |colspan="4" align=left style="background:#B6E0D0"|[[File:Smg2 icon greencomet.png|14px|link=Green Power Star]] [[Bowser Jr.'s Fearsome Fleet#Green Star 2|Green Star 2]] | ||
|- | |- | ||
|colspan="12" align=center style="background:#66BE9C"| A space station owned by the [[Koopa Troop]], featuring [[Undergrunt Gunner]]s, [[Bullet Bill]]s, and [[Hammer Bro]]s as enemies. Mario faces off against Bowser Jr.'s colossal robot [[Megahammer]] here, which necessitates the use of Yoshi to defeat it.<br>'''Unlock criterion''': Have 28 Power Stars in possession | |colspan="12" align=center style="background:#66BE9C"|A space station owned by the [[Koopa Troop]], featuring [[Undergrunt Gunner]]s, [[Bullet Bill]]s, and [[Hammer Bro]]s as enemies. Mario faces off against Bowser Jr.'s colossal robot [[Megahammer]] here, which necessitates the use of Yoshi to defeat it.<br>'''Unlock criterion''': Have 28 Power Stars in possession | ||
|- | |- | ||
| colspan="12" style="background:#7EACEA; color:white;"| [[File:SMG2 Asset Texture World Banner (World 4).png|45px|link=World 4 (Super Mario Galaxy 2)]] '''World 4. The Many Mysteries of the Cosmos''' | |colspan="12" style="background:#7EACEA; color:white;"|[[File:SMG2 Asset Texture World Banner (World 4).png|45px|link=World 4 (Super Mario Galaxy 2)]] '''World 4. The Many Mysteries of the Cosmos''' | ||
|- | |- | ||
!colspan="4" style="background:#B9B257"| 22. [[Supermassive Galaxy]]<br>[[File:SMG Asset Sprite UI Power Star.png|15px|Total number of obtainable Power Stars.]]×6 [[File:SMG Asset Model Good Egg Galaxy (Dino Piranha Planet).png|15px|Total number of reachable areas.]]×5 | !colspan="4" style="background:#B9B257"|22. [[Supermassive Galaxy]]<br>[[File:SMG Asset Sprite UI Power Star.png|15px|Total number of obtainable Power Stars.]]×6 [[File:SMG Asset Model Good Egg Galaxy (Dino Piranha Planet).png|15px|Total number of reachable areas.]]×5 | ||
!colspan="2" style="background:#B9B257"| Missions | !colspan="2" style="background:#B9B257"|Missions | ||
!colspan="4" style="background:#A4AAB4"| 23. [[Flipsville Galaxy]]<br>[[File:SMG Asset Sprite UI Power Star.png|15px|Total number of obtainable Power Stars.]]×6 [[File:SMG Asset Model Good Egg Galaxy (Dino Piranha Planet).png|15px|Total number of reachable areas.]]×6 [[File:SMG2 Asset Sprite UI Bowser.png|15px|Total number of boss battles.]]×1 | !colspan="4" style="background:#A4AAB4"|23. [[Flipsville Galaxy]]<br>[[File:SMG Asset Sprite UI Power Star.png|15px|Total number of obtainable Power Stars.]]×6 [[File:SMG Asset Model Good Egg Galaxy (Dino Piranha Planet).png|15px|Total number of reachable areas.]]×6 [[File:SMG2 Asset Sprite UI Bowser.png|15px|Total number of boss battles.]]×1 | ||
!colspan="2" style="background:#A4AAB4"| Missions | !colspan="2" style="background:#A4AAB4"|Missions | ||
|- | |- | ||
| colspan="4" rowspan="3" align=center style="background:#FFFFFF"| [[File:SMG2 Supermassive Giant Star Chips.png|x90px]] | |colspan="4" rowspan="3" align=center style="background:#FFFFFF"|[[File:SMG2 Supermassive Giant Star Chips.png|x90px]] | ||
| align=left style="background:#E1DEB5"| [[File:Smg2 icon powerstar.png|14px|link=Power Star]] [[Huge Trouble with Big Wigglers]] | |align=left style="background:#E1DEB5"|[[File:Smg2 icon powerstar.png|14px|link=Power Star]] [[Huge Trouble with Big Wigglers]] | ||
| align=left style="background:#E1DEB5"| [[File:Smg2 icon prankstercomet.png|14px|link=Power Star]] [[Big Wigglers Speed Run]] | |align=left style="background:#E1DEB5"|[[File:Smg2 icon prankstercomet.png|14px|link=Power Star]] [[Big Wigglers Speed Run]] | ||
| colspan="4" rowspan="3" align=center style="background:#FFFFFF"| [[File:SMG2 Flipsville End Gate Planet.png|x90px]] | |colspan="4" rowspan="3" align=center style="background:#FFFFFF"|[[File:SMG2 Flipsville End Gate Planet.png|x90px]] | ||
| align=left style="background:#DBDDE1"| [[File:Smg2 icon powerstar.png|14px|link=Power Star]] [[Flip-Flopping in Flipsville]] | |align=left style="background:#DBDDE1"|[[File:Smg2 icon powerstar.png|14px|link=Power Star]] [[Flip-Flopping in Flipsville]] | ||
| align=left style="background:#DBDDE1"| [[File:Smg2 icon powerstar.png|14px|link=Power Star]] [[Flipsville's New Digs]] | |align=left style="background:#DBDDE1"|[[File:Smg2 icon powerstar.png|14px|link=Power Star]] [[Flipsville's New Digs]] | ||
|- | |- | ||
| align=left style="background:#D7D39D"| [[File:SMG Asset Sprite LS Secret Star.png|14px|link=Power Star]] [[In Full Bloom]] | |align=left style="background:#D7D39D"|[[File:SMG Asset Sprite LS Secret Star.png|14px|link=Power Star]] [[In Full Bloom]] | ||
| align=left style="background:#D7D39D"| [[File:Smg2 icon greencomet.png|14px|link=Green Power Star]] [[Supermassive Galaxy#Green Star 1|Green Star 1]] | |align=left style="background:#D7D39D"|[[File:Smg2 icon greencomet.png|14px|link=Green Power Star]] [[Supermassive Galaxy#Green Star 1|Green Star 1]] | ||
| align=left style="background:#C4C8CE"| [[File:Smg2 icon prankstercomet.png|14px|link=Power Star]] [[Purple Coin Spin Speed Run]] | |align=left style="background:#C4C8CE"|[[File:Smg2 icon prankstercomet.png|14px|link=Power Star]] [[Purple Coin Spin Speed Run]] | ||
| align=left style="background:#C4C8CE"| [[File:Smg2 icon greencomet.png|14px|link=Green Power Star]] [[Flipsville Galaxy#Green Star 1|Green Star 1]] | |align=left style="background:#C4C8CE"|[[File:Smg2 icon greencomet.png|14px|link=Green Power Star]] [[Flipsville Galaxy#Green Star 1|Green Star 1]] | ||
|- | |- | ||
| align=left style="background:#E1DEB5"| [[File:Smg2 icon greencomet.png|14px|link=Green Power Star]] [[Supermassive Galaxy#Green Star 2|Green Star 2]] | |align=left style="background:#E1DEB5"|[[File:Smg2 icon greencomet.png|14px|link=Green Power Star]] [[Supermassive Galaxy#Green Star 2|Green Star 2]] | ||
| align=left style="background:#E1DEB5"| [[File:Smg2 icon greencomet.png|14px|link=Green Power Star]] [[Supermassive Galaxy#Green Star 3|Green Star 3]] | |align=left style="background:#E1DEB5"|[[File:Smg2 icon greencomet.png|14px|link=Green Power Star]] [[Supermassive Galaxy#Green Star 3|Green Star 3]] | ||
| align=left style="background:#DBDDE1"| [[File:Smg2 icon greencomet.png|14px|link=Green Power Star]] [[Flipsville Galaxy#Green Star 2|Green Star 2]] | |align=left style="background:#DBDDE1"|[[File:Smg2 icon greencomet.png|14px|link=Green Power Star]] [[Flipsville Galaxy#Green Star 2|Green Star 2]] | ||
| align=left style="background:#DBDDE1"| [[File:Smg2 icon greencomet.png|14px|link=Green Power Star]] [[Flipsville Galaxy#Green Star 3|Green Star 3]] | |align=left style="background:#DBDDE1"|[[File:Smg2 icon greencomet.png|14px|link=Green Power Star]] [[Flipsville Galaxy#Green Star 3|Green Star 3]] | ||
|- | |- | ||
|colspan="6" align=center style="background:#D7D39D"| A galaxy where everything is huge. Mario will have to work his way around the oversized obstacles to reach his Power Star.<br>'''Unlock criterion''': Complete "Bowser Jr.'s Mighty Megahammer" | |colspan="6" align=center style="background:#D7D39D"|A galaxy where everything is huge. Mario will have to work his way around the oversized obstacles to reach his Power Star.<br>'''Unlock criterion''': Complete "Bowser Jr.'s Mighty Megahammer" | ||
|colspan="6" align=center style="background:#C4C8CE"| The gravity will switch around by ground pounding the cages on the floor, bringing Mario to the opposite side of gravity.<br>'''Unlock criterion''': Complete either "Huge Trouble with Big Wigglers" or "In Full Bloom" | |colspan="6" align=center style="background:#C4C8CE"|The gravity will switch around by ground pounding the cages on the floor, bringing Mario to the opposite side of gravity.<br>'''Unlock criterion''': Complete either "Huge Trouble with Big Wigglers" or "In Full Bloom" | ||
|- | |- | ||
!colspan="4" style="background:#9B68C6"| 24. [[Starshine Beach Galaxy]]<br>[[File:SMG Asset Sprite UI Power Star.png|15px|Total number of obtainable Power Stars.]]×6 [[File:SMG Asset Model Good Egg Galaxy (Dino Piranha Planet).png|15px|Total number of reachable areas.]]×2 | !colspan="4" style="background:#9B68C6"|24. [[Starshine Beach Galaxy]]<br>[[File:SMG Asset Sprite UI Power Star.png|15px|Total number of obtainable Power Stars.]]×6 [[File:SMG Asset Model Good Egg Galaxy (Dino Piranha Planet).png|15px|Total number of reachable areas.]]×2 | ||
!colspan="2" style="background:#9B68C6"| Missions | !colspan="2" style="background:#9B68C6"|Missions | ||
!colspan="4" style="background:#D4D8F1"| 25. [[Chompworks Galaxy]]<br>[[File:SMG Asset Sprite UI Power Star.png|15px|Total number of obtainable Power Stars.]]×6 [[File:SMG Asset Model Good Egg Galaxy (Dino Piranha Planet).png|15px|Total number of reachable areas.]]×5 | !colspan="4" style="background:#D4D8F1"|25. [[Chompworks Galaxy]]<br>[[File:SMG Asset Sprite UI Power Star.png|15px|Total number of obtainable Power Stars.]]×6 [[File:SMG Asset Model Good Egg Galaxy (Dino Piranha Planet).png|15px|Total number of reachable areas.]]×5 | ||
!colspan="2" style="background:#D4D8F1"| Missions | !colspan="2" style="background:#D4D8F1"|Missions | ||
|- | |- | ||
| colspan="4" rowspan="3" align=center style="background:#FFFFFF"| [[File:SMG2 Starshine Beach Main Planet.png|x90px]] | |colspan="4" rowspan="3" align=center style="background:#FFFFFF"|[[File:SMG2 Starshine Beach Main Planet.png|x90px]] | ||
| align=left style="background:#CFB6E4"| [[File:Smg2 icon powerstar.png|14px|link=Power Star]] [[Surf, Sand, and Silver Stars]] | |align=left style="background:#CFB6E4"|[[File:Smg2 icon powerstar.png|14px|link=Power Star]] [[Surf, Sand, and Silver Stars]] | ||
| align=left style="background:#CFB6E4"| [[File:Smg2 icon powerstar.png|14px|link=Power Star]] [[Climbing the Cloudy Tower]] | |align=left style="background:#CFB6E4"|[[File:Smg2 icon powerstar.png|14px|link=Power Star]] [[Climbing the Cloudy Tower]] | ||
| colspan="4" rowspan="3" align=center style="background:#FFFFFF"| [[File:SMG2 Chompworks Starting Planet.png|x90px]] | |colspan="4" rowspan="3" align=center style="background:#FFFFFF"|[[File:SMG2 Chompworks Starting Planet.png|x90px]] | ||
| align=left style="background:#F6F7FC"| [[File:Smg2 icon powerstar.png|14px|link=Power Star]] [[Where the Chomps Are Made of Gold]] | |align=left style="background:#F6F7FC"|[[File:Smg2 icon powerstar.png|14px|link=Power Star]] [[Where the Chomps Are Made of Gold]] | ||
| align=left style="background:#F6F7FC"| [[File:Smg2 icon powerstar.png|14px|link=Power Star]] [[Spring into the Chompworks]] | |align=left style="background:#F6F7FC"|[[File:Smg2 icon powerstar.png|14px|link=Power Star]] [[Spring into the Chompworks]] | ||
|- | |- | ||
| align=left style="background:#B58FD5"| [[File:Smg2 icon prankstercomet.png|14px|link=Power Star]] [[Purple Coin Beach Dash]] | |align=left style="background:#B58FD5"|[[File:Smg2 icon prankstercomet.png|14px|link=Power Star]] [[Purple Coin Beach Dash]] | ||
| align=left style="background:#B58FD5"| [[File:Smg2 icon greencomet.png|14px|link=Green Power Star]] [[Starshine Beach Galaxy#Green Star 1|Green Star 1]] | |align=left style="background:#B58FD5"|[[File:Smg2 icon greencomet.png|14px|link=Green Power Star]] [[Starshine Beach Galaxy#Green Star 1|Green Star 1]] | ||
| align=left style="background:#E5E8F7"| [[File:Smg2 icon prankstercomet.png|14px|link=Power Star]] [[Cosmic Clones in the Chompworks]] | |align=left style="background:#E5E8F7"|[[File:Smg2 icon prankstercomet.png|14px|link=Power Star]] [[Cosmic Clones in the Chompworks]] | ||
| align=left style="background:#E5E8F7"| [[File:Smg2 icon greencomet.png|14px|link=Green Power Star]] [[Chompworks Galaxy#Green Star 1|Green Star 1]] | |align=left style="background:#E5E8F7"|[[File:Smg2 icon greencomet.png|14px|link=Green Power Star]] [[Chompworks Galaxy#Green Star 1|Green Star 1]] | ||
|- | |- | ||
| align=left style="background:#CFB6E4"| [[File:Smg2 icon greencomet.png|14px|link=Green Power Star]] [[Starshine Beach Galaxy#Green Star 2|Green Star 2]] | |align=left style="background:#CFB6E4"|[[File:Smg2 icon greencomet.png|14px|link=Green Power Star]] [[Starshine Beach Galaxy#Green Star 2|Green Star 2]] | ||
| align=left style="background:#CFB6E4"| [[File:Smg2 icon greencomet.png|14px|link=Green Power Star]] [[Starshine Beach Galaxy#Green Star 3|Green Star 3]] | |align=left style="background:#CFB6E4"|[[File:Smg2 icon greencomet.png|14px|link=Green Power Star]] [[Starshine Beach Galaxy#Green Star 3|Green Star 3]] | ||
| align=left style="background:#F6F7FC"| [[File:Smg2 icon greencomet.png|14px|link=Green Power Star]] [[Chompworks Galaxy#Green Star 2|Green Star 2]] | |align=left style="background:#F6F7FC"|[[File:Smg2 icon greencomet.png|14px|link=Green Power Star]] [[Chompworks Galaxy#Green Star 2|Green Star 2]] | ||
| align=left style="background:#F6F7FC"| [[File:Smg2 icon greencomet.png|14px|link=Green Power Star]] [[Chompworks Galaxy#Green Star 3|Green Star 3]] | |align=left style="background:#F6F7FC"|[[File:Smg2 icon greencomet.png|14px|link=Green Power Star]] [[Chompworks Galaxy#Green Star 3|Green Star 3]] | ||
|- | |- | ||
|colspan="6" align=center style="background:#B58FD5"| A tropical beach galaxy inhabited by [[Pianta]]s. A large tower is featured here, which can be accessed from underwater.<br>'''Unlock criterion''': Complete either "Flip-Flopping in Flipsville" or "The Sweetest Silver Stars" | |colspan="6" align=center style="background:#B58FD5"|A tropical beach galaxy inhabited by [[Pianta]]s. A large tower is featured here, which can be accessed from underwater.<br>'''Unlock criterion''': Complete either "Flip-Flopping in Flipsville" or "The Sweetest Silver Stars" | ||
|colspan="6" align=center style="background:#E5E8F7"| An industrial galaxy all about rolling Chomps. They will constantly roll out of cannons, and Mario will have to use them to activate various contraptions.<br>'''Unlock criterion''': Complete either "Flip-Flopping in Flipsville" or "The Sweetest Silver Stars" | |colspan="6" align=center style="background:#E5E8F7"|An industrial galaxy all about rolling Chomps. They will constantly roll out of cannons, and Mario will have to use them to activate various contraptions.<br>'''Unlock criterion''': Complete either "Flip-Flopping in Flipsville" or "The Sweetest Silver Stars" | ||
|- | |- | ||
!colspan="4" style="background:#DC3834"| 26. [[File:SMG Asset Sprite UI Hungry Luma.png|14px|link=Hungry Luma]] [[Sweet Mystery Galaxy]]<br>[[File:SMG Asset Sprite UI Power Star.png|15px|Total number of obtainable Power Stars.]]x4 [[File:SMG Asset Model Good Egg Galaxy (Dino Piranha Planet).png|15px|Total number of reachable areas.]]×2 | !colspan="4" style="background:#DC3834"|26. [[File:SMG Asset Sprite UI Hungry Luma.png|14px|link=Hungry Luma]] [[Sweet Mystery Galaxy]]<br>[[File:SMG Asset Sprite UI Power Star.png|15px|Total number of obtainable Power Stars.]]x4 [[File:SMG Asset Model Good Egg Galaxy (Dino Piranha Planet).png|15px|Total number of reachable areas.]]×2 | ||
!colspan="2" style="background:#DC3834"| Missions | !colspan="2" style="background:#DC3834"|Missions | ||
!colspan="4" style="background:#9BF40A"| 27. [[Honeyhop Galaxy]]<br>[[File:SMG Asset Sprite UI Power Star.png|15px|Total number of obtainable Power Stars.]]×4 [[File:SMG Asset Model Good Egg Galaxy (Dino Piranha Planet).png|15px|Total number of reachable areas.]]×2 | !colspan="4" style="background:#9BF40A"|27. [[Honeyhop Galaxy]]<br>[[File:SMG Asset Sprite UI Power Star.png|15px|Total number of obtainable Power Stars.]]×4 [[File:SMG Asset Model Good Egg Galaxy (Dino Piranha Planet).png|15px|Total number of reachable areas.]]×2 | ||
!colspan="2" style="background:#9BF40A"| Missions | !colspan="2" style="background:#9BF40A"|Missions | ||
|- | |- | ||
| colspan="4" rowspan="2" align=center style="background:#FFFFFF"| [[File:SMG2 Sweet Mystery Planet.png|x90px]] | |colspan="4" rowspan="2" align=center style="background:#FFFFFF"|[[File:SMG2 Sweet Mystery Planet.png|x90px]] | ||
| align=left style="background:#E9827F"| [[File:Smg2 icon powerstar.png|14px|link=Power Star]] [[Bulb Berry's Mysterious Glow]] | |align=left style="background:#E9827F"|[[File:Smg2 icon powerstar.png|14px|link=Power Star]] [[Bulb Berry's Mysterious Glow]] | ||
| align=left style="background:#E9827F"| [[File:Smg2 icon prankstercomet.png|14px|link=Power Star]] [[Bulb Berry's Purple Coin Glow]] | |align=left style="background:#E9827F"|[[File:Smg2 icon prankstercomet.png|14px|link=Power Star]] [[Bulb Berry's Purple Coin Glow]] | ||
| colspan="4" rowspan="2" align=center style="background:#FFFFFF"| [[File:SMG2 Honeyhop Queen Bee Planet.png|x90px]] | |colspan="4" rowspan="2" align=center style="background:#FFFFFF"|[[File:SMG2 Honeyhop Queen Bee Planet.png|x90px]] | ||
| align=left style="background:#CEFA86"| [[File:Smg2 icon powerstar.png|14px|link=Power Star]] [[The Sweetest Silver Stars]] | |align=left style="background:#CEFA86"|[[File:Smg2 icon powerstar.png|14px|link=Power Star]] [[The Sweetest Silver Stars]] | ||
| align=left style="background:#CEFA86"| [[File:Smg2 icon powerstar.png|14px|link=Power Star]] [[The Chimp's Score Challenge]] | |align=left style="background:#CEFA86"|[[File:Smg2 icon powerstar.png|14px|link=Power Star]] [[The Chimp's Score Challenge]] | ||
|- | |- | ||
| align=left style="background:#F1AFAD"| [[File:Smg2 icon greencomet.png|14px|link=Green Power Star]] [[Sweet Mystery Galaxy#Green Star 1|Green Star 1]] | |align=left style="background:#F1AFAD"|[[File:Smg2 icon greencomet.png|14px|link=Green Power Star]] [[Sweet Mystery Galaxy#Green Star 1|Green Star 1]] | ||
| align=left style="background:#F1AFAD"| [[File:Smg2 icon greencomet.png|14px|link=Green Power Star]] [[Sweet Mystery Galaxy#Green Star 2|Green Star 2]] | |align=left style="background:#F1AFAD"|[[File:Smg2 icon greencomet.png|14px|link=Green Power Star]] [[Sweet Mystery Galaxy#Green Star 2|Green Star 2]] | ||
| align=left style="background:#E4FCBC"| [[File:Smg2 icon greencomet.png|14px|link=Green Power Star]] [[Honeyhop Galaxy#Green Star 1|Green Star 1]] | |align=left style="background:#E4FCBC"|[[File:Smg2 icon greencomet.png|14px|link=Green Power Star]] [[Honeyhop Galaxy#Green Star 1|Green Star 1]] | ||
| align=left style="background:#E4FCBC"| [[File:Smg2 icon greencomet.png|14px|link=Green Power Star]] [[Honeyhop Galaxy#Green Star 2|Green Star 2]] | |align=left style="background:#E4FCBC"|[[File:Smg2 icon greencomet.png|14px|link=Green Power Star]] [[Honeyhop Galaxy#Green Star 2|Green Star 2]] | ||
|- | |- | ||
|colspan="6" align=center style="background:#E9827F"| A calm galaxy filled with many different sweets that are walked across. Yoshi's Bulb Berry will reveal more of the path to travel on.<br>'''Unlock criterion''': Complete "Bowser Jr.'s Mighty Megahammer" and feed the Hungry Luma 1200 Star Bits | |colspan="6" align=center style="background:#E9827F"|A calm galaxy filled with many different sweets that are walked across. Yoshi's Bulb Berry will reveal more of the path to travel on.<br>'''Unlock criterion''': Complete "Bowser Jr.'s Mighty Megahammer" and feed the Hungry Luma 1200 Star Bits | ||
|colspan="6" align=center style="background:#CEFA86"| Another sector of the Honeyhive Kingdom, where Mario comes face-to-face with the Queen Bee herself, who requires Mario's aid to rid of an itch. The Chimp also has another stomping challenge here.<br>'''Unlock criterion''': Complete either "Huge Trouble with Big Wigglers" or "In Full Bloom" | |colspan="6" align=center style="background:#CEFA86"|Another sector of the Honeyhive Kingdom, where Mario comes face-to-face with the Queen Bee herself, who requires Mario's aid to rid of an itch. The Chimp also has another stomping challenge here.<br>'''Unlock criterion''': Complete either "Huge Trouble with Big Wigglers" or "In Full Bloom" | ||
|- | |- | ||
!colspan="4" style="background:#49AD87"| 28. [[Bowser's Gravity Gauntlet]]<br>[[File:SMG Asset Sprite UI Power Star.png|15px|Total number of obtainable Power Stars.]]×4 [[File:SMG Asset Model Good Egg Galaxy (Dino Piranha Planet).png|15px|Total number of reachable areas.]]×4 [[File:SMG2 Asset Sprite UI Bowser.png|15px|Total number of boss battles.]]×1 | !colspan="4" style="background:#49AD87"|28. [[Bowser's Gravity Gauntlet]]<br>[[File:SMG Asset Sprite UI Power Star.png|15px|Total number of obtainable Power Stars.]]×4 [[File:SMG Asset Model Good Egg Galaxy (Dino Piranha Planet).png|15px|Total number of reachable areas.]]×4 [[File:SMG2 Asset Sprite UI Bowser.png|15px|Total number of boss battles.]]×1 | ||
!colspan="8" style="background:#49AD87"| Missions | !colspan="8" style="background:#49AD87"|Missions | ||
|- | |- | ||
| colspan="4" rowspan=2 align=center style="background:#FFFFFF"| [[File:Bowser's Gravity Comet Medal.png|x90px]] | |colspan="4" rowspan=2 align=center style="background:#FFFFFF"|[[File:Bowser's Gravity Comet Medal.png|x90px]] | ||
| colspan="4" align=left style="background:#66BE9C"| [[File:Smg2 icon grandstar.png|14px|link=Power Star]] [[Breaking into Bowser's Castle]] | |colspan="4" align=left style="background:#66BE9C"|[[File:Smg2 icon grandstar.png|14px|link=Power Star]] [[Breaking into Bowser's Castle]] | ||
| colspan="4" align=left style="background:#66BE9C"| [[File:Smg2 icon prankstercomet.png|14px|link=Power Star]] [[Gravity Star Speed Run]] | |colspan="4" align=left style="background:#66BE9C"|[[File:Smg2 icon prankstercomet.png|14px|link=Power Star]] [[Gravity Star Speed Run]] | ||
|- | |- | ||
| colspan="4" align=left style="background:#B6E0D0"| [[File:Smg2 icon greencomet.png|14px|link=Green Power Star]] [[Bowser's Gravity Gauntlet#Green Star 1|Green Star 1]] | |colspan="4" align=left style="background:#B6E0D0"|[[File:Smg2 icon greencomet.png|14px|link=Green Power Star]] [[Bowser's Gravity Gauntlet#Green Star 1|Green Star 1]] | ||
| colspan="4" align=left style="background:#B6E0D0"| [[File:Smg2 icon greencomet.png|14px|link=Green Power Star]] [[Bowser's Gravity Gauntlet#Green Star 2|Green Star 2]] | |colspan="4" align=left style="background:#B6E0D0"|[[File:Smg2 icon greencomet.png|14px|link=Green Power Star]] [[Bowser's Gravity Gauntlet#Green Star 2|Green Star 2]] | ||
|- | |- | ||
|colspan="12" align=center style="background:#66BE9C"| Bowser's second space castle, with many different changes in the gravity. Bowser's fight itself also has an increase in difficulty.<br>'''Unlock criterion''': Complete either "Surf, Sand, and Silver Stars" or "Where the Chomps Are Made of Gold" and have 40 Power Stars in possession | |colspan="12" align=center style="background:#66BE9C"|Bowser's second space castle, with many different changes in the gravity. Bowser's fight itself also has an increase in difficulty.<br>'''Unlock criterion''': Complete either "Surf, Sand, and Silver Stars" or "Where the Chomps Are Made of Gold" and have 40 Power Stars in possession | ||
|- | |- | ||
| colspan="12" style="background:#7EACEA; color:white;"| [[File:SMG2 Asset Texture World Banner (World 5).png|45px|link=World 5 (Super Mario Galaxy 2)]] '''World 5. Trial of the Galaxies''' | |colspan="12" style="background:#7EACEA; color:white;"|[[File:SMG2 Asset Texture World Banner (World 5).png|45px|link=World 5 (Super Mario Galaxy 2)]] '''World 5. Trial of the Galaxies''' | ||
|- | |- | ||
!colspan="4" style="background:#B9B257"| 29. [[Space Storm Galaxy]]<br>[[File:SMG Asset Sprite UI Power Star.png|15px|Total number of obtainable Power Stars.]]×6 [[File:SMG Asset Model Good Egg Galaxy (Dino Piranha Planet).png|15px|Total number of reachable areas.]]×5 | !colspan="4" style="background:#B9B257"|29. [[Space Storm Galaxy]]<br>[[File:SMG Asset Sprite UI Power Star.png|15px|Total number of obtainable Power Stars.]]×6 [[File:SMG Asset Model Good Egg Galaxy (Dino Piranha Planet).png|15px|Total number of reachable areas.]]×5 | ||
!colspan="2" style="background:#B9B257"| Missions | !colspan="2" style="background:#B9B257"|Missions | ||
!colspan="4" style="background:#A4AAB4"| 30. [[Slipsand Galaxy]]<br>[[File:SMG Asset Sprite UI Power Star.png|15px|Total number of obtainable Power Stars.]]×6 [[File:SMG Asset Model Good Egg Galaxy (Dino Piranha Planet).png|15px|Total number of reachable areas.]]×5 [[File:SMG2 Asset Sprite UI Bowser.png|15px|Total number of boss battles.]]×1 | !colspan="4" style="background:#A4AAB4"|30. [[Slipsand Galaxy]]<br>[[File:SMG Asset Sprite UI Power Star.png|15px|Total number of obtainable Power Stars.]]×6 [[File:SMG Asset Model Good Egg Galaxy (Dino Piranha Planet).png|15px|Total number of reachable areas.]]×5 [[File:SMG2 Asset Sprite UI Bowser.png|15px|Total number of boss battles.]]×1 | ||
!colspan="2" style="background:#A4AAB4"| Missions | !colspan="2" style="background:#A4AAB4"|Missions | ||
|- | |- | ||
| colspan="4" rowspan="3" align=center style="background:#FFFFFF"| [[File:Space Storm Galaxy SMG2 early.png|x90px]] | |colspan="4" rowspan="3" align=center style="background:#FFFFFF"|[[File:Space Storm Galaxy SMG2 early.png|x90px]] | ||
| align=left style="background:#E1DEB5"| [[File:Smg2 icon powerstar.png|14px|link=Power Star]] [[Follow Me, Bob-omb]] | |align=left style="background:#E1DEB5"|[[File:Smg2 icon powerstar.png|14px|link=Power Star]] [[Follow Me, Bob-omb]] | ||
| align=left style="background:#E1DEB5"| [[File:Smg2 icon powerstar.png|14px|link=Power Star]] [[To the Top of Topman's Tower]] | |align=left style="background:#E1DEB5"|[[File:Smg2 icon powerstar.png|14px|link=Power Star]] [[To the Top of Topman's Tower]] | ||
| colspan="4" rowspan="3" align=center style="background:#FFFFFF"| [[File:SMG2 Slipsand Starting Planet.png|x90px]] | |colspan="4" rowspan="3" align=center style="background:#FFFFFF"|[[File:SMG2 Slipsand Starting Planet.png|x90px]] | ||
| align=left style="background:#DBDDE1"| [[File:Smg2 icon powerstar.png|14px|link=Power Star]] [[Squizzard's Sandy Sinkhole]] | |align=left style="background:#DBDDE1"|[[File:Smg2 icon powerstar.png|14px|link=Power Star]] [[Squizzard's Sandy Sinkhole]] | ||
| align=left style="background:#DBDDE1"| [[File:Smg2 icon powerstar.png|14px|link=Power Star]] [[Sailing the Sandy Seas]] | |align=left style="background:#DBDDE1"|[[File:Smg2 icon powerstar.png|14px|link=Power Star]] [[Sailing the Sandy Seas]] | ||
|- | |- | ||
| align=left style="background:#D7D39D"| [[File:SMG Asset Sprite LS Secret Star.png|14px|link=Power Star]] [[C'mere, Topman]] | |align=left style="background:#D7D39D"|[[File:SMG Asset Sprite LS Secret Star.png|14px|link=Power Star]] [[C'mere, Topman]] | ||
| align=left style="background:#D7D39D"| [[File:Smg2 icon greencomet.png|14px|link=Green Power Star]] [[Space Storm Galaxy#Green Star 1|Green Star 1]] | |align=left style="background:#D7D39D"|[[File:Smg2 icon greencomet.png|14px|link=Green Power Star]] [[Space Storm Galaxy#Green Star 1|Green Star 1]] | ||
| align=left style="background:#C4C8CE"| [[File:Smg2 icon prankstercomet.png|14px|link=Power Star]] [[Squizzard's Daredevil Run]] | |align=left style="background:#C4C8CE"|[[File:Smg2 icon prankstercomet.png|14px|link=Power Star]] [[Squizzard's Daredevil Run]] | ||
| align=left style="background:#C4C8CE"| [[File:Smg2 icon greencomet.png|14px|link=Green Power Star]] [[Slipsand Galaxy#Green Star 1|Green Star 1]] | |align=left style="background:#C4C8CE"|[[File:Smg2 icon greencomet.png|14px|link=Green Power Star]] [[Slipsand Galaxy#Green Star 1|Green Star 1]] | ||
|- | |- | ||
| align=left style="background:#E1DEB5"| [[File:Smg2 icon greencomet.png|14px|link=Green Power Star]] [[Space Storm Galaxy#Green Star 2|Green Star 2]] | |align=left style="background:#E1DEB5"|[[File:Smg2 icon greencomet.png|14px|link=Green Power Star]] [[Space Storm Galaxy#Green Star 2|Green Star 2]] | ||
| align=left style="background:#E1DEB5"| [[File:Smg2 icon greencomet.png|14px|link=Green Power Star]] [[Space Storm Galaxy#Green Star 3|Green Star 3]] | |align=left style="background:#E1DEB5"|[[File:Smg2 icon greencomet.png|14px|link=Green Power Star]] [[Space Storm Galaxy#Green Star 3|Green Star 3]] | ||
| align=left style="background:#DBDDE1"| [[File:Smg2 icon greencomet.png|14px|link=Green Power Star]] [[Slipsand Galaxy#Green Star 2|Green Star 2]] | |align=left style="background:#DBDDE1"|[[File:Smg2 icon greencomet.png|14px|link=Green Power Star]] [[Slipsand Galaxy#Green Star 2|Green Star 2]] | ||
| align=left style="background:#DBDDE1"| [[File:Smg2 icon greencomet.png|14px|link=Green Power Star]] [[Slipsand Galaxy#Green Star 3|Green Star 3]] | |align=left style="background:#DBDDE1"|[[File:Smg2 icon greencomet.png|14px|link=Green Power Star]] [[Slipsand Galaxy#Green Star 3|Green Star 3]] | ||
|- | |- | ||
|colspan="6" align=center style="background:#D7D39D"| A galaxy featuring a large broken spaceship and factories. Bob-Ombs are the key to getting through the planets.<br>'''Unlock criterion''': Complete "Breaking into Bowser's Castle" | |colspan="6" align=center style="background:#D7D39D"|A galaxy featuring a large broken spaceship and factories. Bob-Ombs are the key to getting through the planets.<br>'''Unlock criterion''': Complete "Breaking into Bowser's Castle" | ||
|colspan="6" align=center style="background:#C4C8CE"| A desert-based galaxy where sand currents constantly move in one direction. The most notable landmark is the giant pyramid with a large slide outside.<br>'''Unlock criterion''': Complete "Follow Me, Bob-omb" | |colspan="6" align=center style="background:#C4C8CE"|A desert-based galaxy where sand currents constantly move in one direction. The most notable landmark is the giant pyramid with a large slide outside.<br>'''Unlock criterion''': Complete "Follow Me, Bob-omb" | ||
|- | |- | ||
!colspan="4" style="background:#9B68C6"| 31. [[Shiverburn Galaxy]]<br>[[File:SMG Asset Sprite UI Power Star.png|15px|Total number of obtainable Power Stars.]]×6 [[File:SMG Asset Model Good Egg Galaxy (Dino Piranha Planet).png|15px|Total number of reachable areas.]]×4 [[File:SMG2 Asset Sprite UI Bowser.png|15px|Total number of boss battles.]]×1 | !colspan="4" style="background:#9B68C6"|31. [[Shiverburn Galaxy]]<br>[[File:SMG Asset Sprite UI Power Star.png|15px|Total number of obtainable Power Stars.]]×6 [[File:SMG Asset Model Good Egg Galaxy (Dino Piranha Planet).png|15px|Total number of reachable areas.]]×4 [[File:SMG2 Asset Sprite UI Bowser.png|15px|Total number of boss battles.]]×1 | ||
!colspan="2" style="background:#9B68C6"| Missions | !colspan="2" style="background:#9B68C6"|Missions | ||
!colspan="4" style="background:#D4D8F1"| 32. [[Boo Moon Galaxy]]<br>[[File:SMG Asset Sprite UI Power Star.png|15px|Total number of obtainable Power Stars.]]×6 [[File:SMG Asset Model Good Egg Galaxy (Dino Piranha Planet).png|15px|Total number of reachable areas.]]×5 | !colspan="4" style="background:#D4D8F1"|32. [[Boo Moon Galaxy]]<br>[[File:SMG Asset Sprite UI Power Star.png|15px|Total number of obtainable Power Stars.]]×6 [[File:SMG Asset Model Good Egg Galaxy (Dino Piranha Planet).png|15px|Total number of reachable areas.]]×5 | ||
!colspan="2" style="background:#D4D8F1"| Missions | !colspan="2" style="background:#D4D8F1"|Missions | ||
|- | |- | ||
| colspan="4" rowspan="3" align=center style="background:#FFFFFF"| [[File:SMG2 Shiverburn Starting Planet.png|x90px]] | |colspan="4" rowspan="3" align=center style="background:#FFFFFF"|[[File:SMG2 Shiverburn Starting Planet.png|x90px]] | ||
| align=left style="background:#CFB6E4"| [[File:Smg2 icon powerstar.png|14px|link=Power Star]] [[Prince Pikante's Peppery Mood]] | |align=left style="background:#CFB6E4"|[[File:Smg2 icon powerstar.png|14px|link=Power Star]] [[Prince Pikante's Peppery Mood]] | ||
| align=left style="background:#CFB6E4"| [[File:Smg2 icon prankstercomet.png|14px|link=Power Star]] [[Octo-Army Icy Rainbow Romp]] | |align=left style="background:#CFB6E4"|[[File:Smg2 icon prankstercomet.png|14px|link=Power Star]] [[Octo-Army Icy Rainbow Romp]] | ||
| colspan="4" rowspan="3" align=center style="background:#FFFFFF"| [[File:SMG2 Boo Moon Swamp Planet.png|x90px]] | |colspan="4" rowspan="3" align=center style="background:#FFFFFF"|[[File:SMG2 Boo Moon Swamp Planet.png|x90px]] | ||
| align=left style="background:#F6F7FC"| [[File:Smg2 icon powerstar.png|14px|link=Power Star]] [[Silver Stars Pop-Up]] | |align=left style="background:#F6F7FC"|[[File:Smg2 icon powerstar.png|14px|link=Power Star]] [[Silver Stars Pop-Up]] | ||
| align=left style="background:#F6F7FC"| [[File:Smg2 icon powerstar.png|14px|link=Power Star]] [[Haunting the Howling Tower]] | |align=left style="background:#F6F7FC"|[[File:Smg2 icon powerstar.png|14px|link=Power Star]] [[Haunting the Howling Tower]] | ||
|- | |- | ||
| align=left style="background:#B58FD5"| [[File:SMG Asset Sprite LS Secret Star.png|14px|link=Power Star]] [[The Chimp's Ultimate Skating Challenge]] | |align=left style="background:#B58FD5"|[[File:SMG Asset Sprite LS Secret Star.png|14px|link=Power Star]] [[The Chimp's Ultimate Skating Challenge]] | ||
| align=left style="background:#B58FD5"| [[File:Smg2 icon greencomet.png|14px|link=Green Power Star]] [[Shiverburn Galaxy#Green Star 1|Green Star 1]] | |align=left style="background:#B58FD5"|[[File:Smg2 icon greencomet.png|14px|link=Green Power Star]] [[Shiverburn Galaxy#Green Star 1|Green Star 1]] | ||
| align=left style="background:#E5E8F7"| [[File:SMG Asset Sprite LS Secret Star.png|14px|link=Power Star]] [[The Star in the Sinking Swamp]] | |align=left style="background:#E5E8F7"|[[File:SMG Asset Sprite LS Secret Star.png|14px|link=Power Star]] [[The Star in the Sinking Swamp]] | ||
| align=left style="background:#E5E8F7"| [[File:Smg2 icon greencomet.png|14px|link=Green Power Star]] [[Boo Moon Galaxy#Green Star 1|Green Star 1]] | |align=left style="background:#E5E8F7"|[[File:Smg2 icon greencomet.png|14px|link=Green Power Star]] [[Boo Moon Galaxy#Green Star 1|Green Star 1]] | ||
|- | |- | ||
| align=left style="background:#CFB6E4"| [[File:Smg2 icon greencomet.png|14px|link=Green Power Star]] [[Shiverburn Galaxy#Green Star 2|Green Star 2]] | |align=left style="background:#CFB6E4"|[[File:Smg2 icon greencomet.png|14px|link=Green Power Star]] [[Shiverburn Galaxy#Green Star 2|Green Star 2]] | ||
| align=left style="background:#CFB6E4"| [[File:Smg2 icon greencomet.png|14px|link=Green Power Star]] [[Shiverburn Galaxy#Green Star 3|Green Star 3]] | |align=left style="background:#CFB6E4"|[[File:Smg2 icon greencomet.png|14px|link=Green Power Star]] [[Shiverburn Galaxy#Green Star 3|Green Star 3]] | ||
| align=left style="background:#F6F7FC"| [[File:Smg2 icon greencomet.png|14px|link=Green Power Star]] [[Boo Moon Galaxy#Green Star 2|Green Star 2]] | |align=left style="background:#F6F7FC"|[[File:Smg2 icon greencomet.png|14px|link=Green Power Star]] [[Boo Moon Galaxy#Green Star 2|Green Star 2]] | ||
| align=left style="background:#F6F7FC"| [[File:Smg2 icon greencomet.png|14px|link=Green Power Star]] [[Boo Moon Galaxy#Green Star 3|Green Star 3]] | |align=left style="background:#F6F7FC"|[[File:Smg2 icon greencomet.png|14px|link=Green Power Star]] [[Boo Moon Galaxy#Green Star 3|Green Star 3]] | ||
|- | |- | ||
|colspan="6" align=center style="background:#B58FD5"| A spiritual successor to the [[Freezeflame Galaxy]] from ''Super Mario Galaxy'', featuring planets of lava and ice. Distinctly, the first planet has the ability to instantly switch the lava to ice with the push of a switch.<br>'''Unlock criterion''': Complete "Follow Me, Bob-omb" | |colspan="6" align=center style="background:#B58FD5"|A spiritual successor to the [[Freezeflame Galaxy]] from ''Super Mario Galaxy'', featuring planets of lava and ice. Distinctly, the first planet has the ability to instantly switch the lava to ice with the push of a switch.<br>'''Unlock criterion''': Complete "Follow Me, Bob-omb" | ||
|colspan="6" align=center style="background:#E5E8F7"| Another ghost-based galaxy, but with challenges of traversing a [[Snake Block]] across a swamp, and using the [[Boo Mushroom]] to make way to the top of a ghost-filled tower.<br>'''Unlock criterion''': Complete "Follow Me, Bob-omb" | |colspan="6" align=center style="background:#E5E8F7"|Another ghost-based galaxy, but with challenges of traversing a [[Snake Block]] across a swamp, and using the [[Boo Mushroom]] to make way to the top of a ghost-filled tower.<br>'''Unlock criterion''': Complete "Follow Me, Bob-omb" | ||
|- | |- | ||
!colspan="4" style="background:#DC3834"| 33. [[Upside Dizzy Galaxy]]<br>[[File:SMG Asset Sprite UI Power Star.png|15px|Total number of obtainable Power Stars.]]x4 [[File:SMG Asset Model Good Egg Galaxy (Dino Piranha Planet).png|15px|Total number of reachable areas.]]×2 | !colspan="4" style="background:#DC3834"|33. [[Upside Dizzy Galaxy]]<br>[[File:SMG Asset Sprite UI Power Star.png|15px|Total number of obtainable Power Stars.]]x4 [[File:SMG Asset Model Good Egg Galaxy (Dino Piranha Planet).png|15px|Total number of reachable areas.]]×2 | ||
!colspan="2" style="background:#DC3834"| Missions | !colspan="2" style="background:#DC3834"|Missions | ||
!colspan="4" style="background:#9BF40A"| 34. [[File:SMG Asset Sprite UI Hungry Luma.png|14px|link=Hungry Luma]] [[Fleet Glide Galaxy]]<br>[[File:SMG Asset Sprite UI Power Star.png|15px|Total number of obtainable Power Stars.]]×4 [[File:SMG Asset Model Good Egg Galaxy (Dino Piranha Planet).png|15px|Total number of reachable areas.]]×1 | !colspan="4" style="background:#9BF40A"|34. [[File:SMG Asset Sprite UI Hungry Luma.png|14px|link=Hungry Luma]] [[Fleet Glide Galaxy]]<br>[[File:SMG Asset Sprite UI Power Star.png|15px|Total number of obtainable Power Stars.]]×4 [[File:SMG Asset Model Good Egg Galaxy (Dino Piranha Planet).png|15px|Total number of reachable areas.]]×1 | ||
!colspan="2" style="background:#9BF40A"| Missions | !colspan="2" style="background:#9BF40A"|Missions | ||
|- | |- | ||
| colspan="4" rowspan="2" align=center style="background:#FFFFFF"| [[File:SMG2 Upside Dizzy 2.png|x90px]] | |colspan="4" rowspan="2" align=center style="background:#FFFFFF"|[[File:SMG2 Upside Dizzy 2.png|x90px]] | ||
| align=left style="background:#E9827F"| [[File:Smg2 icon powerstar.png|14px|link=Power Star]] [[A Walk on the Weird Side]] | |align=left style="background:#E9827F"|[[File:Smg2 icon powerstar.png|14px|link=Power Star]] [[A Walk on the Weird Side]] | ||
| align=left style="background:#E9827F"| [[File:SMG Asset Sprite LS Secret Star.png|14px|link=Power Star]] [[Burning Upside Dizzy]] | |align=left style="background:#E9827F"|[[File:SMG Asset Sprite LS Secret Star.png|14px|link=Power Star]] [[Burning Upside Dizzy]] | ||
| colspan="4" rowspan="2" align=center style="background:#FFFFFF"| [[File:SMG2 Fleet Glide Magmaargh Area.png|x90px]] | |colspan="4" rowspan="2" align=center style="background:#FFFFFF"|[[File:SMG2 Fleet Glide Magmaargh Area.png|x90px]] | ||
| align=left style="background:#CEFA86"| [[File:Smg2 icon powerstar.png|14px|link=Power Star]] [[Fluzzard's Wild Battlefield Glide]] | |align=left style="background:#CEFA86"|[[File:Smg2 icon powerstar.png|14px|link=Power Star]] [[Fluzzard's Wild Battlefield Glide]] | ||
| align=left style="background:#CEFA86"| [[File:Smg2 icon powerstar.png|14px|link=Power Star]] [[Fastest Feathers in the Galaxy]] | |align=left style="background:#CEFA86"|[[File:Smg2 icon powerstar.png|14px|link=Power Star]] [[Fastest Feathers in the Galaxy]] | ||
|- | |- | ||
| align=left style="background:#F1AFAD"| [[File:Smg2 icon greencomet.png|14px|link=Green Power Star]] [[Upside Dizzy Galaxy#Green Star 1|Green Star 1]] | |align=left style="background:#F1AFAD"|[[File:Smg2 icon greencomet.png|14px|link=Green Power Star]] [[Upside Dizzy Galaxy#Green Star 1|Green Star 1]] | ||
| align=left style="background:#F1AFAD"| [[File:Smg2 icon greencomet.png|14px|link=Green Power Star]] [[Upside Dizzy Galaxy#Green Star 2|Green Star 2]] | |align=left style="background:#F1AFAD"|[[File:Smg2 icon greencomet.png|14px|link=Green Power Star]] [[Upside Dizzy Galaxy#Green Star 2|Green Star 2]] | ||
| align=left style="background:#E4FCBC"| [[File:Smg2 icon greencomet.png|14px|link=Green Power Star]] [[Fleet Glide Galaxy#Green Star 1|Green Star 1]] | |align=left style="background:#E4FCBC"|[[File:Smg2 icon greencomet.png|14px|link=Green Power Star]] [[Fleet Glide Galaxy#Green Star 1|Green Star 1]] | ||
| align=left style="background:#E4FCBC"| [[File:Smg2 icon greencomet.png|14px|link=Green Power Star]] [[Fleet Glide Galaxy#Green Star 2|Green Star 2]] | |align=left style="background:#E4FCBC"|[[File:Smg2 icon greencomet.png|14px|link=Green Power Star]] [[Fleet Glide Galaxy#Green Star 2|Green Star 2]] | ||
|- | |- | ||
|colspan="6" align=center style="background:#E9827F"| The sequel galaxy to Rightside Down Galaxy, featuring platforming challenges with gravity-changing walls. The second half of the level has the gravity change in between time intervals.<br>'''Unlock criterion''': Complete "Follow Me, Bob-omb" | |colspan="6" align=center style="background:#E9827F"|The sequel galaxy to Rightside Down Galaxy, featuring platforming challenges with gravity-changing walls. The second half of the level has the gravity change in between time intervals.<br>'''Unlock criterion''': Complete "Follow Me, Bob-omb" | ||
|colspan="6" align=center style="background:#CEFA86"| Mario flies with Fluzzard once again, but this time in a factory-like course with obstacles like falling pillars, Thwomps, and Banzai Bills.<br>'''Unlock criterion''': Complete "Follow Me, Bob-omb" and feed the Hungry Luma 1500 Star Bits | |colspan="6" align=center style="background:#CEFA86"|Mario flies with Fluzzard once again, but this time in a factory-like course with obstacles like falling pillars, Thwomps, and Banzai Bills.<br>'''Unlock criterion''': Complete "Follow Me, Bob-omb" and feed the Hungry Luma 1500 Star Bits | ||
|- | |- | ||
!colspan="4" style="background:#49AD87"| 35. [[Bowser Jr.'s Boom Bunker]]<br>[[File:SMG Asset Sprite UI Power Star.png|15px|Total number of obtainable Power Stars.]]×4 [[File:SMG Asset Model Good Egg Galaxy (Dino Piranha Planet).png|15px|Total number of reachable areas.]]×6 [[File:SMG2 Asset Sprite UI Bowser.png|15px|Total number of boss battles.]]×1 | !colspan="4" style="background:#49AD87"|35. [[Bowser Jr.'s Boom Bunker]]<br>[[File:SMG Asset Sprite UI Power Star.png|15px|Total number of obtainable Power Stars.]]×4 [[File:SMG Asset Model Good Egg Galaxy (Dino Piranha Planet).png|15px|Total number of reachable areas.]]×6 [[File:SMG2 Asset Sprite UI Bowser.png|15px|Total number of boss battles.]]×1 | ||
!colspan="8" style="background:#49AD87"| Missions | !colspan="8" style="background:#49AD87"|Missions | ||
|- | |- | ||
| colspan="4" rowspan=2 align=center style="background:#FFFFFF"| [[File:Bowser Jrs Boomsday Machine.png|x90px]] | |colspan="4" rowspan=2 align=center style="background:#FFFFFF"|[[File:Bowser Jrs Boomsday Machine.png|x90px]] | ||
| colspan="4" align=left style="background:#66BE9C"| [[File:Smg2 icon grandstar.png|14px|link=Power Star]] [[Bowser Jr.'s Boomsday Machine]] | |colspan="4" align=left style="background:#66BE9C"|[[File:Smg2 icon grandstar.png|14px|link=Power Star]] [[Bowser Jr.'s Boomsday Machine]] | ||
| colspan="4" align=left style="background:#66BE9C"| [[File:Smg2 icon prankstercomet.png|14px|link=Power Star]] [[Boomsday Machine Daredevil Run]] | |colspan="4" align=left style="background:#66BE9C"|[[File:Smg2 icon prankstercomet.png|14px|link=Power Star]] [[Boomsday Machine Daredevil Run]] | ||
|- | |- | ||
| colspan="4" align=left style="background:#B6E0D0"| [[File:Smg2 icon greencomet.png|14px|link=Green Power Star]] [[Bowser Jr.'s Boom Bunker#Green Star 1|Green Star 1]] | |colspan="4" align=left style="background:#B6E0D0"|[[File:Smg2 icon greencomet.png|14px|link=Green Power Star]] [[Bowser Jr.'s Boom Bunker#Green Star 1|Green Star 1]] | ||
| colspan="4" align=left style="background:#B6E0D0"| [[File:Smg2 icon greencomet.png|14px|link=Green Power Star]] [[Bowser Jr.'s Boom Bunker#Green Star 2|Green Star 2]] | |colspan="4" align=left style="background:#B6E0D0"|[[File:Smg2 icon greencomet.png|14px|link=Green Power Star]] [[Bowser Jr.'s Boom Bunker#Green Star 2|Green Star 2]] | ||
|- | |- | ||
|colspan="12" align=center style="background:#66BE9C"| A series of planets involving Bullet Bills, cannons, and the Cloud Flower. Mario will also encounter Bowser Jr. using his most powerful weapon: his [[Boomsday Machine]]. <br>'''Unlock criterion''': Complete "Follow Me, Bob-omb" and have 55 Power Stars in possession | |colspan="12" align=center style="background:#66BE9C"|A series of planets involving Bullet Bills, cannons, and the Cloud Flower. Mario will also encounter Bowser Jr. using his most powerful weapon: his [[Boomsday Machine]]. <br>'''Unlock criterion''': Complete "Follow Me, Bob-omb" and have 55 Power Stars in possession | ||
|- | |- | ||
| colspan="12" style="background:#7EACEA; color:white;"| [[File:SMG2 Asset Texture World Banner (World 6).png|45px|link=World 6 (Super Mario Galaxy 2)]] '''World 6. Bowser in Your Sights''' | |colspan="12" style="background:#7EACEA; color:white;"|[[File:SMG2 Asset Texture World Banner (World 6).png|45px|link=World 6 (Super Mario Galaxy 2)]] '''World 6. Bowser in Your Sights''' | ||
|- | |- | ||
!colspan="4" style="background:#B9B257"| 36. [[Melty Monster Galaxy]]<br>[[File:SMG Asset Sprite UI Power Star.png|15px|Total number of obtainable Power Stars.]]×6 [[File:SMG Asset Model Good Egg Galaxy (Dino Piranha Planet).png|15px|Total number of reachable areas.]]×5 | !colspan="4" style="background:#B9B257"|36. [[Melty Monster Galaxy]]<br>[[File:SMG Asset Sprite UI Power Star.png|15px|Total number of obtainable Power Stars.]]×6 [[File:SMG Asset Model Good Egg Galaxy (Dino Piranha Planet).png|15px|Total number of reachable areas.]]×5 | ||
!colspan="2" style="background:#B9B257"| Missions | !colspan="2" style="background:#B9B257"|Missions | ||
!colspan="4" style="background:#A4AAB4"| 37. [[Clockwork Ruins Galaxy]]<br>[[File:SMG Asset Sprite UI Power Star.png|15px|Total number of obtainable Power Stars.]]×6 [[File:SMG Asset Model Good Egg Galaxy (Dino Piranha Planet).png|15px|Total number of reachable areas.]]×4 | !colspan="4" style="background:#A4AAB4"|37. [[Clockwork Ruins Galaxy]]<br>[[File:SMG Asset Sprite UI Power Star.png|15px|Total number of obtainable Power Stars.]]×6 [[File:SMG Asset Model Good Egg Galaxy (Dino Piranha Planet).png|15px|Total number of reachable areas.]]×4 | ||
!colspan="2" style="background:#A4AAB4"| Missions | !colspan="2" style="background:#A4AAB4"|Missions | ||
|- | |- | ||
| colspan="4" rowspan="3" align=center style="background:#FFFFFF"| [[File:SMG2 Melty Monster Magmaargh Planets.png|x90px]] | |colspan="4" rowspan="3" align=center style="background:#FFFFFF"|[[File:SMG2 Melty Monster Magmaargh Planets.png|x90px]] | ||
| align=left style="background:#E1DEB5"| [[File:Smg2 icon powerstar.png|14px|link=Power Star]] [[The Magnificent Magma Sea]] | |align=left style="background:#E1DEB5"|[[File:Smg2 icon powerstar.png|14px|link=Power Star]] [[The Magnificent Magma Sea]] | ||
| align=left style="background:#E1DEB5"| [[File:Smg2 icon powerstar.png|14px|link=Power Star]] [[A Stroll Down Rolling Lane]] | |align=left style="background:#E1DEB5"|[[File:Smg2 icon powerstar.png|14px|link=Power Star]] [[A Stroll Down Rolling Lane]] | ||
| colspan="4" rowspan="3" align=center style="background:#FFFFFF"| [[File:SMG2 Clockwork Ruins Starting Planet.png|x90px]] | |colspan="4" rowspan="3" align=center style="background:#FFFFFF"|[[File:SMG2 Clockwork Ruins Starting Planet.png|x90px]] | ||
| align=left style="background:#DBDDE1"| [[File:Smg2 icon powerstar.png|14px|link=Power Star]] [[Time for Adventure]] | |align=left style="background:#DBDDE1"|[[File:Smg2 icon powerstar.png|14px|link=Power Star]] [[Time for Adventure]] | ||
| align=left style="background:#DBDDE1"| [[File:Smg2 icon prankstercomet.png|14px|link=Power Star]] [[The Adventure of the Purple Coins]] | |align=left style="background:#DBDDE1"|[[File:Smg2 icon prankstercomet.png|14px|link=Power Star]] [[The Adventure of the Purple Coins]] | ||
|- | |- | ||
| align=left style="background:#D7D39D"| [[File:SMG Asset Sprite LS Secret Star.png|14px|link=Power Star]] [[The Chimp's Bowling Challenge]] | |align=left style="background:#D7D39D"|[[File:SMG Asset Sprite LS Secret Star.png|14px|link=Power Star]] [[The Chimp's Bowling Challenge]] | ||
| align=left style="background:#D7D39D"| [[File:Smg2 icon greencomet.png|14px|link=Green Power Star]] [[Melty Monster Galaxy#Green Star 1|Green Star 1]] | |align=left style="background:#D7D39D"|[[File:Smg2 icon greencomet.png|14px|link=Green Power Star]] [[Melty Monster Galaxy#Green Star 1|Green Star 1]] | ||
| align=left style="background:#C4C8CE"| [[File:SMG Asset Sprite LS Secret Star.png|14px|link=Power Star]] [[The Ledge Hammer Trap]] | |align=left style="background:#C4C8CE"|[[File:SMG Asset Sprite LS Secret Star.png|14px|link=Power Star]] [[The Ledge Hammer Trap]] | ||
| align=left style="background:#C4C8CE"| [[File:Smg2 icon greencomet.png|14px|link=Green Power Star]] [[Clockwork Ruins Galaxy#Green Star 1|Green Star 1]] | |align=left style="background:#C4C8CE"|[[File:Smg2 icon greencomet.png|14px|link=Green Power Star]] [[Clockwork Ruins Galaxy#Green Star 1|Green Star 1]] | ||
|- | |- | ||
| align=left style="background:#E1DEB5"| [[File:Smg2 icon greencomet.png|14px|link=Green Power Star]] [[Melty Monster Galaxy#Green Star 2|Green Star 2]] | |align=left style="background:#E1DEB5"|[[File:Smg2 icon greencomet.png|14px|link=Green Power Star]] [[Melty Monster Galaxy#Green Star 2|Green Star 2]] | ||
| align=left style="background:#E1DEB5"| [[File:Smg2 icon greencomet.png|14px|link=Green Power Star]] [[Melty Monster Galaxy#Green Star 3|Green Star 3]] | |align=left style="background:#E1DEB5"|[[File:Smg2 icon greencomet.png|14px|link=Green Power Star]] [[Melty Monster Galaxy#Green Star 3|Green Star 3]] | ||
| align=left style="background:#DBDDE1"| [[File:Smg2 icon greencomet.png|14px|link=Green Power Star]] [[Clockwork Ruins Galaxy#Green Star 2|Green Star 2]] | |align=left style="background:#DBDDE1"|[[File:Smg2 icon greencomet.png|14px|link=Green Power Star]] [[Clockwork Ruins Galaxy#Green Star 2|Green Star 2]] | ||
| align=left style="background:#DBDDE1"| [[File:Smg2 icon greencomet.png|14px|link=Green Power Star]] [[Clockwork Ruins Galaxy#Green Star 3|Green Star 3]] | |align=left style="background:#DBDDE1"|[[File:Smg2 icon greencomet.png|14px|link=Green Power Star]] [[Clockwork Ruins Galaxy#Green Star 3|Green Star 3]] | ||
|- | |- | ||
|colspan="6" align=center style="background:#D7D39D"| A galaxy featuring lots of planets made of lava. [[Magmaargh]]s and [[Magmaw]]s inhabit the lava.<br>'''Unlock criterion''': Complete "Bowser Jr.'s Boomsday Machine" | |colspan="6" align=center style="background:#D7D39D"|A galaxy featuring lots of planets made of lava. [[Magmaargh]]s and [[Magmaw]]s inhabit the lava.<br>'''Unlock criterion''': Complete "Bowser Jr.'s Boomsday Machine" | ||
|colspan="6" align=center style="background:#C4C8CE"| A galaxy featuring rotating platforms stylized like ruined clocks. These platforms also roll along the ground, forcing Mario to either avoid them, or climb up them.<br>'''Unlock criterion''': Complete either "The Magnificent Magma Sea" or "The Chimp's Bowling Challenge" | |colspan="6" align=center style="background:#C4C8CE"|A galaxy featuring rotating platforms stylized like ruined clocks. These platforms also roll along the ground, forcing Mario to either avoid them, or climb up them.<br>'''Unlock criterion''': Complete either "The Magnificent Magma Sea" or "The Chimp's Bowling Challenge" | ||
|- | |- | ||
!colspan="4" style="background:#9B68C6"| 38. [[Throwback Galaxy]]<br>[[File:SMG Asset Sprite UI Power Star.png|15px|Total number of obtainable Power Stars.]]×6 [[File:SMG Asset Model Good Egg Galaxy (Dino Piranha Planet).png|15px|Total number of reachable areas.]]×1 [[File:SMG2 Asset Sprite UI Bowser.png|15px|Total number of boss battles.]]×1 | !colspan="4" style="background:#9B68C6"|38. [[Throwback Galaxy]]<br>[[File:SMG Asset Sprite UI Power Star.png|15px|Total number of obtainable Power Stars.]]×6 [[File:SMG Asset Model Good Egg Galaxy (Dino Piranha Planet).png|15px|Total number of reachable areas.]]×1 [[File:SMG2 Asset Sprite UI Bowser.png|15px|Total number of boss battles.]]×1 | ||
!colspan="2" style="background:#9B68C6"| Missions | !colspan="2" style="background:#9B68C6"|Missions | ||
!colspan="4" style="background:#D4D8F1"| 39. [[Battle Belt Galaxy]]<br>[[File:SMG Asset Sprite UI Power Star.png|15px|Total number of obtainable Power Stars.]]×6 [[File:SMG Asset Model Good Egg Galaxy (Dino Piranha Planet).png|15px|Total number of reachable areas.]]×9 [[File:SMG2 Asset Sprite UI Bowser.png|15px|Total number of boss battles.]]×1 | !colspan="4" style="background:#D4D8F1"|39. [[Battle Belt Galaxy]]<br>[[File:SMG Asset Sprite UI Power Star.png|15px|Total number of obtainable Power Stars.]]×6 [[File:SMG Asset Model Good Egg Galaxy (Dino Piranha Planet).png|15px|Total number of reachable areas.]]×9 [[File:SMG2 Asset Sprite UI Bowser.png|15px|Total number of boss battles.]]×1 | ||
!colspan="2" style="background:#D4D8F1"| Missions | !colspan="2" style="background:#D4D8F1"|Missions | ||
|- | |- | ||
| colspan="4" rowspan="3" align=center style="background:#FFFFFF"| [[File:SMG2WhompsFortress.png|x90px]] | |colspan="4" rowspan="3" align=center style="background:#FFFFFF"|[[File:SMG2WhompsFortress.png|x90px]] | ||
| align=left style="background:#CFB6E4"| [[File:Smg2 icon powerstar.png|14px|link=Power Star]] [[Return of the Whomp King]] | |align=left style="background:#CFB6E4"|[[File:Smg2 icon powerstar.png|14px|link=Power Star]] [[Return of the Whomp King]] | ||
| align=left style="background:#CFB6E4"| [[File:Smg2 icon powerstar.png|14px|link=Power Star]] [[Silver Stars in the Whomp Fortress]] | |align=left style="background:#CFB6E4"|[[File:Smg2 icon powerstar.png|14px|link=Power Star]] [[Silver Stars in the Whomp Fortress]] | ||
| colspan="4" rowspan="3" align=center style="background:#FFFFFF"| [[File:SMG2 Battle Belt Jack-O-Goomba.png|x90px]] | |colspan="4" rowspan="3" align=center style="background:#FFFFFF"|[[File:SMG2 Battle Belt Jack-O-Goomba.png|x90px]] | ||
| align=left style="background:#F6F7FC"| [[File:Smg2 icon powerstar.png|14px|link=Power Star]] [[Mini-Planet Mega-Run]] | |align=left style="background:#F6F7FC"|[[File:Smg2 icon powerstar.png|14px|link=Power Star]] [[Mini-Planet Mega-Run]] | ||
| align=left style="background:#F6F7FC"| [[File:Smg2 icon prankstercomet.png|14px|link=Power Star]] [[Mini-Planet Daredevil Run]] | |align=left style="background:#F6F7FC"|[[File:Smg2 icon prankstercomet.png|14px|link=Power Star]] [[Mini-Planet Daredevil Run]] | ||
|- | |- | ||
| align=left style="background:#B58FD5"| [[File:Smg2 icon prankstercomet.png|14px|link=Power Star]] [[Whomp Silver Star Speed Run]] | |align=left style="background:#B58FD5"|[[File:Smg2 icon prankstercomet.png|14px|link=Power Star]] [[Whomp Silver Star Speed Run]] | ||
| align=left style="background:#B58FD5"| [[File:Smg2 icon greencomet.png|14px|link=Green Power Star]] [[Throwback Galaxy#Green Star 1|Green Star 1]] | |align=left style="background:#B58FD5"|[[File:Smg2 icon greencomet.png|14px|link=Green Power Star]] [[Throwback Galaxy#Green Star 1|Green Star 1]] | ||
| align=left style="background:#E5E8F7"| [[File:SMG Asset Sprite LS Secret Star.png|14px|link=Power Star]] [[Snacktime for Gobblegut]] | |align=left style="background:#E5E8F7"|[[File:SMG Asset Sprite LS Secret Star.png|14px|link=Power Star]] [[Snacktime for Gobblegut]] | ||
| align=left style="background:#E5E8F7"| [[File:Smg2 icon greencomet.png|14px|link=Green Power Star]] [[Battle Belt Galaxy#Green Star 1|Green Star 1]] | |align=left style="background:#E5E8F7"|[[File:Smg2 icon greencomet.png|14px|link=Green Power Star]] [[Battle Belt Galaxy#Green Star 1|Green Star 1]] | ||
|- | |- | ||
| align=left style="background:#CFB6E4"| [[File:Smg2 icon greencomet.png|14px|link=Green Power Star]] [[Throwback Galaxy#Green Star 2|Green Star 2]] | |align=left style="background:#CFB6E4"|[[File:Smg2 icon greencomet.png|14px|link=Green Power Star]] [[Throwback Galaxy#Green Star 2|Green Star 2]] | ||
| align=left style="background:#CFB6E4"| [[File:Smg2 icon greencomet.png|14px|link=Green Power Star]] [[Throwback Galaxy#Green Star 3|Green Star 3]] | |align=left style="background:#CFB6E4"|[[File:Smg2 icon greencomet.png|14px|link=Green Power Star]] [[Throwback Galaxy#Green Star 3|Green Star 3]] | ||
| align=left style="background:#F6F7FC"| [[File:Smg2 icon greencomet.png|14px|link=Green Power Star]] [[Battle Belt Galaxy#Green Star 2|Green Star 2]] | |align=left style="background:#F6F7FC"|[[File:Smg2 icon greencomet.png|14px|link=Green Power Star]] [[Battle Belt Galaxy#Green Star 2|Green Star 2]] | ||
| align=left style="background:#F6F7FC"| [[File:Smg2 icon greencomet.png|14px|link=Green Power Star]] [[Battle Belt Galaxy#Green Star 3|Green Star 3]] | |align=left style="background:#F6F7FC"|[[File:Smg2 icon greencomet.png|14px|link=Green Power Star]] [[Battle Belt Galaxy#Green Star 3|Green Star 3]] | ||
|- | |- | ||
|colspan="6" align=center style="background:#B58FD5"| A reimagining of [[Whomp's Fortress]] from ''[[Super Mario 64]]''. Like the original, Mario must traverse his way past [[Thwomp]]s, [[Piranha Plant]]s and [[Whomp]]s to reach the top. Other familiar faces like [[Bob-omb Buddy|Bob-omb Buddies]] and the [[Whomp King]] are met here.<br>'''Unlock criterion''': Complete either "Time for Adventure" or "The Ledge Hammer Trap" and have 60 Power Stars in possession. | |colspan="6" align=center style="background:#B58FD5"|A reimagining of [[Whomp's Fortress]] from ''[[Super Mario 64]]''. Like the original, Mario must traverse his way past [[Thwomp]]s, [[Piranha Plant]]s and [[Whomp]]s to reach the top. Other familiar faces like [[Bob-omb Buddy|Bob-omb Buddies]] and the [[Whomp King]] are met here.<br>'''Unlock criterion''': Complete either "Time for Adventure" or "The Ledge Hammer Trap" and have 60 Power Stars in possession. | ||
|colspan="6" align=center style="background:#E5E8F7"| This galaxy is an enemy gauntlet where every planet requires Mario to defeat all of enemies on it in order to proceed.<br>'''Unlock criterion''': Complete "Return of the Whomp King" and have 65 Power Stars in possession | |colspan="6" align=center style="background:#E5E8F7"|This galaxy is an enemy gauntlet where every planet requires Mario to defeat all of enemies on it in order to proceed.<br>'''Unlock criterion''': Complete "Return of the Whomp King" and have 65 Power Stars in possession | ||
|- | |- | ||
!colspan="4" style="background:#DC3834"| 40. [[File:SMG Asset Sprite UI Hungry Luma.png|14px|link=Hungry Luma]] [[Flash Black Galaxy]]<br>[[File:SMG Asset Sprite UI Power Star.png|15px|Total number of obtainable Power Stars.]]x4 [[File:SMG Asset Model Good Egg Galaxy (Dino Piranha Planet).png|15px|Total number of reachable areas.]]×2 | !colspan="4" style="background:#DC3834"|40. [[File:SMG Asset Sprite UI Hungry Luma.png|14px|link=Hungry Luma]] [[Flash Black Galaxy]]<br>[[File:SMG Asset Sprite UI Power Star.png|15px|Total number of obtainable Power Stars.]]x4 [[File:SMG Asset Model Good Egg Galaxy (Dino Piranha Planet).png|15px|Total number of reachable areas.]]×2 | ||
!colspan="2" style="background:#DC3834"| Missions | !colspan="2" style="background:#DC3834"|Missions | ||
!colspan="4" style="background:#9BF40A"| 41. [[Slimy Spring Galaxy]]<br>[[File:SMG Asset Sprite UI Power Star.png|15px|Total number of obtainable Power Stars.]]×4 [[File:SMG Asset Model Good Egg Galaxy (Dino Piranha Planet).png|15px|Total number of reachable areas.]]×2 | !colspan="4" style="background:#9BF40A"|41. [[Slimy Spring Galaxy]]<br>[[File:SMG Asset Sprite UI Power Star.png|15px|Total number of obtainable Power Stars.]]×4 [[File:SMG Asset Model Good Egg Galaxy (Dino Piranha Planet).png|15px|Total number of reachable areas.]]×2 | ||
!colspan="2" style="background:#9BF40A"| Missions | !colspan="2" style="background:#9BF40A"|Missions | ||
|- | |- | ||
| colspan="4" rowspan="2" align=center style="background:#FFFFFF"| [[File:SMG2 Flash Black Tower.png|x90px]] | |colspan="4" rowspan="2" align=center style="background:#FFFFFF"|[[File:SMG2 Flash Black Tower.png|x90px]] | ||
| align=left style="background:#E9827F"| [[File:Smg2 icon powerstar.png|14px|link=Power Star]] [[Jumping Around in the Dark]] | |align=left style="background:#E9827F"|[[File:Smg2 icon powerstar.png|14px|link=Power Star]] [[Jumping Around in the Dark]] | ||
| align=left style="background:#E9827F"| [[File:Smg2 icon prankstercomet.png|14px|link=Power Star]] [[Dark Octo-Army Romp]] | |align=left style="background:#E9827F"|[[File:Smg2 icon prankstercomet.png|14px|link=Power Star]] [[Dark Octo-Army Romp]] | ||
| colspan="4" rowspan="2" align=center style="background:#FFFFFF"| [[File:SMG2 Slimy Spring Snoodle Cavern.png|x90px]] | |colspan="4" rowspan="2" align=center style="background:#FFFFFF"|[[File:SMG2 Slimy Spring Snoodle Cavern.png|x90px]] | ||
| align=left style="background:#CEFA86"| [[File:Smg2 icon powerstar.png|14px|link=Power Star]] [[The Deep Shell Well]] | |align=left style="background:#CEFA86"|[[File:Smg2 icon powerstar.png|14px|link=Power Star]] [[The Deep Shell Well]] | ||
| align=left style="background:#CEFA86"| [[File:Smg2 icon powerstar.png|14px|link=Power Star]] [[The Chimp's Coin Challenge]] | |align=left style="background:#CEFA86"|[[File:Smg2 icon powerstar.png|14px|link=Power Star]] [[The Chimp's Coin Challenge]] | ||
|- | |- | ||
| align=left style="background:#F1AFAD"| [[File:Smg2 icon greencomet.png|14px|link=Green Power Star]] [[Flash Black Galaxy#Green Star 1|Green Star 1]] | |align=left style="background:#F1AFAD"|[[File:Smg2 icon greencomet.png|14px|link=Green Power Star]] [[Flash Black Galaxy#Green Star 1|Green Star 1]] | ||
| align=left style="background:#F1AFAD"| [[File:Smg2 icon greencomet.png|14px|link=Green Power Star]] [[Flash Black Galaxy#Green Star 2|Green Star 2]] | |align=left style="background:#F1AFAD"|[[File:Smg2 icon greencomet.png|14px|link=Green Power Star]] [[Flash Black Galaxy#Green Star 2|Green Star 2]] | ||
| align=left style="background:#E4FCBC"| [[File:Smg2 icon greencomet.png|14px|link=Green Power Star]] [[Slimy Spring Galaxy#Green Star 1|Green Star 1]] | |align=left style="background:#E4FCBC"|[[File:Smg2 icon greencomet.png|14px|link=Green Power Star]] [[Slimy Spring Galaxy#Green Star 1|Green Star 1]] | ||
| align=left style="background:#E4FCBC"| [[File:Smg2 icon greencomet.png|14px|link=Green Power Star]] [[Slimy Spring Galaxy#Green Star 2|Green Star 2]] | |align=left style="background:#E4FCBC"|[[File:Smg2 icon greencomet.png|14px|link=Green Power Star]] [[Slimy Spring Galaxy#Green Star 2|Green Star 2]] | ||
|- | |- | ||
|colspan="6" align=center style="background:#E9827F"| A tall mansion-like building that is pitch dark, but briefly lights up during time intervals.<br>'''Unlock criterion''': Complete either "The Magnificent Magma Sea" or "The Chimp's Bowling Challenge" and feed the Hungry Luma 1800 Star Bits | |colspan="6" align=center style="background:#E9827F"|A tall mansion-like building that is pitch dark, but briefly lights up during time intervals.<br>'''Unlock criterion''': Complete either "The Magnificent Magma Sea" or "The Chimp's Bowling Challenge" and feed the Hungry Luma 1800 Star Bits | ||
|colspan="6" align=center style="background:#CEFA86"| A mysterious underwater cave inhabited by various creatures including [[Snoodle]]s, [[Gringill]]s, and [[Urchin]]s.<br>'''Unlock criterion''': Unlock Flash Black Galaxy by feeding the World 6 Hungry Luma 1800 Star Bits, then complete "Jumping Around in the Dark" | |colspan="6" align=center style="background:#CEFA86"|A mysterious underwater cave inhabited by various creatures including [[Snoodle]]s, [[Gringill]]s, and [[Urchin]]s.<br>'''Unlock criterion''': Unlock Flash Black Galaxy by feeding the World 6 Hungry Luma 1800 Star Bits, then complete "Jumping Around in the Dark" | ||
|- | |- | ||
!colspan="4" style="background:#49AD87"| 42. [[Bowser's Galaxy Generator]]<br>[[File:SMG Asset Sprite UI Power Star.png|15px|Total number of obtainable Power Stars.]]×4 [[File:SMG Asset Model Good Egg Galaxy (Dino Piranha Planet).png|15px|Total number of reachable areas.]]×11 [[File:SMG2 Asset Sprite UI Bowser.png|15px|Total number of boss battles.]]×1 | !colspan="4" style="background:#49AD87"|42. [[Bowser's Galaxy Generator]]<br>[[File:SMG Asset Sprite UI Power Star.png|15px|Total number of obtainable Power Stars.]]×4 [[File:SMG Asset Model Good Egg Galaxy (Dino Piranha Planet).png|15px|Total number of reachable areas.]]×11 [[File:SMG2 Asset Sprite UI Bowser.png|15px|Total number of boss battles.]]×1 | ||
!colspan="8" style="background:#49AD87"| Missions | !colspan="8" style="background:#49AD87"|Missions | ||
|- | |- | ||
| colspan="4" rowspan=2 align=center style="background:#FFFFFF"| [[File:SMG2 Lava Castle.png|x90px]] | |colspan="4" rowspan=2 align=center style="background:#FFFFFF"|[[File:SMG2 Lava Castle.png|x90px]] | ||
| colspan="4" align=left style="background:#66BE9C"| [[File:Smg2 icon grandstar.png|14px|link=Power Star]] [[Bowser's Fortified Fortress]] | |colspan="4" align=left style="background:#66BE9C"|[[File:Smg2 icon grandstar.png|14px|link=Power Star]] [[Bowser's Fortified Fortress]] | ||
| colspan="4" align=left style="background:#66BE9C"| [[File:Smg2 icon prankstercomet.png|14px|link=Power Star]] [[Bowser's Big Bad Speed Run]] | |colspan="4" align=left style="background:#66BE9C"|[[File:Smg2 icon prankstercomet.png|14px|link=Power Star]] [[Bowser's Big Bad Speed Run]] | ||
|- | |- | ||
| colspan="4" align=left style="background:#B6E0D0"| [[File:Smg2 icon greencomet.png|14px|link=Green Power Star]] [[Bowser's Galaxy Generator#Green Star 1|Green Star 1]] | |colspan="4" align=left style="background:#B6E0D0"|[[File:Smg2 icon greencomet.png|14px|link=Green Power Star]] [[Bowser's Galaxy Generator#Green Star 1|Green Star 1]] | ||
| colspan="4" align=left style="background:#B6E0D0"| [[File:Smg2 icon greencomet.png|14px|link=Green Power Star]] [[Bowser's Galaxy Generator#Green Star 2|Green Star 2]] | |colspan="4" align=left style="background:#B6E0D0"|[[File:Smg2 icon greencomet.png|14px|link=Green Power Star]] [[Bowser's Galaxy Generator#Green Star 2|Green Star 2]] | ||
|- | |- | ||
|colspan="12" align=center style="background:#66BE9C"| Bowser's grand final fortress, where he is battled for the last time. Mario will traverse the castle in various ways, including with the [[Spin Drill]], [[Cloud Flower]], and Yoshi. After Bowser's defeat, Mario finally saves Princess Peach and returns home. <br>'''Unlock criterion''': Collect a Power Star from either the Battle Belt or Slimy Spring Galaxy and have 70 Power Stars in possession | |colspan="12" align=center style="background:#66BE9C"|Bowser's grand final fortress, where he is battled for the last time. Mario will traverse the castle in various ways, including with the [[Spin Drill]], [[Cloud Flower]], and Yoshi. After Bowser's defeat, Mario finally saves Princess Peach and returns home. <br>'''Unlock criterion''': Collect a Power Star from either the Battle Belt or Slimy Spring Galaxy and have 70 Power Stars in possession | ||
|- | |- | ||
| colspan="12" style="background:#7EACEA; color:white;"| [[File:SMG2 Asset Texture World Banner (World S).png|45px|link=World S]] '''World S. Here We Go!''' | | colspan="12" style="background:#7EACEA; color:white;"|[[File:SMG2 Asset Texture World Banner (World S).png|45px|link=World S]] '''World S. Here We Go!''' | ||
|- | |- | ||
!colspan="4" style="background:#DC3834"| 43. [[Mario Squared Galaxy]]<br>[[File:SMG Asset Sprite UI Power Star.png|15px|Total number of obtainable Power Stars.]]x4 [[File:SMG Asset Model Good Egg Galaxy (Dino Piranha Planet).png|15px|Total number of reachable areas.]]×1 | !colspan="4" style="background:#DC3834"|43. [[Mario Squared Galaxy]]<br>[[File:SMG Asset Sprite UI Power Star.png|15px|Total number of obtainable Power Stars.]]x4 [[File:SMG Asset Model Good Egg Galaxy (Dino Piranha Planet).png|15px|Total number of reachable areas.]]×1 | ||
!colspan="2" style="background:#DC3834"| Missions | !colspan="2" style="background:#DC3834"|Missions | ||
!colspan="4" style="background:#9BF40A"| 44. [[Rolling Coaster Galaxy]]<br>[[File:SMG Asset Sprite UI Power Star.png|15px|Total number of obtainable Power Stars.]]×4 [[File:SMG Asset Model Good Egg Galaxy (Dino Piranha Planet).png|15px|Total number of reachable areas.]]×1 | !colspan="4" style="background:#9BF40A"|44. [[Rolling Coaster Galaxy]]<br>[[File:SMG Asset Sprite UI Power Star.png|15px|Total number of obtainable Power Stars.]]×4 [[File:SMG Asset Model Good Egg Galaxy (Dino Piranha Planet).png|15px|Total number of reachable areas.]]×1 | ||
!colspan="2" style="background:#9BF40A"| Missions | !colspan="2" style="background:#9BF40A"|Missions | ||
|- | |- | ||
| colspan="4" rowspan="2" align=center style="background:#FFFFFF"| [[File:Make Mario a Star.png|x90px]] | |colspan="4" rowspan="2" align=center style="background:#FFFFFF"|[[File:Make Mario a Star.png|x90px]] | ||
| align=left style="background:#E9827F"| [[File:Smg2 icon powerstar.png|14px|link=Power Star]] [[Make Mario a Star]] | |align=left style="background:#E9827F"|[[File:Smg2 icon powerstar.png|14px|link=Power Star]] [[Make Mario a Star]] | ||
| align=left style="background:#E9827F"| [[File:Smg2 icon prankstercomet.png|14px|link=Power Star]] [[Luigi's Purple Coin Chaos]] | |align=left style="background:#E9827F"|[[File:Smg2 icon prankstercomet.png|14px|link=Power Star]] [[Luigi's Purple Coin Chaos]] | ||
| colspan="4" rowspan="2" align=center style="background:#FFFFFF"| [[File:SMG2 Rolling Coaster Middle Path.png|x90px]] | |colspan="4" rowspan="2" align=center style="background:#FFFFFF"|[[File:SMG2 Rolling Coaster Middle Path.png|x90px]] | ||
| align=left style="background:#CEFA86"| [[File:Smg2 icon powerstar.png|14px|link=Power Star]] [[The Rainbow Road Roll]] | |align=left style="background:#CEFA86"|[[File:Smg2 icon powerstar.png|14px|link=Power Star]] [[The Rainbow Road Roll]] | ||
| align=left style="background:#CEFA86"| [[File:Smg2 icon prankstercomet.png|14px|link=Power Star]] [[Purple Coins on the Rainbow Road]] | |align=left style="background:#CEFA86"|[[File:Smg2 icon prankstercomet.png|14px|link=Power Star]] [[Purple Coins on the Rainbow Road]] | ||
|- | |- | ||
| align=left style="background:#F1AFAD"| [[File:Smg2 icon greencomet.png|14px|link=Green Power Star]] [[Mario Squared Galaxy#Green Star 1|Green Star 1]] | |align=left style="background:#F1AFAD"|[[File:Smg2 icon greencomet.png|14px|link=Green Power Star]] [[Mario Squared Galaxy#Green Star 1|Green Star 1]] | ||
| align=left style="background:#F1AFAD"| [[File:Smg2 icon greencomet.png|14px|link=Green Power Star]] [[Mario Squared Galaxy#Green Star 2|Green Star 2]] | |align=left style="background:#F1AFAD"|[[File:Smg2 icon greencomet.png|14px|link=Green Power Star]] [[Mario Squared Galaxy#Green Star 2|Green Star 2]] | ||
| align=left style="background:#E4FCBC"| [[File:Smg2 icon greencomet.png|14px|link=Green Power Star]] [[Rolling Coaster Galaxy#Green Star 1|Green Star 1]] | |align=left style="background:#E4FCBC"|[[File:Smg2 icon greencomet.png|14px|link=Green Power Star]] [[Rolling Coaster Galaxy#Green Star 1|Green Star 1]] | ||
| align=left style="background:#E4FCBC"| [[File:Smg2 icon greencomet.png|14px|link=Green Power Star]] [[Rolling Coaster Galaxy#Green Star 2|Green Star 2]] | |align=left style="background:#E4FCBC"|[[File:Smg2 icon greencomet.png|14px|link=Green Power Star]] [[Rolling Coaster Galaxy#Green Star 2|Green Star 2]] | ||
|- | |- | ||
|colspan="6" align=center style="background:#E9827F"| A planet resembling an 8-bit sprite of Mario from ''[[Super Mario Bros.]]'', much like one of the planets from the previous game's [[Toy Time Galaxy]]. The Power Star appears once all of the [[Flipswitch Panel]]s have been stepped on.<br>'''Unlock criterion''': Complete "Bowser's Fortified Fortress" | |colspan="6" align=center style="background:#E9827F"|A planet resembling an 8-bit sprite of Mario from ''[[Super Mario Bros.]]'', much like one of the planets from the previous game's [[Toy Time Galaxy]]. The Power Star appears once all of the [[Flipswitch Panel]]s have been stepped on.<br>'''Unlock criterion''': Complete "Bowser's Fortified Fortress" | ||
|colspan="6" align=center style="background:#CEFA86"| A large slope with a rainbow-colored floor, referencing the [[Rainbow Road]] tracks from the ''[[Mario Kart]]'' series. The Star Ball is used once again to traverse this road.<br>'''Unlock criterion''': Complete "Make Mario a Star" and have 75 Power Stars in possession | |colspan="6" align=center style="background:#CEFA86"|A large slope with a rainbow-colored floor, referencing the [[Rainbow Road]] tracks from the ''[[Mario Kart]]'' series. The Star Ball is used once again to traverse this road.<br>'''Unlock criterion''': Complete "Make Mario a Star" and have 75 Power Stars in possession | ||
|- | |- | ||
!colspan="4" style="background:#DC3834"| 45. [[Twisty Trials Galaxy]]<br>[[File:SMG Asset Sprite UI Power Star.png|15px|Total number of obtainable Power Stars.]]x4 [[File:SMG Asset Model Good Egg Galaxy (Dino Piranha Planet).png|15px|Total number of reachable areas.]]×1 | !colspan="4" style="background:#DC3834"|45. [[Twisty Trials Galaxy]]<br>[[File:SMG Asset Sprite UI Power Star.png|15px|Total number of obtainable Power Stars.]]x4 [[File:SMG Asset Model Good Egg Galaxy (Dino Piranha Planet).png|15px|Total number of reachable areas.]]×1 | ||
!colspan="2" style="background:#DC3834"| Missions | !colspan="2" style="background:#DC3834"|Missions | ||
!colspan="4" style="background:#9BF40A"| 46. [[Stone Cyclone Galaxy]]<br>[[File:SMG Asset Sprite UI Power Star.png|15px|Total number of obtainable Power Stars.]]×4 [[File:SMG Asset Model Good Egg Galaxy (Dino Piranha Planet).png|15px|Total number of reachable areas.]]×1 | !colspan="4" style="background:#9BF40A"|46. [[Stone Cyclone Galaxy]]<br>[[File:SMG Asset Sprite UI Power Star.png|15px|Total number of obtainable Power Stars.]]×4 [[File:SMG Asset Model Good Egg Galaxy (Dino Piranha Planet).png|15px|Total number of reachable areas.]]×1 | ||
!colspan="2" style="background:#9BF40A"| Missions | !colspan="2" style="background:#9BF40A"|Missions | ||
|- | |- | ||
| colspan="4" rowspan="2" align=center style="background:#FFFFFF"| [[File:SMG2 Twisty Trials Cloud Section.png|x90px]] | |colspan="4" rowspan="2" align=center style="background:#FFFFFF"|[[File:SMG2 Twisty Trials Cloud Section.png|x90px]] | ||
| align=left style="background:#E9827F"| [[File:Smg2 icon powerstar.png|14px|link=Power Star]] [[Spinning and Spinning and Spinning]] | |align=left style="background:#E9827F"|[[File:Smg2 icon powerstar.png|14px|link=Power Star]] [[Spinning and Spinning and Spinning]] | ||
| align=left style="background:#E9827F"| [[File:Smg2 icon prankstercomet.png|14px|link=Power Star]] [[Turning Turning Double Time]] | |align=left style="background:#E9827F"|[[File:Smg2 icon prankstercomet.png|14px|link=Power Star]] [[Turning Turning Double Time]] | ||
| colspan="4" rowspan="2" align=center style="background:#FFFFFF"| [[File:SMG2 Stone Cyclone Tox Boxes.png|x90px]] | |colspan="4" rowspan="2" align=center style="background:#FFFFFF"|[[File:SMG2 Stone Cyclone Tox Boxes.png|x90px]] | ||
| align=left style="background:#CEFA86"| [[File:Smg2 icon powerstar.png|14px|link=Power Star]] [[Silver Stars on the Cyclone]] | |align=left style="background:#CEFA86"|[[File:Smg2 icon powerstar.png|14px|link=Power Star]] [[Silver Stars on the Cyclone]] | ||
| align=left style="background:#CEFA86"| [[File:Smg2 icon prankstercomet.png|14px|link=Power Star]] [[Tox Box Speed Run]] | |align=left style="background:#CEFA86"|[[File:Smg2 icon prankstercomet.png|14px|link=Power Star]] [[Tox Box Speed Run]] | ||
|- | |- | ||
| align=left style="background:#F1AFAD"| [[File:Smg2 icon greencomet.png|14px|link=Green Power Star]] [[Twisty Trials Galaxy#Green Star 1|Green Star 1]] | |align=left style="background:#F1AFAD"|[[File:Smg2 icon greencomet.png|14px|link=Green Power Star]] [[Twisty Trials Galaxy#Green Star 1|Green Star 1]] | ||
| align=left style="background:#F1AFAD"| [[File:Smg2 icon greencomet.png|14px|link=Green Power Star]] [[Twisty Trials Galaxy#Green Star 2|Green Star 2]] | |align=left style="background:#F1AFAD"|[[File:Smg2 icon greencomet.png|14px|link=Green Power Star]] [[Twisty Trials Galaxy#Green Star 2|Green Star 2]] | ||
| align=left style="background:#E4FCBC"| [[File:Smg2 icon greencomet.png|14px|link=Green Power Star]] [[Stone Cyclone Galaxy#Green Star 1|Green Star 1]] | |align=left style="background:#E4FCBC"|[[File:Smg2 icon greencomet.png|14px|link=Green Power Star]] [[Stone Cyclone Galaxy#Green Star 1|Green Star 1]] | ||
| align=left style="background:#E4FCBC"| [[File:Smg2 icon greencomet.png|14px|link=Green Power Star]] [[Stone Cyclone Galaxy#Green Star 2|Green Star 2]] | |align=left style="background:#E4FCBC"|[[File:Smg2 icon greencomet.png|14px|link=Green Power Star]] [[Stone Cyclone Galaxy#Green Star 2|Green Star 2]] | ||
|- | |- | ||
|colspan="6" align=center style="background:#E9827F"| A secret area with lots of large rotating platforms, directly based on the mission [[The Secret of Ricco Tower]] from ''[[Super Mario Sunshine]]'', though much easier due to the Spin, Cloud Flower, and Yoshi.<br>'''Unlock criterion''': Complete "The Rainbow Road Roll" and have 80 Power Stars in possession | |colspan="6" align=center style="background:#E9827F"|A secret area with lots of large rotating platforms, directly based on the mission [[The Secret of Ricco Tower]] from ''[[Super Mario Sunshine]]'', though much easier due to the Spin, Cloud Flower, and Yoshi.<br>'''Unlock criterion''': Complete "The Rainbow Road Roll" and have 80 Power Stars in possession | ||
|colspan="6" align=center style="background:#CEFA86"| A cylindrical stone planet with Thwomps and [[Tox Box]]es, it is a direct replica of the Stone Cyclone planet from the [[Beach Bowl Galaxy]] in the previous game, though all of the enemies and platforms move much faster, even more than the planet's Fast-Foe Comet.<br>'''Unlock criterion''': Complete "Spinning and Spinning and Spinning" and have 90 Power Stars in possession | |colspan="6" align=center style="background:#CEFA86"|A cylindrical stone planet with Thwomps and [[Tox Box]]es, it is a direct replica of the Stone Cyclone planet from the [[Beach Bowl Galaxy]] in the previous game, though all of the enemies and platforms move much faster, even more than the planet's Fast-Foe Comet.<br>'''Unlock criterion''': Complete "Spinning and Spinning and Spinning" and have 90 Power Stars in possession | ||
|- | |- | ||
!colspan="4" style="background:#DC3834"| 47. [[Boss Blitz Galaxy]]<br>[[File:SMG Asset Sprite UI Power Star.png|15px|Total number of obtainable Power Stars.]]x4 [[File:SMG Asset Model Good Egg Galaxy (Dino Piranha Planet).png|15px|Total number of reachable areas.]]×6 [[File:SMG2 Asset Sprite UI Bowser.png|15px|Total number of boss battles.]]×5 | !colspan="4" style="background:#DC3834"|47. [[Boss Blitz Galaxy]]<br>[[File:SMG Asset Sprite UI Power Star.png|15px|Total number of obtainable Power Stars.]]x4 [[File:SMG Asset Model Good Egg Galaxy (Dino Piranha Planet).png|15px|Total number of reachable areas.]]×6 [[File:SMG2 Asset Sprite UI Bowser.png|15px|Total number of boss battles.]]×5 | ||
!colspan="2" style="background:#DC3834"| Missions | !colspan="2" style="background:#DC3834"|Missions | ||
!colspan="4" style="background:#9BF40A"| 48. [[File:SMG Asset Sprite UI Hungry Luma.png|14px|link=Hungry Luma]] [[Flip-Out Galaxy]]<br>[[File:SMG Asset Sprite UI Power Star.png|15px|Total number of obtainable Power Stars.]]×4 [[File:SMG Asset Model Good Egg Galaxy (Dino Piranha Planet).png|15px|Total number of reachable areas.]]×2 | !colspan="4" style="background:#9BF40A"|48. [[File:SMG Asset Sprite UI Hungry Luma.png|14px|link=Hungry Luma]] [[Flip-Out Galaxy]]<br>[[File:SMG Asset Sprite UI Power Star.png|15px|Total number of obtainable Power Stars.]]×4 [[File:SMG Asset Model Good Egg Galaxy (Dino Piranha Planet).png|15px|Total number of reachable areas.]]×2 | ||
!colspan="2" style="background:#9BF40A"| Missions | !colspan="2" style="background:#9BF40A"|Missions | ||
|- | |- | ||
| colspan="4" rowspan="2" align=center style="background:#FFFFFF"| [[File:SMG2 Boss Blitz Dino Piranha.png|x90px]] | |colspan="4" rowspan="2" align=center style="background:#FFFFFF"|[[File:SMG2 Boss Blitz Dino Piranha.png|x90px]] | ||
| align=left style="background:#E9827F"| [[File:Smg2 icon powerstar.png|14px|link=Power Star]] [[Throwback Throwdown]] | |align=left style="background:#E9827F"|[[File:Smg2 icon powerstar.png|14px|link=Power Star]] [[Throwback Throwdown]] | ||
| align=left style="background:#E9827F"| [[File:Smg2 icon prankstercomet.png|14px|link=Power Star]] [[Throwback Throwdown Speed Run]] | |align=left style="background:#E9827F"|[[File:Smg2 icon prankstercomet.png|14px|link=Power Star]] [[Throwback Throwdown Speed Run]] | ||
| colspan="4" rowspan="2" align=center style="background:#FFFFFF"| [[File:SMG2 Flip Out Wicked Wall Jumps.png|x90px]] | |colspan="4" rowspan="2" align=center style="background:#FFFFFF"|[[File:SMG2 Flip Out Wicked Wall Jumps.png|x90px]] | ||
| align=left style="background:#CEFA86"| [[File:Smg2 icon powerstar.png|14px|link=Power Star]] [[Wicked Wall Jumps]] | |align=left style="background:#CEFA86"|[[File:Smg2 icon powerstar.png|14px|link=Power Star]] [[Wicked Wall Jumps]] | ||
| align=left style="background:#CEFA86"| [[File:Smg2 icon prankstercomet.png|14px|link=Power Star]] [[Cosmic Clone Wall Jumpers]] | |align=left style="background:#CEFA86"|[[File:Smg2 icon prankstercomet.png|14px|link=Power Star]] [[Cosmic Clone Wall Jumpers]] | ||
|- | |- | ||
| align=left style="background:#F1AFAD"| [[File:Smg2 icon greencomet.png|14px|link=Green Power Star]] [[Boss Blitz Galaxy#Green Star 1|Green Star 1]] | |align=left style="background:#F1AFAD"|[[File:Smg2 icon greencomet.png|14px|link=Green Power Star]] [[Boss Blitz Galaxy#Green Star 1|Green Star 1]] | ||
| align=left style="background:#F1AFAD"| [[File:Smg2 icon greencomet.png|14px|link=Green Power Star]] [[Boss Blitz Galaxy#Green Star 2|Green Star 2]] | |align=left style="background:#F1AFAD"|[[File:Smg2 icon greencomet.png|14px|link=Green Power Star]] [[Boss Blitz Galaxy#Green Star 2|Green Star 2]] | ||
| align=left style="background:#E4FCBC"| [[File:Smg2 icon greencomet.png|14px|link=Green Power Star]] [[Flip-Out Galaxy#Green Star 1|Green Star 1]] | |align=left style="background:#E4FCBC"|[[File:Smg2 icon greencomet.png|14px|link=Green Power Star]] [[Flip-Out Galaxy#Green Star 1|Green Star 1]] | ||
| align=left style="background:#E4FCBC"| [[File:Smg2 icon greencomet.png|14px|link=Green Power Star]] [[Flip-Out Galaxy#Green Star 2|Green Star 2]] | |align=left style="background:#E4FCBC"|[[File:Smg2 icon greencomet.png|14px|link=Green Power Star]] [[Flip-Out Galaxy#Green Star 2|Green Star 2]] | ||
|- | |- | ||
|colspan="6" align=center style="background:#E9827F"| In this galaxy, the player fights against five bosses from the first ''Super Mario Galaxy'': [[Dino Piranha]], [[King Kaliente]], [[Major Burrows]], [[Bouldergeist]], and [[Fiery Dino Piranha]], in that order. All the bosses have the exact same fighting strategy as the first game.<br>'''Unlock criterion''': Complete "Silver Stars on the Cyclone" and have 100 Power Stars in possession | |colspan="6" align=center style="background:#E9827F"|In this galaxy, the player fights against five bosses from the first ''Super Mario Galaxy'': [[Dino Piranha]], [[King Kaliente]], [[Major Burrows]], [[Bouldergeist]], and [[Fiery Dino Piranha]], in that order. All the bosses have the exact same fighting strategy as the first game.<br>'''Unlock criterion''': Complete "Silver Stars on the Cyclone" and have 100 Power Stars in possession | ||
|colspan="6" align=center style="background:#CEFA86"| The sequel galaxy to Flip-Swap Galaxy, but instead of panels that flip, there are red and blue walls that go in and out with every Spin. Lots of wall jumping is necessary to make it through this galaxy.<br>'''Unlock criterion''': Complete "Throwback Throwdown", have 110 Power Stars in possession, and feed the Hungry Luma 2000 Star Bits | |colspan="6" align=center style="background:#CEFA86"|The sequel galaxy to Flip-Swap Galaxy, but instead of panels that flip, there are red and blue walls that go in and out with every Spin. Lots of wall jumping is necessary to make it through this galaxy.<br>'''Unlock criterion''': Complete "Throwback Throwdown", have 110 Power Stars in possession, and feed the Hungry Luma 2000 Star Bits | ||
|- | |- | ||
!colspan="4" style="background:#49AD87"| 49. [[Grandmaster Galaxy]]<br>[[File:SMG Asset Sprite UI Power Star.png|15px|Total number of obtainable Power Stars.]]×2 [[File:SMG Asset Model Good Egg Galaxy (Dino Piranha Planet).png|15px|Total number of reachable areas.]]×7 | !colspan="4" style="background:#49AD87"|49. [[Grandmaster Galaxy]]<br>[[File:SMG Asset Sprite UI Power Star.png|15px|Total number of obtainable Power Stars.]]×2 [[File:SMG Asset Model Good Egg Galaxy (Dino Piranha Planet).png|15px|Total number of reachable areas.]]×7 | ||
!colspan="8" style="background:#49AD87"| Missions | !colspan="8" style="background:#49AD87"|Missions | ||
|- | |- | ||
| colspan="4" rowspan=2 align=center style="background:#FFFFFF"| [[File:SMG2 Grandmaster Platform Planet.png|x90px]] | |colspan="4" rowspan=2 align=center style="background:#FFFFFF"|[[File:SMG2 Grandmaster Platform Planet.png|x90px]] | ||
| colspan="8" align=left style="background:#66BE9C"| [[File:Smg2 icon powerstar.png|14px|link=Power Star]] [[The Ultimate Test]] | |colspan="8" align=left style="background:#66BE9C"|[[File:Smg2 icon powerstar.png|14px|link=Power Star]] [[The Ultimate Test]] | ||
|- | |- | ||
| colspan="8" align=left style="background:#66BE9C"| [[File:Smg2 icon prankstercomet.png|14px|link=Power Star]] [[The Perfect Run]] | |colspan="8" align=left style="background:#66BE9C"|[[File:Smg2 icon prankstercomet.png|14px|link=Power Star]] [[The Perfect Run]] | ||
|- | |- | ||
|colspan="12" align=center style="background:#66BE9C"| The true final galaxy of the game, featuring the hardest challenges on different planets each with different gimmicks that the player needs to watch out for. At the very end of the Prankster Comet, Mario will come face-to-face with [[Rosalina]] herself.<br>'''Unlock criterion''': Collect all 240 Power Stars and Green Stars | |colspan="12" align=center style="background:#66BE9C"|The true final galaxy of the game, featuring the hardest challenges on different planets each with different gimmicks that the player needs to watch out for. At the very end of the Prankster Comet, Mario will come face-to-face with [[Rosalina]] herself.<br>'''Unlock criterion''': Collect all 240 Power Stars and Green Stars | ||
|- | |- | ||
| colspan="12" align=left style="background:#F5F5F5; color:black;"|'''Level chart information and legend''': Galaxies are designated with a unique number. This number correlates with how galaxies are listed within the game's [[Star List]]. Galaxies accessed by feeding [[Hungry Luma]]s are denoted by [[File:SMG Asset Sprite UI Hungry Luma.png|14px]]. Three symbols convey attributes about each galaxy: [[File:SMG Asset Sprite UI Power Star.png|15px]] denotes the total number of obtainable [[Power Star]]s; [[File:SMG Asset Model Good Egg Galaxy (Dino Piranha Planet).png|15px]] denotes the total number of reachable areas; and [[File:SMG2 Asset Sprite UI Bowser.png|15px]] denotes the number of boss battles. The name of each mission is accompanied by a symbol that indicates what type of mission it is and the type of Power Star obtained. [[File:Smg2 icon powerstar.png|14px]] denotes a normal mission; [[File:Smg2 icon grandstar.png|14px]] denotes a [[Grand Star]] mission; [[File:Smg2 icon prankstercomet.png|14px]] denotes a [[Prankster Comet]] mission; [[File:Smg2 icon greencomet.png|14px]] denotes a [[Green Star]] Prankster Comet; and [[File:SMG Asset Sprite LS Secret Star.png|14px]] denotes an intramissionary Secret Star. | |colspan="12" align=left style="background:#F5F5F5; color:black;"|'''Level chart information and legend''': Galaxies are designated with a unique number. This number correlates with how galaxies are listed within the game's [[Star List]]. Galaxies accessed by feeding [[Hungry Luma]]s are denoted by [[File:SMG Asset Sprite UI Hungry Luma.png|14px]]. Three symbols convey attributes about each galaxy: [[File:SMG Asset Sprite UI Power Star.png|15px]] denotes the total number of obtainable [[Power Star]]s; [[File:SMG Asset Model Good Egg Galaxy (Dino Piranha Planet).png|15px]] denotes the total number of reachable areas; and [[File:SMG2 Asset Sprite UI Bowser.png|15px]] denotes the number of boss battles. The name of each mission is accompanied by a symbol that indicates what type of mission it is and the type of Power Star obtained. [[File:Smg2 icon powerstar.png|14px]] denotes a normal mission; [[File:Smg2 icon grandstar.png|14px]] denotes a [[Grand Star]] mission; [[File:Smg2 icon prankstercomet.png|14px]] denotes a [[Prankster Comet]] mission; [[File:Smg2 icon greencomet.png|14px]] denotes a [[Green Star]] Prankster Comet; and [[File:SMG Asset Sprite LS Secret Star.png|14px]] denotes an intramissionary Secret Star. | ||
|} | |} | ||
Revision as of 15:31, November 28, 2021
Template:Infobox Super Mario Galaxy 2 (known as Super Mario Wii 2 in South Korea) is a 3D action platformer game released for the Wii on May 22, 2010. It is the sequel to the 2007 game Super Mario Galaxy[1] and is the fourth 3D platformer entry in the Mario franchise; it is also the first, and thus far, the only 3D platformer in the Mario franchise to be released on the same console as its predecessor (Super Mario Galaxy 2 was released on the Wii; the same console that Super Mario Galaxy was originally released for). The sequel retains many elements from its predecessor, such as the adventure being in outer space, the element of gravity, and recurring objects such as Launch Stars and Sling Stars. Returning items include the Bee Mushroom and the Fire Flower. However, the game introduces new elements as well, such as the utilization of Yoshi, new power-ups like the Cloud Flower, and the use of a guide within the game for beginner players. All releases of the game except for the American version include a beginner's DVD to help players understand the controls and items if they have not played Super Mario Galaxy. In North America, help for beginners is found on the official website as well as on the Nintendo Channel.
Super Mario Galaxy 2 is also the first Wii title to be digitally re-released on the Wii U's Nintendo eShop service.
Story
From the instruction booklet
Shining stardust falls on the Mushroom Kingdom once every hundred years. That time had come again...
- Dear Mario,
- Would you like to share some cake while we watch the shooting stars? Meet me at the castle!
- Peach
Mario ran through the field with stars falling around him. Suddenly, he noticed a strange light in the grass. As he peered cautiously through the reeds, he saw a small, lost Luma. With the baby Luma tucked safely under his cap, Mario rushed on to the castle. But when he got there, something unexpected was waiting for him…
Super Mario Galaxy 2 is "another story of stardust".[2] The game begins at the time of the Star Festival, which only happens every 100 years. Princess Peach invites Mario to share some cake while watching the shooting stars. On his way to Peach's Castle, Mario finds a lost Baby Luma, who seems to like Mario and jumps into his hat, granting him spin power. Near the castle, Mario discovers it under attack by Bowser, now gigantic thanks to the Power Stars, who kidnaps Peach and takes her away to the center of the universe. In response, Lumas who crashed near the castle offer to aid Mario to chase Bowser by transforming into a Launch Star and launching Mario to space.
After collecting a Power Star, Mario arrives on a planet-like object, where he meets Lubba, who tells him that his crew and their spaceship were attacked by Bowser. Realizing both him and Mario need each others' help to collect the stolen Power Stars and rescue Peach, he uses the Power Star to fix his ship and transform it into Starship Mario, which is used to travel through space and find more Power Stars. During his travels, Mario has to deal with Bowser's forces, including Bowser Jr. and Super Bowser himself.
Finally, Mario and friends locate Bowser's Galaxy Generator, where Bowser is fought for the final time. After Bowser's defeat, his empire becomes undone, and Peach is saved. A comet which was caught by Bowser's fortress is also freed and is revealed to be the Comet Observatory. Rosalina then appears, happy to see that Baby Luma is safe. Baby Luma, overjoyed that he's reunited with his "mama", heads back to his home, and takes Mario's cap as a souvenir, much to Mario's surprise. After the Comet Observatory leaves, Mario and Peach return to their own home using the Starship Mario. Along the way, Bowser is shown in a tiny form near Peach's Castle.

If the player collects the first 120 Power Stars and battles Bowser again in his fortress, an extra scene is shown after the credits, revealing Rosalina and her Lumas in the Comet Observatory's Library. She has finished reading a story to them (possibly the events of the game itself) and plans on telling the Lumas a new story about the Green Power Stars. A new feature is then unlocked in which all the galaxies are visited by green Prankster Comets. From there, the player must hunt down all the Green Stars. When they are all collected (adding up to 240 Power Stars), the Grandmaster Galaxy will be opened in World S. It houses the last two Power Stars, and when the last one is reached, Rosalina will congratulate the player, and will appear on Starship Mario.
Gameplay elements
The gameplay is similar to Super Mario Galaxy, with a focus on platforming based on and around 3-D planets of varying sizes and with many different types of surfaces. Power-ups, such as the Bee Mushroom, Boo Mushroom, Spring Mushroom, and Fire Flower make a return, along with new ones such as the Rock Mushroom and the Cloud Flower, as well as various enemies and Airships. Launch Stars reappear for interplanetary navigation, along with a Luma and Mario's spin action. Additionally, the concept of "dark matter" appears as the medium of which Cosmic Clones are composed, and as a portal through which Airships emerge. 2-D stages featured in Super Mario Galaxy are also included in Super Mario Galaxy 2, introducing many new features. The game has only three file slots to use, unlike the six files in the preceding game; also, files can no longer be copied.
Mario is controlled with the analog stick and can jump with the ![]() . The
. The ![]() works just as the
works just as the ![]() trigger did in Super Mario 64. The player uses it to make Mario crouch, do Somersaults and do Long Jumps. The
trigger did in Super Mario 64. The player uses it to make Mario crouch, do Somersaults and do Long Jumps. The ![]() centers the camera behind Mario, while the
centers the camera behind Mario, while the ![]() can adjust the camera angle manually. By pressing the upper part of the
can adjust the camera angle manually. By pressing the upper part of the ![]() , the player can enter a first person perspective.
, the player can enter a first person perspective.
The game also uses the motion sensors in the Wii Remote. The pointer of the Remote appears as the Star Cursor on the screen. The Star Cursor is used to perform a variety of actions, such as using Pull Stars, manipulating Sling Pods, and collecting Star Bits. Shaking the Wii Remote or Nunchuk will make Mario perform a Spin.
One of the more notable additions in Super Mario Galaxy 2 is the inclusion of Yoshi. When Mario finds a Yoshi egg, he can crack it to release and use Yoshi. Yoshi will change colors when eating either a Dash Pepper, Blimp Berry or Bulb Berry; a Dash Yoshi darts at rapid speeds, a Blimp Yoshi inflates and floats upwards, and a Bulb Yoshi lights up and shows hidden paths for a certain amount of time, respectively. When utilizing Yoshi, the player's Wii Remote cursor turns into a red sphere that detects targets for Yoshi's tongue. Using the cursor allows Yoshi to swallow enemies and swing from special flowers.
Elements from older games are also included in the new game. These elements include a remix of Super Mario Bros.'s overworld theme (which is originally heard in Toy Time Galaxy from the predecessor, Super Mario Galaxy), Supermassive Galaxy, a galaxy that is reminiscent of Giant Land from Super Mario Bros. 3, a remix of the second overworld theme from Super Mario World, the checkpoint flag from New Super Mario Bros. Wii, Throwback Galaxy, a galaxy based on Whomp's Fortress from Super Mario 64, and a remix of the main theme and slide theme from Super Mario 64.
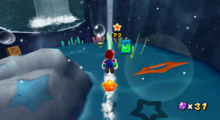
Like Super Mario Galaxy, Super Mario Galaxy 2 features a main hub. For traveling between different galaxies, Mario will use a planet shaped like his head, Starship Mario. Starship Mario can be explored, much like the Comet Observatory, although it is smaller. The game has a total of 242 stars to collect, twice the number of stars found in Super Mario Galaxy, including 120 Power Stars, 120 Green Power Stars and an extra 2 Power Stars in Grandmaster Galaxy.
Multiplayer from the original Super Mario Galaxy reappears, but in addition to being another star cursor, the second player is a Co-Star Luma. The second player can stun enemies and pick up Star Bits like in Super Mario Galaxy, but now they can pick up coins (including Purple Coins) and mushrooms, defeat enemies by spinning, stop the Star Ball (while player 1 is riding on it), activate checkpoints, and flip switches.

Super Mario Galaxy 2 features ways to help players during gameplay similar to the Super Guide mode seen in New Super Mario Bros. Wii. In some levels, the player may watch the Tip Network, which it is a short demonstration of Mario taking some actions to progress. Another way the game offers is the Cosmic Guide mode. If the player finds a very difficult obstacle on his or her way, an entity known as the Cosmic Spirit will ask Mario if he needs some help. Activating this mode, Mario will pass automatically through the level to find the Star. The player may stop this mode by pressing the ![]() , though once the player has chosen this mode, they will finish a level by getting a Bronze Star instead of one gold. The player must play through the level without the Cosmic Guide in order to gain a gold Star.
, though once the player has chosen this mode, they will finish a level by getting a Bronze Star instead of one gold. The player must play through the level without the Cosmic Guide in order to gain a gold Star.
Unlike in Super Mario Galaxy, the player can now switch between playing as Mario or playing as Luigi in certain levels. If the player clears Bowser's Galaxy Generator, Luigi can be played as in any level. Like in most Mario games, Luigi can jump higher, but has reduced traction.
Controls
 : Move
 (shake): Spin
 : Jump / Interact / Swim (while underwater) / Stun enemies and grab coins and items (P2 only)
 : Shoot Star Bit
 : Crouch / Ground Pound (in midair) / Dive (while underwater)
 : Enter/exit first-person view
 : Rotate camera left/right
 : Pause
Characters
Playable characters
| Name | Description |
|---|---|
 Mario |
The hero of the Mushroom Kingdom and the game's protagonist. An invitation to Peach's Castle turns tragic when she is kidnapped by Bowser and takes her into the depths of space. After encountering a group of star children called Lumas and their leader Lubba, Mario embarks on a journey through space to collect Power Stars, stop Bowser, and rescue the princess. This is accomplished through the aide of an apricot-colored Luma. The game's story is partially framed as a retelling of its predecessor, and Mario similarly has the same feel, physics, and control from the first Super Mario Galaxy. |
 Luigi |
Mario's younger twin brother. He can jump higher and run faster than Mario, but at the cost of reduced traction and increased startup. This causes Luigi to skid as he moves, and increases the risk of him falling off of a platform or colliding with an obstacle. Luigi is periodically encountered at the start of various missions after Mario has collected thirty Power Stars and clears "Bowser's Big Lava Power Party". He offers to swap places with Mario for the mission when prompted, allowing the player to temporarily control him. Clearing "Bowser's Fortified Fortress" makes Luigi permanently available. He can be swapped with Mario by entering a door beneath the stern of Starship Mario. |
 Co-Star Luma |
A young Luma that can be controlled by a second player during Co-Star Mode. It cannot be moved independently: it automatically trails behind Mario[note 1] as he progresses through levels. However, using the Star Cursor, Co-Star Luma can collect far-off items (e.g. coins, 1-Up Mushrooms) and hold enemies in place. It can still perform the Spin move and collect Star Bits like Mario. Controlling Co-Star Luma does not require using a Nunchuck. |
Rideable characters
| Name | Description | Locations |
|---|---|---|
 Yoshi |
A dinosaur-like creature with a long tongue that can be ridden by Mario. He was recruited by the Lumas to help collect Power Stars, but he became too overwhelmed and was locked within an egg by a Magikoopa. Yoshi can eat enemies and latch onto flowers by pointing at them on-screen with the Wii Remote's cursor. He can Flutter Jump to gain height and prolong his fall. Yoshi has many of the same abilities as Mario, including the Spin, Side Somersault, and Back-flip. When the player gets damaged, Mario falls off Yoshi and Yoshi runs off. Yoshi has a house on the starting planet of Sky Station Galaxy and refers to himself as a "space dragon". | Yoshi Star Galaxy Hightail Falls Galaxy Tall Trunk Galaxy Haunty Halls Galaxy Beat Block Galaxy Bowser Jr.'s Fearsome Fleet Starshine Beach Galaxy Sweet Mystery Galaxy Flash Black Galaxy Bowser's Galaxy Generator Twisty Trials Galaxy Grandmaster Galaxy Starship Mario |
 Fluzzard |
A big bird similar to a paraglider. Mario holds onto his talons and glides with him during the Fluzzard Gliding minigame. He is spoken for by the Jibberjays. One states that Fluzzard has taken a liking to Mario. He is apparently quite shy. | Wild Glide Galaxy Fleet Glide Galaxy |
Non-playable characters
A star symbol (★) denotes a character that was not in the first Super Mario Galaxy.
| Name | Description | Locations |
|---|---|---|
 Baby Luma |
Mario's traveling companion – a young Luma who resides under his cap. He grants Mario the ability to Spin and travel through space. Mario first encounters him collapsed on a road leading to Peach's Castle and he immediately takes a liking to him. At the end of the game, Baby Luma keeps his cap as a memento. | All galaxies |
 Princess Peach |
The ruler of the Mushroom Kingdom. She invites Mario to her castle to watch the shooting stars fall from the sky. However, upon arriving, he finds her in Bowser's grasp. She is whisked away to the center of the universe. The game follows Mario's quest to save her. She periodically sends letters of encouragement to Mario that contain five 1-Up Mushrooms, even when the player is controlling Luigi. Lubba refers to Peach as Mario's "special one". | Bowser's Galaxy Generator |
 Lubba ★ |
A portly, wisecracking Luma. He is the leader of a band of young Lumas who travel through space on a starship that they built themselves. As an innocent bystander to Bowser's galactic conquests, Lubba's ship was damaged by meteorites. This causes several of his Lumas to become lost in space and the ship to lose its source of energy – the Power Stars. Lubba cuts a deal with Mario after he is rescued by some of his Lumas: if he collects Power Stars for him, he allows Mario to use his ship and take him to rescue Princess Peach. Once in agreement, Lubba turns the starship into Mario's image and starts to affectionately call him "captain". Lubba reacts to the player's actions in-game even though he remains on Starship Mario. For example, if the player is having a difficult time completing a course, he provides words of assurance and appreciation. Lubba considers the Lumas he travels with to be his family. | Starship Mario |
 Lumas |
Star children that make their home on Starship Mario. Lumas appear trapped in several galaxies. Freeing them enables Mario to progress through the level. They otherwise appear in missions in order to help Mario, either by transforming into Launch Stars, directing him towards the right path, or giving him tips on progression. Lumas become celestial bodies when they grow up, and which ones they become is dependent on their color. They eat Star Bits and squeal with delight when fed via the Star Cursor. The Lumas encountered at the start of the game are already familiar with Mario. | Sky Station Galaxy Yoshi Star Galaxy Spin-Dig Galaxy Cosmic Cove Galaxy Bowser's Lava Lair Bowser's Gravity Gauntlet Space Storm Galaxy Clockwork Ruins Galaxy Bowser's Galaxy Generator Starship Mario |
 Giant Lumas ★ |
Enormous Lumas. Unlike normal-sized Lumas, these ones do not twirl if spun against and speak at a slightly lower octave. While Lumas can be many different colors, the Giant Lumas are all yellow. | Supermassive Galaxy |
 Hungry Lumas |
Big, voracious Lumas that can be encountered on the world map. They transform into galaxies when fed a specified number of Star Bits. Hungry Lumas that only eat coinage can be encountered in levels and transform into new planets if fed a specified amount of coins. These new planets always give Mario access to a hidden Power Star. | Fluffy Bluff Galaxy Puzzle Plank Galaxy Hightail Falls Galaxy Cosmic Cove Galaxy Cloudy Court Galaxy Clockwork Ruins Galaxy Battle Belt Galaxy Starship Mario |
 Lumalees |
Big Lumas that run the Luma Shops. One typically proceeds a boss encounter and transforms into a Mushroom of choice in exchange for thirty Star Bits. A pair of Lumalees live inside Starship Mario's left ear. One transforms into a Chance Cube if fed thirty Star Bits. The other transforms into five if fed one-hundred coins. | Spin-Dig Galaxy Puzzle Plank Galaxy Boulder Bowl Galaxy Freezy Flake Galaxy Bowser Jr.'s Fiery Flotilla Flipsville Galaxy Slipsand Galaxy Shiverburn Galaxy Battle Belt Galaxy Boss Blitz Galaxy Starship Mario |
 Tip Network ★ |
A talking television monitor that provides brief tutorials when prompted. It typically appears in difficult parts of a galaxy. | All galaxies |
 Toad Brigade Captain |
The captain of the Toad Brigade – a five-member team of Toads on a quest to help find Princess Peach. This Red Toad self-designated himself as the brigade captain. Though cowardly, he sometimes puts himself into dangerous situations out in the field and pushes himself farther than his teammates. Comments made by some of the other Toads indicate they believe his position as the leader is not untenable and that he can be quite lazy. | Fluffy Bluff Galaxy Flip-Swap Galaxy Rightside Down Galaxy Boulder Bowl Galaxy Bowser's Lava Lair Flipsville Galaxy Bowser Jr.'s Boom Bunker Battle Belt Galaxy Slimy Spring Galaxy Rolling Coaster Galaxy Grandmaster Galaxy Starship Mario |
 Banktoad |
A member of the Toad Brigade who sets up a bank for Star Bits on the Starship Mario. He gives Mario 1-Up Mushrooms in exchange for storing Star Bits. When out on missions with their brigade, he typically is equipped with a pickaxe. | Fluffy Bluff Galaxy Flip-Swap Galaxy Rightside Down Galaxy Boulder Bowl Galaxy Bowser's Lava Lair Flipsville Galaxy Bowser Jr.'s Boom Bunker Rolling Coaster Galaxy Grandmaster Galaxy Starship Mario |
 Mailtoad |
A member of the Toad Brigade who runs a postal service on the Starship Mario. He delivers mail for Mario, Luigi, and the baby Luma. He can be prompted to view all letters previously received. | Fluffy Bluff Galaxy Flip-Swap Galaxy Rightside Down Galaxy Boulder Bowl Galaxy Bowser's Lava Lair Flipsville Galaxy Bowser Jr.'s Boom Bunker Battle Belt Galaxy Rolling Coaster Galaxy Grandmaster Galaxy Starship Mario |
 Blue Toad |
A knowledgeable member of the Toad Brigade. He provides words of advice and tips on progression to Mario when prompted. He cannot see well without his glasses. | Fluffy Bluff Galaxy Flip-Swap Galaxy Rightside Down Galaxy Boulder Bowl Galaxy Bowser's Lava Lair Flipsville Galaxy Bowser Jr.'s Boom Bunker Rolling Coaster Galaxy Grandmaster Galaxy Starship Mario |
 Yellow Toad |
A very sleepy member of the Toad Brigade. He is typically found sleeping or wishing to be home when out in the field. | Fluffy Bluff Galaxy Flip-Swap Galaxy Rightside Down Galaxy Boulder Bowl Galaxy Bowser's Lava Lair Flipsville Galaxy Bowser Jr.'s Boom Bunker Battle Belt Galaxy Rolling Coaster Galaxy Grandmaster Galaxy Starship Mario |
 The Chimp ★ |
A conceited monkey who considers himself the "best in the universe". He recognizes Mario as his greatest rival and periodically challenges him to a contest via mail. The Chimp is the host of the skating minigame and the 10,000-point jumping challenge. He expresses his admiration for Mario and awards him with a Power Star if he beats his high-score in either. | Fluffy Bluff Galaxy Freezy Flake Galaxy Honeyhop Galaxy Shiverburn Galaxy Melty Monster Galaxy Slimy Spring Galaxy |
 Star Bunnies |
Spacefaring rabbits that like to play. They teach Mario how to use his spin ability after jumping to gain extra height. A community of rabbits live on Freezy Flake Galaxy, where at least one is seen living in a miniature log cabin. They often end their sentences with "boiyoing" and sport Toad-like vests. | Flip-Swap Galaxy Cosmic Cove Galaxy Freezy Flake Galaxy Flip-Out Galaxy Starship Mario |
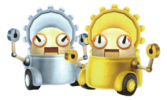 Gearmos |
Maintenance robots with an obsession for orderliness. They run a facility that destroys Chomps and teach the player how to make the most out of their spring form. An overworked individual hosts the crate burning minigame. There are Gold and Silver Gearmos who give Mario a Power Star in exchange for bringing them a Goomba and Spiky Topman, respectively. | Rightside Down Galaxy Boulder Bowl Galaxy Tall Trunk Galaxy Chompworks Galaxy Space Storm Galaxy Upside Dizzy Galaxy Starship Mario |
 Penguins |
Carefree, flightless birds who love swimming. They share swimming techniques with Mario when prompted. Most penguins are young birds that are a little shorter than Mario, but the two adults in the game – Penguru and Coach – tower over him. | Cosmic Cove Galaxy Starship Mario |
 Penguru |
A knowledgeable, elderly penguin. He shares cryptic hints on level progression when prompted. | Hightail Falls Galaxy Cosmic Cove Galaxy |
 Coach |
A big penguin that teaches young birds how to swim. During the "Exploring the Cosmic Cavern" mission, he keeps watch over a trapped Luma while his students search for a key to free it. He has a kind and paternal disposition. | Cosmic Cove Galaxy |
 Jibberjays ★ |
Excitable birds that host the Fluzzard Gliding minigame. One of the orange Jibberjays gives Mario a tutorial on how to fly with Fluzzard. They recognize Mario as their leader if he out-glides the competitive black Jibberjay, who periodically challenges him to a race via postage. | Wild Glide Galaxy Fleet Glide Galaxy Starship Mario |
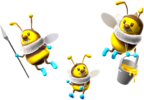 Honeybees |
Bee people in search of Power Stars for their queen. They teach the player how to use their bee form. They award Mario with a "Certificate of Commendation" for locating the hidden Power Star in Honeybloom Galaxy. | Honeybloom Galaxy Honeyhop Galaxy Starship Mario |
 Queen Bee |
The ruler of the Honeybees and Honeyhop Galaxy. She mistakes Mario for a new bee, even if he is not in his bee form, and ask him to take care of an "itchiness" for her. Her body can be clung to by the player. Queen Bee's gentle and calm disposition contrasts with her large size. | Honeyhop Galaxy |
 Whittles ★ |
Wise wood people similar to kodama. They teach Mario how to use his cloud form, the Dash Pepper, and the Blimp Fruit. The giant tree of Tall Trunk Galaxy is sacred to them. A Whittle with an oblong head has some position of authority. It recognizes Mario's bravery with a Power Star if he ventures down Tall Trunk's Big Slide. | Fluffy Bluff Galaxy Hightail Falls Galaxy Tall Trunk Galaxy Clockwork Ruins Galaxy Starship Mario |
 Bill Board |
A talking board that calls out to Mario and teaches him how to use the Star Ball. | Rolling Masterpiece Galaxy Battle Belt Galaxy |
 Piantas ★ |
Cheerful mountain people that wear grass skirts and grow palms from their heads. During the Strongest Pianta Competition, some individuals toss Mario to great heights if approached. A green Pianta runs a leaf raft shop and allows Mario to use it. | Starshine Beach Galaxy |
 Bob-omb Buddies ★ |
Friendly Bob-ombs that lack fuses. Their Power Star was stolen by the Whomp King. They affectionately refer to Mario as "'stache man" and at least one seems to recognize him. The Bob-omb Buddy who boards Starship Mario speaks of a mythical world prior to the final showdown with Bowser. | Throwback Galaxy Starship Mario |
 Rosalina |
A mysterious woman who serves as the guardian of the cosmos. She travels through space via the Comet Observatory, a vessel she built for the Lumas. Her observatory is encountered before reaching the center of the universe, where Bowser's Galaxy Generator is attempting to consume it. The baby Luma considers Rosalina to be his mother and she periodically sends letters containing fifty Star Bits to him throughout the course of the game. When encountered in-person, she already knows who Mario is and Lubba mentions having met her before. It is revealed towards the end of the game that she is the narrator of its story. Rosalina appears at the very end of Grandmaster Galaxy, where she gives Mario the final Power Star. | Grandmaster Galaxy Starship Mario |
 Cosmic Spirit ★ |
An entity in the form of Rosalina. It appears in a galaxy if Mario loses a significant amount of lives and offers to "guide" him to the Power Star. Agreeing causes it to take control of Mario's body and progress through the level. The player can press |
Sky Station Galaxy Fluffy Bluff Galaxy Flip-Swap Galaxy Bowser Jr.'s Fiery Flotilla Hightail Falls Galaxy Boulder Bowl Galaxy Tall Trunk Galaxy Haunty Halls Galaxy Supermassive Galaxy Flipsville Galaxy Chompworks Galaxy Slipsand Galaxy Melty Monster Galaxy Battle Belt Galaxy Mario Squared Galaxy Rolling Coaster Galaxy Twisty Trials Galaxy Stone Cyclone Galaxy Boss Blitz Galaxy Flip-Out Galaxy |
- ^ Unless explicitly specified otherwise, any mentioning of Mario is equally applicable to Luigi while the player is controlling him.
Enemies
New enemies
| Name | Locations | Possible spoils | |
|---|---|---|---|
 Bee Eater |
Variants of the rubbery bulb plant with protractible spines. When in proximity to Mario,[note 1] their spines extend and they sling their bulbs towards him. Some Bee Eaters are rooted upside-down. | Honeybloom Galaxy | Indestructible |
 Big Paragoomba |
Giant Paragoombas that float back-and-forth. Spinning into them leaves them upside-down and dazed, with their wings fallen off. Kicking them in this state defeats them. If left undisturbed, they right themselves and behave as Giant Goombas. | Supermassive Galaxy | |
 Choppah |
Helmeted creatures that hover in midair. They fly in set horizontal or vertical trajectories. Mario cannot defeat them himself and making contact damages him, but Yoshi can eat them. Shooting one with a Star Bit stuns it in-place for three seconds. | Honeybloom Galaxy Sweet Mystery Galaxy Honeyhop Galaxy Flip-Out Galaxy Grandmaster Galaxy |
|
 Cosmic Clone |
Dark entities in the form of Mario. They appear in sections of galaxies and trail Mario, mimicking his every move and positioning. Crossing paths with a Cosmic Clone causes damage to Mario and makes the clone disappear. Cosmic Clones continuously emerge from a small rupture of shadow in an area. Completing a necessary objective (i.e. activating all Flipswitch Panels) in the area closes the rupture and defeats all of the clones at once. | Sky Station Galaxy Spin-Dig Galaxy Fluffy Bluff Galaxy Puzzle Plank Galaxy Cloudy Court Galaxy Haunty Halls Galaxy Chompworks Galaxy Mario Squared Galaxy Flip-Out Galaxy |
|
 Digga |
Drill enemies that tunnel through earth. Jumping on their backs or attacking them with a Spin Drill defeats them. Digga-Leg expels Diggas from its head during its boss fight. | Spin-Dig Galaxy | |
Electric Pressure |
Suspended electroshock devices that discharge balls of electricity from their nozzles. The balls slowly trail after Mario and electrocute him on contact. | Space Storm Galaxy | Indestructible |
Elite Octoomba |
Strong Octoombas that fire two consecutive rocks from their siphon. Though they sidestep back-and-forth along set paths, they turn to face Mario as he moves. If the first rock misses, the second one may strike him if he does not keep moving. | Sky Station Galaxy Fluffy Bluff Galaxy Boulder Bowl Galaxy Cloudy Court Galaxy Honeyhop Galaxy Shiverburn Galaxy Clockwork Ruins Galaxy |
|
 Fizzlit |
Amorphous creatures that bounce around Mario. They periodically halt and flatten themselves into yellow pubbles which discharge electricity. They cannot be harmed in this state, and direct contact electrocutes Mario. Yoshi is forced back into his egg if he attempts to eat a Fizzlit in this state. | Cosmic Cove Galaxy Bowser Jr.'s Fearsome Fleet Space Storm Galaxy Bowser Jr.'s Boom Bunker |
|
 Flaptack |
Squat birds with a horn on their head. They idly flutter in place. When in proximity to Mario, they fly towards him, turn upside down, and slam themselves into the ground below in an attempt to strike him. They are temporarily stuck into the ground and can be defeated. Flaptacks sometimes are not within the player's field of view, but they can still be spotted by their large shadow they cast. Shooting a Flaptack dazes it and makes it fall to the ground. | Fluffy Bluff Galaxy Cloudy Court Galaxy Flash Black Galaxy |
|
Flomp |
Suspended stone platforms. They rapidly spin for one second in three second intervals. If Mario is on top of a Flomp when it spins, he falls through it. They appear in pairs or more. | Bowser's Lava Lair Grandmaster Galaxy |
Indestructible |
  Flower Mimic |
Hovering flowers which can be boarded like platforms. When idle, they look like broad, pink flowers. When Mario stands on one, a white rim protrudes from the edges of the flower and snaps shut after three seconds. Mario is damaged if he is on top of it when it closes. | Honeybloom Galaxy Honeyhop Galaxy |
Indestructible |
 Gummit |
Creatures like the smackable moles in the Whac-A-Mole arcade game. They appear during The Chimp's Skating Challenge. During the challenge, they periodically pop out of holes in the ice. Mario accumulates points by skating into Gummits and kicking them. | Freezy Flake Galaxy Shiverburn Galaxy |
10 pts. |
 Golden Gummit |
Gold Gummits. They appear in fewer numbers and retreat down their holes faster than the other Gummits. | Freezy Flake Galaxy Shiverburn Galaxy |
50 pts. |
 Kleptoad |
Frogs that pop out of the ground indefinitely. They carry coins and Silver Stars in bubbles above their heads. | Hightail Falls Galaxy | |
 Magmaargh |
Enormous Blarggs submerged in lava. They idly lie deep in lava with only their eyes, nostrils, and ears exposed like hippopotamuses. When in proximity to Mario, they burst to the surface with their jaws open wide and slam their faces forward to strike him. Direct contact burns Mario. They can phase through solid platforms. | Fleet Glide Galaxy Melty Monster Galaxy |
Indestructible |
Magmaw |
Small Magmaarghs that endlessly shuffle through lava. They can pass through solid platforms. | Melty Monster Galaxy | Indestructible |
 Mattermouth |
Disembodied skulls that chomp through matter. They leave a trail of empty space behind them that Mario can fall through, but it gradually reemerges. Jumping on a Mattermouth causes it to change direction. | Bowser's Lava Lair Haunty Halls Galaxy |
Indestructible |
 Octoboo |
Ghostly Octoombas that hover in set paths. They appear in groups, usually hovering in a circular path, but in some instances they hover in continuous paths. Making direct contact damages Mario. Spinning into Octoombas makes them safely permiable for one second. | Haunty Halls Galaxy Boo Moon Galaxy Flash Black Galaxy |
Indestructible |
| File:Whimp.png Pattan |
Diminutive Whomps. They appear in groups of three or five and rush down Mario. When close, they fling themselves face first to strike him. A successful strike damages Mario. They fall apart after attacking. The Whomp King summons them during his boss fight. | Throwback Galaxy | None |
Pinhead |
Stationary bowling pin creatures. Pinheads are skittish: they sit above trapdoors that they fall through when approached by Mario. They can only be defeated by Mario when he rolls into them in his rock form. They typically sit in groups of six. | Boulder Bowl Galaxy Melty Monster Galaxy |
100 pts. |
 Prickly Piranha Plant |
A Spiny Piranha Plant with additional spines on its head. The spines damage Mario on contact and prevent its body from direct harm. Spinning a rubbery bulb plant into it defeats it. There is only one in the game. | Sky Station Galaxy | |
 Pupdozer |
Squat dinosaur creatures. Their backs are covered in spikes that protect them from harm and damages Mario on contact. Their bellies are unguarded: Ground-Pounding through a grate while a Pupdozer is above it defeats it. | Flipsville Galaxy | |
 Rhomp |
Rolling stone beings. A rolling Rhomp flattens Mario and completely depletes his life meter. | Slipsand Galaxy | Indestructible |
 Silver Chomp |
Chomps with crazed eyes. They home-in on Mario. Contact damages Mario. They can only be defeated by spinning rubbery bulb plants into them, or by knocking them into bottomless pits. | Rolling Masterpiece Galaxy Slipsand Galaxy Battle Belt Galaxy |
|
 Smeech |
Winged creatures. They quickly fly away from Mario if approached by him. If approached by Yoshi, they will pursue him with smacking lips and latch onto his mouth. This prevents Yoshi from using his tongue or eating fruits. Spinning while a Smeech is attached dislodge it from Yoshi's mouth and defeats it. | Yoshi Star Galaxy Hightail Falls Galaxy Haunty Halls Galaxy Starshine Beach Galaxy Sweet Mystery Galaxy |
|
 Snoodle |
Benthic creatures that look like the giant tube worm. They protrude from holes on the seafloor and extend their heads towards Mario to strike him. They are vulnerable to beacons of light from Green Shells, but they are defeatable through typical means as well (i.e. spin, or thrown projectile). | Cosmic Cove Galaxy Slimy Spring Galaxy |
|
 Spiky Gummit |
Gummits covered in spikes. Making contact does not damage Mario, but it causes knockback that costs Mario at least one second of time in The Chimp's Skating Challenge. | Freezy Flake Galaxy Shiverburn Galaxy |
Indestructible |
 Swaphopper |
Insect creatures that hop from side-to-side. Their tops are protected by a spiked shell that damages Mario on contact, but their undersides are defenseless. Shifting the gravitational plane using Arrow Switches alters which side points upward, which is the only way Mario can gain access to their damageable undersides. While right-side up, a Swaphopper looks aggressive and slowly pursues Mario. When flipped over, it looks cowardly and tries to move away. | Rightside Down Galaxy Upside Dizzy Galaxy Battle Belt Galaxy |
|
 Tongari |
Slow-moving turbo snail enemies. They move in unilateral directions. Some can be found outside of water on ceilings and walls. | Starshine Beach Galaxy Boo Moon Galaxy |
Indestructible |
 Twirlip |
Spinning flower enemies. They periodically open their flowers and spin rapidly in circles. Twirlips can only be jumped on while they are twirling, and they can only be spun into when they are closed. | Spin-Dig Galaxy Flipsville Galaxy Starshine Beach Galaxy |
Returning enemies
A star symbol (★) denotes a character that was not in the first Super Mario Galaxy.
| Name | Locations | Possible spoils | |
|---|---|---|---|
 Amp |
Magnetic orbs with smiling faces. They discharge electricity and shock Mario on contact. They move in a fixed direction, typically in a circular pattern. | Sky Station Galaxy Spin-Dig Galaxy Space Storm Galaxy |
Indestructible |
 Banzai Bill |
Giant, slow-moving missiles with sharkmouths. Their line of trajectory is fixed in one direction, and they slowly rotate as they move. | Sky Station Galaxy Bowser Jr.'s Fearsome Fleet Fleet Glide Galaxy Bowser's Galaxy Generator |
None |
 Bat |
Winged creatures that roost in caves and swoop down to attack Mario. They fly-in-place and cackle when they make successful strikes. Bats can be defeated with a spin or stomp. | Fleet Glide Galaxy Slimy Spring Galaxy |
|
 Big Amp |
Large Amps. They are typically in pairs. Unlike normal-sized Amps, the big ones lack faces. | Space Storm Galaxy | Indestructible |
 Big Thwomp ★ |
Enormous Thwomps. The pair found in the game are close enough to be Wall Jumped between. | Supermassive Galaxy | Indestructible |
 Big Wiggler ★ |
Giant Wigglers. They are too large to harm. Some are in a permanent state of anger that makes them faster and harder to avoid. | Supermassive Galaxy | Indestructible |
 Blooper |
White squids. They swim erratically when approached by Mario in an attempt to strike him. They can be defeated with a spin or a projectile Green Shell. Bloopers release a cloud of ink when defeated. | Starshine Beach Galaxy | |
Bob-omb |
Walking bombs that look like wind-up toys. There are two varieties: Bob-ombs that actively pursue Mario until they explode and legless bombs than can be picked up and thrown. The legless variety can be used to destroy cages and enemies. Jumping on a walking Bob-omb causes its legs to retract and become this second variant. | Rolling Masterpiece Galaxy Space Storm Galaxy Rolling Coaster Galaxy |
None |
 Bomb Boo |
Explosive Boos. Unlike normal Boos, Bomb Boos do not cower when faced by Mario. They charge directly towards him on sight. Spinning near a Bomb Boo causes Mario to grab onto its tongue and swing it in circles, like a lasso. It detonates if it is swung into an object or wall. If Mario does not release the Bomb Boo, it is pulled in closer and explodes in his face. Bomb Boos are conjured by Bouldergeist and can be used to destroy the boss's stone armor. | Boss Blitz Galaxy | None |
 Bomp |
Large, moving stones that shift in-and-out of crevices found on walls. They do not damage Mario directly, but they are positioned to push him off of platforms and solid ground. The tops of their bodies can be walked on. | Fluffy Bluff Galaxy Throwback Galaxy |
Indestructible |
 Boo |
Round ghosts with long tongues. They pursue Mario when his back is turned towards them. If Mario looks directly at Boos, they sheepishly shield their their eyes and stop moving. Spinning them causes them to shift their position and forces them to phase through nearby walls, but they cannot be damaged this way. Boos are only weak to beacons of light. Some can be found underwater. Mario can transform into one via the Boo Mushroom. | Haunty Halls Galaxy Boo Moon Galaxy Battle Belt Galaxy Slimy Spring Galaxy |
|
Boomerang Bro ★ |
Hammer Bros. relatives that wield boomerangs. The boomerangs can be swallowed by Yoshi and spitted out as a projectile. | Bowser Jr.'s Boom Bunker Bowser's Galaxy Generator Grandmaster Galaxy |
|
 Boulder |
Giant, rolling rocks. They are composed of cragged stones with a red gem in their centers. Boulders roll around in circles, damaging Mario on contact. Striking them in their red gem with a spin destroys them. | Boulder Bowl Galaxy | |
Bowser Statue ★ |
Stone statues of Bowser. Most statues are inanimate objects that contain items, but a few have glowing eyes and shoot beams of energy that damage Mario on contact. | Bowser's Lava Lair | Indestructible |
 Bullet Bill |
Angry-looking bullets fired from Bill Blasters. They normally fly in a straight line, but most can change course and directly target Mario if he is within their proximity. Mario can lure Bullet Bills towards cages and fences in order to destroy them. Their eyes flash with red light and their bodies twirl when they lock onto Mario. Yoshi cannot swallow Bullet Bills, but he can hold them in his mouth and fire them. The Bullet Bill explodes and damages Mario if held in Yoshi's mouth for too long. | Bowser Jr.'s Fearsome Fleet Fleet Glide Galaxy Bowser Jr.'s Boom Bunker Bowser's Galaxy Generator Grandmaster Galaxy |
None |
 Cannonball |
Round ammunition shot from enemy cannons. They maintain a straight, horizontal trajectory and move relatively slowly. They burst when they make contact with Mario. | Fleet Glide Galaxy | None |
 Cheep Cheep |
Pudgy red fish that swim through water. In 2D areas, they swim underwater in set trajectories. In 3D areas, they swim at the surface. | Cosmic Cove Galaxy Starshine Beach Galaxy Bowser's Gravity Gauntlet |
|
 Chomp |
Toothy, metal monsters that roll in a set trajectory. A Chomp breaks when they make contact with an unmovable obstacle or another Chomp. There are diminishing returns with Chomps: if Mario stays in an area where Chomps are continuously breaking, they will drop fewer Star Bits each time and eventually stop all together. Chomps bark like dogs when in close proximity. | Flip-Swap Galaxy Rightside Down Galaxy Boulder Bowl Galaxy Flipsville Galaxy Chompworks Galaxy |
|
 Clampy |
A giant clam that periodically opens and shuts its valves. Items are found within them. Snapping shut with Mario inside damages him. | Starshine Beach Galaxy | Indestructible |
 Cluckboom |
Red Coo Coos that lay explosive eggs. They fly in a continuous set path, fluttering back-and-forth. They fall to the ground if shot at with Star Bits, which leaves them dazed and open to attack. | Slipsand Galaxy | |
Crabber (red) |
Aggressive, sidestepping crabs. Crabbers have hard shells that protect them from jumps and spins head-on, but their fleshy rears are exposed and can be struck. Red Crabbers directly move in to attack Mario, but move slowly. | Boulder Bowl Galaxy Starshine Beach Galaxy Battle Belt Galaxy |
|
Crabber (turquoise) |
Evasive Crabbers that frantically scuttle away from Mario. They bury themselves underground in an attempt to escape and resurface seconds after. | Boulder Bowl Galaxy Battle Belt Galaxy |
|
 Dry Bones |
Undead Koopa Troopas. They chase down and tackle Mario on sight. Damaging a Dry Bones causes it to crumble into a pile of bones, but it is reanimated after a few seconds. There are only permenetly when lured into lava. | Bowser Jr.'s Fiery Flotilla Bowser's Lava Lair Bowser's Gravity Gauntlet Slipsand Galaxy Bowser Jr.'s Boom Bunker Bowser's Galaxy Generator |
|
 Fire Pressure |
Mounted flamethrowers that periodically shoot balls of flame. The flames are expelled in set intervals that can be timed. | Bowser's Galaxy Generator | Indestructible |
Flipbug |
Skittish beetles. When Mario is in close proximity, they cowardly try to fly away before tiring out and falling to the ground, flailing helplessly. If spotted in his bee form, they aggressively pursue him. | Yoshi Star Galaxy Puzzle Plank Galaxy Tall Trunk Galaxy Honeyhop Galaxy |
|
 Floating Mine |
Spiked bombs suspended in mid-air. They are usually fixed in one spot, but some move in vertical and horizontal trajectories in a few galaxies. Making contact with a mine causes it to explode in Mario's face, causing damage. They can be destroyed by shooting them with a Star Bit. | Bowser Jr.'s Fearsome Fleet Bowser Jr.'s Boom Bunker Flash Black Galaxy Slimy Spring Galaxy Grandmaster Galaxy |
|
Floating Mine (underwater) |
Naval mines that have eyes. They keep their eyes shut unless Mario is in close proximity. They regenerate after detonating. | Cosmic Cove Galaxy | None |
 Fuzzy ★ |
Black, furry creatures. They are obstacles that move along suspended treaded paths. | Honeybloom Galaxy Flipsville Galaxy |
|
 Giant Goomba |
Giant Goombas. They are too large to be stomped. They can only be defeated with a spin and a kick. Big Paragoombas become Giant Goombas if they recover from being dazed. | Supermassive Galaxy | |
 Giant Koopa ★ |
Giant Koopa Troopas. Striking them with a Spin Drill defeats them. They are not vulnerable to being stomped and do not retract into their shells. | Supermassive Galaxy | |
 Gold Chomp |
A rolling Chomp made of gold. | Chompworks Galaxy | |
 Goomba |
Squat mushroom beings that rushdown Mario when he is in their line of sight. Goombas can be defeated with a single jump. Spinning or shooting them with Star Bits causes them to flip over and spin like a top. They can be kicked or stomped on in this state. Paragoombas and Jack O'Goombas become these if not fully defeated. The Gold Gearmo asks Mario to lure one to her so she can keep it as a pet. | Sky Station Galaxy Yoshi Star Galaxy Spin-Dig Galaxy Fluffy Bluff Galaxy Flip-Swap Galaxy Rightside Down Galaxy Boulder Bowl Galaxy Cosmic Cove Galaxy Honeybloom Galaxy Tall Trunk Galaxy Cloudy Court Galaxy Haunty Halls Galaxy Freezy Flake Galaxy Rolling Masterpiece Galaxy Beat Block Galaxy Bowser's Gravity Gauntlet Boo Moon Galaxy Upside Dizzy Galaxy Throwback Galaxy Battle Belt Galaxy Flash Black Galaxy Slimy Spring Galaxy |
|
 Goombeetle |
Goombas in metal helmets. The helmets protect them from being stomped. Spinning ito them makes them fall upside down. They can be defeated in this state. | Bowser Jr.'s Fiery Flotilla Beat Block Galaxy Chompworks Galaxy |
|
 Grinder ★ |
Big saw blades. They damage Mario on contact and destroy wooden platforms. | Puzzle Plank Galaxy Rolling Masterpiece Galaxy |
Indestructible |
 Gringill |
Giant eels. They nestle in caves and swim in open waters with snapping jaws. Nesting Gringills snap at Mario if he approaches the mouth of their caves. They can only be defeated with projectile shells. | Cosmic Cove Galaxy Slimy Spring Galaxy |
|
 Gringill (big) |
Enormous Gringills found in underwater caves. They bite Mario if he approaches the mouth of their caves. | Starshine Beach Galaxy | |
 Hammer Bro ★ |
Helmeted Koopas that throw hammers. They toss three hammers in succession before hoping to a new position. Yoshi can swallow a hammer and spit it back as a projectile. Jumping on a Hammer Bro leaves it incapacitated and vulnerable to attack. | Bowser's Lava Lair Bowser Jr.'s Fearsome Fleet Bowser's Galaxy Generator Grandmaster Galaxy |
|
 Jack O'Goomba |
Slow-moving Goombas wearing jack o'lanterns. They periodically leave blue flames behind them that damage Mario on contact. Jack O'Goombas can be defeated in one hit with a Ground-Pound. Spinning into one breaks the pumpkin and turns it into a regular Goomba. | Haunty Halls Galaxy Boo Moon Galaxy Clockwork Ruins Galaxy Battle Belt Galaxy Flash Black Galaxy |
|
 Jammyfish |
Jellyfish creatures that idly swim in set trajectory. They damage Mario on contact, but do not actively pursue him. | Cosmic Cove Galaxy | |
 Jellyfish |
An adult Jammyfish that electrocutes Mario on contact. It idly pulsates in-place and emits a low, otherworldly sound. Jellyfish can be defeated by throwing two shells at them. The first strike turns it green, but its behavior does not chang. | Cosmic Cove Galaxy | |
| File:SMG Sentry Beam model.png Jump Beamer |
Spring-like robots that discharge circular shockwaves. One can be used as a spring after jumping on its head, allowing Mario to reach great heights. | Space Storm Galaxy | None |
 Koopa Troopa |
Green-shelled turtles. They walk back-and-forth in a straight line. When jumped on, they retreat into their shells. Mario can pick one up and use it as a projectile or as an aide for swimming. | Cosmic Cove Galaxy | |
Lakitu ★ |
Cloud-riding Koopas. They closely follow Mario and toss Spiny Eggs at him. Yoshi can eat the cloud, leaving the Lakitu helplessly flailing on the ground. When in proximity, Lakitus emit a consecutive high-pitched ringing sound. | Yoshi Star Galaxy Starshine Beach Galaxy |
|
 Lava Bubble (blue) |
Floating drops of lava that propel themselves towards Mario. They appear during the boss battle with King Kaliente. They can only be defeated by shooting them with a Star Bit and otherwise burn out on their own. | Boss Blitz Galaxy | None |
Lava Bubble (red) ★ |
Lava Bubbles that act as obstacles. They appear between gaps in platforms that cover lava. | Bowser's Lava Lair Bowser's Gravity Gauntlet Melty Monster Galaxy |
Indestructible |
 Li'l Brr |
Floating ice enemies that freeze Mario on contact. Spinning near them neutralizes their icy cloud and forces them to the ground. This leaves them vulnerable to being kicked. | Cosmic Cove Galaxy Freezy Flake Galaxy Battle Belt Galaxy |
|
 Li'l Cinder |
Floating fire enemies that burn Mario on contact. Spinning near them extinguishes their flame and leave them vulnerable to being kicked. Extinguished Li'l Cinders hop towards the nearest pool of lava to reignite. | Bowser's Lava Lair Freezy Flake Galaxy Melty Monster Galaxy Battle Belt Galaxy Mario Squared Galaxy |
|
 Magikoopa |
Robed Koopas that can teleport. They can summon small enemies or shoot magical projectiles at Mario with their wand. Shooting a Magikoopa with a Star Bit does not daze it, but it does make it stall. | Yoshi Star Galaxy Bowser Jr.'s Fiery Flotilla Bowser's Lava Lair Bowser's Gravity Gauntlet Slipsand Galaxy Bowser's Galaxy Generator |
|
 Mandibug |
Large stink bug creatures. They quickly charge towards Mario in a straight line after making visual contact, snapping at him with their mandibles. They can be defeated by Ground-Pounding their abdomens. Mandibugs cower in fear if Mario stands on their back but eventually shake him off. | Puzzle Plank Galaxy | |
 Mega Boo |
Giant Boos. They appear once Mario crosses a specific corridor and slowly follow him. They cannot be defeated. | Haunty Halls Galaxy | Indestructible |
 Meteor |
Fiery space rocks. They typically appear raining from the sky. | Hightail Falls Galaxy Shiverburn Galaxy |
None |
 Micro Mecha-Bowser |
Mechanical Koopas that breath fire. They can only be defeated with a Ground-Pound. Spinning them causes their heads to swing back and briefly delays their fire breath attack. | Cosmic Cove Galaxy Flipsville Galaxy |
|
 Mini Goomba |
Diminutive and weak Goombas. Like normal-sized Goombas, they charge towards Mario if he is near. They can can be defeated with a single spin. | Sky Station Galaxy Bowser Jr.'s Fiery Flotilla Cloudy Court Galaxy Battle Belt Galaxy Rolling Coaster Galaxy |
|
 Mini Wanwan |
Small Chomps that roll in circles. Mini Wanwans cannot be damaged directly: they are only defeated if a rubbery bulb plant is spun into them. | Sky Station Galaxy Chompworks Galaxy |
|
Octoguy |
Small Octoombas that shuffle backwards from Mario when approached. They periodically stop to shoot a rock at him from their siphons. They often appear in large groups. | Boulder Bowl Galaxy Honeyhop Galaxy Shiverburn Galaxy |
|
Octoomba |
Goomba-like octopus aliens. They sidestep back-and-forth along a set back and keep their eyes locked onto Mario when he is nearby. If in close proximity, they fire a single rock from their siphons. | Sky Station Galaxy Yoshi Star Galaxy Fluffy Bluff Galaxy Flip-Swap Galaxy Puzzle Plank Galaxy Beat Block Galaxy Flipsville Galaxy Chompworks Galaxy Honeyhop Galaxy Shiverburn Galaxy Melty Monster Galaxy Clockwork Ruins Galaxy Flash Black Galaxy Bowser's Galaxy Generator Stone Cyclone Galaxy |
|
![Artwork of a Rocto from Super Mario Galaxy.[1] It has subsequently been used for Super Mario Galaxy 2. This specific image was scanned from its guidebook by Shokora (talk).](https://mario.wiki.gallery/images/thumb/9/94/SMG_Octopus_Artwork.png/51px-SMG_Octopus_Artwork.png) Ota Rock |
Large, stationary aliens that hide in barrels. They shoot coconuts[note 2] and flaming rocks at Mario from their siphons. The coconuts can be deflected back at them if spun against. Ota Rocks are always found in pairs or more. | Shiverburn Galaxy Grandmaster Galaxy |
None |
 Paragoomba ★ |
Winged Goombas. They fly back-and-forth in set trajectories. Spinning one causes its wings to fall off and reverts it back to a normal Goomba. | Sky Station Galaxy Yoshi Star Galaxy Spin-Dig Galaxy Rightside Down Galaxy Hightail Falls Galaxy Cosmic Cove Galaxy Tall Trunk Galaxy Cloudy Court Galaxy Chompworks Galaxy Upside Dizzy Galaxy Throwback Galaxy Flash Black Galaxy Slimy Spring Galaxy Grandmaster Galaxy |
|
 Petapeta |
Sandal-wearing sack creatures that turn invisible when moving. Petapetas are harmless, but can be defeated to recover a large number of Star Bits. Their movement can be tracked by following their footsteps. | Starshine Beach Galaxy | |
 Piranha Plant |
Carnivorous plants that lunge out at Mario with snapping jaws if approached. They scoffingly laugh if they make a successful bite. Sproutle Vines sometimes grow from where a Piranha Plant is defeated. They idly keep their heads raised skyward when unapproached. | Sky Station Galaxy Yoshi Star Galaxy Spin-Dig Galaxy Fluffy Bluff Galaxy Tall Trunk Galaxy Honeyhop Galaxy Throwback Galaxy |
|
 Pokey Head |
Disembodied Pokeys. They are buried with only their flowers visible. When approached by Mario, they burst out of the ground and start hopping after them. A Pokey Head gleefully bounces in-place if it successfully strikes Mario. | Slipsand Galaxy | |
 Prickly plant |
Idle plants with sharp, needle-like flowers. They damage Mario on contact. Destroying them without a power-up usually requires striking them with another object, such as a coconut or rubbery bulb plant. They can be eaten by Yoshi. | Yoshi Star Galaxy Boulder Bowl Galaxy Cosmic Cove Galaxy Tall Trunk Galaxy Cloudy Court Galaxy Slipsand Galaxy Melty Monster Galaxy Boss Blitz Galaxy |
|
 Ring Beamer |
Domed machines covered in spikes that emit circular shockwaves. The shockwaves cause electrical damage. They cannot be damaged or halted by any means. Unlike Ball Beamers, attempting to jump on Ring Beamers damages him. | Shiverburn Galaxy Grandmaster Galaxy |
Indestructible |
 Sentry Beam |
Stationary robots suspended above ground via a propeller. They shoot electric lasers from their maw. Sentry Beams are completely invincible, although standing on top of them temporarily prevent it from firing. They follow Mario's position when he is close. | Mario Squared Galaxy Grandmaster Galaxy |
Indestructible |
 Skeeter ★ |
Insect enemies that look like water striders. They skim on the surface on the water and make short bursts of movement by contracting their legs. | Cosmic Cove Galaxy Starshine Beach Galaxy Throwback Galaxy |
|
 Slurple |
Leech-like parasites. They latch onto Mario and gradually deplete life meter. Slurples are easily disposed of with a spin. | Puzzle Plank Galaxy Upside Dizzy Galaxy |
|
 Spiny ★ |
Stout Koopas with spikes on their carrapaces. The spikes protect them from being jumped on and damage Mario on contact. They charge towards him if he is in proximity. Yoshi cannot swallow Spinies, but he can shoot them out as projectile Spiny Eggs. | Yoshi Star Galaxy Tall Trunk Galaxy Starshine Beach Galaxy |
|
 Spiny Cheep Cheep |
Cheep Cheeps that look like pufferfish. They protract their spines and charge towards Mario on sight. | Cosmic Cove Galaxy | |
 Spiny Egg ★ |
The retracted form of Spinies. They are tossed by Lakitus and spit out as projectiles by Yoshi. Direct contact damages Mario. | Yoshi Star Galaxy Starshine Beach Galaxy |
None |
 Spiny Piranha Plant |
Giant Piranha Plants that forcefully slam their heads into the ground. They can be defeated by jumping on their heads, or stunned by spinning into them. | Rightside Down Galaxy Throwback Galaxy |
|
 Spoing |
Spiders that hop up-and-down in-place. They stop jumping and laugh if they successfully damage Mario. | Tall Trunk Galaxy Flip-Out Galaxy |
|
 Sprangler |
Spiders that hang from silk. They sway back-and-forth in an attempt to strike Mario. Spranglers become briefly incapacitated if spun into and can be kicked to defeat them. They otherwise can be jumped on. | Yoshi Star Galaxy Tall Trunk Galaxy |
|
 Spring Topman |
Green Topmen. Colliding with Mario causes him to spin out of control. Jumping on one's head leaves it stunned and exposes the spring underneath its head. It can be jumped on while in this state to reach great heights. Some Spring Topmen can produce single Topminis. | Space Storm Galaxy | None |
Super Piranha Plant ★ |
Giant Piranha Plants. They rest in giant pipes filled with soil. They burst from the soil in set intervals that can be timed. | Supermassive Galaxy | Indestructible |
 Thwomp |
Giant, grimacing stones. They hang suspended in mid-air, but periodically slam down towards the ground with violent force. Crushing Mario completely depletes his life meter. The tops and sides of their bodies can be used as platforms and walls, respectively. | Rightside Down Galaxy Bowser Jr.'s Fiery Flotilla Space Storm Galaxy Fleet Glide Galaxy Throwback Galaxy Stone Cyclone Galaxy |
Indestructible |
 Topman |
Top enemies that spin into Mario. Topmen do not directly harm him, but they can push him into hazards or off of a platform. The spike on their heads protects them from being stomped on and damage him on contact. Topmen can only be defeated if knocked into an electric rail or off the side of a platform. The Silver Gearmo asks Mario to lure her one so she can keep it as a pet. | Space Storm Galaxy | |
 Topmini |
Tiny Topmen that can be defeated by spinning into them. Topminis are incapable of damaging Mario and can only push them around. There are dark voids continuously produce Topminis. | Space Storm Galaxy | |
 Tox Box |
Giant, solemn-looking boxes made out of stone. They roll around in set trajectories. One of their sides is open and can be safely stood under. All other sides crush Mario. Tox Boxes are the same width of the paths they travel, making them difficult to avoid. | Stone Cyclone Galaxy | Indestructible |
Undergrunt |
Burrowing Montys. They leave trails of disturbed dirt as they burrow through the ground. They can be defeated by ground-pounding approximal earth. This forces them to the surface dazed, leaving them vulnerable to being spun. Their spiked helmets damage Mario if he tries to jump on them. The helmets protrude from the ground as the Undergrunts burrow, enabling the player to track their movements. | Battle Belt Galaxy | |
 Undergrunt Gunner ★ |
Blue Undergrunts piloting hovercrafts. Each hovercraft is equipped with Bill Blaster. They can only be defeated if struck by Bullet Bills themselves. | Bowser Jr.'s Fearsome Fleet Fleet Glide Galaxy |
|
 Urchin |
Benthic creatures with protractible spines. They aggressively roll towards Mario when he is in close proximity. They can only be damaged by shells and fireballs. | Starshine Beach Galaxy Slimy Spring Galaxy |
|
 Urchin (land) |
Red Urchins only found on land. One protracts its spines and rolls towards Mario if he approaches it. They are immune to spinning or being stomped. They can only be damaged by fire and lava. | Battle Belt Galaxy | |
 Water Shooter |
Mounted nozzles that shoot large drops of water over great distances. A drop traps Mario if within its trajectory and carries him with it. He is freed if he spins. | Starshine Beach Galaxy Honeyhop Galaxy Space Storm Galaxy |
Indestructible |
 Whomp ★ |
Walking stone walls similar to nurikabe. When Mario is before them, they quicken their pace and slam down face first to crush him. A successful strike completely depletes Mario's life meter, costing him a life. Their attack leaves them lying on the ground and vulnerable for a few seconds. Their weak point is a cylindrical button with a ground-pound symbol on it. | Bowser's Lava Lair Bowser's Gravity Gauntlet Throwback Galaxy |
|
 Wiggler |
Caterpillars that amble around in circles. Performing a ground-pound on nearby earth or directly spinning one flips a Wiggler on its back. If the incapacitated Wiggler is not defeated within five seconds, it becomes angry and uprights itself. An enraged Wiggler is much faster and cannot be harmed. It returns to its original disposition after a few seconds. Wigglers can be defeated in a single hit by ground-pounding them. | Puzzle Plank Galaxy Tall Trunk Galaxy Throwback Galaxy |
- ^ Unless explicitly specified otherwise, any mentioning of Mario is equally applicable to Luigi during his playthrough.
- ^ Any mentioning of coconuts is equally applicable to watermelons, which replace all coconuts if the player accumulates 9999 Star Bits.
Bosses
| Peewee Piranha | King Lakitu | Digga-Leg | Gobblegut | ||||||||
|---|---|---|---|---|---|---|---|---|---|---|---|

|

|

|

| ||||||||
| A Piranha Plant monster with a bulbous rear. It rushes at Mario when he is in its line of sight. Its rump is its weak point, but it is protected by an egg shell. Spinning into the shell breaks it. | A giant Lakitu that can discharge lightning from his cloud. He throws Spiny Eggs at Mario and Yoshi. Firing the Spinies back at him is the only way to damage him. | A large construction robot equipped with Diggas. A glass casing under its head is its weak point: it can only be struck with the Spin Drill. It leaps to crush Mario with its feet after he lands a hit. | An earth dragon that tunnels through the ground with his jaws. Gobblegut's body is lined with vulnerable buldges that burst when spun into. Bursting every bulge defeats him. | ||||||||
| Missions | Missions | Missions | Missions | ||||||||
| Peewee Piranha's Temper Tantrum Peewee Piranha's Speed Run |
Spiny Control | Digga-Leg's Planet Digga-Leg's Daredevil Run |
Gobblegut's Aching Belly Fiery Flotilla Speed Run | ||||||||
| Stink Bug Parent | Rollodillo | Sorbetti | Megahammer | ||||||||

|

|
|

| ||||||||
| A Mandibug that carries its child on its back. Both can be defeated by performing a Ground-Pound. Defeating the child enrages the parent and makes it harder to strike. | A giant armadillo creature that rolls like Rock Mario and gallops. It rapidly charges towards Mario but tires out after three rolls. Its behind is unprotected and vulnerable to strikes. | A malevolent snowman that frightens local Star Bunnies. It slowly rolls its head towards Mario and laughs with a successful hit. Its red nose is its weak point. Its movement quickens after being struck twice. | Bowser Jr.'s clown mech, equipped with Bill Blasters. It discharges electric shockwaves and has hammerheads in place of hands to crush Mario. Breaking the glass orbs on its body weakens it. | ||||||||
| Missions | Missions | Missions | Missions | ||||||||
| The Puzzling Picture Block | Rock and Rollodillo | Sorbetti's Chilly Reception | Bowser Jr.'s Mighty Megahammer Megahammer's Daredevil Bash | ||||||||
| Glamdozer | Squizzard | Prince Pikante | Boomsday Machine | ||||||||

|
File:SMG2 Screenshot Slipsand Galaxy (Squizzard).png | 
|
| ||||||||
| A maternal Pupdozer. She climbs back-and-over the sides of a disc-shaped planet in pursuit of Mario. Her backside is protected by spiky armor, but her belly is soft and vulnerable. After being struck once, she starts spewing balls of melting goo. | A lizard-like antlion creature sitting at the center of a sinkhole. It tosses explosive knobby balls at Mario. After being struck twice, it erects two cannons to fire balls alongside it. It can only be damaged by fireballs launched by Fire Mario. | A wagon-riding Ota Rocks that fires coconuts and enflamed rocks from his siphon. The wagon is equipped with three cannons that also shoot rocks in tandem with Prince Pikante. Spinning into the coconuts parries them back at him. | Bowser Jr.'s battle tank, piloted during his last stand. Its top is a tower equipped with Fire Bars and cannons that shoot homing electrical orbs. Its lined with vents that pull Mario towards it. Its weak point is Bowser Jr.'s glass cockpit. | ||||||||
| Missions | Missions | Missions | Missions | ||||||||
| Flip-Flopping in Flipsville | Squizzard's Sandy Sinkhole Squizzard's Daredevil Run |
Prince Pikante's Peppery Mood | Bowser Jr.'s Boomsday Machine Boomsday Machine Daredevil Run | ||||||||
| Whomp King | Bowser | ||||||||||

|
| ||||||||||
| The giant king of the Whomps, who stole a Power Star from the Bob-omb Buddies. When Mario is before him, he slams his body face first to crush him. His attack makes the ground quake: if Mario is on the ground when he evades the Whomp King's attack, the quake leaves him stunned in place for two seconds. Pattans are summoned during the fight. | Mario's arch-nemesis: the fire-breathing king of Koopas. Bowser is unnaturally large from ingesting Grand Stars. He fights Mario on a planetoid he dwarfs in size and attacks with an onslaught of punches, shockwaves, and fire breath. Bowser summons a storm of meteorites with a roar. Ground-Pounding them into him is the only way to damage him. | ||||||||||
| Missions | Missions | ||||||||||
| Return of the Whomp King | Bowser's Big Lava Power Party Breaking into Bowser's Castle Bowser's Fortified Fortress | ||||||||||
| Bugaboom | Gobblegut (fiery) | Dino Piranha | King Kaliente | ||||||||
|---|---|---|---|---|---|---|---|---|---|---|---|

|

|
|
| ||||||||
| An enormous, winged Mandibug. It tries to bite Mario with its mandibles. Ground pounding its abdomen damages it. Bugaboom takes flight after being struck once and starts releasing explosive droppings as it flies. | A fast-moving Gobblegut covered in flames. His bellyache bulges are his weak points. Once half of them burst, he moves faster and summons a rain of fireballs that leave pools of lava on his planet. | A Piranha Plant monster with a clubbed tail. It charges down Mario when he is in its line of sight. Spinning into its club slingshots it towards its head, damaging it. Its charges more quickly after the first strike. | A giant Ota Rock that dwells in lava. He shoots coconuts and flaming rocks at Mario from his siphon. Spinning into a coconut smacks it back towards him and damages him. He starts to parry these attacks as the fight progresses. | ||||||||
| Missions | Missions | Missions | Missions | ||||||||
| Bugaboom's Back | Snacktime for Gobblegut | Throwback Throwdown ( Throwback Throwdown Speed Run |
Throwback Throwdown ( Throwback Throwdown Speed Run | ||||||||
| Major Burrows | Bouldergeist | Fiery Dino Piranha | |||||||||
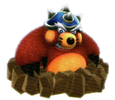
|

|

| |||||||||
| A giant Undergrunt. He burrows towards Mario before bursting from the ground with swiping claws. Performing a Ground Pound on the earth when his head is exposed forces him to the surface and leaves him vulnerable to a spin attack. | A large ghost covered in rocks. It launches rocks and erects stone spikes to damage Mario. Attacking it with Bomb Boos destroys its armor and leaves it vulnerable to attack. During the second phase, it constructs giant hands to attack Mario and protect its body. | A fast-moving Dino Piranha. Its clubbed tail periodically catches fire. The flames burn Mario and prevent him from spinning the club. After landing a hit, Fiery Dino Piranha becomes faster; leaves walls of fire in its wake; and spews balls of flame. Defeating this boss without being damaged requires well-timed precision. | |||||||||
| Missions | Missions | Missions | |||||||||
| Throwback Throwdown ( Throwback Throwdown Speed Run |
Throwback Throwdown ( Throwback Throwdown Speed Run |
Throwback Throwdown Throwback Throwdown Speed Run | |||||||||
Items
- SMG2 Plus Clock.png
- SMG2 Coin Block.png
- SMG2 Green Shell.png
- SMG2 Note.png
- SMG2 Rock Mushroom.jpg
Objects
- SMG2 Blue Switch.png
- SMG2 Coconut.png
- SMG2 Crate.png
- SMG2 Stone Wheels.png
- SMG2 Stump.png
- SMG2 Treasure Chest.png
- SMG2 Watermelon.png
Power-ups
This game introduces the Cloud Flower, the Spin Drill, and the Rock Mushroom. The Ice Flower and the Red Star would have made a comeback appearance in the sequel before being removed. All of the power-ups except for the Rainbow Star appear in the Engine Room of Starship Mario, though none can be used, as they are contained as souvenirs in small glass domes which cannot be penetrated. However, the Cloud Flower will appear on the "forehead" of the Starship Mario, which can be used around the ship.
| Power-Up | Transformation | Function |
|---|---|---|
 Cloud Flower |
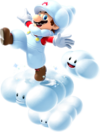 Cloud Mario |
Allows Mario to make three cloud platforms by shaking the Wii Remote. Also allows him to walk on other Clouds. If Mario picks up another Cloud Flower when he is Cloud Mario, his clouds would refill back up to three. |
 Spin Drill |
|
An item that allows Mario to drill though dirt by shaking the Wii Remote which sends him to the other side of the planet Mario is currently on. |
| File:SMG2 Rock Mushroom.jpg Rock Mushroom |
 Rock Mario |
Allows Mario to turn into a rock by shaking the Wii Remote, knocking out enemies and boulders along the way. Can also be used to destroy Red Crystals and to knock down bridges. |
 Bee Mushroom |
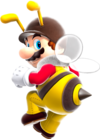 Bee Mario |
Allows Mario to fly for a short time when the |
 Boo Mushroom |
 Boo Mario |
A mushroom that gives Mario the power of intangibility, and also allows him to float in the air with |
 Fire Flower |
 Fire Mario |
A power-up that temporarily allows Mario to throw fireballs at his enemies by shaking the Wii Remote. |
 Spring Mushroom |
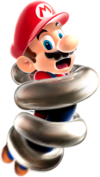 Spring Mario |
A power-up that transforms Mario into Spring Mario, allowing Mario to bounce extremely high by pressing the |
 Rainbow Star |
 Rainbow Mario |
A power-up that turns Mario into Rainbow Mario, thereby making him completely invincible for a short time. |
Power-up locations
1 - Unlocks after completing Climbing the Cloudy Tower
2 - Only appear in Star 1
3 - Only appear in Star 2
4 - Only appear in Comet Star
Yoshi and Fruits
These are Yoshi's powerups and the locations they are in, along with the locations that Yoshi himself is in.
Dash Yoshi after eating a Dash Pepper
Blimp Yoshi after eating a Blimp Fruit
Bulb Yoshi after eating a Bulb Berry
Locations
Prankster Comets
Like the previous game, Prankster Comets appear and cause special missions to appear. While some comets from the first game return, others are completely new. Unlike the previous game, however, comets are gotten by collecting Comet Medals instead of appearing randomly; also, not all galaxies have a comet (barring the Green Comet that appears after all 120 regular Power Stars are gotten). The table below shows how many Comet Medals it takes to cause a Prankster Comet to appear in a certain galaxy, as shown in the Prima Official Game Guide:
The following galaxies do not have a comet associated with them:
- Fluffy Bluff Galaxy
- Rightside Down Galaxy
- Cosmic Cove Galaxy
- Wild Glide Galaxy
- Honeybloom Galaxy
- Freezy Flake Galaxy
- Honeyhop Galaxy
- Space Storm Galaxy
- Boo Moon Galaxy
- Upside Dizzy Galaxy
- Fleet Glide Galaxy
- Melty Monster Galaxy
- Slimy Spring Galaxy
Galaxies
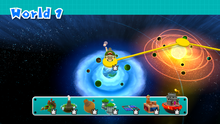
All forty-nine Galaxies can be accessed via the Grand World Map by piloting Starship Mario through the different worlds and galaxies. There are seven more galaxies in this game than in the first game. Galaxies marked with an asterisk (*) are only accessible by feeding a Hungry Luma. Unlike the first game, which had numerous galaxies consisting of only a single mission, each galaxy in Super Mario Galaxy 2 has two to three unique missions; with many of the smaller galaxies possessing a Prankster Comet level or a hidden mission. Additionally, each galaxy has a number of Green Stars, the amount of which is equal to the amount of Power Stars in the galaxy.
| Galaxies | |||||||||||
|---|---|---|---|---|---|---|---|---|---|---|---|
| 01. Sky Station Galaxy |
Missions | 02. Yoshi Star Galaxy |
Missions | ||||||||

|

|
||||||||||
| The first location visited on the adventure. Features various structures on planets, as well as various enemies Goombas, Octoombas, and a boss, Peewee Piranha. Unlock criterion: None |
A volcano and prehistoric-based land which houses enemies such as Goombas and Spinies. Yoshi makes his first appearance here, being guarded by a Magikoopa. Unlock criterion: Complete "Peewee Piranha's Temper Tantrum" | ||||||||||
| 03. Spin-Dig Galaxy |
Missions | 04. Fluffy Bluff Galaxy |
Missions | ||||||||

|

|
||||||||||
| A galaxy with planets made of dirt. The Spin Drill is introduced here and is used to bury through the dirt. Unlock criterion: Complete "Saddle Up with Yoshi" and have 3 Power Stars in possession |
A land made of water and clouds. The player meets The Chimp here, and is also introduced to the Cloud Flower. Unlock criterion: Complete "Digga-Leg's Planet" | ||||||||||
| 05. |
Missions | 06. Rightside Down Galaxy |
Missions | ||||||||

|

|
||||||||||
| A trial of red and blue platforms that flip around whenever the player spins. Various hazards like Chain Chomps and electric fences are present on the course. Unlock criterion: Complete "Saddle Up with Yoshi" and feed the Hungry Luma 300 Star Bits |
A building where gravity will switch around depending on what direction the arrows are facing. Unlock criterion: Complete "Digga-Leg's Planet" | ||||||||||
| 07. Bowser Jr.'s Fiery Flotilla |
Missions | ||||||||||

|
|||||||||||
| A fortress with various enemies and lava. Mario encounters Bowser Jr. for the first time, who sends out Gobblegut to finish Mario off. Unlock criterion: Complete either "Search for the Toad Brigade Captain" or "Every Planet Has Its Price" and have 9 Power Stars in possession | |||||||||||
| 08. Puzzle Plank Galaxy |
Missions | 09. Hightail Falls Galaxy |
Missions | ||||||||

|

|
||||||||||
| A galaxy with planets made of wood to form puzzle-like shapes. Buzz saws also appear and cut off certain parts of wood. Unlock criterion: Complete "Gobblegut's Aching Belly" |
A large waterfall with steep platforms that can only be traversed with the power of Yoshi's new Dash Pepper. Unlock criterion: Complete either "The Puzzling Picture Block" or "Bugaboom's Back" | ||||||||||
| 10. Boulder Bowl Galaxy |
Missions | 11. Cosmic Cove Galaxy |
Missions | ||||||||

|

|
||||||||||
| A galaxy containing many rock-based obstacles, including boulders, Octoombas, and Octoguys. The new Rock Mushroom is used in order to take down large obstacles that cannot be taken down normally. Unlock criterion: Complete either "The Puzzling Picture Block" or "Bugaboom's Back" |
A mysterious undersea cavern that leads to many special areas. The water on the main planet can be turned into ice. Unlock criterion: Collect a Power Star from either the Boulder Bowl or Hightail Falls Galaxy | ||||||||||
| 12. Wild Glide Galaxy |
Missions | 13. |
Missions | ||||||||

|

|
||||||||||
| A jungle racecourse where a Jibberjay teaches Mario how to fly with Fluzzard. Unlock criterion: Collect a Power Star from either the Boulder Bowl or Hightail Falls Galaxy |
A bee-themed level that takes place entirely in the 2D side-scrolling perspective. Mario should use the Bee Mushroom to fly around dangerous hazards. Unlock criterion: Collect a Power Star from either the Boulder Bowl or Hightail Falls Galaxy and feed the Hungry Luma 700 Star Bits | ||||||||||
| 14. Bowser's Lava Lair |
Missions | ||||||||||

|
|||||||||||
| A volcanic fortress prominently featuring Whomps and fiery enemies. Mario fights Giant Bowser for the first time, who attacks by punching the ground and summoning meteorites. Unlock criterion: Collect a Power Star from either the Wild Glide, Honeybloom, or Cosmic Cove Galaxy and have 16 Power Stars in possession | |||||||||||
| 15. Tall Trunk Galaxy |
Missions | 16. Cloudy Court Galaxy |
Missions | ||||||||

|

|
||||||||||
| A galaxy consisting of many trees floating in the sky. This galaxy introduces the Blimp Fruit for Yoshi and contains a planet homaging Super Mario 64's slide levels. Unlock criterion: Complete "Bowser's Big Lava Power Party" |
A cloud-themed galaxy featuring medieval buildings. Much like Fluffy Bluff Galaxy, the Cloud Flower is prominently used for traversing its planets. Unlock criterion: Complete "Bowser's Big Lava Power Party" | ||||||||||
| 17. Haunty Halls Galaxy |
Missions | 18. Freezy Flake Galaxy |
Missions | ||||||||

|

|
||||||||||
| A haunted galaxy containing Octoboos and Boos. The Bulb Berry is introduced here, allowing Yoshi to light up hidden platforms. Unlock criterion: Collect a Power Star from either the Tall Trunk Galaxy or Freezy Flake Galaxy |
A snowy galaxy containing Li'l Brrs and Li'l Cinders, and featuring both the Fire Flower and Rock Mushroom power-ups. The boss of this galaxy is Sorbetti, a giant snowman's head. Unlock criterion: Collect a Power Star from either the Cloudy Court Galaxy or Haunty Halls Galaxy | ||||||||||
| 19. Rolling Masterpiece Galaxy |
Missions | 20. |
Missions | ||||||||

|

|
||||||||||
| A galaxy themed after arts and craft supplies, which introduces the Star Ball for Mario to roll around on. Goombas and Bob-ombs appear as enemies here. Unlock criterion: Complete either "Bowser on Ice" or "The Chimp's Skating Challenge" |
A small galaxy featuring green and yellow Beat Blocks which disappear and reappear at short intervals. Octoombas appear on the green blocks while Goombeetles appear on the yellow blocks. Unlock criterion: Complete "A Glimmer of Bulb Berry" and feed the Hungry Luma 1000 Star Bits | ||||||||||
| 21. Bowser Jr.'s Fearsome Fleet |
Missions | ||||||||||

|
|||||||||||
| A space station owned by the Koopa Troop, featuring Undergrunt Gunners, Bullet Bills, and Hammer Bros as enemies. Mario faces off against Bowser Jr.'s colossal robot Megahammer here, which necessitates the use of Yoshi to defeat it. Unlock criterion: Have 28 Power Stars in possession | |||||||||||
| 22. Supermassive Galaxy |
Missions | 23. Flipsville Galaxy |
Missions | ||||||||

|

|
||||||||||
| A galaxy where everything is huge. Mario will have to work his way around the oversized obstacles to reach his Power Star. Unlock criterion: Complete "Bowser Jr.'s Mighty Megahammer" |
The gravity will switch around by ground pounding the cages on the floor, bringing Mario to the opposite side of gravity. Unlock criterion: Complete either "Huge Trouble with Big Wigglers" or "In Full Bloom" | ||||||||||
| 24. Starshine Beach Galaxy |
Missions | 25. Chompworks Galaxy |
Missions | ||||||||

|

|
||||||||||
| A tropical beach galaxy inhabited by Piantas. A large tower is featured here, which can be accessed from underwater. Unlock criterion: Complete either "Flip-Flopping in Flipsville" or "The Sweetest Silver Stars" |
An industrial galaxy all about rolling Chomps. They will constantly roll out of cannons, and Mario will have to use them to activate various contraptions. Unlock criterion: Complete either "Flip-Flopping in Flipsville" or "The Sweetest Silver Stars" | ||||||||||
| 26. |
Missions | 27. Honeyhop Galaxy |
Missions | ||||||||

|

|
||||||||||
| A calm galaxy filled with many different sweets that are walked across. Yoshi's Bulb Berry will reveal more of the path to travel on. Unlock criterion: Complete "Bowser Jr.'s Mighty Megahammer" and feed the Hungry Luma 1200 Star Bits |
Another sector of the Honeyhive Kingdom, where Mario comes face-to-face with the Queen Bee herself, who requires Mario's aid to rid of an itch. The Chimp also has another stomping challenge here. Unlock criterion: Complete either "Huge Trouble with Big Wigglers" or "In Full Bloom" | ||||||||||
| 28. Bowser's Gravity Gauntlet |
Missions | ||||||||||

|
|||||||||||
| Bowser's second space castle, with many different changes in the gravity. Bowser's fight itself also has an increase in difficulty. Unlock criterion: Complete either "Surf, Sand, and Silver Stars" or "Where the Chomps Are Made of Gold" and have 40 Power Stars in possession | |||||||||||
| 29. Space Storm Galaxy |
Missions | 30. Slipsand Galaxy |
Missions | ||||||||

|

|
||||||||||
| A galaxy featuring a large broken spaceship and factories. Bob-Ombs are the key to getting through the planets. Unlock criterion: Complete "Breaking into Bowser's Castle" |
A desert-based galaxy where sand currents constantly move in one direction. The most notable landmark is the giant pyramid with a large slide outside. Unlock criterion: Complete "Follow Me, Bob-omb" | ||||||||||
| 31. Shiverburn Galaxy |
Missions | 32. Boo Moon Galaxy |
Missions | ||||||||

|

|
||||||||||
| A spiritual successor to the Freezeflame Galaxy from Super Mario Galaxy, featuring planets of lava and ice. Distinctly, the first planet has the ability to instantly switch the lava to ice with the push of a switch. Unlock criterion: Complete "Follow Me, Bob-omb" |
Another ghost-based galaxy, but with challenges of traversing a Snake Block across a swamp, and using the Boo Mushroom to make way to the top of a ghost-filled tower. Unlock criterion: Complete "Follow Me, Bob-omb" | ||||||||||
| 33. Upside Dizzy Galaxy |
Missions | 34. |
Missions | ||||||||

|

|
||||||||||
| The sequel galaxy to Rightside Down Galaxy, featuring platforming challenges with gravity-changing walls. The second half of the level has the gravity change in between time intervals. Unlock criterion: Complete "Follow Me, Bob-omb" |
Mario flies with Fluzzard once again, but this time in a factory-like course with obstacles like falling pillars, Thwomps, and Banzai Bills. Unlock criterion: Complete "Follow Me, Bob-omb" and feed the Hungry Luma 1500 Star Bits | ||||||||||
| 35. Bowser Jr.'s Boom Bunker |
Missions | ||||||||||

|
|||||||||||
| A series of planets involving Bullet Bills, cannons, and the Cloud Flower. Mario will also encounter Bowser Jr. using his most powerful weapon: his Boomsday Machine. Unlock criterion: Complete "Follow Me, Bob-omb" and have 55 Power Stars in possession | |||||||||||
| 36. Melty Monster Galaxy |
Missions | 37. Clockwork Ruins Galaxy |
Missions | ||||||||

|

|
||||||||||
| A galaxy featuring lots of planets made of lava. Magmaarghs and Magmaws inhabit the lava. Unlock criterion: Complete "Bowser Jr.'s Boomsday Machine" |
A galaxy featuring rotating platforms stylized like ruined clocks. These platforms also roll along the ground, forcing Mario to either avoid them, or climb up them. Unlock criterion: Complete either "The Magnificent Magma Sea" or "The Chimp's Bowling Challenge" | ||||||||||
| 38. Throwback Galaxy |
Missions | 39. Battle Belt Galaxy |
Missions | ||||||||

|

|
||||||||||
| A reimagining of Whomp's Fortress from Super Mario 64. Like the original, Mario must traverse his way past Thwomps, Piranha Plants and Whomps to reach the top. Other familiar faces like Bob-omb Buddies and the Whomp King are met here. Unlock criterion: Complete either "Time for Adventure" or "The Ledge Hammer Trap" and have 60 Power Stars in possession. |
This galaxy is an enemy gauntlet where every planet requires Mario to defeat all of enemies on it in order to proceed. Unlock criterion: Complete "Return of the Whomp King" and have 65 Power Stars in possession | ||||||||||
| 40. |
Missions | 41. Slimy Spring Galaxy |
Missions | ||||||||

|

|
||||||||||
| A tall mansion-like building that is pitch dark, but briefly lights up during time intervals. Unlock criterion: Complete either "The Magnificent Magma Sea" or "The Chimp's Bowling Challenge" and feed the Hungry Luma 1800 Star Bits |
A mysterious underwater cave inhabited by various creatures including Snoodles, Gringills, and Urchins. Unlock criterion: Unlock Flash Black Galaxy by feeding the World 6 Hungry Luma 1800 Star Bits, then complete "Jumping Around in the Dark" | ||||||||||
| 42. Bowser's Galaxy Generator |
Missions | ||||||||||

|
|||||||||||
| Bowser's grand final fortress, where he is battled for the last time. Mario will traverse the castle in various ways, including with the Spin Drill, Cloud Flower, and Yoshi. After Bowser's defeat, Mario finally saves Princess Peach and returns home. Unlock criterion: Collect a Power Star from either the Battle Belt or Slimy Spring Galaxy and have 70 Power Stars in possession | |||||||||||
| 43. Mario Squared Galaxy |
Missions | 44. Rolling Coaster Galaxy |
Missions | ||||||||

|

|
||||||||||
| A planet resembling an 8-bit sprite of Mario from Super Mario Bros., much like one of the planets from the previous game's Toy Time Galaxy. The Power Star appears once all of the Flipswitch Panels have been stepped on. Unlock criterion: Complete "Bowser's Fortified Fortress" |
A large slope with a rainbow-colored floor, referencing the Rainbow Road tracks from the Mario Kart series. The Star Ball is used once again to traverse this road. Unlock criterion: Complete "Make Mario a Star" and have 75 Power Stars in possession | ||||||||||
| 45. Twisty Trials Galaxy |
Missions | 46. Stone Cyclone Galaxy |
Missions | ||||||||

|

|
||||||||||
| A secret area with lots of large rotating platforms, directly based on the mission The Secret of Ricco Tower from Super Mario Sunshine, though much easier due to the Spin, Cloud Flower, and Yoshi. Unlock criterion: Complete "The Rainbow Road Roll" and have 80 Power Stars in possession |
A cylindrical stone planet with Thwomps and Tox Boxes, it is a direct replica of the Stone Cyclone planet from the Beach Bowl Galaxy in the previous game, though all of the enemies and platforms move much faster, even more than the planet's Fast-Foe Comet. Unlock criterion: Complete "Spinning and Spinning and Spinning" and have 90 Power Stars in possession | ||||||||||
| 47. Boss Blitz Galaxy |
Missions | 48. |
Missions | ||||||||

|

|
||||||||||
| In this galaxy, the player fights against five bosses from the first Super Mario Galaxy: Dino Piranha, King Kaliente, Major Burrows, Bouldergeist, and Fiery Dino Piranha, in that order. All the bosses have the exact same fighting strategy as the first game. Unlock criterion: Complete "Silver Stars on the Cyclone" and have 100 Power Stars in possession |
The sequel galaxy to Flip-Swap Galaxy, but instead of panels that flip, there are red and blue walls that go in and out with every Spin. Lots of wall jumping is necessary to make it through this galaxy. Unlock criterion: Complete "Throwback Throwdown", have 110 Power Stars in possession, and feed the Hungry Luma 2000 Star Bits | ||||||||||
| 49. Grandmaster Galaxy |
Missions | ||||||||||

|
|||||||||||
| The true final galaxy of the game, featuring the hardest challenges on different planets each with different gimmicks that the player needs to watch out for. At the very end of the Prankster Comet, Mario will come face-to-face with Rosalina herself. Unlock criterion: Collect all 240 Power Stars and Green Stars | |||||||||||
| Level chart information and legend: Galaxies are designated with a unique number. This number correlates with how galaxies are listed within the game's Star List. Galaxies accessed by feeding Hungry Lumas are denoted by | |||||||||||
Differences from Super Mario Galaxy
Gameplay
- While swimming underwater, Mario and Luigi no longer spin rapidly.
- An exploit that allowed Mario to climb up slopes was patched.
- The game now saves automatically instead of the player having to manually save after every Power Star collected.
- If the player gets a Game Over, they return to the hub world, rather than all the way back to the title screen.
- There are only three save files instead of six.
- Rosalina and Luma are new save file icons.
- Luigi can be used as an icon immediately.
- The player cannot copy save files like in the previous game.
- Bugaboom's boss fight now uses the Cloud Flower and springs, rather than the Bee Mushroom and swinging flowers.
- Coins are now a general collectible like Star Bits, rather than just being collected for a high score. After collecting a Power Star, coins collected will be added to the coin collection, similar to Star Bits.
- The game now records the time the player has taken to beat the level.
- Luigi is now playable in the same save file as Mario, and is accessed by a secret door on the Starship Mario, rather than having to play the entire game again as Luigi.
- Cutscenes are now done in a storybook format, and the player has to press a button to progress dialogue.
- The game rewards a 1-Up upon collecting 100 Star Bits, rather than every 50.
- Collecting a Life Mushroom while having a full six hit points now rewards a 1-Up rather than absolutely nothing.
- When receiving a letter from Princess Peach, Mailtoad automatically gives the player 5 1-Ups, rather than asking if they want to accept it.
- Luigi no longer receives 20 1-Ups from Peach's letters, only receiving 5 like Mario.
- The credits are more interactive, with the player playing through various levels in the game, rather than having standard credits.
- The first-person camera is able to turn 360 degrees rather than 90 degrees left and right.
Levels
- In the first game, excluding green or red Power Stars, major galaxies had six Power Stars (three missions, two Prankster Comets, and a Hidden Star) while minor galaxies had one (the sole mission). In the sequel, these numbers were changed to give major galaxies three Power Stars and minor galaxies two Power Stars.
- The type of stars each galaxy has now varies, rather than having a constant amount of each type per galaxy. Major galaxies have either two missions and a Prankster Comet, two missions and a Hidden Star, or one mission, Prankster Comet, and Hidden Star each. Minor galaxies have either one mission and a Prankster Comet, one mission and a Hidden Star, or two missions (with the second mission being a challenge from either The Chimp or Jibberjay).
- Hungry Lumas that create planets in galaxies now require coins to be fed to them instead of Star Bits. However, Hungry Lumas that make galaxies still require Star Bits.
- Hungry Luma galaxies can be accessed via the World Map, just like the rest of the galaxies in their corresponding world, rather than using an alternate method to access it (a launch star outside of the dome).
- The prologue level cannot be replayed. The prologue level of the first game could be replayed via the Grand Finale Galaxy.
- The galaxy icons on the World Map are much more detailed than in the first game, and some of them have more animated features, rather than being completely stationary models. Similar concepts have been used later in Super Mario 3D Land and Super Mario 3D World's stage icons.
Prankster Comets
- Prankster Comets are no longer categorized by type, simply leaving them as generic Prankster Comets.
- Boss galaxies now have Prankster Comets.
- During Speedy and Purple Coin missions, the clock now stops after the star appears, whereas in the original, the clock ran until the star was grabbed.
- Some Speedy Comet missions have clocks that must be grabbed to keep the timer going.
- Cosmic Comets and Fast-Foe Comets do not return, being replaced by Clone Comets and Double Time Comets respectively.
- The game now notifies a player when a Prankster Comet has appeared in a certain galaxy, rather than having to check themselves.
- The player can select any mission in the galaxy they want even if a Prankster Comet is in orbit. Because of this, Comet Tico and his ability to move Prankster Comets do not return.
- If the player loses a life during a Prankster Comet mission, the game does not ask the player if they want to retry the mission or return to the hub world, instead restarting the mission as normal.
Music
- While many soundtracks return from the first game, some returning soundtracks have been remixed to be more orchestrated rather than maintaining synthesized instruments. This includes:
- The theme of Bowser's Star Reactor and Bowser's Dark Matter Plant, used in Bowser's Lava Lair and Bowser's Gravity Gauntlet.
- The theme of Honeyhive Galaxy and Gold Leaf Galaxy used in Honeybloom Galaxy and Honeyhop Galaxy.
- The theme of Toy Time Galaxy used in Supermassive Galaxy.
- The mission selection theme.
- The level introduction theme.
- The Power Star fanfare.
- The jingle that plays when the player returns to the hub world.
- The theme of the Baron Brrr and Undergrunt Gunner boss battle, used in the King Lakitu and Stink Bug Parent battles.
- When the star appears, the music changes to the soft "star appears" theme for the rest of the mission, unlike the original, which only played the theme after a boss was beaten.
- When Mailtoad has a letter from Peach, there is no sound that constantly plays when the player is near him.
- During the egg phase of Dino Piranha and Fiery Dino Piranha's boss fights, as well as the first phase of Major Burrow's boss fight, a new soundtrack is used during those sections instead of the originals.
- The Stink Bug Parent mini-boss now has an actual theme playing (which shares the same with King Lakitu), rather than using the same theme as the level.
Aesthetic
- When Lumalee asks if the player wants to buy a 1-Up Mushroom or Life Mushroom, the dialogue boxes now show their names alongside their icon (like the Japanese version of the first game), rather than just their icon like in the English version of the first game.
- In the American version of the game, when getting an extra life, the text now shows "1UP" like the Japanese version instead of "1-UP" like the English version of the previous game. However, it's still "1-UP" in the European version.
- The "Game Over" text is now yellow instead of pink. The text is also slightly wider than in the previous game.
- The first Star that the player obtains is a Power Star rather than a Grand Star.
- The text saying "You got a Star/Grand Star" during the star collecting victory animation as well as the text saying "TOO BAD!" during when Mario/Luigi loses a life are slightly larger than in the first game.
- When the player returns to the Starship Mario after obtaining a Grand Star, the text box that appears afterwards says "You got a Grand Star", instead of "You got a Star".
- Similarly, when the player collects a Green Power Star, the text box says, "You got a Green Star", instead of "You got a hidden Star".
- Fiery Dino Piranha's egg now has visible heatwaves around it.
Development
The development of Super Mario Galaxy 2 started as soon as the first Super Mario Galaxy was released. Many of the ideas were based on those shown in the first game, which, for example, included moving or adding new stars in the levels. The project was initially called Super Mario Galaxy 1.5. The development of the new version of the game lasted a year; however, Miyamoto realized that the new game was beginning to overflow with new elements and ideas. Therefore, the team decided to create a real Super Mario Galaxy sequel rather than a new version of the original installment.[3] The development of the sequel then lasted two and half years.[4]
The game was revealed at E3 2009, along with New Super Mario Bros. Wii. Although the game was far along in development, it was held back to 2010 due to the release of New Super Mario Bros. Wii in November 2009.[5] According to Shigeru Miyamoto, 90% of the features in the game would be new, whereas the remaining 10% were already introduced or featured in the original Super Mario Galaxy. Shigeru Miyamoto noted, "Really what we ended up with is more than 90% of what you'll see in Galaxy 2 is brand new. I'd say closer to 95, maybe even 99%. One of the new things was the inclusion of Yoshi, and also the use of the drill to open up and drill through stages."[6] On the other hand, Miyamoto stated in an interview that he wanted to go with as little story as possible for Super Mario Galaxy 2.[7]
Some of the developers wanted to include characters from other Nintendo franchises, such as Pikmin or Donkey Kong. However, Miyamoto shot down the idea. [8]
CEO of Nintendo America Reggie Fils-Aime stated that Super Mario Galaxy 2 would be more challenging regarding its predecessor. It was hinted that the new game would implement a tool-assisted guide, similar to the Super Guide from New Super Mario Bros Wii. It was eventually confirmed, although it worked differently. Beginner players could use the Cosmic Guide mode (activated when encountering the Cosmic Spirit) or the Tip Network to learn moves and hints during gameplay. Japanese, European and Australian boxes came with a special DVD to help players to know basic and expert techniques of the game.
Super Mario Galaxy 2 Original Soundtrack
- Main article: Super Mario Galaxy 2 Original Soundtrack
An official two-disc soundtrack was released exclusively to Club Nintendo members in Japan, which holds all seventy songs from the game. The game's official soundtrack is performed by the Mario Galaxy Orchestra.
Reception
Upon its release, Super Mario Galaxy 2 was met with critical acclaim, and is one of the highest rated video games of all time on the aggregation sites Metacritic and GameRankings. EDGE magazine has given the game a perfect score of 10 out of 10, being the third Mario game so far to receive such rating (the others were Super Mario 64 and Super Mario Galaxy). Official Nintendo Magazine grants it a 97%, while Game Informer has given the game 9.25 out of 10. Nintendo Power gave it a 9.5 out of 10. IGN and Gamespot granted the game a perfect 10/10, as well as GamesRadar. Gamespot also gave the game the Best Platforming Award and the Best Wii Game Award of 2010. IGN named it the Best Wii Game of all time. Gametrailers has given a 9.7 from 10, while Famitsu a 37 out of 40. GamePro gave it four and a half stars, X-Play gave it a perfect five out of five stars, and 1UP.com an "A" rating.
| Reviews | |||
|---|---|---|---|
| Release | Reviewer, Publication | Score | Comment |
| Wii | Ryan Davis, Giant Bomb | 5/5 | "For all the meaningful changes and additions that have been made, this is still more Super Mario Galaxy--which is to say that it looks and sounds about as good as a game for the Wii ever has, with consistently inventive level design, and exceptionally responsive gameplay. We all like to give Nintendo a hard time for pandering to casual and nostalgic audiences, but when it brings its A-game, it's still able to deliver a fun, accessible game experience that's second to none." |
| Wii | Tom Mc Shea, GameSpot | 10/10 | "Super Mario Galaxy 2 is simply an outstanding game. It never rests on its laurels for a second, constantly presenting new objectives and mechanics to push you to never before seen places. Even the two-player mode offers new abilities and delights, making it even more fun to play with a friend by your side. Everything is so well designed and so entertaining that it's easy to get sucked into this world for hours. Super Mario Galaxy 2 is so phenomenal that it's difficult to imagine where Mario could possibly go in the future. But that's hardly your concern now. Mario proves that he is still the king of fun." |
| Wii | Oli Welsh, Eurogamer | 10/10 | "While the New Super Mario Bros. games have been content to remind us of Mario's roots, Super Mario Galaxy recast him in the role of fearless explorer, leaping into impossible realms, redefining what we could do in virtual space. Here, once again, was the Mario of Donkey Kong, of Super Mario Bros., of Super Mario 64. A simple extension of the Galaxy concept, Super Mario Galaxy 2 can't possibly have the same impact. But it does have the same spirit, throwing new ideas at you with gleeful and impulsive abandon, leaving you breathless, scrambling happily to keep up. You can't really complain about more of the same, when the same is the one thing it never is." |
| Aggregators | |||
| Compiler | Platform / Score | ||
| Metacritic | 97 | ||
| GameRankings | 97.35% | ||
Sales
Super Mario Galaxy 2 sold 143,000 copies on its first day of release in Japan and 340,000 copies in its first week.[9] In North America, the game sold 650,000 copies during the month of May 2010.[10] In the United Kingdom, it was the third best-selling game among multiplatform releases and the best-selling single platform release for the week ending June 26, 2010.[11] As of July 16, 2010, the game has sold 1 million copies within the USA[12] and 6.36 million copies worldwide as of April 2011.[13]
Awards
Super Mario Galaxy 2 was awarded Game of the Year by Nintendo Power[14] and named "Wii Game of the Year" by IGN,[15]GameSpot,[16] and 1UP[17] in 2010. In the March 2012 issue of Official Nintendo Magazine, the publication named Super Mario Galaxy 2 the "Greatest Nintendo Game Ever Made" ranking at #1 out of 100.[18] It was awarded Game of the Year and Best Game on Wii by Guinness Book of World Records Gamer's Edition 2011.[citation needed]
Media
- For a complete list of media for this subject, see List of Super Mario Galaxy 2 media.
| File info 0:30 |
| File info 0:30 |
| File info 0:30 |
| File info 0:30 |
Quotes
- Main article: List of Super Mario Galaxy 2 quotes
- "Oh, by the way, I found this 1-Up Mushroom a little while ago! Think you can use it?" - Banktoad
- "Super Mario Galaxy, Wahoo!" - Mario
- "First time in galaxy, always Comet medal somewhere. Look hard. Find!" - Whittle
Glitches
- Main article: List of Super Mario Galaxy 2 glitches
Yoshi's infinite Flutter Jump
To perform this glitch, Mario should ride Yoshi and perform a Flutter Jump. When he is almost finished, the player should release ![]() and press
and press ![]() , then, release
, then, release ![]() and hold
and hold ![]() , repeating this to gain more height.[19][20] This was discovered by fans very shortly after the game's release. This glitch is known by many fans as "Infinite Fluttering," and has become the most well-known glitch in the game. Using this glitch, players can fight the final boss, Bowser, and also even clear the Perfect Run with Yoshi. It is also because of this glitch that many other glitches have also been found.
, repeating this to gain more height.[19][20] This was discovered by fans very shortly after the game's release. This glitch is known by many fans as "Infinite Fluttering," and has become the most well-known glitch in the game. Using this glitch, players can fight the final boss, Bowser, and also even clear the Perfect Run with Yoshi. It is also because of this glitch that many other glitches have also been found.
Flip-Swap Superjump
In the Flip-Swap Galaxy, Mario can use the upward momentum from a Red-Blue Panel flipping up to perform an extremely long, high jump. Mario must be on one of the non-flipping platforms in the galaxy. Then, he must run toward an empty space that a flipping platform flips to when Mario spins. Right before Mario runs into the empty space, he must spin to make the flipping platform flip to the empty space. Mario should fall onto the flipping platform while it is still rising. Finally, Mario must perform a Long Jump right before the platform stops moving. The timing for this is difficult, but if performed correctly, Mario will do a "superjump" that covers huge distance and can be used as a shortcut.[19][21]
This can also happen if Cloud Mario jumps immediately after he forms a cloud.[19]
Pre-release and unused content
In the debut trailer from E3 2009 and the two Media Summit Trailers, there were several differences from the game's release.
- The starting planet in Boo Moon Galaxy was originally going to look similar to the Crystal Planet in Space Junk Galaxy from the first game.
- When a player used a Dash Pepper, the player did not glow or leave a glowing trail as in the final version.
- Good Egg Galaxy's background was used in Tall Trunk's Slide, and in Space Storm Galaxy's Topman's tower.
Gallery
- For this subject's image gallery, see Gallery:Super Mario Galaxy 2.
Staff
- Main article: List of Super Mario Galaxy 2 staff
General Producer
Producers
Director
Music
References to other games
- Super Mario Bros.: Supermassive Galaxy's music, which is itself a remix of Toy Time Galaxy's music from the first game, originated from this game's overworld theme. The first few notes of this music are played when switching between Mario and Luigi. Other music from this game returned from Super Mario Galaxy as well. In the Grandmaster Galaxy, there is a backdrop featuring elements and enemies, as well as Mario and Luigi in their 8-bit sprites from this game.
- Super Mario Bros. 3: Supermassive Galaxy is similar to Giant Land from this game, as the two are of massive size and feature giant versions of common items and enemies.
- Super Mario World: Yoshi, who first appeared in this game, is playable in Super Mario Galaxy 2, and the percussion sounds heard when riding on Yoshi are reused. In fact, when Mario first saves Yoshi, his speech is obviously based on his speech in this game. Additionally, this game's athletic theme returns as Hightail Falls Galaxy's music (as well as the music that plays during the mission for Starshine Beach Galaxy, "Purple Coin Beach Dash"), and the Ghost House theme returns as Haunty Halls Galaxy's and Boo Moon Galaxy's music. Also, the sound effect that is heard when a P Switch's effect is about to run out is used in the bonus areas of Super Mario Galaxy 2, and the sound effect heard when passing through a door in this game is used when opening a door in Boo Moon Galaxy. In Puzzle Plank Galaxy, the Rainbow Notes play the Bonus Game theme from Super Mario World.
- Yoshi's Cookie: Some of the cookies seen inside the chocolate box platforms via the Bulb Berry in Sweet Mystery Galaxy are the checked cookies from this game.
- Super Mario 64: The slider theme from this game is used for Tall Trunk Galaxy and Rolling Coaster Galaxy. The "Bowser's Road" theme is remixed once again, appearing in several Bowser-themed galaxies. Also, the Throwback Galaxy is a replica of Whomp's Fortress; its boss, the Whomp King, is fought there, and an arrangement of the course's music plays there as well. Both games start with Peach sending a letter to Mario involving cake. Additionally, the "Inside the Castle Walls" theme can be heard when rescuing Peach and the final Grand Star in Super Mario Galaxy 2. The Rainbow Star theme is remixed once again from the Wing Cap and Vanish Cap theme. Finally, Mario says, "Thank you so much for playing my game!" after the ending credits, just as he did in this game.
- Super Mario Sunshine: The Starshine Beach Galaxy is based on some elements from this game. The main mission of Twisty Trials Galaxy is a replica of the secret level found in Episode 4 of Ricco Harbor. The red and blue flipping platforms return, although they work differently. A few of Yoshi's sound clips are reused from this game. Piantas also return.
- Super Mario 64 DS: The Silver Stars from this game return in Super Mario Galaxy 2.
- New Super Mario Bros. Wii: The Checkpoint Flag returns from this game, and the Cosmic Guide and Tip Network are based on the Super Guide and hint movies from this game, respectively. Also, the world maps are based on the one from this game. In both games, Bowser is giant, and the final battle is divided in two different parts, the latter having a bigger Bowser. The model for the Koopalings' cake reappears in Super Mario Galaxy 2's credits. Additionally, when players collect all the coins in a certain time limit that were accessed by a switch in Super Mario Galaxy 2, the audience claps in the same fashion they did in this game.
References in later games
- Donkey Kong Country Returns: The Flip-Out Galaxy's concept is back (but slighty changed) for the Switcheroo level.
- Super Mario 3D Land: Star Medals look similar to Comet Medals. In addition, the theme used on bonus planets is covered for Mystery Boxes. The blue and red flipping platforms return, but they are activated by jumping. The "beat blocks" return as well. Cosmic Clones return, but they look different. An early theme for the Boom Boom battle was the same theme played when fighting Peewee Piranha. Also, a lot of the voice clips, sounds, and enemy animations and behaviors are reused. World 7-5 is similar to Puzzle Plank Galaxy, and Special 5-1 is similar to Flip-Swap Galaxy. Also, a strange, ghostly entity can be seen in the woods near the Flagpole of World 4-4, which bears resemblance to the three, strange, black Kodama-esque figures (Hellvalleyskytrees) seen in the background of Shiverburn Galaxy.
- Mario & Sonic at the London 2012 Olympic Games: The Sky Station Galaxy (under the name "Synchro Battle Galaxy") appears in the Dream Spacewalk event.
- Fortune Street: Starship Mario makes an appearance as one of the Mario series game boards.
- Super Mario 3D World: Green Stars make an appearance, replacing Star Medals from Super Mario 3D Land. Fizzlits return, although in a more square-shaped appearance. The final boss themes (and the Meowser defeated fanfare) have portions of the themes for Bowser's Galaxy Generator. Also, Grumblumps have a similar appearance to Rhomps. The Beat Block mechanic returns under the name "Beep Block", and the Beep Block stages return to the "beep-beep-beep-switch" rhythm as in this game with the same tempo as the Beat Block Galaxy theme as well. There is additionally a level called Boss Blitz, which is in reference to the Boss Blitz Galaxy.
- Super Smash Bros. for Nintendo 3DS / Wii U: Starship Mario appears in the background of the Mario Galaxy stage.
- Mario Kart 8 / Mario Kart 8 Deluxe: The giant dragon used for the Dragon Driftway racetrack has a similar design to Gobblegut, but with legs. In Deluxe, the battle course Dragon Palace has two statues of the same Gobblegut-like dragons.
- Mario + Rabbids Kingdom Battle: Gobblegut is used as the base design for a weapon in this game.
- Super Smash Bros. Ultimate: Rock Mario, Lubba, and Starship Mario appear as spirits using their artwork from Super Mario Galaxy 2. Also, Melty Monster Galaxy's theme is added to the Mario series track list.
Names in other languages
| Language | Name | Meaning | Notes |
|---|---|---|---|
| Chinese | 超級瑪利歐銀河2[?] Chāojí Mǎlìōu Yínhé Èr |
Super Mario Galaxy 2 | |
| German | Super Mario Galaxy 2[?] | - | |
| Korean | 슈퍼 마리오 Wii 2 갤럭시 어드벤처 투게더[?] Syupeo Mario Wii 2 Gaelleoksi Eodeubencheo Tugedeo |
Super Mario Wii 2: Galaxy Adventure Together | |
| Spanish | Super Mario Galaxy 2[?] | - |
Trivia
- The save data description is "Launch into a new adventure!"
- In the Japanese version, it says 「銀河を舞台にまたまた大冒険!」
- Even though Super Mario Galaxy 2 is not featured in the compilation title Super Mario 3D All-Stars, an abridged version of the theme for when Mario or Luigi grabs a Power Star is recycled for the game's main menu.
References
- ^ https://www.nintendo.com/games/detail/super-mario-galaxy-2-wii
- ^ Mario Portal (Japanese). Nintendo. Retrieved August 19, 2018.
- ^ Nintendo Everything >> Blog Archive >> At one point, Super Mario Galaxy 2 was Super Mario Galaxy 1.5 "As soon as the project was over, we started making something that we might call version 1.5. We did things like moving or adding stars to levels that were already available... we realized that there were too many things to fit into a version 1.5. That made us realize we should start from scratch and make Super Mario Galaxy 2." - Miyamoto during Iwata Asks: Super Mario Galaxy 2 interview
- ^ Iwata Asks: Super Mario Galaxy 2 - Volume 2
- ^ https://web.archive.org/web/20090612002157/http://wii.ign.com/articles/989/989996p1.html
- ^ E3: Miyamoto: Galaxy 2 Is As Big As The Original
- ^ Shigeru Miyamoto Interview at Wired.com
- ^ Super Mario Galaxy 2 Could Have Featured Donkey Kong and Pikmin Cameos, But Miyamoto Said "No"
- ^ https://web.archive.org/web/20100610070540/http://www.gamasutra.com:80/view/news/28821/Super_Mario_Galaxy_2_Dominates_Charts_In_Japanese_Debut.php]
- ^ https://www.gamespot.com/articles/may-sales-rebound-led-by-red-dead-redemption-analyst/1100-6267067/
- ^ https://web.archive.org/web/20100712221657/http://www.gamasutra.com/view/news/29149/Lego_Harry_Potter_Years_14_Ends_Red_Deads_FiveWeek_Run_In_UK.php
- ^ https://web.archive.org/web/20100730014304/http://uk.gamespot.com/news/6269359.html
- ^ https://www.nintendo.co.jp/ir/pdf/2011/110426e.pdf#page=5
- ^ https://www.retromags.com/magazines/usa/nintendo-power/nintendo-power-issue-265/
- ^ https://web.archive.org/web/20120314091306/http://uk.bestof.ign.com/2010/wii/best-wii-game-of-the-year.html
- ^ https://web.archive.org/web/20101228175310/http://uk.gamespot.com/best-of-2010/platform-awards/index.html?page=4
- ^ https://archive.is/20130101174447/http://www.1up.com/features/1up-2010-game-year-awards
- ^ https://web.archive.org/web/20120309185253/http://www.officialnintendomagazine.co.uk/36238/super-mario-galaxy-2-is-onms-best-nintendo-game-of-all-time/
- ^ a b c A+Start (Mar 20, 2015)Super Mario Galaxy 2 Glitches - Son Of A Glitch - Episode 40 YouTube. Retrieved March 6, 2017.
- ^ Pottoww (Jul 5, 2014) Super Mario Galaxy 2 Glitch - How to Infinite Flutter using Yoshi (Explanation) YouTube. Retrieved March 6, 2017.
- ^ packattack04082 (Jun 20, 2010) Super Mario Galaxy 2 - Flip-Swap Galaxy - Think Before You Shake - 30.11 YouTube. Retrieved March 6, 2017
External links
- Official North American Website
- Official Mexican Website
- Official Japanese Website
- Official Oceanian Website
- Official European Website
- Wii's channel on Youtube - Super Mario Galaxy 2
- Official Chinese Website (Taiwan)
- Official Chinese Website (Hong Kong)
