Mario Kart 8 Deluxe: Difference between revisions
Tag: Mobile edit |
m (Text replacement - "([Cc])olor-link" to "$1olor link") |
||
| Line 1: | Line 1: | ||
{{ | {{italic title}} | ||
{{about|the Nintendo Switch port of the Mario Kart 8 game|the game's original version|[[Mario Kart 8]]}} | {{about|the [[Nintendo Switch]] [[Reissue#Ports|port]] of the Mario Kart 8 game|the game's original version|[[Mario Kart 8]]}} | ||
{{ | {{game infobox | ||
|title=Mario Kart 8 Deluxe | |title=Mario Kart 8 Deluxe | ||
|image=[[File:MK8 Deluxe - Box NA.png|250px]] | |image=[[File:MK8 Deluxe - Box NA.png|250px]] | ||
|developer=[[Nintendo Entertainment Planning and Development|Nintendo EPD]]<br>[[Bandai Namco Entertainment|BANDAI NAMCO Studios Inc.]] | |developer=[[Nintendo Entertainment Planning and Development|Nintendo EPD]]<br>[[Bandai Namco Entertainment|BANDAI NAMCO Studios Inc.]] | ||
|publisher=[[Nintendo]] | |publisher=[[Nintendo]]<br>Tencent Games (China) | ||
| | |release={{flag list|Japan|April 28, 2017|USA|April 28, 2017|Mexico|April 28, 2017<ref>{{cite|language=es-419|url=www.nintendo.com/es-mx/store/products/mario-kart-8-deluxe-switch|title=Mario Kart™ 8 Deluxe para la consola Nintendo Switch|publisher=Nintendo.com|accessdate=November 6, 2024}}</ref>|Europe|April 28, 2017|Australia|April 28, 2017|HK|April 28, 2017<ref>{{cite|url=www.nintendo.com.hk/software/switch|title=遊戲軟體一覽 {{!}} 任天堂(香港)有限公司網站|publisher=Nintendo of HK|language=zh-hant|accessdate=November 6, 2024}}</ref>|Singapore|April 28, 2017<ref>{{cite|author=|date=|url=www.nintendo.com/sg/switch/aabp/products/soft.html|title=Mario Kart 8 Deluxe: Product Information|publisher=Nintendo of Singapore|language=en|archive=web.archive.org/web/20240213081537/https://www.nintendo.com/sg/switch/aabp/products/soft.html|accessdate=June 1, 2024}}</ref>|South Korea|December 15, 2017<ref>{{cite|deadlink=y|archive=web.archive.org/web/20170920035442/http://www.nintendo.co.kr/PR/press_list.php?cPage1=1&cPage2=1&idx=274&press_div=P|title=한국닌텐도 홈페이지|language=ko|publisher=Nintendo of Korea|accessdate=November 6, 2024}}</ref>|ROC|December 15, 2017<ref>{{cite|language=zh-hant|url=www.nintendo.tw/pressrelease/switch_20170920.html|title=任天堂(香港)有限公司|publisher=Nintendo of Taiwan|accessdate=November 6, 2024}}</ref>|China|March 16, 2020<ref>{{cite|url=www.nintendoswitch.com.cn/topics/6ff1f459-9281-4706-b7f8-52bab6f45d21|date=March 13, 2020|language=zh-hans|title=《马力欧卡丁车8 豪华版》《超级马力欧 奥德赛》将于3月16日发售 - 腾讯Nintendo Switch官网|publisher=Tencent|accessdate=November 6, 2024}}</ref>}} | ||
|genre=[[ | |languages={{languages|en_us=y|en_gb=y|fr_fr=y|fr_ca=y|es_es=y|es_latam=y|de=y|it=y|nl=y|ru=y|pt_pt=y|jp=y|kr=y|zh_simp=y|zh_trad=y|zh_simp_note={{footnote|main|SC}}}}{{footnote|note|SC|The global and domestic versions have slightly different localizations.}} | ||
|modes=Single Player, Multiplayer, Online Play, Wireless Play | |genre=[[Genre#Racing|Racing]] | ||
|ratings={{ratings|esrb=E|pegi=3|acb=g|cero=A|usk=0| | |modes=Single Player, Multiplayer, Online Play, Wireless Play, LAN Play | ||
|ratings={{ratings|esrb=E|pegi=3|acb=g|cero=A|usk=0|classind=l|smeccv=A|rars=0+|grac=all|cadpa=8+|gsrr=p|fpb=pg|gcam=3|nmc=3}} | |||
|platforms=[[Nintendo Switch]] | |platforms=[[Nintendo Switch]] | ||
| | |format={{format|switch=1|switchdl=1}} | ||
|input={{input|joy-con=1| | |input={{input|joy-con=1|joy-con-horizontal=1|switchpro=1}} | ||
|serials={{flag list|USA|HAC-P-AABPA-USA|Europe|LA-H-AABPA-EUR}} | |||
}} | }} | ||
'''''Mario Kart 8 Deluxe''''' is a [[Genre#Racing|racing]] game in the ''[[Mario Kart (series)|Mario Kart]]'' series released worldwide for the [[Nintendo Switch]] on April 28, 2017. It is an enhanced [[Reissue#Ports|port]] of ''[[Mario Kart 8]]'' for the [[Wii U]] and is the first ''[[Super Mario (franchise)|Super Mario]]'' game overall to be released for the Nintendo Switch. The base game contains additional content such as several new characters and an overhauled [[Battle Mode]] with new courses and modes. First teased in the Nintendo Switch's announcement video on October 20, 2016, the game was formally announced as part of the Nintendo Switch presentation on January 13, 2017. | |||
'' | Throughout 2022 and 2023, new race courses and returning characters were added to the game via the ''[[Mario Kart 8 Deluxe – Booster Course Pass]]'' paid DLC. An edition of the game that has the ''Booster Course Pass'' activated from the start, titled the '''''Mario Kart 8 Deluxe Bundle (Game + Booster Course Pass)''''', is available for purchase digitally.<ref>{{cite|language=en-us|url=www.nintendo.com/us/store/products/mario-kart-8-deluxe-bundle-game-plus-booster-course-pass-switch|title=Mario Kart™ 8 Deluxe Bundle (Game + Booster Course Pass)|publisher=nintendo.com|accessdate=January 31, 2023|archive=web.archive.org/web/20230128063850/https://www.nintendo.com/store/products/mario-kart-8-deluxe-bundle-game-plus-booster-course-pass-switch}}</ref> | ||
==Controls== | ==Controls== | ||
===Dual Joy-Con / Pro Controller=== | ===Dual Joy-Con / Pro Controller=== | ||
{|class="wikitable sortable | |||
|- | |||
!Action | |||
!Dual Joy-Con | |||
!Pro Controller | |||
!Motion | |||
|- | |||
|style="text-align:center"|Steer | |||
== | |style="text-align:center"|{{button|switch|leftstick}} / {{button|switch|leftright}} | ||
|style="text-align:center"|{{button|switch|leftstick}} / {{button|switch|padleftright}} | |||
|style="text-align:center"|Tilt {{button|switch|joy-con}} / {{button|switch|pro}} | |||
|- | |||
|style="text-align:center"|Accelerate / [[Rocket Start]] (press and hold when the countdown hits 2) | |||
|style="text-align:center"colspan=3|{{button|switch|A}} / {{button|switch|Y}} / {{button|switch|rightstick}}↑ | |||
|- | |||
|style="text-align:center"|Brake / Reverse | |||
|style="text-align:center"colspan=3|{{button|switch|B}} / {{button|switch|rightstick}}↓ | |||
|- | |||
|style="text-align:center"|Item / Horn | |||
|style="text-align:center"colspan=3|{{button|switch|L}} / {{button|switch|ZL}} | |||
|- | |||
|style="text-align:center"|Drift / Hop / Trick | |||
|style="text-align:center"colspan=3|{{button|switch|R}} / {{button|switch|ZR}} | |||
|- | |||
|style="text-align:center"|Rear view | |||
|style="text-align:center" colspan=3|{{button|switch|X}} | |||
|} | |||
===Joy-Con (sideways)=== | ===Joy-Con (sideways)=== | ||
*{{button| | *{{button|switch|Stick}} or tilt {{button|switch|joy-con-sideways}}: Steer | ||
*{{button| | *{{button|switch|jc-right}} or {{button|switch|jc-left}}: Accelerate / [[Rocket Start]] (press and hold when the countdown hits 2) | ||
*{{button| | *{{button|switch|jc-bottom}}: Brake/reverse | ||
*{{button| | *{{button|switch|SL}}: Use horn/item | ||
*{{button| | *{{button|switch|SR}}: Hop/drift/trick | ||
*{{button| | *{{button|switch|Stick}} or tilt + {{button|switch|jc-right}} or {{button|switch|jc-left}} or auto-accelerate + {{button|switch|SR}}: Drift | ||
*{{button| | *{{button|switch|jc-top}}: Rear view | ||
===Toy-Con Motorbike=== | ===Toy-Con Motorbike=== | ||
*Tilt: Steer | *Tilt: Steer | ||
*{{button| | *{{button|switch|joy-con-r}} Forward tilt: Accelerate / [[Rocket Start]] (press and hold when the countdown hits 2) | ||
*{{button| | *{{button|switch|A}}: Brake / reverse | ||
*{{button| | *{{button|switch|ZL}}: Use horn/item | ||
*{{button| | *{{button|switch|R}}: Hop / trick | ||
*Tilt + {{button| | *Tilt + {{button|switch|joy-con-r}} forward tilt or auto-accelerate + {{button|switch|R}}: Drift | ||
*{{button| | *{{button|switch|left}}: Switch view | ||
===Toy-Con Car=== | ===Toy-Con Car=== | ||
*Tilt: Steer | *Tilt: Steer | ||
*Pedal half press | *Pedal half press: Accelerate / [[Rocket Start]] (press and hold when the countdown hits 2) | ||
*{{button| | *{{button|switch|R}}: Use horn/item | ||
*Pedal full press: Hop / trick | *Pedal full press: Hop / trick | ||
*Tilt + pedal full press: Drift | *Tilt + pedal full press: Drift | ||
*{{button| | *{{button|switch|X}}: Switch view | ||
==Differences from the original== | ==Differences from the original== | ||
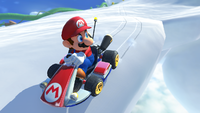
[[File:MK8D Mario Using Smart Steering.png|thumb|left|Mario driving with | [[File:MK8D Mario Using Smart Steering.png|thumb|left|Mario driving with Smart Steering activated, indicated by the antenna at the back of the kart]] | ||
The game features most of the base and DLC content of ''Mario Kart 8''. | The game features most of the base and DLC content of ''Mario Kart 8''. Characters that were originally unlockable or exclusive to downloadable content in ''Mario Kart 8'' are available from the start in this game, making for the largest starting roster of any ''Mario Kart'' game. | ||
The overall game difficulty has been reduced, as CPUs slow down closer to the player compared to the original version and do not charge Mini Turbos or Super Mini Turbos as quickly. The default speed of the CPUs in the Normal and Easy difficulties is also reduced. | |||
All courses that feature confetti flying around the [[Finish line (object)|finish line]], such as [[Mario Circuit (Mario Kart 8)|Mario Circuit]], now also have confetti on the ground of the course near it.<ref>{{cite|url=www.youtube.com/watch?v=9F2djsuZuTg&t=230s|language=en|timestamp=03:50|title=Luigi Wins by Doing Absolutely Nothing - Mario Kart 8 Deluxe|publisher=YouTube|accessdate=November 6, 2024|author=GameXplain|date=April 21, 2017}}</ref> | |||
When using the rearview mirror, the character will now move their eyes slightly to the left to look back, like in ''[[Mario Kart Wii]]''; however, their eyes will stay looking to the left as long as the rearview is active, rather than switching back after a second as they do in ''Mario Kart Wii''. | |||
When playing with teams, flags colored to correspond to the teams are added behind the vehicles. If Smart Steering is on, then the Smart Steering antenna serves as the pole of the flag. These flags do not appear in Balloon Battle and Bob-omb Blast, as the colors of the balloons represent the teams in these modes. | |||
===Gameplay=== | |||
*When playing with the map enabled in local splitscreen multiplayer, there will only be one map in the center of the screen, rather than each player having their own copy of the map like in the Wii U version and ''[[Mario Kart 64]]''. | |||
*Introduces Smart Steering and Auto-Accelerate for beginners; the former makes staying on the track easier by automatically steering the vehicle away from edges on the track, while the latter makes the vehicle automatically accelerate (though this is not available in Battle Mode). If the Smart Steering mode is on, the player's vehicle will have a black antenna sticking out of its rear end; this antenna blinks yellow and bends when Smart Steering is in effect. Smart Steering and Auto-Accelerate can be toggled on and off individually for each player in the vehicle part selection menu and in the pause menu. | |||
*There is an additional level of [[Mini-Turbo]], called Ultra Mini-Turbo, denoted by purple sparks (referred to as pink in the British English version) that appear after the orange sparks. This new level of Mini-Turbo can only be used if Smart Steering is off. | |||
*In a race, the 1st place player no longer has a crown on their map icon, though they still do in battles. | |||
===Game modes=== | |||
*200cc engine class for Time Trials has been added (separately recorded from the 150cc Time Trials). | |||
*Offline "VS Race" now requires a minimum of four races per cup instead of three. Additionally, the versus race menu was entirely redesigned. | |||
===Items=== | |||
*Characters can now carry up to two items at once, even if they do not equip the first item, and the game features the return of the [[Item Box#Mario Kart 8 / Mario Kart 8 Deluxe|Double Item Box]] from ''[[Mario Kart: Double Dash!!]]''. | |||
*[[Red Shell]]s and [[Spiny Shell (blue)|Spiny Shell]]s are now slower when they lock onto their target, meaning players are able to outrun them in 200cc when they have any kind of speed boost. | |||
*If a [[Blooper]] is about to ink the player as they cross the finish line, the player will now still get inked.<ref>{{cite|language=en|author=Nintendo World Report TV|date=January 14, 2017|url=www.youtube.com/watch?v=iaPqoUWLpMc&t=195s|title=Mario Kart 8 Deluxe - Wario's Gold Mine - Nintendo Switch Off-Screen Footage|publisher=YouTube|accessdate=November 6, 2024}}</ref> This is unlike the Wii U version, where the Blooper or the ink disappeared instead. Characters also no longer vocally react when they are inked by a Blooper. | |||
*CPU players now have a chance to obtain [[Triple Red Shells]] from [[Item Box]]es, but this primarily only happens in the Shells Only item setting. | |||
*When a [[Bob-omb]] or Spiny Shell explodes, its explosion is now shown on the course map. | |||
[[ | ===Online=== | ||
*Since the service went live, playing online now requires a subscription to [[Nintendo Switch Online]], rather than being tied to [[Nintendo Network]] as with the original release. | |||
*Online lobbies have been changed in that players playing Worldwide or Regional VS Races between 1000 VR and 3000 VR will be randomized either a 100cc or 150cc race, and starting at over 3000 VR, players will now be randomized a 150cc, Mirror, or 200cc race. | |||
*The engine class for the upcoming race in a race lobby is now shown in the lobby as the course is selected, via a "50", "100", "150", mirrored "150" (for Mirror), or "200" icon in the bottom right of the selected course icon. This extends to online battle lobbies, which will display a symbol of a yellow balloon (for Balloon Battle), a [[Potted Piranha Plant|potted Piranha Plant]] (for Renegade Roundup), a [[coin]] (for Coin Runners), a [[Shine Sprite]] (for Shine Thief), or a [[Bob-omb]] (for Bob-omb Blast) to denote which battle mode is about to be played. | |||
*There is now an option to change character and vehicle combinations in an online lobby without having to leave; this is done by pressing {{button|switch|jc-left}} during the course selection of an online lobby. | |||
*The [[Mii]] characters that represent the players in online lobbies wear racing suits, unlike in the original version in which they wore their regular outfits. | |||
*The Mii of the previous race or battle's winner will also wear a [[crown]] identical to the one worn by the first-place player in Battle Mode. | |||
*The newly added wireless and LAN modes use a very similar lobby to the online lobby, albeit visually set in a garage rather than on a [[Earth|globe]]. | |||
*Players can now see the lap count or timer when spectating an online race or battle respectively. However, it is no longer possible to see the lap count when crossing the finish line nor the full results in multiplayer (including online lobbies) at the end of the race while watching Highlight Reels via [[Mario Kart TV]]. | |||
===HUD / Graphical interface=== | |||
*The user interface on the title screen has been almost entirely redesigned, being more simple than the Wii U game. | |||
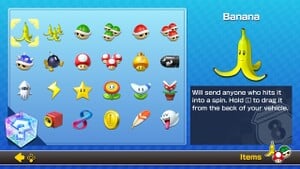
*The game features an in-game guide, directly accessible from the game's menu; this guide explains various techniques, Battle Mode, and the functions of each item. Much of its text is reused from the Wii U version's electronic manual. | |||
*The course map color for the race courses is now white instead of blue, including the maps of the [[Rainbow Road]]s and {{classic link|GCN|Baby Park}}, which originally had multiple colors. However, the battle courses have color-shaded areas and lines on their maps that make it easier for players to determine where they are. | |||
*The character icons on the course map are now slightly larger, more detailed, and of a higher resolution. | |||
*[[Inkling|Inkling Girl]], [[Isabelle]], and [[Link]] now appear on the loading screen, and the game also has reduced loading times when compared to the Wii U game; as a result, the second set of characters that originally appeared on the loading screen is rarely seen before the game finishes loading. | |||
===Removed features=== | |||
*Being able to see which items the other drivers have, which was only possible when playing with the Wii U GamePad in the original, has now been removed entirely. | |||
*[[Miiverse]] compatibility is absent, including [[stamp]]s and the ability to upload [[Highlight Reel]]s on YouTube; these features were also discontinued in the Wii U version when Miiverse was terminated on November 7, 2017. | |||
*An exploit in the original version that allowed players to gain speed by [[Hop (move)|hopping]] after speed boosting has been fixed. | |||
===Technical aspects=== | |||
*The game now mostly renders in native 1920x1080 resolution in TV mode (sometimes switching to native 1728x972), and always renders at native 1280x720 resolution in Tabletop and Handheld Mode, instead of the dynamic 1280x720/1152x648 rendering resolution used in the original Wii U version. | |||
*Motion blur when boosting is present in LAN and online mode, and in earlier builds, it was also present in splitscreen multiplayer.<ref>{{file link|MK8D 4-Player Gameplay Screenshot.png|Screenshot of the starting boost in a four-player split-screen VS Race}}.</ref> | |||
*The shadows present in the game are of higher quality in multiplayer. | |||
*The game supports 5.1 surround. Effects that can play on the rear speakers include approaching shells, certain vehicles' engines, sceneries (e.g. bats, falling rocks, water, helicopters), and if other drivers are immediately to the side. Background music, Lakitu's countdowns, and menu sounds are mixed to stereo only. Some surround receiver producers' models may default to Standard modes that water out the effect (e.g. playing background music via side speakers), necessitating switching them to Straight/Direct or upmixing modes. | |||
==Battle Mode== | ==Battle Mode== | ||
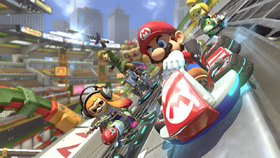
[[File:MK8D Isabelle Inkling and Link.png|left|thumb|upright=1.4|Inkling Girl, [[Link]], Mario, and [[Isabelle]] in Battle Stadium.]] | [[File:MK8D Isabelle Inkling and Link.png|left|thumb|upright=1.4|Inkling Girl, [[Link]], Mario, and [[Isabelle]] in Battle Stadium.]] | ||
The biggest change made between ''Mario Kart 8 Deluxe'' and the original release of ''Mario Kart 8'' is the [[Battle Mode]]. Battle Mode now returns to the arena-based battle and unlike previous games, each player starts with five balloons, as opposed to three. Another addition to Battle Mode is that the character in the lead now wears a crown, unlike in ''Mario Kart 8'' where the crown is displayed only on the HUD map. Additionally, players now start out with zero points instead of ''Mario Kart 8'' | The biggest change made between ''Mario Kart 8 Deluxe'' and the original release of ''Mario Kart 8'' is the [[Battle Mode]]. Battle Mode now returns to the arena-based battle (replacing all eight Battle Mode race tracks from ''Mario Kart 8'') and unlike previous games, each player starts with five balloons, as opposed to three. Another addition to Battle Mode is that the character in the lead now wears a crown, unlike in ''Mario Kart 8'' where the crown is displayed only on the HUD map. Additionally, players now start out with zero points instead of ''Mario Kart 8''{{'}}s default three points, and their balloons do not serve as the remaining three points. | ||
Returning from ''[[Mario Kart Wii]]'' and ''[[Mario Kart 7]]'' is the ability to respawn after all balloons are popped; this causes the player's total score to halve and the player respawns with three balloons instead of five. A new addition to this mode is the feature to tell exactly which character hit whom, which appears on the bottom of the screen. Furthermore, after getting hit, players now have about 1.5 seconds of invincibility frames, unlike in ''Mario Kart 8''. The item options also appear to have been updated; alongside the "Frantic Items" option, which chooses powerful items more frequently, a "Skilled Items" option is also available for selection; in this option, powerful items appear less frequently, similar to ''Mario Kart Wii''{{'}}s "Strategic" ("Basic" in the British English version) item option. | |||
{{br}} | {{br}} | ||
There are five different Battle Mode types: | There are five different Battle Mode types: | ||
*'''Balloon Battle''': The classic mode where players use items to pop opponents' balloons or steal them in order to score points. This mode now uses the point-based set-up seen in ''Mario Kart Wii'', and ''Mario Kart 7'', rather than the survival set-up of ''Mario Kart 8'' and earlier installments prior to ''Mario Kart Wii''. | *'''Balloon Battle''': The classic mode where players use items to pop opponents' balloons or steal them in order to score points. This mode now uses the point-based set-up seen in ''Mario Kart Wii'', and ''Mario Kart 7'', rather than the survival set-up of ''Mario Kart 8'' and earlier installments prior to ''Mario Kart Wii''. | ||
*'''Renegade Roundup''': A new mode in the vein of "{{wp|Tag (game)|cops and robbers}}", with the racers being divided into two teams. One team, known as "The Authorities", has to use [[Potted Piranha Plant|Piranha Plant]] items (which are permanently attached to the front of their vehicle and only serve to capture the opposing team; they do not operate like the regular item) in order to capture players from the other team, known as "The Renegades". Captured Renegades are placed into one of several jail cells floating above various points on the stage. Remaining Renegades can free their teammates by driving over a key switch placed below the jail cells. The Renegades win if at least one member is still running free when time runs out, and the Authorities win if all of the Renegades get captured. All Authority team members also temporarily lose their ability to capture after being hit by an item and Renegades receive a speed boost and temporary immunity when they are freed from the cells. | |||
*'''Renegade Roundup''': A new mode in the vein of "cops and robbers", with the racers being divided into two teams. One team, known as "The Authorities", has to use [[Piranha Plant | *'''Bob-omb Blast''': A returning mode from ''Mario Kart: Double Dash!!'', in which players attack one another using [[Bob-omb]]s to score points and can carry up to 10 Bob-ombs. This version follows nearly all of the same rules as Balloon Battle, the differences being these: the only items are Bob-ombs, players cannot be hurt by their own Bob-ombs exploding, and Bob-ombs thrown forward explode instantly. | ||
*'''Bob-omb Blast''': A returning mode from ''Mario Kart: Double Dash!!'', in which players attack one another using [[Bob-omb]]s to score points and can carry up to 10 Bob-ombs. This version follows all of the same rules as Balloon Battle, the | |||
*'''Coin Runners''': Originating in ''Mario Kart Wii'', this mode was last seen in ''Mario Kart 7''. Players must collect [[Coin]]s scattered across the course in order to have the most by the end of the match. Plays more akin to the ''Mario Kart Wii'' version of the mode, with players having no limit to the amount of coins they can collect, as opposed to the 10-coin limit in the ''Mario Kart 7'' version. | *'''Coin Runners''': Originating in ''Mario Kart Wii'', this mode was last seen in ''Mario Kart 7''. Players must collect [[Coin]]s scattered across the course in order to have the most by the end of the match. Plays more akin to the ''Mario Kart Wii'' version of the mode, with players having no limit to the amount of coins they can collect, as opposed to the 10-coin limit in the ''Mario Kart 7'' version. | ||
*'''Shine Thief''': Another returning mode from ''Mario Kart: Double Dash!!'', one player must retrieve a [[Shine Sprite]] and keep hold of it for about 20 seconds, while the opponents use items against whoever has the Shine to force that player to drop it. The driver holding the shine sprite has a slightly reduced top speed. In Team play, one team must collectively manage to hold on to the Shine for about 30 seconds. | *'''Shine Thief''': Another returning mode from ''Mario Kart: Double Dash!!'', one player must retrieve a [[Shine Sprite]] and keep hold of it for about 20 seconds, while the opponents use items against whoever has the Shine to force that player to drop it. The driver holding the shine sprite has a slightly reduced top speed. In Team play, one team must collectively manage to hold on to the Shine for about 30 seconds. | ||
There is also the option to randomly select one of the five available modes by choosing "Random Battle". | There is also the option to randomly select one of the five available modes by choosing "Random Battle". | ||
== | ==Characters== | ||
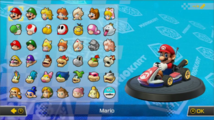
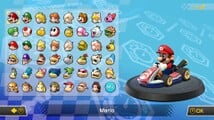
Excluding character variants, there are a total of 48 playable characters in ''Mario Kart 8 Deluxe'', including 40 in the base game and eight as DLC. All base and DLC characters from ''Mario Kart 8'' are present in the base roster of ''Mario Kart 8 Deluxe'' and are now available from the start, while more characters that were not present in ''Mario Kart 8'' are also added. The base game includes returning characters [[Bowser Jr.]], [[King Boo]], and [[Dry Bones]], who last appeared in the series as playable characters in ''[[Mario Kart Wii]]'', and [[Gold Mario]] (as a variant of [[Metal Mario]]), who was previously playable in ''[[Mario Kart Arcade GP DX]]''. It also introduces a new non-''Super Mario'' character, being the [[Inkling]] from ''{{iw|inkipedia|Splatoon}}''. Both the Inkling Girl and Inkling Boy are playable, and they have three selectable colors each. At the game's launch, Inkling Girl and Inkling Boy took up separate slots on the character selection screen, as did the two Villagers, who were originally present in the same character slot (with the female Villager being a variant of the male one) in ''Mario Kart 8''. However, as of the version 3.0.0 update, Inkling Boy and female Villager are now considered variants of Inkling Girl and male Villager respectively.<ref name=news>{{cite|url=www.nintendo.com/jp/topics/article/ad54329a-2ddc-436d-8e96-43139628e6c3|title=『マリオカート8 デラックス コース追加パス』最後の第6弾は11月9日配信決定。新キャラクターや「ミュージック」機能なども追加。|publisher=Nintendo of Japan|language=ja|author=Nintendo|date=November 1, 2024|accessdate=November 6, 2024}}</ref> | |||
Eight additional characters were added as downloadable content via the ''[[Mario Kart 8 Deluxe – Booster Course Pass|Booster Course Pass]]'', starting with its fourth wave. Characters added include [[Birdo]], who was added in Wave 4 with nine selectable colors, [[Petey Piranha]], [[Wiggler]], and [[Kamek]], who were added in Wave 5, and [[Diddy Kong]], [[Funky Kong]], [[Pauline]], and [[Peachette]], who were added in Wave 6.<ref>{{cite|url=www.youtube.com/watch?v=BiJ7IoeuhXE|title=Mario Kart 8 Deluxe - Booster Course Pass Wave 6 - Nintendo Switch 9.14.2023|language=en-us|author=Nintendo of America|publisher=YouTube|accessdate=November 6, 2024|date=September 14, 2023}}</ref> Wiggler, Gold Mario, Kamek, Pauline, Peachette, and all Birdo variants are playable for the first time in a home console ''Mario Kart'' installment. Kamek, Pauline, Peachette, and almost all Birdo variants were originally introduced in ''[[Mario Kart Tour]]'', which released after ''Mario Kart 8 Deluxe''. With Birdo's inclusion in Wave 4 and Diddy Kong and Funky Kong's inclusion in Wave 6, all playable characters from ''Mario Kart Wii'' are now included in ''Mario Kart 8 Deluxe''. | |||
| | |||
There is only one unlockable character in this game, that being Gold Mario. He is unlocked by clearing all cups of the 200cc Grand Prix. Additionally, the version 1.6.0 update added a new variant for [[Link]], Champion's Tunic Link,<ref name=ChampionLink>{{cite|language=en-us|author=@NintendoAmerica|date=July 20, 2018|url=x.com/NintendoAmerica/status/1020112660778561536|title=A new update to #MarioKart 8 Deluxe is available now for #NintendoSwitch! Race like a champion with the Master Cycle Zero and Champion’s Tunic Link from The Legend of #Zelda: Breath of the Wild! This update also includes the Ancient Tires and the Paraglider parts!|publisher=X|accessdate=September 12, 2023}}</ref> based on his appearance in ''{{iw|zeldawiki|The Legend of Zelda: Breath of the Wild}}''. When Gold Mario is unlocked and Champion's Tunic Link is downloaded, they become the default variations of their character, while Metal Mario and the version of Link based on his appearance in ''{{iw|zeldawiki|The Legend of Zelda: Skyward Sword}}'' are relegated to alternate costumes. As of the 3.0.0 update, however, the character select screen now remembers the last costume used for characters with alternate costumes. | |||
| | |||
| | |||
| | |||
| | |||
| | |||
}} | |||
There are more individual character weight classes when compared to the Wii U game, with several returning characters having different statistics, thus resulting in fewer characters having the same stats as each other. | |||
Characters, variants, and Mii Racing Suits playable in this game that are not playable in the original ''Mario Kart 8'' are listed in ''italics''. | |||
<center> | |||
<gallery widths=250px> | |||
MK8DX Character Roster.png|Character select screen at launch | |||
MK8DXGoldMarioDLCRoster.jpg|Character select screen with [[Gold Mario]] unlocked and all DLC characters downloaded | |||
MK8DX | |||
</gallery> | </gallery> | ||
{ | {|class="wikitable"style="width:85%" | ||
|- | |- | ||
!colspan="8" | !colspan=2 width=11% style="background:#EAECF0"|[[File:MK8 Mario Emblem.png|center|30px]] {{color link|black|Mario}} | ||
!colspan=2 width=11% style="background:#EAECF0"|[[File:MK8 Luigi Emblem.png|center|30px]] {{color link|black|Luigi}} | |||
!colspan=2 width=11% style="background:#EAECF0"|[[File:MK8 Peach Emblem.png|center|30px]] {{color link|black|Princess Peach|Peach}} | |||
!colspan=2 width=11% style="background:#EAECF0"|[[File:MK8 Daisy Emblem.png|center|30px]] {{color link|black|Princess Daisy|Daisy}} | |||
!colspan=2 width=11% style="background:#EAECF0"|[[File:MK8 Rosalina Emblem.png|center|30px]] {{color link|black|Rosalina}} | |||
!colspan=2 width=11% style="background:#EAECF0"|[[File:MK8 Tanooki Mario Emblem.png|center|30px]] {{color link|black|Tanooki Mario}} | |||
!colspan=2 width=11% style="background:#EAECF0"|[[File:MK8 Cat Peach Emblem.png|center|30px]] {{color link|black|Cat Mario|Cat Peach}} | |||
!colspan=2 width=11% style="background:#EAECF0"|[[File:MK8D Birdo Emblem.png|center|30px]] ''{{color link|black|Birdo}}'' <small>[[Mario Kart 8 Deluxe – Booster Course Pass#Wave 4|DLC, Wave 4]]</small> | |||
|-align="center"style="background:#FFFFFF" | |||
|colspan=2|[[File:MK8 Mario Icon.png|70px]] | |||
|colspan=2|[[File:MK8 Luigi Icon.png|70px]] | |||
|colspan=2|[[File:MK8 Peach Icon.png|70px]] | |||
|colspan=2|[[File:MK8 Daisy Icon.png|70px]] | |||
|colspan=2|[[File:MK8 Rosalina Icon.png|70px]] | |||
|colspan=2|[[File:MK8 Tanooki Mario Icon.png|70px]] | |||
|colspan=2|[[File:MK8 Cat Peach Icon.png|70px]] | |||
|colspan=2|[[File:MK8D Birdo Icon.png|70px]] | |||
|- | |- | ||
! | !colspan=2 width=11% style="background:#EAECF0"|[[File:MK8 Green Yoshi Emblem.png|center|30px]] {{color link|black|Yoshi}} | ||
! | !colspan=2 width=11% style="background:#EAECF0"|[[File:MK8 Toad Emblem.png|center|30px]] {{color link|black|Toad}} | ||
! | !colspan=2 width=11% style="background:#EAECF0"|[[File:MK8 Koopa Troopa Emblem.png|center|30px]] {{color link|black|Koopa Troopa}} | ||
! | !colspan=2 width=11% style="background:#EAECF0"|[[File:MK8 Shy Guy Emblem.png|center|30px]] {{color link|black|Shy Guy}} | ||
! | !colspan=2 width=11% style="background:#EAECF0"|[[File:MK8 Lakitu Emblem.png|center|30px]] {{color link|black|Lakitu}} | ||
!colspan=2 width=11% style="background:#EAECF0"|[[File:MK8 Toadette Emblem.png|center|30px]] {{color link|black|Toadette}} | |||
!colspan=2 width=11% style="background:#EAECF0"|[[File:MK8D King Boo Emblem.png|center|30px]] ''{{color link|black|King Boo}}'' | |||
!colspan=2 width=11% style="background:#EAECF0"|[[File:MK8D Petey Piranha Emblem.png|center|30px]] ''{{color link|black|Petey Piranha}}'' <small>[[Mario Kart 8 Deluxe – Booster Course Pass#Wave 5|DLC, Wave 5]]</small> | |||
|-align="center"style="background:#FFFFFF" | |||
|colspan=2|[[File:MK8 Yoshi Icon.png|70px]] | |||
|colspan=2|[[File:MK8 Toad Icon.png|70px]] | |||
|colspan=2|[[File:MK8 Koopa Icon.png|70px]] | |||
|colspan=2|[[File:MK8 ShyGuy Icon.png|70px]] | |||
|colspan=2|[[File:MK8 Lakitu Icon.png|70px]] | |||
|colspan=2|[[File:MK8 Toadette Icon.png|70px]] | |||
|colspan=2|[[File:MK8DX King Boo Icon.png|70px]] | |||
|colspan=2|[[File:MK8DX Petey Piranha Icon.png|70px]] | |||
|- | |- | ||
![[File:MK8 Mario | !colspan=2 width=11% style="background:#EAECF0"|[[File:MK8 Baby Mario Emblem.png|center|30px]] {{color link|black|Baby Mario}} | ||
![[File:MK8 | !colspan=2 width=11% style="background:#EAECF0"|[[File:MK8 Baby Luigi Emblem.png|center|30px]] {{color link|black|Baby Luigi}} | ||
!colspan=2 width=11% style="background:#EAECF0"|[[File:MK8 Baby Peach Emblem.png|center|30px]] {{color link|black|Baby Peach}} | |||
!colspan=2 width=11% style="background:#EAECF0"|[[File:MK8 Baby Daisy Emblem.png|center|30px]] {{color link|black|Baby Daisy}} | |||
!colspan=2 width=11% style="background:#EAECF0"|[[File:MK8 Baby Rosalina Emblem.png|center|30px]] {{color link|black|Baby Rosalina}} | |||
!colspan=2 width=11% style="background:#EAECF0"|[[File:MK8 Metal Mario Emblem.png|center|30px]] {{color link|black|Metal Mario}} | |||
!colspan=2 width=11% style="background:#EAECF0"|[[File:MK8 Pink Gold Peach Emblem.png|center|30px]] {{color link|black|Pink Gold Peach}} | |||
!colspan=2 width=11% style="background:#EAECF0"|[[File:MK8D Wiggler Emblem.png|center|30px]] ''{{color link|black|Wiggler}}'' <small>[[Mario Kart 8 Deluxe – Booster Course Pass#Wave 5|DLC, Wave 5]]</small> | |||
|-align="center"style="background:#FFFFFF" | |||
|colspan=2|[[File:MK8 BabyMario Icon.png|70px]] | |||
|colspan=2|[[File:MK8 BabyLuigi Icon.png|70px]] | |||
|colspan=2|[[File:MK8 BabyPeach Icon.png|70px]] | |||
|colspan=2|[[File:MK8 BabyDaisy Icon.png|70px]] | |||
|colspan=2|[[File:MK8 BabyRosalina Icon.png|70px]] | |||
|colspan=2|[[File:MK8 MMario Icon.png|70px]] | |||
|colspan=2|[[File:MK8 PGPeach Icon.png|70px]] | |||
|colspan=2|[[File:MK8DX Wiggler Icon.png|70px]] | |||
|- | |- | ||
![[File:MK8 | !colspan=2 width=11% style="background:#EAECF0"|[[File:MK8 Wario Emblem.png|center|30px]] {{color link|black|Wario}} | ||
![[File:MK8 | !colspan=2 width=11% style="background:#EAECF0"|[[File:MK8 Waluigi Emblem.png|center|30px]] {{color link|black|Waluigi}} | ||
!colspan=2 width=11% style="background:#EAECF0"|[[File:MK8 Donkey Kong Emblem.png|center|30px]] {{color link|black|Donkey Kong}} | |||
!colspan=2 width=11% style="background:#EAECF0"|[[File:MK8 Bowser Emblem.png|center|30px]] {{color link|black|Bowser}} | |||
!colspan=2 width=11% style="background:#EAECF0"|[[File:MK8D Dry Bones Emblem.png|center|30px]] ''{{color link|black|Dry Bones}}'' | |||
!colspan=2 width=11% style="background:#EAECF0"|[[File:MK8D Bowser Jr Emblem.png|center|30px]] ''{{color link|black|Bowser Jr.}}'' | |||
!colspan=2 width=11% style="background:#EAECF0"|[[File:MK8 Dry Bowser Emblem.png|center|30px]] {{color link|black|Dry Bowser}} | |||
!colspan=2 width=11% style="background:#EAECF0"|[[File:MK8D Kamek Emblem.png|center|30px]] ''{{color link|black|Kamek}}'' <small>[[Mario Kart 8 Deluxe – Booster Course Pass#Wave 5|DLC, Wave 5]]</small> | |||
|-align="center"style="background:#FFFFFF" | |||
|colspan=2|[[File:MK8 Wario Icon.png|70px]] | |||
|colspan=2|[[File:MK8 Waluigi Icon.png|70px]] | |||
|colspan=2|[[File:MK8 DKong Icon.png|70px]] | |||
|colspan=2|[[File:MK8 Bowser Icon.png|70px]] | |||
|colspan=2|[[File:MK8DX Dry Bones Icon.png|70px]] | |||
|colspan=2|[[File:MK8 Bowser Jr Icon.png|70px]] | |||
|colspan=2|[[File:MK8 Dry Bowser Icon.png|70px]] | |||
|colspan=2|[[File:MK8DX Kamek Icon.png|70px]] | |||
|- | |- | ||
![[File:MK8 | !colspan=2 width=11% style="background:#EAECF0"|[[File:MK8 Lemmy Emblem.png|center|30px]] {{color link|black|Lemmy Koopa|Lemmy}} | ||
![[File:MK8 | !colspan=2 width=11% style="background:#EAECF0"|[[File:MK8 Larry Emblem.png|center|30px]] {{color link|black|Larry Koopa|Larry}} | ||
!colspan=2 width=11% style="background:#EAECF0"|[[File:MK8 Wendy Emblem.png|center|30px]] {{color link|black|Wendy O. Koopa|Wendy}} | |||
!colspan=2 width=11% style="background:#EAECF0"|[[File:MK8 Ludwig Emblem.png|center|30px]] {{color link|black|Ludwig von Koopa|Ludwig}} | |||
!colspan=2 width=11% style="background:#EAECF0"|[[File:MK8 Iggy Emblem.png|center|30px]] {{color link|black|Iggy Koopa|Iggy}} | |||
!colspan=2 width=11% style="background:#EAECF0"|[[File:MK8 Roy Emblem.png|center|30px]] {{color link|black|Roy Koopa|Roy}} | |||
!colspan=2 width=11% style="background:#EAECF0"|[[File:MK8 Morton Jr Emblem.png|center|30px]] {{color link|black|Morton Koopa Jr.|Morton}} | |||
!colspan=2 width=11% style="background:#EAECF0"|[[File:MK8D Peachette Emblem.png|center|30px]] ''{{color link|black|Peachette}}'' <small>[[Mario Kart 8 Deluxe – Booster Course Pass#Wave 6|DLC, Wave 6]]</small> | |||
|-align="center"style="background:#FFFFFF" | |||
|colspan=2|[[File:MK8 Lemmy Icon.png|70px]] | |||
|colspan=2|[[File:MK8 Larry Icon.png|70px]] | |||
|colspan=2|[[File:MK8 Wendy Icon.png|70px]] | |||
|colspan=2|[[File:MK8 Ludwig Icon.png|70px]] | |||
|colspan=2|[[File:MK8 Iggy Icon.png|70px]] | |||
|colspan=2|[[File:MK8 Roy Icon.png|70px]] | |||
|colspan=2|[[File:MK8 Morton Icon.png|70px]] | |||
|colspan=2|[[File:MK8DX Peachette Icon.png|70px]] | |||
|- | |- | ||
![[File:MK8 | !colspan=2 width=11% style="background:#EAECF0"|[[File:MK8D Inkling Girl Emblem.png|center|30px]] ''{{color link|black|Inkling|Inkling Girl}}'' <sup>(new)</sup> | ||
![[File:MK8 | !colspan=2 width=11% style="background:#EAECF0"|[[File:MK8 Villager Emblem.png|center|30px]] {{color link|black|Villager}} | ||
![[File:MK8 | !colspan=2 width=11% style="background:#EAECF0"|[[File:MK8 Isabelle Emblem.png|center|30px]] {{color link|black|Isabelle}} | ||
!colspan=2 width=11% style="background:#EAECF0"|[[File:MK8D BotW Link Emblem.png|center|30px]] ''{{color link|black|Link}}'' | |||
!colspan=2 width=11% style="background:#EAECF0"|[[File:MK8D Diddy Kong Emblem.png|center|30px]] ''{{color link|black|Diddy Kong}}'' <small>[[Mario Kart 8 Deluxe – Booster Course Pass#Wave 6|DLC, Wave 6]]</small> | |||
!colspan=2 width=11% style="background:#EAECF0"|[[File:MK8D Funky Kong Emblem.png|center|30px]] ''{{color link|black|Funky Kong}}'' <small>[[Mario Kart 8 Deluxe – Booster Course Pass#Wave 6|DLC, Wave 6]]</small> | |||
!colspan=2 width=11% style="background:#EAECF0"|[[File:MK8D Pauline Emblem.png|center|30px]] ''{{color link|black|Pauline}}'' <small>[[Mario Kart 8 Deluxe – Booster Course Pass#Wave 6|DLC, Wave 6]]</small> | |||
!colspan=2 width=11% style="background:#EAECF0"|[[File:MK8 Mii Emblem.png|center|30px]] {{color link|black|Mii}} | |||
|-align="center"style="background:#FFFFFF" | |||
|colspan=2|[[File:MK8DX Female Inkling Icon.png|70px]] | |||
|colspan=2|[[File:VillagerMale-Icon-MK8.png|70px]] | |||
|colspan=2|[[File:MK8 Isabelle Icon.png|70px]] | |||
|colspan=2|[[File:MK8D BotW Link Icon.png|70px]] | |||
|colspan=2|[[File:MK8DX Diddy Kong Icon.png|70px]] | |||
|colspan=2|[[File:MK8DX Funky Kong Icon.png|70px]] | |||
|colspan=2|[[File:MK8DX Pauline Icon.png|70px]] | |||
|colspan=2|[[File:Mii MK8.png|70px]] | |||
|} | |||
</center> | |||
===Character variants=== | |||
With the exceptions of [[Link]] and the [[Villager]], the displayed name of the character changes based on the variant that is selected. From version 3.0.0 onwards, the last used variant will have their icon shown on the character selection screen. Unlike in ''Mario Kart 8'', the sub-menu for the two Villagers does not use a unique ''Animal Crossing''-inspired color scheme, instead using the same gray color as the others. | |||
<center> | |||
{|class="wikitable"style="width:85%" | |||
|- | |||
!colspan=2|Character | |||
!colspan=16|Variant(s) | |||
|-align="center"style="background:#FFFFFF" | |||
!colspan=2 width=8% style="background:#EAECF0"|[[File:MK8D Birdo Emblem.png|center|30px]] ''{{color link|black|Birdo}}'' <small>[[Mario Kart 8 Deluxe – Booster Course Pass#Wave 4|DLC, Wave 4]]</small> | |||
!colspan=2 width=8% style="background:#EAECF0"|[[File:MK8D Birdo Light Blue Emblem.png|center|30px]] ''{{color link|black|Birdo|Birdo (Light-Blue)}}'' | |||
!colspan=2 width=8% style="background:#EAECF0"|[[File:MK8D Birdo Black Emblem.png|center|30px]] ''{{color link|black|Birdo|Birdo (Black)}}'' | |||
!colspan=2 width=8% style="background:#EAECF0"|[[File:MK8D Birdo Red Emblem.png|center|30px]] ''{{color link|black|Birdo|Birdo (Red)}}'' <sup>(new)</sup> | |||
!colspan=2 width=8% style="background:#EAECF0"|[[File:MK8D Birdo Yellow Emblem.png|center|30px]] ''{{color link|black|Birdo|Birdo (Yellow)}}'' | |||
!colspan=2 width=8% style="background:#EAECF0"|[[File:MK8D Birdo White Emblem.png|center|30px]] ''{{color link|black|Birdo|Birdo (White)}}'' | |||
!colspan=2 width=8% style="background:#EAECF0"|[[File:MK8D Birdo Blue Emblem.png|center|30px]] ''{{color link|black|Birdo|Birdo (Blue)}}'' | |||
!colspan=2 width=8% style="background:#EAECF0"|[[File:MK8D Birdo Green Emblem.png|center|30px]] ''{{color link|black|Birdo|Birdo (Green)}}'' <sup>(new)</sup> | |||
!colspan=2 width=8% style="background:#EAECF0"|[[File:MK8D Birdo Orange Emblem.png|center|30px]] ''{{color link|black|Birdo|Birdo (Orange)}}'' | |||
|-align="center"style="background:#FFFFFF" | |||
|colspan=2|[[File:MK8D Birdo Icon.png|70px]] | |||
|colspan=2|[[File:MK8D Birdo Light-Blue Icon.png|70px]] | |||
|colspan=2|[[File:MK8D Birdo Black Icon.png|70px]] | |||
|colspan=2|[[File:MK8D Birdo Red Icon.png|70px]] | |||
|colspan=2|[[File:MK8D Birdo Yellow Icon.png|70px]] | |||
|colspan=2|[[File:MK8D Birdo White Icon.png|70px]] | |||
|colspan=2|[[File:MK8D Birdo Blue Icon.png|70px]] | |||
|colspan=2|[[File:MK8D Birdo Green Icon.png|70px]] | |||
|colspan=2|[[File:MK8D Birdo Orange Icon.png|70px]] | |||
|- | |||
!colspan=2 width=8% style="background:#EAECF0"|[[File:MK8 Green Yoshi Emblem.png|center|30px]] {{color link|black|Yoshi}} | |||
!colspan=2 width=8% style="background:#EAECF0"|[[File:MK8 Light-Blue Yoshi Emblem.png|center|30px]] {{color link|black|Yoshi (species)|Light-Blue Yoshi}} | |||
!colspan=2 width=8% style="background:#EAECF0"|[[File:MK8 Black Yoshi Emblem.png|center|30px]] {{color link|black|Yoshi (species)|Black Yoshi}} | |||
!colspan=2 width=8% style="background:#EAECF0"|[[File:MK8 Red Yoshi Emblem.png|center|30px]] {{color link|black|Yoshi (species)|Red Yoshi}} | |||
!colspan=2 width=8% style="background:#EAECF0"|[[File:MK8 Yellow Yoshi Emblem.png|center|30px]] {{color link|black|Yoshi (species)|Yellow Yoshi}} | |||
!colspan=2 width=8% style="background:#EAECF0"|[[File:MK8 White Yoshi Emblem.png|center|30px]] {{color link|black|Yoshi (species)|White Yoshi}} | |||
!colspan=2 width=8% style="background:#EAECF0"|[[File:MK8 Blue Yoshi Emblem.png|center|30px]] {{color link|black|Yoshi (species)|Blue Yoshi}} | |||
!colspan=2 width=8% style="background:#EAECF0"|[[File:MK8 Pink Yoshi Emblem.png|center|30px]] {{color link|black|Yoshi (species)|Pink Yoshi}} | |||
!colspan=2 width=8% style="background:#EAECF0"|[[File:MK8 Orange Yoshi Emblem.png|center|30px]] {{color link|black|Yoshi (species)|Orange Yoshi}} | |||
|-align="center"style="background:#FFFFFF" | |||
|colspan=2|[[File:MK8 Yoshi Icon.png|70px]] | |||
|colspan=2|[[File:MK8 Light-Blue Yoshi Icon.png|70px]] | |||
|colspan=2|[[File:MK8 Black Yoshi Icon.png|70px]] | |||
|colspan=2|[[File:MK8 Red Yoshi Icon.png|70px]] | |||
|colspan=2|[[File:MK8 Yellow Yoshi Icon.png|70px]] | |||
|colspan=2|[[File:MK8 White Yoshi Icon.png|70px]] | |||
|colspan=2|[[File:MK8 Blue Yoshi Icon.png|70px]] | |||
|colspan=2|[[File:MK8 Pink Yoshi Icon.png|70px]] | |||
|colspan=2|[[File:MK8 Orange Yoshi Icon.png|70px]] | |||
|- | |||
!colspan=2 width=8% style="background:#EAECF0"|[[File:MK8 Shy Guy Emblem.png|center|30px]] {{color link|black|Shy Guy}} | |||
!colspan=2 width=8% style="background:#EAECF0"|[[File:MK8 Shy Guy Emblem.png|center|30px]] {{color link|black|Shy Guy|Light-Blue Shy Guy}} | |||
!colspan=2 width=8% style="background:#EAECF0"|[[File:MK8 Shy Guy Emblem.png|center|30px]] {{color link|black|Shy Guy|Black Shy Guy}} | |||
!colspan=2 width=8% style="background:#EAECF0"|[[File:MK8 Shy Guy Emblem.png|center|30px]] {{color link|black|Shy Guy|Green Shy Guy}} | |||
!colspan=2 width=8% style="background:#EAECF0"|[[File:MK8 Shy Guy Emblem.png|center|30px]] {{color link|black|Shy Guy|Yellow Shy Guy}} | |||
!colspan=2 width=8% style="background:#EAECF0"|[[File:MK8 Shy Guy Emblem.png|center|30px]] {{color link|black|Shy Guy|White Shy Guy}} | |||
!colspan=2 width=8% style="background:#EAECF0"|[[File:MK8 Shy Guy Emblem.png|center|30px]] {{color link|black|Shy Guy|Blue Shy Guy}} | |||
!colspan=2 width=8% style="background:#EAECF0"|[[File:MK8 Shy Guy Emblem.png|center|30px]] {{color link|black|Shy Guy|Pink Shy Guy}} | |||
!colspan=2 width=8% style="background:#EAECF0"|[[File:MK8 Shy Guy Emblem.png|center|30px]] {{color link|black|Shy Guy|Orange Shy Guy}} | |||
|-align="center"style="background:#FFFFFF" | |||
|colspan=2|[[File:MK8 ShyGuy Icon.png|70px]] | |||
|colspan=2|[[File:MK8 Light-Blue Shy Guy Icon.png|70px]] | |||
|colspan=2|[[File:MK8 Black Shy Guy Icon.png|70px]] | |||
|colspan=2|[[File:MK8 Green Shy Guy Icon.png|70px]] | |||
|colspan=2|[[File:MK8 Yellow Shy Guy Icon.png|70px]] | |||
|colspan=2|[[File:MK8 White Shy Guy Icon.png|70px]] | |||
|colspan=2|[[File:MK8 Blue Shy Guy Icon.png|70px]] | |||
|colspan=2|[[File:MK8 Pink Shy Guy Icon.png|70px]] | |||
|colspan=2|[[File:MK8 Orange Shy Guy Icon.png|70px]] | |||
|- | |||
!colspan=2 width=8% style="background:#EAECF0"|[[File:MK8 Metal Mario Emblem.png|center|30px]] {{color link|black|Metal Mario}} | |||
!colspan=2 width=8% style="background:#EAECF0"|[[File:MK8D Gold Mario Emblem.png|center|30px]] ''{{color link|black|Gold Mario}}''{{footnote|main|1}} | |||
!rowspan=2 colspan=14| | |||
|-align="center"style="background:#FFFFFF" | |||
|colspan=2|[[File:MK8 MMario Icon.png|70px]] | |||
|colspan=2|[[File:MK8DX Gold Mario Icon.png|70px]] | |||
|- | |||
!colspan=2 width=8% style="background:#EAECF0"|[[File:MK8D Inkling Girl Emblem.png|center|30px]] ''{{color link|black|Inkling|Inkling Girl}}'' | |||
!colspan=2 width=8% style="background:#EAECF0"|[[File:MK8D Green Inkling Girl Emblem.png|center|30px]] ''{{color link|black|Inkling|Inkling Girl}}'' | |||
!colspan=2 width=8% style="background:#EAECF0"|[[File:MK8D Magenta Inkling Girl Emblem.png|center|30px]] ''{{color link|black|Inkling|Inkling Girl}}'' | |||
!colspan=2 width=8% style="background:#EAECF0"|[[File:MK8D Inkling Boy Emblem.png|center|30px]] ''{{color link|black|Inkling|Inkling Boy}}''{{footnote|main|2}} | |||
!colspan=2 width=8% style="background:#EAECF0"|[[File:MK8D Purple Inkling Boy Emblem.png|center|30px]] ''{{color link|black|Inkling|Inkling Boy}}'' | |||
!colspan=2 width=8% style="background:#EAECF0"|[[File:MK8D Cyan Inkling Boy Emblem.png|center|30px]] ''{{color link|black|Inkling|Inkling Boy}}'' | |||
!rowspan=2 colspan=6| | |||
|-align="center"style="background:#FFFFFF" | |||
|colspan=2|[[File:MK8DX Female Inkling Icon.png|70px]] | |||
|colspan=2|[[File:MK8D Green Inkling Icon.png|70px]] | |||
|colspan=2|[[File:MK8D Pink Inkling Icon.png|70px]] | |||
|colspan=2|[[File:MK8DX Male Inkling Icon.png|70px]] | |||
|colspan=2|[[File:MK8D Purple Inkling Icon.png|70px]] | |||
|colspan=2|[[File:MK8D Cyan Inkling Icon.png|70px]] | |||
|- | |||
!colspan=2 width=8% style="background:#EAECF0"|[[File:MK8 Villager Emblem.png|center|30px]] {{color link|black|Villager}} | |||
!colspan=2 width=8% style="background:#EAECF0"|[[File:MK8 Villager Emblem.png|center|30px]] {{color link|black|Villager}}{{footnote|main|2}} | |||
!rowspan=2 colspan=14| | |||
|-align="center"style="background:#FFFFFF" | |||
|colspan=2|[[File:VillagerMale-Icon-MK8.png|70px]] | |||
|colspan=2|[[File:VillagerFemale-Icon-MK8.png|70px]] | |||
|- | |- | ||
![[File: | !colspan=2 width=8% style="background:#EAECF0"|[[File:MK8D BotW Link Emblem.png|center|30px]] ''{{color link|black|Link}}'' | ||
![[File: | !colspan=2 width=8% style="background:#EAECF0"|[[File:MK8 Link Emblem.png|center|30px]] {{color link|black|Link}}{{footnote|main|3}} | ||
!rowspan=2 colspan=14| | |||
|-align="center"style="background:#FFFFFF" | |||
|colspan=2|[[File:MK8D BotW Link Icon.png|70px]] | |||
|colspan=2|[[File:MK8 Link Icon.png|70px]] | |||
|} | |||
</center> | |||
{{footnote|note|1|This variant is used as the select icon for the base character on the main select screen once it is available.}} | |||
{{footnote|note|2|Originally a separate character slot before being relegated to a variant in the version 3.0.0 update.}} | |||
{{footnote|note|3|Originally the only version of the character before being relegated to a variant in the version 1.6.0 update.}} | |||
===Mii Racing Suits=== | |||
All 20 Mii Racing Suits return from ''Mario Kart 8'', and, like in that game, the color of the standard suit matches the favorite color of the selected Mii. There are also two additional Mii Racing Suits tied to scanning [[amiibo]] - the new Splatoon Suit, which is unlocked either by scanning any Inkling or ''Splatoon'' series amiibo, and the Daisy Suit, returning from ''Mario Kart Tour'', which can be unlocked by scanning any Daisy amiibo after installing version 3.0.0. In addition, the Animal Crossing Suit can now be unlocked with any Isabelle or ''Animal Crossing'' series amiibo, and the Pikmin Suit can be unlocked with ''Pikmin'' series amiibo. In version 3.0.0, scanning any amiibo of characters in ''The Legend of Zelda'', ''Metroid'', and ''Kirby'' series unlocks the respective series' Mii Racing Suits. | |||
{|border="1"cellpadding="3"style="background:#f5f5f5;text-align:center;width:1000px;border-collapse:collapse;margin-bottom:35px;"align=center | |||
|- | |- | ||
![[File: | !colspan="12"style="background:#9c9c9c"|Normal Suits | ||
|- | |||
!colspan=2 width=11% style="background:#dedede"|Red | |||
!colspan=2 width=11% style="background:#dedede"|Orange | |||
!colspan=2 width=11% style="background:#dedede"|Yellow | |||
!colspan=2 width=11% style="background:#dedede"|Light-green | |||
!colspan=2 width=11% style="background:#dedede"|Green | |||
!colspan=2 width=11% style="background:#dedede"|Blue | |||
|-align="center"style="background:#FFFFFF" | |||
|colspan=2|[[File:MK8D Mii Racing Suit Red.png|70px]] | |||
|colspan=2|[[File:MK8D Mii Racing Suit Orange.png|70px]] | |||
|colspan=2|[[File:MK8D Mii Racing Suit Yellow.png|70px]] | |||
|colspan=2|[[File:MK8D Mii Racing Suit Light Green.png|70px]] | |||
|colspan=2|[[File:MK8D Mii Racing Suit Green.png|70px]] | |||
|colspan=2|[[File:MK8D Mii Racing Suit Blue.png|70px]] | |||
|- | |||
!colspan=2 width=11% style="background:#dedede"|Light-blue | |||
!colspan=2 width=11% style="background:#dedede"|Pink | |||
!colspan=2 width=11% style="background:#dedede"|Purple | |||
!colspan=2 width=11% style="background:#dedede"|Brown | |||
!colspan=2 width=11% style="background:#dedede"|White | |||
!colspan=2 width=11% style="background:#dedede"|Black | |||
|-align="center"style="background:#FFFFFF" | |||
|colspan=2|[[File:MK8D Mii Racing Suit Cyan.png|70px]] | |||
|colspan=2|[[File:MK8D Mii Racing Suit Pink.png|70px]] | |||
|colspan=2|[[File:MK8D Mii Racing Suit Purple.png|70px]] | |||
|colspan=2|[[File:MK8D Mii Racing Suit Brown.png|70px]] | |||
|colspan=2|[[File:MK8D Mii Racing Suit White.png|70px]] | |||
|colspan=2|[[File:MK8D Mii Racing Suit Black.png|70px]] | |||
|} | |||
{|border="1"cellpadding="3"style="background:#f5f5f5;text-align:center;width:1000px;border-collapse:collapse;margin-bottom:5px;"align=center | |||
|- | |- | ||
! | !colspan="14"style="background:#9c9c9c"|amiibo Suits | ||
|- | |- | ||
! | !colspan=2 width=11% style="background:#dedede"|{{color link|black|Mario|Mario Suit}} | ||
!colspan=2 width=11% style="background:#dedede"|{{color link|black|Luigi|Luigi Suit}} | |||
!colspan=2 width=11% style="background:#dedede"|{{color link|black|Princess Peach|Peach Suit}} | |||
!colspan=2 width=11% style="background:#dedede"|{{color link|black|Yoshi|Yoshi Suit}} | |||
!colspan=2 width=11% style="background:#dedede"|{{color link|black|Donkey Kong|Donkey Kong Suit}} | |||
!colspan=2 width=11% style="background:#dedede"|{{color link|black|Link|Hylian Suit}} | |||
!colspan=2 width=11% style="background:#dedede"|{{color link|black|Captain Falcon|Captain Falcon Suit}} | |||
|-align="center"style="background:#FFFFFF" | |||
|colspan=2|[[File:MK8D Mii Racing Suit Mario.png|70px]] | |||
|colspan=2|[[File:MK8D Mii Racing Suit Luigi.png|70px]] | |||
|colspan=2|[[File:MK8D Mii Racing Suit Peach.png|70px]] | |||
|colspan=2|[[File:MK8D Mii Racing Suit Yoshi.png|70px]] | |||
|colspan=2|[[File:MK8D Mii Racing Suit DK.png|70px]] | |||
|colspan=2|[[File:MK8D Mii Racing Suit Link.png|70px]] | |||
|colspan=2|[[File:MK8D Mii Racing Suit Captain Falcon.png|70px]] | |||
|- | |- | ||
! | !colspan=2 width=11% style="background:#dedede"|{{color link|black|Kirby|Kirby Suit}} | ||
!colspan=2 width=11% style="background:#dedede"|{{color link|black|Samus|Varia Suit}} | |||
!colspan=2 width=11% style="background:#dedede"|{{color link|black|Fox|Fox Suit}} | |||
!colspan=2 width=11% style="background:#dedede"|{{color link|black|Toad|Toad Suit}} | |||
!colspan=2 width=11% style="background:#dedede"|{{color link|black|Bowser|Bowser Suit}} | |||
!colspan=2 width=11% style="background:#dedede"|{{color link|black|Wario|Wario Suit}} | |||
!colspan=2 width=11% style="background:#dedede"|{{color link|black|Rosalina|Rosalina Suit}} | |||
|-align="center"style="background:#FFFFFF" | |||
|colspan=2|[[File:MK8D Mii Racing Suit Kirby.png|70px]] | |||
|colspan=2|[[File:MK8D Mii Racing Suit Samus.png|70px]] | |||
|colspan=2|[[File:MK8D Mii Racing Suit Fox.png|70px]] | |||
|colspan=2|[[File:MK8D Mii Racing Suit Toad.png|70px]] | |||
|colspan=2|[[File:MK8D Mii Racing Suit Bowser.png|70px]] | |||
|colspan=2|[[File:MK8D Mii Racing Suit Wario.png|70px]] | |||
|colspan=2|[[File:MK8D Mii Racing Suit Rosalina.png|70px]] | |||
|- | |- | ||
![[File: | !colspan=2 width=11% style="background:#dedede"|{{color link|black|Olimar|Pikmin Suit}} | ||
!colspan=2 width=11% style="background:#dedede"|{{color link|black|Villager|Animal Crossing Suit}} | |||
!colspan=2 width=11% style="background:#dedede"|{{color link|black|Mega Man|Mega Man Suit}} | |||
!colspan=2 width=11% style="background:#dedede"|{{color link|black|Pac-Man|PAC-MAN Suit}} | |||
!colspan=2 width=11% style="background:#dedede"|{{color link|black|Sonic|Sonic Suit}} | |||
!colspan=2 width=11% style="background:#dedede"|''{{color link|black|Inkling|Inkling Suit}}'' | |||
!colspan=2 width=11% style="background:#dedede"|''{{color link|black|Princess Daisy|Daisy Suit}}''<br><small>(ver 3.0.0)</small> | |||
|-align="center"style="background:#FFFFFF" | |||
|colspan=2|[[File:MK8D Mii Racing Suit Olimar.png|70px]] | |||
|colspan=2|[[File:MK8D Mii Racing Suit Animal Crossing.png|70px]] | |||
|colspan=2|[[File:MK8D Mii Racing Suit Mega Man.png|70px]] | |||
|colspan=2|[[File:MK8D Mii Racing Suit Pac-Man.png|70px]] | |||
|colspan=2|[[File:MK8D Mii Racing Suit Sonic.png|70px]] | |||
|colspan=2|[[File:MK8D Mii Racing Suit Inkling.png|70px]] | |||
|colspan=2|[[File:MK8D Mii Racing Suit Daisy.png|70px]] | |||
|} | |||
As part of the sixth wave of the Booster Course Pass, 17 additional Mii Racing Suits from ''Mario Kart Tour'' were added. These costumes can be unlocked via purchasing the DLC.<ref name=news/> Some [[Jump Boost]] animations from these suits are different from those of the standard and amiibo racing suits. | |||
{|border="1"cellpadding="3"style="background:#f5f5f5;text-align:center;width:1000px;border-collapse:collapse;margin-bottom:5px;"align=center | |||
|- | |- | ||
! | !colspan="14"style="background:#9c9c9c"|DLC Suits <center> <small>(added in ver. 3.0.0) | ||
|- | |- | ||
![[File: | !colspan=2 width=11% style="background:#dedede"|{{color link|black|? Block|? Block Suit}} | ||
!colspan=2 width=11% style="background:#dedede"|{{color link|black|Castle|Castle Suit}} | |||
!colspan=2 width=11% style="background:#dedede"|{{color link|black|Toadette|Toadette Suit}} | |||
!colspan=2 width=11% style="background:#dedede"|{{color link|black|Dry Bowser|Dry Bowser Suit}} | |||
!colspan=2 width=11% style="background:#dedede"|{{color link|black|Chain Chomp|Chain Chomp Suit}} | |||
!colspan=2 width=11% style="background:#dedede"|{{color link|black|Cheep Cheep|Cheep Cheep Suit}} | |||
|-align="center"style="background: #FFFFFF" | |||
|colspan=2|[[File:MK8D Mii Racing Suit - Block.png|70px]] | |||
|colspan=2|[[File:MK8D Mii Racing Suit Castle.png|70px]] | |||
|colspan=2|[[File:MK8D Mii Racing Suit Toadette.png|70px]] | |||
|colspan=2|[[File:MK8D Mii Racing Suit Dry Bowser.png|70px]] | |||
|colspan=2|[[File:MK8D Mii Racing Suit Chain Chomp.png|70px]] | |||
|colspan=2|[[File:MK8D Mii Racing Suit Cheep Cheep.png|70px]] | |||
|- | |- | ||
! | !colspan=2 width=11% style="background:#dedede"|{{color link|black|Dolphin|Dolphin Suit}} | ||
!colspan=2 width=11% style="background:#dedede"|{{color link|black|Pokey|Pokey Suit}} | |||
!colspan=2 width=11% style="background:#dedede"|{{color link|black|Blooper|Blooper Suit}} | |||
!colspan=2 width=11% style="background:#dedede"|{{color link|black|Koopa Clown Car|Koopa Clown Car Suit}} | |||
!colspan=2 width=11% style="background:#dedede"|{{color link|black|Para-Biddybud|Para-Biddybud Suit}} | |||
!colspan=2 width=11% style="background:#dedede"|{{color link|black|Sky-High Sundae|Ice Cream Suit}} | |||
|-align="center"style="background:#FFFFFF" | |||
|colspan=2|[[File:MK8D Mii Racing Suit Dolphin.png|70px]] | |||
|colspan=2|[[File:MK8D Mii Racing Suit Pokey.png|70px]] | |||
|colspan=2|[[File:MK8D Mii Racing Suit Blooper.png|70px]] | |||
|colspan=2|[[File:MK8D Mii Racing Suit Koopa Clown Car.png|70px]] | |||
|colspan=2|[[File:MK8D Mii Racing Suit Para-Biddybud.png|70px]] | |||
|colspan=2|[[File:MK8D Mii Racing Suit Ice Cream.png|70px]] | |||
|- | |- | ||
![[File: | !colspan=2 width=11% style="background:#dedede"|{{color link|black|Birdo|Birdo Suit}} | ||
!colspan=2 width=11% style="background:#dedede"|{{color link|black|Petey Piranha|Petey Piranha Suit}} | |||
!colspan=2 width=11% style="background:#dedede"|{{color link|black|Wiggler|Wiggler Suit}} | |||
!colspan=2 width=11% style="background:#dedede"|{{color link|black|Goomba|Goomba Suit}} | |||
!colspan=2 width=11% style="background:#dedede"|{{color link|black|Moo Moo|Moo Moo Suit}} | |||
!rowspan=2| | |||
|-align="center"style="background: #FFFFFF" | |||
|colspan=2|[[File:MK8D Mii Racing Suit Birdo.png|70px]] | |||
|colspan=2|[[File:MK8D Mii Racing Suit Petey Piranha.png|70px]] | |||
|colspan=2|[[File:MK8D Mii Racing Suit Wiggler.png|70px]] | |||
|colspan=2|[[File:MK8D Mii Racing Suit Goomba.png|70px]] | |||
|colspan=2|[[File:MK8D Mii Racing Suit Moo Moo.png|70px]] | |||
|} | |} | ||
==Vehicle parts== | ===Rival order=== | ||
''Mario Kart 8 Deluxe'' features six additional vehicle body parts. One is the [[Koopa Clown]], returning from ''[[Mario Kart 7]]''. Two new vehicles are ''Splatoon''-based ATVs; the [[Splat Buggy]] and [[Inkstriker]]. These three change their colors for certain characters: the former for the [[Koopalings]], and the latter two for all [[Inkling]] variations. | Like in ''Mario Kart 8'', characters have set [[Rival|rivals]] that consistently appear when racing in Grand Prix races. They are once again restricted to Grand Prix only, not appearing in single player versus or battle mode. Unlike the previous game, more characters have rivals: the twelve characters from the previous game who had rivals retain their rivals in this game, while most other characters range from having one to two rivals each, though some still have none at all. | ||
{|border="1"cellpadding="3"style="background:#f5f5f5;text-align:center;width:100%;border-collapse:collapse;margin-bottom:2px;"align=center | |||
Computer characters now | |- | ||
!colspan="2"style="background:#dedede"width="25%"|Column 1 | |||
===Available parts=== | !colspan="2"style="background:#dedede"width="25%"|Column 2 | ||
The parts available are listed here in the order shown in the vehicle customization screen, with the following notation:<br | !colspan="2"style="background:#dedede"width="25%"|Column 3 | ||
!colspan="2"style="background:#dedede"width="25%"|Column 4 | |||
*'''Bold''' = Part is available at the start. | |- | ||
!style="background:#dedede"width="4%"|Player | |||
!style="background:#dedede"width="8%"|Rival(s) | |||
!style="background:#dedede"width="4%"|Player | |||
!style="background:#dedede"width="8%"|Rival(s) | |||
!style="background:#dedede"width="4%"|Player | |||
!style="background:#dedede"width="8%"|Rival(s) | |||
!style="background:#dedede"width="4%"|Player | |||
!style="background:#dedede"width="8%"|Rival(s) | |||
|- | |||
!style="background:#dedede"|[[File:MK8 Mario Icon.png|link=Mario|32x32px]]||[[File:MK8 Peach Icon.png|link=Princess Peach|32x32px|Peach]][[File:MK8 Bowser Icon.png|link=Bowser|32x32px]] | |||
!style="background:#dedede"|[[File:MK8 Luigi Icon.png|link=Luigi|32x32px]]||[[File:MK8 Mario Icon.png|link=Mario|32x32px]][[File:MK8 Daisy Icon.png|link=Princess Daisy|32x32px|Daisy]] | |||
!style="background:#dedede"|[[File:MK8 Peach Icon.png|link=Princess Peach|32x32px|Peach]]||[[File:MK8 Toad Icon.png|link=Toad|32x32px]][[File:MK8 DKong Icon.png|link=Donkey Kong|32x32px]] | |||
!style="background:#dedede"|[[File:MK8 Daisy Icon.png|link=Princess Daisy|32x32px|Daisy]]||[[File:MK8 Peach Icon.png|link=Princess Peach|32x32px|Peach]][[File:MK8 Waluigi Icon.png|link=Waluigi|32x32px]] | |||
|- | |||
!style="background:#dedede"|[[File:MK8 Yoshi Icon.png|link=Yoshi|32x32px]]||[[File:MK8 Toad Icon.png|link=Toad|32x32px]][[File:MK8 DKong Icon.png|link=Donkey Kong|32x32px]] | |||
!style="background:#dedede"|[[File:MK8 Toad Icon.png|link=Toad|32x32px]]||[[File:MK8 Koopa Icon.png|link=Koopa|32x32px]][[File:MK8 Waluigi Icon.png|link=Waluigi|32x32px]] | |||
!style="background:#dedede"|[[File:MK8 Koopa Icon.png|link=Koopa Troopa|32x32px]]||[[File:MK8 Yoshi Icon.png|link=Yoshi|32x32px]][[File:MK8 Toad Icon.png|link=Toad|32x32px]] | |||
!style="background:#dedede"|[[File:MK8 ShyGuy Icon.png|link=Shy Guy|32x32px]]||[[File:MK8 Yoshi Icon.png|link=Yoshi|32x32px]] | |||
|- | |||
!style="background:#dedede"|[[File:MK8 BabyMario Icon.png|link=Baby Mario|32x32px]]||[[File:MK8 Bowser Jr Icon.png|link=Bowser Jr.|32x32px]][[File:MK8 BabyPeach Icon.png|link=Baby Peach|32x32px]] | |||
!style="background:#dedede"|[[File:MK8 BabyLuigi Icon.png|link=Baby Luigi|32x32px]]||[[File:MK8 BabyMario Icon.png|link=Baby Mario|32x32px]][[File:MK8 BabyDaisy Icon.png|link=Baby Daisy|32x32px]] | |||
!style="background:#dedede"|[[File:MK8 BabyPeach Icon.png|link=Baby Peach|32x32px]]||[[File:MK8 BabyMario Icon.png|link=Baby Mario|32x32px]][[File:MK8 BabyDaisy Icon.png|link=Baby Daisy|32x32px]] | |||
!style="background:#dedede"|[[File:MK8 BabyDaisy Icon.png|link=Baby Daisy|32x32px]]||[[File:MK8 BabyPeach Icon.png|link=Baby Peach|32x32px]][[File:MK8 BabyLuigi Icon.png|link=Baby Luigi|32x32px]] | |||
|- | |||
!style="background:#dedede"|[[File:MK8 Wario Icon.png|link=Wario|32x32px]]||[[File:MK8 Mario Icon.png|link=Mario|32x32px]][[File:MK8 Daisy Icon.png|link=Princess Daisy|32x32px|Daisy]] | |||
!style="background:#dedede"|[[File:MK8 Waluigi Icon.png|link=Waluigi|32x32px]]||[[File:MK8 Luigi Icon.png|link=Luigi|32x32px]][[File:MK8 Toadette Icon.png|link=Toadette|32x32px]] | |||
!style="background:#dedede"|[[File:MK8 DKong Icon.png|link=Donkey Kong|32x32px]]||[[File:MK8 Bowser Icon.png|link=Bowser|32x32px]][[File:MK8 Wario Icon.png|link=Wario|32x32px]] | |||
!style="background:#dedede"|[[File:MK8 Bowser Icon.png|link=Bowser|32x32px]]||[[File:MK8 Mario Icon.png|link=Mario|32x32px]][[File:MK8 Luigi Icon.png|link=Luigi|32x32px]] | |||
|- | |||
!style="background:#dedede"|[[File:MK8 Lemmy Icon.png|link=Lemmy Koopa|Lemmy|32x32px]]||[[File:MK8 Larry Icon.png|link=Larry Koopa|Larry|32x32px]] | |||
!style="background:#dedede"|[[File:MK8 Larry Icon.png|link=Larry Koopa|Larry|32x32px]]||[[File:MK8 Lemmy Icon.png|link=Lemmy Koopa|Lemmy|32x32px]] | |||
!style="background:#dedede"|[[File:MK8 Wendy Icon.png|link=Wendy O. Koopa|Wendy|32x32px]]||[[File:MK8 Daisy Icon.png|link=Princess Daisy|32x32px|Daisy]][[File:MK8 Peach Icon.png|link=Princess Peach|32x32px|Peach]] | |||
!style="background:#dedede"|[[File:MK8 Ludwig Icon.png|link=Ludwig von Koopa|Ludwig|32x32px]]||[[File:MK8 Iggy Icon.png|link=Iggy Koopa|Iggy|32x32px]] | |||
|- | |||
!style="background:#dedede"|[[File:MK8DX Female Inkling Icon.png|link=Inkling|Inkling Girl|32x32px]]||[[File:MK8DX Male Inkling Icon.png|link=Inkling|Inkling Boy|32x32px]] | |||
!style="background:#dedede"|[[File:VillagerMale-Icon-MK8.png|link=Villager|32x32px]]||[[File:MK8 Isabelle Icon.png|link=Isabelle|32x32px]] | |||
!style="background:#dedede"|[[File:MK8 Isabelle Icon.png|link=Isabelle|32x32px]]||[[File:VillagerFemale-Icon-MK8.png|link=Villager|32x32px]] | |||
!style="background:#dedede"|[[File:MK8D BotW Link Icon.png|link=Link|32x32px]]||None | |||
|- | |||
!style="background:#dedede"|[[File:MK8DX Male Inkling Icon.png|link=Inkling|Inkling Boy|32x32px]]||[[File:MK8DX Female Inkling Icon.png|link=Inkling|Inkling Girl|32x32px]] | |||
!style="background:#dedede"|[[File:VillagerFemale-Icon-MK8.png|link=Villager|32x32px]]||[[File:VillagerMale-Icon-MK8.png|link=Villager|32x32px]] | |||
!colspan="4"style="background:#dedede"| | |||
|- | |||
!colspan="2"style="background:#dedede"width="25%"|Column 5 | |||
!colspan="2"style="background:#dedede"width="25%"|Column 6 | |||
!colspan="2"style="background:#dedede"width="25%"|Column 7 | |||
!colspan="2"style="background:#dedede"width="25%"|Column 8 | |||
|- | |||
!style="background:#dedede"width="4%"|Player | |||
!style="background:#dedede"width="8%"|Rival(s) | |||
!style="background:#dedede"width="4%"|Player | |||
!style="background:#dedede"width="8%"|Rival(s) | |||
!style="background:#dedede"width="4%"|Player | |||
!style="background:#dedede"width="8%"|Rival(s) | |||
!style="background:#dedede"width="4%"|Player | |||
!style="background:#dedede"width="8%"|Rival(s) | |||
|- | |||
!style="background:#dedede"|[[File:MK8 Rosalina Icon.png|link=Rosalina|32x32px]]||[[File:MK8 Toad Icon.png|link=Toad|32x32px]] | |||
!style="background:#dedede"|[[File:MK8 Tanooki Mario Icon.png|link=Tanooki Mario|32x32px]]||[[File:MK8 Cat Peach Icon.png|link=Cat Mario|Cat Peach|32x32px]] | |||
!style="background:#dedede"|[[File:MK8 Cat Peach Icon.png|link=Cat Mario|Cat Peach|32x32px]]||[[File:MK8 Tanooki Mario Icon.png|link=Tanooki Mario|32x32px]] | |||
!style="background:#dedede"|[[File:MK8D Birdo Icon.png|32x32px|link=Birdo|32x32px]]||[[File:MK8 Yoshi Icon.png|link=Yoshi|32x32px|Yoshi]] | |||
|- | |||
!style="background:#dedede"|[[File:MK8 Lakitu Icon.png|link=Lakitu|32x32px]]||None | |||
!style="background:#dedede"|[[File:MK8 Toadette Icon.png|link=Toadette|32x32px]]||[[File:MK8 Yoshi Icon.png|link=Yoshi|32x32px]][[File:MK8 Wario Icon.png|link=Wario|32x32px]] | |||
!style="background:#dedede"|[[File:MK8DX King Boo Icon.png|link=King Boo|32x32px]]||[[File:MK8DX Petey Piranha Icon.png|32x32px|link=Petey Piranha|32x32px]] | |||
!style="background:#dedede"|[[File:MK8DX Petey Piranha Icon.png|32x32px|link=Petey Piranha|32x32px]]||[[File:MK8DX King Boo Icon.png|32x32px|link=King Boo|32x32px]] | |||
|- | |||
!style="background:#dedede"|[[File:MK8 BabyRosalina Icon.png|link=Baby Rosalina|32x32px]]||[[File:MK8 Toadette Icon.png|link=Toadette|32x32px]] | |||
!style="background:#dedede"|[[File:MK8 MMario Icon.png|link=Metal Mario|32x32px]]||[[File:MK8 PGPeach Icon.png|link=Pink Gold Peach|32x32px]] | |||
!style="background:#dedede"|[[File:MK8 PGPeach Icon.png|link=Pink Gold Peach|32x32px]]||[[File:MK8 MMario Icon.png|link=Metal Mario|32x32px]] | |||
!style="background:#dedede"|[[File:MK8DX Wiggler Icon.png|32x32px|link=Wiggler|32x32px]]||[[File:MK8 Yoshi Icon.png|32x32px|link=Yoshi|32x32px]][[File:MK8 ShyGuy Icon.png|32x32px|link=Shy Guy|32x32px]] | |||
|- | |||
!style="background:#dedede"|[[File:MK8DX Dry Bones Icon.png|link=Dry Bones|32x32px]]||[[File:MK8 Koopa Icon.png|link=Koopa Troopa|32x32px]][[File:MK8 Dry Bowser Icon.png|link=Dry Bowser|32x32px]] | |||
!style="background:#dedede"|[[File:MK8 Bowser Jr Icon.png|link=Bowser Jr.|32x32px]]||[[File:MK8 Peach Icon.png|link=Princess Peach|32x32px|Peach]] | |||
!style="background:#dedede"|[[File:MK8 Dry Bowser Icon.png|link=Dry Bowser|32x32px]]||[[File:MK8DX Dry Bones Icon.png|link=Dry Bones|32x32px]] | |||
!style="background:#dedede"|[[File:MK8DX Kamek Icon.png|32x32px|link=Kamek|32x32px]]||[[File:MK8 Bowser Jr Icon.png|link=Bowser Jr.|32x32px]] | |||
|- | |||
!style="background:#dedede"|[[File:MK8 Iggy Icon.png|link=Iggy Koopa|Iggy|32x32px]]||[[File:MK8 Ludwig Icon.png|link=Ludwig von Koopa|Ludwig|32x32px]] | |||
!style="background:#dedede"|[[File:MK8 Roy Icon.png|link=Roy Koopa|Roy|32x32px]]||[[File:MK8 Morton Icon.png|link=Morton Koopa Jr.|Morton|32x32px]] | |||
!style="background:#dedede"|[[File:MK8 Morton Icon.png|link=Morton Koopa Jr.|Morton|32x32px]]||[[File:MK8 Roy Icon.png|link=Roy Koopa|Roy|32x32px]] | |||
!style="background:#dedede"|[[File:MK8DX Peachette Icon.png|link=Peachette|32x32px]]||[[File:MK8 Yoshi Icon.png|32x32px|link=Yoshi|32x32px]][[File:MK8 Wario Icon.png|link=Wario|32x32px]] | |||
|- | |||
!style="background:#dedede"|[[File:MK8DX Diddy Kong Icon.png|link=Diddy Kong|32x32px]]||[[File:MK8 DKong Icon.png|link=Donkey Kong|32x32px]] | |||
!style="background:#dedede"|[[File:MK8DX Funky Kong Icon.png|link=Funky Kong|32x32px]]||[[File:MK8 DKong Icon.png|link=Donkey Kong|32x32px]] | |||
!style="background:#dedede"|[[File:MK8DX Pauline Icon.png|link=Pauline|32x32px]]||[[File:MK8 DKong Icon.png|link=Donkey Kong|32x32px]] | |||
!style="background:#dedede"|[[File:Mii_MK8.png|link=Mii|32x32px]]||None | |||
|} | |||
==Vehicle parts== | |||
''Mario Kart 8 Deluxe'' features six additional vehicle body parts. One is the [[Koopa Clown]], returning from ''[[Mario Kart 7]]''. Two new vehicles are ''Splatoon''-based ATVs; the [[Splat Buggy]] and [[Inkstriker]]. These three change their colors for certain characters: the former for the [[Koopalings]], and the latter two for all [[Inkling]] variations. Version 1.6.0 adds the [[Master Cycle Zero]], [[Ancient Tires]], and [[Paraglider (The Legend of Zelda)|Paraglider]]. In total, there are 41 vehicle bodies, 22 tires, and 15 gliders, resulting in up to 13,530 different combinations. | |||
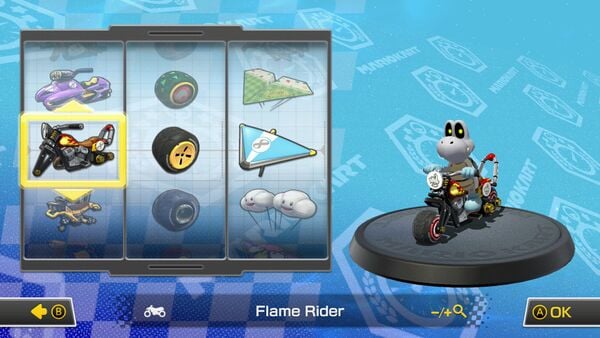
Computer-controlled characters now choose from a wider variety of kart parts than in the original version, such as the [[Flame Rider]] and the [[Sports Coupe]]. However, they are still restricted to a set amount of body parts per character. A CPU [[Baby Daisy]] has the tendency to use the [[Wild Wiggler]] with [[Wood]] tires, for example. | |||
The vehicle parts that were exclusive to downloadable content in ''Mario Kart 8'' (i.e. parts included within the [[Mercedes-Benz x Mario Kart 8|Mercedes-Benz × ''Mario Kart 8'']], [[The Legend of Zelda x Mario Kart 8|''The Legend of Zelda'' × ''Mario Kart 8'']], and [[Animal Crossing x Mario Kart 8|''Animal Crossing'' × ''Mario Kart 8'']] add-on packs) are now accessible in the base game and are randomly unlocked by collecting [[coin]]s during gameplay. | |||
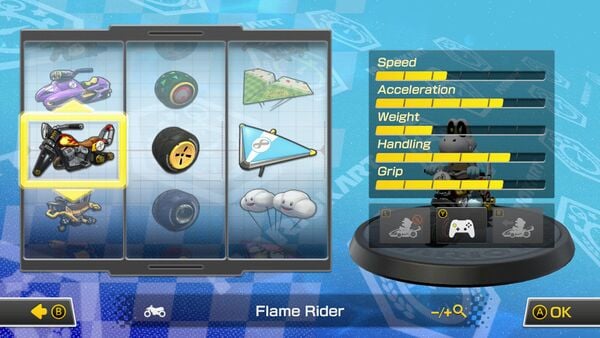
The statistics of some vehicle parts have been altered, and certain physics elements, such as the speed increase per stat and the acceleration tiers, have been adjusted. | |||
===Available parts=== | |||
The parts available are listed here in the order shown in the vehicle customization screen, with the following notation:<br> | |||
*'''Bold''' = Part is available at the start. | |||
*<nowiki>*</nowiki> = Changes color, depending on the character. | *<nowiki>*</nowiki> = Changes color, depending on the character. | ||
*<nowiki>**</nowiki> = Changes color for the [[Koopalings]]. | *<nowiki>**</nowiki> = Changes color for the [[Koopalings]]. | ||
*<nowiki>***</nowiki> = Changes color for [[Daisy]], [[Baby Daisy]], [[Rosalina]], | *<nowiki>***</nowiki> = Changes color for [[Daisy]], [[Baby Daisy]], [[Rosalina]], [[Baby Rosalina]], [[Wiggler]], [[Kamek]], and [[Funky Kong]]. | ||
*<nowiki>****</nowiki> = Changes color for the [[Inkling]]s. | *<nowiki>****</nowiki> = Changes color for the [[Inkling]]s. | ||
*<small>(DX)</small> = Part is not available in the original ''[[Mario Kart 8]]''. | *<small>(DX)</small> = Part is not available in the original ''[[Mario Kart 8]]''. | ||
*<small>(NEW)</small> = Part is introduced in this game. | *<small>(NEW)</small> = Part is introduced in this game. | ||
The "8" logos on the parts are replaced with the driver's [[emblem]], except on the [[Gold Standard]] and [[Gold Glider]]. | |||
The "8" logos on the parts are replaced with the | ====[[Kart]]s==== | ||
==== | |||
<gallery> | <gallery> | ||
StandardKartBodyMK8.png|'''[[Standard Kart]]'''* | StandardKartBodyMK8.png|'''[[Standard Kart]]'''* | ||
| Line 265: | Line 655: | ||
</gallery> | </gallery> | ||
====Standard | ====[[Standard bike (vehicle class)|Standard bike]]s==== | ||
<gallery> | <gallery> | ||
StandardBikeBodyMK8.png|'''[[Standard Bike]]'''* | StandardBikeBodyMK8.png|'''[[Standard Bike]]'''* | ||
| Line 272: | Line 662: | ||
VarmintBodyMK8.png|[[Varmint]] | VarmintBodyMK8.png|[[Varmint]] | ||
MrScootyBodyMK8.png|[[Mr. Scooty]]<br>''Mr Scooty'' | MrScootyBodyMK8.png|[[Mr. Scooty]]<br>''Mr Scooty'' | ||
MK8D Master Cycle Zero.png|[[Master Cycle Zero]] <small>(NEW)</small> | |||
MK8 Light-Green City Tripper.png|'''[[City Tripper]]'''* | MK8 Light-Green City Tripper.png|'''[[City Tripper]]'''* | ||
</gallery> | </gallery> | ||
====Sport | ====[[Sport bike (vehicle class)|Sport bike]]s==== | ||
<gallery> | <gallery> | ||
CometBodyMK8.png|'''[[ | CometBodyMK8.png|'''[[Comet]]''' | ||
SportBikeBodyMK8.png|[[Sport Bike]]* | SportBikeBodyMK8.png|[[Sport Bike]]* | ||
JetBikeBodyMK8.png|[[Jet Bike]] | JetBikeBodyMK8.png|[[Jet Bike]] | ||
| Line 285: | Line 675: | ||
</gallery> | </gallery> | ||
==== | ====[[All-Terrain Vehicle|ATV]]s==== | ||
<gallery> | <gallery> | ||
StandardATVBodyMK8.png|'''[[Standard ATV]]'''*<br>''Standard Quad'' | StandardATVBodyMK8.png|'''[[Standard ATV]]'''*<br>''Standard Quad'' | ||
| Line 295: | Line 685: | ||
</gallery> | </gallery> | ||
==== | ====[[Tire]]s==== | ||
<gallery> | <gallery> | ||
StandardTiresMK8.png|'''[[Standard (tire)|Standard]]'''<br>''Normal'' | StandardTiresMK8.png|'''[[Standard (tire)|Standard]]'''<br>''Normal'' | ||
| Line 317: | Line 707: | ||
GLATires-MK8.png|[[GLA Tires]] <br>''GLA Wheels'' | GLATires-MK8.png|[[GLA Tires]] <br>''GLA Wheels'' | ||
MK8-TriforceTires.png|[[Triforce Tires]] <br>''Triforce Tyres'' | MK8-TriforceTires.png|[[Triforce Tires]] <br>''Triforce Tyres'' | ||
MK8D Ancient Tires.png|[[Ancient Tires]] <small>(NEW)</small> <br>''Ancient Tyres'' | |||
Leaf Tires MK8.png|[[Leaf Tires]] <br>''Leaf Tyres'' | Leaf Tires MK8.png|[[Leaf Tires]] <br>''Leaf Tyres'' | ||
</gallery> | </gallery> | ||
==== | ====[[Glider]]s==== | ||
<gallery> | <gallery> | ||
SuperGliderMK8.png|'''[[Super Glider]]'''* | SuperGliderMK8.png|'''[[Super Glider]]'''* | ||
| Line 336: | Line 726: | ||
GoldGliderMK8.png|[[Gold Glider]] | GoldGliderMK8.png|[[Gold Glider]] | ||
MK8-HylianKite.png|[[Hylian Kite]] | MK8-HylianKite.png|[[Hylian Kite]] | ||
MK8D Paraglider.png|[[Paraglider (The Legend of Zelda)|Paraglider]] <small>(NEW)</small> | |||
PaperGliderIcon-MK8.png|[[Paper Glider]] | PaperGliderIcon-MK8.png|[[Paper Glider]] | ||
</gallery> | </gallery> | ||
===CPU combinations=== | |||
All | All characters in the game besides Miis and most variants (with the exceptions of blue Inkling Boy, female Villager, and Link's alternate outfit) can be used by CPUs. Each of these characters have four different combinations of vehicle parts that they can use as CPUs: | ||
{|border="1" cellpadding="3" style="background:#f5f5f5;text-align:center;width:100%;border-collapse:collapse;margin-bottom:2px;" align=center | {|border="1"cellpadding="3"style="background:#f5f5f5;text-align:center;width:100%;border-collapse:collapse;margin-bottom:2px;"align=center | ||
|- | |- | ||
!colspan="5" | !colspan="5"style="background:#9c9c9c"|CPU combinations | ||
|- | |- | ||
! | !style="background:#dedede"width="10%"|Character | ||
! | !style="background:#dedede"width="22%"|Combination 1 | ||
! | !style="background:#dedede"width="22%"|Combination 2 | ||
! | !style="background:#dedede"width="22%"|Combination 3 | ||
! | !style="background:#dedede"width="22%"|Combination 4 | ||
|- | |- | ||
![[File:MK8 Mario Icon.png|link=Mario|32x32px]]||[[File:StandardKartBodyMK8.png|link=Standard Kart|32x32px]][[File:StandardTiresMK8.png|link=Standard (tire)|32x32px]][[File:SuperGliderMK8.png|link=Super Glider|32x32px]]||[[File:ZeldaMK8Bdasher.png|link=B Dasher|32x32px]][[File:StandardTiresMK8.png|link=Standard (tire)|32x32px]][[File:SuperGliderMK8.png|link=Super Glider|32x32px]]||[[File:MK8PWing.png|link=P-Wing (kart)|32x32px]][[File:Blue Standard.png|link=Blue Standard|32x32px]][[File:ParafoilGliderMK8.png|link=Parafoil|32x32px]]||[[File:CometBodyMK8.png|link=Comet | ![[File:MK8 Mario Icon.png|link=Mario|32x32px]]||[[File:StandardKartBodyMK8.png|link=Standard Kart|32x32px]][[File:StandardTiresMK8.png|link=Standard (tire)|32x32px]][[File:SuperGliderMK8.png|link=Super Glider|32x32px]]||[[File:ZeldaMK8Bdasher.png|link=B Dasher|32x32px]][[File:StandardTiresMK8.png|link=Standard (tire)|32x32px]][[File:SuperGliderMK8.png|link=Super Glider|32x32px]]||[[File:MK8PWing.png|link=P-Wing (kart)|32x32px]][[File:Blue Standard.png|link=Blue Standard|32x32px]][[File:ParafoilGliderMK8.png|link=Parafoil|32x32px]]||[[File:CometBodyMK8.png|link=Comet|32x32px]][[File:SlimTiresMK8.png|link=Slim (tire)|32x32px]][[File:SuperGliderMK8.png|link=Super Glider|32x32px]] | ||
|- | |- | ||
![[File:MK8 Luigi Icon.png|link=Luigi|32x32px]]||[[File:StandardKartBodyMK8.png|link=Standard Kart|32x32px]][[File:StandardTiresMK8.png|link=Standard (tire)|32x32px]][[File: | ![[File:MK8 Luigi Icon.png|link=Luigi|32x32px]]||[[File:StandardKartBodyMK8 Luigi.png|link=Standard Kart|32x32px]][[File:StandardTiresMK8.png|link=Standard (tire)|32x32px]][[File:MK8ThumbGreenSG.png|link=Super Glider|32x32px]]||[[File:Mach8BodyMK8.png|link=Mach 8|32x32px]][[File:SlimTiresMK8.png|link=Slim (tire)|32x32px]][[File:MK8ThumbGreenSG.png|link=Super Glider|32x32px]]||[[File:MK8 Green Circuit Special.png|link=Circuit Special|32x32px]][[File:SlickTiresMK8.png|link=Slick|32x32px]][[File:MK8ThumbGreenSG.png|link=Super Glider|32x32px]]||[[File:StandardBikeBodyMK8 Luigi.png|link=Standard Bike|32x32px]][[File:SlimTiresMK8.png|link=Slim (tire)|32x32px]][[File:MK8ThumbGreenSG.png|link=Super Glider|32x32px]] | ||
|- | |- | ||
![[File:MK8 Peach Icon.png|link=Peach|32x32px]]||[[File:StandardKartBodyMK8.png|link=Standard Kart|32x32px]][[File:StandardTiresMK8.png|link=Standard (tire)|32x32px]][[File: | ![[File:MK8 Peach Icon.png|link=Peach|32x32px]]||[[File:StandardKartBodyMK8 Peach.png|link=Standard Kart|32x32px]][[File:StandardTiresMK8.png|link=Standard (tire)|32x32px]][[File:MK8ThumbPinkSG.png|link=Super Glider|32x32px]]||[[File:PrancerBodyMK8.png|link=Prancer|32x32px]][[File:WoodTiresMK8.png|link=Wood|32x32px]][[File:PeachParasolGliderMK8.png|link=Peach Parasol (glider)|32x32px]]||[[File:StandardBikeBodyMK8 Peach.png|link=Standard Bike|32x32px]][[File:SlimTiresMK8.png|link=Slim (tire)|32x32px]][[File:MK8ThumbPinkSG.png|link=Super Glider|32x32px]]||[[File:JetBikeBodyMK8.png|link=Jet Bike|32x32px]][[File:SlimTiresMK8.png|link=Slim (tire)|32x32px]][[File:MK8ThumbPinkSG.png|link=Super Glider|32x32px]] | ||
|- | |- | ||
![[File:MK8 Daisy Icon.png|link=Daisy|32x32px]]||[[File:StandardKartBodyMK8.png|link=Standard Kart|32x32px]][[File:StandardTiresMK8.png|link=Standard (tire)|32x32px]][[File: | ![[File:MK8 Daisy Icon.png|link=Daisy|32x32px]]||[[File:StandardKartBodyMK8 Daisy.png|link=Standard Kart|32x32px]][[File:StandardTiresMK8.png|link=Standard (tire)|32x32px]][[File:MK8ThumbOrangeSG.png|link=Super Glider|32x32px]]||[[File:CatCruiserBodyMK8.png|link=Cat Cruiser|32x32px]][[File:StandardTiresMK8.png|link=Standard (tire)|32x32px]][[File:MK8ThumbOrangeSG.png|link=Super Glider|32x32px]]||[[File:SportsCoupeMK8.png|link=Sports Coupe|32x32px]][[File:StandardTiresMK8.png|link=Standard (tire)|32x32px]][[File:MK8ThumbOrangeSG.png|link=Super Glider|32x32px]]||[[File:VarmintBodyMK8.png|link=Varmint|32x32px]][[File:HotMonsterTiresMK8.png|link=Hot Monster|32x32px]][[File:MK8ThumbOrangeSG.png|link=Super Glider|32x32px]] | ||
|- | |- | ||
![[File:MK8 Rosalina Icon.png|link=Rosalina|32x32px]]||[[File:StandardKartBodyMK8.png|link=Standard Kart|32x32px]][[File:StandardTiresMK8.png|link=Standard (tire)|32x32px]][[File: | ![[File:MK8 Rosalina Icon.png|link=Rosalina|32x32px]]||[[File:StandardKartBodyMK8 Rosalina.png|link=Standard Kart|32x32px]][[File:StandardTiresMK8.png|link=Standard (tire)|32x32px]][[File:MK8ThumbRosalinaSG.png|link=Super Glider|32x32px]]||[[File:CircuitSpecialBodyMK8.png|link=Circuit Special|32x32px]][[File:StandardTiresMK8.png|link=Standard (tire)|32x32px]][[File:MK8ThumbRosalinaSG.png|link=Super Glider|32x32px]]||[[File:SportBikeOrangeYellowVarnishMK8.png|link=Sport Bike|32x32px]][[File:SlimTiresMK8.png|link=Slim (tire)|32x32px]][[File:MK8ThumbRosalinaSG.png|link=Super Glider|32x32px]]||[[File:StandardATVBodyMK8 Rosalina.png|link=Standard ATV|32x32px]][[File:MonsterTiresMK8.png|link=Monster (tire)|32x32px]][[File:MK8ThumbRosalinaSG.png|link=Super Glider|32x32px]] | ||
|- | |- | ||
![[File:MK8 Tanooki Mario Icon.png|link=Tanooki Mario|32x32px]]||[[File:StandardKartBodyMK8.png|link=Standard Kart|32x32px]][[File:StandardTiresMK8.png|link=Standard (tire)|32x32px]][[File: | ![[File:MK8 Tanooki Mario Icon.png|link=Tanooki Mario|32x32px]]||[[File:StandardKartBodyMK8 TanookiMario.png|link=Standard Kart|32x32px]][[File:StandardTiresMK8.png|link=Standard (tire)|32x32px]][[File:MK8ThumbTanookiMarioSG.png|link=Super Glider|32x32px]]||[[File:MK8 Tanooki Buggy Sprite.png|link=Tanooki Kart|32x32px]][[File:MonsterTiresMK8.png|link=Monster (tire)|32x32px]][[File:WaddleWingMK8.png|link=Waddle Wing|32x32px]]||[[File:StandardBikeBodyMK8 TanookiMario.png|link=Standard Bike|32x32px]][[File:SlimTiresMK8.png|link=Slim (tire)|32x32px]][[File:MK8ThumbTanookiMarioSG.png|link=Super Glider|32x32px]]||[[File:VarmintBodyMK8.png|link=Varmint|32x32px]][[File:MonsterTiresMK8.png|link=Monster (tire)|32x32px]][[File:WaddleWingMK8.png|link=Waddle Wing|32x32px]] | ||
|- | |- | ||
![[File:MK8 Cat Peach Icon.png|link=Cat Peach|32x32px]]||[[File:StandardKartBodyMK8.png|link=Standard Kart|32x32px]][[File:StandardTiresMK8.png|link=Standard (tire)|32x32px]][[File: | ![[File:MK8 Cat Peach Icon.png|link=Cat Peach|32x32px]]||[[File:StandardKartBodyMK8 CatPeach.png|link=Standard Kart|32x32px]][[File:StandardTiresMK8.png|link=Standard (tire)|32x32px]][[File:MK8ThumbCatPeachSG.png|link=Super Glider|32x32px]]||[[File:CatCruiserBodyMK8.png|link=Cat Cruiser|32x32px]][[File:Retro Off-Road.png|link=Retro Off-Road|32x32px]][[File:MK8ThumbCatPeachSG.png|link=Super Glider|32x32px]]||[[File:PrancerBodyMK8.png|link=Prancer|32x32px]][[File:WoodTiresMK8.png|link=Wood|32x32px]][[File:PeachParasolGliderMK8.png|link=Peach Parasol (glider)|32x32px]]||[[File:StandardBikeBodyMK8 CatPeach.png|link=Standard Bike|32x32px]][[File:SlimTiresMK8.png|link=Slim (tire)|32x32px]][[File:PlaneGliderMK8.png|link=Plane Glider|32x32px]] | ||
|- | |- | ||
![[File: | ![[File:MK8D Birdo Icon.png|link=Birdo|32x32px]]||[[File:StandardKartBodyMK8 Toadette.png|link=Standard Kart|32x32px]][[File:StandardTiresMK8.png|link=Standard (tire)|32x32px]][[File:MK8ThumbToadetteSG.png|link=Super Glider|32x32px]]||[[File:Mach8BodyMK8.png|link=Mach 8|32x32px]][[File:SlimTiresMK8.png|link=Slim (tire)|32x32px]][[File:MK8ThumbToadetteSG.png|link=Super Glider|32x32px]]||[[File:StandardBikeBodyMK8 Toadette.png|link=Standard Bike|32x32px]][[File:SlimTiresMK8.png|link=Slim (tire)|32x32px]][[File:MK8ThumbToadetteSG.png|link=Super Glider|32x32px]]||[[File:WildWigglerBodyMK8.png|link=Wild Wiggler|32x32px]][[File:StandardTiresMK8.png|link=Standard (tire)|32x32px]][[File:FlowerGliderMK8.png|link=Flower Glider|32x32px]] | ||
|- | |- | ||
![[File:MK8 | ![[File:MK8 Yoshi Icon.png|link=Yoshi|32x32px]]||[[File:StandardKartBodyMK8 Yoshi.png|link=Standard Kart|32x32px]][[File:StandardTiresMK8.png|link=Standard (tire)|32x32px]][[File:MK8ThumbYoshiSG.png|link=Super Glider|32x32px]]||[[File:Mach8BodyMK8.png|link=Mach 8|32x32px]][[File:SlimTiresMK8.png|link=Slim (tire)|32x32px]][[File:MK8ThumbYoshiSG.png|link=Super Glider|32x32px]]||[[File:StandardBikeBodyMK8 Yoshi.png|link=Standard Bike|32x32px]][[File:SlimTiresMK8.png|link=Slim (tire)|32x32px]][[File:MK8ThumbYoshiSG.png|link=Super Glider|32x32px]]||[[File:WildWigglerBodyMK8.png|link=Wild Wiggler|32x32px]][[File:StandardTiresMK8.png|link=Standard (tire)|32x32px]][[File:FlowerGliderMK8.png|link=Flower Glider|32x32px]] | ||
|- | |- | ||
![[File:MK8 | ![[File:MK8 Toad Icon.png|link=Toad|32x32px]]||[[File:StandardKartBodyMK8 Toad.png|link=Standard Kart|32x32px]][[File:StandardTiresMK8.png|link=Standard (tire)|32x32px]][[File:MK8ThumbToadSG.png|link=Super Glider|32x32px]]||[[File:MK8BluePFIcon.png|link=Pipe Frame|32x32px]][[File:SlimTiresMK8.png|link=Slim (tire)|32x32px]][[File:ParafoilGliderMK8.png|link=Parafoil|32x32px]]||[[File:SneakerBodyMK8.png|link=Sneeker|32x32px]][[File:Blue Standard.png|link=Blue Standard|32x32px]][[File:MK8ThumbToadSG.png|link=Super Glider|32x32px]]||[[File:YoshiBikeBodyMK8.png|link=Yoshi Bike|32x32px]][[File:CrimsonSlimTiresMK8.png|link=Crimson Slim|32x32px]][[File:MK8ThumbToadSG.png|link=Super Glider|32x32px]] | ||
|- | |- | ||
![[File:MK8 | ![[File:MK8 Koopa Icon.png|link=Koopa Troopa|32x32px]]||[[File:StandardKartBodyMK8 KoopaTroopa.png|link=Standard Kart|32x32px]][[File:StandardTiresMK8.png|link=Standard (tire)|32x32px]][[File:MK8ThumbKoopaTroopaSG.png|link=Super Glider|32x32px]]||[[File:Steel Driver.png|link=Steel Driver|32x32px]][[File:MetalTiresMK8.png|link=Metal|32x32px]][[File:ParafoilGliderMK8.png|link=Parafoil|32x32px]]||[[File:Sport Bike Green.png|link=Sport Bike|32x32px]][[File:StandardTiresMK8.png|link=Standard (tire)|32x32px]][[File:MK8ThumbKoopaTroopaSG.png|link=Super Glider|32x32px]]||[[File:StandardATVBodyMK8 KoopaTroopa.png|link=Standard ATV|32x32px]][[File:StandardTiresMK8.png|link=Standard (tire)|32x32px]][[File:MK8ThumbKoopaTroopaSG.png|link=Super Glider|32x32px]] | ||
|- | |- | ||
![[File:MK8 | ![[File:MK8 ShyGuy Icon.png|link=Shy Guy|32x32px]]||[[File:StandardKartBodyMK8 ShyGuy.png|link=Standard Kart|32x32px]][[File:StandardTiresMK8.png|link=Standard (tire)|32x32px]][[File:MK8ThumbShyGuySG.png|link=Super Glider|32x32px]]||[[File:MK8BlackPFIcon.png|link=Pipe Frame|32x32px]][[File:StandardTiresMK8.png|link=Standard (tire)|32x32px]][[File:MK8ThumbShyGuySG.png|link=Super Glider|32x32px]]||[[File:MK8 Gray Sneeker.png|link=Sneeker|32x32px]][[File:Off-Road.png|link=Off-Road|32x32px]][[File:MK8ThumbShyGuySG.png|link=Super Glider|32x32px]]||[[File:FlameRiderBodyMK8.png|link=Flame Rider|32x32px]][[File:Off-Road.png|link=Off-Road|32x32px]][[File:MK8ThumbShyGuySG.png|link=Super Glider|32x32px]] | ||
|- | |- | ||
![[File:MK8 | ![[File:MK8 Lakitu Icon.png|link=Lakitu|32x32px]]||[[File:StandardKartBodyMK8 Lakitu.png|link=Standard Kart|32x32px]][[File:StandardTiresMK8.png|link=Standard (tire)|32x32px]][[File:MK8ThumbLakituSG.png|link=Super Glider|32x32px]]||[[File:Biddybuggy-blue.png|link=Biddybuggy|32x32px]][[File:MonsterTiresMK8.png|link=Monster (tire)|32x32px]][[File:ParachuteGliderMK8.png|link=Parachute (glider)|Parachute|32x32px]]||[[File:MrScootyBodyMK8.png|link=Mr. Scooty|32x32px]][[File:StandardTiresMK8.png|link=Standard (tire)|32x32px]][[File:Cloud Glider.png|link=Cloud Glider|32x32px]]||[[File:StandardATVBodyMK8 Lakitu.png|link=Standard ATV|32x32px]][[File:StandardTiresMK8.png|link=Standard (tire)|32x32px]][[File:Cloud Glider.png|link=Cloud Glider|32x32px]] | ||
|- | |- | ||
![[File:MK8DX King Boo Icon.png|link=King Boo|32x32px]]||[[File:StandardKartBodyMK8.png|link=Standard Kart|32x32px]][[File:MonsterTiresMK8.png|link=Monster (tire)|32x32px]][[File: | ![[File:MK8 Toadette Icon.png|link=Toadette|32x32px]]||[[File:StandardKartBodyMK8 Toadette.png|link=Standard Kart|32x32px]][[File:StandardTiresMK8.png|link=Standard (tire)|32x32px]][[File:MK8ThumbToadetteSG.png|link=Super Glider|32x32px]]||[[File:CatCruiserBodyMK8.png|link=Cat Cruiser|32x32px]][[File:Retro Off-Road.png|link=Retro Off-Road|32x32px]][[File:MK8ThumbToadetteSG.png|link=Super Glider|32x32px]]||[[File:MrScootyBodyMK8.png|link=Mr. Scooty|32x32px]][[File:AzureRollerTiresMK8.png|link=Azure Roller|32x32px]][[File:MK8ThumbToadetteSG.png|link=Super Glider|32x32px]]||[[File:TeddyBuggyBodyMK8.png|link=Teddy Buggy|32x32px]][[File:ButtonTiresMK8.png|link=Button (tire)|32x32px]][[File:ParafoilGliderMK8.png|link=Parafoil|32x32px]] | ||
|- | |||
![[File:MK8DX King Boo Icon.png|link=King Boo|32x32px]]||[[File:StandardKartBodyMK8D KingBoo.png|link=Standard Kart|32x32px]][[File:MonsterTiresMK8.png|link=Monster (tire)|32x32px]][[File:MK8DThumbKingBooSG.png|link=Super Glider|32x32px]]||[[File:MK8 Black Circuit.png|link=Circuit Special|32x32px]][[File:StandardTiresMK8.png|link=Standard (tire)|32x32px]][[File:MK8DThumbKingBooSG.png|link=Super Glider|32x32px]]||[[File:BadwagonBodyMK8.png|link=Badwagon|32x32px]][[File:Off-Road.png|link=Off-Road|32x32px]][[File:MK8DThumbKingBooSG.png|link=Super Glider|32x32px]]||[[File:FlameRiderBodyMK8.png|link=Flame Rider|32x32px]][[File:MonsterTiresMK8.png|link=Monster (tire)|32x32px]][[File:MK8DThumbKingBooSG.png|link=Super Glider|32x32px]] | |||
|- | |||
![[File:MK8DX Petey Piranha Icon.png|link=Petey Piranha|32x32px]]||[[File:StandardKartBodyMK8 Luigi.png|link=Standard Kart|32x32px]][[File:MonsterTiresMK8.png|link=Monster (tire)|32x32px]][[File:MK8ThumbGreenSG.png|link=Super Glider|32x32px]]||[[File:MK8 Green Circuit Special.png|link=Circuit Special|32x32px]][[File:StandardTiresMK8.png|link=Standard (tire)|32x32px]][[File:MK8ThumbGreenSG.png|link=Super Glider|32x32px]]||[[File:BadwagonBodyMK8.png|link=Badwagon|32x32px]][[File:Off-Road.png|link=Off-Road|32x32px]][[File:MK8ThumbGreenSG.png|link=Super Glider|32x32px]]||[[File:FlameRiderBodyMK8.png|link=Flame Rider|32x32px]][[File:MonsterTiresMK8.png|link=Monster (tire)|32x32px]][[File:MK8ThumbGreenSG.png|link=Super Glider|32x32px]] | |||
|- | |- | ||
![[File:MK8 BabyMario Icon.png|link=Baby Mario|32x32px]]||[[File:StandardKartBodyMK8.png|link=Standard Kart|32x32px]][[File:StandardTiresMK8.png|link=Standard (tire)|32x32px]][[File:SuperGliderMK8.png|link=Super Glider|32x32px]]||[[File:PipeFrameBodyMK8.png|link=Pipe Frame|32x32px]][[File:StandardTiresMK8.png|link=Standard (tire)|32x32px]][[File:ParafoilGliderMK8.png|link=Parafoil|32x32px]]||[[File:BiddybuggyBodyMK8.png|link=Biddybuggy|32x32px]][[File:StandardTiresMK8.png|link=Standard (tire)|32x32px]][[File:SuperGliderMK8.png|link=Super Glider|32x32px]]||[[File:YoshiBikeBodyMK8.png|link=Yoshi Bike|32x32px]][[File:MonsterTiresMK8.png|link=Monster (tire)|32x32px]][[File:SuperGliderMK8.png|link=Super Glider|32x32px]] | ![[File:MK8 BabyMario Icon.png|link=Baby Mario|32x32px]]||[[File:StandardKartBodyMK8.png|link=Standard Kart|32x32px]][[File:StandardTiresMK8.png|link=Standard (tire)|32x32px]][[File:SuperGliderMK8.png|link=Super Glider|32x32px]]||[[File:PipeFrameBodyMK8.png|link=Pipe Frame|32x32px]][[File:StandardTiresMK8.png|link=Standard (tire)|32x32px]][[File:ParafoilGliderMK8.png|link=Parafoil|32x32px]]||[[File:BiddybuggyBodyMK8.png|link=Biddybuggy|32x32px]][[File:StandardTiresMK8.png|link=Standard (tire)|32x32px]][[File:SuperGliderMK8.png|link=Super Glider|32x32px]]||[[File:YoshiBikeBodyMK8.png|link=Yoshi Bike|32x32px]][[File:MonsterTiresMK8.png|link=Monster (tire)|32x32px]][[File:SuperGliderMK8.png|link=Super Glider|32x32px]] | ||
|- | |- | ||
![[File:MK8 BabyLuigi Icon.png|link=Baby Luigi|32x32px]]||[[File:StandardKartBodyMK8.png|link=Standard Kart|32x32px]][[File:StandardTiresMK8.png|link=Standard (tire)|32x32px]][[File: | ![[File:MK8 BabyLuigi Icon.png|link=Baby Luigi|32x32px]]||[[File:StandardKartBodyMK8 Luigi.png|link=Standard Kart|32x32px]][[File:StandardTiresMK8.png|link=Standard (tire)|32x32px]][[File:MK8ThumbGreenSG.png|link=Super Glider|32x32px]]||[[File:MK8GreenPFIcon.png|link=Pipe Frame|32x32px]][[File:StandardTiresMK8.png|link=Standard (tire)|32x32px]][[File:ParafoilGliderMK8.png|link=Parafoil|32x32px]]||[[File:Biddybuggy-green.png|link=Biddybuggy|32x32px]][[File:StandardTiresMK8.png|link=Standard (tire)|32x32px]][[File:MK8ThumbGreenSG.png|link=Super Glider|32x32px]]||[[File:MrScootyBodyMK8.png|link=Mr. Scooty|32x32px]][[File:RollerTiresMK8.png|link=Roller|32x32px]][[File:MK8ThumbGreenSG.png|link=Super Glider|32x32px]] | ||
|- | |- | ||
![[File:MK8 BabyPeach Icon.png|link=Baby Peach|32x32px]]||[[File:StandardKartBodyMK8.png|link=Standard Kart|32x32px]][[File:StandardTiresMK8.png|link=Standard (tire)|32x32px]][[File: | ![[File:MK8 BabyPeach Icon.png|link=Baby Peach|32x32px]]||[[File:StandardKartBodyMK8 Peach.png|link=Standard Kart|32x32px]][[File:StandardTiresMK8.png|link=Standard (tire)|32x32px]][[File:MK8ThumbPinkSG.png|link=Super Glider|32x32px]]||[[File:Biddybuggy-pink.png|link=Biddybuggy|32x32px]][[File:StandardTiresMK8.png|link=Standard (tire)|32x32px]][[File:MK8ThumbPinkSG.png|link=Super Glider|32x32px]]||[[File:StandardBikeBodyMK8 Peach.png|link=Standard Bike|32x32px]][[File:StandardTiresMK8.png|link=Standard (tire)|32x32px]][[File:PlaneGliderMK8.png|link=Plane Glider|32x32px]]||[[File:TeddyBuggyBodyMK8.png|link=Teddy Buggy|32x32px]][[File:WoodTiresMK8.png|link=Wood|32x32px]][[File:ParafoilGliderMK8.png|link=Parafoil|32x32px]] | ||
|- | |- | ||
![[File:MK8 BabyDaisy Icon.png|link=Baby Daisy|32x32px]]||[[File:StandardKartBodyMK8.png|link=Standard Kart|32x32px]][[File:StandardTiresMK8.png|link=Standard (tire)|32x32px]][[File: | ![[File:MK8 BabyDaisy Icon.png|link=Baby Daisy|32x32px]]||[[File:StandardKartBodyMK8 Daisy.png|link=Standard Kart|32x32px]][[File:StandardTiresMK8.png|link=Standard (tire)|32x32px]][[File:MK8ThumbOrangeSG.png|link=Super Glider|32x32px]]||[[File:Biddybuggy-yellow.png|link=Biddybuggy|32x32px]][[File:StandardTiresMK8.png|link=Standard (tire)|32x32px]][[File:MK8ThumbOrangeSG.png|link=Super Glider|32x32px]]||[[File:StandardBikeBodyMK8 Daisy.png|link=Standard Bike|32x32px]][[File:StandardTiresMK8.png|link=Standard (tire)|32x32px]][[File:PlaneGliderMK8.png|link=Plane Glider|32x32px]]||[[File:WildWigglerBodyMK8.png|link=Wild Wiggler|32x32px]][[File:WoodTiresMK8.png|link=Wood|32x32px]][[File:FlowerGliderMK8.png|link=Flower Glider|32x32px]] | ||
|- | |- | ||
![[File:MK8 BabyRosalina Icon.png|link=Baby Rosalina|32x32px]]||[[File:StandardKartBodyMK8.png|link=Standard Kart|32x32px]][[File:StandardTiresMK8.png|link=Standard (tire)|32x32px]][[File: | ![[File:MK8 BabyRosalina Icon.png|link=Baby Rosalina|32x32px]]||[[File:StandardKartBodyMK8 Rosalina.png|link=Standard Kart|32x32px]][[File:StandardTiresMK8.png|link=Standard (tire)|32x32px]][[File:MK8ThumbRosalinaSG.png|link=Super Glider|32x32px]]||[[File:Biddybuggy-blue.png|link=Biddybuggy|32x32px]][[File:StandardTiresMK8.png|link=Standard (tire)|32x32px]][[File:MK8ThumbRosalinaSG.png|link=Super Glider|32x32px]]||[[File:MrScootyBodyMK8.png|link=Mr. Scooty|32x32px]][[File:StandardTiresMK8.png|link=Standard (tire)|32x32px]][[File:MK8ThumbRosalinaSG.png|link=Super Glider|32x32px]]||[[File:StandardATVBodyMK8 Rosalina.png|link=Standard ATV|32x32px]][[File:Blue Standard.png|link=Blue Standard|32x32px]][[File:MK8ThumbRosalinaSG.png|link=Super Glider|32x32px]] | ||
|- | |- | ||
![[File:MK8 MMario Icon.png|link=Metal Mario | ![[File:MK8 MMario Icon.png|link=Metal Mario|32x32px]]||[[File:StandardKartBodyMK8 MetalMario.png|link=Standard Kart|32x32px]][[File:StandardTiresMK8.png|link=Standard (tire)|32x32px]][[File:MK8ThumbMetalMarioSG.png|link=Super Glider|32x32px]]||[[File:TrispeederBodyMK8.png|link=Tri-Speeder|32x32px]][[File:MetalTiresMK8.png|link=Metal|32x32px]][[File:MK8ThumbMetalMarioSG.png|link=Super Glider|32x32px]]||[[File:JetBikeBodyMK8.png|link=Jet Bike|32x32px]][[File:MetalTiresMK8.png|link=Metal|32x32px]][[File:MK8ThumbMetalMarioSG.png|link=Super Glider|32x32px]]||[[File:StandardATVBodyMK8 MetalMario.png|link=Standard ATV|32x32px]][[File:MonsterTiresMK8.png|link=Monster (tire)|32x32px]][[File:MK8ThumbMetalMarioSG.png|link=Super Glider|32x32px]] | ||
|- | |- | ||
![[File:MK8 PGPeach Icon.png|link=Pink Gold Peach|32x32px]]||[[File:StandardKartBodyMK8.png|link=Standard Kart|32x32px]][[File:StandardTiresMK8.png|link=Standard (tire)|32x32px]][[File: | ![[File:MK8 PGPeach Icon.png|link=Pink Gold Peach|32x32px]]||[[File:StandardKartBodyMK8 PinkGoldPeach.png|link=Standard Kart|32x32px]][[File:StandardTiresMK8.png|link=Standard (tire)|32x32px]][[File:MK8ThumbPinkGoldPeachSG.png|link=Super Glider|32x32px]]||[[File:MK8 Orange Circuit Special.png|link=Circuit Special|32x32px]][[File:SpongeTiresMK8.png|link=Sponge|32x32px]][[File:MK8ThumbPinkGoldPeachSG.png|link=Super Glider|32x32px]]||[[File:BadwagonBodyMK8.png|link=Badwagon|32x32px]][[File:Off-Road.png|link=Off-Road|32x32px]][[File:MK8ThumbPinkGoldPeachSG.png|link=Super Glider|32x32px]]||[[File:CometBodyMK8.png|link=Comet|32x32px]][[File:MetalTiresMK8.png|link=Metal|32x32px]][[File:MK8ThumbPinkGoldPeachSG.png|link=Super Glider|32x32px]] | ||
|- | |- | ||
![[File: | ![[File:MK8DX Wiggler Icon.png|link=Wiggler|32x32px]]||[[File:StandardKartBodyMK8 Daisy.png|link=Standard Kart|32x32px]][[File:StandardTiresMK8.png|link=Standard (tire)|32x32px]][[File:MK8ThumbOrangeSG.png|link=Super Glider|32x32px]]||[[File:Steel Driver.png|link=Steel Driver|32x32px]][[File:MetalTiresMK8.png|link=Metal|32x32px]][[File:ParafoilGliderMK8.png|link=Parafoil|32x32px]]||[[File:StandardBikeBodyMK8 Daisy.png|link=Standard Bike|32x32px]][[File:StandardTiresMK8.png|link=Standard (tire)|32x32px]][[File:MK8ThumbOrangeSG.png|link=Super Glider|32x32px]]||[[File:StandardATVBodyMK8 Daisy.png|link=Standard ATV|32x32px]][[File:Off-Road.png|link=Off-Road|32x32px]][[File:MK8ThumbOrangeSG.png|link=Super Glider|32x32px]] | ||
|- | |- | ||
![[File:MK8 | ![[File:MK8 Wario Icon.png|link=Wario|32x32px]]||[[File:StandardKartBodyMK8 Wario.png|link=Standard Kart|32x32px]][[File:MonsterTiresMK8.png|link=Monster (tire)|32x32px]][[File:MK8ThumbWarioSG.png|link=Super Glider|32x32px]]||[[File:TrispeederBodyMK8.png|link=Tri-Speeder|32x32px]][[File:Off-Road.png|link=Off-Road|32x32px]][[File:WarioWingMK8.png|link=Wario Wing|32x32px]]||[[File:VarmintBodyMK8.png|link=Varmint|32x32px]][[File:HotMonsterTiresMK8.png|link=Hot Monster|32x32px]][[File:WarioWingMK8.png|link=Wario Wing|32x32px]]||[[File:StandardATVBodyMK8 Wario.png|link=Standard ATV|32x32px]][[File:MonsterTiresMK8.png|link=Monster (tire)|32x32px]][[File:MK8ThumbWarioSG.png|link=Super Glider|32x32px]] | ||
|- | |- | ||
![[File:MK8 | ![[File:MK8 Waluigi Icon.png|link=Waluigi|32x32px]]||[[File:StandardKartBodyMK8 Waluigi.png|link=Standard Kart|32x32px]][[File:MonsterTiresMK8.png|link=Monster (tire)|32x32px]][[File:MK8ThumbWaluigiSG.png|link=Super Glider|32x32px]]||[[File:TheDukeBodyMK8.png|link=The Duke|32x32px]][[File:MonsterTiresMK8.png|link=Monster (tire)|32x32px]][[File:WarioWingMK8.png|link=Wario Wing|32x32px]]||[[File:FlameRiderBodyMK8.png|link=Flame Rider|32x32px]][[File:SlimTiresMK8.png|link=Slim (tire)|32x32px]][[File:WarioWingMK8.png|link=Wario Wing|32x32px]]||[[File:StandardATVBodyMK8 Waluigi.png|link=Standard ATV|32x32px]][[File:MonsterTiresMK8.png|link=Monster (tire)|32x32px]][[File:MK8ThumbWaluigiSG.png|link=Super Glider|32x32px]] | ||
|- | |- | ||
![[File:MK8 | ![[File:MK8 DKong Icon.png|link=Donkey Kong|32x32px]]||[[File:StandardKartBodyMK8 DonkeyKong.png|link=Standard Kart|32x32px]][[File:MonsterTiresMK8.png|link=Monster (tire)|32x32px]][[File:MK8ThumbDonkeyKongSG.png|link=Super Glider|32x32px]]||[[File:SportsCoupeMK8.png|link=Sports Coupe|32x32px]][[File:MonsterTiresMK8.png|link=Monster (tire)|32x32px]][[File:MK8ThumbDonkeyKongSG.png|link=Super Glider|32x32px]]||[[File:VarmintBodyMK8.png|link=Varmint|32x32px]][[File:MonsterTiresMK8.png|link=Monster (tire)|32x32px]][[File:WaddleWingMK8.png|link=Waddle Wing|32x32px]]||[[File:StandardATVBodyMK8 DonkeyKong.png|link=Standard ATV|32x32px]][[File:HotMonsterTiresMK8.png|link=Hot Monster|32x32px]][[File:WaddleWingMK8.png|link=Waddle Wing|32x32px]] | ||
|- | |- | ||
![[File: | ![[File:MK8 Bowser Icon.png|link=Bowser|32x32px]]||[[File:MK8 Black Circuit.png|link=Circuit Special|32x32px]][[File:MonsterTiresMK8.png|link=Monster (tire)|32x32px]][[File:MK8ThumbBowserSG.png|link=Super Glider|32x32px]]||[[File:LandshipBodyMK8.png|link=Landship|32x32px]][[File:WoodTiresMK8.png|link=Wood|32x32px]][[File:BowserKiteMK8.png|link=Bowser Kite|32x32px]]||[[File:MK8DX Koopa Clown.png|link=Koopa Clown|32x32px]][[File:StandardTiresMK8.png|link=Standard (tire)|32x32px]][[File:MK8ThumbBowserSG.png|link=Super Glider|32x32px]]||[[File:FlameRiderBodyMK8.png|link=Flame Rider|32x32px]][[File:MonsterTiresMK8.png|link=Monster (tire)|32x32px]][[File:BowserKiteMK8.png|link=Bowser Kite|32x32px]] | ||
|- | |- | ||
![[File: | ![[File:MK8DX Dry Bones Icon.png|link=Dry Bones|32x32px]]||[[File:StandardKartBodyMK8D DryBones.png|link=Standard Kart|32x32px]][[File:StandardTiresMK8.png|link=Standard (tire)|32x32px]][[File:MK8DThumbDryBonesSG.png|link=Super Glider|32x32px]]||[[File:Steel Driver.png|link=Steel Driver|32x32px]][[File:MetalTiresMK8.png|link=Metal|32x32px]][[File:ParafoilGliderMK8.png|link=Parafoil|32x32px]]||[[File:StandardBikeBodyMK8D DryBones.png|link=Standard Bike|32x32px]][[File:StandardTiresMK8.png|link=Standard (tire)|32x32px]][[File:MK8DThumbDryBonesSG.png|link=Super Glider|32x32px]]||[[File:StandardATVBodyMK8D DryBones.png|link=Standard ATV|32x32px]][[File:Off-Road.png|link=Off-Road|32x32px]][[File:MK8DThumbDryBonesSG.png|link=Super Glider|32x32px]] | ||
|- | |- | ||
![[File:MK8 | ![[File:MK8 Bowser Jr Icon.png|link=Bowser Jr.|32x32px]]||[[File:LandshipBodyMK8.png|link=Landship|32x32px]][[File:WoodTiresMK8.png|link=Wood|32x32px]][[File:MK8DThumbBowserJrSG.png|link=Super Glider|32x32px]]||[[File:MK8DX Koopa Clown.png|link=Koopa Clown|32x32px]][[File:StandardTiresMK8.png|link=Standard (tire)|32x32px]][[File:MK8DThumbBowserJrSG.png|link=Super Glider|32x32px]]||[[File:StandardBikeBodyMK8D BowserJr.png|link=Standard Bike|32x32px]][[File:StandardTiresMK8.png|link=Standard (tire)|32x32px]][[File:MK8DThumbBowserJrSG.png|link=Super Glider|32x32px]]||[[File:StandardATVBodyMK8D BowserJr.png|link=Standard ATV|32x32px]][[File:StandardTiresMK8.png|link=Standard (tire)|32x32px]][[File:MK8DThumbBowserJrSG.png|link=Super Glider|32x32px]] | ||
|- | |- | ||
![[File:MK8 | ![[File:MK8 Dry Bowser Icon.png|link=Dry Bowser|32x32px]]||[[File:StandardKartBodyMK8 DryBowser.png|link=Standard Kart|32x32px]][[File:MonsterTiresMK8.png|link=Monster (tire)|32x32px]][[File:MK8ThumbDryBowserSG.png|link=Super Glider|32x32px]]||[[File:StandardBikeBodyMK8 DryBowser.png|link=Standard Bike|32x32px]][[File:MonsterTiresMK8.png|link=Monster (tire)|32x32px]][[File:MK8ThumbDryBowserSG.png|link=Super Glider|32x32px]]||[[File:StandardATVBodyMK8 DryBowser.png|link=Standard ATV|32x32px]][[File:MonsterTiresMK8.png|link=Monster (tire)|32x32px]][[File:MK8ThumbDryBowserSG.png|link=Super Glider|32x32px]]||[[File:MK8BoneRattler.png|link=Bone Rattler|32x32px]][[File:MetalTiresMK8.png|link=Metal|32x32px]][[File:MK8ThumbDryBowserSG.png|link=Super Glider|32x32px]] | ||
|- | |- | ||
![[File: | ![[File:MK8DX Kamek Icon.png|link=Kamek|32x32px]]||[[File:LandshipBodyMK8.png|link=Landship|32x32px]][[File:WoodTiresMK8.png|link=Wood|32x32px]][[File:MK8ThumbSkyMiiSG.png|link=Super Glider|32x32px]]||[[File:MK8DX Koopa Clown.png|link=Koopa Clown|32x32px]][[File:StandardTiresMK8.png|link=Standard (tire)|32x32px]][[File:MK8ThumbSkyMiiSG.png|link=Super Glider|32x32px]]||[[File:StandardBikeBodyMK8 Lakitu.png|link=Standard Bike|32x32px]][[File:StandardTiresMK8.png|link=Standard (tire)|32x32px]][[File:MK8ThumbSkyMiiSG.png|link=Super Glider|32x32px]]||[[File:StandardATVBodyMK8 Lakitu.png|link=Standard ATV|32x32px]][[File:StandardTiresMK8.png|link=Standard (tire)|32x32px]][[File:MK8ThumbSkyMiiSG.png|link=Super Glider|32x32px]] | ||
|- | |- | ||
![[File:MK8 | ![[File:MK8 Lemmy Icon.png|link=Lemmy Koopa|32x32px]]||[[File:MK8 Green Circuit Special.png|link=Circuit Special|32x32px]][[File:StandardTiresMK8.png|link=Standard (tire)|32x32px]][[File:MK8ThumbLemmySG.png|link=Super Glider|32x32px]]||[[File:Landship-Lemmy.png|link=Landship|32x32px]][[File:WoodTiresMK8.png|link=Wood|32x32px]][[File:MK8ThumbLemmySG.png|link=Super Glider|32x32px]]||[[File:MK8DX Koopa ClownLemmy.png|link=Koopa Clown|32x32px]][[File:StandardTiresMK8.png|link=Standard (tire)|32x32px]][[File:MK8ThumbLemmySG.png|link=Super Glider|32x32px]]||[[File:MrScootyBodyMK8.png|link=Mr. Scooty|32x32px]][[File:StandardTiresMK8.png|link=Standard (tire)|32x32px]][[File:MK8ThumbLemmySG.png|link=Super Glider|32x32px]] | ||
|- | |- | ||
![[File:MK8 | ![[File:MK8 Larry Icon.png|link=Larry Koopa|32x32px]]||[[File:Landship-Larry.png|link=Landship|32x32px]][[File:WoodTiresMK8.png|link=Wood|32x32px]][[File:MK8ThumbLarrySG.png|link=Super Glider|32x32px]]||[[File:MK8DX Koopa ClownLarry.png|link=Koopa Clown|32x32px]][[File:StandardTiresMK8.png|link=Standard (tire)|32x32px]][[File:MK8ThumbLarrySG.png|link=Super Glider|32x32px]]||[[File:SportBikeBodyMK8.png|link=Sport Bike|32x32px]][[File:MonsterTiresMK8.png|link=Monster (tire)|32x32px]][[File:MK8ThumbLarrySG.png|link=Super Glider|32x32px]]||[[File:StandardATVBodyMK8 Larry.png|link=Standard ATV|32x32px]][[File:Blue Standard.png|link=Blue Standard|32x32px]][[File:MK8ThumbLarrySG.png|link=Super Glider|32x32px]] | ||
|- | |- | ||
![[File:MK8 | ![[File:MK8 Wendy Icon.png|link=Wendy O. Koopa|32x32px]]||[[File:Landship-Wendy.png|link=Landship|32x32px]][[File:WoodTiresMK8.png|link=Wood|32x32px]][[File:MK8ThumbWendySG.png|link=Super Glider|32x32px]]||[[File:MK8 Pink Sneeker.png|link=Sneeker|32x32px]][[File:StandardTiresMK8.png|link=Standard (tire)|32x32px]][[File:MK8ThumbWendySG.png|link=Super Glider|32x32px]]||[[File:MK8DX Koopa ClownWendy.png|link=Koopa Clown|32x32px]][[File:StandardTiresMK8.png|link=Standard (tire)|32x32px]][[File:MK8ThumbWendySG.png|link=Super Glider|32x32px]]||[[File:VarmintBodyMK8.png|link=Varmint|32x32px]][[File:StandardTiresMK8.png|link=Standard (tire)|32x32px]][[File:MK8ThumbWendySG.png|link=Super Glider|32x32px]] | ||
|- | |- | ||
![[File:MK8 | ![[File:MK8 Ludwig Icon.png|link=Ludwig von Koopa|32x32px]]||[[File:Biddybuggy-blue.png|link=Biddybuggy|32x32px]][[File:RollerTiresMK8.png|link=Roller|32x32px]][[File:MK8ThumbLudwigSG.png|link=Super Glider|32x32px]]||[[File:Landship-Ludwig.png|link=Landship|32x32px]][[File:WoodTiresMK8.png|link=Wood|32x32px]][[File:MK8ThumbLudwigSG.png|link=Super Glider|32x32px]]||[[File:MK8DX Koopa ClownLudwig.png|link=Koopa Clown|32x32px]][[File:StandardTiresMK8.png|link=Standard (tire)|32x32px]][[File:MK8ThumbLudwigSG.png|link=Super Glider|32x32px]]||[[File:JetBikeBodyMK8.png|link=Jet Bike|32x32px]][[File:SlimTiresMK8.png|link=Slim (tire)|32x32px]][[File:MK8ThumbLudwigSG.png|link=Super Glider|32x32px]] | ||
|- | |- | ||
![[File:MK8 | ![[File:MK8 Iggy Icon.png|link=Iggy Koopa|32x32px]]||[[File:Steel Driver.png|link=Steel Driver|32x32px]][[File:MetalTiresMK8.png|link=Metal|32x32px]][[File:ParafoilGliderMK8.png|link=Parafoil|32x32px]]||[[File:Landship-Iggy.png|link=Landship|32x32px]][[File:WoodTiresMK8.png|link=Wood|32x32px]][[File:MK8ThumbIggySG.png|link=Super Glider|32x32px]]||[[File:MK8DX Koopa ClownIggy.png|link=Koopa Clown|32x32px]][[File:StandardTiresMK8.png|link=Standard (tire)|32x32px]][[File:MK8ThumbIggySG.png|link=Super Glider|32x32px]]||[[File:StandardBikeBodyMK8 Iggy.png|link=Standard Bike|32x32px]][[File:SlimTiresMK8.png|link=Slim (tire)|32x32px]][[File:MK8ThumbIggySG.png|link=Super Glider|32x32px]] | ||
|- | |- | ||
![[File: | ![[File:MK8 Roy Icon.png|link=Roy Koopa|32x32px]]||[[File:BadwagonBodyMK8.png|link=Badwagon|32x32px]][[File:Off-Road.png|link=Off-Road|32x32px]][[File:MK8ThumbRoySG.png|link=Super Glider|32x32px]]||[[File:Landship-Roy.png|link=Landship|32x32px]][[File:WoodTiresMK8.png|link=Wood|32x32px]][[File:MK8ThumbRoySG.png|link=Super Glider|32x32px]]||[[File:MK8DX Koopa ClownRoy.png|link=Koopa Clown|32x32px]][[File:StandardTiresMK8.png|link=Standard (tire)|32x32px]][[File:MK8ThumbRoySG.png|link=Super Glider|32x32px]]||[[File:TheDukeBodyMK8.png|link=The Duke|32x32px]][[File:MonsterTiresMK8.png|link=Monster (tire)|32x32px]][[File:MK8ThumbRoySG.png|link=Super Glider|32x32px]] | ||
|- | |- | ||
![[File: | ![[File:MK8 Morton Icon.png|link=Morton Koopa Jr.|32x32px]]||[[File:TrispeederBodyMK8.png|link=Tri-Speeder|32x32px]][[File:MonsterTiresMK8.png|link=Monster (tire)|32x32px]][[File:MK8ThumbMortonSG.png|link=Super Glider|32x32px]]||[[File:Landship-Morton.png|link=Landship|32x32px]][[File:WoodTiresMK8.png|link=Wood|32x32px]][[File:MK8ThumbMortonSG.png|link=Super Glider|32x32px]]||[[File:MK8DX Koopa ClownMorton.png|link=Koopa Clown|32x32px]][[File:StandardTiresMK8.png|link=Standard (tire)|32x32px]][[File:MK8ThumbMortonSG.png|link=Super Glider|32x32px]]||[[File:StandardBikeBodyMK8 Morton.png|link=Standard Bike|32x32px]][[File:MonsterTiresMK8.png|link=Monster (tire)|32x32px]][[File:MK8ThumbMortonSG.png|link=Super Glider|32x32px]] | ||
|- | |- | ||
![[File: | ![[File:MK8DX Peachette Icon.png|link=Peachette|32x32px]]||[[File:StandardKartBodyMK8 Toadette.png|link=Standard Kart|32x32px]][[File:StandardTiresMK8.png|link=Standard (tire)|32x32px]][[File:MK8ThumbToadetteSG.png|link=Super Glider|32x32px]]||[[File:CatCruiserBodyMK8.png|link=Cat Cruiser|32x32px]][[File:Retro Off-Road.png|link=Retro Off-Road|32x32px]][[File:MK8ThumbToadetteSG.png|link=Super Glider|32x32px]]||[[File:MrScootyBodyMK8.png|link=Mr. Scooty|32x32px]][[File:AzureRollerTiresMK8.png|link=Azure Roller|32x32px]][[File:MK8ThumbToadetteSG.png|link=Super Glider|32x32px]]||[[File:TeddyBuggyBodyMK8.png|link=Teddy Buggy|32x32px]][[File:ButtonTiresMK8.png|link=Button (tire)|32x32px]][[File:ParafoilGliderMK8.png|link=Parafoil|32x32px]] | ||
|- | |- | ||
![[File: | ![[File:MK8DX Female Inkling Icon.png|link=Inkling|32x32px]]||[[File:StandardKartBodyMK8D InklingGirl.png|link=Standard Kart|32x32px]][[File:StandardTiresMK8.png|link=Standard (tire)|32x32px]][[File:MK8DThumbInklingGirlSG.png|link=Super Glider|32x32px]]||[[File:StandardBikeBodyMK8D InklingGirl.png|link=Standard Bike|32x32px]][[File:MonsterTiresMK8.png|link=Monster (tire)|32x32px]][[File:MK8DThumbInklingGirlSG.png|link=Super Glider|32x32px]]||[[File:SplatBuggyMK8D InklingGirlOrange.png|link=Splat Buggy|32x32px]][[File:StandardTiresMK8.png|link=Standard (tire)|32x32px]][[File:MK8DThumbInklingGirlSG.png|link=Super Glider|32x32px]]||[[File:InkstrikerMK8D InklingGirlOrange.png|link=Inkstriker|32x32px]][[File:StandardTiresMK8.png|link=Standard (tire)|32x32px]][[File:MK8DThumbInklingGirlSG.png|link=Super Glider|32x32px]] | ||
|- | |- | ||
![[File: | ![[File:MK8DX Male Inkling Icon.png|link=Inkling|32x32px]]||[[File:StandardKartBodyMK8D InklingBoy.png|link=Standard Kart|32x32px]][[File:StandardTiresMK8.png|link=Standard (tire)|32x32px]][[File:MK8DThumbInklingBoySG.png|link=Super Glider|32x32px]]||[[File:StandardBikeBodyMK8D InklingBoy.png|link=Standard Bike|32x32px]][[File:MonsterTiresMK8.png|link=Monster (tire)|32x32px]][[File:MK8DThumbInklingBoySG.png|link=Super Glider|32x32px]]||[[File:SplatBuggyMK8D InklingBoyBlue.png|link=Splat Buggy|32x32px]][[File:StandardTiresMK8.png|link=Standard (tire)|32x32px]][[File:MK8DThumbInklingBoySG.png|link=Super Glider|32x32px]]||[[File:InkstrikerMK8D InklingBoyBlue.png|link=Inkstriker|32x32px]][[File:StandardTiresMK8.png|link=Standard (tire)|32x32px]][[File:MK8DThumbInklingBoySG.png|link=Super Glider|32x32px]] | ||
|- | |- | ||
![[File: | ![[File:VillagerMale-Icon-MK8.png|link=Villager|32x32px]]||[[File:StandardKartBodyMK8 VillagerBoy.png|link=Standard Kart|32x32px]][[File:StandardTiresMK8.png|link=Standard (tire)|32x32px]][[File:MK8ThumbVillagerBoySG.png|link=Super Glider|32x32px]]||[[File:BiddybuggyBodyMK8.png|link=Biddybuggy|32x32px]][[File:StandardTiresMK8.png|link=Standard (tire)|32x32px]][[File:MK8ThumbVillagerBoySG.png|link=Super Glider|32x32px]]||[[File:MK8Streetle.png|link=Streetle|32x32px]][[File:Leaf Tires MK8.png|link=Leaf Tires|32x32px]][[File:PaperGliderIcon-MK8.png|link=Paper Glider|32x32px]]||[[File:MK8 Red City Tripper.png|link=City Tripper|32x32px]][[File:SlimTiresMK8.png|link=Slim (tire)|32x32px]][[File:PaperGliderIcon-MK8.png|link=Paper Glider|32x32px]] | ||
|- | |- | ||
![[File:MK8 Isabelle Icon.png|link=Isabelle|32x32px]]||[[File:StandardKartBodyMK8.png|link=Standard Kart|32x32px]][[File:StandardTiresMK8.png|link=Standard (tire)|32x32px]][[File: | ![[File:VillagerFemale-Icon-MK8.png|link=Villager|32x32px]]||[[File:StandardKartBodyMK8 VillagerGirl.png|link=Standard Kart|32x32px]][[File:StandardTiresMK8.png|link=Standard (tire)|32x32px]][[File:MK8ThumbVillagerGirlSG.png|link=Super Glider|32x32px]]||[[File:Biddybuggy-pink.png|link=Biddybuggy|32x32px]][[File:StandardTiresMK8.png|link=Standard (tire)|32x32px]][[File:MK8ThumbVillagerGirlSG.png|link=Super Glider|32x32px]]||[[File:MK8 Pink City Tripper.png|link=City Tripper|32x32px]][[File:SlimTiresMK8.png|link=Slim (tire)|32x32px]][[File:PaperGliderIcon-MK8.png|link=Paper Glider|32x32px]]||[[File:TeddyBuggyBodyMK8.png|link=Teddy Buggy|32x32px]][[File:ButtonTiresMK8.png|link=Button (tire)|32x32px]][[File:PaperGliderIcon-MK8.png|link=Paper Glider|32x32px]] | ||
|- | |||
![[File:MK8 Isabelle Icon.png|link=Isabelle|32x32px]]||[[File:StandardKartBodyMK8 Isabelle.png|link=Standard Kart|32x32px]][[File:StandardTiresMK8.png|link=Standard (tire)|32x32px]][[File:MK8ThumbIsabelleSG.png|link=Super Glider|32x32px]]||[[File:Biddybuggy-green.png|link=Biddybuggy|32x32px]][[File:StandardTiresMK8.png|link=Standard (tire)|32x32px]][[File:PaperGliderIcon-MK8.png|link=Paper Glider|32x32px]]||[[File:SportsCoupeMK8.png|link=Sports Coupe|32x32px]][[File:StandardTiresMK8.png|link=Standard (tire)|32x32px]][[File:MK8ThumbIsabelleSG.png|link=Super Glider|32x32px]]||[[File:MK8 Light-Green City Tripper.png|link=City Tripper|32x32px]][[File:SlimTiresMK8.png|link=Slim (tire)|32x32px]][[File:PaperGliderIcon-MK8.png|link=Paper Glider|32x32px]] | |||
|- | |||
![[File:MK8D BotW Link Icon.png|link=Link|32x32px]]||[[File:StandardKartBodyMK8D BotWLink.png|link=Standard Kart|32x32px]][[File:StandardTiresMK8.png|link=Standard (tire)|32x32px]][[File:MK8ThumbLinkSG.png|link=Super Glider|32x32px]]||[[File:Mach8BodyMK8.png|link=Mach 8|32x32px]][[File:MK8-TriforceTires.png|link=Triforce Tires|32x32px]][[File:MK8ThumbLinkSG.png|link=Super Glider|32x32px]]||[[File:FlameRiderBodyMK8.png|link=Flame Rider|32x32px]][[File:MonsterTiresMK8.png|link=Monster (tire)|32x32px]][[File:ParachuteGliderMK8.png|link=Parachute (glider)|Parachute|32x32px]]||[[File:MK8D Master Cycle Zero.png|link=Master Cycle Zero|32x32px]][[File:MK8D Ancient Tires.png|link=Ancient Tires|32x32px]][[File:MK8D Paraglider.png|link=Paraglider (The Legend of Zelda)|32x32px]] | |||
|- | |||
![[File:MK8 Link Icon.png|link=Link|32x32px]]||[[File:StandardKartBodyMK8 Link.png|link=Standard Kart|32x32px]][[File:StandardTiresMK8.png|link=Standard (tire)|32x32px]][[File:MK8ThumbLinkSG.png|link=Super Glider|32x32px]]||[[File:TrispeederBodyMK8.png|link=Tri-Speeder|32x32px]][[File:MK8-TriforceTires.png|link=Triforce Tires|32x32px]][[File:MK8-HylianKite.png|link=Hylian Kite|32x32px]]||[[File:CometBodyMK8.png|link=Comet|32x32px]][[File:SlimTiresMK8.png|link=Slim (tire)|32x32px]][[File:MK8ThumbLinkSG.png|link=Super Glider|32x32px]]||[[File:MK8MasterCycle.png|link=Master Cycle|32x32px]][[File:MK8-TriforceTires.png|link=Triforce Tires|32x32px]][[File:MK8-HylianKite.png|link=Hylian Kite|32x32px]] | |||
|- | |||
![[File:MK8DX Diddy Kong Icon.png|link=Diddy Kong|32x32px]]||[[File:StandardKartBodyMK8.png|link=Standard Kart|32x32px]][[File:StandardTiresMK8.png|link=Standard (tire)|32x32px]][[File:SuperGliderMK8.png|link=Super Glider|32x32px]]||[[File:PipeFrameBodyMK8.png|link=Pipe Frame|32x32px]][[File:SlimTiresMK8.png|link=Slim (tire)|32x32px]][[File:ParafoilGliderMK8.png|link=Parafoil|32x32px]]||[[File:SneakerBodyMK8.png|link=Sneeker|32x32px]][[File:Blue Standard.png|link=Blue Standard|32x32px]][[File:SuperGliderMK8.png|link=Super Glider|32x32px]]||[[File:YoshiBikeBodyMK8.png|link=Yoshi Bike|32x32px]][[File:CrimsonSlimTiresMK8.png|link=Crimson Slim|32x32px]][[File:SuperGliderMK8.png|link=Super Glider|32x32px]] | |||
|- | |||
![[File:MK8DX Funky Kong Icon.png|link=Funky Kong|32x32px]]||[[File:StandardKartBodyMK8 Lakitu.png|link=Standard Kart|32x32px]][[File:MonsterTiresMK8.png|link=Monster (tire)|32x32px]][[File:SuperGliderMK8.png|link=Super Glider|32x32px]]||[[File:SportsCoupeMK8.png|link=Sports Coupe|32x32px]][[File:MonsterTiresMK8.png|link=Monster (tire)|32x32px]][[File:SuperGliderMK8.png|link=Super Glider|32x32px]]||[[File:VarmintBodyMK8.png|link=Varmint|32x32px]][[File:MonsterTiresMK8.png|link=Monster (tire)|32x32px]][[File:WaddleWingMK8.png|link=Waddle Wing|32x32px]]||[[File:StandardATVBodyMK8 Lakitu.png|link=Standard ATV|32x32px]][[File:HotMonsterTiresMK8.png|link=Hot Monster|32x32px]][[File:WaddleWingMK8.png|link=Waddle Wing|32x32px]] | |||
|- | |||
![[File:MK8DX Pauline Icon.png|link=Pauline|32x32px]]||[[File:StandardKartBodyMK8.png|link=Standard Kart|32x32px]][[File:StandardTiresMK8.png|link=Standard (tire)|32x32px]][[File:SuperGliderMK8.png|link=Super Glider|32x32px]]||[[File:ZeldaMK8Bdasher.png|link=B Dasher|32x32px]][[File:StandardTiresMK8.png|link=Standard (tire)|32x32px]][[File:SuperGliderMK8.png|link=Super Glider|32x32px]]||[[File:MK8PWing.png|link=P-Wing (kart)|32x32px]][[File:Blue Standard.png|link=Blue Standard|32x32px]][[File:ParafoilGliderMK8.png|link=Parafoil|32x32px]]||[[File:CometBodyMK8.png|link=Comet|32x32px]][[File:SlimTiresMK8.png|link=Slim (tire)|32x32px]][[File:SuperGliderMK8.png|link=Super Glider|32x32px]] | |||
|} | |} | ||
| Line 441: | Line 847: | ||
''Mario Kart 8 Deluxe'' features different statistics with respect to ''[[Mario Kart 8]]''. | ''Mario Kart 8 Deluxe'' features different statistics with respect to ''[[Mario Kart 8]]''. | ||
===Statistics shown in the vehicle customization screen=== | ===Statistics shown in the vehicle customization screen=== | ||
Just like ''[[Mario Kart 7]]'' and ''[[Mario Kart 8#Statistics shown in the vehicle customization screen|Mario Kart 8]]'', the game uses "points" ("PT") which are conferred by characters and vehicle parts to determine the final values of the game's statistics. In each statistics, the points given by the character, body, tires, and glider are summed to obtain a final value called "Level" ("Lv") which is then used by [[Mario Kart 8 Deluxe in-game statistics#Statistics | Just like ''[[Mario Kart 7]]'' and ''[[Mario Kart 8#Statistics shown in the vehicle customization screen|Mario Kart 8]]'', the game uses "points" ("PT") which are conferred by characters and vehicle parts to determine the final values of the game's statistics. In each statistics, the points given by the character, body, tires, and glider are summed to obtain a final value called "Level" ("Lv") which is then used by [[Mario Kart 8 Deluxe in-game statistics#Statistics translation tables|a table]] to convert the level into appropriate physical parameters used by the game. There are a total of 8,064 different stat combinations. The Level of five statistics is displayed in the vehicle customization screen: | ||
*'''Speed:''' The top speed of the vehicle on land with normal gravity. | *'''Speed:''' The top speed of the vehicle on land with normal gravity. | ||
*'''Acceleration:''' | *'''Acceleration:''' How fast the speed increases when holding the acceleration button until top speed has been reached. | ||
*'''Weight:''' The weight of the vehicle. Vehicles with higher weight knock away vehicles with lower weight. | *'''Weight:''' The weight of the vehicle. Vehicles with higher weight knock away vehicles with lower weight. | ||
*'''Handling:''' The turning ability of the vehicle on land with normal gravity. A higher stat means vehicles turn sharper, and will continue turning normally for longer before automatically initiating a drift. | *'''Handling:''' The turning ability of the vehicle on land with normal gravity. A higher stat means vehicles turn sharper, and will continue turning normally for longer before automatically initiating a drift. | ||
*'''Traction (Grip in the British English version):''' The grasp of the vehicle. Vehicles with higher traction slip less on certain terrain and can stay stable on the road better. Not to be confused with handling. | *'''Traction (Grip in the British English version):''' The grasp of the vehicle to the ground while off-road. Vehicles with higher traction slip less on certain terrain and can stay stable on the road better. Not to be confused with handling. | ||
Said Level is represented through bars by adding three points to the sum of points, then dividing the result by four, resulting in values ranging from 0.75 to 5.75. As an example, the process through which the statistics of a certain combination of character and vehicle parts are calculated and displayed is shown below: | Said Level is represented through bars by adding three points to the sum of points, then dividing the result by four, resulting in values ranging from 0.75 to 5.75. As an example, the process through which the statistics of a certain combination of character and vehicle parts are calculated and displayed is shown below: | ||
[[File:MK8D Vehicle Customization Screen.jpg|thumb|center|600px|A combination consisting of [[Dry Bones]], [[Flame Rider]], [[Standard (tire)|Standard Tires]], and [[Super Glider]].]] | [[File:MK8D Vehicle Customization Screen.jpg|thumb|center|600px|A combination consisting of [[Dry Bones]], [[Flame Rider]], [[Standard (tire)|Standard Tires]], and [[Super Glider]].]] | ||
{|class="wikitable"style="text-align:center;margin:auto" | |||
{|class="wikitable" style="text-align:center; margin:auto" | |||
!rowspan=2|Element | !rowspan=2|Element | ||
!colspan=5|Points conferred | !colspan=5|Points conferred | ||
| Line 462: | Line 864: | ||
!Handling | !Handling | ||
!Traction | !Traction | ||
|- style="color:red" | |-style="color:red" | ||
![[File:MK8DX Dry Bones Icon.png]]<br>[[Dry Bones]] | ![[File:MK8DX Dry Bones Icon.png|64px]]<br>[[Dry Bones]] | ||
|''' | |'''2''' | ||
|'''5''' | |'''5''' | ||
|'''1''' | |'''1''' | ||
|'''8''' | |'''8''' | ||
|'''4''' | |'''4''' | ||
|- style="color:green" | |-style="color:green" | ||
![[File:FlameRiderBodyMK8.png]]<br>[[File:MK8 Standard Bike Body Icon Inverted.png]][[Flame Rider]] | ![[File:FlameRiderBodyMK8.png|64px]]<br>[[File:MK8 Standard Bike Body Icon Inverted.png]][[Flame Rider]] | ||
|'''2''' | |'''2''' | ||
|'''5''' | |'''5''' | ||
| Line 476: | Line 878: | ||
|'''4''' | |'''4''' | ||
|'''5''' | |'''5''' | ||
|- style="color:blue" | |-style="color:blue" | ||
![[File:StandardTiresMK8.png]]<br>[[File:MK8 Tire Icon Inverted.png]][[Standard (tire)|Standard Tires]] | ![[File:StandardTiresMK8.png|64px]]<br>[[File:MK8 Tire Icon Inverted.png]][[Standard (tire)|Standard Tires]] | ||
|'''2''' | |'''2''' | ||
|'''4''' | |'''4''' | ||
| Line 483: | Line 885: | ||
|'''3''' | |'''3''' | ||
|'''5''' | |'''5''' | ||
|- style="color:darkorange" | |-style="color:darkorange" | ||
![[File:MK8DThumbDryBonesSG.png]]<br>[[File:MK8 Glider Icon Inverted.png]][[Super Glider]] | ![[File:MK8DThumbDryBonesSG.png|64px]]<br>[[File:MK8 Glider Icon Inverted.png]][[Super Glider]] | ||
|'''1''' | |'''1''' | ||
|'''1''' | |'''1''' | ||
| Line 499: | Line 901: | ||
|- | |- | ||
!Level | !Level | ||
!<span style="color:red"> | !<span style="color:red">2</span> + <span style="color:green">2</span> + <span style="color:blue">2</span> + <span style="color:darkorange">1</span> =<br>7 | ||
!<span style="color:red">5</span> + <span style="color:green">5</span> + <span style="color:blue">4</span> + <span style="color:darkorange">1</span> =<br>15 | !<span style="color:red">5</span> + <span style="color:green">5</span> + <span style="color:blue">4</span> + <span style="color:darkorange">1</span> =<br>15 | ||
!<span style="color:red">1</span> + <span style="color:green">1</span> + <span style="color:blue">2</span> + <span style="color:darkorange">1</span> =<br>5 | !<span style="color:red">1</span> + <span style="color:green">1</span> + <span style="color:blue">2</span> + <span style="color:darkorange">1</span> =<br>5 | ||
| Line 506: | Line 908: | ||
|- style="font-weight:bold" | |- style="font-weight:bold" | ||
!Value shown in the vehicle customization screen | !Value shown in the vehicle customization screen | ||
!( | !(7 + 3) / 4 = 10 / 4 =<br>2.5 | ||
!(15 + 3) / 4 = 18 / 4 =<br>4.5 | !(15 + 3) / 4 = 18 / 4 =<br>4.5 | ||
!(5 + 3) / 4 = 8 / 4 =<br>2 | !(5 + 3) / 4 = 8 / 4 =<br>2 | ||
| Line 512: | Line 914: | ||
!(15 + 3) / 4 = 18 / 4 =<br>4.5 | !(15 + 3) / 4 = 18 / 4 =<br>4.5 | ||
|} | |} | ||
[[File:MK8D Vehicle Customization Screen Stats.jpg|thumb|center|600px|The values actually shown in the vehicle customization screen, matching the values calculated.]] | [[File:MK8D Vehicle Customization Screen Stats.jpg|thumb|center|600px|The values actually shown in the vehicle customization screen, matching the values calculated.]] | ||
| Line 519: | Line 920: | ||
In addition to the statistics shown in the vehicle customization screen, there are the following statistics: | In addition to the statistics shown in the vehicle customization screen, there are the following statistics: | ||
*'''Water Speed:''' The top speed of the vehicle while driving underwater. | *'''Water Speed:''' The top speed of the vehicle while driving underwater. | ||
*'''Air Speed:''' The top speed of the vehicle while gliding. | *'''Air Speed:''' The top speed of the vehicle while gliding. | ||
| Line 526: | Line 926: | ||
*'''Air Handling:''' The turning ability of the vehicle while gliding. | *'''Air Handling:''' The turning ability of the vehicle while gliding. | ||
*'''Anti-Gravity Handling:''' The turning ability of the vehicle in anti-gravity mode. | *'''Anti-Gravity Handling:''' The turning ability of the vehicle in anti-gravity mode. | ||
*'''Mini-Turbo:''' The length of the vehicle's mini-turbo speed boosts. | *'''Mini-Turbo:''' The length of the vehicle's mini-turbo speed boosts and how fast mini-turbos can be charged. Also affects the length of jump boosts from tricks. | ||
*'''Invincibility:''' The length of time the vehicle is invincible after spinning out. Added in v2.2.0.<ref>{{cite|url=docs.google.com/spreadsheets/u/0/d/1W3G9ih4aBHCjItIFCakWnbw7ATivIUibZmTVUkecS4s/htmlview|title=MK8D Stat sheet (Updated for W6)|publisher=Google Docs|language=en|accessdate=November 6, 2024}}</ref> | |||
Just like in ''[[Mario Kart 8]]'', Miis can be Light, Medium, or Heavy, depending on their height and weight. | Just like in ''[[Mario Kart 8]]'', Miis can be Light, Medium, or Heavy, depending on their height and weight. | ||
The statistics are shown in points. | The statistics are shown in points. | ||
{|border="1" cellpadding="3" style="background:# | {|border="1"cellpadding="3"style="background:#f8f9fa;text-align:center;width:94%;border-collapse:collapse;margin-bottom:5px;text-align:center;" | ||
|- | |||
!colspan="15"style="background-color:#eaecf0;"|Drivers' Statistics | |||
|- | |- | ||
!colspan=" | !style="width:8%;"rowspan="2"|Vehicle size | ||
!style="width:14%;"rowspan="2"|Character | |||
!style="width:24%;"colspan="4"|Speed | |||
!style="width:6%;"rowspan="2"|Acceleration | |||
!style="width:6%;"rowspan="2"|Weight | |||
!style="width:24%;"colspan="4"|Handling | |||
!style="width:6%;"rowspan="2"|Traction | |||
!style="width:6%;"rowspan="2"|Mini-Turbo | |||
!style="width:6%;"rowspan="2"|Invincibility | |||
|- | |||
!style="width:6%;"|Ground | |||
!style="width:6%;"|Water | |||
!style="width:6%;"|Air | |||
!style="width:6%;"|Anti-Gravity | |||
!style="width:6%;"|Ground | |||
!style="width:6%;"|Water | |||
!style="width:6%;"|Air | |||
!style="width:6%;"|Anti-Gravity | |||
|-style="font-weight:bold" | |||
!rowspan="6"style="background-color:#CCFFFF;color:dodgerblue;border-color:black;"|Small | |||
!width="1%"style="background-color:#CCFFFF;"|[[File:MK8 BabyPeach Icon.png|link=Baby Peach|32x32px]][[File:MK8 BabyDaisy Icon.png|link=Baby Daisy|32x32px]] | |||
|style="background-color:#ffff80;"|1 | |||
|style="background-color:#ffff80;"|1 | |||
|style="background-color:#ffff80;"|1 | |||
|style="background-color:#ffff80;"|1 | |||
|style="background-color:#80b2ff;"|4 | |||
|style="background-color:#ffff80;"|0 | |||
|style="background-color:#8080ff;"|10 | |||
|style="background-color:#8080ff;"|10 | |||
|style="background-color:#8080ff;"|10 | |||
|style="background-color:#8080ff;"|10 | |||
|style="background-color:#8080ff;"|5 | |||
|style="background-color:#8080ff;"|5 | |||
|style="background-color:#8080ff;"|6 | |||
|-style="font-weight:bold" | |||
!width="1%"style="background-color:#CCFFFF;"|[[File:MK8 BabyRosalina Icon.png|link=Baby Rosalina|32x32px]][[File:MK8 Lemmy Icon.png|link=Lemmy|32x32px]] | |||
|style="background-color:#ffff80;"|1 | |||
|style="background-color:#ffff80;"|1 | |||
|style="background-color:#ffff80;"|1 | |||
|style="background-color:#ffff80;"|1 | |||
|style="background-color:#8080ff;"|5 | |||
|style="background-color:#ffff80;"|0 | |||
|style="background-color:#8099ff;"|9 | |||
|style="background-color:#8099ff;"|9 | |||
|style="background-color:#8099ff;"|9 | |||
|style="background-color:#8099ff;"|9 | |||
|style="background-color:#80e5ff;"|3 | |||
|style="background-color:#8080ff;"|5 | |||
|style="background-color:#8080ff;"|6 | |||
|-style="font-weight:bold" | |||
!width="1%"style="background-color:#CCFFFF;"|[[File:MK8 BabyMario Icon.png|link=Baby Mario|32x32px]][[File:MK8 BabyLuigi Icon.png|link=Baby Luigi|32x32px]][[File:MK8DX Dry Bones Icon.png|link=Dry Bones|32x32px]][[File:Mii MK8.png|link=Mii|32x32px|Mii (Light)]] | |||
|style="background-color:#e5ff99;"|2 | |||
|style="background-color:#e5ff99;"|2 | |||
|style="background-color:#e5ff99;"|2 | |||
|style="background-color:#e5ff99;"|2 | |||
|style="background-color:#8080ff;"|5 | |||
|style="background-color:#e5ff99;"|1 | |||
|style="background-color:#80b2ff;"|8 | |||
|style="background-color:#80b2ff;"|8 | |||
|style="background-color:#80b2ff;"|8 | |||
|style="background-color:#80b2ff;"|8 | |||
|style="background-color:#80b2ff;"|4 | |||
|style="background-color:#8080ff;"|5 | |||
|style="background-color:#80b2ff;"|5 | |||
|-style="font-weight:bold" | |||
!width="1%"style="background-color:#CCFFFF;"|[[File:MK8 Koopa Icon.png|link=Koopa Troopa|32x32px]][[File:MK8 Lakitu Icon.png|link=Lakitu|32x32px]][[File:MK8 Bowser Jr Icon.png|link=Bowser Jr.|32x32px]] | |||
|style="background-color:#ccffb2;"|3 | |||
|style="background-color:#ccffb2;"|3 | |||
|style="background-color:#ccffb2;"|3 | |||
|style="background-color:#ccffb2;"|3 | |||
|style="background-color:#80b2ff;"|4 | |||
|style="background-color:#ccffb2;"|2 | |||
|style="background-color:#80b2ff;"|8 | |||
|style="background-color:#80b2ff;"|8 | |||
|style="background-color:#80b2ff;"|8 | |||
|style="background-color:#80b2ff;"|8 | |||
|style="background-color:#8080ff;"|5 | |||
|style="background-color:#80b2ff;"|4 | |||
|style="background-color:#80e5ff;"|4 | |||
|-style="font-weight:bold" | |||
!width="1%"style="background-color:#CCFFFF;"|[[File:MK8 Toadette Icon.png|link=Toadette|32x32px]][[File:MK8 Wendy Icon.png|link=Wendy|32x32px]][[File:MK8 Isabelle Icon.png|link=Isabelle|32x32px]] | |||
|style="background-color:#ccffb2;"|3 | |||
|style="background-color:#ccffb2;"|3 | |||
|style="background-color:#ccffb2;"|3 | |||
|style="background-color:#ccffb2;"|3 | |||
|style="background-color:#8080ff;"|5 | |||
|style="background-color:#ccffb2;"|2 | |||
|style="background-color:#80ccff;"|7 | |||
|style="background-color:#80ccff;"|7 | |||
|style="background-color:#80ccff;"|7 | |||
|style="background-color:#80ccff;"|7 | |||
|style="background-color:#99ffe5;"|2 | |||
|style="background-color:#80b2ff;"|4 | |||
|style="background-color:#99ffe5;"|3 | |||
|-style="font-weight:bold" | |||
!width="1%"style="background-color:#CCFFFF;"|[[File:MK8 Toad Icon.png|link=Toad|32x32px]][[File:MK8 ShyGuy Icon.png|link=Shy Guy|32x32px]][[File:MK8 Larry Icon.png|link=Larry|32x32px]] | |||
|style="background-color:#b2ffcc;"|4 | |||
|style="background-color:#b2ffcc;"|4 | |||
|style="background-color:#b2ffcc;"|4 | |||
|style="background-color:#b2ffcc;"|4 | |||
|style="background-color:#80b2ff;"|4 | |||
|style="background-color:#b2ffcc;"|3 | |||
|style="background-color:#80ccff;"|7 | |||
|style="background-color:#80ccff;"|7 | |||
|style="background-color:#80ccff;"|7 | |||
|style="background-color:#80ccff;"|7 | |||
|style="background-color:#80b2ff;"|4 | |||
|style="background-color:#80b2ff;"|4 | |||
|style="background-color:#99ffe5;"|3 | |||
|-style="font-weight:bold" | |||
!rowspan="7"style="background-color:honeydew; color: green; border-color: black;"|Medium | |||
!width="1%"style="background-color:honeydew;"|[[File:MK8 Cat Peach Icon.png|link=Cat Peach|32x32px]][[File:MK8DX Female Inkling Icon.png|link=Inkling|32x32px]][[File:VillagerFemale-Icon-MK8.png|link=Villager|32x32px]][[File:MK8DX Diddy Kong Icon.png|link=Diddy Kong|32x32px]] | |||
|style="background-color:#99ffe5;"|5 | |||
|style="background-color:#99ffe5;"|5 | |||
|style="background-color:#99ffe5;"|5 | |||
|style="background-color:#99ffe5;"|5 | |||
|style="background-color:#80b2ff;"|4 | |||
|style="background-color:#b2ffcc;"|3 | |||
|style="background-color:#80e5ff;"|6 | |||
|style="background-color:#80e5ff;"|6 | |||
|style="background-color:#80e5ff;"|6 | |||
|style="background-color:#80e5ff;"|6 | |||
|style="background-color:#80e5ff;"|3 | |||
|style="background-color:#80b2ff;"|4 | |||
|style="background-color:#99ffe5;"|3 | |||
|-style="font-weight:bold" | |||
!width="1%"style="background-color:honeydew;"|[[File:MK8 Peach Icon.png|link=Peach|32x32px]][[File:MK8 Daisy Icon.png|link=Daisy|32x32px]][[File:MKT Icon Birdo.png|link=Birdo|32x32px]][[File:MK8 Yoshi Icon.png|link=Yoshi|32x32px]][[File:MK8DX Peachette Icon.png|link=Peachette|32x32px]] | |||
|style="background-color:#80ffff;"|6 | |||
|style="background-color:#80ffff;"|6 | |||
|style="background-color:#80ffff;"|6 | |||
|style="background-color:#80ffff;"|6 | |||
|style="background-color:#80e5ff;"|3 | |||
|style="background-color:#99ffe5;"|4 | |||
|style="background-color:#80ffff;"|5 | |||
|style="background-color:#80ffff;"|5 | |||
|style="background-color:#80ffff;"|5 | |||
|style="background-color:#80ffff;"|5 | |||
|style="background-color:#80e5ff;"|3 | |||
|style="background-color:#80b2ff;"|4 | |||
|style="background-color:#ffff80;"|1 | |||
|-style="font-weight:bold" | |||
!width="1%"style="background-color:honeydew;"|[[File:MK8 Tanooki Mario Icon.png|link=Tanooki Mario|32x32px]][[File:MK8DX Male Inkling Icon.png|link=Inkling|32x32px]][[File:VillagerMale-Icon-MK8.png|link=Villager|32x32px]] | |||
|style="background-color:#80ffff;"|6 | |||
|style="background-color:#80ffff;"|6 | |||
|style="background-color:#80ffff;"|6 | |||
|style="background-color:#80ffff;"|6 | |||
|style="background-color:#80e5ff;"|3 | |||
|style="background-color:#80ffff;"|5 | |||
|style="background-color:#80ffff;"|5 | |||
|style="background-color:#80ffff;"|5 | |||
|style="background-color:#80ffff;"|5 | |||
|style="background-color:#80ffff;"|5 | |||
|style="background-color:#ccffb2;"|1 | |||
|style="background-color:#80b2ff;"|4 | |||
|style="background-color:#ffff80;"|1 | |||
|-style="font-weight:bold" | |||
!width="1%"style="background-color:honeydew;"|[[File:MK8 Luigi Icon.png|link=Luigi|32x32px]][[File:MK8 Iggy Icon.png|link=Iggy|32x32px]][[File:MK8DX Kamek Icon.png|link=Kamek|32x32px]] | |||
|style="background-color:#80e5ff;"|7 | |||
|style="background-color:#80e5ff;"|7 | |||
|style="background-color:#80e5ff;"|7 | |||
|style="background-color:#80e5ff;"|7 | |||
|style="background-color:#99ffe5;"|2 | |||
|style="background-color:#80e5ff;"|6 | |||
|style="background-color:#80ffff;"|5 | |||
|style="background-color:#80ffff;"|5 | |||
|style="background-color:#80ffff;"|5 | |||
|style="background-color:#80ffff;"|5 | |||
|style="background-color:#ccffb2;"|1 | |||
|style="background-color:#80e5ff;"|3 | |||
|style="background-color:#99ffe5;"|3 | |||
|-style="font-weight:bold" | |||
!width="1%"style="background-color:honeydew;"|[[File:MK8 Mario Icon.png|link=Mario|32x32px]][[File:MK8 Ludwig Icon.png|link=Ludwig|32x32px]][[File:Mii MK8.png|link=Mii|32x32px|Mii (Medium)]] | |||
|style="background-color:#80e5ff;"|7 | |||
|style="background-color:#80e5ff;"|7 | |||
|style="background-color:#80e5ff;"|7 | |||
|style="background-color:#80e5ff;"|7 | |||
|style="background-color:#99ffe5;"|2 | |||
|style="background-color:#80e5ff;"|6 | |||
|style="background-color:#99ffe5;"|4 | |||
|style="background-color:#99ffe5;"|4 | |||
|style="background-color:#99ffe5;"|4 | |||
|style="background-color:#99ffe5;"|4 | |||
|style="background-color:#99ffe5;"|2 | |||
|style="background-color:#80e5ff;"|3 | |||
|style="background-color:#99ffe5;"|3 | |||
|-style="font-weight:bold" | |||
!width="1%"style="background-color:honeydew;"|[[File:MK8 MMario Icon.png|link=Metal Mario|32x32px]][[File:MK8DX Gold Mario Icon.png|link=Gold Mario|32x32px]][[File:MK8 PGPeach Icon.png|link=Pink Gold Peach|32x32px]] | |||
|style="background-color:#80bfff;"|8 | |||
|style="background-color:#80bfff;"|8 | |||
|style="background-color:#80bfff;"|8 | |||
|style="background-color:#80bfff;"|8 | |||
|style="background-color:#ccffb2;"|1 | |||
|style="background-color:#8080ff;"|10 | |||
|style="background-color:#b2ffcc;"|3 | |||
|style="background-color:#b2ffcc;"|3 | |||
|style="background-color:#b2ffcc;"|3 | |||
|style="background-color:#b2ffcc;"|3 | |||
|style="background-color:#ccffb2;"|1 | |||
|style="background-color:#ccffb2;"|1 | |||
|style="background-color:#99ffe5;"|3 | |||
|-style="font-weight:bold" | |||
!width="1%"style="background-color:honeydew;"|[[File:MK8DX Wiggler Icon.png|link=Wiggler|32x32px]] | |||
|style="background-color:#8099ff;"|9 | |||
|style="background-color:#8099ff;"|9 | |||
|style="background-color:#8099ff;"|9 | |||
|style="background-color:#8099ff;"|9 | |||
|style="background-color:#ccffb2;"|1 | |||
|style="background-color:#80b2ff;"|8 | |||
|style="background-color:#ccffb2;"|2 | |||
|style="background-color:#ccffb2;"|2 | |||
|style="background-color:#ccffb2;"|2 | |||
|style="background-color:#ccffb2;"|2 | |||
|style="background-color:#ffff80;"|0 | |||
|style="background-color:#ccffb2;"|1 | |||
|style="background-color:#80e5ff;"|4 | |||
|-style="font-weight:bold" | |||
!rowspan="5"style="background-color:mistyrose;color:red;border-color:black;"|Large | |||
!width="1%"style="background-color:mistyrose;"|[[File:MK8 Rosalina Icon.png|link=Rosalina|32x32px]][[File:MK8DX King Boo Icon.png|link=King Boo|32x32px]][[File:MK8D BotW Link Icon.png|link=Link|32x32px]][[File:MK8 Link Icon.png|link=Link|32x32px]][[File:MK8DX Pauline Icon.png|link=Pauline|32x32px]] | |||
|style="background-color:#80bfff;"|8 | |||
|style="background-color:#80bfff;"|8 | |||
|style="background-color:#80bfff;"|8 | |||
|style="background-color:#80bfff;"|8 | |||
|style="background-color:#ccffb2;"|1 | |||
|style="background-color:#80ccff;"|7 | |||
|style="background-color:#b2ffcc;"|3 | |||
|style="background-color:#b2ffcc;"|3 | |||
|style="background-color:#b2ffcc;"|3 | |||
|style="background-color:#b2ffcc;"|3 | |||
|style="background-color:#80e5ff;"|3 | |||
|style="background-color:#99ffe5;"|2 | |||
|style="background-color:#80e5ff;"|4 | |||
|-style="font-weight:bold" | |||
!width="1%"style="background-color:mistyrose;"|[[File:MK8DX Petey Piranha Icon.png|link=Petey Piranha|32x32px]] | |||
|style="background-color:#80bfff;"|8 | |||
|style="background-color:#80bfff;"|8 | |||
|style="background-color:#80bfff;"|8 | |||
|style="background-color:#80bfff;"|8 | |||
|style="background-color:#ccffb2;"|1 | |||
|style="background-color:#8080ff;"|10 | |||
|style="background-color:#b2ffcc;"|3 | |||
|style="background-color:#b2ffcc;"|3 | |||
|style="background-color:#b2ffcc;"|3 | |||
|style="background-color:#b2ffcc;"|3 | |||
|style="background-color:#ccffb2;"|1 | |||
|style="background-color:#ccffb2;"|1 | |||
|style="background-color:#8080ff;"|6 | |||
|-style="font-weight:bold" | |||
!width="1%"style="background-color:mistyrose;"|[[File:MK8 Waluigi Icon.png|link=Waluigi|32x32px]][[File:MK8 DKong Icon.png|link=Donkey Kong|32x32px]][[File:MK8 Roy Icon.png|link=Roy|32x32px]] | |||
|style="background-color:#8099ff;"|9 | |||
|style="background-color:#8099ff;"|9 | |||
|style="background-color:#8099ff;"|9 | |||
|style="background-color:#8099ff;"|9 | |||
|style="background-color:#ccffb2;"|1 | |||
|style="background-color:#80b2ff;"|8 | |||
|style="background-color:#ccffb2;"|2 | |||
|style="background-color:#ccffb2;"|2 | |||
|style="background-color:#ccffb2;"|2 | |||
|style="background-color:#ccffb2;"|2 | |||
|style="background-color:#ffff80;"|0 | |||
|style="background-color:#ccffb2;"|1 | |||
|style="background-color:#80e5ff;"|4 | |||
|-style="font-weight:bold" | |||
!width="1%"style="background-color:mistyrose;"|[[File:MK8 Wario Icon.png|link=Wario|32x32px]][[File:MK8 Dry Bowser Icon.png|link=Dry Bowser|32x32px]][[File:MK8DX Funky Kong Icon.png|link=Funky Kong|32x32px]][[File:Mii_MK8.png|link=Mii|32x32px|Mii (Heavy)]] | |||
|style="background-color:#8080ff;"|10 | |||
|style="background-color:#8080ff;"|10 | |||
|style="background-color:#8080ff;"|10 | |||
|style="background-color:#8080ff;"|10 | |||
|style="background-color:#ffff80;"|0 | |||
|style="background-color:#8099ff;"|9 | |||
|style="background-color:#e5ff99;"|1 | |||
|style="background-color:#e5ff99;"|1 | |||
|style="background-color:#e5ff99;"|1 | |||
|style="background-color:#e5ff99;"|1 | |||
|style="background-color:#ccffb2;"|1 | |||
|style="background-color:#ffff80;"|0 | |||
|style="background-color:#80b2ff;"|5 | |||
|-style="font-weight:bold" | |||
!width="1%"style="background-color:mistyrose;"|[[File:MK8 Bowser Icon.png|link=Bowser|32x32px]][[File:MK8 Morton Icon.png|link=Morton|32x32px]] | |||
|style="background-color:#8080ff;"|10 | |||
|style="background-color:#8080ff;"|10 | |||
|style="background-color:#8080ff;"|10 | |||
|style="background-color:#8080ff;"|10 | |||
|style="background-color:#ffff80;"|0 | |||
|style="background-color:#8080ff;"|10 | |||
|style="background-color:#ffff80;"|0 | |||
|style="background-color:#ffff80;"|0 | |||
|style="background-color:#ffff80;"|0 | |||
|style="background-color:#ffff80;"|0 | |||
|style="background-color:#ffff80;"|0 | |||
|style="background-color:#ffff80;"|0 | |||
|style="background-color:#8080ff;"|6 | |||
|} | |||
===Parts' statistics=== | |||
The number of groups of vehicle parts sharing the same statistics has increased as well when compared with ''Mario Kart 8''. | |||
The statistics are reported in points. The invincibility statistic cells for vehicle bodies and tires are split up according to each part inside that row, from left to right. There is an unused stat for on-road traction, which can be viewed [[Mario Kart 8 Deluxe in-game statistics|here]]. | |||
{|border="1"cellpadding="3"style="background:#f8f9fa;text-align:center;width:94%;border-collapse:collapse;margin-bottom:5px;text-align:center;" | |||
|- | |- | ||
! | !colspan="17"style="background-color:#eaecf0;"|Bodies' Statistics | ||
|- | |- | ||
! | !width="22%"rowspan="2"|Body<br>*[[Sport bike (vehicle class)|sport bike]] | ||
!width="24%"colspan="4"|Speed | |||
!width="6%"rowspan="2"|Acceleration | |||
!width="6%"rowspan="2"|Weight | |||
!width="24%"colspan="4"|Handling | |||
!width="6%"rowspan="2"|Traction | |||
!width="6%"rowspan="2"|Mini-Turbo | |||
!style="width: 6%;"rowspan="2;"colspan="4"|Invincibility | |||
!width=" | |||
!width=" | |||
!width=" | |||
!width=" | |||
!width=" | |||
!width=" | |||
! | |||
|- | |- | ||
!width="6%"|Ground | !width="6%"|Ground | ||
!width="6%"|Water | !width="6%"|Water | ||
| Line 807: | Line 1,253: | ||
!width="6%"|Air | !width="6%"|Air | ||
!width="6%"|Anti-Gravity | !width="6%"|Anti-Gravity | ||
|- style="font-weight:bold" | |-style="font-weight:bold" | ||
|width="1% | |width="1%"|[[File:BiddybuggyBodyMK8.png|x32px|link=Biddybuggy|Biddybuggy (Buggybud)]][[File:MrScootyBodyMK8.png|x32px|link=Mr. Scooty|Mr. Scooty (Mr Scooty)]] | ||
|style="background-color:#ffff80;"|0 | |||
|style="background-color:# | |style="background-color:#ffff80;"|1 | ||
|style="background-color:# | |style="background-color:#bfffbf;"|1 | ||
|style="background-color:# | |style="background-color:#99ffe5;"|2 | ||
|style="background-color:# | |style="background-color:#8080ff;"|7 | ||
|style="background-color:# | |style="background-color:#ffff80;"|0 | ||
|style="background-color:# | |style="background-color:#8080ff;"|5 | ||
|style="background-color:# | |style="background-color:#80bfff;"|4 | ||
|style="background-color:# | |style="background-color:#8080ff;"|4 | ||
|style="background-color:# | |style="background-color:#8080ff;"|5 | ||
|style="background-color:# | |style="background-color:#80ecff;"|4 | ||
|style="background-color:# | |style="background-color:#8080ff;"|7 | ||
| | |style="background-color:#ffff80;"colspan="2"|0 | ||
|style="background-color:#ffff80;"colspan="2"|0 | |||
|style="background-color:# | |-style="font-weight:bold" | ||
|style="background-color:# | |width="1%"|[[File:MK8Streetle.png|x32px|link=Streetle|Streetle]][[File:LandshipBodyMK8.png|x32px|link=Landship|Landship]] | ||
|style="background-color:# | |style="background-color:#99ffe5;"|2 | ||
|style="background-color:# | |style="background-color:#8080ff;"|5 | ||
|style="background-color:#80a4ff;"| 6 | |style="background-color:#80ffff;"|2 | ||
|style="background-color:# | |style="background-color:#ffff80;"|0 | ||
|style="background-color:# | |style="background-color:#80a4ff;"|6 | ||
|style="background-color:# | |style="background-color:#ffff80;"|0 | ||
|style="background-color:# | |style="background-color:#80b2ff;"|4 | ||
|style="background-color:# | |style="background-color:#8080ff;"|5 | ||
|style="background-color:# | |style="background-color:#80bfff;"|3 | ||
|style="background-color:#80a4ff;"| 6 | |style="background-color:#bfffbf;"|2 | ||
| | |style="background-color:#80a4ff;"|6 | ||
|style="background-color:#80a4ff;"|6 | |||
|style="background-color:# | |style="background-color:#92ffec;"colspan="2"|3 | ||
|style="background-color:#80ffff;"| 3 | |style="background-color:#b6ffc8;"colspan="2"|2 | ||
|style="background-color:# | |-style="font-weight:bold" | ||
|style="background-color:# | |width="1%"|[[File:PipeFrameBodyMK8.png|x32px|link=Pipe Frame|Pipe Frame]][[File:VarmintBodyMK8.png|x32px|link=Varmint|Varmint]][[File:MK8 Light-Green City Tripper.png|x32px|link=City Tripper|City Tripper]] | ||
|style="background-color:# | |style="background-color:#99ffe5;"|2 | ||
|style="background-color:# | |style="background-color:#80ffff;"|3 | ||
|style="background-color:# | |style="background-color:#bfffbf;"|1 | ||
|style="background-color:# | |style="background-color:#ccffb2;"|1 | ||
|style="background-color:#80ffff;"| 2 | |style="background-color:#80a4ff;"|6 | ||
|style="background-color:#80bfff;"| 4 | |style="background-color:#bfffbf;"|1 | ||
|style="background-color:#80ecff;"| 4 | |style="background-color:#8080ff;"|5 | ||
|style="background-color:# | |style="background-color:#80bfff;"|4 | ||
| | |style="background-color:#80ffff;"|2 | ||
| | |style="background-color:#80bfff;"|4 | ||
| | |style="background-color:#80ecff;"|4 | ||
|style="background-color:# | |style="background-color:#80a4ff;"|6 | ||
|style="background-color:# | |style="background-color:#92ffec;"|3 | ||
|style="background-color:# | |style="background-color:#b6ffc8;"|2 | ||
|style="background-color:# | |style="background-color:#b6ffc8;"colspan="2"|2 | ||
|style="background-color:# | |-style="font-weight:bold" | ||
|style="background-color:# | |width="1%"|[[File:CatCruiserBodyMK8.png|x32px|link=Cat Cruiser|Cat Cruiser]][[File:CometBodyMK8.png|x32px|link=Comet|Comet]]*[[File:YoshiBikeBodyMK8.png|x32px|link=Yoshi Bike|Yoshi Bike]]*[[File:TeddyBuggyBodyMK8.png|x32px|link=Teddy Buggy|Teddy Buggy]] | ||
|style="background-color:# | |style="background-color:#99ffe5;"|2 | ||
|style="background-color:#bfffbf;"| | |style="background-color:#bfffbf;"|2 | ||
|style="background-color:# | |style="background-color:#8080ff;"|4 | ||
|style="background-color:# | |style="background-color:#80e5ff;"|3 | ||
|style="background-color:# | |style="background-color:#80c8ff;"|5 | ||
| | |style="background-color:#80ffff;"|2 | ||
| | |style="background-color:#80b2ff;"|4 | ||
|style="background-color:#99ffe5;"| 2 | |style="background-color:#bfffbf;"|2 | ||
|style="background-color:#bfffbf;"| 2 | |style="background-color:#8080ff;"|4 | ||
|style="background-color:# | |style="background-color:#80ffff;"|3 | ||
|style="background-color:# | |style="background-color:#92ffec;"|3 | ||
|style="background-color:#80c8ff;"| 5 | |style="background-color:#80a4ff;"|6 | ||
|style="background-color:# | |style="background-color:#92ffec;"|3 | ||
|style="background-color:#80b2ff;"| 4 | |style="background-color:#92ffec;"|3 | ||
|style="background-color:# | |style="background-color:#b6ffc8;"|2 | ||
|style="background-color:# | |style="background-color:#daffa4;"|1 | ||
|style="background-color:# | |-style="font-weight:bold" | ||
|style="background-color:# | |width="1%"|[[File:W25SilverArrow-MK8.png|x32px|link=W 25 Silver Arrow|W 25 Silver Arrow]][[File:StandardBikeBodyMK8.png|x32px|link=Standard Bike|Standard Bike]][[File:FlameRiderBodyMK8.png|x32px|link=Flame Rider|Flame Rider]][[File:WildWigglerBodyMK8.png|x32px|link=Wild Wiggler|Wild Wiggler]] | ||
|style="background-color:#80c8ff;"| 5 | |style="background-color:#99ffe5;"|2 | ||
| | |style="background-color:#bfffbf;"|2 | ||
| | |style="background-color:#80bfff;"|3 | ||
|style="background-color:# | |style="background-color:#80b2ff;"|4 | ||
|style="background-color:# | |style="background-color:#80c8ff;"|5 | ||
|style="background-color:# | |style="background-color:#bfffbf;"|1 | ||
|style="background-color:# | |style="background-color:#80b2ff;"|4 | ||
|style="background-color:# | |style="background-color:#80ffff;"|3 | ||
|style="background-color:#80bfff;"| 3 | |style="background-color:#80bfff;"|3 | ||
|style="background-color:# | |style="background-color:#80bfff;"|4 | ||
|style="background-color:# | |style="background-color:#80c8ff;"|5 | ||
|style="background-color:# | |style="background-color:#80c8ff;"|5 | ||
|style="background-color:# | |style="background-color:#80ecff;"|4 | ||
|style="background-color:# | |style="background-color:#80ecff;"|4 | ||
|style="background-color:# | |style="background-color:#80ecff;"|4 | ||
| | |style="background-color:#80ecff;"|4 | ||
| | |-style="font-weight:bold" | ||
|width="1%"|[[File:Mach8BodyMK8.png|x32px|link=Mach 8|Mach 8]][[File:SportsCoupeMK8.png|x32px|link=Sports Coupe|Sports Coupe (Sports Coupé)]][[File:MK8DX Inkstriker.png|x32px|link=Inkstriker|Inkstriker]] | |||
|style="background-color:# | |style="background-color:#80e5ff;"|3 | ||
|style="background-color:# | |style="background-color:#80ffff;"|3 | ||
|style="background-color:#80e5ff;"| 3 | |style="background-color:#8080ff;"|4 | ||
|style="background-color:# | |style="background-color:#8080ff;"|5 | ||
|style="background-color:# | |style="background-color:#92ffec;"|3 | ||
|style="background-color:# | |style="background-color:#80bfff;"|3 | ||
|style="background-color:# | |style="background-color:#99ffe5;"|2 | ||
|style="background-color:# | |style="background-color:#bfffbf;"|2 | ||
|style="background-color:# | |style="background-color:#80ffff;"|2 | ||
|style="background-color:# | |style="background-color:#80bfff;"|4 | ||
|style="background-color:# | |style="background-color:#80ecff;"|4 | ||
| | |style="background-color:#80c8ff;"|5 | ||
| | |style="background-color:#92ffec;"|3 | ||
|style="background-color:# | |style="background-color:#92ffec;"|3 | ||
|style="background-color:#80ffff;"| 3 | |style="background-color:#daffa4;"colspan="2"|1 | ||
|style="background-color:#80bfff;"| 3 | |-style="font-weight:bold" | ||
|style="background-color:#80e5ff;"| 3 | |width="1%"|[[File:MK8 Tanooki Buggy Sprite.png|x32px|link=Tanooki Kart|Tanooki Kart]][[File:MK8DX Koopa Clown.png|x32px|link=Koopa Clown|Koopa Clown]][[File:MK8D Master Cycle Zero.png|x32px|link=Master Cycle Zero|Master Cycle Zero]] | ||
|style="background-color:# | |style="background-color:#80e5ff;"|3 | ||
|style="background-color:# | |style="background-color:#80bfff;"|4 | ||
|style="background-color:#80e5ff;"| 3 | |style="background-color:#80bfff;"|3 | ||
|style="background-color:# | |style="background-color:#80e5ff;"|3 | ||
|style="background-color:#80bfff;"| 3 | |style="background-color:#b6ffc8;"|2 | ||
|style="background-color:# | |style="background-color:#80bfff;"|3 | ||
|style="background-color:# | |style="background-color:#80b2ff;"|4 | ||
|style="background-color:# | |style="background-color:#80bfff;"|4 | ||
| | |style="background-color:#80bfff;"|3 | ||
| | |style="background-color:#80ffff;"|3 | ||
|style="background-color:# | |style="background-color:#8080ff;"|7 | ||
|style="background-color:# | |style="background-color:#80c8ff;"|5 | ||
|style="background-color:# | |style="background-color:#80ecff;"|4 | ||
|style="background-color:# | |style="background-color:#92ffec;"|3 | ||
|style="background-color:# | |style="background-color:#92ffec;"colspan="2"|3 | ||
|style="background-color:#ffff80;"| 0 | |-style="font-weight:bold" | ||
|style="background-color:# | |width="1%"|[[File:300SLRoadster MK8.png|x32px|link=300 SL Roadster|300 SL Roadster]][[File:StandardKartBodyMK8.png|x32px|link=Standard Kart|Standard Kart]][[File:TheDukeBodyMK8.png|x32px|link=The Duke|The Duke]] | ||
|style="background-color:# | |style="background-color:#80e5ff;"|3 | ||
|style="background-color:# | |style="background-color:#80ffff;"|3 | ||
|style="background-color:#8080ff;"| 5 | |style="background-color:#80bfff;"|3 | ||
|style="background-color:# | |style="background-color:#80e5ff;"|3 | ||
|style="background-color:# | |style="background-color:#80ecff;"|4 | ||
| | |style="background-color:#80ffff;"|2 | ||
|style="background-color:#80e5ff;"|3 | |||
|style="background-color:# | |style="background-color:#bfffbf;"|2 | ||
|style="background-color:# | |style="background-color:#80bfff;"|3 | ||
|style="background-color:# | |style="background-color:#80ffff;"|3 | ||
|style="background-color:# | |style="background-color:#92ffec;"|3 | ||
|style="background-color:# | |style="background-color:#80c8ff;"|5 | ||
|style="background-color:# | |style="background-color:#80ecff;"|4 | ||
|style="background-color:# | |style="background-color:#92ffec;"|3 | ||
|style="background-color:# | |style="background-color:#92ffec;"colspan="2"|3 | ||
|style="background-color:#80bfff;"| 3 | |-style="font-weight:bold" | ||
|style="background-color:#bfffbf;"| 2 | |width="1%"|[[File:MK8BlueFalcon.png|x32px|link=Blue Falcon|Blue Falcon]][[File:MK8DX Splat Buggy.png|x32px|link=Splat Buggy|Splat Buggy]] | ||
|style="background-color:# | |style="background-color:#80b2ff;"|4 | ||
|style="background-color:# | |style="background-color:#bfffbf;"|2 | ||
| | |style="background-color:#80bfff;"|3 | ||
| | |style="background-color:#80b2ff;"|4 | ||
|style="background-color:#80b2ff;"| 4 | |style="background-color:#92ffec;"|3 | ||
|style="background-color:#bfffbf;"| 2 | |style="background-color:#ffff80;"|0 | ||
|style="background-color:#80bfff;"| 3 | |style="background-color:#99ffe5;"|2 | ||
|style="background-color:#80e5ff;"| 3 | |style="background-color:#80ffff;"|3 | ||
|style="background-color:#b6ffc8;"| 2 | |style="background-color:#bfffbf;"|1 | ||
|style="background-color:#80ffff;"| 2 | |style="background-color:#8080ff;"|5 | ||
|style="background-color:#80e5ff;"| 3 | |style="background-color:#92ffec;"|3 | ||
|style="background-color:#bfffbf;"| 2 | |style="background-color:#80ecff;"|4 | ||
|style="background-color:#80ffff;"| 2 | |style="background-color:#80ecff;"colspan="2"|4 | ||
|style="background-color:#80ffff;"| 3 | |style="background-color:#92ffec;"colspan="2"|3 | ||
|style="background-color:#ffff80;"| 0 | |-style="font-weight:bold" | ||
|style="background-color:# | |width="1%"|[[File:PrancerBodyMK8.png|x32px|link=Prancer|Prancer]][[File:SportBikeBodyMK8.png|x32px|link=Sport Bike|Sport Bike]]*[[File:JetBikeBodyMK8.png|x32px|link=Jet Bike|Jet Bike]]* | ||
| | |style="background-color:#80b2ff;"|4 | ||
| | |style="background-color:#80ffff;"|3 | ||
|style="background-color:# | |style="background-color:#80bfff;"|3 | ||
|style="background-color:# | |style="background-color:#80e5ff;"|3 | ||
|style="background-color:# | |style="background-color:#b6ffc8;"|2 | ||
|style="background-color:# | |style="background-color:#bfffbf;"|1 | ||
|style="background-color:# | |style="background-color:#80e5ff;"|3 | ||
|style="background-color:# | |style="background-color:#80ffff;"|3 | ||
|style="background-color:# | |style="background-color:#80bfff;"|3 | ||
|style="background-color:# | |style="background-color:#bfffbf;"|2 | ||
|style="background-color:# | |style="background-color:#b6ffc8;"|2 | ||
|style="background-color:# | |style="background-color:#80ecff;"|4 | ||
|style="background-color:# | |style="background-color:#80c8ff;"|5 | ||
|style="background-color:# | |style="background-color:#92ffec;"|3 | ||
| | |style="background-color:#92ffec;"colspan="2"|3 | ||
| | |-style="font-weight:bold" | ||
| | |width="1%"|[[File:SneakerBodyMK8.png|x32px|link=Sneeker|Sneeker (Bounder)]][[File:Gold_Standard.png|x32px|link=Gold Standard|Gold Standard (Gold Kart)]][[File:MK8MasterCycle.png|x32px|link=Master Cycle|Master Cycle]]* | ||
|style="background-color:# | |style="background-color:#80b2ff;"|4 | ||
|style="background-color:# | |style="background-color:#bfffbf;"|2 | ||
|style="background-color:# | |style="background-color:#80bfff;"|3 | ||
|style="background-color:# | |style="background-color:#80e5ff;"|3 | ||
|style="background-color:# | |style="background-color:#b6ffc8;"|2 | ||
|style="background-color:# | |style="background-color:#80ffff;"|2 | ||
|style="background-color:# | |style="background-color:#80e5ff;"|3 | ||
|style="background-color:# | |style="background-color:#bfffbf;"|2 | ||
|style="background-color:# | |style="background-color:#80ffff;"|2 | ||
|style="background-color:# | |style="background-color:#80ffff;"|3 | ||
|style="background-color:# | |style="background-color:#ffff80;"|0 | ||
| | |style="background-color:#80ecff;"|4 | ||
| | |style="background-color:#80c8ff;"|5 | ||
|style="background-color:# | |style="background-color:#80ecff;"|4 | ||
|style="background-color:#92ffec;"colspan="2"|3 | |||
|style=" | |-style="font-weight:bold" | ||
| | |width="1%"|[[File:Steel Driver.png|x32px|link=Steel Driver|Steel Driver]][[File:TrispeederBodyMK8.png|x32px|link=Tri-Speeder|Tri-Speeder]][[File:MK8BoneRattler.png|x32px|link=Bone Rattler|Bone Rattler]] | ||
| | |style="background-color:#80b2ff;"|4 | ||
| | |style="background-color:#8080ff;"|5 | ||
|style="background-color:# | |style="background-color:#ffff80;"|0 | ||
|style="background-color:# | |style="background-color:#99ffe5;"|2 | ||
|style="background-color:# | |style="background-color:#daffa4;"|1 | ||
|style="background-color:# | |style="background-color:#8080ff;"|4 | ||
|style="background-color:# | |style="background-color:#ccffb2;"|1 | ||
|style="background-color:# | |style="background-color:#8080ff;"|5 | ||
| | |style="background-color:#bfffbf;"|1 | ||
|style="background-color:#ffff80;"|1 | |||
|style="background-color:#92ffec;"|3 | |||
| | |style="background-color:#92ffec;"|3 | ||
|style="background-color:#80a4ff;"|6 | |||
! | |style="background-color:#80a4ff;"|6 | ||
|style="background-color:#80c8ff;"colspan="2"|5 | |||
|-style="font-weight:bold" | |||
|width="1%"|[[File:CircuitSpecialBodyMK8.png|x32px|link=Circuit Special|Circuit Special]][[File:ZeldaMK8Bdasher.png|x32px|link=B Dasher|B Dasher]][[File:MK8PWing.png|x32px|link=P-Wing (kart)|P-Wing]] | |||
|style="background-color:#8080ff;"|5 | |||
|style="background-color:#ffff80;"|1 | |||
|- | |style="background-color:#80ffff;"|2 | ||
|style="background-color:#80b2ff;"|4 | |||
|style="background-color:#daffa4;"|1 | |||
|style="background-color:#80bfff;"|3 | |||
|style="background-color:#ccffb2;"|1 | |||
|style="background-color:#ffff80;"|1 | |||
|style="background-color:#ffff80;"|0 | |||
|style="background-color:#bfffbf;"|2 | |||
|style="background-color:#daffa4;"|1 | |||
|style="background-color:#92ffec;"|3 | |||
|style="background-color:#80a4ff;"|6 | |||
|style="background-color:#80a4ff;"|6 | |||
|style="background-color:#80a4ff;"colspan="2"|6 | |||
|-style="font-weight:bold" | |||
|width="1%"|[[File:BadwagonBodyMK8.png|x32px|link=Badwagon|Badwagon]][[File:GLA-MK8.png|x32px|link=GLA|GLA]][[File:StandardATVBodyMK8.png|x32px|link=Standard ATV|Standard ATV (Standard Quad)]] | |||
|style="background-color:#8080ff;"|5 | |||
|style="background-color:#bfffbf;"|2 | |||
|style="background-color:#bfffbf;"|1 | |||
|style="background-color:#80e5ff;"|3 | |||
|style="background-color:#ffff80;"|0 | |||
|style="background-color:#8080ff;"|4 | |||
|style="background-color:#ffff80;"|0 | |||
|style="background-color:#ffff80;"|1 | |||
|style="background-color:#ffff80;"|0 | |||
|style="background-color:#ffff80;"|1 | |||
|style="background-color:#80c8ff;"|5 | |||
|style="background-color:#92ffec;"|3 | |||
|style="background-color:#8080ff;"|7 | |||
|style="background-color:#8080ff;"|7 | |||
|style="background-color:#80a4ff;"colspan="2"|6 | |||
|-style="font-weight:bold" | |||
!colspan="17"style="background-color:#eaecf0;"|Tires' Statistics | |||
|- | |||
!colspan="1"width="10%"rowspan="2"|Tire | |||
!width="24%"colspan="4"|Speed | |||
!width="6%"rowspan="2"|Acceleration | |||
!width="6%"rowspan="2"|Weight | |||
!width="24%"colspan="4"|Handling | |||
!width="6%"rowspan="2"|Traction | |||
!width="6%"rowspan="2"|Mini-Turbo | |||
!style="width: 6%;"rowspan="2;"colspan="4"|Invincibility | |||
|- | |||
!width="6%"|Ground | !width="6%"|Ground | ||
!width="6%"|Water | !width="6%"|Water | ||
| Line 1,023: | Line 1,510: | ||
!width="6%"|Air | !width="6%"|Air | ||
!width="6%"|Anti-Gravity | !width="6%"|Anti-Gravity | ||
|- style="font-weight:bold" | |-style="font-weight:bold" | ||
|width="1% | |width="1%"|[[File:RollerTiresMK8.png|x32px|link=Roller|Roller]][[File:AzureRollerTiresMK8.png|x32px|link=Azure Roller|Azure Roller]] | ||
|style="background-color:# | |style="background-color:#ffff80;"|0 | ||
|style="background-color:#80bfff;"| 3 | |style="background-color:#80bfff;"|3 | ||
|style="background-color:#80bfff;"| 3 | |style="background-color:#80bfff;"|3 | ||
|style="background-color:# | |style="background-color:#ffff80;"|0 | ||
|style="background-color:# | |style="background-color:#8080ff;"|6 | ||
|style="background-color:# | |style="background-color:#ffff80;"|0 | ||
|style="background-color:# | |style="background-color:#8080ff;"|4 | ||
|style="background-color:# | |style="background-color:#8080ff;"|4 | ||
|style="background-color:# | |style="background-color:#8080ff;"|4 | ||
|style="background-color:# | |style="background-color:#8080ff;"|4 | ||
|style="background-color:# | |style="background-color:#80ecff;"|4 | ||
|style="background-color:# | |style="background-color:#8080ff;"|6 | ||
| | |style="background-color:#ffff80;"colspan="2"|0 | ||
|style="background-color:#ffff80;"colspan="2"|0 | |||
|style="background-color:# | |-style="font-weight:bold" | ||
|style="background-color:#80ffff;"| 2 | |width="1%"|[[File:ButtonTiresMK8.png|x32px|link=Button (tire)|Button]][[File:Leaf Tires MK8.png|x32px|link=Leaf Tires|Leaf Tires (Leaf Tyres)]] | ||
|style="background-color:# | |style="background-color:#bfffbf;"|1 | ||
|style="background-color:#80ffff;"| 2 | |style="background-color:#80ffff;"|2 | ||
|style="background-color:# | |style="background-color:#80ffff;"|2 | ||
|style="background-color:# | |style="background-color:#80ffff;"|2 | ||
|style="background-color:# | |style="background-color:#80aaff;"|5 | ||
|style="background-color:# | |style="background-color:#ffff80;"|0 | ||
|style="background-color:# | |style="background-color:#80bfff;"|3 | ||
|style="background-color:# | |style="background-color:#80bfff;"|3 | ||
|style="background-color:# | |style="background-color:#80ffff;"|2 | ||
|style="background-color:# | |style="background-color:#8080ff;"|4 | ||
| | |style="background-color:#92ffec;"|3 | ||
| | |style="background-color:#80aaff;"|5 | ||
|style="background-color:# | |style="background-color:#80ffff;"colspan="2"|3 | ||
|style="background-color:# | |style="background-color:#80ffff;"colspan="2"|3 | ||
|style="background-color:# | |-style="font-weight:bold" | ||
|style="background-color:# | |width="1%"|[[File:CushionTiresMK8.png|x32px|link=Cushion|Cushion]][[File:SpongeTiresMK8.png|x32px|link=Sponge|Sponge]] | ||
|style="background-color:# | |style="background-color:#bfffbf;"|1 | ||
|style="background-color:# | |style="background-color:#bfffbf;"|1 | ||
|style="background-color:# | |style="background-color:#8080ff;"|4 | ||
|style="background-color:# | |style="background-color:#bfffbf;"|1 | ||
|style="background-color:# | |style="background-color:#80d4ff;"|4 | ||
|style="background-color:# | |style="background-color:#bfffbf;"|1 | ||
|style="background-color:# | |style="background-color:#80ffff;"|2 | ||
|style="background-color:# | |style="background-color:#bfffbf;"|1 | ||
| | |style="background-color:#80bfff;"|3 | ||
|style="background-color:#80ffff;"|2 | |||
| | |style="background-color:#80a4ff;"|6 | ||
|style="background-color:#80ffff;"| 2 | |style="background-color:#80aaff;"|5 | ||
|style="background-color:# | |style="background-color:#8080ff;"colspan="2"|6 | ||
|style="background-color:# | |style="background-color:#80d4ff;"colspan="2"|4 | ||
|style="background-color:# | |-style="font-weight:bold" | ||
|style="background-color:# | |width="1%"|[[File:GLATires-MK8.png|x32px|link=GLA Tires|GLA Tires (GLA Wheels)]][[File:StandardTiresMK8.png|x32px|link=Standard (tire)|Standard (Normal)]][[File:Blue_Standard.png|x32px|link=Blue Standard|Blue Standard (Normal Blue)]] | ||
|style="background-color:# | |style="background-color:#80ffff;"|2 | ||
|style="background-color:# | |style="background-color:#80bfff;"|3 | ||
|style="background-color:# | |style="background-color:#80bfff;"|3 | ||
|style="background-color:#80bfff;"| 3 | |style="background-color:#80ffff;"|2 | ||
|style="background-color:# | |style="background-color:#80d4ff;"|4 | ||
|style="background-color:# | |style="background-color:#80ffff;"|2 | ||
| | |style="background-color:#80bfff;"|3 | ||
| | |style="background-color:#80bfff;"|3 | ||
|style="background-color:#80bfff;"|3 | |||
|style=" | |style="background-color:#80bfff;"|3 | ||
| | |style="background-color:#80c8ff;"|5 | ||
|style="background-color:#80ffff;"|4 | |||
| | |style="background-color:#80aaff;"|5 | ||
| | |style="background-color:#80d4ff;"|4 | ||
|style="background-color:# | |style="background-color:#80d4ff;"colspan="2"|4 | ||
|style="background-color:# | |-style="font-weight:bold" | ||
|style="background-color:# | |width="1%"|[[File:SlimTiresMK8.png|x32px|link=Slim (tire)|Slim]][[File:WoodTiresMK8.png|x32px|link=Wood|Wood (Wooden)]][[File:CrimsonSlimTiresMK8.png|x32px|link=Crimson Slim|Crimson Slim]] | ||
|style="background-color:# | |style="background-color:#80bfff;"|3 | ||
|style="background-color:# | |style="background-color:#80ffff;"|2 | ||
|style="background-color:# | |style="background-color:#80ffff;"|2 | ||
| | |style="background-color:#8080ff;"|4 | ||
| | |style="background-color:#aaffd4;"|2 | ||
|style="background-color:# | |style="background-color:#80ffff;"|2 | ||
|style="background-color:# | |style="background-color:#8080ff;"|4 | ||
|style="background-color:# | |style="background-color:#8080ff;"|4 | ||
|style="background-color:# | |style="background-color:#8080ff;"|4 | ||
|style="background-color:# | |style="background-color:#80bfff;"|3 | ||
|style=" | |style="background-color:#daffa4;"|1 | ||
| | |style="background-color:#aaffd4;"|3 | ||
| | |style="background-color:#80aaff;"|5 | ||
|style="background-color:#80aaff;"|5 | |||
| | |style="background-color:#80aaff;"colspan="2"|5 | ||
|style="background-color:# | |-style="font-weight:bold" | ||
|style="background-color:# | |width="1%"|[[File:MonsterTiresMK8.png|x32px|link=Monster (tire)|Monster]][[File:HotMonsterTiresMK8.png|x32px|link=Hot Monster|Hot Monster (Funky Monster)]][[File:MK8D Ancient Tires.png|x32px|link=Ancient Tires|Ancient Tires (Ancient Tyres)]] | ||
| | |style="background-color:#80bfff;"|3 | ||
| | |style="background-color:#80ffff;"|2 | ||
|style="background-color:#bfffbf;"| 1 | |style="background-color:#bfffbf;"|1 | ||
|style="background-color:# | |style="background-color:#80ffff;"|2 | ||
|style="background-color:# | |style="background-color:#aaffd4;"|2 | ||
|style="background-color:# | |style="background-color:#8080ff;"|4 | ||
|style="background-color:# | |style="background-color:#ffff80;"|0 | ||
|style="background-color:# | |style="background-color:#bfffbf;"|1 | ||
|style="background-color:# | |style="background-color:#bfffbf;"|1 | ||
|style="background-color:# | |style="background-color:#ffff80;"|0 | ||
|style=" | |style="background-color:#8080ff;"|7 | ||
| | |style="background-color:#aaffd4;"|3 | ||
| | |style="background-color:#8080ff;"|6 | ||
| | |style="background-color:#8080ff;"|6 | ||
| | |style="background-color:#80aaff;"colspan="2"|5 | ||
| | |-style="font-weight:bold" | ||
|style="background-color:# | |width="1%"|[[File:Off-Road.png|x32px|link=Off-Road|Off-Road]][[File:Retro_Off-Road.png|x32px|link=Retro Off-Road|Retro Off-Road]][[File:MK8-TriforceTires.png|x32px|link=Triforce Tires|Triforce Tires (Triforce Tyres)]] | ||
|style="background-color:# | |style="background-color:#80bfff;"|3 | ||
|style="background-color:# | |style="background-color:#8080ff;"|4 | ||
|style="background-color:# | |style="background-color:#bfffbf;"|1 | ||
|style="background-color:# | |style="background-color:#80ffff;"|2 | ||
|style="background-color:# | |style="background-color:#80ffff;"|3 | ||
|style="background-color:# | |style="background-color:#80bfff;"|3 | ||
|style="background-color:# | |style="background-color:#bfffbf;"|1 | ||
|style="background-color:#bfffbf;"|1 | |||
|style=" | |style="background-color:#80ffff;"|2 | ||
| | |style="background-color:#80ffff;"|2 | ||
|style="background-color:#80a4ff;"|6 | |||
| | |style="background-color:#aaffd4;"|3 | ||
|style="background-color:#8080ff;"|6 | |||
|style="background-color:# | |style="background-color:#8080ff;"|6 | ||
|style="background-color:# | |style="background-color:#8080ff;"colspan="2"|6 | ||
|style="background-color:#8080ff;"| 4 | |-style="font-weight:bold" | ||
|style="background-color:# | |width="1%"|[[File:SlickTiresMK8.png|x32px|link=Slick|Slick]][[File:CyberSlickTiresMK8.png|x32px|link=Cyber Slick|Cyber Slick]] | ||
|style="background-color:# | |style="background-color:#8080ff;"|4 | ||
|style="background-color:# | |style="background-color:#ffff80;"|0 | ||
|style="background-color:# | |style="background-color:#ffff80;"|0 | ||
|style="background-color:#bfffbf;"| 1 | |style="background-color:#8080ff;"|4 | ||
|style="background-color:# | |style="background-color:#d4ffaa;"|1 | ||
|style="background-color:# | |style="background-color:#80bfff;"|3 | ||
|style="background-color:# | |style="background-color:#80ffff;"|2 | ||
|style="background-color:# | |style="background-color:#ffff80;"|0 | ||
| | |style="background-color:#bfffbf;"|1 | ||
|style="background-color:#80ffff;"|2 | |||
|style="background-color:#ffff80;"|0 | |||
|- style=" | |style="background-color:#d4ffaa;"|2 | ||
|style="background-color:#80aaff;"colspan="2"|5 | |||
|style="background-color:#80aaff;"colspan="2"|5 | |||
!width="6%" rowspan="2"| | |-style="font-weight:bold" | ||
!width="6%" rowspan="2"| | |width="1%"|[[File:MetalTiresMK8.png|x32px|link=Metal|Metal]][[File:Gold_Tires_MK8.png|x32px|link=Gold Tires|Gold Tires (Gold Wheels)]] | ||
! | |style="background-color:#8080ff;"|4 | ||
|style="background-color:#80bfff;"|3 | |||
|style="background-color:#80ffff;"|2 | |||
|- | |style="background-color:#bfffbf;"|1 | ||
|style="background-color:#ffff80;"|0 | |||
|style="background-color:#8080ff;"|4 | |||
|style="background-color:#80ffff;"|2 | |||
|style="background-color:#80ffff;"|2 | |||
|style="background-color:#ffff80;"|0 | |||
|style="background-color:#bfffbf;"|1 | |||
|style="background-color:#b6ffc8;"|2 | |||
|style="background-color:#d4ffaa;"|2 | |||
|style="background-color:#8080ff;"colspan="2"|6 | |||
|style="background-color:#80aaff;"colspan="2"|5 | |||
|-style="font-weight:bold" | |||
!colspan="17"style="background-color:#eaecf0;"|Gliders' Statistics | |||
|- | |||
!colspan="1"width="10%"rowspan="2"|Glider | |||
!width="24%"colspan="4"|Speed | |||
!width="6%"rowspan="2"|Acceleration | |||
!width="6%"rowspan="2"|Weight | |||
!width="24%"colspan="4"|Handling | |||
!width="6%"rowspan="2"|Traction | |||
!width="6%"rowspan="2"|Mini-Turbo | |||
!style="width: 6%;"rowspan="2;"colspan="4"|Invincibility | |||
|- | |||
!width="6%"|Ground | !width="6%"|Ground | ||
!width="6%"|Water | !width="6%"|Water | ||
| Line 1,169: | Line 1,678: | ||
!width="6%"|Air | !width="6%"|Air | ||
!width="6%"|Anti-Gravity | !width="6%"|Anti-Gravity | ||
|- style="font-weight:bold" | |-style="font-weight:bold" | ||
|width="1% | |width="1%"|[[File:Cloud_Glider.png|x32px|link=Cloud Glider|Cloud Glider]][[File:ParachuteGliderMK8.png|x32px|link=Parachute (glider)|Parachute]][[File:FlowerGliderMK8.png|x32px|link=Flower Glider|Flower Glider]][[File:PaperGliderIcon-MK8.png|x32px|link=Paper Glider|Paper Glider]] | ||
|style="background-color:#8080ff;"| 1 | |style="background-color:#ffff80;"|0 | ||
|style="background-color:# | |style="background-color:#8080ff;"|1 | ||
|style="background-color:#8080ff;"| | |style="background-color:#ffff80;"|1 | ||
|style="background-color:# | |style="background-color:#8080ff;"|1 | ||
|style="background-color:#ffff80;"| | |style="background-color:#8080ff;"|2 | ||
|style="background-color:#80ffff;"| 1 | |style="background-color:#ffff80;"|0 | ||
|style="background-color:# | |style="background-color:#80ffff;"|1 | ||
|style="background-color:# | |style="background-color:#ffff80;"|0 | ||
|style="background-color:# | |style="background-color:#8080ff;"|2 | ||
|style="background-color:#8080ff;"| 1 | |style="background-color:#8080ff;"|1 | ||
|style="background-color:#8080ff;"| | |style="background-color:#8080ff;"|1 | ||
|style="background-color:#ffff80;"| | |style="background-color:#8080ff;"|2 | ||
|- style="font-weight:bold" | |style="background-color:#ffff80;"colspan="4"|0 | ||
|width="1% | |-style="font-weight:bold" | ||
|style="background-color:#ffff80;"| 0 | |width="1%"|[[File:PeachParasolGliderMK8.png|x32px|link=Peach Parasol (glider)|Peach Parasol]][[File:ParafoilGliderMK8.png|x32px|link=Parafoil|Parafoil]][[File:BowserKiteMK8.png|x32px|link=Bowser Kite|Bowser Kite]][[File:MKTVParafoilGliderMK8.png|x32px|link=MKTV Parafoil|MKTV Parafoil]] | ||
|style="background-color:# | |style="background-color:#ffff80;"|0 | ||
|style="background-color:#ffff80;"| 1 | |style="background-color:#ffff80;"|0 | ||
|style="background-color:#8080ff;"| 1 | |style="background-color:#ffff80;"|1 | ||
|style="background-color:#8080ff;"| 2 | |style="background-color:#8080ff;"|1 | ||
|style="background-color:# | |style="background-color:#8080ff;"|2 | ||
|style="background-color:#80ffff;"| 1 | |style="background-color:#80ffff;"|1 | ||
|style="background-color:# | |style="background-color:#80ffff;"|1 | ||
|style="background-color:#8080ff;"| 2 | |style="background-color:#8080ff;"|1 | ||
|style="background-color:# | |style="background-color:#8080ff;"|2 | ||
|style="background-color:# | |style="background-color:#ffff80;"|0 | ||
|style="background-color:#8080ff;"| 2 | |style="background-color:#ffff80;"|0 | ||
|- style="font-weight:bold" | |style="background-color:#8080ff;"|2 | ||
|width="1% | |style="background-color:#ffff80;"colspan="4"|0 | ||
|style="background-color:#8080ff;"| 1 | |-style="font-weight:bold" | ||
|style="background-color:#ffff80;"| 0 | |width="1%"|[[File:WarioWingMK8.png|x32px|link=Wario Wing|Wario Wing]][[File:PlaneGliderMK8.png|x32px|link=Plane Glider|Plane Glider]][[File:GoldGliderMK8.png|x32px|link=Gold Glider|Gold Glider]][[File:MK8D Paraglider.png|x32px|link=Paraglider (The Legend of Zelda)|Paraglider (The Legend of Zelda)]] | ||
|style="background-color:#8080ff;"| 2 | |style="background-color:#8080ff;"|1 | ||
|style="background-color:#8080ff;"| 1 | |style="background-color:#ffff80;"|0 | ||
|style="background-color:#ffff80;"| 1 | |style="background-color:#8080ff;"|2 | ||
|style="background-color:#8080ff;"| 2 | |style="background-color:#8080ff;"|1 | ||
|style="background-color:#80ffff;"| 1 | |style="background-color:#ffff80;"|1 | ||
|style="background-color:#8080ff;"| 1 | |style="background-color:#8080ff;"|2 | ||
|style="background-color:#ffff80;"| 1 | |style="background-color:#80ffff;"|1 | ||
|style="background-color:#ffff80;"| 0 | |style="background-color:#8080ff;"|1 | ||
|style="background-color:#ffff80;"| 0 | |style="background-color:#ffff80;"|1 | ||
|style="background-color:#ffff80;"| 1 | |style="background-color:#ffff80;"|0 | ||
|- style="font-weight:bold" | |style="background-color:#ffff80;"|0 | ||
|width="1% | |style="background-color:#ffff80;"|1 | ||
|style="background-color:# | |style="background-color:#8080ff;"colspan="4"|1 | ||
|style="background-color:# | |-style="font-weight:bold" | ||
|style="background-color:#ffff80;"| | |width="1%"|[[File:SuperGliderMK8.png|x32px|link=Super Glider|Super Glider]][[File:WaddleWingMK8.png|x32px|link=Waddle Wing|Waddle Wing]][[File:MK8-HylianKite.png|x32px|link=Hylian Kite|Hylian Kite]] | ||
|style="background-color:# | |style="background-color:#8080ff;"|1 | ||
|style="background-color:# | |style="background-color:#8080ff;"|1 | ||
|style="background-color:#80ffff;"| 1 | |style="background-color:#8080ff;"|2 | ||
|style="background-color:# | |style="background-color:#ffff80;"|0 | ||
|style="background-color:# | |style="background-color:#ffff80;"|1 | ||
|style="background-color:#8080ff;"| | |style="background-color:#80ffff;"|1 | ||
|style="background-color:# | |style="background-color:#80ffff;"|1 | ||
|style="background-color:#ffff80;"| | |style="background-color:#ffff80;"|0 | ||
|style="background-color:#8080ff;"| | |style="background-color:#ffff80;"|1 | ||
|style="background-color:#8080ff;"|1 | |||
|style="background-color:#8080ff;"|1 | |||
|style="background-color:#ffff80;"|1 | |||
|style="background-color:#8080ff;"colspan="4"|1 | |||
|} | |} | ||
<nowiki>*</nowiki>[[Sport bike (vehicle class)|sport bike]] | |||
==Unlocking criteria== | ==Unlocking criteria== | ||
===Gold Mario=== | ===Gold Mario=== | ||
The only unlockable playable character in this game is [[Gold Mario]], who is unlocked by winning all twelve gold cups at 200cc. Once unlocked, he replaces [[ | The only unlockable playable character in this game is [[Gold Mario]], who is unlocked by winning all twelve base-game gold cups at 200cc. Once unlocked, he replaces [[Metal Mario]] on the character select screen. Metal Mario is from then on treated as a color variant of Gold Mario. The two differ only in their color scheme and the voice clip used when selecting them. Their other voice clips, horn sounds, animations, and statistics are identical. | ||
===Vehicle parts=== | ===Vehicle parts=== | ||
| Line 1,236: | Line 1,750: | ||
===Special parts=== | ===Special parts=== | ||
Special gold parts are unlocked with the following criteria: | Special gold parts are unlocked with the following criteria: | ||
*[[Gold Standard]]: Unlocked by achieving at least 1 star ranking on all Mirror Cups. | *[[Gold Standard]]: Unlocked by achieving at least 1 star ranking on all base-game Mirror Cups. | ||
*[[Gold Tires]]: Unlocked by defeating all 48 staff ghosts in 150cc Time Trials. | *[[Gold Tires]]: Unlocked by defeating all 48 base-game staff ghosts in 150cc Time Trials. | ||
*[[Gold Glider]]: Unlocked by collecting | *[[Gold Glider]]: Unlocked by collecting 5000 coins. | ||
===Alternate title screens=== | |||
Additional title screens can appear when hovering over the single player and multiplayer options on the main menu. These are unlocked by obtaining a gold trophy in every base-game cup in Mirror and 200cc, after which the title screens used are randomly selected. These alternate title screens can appear on start-up, which causes a different voice clip to play corresponding to the character shown on the screen, replacing the usual clip of [[Mario]] yelling "Mario Kart 8!" | |||
==Courses== | ==Courses== | ||
There are 48 race courses in the game (including all four cups that were DLC in the original ''Mario Kart 8''), these being the 25 courses introduced in the original game and 23 | There are 48 race courses in the base game (including all four cups that were DLC in the original ''Mario Kart 8''), these being the 25 courses [[New course|introduced]] in the original game and 23 [[classic course]]s, which includes two courses from ''Super Mario Kart'', three courses each from ''Mario Kart: Super Circuit'', ''Mario Kart DS'', and ''Mario Kart Wii'', and four courses each from ''Mario Kart 64'', ''Mario Kart: Double Dash!!'', and ''Mario Kart 7''. It is also the first ''Mario Kart'' game since ''Mario Kart 64'' to have all courses available from the start. | ||
In the British English version of the game, [[Toad Harbor]] is spelled "Toad Harbour", [[Bone-Dry Dunes]] is formatted "Bone Dry Dunes", and {{classic link|3DS|Music Park}}, {{classic link|3DS|Piranha Plant Slide}}, and {{classic link|3DS|Neo Bowser City}} are respectively known as <small>3DS</small> Melody Motorway, <small>3DS</small> Piranha Plant Pipeway, and <small>3DS</small> Koopa City. | |||
{|width=60% style="border-collapse:collapse;margin-bottom:5px;"align="center"cellpadding="4" | |||
|-valign=top bgcolor= | |||
![[File:MK8 MushroomCup.png|70px]]<br>[[Mushroom Cup]] | |||
![[File:MK8 FlowerCup.png|70px]]<br>[[Flower Cup]] | |||
![[File:MK8 Star Cup Emblem.png|70px]]<br>[[Star Cup]] | |||
![[File:MK8 Special Cup Emblem.png|70px]]<br>[[Special Cup]] | |||
![[File:MK8 Egg Cup Emblem.png|70px]]<br>[[Egg Cup]] | |||
![[File:MK8 Crossing Cup Emblem.png|70px]]<br>[[Crossing Cup]] | |||
|-align=center | |||
|{{course icon|MK8|Mario Kart Stadium}} | |||
|{{course icon|MK8|Mario Circuit|link=Mario Circuit (Mario Kart 8)}} | |||
|{{course icon|MK8|Sunshine Airport}} | |||
|{{course icon|MK8|Cloudtop Cruise}} | |||
|{{course icon|MK8|GCN Yoshi Circuit}} | |||
|{{course icon|MK8|GCN Baby Park}} | |||
|-align=center | |||
|{{course icon|MK8|Water Park}} | |||
|{{course icon|MK8|Toad Harbor}} | |||
|{{course icon|MK8|Dolphin Shoals}} | |||
|{{course icon|MK8|Bone-Dry Dunes}} | |||
|{{course icon|MK8|Excitebike Arena}} | |||
|{{course icon|MK8|GBA Cheese Land}} | |||
|-align=center | |||
|{{course icon|MK8|Sweet Sweet Canyon}} | |||
|{{course icon|MK8|Twisted Mansion}} | |||
|{{course icon|MK8|Electrodrome}} | |||
|{{course icon|MK8|Bowser's Castle|link=Bowser's Castle (Mario Kart 8)}} | |||
|{{course icon|MK8|Dragon Driftway}} | |||
|{{course icon|MK8|Wild Woods}} | |||
|-align=center | |||
|{{course icon|MK8|Thwomp Ruins}} | |||
|{{course icon|MK8|Shy Guy Falls}} | |||
|{{course icon|MK8|Mount Wario}} | |||
|{{course icon|MK8|Rainbow Road|link=Rainbow Road (Mario Kart 8)}} | |||
|{{course icon|MK8|Mute City}} | |||
|{{course icon|MK8|Animal Crossing}} | |||
|} | |||
{|width=60% style="border-collapse:collapse;margin-bottom:5px;"align="center"cellpadding="4" | |||
|-valign=top | |||
![[File:MK8 Shell Cup Emblem.png|70px]]<br>[[Shell Cup]] | |||
![[File:MK8 Banana Cup Emblem.png|70px]]<br>[[Banana Cup]] | |||
![[File:MK8 Leaf Cup Emblem.png|70px]]<br>[[Leaf Cup]] | |||
![[File:MK8 Lightning Cup Emblem.png|70px]]<br>[[Lightning Cup]] | |||
![[File:MK8 Triforce Cup Emblem.png|70px]]<br>[[Triforce Cup]] | |||
![[File:MK8 Bell Cup Emblem.png|70px]]<br>[[Bell Cup]] | |||
|-align=center | |||
|{{course icon|MK8|Wii Moo Moo Meadows}} | |||
|{{course icon|MK8|GCN Dry Dry Desert}} | |||
|{{course icon|MK8|DS Wario Stadium}} | |||
|{{course icon|MK8|DS Tick-Tock Clock}} | |||
|{{course icon|MK8|Wii Wario's Gold Mine}} | |||
|{{course icon|MK8|3DS Neo Bowser City}} | |||
|-align=center | |||
|{{course icon|MK8|GBA Mario Circuit}} | |||
|{{course icon|MK8|SNES Donut Plains 3}} | |||
|{{course icon|MK8|GCN Sherbet Land}} | |||
|{{course icon|MK8|3DS Piranha Plant Slide}} | |||
|{{course icon|MK8|SNES Rainbow Road}} | |||
|{{course icon|MK8|GBA Ribbon Road}} | |||
|-align=center | |||
|{{course icon|MK8|DS Cheep Cheep Beach}} | |||
|{{course icon|MK8|N64 Royal Raceway}} | |||
|{{course icon|MK8|3DS Music Park}} | |||
|{{course icon|MK8|Wii Grumble Volcano}} | |||
|{{course icon|MK8|Ice Ice Outpost}} | |||
|{{course icon|MK8|Super Bell Subway}} | |||
|-align=center | |||
|{{course icon|MK8|N64 Toad's Turnpike}} | |||
|{{course icon|MK8|3DS DK Jungle}} | |||
|{{course icon|MK8|N64 Yoshi Valley}} | |||
|{{course icon|MK8|N64 Rainbow Road}} | |||
|{{course icon|MK8|Hyrule Circuit}} | |||
|{{course icon|MK8|Big Blue}} | |||
|} | |||
===''Booster Course Pass''=== | |||
{{main|Mario Kart 8 Deluxe – Booster Course Pass}} | |||
The ''Mario Kart 8 Deluxe – Booster Course Pass'' DLC includes 48 additional courses (mostly classic courses), released in six waves of eight courses each, increasing the game's total number of courses to 96. The first wave released on March 18, 2022, and the final wave released on November 9, 2023. The classic courses in the DLC include two courses each from ''Super Mario Kart'' and ''Mario Kart 64'', three courses from ''Mario Kart: Double Dash!!'', four courses each from ''Mario Kart DS'' and ''Mario Kart 7'', five courses from ''Mario Kart: Super Circuit'', eight courses from ''Mario Kart Wii'', and seventeen courses from ''[[Mario Kart Tour]]'' (making ''Mario Kart 8 Deluxe'' the first game in the series to feature classic courses of a ''Mario Kart'' game released after it), which increases the total number of courses from each game to four courses from ''Super Mario Kart'', six courses from ''Mario Kart 64'', seven courses each from ''Mario Kart: Double Dash!!'' and ''Mario Kart DS'', eight courses each from ''Mario Kart: Super Circuit'' and ''Mario Kart 7'', and eleven courses from ''Mario Kart Wii''. Three new courses are also included, namely [[Sky-High Sundae]], [[Yoshi's Island (race course)|Yoshi's Island]], and [[Squeaky Clean Sprint]], increasing the total number of new courses to 28. | |||
In the British English version of the game, {{classic link|3DS|Rock Rock Mountain}} and {{classic link|Wii|DK Summit}} are known as {{classic|3DS|Alpine Pass}} and {{classic|Wii|DK's Snowboard Cross}} respectively, as was the case in the British English versions of their original appearances. However, most courses that had different names between European French and Canadian French in previous games instead use their European French names in both versions, with the exceptions of {{classic link|DS|Waluigi Pinball}}, {{classic link|Tour|Amsterdam Drift}}, and {{classic link|3DS|Rosalina's Ice World}}. | |||
{{:Mario Kart 8 Deluxe – Booster Course Pass}} | |||
===Battle courses=== | |||
Eight battle courses are present in ''Mario Kart 8 Deluxe'', five [[New course|new]] and three [[Classic course|classic]], replacing the repurposed race courses used for Battle Mode in the Wii U version. | |||
Most battle courses visually resemble race courses from ''Mario Kart 8'': Battle Stadium with [[Mario Kart Stadium]], Sweet Sweet Kingdom with [[Sweet Sweet Canyon]], Dragon Palace with [[Dragon Driftway]], Lunar Colony with [[Rainbow Road (Mario Kart 8)|Rainbow Road]], {{classic|GCN|Luigi's Mansion}} with [[Twisted Mansion]], and {{classic|SNES|Battle Course 1}} with {{classic link|SNES|Donut Plains 3}}, all sharing similar textures and/or assets. | |||
{| width=60% style="border-collapse:collapse;margin-bottom:5px;" align="center" cellpadding="4" | Similar to regular races, a course introduction scene is now added at the start. | ||
{|width=60% style="border-collapse:collapse;margin-bottom:5px;"align="center"cellpadding="4" | |||
|-align=center | |||
|{{course icon|MK8D|Battle Stadium}} | |||
|{{course icon|MK8D|Sweet Sweet Kingdom}} | |||
|{{course icon|MK8D|Dragon Palace}} | |||
|{{course icon|MK8D|Lunar Colony}} | |||
|-align=center | |||
|- align=center | |{{course icon|MK8D|3DS Wuhu Town}} | ||
| | |{{course icon|MK8D|GCN Luigi's Mansion}} | ||
| | |{{course icon|MK8D|SNES Battle Course 1}} | ||
|{{course icon|MK8D|Urchin Underpass}} | |||
| | |||
| | |||
| | |||
|- align=center | |||
| | |||
| | |||
| | |||
| | |||
|} | |} | ||
| Line 1,323: | Line 1,864: | ||
===150cc Staff Ghosts=== | ===150cc Staff Ghosts=== | ||
In ''Mario Kart 8 Deluxe'', the times for staff ghosts in 150cc are slightly different from the original ''Mario Kart 8''. Also, unlike the original game, players will not unlock any stamps if they beat the ghosts. | In ''Mario Kart 8 Deluxe'', the times for staff ghosts in 150cc are slightly different from the original ''Mario Kart 8''. Also, unlike the original game, players will not unlock any stamps if they beat the ghosts. | ||
{|border=1 style="text-align:center;border-collapse:collapse;max-width:100em;margin:auto"align=center class="wikitable mw-collapsible mw-collapsed" | |||
{| border=1 style="text-align:center;border-collapse:collapse;max-width:100em;margin:auto" align=center class="wikitable mw-collapsible mw-collapsed" | |||
|- | |- | ||
!width=15% rowspan=2|Course | !width=15% rowspan=2|Course | ||
| Line 1,481: | Line 2,021: | ||
|Super Glider | |Super Glider | ||
|- | |- | ||
! | !{{classic|Wii|Moo Moo Meadows}} | ||
|Nin★Chris | |Nin★Chris | ||
|United Kingdom | |United Kingdom | ||
| Line 1,490: | Line 2,030: | ||
|Super Glider | |Super Glider | ||
|- | |- | ||
! | !{{classic|GBA|Mario Circuit}} | ||
|Nin★Rie | |Nin★Rie | ||
|Japan | |Japan | ||
| Line 1,499: | Line 2,039: | ||
|Super Glider | |Super Glider | ||
|- | |- | ||
! | !{{classic|DS|Cheep Cheep Beach}} | ||
|Nin★Massim | |Nin★Massim | ||
|Italy | |Italy | ||
| Line 1,508: | Line 2,048: | ||
|Parachute | |Parachute | ||
|- | |- | ||
! | !{{classic|N64|Toad's Turnpike}} | ||
|Nin★Alice | |Nin★Alice | ||
|United States | |United States | ||
| Line 1,517: | Line 2,057: | ||
|Parachute | |Parachute | ||
|- | |- | ||
! | !{{classic|GCN|Dry Dry Desert}} | ||
|Nin★Maria | |Nin★Maria | ||
|Portugal | |Portugal | ||
| Line 1,526: | Line 2,066: | ||
|Super Glider | |Super Glider | ||
|- | |- | ||
! | !{{classic|SNES|Donut Plains 3}} | ||
|Nin★Frank | |Nin★Frank | ||
|United Kingdom | |United Kingdom | ||
| Line 1,535: | Line 2,075: | ||
|MKTV Parafoil | |MKTV Parafoil | ||
|- | |- | ||
! | !{{classic|N64|Royal Raceway}} | ||
|Nin★Skip | |Nin★Skip | ||
|United States | |United States | ||
| Line 1,544: | Line 2,084: | ||
|Peach Parasol | |Peach Parasol | ||
|- | |- | ||
! | !{{classic|3DS|DK Jungle}} | ||
|Nin★Rie | |Nin★Rie | ||
|Japan | |Japan | ||
| Line 1,553: | Line 2,093: | ||
|Waddle Wing | |Waddle Wing | ||
|- | |- | ||
! | !{{classic|DS|Wario Stadium}} | ||
|Nin★Mizuho | |Nin★Mizuho | ||
|Japan | |Japan | ||
| Line 1,562: | Line 2,102: | ||
|Wario Wing | |Wario Wing | ||
|- | |- | ||
! | !{{classic|GCN|Sherbet Land}} | ||
|Nin★Fausti | |Nin★Fausti | ||
|France | |France | ||
| Line 1,571: | Line 2,111: | ||
|Super Glider | |Super Glider | ||
|- | |- | ||
! | !{{classic|3DS|Music Park}} | ||
|Nin★Sho | |Nin★Sho | ||
|Japan | |Japan | ||
| Line 1,580: | Line 2,120: | ||
|Super Glider | |Super Glider | ||
|- | |- | ||
! | !{{classic|N64|Yoshi Valley}} | ||
|Nin★Mark | |Nin★Mark | ||
|Netherlands | |Netherlands | ||
| Line 1,589: | Line 2,129: | ||
|Flower Glider | |Flower Glider | ||
|- | |- | ||
! | !{{classic|DS|Tick-Tock Clock}} | ||
|Nin★Sophia | |Nin★Sophia | ||
|Germany | |Germany | ||
| Line 1,598: | Line 2,138: | ||
|Super Glider | |Super Glider | ||
|- | |- | ||
! | !{{classic|3DS|Piranha Plant Slide}} | ||
|Nin★Polly | |Nin★Polly | ||
|United Kingdom | |United Kingdom | ||
| Line 1,607: | Line 2,147: | ||
|Super Glider | |Super Glider | ||
|- | |- | ||
! | !{{classic|Wii|Grumble Volcano}} | ||
|Nin★Yuya | |Nin★Yuya | ||
|Japan | |Japan | ||
| Line 1,616: | Line 2,156: | ||
|Super Glider | |Super Glider | ||
|- | |- | ||
! | !{{classic|N64|Rainbow Road}} | ||
|Nin★Leonel | |Nin★Leonel | ||
|United States | |United States | ||
| Line 1,625: | Line 2,165: | ||
|Super Glider | |Super Glider | ||
|- | |- | ||
! | !{{classic|GCN|Yoshi Circuit}} | ||
|Nin★Adrien | |Nin★Adrien | ||
|France | |France | ||
| Line 1,661: | Line 2,201: | ||
|Super Glider | |Super Glider | ||
|- | |- | ||
! | !{{classic|Wii|Wario's Gold Mine}} | ||
|Nin★Pit | |Nin★Pit | ||
|Germany | |Germany | ||
| Line 1,670: | Line 2,210: | ||
|Super Glider | |Super Glider | ||
|- | |- | ||
! | !{{classic|SNES|Rainbow Road}} | ||
|Nin★Anne | |Nin★Anne | ||
|Netherlands | |Netherlands | ||
| Line 1,697: | Line 2,237: | ||
|Hylian Kite | |Hylian Kite | ||
|- | |- | ||
! | !{{classic|GCN|Baby Park}} | ||
|Nin★Joost | |Nin★Joost | ||
|Netherlands | |Netherlands | ||
| Line 1,706: | Line 2,246: | ||
|Super Glider | |Super Glider | ||
|- | |- | ||
! | !{{classic|GBA|Cheese Land}} | ||
|Nin★Aracel | |Nin★Aracel | ||
|Spain | |Spain | ||
| Line 1,733: | Line 2,273: | ||
|Paper Glider | |Paper Glider | ||
|- | |- | ||
! | !{{classic|3DS|Neo Bowser City}} | ||
|Nin★Rui | |Nin★Rui | ||
|Portugal | |Portugal | ||
| Line 1,742: | Line 2,282: | ||
|Super Glider | |Super Glider | ||
|- | |- | ||
! | !{{classic|GBA|Ribbon Road}} | ||
|Nin★Giulia | |Nin★Giulia | ||
|Italy | |Italy | ||
| Line 1,768: | Line 2,308: | ||
|Blue Standard | |Blue Standard | ||
|Super Glider | |Super Glider | ||
|- | |- | ||
! | !{{classic|Tour|Paris Promenade}} | ||
|Nin★Adrien | |||
|France | |||
|2:07.401 | |||
|Peach | |||
|Standard Kart | |||
|Slim | |||
|Peach Parasol | |||
|- | |- | ||
! | !{{classic|3DS|Toad Circuit}} | ||
| | |Nin★Sho | ||
| | |Japan | ||
|1: | |1:33.670 | ||
| | |Toad | ||
| | |Mr. Scooty | ||
| | |Azure Roller | ||
| | |Super Glider | ||
|- | |- | ||
! | !{{classic|N64|Choco Mountain}} | ||
| | |Nin★Massim | ||
| | |Italy | ||
| | |2:08.949 | ||
| | |Koopa Troopa | ||
|Biddybuggy | |Biddybuggy | ||
|Standard | |Standard | ||
|Super Glider | |Super Glider | ||
|- | |- | ||
! | !{{classic|Wii|Coconut Mall}} | ||
| | |||
| | |||
|Nin★Skip | |Nin★Skip | ||
|United States | |United States | ||
|1: | |1:58.401 | ||
| | |Baby Mario | ||
| | |Sneeker | ||
| | |Metal | ||
| | |Super Glider | ||
|- | |- | ||
! | !{{classic|Tour|Tokyo Blur}} | ||
| | |Nin★Yuya | ||
| | |Japan | ||
|1: | |1:36.317 | ||
| | |Blue Inkling Boy | ||
| | |Splat Buggy | ||
| | |Blue Standard | ||
|Super Glider | |Super Glider | ||
|- | |- | ||
! | !{{classic|DS|Shroom Ridge}} | ||
| | |Nin★Frank | ||
| | |United Kingdom | ||
| | |2:09.148 | ||
| | |Bowser | ||
| | |Bone Rattler | ||
| | |Off-Road | ||
|Super Glider | |Super Glider | ||
|- | |- | ||
! | !{{classic|GBA|Sky Garden}} | ||
| | |Nin★Pedro | ||
| | |Spain | ||
|1: | |1:42.267 | ||
| | |Lakitu | ||
| | |P-Wing | ||
| | |Retro Off-Road | ||
| | |Cloud Glider | ||
|- | |- | ||
! | !Ninja Hideaway | ||
| | |Nin★Fausti | ||
| | |France | ||
| | |2:20.813 | ||
| | |Black Shy Guy | ||
|Standard ATV | |Standard ATV | ||
| | |Standard | ||
| | |Super Glider | ||
|- | |- | ||
! | !{{classic|Tour|New York Minute}} | ||
| | |Nin★Leonel | ||
| | |United States | ||
|1: | |1:34.573 | ||
| | |Donkey Kong | ||
| | |Varmint | ||
| | |Monster | ||
| | |Super Glider | ||
|- | |- | ||
! | !{{classic|SNES|Mario Circuit 3}} | ||
| | |Nin★Mark | ||
| | |Netherlands | ||
|1: | |1:46.806 | ||
| | |Mario | ||
| | |B Dasher | ||
| | |Standard | ||
| | |Super Glider | ||
|- | |- | ||
! | !{{classic|N64|Kalimari Desert}} | ||
| | |Nin★Pit | ||
| | |Germany | ||
|1:40. | |1:40.363 | ||
| | |Dry Bones | ||
|Standard Kart | |||
|Monster | |||
|Super Glider | |||
|- | |||
!{{classic|DS|Waluigi Pinball}} | |||
|Nin★Chris | |||
|United Kingdom | |||
|2:36.450 | |||
|Waluigi | |||
|The Duke | |The Duke | ||
| | |Monster | ||
| | |Super Glider | ||
|- | |- | ||
! | !{{classic|Tour|Sydney Sprint}} | ||
| | |Nin★Rie | ||
| | |Japan | ||
|1: | |2:16.617 | ||
| | |Baby Mario | ||
| | |Biddybuggy | ||
| | |Standard | ||
| | |Super Glider | ||
|- | |||
!{{classic|GBA|Snow Land}} | |||
|Nin★Maria | |||
|Portugal | |||
|1:46.763 | |||
|Tanooki Mario | |||
|Tanooki Kart | |||
|Standard | |||
|Super Glider | |||
|- | |- | ||
! | !{{classic|Wii|Mushroom Gorge}} | ||
| | |Nin★Massim | ||
|Italy | |Italy | ||
|1: | |1:50.666 | ||
| | |Toadette | ||
|Teddy Buggy | |||
| | |||
|Wood | |Wood | ||
| | |Super Glider | ||
|- | |- | ||
! | !Sky-High Sundae | ||
| | |Nin★Akira | ||
| | |Japan | ||
| | |2:07.380 | ||
| | |Rosalina | ||
| | |Circuit Special | ||
|Standard | |||
|Super Glider | |||
|- | |||
!{{classic|Tour|London Loop}} | |||
|Nin★Frank | |||
|United Kingdom | |||
|2:20.500 | |||
|Mario | |||
|Comet | |||
|Slim | |Slim | ||
| | |Super Glider | ||
|- | |- | ||
! | !{{classic|GBA|Boo Lake}} | ||
| | |Nin★Rie | ||
| | |Japan | ||
|1: | |1:36.212 | ||
| | |King Boo | ||
| | |Circuit Special | ||
| | |Monster | ||
| | |Super Glider | ||
|- | |||
!{{classic|3DS|Rock Rock Mountain}} | |||
|Nin★Fausti | |||
|France | |||
|2:24.730 | |||
|Morton | |||
|Pipe Frame | |||
|Monster | |||
|Super Glider | |||
|- | |- | ||
! | !{{classic|Wii|Maple Treeway}} | ||
| | |Nin★Pavel | ||
| | |Russia | ||
| | |2:36.581 | ||
| | |Daisy | ||
| | |Prancer | ||
| | |Off-Road | ||
| | |Super Glider | ||
|- | |- | ||
! | !{{classic|Tour|Berlin Byways}} | ||
| | |Nin★Sophia | ||
|Germany | |Germany | ||
| | |2:11.001 | ||
| | |Donkey Kong | ||
| | |Varmint | ||
| | |Monster | ||
| | |Super Glider | ||
|- | |||
!{{classic|DS|Peach Gardens}} | |||
|Nin★Marie | |||
|United States | |||
|2:19.534 | |||
|Peach | |||
|Prancer | |||
|Wood | |||
|Super Glider | |||
|- | |||
!Merry Mountain | |||
|Nin★Elena | |||
|Russia | |||
|2:09.693 | |||
|Shy Guy | |||
|Flame Rider | |||
|Off-Road | |||
|Super Glider | |||
|- | |- | ||
! | !{{classic|3DS|Rainbow Road}} | ||
|Nin★Mizuho | |Nin★Mizuho | ||
|Japan | |Japan | ||
|1: | |1:52.015 | ||
| | |Rosalina | ||
| | |Circuit Special | ||
| | |Standard | ||
| | |Super Glider | ||
|- | |- | ||
! | !{{classic|Tour|Amsterdam Drift}} | ||
| | |Nin★Mark | ||
| | |Netherlands | ||
|1: | |1:48.580 | ||
| | |Daisy | ||
| | |Prancer | ||
| | |Wood | ||
|Super Glider | |Super Glider | ||
|- | |- | ||
! | !{{classic|GBA|Riverside Park}} | ||
| | |Nin★Frank | ||
|United Kingdom | |United Kingdom | ||
|1: | |1:34.480 | ||
| | |Toad | ||
| | |Standard ATV | ||
| | |Standard | ||
|Super Glider | |Super Glider | ||
|- | |- | ||
! | !{{classic|Wii|DK Summit}} | ||
| | |Nin★Fausti | ||
| | |France | ||
| | |2:22.680 | ||
| | |Donkey Kong | ||
| | |Varmint | ||
|Monster | |Monster | ||
| | |Super Glider | ||
|- | |- | ||
! | !Yoshi's Island | ||
| | |Nin★Skip | ||
|United | |United States | ||
| | |2:20.116 | ||
|Baby | |Baby Mario | ||
| | |Biddybuggy | ||
| | |Standard | ||
| | |Super Glider | ||
|- | |- | ||
! | !{{classic|Tour|Bangkok Rush}} | ||
| | |Nin★Yuya | ||
| | |Japan | ||
|1: | |1:54.995 | ||
| | |Blue Inkling Boy | ||
| | |Inkstriker | ||
| | |Monster | ||
| | |Super Glider | ||
|- | |||
!{{classic|DS|Mario Circuit}} | |||
|Nin★Pit | |||
|Germany | |||
|1:50.550 | |||
|Mario | |||
|B Dasher | |||
|Standard | |||
|Super Glider | |||
|- | |- | ||
! | !{{classic|GCN|Waluigi Stadium}} | ||
| | |Nin★Maria | ||
| | |Portugal | ||
| | |2:16.894 | ||
|Waluigi | |Waluigi | ||
| | |The Duke | ||
|Monster | |Monster | ||
| | |Super Glider | ||
|- | |- | ||
! | !{{classic|Tour|Singapore Speedway}} | ||
| | |Nin★Alice | ||
| | |United States | ||
| | |2:08.954 | ||
| | |Bowser | ||
|Badwagon | |Badwagon | ||
| | |Monster | ||
|Super Glider | |Super Glider | ||
|- | |- | ||
! | !{{classic|Tour|Athens Dash}} | ||
| | |Nin★Pedro | ||
| | |Spain | ||
|1: | |1:52.892 | ||
| | |Wiggler | ||
| | |Circuit Special | ||
|Sponge | |Sponge | ||
| | |Super Glider | ||
|- | |- | ||
! | !{{classic|GCN|Daisy Cruiser}} | ||
| | |Nin★Chris | ||
|United Kingdom | |United Kingdom | ||
|1: | |1:47.238 | ||
| | |Daisy | ||
| | |Jet Bike | ||
| | |Slim | ||
| | |Super Glider | ||
|- | |- | ||
! | !{{classic|Wii|Moonview Highway}} | ||
| | |Nin★Yuya | ||
| | |Japan | ||
|1: | |1:54.655 | ||
| | |Waluigi | ||
| | |The Duke | ||
| | |Monster | ||
| | |Wario Wing | ||
|- | |- | ||
! | !Squeaky Clean Sprint | ||
|Nin★Fausti | |Nin★Fausti | ||
|France | |France | ||
|1: | |2:17.580 | ||
|Kamek | |||
|City Tripper | |||
|Cushion | |||
|Cloud Glider | |||
|- | |||
!{{classic|Tour|Los Angeles Laps}} | |||
|Nin★Alice | |||
|United States | |||
|1:57.938 | |||
|Mario | |Mario | ||
| | |Comet | ||
| | |Slim | ||
|Super Glider | |Super Glider | ||
|- | |- | ||
! | !{{classic|GBA|Sunset Wilds}} | ||
| | |Nin★Pit | ||
| | |Germany | ||
|1: | |1:48.993 | ||
| | |Petey Piranha | ||
| | |Flame Rider | ||
| | |Off-Road | ||
| | |Flower Glider | ||
|- | |- | ||
! | !{{classic|Wii|Koopa Cape}} | ||
| | |Nin★Massim | ||
| | |Italy | ||
| | |2:18.943 | ||
| | |Koopa Troopa | ||
| | |Steel Driver | ||
| | |Metal | ||
|Super Glider | |Super Glider | ||
|- | |- | ||
! | !{{classic|Tour|Vancouver Velocity}} | ||
| | |Nin★Skip | ||
| | |United States | ||
| | |2:11.072 | ||
| | |Rosalina | ||
| | |Sport Bike | ||
| | |Slim | ||
|Super Glider | |Super Glider | ||
|- | |- | ||
! | !{{classic|Tour|Rome Avanti}} | ||
| | |Nin★Giulia | ||
| | |Italy | ||
|1: | |1:57.329 | ||
| | |Pauline | ||
| | |Badwagon | ||
| | |Metal | ||
| | |Super Glider | ||
|- | |- | ||
! | !{{classic|GCN|DK Mountain}} | ||
| | |Nin★Laura | ||
|United States | |United States | ||
| | |2:35.917 | ||
| | |Funky Kong | ||
|Standard | |Standard ATV | ||
| | |Monster | ||
| | |Parafoil | ||
|- | |- | ||
! | !{{classic|Wii|Daisy Circuit}} | ||
|Nin★Adrien | |||
| | |||
| | |||
| | |||
|France | |France | ||
| | |2:01.099 | ||
| | |Daisy | ||
| | |Sports Coupe | ||
| | |Standard | ||
| | |Super Glider | ||
|- | |- | ||
! | !Piranha Plant Cove | ||
| | |Nin★Sophia | ||
| | |Germany | ||
|1: | |2:17.775 | ||
| | |Petey Piranha | ||
| | |Flame Rider | ||
| | |Slim | ||
| | |Flower Glider | ||
|- | |||
!{{classic|Tour|Madrid Drive}} | |||
|Nin★Aracel | |||
|Spain | |||
|2:10.689 | |||
|Peachette | |||
|Biddybuggy | |||
|Standard | |||
|Cloud Glider | |||
|- | |||
!{{classic|3DS|Rosalina's Ice World}} | |||
|Nin★Pavel | |||
|Russia | |||
|2:10.993 | |||
|Rosalina | |||
|Sport Bike | |||
|Slim | |||
|Super Glider | |||
|- | |||
!{{classic|SNES|Bowser Castle 3}} | |||
|Nin★Polly | |||
|United Kingdom | |||
|1:54.632 | |||
|Bowser | |||
|Landship | |||
|Wood | |||
|Super Glider | |||
|- | |- | ||
! | !{{classic|Wii|Rainbow Road}} | ||
|Nin★Leonel | |Nin★Leonel | ||
|United States | |United States | ||
| | |2:49.574 | ||
| | |Mario | ||
| | |Standard Kart | ||
| | |Standard | ||
| | |Super Glider | ||
|} | |||
===200cc Staff Ghosts=== | |||
''Mario Kart 8 Deluxe'' features a new option for players to race in Time Trials in the 200cc engine class. This option also features entirely new staff ghosts for each of the courses. | |||
{|border=1 style="text-align:center;border-collapse:collapse;max-width:100em;margin:auto"align=center class="wikitable mw-collapsible mw-collapsed" | |||
|- | |||
!width=15% rowspan=2|Course | |||
!width=10% rowspan=2|Staff Name | |||
!width=10% rowspan=2|Country | |||
!width=5% rowspan=2|Time | |||
!width=10% rowspan=2|Character | |||
!width=30% colspan=3|Vehicle Combination | |||
|- | |||
!width=10%|Body | |||
!width=10%|Tires | |||
!width=10%|Glider | |||
|- | |- | ||
! | !Mario Kart Stadium | ||
| | |Nin★Sophia | ||
| | |Germany | ||
|1: | |1:21.984 | ||
| | |Gold Mario | ||
| | |Gold Standard | ||
| | |Gold Tires | ||
| | |Gold Glider | ||
|- | |- | ||
! | !Water Park | ||
| | |Nin★Yuya | ||
|Japan | |Japan | ||
|1: | |1:22.799 | ||
| | |Baby Mario | ||
| | |Biddybuggy | ||
| | |Standard | ||
|Super Glider | |Super Glider | ||
|- | |- | ||
! | !Sweet Sweet Canyon | ||
| | |Nin★Alice | ||
| | |United States | ||
|1: | |1:40.972 | ||
|Peach | |||
|Prancer | |||
|Wood | |||
|Peach Parasol | |||
|- | |||
!Thwomp Ruins | |||
|Nin★Skip | |||
|United States | |||
|1:31.436 | |||
|Bowser | |Bowser | ||
| | |Badwagon | ||
|Standard | |Standard | ||
|Bowser Kite | |||
|- | |||
!Mario Circuit | |||
|Nin★Joost | |||
|Netherlands | |||
|1:23.243 | |||
|Pink Gold Peach | |||
|Standard Bike | |||
|Slim | |||
|Super Glider | |Super Glider | ||
|- | |- | ||
! | !Toad Harbor | ||
| | |Nin★Adrien | ||
|France | |||
|1:43.003 | |||
|Toad | |||
|Sports Coupe | |||
|Standard | |||
|Super Glider | |||
|- | |||
!Twisted Mansion | |||
|Nin★Rui | |||
|Portugal | |Portugal | ||
|1: | |1:38.244 | ||
| | |King Boo | ||
| | |Wild Wiggler | ||
| | |Sponge | ||
| | |Flower Glider | ||
|- | |- | ||
! | !Shy Guy Falls | ||
| | |Nin★Anne | ||
| | |Netherlands | ||
|1: | |1:40.698 | ||
| | |White Yoshi | ||
| | |Standard ATV | ||
| | |Retro Off-Road | ||
| | |Parafoil | ||
|- | |- | ||
! | !Sunshine Airport | ||
| | |Nin★Sho | ||
|Japan | |Japan | ||
|1: | |1:45.437 | ||
|Luigi | |Luigi | ||
| | |Jet Bike | ||
| | |Metal | ||
|Plane Glider | |Plane Glider | ||
|- | |- | ||
!Dolphin Shoals | |||
| | |Nin★Polly | ||
| | |United Kingdom | ||
| | |1:38.911 | ||
| | |Ludwig | ||
| | |Steel Driver | ||
|Blue Standard | |||
|Bowser Kite | |||
|- | |||
!Electrodrome | |||
|Nin★Laura | |||
|United States | |||
|1:40.943 | |||
|Roy | |||
|The Duke | |||
|Cushion | |||
|Parafoil | |||
| | |||
| | |||
|- | |- | ||
| | !Mount Wario | ||
| | |Nin★Massim | ||
| | |Italy | ||
| | |1:37.266 | ||
|Wario | |||
|Standard ATV | |||
|Crimson Slim | |||
|Wario Wing | |||
|- | |- | ||
| | !Cloudtop Cruise | ||
| | |Nin★Giulia | ||
| | |Italy | ||
| | |1:44.120 | ||
|Bowser Jr. | |||
|Koopa Clown | |||
|Cyber Slick | |||
|Cloud Glider | |||
|- | |- | ||
| | !Bone-Dry Dunes | ||
| | |Nin★Pavel | ||
| | |Russia | ||
| | |1:39.330 | ||
|Dry Bones | |||
|Pipe Frame | |||
|Wood | |||
|Plane Glider | |||
|- | |- | ||
! | !Bowser's Castle | ||
| | |Nin★Mark | ||
| | |Netherlands | ||
| | |1:40.953 | ||
|- | |Dry Bowser | ||
| | |Flame Rider | ||
| | |Slim | ||
|Bowser Kite | |||
|- | |||
!Rainbow Road | |||
|Nin★Pedro | |||
|Spain | |||
|1:55.767 | |||
|Rosalina | |||
|Mach 8 | |||
|Blue Standard | |||
|MKTV Parafoil | |||
|- | |- | ||
| | !{{classic|Wii|Moo Moo Meadows}} | ||
| | |Nin★Leonel | ||
| | |United States | ||
{{ | |1:09.980 | ||
|Baby Daisy | |||
|Sneeker | |||
|Cyber Slick | |||
|MKTV Parafoil | |||
|- | |||
!{{classic|GBA|Mario Circuit}} | |||
|Nin★Pit | |||
|Germany | |||
|1:10.475 | |||
|Baby Luigi | |||
|Sport Bike | |||
|Slick | |||
|Parachute | |||
|- | |||
!{{classic|DS|Cheep Cheep Beach}} | |||
|Nin★Mizuho | |||
|Japan | |||
|1:25.089 | |||
|Lakitu | |||
|Landship | |||
|Metal | |||
|Cloud Glider | |||
|- | |||
!{{classic|N64|Toad's Turnpike}} | |||
|Nin★Rie | |||
|Japan | |||
|1:21.156 | |||
==Staff== | |Toadette | ||
{{main|List of Mario Kart 8 Deluxe staff}} | |Sports Coupe | ||
|Slick | |||
==Gallery== | |Super Glider | ||
{{main-gallery}} | |- | ||
!{{classic|GCN|Dry Dry Desert}} | |||
|Nin★Chris | |||
|United Kingdom | |||
|1:45.087 | |||
|Lemmy | |||
|Tanooki Kart | |||
|Off-Road | |||
|Super Glider | |||
|- | |||
!{{classic|SNES|Donut Plains 3}} | |||
|Nin★Mizuho | |||
|Japan | |||
|1:11.794 | |||
|Koopa Troopa | |||
|Streetle | |||
|Monster | |||
|Flower Glider | |||
|- | |||
!{{classic|N64|Royal Raceway}} | |||
|Nin★Dylan | |||
|United Kingdom | |||
|1:43.120 | |||
|Baby Peach | |||
|Circuit Special | |||
|Cyber Slick | |||
|Parafoil | |||
|- | |||
!{{classic|3DS|DK Jungle}} | |||
|Nin★Polly | |||
|United Kingdom | |||
|1:46.758 | |||
|Yellow Yoshi | |||
|City Tripper | |||
|Hot Monster | |||
|Paper Glider | |||
|- | |||
!{{classic|DS|Wario Stadium}} | |||
|Nin★Massim | |||
|Italy | |||
|1:39.724 | |||
|Waluigi | |||
|Varmint | |||
|Hot Monster | |||
|Wario Wing | |||
|- | |||
!{{classic|GCN|Sherbet Land}} | |||
|Nin★Sophia | |||
|Germany | |||
|1:34.370 | |||
|Iggy | |||
|Bone Rattler | |||
|Monster | |||
|Bowser Kite | |||
|- | |||
!{{classic|3DS|Music Park}} | |||
|Nin★Mitsu | |||
|Japan | |||
|1:36.529<br>1:38.847{{footnote|main|TC}} | |||
|Daisy | |||
|Badwagon | |||
|GLA Tires<br>Off-Road{{footnote|main|TC}} | |||
|MKTV Parafoil | |||
|- | |||
!{{classic|N64|Yoshi Valley}} | |||
|Nin★Yuya | |||
|Japan | |||
|1:35.628 | |||
|Green Shy Guy | |||
|Comet | |||
|Slim | |||
|Super Glider | |||
|- | |||
!{{classic|DS|Tick-Tock Clock}} | |||
|Nin★Elena | |||
|Russia | |||
|1:32.483 | |||
|Larry | |||
|Standard Kart | |||
|Sponge | |||
|Paper Glider | |||
|- | |||
!{{classic|3DS|Piranha Plant Slide}} | |||
|Nin★Frank | |||
|United Kingdom | |||
|1:48.454 | |||
|Wendy | |||
|Mr. Scooty | |||
|Metal | |||
|Peach Parasol | |||
|- | |||
!{{classic|Wii|Grumble Volcano}} | |||
|Nin★Maria | |||
|Portugal | |||
|1:44.284 | |||
|Morton | |||
|Standard Bike | |||
|Cushion | |||
|Parachute | |||
|- | |||
!{{classic|N64|Rainbow Road}} | |||
|Nin★Fausti | |||
|France | |||
|1:08.128 | |||
|Mario | |||
|Tri-Speeder | |||
|Monster | |||
|Super Glider | |||
|- | |||
!{{classic|GCN|Yoshi Circuit}} | |||
|Nin★Elena | |||
|Russia | |||
|1:38.869 | |||
|Light-blue Shy Guy | |||
|P-Wing | |||
|Slick | |||
|Parachute | |||
|- | |||
!Excitebike Arena | |||
|Nin★Akira | |||
|Japan | |||
|1:29.202 | |||
|Inkling Girl | |||
|Inkstriker | |||
|Leaf Tires | |||
|Super Glider | |||
|- | |||
!Dragon Driftway | |||
|Nin★Aracel | |||
|Spain | |||
|1:34.873 | |||
|Purple Inkling Boy | |||
|Splat Buggy | |||
|Blue Standard | |||
|Super Glider | |||
|- | |||
!Mute City | |||
|Nin★Sho | |||
|Japan | |||
|1:34.273 | |||
|Metal Mario | |||
|Blue Falcon | |||
|Azure Roller | |||
|Parafoil | |||
|- | |||
!{{classic|Wii|Wario's Gold Mine}} | |||
|Nin★Alice | |||
|United States | |||
|1:41.168 | |||
|Waluigi | |||
|Standard Bike | |||
|Retro Off-Road | |||
|Wario Wing | |||
|- | |||
!{{classic|SNES|Rainbow Road}} | |||
|Nin★Marie | |||
|United States | |||
|1:12.762<br>1:12.696{{footnote|main|TC}} | |||
|Tanooki Mario | |||
|GLA<br>Pipe Frame{{footnote|main|TC}} | |||
|GLA Tires<br>Standard{{footnote|main|TC}} | |||
|Parachute | |||
|- | |||
!Ice Ice Outpost | |||
|Nin★Juliet | |||
|France | |||
|1:32.435 | |||
|Cat Peach | |||
|Sneeker | |||
|Off-Road | |||
|Peach Parasol | |||
|- | |||
!Hyrule Circuit | |||
|Nin★Mark | |||
|Netherlands | |||
|1:40.394 | |||
|Link | |||
|Master Cycle | |||
|Triforce Tires | |||
|Hylian Kite | |||
|- | |||
!{{classic|GCN|Baby Park}} | |||
|Nin★Leonel | |||
|United States | |||
|0:59.765 | |||
|Baby Rosalina | |||
|Teddy Buggy | |||
|Cyber Slick | |||
|Waddle Wing | |||
|- | |||
!{{classic|GBA|Cheese Land}} | |||
|Nin★Chris | |||
|United Kingdom | |||
|1:41.248 | |||
|Donkey Kong | |||
|Streetle | |||
|Roller | |||
|Flower Glider | |||
|- | |||
!Wild Woods | |||
|Nin★Mitsu | |||
|Japan | |||
|1:27.555 | |||
|Villager (Girl) | |||
|City Tripper | |||
|Leaf Tires | |||
|Paper Glider | |||
|- | |||
!Animal Crossing | |||
|Nin★Fausti | |||
|France | |||
|1:23.417<br>1:23.491{{footnote|main|TC}} | |||
|Villager (Boy) | |||
|300 SL Roadster<br>Streetle{{footnote|main|TC}} | |||
|GLA Tires<br>Standard{{footnote|main|TC}} | |||
|Super Glider | |||
|- | |||
!{{classic|3DS|Neo Bowser City}} | |||
|Nin★Massim | |||
|Italy | |||
|1:37.526 | |||
|Bowser | |||
|Bone Rattler | |||
|Standard | |||
|Super Glider | |||
|- | |||
!{{classic|GBA|Ribbon Road}} | |||
|Nin★Maria | |||
|Portugal | |||
|1:31.220 | |||
|Isabelle | |||
|Cat Cruiser | |||
|Crimson Slim | |||
|Paper Glider | |||
|- | |||
!Super Bell Subway | |||
|Nin★Skip | |||
|United States | |||
|1:23.304 | |||
|Blue Yoshi | |||
|Yoshi Bike | |||
|Blue Standard | |||
|Super Glider | |||
|- | |||
!Big Blue | |||
|Nin★Rie | |||
|Japan | |||
|1:13.516<br>1:13.200{{footnote|main|TC}} | |||
|Luigi | |||
|W 25 Silver Arrow<br>Blue Falcon{{footnote|main|TC}} | |||
|Slim | |||
|Plane Glider | |||
|- | |||
!{{classic|Tour|Paris Promenade}} | |||
|Nin★Joost | |||
|Netherlands | |||
|1:27.101 | |||
|Rosalina | |||
|Comet | |||
|Slim | |||
|Super Glider | |||
|- | |||
!{{classic|3DS|Toad Circuit}} | |||
|Nin★Aracel | |||
|Spain | |||
|1:03.969 | |||
|Toadette | |||
|Prancer | |||
|Wood | |||
|Super Glider | |||
|- | |||
!{{classic|N64|Choco Mountain}} | |||
|Nin★Alice | |||
|United States | |||
|1:31.715 | |||
|Tanooki Mario | |||
|Tanooki Kart | |||
|Monster | |||
|Super Glider | |||
|- | |||
!{{classic|Wii|Coconut Mall}} | |||
|Nin★Polly | |||
|United Kingdom | |||
|1:29.009 | |||
|Baby Luigi | |||
|Yoshi Bike | |||
|Slick | |||
|Parachute | |||
|- | |||
!{{classic|Tour|Tokyo Blur}} | |||
|Nin★Aracel | |||
|Spain | |||
|1:07.560 | |||
|Inkling Girl | |||
|Inkstriker | |||
|Metal | |||
|Super Glider | |||
|- | |||
!{{classic|DS|Shroom Ridge}} | |||
|Nin★Akira | |||
|Japan | |||
|1:37.626 | |||
|Morton | |||
|Standard Bike | |||
|Cushion | |||
|Parachute | |||
|- | |||
!{{classic|GBA|Sky Garden}} | |||
|Nin★Rui | |||
|Portugal | |||
|1:13.606 | |||
|Ludwig | |||
|Steel Driver | |||
|Blue Standard | |||
|Bowser Kite | |||
|- | |||
!Ninja Hideaway | |||
|Nin★Giulia | |||
|Italy | |||
|1:37.815 | |||
|Black Yoshi | |||
|Teddy Buggy | |||
|Standard | |||
|Super Glider | |||
|- | |||
!{{classic|Tour|New York Minute}} | |||
|Nin★Sho | |||
|Japan | |||
|1:07.562 | |||
|Yoshi | |||
|Sports Coupe | |||
|Standard | |||
|Super Glider | |||
|- | |||
!{{classic|SNES|Mario Circuit 3}} | |||
|Nin★Giulia | |||
|Italy | |||
|1:17.075 | |||
|Luigi | |||
|Mach 8 | |||
|Slim | |||
|Super Glider | |||
|- | |||
!{{classic|N64|Kalimari Desert}} | |||
|Nin★Juliet | |||
|France | |||
|1:10.511 | |||
|Dry Bowser | |||
|Bone Rattler | |||
|Monster | |||
|Super Glider | |||
|- | |||
!{{classic|DS|Waluigi Pinball}} | |||
|Nin★Pavel | |||
|Russia | |||
|2:00.942 | |||
|Morton | |||
|Pipe Frame | |||
|Monster | |||
|Super Glider | |||
|- | |||
!{{classic|Tour|Sydney Sprint}} | |||
|Nin★Giulia | |||
|Italy | |||
|1:37.367 | |||
|Bowser Jr. | |||
|Koopa Clown | |||
|Standard | |||
|Super Glider | |||
|- | |||
!{{classic|GBA|Snow Land}} | |||
|Nin★Leonel | |||
|United States | |||
|1:21.826 | |||
|King Boo | |||
|Circuit Special | |||
|Monster | |||
|Super Glider | |||
|- | |||
!{{classic|Wii|Mushroom Gorge}} | |||
|Nin★Chris | |||
|United Kingdom | |||
|1:21.194 | |||
|Toad | |||
|Standard ATV | |||
|Standard | |||
|Super Glider | |||
|- | |||
!Sky-High Sundae | |||
|Nin★Mitsu | |||
|Japan | |||
|1:30.777 | |||
|Peach | |||
|Standard Bike | |||
|Slim | |||
|Super Glider | |||
|- | |||
!{{classic|Tour|London Loop}} | |||
|Nin★Alice | |||
|United States | |||
|1:38.896 | |||
|Red Yoshi | |||
|Sports Coupe | |||
|Standard | |||
|Super Glider | |||
|- | |||
!{{classic|GBA|Boo Lake}} | |||
|Nin★Joost | |||
|Netherlands | |||
|1:09.576 | |||
|Dry Bones | |||
|Standard Kart | |||
|Monster | |||
|Super Glider | |||
|- | |||
!{{classic|3DS|Rock Rock Mountain}} | |||
|Nin★Juliet | |||
|France | |||
|1:39.664 | |||
|Bowser | |||
|Landship | |||
|Wood | |||
|Super Glider | |||
|- | |||
!{{classic|Wii|Maple Treeway}} | |||
|Nin★Sho | |||
|Japan | |||
|1:58.543 | |||
|Wario | |||
|Tri-Speeder | |||
|Monster | |||
|Super Glider | |||
|- | |||
!{{classic|Tour|Berlin Byways}} | |||
|Nin★Skip | |||
|United States | |||
|1:35.467 | |||
|Toad | |||
|Standard ATV | |||
|Standard | |||
|Super Glider | |||
|- | |||
!{{classic|DS|Peach Gardens}} | |||
|Nin★Aracel | |||
|Spain | |||
|1:39.851 | |||
|Toadette | |||
|Teddy Buggy | |||
|Button | |||
|Super Glider | |||
|- | |||
!Merry Mountain | |||
|Nin★Mark | |||
|Netherlands | |||
|1:31.642 | |||
|Luigi | |||
|Mach 8 | |||
|Slim | |||
|Super Glider | |||
|- | |||
!{{classic|3DS|Rainbow Road}} | |||
|Nin★Dylan | |||
|United Kingdom | |||
|1:19.545 | |||
|Waluigi | |||
|The Duke | |||
|Monster | |||
|Super Glider | |||
|- | |||
!{{classic|Tour|Amsterdam Drift}} | |||
|Nin★Rie | |||
|Japan | |||
|1:19.135 | |||
|Shy Guy | |||
|Flame Rider | |||
|Off-Road | |||
|Super Glider | |||
|- | |||
!{{classic|GBA|Riverside Park}} | |||
|Nin★Elena | |||
|Russia | |||
|1:13.455 | |||
|Bowser Jr. | |||
|Koopa Clown | |||
|Slim | |||
|Super Glider | |||
|- | |||
!{{classic|Wii|DK Summit}} | |||
|Nin★Massim | |||
|Italy | |||
|1:53.372 | |||
|Rosalina | |||
|Circuit Special | |||
|Standard | |||
|Super Glider | |||
|- | |||
!Yoshi's Island | |||
|Nin★Polly | |||
|United Kingdom | |||
|1:40.731 | |||
|Yoshi | |||
|Wild Wiggler | |||
|Standard | |||
|Super Glider | |||
|- | |||
!{{classic|Tour|Bangkok Rush}} | |||
|Nin★Leonel | |||
|United States | |||
|1:24.201 | |||
|Wario | |||
|Standard Kart | |||
|Monster | |||
|Wario Wing | |||
|- | |||
!{{classic|DS|Mario Circuit}} | |||
|Nin★Sho | |||
|Japan | |||
|1:24.282 | |||
|Peach | |||
|Standard Bike | |||
|Slim | |||
|Super Glider | |||
|- | |||
!{{classic|GCN|Waluigi Stadium}} | |||
|Nin★Aracel | |||
|Spain | |||
|1:43.781 | |||
|Luigi | |||
|Mach 8 | |||
|Slim | |||
|Super Glider | |||
|- | |||
!{{classic|Tour|Singapore Speedway}} | |||
|Nin★Mizuho | |||
|Japan | |||
|1:32.160 | |||
|Mario | |||
|Comet | |||
|Slim | |||
|Super Glider | |||
|- | |||
!{{classic|Tour|Athens Dash}} | |||
|Nin★Massim | |||
|Italy | |||
|1:21.362 | |||
|Dry Bones | |||
|Standard Kart | |||
|Monster | |||
|Super Glider | |||
|- | |||
!{{classic|GCN|Daisy Cruiser}} | |||
|Nin★Elena | |||
|Russia | |||
|1:21.241 | |||
|Bowser | |||
|Flame Rider | |||
|Monster | |||
|Super Glider | |||
|- | |||
!{{classic|Wii|Moonview Highway}} | |||
|Nin★Sophia | |||
|Germany | |||
|1:19.973 | |||
|Donkey Kong | |||
|Varmint | |||
|Monster | |||
|Super Glider | |||
|- | |||
!Squeaky Clean Sprint | |||
|Nin★Leonel | |||
|United States | |||
|1:38.459 | |||
|Yoshi | |||
|Wild Wiggler | |||
|Monster | |||
|Super Glider | |||
|- | |||
!{{classic|Tour|Los Angeles Laps}} | |||
|Nin★Mitsu | |||
|Japan | |||
|1:25.694 | |||
|Birdo (Red) | |||
|Pipe Frame | |||
|Monster | |||
|Super Glider | |||
|- | |||
!{{classic|GBA|Sunset Wilds}} | |||
|Nin★Juliet | |||
|France | |||
|1:20.411 | |||
|Shy Guy | |||
|Flame Rider | |||
|Off-Road | |||
|Super Glider | |||
|- | |||
!{{classic|Wii|Koopa Cape}} | |||
|Nin★Frank | |||
|United Kingdom | |||
|1:41.749 | |||
|Toad | |||
|Standard ATV | |||
|Standard | |||
|Super Glider | |||
|- | |||
!{{classic|Tour|Vancouver Velocity}} | |||
|Nin★Joost | |||
|Netherlands | |||
|1:32.752 | |||
|Peach | |||
|Standard Bike | |||
|Slim | |||
|Super Glider | |||
|- | |||
!{{classic|Tour|Rome Avanti}} | |||
|Nin★Akira | |||
|Japan | |||
|1:25.406 | |||
|Yoshi | |||
|Wild Wiggler | |||
|Standard | |||
|Super Glider | |||
|- | |||
!{{classic|GCN|DK Mountain}} | |||
|Nin★Dylan | |||
|United Kingdom | |||
|2:06.814 | |||
|Diddy Kong | |||
|Mr. Scooty | |||
|Button | |||
|Waddle Wing | |||
|- | |||
!{{classic|Wii|Daisy Circuit}} | |||
|Nin★Pit | |||
|Germany | |||
|1:25.861 | |||
|Donkey Kong | |||
|Varmint | |||
|Monster | |||
|Super Glider | |||
|- | |||
!Piranha Plant Cove | |||
|Nin★Alice | |||
|United States | |||
|1:41.315 | |||
|Koopa Troopa | |||
|Steel Driver | |||
|Metal | |||
|Super Glider | |||
|- | |||
!{{classic|Tour|Madrid Drive}} | |||
|Nin★Fausti | |||
|France | |||
|1:33.156 | |||
|Toad | |||
|Sneeker | |||
|Standard | |||
|Super Glider | |||
|- | |||
!{{classic|3DS|Rosalina's Ice World}} | |||
|Nin★Leonel | |||
|United States | |||
|1:38.735 | |||
|King Boo | |||
|Circuit Special | |||
|Monster | |||
|Super Glider | |||
|- | |||
!{{classic|SNES|Bowser Castle 3}} | |||
|Nin★Mark | |||
|Netherlands | |||
|1:22.052 | |||
|Dry Bones | |||
|Standard Kart | |||
|Monster | |||
|Super Glider | |||
|- | |||
!{{classic|Wii|Rainbow Road}} | |||
|Nin★Yuya | |||
|Japan | |||
|2:06.146 | |||
|Luigi | |||
|Mach 8 | |||
|Slim | |||
|Super Glider | |||
|} | |||
{{footnote|note|TC|Used in the Tencent Chinese release<ref>{{cite|language=en|author=@zachruff|date=May 22, 2022|url=x.com/Zachruff/status/1528386463632658434|title=So it turns out that there are 4 staff ghosts in the Tencent Chinese version of MK8D that are actually different to the global version. It seems that they really did not like the Mercedes car parts so any ghost that used them had to be redone.|publisher=X|accessdate=May 24, 2022}}</ref>}} | |||
==New items== | |||
[[File:Items from MK8DX.jpg|thumb|right|300px|The items found in the Tips mode]] | |||
The [[Boo]] item makes a return in this game, functioning as it had previously. The [[Cape Feather]] was added to Battle Mode only, and is impossible to obtain otherwise. All other items from the Wii U version return as well, with their item distributions altered. | |||
<center> | |||
{|class="wikitable"width=75% | |||
!colspan="2"| | |||
===Coins=== | |||
|- | |||
|align=center|[[File:MK8D Cash.png|x75px]]<br>[[Cash]] | |||
|The equivalent of a coin, used for [[Urchin Underpass]]. They replace coins both as an item and on the track. | |||
|- | |||
|align=center|[[File:MK8D CoinYoshi.png|x75px]]<br>[[Coin]] ([[Yoshi's Island (race course)|Yoshi's Island]]) | |||
|In the [[Yoshi's Island (race course)|Yoshi's Island]] course, coins have an altered appearance that resembles their design in the ''[[Yoshi's Island (series)|Yoshi's Island]]'' series, both as an item and on the track. | |||
|- | |||
!colspan="2"| | |||
===New items=== | |||
|- | |||
|align=center|[[File:NSMBW Boo Artwork.png|x75px]]<br>[[Boo]] | |||
|Allows the player to become invisible to other racers for 10 seconds. While invisible, players will also be granted immunity to items and obstacles. Activating the item will also allow Boo to steal an item from a randomly selected racer in front of the player. If there are no items to steal, Boo will bring back a single Mushroom by default. If Boo steals a multiple usage item or a timed item, it will be returned to the player fresh. Boo cannot steal Crazy 8s or Piranha Plants and Bullet Bills already in use. Only one Boo can be in play at a time; once it brings back an item, another can appear in Item Boxes again, even while a player is still invisible. Players who are under the effect of a Super Star or a Boo are not immune to Boo's item stealing. | |||
|- | |||
|align=center|[[File:MK8 Deluxe Art - Cape Feather.png|x75px]]<br>[[Cape Feather|Feather]] | |||
|Causes the player to spin and leap in the air, providing a small speed boost upon landing, akin to a regular trick (characters will also perform a trick animation during the jump). When used near an opponent, the player steals a balloon, 3 coins, or the Shine Sprite from them, depending on the mode; however, the player needs to touch the opponent to steal from them, either by touching them upon use, or upon landing. Can be used on trickable places to gain more height, though does not grant more height if used while airborne, and cancels the gliding immediately. Exclusive to Battle Mode. | |||
|} | |||
</center> | |||
==New course elements== | |||
All of the course elements from the original ''Mario Kart 8'', including enemies and obstacles, are retained in this game, along with several elements exclusive to the ''Booster Course Pass'' courses. | |||
{|border="1"cellpadding="3"style="background:#f5f5f5;text-align:left;border-collapse:collapse;margin-bottom:5px;width:100%;"align=center | |||
|- | |||
!colspan="3"style="background:#9c9c9c"align=center|Characters and elements | |||
|- | |||
!width="15%"style="background:#dedede"align=center|Character/element | |||
!width="20%"style="background:#dedede"align=center|Location | |||
!width="65%"style="background:#dedede"align=center|Description | |||
|- | |||
|align=center|[[File:MK8D Arrow Field.png|150px]][[File:MK8DX KalimariDesert Arrow.png|150px]]<br>{{conjectural|[[Arrow field]]}} | |||
|align=center|{{classic link|Tour|Paris Promenade}}<br>{{classic link|Tour|Tokyo Blur}}<br>{{classic link|Tour|New York Minute}}<br>{{classic link|N64|Kalimari Desert}}<br>{{classic link|Tour|Sydney Sprint}}<br>{{classic link|Tour|London Loop}}<br>{{classic link|Tour|Berlin Byways}}<br>{{classic link|DS|Peach Gardens}}<br>{{classic link|Tour|Amsterdam Drift}}<br>{{classic link|Tour|Bangkok Rush}}<br>{{classic link|Tour|Singapore Speedway}}<br>{{classic link|Tour|Athens Dash}}<br>{{classic link|Tour|Los Angeles Laps}}<br>{{classic link|Tour|Vancouver Velocity}}<br>{{classic link|Tour|Rome Avanti}}<br>[[Piranha Plant Cove]]<br>{{classic link|Tour|Madrid Drive}} | |||
|Large, holographic, floating arrows that point in the direction that the players should go and change position each lap (or only in the last lap in {{classic|Tour|Paris Promenade}} and {{classic|DS|Peach Gardens}}), altering the path of the course. If the player goes past them, they will be considered out of bounds and taken back onto the track by [[Lakitu (Mario Kart referee)|Lakitu]]. In multiplayer, the arrow fields are independent to each player, meaning that if multiple players are on different laps, the arrow fields will be different for each of them to match what lap they are on. Arrow fields are red in most of the city courses and {{classic|DS|Peach Gardens}} and are teal in {{classic|N64|Kalimari Desert}} and {{classic|Tour|Bangkok Rush}}, though this is simply a visual difference. | |||
|- | |||
|align=center|[[File:MK8D BathBomb.png|150px]]<br>[[Bath Bomb]] | |||
|align=center|[[Squeaky Clean Sprint]] | |||
|Large, opal colored bath bombs that fizz underwater. Players can trick whilst inside the bubbles produced, similarly to a geyser. | |||
|- | |||
|align=center|[[File:MK8D Moonview City View.jpg|150px]]<br>[[Bob-omb Car]] | |||
|align=center|{{classic link|Wii|Moonview Highway}} | |||
|Bob-omb-based vehicles that explode upon contact. If a player drives into one, they spin out in the same way as if they were caught in the blast of a regular Bob-omb. | |||
|- | |||
|align=center|[[File:MK8D Boulder TourSydneySprint.jpg|150px]]<br>[[Boulder]] | |||
|align=center|{{classic link|Tour|Sydney Sprint}} | |||
|Objects scattered around grassy portions of the course. They slow down drivers on contact. | |||
|- | |||
|align=center|[[File:MK8DX WaluigiPinball Bumper.png|150px]]<br>[[Bumper (Mario Kart series)|Bumper]] | |||
|align=center|{{classic link|DS|Waluigi Pinball}} | |||
|Obstacles that bounce players and [[metal ball]]s that touch them away from themselves. Some are stationary, while others move in circles. | |||
|- | |||
|align=center|[[File:MK8 Ninja Hideaway Ceiling.png|150px]]<br>[[Ceiling Needle]]s | |||
|align=center|[[Ninja Hideaway]] | |||
|Giant shuriken stuck to broad ceilings that slowly rise and fall at set intervals, serving as obstacles for players on the course's lower route, while the ceilings themselves serve as platforms for players on the upper route, with a [[ramp]] on one of them. | |||
|- | |||
|align=center|[[File:MK8 Clampy.png|150px]]<br>[[Clampy]] | |||
|align=center|{{classic link|GCN|Daisy Cruiser}}<br>[[Piranha Plant Cove]] | |||
|Clampys open and shut periodically. They contain Item Boxes. | |||
|- | |||
|align=center|[[File:MK8D GBA Sunset Wilds Scene 2.jpg|150px]]<br>[[Exploring Shy Guy]] | |||
|align=center|{{classic link|GBA|Sunset Wilds}} | |||
|Exploring Shy Guys skip back and forth across the track. If a player makes contact with one, the player spins out. If they hit one with an item, they will drop 3 coins. | |||
|- | |||
|align=center|[[File:MK8D_DS_Mario_Circuit_Scene_6.jpg|150px]]<br>[[Fire Piranha Plant]] | |||
|align=center|{{classic link|DS|Mario Circuit}} | |||
|Piranha Plant variants that shoot [[fireball]]s that bounce across the course, causing racers to spin out. | |||
|- | |||
|align=center|[[File:MK8DX Flipper.png|150px]]<br>[[Flipper (Mario Kart series)|Flipper]] | |||
|align=center|{{classic link|DS|Waluigi Pinball}} | |||
|Large obstacles that can swing back and forth and push back [[metal ball]]s that collide with them. Players who collide with them are knocked over. | |||
|- | |||
|align=center|[[File:MK8D_Tour_Rome_Avanti_Scene_2.png|150px]]<br>[[Fuzzy]] | |||
|align=center|{{classic link|Tour|Rome Avanti}} | |||
|Black furry creatures on circular [[track]]s. They circle around coins, and spin players out when collided with. | |||
|- | |||
|align=center|[[File:Yoshi'sFinishLine.jpg|150px]]<br>[[Goal Ring]] | |||
|align=center|[[Yoshi's Island (race course)|Yoshi's Island]] | |||
|A decorative item that appears near the finish line. | |||
|- | |||
|align=center|[[File:MK8 Yoshis Island view.png|150px]]<br>[[Goonie]] | |||
|align=center|[[Yoshi's Island (race course)|Yoshi's Island]] | |||
|Spectators who appear in the background during the volcano ascent. | |||
|- | |||
|align=center|[[File:MK8D Merry Mountain Half-pipe.png|150px]]<br>[[Half-pipe (object)|Half-pipe]] | |||
|align=center|{{classic link|Wii|Maple Treeway}}<br>[[Merry Mountain]]<br>{{classic link|Wii|DK Summit}}<br>{{classic link|GCN|Waluigi Stadium}}<br>{{classic link|Tour|Athens Dash}}<br>[[Squeaky Clean Sprint]]<br>{{classic link|Tour|Los Angeles Laps}}<br>{{classic link|Wii|Koopa Cape}}<br>{{classic link|GCN|DK Mountain}}<br>{{classic link|3DS|Rosalina's Ice World}}<br>{{classic link|Wii|Rainbow Road}} | |||
|Vertical ramps that allow players to jump off the side of a course and perform a [[Jump Boost]] to gain a speed boost upon landing. They resemble [[Antigravity Panel]]s and briefly put the player into [[anti-gravity]] mode while they are airborne. | |||
|- | |||
|align=center|[[File:Yoshi'sPuffinMk8.jpg|150px]]<br>[[Huffin Puffin]] | |||
|align=center|[[Yoshi's Island (race course)|Yoshi's Island]] | |||
|Enemies who wander around near the starting line, occasionally onto the track. Players who collide with them will stop but not spin out. | |||
|- | |||
|align=center|[[File:MK8_Icicle.png|150px]]<br>[[Icicle]] | |||
|align=center|{{classic link|3DS|Rosalina's Ice World}} | |||
|Upward-pointing icicles on the ground that break when driven into, but will also slow the driver down. | |||
|- | |||
|align=center|[[File:MK8D GCN Daisy Cruiser Scene 2.jpg|150px]]<br>[[Innertube Goomba]] | |||
|align=center|{{classic link|Tour|Singapore Speedway}}<br>{{classic link|GCN|Daisy Cruiser}} | |||
|Innertube Goombas float above water. If made contact with, the player spins out. | |||
|- | |||
|align=center|[[File:MK8D GCN Waluigi Stadium Scene 4.jpg|200px]]<br>[[Mecha Piranha Plant]] | |||
|align=center|{{classic link|GCN|Waluigi Stadium}} | |||
|Large retracting obstacles that act like moving walls and stop any players who run into them. | |||
|- | |||
|align=center|[[File:MK8DX Pinball.png|150px]]<br>[[Metal ball]] | |||
|align=center|{{classic link|DS|Waluigi Pinball}} | |||
|Giant spherical obstacles that roll throughout the course and knock over players they collide with. In the pinball table section at the end of the course, they are bounced around in different directions by [[Bumper (Mario Kart series)|bumper]]s and [[Flipper (Mario Kart series)|flipper]]s. | |||
|- | |||
|align=center|[[File:MK8 Green Mushroom.png|150px]]<br>[[Mushroom Platform]] | |||
|align=center|{{classic link|Wii|Mushroom Gorge}} | |||
|Large, green mushrooms with white spots. Though shaped identically to [[Mushroom Trampoline]]s, they are functionally different in that they act like regular surfaces rather than bouncing players into the air. A [[Jump Boost]] can be performed when driving off the edge of a Mushroom Platform. | |||
|- | |||
|align=center|[[File:MK8D Mushroom Trampoline.png|150px]][[File:MK8 Blue Mushroom.png|150px]][[File:MultiMushroom.png|150px]]<br>[[Mushroom Trampoline]] | |||
|align=center|{{classic link|GBA|Sky Garden}}<br>{{classic link|Wii|Mushroom Gorge}}<br>{{classic link|3DS|Rainbow Road}}<br>[[Squeaky Clean Sprint]] | |||
|Large mushrooms that bounce the player into the air, allowing them to perform a [[Jump Boost]]. They are red with white spots in <small>GBA</small> Sky Garden and <small>Wii</small> Mushroom Gorge and are white with multi-colored spots in <small>3DS</small> Rainbow Road. <small>Wii</small> Mushroom Gorge also contains one Mushroom Trampoline that is blue with white spots and functions differently to the others: it bounces the player upwards and activates their [[glider]] on contact, also giving them an opportunity to perform a Jump Boost. In <small>GBA</small> Sky Garden, there are also leaves that have the same properties of bouncing the player into the air as regular Mushroom Trampolines. | |||
|- | |||
|align=center|[[File:MK8-course-GBA SnowLand.jpg|200px]]<br>[[Penguin]] | |||
|align=center|{{classic link|GBA|Snow Land}}<br>{{classic link|3DS|Rosalina's Ice World}} | |||
|Enemies that either waddle or slide on their bellies around the course. Players who collide with them spin out. | |||
|- | |||
|align=center|[[File:MK8D GBA Riverside Park Scene 9.jpg|200px]]<br>[[Ptooie]] | |||
|align=center|{{classic link|GBA|Riverside Park}} | |||
|Enemies that walk around the course. They are shown to be carrying Mushrooms and Bananas which they will drop if bumped into them or hit with another item. | |||
|- | |||
|align=center|[[File:MK8D_Tour_Rome_Avanti_Scene_2.png|150px]]<br>[[Rocky Wrench]] | |||
|align=center|{{classic link|Tour|Rome Avanti}} | |||
|Mole-like creatures who hide in [[manhole]]s. They occasionally pop up out of the ground, stopping players who drive into them. When underground, racers can drive over them with no consequences. If they're half above the ground, they can be tricked off. | |||
|- | |||
|align=center|[[File:MK8D ShoeGoomba.png|150px]]<br>[[Shoe Goomba]] | |||
|align=center|{{classic link|Tour|Madrid Drive}} | |||
|Big Goombas wearing bright yellow [[Goomba's Shoe|Shoes]]. They kick [[Soccer Ball]]s around. | |||
|- | |||
|align=center|[[File:MK8D Shy Guy Ninja Obstacles.png|200px]]<br>[[Shy Guy|Shy Guy (Ninja)]] | |||
|align=center|[[Ninja Hideaway]] | |||
|Shy Guys clad in ninja outfits. They stand in place and act as hazards, causing players who collide with them to spin out. They will also occasionally transform into a [[Banana]]. There are also Shy Guys that fly with kites during the glider section and touching one will cause the player to lose their glider, making them fall. | |||
|- | |||
|align=center|[[File:MK8D SoccerBall.png|150px]]<br>[[Soccer Ball]] | |||
|align=center|{{classic link|Tour|Madrid Drive}} | |||
|Big balls kicked around by [[Shoe Goomba]]s. They bounce on the floor, spinning out racers who they collide with. | |||
|- | |||
|align=center|[[File:YoshisIslandMk8Stilt.jpg|150px]]<br>[[Stilt Guy]] | |||
|align=center|[[Yoshi's Island (race course)|Yoshi's Island]] | |||
|Enemies that slowly move back and forth across the track at the beginning of the course. Touching them causes the player to spin out. | |||
|- | |||
|align=center|[[File:MK8-Course-Wii DKSummit.jpg|200px]]<br>[[Snowboarding Shy Guy]] | |||
|align=center|{{classic link|Wii|DK Summit}} | |||
|Shy Guys that snowboard across the snow and perform tricks on half-pipes. Driving into them will cause the player to spin out. | |||
|- | |||
|align=center|[[File:MK8D Table.png|150px]]<br>[[Table]] | |||
|align=center|{{classic link|GCN|Daisy Cruiser}} | |||
|Tables, decorated with cloths, candles, and plates. They rock side-to-side, and act as a wall for players. Spectators may be seated at these tables. | |||
|- | |||
|align=center|[[File:MK8-Course-N64 KalimariDesert.jpg|150px]]<br>[[Train (obstacle)|Train]] | |||
|align=center|{{classic link|N64|Kalimari Desert}} | |||
|A moderately fast train which follows a set railway. Hitting it on impact results in the player being knocked over. | |||
|- | |||
|align="center"|[[File:MK8D New York Minute Scene 2.jpg|200px]]<br>[[Water Geyser]] | |||
|align="center"|{{classic link|Tour|New York Minute}}<br>{{classic link|Tour|Singapore Speedway}}<br>[[Yoshi's Island (race course)|Yoshi's Island]]<br>[[Squeaky Clean Sprint]]<br>[[Piranha Plant Cove]]<br>{{classic link|Tour|Madrid Drive}} | |||
|Geysers that occasionally burst out from the ground for a few seconds before disappearing. Coming into contact with one boosts the player upwards, at which point they can perform a [[Jump Boost]]. In {{classic|Tour|New York Minute}}, they emerge under manhole covers, which function as platforms. | |||
|- | |||
|align=center|[[File:MK8DBerlinByways1.jpg|200px]]<br>[[Whomp]] | |||
|align=center|{{classic link|Tour|Berlin Byways}} | |||
|Enemies that stand in gaps in the [[Berlin Wall]]. They slam their faces onto the track and flatten any players caught under them, but their edges can then be used to perform [[Jump Boost]]s before they get back up. | |||
|- | |||
|align=center|[[File:MK8 Wiggler.png|150px]]<br>[[Mega Wiggler|Big Wiggler]] | |||
|align=center|{{classic link|Wii|Maple Treeway}}<br>{{classic link|DS|Mario Circuit}}<br>{{classic link|Tour|Madrid Drive}} | |||
|Enemies that walk around at a slow speed with occasional stops. Driving into them results in the player spinning out. Sometimes they can be seen sleeping. | |||
|- | |||
|align=center|[[File:MK8DX Winged Cloud.png|150px]]<br>[[Winged Cloud]] | |||
|align=center|[[Yoshi's Island (race course)|Yoshi's Island]] | |||
|An item that appears during the second glider section. When touched, it bursts and causes a red bridge shortcut to appear. | |||
|} | |||
==New amiibo compatibility== | |||
[[File:MK8 DX amiibo Press 2.jpg|thumb|250px|Some of the Mii Racing Suits and amiibo that can be used to unlock them in ''Mario Kart 8 Deluxe'']] | |||
In addition to all of the compatible [[amiibo]] in ''Mario Kart 8'' and their respective Mii Racing Suits, ''Mario Kart 8 Deluxe'' adds compatibility with amiibo from the ''Splatoon'' line, which unlock a Mii Racing Suit based on ''Splatoon''. Additionally, more amiibo can be used to unlock the returning Mii Racing Suits, with all ''[[nookipedia:Animal Crossing (series)|Animal Crossing]]''-related amiibo unlocking the Animal Crossing Suit and the [[Pikmin]] amiibo unlocking the Pikmin Suit. Version 3.0.0 adds compatibility with the Daisy amiibo to unlock the Daisy Mii Racing Suit, as well as any amiibo from the ''Legend of Zelda'', ''Metroid'', and ''Kirby'' series to unlock their respective suits. | |||
==Update history== | |||
{{main|Mario Kart 8 Deluxe update history}} | |||
''Mario Kart 8 Deluxe'' has received many updates since launch. Most of them addressed technical aspects of the game, while others expanded controller support (e.g. [[Nintendo Switch#Nintendo Labo|Toy-Con Motorbike and Toy-Con Car]]) or delivered new content, such as a variant of Link wearing his [[zeldawiki:Tunic of Memories|Champion's Tunic]] from ''[[zeldawiki:The Legend of Zelda: Breath of the Wild|The Legend of Zelda: Breath of the Wild]]'', support for the ''Mario Kart 8 Deluxe – Booster Course Pass'' DLC, a Custom Items setting, and a menu for listening to the music of each of the game's courses. In order to play online, players must have downloaded the most recent software update.<ref>{{cite|url=en-americas-support.nintendo.com/app/answers/detail/a_id/26098/~/how-to-update-mario-kart-8-deluxe|language=en-us|title=How to Update Mario Kart 8 Deluxe|publisher=Nintendo of America|accessdate=November 6, 2024}}</ref> | |||
==Official tournaments== | |||
:''For official competitions held in the game's [[Wii U]] version, see [[Mario Kart 8#Official competitions|''Mario Kart 8'' § Official competitions]].'' | |||
Nintendo has sponsored many ''Mario Kart 8 Deluxe'' tournaments, held either online or at special events, with prizes ranging from virtual [[My Nintendo]] points to physical merchandise and memorabilia. Nintendo's online tournaments are restricted to one country or region, and may be recurrent on a weekly, monthly, or seasonal basis as part of a named series. | |||
The following is a list of ''Mario Kart 8 Deluxe'' competitions held or sanctioned by Nintendo. | |||
===North America=== | |||
{|class="wikitable" style="text-align:center"width=40% width=40%width=40% | |||
|- | |||
!width=25%|Title | |||
!width=25%|Location | |||
!width=50%|Banner | |||
|- | |||
![[NOA 150cc Tournament and NOA Battlethon|NOA 150cc Tournament<br>NOA Battlethon]] | |||
|Online | |||
|N/A | |||
|- | |||
![[Mario Kart North American Open|''Mario Kart'' North American Open]] | |||
|Online | |||
|[[File:MK NA Open 2022-07 banner.jpg|300px]] | |||
|- | |||
![[Mario Kart 8 Deluxe Holiday Fun Run|''Mario Kart 8 Deluxe'' Holiday Fun Run]] | |||
|Online | |||
|[[File:MK8D Holiday Fun Run 2021.jpg|300px]] | |||
|- | |||
![[Mario Kart 8 Deluxe Championship Cup 2022|''Mario Kart 8 Deluxe'' Championship Cup 2022]] | |||
|{{wp|Seattle Convention Center}}<br>({{wp|PAX (event)|PAX West 2022}}) | |||
|[[File:MK8D Championship Cup 2022 promo pic Twitter.png|300px]] | |||
|- | |||
![[Mario Kart 8 Deluxe North American Qualifier 2022|''Mario Kart 8 Deluxe'' North American Qualifier 2022]] | |||
|Online | |||
|[[File:MK8D North American Qualifier 2022 banner.jpg|300px]] | |||
|- | |||
![[Mario Kart 8 Deluxe North American Qualifier 2023|''Mario Kart 8 Deluxe'' North American Qualifier 2023]] | |||
|{{wp|Boston Convention and Exhibition Center}}<br>({{wp|PAX (event)|PAX East 2023}}) | |||
|[[File:MK8D NA Qualifier 2023 promo pic Twitter.jpg|300px]] | |||
|- | |||
![[Mario Kart 8 Deluxe Championship Cup 2023|''Mario Kart 8 Deluxe'' Championship Cup 2023]] | |||
|Boston Convention and Exhibition Center<br>(PAX East 2023) | |||
|[[File:MK8D Championship Cup 2023 promo pic Twitter.jpg|300px]] | |||
|- | |||
![[Mario Kart 8 Deluxe Championship 2023 Qualifier|''Mario Kart 8 Deluxe'' Championship 2023 Qualifier]] | |||
|Online | |||
|[[File:MK8D Championship 2023 Qualifier online c.jpg|300px]] | |||
|- | |||
![[Mario Kart 8 Deluxe Championship 2023 Qualifier#Second qualifier|''Mario Kart 8 Deluxe'' Championship 2023 Qualifier at Nintendo Live]] | |||
|{{wp|Seattle Convention Center}}<br>([[Nintendo Live 2023]]) | |||
|[[File:MK8D Championship 2023 Qualifier at Nintendo Live banner b.jpg|300px]] | |||
|- | |||
![[Mario Kart 8 Deluxe Championship 2023|''Mario Kart 8 Deluxe'' Championship 2023]] | |||
|Seattle Convention Center<br>(Nintendo Live 2023) | |||
|[[File:MK8D Championship 2023 banner a.jpg|300px]] | |||
|} | |||
===Australia and New Zealand=== | |||
{|class="wikitable"style="text-align:center"width=40% | |||
|- | |||
!width=25%|Title | |||
!width=25%|Location | |||
!width=50%|Banner/logo | |||
|- | |||
![[Mario Kart 8 Deluxe Super Saturdays|''Mario Kart 8 Deluxe'' Super Saturdays]] | |||
|Online | |||
|N/A | |||
|- | |||
![[Mario Kart AU/NZ My Nintendo Cup|''Mario Kart'' AU/NZ My Nintendo Cup]] | |||
|Online | |||
|[[File:MK AUNZ My Nintendo Cup.png|300px]] | |||
|- | |||
![[Mario Kart 8 Deluxe: AU/NZ Grand Prix|''Mario Kart 8 Deluxe'': AU/NZ Grand Prix]] | |||
|Online | |||
|[[File:MK8D AUNZ Grand Prix 2022 Summer logo w bg.jpg|300px]] | |||
|} | |||
===China=== | |||
{|class="wikitable"style="text-align:center"width=40% | |||
|- | |||
!width=25%|Title | |||
!width=25%|Location | |||
!width=50%|Banner | |||
|- | |||
![[Mario Kart 8 Deluxe Summit Invitational Tournament|''Mario Kart 8 Deluxe'' Summit Invitational Tournament]] | |||
|Online | |||
|[[File:MK8D Tencent Invitation Tournament banner.jpg|300px]] | |||
|- | |||
![[Mario Kart 8 Deluxe Online Tournaments (2021 Tencent series)|''Mario Kart 8 Deluxe'' Online Tournaments]] | |||
|Online | |||
|[[File:Tencent MK8D Online Tournaments 2021.jpg|300px]] | |||
|- | |||
![[Mario Kart 8 Deluxe National Battle Team Open Tournament|''Mario Kart 8 Deluxe'' National Battle Team Open Tournament]] | |||
|Online | |||
|N/A | |||
|- | |||
![[Mario Kart 8 Deluxe National Battle Team Open Tournament#Mario Kart 8 Deluxe Open Team Championship|''Mario Kart 8 Deluxe'' Open Team Championship]] | |||
|{{wp|Shanghai}} (exact location TBD) | |||
|N/A | |||
|} | |||
===Europe=== | |||
{|class="wikitable"style="text-align:center"width=40% width=40%width=40% | |||
|- | |||
!width=25%|Title | |||
!width=25%|Location | |||
!width=50%|Banner/logo | |||
|- | |||
![[Mario Kart 8 Deluxe Seasonal Circuit|''Mario Kart 8 Deluxe'' Seasonal Circuit]] | |||
|Mostly online. The sole exception is the ''gran final'' of the 2022 [[Mario Kart 8 Deluxe Seasonal Circuit#Spain|''Mario Kart 8 Deluxe'' Seasonal Circuit Spain]] event, which took place at the Gamergy event in {{wp|Madrid}}. | |||
|[[File:MK8D Seasonal Circuit Benelux promo Twitter.jpg|300px]] | |||
|- | |||
![[Mario Kart 8 Deluxe European Championship 2023|''Mario Kart 8 Deluxe'' European Championship 2023]] | |||
|The qualifiers were held online. The final rounds were held at the VILCO convention center in {{wp|Bad Vilbel}}, {{wp|Germany}}. | |||
|[[File:MK8D European Championship 2023 logo.png|300px]] | |||
|} | |||
===Hong Kong=== | |||
{|class="wikitable"style="text-align:center"width=40% | |||
|- | |||
!width=25%|Title | |||
!width=25%|Location | |||
!width=50%|Banner | |||
|- | |||
![[Nintendo HK 2021 Cup]] | |||
|Online | |||
|[[File:MK8D Nintendo HK 2021 Cup.png|300px]] | |||
|} | |||
===Japan=== | |||
{|class="wikitable"style="text-align:center"width=40% | |||
|- | |||
!width=25%|Title | |||
!width=25%|Location | |||
!width=50%|Logo | |||
|- | |||
![[Mario Kart 8 Deluxe Online Challenge|''Mario Kart 8 Deluxe'' Online Challenge]] | |||
|Online | |||
|[[File:MK8D Online Challenge logo.png|300px]] | |||
|- | |||
![[Mario Kart 8 Deluxe Online Challenge#Mario Kart 8 Deluxe Online Challenge Final Stage|''Mario Kart 8 Deluxe'' Online Challenge Final Stage]] | |||
|{{wp|Tokyo Big Sight|Tokyo International Exhibition Center}}<br>(Nintendo Live 2022) | |||
|[[File:MK8D Online Challenge Final Stage logo2.png|300px]] | |||
|- | |||
![[Mario Kart 8 Deluxe World Championship 2024|''Mario Kart 8 Deluxe'' World Championship 2024]] | |||
|TBD | |||
|[[File:MK8D World Championship 2024 logo.jpg|300px]] | |||
|} | |||
===Spain=== | |||
{|class="wikitable"style="text-align:center"width=40% | |||
|- | |||
!width=25%|Title | |||
!width=25%|Location | |||
!width=50%|Banner | |||
|- | |||
![[TorneoMK8D|#TorneoMK8D]] | |||
|Online | |||
|[[File:MK8D TorneoMK8D a.jpg|300px]] | |||
|} | |||
===United Kingdom and Ireland=== | |||
{|class="wikitable"style="text-align:center"width=40% | |||
|- | |||
!width=25%|Title | |||
!width=25%|Location | |||
!width=50%|Banner | |||
|- | |||
![[Nintendo UK VS Cup]] | |||
|Online | |||
|N/A | |||
|- | |||
![[Nintendo VS UK Cup]] | |||
|Online | |||
|N/A | |||
|} | |||
==Pre-release and unused content== | |||
===Early ''Booster Course Pass'' course designs=== | |||
Some of the courses in the ''[[Mario Kart 8 Deluxe – Booster Course Pass]]'' had several differences between promotional material and their final release, some of which made the courses further resemble their ''[[Mario Kart Tour]]'' counterparts: | |||
*Prior to Wave 1's launch, {{classic link|Tour|Paris Promenade}} had simpler detailing overall, most notably in the lighting, trees, and the road. At the left turn that leads to the Luxor Obelisk at the end of the track, the right path, which is used in the final lap, was blocked by fences, some of which have arrows, rather than the backside of a metal ramp like in the final version. The optional [[Glide Ramp|glide ramp]] featured in the final lap was also not present, and consequently neither was the coin on top of the parasol. The ramp in front of the [[Eiffel Tower]], though still functioning like a glide ramp, had the appearance of a normal ramp, similar to Paris Promenade 3. Likewise, the [[Dash Panel|dash panel]] underneath the Eiffel Tower appears to have been invisible, as while seemingly not present, drivers are still seen driving towards it in multiple clips. The Piranha Plant [[Wooden cutout|cutouts]] blocking the shortcut through the [[Arc de Triomphe]] were not present. There was an arrow on the Eiffel Tower pointing towards the path from Paris Promenade 3 not present in the final version. | |||
*Prior to Wave 1's launch, the sand in {{classic link|3DS|Toad Circuit}} was a very dark yellow color, as opposed to the bright sand-like color in the final version. The starting banner was significantly different, with the objects at the top corners being smaller, less round and generally less detailed, the bolts not being present and the horizontal shafts being missing from the columns. There was no confetti present around the starting line, despite confetti still falling there. The checkered line on the road continued onto where the starting grid is, instead of ending before it. There were significantly fewer flowers and plants present around the course. The coins present on the course differ in multiple ways, such as there being a row of them shortly after the starting line, an extra coin present at the final turn, there not being a coin on the ramp shortcut and coins having different positions in general. The final row of Item Boxes did not feature a Double Item Box. | |||
*Prior to Wave 1's launch, {{classic link|N64|Choco Mountain}} had a significantly different road texture, while the walls and rocks lacked the detail they have in the final version. The cracks on the road around where the rocks fall were completely absent, and the coins present after where the second rock falls were instead after the first rock. There appear to have originally been coins leading up to the cave, while conversely the coins on the final turn appear to have been missing. Some of the lights within the cave emitted light onto the ceiling similarly to the crystals, unlike in the final version. The glide ramp leading out of the cave was invisible. Certain wooden elements like fences and the boards at the end of the gliding section had different coloring. | |||
*Prior to Wave 1's launch, {{classic link|Wii|Coconut Mall}}'s exterior was a bright, pale peachy color, but in the time between its reveal and release, it was updated to be a more vibrant orange. This also applied to certain parts of the interior. Likewise, the stone floor in the center of the mall was originally gray, while it was changed to orange in the final version. The reflections on the windows had also been changed during this time. The flower bushes present around the mall's exterior were a lot less detailed and had a mix of white and purple flowers instead of the yellow ones the final version uses. The [[Mario Kart TV]] vans were not present. There was no row of Item Boxes at the entrance to the courtyard. The escalator rails were significantly less glossy, and all escalators seem to have had coins at the bottom of them. Similarly, both dash panels in the courtyard had a coin following them. The coins on the turn following the gliding section were instead on the road leading to it. Oddly, the results screen following a Grand Prix or a VS match uses an image of the old design despite the existence of an updated version of said image. | |||
*Prior to Wave 1's launch, the Kaminarimon's lantern in {{classic link|Tour|Tokyo Blur}} looked less saturated and lacked the ridges it has in the final version. The sun was not present over Mount Fuji, and the different lighting made the clock on the Wako store appear significantly brighter. The bushes were less detailed, having a less rough texture and much simpler flowers. The platform which the flower bushes leading to the Kaminarimon are on did not have its outer layer raised. The cracks on the road that appear underneath the Thwomps were completely absent. The text on the "Welcome to Tokyo" sign was significantly dimmer. The roadside barriers with arrows had much simpler designs, with the arrows being 2D instead of fully modeled like they are in the final version. There is also footage of this course showing an early design for the [[Arrow field|arrow field]], in which the arrows have an identical design to the green arrow holograms in {{classic link|SNES|Rainbow Road}}.<ref>{{cite|date=December 25, 2022|timestamp=0:23|url=www.youtube.com/watch?v=_NIQxr42pZA&t=23s|author=Nintendo|title=マリオカート8 デラックス コース追加パス TVCM3|publisher=YouTube|language=ja|accessdate=November 6, 2024}}</ref> | |||
*Prior to Wave 1's launch, {{classic link|DS|Shroom Ridge}} did not have the glide ramp shortcut on the grass patch. The wind shortcut was also not present in trailer footage despite appearing in a released screenshot. Flowers, bushes and other plants had different, less detailed designs and appeared in different locations. Some notable examples include how the grass patch with the glide ramp featured alternating groups of blue and orange flowers instead of the multicolored ones present in the final version, and how the flower bushes were significantly less detailed and had red flowers and in smaller quantities compared to the pink flowers the final version has (oddly, future waves would exclusively use these lesser detailed flower bushes). The dividing stripes on the road continued through the starting grid instead of ending before it. The starting banner lacked details it has in the final version, such as the bolts on the columns, the lights across the top and most of the metal strips holding up the logo. The static coins at the turn adjacent to the wind shortcut appear to have initially been on the opposite side of the road. | |||
*Prior to Wave 1's launch, {{classic link|GBA|Sky Garden}}'s textures for the road and the vine bridges were significantly larger. The final row of Item Boxes was slightly further into the course, and the Double Item Box was on the opposite side of the road. There was one more [[Mushroom Trampoline]] present underneath the course compared to the final version. The glide ramp at the end of the course was invisible. There were far less grass blades around the course. The flowers were blue with a much simpler design, while the flower bushes had less distinct and detailed shapes with multiple colors of flowers instead of just pink flowers like in the final version. | |||
*Prior to Wave 2's launch, the first row of Item Boxes in {{classic link|Tour|New York Minute}} was on the bridge leading into Central Park instead of being before it like in the final version. There were no Toads behind the front desk of 30 Rockefeller Plaza. | |||
*Prior to Wave 2's launch, {{classic link|SNES|Mario Circuit 3}} had an additional coin in both the first turn and the turn with the first oil slick. | |||
*Prior to Wave 2's launch, {{classic link|N64|Kalimari Desert}} had a floating group of coins that would have been reached by taking the first glide ramp shortcut. The second row of Item Boxes was shown as only having single Item Boxes in what appears to be the first lap, with the same clip showing Item Boxes present on the train tracks similarly to lap 3 of the final version. An arrow fence was present beside the road shortly after the second overlap between the road and the train tracks. | |||
*Prior to Wave 2's launch, the helicopter in {{classic link|DS|Waluigi Pinball}} was missing the beam of light eminating from its flashlight. The padels had the electricity effect at all times unlike the final version in which they only exhibit it upon activating. | |||
*Prior to Wave 2's launch, {{classic link|GBA|Snow Land}} had a row of Item Boxes after the starting line, in place of the moving Item Boxes present in the final version. The coins on the sheet of ice were in different positions. The row of Item Boxes on the ramp at the end of the sheet of ice were instead placed later on the following road with differing Double Item Box placements, and the ramp instead had a row of coins which are substituted by coins shortly after it in the final version. Some of the snow such as that present on the starting banner had significantly less detail. Some of the trees present on the course used simpler models. | |||
*Prior to Wave 2's launch, {{classic link|Wii|Mushroom Gorge}} had various differences in the placements of flowers throughout the course. The first row of Item Boxes was placed slightly earlier. | |||
*Prior to Wave 2's launch, [[Sky-High Sundae]] did not have coins on the first two giant pieces of ice. The left split path only had 3 Item Boxes and they were placed earlier. The second coin on the path of ice-cream cones was placed slightly earlier. | |||
*Prior to Wave 3's launch, the clock hands of [[Big Ben]] in {{classic link|Tour|London Loop}} appeared perceptibly darker and less reflective in screenshots of the course. The row of coins in the area with the first Chain Chomp appears to have had at least one additional coin. | |||
*When {{classic link|DS|Peach Gardens}} was shown in the September 2022 Nintendo Direct, the loop at the beginning of the course lacked the barriers blocking off the right side, similar to previous iterations of the course, and even had at least one coin present. The arrow on the Mario topiary was also not present. The first flowerbed shortcut was much smaller. The route used to turn around on lap three was completely blocked off by a fountain, and the ramps at the mansion were also not present, though there was seemingly nothing else blocking that path. The Mario Kart TV van, spectators and benches were also not in that section at the time. The first row of Item Boxes was closer to the start of the bridge. The row of coins at the entrance to the maze was not present. In the Direct, the row of Item Boxes in the maze was replaced with a row of coins. However, in a screenshot released shortly after, there was a row of Item Boxes like in the final version, but with the addition of at least one more Double Item Box. There were no spectators after the starting line, nor on the windowsills close to it. The coins on the left of the mansion were gone in favor of a row of coins at the top of the stairs, and the coins around the [[Piranha Plant]] were gone in favor of there being coins in the following section with the [[Monty Mole|Monty Moles]]. | |||
*When [[Merry Mountain]] was shown in the September 2022 Nintendo Direct, there was one shot in which there were no [[Spin Boost Pillar|Spin Boost Pillars]] on the mountain, with there instead only being a dash panel at the start of the descent. Screenshots would later show the mountain having both the dash panel and the Spin Boost Pillars, whereas the final version only has the latter. The suspended railroad had the ramp at the end angled more upwards than the rest of it, and was missing the wooden boards that are nailed onto it in the final version. The first row of Item Boxes was shown both not being present at all and being besides the grass shortcut, in which case taking the cut would not allow players to collect an item. The row of Item Boxes on the bridge were also not present. The Item Boxes at the top of the mountain were all lined up in a row, but with the Double Item Boxes still requiring drivers to take the [[Half-pipe (object)|half-pipe]] to collect them, and there was also a higher number of coins placed above the half-pipe. There was one less coin in the row before the split paths. There were no sitting spectators at the train station, nor besides the later part of the train track. The Toads on the mountain did not wear coats, and there were no spectators around the half-pipe. The [[Snowman|snowman]] following the bridge was not present. | |||
*When [[Yoshi's Island (race course)|Yoshi's Island]] was shown in the February 2023 Nintendo Direct, [[Poochy]] was not present on the mailbox. The first row of Item Boxes was even closer to the bridge. Every arrow sign was double-sided, and the waterfalls had white outlines. There were less Yoshi spectators at in the first section of the course, but there was an additional [[Petal Guy]] next to where the second [[Stilt Guy]] is. The ramp leading into the underwater section had an additional coin, and the Yoshi spectator to the left of it was on the ground instead of on the tree root like it is in the final version. The underwater geysers had an effect at the bottom that resembled water splashing out of them, appeared less transparent and had fewer, smaller bubbles. The Yoshi spectator on the tower atop the clouds was not present, while the Paratroopas in this section were static instead of flying from side-to-side as in the final version. The animation for the pieces of the red bridge falling into place was simpler, with them already being in a horizontal position instead of flipping over like they do in the final version. | |||
*When [[Squeaky Clean Sprint]] was shown in the June 2023 Nintendo Direct, there were no coins on top of the sink and the [[Yoshi's Egg]] soap dispenser. The nails on the wooden shelf had a darker color and were less reflective. | |||
*When {{classic link|Wii|Daisy Circuit}} was shown in the September 2023 Nintendo Direct, the objects to the left of the statue of Daisy and Luigi were arranged differently. The row of Item Boxes was in the opposite order, while the cones and coins were on the left half of the road. The cones and coins to the right of the statue of Baby Daisy and Baby Luigi were a little earlier. The glide ramp shortcut only had one Double Item Box. The two groups of coins around the lighthouse were both missing a coin. There were no coins in front of the [[List of sponsors debuting in Mario Kart Wii#Daisy Candy|Daisy Candy]] sign. | |||
===Original order of courses in Waves 3 to 6=== | |||
In version 2.1.0 and onwards, the internal file names for some of the courses in the ''Booster Course Pass'' suggest that the release order in their respective cups differs from the originally planned order. Every course's internal file name has two digits, with the first indicating its intended wave and the second indicating its position in said wave (for example, {{classic link|Tour|Berlin Byways}}' file name is "Cnsw_35", indicating that it is the fifth track in Wave 3, or the first track in the [[Moon Cup]]). In addition to several courses changing their order within their wave, several courses also switched waves entirely, such as {{classic link|GCN|Waluigi Stadium}}, which was set to be in Wave 3's Moon Cup but was delayed to Wave 4 in favor of {{classic link|Wii|Maple Treeway}}, whose internal file name suggests that it was once slated for Wave 6's Acorn Cup. Additionally, Wave 6 was originally intended to have 3 tracks without prefixes, but two of them were replaced by {{classic link|Wii|Moonview Highway}} and {{classic link|3DS|Rosalina's Ice World}}, as indicated by their filenames. It was also originally intended to have a fourth GCN course, but was replaced by {{classic link|Wii|Daisy Circuit}}, as indicated by its filename. | |||
Further evidence appears in an advertisement for Wave 3 posted by Nintendo of America on YouTube, which displays the courses in their original order, albeit with {{classic|Wii|Maple Treeway}} in place of {{classic|GCN|Waluigi Stadium}}; this advertisement was unlisted soon after its release.<ref>{{cite|url=www.youtube.com/watch?v=TBCHkZ15MUM|title=Mario Kart 8 Deluxe - Booster Course Pass DLC Wave 3 - Nintendo Switch|author=Nintendo of America|language=en-us|publisher=YouTube|date=November 22, 2022|accessdate=November 6, 2024}}</ref> | |||
{|align=center width="75%" | |||
| | |||
{|class="wikitable"width="100%" ; | |||
|- | |||
!Wave 3 (pre-release) | |||
!Wave 3 (final) | |||
|- | |||
|{{classic link|Tour|London Loop}} | |||
|{{classic|Tour|London Loop}} | |||
|- | |||
|{{classic link|DS|Peach Gardens}} | |||
|{{classic|GBA|Boo Lake}} | |||
|- | |||
|{{classic link|GBA|Boo Lake}} | |||
|{{classic|3DS|Rock Rock Mountain}} | |||
|- | |||
|{{classic link|3DS|Rock Rock Mountain}} | |||
|{{classic link|Wii|Maple Treeway}} | |||
|- | |||
|{{classic link|Tour|Berlin Byways}} | |||
|{{classic|Tour|Berlin Byways}} | |||
|- | |||
|{{classic link|GCN|Waluigi Stadium}} | |||
|{{classic|DS|Peach Gardens}} | |||
|- | |||
|[[Merry Mountain]] | |||
|Merry Mountain | |||
|- | |||
|{{classic link|3DS|Rainbow Road}} | |||
|{{classic|3DS|Rainbow Road}} | |||
|} | |||
|width="50%"style="margin:center;"| | |||
{|class="wikitable"width="100%"; | |||
|- | |||
!Wave 4 (pre-release) | |||
!Wave 4 (final) | |||
|- | |||
|{{classic link|Tour|Amsterdam Drift}} | |||
|{{classic|Tour|Amsterdam Drift}} | |||
|- | |||
|{{classic link|Wii|DK Summit}} | |||
|{{classic|GBA|Riverside Park}} | |||
|- | |||
|{{classic link|DS|Mario Circuit}} | |||
|{{classic|Wii|DK Summit}} | |||
|- | |||
|[[Yoshi's Island (race course)|Yoshi's Island]] | |||
|Yoshi's Island | |||
|- | |||
|{{classic link|Tour|Singapore Speedway}} | |||
|{{classic link|Tour|Bangkok Rush}} | |||
|- | |||
|{{classic link|GCN|Daisy Cruiser}} | |||
|{{classic|DS|Mario Circuit}} | |||
|- | |||
|{{classic link|GBA|Riverside Park}} | |||
|{{classic|GCN|Waluigi Stadium}} | |||
|- | |||
|{{classic link|Tour|Los Angeles Laps}} | |||
|{{classic|Tour|Singapore Speedway}} | |||
|} | |||
|} | |||
{|align=center width="75%" | |||
| | |||
{|class="wikitable"width="100%"; | |||
|- | |||
!Wave 5 (pre-release) | |||
!Wave 5 (final) | |||
|- | |||
|{{classic link|Tour|Madrid Drive}} | |||
|{{classic link|Tour|Athens Dash}} | |||
|- | |||
|{{classic link|Wii|Koopa Cape}} | |||
|{{classic|GCN|Daisy Cruiser}} | |||
|- | |||
|{{classic link|GBA|Sunset Wilds}} | |||
|{{classic link|Wii|Moonview Highway}} | |||
|- | |||
|{{classic link|Tour|Rome Avanti}} | |||
|Squeaky Clean Sprint | |||
|- | |||
|{{classic|Tour|Bangkok Rush}} | |||
|{{classic|Tour|Los Angeles Laps}} | |||
|- | |||
|{{classic link|GCN|DK Mountain}} | |||
|{{classic|GBA|Sunset Wilds}} | |||
|- | |||
|{{classic link|SNES|Bowser Castle 3}} | |||
|{{classic|Wii|Koopa Cape}} | |||
|- | |||
|[[Squeaky Clean Sprint]] | |||
|{{classic link|Tour|Vancouver Velocity}} | |||
|} | |||
|width="50%"style="margin:center;"| | |||
{|class="wikitable"width="100%"; | |||
|- | |||
!Wave 6 (pre-release) | |||
!Wave 6 (final) | |||
|- | |||
|{{classic|Tour|Vancouver Velocity}} | |||
|{{classic|Tour|Rome Avanti}} | |||
|- | |||
|{{classic|Wii|Maple Treeway}} | |||
|{{classic|GCN|DK Mountain}} | |||
|- | |||
|???{{footnote|note|a}} | |||
|{{classic link|Wii|Daisy Circuit}} | |||
|- | |||
|[[Piranha Plant Cove]] | |||
|Piranha Plant Cove | |||
|- | |||
|{{classic|Tour|Athens Dash}} | |||
|{{classic|Tour|Madrid Drive}} | |||
|- | |||
|{{classic|GCN|???}}{{footnote|note|b}} | |||
|{{classic link|3DS|Rosalina's Ice World}} | |||
|- | |||
|???{{footnote|note|c}} | |||
|{{classic|SNES|Bowser Castle 3}} | |||
|- | |||
|{{classic link|Wii|Rainbow Road}} | |||
|{{classic|Wii|Rainbow Road}} | |||
|} | |||
|} | |||
{{footnote|note|a|Although this slot originally lacked a prefix, {{classic|Wii|Moonview Highway}}'s internal name assigns it to this slot.}} | |||
{{footnote|note|b|Although this slot originally had a "GCN" prefix assigned to it, {{classic|Wii|Daisy Circuit}}'s internal name assigns it to this slot.}} | |||
{{footnote|note|c|Although this slot originally lacked a prefix, {{classic|3DS|Rosalina's Ice World}}'s internal name assigns it to this slot.}} | |||
===Music prefetches=== | |||
In the 2.1.0 update, several prefetch music tracks of unreleased race courses were added to the game's files. They all sound different from their arrangements in ''Mario Kart Tour'' and the final arrangements used in the ''Booster Course Pass''. | |||
====Wave 3==== | |||
{{media table | |||
|file1=MK8D Tour LondonLoop prefetch.oga | |||
|title1={{classic|Tour|London Loop}} | |||
|length1=0:01 | |||
|file2=MK8D GBA BooLakeBrokenPier prefetch.oga | |||
|title2={{classic|GBA|Boo Lake}} | |||
|length2=0:02 | |||
|file3=MK8D 3DS AlpinePass prefetch.oga | |||
|title3={{classic|3DS|Rock Rock Mountain}} | |||
|length3=0:02 | |||
|file4=MK8D Wii MapleTreeway prefatch.oga | |||
|title4={{classic|Wii|Maple Treeway}} | |||
|length4=0:02 | |||
|file5=MK8D Tour BerlinByways prefetch.oga | |||
|title5={{classic|Tour|Berlin Byways}} | |||
|length5=0:02 | |||
|file6=MK8D DS PeachGardens prefetch.oga | |||
|title6={{classic|DS|Peach Gardens}} | |||
|length6=0:02 | |||
|file7=MK8D Tour MerryMountain prefetch.oga | |||
|title7=Merry Mountain | |||
|length7=0:02 | |||
|file8=MK8D 3DS RainbowRoad prefatch.oga | |||
|title8={{classic|3DS|Rainbow Road}} | |||
|length8=0:02 | |||
|file9=MK8D 3DS RainbowRoad Moon prefatch.oga | |||
|title9={{classic|3DS|Rainbow Road}} (Moon) | |||
|length9=0:02 | |||
}} | |||
====Wave 4==== | |||
{{media table | |||
|file1=MK8D Tour AmsterdamDrift prefatch.oga | |||
|title1={{classic|Tour|Amsterdam Drift}} | |||
|length1=0:02 | |||
|file2=MK8D Tour BangkokRush prefatch.oga | |||
|title2={{classic|Tour|Bangkok Rush}} | |||
|length2=0:02 | |||
|file3=MK8D GCN WaluigiStadium prefetch.oga | |||
|title3={{classic|GCN|Waluigi Stadium}} | |||
|length3=0:02 | |||
|file4=MK8D Tour SingaporeSpeedway prefatch.oga | |||
|title4={{classic|Tour|Singapore Speedway}} | |||
|length4=0:02 | |||
|file5=MK8D Tour SingaporeSpeedway Chinatown prefatch.oga | |||
|title5={{classic|Tour|Singapore Speedway}} (Chinatown) | |||
|length5=0:02 | |||
}} | |||
====Wave 5==== | |||
{{media table | |||
|file1=MK8D Tour LosAngelesLaps prefatch.oga | |||
|title1={{classic|Tour|Los Angeles Laps}} | |||
|length1=0:02 | |||
|file2=MK8D GBA SunsetWilds prefatch.oga | |||
|title2={{classic|GBA|Sunset Wilds}} | |||
|length2=0:02 | |||
|file3=MK8D Tour VancouverVelocity prefatch.oga | |||
|title3={{classic|Tour|Vancouver Velocity}} | |||
|length3=0:02 | |||
}} | |||
===Gallery=== | |||
<gallery widths=250px> | |||
MK8-Course-3DS ToadCircuit.jpg|Pre-release screenshot of {{classic|3DS|Toad Circuit}} | |||
MK8D Tokyo Blur Early Arrow Field.png|{{classic|Tour|Tokyo Blur}} with an early arrow field design | |||
MK8-Course-Wii CoconutMall.jpg|{{classic|Wii|Coconut Mall}}'s early design | |||
MK8D Peach Gardens Birds Eye.png|Pre-release birds-eye view of {{classic|DS|Peach Gardens}} | |||
MK8DPeachGardens3.jpg|Pre-release screenshot of the roundabout in {{classic|DS|Peach Gardens}}, without the barrier | |||
BCP_Wave_3_Original_Order.png|Original order for the Rock and Moon Cups, as shown in an unlisted video by Nintendo | |||
</gallery> | |||
==Reception== | |||
===Critical reception=== | |||
''Mario Kart 8 Deluxe'' has been received with universal acclaim, garnering higher aggregate scores than the original ''Mario Kart 8''. The game has been praised for being well-suited to the Switch's portability, the increased performance, and particularly the redesigned Battle Mode, although several reviews noted ''Mario Kart 8 Deluxe'' would not be as appealing of a proposition to players who already own ''Mario Kart 8'' and its downloadable content. | |||
{|class="wikitable reviews" | |||
!colspan="4"style="font-size:120%;text-align:center;background-color:silver"|Reviews | |||
|-style="background-color:#E6E6E6;" | |||
|Release | |||
|Reviewer, Publication | |||
|Score | |||
|Comment | |||
|- | |||
|[[Nintendo Switch]] | |||
|Laurely Birba, [https://www.jeuxactu.com/test-mario-kart-8-deluxe-sur-nintendo-switch-109030.htm Jeux Actu] | |||
|18/20 | |||
|align=left|''While purists may accuse Mario Kart 8 of being a opportunistic rehash, Nintendo's goal was to give the Switch a racing game that is fun, polished, filled with content, and able to showcase the Switch's hybrid nature. These four objectives are mostly accomplished, and the game will have no problem seducing newcomers considering how well the formula has been mastered. | |||
|- | |||
|Nintendo Switch | |||
|Kallie Plagge, [https://www.gamespot.com/reviews/mario-kart-8-deluxe-review/1900-6416660/ GameSpot] | |||
|9/10 | |||
|align=left|''Even if you didn't really care about Battle Mode, the smallest changes in Mario Kart 8 Deluxe refine an already great racing game. But the huge overhaul to the original's afterthought of a Battle Mode is a chaotic, varied opportunity to play very differently than in Grand Prix mode and well worth reinvesting yourself in Mario Kart 8 on Switch.'' | |||
|- | |||
|Nintendo Switch | |||
|Matthew Sainsbury, [https://www.digitallydownloaded.net/2017/04/review-mario-kart-8-deluxe-nintendo.html Digitally Downloaded] | |||
|4.5/5 | |||
|align=left|''Thanks to substantial DLC releases, Mario Kart 8 on the Wii U went from being a game with plenty of content, to one with an overload of it. Mario Kart 8 Deluxe on the Nintendo Switch has all of that, plus the return of the battle mode (which should never have left), and while it won't be a '''new''' game as such for the people who actually bought a Wii U (we're a special club), having this game on a portable console is reason enough to buy it all over again.'' | |||
|- | |||
!colspan="4"style="background-color:silver;font-size:120%;text-align:center;"|Aggregators | |||
|-style="background-color:#E6E6E6;" | |||
|colspan=2|Compiler | |||
|colspan=2|Platform / Score | |||
|- | |||
|colspan=2|Metacritic | |||
|colspan=2 style="background-color:LimeGreen"|[http://www.metacritic.com/game/switch/mario-kart-8-deluxe 92] | |||
|- | |||
|colspan=2|GameRankings | |||
|colspan=2|[https://web.archive.org/web/20190226113229/https://www.gamerankings.com/switch/200276-mario-kart-8-deluxe/index.html 92.39%] | |||
|} | |||
{{br}} | |||
===Sales=== | |||
In the United Kingdom, ''Mario Kart 8 Deluxe'' debuted at No. 1 on the sales chart, making it the first Nintendo game to be No. 1 in the UK since 2011's ''[[bulbapedia:Pokémon Black and White Versions|Pokémon Black and White]]'', and the first ''Super Mario'' game to place such since ''Mario Kart Wii''.<ref>{{cite|author=Dring, Christopher|language=en|date=April 30, 2017|url=www.gamesindustry.biz/mario-kart-8-deluxe-is-nintendos-first-uk-no-1-since-2011|title=Mario Kart 8 Deluxe is Nintendo's first UK No.1 since 2011|publisher=GameIndustryBiz|accessdate=November 6, 2024}}</ref> | |||
The game sold 459,000 copies for its US launch day, making it the fastest-selling ''Mario Kart'' game in the US and meaning 45% of US Switch owners purchased the game.<ref>{{cite|language=en|author=Brian|date=May 1, 2017|url=nintendoeverything.com/mario-kart-8-deluxe-sells-459000-copies-in-the-us-on-launch-day-fastest-selling-mario-kart-game|title=Mario Kart 8 Deluxe sells 459,000 copies in the US on launch day, fastest-selling Mario Kart game|publisher=Nintendo Everything|accessdate=November 6, 2024}}</ref> | |||
As of December 31, 2017, ''Mario Kart 8 Deluxe'' had sold 7.33 million units worldwide. As of March 31, 2018, it reached 9.22 million units, exceeding the original ''Mario Kart 8''{{'}}s 8.42 million and making it the second best-selling game on the Nintendo Switch behind ''[[Super Mario Odyssey]]''.<ref>{{cite|deadlink=y|archive=web.archive.org/web/20180507005730/https://www.nintendo.co.jp/ir/en/finance/software/index.html|title=IR Information : Sales Data - Top Selling Title Sales Units|publisher=Nintendo of Japan|language=en|author=Nintendo|accessdate=November 6, 2024}}</ref> As of December 31, 2018, ''Mario Kart 8 Deluxe'' had sold 15.02 million units worldwide, exceeding ''Super Mario Odyssey''{{'}}s sales and making it the best-selling game on the Nintendo Switch.<ref name=Jansales>{{cite|language=en|author=GameXplain|date=February 1, 2019|deadlink=y|url=www.youtube.com/watch?v=cVJnzoW-E6w|title=Nintendo's Financial Report - 30 Million Switches Sold Worldwide, Doubled Software Sales, & More!|publisher=YouTube|accessdate=December 22, 2020}}</ref> As of September 30, 2021, the game had sold 38.74 million units worldwide, surpassing ''Mario Kart Wii'' as the best-selling game in the series.<ref>{{cite|language=en|author=Nintendo|date=November 4, 2021|title=Top Selling Title Sales Unites|publisher=Nintendo Japan|accessdate=November 8, 2021|archive=web.archive.org/web/20211108090438/https://www.nintendo.co.jp/ir/en/finance/software/index.html|deadlink=y}}</ref> As of December 31, 2021, the game had sold 43.35 million units worldwide, making it the single best-selling game in the ''Super Mario'' franchise, surpassing ''[[Super Mario Bros.]]'' for the [[Nintendo Entertainment System]].<ref>{{cite|author=Nintendo|language=en|deadlink=y|date=|title=Top Selling Title Sales Unites|publisher=Nintendo Japan|archive=web.archive.org/web/20220203073454/https://www.nintendo.co.jp/ir/en/finance/software/index.html|accessdate=February 3, 2022}}</ref> As of September 30, 2024, the game had sold 64.27 million units worldwide.<ref>{{cite|author=Nintendo|date=November 5, 2024|url=www.nintendo.co.jp/ir/en/finance/software/index.html|title=Top Selling Title Sales Units|language=en|publisher=Nintendo Japan|accessdate=November 6, 2024}}</ref> | |||
===Awards and acknowledgements=== | |||
''Mario Kart 8 Deluxe'' was nominated for the "Best Family Game" and "Best Multiplayer" awards at The Game Awards 2017.<ref name="The Game Awards">{{cite|deadlink=y|archive=web.archive.org/web/20171114202345/http://thegameawards.com/awards|title=Awards - The Game Awards 2017|publisher=The Game Awards|accessdate=November 6, 2024}}</ref> However, it won neither, losing the former to ''[[Super Mario Odyssey]]'' and the latter to ''{{wp|PlayerUnknown's Battlegrounds}}''.<ref name="The Game Awards" /> | |||
==References to other games== | |||
*''[[Donkey Kong (game)|Donkey Kong]]'': Pauline's horn noise is based on the stage clear jingle from this game. | |||
*''[[Super Mario Kart]]'': The [[Cape Feather|Feather]] item returns from this game, with the same function. [[SNES Battle Course 1|Battle Course 1]] reappears as a classic battle course; a billboard in the course background is modeled after the player select screen from this game. [[SNES Mario Circuit 3|Mario Circuit 3]] and [[SNES Bowser Castle 3|Bowser Castle 3]] are included among the courses in the ''[[Mario Kart 8 Deluxe – Booster Course Pass|Booster Course Pass]]''. The end credits theme is arranged for the Booster Course Pass end credits theme. | |||
*''[[Super Mario World 2: Yoshi's Island]]'': [[Yoshi's Island (race course)|Yoshi's Island]], a course appearing in the ''Booster Course Pass'', is heavily based on this game. Kamek's horn noise sounds like his speaking sound effect in this game. | |||
*''[[Mario Kart 64]]'': Similar to this game, all courses in ''Mario Kart 8 Deluxe'' are unlocked from the start. [[N64 Choco Mountain|Choco Mountain]] and [[N64 Kalimari Desert|Kalimari Desert]] are included among the courses in the ''Booster Course Pass''. | |||
*''[[Mario Golf (Nintendo 64)|Mario Golf]]'': [[Metal Mario]] has an alternate color scheme where he can be changed into gold like in this game. However, unlike this game, Gold Mario is an unlockable skin. | |||
*''[[Mario Kart: Super Circuit]]'': [[GBA Sky Garden|Sky Garden]], [[GBA Snow Land|Snow Land]], [[GBA Boo Lake|Boo Lake]], [[GBA Riverside Park|Riverside Park]], and [[GBA Sunset Wilds|Sunset Wilds]] are included among the courses in the ''Booster Course Pass''. | |||
*''[[Super Mario Sunshine]]'': King Boo's horn noise uses the sound of the [[King Boo (Super Mario Sunshine)|King Boo]] from this game being hit by a pepper. | |||
*''[[Mario Kart: Double Dash!!]]'': [[GCN Luigi's Mansion|Luigi's Mansion]] reappears as a classic battle course. The [[Item Box#Mario Kart 8 / Mario Kart 8 Deluxe|Double Item Box]]es and the two Battle sub-modes, Bob-omb Blast and Shine Thief, return. [[GCN Waluigi Stadium|Waluigi Stadium]], [[GCN Daisy Cruiser|Daisy Cruiser]], and [[GCN DK Mountain|DK Mountain]] are included among the courses in the ''Booster Course Pass''. | |||
*''[[Yoshi Touch & Go]]'': Artwork of Baby Mario and Yoshi is reused from the game in the Yoshi's Island course on the mural outside of Yoshi's House. | |||
*''[[Mario Kart DS]]'': An arrangement of [[DS Luigi's Mansion|Luigi's Mansion]]'s music is used in {{classic link|GCN|Luigi's Mansion}}. [[DS Shroom Ridge|Shroom Ridge]], [[DS Waluigi Pinball|Waluigi Pinball]], [[DS Peach Gardens|Peach Gardens]], and [[DS Mario Circuit|Mario Circuit]] are included among the courses in the ''Booster Course Pass''. | |||
*''[[Mario Kart Wii]]'': [[Wii Coconut Mall|Coconut Mall]], [[Wii Mushroom Gorge|Mushroom Gorge]], [[Wii Maple Treeway|Maple Treeway]], [[Wii DK Summit|DK Summit]], [[Wii Koopa Cape|Koopa Cape]], [[Wii Moonview Highway|Moonview Highway]], [[Wii Daisy Circuit|Daisy Circuit]], and [[Wii Rainbow Road|Rainbow Road]] are included among the courses in the ''Booster Course Pass''. | |||
*''[[New Super Mario Bros. Wii]]'': Boo's artwork from this game is reused for King Boo's character select icon, albeit with the addition of the latter's crown. | |||
*''[[Mario & Sonic at the Olympic Winter Games (Wii)|Mario & Sonic at the Olympic Winter Games]]'': Canada Hockey Place re-appears in the Vancouver Velocity track, now referred to by its sponsored name Rogers Arena. | |||
*''[[Mario Kart 7]]'': The [[Koopa Clown]] kart returns from this game. [[3DS Wuhu Town|Wuhu Town]] reappears as a classic battle course, and [[3DS Toad Circuit|Toad Circuit]], [[3DS Rock Rock Mountain|Rock Rock Mountain]], [[3DS Rainbow Road|Rainbow Road]], and [[3DS Rosalina's Ice World|Rosalina's Ice World]] are included among the courses in the ''Booster Course Pass''. [[Lunar Colony]] has a moon section with low gravity just like Rainbow Road from this game. | |||
*''[[Super Mario 3D World]]'': The crown mechanic in Battle Mode is similar to the mechanic in this game's multi-player, where the player with the highest score from one stage will be wearing a crown in the next stage. | |||
*''[[Donkey Kong Country: Tropical Freeze]]'': Funky Kong's character select icon is reused from this game. | |||
*''[[Super Smash Bros. for Nintendo 3DS / Wii U]]'': The [[Koopa Clown]]'s propellers in anti-gravity sections emerge from circular panels on the side of the vehicle, much like the [[Junior Clown Car]]'s weapons. Also, the Koopalings' Koopa Clowns match the Clown Car colors they use in this game. | |||
*''[[Super Mario Odyssey]]'': A ring similar to the [[Binding Band]] appears inside the drain in [[Squeaky Clean Sprint]]. | |||
*''[[Mario Kart Tour]]'': [[Tour New York Minute|New York Minute]], [[Tour Tokyo Blur|Tokyo Blur]], [[Tour Paris Promenade|Paris Promenade]], [[Tour London Loop|London Loop]], [[Tour Vancouver Velocity|Vancouver Velocity]], [[Tour Los Angeles Laps|Los Angeles Laps]], [[Merry Mountain]], [[Tour Berlin Byways|Berlin Byways]], [[Ninja Hideaway]], [[Tour Sydney Sprint|Sydney Sprint]], [[Tour Singapore Speedway|Singapore Speedway]], [[Tour Amsterdam Drift|Amsterdam Drift]], [[Tour Bangkok Rush|Bangkok Rush]], [[Piranha Plant Cove]], [[Tour Athens Dash|Athens Dash]], [[Tour Rome Avanti|Rome Avanti]], and [[Tour Madrid Drive|Madrid Drive]] are included among the courses in the ''Booster Course Pass''. Additionally, the designs of the courses in the ''Booster Course Pass'' are based on their designs from ''Mario Kart Tour'', and {{classic link|N64|Kalimari Desert}}'s second and third laps are based on the variant Kalimari Desert 2 from this game. The ''Booster Course Pass'' characters except for Funky Kong reuse their face icons from this game. All the Mii Racing Suits included in Wave 6 come from this game; some of their unique trick animations are also reused. | |||
==References in other games== | |||
*''[[Super Mario Run]]'': Key art for the game appears when tapping on the Nintendo Switch collectible in Kingdom Builder. | |||
*''[[Mario Kart Tour]]'': The third level of [[Mini-Turbo]]s, Ultra Mini-Turbos, returns. The [[Koopa Clown]] retains its appearance from this game. [[King Boo]] reuses his face icon from this game. [[Sky-High Sundae]], [[Yoshi's Island (race course)|Yoshi's Island]], and [[Squeaky Clean Sprint]] all reappear, though they are considered new courses in both games. {{classic link|SNES|Battle Course 1}}'s music arrangement is used in Balloon Battles. | |||
==Staff== | |||
{{main|List of Mario Kart 8 Deluxe staff}} | |||
==Gallery== | |||
{{main-gallery}} | |||
<gallery widths=160px> | <gallery widths=160px> | ||
MK8 Deluxe Art - Mario (transparent).png|[[Mario]] | MK8 Deluxe Art - Mario (transparent).png|[[Mario]] | ||
Mario Kart 8 Deluxe Art - Link.png|[[Link]] | Mario Kart 8 Deluxe Art - Link.png|[[Link]] | ||
MK8DX Isabelle.png|[[Isabelle]] | MK8DX Isabelle.png|[[Isabelle]] | ||
MK8 Deluxe Art - Inkling.png|[[Inkling]] and a [[Blooper]] | MK8 Deluxe Art - Inkling.png|[[Inkling]] and a [[Blooper]] | ||
MK8DX Lakitu.png|[[Lakitu]] | MK8DX Lakitu.png|[[Lakitu (Mario Kart referee)|Lakitu]] | ||
</gallery> | </gallery> | ||
==Media== | ==Media== | ||
{{main-media|List of Mario Kart 8 media}} | {{main-media|List of Mario Kart 8 Deluxe media}} | ||
{{media table | {{media table | ||
| | |file1=MK8D-BattleStadium-music.oga | ||
|title1=[[Battle Stadium]] theme | |||
| | |file2=MK8D-SweetSweetKingdom-music.oga | ||
| | |title2=[[Sweet Sweet Kingdom]] theme | ||
|file3=MK8D-DragonPalace-music.oga | |||
| | |title3=[[Dragon Palace]] theme | ||
| | |file4=MK8D-LunarColony-music.oga | ||
|title4=[[Lunar Colony]] theme | |||
| | |file5=MK8D-3DS-WuhuTown-music.oga | ||
| | |title5={{classic link|3DS|Wuhu Town}} theme | ||
|file6=MK8D-GCN-LuigisMansion-music.oga | |||
| | |title6={{classic link|GCN|Luigi's Mansion}} theme | ||
| | |file7=MK8D-SNES-BattleCourse1-music.oga | ||
|title7={{classic link|SNES|Battle Course 1}} theme | |||
| | |file8=MK8D-UrchinUnderpass-music.oga | ||
| | |title8=[[Urchin Underpass]] theme | ||
}} | |||
| | |||
| | ==Names in other languages== | ||
{{foreign names | |||
| | |Jap=マリオカート8 デラックス | ||
| | |JapR=Mario Kāto 8 Derakkusu | ||
|JapM=Mario Kart 8 Deluxe | |||
| | |Kor=마리오 카트 8 디럭스 | ||
}} | |KorR=Mario Kateu 8 Direokseu | ||
|KorM=Mario Kart 8 Deluxe | |||
==Names in other languages== | |ChiS=马力欧卡丁车8 豪华版 | ||
{{foreign names | |ChiSR=Mǎlìōu Kǎdīngchē 8 Háohuábǎn | ||
|Jap=マリオカート8 デラックス | |ChiSM=Mario Kart 8 Deluxe Edition | ||
|JapR=Mario Kāto 8 Derakkusu | |ChiT=瑪利歐賽車8 豪華版 | ||
|JapM=Mario Kart 8 Deluxe | |ChiTR=Mǎlìōu Sàichē 8 Háohuábǎn | ||
|Kor=마리오 카트 8 디럭스 | |ChiTM=Mario Racing 8 Deluxe Edition | ||
|KorR=Mario Kateu 8 Direokseu | }} | ||
|KorM=Mario Kart 8 Deluxe | |||
|ChiS=马力欧卡丁车8 豪华版 | ==Trivia== | ||
|ChiSR=Mǎlìōu Kǎdīngchē 8 Háohuábǎn | *As the Nintendo Switch is not region-locked like previous Nintendo consoles (excluding console and game units officially sold in mainland China), this is the first ''Super Mario'' game to be playable in the same build in all regions. | ||
|ChiSM=Mario Kart 8 Deluxe Edition | *In the music menu, in addition to the usual method of pressing {{button|switch|Y}} to cycle through the different song variants of a course, it is possible to select a specific one via the shoulder buttons, similarly to selecting the season of [[Animal Crossing]]. Depending on the number of song variants a course has, holding {{button|switch|L}} selects the first variant, {{button|switch|R}} selects the second variant, {{button|switch|ZL}} selects the third variant, {{button|switch|ZR}} selects the fourth variant, and both {{button|switch|L}} and {{button|switch|R}} selects the fifth variant. | ||
|ChiT=瑪利歐賽車8 豪華版 | |||
|ChiTR=Mǎlìōu Sàichē 8 Háohuábǎn | ==References== | ||
|ChiTM=Mario Racing 8 Deluxe Edition | <references/> | ||
}} | |||
==External links== | ==External links== | ||
*[https://www.nintendo.co.jp/switch/aabpa/ | {{TCRF}} | ||
*[https://mariokart8.nintendo.com Official American site] | *[https://www.nintendo.co.jp/switch/aabpa/ Official Japanese site] | ||
*[ | *[https://mariokart8.nintendo.com Official North American site] | ||
*[ | *[https://mariokart8.nintendo.com/fr/ Official Canadian site] | ||
*[ | *[https://mariokart8.nintendo.com/es/ Official Latin American site] | ||
*[ | *[https://www.nintendo.co.uk/Games/Nintendo-Switch/Mario-Kart-8-Deluxe-1173281.html Official European site] | ||
*[ | *[https://www.nintendo.com.au/games/nintendo-switch/mario-kart-8-deluxe Official Oceanian site] | ||
*[https://www.nintendo.co.kr/software/switch/aabpa/ Official Korean site] | |||
*[https://www.nintendo.com.hk/switch/mario_kart_8_deluxe/ Official Chinese (Hong Kong) site] | |||
*[https://www.nintendo.tw/switch/mario_kart_8_deluxe/ Official Chinese (Taiwan) site] | |||
*[https://www.nintendoswitch.com.cn/mario_kart_8_deluxe/ Official Chinese (Mainland) site] | *[https://www.nintendoswitch.com.cn/mario_kart_8_deluxe/ Official Chinese (Mainland) site] | ||
{{MK8}} | {{MK8}} | ||
{{ | {{Super Mario games}} | ||
{{ | {{Switch}} | ||
[[Category:2017 games]] | [[Category:2017 games]] | ||
[[Category:Crossover | [[Category:2020 games]] | ||
[[Category:Crossover games]] | |||
[[Category:Mario Kart 8|*]] | [[Category:Mario Kart 8|*]] | ||
[[Category:Mario Kart 8 Deluxe|*]] | [[Category:Mario Kart 8 Deluxe|*]] | ||
[[Category:Nintendo Switch | [[Category:Nintendo Switch games]] | ||
[[Category:Racing | [[Category:Racing games]] | ||
[[Category: | [[Category:Enhanced ports]] | ||
[[Category:Games with Nintendo Switch Online]] | [[Category:Games with Nintendo Switch Online]] | ||
[[Category:Amiibo-compatible games]] | [[Category:Amiibo-compatible games]] | ||
[[de:Mario Kart 8 Deluxe]] | [[de:Mario Kart 8 Deluxe]] | ||
[[it:Mario Kart 8 Deluxe]] | [[it:Mario Kart 8 Deluxe]] | ||
Latest revision as of 17:33, December 31, 2024
- This article is about the Nintendo Switch port of the Mario Kart 8 game. For the game's original version, see Mario Kart 8.
| Mario Kart 8 Deluxe | |||||||||||||||||||||||||||||
|---|---|---|---|---|---|---|---|---|---|---|---|---|---|---|---|---|---|---|---|---|---|---|---|---|---|---|---|---|---|
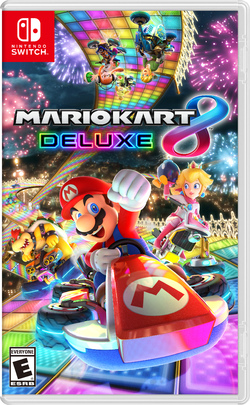 For alternate box art, see the game's gallery. | |||||||||||||||||||||||||||||
| Developer | Nintendo EPD BANDAI NAMCO Studios Inc. | ||||||||||||||||||||||||||||
| Publisher | Nintendo Tencent Games (China) | ||||||||||||||||||||||||||||
| Platform(s) | Nintendo Switch | ||||||||||||||||||||||||||||
| Release date | |||||||||||||||||||||||||||||
| Language(s) | English (United Kingdom) English (United States) French (France) French (Canada) German Spanish (Spain) Spanish (Latin America) Italian Dutch Portuguese (Portugal) Russian Japanese Simplified ChineseSC Traditional Chinese Korean SC - The global and domestic versions have slightly different localizations. | ||||||||||||||||||||||||||||
| Genre | Racing | ||||||||||||||||||||||||||||
| Rating(s) |
| ||||||||||||||||||||||||||||
| Mode(s) | Single Player, Multiplayer, Online Play, Wireless Play, LAN Play | ||||||||||||||||||||||||||||
| Format | Nintendo Switch: | ||||||||||||||||||||||||||||
| Input | Nintendo Switch: | ||||||||||||||||||||||||||||
| Serial code(s) | |||||||||||||||||||||||||||||
Mario Kart 8 Deluxe is a racing game in the Mario Kart series released worldwide for the Nintendo Switch on April 28, 2017. It is an enhanced port of Mario Kart 8 for the Wii U and is the first Super Mario game overall to be released for the Nintendo Switch. The base game contains additional content such as several new characters and an overhauled Battle Mode with new courses and modes. First teased in the Nintendo Switch's announcement video on October 20, 2016, the game was formally announced as part of the Nintendo Switch presentation on January 13, 2017.
Throughout 2022 and 2023, new race courses and returning characters were added to the game via the Mario Kart 8 Deluxe – Booster Course Pass paid DLC. An edition of the game that has the Booster Course Pass activated from the start, titled the Mario Kart 8 Deluxe Bundle (Game + Booster Course Pass), is available for purchase digitally.[7]
Controls
Dual Joy-Con / Pro Controller
| Action | Dual Joy-Con | Pro Controller | Motion |
|---|---|---|---|
| Steer | Tilt | ||
| Accelerate / Rocket Start (press and hold when the countdown hits 2) | |||
| Brake / Reverse | |||
| Item / Horn | |||
| Drift / Hop / Trick | |||
| Rear view | |||
Joy-Con (sideways)
or tilt
: Steer
or
: Accelerate / Rocket Start (press and hold when the countdown hits 2)
: Brake/reverse
: Use horn/item
: Hop/drift/trick
or tilt +
or
or auto-accelerate +
: Drift
: Rear view
Toy-Con Motorbike
- Tilt: Steer
Forward tilt: Accelerate / Rocket Start (press and hold when the countdown hits 2)
: Brake / reverse
: Use horn/item
: Hop / trick
- Tilt +
forward tilt or auto-accelerate +
: Drift
: Switch view
Toy-Con Car
- Tilt: Steer
- Pedal half press: Accelerate / Rocket Start (press and hold when the countdown hits 2)
: Use horn/item
- Pedal full press: Hop / trick
- Tilt + pedal full press: Drift
: Switch view
Differences from the original
The game features most of the base and DLC content of Mario Kart 8. Characters that were originally unlockable or exclusive to downloadable content in Mario Kart 8 are available from the start in this game, making for the largest starting roster of any Mario Kart game.
The overall game difficulty has been reduced, as CPUs slow down closer to the player compared to the original version and do not charge Mini Turbos or Super Mini Turbos as quickly. The default speed of the CPUs in the Normal and Easy difficulties is also reduced.
All courses that feature confetti flying around the finish line, such as Mario Circuit, now also have confetti on the ground of the course near it.[8]
When using the rearview mirror, the character will now move their eyes slightly to the left to look back, like in Mario Kart Wii; however, their eyes will stay looking to the left as long as the rearview is active, rather than switching back after a second as they do in Mario Kart Wii.
When playing with teams, flags colored to correspond to the teams are added behind the vehicles. If Smart Steering is on, then the Smart Steering antenna serves as the pole of the flag. These flags do not appear in Balloon Battle and Bob-omb Blast, as the colors of the balloons represent the teams in these modes.
Gameplay
- When playing with the map enabled in local splitscreen multiplayer, there will only be one map in the center of the screen, rather than each player having their own copy of the map like in the Wii U version and Mario Kart 64.
- Introduces Smart Steering and Auto-Accelerate for beginners; the former makes staying on the track easier by automatically steering the vehicle away from edges on the track, while the latter makes the vehicle automatically accelerate (though this is not available in Battle Mode). If the Smart Steering mode is on, the player's vehicle will have a black antenna sticking out of its rear end; this antenna blinks yellow and bends when Smart Steering is in effect. Smart Steering and Auto-Accelerate can be toggled on and off individually for each player in the vehicle part selection menu and in the pause menu.
- There is an additional level of Mini-Turbo, called Ultra Mini-Turbo, denoted by purple sparks (referred to as pink in the British English version) that appear after the orange sparks. This new level of Mini-Turbo can only be used if Smart Steering is off.
- In a race, the 1st place player no longer has a crown on their map icon, though they still do in battles.
Game modes
- 200cc engine class for Time Trials has been added (separately recorded from the 150cc Time Trials).
- Offline "VS Race" now requires a minimum of four races per cup instead of three. Additionally, the versus race menu was entirely redesigned.
Items
- Characters can now carry up to two items at once, even if they do not equip the first item, and the game features the return of the Double Item Box from Mario Kart: Double Dash!!.
- Red Shells and Spiny Shells are now slower when they lock onto their target, meaning players are able to outrun them in 200cc when they have any kind of speed boost.
- If a Blooper is about to ink the player as they cross the finish line, the player will now still get inked.[9] This is unlike the Wii U version, where the Blooper or the ink disappeared instead. Characters also no longer vocally react when they are inked by a Blooper.
- CPU players now have a chance to obtain Triple Red Shells from Item Boxes, but this primarily only happens in the Shells Only item setting.
- When a Bob-omb or Spiny Shell explodes, its explosion is now shown on the course map.
Online
- Since the service went live, playing online now requires a subscription to Nintendo Switch Online, rather than being tied to Nintendo Network as with the original release.
- Online lobbies have been changed in that players playing Worldwide or Regional VS Races between 1000 VR and 3000 VR will be randomized either a 100cc or 150cc race, and starting at over 3000 VR, players will now be randomized a 150cc, Mirror, or 200cc race.
- The engine class for the upcoming race in a race lobby is now shown in the lobby as the course is selected, via a "50", "100", "150", mirrored "150" (for Mirror), or "200" icon in the bottom right of the selected course icon. This extends to online battle lobbies, which will display a symbol of a yellow balloon (for Balloon Battle), a potted Piranha Plant (for Renegade Roundup), a coin (for Coin Runners), a Shine Sprite (for Shine Thief), or a Bob-omb (for Bob-omb Blast) to denote which battle mode is about to be played.
- There is now an option to change character and vehicle combinations in an online lobby without having to leave; this is done by pressing
during the course selection of an online lobby.
- The Mii characters that represent the players in online lobbies wear racing suits, unlike in the original version in which they wore their regular outfits.
- The Mii of the previous race or battle's winner will also wear a crown identical to the one worn by the first-place player in Battle Mode.
- The newly added wireless and LAN modes use a very similar lobby to the online lobby, albeit visually set in a garage rather than on a globe.
- Players can now see the lap count or timer when spectating an online race or battle respectively. However, it is no longer possible to see the lap count when crossing the finish line nor the full results in multiplayer (including online lobbies) at the end of the race while watching Highlight Reels via Mario Kart TV.
HUD / Graphical interface
- The user interface on the title screen has been almost entirely redesigned, being more simple than the Wii U game.
- The game features an in-game guide, directly accessible from the game's menu; this guide explains various techniques, Battle Mode, and the functions of each item. Much of its text is reused from the Wii U version's electronic manual.
- The course map color for the race courses is now white instead of blue, including the maps of the Rainbow Roads and GCN Baby Park, which originally had multiple colors. However, the battle courses have color-shaded areas and lines on their maps that make it easier for players to determine where they are.
- The character icons on the course map are now slightly larger, more detailed, and of a higher resolution.
- Inkling Girl, Isabelle, and Link now appear on the loading screen, and the game also has reduced loading times when compared to the Wii U game; as a result, the second set of characters that originally appeared on the loading screen is rarely seen before the game finishes loading.
Removed features
- Being able to see which items the other drivers have, which was only possible when playing with the Wii U GamePad in the original, has now been removed entirely.
- Miiverse compatibility is absent, including stamps and the ability to upload Highlight Reels on YouTube; these features were also discontinued in the Wii U version when Miiverse was terminated on November 7, 2017.
- An exploit in the original version that allowed players to gain speed by hopping after speed boosting has been fixed.
Technical aspects
- The game now mostly renders in native 1920x1080 resolution in TV mode (sometimes switching to native 1728x972), and always renders at native 1280x720 resolution in Tabletop and Handheld Mode, instead of the dynamic 1280x720/1152x648 rendering resolution used in the original Wii U version.
- Motion blur when boosting is present in LAN and online mode, and in earlier builds, it was also present in splitscreen multiplayer.[10]
- The shadows present in the game are of higher quality in multiplayer.
- The game supports 5.1 surround. Effects that can play on the rear speakers include approaching shells, certain vehicles' engines, sceneries (e.g. bats, falling rocks, water, helicopters), and if other drivers are immediately to the side. Background music, Lakitu's countdowns, and menu sounds are mixed to stereo only. Some surround receiver producers' models may default to Standard modes that water out the effect (e.g. playing background music via side speakers), necessitating switching them to Straight/Direct or upmixing modes.
Battle Mode
The biggest change made between Mario Kart 8 Deluxe and the original release of Mario Kart 8 is the Battle Mode. Battle Mode now returns to the arena-based battle (replacing all eight Battle Mode race tracks from Mario Kart 8) and unlike previous games, each player starts with five balloons, as opposed to three. Another addition to Battle Mode is that the character in the lead now wears a crown, unlike in Mario Kart 8 where the crown is displayed only on the HUD map. Additionally, players now start out with zero points instead of Mario Kart 8's default three points, and their balloons do not serve as the remaining three points.
Returning from Mario Kart Wii and Mario Kart 7 is the ability to respawn after all balloons are popped; this causes the player's total score to halve and the player respawns with three balloons instead of five. A new addition to this mode is the feature to tell exactly which character hit whom, which appears on the bottom of the screen. Furthermore, after getting hit, players now have about 1.5 seconds of invincibility frames, unlike in Mario Kart 8. The item options also appear to have been updated; alongside the "Frantic Items" option, which chooses powerful items more frequently, a "Skilled Items" option is also available for selection; in this option, powerful items appear less frequently, similar to Mario Kart Wii's "Strategic" ("Basic" in the British English version) item option.
There are five different Battle Mode types:
- Balloon Battle: The classic mode where players use items to pop opponents' balloons or steal them in order to score points. This mode now uses the point-based set-up seen in Mario Kart Wii, and Mario Kart 7, rather than the survival set-up of Mario Kart 8 and earlier installments prior to Mario Kart Wii.
- Renegade Roundup: A new mode in the vein of "cops and robbers", with the racers being divided into two teams. One team, known as "The Authorities", has to use Piranha Plant items (which are permanently attached to the front of their vehicle and only serve to capture the opposing team; they do not operate like the regular item) in order to capture players from the other team, known as "The Renegades". Captured Renegades are placed into one of several jail cells floating above various points on the stage. Remaining Renegades can free their teammates by driving over a key switch placed below the jail cells. The Renegades win if at least one member is still running free when time runs out, and the Authorities win if all of the Renegades get captured. All Authority team members also temporarily lose their ability to capture after being hit by an item and Renegades receive a speed boost and temporary immunity when they are freed from the cells.
- Bob-omb Blast: A returning mode from Mario Kart: Double Dash!!, in which players attack one another using Bob-ombs to score points and can carry up to 10 Bob-ombs. This version follows nearly all of the same rules as Balloon Battle, the differences being these: the only items are Bob-ombs, players cannot be hurt by their own Bob-ombs exploding, and Bob-ombs thrown forward explode instantly.
- Coin Runners: Originating in Mario Kart Wii, this mode was last seen in Mario Kart 7. Players must collect Coins scattered across the course in order to have the most by the end of the match. Plays more akin to the Mario Kart Wii version of the mode, with players having no limit to the amount of coins they can collect, as opposed to the 10-coin limit in the Mario Kart 7 version.
- Shine Thief: Another returning mode from Mario Kart: Double Dash!!, one player must retrieve a Shine Sprite and keep hold of it for about 20 seconds, while the opponents use items against whoever has the Shine to force that player to drop it. The driver holding the shine sprite has a slightly reduced top speed. In Team play, one team must collectively manage to hold on to the Shine for about 30 seconds.
There is also the option to randomly select one of the five available modes by choosing "Random Battle".
Characters
Excluding character variants, there are a total of 48 playable characters in Mario Kart 8 Deluxe, including 40 in the base game and eight as DLC. All base and DLC characters from Mario Kart 8 are present in the base roster of Mario Kart 8 Deluxe and are now available from the start, while more characters that were not present in Mario Kart 8 are also added. The base game includes returning characters Bowser Jr., King Boo, and Dry Bones, who last appeared in the series as playable characters in Mario Kart Wii, and Gold Mario (as a variant of Metal Mario), who was previously playable in Mario Kart Arcade GP DX. It also introduces a new non-Super Mario character, being the Inkling from Splatoon. Both the Inkling Girl and Inkling Boy are playable, and they have three selectable colors each. At the game's launch, Inkling Girl and Inkling Boy took up separate slots on the character selection screen, as did the two Villagers, who were originally present in the same character slot (with the female Villager being a variant of the male one) in Mario Kart 8. However, as of the version 3.0.0 update, Inkling Boy and female Villager are now considered variants of Inkling Girl and male Villager respectively.[11]
Eight additional characters were added as downloadable content via the Booster Course Pass, starting with its fourth wave. Characters added include Birdo, who was added in Wave 4 with nine selectable colors, Petey Piranha, Wiggler, and Kamek, who were added in Wave 5, and Diddy Kong, Funky Kong, Pauline, and Peachette, who were added in Wave 6.[12] Wiggler, Gold Mario, Kamek, Pauline, Peachette, and all Birdo variants are playable for the first time in a home console Mario Kart installment. Kamek, Pauline, Peachette, and almost all Birdo variants were originally introduced in Mario Kart Tour, which released after Mario Kart 8 Deluxe. With Birdo's inclusion in Wave 4 and Diddy Kong and Funky Kong's inclusion in Wave 6, all playable characters from Mario Kart Wii are now included in Mario Kart 8 Deluxe.
There is only one unlockable character in this game, that being Gold Mario. He is unlocked by clearing all cups of the 200cc Grand Prix. Additionally, the version 1.6.0 update added a new variant for Link, Champion's Tunic Link,[13] based on his appearance in The Legend of Zelda: Breath of the Wild. When Gold Mario is unlocked and Champion's Tunic Link is downloaded, they become the default variations of their character, while Metal Mario and the version of Link based on his appearance in The Legend of Zelda: Skyward Sword are relegated to alternate costumes. As of the 3.0.0 update, however, the character select screen now remembers the last costume used for characters with alternate costumes.
There are more individual character weight classes when compared to the Wii U game, with several returning characters having different statistics, thus resulting in fewer characters having the same stats as each other.
Characters, variants, and Mii Racing Suits playable in this game that are not playable in the original Mario Kart 8 are listed in italics.
Character select screen with Gold Mario unlocked and all DLC characters downloaded
Character variants
With the exceptions of Link and the Villager, the displayed name of the character changes based on the variant that is selected. From version 3.0.0 onwards, the last used variant will have their icon shown on the character selection screen. Unlike in Mario Kart 8, the sub-menu for the two Villagers does not use a unique Animal Crossing-inspired color scheme, instead using the same gray color as the others.
1 - This variant is used as the select icon for the base character on the main select screen once it is available.
2 - Originally a separate character slot before being relegated to a variant in the version 3.0.0 update.
3 - Originally the only version of the character before being relegated to a variant in the version 1.6.0 update.
Mii Racing Suits
All 20 Mii Racing Suits return from Mario Kart 8, and, like in that game, the color of the standard suit matches the favorite color of the selected Mii. There are also two additional Mii Racing Suits tied to scanning amiibo - the new Splatoon Suit, which is unlocked either by scanning any Inkling or Splatoon series amiibo, and the Daisy Suit, returning from Mario Kart Tour, which can be unlocked by scanning any Daisy amiibo after installing version 3.0.0. In addition, the Animal Crossing Suit can now be unlocked with any Isabelle or Animal Crossing series amiibo, and the Pikmin Suit can be unlocked with Pikmin series amiibo. In version 3.0.0, scanning any amiibo of characters in The Legend of Zelda, Metroid, and Kirby series unlocks the respective series' Mii Racing Suits.
| Normal Suits | |||||||||||
|---|---|---|---|---|---|---|---|---|---|---|---|
| Red | Orange | Yellow | Light-green | Green | Blue | ||||||

|

|

|

|

|

| ||||||
| Light-blue | Pink | Purple | Brown | White | Black | ||||||

|

|

|

|

|

| ||||||
As part of the sixth wave of the Booster Course Pass, 17 additional Mii Racing Suits from Mario Kart Tour were added. These costumes can be unlocked via purchasing the DLC.[11] Some Jump Boost animations from these suits are different from those of the standard and amiibo racing suits.
Rival order
Like in Mario Kart 8, characters have set rivals that consistently appear when racing in Grand Prix races. They are once again restricted to Grand Prix only, not appearing in single player versus or battle mode. Unlike the previous game, more characters have rivals: the twelve characters from the previous game who had rivals retain their rivals in this game, while most other characters range from having one to two rivals each, though some still have none at all.
Vehicle parts
Mario Kart 8 Deluxe features six additional vehicle body parts. One is the Koopa Clown, returning from Mario Kart 7. Two new vehicles are Splatoon-based ATVs; the Splat Buggy and Inkstriker. These three change their colors for certain characters: the former for the Koopalings, and the latter two for all Inkling variations. Version 1.6.0 adds the Master Cycle Zero, Ancient Tires, and Paraglider. In total, there are 41 vehicle bodies, 22 tires, and 15 gliders, resulting in up to 13,530 different combinations.
Computer-controlled characters now choose from a wider variety of kart parts than in the original version, such as the Flame Rider and the Sports Coupe. However, they are still restricted to a set amount of body parts per character. A CPU Baby Daisy has the tendency to use the Wild Wiggler with Wood tires, for example.
The vehicle parts that were exclusive to downloadable content in Mario Kart 8 (i.e. parts included within the Mercedes-Benz × Mario Kart 8, The Legend of Zelda × Mario Kart 8, and Animal Crossing × Mario Kart 8 add-on packs) are now accessible in the base game and are randomly unlocked by collecting coins during gameplay.
The statistics of some vehicle parts have been altered, and certain physics elements, such as the speed increase per stat and the acceleration tiers, have been adjusted.
Available parts
The parts available are listed here in the order shown in the vehicle customization screen, with the following notation:
- Bold = Part is available at the start.
- * = Changes color, depending on the character.
- ** = Changes color for the Koopalings.
- *** = Changes color for Daisy, Baby Daisy, Rosalina, Baby Rosalina, Wiggler, Kamek, and Funky Kong.
- **** = Changes color for the Inklings.
- (DX) = Part is not available in the original Mario Kart 8.
- (NEW) = Part is introduced in this game.
The "8" logos on the parts are replaced with the driver's emblem, except on the Gold Standard and Gold Glider.
Karts
Biddybuggy*
BuggybudLandship**
Sneeker*
BounderSports Coupe
Sports CoupéGold Standard
Gold KartGLA*
Koopa Clown** (DX)
Standard bikes
Mr. Scooty
Mr ScootyMaster Cycle Zero (NEW)
Sport bikes
ATVs
Standard ATV*
Standard QuadSplat Buggy**** (NEW)
Inkstriker**** (NEW)
Tires
Standard
NormalWood
WoodenBlue Standard
Normal BlueHot Monster
Funky MonsterGold Tires
Gold WheelsGLA Tires
GLA WheelsTriforce Tires
Triforce TyresAncient Tires (NEW)
Ancient TyresLeaf Tires
Leaf Tyres
Gliders
Paraglider (NEW)
CPU combinations
All characters in the game besides Miis and most variants (with the exceptions of blue Inkling Boy, female Villager, and Link's alternate outfit) can be used by CPUs. Each of these characters have four different combinations of vehicle parts that they can use as CPUs:
| CPU combinations | ||||
|---|---|---|---|---|
| Character | Combination 1 | Combination 2 | Combination 3 | Combination 4 |
Drivers' and vehicle parts' statistics
- For the in-game tables from which these values were derived and for the tables to translate those values into the actual statistics used by the game, see Mario Kart 8 Deluxe in-game statistics.
Mario Kart 8 Deluxe features different statistics with respect to Mario Kart 8.
Statistics shown in the vehicle customization screen
Just like Mario Kart 7 and Mario Kart 8, the game uses "points" ("PT") which are conferred by characters and vehicle parts to determine the final values of the game's statistics. In each statistics, the points given by the character, body, tires, and glider are summed to obtain a final value called "Level" ("Lv") which is then used by a table to convert the level into appropriate physical parameters used by the game. There are a total of 8,064 different stat combinations. The Level of five statistics is displayed in the vehicle customization screen:
- Speed: The top speed of the vehicle on land with normal gravity.
- Acceleration: How fast the speed increases when holding the acceleration button until top speed has been reached.
- Weight: The weight of the vehicle. Vehicles with higher weight knock away vehicles with lower weight.
- Handling: The turning ability of the vehicle on land with normal gravity. A higher stat means vehicles turn sharper, and will continue turning normally for longer before automatically initiating a drift.
- Traction (Grip in the British English version): The grasp of the vehicle to the ground while off-road. Vehicles with higher traction slip less on certain terrain and can stay stable on the road better. Not to be confused with handling.
Said Level is represented through bars by adding three points to the sum of points, then dividing the result by four, resulting in values ranging from 0.75 to 5.75. As an example, the process through which the statistics of a certain combination of character and vehicle parts are calculated and displayed is shown below:
| Element | Points conferred | ||||
|---|---|---|---|---|---|
| Speed | Acceleration | Weight | Handling | Traction | |
Dry Bones |
2 | 5 | 1 | 8 | 4 |
| 2 | 5 | 1 | 4 | 5 | |
| 2 | 4 | 2 | 3 | 5 | |
| 1 | 1 | 1 | 1 | 1 | |
| Final values | Speed | Acceleration | Weight | Handling | Traction |
| Level | 2 + 2 + 2 + 1 = 7 |
5 + 5 + 4 + 1 = 15 |
1 + 1 + 2 + 1 = 5 |
8 + 4 + 3 + 1 = 16 |
4 + 5 + 5 + 1 = 15 |
| Value shown in the vehicle customization screen | (7 + 3) / 4 = 10 / 4 = 2.5 |
(15 + 3) / 4 = 18 / 4 = 4.5 |
(5 + 3) / 4 = 8 / 4 = 2 |
(16 + 3) / 4 = 19 / 4 = 4.75 |
(15 + 3) / 4 = 18 / 4 = 4.5 |
Drivers' statistics
Drivers are still grouped into small groups of characters sharing the same statistics, the number of groups has been increased with respect to Mario Kart 8.
In addition to the statistics shown in the vehicle customization screen, there are the following statistics:
- Water Speed: The top speed of the vehicle while driving underwater.
- Air Speed: The top speed of the vehicle while gliding.
- Anti-Gravity Speed: The top speed of the vehicle in anti-gravity mode.
- Water Handling: The turning ability of the vehicle while driving underwater.
- Air Handling: The turning ability of the vehicle while gliding.
- Anti-Gravity Handling: The turning ability of the vehicle in anti-gravity mode.
- Mini-Turbo: The length of the vehicle's mini-turbo speed boosts and how fast mini-turbos can be charged. Also affects the length of jump boosts from tricks.
- Invincibility: The length of time the vehicle is invincible after spinning out. Added in v2.2.0.[14]
Just like in Mario Kart 8, Miis can be Light, Medium, or Heavy, depending on their height and weight.
The statistics are shown in points.
Parts' statistics
The number of groups of vehicle parts sharing the same statistics has increased as well when compared with Mario Kart 8.
The statistics are reported in points. The invincibility statistic cells for vehicle bodies and tires are split up according to each part inside that row, from left to right. There is an unused stat for on-road traction, which can be viewed here.
| Bodies' Statistics | ||||||||||||||||
|---|---|---|---|---|---|---|---|---|---|---|---|---|---|---|---|---|
| Body *sport bike |
Speed | Acceleration | Weight | Handling | Traction | Mini-Turbo | Invincibility | |||||||||
| Ground | Water | Air | Anti-Gravity | Ground | Water | Air | Anti-Gravity | |||||||||
| 0 | 1 | 1 | 2 | 7 | 0 | 5 | 4 | 4 | 5 | 4 | 7 | 0 | 0 | |||
| 2 | 5 | 2 | 0 | 6 | 0 | 4 | 5 | 3 | 2 | 6 | 6 | 3 | 2 | |||
| 2 | 3 | 1 | 1 | 6 | 1 | 5 | 4 | 2 | 4 | 4 | 6 | 3 | 2 | 2 | ||
| 2 | 2 | 4 | 3 | 5 | 2 | 4 | 2 | 4 | 3 | 3 | 6 | 3 | 3 | 2 | 1 | |
| 2 | 2 | 3 | 4 | 5 | 1 | 4 | 3 | 3 | 4 | 5 | 5 | 4 | 4 | 4 | 4 | |
| 3 | 3 | 4 | 5 | 3 | 3 | 2 | 2 | 2 | 4 | 4 | 5 | 3 | 3 | 1 | ||
| 3 | 4 | 3 | 3 | 2 | 3 | 4 | 4 | 3 | 3 | 7 | 5 | 4 | 3 | 3 | ||
| 3 | 3 | 3 | 3 | 4 | 2 | 3 | 2 | 3 | 3 | 3 | 5 | 4 | 3 | 3 | ||
| 4 | 2 | 3 | 4 | 3 | 0 | 2 | 3 | 1 | 5 | 3 | 4 | 4 | 3 | |||
| 4 | 3 | 3 | 3 | 2 | 1 | 3 | 3 | 3 | 2 | 2 | 4 | 5 | 3 | 3 | ||
| 4 | 2 | 3 | 3 | 2 | 2 | 3 | 2 | 2 | 3 | 0 | 4 | 5 | 4 | 3 | ||
| 4 | 5 | 0 | 2 | 1 | 4 | 1 | 5 | 1 | 1 | 3 | 3 | 6 | 6 | 5 | ||
| 5 | 1 | 2 | 4 | 1 | 3 | 1 | 1 | 0 | 2 | 1 | 3 | 6 | 6 | 6 | ||
| 5 | 2 | 1 | 3 | 0 | 4 | 0 | 1 | 0 | 1 | 5 | 3 | 7 | 7 | 6 | ||
| Tires' Statistics | ||||||||||||||||
| Tire | Speed | Acceleration | Weight | Handling | Traction | Mini-Turbo | Invincibility | |||||||||
| Ground | Water | Air | Anti-Gravity | Ground | Water | Air | Anti-Gravity | |||||||||
| 0 | 3 | 3 | 0 | 6 | 0 | 4 | 4 | 4 | 4 | 4 | 6 | 0 | 0 | |||
| 1 | 2 | 2 | 2 | 5 | 0 | 3 | 3 | 2 | 4 | 3 | 5 | 3 | 3 | |||
| 1 | 1 | 4 | 1 | 4 | 1 | 2 | 1 | 3 | 2 | 6 | 5 | 6 | 4 | |||
| 2 | 3 | 3 | 2 | 4 | 2 | 3 | 3 | 3 | 3 | 5 | 4 | 5 | 4 | 4 | ||
| 3 | 2 | 2 | 4 | 2 | 2 | 4 | 4 | 4 | 3 | 1 | 3 | 5 | 5 | 5 | ||
| 3 | 2 | 1 | 2 | 2 | 4 | 0 | 1 | 1 | 0 | 7 | 3 | 6 | 6 | 5 | ||
| 3 | 4 | 1 | 2 | 3 | 3 | 1 | 1 | 2 | 2 | 6 | 3 | 6 | 6 | 6 | ||
| 4 | 0 | 0 | 4 | 1 | 3 | 2 | 0 | 1 | 2 | 0 | 2 | 5 | 5 | |||
| 4 | 3 | 2 | 1 | 0 | 4 | 2 | 2 | 0 | 1 | 2 | 2 | 6 | 5 | |||
| Gliders' Statistics | ||||||||||||||||
| Glider | Speed | Acceleration | Weight | Handling | Traction | Mini-Turbo | Invincibility | |||||||||
| Ground | Water | Air | Anti-Gravity | Ground | Water | Air | Anti-Gravity | |||||||||
| 0 | 1 | 1 | 1 | 2 | 0 | 1 | 0 | 2 | 1 | 1 | 2 | 0 | ||||
| 0 | 0 | 1 | 1 | 2 | 1 | 1 | 1 | 2 | 0 | 0 | 2 | 0 | ||||
| 1 | 0 | 2 | 1 | 1 | 2 | 1 | 1 | 1 | 0 | 0 | 1 | 1 | ||||
| 1 | 1 | 2 | 0 | 1 | 1 | 1 | 0 | 1 | 1 | 1 | 1 | 1 | ||||
Unlocking criteria
Gold Mario
The only unlockable playable character in this game is Gold Mario, who is unlocked by winning all twelve base-game gold cups at 200cc. Once unlocked, he replaces Metal Mario on the character select screen. Metal Mario is from then on treated as a color variant of Gold Mario. The two differ only in their color scheme and the voice clip used when selecting them. Their other voice clips, horn sounds, animations, and statistics are identical.
Vehicle parts
A vehicle part is randomly unlocked every 30 coins. Once reaching 450 coins this changes to every 50, and once reaching 1500 coins this changes to every 100. Eventually, the last non-gold vehicle part is unlocked on reaching 3100 coins.
Special parts
Special gold parts are unlocked with the following criteria:
- Gold Standard: Unlocked by achieving at least 1 star ranking on all base-game Mirror Cups.
- Gold Tires: Unlocked by defeating all 48 base-game staff ghosts in 150cc Time Trials.
- Gold Glider: Unlocked by collecting 5000 coins.
Alternate title screens
Additional title screens can appear when hovering over the single player and multiplayer options on the main menu. These are unlocked by obtaining a gold trophy in every base-game cup in Mirror and 200cc, after which the title screens used are randomly selected. These alternate title screens can appear on start-up, which causes a different voice clip to play corresponding to the character shown on the screen, replacing the usual clip of Mario yelling "Mario Kart 8!"
Courses
There are 48 race courses in the base game (including all four cups that were DLC in the original Mario Kart 8), these being the 25 courses introduced in the original game and 23 classic courses, which includes two courses from Super Mario Kart, three courses each from Mario Kart: Super Circuit, Mario Kart DS, and Mario Kart Wii, and four courses each from Mario Kart 64, Mario Kart: Double Dash!!, and Mario Kart 7. It is also the first Mario Kart game since Mario Kart 64 to have all courses available from the start.
In the British English version of the game, Toad Harbor is spelled "Toad Harbour", Bone-Dry Dunes is formatted "Bone Dry Dunes", and 3DS Music Park, 3DS Piranha Plant Slide, and 3DS Neo Bowser City are respectively known as 3DS Melody Motorway, 3DS Piranha Plant Pipeway, and 3DS Koopa City.
 Mushroom Cup |
 Flower Cup |
 Star Cup |
 Special Cup |
 Egg Cup |
 Crossing Cup |
|---|---|---|---|---|---|
 Shell Cup |
 Banana Cup |
 Leaf Cup |
 Lightning Cup |
 Triforce Cup |
 Bell Cup |
|---|---|---|---|---|---|
Booster Course Pass
- Main article: Mario Kart 8 Deluxe – Booster Course Pass
The Mario Kart 8 Deluxe – Booster Course Pass DLC includes 48 additional courses (mostly classic courses), released in six waves of eight courses each, increasing the game's total number of courses to 96. The first wave released on March 18, 2022, and the final wave released on November 9, 2023. The classic courses in the DLC include two courses each from Super Mario Kart and Mario Kart 64, three courses from Mario Kart: Double Dash!!, four courses each from Mario Kart DS and Mario Kart 7, five courses from Mario Kart: Super Circuit, eight courses from Mario Kart Wii, and seventeen courses from Mario Kart Tour (making Mario Kart 8 Deluxe the first game in the series to feature classic courses of a Mario Kart game released after it), which increases the total number of courses from each game to four courses from Super Mario Kart, six courses from Mario Kart 64, seven courses each from Mario Kart: Double Dash!! and Mario Kart DS, eight courses each from Mario Kart: Super Circuit and Mario Kart 7, and eleven courses from Mario Kart Wii. Three new courses are also included, namely Sky-High Sundae, Yoshi's Island, and Squeaky Clean Sprint, increasing the total number of new courses to 28.
In the British English version of the game, 3DS Rock Rock Mountain and Wii DK Summit are known as 3DS Alpine Pass and Wii DK's Snowboard Cross respectively, as was the case in the British English versions of their original appearances. However, most courses that had different names between European French and Canadian French in previous games instead use their European French names in both versions, with the exceptions of DS Waluigi Pinball, Tour Amsterdam Drift, and 3DS Rosalina's Ice World.
 Golden Dash Cup |
 Lucky Cat Cup |
 Turnip Cup |
 Propeller Cup |
 Rock Cup |
 Moon Cup |
|---|---|---|---|---|---|
 Fruit Cup |
 Boomerang Cup |
 Feather Cup |
 Cherry Cup |
 Acorn Cup |
 Spiny Cup |
|---|---|---|---|---|---|
Battle courses
Eight battle courses are present in Mario Kart 8 Deluxe, five new and three classic, replacing the repurposed race courses used for Battle Mode in the Wii U version.
Most battle courses visually resemble race courses from Mario Kart 8: Battle Stadium with Mario Kart Stadium, Sweet Sweet Kingdom with Sweet Sweet Canyon, Dragon Palace with Dragon Driftway, Lunar Colony with Rainbow Road, GCN Luigi's Mansion with Twisted Mansion, and SNES Battle Course 1 with SNES Donut Plains 3, all sharing similar textures and/or assets.
Similar to regular races, a course introduction scene is now added at the start.
Ghosts
150cc Staff Ghosts
In Mario Kart 8 Deluxe, the times for staff ghosts in 150cc are slightly different from the original Mario Kart 8. Also, unlike the original game, players will not unlock any stamps if they beat the ghosts.
| Course | Staff Name | Country | Time | Character | Vehicle Combination | ||
|---|---|---|---|---|---|---|---|
| Body | Tires | Glider | |||||
| Mario Kart Stadium | Nin★Chris | United Kingdom | 1:53.191 | Mario | Sports Coupe | Standard | Super Glider |
| Water Park | Nin★Massim | Italy | 2:02.186 | Baby Luigi | Mr. Scooty | Roller | Super Glider |
| Sweet Sweet Canyon | Nin★Fausti | France | 2:07.205 | Baby Peach | Teddy Buggy | Wood | Peach Parasol |
| Thwomp Ruins | Nin★Sophia | Germany | 2:12.125 | Donkey Kong | Standard ATV | Monster | Super Glider |
| Mario Circuit | Nin★Sho | Japan | 2:08.501 | Mario | Standard Kart | Standard | Super Glider |
| Toad Harbor | Nin★Alice | United States | 2:29.282 | Toadette | Cat Cruiser | Retro Off-Road | Plane Glider |
| Twisted Mansion | Nin★Mark | Netherlands | 2:14.615 | Luigi | Mach 8 | Slim | Super Glider |
| Shy Guy Falls | Nin★Frank | United Kingdom | 2:21.804 | Shy Guy | Flame Rider | Off-Road | Super Glider |
| Sunshine Airport | Nin★Leonel | United States | 2:20.447 | Rosalina | Circuit Special | Standard | Super Glider |
| Dolphin Shoals | Nin★Skip | United States | 2:14.832 | Wendy | Landship | Wood | Bowser Kite |
| Electrodrome | Nin★Yuya | Japan | 2:21.023 | Larry | Sport Bike | Monster | Super Glider |
| Mount Wario | Nin★Elena | Russia | 2:03.483 | Waluigi | The Duke | Monster | Wario Wing |
| Cloudtop Cruise | Nin★Maria | Portugal | 2:19.568 | Baby Rosalina | Biddybuggy | Standard | Super Glider |
| Bone-Dry Dunes | Nin★Elena | Russia | 2:15.338 | Morton | Tri-Speeder | Monster | Super Glider |
| Bowser's Castle | Nin★Polly | United Kingdom | 2:21.980 | Bowser | Badwagon | Standard | Super Glider |
| Rainbow Road | Nin★Mizuho | Japan | 2:25.267 | Pink Gold Peach | Comet | Slim | Super Glider |
| Wii Moo Moo Meadows | Nin★Chris | United Kingdom | 1:41.846 | Daisy | Varmint | Hot Monster | Super Glider |
| GBA Mario Circuit | Nin★Rie | Japan | 1:44.593 | Baby Mario | Yoshi Bike | Standard | Super Glider |
| DS Cheep Cheep Beach | Nin★Massim | Italy | 2:06.314 | Koopa Troopa | Steel Driver | Metal | Parachute |
| N64 Toad's Turnpike | Nin★Alice | United States | 2:08.966 | Toad | Standard Bike | Standard | Parachute |
| GCN Dry Dry Desert | Nin★Maria | Portugal | 2:26.614 | Peach | Standard Bike | Slim | Super Glider |
| SNES Donut Plains 3 | Nin★Frank | United Kingdom | 1:35.564 | Lakitu | Pipe Frame | Monster | MKTV Parafoil |
| N64 Royal Raceway | Nin★Skip | United States | 2:18.307 | Peach | Prancer | Wood | Peach Parasol |
| 3DS DK Jungle | Nin★Rie | Japan | 2:20.006 | Donkey Kong | Varmint | Monster | Waddle Wing |
| DS Wario Stadium | Nin★Mizuho | Japan | 2:09.171 | Wario | Tri-Speeder | Off-Road | Wario Wing |
| GCN Sherbet Land | Nin★Fausti | France | 2:20.174 | Lemmy | Sneeker | Standard | Super Glider |
| 3DS Music Park | Nin★Sho | Japan | 2:19.675 | Baby Daisy | Biddybuggy | Standard | Super Glider |
| N64 Yoshi Valley | Nin★Mark | Netherlands | 2:23.688 | Yoshi | Wild Wiggler | Standard | Flower Glider |
| DS Tick-Tock Clock | Nin★Sophia | Germany | 2:06.485 | Iggy | Standard Bike | Monster | Super Glider |
| 3DS Piranha Plant Slide | Nin★Polly | United Kingdom | 2:21.321 | Ludwig | Jet Bike | Slim | Super Glider |
| Wii Grumble Volcano | Nin★Yuya | Japan | 2:16.524 | Roy | Badwagon | Off-Road | Super Glider |
| N64 Rainbow Road | Nin★Leonel | United States | 1:33.981 | Metal Mario | Standard ATV | Monster | Super Glider |
| GCN Yoshi Circuit | Nin★Adrien | France | 2:07.557 | Red Yoshi | B Dasher | Standard | Super Glider |
| Excitebike Arena | Nin★Pedro | Spain | 1:58.808 | Mario | Standard Bike | Slim | Super Glider |
| Dragon Driftway | Nin★Mitsu | Japan | 2:05.957 | Lakitu | Varmint | Monster | Cloud Glider |
| Mute City | Nin★Laura | United States | 2:10.167 | Mario | Blue Falcon | Roller | Super Glider |
| Wii Wario's Gold Mine | Nin★Pit | Germany | 2:22.119 | Wario | Standard Kart | Monster | Super Glider |
| SNES Rainbow Road | Nin★Anne | Netherlands | 1:40.711 | Cat Peach | Cat Cruiser | Retro Off-Road | Super Glider |
| Ice Ice Outpost | Nin★Pavel | Russia | 2:09.427 | Tanooki Mario | Tanooki Kart | Monster | Super Glider |
| Hyrule Circuit | Nin★Mitsu | Japan | 2:08.616 | Link | Master Cycle | Triforce Tires | Hylian Kite |
| GCN Baby Park | Nin★Joost | Netherlands | 1:16.561 | Baby Mario | Biddybuggy | Standard | Super Glider |
| GBA Cheese Land | Nin★Aracel | Spain | 2:06.316 | Orange Yoshi | Pipe Frame | Monster | Parafoil |
| Wild Woods | Nin★Akira | Japan | 2:05.396 | Villager (Boy) | Streetle | Leaf Tires | Paper Glider |
| Animal Crossing | Nin★Marie | United States | 1:53.584 | Isabelle | City Tripper | Slim | Paper Glider |
| 3DS Neo Bowser City | Nin★Rui | Portugal | 2:13.138 | Dry Bowser | Bone Rattler | Metal | Super Glider |
| GBA Ribbon Road | Nin★Giulia | Italy | 2:07.152 | Villager (Girl) | Teddy Buggy | Button | Super Glider |
| Super Bell Subway | Nin★Juliet | France | 2:06.487 | Pink Shy Guy | City Tripper | Slim | Super Glider |
| Big Blue | Nin★Dylan | United Kingdom | 1:37.316 | Mario | P-Wing | Blue Standard | Super Glider |
| Tour Paris Promenade | Nin★Adrien | France | 2:07.401 | Peach | Standard Kart | Slim | Peach Parasol |
| 3DS Toad Circuit | Nin★Sho | Japan | 1:33.670 | Toad | Mr. Scooty | Azure Roller | Super Glider |
| N64 Choco Mountain | Nin★Massim | Italy | 2:08.949 | Koopa Troopa | Biddybuggy | Standard | Super Glider |
| Wii Coconut Mall | Nin★Skip | United States | 1:58.401 | Baby Mario | Sneeker | Metal | Super Glider |
| Tour Tokyo Blur | Nin★Yuya | Japan | 1:36.317 | Blue Inkling Boy | Splat Buggy | Blue Standard | Super Glider |
| DS Shroom Ridge | Nin★Frank | United Kingdom | 2:09.148 | Bowser | Bone Rattler | Off-Road | Super Glider |
| GBA Sky Garden | Nin★Pedro | Spain | 1:42.267 | Lakitu | P-Wing | Retro Off-Road | Cloud Glider |
| Ninja Hideaway | Nin★Fausti | France | 2:20.813 | Black Shy Guy | Standard ATV | Standard | Super Glider |
| Tour New York Minute | Nin★Leonel | United States | 1:34.573 | Donkey Kong | Varmint | Monster | Super Glider |
| SNES Mario Circuit 3 | Nin★Mark | Netherlands | 1:46.806 | Mario | B Dasher | Standard | Super Glider |
| N64 Kalimari Desert | Nin★Pit | Germany | 1:40.363 | Dry Bones | Standard Kart | Monster | Super Glider |
| DS Waluigi Pinball | Nin★Chris | United Kingdom | 2:36.450 | Waluigi | The Duke | Monster | Super Glider |
| Tour Sydney Sprint | Nin★Rie | Japan | 2:16.617 | Baby Mario | Biddybuggy | Standard | Super Glider |
| GBA Snow Land | Nin★Maria | Portugal | 1:46.763 | Tanooki Mario | Tanooki Kart | Standard | Super Glider |
| Wii Mushroom Gorge | Nin★Massim | Italy | 1:50.666 | Toadette | Teddy Buggy | Wood | Super Glider |
| Sky-High Sundae | Nin★Akira | Japan | 2:07.380 | Rosalina | Circuit Special | Standard | Super Glider |
| Tour London Loop | Nin★Frank | United Kingdom | 2:20.500 | Mario | Comet | Slim | Super Glider |
| GBA Boo Lake | Nin★Rie | Japan | 1:36.212 | King Boo | Circuit Special | Monster | Super Glider |
| 3DS Rock Rock Mountain | Nin★Fausti | France | 2:24.730 | Morton | Pipe Frame | Monster | Super Glider |
| Wii Maple Treeway | Nin★Pavel | Russia | 2:36.581 | Daisy | Prancer | Off-Road | Super Glider |
| Tour Berlin Byways | Nin★Sophia | Germany | 2:11.001 | Donkey Kong | Varmint | Monster | Super Glider |
| DS Peach Gardens | Nin★Marie | United States | 2:19.534 | Peach | Prancer | Wood | Super Glider |
| Merry Mountain | Nin★Elena | Russia | 2:09.693 | Shy Guy | Flame Rider | Off-Road | Super Glider |
| 3DS Rainbow Road | Nin★Mizuho | Japan | 1:52.015 | Rosalina | Circuit Special | Standard | Super Glider |
| Tour Amsterdam Drift | Nin★Mark | Netherlands | 1:48.580 | Daisy | Prancer | Wood | Super Glider |
| GBA Riverside Park | Nin★Frank | United Kingdom | 1:34.480 | Toad | Standard ATV | Standard | Super Glider |
| Wii DK Summit | Nin★Fausti | France | 2:22.680 | Donkey Kong | Varmint | Monster | Super Glider |
| Yoshi's Island | Nin★Skip | United States | 2:20.116 | Baby Mario | Biddybuggy | Standard | Super Glider |
| Tour Bangkok Rush | Nin★Yuya | Japan | 1:54.995 | Blue Inkling Boy | Inkstriker | Monster | Super Glider |
| DS Mario Circuit | Nin★Pit | Germany | 1:50.550 | Mario | B Dasher | Standard | Super Glider |
| GCN Waluigi Stadium | Nin★Maria | Portugal | 2:16.894 | Waluigi | The Duke | Monster | Super Glider |
| Tour Singapore Speedway | Nin★Alice | United States | 2:08.954 | Bowser | Badwagon | Monster | Super Glider |
| Tour Athens Dash | Nin★Pedro | Spain | 1:52.892 | Wiggler | Circuit Special | Sponge | Super Glider |
| GCN Daisy Cruiser | Nin★Chris | United Kingdom | 1:47.238 | Daisy | Jet Bike | Slim | Super Glider |
| Wii Moonview Highway | Nin★Yuya | Japan | 1:54.655 | Waluigi | The Duke | Monster | Wario Wing |
| Squeaky Clean Sprint | Nin★Fausti | France | 2:17.580 | Kamek | City Tripper | Cushion | Cloud Glider |
| Tour Los Angeles Laps | Nin★Alice | United States | 1:57.938 | Mario | Comet | Slim | Super Glider |
| GBA Sunset Wilds | Nin★Pit | Germany | 1:48.993 | Petey Piranha | Flame Rider | Off-Road | Flower Glider |
| Wii Koopa Cape | Nin★Massim | Italy | 2:18.943 | Koopa Troopa | Steel Driver | Metal | Super Glider |
| Tour Vancouver Velocity | Nin★Skip | United States | 2:11.072 | Rosalina | Sport Bike | Slim | Super Glider |
| Tour Rome Avanti | Nin★Giulia | Italy | 1:57.329 | Pauline | Badwagon | Metal | Super Glider |
| GCN DK Mountain | Nin★Laura | United States | 2:35.917 | Funky Kong | Standard ATV | Monster | Parafoil |
| Wii Daisy Circuit | Nin★Adrien | France | 2:01.099 | Daisy | Sports Coupe | Standard | Super Glider |
| Piranha Plant Cove | Nin★Sophia | Germany | 2:17.775 | Petey Piranha | Flame Rider | Slim | Flower Glider |
| Tour Madrid Drive | Nin★Aracel | Spain | 2:10.689 | Peachette | Biddybuggy | Standard | Cloud Glider |
| 3DS Rosalina's Ice World | Nin★Pavel | Russia | 2:10.993 | Rosalina | Sport Bike | Slim | Super Glider |
| SNES Bowser Castle 3 | Nin★Polly | United Kingdom | 1:54.632 | Bowser | Landship | Wood | Super Glider |
| Wii Rainbow Road | Nin★Leonel | United States | 2:49.574 | Mario | Standard Kart | Standard | Super Glider |
200cc Staff Ghosts
Mario Kart 8 Deluxe features a new option for players to race in Time Trials in the 200cc engine class. This option also features entirely new staff ghosts for each of the courses.
| Course | Staff Name | Country | Time | Character | Vehicle Combination | ||
|---|---|---|---|---|---|---|---|
| Body | Tires | Glider | |||||
| Mario Kart Stadium | Nin★Sophia | Germany | 1:21.984 | Gold Mario | Gold Standard | Gold Tires | Gold Glider |
| Water Park | Nin★Yuya | Japan | 1:22.799 | Baby Mario | Biddybuggy | Standard | Super Glider |
| Sweet Sweet Canyon | Nin★Alice | United States | 1:40.972 | Peach | Prancer | Wood | Peach Parasol |
| Thwomp Ruins | Nin★Skip | United States | 1:31.436 | Bowser | Badwagon | Standard | Bowser Kite |
| Mario Circuit | Nin★Joost | Netherlands | 1:23.243 | Pink Gold Peach | Standard Bike | Slim | Super Glider |
| Toad Harbor | Nin★Adrien | France | 1:43.003 | Toad | Sports Coupe | Standard | Super Glider |
| Twisted Mansion | Nin★Rui | Portugal | 1:38.244 | King Boo | Wild Wiggler | Sponge | Flower Glider |
| Shy Guy Falls | Nin★Anne | Netherlands | 1:40.698 | White Yoshi | Standard ATV | Retro Off-Road | Parafoil |
| Sunshine Airport | Nin★Sho | Japan | 1:45.437 | Luigi | Jet Bike | Metal | Plane Glider |
| Dolphin Shoals | Nin★Polly | United Kingdom | 1:38.911 | Ludwig | Steel Driver | Blue Standard | Bowser Kite |
| Electrodrome | Nin★Laura | United States | 1:40.943 | Roy | The Duke | Cushion | Parafoil |
| Mount Wario | Nin★Massim | Italy | 1:37.266 | Wario | Standard ATV | Crimson Slim | Wario Wing |
| Cloudtop Cruise | Nin★Giulia | Italy | 1:44.120 | Bowser Jr. | Koopa Clown | Cyber Slick | Cloud Glider |
| Bone-Dry Dunes | Nin★Pavel | Russia | 1:39.330 | Dry Bones | Pipe Frame | Wood | Plane Glider |
| Bowser's Castle | Nin★Mark | Netherlands | 1:40.953 | Dry Bowser | Flame Rider | Slim | Bowser Kite |
| Rainbow Road | Nin★Pedro | Spain | 1:55.767 | Rosalina | Mach 8 | Blue Standard | MKTV Parafoil |
| Wii Moo Moo Meadows | Nin★Leonel | United States | 1:09.980 | Baby Daisy | Sneeker | Cyber Slick | MKTV Parafoil |
| GBA Mario Circuit | Nin★Pit | Germany | 1:10.475 | Baby Luigi | Sport Bike | Slick | Parachute |
| DS Cheep Cheep Beach | Nin★Mizuho | Japan | 1:25.089 | Lakitu | Landship | Metal | Cloud Glider |
| N64 Toad's Turnpike | Nin★Rie | Japan | 1:21.156 | Toadette | Sports Coupe | Slick | Super Glider |
| GCN Dry Dry Desert | Nin★Chris | United Kingdom | 1:45.087 | Lemmy | Tanooki Kart | Off-Road | Super Glider |
| SNES Donut Plains 3 | Nin★Mizuho | Japan | 1:11.794 | Koopa Troopa | Streetle | Monster | Flower Glider |
| N64 Royal Raceway | Nin★Dylan | United Kingdom | 1:43.120 | Baby Peach | Circuit Special | Cyber Slick | Parafoil |
| 3DS DK Jungle | Nin★Polly | United Kingdom | 1:46.758 | Yellow Yoshi | City Tripper | Hot Monster | Paper Glider |
| DS Wario Stadium | Nin★Massim | Italy | 1:39.724 | Waluigi | Varmint | Hot Monster | Wario Wing |
| GCN Sherbet Land | Nin★Sophia | Germany | 1:34.370 | Iggy | Bone Rattler | Monster | Bowser Kite |
| 3DS Music Park | Nin★Mitsu | Japan | 1:36.529 1:38.847TC |
Daisy | Badwagon | GLA Tires Off-RoadTC |
MKTV Parafoil |
| N64 Yoshi Valley | Nin★Yuya | Japan | 1:35.628 | Green Shy Guy | Comet | Slim | Super Glider |
| DS Tick-Tock Clock | Nin★Elena | Russia | 1:32.483 | Larry | Standard Kart | Sponge | Paper Glider |
| 3DS Piranha Plant Slide | Nin★Frank | United Kingdom | 1:48.454 | Wendy | Mr. Scooty | Metal | Peach Parasol |
| Wii Grumble Volcano | Nin★Maria | Portugal | 1:44.284 | Morton | Standard Bike | Cushion | Parachute |
| N64 Rainbow Road | Nin★Fausti | France | 1:08.128 | Mario | Tri-Speeder | Monster | Super Glider |
| GCN Yoshi Circuit | Nin★Elena | Russia | 1:38.869 | Light-blue Shy Guy | P-Wing | Slick | Parachute |
| Excitebike Arena | Nin★Akira | Japan | 1:29.202 | Inkling Girl | Inkstriker | Leaf Tires | Super Glider |
| Dragon Driftway | Nin★Aracel | Spain | 1:34.873 | Purple Inkling Boy | Splat Buggy | Blue Standard | Super Glider |
| Mute City | Nin★Sho | Japan | 1:34.273 | Metal Mario | Blue Falcon | Azure Roller | Parafoil |
| Wii Wario's Gold Mine | Nin★Alice | United States | 1:41.168 | Waluigi | Standard Bike | Retro Off-Road | Wario Wing |
| SNES Rainbow Road | Nin★Marie | United States | 1:12.762 1:12.696TC |
Tanooki Mario | GLA Pipe FrameTC |
GLA Tires StandardTC |
Parachute |
| Ice Ice Outpost | Nin★Juliet | France | 1:32.435 | Cat Peach | Sneeker | Off-Road | Peach Parasol |
| Hyrule Circuit | Nin★Mark | Netherlands | 1:40.394 | Link | Master Cycle | Triforce Tires | Hylian Kite |
| GCN Baby Park | Nin★Leonel | United States | 0:59.765 | Baby Rosalina | Teddy Buggy | Cyber Slick | Waddle Wing |
| GBA Cheese Land | Nin★Chris | United Kingdom | 1:41.248 | Donkey Kong | Streetle | Roller | Flower Glider |
| Wild Woods | Nin★Mitsu | Japan | 1:27.555 | Villager (Girl) | City Tripper | Leaf Tires | Paper Glider |
| Animal Crossing | Nin★Fausti | France | 1:23.417 1:23.491TC |
Villager (Boy) | 300 SL Roadster StreetleTC |
GLA Tires StandardTC |
Super Glider |
| 3DS Neo Bowser City | Nin★Massim | Italy | 1:37.526 | Bowser | Bone Rattler | Standard | Super Glider |
| GBA Ribbon Road | Nin★Maria | Portugal | 1:31.220 | Isabelle | Cat Cruiser | Crimson Slim | Paper Glider |
| Super Bell Subway | Nin★Skip | United States | 1:23.304 | Blue Yoshi | Yoshi Bike | Blue Standard | Super Glider |
| Big Blue | Nin★Rie | Japan | 1:13.516 1:13.200TC |
Luigi | W 25 Silver Arrow Blue FalconTC |
Slim | Plane Glider |
| Tour Paris Promenade | Nin★Joost | Netherlands | 1:27.101 | Rosalina | Comet | Slim | Super Glider |
| 3DS Toad Circuit | Nin★Aracel | Spain | 1:03.969 | Toadette | Prancer | Wood | Super Glider |
| N64 Choco Mountain | Nin★Alice | United States | 1:31.715 | Tanooki Mario | Tanooki Kart | Monster | Super Glider |
| Wii Coconut Mall | Nin★Polly | United Kingdom | 1:29.009 | Baby Luigi | Yoshi Bike | Slick | Parachute |
| Tour Tokyo Blur | Nin★Aracel | Spain | 1:07.560 | Inkling Girl | Inkstriker | Metal | Super Glider |
| DS Shroom Ridge | Nin★Akira | Japan | 1:37.626 | Morton | Standard Bike | Cushion | Parachute |
| GBA Sky Garden | Nin★Rui | Portugal | 1:13.606 | Ludwig | Steel Driver | Blue Standard | Bowser Kite |
| Ninja Hideaway | Nin★Giulia | Italy | 1:37.815 | Black Yoshi | Teddy Buggy | Standard | Super Glider |
| Tour New York Minute | Nin★Sho | Japan | 1:07.562 | Yoshi | Sports Coupe | Standard | Super Glider |
| SNES Mario Circuit 3 | Nin★Giulia | Italy | 1:17.075 | Luigi | Mach 8 | Slim | Super Glider |
| N64 Kalimari Desert | Nin★Juliet | France | 1:10.511 | Dry Bowser | Bone Rattler | Monster | Super Glider |
| DS Waluigi Pinball | Nin★Pavel | Russia | 2:00.942 | Morton | Pipe Frame | Monster | Super Glider |
| Tour Sydney Sprint | Nin★Giulia | Italy | 1:37.367 | Bowser Jr. | Koopa Clown | Standard | Super Glider |
| GBA Snow Land | Nin★Leonel | United States | 1:21.826 | King Boo | Circuit Special | Monster | Super Glider |
| Wii Mushroom Gorge | Nin★Chris | United Kingdom | 1:21.194 | Toad | Standard ATV | Standard | Super Glider |
| Sky-High Sundae | Nin★Mitsu | Japan | 1:30.777 | Peach | Standard Bike | Slim | Super Glider |
| Tour London Loop | Nin★Alice | United States | 1:38.896 | Red Yoshi | Sports Coupe | Standard | Super Glider |
| GBA Boo Lake | Nin★Joost | Netherlands | 1:09.576 | Dry Bones | Standard Kart | Monster | Super Glider |
| 3DS Rock Rock Mountain | Nin★Juliet | France | 1:39.664 | Bowser | Landship | Wood | Super Glider |
| Wii Maple Treeway | Nin★Sho | Japan | 1:58.543 | Wario | Tri-Speeder | Monster | Super Glider |
| Tour Berlin Byways | Nin★Skip | United States | 1:35.467 | Toad | Standard ATV | Standard | Super Glider |
| DS Peach Gardens | Nin★Aracel | Spain | 1:39.851 | Toadette | Teddy Buggy | Button | Super Glider |
| Merry Mountain | Nin★Mark | Netherlands | 1:31.642 | Luigi | Mach 8 | Slim | Super Glider |
| 3DS Rainbow Road | Nin★Dylan | United Kingdom | 1:19.545 | Waluigi | The Duke | Monster | Super Glider |
| Tour Amsterdam Drift | Nin★Rie | Japan | 1:19.135 | Shy Guy | Flame Rider | Off-Road | Super Glider |
| GBA Riverside Park | Nin★Elena | Russia | 1:13.455 | Bowser Jr. | Koopa Clown | Slim | Super Glider |
| Wii DK Summit | Nin★Massim | Italy | 1:53.372 | Rosalina | Circuit Special | Standard | Super Glider |
| Yoshi's Island | Nin★Polly | United Kingdom | 1:40.731 | Yoshi | Wild Wiggler | Standard | Super Glider |
| Tour Bangkok Rush | Nin★Leonel | United States | 1:24.201 | Wario | Standard Kart | Monster | Wario Wing |
| DS Mario Circuit | Nin★Sho | Japan | 1:24.282 | Peach | Standard Bike | Slim | Super Glider |
| GCN Waluigi Stadium | Nin★Aracel | Spain | 1:43.781 | Luigi | Mach 8 | Slim | Super Glider |
| Tour Singapore Speedway | Nin★Mizuho | Japan | 1:32.160 | Mario | Comet | Slim | Super Glider |
| Tour Athens Dash | Nin★Massim | Italy | 1:21.362 | Dry Bones | Standard Kart | Monster | Super Glider |
| GCN Daisy Cruiser | Nin★Elena | Russia | 1:21.241 | Bowser | Flame Rider | Monster | Super Glider |
| Wii Moonview Highway | Nin★Sophia | Germany | 1:19.973 | Donkey Kong | Varmint | Monster | Super Glider |
| Squeaky Clean Sprint | Nin★Leonel | United States | 1:38.459 | Yoshi | Wild Wiggler | Monster | Super Glider |
| Tour Los Angeles Laps | Nin★Mitsu | Japan | 1:25.694 | Birdo (Red) | Pipe Frame | Monster | Super Glider |
| GBA Sunset Wilds | Nin★Juliet | France | 1:20.411 | Shy Guy | Flame Rider | Off-Road | Super Glider |
| Wii Koopa Cape | Nin★Frank | United Kingdom | 1:41.749 | Toad | Standard ATV | Standard | Super Glider |
| Tour Vancouver Velocity | Nin★Joost | Netherlands | 1:32.752 | Peach | Standard Bike | Slim | Super Glider |
| Tour Rome Avanti | Nin★Akira | Japan | 1:25.406 | Yoshi | Wild Wiggler | Standard | Super Glider |
| GCN DK Mountain | Nin★Dylan | United Kingdom | 2:06.814 | Diddy Kong | Mr. Scooty | Button | Waddle Wing |
| Wii Daisy Circuit | Nin★Pit | Germany | 1:25.861 | Donkey Kong | Varmint | Monster | Super Glider |
| Piranha Plant Cove | Nin★Alice | United States | 1:41.315 | Koopa Troopa | Steel Driver | Metal | Super Glider |
| Tour Madrid Drive | Nin★Fausti | France | 1:33.156 | Toad | Sneeker | Standard | Super Glider |
| 3DS Rosalina's Ice World | Nin★Leonel | United States | 1:38.735 | King Boo | Circuit Special | Monster | Super Glider |
| SNES Bowser Castle 3 | Nin★Mark | Netherlands | 1:22.052 | Dry Bones | Standard Kart | Monster | Super Glider |
| Wii Rainbow Road | Nin★Yuya | Japan | 2:06.146 | Luigi | Mach 8 | Slim | Super Glider |
TC - Used in the Tencent Chinese release[15]
New items
The Boo item makes a return in this game, functioning as it had previously. The Cape Feather was added to Battle Mode only, and is impossible to obtain otherwise. All other items from the Wii U version return as well, with their item distributions altered.
Coins | |
|---|---|
 Cash |
The equivalent of a coin, used for Urchin Underpass. They replace coins both as an item and on the track. |
 Coin (Yoshi's Island) |
In the Yoshi's Island course, coins have an altered appearance that resembles their design in the Yoshi's Island series, both as an item and on the track. |
New items | |
 Boo |
Allows the player to become invisible to other racers for 10 seconds. While invisible, players will also be granted immunity to items and obstacles. Activating the item will also allow Boo to steal an item from a randomly selected racer in front of the player. If there are no items to steal, Boo will bring back a single Mushroom by default. If Boo steals a multiple usage item or a timed item, it will be returned to the player fresh. Boo cannot steal Crazy 8s or Piranha Plants and Bullet Bills already in use. Only one Boo can be in play at a time; once it brings back an item, another can appear in Item Boxes again, even while a player is still invisible. Players who are under the effect of a Super Star or a Boo are not immune to Boo's item stealing. |
 Feather |
Causes the player to spin and leap in the air, providing a small speed boost upon landing, akin to a regular trick (characters will also perform a trick animation during the jump). When used near an opponent, the player steals a balloon, 3 coins, or the Shine Sprite from them, depending on the mode; however, the player needs to touch the opponent to steal from them, either by touching them upon use, or upon landing. Can be used on trickable places to gain more height, though does not grant more height if used while airborne, and cancels the gliding immediately. Exclusive to Battle Mode. |
New course elements
All of the course elements from the original Mario Kart 8, including enemies and obstacles, are retained in this game, along with several elements exclusive to the Booster Course Pass courses.
| Characters and elements | ||
|---|---|---|
| Character/element | Location | Description |
  Arrow field |
Tour Paris Promenade Tour Tokyo Blur Tour New York Minute N64 Kalimari Desert Tour Sydney Sprint Tour London Loop Tour Berlin Byways DS Peach Gardens Tour Amsterdam Drift Tour Bangkok Rush Tour Singapore Speedway Tour Athens Dash Tour Los Angeles Laps Tour Vancouver Velocity Tour Rome Avanti Piranha Plant Cove Tour Madrid Drive |
Large, holographic, floating arrows that point in the direction that the players should go and change position each lap (or only in the last lap in Tour Paris Promenade and DS Peach Gardens), altering the path of the course. If the player goes past them, they will be considered out of bounds and taken back onto the track by Lakitu. In multiplayer, the arrow fields are independent to each player, meaning that if multiple players are on different laps, the arrow fields will be different for each of them to match what lap they are on. Arrow fields are red in most of the city courses and DS Peach Gardens and are teal in N64 Kalimari Desert and Tour Bangkok Rush, though this is simply a visual difference. |
 Bath Bomb |
Squeaky Clean Sprint | Large, opal colored bath bombs that fizz underwater. Players can trick whilst inside the bubbles produced, similarly to a geyser. |
 Bob-omb Car |
Wii Moonview Highway | Bob-omb-based vehicles that explode upon contact. If a player drives into one, they spin out in the same way as if they were caught in the blast of a regular Bob-omb. |
 Boulder |
Tour Sydney Sprint | Objects scattered around grassy portions of the course. They slow down drivers on contact. |
 Bumper |
DS Waluigi Pinball | Obstacles that bounce players and metal balls that touch them away from themselves. Some are stationary, while others move in circles. |
 Ceiling Needles |
Ninja Hideaway | Giant shuriken stuck to broad ceilings that slowly rise and fall at set intervals, serving as obstacles for players on the course's lower route, while the ceilings themselves serve as platforms for players on the upper route, with a ramp on one of them. |
 Clampy |
GCN Daisy Cruiser Piranha Plant Cove |
Clampys open and shut periodically. They contain Item Boxes. |
 Exploring Shy Guy |
GBA Sunset Wilds | Exploring Shy Guys skip back and forth across the track. If a player makes contact with one, the player spins out. If they hit one with an item, they will drop 3 coins. |
 Fire Piranha Plant |
DS Mario Circuit | Piranha Plant variants that shoot fireballs that bounce across the course, causing racers to spin out. |
 Flipper |
DS Waluigi Pinball | Large obstacles that can swing back and forth and push back metal balls that collide with them. Players who collide with them are knocked over. |
 Fuzzy |
Tour Rome Avanti | Black furry creatures on circular tracks. They circle around coins, and spin players out when collided with. |
 Goal Ring |
Yoshi's Island | A decorative item that appears near the finish line. |
 Goonie |
Yoshi's Island | Spectators who appear in the background during the volcano ascent. |
 Half-pipe |
Wii Maple Treeway Merry Mountain Wii DK Summit GCN Waluigi Stadium Tour Athens Dash Squeaky Clean Sprint Tour Los Angeles Laps Wii Koopa Cape GCN DK Mountain 3DS Rosalina's Ice World Wii Rainbow Road |
Vertical ramps that allow players to jump off the side of a course and perform a Jump Boost to gain a speed boost upon landing. They resemble Antigravity Panels and briefly put the player into anti-gravity mode while they are airborne. |
 Huffin Puffin |
Yoshi's Island | Enemies who wander around near the starting line, occasionally onto the track. Players who collide with them will stop but not spin out. |
 Icicle |
3DS Rosalina's Ice World | Upward-pointing icicles on the ground that break when driven into, but will also slow the driver down. |
 Innertube Goomba |
Tour Singapore Speedway GCN Daisy Cruiser |
Innertube Goombas float above water. If made contact with, the player spins out. |
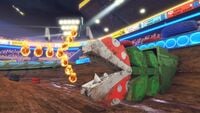 Mecha Piranha Plant |
GCN Waluigi Stadium | Large retracting obstacles that act like moving walls and stop any players who run into them. |
 Metal ball |
DS Waluigi Pinball | Giant spherical obstacles that roll throughout the course and knock over players they collide with. In the pinball table section at the end of the course, they are bounced around in different directions by bumpers and flippers. |
 Mushroom Platform |
Wii Mushroom Gorge | Large, green mushrooms with white spots. Though shaped identically to Mushroom Trampolines, they are functionally different in that they act like regular surfaces rather than bouncing players into the air. A Jump Boost can be performed when driving off the edge of a Mushroom Platform. |
  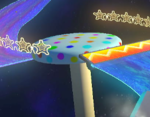 Mushroom Trampoline |
GBA Sky Garden Wii Mushroom Gorge 3DS Rainbow Road Squeaky Clean Sprint |
Large mushrooms that bounce the player into the air, allowing them to perform a Jump Boost. They are red with white spots in GBA Sky Garden and Wii Mushroom Gorge and are white with multi-colored spots in 3DS Rainbow Road. Wii Mushroom Gorge also contains one Mushroom Trampoline that is blue with white spots and functions differently to the others: it bounces the player upwards and activates their glider on contact, also giving them an opportunity to perform a Jump Boost. In GBA Sky Garden, there are also leaves that have the same properties of bouncing the player into the air as regular Mushroom Trampolines. |
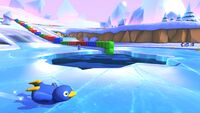 Penguin |
GBA Snow Land 3DS Rosalina's Ice World |
Enemies that either waddle or slide on their bellies around the course. Players who collide with them spin out. |
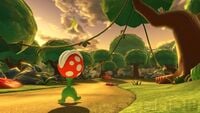 Ptooie |
GBA Riverside Park | Enemies that walk around the course. They are shown to be carrying Mushrooms and Bananas which they will drop if bumped into them or hit with another item. |
 Rocky Wrench |
Tour Rome Avanti | Mole-like creatures who hide in manholes. They occasionally pop up out of the ground, stopping players who drive into them. When underground, racers can drive over them with no consequences. If they're half above the ground, they can be tricked off. |
 Shoe Goomba |
Tour Madrid Drive | Big Goombas wearing bright yellow Shoes. They kick Soccer Balls around. |
 Shy Guy (Ninja) |
Ninja Hideaway | Shy Guys clad in ninja outfits. They stand in place and act as hazards, causing players who collide with them to spin out. They will also occasionally transform into a Banana. There are also Shy Guys that fly with kites during the glider section and touching one will cause the player to lose their glider, making them fall. |
 Soccer Ball |
Tour Madrid Drive | Big balls kicked around by Shoe Goombas. They bounce on the floor, spinning out racers who they collide with. |
 Stilt Guy |
Yoshi's Island | Enemies that slowly move back and forth across the track at the beginning of the course. Touching them causes the player to spin out. |
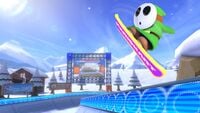 Snowboarding Shy Guy |
Wii DK Summit | Shy Guys that snowboard across the snow and perform tricks on half-pipes. Driving into them will cause the player to spin out. |
 Table |
GCN Daisy Cruiser | Tables, decorated with cloths, candles, and plates. They rock side-to-side, and act as a wall for players. Spectators may be seated at these tables. |
 Train |
N64 Kalimari Desert | A moderately fast train which follows a set railway. Hitting it on impact results in the player being knocked over. |
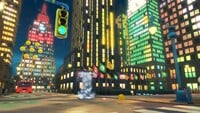 Water Geyser |
Tour New York Minute Tour Singapore Speedway Yoshi's Island Squeaky Clean Sprint Piranha Plant Cove Tour Madrid Drive |
Geysers that occasionally burst out from the ground for a few seconds before disappearing. Coming into contact with one boosts the player upwards, at which point they can perform a Jump Boost. In Tour New York Minute, they emerge under manhole covers, which function as platforms. |
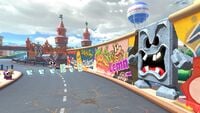 Whomp |
Tour Berlin Byways | Enemies that stand in gaps in the Berlin Wall. They slam their faces onto the track and flatten any players caught under them, but their edges can then be used to perform Jump Boosts before they get back up. |
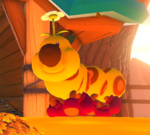 Big Wiggler |
Wii Maple Treeway DS Mario Circuit Tour Madrid Drive |
Enemies that walk around at a slow speed with occasional stops. Driving into them results in the player spinning out. Sometimes they can be seen sleeping. |
 Winged Cloud |
Yoshi's Island | An item that appears during the second glider section. When touched, it bursts and causes a red bridge shortcut to appear. |
New amiibo compatibility
In addition to all of the compatible amiibo in Mario Kart 8 and their respective Mii Racing Suits, Mario Kart 8 Deluxe adds compatibility with amiibo from the Splatoon line, which unlock a Mii Racing Suit based on Splatoon. Additionally, more amiibo can be used to unlock the returning Mii Racing Suits, with all Animal Crossing-related amiibo unlocking the Animal Crossing Suit and the Pikmin amiibo unlocking the Pikmin Suit. Version 3.0.0 adds compatibility with the Daisy amiibo to unlock the Daisy Mii Racing Suit, as well as any amiibo from the Legend of Zelda, Metroid, and Kirby series to unlock their respective suits.
Update history
- Main article: Mario Kart 8 Deluxe update history
Mario Kart 8 Deluxe has received many updates since launch. Most of them addressed technical aspects of the game, while others expanded controller support (e.g. Toy-Con Motorbike and Toy-Con Car) or delivered new content, such as a variant of Link wearing his Champion's Tunic from The Legend of Zelda: Breath of the Wild, support for the Mario Kart 8 Deluxe – Booster Course Pass DLC, a Custom Items setting, and a menu for listening to the music of each of the game's courses. In order to play online, players must have downloaded the most recent software update.[16]
Official tournaments
- For official competitions held in the game's Wii U version, see Mario Kart 8 § Official competitions.
Nintendo has sponsored many Mario Kart 8 Deluxe tournaments, held either online or at special events, with prizes ranging from virtual My Nintendo points to physical merchandise and memorabilia. Nintendo's online tournaments are restricted to one country or region, and may be recurrent on a weekly, monthly, or seasonal basis as part of a named series.
The following is a list of Mario Kart 8 Deluxe competitions held or sanctioned by Nintendo.
North America
| Title | Location | Banner |
|---|---|---|
| NOA 150cc Tournament NOA Battlethon |
Online | N/A |
| Mario Kart North American Open | Online | 
|
| Mario Kart 8 Deluxe Holiday Fun Run | Online | 
|
| Mario Kart 8 Deluxe Championship Cup 2022 | Seattle Convention Center (PAX West 2022) |
|
| Mario Kart 8 Deluxe North American Qualifier 2022 | Online | 
|
| Mario Kart 8 Deluxe North American Qualifier 2023 | Boston Convention and Exhibition Center (PAX East 2023) |
|
| Mario Kart 8 Deluxe Championship Cup 2023 | Boston Convention and Exhibition Center (PAX East 2023) |
|
| Mario Kart 8 Deluxe Championship 2023 Qualifier | Online | 
|
| Mario Kart 8 Deluxe Championship 2023 Qualifier at Nintendo Live | Seattle Convention Center (Nintendo Live 2023) |
|
| Mario Kart 8 Deluxe Championship 2023 | Seattle Convention Center (Nintendo Live 2023) |
|
Australia and New Zealand
| Title | Location | Banner/logo |
|---|---|---|
| Mario Kart 8 Deluxe Super Saturdays | Online | N/A |
| Mario Kart AU/NZ My Nintendo Cup | Online | 
|
| Mario Kart 8 Deluxe: AU/NZ Grand Prix | Online | 
|
China
| Title | Location | Banner |
|---|---|---|
| Mario Kart 8 Deluxe Summit Invitational Tournament | Online | 
|
| Mario Kart 8 Deluxe Online Tournaments | Online | 
|
| Mario Kart 8 Deluxe National Battle Team Open Tournament | Online | N/A |
| Mario Kart 8 Deluxe Open Team Championship | Shanghai (exact location TBD) | N/A |
Europe
| Title | Location | Banner/logo |
|---|---|---|
| Mario Kart 8 Deluxe Seasonal Circuit | Mostly online. The sole exception is the gran final of the 2022 Mario Kart 8 Deluxe Seasonal Circuit Spain event, which took place at the Gamergy event in Madrid. | 
|
| Mario Kart 8 Deluxe European Championship 2023 | The qualifiers were held online. The final rounds were held at the VILCO convention center in Bad Vilbel, Germany. | 
|
Hong Kong
| Title | Location | Banner |
|---|---|---|
| Nintendo HK 2021 Cup | Online | 
|
Japan
| Title | Location | Logo |
|---|---|---|
| Mario Kart 8 Deluxe Online Challenge | Online | 
|
| Mario Kart 8 Deluxe Online Challenge Final Stage | Tokyo International Exhibition Center (Nintendo Live 2022) |
|
| Mario Kart 8 Deluxe World Championship 2024 | TBD | 
|
Spain
| Title | Location | Banner |
|---|---|---|
| #TorneoMK8D | Online | 
|
United Kingdom and Ireland
| Title | Location | Banner |
|---|---|---|
| Nintendo UK VS Cup | Online | N/A |
| Nintendo VS UK Cup | Online | N/A |
Pre-release and unused content
Early Booster Course Pass course designs
Some of the courses in the Mario Kart 8 Deluxe – Booster Course Pass had several differences between promotional material and their final release, some of which made the courses further resemble their Mario Kart Tour counterparts:
- Prior to Wave 1's launch, Tour Paris Promenade had simpler detailing overall, most notably in the lighting, trees, and the road. At the left turn that leads to the Luxor Obelisk at the end of the track, the right path, which is used in the final lap, was blocked by fences, some of which have arrows, rather than the backside of a metal ramp like in the final version. The optional glide ramp featured in the final lap was also not present, and consequently neither was the coin on top of the parasol. The ramp in front of the Eiffel Tower, though still functioning like a glide ramp, had the appearance of a normal ramp, similar to Paris Promenade 3. Likewise, the dash panel underneath the Eiffel Tower appears to have been invisible, as while seemingly not present, drivers are still seen driving towards it in multiple clips. The Piranha Plant cutouts blocking the shortcut through the Arc de Triomphe were not present. There was an arrow on the Eiffel Tower pointing towards the path from Paris Promenade 3 not present in the final version.
- Prior to Wave 1's launch, the sand in 3DS Toad Circuit was a very dark yellow color, as opposed to the bright sand-like color in the final version. The starting banner was significantly different, with the objects at the top corners being smaller, less round and generally less detailed, the bolts not being present and the horizontal shafts being missing from the columns. There was no confetti present around the starting line, despite confetti still falling there. The checkered line on the road continued onto where the starting grid is, instead of ending before it. There were significantly fewer flowers and plants present around the course. The coins present on the course differ in multiple ways, such as there being a row of them shortly after the starting line, an extra coin present at the final turn, there not being a coin on the ramp shortcut and coins having different positions in general. The final row of Item Boxes did not feature a Double Item Box.
- Prior to Wave 1's launch, N64 Choco Mountain had a significantly different road texture, while the walls and rocks lacked the detail they have in the final version. The cracks on the road around where the rocks fall were completely absent, and the coins present after where the second rock falls were instead after the first rock. There appear to have originally been coins leading up to the cave, while conversely the coins on the final turn appear to have been missing. Some of the lights within the cave emitted light onto the ceiling similarly to the crystals, unlike in the final version. The glide ramp leading out of the cave was invisible. Certain wooden elements like fences and the boards at the end of the gliding section had different coloring.
- Prior to Wave 1's launch, Wii Coconut Mall's exterior was a bright, pale peachy color, but in the time between its reveal and release, it was updated to be a more vibrant orange. This also applied to certain parts of the interior. Likewise, the stone floor in the center of the mall was originally gray, while it was changed to orange in the final version. The reflections on the windows had also been changed during this time. The flower bushes present around the mall's exterior were a lot less detailed and had a mix of white and purple flowers instead of the yellow ones the final version uses. The Mario Kart TV vans were not present. There was no row of Item Boxes at the entrance to the courtyard. The escalator rails were significantly less glossy, and all escalators seem to have had coins at the bottom of them. Similarly, both dash panels in the courtyard had a coin following them. The coins on the turn following the gliding section were instead on the road leading to it. Oddly, the results screen following a Grand Prix or a VS match uses an image of the old design despite the existence of an updated version of said image.
- Prior to Wave 1's launch, the Kaminarimon's lantern in Tour Tokyo Blur looked less saturated and lacked the ridges it has in the final version. The sun was not present over Mount Fuji, and the different lighting made the clock on the Wako store appear significantly brighter. The bushes were less detailed, having a less rough texture and much simpler flowers. The platform which the flower bushes leading to the Kaminarimon are on did not have its outer layer raised. The cracks on the road that appear underneath the Thwomps were completely absent. The text on the "Welcome to Tokyo" sign was significantly dimmer. The roadside barriers with arrows had much simpler designs, with the arrows being 2D instead of fully modeled like they are in the final version. There is also footage of this course showing an early design for the arrow field, in which the arrows have an identical design to the green arrow holograms in SNES Rainbow Road.[17]
- Prior to Wave 1's launch, DS Shroom Ridge did not have the glide ramp shortcut on the grass patch. The wind shortcut was also not present in trailer footage despite appearing in a released screenshot. Flowers, bushes and other plants had different, less detailed designs and appeared in different locations. Some notable examples include how the grass patch with the glide ramp featured alternating groups of blue and orange flowers instead of the multicolored ones present in the final version, and how the flower bushes were significantly less detailed and had red flowers and in smaller quantities compared to the pink flowers the final version has (oddly, future waves would exclusively use these lesser detailed flower bushes). The dividing stripes on the road continued through the starting grid instead of ending before it. The starting banner lacked details it has in the final version, such as the bolts on the columns, the lights across the top and most of the metal strips holding up the logo. The static coins at the turn adjacent to the wind shortcut appear to have initially been on the opposite side of the road.
- Prior to Wave 1's launch, GBA Sky Garden's textures for the road and the vine bridges were significantly larger. The final row of Item Boxes was slightly further into the course, and the Double Item Box was on the opposite side of the road. There was one more Mushroom Trampoline present underneath the course compared to the final version. The glide ramp at the end of the course was invisible. There were far less grass blades around the course. The flowers were blue with a much simpler design, while the flower bushes had less distinct and detailed shapes with multiple colors of flowers instead of just pink flowers like in the final version.
- Prior to Wave 2's launch, the first row of Item Boxes in Tour New York Minute was on the bridge leading into Central Park instead of being before it like in the final version. There were no Toads behind the front desk of 30 Rockefeller Plaza.
- Prior to Wave 2's launch, SNES Mario Circuit 3 had an additional coin in both the first turn and the turn with the first oil slick.
- Prior to Wave 2's launch, N64 Kalimari Desert had a floating group of coins that would have been reached by taking the first glide ramp shortcut. The second row of Item Boxes was shown as only having single Item Boxes in what appears to be the first lap, with the same clip showing Item Boxes present on the train tracks similarly to lap 3 of the final version. An arrow fence was present beside the road shortly after the second overlap between the road and the train tracks.
- Prior to Wave 2's launch, the helicopter in DS Waluigi Pinball was missing the beam of light eminating from its flashlight. The padels had the electricity effect at all times unlike the final version in which they only exhibit it upon activating.
- Prior to Wave 2's launch, GBA Snow Land had a row of Item Boxes after the starting line, in place of the moving Item Boxes present in the final version. The coins on the sheet of ice were in different positions. The row of Item Boxes on the ramp at the end of the sheet of ice were instead placed later on the following road with differing Double Item Box placements, and the ramp instead had a row of coins which are substituted by coins shortly after it in the final version. Some of the snow such as that present on the starting banner had significantly less detail. Some of the trees present on the course used simpler models.
- Prior to Wave 2's launch, Wii Mushroom Gorge had various differences in the placements of flowers throughout the course. The first row of Item Boxes was placed slightly earlier.
- Prior to Wave 2's launch, Sky-High Sundae did not have coins on the first two giant pieces of ice. The left split path only had 3 Item Boxes and they were placed earlier. The second coin on the path of ice-cream cones was placed slightly earlier.
- Prior to Wave 3's launch, the clock hands of Big Ben in Tour London Loop appeared perceptibly darker and less reflective in screenshots of the course. The row of coins in the area with the first Chain Chomp appears to have had at least one additional coin.
- When DS Peach Gardens was shown in the September 2022 Nintendo Direct, the loop at the beginning of the course lacked the barriers blocking off the right side, similar to previous iterations of the course, and even had at least one coin present. The arrow on the Mario topiary was also not present. The first flowerbed shortcut was much smaller. The route used to turn around on lap three was completely blocked off by a fountain, and the ramps at the mansion were also not present, though there was seemingly nothing else blocking that path. The Mario Kart TV van, spectators and benches were also not in that section at the time. The first row of Item Boxes was closer to the start of the bridge. The row of coins at the entrance to the maze was not present. In the Direct, the row of Item Boxes in the maze was replaced with a row of coins. However, in a screenshot released shortly after, there was a row of Item Boxes like in the final version, but with the addition of at least one more Double Item Box. There were no spectators after the starting line, nor on the windowsills close to it. The coins on the left of the mansion were gone in favor of a row of coins at the top of the stairs, and the coins around the Piranha Plant were gone in favor of there being coins in the following section with the Monty Moles.
- When Merry Mountain was shown in the September 2022 Nintendo Direct, there was one shot in which there were no Spin Boost Pillars on the mountain, with there instead only being a dash panel at the start of the descent. Screenshots would later show the mountain having both the dash panel and the Spin Boost Pillars, whereas the final version only has the latter. The suspended railroad had the ramp at the end angled more upwards than the rest of it, and was missing the wooden boards that are nailed onto it in the final version. The first row of Item Boxes was shown both not being present at all and being besides the grass shortcut, in which case taking the cut would not allow players to collect an item. The row of Item Boxes on the bridge were also not present. The Item Boxes at the top of the mountain were all lined up in a row, but with the Double Item Boxes still requiring drivers to take the half-pipe to collect them, and there was also a higher number of coins placed above the half-pipe. There was one less coin in the row before the split paths. There were no sitting spectators at the train station, nor besides the later part of the train track. The Toads on the mountain did not wear coats, and there were no spectators around the half-pipe. The snowman following the bridge was not present.
- When Yoshi's Island was shown in the February 2023 Nintendo Direct, Poochy was not present on the mailbox. The first row of Item Boxes was even closer to the bridge. Every arrow sign was double-sided, and the waterfalls had white outlines. There were less Yoshi spectators at in the first section of the course, but there was an additional Petal Guy next to where the second Stilt Guy is. The ramp leading into the underwater section had an additional coin, and the Yoshi spectator to the left of it was on the ground instead of on the tree root like it is in the final version. The underwater geysers had an effect at the bottom that resembled water splashing out of them, appeared less transparent and had fewer, smaller bubbles. The Yoshi spectator on the tower atop the clouds was not present, while the Paratroopas in this section were static instead of flying from side-to-side as in the final version. The animation for the pieces of the red bridge falling into place was simpler, with them already being in a horizontal position instead of flipping over like they do in the final version.
- When Squeaky Clean Sprint was shown in the June 2023 Nintendo Direct, there were no coins on top of the sink and the Yoshi's Egg soap dispenser. The nails on the wooden shelf had a darker color and were less reflective.
- When Wii Daisy Circuit was shown in the September 2023 Nintendo Direct, the objects to the left of the statue of Daisy and Luigi were arranged differently. The row of Item Boxes was in the opposite order, while the cones and coins were on the left half of the road. The cones and coins to the right of the statue of Baby Daisy and Baby Luigi were a little earlier. The glide ramp shortcut only had one Double Item Box. The two groups of coins around the lighthouse were both missing a coin. There were no coins in front of the Daisy Candy sign.
Original order of courses in Waves 3 to 6
In version 2.1.0 and onwards, the internal file names for some of the courses in the Booster Course Pass suggest that the release order in their respective cups differs from the originally planned order. Every course's internal file name has two digits, with the first indicating its intended wave and the second indicating its position in said wave (for example, Tour Berlin Byways' file name is "Cnsw_35", indicating that it is the fifth track in Wave 3, or the first track in the Moon Cup). In addition to several courses changing their order within their wave, several courses also switched waves entirely, such as GCN Waluigi Stadium, which was set to be in Wave 3's Moon Cup but was delayed to Wave 4 in favor of Wii Maple Treeway, whose internal file name suggests that it was once slated for Wave 6's Acorn Cup. Additionally, Wave 6 was originally intended to have 3 tracks without prefixes, but two of them were replaced by Wii Moonview Highway and 3DS Rosalina's Ice World, as indicated by their filenames. It was also originally intended to have a fourth GCN course, but was replaced by Wii Daisy Circuit, as indicated by its filename.
Further evidence appears in an advertisement for Wave 3 posted by Nintendo of America on YouTube, which displays the courses in their original order, albeit with Wii Maple Treeway in place of GCN Waluigi Stadium; this advertisement was unlisted soon after its release.[18]
|
|
|
|
a - Although this slot originally lacked a prefix, Wii Moonview Highway's internal name assigns it to this slot.
b - Although this slot originally had a "GCN" prefix assigned to it, Wii Daisy Circuit's internal name assigns it to this slot.
c - Although this slot originally lacked a prefix, 3DS Rosalina's Ice World's internal name assigns it to this slot.
Music prefetches
In the 2.1.0 update, several prefetch music tracks of unreleased race courses were added to the game's files. They all sound different from their arrangements in Mario Kart Tour and the final arrangements used in the Booster Course Pass.
Wave 3
| File info 0:01 |
| File info 0:02 |
| File info 0:02 |
| File info 0:02 |
| File info 0:02 |
| File info 0:02 |
| File info 0:02 |
| File info 0:02 |
| File info 0:02 |
Wave 4
| File info 0:02 |
| File info 0:02 |
| File info 0:02 |
| File info 0:02 |
| File info 0:02 |
Wave 5
| File info 0:02 |
| File info 0:02 |
| File info 0:02 |
Gallery
Reception
Critical reception
Mario Kart 8 Deluxe has been received with universal acclaim, garnering higher aggregate scores than the original Mario Kart 8. The game has been praised for being well-suited to the Switch's portability, the increased performance, and particularly the redesigned Battle Mode, although several reviews noted Mario Kart 8 Deluxe would not be as appealing of a proposition to players who already own Mario Kart 8 and its downloadable content.
| Reviews | |||
|---|---|---|---|
| Release | Reviewer, Publication | Score | Comment |
| Nintendo Switch | Laurely Birba, Jeux Actu | 18/20 | While purists may accuse Mario Kart 8 of being a opportunistic rehash, Nintendo's goal was to give the Switch a racing game that is fun, polished, filled with content, and able to showcase the Switch's hybrid nature. These four objectives are mostly accomplished, and the game will have no problem seducing newcomers considering how well the formula has been mastered. |
| Nintendo Switch | Kallie Plagge, GameSpot | 9/10 | Even if you didn't really care about Battle Mode, the smallest changes in Mario Kart 8 Deluxe refine an already great racing game. But the huge overhaul to the original's afterthought of a Battle Mode is a chaotic, varied opportunity to play very differently than in Grand Prix mode and well worth reinvesting yourself in Mario Kart 8 on Switch. |
| Nintendo Switch | Matthew Sainsbury, Digitally Downloaded | 4.5/5 | Thanks to substantial DLC releases, Mario Kart 8 on the Wii U went from being a game with plenty of content, to one with an overload of it. Mario Kart 8 Deluxe on the Nintendo Switch has all of that, plus the return of the battle mode (which should never have left), and while it won't be a new game as such for the people who actually bought a Wii U (we're a special club), having this game on a portable console is reason enough to buy it all over again. |
| Aggregators | |||
| Compiler | Platform / Score | ||
| Metacritic | 92 | ||
| GameRankings | 92.39% | ||
Sales
In the United Kingdom, Mario Kart 8 Deluxe debuted at No. 1 on the sales chart, making it the first Nintendo game to be No. 1 in the UK since 2011's Pokémon Black and White, and the first Super Mario game to place such since Mario Kart Wii.[19]
The game sold 459,000 copies for its US launch day, making it the fastest-selling Mario Kart game in the US and meaning 45% of US Switch owners purchased the game.[20]
As of December 31, 2017, Mario Kart 8 Deluxe had sold 7.33 million units worldwide. As of March 31, 2018, it reached 9.22 million units, exceeding the original Mario Kart 8's 8.42 million and making it the second best-selling game on the Nintendo Switch behind Super Mario Odyssey.[21] As of December 31, 2018, Mario Kart 8 Deluxe had sold 15.02 million units worldwide, exceeding Super Mario Odyssey's sales and making it the best-selling game on the Nintendo Switch.[22] As of September 30, 2021, the game had sold 38.74 million units worldwide, surpassing Mario Kart Wii as the best-selling game in the series.[23] As of December 31, 2021, the game had sold 43.35 million units worldwide, making it the single best-selling game in the Super Mario franchise, surpassing Super Mario Bros. for the Nintendo Entertainment System.[24] As of September 30, 2024, the game had sold 64.27 million units worldwide.[25]
Awards and acknowledgements
Mario Kart 8 Deluxe was nominated for the "Best Family Game" and "Best Multiplayer" awards at The Game Awards 2017.[26] However, it won neither, losing the former to Super Mario Odyssey and the latter to PlayerUnknown's Battlegrounds.[26]
References to other games
- Donkey Kong: Pauline's horn noise is based on the stage clear jingle from this game.
- Super Mario Kart: The Feather item returns from this game, with the same function. Battle Course 1 reappears as a classic battle course; a billboard in the course background is modeled after the player select screen from this game. Mario Circuit 3 and Bowser Castle 3 are included among the courses in the Booster Course Pass. The end credits theme is arranged for the Booster Course Pass end credits theme.
- Super Mario World 2: Yoshi's Island: Yoshi's Island, a course appearing in the Booster Course Pass, is heavily based on this game. Kamek's horn noise sounds like his speaking sound effect in this game.
- Mario Kart 64: Similar to this game, all courses in Mario Kart 8 Deluxe are unlocked from the start. Choco Mountain and Kalimari Desert are included among the courses in the Booster Course Pass.
- Mario Golf: Metal Mario has an alternate color scheme where he can be changed into gold like in this game. However, unlike this game, Gold Mario is an unlockable skin.
- Mario Kart: Super Circuit: Sky Garden, Snow Land, Boo Lake, Riverside Park, and Sunset Wilds are included among the courses in the Booster Course Pass.
- Super Mario Sunshine: King Boo's horn noise uses the sound of the King Boo from this game being hit by a pepper.
- Mario Kart: Double Dash!!: Luigi's Mansion reappears as a classic battle course. The Double Item Boxes and the two Battle sub-modes, Bob-omb Blast and Shine Thief, return. Waluigi Stadium, Daisy Cruiser, and DK Mountain are included among the courses in the Booster Course Pass.
- Yoshi Touch & Go: Artwork of Baby Mario and Yoshi is reused from the game in the Yoshi's Island course on the mural outside of Yoshi's House.
- Mario Kart DS: An arrangement of Luigi's Mansion's music is used in GCN Luigi's Mansion. Shroom Ridge, Waluigi Pinball, Peach Gardens, and Mario Circuit are included among the courses in the Booster Course Pass.
- Mario Kart Wii: Coconut Mall, Mushroom Gorge, Maple Treeway, DK Summit, Koopa Cape, Moonview Highway, Daisy Circuit, and Rainbow Road are included among the courses in the Booster Course Pass.
- New Super Mario Bros. Wii: Boo's artwork from this game is reused for King Boo's character select icon, albeit with the addition of the latter's crown.
- Mario & Sonic at the Olympic Winter Games: Canada Hockey Place re-appears in the Vancouver Velocity track, now referred to by its sponsored name Rogers Arena.
- Mario Kart 7: The Koopa Clown kart returns from this game. Wuhu Town reappears as a classic battle course, and Toad Circuit, Rock Rock Mountain, Rainbow Road, and Rosalina's Ice World are included among the courses in the Booster Course Pass. Lunar Colony has a moon section with low gravity just like Rainbow Road from this game.
- Super Mario 3D World: The crown mechanic in Battle Mode is similar to the mechanic in this game's multi-player, where the player with the highest score from one stage will be wearing a crown in the next stage.
- Donkey Kong Country: Tropical Freeze: Funky Kong's character select icon is reused from this game.
- Super Smash Bros. for Nintendo 3DS / Wii U: The Koopa Clown's propellers in anti-gravity sections emerge from circular panels on the side of the vehicle, much like the Junior Clown Car's weapons. Also, the Koopalings' Koopa Clowns match the Clown Car colors they use in this game.
- Super Mario Odyssey: A ring similar to the Binding Band appears inside the drain in Squeaky Clean Sprint.
- Mario Kart Tour: New York Minute, Tokyo Blur, Paris Promenade, London Loop, Vancouver Velocity, Los Angeles Laps, Merry Mountain, Berlin Byways, Ninja Hideaway, Sydney Sprint, Singapore Speedway, Amsterdam Drift, Bangkok Rush, Piranha Plant Cove, Athens Dash, Rome Avanti, and Madrid Drive are included among the courses in the Booster Course Pass. Additionally, the designs of the courses in the Booster Course Pass are based on their designs from Mario Kart Tour, and N64 Kalimari Desert's second and third laps are based on the variant Kalimari Desert 2 from this game. The Booster Course Pass characters except for Funky Kong reuse their face icons from this game. All the Mii Racing Suits included in Wave 6 come from this game; some of their unique trick animations are also reused.
References in other games
- Super Mario Run: Key art for the game appears when tapping on the Nintendo Switch collectible in Kingdom Builder.
- Mario Kart Tour: The third level of Mini-Turbos, Ultra Mini-Turbos, returns. The Koopa Clown retains its appearance from this game. King Boo reuses his face icon from this game. Sky-High Sundae, Yoshi's Island, and Squeaky Clean Sprint all reappear, though they are considered new courses in both games. SNES Battle Course 1's music arrangement is used in Balloon Battles.
Staff
- Main article: List of Mario Kart 8 Deluxe staff
Gallery
- For this subject's image gallery, see Gallery:Mario Kart 8 Deluxe.
Media
- For a complete list of media for this subject, see List of Mario Kart 8 Deluxe media.
| File info |
| File info |
| File info |
| File info |
| File info |
| File info |
| File info |
| File info |
Names in other languages
| Language | Name | Meaning | Notes |
|---|---|---|---|
| Japanese | マリオカート8 デラックス[?] Mario Kāto 8 Derakkusu |
Mario Kart 8 Deluxe | |
| Chinese (simplified) | 马力欧卡丁车8 豪华版[?] Mǎlìōu Kǎdīngchē 8 Háohuábǎn |
Mario Kart 8 Deluxe Edition | |
| Chinese (traditional) | 瑪利歐賽車8 豪華版[?] Mǎlìōu Sàichē 8 Háohuábǎn |
Mario Racing 8 Deluxe Edition | |
| Korean | 마리오 카트 8 디럭스[?] Mario Kateu 8 Direokseu |
Mario Kart 8 Deluxe |
Trivia
- As the Nintendo Switch is not region-locked like previous Nintendo consoles (excluding console and game units officially sold in mainland China), this is the first Super Mario game to be playable in the same build in all regions.
- In the music menu, in addition to the usual method of pressing
to cycle through the different song variants of a course, it is possible to select a specific one via the shoulder buttons, similarly to selecting the season of Animal Crossing. Depending on the number of song variants a course has, holding
selects the first variant,
selects the second variant,
selects the third variant,
selects the fourth variant, and both
and
selects the fifth variant.
References
- ^ Mario Kart™ 8 Deluxe para la consola Nintendo Switch. Nintendo.com (Latin American Spanish). Retrieved November 6, 2024.
- ^ 遊戲軟體一覽 | 任天堂(香港)有限公司網站. Nintendo of HK (Traditional Chinese). Retrieved November 6, 2024.
- ^ Mario Kart 8 Deluxe: Product Information. Nintendo of Singapore (English). Retrieved June 1, 2024. (Archived February 13, 2024, 08:15:37 UTC via Wayback Machine.)
- ^ 한국닌텐도 홈페이지. Nintendo of Korea (Korean). Archived September 20, 2017, 03:54:42 UTC from the original via Wayback Machine. Retrieved November 6, 2024.
- ^ 任天堂(香港)有限公司. Nintendo of Taiwan (Traditional Chinese). Retrieved November 6, 2024.
- ^ March 13, 2020. 《马力欧卡丁车8 豪华版》《超级马力欧 奥德赛》将于3月16日发售 - 腾讯Nintendo Switch官网. Tencent (Simplified Chinese). Retrieved November 6, 2024.
- ^ Mario Kart™ 8 Deluxe Bundle (Game + Booster Course Pass). nintendo.com (American English). Retrieved January 31, 2023. (Archived January 28, 2023, 06:38:50 UTC via Wayback Machine.)
- ^ GameXplain (April 21, 2017). Luigi Wins by Doing Absolutely Nothing - Mario Kart 8 Deluxe (03:50). YouTube (English). Retrieved November 6, 2024.
- ^ Nintendo World Report TV (January 14, 2017). Mario Kart 8 Deluxe - Wario's Gold Mine - Nintendo Switch Off-Screen Footage. YouTube (English). Retrieved November 6, 2024.
- ^ Screenshot of the starting boost in a four-player split-screen VS Race.
- ^ a b Nintendo (November 1, 2024). 『マリオカート8 デラックス コース追加パス』最後の第6弾は11月9日配信決定。新キャラクターや「ミュージック」機能なども追加。. Nintendo of Japan (Japanese). Retrieved November 6, 2024.
- ^ Nintendo of America (September 14, 2023). Mario Kart 8 Deluxe - Booster Course Pass Wave 6 - Nintendo Switch 9.14.2023. YouTube (American English). Retrieved November 6, 2024.
- ^ @NintendoAmerica (July 20, 2018). A new update to #MarioKart 8 Deluxe is available now for #NintendoSwitch! Race like a champion with the Master Cycle Zero and Champion’s Tunic Link from The Legend of #Zelda: Breath of the Wild! This update also includes the Ancient Tires and the Paraglider parts!. X (American English). Retrieved September 12, 2023.
- ^ MK8D Stat sheet (Updated for W6). Google Docs (English). Retrieved November 6, 2024.
- ^ @zachruff (May 22, 2022). So it turns out that there are 4 staff ghosts in the Tencent Chinese version of MK8D that are actually different to the global version. It seems that they really did not like the Mercedes car parts so any ghost that used them had to be redone.. X (English). Retrieved May 24, 2022.
- ^ How to Update Mario Kart 8 Deluxe. Nintendo of America (American English). Retrieved November 6, 2024.
- ^ Nintendo (December 25, 2022). マリオカート8 デラックス コース追加パス TVCM3 (0:23). YouTube (Japanese). Retrieved November 6, 2024.
- ^ Nintendo of America (November 22, 2022). Mario Kart 8 Deluxe - Booster Course Pass DLC Wave 3 - Nintendo Switch. YouTube (American English). Retrieved November 6, 2024.
- ^ Dring, Christopher (April 30, 2017). Mario Kart 8 Deluxe is Nintendo's first UK No.1 since 2011. GameIndustryBiz (English). Retrieved November 6, 2024.
- ^ Brian (May 1, 2017). Mario Kart 8 Deluxe sells 459,000 copies in the US on launch day, fastest-selling Mario Kart game. Nintendo Everything (English). Retrieved November 6, 2024.
- ^ Nintendo. IR Information : Sales Data - Top Selling Title Sales Units. Nintendo of Japan (English). Archived May 7, 2018, 00:57:30 UTC from the original via Wayback Machine. Retrieved November 6, 2024.
- ^ GameXplain (February 1, 2019). Nintendo's Financial Report - 30 Million Switches Sold Worldwide, Doubled Software Sales, & More!. YouTube (English). Retrieved December 22, 2020.[dead link]
- ^ Nintendo (November 4, 2021). Top Selling Title Sales Unites. Nintendo Japan (English). Archived November 8, 2021, 09:04:38 UTC from the original via Wayback Machine. Retrieved November 8, 2021.
- ^ Nintendo. Top Selling Title Sales Unites. Nintendo Japan (English). Archived February 3, 2022, 07:34:54 UTC from the original via Wayback Machine. Retrieved February 3, 2022.
- ^ Nintendo (November 5, 2024). Top Selling Title Sales Units. Nintendo Japan (English). Retrieved November 6, 2024.
- ^ a b Awards - The Game Awards 2017. The Game Awards. Archived November 14, 2017, 20:23:45 UTC from the original via Wayback Machine. Retrieved November 6, 2024.
External links
- Official Japanese site
- Official North American site
- Official Canadian site
- Official Latin American site
- Official European site
- Official Oceanian site
- Official Korean site
- Official Chinese (Hong Kong) site
- Official Chinese (Taiwan) site
- Official Chinese (Mainland) site
