Mystery Box: Difference between revisions
m (Text replacement - "(\| *)Jap([RMCN\d]* *=)" to "$1Jpn$2") |
|||
| (144 intermediate revisions by 79 users not shown) | |||
| Line 1: | Line 1: | ||
{{ | {{about|the box from ''Super Mario 3D Land''|the item from the [[Paper Mario (series)|''Paper Mario'' series]] with the same name|[[Mystery Box (item)]]|the Captain Command in ''Bowser Jr.'s Journey''|[[Mystery Box (Captain Command)]]}} | ||
{{item | {{item infobox | ||
|image=[[File:MysteryBox CTTT.png|200x200px]]<br>Artwork from ''[[Captain Toad: Treasure Tracker]]'' | |||
|first_appearance=''[[Super Mario 3D Land]]'' ([[List of games by date#2011|2011]]) | |||
|latest_appearance=''[[Super Mario 3D World + Bowser's Fury]]'' ([[List of games by date#2021|2021]]) | |||
|image=[[File:MysteryBox | |||
|first_appearance=''[[Super Mario 3D Land]]'' ([[2011]]) | |||
|latest_appearance= | |||
}} | }} | ||
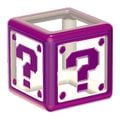
'''Mystery Boxes''' are | '''Mystery Boxes''' are objects debuting in ''[[Super Mario 3D Land]]''. | ||
==History== | |||
===''Super Mario'' series=== | |||
====''Super Mario 3D Land''==== | |||
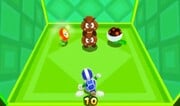
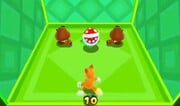
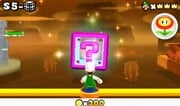
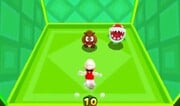
In ''Super Mario 3D Land'', they are found in most Worlds, with their primary task being to defeat all the enemies in the box within ten seconds. Enemies can range from [[Goomba]]s to [[Boom Boom]]s. When Mario completes the task, [[coin]]s and a [[Star Medal]] appear. Other items, such as [[1-Up Mushroom]]s, [[Super Leaf|Super Leaves]] and [[Fire Flower]]s are also found within Mystery Boxes. However, if Mario loses a life in a Mystery Box, he will be forced to quit the level. Whenever the player first encounters a Mystery Box on the world map, they are required to enter it before moving on. The Mystery Box theme is a remix of the [[Teleporter (Super Mario Galaxy 2)|Teleporter]] theme from ''[[Super Mario Galaxy 2]]''. | |||
[[File:Golden Mystery Box.png|thumb|left|A golden Mystery Box. Note that there are two Star Medals and even a P-Wing.]] | [[File:Golden Mystery Box.png|thumb|left|A golden Mystery Box. Note that there are two Star Medals and even a P-Wing.]] | ||
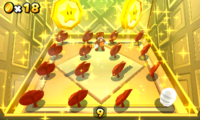
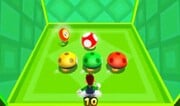
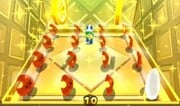
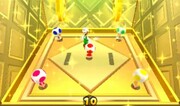
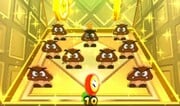
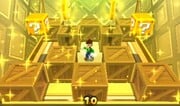
Mystery Boxes can also be golden on the inside, while still appearing purple on the outside. All of the golden-sided Mystery Boxes contain two Star Medals, and at least three 1-Up Mushrooms, with some containing as many as eight. No golden-sided Mystery Boxes contain enemies, and as such, Star Medals appear immediately upon entering a box. They can contain many different things, such as [[Poison Mushroom]]s, [[Toad (species)| | Mystery Boxes can also be golden on the inside, while still appearing purple on the outside. All of the golden-sided Mystery Boxes contain two Star Medals, and at least three 1-Up Mushrooms, with some containing as many as eight. No golden-sided Mystery Boxes contain enemies, and as such, Star Medals appear immediately upon entering a box. They can contain many different things, such as [[Poison Mushroom]]s, [[Toad (species)|Toad]]s, or even [[P-Wing]]s. These Mystery Boxes have a cover of the [[Ground Theme (Super Mario Bros.)|main theme]] from ''[[Super Mario Bros.]]'' as the background music. | ||
There are a total of 20 unique normal Mystery Box contents and 15 unique golden-sided Mystery Boxes contents. Golden-sided Mystery Boxes | There are a total of 20 unique normal Mystery Box contents and 15 unique golden-sided Mystery Boxes contents. Golden-sided Mystery Boxes more rarely appear than normal ones. Each normal Mystery Box can be found in two different Worlds, while each golden-sided one can only be found in a single World. | ||
After completing a Mystery Box, it turns gray on the | After completing a Mystery Box, it turns gray on the overworld map and "falls asleep", rendering it inaccessible. It may be accessed again 20 hours later. The contents of each Mystery Box changes each time it is re-entered. | ||
Mystery Boxes can also be accessed via StreetPass | Mystery Boxes can also be accessed via {{iw|nwiki|StreetPass}}, a wireless feature that automatically exchanges information with nearby [[Nintendo 3DS]] systems while the system is in sleep mode). The only difference in a StreetPass Mystery Box is that it is guaranteed to have a Star Medal or two, unless of course all Star Medals have been collected. | ||
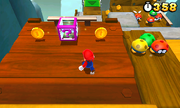
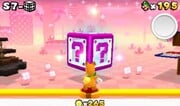
Mystery Boxes also can appear in some levels, which the goal is to collect as many coins from the blocks within the time limit. | Mystery Boxes also can appear in some levels of ''Super Mario 3D Land'', which the goal is to collect as many coins from the blocks within the time limit. In the early versions of the game, these Mystery Boxes used the same design as that of the current [[Warp Box]]; similarly, the early Warp Boxes used the current Mystery Box design, albeit with an exclamation point instead of a question mark.<ref>{{cite|author=UltimatePisman|date=May 27, 2015|title=''Super Mario 3D Land'': E3 2011 Beta|archive=web.archive.org/web/20150819031416/https://www.youtube.com/watch?v=N8CaDJZzjJY|deadlink=y|publisher=YouTube|language=en|accessdate=June 29, 2024}}</ref> The colors were switched in the final version of the game. | ||
== | ====''Super Mario 3D World'' / ''Super Mario 3D World + Bowser's Fury''==== | ||
Mystery Boxes in ''[[Super Mario 3D World]]'' and [[Super Mario 3D World + Bowser's Fury|its Nintendo Switch port]] can only be found in levels. Each of them has a [[Green Star]] which must be collected within the time limit. If Mario fails, he is sent back to the proper level. The Green Stars must be collected in different ways, like defeating every enemy present, navigating through a small obstacle course, or using given items or forms to reach it. Certain worlds also feature special courses called [[Mystery House]]s, which consist of clearing a number of Mystery Box courses in quick succession. In one area of the [[Shiftier Boo Mansion]] level, a [[illusion|fake Mystery Box]] appears, which summons a [[Big Boo]] when interacted with. | |||
=== | ===''Captain Toad: Treasure Tracker''=== | ||
Mystery Boxes also appear in ''[[Captain Toad: Treasure Tracker]]'' and its Nintendo Switch and Nintendo 3DS [[Captain Toad: Treasure Tracker (Nintendo Switch / Nintendo 3DS)|ports]], appearing only in [[Coins Galore]] bonus levels this time. After entering a Coins Galore level, [[Captain Toad]] or [[Toadette]] can select two Mystery Boxes: one that accesses a bonus area with [[Super Pickax]]es and other that access a bonus area with [[Double Cherry|Double Cherries]]. The task is to collect many coins or [[Gold Mushroom]]s within 10 seconds. After completing a Coins Galore level, it cannot be entered again. However, if the Toads complete every level of the game, these Coins Galore levels will be permanently open and can be accessed at any time from the [[Bonus Episode]]. | |||
==Contents== | |||
* | ===''Super Mario 3D Land''=== | ||
* | {|class="wikitable"style="text-align:center" | ||
!Image | |||
* | !Content | ||
!Location | |||
|- | |||
|[[File:SM3DL W1-3 MB (inside).png|180px]] | |||
* | | | ||
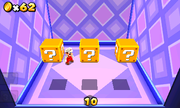
* | *3 [[? Block]]s, two of which contain a single [[coin]] and the other of which continues to produce coins as long as time remains on the Box's timer | ||
* | *2 [[Hidden Block]]s (Note: They appear where there are gaps between the ? Blocks.) | ||
* | |[[File:SM3DL W1-3 MB.png|180px|link=World 1-3 (Super Mario 3D Land)]] | ||
|- | |||
|[[File:SM3DL W1-4 MB (inside).png|180px]] | |||
| | |||
*3 [[Long ? Block]]s containing two [[coin]]s and a [[Super Leaf]], a single set of three coins, and multiple sets of three coins, respectively | |||
|[[File:SM3DL W1-4 MB.png|180px|link=World 1-4 (Super Mario 3D Land)]] | |||
|- | |||
|[[File:SM3DL W6-1 MB (inside).jpg|180px]] | |||
| | |||
*3 [[Roulette Block]]s | |||
|[[File:SM3DL W6-1 MB.jpg|180px|link=World 6-1 (Super Mario 3D Land)]]<br>(Note: A [[Yellow Toad and Blue Toad|yellow Toad]] will also be found here and will give a [[1-Up Mushroom]] if the player watched his entrance into the hidden Box through a pair of [[binoculars]].) | |||
|- | |||
|[[File:SM3DL W8-5 3rd Star Medal.jpg|180px]] | |||
| | |||
*3 [[coin]] throwing [[Rocky Wrench]]es | |||
*1 [[Star Medal]] | |||
|[[File:SM3DL W8-5 MB.jpg|180px|link=World 8-5 (Super Mario 3D Land)]] | |||
|- | |||
|[[File:SM3DL S1-3 MB (inside).jpg|180px]] | |||
| | |||
*45 [[Brick Block]]s each containing a [[coin]] | |||
*3 [[Hidden Block]]s each containing a [[coin]] | |||
*1 [[Hidden Block]] containing a [[1-Up Mushroom]] | |||
|[[File:SM3DL S1-3 MB.jpg|180px|link=Special 1-3]] | |||
|} | |||
* | ====World Map Mystery Boxes==== | ||
* | Defeating every enemy in a Box will cause ten [[coin]]s and a [[Star Medal]] to appear. | ||
{|class="wikitable"style="text-align:center" | |||
!Image | |||
!Content | |||
!Location(s) | |||
|- | |||
|[[File:SM3DL W1 MB (inside).png|180px]] | |||
| | |||
*2 [[Goomba Board]]s | |||
*1 [[Fire Flower]] | |||
|[[File:SM3DL W1 MB.png|180px|link=World 1 (Super Mario 3D Land)]][[File:SM3DL W6 MB.jpg|180px|link=World 6 (Super Mario 3D Land)]]<br>(Note: This is also the tutorial.) | |||
|- | |||
|[[File:SM3DL W1 MB (3rd inside).jpg|180px]] | |||
| | |||
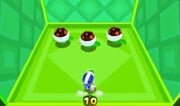
*3 [[Piranha Plant]]s | |||
|[[File:SM3DL W1 MB.png|180px|link=World 1 (Super Mario 3D Land)]][[File:SM3DL W6 MB.jpg|180px|link=World 6 (Super Mario 3D Land)]] | |||
|- | |||
|[[File:SM3DL W1 MB (2nd inside).jpg|180px]] | |||
| | |||
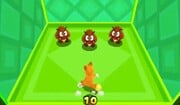
*3 [[Goomba]]s | |||
|[[File:SM3DL W1 MB.png|180px|link=World 1 (Super Mario 3D Land)]][[File:SM3DL S1 MB.jpg|180px|link=Special 1]] | |||
|- | |||
|[[File:SM3DL W1 MB (4th inside).jpg|180px]] | |||
| | |||
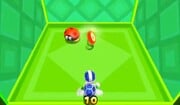
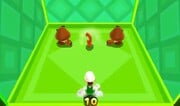
*1 red [[Biddybud]] | |||
*1 [[Fire Flower]] | |||
|[[File:SM3DL W1 MB.png|180px|link=World 1 (Super Mario 3D Land)]][[File:SM3DL S3 MB.jpg|180px|link=Special 3]] | |||
|- | |||
|[[File:SM3DL S3 MB (2nd inside).jpg|180px]] | |||
| | |||
*1 [[Fire Flower]] | |||
*1 [[Goomba Tower]], two [[Goomba]]s high | |||
*1 [[Fire Piranha Plant]] | |||
|[[File:SM3DL W2 MB.jpg|180px|link=World 2 (Super Mario 3D Land)]][[File:SM3DL S3 MB.jpg|180px|link=Special 3]] | |||
|- | |||
|[[File:SM3DL W4 MB (2nd inside).jpg|180px]] | |||
| | |||
*2 [[Tail Goomba]]s | |||
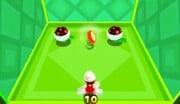
*1 [[Piranha Plant]] | |||
|[[File:SM3DL W4 MB.jpg|180px|link=World 4 (Super Mario 3D Land)]][[File:SM3DL S5 MB.jpg|180px|link=Special 5]] | |||
|- | |||
|[[File:SM3DL W4 MB (inside).jpg|180px]] | |||
| | |||
*1 [[Goomba]] | |||
*1 [[Piranha Plant]] | |||
|[[File:SM3DL W4 MB.jpg|180px|link=World 4 (Super Mario 3D Land)]][[File:SM3DL S5 MB.jpg|180px|link=Special 5]] | |||
|- | |||
|[[File:SM3DL W6 MB (2nd inside).jpg|180px]] | |||
| | |||
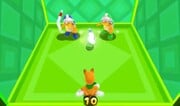
*3 [[Biddybud]]s (yellow, green, and red) | |||
*1 [[Fire Flower]] | |||
*1 [[Super Mushroom]] | |||
|[[File:SM3DL W6 MB.jpg|180px|link=World 6 (Super Mario 3D Land)]][[File:SM3DL S7 MB.jpg|180px|link=Special 7]] | |||
|- | |||
|[[File:SM3DL W2 MB (inside).jpg|180px]] | |||
| | |||
*2 [[Fire Piranha Plant]]s | |||
*1 [[Fire Flower]] | |||
|[[File:SM3DL W2 MB.jpg|180px|link=World 2 (Super Mario 3D Land)]][[File:SM3DL S3 MB.jpg|180px|link=Special 3]] | |||
|- | |||
|[[File:SM3DL S5 MB (inside).jpg|180px]] | |||
| | |||
*2 [[Tail Goomba]]s | |||
*1 [[Super Leaf]] | |||
|[[File:SM3DL W2 MB.jpg|180px|link=World 2 (Super Mario 3D Land)]][[File:SM3DL S5 MB.jpg|180px|link=Special 5]] | |||
|- | |||
|[[File:SM3DL W2 MB (3rd inside).jpg|180px]] | |||
| | |||
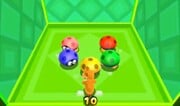
*5 [[Biddybud]]s (yellow, green, red, blue, and pink) | |||
|[[File:SM3DL W2 MB.jpg|180px|link=World 2 (Super Mario 3D Land)]][[File:SM3DL S3 MB.jpg|180px|link=Special 3]] | |||
|- | |||
|[[File:SM3DL W6 MB (4th inside).jpg|180px]] | |||
| | |||
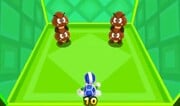
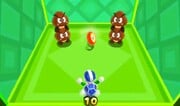
*2 [[Goomba Tower]]s, two [[Goomba]]s high each | |||
|[[File:SM3DL W6 MB.jpg|180px|link=World 6 (Super Mario 3D Land)]][[File:SM3DL S7 MB.jpg|180px|link=Special 7]] | |||
|- | |||
|[[File:SM3DL S1 MB (3rd inside).jpg|180px]] | |||
| | |||
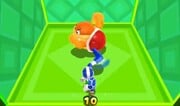
*1 [[Hammer Bro]] | |||
*1 [[Boomerang Flower]] | |||
|[[File:SM3DL S1 MB.jpg|180px|link=Special 1]] | |||
|- | |||
|[[File:SM3DL S1 MB (inside).jpg|180px]] | |||
| | |||
*1 [[Goomba]] | |||
*1 [[Super Leaf]] | |||
|[[File:SM3DL W1 MB.png|180px|link=World 1 (Super Mario 3D Land)]][[File:SM3DL S1 MB.jpg|180px|link=Special 1]] | |||
|- | |||
|[[File:SM3DL S3 MB (inside).jpg|180px]] | |||
| | |||
*1 [[Boomerang Bro]] | |||
*1 [[Boomerang Flower]] | |||
|[[File:SM3DL S3 MB.jpg|180px|link=Special 3]] | |||
|- | |||
|[[File:SM3DL S5 MB (3rd inside).jpg|180px]] | |||
| | |||
*1 [[Hammer Bro]] | |||
*1 [[Boomerang Bro]] | |||
|[[File:SM3DL S5 MB.jpg|180px|link=Special 5]] | |||
|- | |||
|[[File:SM3DL S7 MB (inside).jpg|180px]] | |||
| | |||
*1 [[Hammer Bro]] | |||
*1 [[Boomerang Bro]] | |||
*1 [[Boomerang Flower]] | |||
|[[File:SM3DL S7 MB.jpg|180px|link=Special 7]] | |||
|- | |||
|[[File:SM3DL S7 MB (2nd inside).jpg|180px]] | |||
| | |||
*3 [[Fire Piranha Plant]]s | |||
|[[File:SM3DL W6 MB.jpg|180px|link=World 6 (Super Mario 3D Land)]][[File:SM3DL S7 MB.jpg|180px|link=Special 7]] | |||
|- | |||
|[[File:SM3DL S7 MB (3rd inside).jpg|180px]] | |||
| | |||
*[[Boom Boom]] (requiring only one hit to defeat) | |||
|[[File:SM3DL S7 MB.jpg|180px|link=Special 7]] | |||
|- | |||
|[[File:SM3DL W4 MB (3rd inside).jpg|180px]] | |||
| | |||
*2 [[Goomba Tower]]s, two [[Goomba]]s high each | |||
*1 [[Fire Flower]] | |||
|[[File:SM3DL W4 MB.jpg|180px|link=World 4 (Super Mario 3D Land)]][[File:SM3DL S5 MB.jpg|180px|link=Special 5]][[File:SM3DL S7 MB.jpg|180px|link=Special 7]] | |||
|} | |||
=====Golden Mystery Boxes===== | |||
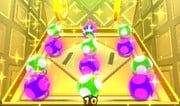
In addition to the features listed here, each Box contains two Star Medals. | |||
{|class="wikitable"style="text-align:center" | |||
!Image | |||
!Content | |||
!Appearance | |||
|- | |||
|[[File:SM3DL W1 MB (5th inside).jpg|180px]] | |||
| | |||
*15 [[Super Leaves]] | |||
*1 [[P-Wing]] | |||
|[[File:SM3DL W1 MB.png|180px|link=World 1 (Super Mario 3D Land)]] | |||
|- | |||
|[[File:SM3DL W1 MB (6th inside).jpg|180px]] | |||
| | |||
*5 [[Toad (species)|Toads]] (red, blue, yellow, green, and purple) | |||
|[[File:SM3DL W1 MB.png|180px|link=World 1 (Super Mario 3D Land)]] | |||
|- | |||
|[[File:SM3DL W2 MB (2nd inside).jpg|180px]] | |||
| | |||
*9 [[Goomba Board]]s, five of which contain [[1-Up Mushroom]]s and others which contain [[coin]]s | |||
*1 [[Fire Flower]] | |||
|[[File:SM3DL W2 MB.jpg|180px|link=World 2 (Super Mario 3D Land)]] | |||
|- | |||
|[[File:SM3DL W4 MB (4th inside).jpg|180px]] | |||
| | |||
*10 [[crate]]s, four of which contain [[1-Up Mushroom]]s | |||
*2 [[? Block]]s containing a [[Super Leaf]] and a [[Fire Flower]], respectively | |||
|[[File:SM3DL W4 MB.jpg|180px|link=World 4 (Super Mario 3D Land)]] | |||
|- | |||
|[[File:SM3DL W6 MB (3rd inside).jpg|180px]] | |||
| | |||
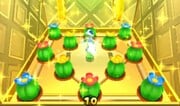
*12 [[Cactus|cacti]], four of which contain [[1-Up Mushroom]]s | |||
*1 [[Boomerang Flower]] | |||
|[[File:SM3DL W6 MB.jpg|180px|link=World 6 (Super Mario 3D Land)]] | |||
|- | |||
|[[File:SM3DL W6 MB (5th inside).jpg|180px]] | |||
| | |||
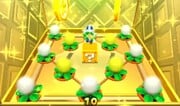
*7 white dandelions | |||
*4 yellow dandelions containing [[1-Up Mushroom]]s | |||
*1 [[? Block]] containing a [[Super Leaf]] | |||
|[[File:SM3DL W6 MB.jpg|180px|link=World 6 (Super Mario 3D Land)]] | |||
|- | |||
|[[File:SM3DL W6 MB (inside).jpg|180px]] | |||
| | |||
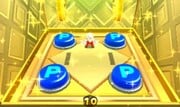
*4 [[P Switch]]es pressing each of which causes a [[1-Up Mushroom]] to appear | |||
|[[File:SM3DL W6 MB.jpg|180px|link=World 6 (Super Mario 3D Land)]] | |||
|- | |||
|[[File:SM3DL S1 MB (4th inside).jpg|180px]] | |||
| | |||
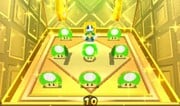
*7 [[1-Up Mushroom Board]]s, four of which contain real [[1-Up Mushroom]]s | |||
*A 5th [[1-Up Mushroom]] | |||
*1 [[? Block]] containing a [[Fire Flower]] | |||
|[[File:SM3DL S1 MB.jpg|180px|link=Special 1]] | |||
|- | |||
|[[File:SM3DL S5 MB (4th inside).jpg|180px]] | |||
| | |||
*6 [[1-Up Mushroom]]s | |||
*6 [[Poison Mushroom]]s | |||
|[[File:SM3DL S5 MB.jpg|180px|link=Special 5]] | |||
|- | |||
|[[File:SM3DL S5 MB (2nd inside).jpg|180px]] | |||
| | |||
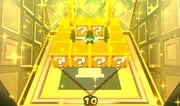
*12 [[? Block]]s containing [[coin]]s | |||
*4 [[Invisible ? Block]]s containing [[1-Up Mushroom]]s | |||
|[[File:SM3DL S5 MB.jpg|180px|link=Special 5]] | |||
|- | |||
|[[File:SM3DL S7 MB (5th inside).jpg|180px]] | |||
| | |||
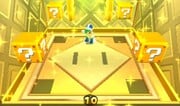
*3 [[? Block]]s containing [[1-Up Mushroom]]s | |||
*1 [[Coin Box|? Box]] | |||
|[[File:SM3DL S7 MB.jpg|180px|link=Special 7]] | |||
|- | |||
|[[File:SM3DL S7 MB (4th inside).jpg|180px]] | |||
| | |||
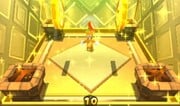
*4 [[Lantern|torches]] containing [[1-Up Mushroom]]s | |||
*1 [[Fire Flower]] | |||
|[[File:SM3DL S7 MB.jpg|180px|link=Special 7]] | |||
|- | |||
|[[File:SM3DL S1 MB (2nd inside).jpg|180px]] | |||
| | |||
*8 [[1-Up Mushroom]]s | |||
|[[File:SM3DL S1 MB.jpg|180px|link=Special 1]] | |||
|- | |||
|[[File:SM3DL S3 MB (3rd inside).jpg|180px]] | |||
| | |||
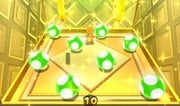
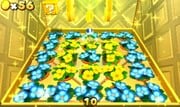
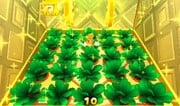
*[[Flower (environmental object)|Flowers]], some of which contain [[1-Up Mushroom]]s, and some of which contain [[coin]]s | |||
*1 [[? Block]] containing a [[Fire Flower]] | |||
|[[File:SM3DL S3 MB.jpg|180px|link=Special 3]] | |||
|- | |||
|[[File:SM3DL S7 MB (6th inside).jpg|180px]] | |||
| | |||
*Plants, some of which contain [[1-Up Mushroom]]s, and some of which contain [[coin]]s | |||
*1 [[Coin Coffer]] hiding in one of the plants | |||
*1 [[? Block]] containing a [[Super Leaf]] | |||
|[[File:SM3DL S7 MB.jpg|180px|link=Special 7]] | |||
|} | |||
===''Super Mario 3D World''=== | |||
The player obtains a [[Green Star]] by completing the following objectives: | |||
{|class="wikitable"style="text-align:center" | |||
!Level | |||
!Location | |||
!Objective | |||
|- | |||
|'''World 1-2''': [[Koopa Troopa Cave]] | |||
|[[File:SM3DW W1-2 Mystery Box.jpg|180px]] | |||
|Defeating two [[Koopa Troopa]]s | |||
|- | |||
|'''World 1-5''': [[Switch Scramble Circus]] | |||
|[[File:SM3DW W1-5 Mystery Box.jpg|180px]] | |||
|Destroying the crate in the left-hand corner | |||
|- | |||
|'''World 2-3''': [[Shadow-Play Alley]] | |||
|[[File:SM3DW W2-3 Mystery Box.jpg|180px]] | |||
|Pressing the [[P Switch]] to open a hidden room underneath the stairs | |||
|- | |||
|'''World 3-3''': [[Shifty Boo Mansion]] | |||
|[[File:SM3DW W3-3 Mystery Box.jpg|180px]] | |||
|Dodging the [[Peepa]]s in the rotating room to reach the Green Star | |||
|- | |||
|'''World 3-6''': [[Mount Must Dash]] | |||
|[[File:SM3DW W3-6 Mystery Box.jpg|180px]] | |||
|Catching the [[Rabbit]] | |||
|- | |||
|'''World 4-2''': [[Piranha Creeper Creek]] | |||
|[[File:SM3DW W4-2 Mystery Box.jpg|180px]] | |||
|Using four [[Piranha Creeper]]s as platforms to reach the Green Star | |||
|- | |||
|'''World 4-4''': [[Big Bounce Byway]] | |||
|[[File:SM3DW W4-4 Mystery Box.jpg|180px]] | |||
|Jumping with a disabled [[Hop-Chops|Hop-Chop]] or using the [[Cat Mario|Cat transformation]] to climb to the Green Star | |||
|- | |||
|'''{{world|4|castle3dw}}''': [[Lava Rock Lair]] | |||
|[[File:SM3DW W4-C Mystery Box.jpg|180px]] | |||
|Pressing the three [[P Panel]]s | |||
|- | |||
|'''World 5-7''': [[Searchlight Sneak]] | |||
|[[File:SM3DW W5-7 Mystery Box.jpg|180px]] | |||
|Climbing the stairs to the Star while dodging [[Cat Bullet Bill]]s | |||
|- | |||
|'''World 6-3''': [[Hands-On Hall]] | |||
|[[File:SM3DW W6-3 Mystery Box.jpg|180px]] | |||
|Defeating the [[Spike]] | |||
|- | |||
|'''World 6-5''': [[Ty-Foo Flurries]] | |||
|[[File:SM3DW W6-5 Mystery Box.jpg|180px]] | |||
|[[Ice Skate|Skating]] to the Star while dodging [[Walleye]]s and [[Skating Goomba]]s | |||
|- | |||
|'''World 6-6''': [[Bullet Bill Base]] | |||
|[[File:SM3DW W6-6 Mystery Box.jpg|180px]] | |||
|Navigating the circular vertical conveyor belt to reach the Green Star | |||
|- | |||
|'''{{world|castle|4}}''': [[Boiling Blue Bully Belt]] | |||
|[[File:SM3DW WC-4 Mystery Box.jpg|180px]] | |||
|Pushing a [[Bully]] into the lava | |||
|- | |||
|'''{{world|bowser|1}}''': [[Spiky Spike Bridge]] | |||
|[[File:SM3DW WB-1 Mystery Box.jpg|180px]] | |||
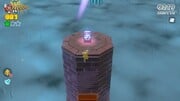
|Climbing up the wall to the P Switch to reveal the Green Star and climbing the opposite wall to retrieve it | |||
|- | |||
|'''{{world|bowser|3}}''': [[Cookie Cogworks]] | |||
|[[File:SM3DW WB-3 Mystery Box.jpg|180px]] | |||
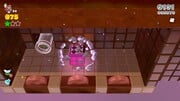
|Navigating the giant cookie rotating counterclockwise to reach the Green Star | |||
|- | |||
|'''{{world|bowser|4}}''': [[Footlight Lane]] | |||
|[[File:SM3DW WB-4 Mystery Box.jpg|180px]] | |||
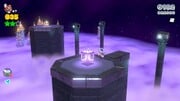
|Navigating the invisible floors and dodging the [[Thwomp]] to reach the Green Star | |||
|- | |||
|'''{{world|bowser|6}}''': [[A Beam in the Dark]] | |||
|[[File:SM3DW WB-6 Mystery Box.jpg|180px]] | |||
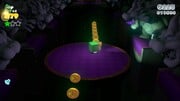
|Defeating six [[Boo]]s with [[Light Box]]es or the [[Lucky Bell]] | |||
|- | |||
|'''{{world|star2|3}}''': [[Rolling Ride Run]] | |||
|[[File:SM3DW WS-3 Mystery Box.jpg|180px]] | |||
|Rotating the room to the right or using the Cat transformation to reach the Green Star | |||
|- | |||
|'''{{world|star2|5}}''': [[Super Block Land]] | |||
|[[File:SM3DW WS-5 Mystery Box.jpg|180px]] | |||
|Extending the blocks in the room or using the Cat transformation to reach the Green Star | |||
|- | |||
|'''{{world|star2|8}}''': [[Peepa's Fog Bog]] | |||
|[[File:SM3DW WS-8 Mystery Box.jpg|180px]] | |||
|Throwing a snowball at the Green Star to collect it; going near it causes it to vanish | |||
|- | |||
|'''{{world|flower2|1}}''': [[Switch Shock Circus]] | |||
|[[File:SM3DW WF-1 Mystery Box.jpg|180px]] | |||
|Turning on all four [[Flipswitch Panel|Switch Panel]]s on the wall to reveal the Green Star | |||
|} | |||
==Gallery== | |||
<gallery> | |||
MysteryBox SM3DL.png|''[[Super Mario 3D Land]]'' | |||
Mystery Box SM3DW Prima.jpg|''[[Super Mario 3D World]]'' | |||
</gallery> | |||
==Names in other languages== | |||
{{foreign names | |||
|Jpn=ミステリーボックス<ref>{{cite|author=Sakai, Kazuya (Ambit) et al.|date=October 19, 2015|title=''Super Mario Bros. Hyakka: Nintendo Kōshiki Guidebook''|publisher=[[Shogakukan]]|language=ja|isbn=978-4-09-106569-8|page=186 and 233}}</ref> | |||
|JpnR=Misuterī Bokkusu | |||
|JpnM=Mystery Box | |||
|Spa=Caja misteriosa | |||
|SpaM=Mysterious box | |||
|Ger=Rätselbox | |||
|GerM=Mystery Box | |||
|Por=Caixa Mistério | |||
|PorM=Mystery Box | |||
|Rus=Ящик с секретом | |||
|RusR=Yashchik s sekretom | |||
|RusM=Box with secret | |||
|Chi=神秘箱 | |||
|ChiR=Shénmì Xiāng | |||
|ChiM=Mystery Box | |||
|Ita=Cubo Mistero | |||
|ItaM=Mystery Cube | |||
}} | |||
==References== | |||
<references/> | |||
{{SM3DL}} | {{SM3DL}} | ||
[[Category: | {{SM3DW}} | ||
[[Category: | {{CTTT}} | ||
[[Category: | [[Category:Blocks]] | ||
[[Category:Locations]] | |||
[[Category:Captain Toad: Treasure Tracker objects]] | |||
[[Category:Super Mario 3D Land objects]] | |||
[[Category:Super Mario 3D World objects]] | |||
[[it:Cubo Mistero]] | |||
Latest revision as of 15:03, January 7, 2025
- This article is about the box from Super Mario 3D Land. For the item from the Paper Mario series with the same name, see Mystery Box (item). For the Captain Command in Bowser Jr.'s Journey, see Mystery Box (Captain Command).
| Mystery Box | |
|---|---|
 Artwork from Captain Toad: Treasure Tracker | |
| First appearance | Super Mario 3D Land (2011) |
| Latest appearance | Super Mario 3D World + Bowser's Fury (2021) |
Mystery Boxes are objects debuting in Super Mario 3D Land.
History[edit]
Super Mario series[edit]
Super Mario 3D Land[edit]
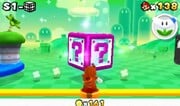
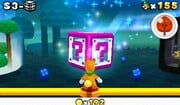
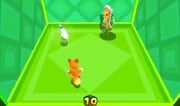
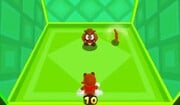
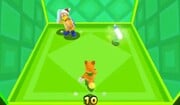
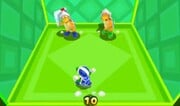
In Super Mario 3D Land, they are found in most Worlds, with their primary task being to defeat all the enemies in the box within ten seconds. Enemies can range from Goombas to Boom Booms. When Mario completes the task, coins and a Star Medal appear. Other items, such as 1-Up Mushrooms, Super Leaves and Fire Flowers are also found within Mystery Boxes. However, if Mario loses a life in a Mystery Box, he will be forced to quit the level. Whenever the player first encounters a Mystery Box on the world map, they are required to enter it before moving on. The Mystery Box theme is a remix of the Teleporter theme from Super Mario Galaxy 2.
Mystery Boxes can also be golden on the inside, while still appearing purple on the outside. All of the golden-sided Mystery Boxes contain two Star Medals, and at least three 1-Up Mushrooms, with some containing as many as eight. No golden-sided Mystery Boxes contain enemies, and as such, Star Medals appear immediately upon entering a box. They can contain many different things, such as Poison Mushrooms, Toads, or even P-Wings. These Mystery Boxes have a cover of the main theme from Super Mario Bros. as the background music.
There are a total of 20 unique normal Mystery Box contents and 15 unique golden-sided Mystery Boxes contents. Golden-sided Mystery Boxes more rarely appear than normal ones. Each normal Mystery Box can be found in two different Worlds, while each golden-sided one can only be found in a single World.
After completing a Mystery Box, it turns gray on the overworld map and "falls asleep", rendering it inaccessible. It may be accessed again 20 hours later. The contents of each Mystery Box changes each time it is re-entered.
Mystery Boxes can also be accessed via StreetPass, a wireless feature that automatically exchanges information with nearby Nintendo 3DS systems while the system is in sleep mode). The only difference in a StreetPass Mystery Box is that it is guaranteed to have a Star Medal or two, unless of course all Star Medals have been collected.
Mystery Boxes also can appear in some levels of Super Mario 3D Land, which the goal is to collect as many coins from the blocks within the time limit. In the early versions of the game, these Mystery Boxes used the same design as that of the current Warp Box; similarly, the early Warp Boxes used the current Mystery Box design, albeit with an exclamation point instead of a question mark.[1] The colors were switched in the final version of the game.
Super Mario 3D World / Super Mario 3D World + Bowser's Fury[edit]
Mystery Boxes in Super Mario 3D World and its Nintendo Switch port can only be found in levels. Each of them has a Green Star which must be collected within the time limit. If Mario fails, he is sent back to the proper level. The Green Stars must be collected in different ways, like defeating every enemy present, navigating through a small obstacle course, or using given items or forms to reach it. Certain worlds also feature special courses called Mystery Houses, which consist of clearing a number of Mystery Box courses in quick succession. In one area of the Shiftier Boo Mansion level, a fake Mystery Box appears, which summons a Big Boo when interacted with.
Captain Toad: Treasure Tracker[edit]
Mystery Boxes also appear in Captain Toad: Treasure Tracker and its Nintendo Switch and Nintendo 3DS ports, appearing only in Coins Galore bonus levels this time. After entering a Coins Galore level, Captain Toad or Toadette can select two Mystery Boxes: one that accesses a bonus area with Super Pickaxes and other that access a bonus area with Double Cherries. The task is to collect many coins or Gold Mushrooms within 10 seconds. After completing a Coins Galore level, it cannot be entered again. However, if the Toads complete every level of the game, these Coins Galore levels will be permanently open and can be accessed at any time from the Bonus Episode.
Contents[edit]
Super Mario 3D Land[edit]
| Image | Content | Location |
|---|---|---|
|
|
|
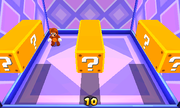
|
|
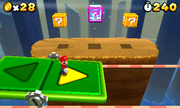
|
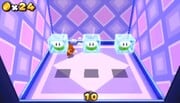
|
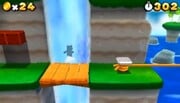 (Note: A yellow Toad will also be found here and will give a 1-Up Mushroom if the player watched his entrance into the hidden Box through a pair of binoculars.) | |
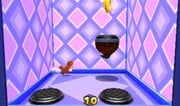
|
|
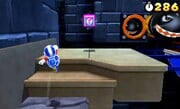
|
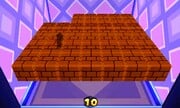
|
|
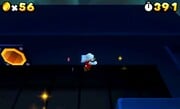
|
World Map Mystery Boxes[edit]
Defeating every enemy in a Box will cause ten coins and a Star Medal to appear.
| Image | Content | Location(s) |
|---|---|---|
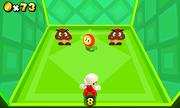
|
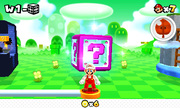 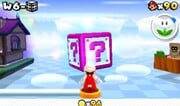 (Note: This is also the tutorial.) | |
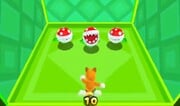
|
 
| |
|
|
|
|
|
|
|
|
|
|
| |
|
|
 
|
|
|
|
|
 
| |
|
 
| |
|
|
 
|
|
|
 
|
|

| |
|
|
 
|
|

| |
|

| |
|

| |
|
 
| |
|
|

|
|
|
  
|
Golden Mystery Boxes[edit]
In addition to the features listed here, each Box contains two Star Medals.
| Image | Content | Appearance |
|---|---|---|
|
|

|
|
|

|
|
|

|
|
|

|
|
|

|
|
|

|
|
|

|
|
|

|
|

| |
|
|

|
|
|

|
|
|

|
|

| |
|
|

|
|
|

|
Super Mario 3D World[edit]
The player obtains a Green Star by completing the following objectives:
| Level | Location | Objective |
|---|---|---|
| World 1-2: Koopa Troopa Cave | 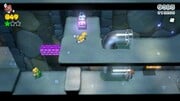
|
Defeating two Koopa Troopas |
| World 1-5: Switch Scramble Circus | 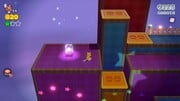
|
Destroying the crate in the left-hand corner |
| World 2-3: Shadow-Play Alley | 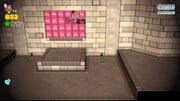
|
Pressing the P Switch to open a hidden room underneath the stairs |
| World 3-3: Shifty Boo Mansion | 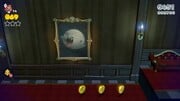
|
Dodging the Peepas in the rotating room to reach the Green Star |
| World 3-6: Mount Must Dash | 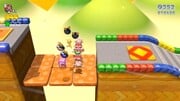
|
Catching the Rabbit |
| World 4-2: Piranha Creeper Creek | 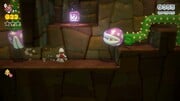
|
Using four Piranha Creepers as platforms to reach the Green Star |
| World 4-4: Big Bounce Byway | 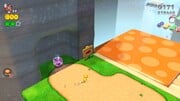
|
Jumping with a disabled Hop-Chop or using the Cat transformation to climb to the Green Star |
| World 4- |
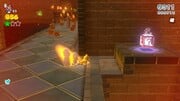
|
Pressing the three P Panels |
| World 5-7: Searchlight Sneak | 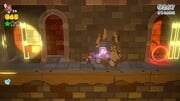
|
Climbing the stairs to the Star while dodging Cat Bullet Bills |
| World 6-3: Hands-On Hall | 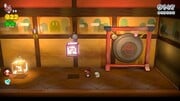
|
Defeating the Spike |
| World 6-5: Ty-Foo Flurries | 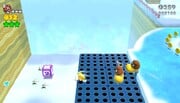
|
Skating to the Star while dodging Walleyes and Skating Goombas |
| World 6-6: Bullet Bill Base | 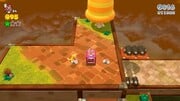
|
Navigating the circular vertical conveyor belt to reach the Green Star |
| World |
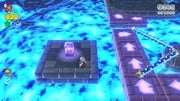
|
Pushing a Bully into the lava |
| World |
|
Climbing up the wall to the P Switch to reveal the Green Star and climbing the opposite wall to retrieve it |
| World |
|
Navigating the giant cookie rotating counterclockwise to reach the Green Star |
| World |
|
Navigating the invisible floors and dodging the Thwomp to reach the Green Star |
| World |
|
Defeating six Boos with Light Boxes or the Lucky Bell |
| World |
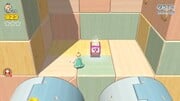
|
Rotating the room to the right or using the Cat transformation to reach the Green Star |
| World |
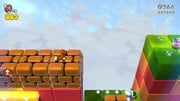
|
Extending the blocks in the room or using the Cat transformation to reach the Green Star |
| World |
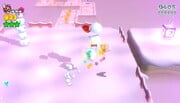
|
Throwing a snowball at the Green Star to collect it; going near it causes it to vanish |
| World |
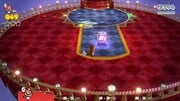
|
Turning on all four Switch Panels on the wall to reveal the Green Star |
Gallery[edit]
Names in other languages[edit]
| Language | Name | Meaning | Notes |
|---|---|---|---|
| Japanese | ミステリーボックス[2] Misuterī Bokkusu |
Mystery Box | |
| Chinese | 神秘箱[?] Shénmì Xiāng |
Mystery Box | |
| German | Rätselbox[?] | Mystery Box | |
| Italian | Cubo Mistero[?] | Mystery Cube | |
| Portuguese | Caixa Mistério[?] | Mystery Box | |
| Russian | Ящик с секретом[?] Yashchik s sekretom |
Box with secret | |
| Spanish | Caja misteriosa[?] | Mysterious box |
References[edit]
- ^ UltimatePisman (May 27, 2015). Super Mario 3D Land: E3 2011 Beta. YouTube (English). Archived August 19, 2015, 03:14:16 UTC from the original via Wayback Machine. Retrieved June 29, 2024.
- ^ Sakai, Kazuya (Ambit) et al. (October 19, 2015). Super Mario Bros. Hyakka: Nintendo Kōshiki Guidebook. Shogakukan (Japanese). ISBN 978-4-09-106569-8. Page 186 and 233.
