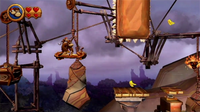
Donkey Kong Country Returns
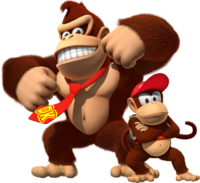
Template:Infobox Donkey Kong Country Returns is a side-scrolling 2.5D platform game developed by Retro Studios for the Wii. It is the fourth game in the Donkey Kong Country series, the first since Donkey Kong Country 3: Dixie Kong's Double Trouble!. The game stars Donkey Kong and Diddy Kong, who travel across the island to retrieve the Banana Hoard, which has been stolen by the Tiki Tak Tribe. A successor named Donkey Kong Country: Tropical Freeze was released for the Wii U in February 2014.
An enhanced port was later made for the Nintendo 3DS under the name Donkey Kong Country Returns 3D, released in 2013. In addition, the original Wii game was later released for digital download on the Nintendo eShop for Wii U on January 21-22, 2015 in all regions excluding North America. On March 31, 2016, the digital re-release was made available in North America exclusively for My Nintendo users. The game was later made publicly available on the North American Wii U eShop on September 22, 2016.
Story
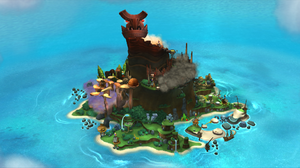
On one peaceful day, the volcano of Donkey Kong Island erupts and reawakens the Tiki Tak Tribe from their slumber. For mysterious purposes, the Tikis hypnotize the local wildlife ranging from elephants, giraffes, zebras and squirrels by using their music to bring them every banana in sight. Under their control, Donkey Kong is robbed of his Banana Hoard. Inside DK's Tree House, Diddy Kong notices the Tikis with the bananas. He looks upon the cavern beneath the house and notices that there are no bananas, then angrily chases after them. Donkey Kong then emerges from the house and sees the animals stealing his bananas. However, a Tiki named Kalimba forces him back into the house and attempts to hypnotize him as well, but he is somehow immune to the hypnotic powers of the Tikis. He punches Kalimba Tiki through the front door and out of the tree house and immediately sets off for adventure. Donkey Kong reunites himself with Diddy Kong and the two simians head off through the island to recover their precious bananas.
After traveling through various parts of Donkey Kong Island, Donkey Kong and Diddy Kong soon encounter the leader of the Tiki Tak Tribe, Tiki Tong. After they defeat him, Tiki Tong's explosion launches them into space. While there, the Kong's knock the moon down to earth, which crushes the Tiki base inside the volcano. This releases the bananas, which sends them and the moon flying out of the volcano. With the statue destroyed, the effects of the hypnosis on the creatures of the island are undone. DK and Diddy are able to land before they crash onto the island, and cheer as their bananas continue to rain from the volcano.
After the credits, a Golden Temple appears on the island. If the Kongs get all the Rare Orbs from the eight Kong Temples, they'll have access to the Golden Temple and its secrets.
Gameplay
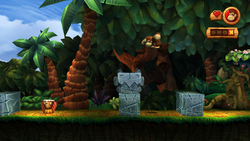
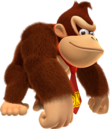
Donkey Kong Country Returns is a platformer game. The two playable characters are Donkey Kong and Diddy Kong. The animal buddies are Squawks the parrot and Rambi the rhino. Squawks helps find Puzzle Pieces and Rambi can destroy most enemies and hazards simply by charging into them.
Donkey Kong and Diddy Kong can be fired further forward or further back in levels from Barrel Cannons. It is harder to see what is going on when the apes are fired further back.
If the Kongs get hit by an enemy or hit spikes, they will lose some health. If they lose all their health, get hit by waves in the level Tidal Terror or fall into a pit, they will lose a life. If they lose all their lives, it is Game Over.
Time Attack
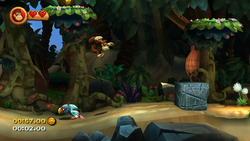
The Time Attack mode is accessible when any level has been completed at least once. In this mode, the player can earn one of four medals by finishing it in the fastest time possible. The level is always started with only Donkey Kong, even if players have Diddy Kong with them. When the Tutorial Pig finishes the countdown and waves the green flag, the timer and level will officially start. If the Kongs reach the end of the level and hit the Slot Machine Barrel with a checkered flag on it, then the Tutorial Pig will wave it to stop the timer. Then, the player's total time is recorded and a bronze, silver, gold, or shiny gold medal is awarded, depending on how fast the player did in the level. Shiny gold medals require an even faster time than normal gold medals, and their required time is not shown in the game.
Players don't lose lives in Time Attack mode. However, the timer does not reset if players are taken out by enemies, obstacles, or an abyss.
Time Attack mode does not affect the game clear percentage, nor unlocks anything in Extras; as a result, this game mode is completely optional.
Mirror Mode
The treasure of the Golden Temple is a mirror, which unlocks Mirror Mode. In this mode, level layouts are completely mirrored, and players cannot use inventory items or Diddy Kong. As a result, no multiplayer feature is available during this mode. To add to the difficulty, Donkey Kong only gets one hit point, and as such, all recovery hearts are removed. Clearing all the levels in Mirror Mode will unlock some bonus images in the Image Gallery and is necessary for 200% completion.
K-O-N-G Letters are also mirrored, and if they are collected again in a level during Mirror Mode, the orange starred emblem corresponding to the level, meaning all Letters have been previously collected there, will become blue. However, recollecting the letters in Mirror Mode is not necessary to complete the game 200%.
Extras
- Main article: List of extras in Donkey Kong Country Returns
Images, music, and dioramas can be unlocked if players perform certain tasks within the game, such as collecting all Puzzle Pieces in levels, defeating bosses and beating Key Temple stages.
Controls
This game utilizes two different control schemes, which are the ![]() by itself, and the
by itself, and the ![]() with the Nunchuk Attachment, which serves as the primary control scheme.
with the Nunchuk Attachment, which serves as the primary control scheme.
Wii Remote & Nunchuk
Solo & Co-op
 and
and  : Start Game (At title screen)
 : Jump, Ascend (while using the Barrel Jet)
 or
or  : Grab barrels, vines, cling patches, Dismount Rambi
 or
or  : Pause
 : Walk, Run, Crouch
- Shake: Ground Pound, Blow (while crouching), Roll (while walking/running), Charge (while walking/running on Rambi)
Co-op only
 or
or  (Donkey Kong): Carry Diddy Kong
 or
or  (Diddy Kong): Ride Donkey Kong; Dismount Donkey Kong
Wii Remote (horizontal)
Solo & Co-op
 : Grab barrels, vines, and cling patches
 : Jump; Ascend (while using the Barrel Jet), Start Game (At title screen)
 : Pause
 : Pause
 : Walk, Run (while holding
  )
) : Crouch, Dismount Rambi (while holding
  )
)- Shake: Ground Pound, Blow (while crouching), Roll (while walking/running), Charge (while walking/running on Rambi)
Co-op only
 (Donkey Kong): Carry Diddy Kong (while holding
  )
) (Diddy Kong): Ride Donkey Kong (while holding
  ), Dismount Donkey Kong (while holding
  )
)
Characters
Main characters
| Character | Description |
|---|---|
|
|
| Template:Color-link | |

|
|
| Template:Color-link |
Supporting characters
| Character | Role |
|---|---|
 Cranky Kong |
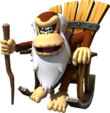
Runs a shop in each world of the game, except for the Golden Temple. He sells various items in exchange for Banana Coins. Like in previous Donkey Kong Country games, Cranky starts making snide or contemptuous comments as soon as the Kongs enter his hut. |
 Tutorial Pig |
A character that pops up from the background to offer indications on how to perform certain actions, such as blowing and rolling. He also runs the checkpoint booths. |
 Rambi the Rhino |
A very strong and rideable Animal Friend, surpassing the powers of Donkey Kong. He can be driven into enemies and solid blocks to crush them effortlessly using his horn. However, Rambi is sensitive to fire enemies and will run away if he touches one. |
 Squawks the Parrot |
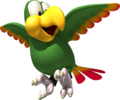
Available for purchase in Cranky Kong's Shop. He warns the player about nearby Puzzle Pieces. |
  Super Kong |
A silver guide available from checkpoint booths after eight consecutive deaths in a level. |
Bosses
Each world of the game ends with a boss battle. Normally peaceful creatures, the first seven bosses will display hostility towards the Kongs once hypnotized by the higher-ranking members of the Tiki Tak Tribe, employed to guard portions of the Banana Hoard. The eighth and final boss is the leader of the tribe himself, Tiki Tong.
Boss battles may be sequential, meaning the boss will become more aggressive as it takes more hits. After receiving the final hit, the creature will faint, and the Tiki that possesses it will reveal itself in a dizzy state, allowing the Kongs a chance to knock it out with repeated punches. However, if ignored for some time, the Tiki will regain consciousness and leave the fight scene, abruptly ending the level, although this has no influence on the game's progress.
| Image | Name | Tiki Possessor | Description | Level appearance |
|---|---|---|---|---|

|
Mugly | 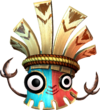
|
Hypnotized by Kalimba. He scurries across the battle arena with his mouth open in an attempt to swallow the Kongs. The boss is normally covered with retractile spikes, making jumping on the enemy dangerous. Mugly will slow down as it runs if the Kongs simply jump over it. This causes the boss to retract its spikes, leaving its rear side open for a jump attack. Mugly will also jump high in the air, trying to thump the Kongs. | Mugly's Mound |
| File:ScurvyCrew.PNG | Scurvy Crew | 
|
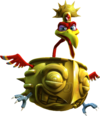
Hypnotized by the Maraca Gang. Their main tactic is digging themselves in the sand and resurfacing one at a time to attack the Kongs. As they lunge their weapons to impale the primates, they can be jumped on to make them raise their claws above their bodies, leaving their sides open for a ground pound or roll attack. Doing either of these will flip the enemy upside down and allow the Kongs to attack its underside, the vulnerable spot. After each member of the crew receives damage, they will return under the ground and slowly spawn from the sand in a tower formation, chasing the Kongs and trying to hurt them. In this formation, they will eventually raise their claws and leave their sides unprotected. The Kongs should now roll into them to scatter each individual upside-down, then proceed stomping on every one of them. | Pinchin' Pirates |
|
Stu | 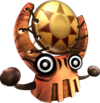
|
Hypnotized by Gong-Oh. Stu uses its cauldron to hoard explosives. His definitory strategy is tossing bombs at the Kongs, which can be picked up as their fuse burns and thrown back at Stu to explode and damage him. At several points in the battle, Stu will draw a bulky missile with the entire floor as its explosion range. Occasionally, he will also drop a Tiki Pop. | Ruined Roost |

|
Mole Miner Max | 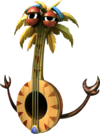
|
Hypnotized by Banjo Bottom. After traversing three sets of mole-infested wagons driven by the Mole Train, the Kongs arrive at the locomotive, where they face Mole Miner Max. The boss simply pops out of the remaining wagons attached to the locomotive, and uses a pickaxe to attack. He will faint once he receives four jump hits. | The Mole Train |
| File:Mangoruby.PNG | Mangoruby | 
|
Hypnotized by Wacky Pipes. The body of this serpent-like creature is segmented into six electrified spheres, meant to prevent jump attacks. However, Mangoruby will lose its power if the Kongs press on the switches scattered on the battle arena. While electrically charged, Mangoruby will give chase and try to stop the Kongs from pressing those switches. Losing its power makes the creature flee away from the Kongs and enables them to stomp on its body, breaking two of its segments with each attack. During the final two hits, the Mangoruby will release electrical energy that moves around the spheres. | Mangoruby Run |

|
Thugly | 
|
Hypnotized by Xylobone. As a relative of Mugly, he uses similar tactics during the fight. These include running across the stage and quivering belly flop attacks. Thugly will slow down if jumped over, folding his incandescent shell due to innertia and leaving his rear side open to a jump attack. He will attempt to ram its horn into the Kongs, but will crash into the wall and fall dizzy on his back, offering a chance to attack his belly side. After three hits, Thugly will morph into a second phase, when he starts spewing trails of fire, along with using the other tactics. After another three hits, Thugly will become angrier and add a fireball-spitting attack to his repertoire of attacks. Three more hits defeat him. | Thugly's Highrise |

|
Colonel Pluck and Stompybot 3000 | 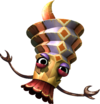
|
Hypnotized by Cordian. Fought on a motionless conveyor belt, Colonel Pluck controls his biped robot, Stompybot 3000, used to slam the Kongs. As he slowly walks across the area, he will sometimes suddenly turn red and walk hurriedly for a brief moment. The Kongs can slip past Stompybot 3000 when it raises its feet to walk. Stompybot 3000's vulnerable spot is on its underside, inaccessible due to spikes. However, Colonel Pluck will perform some brisk movements that will reveal the robot's vulnerable zone, which can now be clung to and pounded repeatedly. This heats up the machine and eventually destroys it, leaving Colonel Pluck in a flying cockpit. During this phase of the battle, Colonel Pluck will drop Buckbots as it soars across the screen, and will also attack the primates by swooping down on them. When close to the ground, the Kongs can attack him with a jump to inflict damage. Three stomps are needed to defeat Colonel Pluck. | Feather Fiend |

|
Tiki Tong | N/A | The head of the Tiki Tak Tribe. Using a serum prepared with bananas and the combined efforts of the other Tikis, Tiki Tong empowers himself with a pair of hands. He uses them in several attack methods, such as laying them flat and sweeping them across the arena, slamming them on the ground, and powerfully clapping them to squash the Kongs. Stomping two times on a hand's back side will destroy it. After losing his hands, Tiki Tong will head into battle using only his main body, raining down fire tikis and swooping to attack. After a while, he will thump full-force into the ground. This creates shock waves, but also unveils the red button on his head. The Kongs must attack this portion three times to vanquish Tiki Tong. | Tiki Tong Terror |
Enemies
The Tiki Tak Tribe has invaded a large portion of Donkey Kong Island, scattering its members throughout all 9 worlds and mixing them with the indigenous population of enemies. The lower-ranking members of the tribe typically resemble bongo drums, the rest being designed after other traditional instruments (kalimba, gong, xylophone etc.), particularly those that possess the boss enemies.
Most of the enemies from the island's natural fauna are specific to certain worlds, though they might briefly appear in other locations. For example, Rawks, which are common in the Jungle world, can be also encountered in Damp Dungeon, a level from the Ruins world, as well as the Golden Temple, the last area to be explored in the game.
| Tiki Tak Tribe | ||||
|---|---|---|---|---|
| Image | Name | Description | First level appearance | Last level appearance |
| File:TikiGoon.PNG | Tiki Goon | Grunt-level enemies, slowly moving back and forth on platforms. Although harmful if simply touched from one side, as they bite, Tiki Goons can be destroyed using any form of attack, such as stomping, rolling, barrel throwing, or Rambi's strike. | Jungle Hijinxs | Red Red Rising |

|
Tiki Doom | A larger variant of the Tiki Goon. While its behavior remains unchanged, slowly traversing patches of ground, it can be taken out with three stomps, as opposed to one. A single roll attack is also decisive. | Tree Top Bop | Golden Temple |
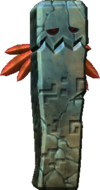
|
Screaming Pillar | A stone totem, initially found sleeping. As soon as it hears the Kongs, it wakes up and screams, toppling on the path. Screaming Pillars can crush the protagonists, as well as any other creature standing right below them. However, after collapsing on the ground, they become harmless and can be jumped on and cracked open with a ground pound. | Jungle Hijinxs | Five Monkey Trial |
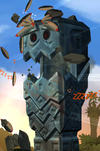
|
Giant Pillar | A colossal pillar acting like Screaming Pillars. It ploughs down into the abyss, destroying the Kongs in one hit. | Canopy Cannons | Canopy Cannons |

|
Tiki Buzz | An airborne Tiki that flies on predetermined paths, ranging from straight lines to circles. Its lateral and bottom sides are dangerous to touch, but it can be defeated using any attack technique. | Crazy Cart | Golden Temple |
| File:TikiTork65.PNG | Tiki Tork | A gargantuan equivalent of Tiki Buzz. Three stomps on its body are necessary to defeat it. Alternatively, the Kongs can use any other attack technique once to achieve the same result. | Prehistoric Path | Golden Temple |
| File:FTikiBuzz65.PNG | Flaming Tiki Buzz | A blackened Tiki Buzz set on fire. While burning, it can only be defeated with a thrown barrel; touching one in this state is harmful. However, a blow will dissolve its flames, leaving it dizzy and as vulnerable as a standard Tiki Buzz. | Crazy Cart | Red Red Rising |
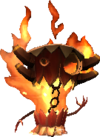
|
Tiki Torch | An enemy that is constantly covered in red flames, walking back and forth on the ground. It is dangerous to make contact with a Tiki Torch shrouded in fire, and while in this state, it can only be attacked from distance with a barrel. The Kongs are able to put out the fire engulfing a Tiki Torch using a short blow. While extinguished, Tiki Torches become confused and open to any kind of attack. | Peaceful Pier | Red Red Rising |

|
Tiki Bomber | A variant of the Tiki Torch that emits blue flames. Apart from being harmful to touch whatsoever while flaming, it can attack by shooting small fireballs from their lateral sides. Blue Tiki Bombers discharge fireballs in straight lines, while brown Tiki Bombers, which are normally found on elevated platforms, shoot them in arc-shaped lines. A blow will extinguish them, allowing the Kongs to defeat them just as Tiki Torches. | Wonky Waterway | Furious Fire |

|
Tiki Boing | A Tiki with a coil-wound body. It moves with rhythmical bounces, enabling it to attack the Kongs in the process. Tiki Boings can be defeated using any form of attack. | Jagged Jewels | Tippy Shippy |
| File:TikiTank.PNG | Tiki Tank | A sturdy Tiki reinforced with stone. Roll attacks and normal stomps do not have effect on it. Instead, the Kongs can pound the ground near a Tiki Tank to flip it over, uncovering its bottom side and allowing them to destroy the enemy with a stomp. Alternatively, a Tiki Tank can be immediately defeated with a barrel or with Rambi. | Button Bash | Red Red Rising |
|
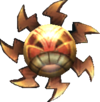
Tiki Zing | A rotating disc with razors. Some Tiki Zings can be found floating in one place, other fly on set patterns, tracing straight lines and circles in the air, and might group themselves in miscellaneous formations, as seen in Clingy Swingy. They are harmful and invulnerable to many of the Kongs' attacks, including barrel tossing, but Rambi is able to break them. | King of Cling | Five Monkey Trial |

|
Big Zing | An uncommon, larger variation of Tiki Zings. It moves considerably slower and is just as harmful. However, Big Zings cannot be defeated by any means of attack. | Platform Panic | Blast & Bounce |

|
Flaming Tiki Zing | A Tiki Zing variant, shrouded in flames. It spins and rotates in circles, being harmful even for Rambi. Flaming Tiki Zings are indestructible. | Precarious Plateau | Precarious Plateau |

|
Tiki Pop | A Tiki with a bowl-shaped head, carrying a flashing bomb. Tiki Bombs walk slowly in one direction on the ground; they will self-destruct moments after spawning from Stu's cauldron. They will explode earlier if the Kongs make contact with them, and their combustion is dangerous. | Ruined Roost | Ruined Roost |

|
Tiki Seeker | Small Tikis peeking from black portals in the background. They cannot be interacted with, but will produce short blades that can hurt the Kongs. They launch the said blades towards the current position of Donkey Kong, before retreating into the portal. | Golden Temple | Golden Temple |

|
Tiki Pilot | The Tiki responsible for transporting part of Donkey Kong's Banana Hoard using his airship and a rope net. Tiki Pilot is briefly seen in the first level, Jungle Hijinxs. | Jungle Hijinxs | Jungle Hijinxs |
| General enemies | ||||
| Image | Name | Description | First level appearance | Last level appearance |
| File:Confused pepe.png | Frogoon | A green frog enemy that attacks by simply jumping in one place. Every time it jumps, the Frogoon stays airborne for a brief moment by inflating itself. Frogoons can be flown away by any means of attack. | Jungle Hijinxs | Muncher Marathon |

|
Hopgoon | A yellow species of frogs related to Frogoons. Instead of jumping in one place, Hopgoons use jumps to move along a path. They can be overcome with any attack. | Tree Top Bop | Muncher Marathon |

|
Chomp | A spiky carnivorous plant affixed to a stretchy stem. After munching air two times, Chomps will dash in the direction they are facing to attack, repeating the process afterwards. They are not very vulnerable, as the Kongs cannot attack them with any direct move, such as stomping or rolling, but can be taken out with a barrel. | King of Cling | Flutter Flyaway |
|
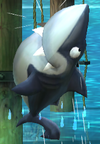
Snaggles | A voracious shark enemy that attacks by jumping out of the water. Every part of its body is dangerous to touch and will damage the Kongs upon direct contact. Snaggleses can only be defeated with a barrel. | Poppin' Planks | Damp Dungeon |
|
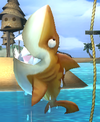
Yellow Snaggles | A relative of Snaggles. It jumps out and drops back into the water just like regular Snaggleses. However, Yellow Snaggleses will attempt a second, quick immediate attack without warning the player. These enemies can be defeated with a barrel. | Poppin' Planks | Damp Dungeon |

|
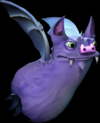
Squeekly | A species of stout bat enemies. They fly in a straight line across the screen, their mouths being wide open. They attempt to attack by flying into the Kongs and are also able to pass by solid walls, whereas other characters are not. Squeeklies can be knocked out with any attack technique. | Tumblin' Temple | Bobbing Basalt |

|
Buzzbite | A short, rash enemy traveling on walls and ceilings. To move, it spins its sharp feet around the body, damaging the Kongs upon contact. They can only be destroyed with a barrel. | Jagged Jewels | Five Monkey Trial |
| Jungle enemies | ||||
| Image | Name | Description | First level appearance | Last level appearance |

|
Awk | A flightless blue bird and a basic enemy. It walks down a path, being harmful if simply touched from behind or front. It can be defeated using any attack technique, such as stomping, rolling, barrel throwing, or Rambi's charge. | Jungle Hijinxs | Canopy Cannons |

|
Rawk | A red-feathered sub-species of Awks. It will charge into the Kongs as it spots them in an attempt to attack. However, Rawks can be defeated just like Awks. | Jungle Hijinxs | Golden Temple |
| File:Mega Chomp.png | Mega Chomp | A giant sub-species of Chomp. It behaves the same, but takes less time before it attacks. It is more resistant than the regular Chomp and cannot be destroyed. | King of Cling | King of Cling |

|
Mimic | A mysterious enemy under the guise of a bush. It mimics the scenery, waiting for the Kongs to approach, then attacks by charging towards them. Mimics can be taken out using any attack method. | Sunset Shore | Sunset Shore |
| Beach enemies | ||||
| Image | Name | Description | First level appearance | Last level appearance |
| File:Snaps closeup.png | Snaps | An orange crab enemy crawling back and forth on the ground. Snapses usually appear from underground, drilling outwards through the sand. They are only able to hurt the Kongs if they come into contact with their lateral sides. Despite being armed with claws, Snapses do not use them. As a result, they can be defeated by all signs of attack, including a roll attack. | Poppin' Planks | Tippy Shippy |
| File:Pinchley.png | Pinchly | A relative of Snaps that makes use of its claws and wears a protective pirate bandana. With its claws, the enemy lunges towards the Kongs in an attempt to injure them. If stomped on, Pinchlys will raise their claws upwards, leaving their lateral sides discovered and open for roll attacks. Pinchlys can also be defeated by flipping them over with a ground pound, then stomping their underside. | Poppin' Planks | Tippy Shippy |

|
Squidly | A mollusk projectile flying along an horizontal path in the air. Its pointy head is covered with a conical, harmful shell that can pounce the Kongs. However, Squidlys can be defeated with a stomp or a thrown barrel. | Sloppy Sands | Five Monkey Trial |

|
Electrasquid | An electrified type of Squidley which cannot be stomped on. The only way to destroy an Electrasquid is by using a barrel. | Sloppy Sands | Tippy Shippy |

|
Squid Shot | A stubby turret machine, operated from inside by an unseen creature. Most times, Squid Shots are the origin of Squidlys and Electrasquids, shooting them in differing patterns. Squid Shots cannot be destroyed, but can be walked on or touched safely. | Sloppy Sands | Five Monkey Trial |

|
Jellybob | A jellyfish foe protected by electricity. It regularily leaps from the water and slowly floats back down in a straight line. It cannot be touched anyhow, but can be defeated from distance with a barrel. | Cannon Cluster | Blowhole Bound |

|
Squiddicus | A giant kraken monster that creates an obstacled course using his large, spike-covered tentacles. The Kongs cannot beat the enemy, but are able to avoid its intervening limbs. | Stormy Shore | Stormy Shore |
| Ruins enemies | ||||
| Image | Name | Description | First level appearance | Last level appearance |

|
Stilts | A clumsy, white turkey enemy walking on stilts, hence its name. It also uses them as defense, kicking and hurting the Kongs with them. Upon getting stomped or rolled under, the enemy loses its stilts (as well as plumage) and starts running aimlessly on the ground, during which it can be defeated by any attack. | Wonky Waterway | Damp Dungeon |

|
Humzee | A species of hummingbird enemies. They attempt to attack the Kongs by repeatedly charging towards them in flight. Although small in size, Humzees can be defeated with a stomp or a roll attack. | Button Bash | Button Bash |
| File:GiantSnaggles-DKCR.png | Mega Snaggles | An enormous Snaggles charging out of the water at regular intervals. There is only one of its kind and cannot be defeated. | Damp Dungeon | Damp Dungeon |

|
Toothberry | A noisy furball enemy that moves by hopping on the ground. It can bite or land on the Kongs to hurt them. However, Toothberries can be defeated using any attack method. | Itty Bitty Biters | Clingy Swingy |
|
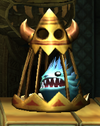
Cageberry | A Toothberry isolated and protected by a thorny cage. To move, the enemy pushes its cage in the desired direction, possibly ramming into the Kongs and hurting them. Cageberries cannot be destroyed, but can be turned upside down and stunned with a close ground pound. The cage can then be anchored into the ground by pounding its bottom surface. After a short time, the Toothberry inside the cage will forcefully pull it outside, propelling the Kongs in the air. | Itty Bitty Biters | Itty Bitty Biters |

|
Ack | A bigger sub-species of Toothberries showing the same behavior. Two stomps are needed to destroy an Ack, but it can be taken out immediately using a roll attack or a barrel. | Itty Bitty Biters | Itty Bitty Biters |

|
AckStack | A stack formation of brown Acks. After they spot the Kongs, they will collapse and toss themselves towards the protagonists in an attempt to hurt them. They will fixate their teeth into the ground, remaining there until receiving a stomp. | Itty Bitty Biters | Itty Bitty Biters |
| Cave enemies | ||||
| Image | Name | Description | First level appearance | Last level appearance |

|
Mole Miner | Mole enemies, mostly found in vehicle riding levels and appearing in various stances. Some of them are seen traveling on rails in mine carts, and can be defeated by stomping or simply crashing with them, though the latter will cost the Kongs a life. Other are using pickaxes as mining tools and also weapons, and can be knocked out by crashing into them. Mole Miners also aid Mole Miner Max in his battle and must be stomped on in order to proceed through the boss fight. | Crazy Cart | The Mole Train |
| File:Mole Guard.png | Mole Guard | A small dispatch of mole enemies using bombs to destroy the track in front of the Kongs during mine cart rides. Since Mole Guards appear in the foreground, they never come in direct contact with the Kongs. | Bombs Away | Bombs Away |
|
Big Squeekly | An enormous Squeekly guarding the cavern. It appears in a Rocket Barrel stage, during which it tries to impede the Kongs in different ways. This includes chasing them down while shooting powerful sonic waves at the primates. | Crowded Cavern | Crowded Cavern |
| Forest enemies | ||||
| Image | Name | Description | First level appearance | Last level appearance |

|
Yellow Chomp | A yellow Chomp lookalike. Just as its red cousin, the Yellow Chomp lunges upwards trying to injure the primates. However, it takes four consecutive chomps before it attacks, as opposed to two. Yellow Chomps can be defeated with a barrel. | Vine Valley | Flutter Flyaway |
| File:Shroom Chomp.png | Shroom Chomp | A green pigmented sub-species of Chomps, standing with their mouths wide open in the air. Their tongue mimics a bouncy mushroom, which the Kongs can use to reach higher areas. Upon bouncing on their tongue, Shroom Chomps immediately close their mouths in an attempt to snatch the Kongs. Jumping on their tongue is safe, but if the Kongs fall directly into the mouth of a Shroom Chomps, they will get trapped there and lose hearts. Shroom Chomps cannot be destroyed. | Longshot Launch | Wigglevine Wonders |
| File:Spore Chomp.png | Spore Chomp | A yellow, completely stationary type of Chomp. Its body is covered with pores that emit poisonous particles. Ground Spore Chomps can be defeated with a single stomp attack. However, many Spore Chomps are stuck to the ceiling and require a barrel toss to be destroyed. | Clingy Swingy | Tippin' Totems |
|
Vine Chomp | An enormous blue Chomp sub-species hiding in the canopy leaves, facing downwards. If the Kongs grab onto its vine-looking tongue, the Vine Chomp will suck it back inside its mouth, along with the characters. Should they end up in the mouth of a Vine Chomp, the creature will chew and injure them. Vine Chomps cannot be destroyed. | Vine Valley | Wigglevine Wonders |

|
Cling Cobra | Similarly to Buzzbites, Cling Cobras are able to stick to any kind of grassy surface. They will hurt the Kongs if they run into them, but can be taken out with any attack technique. | Clingy Swingy | Clingy Swingy |
| File:P.Skittler.png | Skittler | Spider enemies, coming in purple and orange colorations. Purple Skittlers remain stuck to a thread until getting stomped on, after which they will either greet defeat or just fall and crawl on the floor unharmed. Orange Skittlers plunge onto the ground and start walking directly. Walking Skittlers can be defeated using any attack. However, hanging Skittlers are dangerous to run into with a roll attack. | Flutter Flyaway | Muncher Marathon |

|
Munchers | A massive population of small arachnids, invading the forest area after hatching from their eggs. They pursue the Kongs and are impossible to destroy. | Muncher Marathon | Muncher Marathon |
|
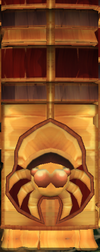
Skittler Pillar | A solid wooden structure ornated with a Skittler carving. It is vertical and moves up and down, powerfully striking the ground. The Kongs can only avoid being squashed by a Skittler Pillar, without being able to destroy it. Pairs of Skittler Pillars that face each other and slowly move at the same time are also encountered; these are completely harmless, but may delay the characters' race to escape the horde of Munchers. | Muncher Marathon | Muncher Marathon |
|
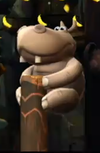
Bopapodamus | A big hippopotamus enemy perched on a high wooden pole. It is completely inoffensive and can be collapsed with five stomp attacks. | Tippin' Totems | Springy Spores |

|
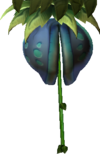
Wigglevine | A strange, pear-shaped enemy. It can fly using two rotor leaves, which are sharp and harmful. Normal-sized Wigglevines can ferry the Kongs above vast abysses using short vines attached to them. Small Wigglevines, on the other hand, are not able to sustain the Kongs with their vines and will self-destruct after a short time. | Wigglevine Wonders | Wigglevine Wonders |
| Cliff enemies | ||||
| Image | Name | Description | First level appearance | Last level appearance |
| File:SkellyrexCliff.PNG | Skellirex | An undead reptile skeleton patrolling a ground area back and forth. It is dangerous to simply run into a Skellirex, but a basic attack will crumble its body, leaving its skull skipping on the floor. The skull can also be destroyed with a basic attack. | Tumblin' Temple | Clifftop Climb |

|
Skullyrex | Merely smaller variations of Skellirex skulls, jumping on the floor while chomping air. They can be defeated with a stomp, roll attack, or a barrel. | Sticky Situation | Crumble Canyon |

|
Bonehead Jed | Small dinosaur skeletons traveling by small carts, pushing their wheels to move forward. They are able to extend their spine and elevate their heads, creating an impediment for the Kongs. Bonehead Jeds can be defeated using any means of attack, except rolling. | Sticky Situation | Boulder Roller |

|
Firehead Ned | A variation of the Bonehead Jed that can spit fireballs. It otherwise behaves the same, using a cart to move and periodically extending its head. It can also be defeated like a Bonehead Jed. | Sticky Situation | Boulder Roller |

|
Firebite | A flaming sub-species of Buzzbites. They quickly move around walls and platforms, leaving a short trail of fire behind. They are dangerous to touch and cannot be destroyed. | Perilous Passage | Perilous Passage |
| Factory enemies | ||||
| Image | Name | Description | First level appearance | Last level appearance |
| File:Saw Attack.png | Tiki Zing (Factory) | A jagged disc object grinding its way on the ground. It will hurt the Kongs upon contact and cannot be destroyed. | Foggy Fumes | Foggy Fumes |

|
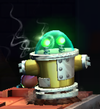
Pogobot | An electrified robot resembling a pogo stick. It hops back and forth down the alley, alternating from short to high jumps. While dangerous to come into direct contact, Pogobots can be defeated from a distance using a barrel. | Foggy Fumes | Cog Jog |
|
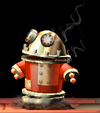
Pyrobot | A cylindrical robot containing a flamethrower, making it capable of shooting flames. Yellow Pyrobots can be wrecked with three basic stomp attacks, but the red models are resistant and require a barrel or a Buckbomb to be destroyed. | Handy Hazards | Treacherous Track |
| File:Buckbot-DKCR.png | Buckbot | A robot designed after household chickens. It patrols a single platform back and forth and can be taken out by any signs of attack. | Slammin' Steel | Feather Fiend |
| File:Buckbomb-DKCR.png | Buckbomb | A reddish variation of the Buckbot. It can be destroyed immediately with a roll or a barrel attack. However, if stomped, it will start ticking, exploding shortly after. Before they go off, Buckbombs can be picked up and hurled into other enemies. | Handy Hazards | Music Madness |
| Electroid | Small, animated balls of plasma following a set path in the air. Some of them are solitary, while other form electrical bonds with each other. Most of the time they can only be avoided. However, sometimes, Electroids might float in front of Reversible Walls, which can push them off the screen. | Slammin' Steel | Switcheroo | |
| Volcano enemies | ||||
| Image | Name | Description | First level appearance | Last level appearance |

|
Char-char | An incandescent rock, usually displaying a grinning face. This type of Char-chars can jump from the ground in an arc shaped path; even though they are harmful if touched directly, they can be put out with a blow or a barrel. A faceless variety also appears in this game. Some of these act like lava bubbles, quickly emerging from lava and plunging back into it; others float slowly towards the ground and die out upon impact. Faceless Char-chars cannot be destroyed with a blow, only with a thrown barrel. | Furious Fire | Moving Melters |

|
Ultra Char-char | Larger Char-chars floating in the air, covering a wide portion of the screen with their fire tails. They cannot be defeated. | Furious Fire | Furious Fire |

|
Fireballs | Powerful concentrations of fire. In Hot Rocket, fireballs appear from behind and soar across the screen. They destroy Donkey Kong's Rocket Barrel if they hit it. In Roasting Rails, larger, heavier balls of fire emerge from lava. They are also capable of wrecking DK's vehicle, or just damaging the Kongs if they are on foot. Neither type of fireball can be destroyed. | Hot Rocket | Roasting Rails |

|
Leaping Flame | Invincible serpents made of fire. They come from lava and circle around the Kongs as they fly with their Rocket Barrel. | Hot Rocket | Hot Rocket |
| Golden Temple enemies | ||||
| Image | Name | Description | First level appearance | Last level appearance |
|
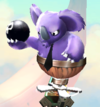
Kowalee | An overgrown koala enemy riding a helicopter-like carriage. It flies in one position and tosses bombs at the Kongs. Before they detonate, the bombs can be thrown back at the enemy to knock it out. | Golden Temple | Golden Temple |
Items and objects
The adventure is littered with noteworthy objects that can be used or manipulated in various ways or purposes. Below is a table that comprises all collectables, projectiles, vehicles, and miscellaneous objects found in the game.
| Collectables | ||||
|---|---|---|---|---|
| Image | Item | Description | ||

|
Banana | Bananas, the most common items in the game, are normally found floating in the air and arranged in rows and other patterns. They are very frequent in the main level space and in Bonus Areas as well. Upon collecting 100 of them, the Kongs receive an extra life. | ||

|
Banana Bunch | Less common than singular bananas, these items come in five or ten bananas. | ||

|
Banana Coin | The currency of the game. They appear frequently and are used to purchase items in Cranky Kong's Shop. Banana Coins are usually encountered floating in the air, and the Kongs can often find them in Bonus Areas. Sometimes, they will spawn after collecting a certain set of bananas. | ||

|
Heart | A common item that refills one space of the health counter. It can be found along the way during normal play and Time Attack, but never during Mirror Mode. | ||

|
Red Balloon | A considerably rare item that enables the Kongs an additional try if they lose all of their hearts. Red Balloons are sometimes found floating in the air; they start ascending just as the Kongs enter their screen, and should be grabbed quickly. The Kongs start off their adventure with four Red Balloons. If all current balloons are lost, the player receives a Game Over. | ||
| K-O-N-G Letters | This set of four letters is found in each level (excluding temple and boss levels) in this order. Should all K-O-N-G Letters in a world be collected, access will be granted to the said world's hidden temple stage. All letters in the game need to be collected in order to fully complete the game. | |||

|
Puzzle Piece | A precious item found in all except boss levels. They are most often encountered in hidden places, though some will spawn after collecting a certain set of items, like bananas and Banana Coins. Puzzle Pieces are also the objective of Bonus Areas. A level contains either five, seven, or nine Puzzle Pieces; if all Puzzle Pieces in a level are collected, they will unlock a piece of artwork in the Extras section in the game's file menu. | ||

|
Rare Orb | A valuable object needed to unlock the gateway to the Golden Temple. Rare Orbs appear at the end of every Key Temple stage and replace Slot Machine Barrels in the said stages. | ||
| Barrel | ||||
| Image | Item | Description | ||
|
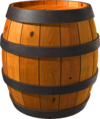
Barrel | A wooden object that is sometimes found lying on the ground. Barrels can be heaved and carried, and can be hurled at enemies to attack them from distance – this is especially useful for enemies like Tiki Torches, Snaggleses, and Jellybobs, which are harmful at any kind of direct contact. Upon getting thrown, barrels start rolling along a path, clearing the way of any enemies and breaking when they knock into a wall. | ||
|
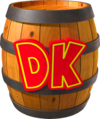
DK Barrel | When Donkey Kong travels alone and encounters a DK Barrel, he can break it to free his partner, Diddy. If they are already teamed up and find a DK Barrel, it can be broken to replenish their health counter. Just as regular barrels, DK Barrels can also be used for purposes of attack. However, they break upon contact with any element. | ||
|
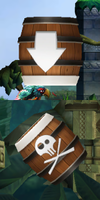
Barrel Cannon | A floating, barrel-shaped cannon. Upon command, the barrel launches the Kongs across long distances. The barrel is usually marked with a white arrow, but certain Barrel Cannons display a skull and crossbones, indicating they self-destruct as soon as they shoot the Kongs. | ||
|
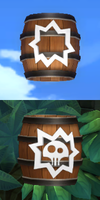
Blast Barrel | A type of barrel similar to Barrel Cannons, it is marked with a white explosion symbol. This barrel automatically shoots the Kongs as they enter it. Self-destructing Blast Barrels, showing a skull symbol inside an explosion, also exist. | ||

|
Slot Machine Barrel | The goal in most levels of the game. When hit, the Slot Machine Barrel will reward the Kongs one of the prizes displayed on the barrel's roulette. | ||
| Miscellaneous | ||||
| Image | Item | Description | ||
  
|
Containers | These objects have an identical purpose, but might change appearance to fit the aesthetic of the environment. They contain items, ranging from bananas to Puzzle Pieces. They are located in the immediate background, and even though they cannot be interacted with directly, the Kongs can pound the surface in front of them to release the item inside. | ||

|
Trapdoor | A thin platform hidden amongst ground. If pounded, it will spin for a short time, allowing the Kongs to fall beneath it. This usually leads to secrets, such as Bonus Areas. | ||
|
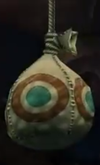
Bag | An object hanging with a rope from above. It displays a bull's-eye and contains a valuable item, such as a Puzzle Piece. A bag can be destroyed with a barrel. | ||

|
Rambi Crate | A spacious crate containing Rambi the Rhino. It has a rhino head emblem on its side. To destroy the crate and free Rambi, the Kongs can ground pound near it or roll into it. | ||
|
Vine | A thin plant hanging from the forest canopy. It can be either stationary or swinging, and appears in various lengths. Vines are used to sway above chasms or climb atop higher areas. Vine Chomps have a vine for a tongue, and use it to attract prey into their mouths. | ||
| Vehicles | ||||
| Image | Item | Description | ||

|
Mine Cart | A vehicle used to travel on rails which cannot be walked on. If empty, the Kongs may take full control of it. However, sometimes, mine carts are occupied by ore, and the Kongs would have to jump from one to another in order to progress. If the mine cart crashes into an element, the Kongs lose a life. | ||

|
Rocket Barrel | A barrel-shaped device used to fly. As it moves through the air, the Kongs can control it by ascending and descending to avoid obstacles. As with the mine cart, if the Rocket Barrel crashes, the Kongs will lose a life. | ||
Worlds and levels
The game is divided into eight main worlds and an extra level, the Golden Temple. With the exception of boss levels, all levels in the game contain a number of Puzzle Pieces that unlock concept artwork.
In each world, the Kongs can come across Cranky Kong's Shop, where Cranky sells various items that can be used in the course of the game.
Below is a table listing all levels in the game, along with the number of Puzzle Pieces each one has (five, seven, or nine), as well as the music theme playing there. The soundtrack of the game features various rearrangements of past Donkey Kong melodies, with the other tunes being new. Tunes followed by an asterisk (*) have been given a title in Super Smash Bros. for Wii U.
| Worlds and levels | ||||
|---|---|---|---|---|
| Jungle | ||||
| Level number | Level name | Number of Puzzle Pieces in the level | Music theme | |
| 1-1 | Jungle Hijinxs | 9 | "Jungle Hijinxs" | |
| 1-2 | King of Cling | 7 | "King of Cling" | |
| 1-3 | Tree Top Bop | 5 | "Jungle Hijinxs" | |
| 1-4 | Sunset Shore | 5 | "Palm Tree Groove" | |
| 1-5 | Canopy Cannons | 5 | "King of Cling" | |
| 1-6 | Crazy Cart | 5 | A rearrangement of "Mine Cart Cruise" | |
| 1-K | Platform Panic | 5 | Temple theme | |
| 1-B | BOSS LEVEL: Mugly's Mound | 0 | Mugly's theme | |
| Beach | ||||
| Level number | Level name | Number of Puzzle Pieces in the level | Music theme | |
| 2-1 | Poppin' Planks | 5 | "Poppin' Planks" | |
| 2-2 | Sloppy Sands | 7 | "Poppin' Planks" "Sloppy Sands" | |
| 2-3 | Peaceful Pier | 5 | A rearrangement of "Poppin' Planks" "Mine Menace" | |
| 2-4 | Cannon Cluster | 7 | "Mast Blast" | |
| 2-5 | Stormy Shore | 5 | Stormy Shore | |
| 2-6 | Blowhole Bound | 5 | "Aquatic Ambiance Returns" (DKCR version) | |
| 2-7 | Tidal Terror | 5 | "Tidal Terror" | |
| 2-K | Tumblin' Temple | 5 | Temple theme | |
| 2-B | BOSS LEVEL: Pinchin' Pirates | 0 | Pinchin' Pirates theme | |
| Ruins | ||||
| Level number | Level name | Number of Puzzle Pieces in the level | Music theme | |
| 3-1 | Wonky Waterway | 7 | "Ruin Rhapsody" | |
| 3-2 | Button Bash | 7 | "Voices of the Temple Returns" | |
| 3-3 | Mast Blast | 7 | "Mast Blast" | |
| 3-4 | Damp Dungeon | 9 | "Ruin Rhapsody" | |
| 3-5 | Itty Bitty Biters | 7 | "Voices of the Temple Returns" | |
| 3-6 | Temple Topple | 5 | "Voices of the Temple Returns" | |
| 3-K | Shifty Smashers | 5 | Temple theme | |
| 3-B | BOSS LEVEL: Ruined Roost | 0 | "Savory Stu" | |
| Cave | ||||
| Level number | Level name | Number of Puzzle Pieces in the level | Music theme | |
| 4-1 | Rickety Rails | 5 | "Rickety Rails" | |
| 4-2 | Grip 'n' Trip | 5 | "Mine Cart Cruise" | |
| 4-3 | Bombs Away | 5 | "Rickety Rails" | |
| 4-4 | Mole Patrol | 5 | "Mole Patrol" * | |
| 4-5 | Crowded Cavern | 5 | "Mine Menace" | |
| 4-K | Jagged Jewels | 5 | Temple theme | |
| 4-B | BOSS LEVEL: Mole Train | 0 | Mole Train theme | |
| Forest | ||||
| Level number | Level name | Number of Puzzle Pieces in the level | Music theme | |
| 5-1 | Vine Valley | 7 | "Forest Frenzy Returns" | |
| 5-2 | Clingy Swingy | 5 | "King of Cling" | |
| 5-3 | Flutter Flyaway | 7 | "Tree Top Rock Returns" | |
| 5-4 | Tippin' Totems | 7 | "Forest Frenzy Returns" | |
| 5-5 | Longshot Launch | 7 | "Tree Top Rock Returns" | |
| 5-6 | Springy Spores | 7 | "King of Cling" | |
| 5-7 | Wigglevine Wonders | 7 | "Forest Frenzy Returns" | |
| 5-8 | Muncher Marathon | 5 | "Tree Top Rock Returns" A rearrangement of "Forest Frenzy Returns" | |
| 5-K | Blast & Bounce | 5 | Temple theme | |
| 5-B | BOSS LEVEL: Mangoruby Run | 0 | "Mangoruby Rush" | |
| Cliff | ||||
| Level number | Level name | Number of Puzzle Pieces in the level | Music theme | |
| 6-1 | Sticky Situation | 9 | "Sticky Situation" | |
| 6-2 | Prehistoric Path | 5 | "Clifftop Concert" "Prehistoric Path" | |
| 6-3 | Weighty Way | 5 | "Boulder Roller" | |
| 6-4 | Boulder Roller | 7 | "Clifftop Concert" An upbeat arrangement of "Sticky Situation" | |
| 6-5 | Precarious Plateau | 5 | "Boulder Roller" | |
| 6-6 | Crumble Canyon | 9 | "Clifftop Concert" | |
| 6-7 | Tippy Shippy | 5 | "Clifftop Concert" | |
| 6-8 | Clifftop Climb | 5 | "Sticky Situation" | |
| 6-K | Perilous Passage | 5 | Temple theme | |
| 6-B | BOSS LEVEL: Thugly's Highrise | 0 | Thugly's theme | |
| Factory | ||||
| Level number | Level name | Number of Puzzle Pieces in the level | Music theme | |
| 7-1 | Foggy Fumes | 7 | "Palm Tree Groove" | |
| 7-2 | Slammin' Steel | 5 | "Factory Friction" | |
| 7-3 | Handy Hazards | 7 | "Factory Friction" | |
| 7-4 | Gear Getaway | 7 | "Factory Friction" "Mine Menace" | |
| 7-5 | Cog Jog | 9 | "Life in the Mines Returns" | |
| 7-6 | Switcheroo | 5 | A rearrangement of "Life in the Mines Returns", with cyber-punk beats added | |
| 7-7 | Music Madness | 5 | "Automatic Action" | |
| 7-R | Lift-off Launch | 0 | "Factory Friction" | |
| 7-K | Treacherous Track | 5 | Temple theme | |
| 7-B | BOSS LEVEL: Feather Fiend | 0 | Feather Fiend theme | |
| Volcano | ||||
| Level number | Level name | Number of Puzzle Pieces in the level | Music theme | |
| 8-1 | Furious Fire | 5 | "Burnin' Bop" | |
| 8-2 | Hot Rocket | 5 | "Mine Menace" | |
| 8-3 | Roasting Rails | 5 | "Lava Blitz" | |
| 8-4 | Smokey Peak | 5 | A rearrangement of "Palm Tree Groove" | |
| 8-5 | Bobbing Basalt | 7 | "Burnin' Bop" | |
| 8-6 | Moving Melters | 5 | "Burnin' Bop" | |
| 8-7 | Red Red Rising | 5 | "Burnin' Bop" | |
| 8-K | Five Monkey Trial | 5 | Temple theme | |
| 8-B | BOSS LEVEL: Tiki Tong Terror | 0 | "Red Rockin'" "Tiki Tong Song" | |
| Golden Temple | ||||
| Level number | Level name | Number of Puzzle Pieces in the level | Music theme | |
| 9-1 | Golden Temple | 5 | Golden Temple theme | |
Marketing and release
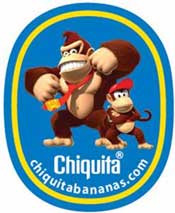
To promote the game, Nintendo partnered Chiquita to cross-promote the game for a limited time by having Donkey Kong promotion stickers on their bananas. In addition, an online contest was set up asking people to upload three photos of themselves doing the "Donkey Kong dance" for a chance to win one of thirty-one prizes.[1] Nintendo also partnered with Johnny Rockets to rebrand their Chocolate Banana Shake as the "Donkey Kong Chocolate Banana Shake" for a limited time. In addition, the promotion ties in with a sweepstakes for a chance to win a copy of the game.[2]
In the United Kingdom, select Game and Gamestation stores were chosen to promote the game at launch by trading a handful of bananas in exchange for the copy of the game. The first twenty customers that arrive at the store are guaranteed to get the game.[3]
Nintendo of Australia promoted the game before launch by having game demo in two locations: The Nintendo Connection at Myer department store, Sydney City in November 27, and The Nintendo Experience at EB Games, Swanston Street, Melbourne in November 28. The first two-hundred people who sampled the game received a special Donkey Kong Poster.[4] They celebrated the launch of the game by holding an event in Circular Quay, located in Sydney, New South Wales, Australia in the afternoon. It featured a tower of bananas with a sign next to it saying "Kong's Banana Hoard", along with a variety of banana-based foods. The staff kept the public entertained with trivia questions; answering them correctly will be rewarded with a free Donkey Kong shirt. At night time, the main event began with the showing of the video game from the projector; giving people a chance to play the game.[5]
Development
Donkey Kong Country Returns development started after several core developers of the Metroid Prime series left Retro Studios, which made several executives skeptical of whether the developer could keep making high-quality games.[6] At the same time, Shigeru Miyamoto wanted to make a new Donkey Kong Country game and suggested Retro Studios as its developer. Since many Retro Studios employees were fans of the series, the suggestion was welcomed enthusiastically by them.[6]
Development started out slow, with the developers creating only two of the eight bosses during 2009.[6] The pace fastened around 2010, as the team increased in size and after E3, as Retro Studios and Nintendo eventually agreed on how the levels should be designed.[6]
Kensuke Tanabe, who had worked on the localization of the original Donkey Kong Country, and his assistant Risa Tabata supervised Retro Studios during development, giving their opinions on the level designs and requesting enemies to be changed. Tanabe also asked for the creation of a multiplayer mode to distinguish the game from Donkey Kong Jungle Beat.[6] Shigeru Miyamoto also gave input, such as requesting that the music not be changed.[6]
Donkey Kong Country Returns 3D
- Main article: Donkey Kong Country Returns 3D
The game was remade for the Nintendo 3DS titled as Donkey Kong Country Returns 3D. Aside from the graphical change, the remake features additional new content, such as an easier mode and all-new levels.
Gallery
- For this subject's image gallery, see Gallery:Donkey Kong Country Returns.
Media
Staff
- Main article: List of Donkey Kong Country Returns staff
Glitches
Diddy and Damaged Donkey Kong
The player must go to an area in a level with a DK Barrel and at least one enemy without Diddy Kong. The player must grab the DK Barrel and wait the enemy to approach Donkey Kong. When the enemy is almost touching him, throw the barrel so that it breaks before Donkey Kong gets damaged. If done correctly, Diddy gets on Donkey Kong's back and two extra hearts appear in the health HUD, but one of the main hearts is empty, while it naturally would refill when the barrel breaks.
Cranky Kong's Shop Glitch
When visiting Cranky Kong's Shop, the game may freeze during transitions, such as when buying items or even entering the shop.[7] This can sometimes be fixed by entering and exiting the Home Menu.[8]
Official soundtrack
- Main article: Donkey Kong Returns Original Sound Track
An original soundtrack that is based on the game is released only in Japan for Club Nintendo members. It has twenty-five songs from the game.
References to other games
- Game & Watch series: Mr. Game & Watch can be seen in one part in the background of Foggy Fumes.
- Donkey Kong: The original 25m level can be seen in one part in the background of Foggy Fumes. Some temple levels also feature cave paintings based on the level. Also, in the level Wonky Waterway, a statue of Donkey Kong with his appearance in this game holding a Wii Remote can be seen. Moreover, in some secret temple levels, some pillars and platforms have paintings that resemble the stages of the arcade game, and at the end of each temple level, sprites of Donkey Kong's head from this game can be seen in the background during the "Level Clear!" screen.
- Donkey Kong Jr.: The music of the sky area of the Golden Temple is a remix of the title and stage themes.
- Super Mario Bros. 2: A piece of concept art based on the overworld levels in this game can be unlocked in Donkey Kong Country Returns.
- Donkey Kong Country: The main theme of Donkey Kong Country Returns, as well as other pieces, are remixed versions of this game's themes. Also Cranky Kong is seen sitting in a rocking chair as he does in this game plus some of his quotes were of those that originated here. Just like in the original, Returns features bonus stages in levels in certain areas instead of Bonus Barrels and players have a one shot chance at beating them also like in the original.
- Donkey Kong Jungle Beat: Some sound effects are borrowed from this game. Also, DK's finishing beating of the world's Tiki after a boss fight is reminiscent of some battles from this game.
- New Super Mario Bros. Wii: The level pads look identical to those from this game, even using the same colors. Also, both games have Super Guide. Worlds 5, 6, 8, and 9 of these two games are respectively similar and have the same theme.
- Donkey Kong Country 2: Diddy's Kong Quest: Ship levels and volcano levels in the series were first seen in this game. Banana coins make a return. Returns' End of level barrel has a similar function to this games' End of Level Target in that they both release prizes depending on what a player chooses.
- Donkey Kong Country 3: Dixie Kong's Double Trouble: Diddy getting on Donkey Kong for the continuous roll attack might have been inspired from Dixie getting on Kiddy Kong and riding him around. Also the concept of Rocket Barrels originated from this game although they were used a little differently.
- Donkey Kong 64: Diddy's jetpack ability and Peanut Popgun originated here.
References in later games
- StreetPass Mii Plaza: Donkey Kong Country Returns is featured on one of the Puzzle Swap panels in this game.
- Mario Kart 7: The DK Jungle course is based on Donkey Kong Country Returns.
- Luigi's Mansion: Dark Moon: In Treacherous Mansion, Strong Greenies have spears decorated with masks resembling the Kalimba Tiki.
- Donkey Kong Country: Tropical Freeze: This game features many elements from Donkey Kong Country Returns, due to it being a sequel.
- Mario Golf: World Tour: The DK Jungle golf course is heavily based on this game. Donkey Kong's Albatross, Hole-in-One and Eagle celebrations feature him in a silhouetted jungle setting referencing the silhouette levels that appeared in this game.
- Mario Kart 8/Mario Kart 8 Deluxe: DK Jungle returns as a retro course and some enemies are seen there.
- Super Smash Bros. for Nintendo 3DS: Tiki Buzzes appears as enemies in Smash Run. The music theme "Gear Getaway" is remixed from this game. Several trophies are also taken from this game.
- Super Smash Bros. for Wii U: Jungle Hijinxs appears as a new stage. The stage features "dual-plane battling", with fighters being able to travel between the foreground and background with Barrel Cannons that appear on the stage. Screaming Pillars also appear as obstacles. Several pieces of music are either directly taken or remixed from this game.
Names in other languages
| Language | Name | Meaning | Notes |
|---|---|---|---|
| German | Donkey Kong Country Returns[?] | - |
Trivia
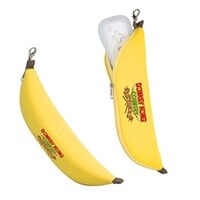
- At the game's release, those who pre-ordered Donkey Kong Country Returns at GameStop in the United States or Canada received a special banana-shaped Wii Remote pouch with the game's logo printed on it.
- If Donkey Kong does nothing for a long time while standing, he will look around, and sit to play what appears to be a Nintendo DS Lite. While he is playing, button sounds and a sound effect from the first Donkey Kong arcade game can be heard. Moments later, he throws the DS behind him, and it quickly fades away.
- Shortly before the game's release in North America, Nintendo tried to trademark the pop culture phrase "It's on like Donkey Kong!"[9]
- Unlike the first two Donkey Kong Country games and Donkey Kong 64, Diddy cannot be controlled in single player. His purpose is allowing Donkey Kong to hover for a while, as well as providing two extra hit points.
References
- ^ GoNintendo: Official PR - Chiquita and Nintendo team up for Donkey Kong Country Returns cross-promotion, dated 1/26/11; retrieved 1/27/11
- ^ GoNintendo: Johnny Rockets starts 'Donkey Kong Chocolate Banana Shake' promo contest, dated 11/14/10; retrieved 1/27/11
- ^ Official Nintendo Magazine: Fans buy Donkey Kong Country Returns with bananas, dated 12/3/10; retrieved 1/27/11
- ^ GoNintendo: Nintendo of Australia - Be The First To Play Donkey Kong Country Returns, dated 11/18/10; retrieved 1/27/11
- ^ Aussie-Nintendo: That's a lot of bananas - Sydney's DKCR launch event, dated 12/4/10; retrieved 1/27/11
- ^ a b c d e f Iwata Asks: Donkey Kong Country Returns (accessed March 08 2012)
- ^ https://www.youtube.com/watch?v=gyZc381WElY&index=10&list=PLVimAd1p9OoBXBcQOkAMEoszUxVRhq8i0
- ^ https://www.youtube.com/watch?v=w3aEkYJQhvE&index=21&list=PLVimAd1p9OoBXBcQOkAMEoszUxVRhq8i0
- ^ http://articles.cnn.com/2010-11-10/tech/on.like.donkey.kong_1_nintendo-claims-nintendo-super-nes-video-game-characters?_s=PM:TECH
External links
- Official American Website
- Official Oceanian Website
- Official European Website
- Official Japanese Website
