3DS Wario Shipyard: Difference between revisions
No edit summary Tags: Mobile edit Advanced mobile edit |
m (Text replacement - "(\| *)Jap([RMCN\d]* *=)" to "$1Jpn$2") |
||
| (9 intermediate revisions by 9 users not shown) | |||
| Line 7: | Line 7: | ||
|tours=[[Wario vs. Waluigi Tour]]<br>[[Los Angeles Tour (2022)]]<br>[[Samurai Tour]]<br>[[Yoshi Tour (2022)]]<br>[[Peach vs. Bowser Tour (May 2022)]]<br>[[Bangkok Tour]]<br>[[Piranha Plant Tour]]<br>[[Ocean Tour]]<br>[[Sundae Tour (2022)]]<br>[[Mario vs. Luigi Tour (2022)]]<br>[[Battle Tour]]<br>[[Ninja Tour (2023)]] | |tours=[[Wario vs. Waluigi Tour]]<br>[[Los Angeles Tour (2022)]]<br>[[Samurai Tour]]<br>[[Yoshi Tour (2022)]]<br>[[Peach vs. Bowser Tour (May 2022)]]<br>[[Bangkok Tour]]<br>[[Piranha Plant Tour]]<br>[[Ocean Tour]]<br>[[Sundae Tour (2022)]]<br>[[Mario vs. Luigi Tour (2022)]]<br>[[Battle Tour]]<br>[[Ninja Tour (2023)]] | ||
|ghost={{ghost|7|Nin★Miyamo|2:26.268|[[File:WarioMKW.png|32px|link=Wario]][[File:MK7 Bolt Buggy.png|32px|link=Bolt Buggy]][[File:MK7 Monster.png|32px|link=Monster (tire)|Monster tires]][[File:MK7WarioSuperGlider.png|32px|link=Super Glider]]}}{{ghost|7 <small>Expert</small>|Nin★syun1|2:12.313|[[File:WarioMKW.png|32px|link=Wario]][[File:MK7 Growlster.png|32px|link=Bruiser]][[File:MK7 Slim.png|32px|link=Slim (tire)|Slim tires]][[File:MK7 Beast Glider.png|32px|link=Beast Glider]]}} | |ghost={{ghost|7|Nin★Miyamo|2:26.268|[[File:WarioMKW.png|32px|link=Wario]][[File:MK7 Bolt Buggy.png|32px|link=Bolt Buggy]][[File:MK7 Monster.png|32px|link=Monster (tire)|Monster tires]][[File:MK7WarioSuperGlider.png|32px|link=Super Glider]]}}{{ghost|7 <small>Expert</small>|Nin★syun1|2:12.313|[[File:WarioMKW.png|32px|link=Wario]][[File:MK7 Growlster.png|32px|link=Bruiser]][[File:MK7 Slim.png|32px|link=Slim (tire)|Slim tires]][[File:MK7 Beast Glider.png|32px|link=Beast Glider]]}} | ||
|online_play= | |online_play=No longer available ([[Nintendo 3DS|3DS]]) | ||
|sample='''''Mario Kart 7 / Mario Kart Tour'''''<br>Normal<br>[[File:Wario's Galleon.oga]]<br>Underwater<br>[[File:Wario_shipyard_underwater.oga]]<br>'''''Mario Kart 7'''''<br>Frontrunning<br>[[File:3DS_WarioShipyard_Frontrunning.oga]]<br>Underwater/frontrunning<br>[[File:3DS_WarioShipyardUnderwater_Frontrunning.oga]] | |sample='''''Mario Kart 7 / Mario Kart Tour'''''<br>Normal<br>[[File:Wario's Galleon.oga]]<br>Underwater<br>[[File:Wario_shipyard_underwater.oga]]<br>'''''Mario Kart 7'''''<br>Frontrunning<br>[[File:3DS_WarioShipyard_Frontrunning.oga]]<br>Underwater/frontrunning<br>[[File:3DS_WarioShipyardUnderwater_Frontrunning.oga]] | ||
|map=''Mario Kart 7''<br>[[File:MK7 WarioShipyard.png|140px]]<br>[[File:Wario Ship.png|140px]]<br>''Mario Kart Tour''<br>[[File:MKT Map WarioShipyard3DS.png|110px]] | |map=''Mario Kart 7''<br>[[File:MK7 WarioShipyard.png|140px]]<br>[[File:Wario Ship.png|140px]]<br>''Mario Kart Tour''<br>[[File:MKT Map WarioShipyard3DS.png|110px]] | ||
| Line 20: | Line 20: | ||
===Course layout=== | ===Course layout=== | ||
[[File:WarioShipyardStartRace.jpg|thumb|left|The starting line of the course]] | [[File:WarioShipyardStartRace.jpg|thumb|left|The starting line of the course]] | ||
The course starts in a dry chamber. After a short straight path there is a left turn leading the player to an [[Underwater driving|underwater area]] divided into two roads, one rising out of the water. After some [[ramp]]s, the racers enter a short tunnel styled after a giant [[Fish Bone]], and some Fish Bones swim through it on the second lap. On the other side of the tunnel, there are | The course starts in a dry chamber. After a short straight path there is a left turn leading the player to an [[Underwater driving|underwater area]] divided into two roads, one rising out of the water. After some [[ramp]]s, the racers enter a short tunnel styled after a giant [[Fish Bone]], and some Fish Bones swim through it on the second lap. On the other side of the tunnel, there are [[Jet Pipe|bubble-jet pipes]]. A huge pipe blows the karts up to the next area of the circuit. | ||
The next road features a mud pit, complete with ship masts and a [[Barrel]], which releases either a [[Banana]], a [[Dash Mushroom|Mushroom]], a [[Green Shell]], and rarely, a [[Super Star|Star]] upon contact. A swinging [[anchor]] is found just before a shipwreck. The road splits into two short paths. As they merge again, racers must avoid two [[Sidestepper]]s and barrels. | The next road features a mud pit, complete with ship masts and a [[Barrel]], which releases either a [[Banana]], a [[Dash Mushroom|Mushroom]], a [[Green Shell]], and rarely, a [[Super Star|Star]] upon contact. A swinging [[anchor]] is found just before a shipwreck. The road splits into two short paths. As they merge again, racers must avoid two [[Sidestepper]]s and barrels. | ||
| Line 34: | Line 34: | ||
==''Mario Kart Tour''== | ==''Mario Kart Tour''== | ||
[[File:MKT Wario Shipyard | [[File:MKT 3DS Wario Shipyard Fish Bones.jpg|250px|thumb|The course in ''Mario Kart Tour'']] | ||
Wario Shipyard makes its [[classic course]] debut in ''[[Mario Kart Tour]]'' starting with the [[Wario vs. Waluigi Tour]]. The artwork of Bull Wario is now found at the entrance of the sunken ship instead of at the exit and there is no longer lightning in the sky. The corner shortcut at the end of the course on the right side and the patch of mud before gliding from the shipwreck have also been removed. The anchors on the course swing slightly faster than in the original and the rightside-up | Wario Shipyard makes its [[classic course]] debut in ''[[Mario Kart Tour]]'' starting with the [[Wario vs. Waluigi Tour]]. The artwork of Bull Wario is now found at the entrance of the sunken ship instead of at the exit and there is no longer lightning in the sky. The corner shortcut at the end of the course on the right side and the patch of mud before gliding from the shipwreck have also been removed. The anchors on the course swing slightly faster than in the original and the rightside-up [[Jet Pipe]] is no longer visible on the course map. The current blown out from the giant Jet Pipe now allows the player to perform a [[Jump Boost]]. | ||
The course also appears as '''Wario Shipyard R''' (reversed), '''Wario Shipyard T''' (with ramps), and '''Wario Shipyard R/T''' (reversed with ramps). The former two debuted alongside the original in the Wario vs. Waluigi Tour, while the latter debuted in the [[Samurai Tour]]. In the R and R/T variants, there is an additional [[Glide Ramp|glide ramp]] shortly after racers exit the Fish Bone tunnel. In the T and R/T variants, several water geysers erupt from the lake towards the end of the track. In the T variant, the glide ramp at the exit of the shipwreck has been removed. | The course also appears as '''Wario Shipyard R''' (reversed), '''Wario Shipyard T''' (with ramps), and '''Wario Shipyard R/T''' (reversed with ramps). The former two debuted alongside the original in the Wario vs. Waluigi Tour, while the latter debuted in the [[Samurai Tour]]. In the R and R/T variants, there is an additional [[Glide Ramp|glide ramp]] shortly after racers exit the Fish Bone tunnel. In the T and R/T variants, several water geysers erupt from the lake towards the end of the track. In the T variant, the glide ramp at the exit of the shipwreck has been removed. | ||
| Line 58: | Line 58: | ||
==Gallery== | ==Gallery== | ||
===''Mario Kart 7''=== | ===''Mario Kart 7''=== | ||
<gallery widths= | <gallery widths=160 heights=96> | ||
WarioShipyardStart.jpg|Start of the course | WarioShipyardStart.jpg|Start of the course | ||
WarioShipyardFishBoneTunnel.jpg|Inside the tunnel resembling a [[Fish Bone]] | WarioShipyardFishBoneTunnel.jpg|Inside the tunnel resembling a [[Fish Bone]] | ||
| Line 68: | Line 68: | ||
===''Mario Kart Tour''=== | ===''Mario Kart Tour''=== | ||
====Course icons==== | ====Course icons==== | ||
{{main-gallery|Mario Kart Tour race course icons (3DS courses)#Wario Shipyard|Mario Kart Tour race course icons (3DS courses) § Wario Shipyard}} | |||
<gallery heights=100> | |||
MKT Icon WarioShipyard3DS WarioCowboy.png|The course icon | |||
MKT Icon WarioShipyardR3DS Wario.png|The course icon of the R variant | |||
MKT Icon WarioShipyardT3DS WarioHiker.png|The course icon of the T variant | |||
MKT Icon WarioShipyardRT3DS CharginChuck.png|The course icon of the R/T variant | |||
MKT Icon WarioShipyard3DS | |||
MKT Icon WarioShipyardR3DS | |||
MKT Icon WarioShipyardT3DS WarioHiker.png|The course icon of the T variant | |||
MKT Icon WarioShipyardRT3DS CharginChuck.png|The course icon of the R/T variant | |||
</gallery> | </gallery> | ||
====Screenshots==== | ====Screenshots==== | ||
<gallery> | <gallery> | ||
MKT | MKT Wario Shipyard View.jpg|View of the course | ||
MKT 3DS Wario Shipyard pipe current.jpg|View of the large | MKT 3DS Wario Shipyard pipe current.jpg|View of the large [[Jet Pipe]] | ||
MKT 3DS Wario Shipyard sunken ship.jpg|View of the section before the sunken ship | MKT 3DS Wario Shipyard sunken ship.jpg|View of the section before the sunken ship | ||
MKT Wario vs. Waluigi Tour Week 1 Drivers.jpg|[[Wario|Wario (Cowboy)]] and [[Waluigi|Waluigi (Vampire)]] tricking on the course | MKT Wario vs. Waluigi Tour Week 1 Drivers.jpg|[[Wario|Wario (Cowboy)]] and [[Waluigi|Waluigi (Vampire)]] tricking on the course | ||
| Line 106: | Line 89: | ||
==Names in other languages== | ==Names in other languages== | ||
{{foreign names | {{foreign names | ||
| | |Jpn=ワリオシップ | ||
| | |JpnR=Wario Shippu | ||
| | |JpnM=Wario Ship | ||
|ChiT=瓦利歐之船 | |ChiT=瓦利歐之船 | ||
|ChiTR=Wǎlìōu zhī Chuán | |ChiTR=Wǎlìōu zhī Chuán | ||
Latest revision as of 11:23, January 7, 2025
| Wario Shipyard Wario's Galleon | |||||||||||
|---|---|---|---|---|---|---|---|---|---|---|---|
| |||||||||||
| Information | |||||||||||
| Appears in | Mario Kart 7 (2011) Mario Kart Tour (2022) | ||||||||||
| Cup(s) | Star Cup | ||||||||||
| Tour(s) | |||||||||||
| Online play | No longer available (3DS) | ||||||||||
| |||||||||||
| |||||||||||
| |||||||||||
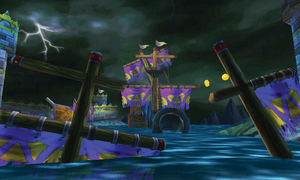
Wario Shipyard (known as Wario's Galleon in the British English version) is the second course of the Star Cup in Mario Kart 7. The course takes place around a Wario-branded sunken pirate ship in stormy weather.
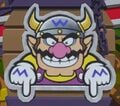
The course features several references to previous courses and games. Minecarts filled with gold appear when the player boards the ship, which likely references Wario's Gold Mine. The music track of this course incorporates the introduction of the main theme from Wario Land: Super Mario Land 3, as well as brief quotes of the main theme from WarioWare, Inc.: Mega Microgame$! and Mario Kart 7's own battle theme. The course is possibly an homage, as the game features a pirate theme, and Bull Wario (a form from that game) can be seen above the Glide Ramp.
The course later returns in Mario Kart Tour starting from the Wario vs. Waluigi Tour.
Mario Kart 7[edit]
Course layout[edit]
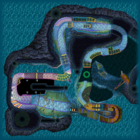
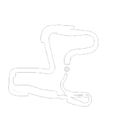
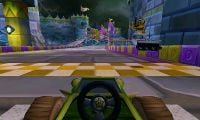
The course starts in a dry chamber. After a short straight path there is a left turn leading the player to an underwater area divided into two roads, one rising out of the water. After some ramps, the racers enter a short tunnel styled after a giant Fish Bone, and some Fish Bones swim through it on the second lap. On the other side of the tunnel, there are bubble-jet pipes. A huge pipe blows the karts up to the next area of the circuit.
The next road features a mud pit, complete with ship masts and a Barrel, which releases either a Banana, a Mushroom, a Green Shell, and rarely, a Star upon contact. A swinging anchor is found just before a shipwreck. The road splits into two short paths. As they merge again, racers must avoid two Sidesteppers and barrels.
A Glide Ramp takes the racers to a big area above the lake, where they must avoid hitting topsails and anchors. This area is followed by two roads: the higher one contains coins and Dash Panels, while the lower one is empty. The finish line is set a right turn after both roads merge into one.
When playing local or online multiplayer, the Sidesteppers, the Barrels, the coins near the Warp Pipes, all but one Fish Bones and one swinging anchor are removed.
Shortcuts[edit]
- By using a Mushroom the player can cut through the mud before the split paths.
- An unintended shortcut can be performed near the end of the course by gliding hard right and using a Mushroom to land just before the finish line, skipping the final turn.[1]
- An extremely difficult shortcut can be performed using the air-blowing pipe. By leaning back off the edge to gain an upwards angle, using a Mushroom and then using another in the air, it is possible to skip the entire shipwreck and land on the other side.[2]
Mario Kart Tour[edit]
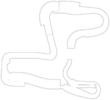
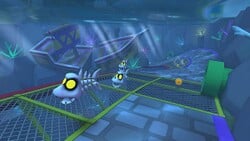
Wario Shipyard makes its classic course debut in Mario Kart Tour starting with the Wario vs. Waluigi Tour. The artwork of Bull Wario is now found at the entrance of the sunken ship instead of at the exit and there is no longer lightning in the sky. The corner shortcut at the end of the course on the right side and the patch of mud before gliding from the shipwreck have also been removed. The anchors on the course swing slightly faster than in the original and the rightside-up Jet Pipe is no longer visible on the course map. The current blown out from the giant Jet Pipe now allows the player to perform a Jump Boost.
The course also appears as Wario Shipyard R (reversed), Wario Shipyard T (with ramps), and Wario Shipyard R/T (reversed with ramps). The former two debuted alongside the original in the Wario vs. Waluigi Tour, while the latter debuted in the Samurai Tour. In the R and R/T variants, there is an additional glide ramp shortly after racers exit the Fish Bone tunnel. In the T and R/T variants, several water geysers erupt from the lake towards the end of the track. In the T variant, the glide ramp at the exit of the shipwreck has been removed.
Appearances[edit]
For this course's tour appearances, see List of 3DS Wario Shipyard tour appearances in Mario Kart Tour.
Top-tier and middle-tier items[edit]
Select "show" to reveal the drivers, karts, and gliders for which 3DS Wario Shipyard and its variants are always favored or favorite courses. For instances in which additional drivers, karts, and gliders temporarily had this course and its variants as favored or favorite courses, see List of 3DS Wario Shipyard tour appearances in Mario Kart Tour.
Bonus challenges[edit]
| Steer Clear of Obstacles | |||||||
|---|---|---|---|---|---|---|---|
| Icon | Course variant | Chosen driver |
Chosen kart |
Chosen glider |
Obstacles | Tour appearances | Cup |
|
Regular | Waluigi |
Pipe Frame |
Super Glider |
Sidestepper |
Wario vs. Waluigi Tour | Diddy Kong Cup |
| Battle Tour | Fire Bro Cup | ||||||
| Time Trial | |||||||
|---|---|---|---|---|---|---|---|
| Icon | Course variant | Chosen driver |
Chosen kart |
Chosen glider |
Grand Star scores | Tour appearances | Cup |
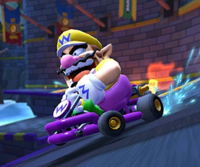
|
Regular | Wario |
Pipe Frame |
Super Glider |
|
Los Angeles Tour (2022) | Dixie Kong Cup |
| Ninja Tour (2023) | Baby Daisy Cup | ||||||
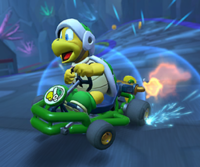
|
R | Hammer Bro |
Pipe Frame |
Super Glider |
|
Samurai Tour | Cat Peach Cup |
| Snap a Photo | ||||||||||
|---|---|---|---|---|---|---|---|---|---|---|
| Icon | Course variant | Chosen driver |
Chosen kart |
Chosen glider |
Other driver information | Objectives | Tour appearances | Cup | ||
| Driver | Kart | Glider | ||||||||

|
T | Wario (Cowboy) |
Brown Offroader |
Wario Wing |
Waluigi (Vampire) |
Vampire Flyer |
Waluigi Wing |
|
Wario vs. Waluigi Tour | Peach Cup |
Sponsors[edit]
- Wario GP (Banners)
Gallery[edit]
Mario Kart 7[edit]
Inside the tunnel resembling a Fish Bone
Bull Wario appearing on a signpost after two Sidesteppers
Mario Kart Tour[edit]
Course icons[edit]
- For this subject's image gallery, see Gallery:Mario Kart Tour race course icons (3DS courses) § Wario Shipyard.
Screenshots[edit]
View of the large Jet Pipe
Wario (Cowboy) and Waluigi (Vampire) tricking on the course
Funky Kong, Chargin' Chuck, Daisy (Swimwear), and Luigi (Vacation) gliding on the R variant
Image of Bull Wario
Names in other languages[edit]
| Language | Name | Meaning | Notes |
|---|---|---|---|
| Japanese | ワリオシップ[?] Wario Shippu |
Wario Ship | |
| Chinese (simplified) | 瓦力欧之船[?] Wǎlìōu zhī Chuán |
Wario's Ship | |
| Chinese (traditional) | 瓦利歐之船[?] Wǎlìōu zhī Chuán |
Wario's Ship | |
| Dutch | Wario's Wrak[?] | Wario's Wreck | |
| French | Galion de Wario[?] | Wario's Galleon | |
| German | Warios Galeonenwrack[?] | Wario's Galleon Wreck | |
| Italian | Galeone di Wario[?] | Wario's Galleon | |
| Korean | 와리오 침몰선[?] Wario Chimmolseon |
Wario Sunken Ship | |
| Portuguese (NOA) | Naufrágio Wario[?] | Wario Shipwreck | |
| Portuguese (NOE) | Galeão do Wario[?] | Wario's Galleon | |
| Russian | Галеон Варио[?] Galeon Vario |
Wario's Galleon | |
| Spanish | Galeón de Wario[?] | Wario's Galleon |
