Whoa Zone: Difference between revisions
No edit summary |
m (Text replacement - "(\| *)Jap([RMCN\d]* *=)" to "$1Jpn$2") |
||
| (75 intermediate revisions by 42 users not shown) | |||
| Line 1: | Line 1: | ||
{{level | {{level infobox | ||
|image=[[File:Whoa Zone SPM.png|250px]] | |||
|image=[[File: | |||
|code=4-4 | |code=4-4 | ||
|game=''[[Super Paper Mario]]'' | |game=''[[Super Paper Mario]]'' | ||
| Line 7: | Line 6: | ||
|before=[[Outer Limits|<<]] | |before=[[Outer Limits|<<]] | ||
|after=[[Downtown of Crag|>>]] | |after=[[Downtown of Crag|>>]] | ||
|track=Whoa Zone | |||
|sample=[[File:SPM Whoa Zone.oga]] | |||
}} | }} | ||
The '''Whoa Zone''' is | The '''Whoa Zone''' (also known as the '''Space Graveyard''') is the final area in [[Outer Space|Chapter 4]] of ''[[Super Paper Mario]]''. [[Squirps]] describes it as a "super-complicated maze". The zone requires the use of gravity-manipulating doors, [[Warp Pipe|pipe]]s and blocks to progress, and is the only place where [[Barribad]]s can be found. | ||
==Chapter 4-4: The Mysterious Mr. L== | ==Chapter 4-4: The Mysterious Mr. L== | ||
| Line 21: | Line 22: | ||
''Would Mario and his friends get their hands on the Pure Heart at long last?''</blockquote> | ''Would Mario and his friends get their hands on the Pure Heart at long last?''</blockquote> | ||
[[File:SPM Whoa Zone Gravity Switch Vertical.png|thumb|left|Gravity switch alters gravity, which is required for navigation.]] | |||
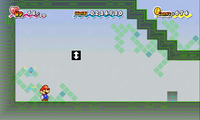
At the start of the level, Squirps loudly announces his arrival and warns the heroes of the complexity of the Whoa Zone before scurrying off by himself, leaving the player to solve the zone's puzzles alone. Nearly every room in the Whoa Zone contains several [[Tileoid]]s. The first room contains almost nothing of note besides several floating blocks and a [[Save Block]], unusually early in the level. The second room has several [[Tileoid R]]s and a [[Tileoid Y]]. A [[Happy Flower (Super Paper Mario)|Happy Flower]] and a [[Mushroom]] can be found as well. There are two doors, one in 2-D and one on a platform in 3-D. The 2-D door leads to a room with some [[Pigarithm]]s. The room has two floors, with a locked door on the second floor. The 3-D door leads to a room with a Pigarithm and more Tileoids, as well as a [[Slow Flower]]. The door at the other end of the room leads to a small room with a [[Barribad]] guarding a chest, which contains a [[Dimension Key]]. The key is used to unlock the door in the other room, which warps the player onto the ceiling and allows them to continue to the next area. | |||
In the next room, only the walls may be traversed. The door leads to the bottom of the left wall. Continuing upward, there will be two more doors, one that must be reached using [[Princess Peach]]'s [[parasol]]. The first door leads to a room with another locked door and a pipe in 3-D, which leads to a room with some [[coin]]s. The other door leads to the top floor of another room. The bottom floor, accessed via [[flip]], has a door on the ceiling, which must be accessed using a [[gravity switch]]. The door leads to the ceiling of the room with the door leading to the first key. At the other side is a door in 3-D, which takes the player to the ceiling of the room with the locked door. On the ceiling is a chest containing the door's key. | |||
'''Storyline text''' | Through the locked door is a hall that must be traversed using gravity switches to walk on the floor and ceiling. The player will come to an invisible door, opened with [[Tippi]]'s ability. The next room has [[Hooligon]]s on every surface. To the right is a gravity switch that rotates the player's gravity to the left wall. Upward from there is another rotator switch that can be hit once to walk on the ceiling or twice to walk on the right wall. On the ceiling is a door that leads to a room with a flipping gravity switch and a Save Block, as well as a locked door. On the right wall is a door that leads to the left wall of another room. The floor is accessed via another door. There are two [[Super Mushroom|Super Shroom]]s and a [[Zombie Shroom]] in [[? Block]]s. Another door will take the player to the ceiling, where another key is found. | ||
[[File:SPM Mr L.png|thumb|left|Mr. L's appearance.]] | |||
[[File:Brobot Battle.png|thumb|Brobot battle.]] | |||
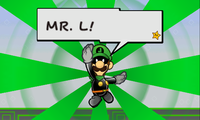
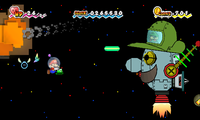
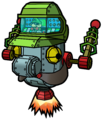
After entering the last locked door, the heroes meet Squirps, who chastises them for being too slow. Before he can take them to the [[Pure Heart]], though, he is stomped by [[Mr. L]], [[Count Bleck]]'s newest recruit. After taunting the heroes, Mr. L attacks, but is quickly defeated. He recovers and summons his spaceship, [[Brobot]]. He then warps everyone to space and the heroes battle Brobot in zero gravity, using Squirps' Squirt Beam to defeat it. After his robot is destroyed, Mr. L leaves, promising to defeat the heroes next time. | |||
Squirps takes the heroes to the final room and shows them a statue of his mother, [[Squirpina XIV]], the queen of the once-great kingdom of Squirpia. Squirps explains that he was placed in a hibernation capsule 1,500 years ago to await the hero and give them the Pure Heart. After bestowing upon them his kingdom's treasure, Squirps goes to sleep by his mother's statue and is apparently presumed dead unless the heroes return to Outer Space. | |||
{{br}} | |||
'''Storyline ending text''' | |||
<blockquote>''"''Phew!'' Now that Squirps is all relaxed, Squirps feels kinda...tired..." said Squirps.'' | <blockquote>''"''Phew!'' Now that Squirps is all relaxed, Squirps feels kinda...tired..." said Squirps.'' | ||
| Line 38: | Line 49: | ||
===Enemies=== | ===Enemies=== | ||
<gallery> | |||
SPMBarribad.png|[[Barribad]] | |||
Brobot.png|[[Brobot]] (Chapter 4 Boss) | |||
SPMHooligon.png|[[Hooligon]]s | |||
Mr. L.jpg|[[Mr. L]] (boss) | |||
SPMPigarithm.png|[[Pigarithm]]s | |||
SPMTileoidR.png|[[Tileoid R]]s | |||
SPMTileoidY.png|[[Tileoid Y]]s | |||
SPMZombieShroom.png|[[Zombie Shroom]] | |||
</gallery> | |||
===Items=== | |||
{{RPG item locations | |||
|item1=Super Card | |||
|image1=[[File:CatchCardSilverSPM.png]] | |||
|location1=[[Brobot]] '''(Map 28)''', use [[Fleep]] on the protruding block from the ceiling, in a room with two gravity switches and filled with Tileloids. | |||
|item2=[[HP Plus]] | |||
|image2=[[File:HP Plus SPM.png]] | |||
|location2='''(Map 29)''', use Fleep slightly right of the planet staff on Squirpina XIV’s statue. Revisit is required, after getting the Pure Heart. | |||
}} | |||
== | ===Menu description=== | ||
[[File: | *''"Few have escaped this graveyard of space. The queen of Squirpia hid a Pure Heart here long ago. Her son is Prince Squirps, or Squirp Korogaline Squirpina."'' | ||
The Whoa Zone appeared differently in the [[List of Super Paper Mario | |||
==Pre-release design== | |||
[[File:Whoa Zone SPM early.png|thumb|The early Whoa Zone.]] | |||
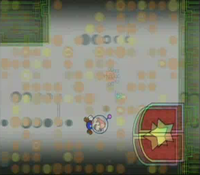
The Whoa Zone appeared differently in the [[List of Super Paper Mario pre-release and unused content|early version]] of ''Super Paper Mario''. It was briefly shown in ''[[Super Paper Mario]]'''s first trailer, where it was shown to have seemingly more circular elements in its background; the circles shown in this background were orange rather than the green color used in the final game. The Whoa Zone's greenish-brown doors were also normal, red [[Warp Door|door]]s in the early game, and [[Mario]] was shown to wear his [[Space Helmet]] inside it during the trailer. | |||
==Names in other languages== | ==Names in other languages== | ||
{{ | {{foreign names | ||
| | |Jpn=サルガッゾーン | ||
| | |JpnR=Sarugazzōn | ||
| | |JpnM=Portmanteau of「サルガッソ」(''Sarugasso'', "{{wp|Sargasso Sea}}") and「ゾーン」(''zōn'', "zone") | ||
|Kor=빙글빙글존 | |||
|KorR=Binggeul Binggeul Jon | |||
|KorM=Round-and-Round Zone | |||
|Spa=Zona Estática | |Spa=Zona Estática | ||
|SpaM=Static Zone | |SpaM=Static Zone | ||
| Line 60: | Line 90: | ||
|FreM=Forbidden Zone | |FreM=Forbidden Zone | ||
|Ger=Boah-Zone | |Ger=Boah-Zone | ||
|GerM= | |GerM=Adaptation of English name | ||
|Ita=Zona Proibita | |Ita=La Zona Proibita | ||
|ItaM=Prohibited Zone}} | |ItaM=Prohibited Zone}} | ||
{{ | |||
;The Mysterious Mr. L | |||
{{foreign names | |||
|Jpn=しょうげきのミスターL! | |||
|JpnR=Shōgeki no Misutā Eru! | |||
|JpnM=The Shocking Mr. L! | |||
|Spa=El misterioso Sr. L | |||
|SpaM=The mysterious Mr. L | |||
|Ita=Il misterioso Mr. L | |||
|ItaM=The mysterious Mr. L | |||
|Fre=Le mystérieux Mister L | |||
|FreM=The mysterious Mr. L | |||
|Ger=Der mysteriöse Meister L | |||
|GerM=The mysterious Mr. L | |||
|Kor=충격의 미스터L! | |||
|KorR=Chunggyeok-ui Miseuteo El! | |||
|KorM=The Shocking Mr. L! | |||
}} | |||
{{SPM}} | {{SPM}} | ||
[[Category:Mazes]] | [[Category:Mazes]] | ||
[[Category: | [[Category:Cosmic areas]] | ||
[[Category:Dimensions]] | [[Category:Dimensions]] | ||
[[Category:Super Paper Mario | [[Category:Super Paper Mario locations]] | ||
[[Category:Super Paper Mario | [[Category:Super Paper Mario levels]] | ||
Latest revision as of 14:53, January 7, 2025
| Level | |||
|---|---|---|---|
| Whoa Zone | |||
| |||
| Level code | 4-4 | ||
| Game | Super Paper Mario | ||
| Boss | Mr. L Brobot | ||
| Music track | Whoa Zone | ||
| |||
| << Directory of levels >> | |||
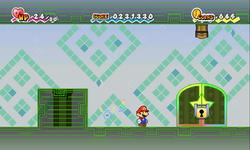
The Whoa Zone (also known as the Space Graveyard) is the final area in Chapter 4 of Super Paper Mario. Squirps describes it as a "super-complicated maze". The zone requires the use of gravity-manipulating doors, pipes and blocks to progress, and is the only place where Barribads can be found.
Chapter 4-4: The Mysterious Mr. L[edit]
Storyline text
Mario and his friends took the Space Byway and merged into the Whoa Zone.
Known to some as the Space Graveyard, it was said to consume all who entered it.
"Just a little bit longer... We'll be arriving soon," said young Squirps.
With his unblinking eyes glimmering, Squirps continued to forge onward.
Would Mario and his friends get their hands on the Pure Heart at long last?
At the start of the level, Squirps loudly announces his arrival and warns the heroes of the complexity of the Whoa Zone before scurrying off by himself, leaving the player to solve the zone's puzzles alone. Nearly every room in the Whoa Zone contains several Tileoids. The first room contains almost nothing of note besides several floating blocks and a Save Block, unusually early in the level. The second room has several Tileoid Rs and a Tileoid Y. A Happy Flower and a Mushroom can be found as well. There are two doors, one in 2-D and one on a platform in 3-D. The 2-D door leads to a room with some Pigarithms. The room has two floors, with a locked door on the second floor. The 3-D door leads to a room with a Pigarithm and more Tileoids, as well as a Slow Flower. The door at the other end of the room leads to a small room with a Barribad guarding a chest, which contains a Dimension Key. The key is used to unlock the door in the other room, which warps the player onto the ceiling and allows them to continue to the next area.
In the next room, only the walls may be traversed. The door leads to the bottom of the left wall. Continuing upward, there will be two more doors, one that must be reached using Princess Peach's parasol. The first door leads to a room with another locked door and a pipe in 3-D, which leads to a room with some coins. The other door leads to the top floor of another room. The bottom floor, accessed via flip, has a door on the ceiling, which must be accessed using a gravity switch. The door leads to the ceiling of the room with the door leading to the first key. At the other side is a door in 3-D, which takes the player to the ceiling of the room with the locked door. On the ceiling is a chest containing the door's key.
Through the locked door is a hall that must be traversed using gravity switches to walk on the floor and ceiling. The player will come to an invisible door, opened with Tippi's ability. The next room has Hooligons on every surface. To the right is a gravity switch that rotates the player's gravity to the left wall. Upward from there is another rotator switch that can be hit once to walk on the ceiling or twice to walk on the right wall. On the ceiling is a door that leads to a room with a flipping gravity switch and a Save Block, as well as a locked door. On the right wall is a door that leads to the left wall of another room. The floor is accessed via another door. There are two Super Shrooms and a Zombie Shroom in ? Blocks. Another door will take the player to the ceiling, where another key is found.
After entering the last locked door, the heroes meet Squirps, who chastises them for being too slow. Before he can take them to the Pure Heart, though, he is stomped by Mr. L, Count Bleck's newest recruit. After taunting the heroes, Mr. L attacks, but is quickly defeated. He recovers and summons his spaceship, Brobot. He then warps everyone to space and the heroes battle Brobot in zero gravity, using Squirps' Squirt Beam to defeat it. After his robot is destroyed, Mr. L leaves, promising to defeat the heroes next time.
Squirps takes the heroes to the final room and shows them a statue of his mother, Squirpina XIV, the queen of the once-great kingdom of Squirpia. Squirps explains that he was placed in a hibernation capsule 1,500 years ago to await the hero and give them the Pure Heart. After bestowing upon them his kingdom's treasure, Squirps goes to sleep by his mother's statue and is apparently presumed dead unless the heroes return to Outer Space.
Storyline ending text
"Phew! Now that Squirps is all relaxed, Squirps feels kinda...tired..." said Squirps.
And with that, Squirps lay down before the statue of his beloved mother.
"Mother..." he said, his voice soft. "I did my best, right? Are you...proud...of me?"
Then...slowly...young Squirps closed his eyes...
The mission had weighed heavy on his tiny back, and he was proud to fulfill it.
Enemies[edit]
Items[edit]
| Item | Image | Location
|
|---|---|---|
| Super Card | Brobot (Map 28), use Fleep on the protruding block from the ceiling, in a room with two gravity switches and filled with Tileloids.
| |
| HP Plus | (Map 29), use Fleep slightly right of the planet staff on Squirpina XIV’s statue. Revisit is required, after getting the Pure Heart.
|
Menu description[edit]
- "Few have escaped this graveyard of space. The queen of Squirpia hid a Pure Heart here long ago. Her son is Prince Squirps, or Squirp Korogaline Squirpina."
Pre-release design[edit]
The Whoa Zone appeared differently in the early version of Super Paper Mario. It was briefly shown in Super Paper Mario's first trailer, where it was shown to have seemingly more circular elements in its background; the circles shown in this background were orange rather than the green color used in the final game. The Whoa Zone's greenish-brown doors were also normal, red doors in the early game, and Mario was shown to wear his Space Helmet inside it during the trailer.
Names in other languages[edit]
| Language | Name | Meaning | Notes |
|---|---|---|---|
| Japanese | サルガッゾーン[?] Sarugazzōn |
Portmanteau of「サルガッソ」(Sarugasso, "Sargasso Sea") and「ゾーン」(zōn, "zone") | |
| French | Zone Interdite[?] | Forbidden Zone | |
| German | Boah-Zone[?] | Adaptation of English name | |
| Italian | La Zona Proibita[?] | Prohibited Zone | |
| Korean | 빙글빙글존[?] Binggeul Binggeul Jon |
Round-and-Round Zone | |
| Spanish | Zona Estática[?] | Static Zone |
- The Mysterious Mr. L
| Language | Name | Meaning | Notes |
|---|---|---|---|
| Japanese | しょうげきのミスターL![?] Shōgeki no Misutā Eru! |
The Shocking Mr. L! | |
| French | Le mystérieux Mister L[?] | The mysterious Mr. L | |
| German | Der mysteriöse Meister L[?] | The mysterious Mr. L | |
| Italian | Il misterioso Mr. L[?] | The mysterious Mr. L | |
| Korean | 충격의 미스터L![?] Chunggyeok-ui Miseuteo El! |
The Shocking Mr. L! | |
| Spanish | El misterioso Sr. L[?] | The mysterious Mr. L |
