Yold Desert: Difference between revisions
mNo edit summary |
(Item section revamp.) |
||
| (62 intermediate revisions by 37 users not shown) | |||
| Line 1: | Line 1: | ||
{{level infobox | |||
{{level | |||
|title=Yold Desert | |title=Yold Desert | ||
|image=[[ | |image=[[File:SPM Yold Desert.png|250px]] | ||
|code=1-3 | |code=1-3 | ||
|game=''[[Super Paper Mario]]'' | |game=''[[Super Paper Mario]]'' | ||
|boss=[[O'Chunks]] | |||
|before=[[Mount Lineland|<<]] | |before=[[Mount Lineland|<<]] | ||
|after=[[Yold Ruins|>>]] | |after=[[Yold Ruins|>>]] | ||
|track="Mount Lineland" | |||
|sample=[[File:SPM Mount Lineland.oga]] | |||
}} | }} | ||
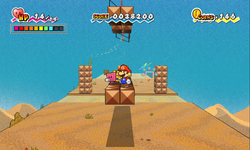
'''Yold Desert''' is an area in [[Lineland]] from ''[[Super Paper Mario]]'' | '''Yold Desert''' is an area in the outskirts of [[Lineland]] from ''[[Super Paper Mario]]''. Throughout the desert, there are clues that the [[Ancients]] left on signposts on how to advance and reach [[Yold Ruins]]. | ||
==Chapter 1-3: The Sands of Yold== | ==Chapter 1-3: The Sands of Yold== | ||
'''Storyline text''' | |||
<blockquote>''With a bold quiver of his magnificent mustache, Mario let loose a hearty sneeze.'' | |||
''A single grain of sand had flown along the warm wind and tickled the hero's nose.'' | |||
''It wasn't long before Mario and Tippi found the source of the sand: the Yold Desert.'' | |||
''{{hover|Along the endless, sunbaked expanse, Mario and Tippi continued their search...|Along the endless, sun-baked expanse, Mario and Tippi continued their search... (PAL version)}}''</blockquote> | |||
[[Mario]] comes to this area after exiting [[Yold Town]]. The first area has a rock, four [[Squiglet]]s, and one [[Squig]]. A Squig [[Catch Card]] can be found in 3D behind a rock. There are four [[? Block]]s in this area, but in 3-D, there are twelve, as well as a Squiglet on them. Most of the ? Blocks contain [[Coin]]s, but some of them also contain [[Pal Pill]]s, a [[Happy Flower (Super Paper Mario)|Happy Flower]], and a [[Speed Flower]]. The next area has three Squiglets and two ? Blocks (four in 3-D). One contains a [[Mushroom]], and the other contains a [[Zombie Shroom]]. Nearby is a red palm tree. Next to the red palm is a rock, a 3-D [[Bald Cleft]], and some [[Quicksand]]. Near the quicksand are three Bald Clefts, two 3-D Squiglets, six [[Brick Block]]s, and two ? Blocks, one of them containing a Mushroom. Next is a rock next to a pile of quicksand. Six Brick Blocks appear above the Quicksand, with a [[Boomboxer]] on one of the blocks. | |||
A [[Jawbus]] and a 3-D Bald Cleft are at the end of this area. There is also a door at the end of this area.The second area starts off with a rock and a Bald Cleft. some Quicksand appears afterwards, along with a [[Cherbil]] and two 3-D Bald Clefts. There is one big rock, which in 3D is an arrow pointing right to a hidden path. The path leads to a large area, empty except for a pillar called a "Yold Signpost." The inscription on it reads "Find ye the tall red palm tree of fortune, and leapeth under its branches ten times," indicating the palm tree in the first area. If the player decides to continue on, however, two Goombas with the ability to flip will appear next to the rock. A large wall made of Hard Blocks forces the player to flip to continue on. Three Goombas are on the other side of the wall, along with three Quicksand pits with four Bald Clefts (two 2D and two 3D) and a Boomboxer at the end of the area. Going back to the first area and following the signpost's instructions causes a door to appear. | |||
[[File:SPM O'Chunks.png|thumb|200px|left|Mario confronting O'Chunks]] | |||
The next area has a Squig and some blocks in the air that can only be reached by the use of a [[Springboard]] with [[spinning device]]s that can ferry Mario across a pit of quicksand and over a wall. Beyond the wall is a Squig, a Squiglet and some blocks, one of which holds a Zombie Shroom. There is a large pit of quicksand that is crossed by a bridge in 3D. Here, there are two [[Spiked Goomba]]s some more spinning devices, but they are frozen. There is a switch boxed up by blocks, except for one opening, which can be used to get [[Thoreau]] in and hit the switch to activate the rectangles. This next area has six Squiglets on the wall when in 3-D, one Squiglet on the ground and one Squig, one 3-D Spiked Goomba, a door, a [[Save Block]], and several blocks in the air leading to a [[Warp Pipe]]. The pipe leads to an underground room full of blocks, most containing coins, but one holds a [[Super Mushroom|Super Shroom]]. | |||
[[File:Yold Ruins entrance.PNG|thumb|200px|The entrance to Yold Ruins.]] | |||
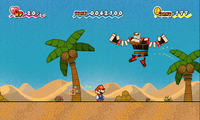
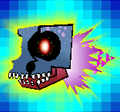
Through the door, Mario and the [[Pixl|Pixls]] find [[O'Chunks]], who challenges Mario to a fight. Tippi recommends [[Tattle|Tattling]] him with her ability and discovers that being thrown makes him dizzy, providing an easy method of defeating O'Chunks. After dispatching him, Mario is able to continue through the desert. | |||
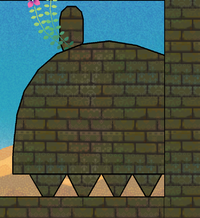
In the next area, there are four Goombas with flip abilities, one 3-D Goomba, two [[Ice Cherbil]]s (one 2D and one 3D), and two sets of moving platforms in the air, each leading to a door. There is also a [[Ghost Shroom]] behind a rock. The left door leads to another Yold Signpost. This one tells of a blue platform that Mario must stand on and press the {{button|wii|1}} and {{button|wii|-}} buttons. Doing so opens the entrance to [[Yold Ruins]], revealing the [[Star Block (Super Paper Mario)|Star Block]]. | |||
{{br|left}} | |||
===Enemies=== | ===Enemies=== | ||
<gallery> | |||
File:SPM Bald Cleft.png|100px|[[Bald Cleft]] | |||
File:SPMBoomboxer.png|100px|[[Boomboxer]] | |||
File:SPMCherbil.png|100px|[[Cherbil]] | |||
File:GoombaSPM.png|100px|[[Goomba]] | |||
File:SPMIceCherbil.png|100px|[[Ice Cherbil]] | |||
File:Chibi Jawbus.png|100px|[[Jawbus]] | |||
File:SPM Megabite Catch Card.png|100px|[[Megabite]] (red palm tree) | |||
File:O'Chunks Artwork- Super Paper Mario.png|100px|[[O'Chunks]] (boss) | |||
File:SPMSpikedGoomba.png|100px|[[Spiked Goomba]] | |||
File:SPMSquig.png|100px|[[Squig]] | |||
File:SPM Squiglet.png|100px|[[Squiglet]] | |||
</gallery> | |||
==Names in | ===Items=== | ||
{{ | {|class=wikitable style="text-align:center" | ||
| | !Item | ||
| | !Icon | ||
| | !Location | ||
| | !Image | ||
| | |- | ||
|[[Catch Card|Caught Card]] | |||
|[[File:CatchCardOrangeSPM.png]] | |||
|align=left|[[Squig]], behind a rock after flipping to 3D near the Boomboxer on brick blocks with a Jawbus nearby, same general area where the red palm tree is located. | |||
|[[File:Yold Desert (Squig Caught Card).png|250px]] | |||
|- | |||
|[[Coin#Super_Paper_Mario|Coin]] | |||
|[[File:SPM Coin.svg|39px]] | |||
|align=left| | |||
*In the third scene (accessed by a door right of the red palm tree), left of the first flipping rectangles. | |||
*In the sixth scene (the one with the signpost with the instructions how to access the end of the area), left of the signpost. Mario must flip into 3-D to see the blocks. | |||
|[[File:Yold Desert Block 23.png|250px]][[File:Yold Desert Blocks 40-44.png|250px]] | |||
|- | |||
|13 Coins<br>[[Happy Flower (Super Paper Mario)|Happy Flower]]<br>[[Pal Pill]]<br>[[Speed Flower]] | |||
|[[File:SPM Coin.svg|39px]]<br>[[File:Happy Flower SPM.png]]<br>[[File:Pal Pill SPM.png]]<br>[[File:Speed Flower SPM.png]] | |||
|align=left|In the first scene, between the first and second rocks. Mario must flip to see all 16 blocks. | |||
|[[File:Yold Desert Blocks 1-16.png|250px]] | |||
|- | |||
|Coin<br>[[Mushroom#Super_Paper_Mario|Mushroom]] | |||
|[[File:SPM Coin.svg|39px]]<br>[[File:Mushroom SPM.png]] | |||
|align=left|In the first scene, after the first quicksand pit, above the group of [[Brick Block|brick blocks]]. | |||
|[[File:Yold Desert Blocks 21-22.png|250px]] | |||
|- | |||
|12 Coins<br>[[Super_Mushroom#Super_Paper_Mario|Super Shroom]] | |||
|[[File:SPM Coin.svg|39px]]<br>[[File:Super Shroom SPM.png]] | |||
|align=left|In the third scene, after entering the pipe near the end and then flipping to 3-D. | |||
|[[File:Yold Desert Blocks 27-39.png|250px]] | |||
|- | |||
|2 Coins<br>Mushroom<br>[[Zombie Shroom]] | |||
|[[File:SPM Coin.svg|39px]]<br>[[File:Mushroom SPM.png]]<br>[[File:SPMZombieShroom.png|39px]] | |||
|align=left|In the first scene, right of the previous ones, near the red palm tree. Mario must flip to see all 4 blocks. | |||
|[[File:Yold Desert Blocks 17-20.png|250px]] | |||
|- | |||
|Coin<br>Zombie Shroom | |||
|[[File:SPM Coin.svg|39px]]<br>[[File:SPMZombieShroom.png|39px]] | |||
|align=left|In the third scene, left after being dropped from the first flipping rectangles. | |||
|[[File:Yold Desert Blocks 24-25.png|250px]] | |||
|- | |||
|[[Courage Shell]] | |||
|[[File:Courage Shell SPM.png]] | |||
|align=left|Behind a rock after flipping to 3D near the Bald Clefts in an area with four narrow quicksand rivers in 2D, same general area where the first Yold Signpost is located. | |||
|[[File:Yold Desert (Courage Shell).png|250px]] | |||
|- | |||
|[[Ghost Shroom]] | |||
|[[File:Ghost Shroom SPM.png]] | |||
|align=left|Behind the second rock from the west near two 3-D Goombas, in an area right after the first O’Chunks boss fight. | |||
|[[File:Yold Desert (Ghost Shroom).png|250px]] | |||
|- | |||
|[[Gold Bar x3]] | |||
|[[File:Gold Bar x3 SPM.png]] | |||
|align=left|'''(Map 9)''', use Fleep on the big rock near a Cherbil, which in 3D is an arrow pointing right to a hidden path. Available after Chapter 5. | |||
|[[File:Yold Desert (Gold Bar x3).png|250px]] | |||
|- | |||
|Mushroom | |||
|[[File:Mushroom SPM.png]] | |||
|align=left|In the third scene, right after being dropped from the second flipping rectangles. | |||
|[[File:Yold Desert Block 26.png|250px]] | |||
|- | |||
|Super Card | |||
|[[File:CatchCardSilverSPM.png]] | |||
|align=left|[[Fracktail]] '''(Map 10)''', use Fleep above the second Yold Signpost, which contains information about {{button|wii|-}} and {{button|wii|1}} buttons. Available after Chapter 5. | |||
|[[File:Yold Desert (Fracktail Super Card).png|250px]] | |||
|} | |||
====Hidden Blocks==== | |||
{|class=wikitable style="text-align:center" | |||
!Item | |||
!Icon | |||
!Location | |||
!Image | |||
!Image (block/s revealed) | |||
|- | |||
|[[Coin#Super_Paper_Mario|Coin]] (both) | |||
|[[File:SPM Coin.svg|39px]] [[File:SPM Coin.svg|39px]] | |||
|In the third scene, after being dropped from the first flipping rectangles, these two blocks can be found as 2nd and 4th blocks in the 4 block row directly behind Mario. | |||
|[[File:SPM Hidden Blocks 2A-3A.png|250px]] | |||
|[[File:SPM Hidden Block 2B.png|250px]][[File:SPM Hidden Block 3B.png|250px]] | |||
|- | |||
|12 Coins | |||
|[[File:SPM Coin.svg|39px]][[File:SPM Coin.svg|39px]][[File:SPM Coin.svg|39px]][[File:SPM Coin.svg|39px]][[File:SPM Coin.svg|39px]][[File:SPM Coin.svg|39px]][[File:SPM Coin.svg|39px]][[File:SPM Coin.svg|39px]][[File:SPM Coin.svg|39px]][[File:SPM Coin.svg|39px]][[File:SPM Coin.svg|39px]][[File:SPM Coin.svg|39px]] | |||
|Same scene, near the end of the scene is a pipe on the block platform. In the room after the pipe is a row of 7 ? Blocks. This hidden block can be found above the fourth one. | |||
|[[File:SPM Hidden Block 4A.png|250px]] | |||
|[[File:SPM Hidden Block 4B.png|250px]] | |||
|} | |||
===Menu description=== | |||
*''"A dry wind rolls across this hot, sandpit-riddled desert. Count Bleck's henchman, O'Chunks, attacked you here. Somewhere in the desert is an entrance to the Yold Ruins."'' | |||
==Names in other languages== | |||
{{foreign names | |||
|Jpn=コダーイさばく | |||
|JpnR=Kodāi Sabaku | |||
|JpnM=From elongated version of「古代」(''kodai'', ancient) and「さばく」(''sabaku'', desert) | |||
|Fre=Désert d'Antan | |||
|FreM=Yesteryear's Desert | |||
|Ger=Uraltwüste | |||
|GerM=Ancient Desert | |||
|SpaE=Desierto Antico<ref name=desiertoantico>[https://youtu.be/YHbewSvNHdc?t=13 "Super Paper Mario - Tierra Lineal - Fase 1-3"].</ref> | |||
|SpaEM=Yold Desert ("Antico" is derived from ''antiguo'' [ancient]) | |||
|Ita=L'Antico Deserto | |||
|ItaM=Old Desert | |||
|Kor=고대사막 | |||
|KorR=Godae Samak | |||
|KorM=Ancient Desert | |||
}} | |||
;The Sands of Yold | |||
{{foreign names | |||
|Jpn=しゃくねつのさばくをとっぱせよ! | |||
|JpnR=Shakunetsu no Sabaku o Toppase yo! | |||
|JpnM=Break Through the Scorching-Hot Desert! | |||
|Ita=Le sabbie antiche | |||
|ItaM=The ancient sands | |||
|Fre=Les sables d'antan | |||
|FreM=The sands of yesteryear | |||
|SpaE=Las arenas de Antica<ref name=desiertoantico>[https://youtu.be/YHbewSvNHdc?t=13 "Super Paper Mario - Tierra Lineal - Fase 1-3"].</ref> | |||
|SpaEM=Yold's Sands | |||
|Kor=이글거리는 사막을 건너라! | |||
|KorR=Igeulgeorineun samag-eul geonneora! | |||
|KorM=Crossing the scorching desert! | |||
|Ger=Die uralten Sande | |||
|GerM=The ancient sands | |||
}} | |||
== | ==Notes== | ||
*The name "Yold" is a combination of "ye" (old way of saying "the") and "old", and the language used in the Yold Signposts is [[wikipedia:Early Modern English|Early Modern English]]. | |||
*The opening of the gate is similar to that of the [[Mask Gate]]s from ''[[Super Mario Bros. 2]]''. | |||
==References== | |||
<references/> | |||
{{SPM}} | {{SPM}} | ||
[[Category:Deserts]] | [[Category:Deserts]] | ||
[[Category:Super Paper Mario | [[Category:Super Paper Mario locations]] | ||
[[Category:Super Paper Mario | [[Category:Super Paper Mario levels]] | ||
[[it:Antico Deserto]] | |||
Latest revision as of 13:47, March 30, 2025
| Level | |||
|---|---|---|---|
| Yold Desert | |||
| |||
| Level code | 1-3 | ||
| Game | Super Paper Mario | ||
| Boss | O'Chunks | ||
| Music track | "Mount Lineland" | ||
| |||
| << Directory of levels >> | |||
Yold Desert is an area in the outskirts of Lineland from Super Paper Mario. Throughout the desert, there are clues that the Ancients left on signposts on how to advance and reach Yold Ruins.
Chapter 1-3: The Sands of Yold[edit]
Storyline text
With a bold quiver of his magnificent mustache, Mario let loose a hearty sneeze.
A single grain of sand had flown along the warm wind and tickled the hero's nose.
It wasn't long before Mario and Tippi found the source of the sand: the Yold Desert.
Along the endless, sunbaked expanse, Mario and Tippi continued their search...
Mario comes to this area after exiting Yold Town. The first area has a rock, four Squiglets, and one Squig. A Squig Catch Card can be found in 3D behind a rock. There are four ? Blocks in this area, but in 3-D, there are twelve, as well as a Squiglet on them. Most of the ? Blocks contain Coins, but some of them also contain Pal Pills, a Happy Flower, and a Speed Flower. The next area has three Squiglets and two ? Blocks (four in 3-D). One contains a Mushroom, and the other contains a Zombie Shroom. Nearby is a red palm tree. Next to the red palm is a rock, a 3-D Bald Cleft, and some Quicksand. Near the quicksand are three Bald Clefts, two 3-D Squiglets, six Brick Blocks, and two ? Blocks, one of them containing a Mushroom. Next is a rock next to a pile of quicksand. Six Brick Blocks appear above the Quicksand, with a Boomboxer on one of the blocks.
A Jawbus and a 3-D Bald Cleft are at the end of this area. There is also a door at the end of this area.The second area starts off with a rock and a Bald Cleft. some Quicksand appears afterwards, along with a Cherbil and two 3-D Bald Clefts. There is one big rock, which in 3D is an arrow pointing right to a hidden path. The path leads to a large area, empty except for a pillar called a "Yold Signpost." The inscription on it reads "Find ye the tall red palm tree of fortune, and leapeth under its branches ten times," indicating the palm tree in the first area. If the player decides to continue on, however, two Goombas with the ability to flip will appear next to the rock. A large wall made of Hard Blocks forces the player to flip to continue on. Three Goombas are on the other side of the wall, along with three Quicksand pits with four Bald Clefts (two 2D and two 3D) and a Boomboxer at the end of the area. Going back to the first area and following the signpost's instructions causes a door to appear.
The next area has a Squig and some blocks in the air that can only be reached by the use of a Springboard with spinning devices that can ferry Mario across a pit of quicksand and over a wall. Beyond the wall is a Squig, a Squiglet and some blocks, one of which holds a Zombie Shroom. There is a large pit of quicksand that is crossed by a bridge in 3D. Here, there are two Spiked Goombas some more spinning devices, but they are frozen. There is a switch boxed up by blocks, except for one opening, which can be used to get Thoreau in and hit the switch to activate the rectangles. This next area has six Squiglets on the wall when in 3-D, one Squiglet on the ground and one Squig, one 3-D Spiked Goomba, a door, a Save Block, and several blocks in the air leading to a Warp Pipe. The pipe leads to an underground room full of blocks, most containing coins, but one holds a Super Shroom.
Through the door, Mario and the Pixls find O'Chunks, who challenges Mario to a fight. Tippi recommends Tattling him with her ability and discovers that being thrown makes him dizzy, providing an easy method of defeating O'Chunks. After dispatching him, Mario is able to continue through the desert.
In the next area, there are four Goombas with flip abilities, one 3-D Goomba, two Ice Cherbils (one 2D and one 3D), and two sets of moving platforms in the air, each leading to a door. There is also a Ghost Shroom behind a rock. The left door leads to another Yold Signpost. This one tells of a blue platform that Mario must stand on and press the ![]() and
and ![]() buttons. Doing so opens the entrance to Yold Ruins, revealing the Star Block.
buttons. Doing so opens the entrance to Yold Ruins, revealing the Star Block.
Enemies[edit]
Items[edit]
| Item | Icon | Location | Image |
|---|---|---|---|
| Caught Card | Squig, behind a rock after flipping to 3D near the Boomboxer on brick blocks with a Jawbus nearby, same general area where the red palm tree is located. | 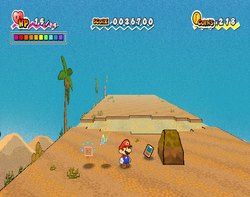
| |
| Coin |
|
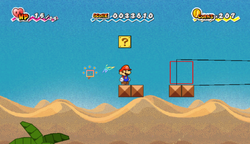 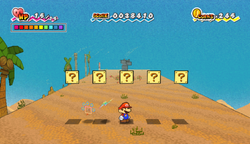
| |
| 13 Coins Happy Flower Pal Pill Speed Flower |
In the first scene, between the first and second rocks. Mario must flip to see all 16 blocks. | 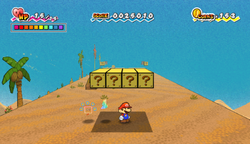
| |
| Coin Mushroom |
In the first scene, after the first quicksand pit, above the group of brick blocks. | 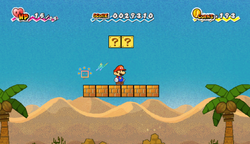
| |
| 12 Coins Super Shroom |
In the third scene, after entering the pipe near the end and then flipping to 3-D. | 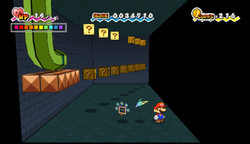
| |
| 2 Coins Mushroom Zombie Shroom |
In the first scene, right of the previous ones, near the red palm tree. Mario must flip to see all 4 blocks. | 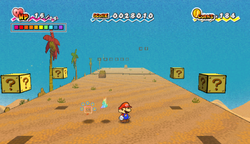
| |
| Coin Zombie Shroom |
In the third scene, left after being dropped from the first flipping rectangles. | 
| |
| Courage Shell | Behind a rock after flipping to 3D near the Bald Clefts in an area with four narrow quicksand rivers in 2D, same general area where the first Yold Signpost is located. | 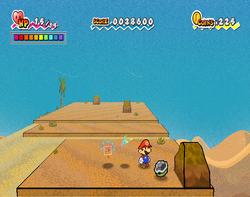
| |
| Ghost Shroom | Behind the second rock from the west near two 3-D Goombas, in an area right after the first O’Chunks boss fight. | 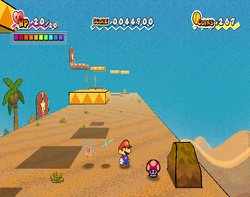
| |
| Gold Bar x3 | (Map 9), use Fleep on the big rock near a Cherbil, which in 3D is an arrow pointing right to a hidden path. Available after Chapter 5. | 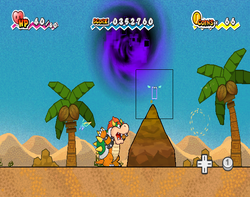
| |
| Mushroom | In the third scene, right after being dropped from the second flipping rectangles. | 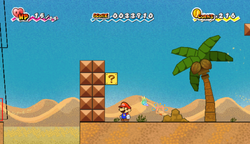
| |
| Super Card | Fracktail (Map 10), use Fleep above the second Yold Signpost, which contains information about |
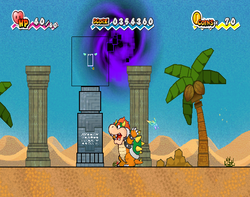
|
Hidden Blocks[edit]
| Item | Icon | Location | Image | Image (block/s revealed) |
|---|---|---|---|---|
| Coin (both) | In the third scene, after being dropped from the first flipping rectangles, these two blocks can be found as 2nd and 4th blocks in the 4 block row directly behind Mario. | 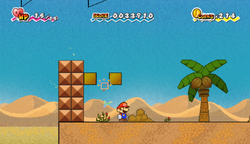
|
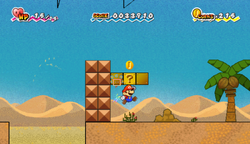 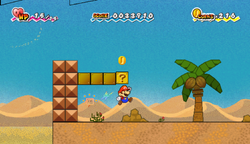
| |
| 12 Coins | Same scene, near the end of the scene is a pipe on the block platform. In the room after the pipe is a row of 7 ? Blocks. This hidden block can be found above the fourth one. | 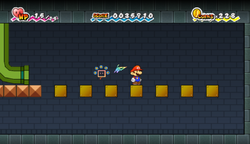
|
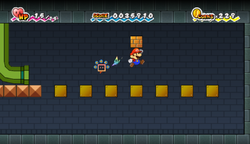
|
Menu description[edit]
- "A dry wind rolls across this hot, sandpit-riddled desert. Count Bleck's henchman, O'Chunks, attacked you here. Somewhere in the desert is an entrance to the Yold Ruins."
Names in other languages[edit]
| Language | Name | Meaning | Notes |
|---|---|---|---|
| Japanese | コダーイさばく[?] Kodāi Sabaku |
From elongated version of「古代」(kodai, ancient) and「さばく」(sabaku, desert) | |
| French | Désert d'Antan[?] | Yesteryear's Desert | |
| German | Uraltwüste[?] | Ancient Desert | |
| Italian | L'Antico Deserto[?] | Old Desert | |
| Korean | 고대사막[?] Godae Samak |
Ancient Desert | |
| Spanish (NOE) | Desierto Antico[1] | Yold Desert ("Antico" is derived from antiguo [ancient]) |
- The Sands of Yold
| Language | Name | Meaning | Notes |
|---|---|---|---|
| Japanese | しゃくねつのさばくをとっぱせよ![?] Shakunetsu no Sabaku o Toppase yo! |
Break Through the Scorching-Hot Desert! | |
| French | Les sables d'antan[?] | The sands of yesteryear | |
| German | Die uralten Sande[?] | The ancient sands | |
| Italian | Le sabbie antiche[?] | The ancient sands | |
| Korean | 이글거리는 사막을 건너라![?] Igeulgeorineun samag-eul geonneora! |
Crossing the scorching desert! | |
| Spanish (NOE) | Las arenas de Antica[1] | Yold's Sands |
Notes[edit]
- The name "Yold" is a combination of "ye" (old way of saying "the") and "old", and the language used in the Yold Signposts is Early Modern English.
- The opening of the gate is similar to that of the Mask Gates from Super Mario Bros. 2.
