Yold Ruins: Difference between revisions
No edit summary |
m (Text replacement - "(\| *)Jap([RMCN\d]* *=)" to "$1Jpn$2") |
||
| (106 intermediate revisions by 63 users not shown) | |||
| Line 1: | Line 1: | ||
The '''Yold Ruins''' are the setting of Chapter 1-4 in ''[[Super Paper Mario]]''. | {{level infobox | ||
|image=[[File:YoldRuins.png|250px]] | |||
|code=1-4 | |||
|game=''[[Super Paper Mario]]'' | |||
|boss=[[Fracktail]] | |||
|before=[[Yold Desert|<<]] | |||
|after=[[Gloam Valley|>>]] | |||
|track=Yold Ruins | |||
|sample=[[File:SPM Yold Ruins.oga]] | |||
}} | |||
{{quote|Mario, I can feel it calling... The [[Pure Heart]] is nearby... But, wait... I sense [[Fracktail|something else]] emanating from the sand dunes.|Tippi|Super Paper Mario}} | |||
The '''Yold Ruins''' are the setting of Chapter 1-4 in ''[[Super Paper Mario]]''. They are the ruins of a fortress found in [[Yold Desert]]. | |||
==Chapter 1-4: Monster of the Ruins== | |||
{{multiple image | |||
|align=right | |||
|direction=horizontal | |||
|width=180 | |||
|image1=Spiky Tromp pit.png | |||
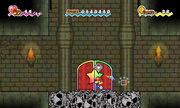
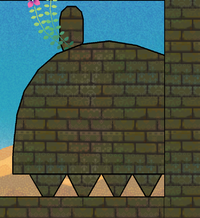
|caption1=Spiky Tromps in the pit. | |||
|image2=SPM-Firebar.png | |||
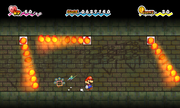
|caption2=Firebars | |||
}} | |||
'''Storyline text''' | |||
<blockquote>''Somehow, Mario had found the strength to cross the desert's sweltering dunes.'' | |||
[[Category: | ''Ahead was a sprawling complex of ruins rising out of the sand.'' | ||
[[Category: Temples | |||
''Thankful for the shade, Mario and Tippi ventured deeper inside.'' | |||
''They were the very ruins Old Man Watchitt had warned them about.'' | |||
''What dangers lurked in the shady corridors ahead?''</blockquote> | |||
[[File:Yold Ruins entrance.PNG|thumb|left|200px|The entrance to Yold Ruins, shaped like [[Fracktail]]'s snout]] | |||
[[Mario]] reaches the ruins after his trek through the [[Yold Desert]]. [[Tippi]] says that she senses the [[Pure Heart]] close ahead, but also senses something else and warns Mario to be careful. | |||
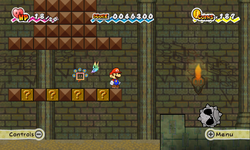
The first room is a small staircase going down, with a door and a [[Squiglet]] at the bottom. The next room is a hallway, that has a [[Buzzy Beetle]] and a [[Quicksand]] pit as the first obstacles. Afterwards, a Buzzy Beetle on the ceiling and one on the ground come next. There is a platform with a [[Fire Bar]] and a [[? Block]] containing a [[Mushroom]]. Above this platform are two Hard Blocks, which Mario can use to get to two hidden areas around the room. Two Buzzy Beetles (one 2D and one 3D) and a [[Squiglet]] appear on the left secret room. On the right one there is one [[Squig]] and a small pit room with a [[Ladder]]. Down here, the player can collect a [[Life Mushroom (Paper Mario series)|Life Shroom]] from a [[treasure chest]]. The following room has three big Fire Bars and a locked door between two small Fire Bars. To the far left of the room is a door in midair. [[Flip]]ping reveals a Squiglet and two Flip blocks underneath it. When Mario hits them, they flip to 2D, allowing him to enter the door. It leads to a small room with two [[Spiky Tromp]]s and a ladder leading to platform and the [[Ruins Key (Super Paper Mario)|key]] to the locked door. Beyond that door is a room with a large pit of quicksand. There is a [[Save Block]] in this room. Above the pit is a platform of blocks, traversed by a Squiglet. Above that platform is a group of blocks in a square shape. Continuing on past here, Mario will find two Spiky Tromps, a Squig and two doors, one on top of the other, and the bottom door is locked. The room behind the unlocked door has a switch on the ceiling and pipe dropping Squiglets. Mario must throw the Squiglets at the switch with [[Thoreau]]. Upon leaving the room, he will find that the blocks mentioned before have rearranged, opening up to reveal a key that can be collected with Thoreau. | |||
{{multiple image | |||
|align=right | |||
|direction=horizontal | |||
|width=180 | |||
|image1=SPM Blue Switch.png | |||
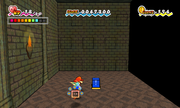
|caption1=This blue switch reveals a big red switch. | |||
|image2=SPM Yold Ruins Big Red Switch.png | |||
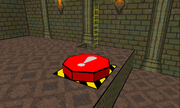
|caption2=A big red switch to drop dozens of Spiky Tromps into a pit. | |||
}} | |||
The next room is small, with a door in midair. Tippi's ability reveals a platform underneath it. The next room has three Fire Bars and two Buzzy Beetles, as well as another locked door. A key can be found surrounded by blocks, but if Mario flips, he finds that the key is actually behind the cage of blocks up a tiny staircase. He can flip in this room to find a hidden path to a small room with two 3D Buzzy Beetles and a Buzzy Beetle [[Catch Card]]. In the next room, Mario starts at the bottom of a large pit. There is a floating door at the top of the pit. There is a trampoline to the left that Mario can use to spring to an alcove at the top of the pit. Flipping reveals a ladder to another area. Mario will find a small blue switch. When hit, the blue switch reveals a large red switch, while also causing many Spiky Tromps to pour out of the wall. Mario must press the big switch to open up the floor, dropping the Spiny Tromps into the pit and crushing them. Mario can then walk on the crushed Tromps and enter the door. The next room has four red switches. Flipping reveals numbers 1-4 on the sides of them. Hitting the blocks in order causes a staircase to appear. At the top is a pipe, a Save Block, and a ? Block containing a [[Super Mushroom|Super Shroom]]. | |||
{{multiple image | |||
|align=left | |||
|direction=horizontal | |||
|width=180 | |||
|image1=FracktailPreBattle.png | |||
|caption1=Fracktail appears | |||
|image2=FracktailMalfunction.png | |||
|caption2=Dimentio short-circuits Fracktail | |||
}} | |||
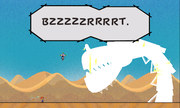
The pipe leads up to the desert. A large robot guardian called [[Fracktail]] rises up from the sand and scans Mario, identifying him as the hero of the prophecy. He is about to let Mario pass, but [[Dimentio]] appears and shoots Fracktail's antenna, causing him to go haywire. Mario is forced to fight Fracktail. By attacking his antenna, Mario destroys the robot. A door appears, leading into one last room. There, Mario finds [[Merlumina]], the ghost of one of the [[Tribe of Ancients|Ancients]]. She tells Mario a story that starts out as the origin of the Pure Hearts, but soon turns into a rambling tale about Merlumina's life as a young adult, during which Mario falls asleep. After the story, Merlumina entrusts Mario with the second Pure Heart. | |||
{{br}} | |||
'''Storyline ending text''' | |||
<blockquote>''Before disappearing, Merlumina had entrusted Mario to save every world.'' | |||
''She had waited 1,500 years to deliver the message to the legendary hero.'' | |||
''With the second Pure Heart in hand, Mario was in great spirits.'' | |||
''But six Pure Hearts still remained to be found, and the journey had just begun.'' | |||
''With a flutter, Tippi said, "I think we'd better return to [[Flipside]]..."'' | |||
''The weight of every world's fate once again rested on Mario's shoulders...''</blockquote> | |||
===Enemies and obstacles=== | |||
<gallery> | |||
File:SPMBuzzyBeetle.png|100px|[[Buzzy Beetle]]s | |||
File:Firebar SPM.png|100px|[[Fire Bar]]s | |||
File:SPMFrackle.png|100px|[[Frackle]]s (fought together with Fracktail) | |||
File:Fracktail.jpg|100px|[[Fracktail]] (Chapter 1 boss) | |||
File:SPM Megabite Catch Card.png|100px|[[Megabite]] (second room) | |||
File:Spiky Tromp SPM.png|100px|[[Spiky Tromp]]s | |||
File:SPMSquig.png|100px|[[Squig]]s | |||
File:SPM Squiglet.png|100px|[[Squiglet]]s | |||
</gallery> | |||
===Items=== | |||
{{RPG item locations | |||
|item1=[[Life Shroom]] | |||
|image1=[[File:Life Shroom SPM.png]] | |||
|location1=In a chest at the top right end of the second area, past a Squig and down the ladder. | |||
|item2=Caught Card | |||
|image2=[[File:CatchCardOrangeSPM.png]] | |||
|location2=[[Buzzy Beetle]], in a secret area via a 3D-accessible path near the door to the Spiky Tromp trap area. | |||
|item3=Super Card | |||
|image3=[[File:CatchCardSilverSPM.png]] | |||
|location3=[[Merlumina]] '''(Map 11)''', use [[Fleep]] on the mural between the second and third pillars in the room where Mario met Merlumina. | |||
}} | |||
===Menu description=== | |||
*"''The Yold Ruins were trapped to protect the Pure Heart. A dragon named Fracktail defended the Pure Heart. Beyond him lay the resting place of Merlumina.''" | |||
==Names in other languages== | |||
{{foreign names | |||
|Jpn=コダーイいせき | |||
|JpnR=Kodāi Iseki | |||
|JpnM=「コダーイ」is an elongated version of「古代」(''kodai'', ancient), and「いせき」means "ruins" | |||
|Fre=Ruines d'Antan | |||
|FreM=Yesteryear's Ruins | |||
|Ger=Linienstein-Ruinen | |||
|GerM=Linestone Ruins | |||
|SpaE=Ruinas Anticas<ref name=ruinasanticas>[https://youtu.be/GO6AAaleDy4?t=17 "Super Paper Mario - Tierra Lineal - Fase 1-4"].</ref> | |||
|SpaEM=Yold Ruins ("Anticas" is derived from ''antiguas'' [ancient]) | |||
|Ita=Antiche Rovine | |||
|ItaM=Ancient Ruins | |||
|Kor=고대유적 | |||
|KorR=Godae Yujeok | |||
|KorM=Ancient Ruins | |||
}} | |||
;Monster of the Ruins | |||
{{foreign names | |||
|Jpn=いせきとカイブツ | |||
|JpnR=Iseki to Kaibutsu | |||
|JpnM=The Ruins and the Monster | |||
|Ita=Il mostro delle rovine | |||
|ItaM=The ruins' monster | |||
|Fre=Le monstre des ruines | |||
|FreM=Monster of the ruins | |||
|SpaE=El monstruo de las ruinas<ref name=ruinasanticas>[https://youtu.be/GO6AAaleDy4?t=17 "Super Paper Mario - Tierra Lineal - Fase 1-4"].</ref> | |||
|SpaEM=The monster of the ruins | |||
|Ger=Das Monster der Ruine | |||
|GerM=The ruins' monster | |||
|Kor=유적과 괴물 | |||
|KorR=Yujeokgwa Goemul | |||
|KorM=Ruins and Monsters | |||
}} | |||
==Trivia== | |||
*Its name comes from the archaic phrase "ye old". | |||
*The walls of Yold Ruins feature a faded, barely-perceptible painting of Fracktail, whose body follows the path that the player should take to reach Fracktail's abode. | |||
==References== | |||
<references/> | |||
{{SPM}} | |||
[[Category:Dungeons]] | |||
[[Category:Super Paper Mario levels]] | |||
[[Category:Super Paper Mario locations]] | |||
[[Category:Temples]] | |||
Latest revision as of 16:14, January 7, 2025
| Level | |||
|---|---|---|---|
| Yold Ruins | |||
| |||
| Level code | 1-4 | ||
| Game | Super Paper Mario | ||
| Boss | Fracktail | ||
| Music track | Yold Ruins | ||
| |||
| << Directory of levels >> | |||
- “Mario, I can feel it calling... The Pure Heart is nearby... But, wait... I sense something else emanating from the sand dunes.”
- —Tippi, Super Paper Mario
The Yold Ruins are the setting of Chapter 1-4 in Super Paper Mario. They are the ruins of a fortress found in Yold Desert.
Chapter 1-4: Monster of the Ruins[edit]
Storyline text
Somehow, Mario had found the strength to cross the desert's sweltering dunes.
Ahead was a sprawling complex of ruins rising out of the sand.
Thankful for the shade, Mario and Tippi ventured deeper inside.
They were the very ruins Old Man Watchitt had warned them about.
What dangers lurked in the shady corridors ahead?
Mario reaches the ruins after his trek through the Yold Desert. Tippi says that she senses the Pure Heart close ahead, but also senses something else and warns Mario to be careful.
The first room is a small staircase going down, with a door and a Squiglet at the bottom. The next room is a hallway, that has a Buzzy Beetle and a Quicksand pit as the first obstacles. Afterwards, a Buzzy Beetle on the ceiling and one on the ground come next. There is a platform with a Fire Bar and a ? Block containing a Mushroom. Above this platform are two Hard Blocks, which Mario can use to get to two hidden areas around the room. Two Buzzy Beetles (one 2D and one 3D) and a Squiglet appear on the left secret room. On the right one there is one Squig and a small pit room with a Ladder. Down here, the player can collect a Life Shroom from a treasure chest. The following room has three big Fire Bars and a locked door between two small Fire Bars. To the far left of the room is a door in midair. Flipping reveals a Squiglet and two Flip blocks underneath it. When Mario hits them, they flip to 2D, allowing him to enter the door. It leads to a small room with two Spiky Tromps and a ladder leading to platform and the key to the locked door. Beyond that door is a room with a large pit of quicksand. There is a Save Block in this room. Above the pit is a platform of blocks, traversed by a Squiglet. Above that platform is a group of blocks in a square shape. Continuing on past here, Mario will find two Spiky Tromps, a Squig and two doors, one on top of the other, and the bottom door is locked. The room behind the unlocked door has a switch on the ceiling and pipe dropping Squiglets. Mario must throw the Squiglets at the switch with Thoreau. Upon leaving the room, he will find that the blocks mentioned before have rearranged, opening up to reveal a key that can be collected with Thoreau.
The next room is small, with a door in midair. Tippi's ability reveals a platform underneath it. The next room has three Fire Bars and two Buzzy Beetles, as well as another locked door. A key can be found surrounded by blocks, but if Mario flips, he finds that the key is actually behind the cage of blocks up a tiny staircase. He can flip in this room to find a hidden path to a small room with two 3D Buzzy Beetles and a Buzzy Beetle Catch Card. In the next room, Mario starts at the bottom of a large pit. There is a floating door at the top of the pit. There is a trampoline to the left that Mario can use to spring to an alcove at the top of the pit. Flipping reveals a ladder to another area. Mario will find a small blue switch. When hit, the blue switch reveals a large red switch, while also causing many Spiky Tromps to pour out of the wall. Mario must press the big switch to open up the floor, dropping the Spiny Tromps into the pit and crushing them. Mario can then walk on the crushed Tromps and enter the door. The next room has four red switches. Flipping reveals numbers 1-4 on the sides of them. Hitting the blocks in order causes a staircase to appear. At the top is a pipe, a Save Block, and a ? Block containing a Super Shroom.
The pipe leads up to the desert. A large robot guardian called Fracktail rises up from the sand and scans Mario, identifying him as the hero of the prophecy. He is about to let Mario pass, but Dimentio appears and shoots Fracktail's antenna, causing him to go haywire. Mario is forced to fight Fracktail. By attacking his antenna, Mario destroys the robot. A door appears, leading into one last room. There, Mario finds Merlumina, the ghost of one of the Ancients. She tells Mario a story that starts out as the origin of the Pure Hearts, but soon turns into a rambling tale about Merlumina's life as a young adult, during which Mario falls asleep. After the story, Merlumina entrusts Mario with the second Pure Heart.
Storyline ending text
Before disappearing, Merlumina had entrusted Mario to save every world.
She had waited 1,500 years to deliver the message to the legendary hero.
With the second Pure Heart in hand, Mario was in great spirits.
But six Pure Hearts still remained to be found, and the journey had just begun.
With a flutter, Tippi said, "I think we'd better return to Flipside..."
The weight of every world's fate once again rested on Mario's shoulders...
Enemies and obstacles[edit]
Items[edit]
| Item | Image | Location
|
|---|---|---|
| Life Shroom | In a chest at the top right end of the second area, past a Squig and down the ladder.
| |
| Caught Card | Buzzy Beetle, in a secret area via a 3D-accessible path near the door to the Spiky Tromp trap area.
| |
| Super Card | Merlumina (Map 11), use Fleep on the mural between the second and third pillars in the room where Mario met Merlumina.
|
Menu description[edit]
- "The Yold Ruins were trapped to protect the Pure Heart. A dragon named Fracktail defended the Pure Heart. Beyond him lay the resting place of Merlumina."
Names in other languages[edit]
| Language | Name | Meaning | Notes |
|---|---|---|---|
| Japanese | コダーイいせき[?] Kodāi Iseki |
「コダーイ」is an elongated version of「古代」(kodai, ancient), and「いせき」means "ruins" | |
| French | Ruines d'Antan[?] | Yesteryear's Ruins | |
| German | Linienstein-Ruinen[?] | Linestone Ruins | |
| Italian | Antiche Rovine[?] | Ancient Ruins | |
| Korean | 고대유적[?] Godae Yujeok |
Ancient Ruins | |
| Spanish (NOE) | Ruinas Anticas[1] | Yold Ruins ("Anticas" is derived from antiguas [ancient]) |
- Monster of the Ruins
| Language | Name | Meaning | Notes |
|---|---|---|---|
| Japanese | いせきとカイブツ[?] Iseki to Kaibutsu |
The Ruins and the Monster | |
| French | Le monstre des ruines[?] | Monster of the ruins | |
| German | Das Monster der Ruine[?] | The ruins' monster | |
| Italian | Il mostro delle rovine[?] | The ruins' monster | |
| Korean | 유적과 괴물[?] Yujeokgwa Goemul |
Ruins and Monsters | |
| Spanish (NOE) | El monstruo de las ruinas[1] | The monster of the ruins |
Trivia[edit]
- Its name comes from the archaic phrase "ye old".
- The walls of Yold Ruins feature a faded, barely-perceptible painting of Fracktail, whose body follows the path that the player should take to reach Fracktail's abode.
