Mario & Luigi: Bowser's Inside Story: Difference between revisions
(3 out of 7 games if counting remakes, not really notable IMO.) Tag: Undo |
|||
| Line 1: | Line 1: | ||
{{ | {{italic title}} | ||
{{ | {{about|the original game for the [[Nintendo DS]]|the remake of this game for the [[Nintendo 3DS]]|[[Mario & Luigi: Bowser's Inside Story + Bowser Jr.'s Journey]]}} | ||
|image=[[ | {{game infobox | ||
|developer=[[AlphaDream]] | |image=[[File:Bowsersinsidestorycover.jpg|300px]]<br>North American box cover | ||
|developer=[[AlphaDream]]<br>[[Nintendo SPD Group No.4]] | |||
|publisher=[[Nintendo]] | |publisher=[[Nintendo]] | ||
| | |release={{release|Japan|February 11, 2009|ROC|February 11, 2009|USA|September 15, 2009|Europe|October 9, 2009<ref>{{cite|language=en-gb|url=www.nintendo.com/en-gb/Games/Nintendo-DS/Mario-Luigi-Bowser-s-Inside-Story-271584.html|title=''Mario & Luigi: Bowser's Inside Story''|publisher=Nintendo UK|accessdate=June 25, 2024}}</ref>|Australia|October 22, 2009|South Korea|July 21, 2011}} | ||
|genre=RPG | |languages={{languages|en_us=y|en_gb=y|es_es=y|es_latam=y|fr_fr=y|fr_ca=y|de=y|it=y|jp=y|kr=y}} | ||
|modes=Single player | |genre=[[Genre#Role-playing|RPG]] | ||
|ratings= | |modes=Single-player | ||
|ratings={{ratings|esrb=E|pegi=3|cero=A|acb=G|grac=all|usk=6}} | |||
|platforms=[[Nintendo DS]] | |platforms=[[Nintendo DS]] | ||
| | |format={{format|ds=1}} | ||
|input= | |input={{input|ds=1}} | ||
|serials=NTR-CLJJ-JPN (Japan) | |||
}} | }} | ||
'''''Mario & Luigi: Bowser's Inside Story''''' | '''''Mario & Luigi: Bowser's Inside Story''''' is a [[Nintendo DS]] game developed by [[AlphaDream]] and published by [[Nintendo]]. It was released worldwide in 2009 and in South Korea in 2011. It is the third title in the [[Mario & Luigi (series)|''Mario & Luigi'' series]], preceded by ''[[Mario & Luigi: Partners in Time]]'' for the Nintendo DS in 2005 and succeeded by ''[[Mario & Luigi: Dream Team]]'' for the [[Nintendo 3DS]] in 2013. The title of the game is a parody on the term "inside story", meaning the "true" tale of an event from the perspective of an insider who participated in the action, as opposed to an outsider who only hears about the event later on. In this case, the game is a literal inside story, as Mario and Luigi have to adventure through Bowser's insides. The game's European Spanish, European French, and Italian name is a parody on the famous novel ''{{wp|Journey to the Center of the Earth}}''. The original French name is ''Voyage au centre de la Terre'', the Spanish name is ''Viaje al centro de la Tierra'', and the Italian name is ''Viaggio al centro della Terra''. | ||
This is the only non-3DS installment in the ''Mario & Luigi'' series not to be released on the [[Virtual Console#Wii U|Virtual Console]] for the [[Wii U]]. | |||
[[ | A Nintendo 3DS [[Reissue#Remakes|remake]] of the game, titled ''[[Mario & Luigi: Bowser's Inside Story + Bowser Jr.'s Journey]]'', was released in Japan on December 27, 2018 and elsewhere in January 2019. Outside Japan, the release year marks the 10th anniversary of this game. This is the second game in the ''Mario & Luigi'' series after ''[[Mario & Luigi: Superstar Saga]]'' to have a remake. | ||
==Story== | |||
[[File:Bowser's Inside Story ToadBlorbs.png|thumb|The blorbs being discussed.]] | |||
After the [[Mushroom Kingdom]]'s citizens start contracting the [[blorbs]], a disease that swells [[Toad (species)|Toads]], [[Princess Peach]] holds an emergency conference meeting at [[Peach's Castle|her castle]], which includes [[Mario]], [[Luigi]], [[Toadbert]], [[Toadsworth]], and a Star Sprite named [[Starlow]]. [[Bowser]] crashes in and is sent flying out of Peach's Castle after easily being defeated by Mario, eventually landing in [[Dimble Wood]], and after regaining consciousness, he comes across a cloaked merchant (who is [[Fawful]] in disguise). The merchant gives him a "[[Vacuum Shroom|Lucky Mushroom]]" that causes Bowser to inhale his surroundings. He returns to Peach's Castle and uses this ability to suck in everyone who attended the conference. | |||
Mario, Luigi, and Starlow reawaken inside the [[Trash Pit]] area of [[Bowser's body]], where they acquire hammers and use them to hit an [[Funny Bone|exposed nerve]] and rouse Bowser, who had been dumped in [[Cavi Cape Cave]]. Starlow, who talks to Bowser throughout the game, withholds information surrounding the Mario Bros.' whereabouts and assists him in remembering the past events. Bowser then encounters Fawful, who explains that the blorbs and the Vacuum Shroom he gave him were all part of a plan to conquer both the Mushroom Kingdom and [[Bowser's Castle]]. He sends out his minion, [[Midbus]], whose speech irritates the Koopa King so much that he decides to pick a fight with him. Bowser loses to Midbus, and he and Fawful abandon him. | |||
Bowser | |||
Bowser helps a stranded [[Broque Monsieur]] get back on [[Plack Beach]], where the sentient block rewards him a [[Vacuum Block]], allowing him to control his sucking abilities. After defeating the [[Sea Pipe Statue]], Bowser drinks water which allows Mario and Luigi to enter the [[Pump Works]] and defeat the [[Scutlet (boss)|Scutlet]] bug that was blocking his fire breath at the [[Flame Pipe]]. Starlow starts using the alias "Chippy" to Bowser. After subduing Broque's pet dog [[Broggy]], Bowser enters Dimble Wood, where he eventually comes across three of his minions: [[Sergeant Guy]], [[Corporal Paraplonk]], and [[Private Goomp]]. They plan to retake Bowser's castle with a [[Banzai Bill]] launcher, where Bowser is required to find ammunition. Bowser procures a giant carrot as a makeshift missile, but the owner, a Wiggler, makes him eat it and then attacks him. After he obtains the Banzai Bill from the Wiggler, Bowser is then overcome with stomach pain caused by consuming a parasitic [[Durmite]] along with the carrot; Mario and Luigi defeat it in battle. | |||
After his stomach issue is resolved, Bowser proceeds to launch the Banzai Bill towards Bowser Castle. However, Midbus dodges his Banzai Bill by launching the castle and landing it on him. The Mario Bros. revive Bowser from the [[Rump Command]], which unintentionally turns him as giant as the castle. After Bowser defeats the castle, it flies away with him in pursuit, traveling through [[Bumpsy Plains]] and [[Bowser Path]] to reach the destination. Bowser deflects Midbus's iron ball, which knocks the castle down. Entering his castle, Bowser discovers that Fawful has turned it into a theater and brainwashed all the Koopa Troop members into a pack of his own adoring fans. Fawful himself arrives and tricks Bowser, forcing him to perform a cage match with Midbus on stage. When Bowser wins, his prize is being forcibly fed fattening foods cooked by Fawful, gaining so much weight that he breaks through the floor and becomes trapped. | |||
[[File:PeachDarkStar.png|left|thumb|Peach tells the story about the Dark Star.]] | |||
Exploring the newly opened [[Flab Zone]] and defeating some [[Kretin]] enemies, Mario and Luigi are reunited with Princess Peach, who explains that Fawful is actually after the [[Dark Star]], an evil entity locked away under Toad Town that can only be revived using Peach herself. Fawful then uses a laser to extract Peach from Bowser and he and Midbus leave with her, while Bowser falls the rest of the way through the floor onto a treadmill they placed beneath him in the basement. He literally burns off all the excess fat, igniting a crate of Bob-ombs in the process which sends him blasting off back to Cavi Cape, falling into the [[Tunnel]]. He meets up with some [[Monty Bros.|Monty Mole minions]] and helps them drill all the way to Toad Town, but when Bowser wanders into the corridor leading to the Dark Star, the security system activates and electrocutes him, rendering him unconscious. | |||
Mario and Luigi gain access to the [[Pipe Yard]] in Bowser's body, which allows them to use warp pipes to return to the outside world. They emerge in the [[Toad Town Caves]] themselves and try to head off and stop [[Fawful]], but arrive too late. Fawful takes the Dark Star to Peach's Castle and uses its power to create a barrier preventing the Mario Bros. from following him. With no other option, they head to [[Dr. Toadley]] to try and do something about the blorbs problem instead, but Bowser arrives at the clinic as well and the three battle, with Bowser losing. Dr. Toadley then tells Mario and Luigi that they need to collect three [[Star Cure]]s to cure the blorbs and possibly find a way into the castle. Bowser awakens, hears this, and rushes off, determined to find the cures before the Bros. Dr. Toadley then reveals to Mario and Luigi that the first cure is held by Durmite inside Bowser's body, and they head back in to get it. They locate Durmite immediately, but it flees through an impassable, [[Boo]]-like barrier, stopping the Mario Bros. in their tracks. | |||
[[File:M&LBIS Boo-Ray Machine screenshot.png|thumb|Yikk presents the Boo-Ray Machine.]] | |||
Meanwhile, Bowser heads to the shores of [[Blubble Lake]], where his sneezes raise the propeller-topped [[Tower of Yikk]] out of the water and straight onto him. The Mario Bros. supersize Bowser again and he defeats the moving tower, venturing inside once he shrinks back to his regular size and meeting the ghost of [[Yikk]], who shines his invention, the [[Boo-ray Machine]], on Bowser's gut. The light from the machine causes the Boo-like barrier to disappear and help Mario and Luigi navigate [[Energy Hold|the maze beyond them]], allowing them to track down Durmite, who reveals herself to be a sage named [[Wisdurm]]. She battles them, turning to a butterfly after her defeat, dropping the Star Cure, and flying off. | |||
Bowser leaves the tower and meets up with Private Goomp, who tells him that he already had one of the Star Cures locked away in his treasure chamber, having recently stolen it from an old Koopa named [[Kuzzle]]. Bowser returns to his castle, regaining access to his treasure vault by pushing a statue of Fawful through the barricades in the floor, only to find that the Monty Bros. are now under Fawful's control and have built a railway straight through the vault. They use the [[Fawful Express]] to ram him out of the castle and into a boulder, resulting in another emergency revival and a giant battle between Bowser and the train. Returning to his vault after destroying the train, Bowser realizes that he has forgotten the combination to the safe that the Star Cure is stored in and asks "Chippy" to retrieve it for him. In the [[Memory Banks]], Mario and Luigi have to defeat [[Bowser Memory ML|blocky doppelgangers]] of themselves, crafted from Bowser's own memories of them. After that, they reassemble a puzzle representing the memory and Bowser opens his safe, only to be pushed in by Private Goomp, Sergeant Guy, and Corporal Paraplonk, who had turned to Fawful's side. With nothing else to do in the cramped safe, Bowser eats the Star Cure, and it is retrieved from his [[Gut Check (location)|gut]] by the Mario Bros. | |||
Mario and Luigi return to Toad Town and are sent after the final Star Cure by Dr. Toadley. Guided by the doctor's messenger bird, [[Birdley]], they meet the sage known as [[Chakron]] at the top of a cliff over Plack Beach, but he will only give them the Star Cure if they can knock him out of the pose he has held for a thousand years. After a cryptic hint from Chakron, the Bros. head for Dimble Wood to collect Attack Pieces for the ground-shaking [[Snack Basket]] move, but Mario is kidnapped by a [[Sockop]] and has to be rescued by Luigi, who wears a [[giant Sockop|knocked-out Sockop]] like a [[Goomba's Shoe]] to sneak into the enemies' territory. Reunited and having gathered all the pieces, the brothers return to Chakron and knock him over, so true to his word, he gives them the final Star Cure. | |||
Mario and Luigi return to | |||
[[File:M&LBIS Miracle Cure screenshot.png|thumb|left|The Miracle Cure curing the blorb-infected Toads.]] | |||
Back at the clinic, Dr. Toadley creates the [[Miracle Cure]] from the three Star Cures, which flies around ridding all the Toads of the blorbs and then allows Mario and Luigi to blast their way through the barriers to get to Peach's Castle. They search the gardens for a way in and are attacked by Midbus, who uses the remote-control [[Junker]] robot to fight them. The Mario Bros. win the battle, and the robot goes haywire, throwing the safe containing Bowser into a pile of garbage, breaking it open. Bowser's back seized up from being in the cramped safe for so long, so Mario and Luigi go back inside him to fix it, allowing him to break into Peach's Castle for them. | |||
Bowser fights his way to Fawful and Midbus as they are slowly awakening the Dark Star. Fawful supercharges his minion into [[Blizzard Midbus]], but Bowser wins the ensuing fight and Midbus's new ice powers end up freezing him solid. Bowser punches out Fawful as he tries to absorb the Dark Star's powers and he only gets a portion of it, with the rest of the revived evil entity forcing its way inside Bowser. Mario and Luigi chase the Dark Star [[Airway (Mario & Luigi: Bowser's Inside Story)|around]] as it absorbs Bowser's DNA and takes on his characteristics, eventually emerging as an incomplete copy of Bowser, which sucks up Peach and floats off in search of the rest of its power. Bowser goes after it but is sidetracked by a final giant battle against Peach's Castle, which had been transformed into [[Super Peach's Castle of Fury|a giant robot]] by Fawful. He then battles Fawful himself, now souped-up by the Dark Star's powers into [[Dark Fawful]]. Bowser wins the fight and Fawful turns into a small ball of dark energy and tries to flee, but he gets absorbed by the Dark Star, allowing it to fully transform into [[Dark Bowser]]. | |||
The real Bowser goes after his copy, chasing it to the tallest tower where it deposits the unconscious Peach before being confronted by Bowser, who aims to capture Peach, both castles and the Dark Star's powers. The final battle is waged on two fronts, starting off with Bowser fighting his clone, before punching it in the gut and forcing it to spit up Fawful. Bowser sucks up the little ball of energy and Mario and Luigi take over the fight, defeating both Fawful and the Dark Star Core inside Bowser. This leaves Dark Bowser unstable, and the real Bowser punches it until it explodes, freeing the Mushroom Kingdom from the Dark Star’s influence for good. | |||
Bowser | |||
Bowser | Inside Bowser, a battered and unstable Fawful appears in front of the Mario Bros., seemingly accepting defeat to them and saying that he will go away permanently, but he is actually faking it as he uses this opportunity to try and take the Mario Bros. with him in a final explosion of his own while sporting a large, dying grin on his face. All this accomplishes though is making Bowser eject everyone he had inhaled. The liberated Toads and the now-conscious Peach move to congratulate Mario and Luigi on a job well done, and Bowser, confused and angry, realizes that the brothers had been inside his body the whole time. Starlow dismissively tells Bowser to not worry about what's in the past but discovering that she was his supposedly loyal minion "Chippy" throws him into a complete rage. The Toads and the Princess flee from the scene, and the [[List of Mario & Luigi: Bowser's Inside Story staff|credits]] show a montage of still images showing that Bowser loses the ensuing fight. | ||
[[File:EndCake MLRPG3.png|thumb|Bowser's cake.]] | |||
Afterward, the heavily-injured Bowser is seen lying in bed at his castle while Private Goomp, Sergeant Guy, and Corporal Paraplonk beg him for forgiveness over their treason. Birdley arrives with a package from Peach, but when Starlow pops out of it to check in on him, Bowser angrily tells her to leave, as he is too busy fixing his castle to attack again anytime soon. He then lets the trio rejoin the rest of the Koopa Troop in helping with the repairs, and only once he is sure he is alone does Bowser open the package, revealing a thank-you cake with his face, Mario, Luigi, and Peach on it. | |||
As in the other ''Mario & Luigi'' games, there is no "Endless Play" feature. As such, if the player plays the game after it is beaten and the ending is done, the game just starts from the last save point, before the final battle. | |||
{{br|right}} | |||
{{ | |||
==Battle | ==Battle system== | ||
The battle system of ''Mario & Luigi: Bowser's Inside Story'' is similar to that of its predecessors. There are some new additions to the system. In this installment, all [[Action Command]]s are evaluated based on how well they are performed. There are five evaluation levels. Ranging from the worst to the best, these levels are: Nothing, OK, Good, Great, and Excellent. The better an Action Command is performed, the more damage an attack does. Receiving a Nothing is equivalent to not performing an Action Command at all. This is carried into all the later installments of the series. | |||
===Stats=== | ===Stats=== | ||
Each brother and Bowser have their own [[Heart Point|HP]], [[Special Point|SP]], POW, DEF, and [[Speed|SPEED]], as well as [[ | Each brother and Bowser have their own [[Heart Point|HP]], [[Special Point|SP]], POW, DEF, and [[Speed|SPEED]], as well as [[Stache|STACHE]] points for the brothers, and HORN points for Bowser. When they finish a battle, they each gain [[Experience Point|EXP Points]] and [[coin]]s. With enough Experience Points, they can level-up and increase each respective statistic. | ||
{|class=wikitable width=100% class=wikitable | |||
|- | |||
!Stat | |||
!Description | |||
|- | |||
|align="center"|[[File:StatHPMLBIS.png|link=HP]] | |||
|HP, or '''H'''eart '''P'''oints, indicate the amount of remaining health a character has. When an enemy hits a character, they lose HP. When their HP reaches zero, they pass out, but can be revived with a [[1-Up Mushroom]] or a [[1-Up Mushroom#Mario & Luigi series|1-Up Deluxe]]. HP can be replenished with a [[Mushroom]], a [[Nut]] or a [[Hot Drumstick|Drumstick]] (Bowser only). | |||
|- | |||
|align="center"|[[File:StatSPMLBIS.png|link=SP]] | |||
|SP, or '''S'''pecial '''P'''oints, indicates how many times Mario, Luigi, or Bowser can use a Special Move. Each attack uses up a certain amount of SP, draining the total. SP can only be restored by ingesting [[Syrup Jar]]s. | |||
|- | |||
|align="center"|[[File:StatPOWMLBIS.png|link=Power]] | |||
|POW, or '''Pow'''er, is how strong the fighter is. POW determines how much damage they can inflict. | |||
|- | |||
|align="center"|[[File:StatDEFMLBIS.png|link=Defense]] | |||
|DEF, or '''Def'''ense, is how much damage the character can block from an enemy hit. A higher DEF stat means less damage is taken. | |||
|- | |||
|align="center"|[[File:StatSPEEDMLBIS.png|link=Speed]] | |||
|SPEED is how fast the character is. In any given battle, the fighter with the most SPEED gets to attack first. The turn then continues, allowing fighters with subsequently lower SPEED to attack until the fighter with the lowest SPEED has attacked. The fighter with the most SPEED then gets to attack again, and the cycle continues until a fight is over. | |||
|- | |||
|align="center"|[[File:StatSTACHEMLBIS.png|link=Stache]] | |||
|STACHE, a Mario and Luigi exclusive stat, is the luck stat of this game. The higher their STACHE stats are, the greater there is a chance of a Critical or Lucky Hit, which doubles POW. A higher STACHE stat makes the player more likely to receive a hit on a [[Scratch Card]]. | |||
|- | |||
|align="center"|[[File:StatHORNMLBIS.png|link=Horn]] | |||
|HORN, a Bowser exclusive stat, functions exactly the same as STACHE does. | |||
|} | |||
===Mario and Luigi's battle system=== | |||
[[File:MLBIS Green Shell screenshot.png|200px|thumb|Mario and Luigi battling.]] | |||
The battle system with Mario and Luigi is similar to the battles from the previous games. There are now six categories of attack during battle, as opposed to ''[[Mario & Luigi: Partners in Time]]''{{'}}s five, or ''[[Mario & Luigi: Superstar Saga]]''{{'}}s four. These are Jump, Hammer, [[Attack Pieces]] ([[Bros. Items]]), Items, [[Bros. Badges]], and Escape. The Bros. can defend with their jump and their hammers. The Jump makes Mario and/or Luigi jump to dodge an attack or to counter-attack. The Hammer is used to counter-attack. The music played while battling is the same as the music played during the debut trailer, as seen in the Japanese site. | |||
A new element has been added to battles, a gauge at the bottom of the screen with Mario and Luigi's heads on either end. When Mario or Luigi pull off an action command, that brother's end of the bar fills slightly. When they meet in the middle, it is possible to use a Bros. Badge move. The effect varies with the equipped badge. The normal effect is to restore 20% of both brothers' HP. Badges can be bought in one of the shops in [[Toad Town]]. Some of the badges require that the Action Commands be pulled off perfectly (EXCELLENT is displayed), and some only need GOOD!. An extra block that appears in the battles can be used to swap the badges that brothers use. | |||
The | |||
===Bowser's battle system=== | |||
[[File:MLBIS Bowser inhale.png|200px|thumb|Bowser battling.]] | |||
Bowser has almost the same battle system as Mario and Luigi's, but with a few differences. He has different options: Punch replaces Jump, [[Fire Breath]] replaces Hammer and [[Special Attack (Bowser)|Enemy Attacks]] replace Special Attacks. However, he does not have Bros. Badges. Instead, Bowser gains a vacuum ability after the player advances further through the game. He can swallow enemies with this new ability to make [[Mario]] and [[Luigi]] fight them in his belly. He can also swallow parts of enemies that can restore his HP, raise defense or attack power, or rescue a [[Blitty]]. Bowser's defenses are the Punch and the Shell. Bowser's Punch can counter-attack an enemy, while his spiky shell can hit enemies that try to jump on his head or protect him from attacks. | |||
Enemy Attacks are special attacks that use mostly members of Bowser's army, which are [[Goomba]]s, [[Koopa Troopa]]s, [[Shy Guy]]s, [[Bob-omb]]s, [[Magikoopas]], and [[Broggy]]. These attacks require the stylus to perform. These characters need to be liberated to unlock these attacks. | |||
[[ | |||
===Special Attacks=== | |||
====Bowser Specials==== | |||
[[Bowser]] has six [[Brawl Attack|Special Attack]]s, five of which are obtained via destroying cages contained Bowser's trapped minions. | |||
{|style="text-align:center;width:85%;margin:0 auto" class=wikitable | |||
!width="20%"|Special Attack | |||
!width="1%"|Illustration | |||
!width="25%"|Description | |||
!width="15%"|SP | |||
!width="20%"|Location | |||
|- | |||
|style="background-color: #bfd3e3"|[[File:MLBISGoombaStorm.png]]<br>[[Goomba Storm]]* | |||
|[[File:Goomba storm.png|200x120px]] | |||
|''Touch each Goomba to fire him up! Flaming Goombas cause more damage!<br>Target: <font color=blue>One enemy</font color>. Effect: [[Burn|<font color=blue>BURN</font color>]].'' | |||
|6 | |||
|[[Dimble Wood]] (after rescuing the [[Goomba|Goomba corps]]) | |||
|- | |||
|style="background-color: #bfd3e3"|[[File:MLBISShyGuySquad.png]]<br>[[Shy Guy Squad]] | |||
|[[File:Shy Guy Squad.PNG|200x120px]] | |||
|''←Quickly slide the stylus repeatedly left. Roll Bowser far back for more damage!<br>Target: <font color=blue>One enemy</font color>. Effect: <font color=blue>None</font color>.'' | |||
|8 | |||
|[[Bowser Path]] (after rescuing the [[Shy Guy|Shy Guy corps]]) | |||
|- | |||
|style="background-color: #bfd3e3"|[[File:MLBISKoopaCorps.png]]<br>[[Koopa Corps]] | |||
|[[File:Koopa Corps.PNG|200x120px]] | |||
|''Slide the stylus to move Bowser up and down and repel the Koopa Shells!<br>Target: <font color=blue>Random</font color>. Effect: <font color=blue>None</font color>.'' | |||
|10 | |||
|[[Blubble Lake]] (after rescuing the [[Koopa Troopa|Koopa unit]]) | |||
|- | |||
|style="background-color: #bfd3e3"|[[File:MLBISBobOmbBlitz.png]]<br>[[Bob-omb Blitz]] | |||
|[[File:Bob-omb Blitz.PNG|200x120px]] | |||
|''Slide the Bob-ombs into place fast! Line up with your foe and charge!<br>Target: <font color=blue>Adjustable</font color> Effect: [[Dizzy|<font color=blue>DIZZY</font color>]].'' | |||
|12 | |||
|[[Bowser's Castle#Mario & Luigi: Bowser's Inside Story / Mario & Luigi: Bowser's Inside Story + Bowser Jr.'s Journey|Bowser Castle]] (after rescuing the [[Bob-omb|Bob-omb squad]]) | |||
|- | |||
|style="background-color: #bfd3e3"|[[File:MLBISMagikoopaMob.png]]<br>[[Magikoopa Mob]] | |||
|[[File:Magikoopa Mob.PNG|200x120px]] | |||
|''Quickly trace the Magikoopa's formation! Bowser's power boosts your magic!<br>Target: <font color=blue>Random</font color>. Effect: [[Burn|<font color=blue>BURN</font color>]].'' | |||
|15 | |||
|[[Peach's Castle#Mario & Luigi: Bowser's Inside Story / Mario & Luigi: Bowser's Inside Story + Bowser Jr.'s Journey|Peach's Castle]] (after rescuing the [[Magikoopa|Magikoopa corps]]) | |||
|- | |||
|style="background-color: #bfd3e3"|[[File:MLBISBroggyBonker.png]]<br>[[Broggy Bonker]] | |||
|[[File:Broggy Bonker.PNG|200x120px]] | |||
|''Scrub all the dirt off that filthy Broggy! Scrub him until he's clean!<br>Target: <font color=blue>One enemy</font color>. Effect: [[Dizzy|<font color=blue>DIZZY</font color>]].'' | |||
|20 | |||
|[[Broque Monsieur's Shop]] (after collecting all fifteen [[Blitty|Blitties]]) | |||
|} | |||
<small>* - Required</small> | |||
[[ | ====Mario & Luigi Specials==== | ||
[[Mario]] and [[Luigi]] obtain these [[Bros. Attack|special attacks]] via [[Attack Piece]]s found by hitting a [[Attack Piece Block]] and numerous other ways. | |||
{|style="text-align:center;width:85%;margin:0 auto" class=wikitable | |||
!width="10%"|Bros. Attack | |||
!width="1%"|Illustration | |||
!width="15%"|Description | |||
!width="15%"|SP | |||
!width="15%"|Location | |||
|- | |||
|style="background-color: #bfd3e3"|[[File:Green Shell Sprite M&L3.png]]<br>[[Green Shell]]* | |||
|[[File:MLBiS Green Shell.png|200x120px]] | |||
|''Mario kicks with {{button|ds|A}}; Luigi with {{button|ds|B}}! Keep on kicking the shell!<br>Target: <font color=blue>One enemy</font color>. Effect: <font color=blue>None</font color>.'' | |||
|3 | |||
|[[Trash Pit]] | |||
|- | |||
|style="background-color: #bfd3e3"|[[File:Fire Flower Sprite M&L3.png]]<br>[[Fire Flower]] | |||
|[[File:MLBiS Fire Flower.png|200x120px]] | |||
|''Repeatedly press the button of whoever's holding the big fireball!<br>Target: <font color=blue>Random</font color>. Effect: <font color=blue>BURN</font color>.'' | |||
|4 | |||
|[[Pump Works]] | |||
|- | |||
|style="background-color: #bfd3e3"|[[File:Jump Helmet Sprite.png]]<br>[[Jump Helmet]] | |||
|[[File:JumpHelmet BiS.png|200x120px]] | |||
|''Land on the helmet and jump with {{button|ds|A}}! Dash to the landing spots with {{button|Padleft}} {{button|Padright}}</font color>!<br>Target: <font color=blue>One enemy</font color>. Effect: <font color=blue>None</font color>.'' | |||
|6 | |||
|[[Flab Zone]] | |||
|- | |||
|style="background-color: #bfd3e3"|[[File:Yoo Who Cannon Sprite.png]]<br>[[Yoo Who Cannon]]* | |||
|[[File:Yoo who cannon.png|200x120px]] | |||
|''Remember which barrels the bros are in! {{button|ds|A}} launches Mario; {{button|ds|B}} launches Luigi!<br>Target: <font color=blue>Random</font color>. Effect: <font color=blue>None</font color>.'' | |||
|7 | |||
|[[Toad Town]] (after mastering the [[Shell Mario]] technique) | |||
|- | |||
|style="background-color: #bfd3e3"|[[File:Super Bouncer Sprite.png]]<br>[[Super Bouncer]] | |||
|[[File:Super bouncer.png|200x120px]] | |||
|''Launch HIGH with {{button|ds|A}}. Move Luigi to the ball's top with {{button|Padleft}} {{button|Padright}}. Use {{button|ds|B}} to squash.<br>Target: <font color=blue>Random</font color>. Effect: <font color=blue>DIZZY</font color>.'' | |||
|7 | |||
|[[Energy Hold]] | |||
|- | |||
|style="background-color: #bfd3e3"|[[File:Mighty Meteor Sprite.png]]<br>[[Mighty Meteor]] | |||
|[[File:Mighty meteor.png|200x120px]] | |||
|''Dash with {{button|Padleft}} {{button|Padright}}! Press and hold {{button|ds|A}} or {{button|ds|B}} to build power, and release to swing!<br>Target: <font color=blue>Random</font color>. Effect: <font color=blue>POW down</font color>.'' | |||
|8 | |||
|[[Toadley Clinic]] (from the intern after obtaining the [[Miracle Cure]]) | |||
|- | |||
|style="background-color: #bfd3e3"|[[File:Spin Pipe Sprite.png]]<br>[[Spin Pipe]] | |||
|[[File:Spin pipe.png|200x120px]] | |||
|''Memorize how the bros stack up! Mario stomps with {{button|ds|A}}; Luigi with {{button|ds|B}}!<br>Target: <font color=blue>One enemy</font color>. Effect: <font color=blue>DIZZY</font color>.'' | |||
|10 | |||
|[[Plack Beach]] (after completing [[Kuzzle]]'s first puzzle) | |||
|- | |||
|style="background-color: #bfd3e3"|[[File:Snack Basket Sprite.png]]<br>[[Snack Basket]]* | |||
|[[File:Snack basket.png|200x120px]] | |||
|''Use {{button|Padleft}} {{button|Padright}} to eat, then repeatedly press {{button|ds|A}} to throw Luigi. Slam down with {{button|ds|B}}!<br>Target: <font color=blue>All ground-based enemies</font color>. Effect: <font color=blue>None</font color>.'' | |||
|14 | |||
|[[Dimble Wood]] | |||
|- | |||
|style="background-color: #bfd3e3"|[[File:Magic Window Sprite.png]]<br>[[Magic Window]] | |||
|[[File:Magic window.png|200x120px]] | |||
|''Mario stomps with {{button|ds|A}}; Luigi with {{button|ds|B}}. Both stomp together with {{button|ds|A}} and {{button|ds|B}}!<br>Target: <font color=blue>Random</font color>. Effect: <font color=blue>DIZZY</font color>.'' | |||
|18 | |||
|[[Bowser's Castle]] (after defeating the [[Shroob]]s) | |||
|- | |||
|style="background-color: #bfd3e3"|[[File:Falling Star Sprite.png]]<br>[[Falling Star]] | |||
|[[File:Falling star.png|200x120px]] | |||
|''Aim with {{button|ds|Pad}}. Throw at the star with {{button|ds|A}} if the light is red, {{button|ds|B}} if it's green!<br>Target: <font color=blue>One enemy</font color>. Effect: <font color=blue>DEF down</font color>.'' | |||
|20 | |||
|[[Peach's Castle Garden]] | |||
|} | |||
<small>* - Required</small> | |||
===Giant Bowser battle system=== | |||
===Bowser | [[File:Giant Bowser Battle.png|thumb|200px|left|Giant Bowser battling [[Bowser's Castle|Bowser Castle]]]] | ||
[[ | At certain points in the game, Bowser gets crushed by a large object such as [[Bowser's Castle]], which leaves him in a dying state. In order to revive Bowser, the Bros. must play a 2D shooter-like minigame in the [[Rump Command]]. When revived, Bowser grows to a giant state. In order to complete these battles, the player must rotate their DS sideways to play. In these battles, Bowser only has three options of attack. Punching requires quickly sliding the stylus across the screen to execute. Fire requires the player to blow into the [[Nintendo DS#Microphone|DS microphone]]. The last option, Healing, requires Mushrooms found within the battle itself. Defending includes an event where the player must tap the touch screen in certain areas to counter-attack, punching to deflect blows, and blowing huge flames at the enemy. After each giant battle, Bowser returns to normal. There are four such battles in the game. | ||
[[Bowser]] has | {{br}} | ||
==Ranks== | |||
{{main|Rank}} | |||
When leveling up Mario and Luigi, and Bowser occasionally reach a [[rank]]. When this happens new criteria is added to the game such as being able to equip more clothing or being able to shop at certain places. Here is a list of the ranks: | |||
=== | '''Mario & Luigi''' | ||
[[ | {|style="text-align:center;margin-auto" class=wikitable | ||
[[ | !width=15%|Name | ||
!width=10%|Achieved at level | |||
!width=65% colspan=2|Benefit | |||
|- | |||
|style="text-align:left"|[[File:MushroomRankBIS.png]]Mushroom Rank | |||
|Default | |||
|Allows up to one accessory to be equipped. | |||
|- | |||
|style="text-align:left"|[[File:ShellRankBIS.png]]Shell Rank | |||
|6 | |||
|Allows up to two accessories to be equipped. | |||
|- | |||
|style="text-align:left"|[[File:FlowerRankBIS.png]]Flower Rank | |||
|12 | |||
|Allows up to three accessories to be equipped. | |||
|- | |||
|style="text-align:left"|[[File:ShineRankBIS.png]]Shine Rank | |||
|18 | |||
|Allows the bros to shop at the [[Toadles Boutique]] in [[Toad Town#Mario & Luigi: Bowser's Inside Story / Mario & Luigi: Bowser's Inside Story + Bowser Jr.'s Journey|Toad Town]]. | |||
|- | |||
|style="text-align:left"|[[File:StarRankBIS.png]]Star Rank | |||
|25 | |||
|Allows the bros to shop at the [[Star Shop]] in [[Toad Town#Mario & Luigi: Bowser's Inside Story / Mario & Luigi: Bowser's Inside Story + Bowser Jr.'s Journey|Toad Town]]. | |||
|- | |||
|style="text-align:left"|[[File:RainbowRankBIS.png]]Rainbow Rank | |||
|40 | |||
|When both brothers reach this rank, gives the [[Badge#Mario & Luigi: Bowser's Inside Story / Mario & Luigi: Bowser's Inside Story + Bowser Jr.'s Journey|Excellent!! Bros Badge]]. | |||
|} | |||
'''Bowser''' | |||
{|style="text-align:center;margin-auto" class=wikitable | |||
!width=15%|Name | |||
!width=10%|Achieved at level | |||
!width=65% colspan=2|Benefit | |||
|- | |||
|style="text-align:left"|[[File:BronzeBossRankBIS.png]]Bronze Boss Rank | |||
|Default | |||
|Allows up to one accessory to be equipped. | |||
|- | |||
|style="text-align:left"|[[File:SilverBossRankBIS.png]]Silver Boss Rank | |||
|10 | |||
|Allows up to two accessories to be equipped. | |||
|- | |||
|style="text-align:left"|[[File:GoldBossRankBIS.png]]Gold Boss Rank | |||
|20 | |||
||Allows up to three accessories to be equipped. | |||
|- | |||
|style="text-align:left"|[[File:FinalBossRankBIS.png]]Final Boss Rank | |||
|40 | |||
|Gives the Intruder Fangs equipment to Bowser. | |||
|} | |||
==Items== | ==Items== | ||
===Key items=== | |||
There are many items that appear in the game that the heroes must obtain in order to advance in the game. Most of these items require the players to go through some trial, whether it be a challenge, facing a boss, or through other means. | |||
{|width=100% class=wikitable style="text-align:center" | |||
|- | |||
!Image | |||
!Name | |||
!In-game description | |||
!Location | |||
!storyline/<br>required? | |||
|- | |||
|[[File:VacuumMushroom.png|16px]] | |||
|[[Vacuum Shroom]] | |||
|align="left"|A strange Mushroom that gives Bowser the ability to inhale anything. | |||
|[[Dimble Wood]] | |||
|✓ | |||
|- | |||
|[[File:MLBIS Hammer icon.png|16px]] | |||
|[[Hammer]]s | |||
|align="left"|''Hammers found in the Trash Pit. Use 'em to whack and break stuff!'' | |||
|[[Trash Pit]] | |||
|✓ | |||
|- | |||
|[[File:Vacuum Block.png|16px]] | |||
|[[Vacuum Block]] | |||
|align="left"|''A rare block from Broque Monsieur. In battle, Bowser inhales stuff!'' | |||
|[[Plack Beach]] | |||
|✓ | |||
|- | |||
|[[File:MLBIS Stingler screenshot.png|16px]] | |||
|[[Stingler]] | |||
|align="left"|''An item that might shock something. Where should you use it?'' | |||
|[[Pump Works]] | |||
|✓ | |||
|- | |||
|[[File:MLBIS Banzai Bill.png|16px]] | |||
|[[Banzai Bill]] | |||
|align="left"|''An enormous, black, shiny weapon. If it's launched at you, you're toast!'' | |||
|[[Dimble Wood]] | |||
|✓ | |||
|- | |||
|[[File:Star Panel sample sprite.png|40px]] etc. | |||
|[[Star Panel]] | |||
|align="left"|''An item created in the Energy Hold. It takes on various shapes.'' | |||
|[[Energy Hold]] | |||
|✓ | |||
|- | |||
|[[File:Red Star Cure.png|16px]] | |||
|[[Star Cure|Red Cure]] | |||
|align="left"|''A curative held by the wise Wisdurm. It took a while to find this thing...'' | |||
|Energy Hold | |||
|✓ | |||
|- | |||
|[[File:Yellow Star Cure.png|16px]] | |||
|[[Star Cure|Yellow Cure]] | |||
|align="left"|''The curative found at Bowser Castle. Bowser swallowed it, so it's all sticky.'' | |||
|[[Treasure Chamber]] | |||
|✓ | |||
|- | |||
|[[File:Green Star Cure.png|16px]] | |||
|[[Star Cure|Green Cure]] | |||
|align="left"|''A 1,000-year-old curative held by Chakron above Plack Beach.'' | |||
|Plack Beach cliff | |||
|✓ | |||
|- | |||
|[[File:MiracleCure.png|16px]] | |||
|[[Miracle Cure]] | |||
|align="left"|''A true miracle cure made by combining the three curatives. It works incredibly!'' | |||
|[[Toadley Clinic]] | |||
|✓ | |||
|- | |||
|[[File:Birdley.png]] | |||
|[[Birdley]] | |||
|align="left"|''Dr. Toadley's pet bird. It guides Mario and friends around.'' | |||
|Toadley Clinic | |||
|✓ | |||
|- | |||
|[[File:Puzzle Sack.png]] | |||
|[[Puzzle Sack]] | |||
|align="left"|''A puzzle in a sack. Give it to [[Kuzzle]].'' | |||
|Plack Beach | |||
| | |||
|- | |||
|[[File:BlittyMLBiS alt.png|16px]] | |||
|[[Blitty]] | |||
|align="left"|''A Blitty from [enemy].'' | |||
|various enemies | |||
| | |||
|- | |||
|[[File:Mushroom Ball.png]] | |||
|[[Mushroom Ball]] | |||
|align="left"|''An item for the [[PR Toad]] in Toad Town. He'll give you what's inside!'' | |||
|[[Toad Town Mall]] | |||
| | |||
|- | |||
|[[File:MLBIS Blue Key.png]] | |||
|[[Blue Key (Mario & Luigi: Bowser's Inside Story)|Blue Key]] | |||
|align="left"|''A key that opens the blue door on the second floor of Peach's Castle.'' | |||
|[[Peach's Castle]] 2F | |||
|✓ | |||
|- | |||
|[[File:MLBIS Red Key.png]] | |||
|[[Red Key (Mario & Luigi: Bowser's Inside Story)|Red Key]] | |||
|align="left"|''A key that opens the red door on the second floor of Peach's Castle.'' | |||
|Peach's Castle 2F | |||
| | |||
|- | |||
|[[File:MLBIS Green Key.png]] | |||
|[[Green Key]] | |||
|align="left"|''A key that opens the green door on the second floor of Peach's Castle.'' | |||
|Peach's Castle 2F | |||
| | |||
|} | |||
===Consumable items=== | |||
These are the items that appear in ''Mario & Luigi: Bowser's Inside Story''. Please note that some of the items used in this game have appeared in the previous installments. | These are the items that appear in ''Mario & Luigi: Bowser's Inside Story''. Please note that some of the items used in this game have appeared in the previous installments. | ||
{|width | {{content description | ||
|image1=[[File:Mushroom BiS.png]] | |||
|name1=[[Mushroom]] | |||
|description1=Restores 30 HP to one of the bros. | |||
|image2=[[File:Mushroom BiS.png]] | |||
|name2=[[Super Mushroom]] | |||
|description2=Restores 60 HP to one of the bros. | |||
|image3=[[File:Mushroom BiS.png]] | |||
|name3=[[Ultra Mushroom]] | |||
|description3=Restores 120 HP to one of the bros. | |||
|image4=[[File:Mushroom BiS.png]] | |||
|name4=[[Max Mushroom]] | |||
|description4=Restores 240 HP to one of the bros. | |||
|image5=[[File:Mushroom One Up BiS.png]] | |||
|name5=[[1-Up Mushroom]] | |||
|description5=Revives a fallen bro with half HP. | |||
|image6=[[File:Mushroom One Up BiS.png]] | |||
|name6=[[1-Up Deluxe]] | |||
|description6=Revives a fallen bro with full HP. | |||
|image7=[[File:Drumstick.png]] | |||
|name7=[[Hot Drumstick]] | |||
|description7=Restores 80 HP to Bowser. | |||
|image8=[[File:Drumstick.png]] | |||
|name8=[[Fiery Drumstick]] | |||
|description8=Restores 150 HP to Bowser. | |||
|image9=[[File:Drumstick.png]] | |||
|name9=[[TNT Drumstick]] | |||
|description9=Restores 280 HP to Bowser. | |||
|image10=[[File:Nut.png]] | |||
|name10=[[Nut]] | |||
|description10=Restores 20 HP to both bros. | |||
|image11=[[File:Nut.png]] | |||
|name11=[[Super Nut]] | |||
|description11=Restores 40 HP to both bros. | |||
|image12=[[File:Nut.png]] | |||
|name12=[[Ultra Nut]] | |||
|description12=Restores 80 HP to both bros. | |||
|image13=[[File:Nut.png]] | |||
|name13=[[Max Nut]] | |||
|description13=Restores 160 HP to both bros. | |||
|image14=[[File:Syrup BiS.png]] | |||
|name14=[[Syrup Jar]] | |||
|description14=Restores 10 SP. | |||
|image15=[[File:Syrup BiS.png]] | |||
|name15=[[Supersyrup Jar]] | |||
|description15=Restores 20 SP. | |||
|image16=[[File:Syrup BiS.png]] | |||
|name16=[[Ultrasyrup Jar]] | |||
|description16=Restores 30 SP. | |||
|image17=[[File:Syrup BiS.png]] | |||
|name17=[[Max Syrup Jar]] | |||
|description17=Restores 40 SP. | |||
|image18=[[File:StarCandy.png]] | |||
|name18=[[Star Candy]] | |||
|description18=Restores all HP & SP and cures status ailments. | |||
|image19=[[File:Herb Refresh BIS.png]] | |||
|name19=[[Refreshing Herb]] | |||
|description19=Cures status effects. | |||
|image20=[[File:Bean M&LBIS sprite.png]] | |||
|name20=[[Bean|Heart Bean]] | |||
|description20=Increases HP to the selected character by 1 Point. | |||
|image21=[[File:Bean M&LBIS sprite.png]] | |||
|name21=[[Bean|Special Bean]] | |||
|description21=Increases SP to the selected character by 1 Point. | |||
|image22=[[File:Bean M&LBIS sprite.png]] | |||
|name22=[[Bean|Power Bean]] | |||
|description22=Increases POW to the selected character by 1 Point. | |||
|image23=[[File:Retry Clock.png]] | |||
|name23=[[Retry Clock]] | |||
|description23=Allows the player to restart a battle if defeated. | |||
}} | |||
===Equipment=== | |||
====Clothing==== | |||
{{main|List of clothing in Mario & Luigi: Bowser's Inside Story}} | |||
''Mario & Luigi: Bowser's Inside Story'' differs from its predecessors by including a more varied clothing system. In addition to overalls, Mario and Luigi can wear socks, gloves, boots, and accessories while Bowser can wear shells, arm bands, rings, and fangs. Mario, Luigi, and Bowser can wear additional clothing types if they [[rank]] up from repeated battles. | |||
====Badges==== | |||
Badges in ''Mario & Luigi: Bowser's Inside Story'' are used exclusively by Mario and Luigi, and they work differently from its predecessors. Mario and Luigi must successfully perform Action Commands to fill the badge gauge. Once the gauge is filled, players can tap it to receive an effect that benefits them in a variety of ways, which can be changed depending on the type of badge both brothers wear. | |||
In the table, the left side of the badge (Luigi's badge) decides how good the action command must be to fill the bar, and how big the effect will be. The right side (Mario's badge) decides what the effect will be. | |||
{|style="text-align:center;width:100%" class=wikitable | |||
!width="5%"|Name of Badge | |||
!width="1%"|Icon | |||
!width="3%"|Price (coins) | |||
!width="20%"|Located | |||
!width="20%"|Effect | |||
|- | |||
|Mushroom Badge{{anchor|Mushroom Badge}} | |||
|[[File:MushroomBadge.png]] | |||
|N/A | |||
|Obtained from Princess Lipid | |||
|Restores HP. | |||
|- | |||
|Powerful Badge{{anchor|Powerful Badge}} | |||
|[[File:PowerFuryBadge.png]] | |||
|2000 | |||
|Bought from Toad Town's Badge Shop | |||
|Increases both brothers' POW in the next attack. | |||
|- | |- | ||
|Bonus Badge{{anchor|Bonus Badge}} | |||
|[[File:BonusBadge.png]] | |||
|500 | |||
|Bought from Toad Town's Badge Shop | |||
|Increases amount of EXP and Coins brothers get in the battle it was used. | |||
|- | |- | ||
| | |Bro Badge{{anchor|Bro Badge}} | ||
| | |[[File:BrotherBadge.png]] | ||
| | |1000 | ||
|Bought from Toad Town's Badge Shop | |||
|Restores SP. | |||
|- | |- | ||
| | |Good Badge{{anchor|Good Badge}} | ||
| | |[[File:GoodBadge.png]] | ||
| | |N/A | ||
|Obtained from Princess Lipid | |||
|Mario or Luigi must achieve at least a "good" rating to fill the meter. | |||
|- | |- | ||
| | |Great Badge{{anchor|Great Badge}} | ||
| | |[[File:GreatBadge.png]] | ||
| | |500 | ||
|Bought from Toad Town's Badge Shop | |||
|Mario or Luigi must achieve at least a "great" rating to fill the meter. | |||
|- | |- | ||
| | |Excellent! Badge{{anchor|Excellent! Badge}} | ||
| | |[[File:ExcellentBadge1.png]] | ||
| | |1000 | ||
|Bought from Toad Town's Badge Shop | |||
|Mario or Luigi must achieve at least an "excellent" rating to fill the meter. | |||
|- | |- | ||
| align=" | |Excellent!! Badge{{anchor|Excellent!! Badge}} | ||
| | |[[File:ExcellentBadge2.png]] | ||
| | |N/A | ||
|Obtained after Mario and Luigi become Rainbow-Ranked (Level 40) | |||
|Mario or Luigi must achieve at least an "excellent" rating to fill the meter. If the attacker gets lower than that, his side of the bar empties. If an excellent is not possible at the time, the meter will not break. | |||
|} | |||
=====Combined effects===== | |||
{|style="text-align:center;width:100%" class=wikitable | |||
!Badge | |||
!width="25%"|[[File:MushroomBadge.png]] | |||
!width="25%"|[[File:PowerFuryBadge.png]] | |||
!width="25%"|[[File:BonusBadge.png]] | |||
!width="25%"|[[File:BrotherBadge.png]] | |||
|- | |- | ||
![[File:GoodBadge.png]] | |||
| | |Restores 20% of HP | ||
| | |Increases Attack Power by 1.2x | ||
|Increases Coins by 1.2x | |||
|Restores 20% of SP | |||
|- | |- | ||
![[File:GreatBadge.png]] | |||
| | |Restores 30% of HP | ||
| Restores | |Increases Attack Power by 1.5x | ||
|Increases Coins by 1.4x | |||
|Restores 30% of SP | |||
|- | |- | ||
![[File:ExcellentBadge1.png]] | |||
| | |Restores 50% of HP & Cures Status Effects | ||
| Restores | |Increases Attack Power by 2x | ||
|Increases EXP by 1.2x, and Coins by 1.6x | |||
|Restores 50% of SP | |||
|- | |- | ||
![[File:ExcellentBadge2.png]] | |||
| | |Restores 100% HP & Cures Status Effects | ||
| | |Increases Attack Power by 4x | ||
|Increases EXP by 1.5x, and Coins by 2x | |||
|Restores 100% SP | |||
|} | |||
==Status ailments== | |||
Many status ailments appear in ''Mario & Luigi: Bowser's Inside Story''. Each type affects the heroes and enemies with their own variables. Many enemies can inflict the diseases, as well as some attacks that the three heroes can learn. To relieve the effects, the player can use a [[Refreshing Herb]] or - depending on the type - can wait for it to run out of their systems. | |||
{|width=100% class=wikitable | |||
|- | |- | ||
!Image | |||
!Name | |||
!Description | |||
!Affects | |||
|- | |- | ||
| align="center" | [[ | |align="center"|[[File:Bowsers Inside Story Burn.png]] | ||
| align="center" | [[ | |align="center"|[[Burn]] | ||
| | |align="center"|Player has fire on them; prevents them from attacking/dodging; loses partial HP every turn. | ||
|Mario; Luigi; Enemies | |||
|- | |- | ||
| align="center" | [[ | |align="center"|[[File:Bowsers Inside Story Defense Down.png]] | ||
| align="center" | [[ | |align="center"|[[DEF-Down]] | ||
| | |align="center"|Defense stat is lowered; affected player takes more damage. | ||
|Mario; Luigi; Bowser; Enemies | |||
|- | |- | ||
| align="center" | [[ | |align="center"|[[File:Bowsers Inside Story Def-up Bowser.png]] | ||
| align="center" | [[ | |align="center"|[[DEF-Up]] | ||
| | |align="center"|Defense stat is boosted; affected character takes less damage. | ||
|Mario; Luigi; Bowser; Enemies | |||
|- | |- | ||
| align="center" | [[ | |align="center"|[[File:Bowsers Inside Story Dizzy.png]] | ||
| align="center" | [[ | |align="center"|[[Dizzy]] | ||
| | |align="center"|Player cannot move from confusion and is unable to attack/dodge. | ||
|Mario; Luigi; Bowser; Enemies | |||
|- | |- | ||
| align="center" | [[ | |align="center"|[[File:Bowsers Inside Story Fury.png]] | ||
| align="center" | [[ | |align="center"|[[Fury]] | ||
| | |align="center"|Player grows furious and increases damage dealt and received. | ||
|Bowser | |||
|- | |- | ||
| align="center" | [[ | |align="center"|[[File:Bowsers Inside Story Poison.png]] | ||
| align="center" | [[ | |align="center"|[[Poison (status effect)|Poison]] | ||
| | |align="center"|Player turns purple and loses partial HP every turn. | ||
|Mario; Luigi | |||
|- | |- | ||
| align="center" | [[ | |align="center"|[[File:Bowsers Inside Story Pow Down.png|80px]] | ||
| align="center" | [[ | |align="center"|[[POW-Down]] | ||
| | |align="center"|Attack Power is lowered; affected player deals less damage. | ||
|Mario; Luigi; Bowser; Enemies | |||
|- | |- | ||
| align="center" | [[ | |align="center"|[[File:Bowsers Inside Story Pow Up.png]] | ||
| align="center" | [[ | |align="center"|[[POW-Up]] | ||
| | |align="center"|Attack Power is boosted; affected player deals more damage. | ||
|Mario; Luigi; Bowser; Enemies | |||
|- | |- | ||
| align="center" | [[ | |align="center"|[[File:Bowsers Inside Story Speed Down.png]] | ||
| align="center" | [[ | |align="center"|[[SPD-Down]] | ||
| | |align="center"|Speed stat is lowered; affected player gets fewer turns. | ||
|Mario; Luigi; Bowser; Enemies | |||
|- | |- | ||
| align="center" | [[ | |align="center"|[[File:Bowsers Inside Story Speed Down.png]] | ||
| align="center" | [[ | |align="center"|[[SPD-Up]] | ||
| | |align="center"|Speed stat is increased; affected player gets more turns. | ||
|Mario; Luigi; Bowser; Enemies | |||
|- | |- | ||
| align="center" | [[ | |align="center"|[[File:Bowsers Inside Story Sick.png]] | ||
| align="center" | [[ | |align="center"|[[Sick]] | ||
| | |align="center"|Player gets a runny nose and loses partial HP every turn. | ||
|Bowser; [[Sniffle Thwomp]] (starts battle sick) | |||
|- | |- | ||
| align="center" | [[ | |align="center"|[[File:Bowsers Inside Story Super Strike.png]] | ||
| align="center" | [[ | |align="center"|[[KO|Super Strike]] | ||
| | |align="center"|Player charges up and may deal greater damage than normal on their immediate next hit. | ||
|Mario; Luigi | |||
|- | |- | ||
| | |||
|align="center"|[[Trip]] | |||
|align="center"|The character cannot attack on the turn he tripped. If an enemy hits from behind in the overworld, the character starts out on this state until his turn, or takes damage from the enemy. | |||
|Mario; Luigi; Bowser | |||
|} | |} | ||
== Characters == | ==Characters== | ||
===Playable=== | |||
<gallery widths=88px heights=88px> | |||
MALBIS Mario.png|[[Mario]] | |||
MALBIS Luigi.png|[[Luigi]] | |||
BowserMLBiS.png|[[Bowser]] | |||
</gallery> | |||
=== | ===Villains=== | ||
<gallery widths=88px heights=88px> | |||
Fawful sprite.PNG|[[Fawful]] | |||
Midbus sprite-1.png|[[Midbus]] | |||
Dark Star MLBIS sprite.png|[[Dark Star]] | |||
</gallery> | |||
=== | ===Supporting=== | ||
*[[Princess Peach]] | *[[Princess Peach]] | ||
*[[Toadsworth]] | *[[Toadsworth]] | ||
| Line 231: | Line 667: | ||
*[[Broque Monsieur]], a bipedal creature who seems to be made from [[? Block]]s. | *[[Broque Monsieur]], a bipedal creature who seems to be made from [[? Block]]s. | ||
*[[Broggy]], Broque's pet. | *[[Broggy]], Broque's pet. | ||
*[[Broque Madame]], another bipedal creature made out of | *[[Broque Madame]], another bipedal creature made out of ? Blocks. | ||
*[[Blitty|Blitties]] | *[[Blitty|Blitties]], cat creatures that seem to also be made out of ? Blocks. | ||
*Three members of Bowser's army: | *Three members of Bowser's army: | ||
**[[Sergeant Guy]], a green [[Shy Guy]] with a bag on his back containing a gray pipe and a [[Magikoopa]]'s wand. | **[[Sergeant Guy]], a green [[Shy Guy]] with a bag on his back containing a gray pipe and a [[Magikoopa]]'s wand. | ||
**[[Corporal Paraplonk]], a red [[Paratroopa]] wearing a red bucket on its head and green shoes. | **[[Corporal Paraplonk]], a red [[Koopa Paratroopa|Paratroopa]] wearing a red bucket on its head and green shoes. | ||
**[[Private Goomp]], a [[Goomba]] that wears blue clothes and seems to look sad. | **[[Private Goomp]], a [[Goomba]] that wears blue clothes and seems to look sad. | ||
*[[Emoglobin]], a species of block-like creatures inside Bowser that give hints and help with minigames. | *[[Emoglobin]], a species of block-like creatures inside Bowser that give hints and help with minigames. | ||
| Line 241: | Line 677: | ||
*[[Yikk]], the creator of [[Tower of Yikk]] and the [[Boo-ray Machine]]. | *[[Yikk]], the creator of [[Tower of Yikk]] and the [[Boo-ray Machine]]. | ||
*[[Kuzzle]], the guardian of the second [[Star Cure]]. | *[[Kuzzle]], the guardian of the second [[Star Cure]]. | ||
*[[ | *The [[Koopa Paratroopa Trio]], friendly blue-shelled [[Koopa Paratroopa|Paratroopas]]. | ||
*[[Dr. Toadley]], the Toad with a Miracle Cure. | *[[Dr. Toadley]], the Toad with a Miracle Cure. | ||
*[[Chakron]], the guardian of the third Star Cure. | |||
== | ==Bestiary== | ||
{{ | {{main|Mario & Luigi: Bowser's Inside Story bestiary}} | ||
Note that stats listed there are from the North American version of the game. Stats with the Challenge Medal and other versions may vary. | |||
*<sup>i</sup> Indicates they can be inhaled by Bowser and then fought by Mario and Luigi. | |||
*<sup>m</sup> Indicates only Mario can battle them. | |||
*<sup>m&l</sup> Indicates only Mario & Luigi can battle them. | |||
*<sup>b</sup> Indicates only Bowser can battle them. | |||
====Mushroom Kingdom==== | ====Mushroom Kingdom==== | ||
{|width=100% | {|width=100% class=wikitable | ||
|- | |- | ||
!Image | !Image | ||
!Name | !Name | ||
![[Heart Point|HP]] | ![[Heart Point|HP]] | ||
![[Experience|EXP]] | ![[Experience Point|EXP]] | ||
!Coins | !Coins | ||
!Location | !Location | ||
|- | |- | ||
| align="center" |[[ | |align="center"data-sort-value="1"|[[File:MLBISChuboomba.png]] | ||
![[ | ![[Chuboomba]] | ||
| align="center" | | |align="center"|50 | ||
| align="center" | | |align="center"|15 | ||
| align="center" | | |align="center"|4 | ||
| [[ | |[[Cavi Cape]] | ||
|- | |- | ||
| align="center" |[[ | |align="center"data-sort-value="2"|[[File:BorpBIS.png]] | ||
![[ | ![[Borp]]<sup>m&l</sup> | ||
| align="center" | | |align="center"|102 | ||
| align="center" | | |align="center"|220 | ||
| align="center" |40 | |align="center"|40 | ||
| [[ | |[[Cavi Cape]] | ||
|- | |- | ||
| align="center" |[[ | |align="center"data-sort-value="3"|[[File:MLBISToothyBattle.png]] | ||
![[ | ![[Toothy]] | ||
| align="center" | | |align="center"|27 | ||
| align="center" | | |align="center"|18 | ||
| align="center" | | |align="center"|5 | ||
| [[ | |[[Plack Beach]] | ||
|- | |- | ||
| align="center" |[[ | |align="center" data-sort-value="4"|[[File:MLBISDrillbitCrab.png]] | ||
![[ | ![[Drillbit Crab]]<sup>m&l</sup> | ||
| align="center" | | |align="center"|115 | ||
| align="center" | | |align="center"|240 | ||
| align="center" | | |align="center"|45 | ||
| [[ | |[[Plack Beach]] | ||
|- | |- | ||
| align="center" |[[ | |align="center"data-sort-value="5"|[[File:MLBISPendril.png]] | ||
![[ | ![[Pendril]]<sup>m&l</sup> | ||
| align="center" | | |align="center"|157 | ||
| align="center" | | |align="center"|260 | ||
| align="center" | | |align="center"|55 | ||
| [[ | |[[Plack Beach]] | ||
|- | |- | ||
| align="center" |[[ | |align="center"data-sort-value="6"|[[File:MLBISTreevilNoBerry.png]][[File:MLBISTreevilWithBerry.png]] | ||
![[ | ![[Treevil]] | ||
| align="center" | | |align="center"|95 | ||
| align="center" | | |align="center"|30; 35 (berry) | ||
| align="center" | | |align="center"|8; 10 (berry) | ||
| [[ | |[[Dimble Wood]] | ||
|- | |- | ||
| align="center" |[[ | |align="center"data-sort-value="8"|[[File:MLBISTrashure.png]] | ||
![[ | ![[Trashure]] | ||
| align="center" | | |align="center"|147 | ||
| align="center" |40 | |align="center"|40 | ||
| align="center" |15 | |align="center"|15 | ||
| [[ | |[[Dimble Wood]] | ||
|- | |- | ||
| align="center" |[[ | |align="center"data-sort-value="9"|[[File:MLBISScutletenemy.png]] | ||
![[ | ![[Scutlet (species)|Scutlet]]<sup>m&l</sup> | ||
| align="center" | | |align="center"|72 | ||
| align="center" | | |align="center"|100 | ||
| align="center" | | |align="center"|25 | ||
| [[ | |[[Dimble Wood]] | ||
|- | |- | ||
| align="center" |[[ | |align="center"data-sort-value="10"|[[File:MLBISSockop.png]] | ||
![[ | ![[Sockop]]<sup>m&l</sup> | ||
| align="center" | | |align="center"|110 | ||
| align="center" | | |align="center"|240 | ||
| align="center" | | |align="center"|55 | ||
| [[ | |[[Dimble Wood]] | ||
|- | |- | ||
| align="center" |[[ | |align="center"data-sort-value="11"|[[File:MLBISFlifit.png]] | ||
![[ | ![[Flifit]] | ||
| align="center" | | |align="center"|108 | ||
| align="center" | | |align="center"|50 | ||
| align="center" | | |align="center"|20 | ||
| [[ | |[[Bumpsy Plains]] | ||
|- | |- | ||
| align="center" |[[ | |align="center"data-sort-value="12"|[[File:MLBISSneed.png]] | ||
![[ | ![[Sneed]]<sup>i</sup>{{footnote|main|1}} | ||
| align="center" | | |align="center"|74 | ||
| align="center" | | |align="center"|200 | ||
| align="center" | | |align="center"|50 | ||
| [[ | |[[Bumpsy Plains]] | ||
|- | |- | ||
| align="center" |[[File: | |align="center"data-sort-value="13"|[[File:MLBISLakituKing.png]] | ||
![[ | ![[Lakitu King]]<sup>i</sup> <sup>m&l</sup> | ||
| align="center" | | |align="center"|90 | ||
| align="center" | | |align="center"|35 | ||
| align="center" | | |align="center"|20 | ||
| [[ | |[[Bumpsy Plains]] | ||
|- | |- | ||
| align="center" |[[ | |align="center"data-sort-value="14"|[[File:MLBISChainChawful2.png]] | ||
![[ | ![[Chain Chawful]] | ||
| align="center" | | |align="center"|165 | ||
| align="center" | | |align="center"|75 | ||
| align="center" | | |align="center"|30 | ||
| [[ | |[[Bowser Path]] | ||
|- | |- | ||
| align="center" |[[ | |align="center"data-sort-value="15"|[[File:MLBISFawfulcopter.png]] | ||
![[ | ![[Fawfulcopter]]<sup>i</sup> <sup>m&l</sup> | ||
| align="center" | | |align="center"|32 | ||
| align="center" | | |align="center"|40 | ||
| align="center" | | |align="center"|20 | ||
| [[ | |[[Bowser Path]] | ||
|- | |- | ||
| align="center" |[[ | |align="center"data-sort-value="16"|[[File:MLBISFawfulGuy.png]] | ||
![[ | ![[Fawful Guy]]<sup>m&l</sup> | ||
| align="center" | | |align="center"|172 | ||
| align="center" |240 | |align="center"|240 | ||
| align="center" | | |align="center"|60 | ||
| [[ | |[[Bowser Path]] | ||
|- | |- | ||
| align="center" |[[ | |align="center"data-sort-value="17"|[[File:MLBISChoomba.png]] | ||
![[ | ![[Choomba]]<sup>b</sup> | ||
| align="center" | | |align="center"|248 | ||
| align="center" | | |align="center"|120 | ||
| align="center" | | |align="center"|31 | ||
| [[ | |[[Tunnel]] | ||
|- | |- | ||
| align="center" |[[ | |align="center"data-sort-value="18"|[[File:MLBISCoalbit.png]] | ||
![[ | ![[Coalbit]]<sup>i</sup> | ||
| align="center" | | |align="center"|34 | ||
| align="center" | | |align="center"|40 | ||
| align="center" | | |align="center"|15 | ||
| [[ | |[[Tunnel]] | ||
|- | |- | ||
| align="center" |[[ | |align="center"data-sort-value="19"|[[File:MLBISRedNooz.png]][[File:MLBISGreenNooz.png]] | ||
![[ | ![[Nooz]]<sup>m&l</sup> | ||
| align="center" | | |align="center"|55 | ||
| align="center" | | |align="center"|50 | ||
| align="center" | | |align="center"|25 | ||
| [[ | |[[Toad Town Caves]] | ||
|- | |- | ||
| align="center" |[[ | |align="center"data-sort-value="21"|[[File:MLBISFawflant.png]] | ||
![[ | ![[Fawflant]]<sup>m&l</sup> | ||
| align="center" | | |align="center"|100 | ||
| align="center" | | |align="center"|70 | ||
| align="center" | | |align="center"|30 | ||
| [[ | |[[Toad Town Caves]] | ||
|- | |- | ||
| align="center" |[[ | |align="center"data-sort-value="22"|[[File:MLBISBeehoss.png]] | ||
![[ | ![[Beehoss]] | ||
| align="center" | | |align="center"|200 | ||
| align="center" | | |align="center"|150 | ||
| align="center" | | |align="center"|40 | ||
| [[ | |[[Blubble Lake]] | ||
|- | |- | ||
| align="center" |[[ | |align="center"data-sort-value="23"|[[File:MLBISCrawful.png]] | ||
![[ | ![[Crawful]] | ||
| align="center" | | |align="center"|173 | ||
| align="center" | | |align="center"|170 | ||
| align="center" | | |align="center"|45 | ||
| [[Blubble Lake]] | |[[Blubble Lake]] | ||
|- | |- | ||
| align="center" |[[ | |align="center"data-sort-value="26"|[[File:MLBISGlamLakitu.png]] | ||
![[ | ![[Glam Lakitu]]<sup>i</sup> <sup>m&l</sup> | ||
| align="center" | | |align="center"|208 | ||
| align="center" | | |align="center"|47 | ||
| align="center" | | |align="center"|60 | ||
| [[ | |[[Blubble Lake]] | ||
|- | |- | ||
| align="center" |[[ | |align="center"data-sort-value="24"|[[File:MLBISFawflopper.png]] | ||
![[ | ![[Fawflopper]]<sup>m&l</sup> | ||
| align="center" | | |align="center"|96 | ||
| align="center" | | |align="center"|200 | ||
| align="center" | | |align="center"|40 | ||
| [[ | |[[Blubble Lake]] | ||
|- | |- | ||
| align="center" |[[ | |align="center"data-sort-value="25"|[[File:MLBISMawfulMole.png]] | ||
![[ | ![[Mawful Mole]]<sup>m&l</sup> | ||
| align="center" | | |align="center"|154 | ||
| align="center" | | |align="center"|230 | ||
| align="center" | | |align="center"|45 | ||
| [[ | |[[Blubble Lake]] | ||
|- | |- | ||
| align="center" |[[ | |align="center"data-sort-value="27"|[[File:MLBISJailgoon.png]] | ||
![[ | ![[Jailgoon]] | ||
| align="center" | | |align="center"|183 | ||
| align="center" | | |align="center"|340 | ||
| align="center" | | |align="center"|55 | ||
| [[ | |[[Bowser's Castle#Mario & Luigi: Bowser's Inside Story / Mario & Luigi: Bowser's Inside Story + Bowser Jr.'s Journey|Bowser Castle]] | ||
|- | |- | ||
| align="center" |[[ | |align="center"data-sort-value="28"|[[File:MLBISSniffleThwomp.png]] | ||
![[ | ![[Sniffle Thwomp]] | ||
| align="center" | | |align="center"|256 | ||
| align="center" | | |align="center"|400 | ||
| align="center" | | |align="center"|60 | ||
| [[ | |[[Bowser's Castle#Mario & Luigi: Bowser's Inside Story / Mario & Luigi: Bowser's Inside Story + Bowser Jr.'s Journey|Bowser Castle]] | ||
|- | |- | ||
| align="center" |[[ | |align="center"data-sort-value="29"|[[File:MLBISMagifoofa.png]] | ||
![[ | ![[Magifoofa]]<sup>m&l</sup> | ||
| align="center" | | |align="center"|124 | ||
| align="center" | | |align="center"|260 | ||
| align="center" | | |align="center"|50 | ||
| [[ | |[[Bowser's Castle#Mario & Luigi: Bowser's Inside Story / Mario & Luigi: Bowser's Inside Story + Bowser Jr.'s Journey|Bowser Castle]] | ||
|- | |- | ||
| align="center" |[[ | |align="center"data-sort-value="30"|[[File:MLBISMechawful.png]] | ||
![[ | ![[Mechawful]] | ||
| align="center" | | |align="center"|277 | ||
| align="center" | | |align="center"|300{{footnote|main|2}} | ||
| align="center" | | |align="center"|70 | ||
| [[Peach's Castle]] | |[[Peach's Castle Garden]] | ||
|- | |- | ||
| align="center" |[[ | |align="center"data-sort-value="31"|[[File:MLBISMechawfulHead.png]] | ||
![[ | ![[Mechawful|Mechawful Head]]<sup>i</sup> | ||
| align="center" | | |align="center"|98 | ||
| align="center" | | |align="center"|150 | ||
| align="center" | | |align="center"|20 | ||
| [[ | |[[Peach's Castle Garden]] | ||
|- | |- | ||
| align="center" |[[ | |align="center"data-sort-value="32"|[[File:MLBISMetalMawfulMole.png]] | ||
![[ | ![[Metal Mawful Mole]]{{footnote|main|1}} | ||
| align="center" | | |align="center"|140 | ||
| align="center" | | |align="center"|350 | ||
| align="center" | | |align="center"|60 | ||
| [[ | |[[Peach's Castle Garden]] | ||
|- | |- | ||
| align="center" |[[ | |align="center"data-sort-value="33"|[[File:MLBISNaplockAwake.png]] | ||
![[ | ![[Naplock]]<sup>b</sup> | ||
| align="center" | | |align="center"|183 | ||
| align="center" | | |align="center"|580 | ||
| align="center" | | |align="center"|80 | ||
| [[ | |[[Peach's Castle#Mario & Luigi: Bowser's Inside Story / Mario & Luigi: Bowser's Inside Story + Bowser Jr.'s Journey|Peach's Castle]] | ||
|- | |- | ||
| align="center" |[[ | |align="center"data-sort-value="34"|[[File:MLBISAlarmBobomb.png]] | ||
![[ | ![[Alarm Bob-omb]]<sup>i</sup> | ||
| align="center" | | |align="center"|123 | ||
| align="center" | | |align="center"|170 | ||
| align="center" | | |align="center"|50 | ||
| [[ | |[[Peach's Castle#Mario & Luigi: Bowser's Inside Story / Mario & Luigi: Bowser's Inside Story + Bowser Jr.'s Journey|Peach's Castle]] | ||
|- | |- | ||
| align="center" |[[ | |align="center"data-sort-value="38"|[[File:MLBISDarkTrashure.png]] | ||
![[ | ![[Dark Trashure]]<sup>b</sup> | ||
| align="center" | | |align="center"|360 | ||
| align="center" | | |align="center"|640 | ||
| align="center" | | |align="center"|100 | ||
| [[ | |[[Peach's Castle#Mario & Luigi: Bowser's Inside Story / Mario & Luigi: Bowser's Inside Story + Bowser Jr.'s Journey|Peach's Castle]] | ||
|- | |- | ||
| align="center" |[[ | |align="center"data-sort-value="39"|[[File:MLBISDarkFawfulGuy.png]] | ||
![[ | ![[Dark Fawful Guy]]<sup>i</sup> <sup>m&l</sup> | ||
| align="center" | | |align="center"|128 | ||
| align="center" |200 | |align="center"|200 | ||
| align="center" | | |align="center"|65 | ||
| [[ | |[[Peach's Castle#Mario & Luigi: Bowser's Inside Story / Mario & Luigi: Bowser's Inside Story + Bowser Jr.'s Journey|Peach's Castle]] | ||
|- | |- | ||
| align="center" |[[ | |align="center"data-sort-value="40"|[[File:MLBISDarkFawfulBomb.png]] | ||
![[ | ![[Dark Fawful Bomb]]<sup>b</sup> | ||
| align="center" | | |align="center"|316 | ||
| align="center" | | |align="center"|0 | ||
| align="center" | | |align="center"|0 | ||
| [[Bowser's | |[[Peach's Castle#Mario & Luigi: Bowser's Inside Story / Mario & Luigi: Bowser's Inside Story + Bowser Jr.'s Journey|Peach's Castle]] | ||
|- | |- | ||
| align="center" |[[ | |align="center"data-sort-value="35"|[[File:MLBISDarkMechawful.png]] | ||
![[ | ![[Dark Mechawful]]<sup>b</sup> | ||
| align="center" | | |align="center"|280 | ||
| align="center" | | |align="center"|800 | ||
| align="center" | | |align="center"|80 | ||
| [[ | |[[Peach's Castle#Mario & Luigi: Bowser's Inside Story / Mario & Luigi: Bowser's Inside Story + Bowser Jr.'s Journey|Peach's Castle]] | ||
|- | |- | ||
| align="center" | |align="center"data-sort-value="36"|[[File:MLBISDarkMechawfulHead.png]] | ||
![[Dark Mechawful|Dark Mechawful Head]]<sup>i</sup> <sup>m&l</sup> | |||
|align="center"|200 | |||
|align="center"|200 | |||
|align="center"|40 | |||
|[[Peach's Castle#Mario & Luigi: Bowser's Inside Story / Mario & Luigi: Bowser's Inside Story + Bowser Jr.'s Journey|Peach's Castle]] | |||
![[ | |||
| align="center" | | |||
| align="center" | | |||
| align="center" | | |||
| [[ | |||
| | |||
|- | |- | ||
|align="center"data-sort-value="37"|[[File:Mechawful 5 Dark.png]] | |||
![[Dark Mechawful.5]]<sup>b</sup> | |||
|align="center"|280 | |||
|align="center"|800{{footnote|main|2}} | |||
|align="center"|80 | |||
|[[Peach's Castle#Mario & Luigi: Bowser's Inside Story / Mario & Luigi: Bowser's Inside Story + Bowser Jr.'s Journey|Peach's Castle]] | |||
|} | |} | ||
{{footnote|note|1|Though they are instantly defeated by Bowser in overworld, Bowser can meet them by battling against other enemies.}} | |||
{{footnote|note|2|Defeating the summoned bodies will not grant extra experience and coins.}} | |||
====Inside Bowser==== | ====Inside Bowser==== | ||
{|width=100% | All enemies here can be battled with Mario & Luigi. | ||
{|width=100% class=wikitable | |||
!Image | !Image | ||
!Name | !Name | ||
![[Heart Point|HP]] | ![[Heart Point|HP]] | ||
![[Experience|EXP]] | ![[Experience Point|EXP]] | ||
!Coins | !Coins | ||
!Location | !Location | ||
|- | |- | ||
| align="center" |[[ | |align="center"|[[File:Goombule Cell Thing.png]] | ||
![[ | ![[Goombule]] | ||
| align="center" | | |align="center"|8 | ||
| align="center" | | |align="center"|3 | ||
| align="center" | | |align="center"|2 | ||
| [[ | |[[Trash Pit]] | ||
|- | |- | ||
| align="center" |[[ | |align="center"|[[File:Goombule Elite.png]] | ||
![[ | ![[Elite Goombule]] | ||
| align="center" | | |align="center"|16 | ||
| align="center" | | |align="center"|4 | ||
| align="center" | | |align="center"|2 | ||
| [[ | |[[Trash Pit]] | ||
|- | |- | ||
| align="center" |[[ | |align="center"|[[File:Spike blop.png]] | ||
![[ | ![[Spike Blop]] | ||
| align="center" | | |align="center"|12 | ||
| align="center" | | |align="center"|5 | ||
| align="center" | | |align="center"|3 | ||
| [[ | |[[Trash Pit]] | ||
|- | |- | ||
| align="center" |[[ | |align="center"|[[File:MLBISBubbleBlooper.png]][[File:MLBISDriedBlooper.png]] | ||
![[Bubble Blooper | ![[Bubble Blooper]] / [[Dried Blooper]] | ||
| align="center" |23 | |align="center"|23 | ||
| align="center" |15 | |align="center"|15 | ||
| align="center" |5 | |align="center"|5 | ||
| [[Pump Works]] | |[[Pump Works]] | ||
|- | |- | ||
| align="center" |[[ | |align="center"|[[File:Protobattle Blis.png]] | ||
![[ | ![[Protobatter]] | ||
| align="center" | | |align="center"|36 | ||
| align="center" | | |align="center"|15 | ||
| align="center" | | |align="center"|5 | ||
| [[ | |[[Pump Works]] | ||
|- | |- | ||
| align="center" |[[ | |align="center"|[[File:Tenderloin.png]] | ||
![[ | ![[Tenderling]] | ||
| align="center" | | |align="center"|45 | ||
| align="center" | | |align="center"|30 | ||
| align="center" | | |align="center"|12 | ||
| [[ | |[[Flab Zone]] | ||
|- | |- | ||
| align="center" |[[ | |align="center"|[[File:Calorite Bis.png]] | ||
![[ | ![[Calorite]] | ||
| align="center" | | |align="center"|85 | ||
| align="center" | | |align="center"|40 | ||
| align="center" | | |align="center"|20 | ||
| [[ | |[[Flab Zone]] | ||
|- | |- | ||
| align="center" |[[ | |align="center"|[[File:Napse Napse.png]] | ||
![[Napse]] | ![[Napse]] | ||
| align="center" |68 | |align="center"|68 | ||
| align="center" |100 | |align="center"|100 | ||
| align="center" |35 | |align="center"|35 | ||
| [[Energy Hold]] | |[[Energy Hold]] | ||
|- | |- | ||
| align="center" |[[ | |align="center"|[[File:MLBISPowPep.png]][[File:MLBISDefPep.png]][[File:MLBISSpeedPep.png]] | ||
![[Pep]] | ![[Pep|POW/DEF/SPEED Pep]] | ||
| align="center" |105 | |align="center"|105 | ||
| align="center" |120 | |align="center"|120 | ||
| align="center" |40 | |align="center"|40 | ||
| [[Energy Hold]] | |[[Energy Hold]] | ||
|- | |- | ||
| align="center" |[[ | |align="center"|[[File:MLBISPiranhaPlorp.png]] | ||
![[Piranha Plorp]] | ![[Piranha Plorp]] | ||
| align="center" |165 | |align="center"|165 | ||
| align="center" |140 | |align="center"|140 | ||
| align="center" |55 | |align="center"|55 | ||
| [[Energy Hold | |[[Energy Hold]] | ||
|- | |- | ||
| align="center" |[[ | |align="center"|[[File:Protobattler Blue.png]] | ||
![[Pwallop]] | ![[Pwallop]] | ||
| align="center" |130 | |align="center"|130 | ||
| align="center" |150 | |align="center"|150 | ||
| align="center" |45 | |align="center"|45 | ||
| [[Energy Hold]] | |[[Energy Hold]] | ||
|- | |- | ||
| align="center" |[[ | |align="center"|[[File:MLBISAirCheep.png]] | ||
![[ | ![[Air Cheep]] | ||
| align="center" | | |align="center"|236 | ||
| align="center" | | |align="center"|600 | ||
| align="center" | | |align="center"|75 | ||
| [[ | |[[Airway (Mario & Luigi: Bowser's Inside Story)|Airway]] | ||
|- | |- | ||
| align="center" |[[ | |align="center"|[[File:MLBISStonk.png]] | ||
![[Stonk]] | ![[Stonk]] | ||
| align="center" |198 | |align="center"|198 | ||
| align="center" |630 | |align="center"|630 | ||
| align="center" |85 | |align="center"|85 | ||
| [[Airway]] | |[[Airway (Mario & Luigi: Bowser's Inside Story)|Airway]] | ||
|- | |- | ||
| align="center" |[[ | |align="center"|[[File:Airnapse.png]] | ||
![[ | ![[Airnapse]] | ||
| align="center" | | |align="center"|150 | ||
| align="center" | | |align="center"|610 | ||
| align="center" | | |align="center"|70 | ||
| [[ | |[[Airway (Mario & Luigi: Bowser's Inside Story)|Airway]] | ||
|- | |- | ||
|align="center"|[[File:MLBISAirCannon.png]] | |||
![[Air Cannon]] | |||
|align="center"|254 | |||
|align="center"|670 | |||
|align="center"|100 | |||
|[[Airway (Mario & Luigi: Bowser's Inside Story)|Airway]] | |||
|} | |} | ||
===Bosses=== | ===Bosses=== | ||
The following is a bestiary for all | The following is a bestiary for all bosses encountered in the game ''Mario & Luigi: Bowser's Inside Story''. Please note that some of the bosses are fought necessarily; some are optional, such as the X bosses; and some require Bowser to become giant to brawl them. | ||
*<sup>e</sup> Indicates the battle automatically ends after several turns. | |||
==== | ====Normal Bosses==== | ||
{|width=100% | {|width=100% class=wikitable | ||
!Image | !Image | ||
!Name | !Name | ||
![[Heart Point|HP]] | ![[Heart Point|HP]] | ||
![[Experience|EXP]] | ![[Experience Point|EXP]] | ||
! | ![[Coin]]s | ||
!Location | !Location | ||
|- | |- | ||
| align="center" |[[ | |align="center"|[[File:Bowser-BIS-enemy.png]] | ||
![[ | ![[Bowser#Mario & Luigi: Bowser's Inside Story / Mario & Luigi: Bowser's Inside Story + Bowser Jr.'s Journey|Bowser]] (1)<sup>m</sup> | ||
| align="center" |20 | |align="center"|20{{footnote|main|3}} | ||
| align="center" | | |align="center"|0 | ||
| align="center" | | |align="center"|0 | ||
| [[ | |[[Peach's Castle#Mario & Luigi: Bowser's Inside Story / Mario & Luigi: Bowser's Inside Story + Bowser Jr.'s Journey|Peach's Castle]] | ||
|- | |- | ||
| align="center" |[[ | |align="center"|[[File:MLBISMidbusBattle.png]] | ||
![[ | ![[Midbus]] (1)<sup>b</sup> <sup>e</sup> | ||
| align="center" | | |align="center"|95 | ||
| align="center" | | |align="center"|0 | ||
| align="center" | | |align="center"|0 | ||
| [[ | |[[Cavi Cape]] | ||
|- | |- | ||
| align="center" |[[ | |align="center"|[[File:MLBISBroqueMonseiurBattle.png]] | ||
![[ | ![[Broque Monsieur]]<sup>i</sup> | ||
| align="center" | | |align="center"|158 | ||
| align="center" | | |align="center"|30 | ||
| align="center" |0 | |align="center"|0 | ||
| [[ | |[[Plack Beach]] | ||
|- | |- | ||
| align="center" |[[ | |align="center"|[[File:Sea Pipe Statue.png]][[File:Stone Blooper.png]] | ||
![[ | ![[Sea Pipe Statue]]<sup>i</sup> | ||
| align="center" | | |align="center"|320 | ||
| align="center" | | |align="center"|150 | ||
| align="center" | | |align="center"|50 | ||
| [[ | |[[Plack Beach]] | ||
|- | |- | ||
| align="center" |[[ | |align="center"|[[File:BossScutletBIS.png]] | ||
![[ | ![[Scutlet (boss)|Scutlet]]<sup>m&l</sup> | ||
| align="center" | | |align="center"|280 | ||
| align="center" | | |align="center"|200 | ||
| align="center" | | |align="center"|50 | ||
| [[ | |[[Flame Pipe]] | ||
|- | |- | ||
| align="center" |[[ | |align="center"|[[File:MLBISBroggyBattle.png]] | ||
![[ | ![[Broggy]]<sup>b</sup> | ||
| align="center" | | |align="center"|198 | ||
| align="center" | | |align="center"|60 | ||
| align="center" | | |align="center"|0 | ||
| [[ | |[[Plack Beach]] | ||
|- | |- | ||
| align="center" |[[ | |align="center"|[[File:WigglerSprite.png]] | ||
![[Bowser | ![[Wiggler#Mario & Luigi: Bowser's Inside Story / Mario & Luigi: Bowser's Inside Story + Bowser Jr.'s Journey|Wiggler]]<sup>b</sup> | ||
| align="center" | | |align="center"|540 | ||
| align="center" | | |align="center"|340 | ||
| align="center" | | |align="center"|150 | ||
| [[ | |[[Dimble Wood]] | ||
|- | |- | ||
| align="center" |[[ | |align="center"|[[File:MLBISDurmite.png]] | ||
![[ | ![[Durmite]]<sup>m&l</sup> | ||
| align="center" | | |align="center"|Durmite - 326<br>Straw - 16 | ||
| align="center" | | |align="center"|300 | ||
| align="center" | | |align="center"|120 | ||
| [[ | |[[Nerve Cluster]] | ||
|- | |- | ||
| align="center" |[[ | |align="center"|[[File:MLBISMidbusBattle.png]] | ||
![[ | ![[Midbus]] (2)<sup>b</sup> | ||
| align="center" | | |align="center"|950 | ||
| align="center" | | |align="center"|550 | ||
| align="center" | | |align="center"|350 | ||
| [[ | |[[Fawful Theater]] | ||
|- | |- | ||
| align="center" |[[ | |align="center"|[[File:MLBISAlphaKretin.png]][[File:Alpha Kretin 2.png]][[File:MLBISBetaKretin.png]] | ||
![[ | ![[Kretin]]<sup>m&l</sup> | ||
| align="center" | | |align="center"|Alpha - 20 (each ball)<br>Beta - 385 | ||
| align="center" | | |align="center"|700 | ||
| align="center" | | |align="center"|200 | ||
| [[ | |[[Flab Zone]] | ||
|- | |- | ||
| align="center" |[[ | |align="center"|[[File:Bowser-BIS-enemy.png]] | ||
![[ | ![[Bowser#Mario & Luigi: Bowser's Inside Story / Mario & Luigi: Bowser's Inside Story + Bowser Jr.'s Journey|Bowser]] (2)<sup>m&l</sup> | ||
| align="center" | | |align="center"|1,215 | ||
| align="center" | | |align="center"|1,000 | ||
| align="center" | | |align="center"|500 | ||
| [[ | |[[Toadley Clinic]] | ||
|- | |- | ||
| align="center" |[[ | |align="center"|[[File:MLBISWisdurmSmall.png]][[File:MLBISWisdurm.png]] | ||
![[ | ![[Wisdurm]]<sup>m&l</sup> | ||
| align="center" |1, | |align="center"|1,610 | ||
| align="center" | | |align="center"|2,800 | ||
| align="center" | | |align="center"|600 | ||
| [[ | |[[Energy Hold]] | ||
|- | |- | ||
| align="center" |[[ | |align="center"|[[File:Bowser Memory M.png]][[File:Bowser Memory L.png]] | ||
![[ | ![[Bowser Memory ML]]<sup>m&l</sup> | ||
| align="center" | | |align="center"|M - 730<br>L - 845 | ||
| align="center" | | |align="center"|3,000 | ||
| align="center" | | |align="center"|700 | ||
| [[ | |[[Memory Banks]] | ||
|- | |- | ||
| align="center" |[[ | |align="center" |[[File:MLBISShroob.png]][[File:MLBISShroob.png]][[File:MLBISShroob.png]] | ||
![[ | ![[Shroob#Mario & Luigi: Bowser's Inside Story / Mario & Luigi: Bowser's Inside Story + Bowser Jr.'s Journey|Shroobs]]<sup>m&l</sup> (×3){{footnote|main|4}} | ||
| align="center" | | |align="center"|500 each | ||
| align="center" | | |align="center"|900 | ||
| align="center" | | |align="center"|300 | ||
| [[ | |[[Bowser's Castle#Mario & Luigi: Bowser's Inside Story / Mario & Luigi: Bowser's Inside Story + Bowser Jr.'s Journey|Bowser Castle]] | ||
|- | |- | ||
| align="center" |[[ | |align="center"|[[File:MLBISChakron.png]] | ||
![[ | ![[Chakron]]<sup>m&l</sup> <sup>e</sup>{{footnote|main|5}} | ||
| align="center" | | |align="center"|9,999 | ||
| align="center" | | |align="center"|0 | ||
| align="center" | | |align="center"|0 | ||
| [[ | |[[Plack Beach]] | ||
|- | |- | ||
| align="center" |[[ | |align="center"|[[File:M&LBIS Junker.png]] | ||
![[ | ![[Junker]]<sup>m&l</sup> | ||
| align="center" | | |align="center"|1,445 | ||
| align="center" | | |align="center"|6,000 | ||
| align="center" | | |align="center"|900 | ||
| [[ | |[[Peach's Castle Garden]] | ||
|- | |- | ||
| align="center" |[[ | |align="center"|[[File:MLBISBlizzardMidbus.png]] | ||
![[ | ![[Blizzard Midbus]]<sup>b</sup><br> | ||
| align="center" | | |align="center"|2,041 | ||
| align="center" | | |align="center"|6,500 | ||
| align="center" | | |align="center"|1,200 | ||
| [[ | |[[Peach's Castle#Mario & Luigi: Bowser's Inside Story / Mario & Luigi: Bowser's Inside Story + Bowser Jr.'s Journey|Peach's Castle]] | ||
|- | |- | ||
| align="center" |[[ | |align="center"|[[File:MLBISDarkStar.png]] | ||
![[ | ![[Dark Star]]<sup>m&l</sup> | ||
| align="center" |1, | |align="center"|1,248 | ||
| align="center" | | |align="center"|9,999 | ||
| align="center" | | |align="center"|2,000 | ||
| [[ | |[[Airway (Mario & Luigi: Bowser's Inside Story)|Airway]] | ||
|- | |- | ||
| align="center" |[[ | |align="center"|[[File:MLBISDarkFawfulNoVaccum.png]] | ||
![[ | ![[Dark Fawful]]<sup>b</sup> | ||
| align="center" | | |align="center"|1,736 | ||
| align="center" | | |align="center"|7,500 | ||
| align="center" | | |align="center"|1,600 | ||
| [[ | |[[Peach's Castle#Mario & Luigi: Bowser's Inside Story / Mario & Luigi: Bowser's Inside Story + Bowser Jr.'s Journey|Peach's Castle]] | ||
|- | |- | ||
| align="center" |[[ | |align="center"|[[File:DarkBowserBIS.png]] | ||
![[ | ![[Dark Bowser]]<sup>b</sup> | ||
| align="center" | | |align="center"|1,000 | ||
| align="center" | | |align="center"|0 | ||
| align="center" |0 | |align="center"|0 | ||
| [[ | |[[Peach's Castle#Mario & Luigi: Bowser's Inside Story / Mario & Luigi: Bowser's Inside Story + Bowser Jr.'s Journey|Peach's Castle]] | ||
|- | |- | ||
| align="center" |[[ | |align="center"|[[File:Fawful Darker.png]] | ||
![[ | ![[Dark Star Core]]<sup>i</sup> <sup>m&l</sup> | ||
| align="center" |250 | |align="center"|Main - 1,560<br>Glasses - 250<br>Appendages - 156 | ||
| align="center" |0 | |align="center"|0 | ||
| align="center" |0 | |align="center"|0 | ||
| [[ | |[[Peach's Castle#Mario & Luigi: Bowser's Inside Story / Mario & Luigi: Bowser's Inside Story + Bowser Jr.'s Journey|Peach's Castle]] | ||
|} | |||
{{footnote|note|3|after the tutorial part, Bowser's HP will be set to 20.}} | |||
{{footnote|note|4|this boss is entirely optional.}} | |||
| | {{footnote|note|5|this battle will end after performing one EXCELLENT [[Snack Basket]].}} | ||
| | ;Boss Support | ||
| | {|width=100% class=wikitable | ||
!Image | |||
| | !Enemy | ||
| | !Battled with | ||
![[Heart Point|HP]] | |||
| | !EXP | ||
!Location | |||
|- | |- | ||
| align="center" |[[ | |align="center"|[[File:LeafGuyBIS.png]] | ||
![[ | ![[Leaf Guy]]<sup>i</sup> <sup>m&l</sup> | ||
| align="center" | | |align="center"|[[Wiggler#Mario & Luigi: Bowser's Inside Story / Mario & Luigi: Bowser's Inside Story + Bowser Jr.'s Journey|Wiggler]] | ||
| align="center" | | |align="center"|56 | ||
| align="center" | | |align="center"|20 | ||
| [[ | |align="center"|[[Dimble Wood]] | ||
|- | |- | ||
| align="center" |[[ | |align="center"|[[File:M&LBIS Biffidus.png]] | ||
![[ | ![[Biffidus]]<sup>m&l</sup> | ||
| align="center" | | |align="center"|[[Durmite]] | ||
| align="center" | | |align="center"|10 | ||
| align="center" |0 | |align="center"|0 | ||
| [[ | |align="center"|[[Nerve Cluster]] | ||
|- | |- | ||
| align="center" |[[ | |align="center"|[[File:Junker Junk Trash.png]] | ||
![[ | ![[Junker Can]]<sup>m&l</sup> | ||
| align="center" | | |align="center"|[[Junker]] | ||
| align="center" | | |align="center"|105 | ||
| align="center" | | |align="center"|0 | ||
| [[ | |align="center"|[[Peach's Castle Garden]] | ||
|- | |- | ||
| align="center" |[[ | |align="center"|[[File:MLBISSnawfulOverworld.png]] | ||
![[ | ![[Snawful]]<sup>i</sup> | ||
| align="center" | | |align="center"|[[Blizzard Midbus]] | ||
| align="center" | | |align="center"|105 | ||
| align="center" | | |align="center"|220 | ||
| [[ | |align="center"|[[Peach's Castle#Mario & Luigi: Bowser's Inside Story / Mario & Luigi: Bowser's Inside Story + Bowser Jr.'s Journey|Peach's Castle]] | ||
|- | |- | ||
| align="center" |[[ | |align="center"|[[File:Satelmite Dark.png]] | ||
![[ | ![[Dark Satellmite]]<sup>m&l</sup> | ||
|align="center"|[[Dark Star]] | |||
|align="center"|260 | |||
|align="center"|0 | |||
|align="center"|[[Airway (Mario & Luigi: Bowser's Inside Story)|Airway]] | |||
| align="center" |[[ | |||
| align="center" | | |||
| align="center" | | |||
| align="center" | |||
| [[ | |||
|- | |- | ||
|align="center"|[[File:MLBISVaccumHelmet.png]] | |||
![[Vacuum Helmet#Mario & Luigi: Bowser's Inside Story / Mario & Luigi: Bowser's Inside Story + Bowser Jr.'s Journey|Vacuum Helmet]]<sup>i</sup> | |||
|align="center"|[[Dark Fawful]] | |||
|align="center"|1,200 | |||
|align="center"|220 | |||
|align="center"|[[Peach's Castle#Mario & Luigi: Bowser's Inside Story / Mario & Luigi: Bowser's Inside Story + Bowser Jr.'s Journey|Peach's Castle]] | |||
|} | |} | ||
====Giant Bosses==== | ====Giant Bosses==== | ||
{|width=100% | All these bosses can only be battled with Giant Bowser. | ||
{|width=100% class=wikitable | |||
!Image | !Image | ||
!Name | !Name | ||
![[Heart Point|HP]] | ![[Heart Point|HP]] | ||
![[Experience|EXP]] | ![[Experience Point|EXP]] | ||
! | ![[Coin]]s | ||
!Location | !Location | ||
|- | |- | ||
|[[File:Bowsercastlebis.PNG | |align="center"|[[File:Bowsercastlebis.PNG]] | ||
![[Bowser's Castle]] | ![[Bowser's Castle#Mario & Luigi: Bowser's Inside Story / Mario & Luigi: Bowser's Inside Story + Bowser Jr.'s Journey|Bowser's Castle]] | ||
| align="center" |535 | |align="center"|535 | ||
| align="center" |380 | |align="center"|380 | ||
| align="center" |200 | |align="center"|200 | ||
| [[Dimble Wood]] | |[[Dimble Wood]] | ||
|- | |- | ||
|[[File:Yikktowerbis.png| | |align="center"|[[File:Yikktowerbis.png|60px]] | ||
![[Tower of Yikk]] | ![[Tower of Yikk]] | ||
| align="center" |508 | |align="center"|508 | ||
| align="center" |1,800 | |align="center"|1,800 | ||
| align="center" |800 | |align="center"|800 | ||
| [[Blubble Lake | |[[Blubble Lake]] | ||
|- | |- | ||
|[[File: | |align="center"|[[File:Fawfulexpressbis.png|80px]]<br>[[File:Hill Monster.png|100px]] | ||
![[ | ![[Fawful Express]]<br>with [[Fawful Mountain]] | ||
| align="center" |1, | |align="center"|Express - 885<br>Mountain - 1,049 | ||
| align="center" | | |align="center"|3,500 | ||
| align="center" | | |align="center"|1,000 | ||
| [[ | |[[Project K]] | ||
|- | |- | ||
|align="center"|[[File:SuperPeachCastleOfFury.png|120px]] | |||
![[Super Peach's Castle of Fury]] | |||
|align="center"|1,488 | |||
|align="center"|7,500 | |||
|align="center"|2,000 | |||
|[[Peach's Castle Garden]] | |||
|} | |} | ||
==== | ====Gauntlet Bosses==== | ||
{|width=100% | Note that all X bosses only awards coins on their first defeat. All these bosses are fought by Mario & Luigi. | ||
{|width=100% class=wikitable | |||
!Image | !Image | ||
!Name | !Name | ||
![[Heart Point|HP]] | ![[Heart Point|HP]] | ||
![[ | ![[Coin]]s | ||
|- | |- | ||
| align="center" |[[ | |align="center"|[[File:Durmite X.png]] | ||
![[ | ![[Durmite X]] | ||
| align="center" | | |align="center"|Durmite X - 575<br>Straw X - 40 | ||
|align="center"|1,000 | |||
| align="center" | | |||
|- | |- | ||
| align="center" |[[ | |align="center"|[[File:Alpha Kretin X.png]][[File:Beta Kretin X.png]] | ||
![[ | ![[Kretin X]] | ||
| align="center" |810 | |align="center"|Alpha - 135 (each ball)<br>Beta - 810 | ||
|align="center"|2,000 | |||
| align="center" |2,000 | |||
|- | |- | ||
| align="center" |[[ | |align="center"|[[File:MLBISWisdurmXSmall.png]][[File:MLBISWisdurmX.png]] | ||
![[ | ![[Wisdurm X]] | ||
| align="center" | | |align="center"|2,380 | ||
| align="center" | | |align="center"|4,000 | ||
|- | |- | ||
| align="center" |[[ | |align="center"|[[File:Bowser Memory MXP.png]][[File:Bowser Memory LXP.png]] | ||
![[Bowser | ![[Bowser Memory MLX]] | ||
| align="center" | | |align="center"|MX - 2,500<br>LX - 3,000 | ||
| align="center" | | |align="center"|6,000 | ||
|- | |- | ||
| align="center" |[[ | |align="center"|[[File:Junker X.png]] | ||
![[ | ![[Junker X]] | ||
| align="center" | | |align="center"|3,080 | ||
| align="center" | | |align="center"|9,000 | ||
|- | |- | ||
| align="center" |[[ | |align="center"|[[File:MLBISDarkStarX.png]] | ||
![[ | ![[Dark Star X]] | ||
| align="center" | | |align="center"|4,030 | ||
| align="center" | | |align="center"|12,500 | ||
|- | |- | ||
| align="center" |[[ | |align="center"|[[File:Bowser Enemy Battle bis2.png]] | ||
![[ | ![[Bowser X]]{{footnote|main|6}} | ||
| | |align="center"|7,155 | ||
| align="center" | | |align="center"|25,000 | ||
| align="center" | | |} | ||
| | {{footnote|note|6|must fight 6 other X bosses consecutively before the battle.}} | ||
| | ;Boss Support | ||
| | {|width=100% class=wikitable | ||
!Image | |||
| | !Enemy | ||
!Battled with | |||
![[Heart Point|HP]] | |||
|- | |- | ||
| align="center" |[[ | |align="center"|[[File:MLBISBiffidusX.png]] | ||
![[ | ![[Biffidus X]] | ||
| align="center" | | |align="center"|[[Durmite X]] | ||
|align="center"|32 | |||
| align="center" | | |||
|- | |- | ||
| align="center" |[[ | |align="center"|[[File:Can Junker X.png]] | ||
![[Junker | ![[Junker Can X]] | ||
| align="center" | | |align="center"|[[Junker X]] | ||
| align="center" | | |align="center"|134 | ||
|- | |- | ||
| align="center" |[[ | |align="center"|[[File:Satelmite Dark X.png]] | ||
![[ | ![[Dark Satellmite X]] | ||
|align="center"|[[Dark Star X]] | |||
|align="center"|416 | |||
| align="center" | |||
| [[ | |||
| align="center" | | |||
|} | |} | ||
{{ | {{br}} | ||
==Overworld== | ==Overworld== | ||
While Mario and Luigi adventure through [[Bowser's | While Mario and Luigi adventure through [[Bowser's body]], Bowser is walking around the overworld. Mario and Luigi can influence Bowser. They can pinch nerves to make Bowser panic. They can also touch Bowser's muscles to give him a power-up. Equally, Bowser can change the course of the Mario Bros.' adventure. For example, he can flood them by drinking from a fountain. After a certain point in the game, Mario and Luigi can go to the [[Pipe Yard]] and use [[Warp Pipe]]s to exit Bowser's body and explore the overworld, and then use the pipes to enter Bowser's body again. Bowser can use [[Chakroad]]s to warp between different locations of the Mushroom Kingdom. | ||
Overworld icons have slightly changed. They now display the health of the character. Bowser uses two buttons in the overworld, X to punch, and Y for firebreath. Later in the game, Bowser learns new moves such as a dashing punch, ground-pounding, and curling up into a spikeball (much like the way he attacked Mario in ''[[Super Mario Galaxy]]''). Mario and Luigi use A and B respectively to jump. At one point they gain hammers. Mario can destroy rocks and crates, while Luigi can hit Mario to make him mini so as to reach previously inaccessible areas. Later in the game, the Marios learn new moves such as the [[Spin Jump]] and the Drill Bros. They also encounter items in the overworld that help them perform moves to reach a goal or an item. The items include a gas pump that seems to be shooting out helium. Mario can fill himself up with helium and float into the air like a balloon. If Luigi is to grab his legs at that time, they are able to perform a floating high jump, somewhat similar to the move found in the first installment of the series. They can also find a Blue Koopa shell that Mario can put on. Luigi can whack him with his hammer to shoot Mario over previously inaccessible areas to hit switches. This move is very similar to the move the Koopa companions use in the ''[[Paper Mario (series)|Paper Mario]]'' series. | |||
While Bowser explores a 3-D overworld, Mario and Luigi explore a 2-D world inside his body, much like a traditional platformer, though they can go into the 3-D overworld at any time once the Pipe Yard is available. The actual overworld is connected just as it was in ''Mario & Luigi: Superstar Saga'', unlike ''Partners in Time''{{'}}s linear levels. The overworld is up to 4-5 times larger than ''Superstar Saga''{{'}}s overworld. The map in this game consists of a beach, a forest, a cape, the road to Bowser's Castle, Toad Town, Bowser's Castle, Peach's Castle, Grasslands, a railroad, underground, and a lake. In the Nintendo Power review, it was stated that there are tons of sidequests, much to explore, and plenty to do in the free roam overworld. | |||
===Locations=== | ===Locations=== | ||
{{ | {{M&LBIS map}} | ||
*[[Mushroom Kingdom]] | *[[Mushroom Kingdom]] | ||
**[[Peach's Castle]] | **[[Peach's Castle]] | ||
| Line 1,049: | Line 1,417: | ||
**[[Cavi Cape]] | **[[Cavi Cape]] | ||
**[[Plack Beach]] | **[[Plack Beach]] | ||
**[[Bumpsy Plains]] | |||
**[[Bowser Path]] | **[[Bowser Path]] | ||
**[[Bowser's Castle]] | **[[Bowser's Castle]] | ||
**[[ | **[[Tunnel]]** | ||
**[[Toad Town Caves]] | |||
**[[Toad Town]] | **[[Toad Town]] | ||
**[[Blubble Lake]] | |||
**[[Tower of Yikk]] | **[[Tower of Yikk]] | ||
**[[ | **[[Project K]]** | ||
**[[ | **[[Peach's Castle Garden]] | ||
** | <nowiki>*</nowiki>Only Mario & Luigi can access.<br> | ||
<nowiki>**</nowiki>Only Bowser can access. | |||
{{ | {{M&LBIS Bowser map}} | ||
*[[Bowser's | *[[Bowser's body]] | ||
**[[Trash Pit]] | **[[Trash Pit]] | ||
**[[Funny Bone]] | **[[Funny Bone]] | ||
**[[Toad Square]] | |||
**[[Challenge Node]] | |||
**[[Arm Center]] | |||
**[[Pump Works]] | |||
**[[Flame Pipe]] | **[[Flame Pipe]] | ||
**[[Gut Check (location)|Gut Check]] | |||
**[[Nerve Cluster]] | **[[Nerve Cluster]] | ||
**[[ | **[[Rump Command]] | ||
**[[Flab Zone]] | |||
**[[Pipe Yard]] | **[[Pipe Yard]] | ||
**[[Leg Outpost]] | **[[Leg Outpost]] | ||
**[[Nose Deck]] | **[[Nose Deck]] | ||
**[[Energy Hold]] | |||
**[[Joint Tower]] | |||
**[[Memory Banks]] | |||
**[[Lumbar Nook]] | |||
**[[Chest Station]] | **[[Chest Station]] | ||
**[[ | **[[Airway (Mario & Luigi: Bowser's Inside Story)|Airway]] | ||
===Shops=== | |||
{{Main|List of shops in Mario & Luigi: Bowser's Inside Story}} | |||
Throughout the game, there are several shops where the player can purchase and sell items from several shops on their adventure. Shops available to Mario and Luigi are run by characters and all found in [[Toad Town Mall]] and [[Toad Square]]. Only two shops are available to Bowser: [[Broque Monsieur's Shop]] and [[Broggy's Shop]], both in [[Dimble Wood]]. However, there are [[Shop Block]]s around the Mushroom Kingdom that provides the same functionality to Bowser. There is a [[Scratch Card]] system where the player has a chance to get a part of their coins spent back. The amount of squares that give coins back depends on Mario and Luigi's stache level and Bowser's horn level. | |||
===Beans=== | |||
{{Main|List of beanholes in Mario & Luigi: Bowser's Inside Story}} | |||
After Mario and Luigi learn the [[Drill Bros.]] move, they can collect beans from beanholes by tunneling underground and then jumping. There are about 200 beanholes scattered around the world, both in the Mushroom Kingdom and inside Bowser's body. Mario and Luigi can also collect beans from characters like [[Kuzzle]] and the [[PR Toad]] of [[Toad Town Mall]]. | |||
==Differences== | ==Differences from other ''Mario & Luigi'' games== | ||
While a direct sequel in the ''Mario & Luigi'' series, ''Mario & Luigi: Bowser's Inside Story'' still has several differences compared to the first two ''Mario & Luigi'' games. | While a direct sequel in the ''Mario & Luigi'' series, ''Mario & Luigi: Bowser's Inside Story'' still has several differences compared to the [[Mario & Luigi: Superstar Saga|first]] [[Mario & Luigi: Partners in Time|two]] ''Mario & Luigi'' games. | ||
===Gameplay | *This is the first game to feature more than one optional boss stronger than the final boss. | ||
*This is the first ''Mario & Luigi'' game to have optional bosses, with the exception of three of the four [[Popple]] fights and [[Jojora]] in '' | *This is the first game in the series not to feature [[Professor E. Gadd]]. | ||
*Unlike '' | *This is the only game in the series not to feature [[Yoshi (species)|Yoshi]]s. | ||
*This is the first game in the ''Mario & Luigi | *This is the only game in the series to feature Bowser as a main protagonist. | ||
*This is the first ''Mario & Luigi'' game to give Mario and Luigi's in-game sprites eyebrows. | |||
*This is the first game in the series where Mario and Luigi can double jump; in battle in the first game, they could not while in the second game, they needed the babies to do it. | |||
*This is the only ''Mario & Luigi'' game to not have any traditional enemies as common enemies, besides derived species which only appear in this game. | |||
*This is the first ''Mario & Luigi'' game to feature an "Excellent!!" rating when completing an attack. | |||
*This is the first ''Mario & Luigi'' game where jump and hammer attacks receive a rating depending on how well timed the attack is. | |||
*This is the only ''Mario & Luigi'' game to not have a purely snow-, desert-, mountain-, or temple-themed area. | |||
**The [[Airway (Mario & Luigi: Bowser's Inside Story)|Airway]] can be considered a snow- or ice-like area when it is frozen, and [[Plack Beach]] features a mountainous section. | |||
===Gameplay differences=== | |||
[[File:Scatchcard.png|200px|thumb|The new scratch card mode, allowing Mario, Luigi, and Bowser to win money back.]] | |||
*This is the first ''Mario & Luigi'' game to have optional bosses, with the exception of three of the four [[Popple]] fights and [[Jojora]] in ''Mario & Luigi: Superstar Saga'', who are not required to be defeated, but can be defeated for extra experience and items. | |||
*Unlike ''Mario & Luigi: Partners in Time'' for the Nintendo DS, this game makes greater use of the DS's touch controls and microphone. | |||
*This is the first game in the ''Mario & Luigi'' series (as well as the fourth RPG overall) to have Bowser as a playable character. | |||
*The player can equip Mario and Luigi with pants, gloves, shoes, socks, and accessories instead of just pants as in the first two ''Mario & Luigi'' games. | *The player can equip Mario and Luigi with pants, gloves, shoes, socks, and accessories instead of just pants as in the first two ''Mario & Luigi'' games. | ||
*Badges have a different function. Bro. Badge moves can be performed with them. This game contains eight badges, which is notably less than the previous ''Mario & Luigi'' games. | |||
*Badges have a different function. Bro. Badge moves can be performed with them. This game contains eight badges, which is notably less than the previous ''Mario & Luigi | *This is the first of the series to have power-ups or other items in the overworld such as the blue [[Koopa Troopa]] shell. | ||
*This is the first of the series to have power-ups or other items in the overworld such as the blue [[Koopa]] shell. | *This is the first ''Mario & Luigi'' game to have a [[rank]] system. This means, if the player gets at a certain level, they go to a higher rank. Ranks for Mario and Luigi are the Mushroom Rank, Shell Rank, Flower Rank, Shine Rank, Star Rank, and the Rainbow Rank. Bowser's ranks are the Bronze Boss Rank, Silver Boss Rank, Gold Boss Rank, and the Final Boss Rank. | ||
*This is the first Mario & Luigi game to have a [[rank]] system. This means, if the player gets at a certain level, | *Mario and Luigi get the [[hammer]]s earlier in ''Mario & Luigi: Bowser's Inside Story'' than in the other ''Mario & Luigi'' games. (An exception is ''Mario & Luigi: Paper Jam'', where they have hammers from the start.) | ||
*Mario and Luigi get the [[hammer]]s earlier in Mario & Luigi: Bowser's Inside Story than other Mario & Luigi games. | *The [[Scratch Card]] is introduced, allowing the main characters to earn back coins after spending them. | ||
*[[ | *This is also the first game where the hammerheads do not fall off in defense when held too long; the bro. just puts it down. Consequently, the hammer can also be held much longer. | ||
*This is also the first game where the hammerheads | *In the first two games of the series, Mario and Luigi use a [[suitcase]] to store anything they collect in their journey. In ''Bowser's Inside Story'', however, they use the [[star menu]], managed by [[Starlow]] in order to access their items. | ||
*In the first two games | *This is the first game to have a Boss-Refight or Skill Challenge. | ||
* This is the first game to have a Boss-Refight or Skill Challenge | *This is the first time in the ''Super Mario'' [[Genre#Role-playing|RPG]] series that a sequel has been released on the same system as its predecessor. | ||
* This is the first time in the Mario [[RPG]] series that a sequel has been released on the same system as its predecessor. | *This is the second game where the Mario Bros. battle inside Bowser's body, the first being ''Mario & Luigi: Superstar Saga'', where they battle [[Cackletta]]'s Soul inside Bowser. Fawful (who worked for Cackletta) is fought in a similar way to Cackletta. Also, before both battles take place, the player fights an affected form of Bowser. While Mario and Luigi are sucked into Bowser and Cackletta was inside him, for Fawful it is the reverse; Bowser inhales Dark Fawful, and he fights the Mario Bros. inside of Bowser. | ||
*This is the second game where the Mario Bros. battle inside Bowser's body, the first being '' | *This is the first ''Mario & Luigi'' game where Bowser does not end up possessed by the main villain, as well as the first RPG game since ''Paper Mario'' where the main villain does not actually possess one of the main characters. | ||
**However, [[Dark Bowser]] is a character who has copied Bowser lineaments by gathering his DNA, and is similar to previous Bowser possessions. | |||
===Release | ===Release differences=== | ||
*This is the first Mario & Luigi game to be released in Japan before any other country. | *This is the first ''Mario & Luigi'' game to be released in Japan before any other country. | ||
*This is the first Mario & Luigi game in which the American | *This is the first ''Mario & Luigi'' game in which the American box art is the same as the Japanese box art. The European box art, while not exactly the same due to the ratings' graphics requiring the artwork to be rearranged, uses the same artwork (but with Luigi's and Bowser's eyelines changed to reflect their positions) and background as the Japanese box art. | ||
*This is the first ''Mario & Luigi'' game to have multiple languages for its North American release. Both the French and Spanish translations are distinct from those of Europe. | |||
==Staff== | |||
{{main|List of Mario & Luigi: Bowser's Inside Story staff}} | |||
The game's producers were Toshiharu Izuno, Akira Otani, and Yoshihiko Maekawa, with [[Shigeru Miyamoto]] and [[Takashi Tezuka]] acting as senior producers and [[Satoru Iwata]] and Tetsuo Mizuno acting as executive producers. The game's director was Hiroyuki Kubota and Makoto Aioi was the main programmer. | |||
==Reception== | |||
''Mario & Luigi: Bowser's Inside Story'' has received critical acclaim, with a score of 91.01% based on 47 reviews on GameRankings<ref>{{cite|deadlink=y|archive=web.archive.org/web/20090903025256/http://www.gamerankings.com/ds/954368-mario-and-luigi-bowsers-inside-story/index.html|title=''Mario & Luigi: Bowser's Inside Story'' for DS|publisher=GameRankings|language=en|accessdate=June 25, 2024}}</ref> and a 90 based on 58 reviews on Metacritic,<ref>{{cite|url=www.metacritic.com/game/mario-and-luigi-bowsers-inside-story|title=''Mario & Luigi: Bowser's Inside Story''|publisher=Metacritic|language=en|accessdate=June 25, 2024}}</ref> making it the highest-rated out of the ''[[Super Mario (franchise)|Super Mario]]'' RPG games. Much of the game's praise was directed towards its gameplay, humor, storyline, integration of [[Bowser]] as one of the main protagonists, and innovative use of the [[Nintendo DS]]'s capabilities. | |||
{|class="wikitable reviews" | |||
!colspan="4"style="font-size:120%;text-align:center;background-color:silver;"|Reviews | |||
|-style="background-color:#E6E6E6" | |||
|Release | |||
|Reviewer, Publication | |||
|Score | |||
|Verdict | |||
|- | |||
|Nintendo DS | |||
|Phil Theobald, [http://ds.gamespy.com/nintendo-ds/mario-luigi-rpg-3/1024131p1.html Gamespy] | |||
|4.5/5 | |||
|"''There's very little in Bowser's Inside Story to not like. It's great to look at, the interaction between the "inside" and "outside" worlds is well thought-out, the mini-games and interactive battles are always a treat to play, and it's probably the funniest Mario & Luigi game yet. The game is long, too. Expect to put in well over 20 hours before you're finished. It may not be a traditional RPG, but it's one of the more enjoyable ones out there.''" | |||
|- | |||
|Nintendo DS | |||
|Christian Donlan, [https://www.eurogamer.net/articles/mario-and-luigi-bowsers-inside-story-review Eurogamer] | |||
|9/10 | |||
|"''Superstar Saga was, very quietly, one of the best games of its generation, sadly appearing too late in the [[Game Boy Advance|GBA's]] lifespan to be much more than a cherished secret. Partners in Time was similarly smart but not quite so engaging, possibly because the inclusion of the Mario babies overburdened the controls while offering too little reward for the extra hassle. That's not the case here, however: the brother's old enemy is a triumph precisely because he provides such a contrast to them: he's a bullish idiot who allows you to enjoy your blunt powers with very few limitations. Inside Story is absolutely a return to form, in other words - and, in the end, you've got Bowser to thank for that.''" | |||
|- | |||
|Nintendo DS | |||
|Craig Harris, [https://www.ign.com/articles/2009/09/10/mario-luigi-bowsers-inside-story-review IGN] | |||
|9.5/10 | |||
|"''The Mario & Luigi series has already established itself as a fantastic RPG franchise, and the third game does not disappoint. I have no problem classifying it as the best of the bunch, thanks to an excellent and appropriately surreal script, epic oversized battles, and the fact that Bowser is a playable character and gets most of the gameplay time. Let's hope that this is a jumping-off point for Bowser; this guy really needed a top-billing production!''" | |||
|- | |||
!colspan="4"style="font-size:120%;text-align:center;background-color:silver;"|Aggregators | |||
|-style="background-color:#E6E6E6" | |||
|colspan=2|Compiler | |||
|colspan=2|{{nw|Platform / Score}} | |||
|- | |||
|colspan=2|Metacritic | |||
|colspan=2 style="background-color:LimeGreen"|[https://www.metacritic.com/game/ds/mario-luigi-bowsers-inside-story 90] | |||
|- | |||
|colspan=2|GameRankings | |||
|colspan=2|[https://www.gamerankings.com/ds/954368-mario-and-luigi-bowsers-inside-story/index.html 91.01%] | |||
|} | |||
{{br}} | |||
===Sales=== | |||
''Bowser's Inside Story'' has sold 3.81 million copies worldwide as of April 2016,<ref>{{cite|format=PDF|page=5|url=www.nintendo.co.jp/ir/pdf/2011/110426e.pdf#page=5|title=Consolidated Sales Units of "Wii" (FY3/2011)|publisher=Nintendo|language=en|accessdate=June 25, 2024}}</ref> making it the best-selling RPG in the ''Super Mario'' franchise. | |||
== | ==''Mushroom Kingdom Tribune''== | ||
[[File:Mktribune.png|thumb|75px|The newspaper]] | |||
The '''''Mushroom Kingdom Tribune''''' was a promotional newspaper sent by [[Nintendo]] via e-mail. This newspaper included information about the release of ''Mario & Luigi: Bowser's Inside Story''. | |||
This newspaper included "Reviews from the [[Mushroom Kingdom]]," which features quotes from the game characters: | |||
{{ | *"''I have chortles!''" – [[Fawful]] | ||
*"''Did someone just page the King of Awesome?''" – [[Bowser]] | |||
*"''SUPER ULTRA WONDER ULTIMATE RUTHLESS GREAT IRON BALL!''" – [[Midbus]] | |||
{{br|right}} | |||
==Quotes== | ==Quotes== | ||
{{Main|List of | {{Main|List of Mario & Luigi: Bowser's Inside Story quotes}} | ||
===Bowser=== | |||
*"''Did somebody page the king of awesome?''" | |||
*"''[[Mario|MAAARIO]]! Are you seriously trying to start with me again?! I hear about this big meeting, and I'm all ready to act nice... But man, the second I see your face, Mr. Nice Bowser is GONE. Yeah, forget your dumb meeting! I'll pummel you and grab [[Princess Peach|Peach]]!''" | |||
*"''GWAHAHA! Great dark hurricane! Seriously, perfect backdrop for an awesome final battle! You really sweat the details! Listen up! You're saying the kingdom will vanish? NOT TODAY! THIS [[Mushroom Kingdom|KINGDOM]] IS ALL MINE! '''SO [[Dark Bowser|YOU]] VANISH'''!''" | |||
*"''SHOWTIME!''" | |||
===Fawful=== | |||
*"''All who resist will be beat like naughty little eggs!''" | |||
*"''Beef? I am lacking in beef. Fawful is beefless.''" | |||
*"''Fawful sings a song of bad!♪ The Mushroom Kingdom is so sad!♪ All of it is for Fawful!♪ And the...rhyme...with that!♪''" | |||
*"''Here Fawful goes, the disappearing..forever disappearing... WITH YOU!''" | |||
*''"I HAVE CHORTLES!"'' | |||
*''"It is I who added the nuts to that statue!"'' | |||
==Pre-release and unused content== | |||
{{main|List of Mario & Luigi: Bowser's Inside Story pre-release and unused content}} | |||
Some enemies have an attack pattern for [[Mario]] and [[Luigi]], even if they do not face them in the game. There are also several unused voice clips for [[Yoshi]], coming from ''[[Yoshi's Story]]''; there is also unused music from ''Mario & Luigi: Partners in Time'', although it will not play correctly. Early screenshots also show [[Treevil]]s being battled at [[Plack Beach]]. | |||
==Glitches== | |||
{{main|List of Mario & Luigi: Bowser's Inside Story glitches}} | |||
Before the fight with [[Scutlet (boss)|Scutlet]], if the players re-enter the [[Pump Works]] and hit the Save Block the message will say that Bowser can breathe fire again, even though the Flame Pipe is still blocked. | |||
== | ==Gallery== | ||
{{main| | {{main-gallery|Mario & Luigi: Bowser's Inside Story}} | ||
<gallery> | |||
Mario Luigi Starlow Artwork - Mario and Luigi BiS.png|[[Mario]], [[Luigi]], and [[Starlow]] | |||
MLBiS Bowser.png|[[Bowser]] | |||
Fawful artwork MLBiS.png|[[Fawful]] | |||
Midbus Artwork - Mario and Luigi BiS.png|[[Midbus]] | |||
Dark Star MaLBIS.png|[[Dark Star]] | |||
ML3drtoadley.png|[[Dr. Toadley]] and [[Birdley]] | |||
</gallery> | |||
== | ==Media== | ||
{{main | {{main-media}} | ||
{{media table | |||
|file1=M&LBIS On To the Next Adventure!.oga | |||
|title1=On To the Next Adventure! | |||
|description1=The music for the title screen | |||
|length1=0:30 | |||
|file2=M&LBIS Doing It Right.oga | |||
|title2=Doing It Right | |||
|description2=The music that plays during tutorials | |||
|length2=0:30 | |||
|file3=M&LBIS A Bit of Peace and Quiet.oga | |||
|title3=A Bit of Peace and Quiet | |||
|description3=The music that plays in Peach's Castle at the start | |||
|length3=0:30 | |||
}} | |||
== | ==References to other games== | ||
*''[[zeldawiki:The Legend of Zelda (Game)|The Legend of Zelda]]'' - In [[Toad Town]], Mario and Luigi meet a Toad who teaches them how to dig up special beans. After finishing, he states, "Find all you can. They're a secret to everybody!", in reference to the saying in this game where the Secret Moblin would give Link free Rupees after saying, "It's a secret to everybody." | |||
*''[[Super Mario Bros. 2]]'' - During Bowser's battle with the giant Wiggler, the Wiggler sometimes attacks by pulling out vegetables, which are the same ones that are seen in this game. Also, one of Bowser's brainwashed minions states that he forgot what Bowser's castle was originally called (before it was turned into "Fawful Theater"), and mistakenly referred to it as "[[Mouser]]'s Castle". | |||
*''[[Super Mario RPG: Legend of the Seven Stars]]'' - In addition to the storyline of Bowser attempting to reclaim his castle, Bowser states that [[Starlow|Chippy]] could be an honorary member of the [[Koopa Troop]], and she could "thank him later" (just like when Bowser rationalizes joining Mario's party). In addition, some notes of the [[Forest Maze]] track appear in the Toad Town and [[Peach's Castle]] themes. | |||
*''[[Super Mario Bros. 3]]'' - The starting section of the file select music is similar to the [[P Switch]] and [[Toad House]] theme. [[Sockop]]s are clearly meant to resemble the [[Goomba's Shoe|Kuribo's Shoe]], and at one point Luigi will even hop around inside an unconscious Sockop, allowing him to walk along spikes without taking damage, just as the Kuribo's Shoe does. In addition, one of the Sockops' names is, apparently, Kuribo. | |||
*''[[Dr. Mario (game)|Dr. Mario]]'' - Blue Viruses appear on a poster in Dr. Toadley's office, and in one of the [[Toothy]]'s attacks. | |||
*''[[Super Mario World 2: Yoshi's Island]]'' and ''[[Yoshi's Island DS]]'' - The [[Fawful Guy]] enemy can imitate the attack patterns of both the [[Woozy Guy]] and the [[Glide Guy]]. In addition, one of its attacks mirrors Yoshi's main form of offense in the game, egg throwing. | |||
*''[[Super Mario 64]]'' - The music that plays within Peach's Castle when visiting it for the first time is a variation of its theme here. | |||
*''[[Super Mario Sunshine]]'' - One of the brother's ranks is called the Shine Rank. | |||
*''[[Paper Mario]]'' - The Koopa Paratroopa Trio in the game wear sunglasses, similar to this game. The blue Koopa shell power-up in the overworld is similar to [[Kooper]]'s field ability. Also, Princess Peach using her combined powers with Starlow references [[Peach Beam]]. | |||
*''[[Mario & Luigi: Superstar Saga]]'' - Fawful reappears as a villain. The way Bros. Attacks are used from this game is reused, and there is a slight remix of [[Cackletta]]'s theme song that played in the background after Fawful took over Peach's castle. Additionally, the statues of Fawful in Bowser's castle depict his outfit from his rematch in this game. Mario and Luigi battle Dark Fawful inside of Bowser's body, just as they did with Cackletta. The chair seen near the [[Conference Room]] has the same design (seen only briefly in the beginning of said game). Also, the [[Mini-Mario|Mini Mario]] and [[Spin Jump]] abilities return. | |||
*''[[Mario & Luigi: Partners in Time]]'' - When Mario and Luigi talk to Broque Madame, she tells them stories about the Shroob invasion that took place in the game. Several Shroobs are also seen at Bowser's castle, where they were kept frozen in a cryogenic chamber. If the player chooses to thaw them out, then an optional boss battle with them will commence. During the battle, several other Shroobs, including the [[Elder Princess Shroob]] can be seen in the background. After the battle, Mario and Luigi tell Starlow about their previous battle with the Shroobs, and how they defeated them while they were babies. While the audience is still in the theater in Bowser's castle, a Shroob can also be found sitting in the audience on the bottom right. Also, there is a boot called the Shroob Boots. Fawful Guys, which are fought by Mario and Luigi in [[Bowser Path]], have an attack in which they are pulled offscreen by a tongue (during which the same roar heard from [[Yoob]] is heard), and are thrown at either one of the bros. in the form of an egg, which highly resembles one of [[Sunnycide]]'s attacks. | |||
*''[[New Super Mario Bros.]]'' - [[Blue Shell]]s make a reappearance, as does [[Shell Mario]]. A Mega Mushroom also occasionally appears during one of Broque Monsieur's attacks in his tutorial. | |||
*''[[Super Paper Mario]]'' - Bowser's battle animation resembles the one in this game. | |||
*''[[Super Mario Galaxy]]'' - Spike Ball, the ability where Bowser curls into a ball, heavily resembles an attack that Bowser uses during his fights against Mario/Luigi. | |||
== | ==References in later games== | ||
* | *''[[Mario & Luigi: Dream Team]]'' - [[Starlow]], [[Broque Monsieur]], [[Broque Madame]], [[Broggy]], [[Private Goomp]], [[Corporal Paraplonk]], and [[Sergeant Guy]] all return to this game. Also, Bowser's theme is reused. The boxart style is reused. | ||
*''[[Super Smash Bros. for Wii U]]'' - The songs "Tough Guy Alert!" and "The Grand Finale" return in this game. | |||
*''[[Nintendo Badge Arcade]]'' - One of the badges in the Pixel Collection set depicts the ''Mario & Luigi: Bowser's Inside Story'' game card. | |||
* | *''[[Super Smash Bros. Ultimate]]'' - The songs "Tough Guy Alert!" and "The Grand Finale" return in this game. Fawful, Starlow, and Broque Monsieur (using their respective artwork from this game) appear as [[Spirit (Super Smash Bros. Ultimate)|spirits]]. [[Piranha Plorp]]s are mentioned in [[List of Palutena's Guidance conversations#Piranha Plant|Palutena's Guidance]] for [[Piranha Plant]]. | ||
* | *''[[Mario & Luigi: Brothership]]'' - There is a {{file link|Mario & Luigi Brothership Treevil.jpg|particular enemy}} with rusty, metallic features that bears a close resemblance to an average [[Treevil]]. | ||
* | |||
==Names in | ==Names in other languages== | ||
{{ | {{foreign names | ||
|Jap= | |Jap=マリオ&ルイージRPG3!!! | ||
|JapR=Mario ando Ruīji Āru Pī Jī Surī!!! | |||
|JapM=Mario & Luigi RPG 3!!! | |JapM=Mario & Luigi RPG 3!!! | ||
| | |ChiT=瑪利歐&路易吉RPG3!!!<ref>{{cite|deadlink=y|archive=web.archive.org/web/20130107235756/http://www.nintendo.tw/ds/ds_software.htm|language=zh-hant|title=Nintendo DS 遊戯軟體|accessdate=June 25, 2024|publisher=Nintendo of Taiwan}}</ref> | ||
| | |ChiTR=Mǎlìōu & Lùyìjí RPG3!!! | ||
| | |ChiTM=Mario & Luigi RPG 3!!! | ||
| | |FreA=Mario & Luigi: Bowser's Inside Story | ||
| | |FreE=Mario & Luigi: Voyage au centre de Bowser | ||
| | |FreEM=Mario & Luigi: Journey to the Center of Bowser<br>(A reference to {{iw|wikipedia|Jules Verne}}'s science fiction novel ''{{iw|wikipedia|Journey to the Center of the Earth}}'') | ||
| | |||
| | |||
|Ger=Mario & Luigi: Abenteuer Bowser | |Ger=Mario & Luigi: Abenteuer Bowser | ||
|GerM=Mario & Luigi: Bowser Adventure | |GerM=Mario & Luigi: Bowser Adventure | ||
|Ita=Mario & Luigi: Viaggio al Centro di Bowser | |Ita=Mario & Luigi: Viaggio al Centro di Bowser | ||
|ItaM=Mario & Luigi: A Journey to the Center of Bowser | |ItaM=Mario & Luigi: Journey to the Center of Bowser<br>(A reference to ''Journey to the Center of the Earth'') | ||
|Kor=마리오&루이지 RPG 3 쿠파 몸속 대모험 | |||
|KorR=Mario & Ruiji RPG 3 Kupa Momsok Daemoheom | |||
|KorM=Mario & Luigi RPG 3: A Great Adventure to Bowser's Body | |||
|SpaA=Mario & Luigi: Bowser's Inside Story | |||
|SpaE=Mario & Luigi: Viaje al centro de Bowser | |||
|SpaEM=Mario & Luigi: Journey to the Center of Bowser<br>(A reference to ''Journey to the Center of the Earth'') | |||
}} | }} | ||
==References== | ==References== | ||
<references/> | <references/> | ||
== | ==External links== | ||
*[ | {{NIWA|NWiki=1|StrategyWiki=1}} | ||
*[http:// | *[https://www.nintendo.co.jp/ds/cljj/index.html Japanese Website for ''Mario & Luigi RPG 3!!!''] | ||
*[http://web.archive.org/web/20140517060542/http://bowsersinsidestory.com/ Nintendo of America's Website for ''Mario & Luigi: Bowser's Inside Story''] | |||
*[https://www.nintendo.com/games/detail/TRSRYArlK4f2wpEB9icuziCm_A58y02l Nintendo of America's gamepage for ''Mario & Luigi: Bowser's Inside Story''] | |||
*[https://www.nintendo.co.uk/Games/Nintendo-DS/Mario-Luigi-Bowser-s-Inside-Story-271584.html Nintendo of Europe's Website for ''Mario & Luigi: Bowser's Inside Story''] | |||
*[ | *[http://nintendo.co.kr/DS/soft/mario_luigi_rpg3/submain.php Korean Website for ''Mario & Luigi RPG 3''] | ||
*[https://www.nintendo.com/consumer/gameslist/manuals/DS_Mario_Luigi_IS_ENG.pdf American English manual] | |||
*[https://www.nintendo.com/consumer/gameslist/manuals/DS_Mario_Luigi_IS_FR.pdf Canadian French manual] | |||
{{M&LBIS}} | |||
{{Super Mario games}} | |||
*[ | |||
*[http:// | |||
{{ | |||
{{ | |||
{{DS}} | {{DS}} | ||
[[ | [[de:Mario & Luigi: Abenteuer Bowser]] | ||
[[ | [[it:Mario & Luigi: Viaggio al centro di Bowser]] | ||
[[Category:Mario & Luigi: Bowser's Inside Story|*]] | [[Category:Mario & Luigi: Bowser's Inside Story|*]] | ||
[[Category:Games]] | |||
[[Category:Nintendo DS games]] | |||
[[Category:Role-playing games]] | |||
[[Category:2009 games]] | [[Category:2009 games]] | ||
[[Category:2011 games]] | |||
Latest revision as of 19:24, June 27, 2024
- This article is about the original game for the Nintendo DS. For the remake of this game for the Nintendo 3DS, see Mario & Luigi: Bowser's Inside Story + Bowser Jr.'s Journey.
| Mario & Luigi: Bowser's Inside Story | |||||||||||||
|---|---|---|---|---|---|---|---|---|---|---|---|---|---|
 North American box cover For alternate box art, see the game's gallery. | |||||||||||||
| Developer | AlphaDream Nintendo SPD Group No.4 | ||||||||||||
| Publisher | Nintendo | ||||||||||||
| Platform(s) | Nintendo DS | ||||||||||||
| Release date | |||||||||||||
| Language(s) | English (United Kingdom) English (United States) French (France) French (Canada) German Spanish (Spain) Spanish (Latin America) Italian Japanese Korean | ||||||||||||
| Genre | RPG | ||||||||||||
| Rating(s) |
| ||||||||||||
| Mode(s) | Single-player | ||||||||||||
| Format | Nintendo DS:
Game Card
| ||||||||||||
| Input | Nintendo DS:
| ||||||||||||
| Serial code(s) | NTR-CLJJ-JPN (Japan) | ||||||||||||
Mario & Luigi: Bowser's Inside Story is a Nintendo DS game developed by AlphaDream and published by Nintendo. It was released worldwide in 2009 and in South Korea in 2011. It is the third title in the Mario & Luigi series, preceded by Mario & Luigi: Partners in Time for the Nintendo DS in 2005 and succeeded by Mario & Luigi: Dream Team for the Nintendo 3DS in 2013. The title of the game is a parody on the term "inside story", meaning the "true" tale of an event from the perspective of an insider who participated in the action, as opposed to an outsider who only hears about the event later on. In this case, the game is a literal inside story, as Mario and Luigi have to adventure through Bowser's insides. The game's European Spanish, European French, and Italian name is a parody on the famous novel Journey to the Center of the Earth. The original French name is Voyage au centre de la Terre, the Spanish name is Viaje al centro de la Tierra, and the Italian name is Viaggio al centro della Terra.
This is the only non-3DS installment in the Mario & Luigi series not to be released on the Virtual Console for the Wii U.
A Nintendo 3DS remake of the game, titled Mario & Luigi: Bowser's Inside Story + Bowser Jr.'s Journey, was released in Japan on December 27, 2018 and elsewhere in January 2019. Outside Japan, the release year marks the 10th anniversary of this game. This is the second game in the Mario & Luigi series after Mario & Luigi: Superstar Saga to have a remake.
Story[edit]

After the Mushroom Kingdom's citizens start contracting the blorbs, a disease that swells Toads, Princess Peach holds an emergency conference meeting at her castle, which includes Mario, Luigi, Toadbert, Toadsworth, and a Star Sprite named Starlow. Bowser crashes in and is sent flying out of Peach's Castle after easily being defeated by Mario, eventually landing in Dimble Wood, and after regaining consciousness, he comes across a cloaked merchant (who is Fawful in disguise). The merchant gives him a "Lucky Mushroom" that causes Bowser to inhale his surroundings. He returns to Peach's Castle and uses this ability to suck in everyone who attended the conference.
Mario, Luigi, and Starlow reawaken inside the Trash Pit area of Bowser's body, where they acquire hammers and use them to hit an exposed nerve and rouse Bowser, who had been dumped in Cavi Cape Cave. Starlow, who talks to Bowser throughout the game, withholds information surrounding the Mario Bros.' whereabouts and assists him in remembering the past events. Bowser then encounters Fawful, who explains that the blorbs and the Vacuum Shroom he gave him were all part of a plan to conquer both the Mushroom Kingdom and Bowser's Castle. He sends out his minion, Midbus, whose speech irritates the Koopa King so much that he decides to pick a fight with him. Bowser loses to Midbus, and he and Fawful abandon him.
Bowser helps a stranded Broque Monsieur get back on Plack Beach, where the sentient block rewards him a Vacuum Block, allowing him to control his sucking abilities. After defeating the Sea Pipe Statue, Bowser drinks water which allows Mario and Luigi to enter the Pump Works and defeat the Scutlet bug that was blocking his fire breath at the Flame Pipe. Starlow starts using the alias "Chippy" to Bowser. After subduing Broque's pet dog Broggy, Bowser enters Dimble Wood, where he eventually comes across three of his minions: Sergeant Guy, Corporal Paraplonk, and Private Goomp. They plan to retake Bowser's castle with a Banzai Bill launcher, where Bowser is required to find ammunition. Bowser procures a giant carrot as a makeshift missile, but the owner, a Wiggler, makes him eat it and then attacks him. After he obtains the Banzai Bill from the Wiggler, Bowser is then overcome with stomach pain caused by consuming a parasitic Durmite along with the carrot; Mario and Luigi defeat it in battle.
After his stomach issue is resolved, Bowser proceeds to launch the Banzai Bill towards Bowser Castle. However, Midbus dodges his Banzai Bill by launching the castle and landing it on him. The Mario Bros. revive Bowser from the Rump Command, which unintentionally turns him as giant as the castle. After Bowser defeats the castle, it flies away with him in pursuit, traveling through Bumpsy Plains and Bowser Path to reach the destination. Bowser deflects Midbus's iron ball, which knocks the castle down. Entering his castle, Bowser discovers that Fawful has turned it into a theater and brainwashed all the Koopa Troop members into a pack of his own adoring fans. Fawful himself arrives and tricks Bowser, forcing him to perform a cage match with Midbus on stage. When Bowser wins, his prize is being forcibly fed fattening foods cooked by Fawful, gaining so much weight that he breaks through the floor and becomes trapped.

Exploring the newly opened Flab Zone and defeating some Kretin enemies, Mario and Luigi are reunited with Princess Peach, who explains that Fawful is actually after the Dark Star, an evil entity locked away under Toad Town that can only be revived using Peach herself. Fawful then uses a laser to extract Peach from Bowser and he and Midbus leave with her, while Bowser falls the rest of the way through the floor onto a treadmill they placed beneath him in the basement. He literally burns off all the excess fat, igniting a crate of Bob-ombs in the process which sends him blasting off back to Cavi Cape, falling into the Tunnel. He meets up with some Monty Mole minions and helps them drill all the way to Toad Town, but when Bowser wanders into the corridor leading to the Dark Star, the security system activates and electrocutes him, rendering him unconscious.
Mario and Luigi gain access to the Pipe Yard in Bowser's body, which allows them to use warp pipes to return to the outside world. They emerge in the Toad Town Caves themselves and try to head off and stop Fawful, but arrive too late. Fawful takes the Dark Star to Peach's Castle and uses its power to create a barrier preventing the Mario Bros. from following him. With no other option, they head to Dr. Toadley to try and do something about the blorbs problem instead, but Bowser arrives at the clinic as well and the three battle, with Bowser losing. Dr. Toadley then tells Mario and Luigi that they need to collect three Star Cures to cure the blorbs and possibly find a way into the castle. Bowser awakens, hears this, and rushes off, determined to find the cures before the Bros. Dr. Toadley then reveals to Mario and Luigi that the first cure is held by Durmite inside Bowser's body, and they head back in to get it. They locate Durmite immediately, but it flees through an impassable, Boo-like barrier, stopping the Mario Bros. in their tracks.

Meanwhile, Bowser heads to the shores of Blubble Lake, where his sneezes raise the propeller-topped Tower of Yikk out of the water and straight onto him. The Mario Bros. supersize Bowser again and he defeats the moving tower, venturing inside once he shrinks back to his regular size and meeting the ghost of Yikk, who shines his invention, the Boo-ray Machine, on Bowser's gut. The light from the machine causes the Boo-like barrier to disappear and help Mario and Luigi navigate the maze beyond them, allowing them to track down Durmite, who reveals herself to be a sage named Wisdurm. She battles them, turning to a butterfly after her defeat, dropping the Star Cure, and flying off.
Bowser leaves the tower and meets up with Private Goomp, who tells him that he already had one of the Star Cures locked away in his treasure chamber, having recently stolen it from an old Koopa named Kuzzle. Bowser returns to his castle, regaining access to his treasure vault by pushing a statue of Fawful through the barricades in the floor, only to find that the Monty Bros. are now under Fawful's control and have built a railway straight through the vault. They use the Fawful Express to ram him out of the castle and into a boulder, resulting in another emergency revival and a giant battle between Bowser and the train. Returning to his vault after destroying the train, Bowser realizes that he has forgotten the combination to the safe that the Star Cure is stored in and asks "Chippy" to retrieve it for him. In the Memory Banks, Mario and Luigi have to defeat blocky doppelgangers of themselves, crafted from Bowser's own memories of them. After that, they reassemble a puzzle representing the memory and Bowser opens his safe, only to be pushed in by Private Goomp, Sergeant Guy, and Corporal Paraplonk, who had turned to Fawful's side. With nothing else to do in the cramped safe, Bowser eats the Star Cure, and it is retrieved from his gut by the Mario Bros.
Mario and Luigi return to Toad Town and are sent after the final Star Cure by Dr. Toadley. Guided by the doctor's messenger bird, Birdley, they meet the sage known as Chakron at the top of a cliff over Plack Beach, but he will only give them the Star Cure if they can knock him out of the pose he has held for a thousand years. After a cryptic hint from Chakron, the Bros. head for Dimble Wood to collect Attack Pieces for the ground-shaking Snack Basket move, but Mario is kidnapped by a Sockop and has to be rescued by Luigi, who wears a knocked-out Sockop like a Goomba's Shoe to sneak into the enemies' territory. Reunited and having gathered all the pieces, the brothers return to Chakron and knock him over, so true to his word, he gives them the final Star Cure.

Back at the clinic, Dr. Toadley creates the Miracle Cure from the three Star Cures, which flies around ridding all the Toads of the blorbs and then allows Mario and Luigi to blast their way through the barriers to get to Peach's Castle. They search the gardens for a way in and are attacked by Midbus, who uses the remote-control Junker robot to fight them. The Mario Bros. win the battle, and the robot goes haywire, throwing the safe containing Bowser into a pile of garbage, breaking it open. Bowser's back seized up from being in the cramped safe for so long, so Mario and Luigi go back inside him to fix it, allowing him to break into Peach's Castle for them.
Bowser fights his way to Fawful and Midbus as they are slowly awakening the Dark Star. Fawful supercharges his minion into Blizzard Midbus, but Bowser wins the ensuing fight and Midbus's new ice powers end up freezing him solid. Bowser punches out Fawful as he tries to absorb the Dark Star's powers and he only gets a portion of it, with the rest of the revived evil entity forcing its way inside Bowser. Mario and Luigi chase the Dark Star around as it absorbs Bowser's DNA and takes on his characteristics, eventually emerging as an incomplete copy of Bowser, which sucks up Peach and floats off in search of the rest of its power. Bowser goes after it but is sidetracked by a final giant battle against Peach's Castle, which had been transformed into a giant robot by Fawful. He then battles Fawful himself, now souped-up by the Dark Star's powers into Dark Fawful. Bowser wins the fight and Fawful turns into a small ball of dark energy and tries to flee, but he gets absorbed by the Dark Star, allowing it to fully transform into Dark Bowser.
The real Bowser goes after his copy, chasing it to the tallest tower where it deposits the unconscious Peach before being confronted by Bowser, who aims to capture Peach, both castles and the Dark Star's powers. The final battle is waged on two fronts, starting off with Bowser fighting his clone, before punching it in the gut and forcing it to spit up Fawful. Bowser sucks up the little ball of energy and Mario and Luigi take over the fight, defeating both Fawful and the Dark Star Core inside Bowser. This leaves Dark Bowser unstable, and the real Bowser punches it until it explodes, freeing the Mushroom Kingdom from the Dark Star’s influence for good.
Inside Bowser, a battered and unstable Fawful appears in front of the Mario Bros., seemingly accepting defeat to them and saying that he will go away permanently, but he is actually faking it as he uses this opportunity to try and take the Mario Bros. with him in a final explosion of his own while sporting a large, dying grin on his face. All this accomplishes though is making Bowser eject everyone he had inhaled. The liberated Toads and the now-conscious Peach move to congratulate Mario and Luigi on a job well done, and Bowser, confused and angry, realizes that the brothers had been inside his body the whole time. Starlow dismissively tells Bowser to not worry about what's in the past but discovering that she was his supposedly loyal minion "Chippy" throws him into a complete rage. The Toads and the Princess flee from the scene, and the credits show a montage of still images showing that Bowser loses the ensuing fight.

Afterward, the heavily-injured Bowser is seen lying in bed at his castle while Private Goomp, Sergeant Guy, and Corporal Paraplonk beg him for forgiveness over their treason. Birdley arrives with a package from Peach, but when Starlow pops out of it to check in on him, Bowser angrily tells her to leave, as he is too busy fixing his castle to attack again anytime soon. He then lets the trio rejoin the rest of the Koopa Troop in helping with the repairs, and only once he is sure he is alone does Bowser open the package, revealing a thank-you cake with his face, Mario, Luigi, and Peach on it.
As in the other Mario & Luigi games, there is no "Endless Play" feature. As such, if the player plays the game after it is beaten and the ending is done, the game just starts from the last save point, before the final battle.
Battle system[edit]
The battle system of Mario & Luigi: Bowser's Inside Story is similar to that of its predecessors. There are some new additions to the system. In this installment, all Action Commands are evaluated based on how well they are performed. There are five evaluation levels. Ranging from the worst to the best, these levels are: Nothing, OK, Good, Great, and Excellent. The better an Action Command is performed, the more damage an attack does. Receiving a Nothing is equivalent to not performing an Action Command at all. This is carried into all the later installments of the series.
Stats[edit]
Each brother and Bowser have their own HP, SP, POW, DEF, and SPEED, as well as STACHE points for the brothers, and HORN points for Bowser. When they finish a battle, they each gain EXP Points and coins. With enough Experience Points, they can level-up and increase each respective statistic.
| Stat | Description |
|---|---|
| HP, or Heart Points, indicate the amount of remaining health a character has. When an enemy hits a character, they lose HP. When their HP reaches zero, they pass out, but can be revived with a 1-Up Mushroom or a 1-Up Deluxe. HP can be replenished with a Mushroom, a Nut or a Drumstick (Bowser only). | |
| SP, or Special Points, indicates how many times Mario, Luigi, or Bowser can use a Special Move. Each attack uses up a certain amount of SP, draining the total. SP can only be restored by ingesting Syrup Jars. | |
| POW, or Power, is how strong the fighter is. POW determines how much damage they can inflict. | |
| DEF, or Defense, is how much damage the character can block from an enemy hit. A higher DEF stat means less damage is taken. | |
| SPEED is how fast the character is. In any given battle, the fighter with the most SPEED gets to attack first. The turn then continues, allowing fighters with subsequently lower SPEED to attack until the fighter with the lowest SPEED has attacked. The fighter with the most SPEED then gets to attack again, and the cycle continues until a fight is over. | |
| STACHE, a Mario and Luigi exclusive stat, is the luck stat of this game. The higher their STACHE stats are, the greater there is a chance of a Critical or Lucky Hit, which doubles POW. A higher STACHE stat makes the player more likely to receive a hit on a Scratch Card. | |
| HORN, a Bowser exclusive stat, functions exactly the same as STACHE does. |
Mario and Luigi's battle system[edit]

The battle system with Mario and Luigi is similar to the battles from the previous games. There are now six categories of attack during battle, as opposed to Mario & Luigi: Partners in Time's five, or Mario & Luigi: Superstar Saga's four. These are Jump, Hammer, Attack Pieces (Bros. Items), Items, Bros. Badges, and Escape. The Bros. can defend with their jump and their hammers. The Jump makes Mario and/or Luigi jump to dodge an attack or to counter-attack. The Hammer is used to counter-attack. The music played while battling is the same as the music played during the debut trailer, as seen in the Japanese site.
A new element has been added to battles, a gauge at the bottom of the screen with Mario and Luigi's heads on either end. When Mario or Luigi pull off an action command, that brother's end of the bar fills slightly. When they meet in the middle, it is possible to use a Bros. Badge move. The effect varies with the equipped badge. The normal effect is to restore 20% of both brothers' HP. Badges can be bought in one of the shops in Toad Town. Some of the badges require that the Action Commands be pulled off perfectly (EXCELLENT is displayed), and some only need GOOD!. An extra block that appears in the battles can be used to swap the badges that brothers use.
Bowser's battle system[edit]

Bowser has almost the same battle system as Mario and Luigi's, but with a few differences. He has different options: Punch replaces Jump, Fire Breath replaces Hammer and Enemy Attacks replace Special Attacks. However, he does not have Bros. Badges. Instead, Bowser gains a vacuum ability after the player advances further through the game. He can swallow enemies with this new ability to make Mario and Luigi fight them in his belly. He can also swallow parts of enemies that can restore his HP, raise defense or attack power, or rescue a Blitty. Bowser's defenses are the Punch and the Shell. Bowser's Punch can counter-attack an enemy, while his spiky shell can hit enemies that try to jump on his head or protect him from attacks.
Enemy Attacks are special attacks that use mostly members of Bowser's army, which are Goombas, Koopa Troopas, Shy Guys, Bob-ombs, Magikoopas, and Broggy. These attacks require the stylus to perform. These characters need to be liberated to unlock these attacks.
Special Attacks[edit]
Bowser Specials[edit]
Bowser has six Special Attacks, five of which are obtained via destroying cages contained Bowser's trapped minions.
| Special Attack | Illustration | Description | SP | Location |
|---|---|---|---|---|
 Goomba Storm* |

|
Touch each Goomba to fire him up! Flaming Goombas cause more damage! Target: One enemy. Effect: BURN. |
6 | Dimble Wood (after rescuing the Goomba corps) |
 Shy Guy Squad |

|
←Quickly slide the stylus repeatedly left. Roll Bowser far back for more damage! Target: One enemy. Effect: None. |
8 | Bowser Path (after rescuing the Shy Guy corps) |
 Koopa Corps |

|
Slide the stylus to move Bowser up and down and repel the Koopa Shells! Target: Random. Effect: None. |
10 | Blubble Lake (after rescuing the Koopa unit) |
 Bob-omb Blitz |

|
Slide the Bob-ombs into place fast! Line up with your foe and charge! Target: Adjustable Effect: DIZZY. |
12 | Bowser Castle (after rescuing the Bob-omb squad) |
 Magikoopa Mob |

|
Quickly trace the Magikoopa's formation! Bowser's power boosts your magic! Target: Random. Effect: BURN. |
15 | Peach's Castle (after rescuing the Magikoopa corps) |
 Broggy Bonker |

|
Scrub all the dirt off that filthy Broggy! Scrub him until he's clean! Target: One enemy. Effect: DIZZY. |
20 | Broque Monsieur's Shop (after collecting all fifteen Blitties) |
* - Required
Mario & Luigi Specials[edit]
Mario and Luigi obtain these special attacks via Attack Pieces found by hitting a Attack Piece Block and numerous other ways.
| Bros. Attack | Illustration | Description | SP | Location |
|---|---|---|---|---|
Green Shell* |

|
Mario kicks with Target: One enemy. Effect: None. |
3 | Trash Pit |
Fire Flower |

|
Repeatedly press the button of whoever's holding the big fireball! Target: Random. Effect: BURN. |
4 | Pump Works |
Jump Helmet |

|
Land on the helmet and jump with Target: One enemy. Effect: None. |
6 | Flab Zone |
Yoo Who Cannon* |

|
Remember which barrels the bros are in! Target: Random. Effect: None. |
7 | Toad Town (after mastering the Shell Mario technique) |
Super Bouncer |

|
Launch HIGH with Target: Random. Effect: DIZZY. |
7 | Energy Hold |
Mighty Meteor |

|
Dash with Target: Random. Effect: POW down. |
8 | Toadley Clinic (from the intern after obtaining the Miracle Cure) |
Spin Pipe |

|
Memorize how the bros stack up! Mario stomps with Target: One enemy. Effect: DIZZY. |
10 | Plack Beach (after completing Kuzzle's first puzzle) |
Snack Basket* |

|
Use Target: All ground-based enemies. Effect: None. |
14 | Dimble Wood |
Magic Window |

|
Mario stomps with Target: Random. Effect: DIZZY. |
18 | Bowser's Castle (after defeating the Shroobs) |
Falling Star |

|
Aim with Target: One enemy. Effect: DEF down. |
20 | Peach's Castle Garden |
* - Required
Giant Bowser battle system[edit]

At certain points in the game, Bowser gets crushed by a large object such as Bowser's Castle, which leaves him in a dying state. In order to revive Bowser, the Bros. must play a 2D shooter-like minigame in the Rump Command. When revived, Bowser grows to a giant state. In order to complete these battles, the player must rotate their DS sideways to play. In these battles, Bowser only has three options of attack. Punching requires quickly sliding the stylus across the screen to execute. Fire requires the player to blow into the DS microphone. The last option, Healing, requires Mushrooms found within the battle itself. Defending includes an event where the player must tap the touch screen in certain areas to counter-attack, punching to deflect blows, and blowing huge flames at the enemy. After each giant battle, Bowser returns to normal. There are four such battles in the game.
Ranks[edit]
- Main article: Rank
When leveling up Mario and Luigi, and Bowser occasionally reach a rank. When this happens new criteria is added to the game such as being able to equip more clothing or being able to shop at certain places. Here is a list of the ranks:
Mario & Luigi
| Name | Achieved at level | Benefit | |
|---|---|---|---|
| Default | Allows up to one accessory to be equipped. | ||
| 6 | Allows up to two accessories to be equipped. | ||
| 12 | Allows up to three accessories to be equipped. | ||
| 18 | Allows the bros to shop at the Toadles Boutique in Toad Town. | ||
| 25 | Allows the bros to shop at the Star Shop in Toad Town. | ||
| 40 | When both brothers reach this rank, gives the Excellent!! Bros Badge. | ||
Bowser
| Name | Achieved at level | Benefit | |
|---|---|---|---|
| Default | Allows up to one accessory to be equipped. | ||
| 10 | Allows up to two accessories to be equipped. | ||
| 20 | Allows up to three accessories to be equipped. | ||
| 40 | Gives the Intruder Fangs equipment to Bowser. | ||
Items[edit]
Key items[edit]
There are many items that appear in the game that the heroes must obtain in order to advance in the game. Most of these items require the players to go through some trial, whether it be a challenge, facing a boss, or through other means.
| Image | Name | In-game description | Location | storyline/ required? |
|---|---|---|---|---|
| Vacuum Shroom | A strange Mushroom that gives Bowser the ability to inhale anything. | Dimble Wood | ✓ | |
| Hammers | Hammers found in the Trash Pit. Use 'em to whack and break stuff! | Trash Pit | ✓ | |
| Vacuum Block | A rare block from Broque Monsieur. In battle, Bowser inhales stuff! | Plack Beach | ✓ | |
| Stingler | An item that might shock something. Where should you use it? | Pump Works | ✓ | |
| Banzai Bill | An enormous, black, shiny weapon. If it's launched at you, you're toast! | Dimble Wood | ✓ | |
| Star Panel | An item created in the Energy Hold. It takes on various shapes. | Energy Hold | ✓ | |
| Red Cure | A curative held by the wise Wisdurm. It took a while to find this thing... | Energy Hold | ✓ | |
| Yellow Cure | The curative found at Bowser Castle. Bowser swallowed it, so it's all sticky. | Treasure Chamber | ✓ | |
| Green Cure | A 1,000-year-old curative held by Chakron above Plack Beach. | Plack Beach cliff | ✓ | |
| Miracle Cure | A true miracle cure made by combining the three curatives. It works incredibly! | Toadley Clinic | ✓ | |
| Birdley | Dr. Toadley's pet bird. It guides Mario and friends around. | Toadley Clinic | ✓ | |
| Puzzle Sack | A puzzle in a sack. Give it to Kuzzle. | Plack Beach | ||
| Blitty | A Blitty from [enemy]. | various enemies | ||
| Mushroom Ball | An item for the PR Toad in Toad Town. He'll give you what's inside! | Toad Town Mall | ||
| Blue Key | A key that opens the blue door on the second floor of Peach's Castle. | Peach's Castle 2F | ✓ | |
| Red Key | A key that opens the red door on the second floor of Peach's Castle. | Peach's Castle 2F | ||
| Green Key | A key that opens the green door on the second floor of Peach's Castle. | Peach's Castle 2F |
Consumable items[edit]
These are the items that appear in Mario & Luigi: Bowser's Inside Story. Please note that some of the items used in this game have appeared in the previous installments.
| Image | Name | Description
|
|---|---|---|
| Mushroom | Restores 30 HP to one of the bros. | |
| Super Mushroom | Restores 60 HP to one of the bros. | |
| Ultra Mushroom | Restores 120 HP to one of the bros. | |
| Max Mushroom | Restores 240 HP to one of the bros. | |
| 1-Up Mushroom | Revives a fallen bro with half HP. | |
| 1-Up Deluxe | Revives a fallen bro with full HP. | |
| Hot Drumstick | Restores 80 HP to Bowser. | |
| Fiery Drumstick | Restores 150 HP to Bowser. | |
| TNT Drumstick | Restores 280 HP to Bowser. | |
| Nut | Restores 20 HP to both bros. | |
| Super Nut | Restores 40 HP to both bros. | |
| Ultra Nut | Restores 80 HP to both bros. | |
| Max Nut | Restores 160 HP to both bros. | |
| Syrup Jar | Restores 10 SP. | |
| Supersyrup Jar | Restores 20 SP. | |
| Ultrasyrup Jar | Restores 30 SP. | |
| Max Syrup Jar | Restores 40 SP. | |
| Star Candy | Restores all HP & SP and cures status ailments. | |
| Refreshing Herb | Cures status effects. | |
| Heart Bean | Increases HP to the selected character by 1 Point. | |
| Special Bean | Increases SP to the selected character by 1 Point. | |
| Power Bean | Increases POW to the selected character by 1 Point. | |
| Retry Clock | Allows the player to restart a battle if defeated. |
Equipment[edit]
Clothing[edit]
- Main article: List of clothing in Mario & Luigi: Bowser's Inside Story
Mario & Luigi: Bowser's Inside Story differs from its predecessors by including a more varied clothing system. In addition to overalls, Mario and Luigi can wear socks, gloves, boots, and accessories while Bowser can wear shells, arm bands, rings, and fangs. Mario, Luigi, and Bowser can wear additional clothing types if they rank up from repeated battles.
Badges[edit]
Badges in Mario & Luigi: Bowser's Inside Story are used exclusively by Mario and Luigi, and they work differently from its predecessors. Mario and Luigi must successfully perform Action Commands to fill the badge gauge. Once the gauge is filled, players can tap it to receive an effect that benefits them in a variety of ways, which can be changed depending on the type of badge both brothers wear.
In the table, the left side of the badge (Luigi's badge) decides how good the action command must be to fill the bar, and how big the effect will be. The right side (Mario's badge) decides what the effect will be.
| Name of Badge | Icon | Price (coins) | Located | Effect |
|---|---|---|---|---|
| Mushroom Badge | N/A | Obtained from Princess Lipid | Restores HP. | |
| Powerful Badge | 2000 | Bought from Toad Town's Badge Shop | Increases both brothers' POW in the next attack. | |
| Bonus Badge | 500 | Bought from Toad Town's Badge Shop | Increases amount of EXP and Coins brothers get in the battle it was used. | |
| Bro Badge | 1000 | Bought from Toad Town's Badge Shop | Restores SP. | |
| Good Badge | N/A | Obtained from Princess Lipid | Mario or Luigi must achieve at least a "good" rating to fill the meter. | |
| Great Badge | 500 | Bought from Toad Town's Badge Shop | Mario or Luigi must achieve at least a "great" rating to fill the meter. | |
| Excellent! Badge | 1000 | Bought from Toad Town's Badge Shop | Mario or Luigi must achieve at least an "excellent" rating to fill the meter. | |
| Excellent!! Badge | N/A | Obtained after Mario and Luigi become Rainbow-Ranked (Level 40) | Mario or Luigi must achieve at least an "excellent" rating to fill the meter. If the attacker gets lower than that, his side of the bar empties. If an excellent is not possible at the time, the meter will not break. |
Combined effects[edit]
| Badge | ||||
|---|---|---|---|---|
| Restores 20% of HP | Increases Attack Power by 1.2x | Increases Coins by 1.2x | Restores 20% of SP | |
| Restores 30% of HP | Increases Attack Power by 1.5x | Increases Coins by 1.4x | Restores 30% of SP | |
| Restores 50% of HP & Cures Status Effects | Increases Attack Power by 2x | Increases EXP by 1.2x, and Coins by 1.6x | Restores 50% of SP | |
| Restores 100% HP & Cures Status Effects | Increases Attack Power by 4x | Increases EXP by 1.5x, and Coins by 2x | Restores 100% SP |
Status ailments[edit]
Many status ailments appear in Mario & Luigi: Bowser's Inside Story. Each type affects the heroes and enemies with their own variables. Many enemies can inflict the diseases, as well as some attacks that the three heroes can learn. To relieve the effects, the player can use a Refreshing Herb or - depending on the type - can wait for it to run out of their systems.
| Image | Name | Description | Affects |
|---|---|---|---|
| Burn | Player has fire on them; prevents them from attacking/dodging; loses partial HP every turn. | Mario; Luigi; Enemies | |

|
DEF-Down | Defense stat is lowered; affected player takes more damage. | Mario; Luigi; Bowser; Enemies |

|
DEF-Up | Defense stat is boosted; affected character takes less damage. | Mario; Luigi; Bowser; Enemies |
| Dizzy | Player cannot move from confusion and is unable to attack/dodge. | Mario; Luigi; Bowser; Enemies | |

|
Fury | Player grows furious and increases damage dealt and received. | Bowser |
| Poison | Player turns purple and loses partial HP every turn. | Mario; Luigi | |

|
POW-Down | Attack Power is lowered; affected player deals less damage. | Mario; Luigi; Bowser; Enemies |

|
POW-Up | Attack Power is boosted; affected player deals more damage. | Mario; Luigi; Bowser; Enemies |
| SPD-Down | Speed stat is lowered; affected player gets fewer turns. | Mario; Luigi; Bowser; Enemies | |
| SPD-Up | Speed stat is increased; affected player gets more turns. | Mario; Luigi; Bowser; Enemies | |

|
Sick | Player gets a runny nose and loses partial HP every turn. | Bowser; Sniffle Thwomp (starts battle sick) |
| Super Strike | Player charges up and may deal greater damage than normal on their immediate next hit. | Mario; Luigi | |
| Trip | The character cannot attack on the turn he tripped. If an enemy hits from behind in the overworld, the character starts out on this state until his turn, or takes damage from the enemy. | Mario; Luigi; Bowser |
Characters[edit]
Playable[edit]


Villains[edit]
Supporting[edit]
- Princess Peach
- Toadsworth
- Toadbert
- Starlow
- Kamek
- Toads
- Broque Monsieur, a bipedal creature who seems to be made from ? Blocks.
- Broggy, Broque's pet.
- Broque Madame, another bipedal creature made out of ? Blocks.
- Blitties, cat creatures that seem to also be made out of ? Blocks.
- Three members of Bowser's army:
- Sergeant Guy, a green Shy Guy with a bag on his back containing a gray pipe and a Magikoopa's wand.
- Corporal Paraplonk, a red Paratroopa wearing a red bucket on its head and green shoes.
- Private Goomp, a Goomba that wears blue clothes and seems to look sad.
- Emoglobin, a species of block-like creatures inside Bowser that give hints and help with minigames.
- Princess Lipid, who explains Bros. Badges.
- Yikk, the creator of Tower of Yikk and the Boo-ray Machine.
- Kuzzle, the guardian of the second Star Cure.
- The Koopa Paratroopa Trio, friendly blue-shelled Paratroopas.
- Dr. Toadley, the Toad with a Miracle Cure.
- Chakron, the guardian of the third Star Cure.
Bestiary[edit]
- Main article: Mario & Luigi: Bowser's Inside Story bestiary
Note that stats listed there are from the North American version of the game. Stats with the Challenge Medal and other versions may vary.
- i Indicates they can be inhaled by Bowser and then fought by Mario and Luigi.
- m Indicates only Mario can battle them.
- m&l Indicates only Mario & Luigi can battle them.
- b Indicates only Bowser can battle them.
Mushroom Kingdom[edit]


1 - Though they are instantly defeated by Bowser in overworld, Bowser can meet them by battling against other enemies.
2 - Defeating the summoned bodies will not grant extra experience and coins.
Inside Bowser[edit]
All enemies here can be battled with Mario & Luigi.
| Image | Name | HP | EXP | Coins | Location |
|---|---|---|---|---|---|
| Goombule | 8 | 3 | 2 | Trash Pit | |
| Elite Goombule | 16 | 4 | 2 | Trash Pit | |
| Spike Blop | 12 | 5 | 3 | Trash Pit | |
| Bubble Blooper / Dried Blooper | 23 | 15 | 5 | Pump Works | |
| Protobatter | 36 | 15 | 5 | Pump Works | |
| Tenderling | 45 | 30 | 12 | Flab Zone | |
| Calorite | 85 | 40 | 20 | Flab Zone | |
| Napse | 68 | 100 | 35 | Energy Hold | |
| POW/DEF/SPEED Pep | 105 | 120 | 40 | Energy Hold | |
| Piranha Plorp | 165 | 140 | 55 | Energy Hold | |
| Pwallop | 130 | 150 | 45 | Energy Hold | |
| Air Cheep | 236 | 600 | 75 | Airway | |

|
Stonk | 198 | 630 | 85 | Airway |
| Airnapse | 150 | 610 | 70 | Airway | |
| Air Cannon | 254 | 670 | 100 | Airway |
Bosses[edit]
The following is a bestiary for all bosses encountered in the game Mario & Luigi: Bowser's Inside Story. Please note that some of the bosses are fought necessarily; some are optional, such as the X bosses; and some require Bowser to become giant to brawl them.
- e Indicates the battle automatically ends after several turns.
Normal Bosses[edit]
| Image | Name | HP | EXP | Coins | Location |
|---|---|---|---|---|---|

|
Bowser (1)m | 203 | 0 | 0 | Peach's Castle |

|
Midbus (1)b e | 95 | 0 | 0 | Cavi Cape |
| Broque Monsieuri | 158 | 30 | 0 | Plack Beach | |
 |
Sea Pipe Statuei | 320 | 150 | 50 | Plack Beach |

|
Scutletm&l | 280 | 200 | 50 | Flame Pipe |

|
Broggyb | 198 | 60 | 0 | Plack Beach |
| Wigglerb | 540 | 340 | 150 | Dimble Wood | |

|
Durmitem&l | Durmite - 326 Straw - 16 |
300 | 120 | Nerve Cluster |
|
|
Midbus (2)b | 950 | 550 | 350 | Fawful Theater |
  |
Kretinm&l | Alpha - 20 (each ball) Beta - 385 |
700 | 200 | Flab Zone |
|
|
Bowser (2)m&l | 1,215 | 1,000 | 500 | Toadley Clinic |

|
Wisdurmm&l | 1,610 | 2,800 | 600 | Energy Hold |
| Bowser Memory MLm&l | M - 730 L - 845 |
3,000 | 700 | Memory Banks | |
| Shroobsm&l (×3)4 | 500 each | 900 | 300 | Bowser Castle | |
| Chakronm&l e5 | 9,999 | 0 | 0 | Plack Beach | |

|
Junkerm&l | 1,445 | 6,000 | 900 | Peach's Castle Garden |

|
Blizzard Midbusb |
2,041 | 6,500 | 1,200 | Peach's Castle |

|
Dark Starm&l | 1,248 | 9,999 | 2,000 | Airway |
| Dark Fawfulb | 1,736 | 7,500 | 1,600 | Peach's Castle | |

|
Dark Bowserb | 1,000 | 0 | 0 | Peach's Castle |

|
Dark Star Corei m&l | Main - 1,560 Glasses - 250 Appendages - 156 |
0 | 0 | Peach's Castle |
3 - after the tutorial part, Bowser's HP will be set to 20.
4 - this boss is entirely optional.
5 - this battle will end after performing one EXCELLENT Snack Basket.
- Boss Support
| Image | Enemy | Battled with | HP | EXP | Location |
|---|---|---|---|---|---|
| Leaf Guyi m&l | Wiggler | 56 | 20 | Dimble Wood | |
| Biffidusm&l | Durmite | 10 | 0 | Nerve Cluster | |
| Junker Canm&l | Junker | 105 | 0 | Peach's Castle Garden | |
| Snawfuli | Blizzard Midbus | 105 | 220 | Peach's Castle | |
| Dark Satellmitem&l | Dark Star | 260 | 0 | Airway | |
| Vacuum Helmeti | Dark Fawful | 1,200 | 220 | Peach's Castle |
Giant Bosses[edit]
All these bosses can only be battled with Giant Bowser.
| Image | Name | HP | EXP | Coins | Location |
|---|---|---|---|---|---|

|
Bowser's Castle | 535 | 380 | 200 | Dimble Wood |

|
Tower of Yikk | 508 | 1,800 | 800 | Blubble Lake |

|
Fawful Express with Fawful Mountain |
Express - 885 Mountain - 1,049 |
3,500 | 1,000 | Project K |

|
Super Peach's Castle of Fury | 1,488 | 7,500 | 2,000 | Peach's Castle Garden |
Gauntlet Bosses[edit]
Note that all X bosses only awards coins on their first defeat. All these bosses are fought by Mario & Luigi.
| Image | Name | HP | Coins |
|---|---|---|---|

|
Durmite X | Durmite X - 575 Straw X - 40 |
1,000 |
 |
Kretin X | Alpha - 135 (each ball) Beta - 810 |
2,000 |

|
Wisdurm X | 2,380 | 4,000 |
| Bowser Memory MLX | MX - 2,500 LX - 3,000 |
6,000 | |

|
Junker X | 3,080 | 9,000 |

|
Dark Star X | 4,030 | 12,500 |

|
Bowser X6 | 7,155 | 25,000 |
6 - must fight 6 other X bosses consecutively before the battle.
- Boss Support
| Image | Enemy | Battled with | HP |
|---|---|---|---|
| Biffidus X | Durmite X | 32 | |
| Junker Can X | Junker X | 134 | |
| Dark Satellmite X | Dark Star X | 416 |
Overworld[edit]
While Mario and Luigi adventure through Bowser's body, Bowser is walking around the overworld. Mario and Luigi can influence Bowser. They can pinch nerves to make Bowser panic. They can also touch Bowser's muscles to give him a power-up. Equally, Bowser can change the course of the Mario Bros.' adventure. For example, he can flood them by drinking from a fountain. After a certain point in the game, Mario and Luigi can go to the Pipe Yard and use Warp Pipes to exit Bowser's body and explore the overworld, and then use the pipes to enter Bowser's body again. Bowser can use Chakroads to warp between different locations of the Mushroom Kingdom.
Overworld icons have slightly changed. They now display the health of the character. Bowser uses two buttons in the overworld, X to punch, and Y for firebreath. Later in the game, Bowser learns new moves such as a dashing punch, ground-pounding, and curling up into a spikeball (much like the way he attacked Mario in Super Mario Galaxy). Mario and Luigi use A and B respectively to jump. At one point they gain hammers. Mario can destroy rocks and crates, while Luigi can hit Mario to make him mini so as to reach previously inaccessible areas. Later in the game, the Marios learn new moves such as the Spin Jump and the Drill Bros. They also encounter items in the overworld that help them perform moves to reach a goal or an item. The items include a gas pump that seems to be shooting out helium. Mario can fill himself up with helium and float into the air like a balloon. If Luigi is to grab his legs at that time, they are able to perform a floating high jump, somewhat similar to the move found in the first installment of the series. They can also find a Blue Koopa shell that Mario can put on. Luigi can whack him with his hammer to shoot Mario over previously inaccessible areas to hit switches. This move is very similar to the move the Koopa companions use in the Paper Mario series.
While Bowser explores a 3-D overworld, Mario and Luigi explore a 2-D world inside his body, much like a traditional platformer, though they can go into the 3-D overworld at any time once the Pipe Yard is available. The actual overworld is connected just as it was in Mario & Luigi: Superstar Saga, unlike Partners in Time's linear levels. The overworld is up to 4-5 times larger than Superstar Saga's overworld. The map in this game consists of a beach, a forest, a cape, the road to Bowser's Castle, Toad Town, Bowser's Castle, Peach's Castle, Grasslands, a railroad, underground, and a lake. In the Nintendo Power review, it was stated that there are tons of sidequests, much to explore, and plenty to do in the free roam overworld.
Locations[edit]
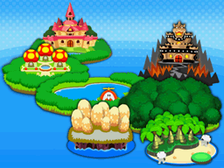
*Only Mario & Luigi can access.
**Only Bowser can access.
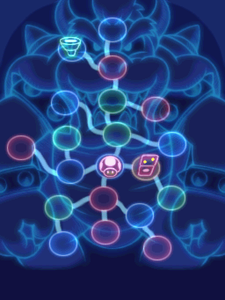
Shops[edit]
- Main article: List of shops in Mario & Luigi: Bowser's Inside Story
Throughout the game, there are several shops where the player can purchase and sell items from several shops on their adventure. Shops available to Mario and Luigi are run by characters and all found in Toad Town Mall and Toad Square. Only two shops are available to Bowser: Broque Monsieur's Shop and Broggy's Shop, both in Dimble Wood. However, there are Shop Blocks around the Mushroom Kingdom that provides the same functionality to Bowser. There is a Scratch Card system where the player has a chance to get a part of their coins spent back. The amount of squares that give coins back depends on Mario and Luigi's stache level and Bowser's horn level.
Beans[edit]
After Mario and Luigi learn the Drill Bros. move, they can collect beans from beanholes by tunneling underground and then jumping. There are about 200 beanholes scattered around the world, both in the Mushroom Kingdom and inside Bowser's body. Mario and Luigi can also collect beans from characters like Kuzzle and the PR Toad of Toad Town Mall.
Differences from other Mario & Luigi games[edit]
While a direct sequel in the Mario & Luigi series, Mario & Luigi: Bowser's Inside Story still has several differences compared to the first two Mario & Luigi games.
- This is the first game to feature more than one optional boss stronger than the final boss.
- This is the first game in the series not to feature Professor E. Gadd.
- This is the only game in the series not to feature Yoshis.
- This is the only game in the series to feature Bowser as a main protagonist.
- This is the first Mario & Luigi game to give Mario and Luigi's in-game sprites eyebrows.
- This is the first game in the series where Mario and Luigi can double jump; in battle in the first game, they could not while in the second game, they needed the babies to do it.
- This is the only Mario & Luigi game to not have any traditional enemies as common enemies, besides derived species which only appear in this game.
- This is the first Mario & Luigi game to feature an "Excellent!!" rating when completing an attack.
- This is the first Mario & Luigi game where jump and hammer attacks receive a rating depending on how well timed the attack is.
- This is the only Mario & Luigi game to not have a purely snow-, desert-, mountain-, or temple-themed area.
- The Airway can be considered a snow- or ice-like area when it is frozen, and Plack Beach features a mountainous section.
Gameplay differences[edit]

- This is the first Mario & Luigi game to have optional bosses, with the exception of three of the four Popple fights and Jojora in Mario & Luigi: Superstar Saga, who are not required to be defeated, but can be defeated for extra experience and items.
- Unlike Mario & Luigi: Partners in Time for the Nintendo DS, this game makes greater use of the DS's touch controls and microphone.
- This is the first game in the Mario & Luigi series (as well as the fourth RPG overall) to have Bowser as a playable character.
- The player can equip Mario and Luigi with pants, gloves, shoes, socks, and accessories instead of just pants as in the first two Mario & Luigi games.
- Badges have a different function. Bro. Badge moves can be performed with them. This game contains eight badges, which is notably less than the previous Mario & Luigi games.
- This is the first of the series to have power-ups or other items in the overworld such as the blue Koopa Troopa shell.
- This is the first Mario & Luigi game to have a rank system. This means, if the player gets at a certain level, they go to a higher rank. Ranks for Mario and Luigi are the Mushroom Rank, Shell Rank, Flower Rank, Shine Rank, Star Rank, and the Rainbow Rank. Bowser's ranks are the Bronze Boss Rank, Silver Boss Rank, Gold Boss Rank, and the Final Boss Rank.
- Mario and Luigi get the hammers earlier in Mario & Luigi: Bowser's Inside Story than in the other Mario & Luigi games. (An exception is Mario & Luigi: Paper Jam, where they have hammers from the start.)
- The Scratch Card is introduced, allowing the main characters to earn back coins after spending them.
- This is also the first game where the hammerheads do not fall off in defense when held too long; the bro. just puts it down. Consequently, the hammer can also be held much longer.
- In the first two games of the series, Mario and Luigi use a suitcase to store anything they collect in their journey. In Bowser's Inside Story, however, they use the star menu, managed by Starlow in order to access their items.
- This is the first game to have a Boss-Refight or Skill Challenge.
- This is the first time in the Super Mario RPG series that a sequel has been released on the same system as its predecessor.
- This is the second game where the Mario Bros. battle inside Bowser's body, the first being Mario & Luigi: Superstar Saga, where they battle Cackletta's Soul inside Bowser. Fawful (who worked for Cackletta) is fought in a similar way to Cackletta. Also, before both battles take place, the player fights an affected form of Bowser. While Mario and Luigi are sucked into Bowser and Cackletta was inside him, for Fawful it is the reverse; Bowser inhales Dark Fawful, and he fights the Mario Bros. inside of Bowser.
- This is the first Mario & Luigi game where Bowser does not end up possessed by the main villain, as well as the first RPG game since Paper Mario where the main villain does not actually possess one of the main characters.
- However, Dark Bowser is a character who has copied Bowser lineaments by gathering his DNA, and is similar to previous Bowser possessions.
Release differences[edit]
- This is the first Mario & Luigi game to be released in Japan before any other country.
- This is the first Mario & Luigi game in which the American box art is the same as the Japanese box art. The European box art, while not exactly the same due to the ratings' graphics requiring the artwork to be rearranged, uses the same artwork (but with Luigi's and Bowser's eyelines changed to reflect their positions) and background as the Japanese box art.
- This is the first Mario & Luigi game to have multiple languages for its North American release. Both the French and Spanish translations are distinct from those of Europe.
Staff[edit]
- Main article: List of Mario & Luigi: Bowser's Inside Story staff
The game's producers were Toshiharu Izuno, Akira Otani, and Yoshihiko Maekawa, with Shigeru Miyamoto and Takashi Tezuka acting as senior producers and Satoru Iwata and Tetsuo Mizuno acting as executive producers. The game's director was Hiroyuki Kubota and Makoto Aioi was the main programmer.
Reception[edit]
Mario & Luigi: Bowser's Inside Story has received critical acclaim, with a score of 91.01% based on 47 reviews on GameRankings[2] and a 90 based on 58 reviews on Metacritic,[3] making it the highest-rated out of the Super Mario RPG games. Much of the game's praise was directed towards its gameplay, humor, storyline, integration of Bowser as one of the main protagonists, and innovative use of the Nintendo DS's capabilities.
| Reviews | |||
|---|---|---|---|
| Release | Reviewer, Publication | Score | Verdict |
| Nintendo DS | Phil Theobald, Gamespy | 4.5/5 | "There's very little in Bowser's Inside Story to not like. It's great to look at, the interaction between the "inside" and "outside" worlds is well thought-out, the mini-games and interactive battles are always a treat to play, and it's probably the funniest Mario & Luigi game yet. The game is long, too. Expect to put in well over 20 hours before you're finished. It may not be a traditional RPG, but it's one of the more enjoyable ones out there." |
| Nintendo DS | Christian Donlan, Eurogamer | 9/10 | "Superstar Saga was, very quietly, one of the best games of its generation, sadly appearing too late in the GBA's lifespan to be much more than a cherished secret. Partners in Time was similarly smart but not quite so engaging, possibly because the inclusion of the Mario babies overburdened the controls while offering too little reward for the extra hassle. That's not the case here, however: the brother's old enemy is a triumph precisely because he provides such a contrast to them: he's a bullish idiot who allows you to enjoy your blunt powers with very few limitations. Inside Story is absolutely a return to form, in other words - and, in the end, you've got Bowser to thank for that." |
| Nintendo DS | Craig Harris, IGN | 9.5/10 | "The Mario & Luigi series has already established itself as a fantastic RPG franchise, and the third game does not disappoint. I have no problem classifying it as the best of the bunch, thanks to an excellent and appropriately surreal script, epic oversized battles, and the fact that Bowser is a playable character and gets most of the gameplay time. Let's hope that this is a jumping-off point for Bowser; this guy really needed a top-billing production!" |
| Aggregators | |||
| Compiler | Platform / Score | ||
| Metacritic | 90 | ||
| GameRankings | 91.01% | ||
Sales[edit]
Bowser's Inside Story has sold 3.81 million copies worldwide as of April 2016,[4] making it the best-selling RPG in the Super Mario franchise.
Mushroom Kingdom Tribune[edit]

The Mushroom Kingdom Tribune was a promotional newspaper sent by Nintendo via e-mail. This newspaper included information about the release of Mario & Luigi: Bowser's Inside Story.
This newspaper included "Reviews from the Mushroom Kingdom," which features quotes from the game characters:
- "I have chortles!" – Fawful
- "Did someone just page the King of Awesome?" – Bowser
- "SUPER ULTRA WONDER ULTIMATE RUTHLESS GREAT IRON BALL!" – Midbus
Quotes[edit]
- Main article: List of Mario & Luigi: Bowser's Inside Story quotes
Bowser[edit]
- "Did somebody page the king of awesome?"
- "MAAARIO! Are you seriously trying to start with me again?! I hear about this big meeting, and I'm all ready to act nice... But man, the second I see your face, Mr. Nice Bowser is GONE. Yeah, forget your dumb meeting! I'll pummel you and grab Peach!"
- "GWAHAHA! Great dark hurricane! Seriously, perfect backdrop for an awesome final battle! You really sweat the details! Listen up! You're saying the kingdom will vanish? NOT TODAY! THIS KINGDOM IS ALL MINE! SO YOU VANISH!"
- "SHOWTIME!"
Fawful[edit]
- "All who resist will be beat like naughty little eggs!"
- "Beef? I am lacking in beef. Fawful is beefless."
- "Fawful sings a song of bad!♪ The Mushroom Kingdom is so sad!♪ All of it is for Fawful!♪ And the...rhyme...with that!♪"
- "Here Fawful goes, the disappearing..forever disappearing... WITH YOU!"
- "I HAVE CHORTLES!"
- "It is I who added the nuts to that statue!"
Pre-release and unused content[edit]
Some enemies have an attack pattern for Mario and Luigi, even if they do not face them in the game. There are also several unused voice clips for Yoshi, coming from Yoshi's Story; there is also unused music from Mario & Luigi: Partners in Time, although it will not play correctly. Early screenshots also show Treevils being battled at Plack Beach.
Glitches[edit]
- Main article: List of Mario & Luigi: Bowser's Inside Story glitches
Before the fight with Scutlet, if the players re-enter the Pump Works and hit the Save Block the message will say that Bowser can breathe fire again, even though the Flame Pipe is still blocked.
Gallery[edit]
- For this subject's image gallery, see Gallery:Mario & Luigi: Bowser's Inside Story.

Dr. Toadley and Birdley


Media[edit]
- For a complete list of media for this subject, see List of Mario & Luigi: Bowser's Inside Story media.
| File info 0:30 |
| File info 0:30 |
| File info 0:30 |
References to other games[edit]
- The Legend of Zelda - In Toad Town, Mario and Luigi meet a Toad who teaches them how to dig up special beans. After finishing, he states, "Find all you can. They're a secret to everybody!", in reference to the saying in this game where the Secret Moblin would give Link free Rupees after saying, "It's a secret to everybody."
- Super Mario Bros. 2 - During Bowser's battle with the giant Wiggler, the Wiggler sometimes attacks by pulling out vegetables, which are the same ones that are seen in this game. Also, one of Bowser's brainwashed minions states that he forgot what Bowser's castle was originally called (before it was turned into "Fawful Theater"), and mistakenly referred to it as "Mouser's Castle".
- Super Mario RPG: Legend of the Seven Stars - In addition to the storyline of Bowser attempting to reclaim his castle, Bowser states that Chippy could be an honorary member of the Koopa Troop, and she could "thank him later" (just like when Bowser rationalizes joining Mario's party). In addition, some notes of the Forest Maze track appear in the Toad Town and Peach's Castle themes.
- Super Mario Bros. 3 - The starting section of the file select music is similar to the P Switch and Toad House theme. Sockops are clearly meant to resemble the Kuribo's Shoe, and at one point Luigi will even hop around inside an unconscious Sockop, allowing him to walk along spikes without taking damage, just as the Kuribo's Shoe does. In addition, one of the Sockops' names is, apparently, Kuribo.
- Dr. Mario - Blue Viruses appear on a poster in Dr. Toadley's office, and in one of the Toothy's attacks.
- Super Mario World 2: Yoshi's Island and Yoshi's Island DS - The Fawful Guy enemy can imitate the attack patterns of both the Woozy Guy and the Glide Guy. In addition, one of its attacks mirrors Yoshi's main form of offense in the game, egg throwing.
- Super Mario 64 - The music that plays within Peach's Castle when visiting it for the first time is a variation of its theme here.
- Super Mario Sunshine - One of the brother's ranks is called the Shine Rank.
- Paper Mario - The Koopa Paratroopa Trio in the game wear sunglasses, similar to this game. The blue Koopa shell power-up in the overworld is similar to Kooper's field ability. Also, Princess Peach using her combined powers with Starlow references Peach Beam.
- Mario & Luigi: Superstar Saga - Fawful reappears as a villain. The way Bros. Attacks are used from this game is reused, and there is a slight remix of Cackletta's theme song that played in the background after Fawful took over Peach's castle. Additionally, the statues of Fawful in Bowser's castle depict his outfit from his rematch in this game. Mario and Luigi battle Dark Fawful inside of Bowser's body, just as they did with Cackletta. The chair seen near the Conference Room has the same design (seen only briefly in the beginning of said game). Also, the Mini Mario and Spin Jump abilities return.
- Mario & Luigi: Partners in Time - When Mario and Luigi talk to Broque Madame, she tells them stories about the Shroob invasion that took place in the game. Several Shroobs are also seen at Bowser's castle, where they were kept frozen in a cryogenic chamber. If the player chooses to thaw them out, then an optional boss battle with them will commence. During the battle, several other Shroobs, including the Elder Princess Shroob can be seen in the background. After the battle, Mario and Luigi tell Starlow about their previous battle with the Shroobs, and how they defeated them while they were babies. While the audience is still in the theater in Bowser's castle, a Shroob can also be found sitting in the audience on the bottom right. Also, there is a boot called the Shroob Boots. Fawful Guys, which are fought by Mario and Luigi in Bowser Path, have an attack in which they are pulled offscreen by a tongue (during which the same roar heard from Yoob is heard), and are thrown at either one of the bros. in the form of an egg, which highly resembles one of Sunnycide's attacks.
- New Super Mario Bros. - Blue Shells make a reappearance, as does Shell Mario. A Mega Mushroom also occasionally appears during one of Broque Monsieur's attacks in his tutorial.
- Super Paper Mario - Bowser's battle animation resembles the one in this game.
- Super Mario Galaxy - Spike Ball, the ability where Bowser curls into a ball, heavily resembles an attack that Bowser uses during his fights against Mario/Luigi.
References in later games[edit]
- Mario & Luigi: Dream Team - Starlow, Broque Monsieur, Broque Madame, Broggy, Private Goomp, Corporal Paraplonk, and Sergeant Guy all return to this game. Also, Bowser's theme is reused. The boxart style is reused.
- Super Smash Bros. for Wii U - The songs "Tough Guy Alert!" and "The Grand Finale" return in this game.
- Nintendo Badge Arcade - One of the badges in the Pixel Collection set depicts the Mario & Luigi: Bowser's Inside Story game card.
- Super Smash Bros. Ultimate - The songs "Tough Guy Alert!" and "The Grand Finale" return in this game. Fawful, Starlow, and Broque Monsieur (using their respective artwork from this game) appear as spirits. Piranha Plorps are mentioned in Palutena's Guidance for Piranha Plant.
- Mario & Luigi: Brothership - There is a particular enemy with rusty, metallic features that bears a close resemblance to an average Treevil.
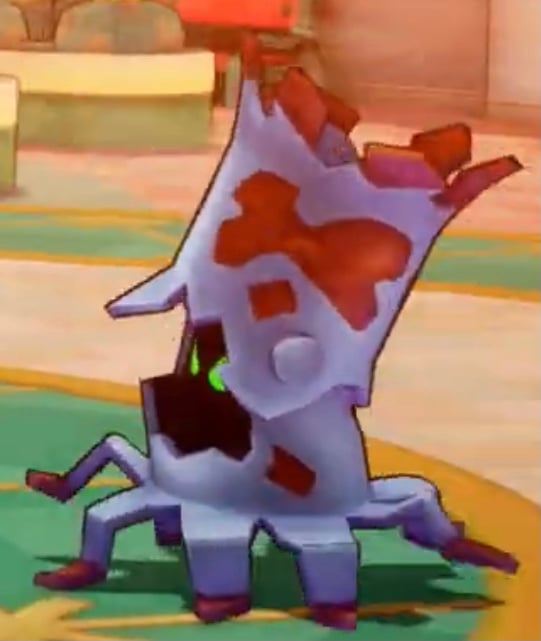
Names in other languages[edit]
| Language | Name | Meaning |
|---|---|---|
| Japanese | マリオ&ルイージRPG3!!! Mario ando Ruīji Āru Pī Jī Surī!!! |
Mario & Luigi RPG 3!!! |
| Chinese (traditional) | 瑪利歐&路易吉RPG3!!![5] Mǎlìōu & Lùyìjí RPG3!!! |
Mario & Luigi RPG 3!!! |
| French (NOA) | Mario & Luigi: Bowser's Inside Story |
- |
| French (NOE) | Mario & Luigi: Voyage au centre de Bowser |
Mario & Luigi: Journey to the Center of Bowser (A reference to Jules Verne's science fiction novel Journey to the Center of the Earth) |
| German | Mario & Luigi: Abenteuer Bowser |
Mario & Luigi: Bowser Adventure |
| Italian | Mario & Luigi: Viaggio al Centro di Bowser |
Mario & Luigi: Journey to the Center of Bowser (A reference to Journey to the Center of the Earth) |
| Korean | 마리오&루이지 RPG 3 쿠파 몸속 대모험 Mario & Ruiji RPG 3 Kupa Momsok Daemoheom |
Mario & Luigi RPG 3: A Great Adventure to Bowser's Body |
| Spanish (NOA) | Mario & Luigi: Bowser's Inside Story |
- |
| Spanish (NOE) | Mario & Luigi: Viaje al centro de Bowser |
Mario & Luigi: Journey to the Center of Bowser (A reference to Journey to the Center of the Earth) |
References[edit]
- ^ Mario & Luigi: Bowser's Inside Story. Nintendo UK (British English). Retrieved June 25, 2024.
- ^ Mario & Luigi: Bowser's Inside Story for DS. GameRankings (English). Archived September 3, 2009, 02:52:56 UTC from the original via Wayback Machine. Retrieved June 25, 2024.
- ^ Mario & Luigi: Bowser's Inside Story. Metacritic (English). Retrieved June 25, 2024.
- ^ Consolidated Sales Units of "Wii" (FY3/2011) (PDF). Nintendo (English). Page 5. Retrieved June 25, 2024.
- ^ Nintendo DS 遊戯軟體. Nintendo of Taiwan (Traditional Chinese). Archived January 7, 2013, 23:57:56 UTC from the original via Wayback Machine. Retrieved June 25, 2024.
External links[edit]
- Japanese Website for Mario & Luigi RPG 3!!!
- Nintendo of America's Website for Mario & Luigi: Bowser's Inside Story
- Nintendo of America's gamepage for Mario & Luigi: Bowser's Inside Story
- Nintendo of Europe's Website for Mario & Luigi: Bowser's Inside Story
- Korean Website for Mario & Luigi RPG 3
- American English manual
- Canadian French manual