User:Mid188/Sandbox: Difference between revisions
mNo edit summary |
mNo edit summary |
||
| (31 intermediate revisions by 2 users not shown) | |||
| Line 1: | Line 1: | ||
=Rogueport= | =Rogueport= | ||
The below items are acquired while exploring Rogueport. Other items not listed below | The below items are acquired while exploring Rogueport. Other items not listed below are purchased from vendors in town, namely [[Toad Bros. Bazaar]], [[Charlieton]], [[Lovely Howz of Badges]], [[Westside Goods]] and [[Pianta Parlor]]. Also not listed below are the [[List of recipes in Paper Mario: The Thousand-Year Door|dishes]] from [[Zess T.]] and the items given as rewards for getting certain amount of Shop Points. | ||
In the remake, the cockroaches and the grass sticking out of the ground can both be squished for one Coin at random. | |||
{|class=wikitable style="text-align:center" | {|class=wikitable style="text-align:center" | ||
!Item | !Item | ||
| Line 9: | Line 10: | ||
|{{PMTTYD item|link=Attack FX B (Paper Mario: The Thousand-Year Door)|Attack FX B|game=NS}} | |{{PMTTYD item|link=Attack FX B (Paper Mario: The Thousand-Year Door)|Attack FX B|game=NS}} | ||
|Given back by [[Ms. Mowz]] after completing [[Trouble Center#Ms. Mowz (Posted as ???)|her trouble]]. | |Given back by [[Ms. Mowz]] after completing [[Trouble Center#Ms. Mowz (Posted as ???)|her trouble]]. | ||
| | |[[File:Rogeuport (Attack FX B).png|250px]] | ||
| | | | ||
|- | |- | ||
|{{PMTTYD item|Blimp Ticket|game=NS}} | |{{PMTTYD item|Blimp Ticket|game=NS}} | ||
|Given by [[Don Pianta]] after helping him find [[Francesca]] and [[Frankie]] before Chapter 3. | |Given by [[Don Pianta]] after helping him find [[Francesca]] and [[Frankie]] before Chapter 3. | ||
| | |[[File:Rogueport (Blimp Ticket).png|250px]] | ||
| | | | ||
|- | |- | ||
|{{PMTTYD item|link=Box|Package|text=Box|game=NS}} | |{{PMTTYD item|link=Box|Package|text=Box|game=NS}} | ||
|Given by [[McGoomba]] while doing [[Trouble Center#McGoomba|his trouble]]. | |Given by [[McGoomba]] while doing [[Trouble Center#McGoomba|his trouble]]. | ||
| | |[[File:Rogueport (Box).png|250px]] | ||
| | | | ||
|- | |- | ||
|rowspan= | |rowspan=8|{{PMTTYD item|Coin|game=NS}} | ||
|After entering the east side for the first time, Mario is robbed of half of his coins. By going back to the square, north to the alley, left into the house and talking to the bandit, Mario is given the coins back. | |After entering the east side for the first time, Mario is robbed of half of his coins. By going back to the square, north to the alley, left into the house and talking to the bandit, Mario is given the coins back. | ||
| | |[[File:Rogueport (Coins Stolen).png|250px]][[File:Rogueport (Coins Returned).png|250px]] | ||
| | | | ||
|- | |- | ||
|In the harbor, before Chapter 4, Mario can give Lumpy the Ratooey 100, 200 or 300 Coins. After chapter 6, Lumpy will give back 300 (if given 100), 600/500 (in Japanese GameCube version) (if given 200) or 999 Coins (if given 300). | |In the harbor, after starting Chapter 1 and before starting Chapter 4, Mario can give [[Lumpy|Lumpy the Ratooey]] 100, 200 or 300 Coins. After chapter 6, Lumpy will give back 300 (if given 100), 600/500 (in Japanese GameCube version) (if given 200) or 999 Coins (if given 300). | ||
| | |[[File:Rogueport (Lumpy Coins).png|250px]] | ||
| | |[[File:PMTTYDNS Lumpy Coins.jpg|250px]] | ||
|- | |- | ||
|20 (30 on Switch) Coins given by [[Garf]] after doing his [[Need a key!|trouble]]. | |20 (30 on Switch) Coins given by [[Garf]] after doing his [[Need a key!|trouble]]. | ||
| | |[[File:Rogueport (Garf Coins).png|250px]] | ||
| | | | ||
|- | |- | ||
|20 (30 on Switch) Coins given by [[McGoomba]] after doing his [[Safe delivery...|trouble]]. | |20 (30 on Switch) Coins given by [[McGoomba]] after doing his [[Safe delivery...|trouble]]. | ||
| | |[[File:Rogueport (McGoomba Coins).png|250px]] | ||
| | | | ||
|- | |- | ||
|20 (30 on Switch) Coins given by [[Arfur]] after doing his [[Competitor research!|trouble]]. | |20 (30 on Switch) Coins given by [[Arfur]] after doing his [[Competitor research!|trouble]]. | ||
| | |[[File:Rogueport (Arfur Coins).png|250px]] | ||
| | | | ||
|- | |- | ||
|20 (30 on Switch) Coins given by [[Goomther]] after doing his [[Find this guy!|trouble]]. | |20 (30 on Switch) Coins given by [[Goomther]] after doing his [[Find this guy!|trouble]]. | ||
| | |[[File:Rogueport (Goomther Coins).png|250px]] | ||
| | | | ||
|- | |- | ||
|11 Coins given by [[Bomberto]] after doing his [[I'm hungry!|trouble]]. | |11 Coins given by [[Bomberto]] after doing his [[I'm hungry!|trouble]]. | ||
|[[File:Rogueport (Bomberto Coins).png|250px]] | |||
| | | | ||
|- | |||
|200 given by innkeeper after sleeping in the inn 50 times. Missable if given elsewhere. | |||
|[[File:Rogueport (Inn Reward Coins).png|250px]] | |||
| | | | ||
|- | |- | ||
| Line 58: | Line 63: | ||
|{{PMTTYD item|Golden Card|Gold Card|game=NS}} | |{{PMTTYD item|Golden Card|Gold Card|game=NS}} | ||
|Received from [[Frankie]] after doing [[Trouble Center#Frankie|his trouble]]. | |Received from [[Frankie]] after doing [[Trouble Center#Frankie|his trouble]]. | ||
| | |[[File:Rogueport (Gold Card).png|250px]] | ||
| | | | ||
|- | |- | ||
| Line 68: | Line 73: | ||
|{{PMTTYD item|Honey Mushroom|game=NS}} | |{{PMTTYD item|Honey Mushroom|game=NS}} | ||
|Cooked by [[Zess T.]] and given to [[Mario]] after completing [[Trouble Center#Zess T.|her trouble]]. | |Cooked by [[Zess T.]] and given to [[Mario]] after completing [[Trouble Center#Zess T.|her trouble]]. | ||
| | |[[File:Rogueport (Honey Shroom).png|250px]] | ||
| | | | ||
|- | |- | ||
|{{PMTTYD item|House Key|game=NS}} | |{{PMTTYD item|House Key|game=NS}} | ||
|In front of the badge shop during [[Trouble Center#Garf|Garf's trouble]]. | |In front of the badge shop during [[Trouble Center#Garf|Garf's trouble]]. | ||
| | |[[File:Rogueport (House Key).png|250px]] | ||
| | | | ||
|- | |- | ||
| Line 83: | Line 88: | ||
|{{PMTTYD item|Life Mushroom|game=NS}} | |{{PMTTYD item|Life Mushroom|game=NS}} | ||
|Given by Lucky if the last number on Mario's Lottery Ticket matches the lottery number. | |Given by Lucky if the last number on Mario's Lottery Ticket matches the lottery number. | ||
| | |[[File:Rogueport (Happy Lucky Lottery Life Shroom).png|250px]] | ||
| | | | ||
|-style="background:lightgreen" | |-style="background:lightgreen" | ||
|{{PMTTYD item|Lottery Ticket|game=NS}} | |{{PMTTYD item|Lottery Ticket|game=NS}} | ||
|Can be bought from the [[Happy Lucky Lottery]]. | |Can be bought from the [[Happy Lucky Lottery]]. | ||
| | |[[File:Rogueport (Lottery Pick).png|250px]] | ||
| | | | ||
|- | |- | ||
|{{PMTTYD item|Lucky Day|game=NS}} | |{{PMTTYD item|Lucky Day|game=NS}} | ||
|Given by Lucky if the last three[[File:Nintendo GameCube symbol.svg|15px|link=Nintendo GameCube]]/all four [[File:Nintendo Switch Logo.svg|15px|link=Nintendo Switch]] numbers on Mario's Lottery Ticket match the lottery number. | |Given by Lucky if the last three[[File:Nintendo GameCube symbol.svg|15px|link=Nintendo GameCube]]/all four [[File:Nintendo Switch Logo.svg|15px|link=Nintendo Switch]] numbers on Mario's Lottery Ticket match the lottery number. | ||
| | |[[File:Rogueport (Happy Lucky Lotter Lucky Day).png|250px]] | ||
| | | | ||
|-style="background:lightgreen" | |-style="background:lightgreen" | ||
|{{PMTTYD item|Mushroom|game=NS}} | |{{PMTTYD item|Mushroom|game=NS}} | ||
|Given by Lucky if Mario's Lottery Ticket number does not match the lottery number. | |Given by Lucky if Mario's Lottery Ticket number does not match the lottery number. | ||
| | |[[File:Rogueport (Happy Lucky Lottery Mushroom).png|250px]] | ||
| | | | ||
|- | |- | ||
|{{PMTTYD item|Old Letter|game=NS}} | |{{PMTTYD item|Old Letter|game=NS}} | ||
|Given by [[Podley]] near the start of Chapter 5. | |Given by [[Podley]] near the start of Chapter 5. | ||
|[[File:Rogueport (Old Letter).png|250px]] | |||
| | | | ||
|-style="background:lightgreen" | |||
|rowspan=3|{{PMTTYD item|Pianta Token|game=NS}} | |||
|Given by the Pianta Changer in exchange for Coins. | |||
|[[File:Rogueport (Piantas).png|250px]] | |||
| | | | ||
|-style="background:lightgreen" | |-style="background:lightgreen" | ||
| | |[[File:Nintendo GameCube symbol.svg|15px|link=Nintendo GameCube]]: Depending on which symbols are matched on the slot machine, Mario is awarded either 3 (Don Pianta symbol), 15 (Star symbol) or 100 Pianta Tokens (7 symbol).<br>[[File:Nintendo Switch Logo.svg|15px|link=Nintendo Switch]]: Given by a machine game machine. Amount depends on the machine and the symbol, ranging from 2, up to 50 tokens. | ||
|[[File:Rogueport (Slot Machine Piantas).png|250px]] | |||
| | |||
| | | | ||
|- | |- | ||
| Line 117: | Line 126: | ||
|{{PMTTYD item|Power Plus|game=NS}} | |{{PMTTYD item|Power Plus|game=NS}} | ||
|Given by Lucky if the all four[[File:Nintendo GameCube symbol.svg|15px|link=Nintendo GameCube]]/last three[[File:Nintendo Switch Logo.svg|15px|link=Nintendo Switch]] numbers on Mario's Lottery Ticket match the lottery number. | |Given by Lucky if the all four[[File:Nintendo GameCube symbol.svg|15px|link=Nintendo GameCube]]/last three[[File:Nintendo Switch Logo.svg|15px|link=Nintendo Switch]] numbers on Mario's Lottery Ticket match the lottery number. | ||
| | |[[File:Rogueport (Happy Lucky Lottery Power Plus).png|250px]] | ||
| | | | ||
|- | |- | ||
|{{PMTTYD item|Power Smash|game=NS}} | |{{PMTTYD item|Power Smash|game=NS}} | ||
|Given by [[Professor Frankly]] during the prologue. | |Given by [[Professor Frankly]] during the prologue. | ||
| | |[[File:Rogueport (Power Smash).png|250px]] | ||
| | | | ||
|- | |- | ||
| Line 221: | Line 230: | ||
|{{PMTTYD item|Train Ticket|game=NS}} | |{{PMTTYD item|Train Ticket|game=NS}} | ||
|Given by [[Don Pianta]] after reuniting with his daughter near the start of Chapter 6. | |Given by [[Don Pianta]] after reuniting with his daughter near the start of Chapter 6. | ||
| | |[[File:Rogueport (Train Ticket).png|250px]] | ||
| | | | ||
|- | |- | ||
| Line 236: | Line 245: | ||
|rowspan=2|{{PMTTYD item|Ultra Mushroom|game=NS}} | |rowspan=2|{{PMTTYD item|Ultra Mushroom|game=NS}} | ||
|Given by [[Plenn T.]] after doing [[Trouble Center#Plenn T.|his trouble]]. | |Given by [[Plenn T.]] after doing [[Trouble Center#Plenn T.|his trouble]]. | ||
| | |[[File:Rogueport (Plenn T. Ultra Shroom).png|250px]] | ||
| | | | ||
|-style="background:lightgreen" | |-style="background:lightgreen" | ||
|Given by Lucky if the last two numbers on Mario's Lottery Ticket match the lottery number. | |Given by Lucky if the last two numbers on Mario's Lottery Ticket match the lottery number. | ||
| | |[[File:Rogueport (Happy Lucky Lottery Ultra Shroom).png|250px]] | ||
| | | | ||
|-style="background:lightgreen" | |-style="background:lightgreen" | ||
|{{PMTTYD item|Zess Dynamite|game=NS}} | |{{PMTTYD item|Zess Dynamite|game=NS}} | ||
|Given by Lucky if all four numbers on Mario's Lottery Ticket match the lottery number after getting Power Plus[[File:Nintendo GameCube symbol.svg|15px|link=Nintendo GameCube]]/Lucky Day[[File:Nintendo Switch Logo.svg|15px|link=Nintendo Switch]] Badge. | |Given by Lucky if all four numbers on Mario's Lottery Ticket match the lottery number after getting Power Plus[[File:Nintendo GameCube symbol.svg|15px|link=Nintendo GameCube]]/Lucky Day[[File:Nintendo Switch Logo.svg|15px|link=Nintendo Switch]] Badge. | ||
| | |[[File:Rogueport (Happy Lucky Lottery Zess Dynamite).png|250px]] | ||
| | | | ||
|-style="background:lightgreen" | |-style="background:lightgreen" | ||
|{{PMTTYD item|Zess Special|game=NS}} | |{{PMTTYD item|Zess Special|game=NS}} | ||
|Given by Lucky if last three numbers on Mario's Lottery Ticket match the lottery number after getting Lucky Day[[File:Nintendo GameCube symbol.svg|15px|link=Nintendo GameCube]]/Power Plus[[File:Nintendo Switch Logo.svg|15px|link=Nintendo Switch]] Badge. | |Given by Lucky if last three numbers on Mario's Lottery Ticket match the lottery number after getting Lucky Day[[File:Nintendo GameCube symbol.svg|15px|link=Nintendo GameCube]]/Power Plus[[File:Nintendo Switch Logo.svg|15px|link=Nintendo Switch]] Badge. | ||
| | |[[File:Rogueport (Happy Lucky Lottery Zess Special).png|250px]] | ||
| | | | ||
|} | |} | ||
=Rogueport Sewers/Underground= | =Rogueport Sewers/Underground= | ||
Additional items are | Additional items are bought from [[Deepdown Depot]] (+ the Shop Point rewards), [[Dazzle]] and [[Charlieton]] (in the [[Pit of 100 Trials (Paper Mario: The Thousand-Year Door)|Pit of 100 Trials]]), as well as dropped by enemies. In the remake, the grass sticking out in various places of the underground can be hammered for one Coin at random. | ||
{|class=wikitable style="text-align:center" | {|class=wikitable style="text-align:center" | ||
| Line 270: | Line 279: | ||
|{{PMTTYD item|Coin|game=NS}} | |{{PMTTYD item|Coin|game=NS}} | ||
|30 given by [[Merlee]] after completing her [[Heartful Cake recipe...|trouble]]. | |30 given by [[Merlee]] after completing her [[Heartful Cake recipe...|trouble]]. | ||
| | |[[File:Rogueport Sewers (Merlee Coins).png|250px]] | ||
| | | | ||
|- | |- | ||
|{{PMTTYD item|Damage Dodge|game=NS}} | |{{PMTTYD item|Damage Dodge|game=NS}} | ||
|In the Boggly Woods pipe room on sublevel 3, it is on the northwest platform in the Punio room. Accessible from the passage Punio made available. | |In the Boggly Woods pipe room on sublevel 3, it is on the northwest platform in the Punio room. Accessible from the passage Punio made available. | ||
| | |[[File:Rogueport Sewers (Damage Dodge).png|250px]] | ||
| | | | ||
|- | |- | ||
|{{PMTTYD item|Defend Plus|game=NS}} | |{{PMTTYD item|Defend Plus|game=NS}} | ||
|In the Spunia room on sublevel 2, it is on the northeast platform. | |In the Spunia room on sublevel 2, it is on the northeast platform. | ||
| | |[[File:Rogueport Sewers (Defend Plus).png|250px]] | ||
| | | | ||
|- | |- | ||
| Line 340: | Line 349: | ||
|{{PMTTYD item|Silver Card|game=NS}} | |{{PMTTYD item|Silver Card|game=NS}} | ||
|In the [[Pit of 100 Trials (Paper Mario: The Thousand-Year Door)|Pit of 100 Trials]] entrance room on sublevel 3, it is given by [[Pine T. Jr.]] for doing [[Help my Daddy!|his trouble]]. | |In the [[Pit of 100 Trials (Paper Mario: The Thousand-Year Door)|Pit of 100 Trials]] entrance room on sublevel 3, it is given by [[Pine T. Jr.]] for doing [[Help my Daddy!|his trouble]]. | ||
| | |[[File:Rogueport Sewers (Silver Card).png|250px]] | ||
| | | | ||
|- | |- | ||
| Line 441: | Line 450: | ||
=Petal Meadows= | =Petal Meadows= | ||
In the remake, due to grass becoming more paperified, hitting it with hammer will cause it to spawn Coins at random. | |||
{|class=wikitable style="text-align:center" | {|class=wikitable style="text-align:center" | ||
!Item | !Item | ||
| Line 462: | Line 472: | ||
|- | |- | ||
|In the third area, in the two bushes in the foreground on the left side of the bridge. | |In the third area, in the two bushes in the foreground on the left side of the bridge. | ||
| | |[[File:Petal Meadows (2 Coins).png|250px]] | ||
| | | | ||
|- | |- | ||
| Line 477: | Line 487: | ||
|{{PMTTYD item|Horsetail|game=NS}} | |{{PMTTYD item|Horsetail|game=NS}} | ||
|In the second screen, it is dropped by the rightmost [[Candy Pop|Candy Cane]] when hit 10 times. Replenishable source. | |In the second screen, it is dropped by the rightmost [[Candy Pop|Candy Cane]] when hit 10 times. Replenishable source. | ||
| | |[[File:Petal Meadows (Horsetail).png|250px]] | ||
| | | | ||
|- | |- | ||
|rowspan=2|{{PMTTYD item|Mushroom|game=NS}} (x2) | |rowspan=2|{{PMTTYD item|Mushroom|game=NS}} (x2) | ||
|In the right tree back of the entrance pipe in the first screen. | |In the right tree back of the entrance pipe in the first screen. | ||
| | |[[File:Petal Meadows (Mushroom).png|250px]] | ||
| | | | ||
|- | |- | ||
| Line 491: | Line 501: | ||
|{{PMTTYD item|Mystery|game=NS}} | |{{PMTTYD item|Mystery|game=NS}} | ||
|In the second bush to the right of the bridge in the third screen. | |In the second bush to the right of the bridge in the third screen. | ||
| | |[[File:Petal Meadows (Mystery).png|250px]] | ||
| | | | ||
|- | |- | ||
| Line 505: | Line 515: | ||
=Petalburg= | =Petalburg= | ||
Additional items are on sale at [[Niff T.'s shop]]. | Additional items are on sale at [[Niff T.'s shop]] (+ the Shop Point rewards). In the remake, due to grass becoming more paperified, hitting it with hammer will cause it to spawn Coins at random. | ||
{|class=wikitable style="text-align:center" | {|class=wikitable style="text-align:center" | ||
| Line 512: | Line 522: | ||
!Location Image | !Location Image | ||
!Location Image (Remake) | !Location Image (Remake) | ||
|- | |||
|{{PMTTYD item|Coin|game=NS}} | |||
|200 given by innkeeper after sleeping in the inn 50 times. Missable if given elsewhere. | |||
|[[File:Petalburg (Inn Reward Coins).png|250px]] | |||
| | |||
|-style="background:lightgreen" | |-style="background:lightgreen" | ||
|{{PMTTYD item|Dried Bouquet|game=NS}} | |{{PMTTYD item|Dried Bouquet|game=NS}} | ||
|Given by [[Bub-ulber]] after finishing [[The food I want.|his trouble]]. Finishing his trouble allows Mario to trade [[Hot Dog (item)|Hot Dog]]s to him in exchange for Dried Bouquets at any time. | |Given by [[Bub-ulber]] after finishing [[The food I want.|his trouble]]. Finishing his trouble allows Mario to trade [[Hot Dog (item)|Hot Dog]]s to him in exchange for Dried Bouquets at any time. | ||
| | |[[File:Petalburg (Dried Bouquet).png|250px]] | ||
| | | | ||
|- | |- | ||
|{{PMTTYD item|Mega Rush P|game=NS}} | |{{PMTTYD item|Mega Rush P|game=NS}} | ||
|In the east area, it is behind the fence to the right of [[Kroop]]'s house. Requires Paper Mode. | |In the east area, it is behind the fence to the right of [[Kroop]]'s house. Requires Paper Mode. | ||
| | |[[File:Petalburg (Mega Rush P).png|250px]] | ||
| | | | ||
|- | |- | ||
|{{PMTTYD item|Routing Slip|game=NS}} | |{{PMTTYD item|Routing Slip|game=NS}} | ||
|Given to and given back by Kroop in his house during [[Newsletter...|Mayor Dour's trouble]] | |Given to and given back by Kroop in his house during [[Newsletter...|Mayor Dour's trouble]] | ||
| | |[[File:Petalburg (Routing Slip).png|250px]] | ||
| | | | ||
|- | |- | ||
| Line 539: | Line 554: | ||
|rowspan=2|{{PMTTYD item|Turtley Leaf|game=NS}} (x2) | |rowspan=2|{{PMTTYD item|Turtley Leaf|game=NS}} (x2) | ||
|In the east area, it is in the front yard of Kroop's house. Can be randomly harvested once at a time, from one of the three vegetations for an unlimited amount of times. | |In the east area, it is in the front yard of Kroop's house. Can be randomly harvested once at a time, from one of the three vegetations for an unlimited amount of times. | ||
| | |[[File:Petalburg (Turtley Leaf).png|250px]] | ||
| | | | ||
|- | |- | ||
|Given by Kroop for doing [[Listen to me!|his trouble]]. | |Given by Kroop for doing [[Listen to me!|his trouble]]. | ||
| | |[[File:Petalburg (Kroop Turtley Leaf).png|250px]] | ||
| | | | ||
|} | |} | ||
=Path to Shhwonk Fortress= | =Path to Shhwonk Fortress= | ||
In the remake, due to grass becoming more paperified, hitting it with hammer will cause it to spawn Coins at random. | |||
{|class=wikitable style="text-align:center" | {|class=wikitable style="text-align:center" | ||
!Item | !Item | ||
| Line 556: | Line 572: | ||
|rowspan=4|{{PMTTYD item|Coin|game=NS}} | |rowspan=4|{{PMTTYD item|Coin|game=NS}} | ||
|In the first screen, in the fifth tree. | |In the first screen, in the fifth tree. | ||
| | |[[File:Petal Meadows (Coin 1).png|250px]] | ||
| | | | ||
|- | |- | ||
|In the third screen, in the third tree. | |In the third screen, in the third tree. | ||
| | |[[File:Petal Meadows (Coin 2).png|250px]] | ||
| | | | ||
|- | |- | ||
|In the third screen, in the last bush. | |In the third screen, in the last bush. | ||
| | |[[File:Petal Meadows (Coin 3).png|250px]] | ||
| | | | ||
|- | |- | ||
|In the fifth screen, in the second-to-last bush. | |In the fifth screen, in the second-to-last bush. | ||
| | |[[File:Petal Meadows (Coin 4).png|250px]] | ||
| | | | ||
|- | |- | ||
| Line 578: | Line 594: | ||
|{{PMTTYD item|Inn Coupon|game=NS}} | |{{PMTTYD item|Inn Coupon|game=NS}} | ||
|On the ground in the fifth screen to the right of Petalburg. | |On the ground in the fifth screen to the right of Petalburg. | ||
| | |[[File:Petal Meadows (Inn Coupon).png|250px]] | ||
| | | | ||
|- | |- | ||
| Line 587: | Line 603: | ||
|- | |- | ||
|In the third screen to the right of Petalburg, one is in the first bush on the last platform. | |In the third screen to the right of Petalburg, one is in the first bush on the last platform. | ||
| | |[[File:Petal Meadows (POW Block).png|250px]] | ||
| | | | ||
|- | |- | ||
| Line 597: | Line 613: | ||
=Shhwonk Fortress= | =Shhwonk Fortress= | ||
In the remake, the grass in the Thwomp room can be squished for Coins to randomly spawn. | |||
{|class=wikitable style="text-align:center" | {|class=wikitable style="text-align:center" | ||
!Item | !Item | ||
| Line 603: | Line 620: | ||
!Location Image (Remake) | !Location Image (Remake) | ||
|- | |- | ||
|{{PMTTYD item| | |{{PMTTYD item|Moon Stone|game=NS}} [[File:Nintendo GameCube symbol.svg|15px|link=Nintendo GameCube]]<br>{{PMTTYD item|Moon Stone|game=NS}} and {{PMTTYD item|Mushroom|game=NS}} [[File:Nintendo Switch Logo.svg|15px|link=Nintendo Switch]] | ||
| | |Two screens to the left of the entrance. Stone Guarded by four [[Fuzzy|Fuzzies]]. | ||
| | |[[File:Petal Meadows (Moon Stone).png|250px]] | ||
|[[File:Shhwonk Fortress Block | |[[File:Shhwonk Fortress Block 2.png|250px]] | ||
|- | |- | ||
|{{PMTTYD item|Multibounce|game=NS}} | |{{PMTTYD item|Multibounce|game=NS}} | ||
| Line 613: | Line 630: | ||
|[[File:Shhwonk Fortress Block 1.png|250px]] | |[[File:Shhwonk Fortress Block 1.png|250px]] | ||
|- | |- | ||
|{{PMTTYD item| | |{{PMTTYD item|Sun Stone|game=NS}} [[File:Nintendo GameCube symbol.svg|15px|link=Nintendo GameCube]]<br>{{PMTTYD item|Sun Stone|game=NS}} and {{PMTTYD item|Fire Flower|game=NS}} [[File:Nintendo Switch Logo.svg|15px|link=Nintendo Switch]] | ||
|Two screens to the right of the entrance. Stone guarded by four Fuzzies. | |||
|[[File:Petal Meadows (Sun Stone).png|250px]] | |||
|[[File:Shhwonk Fortress Block 3.png|250px]] | |||
|Two screens to the | |||
| | |||
| | |||
|} | |} | ||
=Hooktail Castle= | =Hooktail Castle= | ||
In the remake, grass found in the wooden bridge scene can be hammered to spawn Coins at random. | |||
{|class=wikitable style="text-align:center" | {|class=wikitable style="text-align:center" | ||
!Item | !Item | ||
| Line 711: | Line 719: | ||
|{{PMTTYD item|Special Card|game=NS}} | |{{PMTTYD item|Special Card|game=NS}} | ||
|In the room with a block to the third floor, it is given by [[Koopook]] for doing [[Try to find me!|his trouble]]. | |In the room with a block to the third floor, it is given by [[Koopook]] for doing [[Try to find me!|his trouble]]. | ||
| | |[[File:Hooktail Castle (Special Card).png|250px]] | ||
| | | | ||
|- | |- | ||
| Line 741: | Line 749: | ||
|} | |} | ||
= | =Boggly Woods= | ||
In the Nintendo Switch remake, additional items can be [[List of shops in Paper Mario: The Thousand-Year Door#Boggly Woods|purchased]] from [[Charlieton]]. | |||
{|class=wikitable style="text-align:center" | {|class=wikitable style="text-align:center" | ||
!Item | !Item | ||
| Line 748: | Line 757: | ||
!Location Image (Remake) | !Location Image (Remake) | ||
|- | |- | ||
|{{PMTTYD item| | |rowspan=2|{{PMTTYD item|Coin|game=NS}} | ||
|In the | |In the third screen, in the second-to-last tree. | ||
|[[File: | |[[File:Boggly Woods (Coin).png|250px]] | ||
| | | | ||
|- | |- | ||
| | |20 (30 on Switch) given by Doe T. after completing his [[Roust these cads!|trouble]]. | ||
| | |[[File:Boggly Woods (Doe T. Coins).png|250px]] | ||
| | | | ||
|- | |- | ||
|{{PMTTYD item| | |{{PMTTYD item|Honey Syrup|game=NS}} | ||
| | |In the second screen, to the left of the third tree from right. | ||
|[[File: | |[[File:PMTTYD Boggly Woods Honey Syrup.png|250px]] | ||
| | | | ||
|- | |- | ||
|{{PMTTYD item| | |{{PMTTYD item|Inn Coupon|game=NS}} | ||
| | |In the third screen, in the bush to the right of the pipe. | ||
| | |[[File:PMTTYD Boggly Woods Inn Coupon.png|250px]] | ||
| | | | ||
|- | |- | ||
|{{PMTTYD item| | |{{PMTTYD item|link=Necklace (Paper Mario: The Thousand-Year Door)|Necklace|game=NS}} | ||
| | |In the second screen, dropped by the [[Three Shadows]]. | ||
| | |[[File:PMTTYD Boggly Woods Sirens Drop Necklace.png|250px]] | ||
| | | | ||
|- | |- | ||
|{{PMTTYD item| | |{{PMTTYD item|Quake Hammer|game=NS}} | ||
| | |In the fourth screen, in the red question block on top of the right platform. | ||
|[[File: | |[[File:Boggly Woods Block.png|250px]] | ||
|[[File: | |[[File:Boggly Woods Block (Switch).png|250px]] | ||
|- | |- | ||
|{{PMTTYD item| | |{{PMTTYD item|Shine Sprite|game=NS}} | ||
| | |In the fourth screen, to the left of the high [[plane panel]]. | ||
|[[File: | |[[File:PMTTYD Shine Sprite BooglyWoods.png|250px]] | ||
|[[File: | |[[File:PMTTYD Shine Sprite BooglyWoods (Switch).png|250px]] | ||
|- | |- | ||
|{{PMTTYD item| | |{{PMTTYD item|Sleepy Sheep|game=NS}} | ||
|In the second screen, in the leftmost tree. | |||
|[[File:PMTTYD Boggly Woods Sleepy Sheep.png|250px]] | |||
| | |||
|[[File:PMTTYD | |||
| | | | ||
|- | |- | ||
|{{PMTTYD item| | |rowspan=3|{{PMTTYD item|Star Piece|game=NS}} | ||
| | |In the fourth screen, on the left of the tree stumps to the north of the airplane area. | ||
|[[File:PMTTYD | |[[File:PMTTYD Star Piece BogglyWoodsPanel.png|250px]] | ||
|[[File:PMTTYD Star Piece BogglyWoodsPanel (Switch).png|250px]] | |||
|- | |- | ||
| | |In the fifth screen, in the third tree. | ||
|[[File:PMTTYD Star Piece BogglyWoodsTree.png|250px]] | |||
|[[File:PMTTYD Star Piece BogglyWoodsTree (Switch).png|250px]] | |||
|- | |- | ||
| | |In the fifth screen, to the left of the pipe leading to [[Flurrie]]'s house. | ||
|[[File:PMTTYD Star Piece BogglyWoodsPipe.png|250px]] | |||
|[[File: | |[[File:PMTTYD Star Piece BogglyWoodsPipe (Switch).png|250px]] | ||
|[[File: | |||
|- | |- | ||
|{{PMTTYD item|Volt Mushroom|game=NS}} | |||
| | |In the fifth screen, in the right of the area behind the fence. | ||
|[[File:PMTTYD | |[[File:PMTTYD Boggly Woods Volt Shroom.png|250px]] | ||
|[[File: | | | ||
|} | |||
===Hidden ? Block=== | |||
{{main|List of hidden blocks in Paper Mario: The Thousand-Year Door}} | |||
{|class=wikitable style="text-align:center" | |||
!Item | |||
!Description | |||
!Block un/revealed ([[File:Nintendo GameCube symbol.svg|15px|link=Nintendo GameCube]]) | |||
!Block un/revealed ([[File:Nintendo Switch Logo.svg|15px|link=Nintendo Switch]]) | |||
|- | |- | ||
|In the | |{{PMTTYD item|P-Down, D-Up P|game=NS}} | ||
|[[File: | |In the area with the tall stump that allows him to go into Airplane Mode, he should go to the tree stumps in the back and jump at the tenth one from the left to reveal the hidden ? Block. The location of this block is mentioned in Wonky's Tales, "Secret of Boggly Woods".<ref>{{cite|author=Wonky|quote=Deep in Boggly Woods is a spot with a bunch of tree stumps all lined up... If you jump hard on the tenth stump from the left, you'll get something good. Now I don't know what it is, but I hear it's really good.}}</ref> | ||
|[[File:PMTTYDHiddenBlocks2.png|250px]][[File:PMTTYDHiddenBlocks2R.png|250px]] | |||
| | |[[File:PMTTYDHiddenBlocks2 (Switch).png|250px]][[File:PMTTYDHiddenBlocks2R (Switch).png|250px]] | ||
|} | |||
=Flurrie's House= | |||
| | {|class=wikitable style="text-align:center" | ||
!Item | |||
!Location | |||
!Location Image | |||
!Location Image (Remake) | |||
|- | |- | ||
|{{PMTTYD item|Star Piece|game=NS}} | |||
| | |Under a panel in the southeast of the bedroom. | ||
|[[File:PMTTYD | |[[File:PMTTYD Star Piece FlurrieHouse.png|250px]] | ||
| | |[[File:PMTTYD Star Piece FlurrieHouse (Switch).png|250px]] | ||
|- | |- | ||
| | |{{PMTTYD item|Super Appeal P|game=NS}} | ||
|In the chest box in the bedroom. Flurrie might have used it when she was an actress. | |||
|[[File: | |[[File:Flurrie's House Treasure Chest.png|250px]] | ||
| | |[[File:Flurrie's House Treasure Chest (Switch).png|250px]] | ||
|} | |} | ||
=The Great Tree= | |||
In addition, there is a [[Pungent's Great Tree Shop|shop]] covered by a piece of paper to the lower-left of the twisty path. Having Flurrie blow it away will allow Mario access to the shop. | |||
{|class=wikitable style="text-align:center" | {|class=wikitable style="text-align:center" | ||
!Item | !Item | ||
| Line 847: | Line 855: | ||
!Location Image (Remake) | !Location Image (Remake) | ||
|- | |- | ||
|{{PMTTYD item|Blue | |{{PMTTYD item|link=Blue Key (Paper Mario: The Thousand-Year Door)|Blue Key|game=NS}} | ||
|In the second room below the entrance, to the right of the twisty path, it's inside the chest on the ground. | |||
|[[File:The Great Tree Treasure Chest 2.png|250px]] | |||
|[[File:The Great Tree Treasure Chest 2 (Switch).png|250px]] | |||
|- | |||
|{{PMTTYD item|link=Charge (badge)|Charge|game=NS}} | |||
|In the second room below the entrance, to the right of the twisty path, it's on the left pillar in the underground. | |||
|[[File:PMTTYD The Great Tree Charge Badge.png|250px]] | |||
| | | | ||
|- | |||
|rowspan=5|{{PMTTYD item|Coin|game=NS}} | |||
|In the entrance scene, in the first bush. | |||
|[[File:The Great Tree (Coin 1).png|250px]] | |||
| | | | ||
|- | |- | ||
| | |In the storeroom in the highest place, in the first bush. | ||
|[[File:The Great Tree (Coin 2).png|250px]] | |||
| | | | ||
|- | |- | ||
| | |In the area before the area with the trap, in the second bush. | ||
|[[File:The Great Tree (Coin 3).png|250px]] | |||
| | | | ||
|- | |- | ||
| | |In the next area (accessed by a pipe on the log), in the third bush found on the lower part. | ||
|[[File:The Great Tree (Coin 4).png|250px]] | |||
| | | | ||
|- | |- | ||
| | |60 (50 on Switch) given by [[Puni elder|Puni Elder]] after completing her [[Life Mushroom!|trouble]]. | ||
| | |[[File:The Great Tree (Puni Elder Coins).png|250px]] | ||
| | | | ||
|- | |- | ||
|{{PMTTYD item|Damage Dodge P|game=NS}} | |||
|{{PMTTYD item| | |In the second room below the entrance, it's in a ? Block above an invisible block by the twisty path. | ||
|[[File:PMTTYDHiddenBlocks3.png|250px]] | |||
|[[File:PMTTYDHiddenBlocks3 (Switch).png|250px]] | |||
|- | |||
|{{PMTTYD item|Dizzy Dial|game=NS}} | |||
|In the water-draining room deep in the tree, it's to the back of the stairs in the upper room. | |||
|[[File:The Great Tree (Dizzy Dial).png|250px]] | |||
| | | | ||
|- | |- | ||
|{{PMTTYD item| | |{{PMTTYD item|Emerald Star|game=NS}} | ||
|In the | |Stolen by [[Lord Crump]] and picked up by Mario after [[Magnus von Grapple]] is defeated. | ||
| | |[[File:PMTTYD Emerald Star get.png|250px]] | ||
|[[File:TTYDNS Emerald Star Get.png|250px]] | |||
|- | |||
|{{PMTTYD item|FP Plus|game=NS}} | |||
|In the outside area, it's in the waterfall to the right of the tree. | |||
|[[File:PMTTYD The Great Tree FP Plus.png|250px]] | |||
| | | | ||
|- | |- | ||
|{{PMTTYD item| | |rowspan=2|{{PMTTYD item|Mushroom|game=NS}} (×2) | ||
|In the | |In the room before the Crystal Star room, it's in the left bush. | ||
|[[File:PMTTYD | |[[File:PMTTYD The Great Tree Mushroom.png|250px]] | ||
| | | | ||
|- | |- | ||
|{{PMTTYD item| | |In the storeroom in the highest place, it's given by [[Jabble]] when talked to after Chapter 2. | ||
| | |[[File:The Great Tree (Jabble Mushroom).png|250px]] | ||
|[[File: | | | ||
|-style="background:lightgreen" | |||
|{{PMTTYD item|Mystic Egg|game=NS}} | |||
|Given by [[Petuni]] by playing the [[Stump Petuni]] game with her. Available after Chapter 2. (Repeatable + free of charge) | |||
|[[File:The Great Tree (Mystic Egg).png|250px]] | |||
| | | | ||
|- | |- | ||
|{{PMTTYD item| | |{{PMTTYD item|Power Punch|game=NS}} | ||
|In the second | |In the second room above the entrance area, it's in the southeast bush on the ground. | ||
|[[File:PMTTYD | |[[File:PMTTYD The Great Tree Power Punch.png|250px]] | ||
| | | | ||
|- | |- | ||
|{{PMTTYD item| | |{{PMTTYD item|Puni Orb|game=NS}} | ||
| | |Given by the [[Puni elder]] in Chapter 2. This is the only key item removable from Mario's inventory at will. | ||
|[[File:The Great Tree (Puni Orb).png|250px]] | |||
|[[File: | | | ||
|- | |- | ||
|{{PMTTYD item| | |{{PMTTYD item|link=Red Key (Paper Mario: The Thousand-Year Door)|Red Key|game=NS}} | ||
|In the | |In the storeroom in the highest place, it's dropped by the [[X-Naut]] guard. | ||
|[[File:PMTTYD | |[[File:PMTTYD The Great Tree X-Naut Drops Red Key.png|250px]] | ||
| | | | ||
|- | |- | ||
|{{PMTTYD item| | |{{PMTTYD item|Routing Slip|game=NS}} | ||
| | |Given to and given back by Puni Elder in the entrance area during [[Newsletter...|Mayor Dour's trouble]] | ||
|[[File: | |[[File:The Great Tree (Routing Slip).png|250px]] | ||
| | | | ||
|- | |- | ||
|rowspan= | |rowspan=4|{{PMTTYD item|Shine Sprite|game=NS}} (×4) | ||
|In the | |In the room to the right of the entrance, it's to the right of the bubble pond. | ||
|[[File:PMTTYD | |[[File:PMTTYD Shine Sprite GreatTreeBubbleRoom.png|250px]] | ||
|[[File:PMTTYD | |[[File:PMTTYD Shine Sprite GreatTreeBubbleRoom (Switch).png|250px]] | ||
|- | |||
|In the first room below the entrance, it's above the big stone in the lower-left of the room. Accessible with the airplane panels. | |||
|[[File:PMTTYD Shine Sprite GreatTreePlaneRoom.png|250px]] | |||
|[[File:PMTTYD Shine Sprite GreatTreePlaneRoom (Switch).png|250px]] | |||
|- | |- | ||
|In the | |In the second room below the entrance, to the right of the twisty path, it's on the back pillar in the underground. | ||
|[[File:PMTTYD | |[[File:PMTTYD Shine Sprite GreatTreeSymbolRoom.png|250px]] | ||
|[[File:PMTTYD | |[[File:PMTTYD Shine Sprite GreatTreeSymbolRoom (Switch).png|250px]] | ||
|- | |- | ||
|In the | |In the water-draining room deep in the tree, it's above a lily in the lower-room. | ||
|[[File:PMTTYD | |[[File:PMTTYD Shine Sprite GreatTreePond.png|250px]] | ||
|[[File:PMTTYD | |[[File:PMTTYD Shine Sprite GreatTreePond (Switch).png|250px]] | ||
|- | |- | ||
|{{PMTTYD item| | |{{PMTTYD item|Shrink Stomp|game=NS}} | ||
|In the | |In the water-draining room deep in the tree, it's inside a chest box in front of the stairs in the upper room. | ||
|[[File: | |[[File:The Great Tree Treasure Chest 4.png|250px]] | ||
| | |[[File:The Great Tree Treasure Chest 4 (Switch).png|250px]] | ||
|- | |- | ||
|{{PMTTYD item| | |rowspan=6|{{PMTTYD item|Star Piece|game=NS}} (×6) | ||
|In the area | |In the first room above the entrance area, it's under a panel near the pipe to the up. | ||
|[[File: | |[[File:PMTTYD Star Piece GreatTreeBubbleRoomPanel.png|250px]] | ||
|[[File: | |[[File:PMTTYD Star Piece GreatTreeBubbleRoomPanel (Switch).png|250px]] | ||
|- | |- | ||
| | |In the third room above the entrance area, it's under a panel in the blue cell. | ||
|[[File:PMTTYD Star Piece GreatTreeBlueCellPanel.png|250px]] | |||
|[[File:PMTTYD Star Piece | |[[File:PMTTYD Star Piece GreatTreeBlueCellPanel (Switch).png|250px]] | ||
|[[File:PMTTYD Star Piece | |||
|- | |- | ||
|{{PMTTYD item|Super | |In the second room below the entrance, it's in the northwest bush below the twisty path. | ||
|In the chest | |[[File:PMTTYD Star Piece GreatTreeMiddleRoomGrass.png|250px]] | ||
|[[File: | |[[File:PMTTYD Star Piece GreatTreeMiddleRoomGrass (Switch).png|250px]] | ||
|[[File: | |- | ||
|In the second room below the entrance, to the left of the twisty path, it's behind the entrance pipe of the lower area. | |||
|[[File:PMTTYD Star Piece GreatTreeDownPipe.png|250px]] | |||
|[[File:PMTTYD Star Piece GreatTreeDownPipe (Switch).png|250px]] | |||
|- | |||
|In the second room below the entrance, to the left of the twisty path, it's behind the pipe in the area below the trap. | |||
|[[File:PMTTYD Star Piece GreatTreePillarRoomPipe.png|250px]] | |||
|[[File:PMTTYD Star Piece GreatTreePillarRoomPipe (Switch).png|250px]] | |||
|- | |||
|In the shortcut room from the tree bottom to the twisty path area, it's in the southwest bush. | |||
|[[File:PMTTYD Star Piece GreatTreeLowRoomGrass.png|250px]] | |||
|[[File:PMTTYD Star Piece GreatTreeLowRoomGrass (Switch).png|250px]] | |||
|- | |||
|{{PMTTYD item|Super Boots|game=NS}} | |||
|In the second room below the entrance, to the right of the twisty path, it's in a chest in a north cave. | |||
|[[File:PMTTYD The Great Tree Super Boots Room.png|250px]] | |||
|[[File:The Great Tree Treasure Chest 3 (Switch).png|250px]] | |||
|- | |||
|{{PMTTYD item|Thunder Rage|game=NS}} | |||
|In the bubble room to the right of the entrance, it's in the rightmost bush on the ground. | |||
|[[File:The Great Tree (Thunder Rage).png|250px]] | |||
| | |||
|- | |||
|{{PMTTYD item|Ultra Mushroom|game=NS}} | |||
|In the storeroom in the highest place, it's inside the left chest. (The right chest is opened by Ms. Mowz.) | |||
|[[File:The Great Tree Treasure Chest 1.png|250px]] | |||
|[[File:The Great Tree Treasure Chest 1 (Switch).png|250px]] | |||
|} | |} | ||
=The | ===Hidden ? Block=== | ||
{{main|List of hidden blocks in Paper Mario: The Thousand-Year Door}} | |||
{|class=wikitable style="text-align:center" | {|class=wikitable style="text-align:center" | ||
!Item | !Item | ||
!Location | !Description | ||
!Location Image | !Block un/revealed ([[File:Nintendo GameCube symbol.svg|15px|link=Nintendo GameCube]]) | ||
!Block un/revealed ([[File:Nintendo Switch Logo.svg|15px|link=Nintendo Switch]]) | |||
|- | |||
|{{PMTTYD item|Coin|game=NS}} | |||
|In the area with the narrow passageways with [[Pider]]s, is a red ? Block. Mario must use [[Koops]] to hit the hidden ? Block directly underneath the block. | |||
|[[File:PMTTYDHiddenBlocks3.png|250px]][[File:PMTTYDHiddenBlocks3R.png|250px]] | |||
|[[File:PMTTYDHiddenBlocks3 (Switch).png|250px]][[File:PMTTYDHiddenBlocks3R (Switch).png|250px]] | |||
|} | |||
=Glitzville= | |||
Additional items are on sale at the [[souvenir shop (Paper Mario: The Thousand-Year Door)|souvenir shop]], which is located in the western part of Glitzville. | |||
{|class=wikitable style="text-align:center" | |||
!Item | |||
!Location | |||
!Location Image | |||
!Location Image (Remake) | !Location Image (Remake) | ||
|--style="background:lightgreen" | |||
|{{PMTTYD item|link=Hot Dog (item)|Hot Dog|game=NS}} | |||
|Purchasable from the [[Hot Dog Stand]] from [[Mr. Hoggle]] for 10 [[coin]]s each. | |||
|[[File:Glitzville (Hotdogs).png|250px]] | |||
| | |||
|--style="background:lightgreen" | |||
|{{PMTTYD item|Hot Sauce|game=NS}} | |||
|Given and purchasable from the [[businessman]] after finishing [[Security code...|his trouble]]. | |||
|[[File:Glitzville (Hot Sauce).png|250px]] | |||
| | |||
|- | |- | ||
|{{PMTTYD item| | |{{PMTTYD item|Inn Coupon|game=NS}} | ||
| | |Behind the red poster to the front of the juice bar. | ||
|[[File: | |[[File:Glitzville (Inn Coupon).png|250px]] | ||
| | | | ||
|- | |- | ||
|{{PMTTYD item|Power Plus P|game=NS}} | |||
|In the | |In the chest box on the roof of the juice bar. | ||
| | |[[File:Glitzville Treasure Chest.png|250px]] | ||
| | |[[File:Glitzville Treasure Chest (Switch).png|250px]] | ||
|- | |- | ||
|In the | |{{PMTTYD item|Shine Sprite|game=NS}} | ||
| | |In the right of the area near the Glitz Pit. There is a hidden block below to reach it, or it can be reached later with a Spring Jump. | ||
| | |[[File:PMTTYD Shine Sprite Glitzville.png|250px]] | ||
|[[File:PMTTYD Shine Sprite Glitzville (Switch).png|250px]] | |||
|- | |- | ||
| | |rowspan=5|{{PMTTYD item|link=Star Piece (Paper Mario series)|Star Piece|game=NS}} (×5) | ||
| | |Behind the telephone booth in the southwest. | ||
| | |[[File:PMTTYD Star Piece GlitzvillePhoneBox.png|250px]] | ||
|[[File:PMTTYD Star Piece GlitzvillePhoneBox (Switch).png|250px]] | |||
|- | |- | ||
|In the | |In the far-left corner inside the juicy shop. | ||
| | |[[File:PMTTYD Star Piece GlitzvilleJuiceShopBehind.png|250px]] | ||
| | |[[File:PMTTYD Star Piece GlitzvilleJuiceShopBehind (Switch).png|250px]] | ||
|- | |- | ||
| | |Behind the east plants in front of the entrance to Glitz Pit. | ||
|[[File:PMTTYD Star Piece GlitzvillePlant.png|250px]] | |||
|[[File:PMTTYD Star Piece GlitzvillePlant (Switch).png|250px]] | |||
|- | |- | ||
| | |Under a panel in the middle-south. | ||
|[[File:PMTTYD Star Piece GlitzvillePanel.png|250px]] | |||
|[[File: | |[[File:PMTTYD Star Piece GlitzvillePanel (Switch).png|250px]] | ||
|[[File: | |||
|- | |- | ||
| | |Under the Rawk Hawk poster on top of the juice shop. Requires Tube Mario or Koops. | ||
|[[File:PMTTYD Star Piece GlitzvilleJuiceShopRoof.png|250px]] | |||
| | |[[File:PMTTYD Star Piece GlitzvilleJuiceShopRoof (Switch).png|250px]] | ||
| | |||
|- | |- | ||
|{{PMTTYD item| | |{{PMTTYD item|link=Storage Key|Storage Key yellow|text=Storage Key|game=NS}} | ||
| | |Behind the telephone booth during one of [[Jolene|X]]'s missions. | ||
|[[File:Glitzville (Storage Key).png|250px]] | |||
|[[File: | |||
| | | | ||
|- | |- | ||
|{{PMTTYD item|Super Hammer|game=NS}} | |||
| | |Given by [[Podler]] in the juice shop during Chapter 3. | ||
|[[File: | |[[File:Glitzville (Super Hammer).png|250px]] | ||
| | | | ||
|- | |} | ||
| | ===Hidden ? Block=== | ||
{{main|List of hidden blocks in Paper Mario: The Thousand-Year Door}} | |||
{|class=wikitable style="text-align:center" | |||
!Item | |||
!Description | |||
!Block un/revealed ([[File:Nintendo GameCube symbol.svg|15px|link=Nintendo GameCube]]) | |||
!Block un/revealed ([[File:Nintendo Switch Logo.svg|15px|link=Nintendo Switch]]) | |||
|- | |||
|{{PMTTYD item|Coin|game=NS}} | |||
|Outside, near the front-right pillar of the [[Glitz Pit]]'s entrance is a Shine Sprite. There's a hidden ? Block underneath it that Mario can reveal by hitting it with his Hammer. | |||
|[[File:PMTTYDHiddenBlocks4.png|250px]][[File:PMTTYDHiddenBlocks4R.png|250px]] | |||
|[[File:PMTTYDHiddenBlocks4 (Switch).png|250px]][[File:PMTTYDHiddenBlocks4R (Switch).png|250px]] | |||
|} | |||
{{br}} | |||
=Glitz Pit= | |||
{|class=wikitable style="text-align:center" | |||
!Item | |||
!Location | |||
!Location Image | |||
!Location Image (Remake) | |||
|- | |||
|{{PMTTYD item|Battle Trunks|game=NS}} (×20) | |||
|All in the storeroom during [[Help wanted!|Jolene's trouble]]. | |||
|[[File:HelpWanted PMTYYD.png|250px]] | |||
| | | | ||
|- | |||
|[[File:Champs Belt PMTTYDNS icon.png|25x25px]] [[Champ's Belt]] | |||
|Won after defeating [[Rawk Hawk]]. | |||
|[[File:Glitz Pit (Champ's Belt).png|250px]][[File:Glitz Pit (Champ's Belt Rematch).png|250px]] | |||
| | |||
|- | |||
|{{PMTTYD item|link=Charge P|Charge P O|text=Charge P|game=NS}} | |||
|In the first-floor storeroom, it can be found among the boxes in the northeast corner with [[Flurrie]]'s help. | |||
|[[File:Glitz Pit (Charge P).png|250px]] | |||
| | | | ||
|-style="background:lightgreen" | |-style="background:lightgreen" | ||
|{{PMTTYD item| | |rowspan=4|{{PMTTYD item|Coin|text=Coins|game=NS}} | ||
|Given by [[ | |Given by [[Jolene]] after each match. Amount depends on an opponent and outcome. | ||
|[[File:Glitz Pit (Match Coins 1).png|250px]][[File:Glitz Pit (Match Coins 2).png|250px]][[File:Glitz Pit (Match Coins 3).png|250px]] | |||
| | | | ||
|- | |||
|30 given by [[Grubba]] after beating [[The Iron Adonis Twins]] for the first time. | |||
|[[File:Glitz Pit (Going into Major League Coins).png|250px]] | |||
| | | | ||
|- | |- | ||
| | |30 given by Jolene after completing her [[Help wanted!|trouble]]. | ||
| | |[[File:Glitz Pit (Jolyne Trouble Coins).png|250px]] | ||
|[[File: | |||
| | | | ||
|- | |- | ||
| | |In the blue minor-league locker room, three coins are inside different lockers. Missable if the player does not collect them before warping back to the other major league locker. [[File:Nintendo Switch Logo.svg|15px|link=Nintendo Switch]] | ||
| | |N/A | ||
| | | | ||
|- | |||
|{{PMTTYD item|Dizzy Dial|game=NS}} [[File:Nintendo Switch Logo.svg|15px|link=Nintendo Switch]] | |||
|In the minor-league locker room, it is in the topmost locker on the left wall. Missable if the player does not get it before ranking up to the major league the second time. | |||
|N/A | |||
| | | | ||
|- | |- | ||
|{{PMTTYD item|link= | |{{PMTTYD item|link=Dubious Documents|Dubious Paper 2|text=Dubious Documents|game=NS}} | ||
|In the | |In the minor league locker room, it can be found on top of the shelf in the room to the left. | ||
|[[File: | |[[File:Glitz Pit (Dubious Paper).png|250px]] | ||
| | | | ||
|- | |- | ||
|{{PMTTYD item| | |{{PMTTYD item|Gold Star|game=NS}} | ||
|Given to | |Given to Mario after he helps [[Jolene]] defeat [[Macho Grubba]] at the end of Chapter 3. | ||
|[[File:Glitz Pit (Gold Star).png|250px]] | |||
| | | | ||
|- | |||
|{{PMTTYD item|link=Hot Dog (item)|Hot Dog|game=NS}} [[File:Nintendo Switch Logo.svg|15px|link=Nintendo Switch]] | |||
|In the backstage hallway, it is on top of the ladder. | |||
|N/A | |||
| | | | ||
|- | |- | ||
|{{PMTTYD item|HP Plus P|game=NS}} | |||
|In the | |In the second-floor storeroom, it can be found on top of the big box in the left. | ||
|[[File: | |[[File:Glitz Pit (HP Plus P).png|250px]] | ||
| | | | ||
|- | |- | ||
|In the | |{{PMTTYD item|Ice Storm|game=NS}} | ||
|In the major-league room, it can be found in the northwest corner. [[File:Nintendo GameCube symbol.svg|15px|link=Nintendo GameCube]].<br>In the major-league room, inside one of the western lockers. Missable if the player doesn’t get it before defeating Rawk Hawk the second time. [[File:Nintendo Switch Logo.svg|15px|link=Nintendo Switch]] | |||
|[[File: | |[[File:Glitz Pit (Ice Storm).png|250px]] | ||
| | |||
|- | |- | ||
|In the | |{{PMTTYD item|Last Stand|game=NS}} | ||
|[[File: | |In the corridor of the Glitz Pit, it can be found in a blue box near the right entrance. | ||
| | |[[File:Glitz Pit (Last Stand).png|250px]] | ||
| | |||
|- | |- | ||
| | |{{PMTTYD item|link=Life Mushroom (Paper Mario series)|Life Mushroom|game=NS}} [[File:Nintendo Switch Logo.svg|15px|link=Nintendo Switch]] | ||
|[[File: | |In the blue major-league locker room, it is inside the middle locker on the right wall. Missable if the player does not get it before warping back to the other major league locker. | ||
| | |N/A | ||
| | |||
|- | |- | ||
|{{PMTTYD item| | |{{PMTTYD item|Power Punch|game=NS}} [[File:Nintendo Switch Logo.svg|15px|link=Nintendo Switch]] | ||
|In the | |In the major-league locker room, it is inside the bottommost locker on the left wall. Missable if the player does not get it before defeating [[Rawk Hawk]] the second time. | ||
|N/A | |||
| | | | ||
|- | |- | ||
| | |[[File:Prince Mush's Belt PMTTYDNS icon.png|25x25px]] [[Prince Mush's Belt]] [[File:Nintendo Switch Logo.svg|15px|link=Nintendo Switch]] | ||
|Given to the player by [[Prince Mush]] in the corridor after winning the Exhibition Match against him at least once. | |||
|[[File: | |N/A | ||
|[[ | | | ||
|- | |- | ||
|In the | |{{PMTTYD item|Shine Sprite|game=NS}} | ||
|[[File:PMTTYD | |In the second-floor storeroom, it can be found by the north wall between the boxes. | ||
|[[File:PMTTYD | |[[File:PMTTYD Shine Sprite GlitzStoreroom.png|250px]] | ||
|[[File:PMTTYD Shine Sprite GlitzStoreroom (Switch).png|250px]] | |||
|- | |- | ||
|In the | |rowspan=5|{{PMTTYD item|link=Star Piece (Paper Mario series)|Star Piece|game=NS}} (×5) | ||
|[[File:PMTTYD Star Piece | |In the lobby, one is under a panel in the wall corner to the northwest of the entrance. | ||
|[[File:PMTTYD Star Piece | |[[File:PMTTYD Star Piece GlitzPitLobbyPanel.png|250px]] | ||
|[[File:PMTTYD Star Piece GlitzPitLobbyPanel (Switch).png|250px]] | |||
|- | |- | ||
|In the | |In the office, one is in the drawer near the computer. | ||
|[[File:PMTTYD Star Piece | |[[File:PMTTYD Star Piece GlitzPitOfficeDrawer.png|250px]] | ||
|[[File:PMTTYD Star Piece | |[[File:PMTTYD Star Piece GlitzPitOfficeDrawer (Switch).png|250px]] | ||
|- | |- | ||
|In the | |In the office, one is behind the plant in the southwest. | ||
|[[File:PMTTYD Star Piece | |[[File:PMTTYD Star Piece GlitzPitOfficePlant.png|250px]] | ||
|[[File:PMTTYD Star Piece | |[[File:PMTTYD Star Piece GlitzPitOfficePlant (Switch).png|250px]] | ||
|- | |- | ||
|In the | |In the first-floor storage room, one is under a panel on the floor. | ||
|[[File:PMTTYD Star Piece | |[[File:PMTTYD Star Piece GlitzPitStoragePanel.png|250px]] | ||
|[[File:PMTTYD Star Piece | |[[File:PMTTYD Star Piece GlitzPitStoragePanel (Switch).png|250px]] | ||
|- | |- | ||
| | |To the right of the second-floor storage room, one is among the rightmost boxes. | ||
|[[File:PMTTYD Star Piece GlitzPitStorageBox.png|250px]] | |||
|[[File:PMTTYD | |[[File:PMTTYD Star Piece GlitzPitStorageBox (Switch).png|250px]] | ||
|[[File: | |||
|- | |- | ||
|{{PMTTYD item| | |{{PMTTYD item|link=Storage Key|Storage Key blue|text=Storage Key|game=NS}} | ||
|In the | |In the second-floor lobby, it can be found behind the leftmost poster during one of [[Jolene|X]]'s missions. | ||
|[[File:PMTTYD Flurrie Posters.png|250px]] | |||
| | | | ||
|- | |||
|{{PMTTYD item|Wrestling Magazine|game=NS}} | |||
|In the office, it is held by [[Jolene]] and given to [[Mario]] during [[I need my magazine.|Toodles's trouble]]. | |||
|[[File:PMTTYD I need my magazine First Stop.png|250px]] | |||
| | | | ||
|} | |} | ||
= | =Twilight Town= | ||
Some items are on sale in the [[Twilight Shop]] which is located in the east area. | |||
{|class=wikitable style="text-align:center" | {|class=wikitable style="text-align:center" | ||
!Item | !Item | ||
! | !Location | ||
! | !Location Image | ||
! | !Location Image (Remake) | ||
|- | |- | ||
|{{PMTTYD item| | |{{PMTTYD item|Boo's Sheet|game=NS}}<br>{{PMTTYD item|Jammin' Jelly|game=NS}}<br>{{PMTTYD item|Life Mushroom (Paper Mario series)|Life Mushroom|game=NS}} | ||
|In the second scene, in the storage room of the shop. | |||
|[[File:Twilight Town (Storeroom Items).png|250px]] | |||
{| | |||
| | |||
| | |||
| | | | ||
|- | |||
|rowspan=3|{{PMTTYD item|Coin|game=NS}} | |||
|In the first scene, in the rightmost bush. | |||
|[[File:Twilight Town (Coin).png|250px]] | |||
| | | | ||
|- | |- | ||
|30 given by [[Mayor Dour]] for completing his [[Newsletter...|trouble]]. | |||
| | |[[File:Twilight Town (Mayor Dour Coins).png|250px]] | ||
| | | | ||
|- | |||
|200 given by innkeeper after sleeping in the inn 50 times. Missable if given elsewhere. | |||
|[[File:Twilight Town (Inn Reward Coins).png|250px]] | |||
| | | | ||
|- | |- | ||
|{{PMTTYD item| | |{{PMTTYD item|Defend Plus|game=NS}} | ||
| | |In the second scene, in a chest box in the storage room of the shop. | ||
| | |[[File:Twilight Town Treasure Chest.png|250px]] | ||
| | |[[File:Twilight Town Treasure Chest (Switch).png|250px]] | ||
|- | |- | ||
|{{PMTTYD item| | |{{PMTTYD item|Fire Flower|game=NS}} [[File:Nintendo Switch Logo.svg|15px|link=Nintendo Switch]] | ||
|In the first scene, in the lowest leftmost bush. | |||
|N/A | |||
| | | | ||
|- | |- | ||
|{{PMTTYD item| | |{{PMTTYD item|Inn Coupon|game=NS}} | ||
|In the right of the | |In the second scene, behind the notice board in the right of the shop. | ||
|[[File: | |[[File:Twilight Town (Inn Coupon).png|250px]] | ||
| | | | ||
|- | |- | ||
|{{PMTTYD item|Meteor Meal|game=NS}} | |||
| | |In the second scene, given by [[Eve]] for doing [[Tell that person...|her trouble]]. | ||
|[[File: | |[[File:Twilight Town (Meteor Meal).png|250px]] | ||
|[[File: | | | ||
|--style="background:lightgreen" | |||
|{{PMTTYD item|Peachy Peach|game=NS}} | |||
|In the first scene, appearing in the left desk every time [[Mario]] sleeps at the [[inn]]. | |||
|[[File:Twilight Town (Peachy Peach).png|250px]] | |||
| | |||
|- | |- | ||
|In the | |{{PMTTYD item|Routing Slip|game=NS}} | ||
|In the first scene, received from [[Mayor Dour]] while doing [[Newsletter...|his trouble]]. | |||
|[[File: | |[[File:Twilight Town (Routing Slip).png|250px]] | ||
| | |||
|- | |- | ||
| | |{{PMTTYD item|link=Shooting Star (item)|Shooting Star|game=NS}} | ||
|[[File: | |In the second scene, given by Eve if Mario does a favor for her in Chapter 4. | ||
| | |[[File:Twilight Town (Shooting Star).png|250px]] | ||
| | |||
|- | |- | ||
| | |rowspan=3|{{PMTTYD item|link=Star Piece (Paper Mario series)|Star Piece|game=NS}} (×3) | ||
|[[File:PMTTYD Star Piece | |In the first scene, behind the leftmost house. | ||
|[[File:PMTTYD Star Piece | |[[File:PMTTYD Star Piece TwilightTownBehindHouse.png|250px]] | ||
|[[File:PMTTYD Star Piece TwilightTownBehindHouse (Switch).png|250px]] | |||
|- | |- | ||
| | |In the first scene, in the southernmost bush in the southeast area. | ||
|[[File:PMTTYD Star Piece | |[[File:PMTTYD Star Piece TwilightTownGrass.png|250px]] | ||
|[[File:PMTTYD Star Piece | |[[File:PMTTYD Star Piece TwilightTownGrass (Switch).png|250px]] | ||
|- | |- | ||
| | |In the second scene, behind the fence near the southeast tree. | ||
| | |[[File:PMTTYD Star Piece TwilightTownBehindTree.png|250px]] | ||
| | |[[File:PMTTYD Star Piece TwilightTownBehindTree (Switch).png|250px]] | ||
| | |||
|- | |- | ||
|{{PMTTYD item| | |{{PMTTYD item|Superbombomb|game=NS}} | ||
| | |In the first scene, in the leftmost bush after [[Vivian]] dropped it. | ||
| | |[[File:Twilight Town (Superbombomb).png|250px]] | ||
| | | | ||
|} | |} | ||
== | |||
=Twilight Trail= | |||
{|class=wikitable style="text-align:center" | {|class=wikitable style="text-align:center" | ||
!Item | !Item | ||
!Location | |||
!Location Image | |||
!Location | |||
!Location Image | |||
!Location Image (Remake) | !Location Image (Remake) | ||
|- | |- | ||
|{{PMTTYD item| | |{{PMTTYD item|Black Key|game=NS}} | ||
| | |In the first screen to the right of Twilight Town, it is in the wooden shack near the entrance. | ||
|[[File: | |[[File:Twilight Trail (Black Key).png|250px]] | ||
| | | | ||
|- | |- | ||
|[[File: | |rowspan=5|{{PMTTYD item|Coin|game=NS}} | ||
| | |In the wooden shack in the first screen, 10 of them in the Coin Block. | ||
|[[File:Twilight Trail Block 6.png|250px]] | |||
|[[File:Twilight Trail Block 1 (Switch).png|250px]] | |||
|- | |- | ||
|In the second screen, in the middle in ? Block. | |||
|In the | |[[File:PMTTYDHiddenBlocks5.png|250px]] | ||
| | |[[File:PMTTYDHiddenBlocks5 (Switch).png|250px]] | ||
| | |||
|- | |- | ||
| | |In the second screen, southeast of the ? Block in the Coin Block. | ||
| | |N/A | ||
|[[File:Twilight Trail Block 5 (Switch).png|250px]] | |||
|- | |- | ||
| | |In the second screen, near the exit, 10 of them in the Coin Block. | ||
|[[File:Twilight Trail Block 2.png|250px]] | |||
|[[File:Twilight Trail Block 6 (Switch).png|250px]] | |||
|- | |- | ||
| | |In the south of the first forest screen, 10 of them in the Coin Block. | ||
| | |[[File:Twilight Trail Block 3.png|250px]] | ||
| | |[[File:Twilight Trail Block 7 (Switch).png|250px]] | ||
|- | |- | ||
|In the | |{{PMTTYD item|Earth Quake|game=NS}} | ||
| | |In the first forest screen, it is in the yellow ? block in the northeast. | ||
| | |[[File:Twilight Trail Block 4.png|250px]] | ||
|[[File:Twilight Trail Block 8 (Switch).png|250px]] | |||
|- | |- | ||
|{{PMTTYD item| | |{{PMTTYD item|Hammer Throw|game=NS}} | ||
|In the | |In the second forest screen, it is in the red ? block on the path. | ||
| | |[[File:Twilight Trail Block 5.png|250px]] | ||
| | |[[File:Twilight Trail Block 9 (Switch).png|250px]] | ||
|- | |- | ||
|{{PMTTYD item| | |{{PMTTYD item|Mushroom|game=NS}} [[File:Nintendo Switch Logo.svg|15px|link=Nintendo Switch]]<br>{{PMTTYD item|Super Mushroom|game=NS}} [[File:Nintendo Switch Logo.svg|15px|link=Nintendo Switch]] | ||
|In the | |In the first two Brick Blocks in the second area. | ||
| | |N/A | ||
| | |[[File:Twilight Trail Blocks 2-3 (Switch).png|250px]] | ||
|- | |- | ||
|{{PMTTYD item| | |{{PMTTYD item|Shine Sprite|game=NS}} | ||
| | |In the third forest screen, it is behind the last tree before Creepy Steeple. | ||
|[[File:PMTTYD Shine Sprite TwilightTrail.png|250px]] | |||
|[[File:PMTTYD Shine Sprite TwilightTrail (Switch).png|250px]] | |||
|- | |- | ||
|{{PMTTYD item| | |{{PMTTYD item|Shop Key|game=NS}} | ||
|In the | |In the third screen to the right of Twilight Town, it is to the right of the fallen tree. [[Mario]] gets it with [[Koops]] in Chapter 4. | ||
| | |[[File:Twilight Trail (Shop Key).png|250px]] | ||
| | | | ||
|- | |- | ||
|{{PMTTYD item| | |rowspan=2|{{PMTTYD item|Star Piece|game=NS}} | ||
|In the | |In the third screen to the right of Twilight Town, it is behind the fallen tree. | ||
| | |[[File:PMTTYD Star Piece TwilightTrailBehindTree.png|250px]] | ||
| | |[[File:PMTTYD Star Piece TwilightTrailBehindTree (Switch).png|250px]] | ||
|- | |- | ||
| | |In the third screen to the right of Twilight Town, it is behind the pipe that leads to the forest. | ||
| | |[[File:PMTTYD Star Piece TwilightTrailBehindPipe.png|250px]] | ||
|[[File:PMTTYD Star Piece TwilightTrailBehindPipe (Switch).png|250px]] | |||
|} | |||
===Hidden blocks=== | |||
{{main|List of hidden blocks in Paper Mario: The Thousand-Year Door}} | |||
{|class=wikitable style="text-align:center" | |||
!Item | |||
!Description | |||
!Block un/revealed ([[File:Nintendo GameCube symbol.svg|15px|link=Nintendo GameCube]]) | |||
!Block un/revealed ([[File:Nintendo Switch Logo.svg|15px|link=Nintendo Switch]]) | |||
|- | |- | ||
|{{PMTTYD item| | |{{PMTTYD item|Super Mushroom|game=NS}} | ||
|In the | |In the second area from Twilight Town, Mario should find a ? Block, then jump up from it to reveal the hidden ? Block. | ||
| | |[[File:PMTTYDHiddenBlocks5.png|250px]][[File:PMTTYDHiddenBlocks5R.png|250px]] | ||
| | |[[File:PMTTYDHiddenBlocks5 (Switch).png|250px]][[File:PMTTYDHiddenBlocks5R (Switch).png|250px]] | ||
|- | |- | ||
|{{PMTTYD item| | |{{PMTTYD item|Coin|game=NS}} Block | ||
| | |In the dark wooded area with the boulder that must be pushed, Mario should jump left of the first hole to reveal the hidden ? Block (covered by a tree in the foreground). | ||
| | |[[File:PMTTYDHiddenBlocks6.png|250px]][[File:PMTTYDHiddenBlocks6R.png|250px]] | ||
| | |[[File:PMTTYDHiddenBlocks6 (Switch).png|250px]][[File:PMTTYDHiddenBlocks6R (Switch).png|250px]] | ||
|- | |} | ||
|{{PMTTYD item| | {{br}} | ||
| | |||
=Creepy Steeple= | |||
{|class=wikitable style="text-align:center" | |||
!Item | |||
!Location | |||
!Location Image | |||
!Location Image (Remake) | |||
|- | |||
|{{PMTTYD item|Boo's Sheet|game=NS}} [[File:Nintendo Switch Logo.svg|15px|link=Nintendo Switch]] | |||
|Rewarded from the Creepy Steeple Boo after successfully answering all questions of his first quiz. | |||
|N/A | |N/A | ||
| | |||
|- | |||
|{{PMTTYD item|Coin|game=NS}} | |||
|In the passage below the main room, it is dropped by the Boo if his quiz was answered incorrectly. | |||
|[[File:Creepy Steeple (Coin).png|250px]] | |||
| | |||
|- | |||
|{{PMTTYD item|Cookbook|game=NS}}<br>{{PMTTYD item|Ice Smash|game=NS}} | |||
|In the treasure room through a hole on the north wall of the main room, they are inside the treasure chests. | |||
|[[File:Creepy Steeple Treasure Chests 1-2.png|250px]] | |||
|[[File:Creepy Steeple Treasure Chests 1-2 (Switch).png|250px]] | |||
|- | |||
|{{PMTTYD item|Flower Saver|game=NS}} | |||
|In the room just below the main room, it is in a chest in the secret passage to the back. Mario must have Flurrie blow up the wall. | |||
|[[File:Creepy Steeple Treasure Chest 3.png|250px]] | |||
|[[File:Creepy Steeple Treasure Chest 3 (Switch).png|250px]] | |||
|-style="background:lightgreen" | |||
|{{PMTTYD item|Golden Leaf|game=NS}} | |||
|In the passage to the north of the main room, there is a gap in the fence on the north. To the right is the tree with this item, a replenishable resource. | |||
|[[File:Creepy Steeple (Golden Leaf).png|250px]] | |||
| | | | ||
|- | |- | ||
| | |{{PMTTYD item|Ice Storm|game=NS}} [[File:Nintendo Switch Logo.svg|15px|link=Nintendo Switch]] | ||
| | |Rewarded from the Creepy Steeple Boo after successfully answering all questions of his third quiz. | ||
|N/A | |N/A | ||
| | | | ||
|- | |- | ||
|{{PMTTYD item| | |{{PMTTYD item|Lucky Start|game=NS}} | ||
|In the | |In the main room, it is dropped by the [[Big Boo|Atomic Boo]]. | ||
|[[File:Creepy Steeple (Lucky Start).png|250px]] | |||
|[[File: | | | ||
|- | |- | ||
|{{PMTTYD item|Money Money|game=NS}} [[File:Nintendo Switch Logo.svg|15px|link=Nintendo Switch]] | |||
|Rewarded from the Creepy Steeple Boo after successfully answering all questions of his final quiz. | |||
|N/A | |||
| | | | ||
|- | |- | ||
|In the | |{{PMTTYD item|Mr. Softener|game=NS}}<br>{{PMTTYD item|Power Plus|link=Power Plus (badge)|game=NS}}<br>{{PMTTYD item|link=Steeple Key|Steeple Key purple|text=Steeple Key|game=NS}}<br>{{PMTTYD item|link=The Letter "p"|Letter P|text=The Letter "p"|game=NS}} | ||
|[[File:PMTTYD | |In the storeroom with the parrot, they are in the treasure chests. | ||
|[[File: | |[[File:PMTTYD Creepy Steeple Parrot Room.png|250px]][[File:Creepy Steeple Treasure Chests 5-8.png|250px]] | ||
|[[File:Creepy Steeple Treasure Chests 5-8 (Switch).png|250px]] | |||
|- | |- | ||
| | |{{PMTTYD item|Peachy Peach|game=NS}} [[File:Nintendo Switch Logo.svg|15px|link=Nintendo Switch]] | ||
|[[File: | |Rewarded from the Creepy Steeple Boo after successfully answering all questions of his second quiz. | ||
| | |N/A | ||
| | |||
|- | |- | ||
|In the | |{{PMTTYD item|Ruby Star|game=NS}} | ||
|[[File: | |In the balcony, dropped by [[Doopliss]] after he is defeated at the end of Chapter 4. | ||
| | |[[File:Creepy Steeple (Ruby Star).png|250px]] | ||
| | |||
|- | |- | ||
| | |rowspan=3|{{PMTTYD item|Shine Sprite|game=NS}} | ||
|[[File:PMTTYD | |In the treasure room through a hole on the north wall of the main room, it is in the right. | ||
|[[File:PMTTYD | |[[File:PMTTYD Shine Sprite CreepySteepleWellRoom.png|250px]] | ||
|[[File:PMTTYD Shine Sprite CreepySteepleWellRoom (Switch).png|250px]] | |||
|- | |- | ||
| | |Down the well through the pipe outside the steeple, it is to the southwest of the trampoline. | ||
|[[File:PMTTYD Shine Sprite CreepySteepleTreasureRoom.png|250px]] | |||
|[[File:PMTTYD | |[[File:PMTTYD Shine Sprite CreepySteepleTreasureRoom (Switch).png|250px]] | ||
|- | |- | ||
| | |Halfway through the pipe outside the steeple, it is next to the save block. | ||
|[[File:PMTTYD Shine Sprite CreepySteepleWellPassage.png|250px]] | |||
|[[File:PMTTYD | |[[File:PMTTYD Shine Sprite CreepySteepleWellPassage (Switch).png|250px]] | ||
| | |||
|- | |- | ||
|{{PMTTYD item| | |{{PMTTYD item|Shooting Star (item)|Shooting Star|game=NS}} [[File:Nintendo Switch Logo.svg|15px|link=Nintendo Switch]] | ||
| | |Rewarded from the Creepy Steeple Boo after successfully answering all questions of his fourth quiz. | ||
| | |N/A | ||
| | | | ||
|- | |- | ||
|rowspan= | |rowspan=5|{{PMTTYD item|Star Piece|game=NS}} | ||
| | |Outside Creepy Steeple, it is to the left of the main gate, by the back side. | ||
| | |[[File:PMTTYD Star Piece CreepySteepleOutside.png|250px]] | ||
| | |[[File:PMTTYD Star Piece CreepySteepleOutside (Switch).png|250px]] | ||
|- | |- | ||
| | |In the treasure room through a hole on the north wall of the main room, it is behind the mats. | ||
|[[File:PMTTYD Star Piece CreepySteepleSecretRoom.png|250px]] | |||
|[[File:PMTTYD Star Piece CreepySteepleSecretRoomSwitch.jpg|250px]] | |||
|- | |- | ||
|In the room to the right of the main room, it is under a panel to the right of the stairs in the middle. | |||
|In the | |[[File:PMTTYD Star Piece CreepySteepleStairPanel.png|250px]] | ||
|[[File: | |[[File:PMTTYD Star Piece CreepySteepleStairPanel (Switch).png|250px]] | ||
|[[File: | |||
|- | |- | ||
| | |In the passage below the main room, it is behind the right windows in the north side. Accessible from the pipe/well outside the steeple. | ||
| | |[[File:PMTTYD Star Piece CreepySteepleBasement.png|250px]] | ||
|[[File:PMTTYD Star Piece CreepySteepleBasement (Switch).png|250px]] | |||
| | |||
|- | |- | ||
|In the storeroom with the parrot, it is under a panel in the southeast. | |||
|In the | |[[File:PMTTYD Star Piece CreepySteepleParrotPanel.png|250px]] | ||
| | |[[File:PMTTYD Star Piece CreepySteepleParrotPanel (Switch).png|250px]] | ||
| | |||
|- | |- | ||
|{{PMTTYD item| | |{{PMTTYD item|link=Steeple Key|Steeple Key gray|text=Steeple Key|game=NS}} | ||
|In the | |In the main room, it is in the left of the south hallway in the high place. | ||
|[[File:Creepy Steeple (Steeple Key).png|250px]] | |||
|[[File:Remake Gray Steeple Key .jpg|250px]] | |||
|- | |- | ||
|{{PMTTYD item| | |{{PMTTYD item|Tornado Jump|link=Tornado Jump (badge)|game=NS}} | ||
| | |Down the well through the pipe outside the steeple, it is in the red question block near the Buzzy Beetles. | ||
|[[File:Creepy Steeple Block.png|250px]] | |||
|[[File:Creepy Steeple Block (Switch).png|250px]] | |||
|- | |- | ||
|{{PMTTYD item| | |rowspan=2|{{PMTTYD item|Ultra Mushroom|game=NS}} | ||
|In the | |In the passage below the main room, it is dropped by the Boo if his quiz was answered correctly in Chapter 4 and lost forever if answered incorrectly. | ||
|[[File:Creepy Steeple (Ultra Shroom).png|250px]] | |||
| | | | ||
|- | |- | ||
| | |Rewarded from the Creepy Steeple Boo after successfully answering all questions of his fifth quiz. [[File:Nintendo Switch Logo.svg|15px|link=Nintendo Switch]] | ||
| | |N/A | ||
| | | | ||
| | |} | ||
===Hidden ? Block=== | |||
| | {{main|List of hidden blocks in Paper Mario: The Thousand-Year Door}} | ||
{|class=wikitable style="text-align:center" | |||
!Item | |||
!Description | |||
!Block un/revealed ([[File:Nintendo GameCube symbol.svg|15px|link=Nintendo GameCube]]) | |||
!Block un/revealed ([[File:Nintendo Switch Logo.svg|15px|link=Nintendo Switch]]) | |||
|- | |- | ||
| | |{{PMTTYD item|Coin|game=NS}} | ||
|[[File: | |At the entrance of the Steeple, Mario should jump at the fourth step from the top to reveal the hidden ? Block. The location of this block is mentioned in Wonky's Tales, "Creepy Steeple's Secret".<ref>'''Wonky:''' There's a wacky old place called Creepy Steeple somewhere in this land, and if you jump on the fourth step from the top, ol' Wonky hears you get a good thing. I don't know how useful that is, but hey, it's worth a shot.</ref> | ||
|[[File:PMTTYDHiddenBlocks7.png|250px]][[File:PMTTYDHiddenBlocks7R.png|250px]] | |||
|[[File:PMTTYDHiddenBlocks7 (Switch).png|250px]][[File:PMTTYDHiddenBlocks7R (Switch).png|250px]] | |||
|[[File: | |||
|} | |} | ||
= | =Keelhaul Key= | ||
Additional items are on sale at the [[Keelhaul Galleria]], an item shop located in the shantytown. | |||
{|class=wikitable style="text-align:center" | {|class=wikitable style="text-align:center" | ||
!Item | !Item | ||
| Line 1,433: | Line 1,534: | ||
!Location Image (Remake) | !Location Image (Remake) | ||
|- | |- | ||
|{{PMTTYD item| | |{{PMTTYD item|link=Chuckola Cola (Paper Mario: The Thousand-Year Door)|Chuckola Cola|game=NS}} | ||
|In the | |In the town; given by [[Flavio]] in Chapter 5. | ||
|[[File:Keelhaul Key (Chuckola Cola).png|250px]] | |||
| | | | ||
|-style="background:lightgreen" | |||
|{{PMTTYD item|Coconut|game=NS}} | |||
|In the third scene to the right of the town; on the coconut tree in the background. Replenishable source. | |||
|[[File:Keelhaul Key (2 Coconuts).png|250px]] | |||
| | | | ||
|- | |- | ||
|rowspan=5|{{PMTTYD item|Coin|game=NS}} | |rowspan=5|{{PMTTYD item|Coin|game=NS}} | ||
|In the | |200 given by innkeeper after sleeping in the inn 50 times. Missable if given elsewhere. | ||
|[[File: | |[[File:Keelhaul Key (Inn Reward Coins).png|250px]] | ||
|[[File: | | | ||
|- | |||
|In the first scene to the right of the town, in the last bush. | |||
|[[File:Keelhaul Key (Coin 1).png|250px]] | |||
| | |||
|- | |||
|In the second scene to the right of the town, in the middle of the lower part in the ? Block. | |||
|[[File:PMTTYDHiddenBlocks8.png|250px]] | |||
|[[File:PMTTYDHiddenBlocks8 (Switch).png|250px]] | |||
|- | |- | ||
|In the second | |In the second scene to the right of the town, in the last bush in the upper part. | ||
|[[File: | |[[File:Keelhaul Key (Coin 2).png|250px]] | ||
| | | | ||
|- | |- | ||
|In the second | |In the second scene to the right of the town, to the left of the left cliff of the upper part in the Coin Block.[[File:Nintendo Switch Logo.svg|15px|link=Nintendo Switch]] | ||
|N/A | |N/A | ||
|[[File: | |[[File:Keelhaul Key Block 4 (Switch).png|250px]] | ||
|- | |- | ||
|In the | |{{PMTTYD item|Courage Shell|game=NS}}<br>{{PMTTYD item|Head Rattle|game=NS}} | ||
|[[File: | |In the first scene to the right of the town, in the ? Blocks. | ||
|[[File: | |[[File:Keelhaul Key Blocks 1-2.png|250px]] | ||
|[[File:Keelhaul Key Blocks 1-2 (Switch).png|250px]] | |||
|- | |- | ||
|In the | |{{PMTTYD item|Ice Power|game=NS}} | ||
|[[File: | |In the third scene to the right of the town; below the right end of the bridge. | ||
| | |[[File:Keelhaul Key (Ice Power).png|250px]] | ||
| | |||
|- | |- | ||
|{{PMTTYD item| | |{{PMTTYD item|Inn Coupon|game=NS}} | ||
|In the | |In the third scene to the right of the town; behind a bush near the entrance. | ||
|[[File: | |[[File:Keelhaul Key (Inn Coupon).png|250px]] | ||
|[[File: | | | ||
|-style="background:lightgreen" | |||
|{{PMTTYD item|Keel Mango|game=NS}} | |||
|In the first scene to the right of the town; on the fruit tree in the left after Chapter 5 (Replenishable source). In the Nintendo Switch remake, it is always available. | |||
|[[File:Keelhaul Key (Keel Mango).png|250px]] | |||
| | |||
|- | |- | ||
|{{PMTTYD item| | |{{PMTTYD item|Mini Mr. Mini|game=NS}} | ||
|In the second | |In the second scene to the right of the town; in a bush in the south side. | ||
|[[File: | |[[File:Keelhaul Key (Mini Mr. Mini).png|250px]] | ||
| | | | ||
|- | |- | ||
|{{PMTTYD item| | |rowspan=2|{{PMTTYD item|Shine Sprite|game=NS}} | ||
|In the second scene to the right of the town; above a brick to the left of the left cliff of the high mountain. | |||
|[[File:PMTTYD Shine Sprite KeelhaulKeyCliff.png|250px]] | |||
|[[File: | |[[File:PMTTYD Shine Sprite KeelhaulKeyCliff (Switch).png|250px]] | ||
|- | |- | ||
|In the third scene to the right of the town; covered by the leaves of the tree near the right exit. | |||
|In the third | |[[File:PMTTYD Shine Sprite KeelhaulKeyTree.png|250px]] | ||
|[[File:PMTTYD Shine Sprite | |[[File:PMTTYD Shine Sprite KeelhaulKeyTree (Switch).png|250px]] | ||
|[[File:PMTTYD Shine Sprite | |||
|- | |- | ||
|{{PMTTYD item| | |{{PMTTYD item|Skull Gem|game=NS}} | ||
| | |Given to [[Mario]] temporarily in Chapter 5. | ||
| | |[[File:Keelhaul Key (Skull Gem).png|250px]] | ||
| | | | ||
|- | |- | ||
|{{PMTTYD item|Spite Pouch|game=NS}} | |||
|In the | |In the fourth scene to the right of the town; in the last bush before the water. | ||
|[[File: | |[[File:Keelhaul Key (Spite Pouch).png|250px]] | ||
| | | | ||
|- | |- | ||
|In the | |rowspan=6|{{PMTTYD item|link=Star Piece (Paper Mario series)|Star Piece|game=NS}} (×6) | ||
|[[File:PMTTYD Star Piece | |In the beach scene to the left of the town; under a panel by a rock in the east. | ||
|[[File:PMTTYD Star Piece | |[[File:PMTTYD Star Piece KeelhaulKeyPanel.png|250px]] | ||
|[[File:PMTTYD Star Piece KeelhaulKeyPanel (Switch).png|250px]] | |||
|- | |- | ||
|In the town scene; in the left corner of the water to the south of the town. | |||
|In the | |[[File:PMTTYD Star Piece KeelhaulKeyBeach.png|250px]] | ||
|[[File: | |[[File:PMTTYD Star Piece KeelhaulKeyBeach (Switch).png|250px]] | ||
|[[File: | |||
|- | |- | ||
|{{PMTTYD item| | |In the town scene; behind the rocks near the right exit. | ||
|In the | |[[File:PMTTYD Star Piece KeelhaulKeyBehindRock.png|250px]] | ||
|[[File: | |[[File:PMTTYD Star Piece KeelhaulKeyBehindRock (Switch).png|250px]] | ||
|[[File: | |- | ||
|In the first scene to the right of the town; in the first clump of grass. | |||
|[[File:PMTTYD Star Piece KeelhaulKeyGrass.png|250px]] | |||
|[[File:PMTTYD Star Piece KeelhaulKeyGrass (Switch).png|250px]] | |||
|- | |||
|In the second scene to the right of the town; behind the tree trunk on the ground in the south area. | |||
|[[File:PMTTYD Star Piece KeelhaulKeyBehindRoot.png|250px]] | |||
|[[File:PMTTYD Star Piece KeelhaulKeyBehindRoot (Switch).png|250px]] | |||
|- | |||
|In the fourth scene to the right of the town; behind the rock in the south of where the water starts. | |||
|[[File:PMTTYD Star Piece KeelhaulKeyBehindStone.png|250px]] | |||
|[[File:PMTTYD Star Piece KeelhaulKeyBehindStone (Switch).png|250px]] | |||
|- | |||
|{{PMTTYD item|Thunder Rage|game=NS}} | |||
|In the second scene to the right of the town; in the question block on the high mountain. | |||
|[[File:Keelhaul Key Block 4.png|250px]] | |||
|[[File:Keelhaul Key Block 5 (Switch).png|250px]] | |||
|- | |||
|{{PMTTYD item|link=Wedding Ring|Wedding Ring large|text=Wedding Ring|game=NS}} | |||
|In the fourth scene to the right of the town; near the cave after [[Francesca]] lost it. | |||
|[[File:Keelhaul Key (Wedding Ring).png|250px]] | |||
| | |||
|- | |||
|{{PMTTYD item|Whacka Bump|game=NS}} (×8) | |||
|In the beach scene to the left of the town; dropped by [[Whacka]] when hit. | |||
|[[File:PM2 Mario Collects Bump.png|250px]] | |||
| | |||
|} | |} | ||
= | ===Hidden ? Blocks=== | ||
{{main|List of hidden blocks in Paper Mario: The Thousand-Year Door}} | |||
{|class=wikitable style="text-align:center" | |||
!Item | |||
!Description | |||
!Block un/revealed ([[File:Nintendo GameCube symbol.svg|15px|link=Nintendo GameCube]]) | |||
!Block un/revealed ([[File:Nintendo Switch Logo.svg|15px|link=Nintendo Switch]]) | |||
|- | |||
|{{PMTTYD item|Coin|game=NS}} Block containing 10 coins. | |||
|In the fourth area is a ? Block on the ground. Jumping at the block outline above it will reveal the hidden ? Block. | |||
|[[File:PMTTYDHiddenBlocks8.png|250px]][[File:PMTTYDHiddenBlocks8R.png|250px]] | |||
|[[File:PMTTYDHiddenBlocks8 (Switch).png|250px]][[File:PMTTYDHiddenBlocks8R (Switch).png|250px]] | |||
|- | |||
|{{PMTTYD item|Jammin' Jelly|game=NS}} | |||
|In the same area, is another ? block containing a Thunder Rage at the top of the area. Slightly south of this block is the hidden one. To hit it, Mario must walk to the edge and spin his Hammer to reveal it. Alternatively, he can use [[Bobbery]] to reveal it. Another option is for Mario to get to the center yellow block and using the Spring Jump from the [[Ultra Boots]] to spring straight up to reveal the hidden ? Block. In the Nintendo Switch remake, a fourth option is to use the hammer facing the screen at this spot. The location of this block is mentioned in Wonky's Tales, "Southern Isle Secret".<ref>{{cite|author=Wonky|quote=Far to the south of Rogueport lies an isle, and on this isle there are three yellow blocks in a row. And if you do a Spring Jump on the second of these blocks from the bottom... I hear you'll get something good for your health. But what island could this "southern isle" be referring to, anyway?|title=''Paper Mario: The Thousand-Year Door''}}</ref> | |||
|[[File:PMTTYDHiddenBlocks9.png|250px]][[File:PMTTYDHiddenBlocks9R.png|250px]] | |||
|[[File:PMTTYDHiddenBlocks9 (Switch).png|250px]][[File:PMTTYDHiddenBlocks9R (Switch).png|250px]] | |||
|} | |||
=Pirate's Grotto= | |||
In the Nintendo Switch remake, additional items can be [[List of shops in Paper Mario: The Thousand-Year Door#Pirate's Grotto|purchased]] from a Toad merchant in the area west of the location where the Black Skull sits. | |||
{|class=wikitable style="text-align:center" | {|class=wikitable style="text-align:center" | ||
!Item | !Item | ||
| Line 1,521: | Line 1,678: | ||
!Location Image (Remake) | !Location Image (Remake) | ||
|- | |- | ||
|{{PMTTYD item| | |{{PMTTYD item|Black Key|game=NS}} | ||
|In the leftmost screen in the south area; dropped by an [[Ember]] that appear after talking to the black chest. | |||
|[[File:Pirate's Grotto (Black Key).png|250px]] | |||
| | | | ||
|- | |- | ||
|{{PMTTYD item| | |{{PMTTYD item|Couple's Cake|game=NS}} | ||
|In the | |In the storeroom in the left of the north area; dropped by [[Goom Goom]] when Mario takes on [[Looking for a gal!|his trouble]]. | ||
|[[File:Pirate's Grotto (Couple's Cake).png|250px]] | |||
|[[File: | | | ||
|- | |- | ||
|{{PMTTYD item| | |{{PMTTYD item|Defend Plus P|game=NS}} (International and Switch)<br>{{PMTTYD item|Damage Dodge P|game=NS}} (Japanese GameCube) | ||
|In the room | |In the big stair room in the right of the north area, there is a river to the north of the stairs. To the right of the river source is a chest box with this badge. Accessible using Boat Mode. | ||
|[[File: | |[[File:Pirate's Grotto Treasure Chest.png|250px]] | ||
|[[File: | |[[File:Pirate's Grotto Treasure Chest 2 (Switch).png|250px]] | ||
|- | |- | ||
|{{PMTTYD item| | |{{PMTTYD item|Gate Handle|game=NS}} | ||
|In the | |In the leftmost screen of the entrance area; on top of a ship floating in the south. | ||
|[[File:Pirate's Grotto (Gate Handle).png|250px]] | |||
| | | | ||
|- | |||
|{{PMTTYD item|Grotto Key|game=NS}} | |||
|In the storeroom in the left of the north area; on top of the north ledge. | |||
|[[File:Pirate's Grotto (Grotto Key).png|250px]] | |||
| | | | ||
|- | |- | ||
|{{PMTTYD item| | |{{PMTTYD item|P-Down, D-Up|game=NS}} | ||
|In the leftmost screen of the south area; behind a chest in the sunken ship with the black curse box. | |||
|[[File:Pirate's Grotto (P-Down, D-Up).png|250px]] | |||
| | | | ||
|- | |- | ||
|{{PMTTYD item| | |{{PMTTYD item|Ruin Powder|game=NS}} | ||
|In the | |In the entrance scene; behind the southwest barrel. | ||
|[[File:Pirate's Grotto (Ruin Powder).png|250px]] | |||
| | | | ||
|- | |- | ||
|{{PMTTYD item| | |{{PMTTYD item|Sapphire Star|game=NS}} | ||
|On the [[Black Skull]] (Cortez's ship), it is given to Mario after he defeats Cortez. | |||
|[[File:Pirate's Grotto (Sapphire Star).png|250px]] | |||
| | | | ||
|- | |- | ||
|{{PMTTYD item| | |rowspan=5|{{PMTTYD item|Shine Sprite|game=NS}} (×5) | ||
|In the | |In the spike room in the left of the first areas; on top of the far side of the ship floating in the left. | ||
|[[File:PMTTYD | |[[File:PMTTYD Shine Sprite PiratesGrottoBoat.png|250px]] | ||
|[[File: | |[[File:PMTTYD Shine Sprite PiratesGrottoBoat (Switch).png|250px]] | ||
|- | |- | ||
| | |In the storeroom in the left of the north area; on top of the barrels in the high place on the left. | ||
| | |[[File:PMTTYD Shine Sprite PiratesGrottoBarrel.png|250px]] | ||
|[[File:PMTTYD Shine Sprite PiratesGrottoBarrel (Switch).png|250px]] | |||
| | |||
|- | |- | ||
| | |In the big stair room in the right of the north area; above the last few stairs. Accessible with a hidden block. | ||
| | |[[File:PMTTYD Shine Sprite PiratesGrottoStair.png|250px]] | ||
| | |[[File:PMTTYDPiratesGrottoShineSpriteNS.jpg|250px]] | ||
| | |||
|- | |- | ||
|In the room with boats and barrels in the middle of the south area; high in the northeast corner. Accessible with a hidden block below. | |||
|In the | |[[File:PMTTYD Shine Sprite PiratesGrottoWaveRoomLeft.png|250px]] | ||
|[[File:PMTTYD Shine Sprite | |[[File:PMTTYD Shine Sprite PiratesGrottoWaveRoomLeft (Switch).png|250px]] | ||
|[[File:PMTTYD Shine Sprite | |||
|- | |- | ||
| | |In the room with spikes and waves in the right of the south area; to the right of the north entrance. Requires Koops. | ||
|[[File:PMTTYD Shine Sprite | |[[File:PMTTYD Shine Sprite PiratesGrottoWaveRoomOverwater.png|250px]] | ||
|[[File:PMTTYD Shine Sprite | |[[File:PMTTYD Shine Sprite PiratesGrottoWaveRoomOverwater (Switch).png|250px]] | ||
|- | |- | ||
| | |rowspan=4|{{PMTTYD item|link=Star Piece (Paper Mario series)|Star Piece|game=NS}} (×4) | ||
|[[File:PMTTYD | |In the spike room in the left of the first areas; on a small island in the south. | ||
|[[File:PMTTYD | |[[File:PMTTYD Star Piece PiratesGrotto.png|250px]] | ||
|[[File:PMTTYD Star Piece PiratesGrotto (Switch).png|250px]] | |||
|- | |- | ||
| | |In the storeroom in the left of the north area; inside a barrel in the high place on the left. | ||
|[[File:PMTTYD Star Piece PiratesGrottoBarrel.png|250px]] | |||
|[[File:PMTTYD Star Piece PiratesGrottoBarrel (Switch).png|250px]] | |||
|- | |- | ||
| | |In the waterfall room of the north area; under a panel near the door to the right of the waterfall source. | ||
|[[File:PMTTYD Star Piece PiratesGrottoWaterfallPanel.png|250px]] | |||
|[[File:PMTTYD Star Piece | |[[File:PMTTYD Star Piece PiratesGrottoWaterfallPanel (Switch).png|250px]] | ||
|[[File:PMTTYD Star Piece | |||
|- | |- | ||
|In the | |In the Buzzy Beetle room in the right of the north area; under a panel at the center of the room. | ||
|[[File:PMTTYD Star Piece | |[[File:PMTTYD Star Piece PiratesGrottoDarkRoomPanel.png|250px]] | ||
|[[File:PMTTYD Star Piece | |[[File:PMTTYD Star Piece PiratesGrottoDarkRoomPanel (Switch).png|250px]] | ||
|- | |- | ||
|{{PMTTYD item|Super Mushroom|game=NS}} [[File:Nintendo Switch Logo.svg|15px|link=Nintendo Switch]] | |||
|In a chest inside the derelict ship housing the black chest. | |||
|N/A | |||
|[[File:Pirate's Grotto Treasure Chest 1 (Switch).png|250px]] | |||
|} | |||
|{{PMTTYD item| | |||
| | |||
| | |||
|[[File: | |||
|} | |||
===Hidden ? | ===Hidden ? Blocks=== | ||
{{main|List of hidden blocks in Paper Mario: The Thousand-Year Door}} | {{main|List of hidden blocks in Paper Mario: The Thousand-Year Door}} | ||
{|class=wikitable style="text-align:center" | {|class=wikitable style="text-align:center" | ||
| Line 1,639: | Line 1,771: | ||
|- | |- | ||
|{{PMTTYD item|Coin|game=NS}} | |{{PMTTYD item|Coin|game=NS}} | ||
| | |In the area with the second Save Block, at the second step from the top, Mario must use [[Koops]] to hit the hidden ? Block underneath the Shine Sprite. | ||
|[[File: | |[[File:PMTTYDHiddenBlocks10.png|250px]][[File:PMTTYDHiddenBlocks10R.png|250px]] | ||
|[[File: | |[[File:PMTTYDHiddenBlocksPGS.jpg|250px]][[File:PMTTYDPiratesGrottoShineSpriteNS.jpg|250px]] | ||
|- | |||
|{{PMTTYD item|Coin|game=NS}} Block | |||
|In the area just before the corridor with [[Bill Blaster]]s, there's a Shine Sprite on the right side. There's a hidden ? Block underneath it that Mario can reveal by hitting it with his Hammer. | |||
|[[File:PMTTYDHiddenBlocks11.png|250px]][[File:PMTTYDHiddenBlocks11R.png|250px]] | |||
|[[File:PMTTYDHiddenBlocks11 (Switch).png|250px]][[File:PMTTYDHiddenBlocks11R (Switch).png|250px]] | |||
|} | |||
;Nintendo Switch version only | |||
{|class=wikitable style="text-align:center" | |||
!Item | |||
!Description | |||
!Image | |||
!Image (block revealed) | |||
|- | |||
|{{PMTTYD item|Coin|game=NS}} | |||
|In the area with the second Save Block, at the second step from the top, Mario must use hammer to hit the two hidden blocks that lead to the Shine Sprite, which can then be obtained by simply jumping. | |||
|[[File:PMTTYDHiddenBlocksPGS.jpg|250px]] | |||
|[[File:PMTTYDPiratesGrottoShineSpriteNS.jpg|250px]] | |||
|- | |||
|{{PMTTYD item|Super Mushroom|game=NS}} | |||
|In the second lower stone platform near the [[Black Skull]] on the ground. This hidden block [[Missable content|disappears]] after completing Chapter 5 due to the Black Skull breaking the bridge leading it. | |||
|[[File:PMTTYDHiddenBlockPiratesGrottoSM.jpg|250px]] | |||
|[[File:PMTTYDHiddenBlockPiratesGrottoSMR.jpg|250px]] | |||
|} | |} | ||
= | =Excess Express= | ||
Additional items are on sale at the [[ | Additional items are on sale at the [[Sales Stall]] item shop in the dining car. | ||
{|class=wikitable style="text-align:center" | {|class=wikitable style="text-align:center" | ||
| Line 1,653: | Line 1,808: | ||
!Location Image (Remake) | !Location Image (Remake) | ||
|- | |- | ||
|{{PMTTYD item| | |{{PMTTYD item|Autograph|game=NS}} | ||
| | |Given by the [[Excess Express engineer|engineer]] while doing [[Bub]]'s favor. | ||
|[[File:Excess Express (Autograph).png|250px]] | |||
| | | | ||
|- | |||
|{{PMTTYD item|Blanket|game=NS}} | |||
|Given by [[Ghost T.]] after returning the [[Ragged Diary]] to him. | |||
|[[File:Excess Express (Blanket).png|250px]] | |||
| | | | ||
|- | |- | ||
|{{PMTTYD item| | |{{PMTTYD item|Briefcase|game=NS}} | ||
| | |Given by [[Doopliss]] as [[Zip Toad]] after he is caught. [[Mario]] later returns it to the [[businessman]]. | ||
| | |[[File:Excess Express (Briefcase).png|250px]] | ||
| | | | ||
|- | |- | ||
|rowspan=2|{{PMTTYD item|Coin|game=NS}} | |rowspan=2|{{PMTTYD item|Coin|game=NS}} | ||
| | |30 given by [[Toodles]] after giving her back her [[Gold Ring (item)|Gold Ring]]. | ||
|[[File:Excess Express (Toodles Coins).png|250px]] | |||
|[[File: | | | ||
|- | |- | ||
| | |40 given by [[Chef Shimi]] after completing his [[Get these ingredients!|trouble]]. | ||
|[[File:Excess Express (Chef Shimi Coins).png|250px]] | |||
|[[File: | | | ||
|- | |- | ||
|{{PMTTYD item| | |{{PMTTYD item|Dried Mushroom|game=NS}} | ||
| | |Left by someone inside a drawer in cabin 005. | ||
|[[File: | |[[File:Excess Express (Dried Shroom).png|250px]] | ||
| | | | ||
|- | |- | ||
|{{PMTTYD item| | |{{PMTTYD item|Galley Pot|game=NS}} | ||
| | |Found in [[Heff T.]]'s drawer after following the trail of stew to cabin 003. | ||
|[[File:Excess Express (Galley Pot).png|250px]] | |||
| | | | ||
|- | |||
|{{PMTTYD item|link=Gold Ring (item)|Gold Ring|game=NS}} | |||
|Given by [[Doopliss]] as [[Zip Toad]] after he is caught. | |||
|[[File:Excess Express (Gold Ring).png|250px]] | |||
| | | | ||
|- | |- | ||
|{{PMTTYD item| | |{{PMTTYD item|Mushroom|game=NS}} [[File:Nintendo GameCube symbol.svg|15px|link=Nintendo GameCube]] | ||
| | |Given by the [[Excess Express conductor|conductor]] after returning the [[blanket]] to him. | ||
| | |[[File:Excess Express (Mushroom).png|250px]] | ||
| | |N/A | ||
|- | |- | ||
|{{PMTTYD item| | |{{PMTTYD item|Ragged Diary|game=NS}} | ||
| | |Found behind some crates in the baggage room. Accessible using Paper Mode. | ||
| | |[[File:Excess Express (Ragged Diary).png|250px]] | ||
| | |[[File:Excess Express Treasure Chest.png|250px]] | ||
|- | |- | ||
|{{PMTTYD item| | |{{PMTTYD item|Shell Earrings|game=NS}} | ||
| | |Given by [[Doopliss]] as [[Zip Toad]] after he is caught. | ||
| | |[[File:Excess Express (Shell Earrings).png|250px]] | ||
| | | | ||
|- | |- | ||
|rowspan=2|{{PMTTYD item|Shine Sprite|game=NS}} | |rowspan=2|{{PMTTYD item|Shine Sprite|game=NS}} (×2) | ||
| | |Found in cabin 005 | ||
|[[File:PMTTYD Shine Sprite | |[[File:PMTTYD Shine Sprite ExcessExpressCabin5.png|250px]] | ||
|[[File:PMTTYD Shine Sprite | |[[File:PMTTYD Shine Sprite ExcessExpressCabin5 (Switch).png|250px]] | ||
|- | |- | ||
| | |Given by [[Bub]] after giving the [[autograph]] from [[Excess Express engineer|the engineer]] to him. | ||
|[[File:PMTTYD Shine Sprite | |[[File:PMTTYD Shine Sprite ExcessExpressBub.png|250px]] | ||
|[[File:PMTTYD Shine Sprite | |[[File:PMTTYD Shine Sprite ExcessExpressBub (Switch).png|250px]] | ||
|- | |- | ||
|{{PMTTYD item| | |rowspan=5|{{PMTTYD item|link=Star Piece (Paper Mario series)|Star Piece|game=NS}} (×5) | ||
| | |Found under a panel in front of the gauge in the engineer's room.<ref name="Engine Star Piece" group=note>Only accessible while traveling to Poshley Heights.</ref> | ||
| | |[[File:PMTTYD Star Piece ExcessExpressConductorPanel.png|250px]] | ||
| | |[[File:PMTTYD Star Piece ExcessExpressConductorPanel (Switch).png|250px]] | ||
|- | |- | ||
| | |Found under a panel in the southwest corner in cabin 004. | ||
|[[File:PMTTYD Star Piece ExcessExpressCabin4.png|250px]] | |||
| | |[[File:PMTTYD Star Piece ExcessExpressCabin4Switch.png|250px]] | ||
| | |||
|- | |- | ||
| | |Given by [[Chef Shimi]] after returning the [[Galley Pot]]. | ||
|[[File:PMTTYD Star Piece ExcessExpressChefShimi.png|250px]] | |||
|[[File:PMTTYD Star Piece | |[[File:PMTTYD Star Piece ExcessExpressChefShimi (Switch).png|250px]] | ||
|[[File:PMTTYD Star Piece | |||
|- | |- | ||
| | |Given by the [[Excess Express waitress|waitress]] after returning her [[Shell Earrings]]. | ||
|[[File:PMTTYD Star Piece | |[[File:PMTTYD Star Piece ExcessExpressWaitress.png|250px]] | ||
|[[File:PMTTYD Star Piece | |[[File:PMTTYD Star Piece ExcessExpressWaitress (Switch).png|250px]] | ||
|- | |- | ||
| | |Found in a drawer in cabin 008. | ||
|[[File:PMTTYD Star Piece | |[[File:PMTTYD Star Piece ExcessExpressCabin8.png|250px]] | ||
|[[File:PMTTYD Star Piece | |[[File:PMTTYD Star Piece ExcessExpressCabin8 (Switch).png|250px]] | ||
|- | |- | ||
| | |{{PMTTYD item|Super Mushroom|game=NS}} [[File:Nintendo Switch Logo.svg|15px|link=Nintendo Switch]] | ||
|[[File: | |Given by the [[Excess Express conductor|conductor]] after returning the [[blanket]] to him. | ||
|[[ | |N/A | ||
| | |||
|- | |- | ||
|{{PMTTYD item|Threatening Note|game=NS}} [[File:Nintendo Switch Logo.svg|15px|link=Nintendo Switch]] | |||
|Automatically obtained in cabin 005. Is treated as an Important Item in the Nintendo Switch remake. | |||
|N/A | |||
|{{PMTTYD item| | |||
| | |||
| | |||
| | |||
| | | | ||
|- | |- | ||
|{{PMTTYD item| | |{{PMTTYD item|Vital Paper|game=NS}} | ||
| | |Found in cabin 001 after the [[businessman]]'s things are stolen. | ||
|[[File: | |[[File:Excess Express (Vital Paper).png|250px]] | ||
| | | | ||
|} | |} | ||
=== | ==Notes== | ||
<references group=note /> | |||
=Riverside Station= | |||
{|class=wikitable style="text-align:center" | {|class=wikitable style="text-align:center" | ||
!Item | !Item | ||
!Location | |||
!Location | |||
!Location Image | !Location Image | ||
!Location Image (Remake) | !Location Image (Remake) | ||
|- | |- | ||
|{{PMTTYD item| | |{{PMTTYD item|Close Call P|game=NS}} | ||
|In the | |In the first room, it is on the ledge on the left side of the room and is accessed by [[Spring Jump]]ing underneath the ledge. | ||
|[[File:Riverside Station (Close Call P).png|250px]] | |||
| | | | ||
|- | |||
|{{PMTTYD item|Coin|game=NS}} [[File:Nintendo Switch Logo.svg|15px|link=Nintendo Switch]] | |||
|On the Deck, in the middle of the upper part. | |||
|N/A | |||
|[[File:Riverside Station Block 2.png|250px]] | |||
|- | |||
|{{PMTTYD item|Dried Mushroom|game=NS}} | |||
|In the Sublevel, it is in the garbage can below the maze, near the door to the office. [[File:Nintendo GameCube symbol.svg|15px|link=Nintendo GameCube]]<br>In the Sublevel, inside a garbage can on the lowest ground near the jump pad. [[File:Nintendo Switch Logo.svg|15px|link=Nintendo Switch]] | |||
|[[File:Riverside Station (Dried Shroom).png|250px]] | |||
| | | | ||
|- | |- | ||
|{{PMTTYD item| | |{{PMTTYD item|link=Station Key|Entrance Key|game=NS}} | ||
| | |Outside Riverside Station, it is given by the Toad worker near the drawbridge. | ||
|[[File:Riverside Station (Station Key 1).png|250px]] | |||
| | | | ||
|- | |||
|{{PMTTYD item|link=Elevator Key (Riverside Station)|Elevator Key|game=NS}} | |||
|In the Office, it is on top of a ledge inside some fencing and is accessed by Spring Jumping underneath the ledge. | |||
|[[File:Riverside Station (Elevator Key).png|250px]] | |||
| | | | ||
|- | |- | ||
|{{PMTTYD item| | |{{PMTTYD item|link=HP Plus (badge)|HP Plus|game=NS}} | ||
| | |On the Deck, it is on a ledge in the northwest wall accessed by using [[Tube Mode]] at the base of the highest set of stairs. | ||
|[[File:Riverside Station (HP Plus).png|250px]] | |||
|[[File: | |||
| | | | ||
|- | |- | ||
|{{PMTTYD item| | |rowspan=3|{{PMTTYD item|Ice Storm|game=NS}} (×3) [[File:Nintendo Switch Logo.svg|15px|link=Nintendo Switch]] | ||
| | |Behind a blowable poster in the second room. | ||
| | |N/A | ||
| | | | ||
|- | |- | ||
|In a ? Block above a gear in the Machinery Room. | |||
|In | |N/A | ||
| | |[[File:Riverside Station Block 1.png|250px]] | ||
| | |||
|- | |- | ||
| | |Behind one of the blowable posters in the lower part of the Deck. | ||
|N/A | |||
| | |||
| | | | ||
|- | |- | ||
|{{PMTTYD item| | |{{PMTTYD item|Maple Syrup|game=NS}} [[File:Nintendo Switch Logo.svg|15px|link=Nintendo Switch]] | ||
| | |In a ? Block in the lower part of the Deck. | ||
| | |N/A | ||
|[[File:Riverside Station Block 3.png|250px]] | |||
|- | |||
|{{PMTTYD item|P-Up, D-Down|game=NS}} | |||
|In the Sublevel, it is in a small alcove inside the big maze. | |||
|[[File:Riverside Station (P-Up, D-Down).png|250px]] | |||
| | | | ||
|- | |- | ||
|rowspan= | |rowspan=2|{{PMTTYD item|Shine Sprite|game=NS}} (×2) | ||
| | |Near the wall corner on the right side of the Deck. | ||
|[[File:PMTTYD Shine Sprite | |[[File:PMTTYD Shine Sprite RiversideStationOutside.png|250px]] | ||
|[[File:PMTTYD Shine Sprite | |[[File:PMTTYD Shine Sprite RiversideStationOutside (Switch).png|250px]] | ||
|- | |- | ||
| | |On top of the stairs above the records shelf in the Records Room. | ||
|[[File:PMTTYD Shine Sprite | |[[File:PMTTYD Shine Sprite RiversideStationStair.png|250px]] | ||
|[[File:PMTTYD Shine Sprite | |[[File:PMTTYD Shine Sprite RiversideStationStair (Switch).png|250px]] | ||
|- | |- | ||
| | |{{PMTTYD item|Spite Pouch|game=NS}} [[File:Nintendo Switch Logo.svg|15px|link=Nintendo Switch]] | ||
|[[File: | |Behind one of the blowable posters in the lower part of the Deck. | ||
| | |N/A | ||
| | |||
|- | |- | ||
|In the | |{{PMTTYD item|link=Star Piece (Paper Mario series)|Star Piece|game=NS}} | ||
|[[File:PMTTYD | |In the Machinery Room, it is behind the last gear. | ||
|[[File:PMTTYD | |[[File:PMTTYD Star Piece RiversideStation.png|250px]] | ||
|[[File:PMTTYD Star Piece RiversideStation (Switch).png|250px]] | |||
|- | |- | ||
|In the | |{{PMTTYD item|Station Key|game=NS}} | ||
|[[File: | |In the Machinery Room, it is on the last platform. | ||
| | |[[File:Riverside Station (Station Key 2).png|250px]] | ||
| | |||
|- | |- | ||
|rowspan= | |rowspan=2|{{PMTTYD item|Super Mushroom|game=NS}} (×2) [[File:Nintendo Switch Logo.svg|15px|link=Nintendo Switch]] | ||
| | |Behind one of the blowable posters in the lower part of the Deck. | ||
| | |N/A | ||
| | | | ||
|- | |- | ||
|In the | |In the Sublevel, it is in the larger garbage bin in the area before the door to the office. | ||
| | |N/A | ||
| | | | ||
|- | |- | ||
| | |{{PMTTYD item|Thunder Rage|game=NS}} [[File:Nintendo Switch Logo.svg|15px|link=Nintendo Switch]] | ||
|[[File: | |Behind one of the blowable posters in the lower part of the Deck. | ||
| | |N/A | ||
| | |||
|- | |- | ||
|{{PMTTYD item|Ultra Boots|game=NS}} | |||
|In the Office, it is in a chest in the ceiling and is accessed through the higher door in the records room. | |||
|[[File:Riverside Station Treasure Chest.png|250px]] | |||
|[[File:Riverside Station Treasure Chest (Switch).png|250px]] | |||
|{{PMTTYD item| | |||
|In a chest | |||
| | |||
|[[File: | |||
|} | |} | ||
===Hidden ? | ===Hidden ? Block=== | ||
{{main|List of hidden blocks in Paper Mario: The Thousand-Year Door}} | {{main|List of hidden blocks in Paper Mario: The Thousand-Year Door}} | ||
{|class=wikitable style="text-align:center" | {|class=wikitable style="text-align:center" | ||
| Line 1,877: | Line 2,023: | ||
!Block un/revealed ([[File:Nintendo Switch Logo.svg|15px|link=Nintendo Switch]]) | !Block un/revealed ([[File:Nintendo Switch Logo.svg|15px|link=Nintendo Switch]]) | ||
|- | |- | ||
|{{PMTTYD item| | |{{PMTTYD item|Thunder Rage|game=NS}} | ||
| | |On the Deck, in the area with [[Poison Pokey]]s, is a lone ? Block. Jumping up from it reveals the hidden ? Block. | ||
|[[File:PMTTYDHiddenBlocks12.png|250px]][[File:PMTTYDHiddenBlocks12R.png|250px]] | |||
|[[File:PMTTYDHiddenBlocks12 (Switch).png|250px]][[File:PMTTYDHiddenBlocks12R (Switch).png|250px]] | |||
|[[File: | |||
|[[File: | |||
|} | |} | ||
;Nintendo Switch version | ;Nintendo Switch version-exclusive | ||
{|class=wikitable | {| class="wikitable" | ||
!Item | !Item | ||
!Description | !Description | ||
!Image | !Image | ||
!Image (block revealed) | !Image (block revealed) | ||
|- | |- | ||
|{{PMTTYD item|Super Mushroom|game=NS}} | |{{PMTTYD item|Super Mushroom|game=NS}} | ||
|In the | |In the Records Room, a Hidden Block can be found at the end of the middle ledge on the right. | ||
|[[File: | |[[File:PMTTYDHiddenBlocksRiverside.jpg|250px]] | ||
|[[File: | |[[File:PMTTYDHiddenBlocksRiversideR.jpg|250px]] | ||
|} | |} | ||
= | =Poshley Heights= | ||
{|class=wikitable style="text-align:center" | {|class=wikitable style="text-align:center" | ||
!Item | !Item | ||
| Line 1,915: | Line 2,049: | ||
!Location Image (Remake) | !Location Image (Remake) | ||
|- | |- | ||
|{{PMTTYD item| | |{{PMTTYD item|Choco Cake|game=NS}} | ||
|Given by | |Given by [[Toadia]] after finishing [[I wanna meet Luigi!|her trouble]]. | ||
| | |[[File:Poshley Heights (Choco Cake).png|250px]] | ||
| | | | ||
|- | |- | ||
|{{PMTTYD item| | |rowspan=3|{{PMTTYD item|Coin|game=NS}} | ||
| | |64 given by [[Goldbob]] after finishing his [[Delivery, please!|trouble]]. | ||
| | |[[File:Poshley Heights (Goldbob Coins).png|250px]] | ||
| | | | ||
|- | |- | ||
| | |200 given by innkeeper after sleeping in the inn 50 times. Missable if given elsewhere. | ||
| | |[[File:Poshley Heights (Inn Reward Coins).png|250px]] | ||
| | | | ||
|- | |- | ||
| | |3 given by [[Bub]] after finishing his [[Help me make up.|trouble]]. | ||
| | |[[File:Poshley Heights (Bub Coins).png|250px]] | ||
| | | | ||
|-style="background:lightgreen" | |||
|{{PMTTYD item|Fresh Pasta|game=NS}} | |||
|In the second area, it can be bought for 50 coins from the shop in the left. | |||
|[[File:Poshley Heights (Fresh Pasta).png|250px]] | |||
| | | | ||
|- | |- | ||
| | |[[File:Goldbob's Pass PMTTYDNS icon.png|25x25px]] [[Goldbob's Pass]] | ||
| | |Given by [[Goldbob]] during the General White hunt in Chapter 7. | ||
| | |[[File:Poshley Heights (Goldbob Guide).png|250px]] | ||
| | | | ||
|- | |- | ||
|{{PMTTYD item| | |{{PMTTYD item|Inn Coupon|game=NS}} | ||
| | |In the second area; behind the pasta-selling little shop in the left. | ||
|[[File:Poshley Heights (Inn Coupon).png|250px]] | |||
| | | | ||
|- | |- | ||
|{{PMTTYD item| | |{{PMTTYD item|HP Drain P|game=NS}} | ||
| | |In the first area; in a chest in the back room of Goldbob's house. Accessible using Paper Mode. | ||
|[[File:Poshley Heights Treasure Chest.png|250px]] | |||
|[[File:Poshley Heights Treasure Chest (Switch).png|250px]] | |||
|-style="background:lightgreen" | |||
|{{PMTTYD item|Omelette Meal|game=NS}} | |||
|In the second area, it appears in the desk to the left of the inn counter after sleeping at the [[inn]]. | |||
|[[File:Poshley Heights (Omelette Meal).png|250px]] | |||
| | | | ||
|- | |- | ||
|{{PMTTYD item| | |{{PMTTYD item|link=Package (Paper Mario: The Thousand-Year Door)|Package|game=NS}} | ||
| | |Given by [[Goldbob]] during [[Delivery, please!|his trouble]]. | ||
|[[File:Deliveryplease TTYD.png|250px]] | |||
| | | | ||
|- | |- | ||
|{{PMTTYD item| | |{{PMTTYD item|Platinum Card|game=NS}} | ||
|Given by [[ | |Given by [[Toodles]] after finishing [[I need my magazine.|her trouble]]. | ||
|[[File:Poshley Heights (Platinum Card).png|250px]] | |||
| | | | ||
|- | |||
|{{PMTTYD item|link=Present (Paper Mario: The Thousand-Year Door)|Present|game=NS}} | |||
|Given by [[Bub]] while doing [[Help me make up.|his trouble]]. | |||
|[[File:Poshley Heights (Present).png|250px]] | |||
| | | | ||
|- | |- | ||
|{{PMTTYD item|Shine Sprite|game=NS}} | |||
| | |In the third scene; high to the left of Poshley Sanctum. | ||
|[[File:PMTTYD Shine Sprite | |[[File:PMTTYD Shine Sprite PoshleyHeights.png|250px]] | ||
|[[File:PMTTYD Shine Sprite | |[[File:PMTTYD Shine Sprite PoshleyHeights (Switch).png|250px]] | ||
|- | |- | ||
| | |rowspan=4|{{PMTTYD item|link=Star Piece (Paper Mario series)|Star Piece|game=NS}} (×4) | ||
|[[File:PMTTYD | |In the first scene; under a panel in the red floor at the center. | ||
|[[File:PMTTYD | |[[File:PMTTYD Star Piece PoshleyHeightsPanel.png|250px]] | ||
|[[File:PMTTYD Star Piece PoshleyHeightsPanel (Switch).png|250px]] | |||
|- | |- | ||
| | |In the first scene; behind the chair to the left of Goldbob's house. | ||
|[[File:PMTTYD Star Piece PoshleyHeightsDeckchair.png|250px]] | |||
|[[File:PMTTYD Star Piece | |[[File:PMTTYD Star Piece PoshleyHeightsDeckchair (Switch).png|250px]] | ||
|[[File:PMTTYD Star Piece | |||
|- | |- | ||
| | |In the first scene; inside the hedge to the right of [[Toodles]]'s house. | ||
|[[File:PMTTYD Star Piece | |[[File:PMTTYD Star Piece PoshleyHeightsRoseHedge.png|250px]] | ||
|[[File:PMTTYD Star Piece | |[[File:PMTTYD Star Piece PoshleyHeightsRoseHedge (Switch).png|250px]] | ||
|- | |- | ||
| | |In the second scene; in the corner of the hedge to the northwest of the penguin's house. | ||
|[[File:PMTTYD Star Piece | |[[File:PMTTYD Star Piece PoshleyHeightsHotelHedge.png|250px]] | ||
|[[File:PMTTYD Star Piece | |[[File:PMTTYD Star Piece PoshleyHeightsHotelHedge (Switch).png|250px]] | ||
|} | |||
=Poshley Sanctum= | |||
{|class=wikitable style="text-align:center" | |||
!Item | |||
!Location | |||
!Location Image | |||
!Location Image (Remake) | |||
|- | |- | ||
| | |{{PMTTYD item|Boo's Sheet|game=NS}} [[File:Nintendo Switch Logo.svg|15px|link=Nintendo Switch]] | ||
|[[File: | |In the hidden room, on top of a Brick Block on the highest level on the east side. Can be obtained with Koops or Yoshi. | ||
| | |N/A | ||
| | |||
|- | |- | ||
|{{PMTTYD item|Coin|game=NS}} [[File:Nintendo Switch Logo.svg|15px|link=Nintendo Switch]] | |||
|In the hidden room, on the highest level on the east side. Can be reached by using Yoshi, then performing a Spin Jump. | |||
|{{PMTTYD item| | |||
| | |||
|N/A | |N/A | ||
| | |[[File:Poshley Sanctum Block 3.png|250px]] | ||
|- | |- | ||
|{{PMTTYD item| | |{{PMTTYD item|Garnet Star|game=NS}} | ||
| | |There is a fake Garnet Star in the front room. The real one is in the back room. | ||
| | |[[File:Poshley Sanctum (Garnet Star).png|250px]] | ||
| | | | ||
|- | |- | ||
|{{PMTTYD item| | |{{PMTTYD item|L Emblem|game=NS}} | ||
| | |In the hidden room, on the far side of the highest platform in the left. | ||
|[[File:Poshley Sanctum (L Emblem).png|250px]] | |||
| | | | ||
|- | |- | ||
|{{PMTTYD item| | |{{PMTTYD item|Mystery|game=NS}} [[File:Nintendo Switch Logo.svg|15px|link=Nintendo Switch]] | ||
|In a ? Block in the front room. | |||
| | |||
|N/A | |N/A | ||
|[[File: | |[[File:Poshley Sanctum Block 2.png|250px]] | ||
|- | |- | ||
|{{PMTTYD item| | |{{PMTTYD item|Shine Sprite|game=NS}} | ||
|In the | |In the hidden room, on the far side of the middle platform on the left. | ||
|[[File:PMTTYD Shine Sprite PoshleySanctum.png|250px]] | |||
|[[File:PMTTYD Shine Sprite PoshleySanctum (Switch).png|250px]] | |||
|- | |- | ||
|{{PMTTYD item| | |{{PMTTYD item|Thunder Rage|game=NS}} [[File:Nintendo Switch Logo.svg|15px|link=Nintendo Switch]] | ||
| | |In a ? Block in the front room. | ||
| | |N/A | ||
| | |[[File:Poshley Sanctum Block 1.png|250px]] | ||
| | |} | ||
=Path to Fahr Outpost= | |||
{|class=wikitable style="text-align:center" | |||
!Item | |||
!Location | |||
!Location Image | |||
!Location Image (Remake) | |||
|- | |- | ||
|{{PMTTYD item | |{{PMTTYD item|HP Plus P|game=NS}} | ||
| | |In the third scene of the path; in the red question block on the ground. | ||
| | |[[File:Fahr Outpost Block.png|250px]] | ||
| | |[[File:Path to Fahr Outpost Block.png|250px]] | ||
|- | |- | ||
|{{PMTTYD item|Shine Sprite|game=NS}} | |||
| | |In the second scene on the path; behind the first south-side tree from the left. | ||
|[[File:PMTTYD Shine Sprite FahrOutpostBehindTree.png|250px]] | |||
| | |[[File:PMTTYD Shine Sprite FahrOutpostBehindTree (Switch).png|250px]] | ||
|- | |- | ||
|In a | |rowspan=3|{{PMTTYD item|link=Star Piece (Paper Mario series)|Star Piece|game=NS}} (×3) | ||
| | |In the first scene on the path; under a panel to the left of the entrance pipe. | ||
|[[File: | |[[File:PMTTYD Star Piece FahrOutpostPipePanel.png|250px]] | ||
|[[File:PMTTYD Star Piece FahrOutpostPipePanel (Switch).png|250px]] | |||
|- | |- | ||
| | |In the second scene on the path; among the grass to the left of the south-side tree in the middle. | ||
| | |[[File:PMTTYD Star Piece FahrOutpostGrass.png|250px]] | ||
| | |[[File:PMTTYD Star Piece FahrOutpostGrass (Switch).png|250px]] | ||
|- | |||
|In the third scene on the path; behind the south-side wall just before the village. | |||
|[[File:PMTTYD Star Piece FahrOutpostPathWall.png|250px]] | |||
|[[File:PMTTYD Star Piece FahrOutpostPathWall (Switch).png|250px]] | |||
|} | |||
===Hidden ? Block=== | |||
{{main|List of hidden blocks in Paper Mario: The Thousand-Year Door}} | |||
{|class=wikitable style="text-align:center" | |||
!Item | |||
!Description | |||
!Block un/revealed ([[File:Nintendo GameCube symbol.svg|15px|link=Nintendo GameCube]]) | |||
!Block un/revealed ([[File:Nintendo Switch Logo.svg|15px|link=Nintendo Switch]]) | |||
|- | |- | ||
|{{PMTTYD item| | |{{PMTTYD item|Double Dip P|game=NS}} | ||
|In the first area with the Warp Pipe to Rogueport Underground, Mario should jump directly in front of the rightmost tree to reveal the hidden ? Block. The location of this block is mentioned in Wonky's Tales, "Cold Place's Secret".<ref>{{cite|author=Wonky|quote=There's a pipe down here that leads to a very cold place, ol' Wonky hears, and if you jump in front of the tree to the far right of the area you come out in then you get something nice, supposedly. But you won't catch 'ol Wonky out in a chilly place like that, no sir!}}</ref> | |||
| | |[[File:PMTTYDHiddenBlocks13.png|250px]][[File:PMTTYDHiddenBlocks13R.png|250px]] | ||
|[[File: | |[[File:PMTTYDHiddenBlocks13 (Switch).png|250px]][[File:PMTTYDHiddenBlocks13R (Switch).png|250px]] | ||
|} | |||
=Fahr Outpost= | |||
Other items are on sale at the [[Northwinds Mart]] item shop. | |||
{|class=wikitable style="text-align:center" | |||
!Item | |||
!Location | |||
!Location Image | |||
!Location Image (Remake) | |||
|- | |- | ||
|{{PMTTYD item| | |rowspan=2|{{PMTTYD item|Coin|game=NS}} | ||
| | |20 (30 on Switch) given by [[Gob]] after completing his [[I can't speak!|trouble]]. | ||
|[[File:Fahr Outpost (Gob Coins).png|250px]] | |||
| | | | ||
|- | |||
|200 given by innkeeper after sleeping in the inn 50 times. Missable if given elsewhere. | |||
|[[File:Fahr Outpost (Inn Reward Coins).png|250px]] | |||
| | | | ||
|- | |- | ||
|{{PMTTYD item|Inn Coupon|game=NS}} | |||
| | |In the east area; behind the stairs in front of the inn. | ||
|[[File:Fahr Outpost (Inn Coupon).png|250px]] | |||
|[[File: | |||
| | | | ||
|- | |- | ||
|{{PMTTYD item| | |{{PMTTYD item|Shine Sprite|game=NS}} | ||
|In the | |In the east village scene; on the ground to the right of General White's house. | ||
|[[File:PMTTYD | |[[File:PMTTYD Shine Sprite FahrOutpostBehindVillage.png|250px]] | ||
|[[File:PMTTYD | |[[File:PMTTYD Shine Sprite FahrOutpostBehindVillage (Switch).png|250px]] | ||
|- | |- | ||
|{{PMTTYD item| | |{{PMTTYD item|Snow Bunny|game=NS}} | ||
| | |Given by [[Swob]] for doing [[Erase that graffiti!|his trouble]]. | ||
|[[File:Fahr Outpost (Swob Snow Bunny).png|250px]] | |||
| | | | ||
|-style="background:lightgreen" | |||
|{{PMTTYD item|Space Food|game=NS}} | |||
|In the east area of the village, it appears on the left chair every time Mario sleeps at the inn. | |||
|[[File:Fahr Outpost (Space Food).png|250px]] | |||
| | | | ||
|- | |- | ||
|rowspan= | |rowspan=3|{{PMTTYD item|link=Star Piece (Paper Mario series)|Star Piece|game=NS}} (×3) | ||
| | |In the west village scene; in the wall corner in the southwest. | ||
|[[File:PMTTYD Star Piece FahrOutpostVillageWall.png|250px]] | |||
|[[File:PMTTYD Star Piece FahrOutpostVillageWall (Switch).png|250px]] | |||
|- | |||
|In the east village scene; behind the boxes in [[General White]]'s house. | |||
|[[File:PMTTYD Star Piece FahrOutpostBehindBox.png|250px]] | |||
|[[File:PMTTYD Star Piece FahrOutpostBehindBox (Switch).png|250px]] | |||
|- | |||
|In the east village scene; under a panel to the left of the cannon statue. | |||
|[[File:PMTTYD Star Piece FahrOutpostCannonPanel.png|250px]] | |||
|[[File:PMTTYD Star Piece FahrOutpostCannonPanel (Switch).png|250px]] | |||
|} | |||
=Moon= | |||
{|class=wikitable style="text-align:center" | |||
!Item | |||
!Location | |||
!Location Image | |||
!Location Image (Remake) | |||
|- | |||
|{{PMTTYD item|Courage Shell|game=NS}} | |||
|In the screen to the left of the landing screen, it is in the cracked rock in the south. | |||
|[[File:Moon (Courage Shell Hidden).png|250px]][[File:Moon (Courage Shell).png|250px]] | |||
| | |||
|- | |||
|rowspan=2|{{PMTTYD item|Maple Syrup|game=NS}} [[File:Nintendo Switch Logo.svg|15px|link=Nintendo Switch]] | |||
|In a breakable rock in the second screen right of the landing site, in the west. | |||
|N/A | |N/A | ||
| | | | ||
|- | |- | ||
|In the | |In a breakable rock in the second screen left of the landing site, in the east. | ||
|N/A | |N/A | ||
| | | | ||
|- | |- | ||
|{{PMTTYD item| | |{{PMTTYD item|POW Block|game=NS}} [[File:Nintendo Switch Logo.svg|15px|link=Nintendo Switch]] | ||
| | |In a breakable rock in the screen with the X-Naut Fortress in the background, in the southwest. | ||
|N/A | |N/A | ||
| | | | ||
|- | |- | ||
|{{PMTTYD item| | |{{PMTTYD item|Power Punch|game=NS}} | ||
|In the | |In the screen with the X-Naut Fortress, it is in the cracked rock in the southeast. | ||
|[[File: | |[[File:Moon (Power Punch Hidden).png|250px]][[File:Moon (Power Punch).png|250px]] | ||
|[[File: | | | ||
|- | |||
|{{PMTTYD item|Ruin Powder|game=NS}} [[File:Nintendo GameCube symbol.svg|15px|link=Nintendo GameCube]] | |||
|In the screen to the right of the X-Naut Fortress screen, it is inside the cracked rock in the center. | |||
|[[File:Moon (Ruin Powder Hidden).png|250px]][[File:Moon (Ruin Powder).png|250px]] | |||
|N/A | |||
|- | |||
|{{PMTTYD item|Star Piece (Paper Mario series)|Star Piece|game=NS}} | |||
|In the screen with the X-Naut Fortress, it is behind a rock to the southeast of the pipe. | |||
|[[File:PMTTYD Star Piece Moon.png|250px]] | |||
|[[File:PMTTYD Star Piece Moon (Switch).png|250px]] | |||
|- | |||
|{{PMTTYD item|Stopwatch|link=Stop Watch|game=NS}} | |||
|In the landing screen, it is in the cracked rock in the northwest. | |||
|[[File:Moon (Stopwatch Hidden).png|250px]][[File:Moon (Stopwatch).png|250px]] | |||
| | |||
|- | |||
|{{PMTTYD item|Volt Mushroom|game=NS}} | |||
|In the screen to the east of the landing screen, it is in the cracked rock in the middle. | |||
|[[File:Moon (Volt Shroom Hidden).png|250px]][[File:Moon (Volt Shroom).png|250px]] | |||
| | |||
|- | |||
|{{PMTTYD item|Ultra Mushroom|game=NS}} [[File:Nintendo Switch Logo.svg|15px|link=Nintendo Switch]] | |||
|In a breakable rock in the first screen right of the landing site, in the northeast. | |||
|N/A | |||
| | |||
|} | |} | ||
== | =X-Naut Fortress= | ||
{|class=wikitable style="text-align:center" | {|class=wikitable style="text-align:center" | ||
!Item | !Item | ||
! | !Location | ||
! | !Location Image | ||
! | !Location Image (Remake) | ||
|- | |- | ||
|{{PMTTYD item| | |{{PMTTYD item|link=Cog (Paper Mario: The Thousand-Year Door)|Cog|game=NS}} | ||
| | |In the transportation room on sublevel 2, it is on top of the controller. Accessible from the air vent with [[Koops]] or [[Yoshi Kid]]. | ||
|[[File:Cog and teleporter.png|250px]] | |||
|[[File: | | | ||
| | |||
|- | |- | ||
|{{PMTTYD item| | |{{PMTTYD item|Crystal Star|game=NS}} | ||
| | |Dropped after [[Magnus von Grapple 2.0]] is defeated. | ||
|[[File:X-Naut Fortress (Crystal Star).png|250px]] | |||
|[[File: | | | ||
| | |||
|- | |- | ||
|{{PMTTYD item|link= | |{{PMTTYD item|link=Elevator Key (X-Naut Fortress)|Elevator Key Blue|text=Elevator Key (Blue)|game=NS}} | ||
|To the right of level 1, it is guarded in a chest beyond the electrical floors. | |||
|[[File:X-Naut Fortress Treasure Chest 1.png|250px]] | |||
| | |[[File:X-Naut Fortress Treasure Chest 1 (Switch).png|250px]] | ||
| | |||
| | |||
| | |||
| | |||
|- | |- | ||
|[[File: | |{{PMTTYD item|link=Elevator Key (X-Naut Fortress)|Elevator Key Red|text=Elevator Key (Red)|game=NS}} | ||
| | |Won after the [[66th Trivia Quiz-Off]]. In the original, the Thwomp drops the card only, but in the remake, he drops a chest containing said card. | ||
|[[File:X-Naut Fortress (Elevator Key).png|250px]] | |||
|[[File:X-Naut Fortress Treasure Chest 3 (Switch).png|250px]] | |||
|- | |- | ||
|{{PMTTYD item| | |6 {{PMTTYD item|link=Coin|Coin|text=Coins|game=NS}}<br>{{PMTTYD item|Feeling Fine|game=NS}}<br>{{PMTTYD item|Feeling Fine P|game=NS}} | ||
| | |To the left of sublevel 1, they are on the item platform to be retrieved with the crane. | ||
| | |[[File:X-Naut Fortress (Crane Items).png|250px]] | ||
| | | | ||
|- | |- | ||
|{{PMTTYD item|HP Drain | |{{PMTTYD item|link=HP Drain (item)|HP Drain|game=NS}} | ||
| | |To the left of sublevel 3, it is in the question block on the south side. | ||
|[[File: | |[[File:X-Naut Fortress Block 3.png|250px]] | ||
|[[File: | |[[File:X-Naut Fortress Block 3 (Switch).png|250px]] | ||
|- | |- | ||
|{{PMTTYD item|link= | |{{PMTTYD item|link=Security Key|Security Key Diamond|text=Security Key (◆)|game=NS}} | ||
| | |To the left of sublevel 2, it is guarded in a chest beyond the electrical floors. | ||
|[[File: | |[[File:X-Naut Fortress Treasure Chest 2.png|250px]] | ||
|[[File:X-Naut Fortress Treasure Chest 2 (Switch).png|250px]] | |||
|- | |||
|{{PMTTYD item|link=Security Key|Security Key Spade|text=Security Key (♠︎)|game=NS}} | |||
|To the left of sublevel 3, it is guarded in a chest beyond the electrical floors. | |||
|[[File:X-Naut Fortress Treasure Chest 3.png|250px]] | |||
|[[File:X-Naut Fortress Treasure Chest 4 (Switch).png|250px]] | |||
|- | |||
|{{PMTTYD item|link=Security Key|Security Key Heart|text=Security Key (♥︎)|game=NS}} | |||
|To the right of sublevel 2, it is on the computer desk in the back room of [[Grodus]]'s area. | |||
|[[File:PMTTYD X-Naut Fortress Grodus Office.png|250px]] | |||
| | | | ||
|- | |- | ||
|{{PMTTYD item| | |{{PMTTYD item|link=Security Key|Security Key Club|text=Security Key (♣︎)|game=NS}} | ||
| | |To the right of sublevel 3, it is in the factory room. Accessible from the airplane panel near the right exit.[[File:Nintendo GameCube symbol.svg|15px|link=Nintendo GameCube]]<br>To the left of sublevel 4, it is held by an Elite X-Naut in the shower. [[File:Nintendo Switch Logo.svg|15px|link=Nintendo Switch]] | ||
| | |[[File:PMTTYD X-Naut Fortress Mechanical Room 8.png|250px]] | ||
| | | | ||
|- | |- | ||
|{{PMTTYD item|link= | |{{PMTTYD item|link=Security Key|Security Key Star|text=Security Key (★)|game=NS}} [[File:Nintendo Switch Logo.svg|15px|link=Nintendo Switch]] | ||
|To the right of sublevel 3, it is in the factory room. Accessible from the airplane panel near the right exit. | |||
| | |N/A | ||
| | | | ||
|- | |- | ||
|{{PMTTYD item| | |{{PMTTYD item|Sleepy Sheep|game=NS}} | ||
| | |To the left of sublevel 2, it is in the yellow question block on the back side. | ||
|[[File:PMTTYD | |[[File:X-Naut Fortress Block 2.png|250px]] | ||
|[[File:PMTTYD | |[[File:X-Naut Fortress Block 2 (Switch).png|250px]] | ||
|- | |||
|rowspan=2|{{PMTTYD item|link=Star Piece (Paper Mario series)|Star Piece|game=NS}} (×2) | |||
|To the left of sublevel 1, it is on the item platform to be retrieved with the crane. | |||
|[[File:PMTTYD Star Piece XNautFortressCrane.png|250px]] | |||
|[[File:PMTTYD Star Piece XNautFortressCrane (Switch).png|250px]] | |||
|- | |- | ||
|In the southwest corner of the air vent on Sublevel 2. | |||
|In the | |[[File:PMTTYD Star Piece XNautFortressRoom.png|250px]] | ||
|[[File:PMTTYD Star Piece | |[[File:PMTTYD Star Piece XNautFortressRoom (Switch).png|250px]] | ||
|[[File:PMTTYD Star Piece | |||
|- | |- | ||
| | |{{PMTTYD item|Super Mushroom|game=NS}} [[File:Nintendo GameCube symbol.svg|15px|link=Nintendo GameCube]] | ||
|[[File: | |To the right of level 1, it is in the yellow question block on the back side. | ||
|[[File: | |[[File:X-Naut Fortress Block 1.png|250px]] | ||
|N/A | |||
|- | |- | ||
| | |rowspan=3|{{PMTTYD item|Ultra Mushroom|game=NS}} (x1/3) | ||
|[[File:PMTTYD | |To the right of sublevel 3, in the factory room, it is on the left high platform in the background. | ||
| | |[[File:PMTTYD X-Naut Fortress Mechanical Room 2.png|250px]] | ||
| | |||
|- | |- | ||
| | |To the right of level 1, it is in the yellow question block on the back side. [[File:Nintendo Switch Logo.svg|15px|link=Nintendo Switch]] | ||
|[[File: | |N/A | ||
|[[File: | |[[File:X-Naut Fortress Block 1 (Switch).png|250px]] | ||
|} | |- | ||
|In the factory of Sublevel Three; on a high platform in the background on the far east. [[File:Nintendo Switch Logo.svg|15px|link=Nintendo Switch]] | |||
|N/A | |||
| | |||
|} | |||
Following items are only available for Princess Peach during the Chapter 5 interlude: | |||
{|class=wikitable style="text-align:center" | {|class=wikitable style="text-align:center" | ||
!Item | !Item | ||
| Line 2,222: | Line 2,427: | ||
!Location Image (Remake) | !Location Image (Remake) | ||
|- | |- | ||
|{{PMTTYD item| | |{{PMTTYD item|Blue Potion|game=NS}}<br>{{PMTTYD item|Green Potion|game=NS}}<br>{{PMTTYD item|Red Potion|game=NS}}<br>{{PMTTYD item|Yellow Potion|Orange Potion}} [[File:Nintendo GameCube symbol.svg|15px|link=Nintendo GameCube]] {{PMTTYD item|Yellow Potion|game=NS}} [[File:Nintendo Switch Logo.svg|15px|link=Nintendo Switch]] | ||
| | |On the desk in the lab on sublevel 2. | ||
| | |[[File:X-Naut Fortress (Potions).png|250px]] | ||
| | | | ||
|- | |- | ||
|{{PMTTYD item| | |{{PMTTYD item|Data Disk|game=NS}} | ||
|To the right of sublevel 2, it is on the shelf in the computer room behind [[Grodus]]'s room. | |||
| | |[[File:X-Naut Fortress (Data Disk).png|250px]] | ||
| | |||
|} | |||
===Crane game items=== | |||
After leaving and re-entering the X-Naut Fortress at least once in the Nintendo Switch remake, new items appear in the crane room on Sublevel One if the player had already collected every item beforehand. There are four batches of different items to collect. To make the next batch appear, it is necessary to collect every item on the current batch, leave the X-Naut Fortress, and return to it. | |||
{|class=wikitable style="text-align:center" | |||
!Batch set | |||
!Items | |||
!Location Image | |||
|- | |- | ||
|{{PMTTYD item| | |1 | ||
| | |{{PMTTYD item|POW Block|game=NS}}, {{PMTTYD item|Sleepy Sheep|game=NS}}, {{PMTTYD item|Courage Shell|game=NS}}, {{PMTTYD item|Mr. Softener|game=NS}}, 5 {{PMTTYD item|link=Coin|Coin|text=Coins|game=NS}} | ||
| | | | ||
|- | |||
|2 | |||
|{{PMTTYD item|Volt Mushroom|game=NS}}, {{PMTTYD item|Dizzy Dial|game=NS}}, {{PMTTYD item|Power Punch|game=NS}}, {{PMTTYD item|Mini Mr. Mini|game=NS}}, 5 {{PMTTYD item|link=Coin|Coin|text=Coins|game=NS}} | |||
| | | | ||
|- | |- | ||
|{{PMTTYD item| | |3 | ||
| | |{{PMTTYD item|Slow Mushroom|game=NS}}, {{PMTTYD item|Super Mushroom|game=NS}}, {{PMTTYD item|Maple Syrup|game=NS}}, {{PMTTYD item|Gradual Syrup|game=NS}}, 5 {{PMTTYD item|link=Coin|Coin|text=Coins|game=NS}} | ||
| | | | ||
|- | |||
|4 | |||
|{{PMTTYD item|Ruin Powder|game=NS}}, {{PMTTYD item|Stopwatch|game=NS}}, {{PMTTYD item|Gold Bar|game=NS}}, {{PMTTYD item|link=HP Drain (item)|HP Drain|game=NS}}, {{PMTTYD item|Spite Pouch|game=NS}}, 4 {{PMTTYD item|link=Coin|Coin|text=Coins|game=NS}} | |||
| | | | ||
|} | |} | ||
= | =Palace of Shadow= | ||
{|class=wikitable style="text-align:center" | {|class=wikitable style="text-align:center" | ||
!Item | !Item | ||
| Line 2,265: | Line 2,468: | ||
!Location Image (Remake) | !Location Image (Remake) | ||
|- | |- | ||
|{{PMTTYD item| | |{{PMTTYD item|All or Nothing|game=NS}} | ||
|In the | |In the fourth room from the start, in the red [[? Block]]. | ||
|[[File: | |[[File:Palace of Shadow Block 2.png|250px]] | ||
|[[File: | |[[File:Palace of Shadow Block 2 (Switch).png|250px]] | ||
|- | |--style="background:lightgreen" | ||
|{{PMTTYD item| | |rowspan=3|{{PMTTYD item|Coin|game=NS}} | ||
|In the | |In the fifth room from the start, there are firebars which can be jumped over multiple times. Doing so makes the firebar disappear and spawn 5 Coins. There are five of them, so making them all disappear nets total of 25 Coins. | ||
|[[File: | |[[File:Palace of Shadow (5 Coins 1).png|250px]][[File:Palace of Shadow (5 Coins 2).png|250px]][[File:Palace of Shadow (5 Coins 3).png|250px]][[File:Palace of Shadow (5 Coins 4).png|250px]][[File:Palace of Shadow (5 Coins 5).png|250px]] | ||
|[[File: | | | ||
|- | |||
|In the eighth room from the start, it is to the left of the ? Blocks in the north. [[File:Nintendo GameCube symbol.svg|15px|link=Nintendo GameCube]] | |||
|[[File:Palace of Shadow Blocks 4-6.png|250px]] | |||
|N/A | |||
|- | |- | ||
|In Gear Room Three, on the ground in the west part. | |||
|In | |[[File:PMTTYDHiddenBlocks15.png|250px]] | ||
|[[File: | |[[File:PMTTYDHiddenBlocks15 (Switch).png|250px]] | ||
|[[File: | |||
|- | |- | ||
| | |{{PMTTYD item|Fire Flower|game=NS}} [[File:Nintendo Switch Logo.svg|15px|link=Nintendo Switch]] | ||
|[[File: | |In the first ? Block in the Antechamber. | ||
|[[File: | |N/A | ||
|[[File:Palace of Shadow Blocks 15-16 (Switch).png|250px]] | |||
|- | |- | ||
| | |{{PMTTYD item|Gradual Syrup|game=NS}} [[File:Nintendo Switch Logo.svg|15px|link=Nintendo Switch]] | ||
|To the right of Gloomtail's room, it is in the first ? Block. Requires Admiral Bobbery. Accessible before activating the orrery in the Palace of Shadow Tower. | |||
|N/A | |||
| | |[[File:Palace of Shadow Block 7 (Switch).png|250px]] | ||
|- | |- | ||
|{{PMTTYD item| | |rowspan=2|{{PMTTYD item|Ice Storm|game=NS}} (x2) [[File:Nintendo Switch Logo.svg|15px|link=Nintendo Switch]] | ||
|In the | |In the eighth room from the start, it is to the right of the ? Blocks in the north. | ||
| | |N/A | ||
|[[File: | |[[File:Palace of Shadow Blocks 4-5 (Switch).png|250px]] | ||
|- | |- | ||
|In the third corridor to Gloomtail's lair, it is in a ? Block. Accessible before activating the orrery in the Palace of Shadow Tower. | |||
|In the | |N/A | ||
| | |[[File:Palace of Shadow Block 6 (Switch).png|250px]] | ||
| | |||
|- | |- | ||
|{{PMTTYD item| | |rowspan=4|{{PMTTYD item|Jammin' Jelly|game=NS}} (×3/2) | ||
|In the | |In the eighth room from the start, it is to the right of the ? Blocks in the north. [[File:Nintendo GameCube symbol.svg|15px|link=Nintendo GameCube]] | ||
|[[File:Palace of Shadow Blocks 4-6.png|250px]] | |||
|[[File: | |N/A | ||
|- | |- | ||
| | |To the right of Gloomtail's room, in the second ? Block. Requires Admiral Bobbery. Accessible before activating the orrery in the Palace of Shadow Tower. [[File:Nintendo GameCube symbol.svg|15px|link=Nintendo GameCube]] | ||
| | |[[File:Palace of Shadow Block 8.png|250px]] | ||
|N/A | |||
| | |||
| | |||
|- | |- | ||
|In the Antechamber, in the third ? Block. [[File:Nintendo Switch Logo.svg|15px|link=Nintendo Switch]] | |||
|In the | |N/A | ||
|[[File:Palace of Shadow Block 17 (Switch).png|250px]] | |||
|[[File: | |||
|- | |- | ||
|In the | |In the Depths, in a chest. | ||
|[[File: | |[[File:Palace of Shadow Treasure Chest 13.png|250px]] | ||
|[[File: | |[[File:Palace of Shadow Treasure Chest 13 (Switch).png|250px]] | ||
|- | |- | ||
|In the east | |rowspan=3|{{PMTTYD item|link=Life Mushroom (Paper Mario series)|Life Mushroom|game=NS}} (×3/2) | ||
|In Gear Room One, it is near the east entrance in the north part. [[File:Nintendo GameCube symbol.svg|15px|link=Nintendo GameCube]] | |||
|[[File: | |[[File:Palace of Shadow Block 11.png|250px]] | ||
| | |N/A | ||
|- | |||
|In Gear Room Two, it is in the yellow ? Block above the spinning wheels. | |||
|[[File:Palace of Shadow Block 12.png|250px]] | |||
|[[File:Palace of Shadow Block 13 (Switch).png|250px]] | |||
|- | |- | ||
|In Concealed Path Four, it can be found on a high pedestal. Accessible with the [[plane panel]]. | |||
|In | |[[File:Palace of Shadow (Life Shroom).png|250px]] | ||
| | |||
| | | | ||
|- | |- | ||
|rowspan=2|{{PMTTYD item| | |rowspan=2|{{PMTTYD item|Mr. Softener|game=NS}} [[File:Nintendo Switch Logo.svg|15px|link=Nintendo Switch]] | ||
|In | |In the third room from the start, it is in the ? Block near the entrance. | ||
|N/A | |||
|[[File:Palace of Shadow Block 1 (Switch).png|250px]] | |||
|- | |||
|In the northeastern corner of Concealed Path Four, behind the platform. | |||
|N/A | |N/A | ||
| | | | ||
|- | |- | ||
| | |{{PMTTYD item|link=Mystery Box (item)|Mystery|game=NS}} [[File:Nintendo Switch Logo.svg|15px|link=Nintendo Switch]] | ||
|To the right of Gloomtail's room, in the third ? Block. Requires Admiral Bobbery. Accessible before activating the orrery in the Palace of Shadow Tower. | |||
|N/A | |N/A | ||
|[[File:Palace of Shadow Block 9 (Switch).png|250px]] | |||
|- | |||
|{{PMTTYD item|link=Palace Key (Paper Mario: The Thousand-Year Door)|Palace Key purple|text=Palace Key|game=NS}} | |||
|In the sixth room from the start, it is dropped by the [[Dark Bones]]. | |||
|[[File:Palace of Shadow (Palace Key 1).png|250px]] | |||
| | | | ||
|- | |- | ||
|{{PMTTYD item| | |{{PMTTYD item|link=Palace Key (Paper Mario: The Thousand-Year Door)|Palace Key gray|text=Palace Key|game=NS}} | ||
|In a | |In Gear Room Two, it is on a ledge to the lower-right of the spinning wheels. | ||
| | |[[File:Palace of Shadow (Palace Key 2).png|250px]] | ||
| | | | ||
|- | |- | ||
|{{PMTTYD item| | |{{PMTTYD item|link=Palace Key (Paper Mario: The Thousand-Year Door)|Palace Key pink|text=Palace Key|game=NS}} | ||
|In | |In Gear Room Three, it is in a chest in the east part. | ||
| | |[[File:Palace of Shadow Treasure Chest 11.png|250px]] | ||
| | |[[File:Palace of Shadow Treasure Chest 11 (Switch).png|250px]] | ||
|- | |- | ||
|{{PMTTYD item| | |{{PMTTYD item|Power Punch|game=NS}} [[File:Nintendo Switch Logo.svg|15px|link=Nintendo Switch]] | ||
|In | |In Gear Room One, it is near the east entrance in the north part. | ||
|N/A | |N/A | ||
|[[File:Palace of Shadow Block 12 (Switch).png|250px]] | |||
|- | |- | ||
|{{PMTTYD item| | |{{PMTTYD item|P-Up, D-Down P|game=NS}} | ||
|In the | |In the eighth room from the start, it is in the red ? Block in the north. | ||
|[[File: | |[[File:Palace of Shadow Blocks 4-6.png|250px]] | ||
|[[File: | |[[File:Palace of Shadow Blocks 4-5 (Switch).png|250px]] | ||
|- | |- | ||
|{{PMTTYD item| | |{{PMTTYD item|Repel Cape|game=NS}} | ||
|In | |In Gear Room One, it is in a yellow ? Block. In the Nintendo Switch remake, this block is on the ground. | ||
| | |[[File:Palace of Shadow Block 10.png|250px]] | ||
| | |[[File:Palace of Shadow Block 11 (Switch).png|250px]] | ||
|- | |- | ||
|{{PMTTYD item| | |rowspan=5|{{PMTTYD item|link=Shooting Star (item)|Shooting Star|game=NS}} (×3/4) | ||
|In the | |In the second room from the start, it is on the other side of the bridge to the north. [[File:Nintendo Switch Logo.svg|15px|link=Nintendo Switch]] | ||
| | |N/A | ||
| | | | ||
|- | |- | ||
| | |In the third room from the start, it is in the ? Block near the entrance. [[File:Nintendo GameCube symbol.svg|15px|link=Nintendo GameCube]] | ||
| | |[[File:Palace of Shadow Block 1.png|250px]] | ||
|N/A | |N/A | ||
|- | |- | ||
|In Gear Room Two, it is in the chest in the southwest corner. | |||
|[[File:Palace of Shadow Treasure Chest 10.png|250px]] | |||
|[[File:Palace of Shadow Treasure Chest 10 (Switch).png|250px]] | |||
| | |||
|- | |- | ||
|' | |To the right of Gloomtail's room, it is in the second ? Block. Requires Admiral Bobbery. Accessible before activating the orrery in the Palace of Shadow Tower. [[File:Nintendo Switch Logo.svg|15px|link=Nintendo Switch]] | ||
|N/A | |||
| | |[[File:Palace of Shadow Block 8 (Switch).png|250px]] | ||
| | |||
|- | |- | ||
| | |In Concealed Path Four, it is on a low pedestal. Accessible with the airplane panel. | ||
| | |[[File:Palace of Shadow (Shooting Star).png|250px]] | ||
| | |||
| | | | ||
|- | |- | ||
|' | |{{PMTTYD item|link=Star Stone (Paper Mario: The Thousand-Year Door)|Star Stone|game=NS}} | ||
|{{PMTTYD item| | |In Gloomtail's room, it is in the chest box spit out from Gloomtail when defeated. | ||
| | |[[File:Palace of Shadow Treasure Chest 9.png|250px]] | ||
|[[File:Palace of Shadow Treasure Chest 1 (Switch).png|250px]] | |||
|- | |||
|{{PMTTYD item|Stopwatch|game=NS}} | |||
|In the second room from the start, it is to the north of the entrance. | |||
|[[File:Palace of Shadow (Stopwatch).png|250px]] | |||
| | | | ||
|- | |- | ||
| | |rowspan=2|{{PMTTYD item|Thunder Rage|game=NS}} (×1/2) | ||
|{{PMTTYD item| | |In the first descended hallway, it is in the high ? Block. | ||
| | |[[File:Palace of Shadow Block 9.png|250px]] | ||
| | |[[File:Palace of Shadow Block 10 (Switch).png|250px]] | ||
|- | |- | ||
| | |In the northwestern corner of Concealed Path Four, behind the platform. [[File:Nintendo Switch Logo.svg|15px|link=Nintendo Switch]] | ||
|N/A | |||
| | |||
| | | | ||
|- | |- | ||
| | |rowspan=7|{{PMTTYD item|link=Palace Key (Paper Mario: The Thousand-Year Door)|Tower Key|game=NS}} (x8) | ||
|{{PMTTYD item | |In the first-floor [[Palace of Shadow Tower]], it is in a chest in the southwest room. Accessible by hitting the ! Blocks in this order: left, left, left, right, right. | ||
| | |[[File:Palace of Shadow Treasure Chests 3 and 7.png|250px]] | ||
| | |[[File:Palace of Shadow Treasure Chests 4 and 8 (Switch).png|250px]] | ||
|- | |- | ||
| | |In the first and second floors of Palace of Shadow Tower, they are in a chests in the northwest rooms. Accessible by hitting the ! Block after clearing the blocks. | ||
| | |[[File:Palace of Shadow Treasure Chests 1 and 5.png|250px]] | ||
| | |[[File:Palace of Shadow Treasure Chests 2 and 6 (Switch).png|250px]] | ||
| | |||
|- | |- | ||
| | |In the first-floor Palace of Shadow Tower, it is in a chest in the northeast room. Accessible by hitting the ! Block beyond the fake wall on the right. | ||
| | |[[File:Palace of Shadow Treasure Chest 2.png|250px]] | ||
| | |[[File:Palace of Shadow Treasure Chest 3 (Switch).png|250px]] | ||
| | |||
|- | |- | ||
| | |In the first-floor Palace of Shadow Tower, it is in a chest in the southeast room, covered by a piece of paper which can be blown away by [[Flurrie]]. | ||
| | |[[File:Palace of Shadow Treasure Chests 4 and 8.png|250px]] | ||
| | |[[File:Palace of Shadow Treasure Chests 5 and 9 (Switch).png|250px]] | ||
|- | |- | ||
! | |In the second-floor Palace of Shadow Tower, it is in a chest in the southwest room. Accessible by hitting the ! Block after defeating the bones in the order from weak to strong. | ||
|[[File:Palace of Shadow Treasure Chests 3 and 7.png|250px]] | |||
|[[File:Palace of Shadow Treasure Chests 4 and 8 (Switch).png|250px]] | |||
|- | |- | ||
| | |In the second-floor Palace of Shadow Tower, it is in a chest in the northeast room. In the Gamecube version, it is beyond the wall on the right which can be blown up by [[Bobbery]]. In the Switch version, it appears in the room proper after hitting the ! Block beyond the wall on the right which can be blown up by Bobbery. | ||
|[[File:Palace of Shadow Treasure Chest 6.png|250px]] | |||
|[[File:Palace of Shadow Treasure Chest 7 (Switch).png|250px]] | |||
|- | |- | ||
| | |In the second-floor Palace of Shadow Tower, it is in a chest in the southeast room. Accessible by hitting the invisible ! Block. | ||
| | |[[File:Palace of Shadow Treasure Chests 4 and 8.png|250px]] | ||
|[[File:Palace of Shadow Treasure Chests 5 and 9 (Switch).png|250px]] | |||
|- | |- | ||
|{{PMTTYD item| | |rowspan=4|{{PMTTYD item|Ultra Mushroom|game=NS}} (×3) | ||
| | |In the seventh room from the start, it is in the ? Block near the entrance. | ||
|[[File:Palace of Shadow Block 3.png|250px]] | |||
|[[File:Palace of Shadow Block 3 (Switch).png|250px]] | |||
|- | |- | ||
| | |To the right of Gloomtail's room, it is in the first ? Block. Requires Admiral Bobbery. Accessible before activating the orrery in the Palace of Shadow Tower. [[File:Nintendo GameCube symbol.svg|15px|link=Nintendo GameCube]] | ||
| | |[[File:Palace of Shadow Block 7.png|250px]] | ||
|N/A | |||
|- | |- | ||
| | |In the Antechamber, it is in the second ? Block. [[File:Nintendo Switch Logo.svg|15px|link=Nintendo Switch]] | ||
|N/A | |||
|[[File:Palace of Shadow Blocks 15-16 (Switch).png|250px]] | |||
| | |||
|- | |- | ||
|{{ | |In the Depths, it is in the chest near the doorway back to the Throne Room. | ||
| | |[[File:Palace of Shadow Treasure Chest 12.png|250px]] | ||
|[[File:Palace of Shadow Treasure Chest 12 (Switch).png|250px]] | |||
|} | |||
===Hidden ? Blocks=== | |||
{{main|List of hidden blocks in Paper Mario: The Thousand-Year Door}} | |||
{|class=wikitable style="text-align:center" | |||
!Item | |||
!Description | |||
!Block un/revealed ([[File:Nintendo GameCube symbol.svg|15px|link=Nintendo GameCube]]) | |||
!Block un/revealed ([[File:Nintendo Switch Logo.svg|15px|link=Nintendo Switch]]) | |||
|- | |- | ||
|{{PMTTYD item| | |{{PMTTYD item|Boo's Sheet|game=NS}} | ||
| | |In the area with a bridge over water with fire bars, in a middle of the room is a couple of fire bars spinning around one spot. At that spot, Mario should jump from it to reveal the hidden ? Block. | ||
|[[File:PMTTYDHiddenBlocks14.png|250px]][[File:PMTTYDHiddenBlocks14R.png|250px]] | |||
|[[File:PMTTYDHiddenBlocks14 (Switch).png|250px]][[File:PMTTYDHiddenBlocks14R (Switch).png|250px]] | |||
|- | |- | ||
|{{PMTTYD item| | |{{PMTTYD item|Point Swap|game=NS}} | ||
| | |In the mechanical side of the hallways leading to the palace's throne room, one of the rooms has a lone Coin Block. Jumping above this block will reveal the hidden ? Block. | ||
|[[File:PMTTYDHiddenBlocks15.png|250px]][[File:PMTTYDHiddenBlocks15R.png|250px]] | |||
|[[File:PMTTYDHiddenBlocks15 (Switch).png|250px]][[File:PMTTYDHiddenBlocks15R (Switch).png|250px]] | |||
|[[File: | |||
|} | |} | ||
;Nintendo Switch version-exclusive | |||
{|class=wikitable | {| class="wikitable" | ||
!Item | !Item | ||
! | !Description | ||
! | !Image | ||
! | !Image (block revealed) | ||
|- | |- | ||
|{{PMTTYD item| | |{{PMTTYD item|Jammin' Jelly|game=NS}} | ||
|In the | |In the courtyard, at the [[Palace of Shadow Tower]]'s entryway, on the left side of the tower's base. | ||
|[[File: | |[[File:PMTTYDHiddenBlockPalaceofShadowCourtyard1.jpg|250px]] | ||
|[[File: | |[[File:PMTTYDHiddenBlockPalaceofShadowCourtyard1R.jpg|250px]] | ||
|- | |- | ||
|{{PMTTYD item|Ultra Mushroom|game=NS}} | |||
|In the | |In the courtyard, at the Palace of Shadow Tower's entryway, on the right side of the tower's base. | ||
|[[File: | |[[File:PMTTYDHiddenBlockPalaceofShadowCourtyard2.jpg|250px]] | ||
| | |[[File:PMTTYDHiddenBlockPalaceofShadowCourtyard2R.jpg|250px]] | ||
|} | |||
=Pit of 100 Trials= | |||
{| class="wikitable" | |||
!rowspan=2|Item | |||
!rowspan=2|Location | |||
!colspan=2|Images | |||
|- | |- | ||
!GameCube | |||
!Switch | |||
|- | |- | ||
|{{PMTTYD item| | |{{PMTTYD item|Sleepy Stomp|game=NS}} | ||
| | |On Floor 10. | ||
|rowspan=4|[[File:Pit of 100 Trials Chests 1-4.png|100px]] | |||
|[[File: | |rowspan=4|[[File:Pit of 100 Trials Treasure Chests 1-4 (Switch).png|100px]] | ||
|- | |- | ||
|{{PMTTYD item| | |{{PMTTYD item|Fire Drive|game=NS}} | ||
|On Floor 20. | |||
| | |||
|- | |- | ||
|{{PMTTYD item|Zap Tap|game=NS}} | |||
|On Floor 30. | |||
| | |||
|- | |- | ||
| | |{{PMTTYD item|Pity Flower|game=NS}} | ||
| | |On Floor 40. | ||
| | |||
|- | |- | ||
|{{PMTTYD item|Strange Sack|game=NS}} | |||
| | |On Floor 50. | ||
|[[File: | |rowspan=3|[[File:Pit of 100 Trials Chests 5-7.png|100px]] | ||
|rowspan=3|[[File:Pit of 100 Trials Treasure Chests 5-7 (Switch).png|100px]] | |||
|- | |- | ||
| | |{{PMTTYD item|Double Dip|game=NS}} | ||
| | |On Floor 60. | ||
|- | |- | ||
| | |{{PMTTYD item|Double Dip P|game=NS}} | ||
| | |On Floor 70. | ||
|- | |- | ||
| | |{{PMTTYD item|Bump Attack|game=NS}} | ||
|[[File: | |On Floor 80. | ||
|[[File: | |rowspan=2|[[File:Pit of 100 Trials Chests 8-9.png|100px]] | ||
|rowspan=2|[[File:Pit of 100 Trials Treasure Chests 8-9 (Switch).png|100px]] | |||
|- | |- | ||
|{{PMTTYD item|Lucky Day|game=NS}} | |||
|On Floor 90. | |||
| | |||
|- | |- | ||
| | |{{PMTTYD item|Return Postage|game=NS}} | ||
|[[File: | |On Floor 100; after defeating Bonetail. | ||
|[[File: | |[[File:Pit of 100 Trials Chest 10.png|100px]] | ||
|[[File:Pit of 100 Trials Chest 10 (Switch).png|100px]] | |||
|- | |- | ||
|{{PMTTYD item|Gold Whacka Bump|game=NS}} [[File:Nintendo Switch Logo.svg|15px|link=Nintendo Switch]] | |||
|On Floor 100; after defeating Whacka once. | |||
| | |||
|N/A | |N/A | ||
|[[File: | |[[File:TTYDNS Gold Whacka Bump drop.jpg|100px]] | ||
|- | |- | ||
|{{PMTTYD item|Whacka Bump|game=NS}} [[File:Nintendo Switch Logo.svg|15px|link=Nintendo Switch]] | |||
|On Floor 100; after defeating Whacka a subsequent time. Unlimited source. | |||
|{{PMTTYD item| | |||
| | |||
|N/A | |N/A | ||
| | | | ||
|} | |} | ||
Latest revision as of 09:03, January 30, 2025
Rogueport
The below items are acquired while exploring Rogueport. Other items not listed below are purchased from vendors in town, namely Toad Bros. Bazaar, Charlieton, Lovely Howz of Badges, Westside Goods and Pianta Parlor. Also not listed below are the dishes from Zess T. and the items given as rewards for getting certain amount of Shop Points. In the remake, the cockroaches and the grass sticking out of the ground can both be squished for one Coin at random.
| Item | Location | Location Image | Location Image (Remake) |
|---|---|---|---|
| Given back by Ms. Mowz after completing her trouble. | 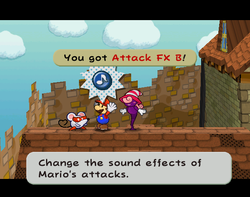
|
||
| Given by Don Pianta after helping him find Francesca and Frankie before Chapter 3. | 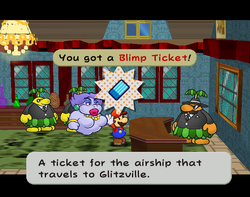
|
||
| Given by McGoomba while doing his trouble. | 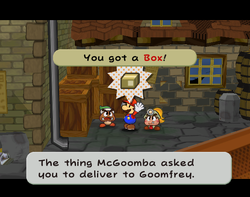
|
||
| After entering the east side for the first time, Mario is robbed of half of his coins. By going back to the square, north to the alley, left into the house and talking to the bandit, Mario is given the coins back. |  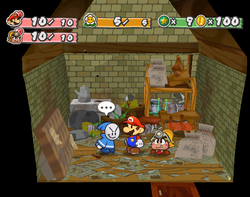
|
||
| In the harbor, after starting Chapter 1 and before starting Chapter 4, Mario can give Lumpy the Ratooey 100, 200 or 300 Coins. After chapter 6, Lumpy will give back 300 (if given 100), 600/500 (in Japanese GameCube version) (if given 200) or 999 Coins (if given 300). | 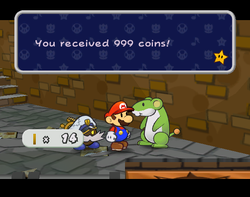
|
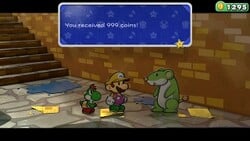
| |
| 20 (30 on Switch) Coins given by Garf after doing his trouble. | 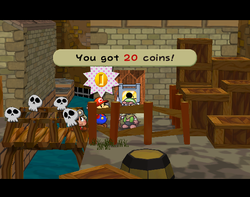
|
||
| 20 (30 on Switch) Coins given by McGoomba after doing his trouble. | 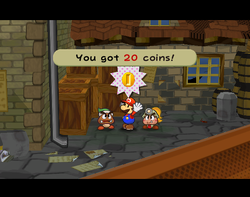
|
||
| 20 (30 on Switch) Coins given by Arfur after doing his trouble. | 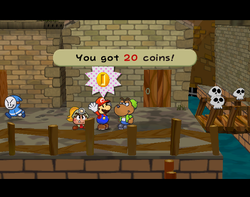
|
||
| 20 (30 on Switch) Coins given by Goomther after doing his trouble. | 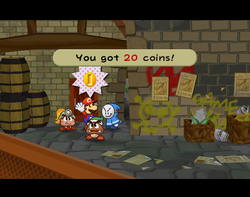
|
||
| 11 Coins given by Bomberto after doing his trouble. | 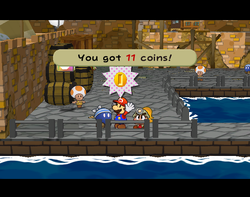
|
||
| 200 given by innkeeper after sleeping in the inn 50 times. Missable if given elsewhere. | 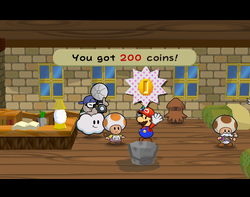
|
||
| In the east area guarded by Gus, it is in a chest near the south sea. Accessible from a boat panel near the other side of the river. | 
|
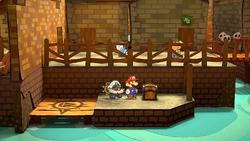
| |
| Received from Frankie after doing his trouble. | 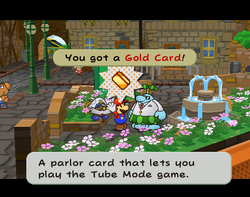
|
||
| After acquiring the Cooking Trophy, Badge Trophy, and Tattle Trophy; appears on the gallows in the town square. | N/A | 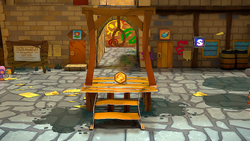
| |
| Cooked by Zess T. and given to Mario after completing her trouble. | 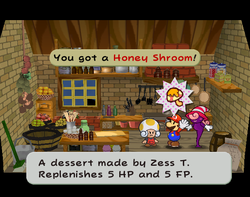
|
||
| In front of the badge shop during Garf's trouble. | 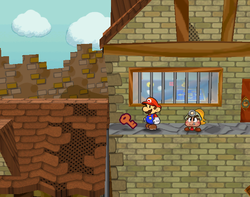
|
||
| In the harbor, it is in the chest on the small house to the left of the sea. | 
|
| |
| Given by Lucky if the last number on Mario's Lottery Ticket matches the lottery number. | 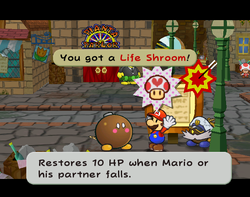
|
||
| Can be bought from the Happy Lucky Lottery. | 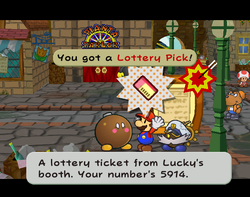
|
||
| Given by Lucky if the last three |
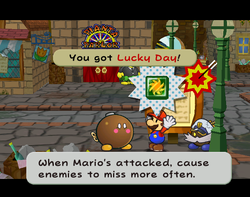
|
||
| Given by Lucky if Mario's Lottery Ticket number does not match the lottery number. | 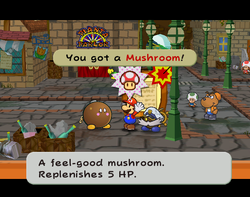
|
||
| Given by Podley near the start of Chapter 5. | 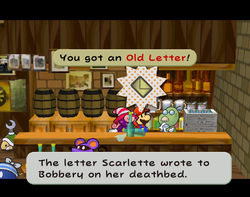
|
||
| Given by the Pianta Changer in exchange for Coins. | 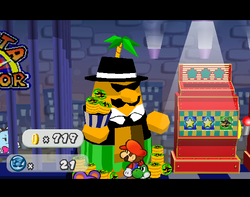
|
||
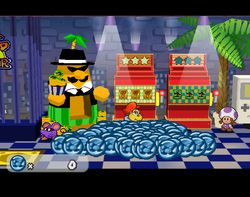
|
|||
| 10 tokens given by Lahla after doing her trouble. | 
|
||
| Given by Lucky if the all four |
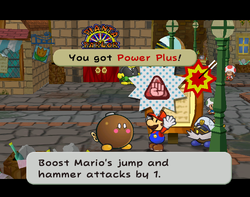
|
||
| Given by Professor Frankly during the prologue. | 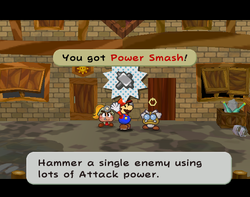
|
||
| In the east, it is on top of the red roof. | |||
| In the east, it is in the back room of Admiral Bobbery's house. | |||
| In the east, it is behind the rightmost house, across the river from Ishnail's house. | |||
| In the west, the second floor of the Toad kid's house has a hole to the right. Roll in and it is in the backyard there. | |||
| In the west, there is a cracked wall to the left of the store. Blow it up and it is at the end of the path behind. | |||
| In the harbor, it is behind the barrels in the small room to the left of the sea. | 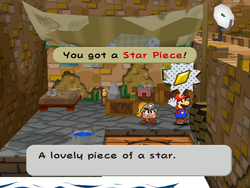
|
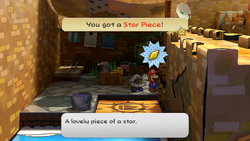
| |
| In the harbor, it is under a panel in a wall corner near the stairs. | 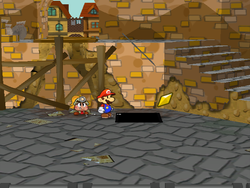
|
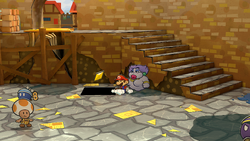
| |
| In the square, it is among the chests near the east fence. | 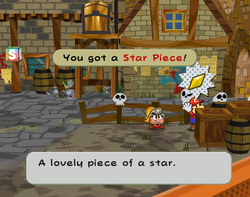
|
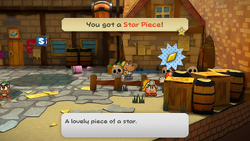
| |
| In the square, it is under a panel in front of the gallows. | 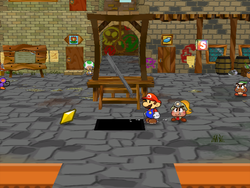
|
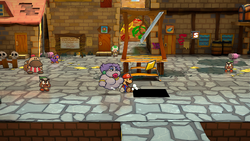
| |
| In the square, it is on top of Zess T.'s house, on the far side of the roof on the left. | 
|
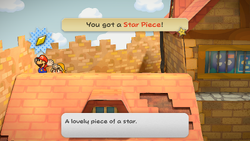
| |
| In the square, go through the alley, and it is in the house to the left. | 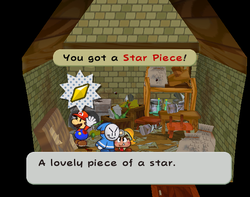
|
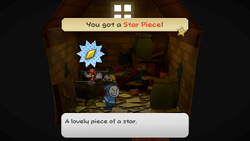
| |
| In the square, go through the alley, and it is under a panel directly behind the rightmost house. | 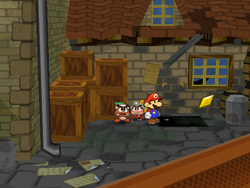
|
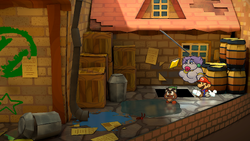
| |
| In the east, it is on top of a crate behind Frankly's house. Accessible from the fake wall in the left. | 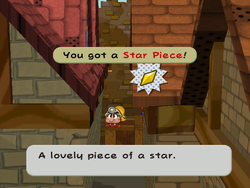
|
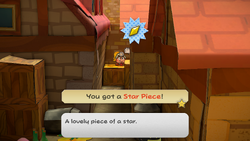
| |
| In the east, it is under a panel in front of Frankly's house. | 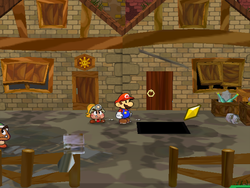
|
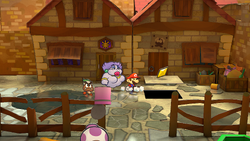
| |
| In the east, it is behind the chimney of Bobbery's house. | 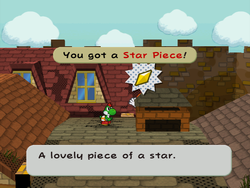
|
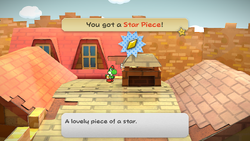
| |
| In the east, it is behind the barrel in front of Ishnail's house. | 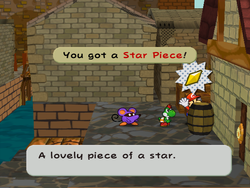
|
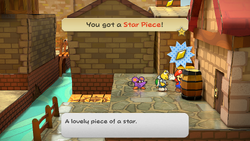
| |
| In the east, it is under a panel on top of the house to the right of the river. | 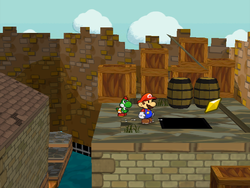
|
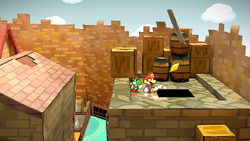
| |
| In the west, it is in the wall corner near the entrance and the low wall surrounding the garden. | 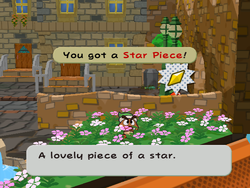
|
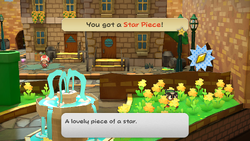
| |
| In the west, it is behind the tall pipe in the garden. | 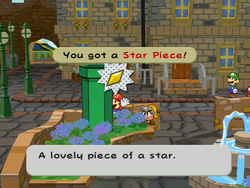
|
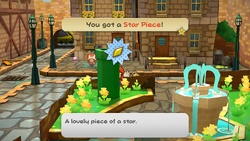
| |
| In the west, it is under a panel in front of the Pianta Parlor. | 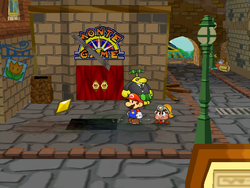
|
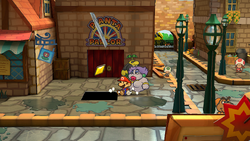
| |
| In the west, it is behind the trash can to the left-front of the store. | 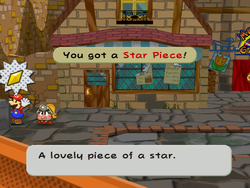
|
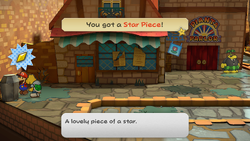
| |
| In the station area, it is under a panel in front of the Toad girl on the train platform. | 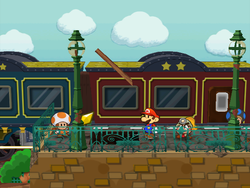
|
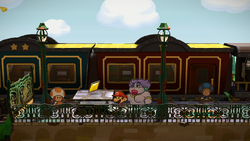
| |
| In the station area: It is behind the pipe that leads to the blimp landing area. Under a panel to the right of the pipe. |
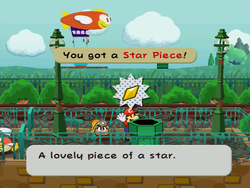
|
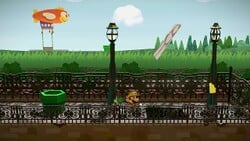
| |
| Given by Don Pianta after reuniting with his daughter near the start of Chapter 6. | 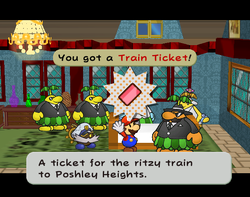
|
||
| Found in front of the rightmost houses in east Rogueport while doing Frankie's trouble. In the Japanese release of the GameCube version, and the Nintendo Switch version in all regions, it is on top of the wall Gus guards. | 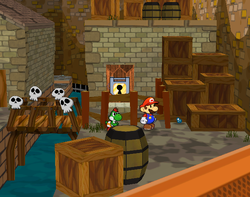 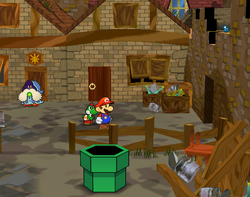
|
||
| In the plaza, it is in the big chest near the inn. Requires a Spring Jump. | 
|
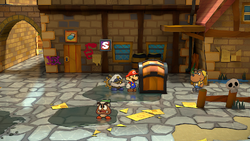
| |
| Given by Plenn T. after doing his trouble. | 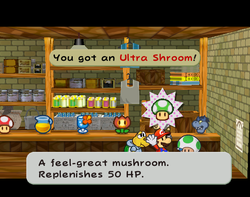
|
||
| Given by Lucky if the last two numbers on Mario's Lottery Ticket match the lottery number. | 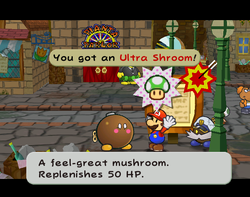
|
||
| Given by Lucky if all four numbers on Mario's Lottery Ticket match the lottery number after getting Power Plus |
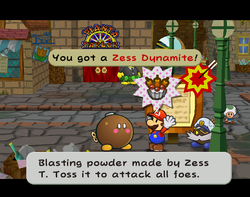
|
||
| Given by Lucky if last three numbers on Mario's Lottery Ticket match the lottery number after getting Lucky Day |
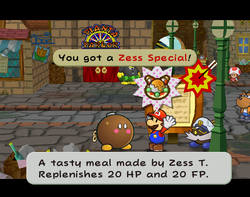
|
Rogueport Sewers/Underground
Additional items are bought from Deepdown Depot (+ the Shop Point rewards), Dazzle and Charlieton (in the Pit of 100 Trials), as well as dropped by enemies. In the remake, the grass sticking out in various places of the underground can be hammered for one Coin at random.
| Item | Location | Location Image | Location Image (Remake) |
|---|---|---|---|
| In the lower corridor on sublevel 3, it is on a ledge by the left of the stairs. | 
|
||
| 30 given by Merlee after completing her trouble. | 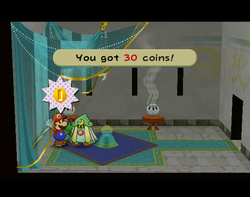
|
||
| In the Boggly Woods pipe room on sublevel 3, it is on the northwest platform in the Punio room. Accessible from the passage Punio made available. | 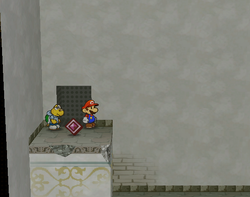
|
||
| In the Spunia room on sublevel 2, it is on the northeast platform. | 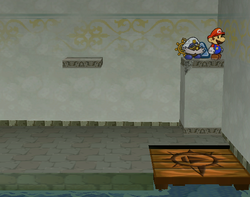
|
||
| In the eastern entrance room on sublevel 1, it is in a chest in a highest place just before the sea room. Accessible from the next room. | 
|
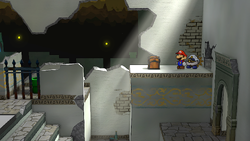
| |
| In the eastern corridor on sublevel 2, they are in the ? Blocks on the ground. | 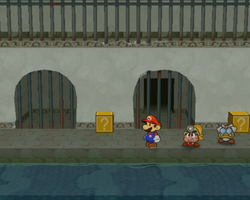
|
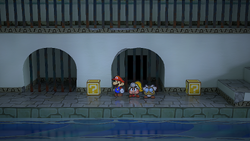
| |
| In the western entrance room on sublevel 1, it is inside a chest to the left of the X sign on the southwest ground. Requires a Spring Jump. | 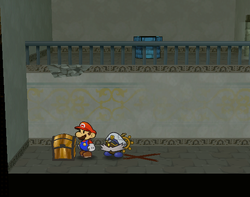
|
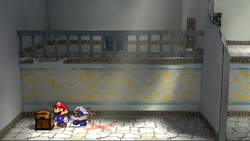
| |
| In the western blue pipe room on sublevel 2, it is in the chest near the pipe to Chapter 6. Behind a big stone block, in the pipe room. |
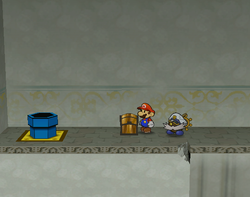
|
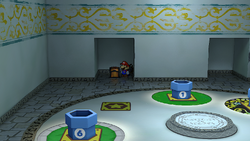
| |
| In the western corridor on sublevel 2, they are in the ? Blocks on the ground. | 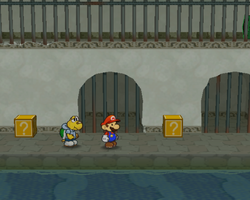
|
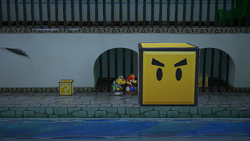
| |
| In the lower corridor on sublevel 3, it is in a chest hidden behind a piece of paper underneath the stairs. Mario must have Flurrie to blow it up first. | 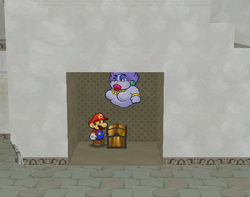
|
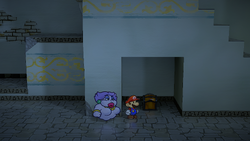
| |
| In the western entrance room on sublevel 1, it is on the westernmost platform, near the pipe to the background. | |||
| In the ruins of the 1,000 year old town on sublevel 1, Mario must do a Spring Jump near the thin pipe to the north of the up-down platform, and go right to find it. | |||
| In the Petal Meadows pipe room on sublevel 1, it is on the south platform beyond the sea. | |||
| In the eastern blue pipe room on sublevel 2, it is next to the pipe to Petalburg. Behind a big yellow block, in the pipe room. |
|||
| Three in the Spunia room on sublevel 2, it is in the secret room to the right of the river. | |||
| In the Thousand-Year Door room on sublevel 3, it is on top of the west ledge with an plane panel. | |||
| In the Pit of 100 Trials entrance room on sublevel 3, it is given by Pine T. Jr. for doing his trouble. | 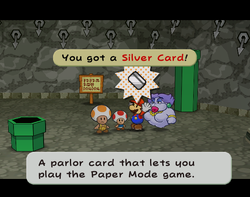
|
||
| In the ruins of the 1,000 year old town on sublevel 1, it is inside a chest in the left of the south water. | 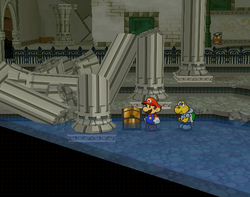
|
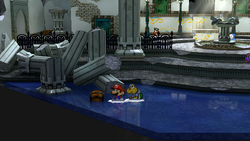
| |
| In the spike room on sublevel 2, it is in a chest located behind a series of spikes that can be crossed with Vivian. | 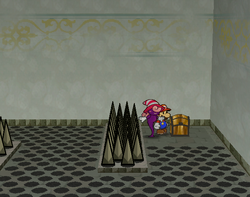
|
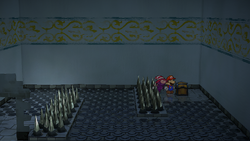
| |
| In the ruins of the 1,000 year old town on sublevel 1, it is behind the broken pillars in the southeast. | 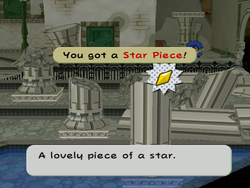
|
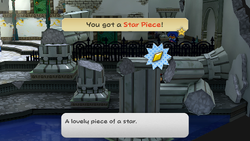
| |
| In the ruins of the 1,000 year old town on sublevel 1, it is behind the column to the right of the buildings. | 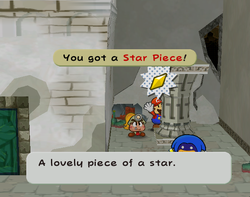
|
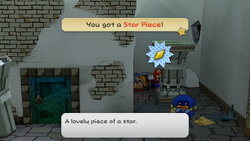
| |
| In the ruins of the 1,000 year old town on sublevel 1, it is behind the column to the left of the buildings. | 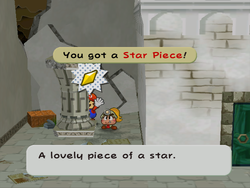
|
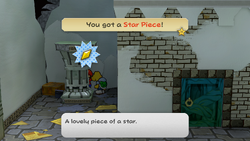
| |
| In the ruins of the 1,000 year old town on sublevel 1, it is by the front side of the table in Wonky's house. | 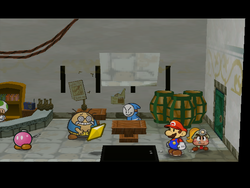
|
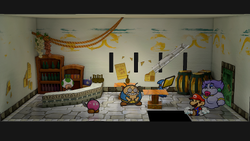
| |
| In the eastern entrance room on sublevel 1, it is under a panel at the center of the first sunken area. | 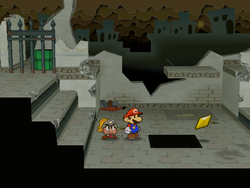
|
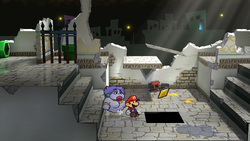
| |
| In the abandoned house on sublevel 1, it is in the hammock. Accessible by shimmying along a water pipe in the Petal Meadows pipe room using the Spring Jump. | 
|
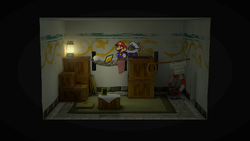
| |
| In the western entrance room on sublevel 1, it is on the last platform in the background. | 
|
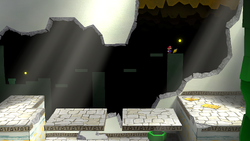
| |
| In the western entrance room on sublevel 1, it is on the ground, behind the L-shaped platform. | 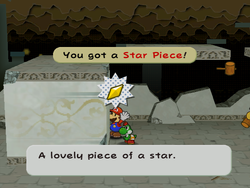
|
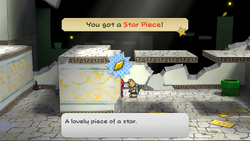
| |
| In the Thousand-Year Door room on sublevel 3, it is under a panel in the south. | 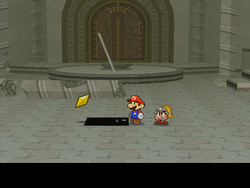
|
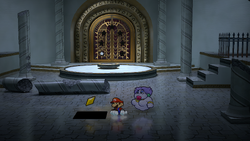
| |
| In the Pit of 100 Trials entrance room on sublevel 3, it is behind the stairs to the right. | 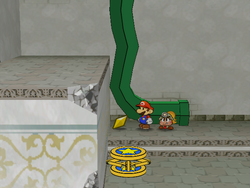
|
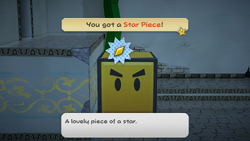
| |
| In the lower corridor on sublevel 3, it is behind the big yellow block, in front of the turning corner of the pipe. | 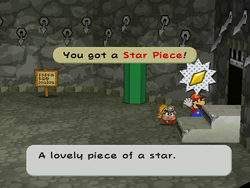
|
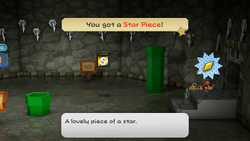
| |
| In the lower corridor on sublevel 3, it is under a panel in front of the pipe to Chapter 2. | 
|
| |
| In the lower corridor on sublevel 3, it is under a panel in front of the black chest. | 
|
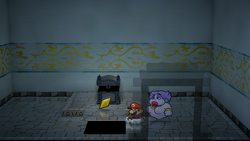
|
Hidden ? Block
| Item | Description | Block un/revealed ( |
Block un/revealed ( |
|---|---|---|---|
| In the lower corridor of sublevel 3, across the room from the Puni-sized hole, Mario should jump to reveal the hidden ? Block. The location of this block is mentioned in Wonky's Tales, "What's Hidden Below".[1] |  
|
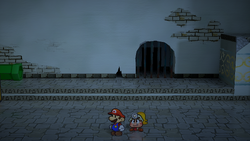 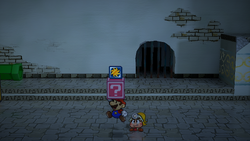
|
- Nintendo Switch version-exclusive
| Item | Description | Image | Image (block revealed) |
|---|---|---|---|
| On top of Herb T.'s building on the northwestern part of its roof. Can be reached by using a Spring Jump on the pipe to reach the roof of Merluvlee's building then using Yoshi to cross the gap. | 
|

| |
| On top of Herb T.'s building on the northeastern part of its roof. | 
|

|
Petal Meadows
In the remake, due to grass becoming more paperified, hitting it with hammer will cause it to spawn Coins at random.
| Item | Location | Location Image | Location Image (Remake) |
|---|---|---|---|
| In the red question block in the second screen. | 
|

| |
| In the second area, there is a Coin Block containing 10 Coin between two pipes. | 
|

| |
| In the second area, in a Brick Block visible by taking the pipe. Can be reached by using Yoshi, then performing a Spin Jump. |
N/A | 
| |
| In the third area, in the two bushes in the foreground on the left side of the bridge. | 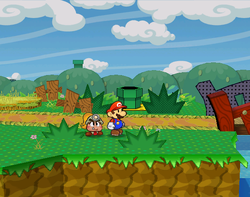
|
||
| In the question block near the bridge in the third screen. | 
|

| |
| On top of a high brick in the second screen. Mario can take the pipe and toss Koops to get it. | 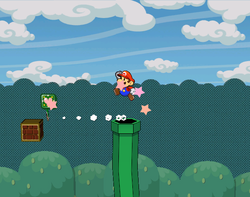
|
||
| In the second screen, it is dropped by the rightmost Candy Cane when hit 10 times. Replenishable source. | 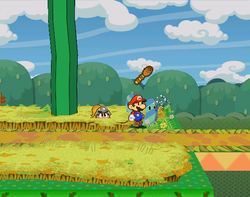
|
||
| In the right tree back of the entrance pipe in the first screen. | 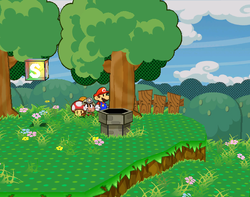
|
||
| In the question block in the right of the first screen. | 
|

| |
| In the second bush to the right of the bridge in the third screen. | 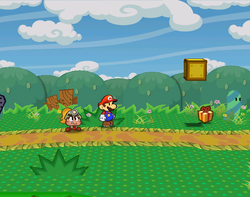
|
||
| One is in the left tree back of the entrance pipe in the first screen. | 
|
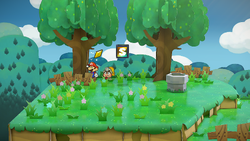
| |
| One is in the right of the background area in the third screen. Mario can get it by taking a pipe. | 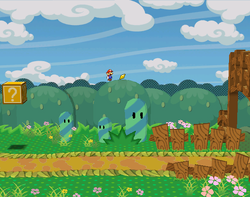
|
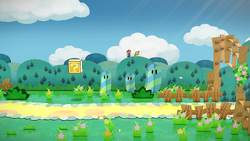
|
Petalburg
Additional items are on sale at Niff T.'s shop (+ the Shop Point rewards). In the remake, due to grass becoming more paperified, hitting it with hammer will cause it to spawn Coins at random.
| Item | Location | Location Image | Location Image (Remake) |
|---|---|---|---|
| 200 given by innkeeper after sleeping in the inn 50 times. Missable if given elsewhere. | 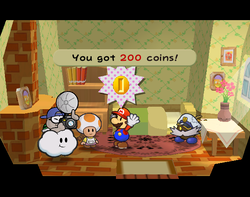
|
||
| Given by Bub-ulber after finishing his trouble. Finishing his trouble allows Mario to trade Hot Dogs to him in exchange for Dried Bouquets at any time. | 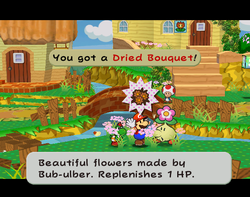
|
||
| In the east area, it is behind the fence to the right of Kroop's house. Requires Paper Mode. | 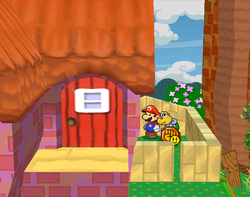
|
||
| Given to and given back by Kroop in his house during Mayor Dour's trouble | 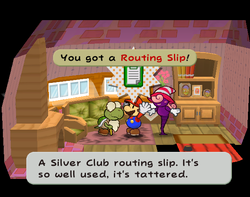
|
||
| In the west area, it is under a panel in front of Bub-ulber on the island to the south of the river. | 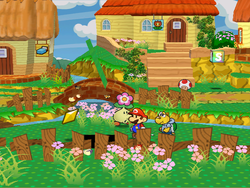
|
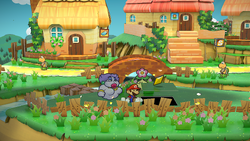
| |
| In the east area, it is under a panel to the south of the east exit. | 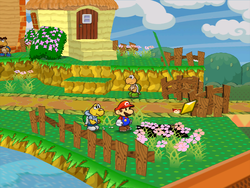
|
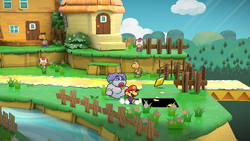
| |
| In the east area, it is in the front yard of Kroop's house. Can be randomly harvested once at a time, from one of the three vegetations for an unlimited amount of times. | 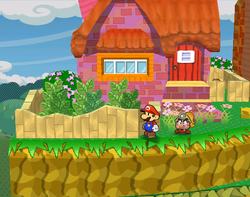
|
||
| Given by Kroop for doing his trouble. | 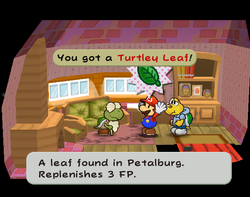
|
Path to Shhwonk Fortress
In the remake, due to grass becoming more paperified, hitting it with hammer will cause it to spawn Coins at random.
| Item | Location | Location Image | Location Image (Remake) |
|---|---|---|---|
| In the first screen, in the fifth tree. | 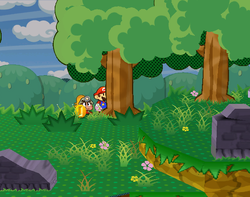
|
||
| In the third screen, in the third tree. | 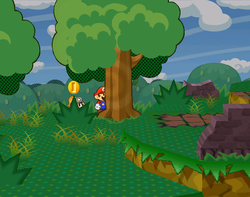
|
||
| In the third screen, in the last bush. | 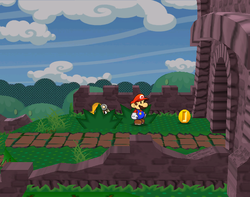
|
||
| In the fifth screen, in the second-to-last bush. | 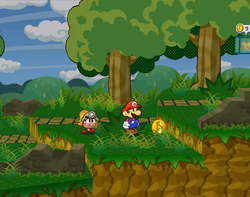
|
||
| In the fifth screen to the right of Petalburg, in the question block in the middle. | 
|

| |
| On the ground in the fifth screen to the right of Petalburg. | 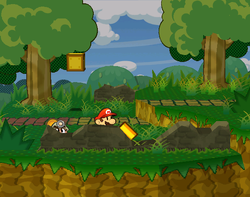
|
||
| In the first screen to the right of Petalburg, one is in the question block on the ground. | 
|
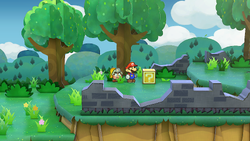
| |
| In the third screen to the right of Petalburg, one is in the first bush on the last platform. | 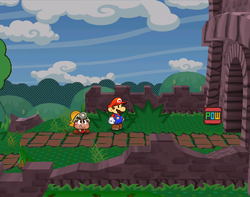
|
||
| One is in the first clump of grass beyond Petalburg. | 
|
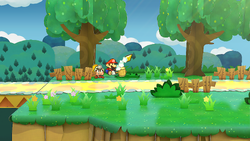
|
Shhwonk Fortress
In the remake, the grass in the Thwomp room can be squished for Coins to randomly spawn.
| Item | Location | Location Image | Location Image (Remake) |
|---|---|---|---|
| Two screens to the left of the entrance. Stone Guarded by four Fuzzies. | 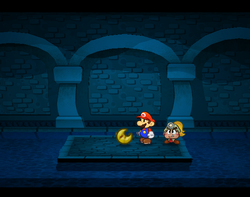
|
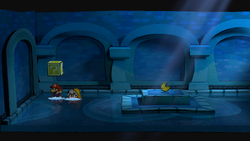
| |
| In the red ? block in the entrance screen underground. | 
|
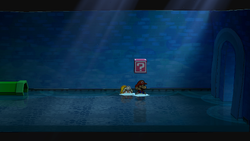
| |
| Two screens to the right of the entrance. Stone guarded by four Fuzzies. | 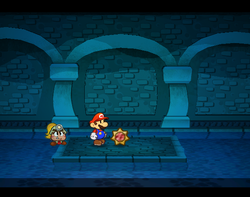
|

|
Hooktail Castle
In the remake, grass found in the wooden bridge scene can be hammered to spawn Coins at random.
| Item | Location | Location Image | Location Image (Remake) |
|---|---|---|---|
| In the storeroom in the right of the first floor, it is in the first cell. | 
|
||
| In the spiky room in the right of the first floor, it is in the chest in the middle. | 
|

| |
| In the second room on the first floor, it is in the right of the area behind the cells. In the GameCube version, it shares the design with Castle Key (Red). | 
|
||
| In the third room on the first floor, it is on a low ledge on the north wall. Accessible from the flippable stairs. | 
|
||
| In the storeroom on the third floor, they are in the chests. In the GameCube version, the Castle Key shares the design with Castle Key (Red). | 
|

| |
| In the stair area on the third floor, it is across a gap in the south. Requires Koops. In the GameCube version, it shares the design with Castle Key (Red). | 
|
||
| Found by Koopley in Hooktail's stomach. Given to Mario after Hooktail is defeated. | 
|

| |
| Inside the chest covered by a piece of paper at the center of Hooktail's room while doing Ms. Mowz's trouble. | 
|

| |
| Outside the castle, it is to the right under the broken bridge. Requires Koops. | 
|
||
| In the stair area on the second floor, it is on top of the high platform in the southeast. Accessible with the yellow block from the third floor. | 
|

| |
| In the room with a block to the third floor, it is on a ledge by the left wall. | 
|
||
| In the first room on the first floor, it is in the red ? block. | 
|

| |
| In the third room on the first floor, it is by the north wall. | |||
| In the storeroom on the third floor, it is above the left chests. | |||
| In the stair area on the fourth floor, it is in front of the window by the door to the outside. | |||
| In the room with a block to the third floor, it is given by Koopook for doing his trouble. | 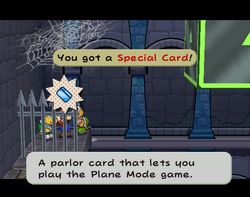
|
||
| In the second room on the first floor, it is under a panel behind the leftmost cell. | 
|

| |
| In the third room on the first floor, it is on a high ledge on the north wall. Accessible from the yellow block or the window area on the second floor. | 
|

| |
| To the right of the third room on the first floor, it is on a high ledge through a hole on the wall. Accessible from the purple block. | 
|

| |
| In the window area on the second floor, it is in the right of the area behind the windows. | 
|

| |
| In the airplane room on the third floor, it is on the right of the north ledge. | 
|

| |
| To the right of the spiky room on the first floor, it is inside a chest that appears after hitting the ! block. Requires Bobbery. | 
|

|
Boggly Woods
In the Nintendo Switch remake, additional items can be purchased from Charlieton.
| Item | Location | Location Image | Location Image (Remake) |
|---|---|---|---|
| In the third screen, in the second-to-last tree. | 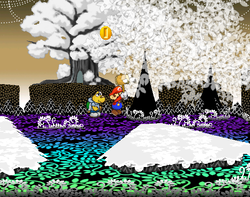
|
||
| 20 (30 on Switch) given by Doe T. after completing his trouble. | 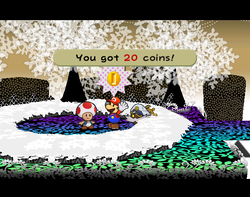
|
||
| In the second screen, to the left of the third tree from right. | 
|
||
| In the third screen, in the bush to the right of the pipe. | 
|
||
| In the second screen, dropped by the Three Shadows. | 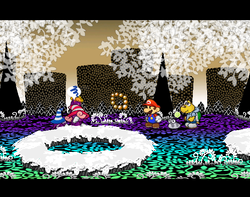
|
||
| In the fourth screen, in the red question block on top of the right platform. | 
|

| |
| In the fourth screen, to the left of the high plane panel. | |||
| In the second screen, in the leftmost tree. | 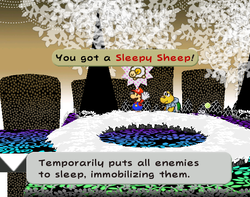
|
||
| In the fourth screen, on the left of the tree stumps to the north of the airplane area. | 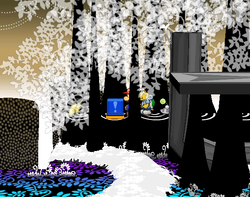
|
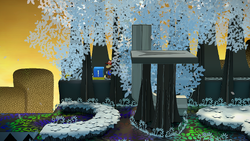
| |
| In the fifth screen, in the third tree. | 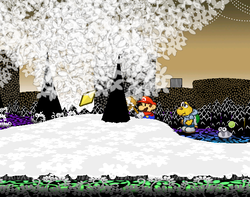
|
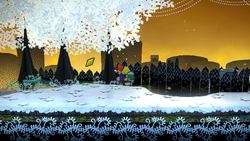
| |
| In the fifth screen, to the left of the pipe leading to Flurrie's house. | 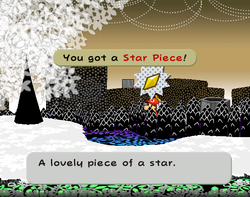
|
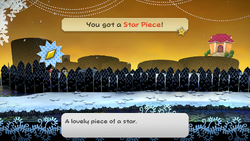
| |
| In the fifth screen, in the right of the area behind the fence. | 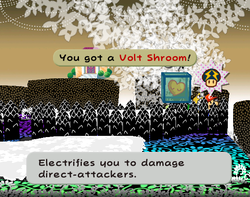
|
Hidden ? Block
| Item | Description | Block un/revealed ( |
Block un/revealed ( |
|---|---|---|---|
| In the area with the tall stump that allows him to go into Airplane Mode, he should go to the tree stumps in the back and jump at the tenth one from the left to reveal the hidden ? Block. The location of this block is mentioned in Wonky's Tales, "Secret of Boggly Woods".[2] | 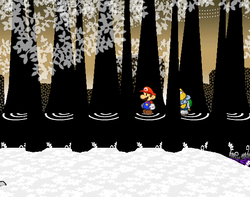 
|
|
Flurrie's House
| Item | Location | Location Image | Location Image (Remake) |
|---|---|---|---|
| Under a panel in the southeast of the bedroom. | 
|
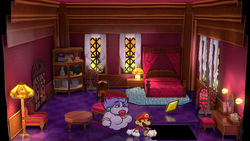
| |
| In the chest box in the bedroom. Flurrie might have used it when she was an actress. | 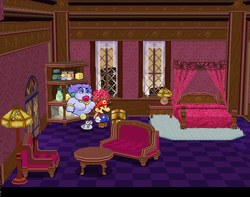
|
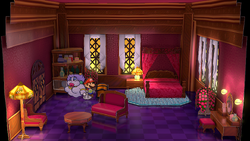
|
The Great Tree
In addition, there is a shop covered by a piece of paper to the lower-left of the twisty path. Having Flurrie blow it away will allow Mario access to the shop.
| Item | Location | Location Image | Location Image (Remake) |
|---|---|---|---|
| In the second room below the entrance, to the right of the twisty path, it's inside the chest on the ground. | 
|
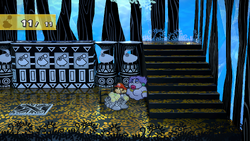
| |
| In the second room below the entrance, to the right of the twisty path, it's on the left pillar in the underground. | 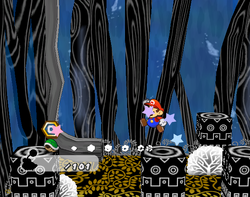
|
||
| In the entrance scene, in the first bush. | 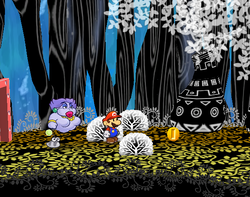
|
||
| In the storeroom in the highest place, in the first bush. | 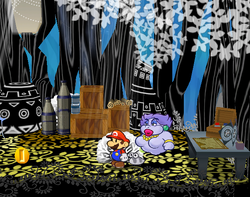
|
||
| In the area before the area with the trap, in the second bush. | 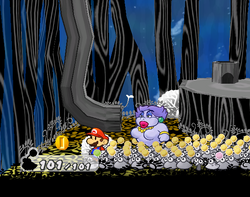
|
||
| In the next area (accessed by a pipe on the log), in the third bush found on the lower part. | 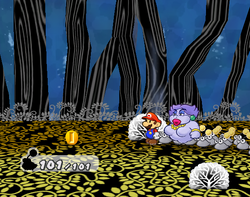
|
||
| 60 (50 on Switch) given by Puni Elder after completing her trouble. | 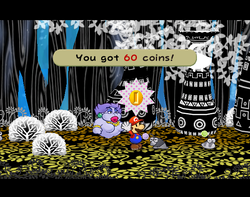
|
||
| In the second room below the entrance, it's in a ? Block above an invisible block by the twisty path. | 
|

| |
| In the water-draining room deep in the tree, it's to the back of the stairs in the upper room. | 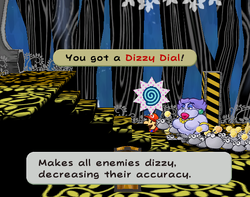
|
||
| Stolen by Lord Crump and picked up by Mario after Magnus von Grapple is defeated. | 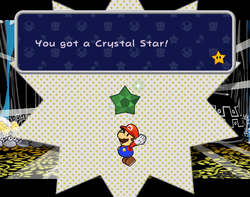
|
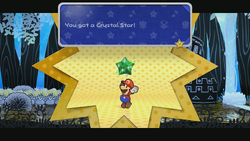
| |
| In the outside area, it's in the waterfall to the right of the tree. | 
|
||
| In the room before the Crystal Star room, it's in the left bush. | 
|
||
| In the storeroom in the highest place, it's given by Jabble when talked to after Chapter 2. | 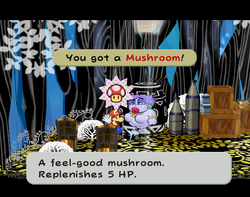
|
||
| Given by Petuni by playing the Stump Petuni game with her. Available after Chapter 2. (Repeatable + free of charge) | 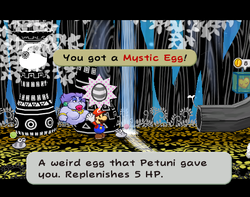
|
||
| In the second room above the entrance area, it's in the southeast bush on the ground. | 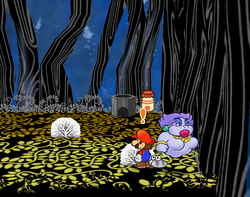
|
||
| Given by the Puni elder in Chapter 2. This is the only key item removable from Mario's inventory at will. | 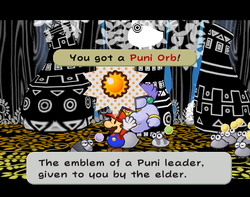
|
||
| In the storeroom in the highest place, it's dropped by the X-Naut guard. | 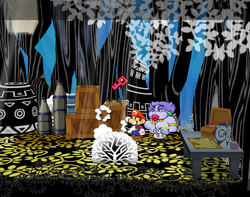
|
||
| Given to and given back by Puni Elder in the entrance area during Mayor Dour's trouble | 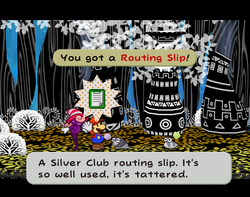
|
||
| In the room to the right of the entrance, it's to the right of the bubble pond. | |||
| In the first room below the entrance, it's above the big stone in the lower-left of the room. Accessible with the airplane panels. | |||
| In the second room below the entrance, to the right of the twisty path, it's on the back pillar in the underground. | |||
| In the water-draining room deep in the tree, it's above a lily in the lower-room. | |||
| In the water-draining room deep in the tree, it's inside a chest box in front of the stairs in the upper room. | 
|
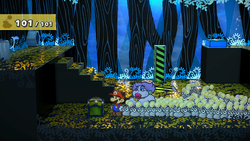
| |
| In the first room above the entrance area, it's under a panel near the pipe to the up. | 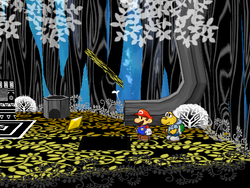
|
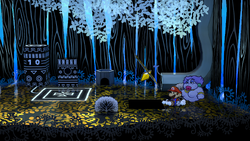
| |
| In the third room above the entrance area, it's under a panel in the blue cell. | 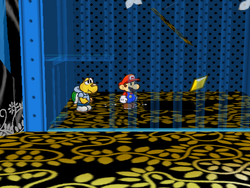
|
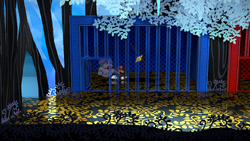
| |
| In the second room below the entrance, it's in the northwest bush below the twisty path. | 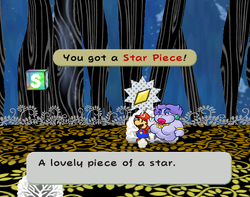
|
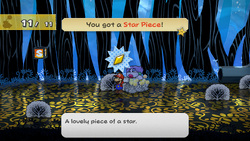
| |
| In the second room below the entrance, to the left of the twisty path, it's behind the entrance pipe of the lower area. | 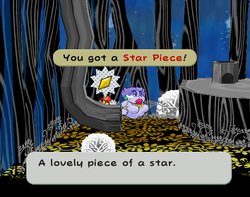
|
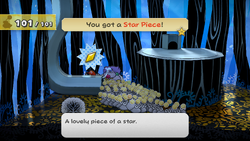
| |
| In the second room below the entrance, to the left of the twisty path, it's behind the pipe in the area below the trap. | 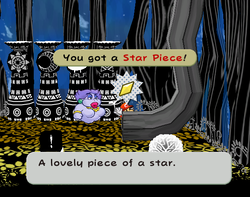
|
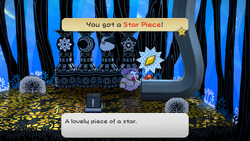
| |
| In the shortcut room from the tree bottom to the twisty path area, it's in the southwest bush. | 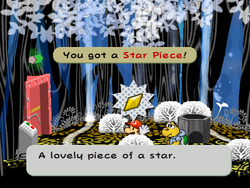
|
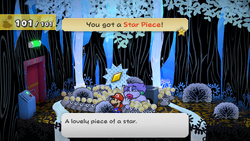
| |
| In the second room below the entrance, to the right of the twisty path, it's in a chest in a north cave. | 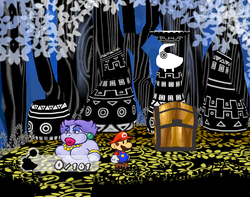
|
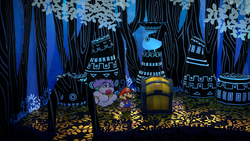
| |
| In the bubble room to the right of the entrance, it's in the rightmost bush on the ground. | 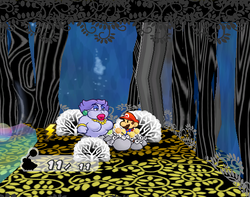
|
||
| In the storeroom in the highest place, it's inside the left chest. (The right chest is opened by Ms. Mowz.) | 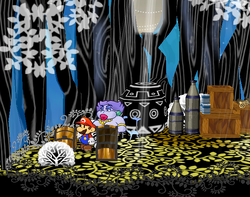
|
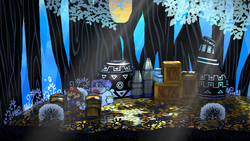
|
Hidden ? Block
| Item | Description | Block un/revealed ( |
Block un/revealed ( |
|---|---|---|---|
| In the area with the narrow passageways with Piders, is a red ? Block. Mario must use Koops to hit the hidden ? Block directly underneath the block. |  
|
 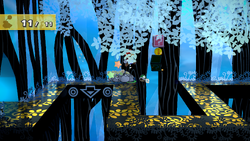
|
Glitzville
Additional items are on sale at the souvenir shop, which is located in the western part of Glitzville.
| Item | Location | Location Image | Location Image (Remake) |
|---|---|---|---|
| Purchasable from the Hot Dog Stand from Mr. Hoggle for 10 coins each. | 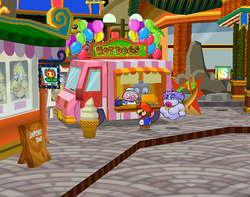
|
||
| Given and purchasable from the businessman after finishing his trouble. | 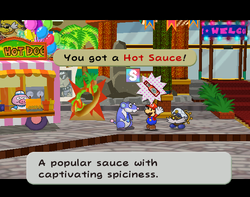
|
||
| Behind the red poster to the front of the juice bar. | 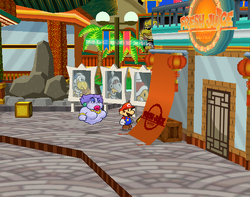
|
||
| In the chest box on the roof of the juice bar. | 
|
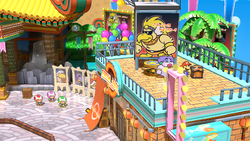
| |
| In the right of the area near the Glitz Pit. There is a hidden block below to reach it, or it can be reached later with a Spring Jump. | |||
| Behind the telephone booth in the southwest. | 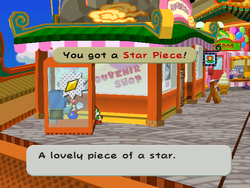
|
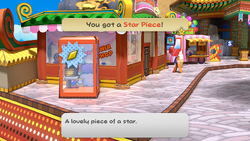
| |
| In the far-left corner inside the juicy shop. | 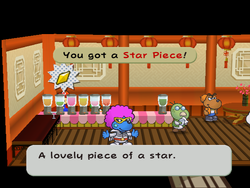
|
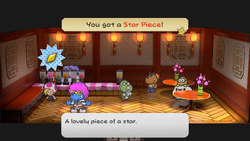
| |
| Behind the east plants in front of the entrance to Glitz Pit. | 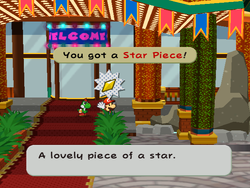
|
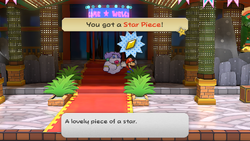
| |
| Under a panel in the middle-south. | 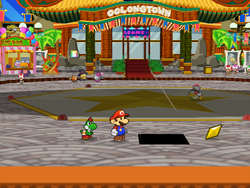
|
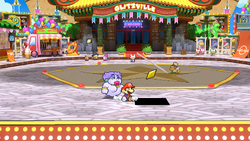
| |
| Under the Rawk Hawk poster on top of the juice shop. Requires Tube Mario or Koops. | 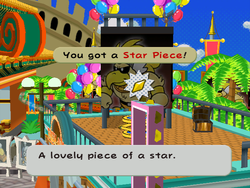
|
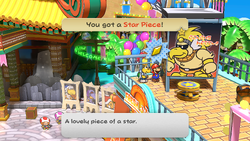
| |
| Behind the telephone booth during one of X's missions. | 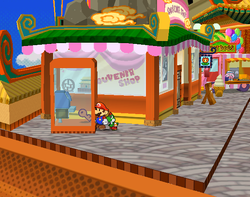
|
||
| Given by Podler in the juice shop during Chapter 3. | 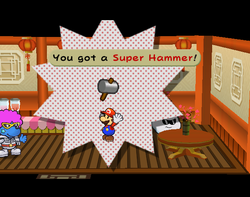
|
Hidden ? Block
| Item | Description | Block un/revealed ( |
Block un/revealed ( |
|---|---|---|---|
| Outside, near the front-right pillar of the Glitz Pit's entrance is a Shine Sprite. There's a hidden ? Block underneath it that Mario can reveal by hitting it with his Hammer. |  
|
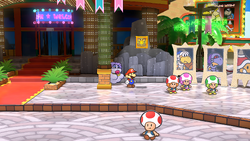 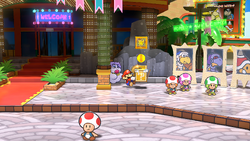
|
Glitz Pit
| Item | Location | Location Image | Location Image (Remake) |
|---|---|---|---|
| All in the storeroom during Jolene's trouble. | 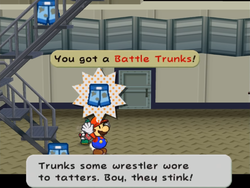
|
||
| Won after defeating Rawk Hawk. | 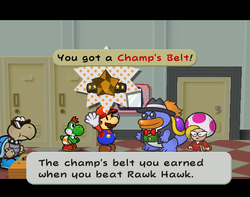 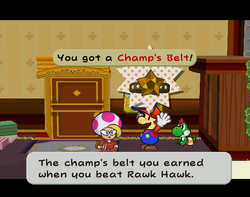
|
||
| In the first-floor storeroom, it can be found among the boxes in the northeast corner with Flurrie's help. | 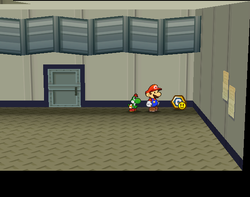
|
||
| Given by Jolene after each match. Amount depends on an opponent and outcome. | 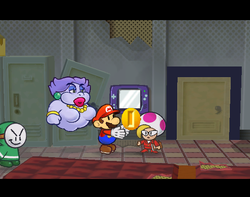 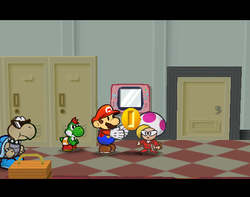 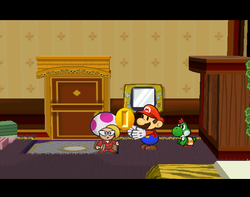
|
||
| 30 given by Grubba after beating The Iron Adonis Twins for the first time. | 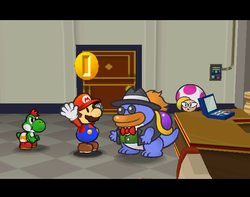
|
||
| 30 given by Jolene after completing her trouble. | 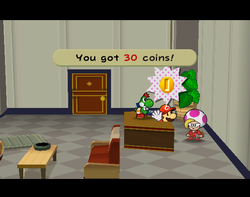
|
||
| In the blue minor-league locker room, three coins are inside different lockers. Missable if the player does not collect them before warping back to the other major league locker. |
N/A | ||
| In the minor-league locker room, it is in the topmost locker on the left wall. Missable if the player does not get it before ranking up to the major league the second time. | N/A | ||
| In the minor league locker room, it can be found on top of the shelf in the room to the left. | 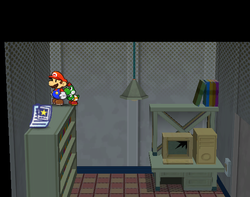
|
||
| Given to Mario after he helps Jolene defeat Macho Grubba at the end of Chapter 3. | 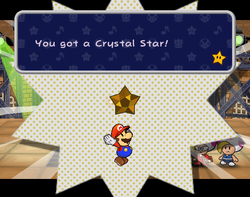
|
||
| In the backstage hallway, it is on top of the ladder. | N/A | ||
| In the second-floor storeroom, it can be found on top of the big box in the left. | 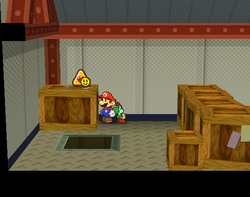
|
||
| In the major-league room, it can be found in the northwest corner. In the major-league room, inside one of the western lockers. Missable if the player doesn’t get it before defeating Rawk Hawk the second time. |
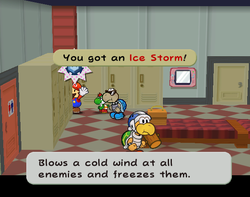
|
||
| In the corridor of the Glitz Pit, it can be found in a blue box near the right entrance. | 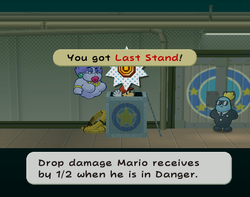
|
||
| In the blue major-league locker room, it is inside the middle locker on the right wall. Missable if the player does not get it before warping back to the other major league locker. | N/A | ||
| In the major-league locker room, it is inside the bottommost locker on the left wall. Missable if the player does not get it before defeating Rawk Hawk the second time. | N/A | ||
| Given to the player by Prince Mush in the corridor after winning the Exhibition Match against him at least once. | N/A | ||
| In the second-floor storeroom, it can be found by the north wall between the boxes. | |||
| In the lobby, one is under a panel in the wall corner to the northwest of the entrance. | 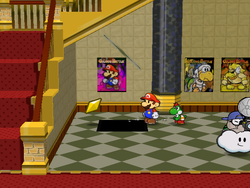
|
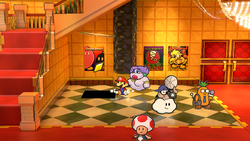
| |
| In the office, one is in the drawer near the computer. | 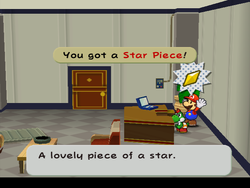
|
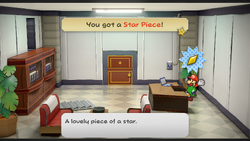
| |
| In the office, one is behind the plant in the southwest. | 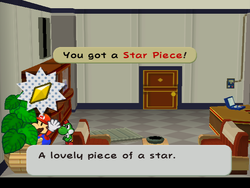
|
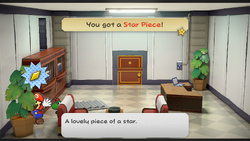
| |
| In the first-floor storage room, one is under a panel on the floor. | 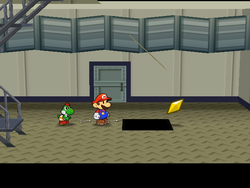
|
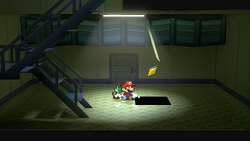
| |
| To the right of the second-floor storage room, one is among the rightmost boxes. | 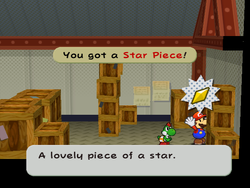
|
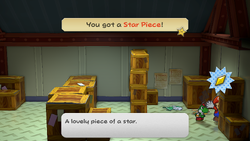
| |
| In the second-floor lobby, it can be found behind the leftmost poster during one of X's missions. | 
|
||
| In the office, it is held by Jolene and given to Mario during Toodles's trouble. | 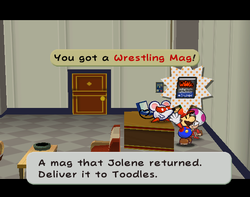
|
Twilight Town
Some items are on sale in the Twilight Shop which is located in the east area.
| Item | Location | Location Image | Location Image (Remake) |
|---|---|---|---|
| In the second scene, in the storage room of the shop. | 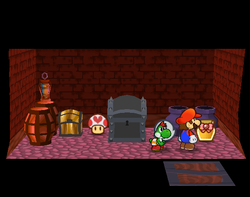
|
||
| In the first scene, in the rightmost bush. | 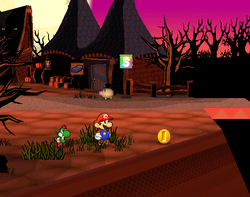
|
||
| 30 given by Mayor Dour for completing his trouble. | 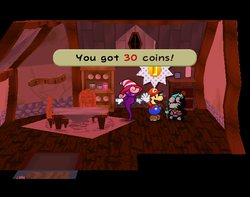
|
||
| 200 given by innkeeper after sleeping in the inn 50 times. Missable if given elsewhere. | 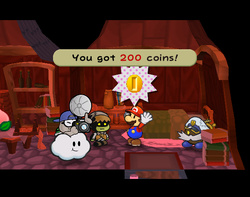
|
||
| In the second scene, in a chest box in the storage room of the shop. | 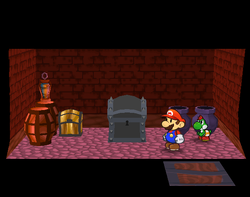
|
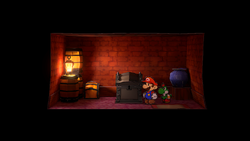
| |
| In the first scene, in the lowest leftmost bush. | N/A | ||
| In the second scene, behind the notice board in the right of the shop. | 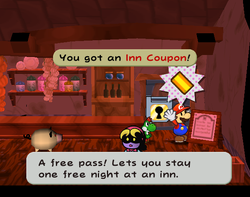
|
||
| In the second scene, given by Eve for doing her trouble. | 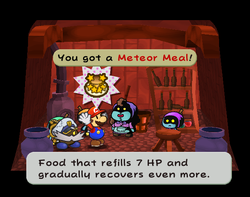
|
||
| In the first scene, appearing in the left desk every time Mario sleeps at the inn. | 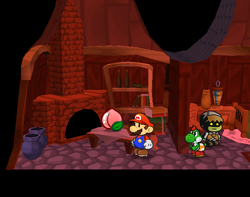
|
||
| In the first scene, received from Mayor Dour while doing his trouble. | 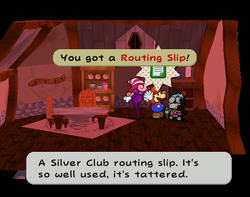
|
||
| In the second scene, given by Eve if Mario does a favor for her in Chapter 4. | 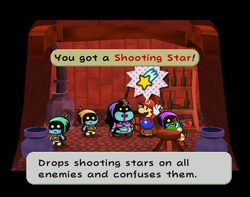
|
||
| In the first scene, behind the leftmost house. | 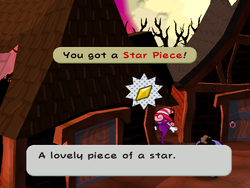
|
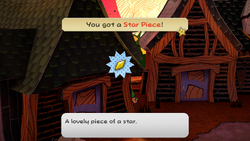
| |
| In the first scene, in the southernmost bush in the southeast area. | 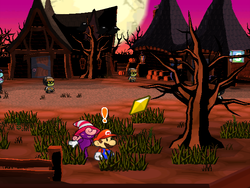
|
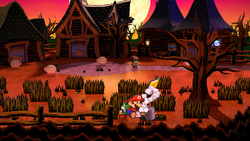
| |
| In the second scene, behind the fence near the southeast tree. | 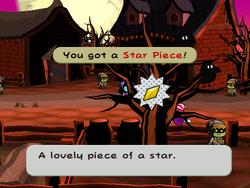
|
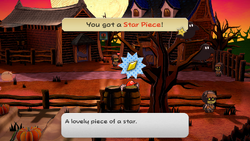
| |
| In the first scene, in the leftmost bush after Vivian dropped it. | 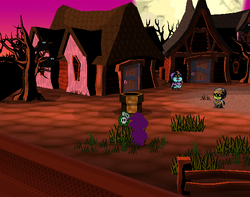
|
Twilight Trail
| Item | Location | Location Image | Location Image (Remake) |
|---|---|---|---|
| In the first screen to the right of Twilight Town, it is in the wooden shack near the entrance. | 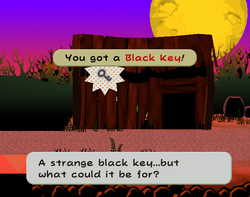
|
||
| In the wooden shack in the first screen, 10 of them in the Coin Block. | 
|

| |
| In the second screen, in the middle in ? Block. | 
|
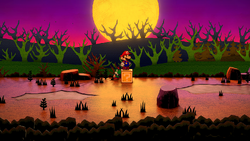
| |
| In the second screen, southeast of the ? Block in the Coin Block. | N/A | 
| |
| In the second screen, near the exit, 10 of them in the Coin Block. | 
|

| |
| In the south of the first forest screen, 10 of them in the Coin Block. | 
|

| |
| In the first forest screen, it is in the yellow ? block in the northeast. | 
|

| |
| In the second forest screen, it is in the red ? block on the path. | 
|

| |
| In the first two Brick Blocks in the second area. | N/A | 
| |
| In the third forest screen, it is behind the last tree before Creepy Steeple. | |||
| In the third screen to the right of Twilight Town, it is to the right of the fallen tree. Mario gets it with Koops in Chapter 4. | 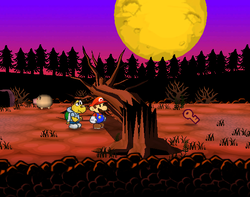
|
||
| In the third screen to the right of Twilight Town, it is behind the fallen tree. | 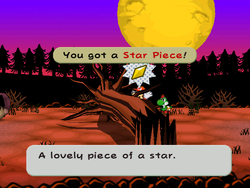
|
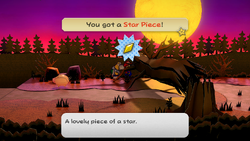
| |
| In the third screen to the right of Twilight Town, it is behind the pipe that leads to the forest. | 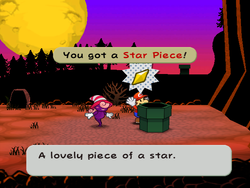
|
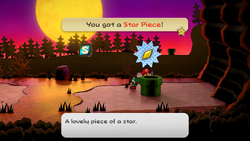
|
Hidden blocks
| Item | Description | Block un/revealed ( |
Block un/revealed ( |
|---|---|---|---|
| In the second area from Twilight Town, Mario should find a ? Block, then jump up from it to reveal the hidden ? Block. |  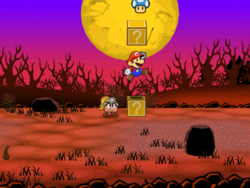
|
 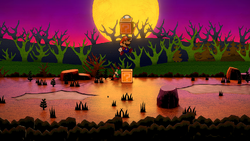
| |
| In the dark wooded area with the boulder that must be pushed, Mario should jump left of the first hole to reveal the hidden ? Block (covered by a tree in the foreground). |  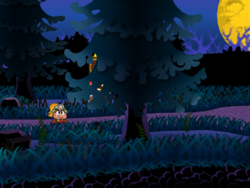
|
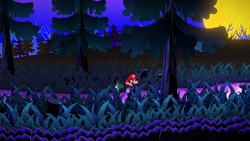 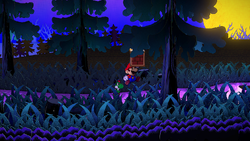
|
Creepy Steeple
| Item | Location | Location Image | Location Image (Remake) |
|---|---|---|---|
| Rewarded from the Creepy Steeple Boo after successfully answering all questions of his first quiz. | N/A | ||
| In the passage below the main room, it is dropped by the Boo if his quiz was answered incorrectly. | 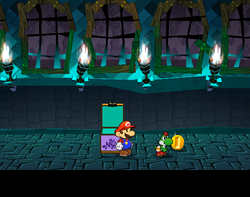
|
||
| In the treasure room through a hole on the north wall of the main room, they are inside the treasure chests. | 
|
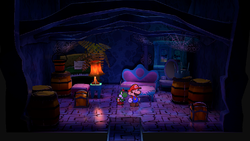
| |
| In the room just below the main room, it is in a chest in the secret passage to the back. Mario must have Flurrie blow up the wall. | 
|
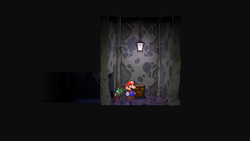
| |
| In the passage to the north of the main room, there is a gap in the fence on the north. To the right is the tree with this item, a replenishable resource. | 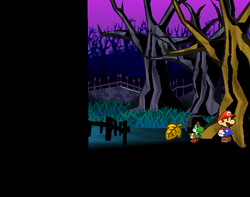
|
||
| Rewarded from the Creepy Steeple Boo after successfully answering all questions of his third quiz. | N/A | ||
| In the main room, it is dropped by the Atomic Boo. | 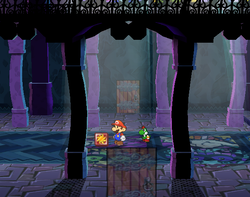
|
||
| Rewarded from the Creepy Steeple Boo after successfully answering all questions of his final quiz. | N/A | ||
| In the storeroom with the parrot, they are in the treasure chests. |  
|
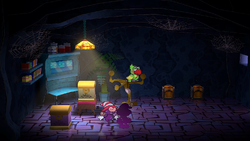
| |
| Rewarded from the Creepy Steeple Boo after successfully answering all questions of his second quiz. | N/A | ||
| In the balcony, dropped by Doopliss after he is defeated at the end of Chapter 4. | 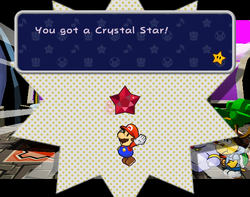
|
||
| In the treasure room through a hole on the north wall of the main room, it is in the right. | |||
| Down the well through the pipe outside the steeple, it is to the southwest of the trampoline. | |||
| Halfway through the pipe outside the steeple, it is next to the save block. | |||
| Rewarded from the Creepy Steeple Boo after successfully answering all questions of his fourth quiz. | N/A | ||
| Outside Creepy Steeple, it is to the left of the main gate, by the back side. | 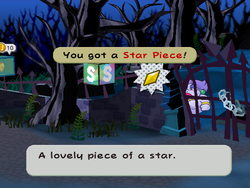
|
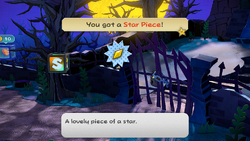
| |
| In the treasure room through a hole on the north wall of the main room, it is behind the mats. | 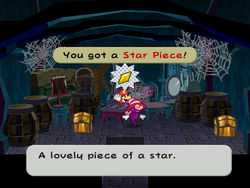
|
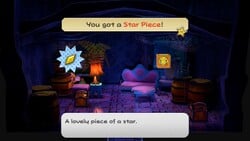
| |
| In the room to the right of the main room, it is under a panel to the right of the stairs in the middle. | 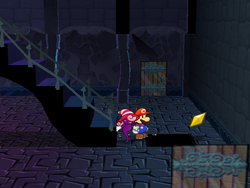
|
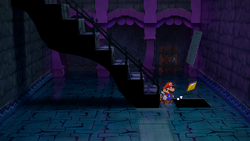
| |
| In the passage below the main room, it is behind the right windows in the north side. Accessible from the pipe/well outside the steeple. | 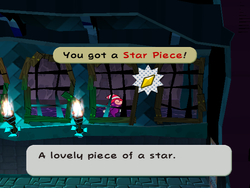
|
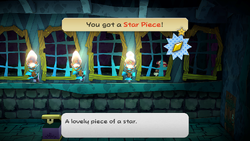
| |
| In the storeroom with the parrot, it is under a panel in the southeast. | 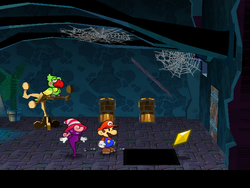
|
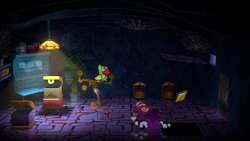
| |
| In the main room, it is in the left of the south hallway in the high place. | 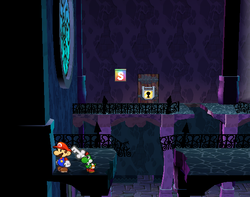
|
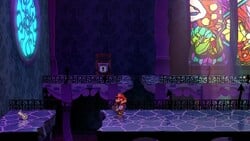
| |
| Down the well through the pipe outside the steeple, it is in the red question block near the Buzzy Beetles. | 
|
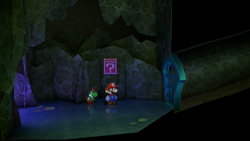
| |
| In the passage below the main room, it is dropped by the Boo if his quiz was answered correctly in Chapter 4 and lost forever if answered incorrectly. | 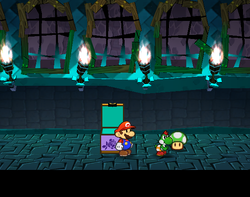
|
||
| Rewarded from the Creepy Steeple Boo after successfully answering all questions of his fifth quiz. |
N/A |
Hidden ? Block
| Item | Description | Block un/revealed ( |
Block un/revealed ( |
|---|---|---|---|
| At the entrance of the Steeple, Mario should jump at the fourth step from the top to reveal the hidden ? Block. The location of this block is mentioned in Wonky's Tales, "Creepy Steeple's Secret".[3] |  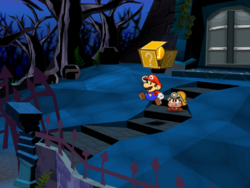
|
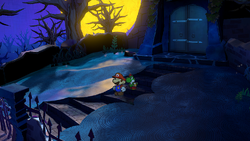 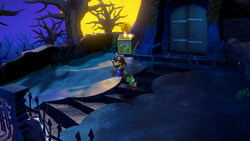
|
Keelhaul Key
Additional items are on sale at the Keelhaul Galleria, an item shop located in the shantytown.
| Item | Location | Location Image | Location Image (Remake) |
|---|---|---|---|
| In the town; given by Flavio in Chapter 5. | 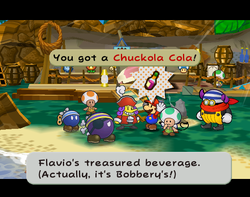
|
||
| In the third scene to the right of the town; on the coconut tree in the background. Replenishable source. | 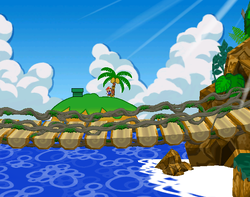
|
||
| 200 given by innkeeper after sleeping in the inn 50 times. Missable if given elsewhere. | 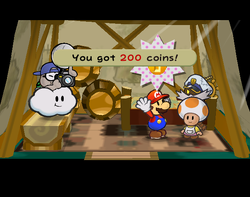
|
||
| In the first scene to the right of the town, in the last bush. | 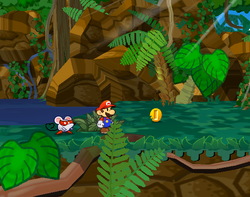
|
||
| In the second scene to the right of the town, in the middle of the lower part in the ? Block. | 
|
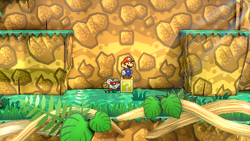
| |
| In the second scene to the right of the town, in the last bush in the upper part. | 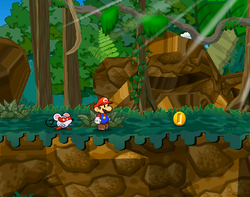
|
||
| In the second scene to the right of the town, to the left of the left cliff of the upper part in the Coin Block. |
N/A | 
| |
| In the first scene to the right of the town, in the ? Blocks. | 
|
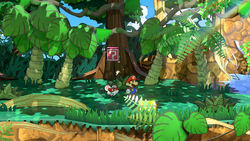
| |
| In the third scene to the right of the town; below the right end of the bridge. | 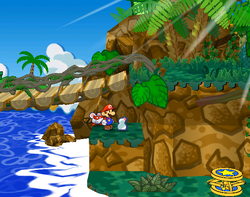
|
||
| In the third scene to the right of the town; behind a bush near the entrance. | 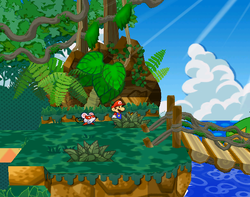
|
||
| In the first scene to the right of the town; on the fruit tree in the left after Chapter 5 (Replenishable source). In the Nintendo Switch remake, it is always available. | 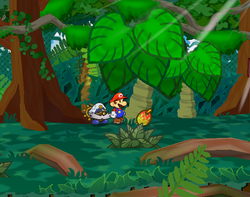
|
||
| In the second scene to the right of the town; in a bush in the south side. | 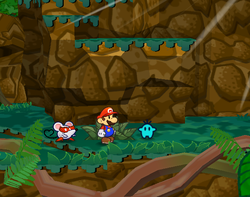
|
||
| In the second scene to the right of the town; above a brick to the left of the left cliff of the high mountain. | |||
| In the third scene to the right of the town; covered by the leaves of the tree near the right exit. | |||
| Given to Mario temporarily in Chapter 5. | 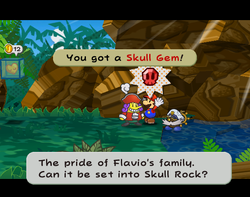
|
||
| In the fourth scene to the right of the town; in the last bush before the water. | 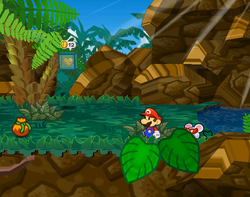
|
||
| In the beach scene to the left of the town; under a panel by a rock in the east. | 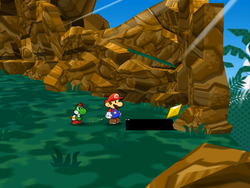
|
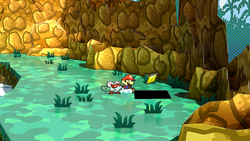
| |
| In the town scene; in the left corner of the water to the south of the town. | 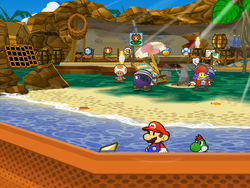
|
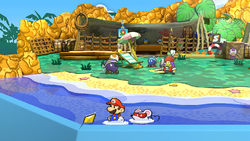
| |
| In the town scene; behind the rocks near the right exit. | 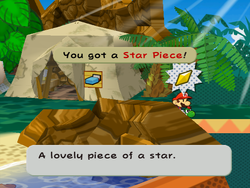
|
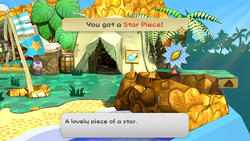
| |
| In the first scene to the right of the town; in the first clump of grass. | 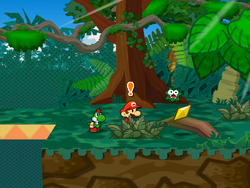
|
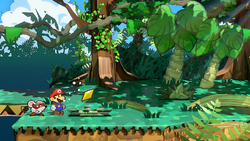
| |
| In the second scene to the right of the town; behind the tree trunk on the ground in the south area. | 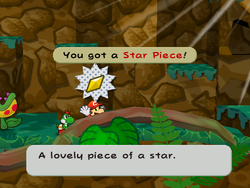
|
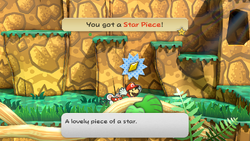
| |
| In the fourth scene to the right of the town; behind the rock in the south of where the water starts. | 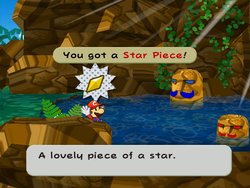
|
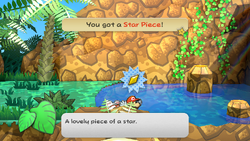
| |
| In the second scene to the right of the town; in the question block on the high mountain. | 
|

| |
| In the fourth scene to the right of the town; near the cave after Francesca lost it. | 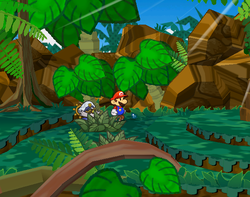
|
||
| In the beach scene to the left of the town; dropped by Whacka when hit. | 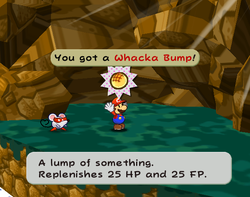
|
Hidden ? Blocks
| Item | Description | Block un/revealed ( |
Block un/revealed ( |
|---|---|---|---|
| In the fourth area is a ? Block on the ground. Jumping at the block outline above it will reveal the hidden ? Block. |  
|
 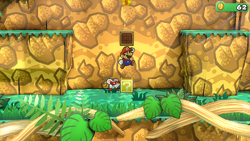
| |
| In the same area, is another ? block containing a Thunder Rage at the top of the area. Slightly south of this block is the hidden one. To hit it, Mario must walk to the edge and spin his Hammer to reveal it. Alternatively, he can use Bobbery to reveal it. Another option is for Mario to get to the center yellow block and using the Spring Jump from the Ultra Boots to spring straight up to reveal the hidden ? Block. In the Nintendo Switch remake, a fourth option is to use the hammer facing the screen at this spot. The location of this block is mentioned in Wonky's Tales, "Southern Isle Secret".[4] | 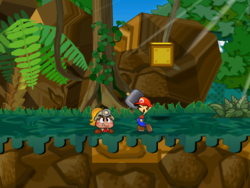 
|
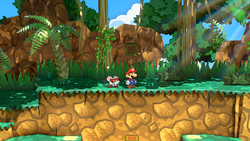 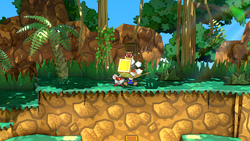
|
Pirate's Grotto
In the Nintendo Switch remake, additional items can be purchased from a Toad merchant in the area west of the location where the Black Skull sits.
| Item | Location | Location Image | Location Image (Remake) |
|---|---|---|---|
| In the leftmost screen in the south area; dropped by an Ember that appear after talking to the black chest. | 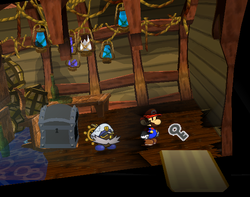
|
||
| In the storeroom in the left of the north area; dropped by Goom Goom when Mario takes on his trouble. | 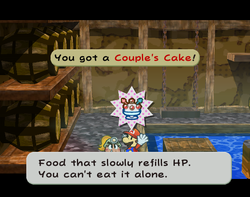
|
||
| In the big stair room in the right of the north area, there is a river to the north of the stairs. To the right of the river source is a chest box with this badge. Accessible using Boat Mode. | 
|
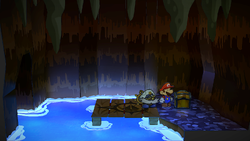
| |
| In the leftmost screen of the entrance area; on top of a ship floating in the south. | 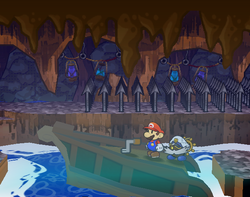
|
||
| In the storeroom in the left of the north area; on top of the north ledge. | 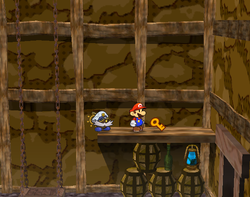
|
||
| In the leftmost screen of the south area; behind a chest in the sunken ship with the black curse box. | 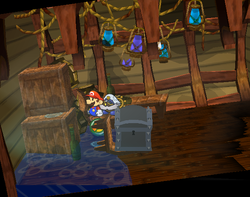
|
||
| In the entrance scene; behind the southwest barrel. | 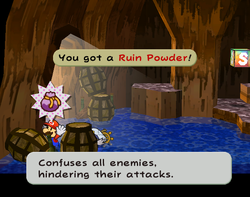
|
||
| On the Black Skull (Cortez's ship), it is given to Mario after he defeats Cortez. | 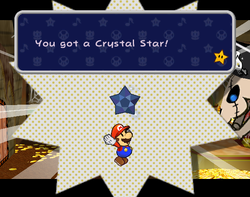
|
||
| In the spike room in the left of the first areas; on top of the far side of the ship floating in the left. | |||
| In the storeroom in the left of the north area; on top of the barrels in the high place on the left. | |||
| In the big stair room in the right of the north area; above the last few stairs. Accessible with a hidden block. | |||
| In the room with boats and barrels in the middle of the south area; high in the northeast corner. Accessible with a hidden block below. | |||
| In the room with spikes and waves in the right of the south area; to the right of the north entrance. Requires Koops. | |||
| In the spike room in the left of the first areas; on a small island in the south. | 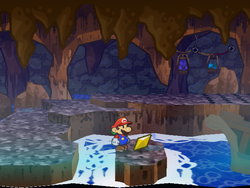
|
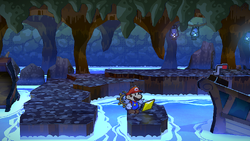
| |
| In the storeroom in the left of the north area; inside a barrel in the high place on the left. | 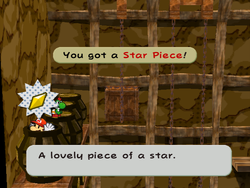
|
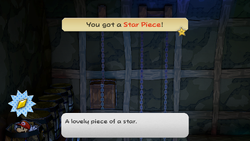
| |
| In the waterfall room of the north area; under a panel near the door to the right of the waterfall source. | 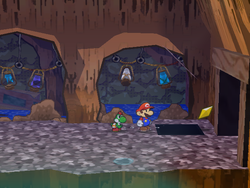
|
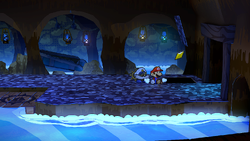
| |
| In the Buzzy Beetle room in the right of the north area; under a panel at the center of the room. | 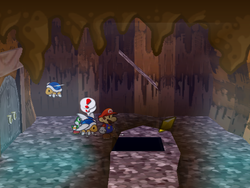
|
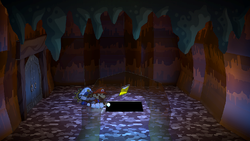
| |
| In a chest inside the derelict ship housing the black chest. | N/A | 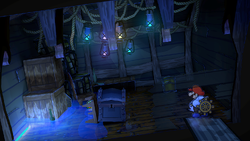
|
Hidden ? Blocks
| Item | Description | Block un/revealed ( |
Block un/revealed ( |
|---|---|---|---|
| In the area with the second Save Block, at the second step from the top, Mario must use Koops to hit the hidden ? Block underneath the Shine Sprite. | 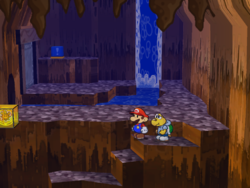 
|
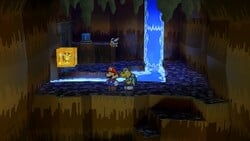 | |
| In the area just before the corridor with Bill Blasters, there's a Shine Sprite on the right side. There's a hidden ? Block underneath it that Mario can reveal by hitting it with his Hammer. |  
|
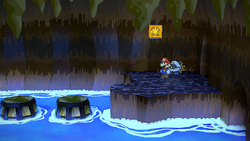 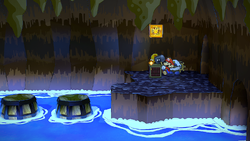
|
- Nintendo Switch version only
| Item | Description | Image | Image (block revealed) |
|---|---|---|---|
| In the area with the second Save Block, at the second step from the top, Mario must use hammer to hit the two hidden blocks that lead to the Shine Sprite, which can then be obtained by simply jumping. | 
|
||
| In the second lower stone platform near the Black Skull on the ground. This hidden block disappears after completing Chapter 5 due to the Black Skull breaking the bridge leading it. | 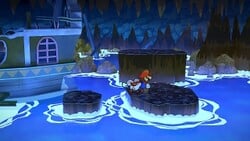
|

|
Excess Express
Additional items are on sale at the Sales Stall item shop in the dining car.
| Item | Location | Location Image | Location Image (Remake) |
|---|---|---|---|
| Given by the engineer while doing Bub's favor. | 
|
||
| Given by Ghost T. after returning the Ragged Diary to him. | 
|
||
| Given by Doopliss as Zip Toad after he is caught. Mario later returns it to the businessman. | 
|
||
| 30 given by Toodles after giving her back her Gold Ring. | 
|
||
| 40 given by Chef Shimi after completing his trouble. | 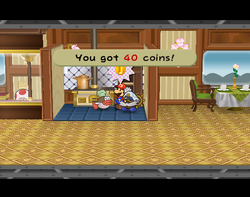
|
||
| Left by someone inside a drawer in cabin 005. | 
|
||
| Found in Heff T.'s drawer after following the trail of stew to cabin 003. | 
|
||
| Given by Doopliss as Zip Toad after he is caught. | 
|
||
| Given by the conductor after returning the blanket to him. | 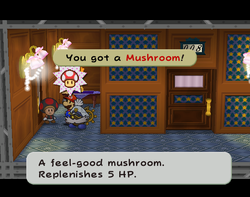
|
N/A | |
| Found behind some crates in the baggage room. Accessible using Paper Mode. | 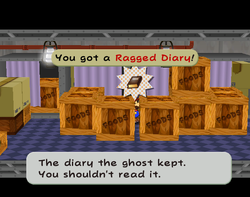
|
| |
| Given by Doopliss as Zip Toad after he is caught. | 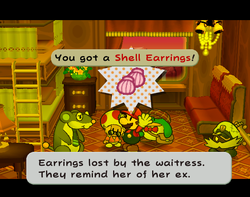
|
||
| Found in cabin 005 | |||
| Given by Bub after giving the autograph from the engineer to him. | |||
| Found under a panel in front of the gauge in the engineer's room.[note 1] | 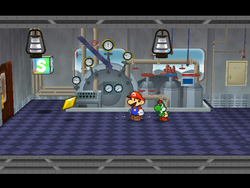
|
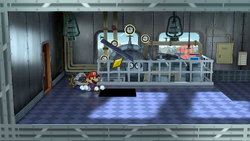
| |
| Found under a panel in the southwest corner in cabin 004. | 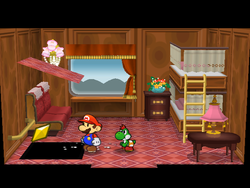
|
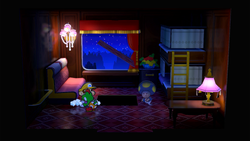
| |
| Given by Chef Shimi after returning the Galley Pot. | 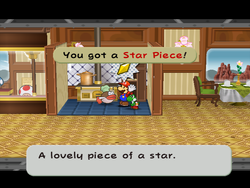
|
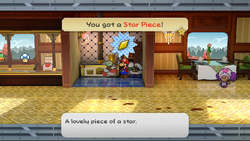
| |
| Given by the waitress after returning her Shell Earrings. | 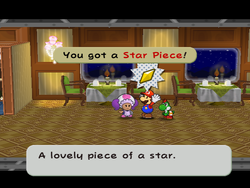
|
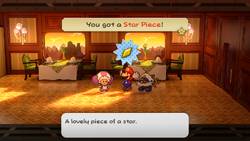
| |
| Found in a drawer in cabin 008. | 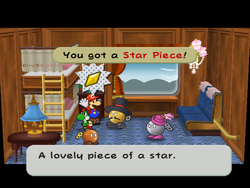
|
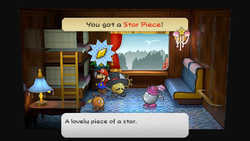
| |
| Given by the conductor after returning the blanket to him. | N/A | ||
| Automatically obtained in cabin 005. Is treated as an Important Item in the Nintendo Switch remake. | N/A | ||
| Found in cabin 001 after the businessman's things are stolen. | 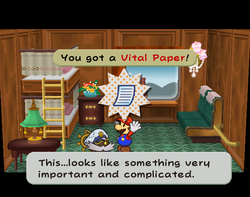
|
Notes
- ^ Only accessible while traveling to Poshley Heights.
Riverside Station
| Item | Location | Location Image | Location Image (Remake) |
|---|---|---|---|
| In the first room, it is on the ledge on the left side of the room and is accessed by Spring Jumping underneath the ledge. | 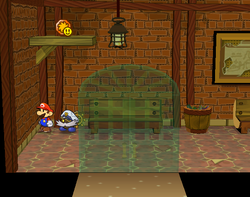
|
||
| On the Deck, in the middle of the upper part. | N/A | 
| |
| In the Sublevel, it is in the garbage can below the maze, near the door to the office. In the Sublevel, inside a garbage can on the lowest ground near the jump pad. |
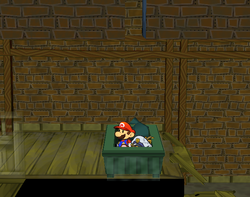
|
||
| Outside Riverside Station, it is given by the Toad worker near the drawbridge. | 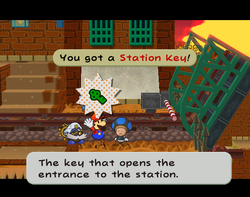
|
||
| In the Office, it is on top of a ledge inside some fencing and is accessed by Spring Jumping underneath the ledge. | 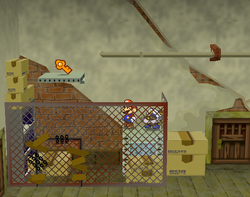
|
||
| On the Deck, it is on a ledge in the northwest wall accessed by using Tube Mode at the base of the highest set of stairs. | 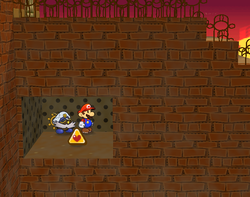
|
||
| Behind a blowable poster in the second room. | N/A | ||
| In a ? Block above a gear in the Machinery Room. | N/A | 
| |
| Behind one of the blowable posters in the lower part of the Deck. | N/A | ||
| In a ? Block in the lower part of the Deck. | N/A | 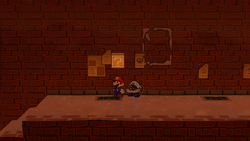
| |
| In the Sublevel, it is in a small alcove inside the big maze. | 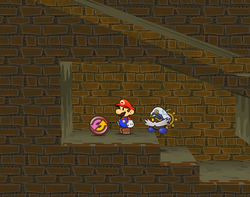
|
||
| Near the wall corner on the right side of the Deck. | |||
| On top of the stairs above the records shelf in the Records Room. | |||
| Behind one of the blowable posters in the lower part of the Deck. | N/A | ||
| In the Machinery Room, it is behind the last gear. | 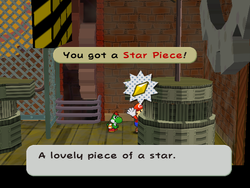
|
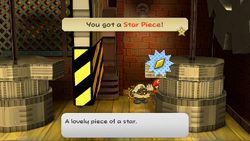
| |
| In the Machinery Room, it is on the last platform. | 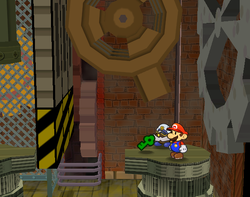
|
||
| Behind one of the blowable posters in the lower part of the Deck. | N/A | ||
| In the Sublevel, it is in the larger garbage bin in the area before the door to the office. | N/A | ||
| Behind one of the blowable posters in the lower part of the Deck. | N/A | ||
| In the Office, it is in a chest in the ceiling and is accessed through the higher door in the records room. | 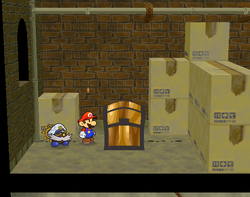
|
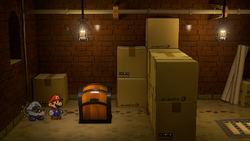
|
Hidden ? Block
| Item | Description | Block un/revealed ( |
Block un/revealed ( |
|---|---|---|---|
| On the Deck, in the area with Poison Pokeys, is a lone ? Block. Jumping up from it reveals the hidden ? Block. |  
|
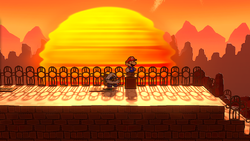 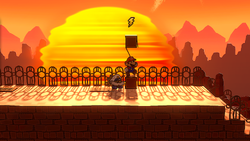
|
- Nintendo Switch version-exclusive
| Item | Description | Image | Image (block revealed) |
|---|---|---|---|
| In the Records Room, a Hidden Block can be found at the end of the middle ledge on the right. | 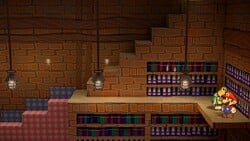
|
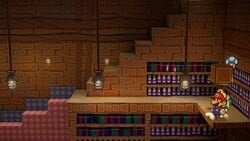
|
Poshley Heights
| Item | Location | Location Image | Location Image (Remake) |
|---|---|---|---|
| Given by Toadia after finishing her trouble. | 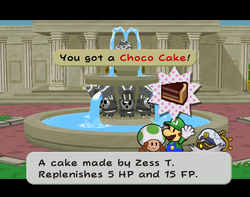
|
||
| 64 given by Goldbob after finishing his trouble. | 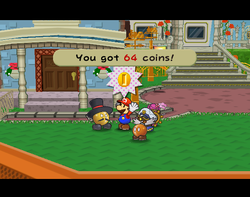
|
||
| 200 given by innkeeper after sleeping in the inn 50 times. Missable if given elsewhere. | 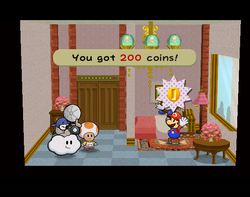
|
||
| 3 given by Bub after finishing his trouble. | 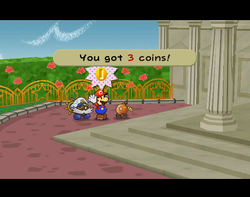
|
||
| In the second area, it can be bought for 50 coins from the shop in the left. | 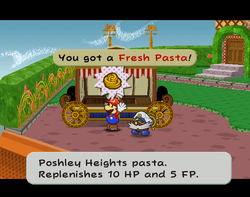
|
||
| Given by Goldbob during the General White hunt in Chapter 7. | 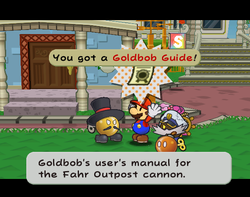
|
||
| In the second area; behind the pasta-selling little shop in the left. | 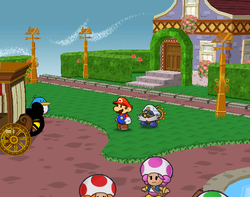
|
||
| In the first area; in a chest in the back room of Goldbob's house. Accessible using Paper Mode. | 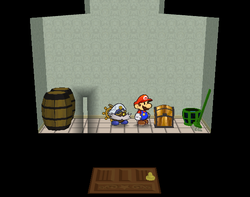
|
| |
| In the second area, it appears in the desk to the left of the inn counter after sleeping at the inn. | 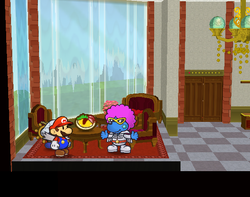
|
||
| Given by Goldbob during his trouble. | 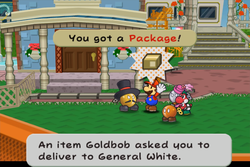
|
||
| Given by Toodles after finishing her trouble. | 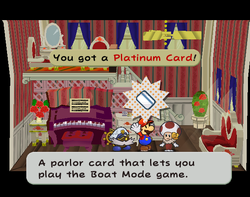
|
||
| Given by Bub while doing his trouble. | 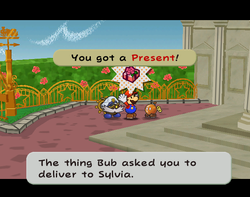
|
||
| In the third scene; high to the left of Poshley Sanctum. | |||
| In the first scene; under a panel in the red floor at the center. | 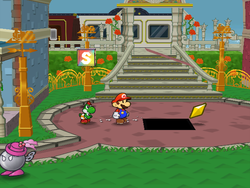
|
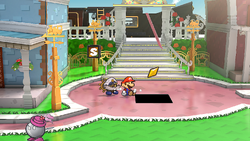
| |
| In the first scene; behind the chair to the left of Goldbob's house. | 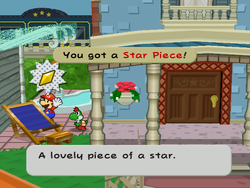
|
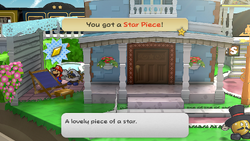
| |
| In the first scene; inside the hedge to the right of Toodles's house. | 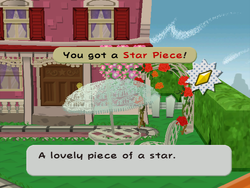
|
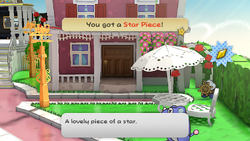
| |
| In the second scene; in the corner of the hedge to the northwest of the penguin's house. | 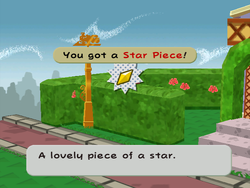
|
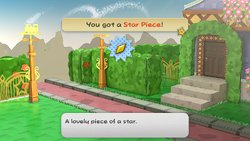
|
Poshley Sanctum
| Item | Location | Location Image | Location Image (Remake) |
|---|---|---|---|
| In the hidden room, on top of a Brick Block on the highest level on the east side. Can be obtained with Koops or Yoshi. | N/A | ||
| In the hidden room, on the highest level on the east side. Can be reached by using Yoshi, then performing a Spin Jump. | N/A | 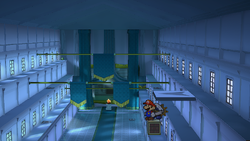
| |
| There is a fake Garnet Star in the front room. The real one is in the back room. | 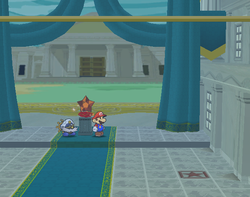
|
||
| In the hidden room, on the far side of the highest platform in the left. | 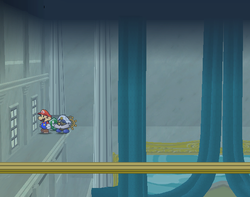
|
||
| In a ? Block in the front room. | N/A | 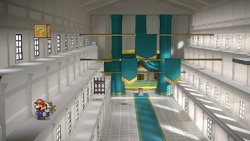
| |
| In the hidden room, on the far side of the middle platform on the left. | |||
| In a ? Block in the front room. | N/A | 
|
Path to Fahr Outpost
| Item | Location | Location Image | Location Image (Remake) |
|---|---|---|---|
| In the third scene of the path; in the red question block on the ground. | 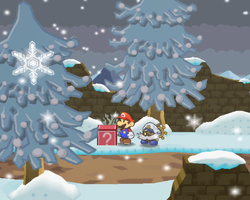
|
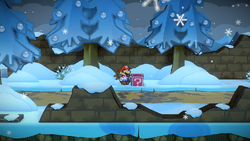
| |
| In the second scene on the path; behind the first south-side tree from the left. | |||
| In the first scene on the path; under a panel to the left of the entrance pipe. | 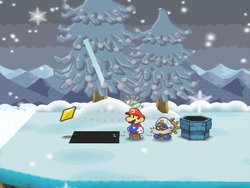
|
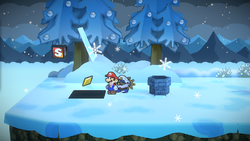
| |
| In the second scene on the path; among the grass to the left of the south-side tree in the middle. | 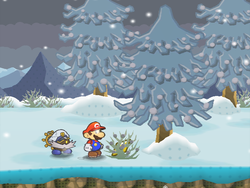
|
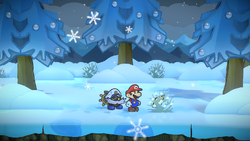
| |
| In the third scene on the path; behind the south-side wall just before the village. | 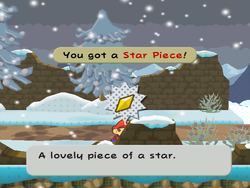
|
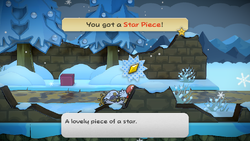
|
Hidden ? Block
| Item | Description | Block un/revealed ( |
Block un/revealed ( |
|---|---|---|---|
| In the first area with the Warp Pipe to Rogueport Underground, Mario should jump directly in front of the rightmost tree to reveal the hidden ? Block. The location of this block is mentioned in Wonky's Tales, "Cold Place's Secret".[5] | 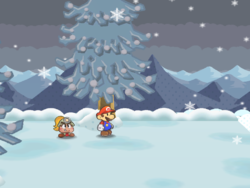 
|
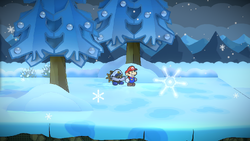 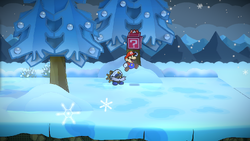
|
Fahr Outpost
Other items are on sale at the Northwinds Mart item shop.
| Item | Location | Location Image | Location Image (Remake) |
|---|---|---|---|
| 20 (30 on Switch) given by Gob after completing his trouble. | 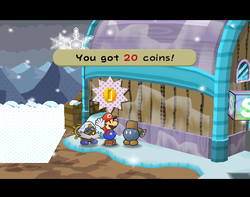
|
||
| 200 given by innkeeper after sleeping in the inn 50 times. Missable if given elsewhere. | 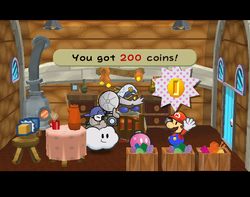
|
||
| In the east area; behind the stairs in front of the inn. | 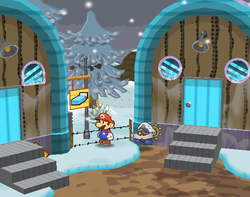
|
||
| In the east village scene; on the ground to the right of General White's house. | |||
| Given by Swob for doing his trouble. | 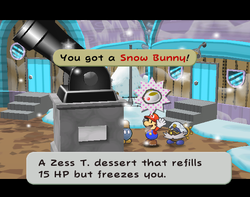
|
||
| In the east area of the village, it appears on the left chair every time Mario sleeps at the inn. | 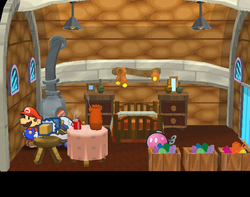
|
||
| In the west village scene; in the wall corner in the southwest. | 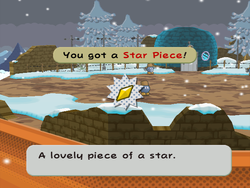
|
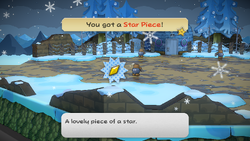
| |
| In the east village scene; behind the boxes in General White's house. | 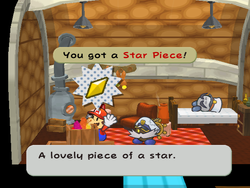
|
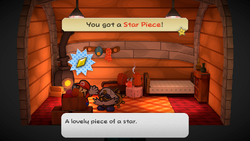
| |
| In the east village scene; under a panel to the left of the cannon statue. | 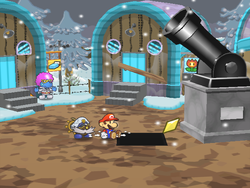
|
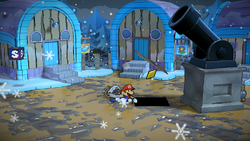
|
Moon
| Item | Location | Location Image | Location Image (Remake) |
|---|---|---|---|
| In the screen to the left of the landing screen, it is in the cracked rock in the south. | 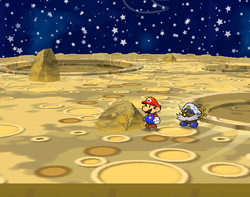 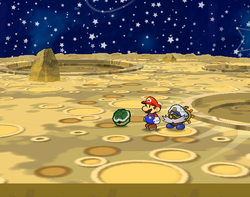
|
||
| In a breakable rock in the second screen right of the landing site, in the west. | N/A | ||
| In a breakable rock in the second screen left of the landing site, in the east. | N/A | ||
| In a breakable rock in the screen with the X-Naut Fortress in the background, in the southwest. | N/A | ||
| In the screen with the X-Naut Fortress, it is in the cracked rock in the southeast. | 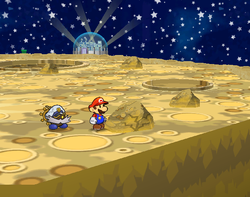 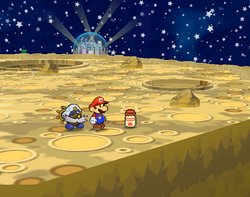
|
||
| In the screen to the right of the X-Naut Fortress screen, it is inside the cracked rock in the center. | 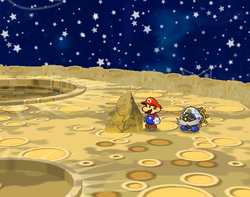 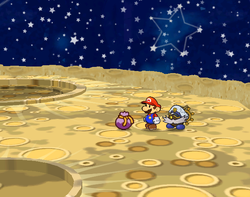
|
N/A | |
| In the screen with the X-Naut Fortress, it is behind a rock to the southeast of the pipe. | 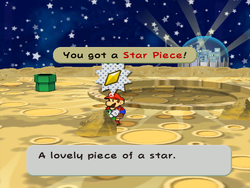
|
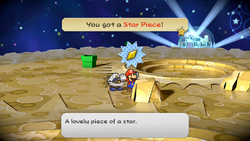
| |
| In the landing screen, it is in the cracked rock in the northwest. | 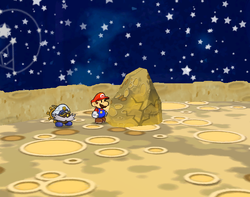 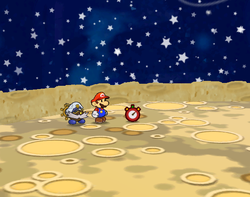
|
||
| In the screen to the east of the landing screen, it is in the cracked rock in the middle. | 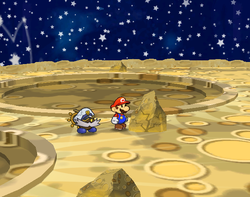 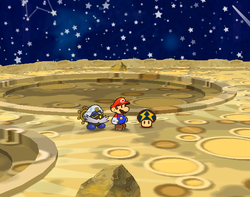
|
||
| In a breakable rock in the first screen right of the landing site, in the northeast. | N/A |
X-Naut Fortress
| Item | Location | Location Image | Location Image (Remake) |
|---|---|---|---|
| In the transportation room on sublevel 2, it is on top of the controller. Accessible from the air vent with Koops or Yoshi Kid. | 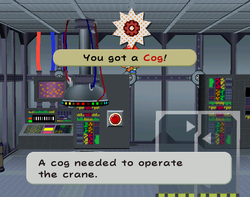
|
||
| Dropped after Magnus von Grapple 2.0 is defeated. | 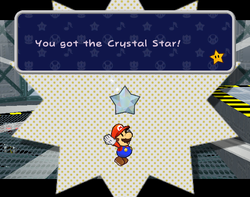
|
||
| To the right of level 1, it is guarded in a chest beyond the electrical floors. | 
|
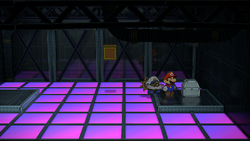
| |
| Won after the 66th Trivia Quiz-Off. In the original, the Thwomp drops the card only, but in the remake, he drops a chest containing said card. | 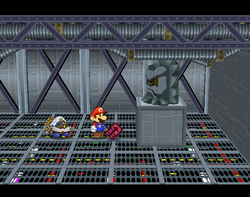
|
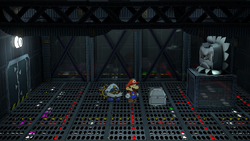
| |
| 6 |
To the left of sublevel 1, they are on the item platform to be retrieved with the crane. | 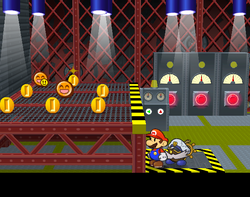
|
|
| To the left of sublevel 3, it is in the question block on the south side. | 
|
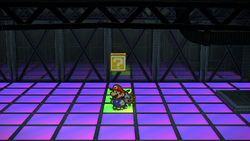
| |
| To the left of sublevel 2, it is guarded in a chest beyond the electrical floors. | 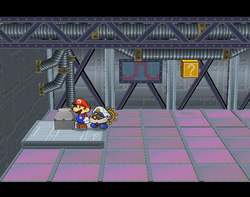
|
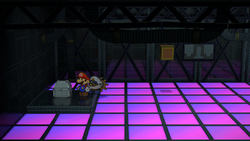
| |
| To the left of sublevel 3, it is guarded in a chest beyond the electrical floors. | 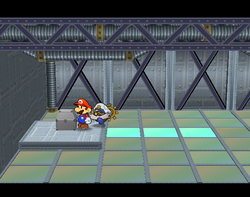
|
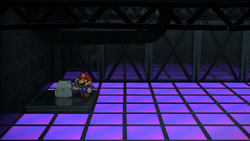
| |
| To the right of sublevel 2, it is on the computer desk in the back room of Grodus's area. | 
|
||
| To the right of sublevel 3, it is in the factory room. Accessible from the airplane panel near the right exit. To the left of sublevel 4, it is held by an Elite X-Naut in the shower. |
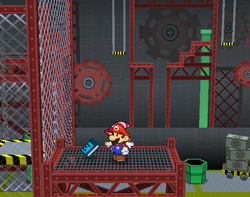
|
||
| To the right of sublevel 3, it is in the factory room. Accessible from the airplane panel near the right exit. | N/A | ||
| To the left of sublevel 2, it is in the yellow question block on the back side. | 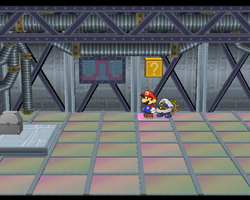
|
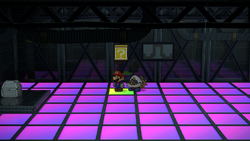
| |
| To the left of sublevel 1, it is on the item platform to be retrieved with the crane. | 
|
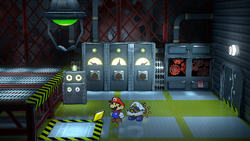
| |
| In the southwest corner of the air vent on Sublevel 2. | 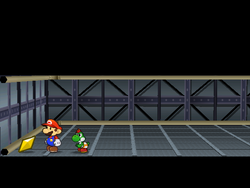
|
| |
| To the right of level 1, it is in the yellow question block on the back side. | 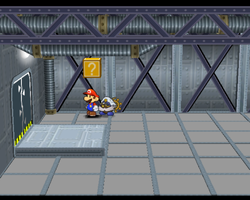
|
N/A | |
| To the right of sublevel 3, in the factory room, it is on the left high platform in the background. | 
|
||
| To the right of level 1, it is in the yellow question block on the back side. |
N/A | 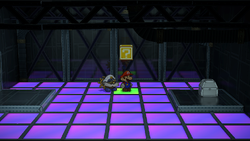
| |
| In the factory of Sublevel Three; on a high platform in the background on the far east. |
N/A |
Following items are only available for Princess Peach during the Chapter 5 interlude:
| Item | Location | Location Image | Location Image (Remake) |
|---|---|---|---|
| On the desk in the lab on sublevel 2. | 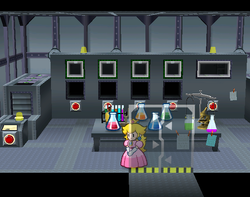
|
||
| To the right of sublevel 2, it is on the shelf in the computer room behind Grodus's room. | 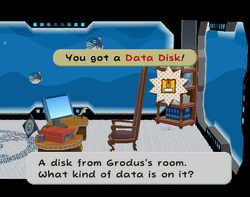
|
Crane game items
After leaving and re-entering the X-Naut Fortress at least once in the Nintendo Switch remake, new items appear in the crane room on Sublevel One if the player had already collected every item beforehand. There are four batches of different items to collect. To make the next batch appear, it is necessary to collect every item on the current batch, leave the X-Naut Fortress, and return to it.
| Batch set | Items | Location Image |
|---|---|---|
| 1 | ||
| 2 | ||
| 3 | ||
| 4 |
Palace of Shadow
| Item | Location | Location Image | Location Image (Remake) |
|---|---|---|---|
| In the fourth room from the start, in the red ? Block. | 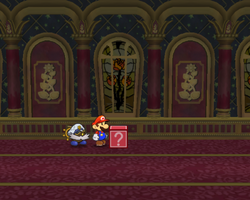
|
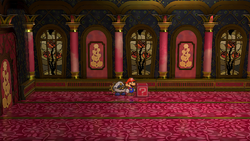
| |
| In the fifth room from the start, there are firebars which can be jumped over multiple times. Doing so makes the firebar disappear and spawn 5 Coins. There are five of them, so making them all disappear nets total of 25 Coins. | 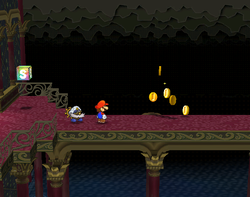 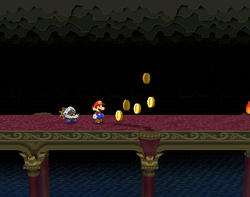 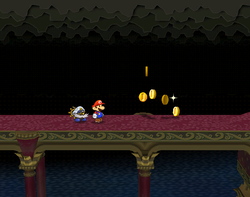 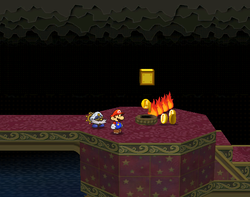 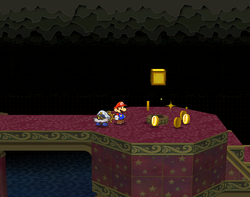
|
||
| In the eighth room from the start, it is to the left of the ? Blocks in the north. |

|
N/A | |
| In Gear Room Three, on the ground in the west part. | 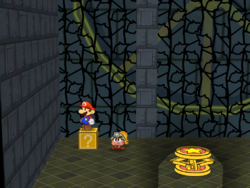
|

| |
| In the first ? Block in the Antechamber. | N/A | 
| |
| To the right of Gloomtail's room, it is in the first ? Block. Requires Admiral Bobbery. Accessible before activating the orrery in the Palace of Shadow Tower. | N/A | 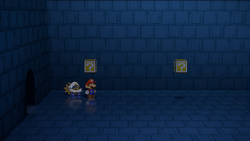
| |
| In the eighth room from the start, it is to the right of the ? Blocks in the north. | N/A | 
| |
| In the third corridor to Gloomtail's lair, it is in a ? Block. Accessible before activating the orrery in the Palace of Shadow Tower. | N/A | 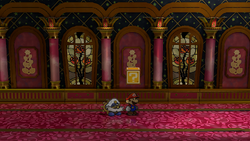
| |
| In the eighth room from the start, it is to the right of the ? Blocks in the north. |

|
N/A | |
| To the right of Gloomtail's room, in the second ? Block. Requires Admiral Bobbery. Accessible before activating the orrery in the Palace of Shadow Tower. |

|
N/A | |
| In the Antechamber, in the third ? Block. |
N/A | 
| |
| In the Depths, in a chest. | 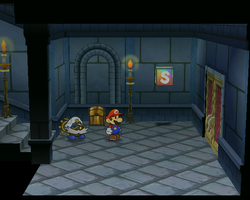
|
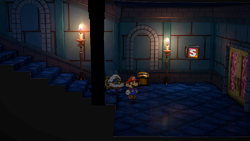
| |
| In Gear Room One, it is near the east entrance in the north part. |

|
N/A | |
| In Gear Room Two, it is in the yellow ? Block above the spinning wheels. | 
|

| |
| In Concealed Path Four, it can be found on a high pedestal. Accessible with the plane panel. | 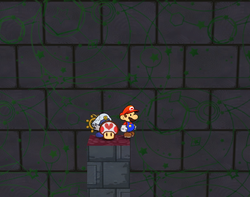
|
||
| In the third room from the start, it is in the ? Block near the entrance. | N/A | 
| |
| In the northeastern corner of Concealed Path Four, behind the platform. | N/A | ||
| To the right of Gloomtail's room, in the third ? Block. Requires Admiral Bobbery. Accessible before activating the orrery in the Palace of Shadow Tower. | N/A | 
| |
| In the sixth room from the start, it is dropped by the Dark Bones. | 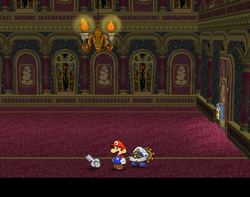
|
||
| In Gear Room Two, it is on a ledge to the lower-right of the spinning wheels. | 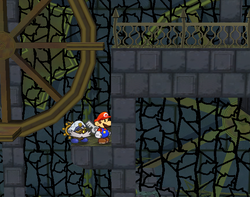
|
||
| In Gear Room Three, it is in a chest in the east part. | 
|
| |
| In Gear Room One, it is near the east entrance in the north part. | N/A | 
| |
| In the eighth room from the start, it is in the red ? Block in the north. | 
|

| |
| In Gear Room One, it is in a yellow ? Block. In the Nintendo Switch remake, this block is on the ground. | 
|
| |
| In the second room from the start, it is on the other side of the bridge to the north. |
N/A | ||
| In the third room from the start, it is in the ? Block near the entrance. |
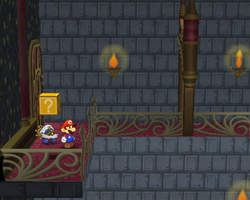
|
N/A | |
| In Gear Room Two, it is in the chest in the southwest corner. | 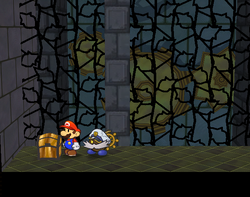
|
| |
| To the right of Gloomtail's room, it is in the second ? Block. Requires Admiral Bobbery. Accessible before activating the orrery in the Palace of Shadow Tower. |
N/A | 
| |
| In Concealed Path Four, it is on a low pedestal. Accessible with the airplane panel. | 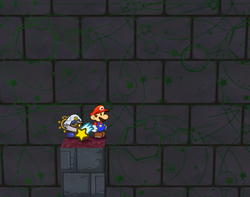
|
||
| In Gloomtail's room, it is in the chest box spit out from Gloomtail when defeated. | 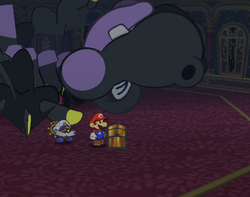
|
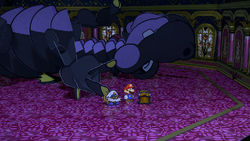
| |
| In the second room from the start, it is to the north of the entrance. | 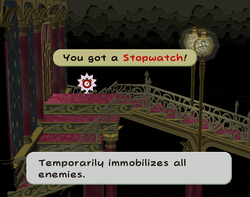
|
||
| In the first descended hallway, it is in the high ? Block. | 
|

| |
| In the northwestern corner of Concealed Path Four, behind the platform. |
N/A | ||
| In the first-floor Palace of Shadow Tower, it is in a chest in the southwest room. Accessible by hitting the ! Blocks in this order: left, left, left, right, right. | 
|
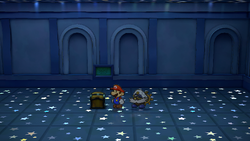
| |
| In the first and second floors of Palace of Shadow Tower, they are in a chests in the northwest rooms. Accessible by hitting the ! Block after clearing the blocks. | 
|
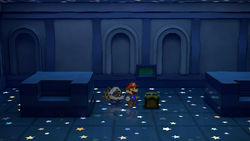
| |
| In the first-floor Palace of Shadow Tower, it is in a chest in the northeast room. Accessible by hitting the ! Block beyond the fake wall on the right. | 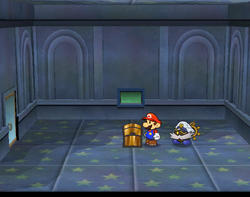
|
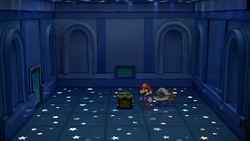
| |
| In the first-floor Palace of Shadow Tower, it is in a chest in the southeast room, covered by a piece of paper which can be blown away by Flurrie. | 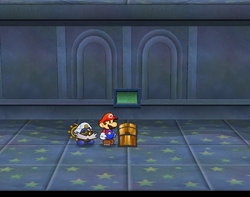
|
| |
| In the second-floor Palace of Shadow Tower, it is in a chest in the southwest room. Accessible by hitting the ! Block after defeating the bones in the order from weak to strong. | 
|

| |
| In the second-floor Palace of Shadow Tower, it is in a chest in the northeast room. In the Gamecube version, it is beyond the wall on the right which can be blown up by Bobbery. In the Switch version, it appears in the room proper after hitting the ! Block beyond the wall on the right which can be blown up by Bobbery. | 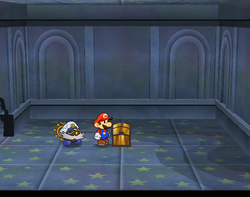
|
| |
| In the second-floor Palace of Shadow Tower, it is in a chest in the southeast room. Accessible by hitting the invisible ! Block. | 
|

| |
| In the seventh room from the start, it is in the ? Block near the entrance. | 
|

| |
| To the right of Gloomtail's room, it is in the first ? Block. Requires Admiral Bobbery. Accessible before activating the orrery in the Palace of Shadow Tower. |

|
N/A | |
| In the Antechamber, it is in the second ? Block. |
N/A | 
| |
| In the Depths, it is in the chest near the doorway back to the Throne Room. | 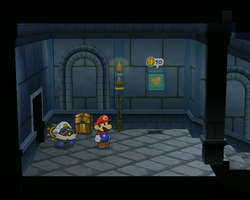
|
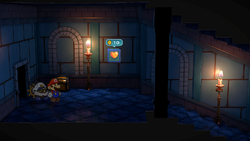
|
Hidden ? Blocks
| Item | Description | Block un/revealed ( |
Block un/revealed ( |
|---|---|---|---|
| In the area with a bridge over water with fire bars, in a middle of the room is a couple of fire bars spinning around one spot. At that spot, Mario should jump from it to reveal the hidden ? Block. |  
|
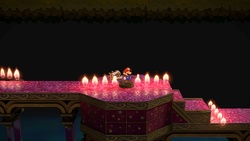 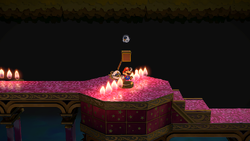
| |
| In the mechanical side of the hallways leading to the palace's throne room, one of the rooms has a lone Coin Block. Jumping above this block will reveal the hidden ? Block. |  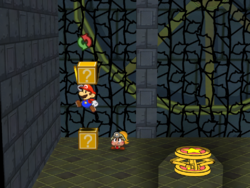
|
 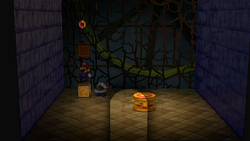
|
- Nintendo Switch version-exclusive
| Item | Description | Image | Image (block revealed) |
|---|---|---|---|
| In the courtyard, at the Palace of Shadow Tower's entryway, on the left side of the tower's base. | 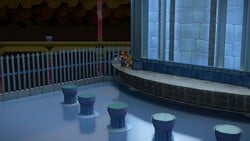
|
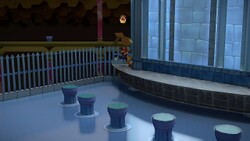
| |
| In the courtyard, at the Palace of Shadow Tower's entryway, on the right side of the tower's base. | 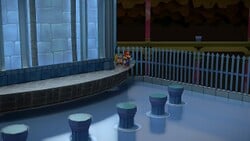
|
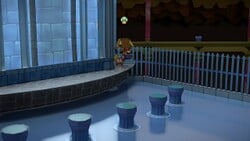
|
Pit of 100 Trials
| Item | Location | Images | |
|---|---|---|---|
| GameCube | Switch | ||
| On Floor 10. | 
|

| |
| On Floor 20. | |||
| On Floor 30. | |||
| On Floor 40. | |||
| On Floor 50. | 
|

| |
| On Floor 60. | |||
| On Floor 70. | |||
| On Floor 80. | 
|

| |
| On Floor 90. | |||
| On Floor 100; after defeating Bonetail. | 
|

| |
| On Floor 100; after defeating Whacka once. | N/A | 
| |
| On Floor 100; after defeating Whacka a subsequent time. Unlimited source. | N/A | ||
- ^ "Ol' Wonky just got this juicy bit of info recently... You know that small hole down here that only a little critter can get through? Well, you just head out away from the wall there... And when you can't go any further, jump to get something good. If you see that hole, you should give it a try..." – Wonky (2024). Paper Mario: The Thousand-Year Door (Nintendo Switch). Nintendo (English).
- ^ "Deep in Boggly Woods is a spot with a bunch of tree stumps all lined up... If you jump hard on the tenth stump from the left, you'll get something good. Now I don't know what it is, but I hear it's really good." – Wonky.
- ^ Wonky: There's a wacky old place called Creepy Steeple somewhere in this land, and if you jump on the fourth step from the top, ol' Wonky hears you get a good thing. I don't know how useful that is, but hey, it's worth a shot.
- ^ "Far to the south of Rogueport lies an isle, and on this isle there are three yellow blocks in a row. And if you do a Spring Jump on the second of these blocks from the bottom... I hear you'll get something good for your health. But what island could this "southern isle" be referring to, anyway?" – Wonky. Paper Mario: The Thousand-Year Door.
- ^ "There's a pipe down here that leads to a very cold place, ol' Wonky hears, and if you jump in front of the tree to the far right of the area you come out in then you get something nice, supposedly. But you won't catch 'ol Wonky out in a chilly place like that, no sir!" – Wonky.