Super Mario 64: Difference between revisions
Nintendo101 (talk | contribs) (→Courses: small tweaks, including subdividing chart and description for ease of subsequent edits. Found primary text using consistent language for each type of course and names for the MIPS and Toad stars.) |
Nintendo101 (talk | contribs) mNo edit summary |
||
| (111 intermediate revisions by 26 users not shown) | |||
| Line 1: | Line 1: | ||
{{italic title}} | {{italic title}} | ||
{{about|the original [[Nintendo 64]] game|the [[Nintendo DS]] remake|[[Super Mario 64 DS]]}} | {{about|the original [[Nintendo 64]] game|the [[Nintendo DS]] remake|[[Super Mario 64 DS]]|the slot machine based on the game|[[Super Mario 64 (slot machine)]]}} | ||
{{game infobox | {{game infobox | ||
|image=[[File:Super Mario 64 Boxart.png|260px]] | |image=[[File:Super Mario 64 Boxart.png|260px]] | ||
|developer=[[Nintendo Entertainment Analysis and Development|Nintendo EAD]] | |developer=[[Nintendo Entertainment Analysis and Development|Nintendo EAD]] | ||
|publisher=[[Nintendo]] | |publisher=[[Nintendo]] | ||
|release='''Nintendo 64:'''<br>{{ | |release='''Nintendo 64:'''<br>{{flag list|Japan|June 23, 1996<ref>{{cite|url=https://www.videogameschronicle.com/news/the-nintendo-64-and-super-mario-64-turn-25-years-old-today/|title=The Nintendo 64 and Super Mario 64 Turn 25 Years Old Today|date=June 23, 2021|author=Scullon, Chris|accessdate=December 18, 2024|website=Video Games Chronicle|publisher=Gamer Network|archive-url=https://web.archive.org/web/20210726223151/https://www.videogameschronicle.com/news/the-nintendo-64-and-super-mario-64-turn-25-years-old-today/|archive-date=July 26, 2021|url-status=live}}</ref>|USA|September 29, 1996<ref>{{cite|url=https://www.wired.com/2016/09/nintendo-64-20th-anniversary/|title=Nintendo 64 Came Out 20 Years Ago. Here's How a Teenaged Me Reviewed It|date=September 29, 2016|accessdate=December 18, 2024|website=Wired|archive-url=https://web.archive.org/web/20160929205936/https://www.wired.com/2016/09/nintendo-64-20th-anniversary/|archive-date=September 29, 2016|author=Kohler, Chris|url-access=subscription}}</ref>|Europe|March 1, 1997<ref>{{Cite|url=https://www.eurogamer.net/articles/2017-03-01-the-nintendo-64-turns-20-in-europe|title=The Nintendo 64 Turns 20 in Europe|author=Yin-Poole, Wesley|website=Eurogamer|publisher=Gamer Network|archive-url=https://web.archive.org/web/20170303011805/http://www.eurogamer.net/articles/2017-03-01-the-nintendo-64-turns-20-in-europe|date=March 1, 2017|archive-date=March 3, 2017|accessdate=December 18, 2024|url-status=live}}</ref>|Australia|March 1, 1997<ref>{{Cite|url=https://www.nintendolife.com/games/n64/super_mario_64|title=Super Mario 64 (N64)|website=Nintendo Life|date=October 4, 2021 |publisher=NLife Media|accessdate=December 18, 2024|archive-url=https://web.archive.org/web/20220707184905/https://www.nintendolife.com/games/n64/super_mario_64|archive-date=July 7, 2022|url-status=live}}</ref>|Japan|July 18, 1997 (''Shindō Pak Taiō Version'')<ref>{{Cite|url=https://www.nintendo.co.jp/n01/n64/software/nus_p_nsmj/index.html|title=スーパーマリオ64|trans-title=Super Mario 64|accessdate=December 18, 2024|publisher=[[Nintendo]]|language=ja|archive-url=https://web.archive.org/web/19970128181817/http://www.nintendo.co.jp/n01/n64/software/nus_p_nsmj/index.html|archive-date=January 28, 1997|url-status=live|quote=スーパーマリオ64 振動パック対応バージョン 1997年7月18日発売|trans-quote=Super Mario 64 Vibration Pack Compatible Version: Released July 18, 1997}}</ref>|China|November 18, 2003 ({{wp|iQue Player}})<ref>{{cite|archive-url=https://web.archive.org/web/20051225021132if_/http://www.ique.com/news/game_news_031118.htm|url=http://www.ique.com/news/game_news_031118.htm|title=iQue PLAYER优惠套装上海试卖,五款精品游戏同步发售!|trans-title=iQue Player Discount Set Trial Sale in Shanghai, Five High-quality Games Released Simultaneously!|language=Chinese|accessdate=December 18, 2024|archive-date=December 25, 2005|publisher=iQue}}</ref><ref>{{Cite|url=https://www.avclub.com/meet-the-ique-player-a-nintendo-console-that-was-only-1798244884|title=Meet the iQue Player, a Nintendo Console That Was Only Available in China|author=Blevins, Joe|date=March 4, 2016|accessdate=December 18, 2024|website=The A.V. Club|publisher=G/O Media|archive-url=https://web.archive.org/web/20210711174800/https://www.avclub.com/meet-the-ique-player-a-nintendo-console-that-was-only-1798244884|archive-date=July 11, 2021|url-status=live}}</ref>}} '''[[Player's Choice]]:''' <br>{{flag list|USA|January 26, 1998<ref>{{cite|title=''Electronic Gaming Monthly'' issue 104|page=28|date=March 1998|accessdate=November 19, 2024}}</ref>}} '''Virtual Console (Wii):'''<br>{{flag list|USA|November 19, 2006|Japan|December 2, 2006|Australia|December 7, 2006|Europe|December 8, 2006}} '''Virtual Console (Wii U):'''<br>{{flag list|USA|April 1, 2015|Europe|April 1, 2015<ref>[https://www.youtube.com/watch?v=sMWGe657t8g Nintendo Direct Presentation - 01.04.2015]. Posted to YouTube by Nintendo of Europe on April 1, 2015. Retrieved April 1, 2015.</ref>|Australia|April 2, 2015|South Africa|April 2, 2015<ref>https://www.nintendo.com/en-za/Games/Nintendo-64/Super-Mario-64-269745.html</ref>|Japan|April 8, 2015<ref>[http://www.nintendo.co.jp/wiiu/software/vc/nabj/index.html?_ga=1.126163213.1818326145.1407870473 Super Mario 64 for Wii U Virtual Console on the Nintendo of Japan website]. Retrieved April 1, 2015.</ref>}} '''Nintendo 64 - Nintendo Switch Online:'''<br>{{flag list|USA|October 25, 2021<ref>Nintendo (September 23, 2021). [https://youtu.be/dG9fAtmYdlM?t=1260 Nintendo Direct - 9.23.2021]. ''YouTube''. Retrieved September 24, 2021.</ref>|Japan|October 26, 2021<ref>Nintendo 公式チャンネル (September 24, 2021). [https://youtu.be/MegZz4gKSPk?t=1142 Nintendo Direct 2021.9.24]. ''YouTube''. Retrieved September 24, 2021.</ref>|Europe|October 26, 2021<ref>@NintendoEurope (September 23, 2021). [https://twitter.com/NintendoEurope/status/1441166363037364229?s=20 "''Play a growing library of Nintendo 64 and SEGA Mega Drive games anytime, anywhere with #NintendoSwitchOnline + Expansion Pack, a new membership launching in late October.''"] ''Twitter''. Retrieved September 24, 2021.</ref>|Australia|October 26, 2021<ref>@NintendoAUNZ (September 24, 2021). [https://twitter.com/NintendoAUNZ/status/1441167178850390018?s=20 "''Play a growing library of Nintendo 64 and SEGA Mega Drive games anytime, anywhere with #NintendoSwitchOnline + Expansion Pack, a new membership launching in late October.''"] ''Twitter''. Retrieved September 24, 2021.</ref>|HK|October 26, 2021<ref>[https://www.nintendo.com.hk/topics/article/a_211015_02.html 《集合啦!動物森友會》將於11月5日發布免費更新(Ver.2.0),以及發售付費新增內容《集合啦!動物森友會 快樂家樂園》。] ''Nintendo HK''. Retrieved October 16, 2021.</ref>|South Korea|October 26, 2021<ref>[https://www.nintendo.co.kr/news/view.php?no=Q0tKRlVXa25aZkFlY2RCaENKYWZOZz09 「Nintendo Switch Online」을 더욱 즐겁게! 「Nintendo Switch Online + 추가 팩」이 10월 26일(화)부터 시작!] ''Nintendo Korea''. Retrieved October 16, 2021.</ref>}} | ||
|languages={{languages|en_us=y|fr_fr=y|de=y|jp=y|zh_simp=y}} | |languages={{languages|en_us=y|fr_fr=y|de=y|jp=y|zh_simp=y}} | ||
|genre=3D [[genre#Platform games|platformer]], action-adventure | |genre=3D [[genre#Platform games|platformer]], action-adventure | ||
|modes=Single player | |modes=Single player | ||
|ratings={{ratings|acb=g|cero=a|esrb=K-A|pegi=3}} | |ratings='''Original release:'''{{ratings|acb=g|cero=a|esrb=K-A|pegi=3|usk=0|grac=all}}'''Virtual Console:'''{{ratings|esrb=E}} | ||
|platforms=[[Nintendo 64]], [[Nintendo 64DD]], [[Virtual Console]] ([[Wii]], [[Wii U]]), [[Nintendo 64 - Nintendo Switch Online]] | |platforms=[[Nintendo 64]], [[Nintendo 64DD]], [[Virtual Console]] ([[Wii]], [[Wii U]]), [[Nintendo 64 - Nintendo Switch Online]] | ||
| | |format={{format|n64=1|iqp=1|64dd=1|wiidl=1|switchdl=1}} | ||
|input={{input|n64=1|iqp=1|classic=1|wiigcn=1|wiiu=1|wiiupro=1|wiiuremote=1|wiiuclassic=1|joy-con=1|switchpro=1|switchn64=1}} | |input={{input|n64=1|iqp=1|classic=1|wiigcn=1|wiiu=1|wiiupro=1|wiiuremote=1|wiiuclassic=1|joy-con=1|joy-con-horizontal=1|switchpro=1|switchn64=1}} | ||
|serials={{flag list|Japan|NUS-NSMJ-JPN|USA|NUS-NSME-USA|Europe|NUS-NSMP-EUR}} | |||
}} | }} | ||
'''''Super Mario 64''''' is a 3D action-adventure platform game released for the [[Nintendo 64]] in 1996 for Japan and North America and in 1997 for Europe and Australia. It is the eighth entry in the ''[[Super Mario (series)|Super Mario]]'' series.<ref>Shogakukan. 2015. ''Super Mario | '''''Super Mario 64''''' is a 3D action-adventure platform game released for the [[Nintendo 64]] in 1996 for Japan and North America and in 1997 for Europe and Australia. It is the eighth entry in the ''[[Super Mario (series)|Super Mario]]'' series.<ref name=encyclopedia>{{cite|author=Sakai, Kazuya (Ambit), kikai, Akinori Sao, Junko Fukuda, Kunio Takayama, and Ko Nakahara (Shogakukan), editors|title=『[[Super Mario Bros. Encyclopedia|スーパーマリオブラザーズ百科: 任天堂公式ガイドブック]]』|language=ja|location=Tokyo|publisher=Shogakukan|date=2015|page=11–13|isbn=978-4-09-106569-8}}</ref><ref>{{cite|author=[[Nintendo|Nintendo Co., Ltd]]|title=HISTORY → Series → ''Super Mario''|url=www.nintendo.com/jp/character/mario/en/history/index.html|publisher=Mario Portal|accessdate=6 Nov. 2024|archive=web.archive.org/web/20241003115239/https://www.nintendo.com/jp/character/mario/en/history/index.html}}</ref> This game was one of two (three in Japan) launch titles for the Nintendo 64, along with ''[[nwiki:Pilotwings 64|Pilotwings 64]]'', which helped drive initial sales of the console. Despite its name, ''Super Mario 64'' runs in 32-bit, like most Nintendo 64 games at the time. Since its release, ''Super Mario 64'' has been widely acclaimed as one of the greatest and most important games of all time.<ref>[http://www.gamefaqs.com/features/contest/top10 GameFaqs - The top 10 games Ever]</ref><ref>[http://www.edge-online.com/features/the-100-best-games-to-play-today?page=0%2C10 Edge Online - The 100 Best Games to Play Today]</ref><ref>[http://www.officialnintendomagazine.co.uk/article.php?id=7327 Official Nintendo Magazine - 100 Best Nintendo Games]</ref> | ||
In entering the third dimension, ''Super Mario 64'' largely eschews the obstacle course-based design of the 2D ''[[Super Mario (franchise)|Mario]]'' platformers for a mission structure and gameplay focused on exploring a larger area. Though not the first 3D platform game, ''Super Mario 64'' codified many of the controls and design conventions of the genre.<ref>[http://www.gamespot.com/gamespot/features/video/15influential/p15_01.html GameSpot - 15 Most Influential Games of All Time]</ref> Being the first 3D ''Super Mario'' game, ''Super Mario 64'' has introduced several moves, including [[Triple Jump|triple-jump]]ing, [[Ground Pound|ground-pound]]ing, [[Long Jump|long-jump]]ing, [[dive|diving]], and [[Side Somersault|side-somersaulting]], which would be used in most subsequent installments of the ''Super Mario'' series. [[Punch]]ing and [[kick]]ing were also introduced but would not appear in any later title other than its DS remake. The game popularized [[Charles Martinet]]'s portrayal as [[Mario]] (being the first game of the ''Super Mario'' series to feature his voice) and [[Princess Peach|Princess Toadstool]]'s name as Peach in {{wp|Western world|the West}}, and made them both series standards. | In entering the third dimension, ''Super Mario 64'' largely eschews the obstacle course-based design of the 2D ''[[Super Mario (franchise)|Mario]]'' platformers for a mission structure and gameplay focused on exploring a larger area. Though not the first 3D platform game, ''Super Mario 64'' codified many of the controls and design conventions of the genre.<ref>[http://www.gamespot.com/gamespot/features/video/15influential/p15_01.html GameSpot - 15 Most Influential Games of All Time]</ref> Being the first 3D ''Super Mario'' game, ''Super Mario 64'' has introduced several moves, including [[Triple Jump|triple-jump]]ing, [[Ground Pound|ground-pound]]ing, [[Long Jump|long-jump]]ing, [[dive|diving]], and [[Side Somersault|side-somersaulting]], which would be used in most subsequent installments of the ''Super Mario'' series. [[Punch]]ing and [[kick]]ing were also introduced but would not appear in any later title other than its DS remake. The game popularized [[Charles Martinet]]'s portrayal as [[Mario]] (being the first game of the ''Super Mario'' series to feature his voice) and [[Princess Peach|Princess Toadstool]]'s name as Peach in {{wp|Western world|the West}}, and made them both series standards. | ||
| Line 20: | Line 21: | ||
In 1996, a [[List of unreleased media#Super Mario 64: Disk Ban|Nintendo 64DD version]] of the game was shown at {{wp|Nintendo Space World#Shoshinkai 1996|Shoshinkai 1996}}.<ref>http://gamingafterhours.com/2014/06/24/super-mario-64dd-version-discovered-in-japan/</ref> A sequel, named ''[[Super Mario 64 2]]'', was being developed for the [[Nintendo 64DD]], but it was canceled due to the 64DD's commercial failure. | In 1996, a [[List of unreleased media#Super Mario 64: Disk Ban|Nintendo 64DD version]] of the game was shown at {{wp|Nintendo Space World#Shoshinkai 1996|Shoshinkai 1996}}.<ref>http://gamingafterhours.com/2014/06/24/super-mario-64dd-version-discovered-in-japan/</ref> A sequel, named ''[[Super Mario 64 2]]'', was being developed for the [[Nintendo 64DD]], but it was canceled due to the 64DD's commercial failure. | ||
On November 17, 2003, ''Super Mario 64'' was rereleased for the | On November 17, 2003, ''Super Mario 64'' was rereleased for the iQue Player as one of the launch titles, and a timed demo of the game was bundled with every iQue Player. The game was digitally rereleased for the [[Wii]]'s [[Virtual Console]] service in November 2006 and for the [[Wii U]]'s Virtual Console service in April 2015. ''Super Mario 64'' was among the first games released on both Virtual Console services. | ||
A sequel titled ''[[Super Mario Sunshine]]'' was developed for the [[Nintendo GameCube]] and released in 2002. In 2004, a [[reissue|remake]] was released for the [[Nintendo DS]], titled ''[[Super Mario 64 DS]]''. It has several differences, notably the inclusion of [[Luigi]], [[Yoshi]], and [[Wario]] as playable characters. An emulation of the 1997 rerelease of the game is bundled in with ''[[Super Mario 3D All-Stars]]'' for the [[Nintendo Switch]], though with upscaled graphics and a redrawn HUD. The original game is one of the launch titles for [[Nintendo 64 - Nintendo Switch Online]]. | A sequel titled ''[[Super Mario Sunshine]]'' was developed for the [[Nintendo GameCube]] and released in 2002. In 2004, a [[reissue|remake]] was released for the [[Nintendo DS]], titled ''[[Super Mario 64 DS]]''. It has several differences, notably the inclusion of [[Luigi]], [[Yoshi]], and [[Wario]] as playable characters. An emulation of the 1997 rerelease of the game is bundled in with ''[[Super Mario 3D All-Stars]]'' for the [[Nintendo Switch]], though with upscaled graphics and a redrawn HUD. The original game is one of the launch titles for [[Nintendo 64 - Nintendo Switch Online]]. | ||
| Line 28: | Line 29: | ||
[[File:Peach's message.png|200px|thumb|The Princess's [[letter]]]] | [[File:Peach's message.png|200px|thumb|The Princess's [[letter]]]] | ||
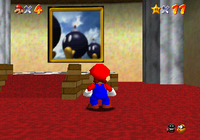
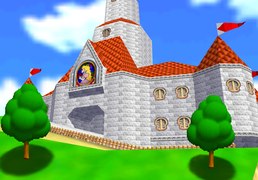
[[File:SM64-Facing Bob-omb Battlefield.png|thumb|Mario in front of a painting, which serves as an entrance to a level]] | [[File:SM64-Facing Bob-omb Battlefield.png|thumb|Mario in front of a painting, which serves as an entrance to a level]] | ||
The following is the story given on pages 4 and 5 of the ''Super Mario 64'' instruction booklet. The colors given in the instruction booklet signify who is talking: {{color | The following is the story given on pages 4 and 5 of the ''Super Mario 64'' instruction booklet. The colors given in the instruction booklet signify who is talking: {{color link|red|Mario}}, {{color link|hotpink|Princess Peach}}, {{color link|orange|Bowser}}, and {{color link|blue|Toad}}, with black being narration. | ||
<blockquote> | <blockquote> | ||
{{color|"Mario, please come to the castle. I've baked a cake for you. Yours truly, Princess Toadstool." | {{color|hotpink|"Mario, please come to the castle. I've baked a cake for you. Yours truly, Princess Toadstool."}} | ||
{{color|"Wow, an invitation from Peach! I'll head out right away. I hope she can wait for me!" | {{color|red|"Wow, an invitation from Peach! I'll head out right away. I hope she can wait for me!"}}<br> | ||
Mario is so excited to receive the invitation from the Princess, who lives in the Mushroom Castle, that he quickly dresses in his best and leaves right away. | Mario is so excited to receive the invitation from the Princess, who lives in the Mushroom Castle, that he quickly dresses in his best and leaves right away. | ||
{{color|"Hmmm, something's not quite right here... It's so quiet..." | {{color|red|"Hmmm, something's not quite right here... It's so quiet..."}}<br> | ||
Shaking off his uneasy premonition, Mario steps into the silent castle, where he is greeted by the gruff words, | Shaking off his uneasy premonition, Mario steps into the silent castle, where he is greeted by the gruff words, | ||
{{color|"No one's home! Now scram! Bwa, ha, ha." | {{color|orange|"No one's home! Now scram! Bwa, ha, ha."}}<br> | ||
The sound seems to come from everywhere. | The sound seems to come from everywhere. | ||
{{color|"Who's there?! I've heard that voice somewhere before..." | {{color|red|"Who's there?! I've heard that voice somewhere before..."}}<br> | ||
Mario begins searching all over the castle. Most of the doors are locked, but finding one open, he peeks inside. Hanging on the wall is the largest painting he has ever seen, and from behind the painting comes the strangest sound that he has ever heard... | Mario begins searching all over the castle. Most of the doors are locked, but finding one open, he peeks inside. Hanging on the wall is the largest painting he has ever seen, and from behind the painting comes the strangest sound that he has ever heard... | ||
{{color|"I think I hear someone calling. What secrets does this painting hold?" | {{color|red|"I think I hear someone calling. What secrets does this painting hold?"}}<br> | ||
Without a second thought, Mario jumps at the painting. As he is drawn into it, another world opens before his very eyes. | Without a second thought, Mario jumps at the painting. As he is drawn into it, another world opens before his very eyes. | ||
| Line 53: | Line 54: | ||
To help him accomplish this, he plans to convert the residents of the painting world into monsters as well. If nothing is done, all those monsters will soon begin to overflow from inside the painting. | To help him accomplish this, he plans to convert the residents of the painting world into monsters as well. If nothing is done, all those monsters will soon begin to overflow from inside the painting. | ||
{{color|"A plan this maniacal, this cunning...this must be the work of Bowser!" | {{color|red|"A plan this maniacal, this cunning...this must be the work of Bowser!"}}<br> | ||
Princess Toadstool and Toad are missing, too. Bowser must have taken them and sealed them inside the painting. Unless Mario recovers the Power Stars immediately, the inhabitants of this world will become Bowser's army. | Princess Toadstool and Toad are missing, too. Bowser must have taken them and sealed them inside the painting. Unless Mario recovers the Power Stars immediately, the inhabitants of this world will become Bowser's army. | ||
{{color|"Well, Bowser's not going to get away with it, not as long as I'm around!" | {{color|red|"Well, Bowser's not going to get away with it, not as long as I'm around!"}}<br> | ||
Stolen Power Stars are hidden throughout the painting world. Use your wisdom and strength to recover the Power Stars and restore peace to the Mushroom Castle. | Stolen Power Stars are hidden throughout the painting world. Use your wisdom and strength to recover the Power Stars and restore peace to the Mushroom Castle. | ||
{{color|"Mario! You are the only one we can count on." | {{color|blue|"Mario! You are the only one we can count on."}} | ||
</blockquote> | </blockquote> | ||
{{br}} | {{br}} | ||
| Line 72: | Line 73: | ||
The courses feature various enemies who chase or attack Mario on sight. Most enemies can be defeated by [[kick]]ing, punching, or jumping on them and leave coins when defeated; some missions also require Mario to defeat a specific type of enemy. Multiple missions involve fighting a large boss, whose defeat usually involves a puzzle or more advanced maneuvering than standard enemies. Not all characters Mario can encounter are hostile, however. Friendly NPCs include [[Toad (species)|Toad]]s sealed inside the castle's walls who give hints or backstory when spoken to, [[Bob-omb Buddy|Bob-omb Buddies]] who give clearance to use a [[cannon]] on the course, and mission-specific characters who challenge Mario to a race or ask him to fetch an object in exchange for a Power Star. | The courses feature various enemies who chase or attack Mario on sight. Most enemies can be defeated by [[kick]]ing, punching, or jumping on them and leave coins when defeated; some missions also require Mario to defeat a specific type of enemy. Multiple missions involve fighting a large boss, whose defeat usually involves a puzzle or more advanced maneuvering than standard enemies. Not all characters Mario can encounter are hostile, however. Friendly NPCs include [[Toad (species)|Toad]]s sealed inside the castle's walls who give hints or backstory when spoken to, [[Bob-omb Buddy|Bob-omb Buddies]] who give clearance to use a [[cannon]] on the course, and mission-specific characters who challenge Mario to a race or ask him to fetch an object in exchange for a Power Star. | ||
Various power-ups can help Mario on his adventure. [[Koopa Shell]]s can be ridden on land, water, or [[ | Various power-ups can help Mario on his adventure. [[Koopa Shell]]s can be ridden on land, water, [[lava]], or [[quicksand]] to provide temporary invincibility, and by hitting [[Cap Switch]]es found in the secret courses, Mario can activate [[block]]s containing the [[Wing Cap]], [[Vanish Cap]], and [[Metal Cap]], whose powers are necessary to complete many of the missions. As the game is a showcase title for a new console and the first 3D ''Super Mario'' game, many aspects of the game showcase the [[Nintendo 64]]'s features. Multiple sections take advantage of the analog stick's precision requiring Mario to walk slowly over narrow passageways or tiptoe to sneak up on enemies. Some bridges and platforms sway under Mario's weight. | ||
===Controls=== | ===Controls=== | ||
The charts below refer to the original game and subsequent ports, such as those released through [[Virtual Console]]s and [[Nintendo Switch Online]]. For the control scheme of the remake released for the [[Nintendo DS]], click [[Super Mario 64 DS#Controls|here]]. For the iteration included in ''Super Mario 3D All-Stars'' for [[Nintendo Switch]] systems, click [[Super Mario 3D All-Stars#Super Mario 64|here]]. A "→" (right arrow) conveys buttons to press in succession, and a "+" (plus sign) conveys buttons to press simultaneously. A "/" ( | The charts below refer to the original game and subsequent ports, such as those released through [[Virtual Console]]s and [[Nintendo Switch Online]]. For the control scheme of the remake released for the [[Nintendo DS]], click [[Super Mario 64 DS#Controls|here]]. For the iteration included in ''Super Mario 3D All-Stars'' for [[Nintendo Switch]] systems, click [[Super Mario 3D All-Stars#Super Mario 64|here]]. A "→" (right arrow) conveys buttons to press in succession, and a "+" (plus sign) conveys buttons to press simultaneously. A "/" (slash) conveys an alternative combination of button presses for the action. The controls for the [[Wii U]] can be customized in the emulator settings, with the column below displaying the default mapping. | ||
====Nintendo 64, iQue, Wii, and Wii U controls==== | ====Nintendo 64, iQue, Wii, and Wii U controls==== | ||
<center> | <center> | ||
| Line 81: | Line 81: | ||
|- | |- | ||
!rowspan=2 width=9% style="background:#FF2400;color:white;"|Action(s) | !rowspan=2 width=9% style="background:#FF2400;color:white;"|Action(s) | ||
!colspan= | !colspan=4 style="background:#FF2400;color:white;"|Input(s) | ||
|- | |- | ||
!width=13% style="background:#FF2400;color:white;"|Nintendo 64 Controller | !width=13% style="background:#FF2400;color:white;"|Nintendo 64 Controller / iQue Player | ||
!width=13% style="background:#FF2400;color:white;"|Nintendo GameCube Controller | !width=13% style="background:#FF2400;color:white;"|Nintendo GameCube Controller | ||
!width=13% style="background:#FF2400;color:white;"|Classic Controller | !width=13% style="background:#FF2400;color:white;"|Classic Controller | ||
!width=13% style="background:#FF2400;color:white;"|Wii U controllers | !width=13% style="background:#FF2400;color:white;"|Wii U controllers | ||
|- | |- | ||
!colspan= | !colspan=5 style="background:#FF7733;"|Mario controls | ||
|- | |- | ||
|Move | |Move | ||
|{{button|n64|stick}} | |{{button|n64|stick}} | ||
|{{button|gcn|stick}} | |{{button|gcn|stick}} | ||
|{{button|Wii|CCStickL}} | |{{button|Wii|CCStickL}} | ||
| Line 100: | Line 98: | ||
|Sidestep | |Sidestep | ||
|◀{{button|n64|stick}}▶ along a wall | |◀{{button|n64|stick}}▶ along a wall | ||
|◀{{button|gcn|stick}}▶ along a wall | |◀{{button|gcn|stick}}▶ along a wall | ||
|◀{{button|Wii|CCStickL}}▶ along a wall | |◀{{button|Wii|CCStickL}}▶ along a wall | ||
| Line 107: | Line 104: | ||
|[[Jump]], [[swim]], fire [[cannon]] | |[[Jump]], [[swim]], fire [[cannon]] | ||
|{{button|n64|a}} | |{{button|n64|a}} | ||
|{{button|gcn|a}} | |{{button|gcn|a}} | ||
|{{button|Wii|CCa}} | |{{button|Wii|CCa}} | ||
| Line 113: | Line 109: | ||
|- | |- | ||
|[[Double Jump (consecutive)|Double-jump]] | |[[Double Jump (consecutive)|Double-jump]] | ||
|colspan= | |colspan=4|Jump when making contact with the ground while moving (do twice) | ||
|- | |- | ||
|[[Triple Jump|Triple-jump]], [[Fly|take off]] in [[Wing Mario|Wing form]] | |[[Triple Jump|Triple-jump]], [[Fly|take off]] in [[Wing Mario|Wing form]] | ||
|colspan= | |colspan=4|Jump when making contact with the ground while running (do thrice) | ||
|- | |- | ||
|[[Side Somersault|Side-somersault]] | |[[Side Somersault|Side-somersault]] | ||
|◀{{button|n64|stick}} → ({{button|n64|stick}}▶ + {{button|n64|a}}) | |◀{{button|n64|stick}} → ({{button|n64|stick}}▶ + {{button|n64|a}}) | ||
|◀{{button|gcn|stick}} → ({{button|gcn|stick}}▶ + {{button|gcn|a}}) | |◀{{button|gcn|stick}} → ({{button|gcn|stick}}▶ + {{button|gcn|a}}) | ||
|◀{{button|Wii|CCStickL}} → ({{button|Wii|CCStickL}}▶ + {{button|Wii|CCa}}) | |◀{{button|Wii|CCStickL}} → ({{button|Wii|CCStickL}}▶ + {{button|Wii|CCa}}) | ||
| Line 127: | Line 122: | ||
|[[Wall Jump|Wall-kick]] | |[[Wall Jump|Wall-kick]] | ||
|{{button|n64|a}} → {{button|n64|a}} against a wall | |{{button|n64|a}} → {{button|n64|a}} against a wall | ||
|{{button|gcn|a}} → {{button|gcn|a}} against a wall | |{{button|gcn|a}} → {{button|gcn|a}} against a wall | ||
|{{button|Wii|CCa}} → {{button|Wii|CCa}} against a wall | |{{button|Wii|CCa}} → {{button|Wii|CCa}} against a wall | ||
| Line 134: | Line 128: | ||
|[[Backward Somersault|Backward-somersault]] | |[[Backward Somersault|Backward-somersault]] | ||
|{{button|n64|z}} + {{button|n64|a}} | |{{button|n64|z}} + {{button|n64|a}} | ||
|{{button|gcn|L}} + {{button|gcn|a}} | |{{button|gcn|L}} + {{button|gcn|a}} | ||
|{{button|Wii|CCL}} + {{button|Wii|CCa}} | |{{button|Wii|CCL}} + {{button|Wii|CCa}} | ||
| Line 141: | Line 134: | ||
|[[Long Jump|Long-jump]] | |[[Long Jump|Long-jump]] | ||
|{{button|n64|z}} + {{button|n64|a}} while running | |{{button|n64|z}} + {{button|n64|a}} while running | ||
|{{button|gcn|L}} + {{button|gcn|a}} while running | |{{button|gcn|L}} + {{button|gcn|a}} while running | ||
|{{button|Wii|CCL}} + {{button|Wii|CCa}} while running | |{{button|Wii|CCL}} + {{button|Wii|CCa}} while running | ||
| Line 148: | Line 140: | ||
|Climb up ledge | |Climb up ledge | ||
|{{button|n64|a}} + {{button|n64|stick}} while hanging from ledge | |{{button|n64|a}} + {{button|n64|stick}} while hanging from ledge | ||
|{{button|gcn|a}} + {{button|gcn|stick}} while hanging from ledge | |{{button|gcn|a}} + {{button|gcn|stick}} while hanging from ledge | ||
|{{button|Wii|CCa}} + {{button|Wii|CCStickL}} while hanging from ledge | |{{button|Wii|CCa}} + {{button|Wii|CCStickL}} while hanging from ledge | ||
| Line 155: | Line 146: | ||
|Hang on to [[Chain-Link|wire net]] | |Hang on to [[Chain-Link|wire net]] | ||
|{{button|n64|a}} + hold {{button|n64|a}} | |{{button|n64|a}} + hold {{button|n64|a}} | ||
|{{button|gcn|a}} + hold {{button|gcn|a}} | |{{button|gcn|a}} + hold {{button|gcn|a}} | ||
|{{button|Wii|CCa}} + hold {{button|Wii|CCa}} | |{{button|Wii|CCa}} + hold {{button|Wii|CCa}} | ||
| Line 162: | Line 152: | ||
|Grab or release [[pole]] | |Grab or release [[pole]] | ||
|{{button|n64|a}} alongside a pole | |{{button|n64|a}} alongside a pole | ||
|{{button|gcn|a}} alongside a pole | |{{button|gcn|a}} alongside a pole | ||
|{{button|Wii|CCa}} alongside a pole | |{{button|Wii|CCa}} alongside a pole | ||
| Line 169: | Line 158: | ||
|Talk, read, engage object, [[punch]] | |Talk, read, engage object, [[punch]] | ||
|{{button|n64|b}} | |{{button|n64|b}} | ||
|{{button|gcn|b}} | |{{button|gcn|b}} | ||
|{{button|Wii|CCb}} | |{{button|Wii|CCb}} | ||
| Line 176: | Line 164: | ||
|Scroll text | |Scroll text | ||
|{{button|n64|a}} / {{button|n64|b}} | |{{button|n64|a}} / {{button|n64|b}} | ||
|{{button|gcn|a}} / {{button|gcn|b}} | |{{button|gcn|a}} / {{button|gcn|b}} | ||
|{{button|Wii|CCa}} / {{button|Wii|CCb}} | |{{button|Wii|CCa}} / {{button|Wii|CCb}} | ||
| Line 183: | Line 170: | ||
|[[Kick]] | |[[Kick]] | ||
|{{button|n64|b}} + {{button|n64|b}} + {{button|n64|b}} | |{{button|n64|b}} + {{button|n64|b}} + {{button|n64|b}} | ||
|{{button|gcn|b}} + {{button|gcn|b}} + {{button|gcn|b}} | |{{button|gcn|b}} + {{button|gcn|b}} + {{button|gcn|b}} | ||
|{{button|Wii|CCb}} + {{button|Wii|CCb}} + {{button|Wii|CCb}} | |{{button|Wii|CCb}} + {{button|Wii|CCb}} + {{button|Wii|CCb}} | ||
| Line 190: | Line 176: | ||
|Jump-kick | |Jump-kick | ||
|{{button|n64|b}} in midair | |{{button|n64|b}} in midair | ||
|{{button|gcn|b}} in midair | |{{button|gcn|b}} in midair | ||
|{{button|Wii|CCb}} in midair | |{{button|Wii|CCb}} in midair | ||
| Line 197: | Line 182: | ||
|Throw item | |Throw item | ||
|{{button|n64|stick}} + {{button|n64|b}} | |{{button|n64|stick}} + {{button|n64|b}} | ||
|{{button|gcn|stick}} + {{button|gcn|b}} | |{{button|gcn|stick}} + {{button|gcn|b}} | ||
|{{button|Wii|CCstickL}} + {{button|Wii|CCb}} | |{{button|Wii|CCstickL}} + {{button|Wii|CCb}} | ||
| Line 203: | Line 187: | ||
|- | |- | ||
|Swing and toss [[Bowser]] by the tail | |Swing and toss [[Bowser]] by the tail | ||
|{{button|n64|b}} → | |{{button|n64|b}} → ↻{{button|n64|stick}} → {{button|n64|b}} | ||
|{{button|gcn|b}} → ↻{{button|gcn|stick}} → {{button|gcn|b}} | |||
|{{button|gcn|b}} → | |{{button|Wii|CCb}} → ↻{{button|Wii|CCstickL}} → {{button|Wii|CCb}} | ||
|{{button|Wii|CCb}} → | |{{button|Wiiu|b}} → ↻{{button|Wiiu|Leftstick}} → {{button|Wiiu|b}} | ||
|{{button|Wiiu|b}} → | |||
|- | |- | ||
|[[Dive]] | |[[Dive]] | ||
|{{button|n64|b}} while running | |{{button|n64|b}} while running | ||
|{{button|gcn|b}} while running | |{{button|gcn|b}} while running | ||
|{{button|Wii|CCb}} while running | |{{button|Wii|CCb}} while running | ||
| Line 218: | Line 200: | ||
|[[Slide Kick|Slide-kick]] | |[[Slide Kick|Slide-kick]] | ||
|{{button|n64|b}} while sliding | |{{button|n64|b}} while sliding | ||
|{{button|gcn|b}} while sliding | |{{button|gcn|b}} while sliding | ||
|{{button|Wii|CCb}} while sliding | |{{button|Wii|CCb}} while sliding | ||
| Line 225: | Line 206: | ||
|[[Sweep Kick|Sweep-kick]] | |[[Sweep Kick|Sweep-kick]] | ||
|{{button|n64|z}} + {{button|n64|b}} | |{{button|n64|z}} + {{button|n64|b}} | ||
|{{button|gcn|L}} + {{button|gcn|b}} | |{{button|gcn|L}} + {{button|gcn|b}} | ||
|{{button|Wii|CCL}} + {{button|Wii|CCb}} | |{{button|Wii|CCL}} + {{button|Wii|CCb}} | ||
| Line 232: | Line 212: | ||
|[[Crouch]] | |[[Crouch]] | ||
|{{button|n64|z}} | |{{button|n64|z}} | ||
|{{button|gcn|L}} | |{{button|gcn|L}} | ||
|{{button|Wii|CCL}} | |{{button|Wii|CCL}} | ||
| Line 239: | Line 218: | ||
|[[Slide]] | |[[Slide]] | ||
|{{button|n64|z}} while running | |{{button|n64|z}} while running | ||
|{{button|gcn|L}} while running | |{{button|gcn|L}} while running | ||
|{{button|Wii|CCL}} while running | |{{button|Wii|CCL}} while running | ||
| Line 246: | Line 224: | ||
|[[Crouch|Crawl]] | |[[Crouch|Crawl]] | ||
|{{button|n64|z}} + {{button|n64|stick}} | |{{button|n64|z}} + {{button|n64|stick}} | ||
|{{button|gcn|L}} + {{button|gcn|stick}} | |{{button|gcn|L}} + {{button|gcn|stick}} | ||
|{{button|Wii|CCL}} + {{button|Wii|CCstickL}} | |{{button|Wii|CCL}} + {{button|Wii|CCstickL}} | ||
| Line 253: | Line 230: | ||
|[[Ground Pound|Ground-pound]] | |[[Ground Pound|Ground-pound]] | ||
|{{button|n64|z}} in midair | |{{button|n64|z}} in midair | ||
|{{button|gcn|L}} in midair | |{{button|gcn|L}} in midair | ||
|{{button|Wii|CCL}} in midair | |{{button|Wii|CCL}} in midair | ||
|{{button|Wiiu|L}} in midair | |{{button|Wiiu|L}} in midair | ||
|- | |- | ||
!colspan= | !colspan=5 style="background:#FF7733;"|Lakitu Bro controls | ||
|- | |- | ||
|Rotate camera | |Rotate camera | ||
|{{button| | |{{button|n64|cleft}} / {{button|n64|cright}} | ||
|{{button|gcn|c}} left or right | |||
|{{button|Wii|CCstickR}} left or right | |||
|{{button|Wiiu|Rightstick}} left or right | |||
|- | |- | ||
|Zoom in, enter first-person view | |Zoom in, enter first-person view | ||
|{{button| | |{{button|n64|cup}} | ||
|{{button| | |{{button|gcn|c}} up | ||
|{{button|Wii|CCstickR}} up | |||
|{{button|Wiiu|Rightstick}} up | |||
|- | |- | ||
|Zoom out | |Zoom out | ||
|{{button| | |{{button|n64|cdown}} | ||
|{{button| | |{{button|gcn|c}} down | ||
|{{button|Wii|CCstickR}} down | |||
|{{button|Wiiu|Rightstick}} down | |||
|- | |- | ||
|Shift camera view | |Shift camera view | ||
|{{button|n64 | |{{button|n64|r}} | ||
|{{button|gcn|R}} | |{{button|gcn|R}} | ||
|{{button|Wii|CCR}} | |{{button|Wii|CCR}} | ||
|{{button|WiiU|R}} | |{{button|WiiU|R}} | ||
|- | |- | ||
!colspan= | !colspan=5 style="background:#FF7733;"|Menu controls | ||
|- | |- | ||
|Navigate menu | |Navigate menu | ||
|{{button|n64|stick}} | |{{button|n64|stick}} | ||
|{{button|gcn|stick}} | |{{button|gcn|stick}} | ||
|{{button|Wii|CCstickL}} | |{{button|Wii|CCstickL}} | ||
| Line 293: | Line 270: | ||
|Confirm command | |Confirm command | ||
|{{button|n64|a}} | |{{button|n64|a}} | ||
|{{button|gcn|a}} | |{{button|gcn|a}} | ||
|{{button|Wii|CCa}} | |{{button|Wii|CCa}} | ||
| Line 300: | Line 276: | ||
|Cancel command | |Cancel command | ||
|{{button|n64|b}} | |{{button|n64|b}} | ||
|{{button|gcn|b}} | |{{button|gcn|b}} | ||
|{{button|Wii|CCb}} | |{{button|Wii|CCb}} | ||
| Line 306: | Line 281: | ||
|- | |- | ||
|Display pause menu | |Display pause menu | ||
|{{button|n64 | |{{button|n64|start}} | ||
|{{button|gcn|Start}} | |{{button|gcn|Start}} | ||
|{{button|Wii|+}} | |{{button|Wii|+}} | ||
| Line 316: | Line 290: | ||
====Nintendo Switch controls==== | ====Nintendo Switch controls==== | ||
In addition to the controllers listed below, wireless Nintendo 64 Controllers are compatible with Nintendo Switch systems. Nintendo GameCube Controllers can be used through the [[Nintendo Switch#GameCube Controller Adapter|GameCube Controller Adapter]], but it is recognized as a wired Nintendo Switch Pro Controller by ''Super Mario 64''. | In addition to the controllers listed below, wireless Nintendo 64 Controllers are compatible with Nintendo Switch systems. Nintendo GameCube Controllers can be used through the [[Nintendo Switch#GameCube Controller Adapter|GameCube Controller Adapter]], but it is recognized as a wired Nintendo Switch Pro Controller by ''Super Mario 64''. | ||
<center> | <center> | ||
{|class="wikitable"style="width:65%;text-align:center" | {|class="wikitable"style="width:65%;text-align:center" | ||
| Line 323: | Line 296: | ||
!colspan=4 style="background:#FF2400;color:white;"|Input(s) | !colspan=4 style="background:#FF2400;color:white;"|Input(s) | ||
|- | |- | ||
!width=40% style="background:#FF2400;color:white;"|Dual Joy-Con | !width=40% style="background:#FF2400;color:white;"|Dual Joy-Con / Nintendo Switch Pro Controller / Nintendo Switch Lite | ||
!width=40% style="background:#FF2400;color:white;"|Horizontal Joy-Con | !width=40% style="background:#FF2400;color:white;"|Horizontal Joy-Con | ||
|- | |- | ||
| Line 395: | Line 368: | ||
|- | |- | ||
|Swing and toss [[Bowser]] by the tail | |Swing and toss [[Bowser]] by the tail | ||
|{{button|Switch|B}} → | |{{button|Switch|B}} → ↻{{button|Switch|LeftStick}} → {{button|Switch|B}} | ||
|{{button|Switch|JC-Bottom}} → | |{{button|Switch|JC-Bottom}} → ↻{{button|Switch|Stick}} → {{button|Switch|JC-Bottom}} | ||
|- | |- | ||
|[[Dive]] | |[[Dive]] | ||
| Line 468: | Line 441: | ||
{{multiframe | {{multiframe | ||
|[[File:Hokaniwa in Minato.jpg|150px]][[File:Tiny-Huge Island 64.png|150px]] | |[[File:Hokaniwa in Minato.jpg|150px]][[File:Tiny-Huge Island 64.png|150px]] | ||
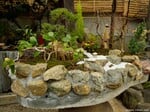
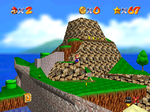
|A photograph of a | |A photograph of a hakoniwa{{footnote|main|A}} (left) compared to a screenshot of Tiny-Huge Island (right). The design principals of the former are the cited influence behind the courses in the game. | ||
|size=300 | |size=300 | ||
|align=right | |align=right | ||
}} | }} | ||
''Super Mario 64'' takes place within the walls of the [[Peach's Castle|Mushroom Castle ]] in the [[Mushroom Kingdom]]. It is the first ''[[Super Mario (series)|Super Mario]]'' game to explicitly include the Mushroom Kingdom as a location since ''[[Super Mario Bros.: The Lost Levels]]''. The game's [[level]]s, called "courses," are not naturally occurring places | ''Super Mario 64'' takes place within the walls of the [[Peach's Castle|Mushroom Castle]] in the [[Mushroom Kingdom]]. It is the first ''[[Super Mario (series)|Super Mario]]'' game to explicitly include the Mushroom Kingdom as a location since ''[[Super Mario Bros.: The Lost Levels]]''. The game's [[level]]s, called "courses," are accessed through [[painting]]s hung on the walls, but some are more cryptically hidden or require the player to accomplish a task in the castle before becoming accessible. Unlike previous games, the courses are not naturally occurring places. They are "painting worlds" that Bowser has corrupted and modified to his liking using the stolen [[Power Star]]s. He has turned some of the inhabitants into [[Bowser's Minions|monsters]],<ref>{{cite|quote=Bowser has stolen the castle's Stars, and he's using their power to create his own world in the paintings and walls.|author=[[Toad (species)|Toad]]|title=''[[Super Mario 64]]'' by [[Nintendo EAD]]|format=North American localization|publisher=[[Nintendo|Nintendo of America]]|date=1996}}</ref><ref>{{cite|quote=Bowser is trying to make a land of monsters inside the walls and the paintings by using the Power Star. Take back the star!|author=[[Toad (species)|Toad]]|title=''[[Super Mario 64]]'' by [[Nintendo EAD]]|format=Japanese localization|archive=https://www.reddit.com/r/translator/comments/15mk306/japanese_english_what_does_this_super_mario_64/|archiver=a translation by u/AlexLuis on Reddit|publisher=[[Nintendo|Nintendo Co., Ltd.]]|date=1996}}</ref> and there apparently is concern that his creations will escape the boundaries of the paintings and enter the [[Earth|real world]].<ref>{{cite|quote=絵の世界のボム兵の話ではこうだ。「突然あらわれた怪物たちが、お城を守るちからの素、パワースターを大量に奪い取り、ピーチ姫やキノコ城の住人たちもこちらの世界に連れ去った。そして絵の世界の住人も怪物にしたてあげ、本当の世界に送りこんで、マリオたちの国を支配しようとしている」。|author=[[Nintendo|Nintendo Co., Ltd.]]|title=STORY|language=ja|publisher=Super Mario 64 Official Site|date=1996|url=www.nintendo.co.jp/n01/n64/software/nus_p_nsmj/index.html}}</ref><ref>{{cite|quote=To help him accomplish this, [Bowser] plans to convert the residents of the painting world into monsters as well. If nothing is done, all those monsters will soon begin to overflow from inside the painting.|author=[[Nintendo|Nintendo of America]]|title="Story" in ''Super Mario 64 Instruction Booklet''|url=https://m1.nintendo.net/docvc/NUS/USA/NSME/NSME_E.pdf|format=pdf|location=Redmond|publisher=Nintendo of America|date=1996|page=5}}</ref><ref>{{cite|quote=Bowser stole the Power Stars that protected the castle and hid them away in magical painting worlds. These worlds look like paintings from the outside, but inside, they are real, three-dimensional places, filled with mysteries and all sorts of characters, both good and bad.... One school of thought believes that Bowser will turn Peach and her entourage into a sort of zombie army, then let them loose on our world. A competing theory suggests that Bowser will simply extend his painting worlds so that they encompass all of reality.|author=Pelland, Scott, and Dan Owsen|title="The Story of Super Mario 64" in ''The Super Mario 64 Player's Guide''|location=Redmond|publisher=[[Nintendo|Nintendo of America]]|date=1996|page=5}}</ref> Some [[:File:SM64 globe artwork.png|paratextual material]] and [[Throwback Galaxy|subsequent titles]] present the courses introduced in this game as visitable places outside the paintings. | ||
Generally, a course is a sprawling location with interactive environmental elements and several levels of elevation. Courses often have subareas and collectibles obscured in the landscape that passively encourage the player to rotate the camera and explore. Most courses feature prominent landmarks, such as the mountain on the [[Bob-omb Battlefield]] and the volcano in [[Lethal Lava Land]], that provide the player with a consistent point of reference that mitigates their chance of getting lost.<ref name=montreal>[[Yoshiaki Koizumi]]. | Generally, a course is a sprawling location with interactive environmental elements and several levels of elevation. Courses often have subareas and collectibles obscured in the landscape that passively encourage the player to rotate the camera and explore. Most courses feature prominent landmarks, such as the mountain on the [[Bob-omb Battlefield]] and the [[volcano]] in [[Lethal Lava Land]], that provide the player with a consistent point of reference that mitigates their chance of getting lost.<ref name=montreal>{{cite|author=[[Yoshiaki Koizumi|Koizumi, Yoshiaki]]|date=27 Nov. 2007|archive=youtu.be/A25Ab7RyUPs|title=''Super Mario Galaxy: The Journey from Garden to Galaxy''|location=Montréal|publisher=Montreal International Games Summit, Alliance numériQC|archiver=YouTube by Eric St-Cyr and A Hover|archivedate=24 Sep. 2016|accessdate=27 Feb. 2021}}</ref> Like its more immediate predecessors, courses are [[Level#List of level themes|themed]] after real-life {{wp|ecosystem}}s (i.e., deserts, mountains, seas) and more fantastical settings (i.e., haunted houses, clocktowers, rainbow roads in the sky). The theme informs the types of objects that can be interacted with in the level, the types of enemies that can be encountered, and the non-playable characters that can be spoken to. For example, [[Pokey|cactus enemies]], a [[Klepto|condor]], and [[quicksand]] are in the desert-themed [[Shifting Sand Land]]. [[Penguin]]s, slippery ice, and deep snow appear on [[Cool, Cool Mountain]] and [[Snowman's Land]]. Most courses contain switches and strikable objects that modify elements of the course, such as the [[Crystal Tap]]s in [[Wet-Dry World]]. | ||
Unlike the levels of prior two-dimensional entries, the courses in this game are open-ended and largely do not funnel the player towards one goal. This was an intentional departure from the level design principals of prior games because the development team did not believe they could be replicated for a fun experience in a three-dimensional environment. Director and series creator [[Shigeru Miyamoto]] wanted ''Super Mario 64'' to be a game where players "create their own vision," a decision partially influenced by the technical difficulty of making a precise jump in a 3D environment.<ref name=taka>64編集部 | Unlike the levels of prior two-dimensional entries, the courses in this game are open-ended and largely do not funnel the player towards one goal. This was an intentional departure from the level design principals of prior games because the development team did not believe they could be replicated for a fun experience in a three-dimensional environment. Director and series creator [[Shigeru Miyamoto]] wanted ''Super Mario 64'' to be a game where players "create their own vision," a decision partially influenced by the technical difficulty of making a precise jump in a 3D environment.<ref name=taka>{{cite|author=64編集部, editors|title=『スーパーマリオ64 マリオ・ザ・テクニック―完全攻略への最短ルート編』|language=ja|location=Tokyo|publisher=Takarajimasha|date=1996|isbn=978-4-79-661121-3}} Cited in-text as Takarajimasha (1996).</ref><ref name=shmup>shmuplations (translator). "[https://shmuplations.com/mario64/ Super Mario 64 – 1996 Developer Interviews]" (English translations of Takarajimasha and Shogakukan, 1996). shmuplations.com. Published 2022. Accessed 22 Jun 2023.</ref><ref name=montreal/> This mindset manifested in levels where players were largely free to interact with the world in ways they wanted to, with larger platforms and sprawling spaces that encouraged exploration rather than carry out precise actions to reach a goal. The courses themselves were created using hakoniwa or "box garden" design principals.<ref name=shoga>{{cite|author=Editing staff|title=『スーパーマリオ64 (ワンダーライフスペシャル―任天堂公式ガイドブック)』|language=ja|location=Tokyo|publisher=[[Shogakukan]]|date=1996|isbn=978-4-09-102554-8}} Cited in-text as Shogakukan (1996).</ref><ref name=shmup/> | ||
{{footnote|main|B}}<ref name=montreal/><ref name=trinen>[[Bill Trinen]] | {{footnote|main|B}}<ref name=montreal/><ref name=trinen>{{cite|author=[[Bill Trinen|Trinen, Bill]]|url=nintendotreehouse.tumblr.com/post/161799433482/whats-in-a-box|title=What's in a Box?|publisher=Nintendo Treehouse Log|date=14 Jun. 2017|accessdate=30 Jan. 2021}}</ref> A hakoniwa is a intricately-arranged miniature garden within an enclosed space, with layers of depth and detail that become apparent to an onlooker when carefully examined.<ref>{{cite|author=Dean, Andrew R.|url=najga.org/handbook/courtyard-garden/|title="Chapter 8: The Courtyard Garden" in ''Handbook, Part 1: Design & Craft''|format=digital|publisher=North American Japanese Garden Association, najga.org|date=10 Dec. 2010|accessdate=24 Jun. 2023}}</ref><ref>{{cite|author=Nihon Gaiji Kyōkai, editors|title=''Contemporary Japan: A Review of Far Eastern Affairs''|location=Tokyo|publisher=Foreign Affairs Association of Japan|format=25|page=246|date=1957}}</ref><ref name=trinen/> Applying these principals allowed the development team to create complex levels that surprise players, another important tenet during development.<ref name=taka/><ref name=shmup/><ref name=montreal/> In {{wp|Western world|the West}}, where creating miniature gardens is not as culturally prevalent, these types of levels are most often likened to {{wp|Sandbox game|sandboxes}}.<ref name=trinen/> | ||
===Courses=== | ===Courses=== | ||
| Line 483: | Line 456: | ||
{{multiframe | {{multiframe | ||
|[[File:SM64 Screenshot Entering a Painting.gif|200px]]<br>[[File:Bob-omb Battlefield mission select.png|200px]] | |[[File:SM64 Screenshot Entering a Painting.gif|200px]]<br>[[File:Bob-omb Battlefield mission select.png|200px]] | ||
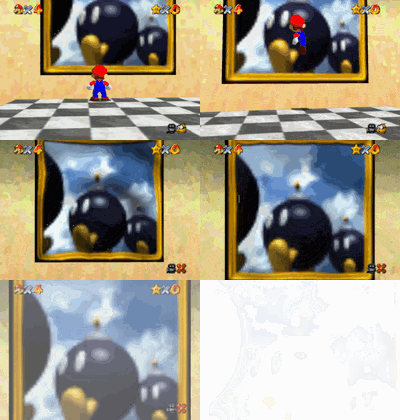
|'''Top image''': Mario entering the painting for the Bob-omb Battlefield | |'''Top image''': Mario entering the painting for the Bob-omb Battlefield<br>'''Bottom image''': The mission-selection screen | ||
|size=200 | |size=200 | ||
|align=right | |align=right | ||
}} | }} | ||
Most of the courses are accessed through [[painting]]s inside the Mushroom Castle, the {{wp|Overworld|hub world}} of the game. The surface of a painting ripples like water when | Most of the courses are accessed through [[painting]]s inside the Mushroom Castle, the {{wp|Overworld|hub world}} of the game. The surface of a painting ripples like water when [[Mario]] is near, and he is brought to the course it represents by {{wp|Chronotope|physically jumping through it}}. Accessing levels in this manner is a departure from the overworld system in previous platform games (see [[Super Mario 64#Mushroom Castle|below]]). However, the castle is divided into several sections that are analogous to the [[world]] structure of proceeding games, where multiple levels are available to the player on a single section and the player must complete a [[List of bosses|boss]]-dedicated course in order to gain access to the next one. As Mario advances through the castle, he encounters some courses that are accessed through portals other than paintings, such as Shifting Sand Land, which is accessed through what looks like a brick wall at a dead end in the basement, and [[Tick Tock Clock]], which is entered through a clock face. The locations of courses on subsequent sections are generally more complex and are puzzles in themselves, such as the painting for [[Snowman's Land]] that is viewable only through a mirror.<ref name=HubDoc>{{cite|author=Design Doc|url=https://www.youtube.com/watch?v=hHguwARMcY8|title=What Makes a Great Hub World? - How Mario 64, Spyro, and Hades Made Theirs ~ Design Doc|publisher=YouTube|date=12 Oct. 2020|accessdate=18 Aug. 2023}}</ref> | ||
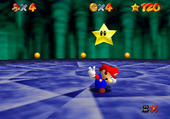
Rather than present a unilateral scenario that leads to a single spatially fixed [[goal]], most courses in the game host multiple objectives called "[[mission]]s" that each have a goal in a different location from each other. For most courses, entering a painting (or equivalency) brings the player to a mission-selection screen, where selecting one sends Mario to the course within the confines of the mission's specific scenario and its unique goal. In nearly all courses, this goal is a Power Star, a collectible token resembling the [[Super Star]] of prior entries. Touching one completes the level and returns Mario to the castle. The number of Power Stars collected is tracked by the game and communicated to the player on the {{wp|user interface}} in the upper right corner of the screen. Accumulating Power Stars is how new courses become accessible to the player. On the first floor, some [[★ door]]s that seal away certain paintings open only after Mario has collected a specified number of Stars. Mario can access a new section only after clearing the current one's Bowser Course, itself becoming accessible only after a specified number of Power Stars has been obtained. However, there are 120 obtainable Power Stars in a game that requires only 70 to access the final level. The player has some discretion on how many or which ones are obtained to finish the game, as well as the order. | Rather than present a unilateral scenario that leads to a single spatially fixed [[goal]], most courses in the game host multiple objectives called "[[mission]]s" that each have a goal in a different location from each other. For most courses, entering a painting (or equivalency) brings the player to a mission-selection screen, where selecting one sends Mario to the course within the confines of the mission's specific scenario and its unique goal. In nearly all courses, this goal is a Power Star, a collectible token resembling the [[Super Star]] of prior entries. Touching one completes the level and returns Mario to the castle. The number of Power Stars collected is tracked by the game and communicated to the player on the {{wp|user interface}} in the upper right corner of the screen. Accumulating Power Stars is how new courses become accessible to the player. On the first floor, some [[★ door]]s that seal away certain paintings open only after Mario has collected a specified number of Stars. Mario can access a new section only after clearing the current one's Bowser Course, itself becoming accessible only after a specified number of Power Stars has been obtained. However, there are 120 obtainable Power Stars in a game that requires only 70 to access the final level. The player has some discretion on how many or which ones are obtained to finish the game, as well as the order. | ||
| Line 498: | Line 471: | ||
*'''Normal Courses''',<ref name=n64site>{{cite|author=[[Nintendo of America]]|deadlink=y|date=1998|archive=https://web.archive.org/web/19980610064137/http://www.nintendo.com/n64/super_mario64/strategy.html|title=Super Mario 64 Strategy|publisher=Nintendo Official Site}}</ref> or '''main courses''',<ref name=booklet>{{cite|author=[[Nintendo|Nintendo of Europe]]|title=''Super Mario 64 Instruction Booklet''|location=Großostheim|publisher=Nintendo of Europe|date=1996|page=15}}</ref> contain six dedicated missions and an unlisted 100-[[coin]] mission. Some of the dedicated missions build off each other environmentally or narratively. (This means the events that transpire in the completion of one mission are reflected in the events of the subsequent mission.) However, some Power Stars can be encountered before the mission-dedicated one and can be collected, resulting in some instances where the Stars are obtained out of the intended "order." These courses are the most intricate levels in the game. Most include objects that can enable quick traversal between areas, such as cannons and [[Warp|Warp Points]]. Some courses include accessible subareas, such as the volcano in Lethal Lava Land and the pyramid in Shifting Sand Land. There are 15 Normal Courses in the game, and they are the only levels explicitly numbered and listed on the pause menu. | *'''Normal Courses''',<ref name=n64site>{{cite|author=[[Nintendo of America]]|deadlink=y|date=1998|archive=https://web.archive.org/web/19980610064137/http://www.nintendo.com/n64/super_mario64/strategy.html|title=Super Mario 64 Strategy|publisher=Nintendo Official Site}}</ref> or '''main courses''',<ref name=booklet>{{cite|author=[[Nintendo|Nintendo of Europe]]|title=''Super Mario 64 Instruction Booklet''|location=Großostheim|publisher=Nintendo of Europe|date=1996|page=15}}</ref> contain six dedicated missions and an unlisted 100-[[coin]] mission. Some of the dedicated missions build off each other environmentally or narratively. (This means the events that transpire in the completion of one mission are reflected in the events of the subsequent mission.) However, some Power Stars can be encountered before the mission-dedicated one and can be collected, resulting in some instances where the Stars are obtained out of the intended "order." These courses are the most intricate levels in the game. Most include objects that can enable quick traversal between areas, such as cannons and [[Warp|Warp Points]]. Some courses include accessible subareas, such as the volcano in Lethal Lava Land and the pyramid in Shifting Sand Land. There are 15 Normal Courses in the game, and they are the only levels explicitly numbered and listed on the pause menu. | ||
*'''Mini courses'''<ref name=booklet/><ref name=upchurch>{{cite|author=Upchurch, David, editor|title="Super Mario 64 The Essential Player's Guide" from ''Official UK Nintendo Magazine''|location=London|publisher=East Midland Allied Press|format=54|page=31|date=Mar. 1997}}</ref> are smaller and structured more like traditional obstacle courses that emphasize precise platforming. They lack dedicated missions to select, and most contain only one Power Star. Power Stars obtained in mini courses are counted together as "Secret Stars" on the pause menu. Mini courses can further be classified into three subtypes, as detailed below. | *'''Mini courses'''<ref name=booklet/><ref name=upchurch>{{cite|author=Upchurch, David, editor|title="Super Mario 64 The Essential Player's Guide" from ''Official UK Nintendo Magazine''|location=London|publisher=East Midland Allied Press|format=54|page=31|date=Mar. 1997}}</ref> are smaller and structured more like traditional obstacle courses that emphasize precise platforming. They lack dedicated missions to select, and most contain only one Power Star. Power Stars obtained in mini courses are counted together as "Secret Stars" on the pause menu. Mini courses can further be classified into three subtypes, as detailed below. | ||
**'''Bowser Courses''' | **'''Bowser Courses'''<ref name=n64site/> (also lowercased)<ref>Upchurch, p. 30</ref> lead to an arena where Mario must defeat [[Bowser]]. Each Bowser Course features a Power Star obtained by collecting eight [[Red Coin]]s, but this does not complete the level. In the first two courses, defeating Bowser awards Mario a [[key]], a different kind of token that completes the level when touched. The key is used to permanently unlock the [[Key Door]] to another section of the castle. In [[Bowser in the Sky]], the final course, defeating Bowser releases the [[Jumbo Star]]. Collecting it does not contribute to the player's Power Star total, instead freeing Princess Peach. There are three Bowser Courses in the whole game, one for each section. | ||
**'''Secret Courses''' | **'''Secret Courses'''<ref name=n64site/> (also lowercased)<ref>Upchurch, p. 32</ref> are cryptically hidden in the castle. All Secret Courses have at least one Power Star to collect, with the sole exception being [[The Princess's Secret Slide]], which has two. None of these courses are accessed through paintings, and they often require the player to investigate a space within the castle to find.<ref name=HubDoc/> There are three in the game. | ||
**'''Switch Cap Courses'''<ref name=n64site/> are where Mario is under the effect of a power-up immediately upon entering a course and is needed to reach a Cap Switch. When one is | **'''Switch Cap Courses'''<ref name=n64site/> are where Mario is under the effect of a power-up immediately upon entering a course and is needed to reach a Cap Switch. When one is stood on, it activates and causes the power-up to permanently become accessible within the Normal Courses. They are analogous to the [[Switch Palace]]s in ''[[Super Mario World]]'', though unlike in them, striking the switch does not make Mario exit the course. These are the only courses (along with [[Over the Rainbows|Wing Mario Over the Rainbow]]) in the game where Mario can fall down a [[pit]] without losing a life; he is instead brought back to the castle. | ||
==== | ====Table==== | ||
There are a number of courses in each section. At least four of them are Normal Courses, and at least two are mini courses. One of the mini courses is always a Bowser Course. Including the Mushroom Castle, there are 25 courses in the game. The chart below lists all of them. Each one is provided with a screenshot, a brief description, and a list of its missions. The order that the courses and missions are listed follows their organization in the ''Super Mario 64'' Player's Guide.<ref>{{cite|author=Pelland, Scott and Dan Owsen|title=''The Super Mario 64 Player's Guide''|location=Redmond|publisher=[[Nintendo|Nintendo of America]]|date=1996}}</ref> Only the names of the missions in Normal Courses are provided in-game. When available, the missions that lack in-game names, such as the 100-coin missions, are also derived from the ''Super Mario 64'' Player's Guide. Where no such name exists, the mission assumes the name of its course. | There are a number of courses in each section. At least four of them are Normal Courses, and at least two are mini courses. One of the mini courses is always a Bowser Course. Including the Mushroom Castle, there are 25 courses in the game. The chart below lists all of them. Each one is provided with a screenshot, a brief description, and a list of its missions. The order that the courses and missions are listed follows their organization in the ''Super Mario 64'' Player's Guide.<ref>{{cite|author=Pelland, Scott and Dan Owsen|title=''The Super Mario 64 Player's Guide''|location=Redmond|publisher=[[Nintendo|Nintendo of America]]|date=1996}}</ref> Only the names of the missions in Normal Courses are provided in-game. When available, the missions that lack in-game names, such as the 100-coin missions, are also derived from the ''Super Mario 64'' Player's Guide. Where no such name exists, the mission assumes the name of its course. | ||
<center> | <center> | ||
| Line 508: | Line 481: | ||
!colspan="3"style="background:#FF2400;color:white;"|Courses | !colspan="3"style="background:#FF2400;color:white;"|Courses | ||
|- | |- | ||
|colspan="3"style="background:#58BC58;"|[[File:SM64 Asset Texture Castle Wall (Main Hall).png|25px]] '''{{color | |colspan="3"style="background:#58BC58;"|[[File:SM64 Asset Texture Castle Wall (Main Hall).png|25px]] '''{{color link|white|Peach's Castle#First floor|First Floor and Mezzanine}}''' | ||
|- | |- | ||
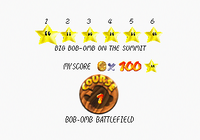
!width=16% style="background:#9FD99F"|01. [[Bob-omb Battlefield]]<br>{{ | !width=16% style="background:#9FD99F"|01. [[Bob-omb Battlefield]]<br>{{icon|SM64-totalS}}×7 {{icon|SM64-totalC}}×6 {{icon|SM64-totalB}}×1 | ||
!colspan="2"width=34% style="background:#9FD99F"|Missions | !colspan="2"width=34% style="background:#9FD99F"|Missions | ||
|- | |- | ||
|rowspan="3"align=center style="background:#FFFFFF"|[[File:SM64 Screenshot Bob-omb Battlefield.png|x100px]] | |rowspan="3"align=center style="background:#FFFFFF"|[[File:SM64 Screenshot Bob-omb Battlefield.png|x100px]] | ||
|width=17%|{{ | |width=17%|{{icon|SM64-Star}} [[Big Bob-omb on the Summit]] | ||
|width=17%|{{ | |width=17%|{{icon|SM64-Star}} [[Footrace with Koopa the Quick]] | ||
|- | |- | ||
|{{ | |{{icon|SM64-Star}} [[Shoot to the Island in the Sky]] | ||
|{{ | |{{icon|SM64-Star}} [[Find the 8 Red Coins]] | ||
|- | |- | ||
|{{ | |{{icon|SM64-Star}} [[Mario Wings to the Sky]] | ||
|{{ | |{{icon|SM64-Star}} [[Behind Chain Chomp's Gate]] | ||
|- | |- | ||
|colspan="3"align=center|Grassy fields surrounding a spiraled mountain. A battle is waged here between the peaceful [[Bob-omb Buddy|Bob-omb Buddies]] and the enemy [[Bob-omb]]s. Once the battle is over, the Bob-omb Buddies allow [[Mario]] to access their [[cannon]]s. There is a floating island in the east and a barred cave towards the center with a [[Chain Chomp]] leashed in front of it.<br>'''Unlock criterion:''' Enter the Mushroom Castle. | |colspan="3"align=center|Grassy fields surrounding a spiraled mountain. A battle is waged here between the peaceful [[Bob-omb Buddy|Bob-omb Buddies]] and the enemy [[Bob-omb]]s. Once the battle is over, the Bob-omb Buddies allow [[Mario]] to access their [[cannon]]s. There is a floating island in the east and a barred cave towards the center with a [[Chain Chomp]] leashed in front of it.<br>'''Unlock criterion:''' Enter the Mushroom Castle. | ||
|- | |- | ||
!width=16% style="background:#9FD99F"|02. [[Whomp's Fortress]]<br>{{ | !width=16% style="background:#9FD99F"|02. [[Whomp's Fortress]]<br>{{icon|SM64-totalS}}×7 {{icon|SM64-totalC}}×1 {{icon|SM64-totalB}}×1 | ||
!colspan="2"width=34% style="background:#9FD99F"|Missions | !colspan="2"width=34% style="background:#9FD99F"|Missions | ||
|- | |- | ||
|rowspan="3"align=center style="background:#FFFFFF"|[[File:SM64 Screenshot Whomp's Fortress.png|x100px]] | |rowspan="3"align=center style="background:#FFFFFF"|[[File:SM64 Screenshot Whomp's Fortress.png|x100px]] | ||
|{{ | |{{icon|SM64-Star}} [[Chip Off Whomp's Block]] | ||
|{{ | |{{icon|SM64-Star}} [[To the Top of the Fortress]] | ||
|- | |- | ||
|{{ | |{{icon|SM64-Star}} [[Shoot into the Wild Blue]] | ||
|{{ | |{{icon|SM64-Star}} [[Red Coins on the Floating Isle]] | ||
|- | |- | ||
|{{ | |{{icon|SM64-Star}} [[Fall onto the Caged Island]] | ||
|{{ | |{{icon|SM64-Star}} [[Blast Away the Wall]] | ||
|- | |- | ||
|colspan="3"align=center|A fortress in the sky. It is ruled by the [[Whomp King]], who sits at the top of the fortress. The path leading to him has falling platforms and stone enemies. Once he is defeated, a climbable tower appears at the top. A chain of floating islands is in the northeast. They can be reached with the help of [[Hoot]], a sleepy owl found in the course's single [[tree]].<br>'''Unlock criterion:''' Collect a Power Star. | |colspan="3"align=center|A fortress in the sky. It is ruled by the [[Whomp King]], who sits at the top of the fortress. The path leading to him has falling platforms and stone enemies. Once he is defeated, a climbable tower appears at the top. A chain of floating islands is in the northeast. They can be reached with the help of [[Hoot]], a sleepy owl found in the course's single [[tree]].<br>'''Unlock criterion:''' Collect a Power Star. | ||
|- | |- | ||
!style="background:#9FD99F"|03. [[Jolly Roger Bay]]<br>{{ | !style="background:#9FD99F"|03. [[Jolly Roger Bay]]<br>{{icon|SM64-totalS}}×7 {{icon|SM64-totalC}}×1 | ||
!colspan="2"style="background:#9FD99F"|Missions | !colspan="2"style="background:#9FD99F"|Missions | ||
|- | |- | ||
|rowspan="3"align=center style="background:#FFFFFF"|[[File:SM64 Screenshot Jolly Roger Bay.png|x100px]] | |rowspan="3"align=center style="background:#FFFFFF"|[[File:SM64 Screenshot Jolly Roger Bay.png|x100px]] | ||
|{{ | |{{icon|SM64-Star}} [[Plunder in the Sunken Ship]] | ||
|{{ | |{{icon|SM64-Star}} [[Can the Eel Come Out to Play?]] | ||
|- | |- | ||
|{{ | |{{icon|SM64-Star}} [[Treasure in the Ocean Cave|Treasure of the Ocean Cave]] | ||
|{{ | |{{icon|SM64-Star}} [[Red Coins on the Ship Afloat]] | ||
|- | |- | ||
|{{ | |{{icon|SM64-Star}} [[Blast to the Stone Pillar]] | ||
|{{ | |{{icon|SM64-Star}} [[Through the Jet Stream (Jolly Roger Bay)|Through the Jet Stream]] | ||
|- | |- | ||
|colspan="3"align=center|A cove containing the wreck of a sunken ship. A giant moray eel called [[Maw-Ray|Unagi]] nests in the ship and stirs when approached. An underwater corridor in the northwest leads to a cave that holds [[treasure chest|Treasure Chest]]s. Solving the puzzle of the chests reveals a Power Star.<br>'''Unlock criterion:''' Collect 3 Power Stars. | |colspan="3"align=center|A cove containing the wreck of a sunken ship. A giant moray eel called [[Maw-Ray|Unagi]] nests in the ship and stirs when approached. An underwater corridor in the northwest leads to a cave that holds [[treasure chest|Treasure Chest]]s. Solving the puzzle of the chests reveals a Power Star.<br>'''Unlock criterion:''' Collect 3 Power Stars. | ||
|- | |- | ||
!style="background:#9FD99F"|04. [[Cool, Cool Mountain]]<br>{{ | !style="background:#9FD99F"|04. [[Cool, Cool Mountain]]<br>{{icon|SM64-totalS}}×7 {{icon|SM64-totalC}}×3 | ||
!colspan="2"style="background:#9FD99F"| Missions | !colspan="2"style="background:#9FD99F"| Missions | ||
|- | |- | ||
|rowspan="3"align=center style="background:#FFFFFF"|[[File:SM64 Screenshot Cool, Cool Mountain.png|x100px]] | |rowspan="3"align=center style="background:#FFFFFF"|[[File:SM64 Screenshot Cool, Cool Mountain.png|x100px]] | ||
|{{ | |{{icon|SM64-Star}} [[Slip Slidin' Away (mission)|Slip Slidin' Away]] | ||
|{{ | |{{icon|SM64-Star}} [[Li'l Penguin Lost]] | ||
|- | |- | ||
|{{ | |{{icon|SM64-Star}} [[Big Penguin Race]] | ||
|{{ | |{{icon|SM64-Star}} [[Frosty Slide for 8 Red Coins]] | ||
|- | |- | ||
|{{ | |{{icon|SM64-Star}} [[Snowman's Lost His Head]] | ||
|{{ | |{{icon|SM64-Star}} [[Mario's Super Wall Kick|Wall Kicks Will Work]] | ||
|- | |- | ||
|colspan="3"align=center|A snow-covered mountain inhabited by [[penguin]]s and [[Snowman|snowpeople]]. Wooden bridges and | |colspan="3"align=center|A snow-covered mountain inhabited by [[penguin]]s and [[Snowman|snowpeople]]. Wooden bridges and an operating [[Ski Lift|gondola]] are built into the side of the mountain. A log cabin is near its peak. It contains the [[Slide (Super Mario 64)#Cabin's Snow Slide|Cabin's Snow Slide]], where Mario is challenged to a race by the [[Big Penguin]].<br>'''Unlock criterion:''' Collect 3 Power Stars. | ||
|- | |- | ||
!style="background:#9FD99F"|[[Bowser in the Dark World]]<br>{{ | !style="background:#9FD99F"|[[Bowser in the Dark World]]<br>{{icon|SM64-totalS}}×1 {{icon|SM64-totalB}}×1 | ||
!colspan="2"style="background:#9FD99F"|Missions | !colspan="2"style="background:#9FD99F"|Missions | ||
|- | |- | ||
|align=center style="background:#FFFFFF"|[[File:SM64 Screenshot Bowser in the Dark World.png|x100px]] | |align=center style="background:#FFFFFF"|[[File:SM64 Screenshot Bowser in the Dark World.png|x100px]] | ||
|{{ | |{{icon|SM64-Key}} Bowser in the Dark World | ||
|{{ | |{{icon|SM64-Star}} {{conjectural|8 Red Coins}} | ||
|- | |- | ||
|colspan="3"align=center|A winding path in a cavernous void. The path bears [[Amp]]s and shifting platforms. It ultimately leads to [[Bowser]], who is fought on a circular platform surrounded by floating [[Mine|bombs]].<br>'''Unlock criterion:''' Collect 8 Power Stars. | |colspan="3"align=center|A winding path in a cavernous void. The path bears [[Amp]]s and shifting platforms. It ultimately leads to [[Bowser]], who is fought on a circular platform surrounded by floating [[Mine|bombs]].<br>'''Unlock criterion:''' Collect 8 Power Stars. | ||
|- | |- | ||
!style="background:#9FD99F"|[[The Princess's Secret Slide]]<br>{{ | !style="background:#9FD99F"|[[The Princess's Secret Slide]]<br>{{icon|SM64-totalS}}×2 | ||
!colspan="2"style="background:#9FD99F"|Missions | !colspan="2"style="background:#9FD99F"|Missions | ||
|- | |- | ||
|align=center style="background:#FFFFFF"|[[File:SM64 Screenshot The Princess's Secret Slide.png|x100px]] | |align=center style="background:#FFFFFF"|[[File:SM64 Screenshot The Princess's Secret Slide.png|x100px]] | ||
|{{ | |{{icon|SM64-Star}} The Princess's Secret Slide | ||
|{{ | |{{icon|SM64-Star}} Second Star<ref>Pelland and Owsen, p. 44</ref> | ||
|- | |- | ||
|colspan="3"align=center|A carpeted [[Slide (Super Mario 64)|slide]] hidden on the mezzanine. Reaching the bottom of the slide gives Mario access to a Power Star—the first Secret Star available to the player. Reaching the bottom within 21 seconds awards Mario a second one.<br>'''Unlock criterion:''' Collect a Power Star. | |colspan="3"align=center|A carpeted [[Slide (Super Mario 64)|slide]] hidden on the mezzanine. Reaching the bottom of the slide gives Mario access to a Power Star—the first Secret Star available to the player. Reaching the bottom within 21 seconds awards Mario a second one.<br>'''Unlock criterion:''' Collect a Power Star. | ||
|- | |- | ||
!style="background:#9FD99F"|[[The Secret Aquarium]]<br>{{ | !style="background:#9FD99F"|[[The Secret Aquarium]]<br>{{icon|SM64-totalS}}×1 | ||
!colspan="2"style="background:#9FD99F"|Mission | !colspan="2"style="background:#9FD99F"|Mission | ||
|- | |- | ||
|align=center style="background:#FFFFFF"|[[File:SM64 Screenshot The Secret Aquarium.png|x100px]] | |align=center style="background:#FFFFFF"|[[File:SM64 Screenshot The Secret Aquarium.png|x100px]] | ||
|colspan="2"align=left|{{ | |colspan="2"align=left|{{icon|SM64-Star}} The Secret Aquarium | ||
|- | |- | ||
|colspan="3"align=center|A closed tank housing blue fish and [[Red Coin]]s. Collecting all of the Red Coins reveals a Secret Star. The aquarium is accessed through a little alcove in the same room that holds the [[painting]] for Jolly Roger Bay.<br>'''Unlock criterion:''' Collect 3 Power Stars. | |colspan="3"align=center|A closed tank housing blue fish and [[Red Coin]]s. Collecting all of the Red Coins reveals a Secret Star. The aquarium is accessed through a little alcove in the same room that holds the [[painting]] for Jolly Roger Bay.<br>'''Unlock criterion:''' Collect 3 Power Stars. | ||
|- | |- | ||
!style="background:#9FD99F"|[[Tower of the Wing Cap]]<br>{{ | !style="background:#9FD99F"|[[Tower of the Wing Cap]]<br>{{icon|SM64-totalS}}×1 | ||
!colspan="2"style="background:#9FD99F"|Mission | !colspan="2"style="background:#9FD99F"|Mission | ||
|- | |- | ||
|align=center style="background:#FFFFFF"|[[File:SM64 Screenshot Tower of the Wing Cap.png|x100px]] | |align=center style="background:#FFFFFF"|[[File:SM64 Screenshot Tower of the Wing Cap.png|x100px]] | ||
|colspan="2"align=left|{{ | |colspan="2"align=left|{{icon|SM64-Star}} Flying for Coins<ref>Pelland and Owsen, p. 45</ref> | ||
|- | |- | ||
|colspan="3"align=center|Towers in a sea of clouds. The turret in the middle holds the [[Cap Switch|Wing Cap Switch]] that makes the [[Wing Cap]] permanently available in Normal Courses once struck. Red Coins appear around the towers and can be collected by Mario only in his [[Wing Mario|Wing form]].<br>'''Unlock criterion:''' Collect 10 Power Stars. | |colspan="3"align=center|Towers in a sea of clouds. The turret in the middle holds the [[Cap Switch|Wing Cap Switch]] that makes the [[Wing Cap]] permanently available in Normal Courses once struck. Red Coins appear around the towers and can be collected by Mario only in his [[Wing Mario|Wing form]].<br>'''Unlock criterion:''' Collect 10 Power Stars. | ||
|- | |- | ||
|colspan="3"style="background:#B49936;color:white;"|[[File:SM64 Asset Texture Castle Wall (Basement).png|25px]] '''{{color | |colspan="3"style="background:#B49936;color:white;"|[[File:SM64 Asset Texture Castle Wall (Basement).png|25px]] '''{{color link|white|Peach's Castle#Basement|The Castle Basement}} and {{color link|white|Courtyard (Peach's Castle)|Courtyard}}''' | ||
|- | |- | ||
!style="background:#D7C277"|05. [[Big Boo's Haunt]]<br>{{ | !style="background:#D7C277"|05. [[Big Boo's Haunt]]<br>{{icon|SM64-totalS}}×7 {{icon|SM64-totalB}}×4 | ||
!colspan="2"style="background:#D7C277"|Missions | !colspan="2"style="background:#D7C277"|Missions | ||
|- | |- | ||
|rowspan="3"align=center style="background:#FFFFFF"|[[File:SM64 Screenshot Big Boo's Haunt.png|x100px]] | |rowspan="3"align=center style="background:#FFFFFF"|[[File:SM64 Screenshot Big Boo's Haunt.png|x100px]] | ||
|{{ | |{{icon|SM64-Star}} [[Go on a Ghost Hunt]] | ||
|{{ | |{{icon|SM64-Star}} [[Ride Big Boo's Merry-Go-Round]] | ||
|- | |- | ||
|{{ | |{{icon|SM64-Star}} [[Secret of the Haunted Books]] | ||
|{{ | |{{icon|SM64-Star}} [[Seek the 8 Red Coins]] | ||
|- | |- | ||
|{{ | |{{icon|SM64-Star}} [[Big Boo's Balcony]] | ||
|{{ | |{{icon|SM64-Star}} [[Eye to Eye in the Secret Room]] | ||
|- | |- | ||
|colspan="3"align=center|The [[Ghost House|haunted house]] hidden in Princess Peach's courtyard. The rooms of the house contain [[Boo]]s and animated furniture that try to strike Mario. Navigation requires solving puzzles and memorizing patterns in the halls. Failing to do so often brings Mario to the house's flooded basement, where a spinning carousel filled with Boos can be found.<br>'''Unlock criteria:''' Collect 12 Power Stars, and defeat the [[Big Boo]] that holds the miniature | |colspan="3"align=center|The [[Ghost House|haunted house]] hidden in Princess Peach's courtyard. The rooms of the house contain [[Boo]]s and animated furniture that try to strike Mario. Navigation requires solving puzzles and memorizing patterns in the halls. Failing to do so often brings Mario to the house's flooded basement, where a spinning carousel filled with Boos can be found.<br>'''Unlock criteria:''' Collect 12 Power Stars, and defeat the [[Big Boo]] that holds the miniature cage in the courtyard. | ||
|- | |- | ||
!style="background:#D7C277"|06. [[Hazy Maze Cave]]<br>{{ | !style="background:#D7C277"|06. [[Hazy Maze Cave]]<br>{{icon|SM64-totalS}}×7 | ||
!colspan="2"style="background:#D7C277"|Missions | !colspan="2"style="background:#D7C277"|Missions | ||
|- | |- | ||
|rowspan="3"align=center style="background:#FFFFFF"|[[File:SM64 Screenshot Hazy Maze Cave.png|x100px]] | |rowspan="3"align=center style="background:#FFFFFF"|[[File:SM64 Screenshot Hazy Maze Cave.png|x100px]] | ||
|{{ | |{{icon|SM64-Star}} [[Swimming Beast in the Cavern]] | ||
|{{ | |{{icon|SM64-Star}} [[Elevate for 8 Red Coins]] | ||
|- | |- | ||
|{{ | |{{icon|SM64-Star}} [[Metal-Head Mario Can Move!]] | ||
|{{ | |{{icon|SM64-Star}} [[Navigating the Toxic Maze]] | ||
|- | |- | ||
|{{ | |{{icon|SM64-Star}} [[A-Maze-Ing Emergency Exit]] | ||
|{{ | |{{icon|SM64-Star}} [[Watch for Rolling Rocks]] | ||
|- | |- | ||
|colspan="3"align=center|An underground labyrinth filled with dead ends, traps, and [[pit|bottomless pit]]s. There are two floors. The first one has a large chamber in the southeast with a controllable elevator, hallways with [[boulder|rolling rock]]s in the northwest, and a maze with [[smoke|strange cloud]]s in the northeast. The lower floor leads to a pool that holds [[Dorrie]].<br>'''Unlock criterion:''' Clear Bowser in the Dark World. | |colspan="3"align=center|An underground labyrinth filled with dead ends, traps, and [[pit|bottomless pit]]s. There are two floors. The first one has a large chamber in the southeast with a controllable elevator, hallways with [[boulder|rolling rock]]s in the northwest, and a maze with [[smoke|strange cloud]]s in the northeast. The lower floor leads to a pool that holds [[Dorrie]].<br>'''Unlock criterion:''' Clear Bowser in the Dark World. | ||
|- | |- | ||
!style="background:#D7C277"|07. [[Lethal Lava Land]]<br>{{ | !style="background:#D7C277"|07. [[Lethal Lava Land]]<br>{{icon|SM64-totalS}}×7 {{icon|SM64-totalB}}×2 | ||
!colspan="2"style="background:#D7C277"|Missions | !colspan="2"style="background:#D7C277"|Missions | ||
|- | |- | ||
|rowspan="3"align=center style="background:#FFFFFF"|[[File:SM64 Screenshot Lethal Lava Land.png|x100px]] | |rowspan="3"align=center style="background:#FFFFFF"|[[File:SM64 Screenshot Lethal Lava Land.png|x100px]] | ||
|{{ | |{{icon|SM64-Star}} [[Boil the Big Bully]] | ||
|{{ | |{{icon|SM64-Star}} [[Bully the Bullies]] | ||
|- | |- | ||
|{{ | |{{icon|SM64-Star}} [[8-Coin Puzzle with 15 Pieces]] | ||
|{{ | |{{icon|SM64-Star}} [[Red-Hot Log Rolling]] | ||
|- | |- | ||
|{{ | |{{icon|SM64-Star}} [[Hot-Foot-It into the Volcano]] | ||
|{{ | |{{icon|SM64-Star}} [[Elevator Tour in the Volcano]] | ||
|- | |- | ||
|colspan="3"align=center|Platforms in a [[lava]] sea. Some of them shift back and forth or can be manually rolled. They surround a small volcano that can be physically entered. [[Bully|Bullies]] appear in this course and knock Mario into lava on contact. [[Lava Bubble|Sparkies]] and other fiery obstacles that burn him when touched also appear.<br>'''Unlock criterion:''' Clear Bowser in the Dark World. | |colspan="3"align=center|Platforms in a [[lava]] sea. Some of them shift back and forth or can be manually rolled. They surround a small [[volcano]] that can be physically entered. [[Bully|Bullies]] appear in this course and knock Mario into lava on contact. [[Lava Bubble|Sparkies]] and other fiery obstacles that burn him when touched also appear.<br>'''Unlock criterion:''' Clear Bowser in the Dark World. | ||
|- | |- | ||
!style="background:#D7C277"|08. [[Shifting Sand Land]]<br>{{ | !style="background:#D7C277"|08. [[Shifting Sand Land]]<br>{{icon|SM64-totalS}}×7 {{icon|SM64-totalC}}×1 {{icon|SM64-totalB}}×1 | ||
!colspan="2"style="background:#D7C277"| Missions | !colspan="2"style="background:#D7C277"| Missions | ||
|- | |- | ||
|rowspan="3"align=center style="background:#FFFFFF"|[[File:SM64 Screenshot Shifting Sand Land.png|x100px]] | |rowspan="3"align=center style="background:#FFFFFF"|[[File:SM64 Screenshot Shifting Sand Land.png|x100px]] | ||
|{{ | |{{icon|SM64-Star}} [[In the Talons of the Big Bird]] | ||
|{{ | |{{icon|SM64-Star}} [[Shining Atop the Pyramid]] | ||
|- | |- | ||
|{{ | |{{icon|SM64-Star}} [[Inside the Ancient Pyramid]] | ||
|{{ | |{{icon|SM64-Star}} [[Stand Tall on the Four Pillars]] | ||
|- | |- | ||
|{{ | |{{icon|SM64-Star}} [[Free Flying for 8 Red Coins]] | ||
|{{ | |{{icon|SM64-Star}} [[Pyramid Puzzle]] | ||
|- | |- | ||
|colspan="3"align=center|Desert sands surrounding a pyramid. [[Klepto]] flies through the sky here. Much of the course is covered in [[quicksand]] and steep dunes. Little [[tornado]]s can be used to avoid obstacles. Narrow walkways are found in the northeast, and a small oasis is in the northwest. The pyramid can be entered, where a labyrinth leads to [[Eyerok]].<br>'''Unlock criterion:''' Clear Bowser in the Dark World. | |colspan="3"align=center|Desert sands surrounding a pyramid. [[Klepto]] flies through the sky here. Much of the course is covered in [[quicksand]] and steep dunes. Little [[tornado]]s can be used to avoid obstacles. Narrow walkways are found in the northeast, and a small oasis is in the northwest. The pyramid can be entered, where a labyrinth leads to [[Eyerok]].<br>'''Unlock criterion:''' Clear Bowser in the Dark World. | ||
|- | |- | ||
!style="background:#D7C277"|09. [[Dire, Dire Docks]]<br>{{ | !style="background:#D7C277"|09. [[Dire, Dire Docks]]<br>{{icon|SM64-totalS}}×7 | ||
!colspan="2"style="background:#D7C277"|Missions | !colspan="2"style="background:#D7C277"|Missions | ||
|- | |- | ||
|rowspan="3"align=center style="background:#FFFFFF"|[[File:SM64 Screenshot Dire, Dire Docks.png|x100px]] | |rowspan="3"align=center style="background:#FFFFFF"|[[File:SM64 Screenshot Dire, Dire Docks.png|x100px]] | ||
|{{ | |{{icon|SM64-Star}} [[Board Bowser's Sub]] | ||
|{{ | |{{icon|SM64-Star}} [[Chests in the Current]] | ||
|- | |- | ||
|{{ | |{{icon|SM64-Star}} [[Pole-Jumping for Red Coins]] | ||
|{{ | |{{icon|SM64-Star}} [[Through the Jet Stream (Dire, Dire Docks)|Through the Jet Stream]] | ||
|- | |- | ||
|{{ | |{{icon|SM64-Star}} [[The Manta Ray's Reward]] | ||
|{{ | |{{icon|SM64-Star}} [[Inside the Cage|Collect the Caps...]] | ||
|- | |- | ||
|colspan="3"align=center|Deep water. A [[whirlpool]] is at the center of the seabed and is circled by [[Sushi]] and a [[Manta|Manta Ray]]. A corridor in the east leads to | |colspan="3"align=center|Deep water. A [[whirlpool]] is at the center of the seabed and is circled by [[Sushi]] and a [[Manta|Manta Ray]]. A corridor in the east leads to a wider area where Bowser has hidden a submarine.<br>'''Unlock criterion:''' Collect 30 Power Stars. | ||
|- | |- | ||
!style="background:#D7C277"|[[Bowser in the Fire Sea]]<br>{{ | !style="background:#D7C277"|[[Bowser in the Fire Sea]]<br>{{icon|SM64-totalS}}×1 {{icon|SM64-totalB}}×1 | ||
!colspan="2"style="background:#D7C277"|Missions | !colspan="2"style="background:#D7C277"|Missions | ||
|- | |- | ||
|align=center style="background:#FFFFFF"|[[File:SM64 Screenshot Bowser in the Fire Sea.png|x100px]] | |align=center style="background:#FFFFFF"|[[File:SM64 Screenshot Bowser in the Fire Sea.png|x100px]] | ||
|{{ | |{{icon|SM64-Key}} Bowser in the Fire Sea | ||
|{{ | |{{icon|SM64-Star}} Power Star for 8 Red Coins<ref>Pelland and Owsen, p. 81</ref> | ||
|- | |- | ||
|colspan="3"align=center|Three narrow pathways surrounded by lava. Portions of the course gently rise and fall in lava, making traversal challenging. The pathway leads to the second battle against Bowser.<br>'''Unlock criterion:''' Complete Board Bowser's Sub. | |colspan="3"align=center|Three narrow pathways surrounded by lava. Portions of the course gently rise and fall in lava, making traversal challenging. The pathway leads to the second battle against Bowser.<br>'''Unlock criterion:''' Complete Board Bowser's Sub. | ||
|- | |- | ||
!style="background:#D7C277"|[[Behind the Waterfall|Cavern of the Metal Cap]]<br>{{ | !style="background:#D7C277"|[[Behind the Waterfall|Cavern of the Metal Cap]]<br>{{icon|SM64-totalS}}×1 | ||
!colspan="2"style="background:#D7C277"|Mission | !colspan="2"style="background:#D7C277"|Mission | ||
|- | |- | ||
|align=center style="background:#FFFFFF"|[[File:SM64 Screenshot Cavern of the Metal Cap.png|x100px]] | |align=center style="background:#FFFFFF"|[[File:SM64 Screenshot Cavern of the Metal Cap.png|x100px]] | ||
|colspan="2"|{{ | |colspan="2"|{{icon|SM64-Star}} Grab 8 Red Coins<ref name=secret2>Pelland and Owsen, p. 82</ref> | ||
|- | |- | ||
|colspan="3"align=center|An underground streambed that holds the Metal Cap Switch. Striking it makes the [[Metal Cap]] accessible in other courses. The water moves rapidly in this course. If Mario is swept up in it, he is brought to the [[Castle Grounds]].<br>'''Unlock criterion:''' Clear Bowser in the Dark World. | |colspan="3"align=center|An underground streambed that holds the Metal Cap Switch. Striking it makes the [[Metal Cap]] accessible in other courses. The water moves rapidly in this course. If Mario is swept up in it, he is brought to the [[Castle Grounds]].<br>'''Unlock criterion:''' Clear Bowser in the Dark World. | ||
|- | |- | ||
!style="background:#D7C277"|[[The Secret Under the Moat|Vanish Cap Under the Moat]]<br>{{ | !style="background:#D7C277"|[[The Secret Under the Moat|Vanish Cap Under the Moat]]<br>{{icon|SM64-totalS}}×1 | ||
!colspan="2"style="background:#D7C277"|Mission | !colspan="2"style="background:#D7C277"|Mission | ||
|- | |- | ||
|align=center style="background:#FFFFFF"|[[File:SM64 Screenshot Vanish Cap Under the Moat.png|x100px]] | |align=center style="background:#FFFFFF"|[[File:SM64 Screenshot Vanish Cap Under the Moat.png|x100px]] | ||
|colspan="2"|{{ | |colspan="2"|{{icon|SM64-Star}} {{conjectural|8 Red Coins}} | ||
|- | |- | ||
|colspan="3"align=center|A hidden area accessible only once the castle's moat is drained. When Mario enters the course, he is in his [[Vanish Mario|Vanish form]], and he must navigate the course while the power-up is still in effect to access the Vanish Cap Switch. Striking it makes the [[Vanish Cap]] accessible in other courses.<br>'''Unlock criteria:''' Clear Bowser in the Dark World and drain the castle's moat. | |colspan="3"align=center|A hidden area accessible only once the castle's moat is drained. When Mario enters the course, he is in his [[Vanish Mario|Vanish form]], and he must navigate the course while the power-up is still in effect to access the Vanish Cap Switch. Striking it makes the [[Vanish Cap]] accessible in other courses.<br>'''Unlock criteria:''' Clear Bowser in the Dark World and drain the castle's moat. | ||
|- | |- | ||
|colspan="3"style="background:#0083CC;"|[[File:SM64 Asset Texture Castle Wall (Third Floor).png|25px]] '''{{color | |colspan="3"style="background:#0083CC;"|[[File:SM64 Asset Texture Castle Wall (Third Floor).png|25px]] '''{{color link|white|Peach's Castle#Second floor|Upper Floors and Tower}}''' | ||
|- | |- | ||
!style="background:#71CCFF"|10. [[Snowman's Land]]<br>{{ | !style="background:#71CCFF"|10. [[Snowman's Land]]<br>{{icon|SM64-totalS}}×7 {{icon|SM64-totalC}}×1 {{icon|SM64-totalB}}×1 | ||
!colspan="2"style="background:#71CCFF"|Missions | !colspan="2"style="background:#71CCFF"|Missions | ||
|- | |- | ||
|rowspan="3"align=center style="background:#FFFFFF"|[[File:SM64 Screenshot Snowman's Land.png|x100px]] | |rowspan="3"align=center style="background:#FFFFFF"|[[File:SM64 Screenshot Snowman's Land.png|x100px]] | ||
|{{ | |{{icon|SM64-Star}} [[Snowman's Big Head]] | ||
|{{ | |{{icon|SM64-Star}} [[Chill with the Bully]] | ||
|- | |- | ||
|{{ | |{{icon|SM64-Star}} [[In the Deep Freeze]] | ||
|{{ | |{{icon|SM64-Star}} [[Whirl from the Freezing Pond]] | ||
|- | |- | ||
|{{ | |{{icon|SM64-Star}} [[Shell Shreddin' for Red Coins]] | ||
|{{ | |{{icon|SM64-Star}} [[Into the Igloo]] | ||
|- | |- | ||
|colspan="3"align=center|A chilly land surrounding a giant snowman. Slippery ice and [[Freezing water|freezing ponds]] appear in this course. The [[Chill Bully]] is on a floating island of ice in the east. Narrow paths allow Mario to ascend the snowman, but he begins to blow gusts of air when he nears his head. An enterable igloo is near the base of the snowman.<br>'''Unlock criterion:''' Clear Bowser in the Fire Sea. | |colspan="3"align=center|A chilly land surrounding a giant snowman. Slippery [[ice]] and [[Freezing water|freezing ponds]] appear in this course. The [[Chill Bully]] is on a floating island of ice in the east. Narrow paths allow Mario to ascend the snowman, but he begins to blow gusts of air when he nears his head. An enterable igloo is near the base of the snowman.<br>'''Unlock criterion:''' Clear Bowser in the Fire Sea. | ||
|- | |- | ||
!style="background:#71CCFF"|11. [[Wet-Dry World]]<br>{{ | !style="background:#71CCFF"|11. [[Wet-Dry World]]<br>{{icon|SM64-totalS}}×7 {{icon|SM64-totalC}}×1 | ||
!colspan="2"style="background:#71CCFF"|Missions | !colspan="2"style="background:#71CCFF"|Missions | ||
|- | |- | ||
|rowspan="3"align=center style="background:#FFFFFF"|[[File:SM64 Screenshot Wet-Dry World.png|x100px]] | |rowspan="3"align=center style="background:#FFFFFF"|[[File:SM64 Screenshot Wet-Dry World.png|x100px]] | ||
|{{ | |{{icon|SM64-Star}} [[Shocking Arrow Lifts!]] | ||
|{{ | |{{icon|SM64-Star}} [[Top o' the Town]] | ||
|- | |- | ||
|{{ | |{{icon|SM64-Star}} [[5 Secrets in the Shallows & Sky|Secrets in the Shallows & Sky]] | ||
|{{ | |{{icon|SM64-Star}} [[Express Elevator--Hurry Up!]] | ||
|- | |- | ||
|{{ | |{{icon|SM64-Star}} [[Go to Town for the Red Coins|Go to Town for Red Coins]] | ||
|{{ | |{{icon|SM64-Star}} [[Quick Race Through Downtown!]] | ||
|- | |- | ||
|colspan="3"align=center|A flooded empty town. There are [[Crystal Tap]]s at several locations in the town that cause the water level to rise or fall. There is a hidden downtown area that can be accessed only through the cage in the southeast.<br>'''Unlock criterion:''' Clear Bowser in the Fire Sea. | |colspan="3"align=center|A flooded empty town. There are [[Crystal Tap]]s at several locations in the town that cause the water level to rise or fall. There is a hidden downtown area that can be accessed only through the cage in the southeast.<br>'''Unlock criterion:''' Clear Bowser in the Fire Sea. | ||
|- | |- | ||
!style="background:#71CCFF"|12. [[Tall, Tall Mountain]]<br>{{ | !style="background:#71CCFF"|12. [[Tall, Tall Mountain]]<br>{{icon|SM64-totalS}}×7 {{icon|SM64-totalC}}×1 | ||
!colspan="2"style="background:#71CCFF"|Missions | !colspan="2"style="background:#71CCFF"|Missions | ||
|- | |- | ||
|rowspan="3"align=center style="background:#FFFFFF"|[[File:SM64 Screenshot Tall, Tall Mountain.png|x100px]] | |rowspan="3"align=center style="background:#FFFFFF"|[[File:SM64 Screenshot Tall, Tall Mountain.png|x100px]] | ||
|{{ | |{{icon|SM64-Star}} [[Scale the Mountain]] | ||
|{{ | |{{icon|SM64-Star}} [[Mystery of the Monkey Cage]] | ||
|- | |- | ||
|{{ | |{{icon|SM64-Star}} [[Scary 'Shrooms, Red Coins]] | ||
|{{ | |{{icon|SM64-Star}} [[Mysterious Mountainside]] | ||
|- | |- | ||
|{{ | |{{icon|SM64-Star}} [[Breathtaking View from the Bridge|Breathtaking View from Bridge]] | ||
|{{ | |{{icon|SM64-Star}} [[Blast to the Lonely Mushroom]] | ||
|- | |- | ||
|colspan="3"align=center|A tall mountain surrounded by [[Mushroom Platform]]s high above the sea. Gusts of [[wind]] and the [[Fwoosh]] make ascending the mountain challenging. The entrance to the [[slide (Super Mario 64)#Mysterious Mountain Slide|Mysterious Mountain Slide]] can be found near the summit. [[Ukiki|Ukkikis]] live in this course, one of which attempts to steal [[Mario Cap|Mario's cap]].<br>'''Unlock criterion:''' Clear Bowser in the Fire Sea. | |colspan="3"align=center|A tall mountain surrounded by [[Mushroom Platform]]s high above the sea. Gusts of [[wind]] and the [[Fwoosh]] make ascending the mountain challenging. The entrance to the [[slide (Super Mario 64)#Mysterious Mountain Slide|Mysterious Mountain Slide]] can be found near the summit. [[Ukiki|Ukkikis]] live in this course, one of which attempts to steal [[Mario Cap|Mario's cap]].<br>'''Unlock criterion:''' Clear Bowser in the Fire Sea. | ||
|- | |- | ||
!style="background:#71CCFF"|13. [[Tiny-Huge Island]]<br>{{ | !style="background:#71CCFF"|13. [[Tiny-Huge Island]]<br>{{icon|SM64-totalS}}×7 {{icon|SM64-totalC}}×1 {{icon|SM64-totalB}}×2 | ||
!colspan="2"style="background:#71CCFF"| Missions | !colspan="2"style="background:#71CCFF"| Missions | ||
|- | |- | ||
|rowspan="3"align=center style="background:#FFFFFF"|[[File:SM64 Screenshot Tiny-Huge Island.png|x100px]] | |rowspan="3"align=center style="background:#FFFFFF"|[[File:SM64 Screenshot Tiny-Huge Island.png|x100px]] | ||
|{{ | |{{icon|SM64-Star}} [[Pluck the Piranha Flower]] | ||
|{{ | |{{icon|SM64-Star}} [[The Tip Top of the Huge Island]] | ||
|- | |- | ||
|{{ | |{{icon|SM64-Star}} [[Rematch with Koopa the Quick]] | ||
|{{ | |{{icon|SM64-Star}} [[Five Itty Bitty Secrets]] | ||
|- | |- | ||
|{{ | |{{icon|SM64-Star}} [[Wiggler's Red Coins]] | ||
|{{ | |{{icon|SM64-Star}} [[Make Wiggler Squirm]] | ||
|- | |- | ||
|colspan="3"align=center|An island that presents itself in two different ways depending on which painting it is accessed from in the castle. One is large with vast areas and giant versions of normal enemies. Mario can easily access the interior of this version of the island, which is home to [[Wiggler]]. The other is tiny with small enemies. Changing the terrain in one version of the island affects the other two, and doing so is required to obtain all of its Power Stars.<br>'''Unlock criterion:''' Clear Bowser in the Fire Sea. | |colspan="3"align=center|An island that presents itself in two different ways depending on which painting it is accessed from in the castle. One is large with vast areas and giant versions of normal enemies. Mario can easily access the interior of this version of the island, which is home to [[Wiggler]]. The other is tiny with small enemies. Changing the terrain in one version of the island affects the other two, and doing so is required to obtain all of its Power Stars.<br>'''Unlock criterion:''' Clear Bowser in the Fire Sea. | ||
|- | |- | ||
!style="background:#71CCFF"|14. [[Tick Tock Clock]]<br>{{ | !style="background:#71CCFF"|14. [[Tick Tock Clock]]<br>{{icon|SM64-totalS}}×7 | ||
!colspan="2"style="background:#71CCFF"|Missions | !colspan="2"style="background:#71CCFF"|Missions | ||
|- | |- | ||
|rowspan="3"align=center style="background:#FFFFFF"|[[File:SM64 Screenshot Tick Tock Clock.png|x100px]] | |rowspan="3"align=center style="background:#FFFFFF"|[[File:SM64 Screenshot Tick Tock Clock.png|x100px]] | ||
|{{ | |{{icon|SM64-Star}} [[Roll into the Cage]] | ||
|{{ | |{{icon|SM64-Star}} [[The Pit and the Pendulums]] | ||
|- | |- | ||
|{{ | |{{icon|SM64-Star}} [[Get a Hand]] | ||
|{{ | |{{icon|SM64-Star}} [[Stomp on the Thwomp]] | ||
|- | |- | ||
|{{ | |{{icon|SM64-Star}} [[Timed Jumps on Moving Bars]] | ||
|{{ | |{{icon|SM64-Star}} [[Stop Time for Red Coins]] | ||
|- | |- | ||
|colspan="3"align=center|A vertical obstacle course within the tower's clock. Moving platforms are found throughout the clockwork, and they can help Mario reach hidden alcoves or throw him back towards the bottom. The speed of these platforms (and whether they move at all) is determined by where the clock's hands are positioned when he enters the course.<br>'''Unlock criterion:''' Collect 50 Power Stars. | |colspan="3"align=center|A vertical obstacle course within the tower's clock. Moving platforms are found throughout the clockwork, and they can help Mario reach hidden alcoves or throw him back towards the bottom. The speed of these platforms (and whether they move at all) is determined by where the clock's hands are positioned when he enters the course.<br>'''Unlock criterion:''' Collect 50 Power Stars. | ||
|- | |- | ||
!style="background:#71CCFF"|15. [[Rainbow Ride]]<br>{{ | !style="background:#71CCFF"|15. [[Rainbow Ride]]<br>{{icon|SM64-totalS}}×7 {{icon|SM64-totalC}}×1 | ||
!colspan="2"style="background:#71CCFF"|Missions | !colspan="2"style="background:#71CCFF"|Missions | ||
|- | |- | ||
|rowspan="3"align=center style="background:#FFFFFF"|[[File:SM64 Screenshot Rainbow Ride.png|x100px]] | |rowspan="3"align=center style="background:#FFFFFF"|[[File:SM64 Screenshot Rainbow Ride.png|x100px]] | ||
|{{ | |{{icon|SM64-Star}} [[Cruiser Crossing the Rainbow]] | ||
|{{ | |{{icon|SM64-Star}} [[The Big House in the Sky]] | ||
|- | |- | ||
|{{ | |{{icon|SM64-Star}} [[Coins Amassed in a Maze]] | ||
|{{ | |{{icon|SM64-Star}} [[Swingin' in the Breeze]] | ||
|- | |- | ||
|{{ | |{{icon|SM64-Star}} [[Tricky Triangles!]] | ||
|{{ | |{{icon|SM64-Star}} [[Somewhere Over the Rainbow]] | ||
|- | |- | ||
|colspan="3"align=center|Floating islands and moving platforms high in the sky. [[Magic carpet]]s travel along rainbows in large stretches of the course, one of which feeds through the [[Cloud House]]. The [[Rainbow Cruiser]] can be found in the northeast.<br>'''Unlock criterion:''' Collect 50 Power Stars. | |colspan="3"align=center|Floating islands and moving platforms high in the sky. [[Magic carpet]]s travel along rainbows in large stretches of the course, one of which feeds through the [[Cloud House]]. The [[Rainbow Cruiser]] can be found in the northeast.<br>'''Unlock criterion:''' Collect 50 Power Stars. | ||
|- | |- | ||
!style="background:#71CCFF"|[[Bowser in the Sky]]<br>{{ | !style="background:#71CCFF"|[[Bowser in the Sky]]<br>{{icon|SM64-totalS}}×1 {{icon|SM64-totalB}}×1 | ||
!colspan="2"style="background:#71CCFF"|Missions | !colspan="2"style="background:#71CCFF"|Missions | ||
|- | |- | ||
|align=center style="background:#FFFFFF"|[[File:SM64 Screenshot Bowser in the Sky.png|x100px]] | |align=center style="background:#FFFFFF"|[[File:SM64 Screenshot Bowser in the Sky.png|x100px]] | ||
|{{ | |{{icon|SM64-StarJ}} Bowser in the Sky | ||
|{{ | |{{icon|SM64-Star}} {{conjectural|8 Red Coins}} | ||
|- | |- | ||
|colspan="3"align=center|A challenging obstacle course that leads to the final confrontation with Bowser. Some of the platforms on this course allow Mario to [[gravity|walk up walls]] if he maintains momentum, while others shift under his weight. Bowser starts to break the arena he is fought on, leaving it in the shape of a five-pointed star. The reward for defeating him, the [[Jumbo Star]], is not incorporated into Mario's total Power Star count.<br>'''Unlock criterion:''' Collect 70 Power Stars. | |colspan="3"align=center|A challenging obstacle course that leads to the final confrontation with Bowser. Some of the platforms on this course allow Mario to [[gravity|walk up walls]] if he maintains momentum, while others shift under his weight. Bowser starts to break the arena he is fought on, leaving it in the shape of a five-pointed star. The reward for defeating him, the [[Jumbo Star]], is not incorporated into Mario's total Power Star count.<br>'''Unlock criterion:''' Collect 70 Power Stars. | ||
|- | |- | ||
!style="background:#71CCFF"|[[Over the Rainbows|Wing Mario Over the Rainbow]]<br>{{ | !style="background:#71CCFF"|[[Over the Rainbows|Wing Mario Over the Rainbow]]<br>{{icon|SM64-totalS}}×1 {{icon|SM64-totalC}}×2 | ||
!colspan="2"style="background:#71CCFF"|Mission | !colspan="2"style="background:#71CCFF"|Mission | ||
|- | |- | ||
|align=center style="background:#FFFFFF"|[[File:SM64 Screenshot Wing Mario Over the Rainbow.png|x100px]] | |align=center style="background:#FFFFFF"|[[File:SM64 Screenshot Wing Mario Over the Rainbow.png|x100px]] | ||
|colspan="2"|{{ | |colspan="2"|{{icon|SM64-Star}} Cloud Hopping for Coins<ref>Pelland and Owsen, p. 126</ref> | ||
|- | |- | ||
|colspan="3"align=center|[[Cloud Lift|Clouds]] and checkerboard platforms in the sky. The platforms are bridged by rainbows.<br>'''Unlock criterion:''' Collect 50 Power Stars. | |colspan="3"align=center|[[Cloud Lift|Clouds]] and checkerboard platforms in the sky. The platforms are bridged by rainbows.<br>'''Unlock criterion:''' Collect 50 Power Stars. | ||
| Line 817: | Line 790: | ||
|colspan="3"style="background:#D81A70;color:white;"|[[File:SM64 Asset Texture Castle (Stained Glass).png|25px]] '''Other''' | |colspan="3"style="background:#D81A70;color:white;"|[[File:SM64 Asset Texture Castle (Stained Glass).png|25px]] '''Other''' | ||
|- | |- | ||
!style="background:#EF79AE"|[[Peach's Castle|Mushroom Castle]]<br>{{ | !style="background:#EF79AE"|[[Peach's Castle|Mushroom Castle]]<br>{{icon|SM64-totalS}}×5 {{icon|SM64-totalC}}×1 | ||
!colspan="2"style="background:#EF79AE"|Missions | !colspan="2"style="background:#EF79AE"|Missions | ||
|- | |- | ||
|rowspan="3"align=center style="background:#FFFFFF"|[[File:SM64 Screenshot Mushroom Castle.png|x100px]] | |rowspan="3"align=center style="background:#FFFFFF"|[[File:SM64 Screenshot Mushroom Castle.png|x100px]] | ||
|{{ | |{{icon|SM64-Star}} [[Toad (species)#Super Mario 64 / Super Mario 64 DS|Toad near Course 6]]<ref name=bonus>{{cite|author=[[Nintendo of America]]|deadlink=y|date=1998|archive=https://web.archive.org/web/19980610035413/http://www.nintendo.com/n64/super_mario64/bonuses.html|title=Bonus Stars - Super Mario 64 Strategy|publisher=Nintendo Official Site}}</ref> | ||
|{{ | |{{icon|SM64-Star}} Toad near Course 12<ref name=bonus/> | ||
|- | |- | ||
|{{ | |{{icon|SM64-Star}} Toad near Course 15<ref name=bonus/> | ||
|{{ | |{{icon|SM64-Star}} [[MIPS|Catch the Yellow Rabbit (1st time)]]<ref name=bonus/> | ||
|- | |- | ||
|colspan="2"|{{ | |colspan="2"|{{icon|SM64-Star}} Catch the Yellow Rabbit (2nd time)<ref name=bonus/> | ||
|- | |- | ||
|colspan="3"align=center|[[Princess Peach]]'s castle in the [[Mushroom Kingdom]]. [[Toad (species)|Toads]] and [[MIPS]] are sealed inside. Some of the former give Mario a Power Star when spoken to. The [[Castle Grounds]] are the first area of the game and where Mario initially appears every time the player loads their save file. Nearly all other courses are accessed from inside the castle, with the Cavern of the Metal Cap and Vanish Cap Under the Moat being the sole exceptions.<br>'''Unlock criterion:''' Begin a new save file. | |colspan="3"align=center|[[Princess Peach]]'s castle in the [[Mushroom Kingdom]]. [[Toad (species)|Toads]] and [[MIPS]] are sealed inside. Some of the former give Mario a Power Star when spoken to. The [[Castle Grounds]] are the first area of the game and where Mario initially appears every time the player loads their save file. Nearly all other courses are accessed from inside the castle, with the Cavern of the Metal Cap and Vanish Cap Under the Moat being the sole exceptions.<br>'''Unlock criterion:''' Begin a new save file. | ||
|- | |- | ||
|colspan="3"style="background:#E4E4E4;color:black;"|'''Level chart information and legend:''' The Normal Courses are designated with the unique number they are given in-game. Bowser, secret, and Switch Cap Courses lack numerical designation and are listed as they appear in the ''Super Mario 64'' Player's Guide. Three symbols convey attributes about each course: {{ | |colspan="3"style="background:#E4E4E4;color:black;"|'''Level chart information and legend:''' The Normal Courses are designated with the unique number they are given in-game. Bowser, secret, and Switch Cap Courses lack numerical designation and are listed as they appear in the ''Super Mario 64'' Player's Guide. Three symbols convey attributes about each course: {{icon|SM64-totalS}} denotes the total number of obtainable [[Power Star]]s, {{icon|SM64-totalC}} denotes the total number of accessible [[cannon]]s, and {{icon|SM64-totalB}} denotes the number of boss battles. The name of each mission is accompanied by a symbol that indicates what type of mission it is. {{icon|SM64-Star}} denotes a mission where the reward is a Power Star, {{icon|SM64-StarJ}} denotes a mission where the reward is the [[Jumbo Star]], and {{icon|SM64-Key}} denotes a mission where the reward is a [[key]]. | ||
|} | |} | ||
</center> | </center> | ||
| Line 842: | Line 815: | ||
In the majority of prior [[Genre#Platform games|platform games]], the player selects levels on a map-like menu with a cursor. The cursor itself may represent the player character, as is done in ''[[Super Mario Land 2: 6 Golden Coins]]'' and ''[[Super Mario World 2: Yoshi's Island]]'', but the degree of control the player has on the cursor is more limited than they would have in the actual levels. ''Super Mario 64'' instead has a fully interactive level as the "map," where Mario controls exactly the same as he does in the courses, and the map itself is an expansive level with its own secrets to find. | In the majority of prior [[Genre#Platform games|platform games]], the player selects levels on a map-like menu with a cursor. The cursor itself may represent the player character, as is done in ''[[Super Mario Land 2: 6 Golden Coins]]'' and ''[[Super Mario World 2: Yoshi's Island]]'', but the degree of control the player has on the cursor is more limited than they would have in the actual levels. ''Super Mario 64'' instead has a fully interactive level as the "map," where Mario controls exactly the same as he does in the courses, and the map itself is an expansive level with its own secrets to find. | ||
The [[Castle Grounds]] are the first area in the game where the player takes control of Mario, and it is a risk-free environment for the player to familiarize themselves with his controls.<ref name=HubDoc/><ref name=Stanton>Rich Stanton. ''A Brief History Of Video Games: From Atari to Virtual Reality'' (digital). London: Little, Brown Book Group, 2015. ISBN: 978-1-47-211881-3.</ref><ref name=TottenH>Christopher W. Totten. "Hub Spaces". ''An Architectural Approach to Level Design''. Boca Raton: CRC Press, 2018. pages 133-135. ISBN: 978-1-35-198292-4.</ref><ref name=shoga/><ref name=shmup/> There are no [[List of enemies|enemies]] here, nor concrete objectives. While the player is directed to the castle in Peach's [[letter]] to Mario, nothing forces them to enter it, implicitly encouraging them to explore. The Castle Grounds are a grassy area with gently sloping hills, [[tree]]s, picket fences, and a small lake that feeds into the castle's moat. Several readable | The [[Castle Grounds]] are the first area in the game where the player takes control of Mario, and it is a risk-free environment for the player to familiarize themselves with his controls.<ref name=HubDoc/><ref name=Stanton>Rich Stanton. ''A Brief History Of Video Games: From Atari to Virtual Reality'' (digital). London: Little, Brown Book Group, 2015. ISBN: 978-1-47-211881-3.</ref><ref name=TottenH>Christopher W. Totten. "Hub Spaces". ''An Architectural Approach to Level Design''. Boca Raton: CRC Press, 2018. pages 133-135. ISBN: 978-1-35-198292-4.</ref><ref name=shoga/><ref name=shmup/> There are no [[List of enemies|enemies]] here, nor concrete objectives. While the player is directed to the castle in Peach's [[letter]] to Mario, nothing forces them to enter it, implicitly encouraging them to explore. The Castle Grounds are a grassy area with gently sloping hills, [[tree]]s, picket fences, and a small lake that feeds into the castle's moat. Several readable [[sign]]s that detail Mario's available actions are near his starting position, but they are not forced upon the player. | ||
The castle's interior is divided into three sections analogous to the [[world]]s of prior ''[[Super Mario (series)|Super Mario]]'' games: a first floor and mezzanine, a basement and [[Courtyard (Peach's Castle)|courtyard]], and a second and third floor that leads to the central tower. With the exception of the basement, the castle's flooring has a checkerboard pattern and red carpeting. A hilly vista with a blue sky behind it is painted on the walls. The basement is a flooded dungeon-like area lit by torches that can burn Mario. One of the basement's corridors has a pair of [[brick pillar]]s that, when [[Ground Pound|ground-pound]]ed, drain the moat. The courtyard is a grassy space behind the Mushroom Castle with a fountain at its center. It is filled with [[Boo]]s, one of which contains a miniature carousel that holds [[Big Boo's Haunt]]. Among the courses of a section, Mario can typically play them in any order. There are some exceptions, such as at the start of the game, when only the [[Bob-omb Battlefield]] is initially accessible. | The castle's interior is divided into three sections analogous to the [[world]]s of prior ''[[Super Mario (series)|Super Mario]]'' games: a first floor and mezzanine, a basement and [[Courtyard (Peach's Castle)|courtyard]], and a second and third floor that leads to the central tower. With the exception of the basement, the castle's flooring has a checkerboard pattern and red carpeting. A hilly vista with a blue sky behind it is painted on the walls. The basement is a flooded dungeon-like area lit by torches that can burn Mario. One of the basement's corridors has a pair of [[brick pillar]]s that, when [[Ground Pound|ground-pound]]ed, drain the moat. The courtyard is a grassy space behind the Mushroom Castle with a fountain at its center. It is filled with [[Boo]]s, one of which contains a miniature carousel that holds [[Big Boo's Haunt]]. Among the courses of a section, Mario can typically play them in any order. There are some exceptions, such as at the start of the game, when only the [[Bob-omb Battlefield]] is initially accessible. | ||
| Line 851: | Line 824: | ||
==Characters== | ==Characters== | ||
===Mario=== | |||
Owing to his [[List of Super Mario 64 pre-release and unused content#Early ideas|removal during development]], ''Super Mario 64'' is one of the few [[Super Mario (series)|''Super Mario'']] games not to feature [[Luigi]], along with ''[[Super Mario Land]]'', ''[[Super Mario Land 2: 6 Golden Coins]]'', and ''[[Super Mario Sunshine]]''. Many data structures in the code have unused references to Luigi's object slot, but he is considered irrecoverable from the final game's codebase.<ref>JoshDuMan. August 28, 2019. [//news.ukikipedia.net/index.php/2019/08/28/decomp-is-out-but-what-does-that-mean-ukikipedia-news-week-10 Decomp is out! …but what does that mean? – Ukikipedia News Week 10]</ref> A [[List of Super Mario 64 pre-release and unused content#Textures|prerelease model and textures]] only surfaced through the {{wp|Nintendo data leak}}. However, Luigi was included as a playable character in the game's [[Nintendo DS]] remake, ''[[Super Mario 64 DS]]''. | Owing to his [[List of Super Mario 64 pre-release and unused content#Early ideas|removal during development]], ''Super Mario 64'' is one of the few [[Super Mario (series)|''Super Mario'']] games not to feature [[Luigi]], along with ''[[Super Mario Land]]'', ''[[Super Mario Land 2: 6 Golden Coins]]'', and ''[[Super Mario Sunshine]]''. Many data structures in the code have unused references to Luigi's object slot, but he is considered irrecoverable from the final game's codebase.<ref>JoshDuMan. August 28, 2019. [//news.ukikipedia.net/index.php/2019/08/28/decomp-is-out-but-what-does-that-mean-ukikipedia-news-week-10 Decomp is out! …but what does that mean? – Ukikipedia News Week 10]</ref> A [[List of Super Mario 64 pre-release and unused content#Textures|prerelease model and textures]] only surfaced through the {{wp|Nintendo data leak}}. However, Luigi was included as a playable character in the game's [[Nintendo DS]] remake, ''[[Super Mario 64 DS]]''. | ||
{|width=100% cellspacing=0 border=1 cellpadding=3 style="border-collapse:collapse;background:#f5f5f5" | {|width=100% cellspacing=0 border=1 cellpadding=3 style="border-collapse:collapse;background:#f5f5f5" | ||
|-style="background:#ff0000;color:white;" | |-style="background:#ff0000;color:white;" | ||
| Line 869: | Line 842: | ||
!width=15%|Locations | !width=15%|Locations | ||
|- | |- | ||
|align=center style="background: | |align=center style="background:white"|[[File:SM3DAS-SM64-LakituBro.png|100x100px]]<br>[[Lakitu Bros.]] | ||
|A pair of [[Lakitu's Cloud|cloud]]-riding [[Koopa (species)|Koopas]] that are documenting Mario's quest to liberate the Mushroom Castle and rescue Princess Peach from Bowser. One Lakitu Bro is with Mario throughout the entirety of the game, serving as an in-game explanation for the title's 3D camera controls. He is generally unseen, but his reflection can be spotted in a large mirror on the second floor of the Mushroom Castle. The Lakitu Bros. work for the [[List of implied organizations#Kingdom News Network|Kingdom News Network]]. | |A pair of [[Lakitu's Cloud|cloud]]-riding [[Koopa (species)|Koopas]] that are documenting Mario's quest to liberate the Mushroom Castle and rescue Princess Peach from Bowser. One Lakitu Bro is with Mario throughout the entirety of the game, serving as an in-game explanation for the title's 3D camera controls. He is generally unseen, but his reflection can be spotted in a large mirror on the second floor of the Mushroom Castle. The Lakitu Bros. work for the [[List of implied organizations#Kingdom News Network|Kingdom News Network]]. | ||
|align=center|All courses | |align=center|All courses | ||
|- | |- | ||
|align=center style="background: | |align=center style="background:white"|[[File:SM64 Asset Model Princess Peach.png|100x100px]]<br>[[Princess Peach]] | ||
|The ruler of the Mushroom Kingdom. She invited Mario to the Mushroom Castle for cake, but she is missing by the time he arrives. Toad informs him that she was kidnapped by Bowser and sealed away within the castle's walls. The game follows Mario's quest to restore the castle's Power Stars and liberate the princess. | |The ruler of the Mushroom Kingdom. She invited Mario to the Mushroom Castle for cake, but she is missing by the time he arrives. Toad informs him that she was kidnapped by Bowser and sealed away within the castle's walls. The game follows Mario's quest to restore the castle's Power Stars and liberate the princess. | ||
|align=center|[[Castle Grounds]] | |align=center|[[Castle Grounds]] | ||
|- | |- | ||
|align=center style="background: | |align=center style="background:white"|[[File:SM64 Asset Model Toad.png|100x100px]]<br>[[Toad]] | ||
|One of Princess Peach's attendants and an old friend of Mario's. He is one of several [[Toad (species)|Mushroom Retainers]] that have been trapped inside the castle. He gives Mario hints, tips, and words of encouragement when spoken to. Some Toads give Mario a Power Star if prompted. | |One of Princess Peach's attendants and an old friend of Mario's. He is one of several [[Toad (species)|Mushroom Retainers]] that have been trapped inside the castle. He gives Mario hints, tips, and words of encouragement when spoken to. Some Toads give Mario a Power Star if prompted. | ||
|align=center|[[Peach's Castle|Mushroom Castle]] | |align=center|[[Peach's Castle|Mushroom Castle]] | ||
|- | |- | ||
|align=center style="background: | |align=center style="background:white"|[[File:Bob-OmbBuddySM64.png|100x100px]]<br>[[Bob-omb Buddy|Bob-omb Buddies]] | ||
|Friendly [[Bob-omb]]s that lack fuses. They reside on the [[Bob-omb Battlefield]], where they are at war with the [[King Bob-omb|Big Bob-omb]] and his army. A Bob-omb Buddy is hidden away in nearly all subsequent courses. If spoken to, it prepares a [[cannon]] for Mario to use. The cannon remains open and accessible for all subsequent revisits. | |Friendly [[Bob-omb]]s that lack fuses. They reside on the [[Bob-omb Battlefield]], where they are at war with the [[King Bob-omb|Big Bob-omb]] and his army. A Bob-omb Buddy is hidden away in nearly all subsequent courses. If spoken to, it prepares a [[cannon]] for Mario to use. The cannon remains open and accessible for all subsequent revisits. | ||
|align=center| [[Bob-omb Battlefield]]; [[Whomp's Fortress]]; [[Jolly Roger Bay]]; [[Cool, Cool Mountain]]; [[Shifting Sand Land]]; [[Snowman's Land]]; [[Wet-Dry World]]; [[Tall, Tall Mountain]]; [[Tiny-Huge Island]]; [[Rainbow Ride]] | |align=center| [[Bob-omb Battlefield]]; [[Whomp's Fortress]]; [[Jolly Roger Bay]]; [[Cool, Cool Mountain]]; [[Shifting Sand Land]]; [[Snowman's Land]]; [[Wet-Dry World]]; [[Tall, Tall Mountain]]; [[Tiny-Huge Island]]; [[Rainbow Ride]]; [[Over the Rainbows|Wing Mario Over the Rainbow]] | ||
|- | |- | ||
|align=center style="background: | |align=center style="background:white"|[[File:SM64 Asset Model Koopa the Quick.png|100x100px]]<br>[[Koopa the Quick]] | ||
|A [[Big Koopa Troopa|Giant Koopa]] from [[Tiny-Huge Island]]. He challenges Mario to a race when spoken to and rewards him with a [[Power Star]] if he defeats him without using certain shortcuts. Mario first encounters Koopa the Quick on the [[Bob-omb Battlefield]] in the mission [[Footrace with Koopa the Quick]] after defeating the [[King Bob-omb|Big Bob-omb]], and he encounters him again on the "huge" side of Tiny-Huge Island in the mission [[Rematch with Koopa the Quick]]. | |A [[Big Koopa Troopa|Giant Koopa]] from [[Tiny-Huge Island]]. He challenges Mario to a race when spoken to and rewards him with a [[Power Star]] if he defeats him without using certain shortcuts. Mario first encounters Koopa the Quick on the [[Bob-omb Battlefield]] in the mission [[Footrace with Koopa the Quick]] after defeating the [[King Bob-omb|Big Bob-omb]], and he encounters him again on the "huge" side of Tiny-Huge Island in the mission [[Rematch with Koopa the Quick]]. | ||
|align=center|[[Bob-omb Battlefield]]; [[Tiny-Huge Island]] | |align=center|[[Bob-omb Battlefield]]; [[Tiny-Huge Island]] | ||
|- | |- | ||
|align=center style="background: | |align=center style="background:white"|[[File:SM64 Asset Model Hoot.png|100x100px]]<br>[[Hoot]] | ||
|A talking owl who roosts in a tree near Mario's starting position on [[Whomp's Fortress]]. Once woken up, Mario can grab onto Hoot's talons and be carried high into the air for a limited time. Hoot slowly descends while carrying Mario and drops him if he hangs on for too long, citing his weight. | |A talking owl who roosts in a tree near Mario's starting position on [[Whomp's Fortress]]. Once woken up, Mario can grab onto Hoot's talons and be carried high into the air for a limited time. Hoot slowly descends while carrying Mario and drops him if he hangs on for too long, citing his weight. | ||
|align=center|[[Whomp's Fortress]] | |align=center|[[Whomp's Fortress]] | ||
|- | |- | ||
|align=center style="background: | |align=center style="background:white"|[[File:SM64 Asset Model Penguin (Adult).png|100x100px]]<br>[[Penguin]]s | ||
|Big talking birds found in courses that feature snow. They are instrumental in several Power Star missions. The [[Mother Penguin]] found at the base of [[Cool, Cool Mountain]] awards Mario a Power Star if her lost chick, [[Baby Penguin#Super Mario 64 / Super Mario 64 DS|Tuxie]], is returned to her, while the [[Big Penguin]] found in the cabin at the top of the mountain gives him a Star if beaten in a race. Revisiting this penguin after collecting all 120 Power Stars reveals that he has let himself go. The extra weight makes him a tougher opponent to out-sleigh. | |Big talking birds found in courses that feature snow. They are instrumental in several Power Star missions. The [[Mother Penguin]] found at the base of [[Cool, Cool Mountain]] awards Mario a Power Star if her lost chick, [[Baby Penguin#Super Mario 64 / Super Mario 64 DS|Tuxie]], is returned to her, while the [[Big Penguin]] found in the cabin at the top of the mountain gives him a Star if beaten in a race. Revisiting this penguin after collecting all 120 Power Stars reveals that he has let himself go. The extra weight makes him a tougher opponent to out-sleigh. | ||
|align=center|[[Cool, Cool Mountain]]; [[Snowman's Land]] | |align=center|[[Cool, Cool Mountain]]; [[Snowman's Land]] | ||
|- | |- | ||
|align=center style="background: | |align=center style="background:white"|[[File:SM64 Asset Model Snowman.png|100x100px]]<br>[[Snowman|Snowmen]] | ||
|Two giant snowmen occur in the game. [[Headless Snowman|One snowman]] is the focus of the mission [[Snowman's Lost His Head]]. His head is on a pedestal halfway down the mountain, while his sentient snowball body appears towards the top, by Mario's starting position. Either piece asks Mario to help put him together when prompted. Once assembled, the snowman gifts Mario a Power Star. The other is in Snowman's Land, where he can climbed as if he was a mountain. As Mario nears his head, he starts to complain about an irritating crawling sensation on his body and tries to blow Mario off. A Power Star is on the very top of his head. | |Two giant snowmen occur in the game. [[Headless Snowman|One snowman]] is the focus of the mission [[Snowman's Lost His Head]]. His head is on a pedestal halfway down the mountain, while his sentient snowball body appears towards the top, by Mario's starting position. Either piece asks Mario to help put him together when prompted. Once assembled, the snowman gifts Mario a Power Star. The other is in Snowman's Land, where he can climbed as if he was a mountain. As Mario nears his head, he starts to complain about an irritating crawling sensation on his body and tries to blow Mario off. A Power Star is on the very top of his head. | ||
|align=center|[[Cool, Cool Mountain]]; [[Snowman's Land]] | |align=center|[[Cool, Cool Mountain]]; [[Snowman's Land]] | ||
|- | |- | ||
|align=center style="background: | |align=center style="background:white"|[[File:SM64 Asset Model MIPS.png|100x100px]]<br>[[MIPS]] | ||
|Princess Peach's pet [[rabbit]].<ref name=MIPS>Shogakukan. 2015. ''Super Mario Bros. Hyakka: Nintendo Kōshiki Guidebook'', ''Super Mario 64'' section, p. 85. 「ピーチ姫の飼っているウサギ。」 ("''Princess Peach’s pet rabbit.''")</ref> He is found in the castle's basement and flees if approached. He gives Mario a Power Star if caught. While captured, MIPS claims to be late for tea. | |Princess Peach's pet [[rabbit]].<ref name=MIPS>Shogakukan. 2015. ''Super Mario Bros. Hyakka: Nintendo Kōshiki Guidebook'', ''Super Mario 64'' section, p. 85. 「ピーチ姫の飼っているウサギ。」 ("''Princess Peach’s pet rabbit.''")</ref> He is found in the castle's basement and flees if approached. He gives Mario a Power Star if caught. While captured, MIPS claims to be late for tea. | ||
|align=center|[[Peach's Castle|Mushroom Castle]] | |align=center|[[Peach's Castle|Mushroom Castle]] | ||
|- | |- | ||
|align=center style="background: | |align=center style="background:white"|[[File:SM64 Asset Model Dorrie.png|100x100px]]<br>[[Dorrie]] | ||
|A gentle giant that resembles a {{wp|plesiosaur}}. It can be found swimming in an underground lake, where it can be ridden. Mario can steer Dorrie's body while standing on its back and lower its neck by performing a [[Ground Pound|Pound the Ground]] attack on its head. | |A gentle giant that resembles a {{wp|plesiosaur}}. It can be found swimming in an underground lake, where it can be ridden. Mario can steer Dorrie's body while standing on its back and lower its neck by performing a [[Ground Pound|Pound the Ground]] attack on its head. | ||
|align=center|[[Hazy Maze Cave]] | |align=center|[[Hazy Maze Cave]] | ||
|- | |- | ||
|align=center style="background: | |align=center style="background:white"|[[File:Ukiki 64.png|100x100px]]<br>[[Ukiki|Ukkiki]]s | ||
|Mischievous monkeys. One steals [[Mario Cap|Mario's cap]] when grabbed. Mario must grab the Ukkiki again in order to get it back, but he runs away if approached and must be cornered. During [[Mystery of the Monkey Cage]], a Ukkiki appears on the summit and taunts Mario. If grabbed, the Ukkiki begs to be released in exchange for a Power Star. | |Mischievous monkeys. One steals [[Mario Cap|Mario's cap]] when grabbed. Mario must grab the Ukkiki again in order to get it back, but he runs away if approached and must be cornered. During [[Mystery of the Monkey Cage]], a Ukkiki appears on the summit and taunts Mario. If grabbed, the Ukkiki begs to be released in exchange for a Power Star. | ||
|align=center|[[Tall, Tall Mountain]] | |align=center|[[Tall, Tall Mountain]] | ||
|- | |- | ||
|align=center style="background: | |align=center style="background:white"|[[File:SM64 Asset Model Yoshi.png|100x100px]]<br>[[Yoshi]] | ||
|An old friend of Mario's. He is a dinosaur-like creature with a long tongue. He can be found on the roof of the Mushroom Castle once all 120 Power Star are collected. Yoshi awards the player 100 lives and a special [[Triple Jump]] for fully completing the game, then disappears off the side of the castle. | |An old friend of Mario's. He is a dinosaur-like creature with a long tongue. He can be found on the roof of the Mushroom Castle once all 120 Power Star are collected. Yoshi awards the player 100 lives and a special [[Triple Jump]] for fully completing the game, then disappears off the side of the castle. | ||
|align=center|[[Castle Grounds]] | |align=center|[[Castle Grounds]] | ||
| Line 919: | Line 892: | ||
==Enemies and obstacles== | ==Enemies and obstacles== | ||
=== | ===Enemies=== | ||
{| | Sorting the "course" columns organizes them by occurrence in-game, not alphabetically. | ||
|-style="background:#FF2400 | {|class="wikitable sortable"style="width:100%;text-align:center" | ||
!width=10%|Name | |-style="color:white;background:#FF2400" | ||
!Description | !rowspan=2 width=10%|Name | ||
! | !rowspan=2 class=unsortable|Description | ||
! | !colspan=2 class=unsortable|Courses | ||
| | !rowspan=2|Dam. | ||
| | !rowspan=2 class=unsortable|Spoils | ||
!rowspan=2|New | |||
|-style="color:white;background:#FF2400" | |||
!width=6%|First | |||
!width=6%|Last | |||
|- | |- | ||
| | |data-sort-value=Goo style="background:white"|[[File:SM64 - Goomba Model.png|100x100px]]<br>[[Goomba]] | ||
| | |align=left|Squat mushroom creatures that chase [[Mario]] when he is in their line of sight. Goombas can be defeated with any attack. | ||
| | |data-sort-value=01|[[Bob-omb Battlefield]] | ||
| | |data-sort-value=23|[[Bowser in the Sky]] | ||
|1 | |||
|{{icon|SM64-Coin}}×1 | |||
|— | |||
|- | |- | ||
| | |data-sort-value=Mic style="background:white"|[[File:Micro-GoombaSM64.png|80x80px]]<br>[[Mini Goomba|Micro-Goomba]] | ||
| | |align=left|Small Goombas. Micro-Goombas pursue Mario when near, but they cause only pushback, an action that also defeats them. They are otherwise vulnerable to any attack. | ||
| | |colspan=2 data-sort-value=20|[[Tiny-Huge Island]] | ||
| | |0 | ||
|{{hover|{{icon|SM64-Coin}}×1|punched or kicked}} | |||
|— | |||
|- | |- | ||
| | |data-sort-value=Gra style="background:white"|[[File:GrandGoombaSM64.png|100x100px]]<br>[[Big Goomba|Grand Goomba]] | ||
| | |align=left|Giant Goombas. It is easier for Mario to avoid their detection than it is with smaller Goombas. Grand Goombas are immune to punches and kicks. | ||
| | |colspan=2 data-sort-value=20|[[Tiny-Huge Island]] | ||
| | |2 | ||
|{{hover|{{icon|SM64-Coin}}×1|jumped on}}<br>{{hover|{{icon|SM64-CoinB}}×1|ground-pounded}} | |||
|— | |||
|- | |- | ||
| | |data-sort-value=Bob style="background:white"|[[File:Bomb-omb SM64.png|100x100px]]<br>[[Bob-omb]] | ||
| | |align=left|Walking bombs. Bob-ombs actively pursue Mario until they explode. He can pick one up and toss it like a projectile to destroy [[block]]s. | ||
| | |data-sort-value=01|[[Bob-omb Battlefield]] | ||
| | |data-sort-value=23|[[Bowser in the Sky]] | ||
|2 | |||
|{{icon|SM64-Coin}}×1 | |||
|— | |||
|- | |- | ||
| | |data-sort-value=Koo style="background:white"|[[File:KoopaTroopaSM64.png|100x100px]]<br>[[Koopa Troopa]] | ||
|align=left|Green-shelled turtles. Attacking one knocks it out of its shell, leaving it vulnerable to defeat and its shell accessible. An [[Unshelled Koopa Troopa|unshelled Koopa]] frantically tries to return to its shell in this state. | |||
|align= | |data-sort-value=01|[[Bob-omb Battlefield]] | ||
|data-sort-value=20|[[Tiny-Huge Island]] | |||
|0 | |||
|{{icon|SM64-Shell}}×1<br>{{icon|SM64-CoinB}}×1 | |||
|— | |||
| | |||
| | |||
| | |||
|- | |- | ||
| | |data-sort-value=SmalK style="background:white"|[[File:SM64 Asset Model Koopa Troopa.png|80x80px]]<br>[[Small Koopa Troopa]] | ||
|A | |align=left|A tiny Koopa Troopa that is defeated on contact. | ||
| | |colspan=2 data-sort-value=20|[[Tiny-Huge Island]] | ||
| | |0 | ||
|{{icon|SM64-CoinB}}×1 | |||
|{{icon|new}} | |||
|- | |- | ||
| | |data-sort-value=Chai style="background:white"|[[File:Chainchompsm64.png|100x100px]]<br>[[Chain Chomp]] | ||
|A | |align=left|A giant metal enemy with snapping jaws. It is shackled to a [[stump|stake]] and lunges at Mario when he is near. [[Ground Pound|Ground-pounding]] the stake frees the Chain Chomp. | ||
| | |colspan=2 data-sort-value=01|[[Bob-omb Battlefield]] | ||
| | |3 | ||
|{{icon|cross}} | |||
|— | |||
|- | |- | ||
| | |data-sort-value=PiraP style="background:white"|[[File:PiranhaPlant SM64.png|100x100px]]<br>[[Piranha Plant]] | ||
| | |align=left|Carnivorous plants that sleep in [[Flower (environmental object)|flowerbed]]s. One stays asleep if Mario approaches it slowly, but it otherwise is easy to stir. Disturbed Piranha Plants snap at Mario. | ||
| | |colspan=2 data-sort-value=02|[[Whomp's Fortress]] | ||
| | |3 | ||
|{{icon|SM64-CoinB}}×1 | |||
|— | |||
|- | |- | ||
| | |data-sort-value=PiraF style="background:white"|[[File:PiranhaPlantSM64.png|100x100px]]<br>[[Big Fire Piranha|Piranha Flower]] | ||
| | |align=left|Large [[Fire Piranha Plant|Venus Fire Trap]]s that spit fireballs. They erupt and recede into the ground in set intervals. | ||
| | |colspan=2 data-sort-value=20|[[Tiny-Huge Island]] | ||
| | |2 | ||
|{{icon|SM64-Coin}}×2<br>{{icon|SM64-Star}}×1 | |||
|{{icon|new}} | |||
|- | |- | ||
| | |data-sort-value=SmallP style="background:white"|[[File:SM64 Asset Model Piranha Plant.png|80x80px]]<br>[[Small Piranha]] | ||
| | |align=left|Small Venus Fire Traps. They behave like the giant Piranha Flowers. | ||
| | |data-sort-value=20|[[Tiny-Huge Island]] | ||
| | |data-sort-value=23|[[Bowser in the Sky]] | ||
|2 | |||
|{{icon|SM64-Coin}}×1 | |||
|{{icon|new}} | |||
|- | |- | ||
| | |data-sort-value=Wh style="background:white"|[[File:WhompSM64.png|100x100px]]<br>[[Whomp]] | ||
| | |align=left|Walking slabs similar to {{wp|nurikabe}}. Whomps slam their bodies into the ground when Mario is in front of them in an attempt to crush him. Whomps are defeated when ground-pounded while they are collapsed on the ground. Repeatedly jumping on one's back awards Mario an additional five Yellow Coins. | ||
| | |data-sort-value=02|[[Whomp's Fortress]] | ||
| | |data-sort-value=23|[[Bowser in the Sky]] | ||
|3 | |||
|{{icon|SM64-Coin}}×5 | |||
|{{icon|new}} | |||
|- | |- | ||
| | |data-sort-value=Th style="background:white"|[[File:ThwompSM64.png|100x100px]]<br>[[Thwomp]] | ||
| | |align=left|Grimacing stones. They slam into the ground every few seconds, crushing Mario if he is underneath. The top of a Thwomp can be safely stood on. | ||
| | |data-sort-value=02|[[Whomp's Fortress]] | ||
| | |data-sort-value=21|[[Tick Tock Clock]] | ||
|3 | |||
|{{icon|cross}} | |||
|— | |||
|- | |- | ||
| | |data-sort-value=Bull style="background:white"|[[File:SM64 Asset Model Bullet Bill.png|100x100px]]<br>[[Bullet Bill]] | ||
|A | |align=left|Missiles fired from the [[Bill Blaster|Blaster]] on Whomp's Fortress. A Bullet Bill swerves to hit Mario when he is in close proximity. Bullet Bills are destroyed only when they collide with obstructions. | ||
| | |colspan=2 data-sort-value=02|[[Whomp's Fortress]] | ||
| | |3 | ||
|None | |||
|— | |||
|- | |- | ||
| | |data-sort-value=U style="background:white"|[[File:Unagi SM64.png|100x100px]]<br>[[Maw-Ray|Unagi]] | ||
|A giant | |align=left|A giant {{wp|moray eel}} enemy nestled within a sunken ship. Luring it out grants Mario access to the ship's interior. In subsequent [[mission]]s, Unagi occurs swimming in open water. Direct contact damages Mario. | ||
|colspan=2 data-sort-value=03|[[Jolly Roger Bay]] | |||
| | |3 | ||
|{{icon|cross}} | |||
|{{icon|new}} | |||
|- | |- | ||
| | |data-sort-value=Spindr style="background:white"|[[File:SpindriftSM64.png|100x100px]]<br>[[Spindrift]] | ||
| | |align=left|Flying flower enemies that slowly follow Mario when near. Stomping on one launches him into the air, [[Spin Jump|spinning]]. Spindrifts occur only in snow-themed [[Level|courses]]. | ||
| | |data-sort-value=04|[[Cool, Cool Mountain]] | ||
| | |data-sort-value=17|[[Snowman's Land]] | ||
|2 | |||
|{{icon|SM64-Coin}}×3 | |||
|{{icon|new}} | |||
|- | |- | ||
| | |data-sort-value=MrB style="background:white"|[[File:SM64 Asset Model Mr. Blizzard.png|100x100px]]<br>[[Mr. Blizzard]] | ||
| | |align=left|[[Snowman]] enemies. Stationary Mr. Blizzards throw snowballs at Mario and rotate to follow his movement. The ones that hop along bridges are indestructible. If Mario loses his cap, he may find it on the head of a Mr. Blizzard upon entering a course with Mr. Blizzards in it. | ||
| | |data-sort-value=04|[[Cool, Cool Mountain]] | ||
| | |data-sort-value=17|[[Snowman's Land]] | ||
|2 | |||
|{{hover|{{icon|SM64-Coin}}×3|throwing-type only}}<br>{{icon|SM64-Cap}}×1 | |||
|{{icon|new}} | |||
|- | |- | ||
| | |data-sort-value=A style="background:white"|[[File:AmpSM64.png|100x100px]]<br>[[Amp]] | ||
| | |align=left|Smiling electrical orbs that shock Mario on contact. They typically travel in fixed circular patterns. | ||
| | |data-sort-value=05|[[Bowser in the Dark World]] | ||
| | |data-sort-value=23|[[Bowser in the Sky]] | ||
|1 | |||
|{{icon|cross}} | |||
|{{icon|new}} | |||
|- | |- | ||
| | |data-sort-value=Scut style="background:white"|[[File:SM64 Asset Model Scuttlebug.png|100x100px]]<br>[[Scuttlebug|Scuttle Bug]] | ||
| | |align=left|Big spiders. They scuttle after Mario when he is near. In the Hazy Maze Cave, there is an [[pit|abyss]] from which Scuttle Bugs indefinitely leap. | ||
| | |data-sort-value=09|[[Big Boo's Haunt]] | ||
| | |data-sort-value=10|[[Hazy Maze Cave]] | ||
|1 | |||
|{{icon|SM64-Coin}}×3 | |||
|{{icon|new}} | |||
|- | |- | ||
| | |data-sort-value=Boo style="background:white"|[[File:SM64 Asset Model Boo.png|100x100px]]<br>[[Boo]] | ||
| | |align=left|Ghost enemies. Boos pursue Mario when his back is turned towards them. If Mario looks directly at one, it stops moving and turns translucent. It is invulnerable in this state. While Boos can be knocked away, this does not permanently defeat them. Boos phase through walls. | ||
| | |data-sort-value=09|[[Courtyard (Peach's Castle)|Courtyard]] | ||
| | |data-sort-value=09|[[Big Boo's Haunt]] | ||
|2 | |||
|{{icon|SM64-Coin}}×1<br>{{icon|SM64-CoinB}}×1<br>{{icon|SM64-birdcage}}×1 | |||
|— | |||
|- | |- | ||
| | |data-sort-value=MrI style="background:white"|[[File:Mr I.png|100x100px]]<br>[[Mr. I|Mr. I.]] | ||
| | |align=left|Unblinking eyeballs fixed in space that fire projectile bubbles. Mr. I.s rotate to follow Mario's position. Running around one eventually makes it spin out of control, defeating it. Touching a Mr. I. directly damages Mario. | ||
| | |data-sort-value=09|[[Big Boo's Haunt]] | ||
| | |data-sort-value=11|[[Lethal Lava Land]] | ||
|2 | |||
|{{icon|SM64-CoinB}}×1 | |||
|{{icon|new}} | |||
|- | |- | ||
| | |data-sort-value=Book style="background:white"|[[File:BookendSM64.png|100x100px]]<br>[[Bookend]] | ||
| | |align=left|Spirited books. In the library of Big Boo's Haunt, Bookends rapidly fly from opposing shelves and damage Mario on impact. Some Bookends slowly emerge from the shelves and snap their pages as if they were jaws. These ones can be stomped. | ||
| | |colspan=2 data-sort-value=09|[[Big Boo's Haunt]] | ||
| | |2 | ||
|{{icon|SM64-CoinB}}×1 | |||
|{{icon|new}} | |||
|- | |- | ||
| | |data-sort-value=Mad style="background:white"|[[File:Mad Piano Model SM64.png|100x100px]]<br>[[Mad Piano]] | ||
|A | |align=left|A toothy enemy. The Mad Piano sits inert like a normal piano. It springs to life when approached, doggedly snapping at Mario. Its keys clatter as it moves. | ||
| | |colspan=2 data-sort-value=09|[[Big Boo's Haunt]] | ||
| | |3 | ||
|{{icon|cross}} | |||
|{{icon|new}} | |||
|- | |- | ||
| | |data-sort-value=Swoo style="background:white"|[[File:SM64Swoop.png|100x100px]]<br>[[Swoop]] | ||
| | |align=left|Bat enemies. Swoops idly hang upside-down until Mario draws near, at which point they drop and start to fly towards him. The sound of one's wingbeats is percussive. | ||
| | |colspan=2 data-sort-value=10|[[Hazy Maze Cave]] | ||
| | |1 | ||
|{{icon|SM64-Coin}}×1 | |||
|— | |||
|- | |- | ||
| | |data-sort-value=Snuf style="background:white"|[[File:SnufitSM64.png|100x100px]]<br>[[Snifit (Super Mario 64)|Snufit]] | ||
| | |align=left|Ghostly [[Snifit]]s that spit bullets at Mario. | ||
| | |data-sort-value=10|[[Hazy Maze Cave]] | ||
| | |data-sort-value=15|[[Behind the Waterfall|Cavern of the Metal Cap]] | ||
|2 | |||
|{{icon|SM64-Coin}}×2 | |||
|{{icon|new}} | |||
|- | |- | ||
| | |data-sort-value=Mont style="background:white"|[[File:SM64 Asset Model Monty Mole 1.png|100x100px]]<br>[[Monty Mole]] | ||
| | |align=left|Mole enemies that pop out of holes. They toss small rocks at Mario that damage him on contact. | ||
| | |data-sort-value=10|[[Hazy Maze Cave]] | ||
| | |data-sort-value=19|[[Tall, Tall Mountain]] | ||
|1 | |||
|{{icon|SM64-1Up}}×1 | |||
|— | |||
|- | |- | ||
| | |data-sort-value=Flam style="background:white"|[[File:SM64 Iron Ball.png|80x80px]]<br>[[Flame thrower (Flame Chomp)|Flame thrower]] | ||
| | |align=left|Tiny stationary [[Flame Chomp|Fire Chomp]]s. One releases a [[Fireball (obstacle)|fireball]] at Mario when it is approached. The flame follows him. | ||
| | |data-sort-value=10|[[Hazy Maze Cave]] | ||
| | |data-sort-value=23|[[Bowser in the Sky]] | ||
| | |3 | ||
|{{icon|cross}} | |||
|{{icon|new}} | |||
{| | |||
|- | |- | ||
| | |data-sort-value=Bully style="background:white"|[[File:SM64 Asset Model Bully.png|100x100px]]<br>[[Bully]] | ||
| | |align=left|Horned, orb-shaped enemies that persistently attempt to shove Mario. Bullies cannot be damaged, but striking one knocks it back. Knocking one into lava defeats it. | ||
| | |data-sort-value=11|[[Lethal Lava Land]] | ||
| | |data-sort-value=14|[[Bowser in the Fire Sea]] | ||
|0 | |||
|{{icon|SM64-Coin}}×1 | |||
|{{icon|new}} | |||
|- | |- | ||
| | |data-sort-value=Pod style="background:white"|[[File:SM64 Asset Model Lava Bubble.png|100x100px]]<br>[[Lava Bubble|Podoboo]] | ||
| | |align=left|Bouncing fiery plumes that hop across narrow strips of terrain. | ||
| | |data-sort-value=11|[[Lethal Lava Land]] | ||
| | |data-sort-value=23|[[Bowser in the Sky]] | ||
|3 | |||
|{{icon|cross}} | |||
|— | |||
|- | |- | ||
| | |data-sort-value=Fly style="background:white"|[[File:FlyGuySM64.png|100x100px]]<br>[[Fly Guy]] | ||
| | |align=left|Flying [[Shy Guy]]s that spit fireballs and try to headbutt Mario when he is close. Stomping one propels Mario high into the air. | ||
| | |data-sort-value=12|[[Shifting Sand Land]] | ||
| | |data-sort-value=22|[[Rainbow Ride]] | ||
|2 | |||
|{{icon|SM64-Coin}}×2 | |||
|— | |||
|- | |- | ||
| | |data-sort-value=Poke style="background:white"|[[File:Old Pokey 64.png|100x100px]]<br>[[Pokey]] | ||
|A | |align=left|A segmented [[cactus]] enemy that slowly shuffles towards Mario. Striking a segment knocks it away and shortens the Pokey's overall body. Hitting the head is ultimately what defeats it. | ||
| | |colspan=2 data-sort-value=12|[[Shifting Sand Land]] | ||
| | |2 | ||
|{{icon|SM64-CoinB}}×1 | |||
|— | |||
|- | |- | ||
| | |data-sort-value=Tox style="background:white"|[[File:SM64 Asset Model Tox Box.png|100x100px]]<br>[[Tox Box]] | ||
| | |align=left|Multifaced iron boxes that roll around in set trajectories. Tox Boxes are the same width of the paths they travel, making them difficult to avoid. One of their sides is open and can be safely stood under. | ||
| | |colspan=2 data-sort-value=12|[[Shifting Sand Land]] | ||
| | |3 | ||
|{{icon|cross}} | |||
|{{icon|new}} | |||
|- | |- | ||
| | |data-sort-value=Grin style="background:white"|[[File:SM64 Asset Model Grindel.png|100x100px]]<br>[[Grindel]] | ||
| | |align=left|Mummified stone enemies. One Grindel slams up and down like a Thwomp. The other hops along narrow paths. | ||
| | |colspan=2 data-sort-value=12|[[Shifting Sand Land]] | ||
| | |3 | ||
|{{icon|cross}} | |||
|{{icon|new}} | |||
|- | |- | ||
| | |data-sort-value=Spinde style="background:white"|[[File:SpindelSM64.png|100x100px]]<br>[[Spindel]] | ||
| | |align=left|Rolling stone enemies. Spindels roll back and forth along narrow paths. | ||
| | |colspan=2 data-sort-value=12|[[Shifting Sand Land]] | ||
| | |3 | ||
|{{icon|cross}} | |||
|{{icon|new}} | |||
|- | |- | ||
| | |data-sort-value=Kle style="background:white"|[[File:SM64 Klepto.png|100x100px]]<br>[[Klepto]] | ||
|A | |align=left|A condor that steals Mario's cap. Klepto soars through the sky in Shifting Sand Land and drops low only to grab Mario's cap. Striking the bird makes it let go. In one mission, it carries a Power Star. | ||
| | |colspan=2 data-sort-value=12|[[Shifting Sand Land]] | ||
| | |0 | ||
|{{icon|SM64-Star}}×1<br>{{icon|SM64-Cap}}×1 | |||
|{{icon|new}} | |||
|- | |- | ||
| | |data-sort-value=Bub style="background:white"|[[File:SM64 Asset Model Bub.png|100x100px]]<br>[[Cheep Cheep|Bub]] | ||
| | |align=left|Pudgy orange fish. They slowly swim towards Mario when he is in close proximity. | ||
| | |colspan=2 data-sort-value=13|[[Dire, Dire Docks]] | ||
| | |1 | ||
|{{icon|cross}} | |||
|— | |||
|- | |- | ||
| | |data-sort-value=Bubb style="background:white"|[[File:SM64 Asset Model Bubba.png|100x100px]]<br>[[Cheep Chomp|Bubba]] | ||
| | |align=left|Large Bubs that pursue Mario in shallow water. They swallow him whole when he is close, costing him a life. | ||
| | |colspan=2 data-sort-value=20|[[Tiny-Huge Island]] | ||
| | |data-sort-value=8|KO | ||
|{{icon|cross}} | |||
|{{icon|new}} | |||
|- | |- | ||
| | |data-sort-value=Sus style="background:white"|[[File:SM64 Asset Model Sushi.png|100x100px]]<br>[[Sushi]] | ||
|A | |align=left|A {{wp|white shark}} enemy that swims in a wide circle. It does not actively pursue or attack Mario, but it damages him on contact. | ||
| | |colspan=2 data-sort-value=13|[[Dire, Dire Docks]] | ||
| | |3 | ||
|{{icon|cross}} | |||
|{{icon|new}} | |||
|- | |- | ||
| | |data-sort-value=Mant style="background:white"|[[File:SM64 Asset Model Manta.png|100x100px]]<br>[[Manta|Manta Ray]] | ||
|A | |align=left|A {{wp|mobula}} that undulates around a whirlpool. Only the end of its tail can damage Mario. The Manta Ray leaves a trail of [[bubble ring]]s as it swims. Swimming through five of them awards Mario a Power Star. | ||
| | |colspan=2 data-sort-value=13|[[Dire, Dire Docks]] | ||
| | |3 | ||
|{{icon|cross}} | |||
|{{icon|new}} | |||
|- | |- | ||
| | |data-sort-value=Mone style="background:white"|[[File:Sm64moneybags.png|100x100px]]<br>[[Moneybag (enemy)|Money Bags]] | ||
| | |align=left|Hopping purse-like creatures. A Money Bags disguises itself as a coin and materializes when approached, at which point it erratically hops around. | ||
| | |colspan=2 data-sort-value=17|[[Snowman's Land]] | ||
| | |2 | ||
|{{icon|SM64-Coin}}×5 | |||
|{{icon|new}} | |||
|- | |- | ||
| | |data-sort-value=Skee style="background:white"|[[File:SM64 Asset Model Skeeter.png|100x100px]]<br>[[Skeeter]] | ||
| | |align=left|{{wp|Water strider}} enemies that skim across water. They scuttle their legs rapidly when restricted to land. Contact damages Mario. | ||
| | |colspan=2 data-sort-value=18|[[Wet-Dry World]] | ||
| | |2 | ||
|{{icon|SM64-Coin}}×3 | |||
|{{icon|new}} | |||
|- | |- | ||
| | |data-sort-value=Heav style="background:white"|[[File:SM64 Asset Model Heave-Ho.png|100x100px]]<br>[[Heave-Ho]] | ||
| | |align=left|Windup machines that slowly track Mario's movements. They hurl him backwards if they manage to slide their shovels under him. Heave-Hos usually occur around other enemies and items of interest, making them easy to overlook. | ||
| | |data-sort-value=18|[[Wet-Dry World]] | ||
| | |data-sort-value=21|[[Tick Tock Clock]] | ||
|0 | |||
|{{icon|cross}} | |||
|{{icon|new}} | |||
|- | |- | ||
| | |data-sort-value=Chuc style="background:white"|[[File:Chuckya SM64.png|100x100px]]<br>[[Chuckya]] | ||
| | |align=left|Big Bob-omb enemies that grip on to Mario and throw him across great distances. Mario can defeat a Chuckya only by tossing it first. | ||
| | |data-sort-value=18|[[Wet-Dry World]] | ||
| | |data-sort-value=23|[[Bowser in the Sky]] | ||
|0 | |||
|{{icon|SM64-Coin}}×5 | |||
|{{icon|new}} | |||
|- | |- | ||
| | |data-sort-value=Fwoo |[[File:SM64 Asset Model Fwoosh.png|100x100px]]<br>[[Fwoosh]] | ||
|A | |align=left|A cloud enemy that blows gusts of [[wind]] to knock Mario off ledges. | ||
| | |colspan=2 data-sort-value=19|[[Tall, Tall Mountain]] | ||
| | |0 | ||
|{{icon|cross}} | |||
|{{icon|new}} | |||
|- | |- | ||
| | |data-sort-value=Lak style="background:white"|[[File:SM64 Screenshot Lakitu.png|100x100px]]<br>[[Lakitu]] | ||
| | |align=left|[[Lakitu's Cloud|Cloud]]-riding [[Koopa (species)|Koopa]]s that drop Spiny bombs. The [[Lakitu Bros.]] are of this species. | ||
| | |data-sort-value=20|[[Tiny-Huge Island]] | ||
| | |data-sort-value=22|[[Rainbow Ride]] | ||
|2 | |||
|{{icon|SM64-Coin}}×5 | |||
|— | |||
|- | |- | ||
| | |data-sort-value=Spiny style="background:white"|[[File:SM64 Spiny.png|100x100px]]<br>[[Spiny]] | ||
| | |align=left|Squat, spiked Koopas that slowly pursue Mario. They are defeated when drawn to water. | ||
| | |data-sort-value=20|[[Tiny-Huge Island]] | ||
| | |data-sort-value=22|[[Rainbow Ride]] | ||
|2 | |||
|None | |||
|— | |||
|- | |- | ||
| | |data-sort-value=SpinyB style="background:white"|[[File:SM64-SpinyEgg.png|100x100px]]<br>[[Spiny Egg|Spiny bomb]] | ||
| | |align=left|The eggs dropped by Lakitus. They hatch into Spinies when they hit the ground. | ||
| | |data-sort-value=20|[[Tiny-Huge Island]] | ||
| | |data-sort-value=22|[[Rainbow Ride]] | ||
|2 | |||
|None | |||
|— | |||
|} | |} | ||
===Obstacles=== | ===Obstacles=== | ||
{| | {|class="wikitable"style="width:100%;text-align:center" | ||
|-style="background:#FF2400 | |-style="color:white;background:#FF2400" | ||
!width=10%|Name | !rowspan=2 width=10%|Name | ||
!Description | !rowspan=2|Description | ||
!width= | !colspan=2|Courses | ||
|-style="color:white;background:#FF2400" | |||
!width=8%|First | |||
!width=8%|Last | |||
|- | |- | ||
| | |style="background:white"|[[File:SM64 Asset Model Bill Blaster.png|100x100px]]<br>[[Bill Blaster|Blaster]] | ||
|A metal cube that shoots out Bullet Bills. | |align=left|A metal cube that shoots out Bullet Bills. | ||
| | |colspan=2|[[Whomp's Fortress]] | ||
|- | |- | ||
| | |style="background:white"|[[File:SM64 Asset Model Floating Mine.png|100x100px]]<br>[[Mine|Bomb]] | ||
|A stationary spiked explosive used to defeat Bowser. | |align=left|A stationary spiked explosive used to defeat Bowser. | ||
|[[Bowser in the Dark World]] | |||
|[[Bowser in the Sky]] | |||
|- | |- | ||
| | |style="background:white"|[[File:SM64 Asset Model Casket.png|100x100px]]<br>[[Casket]] | ||
|Caskets rise and fall. They can crush Mario if he goes under one. | |align=left|Caskets rise and fall. They can crush Mario if he goes under one. | ||
| | |colspan=2|[[Big Boo's Haunt]] | ||
|- | |- | ||
| | |style="background:white"|[[File:SM64 Asset Model Chair.png|100x100px]]<br>[[Chair]] | ||
| | |align=left|A haunted piece of furniture that flings itself at Mario. | ||
| | |colspan=2|[[Big Boo's Haunt]] | ||
|- | |- | ||
| | |style="background:white"|[[File:ClamSM64.png|100x100px]]<br>[[Clam]] | ||
| | |align=left|A giant shellfish that opens and closes its valves, sometimes containing an item. | ||
|[[Jolly Roger Bay]] | |||
|[[Dire, Dire Docks]] | |||
|- | |- | ||
| | |style="background:white"|[[File:SM64 Freezing Water.png|100x100px]]<br>[[Freezing water|Cold water]] | ||
| | |align=left|Chilled water that hurts Mario on contact, either gradually or immediately depending on how cold it is. | ||
| | |colspan=2|[[Snowman's Land]] | ||
|- | |- | ||
| | |style="background:white"|[[File:Cavern of the Metal Cap.png|100x100px]]<br>[[Current]] | ||
| | |align=left|Rapidly moving water that can forcibly remove Mario from the course if it pulls him far enough. | ||
|[[Jolly Roger Bay]] | |||
|[[Tall, Tall Mountain]] | |||
|- | |- | ||
| | |style="background:white"|[[File:Endless Stairs.png|100x100px]]<br>[[Endless stairs]] | ||
|A | |align=left|A magic staircase that loops Mario forever if he tries to climb them without enough Stars. | ||
| | |colspan=2|[[Peach's Castle|Mushroom Castle]] | ||
|- | |- | ||
| | |style="background:white"|[[File:SM64 Asset Model Triangular Column.png|100x100px]]<br>[[Falling Pillar|Falling pillar]] | ||
|A | |align=left|A giant precariously balanced stone that tips at Mario. | ||
| | |colspan=2|[[Jolly Roger Bay]] | ||
|- | |- | ||
| | |style="background:white"|[[File:SM64 Asset Model Fireball.png|100x100px]]<br>[[Fireball (obstacle)|Fireball]] | ||
|A | |align=left|A basic flame that appears as either a standalone obstacle or an enemy projectile. | ||
|[[Bowser in the Dark World]] | |||
|[[Peach's Castle|Mushroom Castle]] | |||
|- | |- | ||
| | |style="background:white"|[[File:SM64 Asset Model Fire Bar.png|100x100px]]<br>[[Fire Bar|Fire bar]] | ||
|A | |align=left|A rotating rock with a constantly alit flamethrower on either side. | ||
| | |colspan=2|[[Lethal Lava Land]] | ||
|- | |- | ||
| | |style="background:white"|[[File:SM64 Flamethrower.png|100x100px]]<br>[[Flamethrower]] | ||
|A | |align=left|A jet of fire that usually comes from small holes but can also come from other openings and even lava. | ||
| | |[[Bowser in the Dark World]] | ||
|[[Bowser in the Sky]] | |||
|- | |- | ||
| | |style="background:white"|[[File:SM64 Asset Model Hidden Smasher.png|100x100px]]<br>[[Hidden smasher]] | ||
|A | |align=left|A giant mass of metal hidden in a wall that tries to crush Mario when he approaches. | ||
| | |colspan=2|[[Lethal Lava Land]] | ||
|- | |- | ||
| | |style="background:white"|[[File:Chillman.png|100x100px]]<br>[[Ice]] | ||
| | |align=left|Icy floors that reduce Mario's traction. Ice makes it difficult to make precise jumps and avoid oncoming hazards. The [[Chill Bully]] is fought on an arena entirely made of ice. | ||
| | |[[Cool, Cool Mountain]] | ||
|[[Snowman's Land]] | |||
|- | |- | ||
| | |style="background:white"|[[File:SM64 Asset Texture Ice Block Shooter.png|100x100px]]<br>[[Ice Block#Super Mario 64 / Super Mario 64 DS|Ice block shooter]] | ||
| | |align=left|A giant hole with Shy Guy masks that shoots triangular [[Ice Block|ice block]]s. | ||
| | |colspan=2|[[Snowman's Land]] | ||
|- | |- | ||
| | |style="background:white"|[[File:DeepFreeze64.png|100x100px]]<br>[[Ice sculpture]] | ||
| | |align=left|Icy blocks arranged into small maze. In the igloo, there are similar walls that contain [[coin]]s. [[Vanish Mario]] is required to phase through them. | ||
| | |colspan=2|[[Snowman's Land]] | ||
|- | |- | ||
| | |style="background:white"|[[File:SM64 Iron Ball.png|100x100px]]<br>[[Metal ball|Iron ball]] | ||
|A variably sized large black sphere that rolls down slopes. | |align=left|A variably sized large black sphere that rolls down slopes. | ||
|[[Bob-omb Battlefield]] | |||
|[[Tiny-Huge Island]] | |||
|- | |- | ||
| | |style="background:white"|[[File:SM64 Asset Texture Ivy.png|100x100px]]<br>Ivy<br>{{conjectural}} | ||
|Slows Mario's speed and also makes it difficult to jump. | |align=left|Slows Mario's speed and also makes it difficult to jump. | ||
| | |colspan=2|[[Tall, Tall Mountain]] | ||
|- | |- | ||
| | |style="background:white"|[[File:SM64 LLL Entrance.png|100x100px]]<br>[[Lava]] | ||
|Molten rock that burns Mario. | |align=left|Molten rock that burns Mario. | ||
|[[Lethal Lava Land]] | |||
|[[Bowser in the Fire Sea]] | |||
|- | |- | ||
| | |style="background:white"|[[File:BompSM64.png|100x100px]]<br>[[Bomp|Moving Bar]] | ||
| | |align=left|A varyingly designed wall protrusion that tries to push Mario but can also be used as a platform. | ||
| | |[[Whomp's Fortress]] | ||
|[[Tick Tock Clock]] | |||
|- | |- | ||
| | |style="background:white"|[[File:SM64 Asset Model Pendulum.png|100x100px]]<br>[[Pendulum]] | ||
|A swinging obstacle that can block Mario's path. Its speed can change depending on the time Mario enters Tick Tock Clock. | |align=left|A swinging obstacle that can block Mario's path. Its speed can change depending on the time Mario enters Tick Tock Clock. | ||
| | |colspan=2|[[Tick Tock Clock]] | ||
|- | |- | ||
| | |style="background:white"|[[File:ShiftingSandLand2.png|100x100px]]<br>[[Quicksand]] | ||
| | |align=left|Sand that pulls Mario under at varying speeds. | ||
| | |colspan=2|[[Shifting Sand Land]] | ||
|- | |- | ||
| | |style="background:white"|[[File:SM64 Asset Model Boulder.png|100x100px]]<br>[[Boulder|Rolling rock]] | ||
|align=left|A giant boulder. | |||
|colspan=2|[[Hazy Maze Cave]] | |||
|A giant boulder. | |||
| | |||
|- | |- | ||
| | |style="background:white"|[[File:SM64 Asset Model Slide Box.png|100x100px]]<br>[[Slide Box]] | ||
|A skull-marked crate that moves back and forth on the rocking ship. | |align=left|A skull-marked crate that moves back and forth on the rocking ship. | ||
| | |colspan=2|[[Jolly Roger Bay]] | ||
|- | |- | ||
| | |style="background:white"|[[File:SM64 mario cough.png|100x100px]]<br>[[Smoke|Strange cloud]] | ||
|Putrid gas found in deep, stagnant caves. | |align=left|Putrid gas found in deep, stagnant caves. | ||
| | |colspan=2|[[Hazy Maze Cave]] | ||
|- | |- | ||
| | |style="background:white"|[[File:SM64 Asset Model Tornado.png|100x100px]]<br>[[Tornado]] | ||
|A whirlwind that makes Mario spin. | |align=left|A whirlwind that makes Mario spin. | ||
| | |colspan=2|[[Shifting Sand Land]] | ||
|- | |- | ||
| | |style="background:white"|[[File:SM64 Asset Model Water Bomb.png|100x100px]]<br>[[Water bomb (object)|Water bomb]] | ||
|A bouncing balloon that pursues Mario after being shot from a cannon. | |align=left|A bouncing balloon that pursues Mario after being shot from a cannon. | ||
| | |colspan=2|[[Bob-omb Battlefield]] | ||
|- | |- | ||
| | |style="background:white"|[[File:SM64 Wet-Dry World Downtown.png|100x100px]]<br>[[Water tide]] | ||
|Water that rises up or down. | |align=left|Water that rises up or down. | ||
| | |[[Wet-Dry World]] | ||
|[[Peach's Castle|Mushroom Castle]] | |||
|- | |- | ||
| | |style="background:white"|[[File:SM64 Asset Model Whirlpool.png|100x100px]]<br>[[Whirlpool]] | ||
|A vortex that can suck Mario inside. | |align=left|A vortex that can suck Mario inside. | ||
| | |colspan=2|[[Dire, Dire Docks]] | ||
|- | |- | ||
| | |style="background:white"|[[File:SM64 Screenshot Wind.png|100x100px]]<br>[[Wind]] | ||
|A gust that can either help or hinder Mario. | |align=left|A gust that can either help or hinder Mario. | ||
|[[Cool, Cool Mountain]] | |||
|[[Bowser in the Sky]] | |||
|- | |- | ||
| | |style="background:white"|[[File:SM64 Vanish Metal Mario.png|100x100px]]<br>[[Chain-Link|Wire net]] (vertical) | ||
|A wall made of iron bars or wire nets. | |align=left|A wall made of iron bars or wire nets. Vanish Mario is required to pass through these walls. | ||
|[[The Secret Under the Moat|Vanish Cap Under the Moat]] | |||
|[[Tick Tock Clock]] | |||
|} | |} | ||
===Bosses=== | ===Bosses=== | ||
Bosses are listed in the order that they are first encountered. | Bosses are listed in the order that they are first encountered. | ||
{| | {|class="wikitable"style="width:100%;text-align:center" | ||
|-style="background:#FF2400 | |-style="color:white;background:#FF2400" | ||
!width=10%|Name | !width=10%|Name | ||
!Description | !Description | ||
!width= | !width=16%|Missions | ||
|- | |- | ||
| | |style="background:white"|[[File:SM64 Asset Model King Bob-omb.png|100x100px]]<br>[[King Bob-omb|Big Bob-omb]] | ||
|A giant [[Bob-omb]] on the [[Bob-omb Battlefield]]. He appears as the first boss in the game and has the first [[Power Star]]. He refers to himself as the "baron of all blasting matter." | |align=left|A giant [[Bob-omb]] on the [[Bob-omb Battlefield]]. He appears as the first boss in the game and has the first [[Power Star]]. He refers to himself as the "baron of all blasting matter." | ||
|[[Big Bob-omb on the Summit]] | |||
|- | |- | ||
| | |style="background:white"|[[File:WhompKingSM64.png|100x100px]]<br>[[Whomp King]] | ||
|A giant [[Whomp]] on top of [[Whomp's Fortress]]. He has the first Power Star, and after he is defeated, there is a tower on top of the fortress. | |align=left|A giant [[Whomp]] on top of [[Whomp's Fortress]]. He has the first Power Star, and after he is defeated, there is a tower on top of the fortress. | ||
|[[Chip Off Whomp's Block]] | |||
|- | |- | ||
| | |style="background:white"|[[File:BowserSM64.png|100x100px]]<br>[[Bowser]] | ||
|Bowser appears in Bowser in the Dark World, Bowser in the Fire Sea (where the arena tilts), and Bowser in the Sky (where he must be thrown three times). Mario needs to swing him by the tail clockwise or counterclockwise and hurl him at bombs on the outside of his circular arena. | |align=left|Bowser appears in Bowser in the Dark World, Bowser in the Fire Sea (where the arena tilts), and Bowser in the Sky (where he must be thrown three times). Mario needs to swing him by the tail clockwise or counterclockwise and hurl him at bombs on the outside of his circular arena. | ||
|[[Bowser in the Dark World]]; [[Bowser in the Fire Sea]]; [[Bowser in the Sky]] | |||
|- | |- | ||
| | |style="background:white"|[[File:Boo 64.png|100x100px]]<br>[[Big Boo (character)|Big Boo]] | ||
|A giant [[Boo]] that appears three times in [[Big Boo's Haunt]]. He initially appears once all the Boos in the mansion have been defeated, again in the underground merry-go-round, and lastly on the top balcony of the mansion. | |align=left|A giant [[Boo]] that appears three times in [[Big Boo's Haunt]]. He initially appears once all the Boos in the mansion have been defeated, again in the underground merry-go-round, and lastly on the top balcony of the mansion. | ||
|[[Go on a Ghost Hunt]]; [[Ride Big Boo's Merry-Go-Round]]; [[Big Boo's Balcony]] | |||
|- | |- | ||
| | |style="background:white"|[[File:SM64 Asset Model Mr. I.png|100x100px]]<br>[[Big Mr. I.]] | ||
|A giant [[Mr. I|Mr. I.]] that appears only in the attic of Big Boo's Haunt. | |align=left|A giant [[Mr. I|Mr. I.]] that appears only in the attic of Big Boo's Haunt. | ||
|[[Eye to Eye in the Secret Room]] | |||
|- | |- | ||
| | |style="background:white"|[[File:BigBullySM64.png|100x100px]]<br>[[Big Bully]] | ||
|A large [[Bully]] that appears in [[Lethal Lava Land]]. On both occasions, Big Bullies try to knock Mario into the lava. | |align=left|A large [[Bully]] that appears in [[Lethal Lava Land]]. On both occasions, Big Bullies try to knock Mario into the lava. | ||
|[[Boil the Big Bully]]; [[Bully the Bullies]] | |||
|- | |- | ||
| | |style="background:white"|[[File:EyerokSM64.png|100x100px]]<br>[[Eyerok]] | ||
|A being composed of two stone hands with eyes on each palm. He appears when Mario blasts open the top of the pyramid in [[Shifting Sand Land]] and rides the elevator inside. | |align=left|A being composed of two stone hands with eyes on each palm. He appears when Mario blasts open the top of the pyramid in [[Shifting Sand Land]] and rides the elevator inside. | ||
|[[Stand Tall on the Four Pillars]] | |||
|- | |- | ||
| | |style="background:white"|[[File:ChillBullySM64.png|100x100px]]<br>[[Chill Bully]] | ||
|A large Bully made of ice. He tries to ram Mario onto a lethally frozen pond in [[Snowman's Land]]. | |align=left|A large Bully made of ice. He tries to ram Mario onto a lethally frozen pond in [[Snowman's Land]]. | ||
|[[Chill with the Bully]] | |||
|- | |- | ||
| | |style="background:white"|[[File:SM64 Asset Model Wiggler.png|100x100px]]<br>[[Wiggler]] | ||
|align=left|A giant caterpillar. He becomes angry when his home on Tiny-Huge Island gets flooded. | |||
|[[Make Wiggler Squirm]] | |||
|A giant caterpillar. He becomes angry when his home on Tiny-Huge Island gets flooded. | |||
|} | |} | ||
| Line 1,375: | Line 1,447: | ||
===Items=== | ===Items=== | ||
These are collectibles, pickups, and health-restoring objects. | These are collectibles, pickups, and health-restoring objects. | ||
{| | {|class="wikitable"style="width:100%;text-align:center" | ||
|-style=" | |-style="color:white;background:red" | ||
!width=12%|Name | !width=12%|Name | ||
! | !Description | ||
|- | |||
|style="background:white"|[[File:PowerStarModelSM64.png|100x100px]]<br>[[Power Star]]s | |||
|align=left|Power Stars fuel the [[Peach's Castle|Mushroom Castle]] and are stolen by [[Bowser]] to seal the castle's inhabitants away. They are the primary objective within [[mission]]s, and accumulating Stars unlocks new missions. A larger token called the [[Jumbo Star]] is made available after the final battle with Bowser. Collecting it does not contribute to the player's total, but it does liberate [[Princess Peach]]. | |||
|- | |||
|style="background:white"|[[File:SM64 Asset Model Key.png|100x100px]]<br>[[Key]]s | |||
|align=left|Tokens awarded to Mario after the first two Bowser battles. A key permanently unlocks a [[Key Door]]. | |||
|- | |||
|style="background:white"|[[File:SM64 Asset Sprite Coin.png|100x100px]]<br>[[Coin|Yellow Coins]] | |||
|align=left|Collecting a Yellow Coin restores one wedge to Mario's Power Meter. Collecting 100 during a mission rewards Mario with a Power Star. He also gains an extra life for every 50 coins he has when he completes a mission, but only up to three (i.e., no more than 150 coins). | |||
|- | |||
|style="background:white"|[[File:SM64 Asset Sprite Red Coin.png|100x100px]]<br>[[Red Coin]]s | |||
|align=left|Red Coins are worth two coins. Eight are scattered around most courses, and collecting them all causes a Power Star to appear. They restore two wedges to Mario's Power Meter when collected. | |||
|- | |||
|style="background:white"|[[File:SM64 Asset Sprite Blue Coin.png|100x100px]]<br>[[Blue Coin]]s | |||
|align=left|Blue Coins are worth five coins. They typically appear after Mario ground-pounds a [[Blue Coin Block]] or after he defeats a strong enemy, such as a [[Mr. I|Mr. I.]] | |||
|- | |||
|style="background:white"|[[File:SM64 Asset Model Spinning Heart.png|100x100px]]<br>[[Spinning Heart]]s | |||
|align=left|Spinning Hearts restore Mario's Power Meter when he passes through one. The amount of health recovered and how fast it does so are dependent on how quickly Mario moves through it. | |||
|- | |- | ||
| | |style="background:white"|[[File:SM64 1-up.png|100x100px]]<br>[[1-Up Mushroom|1UP Mushrooms]] | ||
| | |align=left|Green [[mushroom]]s that give Mario an [[extra life]] each when obtained. | ||
|align= | |||
|- | |- | ||
| | |style="background:white"|[[File:SM64 Asset Sprite Bubble.png|100x100px]]<br>[[Bubble]]s | ||
|align=left|Bubbles are released from opened underwater [[treasure chest|Treasure Chest]]s. Making contact with one refills Mario's [[Health Meter#Super Mario 64 / Super Mario 64 DS|Power Meter]]. | |||
|align= | |||
|- | |- | ||
| | |style="background:white"|[[File:SM64 Asset Model Green Shell.png|100x100px]]<br>[[Koopa Shell]]s | ||
|align=left|Shells from [[Koopa Troopa]]s that Mario can ride, allowing him to defeat enemies he runs over and move around the course quicker. Pressing {{button|n64|Z}} causes the shell to disappear. | |||
|align= | |||
|- | |- | ||
| | |style="background:white"|[[File:SM64 Asset Model Mario Cap.png|100x100px]]<br>[[Mario Cap|Mario's cap]] | ||
|align=left|Mario can lose his cap: It can be stolen by [[Klepto]] or a [[Ukiki|Ukkiki]] or blown away by [[wind]]. He takes more damage without it. Mario can complete a mission or exit a course without his cap, but it is still missing when he returns to the Mushroom Castle. He has to return to the specific course where he lost his cap to retrieve it. | |||
|align= | |||
|- | |- | ||
| | |style="background:white"|[[File:SM64 Asset Model Block.png|100x100px]]<br>[[Crate]]s | ||
|align=left|Small [[Block (Super Mario 64)|blocks]] that can be picked up and tossed to defeat enemies. Crates break on impact and release collectible Yellow Coins. | |||
|align= | |||
|- | |- | ||
| | |style="background:white"|[[File:STROOP- Crazy Box.png|100x100px]]<br>[[Crazed Crate]]s | ||
|align=left|Living crates. When Mario grabs a Crazed Crate, it immediately bounces three times in the direction he was facing when it is grabbed, taking him with it. Each bounce is progressively higher. A Crazed Crate breaks at the end of the third bounce, breaking and releasing Yellow Coins. | |||
|Living crates. When Mario grabs a Crazed Crate, it immediately bounces three times in the direction he was facing when it is grabbed, taking him with it. Each bounce is progressively higher. A Crazed Crate breaks at the end of the third bounce, breaking and releasing Yellow Coins. | |||
|} | |} | ||
| Line 1,419: | Line 1,495: | ||
!width=12%|Cap Block | !width=12%|Cap Block | ||
!width=10%|Power-up | !width=10%|Power-up | ||
!width=10%| | !width=10%|Form | ||
!Description | !Description | ||
|- | |- | ||
|align=center style="background: | |align=center style="background:white"|[[File:SM64 Asset Texture Red Cap Block.png|100x100px]]<br>Red block | ||
|align=center style="background: | |align=center style="background:white"|[[File:WingCap SM64.png|100x100px]]<br>[[Wing Cap]] | ||
|align=center style="background: | |align=center style="background:white"|[[File:WingMarioSM64.png|110x110px]]<br>[[Wing Mario]] | ||
|The Wing Cap is available only in red blocks and transforms Mario into Wing Mario. Performing a [[Triple Jump]] or launching from a [[cannon]] makes Wing Mario [[fly]]. Pressing up on {{button|n64|stick}} makes him descend, and pushing down makes him gain altitude. Alternating between both is necessary to keep Wing Mario airborne. Pressing {{button|n64|z}} brings him back to the ground. | |The Wing Cap is available only in red blocks and transforms Mario into Wing Mario. Performing a [[Triple Jump]] or launching from a [[cannon]] makes Wing Mario [[fly]]. Pressing up on {{button|n64|stick}} makes him descend, and pushing down makes him gain altitude. Alternating between both is necessary to keep Wing Mario airborne. Pressing {{button|n64|z}} brings him back to the ground. | ||
|- | |- | ||
|align=center style="background: | |align=center style="background:white"|[[File:SM64 Asset Texture Green Cap Block.png|100x100px]]<br>Green block | ||
|align=center style="background: | |align=center style="background:white"|[[File:MetalCapSM64.png|100x100px]]<br>[[Metal Cap]] | ||
|align=center style="background: | |align=center style="background:white"|[[File:SM64 SM3DAS Metal Mario Render.png|110x110px]]<br>[[Metal Mario]] | ||
|The Metal Cap is available in green blocks and turns Mario into Metal Mario, a nearly invincible form. He can receive only fall damage in this form. Metal Mario functions the same as his normal form, but he can destroy enemies just by making contact and is impervious to most hazardous obstacles. [[Wind]] and [[current]]s cannot push him. While he does not need air, Metal Mario cannot [[swim]] and sinks to the bottoms of bodies of water, enabling him to circumvent jet streams and other underwater obstacles. | |The Metal Cap is available in green blocks and turns Mario into Metal Mario, a nearly invincible form. He can receive only fall damage in this form. Metal Mario functions the same as his normal form, but he can destroy enemies just by making contact and is impervious to most hazardous obstacles. [[Wind]] and [[current]]s cannot push him. While he does not need air, Metal Mario cannot [[swim]] and sinks to the bottoms of bodies of water, enabling him to circumvent jet streams and other underwater obstacles. | ||
|- | |- | ||
|align=center style="background: | |align=center style="background:white"|[[File:SM64 Asset Texture Blue Cap Block.png|100x100px]]<br>Blue block | ||
|align=center style="background: | |align=center style="background:white"|[[File:SM64 Vanish Cap.png|100x100px]]<br>[[Vanish Cap]] | ||
|align=center style="background: | |align=center style="background:white"|[[File:Vanish Mario.png|110x110px]]<br>[[Vanish Mario]] | ||
|The Vanish Cap is the final unlockable power-up and is contained in blue blocks. It transforms Mario into Vanish Mario, a form that allows Mario to phase through certain barriers and walls. Vanish Mario is undetectable to enemies, and they cannot harm him. He otherwise has the same abilities as normal Mario. | |The Vanish Cap is the final unlockable power-up and is contained in blue blocks. It transforms Mario into Vanish Mario, a form that allows Mario to phase through certain barriers and walls. Vanish Mario is undetectable to enemies, and they cannot harm him. He otherwise has the same abilities as normal Mario. | ||
|} | |} | ||
| Line 1,447: | Line 1,523: | ||
!colspan=3 style="background:#FF7733;color:black;"|Trigger objects | !colspan=3 style="background:#FF7733;color:black;"|Trigger objects | ||
|- | |- | ||
|align=center style="background: | |align=center style="background:white"|[[File:Bluecoinbox.png|100x100px]]<br>[[Blue Coin Block]] | ||
|A block that causes a trail of Blue Coins to appear for a temporary period of time when ground-pounded. It disappears for the remainder of the accessed mission once struck. | |A block that causes a trail of Blue Coins to appear for a temporary period of time when ground-pounded. It disappears for the remainder of the accessed mission once struck. | ||
|- | |- | ||
|align=center style="background: | |align=center style="background:white"|[[File:SM64 Asset Model Brick Pillar.png|100x100px]]<br>[[Brick pillar]] | ||
|A pair of brick pillars is in the basement of the [[Peach's Castle|Mushroom Castle]]. Ground-pounding them permanently drains the moat. | |A pair of brick pillars is in the basement of the [[Peach's Castle|Mushroom Castle]]. Ground-pounding them permanently drains the moat. | ||
|- | |- | ||
|align=center style="background: | |align=center style="background:white"|[[File:SM64 Asset Model Bubble Ring.png|100x100px]]<br>[[Bubble ring]] | ||
|An underwater ring released by the [[Manta|Manta Ray]]. Swimming through five consecutive bubble rings rewards Mario with a Power Star. | |An underwater ring released by the [[Manta|Manta Ray]]. Swimming through five consecutive bubble rings rewards Mario with a Power Star. | ||
|- | |- | ||
|align=center style="background: | |align=center style="background:white"|[[File:VanishSwitch.png|100x100px]]<br>[[Cap Switch]] | ||
|A type of [[! Switch]] found only in switch courses. Ground-pounding one permanently makes corresponding semi-visible blocks turn [[Cap Block|solid]], granting Mario access to the [[List of power-ups|power-up]]s they contain. There are only three Cap Switches in the game, and they correspond as follows: The red one makes the [[Wing Cap]] available, the green one makes the [[Metal Cap]] available, and the blue one makes the [[Vanish Cap]] available. | |A type of [[! Switch]] found only in switch courses. Ground-pounding one permanently makes corresponding semi-visible blocks turn [[Cap Block|solid]], granting Mario access to the [[List of power-ups|power-up]]s they contain. There are only three Cap Switches in the game, and they correspond as follows: The red one makes the [[Wing Cap]] available, the green one makes the [[Metal Cap]] available, and the blue one makes the [[Vanish Cap]] available. | ||
|- | |- | ||
|align=center style="background: | |align=center style="background:white"|[[File:SM64 Asset Model Crystal Tap.png|100x100px]]<br>[[Crystal Tap]] | ||
|An {{wp|octahedron}} in [[Wet-Dry World]] that causes the [[water tide|water level]] to either rise or fall when touched. | |An {{wp|octahedron}} in [[Wet-Dry World]] that causes the [[water tide|water level]] to either rise or fall when touched. | ||
|- | |- | ||
|align=center style="background: | |align=center style="background:white"|[[File:SM64 Asset Model ! Switch.png|100x100px]]<br>[[! Switch|Purple Switch]] | ||
|Purple Switches cause temporary changes to the surrounding environment when stepped on. | |Purple Switches cause temporary changes to the surrounding environment when stepped on. | ||
|- | |- | ||
|align=center style="background: | |align=center style="background:white"|[[File:SM64 Screenshot Secrets.gif|100x100px]]<br>[[Secret]] | ||
|One of five cryptically hidden "spots" within a course. Finding one causes a corresponding red number to appear onscreen. Locating all five secrets causes a Power Star to appear. | |One of five cryptically hidden "spots" within a course. Finding one causes a corresponding red number to appear onscreen. Locating all five secrets causes a Power Star to appear. | ||
|- | |- | ||
|align=center style="background: | |align=center style="background:white"|[[File:SM64 Asset Model Stump.png|100x100px]]<br>[[Stump|Stake]] | ||
|A stake needs to be struck by a Pound the Ground attack three times to be fully embedded into the earth, and doing so may produce a Yellow Coin or trigger a nearby event. Running around one may produce multiple coins. | |A stake needs to be struck by a Pound the Ground attack three times to be fully embedded into the earth, and doing so may produce a Yellow Coin or trigger a nearby event. Running around one may produce multiple coins. | ||
|- | |- | ||
|align=center style="background: | |align=center style="background:white"|[[File:SM64 Asset Model Treasure Chest.png|100x100px]]<br>[[Treasure chest|Treasure Chest]] | ||
|A wooden chest that contains a [[bubble]] and opens when touched. In some missions, five Treasure Chests appear and either release a Power Star or trigger a change in the environment when opened in a specific order. Opening a chest out of order electrocutes Mario and forces the player to start over. | |A wooden chest that contains a [[bubble]] and opens when touched. In some missions, five Treasure Chests appear and either release a Power Star or trigger a change in the environment when opened in a specific order. Opening a chest out of order electrocutes Mario and forces the player to start over. | ||
|- | |- | ||
!colspan=3 style="background:#FF7733;color:black;"|Climbable objects | !colspan=3 style="background:#FF7733;color:black;"|Climbable objects | ||
|- | |- | ||
|align=center style="background: | |align=center style="background:white"|[[File:SM64 Asset Model Pole.png|100x100px]]<br>[[Pole]] | ||
|Mario clings to climbable poles by jumping onto them. He can ascend, descend, and change which face of a pole he is on when the player moves {{button|n64|stick}}. Pressing {{button|n64|A}} makes Mario jump from whichever face he is on. Poles' height and designs depend on where they are encountered. The finish line for footraces against [[Koopa the Quick]] is marked by a flagpole that operates the same way. | |Mario clings to climbable poles by jumping onto them. He can ascend, descend, and change which face of a pole he is on when the player moves {{button|n64|stick}}. Pressing {{button|n64|A}} makes Mario jump from whichever face he is on. Poles' height and designs depend on where they are encountered. The finish line for footraces against [[Koopa the Quick]] is marked by a flagpole that operates the same way. | ||
|- | |- | ||
|align=center style="background: | |align=center style="background:white"|[[File:SM64 Castle Tree.png|100x100px]]<br>[[Tree]] | ||
|Trees function like poles. Reaching the top of one sometimes triggers an event or releases a [[1-Up Mushroom|1UP Mushroom]] that homes in on Mario. | |Trees function like poles. Reaching the top of one sometimes triggers an event or releases a [[1-Up Mushroom|1UP Mushroom]] that homes in on Mario. | ||
|-- | |-- | ||
|align=center style="background: | |align=center style="background:white"|[[File:SM64 Screenshot Chain-Link (Horizontal).png|100x100px]]<br>[[Chain-Link|Wire net]] (horizontal) | ||
|A ceiling of climbable metal netting. | |A ceiling of climbable metal netting. | ||
|- | |- | ||
!colspan=3 style="background:#FF7733;color:black;"|Blocks and platforms | !colspan=3 style="background:#FF7733;color:black;"|Blocks and platforms | ||
|- | |- | ||
|align=center style="background: | |align=center style="background:white"|[[File:SM64 Asset Model Walkway.png|100x100px]]<br>[[Accordion-like platform]]<ref name=n64site/> | ||
|Blue platforms connected to bridges in Bowser in the Fire Sea that gradually rise up and drop down. | |||
|- | |||
|align=center style="background:white"|[[File:SM64 Dark World Stairs.png|100x100px]]<br>Activatable staircase<br>{{Conjectural}} | |||
|A stairway that briefly appears when a switch is pressed. | |A stairway that briefly appears when a switch is pressed. | ||
|- | |- | ||
|align=center style="background: | |align=center style="background:white"|[[File:SM64 Asset Model Arrow Lift.png|100x100px]]<br>[[Arrow Lift (Super Mario 64)|Arrow Lift]] | ||
|A floating block that begins to move back and forth once stood on. An activated Arrow Lift stops moving for two-second intervals before moving again. | |A floating block that begins to move back and forth once stood on. An activated Arrow Lift stops moving for two-second intervals before moving again. | ||
|- | |- | ||
|align=center style="background: | |align=center style="background:white"|[[File:SM64 Asset Model Block.png|100x100px]]<br>[[Block (Super Mario 64)|Block]] | ||
|Blocks contain Yellow Coins and release them once struck. They are visually identical to crates, but they are about the same height as Mario and cannot be picked up. | |Blocks contain Yellow Coins and release them once struck. They are visually identical to crates, but they are about the same height as Mario and cannot be picked up. | ||
|- | |- | ||
|align=center style="background: | |align=center style="background:white"|[[File:SM64 Asset Model Bowser's Sub.png|100x100px]]<br>Bowser's Submarine | ||
|The submarine appears only in [[Dire, Dire Docks]] during [[Board Bowser's Sub]], during which it floats on the surface of the water. Bowser's Submarine does not appear in subsequent missions, and completing Board Bowser's Sub unlocks access to [[Bowser in the Fire Sea]]. | |The submarine appears only in [[Dire, Dire Docks]] during [[Board Bowser's Sub]], during which it floats on the surface of the water. Bowser's Submarine does not appear in subsequent missions, and completing Board Bowser's Sub unlocks access to [[Bowser in the Fire Sea]]. | ||
|- | |- | ||
|align=center style="background: | |align=center style="background:white"|[[File:SM64 Screenshot Cloud House.png|100x100px]]<br>[[Cloud House]] | ||
|A large floating building in [[Rainbow Ride]]. Magic carpets travel through the Cloud House on a rainbow that weaves through it. The fireplace in the building [[Flamethrower|shoots flames]]. | |A large floating building in [[Rainbow Ride]]. Magic carpets travel through the Cloud House on a rainbow that weaves through it. The fireplace in the building [[Flamethrower|shoots flames]]. | ||
|- | |- | ||
|align=center style="background: | |align=center style="background:white"|[[File:SM64 Asset Model Conveyor Belt.png|100x100px]]<br>[[Conveyor Belt|Conveyor belt]] | ||
|A platform with a moving surface. The speed and direction vary depending on the position of the clock hands on [[Tick Tock Clock]]'s face when Mario enters the course. | |A platform with a moving surface. The speed and direction vary depending on the position of the clock hands on [[Tick Tock Clock]]'s face when Mario enters the course. | ||
|- | |- | ||
|align=center style="background: | |align=center style="background:white"|[[File:SM64 Asset Model Drawbridge.png|100x100px]]<br>[[Drawbridge]] | ||
|An object in Lethal Lava Land that opens and closes. | |An object in [[Lethal Lava Land]] that opens and closes. | ||
|- | |- | ||
|align=center style="background: | |align=center style="background:white"|[[File:SM64 Asset Model Donut Block.png|100x100px]]<br>[[Donut Block|Falling Block]] | ||
|A floating platform that falls when stepped on. Thin, holeless Falling Blocks drop quickly, and Mario will lose ground if he does not keep moving forward. | |A floating platform that falls when stepped on. Thin, holeless Falling Blocks drop quickly, and Mario will lose ground if he does not keep moving forward. | ||
|- | |- | ||
|align=center style="background: | |align=center style="background:white"|[[File:SM64 Asset Model Flipping Block 1.png|100x100px]][[File:SM64 Asset Model Flipping Block 2.png|100x100px]]<br>[[Rotating platform|Flipping block]] | ||
|A block platform that flips in set intervals. The speed and direction vary depending on the position of the clock hands on Tick Tock Clock's face when Mario enters the course. | |A block platform that flips in set intervals. The speed and direction vary depending on the position of the clock hands on Tick Tock Clock's face when Mario enters the course. | ||
|- | |- | ||
|align=center style="background: | |align=center style="background:white"|[[File:SM64 Asset Model Floating Wood Platform.png|100x100px]]<br>Floating wooden platform<ref>Pelland and Owsen, p. 96</ref> | ||
|Floating wooden platforms sink slightly in water when stepped on, then rise back up. | |Floating wooden platforms sink slightly in water when stepped on, then rise back up. | ||
|- | |- | ||
|align=center style="background: | |align=center style="background:white"|[[File:SM64 Asset Model Chairlift.png|100x100px]]<br>[[Ski Lift|Gondola]] | ||
|A moving platform on [[Cool, Cool Mountain]]. The gondola moves once Mario steps on it. It stops if it returns to the bottom after Mario has walked off it. | |A moving platform on [[Cool, Cool Mountain]]. The gondola moves once Mario steps on it. It stops if it returns to the bottom after Mario has walked off it. | ||
|- | |- | ||
|align=center style="background: | |align=center style="background:white"|[[File:SM64 Asset Model Lift.png|100x100px]]<br>[[Lift]] | ||
|A moving platform. Some lifts move along [[track]]s. Others move only up and down, like elevators. Their designs and environmental context for moving depend on where they are encountered. | |A moving platform. Some lifts move along [[track]]s. Others move only up and down, like elevators. Their designs and environmental context for moving depend on where they are encountered. | ||
|- | |- | ||
|align=center style="background: | |align=center style="background:white"|[[File:SM64 Asset Model Magic Carpet.png|100x100px]]<br>[[Magic carpet]] | ||
|A type of lift in Rainbow Ride that travels along a rainbow. If Mario remains off a magic carpet for too long, it will disappear and respawn back at its original position. | |A type of lift in Rainbow Ride that travels along a rainbow. If Mario remains off a magic carpet for too long, it will disappear and respawn back at its original position. | ||
|- | |- | ||
|align=center style="background: | |align=center style="background:white"|[[File:SM64 Asset Model Merry-go-round.png|100x100px]]<br>[[Big Boo's Haunt|Merry-go-round]] | ||
|A spinning platform in the basement of Big Boo's Haunt. | |A spinning platform in the basement of Big Boo's Haunt. | ||
|- | |- | ||
|align=center style="background: | |align=center style="background:white"|[[File:SM64 Asset Model Metal Crate.png|100x100px]]<br>[[Metal crate]]<ref>Upchurch, p. 20</ref> | ||
|A large stone block that can be pushed. | |A large stone block that can be pushed. | ||
|- | |- | ||
|align=center style="background: | |align=center style="background:white"|[[File:SM64 Asset Model Minute Hand.png|100x100px]]<br>[[Clock hand|Minute hand]]<ref>Pelland and Owsen, p. 115</ref> | ||
|A long platform in Tick Tock Clock. It rotates in incremental intervals around a pivot point at the center of the course. The speed and direction vary depending on the position of the clock hands on Tick Tock Clock's face when Mario enters the course. | |A long platform in Tick Tock Clock. It rotates in incremental intervals around a pivot point at the center of the course. The speed and direction vary depending on the position of the clock hands on Tick Tock Clock's face when Mario enters the course. | ||
|- | |- | ||
|align=center style="background: | |align=center style="background:white"|[[File:SM64 Mushroom Platform.png|100x100px]]<br>[[Mushroom Platform|Mushroom]] | ||
|A tall platform that looks like a giant mushroom. | |A tall platform that looks like a giant mushroom. | ||
|- | |- | ||
|align=center style="background: | |align=center style="background:white"|[[File:SM64 Asset Model Paddle Platform.png|100x100px]]<br>[[Paddle Platform|Paddle wheel]] | ||
|A set of four lifts attached to a pivot. Standing on a lift causes the paddle wheel to rotate. | |A set of four lifts attached to a pivot. Standing on a lift causes the paddle wheel to rotate. | ||
|- | |- | ||
|align=center style="background: | |align=center style="background:white"|[[File:SM64 Screenshot Pillar.png|100x100px]]<br>Pillar | ||
|An object in [[Shifting Sand Land]] that can be stood upon to open the top of the pyramid. | |An object in [[Shifting Sand Land]] that can be stood upon to open the top of the pyramid. | ||
|- | |- | ||
|align=center style="background: | |align=center style="background:white"|[[File:SM64 Asset Model Propeller Platform.png|100x100px]]<br>Propeller-like platform<br>{{conjectural}} | ||
|A platform in [[Rainbow Ride]] that spins. It can either be ridden or hinder Mario's path. | |A platform in [[Rainbow Ride]] that spins. It can either be ridden or hinder Mario's path. | ||
|- | |- | ||
|align=center style="background: | |align=center style="background:white"|[[File:SM64 Asset Model Puzzle.png|100x100px]]<br>[[8-Coin Puzzle with 15 Pieces|Puzzle]] | ||
|A sliding puzzle of [[Bowser]] suspended over lava. The individual pieces constantly shift positions, forming and unforming the image of Bowser on the puzzle. | |A sliding puzzle of [[Bowser]] suspended over lava. The individual pieces constantly shift positions, forming and unforming the image of Bowser on the puzzle. | ||
|- | |- | ||
|align=center style="background: | |align=center style="background:white"|[[File:SM64 Asset Model Pyramid Platform.png|100x100px]]<br>[[Pyramid platform]] | ||
|A platform that flips upside down for a few seconds once activated by a Purple Switch. | |A platform that flips upside down for a few seconds once activated by a Purple Switch. | ||
|- | |- | ||
|align=center style="background: | |align=center style="background:white"|[[File:SM64 Screenshot Rainbow Cruiser.png|100x100px]]<br>[[Rainbow Cruiser]] | ||
|A six-winged [[airship]] flying in the direction of strong [[wind]]s. | |A six-winged [[airship]] flying in the direction of strong [[wind]]s. | ||
|- | |- | ||
|align=center style="background: | |align=center style="background:white"|[[File:SM64 Asset Model Log.png|100x100px]]<br>[[Rolling log]] | ||
|Logs roll when stood on. Mario must keep pace with a log's roll to avoid falling off. | |Logs roll when stood on. Mario must keep pace with a log's roll to avoid falling off. | ||
|- | |- | ||
|align=center style="background: | |align=center style="background:white"|[[File:SM64 Asset Model Rotating Bar.png|100x100px]]<br>[[Rotating bar]] | ||
|A thin platform embedded in the side of Tick Tock Clock. The speed and direction vary depending on the position of the clock hands on Tick Tock Clock's face when Mario enters the course. | |A thin platform embedded in the side of Tick Tock Clock. The speed and direction vary depending on the position of the clock hands on Tick Tock Clock's face when Mario enters the course. | ||
|- | |- | ||
|align=center style="background: | |align=center style="background:white"|[[File:SM64 Asset Model Rotating Bridge.png|100x100px]]<br>[[Rotating bridge]]<ref>Pelland and Owsen, pp. 25, 26, 28</ref> | ||
|A wooden platform in [[Whomp's Fortress]] that rotates 180˚ around a pivot point. | |A wooden platform in [[Whomp's Fortress]] that rotates 180˚ around a pivot point. | ||
|- | |- | ||
|align=center style="background: | |align=center style="background:white"|[[File:SM64 Asset Model Seesaw.png|100x100px]]<br>[[Seesaw]] | ||
|A long platform that tilts left or right depending on where Mario walks. Seesaws have different appearances depending on where they are found, as well as unconventional shapes. | |A long platform that tilts left or right depending on where Mario walks. Seesaws have different appearances depending on where they are found, as well as unconventional shapes. | ||
|- | |- | ||
|align=center style="background: | |align=center style="background:white"|[[File:SM64 Dotted-Line Block.png|100x100px]]<br>[[Dotted-Line Block|Semi-visible block]] | ||
|A transparent block that turns solid and is able to be used after the player hits the Cap Switch. | |A transparent block that turns solid and is able to be used after the player hits the Cap Switch. | ||
|- | |- | ||
|align=center style="background: | |align=center style="background:white"|[[File:SM64 Asset Model Sunken Ship.png|100x100px]]<br>Ship | ||
|A sunken ship appears at the bottom of [[Jolly Roger Bay]], and it is where [[Maw-Ray|Unagi]] nests. Approaching it causes Unagi to stir and exit the vessel, granting Mario access to its hull. The ship subsequently can be found floating on the surface of the water during [[Red Coins on the Ship Afloat]]. | |A sunken ship appears at the bottom of [[Jolly Roger Bay]], and it is where [[Maw-Ray|Unagi]] nests. Approaching it causes Unagi to stir and exit the vessel, granting Mario access to its hull. The ship subsequently can be found floating on the surface of the water during [[Red Coins on the Ship Afloat]]. | ||
|- | |- | ||
|align=center style="background: | |align=center style="background:white"|[[File:SM64 Asset Model Sliding Platform.png|100x100px]]<br>Sliding platform<ref name=upchurch_redcoins>Upchurch, p. 30</ref> | ||
|A long rectangular platform in [[Bowser in the Dark World]] and [[Bowser in the Sky]] that slides in and out. | |A long rectangular platform in [[Bowser in the Dark World]] and [[Bowser in the Sky]] that slides in and out. | ||
|- | |- | ||
|align=center style="background: | |align=center style="background:white"|[[File:SM64 Asset Model Floating Island 1.png|100x100px]][[File:SM64 Asset Model Spinning Disc.png|100x100px]]<br>[[Spinning disc]]<ref name=RR_disc>Pelland and Owsen, p. 119</ref> | ||
|A spinning circular platform suspended in the air. Spinning discs' designs and environmental context for moving depend on where they are encountered. In [[Tick Tock Clock]], triangular and hexigonal variants serve the same function as spinning discs, where the speed and direction vary depending on the time Mario enters the course. | |A spinning circular platform suspended in the air. Spinning discs' designs and environmental context for moving depend on where they are encountered. In [[Tick Tock Clock]], triangular and hexigonal variants serve the same function as spinning discs, where the speed and direction vary depending on the time Mario enters the course. In Lethal Lava Land, there is a ringed spinning disc that around the volcano that periodically stops, during which the volcano erupts. | ||
|- | |- | ||
|align=center style="background: | |align=center style="background:white"|[[File:SM64 Asset Model Square.png|100x100px]]<br>[[Square (platform)|Square]] | ||
|One of a pair of square-shaped platforms that move within the rims of a larger square-shaped frame. | |One of a pair of square-shaped platforms that move within the rims of a larger square-shaped frame. | ||
|- | |- | ||
|align=center style="background: | |align=center style="background:white"|[[File:SM64 Asset Model Swing.png|100x100px]]<br>[[Swing]] | ||
|A lift that moves back and forth like a pendulum. | |A lift that moves back and forth like a pendulum. | ||
|- | |- | ||
|align=center style="background: | |align=center style="background:white"|[[File:SM64 Asset Model Tapering Platform 1.png|100x100px]]<br>[[Tapering platform]] | ||
|A square or rectangular platform that floats in [[lava]], occasionally partially sinking. The middle section is higher than the edges and, as such, is the only safe place to stand. | |A square or rectangular platform that floats in [[lava]], occasionally partially sinking. The middle section is higher than the edges and, as such, is the only safe place to stand. | ||
|- | |- | ||
|align=center style="background: | |align=center style="background:white"|[[File:SM64 Asset Model Wire Platform 1.png|100x100px]]<br>[[Wire Net Platform|Wire platform]] | ||
|A mesh lift in lava. Some wire platforms move along tracks that temporarily submerge them in lava. | |A mesh lift in lava. Some wire platforms move along tracks that temporarily submerge them in lava. | ||
|- | |- | ||
|align=center style="background: | |align=center style="background:white"|[[File:SM64 Asset Model Wobbly Platform.png|100x100px]]<br>[[Wobbly platform]]<ref>Pelland and Owsen, p. 80</ref> | ||
|A prism-shaped platform that tilts toward the direction that Mario is standing on, dipping the nearest corner into lava. | |A prism-shaped platform that tilts toward the direction that Mario is standing on, dipping the nearest corner into lava. | ||
|- | |- | ||
|align=center style="background: | |align=center style="background:white"|[[File:SM64 Asset Model Wooden Beam.png|100x100px]]<br>[[Wooden beam]]<ref>Pelland and Owsen, p. 28</ref> | ||
|A plank in Whomp's Fortress. [[Kick]]ing or [[punch]]ing the wooden beam causes it to fall over and become useable as a bridge. | |A plank in Whomp's Fortress. [[Kick]]ing or [[punch]]ing the wooden beam causes it to fall over and become useable as a bridge. | ||
|- | |- | ||
|align=center style="background: | |align=center style="background:white"|[[File:SM64 Asset Model Work Elevator.png|100x100px]]<br>[[Work Elevator]] | ||
|A large flat platform with four arrow-emblazoned buttons. Stepping on a button causes the Work Elevator to move in that direction until it meets an obstruction. | |A large flat platform with four arrow-emblazoned buttons. Stepping on a button causes the Work Elevator to move in that direction until it meets an obstruction. | ||
|- | |- | ||
|align=center style="background: | |align=center style="background:white"|[[File:SM64 Asset Model ! Block.png|100x100px]]<br>[[! Block|Yellow block]] | ||
|A floating ! Block that contains items. It releases its content when Mario jumps underneath it. It is functionally comparable to the [[? Block]]s of prior ''Super Mario'' games and is the only ! Block available at the start of the game. | |A floating ! Block that contains items. It releases its content when Mario jumps underneath it. It is functionally comparable to the [[? Block]]s of prior ''Super Mario'' games and is the only ! Block available at the start of the game. | ||
|- | |- | ||
!colspan=3 style="background:#FF7733;color:black;"|Transportation objects | !colspan=3 style="background:#FF7733;color:black;"|Transportation objects | ||
|- | |- | ||
|align=center style="background: | |align=center style="background:white"|[[File:SM64 Star Door screenshot.png|100x100px]]<br>[[★ door]] | ||
|A door to a room that holds (a) painting(s), four of which open only once Mario has collected the required numbers of Power Stars indicated on the fronts of the doors. Not all paintings are locked behind ★ doors. | |A door to a room that holds (a) painting(s), four of which open only once Mario has collected the required numbers of Power Stars indicated on the fronts of the doors. Not all paintings are locked behind ★ doors. | ||
|- | |- | ||
|align=center style="background: | |align=center style="background:white"|[[File:Star Door Mario 64 sprite.png|100x100px]]<br>[[Big Star Door]] | ||
|A larger ★ door that has a higher Power Star-threshold to unlock. Three of the four Big Star Doors lead to rooms that contain Bowser courses. | |A larger ★ door that has a higher Power Star-threshold to unlock. Three of the four Big Star Doors lead to rooms that contain Bowser courses. | ||
|- | |- | ||
|align=center style="background: | |align=center style="background:white"|[[File:SM64 Asset Model Cannon.png|100x100px]]<br>[[Cannon]] | ||
|Cannons launch Mario to distant areas. They are accessed like pipes. Most cannons are overseen by [[Bob-omb Buddy|Bob-omb Buddies]] and become accessible only after Mario speaks to them. | |Cannons launch Mario to distant areas. They are accessed like pipes. Most cannons are overseen by [[Bob-omb Buddy|Bob-omb Buddies]] and become accessible only after Mario speaks to them. | ||
|- | |- | ||
|align=center style="background: | |align=center style="background:white"|[[File:SM64 Screenshot Clock.png|100x100px]]<br>[[Tick Tock Clock|Clock]] | ||
|The portal for Tick Tock Clock. The placement of the clock's hands when Mario enters the face determines the speed and direction of the platforms and obstacles in the course. None of these objects move if he enters the face with the minute hand on 12, and they move slowly if it is on 3. | |The portal for Tick Tock Clock. The placement of the clock's hands when Mario enters the face determines the speed and direction of the platforms and obstacles in the course. None of these objects move if he enters the face with the minute hand on 12, and they move slowly if it is on 3. | ||
|- | |- | ||
|align=center style="background: | |align=center style="background:white"|[[File:SM64 Key Door.png|100x100px]]<br>[[Key Door]] | ||
|A door that requires a key to open. Key Doors lead to new sections of the castle. | |A door that requires a key to open. Key Doors lead to new sections of the castle. | ||
|- | |- | ||
|align=center style="background: | |align=center style="background:white"|[[File:Bob omb Battlefield painting.png|100x100px]]<br>[[Painting]] | ||
|A magical portal created by Bowser. Paintings lead to the courses of the game. | |A magical portal created by Bowser. Paintings lead to the courses of the game. | ||
|- | |- | ||
|align=center style="background: | |align=center style="background:white"|[[File:SM64 Asset Texture Painting (Boo).png|100x100px]]<br>Painting ([[Boo]]) | ||
|Paintings of Boos appear only in Big Boo's Haunt, and Mario can pass through them only in his [[Vanish Mario|Vanish form]]. | |Paintings of Boos appear only in Big Boo's Haunt, and Mario can pass through them only in his [[Vanish Mario|Vanish form]]. | ||
|- | |- | ||
|align=center style="background: | |align=center style="background:white"|[[File:SM64 Screenshot Volcano.png|100x100px]]<br>[[Volcano]] | ||
|The volcano is at the center of Lethal Lava Land and periodically shoots fire. The volcano's interior can be accessed, and two Power Stars can be obtained in it. | |The volcano is at the center of Lethal Lava Land and periodically shoots fire. The volcano's interior can be accessed, and two Power Stars can be obtained in it. | ||
|- | |- | ||
|align=center style="background: | |align=center style="background:white"|[[File:SM64 Asset Model Pipe.png|100x100px]]<br>[[Warp Pipe|Warp pipe]] | ||
|A pipe going through the ground that brings Mario to a new area. He enters one by physically jumping into it. The cabin chimney on Cool, Cool Mountain functions like a warp pipe. Some pipes are [[Shrinker Pipe]]s that change Mario's size and bring him to the two different versions of [[Tiny-Huge Island]]. | |A pipe going through the ground that brings Mario to a new area. He enters one by physically jumping into it. The cabin chimney on Cool, Cool Mountain functions like a warp pipe. Some pipes are [[Shrinker Pipe]]s that change Mario's size and bring him to the two different versions of [[Tiny-Huge Island]]. | ||
|- | |- | ||
|align=center style="background: | |align=center style="background:white"|[[File:SM64 Screenshot Warp Point.gif|100x100px]]<br>[[Warp|Warp Point]] | ||
|Warp Points are hidden spots within a course that teleport Mario from one point to another. | |Warp Points are hidden spots within a course that teleport Mario from one point to another. | ||
|- | |- | ||
!colspan=3 style="background:#FF7733;color:black;"|Other objects | !colspan=3 style="background:#FF7733;color:black;"|Other objects | ||
|- | |- | ||
|align=center style="background: | |align=center style="background:white"|[[File:SM64 Arrow sign.png|100x100px]]<br>[[Arrow Sign]] | ||
|A sign that directs the player towards the intended focus of the mission they enter. | |A sign that directs the player towards the intended focus of the mission they enter. | ||
|- | |- | ||
|align=center style="background: | |align=center style="background:white"|[[File:SM64 Asset Model Butterfly.png|100x100px]]<br>[[Butterfly]] | ||
|Butterflies may turn into [[1-Up Mushroom|1UP Mushroom]]s or giant iron balls that pursue Mario through the air before exploding if he persistently bothers them. They otherwise fly around passively. | |Butterflies may turn into [[1-Up Mushroom|1UP Mushroom]]s or giant iron balls that pursue Mario through the air before exploding if he persistently bothers them. They otherwise fly around passively. | ||
|- | |- | ||
|align=center style="background: | |align=center style="background:white"|[[File:SM64 Screenshot Cloud.png|100x100px]]<br>Cloud<ref>Pelland and Owsen, p. 126</ref> | ||
|A cloud in [[Over the Rainbows|Wing Mario Over the Rainbow]] that cannot be used as a platform. Some transparent clouds contain a [[Red Coin]]. | |A cloud in [[Over the Rainbows|Wing Mario Over the Rainbow]] that cannot be used as a platform. Some transparent clouds contain a [[Red Coin]]. | ||
|- | |- | ||
|align=center style="background: | |align=center style="background:white"|[[File:SM64 Asset Model Wing Mario Over the Rainbow.png|100x100px]]<br>Rainbow | ||
|Rainbows passively indicate an intended direction for the player to follow. Magic carpets move along them in [[Rainbow Ride]], and arches connect different [[Cloud Lift|clouds]] in Wing Mario Over the Rainbow. A ring-shaped rainbow in Rainbow Ride provides a visual target for the player to launch Mario out of a cannon. All rainbows are intangible. | |Rainbows passively indicate an intended direction for the player to follow. Magic carpets move along them in [[Rainbow Ride]], and arches connect different [[Cloud Lift|clouds]] in Wing Mario Over the Rainbow. A ring-shaped rainbow in Rainbow Ride provides a visual target for the player to launch Mario out of a cannon. All rainbows are intangible. | ||
|- | |- | ||
|align=center style="background: | |align=center style="background:white"|[[File:Sign Model SM64.png|100x100px]]<br>[[Sign]] | ||
|A posted board that contains information on actions, scenarios, and locations. Signs can be ground-pounded into the ground. There are variants found hanging on walls. | |A posted board that contains information on actions, scenarios, and locations. Signs can be ground-pounded into the ground. There are variants found hanging on walls. | ||
|- | |- | ||
|align=center style="background: | |align=center style="background:white"|[[File:SM64 Asset Model Star Marker.png|100x100px]]<br>[[Star Marker]] | ||
|A Power Star appears above a Star Marker in missions where Mario must collect eight Red Coins. | |A Power Star appears above a Star Marker in missions where Mario must collect eight Red Coins. | ||
|} | |} | ||
| Line 1,686: | Line 1,760: | ||
|align=right | |align=right | ||
|direction=horizontal | |direction=horizontal | ||
|width= | |width=84 | ||
|image1=SM64 JollyRogerBay Painting NTSC-J.png | |image1=SM64 JollyRogerBay Painting NTSC-J.png | ||
|caption1=Japan | |caption1=Japan | ||
|image2=SM64 JollyRogerBay Painting Other.png | |image2=SM64 JollyRogerBay Painting Other.png | ||
|caption2= | |caption2=International | ||
}} | }} | ||
*The entrance to [[Jolly Roger Bay]] is changed. In the original release, it is a painting of bubbles in a blue frame. In | *The entrance to [[Jolly Roger Bay]] is changed. In the original release, it is a painting of bubbles in a blue frame. In Western releases, it is a painting of a sunken ship in a gold frame. | ||
*In the Japanese version, the animation that plays when Mario collects a key after defeating Bowser depicts him dancing with a Power Star, as he does after completing a Power Star mission in all versions of the game. In Western releases, this is changed to a new animation in which Mario dances with the key itself. | *In the Japanese version, the animation that plays when Mario collects a key after defeating Bowser depicts him dancing with a Power Star, as he does after completing a Power Star mission in all versions of the game. In Western releases, this is changed to a new animation in which Mario dances with the key itself. | ||
*The unused "key" HUD icon is removed from this version. It is replaced with a corrupted graphic. | *The unused "key" HUD icon is removed from this version. It is replaced with a corrupted graphic. | ||
| Line 1,775: | Line 1,849: | ||
====Text changes==== | ====Text changes==== | ||
*The original Japanese script is restored. | *The original Japanese script is restored. | ||
*Text that mentioned pressing {{button|n64|B}} to read | *Text that mentioned pressing {{button|n64|B}} to read [[sign]]s in both the original Japanese and localized scripts now additionally mentions {{button|n64|A}} can be pressed as an alternative. | ||
====Audiovisual changes==== | ====Audiovisual changes==== | ||
| Line 1,802: | Line 1,876: | ||
==Notable mistakes and errors== | ==Notable mistakes and errors== | ||
[[File:SM64 It That Really You.png|thumb|It that really you???]] | |||
*If the player copies a save file to another file that already has data, it will say "Save Data '''Exits'''" instead of "Save Data Exists." This was fixed in ''[[Super Mario 3D All-Stars]]''. | *If the player copies a save file to another file that already has data, it will say "Save Data '''Exits'''" instead of "Save Data Exists." This was fixed in ''[[Super Mario 3D All-Stars]]''. | ||
*On the floating island of the [[Bob-omb Battlefield]], one of the | *On the floating island of the [[Bob-omb Battlefield]], one of the [[sign]]s says, "Pull back '''to to''' fly up." This was fixed in ''Super Mario 3D All-Stars''. | ||
*On [[Cool, Cool Mountain]], the Headless Snowman says, "Have you run '''in to''' any headhunters lately??" instead of "into." | *On [[Cool, Cool Mountain]], the Headless Snowman says, "Have you run '''in to''' any headhunters lately??" instead of "into." | ||
*At the end of the game, when Mario speaks to [[Yoshi]] on the castle roof, he says, "Mario!!! '''It''' that really you???" instead of "Mario!!! Is that really you???" | *At the end of the game, when Mario speaks to [[Yoshi]] on the castle roof, he says, "Mario!!! '''It''' that really you???" instead of "Mario!!! Is that really you???" | ||
| Line 1,811: | Line 1,886: | ||
==Pre-release and unused content== | ==Pre-release and unused content== | ||
{{main|List of Super Mario 64 pre-release and unused content}} | {{main|List of Super Mario 64 pre-release and unused content}} | ||
One unused asset is the [[Blargg]], which is still in the game's data, and would have appeared in Lethal Lava Land, Bowser in the Fire Sea, and Wing Mario Over the Rainbow. Also, the [[Big Boo]] held a key instead of a Star inside him. The purpose of the keys was to unlock many of the doors in Big Boo's Haunt—there was even a "key counter." 32 levels were planned for the game, but only fifteen of them made it into the final product. | One unused asset is the [[Blargg]], which is still in the game's data, and would have appeared in Lethal Lava Land, Bowser in the Fire Sea, and Wing Mario Over the Rainbow. Also, the [[Big Boo (character)|Big Boo]] held a key instead of a Star inside him. The purpose of the keys was to unlock many of the doors in Big Boo's Haunt—there was even a "key counter." 32 levels were planned for the game, but only fifteen of them made it into the final product. | ||
==Staff== | ==Staff== | ||
| Line 1,872: | Line 1,947: | ||
|colspan=2|[http://www.gamerankings.com/n64/198848-super-mario-64/index.html 96.41%] | |colspan=2|[http://www.gamerankings.com/n64/198848-super-mario-64/index.html 96.41%] | ||
|} | |} | ||
===Sales=== | ===Sales=== | ||
''Super Mario 64'' is the best-selling game for the [[Nintendo 64]], selling 11.62 million copies worldwide, as of December 31, 2009. | ''Super Mario 64'' is the best-selling game for the [[Nintendo 64]], selling 11.62 million copies worldwide, as of December 31, 2009. | ||
==Appearances in other media== | ==Appearances in other media== | ||
{{rewrite|Explain in which books it has been adapted|section=y}} | {{rewrite-expand|Explain in which books it has been adapted|section=y}} | ||
{{construction|section=y}} | {{construction|section=y}} | ||
''Super Mario 64'' has received various manga adaptations. | ''Super Mario 64'' has received various manga adaptations. | ||
| Line 2,016: | Line 2,090: | ||
*''[[Paper Mario: Sticker Star]]'' – The theme "Slider" is covered during the minecart part of [[Bowser's Snow Fort]]. | *''[[Paper Mario: Sticker Star]]'' – The theme "Slider" is covered during the minecart part of [[Bowser's Snow Fort]]. | ||
*''[[Super Mario 3D World]]'' – A cover of the theme "Slider" plays when the player rides [[Plessie]]. In [[Shifty Boo Mansion]], a level in ''Super Mario 3D World'', there is a [[Green Star]] hidden behind a portrait of a Boo that can be entered like the pictures in Peach's Castle. | *''[[Super Mario 3D World]]'' – A cover of the theme "Slider" plays when the player rides [[Plessie]]. In [[Shifty Boo Mansion]], a level in ''Super Mario 3D World'', there is a [[Green Star]] hidden behind a portrait of a Boo that can be entered like the pictures in Peach's Castle. | ||
*''[[Mario Kart 8]]'' / ''[[Mario Kart 8 Deluxe]]'' – The merry-go-round music from Big Boo's Haunt can be heard near the Aqua Cups ride in [[Water Park]].<br>As part of their promotion of Wave 2 of the ''[[Mario Kart 8 Deluxe – Booster Course Pass]]'', several official ''Mario Kart'' {{wp|Facebook}} pages localized for European audiences posted a screenshot showing [[Tanooki Mario]] driving near a [[penguin]] in {{classic | *''[[Mario Kart 8]]'' / ''[[Mario Kart 8 Deluxe]]'' – The merry-go-round music from Big Boo's Haunt can be heard near the Aqua Cups ride in [[Water Park]].<br>As part of their promotion of Wave 2 of the ''[[Mario Kart 8 Deluxe – Booster Course Pass]]'', several official ''Mario Kart'' {{wp|Facebook}} pages localized for European audiences posted a screenshot showing [[Tanooki Mario]] driving near a [[penguin]] in {{classic link|GBA|Snow Land}}, with descriptions that translate to "Penguins never forget" or "A penguin never forgets";<ref>MarioKartESP (August 17, 2022). [https://www.facebook.com/MarioKartESP/photos/3794688187321548/ Los pingüinos nunca olvidan.] ''Facebook''. Retrieved November 27, 2022.</ref><ref>MarioKartItalia (August 17, 2022). [https://www.facebook.com/MarioKartItalia/photos/3240767289514140/ Un pinguino non dimentica mai.] ''Facebook''. Retireved November 27, 2022. ([https://archive.ph/EzWoU Archived] via November 27, 2022, 22:01:36 UTC via archive.today.)</ref><ref>MarioKartNL (August 17, 2022). [https://www.facebook.com/MarioKartNL/photos/5305106349602508/ Een pinguïn vergeet nooit.] ''Facebook''. Retireved November 27, 2022. ([https://archive.ph/vVVe0 Archived] via November 27, 2022, 22:04:13 UTC via archive.today.)</ref><ref>MarioKartPT (August 17, 2022). [https://www.facebook.com/MarioKartPT/photos/4774626602636935/ Os pinguins nunca esquecem.] ''Facebook''. Retireved November 27, 2022. ([https://archive.ph/6iAPE Archived] via November 27, 2022, 22:02:38 UTC via archive.today.)</ref> the descriptions, together with the picture, likely reference a popular gameplay act in ''Super Mario 64'' wherein players would intentionally drop the [[Baby Penguin]] off-bounds in the course Cool, Cool Mountain,<ref>March 6, 2013. [https://www.reddit.com/r/gaming/comments/19sxq6/we_all_did_this_super_mario_64/ We all did this - [Super Mario 64<nowiki>]</nowiki>]. ''Reddit'' (/r/gaming). Retrieved November 27, 2022.</ref><ref>Fairfax, Zackerie (March 10, 2021). [https://screenrant.com/super-mario-64-baby-penguin-cliff-kill-save/ What Super Mario 64's Penguin Reveals About Its Players]. ''screenrant.com''. Retrieved November 27, 2022. ([https://web.archive.org/web/20210719013026/https://screenrant.com/super-mario-64-baby-penguin-cliff-kill-save/ Archived] July 19, 2021, 01:30:26 UTC via Wayback Machine.)</ref> implying that Mario is culpable for this act and that penguins hold a grudge against him as a result. | ||
*''[[Mario Party: Island Tour]]'' – A cover of "Koopa's Road" plays in [[Bowser's Peculiar Peak]]. | *''[[Mario Party: Island Tour]]'' – A cover of "Koopa's Road" plays in [[Bowser's Peculiar Peak]]. | ||
*''[[Super Smash Bros. for Nintendo 3DS / Wii U]]'' – Peach's Castle (64) appears as a DLC stage, which returns from the original ''Super Smash Bros.'' In ''[[Super Smash Bros. for Wii U]]'', the original version of the main theme returns, and an arranged version of the theme is featured in the DLC stage in both games. | *''[[Super Smash Bros. for Nintendo 3DS / Wii U]]'' – Peach's Castle (64) appears as a DLC stage, which returns from the original ''Super Smash Bros.'' In ''[[Super Smash Bros. for Wii U]]'', the original version of the main theme returns, and an arranged version of the theme is featured in the DLC stage in both games. | ||
| Line 2,031: | Line 2,105: | ||
==Names in other languages== | ==Names in other languages== | ||
{{foreign names | {{foreign names | ||
| | |Jpn=スーパーマリオ{{ruby|64|六十四(ろくじゅうよん)}} | ||
| | |JpnR=Sūpā Mario Rokujūyon | ||
| | |JpnM=''Super Mario 64'' | ||
|ChiS=神游马力欧 (iQue Player) | |ChiS=神游马力欧 (iQue Player) | ||
|ChiSR=Shényóu Mǎlì'ōu | |ChiSR=Shényóu Mǎlì'ōu | ||
| Line 2,046: | Line 2,120: | ||
}} | }} | ||
== | ==Notes and references== | ||
===Notes=== | ===Notes=== | ||
{{footnote|note|A|{{cite|author=Mizu-chan|title=''Miniature Japanese garden''|location=Minato, Tokyo|publisher=[https://muza-chan.net/ Muza-chan's Gate to Japan]|date=21 Jan. 2014}}}} | {{footnote|note|A|{{cite|author=Mizu-chan|title=''Miniature Japanese garden''|location=Minato, Tokyo|publisher=[https://muza-chan.net/ Muza-chan's Gate to Japan]|date=21 Jan. 2014}}}} | ||
{{footnote|note|B|Private correspondence with shmuplations clarifies that the text they translated as "diorama"<ref name=shmup/> was written as 箱庭 (''hakoniwa'') in the original text.<ref name=shoga/>}} | {{footnote|note|B|Private correspondence with shmuplations clarifies that the text they translated as "diorama"<ref name=shmup/> was written as 箱庭 (''hakoniwa'') in the original text.<ref name=shoga/>}} | ||
=== | ===References=== | ||
<references/> | <references/> | ||
==External links== | ==External links== | ||
{{NIWA|NWiki=1|StrategyWiki=1|Ukikipedia=1}} | {{NIWA|NWiki=1|StrategyWiki=1|Ukikipedia=1}} | ||
{{TCRF|Super Mario 64 (Nintendo 64)}} | |||
*[https://www.nintendo.com/jp/character/mario/en/history/64/index.html Mario Portal Game Archive (EN)] | |||
*[https://www.nintendo.com/jp/character/mario/history/64/index.html Mario Portal Game Archive (JP)] | |||
*[https://www.nintendo.co.jp/n01/n64/software/nus_p_nsmj/index.html Official ''Super Mario 64'' Japanese website] | *[https://www.nintendo.co.jp/n01/n64/software/nus_p_nsmj/index.html Official ''Super Mario 64'' Japanese website] | ||
*[https://www.nintendo.co.jp/n01/n64/software/s_camp/sm64/index.html Official ''Super Mario 64: Shindō Pak Taiō Version'' Japanese website] | *[https://www.nintendo.co.jp/n01/n64/software/s_camp/sm64/index.html Official ''Super Mario 64: Shindō Pak Taiō Version'' Japanese website] | ||
*[https://www.ique.com/games/11011.htm#top ''Super Mario 64'' Chinese website] | *[https://www.ique.com/games/11011.htm#top ''Super Mario 64'' Chinese website] | ||
*[https://m1.nintendo.net/docvc/NUS/USA/NSME/NSME_E.pdf American English instruction booklet] | *[https://m1.nintendo.net/docvc/NUS/USA/NSME/NSME_E.pdf American English instruction booklet] | ||
*[https://m1.nintendo.net/docvc/NUS/EUR/NSMP/NSMP_G.pdf European English instruction booklet] | |||
*[https://m1.nintendo.net/docvc/NUS/USA/NSME/NSME_F.pdf French instruction booklet] | |||
*[https://m1.nintendo.net/docvc/NUS/JPN/NSMJ/NSMJ_J.pdf ''Super Mario 64: Shindō Pak Taiō Version'' Japanese instruction booklet] | *[https://m1.nintendo.net/docvc/NUS/JPN/NSMJ/NSMJ_J.pdf ''Super Mario 64: Shindō Pak Taiō Version'' Japanese instruction booklet] | ||
{{SM64}} | {{SM64}} | ||
| Line 2,065: | Line 2,144: | ||
{{N64}} | {{N64}} | ||
{{Virtual Console}} | {{Virtual Console}} | ||
{{NSO}} | |||
[[de:Super Mario 64]] | [[de:Super Mario 64]] | ||
[[it:Super Mario 64]] | [[it:Super Mario 64]] | ||
| Line 2,074: | Line 2,154: | ||
[[Category:1996 games]] | [[Category:1996 games]] | ||
[[Category:1997 games]] | [[Category:1997 games]] | ||
[[Category:2003 games]] | |||
[[Category:Player's Choice]] | [[Category:Player's Choice]] | ||
Latest revision as of 17:46, January 19, 2025
- This article is about the original Nintendo 64 game. For the Nintendo DS remake, see Super Mario 64 DS. For the slot machine based on the game, see Super Mario 64 (slot machine).
| Super Mario 64 | |||||||||||||||
|---|---|---|---|---|---|---|---|---|---|---|---|---|---|---|---|
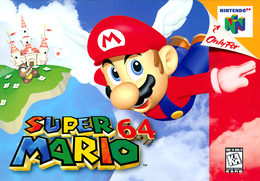 For alternate box art, see the game's gallery. | |||||||||||||||
| Developer | Nintendo EAD | ||||||||||||||
| Publisher | Nintendo | ||||||||||||||
| Platform(s) | Nintendo 64, Nintendo 64DD, Virtual Console (Wii, Wii U), Nintendo 64 - Nintendo Switch Online | ||||||||||||||
| Release date | Nintendo 64: Player's Choice: Virtual Console (Wii): Virtual Console (Wii U): Nintendo 64 - Nintendo Switch Online: | ||||||||||||||
| Language(s) | English (United States) French (France) German Japanese Simplified Chinese | ||||||||||||||
| Genre | 3D platformer, action-adventure | ||||||||||||||
| Rating(s) | Original release:
| ||||||||||||||
| Mode(s) | Single player | ||||||||||||||
| Format | Nintendo 64:
iQue Player:
Nintendo 64DD:
Magneto-optical drive Wii: Nintendo Switch: | ||||||||||||||
| Input | Nintendo 64: iQue Player: Wii: Wii U: Nintendo Switch: | ||||||||||||||
| Serial code(s) | |||||||||||||||
Super Mario 64 is a 3D action-adventure platform game released for the Nintendo 64 in 1996 for Japan and North America and in 1997 for Europe and Australia. It is the eighth entry in the Super Mario series.[18][19] This game was one of two (three in Japan) launch titles for the Nintendo 64, along with Pilotwings 64, which helped drive initial sales of the console. Despite its name, Super Mario 64 runs in 32-bit, like most Nintendo 64 games at the time. Since its release, Super Mario 64 has been widely acclaimed as one of the greatest and most important games of all time.[20][21][22]
In entering the third dimension, Super Mario 64 largely eschews the obstacle course-based design of the 2D Mario platformers for a mission structure and gameplay focused on exploring a larger area. Though not the first 3D platform game, Super Mario 64 codified many of the controls and design conventions of the genre.[23] Being the first 3D Super Mario game, Super Mario 64 has introduced several moves, including triple-jumping, ground-pounding, long-jumping, diving, and side-somersaulting, which would be used in most subsequent installments of the Super Mario series. Punching and kicking were also introduced but would not appear in any later title other than its DS remake. The game popularized Charles Martinet's portrayal as Mario (being the first game of the Super Mario series to feature his voice) and Princess Toadstool's name as Peach in the West, and made them both series standards.
In 1996, a Nintendo 64DD version of the game was shown at Shoshinkai 1996.[24] A sequel, named Super Mario 64 2, was being developed for the Nintendo 64DD, but it was canceled due to the 64DD's commercial failure.
On November 17, 2003, Super Mario 64 was rereleased for the iQue Player as one of the launch titles, and a timed demo of the game was bundled with every iQue Player. The game was digitally rereleased for the Wii's Virtual Console service in November 2006 and for the Wii U's Virtual Console service in April 2015. Super Mario 64 was among the first games released on both Virtual Console services.
A sequel titled Super Mario Sunshine was developed for the Nintendo GameCube and released in 2002. In 2004, a remake was released for the Nintendo DS, titled Super Mario 64 DS. It has several differences, notably the inclusion of Luigi, Yoshi, and Wario as playable characters. An emulation of the 1997 rerelease of the game is bundled in with Super Mario 3D All-Stars for the Nintendo Switch, though with upscaled graphics and a redrawn HUD. The original game is one of the launch titles for Nintendo 64 - Nintendo Switch Online.
As of 2015, Super Mario 64 has sold over 11 million copies worldwide[25] and is marked as the best-selling Nintendo 64 game. The game became the second-best-selling game on the Wii's Virtual Console after Super Mario Bros., as of June 2007.[26]
Storyline
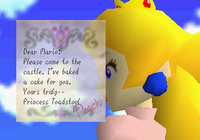
The following is the story given on pages 4 and 5 of the Super Mario 64 instruction booklet. The colors given in the instruction booklet signify who is talking: Mario, Princess Peach, Bowser, and Toad, with black being narration.
"Mario, please come to the castle. I've baked a cake for you. Yours truly, Princess Toadstool."
"Wow, an invitation from Peach! I'll head out right away. I hope she can wait for me!"
Mario is so excited to receive the invitation from the Princess, who lives in the Mushroom Castle, that he quickly dresses in his best and leaves right away."Hmmm, something's not quite right here... It's so quiet..."
Shaking off his uneasy premonition, Mario steps into the silent castle, where he is greeted by the gruff words,"No one's home! Now scram! Bwa, ha, ha."
The sound seems to come from everywhere."Who's there?! I've heard that voice somewhere before..."
Mario begins searching all over the castle. Most of the doors are locked, but finding one open, he peeks inside. Hanging on the wall is the largest painting he has ever seen, and from behind the painting comes the strangest sound that he has ever heard..."I think I hear someone calling. What secrets does this painting hold?"
Without a second thought, Mario jumps at the painting. As he is drawn into it, another world opens before his very eyes.And so begins the grandest of all adventures!
Once inside the painting, Mario finds himself in the midst of battling Bob-ombs. According to the Bob-omb Buddies, someone...or something...has suddenly attacked the castle and stolen the "Power Stars". These stars protect the castle; with the stars in his control, the beast plans to take over the Mushroom Castle.
To help him accomplish this, he plans to convert the residents of the painting world into monsters as well. If nothing is done, all those monsters will soon begin to overflow from inside the painting.
"A plan this maniacal, this cunning...this must be the work of Bowser!"
Princess Toadstool and Toad are missing, too. Bowser must have taken them and sealed them inside the painting. Unless Mario recovers the Power Stars immediately, the inhabitants of this world will become Bowser's army."Well, Bowser's not going to get away with it, not as long as I'm around!"
Stolen Power Stars are hidden throughout the painting world. Use your wisdom and strength to recover the Power Stars and restore peace to the Mushroom Castle."Mario! You are the only one we can count on."
Gameplay
The player controls Mario. In addition to his jump and a basic punch string, Mario's repertoire includes a variety of advanced acrobatic moves (many of them carried over from the 1994 game Donkey Kong) accomplished through precise timing and various combinations of the analog stick and the jump button, such as the somersaulting Triple Jump and the low but far-ranged Long Jump. Eschewing the "Super Mario to Small Mario" mechanic found in most of the previous mainline games, Super Mario 64 employs an eight-sided health meter called the Power Meter, which is depleted when Mario makes contact with enemies or obstacles, and is replenished by collecting coins, running through Spinning Hearts, or submerging Mario in a body of water. Like the previous games, Super Mario 64 employs a life system, although as the game saves after most progression tasks, the effect of a Game Over is marginal.
When the player starts a game, Mario starts off outside the Mushroom Castle, a multi-floor hub mostly devoid of enemies and obstacles. Inside the castle are multiple rooms with paintings and other surfaces concealing portals to the game's various courses. The main goal of the game is to collect Power Stars. There is a total of 120 Power Stars in the game, though only 70 need to be collected in order to complete the game. The Power Stars are split between the fifteen main courses, nine secret courses that are smaller and usually contain only one or two Stars, and various secrets inside the Mushroom Castle. The main courses contain six numbered missions each plus a hidden Power Star for collecting 100 coins. Only a limited portion of the castle is explorable at first, but as Mario collects more Stars, he is able to open more rooms and unlock Bowser levels. Defeating Bowser in his first two levels opens the castle's basement and top floor, respectively.
The game employs a mission-based structure. When the player enters a main course, a screen shows them the Stars they have collected and the newest mission unlocked, each having a title hinting at the mission tasks. Missions vary widely in nature, ranging from defeating enemies to reaching a point of interest on the map to racing friendly characters, though every course features a mission that requires collecting eight Red Coins scattered around the map. Accomplishing a mission rewards the player with a Power Star; collecting it boots Mario back to the room he came from, although collecting 100-Coin Stars allows him to stay on the map. The fifteen main courses consist of large open worlds, with many points of interest and paths, and as such, many of the missions can be completed out of order. Some missions, however, can be completed only by selecting a specific scenario from the course-selection screen, as to prompt the appearance or disappearance of a character or object needed to complete the task.
The courses feature various enemies who chase or attack Mario on sight. Most enemies can be defeated by kicking, punching, or jumping on them and leave coins when defeated; some missions also require Mario to defeat a specific type of enemy. Multiple missions involve fighting a large boss, whose defeat usually involves a puzzle or more advanced maneuvering than standard enemies. Not all characters Mario can encounter are hostile, however. Friendly NPCs include Toads sealed inside the castle's walls who give hints or backstory when spoken to, Bob-omb Buddies who give clearance to use a cannon on the course, and mission-specific characters who challenge Mario to a race or ask him to fetch an object in exchange for a Power Star.
Various power-ups can help Mario on his adventure. Koopa Shells can be ridden on land, water, lava, or quicksand to provide temporary invincibility, and by hitting Cap Switches found in the secret courses, Mario can activate blocks containing the Wing Cap, Vanish Cap, and Metal Cap, whose powers are necessary to complete many of the missions. As the game is a showcase title for a new console and the first 3D Super Mario game, many aspects of the game showcase the Nintendo 64's features. Multiple sections take advantage of the analog stick's precision requiring Mario to walk slowly over narrow passageways or tiptoe to sneak up on enemies. Some bridges and platforms sway under Mario's weight.
Controls
The charts below refer to the original game and subsequent ports, such as those released through Virtual Consoles and Nintendo Switch Online. For the control scheme of the remake released for the Nintendo DS, click here. For the iteration included in Super Mario 3D All-Stars for Nintendo Switch systems, click here. A "→" (right arrow) conveys buttons to press in succession, and a "+" (plus sign) conveys buttons to press simultaneously. A "/" (slash) conveys an alternative combination of button presses for the action. The controls for the Wii U can be customized in the emulator settings, with the column below displaying the default mapping.
Nintendo 64, iQue, Wii, and Wii U controls
| Action(s) | Input(s) | |||
|---|---|---|---|---|
| Nintendo 64 Controller / iQue Player | Nintendo GameCube Controller | Classic Controller | Wii U controllers | |
| Mario controls | ||||
| Move | ||||
| Sidestep | ◀ |
◀ |
◀ |
◀ |
| Jump, swim, fire cannon | ||||
| Double-jump | Jump when making contact with the ground while moving (do twice) | |||
| Triple-jump, take off in Wing form | Jump when making contact with the ground while running (do thrice) | |||
| Side-somersault | ◀ |
◀ |
◀ |
◀ |
| Wall-kick | ||||
| Backward-somersault | ||||
| Long-jump | ||||
| Climb up ledge | ||||
| Hang on to wire net | ||||
| Grab or release pole | ||||
| Talk, read, engage object, punch | ||||
| Scroll text | ||||
| Kick | ||||
| Jump-kick | ||||
| Throw item | ||||
| Swing and toss Bowser by the tail | ||||
| Dive | ||||
| Slide-kick | ||||
| Sweep-kick | ||||
| Crouch | ||||
| Slide | ||||
| Crawl | ||||
| Ground-pound | ||||
| Lakitu Bro controls | ||||
| Rotate camera | ||||
| Zoom in, enter first-person view | ||||
| Zoom out | ||||
| Shift camera view | ||||
| Menu controls | ||||
| Navigate menu | ||||
| Confirm command | ||||
| Cancel command | ||||
| Display pause menu | ||||
Nintendo Switch controls
In addition to the controllers listed below, wireless Nintendo 64 Controllers are compatible with Nintendo Switch systems. Nintendo GameCube Controllers can be used through the GameCube Controller Adapter, but it is recognized as a wired Nintendo Switch Pro Controller by Super Mario 64.
| Action(s) | Input(s) | ||||||
|---|---|---|---|---|---|---|---|
| Dual Joy-Con / Nintendo Switch Pro Controller / Nintendo Switch Lite | Horizontal Joy-Con | ||||||
| Mario controls | |||||||
| Move | |||||||
| Sidestep | ◀ |
◀ | |||||
| Jump, swim, fire cannon | |||||||
| Double-jump | Jump when making contact with the ground while moving (do twice) | ||||||
| Triple-jump, take off in Wing form | Jump when making contact with the ground while running (do thrice) | ||||||
| Side-somersault | ◀ |
◀ | |||||
| Wall-kick | |||||||
| Backward-somersault | |||||||
| Long-jump | |||||||
| Climb up ledge | |||||||
| Hang on to wire net | |||||||
| Grab or release pole | |||||||
| Talk, read, engage object, punch | |||||||
| Scroll text | |||||||
| Kick | |||||||
| Jump-kick | |||||||
| Throw item | |||||||
| Swing and toss Bowser by the tail | |||||||
| Dive | |||||||
| Slide-kick | |||||||
| Sweep-kick | |||||||
| Crouch | |||||||
| Slide | |||||||
| Crawl | |||||||
| Ground-pound | |||||||
| Lakitu Bro controls | |||||||
| Rotate camera | |||||||
| Zoom in, enter first-person view | |||||||
| Zoom out | |||||||
| Shift camera view | |||||||
| Menu controls | |||||||
| Navigate menu | |||||||
| Confirm command | |||||||
| Cancel command | |||||||
| Display pause menu | |||||||
Locations
Setting
Super Mario 64 takes place within the walls of the Mushroom Castle in the Mushroom Kingdom. It is the first Super Mario game to explicitly include the Mushroom Kingdom as a location since Super Mario Bros.: The Lost Levels. The game's levels, called "courses," are accessed through paintings hung on the walls, but some are more cryptically hidden or require the player to accomplish a task in the castle before becoming accessible. Unlike previous games, the courses are not naturally occurring places. They are "painting worlds" that Bowser has corrupted and modified to his liking using the stolen Power Stars. He has turned some of the inhabitants into monsters,[27][28] and there apparently is concern that his creations will escape the boundaries of the paintings and enter the real world.[29][30][31] Some paratextual material and subsequent titles present the courses introduced in this game as visitable places outside the paintings.
Generally, a course is a sprawling location with interactive environmental elements and several levels of elevation. Courses often have subareas and collectibles obscured in the landscape that passively encourage the player to rotate the camera and explore. Most courses feature prominent landmarks, such as the mountain on the Bob-omb Battlefield and the volcano in Lethal Lava Land, that provide the player with a consistent point of reference that mitigates their chance of getting lost.[32] Like its more immediate predecessors, courses are themed after real-life ecosystems (i.e., deserts, mountains, seas) and more fantastical settings (i.e., haunted houses, clocktowers, rainbow roads in the sky). The theme informs the types of objects that can be interacted with in the level, the types of enemies that can be encountered, and the non-playable characters that can be spoken to. For example, cactus enemies, a condor, and quicksand are in the desert-themed Shifting Sand Land. Penguins, slippery ice, and deep snow appear on Cool, Cool Mountain and Snowman's Land. Most courses contain switches and strikable objects that modify elements of the course, such as the Crystal Taps in Wet-Dry World.
Unlike the levels of prior two-dimensional entries, the courses in this game are open-ended and largely do not funnel the player towards one goal. This was an intentional departure from the level design principals of prior games because the development team did not believe they could be replicated for a fun experience in a three-dimensional environment. Director and series creator Shigeru Miyamoto wanted Super Mario 64 to be a game where players "create their own vision," a decision partially influenced by the technical difficulty of making a precise jump in a 3D environment.[33][34][32] This mindset manifested in levels where players were largely free to interact with the world in ways they wanted to, with larger platforms and sprawling spaces that encouraged exploration rather than carry out precise actions to reach a goal. The courses themselves were created using hakoniwa or "box garden" design principals.[35][34] B[32][36] A hakoniwa is a intricately-arranged miniature garden within an enclosed space, with layers of depth and detail that become apparent to an onlooker when carefully examined.[37][38][36] Applying these principals allowed the development team to create complex levels that surprise players, another important tenet during development.[33][34][32] In the West, where creating miniature gardens is not as culturally prevalent, these types of levels are most often likened to sandboxes.[36]
Courses
Overview
Most of the courses are accessed through paintings inside the Mushroom Castle, the hub world of the game. The surface of a painting ripples like water when Mario is near, and he is brought to the course it represents by physically jumping through it. Accessing levels in this manner is a departure from the overworld system in previous platform games (see below). However, the castle is divided into several sections that are analogous to the world structure of proceeding games, where multiple levels are available to the player on a single section and the player must complete a boss-dedicated course in order to gain access to the next one. As Mario advances through the castle, he encounters some courses that are accessed through portals other than paintings, such as Shifting Sand Land, which is accessed through what looks like a brick wall at a dead end in the basement, and Tick Tock Clock, which is entered through a clock face. The locations of courses on subsequent sections are generally more complex and are puzzles in themselves, such as the painting for Snowman's Land that is viewable only through a mirror.[39]
Rather than present a unilateral scenario that leads to a single spatially fixed goal, most courses in the game host multiple objectives called "missions" that each have a goal in a different location from each other. For most courses, entering a painting (or equivalency) brings the player to a mission-selection screen, where selecting one sends Mario to the course within the confines of the mission's specific scenario and its unique goal. In nearly all courses, this goal is a Power Star, a collectible token resembling the Super Star of prior entries. Touching one completes the level and returns Mario to the castle. The number of Power Stars collected is tracked by the game and communicated to the player on the user interface in the upper right corner of the screen. Accumulating Power Stars is how new courses become accessible to the player. On the first floor, some ★ doors that seal away certain paintings open only after Mario has collected a specified number of Stars. Mario can access a new section only after clearing the current one's Bowser Course, itself becoming accessible only after a specified number of Power Stars has been obtained. However, there are 120 obtainable Power Stars in a game that requires only 70 to access the final level. The player has some discretion on how many or which ones are obtained to finish the game, as well as the order.
In most courses, one mission correlates with one Power Star, and its name on the mission-selection screen hints at the Star's location in the course. However, some Power Stars can be encountered outside their dedicated missions and collected. Some mission-dedicated Power Stars become available to the player only once they have cleared specific missions (e.g., Footrace with Koopa the Quick becomes available only after Big Bob-omb on the Summit has been completed) or accomplish tasks outside the paintings (e.g., striking the Cap Switch in the Cavern of the Metal Cap makes the titular power-up accessible in Through the Jet Stream, in which it is not optional). Certain actions completed within a course permanently change elements within it regardless of the mission subsequently played. Recurring examples are the cannons found in most courses, which Mario can enter and launch from to reach distant areas. A cannon becomes useable in a course after Mario has spoken to a Bob-omb Buddy, a friendly non-playable character that controls the cannon, and it remains accessible for all subsequent revisits.
Like in Super Mario World 2: Yoshi's Island and a departure from previous Super Mario games, there is no time limit in effect within courses, but there are a few cases where there is one. For example, Blue Coins appear for only a brief period of time once a Blue Coin Block is struck, and Mario must outrun Koopa the Quick in order to earn a Power Star. All power-ups in this game change Mario's form for a limited time, and one cannot be brought outside a course even if he completes it while still under its effect—another similarity to Yoshi's Island.
There are two different types of courses in Super Mario 64.
- Normal Courses,[40] or main courses,[41] contain six dedicated missions and an unlisted 100-coin mission. Some of the dedicated missions build off each other environmentally or narratively. (This means the events that transpire in the completion of one mission are reflected in the events of the subsequent mission.) However, some Power Stars can be encountered before the mission-dedicated one and can be collected, resulting in some instances where the Stars are obtained out of the intended "order." These courses are the most intricate levels in the game. Most include objects that can enable quick traversal between areas, such as cannons and Warp Points. Some courses include accessible subareas, such as the volcano in Lethal Lava Land and the pyramid in Shifting Sand Land. There are 15 Normal Courses in the game, and they are the only levels explicitly numbered and listed on the pause menu.
- Mini courses[41][42] are smaller and structured more like traditional obstacle courses that emphasize precise platforming. They lack dedicated missions to select, and most contain only one Power Star. Power Stars obtained in mini courses are counted together as "Secret Stars" on the pause menu. Mini courses can further be classified into three subtypes, as detailed below.
- Bowser Courses[40] (also lowercased)[43] lead to an arena where Mario must defeat Bowser. Each Bowser Course features a Power Star obtained by collecting eight Red Coins, but this does not complete the level. In the first two courses, defeating Bowser awards Mario a key, a different kind of token that completes the level when touched. The key is used to permanently unlock the Key Door to another section of the castle. In Bowser in the Sky, the final course, defeating Bowser releases the Jumbo Star. Collecting it does not contribute to the player's Power Star total, instead freeing Princess Peach. There are three Bowser Courses in the whole game, one for each section.
- Secret Courses[40] (also lowercased)[44] are cryptically hidden in the castle. All Secret Courses have at least one Power Star to collect, with the sole exception being The Princess's Secret Slide, which has two. None of these courses are accessed through paintings, and they often require the player to investigate a space within the castle to find.[39] There are three in the game.
- Switch Cap Courses[40] are where Mario is under the effect of a power-up immediately upon entering a course and is needed to reach a Cap Switch. When one is stood on, it activates and causes the power-up to permanently become accessible within the Normal Courses. They are analogous to the Switch Palaces in Super Mario World, though unlike in them, striking the switch does not make Mario exit the course. These are the only courses (along with Wing Mario Over the Rainbow) in the game where Mario can fall down a pit without losing a life; he is instead brought back to the castle.
Table
There are a number of courses in each section. At least four of them are Normal Courses, and at least two are mini courses. One of the mini courses is always a Bowser Course. Including the Mushroom Castle, there are 25 courses in the game. The chart below lists all of them. Each one is provided with a screenshot, a brief description, and a list of its missions. The order that the courses and missions are listed follows their organization in the Super Mario 64 Player's Guide.[45] Only the names of the missions in Normal Courses are provided in-game. When available, the missions that lack in-game names, such as the 100-coin missions, are also derived from the Super Mario 64 Player's Guide. Where no such name exists, the mission assumes the name of its course.
| Courses | ||
|---|---|---|
| 01. Bob-omb Battlefield |
Missions | |
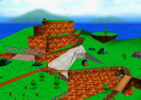
|
||
| Grassy fields surrounding a spiraled mountain. A battle is waged here between the peaceful Bob-omb Buddies and the enemy Bob-ombs. Once the battle is over, the Bob-omb Buddies allow Mario to access their cannons. There is a floating island in the east and a barred cave towards the center with a Chain Chomp leashed in front of it. Unlock criterion: Enter the Mushroom Castle. | ||
| 02. Whomp's Fortress |
Missions | |
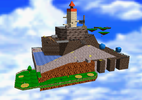
|
||
| A fortress in the sky. It is ruled by the Whomp King, who sits at the top of the fortress. The path leading to him has falling platforms and stone enemies. Once he is defeated, a climbable tower appears at the top. A chain of floating islands is in the northeast. They can be reached with the help of Hoot, a sleepy owl found in the course's single tree. Unlock criterion: Collect a Power Star. | ||
| 03. Jolly Roger Bay |
Missions | |
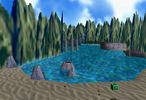
|
||
| A cove containing the wreck of a sunken ship. A giant moray eel called Unagi nests in the ship and stirs when approached. An underwater corridor in the northwest leads to a cave that holds Treasure Chests. Solving the puzzle of the chests reveals a Power Star. Unlock criterion: Collect 3 Power Stars. | ||
| 04. Cool, Cool Mountain |
Missions | |
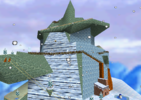
|
||
| A snow-covered mountain inhabited by penguins and snowpeople. Wooden bridges and an operating gondola are built into the side of the mountain. A log cabin is near its peak. It contains the Cabin's Snow Slide, where Mario is challenged to a race by the Big Penguin. Unlock criterion: Collect 3 Power Stars. | ||
| Bowser in the Dark World |
Missions | |
|
||
| A winding path in a cavernous void. The path bears Amps and shifting platforms. It ultimately leads to Bowser, who is fought on a circular platform surrounded by floating bombs. Unlock criterion: Collect 8 Power Stars. | ||
| The Princess's Secret Slide |
Missions | |
|
||
| A carpeted slide hidden on the mezzanine. Reaching the bottom of the slide gives Mario access to a Power Star—the first Secret Star available to the player. Reaching the bottom within 21 seconds awards Mario a second one. Unlock criterion: Collect a Power Star. | ||
| The Secret Aquarium |
Mission | |
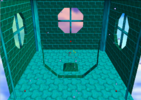
|
||
| A closed tank housing blue fish and Red Coins. Collecting all of the Red Coins reveals a Secret Star. The aquarium is accessed through a little alcove in the same room that holds the painting for Jolly Roger Bay. Unlock criterion: Collect 3 Power Stars. | ||
| Tower of the Wing Cap |
Mission | |
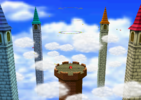
|
||
| Towers in a sea of clouds. The turret in the middle holds the Wing Cap Switch that makes the Wing Cap permanently available in Normal Courses once struck. Red Coins appear around the towers and can be collected by Mario only in his Wing form. Unlock criterion: Collect 10 Power Stars. | ||
| 05. Big Boo's Haunt |
Missions | |
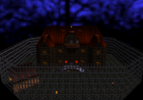
|
||
| The haunted house hidden in Princess Peach's courtyard. The rooms of the house contain Boos and animated furniture that try to strike Mario. Navigation requires solving puzzles and memorizing patterns in the halls. Failing to do so often brings Mario to the house's flooded basement, where a spinning carousel filled with Boos can be found. Unlock criteria: Collect 12 Power Stars, and defeat the Big Boo that holds the miniature cage in the courtyard. | ||
| 06. Hazy Maze Cave |
Missions | |
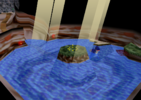
|
||
| An underground labyrinth filled with dead ends, traps, and bottomless pits. There are two floors. The first one has a large chamber in the southeast with a controllable elevator, hallways with rolling rocks in the northwest, and a maze with strange clouds in the northeast. The lower floor leads to a pool that holds Dorrie. Unlock criterion: Clear Bowser in the Dark World. | ||
| 07. Lethal Lava Land |
Missions | |
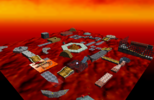
|
||
| Platforms in a lava sea. Some of them shift back and forth or can be manually rolled. They surround a small volcano that can be physically entered. Bullies appear in this course and knock Mario into lava on contact. Sparkies and other fiery obstacles that burn him when touched also appear. Unlock criterion: Clear Bowser in the Dark World. | ||
| 08. Shifting Sand Land |
Missions | |
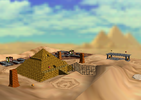
|
||
| Desert sands surrounding a pyramid. Klepto flies through the sky here. Much of the course is covered in quicksand and steep dunes. Little tornados can be used to avoid obstacles. Narrow walkways are found in the northeast, and a small oasis is in the northwest. The pyramid can be entered, where a labyrinth leads to Eyerok. Unlock criterion: Clear Bowser in the Dark World. | ||
| 09. Dire, Dire Docks |
Missions | |
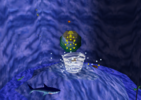
|
||
| Deep water. A whirlpool is at the center of the seabed and is circled by Sushi and a Manta Ray. A corridor in the east leads to a wider area where Bowser has hidden a submarine. Unlock criterion: Collect 30 Power Stars. | ||
| Bowser in the Fire Sea |
Missions | |
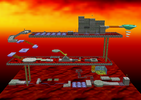
|
||
| Three narrow pathways surrounded by lava. Portions of the course gently rise and fall in lava, making traversal challenging. The pathway leads to the second battle against Bowser. Unlock criterion: Complete Board Bowser's Sub. | ||
| Cavern of the Metal Cap |
Mission | |
|
||
| An underground streambed that holds the Metal Cap Switch. Striking it makes the Metal Cap accessible in other courses. The water moves rapidly in this course. If Mario is swept up in it, he is brought to the Castle Grounds. Unlock criterion: Clear Bowser in the Dark World. | ||
| Vanish Cap Under the Moat |
Mission | |
|
||
| A hidden area accessible only once the castle's moat is drained. When Mario enters the course, he is in his Vanish form, and he must navigate the course while the power-up is still in effect to access the Vanish Cap Switch. Striking it makes the Vanish Cap accessible in other courses. Unlock criteria: Clear Bowser in the Dark World and drain the castle's moat. | ||
| 10. Snowman's Land |
Missions | |
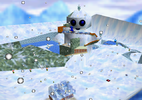
|
||
| A chilly land surrounding a giant snowman. Slippery ice and freezing ponds appear in this course. The Chill Bully is on a floating island of ice in the east. Narrow paths allow Mario to ascend the snowman, but he begins to blow gusts of air when he nears his head. An enterable igloo is near the base of the snowman. Unlock criterion: Clear Bowser in the Fire Sea. | ||
| 11. Wet-Dry World |
Missions | |
|
||
| A flooded empty town. There are Crystal Taps at several locations in the town that cause the water level to rise or fall. There is a hidden downtown area that can be accessed only through the cage in the southeast. Unlock criterion: Clear Bowser in the Fire Sea. | ||
| 12. Tall, Tall Mountain |
Missions | |
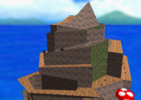
|
||
| A tall mountain surrounded by Mushroom Platforms high above the sea. Gusts of wind and the Fwoosh make ascending the mountain challenging. The entrance to the Mysterious Mountain Slide can be found near the summit. Ukkikis live in this course, one of which attempts to steal Mario's cap. Unlock criterion: Clear Bowser in the Fire Sea. | ||
| 13. Tiny-Huge Island |
Missions | |
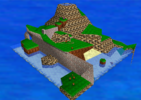
|
||
| An island that presents itself in two different ways depending on which painting it is accessed from in the castle. One is large with vast areas and giant versions of normal enemies. Mario can easily access the interior of this version of the island, which is home to Wiggler. The other is tiny with small enemies. Changing the terrain in one version of the island affects the other two, and doing so is required to obtain all of its Power Stars. Unlock criterion: Clear Bowser in the Fire Sea. | ||
| 14. Tick Tock Clock |
Missions | |
|
||
| A vertical obstacle course within the tower's clock. Moving platforms are found throughout the clockwork, and they can help Mario reach hidden alcoves or throw him back towards the bottom. The speed of these platforms (and whether they move at all) is determined by where the clock's hands are positioned when he enters the course. Unlock criterion: Collect 50 Power Stars. | ||
| 15. Rainbow Ride |
Missions | |
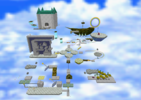
|
||
| Floating islands and moving platforms high in the sky. Magic carpets travel along rainbows in large stretches of the course, one of which feeds through the Cloud House. The Rainbow Cruiser can be found in the northeast. Unlock criterion: Collect 50 Power Stars. | ||
| Bowser in the Sky |
Missions | |
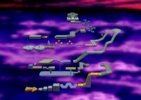
|
||
| A challenging obstacle course that leads to the final confrontation with Bowser. Some of the platforms on this course allow Mario to walk up walls if he maintains momentum, while others shift under his weight. Bowser starts to break the arena he is fought on, leaving it in the shape of a five-pointed star. The reward for defeating him, the Jumbo Star, is not incorporated into Mario's total Power Star count. Unlock criterion: Collect 70 Power Stars. | ||
| Wing Mario Over the Rainbow |
Mission | |
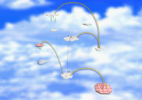
|
||
| Clouds and checkerboard platforms in the sky. The platforms are bridged by rainbows. Unlock criterion: Collect 50 Power Stars. | ||
| Mushroom Castle |
Missions | |
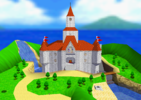
|
||
| Princess Peach's castle in the Mushroom Kingdom. Toads and MIPS are sealed inside. Some of the former give Mario a Power Star when spoken to. The Castle Grounds are the first area of the game and where Mario initially appears every time the player loads their save file. Nearly all other courses are accessed from inside the castle, with the Cavern of the Metal Cap and Vanish Cap Under the Moat being the sole exceptions. Unlock criterion: Begin a new save file. | ||
| Level chart information and legend: The Normal Courses are designated with the unique number they are given in-game. Bowser, secret, and Switch Cap Courses lack numerical designation and are listed as they appear in the Super Mario 64 Player's Guide. Three symbols convey attributes about each course: | ||
Mushroom Castle
- Main article: Peach's Castle
The Mushroom Castle is a connective space from which Mario can access the game's levels. It is a white-bricked palace with a red-tiled roof. Five towers are built into the castle: four at each corner and a large one in the center. Each one is topped with a spire, and the four outermost ones are also topped with a red pennant. A stained glass portrait of Princess Peach is above the front doors, in which Peach has been imprisoned by Bowser. The smaller windows on the castle are shaped like mushrooms. The Mushroom Castle overall bears a superficial resemblance to a keep. It is framed as the place where Peach lives in the Mushroom Kingdom and usually contains Power Stars for protection.[52] Several Toads, the princess's subjects, also live in the castle.
In the majority of prior platform games, the player selects levels on a map-like menu with a cursor. The cursor itself may represent the player character, as is done in Super Mario Land 2: 6 Golden Coins and Super Mario World 2: Yoshi's Island, but the degree of control the player has on the cursor is more limited than they would have in the actual levels. Super Mario 64 instead has a fully interactive level as the "map," where Mario controls exactly the same as he does in the courses, and the map itself is an expansive level with its own secrets to find.
The Castle Grounds are the first area in the game where the player takes control of Mario, and it is a risk-free environment for the player to familiarize themselves with his controls.[39][53][54][35][34] There are no enemies here, nor concrete objectives. While the player is directed to the castle in Peach's letter to Mario, nothing forces them to enter it, implicitly encouraging them to explore. The Castle Grounds are a grassy area with gently sloping hills, trees, picket fences, and a small lake that feeds into the castle's moat. Several readable signs that detail Mario's available actions are near his starting position, but they are not forced upon the player.
The castle's interior is divided into three sections analogous to the worlds of prior Super Mario games: a first floor and mezzanine, a basement and courtyard, and a second and third floor that leads to the central tower. With the exception of the basement, the castle's flooring has a checkerboard pattern and red carpeting. A hilly vista with a blue sky behind it is painted on the walls. The basement is a flooded dungeon-like area lit by torches that can burn Mario. One of the basement's corridors has a pair of brick pillars that, when ground-pounded, drain the moat. The courtyard is a grassy space behind the Mushroom Castle with a fountain at its center. It is filled with Boos, one of which contains a miniature carousel that holds Big Boo's Haunt. Among the courses of a section, Mario can typically play them in any order. There are some exceptions, such as at the start of the game, when only the Bob-omb Battlefield is initially accessible.
Rather than list them individually on the pause menu, all Power Stars collected from the mini courses are collectively listed as the castle's "Secret Stars," and indeed, most of them are well hidden when compared to the main courses in the game. Finding them necessitates exploration and puzzle-solving within the castle's walls. For example, the only way to access Vanish Cap Under the Moat is by draining the moat, the means of which are never explicitly communicated in-game but instead come from familiarity with Mario's moves. The window that leads to The Princess's Secret Slide is not in the center of its room, departing from what is established in the other rooms that contain paintings and can be found only if the player deviates from what is established. This design principal permeates throughout the castle and often awards the player 1UP Mushrooms, hidden courses, or interactable elements.[39][53]
As in the main courses, several non-playable characters appear in the Mushroom Castle. Toads (including the Toad, as relayed in some paratextual material)[52] can be found on each floor, where they provide gameplay tips and words of encouragement when prompted. Some of them give Mario a Power Star when spoken to. MIPS can be found hopping around the basement once Mario has obtained a certain number of Power Stars (see chart above). He will give Mario one if caught. Yoshi appears on the castle's roof after Mario has collected all 120 Stars. Mario can reach him with a cannon that opens on the Castle Grounds after completing Bowser in the Sky with all 120 Stars collected.
Characters
Mario
Owing to his removal during development, Super Mario 64 is one of the few Super Mario games not to feature Luigi, along with Super Mario Land, Super Mario Land 2: 6 Golden Coins, and Super Mario Sunshine. Many data structures in the code have unused references to Luigi's object slot, but he is considered irrecoverable from the final game's codebase.[55] A prerelease model and textures only surfaced through the Nintendo data leak. However, Luigi was included as a playable character in the game's Nintendo DS remake, Super Mario 64 DS.
| Name | Description |
|---|---|
 Mario |
The hero of the Mushroom Kingdom and the game's protagonist. He was invited to the Mushroom Castle by Princess Peach, only to find that she had been kidnapped by Bowser. Mario has significantly expanded movement options to reflect the 3D environment of Super Mario 64. Some notable new moves include the Triple Jump, the Wall Kick, the Pound the Ground attack, and a punch-punch-kick. Unlike in previous installments, Mario has a health meter and does not shrink in size if struck by an enemy. |
Non-playable characters
| Name | Description | Locations |
|---|---|---|
 Lakitu Bros. |
A pair of cloud-riding Koopas that are documenting Mario's quest to liberate the Mushroom Castle and rescue Princess Peach from Bowser. One Lakitu Bro is with Mario throughout the entirety of the game, serving as an in-game explanation for the title's 3D camera controls. He is generally unseen, but his reflection can be spotted in a large mirror on the second floor of the Mushroom Castle. The Lakitu Bros. work for the Kingdom News Network. | All courses |
Princess Peach |
The ruler of the Mushroom Kingdom. She invited Mario to the Mushroom Castle for cake, but she is missing by the time he arrives. Toad informs him that she was kidnapped by Bowser and sealed away within the castle's walls. The game follows Mario's quest to restore the castle's Power Stars and liberate the princess. | Castle Grounds |
 Toad |
One of Princess Peach's attendants and an old friend of Mario's. He is one of several Mushroom Retainers that have been trapped inside the castle. He gives Mario hints, tips, and words of encouragement when spoken to. Some Toads give Mario a Power Star if prompted. | Mushroom Castle |
 Bob-omb Buddies |
Friendly Bob-ombs that lack fuses. They reside on the Bob-omb Battlefield, where they are at war with the Big Bob-omb and his army. A Bob-omb Buddy is hidden away in nearly all subsequent courses. If spoken to, it prepares a cannon for Mario to use. The cannon remains open and accessible for all subsequent revisits. | Bob-omb Battlefield; Whomp's Fortress; Jolly Roger Bay; Cool, Cool Mountain; Shifting Sand Land; Snowman's Land; Wet-Dry World; Tall, Tall Mountain; Tiny-Huge Island; Rainbow Ride; Wing Mario Over the Rainbow |
 Koopa the Quick |
A Giant Koopa from Tiny-Huge Island. He challenges Mario to a race when spoken to and rewards him with a Power Star if he defeats him without using certain shortcuts. Mario first encounters Koopa the Quick on the Bob-omb Battlefield in the mission Footrace with Koopa the Quick after defeating the Big Bob-omb, and he encounters him again on the "huge" side of Tiny-Huge Island in the mission Rematch with Koopa the Quick. | Bob-omb Battlefield; Tiny-Huge Island |
 Hoot |
A talking owl who roosts in a tree near Mario's starting position on Whomp's Fortress. Once woken up, Mario can grab onto Hoot's talons and be carried high into the air for a limited time. Hoot slowly descends while carrying Mario and drops him if he hangs on for too long, citing his weight. | Whomp's Fortress |
 Penguins |
Big talking birds found in courses that feature snow. They are instrumental in several Power Star missions. The Mother Penguin found at the base of Cool, Cool Mountain awards Mario a Power Star if her lost chick, Tuxie, is returned to her, while the Big Penguin found in the cabin at the top of the mountain gives him a Star if beaten in a race. Revisiting this penguin after collecting all 120 Power Stars reveals that he has let himself go. The extra weight makes him a tougher opponent to out-sleigh. | Cool, Cool Mountain; Snowman's Land |
Snowmen |
Two giant snowmen occur in the game. One snowman is the focus of the mission Snowman's Lost His Head. His head is on a pedestal halfway down the mountain, while his sentient snowball body appears towards the top, by Mario's starting position. Either piece asks Mario to help put him together when prompted. Once assembled, the snowman gifts Mario a Power Star. The other is in Snowman's Land, where he can climbed as if he was a mountain. As Mario nears his head, he starts to complain about an irritating crawling sensation on his body and tries to blow Mario off. A Power Star is on the very top of his head. | Cool, Cool Mountain; Snowman's Land |
 MIPS |
Princess Peach's pet rabbit.[56] He is found in the castle's basement and flees if approached. He gives Mario a Power Star if caught. While captured, MIPS claims to be late for tea. | Mushroom Castle |
 Dorrie |
A gentle giant that resembles a plesiosaur. It can be found swimming in an underground lake, where it can be ridden. Mario can steer Dorrie's body while standing on its back and lower its neck by performing a Pound the Ground attack on its head. | Hazy Maze Cave |
 Ukkikis |
Mischievous monkeys. One steals Mario's cap when grabbed. Mario must grab the Ukkiki again in order to get it back, but he runs away if approached and must be cornered. During Mystery of the Monkey Cage, a Ukkiki appears on the summit and taunts Mario. If grabbed, the Ukkiki begs to be released in exchange for a Power Star. | Tall, Tall Mountain |
 Yoshi |
An old friend of Mario's. He is a dinosaur-like creature with a long tongue. He can be found on the roof of the Mushroom Castle once all 120 Power Star are collected. Yoshi awards the player 100 lives and a special Triple Jump for fully completing the game, then disappears off the side of the castle. | Castle Grounds |
Enemies and obstacles
Enemies
Sorting the "course" columns organizes them by occurrence in-game, not alphabetically.
| Name | Description | Courses | Dam. | Spoils | New | |
|---|---|---|---|---|---|---|
| First | Last | |||||
 Goomba |
Squat mushroom creatures that chase Mario when he is in their line of sight. Goombas can be defeated with any attack. | Bob-omb Battlefield | Bowser in the Sky | 1 | — | |
 Micro-Goomba |
Small Goombas. Micro-Goombas pursue Mario when near, but they cause only pushback, an action that also defeats them. They are otherwise vulnerable to any attack. | Tiny-Huge Island | 0 | — | ||
 Grand Goomba |
Giant Goombas. It is easier for Mario to avoid their detection than it is with smaller Goombas. Grand Goombas are immune to punches and kicks. | Tiny-Huge Island | 2 | — | ||
 Bob-omb |
Walking bombs. Bob-ombs actively pursue Mario until they explode. He can pick one up and toss it like a projectile to destroy blocks. | Bob-omb Battlefield | Bowser in the Sky | 2 | — | |
 Koopa Troopa |
Green-shelled turtles. Attacking one knocks it out of its shell, leaving it vulnerable to defeat and its shell accessible. An unshelled Koopa frantically tries to return to its shell in this state. | Bob-omb Battlefield | Tiny-Huge Island | 0 | — | |
 Small Koopa Troopa |
A tiny Koopa Troopa that is defeated on contact. | Tiny-Huge Island | 0 | |||
 Chain Chomp |
A giant metal enemy with snapping jaws. It is shackled to a stake and lunges at Mario when he is near. Ground-pounding the stake frees the Chain Chomp. | Bob-omb Battlefield | 3 | — | ||
 Piranha Plant |
Carnivorous plants that sleep in flowerbeds. One stays asleep if Mario approaches it slowly, but it otherwise is easy to stir. Disturbed Piranha Plants snap at Mario. | Whomp's Fortress | 3 | — | ||
 Piranha Flower |
Large Venus Fire Traps that spit fireballs. They erupt and recede into the ground in set intervals. | Tiny-Huge Island | 2 | |||
 Small Piranha |
Small Venus Fire Traps. They behave like the giant Piranha Flowers. | Tiny-Huge Island | Bowser in the Sky | 2 | ||
 Whomp |
Walking slabs similar to nurikabe. Whomps slam their bodies into the ground when Mario is in front of them in an attempt to crush him. Whomps are defeated when ground-pounded while they are collapsed on the ground. Repeatedly jumping on one's back awards Mario an additional five Yellow Coins. | Whomp's Fortress | Bowser in the Sky | 3 | ||
 Thwomp |
Grimacing stones. They slam into the ground every few seconds, crushing Mario if he is underneath. The top of a Thwomp can be safely stood on. | Whomp's Fortress | Tick Tock Clock | 3 | — | |
 Bullet Bill |
Missiles fired from the Blaster on Whomp's Fortress. A Bullet Bill swerves to hit Mario when he is in close proximity. Bullet Bills are destroyed only when they collide with obstructions. | Whomp's Fortress | 3 | None | — | |
Unagi |
A giant moray eel enemy nestled within a sunken ship. Luring it out grants Mario access to the ship's interior. In subsequent missions, Unagi occurs swimming in open water. Direct contact damages Mario. | Jolly Roger Bay | 3 | |||
 Spindrift |
Flying flower enemies that slowly follow Mario when near. Stomping on one launches him into the air, spinning. Spindrifts occur only in snow-themed courses. | Cool, Cool Mountain | Snowman's Land | 2 | ||
 Mr. Blizzard |
Snowman enemies. Stationary Mr. Blizzards throw snowballs at Mario and rotate to follow his movement. The ones that hop along bridges are indestructible. If Mario loses his cap, he may find it on the head of a Mr. Blizzard upon entering a course with Mr. Blizzards in it. | Cool, Cool Mountain | Snowman's Land | 2 | ||
 Amp |
Smiling electrical orbs that shock Mario on contact. They typically travel in fixed circular patterns. | Bowser in the Dark World | Bowser in the Sky | 1 | ||
 Scuttle Bug |
Big spiders. They scuttle after Mario when he is near. In the Hazy Maze Cave, there is an abyss from which Scuttle Bugs indefinitely leap. | Big Boo's Haunt | Hazy Maze Cave | 1 | ||
 Boo |
Ghost enemies. Boos pursue Mario when his back is turned towards them. If Mario looks directly at one, it stops moving and turns translucent. It is invulnerable in this state. While Boos can be knocked away, this does not permanently defeat them. Boos phase through walls. | Courtyard | Big Boo's Haunt | 2 | — | |
 Mr. I. |
Unblinking eyeballs fixed in space that fire projectile bubbles. Mr. I.s rotate to follow Mario's position. Running around one eventually makes it spin out of control, defeating it. Touching a Mr. I. directly damages Mario. | Big Boo's Haunt | Lethal Lava Land | 2 | ||
 Bookend |
Spirited books. In the library of Big Boo's Haunt, Bookends rapidly fly from opposing shelves and damage Mario on impact. Some Bookends slowly emerge from the shelves and snap their pages as if they were jaws. These ones can be stomped. | Big Boo's Haunt | 2 | |||
 Mad Piano |
A toothy enemy. The Mad Piano sits inert like a normal piano. It springs to life when approached, doggedly snapping at Mario. Its keys clatter as it moves. | Big Boo's Haunt | 3 | |||
 Swoop |
Bat enemies. Swoops idly hang upside-down until Mario draws near, at which point they drop and start to fly towards him. The sound of one's wingbeats is percussive. | Hazy Maze Cave | 1 | — | ||
 Snufit |
Ghostly Snifits that spit bullets at Mario. | Hazy Maze Cave | Cavern of the Metal Cap | 2 | ||
 Monty Mole |
Mole enemies that pop out of holes. They toss small rocks at Mario that damage him on contact. | Hazy Maze Cave | Tall, Tall Mountain | 1 | — | |
 Flame thrower |
Tiny stationary Fire Chomps. One releases a fireball at Mario when it is approached. The flame follows him. | Hazy Maze Cave | Bowser in the Sky | 3 | ||
 Bully |
Horned, orb-shaped enemies that persistently attempt to shove Mario. Bullies cannot be damaged, but striking one knocks it back. Knocking one into lava defeats it. | Lethal Lava Land | Bowser in the Fire Sea | 0 | ||
 Podoboo |
Bouncing fiery plumes that hop across narrow strips of terrain. | Lethal Lava Land | Bowser in the Sky | 3 | — | |
 Fly Guy |
Flying Shy Guys that spit fireballs and try to headbutt Mario when he is close. Stomping one propels Mario high into the air. | Shifting Sand Land | Rainbow Ride | 2 | — | |
Pokey |
A segmented cactus enemy that slowly shuffles towards Mario. Striking a segment knocks it away and shortens the Pokey's overall body. Hitting the head is ultimately what defeats it. | Shifting Sand Land | 2 | — | ||
 Tox Box |
Multifaced iron boxes that roll around in set trajectories. Tox Boxes are the same width of the paths they travel, making them difficult to avoid. One of their sides is open and can be safely stood under. | Shifting Sand Land | 3 | |||
 Grindel |
Mummified stone enemies. One Grindel slams up and down like a Thwomp. The other hops along narrow paths. | Shifting Sand Land | 3 | |||
 Spindel |
Rolling stone enemies. Spindels roll back and forth along narrow paths. | Shifting Sand Land | 3 | |||
 Klepto |
A condor that steals Mario's cap. Klepto soars through the sky in Shifting Sand Land and drops low only to grab Mario's cap. Striking the bird makes it let go. In one mission, it carries a Power Star. | Shifting Sand Land | 0 | |||
 Bub |
Pudgy orange fish. They slowly swim towards Mario when he is in close proximity. | Dire, Dire Docks | 1 | — | ||
 Bubba |
Large Bubs that pursue Mario in shallow water. They swallow him whole when he is close, costing him a life. | Tiny-Huge Island | KO | |||
Sushi |
A white shark enemy that swims in a wide circle. It does not actively pursue or attack Mario, but it damages him on contact. | Dire, Dire Docks | 3 | |||
 Manta Ray |
A mobula that undulates around a whirlpool. Only the end of its tail can damage Mario. The Manta Ray leaves a trail of bubble rings as it swims. Swimming through five of them awards Mario a Power Star. | Dire, Dire Docks | 3 | |||
 Money Bags |
Hopping purse-like creatures. A Money Bags disguises itself as a coin and materializes when approached, at which point it erratically hops around. | Snowman's Land | 2 | |||
 Skeeter |
Water strider enemies that skim across water. They scuttle their legs rapidly when restricted to land. Contact damages Mario. | Wet-Dry World | 2 | |||
 Heave-Ho |
Windup machines that slowly track Mario's movements. They hurl him backwards if they manage to slide their shovels under him. Heave-Hos usually occur around other enemies and items of interest, making them easy to overlook. | Wet-Dry World | Tick Tock Clock | 0 | ||
 Chuckya |
Big Bob-omb enemies that grip on to Mario and throw him across great distances. Mario can defeat a Chuckya only by tossing it first. | Wet-Dry World | Bowser in the Sky | 0 | ||
Fwoosh |
A cloud enemy that blows gusts of wind to knock Mario off ledges. | Tall, Tall Mountain | 0 | |||
 Lakitu |
Cloud-riding Koopas that drop Spiny bombs. The Lakitu Bros. are of this species. | Tiny-Huge Island | Rainbow Ride | 2 | — | |
 Spiny |
Squat, spiked Koopas that slowly pursue Mario. They are defeated when drawn to water. | Tiny-Huge Island | Rainbow Ride | 2 | None | — |
 Spiny bomb |
The eggs dropped by Lakitus. They hatch into Spinies when they hit the ground. | Tiny-Huge Island | Rainbow Ride | 2 | None | — |
Obstacles
| Name | Description | Courses | |
|---|---|---|---|
| First | Last | ||
 Blaster |
A metal cube that shoots out Bullet Bills. | Whomp's Fortress | |
 Bomb |
A stationary spiked explosive used to defeat Bowser. | Bowser in the Dark World | Bowser in the Sky |
Casket |
Caskets rise and fall. They can crush Mario if he goes under one. | Big Boo's Haunt | |
 Chair |
A haunted piece of furniture that flings itself at Mario. | Big Boo's Haunt | |
 Clam |
A giant shellfish that opens and closes its valves, sometimes containing an item. | Jolly Roger Bay | Dire, Dire Docks |
 Cold water |
Chilled water that hurts Mario on contact, either gradually or immediately depending on how cold it is. | Snowman's Land | |
 Current |
Rapidly moving water that can forcibly remove Mario from the course if it pulls him far enough. | Jolly Roger Bay | Tall, Tall Mountain |
 Endless stairs |
A magic staircase that loops Mario forever if he tries to climb them without enough Stars. | Mushroom Castle | |
Falling pillar |
A giant precariously balanced stone that tips at Mario. | Jolly Roger Bay | |
 Fireball |
A basic flame that appears as either a standalone obstacle or an enemy projectile. | Bowser in the Dark World | Mushroom Castle |
 Fire bar |
A rotating rock with a constantly alit flamethrower on either side. | Lethal Lava Land | |
 Flamethrower |
A jet of fire that usually comes from small holes but can also come from other openings and even lava. | Bowser in the Dark World | Bowser in the Sky |
 Hidden smasher |
A giant mass of metal hidden in a wall that tries to crush Mario when he approaches. | Lethal Lava Land | |
 Ice |
Icy floors that reduce Mario's traction. Ice makes it difficult to make precise jumps and avoid oncoming hazards. The Chill Bully is fought on an arena entirely made of ice. | Cool, Cool Mountain | Snowman's Land |
 Ice block shooter |
A giant hole with Shy Guy masks that shoots triangular ice blocks. | Snowman's Land | |
 Ice sculpture |
Icy blocks arranged into small maze. In the igloo, there are similar walls that contain coins. Vanish Mario is required to phase through them. | Snowman's Land | |
 Iron ball |
A variably sized large black sphere that rolls down slopes. | Bob-omb Battlefield | Tiny-Huge Island |
 Ivy [conjectural] |
Slows Mario's speed and also makes it difficult to jump. | Tall, Tall Mountain | |
 Lava |
Molten rock that burns Mario. | Lethal Lava Land | Bowser in the Fire Sea |
 Moving Bar |
A varyingly designed wall protrusion that tries to push Mario but can also be used as a platform. | Whomp's Fortress | Tick Tock Clock |
 Pendulum |
A swinging obstacle that can block Mario's path. Its speed can change depending on the time Mario enters Tick Tock Clock. | Tick Tock Clock | |
 Quicksand |
Sand that pulls Mario under at varying speeds. | Shifting Sand Land | |
 Rolling rock |
A giant boulder. | Hazy Maze Cave | |
 Slide Box |
A skull-marked crate that moves back and forth on the rocking ship. | Jolly Roger Bay | |
 Strange cloud |
Putrid gas found in deep, stagnant caves. | Hazy Maze Cave | |
 Tornado |
A whirlwind that makes Mario spin. | Shifting Sand Land | |
 Water bomb |
A bouncing balloon that pursues Mario after being shot from a cannon. | Bob-omb Battlefield | |
 Water tide |
Water that rises up or down. | Wet-Dry World | Mushroom Castle |
 Whirlpool |
A vortex that can suck Mario inside. | Dire, Dire Docks | |
 Wind |
A gust that can either help or hinder Mario. | Cool, Cool Mountain | Bowser in the Sky |
 Wire net (vertical) |
A wall made of iron bars or wire nets. Vanish Mario is required to pass through these walls. | Vanish Cap Under the Moat | Tick Tock Clock |
Bosses
Bosses are listed in the order that they are first encountered.
| Name | Description | Missions |
|---|---|---|
 Big Bob-omb |
A giant Bob-omb on the Bob-omb Battlefield. He appears as the first boss in the game and has the first Power Star. He refers to himself as the "baron of all blasting matter." | Big Bob-omb on the Summit |
 Whomp King |
A giant Whomp on top of Whomp's Fortress. He has the first Power Star, and after he is defeated, there is a tower on top of the fortress. | Chip Off Whomp's Block |
 Bowser |
Bowser appears in Bowser in the Dark World, Bowser in the Fire Sea (where the arena tilts), and Bowser in the Sky (where he must be thrown three times). Mario needs to swing him by the tail clockwise or counterclockwise and hurl him at bombs on the outside of his circular arena. | Bowser in the Dark World; Bowser in the Fire Sea; Bowser in the Sky |
 Big Boo |
A giant Boo that appears three times in Big Boo's Haunt. He initially appears once all the Boos in the mansion have been defeated, again in the underground merry-go-round, and lastly on the top balcony of the mansion. | Go on a Ghost Hunt; Ride Big Boo's Merry-Go-Round; Big Boo's Balcony |
 Big Mr. I. |
A giant Mr. I. that appears only in the attic of Big Boo's Haunt. | Eye to Eye in the Secret Room |
 Big Bully |
A large Bully that appears in Lethal Lava Land. On both occasions, Big Bullies try to knock Mario into the lava. | Boil the Big Bully; Bully the Bullies |
Eyerok |
A being composed of two stone hands with eyes on each palm. He appears when Mario blasts open the top of the pyramid in Shifting Sand Land and rides the elevator inside. | Stand Tall on the Four Pillars |
 Chill Bully |
A large Bully made of ice. He tries to ram Mario onto a lethally frozen pond in Snowman's Land. | Chill with the Bully |
 Wiggler |
A giant caterpillar. He becomes angry when his home on Tiny-Huge Island gets flooded. | Make Wiggler Squirm |
Items and objects
Items
These are collectibles, pickups, and health-restoring objects.
| Name | Description |
|---|---|
 Power Stars |
Power Stars fuel the Mushroom Castle and are stolen by Bowser to seal the castle's inhabitants away. They are the primary objective within missions, and accumulating Stars unlocks new missions. A larger token called the Jumbo Star is made available after the final battle with Bowser. Collecting it does not contribute to the player's total, but it does liberate Princess Peach. |
 Keys |
Tokens awarded to Mario after the first two Bowser battles. A key permanently unlocks a Key Door. |
Yellow Coins |
Collecting a Yellow Coin restores one wedge to Mario's Power Meter. Collecting 100 during a mission rewards Mario with a Power Star. He also gains an extra life for every 50 coins he has when he completes a mission, but only up to three (i.e., no more than 150 coins). |
Red Coins |
Red Coins are worth two coins. Eight are scattered around most courses, and collecting them all causes a Power Star to appear. They restore two wedges to Mario's Power Meter when collected. |
Blue Coins |
Blue Coins are worth five coins. They typically appear after Mario ground-pounds a Blue Coin Block or after he defeats a strong enemy, such as a Mr. I. |
 Spinning Hearts |
Spinning Hearts restore Mario's Power Meter when he passes through one. The amount of health recovered and how fast it does so are dependent on how quickly Mario moves through it. |
 1UP Mushrooms |
Green mushrooms that give Mario an extra life each when obtained. |
Bubbles |
Bubbles are released from opened underwater Treasure Chests. Making contact with one refills Mario's Power Meter. |
 Koopa Shells |
Shells from Koopa Troopas that Mario can ride, allowing him to defeat enemies he runs over and move around the course quicker. Pressing |
 Mario's cap |
Mario can lose his cap: It can be stolen by Klepto or a Ukkiki or blown away by wind. He takes more damage without it. Mario can complete a mission or exit a course without his cap, but it is still missing when he returns to the Mushroom Castle. He has to return to the specific course where he lost his cap to retrieve it. |
 Crates |
Small blocks that can be picked up and tossed to defeat enemies. Crates break on impact and release collectible Yellow Coins. |
 Crazed Crates |
Living crates. When Mario grabs a Crazed Crate, it immediately bounces three times in the direction he was facing when it is grabbed, taking him with it. Each bounce is progressively higher. A Crazed Crate breaks at the end of the third bounce, breaking and releasing Yellow Coins. |
Power-ups
These are items that transform Mario's appearance and give him unique abilities. Power-ups are available in Cap Blocks, and they start appearing in the main courses only once their corresponding Cap Switches are struck in the hidden switch courses. Unlike in previous Super Mario games, all power-ups in Super Mario 64 only temporarily transform Mario, each one for 60 seconds. If he completes a mission in one of these forms, he will revert to his normal form. Additionally, Mario lacks a weak, diminutive Small form in this game. Mario can be under the effect of two of these power-ups simultaneously in Dire, Dire Docks, namely the Metal and Vanish Caps.
| Cap Block | Power-up | Form | Description |
|---|---|---|---|
 Red block |
 Wing Cap |
 Wing Mario |
The Wing Cap is available only in red blocks and transforms Mario into Wing Mario. Performing a Triple Jump or launching from a cannon makes Wing Mario fly. Pressing up on |
 Green block |
 Metal Cap |
 Metal Mario |
The Metal Cap is available in green blocks and turns Mario into Metal Mario, a nearly invincible form. He can receive only fall damage in this form. Metal Mario functions the same as his normal form, but he can destroy enemies just by making contact and is impervious to most hazardous obstacles. Wind and currents cannot push him. While he does not need air, Metal Mario cannot swim and sinks to the bottoms of bodies of water, enabling him to circumvent jet streams and other underwater obstacles. |
 Blue block |
 Vanish Cap |
 Vanish Mario |
The Vanish Cap is the final unlockable power-up and is contained in blue blocks. It transforms Mario into Vanish Mario, a form that allows Mario to phase through certain barriers and walls. Vanish Mario is undetectable to enemies, and they cannot harm him. He otherwise has the same abilities as normal Mario. |
Objects
Objects are interactable elements of the environment that cannot be picked up or collected by Mario. For objects that primarily function as obstructions or hazards, see above.
| Name | Description | |
|---|---|---|
| Trigger objects | ||
 Blue Coin Block |
A block that causes a trail of Blue Coins to appear for a temporary period of time when ground-pounded. It disappears for the remainder of the accessed mission once struck. | |
 Brick pillar |
A pair of brick pillars is in the basement of the Mushroom Castle. Ground-pounding them permanently drains the moat. | |
 Bubble ring |
An underwater ring released by the Manta Ray. Swimming through five consecutive bubble rings rewards Mario with a Power Star. | |
 Cap Switch |
A type of ! Switch found only in switch courses. Ground-pounding one permanently makes corresponding semi-visible blocks turn solid, granting Mario access to the power-ups they contain. There are only three Cap Switches in the game, and they correspond as follows: The red one makes the Wing Cap available, the green one makes the Metal Cap available, and the blue one makes the Vanish Cap available. | |
 Crystal Tap |
An octahedron in Wet-Dry World that causes the water level to either rise or fall when touched. | |
 Purple Switch |
Purple Switches cause temporary changes to the surrounding environment when stepped on. | |
 Secret |
One of five cryptically hidden "spots" within a course. Finding one causes a corresponding red number to appear onscreen. Locating all five secrets causes a Power Star to appear. | |
Stake |
A stake needs to be struck by a Pound the Ground attack three times to be fully embedded into the earth, and doing so may produce a Yellow Coin or trigger a nearby event. Running around one may produce multiple coins. | |
 Treasure Chest |
A wooden chest that contains a bubble and opens when touched. In some missions, five Treasure Chests appear and either release a Power Star or trigger a change in the environment when opened in a specific order. Opening a chest out of order electrocutes Mario and forces the player to start over. | |
| Climbable objects | ||
Pole |
Mario clings to climbable poles by jumping onto them. He can ascend, descend, and change which face of a pole he is on when the player moves | |
 Tree |
Trees function like poles. Reaching the top of one sometimes triggers an event or releases a 1UP Mushroom that homes in on Mario. | |
 Wire net (horizontal) |
A ceiling of climbable metal netting. | |
| Blocks and platforms | ||
Accordion-like platform[40] |
Blue platforms connected to bridges in Bowser in the Fire Sea that gradually rise up and drop down. | |
 Activatable staircase [conjectural] |
A stairway that briefly appears when a switch is pressed. | |
 Arrow Lift |
A floating block that begins to move back and forth once stood on. An activated Arrow Lift stops moving for two-second intervals before moving again. | |
 Block |
Blocks contain Yellow Coins and release them once struck. They are visually identical to crates, but they are about the same height as Mario and cannot be picked up. | |
Bowser's Submarine |
The submarine appears only in Dire, Dire Docks during Board Bowser's Sub, during which it floats on the surface of the water. Bowser's Submarine does not appear in subsequent missions, and completing Board Bowser's Sub unlocks access to Bowser in the Fire Sea. | |
 Cloud House |
A large floating building in Rainbow Ride. Magic carpets travel through the Cloud House on a rainbow that weaves through it. The fireplace in the building shoots flames. | |
 Conveyor belt |
A platform with a moving surface. The speed and direction vary depending on the position of the clock hands on Tick Tock Clock's face when Mario enters the course. | |
Drawbridge |
An object in Lethal Lava Land that opens and closes. | |
 Falling Block |
A floating platform that falls when stepped on. Thin, holeless Falling Blocks drop quickly, and Mario will lose ground if he does not keep moving forward. | |
  Flipping block |
A block platform that flips in set intervals. The speed and direction vary depending on the position of the clock hands on Tick Tock Clock's face when Mario enters the course. | |
 Floating wooden platform[57] |
Floating wooden platforms sink slightly in water when stepped on, then rise back up. | |
 Gondola |
A moving platform on Cool, Cool Mountain. The gondola moves once Mario steps on it. It stops if it returns to the bottom after Mario has walked off it. | |
 Lift |
A moving platform. Some lifts move along tracks. Others move only up and down, like elevators. Their designs and environmental context for moving depend on where they are encountered. | |
 Magic carpet |
A type of lift in Rainbow Ride that travels along a rainbow. If Mario remains off a magic carpet for too long, it will disappear and respawn back at its original position. | |
Merry-go-round |
A spinning platform in the basement of Big Boo's Haunt. | |
 Metal crate[58] |
A large stone block that can be pushed. | |
 Minute hand[59] |
A long platform in Tick Tock Clock. It rotates in incremental intervals around a pivot point at the center of the course. The speed and direction vary depending on the position of the clock hands on Tick Tock Clock's face when Mario enters the course. | |
 Mushroom |
A tall platform that looks like a giant mushroom. | |
 Paddle wheel |
A set of four lifts attached to a pivot. Standing on a lift causes the paddle wheel to rotate. | |
 Pillar |
An object in Shifting Sand Land that can be stood upon to open the top of the pyramid. | |
Propeller-like platform [conjectural] |
A platform in Rainbow Ride that spins. It can either be ridden or hinder Mario's path. | |
 Puzzle |
A sliding puzzle of Bowser suspended over lava. The individual pieces constantly shift positions, forming and unforming the image of Bowser on the puzzle. | |
 Pyramid platform |
A platform that flips upside down for a few seconds once activated by a Purple Switch. | |
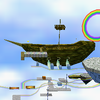 Rainbow Cruiser |
A six-winged airship flying in the direction of strong winds. | |
 Rolling log |
Logs roll when stood on. Mario must keep pace with a log's roll to avoid falling off. | |
Rotating bar |
A thin platform embedded in the side of Tick Tock Clock. The speed and direction vary depending on the position of the clock hands on Tick Tock Clock's face when Mario enters the course. | |
Rotating bridge[60] |
A wooden platform in Whomp's Fortress that rotates 180˚ around a pivot point. | |
Seesaw |
A long platform that tilts left or right depending on where Mario walks. Seesaws have different appearances depending on where they are found, as well as unconventional shapes. | |
 Semi-visible block |
A transparent block that turns solid and is able to be used after the player hits the Cap Switch. | |
Ship |
A sunken ship appears at the bottom of Jolly Roger Bay, and it is where Unagi nests. Approaching it causes Unagi to stir and exit the vessel, granting Mario access to its hull. The ship subsequently can be found floating on the surface of the water during Red Coins on the Ship Afloat. | |
Sliding platform[61] |
A long rectangular platform in Bowser in the Dark World and Bowser in the Sky that slides in and out. | |
 Spinning disc[62] |
A spinning circular platform suspended in the air. Spinning discs' designs and environmental context for moving depend on where they are encountered. In Tick Tock Clock, triangular and hexigonal variants serve the same function as spinning discs, where the speed and direction vary depending on the time Mario enters the course. In Lethal Lava Land, there is a ringed spinning disc that around the volcano that periodically stops, during which the volcano erupts. | |
Square |
One of a pair of square-shaped platforms that move within the rims of a larger square-shaped frame. | |
 Swing |
A lift that moves back and forth like a pendulum. | |
Tapering platform |
A square or rectangular platform that floats in lava, occasionally partially sinking. The middle section is higher than the edges and, as such, is the only safe place to stand. | |
 Wire platform |
A mesh lift in lava. Some wire platforms move along tracks that temporarily submerge them in lava. | |
Wobbly platform[63] |
A prism-shaped platform that tilts toward the direction that Mario is standing on, dipping the nearest corner into lava. | |
Wooden beam[64] |
A plank in Whomp's Fortress. Kicking or punching the wooden beam causes it to fall over and become useable as a bridge. | |
 Work Elevator |
A large flat platform with four arrow-emblazoned buttons. Stepping on a button causes the Work Elevator to move in that direction until it meets an obstruction. | |
 Yellow block |
A floating ! Block that contains items. It releases its content when Mario jumps underneath it. It is functionally comparable to the ? Blocks of prior Super Mario games and is the only ! Block available at the start of the game. | |
| Transportation objects | ||
 ★ door |
A door to a room that holds (a) painting(s), four of which open only once Mario has collected the required numbers of Power Stars indicated on the fronts of the doors. Not all paintings are locked behind ★ doors. | |
Big Star Door |
A larger ★ door that has a higher Power Star-threshold to unlock. Three of the four Big Star Doors lead to rooms that contain Bowser courses. | |
 Cannon |
Cannons launch Mario to distant areas. They are accessed like pipes. Most cannons are overseen by Bob-omb Buddies and become accessible only after Mario speaks to them. | |
 Clock |
The portal for Tick Tock Clock. The placement of the clock's hands when Mario enters the face determines the speed and direction of the platforms and obstacles in the course. None of these objects move if he enters the face with the minute hand on 12, and they move slowly if it is on 3. | |
 Key Door |
A door that requires a key to open. Key Doors lead to new sections of the castle. | |
 Painting |
A magical portal created by Bowser. Paintings lead to the courses of the game. | |
 Painting (Boo) |
Paintings of Boos appear only in Big Boo's Haunt, and Mario can pass through them only in his Vanish form. | |
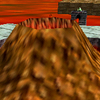 Volcano |
The volcano is at the center of Lethal Lava Land and periodically shoots fire. The volcano's interior can be accessed, and two Power Stars can be obtained in it. | |
 Warp pipe |
A pipe going through the ground that brings Mario to a new area. He enters one by physically jumping into it. The cabin chimney on Cool, Cool Mountain functions like a warp pipe. Some pipes are Shrinker Pipes that change Mario's size and bring him to the two different versions of Tiny-Huge Island. | |
 Warp Point |
Warp Points are hidden spots within a course that teleport Mario from one point to another. | |
| Other objects | ||
 Arrow Sign |
A sign that directs the player towards the intended focus of the mission they enter. | |
 Butterfly |
Butterflies may turn into 1UP Mushrooms or giant iron balls that pursue Mario through the air before exploding if he persistently bothers them. They otherwise fly around passively. | |
 Cloud[65] |
A cloud in Wing Mario Over the Rainbow that cannot be used as a platform. Some transparent clouds contain a Red Coin. | |
 Rainbow |
Rainbows passively indicate an intended direction for the player to follow. Magic carpets move along them in Rainbow Ride, and arches connect different clouds in Wing Mario Over the Rainbow. A ring-shaped rainbow in Rainbow Ride provides a visual target for the player to launch Mario out of a cannon. All rainbows are intangible. | |
 Sign |
A posted board that contains information on actions, scenarios, and locations. Signs can be ground-pounded into the ground. There are variants found hanging on walls. | |
 Star Marker |
A Power Star appears above a Star Marker in missions where Mario must collect eight Red Coins. | |
Reissues
Super Mario 64: Shindō Pak Taiō Version
Super Mario 64: Shindō Pak Taiō Version (Japanese: スーパーマリオ64 振動パック対応バージョン) is a version of the original game released in Japan on July 18, 1997, that includes Rumble Pak support. This game is the same as the international release of the game, as it retains all of the glitch fixes as well as graphical and sound changes (except Mario calling Bowser by his name in the "So long kinga[sic] Bowser!"[66] voice clip, which was changed to "Buh-bye!"). Other differences include a new title screen Easter egg and the fixing of the "Backwards Long Jump" glitch. This version was rereleased for the Virtual Console on the Wii in Japan on December 2, 2006, then on the Wii U on April 8, 2015.
Super Mario 64 DS
- Main article: Super Mario 64 DS
Super Mario 64 DS is a remake of the game for the Nintendo DS, bearing some new features in its storyline, gameplay, and graphics. Unlike in Super Mario 64, Mario is not the only playable character (nor is he even available at the start; the only character available at the start of the game is Yoshi); in addition to Yoshi, Luigi and Wario also join the adventure in order to rescue Princess Peach from Bowser. Yoshi's being on the roof at the start of the game is a reference to the fact that he is there at the end of the original version. Other new features within the game include a multiplayer mode, in which up to four players can play simultaneously on each Nintendo DS connected together locally; minigames to play with each character; and new additions to the story mode such as new missions and levels.
Super Mario 3D All-Stars
- Main article: Super Mario 3D All-Stars
Super Mario 3D All-Stars is a compilation game for the Nintendo Switch featuring high-definition remasters of Super Mario 64 (specifically the Shindō Pak Taiō Version,[67] marking its first international release), Super Mario Sunshine, and Super Mario Galaxy. It was released on September 18, 2020, as part of the 35th anniversary of Super Mario Bros. The game is displayed in 720p resolution and contains redone textures.
Version differences
There is a total of four Nintendo 64 releases of Super Mario 64: the original Japanese version, the North American release, the European and Australian release, and the Japanese Super Mario 64: Shindō Pak Taiō Version rerelease.
Changes to the North American release
Text changes
- The script is exclusively in English.
- Princess Peach signs her letter with a large pink "Peach." In the Japanese release, she signs her letter in normal-sized black text.
Audiovisual changes
- The entrance to Jolly Roger Bay is changed. In the original release, it is a painting of bubbles in a blue frame. In Western releases, it is a painting of a sunken ship in a gold frame.
- In the Japanese version, the animation that plays when Mario collects a key after defeating Bowser depicts him dancing with a Power Star, as he does after completing a Power Star mission in all versions of the game. In Western releases, this is changed to a new animation in which Mario dances with the key itself.
- The unused "key" HUD icon is removed from this version. It is replaced with a corrupted graphic.
- The J, Q, V, Z, %, &, !, and ‼ characters are removed from the game's multicolored font and replaced with corrupted graphics similar to the key. None of these symbols are actually used anywhere in the game.
- The Chain Chomp's bark has been changed to a completely different sound.
- The Red Coin sound effect increases in pitch with each coin collected. In the Japanese release, all Red Coins make the same sound.
- The intro cutscene has several additional sound effects not present in the original release:
- The blowing of wind when Lakitu is flying
- The click of the camera shutter when the in-game camera moves to Lakitu's perspective
- The spring sound and voice line "Ha ha!" when Mario jumps out of the pipe
- A sound effect not present in the Japanese game plays when Mario exits a course through the pause menu.
- When Mario enters certain substages, such as the Tower of the Wing Cap, the Power Star collection sound effect plays.
- When Lakitu appears to explain things to Mario, a short tune entitled "Lakitu's Message" plays. Since this tune is not in the original Japanese release, it is not found on the official soundtrack.
- Western releases add more voice acting for Mario:
- "Hello!" when his face greets the player on the title screen
- "Okey-dokey!" when the player chooses a save file
- "Let's-a go!" when the player chooses a Star before entering a course
- "Game over!" when he runs out of lives
- "Press START to play!" during the title screen demo
- "Boing!" when he jumps off a Spindrift
- "I'm-a tired!" and the names of various pastas when he is sleeping
- "Mamma mia!" when falling out of a non-painting course after Mario loses a life
- In the original Japanese version, Mario says, "Here we go!" when he throws Bowser. In Western versions, he says, "Here we go!" only when throwing Bowser a short distance. When he throws Bowser a long distance, he instead says, "So long kinga Bowser!"
- Similarly, when Mario hits a wall in the Japanese version, he grunts. In Western versions, Mario grunts if he hits a wall at a low speed, but he says, "D'oh!" if he long-jumps or dives into a wall.
- When Mario triple-jumps in the Japanese release, he says, "Yahoo!" In Western releases, he randomly says, "Yahoo!", "Wha-ha!", or "Yippee!"; however, he says only "Yahoo!" when using the improved Triple Jump obtained after he talks to Yoshi.
- All of Princess Peach's voice acting is new in this version of the game.
Fixed glitches
- When Mario steps on one of the Cap Switches, a text box that explains the function of the switch is triggered. In the Japanese release, this text box causes the action in-game to pause until the text box is closed. If a Power Star is collected before this text box appears, the Star does not vanish as it is supposed to do upon collection. In Western releases, the text box does not cause the action to pause, which fixes this glitch.
- If 1,000 coins are collected, the coin counter is intended to immediately set itself back to 999 coins. In the Japanese release, it instead sets the life counter to 999. Because the life counter is stored in memory as a one-byte-wide signed field, this causes an overflow, and Mario's life total becomes -25. Western releases correctly set the coin counter to 999, rather than the life counter.
- The first two times Bowser is defeated, he leaves behind a key. If Mario is standing where the key lands and the player presses
 to activate the first-person camera, Mario continues to look that way during the key collection cutscene.
 - In Shifting Sand Land's pyramid, collecting the fifth secret may cause the audio to stop playing. If this happens, attempting to leave the course in any way causes the game to crash.
- If Mario exits a course while standing on a moving platform, he retains his momentum when the Mushroom Castle loads. This causes Mario to spawn in an abnormal location.
Level design changes
- In the mission Blast to the Stone Pillar, the Power Star is in a yellow block, rather than in the open as it was in the Japanese release.
- In the mission Li'l Penguin Lost, the Power Star's spawn location has been moved from directly above the Mother Penguin to an empty area adjacent to her. This was apparently done because the penguin's hitbox made it difficult to collect the Star in its original location.
Changes to the European and Australian release
These releases feature all the changes of the North American release, plus the following additional changes:
Text changes
- The script can be switched between English, German, and French.
- The North American version's "Sound" menu has been renamed "Options," reflecting the fact that the in-game language can be changed from this menu.
- The characters Ä, Ö, and Ü have been added to the multicolored font, to allow proper representation of the German language. The Ü character is not actually used anywhere in the game. V and Z, which are present in the Japanese release but changed to corrupted characters in the North American release, are restored in this edition of the game.
Audiovisual changes
- The copyright date on the title screen is changed to reflect the release year of the European and Australian editions. The trademark symbol was changed for unknown reasons, and the logo is slightly narrower.
- The intro screen says "PRESS START" in the NTSC versions but just "START" in the PAL version. The text was also moved slightly to the left in the PAL version.
- The NTSC versions have slight letterboxing, while the PAL version does not. This is most noticeable with the gap between the edge of the HUD elements and the edge of the screen.
- In the intro, Mario jumps out of a pipe and a variation on the classic Mario pipe sound effect plays. In this edition of the game, the sound effect plays at a much quieter volume.
- The sound of a Big Star Door closing is now more similar to the sound of the door opening.
- The Yellow Coin collecting sound is slightly slowed down.
- The sound effect of grabbing and then releasing Mario's face on the title screen is changed.
- Mario's Double Jump sound is different.
Gameplay changes
- This version of the game outputs a signal compatible with the PAL television standard, rather than the NTSC standard used by the North American and Japanese releases. Therefore, it outputs 25 frames per second instead of 30. This causes everything in the game to happen at five sixths of the speed that it happens in the North American release.
Changes in Super Mario 64: Shindō Pak Taiō Version
This release features all the changes of the North American release, plus the following additional changes:
Text changes
- The original Japanese script is restored.
- Text that mentioned pressing
 to read signs in both the original Japanese and localized scripts now additionally mentions
  can be pressed as an alternative.
Audiovisual changes
- The copyright date on the title screen is updated to reflect the release date of Super Mario 64: Shindō Pak Taiō Version. The trademark symbol is changed.
- A notice in the lower right corner of the intro screen informs players that this release is compatible with the Rumble Pak.
- If the player presses
 on the intro screen, the background fills with images of Mario's face. These faces are copied from the frame buffer, so they move in synchronization with the modeled Mario face.
 - The voice line "So long kinga Bowser!" is changed to "Buh-bye!" likely since Bowser's Japanese name is Koopa.
- Mario's Double Jump sound is a higher-pitched version of the same sound from the European and Australian version.
- One of Mario's single jump sounds is higher-pitched.
- Mario faces the camera after grabbing a tree.
Gameplay changes
- The game is compatible with the Rumble Pak.
- The "Backwards Long Jump" glitch has been fixed. Although the move itself can be performed, the player is prevented from gaining high speeds.
- The Power Star in Blast to the Stone Pillar is out in the open like in the original Japanese release rather than in a yellow block like in the international releases.
Notable mistakes and errors
- If the player copies a save file to another file that already has data, it will say "Save Data Exits" instead of "Save Data Exists." This was fixed in Super Mario 3D All-Stars.
- On the floating island of the Bob-omb Battlefield, one of the signs says, "Pull back to to fly up." This was fixed in Super Mario 3D All-Stars.
- On Cool, Cool Mountain, the Headless Snowman says, "Have you run in to any headhunters lately??" instead of "into."
- At the end of the game, when Mario speaks to Yoshi on the castle roof, he says, "Mario!!! It that really you???" instead of "Mario!!! Is that really you???"
- If Mario is one Star short of opening a ★ door, the message still refers to the word needed in the plural: "You need 1 more Stars" instead of "You need 1 more Star."
Those errors remained in the Virtual Console version. However, they were removed in Super Mario 64 DS, as Yoshi is a playable character and the message that appears when the player does not have enough Stars to open a ★ door is instead "You need [number] more."
Pre-release and unused content
- Main article: List of Super Mario 64 pre-release and unused content
One unused asset is the Blargg, which is still in the game's data, and would have appeared in Lethal Lava Land, Bowser in the Fire Sea, and Wing Mario Over the Rainbow. Also, the Big Boo held a key instead of a Star inside him. The purpose of the keys was to unlock many of the doors in Big Boo's Haunt—there was even a "key counter." 32 levels were planned for the game, but only fifteen of them made it into the final product.
Staff
- Main article: List of Super Mario 64 staff
Game director
- Shigeru Miyamoto
Assistant directors
- Yoshiaki Koizumi
- Takashi Tezuka
Mario face programmer
- Giles Goddard
Course designers
- Kenta Usui
- Naoki Mori
- Yoshiki Haruhana
- Makoto Miyanaga
- Katsuhiko Kanno
Development
Super Mario 64 was the last game to be directed by Shigeru Miyamoto.
During the development of Super Mario 64, the title screen featuring Mario's face came from 3D struggles, leading Miyamoto to suggest playing with Mario's model like a programmer. Additionally, Miyamoto took up swimming at the time, which is reflected in Mario's breaststroke move.[68]
Reception
Super Mario 64 received critical acclaim, garnering a score of 9.8 from IGN, 9.4 from GameSpot, and 9.75 from Game Informer. Although it was criticized for its camera system and difficulty, it was praised for its graphics, its level design, its soundtrack, and the Super Mario franchise's shift from 2D to 3D. Sometime after the game's release, rumors about secret glitches, Stars, and hidden characters circulated. Among the most notable is the widely publicized hoax that Luigi was hidden and fully playable, causing false rumors to circulate on how to unlock him.
Super Mario 64 was one of the games featured at The Art of Video Games, an exhibition held at the Smithsonian American Art Museum in 2012.[69] The game won voting in the "action" category for the Nintendo 64, beating out Banjo-Kazooie and Star Wars: Shadows of the Empire.
| Reviews | |||
|---|---|---|---|
| Release | Reviewer, Publication | Score | Comment |
| N64 | Doug Perry, IGN | 9.8/10 | "In fact, this game is exactly as one might hope it would be: Mario in 3D. More freedom, more space, more options, better graphics, improved and elaborated control schemes -- it's all there. Possibly the greatest videogame achievement ever. Don't rent. Buy." |
| N64 | Gamespot Staff, GameSpot | 9.4/10 | "Mario 64 is a game that rewards the curious, the original, and in some cases the bludgeoningly stubborn and tenacious. If Mario 64 is even a rough indication of what's to be expected from Nintendo, or from games in general, then we just might have a revolution of sorts in our very hands." |
| Wii | Corbie Dillard, Nintendo Life | 10/10 | "Finishing the game won't take you too long but as with most Mario games that's not really the point, it will take you weeks (and quite possibly months) to discover all the secrets contained within this game." |
| Aggregators | |||
| Compiler | Platform / Score | ||
| Metacritic | 94 | ||
| GameRankings | 96.41% | ||
Sales
Super Mario 64 is the best-selling game for the Nintendo 64, selling 11.62 million copies worldwide, as of December 31, 2009.
Appearances in other media
It has been requested that this section be rewritten and expanded to include more information. Reason: Explain in which books it has been adapted
This section is under construction. Therefore, please excuse its informal appearance while it is being worked on. We hope to have it completed as soon as possible.
Super Mario 64 has received various manga adaptations.
The Headless Snowman
Official descriptions
Wii U eShop description
North American version: On a bright, sunny day in the Mushroom Kingdom, Mario goes to visit the princess but finds her castle eerily empty. Leaping through pictures hanging from the walls, he enters 15 magical worlds in a quest to collect the 120 Power Stars pilfered by evil Bowser and save the day. The game's vast worlds teem with daunting obstacle courses, hidden items, puzzles and more than 30 types of enemies. Take advantage of Mario's large selection of moves, including running, jumping, swimming, stomping, punching, and even backward somersaulting! Special caps give him short-lived powers, including the ability to fly. Super Mario 64 features unmatched camera control that makes adventuring in its 3D world a snap, even for newcomers.
European and Oceanian version: Invited to Princess Peach's castle, Mario discovers that she has once again been kidnapped by Bowser and his minions. However, something has changed... This time the adventure is in 3D!
Leaping through pictures hanging from the walls, Mario searches for 120 Power Stars stashed away in vast, magical worlds teeming with daunting obstacle courses, hidden items, puzzles and an army of enemies! Mario has a huge repertoire of moves, including running, jumping, swimming, stomping and punching, and performing a backward somersault that can help him reach even the highest platforms. Special caps give him short-lived powers, including the ability to fly - and if troublemakers swipe Mario's cap, he'll have to grab it back!
Mario runs freely in a grassy meadow, tiptoes through a gloomy dungeon, climbs to the top of a snow-covered mountain, hot-foots it over lava lakes and swims in the castle moat. He can explore an ancient pyramid and even race Koopas for fabulous prizes. And, of course, he must fight his arch-nemesis Bowser, King of the Koopas - not once, but three times!
Please note: Super Mario 64 on Wii U Virtual Console is the US version of the game.
Super Mario 3D All-Stars description
Princess Peach has invited Mario to her castle to enjoy some cake! On his arrival, he's greeted by an eerie silence...until Bowser's laughter echoes through the halls. Thus begins an adventure to rescue the princess by exploring the magical worlds within the castle's many enchanted paintings. This first 3D action game in the Super Mario series launched alongside the Nintendo 64 system. The introduction of the analog Control Stick set a new standard for later games in the series.
Nintendo 64 - Nintendo Switch Online description
Retrieve the Power Stars and confront the ruthless Bowser!
On a bright, sunny day in the Mushroom Kingdom, Mario goes to visit the princess but finds her castle eerily empty. Leaping through pictures hanging from the walls, he enters 15 magical worlds in a quest to collect the 120 Power Stars pilfered by evil Bowser and save the day. The game's vast worlds teem with daunting obstacle courses, hidden items, puzzles, and more than 30 types of enemies. Take advantage of Mario's large selection of moves, including running, jumping, swimming, stomping, punching, and even backward somersaulting! Special caps give him short-lived powers, including the ability to fly.
Super Mario 64 features revolutionary camera controls that make adventuring in its 3D world a snap, even for newcomers.
Glitches
- Main article: List of Super Mario 64 glitches
A notable glitch is the Backwards Long Jump, which lets Mario slide upward on any staircase, including the endless stairs. Another notable glitch is the Black Room of Death, which traps Mario behind the boundaries of the castle walls. It can be achieved in several ways, including using the Backwards Long Jump glitch. Another rather known glitch is the cloning glitch, often used to collect more coins than the actual number of coins in the game.
As in many other N64 titles, the cartridge can be tilted in the console to achieve messed-up results. For example, Mario's body will flip horizontally, but he can still be controlled. Also, the music will be heavily corrupted.
In multiple areas of the game in the Japanese version, there are unintended invisible walls that Mario can bump into. An example is the one on Tall, Tall Mountain just above the wooden log.
Using a well-timed Triple Jump on the slope near the castle, Mario can climb the castle without the cannon. Also, when he reaches a corner, he can fall down slightly and grab on to a ledge. Mario can then pull himself back up onto the roof, at which point he loses a life. For unknown reasons, he also loses his cap. This occurs because when Mario grabs the ledge, he is out of bounds, but the game waits until he pulls himself back up before causing him to lose a life. Something similar can happen if a door leads out of bounds or into a wall, but that can happen only through modding or glitches.
Angled dive
When Mario enters the water, the angle he was facing before entering is preserved in a datum; therefore, when he jumps and lands on dry land, the next dive he performs starts with this angle. A few frames afterward, the angle fixes itself and the dive is completed correctly. Several things "reset" the angle, including grabbing a ledge, shooting from a cannon, changing areas, and jumping while facing a slope. This glitch does not affect the dive itself, just the animation.
Gallery
- For this subject's image gallery, see Gallery:Super Mario 64.
Mario and Bowser
Metal Mario in the Hazy Maze Cave
Soundtrack
- Main article: Super Mario 64 Original Soundtrack
Super Mario 64's soundtrack comprises 34 music cues composed by veteran composer Koji Kondo. The majority of the cues are new material, with some being interpretations of familiar melodies from earlier media. It also includes hundreds of sound effects; sound designer Yoji Inagaki felt that sound effects were equally as important as music.[70]
An album tying in with the game was published by Pony Canyon under license from Nintendo as the first of ten soundtracks in the Nintendo 64 Sound Series. In addition to all of the game's music cues, the album includes Mario's opening voiceover and a piano arrangement of the Piranha Plant's lullaby.
The music for Super Mario 64 was scored using Best Service's Voice Spectral, Brüse & Brüse AudioProduction's Acoustic Drums, Digidesign's SampleCell II CD-ROM Library #1, the E-mu Proteus/1, ILIO's Synclavier World & Orchestral, the Korg Wavestation, Optical Media International's Universe of Sounds: Sonic Images Vol. 1, Q-Up Arts' The Denny Jaeger Private Collection Vol. 1, Rarefaction's A Poke in the Ear With a Sharp Stick, Roland's JD-990 synthesizer and Sound Canvas SC-88 module, Spectrasonics' Bass Legends and Supreme Beats, and the Yamaha VL1.[71] Many of the sound effects in the game were sourced from Sound Ideas' General Series 6000 and Series 1000 sound effects libraries and the sound effects libraries of American film studios Warner Bros. and Universal Pictures.[72]
Media
- For a complete list of media for this subject, see List of Super Mario 64 media.
| File info 1:12 |
| File info 0:29 |
| File info 0:30 |
| File info 0:29 |
| File info 0:29 |
| File info 0:28 |
References to other games
- Super Mario Bros. – Carvings of Mario and Bowser from this game appear on several pillars in Bowser in the Sky. An arrangement of the Ground Theme plays on the title screen, and the Underground Theme can be heard in the music for the Hazy Maze Cave and Wet-Dry World. There is also a small jingle used at the Power Star select screen that sounds identical to the first few notes of the Ground Theme in this game.
- Super Mario World – The idea of Switch Palaces is, in a way, brought back. Also, when Yoshi is met, he says to Mario "It has been so long since our last adventure!" possibly referring to this game. Also, the soundtrack follows the same composition technique used in Super Mario World in a similar way where there is a signature melody in the game that is heard across different levels in several variations ("Super Mario 64 Main Theme," "Snow Mountain," "Slider").
- Super Mario World 2: Yoshi's Island – The theme used for invincibility in this game, specifically the string instruments playing in the background, is reworked into Wing Mario/Vanish Mario's theme for Super Mario 64. The idea of collecting Red Coins first appeared in this title as well. Fly Guys appear as enemies. Ukkikis also appear as non-playable characters. The grunts made by certain enemies and bosses, such as Bullies and the Whomp King, are based on those made by the bosses of this game when hit.
References in later media
- Donkey Kong Country 3: Dixie Kong's Double Trouble! – A possible theme for Wrinkly's Save Cave is similar to "Inside the Castle Walls," the music for the Mushroom Castle, suggesting that Wrinkly Kong is playing this game.
- Mario Kart 64 – The Mushroom Castle is hidden on Royal Raceway, and its appearance is identical to its design in Super Mario 64. The Castle Grounds are also there and unchanged between the two games. As a drawback, the castle is inaccessible. Penguins in Sherbet Land have an identical appearance and come in various sizes.
- The Legend of Zelda: Ocarina of Time – This game was created using a modified version of Super Mario 64's engine, and it was developed alongside it. Additionally, the notes for the Song of Storms are displayed as stars in the night paintings of the second floor in the Mushroom Castle.[73]
- Mario Party – The board Mario's Rainbow Castle is similar to the secret course Tower of the Wing Cap. Mario's title screen (if he is the most recent winner of a board game) depicts him with the Wing Cap flying with the other playable characters.
- Super Smash Bros. – Most of Mario's moves, animations, and voice clips in this game are derived from the ones in Super Mario 64. Metal Mario appears as a boss. Two levels based on places here are also accessible, namely Peach's Castle and Metal Mario's stage. Although Luigi did not appear in the game, his moves, animations, and voice clips are identical to Mario's in Super Mario 64, except his voice clips are higher-pitched versions of Mario's.
- Trade & Battle: Card Hero series – One of the collectible monsters introduced in the first game resembles the Big Bob-omb and shares the same name in Japanese, ボムキング ("Bomb King"). The monster's redesign in Kousoku Card Battle: Card Hero makes the similarities even more apparent.
- Paper Mario – This game starts the same way, with a letter being sent from Peach. Peach's Castle design in this game is similar to that used in the box art of Super Mario 64. Also, the main room is nearly identical (however, the doors lead to different rooms).
- Mario Kart: Super Circuit – Peach's Castle reappears in the background of Peach Circuit, Mario Circuit 1, and Mario Circuit 4. The music for Bowser's Castle 1, Bowser's Castle 2, Bowser's Castle 3, and Bowser's Castle 4 is a sped-up arrangement of Bowser's battle theme from this game.
- Super Smash Bros. Melee – Two stages based on areas from Super Mario 64 appear: Princess Peach's Castle (which also appears as a trophy) and Rainbow Ride. Metal Mario reappears as a boss and a trophy. Additionally, the Metal Box returns in this game as an item and a trophy. Mario still has his voice clips, moves, and animations, and Luigi still has Mario-like voice clips, moves, and animations. One of Kirby's Stone forms is based on the Thwomp's design first used in this game.
- Super Mario World: Super Mario Advance 2 – A section of the music played inside Peach's Castle plays on the status screen.
- Super Mario Sunshine – A brief clip of Mario's fight with Bowser is seen when FLUDD scans Mario. A few of Mario's voice clips are reused in this game.
- Mario & Luigi: Superstar Saga – In Woohoo Hooniversity, a room with four blocks can be seen in it; one of them is a block from Super Mario 64. The name of the game is even mentioned in the description of the blocks, and the professors are trying to figure out why the block vanishes when struck.
- Paper Mario: The Thousand-Year Door – The game starts in the same way: Peach sends Mario another letter.
- Mario Power Tennis – The music that plays during the minigame Artist On the Court is an arrangement of "Inside the Castle Walls."
- Mario Kart DS – Tick Tock Clock appears as a racetrack in this game. Several bosses found here also reappear in this game.
- Mario & Luigi: Partners in Time – The theme for Peach's Castle is a cover version of this game's castle theme.
- New Super Mario Bros. – This game uses many things that originated in Super Mario 64, such as Dorrie, and a Bowser head closes in on the screen when Mario loses a life. Also, the Wing/Vanish Cap theme is present for invincibility in this game. This is largely because many assets in this game were reused from Super Mario 64 DS.
- Mario Strikers Charged – A cover of the music that plays in Big Boo's merry-go-round is featured in this game, as the theme associated with Boo sidekicks.
- Super Mario Galaxy – The game starts in the same way, with Peach sending Mario another letter. Also, "Bowser's Road" is covered for Bowser's Star Reactor and Bowser's Dark Matter Plant. Also, the falling asleep idle animation returns.
- Super Smash Bros. Brawl – The music from the Bob-omb Battlefield is unlockable, and the Rainbow Ride stage and Metal Box from the previous game return as well. Mario retains the moves and animations that originated in Super Mario 64.
- Mario Super Sluggers – Both songs that play when the player plays in Peach Ice Garden and goes into said place in the Challenge mode are arrangements of the music for Peach's Castle from this game.
- Mario & Luigi: Bowser's Inside Story – The music for when the Mario Bros. first enter Peach's Castle and when everyone is removed from Bowser's Belly is a cover of the Peach's Castle theme. Also, both games end in a view of a cake with Mario and Peach figures on it.
- Mario & Sonic at the Olympic Winter Games – In the Wii version, an arrangement of Cool, Cool Mountain's and Snowman's Land's music is used in Dream Snowball Fight. The main theme and the Bowser stage theme are also used. In the Nintendo DS version, the Cool, Cool Mountain theme is also rearranged as the second part of the Mario & Sonic Download Medley in Ultimate Figure Skating.
- New Super Mario Bros. Wii – Peach's Castle reappears in the game. Winning a Toad House minigame plays the jingle heard after Mario exits a course with a Power Star, and when the player reveals a pair of Bowser or Bowser Jr. icons in the minigame Power-up Panels, the short tune that plays when Mario tries to enter a locked door is heard.
- Super Mario Galaxy 2 – In both Tall Trunk Galaxy (during the mission Tall Trunk's Big Slide) and Rolling Coaster Galaxy, an arrangement of "Slider" plays at a moment. Also Whomp's Fortress reappears as the Throwback Galaxy, alongside Bob-omb Buddies and the Whomp King. Both games start with Peach sending a letter to Mario. Also, an orchestral cover of "Bowser's Road" plays in Bowser's Lava Lair and Bowser's Gravity Gauntlet.
- Super Mario 3D Land – The sound effect of Mario falling from a high place is reused, plus the platforming style is mixed together with Super Mario Bros. 3 and Super Mario Galaxy. Also, when Mario waits outside a purple Mystery Box on the map screen, the endless stairs music from Super Mario 64 can be heard.
- Mario Kart 7 – Metal Mario appears as a playable character.
- Mario Tennis Open – A cover of the music for Peach's Castle is used for Peach's Palace. On the Bowser's Castle court, a cover of the Bowser battle music is played.
- New Super Mario Bros. 2 – The first few notes of the theme for Peach's Castle are played during the intro.
- Paper Mario: Sticker Star – The theme "Slider" is covered during the minecart part of Bowser's Snow Fort.
- Super Mario 3D World – A cover of the theme "Slider" plays when the player rides Plessie. In Shifty Boo Mansion, a level in Super Mario 3D World, there is a Green Star hidden behind a portrait of a Boo that can be entered like the pictures in Peach's Castle.
- Mario Kart 8 / Mario Kart 8 Deluxe – The merry-go-round music from Big Boo's Haunt can be heard near the Aqua Cups ride in Water Park.
As part of their promotion of Wave 2 of the Mario Kart 8 Deluxe – Booster Course Pass, several official Mario Kart Facebook pages localized for European audiences posted a screenshot showing Tanooki Mario driving near a penguin in GBA Snow Land, with descriptions that translate to "Penguins never forget" or "A penguin never forgets";[74][75][76][77] the descriptions, together with the picture, likely reference a popular gameplay act in Super Mario 64 wherein players would intentionally drop the Baby Penguin off-bounds in the course Cool, Cool Mountain,[78][79] implying that Mario is culpable for this act and that penguins hold a grudge against him as a result. - Mario Party: Island Tour – A cover of "Koopa's Road" plays in Bowser's Peculiar Peak.
- Super Smash Bros. for Nintendo 3DS / Wii U – Peach's Castle (64) appears as a DLC stage, which returns from the original Super Smash Bros. In Super Smash Bros. for Wii U, the original version of the main theme returns, and an arranged version of the theme is featured in the DLC stage in both games.
- Super Mario Maker – The victory theme and the Game Over theme are used when the Mario, Silver Mario, and Gold Mario costumes complete a level or lose a life, respectively. Additionally, when a Super Star is obtained, the Wing Cap theme is played for the Mario costume and the Metal Cap theme is played for the Silver Mario and Gold Mario costumes.
- Mario & Luigi: Paper Jam – King Bob-omb reappears as a boss in this game.
- Super Mario Odyssey – The game marks a return to the non-linear, open-ended style of gameplay for 3D Super Mario platformers established by this game. An arrangement of Bowser's theme can be heard in the song "Break Free (Lead the Way)." The Mushroom Kingdom is filled with many references to Mario's past, mostly Super Mario 64. Its regional currency is based on the design of the coins from Super Mario 64. Additionally, Mario can dress up as the original Super Mario 64 model of himself by buying the hat and costume separately at the Mushroom Kingdom Crazy Cap shop. Also, the Metal outfit is just the Super Mario 64 suit but with a metal coat. The jingle that plays when Mario collects a Power Moon is an arrangement of the course jingle from Super Mario 64. Also, the brochure held by Hint Toad and in the Odyssey depicts the Bob-omb Battlefield.
- Mario Tennis Aces – An arrangement of Bowser's level and battle themes is played during the final battle against Bowcien in Adventure Mode.
- Super Smash Bros. Ultimate – The Peach's Castle stage returns in this game, along with Princess Peach's Castle and Rainbow Cruise.
- Super Mario Maker 2 – The original theme "Slider" is featured as a sound effect under the "Musical" category, represented by the Nintendo 64 logo.
- The Super Mario Bros. Movie – A cannon from Super Mario 64 appears. The Main Theme and "Inside the Castle Walls" are arranged into the film's score. The Bob-omb Battlefield appears in the film when Mario, Peach, and Toad are journeying to the Jungle Kingdom. The sun floor pattern surrounding the map is similar to the floor pattern in the first floor of Peach's Castle. King Bob-omb appears at Bowser and Peach's wedding. A Maw-Ray appears. Bowser's laugh is used in "Press Start." One of the attacks used by the Mario Bros. against Bowser in the final battle involves grabbing him by his tail, spinning him, and tossing him upwards, similar to the attack used to defeat Bowser from Super Mario 64.
- Pikmin 4 – The "Mechanical Harp (Lullabies)" treasure found in the second sublevel of the Cavern for a King plays "Piranha Plant's Lullaby" when being carried by Pikmin or interacted in the Treasure Catalog.
- Super Mario Bros. Wonder – Part of "Koopa's Theme" plays when Bowser is transformed into Castle Bowser from the effects of the Wonder Flower. An arrangement of "Slider" plays during the level Bonus: Coins Galore! A new variant of the Metal Mario power-up theme plays when characters turn metal under a Wonder Effect.
Names in other languages
| Language | Name | Meaning | Notes |
|---|---|---|---|
| Japanese | スーパーマリオ Sūpā Mario Rokujūyon |
Super Mario 64 | |
| Chinese (simplified) | 神游马力欧 (iQue Player)[?] Shényóu Mǎlì'ōu |
iQue Mario | |
| 超级马力欧64 (Super Mario 3D All-Stars)[80] | Super Mario 64 | ||
| Chinese (traditional) | 超級瑪利歐64[81] Chāojí Mǎlì'ōu Liùshísì |
Super Mario 64 | |
| Korean | Super Mario 64[?] | - |
Notes and references
Notes
A - Mizu-chan (21 Jan. 2014). Miniature Japanese garden. Minato, Tokyo: Muza-chan's Gate to Japan.
B - Private correspondence with shmuplations clarifies that the text they translated as "diorama"[34] was written as 箱庭 (hakoniwa) in the original text.[35]
References
- ^ Scullon, Chris (June 23, 2021). The Nintendo 64 and Super Mario 64 Turn 25 Years Old Today. Gamer Network via Video Games Chronicle. Retrieved December 18, 2024.
- ^ Kohler, Chris (September 29, 2016). Nintendo 64 Came Out 20 Years Ago. Here's How a Teenaged Me Reviewed It. Retrieved December 18, 2024.
- ^ Yin-Poole, Wesley (March 1, 2017). The Nintendo 64 Turns 20 in Europe. Gamer Network via Eurogamer. Retrieved December 18, 2024.
- ^ October 4, 2021. Super Mario 64 (N64). NLife Media via Nintendo Life. Retrieved December 18, 2024.
- ^ 「スーパーマリオ64 振動パック対応バージョン 1997年7月18日発売」– スーパーマリオ64. Nintendo (Japanese). Retrieved December 18, 2024.
- ^ iQue PLAYER优惠套装上海试卖,五款精品游戏同步发售!. iQue (Chinese). Retrieved December 18, 2024.
- ^ Blevins, Joe (March 4, 2016). Meet the iQue Player, a Nintendo Console That Was Only Available in China. G/O Media via The A.V. Club. Retrieved December 18, 2024.
- ^ March 1998. Electronic Gaming Monthly issue 104. Page 28. Retrieved November 19, 2024.
- ^ Nintendo Direct Presentation - 01.04.2015. Posted to YouTube by Nintendo of Europe on April 1, 2015. Retrieved April 1, 2015.
- ^ https://www.nintendo.com/en-za/Games/Nintendo-64/Super-Mario-64-269745.html
- ^ Super Mario 64 for Wii U Virtual Console on the Nintendo of Japan website. Retrieved April 1, 2015.
- ^ Nintendo (September 23, 2021). Nintendo Direct - 9.23.2021. YouTube. Retrieved September 24, 2021.
- ^ Nintendo 公式チャンネル (September 24, 2021). Nintendo Direct 2021.9.24. YouTube. Retrieved September 24, 2021.
- ^ @NintendoEurope (September 23, 2021). "Play a growing library of Nintendo 64 and SEGA Mega Drive games anytime, anywhere with #NintendoSwitchOnline + Expansion Pack, a new membership launching in late October." Twitter. Retrieved September 24, 2021.
- ^ @NintendoAUNZ (September 24, 2021). "Play a growing library of Nintendo 64 and SEGA Mega Drive games anytime, anywhere with #NintendoSwitchOnline + Expansion Pack, a new membership launching in late October." Twitter. Retrieved September 24, 2021.
- ^ 《集合啦!動物森友會》將於11月5日發布免費更新(Ver.2.0),以及發售付費新增內容《集合啦!動物森友會 快樂家樂園》。 Nintendo HK. Retrieved October 16, 2021.
- ^ 「Nintendo Switch Online」을 더욱 즐겁게! 「Nintendo Switch Online + 추가 팩」이 10월 26일(화)부터 시작! Nintendo Korea. Retrieved October 16, 2021.
- ^ Sakai, Kazuya (Ambit), kikai, Akinori Sao, Junko Fukuda, Kunio Takayama, and Ko Nakahara (Shogakukan), editors (2015). 『スーパーマリオブラザーズ百科: 任天堂公式ガイドブック』. Tokyo: Shogakukan (Japanese). ISBN 978-4-09-106569-8. Page 11–13.
- ^ Nintendo Co., Ltd. HISTORY → Series → Super Mario. Mario Portal. Retrieved 6 Nov. 2024. (Archived October 3, 2024, 11:52:39 UTC via Wayback Machine.)
- ^ GameFaqs - The top 10 games Ever
- ^ Edge Online - The 100 Best Games to Play Today
- ^ Official Nintendo Magazine - 100 Best Nintendo Games
- ^ GameSpot - 15 Most Influential Games of All Time
- ^ http://gamingafterhours.com/2014/06/24/super-mario-64dd-version-discovered-in-japan/
- ^ O'Malley, James (September 11, 2015). 30 Best-selling Super Mario Games of All Time on the Plumber's 30th Birthday. Gizmodo. Archived from the original. Retrieved August 2, 2022.
- ^ https://www.gamespot.com/articles/wii-vc-47m-downloads-100-games/1100-6171850/
- ^ "Bowser has stolen the castle's Stars, and he's using their power to create his own world in the paintings and walls." – Toad (1996). Super Mario 64 by Nintendo EAD (North American localization). Nintendo of America.
- ^ "Bowser is trying to make a land of monsters inside the walls and the paintings by using the Power Star. Take back the star!" – Toad (1996). Super Mario 64 by Nintendo EAD (Japanese localization). Nintendo Co., Ltd.. (Archived via a translation by u/AlexLuis on Reddit.)
- ^ 「絵の世界のボム兵の話ではこうだ。「突然あらわれた怪物たちが、お城を守るちからの素、パワースターを大量に奪い取り、ピーチ姫やキノコ城の住人たちもこちらの世界に連れ去った。そして絵の世界の住人も怪物にしたてあげ、本当の世界に送りこんで、マリオたちの国を支配しようとしている」。」– Nintendo Co., Ltd. (1996). STORY. Super Mario 64 Official Site (Japanese).
- ^ "To help him accomplish this, [Bowser] plans to convert the residents of the painting world into monsters as well. If nothing is done, all those monsters will soon begin to overflow from inside the painting." – Nintendo of America (1996). "Story" in Super Mario 64 Instruction Booklet (pdf). Redmond: Nintendo of America. Page 5.
- ^ "Bowser stole the Power Stars that protected the castle and hid them away in magical painting worlds. These worlds look like paintings from the outside, but inside, they are real, three-dimensional places, filled with mysteries and all sorts of characters, both good and bad.... One school of thought believes that Bowser will turn Peach and her entourage into a sort of zombie army, then let them loose on our world. A competing theory suggests that Bowser will simply extend his painting worlds so that they encompass all of reality." – Pelland, Scott, and Dan Owsen (1996). "The Story of Super Mario 64" in The Super Mario 64 Player's Guide. Redmond: Nintendo of America. Page 5.
- ^ a b c d Koizumi, Yoshiaki (27 Nov. 2007). Super Mario Galaxy: The Journey from Garden to Galaxy. Montréal: Montreal International Games Summit, Alliance numériQC. Retrieved 27 Feb. 2021. (Archived 24 Sep. 2016 via YouTube by Eric St-Cyr and A Hover.)
- ^ a b 64編集部, editors (1996). 『スーパーマリオ64 マリオ・ザ・テクニック―完全攻略への最短ルート編』. Tokyo: Takarajimasha (Japanese). ISBN 978-4-79-661121-3. Cited in-text as Takarajimasha (1996).
- ^ a b c d e shmuplations (translator). "Super Mario 64 – 1996 Developer Interviews" (English translations of Takarajimasha and Shogakukan, 1996). shmuplations.com. Published 2022. Accessed 22 Jun 2023.
- ^ a b c Editing staff (1996). 『スーパーマリオ64 (ワンダーライフスペシャル―任天堂公式ガイドブック)』. Tokyo: Shogakukan (Japanese). ISBN 978-4-09-102554-8. Cited in-text as Shogakukan (1996).
- ^ a b c Trinen, Bill (14 Jun. 2017). What's in a Box?. Nintendo Treehouse Log. Retrieved 30 Jan. 2021.
- ^ Dean, Andrew R. (10 Dec. 2010). "Chapter 8: The Courtyard Garden" in Handbook, Part 1: Design & Craft (digital). North American Japanese Garden Association, najga.org. Retrieved 24 Jun. 2023.
- ^ Nihon Gaiji Kyōkai, editors (1957). Contemporary Japan: A Review of Far Eastern Affairs (25). Tokyo: Foreign Affairs Association of Japan. Page 246.
- ^ a b c d Design Doc (12 Oct. 2020). What Makes a Great Hub World? - How Mario 64, Spyro, and Hades Made Theirs ~ Design Doc. YouTube. Retrieved 18 Aug. 2023.
- ^ a b c d e Nintendo of America (1998). Super Mario 64 Strategy. Nintendo Official Site. Archived June 10, 1998, 06:41:37 UTC from the original via Wayback Machine.
- ^ a b Nintendo of Europe (1996). Super Mario 64 Instruction Booklet. Großostheim: Nintendo of Europe. Page 15.
- ^ Upchurch, David, editor (Mar. 1997). "Super Mario 64 The Essential Player's Guide" from Official UK Nintendo Magazine (54). London: East Midland Allied Press. Page 31.
- ^ Upchurch, p. 30
- ^ Upchurch, p. 32
- ^ Pelland, Scott and Dan Owsen (1996). The Super Mario 64 Player's Guide. Redmond: Nintendo of America.
- ^ Pelland and Owsen, p. 44
- ^ Pelland and Owsen, p. 45
- ^ Pelland and Owsen, p. 81
- ^ Pelland and Owsen, p. 82
- ^ Pelland and Owsen, p. 126
- ^ a b c d e Nintendo of America (1998). Bonus Stars - Super Mario 64 Strategy. Nintendo Official Site. Archived June 10, 1998, 03:54:13 UTC from the original via Wayback Machine.
- ^ a b Pelland and Owsen, p. 5
- ^ a b Rich Stanton. A Brief History Of Video Games: From Atari to Virtual Reality (digital). London: Little, Brown Book Group, 2015. ISBN: 978-1-47-211881-3.
- ^ Christopher W. Totten. "Hub Spaces". An Architectural Approach to Level Design. Boca Raton: CRC Press, 2018. pages 133-135. ISBN: 978-1-35-198292-4.
- ^ JoshDuMan. August 28, 2019. Decomp is out! …but what does that mean? – Ukikipedia News Week 10
- ^ Shogakukan. 2015. Super Mario Bros. Hyakka: Nintendo Kōshiki Guidebook, Super Mario 64 section, p. 85. 「ピーチ姫の飼っているウサギ。」 ("Princess Peach’s pet rabbit.")
- ^ Pelland and Owsen, p. 96
- ^ Upchurch, p. 20
- ^ Pelland and Owsen, p. 115
- ^ Pelland and Owsen, pp. 25, 26, 28
- ^ Upchurch, p. 30
- ^ Pelland and Owsen, p. 119
- ^ Pelland and Owsen, p. 80
- ^ Pelland and Owsen, p. 28
- ^ Pelland and Owsen, p. 126
- ^ Martinet, Charles (April 29, 2019). Tweet by Charles Martinet. Twitter. Retrieved February 6, 2021.
- ^ Master0fHyrule (September 18, 2020). 5 MAJOR Differences In Super Mario 64 That You Will Miss! (Super Mario 3D All Stars). YouTube. Retrieved September 23, 2020.
- ^ MacDonald, Keza (September 14, 2020). Super Mario at 35: Mario's makers on Nintendo's most enduring mascot. The Guardian. Retrieved November 15, 2020.
- ^ http://americanart.si.edu/exhibitions/archive/2012/games/#games
- ^ https://www.nintendo.co.jp/nom/0106/koukaon/interv/talk/index.html
- ^ https://docs.google.com/spreadsheets/d/1JJBlHHDc65fhZmKUGLrDTLCm6rfUU83-kbuD8Y0zU0o/edit?pli=1#gid=717751203
- ^ https://soundeffects.fandom.com/wiki/Super_Mario_64
- ^ HiteiGG's Twitter post, showing the Song of Storms in Super Mario 64
- ^ MarioKartESP (August 17, 2022). Los pingüinos nunca olvidan. Facebook. Retrieved November 27, 2022.
- ^ MarioKartItalia (August 17, 2022). Un pinguino non dimentica mai. Facebook. Retireved November 27, 2022. (Archived via November 27, 2022, 22:01:36 UTC via archive.today.)
- ^ MarioKartNL (August 17, 2022). Een pinguïn vergeet nooit. Facebook. Retireved November 27, 2022. (Archived via November 27, 2022, 22:04:13 UTC via archive.today.)
- ^ MarioKartPT (August 17, 2022). Os pinguins nunca esquecem. Facebook. Retireved November 27, 2022. (Archived via November 27, 2022, 22:02:38 UTC via archive.today.)
- ^ March 6, 2013. We all did this - [Super Mario 64]. Reddit (/r/gaming). Retrieved November 27, 2022.
- ^ Fairfax, Zackerie (March 10, 2021). What Super Mario 64's Penguin Reveals About Its Players. screenrant.com. Retrieved November 27, 2022. (Archived July 19, 2021, 01:30:26 UTC via Wayback Machine.)
- ^ 《超级马力欧64》、《超级马力欧阳光》和《超级马力欧银河》。 3款历代的3D马力欧收录在Nintendo Switch的《超级马力欧 3D 收藏辑》,将于9月18日发售!. Nintendo HK (Chinese). Retrieved September 2020.
- ^ 《超級瑪利歐64》、《超級瑪利歐陽光》和《超級瑪利歐銀河》。3款歷代的3D瑪利歐收錄在Nintendo Switch的《超級瑪利歐 3D 收藏輯》,將於9月18日發售!. Nintendo HK (Chinese (Traditional)). Retrieved September 2020.
External links
- Mario Portal Game Archive (EN)
- Mario Portal Game Archive (JP)
- Official Super Mario 64 Japanese website
- Official Super Mario 64: Shindō Pak Taiō Version Japanese website
- Super Mario 64 Chinese website
- American English instruction booklet
- European English instruction booklet
- French instruction booklet
- Super Mario 64: Shindō Pak Taiō Version Japanese instruction booklet
| Nintendo 64 games | ||
|---|---|---|
| Super Mario franchise | Super Mario 64 (1996) • Mario Kart 64 (1996) • Mario no Photopi (1998) • Mario Party (1998) • Mario Golf (1999) • Mario Artist: Paint Studio* (1999) • Mario Party 2 (1999) • Mario Artist: Talent Studio* (2000) • Mario Artist: Communication Kit* (2000) • Mario Tennis (2000) • Paper Mario (2000) • Mario Artist: Polygon Studio* (2000) • Mario Party 3 (2000) • Dr. Mario 64 (2001) | |
| Donkey Kong franchise | Diddy Kong Racing (1997) • Donkey Kong 64 (1999) | |
| Yoshi franchise | Yoshi's Story (1997) | |
| Crossovers | Super Smash Bros. (1999) | |
