SNES Mario Circuit 2: Difference between revisions
No edit summary |
m (Text replacement - "(\| *)Jap([RMCN\d]* *=)" to "$1Jpn$2") |
||
| (66 intermediate revisions by 28 users not shown) | |||
| Line 5: | Line 5: | ||
|appears_in=''[[Super Mario Kart]]'' ([[List of games by date#1992|1992]])<br>''[[Mario Kart: Super Circuit]]'' ([[List of games by date#2001|2001]])<br>''[[Mario Kart 7]]'' ([[List of games by date#2011|2011]])<br>''[[Mario Kart Tour]]'' ([[List of games by date#2019|2019]]) | |appears_in=''[[Super Mario Kart]]'' ([[List of games by date#1992|1992]])<br>''[[Mario Kart: Super Circuit]]'' ([[List of games by date#2001|2001]])<br>''[[Mario Kart 7]]'' ([[List of games by date#2011|2011]])<br>''[[Mario Kart Tour]]'' ([[List of games by date#2019|2019]]) | ||
|cups=[[Mushroom Cup]] (''Super Mario Kart'')<br>[[Classic course#Mario Kart: Super Circuit|Extra Flower Cup]] (''Super Circuit'')<br>[[Banana Cup]] (''7'') | |cups=[[Mushroom Cup]] (''Super Mario Kart'')<br>[[Classic course#Mario Kart: Super Circuit|Extra Flower Cup]] (''Super Circuit'')<br>[[Banana Cup]] (''7'') | ||
|tours=[[Tokyo Tour]]<br>[[London Tour]]<br>[[Holiday Tour (2019)]]<br>[[New Year's Tour (2020)]]<br>[[Vancouver Tour]]<br>[[Baby Rosalina Tour]]<br>[[Hammer Bro Tour]]<br>[[Trick Tour (2020)]]<br>[[Exploration Tour]]<br>[[Wild West Tour]]<br>[[Summer Festival Tour]]<br>[[Super Mario Kart Tour]]<br>[[Mario vs. Luigi Tour (2020)]]<br>[[New Year's 2021 Tour]]<br>[[Snow Tour]]<br>[[Trick Tour (2021)]]<br>[[Wedding Tour]]<br>[[Los Angeles Tour (2021)]]<br>[[Holiday Tour (2021)]]<br>[[Sky Tour]]<br>[[Bangkok Tour]]<br>[[Piranha Plant Tour]]<br>[[Ocean Tour]] | |tours=[[Tokyo Tour]]<br>[[London Tour]]<br>[[Holiday Tour (2019)]]<br>[[New Year's Tour (2020)]]<br>[[Vancouver Tour]]<br>[[Baby Rosalina Tour]]<br>[[Hammer Bro Tour]]<br>[[Trick Tour (2020)]]<br>[[Exploration Tour (2020)]]<br>[[Wild West Tour]]<br>[[Summer Festival Tour]]<br>[[Super Mario Kart Tour]]<br>[[Mario vs. Luigi Tour (2020)]]<br>[[New Year's 2021 Tour]]<br>[[Snow Tour]]<br>[[Trick Tour (2021)]]<br>[[Wedding Tour]]<br>[[Los Angeles Tour (2021)]]<br>[[Holiday Tour (2021)]]<br>[[Sky Tour]]<br>[[Bangkok Tour]]<br>[[Piranha Plant Tour]]<br>[[Ocean Tour]]<br>[[Mario Tour (2023)]]<br>[[Mario vs. Luigi Tour (2023)]] | ||
|online_play=No longer available ([[Nintendo 3DS|3DS]]) | |||
|sample=''Super Mario Kart''<br>[[File:SMK-Music-MarioCircuit.oga]]<br>''Mario Kart: Super Circuit''<br>[[File:MKSC-ExtraCourse-MarioCircuit.oga]]<br>''Mario Kart 7 / Mario Kart Tour''<br>[[File:MKT SNES Mario Circuit Theme.oga]]<br>''Mario Kart 7'' (frontrunning)<br>[[File:MK7_SNES_MarioCircuit2_Frontrunning.oga]] | |||
|online_play= | |||
|sample=''Super Mario Kart''[[File:SMK-Music-MarioCircuit.oga]] ''Mario Kart: Super Circuit''[[File:MKSC-ExtraCourse-MarioCircuit.oga]] ''Mario Kart 7 / Mario Kart Tour''[[File:MKT SNES Mario Circuit Theme.oga]] ''Mario Kart 7'' (frontrunning)[[File:MK7_SNES_MarioCircuit2_Frontrunning.oga]] | |||
|map=''Super Mario Kart''<br>[[File:SNES Mario Circuit 2.png|140px]]<br> | |map=''Super Mario Kart''<br>[[File:SNES Mario Circuit 2.png|140px]]<br> | ||
''Mario Kart: Super Circuit''<br>[[File:MKSC SNES Mario Circuit 2 Map.png|140px]]<br> | ''Mario Kart: Super Circuit''<br>[[File:MKSC SNES Mario Circuit 2 Map.png|140px]]<br> | ||
<div style="white-space: nowrap;">[[File:MKSC Mario Circuit 2 Extra Cup Map.png|frameless|upright=0.75|Minimap as seen on the menu]][[File:MKSC SNES Mario Circuit 2 Mini Map.png|frameless|upright=0.75|''Mario Kart: Super Circuit'' minimap as seen in the race]]</div | <div style="white-space: nowrap;">[[File:MKSC Mario Circuit 2 Extra Cup Map.png|frameless|upright=0.75|Minimap as seen on the menu]][[File:MKSC SNES Mario Circuit 2 Mini Map.png|frameless|upright=0.75|''Mario Kart: Super Circuit'' minimap as seen in the race]]</div> | ||
''Mario Kart 7''<br>[[File:MK7 SNESMarioCircuit2.png|140px]][[File:MK7 SNES Mario Circuit 2 Minimap.png|140px]]<br> | ''Mario Kart 7''<br>[[File:MK7 SNESMarioCircuit2.png|140px]][[File:MK7 SNES Mario Circuit 2 Minimap.png|140px]]<br> | ||
''Mario Kart Tour''<br>[[File:MKT Map MarioCircuit2SNES.png|140px]] | ''Mario Kart Tour''<br>[[File:MKT Map MarioCircuit2SNES.png|140px]] | ||
|ghost={{ghost|7|Nin★ITRO-S|1:28.106|[[File:MarioMKW.png|32px|link=Mario]][[File:MK7 Pipe Frame.png|32px|link=Pipe Frame]][[File:MK7_Standard.png|32px|link=Standard (tire)]][[File:MK7 Super Glider.png|32px|link=Super Glider]]}}{{ghost|7 <small>Expert</small>|<nowiki>Nin★==Kony</nowiki>|1:17.777|[[File:MarioMKW.png|32px|link=Mario]][[File:MK7_B_Dasher.png|32px|link=B Dasher]][[File:MK7 Slick.png|32px|link=Slick]][[File:MK7 Super Glider.png|32px|link=Super Glider]]}} | |||
}} | }} | ||
'''Mario Circuit 2''' is the fifth and final course of the [[Mushroom Cup]] in ''[[Super Mario Kart]]''. It reappears in ''[[Mario Kart: Super Circuit]]'' as the first course of the [[Classic course#Mario Kart: Super Circuit|Extra Flower Cup]], in ''[[Mario Kart 7]]'' as the second course of the [[Banana Cup]], and in various tours in ''[[Mario Kart Tour]]'' since debuting in the [[Tokyo Tour]]. | '''Mario Circuit 2''' is the fifth and final course of the [[Mushroom Cup]] in ''[[Super Mario Kart]]''. It reappears in ''[[Mario Kart: Super Circuit]]'' as the first course of the [[Classic course#Mario Kart: Super Circuit|Extra Flower Cup]], in ''[[Mario Kart 7]]'' as the second course of the [[Banana Cup]], and in various tours in ''[[Mario Kart Tour]]'' since debuting in the [[Tokyo Tour]]. | ||
==Course layout== | ==''Super Mario Kart''== | ||
===Course layout=== | |||
[[File:SMK Mario Circuit 2 Screenshot.png|thumb|left|The course in ''Super Mario Kart'']] | [[File:SMK Mario Circuit 2 Screenshot.png|thumb|left|The course in ''Super Mario Kart'']] | ||
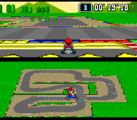
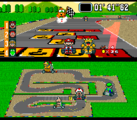
The course is much more complex than Mario Circuit 1. In addition to its many turns, both [[Warp Pipe|pipes]] and [[oil slick]]s appear as obstacles. The course begins with an immediate 90° turn to the left followed by a 90° turn to the right and another 90° left turn. There is then a brief straightaway, where racers encounter the only set of [[? Panel]]s, followed by another 90° left turn. Racers then take another left turn followed by three right turns separated by brief straights; the final right turn is a sharp U turn which brings racers to a bunch of [[Dash Panel|zippers]] covering the width of the track. These zippers are placed directly before a jump pad, allowing racers to jump over a previous part of the track, something that does not happen on any other track. After landing from the jump there is one last 90° left turn and racers then reach the finish line. | |||
{{ | |||
When playing in Grand Prix mode, sometimes a computer driver (mainly last place) does not manage to complete the full jump where racers cross over the track, preventing them from completing a lap. This can also happen to a player when trying to do the jump too slowly. | |||
===Shortcuts=== | |||
A notable shortcut can be found at the beginning of the track. After the first turn, the player can use a [[Dash Mushroom|Mushroom]] or [[Super Star|Star]] to drive through the off-road to the left of the track, cutting off the following two left turns. | |||
===Glitches=== | |||
There is a bug that allows Lakitu to count two laps when only one lap was completed. For this glitch, the player needs one mushroom. Using the ramp near the end, the player must use the mushroom as soon as they use the jump, trying to land near the goal, but in the out-of-bounds area (for the glitch to work, the character must be a little stuck in the wall). If successful, Lakitu will position the player where the goal is, counting a total of two laps (the one the player traveled normally and the one that is glitched). This same glitch works in ''Mario Kart: Super Circuit''.{{ref needed}} | |||
==''Mario Kart: Super Circuit''== | ==''Mario Kart: Super Circuit''== | ||
[[File:MKSC Mario Circuit 2.png|thumb| | [[File:MKSC Mario Circuit 2.png|thumb|Mario racing in Mario Circuit 2 in ''Mario Kart: Super Circuit'']] | ||
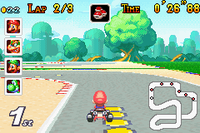
Mario Circuit 2 reappears in ''[[Mario Kart: Super Circuit]]'' as the first track of the [[Classic course#Mario Kart: Super Circuit|Extra Flower Cup]]. The background is from [[GBA Mario Circuit|that game's own Mario Circuit]]. An extra [[Item Box]] is placed at the left of the track before the jump. The pipe and oil slick hazards have been removed. | Mario Circuit 2 reappears in ''[[Mario Kart: Super Circuit]]'' as the first track of the [[Classic course#Mario Kart: Super Circuit|Extra Flower Cup]]. The background is from [[GBA Mario Circuit|that game's own Mario Circuit]]. An extra [[Item Box]] is placed at the left of the track before the jump. The pipe and oil slick hazards have been removed. | ||
{{br | {{br}} | ||
==''Mario Kart 7''== | ==''Mario Kart 7''== | ||
[[File:MK7-SFC-MC.png | [[File:MK7-SFC-MC.png|thumb|left|250px|{{classic|SNES|Mario Circuit 2}} in ''Mario Kart 7'']] | ||
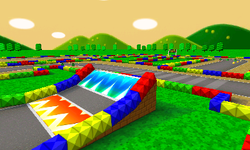
Mario Circuit 2 | Mario Circuit 2 also reappears in ''[[Mario Kart 7]]'' as the second course of the [[Banana Cup]]. Unlike its previous iterations, it has three laps instead of five, and is built in a larger scale, similar to that of {{classic link|SNES|Mario Circuit 3}} in ''[[Mario Kart Wii]]''. | ||
The large jump now encompasses a [[Glide Ramp| | In this version, the Warp Pipes and oil slicks return as obstacles, after being absent from the ''Mario Kart: Super Circuit'' iteration. There are also some new gameplay changes in this version. The straightaways between the 1st and 7th turns have been made longer. There is a trick ramp which makes it easier to perform part of the large off-road shortcut; players can also now use a hidden Bullet Bill path to perform the entire shortcut. The large jump now encompasses a [[Glide Ramp|glide ramp]]. After this glide ramp there is a long ramp on the left wall which allows racers to get extra distance. The straightaway between the 9th and 10th turns has also been lengthened, in order to prevent racers from cutting the track by using the gliders similar to how racers could exploit the jump in previous ''Mario Kart'' games. Players now may fall to the lower section of the track. If players do fall down, they will get picked up by [[Lakitu]] and brought back to the next section of the track. The [[Finish Line (object)|finish line]] is also placed further back from its original appearance, and a starting banner has been added. | ||
This is the first retro track ported from the 2D games to have slopes, which are otherwise commonplace in 3D games. | |||
==''Mario Kart Tour''== | ==''Mario Kart Tour''== | ||
[[File:MKT Icon MarioCircuit2SNES | [[File:MKT Icon MarioCircuit2SNES ToadPitCrew.png|thumb|right|The icon for the course in ''Mario Kart Tour'']] | ||
Mario Circuit 2 reappears in ''[[Mario Kart Tour]]'', starting with the [[Tokyo Tour]]. It remains unchanged in terms of layout, taking its appearance from ''Mario Kart 7''. | Mario Circuit 2 reappears in ''[[Mario Kart Tour]]'', starting with the [[Tokyo Tour]]. It remains unchanged in terms of layout, taking its appearance and music from ''Mario Kart 7''. It also shares its music with {{classic link|SNES|Mario Circuit 1}}, {{classic link|SNES|Mario Circuit 3}}, and [[RMX Mario Circuit 1]]. | ||
The course also appears as '''Mario Circuit 2R''' (reversed), '''Mario Circuit 2T''' (with ramps), and '''Mario Circuit 2R/T''' (reversed with ramps). The first two were introduced alongside the normal variant in the Tokyo Tour, while the last was introduced in the [[New Year's Tour (2020)|2020 New Year's Tour]]. In the T variant, there is a [[Chain Chomp]] near the trick ramp in the off-road , and the glide ramp is now gone. In the R/T variant, three [[Piranha Plant]]s appear on the sides of the course. | |||
===Appearances=== | |||
For this course's tour appearances, see [[List of SNES Mario Circuit 2 tour appearances in Mario Kart Tour|List of {{classic|SNES|Mario Circuit 2}} tour appearances in ''Mario Kart Tour'']]. | |||
===Top-tier and middle-tier items=== | |||
{{MKT favored table|SNES|Mario Circuit 2}} | |||
===Bonus challenges=== | |||
<div class="contentbox mw-collapsible mw-collapsed> | |||
{{MKT bonus challenge table|Ring Race|SNES Mario Circuit 2}} | |||
{{MKT bonus challenge table|Do Jump Boosts|SNES Mario Circuit 2}} | |||
{{MKT bonus challenge table|Goomba Takedown|SNES Mario Circuit 2}} | |||
{{MKT bonus challenge table|Glider Challenge|SNES Mario Circuit 2}} | |||
{{MKT bonus challenge table|Steer Clear of Obstacles|SNES Mario Circuit 2}} | |||
{{MKT bonus challenge table|Vs. Mega|SNES Mario Circuit 2|char=Larry|lc=yes}} | |||
{{MKT bonus challenge table|Smash Small Dry Bones|SNES Mario Circuit 2}} | |||
{{MKT bonus challenge table|Break Item Boxes|SNES Mario Circuit 2}} | |||
{{MKT bonus challenge table|Time Trial|SNES Mario Circuit 2|SNES Mario Circuit 2R}} | |||
{{MKT bonus challenge table|Combo Attack|SNES Mario Circuit 2T}} | |||
</div> | |||
==Gallery== | ==Gallery== | ||
| Line 68: | Line 93: | ||
===''Mario Kart Tour''=== | ===''Mario Kart Tour''=== | ||
====Course icons==== | ====Course icons==== | ||
{{main-gallery|Mario Kart Tour race course icons (SNES courses)#Mario Circuit 2|Mario Kart Tour race course icons (SNES courses) § Mario Circuit 2}} | |||
<gallery> | <gallery> | ||
MKT Icon MarioCircuit2RSNES LuigiClassic.png|The course icon of the R variant | |||
MKT Icon MarioCircuit2TSNES MarioClassic.png|The course icon of the T variant | |||
MKT Icon MarioCircuit2RTSNES IceMario.png|The course icon of the R/T variant | |||
MKT Icon MarioCircuit2RSNES LuigiClassic.png|The course icon of the | |||
MKT Icon MarioCircuit2TSNES MarioClassic.png|The course icon of the | |||
MKT Icon MarioCircuit2RTSNES IceMario.png|The course icon of the | |||
</gallery> | </gallery> | ||
====Screenshots==== | ====Screenshots==== | ||
<gallery> | <gallery> | ||
MKT Tricking Racers.jpg|[[Waluigi]], [[Shy Guy]], and [[Diddy Kong]] | MKT Tricking Racers.jpg|[[Waluigi]], [[Shy Guy]], and [[Diddy Kong]] doing [[Jump Boost]]s on the T variant | ||
MKT Super Mario Kart Tour Event.jpg|Drivers participating in the event on the | MKT Super Mario Kart Tour Event.jpg|Drivers participating in the event on the R/T variant | ||
8 Bit Gliders Pipe.png|Various drivers gliding | 8 Bit Gliders Pipe.png|Various drivers gliding over the course | ||
</gallery> | </gallery> | ||
==Names in other languages== | ==Names in other languages== | ||
{{foreign names | {{foreign names | ||
| | |Jpn=マリオサーキット 2 | ||
| | |JpnR=Mario Sākitto 2 | ||
| | |JpnM=Mario Circuit 2 | ||
|Spa=Circuito Mario 2 | |Spa=Circuito Mario 2 | ||
|SpaM=Mario Circuit 2 | |SpaM=Mario Circuit 2 | ||
| | |Fre=Circuit Mario 2 | ||
| | |FreM=Mario Circuit 2 | ||
|Dut=Mario's Circuit 2 | |Dut=Mario's Circuit 2 | ||
|DutM=Mario's Circuit 2 | |DutM=Mario's Circuit 2 | ||
| Line 140: | Line 140: | ||
}} | }} | ||
==References== | |||
<references/> | |||
{{MK race courses}} | |||
{{SMK}} | {{SMK}} | ||
{{MKSC}} | {{MKSC}} | ||
{{MK7}} | {{MK7}} | ||
{{MKT}} | {{MKT}} | ||
[[Category:Grasslands]] | [[Category:Grasslands]] | ||
[[Category:Classic courses]] | [[Category:Classic courses]] | ||
Latest revision as of 15:50, January 7, 2025
| Mario Circuit 2 | |||||||||||
|---|---|---|---|---|---|---|---|---|---|---|---|
| |||||||||||
| Information | |||||||||||
| Appears in | Super Mario Kart (1992) Mario Kart: Super Circuit (2001) Mario Kart 7 (2011) Mario Kart Tour (2019) | ||||||||||
| Cup(s) | Mushroom Cup (Super Mario Kart) Extra Flower Cup (Super Circuit) Banana Cup (7) | ||||||||||
| Tour(s) |
Tokyo Tour
London Tour Holiday Tour (2019) New Year's Tour (2020) Vancouver Tour Baby Rosalina Tour Hammer Bro Tour Trick Tour (2020) Exploration Tour (2020) Wild West Tour Summer Festival Tour Super Mario Kart Tour Mario vs. Luigi Tour (2020) New Year's 2021 Tour Snow Tour Trick Tour (2021) Wedding Tour Los Angeles Tour (2021) Holiday Tour (2021) Sky Tour Bangkok Tour Piranha Plant Tour Ocean Tour Mario Tour (2023) Mario vs. Luigi Tour (2023) | ||||||||||
| Online play | No longer available (3DS) | ||||||||||
| |||||||||||
| |||||||||||
| |||||||||||
Mario Circuit 2 is the fifth and final course of the Mushroom Cup in Super Mario Kart. It reappears in Mario Kart: Super Circuit as the first course of the Extra Flower Cup, in Mario Kart 7 as the second course of the Banana Cup, and in various tours in Mario Kart Tour since debuting in the Tokyo Tour.
Super Mario Kart[edit]
Course layout[edit]
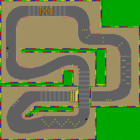
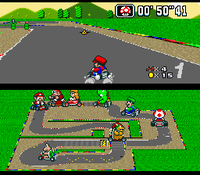
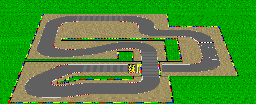
The course is much more complex than Mario Circuit 1. In addition to its many turns, both pipes and oil slicks appear as obstacles. The course begins with an immediate 90° turn to the left followed by a 90° turn to the right and another 90° left turn. There is then a brief straightaway, where racers encounter the only set of ? Panels, followed by another 90° left turn. Racers then take another left turn followed by three right turns separated by brief straights; the final right turn is a sharp U turn which brings racers to a bunch of zippers covering the width of the track. These zippers are placed directly before a jump pad, allowing racers to jump over a previous part of the track, something that does not happen on any other track. After landing from the jump there is one last 90° left turn and racers then reach the finish line.
When playing in Grand Prix mode, sometimes a computer driver (mainly last place) does not manage to complete the full jump where racers cross over the track, preventing them from completing a lap. This can also happen to a player when trying to do the jump too slowly.
Shortcuts[edit]
A notable shortcut can be found at the beginning of the track. After the first turn, the player can use a Mushroom or Star to drive through the off-road to the left of the track, cutting off the following two left turns.
Glitches[edit]
There is a bug that allows Lakitu to count two laps when only one lap was completed. For this glitch, the player needs one mushroom. Using the ramp near the end, the player must use the mushroom as soon as they use the jump, trying to land near the goal, but in the out-of-bounds area (for the glitch to work, the character must be a little stuck in the wall). If successful, Lakitu will position the player where the goal is, counting a total of two laps (the one the player traveled normally and the one that is glitched). This same glitch works in Mario Kart: Super Circuit.[citation needed]
Mario Kart: Super Circuit[edit]
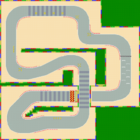
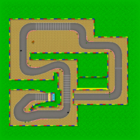
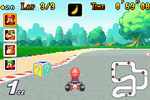
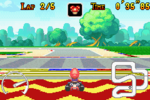
Mario Circuit 2 reappears in Mario Kart: Super Circuit as the first track of the Extra Flower Cup. The background is from that game's own Mario Circuit. An extra Item Box is placed at the left of the track before the jump. The pipe and oil slick hazards have been removed.
Mario Kart 7[edit]
Mario Circuit 2 also reappears in Mario Kart 7 as the second course of the Banana Cup. Unlike its previous iterations, it has three laps instead of five, and is built in a larger scale, similar to that of SNES Mario Circuit 3 in Mario Kart Wii.
In this version, the Warp Pipes and oil slicks return as obstacles, after being absent from the Mario Kart: Super Circuit iteration. There are also some new gameplay changes in this version. The straightaways between the 1st and 7th turns have been made longer. There is a trick ramp which makes it easier to perform part of the large off-road shortcut; players can also now use a hidden Bullet Bill path to perform the entire shortcut. The large jump now encompasses a glide ramp. After this glide ramp there is a long ramp on the left wall which allows racers to get extra distance. The straightaway between the 9th and 10th turns has also been lengthened, in order to prevent racers from cutting the track by using the gliders similar to how racers could exploit the jump in previous Mario Kart games. Players now may fall to the lower section of the track. If players do fall down, they will get picked up by Lakitu and brought back to the next section of the track. The finish line is also placed further back from its original appearance, and a starting banner has been added.
This is the first retro track ported from the 2D games to have slopes, which are otherwise commonplace in 3D games.
Mario Kart Tour[edit]
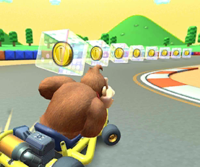
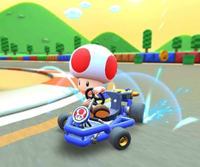
Mario Circuit 2 reappears in Mario Kart Tour, starting with the Tokyo Tour. It remains unchanged in terms of layout, taking its appearance and music from Mario Kart 7. It also shares its music with SNES Mario Circuit 1, SNES Mario Circuit 3, and RMX Mario Circuit 1.
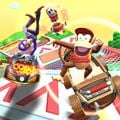
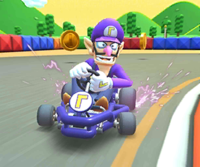
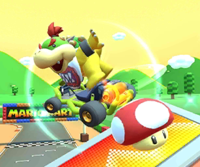
The course also appears as Mario Circuit 2R (reversed), Mario Circuit 2T (with ramps), and Mario Circuit 2R/T (reversed with ramps). The first two were introduced alongside the normal variant in the Tokyo Tour, while the last was introduced in the 2020 New Year's Tour. In the T variant, there is a Chain Chomp near the trick ramp in the off-road , and the glide ramp is now gone. In the R/T variant, three Piranha Plants appear on the sides of the course.
Appearances[edit]
For this course's tour appearances, see List of SNES Mario Circuit 2 tour appearances in Mario Kart Tour.
Top-tier and middle-tier items[edit]
Select "show" to reveal the drivers, karts, and gliders for which SNES Mario Circuit 2 and its variants are always favored or favorite courses. For instances in which additional drivers, karts, and gliders temporarily had this course and its variants as favored or favorite courses, see List of SNES Mario Circuit 2 tour appearances in Mario Kart Tour.
Bonus challenges[edit]
| Ring Race | |||||||
|---|---|---|---|---|---|---|---|
| Icon | Course variant | Chosen driver |
Chosen kart |
Chosen glider |
Grand Star scores | Tour appearances | Cup |
|
Regular | Bowser |
Pipe Frame |
Super Glider |
|
Vancouver Tour | Dry Bowser Cup |
|
Mario Tour (2023) | Tanooki Mario Cup | |||||
| Do Jump Boosts | |||||||
|---|---|---|---|---|---|---|---|
| Icon | Course variant | Chosen driver |
Chosen kart |
Chosen glider |
Grand Star scores | Tour appearances | Cup |
|
Regular | Lemmy |
Pipe Frame |
Super Glider |
|
Holiday Tour (2019) | Wendy Cup |
|
New Year's 2021 Tour | Diddy Kong Cup | |||||
|
Piranha Plant Tour | Dry Bones Cup | |||||
| Goomba Takedown | |||||||||
|---|---|---|---|---|---|---|---|---|---|
| Icon | Course variant | Chosen driver |
Chosen kart |
Chosen glider |
Item Box type found |
Number of item slots | Grand Star scores | Tour appearances | Cup |
|
Regular | Luigi |
Pipe Frame |
Super Glider |
Fire Flower Frenzy (Fire Flower) |
3 |
|
Trick Tour (2020) | Larry Cup |
|
Snow Tour | Baby Mario Cup | |||||||
| Holiday Tour (2021) | Kamek Cup | ||||||||
| Glider Challenge | |||||||
|---|---|---|---|---|---|---|---|
| Icon | Course variant | Chosen driver |
Chosen kart |
Chosen glider |
Grand Star distances | Tour appearances | Cup |
|
Regular | Donkey Kong |
Pipe Frame |
Super Glider |
|
Wild West Tour | Monty Mole Cup |
|
Wedding Tour | Koopa Troopa Cup | |||||
| Sky Tour | Baby Rosalina Cup | ||||||
|
Mario vs. Luigi Tour (2023) | Baby Peach Cup | |||||
| Steer Clear of Obstacles | |||||||
|---|---|---|---|---|---|---|---|
| Icon | Course variant | Chosen driver |
Chosen kart |
Chosen glider |
Obstacles | Tour appearances | Cup |
|
Regular | Luigi |
Pipe Frame |
Super Glider |
Oil slick |
Exploration Tour (2020) | Roy Cup |
| Los Angeles Tour (2021) | Dry Bowser Cup | ||||||
| Bangkok Tour | Birdo Cup | ||||||
| vs. Mega Larry | |||||||
|---|---|---|---|---|---|---|---|
| Icon | Course variant | Mega opponent information | Tour appearances | Cup | |||
| Driver | Kart | Glider | Items used | ||||
 (Icon erroneously shows Lemmy.) |
Regular | Larry |
Landship |
Super Glider[1] |
Bob-ombs[1] Boomerang Flowers[1] |
New Year's Tour (2020) | Roy Cup |
|
Mario vs. Luigi Tour (2023) | Baby Luigi Cup | |||||
| Smash Small Dry Bones | |||||||
|---|---|---|---|---|---|---|---|
| Icon | Course variant | Chosen driver |
Chosen kart |
Chosen glider |
Grand Star scores | Tour appearances | Cup |
|
Regular | Morton |
Pipe Frame |
Super Glider |
|
New Year's Tour (2020) | Morton Cup |
|
Mario Tour (2023) | Baby Luigi Cup | |||||
| Break Item Boxes | |||||||||
|---|---|---|---|---|---|---|---|---|---|
| Icon | Course variant | Chosen driver |
Chosen kart |
Chosen glider |
Item Box type found |
Number of item slots | Grand Star scores | Tour appearances | Cup |
|
Regular | Donkey Kong |
Pipe Frame |
Super Glider |
Mushroom Coin |
1 |
|
Tokyo Tour | Peach Cup |
| 2 | Super Mario Kart Tour | King Boo Cup | |||||||
| Holiday Tour (2021) | Luigi Cup | ||||||||
| 2 |
|
Ocean Tour | Lemmy Cup | ||||||
| Time Trial | |||||||
|---|---|---|---|---|---|---|---|
| Icon | Course variant | Chosen driver |
Chosen kart |
Chosen glider |
Grand Star scores | Tour appearances | Cup |
|
Regular | Toad |
Pipe Frame |
Super Glider |
|
London Tour | Daisy Cup |
| Mario vs. Luigi Tour (2020) | Ice Mario Cup | ||||||
|
R | Waluigi |
Pipe Frame |
Super Glider |
|
Baby Rosalina Tour | Waluigi Cup |
| Combo Attack | |||||||
|---|---|---|---|---|---|---|---|
| Icon | Course variant | Chosen driver |
Chosen kart |
Chosen glider |
Highest combo counts | Tour appearances | Cup |
|
T | Bowser Jr. |
Pipe Frame |
Super Glider |
|
Vancouver Tour | Bowser Jr. Cup |
|
Trick Tour (2021) | Roy Cup | |||||
Gallery[edit]
Super Mario Kart[edit]
Mario Kart: Super Circuit[edit]
Mario Kart 7[edit]
The starting line in Mario Kart 7
A Mii on the course using the Super Leaf.
Mario Kart Tour[edit]
Course icons[edit]
- For this subject's image gallery, see Gallery:Mario Kart Tour race course icons (SNES courses) § Mario Circuit 2.
Screenshots[edit]
Waluigi, Shy Guy, and Diddy Kong doing Jump Boosts on the T variant
Names in other languages[edit]
| Language | Name | Meaning | Notes |
|---|---|---|---|
| Japanese | マリオサーキット 2[?] Mario Sākitto 2 |
Mario Circuit 2 | |
| Chinese (simplified) | 马力欧赛道2[?] Mǎlìōu Sàidào 2 |
Mario Speedway 2 | |
| Chinese (traditional) | 瑪利歐賽道2[?] Mǎlìōu Sàidào 2 |
Mario Speedway 2 | |
| Dutch | Mario's Circuit 2[?] | Mario's Circuit 2 | |
| French | Circuit Mario 2[?] | Mario Circuit 2 | |
| German | Marios Piste 2[?] | Mario's Track 2 | |
| Italian | Circuito di Mario 2[?] | Mario's Circuit 2 | |
| Korean | 마리오 서킷 2[?] Mario Seokit 2 |
Mario Circuit 2 | |
| Portuguese (NOA) | Circuito Mario 2[?] | Mario Circuit 2 | |
| Portuguese (NOE) | Circuito 2 do Mario[?] | Mario's Circuit 2 | |
| Russian | Трасса Марио 2[?] Trassa Mario 2 |
Mario's Track 2 | |
| Spanish | Circuito Mario 2[?] | Mario Circuit 2 |
References[edit]
- ^ a b c UTAGaming (January 4, 2020). Mario Kart Tour - New Year's Tour: Roy Cup - Walkthrough #8. YouTube. Retrieved December 21, 2020.
