World: Difference between revisions
Nintendo101 (talk | contribs) |
|||
| (146 intermediate revisions by 54 users not shown) | |||
| Line 1: | Line 1: | ||
{{about|the term "world"| | {{about|the term "world"|other uses|[[World (disambiguation)]]}} | ||
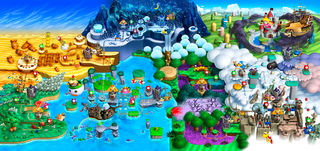
[[File:NSMBW World 1 World Select.png|thumb | [[File:NSMBW World 1 World Select.png|thumb|350px|The world-selection map from ''[[New Super Mario Bros. Wii]]'']] | ||
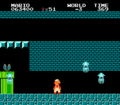
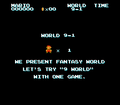
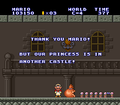
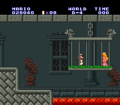
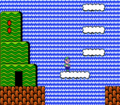
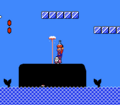
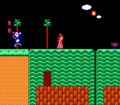
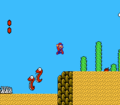
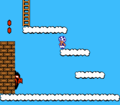
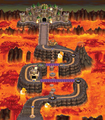
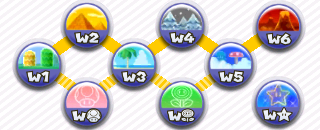
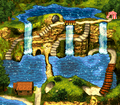
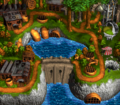
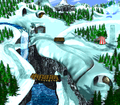
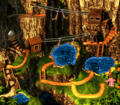
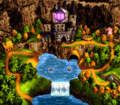
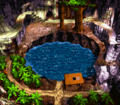
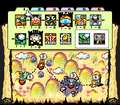
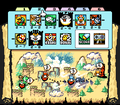
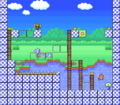
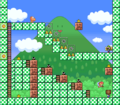
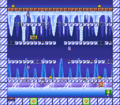
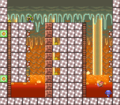
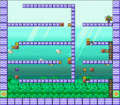
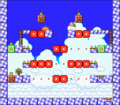
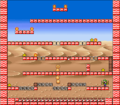
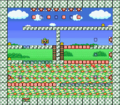
A ''' | A '''world''' is a group of [[level]]s in ''[[Super Mario (franchise)|Super Mario]]'' games. In ''[[Super Mario Bros.]]'' and ''[[Super Mario Bros.: The Lost Levels]]'', each world always has exactly four levels, and in ''[[Super Mario Bros. 2]]'', each world has three (except the final world, which has only two). However, starting in ''[[Super Mario Bros. 3]]'', most games have a varying number of levels. In some three-dimensional ''Super Mario'' games, worlds are no longer used; now each level stands alone (but each level is sometimes referred to as a world), and the missions are referred to as either stars or episodes. In earlier games, worlds were simply numbered "World 1," "World 2," etc. ''Super Mario Bros. 3'' was the first ''Super Mario'' game to give the worlds distinct names, though some later games return to the standard numerical naming. | ||
In general terms, a | In general terms, a world refers to any large area of land and space marked off from other regions. As such, "world" may refer to a politically or geographically distinct region of land (such as [[Desert Land]] or [[Chocolate Island]]), a planet, or even an entire [[galaxy]]. Each world has several different [[List of level themes|terrains and locations]]. | ||
==List of worlds== | ==List of worlds== | ||
===''[[Super Mario (series)|Super Mario]]'' series=== | ===''[[Super Mario (series)|Super Mario]]'' series=== | ||
====''[[Super Mario Bros.]]''==== | ====''[[Super Mario Bros.]]''==== | ||
| Line 150: | Line 18: | ||
SMBDX World 8.png|[[World 8 (Super Mario Bros.)|World 8]] | SMBDX World 8.png|[[World 8 (Super Mario Bros.)|World 8]] | ||
</gallery> | </gallery> | ||
'''Glitch | '''Glitch worlds''' | ||
<gallery> | <gallery> | ||
SMB | SMB Minus World.png|[[Minus World]] (NES version) | ||
SMB FDS World Minus 2.png| | MinusWorldJapan.png|Minus World (FDS version) | ||
VSSMB Minus World.png|Minus World (''[[VS. Super Mario Bros.]]'') | |||
SMB FDS World Minus 2.png|World -2 (FDS version) | |||
SMB FDS World Minus 3.png|World -3 (FDS version) | |||
</gallery> | </gallery> | ||
| Line 175: | Line 46: | ||
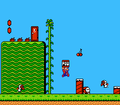
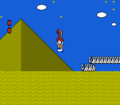
====''[[Super Mario Bros. 2]]''==== | ====''[[Super Mario Bros. 2]]''==== | ||
<gallery> | <gallery> | ||
SMB2 Semisolid Platform Screenshot.png|[[World 1 (Super Mario Bros. 2)|World 1]] | |||
SMB2 W2-1 Screenshot.png|[[World 2 (Super Mario Bros. 2)|World 2]] | |||
Supmario2-40.png|[[World 3 (Super Mario Bros. 2)|World 3]] | Supmario2-40.png|[[World 3 (Super Mario Bros. 2)|World 3]] | ||
SMB2 W4-2.png|[[World 4 (Super Mario Bros. 2)|World 4]] | SMB2 W4-2.png|[[World 4 (Super Mario Bros. 2)|World 4]] | ||
| Line 188: | Line 59: | ||
<gallery> | <gallery> | ||
Grass Land.png|[[Grass Land]] (World 1) | Grass Land.png|[[Grass Land]] (World 1) | ||
Desert Hill map.png|[[Desert Land]] (World 2) | |||
Sea Side.png|[[Water Land]] (World 3) | Sea Side.png|[[Water Land]] (World 3) | ||
SMAS-Big Island Map.png|[[Giant Land]] (World 4) | SMAS-Big Island Map.png|[[Giant Land]] (World 4) | ||
| Line 194: | Line 65: | ||
SMB36.png|[[Ice Land]] (World 6) | SMB36.png|[[Ice Land]] (World 6) | ||
Pipe Land.png|[[Pipe Land]] (World 7) | Pipe Land.png|[[Pipe Land]] (World 7) | ||
Dark Land | SMA4 Dark Land 1.png|[[Dark Land]] (World 8, first area) | ||
SMA4 Dark Land 2.png|Dark Land (World 8, second area) | |||
SMA4 Dark Land 3.png|Dark Land (World 8, third area) | |||
SMA4 Dark Land 4.png|Dark Land (World 8, fourth area) | |||
SMA4 World 9 Warp Zone.png|[[Warp Zone]] (World 9) | SMA4 World 9 Warp Zone.png|[[Warp Zone]] (World 9) | ||
World-e SMA4.gif|[[World-e]] '''(''[[Super Mario Advance 4: Super Mario Bros. 3|Super Mario Advance 4]]'' only)''' | World-e SMA4.gif|[[World-e]] '''(''[[Super Mario Advance 4: Super Mario Bros. 3|Super Mario Advance 4]]'' only)''' | ||
| Line 211: | Line 85: | ||
{{main|Dinosaur Land}} | {{main|Dinosaur Land}} | ||
<gallery> | <gallery> | ||
Yoshi'sIslandSMW.png|[[Yoshi's Island ( | Yoshi'sIslandSMW.png|[[Yoshi's Island (location)#Super Mario World|Yoshi's Island]] (World 1) | ||
DonutPlains.png|[[Donut Plains]] (World 2) | DonutPlains.png|[[Donut Plains]] (World 2) | ||
VanillaDome.png|[[Vanilla Dome]] (World 3) | VanillaDome.png|[[Vanilla Dome]] (World 3) | ||
| Line 224: | Line 98: | ||
====''[[Super Mario Land 2: 6 Golden Coins]]''==== | ====''[[Super Mario Land 2: 6 Golden Coins]]''==== | ||
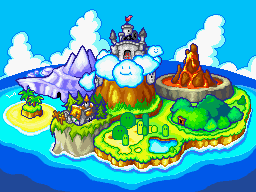
[[File:Sml2map.png|thumb | [[File:Sml2map.png|thumb|150px|Mario Land]] | ||
{{main|Mario Land (Super Mario Land 2: 6 Golden Coins)}} | {{main|Mario Land (Super Mario Land 2: 6 Golden Coins)}} | ||
<gallery> | <gallery> | ||
| Line 251: | Line 125: | ||
====''[[Super Mario Galaxy]]''==== | ====''[[Super Mario Galaxy]]''==== | ||
{{main|Dome}} | {{main|Dome}} | ||
[[File:SMG Terrace Overview.png|thumb | [[File:SMG Terrace Overview.png|thumb|225px|The [[Terrace (Super Mario Galaxy)|Terrace]] [[dome]] from ''[[Super Mario Galaxy]]''. The domes act as worlds in this game.]] | ||
<gallery> | <gallery> | ||
SMG Terrace Exterior.png|[[Terrace (Super Mario Galaxy)|Terrace]] | SMG Terrace Exterior.png|[[Terrace (Super Mario Galaxy)|Terrace]] | ||
| Line 280: | Line 154: | ||
====''[[Super Mario Galaxy 2]]''==== | ====''[[Super Mario Galaxy 2]]''==== | ||
{{main|Grand World Map}} | {{main|Grand World Map}} | ||
[[File:SMG2 Grand World Map.png|thumb | [[File:SMG2 Grand World Map.png|thumb|250px|The Grand World Map found in ''[[Super Mario Galaxy 2]]'']] | ||
<gallery> | <gallery> | ||
SMG2 World 1 Overview.png|[[World 1 (Super Mario Galaxy 2)|World 1: The Great Space Journey Begins]] | SMG2 World 1 Overview.png|[[World 1 (Super Mario Galaxy 2)|World 1: The Great Space Journey Begins]] | ||
| Line 326: | Line 200: | ||
====''[[New Super Mario Bros. U]]'' / ''[[New Super Luigi U]]'' / ''[[New Super Mario Bros. U Deluxe]]''==== | ====''[[New Super Mario Bros. U]]'' / ''[[New Super Luigi U]]'' / ''[[New Super Mario Bros. U Deluxe]]''==== | ||
[[File:NSMBUMushroomKingdom.png|thumb|320px | [[File:NSMBUMushroomKingdom.png|thumb|320px|The World Map from ''New Super Mario Bros. U''.]] | ||
<gallery> | <gallery> | ||
NSMBU Acorn Plains | NSMBU Acorn Plains Map.png|[[Acorn Plains]] (World 1) | ||
Layer Cake Desert.png|[[Layer-Cake Desert]] | Layer Cake Desert.png|[[Layer-Cake Desert]] (World 2) | ||
NSMBU Sparkling Waters World Map Screenshot.png|[[Sparkling Waters]] | NSMBU Sparkling Waters World Map Screenshot.png|[[Sparkling Waters]] (World 3) | ||
Frosted Glacier Map. | NSMBU Frosted Glacier Map.png|[[Frosted Glacier]] (World 4) | ||
Outside Soda Jungle.png|[[Soda Jungle]] | Outside Soda Jungle.png|[[Soda Jungle]] (World 5) | ||
NSMBU Rock-Candy Mines World Map Screenshot.png|[[Rock-Candy Mines]] | NSMBU Rock-Candy Mines World Map Screenshot.png|[[Rock-Candy Mines]] (World 6) | ||
Meringue Clouds.png|[[Meringue Clouds]] | Meringue Clouds.png|[[Meringue Clouds]] (World 7) | ||
NSMBU Peach's Castle World Map.png|[[Peach's Castle ( | NSMBU Peach's Castle World Map.png|[[Peach's Castle (world)|Peach's Castle]] (World 8) | ||
NSMBU Superstar Road World Map Screenshot.png|[[Superstar Road]] | NSMBU Superstar Road World Map Screenshot.png|[[Superstar Road]] (World 9) | ||
NSMBU Secret Island World Map.png|[[Secret Island]] | NSMBU Secret Island World Map.png|[[Secret Island]] | ||
NSMBU Coin Courses Level Select.png|[[Coin Courses#New Super Mario Bros. U|Coin Courses]] (Multiplayer Exclusive) | NSMBU Coin Courses Level Select.png|[[Coin Courses#New Super Mario Bros. U|Coin Courses]] (Multiplayer Exclusive) | ||
</gallery> | </gallery> | ||
====''[[Super Mario 3D World]]''==== | ====''[[Super Mario 3D World]]'' / ''[[Super Mario 3D World + Bowser's Fury]]''==== | ||
{{Main|Sprixie Kingdom}} | {{Main|Sprixie Kingdom}} | ||
<gallery> | <gallery> | ||
| Line 367: | Line 241: | ||
World6 SMR.png|[[World 6 (Super Mario Run)|World 6]] | World6 SMR.png|[[World 6 (Super Mario Run)|World 6]] | ||
World Star SMR.png|[[World Star (Super Mario Run)|World Star]] | World Star SMR.png|[[World Star (Super Mario Run)|World Star]] | ||
</gallery> | |||
====''[[Super Mario Bros. Wonder]]''==== | |||
<gallery> | |||
Pipe-Rock Plateau.png|[[File:SMBW Icon Pipe-Rock Plateau.png|35px]][[Pipe-Rock Plateau]] (World 1) | |||
Fluff-Puff Peaks.png|[[File:SMBW Icon Fluff-Puff Peaks.png|35px]][[Fluff-Puff Peaks]] (World 2) | |||
Shining Falls.png|[[File:SMBW Icon Shining Falls.png|35px]][[Shining Falls]] (World 3) | |||
Sunbaked Desert.png|[[File:SMBW Icon Sunbaked Desert.png|35px]][[Sunbaked Desert]] (World 4) | |||
Fungi Mines.png|[[File:SMBW Icon Fungi Mines.png|35px]][[Fungi Mines]] (World 5) | |||
Deep Magma Bog.png|[[File:SMBW Icon Deep Magma Bog.png|35px]][[Deep Magma Bog]] (World 6) | |||
Petal Isles.png|[[File:SMBW Icon Petal Isles.png|35px]][[Petal Isles]] | |||
Special World SMB Wonder.png|[[File:SMBW Icon Special World.png|35px]][[Special World]] | |||
</gallery> | </gallery> | ||
===''[[ | ===[[Donkey Kong (franchise)|''Donkey Kong'' franchise]]=== | ||
====''[[ | ====[[Donkey Kong (Game Boy)|''Donkey Kong'' (Game Boy)]]==== | ||
[[ | <gallery> | ||
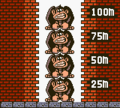
{{main| | DonkeyKong-Stage0(ConstructionSite).png|[[Construction Site]] ([[25m]], [[50m]], [[75m]], [[100m]]) | ||
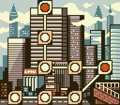
DonkeyKong-Stage1(BigCity).png|[[Big-City]] | |||
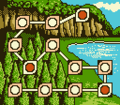
DonkeyKong-Stage2(Forest).png|[[Forest (Donkey Kong)|Forest]] | |||
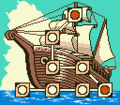
DonkeyKong-Stage3(Ship).png|[[Ship]] | |||
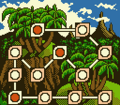
DonkeyKong-Stage4(Jungle).png|[[Jungle (Donkey Kong)|Jungle]] | |||
DonkeyKong-Stage5(Desert).png|[[Desert]] | |||
DonkeyKong-Stage6(Airplane).png|[[Airplane]] | |||
DonkeyKong-Stage7(Iceberg).png|[[Iceberg]] | |||
DonkeyKong-Stage8(RockyValley).png|[[Rocky-Valley]] | |||
DonkeyKong-Stage9(Tower).png|[[Tower (world)|Tower]] | |||
</gallery> | |||
{{br}} | |||
====''[[Donkey Kong Country]]''==== | |||
{{main|Donkey Kong Island}} | |||
<gallery> | |||
KongoJungle.png|[[Kongo Jungle]] | |||
MonkeyMines DKC.png|[[Monkey Mines]] | |||
VineValley DKC.png|[[Vine Valley (world)|Vine Valley]] | |||
GorillaGlacier DKC.png|[[Gorilla Glacier]] | |||
Kremkroc DKC.png|[[Kremkroc Industries, Inc.]] | |||
ChimpCaverns DKC.png|[[Chimp Caverns]] | |||
DKC-GangPlankGalleon.png|[[Gang-Plank Galleon]] | |||
</gallery> | |||
====''[[Donkey Kong Land]]''==== | |||
{{main|Donkey Kong Island}} | |||
<gallery> | |||
GangplankGalleonAhoy.PNG|[[Gangplank Galleon Ahoy!]] | |||
Kremlantis.PNG|[[Kremlantis]] | |||
MonkeyMountains.PNG|[[Monkey Mountains & Chimpanzee Clouds]] | |||
Big Ape City DKL.png|[[Big Ape City]] | |||
</gallery> | |||
====''[[Donkey Kong Country 2: Diddy's Kong Quest]]''==== | |||
{{main|Crocodile Isle}} | |||
<gallery> | |||
Gangplank Galleon.png|[[Gangplank Galleon (world)|Gangplank Galleon]] | |||
CrocodileCauldron.png|[[Crocodile Cauldron]] | |||
Krem Quay.png|[[Krem Quay]] | |||
KrazyKremlandPart2.gif|[[Krazy Kremland]] | |||
Gloomy Gulch.png|[[Gloomy Gulch]] | |||
K. Rool's Keep.png|[[K. Rool's Keep]] | |||
TheFlyingKrock.png|[[The Flying Krock]] | |||
Lost World DKC2 Animated Unopened.gif|[[Lost World (Donkey Kong Country 2)|Lost World]] | |||
</gallery> | |||
====''[[Donkey Kong Land 2]]''==== | |||
{{main|Crocodile Isle}} | |||
<gallery> | |||
GangplankGalleonDKL2.png|[[Gangplank Galleon (world)|Gangplank Galleon]] | |||
KremCauldron.png|[[Krem Cauldron]] | |||
KrazyKremland-DKL2.png|[[Krazy Kremland]] | |||
Gloomy Gulch DKL2.png|[[Gloomy Gulch]] | |||
K. Rool's Keep DKL2.png|[[K. Rool's Keep]] | |||
The Flying Krock (GB).png|[[The Flying Krock]] | |||
LostWorldDKL2.png|[[Lost World (Donkey Kong Country 2)|Lost World]] | |||
</gallery> | |||
====''[[Donkey Kong Country 3: Dixie Kong's Double Trouble!]]''==== | |||
{{main|Northern Kremisphere}} | |||
<gallery> | <gallery> | ||
Lake Orangatanga.png|[[Lake Orangatanga]] | |||
Kremwood Forest.png|[[Kremwood Forest]] | |||
Cotton-Top Cove.png|[[Cotton Top Cove]] | |||
Mekanos.png|[[Mekanos]] | |||
K-3.png|[[K3]] | |||
Razor Ridge.png|[[Razor Ridge]] | |||
Pacifica.png|[[Pacifica]] (GBA Only) | |||
KAOS Kore.png|[[Kaos Kore]] | |||
Krematoa map.png|[[Krematoa]] | |||
</gallery> | </gallery> | ||
====''[[ | ====''[[Donkey Kong Land III]]''==== | ||
{{main|Northern Kremisphere}} | |||
<gallery> | <gallery> | ||
Cape Codswallop DKL3.png|[[Cape Codswallop]] | |||
Primate Plains DKL3.png|[[Primate Plains]] | |||
Blackforest Plateau DKL3.png|[[Blackforest Plateau]] | |||
Great Ape Lakes DKL3.png|[[Great Ape Lakes]] | |||
Tin Can Valley DKL3.png|[[Tin Can Valley]] | |||
Lost World DKL3.png|[[Lost World (Donkey Kong Land III)|Lost World]] | |||
</gallery> | </gallery> | ||
====''[[ | ====''[[Diddy Kong Racing]]''==== | ||
{{main|Timber's Island}} | |||
<gallery> | <gallery> | ||
Dino Domain DKR.png|[[Dino Domain]] | |||
Snowflake Mountain.png|[[Snowflake Mountain]] | |||
Sherbet Island.png|[[Sherbet Island]] | |||
Dragon Forest lobby DKR.png|[[Dragon Forest]] | |||
Future Fun Land.png|[[Future Fun Land]] | |||
</gallery> | </gallery> | ||
====''[[ | ====''[[DK: King of Swing]]''==== | ||
<gallery> | <gallery> | ||
DK-KoS JungleWorld.png|[[Jungle World]] | |||
WildWestWorld.png|[[Wild West World]] | |||
Aqua World DKKoS.png|[[Aqua World]] | |||
DKKoS Ice World.png|[[Ice World]] | |||
DKKoS K Kruizer III World.png|[[K. Kruizer III]] | |||
</gallery> | </gallery> | ||
{{br}} | |||
====''[[ | ====''[[DK: Jungle Climber]]''==== | ||
[[File:DKJC Main map.png|thumb|Full map]] | |||
<gallery> | <gallery> | ||
Sun Sun Island map.png|[[Sun Sun Island]] | |||
Lost Island.png|[[Lost Island]] | |||
Ghost Island map.png|[[Ghost Island]] | |||
Chill 'n' Char Island map.png|[[Chill 'n' Char Island]] | |||
High-High Island map.png|[[High-High Island]] | |||
DKJC Wormhole World.png|[[Wormhole]] | |||
</gallery> | </gallery> | ||
{{br}} | |||
====''[[ | ====''[[Donkey Kong Country Returns]]''==== | ||
<gallery> | <gallery> | ||
JungleDKCR.png|[[Jungle (Donkey Kong Country Returns)|Jungle]] | |||
Beach DKCR.png|[[Beach]] | |||
RuinsDKCR.png|[[Ruins]] | |||
CaveDKCR.png|[[Cave]] | |||
Forest DKCR.png|[[Forest (Donkey Kong Country Returns)|Forest]] | |||
Cliff DKCR.png|[[Cliff (Donkey Kong Country Returns)|Cliff]] | |||
Factory DKCR.png|[[Factory (Donkey Kong Country Returns)|Factory]] | |||
VolcanoDKCR.png|[[Volcano]] | |||
DKCR Golden Temple Map.png|[[Golden Temple]] | |||
CTRP DKReturns scrn01 Ev04.png|[[Cloud (world)|Cloud]] ([[Nintendo 3DS]] [[Donkey Kong Country Returns 3D|version]] only) | |||
</gallery> | </gallery> | ||
===''[[ | ====''[[Donkey Kong Country: Tropical Freeze]]''==== | ||
<gallery> | <gallery> | ||
Lost Mangroves.png|[[Lost Mangroves]] | |||
Autumn Heights.jpg|[[Autumn Heights]] | |||
Bright Savannah.png|[[Bright Savannah]] | |||
Sea Breeze Cove.png|[[Sea Breeze Cove]] | |||
Juicy Jungle.png|[[Juicy Jungle]] | |||
DonkeyKongIsland DKCTF.png|[[Donkey Kong Island (world)|Donkey Kong Island]] | |||
SecretSeclusion.png|[[Secret Seclusion]] | |||
</gallery> | </gallery> | ||
| Line 459: | Line 411: | ||
====''[[Yoshi's Story]]''==== | ====''[[Yoshi's Story]]''==== | ||
{{main|Yoshi's Story (book)}} | |||
<gallery> | <gallery> | ||
Story End 1.png|[[P. 1-Beginning]] | |||
Story End 2.png|[[P. 2-Cavern]] | |||
Story End 3.png|[[P. 3-Summit]] | |||
Story End 4.png|[[P. 4-Jungle]] | |||
Story End 5.png|[[P. 5-Ocean]] | |||
Story End 6.png|[[P. 6-Finale]] | |||
</gallery> | </gallery> | ||
| Line 529: | Line 482: | ||
YCW Shadowville.png|[[Shadowville]] | YCW Shadowville.png|[[Shadowville]] | ||
YCW Hidden Hills.png|[[Hidden Hills]] | YCW Hidden Hills.png|[[Hidden Hills]] | ||
</gallery> | |||
===''[[Wario (franchise)|Wario]]'' franchise=== | |||
====''[[Wario Land: Super Mario Land 3]]''==== | |||
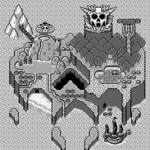
[[File:WarioLandOverworld.png|thumb|150px|Kitchen Island]] | |||
{{main|Kitchen Island}} | |||
<gallery> | |||
RiceBeach.png|[[Rice Beach]] | |||
MtTeapot.png|[[Mt. Teapot]] | |||
Sherbert Land.png|[[Sherbet Land (Wario Land: Super Mario Land 3)|Sherbet Land]] | |||
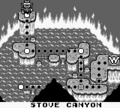
Stove Canyon.png|[[Stove Canyon]] | |||
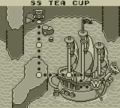
SSTeaCupWL.png|[[SS Tea Cup]] | |||
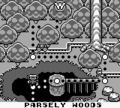
Parsley woods.png|[[Parsley Woods]] | |||
Syrup castle.png|[[Syrup Castle]] | |||
</gallery> | |||
====''[[Wario Land II]]''==== | |||
<gallery> | |||
Sugarpirates.png|[[One Noisy Morning]] | |||
Wario Land 2 S 3x-0.png|[[SS Tea Cup]] | |||
Wario Land 2 S 2x-0.png|[[Invade Wario Castle]] | |||
Wario Land 2 S 2xx-0.png|[[Go to the Cellar!!]] | |||
Wario Land 2 S 3-0.png|[[Maze Woods]] | |||
Wario Land 2 S 3x-0.png|[[Ruins at the Bottom of the Sea]] | |||
Wario Land 2 S 4-0.png|[[In Town]] | |||
Wario Land 2 S 5-0.png|[[Syrup Castle]] | |||
Wario Land 2 S 5x-0.png|[[Mysterious Factory!]] | |||
Wario Land 2 S 5xx-0.png|[[Uncanny Mansion]] | |||
</gallery> | |||
====''[[Wario Land 3]]''==== | |||
<gallery> | |||
Music Box of WL3.png|[[Music box (world)|Music box]] | |||
Music Box World - North.png|North | |||
Music Box World - West.png|West | |||
Music Box World - South.png|South | |||
Music Box World - East.png|East | |||
</gallery> | |||
====''[[Wario Land 4]]''==== | |||
<gallery> | |||
PyramidWario.png|[[Golden Pyramid]] | |||
Entry Passage.png|[[Entry Passage]] | |||
Emerald Passage.png|[[Emerald Passage]] | |||
Ruby Passage.png|[[Ruby Passage]] | |||
Topaz Passage.png|[[Topaz Passage]] | |||
Sapphire Passage.png|[[Sapphire Passage]] | |||
</gallery> | |||
====''[[Wario World]]''==== | |||
<gallery> | |||
Treasure Square.png|[[Treasure Square]] | |||
Excitement Central WW exterior.png|[[Excitement Central]] | |||
Spooktastic World Exterior.png|[[Spooktastic World]] | |||
Thrillsville Exterior.png|[[Thrillsville]] | |||
Sparkle Land Exterior.png|[[Sparkle Land]] | |||
</gallery> | |||
====''[[Wario Land: Shake It!]]''==== | |||
<gallery> | |||
Shake Dimension.png|[[Shake Dimension]] | |||
RatlRuins.png|[[Ratl Ruins]] | |||
WigglyWilds.png|[[Wiggly Wilds]] | |||
RockingRange.png|[[Rocking Range]] | |||
JiggleJungle.png|[[Jiggle Jungle]] | |||
QuiverCliffs.png|[[Quiver Cliffs]] | |||
</gallery> | |||
===''[[Mario & Wario]]''=== | |||
<gallery> | |||
M&W Level 1-1 Map.png|[[Yōsei no Mori]] | |||
M&W Level 2-2 Map.png|[[Yosu Ko]] | |||
M&W Level 3-3 Map.png|[[Kumotori Yama]] | |||
M&W Level 4-4 Map.png|[[Kōri no Dōkutsu]] | |||
M&W Level 5-5 Map.png|[[Honō no Dōkutsu]] | |||
M&W Level 6-6 Map.png|[[Pukupuku Kai]] | |||
M&W Level 7-7 Map.png|[[Balloon Bridge]] | |||
M&W Level 8-8 Map.png|[[Karakara Sabaku]] | |||
M&W Level 9-9 Map.png|[[Wario no Niwa]] | |||
M&W Level 10-10 Map.png|[[Wario Tei]] | |||
M&W Level EX-1 Map.png|[[EXTRA]] | |||
</gallery> | |||
===''[[Hotel Mario]]''=== | |||
<gallery> | |||
HMMortonsHotelStage1.png|[[Morton's Wood Door Hysteria Hotel]] | |||
HMRoysHotelStage1.png|[[Roy's HardBrick Hotel]] | |||
HMLarrysHotelStage1.png|[[Larry's Chillton Hotel]] | |||
HMLemmysHotelStage3.png|[[Lemmy's High-ate Regency Hotel]] | |||
HMLudwigsHotelStage4.png|[[Ludwig's Thump Castle Hotel]] | |||
HMWendysHotelStage1.png|[[Wendy's Blitz Snarlton Hotel]] | |||
HMBowsersHotelStage15.png|[[Bowser's Seizures Palace Hotel]] | |||
</gallery> | </gallery> | ||
| Line 534: | Line 579: | ||
====''[[Mario vs. Donkey Kong]]''==== | ====''[[Mario vs. Donkey Kong]]''==== | ||
<gallery> | <gallery> | ||
MVDK 1-1 1.png|[[Mario Toy Company]] | MVDK 1-1 1.png|[[Mario Toy Company]] (World 1) | ||
MVDK 2-1 1.png|[[Donkey Kong Jungle (world)|Donkey Kong Jungle]] | MVDK 2-1 1.png|[[Donkey Kong Jungle (world)|Donkey Kong Jungle]] (World 2) | ||
MVDK 3-1 1.png|[[Fire Mountain (world)|Fire Mountain]] | MVDK 3-1 1.png|[[Fire Mountain (world)|Fire Mountain]] (World 3) | ||
MVDK 4-1 1.png|[[Spooky House]] | MarioVsDKSwitchMerryMiniLandMenu.jpg|[[Merry Mini-Land]] (World 4) ([[Mario vs. Donkey Kong (Nintendo Switch)|remake]] exclusive) | ||
MVDK 5-1 Part 1.png|[[Mystic Forest]] | MVDK 4-1 1.png|[[Spooky House]] (World 4) (World 5 in the remake) | ||
MVDK 6-1 2.png|[[Twilight City]] | MarioVsDKSwitchSlipperySummitMenu.jpg|[[Slippery Summit]] (World 6) (remake exclusive) | ||
MVDK 1-1+.png|[[Mario Toy Factory]] | MVDK 5-1 Part 1.png|[[Mystic Forest]] (World 5) (World 7 in the remake) | ||
2-1+ MvsDK.png|[[Donkey Kong Jungle Plus]] | MVDK 6-1 2.png|[[Twilight City]] (World 6) (World 8 in the remake) | ||
MVDK Level 3-1+.png|[[Fire Mountain Plus]] | MVDK 1-1+.png|[[Mario Toy Factory]] (World 1+) | ||
MVDK Level 4-1+.png|[[Spooky House Plus]] | 2-1+ MvsDK.png|[[Donkey Kong Jungle Plus]] (World 2+) | ||
MVDK 5-1+ - A.PNG|[[Mystic Forest Plus]] | MVDK Level 3-1+.png|[[Fire Mountain Plus]] (World 3+) | ||
MVDK Level 6-1+.png|[[Twilight City Plus]] | MarioVsDKSwitchMerryMiniLandPlusMenu.jpg|[[Merry Mini-Land Plus]] (World 4+) (remake exclusive) | ||
MVDK Level 4-1+.png|[[Spooky House Plus]] (World 4+) (World 5+ in the remake) | |||
MarioVsDKSwitchSlipperySummitPlusMenu.jpg|[[Slippery Summit Plus]] (World 6+) (remake exclusive) | |||
MVDK 5-1+ - A.PNG|[[Mystic Forest Plus]] (World 5+) (World 7+ in the remake) | |||
MVDK Level 6-1+.png|[[Twilight City Plus]] (World 6+) (World 8+ in the remake) | |||
</gallery> | </gallery> | ||
====''[[Mario vs. Donkey Kong 2: March of the Minis]]''==== | ====''[[Mario vs. Donkey Kong 2: March of the Minis]]''==== | ||
<gallery> | <gallery> | ||
MvDK2 Room 1-2.png|[[Mushroom Mayhem]] | |||
MvDK2 Room 2-5.png|[[Tropical Island]] | |||
MvDK2 Room 3-5.png|[[Pipe Works]] | |||
MvDK2 Room 4-5.png|[[Magnet Mania (Mario vs. Donkey Kong 2: March of the Minis)|Magnet Mania]] | |||
MvDK2 Room 5-1.png|[[Lava Dome]] | |||
MvDK2 Room 6-7.png|[[Toadstool Castle]] | |||
MvDK2 Room 7-5.png|[[Spooky Attic]] | |||
MvDK2 Room 8-2.png|[[Jungle Hijinks]] | |||
MOTH Roof.png|[[Roof (Mario vs. Donkey Kong 2: March of the Minis)|Roof]] | |||
MvsDK2 B1.png|[[DK's Hideout]] | MvsDK2 B1.png|[[DK's Hideout]] | ||
</gallery> | </gallery> | ||
| Line 567: | Line 616: | ||
ScreenshotMvsDK MMA 11.png|[[Sandstone Stroll]] | ScreenshotMvsDK MMA 11.png|[[Sandstone Stroll]] | ||
ScreenshotMvsDK MMA 12.png|[[Magnet Mania (Mario vs. Donkey Kong: Minis March Again!)|Magnet Mania]] | ScreenshotMvsDK MMA 12.png|[[Magnet Mania (Mario vs. Donkey Kong: Minis March Again!)|Magnet Mania]] | ||
MvDKMMA Room 4-4 Screenshot.png|[[Jungle Rumble]] | |||
ScreenshotMvsDK MMA 14.png|[[Rooftop (Mario vs. Donkey Kong: Minis March Again!|Rooftop]] | ScreenshotMvsDK MMA 14.png|[[Rooftop (Mario vs. Donkey Kong: Minis March Again!)|Rooftop]] | ||
RoomB-2 MvsDK MMA.png|[[Basement (Mario vs. Donkey Kong: Minis March Again!)|Basement]] | |||
</gallery> | </gallery> | ||
| Line 626: | Line 675: | ||
===''[[Super Princess Peach]]''=== | ===''[[Super Princess Peach]]''=== | ||
[[File:SPP map screen.png|thumb | [[File:SPP map screen.png|thumb|256px|Vibe Island]] | ||
{{main|Vibe Island}} | {{main|Vibe Island}} | ||
<gallery> | <gallery> | ||
| Line 637: | Line 686: | ||
Giddy Sky.png|[[Giddy Sky]] | Giddy Sky.png|[[Giddy Sky]] | ||
Bowser's Villa.png|[[Bowser's Villa]] | Bowser's Villa.png|[[Bowser's Villa]] | ||
</gallery> | |||
===''[[Paper Mario: Sticker Star]]''=== | |||
<gallery> | |||
World1PMSS.png|[[World 1 (Paper Mario: Sticker Star)|World 1]] | |||
World2PMSS.png|[[World 2 (Paper Mario: Sticker Star)|World 2]] | |||
World3PMSS.png|[[World 3 (Paper Mario: Sticker Star)|World 3]] | |||
World4PMSS.png|[[World 4 (Paper Mario: Sticker Star)|World 4]] | |||
World5PMSS.png|[[World 5 (Paper Mario: Sticker Star)|World 5]] | |||
World6PMSS.png|[[World 6 (Paper Mario: Sticker Star)|World 6]] | |||
</gallery> | </gallery> | ||
| Line 646: | Line 705: | ||
BowserAttack.jpg|[[Bonus Episode]] | BowserAttack.jpg|[[Bonus Episode]] | ||
CTTT Special Banner.jpg|[[Special Episode]] | CTTT Special Banner.jpg|[[Special Episode]] | ||
</gallery> | |||
===''[[Puzzle & Dragons: Super Mario Bros. Edition]]''=== | |||
<gallery> | |||
World1-PDSMBE.jpg|[[World 1 (Puzzle & Dragons: Super Mario Bros. Edition)|World 1]] | |||
World2-PDSMBE.jpg|[[World 2 (Puzzle & Dragons: Super Mario Bros. Edition)|World 2]] | |||
World3-PDSMBE.jpg|[[World 3 (Puzzle & Dragons: Super Mario Bros. Edition)|World 3]] | |||
World4-PDSMBE.jpg|[[World 4 (Puzzle & Dragons: Super Mario Bros. Edition)|World 4]] | |||
World5-PDSMBE.jpg|[[World 5 (Puzzle & Dragons: Super Mario Bros. Edition)|World 5]] | |||
World6-PDSMBE.jpg|[[World 6 (Puzzle & Dragons: Super Mario Bros. Edition)|World 6]] | |||
World7-PDSMBE.jpg|[[World 7 (Puzzle & Dragons: Super Mario Bros. Edition)|World 7]] | |||
World8-PDSMBE.jpg|[[World 8 (Puzzle & Dragons: Super Mario Bros. Edition)|World 8]] | |||
SpecialWorld1-PDSMBE.jpg|[[Special World 1 (Puzzle & Dragons: Super Mario Bros. Edition)|★World 1]] | |||
SpecialWorld2-PDSMBE.jpg|[[Special World 2 (Puzzle & Dragons: Super Mario Bros. Edition)|★World 2]] | |||
SpecialWorld3-PDSMBE.jpg|[[Special World 3 (Puzzle & Dragons: Super Mario Bros. Edition)|★World 3]] | |||
SpecialWorld4-PDSMBE.jpg|[[Special World 4 (Puzzle & Dragons: Super Mario Bros. Edition)|★World 4]] | |||
SpecialWorld5-PDSMBE.jpg|[[Special World 5 (Puzzle & Dragons: Super Mario Bros. Edition)|★World 5]] | |||
SpecialWorld6-PDSMBE.jpg|[[Special World 6 (Puzzle & Dragons: Super Mario Bros. Edition)|★World 6]] | |||
SpecialWorld7-PDSMBE.jpg|[[Special World 7 (Puzzle & Dragons: Super Mario Bros. Edition)|★World 7]] | |||
SpecialWorld8-PDSMBE.jpg|[[Special World 8 (Puzzle & Dragons: Super Mario Bros. Edition)|★World 8]] | |||
</gallery> | </gallery> | ||
| Line 678: | Line 757: | ||
===''[[Dr. Mario World]]''=== | ===''[[Dr. Mario World]]''=== | ||
<gallery> | <gallery> | ||
DMW World 1 | DMW World 1 Icon.png|[[World 1 (Dr. Mario World)|World 1]] | ||
DMW World 2 | DMW World 2 Icon.png|[[World 2 (Dr. Mario World)|World 2]] | ||
DMW World 3 | DMW World 3 Icon.png|[[World 3 (Dr. Mario World)|World 3]] | ||
DMW World 4 | DMW World 4 Icon.png|[[World 4 (Dr. Mario World)|World 4]] | ||
DMW World 5 Icon.png|[[World 5 (Dr. Mario World)|World 5]] | |||
DMW World 6.png|[[World 6 (Dr. Mario World)|World 6]] | DMW World 6 Icon.png|[[World 6 (Dr. Mario World)|World 6]] | ||
DMW World 7 Icon.png|[[World 7 (Dr. Mario World)|World 7]] | |||
DMW World 8 Icon.png|[[World 8 (Dr. Mario World)|World 8]] | |||
Dr Mario World World 9.png|[[World | DMW World 9 Icon.png|[[World 9 (Dr. Mario World)|World 9]] | ||
Dr Mario World World | DMW World 10 Icon.png|[[World 10 (Dr. Mario World)|World 10]] | ||
Dr Mario World World | DMW World 11 Icon.png|[[World 11 (Dr. Mario World)|World 11]] | ||
Dr Mario World World | DMW World 12 Icon.png|[[World 12 (Dr. Mario World)|World 12]] | ||
Dr Mario World World | DMW World 13 Icon.png|[[World 13 (Dr. Mario World)|World 13]] | ||
DMW World 14 Icon.png|[[World 14 (Dr. Mario World)|World 14]] | |||
DMW World 15 Icon.png|[[World 15 (Dr. Mario World)|World 15]] | |||
DMW World 16 Icon.png|[[World 16 (Dr. Mario World)|World 16]] | |||
DMW World 17 Icon.png|[[World 17 (Dr. Mario World)|World 17]] | |||
DMW World 18 Icon.png|[[World 18 (Dr. Mario World)|World 18]] | |||
DMW World 19 Icon.png|[[World 19 (Dr. Mario World)|World 19]] | |||
DMW World 20 Icon.png|[[World 20]] | |||
DMW World 21 Icon.png|[[World 21]] | |||
DMW World 22 Icon.png|[[World 22]] | |||
DMW World 23 Icon.png|[[World 23]] | |||
DMW World 24 Icon.png|[[World 24]] | |||
DMW World 25 Icon.png|[[World 25]] | |||
DMW World 26 Icon.png|[[World 26]] | |||
DMW World 27 Icon.png|[[World 27]] | |||
DMW World 28 Icon.png|[[World 28]] | |||
DMW World 29 Icon.png|[[World 29]] | |||
DMW World 30 Icon.png|[[World 30]] | |||
DMW World 31 Icon.png|[[World 31]] | |||
</gallery> | </gallery> | ||
===''[[Mario + Rabbids Kingdom Battle]]''=== | ===''[[Mario + Rabbids (series)|Mario + Rabbids]]'' series=== | ||
====''[[Mario + Rabbids Kingdom Battle]]''==== | |||
<gallery> | <gallery> | ||
AncientGardens.jpg|[[Ancient Gardens]] | AncientGardens.jpg|[[Ancient Gardens]] | ||
| Line 699: | Line 797: | ||
SpookyTrails.jpg|[[Spooky Trails]] | SpookyTrails.jpg|[[Spooky Trails]] | ||
LavaPitsMRKB.jpg|[[Lava Pit (Mario + Rabbids Kingdom Battle)|Lava Pit]] | LavaPitsMRKB.jpg|[[Lava Pit (Mario + Rabbids Kingdom Battle)|Lava Pit]] | ||
BananaLagoon DonkeyKongAdventure.png|[[Banana Lagoon]] (Donkey Kong Adventure) | |||
Reef DonkeyKongAdventure.png|[[Reef]] (Donkey Kong Adventure) | |||
Jungle MarioRabbidsKingdomBattle.png|[[Jungle (Mario + Rabbids Kingdom Battle)|Jungle]] (Donkey Kong Adventure) | |||
Dungeonworld MarioRabbids.png|[[Dungeon (world)|Dungeon]] (Donkey Kong Adventure) | |||
</gallery> | |||
====''[[Mario + Rabbids Sparks of Hope]]''==== | |||
<gallery> | |||
Sunny Beacon Beach.png|[[Beacon Beach]] | |||
MRSOH Pristine Peaks after the blizzard.jpg|[[Pristine Peaks]] | |||
M+RSOH Palette Prime Memory.jpg|[[Palette Prime]] | |||
Terra Flora saved.png|[[Terra Flora]] | |||
Barrendale Mesa saved.png|[[Barrendale Mesa]] | |||
M+RSOH Cursa's stronghold.png|[[Cursa's stronghold]] | |||
Melodic Gardens.jpg|[[Melodic Gardens]] (The Last Spark Hunter) | |||
MRSOH Space Opera Network.jpg|[[Space Opera Network]] (Rayman in the Phantom Show) | |||
</gallery> | </gallery> | ||
==Names in other languages== | ==Names in other languages== | ||
{{foreign names | {{foreign names | ||
| | |Jap=ワールド | ||
| | |JapR=Wārudo | ||
|JapM=World | |||
|Fre=Monde | |||
|FreM=World | |||
|Spa=Mundo | |Spa=Mundo | ||
|SpaM=World | |SpaM=World | ||
| Line 718: | Line 835: | ||
|RusR=Mir | |RusR=Mir | ||
|RusM=World | |RusM=World | ||
|Kor=월드 | |||
|KorR=Woldeu | |||
|KorM=World | |||
|Chi=世界 | |||
|ChiR=Shìjiè | |||
|ChiM=World | |||
}} | }} | ||
[[Category:Worlds|*]] | |||
[[Category:Game mechanics]] | |||
[[Category:Terms]] | [[Category:Terms]] | ||
[[ | [[de:Welt]] | ||
[[ | [[it:Mondo]] | ||
Latest revision as of 10:14, December 2, 2024
- This article is about the term "world". For other uses, see World (disambiguation).
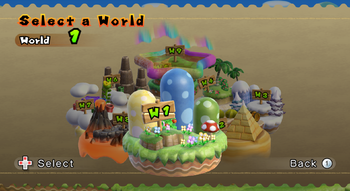
A world is a group of levels in Super Mario games. In Super Mario Bros. and Super Mario Bros.: The Lost Levels, each world always has exactly four levels, and in Super Mario Bros. 2, each world has three (except the final world, which has only two). However, starting in Super Mario Bros. 3, most games have a varying number of levels. In some three-dimensional Super Mario games, worlds are no longer used; now each level stands alone (but each level is sometimes referred to as a world), and the missions are referred to as either stars or episodes. In earlier games, worlds were simply numbered "World 1," "World 2," etc. Super Mario Bros. 3 was the first Super Mario game to give the worlds distinct names, though some later games return to the standard numerical naming.
In general terms, a world refers to any large area of land and space marked off from other regions. As such, "world" may refer to a politically or geographically distinct region of land (such as Desert Land or Chocolate Island), a planet, or even an entire galaxy. Each world has several different terrains and locations.
List of worlds[edit]
Super Mario series[edit]
Super Mario Bros.[edit]
Glitch worlds
Minus World (NES version)
Minus World (VS. Super Mario Bros.)
Super Mario Bros.: The Lost Levels[edit]
Super Mario Bros. 2[edit]
Super Mario Bros. 3[edit]
- Main article: Mushroom World
Grass Land (World 1)
Desert Land (World 2)
Water Land (World 3)
Giant Land (World 4)
Sky Land (World 5)
Ice Land (World 6)
Pipe Land (World 7)
Dark Land (World 8, first area)
Warp Zone (World 9)
World-e (Super Mario Advance 4 only)
Super Mario Land[edit]
- Main article: Sarasaland
Birabuto Kingdom (World 1)
Muda Kingdom (World 2)
Easton Kingdom (World 3)
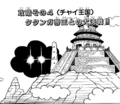
Chai Kingdom (World 4)
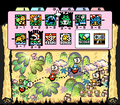
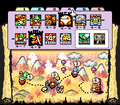
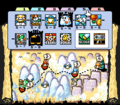
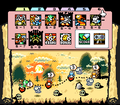
Super Mario World[edit]
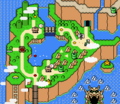
- Main article: Dinosaur Land
Yoshi's Island (World 1)
Donut Plains (World 2)
Vanilla Dome (World 3)
Twin Bridges (World 4)
Forest of Illusion (World 5)
Chocolate Island (World 6)
Valley of Bowser (World 7)
Star World (World 8)
Special Zone (World 9)
Super Mario Land 2: 6 Golden Coins[edit]
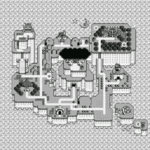
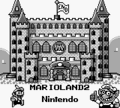
- Main article: Mario Land (Super Mario Land 2: 6 Golden Coins)
New Super Mario Bros.[edit]

Super Mario Galaxy[edit]
- Main article: Dome
New Super Mario Bros. Wii[edit]
World Coin (Coin Battle only)
Super Mario Galaxy 2[edit]
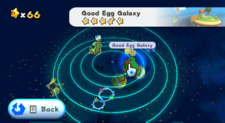
- Main article: Grand World Map
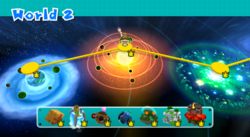
Super Mario 3D Land[edit]
New Super Mario Bros. 2[edit]
World Mushroom (World 7)
World Flower (World 8)
World Star (World 9)
New Super Mario Bros. U / New Super Luigi U / New Super Mario Bros. U Deluxe[edit]
Acorn Plains (World 1)
Layer-Cake Desert (World 2)
Sparkling Waters (World 3)
Frosted Glacier (World 4)
Soda Jungle (World 5)
Rock-Candy Mines (World 6)
Meringue Clouds (World 7)
Peach's Castle (World 8)
Superstar Road (World 9)
Coin Courses (Multiplayer Exclusive)
Super Mario 3D World / Super Mario 3D World + Bowser's Fury[edit]
- Main article: Sprixie Kingdom
World Castle (World 7)
World Bowser (World 8)
World Star (World 9)
World Mushroom (World 10)
World Flower (World 11)
World Crown (World 12)
Super Mario Run[edit]
Super Mario Bros. Wonder[edit]
 Pipe-Rock Plateau (World 1)
 Fluff-Puff Peaks (World 2)
 Shining Falls (World 3)
 Sunbaked Desert (World 4)
 Fungi Mines (World 5)
 Deep Magma Bog (World 6)
Donkey Kong franchise[edit]
Donkey Kong (Game Boy)[edit]
Construction Site (25m, 50m, 75m, 100m)
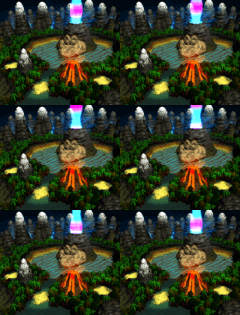
Donkey Kong Country[edit]
- Main article: Donkey Kong Island
Donkey Kong Land[edit]
- Main article: Donkey Kong Island
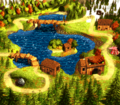
Donkey Kong Country 2: Diddy's Kong Quest[edit]
- Main article: Crocodile Isle
Donkey Kong Land 2[edit]
- Main article: Crocodile Isle
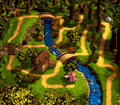
Donkey Kong Country 3: Dixie Kong's Double Trouble![edit]
- Main article: Northern Kremisphere
Pacifica (GBA Only)
Donkey Kong Land III[edit]
- Main article: Northern Kremisphere
Diddy Kong Racing[edit]
- Main article: Timber's Island
DK: King of Swing[edit]
DK: Jungle Climber[edit]
Donkey Kong Country Returns[edit]
Cloud (Nintendo 3DS version only)
Donkey Kong Country: Tropical Freeze[edit]
Yoshi franchise[edit]
Super Mario World 2: Yoshi's Island[edit]
Yoshi's Story[edit]
- Main article: Yoshi's Story (book)
Yoshi Topsy-Turvy[edit]
Chapter 1: Tale of the Spirit of Cuteness
Chapter 2: Tale of the Spirit of Money
Chapter 3: Tale of the Spirit of Power
Chapter 4: Tale of the Spirit of Speed
Chapter 5: The Tale of Bowser's Fields
Chapter 6: Tale of the Spirit of Kindness
Chapter 7: Tale of the Spirit of Fright
Chapter 8: The Tale of Bowser's Cave
Yoshi's Island DS[edit]
Yoshi's New Island[edit]
Yoshi's Woolly World[edit]
Yoshi's Crafted World[edit]
Wario franchise[edit]
Wario Land: Super Mario Land 3[edit]
- Main article: Kitchen Island
Wario Land II[edit]
Wario Land 3[edit]
Wario Land 4[edit]
Wario World[edit]
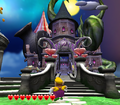
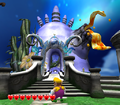
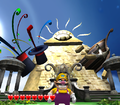
Wario Land: Shake It![edit]
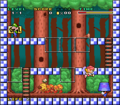
Mario & Wario[edit]
Hotel Mario[edit]
Mario vs. Donkey Kong series[edit]
Mario vs. Donkey Kong[edit]
Mario Toy Company (World 1)
Donkey Kong Jungle (World 2)
Fire Mountain (World 3)
Merry Mini-Land (World 4) (remake exclusive)
Spooky House (World 4) (World 5 in the remake)
Slippery Summit (World 6) (remake exclusive)
Mystic Forest (World 5) (World 7 in the remake)
Twilight City (World 6) (World 8 in the remake)
Mario Toy Factory (World 1+)
Donkey Kong Jungle Plus (World 2+)
Fire Mountain Plus (World 3+)
Merry Mini-Land Plus (World 4+) (remake exclusive)
Spooky House Plus (World 4+) (World 5+ in the remake)
Slippery Summit Plus (World 6+) (remake exclusive)
Mystic Forest Plus (World 5+) (World 7+ in the remake)
Twilight City Plus (World 6+) (World 8+ in the remake)
Mario vs. Donkey Kong 2: March of the Minis[edit]
Mario vs. Donkey Kong: Minis March Again![edit]
Mario vs. Donkey Kong: Mini-Land Mayhem![edit]
Rainbow Summit (Special levels)
Secret Storage (Expert levels)
Mario and Donkey Kong: Minis on the Move[edit]
Mario vs. Donkey Kong: Tipping Stars[edit]
Orbiting Observatory (secret levels)
Bonus 1 (extra levels)
Bonus 2 (extra levels)
Bonus 3 (extra levels)
Mini Mario & Friends: amiibo Challenge[edit]
Super Princess Peach[edit]
- Main article: Vibe Island
Paper Mario: Sticker Star[edit]
Captain Toad: Treasure Tracker[edit]
Puzzle & Dragons: Super Mario Bros. Edition[edit]
Mario Party series[edit]
Mario Party: Star Rush[edit]
Mario Party: The Top 100[edit]
Super Mario Party[edit]
Dr. Mario World[edit]
Mario + Rabbids series[edit]
Mario + Rabbids Kingdom Battle[edit]
Banana Lagoon (Donkey Kong Adventure)
Reef (Donkey Kong Adventure)
Jungle (Donkey Kong Adventure)
Dungeon (Donkey Kong Adventure)
Mario + Rabbids Sparks of Hope[edit]
Melodic Gardens (The Last Spark Hunter)
Space Opera Network (Rayman in the Phantom Show)
Names in other languages[edit]
| Language | Name | Meaning | Notes |
|---|---|---|---|
| Japanese | ワールド[?] Wārudo |
World | |
| Chinese | 世界[?] Shìjiè |
World | |
| Dutch | Wereld[?] | World | |
| French | Monde[?] | World | |
| German | Welt[?] | World | |
| Italian | Mondo[?] | World | |
| Korean | 월드[?] Woldeu |
World | |
| Portuguese | Mundo[?] | World | |
| Russian | Мир[?] Mir |
World | |
| Spanish | Mundo[?] | World |
