User:Mid188/Sandbox: Difference between revisions
mNo edit summary |
(Added images.) |
||
| Line 46: | Line 46: | ||
|[[File:PMCoin.png]][[File:PMCoin.png]][[File:PMCoin.png]][[File:PMCoin.png]][[File:PMCoin.png]][[File:PMCoin.png]][[File:PMCoin.png]][[File:PMCoin.png]][[File:PMCoin.png]][[File:PMCoin.png]]<br>10 [[Coin]]s | |[[File:PMCoin.png]][[File:PMCoin.png]][[File:PMCoin.png]][[File:PMCoin.png]][[File:PMCoin.png]][[File:PMCoin.png]][[File:PMCoin.png]][[File:PMCoin.png]][[File:PMCoin.png]][[File:PMCoin.png]]<br>10 [[Coin]]s | ||
|At [[Jr. Troopa|Jr. Troopa's]] playground, near the tree with [[Goombaria|Goombaria's]] [[Dolly]]. | |At [[Jr. Troopa|Jr. Troopa's]] playground, near the tree with [[Goombaria|Goombaria's]] [[Dolly]]. | ||
|{{anchor|Goomba Village}} | |{{anchor|Goomba Village}}[[File:Goomba Village Block 1.png|250px]] | ||
|- | |- | ||
|Goomba Village | |Goomba Village | ||
|[[File:PMCoin.png]]<br>Coin | |[[File:PMCoin.png]]<br>Coin | ||
|Near the entrance to Jr. Troopa's playground. | |Near the entrance to Jr. Troopa's playground. | ||
| | |[[File:Goomba Village Block 2.png|250px]] | ||
|- | |- | ||
|[[Goomba Road]] | |[[Goomba Road]] | ||
|[[File:PMCoin.png]]<br>Coin (both blocks) | |[[File:PMCoin.png]]<br>Coin (both blocks) | ||
|In the middle of the first scene. | |In the middle of the first scene. | ||
|{{anchor|Goomba Road}} | |{{anchor|Goomba Road}}[[File:Goomba Road Blocks 1-2.png|250px]] | ||
|- | |- | ||
|Goomba Road | |Goomba Road | ||
|[[File:Close Call Badge.png]]<br>[[Close Call (badge)|Close Call]] | |[[File:Close Call Badge.png]]<br>[[Close Call (badge)|Close Call]] | ||
|In the red [[Badge#Paper_Mario|badge]] block on the second part of the path. | |In the red [[Badge#Paper_Mario|badge]] block on the second part of the path. | ||
| | |[[File:Goomba Road Block 3.png|250px]] | ||
|- | |- | ||
|Goomba Road | |Goomba Road | ||
|[[File:PaperMario Items SuperShroom.png]]<br>[[Super_Mushroom#Paper_Mario|Super Shroom]] | |[[File:PaperMario Items SuperShroom.png]]<br>[[Super_Mushroom#Paper_Mario|Super Shroom]] | ||
|To the south of the opening after [[Goomba King's Fortress]], there is a brick which will reveal a ? Block after being hit. | |To the south of the opening after [[Goomba King's Fortress]], there is a brick which will reveal a ? Block after being hit. | ||
| | |[[File:Goomba Road Block 4.png|250px]] | ||
|- | |- | ||
|Goomba Road | |Goomba Road | ||
|[[File:PaperMario Items SleepySheep.png]]<br>[[Sleepy Sheep]] | |[[File:PaperMario Items SleepySheep.png]]<br>[[Sleepy Sheep]] | ||
|Near the descending stairs between Goomba King's Fortress and [[Toad_Town#Paper_Mario|Toad Town]]. | |Near the descending stairs between Goomba King's Fortress and [[Toad_Town#Paper_Mario|Toad Town]]. | ||
| | |[[File:Goomba Road Block 5.png|250px]] | ||
|- | |- | ||
|colspan=4 style="background:#ABC"| | |colspan=4 style="background:#ABC"| | ||
| Line 80: | Line 80: | ||
|[[File:PMCoin.png]] [[File:Dizzy Attack Badge.png]]<br>Coin, [[Dizzy Attack]] | |[[File:PMCoin.png]] [[File:Dizzy Attack Badge.png]]<br>Coin, [[Dizzy Attack]] | ||
|In the middle of the first scene. | |In the middle of the first scene. | ||
|{{anchor|Pleasant Path}} | |{{anchor|Pleasant Path}}[[File:Pleasant Path Blocks 1-2.png|250px]] | ||
|- | |- | ||
|Pleasant Path | |Pleasant Path | ||
|[[File:PaperMario Items FrightJar.png]]<br>[[Fright Mask|Fright Jar]] | |[[File:PaperMario Items FrightJar.png]]<br>[[Fright Mask|Fright Jar]] | ||
|In the rightmost block at the first scene. | |In the rightmost block at the first scene. | ||
| | |[[File:Pleasant Path Block 3.png|250px]] | ||
|- | |- | ||
|Pleasant Path | |Pleasant Path | ||
|[[File:PaperMario Items POWBlock.png]]<br>[[POW_Block#Paper_Mario_series|POW Block]] | |[[File:PaperMario Items POWBlock.png]]<br>[[POW_Block#Paper_Mario_series|POW Block]] | ||
|At the start of the second scene. | |At the start of the second scene. | ||
| | |[[File:Pleasant Path Block 4.png|250px]] | ||
|- | |- | ||
|Pleasant Path | |Pleasant Path | ||
|[[File:PMCoin.png]][[File:PMCoin.png]][[File:PMCoin.png]][[File:PMCoin.png]][[File:PMCoin.png]][[File:PMCoin.png]][[File:PMCoin.png]][[File:PMCoin.png]][[File:PMCoin.png]][[File:PMCoin.png]]<br>10 Coins | |[[File:PMCoin.png]][[File:PMCoin.png]][[File:PMCoin.png]][[File:PMCoin.png]][[File:PMCoin.png]][[File:PMCoin.png]][[File:PMCoin.png]][[File:PMCoin.png]][[File:PMCoin.png]][[File:PMCoin.png]]<br>10 Coins | ||
|At the end of the second scene. | |At the end of the second scene. | ||
| | |[[File:Pleasant Path Block 5.png|250px]] | ||
|- | |- | ||
|Pleasant Path | |Pleasant Path | ||
|[[File:Attack FX B Badge.png]]<br>[[Attack FX B (Paper Mario)|Attack FX B]] | |[[File:Attack FX B Badge.png]]<br>[[Attack FX B (Paper Mario)|Attack FX B]] | ||
|Smashing the blocks near the entrance of [[Koopa Village]] in the order "left, right, middle" will reveal a red ? Badge block. | |Smashing the blocks near the entrance of [[Koopa Village]] in the order "left, right, middle" will reveal a red ? Badge block. | ||
| | |[[File:Pleasant Path Block 6.png|250px]] | ||
|- | |- | ||
|[[Koopa Bros. Fortress]] | |[[Koopa Bros. Fortress]] | ||
|EMPTY/TRAP | |EMPTY/TRAP | ||
|Required to progress, found at the top of the room accessed by a second locked door. | |Required to progress, found at the top of the room accessed by a second locked door. | ||
|{{anchor|Koopa Bros. Fortress}} | |{{anchor|Koopa Bros. Fortress}}[[File:Koopa Bros. Fortress Block 1.png|250px]] | ||
|- | |- | ||
|Koopa Bros. Fortress | |Koopa Bros. Fortress | ||
|[[File:PaperMario Items MapleSyrup.png]]<br>[[Maple Syrup]] | |[[File:PaperMario Items MapleSyrup.png]]<br>[[Maple Syrup]] | ||
|At the [[Bullet_Bill#Paper_Mario|Bullet Bill]] dodging scene, at the southwestern corner. | |At the [[Bullet_Bill#Paper_Mario|Bullet Bill]] dodging scene, at the southwestern corner. | ||
| | |[[File:Koopa Bros. Fortress Block 2.png|250px]] | ||
|- | |- | ||
|[[Toad_Town#Paper_Mario|Toad Town]] | |[[Toad_Town#Paper_Mario|Toad Town]] | ||
|[[File:PMCoin.png]][[File:PMCoin.png]][[File:PMCoin.png]][[File:PMCoin.png]][[File:PMCoin.png]][[File:PMCoin.png]][[File:PMCoin.png]][[File:PMCoin.png]][[File:PMCoin.png]][[File:PMCoin.png]]<br>10 Coins | |[[File:PMCoin.png]][[File:PMCoin.png]][[File:PMCoin.png]][[File:PMCoin.png]][[File:PMCoin.png]][[File:PMCoin.png]][[File:PMCoin.png]][[File:PMCoin.png]][[File:PMCoin.png]][[File:PMCoin.png]]<br>10 Coins | ||
|After gaining access to the rest of Toad Town, this block is found floating above wooden crates in the port. | |After gaining access to the rest of Toad Town, this block is found floating above wooden crates in the port. | ||
|{{anchor|Toad Town}} | |{{anchor|Toad Town}}[[File:Toad Town Block.png|250px]] | ||
|- | |- | ||
|[[Toad Town Tunnels]] | |[[Toad Town Tunnels]] | ||
|[[File:PMCoin.png]][[File:PMCoin.png]][[File:PMCoin.png]][[File:PMCoin.png]][[File:PMCoin.png]][[File:PMCoin.png]][[File:PMCoin.png]][[File:PMCoin.png]][[File:PMCoin.png]][[File:PMCoin.png]]<br>10 Coins | |[[File:PMCoin.png]][[File:PMCoin.png]][[File:PMCoin.png]][[File:PMCoin.png]][[File:PMCoin.png]][[File:PMCoin.png]][[File:PMCoin.png]][[File:PMCoin.png]][[File:PMCoin.png]][[File:PMCoin.png]]<br>10 Coins | ||
|Third brick block in the row of brick blocks found at the room right of the tunnels entrance. | |Third brick block in the row of brick blocks found at the room right of the tunnels entrance. | ||
|{{anchor|Toad Town Tunnels}} | |{{anchor|Toad Town Tunnels}}[[File:Toad Town Tunnels Block 1.png|250px]] | ||
|- | |- | ||
|colspan=4 style="background:#ABC"| | |colspan=4 style="background:#ABC"| | ||
| Line 129: | Line 129: | ||
|[[File:PaperMario Items SleepySheep.png]]<br>Sleepy Sheep | |[[File:PaperMario Items SleepySheep.png]]<br>Sleepy Sheep | ||
|At the southeastern corner of the second scene. | |At the southeastern corner of the second scene. | ||
|{{anchor|Mt. Rugged}} | |{{anchor|Mt. Rugged}}[[File:Mt. Rugged Block 1.png|250px]] | ||
|- | |- | ||
|Mt. Rugged | |Mt. Rugged | ||
|[[File:PaperMario Items Mushroom.png]]<br>[[Mushroom#Paper_Mario|Mushroom]] | |[[File:PaperMario Items Mushroom.png]]<br>[[Mushroom#Paper_Mario|Mushroom]] | ||
|Near the start of the scene to the north of the second scene, accessible after sliding the slope in the third scene. | |Near the start of the scene to the north of the second scene, accessible after sliding the slope in the third scene. | ||
| | |[[File:Mt. Rugged Block 2.png|250px]] | ||
|- | |- | ||
|Mt. Rugged | |Mt. Rugged | ||
|[[File:PMCoin.png]]<br>Coin | |[[File:PMCoin.png]]<br>Coin | ||
|After using the trampoline in the same scene, found on the left. | |After using the trampoline in the same scene, found on the left. | ||
| | |[[File:Mt. Rugged Block 3.png|250px]] | ||
|- | |- | ||
|Mt. Rugged | |Mt. Rugged | ||
|[[File:PaperMario Items HoneySyrup.png]]<br>[[Honey Syrup]] | |[[File:PaperMario Items HoneySyrup.png]]<br>[[Honey Syrup]] | ||
|After using the trampoline in the same scene, found after going to the right, guarded by a [[Cleft]]. | |After using the trampoline in the same scene, found after going to the right, guarded by a [[Cleft]]. | ||
| | |[[File:Mt. Rugged Block 4.png|250px]] | ||
|- | |- | ||
|[[Dry_Dry_Desert_(Paper_Mario)|Dry Dry Desert]] | |[[Dry_Dry_Desert_(Paper_Mario)|Dry Dry Desert]] | ||
|[[File:PaperMario Items FrightJar.png]] [[File:PMCoin.png]]<br>Fright Jar, Coin | |[[File:PaperMario Items FrightJar.png]] [[File:PMCoin.png]]<br>Fright Jar, Coin | ||
|In the scene three scenes north of the entrance. | |In the scene three scenes north of the entrance. | ||
|{{anchor|Dry Dry Desert}} | |{{anchor|Dry Dry Desert}}[[File:Dry Dry Desert Blocks 1-2.png|250px]] | ||
|- | |- | ||
|Dry Dry Desert | |Dry Dry Desert | ||
|[[File:PMCoin.png]][[File:PMCoin.png]][[File:PMCoin.png]][[File:PMCoin.png]][[File:PMCoin.png]][[File:PMCoin.png]][[File:PMCoin.png]][[File:PMCoin.png]][[File:PMCoin.png]][[File:PMCoin.png]]<br>10 Coins | |[[File:PMCoin.png]][[File:PMCoin.png]][[File:PMCoin.png]][[File:PMCoin.png]][[File:PMCoin.png]][[File:PMCoin.png]][[File:PMCoin.png]][[File:PMCoin.png]][[File:PMCoin.png]][[File:PMCoin.png]]<br>10 Coins | ||
|In the scene six scenes east of the previous one, left of the tree. | |In the scene six scenes east of the previous one, left of the tree. | ||
| | |[[File:Dry Dry Desert Block 3.png|250px]] | ||
|- | |- | ||
|Dry Dry Desert | |Dry Dry Desert | ||
|[[File:PMCoin.png]] 10x[[File:PMCoin.png]] [[File:PaperMario Items HoneySyrup.png]]<br>Coin, 10 Coins, Honey Syrup | |[[File:PMCoin.png]] 10x[[File:PMCoin.png]] [[File:PaperMario Items HoneySyrup.png]]<br>Coin, 10 Coins, Honey Syrup | ||
|In the scene two scenes west and one south of the previous one. | |In the scene two scenes west and one south of the previous one. | ||
| | |[[File:Dry Dry Desert Blocks 4-6.png|250px]] | ||
|- | |- | ||
|Dry Dry Desert | |Dry Dry Desert | ||
|[[File:PaperMario Items Mushroom.png]] [[File:PaperMario Items SuperShroom.png]] [[File:PaperMario Items UltraShroom.png]]<br>Mushroom, Super Shroom, [[Ultra Mushroom|Ultra Shroom]] | |[[File:PaperMario Items Mushroom.png]] [[File:PaperMario Items SuperShroom.png]] [[File:PaperMario Items UltraShroom.png]]<br>Mushroom, Super Shroom, [[Ultra Mushroom|Ultra Shroom]] | ||
|In the scene four scenes west and one south of the previous one. Here, Mario must hammer the empty ? block to make others appear. One hit spawns a block to the left with a [[Mushroom#Paper_Mario|Mushroom]], ten hits spawn a block to the right with a [[Super_Mushroom#Paper_Mario|Super Shroom]] and one hundred hits spawns a block in the midle with a [[Ultra Mushroom|Ultra Shroom]]. | |In the scene four scenes west and one south of the previous one. Here, Mario must hammer the empty ? block to make others appear. One hit spawns a block to the left with a [[Mushroom#Paper_Mario|Mushroom]], ten hits spawn a block to the right with a [[Super_Mushroom#Paper_Mario|Super Shroom]] and one hundred hits spawns a block in the midle with a [[Ultra Mushroom|Ultra Shroom]]. | ||
| | |[[File:Dry Dry Desert Blocks 7-9.png|250px]] | ||
|- | |- | ||
|Dry Dry Desert | |Dry Dry Desert | ||
|[[File:PMCoin.png]] [[File:PMCoin.png]] [[File:PaperMario Items FireFlower.png]] [[File:PMCoin.png]] [[File:PMCoin.png]]<br>Coin, Coin, [[Fire_Flower#Paper_Mario|Fire Flower]], Coin, Coin | |[[File:PMCoin.png]] [[File:PMCoin.png]] [[File:PaperMario Items FireFlower.png]] [[File:PMCoin.png]] [[File:PMCoin.png]]<br>Coin, Coin, [[Fire_Flower#Paper_Mario|Fire Flower]], Coin, Coin | ||
|In the scene two scenes east from the previous one. | |In the scene two scenes east from the previous one. | ||
| | |[[File:Dry Dry Desert Blocks 10-14.png|250px]] | ||
|- | |- | ||
|Dry Dry Desert | |Dry Dry Desert | ||
|[[File:PMCoin.png]][[File:PMCoin.png]][[File:PMCoin.png]][[File:PMCoin.png]][[File:PMCoin.png]][[File:PMCoin.png]][[File:PMCoin.png]][[File:PMCoin.png]][[File:PMCoin.png]][[File:PMCoin.png]]<br>10 Coins (both blocks) | |[[File:PMCoin.png]][[File:PMCoin.png]][[File:PMCoin.png]][[File:PMCoin.png]][[File:PMCoin.png]][[File:PMCoin.png]][[File:PMCoin.png]][[File:PMCoin.png]][[File:PMCoin.png]][[File:PMCoin.png]]<br>10 Coins (both blocks) | ||
|In the scene three scenes east from the previous one, two brick blocks closest to the northern exit. | |In the scene three scenes east from the previous one, two brick blocks closest to the northern exit. | ||
| | |[[File:Dry Dry Desert Blocks 15-16.png|250px]] | ||
|- | |- | ||
|Dry Dry Desert | |Dry Dry Desert | ||
|[[File:PMCoin.png]][[File:PMCoin.png]][[File:PMCoin.png]][[File:PMCoin.png]][[File:PMCoin.png]][[File:PMCoin.png]][[File:PMCoin.png]][[File:PMCoin.png]][[File:PMCoin.png]][[File:PMCoin.png]]<br>10 Coins | |[[File:PMCoin.png]][[File:PMCoin.png]][[File:PMCoin.png]][[File:PMCoin.png]][[File:PMCoin.png]][[File:PMCoin.png]][[File:PMCoin.png]][[File:PMCoin.png]][[File:PMCoin.png]][[File:PMCoin.png]]<br>10 Coins | ||
|In the scene five scenes west and two south from the previous one, the middle brick block. | |In the scene five scenes west and two south from the previous one, the middle brick block. | ||
| | |[[File:Dry Dry Desert Block 17.png|250px]] | ||
|- | |- | ||
|Dry Dry Desert | |Dry Dry Desert | ||
|[[File:PMCoin.png]]<br>Coin | |[[File:PMCoin.png]]<br>Coin | ||
|In the scene three scenes east from the previous one. | |In the scene three scenes east from the previous one. | ||
| | |[[File:Dry Dry Desert Block 18.png|250px]] | ||
|- | |- | ||
|Dry Dry Desert | |Dry Dry Desert | ||
|[[File:PMCoin.png]]<br>Coin | |[[File:PMCoin.png]]<br>Coin | ||
|In the scene three scenes east from the previous one. | |In the scene three scenes east from the previous one. | ||
| | |[[File:Dry Dry Desert Block 19.png|250px]] | ||
|- | |- | ||
|Dry Dry Desert | |Dry Dry Desert | ||
|[[File:PMCoin.png]][[File:PMCoin.png]][[File:PMCoin.png]][[File:PMCoin.png]][[File:PMCoin.png]][[File:PMCoin.png]][[File:PMCoin.png]][[File:PMCoin.png]][[File:PMCoin.png]][[File:PMCoin.png]]<br>10 Coins | |[[File:PMCoin.png]][[File:PMCoin.png]][[File:PMCoin.png]][[File:PMCoin.png]][[File:PMCoin.png]][[File:PMCoin.png]][[File:PMCoin.png]][[File:PMCoin.png]][[File:PMCoin.png]][[File:PMCoin.png]]<br>10 Coins | ||
|In the scene four scenes | |In the scene four scenes west and one south from the previous one, the brick block closest to the northern exit. | ||
| | |[[File:Dry Dry Desert Block 20.png|250px]] | ||
|- | |- | ||
|Dry Dry Desert | |Dry Dry Desert | ||
|[[File:PMCoin.png]][[File:PMCoin.png]][[File:PMCoin.png]][[File:PMCoin.png]][[File:PMCoin.png]][[File:PMCoin.png]][[File:PMCoin.png]][[File:PMCoin.png]][[File:PMCoin.png]][[File:PMCoin.png]]<br>10 Coins | |[[File:PMCoin.png]][[File:PMCoin.png]][[File:PMCoin.png]][[File:PMCoin.png]][[File:PMCoin.png]][[File:PMCoin.png]][[File:PMCoin.png]][[File:PMCoin.png]][[File:PMCoin.png]][[File:PMCoin.png]]<br>10 Coins | ||
|In the scene three scenes east from the previous one. | |In the scene three scenes east from the previous one. | ||
| | |[[File:Dry Dry Desert Block 21.png|250px]] | ||
|- | |- | ||
|Dry Dry Desert | |Dry Dry Desert | ||
|[[File:PMCoin.png]]<br>Coin | |[[File:PMCoin.png]]<br>Coin | ||
|In the scene one west and one south from the previous one. | |In the scene one west and one south from the previous one. | ||
| | |[[File:Dry Dry Desert Block 22.png|250px]] | ||
|- | |- | ||
|Dry Dry Desert | |Dry Dry Desert | ||
|[[File:PMCoin.png]][[File:PMCoin.png]][[File:PMCoin.png]][[File:PMCoin.png]][[File:PMCoin.png]][[File:PMCoin.png]][[File:PMCoin.png]][[File:PMCoin.png]][[File:PMCoin.png]][[File:PMCoin.png]]<br>10 Coins (all six blocks) | |[[File:PMCoin.png]][[File:PMCoin.png]][[File:PMCoin.png]][[File:PMCoin.png]][[File:PMCoin.png]][[File:PMCoin.png]][[File:PMCoin.png]][[File:PMCoin.png]][[File:PMCoin.png]][[File:PMCoin.png]]<br>10 Coins (all six blocks) | ||
|In the scene two east from the previous one. | |In the scene two east from the previous one. | ||
| | |[[File:Dry Dry Desert Blocks 23-28.png|250px]] | ||
|- | |- | ||
|[[Dry_Dry_Ruins_(Paper_Mario)|Dry Dry Ruins]] | |[[Dry_Dry_Ruins_(Paper_Mario)|Dry Dry Ruins]] | ||
|EMPTY/TRAP | |EMPTY/TRAP | ||
|Required to progress, found at the end of the room with [[Artifact|Ancient Artifact]]. | |Required to progress, found at the end of the room with [[Artifact|Ancient Artifact]]. | ||
|{{anchor|Dry Dry Ruins}} | |{{anchor|Dry Dry Ruins}}[[File:Dry Dry Ruins Block.png|250px]] | ||
|- | |- | ||
|Toad Town Tunnels | |Toad Town Tunnels | ||
|[[File:PMCoin.png]] [[File:PaperMario Items SnowmanDoll.png]] [[File:PMCoin.png]]<br>Coin, [[Snowman Doll]], Coin | |[[File:PMCoin.png]] [[File:PaperMario Items SnowmanDoll.png]] [[File:PMCoin.png]]<br>Coin, [[Snowman Doll]], Coin | ||
|In the room west of the entrance but before the pipe leading to the new area. | |In the room west of the entrance but before the pipe leading to the new area. | ||
| | |[[File:Toad Town Tunnels Blocks 2-4.png|250px]] | ||
|- | |- | ||
|colspan=4 style="background:#ABC"| | |colspan=4 style="background:#ABC"| | ||
| Line 228: | Line 228: | ||
|[[File:HP Plus Badge.png]]<br>[[HP Plus (badge)|HP Plus]] | |[[File:HP Plus Badge.png]]<br>[[HP Plus (badge)|HP Plus]] | ||
|In the middle of a clearing found on a detour from the fifth area. | |In the middle of a clearing found on a detour from the fifth area. | ||
|{{anchor|Forever Forest}} | |{{anchor|Forever Forest}}[[File:Forever Forest Block 1.png|250px]] | ||
|- | |- | ||
|Forever Forest | |Forever Forest | ||
|[[File:FP Plus Badge.png]]<br>[[FP Plus]] | |[[File:FP Plus Badge.png]]<br>[[FP Plus]] | ||
|In the middle of a clearing found on a detour from the seventh area. | |In the middle of a clearing found on a detour from the seventh area. | ||
| | |[[File:Forever Forest Block 2.png|250px]] | ||
|- | |- | ||
|[[Boo's Mansion]] | |[[Boo's Mansion]] | ||
|[[File:PaperMario Items VoltShroom.png]]<br>[[Volt Shroom]] | |[[File:PaperMario Items VoltShroom.png]]<br>[[Volt Shroom]] | ||
|Outside the mansion, in front of the gate. | |Outside the mansion, in front of the gate. | ||
|{{anchor|Boo's Mansion}} | |{{anchor|Boo's Mansion}}[[File:Boo Mansion Block.png|250px]] | ||
|- | |- | ||
|[[Gusty Gulch]] | |[[Gusty Gulch]] | ||
|[[File:PMCoin.png]]<br>Coin | |[[File:PMCoin.png]]<br>Coin | ||
|In the scene with a [[Save_Block#Paper_Mario_series|Save Block]], found in the house right of the Save Block. | |In the scene with a [[Save_Block#Paper_Mario_series|Save Block]], found in the house right of the Save Block. | ||
|{{anchor|Gusty Gulch}} | |{{anchor|Gusty Gulch}}[[File:Gusty Gulch Block 1.png|250px]] | ||
|- | |- | ||
|Gusty Gulch | |Gusty Gulch | ||
|[[File:PMCoin.png]]<br>Coin | |[[File:PMCoin.png]]<br>Coin | ||
|At the start of the scene one scene to the east of the Boo's area. | |At the start of the scene one scene to the east of the Boo's area. | ||
| | |[[File:Gusty Gulch Block 2.png|250px]] | ||
|- | |- | ||
|Gusty Gulch | |Gusty Gulch | ||
|[[File:PMCoin.png]] [[File:PaperMario Items RepelGel.png]]<br>Coin, [[Repel Gel]] | |[[File:PMCoin.png]] [[File:PaperMario Items RepelGel.png]]<br>Coin, [[Repel Gel]] | ||
|In the middle of the same scene. | |In the middle of the same scene. | ||
| | |[[File:Gusty Gulch Blocks 3-4.png|250px]] | ||
|- | |- | ||
|Gusty Gulch | |Gusty Gulch | ||
|[[File:PaperMario Items SuperShroom.png]] 10x[[File:PMCoin.png]] [[File:PMCoin.png]]<br>Super Shroom, 10 Coins, Coin | |[[File:PaperMario Items SuperShroom.png]] 10x[[File:PMCoin.png]] [[File:PMCoin.png]]<br>Super Shroom, 10 Coins, Coin | ||
|At the end of the scene before the scene with [[Tubba Blubba's Castle]] entrance. | |At the end of the scene before the scene with [[Tubba Blubba's Castle]] entrance. | ||
| | |[[File:Gusty Gulch Blocks 5-7.png|250px]] | ||
|- | |- | ||
|[[Tubba Blubba's Castle]] | |[[Tubba Blubba's Castle]] | ||
|[[File:PaperMario Items MapleSyrup.png]]<br>Maple Syrup | |[[File:PaperMario Items MapleSyrup.png]]<br>Maple Syrup | ||
|By the stairs that lead to the third floor. | |By the stairs that lead to the third floor. | ||
|{{anchor|Tubba Blubba's Castle}} | |{{anchor|Tubba Blubba's Castle}}[[File:Tubba Blubba's Castle Block.png|250px]] | ||
|- | |- | ||
|colspan=4 style="background:#ABC"| | |colspan=4 style="background:#ABC"| | ||
| Line 272: | Line 272: | ||
|[[File:PMCoin.png]]<br>Coin | |[[File:PMCoin.png]]<br>Coin | ||
|At the end of the scene one scene east of the blue station. | |At the end of the scene one scene east of the blue station. | ||
|{{anchor|Shy Guy's Toy Box}} | |{{anchor|Shy Guy's Toy Box}}[[File:Shy Guy's Toy Box Block 1.png|250px]] | ||
|- | |- | ||
|Shy Guy's Toy Box | |Shy Guy's Toy Box | ||
|[[File:PMCoin.png]]<br>Coin | |[[File:PMCoin.png]]<br>Coin | ||
|Left of the wall in the very east of the Blue Station area. | |Left of the wall in the very east of the Blue Station area. | ||
| | |[[File:Shy Guy's Toy Box Block 2.png|250px]] | ||
|- | |- | ||
|Shy Guy's Toy Box | |Shy Guy's Toy Box | ||
|[[File:PMCoin.png]] [[File:PaperMario Items ThunderBolt.png]]<br>Coin, [[Thunder Bolt (item)|Thunder Bolt]] | |[[File:PMCoin.png]] [[File:PaperMario Items ThunderBolt.png]]<br>Coin, [[Thunder Bolt (item)|Thunder Bolt]] | ||
|In the same scene, on the opposite side of the wall. | |In the same scene, on the opposite side of the wall. | ||
| | |[[File:Shy Guy's Toy Box Blocks 3-4.png|250px]] | ||
|- | |- | ||
|Shy Guy's Toy Box | |Shy Guy's Toy Box | ||
|[[File:PMCoin.png]]<br>Coin | |[[File:PMCoin.png]]<br>Coin | ||
|In the scene east of the Pink Station area, found above the walkway with looping [[Shy Guy]]s. | |In the scene east of the Pink Station area, found above the walkway with looping [[Shy Guy]]s. | ||
| | |[[File:Shy Guy's Toy Box Block 5 and Treasure Chest 5.png|250px]] | ||
|- | |- | ||
|Shy Guy's Toy Box | |Shy Guy's Toy Box | ||
|[[File:PMCoin.png]]<br>Coin | |[[File:PMCoin.png]]<br>Coin | ||
|In the scene west of the Pink Station area, found above the flower boxes. | |In the scene west of the Pink Station area, found above the flower boxes. | ||
| | |[[File:Shy Guy's Toy Box Block 6.png|250px]] | ||
|- | |- | ||
|Shy Guy's Toy Box | |Shy Guy's Toy Box | ||
|[[File:PMCoin.png]]<br>Coin (both blocks) | |[[File:PMCoin.png]]<br>Coin (both blocks) | ||
|In the next scene, found in the northwestern corner. | |In the next scene, found in the northwestern corner. | ||
| | |[[File:Shy Guy's Toy Box Blocks 7-8.png|250px]] | ||
|- | |- | ||
|Shy Guy's Toy Box | |Shy Guy's Toy Box | ||
|[[File:PMCoin.png]] 10x[[File:PMCoin.png]] [[File:PMCoin.png]]<br>Coin, 10 Coins, Coin | |[[File:PMCoin.png]] 10x[[File:PMCoin.png]] [[File:PMCoin.png]]<br>Coin, 10 Coins, Coin | ||
|In the previous scene, found on the northern side of the tracks. | |In the previous scene, found on the northern side of the tracks. | ||
| | |[[File:Shy Guy's Toy Box Blocks 9-11.png|250px]] | ||
|- | |- | ||
|Shy Guy's Toy Box | |Shy Guy's Toy Box | ||
|[[File:PMCoin.png]][[File:PMCoin.png]][[File:PMCoin.png]][[File:PMCoin.png]][[File:PMCoin.png]][[File:PMCoin.png]][[File:PMCoin.png]][[File:PMCoin.png]][[File:PMCoin.png]][[File:PMCoin.png]]<br>10 Coins | |[[File:PMCoin.png]][[File:PMCoin.png]][[File:PMCoin.png]][[File:PMCoin.png]][[File:PMCoin.png]][[File:PMCoin.png]][[File:PMCoin.png]][[File:PMCoin.png]][[File:PMCoin.png]][[File:PMCoin.png]]<br>10 Coins | ||
|In the scene east of the Green Station area, found above the moving pink platform near the end of the area. | |In the scene east of the Green Station area, found above the moving pink platform near the end of the area. | ||
| | |[[File:Shy Guy's Toy Box Block 12.png|250px]] | ||
|- | |- | ||
|Shy Guy's Toy Box | |Shy Guy's Toy Box | ||
|[[File:PMCoin.png]][[File:PMCoin.png]][[File:PMCoin.png]][[File:PMCoin.png]][[File:PMCoin.png]][[File:PMCoin.png]][[File:PMCoin.png]][[File:PMCoin.png]][[File:PMCoin.png]][[File:PMCoin.png]]<br>10 Coins | |[[File:PMCoin.png]][[File:PMCoin.png]][[File:PMCoin.png]][[File:PMCoin.png]][[File:PMCoin.png]][[File:PMCoin.png]][[File:PMCoin.png]][[File:PMCoin.png]][[File:PMCoin.png]][[File:PMCoin.png]]<br>10 Coins | ||
|In the scene west of the Red Station area, found above the ferris wheel. | |In the scene west of the Red Station area, found above the ferris wheel. | ||
| | |[[File:Shy Guy's Toy Box Block 13.png|250px]] | ||
|- | |- | ||
|Shy Guy's Toy Box | |Shy Guy's Toy Box | ||
|[[File:PMCoin.png]]<br>Coin (both blocks) | |[[File:PMCoin.png]]<br>Coin (both blocks) | ||
|In the same scene, in the lower part of the scene left of the ferris wheel. | |In the same scene, in the lower part of the scene left of the ferris wheel. | ||
| | |[[File:Shy Guy's Toy Box Blocks 14-15.png|250px]] | ||
|- | |- | ||
|Shy Guy's Toy Box | |Shy Guy's Toy Box | ||
|[[File:PaperMario Items SleepySheep.png]]<br>Sleepy Sheep | |[[File:PaperMario Items SleepySheep.png]]<br>Sleepy Sheep | ||
|In the northwestern corner of the scene to the east of the Red Station area. | |In the northwestern corner of the scene to the east of the Red Station area. | ||
| | |[[File:Shy Guy's Toy Box Block 16.png|250px]] | ||
|- | |- | ||
|colspan=4 style="background:#ABC"| | |colspan=4 style="background:#ABC"| | ||
| Line 331: | Line 331: | ||
|[[File:Power Quake Badge.png]]<br>[[Power Quake]] | |[[File:Power Quake Badge.png]]<br>[[Power Quake]] | ||
|In the scene with jungle entrance to the [[Yoshi Village]], found on an island at the center. | |In the scene with jungle entrance to the [[Yoshi Village]], found on an island at the center. | ||
|{{anchor|Jade Jungle}} | |{{anchor|Jade Jungle}}[[File:Jade Jungle Block.png|250px]] | ||
|- | |- | ||
|[[Mt. Lavalava]] | |[[Mt. Lavalava]] | ||
|[[File:PMCoin.png]]<br>Coin (all four blocks) | |[[File:PMCoin.png]]<br>Coin (all four blocks) | ||
|On the top of the third scene, under the first zipline. | |On the top of the third scene, under the first zipline. | ||
|{{anchor|Mt. Lavalava}} | |{{anchor|Mt. Lavalava}}[[File:Mt. Lavalava Blocks 1-4.png|250px]] | ||
|- | |- | ||
|Mt. Lavalava | |Mt. Lavalava | ||
|[[File:PaperMario Items SuperShroom.png]] [[File:PaperMario Items MapleSyrup.png]]<br>Super Shroom, Maple Syrup | |[[File:PaperMario Items SuperShroom.png]] [[File:PaperMario Items MapleSyrup.png]]<br>Super Shroom, Maple Syrup | ||
|In the scene above the Lava Piranha scene. | |In the scene above the Lava Piranha scene. | ||
| | |[[File:Mt. Lavalava Blocks 5-6.png|250px]] | ||
|- | |- | ||
|colspan=4 style="background:#ABC"| | |colspan=4 style="background:#ABC"| | ||
| Line 350: | Line 350: | ||
|[[File:PaperMario Items DizzyDial.png]]<br>[[Dizzy Dial]] | |[[File:PaperMario Items DizzyDial.png]]<br>[[Dizzy Dial]] | ||
|In the second scene on the southeastern road. | |In the second scene on the southeastern road. | ||
|{{anchor|Flower Fields}} | |{{anchor|Flower Fields}}[[File:Flower Fields Block 1.png|250px]] | ||
|- | |- | ||
|Flower Fields | |Flower Fields | ||
|[[File:PMCoin.png]][[File:PMCoin.png]][[File:PMCoin.png]][[File:PMCoin.png]][[File:PMCoin.png]][[File:PMCoin.png]][[File:PMCoin.png]][[File:PMCoin.png]][[File:PMCoin.png]][[File:PMCoin.png]]<br>10 Coins | |[[File:PMCoin.png]][[File:PMCoin.png]][[File:PMCoin.png]][[File:PMCoin.png]][[File:PMCoin.png]][[File:PMCoin.png]][[File:PMCoin.png]][[File:PMCoin.png]][[File:PMCoin.png]][[File:PMCoin.png]]<br>10 Coins | ||
|In the center of the Hedge Maze found on the western road. Accessed by going right from the last pipe in the maze. | |In the center of the Hedge Maze found on the western road. Accessed by going right from the last pipe in the maze. | ||
| | |[[File:Flower Fields Block 2.png|250px]] | ||
|- | |- | ||
|Toad Town Tunnels | |Toad Town Tunnels | ||
|[[File:PMCoin.png]]<br>Coin | |[[File:PMCoin.png]]<br>Coin | ||
|Beneath the entrance room, there is a pipe by the path to the right that eventually leads to the Ultra Boots. In the first room down the pipe, found near the exit. | |Beneath the entrance room, there is a pipe by the path to the right that eventually leads to the Ultra Boots. In the first room down the pipe, found near the exit. | ||
| | |[[File:Toad Town Tunnels Block 5.png|250px]] | ||
|- | |- | ||
|Toad Town Tunnels | |Toad Town Tunnels | ||
|[[File:PMCoin.png]]<br>Coin (both blocks) | |[[File:PMCoin.png]]<br>Coin (both blocks) | ||
|In the next room, found between the brick blocks. They are high in the air, so [[Ultra Boots]] are required. | |In the next room, found between the brick blocks. They are high in the air, so [[Ultra Boots]] are required. | ||
| | |[[File:Toad Town Tunnels Blocks 6-7.png|250px]] | ||
|- | |- | ||
|Toad Town Tunnels | |Toad Town Tunnels | ||
|[[File:PaperMario Items ShootingStar.png]]<br>[[Shooting Star (item)|Shooting Star]] | |[[File:PaperMario Items ShootingStar.png]]<br>[[Shooting Star (item)|Shooting Star]] | ||
|Beneath the entrance room, in the northwestern corner and high in the air, so Ultra Boots are required. | |Beneath the entrance room, in the northwestern corner and high in the air, so Ultra Boots are required. | ||
| | |[[File:Toad Town Tunnels Block 8.png|250px]] | ||
|- | |- | ||
|Toad Town Tunnels | |Toad Town Tunnels | ||
|[[File:PMCoin.png]]<br>Coin | |[[File:PMCoin.png]]<br>Coin | ||
|In the area two screens east of the blue Warp Pipe to Yoshi's Village is a gap between two high platforms, with a doorway leading to [[Shiver City]] in the east. Found touching the western platform, high in the air, so Ultra Boots are required. | |In the area two screens east of the blue Warp Pipe to Yoshi's Village is a gap between two high platforms, with a doorway leading to [[Shiver City]] in the east. Found touching the western platform, high in the air, so Ultra Boots are required. | ||
| | |[[File:Toad Town Tunnels Block 9.png|250px]] | ||
|- | |- | ||
|colspan=4 style="background:#ABC"| | |colspan=4 style="background:#ABC"| | ||
| Line 384: | Line 384: | ||
|[[File:Mega Jump Badge.png]]<br>[[Mega Jump]] | |[[File:Mega Jump Badge.png]]<br>[[Mega Jump]] | ||
|On the second floor in the fourth scene. | |On the second floor in the fourth scene. | ||
|{{anchor|Shiver Mountain}} | |{{anchor|Shiver Mountain}}[[File:Shiver Mountain Block.png|250px]] | ||
|- | |- | ||
|[[Crystal Palace]] | |[[Crystal Palace]] | ||
|[[File:PMCoin.png]][[File:PMCoin.png]][[File:PMCoin.png]][[File:PMCoin.png]][[File:PMCoin.png]][[File:PMCoin.png]][[File:PMCoin.png]][[File:PMCoin.png]][[File:PMCoin.png]][[File:PMCoin.png]]<br>10 Coins (both blocks) | |[[File:PMCoin.png]][[File:PMCoin.png]][[File:PMCoin.png]][[File:PMCoin.png]][[File:PMCoin.png]][[File:PMCoin.png]][[File:PMCoin.png]][[File:PMCoin.png]][[File:PMCoin.png]][[File:PMCoin.png]]<br>10 Coins (both blocks) | ||
|In the second room after going through the blue locked door. | |In the second room after going through the blue locked door. | ||
|{{anchor|Crystal Palace}} | |{{anchor|Crystal Palace}}[[File:Crystal Palace Blocks 1-2.png|250px]] | ||
|- | |- | ||
|Crystal Palace | |Crystal Palace | ||
|[[File:PaperMario Items SuperShroom.png]]<br>Super Shroom | |[[File:PaperMario Items SuperShroom.png]]<br>Super Shroom | ||
|Near the door in the room to the north of the first room. | |Near the door in the room to the north of the first room. | ||
| | |[[File:Crystal Palace Block 3.png|250px]] | ||
|- | |- | ||
|Crystal Palace | |Crystal Palace | ||
|[[File:PaperMario Items MapleSyrup.png]]<br>Maple Syrup | |[[File:PaperMario Items MapleSyrup.png]]<br>Maple Syrup | ||
|Near the door in the big [[Albino Dino]] statue room. It is high in the air, so Ultra Boots are required. | |Near the door in the big [[Albino Dino]] statue room. It is high in the air, so Ultra Boots are required. | ||
| | |[[File:Crystal Palace Block 4.png|250px]] | ||
|- | |- | ||
|colspan=4 style="background:#ABC"| | |colspan=4 style="background:#ABC"| | ||
| Line 408: | Line 408: | ||
|[[File:PaperMario Items LifeShroom.png]]<br>[[Life Shroom]] | |[[File:PaperMario Items LifeShroom.png]]<br>[[Life Shroom]] | ||
|On a platform in the lava area next to the front door scene. | |On a platform in the lava area next to the front door scene. | ||
|{{anchor|Bowser's Castle}} | |{{anchor|Bowser's Castle}}[[File:Bowser's Castle Block 1.png|250px]] | ||
|- | |- | ||
|Bowser's Castle | |Bowser's Castle | ||
|[[File:Deep Focus Badge.png]]<br>[[Deep Focus]] | |[[File:Deep Focus Badge.png]]<br>[[Deep Focus]] | ||
|On a platform in the lava area, near the entrance. | |On a platform in the lava area, near the entrance. | ||
| | |[[File:Bowser's Castle Block 2.png|250px]] | ||
|- | |- | ||
|Bowser's Castle | |Bowser's Castle | ||
|[[File:PaperMario Items POWBlock.png]]<br>POW Block | |[[File:PaperMario Items POWBlock.png]]<br>POW Block | ||
|At the end of the north fork road in the first grotto scene. | |At the end of the north fork road in the first grotto scene. | ||
| | |[[File:Bowser's Castle Block 3.png|250px]] | ||
|- | |- | ||
|Bowser's Castle | |Bowser's Castle | ||
|[[File:PaperMario Items ShootingStar.png]]<br>Shooting Star | |[[File:PaperMario Items ShootingStar.png]]<br>Shooting Star | ||
|At the end of the north fork road in the second grotto scene. | |At the end of the north fork road in the second grotto scene. | ||
| | |[[File:Bowser's Castle Block 4.png|250px]] | ||
|- | |- | ||
|Bowser's Castle | |Bowser's Castle | ||
|[[File:PaperMario Items SuperShroom.png]]<br>Super Shroom | |[[File:PaperMario Items SuperShroom.png]]<br>Super Shroom | ||
|In the middle of the first [[Dry_Bones#Paper_Mario|Dry Bones]] room. | |In the middle of the first [[Dry_Bones#Paper_Mario|Dry Bones]] room. | ||
| | |[[File:Bowser's Castle Block 5.png|250px]] | ||
|- | |- | ||
|Bowser's Castle | |Bowser's Castle | ||
|[[File:PaperMario Items SuperShroom.png]] [[File:PaperMario Items MapleSyrup.png]]<br>Super Shroom, Maple Syrup | |[[File:PaperMario Items SuperShroom.png]] [[File:PaperMario Items MapleSyrup.png]]<br>Super Shroom, Maple Syrup | ||
|Found outside after the quiz room near the door. | |Found outside after the quiz room near the door. | ||
| | |[[File:Bowser's Castle Blocks 6-7.png|250px]] | ||
|- | |- | ||
|Bowser's Castle | |Bowser's Castle | ||
|[[File:PaperMario Items SuperShroom.png]]<br>Super Shroom | |[[File:PaperMario Items SuperShroom.png]]<br>Super Shroom | ||
|In the same scene, found after going to the right. | |In the same scene, found after going to the right. | ||
| | |[[File:Bowser's Castle Block 8.png|250px]] | ||
|} | |} | ||
| Line 566: | Line 566: | ||
|[[File:Hammer Throw Badge.png]]<br>[[Hammer Throw (badge)|Hammer Throw]] | |[[File:Hammer Throw Badge.png]]<br>[[Hammer Throw (badge)|Hammer Throw]] | ||
|On the roof of [[Toad_Town#Paper_Mario|Toad Town]] entrance; get it by hitting the tree for a trampoline. | |On the roof of [[Toad_Town#Paper_Mario|Toad Town]] entrance; get it by hitting the tree for a trampoline. | ||
|{{anchor|Goomba Road}} | |{{anchor|Goomba Road}}[[File:Goomba Road Treasure Chest.png|250px]] | ||
|- | |- | ||
|colspan=4 style="background:#ABC"| | |colspan=4 style="background:#ABC"| | ||
| Line 575: | Line 575: | ||
|[[File:FP Plus Badge.png]]<br>[[FP Plus]] | |[[File:FP Plus Badge.png]]<br>[[FP Plus]] | ||
|On a high platform near the fortress, accessed through a pipe by blasting the wall found near the Heart Block at the end of the last [[Pleasant Path]] scene. | |On a high platform near the fortress, accessed through a pipe by blasting the wall found near the Heart Block at the end of the last [[Pleasant Path]] scene. | ||
|{{anchor|Koopa Bros. Fortress}} | |{{anchor|Koopa Bros. Fortress}}[[File:Koopa Bros. Fortress Treasure Chest 1.png|250px]] | ||
|- | |- | ||
|Koopa Bros. Fortress | |Koopa Bros. Fortress | ||
|[[File:Refund Badge.png]]<br>[[Refund]] | |[[File:Refund Badge.png]]<br>[[Refund]] | ||
|In a small area outside the fortress that can be accessed by blasting the wall on the east end. | |In a small area outside the fortress that can be accessed by blasting the wall on the east end. | ||
| | |[[File:Koopa Bros. Fortress Treasure Chest 2.png|250px]] | ||
|- | |- | ||
|[[Toad Town Tunnels]] | |[[Toad Town Tunnels]] | ||
|[[File:Shrink Stomp Badge.png]]<br>[[Shrink Stomp]] | |[[File:Shrink Stomp Badge.png]]<br>[[Shrink Stomp]] | ||
|At the end of the area to the east of the entrance. | |At the end of the area to the east of the entrance. | ||
|{{anchor|Toad Town Tunnels}} | |{{anchor|Toad Town Tunnels}}[[File:Toad Town Tunnels Treasure Chest 1.png|250px]] | ||
|- | |- | ||
|colspan=4 style="background:#ABC"| | |colspan=4 style="background:#ABC"| | ||
| Line 594: | Line 594: | ||
|[[File:Damage Dodge Badge.png]]<br>[[Damage Dodge]] | |[[File:Damage Dodge Badge.png]]<br>[[Damage Dodge]] | ||
|In the scene to the north of the second room, by going in the cave. | |In the scene to the north of the second room, by going in the cave. | ||
|{{anchor|Mt. Rugged}} | |{{anchor|Mt. Rugged}}[[File:Mt. Rugged Treasure Chest.png|250px]] | ||
|- | |- | ||
|[[Dry_Dry_Ruins_(Paper_Mario)|Dry Dry Ruins]] | |[[Dry_Dry_Ruins_(Paper_Mario)|Dry Dry Ruins]] | ||
|[[File:Slow Go Badge.png]]<br>[[Slow Go]] | |[[File:Slow Go Badge.png]]<br>[[Slow Go]] | ||
|In the area with the Super Hammer, falling on the ledges above the chest and following them will lead to smaller one, hidden in the dark. | |In the area with the Super Hammer, falling on the ledges above the chest and following them will lead to smaller one, hidden in the dark. | ||
|{{anchor|Dry Dry Ruins}} | |{{anchor|Dry Dry Ruins}}[[File:Dry Dry Ruins Treasure Chest 1.png|250px]] | ||
|- | |- | ||
|Dry Dry Ruins | |Dry Dry Ruins | ||
|[[File:PM Super Hammer Sprite.png]]<br>[[Super_Hammer#Paper_Mario|Super Hammer]] | |[[File:PM Super Hammer Sprite.png]]<br>[[Super_Hammer#Paper_Mario|Super Hammer]] | ||
|Inside a small room with rotating stairs and a stone block blocking the way out. | |Inside a small room with rotating stairs and a stone block blocking the way out. | ||
| | |[[File:Dry Dry Ruins Treasure Chest 2.png|250px]] | ||
|- | |- | ||
|Toad Town Tunnels | |Toad Town Tunnels | ||
|[[File:Power Smash Badge.png]]<br>[[Power Smash]] | |[[File:Power Smash Badge.png]]<br>[[Power Smash]] | ||
|To the west of the entrance is a pipe leading to a new area initially blocked by a [[Stone block|Stone Block]]. In the new area, Mario should go west to find a trampoline on the brick block. By destroying the block and then jumping on the trampoline, he reaches the chest. | |To the west of the entrance is a pipe leading to a new area initially blocked by a [[Stone block|Stone Block]]. In the new area, Mario should go west to find a trampoline on the brick block. By destroying the block and then jumping on the trampoline, he reaches the chest. | ||
| | |[[File:Toad Town Tunnels Treasure Chest 2.png|250px]] | ||
|- | |- | ||
|colspan=4 style="background:#ABC"| | |colspan=4 style="background:#ABC"| | ||
| Line 618: | Line 618: | ||
|[[File:Weight PM.png]]<br>[[Weight]] | |[[File:Weight PM.png]]<br>[[Weight]] | ||
|Guarded by a [[Boo]] in the left room on the second floor. To access it, Mario must play the [[Record (Paper Mario)|Record]] to lure the Boo away. | |Guarded by a [[Boo]] in the left room on the second floor. To access it, Mario must play the [[Record (Paper Mario)|Record]] to lure the Boo away. | ||
|{{anchor|Boo's Mansion}} | |{{anchor|Boo's Mansion}}[[File:Boo's Mansion Treasure Chest 1.png|250px]] | ||
|- | |- | ||
|Boo's Mansion | |Boo's Mansion | ||
|EMPTY/TRAP | |EMPTY/TRAP | ||
|In the west room on the first floor. This one is a trap because when opened, it causes the chandelier in the room to drop down. By leaving and reentering the room, the treasure chest closes itself. | |In the west room on the first floor. This one is a trap because when opened, it causes the chandelier in the room to drop down. By leaving and reentering the room, the treasure chest closes itself. | ||
| | |[[File:Boo's Mansion Treasure Chest 2.png|250px]] | ||
|- | |- | ||
|Boo's Mansion | |Boo's Mansion | ||
|[[File:SuperBoots PM.png]]<br>[[Super Boots]] | |[[File:SuperBoots PM.png]]<br>[[Super Boots]] | ||
|In the northwestern corner of the second storage room. | |In the northwestern corner of the second storage room. | ||
| | |[[File:Boo's Mansion Treasure Chest 3.png|250px]] | ||
|- | |- | ||
|[[Tubba Blubba's Castle]] | |[[Tubba Blubba's Castle]] | ||
|[[File:Tubba Blubba Castle Key.png]]<br>[[Castle Key (Tubba Blubba's Castle)|Castle Key]] | |[[File:Tubba Blubba Castle Key.png]]<br>[[Castle Key (Tubba Blubba's Castle)|Castle Key]] | ||
|In the basement, accessed by falling down from the final room to the north of the first-floor corridor. | |In the basement, accessed by falling down from the final room to the north of the first-floor corridor. | ||
|{{anchor|Tubba Blubba's Castle}} | |{{anchor|Tubba Blubba's Castle}}[[File:Tubba Blubba's Castle Treasure Chest 1.png|250px]] | ||
|- | |- | ||
|Tubba Blubba's Castle | |Tubba Blubba's Castle | ||
|[[File:Tubba Blubba Castle Key.png]]<br>[[Castle Key (Tubba Blubba's Castle)|Castle Key]] | |[[File:Tubba Blubba Castle Key.png]]<br>[[Castle Key (Tubba Blubba's Castle)|Castle Key]] | ||
|In the spike room on the second floor. | |In the spike room on the second floor. | ||
| | |[[File:Tubba Blubba's Castle Treasure Chest 2.png|250px]] | ||
|- | |- | ||
|Tubba Blubba's Castle | |Tubba Blubba's Castle | ||
|[[File:PM Mystical Key.png]]<br>[[Yakkey|Mystical Key]] | |[[File:PM Mystical Key.png]]<br>[[Yakkey|Mystical Key]] | ||
|In the east corner of Tubba Blubba's room on the third floor. | |In the east corner of Tubba Blubba's room on the third floor. | ||
| | |[[File:Tubba Blubba's Castle Treasure Chest 3.png|250px]] | ||
|- | |- | ||
|colspan=4 style="background:#ABC"| | |colspan=4 style="background:#ABC"| | ||
| Line 652: | Line 652: | ||
|[[File:Power Plus Badge.png]]<br>[[Power Plus (badge)|Power Plus]] | |[[File:Power Plus Badge.png]]<br>[[Power Plus (badge)|Power Plus]] | ||
|Guarded by an [[Anti Guy]] in the Blue Station area. Mario can fight him or bribe him with a [[Lemon Candy]] to get it. | |Guarded by an [[Anti Guy]] in the Blue Station area. Mario can fight him or bribe him with a [[Lemon Candy]] to get it. | ||
|{{anchor|Shy Guy's Toy Box}} | |{{anchor|Shy Guy's Toy Box}}[[File:Shy Guy's Toy Box Treasure Chest 1.png|250px]] | ||
|- | |- | ||
|Shy Guy's Toy Box | |Shy Guy's Toy Box | ||
|[[File:OddKey PM.png]]<br>[[Storeroom Key]] | |[[File:OddKey PM.png]]<br>[[Storeroom Key]] | ||
|In the very east of the Blue Station area. Depending on Peach's answers during the interlude, it is guarded by either a [[Mushroom#Paper_Mario|Mushroom]], [[Goomba#Paper_Mario|Goomba]] or [[Clubba]]. | |In the very east of the Blue Station area. Depending on Peach's answers during the interlude, it is guarded by either a [[Mushroom#Paper_Mario|Mushroom]], [[Goomba#Paper_Mario|Goomba]] or [[Clubba]]. | ||
| | |[[File:Shy Guy's Toy Box Treasure Chest 2.png|250px]] | ||
|- | |- | ||
|Shy Guy's Toy Box | |Shy Guy's Toy Box | ||
|[[File:Mailbag PM.png]]<br>[[Mailbag]] | |[[File:Mailbag PM.png]]<br>[[Mailbag]] | ||
|To the east of the Pink Station. | |To the east of the Pink Station. | ||
| | |[[File:Shy Guy's Toy Box Treasure Chest 3.png|250px]] | ||
|- | |- | ||
|Shy Guy's Toy Box | |Shy Guy's Toy Box | ||
|[[File:Defend Plus Badge.png]]<br>[[Defend Plus]] | |[[File:Defend Plus Badge.png]]<br>[[Defend Plus]] | ||
|On the high platform in the northwestern corner of the east scene in the Pink Station area | |On the high platform in the northwestern corner of the east scene in the Pink Station area | ||
| | |[[File:Shy Guy's Toy Box Treasure Chest 4.png|250px]] | ||
|- | |- | ||
|Shy Guy's Toy Box | |Shy Guy's Toy Box | ||
|[[File:Ice Power Badge.png]]<br>[[Ice Power]] | |[[File:Ice Power Badge.png]]<br>[[Ice Power]] | ||
|At the east of the Pink Station area. | |At the east of the Pink Station area. | ||
| | |[[File:Shy Guy's Toy Box Block 5 and Treasure Chest 5.png|250px]] | ||
|- | |- | ||
|Shy Guy's Toy Box | |Shy Guy's Toy Box | ||
|[[File:PM Frying Pan.png]]<br>[[Frying Pan]] | |[[File:PM Frying Pan.png]]<br>[[Frying Pan]] | ||
|In the east corner of the Pink Station area. Depending on Peach's answers during the interlude, it is guarded by either a [[Thunder Rage]], [[Fuzzy#Paper_Mario|Fuzzy]] or [[Hammer_Bro#Paper_Mario|Hammer Bro]]. | |In the east corner of the Pink Station area. Depending on Peach's answers during the interlude, it is guarded by either a [[Thunder Rage]], [[Fuzzy#Paper_Mario|Fuzzy]] or [[Hammer_Bro#Paper_Mario|Hammer Bro]]. | ||
| | |[[File:Shy Guy's Toy Box Treasure Chest 6.png|250px]] | ||
|- | |- | ||
|Shy Guy's Toy Box | |Shy Guy's Toy Box | ||
|[[File:PM Dictionary.png]]<br>[[Dictionary]] | |[[File:PM Dictionary.png]]<br>[[Dictionary]] | ||
|On the platform at the very east of the Green Station area. Depending on Peach's answers during the interlude, it is guarded by either a [[Fresh Juice|Super Soda]], [[Pokey#Paper_Mario|Pokey]] or [[Koopatrol]]. | |On the platform at the very east of the Green Station area. Depending on Peach's answers during the interlude, it is guarded by either a [[Fresh Juice|Super Soda]], [[Pokey#Paper_Mario|Pokey]] or [[Koopatrol]]. | ||
| | |[[File:Shy Guy's Toy Box Treasure Chest 7.png|250px]] | ||
|- | |- | ||
|[[Peach%27s_Castle#Paper_Mario|Princess Peach's Castle]] | |[[Peach%27s_Castle#Paper_Mario|Princess Peach's Castle]] | ||
|[[File:Last Stand Badge.png]]<br>[[Last Stand]] | |[[File:Last Stand Badge.png]]<br>[[Last Stand]] | ||
|During the [[Princess Peach]] interlude after saving [[Muskular]]. Found in the room with a wardrobe. Can be given to Mario via [[Mysterious Treasure Chest]]. Alternatively, Mario can pick it up himself during chapter 8. | |During the [[Princess Peach]] interlude after saving [[Muskular]]. Found in the room with a wardrobe. Can be given to Mario via [[Mysterious Treasure Chest]]. Alternatively, Mario can pick it up himself during chapter 8. | ||
|{{anchor|Princess Peach's Castle}} | |{{anchor|Princess Peach's Castle}}[[File:Princess Peach's Castle Treasure Chest.png|250px]] | ||
|- | |- | ||
|colspan=4 style="background:#ABC"| | |colspan=4 style="background:#ABC"| | ||
| Line 696: | Line 696: | ||
|[[File:VolcanoVase PM.png]]<br>[[Volcano Vase]] | |[[File:VolcanoVase PM.png]]<br>[[Volcano Vase]] | ||
|In a scene to the east of the [[Yoshi Village]] entrance scene (the one where [[Sushie]] was recruited). Only appears after [[Lava Piranha]] is defeated and [[Mt. Lavalava]] erupts. | |In a scene to the east of the [[Yoshi Village]] entrance scene (the one where [[Sushie]] was recruited). Only appears after [[Lava Piranha]] is defeated and [[Mt. Lavalava]] erupts. | ||
|{{anchor|Jade Jungle}} | |{{anchor|Jade Jungle}}[[File:Jade Jungle Treasure Chest.png|250px]] | ||
|- | |- | ||
|[[Mt. Lavalava]] | |[[Mt. Lavalava]] | ||
|[[File:PM Ultra Hammer Sprite.png]]<br>[[Ultra_Hammer#Paper_Mario|Ultra Hammer]] | |[[File:PM Ultra Hammer Sprite.png]]<br>[[Ultra_Hammer#Paper_Mario|Ultra Hammer]] | ||
|Found in the area accessed by going left from second zipline until the dead end. | |Found in the area accessed by going left from second zipline until the dead end. | ||
|{{anchor|Mt. Lavalava}} | |{{anchor|Mt. Lavalava}}[[File:Mt. Lavalava Treasure Chest 1.png|250px]] | ||
|- | |- | ||
|Mt. Lavalava | |Mt. Lavalava | ||
|[[File:Dizzy Stomp Badge.png]]<br>[[Dizzy Stomp]] | |[[File:Dizzy Stomp Badge.png]]<br>[[Dizzy Stomp]] | ||
| | |At the northeastern corner of the scene to the south of the Ultra Hammer area. | ||
| | |[[File:Mt. Lavalava Treasure Chest 2.png|250px]] | ||
|- | |- | ||
|colspan=4 style="background:#ABC"| | |colspan=4 style="background:#ABC"| | ||
| Line 715: | Line 715: | ||
|[[File:UltraBoots PM.png]]<br>[[Ultra Boots]] | |[[File:UltraBoots PM.png]]<br>[[Ultra Boots]] | ||
|At the end of the third room of the area accessed by a pipe in the room with spikes. | |At the end of the third room of the area accessed by a pipe in the room with spikes. | ||
| | |[[File:Toad Town Tunnels Treasure Chest 3.png|250px]] | ||
|- | |- | ||
|colspan=4 style="background:#ABC"| | |colspan=4 style="background:#ABC"| | ||
| Line 724: | Line 724: | ||
|[[File:Attack FX E Badge.png]]<br>[[Attack FX E]] | |[[File:Attack FX E Badge.png]]<br>[[Attack FX E]] | ||
|In the middle house in the west scene. Mario need to go through the right house to reach the window of the middle one to enter. | |In the middle house in the west scene. Mario need to go through the right house to reach the window of the middle one to enter. | ||
|{{anchor|Shiver City}} | |{{anchor|Shiver City}}[[File:Shiver City Treasure Chest.png|250px]] | ||
|- | |- | ||
|[[Crystal Palace]] | |[[Crystal Palace]] | ||
|[[File:PM BlueKey.png]]<br>[[Blue Key (Paper Mario)|Blue Key]]<br>[[File:P-Down D-Up Badge.png]]<br>[[P-Down D-Up]]<br>[[File:P-Up D-Down Badge.png]]<br>[[P-Up D-Down]]<br>[[File:PM Palace Key.png]]<br>[[Palace Key (Paper Mario)|Palace Key]] | |[[File:PM BlueKey.png]]<br>[[Blue Key (Paper Mario)|Blue Key]]<br>[[File:P-Down D-Up Badge.png]]<br>[[P-Down D-Up]]<br>[[File:P-Up D-Down Badge.png]]<br>[[P-Up D-Down]]<br>[[File:PM Palace Key.png]]<br>[[Palace Key (Paper Mario)|Palace Key]] | ||
|'''NOTE''': These four rooms share the same layout so only one image is used.<br>At the very east of the area to the south of the first room. (Blue Key)<br>At the very east of the area below the room to the north of the first room. (P-Down, D-Up Badge)<br>At the very east of the area below the small Albino Dino statue room. (P-Up, D-Down Badge)<br>At the very east of the area below the big Albino Dino room. (Palace Key) | |'''NOTE''': These four rooms share the same layout so only one image is used.<br>At the very east of the area to the south of the first room. (Blue Key)<br>At the very east of the area below the room to the north of the first room. (P-Down, D-Up Badge)<br>At the very east of the area below the small Albino Dino statue room. (P-Up, D-Down Badge)<br>At the very east of the area below the big Albino Dino room. (Palace Key) | ||
|{{anchor|Crystal Palace}} | |{{anchor|Crystal Palace}}[[File:Crystal Palace Treasure Chests 1-2, 5-6.png|250px]] | ||
|- | |- | ||
|Crystal Palace | |Crystal Palace | ||
|[[File:PM Red Key.png]]<br>[[Red Key (Paper Mario)|Red Key]] | |[[File:PM Red Key.png]]<br>[[Red Key (Paper Mario)|Red Key]] | ||
|At the very east of the area below the room to the south of the first room. Mario needs to break the panel in the north room first, then use [[Bombette]] to reach the room itself. | |At the very east of the area below the room to the south of the first room. Mario needs to break the panel in the north room first, then use [[Bombette]] to reach the room itself. | ||
| | |[[File:Crystal Palace Treasure Chest 3.png|250px]] | ||
|- | |- | ||
|Crystal Palace | |Crystal Palace | ||
|[[File:Triple Dip Badge.png]]<br>[[Triple Dip]] | |[[File:Triple Dip Badge.png]]<br>[[Triple Dip]] | ||
|In the fourth room after the red key. Mario must use Bombette on the wall behind the mirror one scene earlier to reach it. | |In the fourth room after the red key. Mario must use Bombette on the wall behind the mirror one scene earlier to reach it. | ||
| | |[[File:Crystal Palace Treasure Chest 4.png|250px]] | ||
|- | |- | ||
|colspan=4 style="background:#ABC"| | |colspan=4 style="background:#ABC"| | ||
| Line 748: | Line 748: | ||
|[[File:PM Bowser Castle Key.png]]<br>[[Castle Key (Bowser's Castle)|Castle Key]] | |[[File:PM Bowser Castle Key.png]]<br>[[Castle Key (Bowser's Castle)|Castle Key]] | ||
|In the scene to the north in the second lava/moving platform area. | |In the scene to the north in the second lava/moving platform area. | ||
|{{anchor|Bowser's Castle}} | |{{anchor|Bowser's Castle}}[[File:Bowser's Castle Treasure Chest.png|250px]] | ||
|} | |} | ||
Revision as of 12:02, December 7, 2023
? Block locations
- This page is about the visible ? Blocks from Paper Mario. For the hidden ones from same game, see List of hidden blocks in Paper Mario.
This is a list of ? Blocks from Paper Mario. There are 107 visible ? Blocks in the game. They contain mostly single coins or items, with occasional Badge. Some of them are also disguised as Brick Blocks and contain maximum of 10 coins.
Mario's House, Princess Peach's Castle, Shooting Star Summit, Koopa Village, Dry Dry Outpost, Windy Mill, Yoshi's Village, Shiver City, Shiver Snowfield, Starborn Valley, Star Way and Star Haven are the only locations without any visible ? Block.
| Prologue | Goomba Village • Goomba Road |
| Chapter 1 | Pleasant Path • Koopa Bros. Fortress • Toad Town • Toad Town Tunnels |
| Chapter 2 | Mt. Rugged • Dry Dry Desert • Dry Dry Ruins • Toad Town Tunnels |
| Chapter 3 | Forever Forest • Boo's Mansion • Gusty Gulch • Tubba Blubba's Castle |
| Chapter 4 | Shy Guy's Toy Box |
| Chapter 5 | Jade Jungle • Mt. Lavalava |
| Chapter 6 | Flower Fields • Toad Town Tunnels |
| Chapter 7 | Shiver Mountain • Crystal Palace |
| Chapter 8 | Bowser's Castle |
? Block locations
PrologueA PLEA FROM THE STARS | |||
| Goomba Village | 10 Coins |
At Jr. Troopa's playground, near the tree with Goombaria's Dolly. | 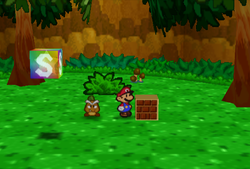
|
| Goomba Village | Coin |
Near the entrance to Jr. Troopa's playground. | 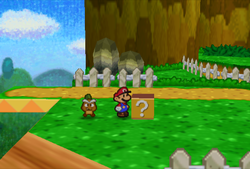
|
| Goomba Road | Coin (both blocks) |
In the middle of the first scene. | 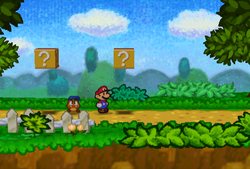
|
| Goomba Road | Close Call |
In the red badge block on the second part of the path. | 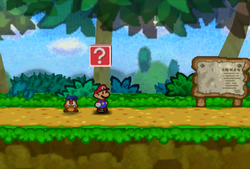
|
| Goomba Road | Super Shroom |
To the south of the opening after Goomba King's Fortress, there is a brick which will reveal a ? Block after being hit. | 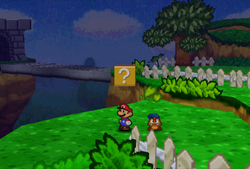
|
| Goomba Road | Sleepy Sheep |
Near the descending stairs between Goomba King's Fortress and Toad Town. | 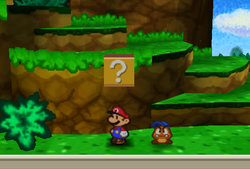
|
Chapter 1STORMING KOOPA BROS. FORTRESS | |||
| Pleasant Path | Coin, Dizzy Attack |
In the middle of the first scene. | 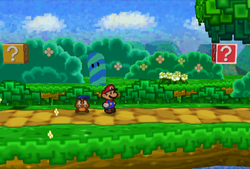
|
| Pleasant Path | Fright Jar |
In the rightmost block at the first scene. | 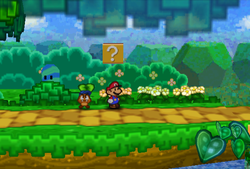
|
| Pleasant Path | POW Block |
At the start of the second scene. | 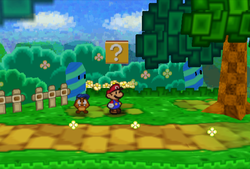
|
| Pleasant Path | 10 Coins |
At the end of the second scene. | 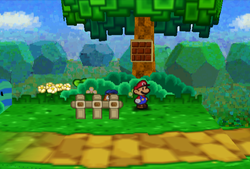
|
| Pleasant Path | Attack FX B |
Smashing the blocks near the entrance of Koopa Village in the order "left, right, middle" will reveal a red ? Badge block. | 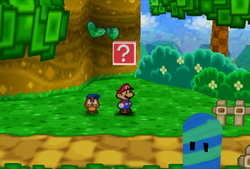
|
| Koopa Bros. Fortress | EMPTY/TRAP | Required to progress, found at the top of the room accessed by a second locked door. | 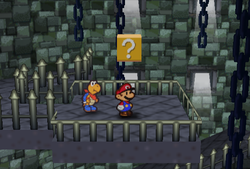
|
| Koopa Bros. Fortress | Maple Syrup |
At the Bullet Bill dodging scene, at the southwestern corner. | 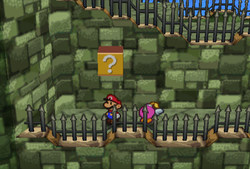
|
| Toad Town | 10 Coins |
After gaining access to the rest of Toad Town, this block is found floating above wooden crates in the port. | 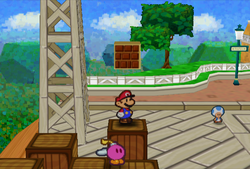
|
| Toad Town Tunnels | 10 Coins |
Third brick block in the row of brick blocks found at the room right of the tunnels entrance. | 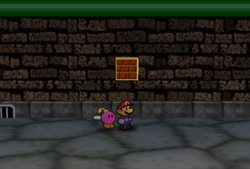
|
Chapter 2THE MYSTERY OF DRY, DRY RUINS | |||
| Mt. Rugged | Sleepy Sheep |
At the southeastern corner of the second scene. | 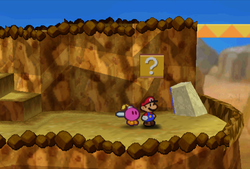
|
| Mt. Rugged | Mushroom |
Near the start of the scene to the north of the second scene, accessible after sliding the slope in the third scene. | 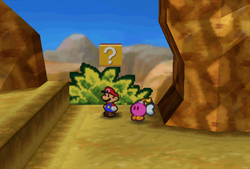
|
| Mt. Rugged | Coin |
After using the trampoline in the same scene, found on the left. | 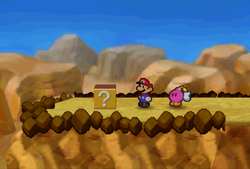
|
| Mt. Rugged | Honey Syrup |
After using the trampoline in the same scene, found after going to the right, guarded by a Cleft. | 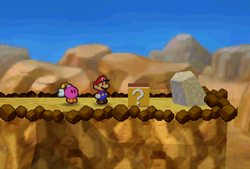
|
| Dry Dry Desert | Fright Jar, Coin |
In the scene three scenes north of the entrance. | 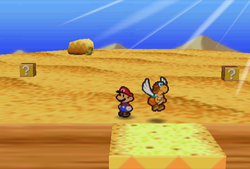
|
| Dry Dry Desert | 10 Coins |
In the scene six scenes east of the previous one, left of the tree. | 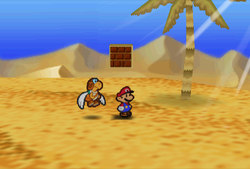
|
| Dry Dry Desert | Coin, 10 Coins, Honey Syrup |
In the scene two scenes west and one south of the previous one. | 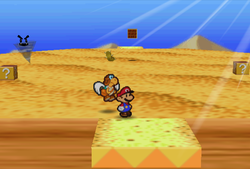
|
| Dry Dry Desert | Mushroom, Super Shroom, Ultra Shroom |
In the scene four scenes west and one south of the previous one. Here, Mario must hammer the empty ? block to make others appear. One hit spawns a block to the left with a Mushroom, ten hits spawn a block to the right with a Super Shroom and one hundred hits spawns a block in the midle with a Ultra Shroom. | 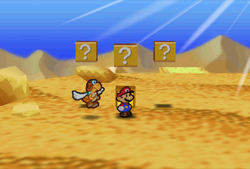
|
| Dry Dry Desert | Coin, Coin, Fire Flower, Coin, Coin |
In the scene two scenes east from the previous one. | 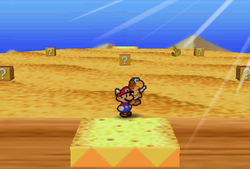
|
| Dry Dry Desert | 10 Coins (both blocks) |
In the scene three scenes east from the previous one, two brick blocks closest to the northern exit. | 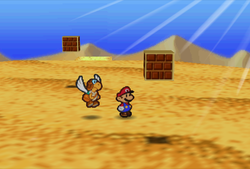
|
| Dry Dry Desert | 10 Coins |
In the scene five scenes west and two south from the previous one, the middle brick block. | 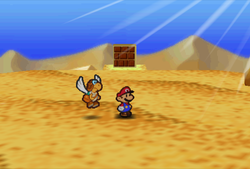
|
| Dry Dry Desert | Coin |
In the scene three scenes east from the previous one. | 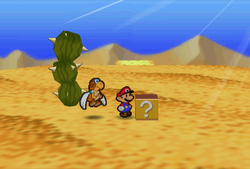
|
| Dry Dry Desert | Coin |
In the scene three scenes east from the previous one. | 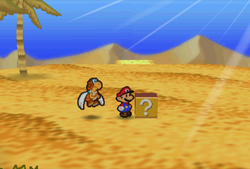
|
| Dry Dry Desert | 10 Coins |
In the scene four scenes west and one south from the previous one, the brick block closest to the northern exit. | 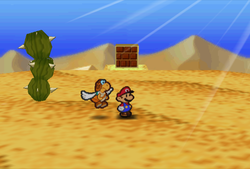
|
| Dry Dry Desert | 10 Coins |
In the scene three scenes east from the previous one. | 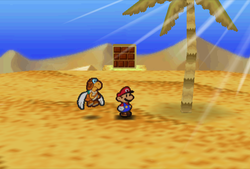
|
| Dry Dry Desert | Coin |
In the scene one west and one south from the previous one. | 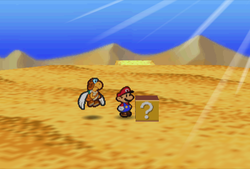
|
| Dry Dry Desert | 10 Coins (all six blocks) |
In the scene two east from the previous one. | 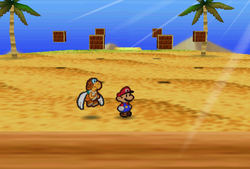
|
| Dry Dry Ruins | EMPTY/TRAP | Required to progress, found at the end of the room with Ancient Artifact. | 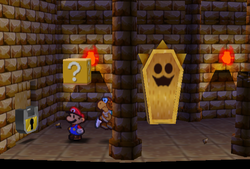
|
| Toad Town Tunnels | Coin, Snowman Doll, Coin |
In the room west of the entrance but before the pipe leading to the new area. | 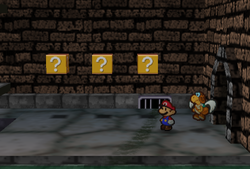
|
Chapter 3THE "INVINCIBLE" TUBBA BLUBBA | |||
| Forever Forest | HP Plus |
In the middle of a clearing found on a detour from the fifth area. | 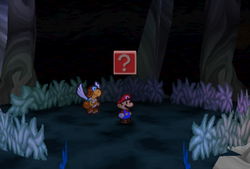
|
| Forever Forest | FP Plus |
In the middle of a clearing found on a detour from the seventh area. | 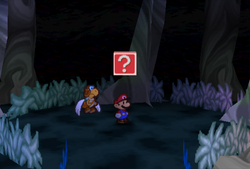
|
| Boo's Mansion | Volt Shroom |
Outside the mansion, in front of the gate. | 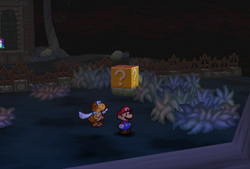
|
| Gusty Gulch | Coin |
In the scene with a Save Block, found in the house right of the Save Block. | 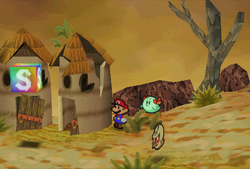
|
| Gusty Gulch | Coin |
At the start of the scene one scene to the east of the Boo's area. | 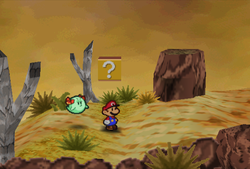
|
| Gusty Gulch | Coin, Repel Gel |
In the middle of the same scene. | 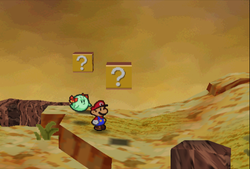
|
| Gusty Gulch | Super Shroom, 10 Coins, Coin |
At the end of the scene before the scene with Tubba Blubba's Castle entrance. | 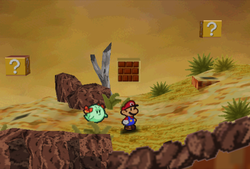
|
| Tubba Blubba's Castle | Maple Syrup |
By the stairs that lead to the third floor. | 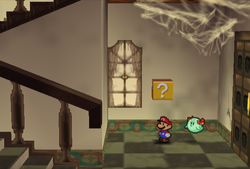
|
Chapter 4TRIALS IN THE TOY BOX | |||
| Shy Guy's Toy Box | Coin |
At the end of the scene one scene east of the blue station. | 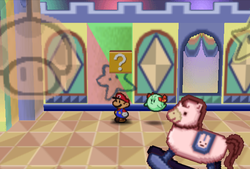
|
| Shy Guy's Toy Box | Coin |
Left of the wall in the very east of the Blue Station area. | 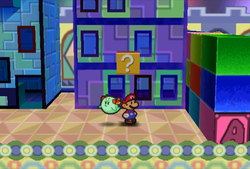
|
| Shy Guy's Toy Box | Coin, Thunder Bolt |
In the same scene, on the opposite side of the wall. | 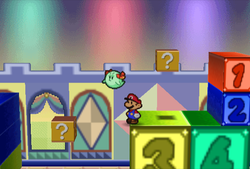
|
| Shy Guy's Toy Box | Coin |
In the scene east of the Pink Station area, found above the walkway with looping Shy Guys. | 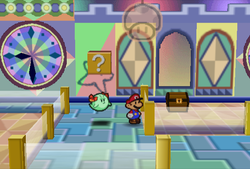
|
| Shy Guy's Toy Box | Coin |
In the scene west of the Pink Station area, found above the flower boxes. | 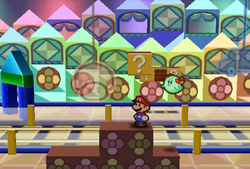
|
| Shy Guy's Toy Box | Coin (both blocks) |
In the next scene, found in the northwestern corner. | 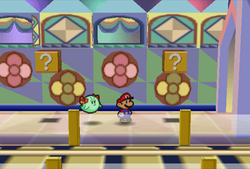
|
| Shy Guy's Toy Box | Coin, 10 Coins, Coin |
In the previous scene, found on the northern side of the tracks. | 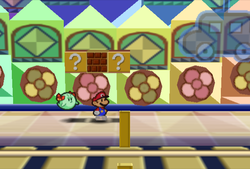
|
| Shy Guy's Toy Box | 10 Coins |
In the scene east of the Green Station area, found above the moving pink platform near the end of the area. | 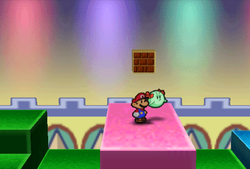
|
| Shy Guy's Toy Box | 10 Coins |
In the scene west of the Red Station area, found above the ferris wheel. | 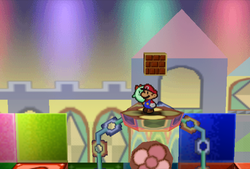
|
| Shy Guy's Toy Box | Coin (both blocks) |
In the same scene, in the lower part of the scene left of the ferris wheel. | 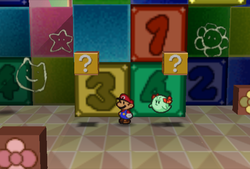
|
| Shy Guy's Toy Box | Sleepy Sheep |
In the northwestern corner of the scene to the east of the Red Station area. | 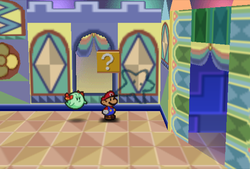
|
Chapter 5HOT, HOT TIMES ON LAVALAVA ISLAND | |||
| Jade Jungle | Power Quake |
In the scene with jungle entrance to the Yoshi Village, found on an island at the center. | 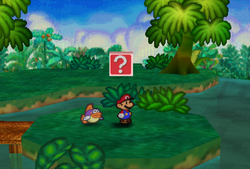
|
| Mt. Lavalava | Coin (all four blocks) |
On the top of the third scene, under the first zipline. | 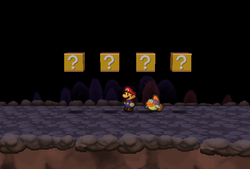
|
| Mt. Lavalava | Super Shroom, Maple Syrup |
In the scene above the Lava Piranha scene. | 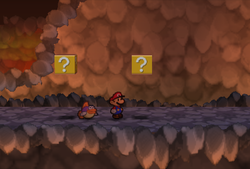
|
Chapter 6DARK DAYS IN FLOWER FIELDS | |||
| Flower Fields | Dizzy Dial |
In the second scene on the southeastern road. | 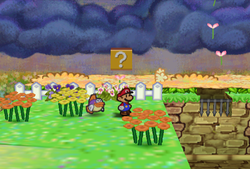
|
| Flower Fields | 10 Coins |
In the center of the Hedge Maze found on the western road. Accessed by going right from the last pipe in the maze. | 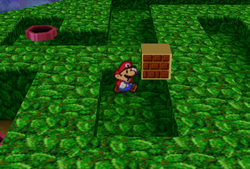
|
| Toad Town Tunnels | Coin |
Beneath the entrance room, there is a pipe by the path to the right that eventually leads to the Ultra Boots. In the first room down the pipe, found near the exit. | 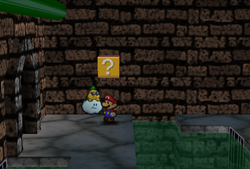
|
| Toad Town Tunnels | Coin (both blocks) |
In the next room, found between the brick blocks. They are high in the air, so Ultra Boots are required. | 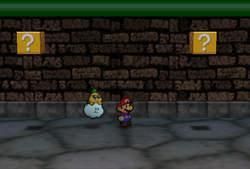
|
| Toad Town Tunnels | Shooting Star |
Beneath the entrance room, in the northwestern corner and high in the air, so Ultra Boots are required. | 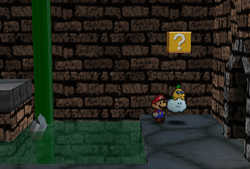
|
| Toad Town Tunnels | Coin |
In the area two screens east of the blue Warp Pipe to Yoshi's Village is a gap between two high platforms, with a doorway leading to Shiver City in the east. Found touching the western platform, high in the air, so Ultra Boots are required. | 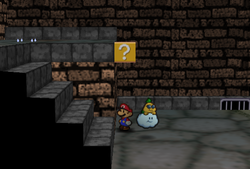
|
Chapter 7A STAR SPIRIT ON ICE | |||
| Shiver Mountain | Mega Jump |
On the second floor in the fourth scene. | 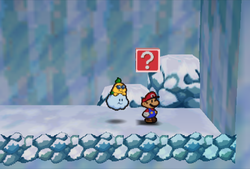
|
| Crystal Palace | 10 Coins (both blocks) |
In the second room after going through the blue locked door. | 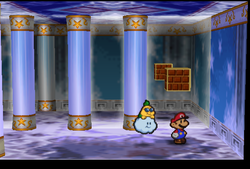
|
| Crystal Palace | Super Shroom |
Near the door in the room to the north of the first room. | 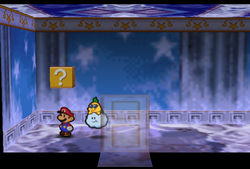
|
| Crystal Palace | Maple Syrup |
Near the door in the big Albino Dino statue room. It is high in the air, so Ultra Boots are required. | 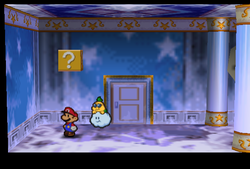
|
Chapter 8A STAR-POWERED SHOWDOWN! | |||
| Bowser's Castle | Life Shroom |
On a platform in the lava area next to the front door scene. | 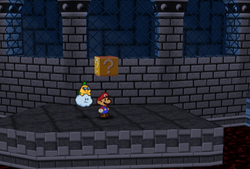
|
| Bowser's Castle | Deep Focus |
On a platform in the lava area, near the entrance. | 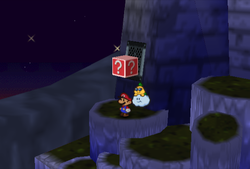
|
| Bowser's Castle | POW Block |
At the end of the north fork road in the first grotto scene. | 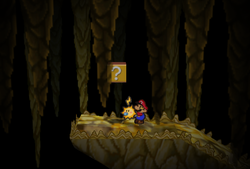
|
| Bowser's Castle | Shooting Star |
At the end of the north fork road in the second grotto scene. | 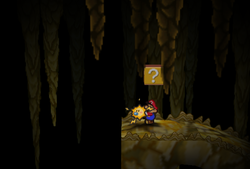
|
| Bowser's Castle | Super Shroom |
In the middle of the first Dry Bones room. | 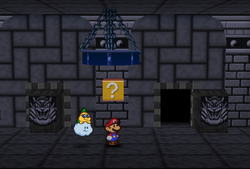
|
| Bowser's Castle | Super Shroom, Maple Syrup |
Found outside after the quiz room near the door. | 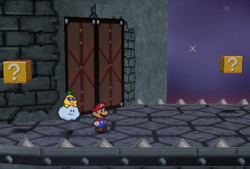
|
| Bowser's Castle | Super Shroom |
In the same scene, found after going to the right. | 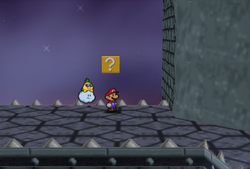
|
? Block count
This chart shows the number of ? Blocks for each location, with the total amount at the bottom. Locations are listed in the order the player can visit them.
| Location | Count |
|---|---|
| Goomba Village | 2 |
| Goomba Road | 5 |
| Pleasant Path | 6 |
| Koopa Bros. Fortress | 2 |
| Toad Town | 1 |
| Toad Town Tunnels | 9 |
| Mt. Rugged | 4 |
| Dry Dry Desert | 28 |
| Dry Dry Ruins | 1 |
| Forever Forest | 2 |
| Boo's Mansion | 1 |
| Gusty Gulch | 7 |
| Tubba Blubba's Castle | 1 |
| Shy Guy's Toy Box | 16 |
| Jade Jungle | 1 |
| Mt. Lavalava | 6 |
| Flower Fields | 2 |
| Shiver Mountain | 1 |
| Crystal Palace | 4 |
| Bowser's Castle | 8 |
| Total | 107 |
See also
Treasure Chest locations
This is a list of Treasure Chests from Paper Mario. There are 34 Treasure Chests in the game.
There are two types of chests: Small ones contain either Badges or items required for progression, while the big ones contain upgrades to Mario's Jump and Hammer abilities.
| Prologue | Goomba Road |
| Chapter 1 | Koopa Bros. Fortress • Toad Town Tunnels |
| Chapter 2 | Mt. Rugged • Dry Dry Ruins • Toad Town Tunnels |
| Chapter 3 | Boo's Mansion • Tubba Blubba's Castle |
| Chapter 4 | Shy Guy's Toy Box • Princess Peach's Castle |
| Chapter 5 | Jade Jungle • Mt. Lavalava |
| Chapter 6 | Toad Town Tunnels |
| Chapter 7 | Shiver City • Crystal Palace |
| Chapter 8 | Bowser's Castle |
Treasure Chest locations
PrologueA PLEA FROM THE STARS | |||
| Goomba Road | Hammer Throw |
On the roof of Toad Town entrance; get it by hitting the tree for a trampoline. | 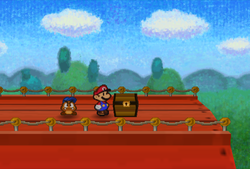
|
Chapter 1STORMING KOOPA BROS. FORTRESS | |||
| Koopa Bros. Fortress | FP Plus |
On a high platform near the fortress, accessed through a pipe by blasting the wall found near the Heart Block at the end of the last Pleasant Path scene. | 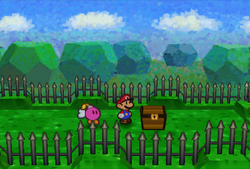
|
| Koopa Bros. Fortress | Refund |
In a small area outside the fortress that can be accessed by blasting the wall on the east end. | 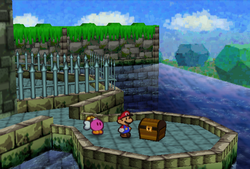
|
| Toad Town Tunnels | Shrink Stomp |
At the end of the area to the east of the entrance. | 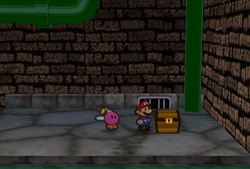
|
Chapter 2THE MYSTERY OF DRY, DRY RUINS | |||
| Mt. Rugged | Damage Dodge |
In the scene to the north of the second room, by going in the cave. | 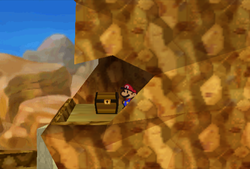
|
| Dry Dry Ruins | Slow Go |
In the area with the Super Hammer, falling on the ledges above the chest and following them will lead to smaller one, hidden in the dark. | 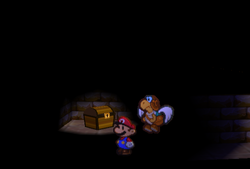
|
| Dry Dry Ruins | Super Hammer |
Inside a small room with rotating stairs and a stone block blocking the way out. | 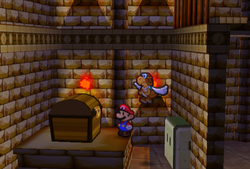
|
| Toad Town Tunnels | Power Smash |
To the west of the entrance is a pipe leading to a new area initially blocked by a Stone Block. In the new area, Mario should go west to find a trampoline on the brick block. By destroying the block and then jumping on the trampoline, he reaches the chest. | 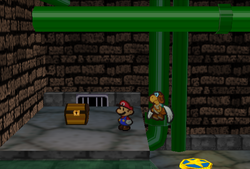
|
Chapter 3THE "INVINCIBLE" TUBBA BLUBBA | |||
| Boo's Mansion | Weight |
Guarded by a Boo in the left room on the second floor. To access it, Mario must play the Record to lure the Boo away. | 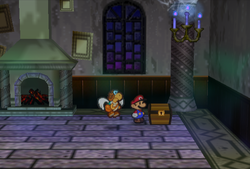
|
| Boo's Mansion | EMPTY/TRAP | In the west room on the first floor. This one is a trap because when opened, it causes the chandelier in the room to drop down. By leaving and reentering the room, the treasure chest closes itself. | 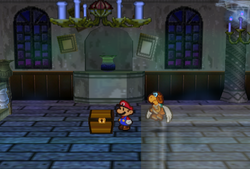
|
| Boo's Mansion | Super Boots |
In the northwestern corner of the second storage room. | 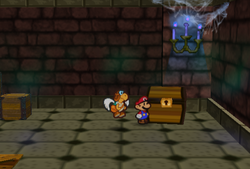
|
| Tubba Blubba's Castle | Castle Key |
In the basement, accessed by falling down from the final room to the north of the first-floor corridor. | 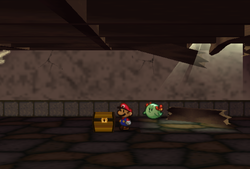
|
| Tubba Blubba's Castle | Castle Key |
In the spike room on the second floor. | 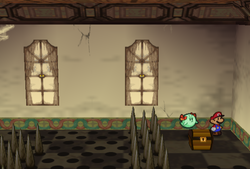
|
| Tubba Blubba's Castle | Mystical Key |
In the east corner of Tubba Blubba's room on the third floor. | 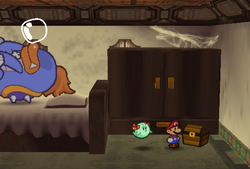
|
Chapter 4TRIALS IN THE TOY BOX | |||
| Shy Guy's Toy Box | Power Plus |
Guarded by an Anti Guy in the Blue Station area. Mario can fight him or bribe him with a Lemon Candy to get it. | 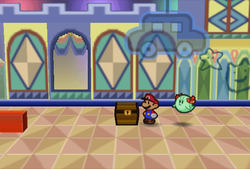
|
| Shy Guy's Toy Box | Storeroom Key |
In the very east of the Blue Station area. Depending on Peach's answers during the interlude, it is guarded by either a Mushroom, Goomba or Clubba. | 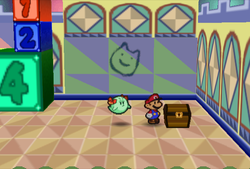
|
| Shy Guy's Toy Box | Mailbag |
To the east of the Pink Station. | 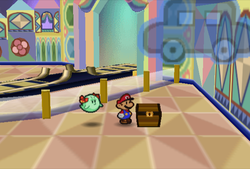
|
| Shy Guy's Toy Box | Defend Plus |
On the high platform in the northwestern corner of the east scene in the Pink Station area | 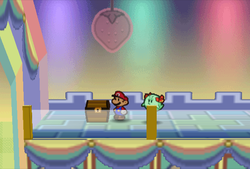
|
| Shy Guy's Toy Box | Ice Power |
At the east of the Pink Station area. | 
|
| Shy Guy's Toy Box | Frying Pan |
In the east corner of the Pink Station area. Depending on Peach's answers during the interlude, it is guarded by either a Thunder Rage, Fuzzy or Hammer Bro. | 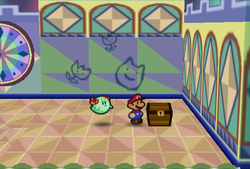
|
| Shy Guy's Toy Box | Dictionary |
On the platform at the very east of the Green Station area. Depending on Peach's answers during the interlude, it is guarded by either a Super Soda, Pokey or Koopatrol. | 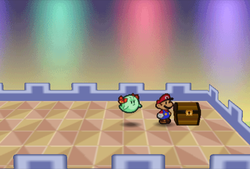
|
| Princess Peach's Castle | Last Stand |
During the Princess Peach interlude after saving Muskular. Found in the room with a wardrobe. Can be given to Mario via Mysterious Treasure Chest. Alternatively, Mario can pick it up himself during chapter 8. | 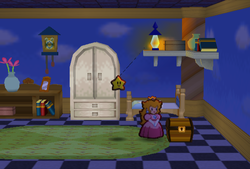
|
Chapter 5HOT, HOT TIMES ON LAVALAVA ISLAND | |||
| Jade Jungle | Volcano Vase |
In a scene to the east of the Yoshi Village entrance scene (the one where Sushie was recruited). Only appears after Lava Piranha is defeated and Mt. Lavalava erupts. | 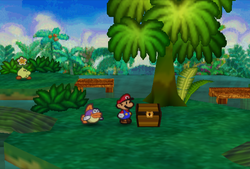
|
| Mt. Lavalava | Ultra Hammer |
Found in the area accessed by going left from second zipline until the dead end. | 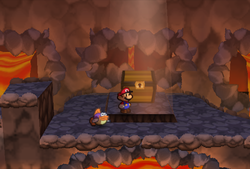
|
| Mt. Lavalava | Dizzy Stomp |
At the northeastern corner of the scene to the south of the Ultra Hammer area. | 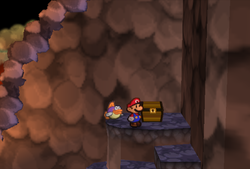
|
Chapter 6DARK DAYS IN FLOWER FIELDS | |||
| Toad Town Tunnels | Ultra Boots |
At the end of the third room of the area accessed by a pipe in the room with spikes. | 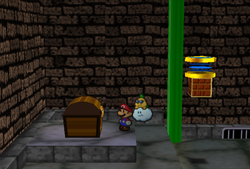
|
Chapter 7A STAR SPIRIT ON ICE | |||
| Shiver City | Attack FX E |
In the middle house in the west scene. Mario need to go through the right house to reach the window of the middle one to enter. | 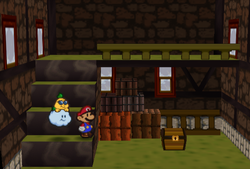
|
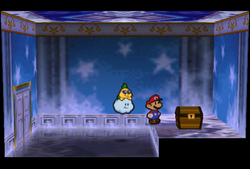
| Crystal Palace | Blue Key P-Down D-Up P-Up D-Down Palace Key |
NOTE: These four rooms share the same layout so only one image is used. At the very east of the area to the south of the first room. (Blue Key) At the very east of the area below the room to the north of the first room. (P-Down, D-Up Badge) At the very east of the area below the small Albino Dino statue room. (P-Up, D-Down Badge) At the very east of the area below the big Albino Dino room. (Palace Key) |
|
| Crystal Palace | Red Key |
At the very east of the area below the room to the south of the first room. Mario needs to break the panel in the north room first, then use Bombette to reach the room itself. | 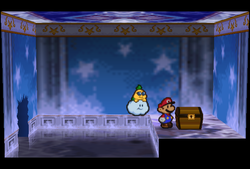
|
| Crystal Palace | Triple Dip |
In the fourth room after the red key. Mario must use Bombette on the wall behind the mirror one scene earlier to reach it. | 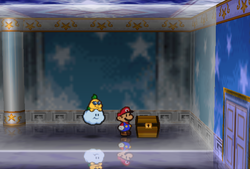
|
Chapter 8A STAR-POWERED SHOWDOWN! | |||
| Bowser's Castle | Castle Key |
In the scene to the north in the second lava/moving platform area. | 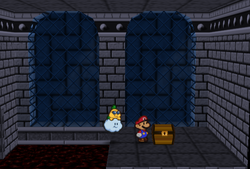
|
Treasure Chest count
This chart shows the number of Treasure Chests for each location, with the total amount at the bottom. Locations are listed in the order the player can visit them.
| Location | Count |
|---|---|
| Goomba Road | 1 |
| Koopa Bros. Fortress | 2 |
| Toad Town Tunnels | 3 |
| Mt. Rugged | 1 |
| Dry Dry Ruins | 2 |
| Boo's Mansion | 3 |
| Tubba Blubba's Castle | 3 |
| Shy Guy's Toy Box | 7 |
| Princess Peach's Castle | 1 |
| Jade Jungle | 1 |
| Mt. Lavalava | 2 |
| Shiver City | 1 |
| Crystal Palace | 6 |
| Bowser's Castle | 1 |
| Total | 34 |