Gallery:Bowser's Fury: Difference between revisions
LinkTheLefty (talk | contribs) |
No edit summary |
||
| Line 181: | Line 181: | ||
SM3DWBF Screenshot Fury Bowser 8.png|Fury Bowser awakening | SM3DWBF Screenshot Fury Bowser 8.png|Fury Bowser awakening | ||
SM3DWBF Screenshot Fury Bowser 1.png|Mario avoiding Fury Bowser's fire breath | SM3DWBF Screenshot Fury Bowser 1.png|Mario avoiding Fury Bowser's fire breath | ||
SM3DWBF Screenshot Fury Bowser 3.png|Mario avoiding some [[ | SM3DWBF Screenshot Fury Bowser 3.png|Mario avoiding some [[Falling_spike_(Bowser%27s_Fury)|Falling spike]]s | ||
SM3DWBF Screenshot Fury Bowser 5.png|Mario avoiding some falling fireballs | SM3DWBF Screenshot Fury Bowser 5.png|Mario avoiding some falling fireballs | ||
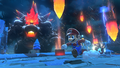
SM3DWBF Screenshot Fury Bowser 7.png|Mario, Bowser Jr., and Plessie fleeing Fury Bowser | SM3DWBF Screenshot Fury Bowser 7.png|Mario, Bowser Jr., and Plessie fleeing Fury Bowser | ||
| Line 191: | Line 191: | ||
SM3DWBF Giga Cat Mario Screenshot.jpg|Giga Cat Mario clawing at Fury Bowser | SM3DWBF Giga Cat Mario Screenshot.jpg|Giga Cat Mario clawing at Fury Bowser | ||
SM3DWBF Screenshot Fury Bowser 11.png|Giga Cat Mario [[Ground Pound]]ing Fury Bowser | SM3DWBF Screenshot Fury Bowser 11.png|Giga Cat Mario [[Ground Pound]]ing Fury Bowser | ||
Giga Cat Mario attacks Fury Bowser.jpg|Giga Cat Mario throwing a | Giga Cat Mario attacks Fury Bowser.jpg|Giga Cat Mario throwing a Falling spike at Fury Bowser | ||
SM3DWBF Screenshot Fury Bowser 13.png|Giga Cat Mario avoiding Fury Bowser's fury blast | SM3DWBF Screenshot Fury Bowser 13.png|Giga Cat Mario avoiding Fury Bowser's fury blast | ||
SM3DWBF Screenshot Giga Cat Mario Dive.png|Giga Cat Mario [[Dive|claw diving]] | SM3DWBF Screenshot Giga Cat Mario Dive.png|Giga Cat Mario [[Dive|claw diving]] | ||
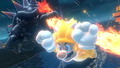
SM3DWBF Screenshot Fury Bowser Fireball.png|A gigantic fireball shot by Fury Bowser during a battle | SM3DWBF Screenshot Fury Bowser Fireball.png|A gigantic fireball shot by Fury Bowser during a battle | ||
SM3DWBF Screenshot Fury Bowser 10.png|A gigantic Small Mario avoiding some | SM3DWBF Screenshot Fury Bowser 10.png|A gigantic Small Mario avoiding some Falling spikes | ||
SM3DWBF Screenshot Fury Bowser 12.png|A gigantic [[Super Mario (form)|Super Mario]] avoiding Fury Bowser's shockwave attack | SM3DWBF Screenshot Fury Bowser 12.png|A gigantic [[Super Mario (form)|Super Mario]] avoiding Fury Bowser's shockwave attack | ||
SM3DWBF Fury Bowser Orange Sky.png|Fury Bowser's non-stop rampage when the player has 47 Cat Shines | SM3DWBF Fury Bowser Orange Sky.png|Fury Bowser's non-stop rampage when the player has 47 Cat Shines | ||
| Line 202: | Line 202: | ||
====Final battle and ending==== | ====Final battle and ending==== | ||
<gallery> | <gallery> | ||
SM3DWBF Giant Bowser Falling Spikes.png|[[Giant Bowser]] attacking with | SM3DWBF Giant Bowser Falling Spikes.png|[[Giant Bowser]] attacking with Falling spikes | ||
SM3DWBF Giant Bowser Defeat.png|Giant Bowser being defeated by Giga Cat Mario and Plessie | SM3DWBF Giant Bowser Defeat.png|Giant Bowser being defeated by Giga Cat Mario and Plessie | ||
SM3DWBF Giga Cat Mario Plessie.png|Giga Cat Mario and Plessie using the Giga Bells | SM3DWBF Giga Cat Mario Plessie.png|Giga Cat Mario and Plessie using the Giga Bells | ||
Revision as of 16:40, January 16, 2025
This is a gallery of images for the game Bowser's Fury. For the Super Mario 3D World campaign's gallery, see Gallery:Super Mario 3D World + Bowser's Fury.
Logos

International logo
Japanese logo
Traditional Chinese logo
Korean logo
Artwork
Key artwork
Key artwork for Bowser's Fury

Characters
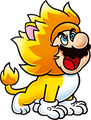
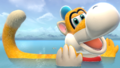
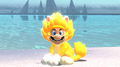
Giga Cat Mario
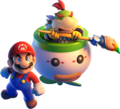
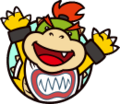
Bowser Jr. and Mario
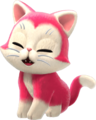
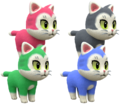
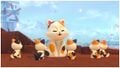
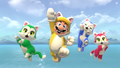
Red kitten
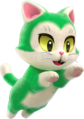
Green kitten
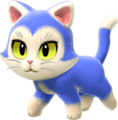
Blue kitten
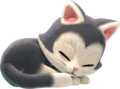
Black kitten
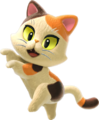
Calico kitten
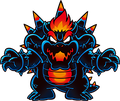
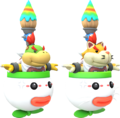
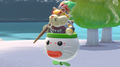
Fury Bowser


.png)
.png)
.png)
.png)
.png)


Enemies
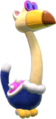
Cat Conkdor
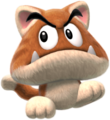
Cat Goomba
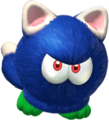
Cat Bully
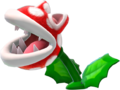
Cat Piranha Plant
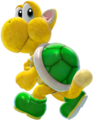
Cat Koopa Troopa

Cat Biddybuds
.png)
.png)
.png)
.png)
.png)
Items and objects

Outline of a Cat Shine


Sprites and models
Sprites
Bowser Jr.'s player icon
Toadette's indicators for missing members of the Toad Brigade
Toadette's indicators for found members of the Toad Brigade


Loading icons

Mario's 8-bit sprite

Bowser Jr.'s 8-bit sprite

Plessie's 8-bit sprite

Fury Bowser's 8-bit sprite


Bowser Jr.'s paintings
Bowser's painting during the introduction
Fury Bowser's painting during the introduction

Bowser Jr. on an airship
Bowser Jr. and Bowser, who is asleep
Bowser Jr. getting out his magic brush
Bowser Jr. painting Bowser with black paint
Bowser becoming corrupted
Bowser Jr. watching Fury Bowser form
Fury Bowser knocking down airships
Bowser Jr. and Mario exploring Lake Lapcat
Bowser Jr. and Mario celebrating
Giga Cat Mario battling Fury Bowser
Bowser Jr. and Bowser watching the sunset
The ending painting if the player has collected less than 100 Cat Shines
The ending painting if the player has collected all 100 Cat Shines


Data-rendered models
Bowser Jr. (normal and cat form)
Kittens
Giga Bell pedestals
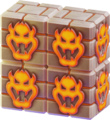
Fury Blocks (flashing red)

Giga Mushroom (unused)


Cat objects


Screenshots
English game select screen (Bowser's Fury)
Japanese game select screen (Bowser's Fury)

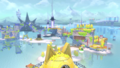
Lake Lapcat in the initial reveal trailer for the campaign
The Lakeside Giga Bell in the initial reveal trailer for the campaign
The corrupted Lakeside Giga Bell
Mario finds a trail of goop outside Peach's Castle
The M Graffiti at the source of the goop

Mario falls into the portal to Lake Lapcat
Mario landing in Lake Lapcat
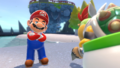
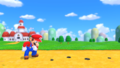
Mario being skeptical of Bowser Jr.
Mario agreeing to help Bowser Jr.
Bowser Jr. joining Mario

Small Mario on the Bowser's Fury loading screen

Bowser Jr. on the Bowser's Fury loading screen

Fury Bowser on the Bowser's Fury loading screen

Plessie on the Bowser's Fury loading screen

Various slides of Bowser's Fury


Normal gameplay
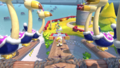
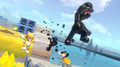
Cat Mario and Bowser Jr. running near Fort Flaptrap
Mario and Bowser Jr. running atop Clawswipe Colosseum
Boomerang Mario and Bowser Jr. near Crisp Climb Castle
Mario and Bowser Jr. defeating some Blocksteppers
Mario and Bowser Jr. defeating a cat Goomba
Mario and Bowser Jr. defeating a cat Goomba
Mario and Bowser Jr. viewing Lake Lapcat atop a lighthouse
Mario and Bowser Jr. moving past some cat Conkdors
Mario and Bowser Jr. looking at unpainted graffiti
Bowser Jr. painting a Fire Flower

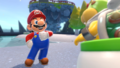
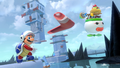
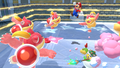
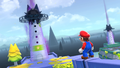
Mario approaching a Cat Shine

Cat Mario approaching a Cat Shine Shard
Mario collecting a Cat Shine
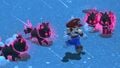
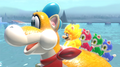
Kittens nuzzling Cat Mario
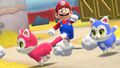
Mario running after some kittens
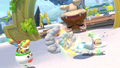
A cat with its kittens

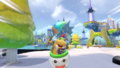
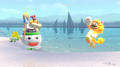
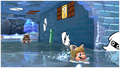
Plessie swimming near Scamper Shores
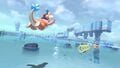
Plessie jumping towards Slipskate Slope
Plessie jumping near the Lakeside Giga Bell
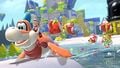
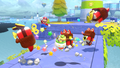
Plessie defeating some Cat Cheep Cheeps near Pounce Bounce Isle
Plessie defeating a Cat Goomba
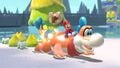
Mario and Bowser Jr. fighting Cat Pom Pom
Cat Mario chasing a Fury Shadow
Mario and Bowser Jr. atop a lighthouse
Mario and Bowser Jr. atop a lighthouse
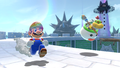
Mario looking at a corrupted lighthouse
Cat Mario watching the Fury Sun rise
Cat Mario watching the Fury Sun rise
Cat Mario and Bowser Jr. watching the dormant Lakeside Giga Bell

The dormant Ruins Giga Bell cleansed of goop
Cat Mario and some kittens behind the Fury Sun
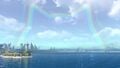
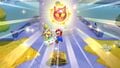
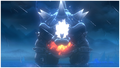
The cat-shaped rainbow that appears after Giga Cat Mario defeats Fury Bowser


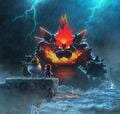
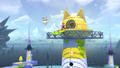
Fury Bowser's rampages
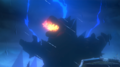
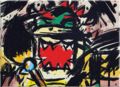
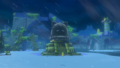
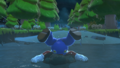
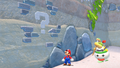
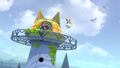
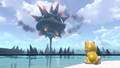
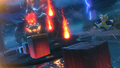
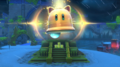
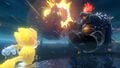
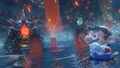
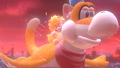
Fury Bowser awakening for the first time

Fury Bowser awakening
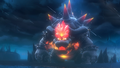
Fury Bowser awakening
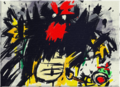
Mario avoiding Fury Bowser's fire breath
Mario avoiding some Falling spikes
Mario avoiding some falling fireballs
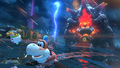
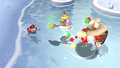
Mario, Bowser Jr., and Plessie fleeing Fury Bowser
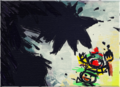
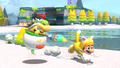
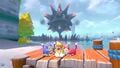
Disaster Kittens attacking Mario
Fury Bowser retreating to the Fury Sun
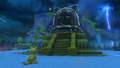
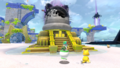
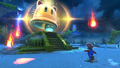
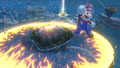
The Lakeside Giga Bell awakening during Fury Bowser's rampage
Mario running towards the Lakeside Giga Bell
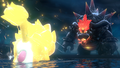
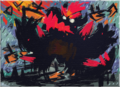
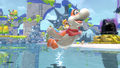
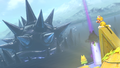
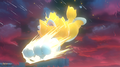
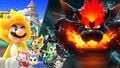
Giga Cat Mario facing off against Fury Bowser
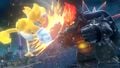
Giga Cat Mario clawing at Fury Bowser

Giga Cat Mario Ground Pounding Fury Bowser
Giga Cat Mario throwing a Falling spike at Fury Bowser
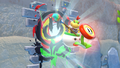
Giga Cat Mario avoiding Fury Bowser's fury blast
Giga Cat Mario claw diving
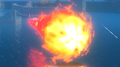
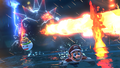
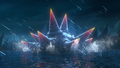
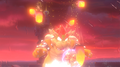
A gigantic fireball shot by Fury Bowser during a battle
A gigantic Small Mario avoiding some Falling spikes
A gigantic Super Mario avoiding Fury Bowser's shockwave attack
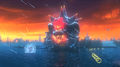
Fury Bowser's non-stop rampage when the player has 47 Cat Shines


Final battle and ending
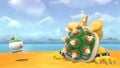
Giant Bowser attacking with Falling spikes

Giant Bowser being defeated by Giga Cat Mario and Plessie
Giga Cat Mario and Plessie using the Giga Bells
The cat-shaped light that appears when Giant Bowser is defeated
Bowser Jr. approaches Bowser after the latter is defeated

Bowser and Bowser Jr. intimidate Cat Mario
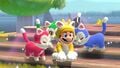
Cat Mario and some kittens strike victory poses
Giga Cat Plessie in the ending cutscene
The ending screen if the player has collected less than 100 Cat Shines
The ending screen if the player has collected all 100 Cat Shines
Mario and Bowser Jr.'s aesthetic changes after collecting all 100 Cat Shines
Cat Mario's new suit, fashioned after Giga Cat Mario
Bowser Jr. with cat ears, fur, and whiskers
Cat Plessie carrying three kittens on its back
Fury Bowser's white hair and spikes that appear after collecting all 100 Cat Shines

Giga Cat Mario and a cat-like Bowser Jr. preapring to battle Fury Bowser
Five shining stars on the Bowser's Fury save file select screen


Snapshot Mode
Stamps being placed in Lake Lapcat
The Pencil Sketch filter used during a fight against Fury Bowser


Promotional merchandise and events
Pre-order bonuses
Close-up of a Nintendo UK-exclusive Sticker Sheet, bundled with a SteelBook and a Lucky Cat Mario figurine

Bundled merchandise
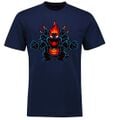
Fury Bowser shirt
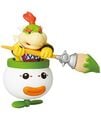
Bowser Jr. figure


My Nintendo stores
Blue folder featuring Fury Bowser
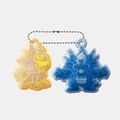
Japanese-exlcusive reflector key holder
Back view


Other
Unlocking the Bowser's Fury theme in Tetris 99
The Bowser's Fury theme on the theme selection screen
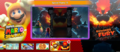
Banner for the Bowser's Fury spirit event
Example spread


Miscellaneous
Play Nintendo


My Nintendo wallpapers


| Super Mario 3D World / Super Mario 3D World + Bowser's Fury / Bowser's Fury | ||
|---|---|---|
| Playable characters | Mario • Luigi • Peach • Toad • Rosalina • Captain Toad • Blue Toadb • Green Toadb • Yellow Toadb • Bowser Jr.c | |
| Forms | Small Mario • Mario (form) • Cat Mario • Double Mario • Tanooki Mario • Fire Mario • Boomerang Mario • Mega Mario • Invincible Mario • White Tanooki Mario • Lucky Cat Mario • White Cat Mariob • Giga Cat Marioc | |
| Non-playable characters | Sprixie Princesses • Sprixies • Rabbits • Mega Rabbit • Toads • Plessie • Lumas • Ghost Miisa • Toadettec • Kittensc • Catc | |
| Enemies | Ant Trooper • Banzai Bill • Biddybud • Big Ant Trooper • Big Boo • Big Galoomba • Blockstepper • Blooper • Blurker • Bob-omb • Boo • Boomerang Bro • Brolder • Bullet Bill • Bully • Cat Banzai Bill • Cat Bullet Bill • Cat Goomba • Chargin' Chuck • Charvaargh • Cheep Cheep • Coin Coffer • Conkdor • Fighter Flyd • Fire Bro • Fire Piranha Plant • Fireballd • Fizzlit • Flopter • Freezied • Fury Shadowc • Fuzzler • Fuzzy • Galoomba • Goomba • Goomba Tower • Grumblump • Hammer Bro • Hop-Chop • Horned Ant Trooper • Ka-thunk • Innertube Goomba • Lava Bubble • Madpole • Magikoopa • Mega Piranha Plant • Mini Goomba • Octoomba • Para-Biddybud • Parabones • Peepa • Piranha Creeper • Piranha Plant • Porcupuffer • Rammerhead • Ring Burner • Shellcreeperd • Sidestepperd • Skating Goomba • Skipsqueak • Small Rammerhead • Snow Pokey • Spike • Spiny • Spiny Skipsqueak • Splorch • Splounder • Stingby • Thwomp • Ty-foo • Unshelled Koopa • Walleye | |
| Obstacles | Baddie Box • Bill Blaster • Cannon • Dark • Fire Bar • Fury Sunc • Fuzzy Horde • Lava • Poison • Poison fog • Quicksand • Spike ball • Spike Block • Spike Trap • Spiked roller • Volcanic debris | |
| Bosses | Bowser • Boom Boom • Pom Pom • Hisstocrat • Boss Brolder • King Ka-thunk • Prince Bully • Motley Bossblob • Meowser • Fury Bowserc • Giant Bowserc | |
| Items and power-ups | + Clock • 1-Up Mushroom • Baseball • Blue Coin • Bomb • Boomerang Flower • Cannon Box • Cat Shinec • Cat Shine Shardc • Coin • Coin Box • Coin pile • Crown • Double Cherry • Fire Flower • Giga Bellc • Gold Shell • Goomba Mask • Green Shell • Green Star Coin • Green Star • Hidden Coin • Ice Skate • Invincibility Bellb • Invincibility Leaf • Keyc • Key Coin • Light Box • Lucky Bell • Mega Mushroom • Plessie Medalc • Potted Piranha Plant • Propeller Box • Red Coin • Snowball • Springboard • Stamp • Super Bell • Super Leaf • Super Mushroom • Super Star | |
| Objects | ? Block • ? Block tower • Arrow platform • Arrow Sign • Assist Block • Beep Block • Big Block • Binoculars • Bowser Board • Bowser Statue • Brick Block • Bubble • Cactus • Cagec • Cat Wheel • Chain-Link • Character Switch • Checkpoint Flag • Clear Pipe • Clear Pipe Cannon • Cloud Cannon • Cloud Lift • Cog • Color Panel • Conveyor Belt • Crab • Crate • Crystal Block • Dash Panel • Donut Block • Empty Block • Falling spikec • Fish • Fling Polec • Floating couch • Floord • Flower • Fluff • Fury Blockc • Gift Box • Glowing spot • Gold P Switch • Goal Pole • Goal Pole (flying) • Gold Ring • Gong • Graffitic • Green Star Ring • Ground-Pound Switchc • Hexagon • Hidden Block • Illusion • Invisible walkway • Jump Panel • Kick Bomb • Lift • Lighthousec • Long ? Block • Multi-Vator • Mushroom Trampoline • Mystery Box • P Panel • P Switch • Pipe • Pixel Luigi • Propeller Platforma • Red POW Block • Red Ring • Red-Blue Panel • Rising pillar • Rock Block • Rocket • Rotating Panel • Roulette Block • Sand statue • Seagullc • Searchlight • Seesaw • Sliding door • Slot Block • Small bird • Splotchy goopc • Super Jump Panelc • Swing • Switch Block • Switch Panel • Switchboard • Super POW Block • Tank • Timer Gatec • Torch • Touchstone • Trample Switch • Trapeze • Tree • Turning Floor • Warp Box • Warp Box (With Key) • Warp Door • World Warp Pipe • Zipline lift | |
| Locations | Normal worlds | World 1 • World 2 • World 3 • World 4 • World 5 • World 6 • World Castle • World Bowser |
| Special worlds | World Star • World Mushroom • World Flower • World Crown | |
| Lake Lapcatc | Fur Step Island • Scamper Shores • Pounce Bounce Isle • Fort Flaptrap • Slipskate Slope • Clawswipe Colosseum • Trickity Tower • Crisp Climb Castle • Risky Whisker Island • Pipe Path Tower • Roiling Roller Isle • Mount Magmeow • Lucky Isle | |
| Other | Sprixie Kingdom • Mushroom Kingdom • Sprixie Houses • Toad Houses • Mystery Houses • Lucky Houses | |
| Moves | Crawl • Crouch • Crouch Jump • Dash • Diveb • Floating Jump • Ground Pound • Ground Pound Jumpb • Jump • Long Jump • Roll • Scuttle • Shell dash • Side Somersault • Slide • Spin • Spin Jump • Swim • Synchro Ground-Pound • Wall Jump | |
| Gameplay elements | amiibob • Captain Toad's Adventures • Completion • Enemy Battles • Luigi Bros. • List of Cat Shine names in other languagesc • List of Pixel Luigi sightings • List of stamps • Miiversea • Points • Snapshot Modeb • Toad Brigadeb | |
| Musical compositions | "Super Bell Hill" • "Mario's Colour Panel" • "Super Block Land" | |
| Further info | Gallery (SM3DW+BF • BF) • Glitches (SM3DW+BF) • Media (SM3DW+BF) • Original soundtrack • Playable characters' statistics (SM3DW+BF) • Pre-release and unused content • Staff (SM3DW+BF) | |
| Related Play Nintendo activities: Can’t-miss games • What does THAT thing do? • Cute-throat enemies • Power-up trivia quiz! • Power-up personality quiz! • Colorful cat-tastrophe! | ||