Mario & Luigi: Dream Team: Difference between revisions
m (Text replacement - "(\| *)Jap([RMCN\d]* *=)" to "$1Jpn$2") |
PotatoPlus (talk | contribs) |
||
| (One intermediate revision by one other user not shown) | |||
| Line 719: | Line 719: | ||
|[[Mount Pajamaja]] (revisit) | |[[Mount Pajamaja]] (revisit) | ||
|- | |- | ||
|[[#Luiginary Works|Luiginary Works]] | |[[File:Luigi Luiginary Works Action Icon MLDT.png]]<br>[[#Luiginary Works|Luiginary Works]] | ||
|{{button|3ds|B}} | |{{button|3ds|B}} | ||
|2 | |2 | ||
| Line 2,912: | Line 2,912: | ||
*''[[Super Mario Sunshine]]'': Bowser Jr. uses his paintbrush as an attack. Also, the credits pictures are similar to this game's; showing Mario and Co. enjoying a vacation. | *''[[Super Mario Sunshine]]'': Bowser Jr. uses his paintbrush as an attack. Also, the credits pictures are similar to this game's; showing Mario and Co. enjoying a vacation. | ||
*''[[Mario & Luigi: Superstar Saga]]'': [[Popple]] and other [[Beanish]] characters appear in this game. [[Queen Bean]] makes a cameo in the Wakeport trading quest with one of the items being a photo of her. Part of "Sunny Driftwood Shore" is an arrangement of the main countermelody of "Sweet Surfin'". The way the Mario Bros. get to Big Massif's Hooraws by having to go through their own puzzle-filled sections in Dreamy Wakeport is similar to how the Koopalings in Bowser's Castle were reached in the first game. When fighting Bowser Jr., he may summon two Shy Guys to carry a fiery rope that the brothers have to jump over to dodge in the same manner as the [[Border Bro]]s in ''Superstar Saga''. In this game, Somnom Woods serves as the penultimate area after collecting all the vital pieces of the Ultibed, just like how [[Joke's End]] was the second-to-last area to visit after collecting all the pieces of the [[Beanstar]]. Also, when perched on the Luiginary Stack, Mario's standing pose is his battle pose in ''Superstar Saga''. A singing Shelltop in Dozing Sands mentions [[Hoohoo Mountain]]. Some elements of the battle theme are used from this game. | *''[[Mario & Luigi: Superstar Saga]]'': [[Popple]] and other [[Beanish]] characters appear in this game. [[Queen Bean]] makes a cameo in the Wakeport trading quest with one of the items being a photo of her. Part of "Sunny Driftwood Shore" is an arrangement of the main countermelody of "Sweet Surfin'". The way the Mario Bros. get to Big Massif's Hooraws by having to go through their own puzzle-filled sections in Dreamy Wakeport is similar to how the Koopalings in Bowser's Castle were reached in the first game. When fighting Bowser Jr., he may summon two Shy Guys to carry a fiery rope that the brothers have to jump over to dodge in the same manner as the [[Border Bro]]s in ''Superstar Saga''. In this game, Somnom Woods serves as the penultimate area after collecting all the vital pieces of the Ultibed, just like how [[Joke's End]] was the second-to-last area to visit after collecting all the pieces of the [[Beanstar]]. Also, when perched on the Luiginary Stack, Mario's standing pose is his battle pose in ''Superstar Saga''. A singing Shelltop in Dozing Sands mentions [[Hoohoo Mountain]]. Some elements of the battle theme are used from this game. | ||
*''[[Mario & Luigi: Partners in Time]]'': The [[Ball Hop]] Bros. Move looks similar to [[Bro Ball|Bros. Ball]], though Ball Hop functions differently | *''[[Mario & Luigi: Partners in Time]]'': The [[Ball Hop]] Bros. Move looks similar to [[Bro Ball|Bros. Ball]], though Ball Hop functions differently. When Bowser is possessed by Antasma, he resembles [[Shrowser]]. [[Kylie Koopa]] also reappears along with a picture of a [[Shroob]]. | ||
*''[[New Super Mario Bros.]]'' series: The sound effects for collecting [[Red Coins]] including the timer are the same as in these games. | *''[[New Super Mario Bros.]]'' series: The sound effects for collecting [[Red Coins]] including the timer are the same as in these games. | ||
*''[[Mario & Luigi: Bowser's Inside Story]]'': Badges are similar to the ones from this game. [[Starlow]], [[Broque Monsieur]], [[Broque Madame]], [[Broggy]], [[Private Goomp]], [[Corporal Paraplonk]], and [[Sergeant Guy]] return as well. Bowser's theme is reused. The [[Banzai Bill Cannon]] re-appears as a prop during the battle with [[Elite Trio|Private Goomp, Corporal Paraplonk and Sergeant Guy]]. Bowser's first boss fight has two attacks based on his abilities in this game, namely his [[Spike Ball (move)|Spike Ball]] and [[Punch]]. and he uses the inhaling power he received in this game during cutscenes. When Giant Luigi fights giant Bowser in Dreamy Neo Bowser Castle, he references his giant battles from this game, and also says "SHOWTIME!" before the fight begins. The [[Earthwake]] battle is similar to the [[Tower of Yikk]] battle. The Mario icon on the Dreamy Mushrise Park pipe map is taken directly from this game. When achieving an "Excellent" with the [[Bye-Bye Cannon]], Mario and Luigi both have similar poses to when they level up in this game. | *''[[Mario & Luigi: Bowser's Inside Story]]'': Badges are similar to the ones from this game. [[Starlow]], [[Broque Monsieur]], [[Broque Madame]], [[Broggy]], [[Private Goomp]], [[Corporal Paraplonk]], and [[Sergeant Guy]] return as well. Bowser's theme is reused. The [[Banzai Bill Cannon]] re-appears as a prop during the battle with [[Elite Trio|Private Goomp, Corporal Paraplonk and Sergeant Guy]]. Bowser's first boss fight has two attacks based on his abilities in this game, namely his [[Spike Ball (move)|Spike Ball]] and [[Punch]]. and he uses the inhaling power he received in this game during cutscenes. When Giant Luigi fights giant Bowser in Dreamy Neo Bowser Castle, he references his giant battles from this game, and also says "SHOWTIME!" before the fight begins. The [[Earthwake]] battle is similar to the [[Tower of Yikk]] battle. The Mario icon on the Dreamy Mushrise Park pipe map is taken directly from this game. When achieving an "Excellent" with the [[Bye-Bye Cannon]], Mario and Luigi both have similar poses to when they level up in this game. | ||
Latest revision as of 12:32, January 15, 2025
| Mario & Luigi: Dream Team | |||||||||||||||||
|---|---|---|---|---|---|---|---|---|---|---|---|---|---|---|---|---|---|
 For alternate box art, see the game's gallery. | |||||||||||||||||
| Developer | AlphaDream Good-Feel[1] Nintendo SPD Group No.4 Paon | ||||||||||||||||
| Publisher | Nintendo | ||||||||||||||||
| Platform(s) | Nintendo 3DS | ||||||||||||||||
| Release date | Original release Nintendo Selects | ||||||||||||||||
| Language(s) | English (United Kingdom) English (United States) French (France) French (Canada) German Spanish (Spain) Spanish (Latin America) Italian Dutch Portuguese (Portugal) Russian Japanese Korean | ||||||||||||||||
| Genre | RPG, Action | ||||||||||||||||
| Rating(s) |
| ||||||||||||||||
| Mode(s) | Single player | ||||||||||||||||
| Format | Nintendo 3DS: | ||||||||||||||||
| Input | Nintendo 3DS:
| ||||||||||||||||
| Serial code(s) | |||||||||||||||||
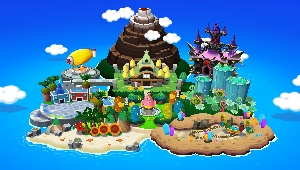
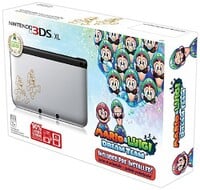
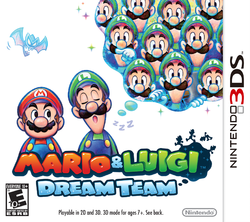
Mario & Luigi: Dream Team (known as Mario & Luigi: Dream Team Bros. in European languages) is a title for the Nintendo 3DS. It is the fourth installment in the Mario & Luigi series, preceded by Mario & Luigi: Bowser's Inside Story from 2009, and succeeded by Mario & Luigi: Paper Jam in 2015. The story follows Mario and Luigi's journey on Pi'illo Island to rescue Princess Peach from Antasma and Bowser and to stop them from conquering the real world with the Dream Stone. During this journey, they find and rescue an ancient species of the island called the Pi'illos. One Pi'illo, Prince Dreambert, accompanies the brothers and Starlow in order to help them. This game is part of "The Year of Luigi," celebrating the 30th anniversary of Luigi's debut. As such, Luigi has a much bigger role in the game than in the previous Mario & Luigi games. Many of the game's mechanics in the Dream World center around him, including Luiginary Works, Luiginoids, Luiginary Attacks, and Giant Luigi. Mario & Luigi: Dream Team is a graphically pivotal entry in the Mario & Luigi series, as its art style was used in every subsequent installment in the series until Mario & Luigi: Brothership.
The game's name comes from the term "dream team", a team composed of the greatest performers of a certain talent. In regions using the title Mario & Luigi RPG, this is the last game in the series to have a numbered title, as later games would instead be subtitled.
Story[edit]
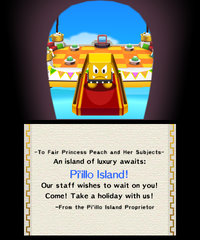
One day in the Mushroom Kingdom, Princess Peach, Mario, Luigi, Toadsworth, and some Toads are invited to Pi'illo Island, which is said to contain a special power that makes people fall asleep. During the flight, a dark pillow falls onto a blimp and transforms into a dark figure who Mario defeats. After defeating him, the blimp malfunctions and crashes into the Pi'illo Blimport. However, it is revealed that it was all Luigi's dream. The group proceeds through Pi'illo Blimport, where they meet Broque Monsieur and many Brocks, who host a variety of welcoming events, including a Check-X Quiz, enemy battles, and a Coin-Up Challenge. They then go to Pi'illo Castle, where they meet Starlow. Mario and Luigi go to a room where Peach and Toadsworth accidentally set off a test platform sending them to ancient Pi'illo ruins. The Bros. follow and eventually find Peach and Toadsworth, as well as a Pi'illo, the latter of whom is to be Prince Dreambert. After defeating Smoldergeist, they find a collection room where Luigi takes a nap on the pillow. After everyone gathers in the collection room, a Dream Portal opens a portal to the Dream World. The dark figure from Luigi's dream pulls Princess Peach into the Dream World. After Mario chases after Peach into Dreamy Pi'illo Castle, with the help of a dreamy version of Broque Monsieur, he comes across Dreamy Luigi, Luigi's dream representation, who assists Mario through his treks in the Dream World.
The Bros. catch up to the dark figure, who creates Dreamy Mario, whom they defeat. The dark figure then creates a portal to Dream's Deep and flees there, sealing it up afterwards. Mario and Luigi then find a Nightmare Chunk and break it, freeing Prince Dreambert. He explains that there were two powers in Pi'illo Island, the Dream Stone and the Dark Stone. Both stones have the power to grant wishes. The Pi'illo folk were protecting the stones from misuse. Then the Bat King Antasma came to steal the Dark Stone to fulfill his desires. The Pi'illo fought Antasma and successfully sealed him in the Dream World, but not before Antasma destroyed the Dark Stone, thus causing the Pi'illos' souls to be trapped in Nightmare Chunks upon being hit by one. Prince Dreambert then runs out of the room, with the Bros. following him. After catching up to Prince Dreambert and saving some Pi'illos, Mario and Luigi learn from one that Eldream, a Pi'illo elder, knows how to reach Dream's Deep. The Bros. then set off to find him in Mushrise Park.
Upon arriving at Mushrise Park, the Bros. learn that Brickle, the park's manager, has Eldream but will not give him up unless they catch him. After the Bros. free him from being stuck in the fountain top and defeat a malfunctioning watering robot named Grobot, Brickle allows them to use his bed in his hut. After freeing Eldream, he opens the portal to Dream's Deep where the Bros. enter. Meanwhile in the real world, Bowser appears along with Kamek and the newly-formed Elite Trio: Private Goomp, Corporal Paraplonk and Sergeant Guy. Bowser follows the princess's scent to Dream's Deep right where the Bros. are confronting Antasma. Upon being convinced by Antasma and his claims, Bowser teams with him and decides to kidnap Peach later.
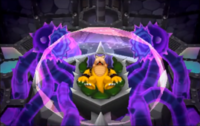
Back in the Real World, the Bros. learn that Antasma is going after the Dream Stone, which resides in Dozing Sands. As the Bros. approach the ruins that hold the Dream Stone, they discover Antasma and Bowser had already stolen it. Prince Dreambert realizes that the Dream Stone's altar is a Dreampoint, a point where one can enter the Dream World easily. Mario enters the Dream World as Luigi sleeps on Prince Dreambert on the Dreampoint, into Dreamy Dozing Sands. After finding the Dream Stone's Soul, it tries to hide as it does not want to get involved but is pestered to the point it is consumed by fury, turning into the massive Robo-Drilldigger to get rid of the Bros. Dreamy Luigi, fusing with many Luiginoids, then becomes Giant Luigi to defeat Robo-Drilldigger. After doing so, the Dream Stone's Soul tells Luigi where the Dream Stone was taken, Mount Pajamaja.
To reach Mount Pajamaja, the Bros. need to take a tour there, signing up requiring them to go to Wakeport. However, the tour cannot begin until Big Massif, the big brother of Lil' Massif and one of the tour guides, shows up. The Bros. later find Big Massif voluntarily asleep on a Dreampoint. Mario enters Dreamy Wakeport, but discovers that to meet Dreamy Big Massif, they have to beat his four Hooraw apprentices with special conditions involved. After beating all four, it is revealed that Dreamy Big Massif was disguised as the tour center operator. Upon beating Dreamy Big Massif, Big Massif wakes up, notices he slept in and starts the tour to and up Mount Pajamaja. After climbing up to the summit, the Bros. find Antasma, Bowser, Kamek and the Elite Trio starting to play music known as the Dreambeats, making all who hear it fall asleep, except for Pi'illos, Starlow, Antasma and Bowser (who is covering his ears). The Bros. try to escape but Luigi falls asleep. Mario manages to escape the Dreambeats by diving through the Dream Portal of a nearby Dreampoint into Dreamy Mount Pajamaja, but the Dream Portal soon closes as the music has made Luigi so deep in his sleep that it cannot remain stable.
Meanwhile, the entire island falls asleep and Dream Orbs, orbs created by those who sleep, are absorbed into the Dream Stone to power it. As the Dream Stone finishes charging, Antasma wishes for a castle for him and Bowser, and surrounds the castle with an impenetrable shield. As Mario gets out of the Dream World, the Bros. head to Pi'illo Castle, and find out that Princess Peach is at Driftwood Shore. When they arrive, they are told to go see Broque Madame who has disguised Peach and Toadsworth as Block folk. It is suggested that Peach should be hidden in the Dream World from Bowser. However, it is revealed that Peach was actually Kamek in disguise, who summons the Elite Trio to fight the Bros. After being defeated, they are teleported out by Kamek who then leaves.
The Bros. start looking for a way to get to Neo Bowser Castle when they discover Dr. Snoozemore has returned and go to see him. Upon finding him, he suggests trying to find the Zeekeeper to break the shield around the Castle. To summon the Zeekeeper, they must use the Ultibed, which in order to access, must first be built by a Bedsmith once they collect the five Zee Parts scattered across the island. The Bros. then find Pi'illoper who takes them to his prized possession, Bedsmith, who is trapped in a Nightmare Chunk. When the Bros. finally reach the Nightmare Chunk, Earthwake, the guardian holding the nightmare chunk in its head, activates and forms a robot made of buildings resulting in another Giant Luigi battle. After beating Earthwake and breaking the nightmare chunk, Bedsmith is more than happy to help, but needs to meet the Bros. at his workshop in Somnom Woods to build the Ultibed.
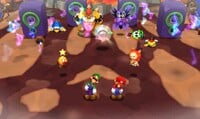
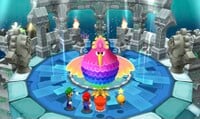
After arriving in Somnom Woods, Bedsmith makes the Ultibed, and then tells the Bros. to find the Zeekeeper they would have to sleep in the temple in Somnom Woods. To reach the temple, the Bros. have to free the Pi'illo Masters which hold the keys to reaching the temple. In Dreamy Somnom Woods, Mario and Dreamy Luigi find the Zee Egg. Mario tries breaking the egg, releasing the Zeekeeper who fights Giant Luigi. After the Zeekeeper is defeated, he notices Prince Dreambert with the Bros. and upon hearing the dire situation, he reluctantly agrees to help. The Zeekeeper unleashes the Wakebeam upon the castle, shattering the barrier and causing the castle to plummet to the ground, allowing the Bros. to then storm the castle.
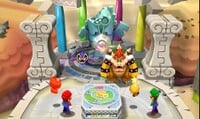
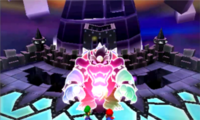
Upon infiltrating Neo Bowser Castle, Kamek tries to hinder Mario and Luigi's progress, but fails. The Bros. then find Bowser sleeping on Antasma as a pillow with a barrier protecting him. Luigi suggests that they enter the Koopa King's Dream World; there, they fight Bowser in his giant form. After losing, Bowser flees with Antasma, and Mario and Luigi pursue the duo. Antasma attempts to challenge the Mario Bros. to a fight with the help of Bowser, but to the surprise of everyone, Bowser turns on him, and he then reveals that was planning to double-cross Antasma all along and flees to the top of the castle. Antasma then reveals he had made a wish on the Dream Stone for the ability to create Dream Portals at some point, and escapes into one. Dreambert chases after Antasma but loses and is knocked back into the real world. Mario jumps into the Dream Portal himself, with Dreamy Luigi and a wounded Prince Dreambert joining the fight to assist him. The three defeat him, and they leave the Dream World, still looking to fight Bowser.
After avoiding Elite Trio's attacks, Mario, Luigi, Starlow, and Prince Dreambert make it to the castle balcony, where Bowser and Peach await. As Bowser boasts about the power he now has, Peach and Starlow activate their wish power and, at the request of Prince Dreambert, destroy the Dream Stone. Bowser in turn inhales the Dream Stone's pieces and becomes Dreamy Bowser. He then engages battle with the Bros., but despite his new powers, he still loses to them and reverts back to his normal self. The Bros. then hit him with their hammers hard, sending him flying out of Neo Bowser Castle and into the sky. However, Neo Bowser Castle no longer has the Dream Stone sustaining it, so it begins to collapse. The Bros. and company are greeted by the Zeekeeper, who takes them out of the castle and back to Pi'illo Island.
Back at Pi'illo Castle, Prince Dreambert presents the Zeekeeper with the Dream Stone's essence extracted from Bowser's body, hoping to get it repaired. He does so, but it becomes the Dream Coin, which spouts infinite coins instead. The Zeekeeper explains that he made it this way because simply having the power to grant all wishes is too risky, and it is more intuitive to "buy" one's wishes. Meanwhile, Bowser and his minions are fleeing the island as he announces he will come back for revenge. They are then showered in coins from the Dream Coin, causing the Koopa Clown Car to fall into the ocean from Private Goomp and Seargent Guy moving around excitedly.
Gameplay[edit]
The gameplay shifts between Luigi's dream world, where Mario and Luigi move in a 2-D fashion, and the regular world, where they freely roam the overworld. While Mario is playing inside Luigi's dreams, Starlow can move Luigi's face to affect the area, such as making him sneeze to spin platforms. The battles give the player coins directly from enemies in battle, like Paper Mario: Sticker Star. Badges similar to those in Mario & Luigi: Bowser's Inside Story make a return in this game. Sometimes, gifts also appear in between or after battles. Giant battles from Mario & Luigi: Bowser's Inside Story return, this time with Luigi instead of Bowser.
The art style also changes in this installment due to the shift to 3D. Unlike the previous games' basic sprite style, this installment uses a pre-rendered visual that makes the sprites smoother with the backgrounds. The environment uses 3D models while in giant battles, characters use 3D models for the first time in the series.
The bottom screen of the 3DS displays the area map. Unlike previous installments, the map shows and follows the actual location of the Bros.
Battle system[edit]
The battle system in the overworld is similar to those in previous titles. Initially, Mario has higher BP, POW, and Speed, while Luigi has more HP, DEF and Stache than his brother, like in other games in the series. The battle system in Dream World is different, as Mario fights merged with Luigi's dream form. As a result, he has higher stats, with his HP and BP increased by 1.5x. On the other hand, Mario is the only one who takes damage, while Luigi is completely unharmable. As such, just Mario being KO'd is enough to result in a Game Over. There are now five categories of attacks, as in Mario & Luigi: Partners in Time. They are Jump, Hammer, Item, Luiginary Attacks (in the Dream World) or Bros. Attacks (in the Real World), and Flee. If a player loses a battle and tries again, a sixth option appears, which is the Hint option. Also, during battles, if the player fails a Bro. Attack a numerous amount of times in battle, a slo-mo feature activates allowing for easier hits. There can be more than five enemies in battle, as in Mario & Luigi: Bowser's Inside Story. The Rank feature returns again. One change is the lack of Lakitus from the level up system.
Badges[edit]
- Main article: Badge § Mario & Luigi: Dream Team
Badges return from Mario & Luigi: Bowser's Inside Story. Upon reaching to Prince Dreambert's petrified pillow in Pi'illo Castle, Mario and Luigi find two Badges with the pillow, which are the Mush Badge and the Starter Badge. While traveling through Dozing Sands, the Bros. encounter a Badge shop owner Brock who gives the two the Guard Badge and the Bronze Badge. All other Badges can be bought at Badge Shops.
During battle, Mario and Luigi can fill up the Badge gauge by attacking enemies, with more successful attacks filling up the gauge faster. Bros. and Luiginary attacks fill it up even faster than normal attacks. When the gauge is full, a Badge Effect will take up a Badge Slot. Badges can be swapped out in and out of battle, although the Badge gauge will reset. Below is a list of all Badge combinations.
| Badge | Starter Badge
|
Master Badge
|
Expert Badge
|
Bronze Badge
|
Silver Badge
|
Gold Badge
|
|---|---|---|---|---|---|---|
Mush Badge
|
Restores 30% of each bro's HP. | Restores 50% of each bro's HP. | Restores 80% of each bro's HP, revives fallen bros and cures bad status effects. | Restores 30% of each bro's BP. | Restores 50% of each bro's BP. | Restores 80% of each bro's BP. |
Strike Badge
|
Hits one enemy for 30 damage. | Hits one enemy for 80 damage. | Hits one enemy for 160 damage. | Hits all enemies for 20 damage. | Hits all enemies for 50 damage. | Hits all enemies for 100 damage. |
Guard Badge
|
Forms a barrier that reduces damage to zero for 3 attacks. | Forms a barrier that reduces damage to zero for 6 attacks. | For 3 turns, prevents HP from hitting zero, making the user impossible to KO. | Temporarily increases DEF and reduces damage dealt by enemies. | Increases how much the Badge Meter charges during battle. | Temporarily increases POW, letting users deal more damage to foes. |
Virus Badge
|
Temporarily decreases enemies' POW, making them deal less damage. | Temporarily decreases enemies' DEF making them take more damage. | Makes all enemies dizzy. (Does not work on some foes.) | Removes all status effects from all enemies. | Might turn any foe into a Mushroom of a type depending on their coin count. | Temporarily increases the chance of Lucky Hits. |
Risk Badge
|
Either fully recovers Mario's and Luigi's HP or drops them to 1. | Either fully charges the Badge Meter or resets it. | Gives everyone a 50% chance of taking enough damage to drop to 0 HP. | Gives everyone a random status effect. | Temporarily increases everyone's POW, upping damage dealt and received. | Damages everyone. (256 HP of damage) |
Miracle Badge
|
Produces more coins from enemies. (+30% coins) | Produces more EXP from enemies. (+30% EXP) | Copies and stores a random Badge effect. | Temporarily increases the chances of Lucky Hits. | Reverts user's status to the prior turn. Returns used items, cancelling effects.* | Stops time for a moment so that all enemies will be unable to move. |
* - The in-game description is incorrect — the user's status is actually reset to how it was at the start of the battle.
Expert Challenges[edit]
- Main article: Expert Challenges
Expert Challenges are unlocked during the Smoldergeist battle. They are battle-exclusive challenges that have different set conditions. Completing an Expert Challenge awards points. Reaching specific point requirements will award Mario and Luigi special gear. There are a total of 111 Expert Challenges in the game. Below are the rewards gained from completing the challenges, as well as the challenges themselves.
Rewards[edit]
| Point requirement | Reward |
|---|---|
| 20 Points | Expert Boots / Challenge Boots |
| 50 Points | POW Scarf |
| 90 Points | Expert Wear / Challenge Wear |
| 140 Points | Perfect POW Gloves |
| 200 Points | BP Knockout Bangle / BP Knock-out Bangle |
| 300 Points | Expert Hammer / Challenge Hammer |
| 450 Points | Birthday Boots / DoB Boots |
| 600 Points | Golden Hammer |
| 800 Points | Master Gloves / Pro Gloves |
| 1000 Points | Duplex Crown |
List of Expert Challenges[edit]
| Expert Challenge name | Points earned | Description |
|---|---|---|
| Excellent Jump | 2 | During one battle, use only the jump attack and get Excellent for all your attacks. |
| Excellent Hammer | 2 | During one battle, use only the hammer attack and get Excellent for all your attacks. |
| Bros. Attack 1 | 3 | Get an Excellent at least once with the 3D Red Shell. |
| Bros. Attack 2 | 3 | Get an Excellent at least once with the 3D Green Shell. |
| Bros. Attack 3 | 3 | Get an Excellent at least once with the Fire Flower. |
| Bros. Attack 4 | 4 | Get an Excellent at least once with the Bye-Bye Cannon. |
| Bros. Attack 5 | 4 | Get an Excellent at least once with the Dropchopper. |
| Bros. Attack 6 | 5 | Get an Excellent at least once with the Bomb Derby. |
| Bros. Attack 7 | 5 | Get an Excellent at least once with the Slingsniper. |
| Bros. Attack 8 | 6 | Get an Excellent at least once with the Jet-Board Bash. |
| Bros. Attack 9 | 6 | Get an Excellent at least once with the Star Rocket. |
| Bros. Attack 10 | 6 | Get an Excellent at least once with the Zee Egg. |
| Luiginary Attack 1 | 4 | Get an Excellent at least once with the Luiginary Ball. |
| Luiginary Attack 2 | 4 | Get an Excellent at least once with the Luiginary Stack. |
| Luiginary Attack 3 | 5 | Get an Excellent at least once with the Luiginary Hammer. |
| Luiginary Attack 4 | 5 | Get an Excellent at least once with the Luiginary Flame. |
| Luiginary Attack 5 | 6 | Get an Excellent at least once with the Luiginary Wall. |
| Luiginary Attack 6 | 6 | Get an Excellent at least once with the Luiginary Typhoon. |
| Excellent Ten 1 | 15 | Get Excellent 10 times in a row during battles in Pi'illo Castle. (Any attacks, any enemies.) |
| Excellent Ten 2 | 15 | Get Excellent 10 times in a row during battles in Dreamy Pi'illo Castle. (Any attacks, any enemies.) |
| Excellent Ten 3 | 15 | Get Excellent 10 times in a row during battles in Mushrise Park. (Any attacks, any enemies.) |
| Excellent Ten 4 | 15 | Get Excellent 10 times in a row during battles in Dreamy Mushrise Park. (Any attacks, any enemies.) |
| Excellent Ten 5 | 15 | Get Excellent 10 times in a row during battles in Dozing Sands. (Any attacks, any enemies.) |
| Excellent Ten 6 | 15 | Get Excellent 10 times in a row during battles in Dreamy Dozing Sands. (Any attacks, any enemies.) |
| Excellent Ten 7 | 15 | Get Excellent 10 times in a row during battles in Wakeport. (Any attacks, any enemies.) |
| Excellent Ten 8 | 15 | Get Excellent 10 times in a row during battles in Dreamy Wakeport. (Any attacks, any enemies.) |
| Excellent Ten 9 | 15 | Get Excellent 10 times in a row during battles on Mount Pajamaja. (Any attacks, any enemies.) |
| Excellent Ten 10 | 15 | Get Excellent 10 times in a row during battles on Dreamy Mount Pajamaja. (Any attacks, any enemies.) |
| Excellent Ten 11 | 15 | Get Excellent 10 times in a row during battles in Driftwood Shore. (Any attacks, any enemies.) |
| Excellent Ten 12 | 15 | Get Excellent 10 times in a row during battles in Dreamy Driftwood Shore. (Any attacks, any enemies.) |
| Excellent Ten 13 | 15 | Get Excellent 10 times in a row during battles in Somnom Woods. (Any attacks, any enemies.) |
| Excellent Ten 14 | 15 | Get Excellent 10 times in a row during battles in Dreamy Somnom Woods. (Any attacks, any enemies.) |
| Excellent Ten 15 | 15 | Get Excellent 10 times in a row during battles in Neo Bowser Castle. (Any attacks, any enemies.) |
| Excellent Ten 16 | 15 | Get Excellent 10 times in a row during battles in Dreamy Neo Bowser Castle. (Any attacks, any enemies.) |
| Dodge Ten 1 | 20 | Dodge 10 enemy attacks in a row in Pi'illo Castle. (Can be different enemies.) |
| Dodge Ten 2 | 20 | Dodge 10 enemy attacks in a row in Dreamy Pi'illo Castle. (Can be different enemies.) |
| Dodge Ten 3 | 21 | Dodge 10 enemy attacks in a row in Mushrise Park. (Can be different enemies.) |
| Dodge Ten 4 | 21 | Dodge 10 enemy attacks in a row in Dreamy Mushrise Park. (Can be different enemies.) |
| Dodge Ten 5 | 22 | Dodge 10 enemy attacks in a row in Dozing Sands. (Can be different enemies.) |
| Dodge Ten 6 | 22 | Dodge 10 enemy attacks in a row in Dreamy Dozing Sands. (Can be different enemies.) |
| Dodge Ten 7 | 23 | Dodge 10 enemy attacks in a row in Wakeport. (Can be different enemies.) |
| Dodge Ten 8 | 23 | Dodge 10 enemy attacks in a row in Dreamy Wakeport. (Can be different enemies.) |
| Dodge Ten 9 | 24 | Dodge 10 enemy attacks in a row on Mount Pajamaja. (Can be different enemies.) |
| Dodge Ten 10 | 24 | Dodge 10 enemy attacks in a row on Dreamy Mount Pajamaja. (Can be different enemies.) |
| Dodge Ten 11 | 25 | Dodge 10 enemy attacks in a row in Driftwood Shore. (Can be different enemies.) |
| Dodge Ten 12 | 25 | Dodge 10 enemy attacks in a row in Dreamy Driftwood Shore. (Can be different enemies.) |
| Dodge Ten 13 | 26 | Dodge 10 enemy attacks in a row in Somnom Woods. (Can be different enemies.) |
| Dodge Ten 14 | 26 | Dodge 10 enemy attacks in a row in Dreamy Somnom Woods. (Can be different enemies.) |
| Dodge Ten 15 | 27 | Dodge 10 enemy attacks in a row in Neo Bowser Castle. (Can be different enemies.) |
| Dodge Ten 16 | 27 | Dodge 10 enemy attacks in a row in Dreamy Neo Bowser Castle. (Can be different enemies.) |
| No Hitter 1 | 5 | Finish a battle involving a Gromba without getting hit by it. (It must attack at least once.) |
| No Hitter 2 | 5 | Finish a battle involving a Dromba without getting hit by it. (It must attack at least once.) |
| No Hitter 3 | 5 | Finish a battle involving a Storch without getting hit by it. (It must attack at least once.) |
| No Hitter 4 | 5 | Finish a battle involving a Bloatula without getting hit by it. (It must attack at least once.) |
| No Hitter 5 | 5 | Finish a battle involving a Capnap without getting hit by it. (It must attack at least once.) |
| No Hitter 6 | 5 | Finish a battle involving a Thorb without getting hit by it. (It must attack at least once.) |
| No Hitter 7 | 5 | Finish a battle involving a Flibbee without getting hit by it. (It must attack at least once.) |
| No Hitter 8 | 5 | Finish a battle involving a Dreamcap Captain and Dreamcaps without getting hit by them. (They must attack at least once.) |
| No Hitter 9 | 5 | Finish a battle involving a Propellion without getting hit by it. (It must attack at least once.) |
| No Hitter 10 | 5 | Finish a battle involving a Flounderflage without getting hit by it. (It must attack at least once.) |
| No Hitter 11 | 5 | Finish a battle involving a Sandoon without getting hit by it. (It must attack at least once.) |
| No Hitter 12 | 5 | Finish a battle involving a Caccac without getting hit by it. (It must attack at least once.) |
| No Hitter 13 | 5 | Finish a battle involving a Dreamy Sandoon without getting hit by it. (It must attack at least once.) |
| No Hitter 14 | 5 | Finish a battle involving a Lob-omb without getting hit by it. (It must attack at least once.) |
| No Hitter 15 | 5 | Finish a battle involving a Skipdrill without getting hit by it. (It must attack at least once.) |
| No Hitter 16 | 5 | Finish a battle involving a Hermite Crab without getting hit by it. (It must attack at least once.) |
| No Hitter 17 | 5 | Finish a battle involving a Cocoknight without getting hit by it. (It must attack at least once.) |
| No Hitter 18 | 5 | Finish a battle involving a Ticksquawk without getting hit by it. (It must attack at least once.) |
| No Hitter 19 | 5 | Finish a battle involving a Monolift without getting hit by it. (It must attack at least once.) |
| No Hitter 20 | 5 | Finish a battle involving a Grumbell without getting hit by it. (It must attack at least once.) |
| No Hitter 21 | 5 | Finish a battle involving a Flibbee R without getting hit by it. (It must attack at least once.) |
| No Hitter 22 | 5 | Finish a battle involving a Pi'illodactyl without getting hit by it. (It must attack at least once.) |
| No Hitter 23 | 5 | Finish a battle involving a Chizzle without getting hit by it. (It must attack at least once.) |
| No Hitter 24 | 5 | Finish a battle involving a Magmad and an Icead without getting hit by them. (It must attack at least once.) |
| No Hitter 25 | 5 | Finish a battle involving a Lob-omb R without getting hit by it. (It must attack at least once.) |
| No Hitter 26 | 5 | Finish a battle involving a Durapurl without getting hit by it. (It must attack at least once.) |
| No Hitter 27 | 5 | Finish a battle involving a Fly Guy without getting hit by it. (It must attack at least once.) |
| No Hitter 28 | 5 | Finish a battle involving a Goomba without getting hit by it. (It must attack at least once.) |
| No Hitter 29 | 5 | Finish a battle involving a Spiny without getting hit by it. (It must attack at least once.) |
| No Hitter 30 | 5 | Finish a battle involving a Lakitu without getting hit by it. (It must attack at least once.) |
| No Hitter 31 | 5 | Finish a battle involving a Piranha Plant without getting hit by it. (It must attack at least once.) |
| No Hitter 32 | 5 | Finish a battle involving a Bloopurn without getting hit by it. (It must attack at least once.) |
| No Hitter 33 | 5 | Finish a battle involving a Dreamcap Captain R and Dreamcaps R without getting hit by them. (They must attack at least once.) |
| No Hitter 34 | 5 | Finish a battle involving a Dark Block without getting hit by it. (It must attack at least once.) |
| No Hitter 35 | 5 | Finish a battle involving a Shy Guy Airtub without getting hit by it. (It must attack at least once.) |
| No Hitter 36 | 5 | Finish a battle involving a Shy Guy without getting hit by it. (It must attack at least once.) |
| No Hitter 37 | 5 | Finish a battle involving a Virus without getting hit by it. (It must attack at least once.) |
| No Hitter 38 | 5 | Finish a battle involving a Monolift R without getting hit by it. (It must attack at least once.) |
| No Hitter 39 | 5 | Finish a battle involving a Hermite Crab R without getting hit by it. (It must attack at least once.) |
| No Hitter 40 | 5 | Finish a battle involving a Fly Guy R without getting hit by it. (It must attack at least once.) |
| No Hitter 41 | 5 | Finish a battle involving a Goomba R without getting hit by it. (It must attack at least once.) |
| No Hitter 42 | 5 | Finish a battle involving a Bandit without getting hit by it. (It must attack at least once.) |
| No Hitter 43 | 5 | Finish a battle involving a Krubbish without getting hit by it. (It must attack at least once.) |
| No Hitter 44 | 5 | Finish a battle involving a Cocoknight R without getting hit by it. (It must attack at least once.) |
| No Hitter 45 | 5 | Finish a battle involving a Eyepi'illo without getting hit by it. (It must attack at least once.) |
| No Hitter 46 | 5 | Finish a battle involving a Beehoss without getting hit by it. (It must attack at least once.) |
| No Hitter 47 | 5 | Finish a battle involving a Boomerang Bro without getting hit by it. (It must attack at least once.) |
| No Hitter 48 | 5 | Finish a battle involving a Pi'illodactyl R without getting hit by it. (It must attack at least once.) |
| No Hitter 49 | 5 | Finish a battle involving a Pelicrump without getting hit by it. (It must attack at least once.) |
| No Hitter 50 | 5 | Finish a battle involving a Spritzbloom without getting hit by it. (It must attack at least once.) |
| No Hitter 51 | 5 | Finish a battle involving a Skipdrill R without getting hit by it. (It must attack at least once.) |
| No Hitter 52 | 5 | Finish a battle involving a Fire Bro without getting hit by it. (It must attack at least once.) |
| No Hitter 53 | 5 | Finish a battle involving a Flaming Antasmaton without getting hit by it. (It must attack at least once.) |
| No Hitter 54 | 5 | Finish a battle involving a Chain Chomp and a Walker Guy without getting hit by them. (They must attack at least once.) |
| No Hitter 55 | 5 | Finish a battle involving a Shy Guy Airtub R without getting hit by it. (It must attack at least once.) |
| No Hitter 56 | 5 | Finish a battle involving a Shy Guy R without getting hit by it. (It must attack at least once.) |
| No Hitter 57 | 5 | Finish a battle involving a Mechakoopa without getting hit by it. (It must attack at least once.) |
| No Hitter 58 | 5 | Finish a battle involving a Big Tail Goomba without getting hit by it. (It must attack at least once.) |
| No Hitter 59 | 5 | Finish a battle involving a Antasman without getting hit by it. (It must attack at least once.) |
| No Hitter 60 | 5 | Finish a battle involving a Spiny R without getting hit by it. (It must attack at least once.) |
| No Hitter 61 | 5 | Finish a battle involving a Lakitu R without getting hit by it. (It must attack at least once.) |
Pi'illos[edit]
- Main article: Pi'illo
Pi'illos are inhabitants of Pi'illo Island that became petrified due to Antasma destroying the Dark Stone. Some Pi'illos are mandatory to rescue, but many are optional. After saving Eldream in Mushrise Park, he will offer rewards to the brothers when they have rescued enough Pi'illos. Below is a list of all rewards that can be obtained by saving Pi'illos.
| Gift | Pi'illos required |
|---|---|
| Bare Hammer | 5 Pi'illos |
| Birthday Hammer | 7 Pi'illos |
| POW Gloves | 12 Pi'illos |
| Birthday Ring | 18 Pi'illos |
| Golden Wear | 26 Pi'illos |
| POW Gloves DX | 37 Pi'illos |
| Zee Egg (Bros. Attack) | 52 Pi'illos |
Status effects[edit]
Status effects can be caused by enemy attacks, items, Bros. Attacks, or the attributes of equipped gear. Some increase/decrease Mario and Luigi's stats while others prevent them from attacking. In this game, there is no Poison effect like the previous entries of the Mario & Luigi series. Those which raise and lower stats stack with all other status effects with the exception of raising a currently lowered stat (or vice versa). All of these effects can be cured with a Refreshing Herb.
| Status | Description |
|---|---|
| Trip | This effect leaves Mario or Luigi unable to avoid enemy attacks. It ends when their turn comes or possibly after getting hit. Entering battle when the enemy touches the rear of Mario or Luigi automatically inflicts that brother with the status. |
| Dizzy | This effect prevents Mario or Luigi from dodging attacks until their turn comes, but can be lost after getting hit. For enemies, it prevents them from attacking for several turns. |
| Burn/Char | This effect is similar to the Dizzy effect, but hurts the character inflicted with it after each turn. For Mario and Luigi, the effect ends when it becomes their turn or possibly after getting hit. For an enemy, it lasts several turns. |
| Mini | This effect makes either Mario and Luigi very small, in addition to reducing the damage they can inflict. In the dream world, using the jump or hammer attack when mini still causes the Luiginoids to be normal size. If a brother faints in the real world whilst the other is suffering the effect, they automatically lose the Mini status so they can carry the brother during enemy attacks. |
| Pow Up | This effect increases the Power of Mario or Luigi, allowing them to deal more damage. |
| Def Up | This effect increases the Defense of Mario or Luigi, reducing the damage they sustain. |
| Speed Up | This effect increases the Speed of Mario or Luigi, allowing them to act sooner than normal. |
| Pow Down | This effect decreases the Power of Mario or Luigi, reducing the damage they inflict. It can combined with the other decreasing effects. |
| Def Down | This effect decreases the Defense of Mario or Luigi, increasing the damage they sustain. |
| Speed Down | This effect decreases the Speed of Mario or Luigi, making them to act later than normal. |
Out-of-battle techniques[edit]
There are out-of battle techniques that Mario and Luigi learn throughout their adventure. The first techniques are jumping. The player uses (or
) for Mario and
(or
) for Luigi. Upon pressing
, it cycles the bros' current techniques, which are paired in sets, going to to different ones gained later on. There are four sets of different techniques. When in the dream world, the only ability that both of the Bros. can use is the jump ability. Only Mario can use the hammer and only Luigi can use Luiginary Works.
| Technique | Button | Set Number | Description | Location unlocked |
|---|---|---|---|---|
Jump |
1 | Mario jumps. He can use this to make a starting attack and jump to places that cannot be walked to. It is the most commonly used technique in the game. | Initially | |
| Same as Mario's jump but for Luigi. | ||||
Hammer |
2 | Mario hammers whatever is in front of him. He can hit buttons and break Nightmare Chunks that cannot be broken with jumping. | Mushrise Park | |
Mole Mario or Mini-Mario |
Luigi hammers Mario so he becomes squashed. Mario is then able to go into smaller areas that cannot be reached normally. If Luigi hammers Mario again he returns to normal size. If Mario is standing on softer ground, Luigi hammers him into the ground so he can move underground. He can use this ability to dig up beans and other things. Pressing |
Dozing Sands | ||
Spin Jump |
3 | Mario jumps on Luigi. Pressing A again initiates the spin jump so Mario and Luigi can spin things and spin other to further away platforms. Press B when Mario is on top of Luigi to return to normal. (Real World only) | Mount Pajamaja | |
Side Drill |
Luigi jumps onto Mario's back; pressing the B button again launches the drill. It drills whichever way Mario and Luigi are facing. Drilling can smash through rocks, and go into drill cannons that shoot out Mario and Luigi in different directions after Mario and Luigi have drilled in. Pressing the A button while Luigi is on Mario's back to returns them to normal. (Real World only) | |||
Ball Hop |
4 | Mario and Luigi jump into ball, which endlessly jumps until the player press A or B again. The jumps that the ball make are higher so the bros can reach higher places. It is also used for Ring Puzzles, where Mario and Luigi must jump through rings without touching the same space again. (Real World only) | Mount Pajamaja (revisit) | |
Luiginary Works |
2 | Luigi flies into a nearby Luiginary Work so it can be controlled by Starlow in the real world. Leaving a Luiginary Work returns Luigi to Mario's position. If there is no Luiginary Work nearby, Luigi flies around but returns to no effect. (Dream World only) | Dreamy Pi'illo Castle |
Luiginary Works[edit]
Luiginary Works are special abilities found in the Dream World. When Dreamy Luigi is near a Luiginary Work, both react to each other, causing them to be surrounded by a green light. Dreamy Luigi, then, can "possess" the object, creating a special object that can be controlled by the sleepy Luigi, with Starlow's help. As said by Prince Dreambert, the Luiginary Works are the objects of connection between the real world and the Dream World.
| Name | Image | Description | Locations present | ||
|---|---|---|---|---|---|
| Luiginary Stache Tree |  |
Dreamy Luigi possesses a tree with mustache-like leaves. If Luigi's mustache is pulled and moved, the leaves move the same way, and they can be used as slingshots for Mario. | Dreamy Pi'illo Castle, Dreamy Mushrise Park, Dreamy Dozing Sands, Dreamy Somnom Woods, Dreamy Neo Bowser Castle (Area B) | ||
| Sneeze Wind |  |
Dreamy Luigi possesses a whirlwind in the level's background. If Luigi sneezes, it causes a strong gust in the Dream World, which can be useful to knock large blocks, spin platforms and move Blocks from the background to the level. | Dreamy Pi'illo Castle, Dreamy Mushrise Park, Dreamy Dozing Sands, Dreamy Wakeport, Dreamy Somnom Woods | ||
| Luiginoid Formation |  |
Dreamy Luigi possesses a constellation in the background. The constellation's stars turn into Luiginoids that can be stacked to help Mario with strong moves. | Dream's Deep, Dreamy Dozing Sands, Dreamy Wakeport, Dreamy Mount Pajamaja (Rock Frame), Dreamy Driftwood Shore, Dreamy Somnom Woods, Dreamy Neo Bowser Castle | ||
| Moves: | |||||
| Stack | Jump, Lean Over, Ground Pound, Crouch, Spring Jump | ||||
| Cone | Spin Jump, Hover Spin, Tornado | ||||
| Ball | Ball Hammer, Hookshot | ||||
| Luiginary Cylinder |  |
Dreamy Luigi possesses a drill. If Starlow spins Luigi's nose, it causes the drill to spin as well which Mario can then hold onto to reach higher areas. | Dreamy Dozing Sands, Dreamy Driftwood Shore, Dreamy Neo Bowser Castle (Area F) | ||
| Luiginary Speedometer |  |
Dreamy Luigi possesses a clock which can affect Mario's speed and jumping height. This is done by Starlow either touching Luigi's mustache or nose. Pulling on the right side of the mustache speeds up time, pulling on the left side slows it down, and tapping Luigi's nose makes everything go at normal speed. | Dreamy Wakeport (Heavy Zest & Thunder Sass area), Dreamy Somnom Woods, Dreamy Neo Bowser Castle (Area E) | ||
| Luiginary Ice |  |
Dreamy Luigi possesses a sun. Starlow can move his arm and make him to press a button near the frozen Pi'llow that is used to change the real world from hot to cold and vice-versa. If the real world gets hot, the sun in the Dream World makes the area similar to a desert. If it gets cold, the sun freezes and the Dream World turns snowy. | Dreamy Mount Pajamaja (Dreampoint) | ||
| Luiginary Gravity |  |
Dreamy Luigi possesses a planet. Starlow can rotate a raft that Luigi is sleeping on to change the gravity in the Dream World. | Dreamy Driftwood Shore, Dreamy Dozing Sands, Dreamy Wakeport | ||
| Luiginary Propeller |  |
Dreamy Luigi possesses a giant pinwheel. When Starlow spins Luigi's nose, the pinwheel causes wind in the Dream World. | Dreamy Somnom Woods, Dreamy Neo Bowser Castle (Area C) | ||
| Luiginary Antigravity |  |
Dreamy Luigi possesses a patch of matter, turning into a circular object with light revolving it, which when activated by Starlow via a switch in the real world, allows Mario to space-swim through the area freely. This is similar to the first time Mario enters the Dream World. | Dreamy Neo Bowser Castle (Area A, D) | ||
Names in other languages[edit]
| Language | Name | Meaning | Notes |
|---|---|---|---|
| Japanese | レンドーパーツ[2] Rendō Pātsu |
Stylistic variant of「連動パーツ」(rendō pātsu, interlocking parts) | |
| French | Mécanismes luimagik[3] | Luimagik mechanisms |
Leveling up[edit]
- Main article: Level up § Mario & Luigi series
Mario and Luigi gain EXP by defeating enemies. When they gain enough, they level up, increasing all of their stats except for STACHE. The player then gets the chance to choose one stat to power up further with a roulette. Continually increasing the same stat will cause lower point values to appear on the roulette. The only ways for the STACHE stat to increase is by choosing to increase the stat manually and by using STACHE beans.
Ranks[edit]
- Main article: Rank § Mario & Luigi: Dream Team
At specific levels, Mario and Luigi will rank up, like in Mario & Luigi: Bowser's Inside Story. Unlike its predecessor however, the player will be allowed to choose a Rank-Up bonus rather than receiving a set reward. Different Rank-Up bonuses are unlocked at later ranks. Upon reaching Rainbow Rank, the player will be able to choose an additional Rank-Up bonus. Below are the different types of ranks in the game, followed by a list of all Rank-Up bonuses.
- Shroom Rank (default)
- Shell Rank (Level 8)
- Flower Rank (Level 16)
- Star Rank (Level 26)
- Rainbow Rank (Level 40)
- Rank-Up Bonuses
| Bonus | Description | Availability | Notes |
|---|---|---|---|
| Gear Slot +1 | Increases your apparel slots by one, letting you use more gear! | Shell Rank | Can be chosen twice. The player can give a brother another extra gear slot if they have already chosen Gear Slot +1 before. |
| Badge Stock +1 | Adds an additional effect stock for your badges. | Shell Rank | If the player selects this for both Bros., they can have the maximum of four badge effect stocks. |
| HP Up+ | Gives you an additional +2 HP every time you gain a level. | Shell Rank | N/A |
| POW Up+ | Gives you an additional +1 POW every time you gain a level. | Shell Rank | N/A |
| BP Up+ | Gives you an additional +1 BP every time you gain a level. | Shell Rank | N/A |
| Quick Level | Gives you 20% more EXP from enemies you defeat, making it easier to level up. | Shell Rank | Increases the total EXP by 20% for each enemy the Bros. defeat. |
| Iron Body | Reduces damage you receive from enemies by 25%. | Shell Rank | N/A |
| Jump Man | Boosts your solo-jump attack power to 125% of normal. | Flower Rank | N/A |
| Hammerhead | Boosts your solo-hammer attack power to 125% of normal. | Flower Rank | N/A |
| Counterer | Boosts your counter-attack power to 150% of normal. | Flower Rank | N/A |
| Shroom EXP | Makes Mushrooms give you EXP as well as HP. Mushrooms lovers level up easily! | Flower Rank | Using Mushrooms adds 150% of the healed HP to the EXP. |
| Big Lucky | Boosts the power of Lucky Hits so you can deliver 200% the normal damage. | Star Rank | N/A |
| Casual Bros. | Makes Bros./Luiginary Attacks cost half the BP they normally do. | Star Rank | Can be stacked with the Bros. Ring. Luiginary Attacks are only affected if Mario chooses this. |
| Quick Healer | Makes restoration items restore 200% of what they normally do (in battle). | Star Rank | N/A |
Giant battles[edit]
- Main article: Giant Luigi
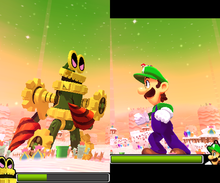
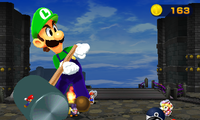
Giant battles play similarly to the ones in the previous installment, with the boss on one screen and Dreamy Luigi on the other. The battles now offer a choice of left-handed or right-handed play; in left-handed play, the boss goes on the right screen and Luigi goes on the left screen, and in right-handed play, the boss goes on the left screen and Luigi goes on the right screen. Attacks and counter-attacks, like in the previous game, are used by tapping repeatedly, sliding in correct shapes and sliding repeatedly. As the playable character being different in this game, Luigi is instead able to perform a variety of the moves he uses in normal battle, such as his jump and hammer attacks, the latter having two variations. He is also given the option to work together with Mario to perform both a useful healing technique and a spinning stomp attack, as well as a finishing attack involving Mario piercing through the boss in question's weak point while riding a Star thrown by Dreamy Luigi.
Unlockables[edit]
Upon completing the game, two new features are made available, Jukebox and Hard Mode. Jukebox allows the player to listen to the game's soundtrack. In Hard Mode, enemies are stronger, and the maximum amount of each item the bros can carry is 10. Like the previous games, should the player lose in a battle in Hard Mode, rather than having the option to restart it, they are automatically be taken back to the title screen. Upon beating the final boss in Hard Mode, the player gets to view a two-screened image featuring all the main characters and main bosses in the game.
Special attacks[edit]
Bros. Attacks[edit]
- Main article: Bros. Attack § Mario & Luigi: Dream Team
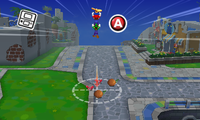
Bros. Attacks are powerful and complex team techniques that Mario and Luigi perform in unison in the Real World. These moves are unlocked by gathering the ten Attack Pieces in a particular area. Like in the previous game, the player is given the option to practice their unlocked Bros. Attacks in the menu. In this game however, certain Bros. Attacks are influenced damage-wise by either Mario's or Luigi's Boots POW stat, Mario's or Luigi's Hammer POW stat, or just Mario's or Luigi's normal POW stat, whose variable POW stat depends on who's performing the attack and how it involves them. Once again exclusive to this game, Mario and Luigi each have Bros. Attacks unique to themselves that only they can activate. Some of Mario's Bro Attacks mainly focus on single targets, while most of Luigi's attack multiple foes.
List of Bros. Attacks[edit]
| Mario | ||||||
|---|---|---|---|---|---|---|
| Bros. Attack | Illustration | Description | Effects | BP | Type | Location |
3D Red Shell* |
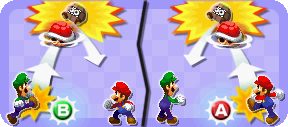
|
Use the A Button for Mario and the B Button for Luigi, and kick that shell! | Mario and Luigi kick a Red Shell at enemies, first targeting one enemy before moving to the next. If the targeted enemy is in the back, the Bros. will fire the shell at any enemies in the enemy's way. It ends with Mario using a charged kick upon Luigi kicking it to him. | 4 | Boots | Mushrise Park |
Bye-Bye Cannon |
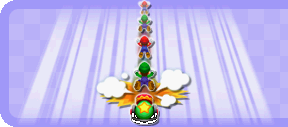  
|
Memorise the order that the shadows of Mario and Luigi launch into the sky. As they land, press the A Button for Mario and the B Button for Luigi. If you get it perfect, they'll descend in the opposite. Stay focused! | Mario and Luigi jump into a cannon. A randomized sequence of them being fired out of the cannon starts. The player must hit the |
7 | Boots | Wakeport |
Bomb Derby |
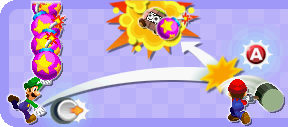 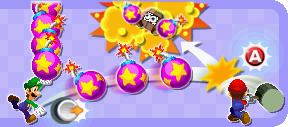
|
Slide right on the Circle Pad to toss bombs then hit 'em with the A Button! Don't delay your swings! Toss a bunch, feel the tempo, and hit all the bombs! | Using the |
9 | Hammer | Driftwood Shore |
Jet-Board Bash |
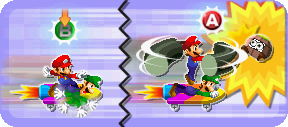
|
Press and hold the B Button to paddle. As you draw near, press the A Button! | Luigi accelerates face-down on a board, Mario riding, and with the right timing Mario needs to hit the enemy with his hammer when the board is accelerating at maximum speed to deal the most damage. | 12 | Hammer | Somnom Woods |
Zee Egg |
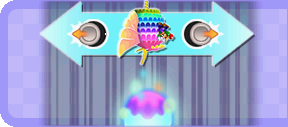 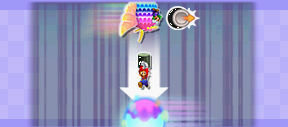 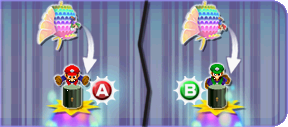
|
Slide the Circle Pad left/right to align the Zeekeeper and the Wakeorb. Once the Wakeorb and the Zeekeeper are aligned, Mario or Luigi will jump out! Use the A Button for Mario and the B Button for Luigi to hit the Wakeorb! | Mario throws the Zee Egg, unleashing the Zeekeeper for him to take Mario and Luigi into the skies and prepare a Wakeorb for Mario and Luigi to hammer upon lining up with it for it to crash down on a single target mainly with maximum damage. | 15 | Hammer | Mushrise Park (given by Eldream after rescuing all Pi'illos) |
| Luigi | ||||||
| Bros. Attack | Illustration | Description | Effects | BP | Type | Location |
3D Green Shell* |
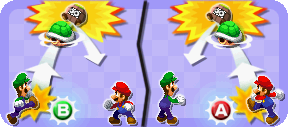
|
Use the A Button for Mario, and the B Button for Luigi, and kick that shell! | The 3D Green Shell has the brothers kick a green shell. It targets all ground enemies; the shell is kicked at enemies randomly. It ends with Luigi using a charged kick upon Mario kicking it to him. | 4 | Boots | Mushrise Park (given upon freeing Brickle from the main fountain) |
Fire Flower |
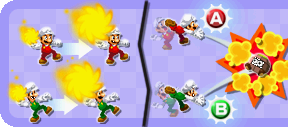 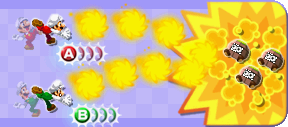
|
Use the A and B Buttons for the bros. When the fireballs get big, throw 'em! If you throw all big fireballs, it's bonfire time! Mash the A and B Buttons! | Mario and Luigi generate fireballs. Shoot the fireballs when they are their biggest size for more damage. If this is done successfully, the player will get a short time to repeatedly tap |
5 | Fire | Dozing Sands |
Dropchopper |
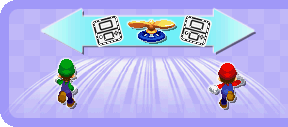 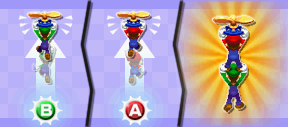 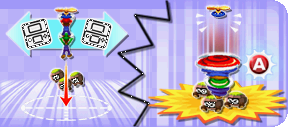
|
Tilt the Nintendo 3DS left and right to pilot the craft once Mario and Luigi grab on. Jump up with the A and B Buttons! If you grab on quickly, you'll fly higher. Press the prompted button when you're above a foe for a devastating slam! | Tilting the 3DS to move the Dropchopper, the player must get Mario and Luigi to jump and hang onto it. Afterwards, Mario and Luigi will do a powerful attack downwards on the unsuspecting enemies. The earlier Mario and Luigi jump on and head upwards, the more damage dealt upon impact. | 7 | Boots | Mount Pajamaja |
Slingsniper* |
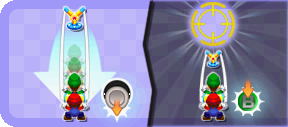 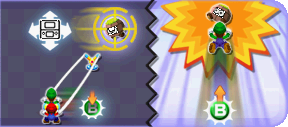
|
Slide and hold the Circle Pad down to draw back, hold the B Button, and aim. Tilt the 3DS to line up your target, then release the B Button to launch Luigi! | Mario pulls Luigi back in the string of a Slingsniper. The player must use the 3DS to aim to successfully sling Luigi into the target enemy. | 9 | - | Mount Pajamaja (given by the Massif Bros. after completing the Ball Hop puzzle) |
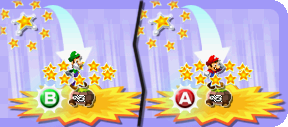
Star Rocket |
|
Tilt the 3DS to change the star's trajectory and grab all the little stars. Use the A and B Buttons as the bro land. More little stars mean more power. | Tilting the 3DS to move the Star Rocket, the player must guide it around to collect all the smaller stars. At the end of the collecting, the player must perform a good timed jump with both Mario and Luigi for lots of damage. | 12 | Boots | Neo Bowser Castle |
* - Mandatory Bros. Attacks.
Luiginary Attacks[edit]
- Main article: Luiginary Attack
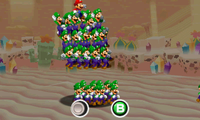
Luiginary Attacks, like Bros. Attacks, are powerful and complex team techniques that Mario and a group Luiginoids perform in unison in the Dream World. These moves are unlocked by gathering the ten Attack Pieces in a particular area. Like with Bros. Attacks, the player is given the option to practice their unlocked Luiginary Attacks in the menu. Much like Bros. Attacks, certain Luiginary Attacks are influenced damage-wise by either Mario and Luigi's Boots POW stat, Mario and Luigi's Hammer POW stat, or just Mario and Luigi's normal POW stat. As Mario battles solo (in a sense) in the Dream World, only he can activate these moves. Using these moves fills up Luigi's side of the Badge meter.
List of Luiginary Attacks[edit]
| Luiginary Attack | Illustration | Description | Effects | BP | Type | Location |
|---|---|---|---|---|---|---|
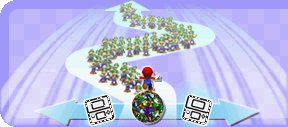
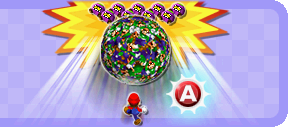
Luiginary Ball* |
|
Tilt the Nintendo 3DS to move the ball. Grab Luiginoids to make the ball bigger! Line it up, and kick it with the A Button! A bigger ball means more damage! | Tilt the 3DS to control the small ball of Luiginoids. Use the ball to collect more Luigis for more damage, then kick the ball with |
6 | Boots | Dreamy Mushrise Park (Eldream's area) |
Luiginary Stack |
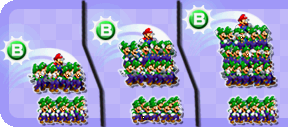 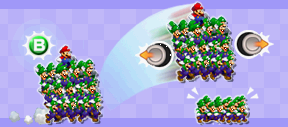 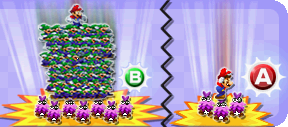
|
Jump with the B Button and stack up Luiginoids as straight as possible! While jumping, adjust the landing zone with left/right on the circle pad! Press the B Button as the stack lands. Use the A Button at the end for Mario. | Perform well-timed jumps to make a large, stable stack of Luiginoids. If they are unbalanced, they may fall or inflict less damage. | 10 | Boots | Dreamy Dozing Sands (Dream Stone Dreampoint) |
Luiginary Hammer |
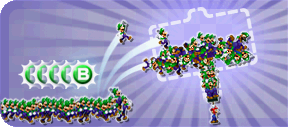 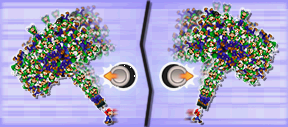 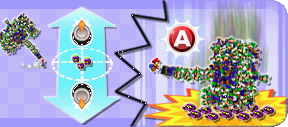
|
Press the B Button repeatedly to form the Luiginoids into a giant hammer! It will tilt, so use left/right on the Circle Pad to help Mario keep it balanced. As Mario runs, aim with up/down on the Circle Pad and swing with the A Button. | Mash the |
10 | Hammer | Dreamy Mount Pajamaja (Summit Dreampoint) |
Luiginary Flame |
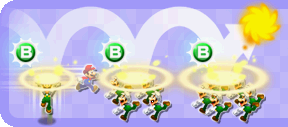 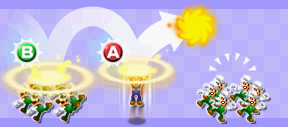 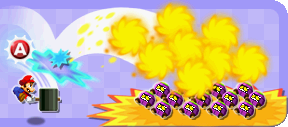
|
The fire will bounce at a steady pace. Press the B Button to make it bigger! Mario will cover the spots where the Luiginoids aren't. Use the A Button here. Press the A Button once to make Mario hammer the flame at the foes! | Press |
14 | Fire | Dreamy Driftwood Shore (Seadric's Dreampoint) |
Luiginary Wall |
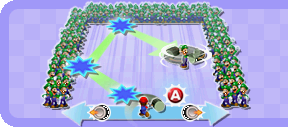 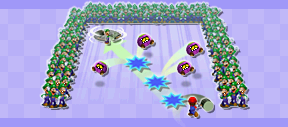 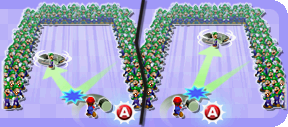
|
Use left/right on the Circle Pad to move and the A Button to hit Dreamy Luigi! Hit Dreamy Luigi where the foes are gathering to deliver more damage! Depending on Mario's position when you swing, Dreamy Luigi's angle will change. | Mario will hit Luigi forward, spinning him and charging through all enemies like a game of Breakout. Players will need to avoid focusing on the same spots of the Luiginoid Wall, otherwise the wall will break and the attack will be more likely to fail. | 14 | Hammer | Dreamy Wakeport (Bedsmith's area) |
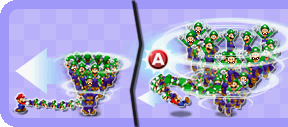
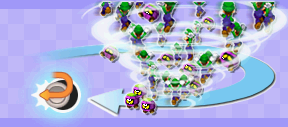
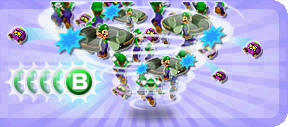
Luiginary Typhoon |
|
Wind up the Luiginoid rope, and yank it with the A Button for a typhoon. You can move the typhoon with the Circle Pad to swallow up your foes. Rapidly press the B Button to deal more damage with the Luiginoids' spin! | Hold |
16 | Hammer | Dreamy Somnom Woods (Ultibed Dreampoint) |
* - Mandatory Luiginary Attack.
Giant Luigi's Bros. Attacks[edit]
| Bros. Attack | Image | Description | Mechanics |
|---|---|---|---|
| Rhythm Mushroom | 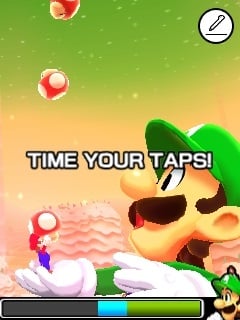
|
Touch Mushrooms to heal up! | This move cannot be used in the Battle Ring. Once Mario throws mushrooms at Luigi, the player must tap the screen as Luigi eats them. |
| Drill Stomp | 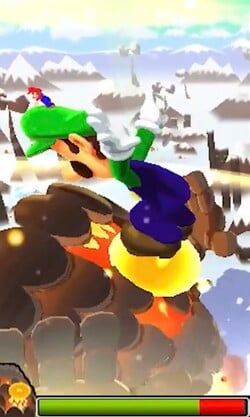
|
Spin more for a super stomp! | This move is unlocked during the battle against Mount Pajamaja, but cannot be used against Robo-Drilldigger X. The player must slide as many circles as possible in the direction shown three times to make Mario stomp down on Luigi and deal heavy damage to the enemy. |
| Finishing Bros. | 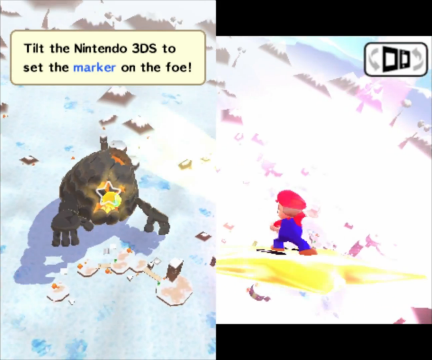
|
Aim with the 3DS! | This move is used at the end of each battle. The player must tilt the 3DS to aim the star marker onto the enemy's weak point, which if hit will earn an "Excellent!" rating and reward the player with better items and more coins than if an "OK" rating is achieved upon missing the target. |
| Star Driver | 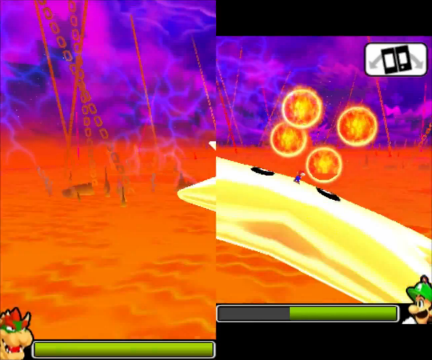
|
Control the star to attack! | This move is used at the real end of the battle against Bowser, as well as Bowser X. The player must tilt the 3DS to dodge Bowser's fireballs, which, if hit, will nullify the attack and Luigi must push Bowser into the pool of lava again. |
Characters[edit]
Playable characters[edit]
| Image | Name | Description
|
|---|---|---|
| Mario | Luigi's older twin brother who enters Dream Worlds to save Pi'illos. | |
| Luigi | Mario's younger twin brother who can cause Dream Portals to appear due to his ability to fall asleep easily. | |
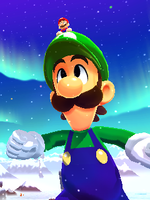 |
Dreamy Luigi | Luigi's envisioning of himself in the Dream World. He can activate Luiginary Works and even create copies of himself known as Luiginoids. In dangerous situations, the Luiginoids can merge with Dreamy Luigi to turn him giant. |
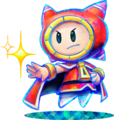
| Starlow | A Star Sprite representative who serves as the Mario Bros.' guide. |
Antagonists[edit]
| Image | Name | Description
|
|---|---|---|
| Bowser | The King of the Koopas who plans to kidnap Princess Peach. He forms an alliance with Antasma. | |
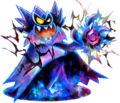
| Antasma | The bat-like enemy of the Pi'illos who trapped all of them within Nightmare Chunks. He forms an alliance with Bowser. | |
| Kamek | Bowser's advisor who hinders the brothers' progress. He also disguises himself as Princess Peach. | |
| Private Goomp | One of the members of the Elite Trio who commands Goombas. | |
| Corporal Paraplonk | One of the members of the Elite Trio who commands Koopa Troopas. | |
| Sergeant Guy | One of the members of the Elite Trio who commands Shy Guys. |
Others[edit]
| Image | Name | Description
|
|---|---|---|
| Princess Peach | The Princess of the Mushroom Kingdom who gets captured by Antasma and Bowser. | |
| Toadsworth | Princess Peach's steward who is constantly worried about her. | |
| Yoshis | Yoshis that were invited to Pi'illo Island. | |
| Pi'llos | Inhabitants of Pi'illo Island who were all trapped in Nightmare Chunks because of Antasma. They have the ability to transform into pillows. | |
| Prince Dreambert | The prince of the Pi'illos who accompanies Mario and co. on their adventure. | |
| Eldream | The elder of the Pi'illos who has a pet bunny named Dreambunny. His pillow was confiscated by Brickle. | |
| Bedsmith | A Pi'illo who helps the bros. build the Ultibed. | |
 |
Mega Pi'illos | Large Pi'illos who break the gates on Mount Pajamaja. |
| Deco Pi'illos | Pi'illos found in Dozing Sands. They give the bros. Dozite to help them reach the Dream Stone. | |
| Pi'illo Masters | Pi'illos found in Somnom Woods. They give the bros. Somnom Stones to help them reach to the Dreampoint where the Zeekeeper is. | |
| Dreambunny | Eldream's pet bunny. He initially escapes from Mario and Dreamy Luigi with his owner's Nightmare Chunk. | |
| Dr. Snoozemore | The proprietor of Pi'illo Island who falls asleep very easily. He is initially on a business trip, but returns to the island. | |
| Brocks | Brick-like characters who work various jobs throughout Pi'illo Island. | |
| Broque Monsieur | A mustached Brock who serves as a tour guide for Pi'illo Castle. He also welcomes Mario's company when they reach Pi'illo Island. | |
| Broque Madame | A fancy Brock who resides in Driftwood Shore. She has Dream World challenges involving Luiginary Attacks. | |
| Broggy | Broque Monsieur's pet dog who delivers the invitation to Peach's Castle. | |
| Brickle | The boss Brock of Mushrise Park. He also has a maintenance hut where Grobot waters plants. | |
| Britta | The boss Brock of Dozing Sands who is very productive. She gets attacked by Torkscrew. | |
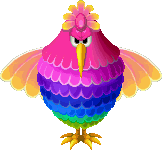 |
Zeekeeper | The bird-like guardian of Pi'illo Island who is very powerful and carefree. |
| Shelltops | Shell-like inhabitants of Pi'illo island commonly found running shops. | |
| Skillit | A Shelltop who hosts the Mad Skillathon in Wakeport, offering challenges involving Bros. Attacks. | |
| Mole Hunt old man | A Shelltop who runs the Mole Hunt game in Driftwood Shore. He also gives advice to the bros. on where to find the Fly Guy R thieves. | |
| Popple | A thief from the Beanbean Kingdom who plans on stealing from Pi'illo Island. He decides to leave the island after getting chased by a Wiggler | |
| Pi'illoper | A Beanish enthusiastic self-proclaimed Pi'illo expert. He owns a house in Wakeport with a basement filled with numerous Pi'illo related artifacts. | |
| Hooskis | Brown variants of Hoohooligans that visit Pi'illo Island. Two notable Hooskis, Hoolo and Hoola, appear in Wakeport. | |
| Big Massif | The older brother of Lil' Massif who is found to be sleeping at a Dreampoint in Wakeport, where Mario challenges him in his dream to wake him up. He also serves as a tour guide for Mount Pajamaja. | |
| Lil' Massif | Big Massif's younger brother who serves as a tour guide for Mount Pajamaja. | |
| Dream Stone's spirit | The spirit of the Dream Stone found in Dreamy Dozing Sands. It is tired and cranky due to the removal of the Dream Stone in the real world. | |
| Seadric | A Seadring who resides in Dreamy Driftwood Shore. He expands a Dream World using Dream Eggs in order to help Mario hide Princess Peach. | |
| Seabelle | The sister of Seadric who is obsessed with makeup and looks. | |
| Seatoon | A brother of Seadric who thinks of Mario, Dreamy Luigi and Prince Dreambert to be the Super Seadrings. | |
| Seabury | A brother of Seadric who likes to tell jokes. | |
| Kylie Koopa | A female Koopa Troopa who works in Wakeport. Mario and Luigi can bring her snapshots to decrypt. | |
 |
Wiggler | A Wiggler who tends to its garden in Wakeport. It becomes angry at Popple for insulting and attacking it. |
| Nommons | Mole-like creatures that live in Somnom Woods. |
Enemies[edit]
- Main article: Mario & Luigi: Dream Team bestiary
b Indicates background enemies which can only be targeted or lured forward through the use of Taunt Balls.
Normal enemies[edit]
Real World[edit]
Dream World[edit]
Bosses[edit]
Normal bosses[edit]
1 - HP shown is an internal value, although no damage numbers are displayed during the battle. Mario automatically wins the battle after two turns.
- Boss support
| Image | Enemy | Battled with | HP | Coins Dropped | Location |
|---|---|---|---|---|---|
| Antasma | Bowser | 6 | 0 | Dream's Deep | |
| Hooraw | Heavy Zest Sorrow Fist Thunder Sass Big Massif |
28 | 5 | Dreamy Wakeport | |
| Block Monolift | Mammoshka | 1 | 0 | Mount Pajamaja | |
| Sub-Goomba | Elite Trio | 80 | 5 | Dreamy Driftwood Shore | |

|
Sergeant Guy Cannon | Elite Trio | 1 | 0 | Dreamy Driftwood Shore |
| Mini Pi'illoidb | Pi'illodium | 1 | 0 | Somnom Woods | |
| Dry Bones | Kamek (2) | 37 | 0 | Dreamy Neo Bowser Castle | |

|
Kamek (Red) | Kamek (3) | 544 | 0 | Dreamy Neo Bowser Castle |

|
Kamek (Green) | Kamek (3) | 816 | 0 | Dreamy Neo Bowser Castle |

|
Kamek (White) | Kamek (3) | 626 | 0 | Dreamy Neo Bowser Castle |
| Antasmunchie | Antasma | 90 | 0 | Dreamy Neo Bowser Castle | |
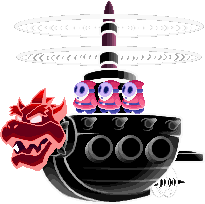
|
Shy Guy Airtub DXb | Dreamy Bowser | 240 | 0 | Neo Bowser Castle |
| Dreamy Goomba | Dreamy Bowser | 95 | 0 | Neo Bowser Castle | |
| Dreamy Bob-omb | Dreamy Bowser | 82 | 0 | Neo Bowser Castle | |
| Dreamy Shy Guy | Dreamy Bowser | 120 | 0 | Neo Bowser Castle | |
| Dreamy Paratroopa | Dreamy Bowser | 54 | 0 | Neo Bowser Castle |
Giant bosses[edit]
| Image | Boss | HP | Coins dropped | Location |
|---|---|---|---|---|
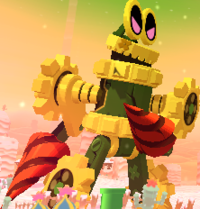
|
Robo-Drilldigger | 500 | OK-400 EXCELLENT-500 |
Dreamy Dozing Sands |
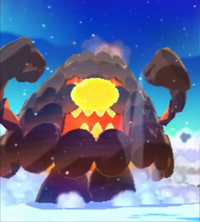
|
Mount Pajamaja | 1600 | OK-560 EXCELLENT-700 |
Dreamy Mount Pajamaja |
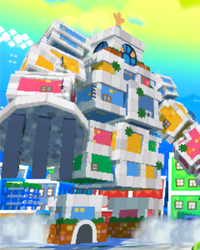
|
Earthwake | 1499 | OK-800 EXCELLENT-1000 |
Dreamy Wakeport |
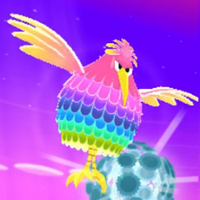
|
Zeekeeper | 2064 | OK-960 EXCELLENT-1200 |
Dreamy Somnom Woods |
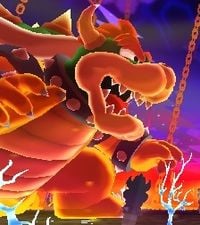
|
Bowser | 2800 | OK-1600 EXCELLENT-2000 |
Dreamy Neo Bowser Castle |
Battle Ring normal bosses[edit]
| Image | Boss | HP | Coin reward |
|---|---|---|---|
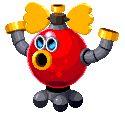
|
Grobot X | 1133 | 600 |
| Bowser X | 771 | 900 | |

|
Torkscrew X | 1594 | 1200 |
| Big Massif X | 1901 | 1500 | |
|
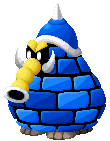
Mammoshka X | 1771 | 1800 |
| Elite Trio X | Private Goomp X-468 Corporal Paraplonk X-780 Sergeant Guy X-1092 |
2100 | |
|
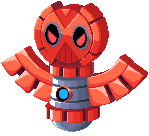
Pi'illodium X | Main-2742 Wings-282 |
2400 |
|
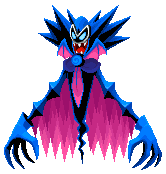
Antasma X | 3336 | 3000 |

|
Bowser Jr. | 4099 | 10000 |
- Boss Support
| Image | Enemy | Battled with | HP |
|---|---|---|---|
| Antasma X | Bowser X | 19 | |
| Hooraw X | Big Massif X | 53 | |
| Block Monolift X | Mammoshka X | 1 | |
| Sub-Goomba X | Elite Trio X | 149 | |

|
Sergeant Guy Cannon X | Elite Trio X | 1 |
| Mini Pi'illoid Xb | Pi'illodium X | 86 | |
| Antasmunchie X | Antasma X | 132 | |

|
Junior Clown Car | Bowser Jr. | 512 |
| Monty Moleb | Bowser Jr. | 1 |
Battle Ring giant bosses[edit]
| Image | Boss | HP | Coin reward |
|---|---|---|---|
|
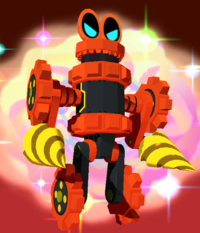
Robo-Drilldigger X | 997 | 1200 |
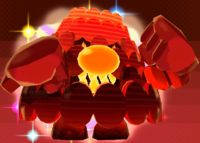
|
Mount Pajamaja X | 1111 | 1500 |
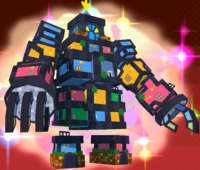
|
Earthwake X | 1801 | 1800 |
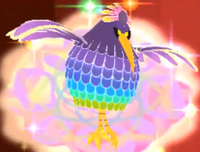
|
Zeekeeper X | 3000 | 2100 |
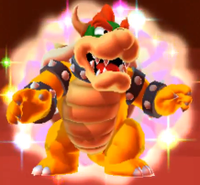
|
Bowser X | 3500 | 2400 |
Items[edit]
Blocks and Coins[edit]
This is a list of the different kinds of blocks that can be found in the game. For a complete list of ? Blocks and their locations in the real world, see List of real world blocks in Mario & Luigi: Dream Team. For a list covering the blocks found in the Dream World, see List of dream world blocks in Mario & Luigi: Dream Team.
| Image | Name | Description
|
|---|---|---|
  |
? Blocks | When struck, ? Blocks give out Coins and items. Sometimes they might have several Coins in them. |
  |
Bros. Blocks and Random Blocks | Blocks resembling ? Blocks with multiple Coins in them. Only found in the real world. |
  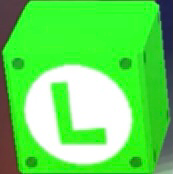  |
M Blocks and L Blocks | Red and green blocks that can only be struck with Mario and Luigi respectively. |
  |
Attack Piece Blocks | Blocks that release Attack Pieces when struck. |
     |
Coins | Found throughout the world, they serve as currency to allow Mario and Luigi to purchase things from shops. |
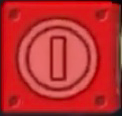 |
Red Coin Blocks | A Block that releases eight Red Coins when struck. Only found in the Dream World. |
 |
Red Coins | Released in groups of eight when a Red Coin Block is struck and will disappear after some time. If all eight are collected, a ! Block appears. |
 |
! Blocks | Blocks that cause events to happen and unlock new paths when struck. |
 |
Save Blocks | Blocks that allow the game to save progress. |
 |
Kamek Blocks | Blocks that reveal the locations of doors where Kamek's magic affected. |
 |
Camera Blocks | Blocks that grant Shot item, which is then taken to Kylie Koopa in Wakeport to solve a puzzle for coin and bean prizes. Only found in the real world. |
List of usable items[edit]
| Name | Image | Description | Effects |
|---|---|---|---|
| Mushroom | Restores 30 HP (to a single bro). | ||
| Super Mushroom | Restores 60 HP (to a single bro). | ||
| Ultra Mushroom | Restores 100 HP (to a single bro). | ||
| Max Mushroom | Restores 160 HP (to a single bro). | ||
| Nut | Restores 15 HP to both Mario and Luigi. | ||
| Super Nut | Restores 30 HP to both Mario and Luigi. | ||
| Ultra Nut | Restores 50 HP to both Mario and Luigi. | ||
| Max Nut | Restores 80 HP to both Mario and Luigi. | ||
| Syrup Jar | Restores 20 BP (to a single bro). | ||
| Supersyrup Jar | Restores 40 BP (to a single bro). | ||
| Ultrasyrup Jar | Restores 60 BP (to a single bro). | ||
| Max Syrup Jar | Restores 80 BP (to a single bro). | ||
| Candy | Restores a little bit of HP and BP (to a single bro). | Restores 40% of a single bro's HP and BP. | |
| Super Candy | Restores a decent amount of HP and BP (to a single bro). | Restores 60% of a single bro's HP and BP. | |
| Ultra Candy | Restores a solid chunk of HP and BP (to a single bro). | Restores 80% of a single bro's HP and BP. | |
| Max Candy | Completely restores both HP and BP (of a single bro). | ||
| 1-Up Mushroom | Revives a fallen bro with half of his HP. | ||
| 1-Up Deluxe | Revives a fallen bro with full HP. | ||
| Refreshing Herb | Cures statuses like BURN, DIZZY, TRIP, and MINI. | ||
| Taunt Ball | Enrages an enemy in the background. Whooooosh! | Brings a background enemy to the battlefield to be fought, and instantly defeats weak ones. | |
| Shock Bomb | Makes enemies dizzy... maybe? | Makes all enemies dizzy, but has no effect on bosses. | |
| Boo Biscuit | Grants damage immunity. Helps with dodge training! | Temporarily turns Mario and Luigi invisible for a short time. | |
| Secret Boxes | Does...who knows what? Use one to find out. | Performs a random effect. | |
Special items[edit]
| Image | Name | Description
|
|---|---|---|
| Attack Piece | If the Mario Bros. collect ten of these in an area, they will learn a new Bros./Luiginary Attack. | |
| Book of Ruins | A rare book that only researchers receive. This item is to be traded during the Hoolo side quest in Wakeport. It must be traded with a heavyweight Beanish. | |
 |
Dozing Mattress | The mattress for the Ultibed, found in Dreamy Dozing Sands. |
| Dozite | Items granted by Deco Pi'illos. They help Mario and Luigi reach the Dream Stone by raising stones in the sand slopes. | |
| Dream Egg | Special eggs that Seadrings lay. They allow Dream Worlds to be expanded. | |
 |
Driftwood Jellyfish Sheets | One of the Ultibed parts, found in Driftwood Shores. They were stolen by and then recovered from Fly Guy Rs. |
| Hammer | Found in Mushrise Park, these allow Mario and Luigi to smash things and fight enemies. | |
| Hooraw Medal | Items the Hooraws have. Mario and Dreamy Luigi must fight them to acquire the Hooraw Medals, which will allow the Bros. to fight Big Massif. | |
| Left and Right Wings | Wings blown off from a wind generator in Mushrise Park due to a sudden gust. A Brock repairs the wind generator using the wings. | |
| Lost Camera | A camera a Toad lost in Wakeport. This item is to be traded with its owner in the Hoolo side quest. | |
 |
Mushrise Tree Board | One of the Ultibed parts, found in Mushrise Park. |
| Old Lithograph | An item given by Broque Madame to the Bros. on Driftwood Shore. It is used to find the cave containing the Driftwood Jellyfish Sheets. | |
 |
Pajamaja Rock Frame | One of the Ultibed parts. It is found on Mount Pajamaja, corrupted by a Nightmare Chunk. |
| Peach's Photo | A photo of Princess Peach found in Wakeport. It is to be traded with a Brock who is a big fan of Princess Peach during the Hoolo side quest. | |
| Pi'illo Ring | A ring with a Pi'illo icon found in Wakeport. It is to be given to Hoolo so he can confess his feelings for Hoola. | |
| Plush Zeekeeper | A plush of the Zeekeeper that Hoolo gives Mario and Luigi to trade for a Pi'illo Ring. | |
| Queen Bean's Photo | A photo of Queen Bean found in Wakeport during the Hoolo side quest. It is to be traded with a homesick Beanish. | |
| Rare Fruit | A fruit that is to be traded with a Red Yoshi in the Hoolo side quest in Wakeport. | |
| Shot | Encrypted photos obtained from Camera Blocks. They can be decrypted at Kylie Koopa's location in Wakeport. | |
| Somnom Stone | Stones given to the Mario Bros. by Pi'illo Masters in Somnom Woods. They create tracks to help Mario and Luigi reach the temple. | |
 |
Ultibed | An important bed built by the Bedsmith. It is used to find the Zeekeeper in the Dream World. |
| Ultibed Manual | A manual obtained from Dream's Deep that shows the locations of the Ultibed Parts. | |
| Yoshi's Egg | A red Yoshi Egg that is to be traded with a Toad in Wakeport during the Hoolo side quest. | |
 |
Zeekeeper's Feathers | One of the Ultibed parts, obtained after the Mario Bros. defeat Grobot X in the Battle Ring. |
Gear[edit]
- Main article: List of Mario & Luigi: Dream Team gear
Different types of gear return in this game, such as wear and gloves. In addition, Mario & Luigi can now equip Boots and Hammers to increase the POW of their respective attacks. Each bro only has one gear slot at the beginning of the game, but up to three can be unlocked through rank-up bonuses.
Beans[edit]
- Main article: List of beanholes in Mario & Luigi: Dream Team
Beans return in this game. They serve the same purpose they had in Mario & Luigi: Bowser's Inside Story, increasing the stats of Mario and Luigi when they eat one. They are marked as Xs in the ground, and are only found in the real world. Mario can rise up from the ground beneath them to dig them up. There are also DX versions of all beans, which raise the respective stat by three points instead of one. Below is a list of all kinds of beans found in the game.
 Heart Beans: Pink beans that increase a bro's HP.
 Bros. Beans: Green beans that increase a bro's BP.
 Power Beans: Orange beans that increase a bro's POW.
 Defense Beans: Silver beans that increase a bro's DEF.
 Speed Beans: Blue beans that increase a bro's SPEED.
 Stache Beans: Brown beans that increase a bro's STACHE.
Locations[edit]
Real world[edit]
| Name | Image(s) | Bros. Attacks found | # of Pi'illos | # of Beans |
|---|---|---|---|---|
| Pi'illo Blimport A place of taking off and landing for Zeeppelins for tourists to access Pi'illo Island. |
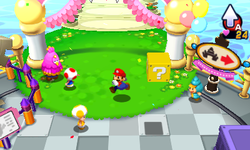
|
None | 0 | 6 |
| Pi'illo Castle A large castle where Prince Dreambert lived. There is a secret passage leading to treasure in the back, a treasure room and caverns underneath the castle. |
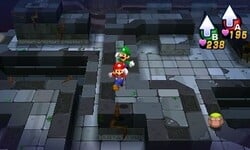
|
None | 3 | 0 |
| Mushrise Park A park where there is lots of gardening. Brickle is the boss Brock of this area. |
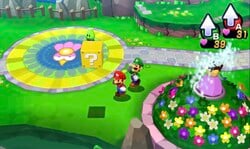
|
3D Red Shell (Mario) Zee Egg (Mario) 3D Green Shell (Luigi) |
5 | 22 |
| Dozing Sands A desert where lots of drilling takes place. Britta is the forewoman Brock of the area. The Dream Stone's resting place is also here. |
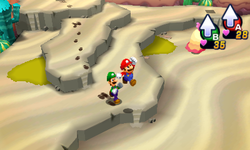
|
Fire Flower (Luigi) | 11 | 32 |
| Wakeport A popular tourist destination where visitors can sign up for the Mount Pajamaja tour. An avid self-proclaimed expert known as the Pi'illoper lives here. |
|
Bye-Bye Cannon (Mario) | 6 | 12 |
| Mount Pajamaja A large, dormant volcano where Bowser and Antasma escape to with the Dream Stone. |
|
Dropchopper (Luigi) Slingsniper (Luigi) |
12 | 24 |
| Driftwood Shore A beach where Broque Madame resides. |
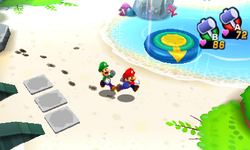
|
Bomb Derby (Mario) | 3 | 10 |
| Somnom Woods A large forest where the ruins of a temple are found. |
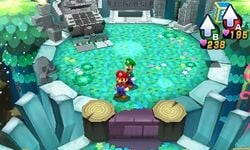
|
Jet-Board Bash (Mario) | 11 | 19 |
| Neo Bowser Castle* A large castle created when Bowser and Antasma used the Dream Stone. |
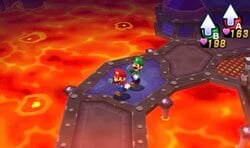
|
Star Rocket (Luigi) | 1 | 18 |
*Neo Bowser Castle was originally not on Pi'illo Island, but floating in the air near the island. However, it crashes onto Pi'illo Island when the Zeekeeper breaks the barrier.
Dream World[edit]
| Name | Image | Luiginary Works | Luiginary Attacks found |
|---|---|---|---|
| Dreamy Pi'illo Castle The Dream World version of Pi'illo Castle. Prince Dreambert is trapped in a Nightmare Chunk here. |
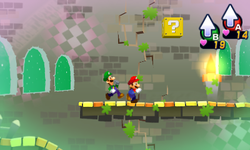
|
Luiginary Stache Tree Sneeze Wind |
None |
| Dreamy Mushrise Park The Dream World equivalent of Mushrise Park. Eldream is trapped in a Nightmare Chunk here. |
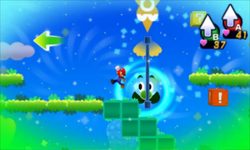
|
Luiginary Stache Tree Sneeze Wind |
Luiginary Ball |
| Dream's Deep The core of the Dream World. Clues to find the Zeekeeper are discovered here. |
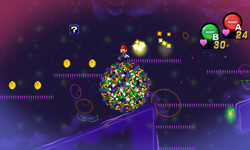
|
Luiginoid Formation | None |
| Dreamy Dozing Sands The Dream World version of Dozing Sands. The Dream Stone's Spirit resides here. |
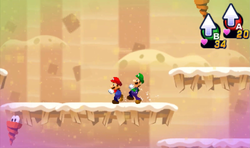
|
Luiginary Stache Tree Luiginoid Formation Luiginary Cylinder Luiginary Gravity |
Luiginary Stack |
| Dreamy Wakeport The Dream World equivalent of Wakeport. Big Massif hosts the Beef-Off here, and the Bedsmith is trapped in a Nightmare Chunk as well. |
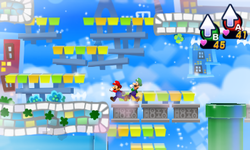
|
Sneeze Wind Luiginoid Formation Luiginary Speedometer Luiginary Gravity |
Luiginary Wall |
| Dreamy Mount Pajamaja The Dream World version of Mount Pajamaja where the mountain itself is sentient. |
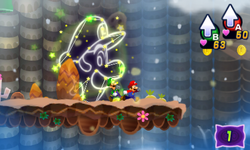
|
Luiginoid Formation Luiginary Ice |
Luiginary Hammer |
| Dreamy Driftwood Shore The Dream World equivalent of Driftwood Shores where Mario tries to hide Princess Peach, but is revealed to be Kamek in disguise. |
|
Luiginoid Formation Luiginary Cylinder Luiginary Gravity |
Luiginary Flame |
| Dreamy Somnom Woods The Dream World version of Somnom Woods where the Zeekeeper sleeps. |
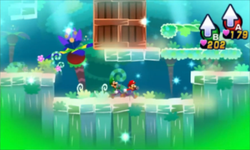
|
Luiginary Stache Tree Sneeze Wind Luiginoid Formation Luiginary Speedometer Luiginary Propeller |
Luiginary Typhoon |
| Dreamy Neo Bowser Castle The Dream World version of Neo Bowser Castle where Bowser's dreams can be accessed. Antasma is also fought here in his own Dream World. |
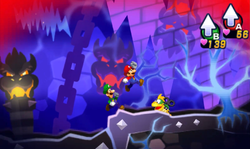
|
Luiginary Stache Tree Luiginoid Formation Luiginary Cylinder Luiginary Speedometer Luiginary Propeller Luiginary Antigravity |
None |
Shops[edit]
- Main article: List of shops in Mario & Luigi: Dream Team
Throughout Pi'illo Island and its Dream Worlds are many shops. Most of them offer Pi'i-lattes, which fully restore the HP and BP of Mario and Luigi for the cost of ten coins. The only shop to not offer Pi'i-lattes is the Dreamy Pi'illo Castle shop. To access Driftwood Shore's Gold Shop, Mario and Luigi must be Rainbow Rank. Below is a list of all shops in the game. Shops marked with an asterisk are an item shop in addition to being a gear shop.
- Pi'illo Castle shop
- Dreamy Pi'illo Castle shop *
- Mushrise Park shop
- Dreamy Mushrise Park shop *
- Dozing Sands shop
- Dreamy Dozing Sands shop *
- Wakeport
- Dreamy Wakeport shop *
- Mount Pajamaja shop
- Dreamy Mount Pajamaja *
- Driftwood Shore shops (silver and gold)
- Dreamy Driftwood Shore shop *
- Neo Bowser Castle shop
- Dreamy Neo Bowser Castle shop *
Sidequests[edit]
Hooski trading quest[edit]
In Wakeport during Mario and Luigi's travels, the player may encounter a male Hooski named Hoolo wanting to propose to nearby female named Hoola, but is lacking the proper proposal gift. Upon Mario and Luigi agreeing to help, they are given a plush Zeekeeper to use in order to get something better to propose with, initiating a brief trading sidequest.
Mario and Luigi first trade the plush Zeekeeper for a rare fruit with a Shelltop in the nearby item shop, afterwards swapping it for a Yoshi Egg with a Red Yoshi in the hotel district, which they then swap for a photo of Peach with a Toad by the tour center, which they then swap for the Book of Ruins with a Brock researcher to the north of the Toad, which they then swap for a photo of Queen Bean with a Beanish in the gear shop, which they then swap for a lost camera with a Bean in one of the buildings in the hotel district, which they then give to a Toad near the rooftops of the hotel district in exchange for info about a bird burying something between the nearby umbrella and fountain, which then turns out to be upon the Bros. digging it out, a Pi'illo ring which Mario and Luigi hand to Hoolo for him to then propose with, Hoola accepting after a short cutscene which ends with the Bros. being rewarded greatly with a Sap Hammer, Heart Bean DX, some Rally Wear, and a 1-Up Mushroom, and if the player talks to him afterwards, he'll give the Bros. an idea of where to go next in Wakeport.
Kylie Koopa's photo puzzles[edit]
During Mario and Luigi's travels in Wakeport, they come across Kylie Koopa upon entering a house, and discover she's the guidebook writer for the island. She offers some work for them, involving them finding camera blocks around the island, bringing them back here and deciphering them. Each shot can be taken back and played as three of the same photo puzzles of differing levels; with each higher level, the photo covers more of the scene, and the games give the player more time to do the puzzle. The Level 1 reward is 100 coins with a time limit of 3 minutes, the Level 2 reward is 300 coins with a time limit of 4 minutes, and the level 3 reward is a DX Bean of varying stat with a time limit of 6 minutes.
| Image | Area | Shot Location | Level 1 Prize | Level 2 Prize | Level 3 Prize |
|---|---|---|---|---|---|
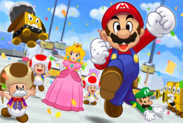
|
Pi'illo Blimport | In the area where Mario and Luigi take the Check-X Quiz, this shot is found in the north-east. | 100 coins | 300 coins | Heart Bean DX |
|
Pi'illo Castle | In the room outside the collection room, this shot is found at the highest point in this room in the north-west. A Zeekeeper mascot idles beneath the block for a period of the game, making it inaccessible until he moves. | 100 coins | 300 coins | Bros. Bean DX |
|
Mushrise Park | In the area with the broken main fountain, this shot is found in a camera block in the west, accessed by spin-jumping or side-drilling towards its secluded heights from one of the nearby flowers. (Spin Jump required.) | 100 coins | 300 coins | Power Bean DX |
|
Dozing Sands | In the area to the east of the area with the Dreampoint, this shot is found in a block in the north of the area, floating above some tall pillars. (Ball Hop required.) | 100 coins | 300 coins | Defense Bean DX |
|
Wakeport | Upon Mario and Luigi agreeing to help, Kylie places this block in the room of her house in plain sight. | 100 coins | 300 coins | Speed Bean DX |
|
Mount Pajamaja | In the area where Mario and Luigi can jump off the edge to land near the oxygen valve, in the northwest. | 100 coins | 300 coins | Stache Bean DX |
|
Driftwood Shore | In the beach area with the Warp Pipe, this camera block is found in the north, accessed by smashing a rock blocking a hole Mini Mario can go through to find the block at the end. | 100 coins | 300 coins | Heart Bean DX |
|
Somnom Woods | In the third area with the deadly liquid, this camera block is found in the south, to the south of the bramble tunnel, and to the east of a rock. | 100 coins | 300 coins | Bros. Bean DX |
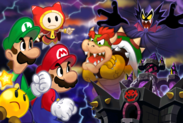
|
Neo Bowser Castle | In the first area where Kamek flees into the Dream World, this camera block is found in the south-west on its own metal platform in the middle of the lava. | 100 coins | 300 coins | Power Bean DX |
Mad Skillathon[edit]
- Main article: Mad Skillathon
Upon Mario and Luigi's first visit to Wakeport, they may come across a Shelltop on a stand, apparently hosting an event known as the Mad Skillathon, a contest for those with skills, with rewards included. Mario and Luigi, after a short conversation, decide to take part using their Bros. Attacks, as the Shelltop counted those as skills. The Mad Skillathon is much like the Cholesteroad in Mario and Luigi: Bowser's Inside Story in the sense that it is a Bros. Attack endurance game. Below is a list of all Bros. Attack challenges and their rewards. After an S rank is earned in all the challenges, the Pro Wear is awarded.
| Bros. Attack | Challenge description | B-Rank Prize (200) | A-Rank Prize (500) | S-Rank Prize (800) |
|---|---|---|---|---|
| 3D Green Shell | Kick the shell as many times as you can! Drop the boss for 20 points! | 100 coins | 300 coins | Rally Belt |
| Fire Flower | A big flame is worth 3 points! Small flames will net you nothing! | 100 coins | 300 coins | Flame Hammer |
| Bye-Bye Cannon | Jump on monsters to increase your score with each bounce! 1->2->3! | 100 coins | 300 coins | Strike Gloves |
| Dropchopper | Grab timers to increase the time. Then drop on monsters' heads! | 100 coins | 300 coins | Action Boots |
| Bomb Derby | Smack the bombs into the monsters! Watch for different kinds of bombs. | 100 coins | 300 coins | Bare Boots DX |
| Slingsniper | Shoot monsters with the B Button! Try to hit multiple monsters at once. | 100 coins | 300 coins | EXP Bro Gloves DX |
| Star Rocket | Tilt the Star Rocket to collect stars, but avoid damage balloons! | 100 coins | 300 coins | Perfect Bro Gloves |
Battle Broque Madame[edit]
Upon Mario and Luigi's first visit to Driftwood Shore, they meet Broque Madame on a stand, who suggests the idea of the Bros. entering her dreams due to her boredom at her shop and her crave for excitement. This is much like the Mad Skillathon, but it uses Luiginary Attacks instead of Bros. Attacks.
These are the list of rewards gained from hitting the B, A or S rank scores, respectively being 200 for B, 500 for A and 800 for S. After getting an S rank in all four challenges, the player is awarded with the Supreme Boots.
| Luiginary Attack | Challenge description | B-Rank Prize (200) | A-Rank Prize (500) | S-Rank Prize (800) |
|---|---|---|---|---|
| Luiginary Ball | Bowl over the small Madames, and then crash into the big Madame! | 100 coins | 300 coins | Coin Boots DX |
| Luiginary Stack | Stack the Luiginoids, and jump on the Broque Madame. Avoid the hazards! | 100 coins | 300 coins | Sap Hammer DX |
| Luiginary Flame | Bounce the flames back, and then use your hammer to hit the last one! | 100 coins | 300 coins | Blunt Hammer DX |
| Luiginary Wall | Hit all of the small Madames back! Hitting items will affect play. | 100 coins | 300 coins | Lucky Gloves DX |
Mole Hunt[edit]
- Main article: Mole Hunt
In Driftwood Shore, Mario and Luigi come across a Shelltop during their treks in the area. Upon beating his game the second and final mandatory time, the Shelltop allows Mario and Luigi to play upon returning to him at will for the usual price of 10 coins, with the inclusion of prizes if Mario and Luigi are good enough.
Differences from other Mario & Luigi games[edit]
- Starting with this game, Mario and Luigi do not let out their battle cries of "Let's-a-go!" and "Okey-dokey!" respectively when starting a battle. In place of those cries, the battle transition shows off how the battle was entered (i.e. a color-coded boot or hammer depending on which brother attacked and how they attacked, or a "!" for bumping into an enemy). Both of these features were added in later entries.
- This is the first game in the series where Bowser is consciously the final boss. This is also the first game where Bowser is not the tutorial boss, as Antasma occupies that role instead.
- This is the first game in the series where the player can save anywhere using Save Blocks or the Save icon on the touch screen.
- To accommodate the 3D feature of the Nintendo 3DS, the game's art style is radically altered to appear 3D while still using sprites. The letters on Mario and Luigi's caps are red and green, respectively, instead of black, and Luigi's pants reach his shoes, hiding his socks. The brothers' mouths are also visible, and none of the enemies have black outlines. However, Dreamy Bowser has a white outline.
- In addition, at certain points the game uses 3D models where sprites would not work with the stereoscopic 3D (such as during giant battles), making this the first Mario & Luigi game to use full 3D graphics.
- Fawful, a recurring character throughout the series, does not make an appearance in this game although there is an unknown NPC that says one of his main quotes when talked to.
- The Stache point system in shops has been dropped; the stat is now used only for Critical or Lucky hits.
- Bosses always drop exclusive items/gear upon defeat (with the exception of Mammoshka, whose probability of dropping exclusive goods is still under 100%).
- The player does not lose coins when running away from battles.
- This is the second game in the series in which Mario and Luigi are the only playable characters in the game (though there is Dreamy Luigi in Dream World).
- This is the first game in the series where battles do not take place on the touch screen (except for Mario & Luigi: Superstar Saga, due to the Game Boy Advance only having one screen). Instead, the badges take up the Bottom screen and Mario and Luigi fight on the top screen.
- This is the first and currently only game in the series where the player cannot explore the Mushroom Kingdom at all, as the player only gains control of Mario after he has already left.
- By extension, this is also the first and currently only game in the series where the player cannot explore Peach's Castle at all, with the landmark being featured only in cutscenes.
- This is the first game in the series which does not feature the Poison status effect. Instead, the Mini status effect occurs.
- This is the first game in the series where Mario and Luigi never end up inside another character; in Mario & Luigi: Superstar Saga, they are inhaled by Bowletta, in Mario & Luigi: Partners in Time, they end up in Yoob's Belly, and in Mario & Luigi: Bowser's Inside Story, they are inhaled by Bowser, with their effort to escape Bowser's body making up a large portion of the story.
- This is the first game to use an icon of a boot for the jump Command Block instead of an upward-pointing arrow like in the previous two games.
- The player has an option to choose what their dominant hand is, which affects the side Giant Luigi is on during giant battles. In Mario & Luigi: Bowser's Inside Story, Giant Bowser is always on the left side, while in the remake he is always on the right side of the screen.
- While Badges return from Mario & Luigi: Bowser's Inside Story, more than one Badge Effect can be held onto at a time rather than just one. In addition, changing Badges in battle does not waste a turn.
Demo[edit]
On the day of the game's release in North America, a demo of the game was also released on the Nintendo eShop, making this the first strictly Super Mario game to have a publicly released demo for download. It uses 1,010 blocks when downloaded, and offers twelve uses. The demo is similar to the E3 demo, in that it has the same options for gameplay minus the giant battle:
- The Real World - the player can explore a segment of Mushrise Park.
- The Dream World - the player can explore a combination of Dreamy Pi'illo Castle and Dreamy Dozing Sands.
- Boss Battle - the player is given the option of either facing Grobot in the real world or Bowser and Antasma in the Dream World.
In Mushrise Park, the objective is to destroy all the rocks, much like how Mario and Luigi must break all the rocks in certain areas upon their return to Mushrise Park. The area has also been changed to prevent the player from exploring other areas. In the Dream World, some areas have been combined to showcase the Luiginary Works. Additionally, in the battles, the available Bros. and Luiginary Attacks use half as many BP as they do in the actual game.
Staff[edit]
- Main article: List of Mario & Luigi: Dream Team staff
The game's executive producers were Tetsuo Mizuno and Satoru Iwata. The other producers were Akira Otani, Yoshihiko Maekawa and Toshiharu Izuno, with Shinya Takahashi serving as the general producer with Yoko Shimomura providing the game's music.
Reception[edit]
The game received aggregately positive reviews, with praise for its graphical style, gameplay, humorous presentation, story and characters, although its overuse of tutorials received criticism, which led to the next titles (remakes included) to add a Guide feature. Both Gamespot and IGN gave the game an 8/10, although it is the lowest review in the series up to that point by both of them. The reasons for this were that IGN believed that the overworld was less appealing than the Dream World and that the game's intro was sluggish and saturated with tutorials.[4] GameXplain on the other hand believes that the game is fun, despite its minor flaws, and that it lives up to the other installments in the series; the game was given 4 1/2 stars out of 5.
| Reviews | |||
|---|---|---|---|
| Release | Reviewer, Publication | Score | Comment |
| Nintendo 3DS | Daniel Krupa, IGN | 8/10 | "Mario and Luigi Dream Team has great moments, but they're almost always confined to its psychedelic dream sections, which teem with imagination and invention. Consequently I always found myself enjoying these sections far more than its overworld exploration, turn-based combat, and more traditional RPG elements. It's an uneven experience, but occasionally it grasps greatness, making it a worthy addition to an already distinguished series." |
| Nintendo 3DS | Simon Parkin, Eurogamer | 7/10 | "While the usual Nintendo weight and sheen is present in the dialogue, the humour has an unexpected thinness, especially in the first half of the game before antagonist Antasma - a bat-king who shares Bowser's fondness for pointless and rather artless princess kidnapping - forms an alliance with the lizard. This is an enjoyable but rarely essential entry to the Mario & Luigi suite, then. AlphaDream is to be commended for its willingness to build each new game around a different kernel of an idea, but, perhaps inevitably, some of those ideas will be smaller than others." |
| Nintendo 3DS | Mark Walton, GameSpot | 8/10 | "The classy combat and quirky characters combined with a levelling system, ranking system, gear to upgrade, and collectible badges and puzzle pieces that offer up new powers make Dream Team a rich RPG. It's also laugh-out-loud funny, even more so if you're a fan of Mario games thanks to some wonderfully self-aware jokes. And while the core combat system and feel of the game remain largely unchanged from previous games in the series, the dream sections with their Luigi-based silliness add just enough to keep things feeling fresh. Mario & Luigi Dream Team is more refinement than reinvention, then, but boy is it a lot of fun." |
| Aggregators | |||
| Compiler | Platform / Score | ||
| Metacritic | 81 | ||
| GameRankings | 80.65% | ||
Sales[edit]
As of March 31, 2014, Mario & Luigi: Dream Team has sold over two million copies worldwide.[5]
Promotion[edit]
A special edition Nintendo 3DS XL with a Luigi-themed print was released in Japan, North America, and the United Kingdom as part of the event and includes a digital copy of Mario & Luigi: Dream Team pre-installed on the SD card.
On the Nintendo YouTube channel, a series of three videos were uploaded to promote the game. They depict Mario and Luigi doing various activites on Pi'illo Island, only for Luigi to fall asleep and open up a Dream Portal, causing Mario to enter the Dream World. The video then transitions to gameplay footage of a mechanic in the Dream World. In the first video, it shows the brothers going to bed and the battle against Mount Pajamaja as Giant Luigi. The second video show them preparing a meal and Mario using the Luiginary Stache Tree. The third video show them at a pool and Mario using the Luiginary Gravity. In each video, a secret phrase is given which allowed access to the "Dreaming with Mario & Luigi" sweepstake.[6] By tweeting a secret phrase using the hashtag "#MarioLuigi", users were entered into the sweepstake. The secrets phrases are as follows:
- Gigantic Luigi saves the day
- Luigi's mustache saves the day
- Defying gravity with Luigi saves the day
Three winners were given a black Nintendo 3DS XL and a copy of the game. The sweepstake ran from August 1, 2013 to August 16, 2013.
Glitches[edit]
- Main article: List of Mario & Luigi: Dream Team glitches
One of the most common glitches in the game is that, at some points, any actions that require the 3DS's gyroscope to perform may result in the game not registering any movement from the system. Two of the most likely points for this to occur are during the Zeekeeper battle and during the "Repel the Shell" portion of the Giant Bowser battle. It is unknown what causes this to happen.
There are also some points in the game in which the game can freeze; this mostly occurs at Neo-Bowser Castle. However, the patch released on September 5, 2013, fixes instances in which this can occur.
Quotes[edit]
- Main article: List of Mario & Luigi: Dream Team quotes
Antasma[edit]
- "SCREEEK! I vanted to steal Peach's power...But I changed my mind! You are much stronger...and evil! SCREEEONK! Vork vith me! SCREEEP!"
- "I vish... TO CONQUER THE VORLD!"
- "SCREEK! I haff heard those vords before, a long time ago... But this time vill be different...I haff Bowser on my si-"
- "SCREEYEE! I can open dream portals venever I vant now...For that is vut I vished the Dream Stone...In the dream vorld, I vill be at full strength...I haff changed, Dreambert. You haff been varned..."
Bowser[edit]
- "Give it to me straight. Princess Peach is gone? Hello? That is MY thing! Only I get to kidnap her! TREASON!"
- "But I don't have time to deal with you now. See, kidnapping Princess Peach is my calling in life! I don't care what you did; I'll find her and nab her!"
- "Blech! Say it, don't spray it, dingbat! I don't "vork" with anyone! Get real!"
- "Bad news, Super Loser Bros.! Big bad Bowser is about to be even big-badder!"
- "Transforming into a giant? I invented that, bud!"
- "Hear this! I will kidnap Peach OVER and OVER again until I pull it off! Failure isn't an option! And neither is giving up!"
Gallery[edit]
- For this subject's image gallery, see Gallery:Mario & Luigi: Dream Team.
Media[edit]
- For a complete list of media for this subject, see List of Mario & Luigi: Dream Team media. For this subject's sound test, see Jukebox.
| File info 0:30 |
| File info 0:30 |
| File info 0:30 |
| File info 0:30 |
Update history[edit]
This is the second 3DS Super Mario game to receive a patch, the first being Mario Kart 7.
Version 1.1[edit]
Date Released: 5 September, 2013
Description This patch fixes two bugs in the game that make it incompletable. The first one is on Mount Pajamaja, where the player would be unable to progress past the segment where Mario and Luigi must Spin Jump into the Massif Bros. to clear a field of icicles, should certain actions be taken, and another one that prevents Mario from completing the final Antasma battle in Dreamy Neo Bowser Castle (by causing the drop present containing the Dark Hammer to never open, causing the battle to never end, forcing the player to reset). The patch also fixes several bugs that cause the game to randomly freeze at inconvenient times. This patch also fixed a Miiverse exploit that could be performed by using pictures from the internet explorer, opening the game and then opening Miiverse.
Nintendo eShop Update Content Description:
- Fixes a bug that occurs on Mount Pajamaja where the Massifs use a spin jump to break icicles. This bug makes it impossible to proceed past this point if the player takes certain actions.
- Fixes a bug that prevents the player from finishing the final battle with Antasma.
- Fixes other issues so that the game plays as intended.
Profiles[edit]
- Nintendo 3DS eShop description
- American English version
Mario and Luigi embark on the adventure of their dreams in a hilarious action RPG that combines the real world with the wild landscapes of Luigi's imagination. In Luigi's dreams, anything is possible — legions of Luigis morph into forms like a bouncy tower or a wrecking ball. You can even poke a sleeping Luigi to alter events in his dream world. While on vacation on Pi'illo Island, the bros. discover that Luigi's sleeping mind can open portals to the dream world. Mario & Luigi can team up for supercharged Bros. Attacks. In the dream world, Mario can use Luiginary Attacks to assemble a hoard of Luigis into attack formations. Adventure with Mario & Luigi to not only rescue Peach, but to help Prince Dreambert free fellow Pi'illo folk from the bat-king Antasama's petrifying spell.
- British English version
Uncover the power of Dreamy Luigi in Mario & Luigi: Dream Team Bros. on Nintendo 3DS!
In this fourth instalment of the popular RPG series Mario & Luigi, the story opens with Princess Peach and her staff, plus brothers Mario and Luigi in tow, being invited for a sightseeing trip to the mysterious Pi'illo Island by its equally mysterious proprietor, Dr Snoozemore. But after an initially hospitable welcoming to the island - albeit with Dr Snoozemore noticeably absent - things take a turn for the worse when Princess Peach is kidnapped and pulled into a Dream World by a new enemy in the series, the ghostly bat king Antasma.
Solve puzzles, battle enemies, and even interact with creations of Luigi's own imagination in order to succeed!
New moves and attacks that use the Nintendo 3DS system's capabilities in original ways.
References to other games[edit]
- Donkey Kong: One of the Rank-Up bonuses in this game is called Jump Man, a reference to Mario's alternate name, Jumpman, for the arcade release.
- Super Mario Bros.: A cover of this game's main theme is heard while a tutorial is being displayed.
- Super Mario World: A Shelltop in Dozing Sands mentions Donut Plains.
- Super Mario World 2: Yoshi's Island: In some versions of the game, Bowser before his Giant Battle states he invented transforming into a giant while Luigi was in the cradle.
- Super Mario 64: One counter-attack Giant Luigi uses against Giant Bowser involves Luigi grabbing him by the tail and spinning him around before launching him off the platform, much like in the Bowser battles of Super Mario 64. Also, a Shelltop in Dozing Sands sings a song and mentions Jolly Roger Bay.
- Paper Mario: In the third and final battle against Kamek in Dreamy Neo Bowser Castle, he creates three different colored clones of himself: red, green and white. The green clone can raise defense like Green Magikoopas and the white clone can heal its allies like White Magikoopas.
- Luigi's Mansion series: One of the messages from Luigi displayed in Dream's Deep is "I fight ghosts!"
- Super Mario Sunshine: Bowser Jr. uses his paintbrush as an attack. Also, the credits pictures are similar to this game's; showing Mario and Co. enjoying a vacation.
- Mario & Luigi: Superstar Saga: Popple and other Beanish characters appear in this game. Queen Bean makes a cameo in the Wakeport trading quest with one of the items being a photo of her. Part of "Sunny Driftwood Shore" is an arrangement of the main countermelody of "Sweet Surfin'". The way the Mario Bros. get to Big Massif's Hooraws by having to go through their own puzzle-filled sections in Dreamy Wakeport is similar to how the Koopalings in Bowser's Castle were reached in the first game. When fighting Bowser Jr., he may summon two Shy Guys to carry a fiery rope that the brothers have to jump over to dodge in the same manner as the Border Bros in Superstar Saga. In this game, Somnom Woods serves as the penultimate area after collecting all the vital pieces of the Ultibed, just like how Joke's End was the second-to-last area to visit after collecting all the pieces of the Beanstar. Also, when perched on the Luiginary Stack, Mario's standing pose is his battle pose in Superstar Saga. A singing Shelltop in Dozing Sands mentions Hoohoo Mountain. Some elements of the battle theme are used from this game.
- Mario & Luigi: Partners in Time: The Ball Hop Bros. Move looks similar to Bros. Ball, though Ball Hop functions differently. When Bowser is possessed by Antasma, he resembles Shrowser. Kylie Koopa also reappears along with a picture of a Shroob.
- New Super Mario Bros. series: The sound effects for collecting Red Coins including the timer are the same as in these games.
- Mario & Luigi: Bowser's Inside Story: Badges are similar to the ones from this game. Starlow, Broque Monsieur, Broque Madame, Broggy, Private Goomp, Corporal Paraplonk, and Sergeant Guy return as well. Bowser's theme is reused. The Banzai Bill Cannon re-appears as a prop during the battle with Private Goomp, Corporal Paraplonk and Sergeant Guy. Bowser's first boss fight has two attacks based on his abilities in this game, namely his Spike Ball and Punch. and he uses the inhaling power he received in this game during cutscenes. When Giant Luigi fights giant Bowser in Dreamy Neo Bowser Castle, he references his giant battles from this game, and also says "SHOWTIME!" before the fight begins. The Earthwake battle is similar to the Tower of Yikk battle. The Mario icon on the Dreamy Mushrise Park pipe map is taken directly from this game. When achieving an "Excellent" with the Bye-Bye Cannon, Mario and Luigi both have similar poses to when they level up in this game.
- New Super Mario Bros. Wii: Kamek disguises himself as Princess Peach again.
- Super Mario 3D Land: Big Tail Goombas and Inky Piranha Plants appear in Dreamy Neo Bowser Castle and Neo Bowser Castle respectively.
- Paper Mario: Sticker Star: The √ and X panels from the Check-X Quiz are similar to the √ and X blocks from Snifit or Whiffit.
- New Super Mario Bros. U: Bombs very similar to the ones used by Lemmy Koopa in this game appear in the Bomb Derby attack.
References in later games[edit]
- Super Smash Bros. for Nintendo 3DS / Wii U: An arrangement of the theme "Try, Try Again" arranged by the original composer Yoko Shimomura is used as the alternate track for the Paper Mario stage in Super Smash Bros. for Nintendo 3DS and a selectable track for the Woolly World stage in Super Smash Bros. for Wii U.
- Mario & Luigi: Paper Jam: Many of the game's graphics are reused, although some characters have received new animations. All of Mario's and Luigi's battle animations are reused with the exception of new jumping in battle animations. One of the new Bros. Attacks, known as Mega Thwonk, features Luigi as a giant, using the same model from the Giant Battles in Mario & Luigi: Dream Team. There are also two returning Bros. Attacks originally from Mario & Luigi: Dream Team. Similar to giant battles, Papercraft battles allow players to win four items. The name Neo Bowser Castle is re-used. Bowser's theme in Paper Jam is a cover of his theme from this game. Antasma makes a cameo in one of Bowser's Character Cards, which is actually their duel artwork from this game.
- Mario & Luigi: Superstar Saga + Bowser's Minions: A cover of "Challenging Actions!" serves as minigame music for the Barrel and Chuckola Bounce minigames, as well as the tutorial for Splart. A poster of Prince Dreambert in front of a Zeekeeper statue can be seen in the lobby of Yoshi Theater. Private Goomp, Corporal Paraplonk, and Sergeant Guy all wear their Elite Trio garb from this game, although this is probably a developer oversight.
- Super Smash Bros. Ultimate: Prince Dreambert and Antasma appear as spirits.
- Mario & Luigi: Brothership: Capnaps, Magmads and Iceads return as enemies. The new Spikely enemy looks like a Thorb. Bomb Derby returns as a Bros. Attack for Mario. The second part of Luigi's Max-Mix Vortex Bros. Attack acts and controls similarly to the Luiginary Typhoon. Luigi's level up animation is similar to the one in this game.
Names in other languages[edit]
| Language | Name | Meaning | Notes |
|---|---|---|---|
| Japanese | マリオ&ルイージRPG4 ドリームアドベンチャー[?] Mario ando Ruīji Āru Pī Jī 4 Dorīmu Adobenchā |
Mario & Luigi RPG 4: Dream Adventure | |
| Chinese (traditional) | 瑪利歐&路易吉RPG4 Dream Adventure[7] Mǎlì'ōu & Lùyìjí RPG 4 Dream Adventure |
Mario & Luigi RPG 4: Dream Adventure | |
| Dutch | Mario & Luigi: Dream Team Bros.[?] | - | |
| French (NOA) | Mario & Luigi: Dream Team[?] | - | |
| French (NOE) | Mario & Luigi: Dream Team Bros.[?] | - | |
| German | Mario & Luigi: Dream Team Bros.[?] | - | |
| Italian | Mario & Luigi: Dream Team Bros.[?] | - | |
| Korean | 마리오 & 루이지 RPG 4: 드림 어드벤처[?] Mario aendeu Ruiji Areupiji 4: Deurim Eodeubencheo |
Mario & Luigi RPG 4: Dream Adventure | |
| Portuguese (NOE) | Mario & Luigi: Dream Team Bros.[?] | - | |
| Russian | Mario & Luigi: Dream Team Bros.[?] | - | |
| Spanish (NOA) | Mario & Luigi: Dream Team[?] | - | |
| Spanish (NOE) | Mario & Luigi: Dream Team Bros.[?] | - |
Trivia[edit]
- Mario & Luigi: Dream Team is the second Super Mario game to receive an E10+ rating by the ESRB, the first being Mario Strikers Charged. This game was originally shown to be rated E by the ESRB like its predecessors,[8] but was later changed to an E10+ rating. According to the ESRB, this was because of the giant bosses fought with Giant Luigi.[9]
- Mario & Luigi: Dream Team is the last Super Mario game to use this design of the ESRB rating system logos. The reason for the change, starting from Mario Party: Island Tour onwards, is because the ESRB wanted to make it easier to see on mobile devices.[10]
- The ACB also rated the game PG for “Mild Violence”, while earlier entries in the series received a G rating.
References[edit]
- ^ Interview: Mario & Luigi Dream Team Bros. CVG (English). Archived September 19, 2013, 19:42:30 UTC from the original via Wayback Machine. Retrieved June 25, 2024.
- ^ 2013. Mario & Luigi: Dream Team Bros. instruction booklet (PDF). Nintendo (Japanese). Page 16.
- ^ 2013. Mario & Luigi: Dream Team Bros. French instruction booklet (PDF). Nintendo of Europe (French). Page 20.
- ^ Kupra, Daniel (July 11, 2013). Mario & Luigi: Dream Team Review. IGN (English). Retrieved June 25, 2024.
- ^ Annual Report 2014 for the fiscal year ended March 31, 2014 (PDF). Nintendo. Retrieved May 6, 2024.
- ^ Image. Twitpic (English).
- ^ 瑪利歐歷史|超級瑪利歐兄弟 35週年|任天堂. Nintendo Taiwan (Traditional Chinese). Retrieved June 25, 2024.
- ^ Nintendo of America (June 11, 2013). Nintendo 3DS - Mario & Luigi: Dream Team E3 Trailer. YouTube (American English). Retrieved June 25, 2024.
- ^ Mario & Luigi: Dream Team. ESRB (English). Retrieved June 25, 2024.
- ^ Clark, Matt (August 2, 2013). ESRB Alters Rating Logos for Easier Reading on Mobile. IGN. Retrieved June 25, 2024. (Archived August 5, 2013, 01:31:29 UTC via Wayback Machine.)
External links[edit]
- Launch trailer
- Official website
- Official American English website
- Official European English website
- Official Oceanian website
