List of blocks in Paper Mario: Difference between revisions
mNo edit summary |
No edit summary |
||
| (7 intermediate revisions by one other user not shown) | |||
| Line 1: | Line 1: | ||
{{italic title|List of blocks in ''Paper Mario''}} | {{italic title|List of blocks in ''Paper Mario''}} | ||
[[File:PaperMarioBrickBlock.png|frame]][[File:PM Question Mark Block Render.png|frame|left]][[File:PM Badge Block Render.png|frame|left]] | |||
{{about|the visible blocks from ''[[Paper Mario]]''|the hidden ones from same game|[[List of hidden blocks in Paper Mario|List of hidden blocks in ''Paper Mario'']]}} | {{about|the visible blocks from ''[[Paper Mario]]''|the hidden ones from same game|[[List of hidden blocks in Paper Mario|List of hidden blocks in ''Paper Mario'']]}} | ||
This is a list of block from ''[[Paper Mario]]''. There are 107 visible blocks in the game. There are two types of blocks: | This is a list of block from ''[[Paper Mario]]''. There are 107 visible blocks in the game. There are two types of blocks: | ||
| Line 7: | Line 8: | ||
[[Mario Bros.'_House#Paper Mario series|Mario's House]], [[Peach%27s_Castle#Paper_Mario|Princess Peach's Castle]], [[Star_Hill#Paper_Mario|Shooting Star Summit]], [[Koopa Village]], [[Dry Dry Outpost]], [[Windy Mill]], [[Yoshi's Village]], [[Shiver City]], [[Shiver Snowfield]], [[Starborn Valley]], [[Star Way]] and [[Star Haven]] are the only locations without any visible block. | [[Mario Bros.'_House#Paper Mario series|Mario's House]], [[Peach%27s_Castle#Paper_Mario|Princess Peach's Castle]], [[Star_Hill#Paper_Mario|Shooting Star Summit]], [[Koopa Village]], [[Dry Dry Outpost]], [[Windy Mill]], [[Yoshi's Village]], [[Shiver City]], [[Shiver Snowfield]], [[Starborn Valley]], [[Star Way]] and [[Star Haven]] are the only locations without any visible block. | ||
==Prologue: A Plea from the Stars== | |||
There are a total of 7 Blocks to find during the Prologue: | |||
*[[Goomba Village (location)|Goomba Village]] has '''2 Blocks''' - 1 ? and 1 Coin | |||
*[[Goomba Road]] has '''5 ? Blocks''' | |||
<br> | |||
{| style="text-align: center; width: 100%; margin: 0 auto; border: #ABC; border-collapse: collapse;" border="1" cellpadding="4" cellspacing="1" | |||
|-style="background: #ABC;font-size:14pt;color:white" | |||
!Item/s | |||
!Description | |||
|- | !Image | ||
| | |||
|- | |- | ||
| | |-style="background: #ABC;font-size:120%;color:#202122" id="Goomba Village" | ||
|[[ | !colspan=3|[[Goomba Village (location)|{{color|#202122|Goomba Village}}]] ­ ­ ­ ­|­ ­ ­ ­ 2 Blocks (1 ?, 1 Coin) | ||
| | |||
| | |||
|- | |- | ||
|[[File:PMCoin.png]][[File:PMCoin.png]][[File:PMCoin.png]][[File:PMCoin.png]][[File:PMCoin.png]][[File:PMCoin.png]][[File:PMCoin.png]][[File:PMCoin.png]][[File:PMCoin.png]][[File:PMCoin.png]]<br>10 [[Coin]]s | |[[File:PMCoin.png]][[File:PMCoin.png]][[File:PMCoin.png]][[File:PMCoin.png]][[File:PMCoin.png]][[File:PMCoin.png]][[File:PMCoin.png]][[File:PMCoin.png]][[File:PMCoin.png]][[File:PMCoin.png]]<br>10 [[Coin]]s | ||
|At [[Jr. Troopa|Jr. Troopa's]] playground, near the tree with [[Goombaria|Goombaria's]] [[Dolly]]. | |At [[Jr. Troopa|Jr. Troopa's]] playground, near the tree with [[Goombaria|Goombaria's]] [[Dolly]]. | ||
| | |[[File:Goomba Village Block 1.png|250px]] | ||
|- | |- | ||
|[[File:PMCoin.png]]<br>Coin | |[[File:PMCoin.png]]<br>Coin | ||
|Near the entrance to Jr. Troopa's playground. | |Near the entrance to Jr. Troopa's playground. | ||
|[[File:Goomba Village Block 2.png|250px]] | |[[File:Goomba Village Block 2.png|250px]] | ||
|- | |- | ||
|[[Goomba Road]] | |-style="background: #ABC;font-size:120%;color:#202122" id="Goomba Road" | ||
!colspan=4|[[Goomba Road|{{color|#202122|Goomba Road}}]] ­ ­ ­ ­|­ ­ ­ ­ 5 ? Blocks | |||
|- | |||
|[[File:PMCoin.png]]<br>Coin (both blocks) | |[[File:PMCoin.png]]<br>Coin (both blocks) | ||
|In the middle of the first scene. | |In the middle of the first scene. | ||
| | |[[File:Goomba Road Blocks 1-2.png|250px]] | ||
|- | |- | ||
|[[File:Close Call Badge.png]]<br>[[Close Call (badge)|Close Call]] | |[[File:Close Call Badge.png]]<br>[[Close Call (badge)|Close Call]] | ||
|In the red [[Badge#Paper_Mario|badge]] block on the second part of the path. | |In the red [[Badge#Paper_Mario|badge]] block on the second part of the path. | ||
|[[File:Goomba Road Block 3.png|250px]] | |[[File:Goomba Road Block 3.png|250px]] | ||
|- | |- | ||
|[[File:PaperMario Items SuperShroom.png]]<br>[[Super_Mushroom#Paper_Mario|Super Shroom]] | |[[File:PaperMario Items SuperShroom.png]]<br>[[Super_Mushroom#Paper_Mario|Super Shroom]] | ||
|To the south of the opening after [[Goomba King's Fortress]], there is a brick which will reveal a ? Block after being hit. | |To the south of the opening after [[Goomba King's Fortress]], there is a brick which will reveal a ? Block after being hit. | ||
|[[File:Goomba Road Block 4.png|250px]] | |[[File:Goomba Road Block 4.png|250px]] | ||
|- | |- | ||
|[[File:PaperMario Items SleepySheep.png]]<br>[[Sleepy Sheep]] | |[[File:PaperMario Items SleepySheep.png]]<br>[[Sleepy Sheep]] | ||
|Near the descending stairs between Goomba King's Fortress and [[Toad_Town#Paper_Mario|Toad Town]]. | |Near the descending stairs between Goomba King's Fortress and [[Toad_Town#Paper_Mario|Toad Town]]. | ||
|[[File:Goomba Road Block 5.png|250px]] | |[[File:Goomba Road Block 5.png|250px]] | ||
|} | |||
==Chapter 1: Storming Koopa Bros. Fortress== | |||
There are a total of 10 Blocks to find during Chapter 1: | |||
*[[Pleasant Path]] has '''6 Blocks''' - 5 ? and 1 Coin | |||
*[[Koopa Bros. Fortress]] has '''2 ? Blocks''' | |||
*[[Toad_Town#Paper_Mario|Toad Town]] has '''1 Coin Block''' | |||
*[[Toad Town Tunnels]] has '''1 Coin Block''' | |||
<br> | |||
{| style="text-align: center; width: 100%; margin: 0 auto; border: #EFCE18; border-collapse: collapse;" border="1" cellpadding="4" cellspacing="1" | |||
|-style="background: #EFCE18;font-size:14pt;color:white" | |||
!Item/s | |||
!Description | |||
!Image | |||
|- | |- | ||
| | |-style="background: #EFCE18;font-size:120%;color:#202122" id="Pleasant Path" | ||
= | !colspan=3|[[Pleasant Path|{{color|#202122|Pleasant Path}}]] ­ ­ ­ ­|­ ­ ­ ­ 6 Blocks (5 ?, 1 Coin) | ||
|- | |- | ||
|[[File:PMCoin.png]] [[File:Dizzy Attack Badge.png]]<br>Coin, [[Dizzy Attack]] | |[[File:PMCoin.png]] [[File:Dizzy Attack Badge.png]]<br>Coin, [[Dizzy Attack]] | ||
|In the middle of the first scene. | |In the middle of the first scene. | ||
| | |[[File:Pleasant Path Blocks 1-2.png|250px]] | ||
|- | |- | ||
|[[File:PaperMario Items FrightJar.png]]<br>[[Fright Mask|Fright Jar]] | |[[File:PaperMario Items FrightJar.png]]<br>[[Fright Mask|Fright Jar]] | ||
|In the rightmost block at the first scene. | |In the rightmost block at the first scene. | ||
|[[File:Pleasant Path Block 3.png|250px]] | |[[File:Pleasant Path Block 3.png|250px]] | ||
|- | |- | ||
|[[File:PaperMario Items POWBlock.png]]<br>[[POW_Block#Paper_Mario_series|POW Block]] | |[[File:PaperMario Items POWBlock.png]]<br>[[POW_Block#Paper_Mario_series|POW Block]] | ||
|At the start of the second scene. | |At the start of the second scene. | ||
|[[File:Pleasant Path Block 4.png|250px]] | |[[File:Pleasant Path Block 4.png|250px]] | ||
|- | |- | ||
|[[File:PMCoin.png]][[File:PMCoin.png]][[File:PMCoin.png]][[File:PMCoin.png]][[File:PMCoin.png]][[File:PMCoin.png]][[File:PMCoin.png]][[File:PMCoin.png]][[File:PMCoin.png]][[File:PMCoin.png]]<br>10 Coins | |[[File:PMCoin.png]][[File:PMCoin.png]][[File:PMCoin.png]][[File:PMCoin.png]][[File:PMCoin.png]][[File:PMCoin.png]][[File:PMCoin.png]][[File:PMCoin.png]][[File:PMCoin.png]][[File:PMCoin.png]]<br>10 Coins | ||
|At the end of the second scene. | |At the end of the second scene. | ||
|[[File:Pleasant Path Block 5.png|250px]] | |[[File:Pleasant Path Block 5.png|250px]] | ||
|- | |- | ||
|[[File:Attack FX B Badge.png]]<br>[[Attack FX B (Paper Mario)|Attack FX B]] | |[[File:Attack FX B Badge.png]]<br>[[Attack FX B (Paper Mario)|Attack FX B]] | ||
|Smashing the blocks near the entrance of [[Koopa Village]] in the order "left, right, middle" will reveal a red ? Badge block. | |Smashing the blocks near the entrance of [[Koopa Village]] in the order "left, right, middle" will reveal a red ? Badge block. | ||
|[[File:Pleasant Path Block 6.png|250px]] | |[[File:Pleasant Path Block 6.png|250px]] | ||
|- | |- | ||
|[[Koopa Bros. Fortress]] | |-style="background: #EFCE18;font-size:120%;color:#202122" id="Koopa Bros. Fortress" | ||
!colspan=3|[[Koopa Bros. Fortress|{{color|#202122|Koopa Bros. Fortress}}]] ­ ­ ­ ­|­ ­ ­ ­ 2 ? Blocks | |||
|- | |||
|EMPTY/TRAP | |EMPTY/TRAP | ||
|Required to progress, found at the top of the room accessed by a second locked door. | |Required to progress, found at the top of the room accessed by a second locked door. | ||
| | |[[File:Koopa Bros. Fortress Block 1.png|250px]] | ||
|- | |- | ||
|[[File:PaperMario Items MapleSyrup.png]]<br>[[Maple Syrup]] | |[[File:PaperMario Items MapleSyrup.png]]<br>[[Maple Syrup]] | ||
|At the [[Bullet_Bill#Paper_Mario|Bullet Bill]] dodging scene, at the southwestern corner. | |At the [[Bullet_Bill#Paper_Mario|Bullet Bill]] dodging scene, at the southwestern corner. | ||
|[[File:Koopa Bros. Fortress Block 2.png|250px]] | |[[File:Koopa Bros. Fortress Block 2.png|250px]] | ||
|- | |- | ||
|[[Toad_Town#Paper_Mario|Toad Town]] | |-style="background: #EFCE18;font-size:120%;color:#202122" id="Toad Town" | ||
!colspan=3|[[Toad_Town#Paper_Mario|{{color|#202122|Toad Town}}]] ­ ­ ­ ­|­ ­ ­ ­ 1 Coin Block | |||
|- | |||
|[[File:PMCoin.png]][[File:PMCoin.png]][[File:PMCoin.png]][[File:PMCoin.png]][[File:PMCoin.png]][[File:PMCoin.png]][[File:PMCoin.png]][[File:PMCoin.png]][[File:PMCoin.png]][[File:PMCoin.png]]<br>10 Coins | |[[File:PMCoin.png]][[File:PMCoin.png]][[File:PMCoin.png]][[File:PMCoin.png]][[File:PMCoin.png]][[File:PMCoin.png]][[File:PMCoin.png]][[File:PMCoin.png]][[File:PMCoin.png]][[File:PMCoin.png]]<br>10 Coins | ||
|After gaining access to the rest of Toad Town, this block is found floating above wooden crates in the port. | |After gaining access to the rest of Toad Town, this block is found floating above wooden crates in the port. | ||
| | |[[File:Toad Town Block.png|250px]] | ||
|- | |||
|-style="background: #EFCE18;font-size:120%;color:#202122" id="Toad Town Tunnels" | |||
!colspan=3|[[Toad Town Tunnels|{{color|#202122|Toad Town Tunnels}}]] ­ ­ ­ ­|­ ­ ­ ­ 1 Coin Block | |||
|- | |- | ||
|[[File:PMCoin.png]][[File:PMCoin.png]][[File:PMCoin.png]][[File:PMCoin.png]][[File:PMCoin.png]][[File:PMCoin.png]][[File:PMCoin.png]][[File:PMCoin.png]][[File:PMCoin.png]][[File:PMCoin.png]]<br>10 Coins | |[[File:PMCoin.png]][[File:PMCoin.png]][[File:PMCoin.png]][[File:PMCoin.png]][[File:PMCoin.png]][[File:PMCoin.png]][[File:PMCoin.png]][[File:PMCoin.png]][[File:PMCoin.png]][[File:PMCoin.png]]<br>10 Coins | ||
|Third brick block in the row of brick blocks found at the room right of the tunnels entrance. | |Third brick block in the row of brick blocks found at the room right of the tunnels entrance. | ||
| | |[[File:Toad Town Tunnels Block 1.png|250px]] | ||
|} | |||
==Chapter 2: The Mystery of Dry Dry Ruins== | |||
There are a total of 36 Blocks to find during Chapter 2: | |||
*[[Mt. Rugged]] has '''4 ? Blocks''' | |||
*[[Dry_Dry_Desert#Paper_Mario|Dry Dry Desert]] has '''28 Blocks''' - 15 ? and 13 Coin | |||
*[[Dry_Dry_Ruins#Paper_Mario|Dry Dry Ruins]] has '''1 ? Block''' | |||
*[[Toad Town Tunnels]] has '''3 ? Blocks''' | |||
<br> | |||
{| style="text-align: center; width: 100%; margin: 0 auto; border: #FFC639; border-collapse: collapse;" border="1" cellpadding="4" cellspacing="1" | |||
|-style="background: #FFC639;font-size:14pt;color:white" | |||
!Item/s | |||
!Description | |||
!Image | |||
|- | |- | ||
| | |-style="background: #FFC639;font-size:120%;color:#202122" id="Mt. Rugged" | ||
!colspan=3|[[Mt. Rugged|{{color|#202122|Mt. Rugged}}]] ­ ­ ­ ­|­ ­ ­ ­ 4 ? Blocks | |||
|- | |- | ||
|[[File:PaperMario Items SleepySheep.png]]<br>Sleepy Sheep | |[[File:PaperMario Items SleepySheep.png]]<br>Sleepy Sheep | ||
|At the southeastern corner of the second scene. | |At the southeastern corner of the second scene. | ||
| | |[[File:Mt. Rugged Block 1.png|250px]] | ||
|- | |- | ||
|[[File:PaperMario Items Mushroom.png]]<br>[[Mushroom#Paper_Mario|Mushroom]] | |[[File:PaperMario Items Mushroom.png]]<br>[[Mushroom#Paper_Mario|Mushroom]] | ||
|Near the start of the scene to the north of the second scene, accessible after sliding the slope in the third scene. | |Near the start of the scene to the north of the second scene, accessible after sliding the slope in the third scene. | ||
|[[File:Mt. Rugged Block 2.png|250px]] | |[[File:Mt. Rugged Block 2.png|250px]] | ||
|- | |- | ||
|[[File:PMCoin.png]]<br>Coin | |[[File:PMCoin.png]]<br>Coin | ||
|After using the trampoline in the same scene, found on the left. | |After using the trampoline in the same scene, found on the left. | ||
|[[File:Mt. Rugged Block 3.png|250px]] | |[[File:Mt. Rugged Block 3.png|250px]] | ||
|- | |- | ||
|[[File:PaperMario Items HoneySyrup.png]]<br>[[Honey Syrup]] | |[[File:PaperMario Items HoneySyrup.png]]<br>[[Honey Syrup]] | ||
|After using the trampoline in the same scene, found after going to the right, guarded by a [[Cleft]]. | |After using the trampoline in the same scene, found after going to the right, guarded by a [[Cleft]]. | ||
|[[File:Mt. Rugged Block 4.png|250px]] | |[[File:Mt. Rugged Block 4.png|250px]] | ||
|- | |- | ||
|[[ | |-style="background: #FFC639;font-size:120%;color:#202122" id="Dry Dry Desert" | ||
!colspan=3|[[Dry_Dry_Desert#Paper_Mario|{{color|#202122|Dry Dry Desert}}]] ­ ­ ­ ­|­ ­ ­ ­ 28 Blocks (15 ?, 13 Coin) | |||
|- | |||
|[[File:PaperMario Items FrightJar.png]] [[File:PMCoin.png]]<br>Fright Jar, Coin | |[[File:PaperMario Items FrightJar.png]] [[File:PMCoin.png]]<br>Fright Jar, Coin | ||
|In the scene three scenes north of the entrance. | |In the scene three scenes north of the entrance. | ||
| | |[[File:Dry Dry Desert Blocks 1-2.png|250px]] | ||
|- | |- | ||
|[[File:PMCoin.png]][[File:PMCoin.png]][[File:PMCoin.png]][[File:PMCoin.png]][[File:PMCoin.png]][[File:PMCoin.png]][[File:PMCoin.png]][[File:PMCoin.png]][[File:PMCoin.png]][[File:PMCoin.png]]<br>10 Coins | |[[File:PMCoin.png]][[File:PMCoin.png]][[File:PMCoin.png]][[File:PMCoin.png]][[File:PMCoin.png]][[File:PMCoin.png]][[File:PMCoin.png]][[File:PMCoin.png]][[File:PMCoin.png]][[File:PMCoin.png]]<br>10 Coins | ||
|In the scene six scenes east of the previous one, left of the tree. | |In the scene six scenes east of the previous one, left of the tree. | ||
|[[File:Dry Dry Desert Block 3.png|250px]] | |[[File:Dry Dry Desert Block 3.png|250px]] | ||
|- | |- | ||
|[[File:PMCoin.png]] 10x[[File:PMCoin.png]] [[File:PaperMario Items HoneySyrup.png]]<br>Coin, 10 Coins, Honey Syrup | |[[File:PMCoin.png]] 10x[[File:PMCoin.png]] [[File:PaperMario Items HoneySyrup.png]]<br>Coin, 10 Coins, Honey Syrup | ||
|In the scene two scenes west and one south of the previous one. | |In the scene two scenes west and one south of the previous one. | ||
|[[File:Dry Dry Desert Blocks 4-6.png|250px]] | |[[File:Dry Dry Desert Blocks 4-6.png|250px]] | ||
|- | |- | ||
|[[File:PaperMario Items Mushroom.png]] [[File:PaperMario Items SuperShroom.png]] [[File:PaperMario Items UltraShroom.png]]<br>Mushroom, Super Shroom, [[Ultra Mushroom|Ultra Shroom]] | |[[File:PaperMario Items Mushroom.png]] [[File:PaperMario Items SuperShroom.png]] [[File:PaperMario Items UltraShroom.png]]<br>Mushroom, Super Shroom, [[Ultra Mushroom|Ultra Shroom]] | ||
|In the scene four scenes west and one south of the previous one. Here, Mario must hammer the empty ? block to make others appear. One hit spawns a block to the left with a [[Mushroom#Paper_Mario|Mushroom]], ten hits spawn a block to the right with a [[Super_Mushroom#Paper_Mario|Super Shroom]] and one hundred hits spawns a block in the midle with a [[Ultra Mushroom|Ultra Shroom]]. | |In the scene four scenes west and one south of the previous one. Here, Mario must hammer the empty ? block to make others appear. One hit spawns a block to the left with a [[Mushroom#Paper_Mario|Mushroom]], ten hits spawn a block to the right with a [[Super_Mushroom#Paper_Mario|Super Shroom]] and one hundred hits spawns a block in the midle with a [[Ultra Mushroom|Ultra Shroom]]. | ||
|[[File:Dry Dry Desert Blocks 7-9.png|250px]] | |[[File:Dry Dry Desert Blocks 7-9.png|250px]] | ||
|- | |- | ||
|[[File:PMCoin.png]] [[File:PMCoin.png]] [[File:PaperMario Items FireFlower.png]] [[File:PMCoin.png]] [[File:PMCoin.png]]<br>Coin, Coin, [[Fire_Flower#Paper_Mario|Fire Flower]], Coin, Coin | |[[File:PMCoin.png]] [[File:PMCoin.png]] [[File:PaperMario Items FireFlower.png]] [[File:PMCoin.png]] [[File:PMCoin.png]]<br>Coin, Coin, [[Fire_Flower#Paper_Mario|Fire Flower]], Coin, Coin | ||
|In the scene two scenes east from the previous one. | |In the scene two scenes east from the previous one. | ||
|[[File:Dry Dry Desert Blocks 10-14.png|250px]] | |[[File:Dry Dry Desert Blocks 10-14.png|250px]] | ||
|- | |- | ||
|[[File:PMCoin.png]][[File:PMCoin.png]][[File:PMCoin.png]][[File:PMCoin.png]][[File:PMCoin.png]][[File:PMCoin.png]][[File:PMCoin.png]][[File:PMCoin.png]][[File:PMCoin.png]][[File:PMCoin.png]]<br>10 Coins (both blocks) | |[[File:PMCoin.png]][[File:PMCoin.png]][[File:PMCoin.png]][[File:PMCoin.png]][[File:PMCoin.png]][[File:PMCoin.png]][[File:PMCoin.png]][[File:PMCoin.png]][[File:PMCoin.png]][[File:PMCoin.png]]<br>10 Coins (both blocks) | ||
|In the scene three scenes east from the previous one, two brick blocks closest to the northern exit. | |In the scene three scenes east from the previous one, two brick blocks closest to the northern exit. | ||
|[[File:Dry Dry Desert Blocks 15-16.png|250px]] | |[[File:Dry Dry Desert Blocks 15-16.png|250px]] | ||
|- | |- | ||
|[[File:PMCoin.png]][[File:PMCoin.png]][[File:PMCoin.png]][[File:PMCoin.png]][[File:PMCoin.png]][[File:PMCoin.png]][[File:PMCoin.png]][[File:PMCoin.png]][[File:PMCoin.png]][[File:PMCoin.png]]<br>10 Coins | |[[File:PMCoin.png]][[File:PMCoin.png]][[File:PMCoin.png]][[File:PMCoin.png]][[File:PMCoin.png]][[File:PMCoin.png]][[File:PMCoin.png]][[File:PMCoin.png]][[File:PMCoin.png]][[File:PMCoin.png]]<br>10 Coins | ||
|In the scene five scenes west and two south from the previous one, the middle brick block. | |In the scene five scenes west and two south from the previous one, the middle brick block. | ||
|[[File:Dry Dry Desert Block 17.png|250px]] | |[[File:Dry Dry Desert Block 17.png|250px]] | ||
|- | |- | ||
|[[File:PMCoin.png]]<br>Coin | |[[File:PMCoin.png]]<br>Coin | ||
|In the scene three scenes east from the previous one. | |In the scene three scenes east from the previous one. | ||
|[[File:Dry Dry Desert Block 18.png|250px]] | |[[File:Dry Dry Desert Block 18.png|250px]] | ||
|- | |- | ||
|[[File:PMCoin.png]]<br>Coin | |[[File:PMCoin.png]]<br>Coin | ||
|In the scene three scenes east from the previous one. | |In the scene three scenes east from the previous one. | ||
|[[File:Dry Dry Desert Block 19.png|250px]] | |[[File:Dry Dry Desert Block 19.png|250px]] | ||
|- | |- | ||
|[[File:PMCoin.png]][[File:PMCoin.png]][[File:PMCoin.png]][[File:PMCoin.png]][[File:PMCoin.png]][[File:PMCoin.png]][[File:PMCoin.png]][[File:PMCoin.png]][[File:PMCoin.png]][[File:PMCoin.png]]<br>10 Coins | |[[File:PMCoin.png]][[File:PMCoin.png]][[File:PMCoin.png]][[File:PMCoin.png]][[File:PMCoin.png]][[File:PMCoin.png]][[File:PMCoin.png]][[File:PMCoin.png]][[File:PMCoin.png]][[File:PMCoin.png]]<br>10 Coins | ||
|In the scene four scenes west and one south from the previous one, the brick block closest to the northern exit. | |In the scene four scenes west and one south from the previous one, the brick block closest to the northern exit. | ||
|[[File:Dry Dry Desert Block 20.png|250px]] | |[[File:Dry Dry Desert Block 20.png|250px]] | ||
|- | |- | ||
|[[File:PMCoin.png]][[File:PMCoin.png]][[File:PMCoin.png]][[File:PMCoin.png]][[File:PMCoin.png]][[File:PMCoin.png]][[File:PMCoin.png]][[File:PMCoin.png]][[File:PMCoin.png]][[File:PMCoin.png]]<br>10 Coins | |[[File:PMCoin.png]][[File:PMCoin.png]][[File:PMCoin.png]][[File:PMCoin.png]][[File:PMCoin.png]][[File:PMCoin.png]][[File:PMCoin.png]][[File:PMCoin.png]][[File:PMCoin.png]][[File:PMCoin.png]]<br>10 Coins | ||
|In the scene three scenes east from the previous one. | |In the scene three scenes east from the previous one. | ||
|[[File:Dry Dry Desert Block 21.png|250px]] | |[[File:Dry Dry Desert Block 21.png|250px]] | ||
|- | |- | ||
|[[File:PMCoin.png]]<br>Coin | |[[File:PMCoin.png]]<br>Coin | ||
|In the scene one west and one south from the previous one. | |In the scene one west and one south from the previous one. | ||
|[[File:Dry Dry Desert Block 22.png|250px]] | |[[File:Dry Dry Desert Block 22.png|250px]] | ||
|- | |- | ||
|[[File:PMCoin.png]][[File:PMCoin.png]][[File:PMCoin.png]][[File:PMCoin.png]][[File:PMCoin.png]][[File:PMCoin.png]][[File:PMCoin.png]][[File:PMCoin.png]][[File:PMCoin.png]][[File:PMCoin.png]]<br>10 Coins (all six blocks) | |[[File:PMCoin.png]][[File:PMCoin.png]][[File:PMCoin.png]][[File:PMCoin.png]][[File:PMCoin.png]][[File:PMCoin.png]][[File:PMCoin.png]][[File:PMCoin.png]][[File:PMCoin.png]][[File:PMCoin.png]]<br>10 Coins (all six blocks) | ||
|In the scene two east from the previous one. | |In the scene two east from the previous one. | ||
|[[File:Dry Dry Desert Blocks 23-28.png|250px]] | |[[File:Dry Dry Desert Blocks 23-28.png|250px]] | ||
|- | |- | ||
|[[ | |-style="background: #FFC639;font-size:120%;color:#202122" id="Dry Dry Ruins" | ||
!colspan=3|[[Dry_Dry_Ruins#Paper_Mario|{{color|#202122|Dry Dry Ruins}}]] ­ ­ ­ ­|­ ­ ­ ­ 1 ? Block | |||
|- | |||
|EMPTY/TRAP | |EMPTY/TRAP | ||
|Required to progress, found at the end of the room with [[Artifact|Ancient Artifact]]. | |Required to progress, found at the end of the room with [[Artifact|Ancient Artifact]]. | ||
| | |[[File:Dry Dry Ruins Block.png|250px]] | ||
|- | |||
|-style="background: #FFC639;font-size:120%;color:#202122" id="Toad Town Tunnels" | |||
!colspan=3|[[Toad Town Tunnels|{{color|#202122|Toad Town Tunnels}}]] ­ ­ ­ ­|­ ­ ­ ­ 3 ? Blocks | |||
|- | |- | ||
|[[File:PMCoin.png]] [[File:PaperMario Items SnowmanDoll.png]] [[File:PMCoin.png]]<br>Coin, [[Snowman Doll]], Coin | |[[File:PMCoin.png]] [[File:PaperMario Items SnowmanDoll.png]] [[File:PMCoin.png]]<br>Coin, [[Snowman Doll]], Coin | ||
|In the room west of the entrance but before the pipe leading to the new area. | |In the room west of the entrance but before the pipe leading to the new area. | ||
|[[File:Toad Town Tunnels Blocks 2-4.png|250px]] | |[[File:Toad Town Tunnels Blocks 2-4.png|250px]] | ||
|} | |||
==Chapter 3: The "Invincible" Tubba Blubba== | |||
There are a total of 11 Blocks to find during Chapter 3: | |||
*[[Forever Forest]] has '''2 ? Blocks''' | |||
*[[Boo's Mansion]] has '''1 ? Block''' | |||
*[[Gusty Gulch]] has '''7 Blocks''' - 6 ?, 1 Coin | |||
*[[Tubba Blubba's Castle]] has '''1 ? Block''' | |||
<br> | |||
{| style="text-align: center; width: 100%; margin: 0 auto; border: #C6BDDE; border-collapse: collapse;" border="1" cellpadding="4" cellspacing="1" | |||
|-style="background: #C6BDDE;font-size:14pt;color:white" | |||
!Item/s | |||
!Description | |||
!Image | |||
|- | |- | ||
| | |-style="background: #C6BDDE;font-size:120%;color:#202122" id="Forever Forest" | ||
!colspan=3|[[Forever Forest|{{color|#202122|Forever Forest}}]] ­ ­ ­ ­|­ ­ ­ ­ 2 ? Blocks | |||
|- | |- | ||
|[[File:HP Plus Badge.png]]<br>[[HP Plus (badge)|HP Plus]] | |[[File:HP Plus Badge.png]]<br>[[HP Plus (badge)|HP Plus]] | ||
|In the middle of a clearing found on a detour from the fifth area. | |In the middle of a clearing found on a detour from the fifth area. | ||
| | |[[File:Forever Forest Block 1.png|250px]] | ||
|- | |- | ||
|[[File:FP Plus Badge.png]]<br>[[FP Plus]] | |[[File:FP Plus Badge.png]]<br>[[FP Plus]] | ||
|In the middle of a clearing found on a detour from the seventh area. | |In the middle of a clearing found on a detour from the seventh area. | ||
|[[File:Forever Forest Block 2.png|250px]] | |[[File:Forever Forest Block 2.png|250px]] | ||
|- | |- | ||
|[[Boo's Mansion]] | |-style="background: #C6BDDE;font-size:120%;color:#202122" id="Boo's Mansion" | ||
!colspan=3|[[Boo's Mansion|{{color|#202122|Boo's Mansion}}]] ­ ­ ­ ­|­ ­ ­ ­ 1 ? Block | |||
|- | |||
|[[File:PaperMario Items VoltShroom.png]]<br>[[Volt Mushroom|Volt Shroom]] | |[[File:PaperMario Items VoltShroom.png]]<br>[[Volt Mushroom|Volt Shroom]] | ||
|Outside the mansion, in front of the gate. | |Outside the mansion, in front of the gate. | ||
| | |[[File:Boo Mansion Block.png|250px]] | ||
|- | |||
|-style="background: #C6BDDE;font-size:120%;color:#202122" id="Gusty Gulch" | |||
!colspan=3|[[Gusty Gulch|{{color|#202122|Gusty Gulch}}]] ­ ­ ­ ­|­ ­ ­ ­ 7 Blocks (6 ?, 1 Coin) | |||
|- | |- | ||
|[[File:PMCoin.png]]<br>Coin | |[[File:PMCoin.png]]<br>Coin | ||
|In the scene with a [[Save_Block#Paper_Mario_series|Save Block]], found in the house right of the Save Block. | |In the scene with a [[Save_Block#Paper_Mario_series|Save Block]], found in the house right of the Save Block. | ||
| | |[[File:Gusty Gulch Block 1.png|250px]] | ||
|- | |- | ||
|[[File:PMCoin.png]]<br>Coin | |[[File:PMCoin.png]]<br>Coin | ||
|At the start of the scene one scene to the east of the Boo's area. | |At the start of the scene one scene to the east of the Boo's area. | ||
|[[File:Gusty Gulch Block 2.png|250px]] | |[[File:Gusty Gulch Block 2.png|250px]] | ||
|- | |- | ||
|[[File:PMCoin.png]] [[File:PaperMario Items RepelGel.png]]<br>Coin, [[Repel Gel]] | |[[File:PMCoin.png]] [[File:PaperMario Items RepelGel.png]]<br>Coin, [[Repel Gel]] | ||
|In the middle of the same scene. | |In the middle of the same scene. | ||
|[[File:Gusty Gulch Blocks 3-4.png|250px]] | |[[File:Gusty Gulch Blocks 3-4.png|250px]] | ||
|- | |- | ||
|[[File:PaperMario Items SuperShroom.png]] 10x[[File:PMCoin.png]] [[File:PMCoin.png]]<br>Super Shroom, 10 Coins, Coin | |[[File:PaperMario Items SuperShroom.png]] 10x[[File:PMCoin.png]] [[File:PMCoin.png]]<br>Super Shroom, 10 Coins, Coin | ||
|At the end of the scene before the scene with [[Tubba Blubba's Castle]] entrance. | |At the end of the scene before the scene with [[Tubba Blubba's Castle]] entrance. | ||
|[[File:Gusty Gulch Blocks 5-7.png|250px]] | |[[File:Gusty Gulch Blocks 5-7.png|250px]] | ||
|- | |- | ||
|[[Tubba Blubba's Castle]] | |-style="background: #C6BDDE;font-size:120%;color:#202122" id="Tubba Blubba's Castle" | ||
!colspan=3|[[Tubba Blubba's Castle|{{color|#202122|Tubba Blubba's Castle}}]] ­ ­ ­ ­|­ ­ ­ ­ 1 ? Block | |||
|- | |||
|[[File:PaperMario Items MapleSyrup.png]]<br>Maple Syrup | |[[File:PaperMario Items MapleSyrup.png]]<br>Maple Syrup | ||
|By the stairs that lead to the third floor. | |By the stairs that lead to the third floor. | ||
| | |[[File:Tubba Blubba's Castle Block.png|250px]] | ||
|} | |||
==Chapter 4: Trials in the Toy Box== | |||
There are a total of 16 Blocks to find in the [[Shy Guy's Toy Box]] during Chapter 4: | |||
*'''13 ? Blocks''' | |||
*'''3 Coin Blocks''' | |||
<br> | |||
{| style="text-align: center; width: 100%; margin: 0 auto; border: #A5CEDE; border-collapse: collapse;" border="1" cellpadding="4" cellspacing="1" | |||
|-style="background: #A5CEDE;font-size:14pt;color:white" | |||
!Item/s | |||
!Description | |||
!Image | |||
|- | |- | ||
| | |-style="background: #A5CEDE;font-size:120%;color:#202122" id="Shy Guy's Toy Box" | ||
!colspan=3|[[Shy Guy's Toy Box|{{color|#202122|Shy Guy's Toy Box}}]] ­ ­ ­ ­|­ ­ ­ ­ 16 Blocks (13 ?, 3 Coin) | |||
|- | |- | ||
|[[File:PMCoin.png]]<br>Coin | |[[File:PMCoin.png]]<br>Coin | ||
|At the end of the scene one scene east of the blue station. | |At the end of the scene one scene east of the blue station. | ||
| | |[[File:Shy Guy's Toy Box Block 1.png|250px]] | ||
|- | |- | ||
|[[File:PMCoin.png]]<br>Coin | |[[File:PMCoin.png]]<br>Coin | ||
|Left of the wall in the very east of the Blue Station area. | |Left of the wall in the very east of the Blue Station area. | ||
|[[File:Shy Guy's Toy Box Block 2.png|250px]] | |[[File:Shy Guy's Toy Box Block 2.png|250px]] | ||
|- | |- | ||
|[[File:PMCoin.png]] [[File:PaperMario Items ThunderBolt.png]]<br>Coin, [[Thunder Bolt (item)|Thunder Bolt]] | |[[File:PMCoin.png]] [[File:PaperMario Items ThunderBolt.png]]<br>Coin, [[Thunder Bolt (item)|Thunder Bolt]] | ||
|In the same scene, on the opposite side of the wall. | |In the same scene, on the opposite side of the wall. | ||
|[[File:Shy Guy's Toy Box Blocks 3-4.png|250px]] | |[[File:Shy Guy's Toy Box Blocks 3-4.png|250px]] | ||
|- | |- | ||
|[[File:PMCoin.png]]<br>Coin | |[[File:PMCoin.png]]<br>Coin | ||
|In the scene east of the Pink Station area, found above the walkway with looping [[Shy Guy]]s. | |In the scene east of the Pink Station area, found above the walkway with looping [[Shy Guy]]s. | ||
|[[File:Shy Guy's Toy Box Block 5 and Treasure Chest 5.png|250px]] | |[[File:Shy Guy's Toy Box Block 5 and Treasure Chest 5.png|250px]] | ||
|- | |- | ||
|[[File:PMCoin.png]]<br>Coin | |[[File:PMCoin.png]]<br>Coin | ||
|In the scene west of the Pink Station area, found above the flower boxes. | |In the scene west of the Pink Station area, found above the flower boxes. | ||
|[[File:Shy Guy's Toy Box Block 6.png|250px]] | |[[File:Shy Guy's Toy Box Block 6.png|250px]] | ||
|- | |- | ||
|[[File:PMCoin.png]]<br>Coin (both blocks) | |[[File:PMCoin.png]]<br>Coin (both blocks) | ||
|In the next scene, found in the northwestern corner. | |In the next scene, found in the northwestern corner. | ||
|[[File:Shy Guy's Toy Box Blocks 7-8.png|250px]] | |[[File:Shy Guy's Toy Box Blocks 7-8.png|250px]] | ||
|- | |- | ||
|[[File:PMCoin.png]] 10x[[File:PMCoin.png]] [[File:PMCoin.png]]<br>Coin, 10 Coins, Coin | |[[File:PMCoin.png]] 10x[[File:PMCoin.png]] [[File:PMCoin.png]]<br>Coin, 10 Coins, Coin | ||
|In the previous scene, found on the northern side of the tracks. | |In the previous scene, found on the northern side of the tracks. | ||
|[[File:Shy Guy's Toy Box Blocks 9-11.png|250px]] | |[[File:Shy Guy's Toy Box Blocks 9-11.png|250px]] | ||
|- | |- | ||
|[[File:PMCoin.png]][[File:PMCoin.png]][[File:PMCoin.png]][[File:PMCoin.png]][[File:PMCoin.png]][[File:PMCoin.png]][[File:PMCoin.png]][[File:PMCoin.png]][[File:PMCoin.png]][[File:PMCoin.png]]<br>10 Coins | |[[File:PMCoin.png]][[File:PMCoin.png]][[File:PMCoin.png]][[File:PMCoin.png]][[File:PMCoin.png]][[File:PMCoin.png]][[File:PMCoin.png]][[File:PMCoin.png]][[File:PMCoin.png]][[File:PMCoin.png]]<br>10 Coins | ||
|In the scene east of the Green Station area, found above the moving pink platform near the end of the area. | |In the scene east of the Green Station area, found above the moving pink platform near the end of the area. | ||
|[[File:Shy Guy's Toy Box Block 12.png|250px]] | |[[File:Shy Guy's Toy Box Block 12.png|250px]] | ||
|- | |- | ||
|[[File:PMCoin.png]][[File:PMCoin.png]][[File:PMCoin.png]][[File:PMCoin.png]][[File:PMCoin.png]][[File:PMCoin.png]][[File:PMCoin.png]][[File:PMCoin.png]][[File:PMCoin.png]][[File:PMCoin.png]]<br>10 Coins | |[[File:PMCoin.png]][[File:PMCoin.png]][[File:PMCoin.png]][[File:PMCoin.png]][[File:PMCoin.png]][[File:PMCoin.png]][[File:PMCoin.png]][[File:PMCoin.png]][[File:PMCoin.png]][[File:PMCoin.png]]<br>10 Coins | ||
|In the scene west of the Red Station area, found above the ferris wheel. | |In the scene west of the Red Station area, found above the ferris wheel. | ||
|[[File:Shy Guy's Toy Box Block 13.png|250px]] | |[[File:Shy Guy's Toy Box Block 13.png|250px]] | ||
|- | |- | ||
|[[File:PMCoin.png]]<br>Coin (both blocks) | |[[File:PMCoin.png]]<br>Coin (both blocks) | ||
|In the same scene, in the lower part of the scene left of the ferris wheel. | |In the same scene, in the lower part of the scene left of the ferris wheel. | ||
|[[File:Shy Guy's Toy Box Blocks 14-15.png|250px]] | |[[File:Shy Guy's Toy Box Blocks 14-15.png|250px]] | ||
|- | |- | ||
|[[File:PaperMario Items SleepySheep.png]]<br>Sleepy Sheep | |[[File:PaperMario Items SleepySheep.png]]<br>Sleepy Sheep | ||
|In the northwestern corner of the scene to the east of the Red Station area. | |In the northwestern corner of the scene to the east of the Red Station area. | ||
|[[File:Shy Guy's Toy Box Block 16.png|250px]] | |[[File:Shy Guy's Toy Box Block 16.png|250px]] | ||
|} | |||
==Chapter 5: Hot Hot Times on Lavalava Island== | |||
There are a total of 7 ? Blocks to find during Chapter 5: | |||
*[[Jade Jungle]] has '''1 ? Block''' | |||
*[[Mt. Lavalava]] has '''6 ? Blocks''' | |||
<br> | |||
{| style="text-align: center; width: 100%; margin: 0 auto; border: #FFC6D6; border-collapse: collapse;" border="1" cellpadding="4" cellspacing="1" | |||
|-style="background: #FFC6D6;font-size:14pt;color:white" | |||
!Item/s | |||
!Description | |||
!Image | |||
|- | |- | ||
| | |-style="background: #FFC6D6;font-size:120%;color:#202122" id="Jade Jungle" | ||
!colspan=3|[[Jade Jungle|{{color|#202122|Jade Jungle}}]] ­ ­ ­ ­|­ ­ ­ ­ 1 ? Block | |||
|- | |- | ||
|[[File:Power Quake Badge.png]]<br>[[Power Quake]] | |[[File:Power Quake Badge.png]]<br>[[Power Quake]] | ||
|In the scene with jungle entrance to the [[Yoshi Village]], found on an island at the center. | |In the scene with jungle entrance to the [[Yoshi Village]], found on an island at the center. | ||
| | |[[File:Jade Jungle Block.png|250px]] | ||
|- | |||
|-style="background: #FFC6D6;font-size:120%;color:#202122" id="Mt. Lavalava" | |||
!colspan=3|[[Mt. Lavalava|{{color|#202122|Mt. Lavalava}}]] ­ ­ ­ ­|­ ­ ­ ­ 6 ? Blocks | |||
|- | |- | ||
|[[File:PMCoin.png]]<br>Coin (all four blocks) | |[[File:PMCoin.png]]<br>Coin (all four blocks) | ||
|On the top of the third scene, under the first zipline. | |On the top of the third scene, under the first zipline. | ||
| | |[[File:Mt. Lavalava Blocks 1-4.png|250px]] | ||
|- | |- | ||
|[[File:PaperMario Items SuperShroom.png]] [[File:PaperMario Items MapleSyrup.png]]<br>Super Shroom, Maple Syrup | |[[File:PaperMario Items SuperShroom.png]] [[File:PaperMario Items MapleSyrup.png]]<br>Super Shroom, Maple Syrup | ||
|In the scene above the Lava Piranha scene. | |In the scene above the Lava Piranha scene. | ||
|[[File:Mt. Lavalava Blocks 5-6.png|250px]] | |[[File:Mt. Lavalava Blocks 5-6.png|250px]] | ||
|} | |||
==Chapter 6: Dark Days in Flower Fields== | |||
There are a total of 7 Blocks to find during Chapter 6: | |||
*[[Flower Fields]] has '''2 Blocks''' - 1 ?, 1 Coin | |||
*[[Toad Town Tunnels]] has '''5 ? Blocks''' | |||
<br> | |||
{| style="text-align: center; width: 100%; margin: 0 auto; border: #E7E719; border-collapse: collapse;" border="1" cellpadding="4" cellspacing="1" | |||
|-style="background: #E7E719;font-size:14pt;color:white" | |||
!Item/s | |||
!Description | |||
!Image | |||
|- | |- | ||
| | |-style="background: #E7E719;font-size:120%;color:#202122" id="Flower Fields" | ||
!colspan=3|[[Flower Fields|{{color|#202122|Flower Fields}}]] ­ ­ ­ ­|­ ­ ­ ­ 2 Blocks (1 ?, 1 Coin) | |||
|- | |- | ||
|[[File:PaperMario Items DizzyDial.png]]<br>[[Dizzy Dial]] | |[[File:PaperMario Items DizzyDial.png]]<br>[[Dizzy Dial]] | ||
|In the second scene on the southeastern road. | |In the second scene on the southeastern road. | ||
| | |[[File:Flower Fields Block 1.png|250px]] | ||
|- | |- | ||
|[[File:PMCoin.png]][[File:PMCoin.png]][[File:PMCoin.png]][[File:PMCoin.png]][[File:PMCoin.png]][[File:PMCoin.png]][[File:PMCoin.png]][[File:PMCoin.png]][[File:PMCoin.png]][[File:PMCoin.png]]<br>10 Coins | |[[File:PMCoin.png]][[File:PMCoin.png]][[File:PMCoin.png]][[File:PMCoin.png]][[File:PMCoin.png]][[File:PMCoin.png]][[File:PMCoin.png]][[File:PMCoin.png]][[File:PMCoin.png]][[File:PMCoin.png]]<br>10 Coins | ||
|In the center of the Hedge Maze found on the western road. Accessed by going right from the last pipe in the maze. | |In the center of the Hedge Maze found on the western road. Accessed by going right from the last pipe in the maze. | ||
|[[File:Flower Fields Block 2.png|250px]] | |[[File:Flower Fields Block 2.png|250px]] | ||
|- | |- | ||
|Toad Town Tunnels | |-style="background: #E7E719;font-size:120%;color:#202122" id="Toad Town Tunnels" | ||
!colspan=3|[[Toad Town Tunnels|{{color|#202122|Toad Town Tunnels}}]] ­ ­ ­ ­|­ ­ ­ ­ 5 ? Blocks | |||
|- | |||
|[[File:PMCoin.png]]<br>Coin | |[[File:PMCoin.png]]<br>Coin | ||
|Beneath the entrance room, there is a pipe by the path to the right that eventually leads to the Ultra Boots. In the first room down the pipe, found near the exit. | |Beneath the entrance room, there is a pipe by the path to the right that eventually leads to the Ultra Boots. In the first room down the pipe, found near the exit. | ||
|[[File:Toad Town Tunnels Block 5.png|250px]] | |[[File:Toad Town Tunnels Block 5.png|250px]] | ||
|- | |- | ||
|[[File:PMCoin.png]]<br>Coin (both blocks) | |[[File:PMCoin.png]]<br>Coin (both blocks) | ||
|In the next room, found between the brick blocks. They are high in the air, so [[Ultra Boots]] are required. | |In the next room, found between the brick blocks. They are high in the air, so [[Ultra Boots]] are required. | ||
|[[File:Toad Town Tunnels Blocks 6-7.png|250px]] | |[[File:Toad Town Tunnels Blocks 6-7.png|250px]] | ||
|- | |- | ||
|[[File:PaperMario Items ShootingStar.png]]<br>[[Shooting Star (item)|Shooting Star]] | |[[File:PaperMario Items ShootingStar.png]]<br>[[Shooting Star (item)|Shooting Star]] | ||
|Beneath the entrance room, in the northwestern corner and high in the air, so Ultra Boots are required. | |Beneath the entrance room, in the northwestern corner and high in the air, so Ultra Boots are required. | ||
|[[File:Toad Town Tunnels Block 8.png|250px]] | |[[File:Toad Town Tunnels Block 8.png|250px]] | ||
|- | |- | ||
|[[File:PMCoin.png]]<br>Coin | |[[File:PMCoin.png]]<br>Coin | ||
|In the area two screens east of the blue Warp Pipe to Yoshi's Village is a gap between two high platforms, with a doorway leading to [[Shiver City]] in the east. Found touching the western platform, high in the air, so Ultra Boots are required. | |In the area two screens east of the blue Warp Pipe to Yoshi's Village is a gap between two high platforms, with a doorway leading to [[Shiver City]] in the east. Found touching the western platform, high in the air, so Ultra Boots are required. | ||
|[[File:Toad Town Tunnels Block 9.png|250px]] | |[[File:Toad Town Tunnels Block 9.png|250px]] | ||
|} | |||
==Chapter 7: A Star Spirit on Ice== | |||
There are a total of 5 Blocks to find during Chapter 7: | |||
*[[Shiver Mountain]] has '''1 ? Block''' | |||
*[[Crystal Palace]] has '''4 Blocks''' - 2 ?, 2 Coin | |||
<br> | |||
{| style="text-align: center; width: 100%; margin: 0 auto; border: #DED618; border-collapse: collapse;" border="1" cellpadding="4" cellspacing="1" | |||
|-style="background: #DED618;font-size:14pt;color:white" | |||
!Item/s | |||
!Description | |||
!Image | |||
|- | |- | ||
| | |-style="background: #DED618;font-size:120%;color:#202122" id="Shiver Mountain" | ||
!colspan=3|[[Shiver Mountain|{{color|#202122|Shiver Mountain}}]] ­ ­ ­ ­|­ ­ ­ ­ 1 ? Block | |||
|- | |- | ||
|[[File:Mega Jump Badge.png]]<br>[[Mega Jump]] | |[[File:Mega Jump Badge.png]]<br>[[Mega Jump]] | ||
|On the second floor in the fourth scene. | |On the second floor in the fourth scene. | ||
| | |[[File:Shiver Mountain Block.png|250px]] | ||
|- | |||
|-style="background: #DED618;font-size:120%;color:#202122" id="Crystal Palace" | |||
!colspan=3|[[Crystal Palace|{{color|#202122|Crystal Palace}}]] ­ ­ ­ ­|­ ­ ­ ­ 4 Blocks (2 ?, 2 Coin) | |||
|- | |- | ||
|[[File:PMCoin.png]][[File:PMCoin.png]][[File:PMCoin.png]][[File:PMCoin.png]][[File:PMCoin.png]][[File:PMCoin.png]][[File:PMCoin.png]][[File:PMCoin.png]][[File:PMCoin.png]][[File:PMCoin.png]]<br>10 Coins (both blocks) | |[[File:PMCoin.png]][[File:PMCoin.png]][[File:PMCoin.png]][[File:PMCoin.png]][[File:PMCoin.png]][[File:PMCoin.png]][[File:PMCoin.png]][[File:PMCoin.png]][[File:PMCoin.png]][[File:PMCoin.png]]<br>10 Coins (both blocks) | ||
|In the second room after going through the blue locked door. | |In the second room after going through the blue locked door. | ||
| | |[[File:Crystal Palace Blocks 1-2.png|250px]] | ||
|- | |- | ||
|[[File:PaperMario Items SuperShroom.png]]<br>Super Shroom | |[[File:PaperMario Items SuperShroom.png]]<br>Super Shroom | ||
|Near the door in the room to the north of the first room. | |Near the door in the room to the north of the first room. | ||
|[[File:Crystal Palace Block 3.png|250px]] | |[[File:Crystal Palace Block 3.png|250px]] | ||
|- | |- | ||
|[[File:PaperMario Items MapleSyrup.png]]<br>Maple Syrup | |[[File:PaperMario Items MapleSyrup.png]]<br>Maple Syrup | ||
|Near the door in the big [[Albino Dino]] statue room. It is high in the air, so Ultra Boots are required. | |Near the door in the big [[Albino Dino]] statue room. It is high in the air, so Ultra Boots are required. | ||
|[[File:Crystal Palace Block 4.png|250px]] | |[[File:Crystal Palace Block 4.png|250px]] | ||
|} | |||
==Chapter 8: A Star-Powered Showdown!== | |||
There are a total of 8 ? Blocks to find in [[Bowser%27s_Castle#Paper_Mario|Bowser's Castle]] during the Chapter 8. | |||
<br> | |||
{| style="text-align: center; width: 100%; margin: 0 auto; border: #ABC; border-collapse: collapse;" border="1" cellpadding="4" cellspacing="1" | |||
|-style="background: #ABC;font-size:14pt;color:white" | |||
!Item/s | |||
!Description | |||
!Image | |||
|- | |- | ||
| | |-style="background: #ABC;font-size:120%;color:#202122" id="Bowser's Castle" | ||
!colspan=3|[[Bowser's Castle#Paper Mario|{{color|#202122|Bowser's Castle}}]] ­ ­ ­ ­|­ ­ ­ ­ 8 ? Blocks | |||
|- | |- | ||
|[[File:PaperMario Items LifeShroom.png]]<br>[[Life Mushroom (Paper Mario series)|Life Shroom]] | |[[File:PaperMario Items LifeShroom.png]]<br>[[Life Mushroom (Paper Mario series)|Life Shroom]] | ||
|On a platform in the lava area next to the front door scene. | |On a platform in the lava area next to the front door scene. | ||
| | |[[File:Bowser's Castle Block 1.png|250px]] | ||
|- | |- | ||
|[[File:Deep Focus Badge.png]]<br>[[Deep Focus]] | |[[File:Deep Focus Badge.png]]<br>[[Deep Focus]] | ||
|On a platform in the lava area, near the entrance. | |On a platform in the lava area, near the entrance. | ||
|[[File:Bowser's Castle Block 2.png|250px]] | |[[File:Bowser's Castle Block 2.png|250px]] | ||
|- | |- | ||
|[[File:PaperMario Items POWBlock.png]]<br>POW Block | |[[File:PaperMario Items POWBlock.png]]<br>POW Block | ||
|At the end of the north fork road in the first grotto scene. | |At the end of the north fork road in the first grotto scene. | ||
|[[File:Bowser's Castle Block 3.png|250px]] | |[[File:Bowser's Castle Block 3.png|250px]] | ||
|- | |- | ||
|[[File:PaperMario Items ShootingStar.png]]<br>Shooting Star | |[[File:PaperMario Items ShootingStar.png]]<br>Shooting Star | ||
|At the end of the north fork road in the second grotto scene. | |At the end of the north fork road in the second grotto scene. | ||
|[[File:Bowser's Castle Block 4.png|250px]] | |[[File:Bowser's Castle Block 4.png|250px]] | ||
|- | |- | ||
|[[File:PaperMario Items SuperShroom.png]]<br>Super Shroom | |[[File:PaperMario Items SuperShroom.png]]<br>Super Shroom | ||
|In the middle of the first [[Dry_Bones#Paper_Mario|Dry Bones]] room. | |In the middle of the first [[Dry_Bones#Paper_Mario|Dry Bones]] room. | ||
|[[File:Bowser's Castle Block 5.png|250px]] | |[[File:Bowser's Castle Block 5.png|250px]] | ||
|- | |- | ||
|[[File:PaperMario Items SuperShroom.png]] [[File:PaperMario Items MapleSyrup.png]]<br>Super Shroom, Maple Syrup | |[[File:PaperMario Items SuperShroom.png]] [[File:PaperMario Items MapleSyrup.png]]<br>Super Shroom, Maple Syrup | ||
|Found outside after the quiz room near the door. | |Found outside after the quiz room near the door. | ||
|[[File:Bowser's Castle Blocks 6-7.png|250px]] | |[[File:Bowser's Castle Blocks 6-7.png|250px]] | ||
|- | |- | ||
|[[File:PaperMario Items SuperShroom.png]]<br>Super Shroom | |[[File:PaperMario Items SuperShroom.png]]<br>Super Shroom | ||
|In the same scene, found after going to the right. | |In the same scene, found after going to the right. | ||
|[[File:Bowser's Castle Block 8.png|250px]] | |[[File:Bowser's Castle Block 8.png|250px]] | ||
|} | |} | ||
==Statistics== | ==Statistics== | ||
This chart shows the number of ? Blocks for each location, with the total amount at the bottom. Locations are listed in the order the player can visit them. | This chart shows the number of ? Blocks for each location, with the total amount at the bottom. Locations are listed in the order the player can visit them. | ||
<onlyinclude>{|style="text-align: center; width: 100% | <onlyinclude>{|style="text-align: center; width: 100%" class="wikitable sortable" | ||
!width="25%"|Location | !width="25%"|Location | ||
!width="25%"|? Blocks | !width="25%"|? Blocks | ||
!width="25%"|Coin Blocks | !width="25%"|Coin Blocks | ||
!width="25%"|Total | !width="25%"|Total | ||
|- | |- | ||
|[[Goomba Village (location)|Goomba Village]]||1||1||2 | |[[Goomba Village (location)|Goomba Village]]||1||1||2 | ||
| Line 491: | Line 526: | ||
|- | |- | ||
|[[Bowser%27s_Castle#Paper_Mario|Bowser's Castle]]||8||0||8 | |[[Bowser%27s_Castle#Paper_Mario|Bowser's Castle]]||8||0||8 | ||
|-style=" | |-style="font-weight:bold" | ||
|Total||83||24||107 | |Total||83||24||107 | ||
|}</onlyinclude> | |}</onlyinclude> | ||
==See also== | ==See also== | ||
*[[Super Block]] | |||
*[[List of hidden blocks in Paper Mario|List of hidden blocks in ''Paper Mario'']] | *[[List of hidden blocks in Paper Mario|List of hidden blocks in ''Paper Mario'']] | ||
*[[List of treasure chests in Paper Mario|List of treasure chests in ''Paper Mario'']] | *[[List of treasure chests in Paper Mario|List of treasure chests in ''Paper Mario'']] | ||
Latest revision as of 19:21, September 11, 2024
- This article is about the visible blocks from Paper Mario. For the hidden ones from same game, see List of hidden blocks in Paper Mario.
This is a list of block from Paper Mario. There are 107 visible blocks in the game. There are two types of blocks:
- ? Block: Yellow/red blocks with white question mark on them. They contain mostly single coins or items, with occasional Badge.
- Coin Block: These blocks have same design as Brick Blocks and contain 10 coins.
Mario's House, Princess Peach's Castle, Shooting Star Summit, Koopa Village, Dry Dry Outpost, Windy Mill, Yoshi's Village, Shiver City, Shiver Snowfield, Starborn Valley, Star Way and Star Haven are the only locations without any visible block.
Prologue: A Plea from the Stars[edit]
There are a total of 7 Blocks to find during the Prologue:
- Goomba Village has 2 Blocks - 1 ? and 1 Coin
- Goomba Road has 5 ? Blocks
| Item/s | Description | Image | |
|---|---|---|---|
| Goomba Village | 2 Blocks (1 ?, 1 Coin) | |||
10 Coins |
At Jr. Troopa's playground, near the tree with Goombaria's Dolly. | 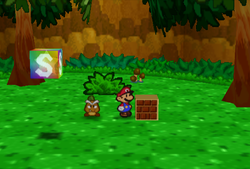
| |
Coin |
Near the entrance to Jr. Troopa's playground. | 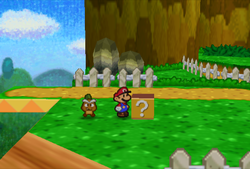
| |
| Goomba Road | 5 ? Blocks | |||
Coin (both blocks) |
In the middle of the first scene. | 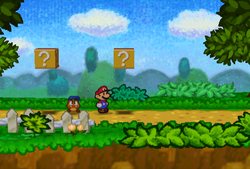
| |
Close Call |
In the red badge block on the second part of the path. | 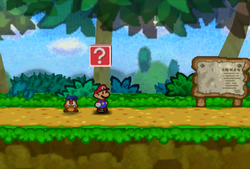
| |
Super Shroom |
To the south of the opening after Goomba King's Fortress, there is a brick which will reveal a ? Block after being hit. | 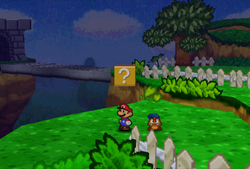
| |
Sleepy Sheep |
Near the descending stairs between Goomba King's Fortress and Toad Town. | 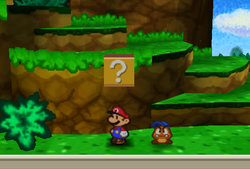
| |
Chapter 1: Storming Koopa Bros. Fortress[edit]
There are a total of 10 Blocks to find during Chapter 1:
- Pleasant Path has 6 Blocks - 5 ? and 1 Coin
- Koopa Bros. Fortress has 2 ? Blocks
- Toad Town has 1 Coin Block
- Toad Town Tunnels has 1 Coin Block
| Item/s | Description | Image |
|---|---|---|
| Pleasant Path | 6 Blocks (5 ?, 1 Coin) | ||
Coin, Dizzy Attack |
In the middle of the first scene. | 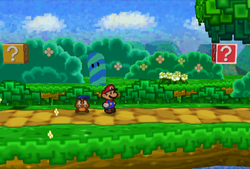
|
Fright Jar |
In the rightmost block at the first scene. | 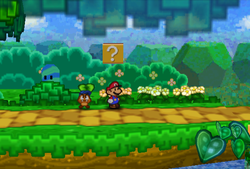
|
POW Block |
At the start of the second scene. | 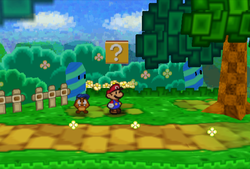
|
10 Coins |
At the end of the second scene. | 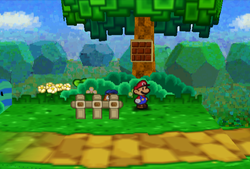
|
Attack FX B |
Smashing the blocks near the entrance of Koopa Village in the order "left, right, middle" will reveal a red ? Badge block. | 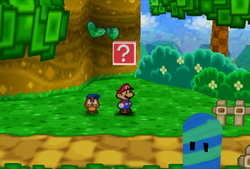
|
| Koopa Bros. Fortress | 2 ? Blocks | ||
| EMPTY/TRAP | Required to progress, found at the top of the room accessed by a second locked door. | 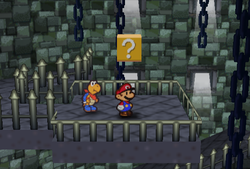
|
Maple Syrup |
At the Bullet Bill dodging scene, at the southwestern corner. | 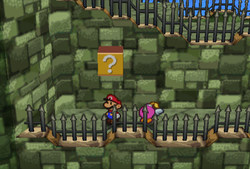
|
| Toad Town | 1 Coin Block | ||
10 Coins |
After gaining access to the rest of Toad Town, this block is found floating above wooden crates in the port. | 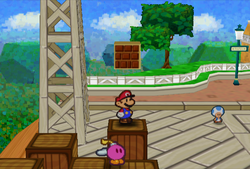
|
| Toad Town Tunnels | 1 Coin Block | ||
10 Coins |
Third brick block in the row of brick blocks found at the room right of the tunnels entrance. | 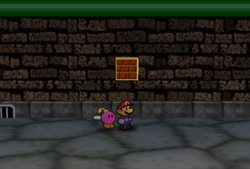
|
Chapter 2: The Mystery of Dry Dry Ruins[edit]
There are a total of 36 Blocks to find during Chapter 2:
- Mt. Rugged has 4 ? Blocks
- Dry Dry Desert has 28 Blocks - 15 ? and 13 Coin
- Dry Dry Ruins has 1 ? Block
- Toad Town Tunnels has 3 ? Blocks
| Item/s | Description | Image |
|---|---|---|
| Mt. Rugged | 4 ? Blocks | ||
Sleepy Sheep |
At the southeastern corner of the second scene. | 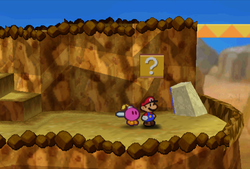
|
Mushroom |
Near the start of the scene to the north of the second scene, accessible after sliding the slope in the third scene. | 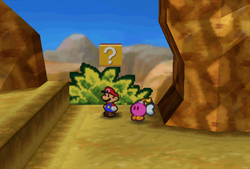
|
Coin |
After using the trampoline in the same scene, found on the left. | 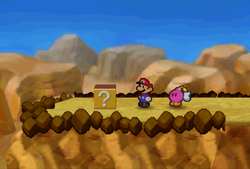
|
Honey Syrup |
After using the trampoline in the same scene, found after going to the right, guarded by a Cleft. | 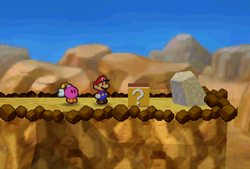
|
| Dry Dry Desert | 28 Blocks (15 ?, 13 Coin) | ||
Fright Jar, Coin |
In the scene three scenes north of the entrance. | 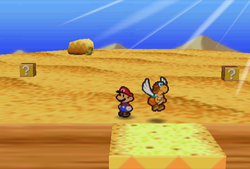
|
10 Coins |
In the scene six scenes east of the previous one, left of the tree. | 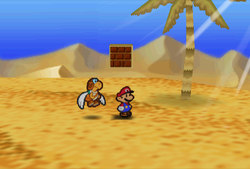
|
Coin, 10 Coins, Honey Syrup |
In the scene two scenes west and one south of the previous one. | 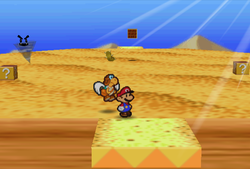
|
Mushroom, Super Shroom, Ultra Shroom |
In the scene four scenes west and one south of the previous one. Here, Mario must hammer the empty ? block to make others appear. One hit spawns a block to the left with a Mushroom, ten hits spawn a block to the right with a Super Shroom and one hundred hits spawns a block in the midle with a Ultra Shroom. | 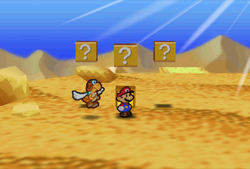
|
Coin, Coin, Fire Flower, Coin, Coin |
In the scene two scenes east from the previous one. | 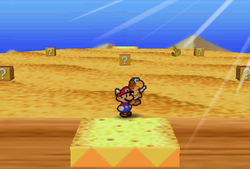
|
10 Coins (both blocks) |
In the scene three scenes east from the previous one, two brick blocks closest to the northern exit. | 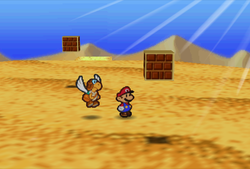
|
10 Coins |
In the scene five scenes west and two south from the previous one, the middle brick block. | 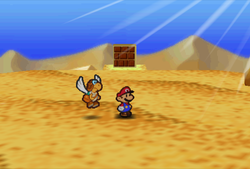
|
Coin |
In the scene three scenes east from the previous one. | 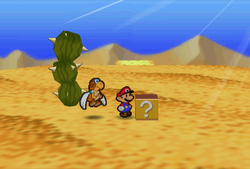
|
Coin |
In the scene three scenes east from the previous one. | 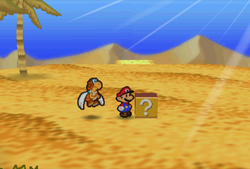
|
10 Coins |
In the scene four scenes west and one south from the previous one, the brick block closest to the northern exit. | 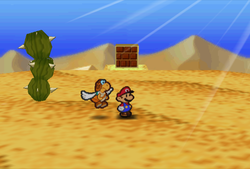
|
10 Coins |
In the scene three scenes east from the previous one. | 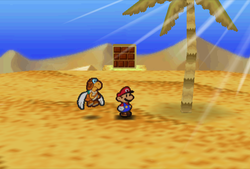
|
Coin |
In the scene one west and one south from the previous one. | 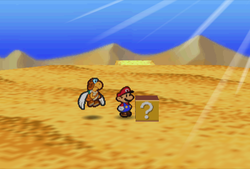
|
10 Coins (all six blocks) |
In the scene two east from the previous one. | 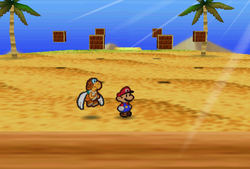
|
| Dry Dry Ruins | 1 ? Block | ||
| EMPTY/TRAP | Required to progress, found at the end of the room with Ancient Artifact. | 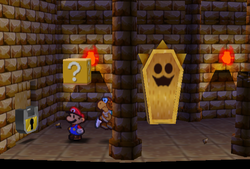
|
| Toad Town Tunnels | 3 ? Blocks | ||
Coin, Snowman Doll, Coin |
In the room west of the entrance but before the pipe leading to the new area. | 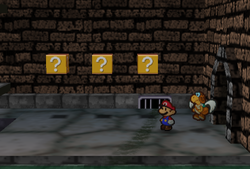
|
Chapter 3: The "Invincible" Tubba Blubba[edit]
There are a total of 11 Blocks to find during Chapter 3:
- Forever Forest has 2 ? Blocks
- Boo's Mansion has 1 ? Block
- Gusty Gulch has 7 Blocks - 6 ?, 1 Coin
- Tubba Blubba's Castle has 1 ? Block
| Item/s | Description | Image |
|---|---|---|
| Forever Forest | 2 ? Blocks | ||
HP Plus |
In the middle of a clearing found on a detour from the fifth area. | 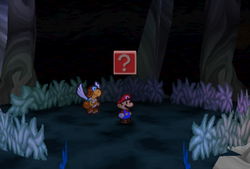
|
FP Plus |
In the middle of a clearing found on a detour from the seventh area. | 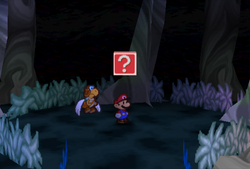
|
| Boo's Mansion | 1 ? Block | ||
Volt Shroom |
Outside the mansion, in front of the gate. | 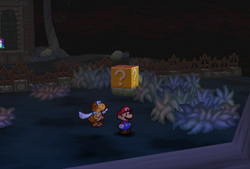
|
| Gusty Gulch | 7 Blocks (6 ?, 1 Coin) | ||
Coin |
In the scene with a Save Block, found in the house right of the Save Block. | 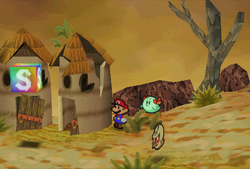
|
Coin |
At the start of the scene one scene to the east of the Boo's area. | 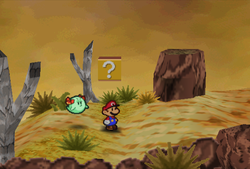
|
Coin, Repel Gel |
In the middle of the same scene. | 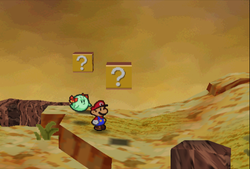
|
Super Shroom, 10 Coins, Coin |
At the end of the scene before the scene with Tubba Blubba's Castle entrance. | 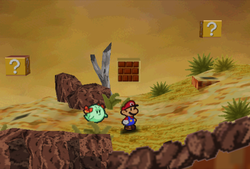
|
| Tubba Blubba's Castle | 1 ? Block | ||
Maple Syrup |
By the stairs that lead to the third floor. | 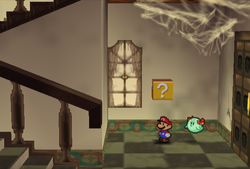
|
Chapter 4: Trials in the Toy Box[edit]
There are a total of 16 Blocks to find in the Shy Guy's Toy Box during Chapter 4:
- 13 ? Blocks
- 3 Coin Blocks
| Item/s | Description | Image |
|---|---|---|
| Shy Guy's Toy Box | 16 Blocks (13 ?, 3 Coin) | ||
Coin |
At the end of the scene one scene east of the blue station. | 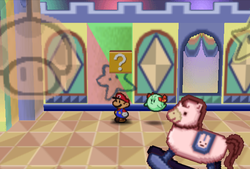
|
Coin |
Left of the wall in the very east of the Blue Station area. | 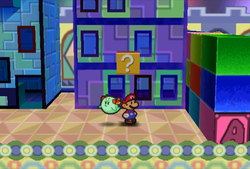
|
Coin, Thunder Bolt |
In the same scene, on the opposite side of the wall. | 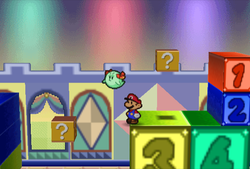
|
Coin |
In the scene east of the Pink Station area, found above the walkway with looping Shy Guys. | 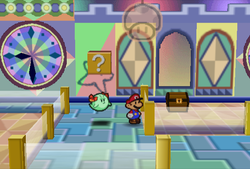
|
Coin |
In the scene west of the Pink Station area, found above the flower boxes. | 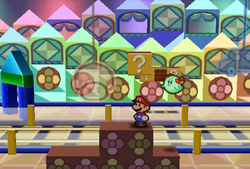
|
Coin (both blocks) |
In the next scene, found in the northwestern corner. | 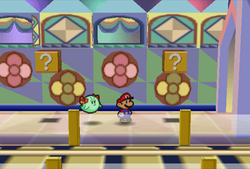
|
Coin, 10 Coins, Coin |
In the previous scene, found on the northern side of the tracks. | 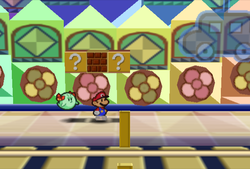
|
10 Coins |
In the scene east of the Green Station area, found above the moving pink platform near the end of the area. | 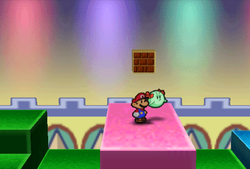
|
10 Coins |
In the scene west of the Red Station area, found above the ferris wheel. | 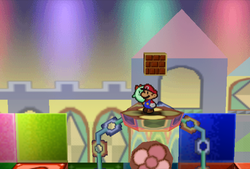
|
Coin (both blocks) |
In the same scene, in the lower part of the scene left of the ferris wheel. | 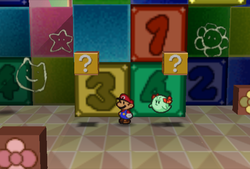
|
Sleepy Sheep |
In the northwestern corner of the scene to the east of the Red Station area. | 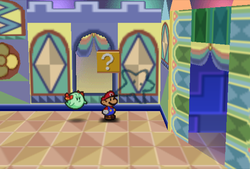
|
Chapter 5: Hot Hot Times on Lavalava Island[edit]
There are a total of 7 ? Blocks to find during Chapter 5:
- Jade Jungle has 1 ? Block
- Mt. Lavalava has 6 ? Blocks
| Item/s | Description | Image |
|---|---|---|
| Jade Jungle | 1 ? Block | ||
Power Quake |
In the scene with jungle entrance to the Yoshi Village, found on an island at the center. | 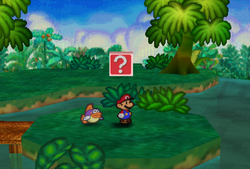
|
| Mt. Lavalava | 6 ? Blocks | ||
Coin (all four blocks) |
On the top of the third scene, under the first zipline. | 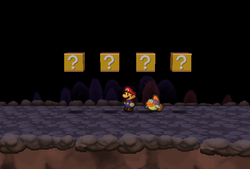
|
Super Shroom, Maple Syrup |
In the scene above the Lava Piranha scene. | 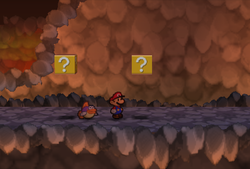
|
Chapter 6: Dark Days in Flower Fields[edit]
There are a total of 7 Blocks to find during Chapter 6:
- Flower Fields has 2 Blocks - 1 ?, 1 Coin
- Toad Town Tunnels has 5 ? Blocks
| Item/s | Description | Image |
|---|---|---|
| Flower Fields | 2 Blocks (1 ?, 1 Coin) | ||
Dizzy Dial |
In the second scene on the southeastern road. | 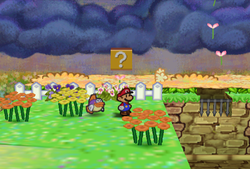
|
10 Coins |
In the center of the Hedge Maze found on the western road. Accessed by going right from the last pipe in the maze. | 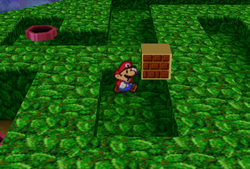
|
| Toad Town Tunnels | 5 ? Blocks | ||
Coin |
Beneath the entrance room, there is a pipe by the path to the right that eventually leads to the Ultra Boots. In the first room down the pipe, found near the exit. | 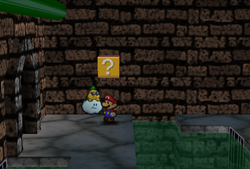
|
Coin (both blocks) |
In the next room, found between the brick blocks. They are high in the air, so Ultra Boots are required. | 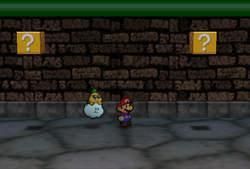
|
Shooting Star |
Beneath the entrance room, in the northwestern corner and high in the air, so Ultra Boots are required. | 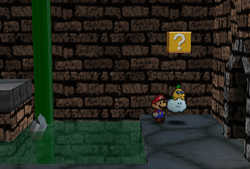
|
Coin |
In the area two screens east of the blue Warp Pipe to Yoshi's Village is a gap between two high platforms, with a doorway leading to Shiver City in the east. Found touching the western platform, high in the air, so Ultra Boots are required. | 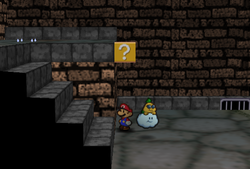
|
Chapter 7: A Star Spirit on Ice[edit]
There are a total of 5 Blocks to find during Chapter 7:
- Shiver Mountain has 1 ? Block
- Crystal Palace has 4 Blocks - 2 ?, 2 Coin
| Item/s | Description | Image |
|---|---|---|
| Shiver Mountain | 1 ? Block | ||
Mega Jump |
On the second floor in the fourth scene. | 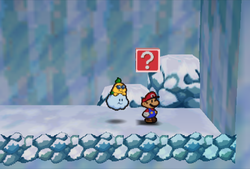
|
| Crystal Palace | 4 Blocks (2 ?, 2 Coin) | ||
10 Coins (both blocks) |
In the second room after going through the blue locked door. | 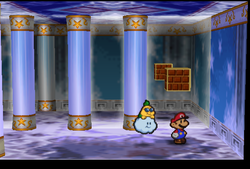
|
Super Shroom |
Near the door in the room to the north of the first room. | 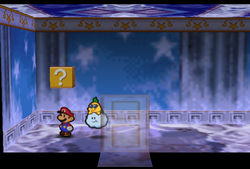
|
Maple Syrup |
Near the door in the big Albino Dino statue room. It is high in the air, so Ultra Boots are required. | 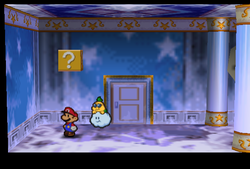
|
Chapter 8: A Star-Powered Showdown![edit]
There are a total of 8 ? Blocks to find in Bowser's Castle during the Chapter 8.
| Item/s | Description | Image |
|---|---|---|
| Bowser's Castle | 8 ? Blocks | ||
Life Shroom |
On a platform in the lava area next to the front door scene. | 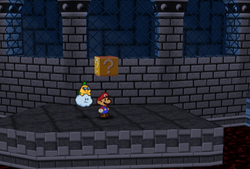
|
Deep Focus |
On a platform in the lava area, near the entrance. | 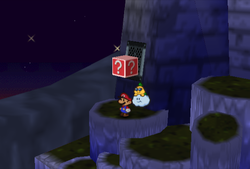
|
POW Block |
At the end of the north fork road in the first grotto scene. | 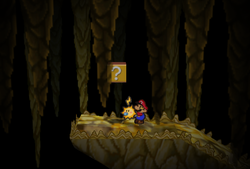
|
Shooting Star |
At the end of the north fork road in the second grotto scene. | 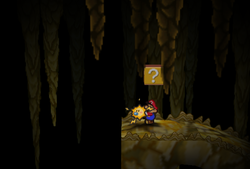
|
Super Shroom |
In the middle of the first Dry Bones room. | 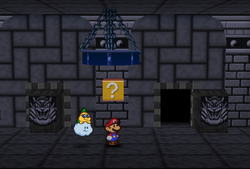
|
Super Shroom, Maple Syrup |
Found outside after the quiz room near the door. | 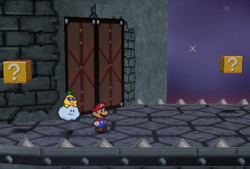
|
Super Shroom |
In the same scene, found after going to the right. | 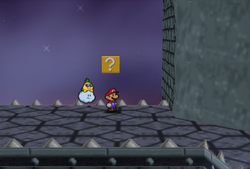
|
Statistics[edit]
This chart shows the number of ? Blocks for each location, with the total amount at the bottom. Locations are listed in the order the player can visit them.
| Location | ? Blocks | Coin Blocks | Total |
|---|---|---|---|
| Goomba Village | 1 | 1 | 2 |
| Goomba Road | 5 | 0 | 5 |
| Pleasant Path | 5 | 1 | 6 |
| Koopa Bros. Fortress | 2 | 0 | 2 |
| Toad Town | 0 | 1 | 1 |
| Toad Town Tunnels | 8 | 1 | 9 |
| Mt. Rugged | 4 | 0 | 4 |
| Dry Dry Desert | 15 | 13 | 28 |
| Dry Dry Ruins | 1 | 0 | 1 |
| Forever Forest | 2 | 0 | 2 |
| Boo's Mansion | 1 | 0 | 1 |
| Gusty Gulch | 6 | 1 | 7 |
| Tubba Blubba's Castle | 1 | 0 | 1 |
| Shy Guy's Toy Box | 13 | 3 | 16 |
| Jade Jungle | 1 | 0 | 1 |
| Mt. Lavalava | 6 | 0 | 6 |
| Flower Fields | 1 | 1 | 2 |
| Shiver Mountain | 1 | 0 | 1 |
| Crystal Palace | 2 | 2 | 4 |
| Bowser's Castle | 8 | 0 | 8 |
| Total | 83 | 24 | 107 |
See also[edit]
- Super Block
- List of hidden blocks in Paper Mario
- List of treasure chests in Paper Mario
- List of Star Pieces in Paper Mario
- List of blocks in Paper Mario: The Thousand-Year Door
- List of blocks in Super Paper Mario
- List of blocks in Paper Mario: Sticker Star
- List of blocks in Paper Mario: Color Splash
- List of ? Blocks in Paper Mario: The Origami King
