Gallery:Yoshi's Island: Super Mario Advance 3: Difference between revisions
No edit summary |
mNo edit summary |
||
| (43 intermediate revisions by 16 users not shown) | |||
| Line 6: | Line 6: | ||
Yoshis island logo.png|International logo | Yoshis island logo.png|International logo | ||
YISMA3 JP logo.png|Japanese logo | YISMA3 JP logo.png|Japanese logo | ||
LogoChinese YI-GBA.png|Chinese logo | |||
SMA3 early logo.jpg|Early logo | SMA3 early logo.jpg|Early logo | ||
</gallery> | </gallery> | ||
===In-game=== | ===In-game=== | ||
<gallery widths=250> | <gallery widths=250> | ||
| Line 16: | Line 15: | ||
SMA3 in-game logo CH.png|Chinese logo | SMA3 in-game logo CH.png|Chinese logo | ||
</gallery> | </gallery> | ||
<gallery widths=250 caption="Game Selection screen"> | <gallery widths=250 caption="Game Selection screen"> | ||
SMA3 YI game select logo.png|International logo | SMA3 YI game select logo.png|International logo | ||
| Line 22: | Line 20: | ||
SMA3 YI game select logo CH.png|Chinese logo | SMA3 YI game select logo CH.png|Chinese logo | ||
</gallery> | </gallery> | ||
<gallery widths=250 caption="''Yoshi's Island''"> | <gallery widths=250 caption="''Yoshi's Island''"> | ||
SMA3 YI in-game logo.png|International logo | SMA3 YI in-game logo.png|International logo | ||
| Line 42: | Line 39: | ||
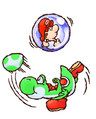
SMA3 Yoshi Egg Website.svg|Yoshi about to throw an egg | SMA3 Yoshi Egg Website.svg|Yoshi about to throw an egg | ||
SMA3 Light-Blue Yoshi Artwork.png|Light Blue Yoshi about to throw an egg | SMA3 Light-Blue Yoshi Artwork.png|Light Blue Yoshi about to throw an egg | ||
YoshiEggThrow. | YoshiEggThrow.png|Yoshi throwing an egg at Baby Mario | ||
Adulthuffin puffin.jpg|[[Huffin Puffin]] | Adulthuffin puffin.jpg|[[Huffin Puffin]] | ||
Huffin puffinschicks.jpg|Huffin Puffins | Huffin puffinschicks.jpg|Huffin Puffins | ||
poochy.jpg|[[Poochy]] detecting an [[Yoshi Egg|Egg]] | poochy.jpg|[[Poochy]] detecting an [[Yoshi's Egg|Egg]] | ||
</gallery> | </gallery> | ||
| Line 59: | Line 56: | ||
Navalpromo.jpg|[[Naval Piranha]] | Navalpromo.jpg|[[Naval Piranha]] | ||
Yoshivkoopa.jpg|Yoshi throwing an Egg at a [[Koopa Troopa]] | Yoshivkoopa.jpg|Yoshi throwing an Egg at a [[Koopa Troopa]] | ||
Squashgoesshyguy.jpg|Yoshi Ground Pounding a Shy Guy. | Squashgoesshyguy.jpg|Yoshi Ground Pounding a [[Shy Guy|Shy-Guy]]. | ||
</gallery> | </gallery> | ||
| Line 75: | Line 72: | ||
SMW2 BiggerBoo.png| [[Bigger Boo]] | SMW2 BiggerBoo.png| [[Bigger Boo]] | ||
SMW2 RogerthePottedGhost.jpg|[[Roger the Potted Ghost]] | SMW2 RogerthePottedGhost.jpg|[[Roger the Potted Ghost]] | ||
Froggy.jpg|[[ | Froggy.jpg|[[Froggy]] | ||
SMW2 NavalPiranha.jpg|[[Naval Piranha]] | SMW2 NavalPiranha.jpg|[[Naval Piranha]] | ||
Marchmilde.png|[[Marching Milde]] | Marchmilde.png|[[Marching Milde]] | ||
| Line 97: | Line 94: | ||
SMA3-PinkYoshi.png|[[Yoshi (species)|Pink Yoshi]] | SMA3-PinkYoshi.png|[[Yoshi (species)|Pink Yoshi]] | ||
SMA3-LightBlueYoshi.png|[[Yoshi (species)|Light Blue Yoshi]] | SMA3-LightBlueYoshi.png|[[Yoshi (species)|Light Blue Yoshi]] | ||
LightBlueYoshi SMA3.png | LightBlueYoshi SMA3.png|Light Blue Yoshi | ||
SMA3-YellowYoshi.png|[[Yoshi (species)|Yellow Yoshi]] | SMA3-YellowYoshi.png|[[Yoshi (species)|Yellow Yoshi]] | ||
SMA3-PurpleYoshi.png|[[Yoshi (species)|Purple Yoshi]] | SMA3-PurpleYoshi.png|[[Yoshi (species)|Purple Yoshi]] | ||
| Line 109: | Line 106: | ||
<gallery> | <gallery> | ||
BabyMarioSMW2.png|[[Baby Mario]] | BabyMarioSMW2.png|[[Baby Mario]] | ||
<gallery> | YISMA3BabyLuigiSprite.png|[[Baby Luigi]] | ||
CapeBabyMarioSMW2.png|[[Superstar Mario]] | |||
SMA3 Powerful Mario.png|Superstar Mario | |||
</gallery> | |||
===Transformations=== | ===Transformations=== | ||
<gallery> | <gallery> | ||
SMA3 Helicopter Yoshi green.png|[[Helicopter Yoshi|Helicopter]] | |||
SMA3 Mole Tank Yoshi green.png|[[Mole Tank]] | |||
YISMA3 - Submarine.png|[[Submarine Yoshi|Submarine]] | YISMA3 - Submarine.png|[[Submarine Yoshi|Submarine]] (Green) | ||
YISMA3 - Submarine -Pink.png|Submarine (Pink, unused) | |||
YISMA3 - Car.png|[[Car Yoshi|Vehicle]] | YISMA3 - Submarine -LightBlue.png|Submarine (Light Blue) | ||
YISMA3 - Submarine -Yellow.png|Submarine (Yellow) | |||
YISMA3 - Submarine -Purple.png|Submarine (Purple, unused) | |||
YISMA3 - Submarine -Brown.png|Submarine (Brown, unused) | |||
YISMA3 - Submarine -Red.png|Submarine (Red) | |||
YISMA3 - Submarine -Blue.png|Submarine (Blue, unused) | |||
SMA3 Train Yoshi green.png|[[Train (form)|Train]] | |||
YISMA3 - Car.png|[[Car Yoshi|Vehicle]] (Green) | |||
YISMA3 - Car -Pink.png|Vehicle (Pink, unused) | |||
YISMA3 - Car -LightBlue.png|Vehicle (Light Blue, unused) | |||
YISMA3 - Car -Yellow.png|Vehicle (Yellow, unused) | |||
YISMA3 - Car -Purple.png|Vehicle (Purple) | |||
YISMA3 - Car -Brown.png|Vehicle (Brown, unused) | |||
YISMA3 - Car -Red.png|Vehicle (Red, unused) | |||
YISMA3 - Car -Blue.png|Vehicle (Blue, unused) | |||
</gallery> | </gallery> | ||
| Line 126: | Line 140: | ||
SMA3-MelonBugBall.png|Melon Bug | SMA3-MelonBugBall.png|Melon Bug | ||
SMA3-MuddyBuddy.png|[[Muddy Buddy]] | SMA3-MuddyBuddy.png|[[Muddy Buddy]] | ||
SMA3 Sprite - Poochy.gif|[[Poochy]] | |||
</gallery> | </gallery> | ||
| Line 139: | Line 153: | ||
SMA3 Baron von Zeppelin magenta.png|Baron von Zeppelin | SMA3 Baron von Zeppelin magenta.png|Baron von Zeppelin | ||
SMA3 Baron von Zeppelin red.png|Baron von Zeppelin | SMA3 Baron von Zeppelin red.png|Baron von Zeppelin | ||
Green Beach Koopa YI.png|[[Beach Koopa]] | Green Beach Koopa YI.png|[[Unshelled Koopa|Beach Koopa]] | ||
SMA3-BeachKoopaRed.png|Beach Koopa | SMA3-BeachKoopaRed.png|Beach Koopa | ||
SMA3 Big Boo.png|[[Big Boo]] | SMA3 Big Boo.png|[[Big Boo]] | ||
SMA3 Big Shy Guy red.png|[[Mega Guy|Big Shy Guy]] | SMA3 Big Shy Guy red.png|[[Mega Guy|Big Shy Guy]] | ||
SMA3 Big Shy Guy green.png|Big Shy Guy | SMA3 Big Shy Guy green.png|Big Shy Guy | ||
SMA3-RedBlargg.png|[[Blargg (small)|Blargg]] | |||
SMA3-BlowHard.png|[[Blow Hard]] | SMA3-BlowHard.png|[[Blow Hard]] | ||
SMA3 Bomb magenta.png|[[Bomb]] | SMA3 Bomb magenta.png|[[Bomb]] | ||
| Line 197: | Line 212: | ||
SMA3-HarryHedgehogLarge.png|Harry Hedgehog | SMA3-HarryHedgehogLarge.png|Harry Hedgehog | ||
SMA3-HeftyGoonie.png|[[Hefty Goonie]] | SMA3-HeftyGoonie.png|[[Hefty Goonie]] | ||
SMA3-Hootie.png|[[Hootie the Blue Fish]] | SMA3-Hootie.png|[[Propeller Piranha|Hootie the Blue Fish]] | ||
SMA3-HotLips.png|[[Hot Lips]] | SMA3-HotLips.png|[[Hot Lips]] | ||
SMA3-IncomingChomp.png|[[Incoming Chomp]] | SMA3-IncomingChomp.png|[[Incoming Chomp]] | ||
| Line 222: | Line 237: | ||
YS-SMA3 Mace Penguin.png|[[Spike|Mace Penguin]] | YS-SMA3 Mace Penguin.png|[[Spike|Mace Penguin]] | ||
SMA3-Milde.png|[[Milde]] | SMA3-Milde.png|[[Milde]] | ||
SMA3 Missile Bill.png|[[Missile Bill]] | SMA3 Missile Bill.png|[[Bull's-Eye Bill|Missile Bill]] | ||
Mock up.PNG|[[Mock Up]] | Mock up.PNG|[[Mock Up]] | ||
SMA3-Needlenose.png|[[Pokey (projectile)| | SMA3-Needlenose.png|[[Pokey (projectile)|Needlenose]] | ||
SMA3-NeedlenoseYellow.png| | SMA3-NeedlenoseYellow.png|Needlenose | ||
SMA3-NepEnut.png|[[Nep-Enut]] | SMA3-NepEnut.png|[[Nep-Enut]] | ||
SMA3-NipperPlant.png|[[Nipper Plant]] | SMA3-NipperPlant.png|[[Nipper Plant]] | ||
| Line 243: | Line 258: | ||
SMA3-Raven.png|[[Raven]] | SMA3-Raven.png|[[Raven]] | ||
SMA3-RavenChick.png|[[Raven (chick)|Raven chick]] | SMA3-RavenChick.png|[[Raven (chick)|Raven chick]] | ||
SMA3-SharkChomp.png|[[Big Chain Chomp|Shark Chomp]] | SMA3-SharkChomp.png|[[Big Chain Chomp|Shark Chomp]] | ||
SMA3-ShyGuy.png|[[Shy Guy]] | SMA3-ShyGuy.png|[[Shy Guy|Shy-Guy]] | ||
SMA3-ShyGuyYellow.png|Shy Guy | SMA3-ShyGuyYellow.png|Shy-Guy | ||
SMA3-ShyGuyGreen.png|Shy Guy | SMA3-ShyGuyGreen.png|Shy-Guy | ||
SMA3-ShyGuyPink.png|Shy Guy | SMA3-ShyGuyPink.png|Shy-Guy | ||
SMA3-ShyGuyonStilts.png|[[Shy Guy on Stilts]] | SMA3-ShyGuyonStilts.png|[[Stilt Guy|Shy-Guy on Stilts]] | ||
SMA3-ShyGuyonStiltsYellow.png|Shy Guy on Stilts | SMA3-ShyGuyonStiltsYellow.png|Shy-Guy on Stilts | ||
SMA3-ShyGuyonStiltsGreen.png|Shy Guy on Stilts | SMA3-ShyGuyonStiltsGreen.png|Shy-Guy on Stilts | ||
SMA3-ShyGuyonStiltsPink.png|Shy Guy on Stilts | SMA3-ShyGuyonStiltsPink.png|Shy-Guy on Stilts | ||
SMA3-SkeletonGoonie.png|[[Skeleton Goonie]] | SMA3-SkeletonGoonie.png|[[Skeleton Goonie]] | ||
SMA3-Slugger.png|[[Slugger]] | SMA3-Slugger.png|[[Slugger]] | ||
| Line 264: | Line 278: | ||
SMA3-SpikedFunGuy.png|[[Spiked Fun Guy (Super Mario World 2: Yoshi's Island)|Spiked Fun Guy]] | SMA3-SpikedFunGuy.png|[[Spiked Fun Guy (Super Mario World 2: Yoshi's Island)|Spiked Fun Guy]] | ||
SMA3-Spooky.png|[[Spooky (enemy)|Spooky]] | SMA3-Spooky.png|[[Spooky (enemy)|Spooky]] | ||
SMA3-Stretch.png|[[Stretch ( | SMA3-Stretch.png|[[Stretch (Super Mario World 2: Yoshi's Island)|Stretch]] | ||
SMA3 Stretch magenta.png|Stretch | SMA3 Stretch magenta.png|Stretch | ||
Tap-Tap SMA3.png|[[Tap-Tap]] | Tap-Tap SMA3.png|[[Tap-Tap]] | ||
| Line 289: | Line 303: | ||
SMA3 Salvo.png|[[Salvo the Slime]] | SMA3 Salvo.png|[[Salvo the Slime]] | ||
SMA3 Roger.png|[[Roger the Potted Ghost]] | SMA3 Roger.png|[[Roger the Potted Ghost]] | ||
Marching Milde.PNG|[[Marching Milde]] | Marching Milde.PNG|[[Marching Milde]] | ||
SMW2 Sluggy.png|[[Sluggy the Unshaven]] | SMW2 Sluggy.png|[[Sluggy the Unshaven]] | ||
| Line 300: | Line 313: | ||
<gallery> | <gallery> | ||
SMA3-1UP.png|[[Extra life|1up]] | SMA3-1UP.png|[[Extra life|1up]] | ||
SMA3-10PointStar.png|[[10 Point Star]] | SMA3-10PointStar.png|[[10-Point Star]] | ||
SMA3-20PointStar.png|[[20 Point Star]] | SMA3-20PointStar.png|[[20-Point Star]] | ||
SMA3-AnytimeEgg.png|[[Anytime Egg]] | SMA3-AnytimeEgg.png|[[Anytime Egg]] | ||
SMA3-AnywherePOW.png|[[Anywhere POW]] | SMA3-AnywherePOW.png|[[Anywhere POW]] | ||
SMA3-IceWatermelon.png|[[Blue | YISMA3 Switch Block red.png|[[Arrow block]] | ||
SMA3-Watermelon.png|[[Green | SMA3-IceWatermelon.png|[[Ice watermelon|Blue watermelon]] | ||
SMA3-WatermelonBite.png|Green | YISMA3 Crate.png|[[Crate]] | ||
SMA3-Watermelon.png|[[Watermelon|Green watermelon]] | |||
SMA3-WatermelonBite.png|Green watermelon | |||
SMA3-MagnifyingGlassCard.png|[[Magnifying Glass (Super Mario World 2: Yoshi's Island)|Magnifying Glass]] | SMA3-MagnifyingGlassCard.png|[[Magnifying Glass (Super Mario World 2: Yoshi's Island)|Magnifying Glass]] | ||
SMA3 POW Block sprite.png|[[POW Block]] | SMA3 POW Block sprite.png|[[POW Block]] | ||
SMA3-FireWatermelon.png|[[Red | SMA3-FireWatermelon.png|[[Fire watermelon|Red watermelon]] | ||
YISMA3 Spotted platform red.png|[[Rough platform|Spotted platform]] | |||
SMA3-SuperBlueWatermelon.png|Super Blue Watermelon | SMA3-SuperBlueWatermelon.png|Super Blue Watermelon | ||
SMA3-SuperGreenWatermelon.png|Super Green Watermelon | SMA3-SuperGreenWatermelon.png|Super Green Watermelon | ||
SMA3-SuperRedWatermelon.png|Super Red Watermelon | SMA3-SuperRedWatermelon.png|Super Red Watermelon | ||
YISMA3 Super Star.png|[[Super Star]] | YISMA3 Super Star.png|[[Super Star]] | ||
SMA3 Thorn.png|[[Thorn]] | SMA3 Thorn.png|[[Thorn]] | ||
</gallery> | </gallery> | ||
| Line 367: | Line 381: | ||
SMA3-WatchOutBelow-Icon.png|[[Watch Out Below!]] | SMA3-WatchOutBelow-Icon.png|[[Watch Out Below!]] | ||
SMA3-TheCaveOfChompRock-Icon.png|[[The Cave Of Chomp Rock]] | SMA3-TheCaveOfChompRock-Icon.png|[[The Cave Of Chomp Rock]] | ||
SMA3-BurtTheBashfulsFort-Icon.png|[[Burt | SMA3-BurtTheBashfulsFort-Icon.png|[[Burt The Bashful's Fort]] | ||
SMA3-HopHopDonutLifts-Icon.png|[[Hop! Hop! Donut Lifts]] | SMA3-HopHopDonutLifts-Icon.png|[[Hop! Hop! Donut Lifts]] | ||
SMA3-ShyGuysOnStilts-Icon.png|[[Shy-Guys On Stilts]] | SMA3-ShyGuysOnStilts-Icon.png|[[Shy-Guys On Stilts]] | ||
SMA3-TouchFuzzyGetDizzy-Icon.png|[[Touch Fuzzy, Get Dizzy]] | SMA3-TouchFuzzyGetDizzy-Icon.png|[[Touch Fuzzy, Get Dizzy]] | ||
SMA3-SalvoTheSlimesCastle-Icon.png|[[Salvo | SMA3-SalvoTheSlimesCastle-Icon.png|[[Salvo The Slime's Castle]] | ||
SMA3-ExerciseInTheSkies-Icon.png|[[Exercise in the Skies]] | SMA3-ExerciseInTheSkies-Icon.png|[[Exercise in the Skies]] | ||
SMA3-PoochyAintStupid-Icon.png|[[Poochy Ain't Stupid]] | SMA3-PoochyAintStupid-Icon.png|[[Poochy Ain't Stupid]] | ||
SMA3-FlipCards-Icon.png|[[Flip Cards]] | SMA3-FlipCards-Icon.png|[[Flip Cards]] | ||
</gallery> | </gallery> | ||
====World 2==== | ====World 2==== | ||
<gallery widths="72" heights="72"> | <gallery widths="72" heights="72"> | ||
| Line 390: | Line 405: | ||
SMA3-ScratchAndMatch-Icon.png|[[Scratch and Match (minigame)|Scratch and Match]] | SMA3-ScratchAndMatch-Icon.png|[[Scratch and Match (minigame)|Scratch and Match]] | ||
</gallery> | </gallery> | ||
====World 3==== | ====World 3==== | ||
<gallery widths="72" heights="72"> | <gallery widths="72" heights="72"> | ||
| Line 404: | Line 420: | ||
SMA3-DrawingLots-Icon.png|[[Drawing Lots]] | SMA3-DrawingLots-Icon.png|[[Drawing Lots]] | ||
</gallery> | </gallery> | ||
====World 4==== | ====World 4==== | ||
<gallery widths="72" heights="72"> | <gallery widths="72" heights="72"> | ||
| Line 418: | Line 435: | ||
SMA3-MatchCards-Icon.png|[[Match Cards]] | SMA3-MatchCards-Icon.png|[[Match Cards]] | ||
</gallery> | </gallery> | ||
====World 5==== | ====World 5==== | ||
<gallery widths="72" heights="72"> | <gallery widths="72" heights="72"> | ||
| Line 432: | Line 450: | ||
SMA3-Roulette-Icon.png|[[Roulette]] | SMA3-Roulette-Icon.png|[[Roulette]] | ||
</gallery> | </gallery> | ||
====World 6==== | ====World 6==== | ||
<gallery widths="72" heights="72"> | <gallery widths="72" heights="72"> | ||
| Line 476: | Line 495: | ||
SMA3-KingBowsersCastleWorldMap.png|King Bowser's Castle (World 6) | SMA3-KingBowsersCastleWorldMap.png|King Bowser's Castle (World 6) | ||
</gallery> | </gallery> | ||
====Map icons==== | ====Map icons==== | ||
<gallery> | <gallery> | ||
| Line 504: | Line 524: | ||
==Screenshots== | ==Screenshots== | ||
<gallery widths=150px> | <gallery widths=150px> | ||
SMA3 Language selection Options.png|Language selection screen (Europe only) | |||
SMA3 Title Screen.png|Title screen | SMA3 Title Screen.png|Title screen | ||
SMA3 Title Screen JP.png|Title screen (Japanese) | SMA3 Title Screen JP.png|Title screen (Japanese) | ||
| Line 513: | Line 534: | ||
SMA3 YI Title Screen JP.png|''Yoshi's Island'' title screen (Japanese) | SMA3 YI Title Screen JP.png|''Yoshi's Island'' title screen (Japanese) | ||
SMA3 YI Title Screen CN.png|''Yoshi's Island'' title screen (Chinese) | SMA3 YI Title Screen CN.png|''Yoshi's Island'' title screen (Chinese) | ||
SMA3 File selection.png|File selection screen | |||
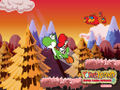
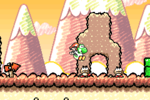
SMW2 WelcometoYoshi'sIsland.png|[[Welcome To Yoshi's Island]] | SMW2 WelcometoYoshi'sIsland.png|[[Welcome To Yoshi's Island]] | ||
SMA3 Make Eggs Throw Eggs Screenshot.png|[[Make Eggs, Throw Eggs]] | SMA3 Make Eggs Throw Eggs Screenshot.png|[[Make Eggs, Throw Eggs]] | ||
| Line 527: | Line 549: | ||
SMW2 SprayFish.PNG|[[Salvo The Slime's Castle]] | SMW2 SprayFish.PNG|[[Salvo The Slime's Castle]] | ||
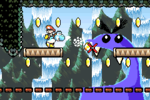
1-8Magic.PNG|[[Kamek]] about to enlarge [[Salvo the Slime]] | 1-8Magic.PNG|[[Kamek]] about to enlarge [[Salvo the Slime]] | ||
SalvotheSlime1.png|[[Salvo The Slime's Castle]] | |||
Exercise in the Skies.png|[[Exercise in the Skies]] (GBA exclusive) | Exercise in the Skies.png|[[Exercise in the Skies]] (GBA exclusive) | ||
SMW2 PoochyBack1.png|[[Poochy Ain't Stupid]] | SMW2 PoochyBack1.png|[[Poochy Ain't Stupid]] | ||
| Line 536: | Line 559: | ||
SMW2 MoleTankBSB.png|[[The Baseball Boys]] | SMW2 MoleTankBSB.png|[[The Baseball Boys]] | ||
2-3 Forest.PNG|[[What's Gusty Taste Like?]] | 2-3 Forest.PNG|[[What's Gusty Taste Like?]] | ||
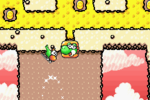
2-3Enut.PNG| | 2-3Enut.PNG|What's Gusty Taste Like? | ||
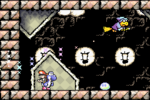
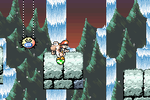
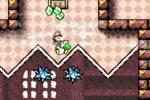
Fire Bar YISMA3.png|[[Bigger Boo's Fort]] | |||
SMA3 The Cave of the Mystery Maze1.png|[[The Cave Of The Mystery Maze]] | |||
SMA3 The Cave of the Mystery Maze.png|The Cave Of The Mystery Maze | |||
2-7 Car.PNG|[[Lakitu's Wall]] | 2-7 Car.PNG|[[Lakitu's Wall]] | ||
The Potted Ghost's Castle.PNG|[[The Potted Ghost's Castle]] | The Potted Ghost's Castle.PNG|[[The Potted Ghost's Castle]] | ||
Mystery of the Castle.png|[[Mystery of the Castle?]] (GBA exclusive) | Mystery of the Castle.png|[[Mystery of the Castle?]] (GBA exclusive) | ||
Hit that switch.PNG|[[Hit That Switch!!]] | Hit that switch.PNG|[[Hit That Switch!!]] | ||
YoshiandMario-Froggyinside story.png|Inside of [[ | YoshiandMario-Froggyinside story.png|Inside of [[Froggy]]'s stomach | ||
Go! Go! Morphing!.png|[[Go! Go! Morphing!]] (GBA exclusive) | Go! Go! Morphing!.png|[[Go! Go! Morphing!]] (GBA exclusive) | ||
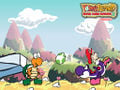
SMA3 GO! GO! MARIO!! Screenshot.png|[[GO! GO! MARIO!!]] | SMA3 GO! GO! MARIO!! Screenshot.png|[[GO! GO! MARIO!!]] | ||
SMA3 Goomba Screenshot.png|Two [[Goomba]]s | SMA3 Goomba Screenshot.png|Two [[Goomba]]s | ||
Hookbill2.png|[[Hookbill The Koopa's Castle]] | |||
FightToadieswToadies.png|[[Fight Toadies w/ Toadies]] (GBA exclusive) | FightToadieswToadies.png|[[Fight Toadies w/ Toadies]] (GBA exclusive) | ||
The Impossible Maze.png|[[The Impossible? Maze]] | The Impossible Maze.png|[[The Impossible? Maze]] | ||
| Line 551: | Line 578: | ||
Yoshi's Island 6-6.PNG|[[The Deep, Underground Maze]] | Yoshi's Island 6-6.PNG|[[The Deep, Underground Maze]] | ||
Endless World of Yoshis.png|[[Endless World of Yoshis]] (GBA exclusive) | Endless World of Yoshis.png|[[Endless World of Yoshis]] (GBA exclusive) | ||
SMA3 Game Over.png|[[Game Over]] | |||
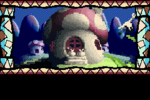
SMA3 Mushroom House.png|Ending | |||
SMA3 Ending.png|Ending | |||
</gallery> | </gallery> | ||
| Line 585: | Line 615: | ||
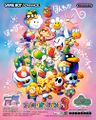
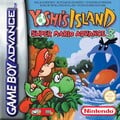
SMA3 EU.jpg|European box art | SMA3 EU.jpg|European box art | ||
SMA3 AUS.jpg|Australian box art | SMA3 AUS.jpg|Australian box art | ||
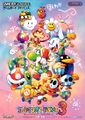
Super Mario Advance 3 Box JP.png|Japanese box art | |||
SMA3 JP back.jpg|Japanese box art (back) | SMA3 JP back.jpg|Japanese box art (back) | ||
SMA3 iQue cover.jpg|Chinese box art (iQue GBA) | SMA3 iQue cover.jpg|Chinese box art (iQue GBA) | ||
| Line 593: | Line 623: | ||
<gallery> | <gallery> | ||
SMA3 - print ad UK.png|UK print ad | SMA3 - print ad UK.png|UK print ad | ||
SMA3 Print ad FR.jpg|French print ad | |||
Yoshi's Island Super Mario Advance 3 Player's Guide.png|[[Nintendo Power]] Player's Guide | Yoshi's Island Super Mario Advance 3 Player's Guide.png|[[Nintendo Power]] Player's Guide | ||
</gallery> | </gallery> | ||
{{ | {{Galleries}} | ||
[[Category:Galleries]] | [[Category:Galleries]] | ||
[[Category:Yoshi's Island: Super Mario Advance 3|*]] | [[Category:Yoshi's Island: Super Mario Advance 3|*]] | ||
Latest revision as of 21:37, March 1, 2025
This is a gallery of images for the game Yoshi's Island: Super Mario Advance 3.
Logos[edit]
International logo
Japanese logo
Chinese logo
Early logo

In-game[edit]
International logo
Japanese logo
Chinese logo
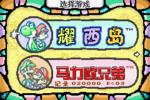
- Game Selection screen

International logo

Japanese logo

Chinese logo
- Yoshi's Island

International logo

Japanese logo

Chinese logo
Artwork[edit]
Heroes[edit]
Baby Mario
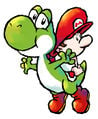
Yoshi and Baby Mario
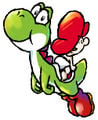
Yoshi and Baby Mario
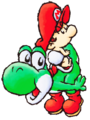
Yoshi and Baby Mario

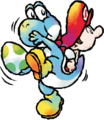
Yoshi and Baby Mario

Yoshi about to throw an egg
Light Blue Yoshi about to throw an egg
Yoshi throwing an egg at Baby Mario

Huffin Puffins


Scenes[edit]
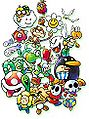
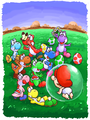
Group artwork of Yoshi and several other characters
Japanese flyer
Alternate Japanese flyer
Yoshis and Baby Mario
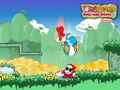
Yoshi and Baby Mario escaping from Kamek's Toadies
Superstar Mario floating
Yoshi throwing an Egg at a Koopa Troopa
Yoshi Ground Pounding a Shy-Guy.


Enemies[edit]
Kamek sending a blast of magic.

Kamek flying


Bosses[edit]


Items[edit]

Sprites[edit]
Yoshis[edit]

Green Yoshi

Light Blue Yoshi

Brown Yoshi


Babies[edit]

Superstar Mario


Transformations[edit]

Submarine (Green)

Submarine (Pink, unused)

Submarine (Light Blue)

Submarine (Yellow)

Submarine (Purple, unused)

Submarine (Brown, unused)

Submarine (Red)

Submarine (Blue, unused)

Vehicle (Green)

Vehicle (Pink, unused)

Vehicle (Light Blue, unused)

Vehicle (Yellow, unused)

Vehicle (Purple)

Vehicle (Brown, unused)

Vehicle (Red, unused)

Vehicle (Blue, unused)


Allies[edit]

Melon Bug


Enemies[edit]

Baron von Zeppelin

Baron von Zeppelin

Baron von Zeppelin

Beach Koopa

Big Shy Guy

Bumpty

Crazee Dayzee

Fat Guy

Flying Wiggler (angry)

Grinder

Grunt

Harry Hedgehog

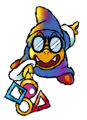
Kamek

Koopa Paratroopa

Koopa Troopa

Little Mouser

Needlenose

Nipper Spore

Petal Guy

Petal Guy

Petal Guy

Piro Dangle (fireless)

Piscatory Pete (yellow)

Shy-Guy

Shy-Guy

Shy-Guy

Shy-Guy on Stilts

Shy-Guy on Stilts

Shy-Guy on Stilts

Sluggy (pink)

Sluggy (yellow)

Spear Guy

Stretch

Tap-Tap

Tap-Tap

Turtle Cannon

Turtle Cannon

Wild Ptooie Piranha

Woozy Guy

Woozy Guy

Woozy Guy

Woozy Guy


Bosses[edit]


Items and objects[edit]

Green watermelon

Super Blue Watermelon

Super Green Watermelon

Super Red Watermelon


Bonus Challenge icons[edit]

10 Point Star

10 Point Star

10UP

Anytime Egg

Anywhere POW

Kamek

Magnifying Glass

Super Blue Watermelon

Super Green Watermelon

Super Red Watermelon

Kamek's Toady

Winged Cloud Maker


Title screen sprites[edit]

Yoshi

Yoshi Flag

Yoshi teleporting

Salvo The Slime's Castle/Naval Piranha's Castle

The Potted Ghost's Castle

Hookbill The Koopa's Castle

Raphael The Raven's Castle

King Bowser's Castle


File icons[edit]

Icon with no data

Icon upon starting the game

Icon upon starting World 1

Icon upon starting World 2

Icon upon starting World 3

Icon upon starting World 4

Icon upon starting World 5

Icon upon starting World 6

Icon upon clearing the game


Level icons[edit]
World 1[edit]
World 2[edit]
World 3[edit]
World 4[edit]
World 5[edit]
World 6[edit]
Mini Battle icons[edit]

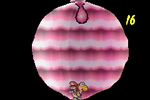
Throwing Balloons (5)

Throwing Balloons (6)


Maps[edit]
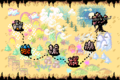
World selection map

World 1
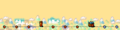
World 2
World 3
World 4

World 5

World 6

World selection icons[edit]

Salvo The Slime's Castle (World 1)

The Potted Ghost's Castle (World 2)

Naval Piranha's Castle (World 3)

Hookbill The Koopa's Castle (World 4)

Raphael The Raven's Castle (World 5)

King Bowser's Castle (World 6)


Map icons[edit]

Burt The Bashful's Fort

Salvo The Slime's Castle

Bigger Boo's Fort

The Potted Ghost's Castle

Prince Froggy's Fort

Naval Piranha's Castle

Marching Milde's Fort

Hookbill The Koopa's Castle

Sluggy The Unshaven's Fort

Raphael The Raven's Castle

Tap-Tap The Red Nose's Fort

King Bowser's Castle


Miscellaneous[edit]

Kamek revealed, from Flip Cards

Kamek (Flip Cards)

Yoshi panel from Match Cards

1UP card

2UP card

3UP card


Screenshots[edit]
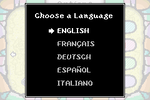
Language selection screen (Europe only)
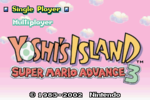
Title screen
Title screen (Japanese)
Title screen (Chinese)
Game selection screen
Game selection screen (Japanese)
Game selection screen (Chinese)
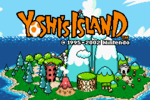
Yoshi's Island title screen
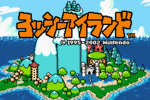
Yoshi's Island title screen (Japanese)
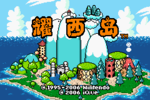
Yoshi's Island title screen (Chinese)
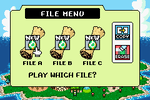
File selection screen
Kamek about to enlarge Salvo the Slime
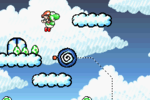
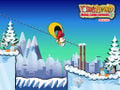
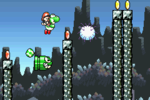
Exercise in the Skies (GBA exclusive)
What's Gusty Taste Like?
The Cave Of The Mystery Maze
Mystery of the Castle? (GBA exclusive)
Inside of Froggy's stomach
Go! Go! Morphing! (GBA exclusive)
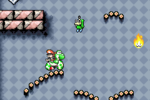
Two Goombas
Fight Toadies w/ Toadies (GBA exclusive)
Endless World of Yoshis (GBA exclusive)
Ending
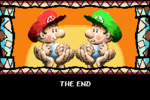
Ending


Maps[edit]
Nintendo Gamers Summit 2002 Press Kit[edit]


Box art[edit]
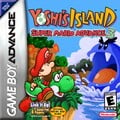
North American box art
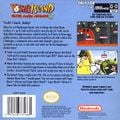
North American box art (back)
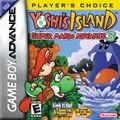
North American box art (Player's Choice)

Preliminary North American box art
European box art
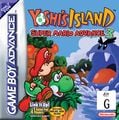
Australian box art
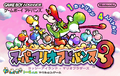
Japanese box art
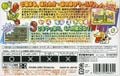
Japanese box art (back)
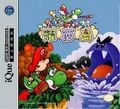
Chinese box art (iQue GBA)


Miscellaneous[edit]
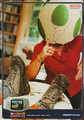
UK print ad
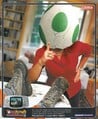
French print ad
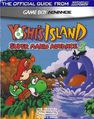
Nintendo Power Player's Guide


