Gallery:Super Mario World: Super Mario Advance 2: Difference between revisions
(Added sprites for Lakitu, Mega Mole, and Porcu-Puffer, including when they're spat out by Yoshi) |
m (Lakitu in a Pipe) |
||
| (14 intermediate revisions by 8 users not shown) | |||
| Line 8: | Line 8: | ||
SMA2 - Early logo.png|Early logo | SMA2 - Early logo.png|Early logo | ||
</gallery> | </gallery> | ||
===In-game=== | ===In-game=== | ||
<gallery widths="230px"> | <gallery widths="230px"> | ||
| Line 42: | Line 41: | ||
SMA2 Small Mario Sprite.png|Small Mario | SMA2 Small Mario Sprite.png|Small Mario | ||
SMWSMA2MarioSprite.png|Super Mario | SMWSMA2MarioSprite.png|Super Mario | ||
SMW SMA2 Fire Mario.png|Fire Mario | |||
SMW SMA2 Cape Mario.png|Caped Mario | SMW SMA2 Cape Mario.png|Caped Mario | ||
SMW SMA2 Small Balloon Mario.png|Small Balloon Mario | SMW SMA2 Small Balloon Mario.png|Small Balloon Mario | ||
| Line 78: | Line 77: | ||
Reznor SMA2 sprite.png|Reznor | Reznor SMA2 sprite.png|Reznor | ||
SMWSMA2LemmyKoopaSprite.png|Lemmy Koopa | SMWSMA2LemmyKoopaSprite.png|Lemmy Koopa | ||
SMA2 Lemmy Decoy Doll.png|One of Lemmy Koopa's [[decoy|decoys]] | |||
SMWSMA2LudwigvonKoopaSprite.png|Ludwig von Koopa | SMWSMA2LudwigvonKoopaSprite.png|Ludwig von Koopa | ||
SMWSMA2RoyKoopaSprite.png|Roy Koopa | SMWSMA2RoyKoopaSprite.png|Roy Koopa | ||
| Line 88: | Line 88: | ||
===Enemies=== | ===Enemies=== | ||
<gallery> | <gallery> | ||
SMW SMA2 | SMW SMA2 Amazing Flying Hammer Bro.png|[[Amazing Flyin' Hammer Brother]] | ||
SMA2 Banzai Bill sprite.png|[[Banzai Bill]] | SMA2 Banzai Bill sprite.png|[[Bomber Bill|Banzai Bill]] | ||
SMA2 Big Boo.png|[[Big Boo]] | SMA2 Big Boo.png|[[Big Boo]] | ||
SMA2 Big Steely.png|[[Big Steely]] | SMA2 Big Steely.png|[[Big Steely]] | ||
SMA2 Bill Blaster sprite.png|[[Bill Blaster]] | |||
SMA2 Blargg sprite.png|[[Blargg]] | SMA2 Blargg sprite.png|[[Blargg]] | ||
SMA2BlarggSpatOut.png|Blargg | |||
SMA2 Blurp.png|[[Blurp]] | SMA2 Blurp.png|[[Blurp]] | ||
SMA2BobOmbFlashing.gif|[[Bob-omb]] | |||
SMWSMA2BooSprite.png|[[Boo]] | SMWSMA2BooSprite.png|[[Boo]] | ||
SMW SMA2 Bony Beetle.png|[[Bony Beetle]] | SMW SMA2 Bony Beetle.png|[[Bony Beetle]] | ||
| Line 103: | Line 106: | ||
SMA2 Red Climbing Koopa.png|Climbing Koopa | SMA2 Red Climbing Koopa.png|Climbing Koopa | ||
SMA2 Dino Rhino sprite.png|[[Dino Rhino|Dino-Rhino]] | SMA2 Dino Rhino sprite.png|[[Dino Rhino|Dino-Rhino]] | ||
Dino-Torch SMA2 sprite.png|[[Dino-Torch]] | |||
SMA2 Dry Bones.png|[[Dry Bones]] | SMA2 Dry Bones.png|[[Dry Bones]] | ||
SMW SMA2 Eerie.png|[[Eerie]] | SMW SMA2 Eerie.png|[[Eerie]] | ||
SMA2 Fishin Boo sprite.png|[[Fishing Boo]] | |||
Floating Mine SMA2.png|[[Floating Mine]] | Floating Mine SMA2.png|[[Floating Mine]] | ||
Floating Mine spat out SMA2.png|Floating Mine | Floating Mine spat out SMA2.png|Floating Mine | ||
SMW SMA2 Flying Goomba.png|[[Paragaloomba|Flying Goomba]] | SMW SMA2 Flying Goomba.png|[[Paragaloomba|Flying Goomba]] | ||
Flying Goomba Fall SMA2.png|Flying Goomba (during Fall) | Flying Goomba Fall SMA2.png|Flying Goomba (during Fall) | ||
SMA2 Fuzzy sprite.gif|[[Fuzzy]] | |||
SMW SMA2 Goomba.png|[[Galoomba|Goomba]] | SMW SMA2 Goomba.png|[[Galoomba|Goomba]] | ||
Galoomba Fall SMA2.png|Goomba (during Fall) | Galoomba Fall SMA2.png|Goomba (during Fall) | ||
SMA2-GreenKoopaTroopa.png|Green Koopa Troopa | SMA2 Grinder sprite.png|[[Grinder]] | ||
SMA2 Jumping Piranha Plant.png|[[Jumping Piranha Plant]] | |||
SMA2 Jumping Fire Piranha Plant Fall.png|[[Jumping Fire Piranha Plant|Jumping Fire Pumpkin Plant]] | |||
SMA2-GreenKoopaTroopa.png|Green [[Koopa Troopa]] | |||
SMA2-RedKoopaTroopa.png|Red Koopa Troopa | SMA2-RedKoopaTroopa.png|Red Koopa Troopa | ||
SMA2-BlueKoopaTroopa.png|Blue Koopa Troopa | SMA2-BlueKoopaTroopa.png|Blue Koopa Troopa | ||
SMA2-YellowKoopaTroopa.png|Yellow Koopa Troopa | SMA2-YellowKoopaTroopa.png|Yellow Koopa Troopa | ||
SMWSMA2LakituSprite.png|Lakitu | SMA2-GreenKoopaParatroopa.png|Green [[Koopa Paratroopa]] | ||
Lakitu_spat_out_SMA2.png|Lakitu | SMA2-RedKoopaParatroopa.png|Red [[Koopa Paratroopa]] | ||
SMA2-YellowKoopaParatroopa.png|Yellow [[Koopa Paratroopa]] | |||
SMWSMA2LakituSprite.png|[[Lakitu in a Pipe]] | |||
Lakitu_spat_out_SMA2.png|Lakitu in a Pipe | |||
SMA2 Lava Bubble sprite.png|[[Lava Bubble]] | SMA2 Lava Bubble sprite.png|[[Lava Bubble]] | ||
SMA2 Zigzag Lava Bubble.gif|Lava Bubble | SMA2 Zigzag Lava Bubble.gif|Lava Bubble | ||
| Line 128: | Line 140: | ||
Para-Goomba Glasses SMA2.gif|Para-Goomba (during Fall) | Para-Goomba Glasses SMA2.gif|Para-Goomba (during Fall) | ||
PidgitBillAdvance.png|Pidgit Bill | PidgitBillAdvance.png|Pidgit Bill | ||
SMWSMA2PokeySprite.png|Pokey | SMWSMA2PokeySprite.png|[[Pokey]] | ||
SMWGreySawPokey.png|Pokey (during Fall) | SMWGreySawPokey.png|Pokey (during Fall) | ||
SMWGreySawPokeyHead.png|Pokey (during Fall) | |||
Porcu-Puffer SMA2.png|[[Porcu-Puffer]] | Porcu-Puffer SMA2.png|[[Porcu-Puffer]] | ||
Porcu-Puffer spat out SMA2.png|Porcu-Puffer | Porcu-Puffer spat out SMA2.png|Porcu-Puffer | ||
| Line 138: | Line 151: | ||
SMW SMA2 Spike Top.png|[[Spike Top]] | SMW SMA2 Spike Top.png|[[Spike Top]] | ||
SMW SMA2 Spiny.png|[[Spiny]] | SMW SMA2 Spiny.png|[[Spiny]] | ||
SMA2 Sumo Brother sprite.png|[[Sumo Bro]] | SMA2 Sumo Brother sprite.png|[[Sumo Bro|Sumo Brother]] | ||
SMA2SuperKoopaSpatOut.png|[[Super Koopa (enemy)|Super Koopa]] | |||
SMA2 Swooper | SMA2 Swooper.png|[[Swoop|Swooper]] | ||
SMA2 Swooper Hiding.png|Swooper | |||
SMW SMA2 Thwimp.png|[[Thwimp]] | SMW SMA2 Thwimp.png|[[Thwimp]] | ||
SMW SMA2 Thwomp.png|[[Thwomp]] | SMW SMA2 Thwomp.png|[[Thwomp]] | ||
| Line 148: | Line 162: | ||
SMA2 Volcano Lotus sprite.png|[[Volcano Lotus]] | SMA2 Volcano Lotus sprite.png|[[Volcano Lotus]] | ||
Volcano Lotus spat out SMA2.png|Volcano Lotus | Volcano Lotus spat out SMA2.png|Volcano Lotus | ||
SMA2 Wiggler sprite.png|[[Wiggler]] | |||
SMA2WigglerSpatOut.png|Wiggler | |||
SMA2 Wiggler Angry sprite.png|Wiggler (angry) | |||
SMA2WigglerSpatOutRed.png|Wiggler (angry) | |||
</gallery> | </gallery> | ||
===Items and objects=== | ===Items and objects=== | ||
<gallery> | <gallery> | ||
SMA2 Question Block sprite.png|[[? Block]] | |||
SMA2 Yellow ! Switch.png|Yellow [[! Switch]] | |||
SMA2 Green ! Switch.png|Green [[! Switch]] | |||
SMA2 Red ! Switch.png|Red [[! Switch]] | |||
SMA2 Blue ! Switch.png|Blue [[! Switch]] | |||
SMA2 1-Up Mushroom sprite.png|[[1-Up Mushroom]] | SMA2 1-Up Mushroom sprite.png|[[1-Up Mushroom]] | ||
SMA2 3UP Moon.png|[[3-Up Moon]] | SMA2 3UP Moon.png|[[3-Up Moon]] | ||
| Line 160: | Line 183: | ||
SMA2BuzzyShell.png|[[Buzzy Shell]] | SMA2BuzzyShell.png|[[Buzzy Shell]] | ||
SMA2 Cape Feather.png|[[Cape Feather]] | SMA2 Cape Feather.png|[[Cape Feather]] | ||
SMA2 Destroyed Fortress.png|A destroyed [[Castle]] or [[Fortress]] | |||
SMA2 Cloud Block.png|[[Cloud Block]] | SMA2 Cloud Block.png|[[Cloud Block]] | ||
SMA2 Coin Counter.png|[[Coin counter]] | |||
SMA2 Yoshi's Egg.png|[[Yoshi's Egg|Egg]] | SMA2 Yoshi's Egg.png|[[Yoshi's Egg|Egg]] | ||
SMA2 Used Block sprite.png|[[Empty Block]] | |||
SMA2 Fire Flower sprite.gif|[[Fire Flower]] | SMA2 Fire Flower sprite.gif|[[Fire Flower]] | ||
SMA2 Fortress Map Icon.png|A [[Fortress]] | |||
SMA2 Giant Gate sprite.png|[[Goal|Giant Gate]] | |||
SMA2 Gray P Switch sprite.png|[[Gray P Switch]] | SMA2 Gray P Switch sprite.png|[[Gray P Switch]] | ||
SMA2 Green Shell sprite.png|[[Green Shell]] | SMA2 Green Shell sprite.png|[[Green Shell]] | ||
| Line 168: | Line 196: | ||
SMA2 Jump Block.png|[[Note Block|Jump Block]] | SMA2 Jump Block.png|[[Note Block|Jump Block]] | ||
SMA2 Key sprite.png|[[Key]] | SMA2 Key sprite.png|[[Key]] | ||
SMA2 Magic Ball.png|[[Magic | SMA2 Magic Ball.png|[[Magic ball]] | ||
SMA2 ON Block.png|[[ON/OFF Switch]] (on) | SMA2 ON Block.png|[[ON/OFF Switch]] (on) | ||
SMA2 OFF Block.png|ON/OFF Switch (off) | SMA2 OFF Block.png|ON/OFF Switch (off) | ||
| Line 176: | Line 204: | ||
Peach Coin.png|"Peach Coin" | Peach Coin.png|"Peach Coin" | ||
SMA2 Red Shell sprite.png|[[Red Shell]] | SMA2 Red Shell sprite.png|[[Red Shell]] | ||
SMA2 Roulette Block.gif|[[Roulette Block]] | |||
SMA2 Rotating Block sprite.png|[[Rotating Block]] | SMA2 Rotating Block sprite.png|[[Rotating Block]] | ||
StrechBlocks.png|[[Stretch Block]] | StrechBlocks.png|[[Stretch Block]] | ||
| Line 200: | Line 229: | ||
SMA2 File selection.png|File selection screen | SMA2 File selection.png|File selection screen | ||
MarioWorld2JumpDifferecnce.png|Jump height difference between Mario and Luigi | MarioWorld2JumpDifferecnce.png|Jump height difference between Mario and Luigi | ||
SMW IggyKoopa.png|[[Iggy Koopa]] boss fight | SMW IggyKoopa.png|[[Iggy|Iggy Koopa]] boss fight | ||
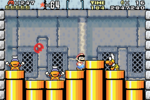
SMA2 Vanilla Dome 1.png|[[Vanilla Dome 1]] | SMA2 Vanilla Dome 1.png|[[Vanilla Dome 1]] | ||
SMA2 Vanilla Dome 3.png|[[Vanilla Dome 3]] | SMA2 Vanilla Dome 3.png|[[Vanilla Dome 3]] | ||
SMW LemmyKoopa.png|[[Lemmy Koopa]] boss fight | SMW LemmyKoopa.png|[[Lemmy|Lemmy Koopa]] boss fight | ||
Forest Ghost House SMA2.png|[[Forest Ghost House]] | Forest Ghost House SMA2.png|[[Forest Ghost House]] | ||
SMA2 Forest Fortress.png|[[Forest Fortress]] | SMA2 Forest Fortress.png|[[Forest Fortress]] | ||
SMA2 Forest Secret Area.png|[[Forest Secret Area]] | SMA2 Forest Secret Area.png|[[Forest Secret Area]] | ||
Star World 3.png|[[Star World 3]] | Star World 3.png|[[Star World 3]] | ||
SMA2 Koopalings Credits.png|The [[Koopalings]] in the credits scene | |||
SMA2 Ending 1.png|Ending screen | SMA2 Ending 1.png|Ending screen | ||
SMA2 Ending 2.png|Ending screen | SMA2 Ending 2.png|Ending screen | ||
</gallery> | </gallery> | ||
===Pre-release=== | ===Pre-release=== | ||
<gallery widths=150px> | <gallery widths=150px> | ||
| Line 226: | Line 255: | ||
SMA2 PC Cover.jpg|North American box art ([[Player's Choice]]) | SMA2 PC Cover.jpg|North American box art ([[Player's Choice]]) | ||
SMA2 European box art.jpg|European box art | SMA2 European box art.jpg|European box art | ||
SMA2 Australian Box Art.jpg|Australasian box art | |||
Super Mario Advance 2 Box JP.png|Japanese box art | Super Mario Advance 2 Box JP.png|Japanese box art | ||
SMA2 iQue Boxart.jpg|Chinese box art | SMA2 iQue Boxart.jpg|Chinese box art | ||
| Line 237: | Line 267: | ||
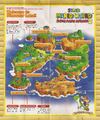
SMW SMA2-Dinosaur Land Map Artwork.png|Flyer packed in with the game | SMW SMA2-Dinosaur Land Map Artwork.png|Flyer packed in with the game | ||
SMW SMA2-Protional Flyer.png|Reverse of the flyer | SMW SMA2-Protional Flyer.png|Reverse of the flyer | ||
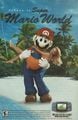
SMA2 print ad.jpg|Print ad | SMA2 print ad.jpg|North American print ad | ||
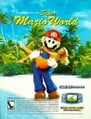
SMA2 Print ad BR.jpg|Brazilian print ad | |||
SMA2 Print ad DE.jpg|German print ad | |||
</gallery> | </gallery> | ||
{{Galleries}} | {{Galleries}} | ||
{{SMW}} | {{SMW}} | ||
[[Category:Galleries]] | [[Category:Galleries]] | ||
[[Category:Super Mario World: Super Mario Advance 2|*]] | [[Category:Super Mario World: Super Mario Advance 2|*]] | ||
Latest revision as of 22:04, March 29, 2025
This is a gallery of images for the game Super Mario World: Super Mario Advance 2.
Logos[edit]
International logo
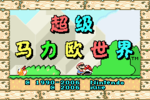
Japanese logo

Chinese logo
Early logo
In-game[edit]
International logo
Japanese logo
Chinese logo
- Game Selection screen

International logo

Japanese logo

Chinese logo
- Super Mario World

International logo

Japanese logo
Chinese logo
Artwork[edit]
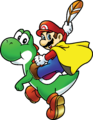
Caped Mario mounted on Yoshi


Sprites[edit]
Mario and Friends[edit]

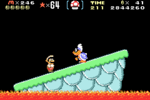
Mario and Yoshi in the game selection menu screen

Small Mario

Super Mario

Fire Mario

Caped Mario

Small Balloon Mario

Super Balloon Mario

Fire Balloon Mario

Caped Balloon Mario

Small Luigi

Super Luigi

Fire Luigi

Caped Luigi

Small Balloon Luigi

Super Balloon Luigi

Fire Balloon Luigi

Caped Balloon Luigi

Yoshi

Yoshi

Red Yoshi

Blue Yoshi

Yellow Yoshi

Green Baby Yoshi

Red Baby Yoshi

Blue Baby Yoshi

Yellow Baby Yoshi

Dolphin

Dolphin

Princess Toadstool


Bosses[edit]

Iggy Koopa

Iggy Koopa in the credits

Big Boo

Morton Koopa Jr.

Reznor

Lemmy Koopa

One of Lemmy Koopa's decoys

Ludwig von Koopa

Roy Koopa

Wendy O. Koopa

Larry Koopa

Bowser


Enemies[edit]

Blargg

Cheep Cheep

Climbing Koopa

Floating Mine

Flying Goomba (during Fall)

Goomba (during Fall)

Green Koopa Troopa

Red Koopa Troopa

Blue Koopa Troopa

Yellow Koopa Troopa

Green Koopa Paratroopa

Red Koopa Paratroopa

Yellow Koopa Paratroopa

Lakitu in a Pipe

Lava Bubble

Mega Mole

Monty Mole

Para-Goomba (during Fall)

Pidgit Bill

Pokey (during Fall)

Pokey (during Fall)

Porcu-Puffer

Rex

Rip Van Fish

Swooper

Thwomp

Volcano Lotus

Wiggler

Wiggler (angry)

Wiggler (angry)


Items and objects[edit]

Yellow ! Switch

Green ! Switch

Red ! Switch

Blue ! Switch

Pink Berry

Green Berry

A Fortress

ON/OFF Switch (on)

ON/OFF Switch (off)

"Peach Coin"


Screenshots[edit]
Introduction

Title screen
Title screen (Japanese)
Title screen (Chinese)
Game selection menu screen
Game selection menu screen (Japanese)
Game selection menu screen (Chinese)
Super Mario World title screen
Super Mario World title screen (Japanese)
Super Mario World title screen (Chinese)
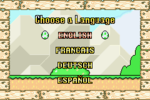
Language selection screen (Europe only)
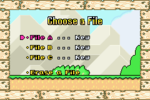
File selection screen
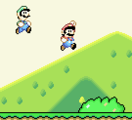
Jump height difference between Mario and Luigi
Iggy Koopa boss fight
Lemmy Koopa boss fight
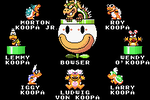
The Koopalings in the credits scene
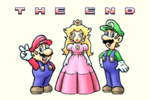
Ending screen
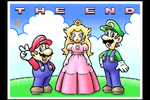
Ending screen


Pre-release[edit]
Early build image 1
Early build image 2
Early build image 3
Early build image 4
Early build image 5


Box art[edit]
North American box art
North American box art (Player's Choice)
European box art
Australasian box art
Japanese box art
Chinese box art
Chinese website thumbnail
European Game Boy Advance bundle, with the game included


Miscellaneous[edit]
Prima Games official guide
Flyer packed in with the game

Reverse of the flyer
North American print ad
Brazilian print ad
German print ad


| Super Mario World / Super Mario World: Super Mario Advance 2 | |
|---|---|
| Protagonists | Mario • Luigi • Princess Toadstool • Yoshi • Red Yoshi • Blue Yoshi • Yellow Yoshi • Baby Yoshi • Dolphin |
| Bosses | Koopalings (Iggy Koopa · Morton Koopa Jr. · Lemmy Koopa · Ludwig von Koopa · Roy Koopa · Wendy O. Koopa · Larry Koopa) • Bowser • Reznor • Big Boo |
| Items | 1-Up Mushroom • 3-Up Moon • Berry • Bonus Coin • Cape Feather • Coin • Control Coin • Dragon Coin • Yoshi's Egg • Fire Flower • Gray Coin • Lakitu's Cloud • Magic ball • Power Balloon • Super Mushroom • Super Star • Yoshi's Wings |
| Objects | ! Block • ! Switch • Arrow Sign • Beanstalk • Blue Door • Bonus block • Bridge • Bubble • Cloud Block • Coin Block • Coin countera • Count-Lift • Daikon • Diagonal platform • Dotted-Line Block • Empty Block • Escalator • Fence • Flimsy Lift • Flying Platform • Flying Prize Block • Grab Block • Gray Block • Gray P Switch • Hidden Block • Ice Block • Note Block • Jumping Board • Key • Lift • Message Block • ON/OFF Switch • Piston Lift • Prize Block • Revolving Door • Rope • Rotating Block • Roulette Block • Semisolid Platform • Single Swing Lift • Skull Raft • Snake platform • Spring platform • Star Road • Stretch Block • Switch Block • Triangular Block • Triple Swing Lift • Yellow Door • Yoshi Cloud |
| Worlds of Dinosaur Land | Yoshi's Island • Donut Plains • Vanilla Dome • Twin Bridges • Forest of Illusion • Chocolate Island • Valley of Bowser • Star World • Special Zone |
| Moves | Crouch • Dash • Fly • Jump • Looking up • Shell Toss • Slide • Spin Jump • Stomp • Swallow • Swim |
| Enemies and obstacles | Amazing Flyin' Hammer Brother • Ball 'N' Chain • Banzai Bill • Big Boo • Big Bubble • Big Steely • Blargg • Blurp • Bob-omb • Bony Beetle • Boo Buddy • Boo Buddy Block • Boo Buddy Snake • Boo Crew • Bowser Statue • Bullet Bill • Buzzy Beetle • Chainsaw • Chargin' Chuck • Cheep Cheep • Circling Boo Buddies • Climbing Koopa • Decoy • Dino-Rhino • Dino-Torch • Disappearing Boo Buddy • Dry Bones • Eerie • Falling spike • Fire Snake • Fishbone • Fishin' Boo • Fishin' Lakitu • Floating Mine • Flying Goomba • Fuzzy • Goomba • Grinder • Haunted Hole • Hothead • Ice • Jumping Fire Piranha Plant • Jumping Piranha Plant • Koopa Paratroopa • Koopa Troopa • Lakitu • Lakitu in a Pipe • Lava • Lava Bubble • Lil Sparky • Magikoopa • Mechakoopa • Mega Mole • Monty Mole • Muncher • Ninji • Para-bomb • Para-Goomba • Pillar • Piranha Plant • Pit • Pokey • Porcu-Puffer • Rex • Rip Van Fish • Shell (flashing) • Skewer • Spike • Spike (Super Mario World) • Spike Top • Spiny • Spiny Egg • Sumo Brother • Super Koopa • Swooper • Thwimp • Thwomp • Torpedo Ted • Torpedo tube • Turtle Cannon • Unshelled Koopa • Urchin • Volcano Lotus • Wiggler |
| Music | Title BGM • Yoshi's Island (Map Screen) • Donut Plains (Map Screen) • Ground BGM • Athletic BGM • Castle BGM • Ghost House BGM • Bonus Game BGM • Koopalings BGM • Bowser BGM • Ending |
| Other | 1-Up Chamber • Bonus game • Bonus Star • Fall • Giant Gate • Item Stock • Keyhole • Midway Gate • Sand cloud • Timer • Tourist Tips |
| Miscellaneous | Gallery (GBA) • Glitches • Mario Bros.a • Nintendo Music • Pre-release and unused content • Super Mario World (soundtrack album) • Nintendo Kōshiki Guidebook Super Mario World • Staff (GBA) |