Pump Works: Difference between revisions
Dongjun713 (talk | contribs) |
m (Mini-Mario detangling) |
||
| (17 intermediate revisions by 10 users not shown) | |||
| Line 1: | Line 1: | ||
{{image|more=yes|Images of the remake}} | |||
{{distinguish|Pipe Works}} | {{distinguish|Pipe Works}} | ||
[[File:Pump Works Map.png|thumb|left|Area map]] | [[File:Pump Works Map.png|thumb|left|Area map]] | ||
[[File:MLBIS Pump Works screenshot.png|thumb|[[Mario]] and [[Luigi]] in the Pump Works]] | [[File:MLBIS Pump Works screenshot.png|thumb|[[Mario]] and [[Luigi]] in the Pump Works]] | ||
[[File:MLBIS DNA-ish door screenshot.png| | [[File:MLBIS DNA-ish door screenshot.png|thumb|left|The exit of Pump Works, which can be opened with the [[Stingler]]]] | ||
{{M&LBIS Bowser map}} | |||
The area can be roughly divided into three parts. The first part starts from the entrance and consists of three chunks in a row. Mario and Luigi must clear the obstacles of this part to reach the orange pipe in the last chunk, which leads to the second part. The second part starts with a DNA-like door, which the bros. must first bypass and clear the rest of this part to find the Stingler, meeting [[Toadsworth]] and learning the [[Mini-Mario]] technique on the way. Once the bros. use Stingler on the DNA-like door, they can exit the area and unlock other areas of Bowser's body including [[Flame Pipe]] (their next area to check), [[Nerve Cluster]], [[Airway (Mario & Luigi: Bowser's Inside Story)|Airway]], [[Chest Station]], [[Nose Deck]] and [[Pipe Yard]]. Later in the game, after Mario and Luigi learn the [[Drill Bros.]] move in the [[Energy Hold]], they can tunnel underground in the first chunk of the first area (the entrance) and go right to access the third part, where they can find [[? Block]]s containing items like [[Super Mushroom]]s, [[Star Candy]], [[Guardian Socks]] and [[1-Up Deluxe]]s. | '''Pump Works''' is a location inside [[Bowser's body]] in ''[[Mario & Luigi: Bowser's Inside Story]]'' and its 3DS [[Mario & Luigi: Bowser's Inside Story + Bowser Jr.'s Journey|remake]]. This area appears to be in [[Bowser]]'s esophagus. It is accessible to [[Mario]] and [[Luigi]] when Bowser drinks water from the [[Sea Pipe Statue]] in [[Plack Beach]]. Drinking water as Bowser floods the area, which allows Mario and Luigi to swim and certain objects to float. Once he stops drinking, the water will drain from the area. Mario and Luigi travel here to search for [[Princess Peach]], but instead they find [[Toadsworth]]. This area also features ten [[Attack Piece]]s that, once gathered, allow Mario and Luigi to use the [[Fire Flower]] [[Bros. Attack|Special Attack]]. Also, it has an obstacle (a cannon that launches food for a giant [[Chombone]]) that is required to obtain the [[Stingler]], an item that can be used to open the exit door resembling DNAs and access other areas of [[Bowser's body]]. | ||
The area can be roughly divided into three parts. The first part starts from the entrance and consists of three chunks in a row. Mario and Luigi must clear the obstacles of this part to reach the orange pipe in the last chunk, which leads to the second part. The second part starts with a DNA-like door, which the bros. must first bypass and clear the rest of this part to find the Stingler, meeting [[Toadsworth]] and learning the [[Mini-Mario (form)|Mini-Mario]] technique on the way. Once the bros. use Stingler on the DNA-like door, they can exit the area and unlock other areas of Bowser's body including [[Flame Pipe]] (their next area to check), [[Nerve Cluster]], [[Airway (Mario & Luigi: Bowser's Inside Story)|Airway]], [[Chest Station]], [[Nose Deck]] and [[Pipe Yard]]. Later in the game, after Mario and Luigi learn the [[Drill Bros.]] move in the [[Energy Hold]], they can tunnel underground in the first chunk of the first area (the entrance) and go right to access the third part, where they can find [[? Block]]s containing items like [[Super Mushroom]]s, [[Star Candy]], [[Guardian Socks]] and [[1-Up Deluxe]]s. | |||
==Enemies== | ==Enemies== | ||
*[[Bone Thwomp]]s (obstacle) | *[[Bone Thwomp]]s (obstacle) | ||
*[[Goombule]]s | |||
*[[Spike Blop]]s | |||
*[[Bubble Blooper]]s | *[[Bubble Blooper]]s | ||
*[[Dried Blooper]]s | *[[Dried Blooper]]s | ||
*[[Protobatter]]s | *[[Protobatter]]s | ||
*[[Chombone]]s (obstacle) | *[[Chombone]]s (obstacle) | ||
==Items== | ==Items== | ||
{ | {{RPG item locations | ||
|item1=[[Mushroom]] (x5) | |||
|image1=[[File:Mushroom BiS.png]] | |||
|location1=<nowiki/> | |||
*x3: In a ? Block in the second scene. | |||
*In a ? Block in the third scene (the rightmost in the upper area of the map). | |||
*In a ? Block in the lower scene before the rightmost one in the DNA door area. | |||
| | |item2=[[1-Up Mushroom]] | ||
|x3 | |image2=[[File:Mushroom One Up BiS.png]] | ||
|location2=In a ? Block in the second scene. | |||
|item3=[[Syrup Jar]] | |||
|image3=[[File:Syrup BiS.png]] | |||
|location3=In a ? Block in the upper scene before the rightmost in the DNA door area. | |||
| | |item4=[[Nut]] | ||
|image4=[[File:Nut.png]] | |||
|[[File:Mushroom One Up BiS.png]] | |location4=In a ? Block in the rightmost scene in the DNA door area. | ||
| | |item5=[[Retry Clock]] | ||
| | |image5=[[File:Retry Clock.png]] | ||
|location5=In a ? Block in the second scene. | |||
|[[File:Syrup BiS.png]] | |item6=[[Stingler]] | ||
| | |image6=[[File:MLBIS Stingler screenshot.png|20px]] | ||
| | |location6=In the fourth scene in the DNA door area. | ||
|item7=[[Attack Piece]] (x10 | |||
|[[File:Nut.png]] | |image7=[[File:MLBIS Attack Piece.png]] | ||
| | |location7=<nowiki/> | ||
| | *<nowiki>#</nowiki>1: Enter the middle pipe in the second scene and hit the ? Block below. | ||
*<nowiki>#</nowiki>2: In the attack piece block in the third scene (the rightmost in the upper area of the map). | |||
|[[File:Retry Clock.png]] | *<nowiki>#</nowiki>3–5: In the attack piece blocks one scene past the DNA door. | ||
| | *<nowiki>#</nowiki>6: In an attack piece block in the upper scene with stair-like platforms beyond the DNA door. | ||
| | *<nowiki>#</nowiki>7: In a ? Block in the upper scene before the rightmost in the DNA door area. | ||
*<nowiki>#</nowiki>8: In an attack piece block in the lower scene before the rightmost one in the DNA door area. | |||
|[[File:MLBIS Stingler screenshot.png|20px]] | *<nowiki>#</nowiki>9: One scene left and there's another one in an attack piece block. | ||
| | *<nowiki>#</nowiki>10: One more scene left and there's another one in an attack piece block. | ||
| | |item8=[[Picnic Wear]] | ||
|image8=[[File:MLRPG3 C Overalls.png]] | |||
| | |location8=In the ? Block in the lower-right of the rightmost scene in the DNA door area. | ||
|#1 | |item9=[[Fighter Wear]] | ||
|image9=[[File:MLRPG3 C Overalls.png]] | |||
|location9=In a ? Block two scene to the right of the DNA door. | |||
|item10=[[Super Mushroom]] (x2) | |||
|image10=[[File:Mushroom BiS.png]] | |||
|location10=In a ? Block in the first scene down the entrance. | |||
|item11=[[Star Candy]] | |||
|image11=[[File:StarCandy.png]] | |||
|location11=In a ? Block at the end beyond the warp pipe maze down the entrance. | |||
|item12=[[Guardian Socks]] | |||
|image12=[[File:MLRPG3 C Socks.png]] | |||
|location12=In a ? Block at the end of the straight route down the entrance. | |||
|item13=[[1-Up Deluxe]] (x3) | |||
|image13=[[File:Mushroom One Up BiS.png]] | |||
|location13=In a ? Block at the end of the warp pipe maze down the entrance. | |||
| | }} | ||
|[[File:MLRPG3 C Overalls.png]] | ==Map== | ||
| | {{wide image|ML-BIS-map-PumpWorks.png|800}} | ||
| | |||
|[[File:MLRPG3 C Overalls.png]] | |||
| | |||
| | |||
|[[File:Mushroom BiS.png]] | |||
| | |||
| | |||
|[[File:StarCandy.png]] | |||
| | |||
| | |||
|[[File:MLRPG3 C Socks.png]] | |||
| | |||
| | |||
|[[File:Mushroom One Up BiS.png]] | |||
| | |||
|} | |||
==Names in other languages== | ==Names in other languages== | ||
{{foreign names | {{foreign names | ||
|Jap=ポンプスペース | |Jap=ポンプスペース | ||
| Line 104: | Line 85: | ||
|SpaE=Sala Pomposa | |SpaE=Sala Pomposa | ||
|SpaEM=Bubbly Room | |SpaEM=Bubbly Room | ||
| | |FreE=Zone hydrique | ||
| | |FreEM=Fluid zone | ||
|Ger=Pumpenkammer | |Ger=Pumpenkammer | ||
|GerM=Pump Chamber | |GerM=Pump Chamber | ||
| Line 115: | Line 96: | ||
}} | }} | ||
{{M&LBIS}} | {{M&LBIS}} | ||
[[Category:Bowser's | [[Category:Bowser's body]] | ||
[[Category: | [[Category:Aquatic areas]] | ||
[[Category:Mario & Luigi: Bowser's Inside Story | [[Category:Mario & Luigi: Bowser's Inside Story locations]] | ||
[[de:Pumpenkammer]] | [[de:Pumpenkammer]] | ||
[[it:Sacca Vascolare]] | [[it:Sacca Vascolare]] | ||
Revision as of 10:22, October 16, 2024
It has been requested that more images be uploaded for this article. Remove this notice only after the additional images have been added. Specifics: Images of the remake
- Not to be confused with Pipe Works.
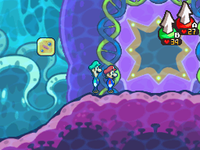
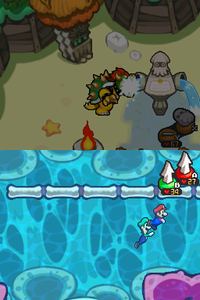
Pump Works is a location inside Bowser's body in Mario & Luigi: Bowser's Inside Story and its 3DS remake. This area appears to be in Bowser's esophagus. It is accessible to Mario and Luigi when Bowser drinks water from the Sea Pipe Statue in Plack Beach. Drinking water as Bowser floods the area, which allows Mario and Luigi to swim and certain objects to float. Once he stops drinking, the water will drain from the area. Mario and Luigi travel here to search for Princess Peach, but instead they find Toadsworth. This area also features ten Attack Pieces that, once gathered, allow Mario and Luigi to use the Fire Flower Special Attack. Also, it has an obstacle (a cannon that launches food for a giant Chombone) that is required to obtain the Stingler, an item that can be used to open the exit door resembling DNAs and access other areas of Bowser's body.
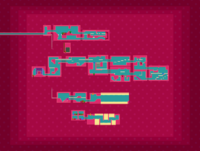
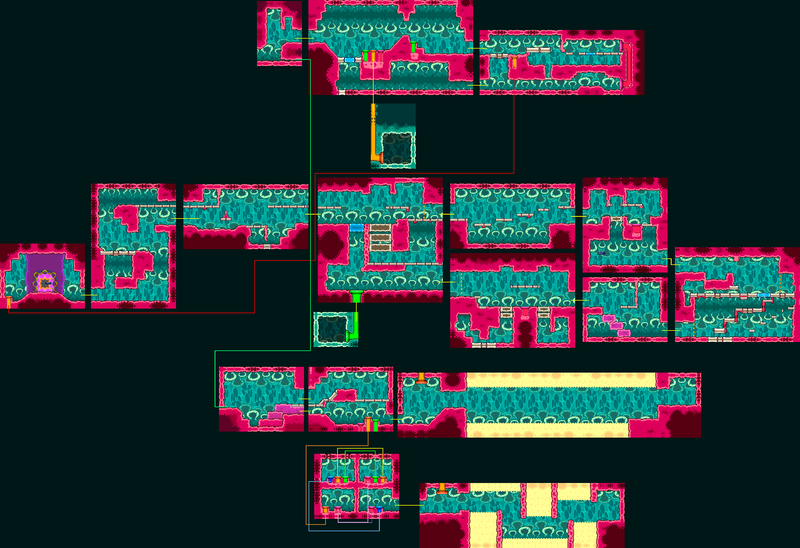
The area can be roughly divided into three parts. The first part starts from the entrance and consists of three chunks in a row. Mario and Luigi must clear the obstacles of this part to reach the orange pipe in the last chunk, which leads to the second part. The second part starts with a DNA-like door, which the bros. must first bypass and clear the rest of this part to find the Stingler, meeting Toadsworth and learning the Mini-Mario technique on the way. Once the bros. use Stingler on the DNA-like door, they can exit the area and unlock other areas of Bowser's body including Flame Pipe (their next area to check), Nerve Cluster, Airway, Chest Station, Nose Deck and Pipe Yard. Later in the game, after Mario and Luigi learn the Drill Bros. move in the Energy Hold, they can tunnel underground in the first chunk of the first area (the entrance) and go right to access the third part, where they can find ? Blocks containing items like Super Mushrooms, Star Candy, Guardian Socks and 1-Up Deluxes.
Enemies
- Bone Thwomps (obstacle)
- Goombules
- Spike Blops
- Bubble Bloopers
- Dried Bloopers
- Protobatters
- Chombones (obstacle)
Items
| Item | Image | Location
|
|---|---|---|
| Mushroom (x5) |
| |
| 1-Up Mushroom | In a ? Block in the second scene.
| |
| Syrup Jar | In a ? Block in the upper scene before the rightmost in the DNA door area.
| |
| Nut | In a ? Block in the rightmost scene in the DNA door area.
| |
| Retry Clock | In a ? Block in the second scene.
| |
| Stingler | In the fourth scene in the DNA door area.
| |
| Attack Piece (x10 |
| |
| Picnic Wear | In the ? Block in the lower-right of the rightmost scene in the DNA door area.
| |
| Fighter Wear | In a ? Block two scene to the right of the DNA door.
| |
| Super Mushroom (x2) | In a ? Block in the first scene down the entrance.
| |
| Star Candy | In a ? Block at the end beyond the warp pipe maze down the entrance.
| |
| Guardian Socks | In a ? Block at the end of the straight route down the entrance.
| |
| 1-Up Deluxe (x3) | In a ? Block at the end of the warp pipe maze down the entrance.
|
Map
Names in other languages
| Language | Name | Meaning | Notes |
|---|---|---|---|
| French (NOE) | Zone hydrique[?] | Fluid zone | |
| German | Pumpenkammer[?] | Pump Chamber | |
| Italian | Sacca Vascolare[?] | Vascular Sac | |
| Korean | 펌프 스페이스[?] Peompeu Seupeiseu |
Pump Space | |
| Spanish (NOA) | Hidrozona[?] | Hidrozone | |
| Spanish (NOE) | Sala Pomposa[?] | Bubbly Room |
