Tokyo Blur 4: Difference between revisions
m (Text replacement - "{{MK Race Courses}}" to "{{MK race courses}}") |
MatiasNTRM (talk | contribs) |
||
| Line 9: | Line 9: | ||
==Course layout== | ==Course layout== | ||
In the standard layout, the track starts out following the same path as [[Tokyo Blur]]. All of the racers start the course on the central span of the {{wp|Rainbow Bridge (Tokyo)|Rainbow Bridge}}. Just after the starting line, the road curves to the right through {{wp|Ginza}}, then makes a slight left before the {{wp|Wako (retailer)|Wako}} store. Not long after, the course makes a right U-turn near the {{wp|National Diet Building}} and the {{wp|Miraikan}}, then goes through a tunnel. The course then makes a sharp left to follow a small portion of [[Tokyo Blur 2]] in reverse, going under the {{wp|Kaminarimon}} next to the {{wp|Sensō-ji}}, where the second segment of the course begins. The track then immediately makes a U-turn toward the {{wp|Shuto Expressway}}; the remainder of the course follows the path of [[Tokyo Blur 3]], entering the expressway through a set of toll gates before rounding the spiral loop around the {{wp|Tokyo Big Sight}}. A [[Glide Ramp]] sends the player back onto the Rainbow Bridge, where a set of [[Thwomp]]s on either side threatens the players just before the finish line. | {{multiframe | ||
|align=left | |||
|1=<div style=background:#999999>[[File:MKT FullMap ToykoBlur4.png|130px]]</div> | |||
|2=The city course's layout in<br>relation to its other layouts | |||
}}In the standard layout, the track starts out following the same path as [[Tokyo Blur]]. All of the racers start the course on the central span of the {{wp|Rainbow Bridge (Tokyo)|Rainbow Bridge}}. Just after the starting line, the road curves to the right through {{wp|Ginza}}, then makes a slight left before the {{wp|Wako (retailer)|Wako}} store. Not long after, the course makes a right U-turn near the {{wp|National Diet Building}} and the {{wp|Miraikan}}, then goes through a tunnel. The course then makes a sharp left to follow a small portion of [[Tokyo Blur 2]] in reverse, going under the {{wp|Kaminarimon}} next to the {{wp|Sensō-ji}}, where the second segment of the course begins. The track then immediately makes a U-turn toward the {{wp|Shuto Expressway}}; the remainder of the course follows the path of [[Tokyo Blur 3]], entering the expressway through a set of toll gates before rounding the spiral loop around the {{wp|Tokyo Big Sight}}. A [[Glide Ramp]] sends the player back onto the Rainbow Bridge, where a set of [[Thwomp]]s on either side threatens the players just before the finish line. | |||
==Appearances== | ==Appearances== | ||
Revision as of 22:05, June 30, 2022
| Tokyo Blur 4 | |||
|---|---|---|---|
 View of the starting banner | |||
| Information | |||
| Appears in | Mario Kart Tour (2021) | ||
| Tour(s) | |||
| |||
| |||

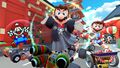
Tokyo Blur 4 is a race course in Mario Kart Tour. It is named after and inspired by Tokyo and is the featured course of the Mario Tour, where it made its debut. Similar to N64 Kalimari Desert 2, this course is divided into two sections rather than two laps. It is the second new course to appear in two consecutive tours after Merry Mountain, and the first city course to do so. This course is a favorite of Blue Yoshi, Nabbit, Daisy (Yukata), Cat Toad, Mario (Racing), and White Yoshi.
Course layout
relation to its other layouts
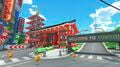
In the standard layout, the track starts out following the same path as Tokyo Blur. All of the racers start the course on the central span of the Rainbow Bridge. Just after the starting line, the road curves to the right through Ginza, then makes a slight left before the Wako store. Not long after, the course makes a right U-turn near the National Diet Building and the Miraikan, then goes through a tunnel. The course then makes a sharp left to follow a small portion of Tokyo Blur 2 in reverse, going under the Kaminarimon next to the Sensō-ji, where the second segment of the course begins. The track then immediately makes a U-turn toward the Shuto Expressway; the remainder of the course follows the path of Tokyo Blur 3, entering the expressway through a set of toll gates before rounding the spiral loop around the Tokyo Big Sight. A Glide Ramp sends the player back onto the Rainbow Bridge, where a set of Thwomps on either side threatens the players just before the finish line.
Appearances
Mario Tour
In the Mario Tour, Tokyo Blur 4 served as the tour's signature course. It appeared as the first course in the Mario Cup, the second course in the Dry Bowser Cup, and the location of the bonus challenge in the Baby Rosalina Cup. Its R/T variant appeared as the first course in the Birdo Cup and the third course in the Wario Cup, its R variant appeared as the first course in the Dry Bones Cup and the third course in the Metal Mario Cup, and its T variant appeared as the second course in the Wendy Cup, the first course in the Morton Cup, and the location of the bonus challenge in the Baby Peach Cup.
Tokyo Blur 4 | |||
|---|---|---|---|
| Drivers | Karts | Gliders | |
| Favorite of | |||
| Favored by | |||
Tokyo Blur 4R/T | |||
| Drivers | Karts | Gliders | |
| Favorite of | |||
| Favored by | |||
Tokyo Blur 4R | |||
| Drivers | Karts | Gliders | |
| Favorite of | |||
| Favored by | |||
Tokyo Blur 4T | |||
| Drivers | Karts | Gliders | |
| Favorite of | |||
| Favored by | |||
Tokyo Blur 4 | |||
| Drivers | Karts | Gliders | |
| Favorite of | |||
| Favored by | |||
Tokyo Blur 4T | |||
| Drivers | Karts | Gliders | |
| Favorite of | |||
| Favored by | |||
Tokyo Blur 4R | |||
| Drivers | Karts | Gliders | |
| Favorite of | |||
| Favored by | |||
Tokyo Blur 4R/T | |||
| Drivers | Karts | Gliders | |
| Favorite of | |||
| Favored by | |||
Yoshi Tour (2021)
In the 2021 Yoshi Tour, Tokyo Blur 4 appeared as the first course in the Bowser Jr. Cup. Its R variant appeared as the second course in the Daisy Cup and the location of the bonus challenge in the Waluigi Cup, and its T variant appeared as the third course in the Baby Rosalina Cup.
Tokyo Blur 4R | |||
|---|---|---|---|
| Drivers | Karts | Gliders | |
| Favorite of | |||
| Favored by | |||
Tokyo Blur 4T | |||
| Drivers | Karts | Gliders | |
| Favorite of | |||
| Favored by | |||
Tokyo Blur 4 | |||
| Drivers | Karts | Gliders | |
| Favorite of | |||
| Favored by | |||
Mario vs. Peach Tour
In the Mario vs. Peach Tour, Tokyo Blur 4 served as one of the five spotlight courses of the tour, alongside the other Tokyo Blur tracks and Ninja Hideaway. It appeared as the first course in the Diddy Kong Cup. Its T variant appeared as the first course in the Rosalina Cup, and its R variant appeared as the third course in the Metal Mario Cup.
Tokyo Blur 4 | |||
|---|---|---|---|
| Drivers | Karts | Gliders | |
| Favorite of | |||
| Favored by | |||
Tokyo Blur 4T | |||
| Drivers | Karts | Gliders | |
| Favorite of | |||
| Favored by | |||
Tokyo Blur 4R | |||
| Drivers | Karts | Gliders | |
| Favorite of | |||
| Favored by | |||
Profiles
- Mario Kart Tour Twitter: The Snow Tour is wrapping up in blue. Next up is the Mario Tour featuring Tokyo Blur 4, a brand-new variant of the existing Tokyo-based course![1]
Gallery
Course icons
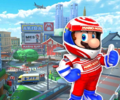
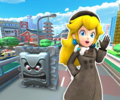
Course icon of Tokyo Blur 4 with Mario (Racing)
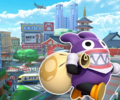
Course icon of Tokyo Blur 4 with Nabbit
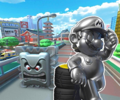
Course icon of Tokyo Blur 4R with Metal Mario
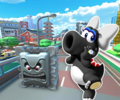
Course icon of Tokyo Blur 4R with Birdo (Black)
Course icon of Tokyo Blur 4R with Peach (Wintertime)
Course icon of Tokyo Blur 4T with Mario (Happi)
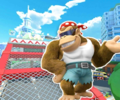
Course icon of Tokyo Blur 4T with Funky Kong
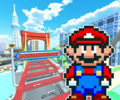
Course icon of Tokyo Blur 4R/T with Mario (SNES)
The icon of the Combo Attack bonus challenge set in Tokyo Blur 4T
The icon of the Time Trial bonus challenge set in Tokyo Blur 4
The icon of the Time Trial bonus challenge set in Tokyo Blur 4R


Screenshots
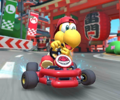
View of the course
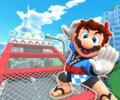
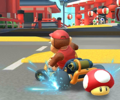
Mario (SNES), Mario (Hakama), and Mario (Happi) tricking, with Mario (Racing) driving ahead
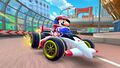
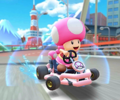
Mario (Racing) drifting in the B Dasher Mk. 2
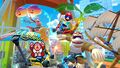
Dixie Kong, Mario (Sunshine), Donkey Kong Jr. (SNES), and Funky Kong gliding in Pipe Frames


Names in other languages
| Language | Name | Meaning | Notes |
|---|---|---|---|
| Chinese (simplified) | 东京赛道4[?] Dōngjīng Sàidào 4 |
Tokyo Speedway 4 | |
| Chinese (traditional) | 東京賽道4[?] Dōngjīng Sàidào 4 |
Tokyo Speedway 4 | |
| French | Traversée de Tokyo 4[?] | Crossing Tokyo 4 | |
| German | Tokio-Tempotour 4[?] | Tokyo Speed Tour 4 | |
| Italian | Neon di Tokyo 4[?] | Tokyo Neon 4 | |
| Korean | 도쿄 블러 4[?] Dokyo Beulleo 4 |
Tokyo Blur 4 | |
| Portuguese | Velocidade em Tóquio 4[?] | Speed in Tokyo 4 | |
| Spanish | Circuito Tokio 4[?] | Tokyo Circuit 4 |