Battle Card (Paper Mario: Color Splash)
- This article is about the cards used as battle commands in Paper Mario: Color Splash. For the cards used as a special effect in Mario & Luigi: Paper Jam, see Battle Card (Mario & Luigi: Paper Jam).
- “Whatever...We've got cards, we've got paint...YOU KNOW WHAT TO DO, MARIO!”
- —Huey, Paper Mario: Color Splash
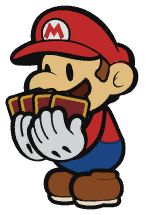
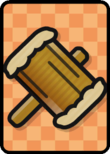
Battle Cards are important elements in Paper Mario: Color Splash. They succeed stickers from the game's predecessor and serve as Mario's main method of attacking. As such, there are a wide variety of cards that appear in the game, and can be found in blocks, or purchased from Prisma Cardware.
Variations[edit]
There are three different kinds of battle cards:
- Basic - These cards are meant for attacking enemies, healing and defending Mario, and refilling the paint hammer.
- Enemy - These cards summon enemies that attack for Mario and take hits for him.
- Thing - These are obtained by finding things in the world and squeezing them into cards. They can then be used to deal big damage to enemies, solve a puzzle outside of battle, and weaken the Koopaling bosses with specific Thing Cards.
Basic Cards[edit]
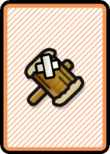
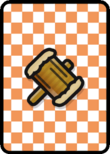
There are 60 Basic Cards in the game pertaining to four categories: Worn-Out Basic Cards have a colored border with fine colored stripes on a white background, Normal Basic Cards have a checkered background with colored squares on a white background, Big Basic Cards have a checkered background with bigger colored squares on a background of a lighter color, and Mega or Huge Basic Cards have a striped radial background in which a striped colored slice is alternated with a striped slice of a lighter color, the stripes themselves alternating a stripe of a lighter color with a stripe of a more saturated color. There are also cards that allow to obtain the same effect up to five times, depending on the number of items in the card.
| # | Image | Unpainted | Name | Details | Price* | Found In |
|---|---|---|---|---|---|---|
| 01 | 
|

|
Worn-Out Jump | Stomps a single enemy with a weak jump. | N/A | Ruddy Road |
| 02 | 
|

|
Worn-Out Jump x3 | Stomps a single enemy with a weak jump. Repeats three times. | N/A | Ruddy Road |
| 03 | 
|

|
Worn-Out Jump x5 | Stomps a single enemy with a weak jump. Repeats five times. | N/A | Sacred Forest |
| 04 | 
|

|
Jump | Stomps a single enemy with a regular jump. | Port Prisma | |
| 05 | 
|

|
Jump x2 | Stomps a single enemy with a regular jump. Repeats twice. | The Crimson Tower | |
| 06 | 
|

|
Jump x3 | Stomps a single enemy with a regular jump. Repeats three times. | N/A | Fortune Island |
| 07 | 
|

|
Big Jump | Stomps a single enemy with a strong jump. | Mondo Woods | |
| 08 | 
|

|
Big Jump x2 | Stomps a single enemy with a strong jump. Repeats twice. | Redpepper Volcano | |
| 09 | 
|

|
Huge Jump | Stomps a single enemy with a super-strong jump. | Green Energy Plant | |
| 10 | 
|

|
Line Jump | Stomps all enemies in order with a jump—forward and backward with perfect execution. | Bloo Bay Beach | |
| 11 | 
|

|
Big Line Jump | Stomps all enemies in order with a strong jump—forward and backward with perfect execution. | Plum Park | |
| 12 | 
|

|
Huge Line Jump | Stomps all enemies in order with a super-strong jump—forward and backward with perfect execution. | N/A | Green Energy Plant |
| 13 | 
|

|
Hopslipper | Quickly stomps a single enemy up to 10 times. | Ruddy Road | |
| 14 | 
|

|
Hopslipper x2 | Quickly stomps a single enemy up to 10 times. Repeats twice. | Plum Park | |
| 15 | 
|

|
Hopslipper x3 | Quickly stomps a single enemy up to 10 times. Repeats three times. | N/A | Redpepper Volcano |
| 16 | 
|

|
Big Hopslipper | Quickly stomps a single enemy with extra power, up to 10 times. | Mondo Woods | |
| 17 | 
|

|
Huge Hopslipper | Quickly stomps a single enemy with super power, up to 10 times. | N/A | Green Energy Plant |
| 18 | 
|

|
Iron Jump | Stomps even spiked enemies with a regular jump. | Sunglow Ridge | |
| 19 | 
|

|
Iron Jump x2 | Stomps even spiked enemies with two regular jumps. | Plum Park | |
| 20 | 
|

|
Iron Jump x3 | Stomps even spiked enemies with three regular jumps. | N/A | Redpepper Crater |
| 21 | 
|

|
Big Iron Jump | Stomps even spiked enemies with a strong jump. | Plum Park | |
| 22 | 
|

|
Huge Iron Jump | Stomps even spiked enemies with a super-strong jump. | N/A | Mossrock Theater |
| 23 | 
|

|
Spin Jump | Stomps a single enemy—spiked or not—with a metal drill. Damages multiple enemies if executed well. | Sunglow Ridge | |
| 24 | 
|

|
Big Spin Jump | Stomps a single enemy—spiked or not—with a strong metal drill. Damages many enemies if executed well. | Toad Trainworks | |
| 25 | 
|

|
Worn-Out Hammer | Whacks one enemy with a weak hammer. Damages multiple enemies if executed well. | N/A | Ruddy Road |
| 26 | 
|

|
Worn-Out Hammer x3 | Whacks one enemy with a weak hammer. Damages multiple enemies if executed well. Repeats three times. | N/A | Ruddy Road |
| 27 | 
|

|
Worn-Out Hammer x5 | Whacks one enemy with a weak hammer. Damages multiple enemies if executed well. Repeats five times. | N/A | The Crimson Tower |
| 28 | 
|

|
Hammer | Whacks one enemy with a regular hammer. Damages multiple enemies if executed well. | Port Prisma | |
| 29 | 
|

|
Hammer x2 | Whacks one enemy with a regular hammer. Damages multiple enemies if executed well. Repeats twice. | The Crimson Tower | |
| 30 | 
|

|
Hammer x3 | Whacks one enemy with a regular hammer. Damages multiple enemies if executed well. Repeats three times. | N/A | Redpepper Crater |
| 31 | 
|

|
Big Hammer | Whacks one enemy with a strong hammer. Damages multiple enemies if executed well. | Mondo Woods | |
| 32 | 
|

|
Big Hammer x2 | Whacks one enemy with a strong hammer. Damages multiple enemies if executed well. Repeats twice. | Redpepper Crater | |
| 33 | 
|

|
Huge Hammer | Whacks one enemy with a super-strong hammer. Damages multiple enemies if executed well. | Cobalt Base or Black Bowser's Castle after beating the game | |
| 34 | 
|

|
KO Hammer | Whacks a single enemy from the side with a hammer. Damages multiple enemies if executed well. | Bloo Bay Beach | |
| 35 | 
|

|
Big KO Hammer | Whacks a single enemy from the side with a strong hammer. Damages multiple enemies if executed well. | Plum Park | |
| 36 | 
|

|
Huge KO Hammer | Whacks a single enemy from the side with a super-strong hammer. Damages multiple enemies if executed well. | N/A | Cobalt Base or Green Energy Plant |
| 37 | 
|

|
Eekhammer | Quickly whacks a single enemy with a hammer up to five times. | Fortune Island | |
| 38 | 
|

|
Eekhammer x2 | Quickly whacks a single enemy with a hammer up to five times. Repeats twice. | Plum Park | |
| 39 | 
|

|
Eekhammer x3 | Quickly whacks a single enemy with a hammer up to five times. Repeats three times. | N/A | Fortune Island |
| 40 | 
|

|
Big Eekhammer | Quickly whacks a single enemy with a strong hammer up to five times. | Mondo Woods | |
| 41 | 
|

|
Big Eekhammer x2 | Quickly whacks a single enemy with a strong hammer up to five times. Repeats twice. | Redpepper Volcano | |
| 42 | 
|

|
Huge Eekhammer | Quickly whacks a single enemy with a super-strong hammer up to five times. | N/A | Cobalt Base or Green Energy Plant |
| 43 | 
|

|
Hurlhammer | Whacks enemies with a thrown hammer. Can damage multiple enemies if executed well. | Marmalade Valley | |
| 44 | 
|

|
Hurlhammer x2 | Whacks enemies with a thrown hammer. Can damage multiple enemies if executed well. Repeats twice. | Fortune Island | |
| 45 | 
|

|
Hurlhammer x3 | Whacks enemies with a thrown hammer. Can damage multiple enemies if executed well. Repeats three times. | N/A | Mossrock Theater |
| 46 | 
|

|
Big Hurlhammer | Whacks enemies with a strong thrown hammer. Can damage multiple enemies if executed well. | Sunset Express | |
| 47 | 
|

|
Huge Hurlhammer | Whacks enemies with a super-strong thrown hammer. Can damage multiple enemies if executed well. | N/A | Cobalt Base or Black Bowser's Castle after beating the game |
| 48 | 
|

|
Blazehammer | Looses a giant flame on impact, burning all enemies if executed well. | N/A | Daffodil Peak |
| 49 | 
|

|
Fire Flower | Throws up to four fireballs at multiple enemies in order if executed well. | Ruddy Road | |
| 50 | 
|

|
Big Fire Flower | Throws up to four super-hot fireballs at multiple enemies in order if executed well. | Vortex Island | |
| 51 | 
|

|
Ice Flower | Throws up to four iceballs at multiple enemies in order if executed well. | Ruddy Road | |
| 52 | 
|

|
Big Ice Flower | Throws up to four freezing cold iceballs at multiple enemies in order if executed well. | Vortex Island | |
| 53 | 
|

|
POW Block | Shakes the ground to deal damage. Can crumple enemies and deliver higher damage if executed well. | Kiwano Temple | |
| 54 | 
|

|
Mushroom | Makes you feel better. Just the thing when you're tired. | Ruddy Road | |
| 55 | 
|

|
Big Mushroom | Makes you feel quite a bit better. Unknown if it tastes good or not. | Plum Park | |
| 56 | 
|

|
Mega Mushroom | Makes you feel GREAT! It also tastes delicious. | Redpepper Volcano | |
| 57 | 
|

|
1-Up Mushroom | Refills your paint reserves. Plus it's just fun to look at. | The Emerald Circus | |
| 58 | 
|

|
Tail | Counters enemy attacks with a swipe of the tail. Lasts until you take damage. | Fort Cobalt | |
| 59 | 
|

|
Spike Helmet | Counters attacks from above. Deals more damage if executed well. Lasts until you take damage. | Indigo Underground | |
| 60 | 
|

|
Frog Suit | Allows you to jump over enemy attacks completely if executed well. Lasts until you take damage. | Sunglow Ridge | |
| *When there are two prices, the upper one is that of the unpainted card, and the lower one is that of the painted card. | ||||||
Enemy Cards[edit]
- "Enemy Card" redirects here. For the "enemy cards" category from the Super Mario Trading Card Collection, see Super Mario Trading Card Collection § Categories.
There are 72 Enemy Cards in the game, and most of them are occasionally dropped by enemies. The Kamek and Koopaling Cards can be obtained by beating the Rock Paper Wizard in Super Roshambo, and the Black Bowser's Castle Card is obtained after Mario defeats Bowser. When Mario uses an Enemy Card, the enemy that is pictured on the card is summoned. The summoned enemy attacks the enemies that are in battle with Mario, and it also takes hits for Mario. The enemy continues to help Mario until it is defeated or the battle is won. Only one enemy can be summoned at a time, and summoning another causes the first one to run away. If an Enemy Card is used against a boss, the enemy runs away, and Koopaling Enemy Cards cause normal enemies to run away when used.
| # | Image | Unpainted | Name | Details | Best Location(s) |
|---|---|---|---|---|---|
| 01 | 
|

|
Red Shy Guy | Rushes over and punches an enemy. | Ruddy Road, Cherry Lake, Indigo Underground, Daffodil Peak, The Crimson Tower, Fort Cobalt |
| 02 | 
|

|
Green Shy Guy | Rushes over and punches an enemy. | Cherry Lake, Sunglow Ridge, Fort Cobalt, Mossrock Theater |
| 03 | 
|

|
Blue Shy Guy | Rushes over and punches an enemy. | Fort Cobalt |
| 04 | 
|

|
Yellow Shy Guy | Rushes over and punches an enemy. | Plum Park, Fort Cobalt, Mossrock Theater |
| 05 | 
|

|
Pink Shy Guy | Rushes over and punches an enemy. | Plum Park, Fort Cobalt, Mossrock Theater |
| 06 | 
|

|
Red Slurp Guy | Slurps paint from a single enemy to restore its own HP. | Bloo Bay Beach, The Crimson Tower, Sunglow Ridge |
| 07 | 
|

|
Blue Slurp Guy | Slurps paint from a single enemy to restore its own HP. | Cherry Lake, Fort Cobalt, Mossrock Theater |
| 08 | 
|

|
Yellow Slurp Guy | Slurps paint from a single enemy to restore its own HP. | Cherry Lake, Sunglow Ridge, Mossrock Theater |
| 09 | 
|

|
Red Spike Guy | Slide into a single enemy and attacks with a head-butt. | Ruddy Road, The Crimson Tower, Mossrock Theater |
| 10 | 
|

|
Green Spike Guy | Slide into a single enemy and attacks with a head-butt. | Mossrock Theater |
| 11 | 
|

|
Blue Spike Guy | Slide into a single enemy and attacks with a head-butt. | Cherry Lake, The Crimson Tower, Fort Cobalt |
| 12 | 
|

|
Yellow Spike Guy | Slide into a single enemy and attacks with a head-butt. | Cherry Lake, The Crimson Tower, Fort Cobalt |
| 13 | 
|

|
Pink Spike Guy | Slide into a single enemy and attacks with a head-butt. | Fort Cobalt |
| 14 | 
|

|
Red Roller Guy | Rolls into all enemies using a powerful ring. | Mossrock Theater |
| 15 | 
|

|
Green Roller Guy | Rolls into all enemies using a powerful ring. | Mossrock Theater |
| 16 | 
|

|
Pink Roller Guy | Rolls into all enemies using a powerful ring. | Mossrock Theater |
| 17 | 
|

|
Sombrero Guy | Throws its hat at a single enemy. | Sunset Express |
| 18 | 
|

|
Shy Bandit | Slurps up paint from a single enemy. Defeating an enemy with this attack may turn the enemy into a card. | Fort Cobalt, World Map |
| 19 | 
|

|
Goomba | Headbutts a single enemy. | The Crimson Tower, Sunglow Ridge, Mondo Woods, The Golden Coliseum, Sacred Forest |
| 20 | 
|

|
Paragoomba | Hurls itself at a single enemy with reckless abandon. | Fort Cobalt, Mustard Café, Sacred Forest |
| 21 | 
|

|
Bone Goomba | Headbutts a single enemy while rocking a skull on its noggin. | Marmalade Valley |
| 22 | 
|

|
Koopa Troopa | Retreats inside its shell, and throws itself at all enemies. | Cherry Lake, Bloo Bay Beach, The Golden Coliseum, Green Energy Plant |
| 23 | 
|

|
Koopa Paratroopa | Retreats inside its shell, and throws itself at a row of enemies. Can only attack enemies on the ground after losing its wings. | Daffodil Peak, The Crimson Tower |
| 24 | 
|

|
Swoop | Swoops down and hurls itself at a single enemy. | Indigo Underground |
| 25 | 
|

|
Cheep Cheep | Shoots water at a single enemy near the ground. | Bloo Bay Beach, Sacred Forest |
| 26 | 
|

|
Blooper | Shoots water at a single enemy. | Plum Park, Vortex Island, Lighthouse Island, Fortune Island |
| 27 | 
|

|
Spike | Hurls an iron ball at all enemies on the ground. | Kiwano Temple, The Golden Coliseum |
| 28 | 
|

|
Dry Bones | Throws a bone at a single enemy. | Marmalade Valley, Vortex Island, Lighthouse Island, Fortune Island, Redpepper Crater |
| 29 | 
|

|
Boo | Slaps a single enemy with its ghastly palm. | Vortex Island, Lighthouse Island, Fortune Island |
| 30 | 
|

|
Scaredy Rat | Hurls itself at a single enemy. | Dark Bloo Inn, Toad Trainworks |
| 31 | 
|

|
Ninji | Strikes a single enemy with an ancient ninja jump attack. | Fort Cobalt |
| 32 | 
|

|
Fuzzy | Strikes a single enemy with a jump attack. | The Golden Coliseum, Sunset Express, Redpepper Volcano |
| 33 | 
|

|
Red Snifit | Spits a bullet at a single enemy. | Plum Park, Mustard Café |
| 34 | 
|

|
Green Snifit | Spits a bullet at a single enemy. | Mustard Café |
| 35 | 
|

|
Blue Snifit | Spits a bullet at a single enemy. | Mustard Café |
| 36 | 
|

|
Yellow Snifit | Spits a bullet at a single enemy. | Mustard Café |
| 37 | 
|

|
Pink Snifit | Spits a bullet at a single enemy. | Mustard Café |
| 38 | 
|

|
Red Slurp Snifit | Slurps up an enemy's paint to restore its own HP. | Sunglow Ridge, Plum Park |
| 39 | 
|

|
Blue Slurp Snifit | Slurps up an enemy's paint to restore its own HP. | Plum Park |
| 40 | 
|

|
Yellow Slurp Snifit | Slurps up an enemy's paint to restore its own HP. | Plum Park |
| 41 | 
|

|
Red Spike Snifit | Spits three bullets at a single enemy. | Plum Park |
| 42 | 
|

|
Green Spike Snifit | Spits three bullets at a single enemy. | Plum Park, Mustard Café |
| 43 | 
|

|
Blue Spike Snifit | Spits three bullets at a single enemy. | Plum Park |
| 44 | 
|

|
Yellow Spike Snifit | Spits three bullets at a single enemy. | Plum Park |
| 45 | 
|

|
Pink Spike Snifit | Spits three bullets at a single enemy. | Mustard Café |
| 46 | 
|

|
Spiny | Retreats inside its shell, and hurls itself at all enemies. | Daffodil Peak, Sunglow Ridge, Kiwano Temple |
| 47 | 
|

|
Buzzy Beetle | Retreats inside its shell, and hurls itself at all enemies. | Indigo Underground, Sacred Forest, Lighthouse Island |
| 48 | 
|

|
Spike Top | Retreats inside its shell, and hurls itself at all enemies. | Redpepper Volcano, Redpepper Crater |
| 49 | 
|

|
Rocky Wrench | Throws a wrench at a single enemy. | Sunset Express |
| 50 | 
|

|
Pokey | Throws itself at a single enemy. | Mustard Café |
| 51 | 
|

|
Green Pokey | Throws itself at a single enemy. | Mustard Café |
| 52 | 
|

|
Bob-omb | Approaches a single enemy and explodes. | Fort Cobalt, Redpepper Crater |
| 53 | 
|

|
Lava Bubble | Throws itself at a single enemy. | Redpepper Volcano, Redpepper Crater |
| 54 | 
|

|
Fire Piranha Plant | Spits a fireball at a single enemy. | Mossrock Theater, Redpepper Crater |
| 55 | 
|

|
Ptooie | Throws an iron ball at a single enemy. | Mossrock Theater |
| 56 | 
|

|
Dino Rhino | Charges a single enemy. | Mossrock Theater, The Emerald Circus |
| 57 | 
|

|
Hammer Bro | Tosses a hammer at a single enemy. | The Golden Coliseum |
| 58 | 
|

|
Boomerang Bro | Tosses a boomerang at all enemies. | Green Energy Plant |
| 59 | 
|

|
Fire Bro | Tosses a fireball at a single enemy. | Redpepper Crater, Fortune Island |
| 60 | 
|

|
Ice Bro | Tosses an iceball at a single enemy. | Lighthouse Island, Fortune Island |
| 61 | 
|

|
Juggler Bro | Tosses a hammer at a single enemy. | Mossrock Theater, The Emerald Circus |
| 62 | 
|

|
Circus Bro | Tosses a boomerang at all enemies. | Mossrock Theater, The Emerald Circus |
| 63 | 
|

|
Sledge Bro | Pounds the ground, shaking up all standing enemies. | Green Energy Plant |
| 64 | 
|

|
Kamek | Attacks all enemies with his Koopa magicks. | Roshambo Temple #6 |
| 65 | 
|

|
Morton | Scares off enemies with his imposing figure. | Roshambo Temple #1 |
| 66 | 
|

|
Iggy | Scares off enemies with his lanky dimensions. | Roshambo Temple #2 |
| 67 | 
|

|
Ludwig | Scares off enemies with his classical stylings. | Roshambo Temple #3 |
| 68 | 
|

|
Wendy | Scares off enemies with her oversized jewelry. | Roshambo Temple #4 |
| 69 | 
|

|
Larry | Scares off enemies with his kooky personality. | Roshambo Temple #5 |
| 70 | 
|

|
Lemmy | Scares off enemies with his rainbow mohawk. | Roshambo Temple #7 |
| 71 | 
|

|
Roy | Scares off enemies with his cool red shades. | Roshambo Temple #8 |
| 72 | 
|

|
Black Bowser's Castle | Falls from the sky and crushes everything. | Defeat Black Bowser |
Thing Cards[edit]
- “Objects that are 3D are called Things. A Thing Card is what you get when you squeeze a Thing. When you use them, crazy things can happen.”
- —Huey, Paper Mario: Color Splash
Only one of each Thing Card can be carried at a time, as well as a corresponding Replica Card. Replica Cards of previously obtained Thing Cards can be found in the courses, without requiring the Thing to be squeezed into the card first. Each Replica Card has an effect similar to the Thing Cards they are replicating, but adds a transparent "REPLICA" watermark in front of the animation and the card, as well as doing less damage. During the battles against the Koopalings, failing to use the mandatory Thing Card at the right time will result in the Koopaling instantly defeating Mario; if a Replica of the mandatory Thing Card is used, the Koopaling will nullify its effect. Almost all Thing Cards have a hidden Action Command that will increase its effects if performed correctly.
| # | Image | Unpainted | Name | Details | Action Command | Origin | Use | The Wringer Prices |
|---|---|---|---|---|---|---|---|---|
| 01 | 
|

|
Fire Extinguisher | Exhales a torrent of CO2 that can quell any flame. | Press |
On top of the cliff in Ruddy Road | To extinguish Morton's hammer in The Crimson Tower | |
| 02 | 
|

|
Fan | The blades inside rotate at high speed to create a nice breeze. | Press |
Scenic spot in Cherry Lake | To blow Surfing Kinopio's boat in Bloo Bay Beach, and to give wind to the captain's ship in Violet Passage | |
| 03 | 
|

|
Plunger | The plumber's weapon of choice. Push down on the shaft to unclog even the cloggiest of pipes. | Press |
Prisma Harbor in Port Prisma | To free Rescue Green from the pipe in Indigo Underground. | |
| 04 | 
|

|
Lemon | Adds a little zest to any meal. | Press |
A hill in Indigo Underground | Part of cooking the Steak in Tangerino Grill | |
| 05 | 
|

|
Cat-o-Luck | A feline statue that purrs with good-luck vibes. Enshrined at the top of a dark-red tower. | Press |
Top floor of The Crimson Tower | N/A | |
| 06 | 
|

|
Piggy Bank | There's only one way to get the coins out of this bad boy: BREAK IT! | Press |
Shed in Château Chanterelle | N/A | |
| 07 | 
|

|
Bone | A favorite snack of round pets with sharp teeth! High in calcium! | Press |
The highest boardwalk in Marmalade Valley1 Dressing room in The Golden Coliseum |
To bait Princess into coming to the professor in Château Chanterelle, and to destroy Iggy's chariots in The Golden Coliseum | |
| 08 | 
|

|
Bottle Opener | Harnesses the principle of leverage to pry off bottle caps. | Press |
Storage in The Golden Coliseum | To open a bottle in Redpepper Volcano | |
| 09 | 
|

|
Ice Pick | Its pointy tip can chip ice into perfectly portioned pieces for any size glass. | Press |
Storage in The Golden Coliseum | To pop Lemmy's Wonder Ball in the Emerald Circus | |
| 10 | 
|

|
Balloons | Makes things float into the sky, and raises voices by an octave or two. | N/A | Performance stage in Plum Park | To lift Ludwig's Super Ludsub out of the water in Fort Cobalt | |
| 11 | 
|

|
Teapot | Used to steep and pour tea at fancy tea parties. | Press |
Serenity Fountain in Plum Park | To start the Tea Party Toads' tea party in Dark Bloo Inn | |
| 12 | 
|

|
Turnip | This turnip is so big that you can't pull it out without 26 hands and a big "Heave ho!" | Press |
Sacred Forest Entrance | N/A | |
| 13 | 
|

|
Instant Camera | The future of personal photography. Selfies so real, you'll begin to question reality itself. | Press |
Snifit or Whiffit prize; Cobalt Base | To stop Wendy's golden ring in Fortune Island | |
| 14 | 
|

|
Basin | An extremely heavy bathing aid. Dropping this on an enemy's head might just knock it out. | Press |
Fences in Fort Cobalt | To stun Draggadon in Redpepper Volcano | |
| 15 | 
|

|
Battery | Contains enough energy to power household items and such. | Press |
Cabin in Violet Passage | To power the house in Green Energy Plant | |
| 16 | 
|

|
Compass | Directs lost travelers to their destination. | N/A | Cabin in Violet Passage | To clear the fog in the fifth area of the Lost Sea | |
| 17 | 
|

|
Cork | A stopper used to keep troublesome things from coming out of dangerous holes. | Press |
Pipe in Vortex Island | To clog the smokestack during Larry's battle in the Sunset Express | |
| 18 |  
|
 
|
Washing Machine3 | Swishes water and agitate clothing in order to remove stubborn stains. | Press |
Parallel vortex in Vortex Island | To clear the black paint during Roy's battle in Black Bowser's Castle | |
| 19 | 
|

|
Lightbulb | Harnesses electricity to illuminate darkness. Sunglasses recommended when handling. | Press |
Top floor in Lighthouse Island | To light up the lighthouse in Lighthouse Island | |
| 20 | 
|

|
Salt and Pepper | Seasons even the blandest of meals. | Press |
Smoky room in Fortune Island | Part of cooking the Steak in Tangerino Grill | |
| 21 | 
|

|
Charcoal Grill | Grills food to perfection. | Press |
Volcano on Fortune Island | Part of cooking the Steak in Tangerino Grill | |
| 22 | 
|

|
Megaphone | Amplifies the sound put into the mic, turning a whisper into a shout... and a shout into an explosion of noise. | Blow into the Wii U GamePad microphone as soon as it begins playing rock music. | Room in Toad Trainworks | To awaken the Thwomp in the Sunset Express | |
| 23 | 
|

|
Hair Dryer | Blows searing-hot air that can dry out or melt practically anything! | Press |
Spa in Redpepper Crater | To melt the ice in Tangerino Grill | |
| 24 | 
|

|
Magnifying Glass | Makes things appear larger than they are. Can also fry ants and other various creatures. | Press |
Tangerino Grill freezer | To enlarge the pipe in Sacred Forest, and to enlarge the small Toad in Port Prisma | |
| 25 | 
|

|
Claw Hammer | This steel-headed hammer is harder than the one Mario usually uses. It can even break huge rocks that might be blocking your path. | Press |
Pipe room in Green Energy Plant | N/A | |
| 26 | 
|

|
Recorder | The pleasant, nostalgic melody makes you feel like you're being whirled up into the sky. | Press |
Goal in Green Energy Plant | N/A | |
| 27 | 
|

|
Disco Ball | This relic from years past is making a comeback. None can resist its call to hit the dance floor. | N/A | Backstage in the Emerald Circus | To distract Lemmy from his Wonder Ball in the Emerald Circus | |
| 28 | 
|

|
Huey+ | A sentient paint can who came from Prisma Fountain Emergency Recovery Unit. | Press |
Black Bowser Boss Battle | To suck the black paint from Black Bowser | N/A |
| 1: Not found in this location after using it in Château Chanterelle 2: Labeled as "Coming soon" on Wringer's list after collecting it in Marmalade Valley and up to collecting it again in The Golden Coliseum 3: The two versions of the Washing Machine thing are exclusive to different versions: the top-loading one appears in the American and Japanese versions, and the front-loading one in the European and Australian versions. +: Although Replica versions of this card are found in the game's files, they cannot be obtained in the final game. | ||||||||
Play Nintendo tips[edit]
A page on the Play Nintendo website offered tips for using Battle Cards.[1][dead link]
- Friend or foe?
Mario keeps all sorts of clever cards up his sleeve in case of a battle. For instance, you can use an Enemy Card to summon an ally to stand by your side in a fight. Cool, huh? There’s just one problem: you never know if your new “ally” will turn against you! If you call on an ally, they’ll definitely hit your enemy…but they may come back and hit you, too. Ouch! - The right card
Before you start throwing down Battle Cards, take a second to size up your enemy. Some enemies can’t be touched by certain cards, so it’d be kind of a waste to use that kind of card on them. For example, you can’t jump on a baddie who’s wearing a spiked hat if you don’t use an Iron Boot card! - Card Collection
You can collect new Battle Cards as you play by hitting Question Blocks, winning battles, and painting colorless spots. You can use in-game coins to acquire Battle Cards and Thing Cards in Port Prisma, too. Players need the proper Thing Card to defeat a boss—and Thing Cards can only be used once—so it’s good to know there’s a place where you can try to find the one you need. - Mushroom Cards
Not all cards are used for fighting, you know! Mushroom Cards, for example, can be used to replenish your health and paint meter. It’s not a bad idea to keep a Mushroom Card or two in your deck to help keep Mario strong during a tough battle.
Names in other languages[edit]
| Language | Name | Meaning | Notes |
|---|---|---|---|
| Japanese | カード[?] Kādo |
Card | |
| French | Carte de combat[?] | Combat card | |
| German | Kampfkarte[?] | Battle Card | |
| Italian | Carta scontro[?] | Battle card | |
| Portuguese (NOE) | Carta de combate[?] | Combat card |
- Basic Cards
| Language | Name | Meaning | Notes |
|---|---|---|---|
| Japanese | ノーマルカード[?] Nōmaru Kādo |
Normal Card | |
| French (NOE) | Carte simple[?] | Simple card | |
| German | Standardkarte[?] | Standard card | |
| Portuguese | Cartas normais[?] | Normal cards |
- Enemy Cards
| Language | Name | Meaning | Notes |
|---|---|---|---|
| Japanese | 敵カード[?] Teki Kādo |
Enemy Card | |
| French (NOE) | Carte ennemi[?] | Enemy Card | |
| German | Schergenkarte[?] | Minion card | |
| Portuguese | Cartas de inimigos[?] | Enemy cards |
- Thing Cards
| Language | Name | Meaning | Notes |
|---|---|---|---|
| Japanese | モノカード[?] Mono Kādo |
Object Card | |
| French (NOE) | Carte truc[?] | Thing Card | |
| German | Dings-Karte[?] | Things card | |
| Portuguese | Cartas de objetos[?] | Object cards |
References[edit]
- ^ Paper Mario: Color Splash Tips & Tricks. Play Nintendo. Retrieved July 4, 2020
