Flutter Flyaway
| Level | |
|---|---|
| Flutter Flyaway | |
| |
| Level code | 5-3 |
| World | Forest |
| Game | Donkey Kong Country Returns (3D) |
| Music track | Tree Top Rock Returns |
| << Directory of levels >> | |
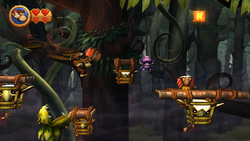
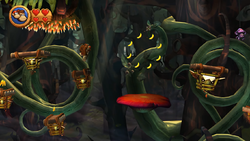
Flutter Flyaway is the thirty-first level in Donkey Kong Country Returns and Donkey Kong Country Returns 3D, as well as the third level in the Forest world.
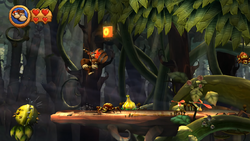
This level is set in a forest where Tiki Buzzes and Tiki Torks are trapped inside wooden cages that the Kongs can stand on. However, the Tiki Buzzes and Torks still have the ability to fly. Donkey and Diddy Kong must carefully hop from one Tiki Buzz to another. Tiki Torks and Tiki Buzzes move in set patterns, move along a vine or in a circular pattern. However, they fly near spikes and other enemies such as Skittlers that can become a problem. These caged Tiki Buzzes and Tiki Torks cannot be defeated, but this is not necessary as they cannot harm the Kongs.
In the Time Attack mode of the game, a time of 1:49:00 is needed to get a gold medal, a time of 1:59:00 for silver, and a time of 2:17:00 for bronze.
Overview
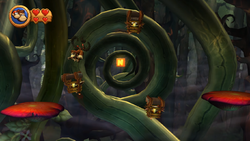
The Kongs begin the level on a pathway that curves into a small, upward hill. An abyss is at the end of the hill with Tiki Torks and Tiki Buzzes in it. They are in cages that can be used as platforms. The first Tiki Tork has the level's first DK Barrel on it, but the two Tiki Buzzes that follow hold no items. A yellow, snapping Chomp foe is after the Tiki Tork here, and a Skittler is next to the second caged Tiki Buzz. The letter K of the K-O-N-G Letters is located in the second caged Tiki Tork, which has a longer platform on top of it. A Tiki Buzz holds another platform near a Skittler. Two caged Tiki Torks fly in a figure eight path along some vines nearby. They can fly the heroes upwards to another caged Tiki Tork with a large area to stand on above it. A Skittler attacks the Kongs here. Two Tiki Buzzes float up and down in the area after this, and a Tiki Tork travels in circles ahead of them. They can jump from the Tiki Tork to reach a Barrel Cannon that shoots them towards two others. When the final barrel shoots them away from it, they are blasted into some curling vines. After they bounce back and fourth between the vines, the land on a solid platform near the Tutorial Pig and the first checkpoint.
A plant containing a Banana Coin is next to the checkpoint near a gap with a red Chomp in it. A thin platform with the second DK Barrel in the level stands between this gap and another with a yellow Chomp in it. The long pathway following this gap has some Skittlers on it that can be used to bounce the Kongs high into the air, where the letter O is. After they pass several Skittlers, they reach another giant gap with caged Tiki Torks and Tiki Buzz floating in it. The heroes first come up to two caged Tiki Torks above the abyss, both of which fly in circles. Spikes hang on a ceiling above the second Tiki Tork. Two bouncy mushrooms are ahead that can be bounced on to reach some more caged Tiki Buzzes. Above these caged enemies and mushrooms are two round structures enclosed in turf that the Kongs can climb on; a Puzzle Piece is in view on top of them. The three aforementioned Tiki Buzzes all float in a circular motion. Spikes hang above the last two Tiki Buzzes, which move parallel to each other as they move in circles. There is a solid area of land after these Tiki Buzzes, and a plant holding a Banana Coin grows in the center of it.
Another large abyss is right after this piece of land, with a Tiki Tork flying in circles around a Puzzle Piece above it. A trio of Tiki Buzzes travel in a circle next to it as well. The primates must use the caged foes as platforms to reach a bouncy mushroom. It can bounce them towards another trio of caged Tiki Buzzes that orbit the letter N. If they continue from here, Donkey and Diddy reach a second bouncy mushroom that is able to bounce them onto a Tiki Tork flying in circles. Another solid piece of ground is nearby after a yellow, snapping Chomp. A Tiki Goon and some item-bearing plants thrive here. Just ahead, two Chomp foes, one red and one yellow, attack between a bouncy mushroom with dozens of bananas spinning above it. A solid pathway with two more Tiki Goons on it is nearby. A Barrel Cannon is after it the shoots the Kongs into another Barrel Cannon with a Puzzle Piece next to it. This cannon then shoots them into the background, where a small hill on a solid platform leads them to the Tutorial Pig and the second checkpoint.
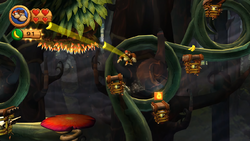
A thinner platform stands after a gap with a red Chomp in it. Several Tiki Buzzes are in a gap ahead, with cages on each of them. Banana Coins and Banana Bunches are placed on the top of their cages, which the Kongs can stand on. They must jump on the Tiki Buzzes to ride over a large abyss. The first set of Tiki Buzzes moves in a curvy, figure eight path, leading the heroes up towards a Skittler that attacks them as they approach. Another set of Tiki Buzzes with more bananas on their cages are across from these first Tiki Buzzes. They, as the previous enemies, move in a figure-eight path under a ceiling of spikes. They also fly near a springy mushroom, which the Kongs can bounce on to reach a pair of Tiki Torks traveling in another figure-eight path leading downwards. They also pull the duo down to a mushroom spring, which has a spiky ceiling above it. Four more caged Tiki Zings move in a figure-eight path near this mushroom, one of which that has the letter G on it. They take the heroes upwards to a bouncy mushroom with a circle of bananas above it. Two more springy mushrooms are ahead, with circles of bananas above them as well. Two Tiki Torks in cages that the Kongs can stand on as the enemies move in a circular motion are after these mushrooms. Another spiky ceiling is above the second one, which is followed by a caged Tiki Buzz that also hovers in circles in front of a round vine. A bouncy mushroom located just ahead of it is able to bounce the duo into an area with three Tiki Torks orbiting around the level's Slot Machine Barrel; if they hit this barrel, the level is completed.
Enemies
| Image | Name | Count |
|---|---|---|

|
Chomp | 3 |

|
Orange Skittler | 4 |

|
Purple Skittler | 8 |
| Tiki Buzz | 27 | |

|
Tiki Goon | 4 |
| Tiki Tork | 17 | |
| Yellow Chomp | 5 |
Items
| Image | Name | Count |
|---|---|---|
| Banana Coin | 14 | |
| DK Barrel | 3 |
K-O-N-G Letters
Puzzle Pieces
| Image | Number | Location |
|---|---|---|
|
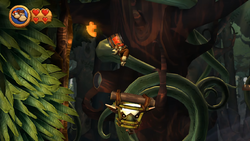
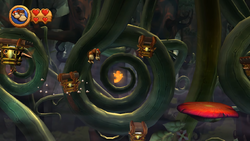
1 | As the Kongs cruise on the first caged Tiki Tork that moves in a figure-eight going upwards, they should avoid jumping to the next platform as they reach the top of the area and wait a few moments to be pulled towards the first Puzzle Piece nearby. |
|
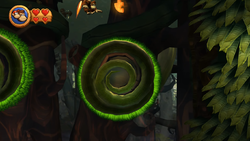
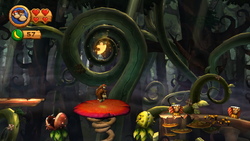
2 | Two round, turf-covered structures can be seen above the first two bouncy mushrooms after the letter O. The duo should bounce to them and climb on top of them to find the second Puzzle Piece. |
|
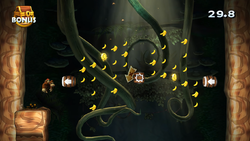
3 | When the heroes reach solid land after the area with the second Puzzle Piece, they should head into the gap near an item-bearing plant to land in a hidden area. If they pound on the ground here, they fall into a Bonus Level, where they must shoot between two Barrel Cannons in order to collect eighty bananas and two Banana Coins within thirty seconds to make a Puzzle Piece appears. As they shoot between the barrels, they must watch for an Auto Fire Barrel in the center that can shoot them out of the level. |
|
4 | The fourth Puzzle Piece is being orbited by three caged Tiki Torks shortly after the previous Puzzle Piece. They can grab it by simply jumping to it, trying to land back on one of the Tikis afterwards. |
|
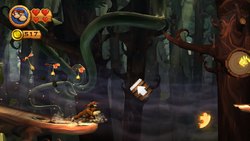
5 | When the Kongs reach a bouncy mushroom placed between two Chomps near the end of the level, they can find many bananas moving in a circle above it. If they grab all of the bananas, a Puzzle Piece appears. |
|
6 | The primates should avoid jumping into the second-to-last Barrel Cannon before the second checkpoint and instead roll-jump under it to grab a Puzzle Piece. They can then land in the nearby Barrel Cannon that follows. |
|
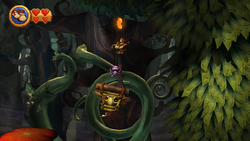
7 | Two caged Tiki Torks can be found moving downwards and then back up in a figure-eight shortly after the second checkpoint. The Kongs should stand on them and wait for them to hover back upwards to be lead to a Skittler that has a Puzzle Piece hanging above it. They can reach it by bouncing on the foe. |
Names in other languages
| Language | Name | Meaning | Notes |
|---|---|---|---|
| French (NOA) | Plateformes Ailées[?] | Winged Platforms | |
| German | Flotter Freiflug[?] | Brisky Free Flight | |
| Italian | Radura volavola[?] | Fliesfly Glade | |
| Spanish | Plataformas Voladoras[?] | Flying Platforms |
