Wonky Waterway
This article is under construction. Therefore, please excuse its informal appearance while it is being worked on. We hope to have it completed as soon as possible. This article is currently under construction by Alex95 (talk).
Template:Levelbox Wonky Waterway is the sixteenth level in Donkey Kong Country Returns and Donkey Kong Country Returns 3D and the first level of the Ruins world.
This level begins on a beach, but most the of it takes place in a dilapidated temple. Here, Donkey and Diddy Kong must utilize vine switches that stick out of statues to open passages and progress overall. Additionally, the level features some falling platforms that quickly collapse with the Kongs' weight. They must move fast across these platforms, watching out for the Tiki Zings hovering around the area. The level contains other enemies as well, including Tiki Buzzes, Tiki Goons, and Screaming Pillars; Tiki Bombers and Stilts also make their debut here.
In the Time Attack mode of the game, a time of 1:13:00 is needed to get a gold medal, a time of 1:33:00 for silver, and a time of 2:32:00 for bronze.
Layout
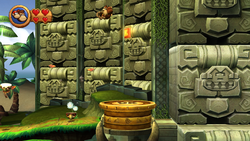
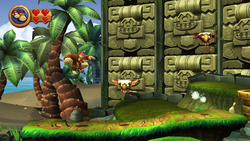
The Kong start the level on a long bridge with a DK Barrel that stretches to a sandy beach area. A stone cube is between the bridge and a Stilts as well. A second stone cube can help the heroes reach a raised area of land, where a few Tiki enemies appear. If the Kongs Ground Pound the golden switch at the end of the short pathway, they open the entrance to the temple. Inside, the Kongs climb along some large stone blocks, passing a Tiki Goon on the way. As they continue along the structures, a Tiki Bomber can be found, along with several Screaming Pillars farther ahead. Another Tiki Bomber is located just after two urns, which contain a Banana Bunch and a Banana Coin. If the vine switch above it is pulled, a small platform shoots out of the wall to aid the Kongs in reaching the green, grassy turf on the ceiling. The letter O is at the end of this turf, and the Tutorial Pig is on the platform right after it, marking the checkpoint.
A DK Barrel is located immediately after the checkmark, along with a bridge. The primates can find a few Screaming Pillars after the bridge, as well as a few small platforms surrounded by spikes. The pillars fall on the small platforms, so the Kongs must jump on the foes to progress and avoid getting smashed. An urn is placed right after this area next to a vine switch. Once it is pulled, the wall in front of the heroes falls to create a pathway over a small gap concealing a Puzzle Piece. As soon as the wall is down, a few Stilts run out, two of which are not on stilts. On the edge of the stone pathway, a Barrel Cannon can be found floating in the air with a trail of bananas after it. The barrel shoots them onto three small platforms that fall as soon as they are touched by the Kongs; the final platform is surrounded by a Tiki Zing, but a Barrel Cannon that shoots the primates to the two falling platforms after it is next to it. Again, one of these platforms has a Tiki Zing hovering around it, but a Barrel Cannon is right after it to blast the heroes to the platforms in the background.
When the primates reach the middle section of platforms, they immediately begin to crumble. The Kongs must quickly travel across the platforms before they fall; however, many of the platforms are very small, and a few Tiki Zings are around them. After the barrel at the end of this area blasts the Kongs to the section of crumbling platforms in the far background, the Kongs encounter a Tiki Zing. The platforms after this foe do not crumble like the previous; instead, they tilt to the side to create a small bridge to the next platform, and then break apart from the impact of hitting the following structures. After passing one more Tiki Zing and one last platform, the Kongs can get in a Barrel Cannon that shoots them back in the foreground to the next Tutorial Pig, marking another checkpoint.
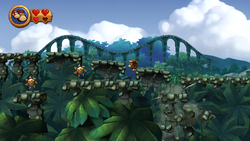
If the heroes pull the vine switch after the pig, they can open a pathway full of bananas and Banana Coins. When they continue out of the tunnel, they meet a few Stilts enemies over a small, stone bridge that stands over some water; blowing out the candles here causes a vine switch to fall that releases collectibles when pulled. Farther ahead is a Tiki Bomber and some Screaming Pillars, who fall on platforms surrounded by small gaps, one of which holds the letter G. If the primates manage to hop along the enemies, they can find the temple's exit, where a Donkey Kong statue can be seen in the background holding a Wii Remote. The path outside of the temple curves in a U shape, with many Tiki enemies flying around it. At the center of the U shaped bridge is a small gap with a thin platform in it. A Screaming Pillar falls on this platform in get in the Kongs' way. If the Kongs climb to the top of the bridge, they can find a Slot Machine Barrel. If they hit the barrel, they finish off the level.
Enemies
| Image | Name | Amount |
|---|---|---|
| Screaming Pillar | 11 | |

|
Stilts | 6 |

|
Tiki Buzz | 10 |
| Tiki Goon | 4 | |
| Tiki Torch | 3 | |
| Tiki Zing | 7 |
Items
| Image | Name | Amount |
|---|---|---|
| Banana Coin | 11 | |
| Barrel | ||
| DK Barrel | 2 | |
| Extra Life Balloon | 1 | |

|
Heart | 1 |
K-O-N-G Letters
| Image | Letter | Location |
|---|---|---|

|
K | Right before the large DK switch that opens the temple, the Kongs must jump from two Tiki Buzzes to reach the letter K, which is hovering over the switch. |
| 250px | O | Just before the checkpoint, the Kongs must climb up some Climbing Grass to reach the letter O. |
| 250px | N | Floating above a Tiki Zing during the part where Donkey Kong and Diddy Kong have to move from crumbling platforms. |
| 250px | G | Right after the sixth Puzzle Piece, the Kongs encounter two Screaming Pillars that collapse onto a short platform. The Kongs can Ground Pound both of them to reach the letter G beneath them. |
Puzzle Pieces
| Image | Number | Location |
|---|---|---|
| 250px | 1 | From the start of the level, the Kongs must go left and perform a long-jump to reach a wooden platform with the first Puzzle Piece and a Tiki Goon. |
| 250px | 2 | Near the start, the Kongs can find three candles between two Screaming Pillars. If they blow out the candles, a vine switch appears. They must pull it to make some bananas, a Banana Coin, and the Puzzle Piece to fall down for them to collect. |

|
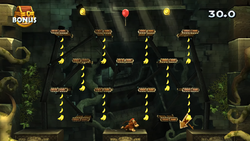
3 | From the same Climbing Grass with the letter O, Donkey Kong and Diddy Kong must climb to the leftmost side and jump in a Blast Barrel to their left. The Blast Barrel takes the Kongs into a Bonus Level, where they must jump from several small platforms to grab eighty bananas, two Banana Coins, and a Red Balloon. When the Kongs obtain every item, the third Puzzle Piece appears over the starting point. |
| 250px | 4 | After the checkpoint, the Kongs encounter three Screaming Pillars that fall around the floor spikes. The Kongs must pound the second Screaming Pillar causing a Puzzle Piece to appear from it. |
| 250px | 5 | Just after the fourth Puzzle Piece and before the end of the temple, Donkey Kong and Diddy can find the fifth one in a large gap in the floor. There is a floor in the gap that is not visible from the higher floor. They must collect the Puzzle Piece before pulling the vine switch, or else the wall falls over the gap, making the Puzzle Piece unreachable. |
| 250px | 6 | Just before the letter G, the Kongs must pound an Item Container to reveal the sixth Puzzle Piece. |
| 250px | 7 | At the end of the level, the Kongs must skip the Slot Machine Barrel and long-jump over the gap to right to land on a hidden platform with two Tiki Goons and a vine switch. By pulling the switch, a platform to the right opens and spits out the seventh and final Puzzle Piece. |
Names in other languages
| Language | Name | Meaning | Notes |
|---|---|---|---|
| Chinese | 遗迹入口[?] Yíjì Rùkǒu |
Ruins Entrance | |
| German | Wackeliger Wasserweg[?] | Wonky Waterway | |
| Italian | Acquedotto rompicollo[?] | Breakneck Aqueduct | |
| Korean | 유적 입구[?] Yujeok Ipgu |
Ruins Entrance | |
| Spanish | Acueducto Agobiante[?] | Overwhelming Aqueduct |
Trivia
- A statue of Donkey Kong as his very first appearance from the original Donkey Kong arcade game holding a Wii Remote appears in the background. Specifically, this sprite is based on Donkey Kong's sign-holding pose from Donkey Kong Jr. Math, with a few minor changes (such as the addition of a tie).
- The blocks that surround and make up the entrance to the temple have carvings of Donkey Kong resembling his original appearance on them.
- At the end of the level, a double rainbow can be seen in the background. In reality, the secondary rainbow has the inverse order of colors compared to the primary rainbow, whereas in the game, the order is the same for both.


