Slammin' Steel: Difference between revisions
No edit summary Tag: Mobile edit |
m (Text replacement - "(\| *)Jap([RMCN\d]* *=)" to "$1Jpn$2") |
||
| Line 118: | Line 118: | ||
==Names in other languages== | ==Names in other languages== | ||
{{foreign names | {{foreign names | ||
| | |Jpn=コンベアスマッシャー | ||
| | |JpnR=Konbea Sumasshā | ||
| | |JpnM=Conveyor Smasher | ||
|Spa=Acero Aplastante | |Spa=Acero Aplastante | ||
|SpaM=Crushing Steel | |SpaM=Crushing Steel | ||
Latest revision as of 17:11, January 7, 2025
| Level | |
|---|---|
| Slammin' Steel | |
| |
| Level code | 7-2 |
| World | Factory |
| Game | Donkey Kong Country Returns (3D/HD) |
| Music track | Factory Friction |
| << Directory of levels >> ** | |
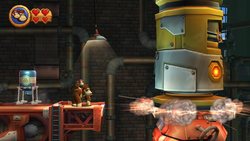
Slammin' Steel is the forty-eighth level in Donkey Kong Country Returns and its Nintendo 3DS and Nintendo Switch ports, as well as the second level in the Factory world. The theme of both this level and Handy Hazards is a remix of Oil Drum Alley's theme.
The whole level takes place inside a factory where there are many platforms pounding the ceiling and floor. A bulk of the level has machinery that crushes players if they are caught in it, losing one heart. Conveyor belts are also a common sight in this level, as well as many Electroids. The steel machinery can crush the Kongs against the floors, ceilings, and some can even smash them against walls. The only enemy type in this level besides Electroids are BuckBots.
In the Time Attack mode of the game, a time of 1:32:00 is needed to get a gold medal, a time of 1:40:00 for silver, and a time of 2:13:00 for bronze.
Overview[edit]
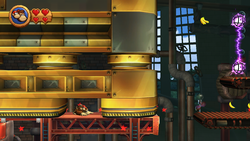
The level begins with a straight pathway leading over some girders and up to a BuckBot. A platform is located just before a conveyor belt, and it is repeatedly being smashed by a cylinder-shaped piece of machinery that the Kongs must avoid. When Donkey and Diddy Kong reach the conveyor belt, they can find a line of bananas and a gap with a pair of Electroids moving in it. If they pass the enemy and the gap, they make it onto another conveyor belt that a giant piece of machinery smashes every few seconds. They must pass the machinery to progress onto a solid set of girders with the first DK Barrel on one of them. Another giant piece of machinery is between the two girders that moves upwards every few seconds to smash a platform above it, which holds a Puzzle Piece. A platform supporting two more large, cylinder-shaped pieces of machinery is ahead, with bananas and the letter K of the K-O-N-G Letters between it.
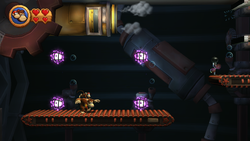
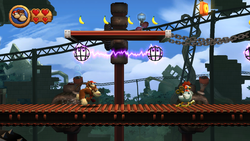
After the primates get to the end of this platform, they can jump over a gap onto another conveyor belt. This belt is followed by three others. A pair of Electroids are between the first two conveyor belts in this area, and another pair is between the second and third belt. The second conveyor belt also supports a lone Electroid enemy, whom the Kongs must jump over. A BuckBot can be found on the third conveyor belt. After the heroes cross the gap just ahead of the third belt, they can reach the fourth conveyor belt, which appears to be much longer than the previous. Two pairs of Electroids move up and down here, creating a horizontal line of electricity between them. Above the two foes are platforms covered in bananas. The letter O is also located between the two platforms. The duo can find a small platform after this last conveyor belt, which has four solid platforms placed near it. The first of the three platforms are constantly being smashed by cylinder-shaped machinery, but the last platform is home to the first checkpoint, which the Tutorial Pig waits at.
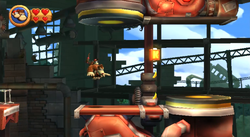
At this point, the primates can find a conveyor belt platform above an abyss nearby. Steel machinery pounds on it every few seconds, so they must progress across it quickly to safely reach another platform. The platform here holds a cylinder-shaped mechanism that can push the Kongs upwards so they can find a hidden area with many bananas and a Puzzle Piece. If the heroes choose to not enter the banana-filled area, they can travel over a gap onto another conveyor belt platform that is smashed by a steel mechanism every few seconds. A small platform follows the conveyor belt and the hidden area of bananas, and it supports the second DK Barrel. A BuckBot walks along another conveyor belt nearby, which is followed by a long area with a giant mechanism smashing it every few seconds. This mechanism is as long as the whole area, and the primates are not fast enough to run under it before it smashes them. So, they must wait in small gaps in the large piece of machinery every time it pounds on the ground.
A set of conveyor belts is after this long area. The area features two groups of two horizontal conveyor belts placed parallel to each other. Between the two groups of belts is a pair of Electroids and another conveyor belt platform above them. Electroids also move along the conveyor belts to the left and right of these foes. Additionally, a BuckBot is on the last platform in the area, which has the letter N high above it. Another long area follows these five conveyor belts, and it features another giant piece of machinery that stretches across the whole area. As before, the Kongs can not completely run through the area without getting smashed by the long mechanism, so they must rely on spaces in the ceiling and in the machinery to protect them. However, some of the spaces have electrical circuits in them, so the Kongs can get electrocuted by them. Once the heroes pass this section of the level, they can find the second checkpoint and the Tutorial Pig.
A rather long conveyor belt platform is after the checkpoint. Two pairs of Electroids stand in the Kongs' way here. An electrical circuit occasionally appears between both groups, hurting the primates if touched. So, the Kongs must jump between the two pairs when the circuits disappear. There is another conveyor belt attached to a wall nearby. It can be used to climb to some platform higher up. As they use a few platforms here to climb into a different room, a thin, cylinder-shaped piece of machinery tries to smash them. When the Kongs pass this and jump up to the next platform, they find themselves in a small passage with a similar piece of machinery in it. The tube-shaped machinery can smash the Kongs if they do not move fast enough, so the primates quickly run to the end of the passage and jump onto a higher platform. There are two platforms that they can jump to while trying to escape the machinery; the first one has a heart item on it, while the second one has a Puzzle Piece.
If the heroes jump up to the area above either of these platforms, they find themselves in a small passage with another piece of machinery in it. Before getting crushed, they must jump into a higher area nearby, where there are more tube-shaped pieces of machinery. To avoid getting crushed, the duo is forced to climb up some conveyor belt platforms placed against the wall. After they climb up to a platform above the belts, they can find more platforms to climb across the area with to their right. When these are climbed, a tire and the letter G are put into view. The tire is in the middle of the area, but the letter G is against the wall opposite to the one the Kongs are closest to at this point. The tire can bounce Donkey and Diddy to an area full of more platforms and tube-shaped machinery. While avoiding being smashed by all the machinery, they must climb upwards with the platforms. Once they reach a platform covered in Banana Bunches, they are able to safely climb to the final platform that has the Slot Machine Barrel above it.
Enemies[edit]
| Image | Name | Count |
|---|---|---|
| BuckBot | 7 | |

|
Electroid | 21 |
Items[edit]
| Image | Name | Count |
|---|---|---|
| Banana Coin | 10 | |
| DK Barrel | 2 | |

|
Heart | 3 |
K-O-N-G Letters[edit]
Puzzle Pieces[edit]
| Image | Number | Location |
|---|---|---|
|
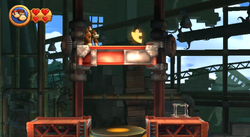
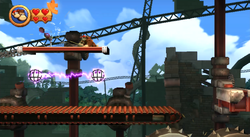
1 | The Kongs should roll jump off of the last platform that is placed just before the first DK Barrel to reach a high platform with the first Puzzle Piece on it. |
|
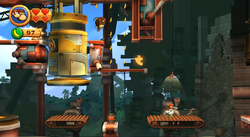
2 | If the duo blows on the tiny fan on the platform to the right of the letter O, a Puzzle Piece appears. |
|
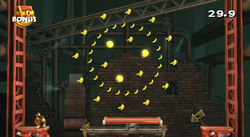
3 | The heroes should head to the second piece of machinery after the checkpoint and stand on it as it quickly moves upwards. When it does this, they are pushed upwards into a hidden area full of bananas and the third Puzzle Piece. To reach the Puzzle Piece, they must first pass a piece of machinery that can crush them into the ceiling. |
|
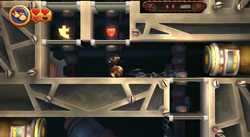
4 | In the area with the long piece of machinery shortly after the third Puzzle Piece, the Kongs should pound on the cracked girder located right after the first space in the machinery to break the floor and fall into a bonus room. Here, they must bounce on a moving trampoline in order to grab many bananas and three Banana Coins. If they collect everything within thirty seconds, a Puzzle Piece appears. |
|
5 | When the heroes reach the area after the second checkpoint where they must climb upwards while avoiding several tube-shaped pieces of machinery, they can find the Puzzle Piece in plain sight on a platform at the end of the passage holding the second tube-shaped mechanism. It is next to a platform with a heart on it. The Kongs have the choice of taking the platform with the heart, which is closer to them, or the platform with the Puzzle Piece, which they need to get on to grab the item. |
Names in other languages[edit]
| Language | Name | Meaning | Notes |
|---|---|---|---|
| Japanese | コンベアスマッシャー[?] Konbea Sumasshā |
Conveyor Smasher | |
| French (NOA) | Acier Assommant[?] | Dazing Steel | |
| German | Stahlpressenstampfer[?] | Steel Press Stomper | |
| Italian | Fucina sottopressa[?] | Underpressure Forge | |
| Spanish | Acero Aplastante[?] | Crushing Steel |
