Cog Jog (level): Difference between revisions
No edit summary Tag: Mobile edit |
No edit summary Tag: Mobile edit |
||
| Line 3: | Line 3: | ||
|code=7-5 | |code=7-5 | ||
|world=[[Factory (Donkey Kong Country Returns)|Factory]] | |world=[[Factory (Donkey Kong Country Returns)|Factory]] | ||
|game=''[[Donkey Kong Country Returns]]'' (''[[Donkey Kong Country Returns 3D|3D]]'') | |game=''[[Donkey Kong Country Returns]]'' (''[[Donkey Kong Country Returns 3D|3D]]''/''[[Donkey Kong Country Returns HD|HD]]'') | ||
|before=[[Gear Getaway|<<]] | |before=[[Gear Getaway|<<]] | ||
|before_alt=[[Handy Hazards|**]] | |before_alt=[[Handy Hazards|**]] | ||
Revision as of 01:30, January 5, 2025
| Level | |
|---|---|
| Cog Jog | |
| |
| Level code | 7-5 |
| World | Factory |
| Game | Donkey Kong Country Returns (3D/HD) |
| Music track | Life in the Mines Returns |
| ** << Directory of levels >> | |
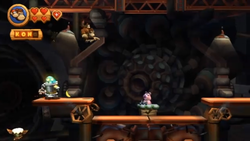
Cog Jog is the fifty-first level in Donkey Kong Country Returns and its Nintendo 3DS and Nintendo Switch ports, as well as the fifth level in the Factory world.
This whole level revolves using rotating platforms and other machinery to cross the level. The Kongs also need to time the Barrel Cannons to shoot when there is a gap in the machinery. Most of the platforms do not perform steep tilts, but some of them have an erratic pattern. Towards the end of the level, there are turf covered machines that the Kongs must grab onto to get to the end. Common enemies here are Pyrobots, Tiki Buzzes, and Tiki Bombers.
In the Time Attack mode of the game, a time of 1:45:00 is needed to get a gold medal, a time of 2:11:00 for silver, and a time of 2:30:00 for bronze.
Overview
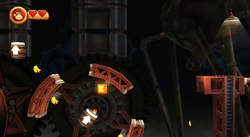
The level begins with a straight pathway leading past a sign that reminds the Kongs to press the hidden, red switch in the level. It is followed by two spinning, round gears with a Tiki Buzz and a platform with a barrel on it above them. Ahead of them is a solid area of ground with a fire-breathing Pyrobot on it. There is a Barrel Cannon behind it that aims to another cannon. However, this cannon is surrounded by a round gear that slowly spins around it. They must shoot through the gaps in the gear to get into the second Barrel Cannon that can blast them through another gap onto another spinning mechanism. Next to it is the third Barrel Cannon that is able to shoot them through a gap in the following gear that rotates around another Barrel Cannon. This gear has collectibles, including the letter K of the K-O-N-G Letters, on the inside part of it. The Kongs, while shooting through the gaps in the cannon again, can find a pogo-stick enemy bouncing along some stair-like structures.
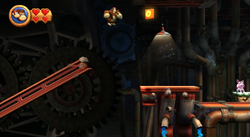
A barrel is on top of the stair and ahead of it is a large abyss that can only be crossed if the primates move along some moving platforms. The first of these platforms is rather long, and it carries two fire-breathing Pyrobots. A Tiki Buzz and a Banana Bunch above it is between it and the following moving platform. When the two platforms float near each other, the Kongs can jump over to the second platform, which is followed by two similar platforms that move at the same rate as it. If they jump from the third of these mechanisms, they can reach another platform that is twice as long as it. This platform, along with the two platforms after it, tilts far enough that the heroes can slide down it and fall into the abyss, so they have to be cautious. Once the Kongs travel over the whole abyss with the remaining three platforms, they can reach a solid area with the letter O hovering above it and the Tutorial Pig with the first checkpoint.
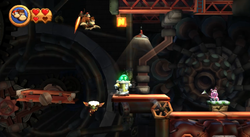
After the checkpoint is a fire-breathing Pyrobot and a group of two platforms that move in circles. The Kongs can use the moving platforms to get onto a switch platform near a Tiki Buzz. A solid area of land with a Tiki Bomber and a giant object that tilts left and right is next to it. It can be climbed to reach collectibles, including a Puzzle Piece. Two tilting platforms are at the end of this area above a wide abyss. A sandbag with an item in it is between them, while a Barrel Cannon ahead of them aims the primates to another Barrel Cannon. However, this cannon is surrounded by a turning gear with gaps in it. They must blast between the gaps to access the Barrel Cannon, which them aims onto a switch hanging from the background. It can be used as a platform to help the primates cross the remaining part of the large pit and then to arrive on a large, round piece of machinery that they can stand on.
Another switch platform is ahead of them, which has a Tiki Buzz and a big area of ground after it. Here, there is a solid platform with a Tiki Bomber and another Tiki Buzz just before the next switch platform. A Barrel Cannon that aims the primates upwards towards another cannon surrounded by a turning gear is next to it. When a gap in the gear is present in the Kongs' path, they should shoot. The Barrel Cannon does not shoot them far enough for them to land directly into the next barrel, and they instead land on the gear around it. While on the gear, they can jump into the Barrel Cannon and blast through another gap in the mechanism to progress to a third Barrel Cannon in the area. This cannon can shoot them onto a pair of platforms that travel in a circle. They enable the heroes to reach a solid area of land with the letter N above it. A Pyrobot and the Tutorial Pig, who waits at the checkpoint, are here as well.
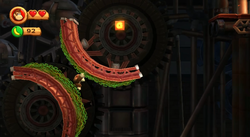
As the primates approach the end of the level, they come up to a rotating gear covered in climbable chains above a wide abyss after a Tiki Buzz. The Kongs can grab onto it and let it pull them towards another gear with chains. This gear can take them to a switch platform that is followed by a flat, red platform that tilts. The primates must ride along it to reach another switch platform. There is a single platform that travels in circles nearby after a Tiki Buzz. It can lead them onto a long, red platform covered in more chains. The duo is able to grab onto the chains and ride along the platform as it tilts in the air. Eventually, it hovers above a switch platform and a Tiki Buzz. They can wait for another turning gear with chains on this platform. When the manage to grab onto it, it pulls them above a gap in the following gear, which has a Barrel Cannon at its center. The heroes must jump into the gap and reach the barrel so they can be fired to another spinning gear with chains around it. This mechanism can lead them to a gear right above it that circles around the letter G. Once the Kongs grab the letter, or simply ignore it, they can jump off of the chains on this final gear above the abyss to reach a solid platform with a fire-breathing Pyrobot on it. The robot is followed by a Barrel Cannon that aims the Kongs towards the Slot Machine Barrel, which is surrounded by another turning gear with gaps in it.
Enemies
| Image | Name | Count |
|---|---|---|
| Pogobot | 1 | |
| Pyrobot | 6 | |

|
Tiki Bomber | 2 |

|
Tiki Buzz | 12 |
Items
| Image | Name | Count |
|---|---|---|
| Banana Coin | 8 | |
| Barrel | 3 | |
| DK Barrel | 1 | |

|
Heart | 3 |
K-O-N-G Letters
Puzzle Pieces
| Image | Number | Location |
|---|---|---|
|
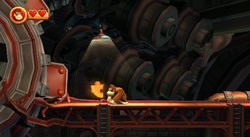
1 | At the beginning of the level, the Kongs should head backwards and hit a lamp hanging from above to reveal the first Puzzle Piece. |
|
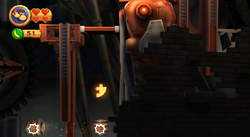
2 | When the Kongs reach the area immediately after the letter K with the pogo-stick enemy, they should drop down off of the left edge of the platform to fall into a hidden Barrel Cannon that shoots them to another. This cannon then blasts them to the second Puzzle Piece. |
|
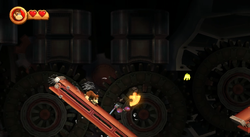
3 | As the Kongs travel along the second-to-last girder before the first checkpoint, they can find a small object that can be blown on to reveal a Puzzle Piece. |
|
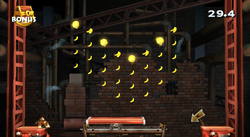
4 | Shortly after the checkpoint, the Kongs reach a pair of rotating platforms. They should ride on the platforms to the top of the area to find a Tiki Buzz guarding the entrance to a bonus room, where they must use a bouncy trampoline to grab 44 bananas and four Banana Coins. Once everything is obtained within thirty seconds, a Puzzle Piece appears. |
|
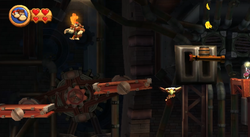
5 | On the same rotating platforms that lead the Kongs to the bonus room, the heroes can find a lamp near the top of the area. If they hit it, a Puzzle Piece appears, and they need to collect it before the piece falls into the pit below. |
|
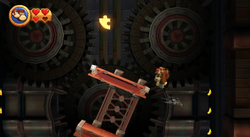
6 | After the first checkpoint, the primates can find a group of girders tilting above a lone Tiki Bomber. They should climb up to the top of the girders to find a Puzzle Piece at the top of the area. |
|
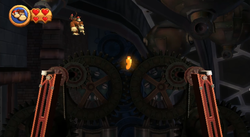
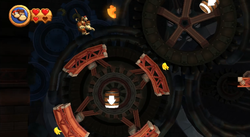
7 | Near the location of the sixth Puzzle Piece is a barrel. The Kongs should pick it up and carry it to the next pair of girders. A sandbag hangs between the two girders that can be broken open with the barrel to release a Puzzle Piece. |
|
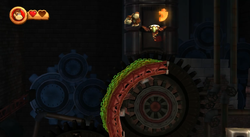
8 | The eighth Puzzle Piece can be found above one of the spinning gears just before the letter N. They must blast onto a pair of rotating platforms and then roll-jump onto the gear under the item to grab it. |
|
9 | When the primates reach the second gear after the second checkpoint, they should ignore the following platform and continue to hold onto the chains of the said platform to be taken to the ninth and final Puzzle Piece. |
Rocket Switch
| Image | Location |
|---|---|
|
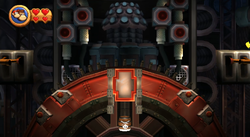
After the seventh Puzzle Piece, the Kongs can find a round platform with an arrow, which is formed by bananas, above it. They should pound the center of the platform, as the bananas indicate, to make the platform rotate. Eventually, it stops spinning, revealing a section of ground on it that the Kongs can pound on to fall into a small passage, leading into a room with a switch that activates the rocket in Lift-off Launch. If the switch is pounded on, a plug connects to the ceiling, taking them a step farther to the world's boss. |
Names in other languages
| Language | Name | Meaning | Notes |
|---|---|---|---|
| French (NOA) | Rondes des Rouages[?] | Rounds of Cogs | |
| German | Zahnradjogging[?] | Gear Jog | |
| Italian | Rotella malferma[?] | Unsteady Wheel | |
| Spanish | Maquinaria Maléfica[?] | Harmful Machinery |
