Handy Hazards: Difference between revisions
No edit summary Tag: Mobile edit |
No edit summary Tag: Mobile edit |
||
| Line 4: | Line 4: | ||
|code=7-3 | |code=7-3 | ||
|world=[[Factory (Donkey Kong Country Returns)|Factory]] | |world=[[Factory (Donkey Kong Country Returns)|Factory]] | ||
|game=''[[Donkey Kong Country Returns]]'' (''[[Donkey Kong Country Returns 3D|3D]]'') | |game=''[[Donkey Kong Country Returns]]'' (''[[Donkey Kong Country Returns 3D|3D]]''/''[[Donkey Kong Country Returns HD|HD]]'') | ||
|before=[[Slammin' Steel|<<]] | |before=[[Slammin' Steel|<<]] | ||
|after=[[Cog Jog (level)|>>]] | |after=[[Cog Jog (level)|>>]] | ||
Revision as of 01:29, January 5, 2025
| Level | |
|---|---|
| Handy Hazards | |
| |
| Level code | 7-3 |
| World | Factory |
| Game | Donkey Kong Country Returns (3D/HD) |
| Music track | Factory Friction |
| << Directory of levels >> ** | |
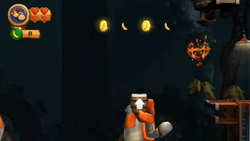
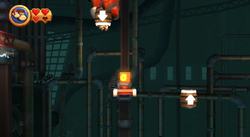
Handy Hazards is the forty-ninth level in the game Donkey Kong Country Returns and its Nintendo 3DS and Nintendo Switch ports, as well as the third level in the Factory world. The Kongs can only access the level by buying a Map Key from Cranky Kong's Shop.
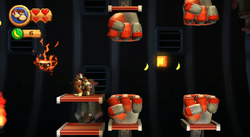
This whole level revolves around using giant mechanical hands as platforms. These hands can be both detrimental and helpful to the player as they serve as both platforms and obstacles. The mechanical hands can crush the Kongs or sway from side to side as platforms. These handy hazards also control Blast Barrels. Common enemies here are Flaming Tiki Buzzes, Pyrobots, BuckBombs, and Electroids.
In the Time Attack mode of the game, a time of 0:57:00 is needed to get a gold medal, a time of 1:00:00 for silver, and a time of 1:16:00 for bronze.
Overview
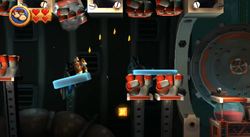
When the Kongs begin the level, they find themselves on a straight pathway leading to an area full of mechanical fists that punch strange, blue structures. The first two rectangular blue structures are parallel to each other, with the first platform bearing a Puzzle Piece. The other structure is placed between two mechanical fists that smash it occasionally. The primates must pass these first two hands to reach two more that push each other up and down. If they pass between these, they reach a slanted, blue structure with a broken hand above it. There is a thinner blue structure ahead that has two pairs of hands smashing it on both sides. The letter K of the K-O-N-G Letters is next to the bottom pair of hands. When the primates reach the platform following this last blue platform, they make their way across a flat, solid platform with an electric, bouncing Pyrobot on it. A large pit follows that has a hand above it. The hand swings back and fourth above a small flame. They must move along the hand to access a Barrel Cannon.
When the cannon is entered, a mechanical hand grabs onto it and pulls it under a few Banana Coins and bananas towards another Barrel Cannon being transported by a hand. The hand can lead this barrel near a Flaming Tiki Buzz to a girder with an explosive Buckbomb on it. Two more of these enemies are ahead on another girder that is located under some moving platforms. One of these three platforms has a Puzzle Piece on it. The Kongs can soon reach a Barrel Cannon that shoots them into another barrel that is moved by a robotic hand. An additional Barrel Cannon then appears across from this barrel, also being carried by a hand. When the cannons are parallel to each other, the heroes can shoot to the Barrel Cannon on the left, passing between two Flaming Tiki Buzzes on the way, to be able to access another Barrel Cannon found nearby at the top of the area. When they reach this, they are shot onto a girder with the Tutorial Pig and the checkpoint present on it.
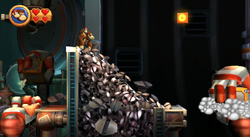
Another hand swings back and fourth above a flame in a pit farther ahead. A few platforms with a Puzzle Piece and other collectibles are also above it. The hand can be used to climb onto a platform with yet another hand on it. Every now and then, a separate hand approaches from behind and places a large block on this hand. The heroes can use this as a platform to reach a curved hill of gears with the letter O hovering just above them. More hands are in the area ahead. Two of them are placed around a group of parallel platforms. The bottom platform has a DK Barrel on it. The top platform in the pair must be accessed to reach the next platform, but it is too high. Therefore, the duo must rely on the blocks placed on the aforementioned hands by other hands to get on it. When they get on the platform, they find themselves in front of a large abyss with many swinging hands and Flaming Tiki Buzzes above it. Collectibles are also scattered above the hands. They must put the hands into use and travel across them to pass the abyss and reach a set of two platforms located next to two parallel sets of fists. The letter N is after between these fists, which smash into each other occasionally. If they maneuver around the fists and progress farther ahead, Donkey and Diddy make their way onto a girder with an explosive BuckBomb on it. Two Puzzle Pieces float on two platforms above this. Another gap full of mechanical hands follows the girder with the chicken enemy. The Kongs must climb on them with the aid of the blocks placed on them by other hands in the background. If they cross this gap, they reach a new platform with the Tutorial Pig and the second checkpoint on it.
A wide abyss full of more hands that swing over small flames is after this checkpoint. As the heroes use the hands to cross the pit, they come up to a Red Balloon that quickly floats upwards. Four more hands appear ahead of these swinging hands with a Banana Coin above each of them. Blocks are placed on them every now and then by hands in the background. The primates must travel across these hands in order to enter another Barrel Cannon that is moved by a mechanical hand when entered. The hand moves back and forth under two electrical currents and another Barrel Cannon. They need to shoot into the Barrel Cannon to advance to another Barrel Cannon nearby that is placed next to a solid platform with the letter G on it. Once they get in this barrel, they are aimed between two mechanical hands at a fourth Barrel Cannon. The must avoid being swiped by the hands and then get into the barrel, which immediately blasts them through a narrow passageway into a fifth Barrel Cannon. Two more Barrel Cannons are next to this vertically-shooting barrel. Hands from below mix up the trio of barrels, making it harder for the Kongs to know when to shoot and where they are. If they manage to shoot while in the middle of the area, they land in a higher area with the Slot Machine Barrel.
Enemies
| Image | Name | Count |
|---|---|---|
| BuckBomb | 4 | |

|
Flaming Tiki Buzz | 5 |
| Pogobot | 1 |
Items
| Image | Name | Count |
|---|---|---|
| Banana Coin | 14 | |
| DK Barrel | 2 | |
| Red Balloon | 4 |
K-O-N-G Letters
Puzzle Pieces
| Image | Number | Location |
|---|---|---|
|
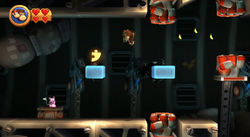
1 | The first Puzzle Piece is visible on the first blue structure at the beginning of the level. The primates should jump from the fist to the right of the first DK Barrel to the nearest blue structure and then continue to the platform with the Puzzle Piece to grab it. |
|
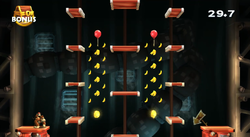
2 | When the primates come up to the second pair of fists in the level, they should hop onto the top of the highest fist after it pushes the hand below it to soon be pulled upwards towards a Barrel Cannon that leads into a bonus room. There, they must collect sixty bananas, two Banana Coins, and two Red Balloons around many conveying platforms moving in a vertical path within thirty seconds to make a Puzzle Piece appear. |
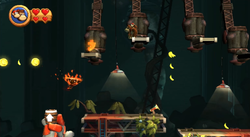
|
3 | In the portion of the level just before the first checkpoint where the heroes must aim between two Flaming Tiki Buzzes with a Barrel Cannon to blast into a parallel cannon, the Kongs should shoot out of the Barrel Cannon to the right of the Tiki enemies when it reaches its highest point to land on a set of platforms. If they jump to the last of the four platforms, they find a Puzzle Piece. |
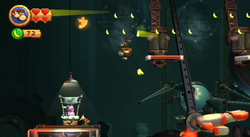
|
4 | The Kongs should jump onto the platforms placed high in the air just before the letter O to make their way onto a platform with the fourth Puzzle Piece on it. |
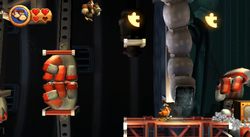
|
5 | The duo should jump on top of the fist to the top-right of the letter N to be pulled up to a platform with a Puzzle Piece on it. |
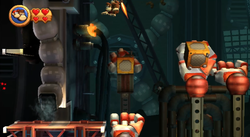
|
6 | If the Kongs roll-jump to the left from the second-to-last hand before the second checkpoint, they can reach a platform with a Puzzle Piece on it. |
|
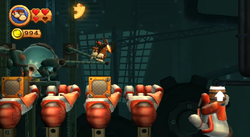
7 | Near the end of the level, a row of four hands can be found with a Banana Coin above each of them. Using the blocks that are placed on the four platforms, the heroes can reach the Banana Coins. When they are all collected, a Puzzle Piece appears. |
Names in other languages
| Language | Name | Meaning | Notes |
|---|---|---|---|
| French (NOA) | Poings Pilons[?] | Pestle Fists | |
| German | Hand in Hand[?] | Hand in Hand | |
| Italian | Montaggio manesco[?] | Abusive Assembly | |
| Spanish | Peligros como Puños[?] | "Hazards like Fists" (pun on verdades como puños, meaning "evident truths") |
Trivia
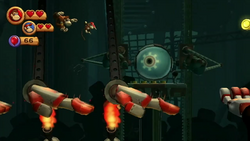
- In the background, there is a giant eyeball-like robot that presses buttons on a keyboard. When the Kongs are in front of the robot, it stops pressing the buttons. The robot re-appears in the Frozen Frenzy level in Donkey Kong Country: Tropical Freeze, but it is now no longer functional because of the Snowmads' takeover of Donkey Kong Island.
